av405
-
Posts
1,203 -
Joined
-
Last visited
Content Type
Profiles
Forums
Events
Gallery
Everything posted by av405
-
Great color choice. Well done.
-
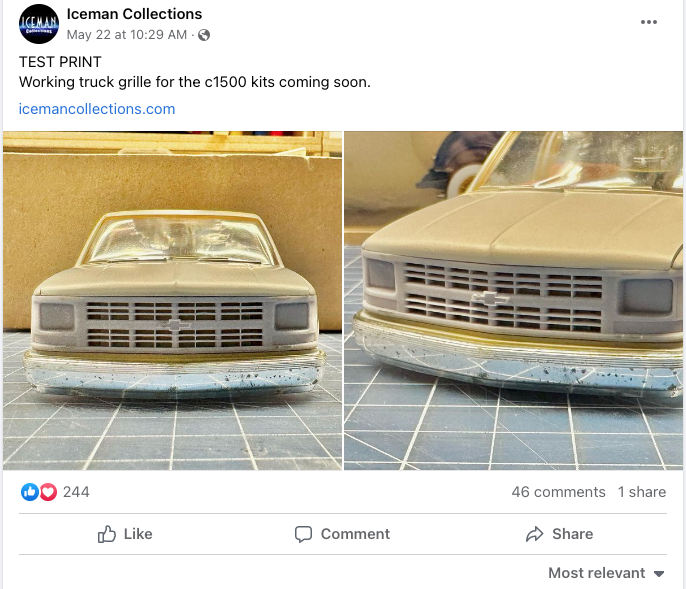
 Iceman Collections is working on a W/T grill. I would love other stock wheel options, a bench seat, and mirrors. Maybe @Oldmopars & @Texas_3D_Customs can help?
-
Chevy van type III ambulance
av405 replied to GLMFAA1's topic in WIP: Model Trucks: Pickups, Vans, SUVs, Light Commercial
Looks good so far! -
Thanks guys! Your comments are much appreciated.
-
Thanks guys! Thanks, a great compliment to receive! Thanks! Ha, I've had a few posters on facebook mention seeing these on the I-10 back in the day as well.
-
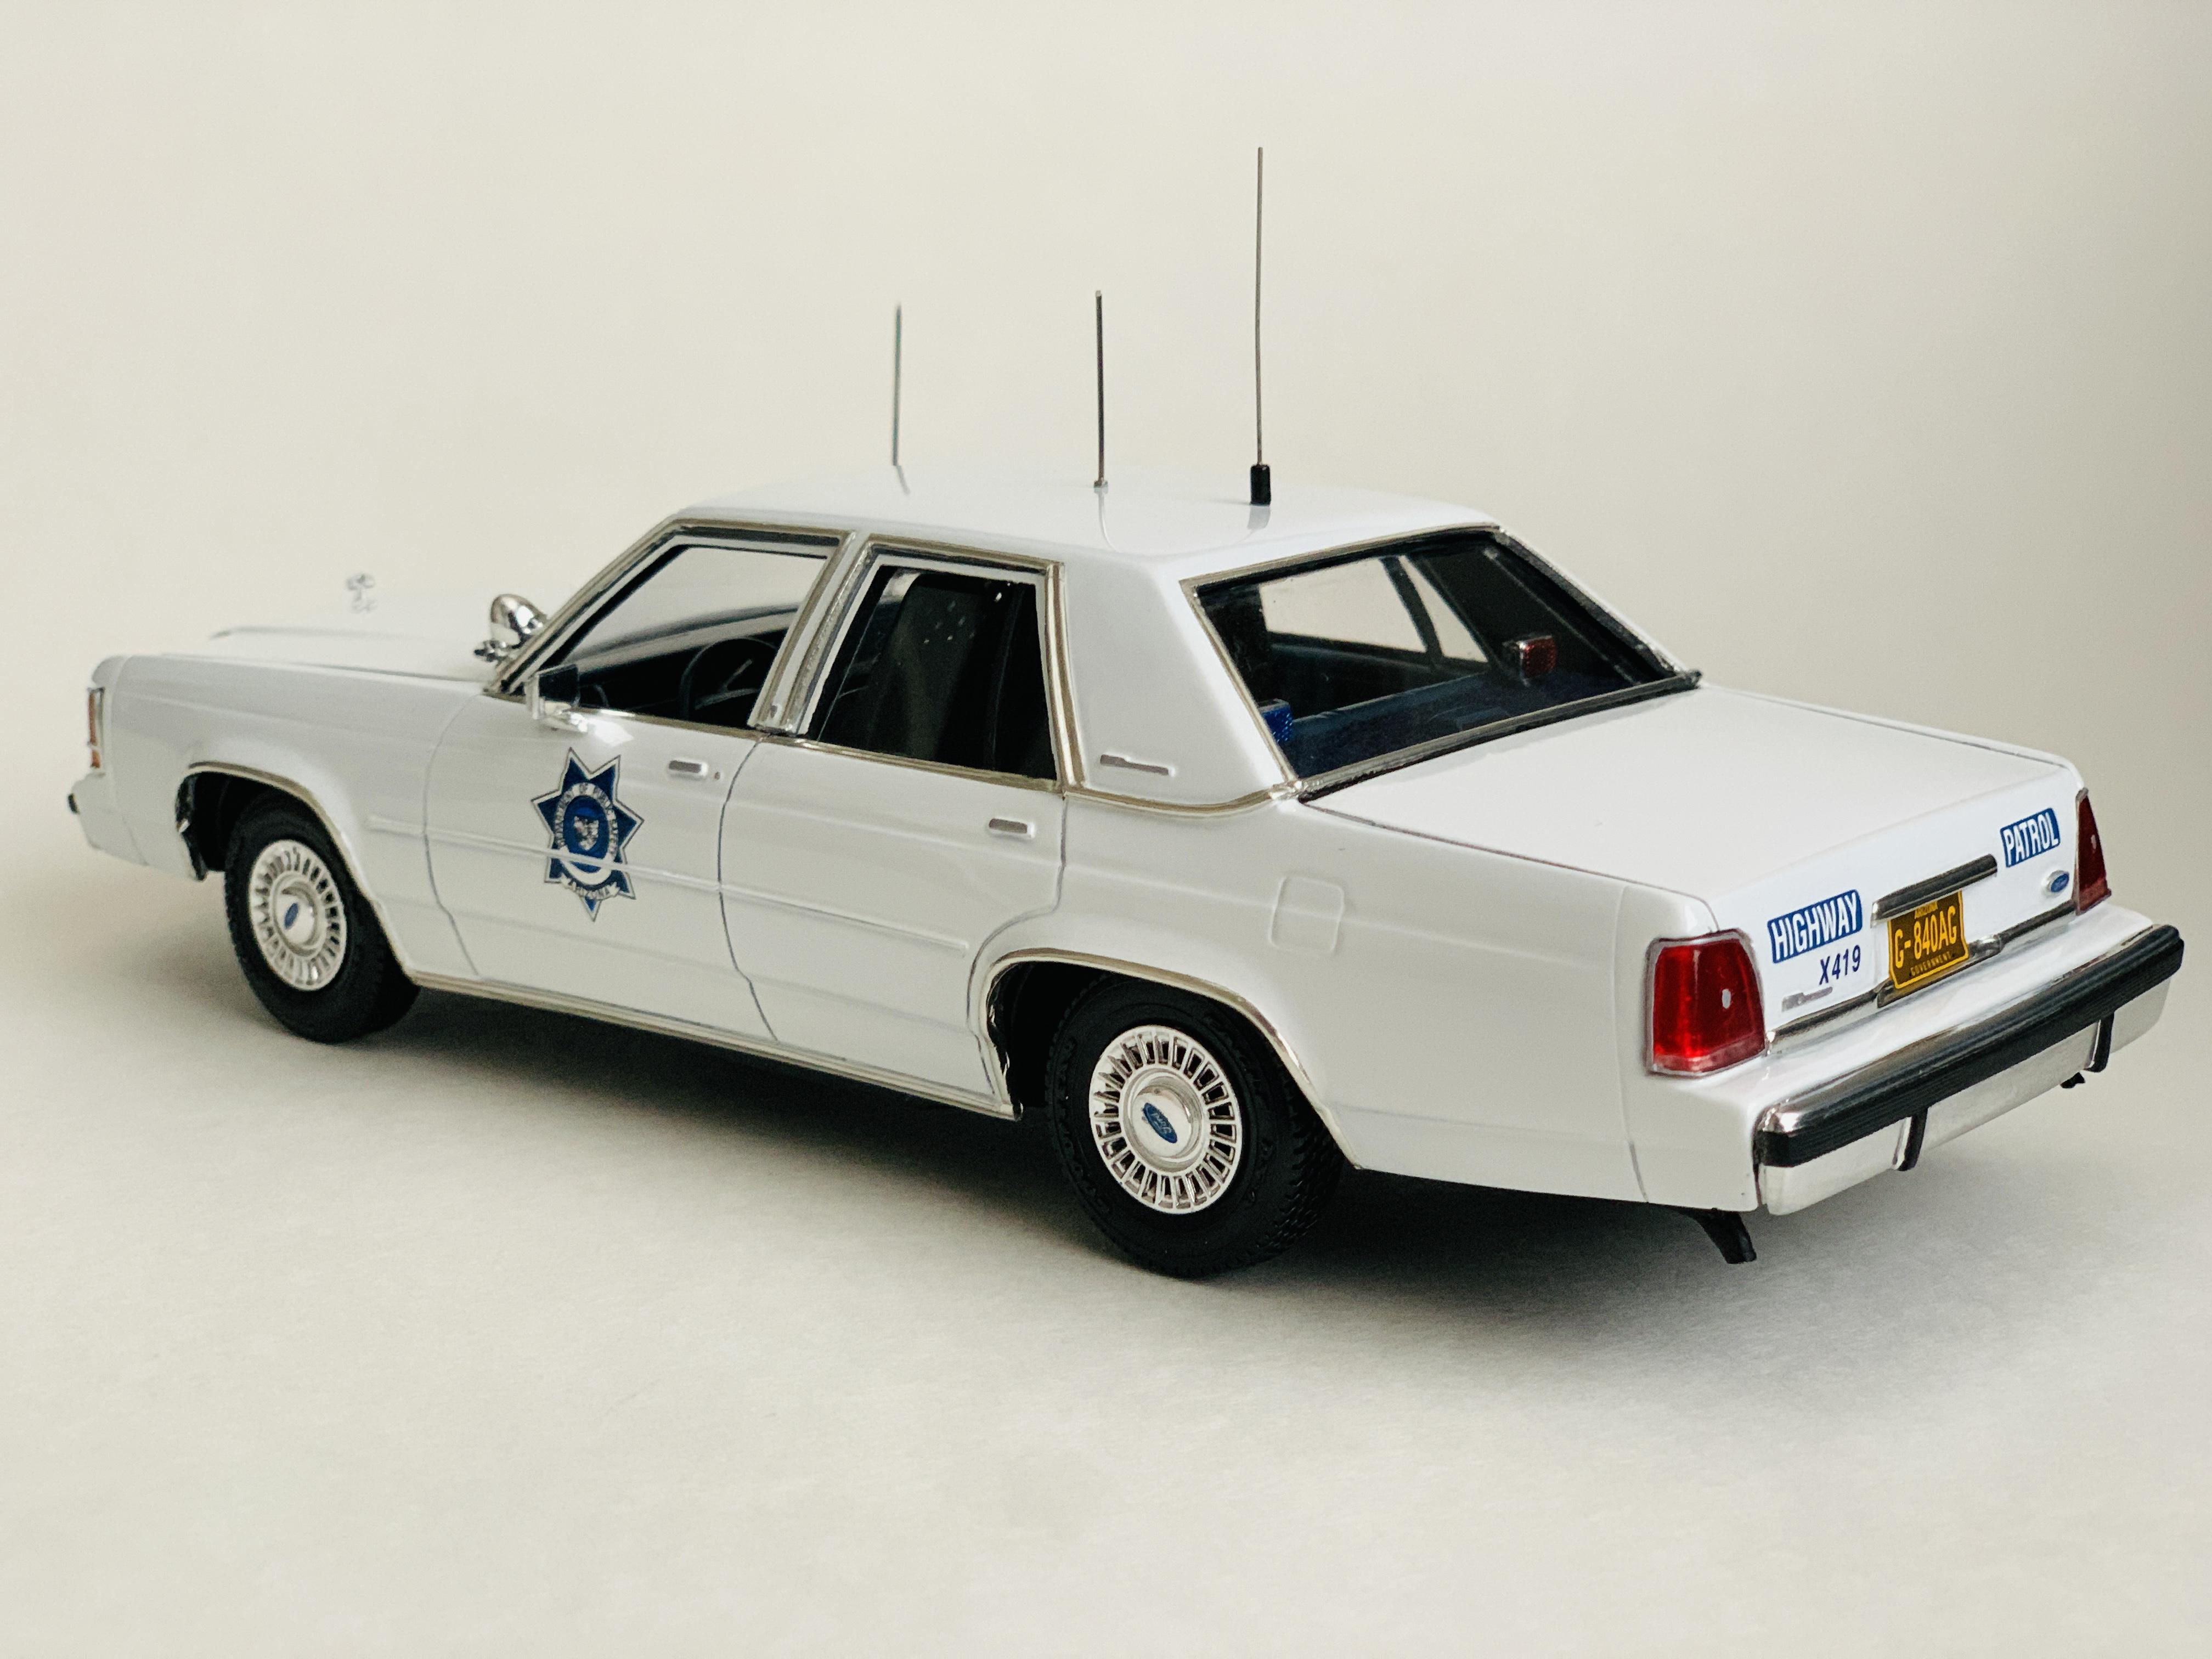
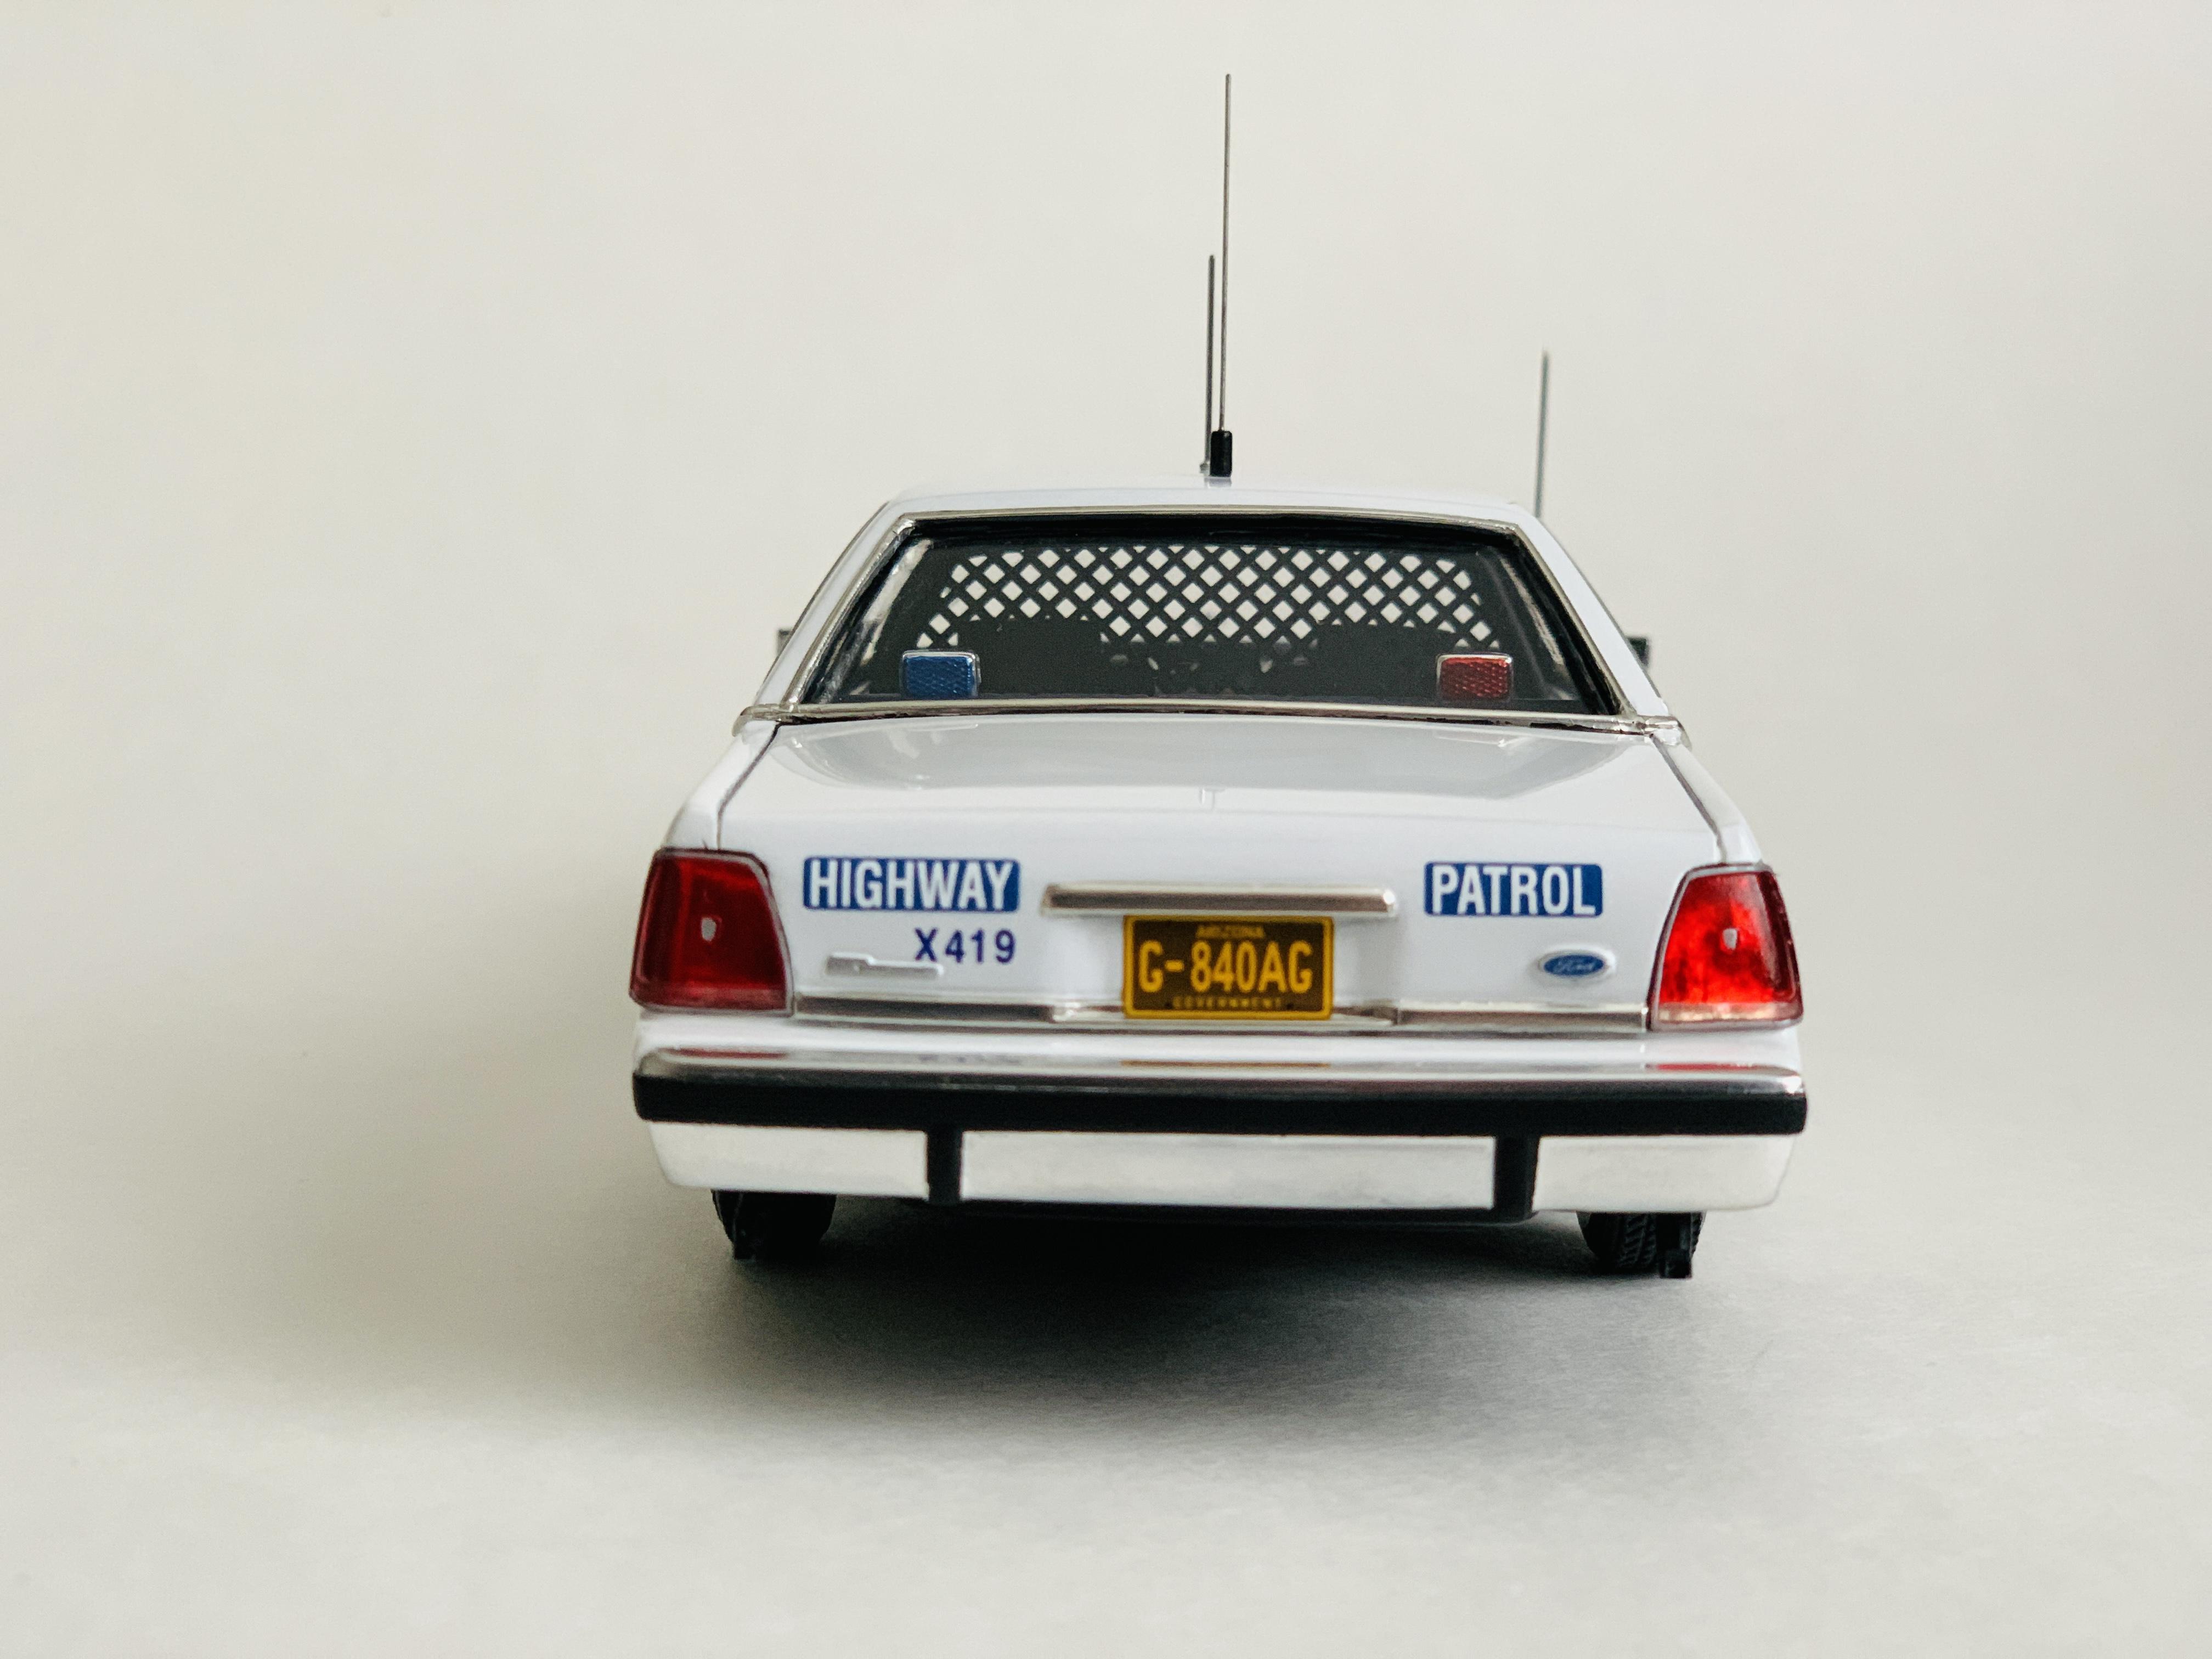
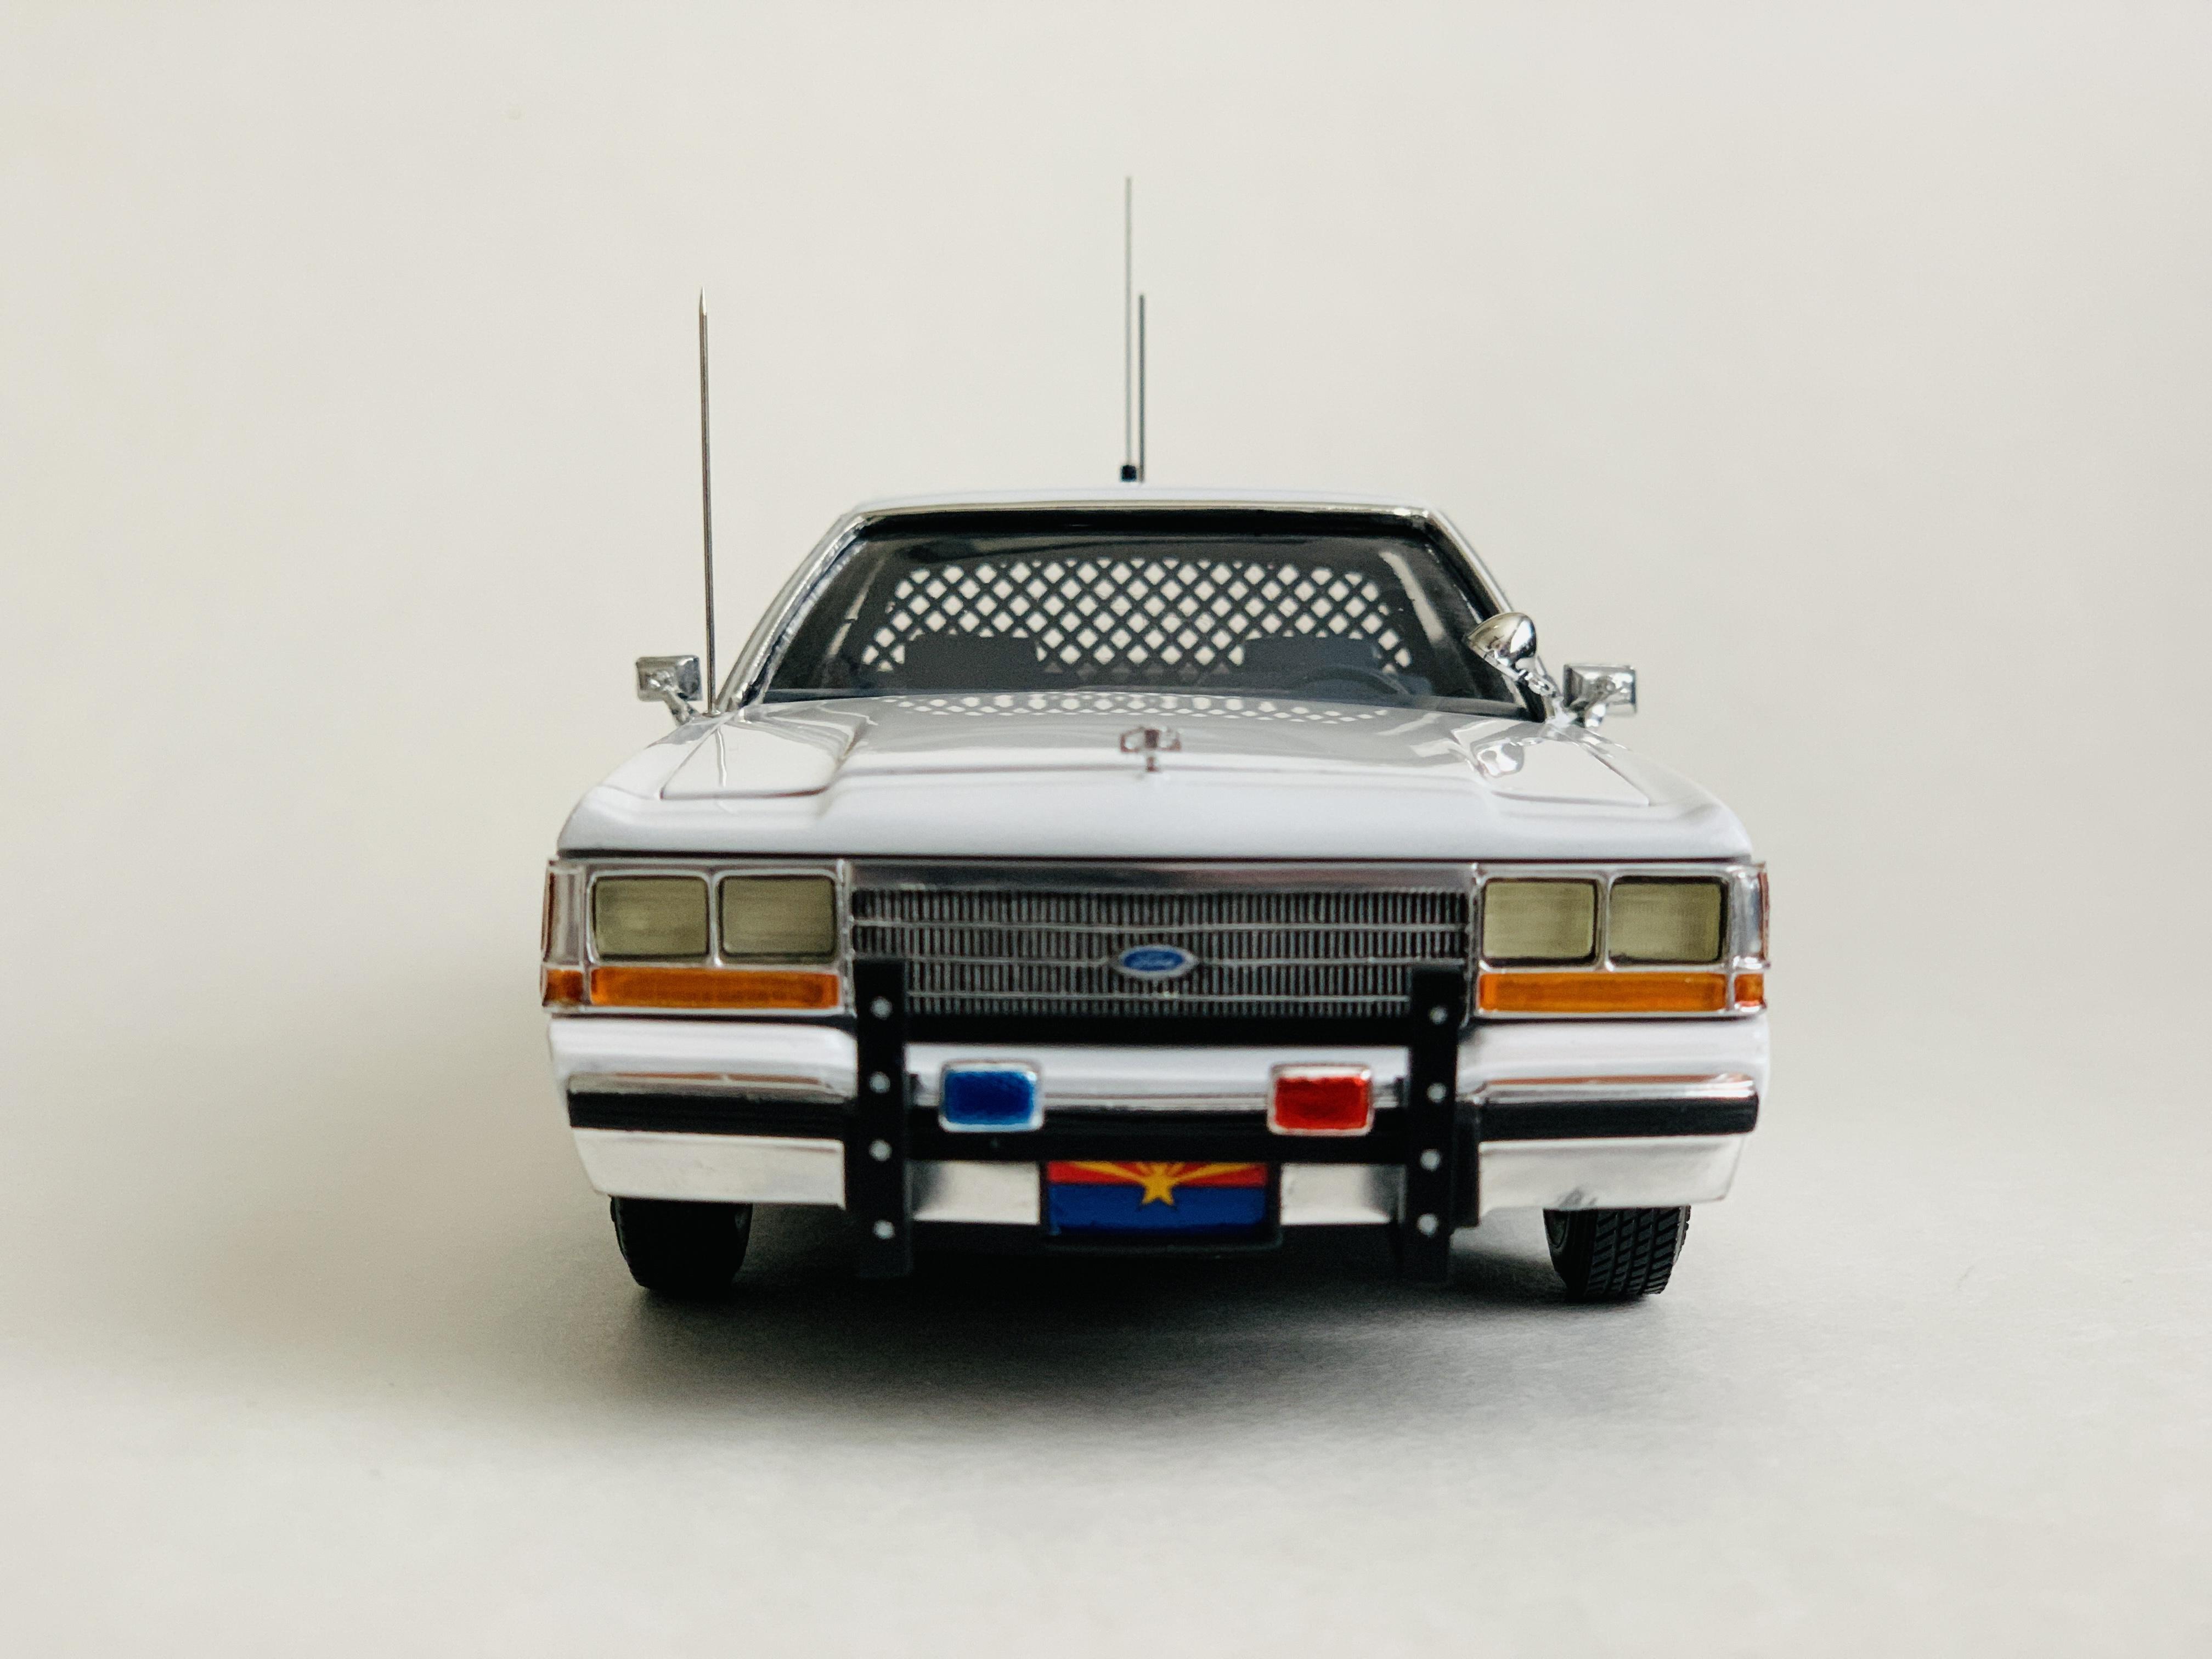
The antenna with the black base was bought on ebay many years ago. I haven't been able to find them again since. The other 2 are satin pins, one having been cut. They are my least favorite part of the car, but I used what I had. Thanks! https://inquarters.com/Large_Scale_Law_Enforcement.html Thank you!
-
Thanks!
-
Thanks! I think styrene strips would be your best bet. The extra chrome that runs along the bottom of the doors could be simple. But with the chrome on the roof that runs down the b-pillars, you'd definitely want to make sure the roof is straight. The roof on my particular kit isn't straight, something I unfortunately noticed too late. Thanks! Ha, I wouldn't describe myself that way. There's a few things not visible to the eye that I messed up on. Not noticing the roof wasn't level until it was too late is one of them. I look at it as an opportunity to learn and improve, not to beat myself up on it.
-
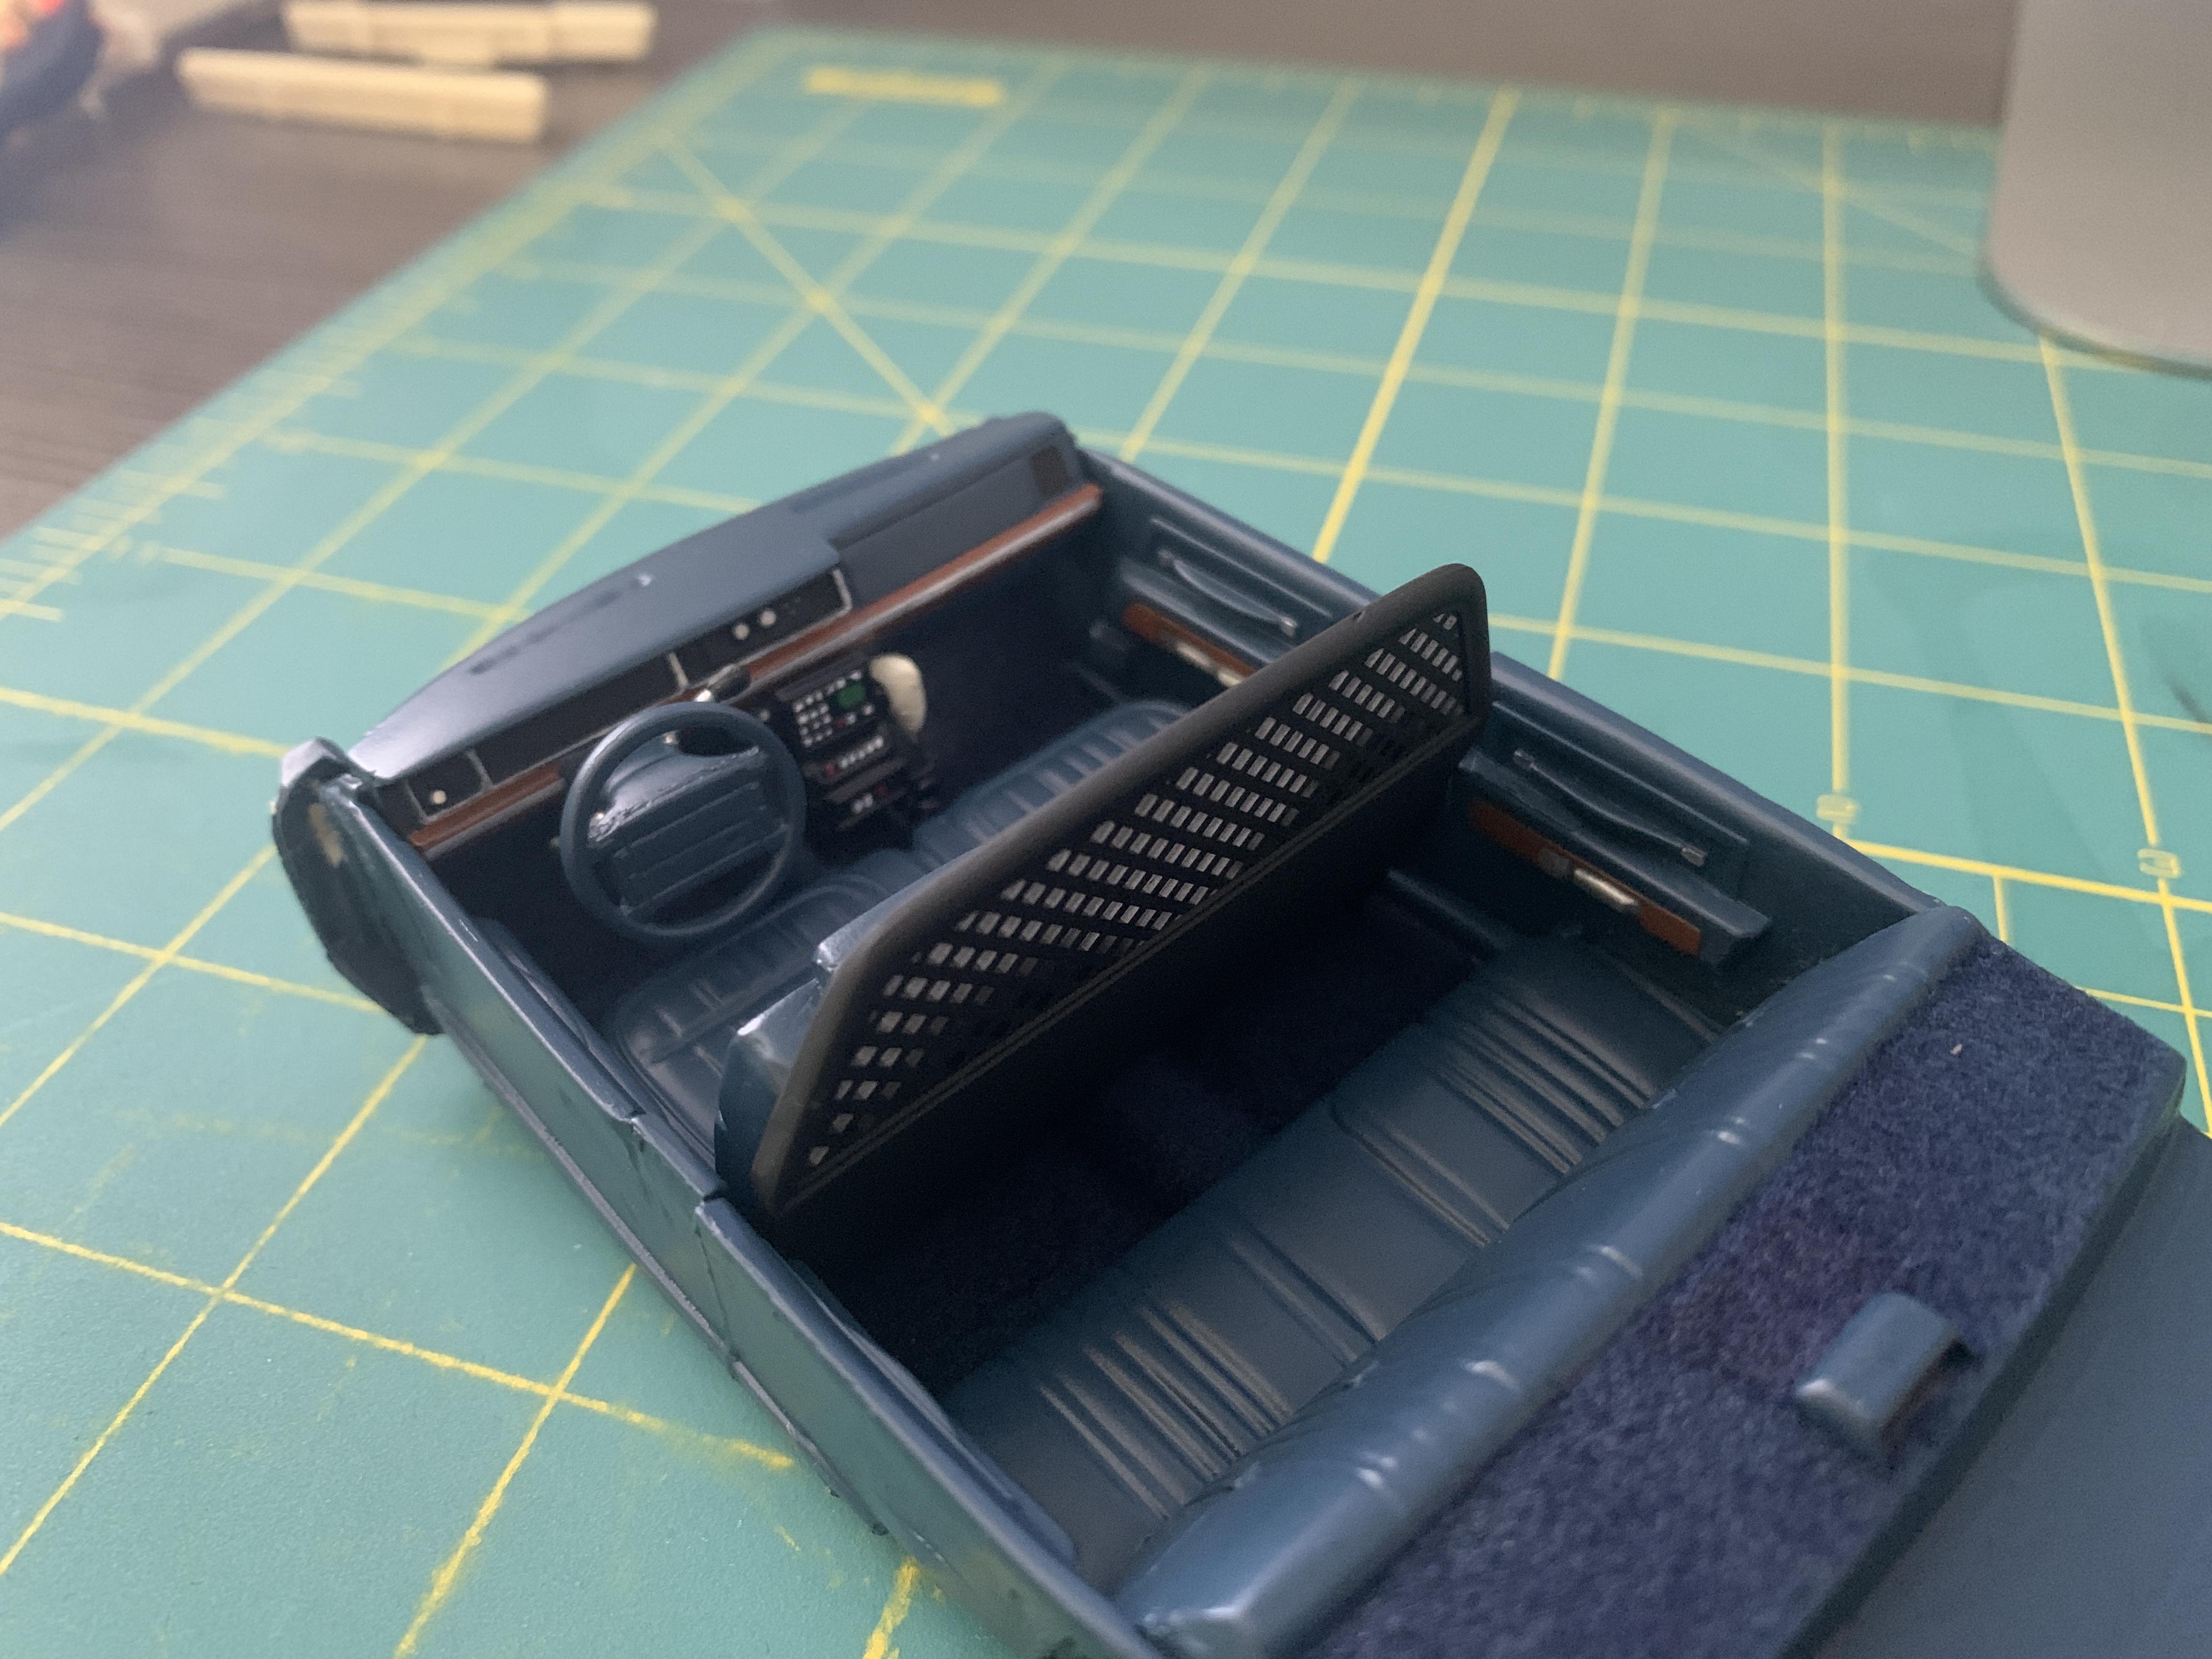
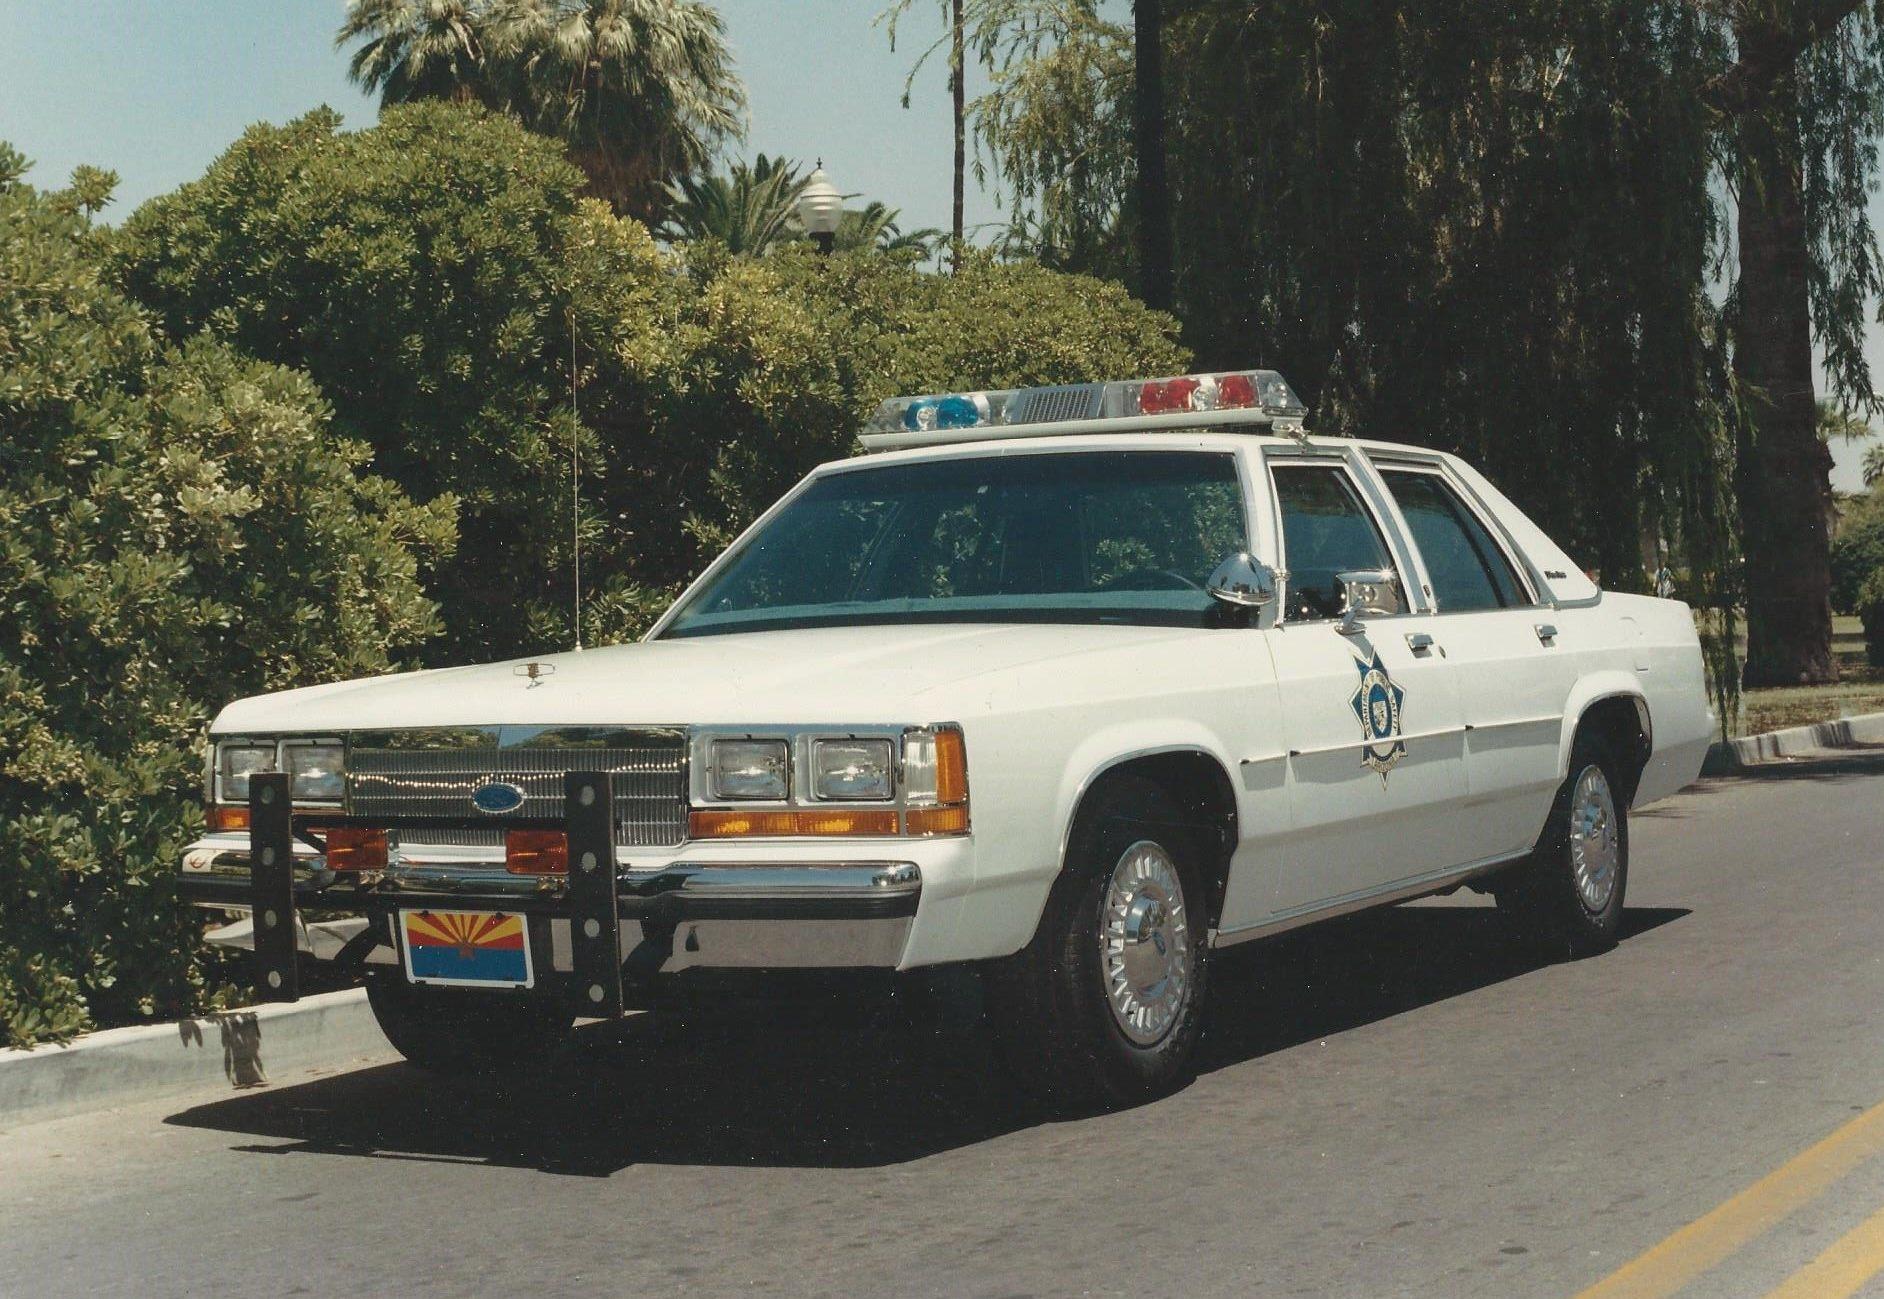
Here's my 1990 Ford LTD Crown Victoria - Arizona Department of Public Safety. This is a full resin kit from @Greg Wann. The wheels, spotlights, Ford decals, and interior/exterior police equipment all came from the Lindberg Crown Victoria kit. Decals are the just released InQuarters decal set. Push bumper is scratch built. Paints and clear are all Tamiya spray cans, with wet sanding and polish after. This is the first full resin kit I've built and overall I'm pleased. There's some things I wasn't happy with concerning my own work, but this was a great learning opportunity for me. I highly recommend the kit, but be aware that it won't look good without bare metal foil applied.
-
Can you touch up burn through?
av405 replied to atomicholiday's topic in Model Building Questions and Answers
With something that small, I would just touch it up. Since it's a thin portion, just put tape around it and have at it with a thin brush or even a toothpick with paint on the end. It by no means looks perfect but at least from far away it looks good. Others might disagree but if you're happy with the rest of the body and only a small section is the problem, I personally don't want to go through the effort of restarting. -
Confused about 3d printing
av405 replied to jeffp60's topic in Truck Aftermarket / Resin / 3D Printed
Well that's the cost of going down the 3D/resin/aftermarket route. You either pay $100 for a full kit or about the same to purchase a body + donor kit + extras. -
How do you keep your models clean?
av405 replied to redscampi's topic in Tips, Tricks, and Tutorials
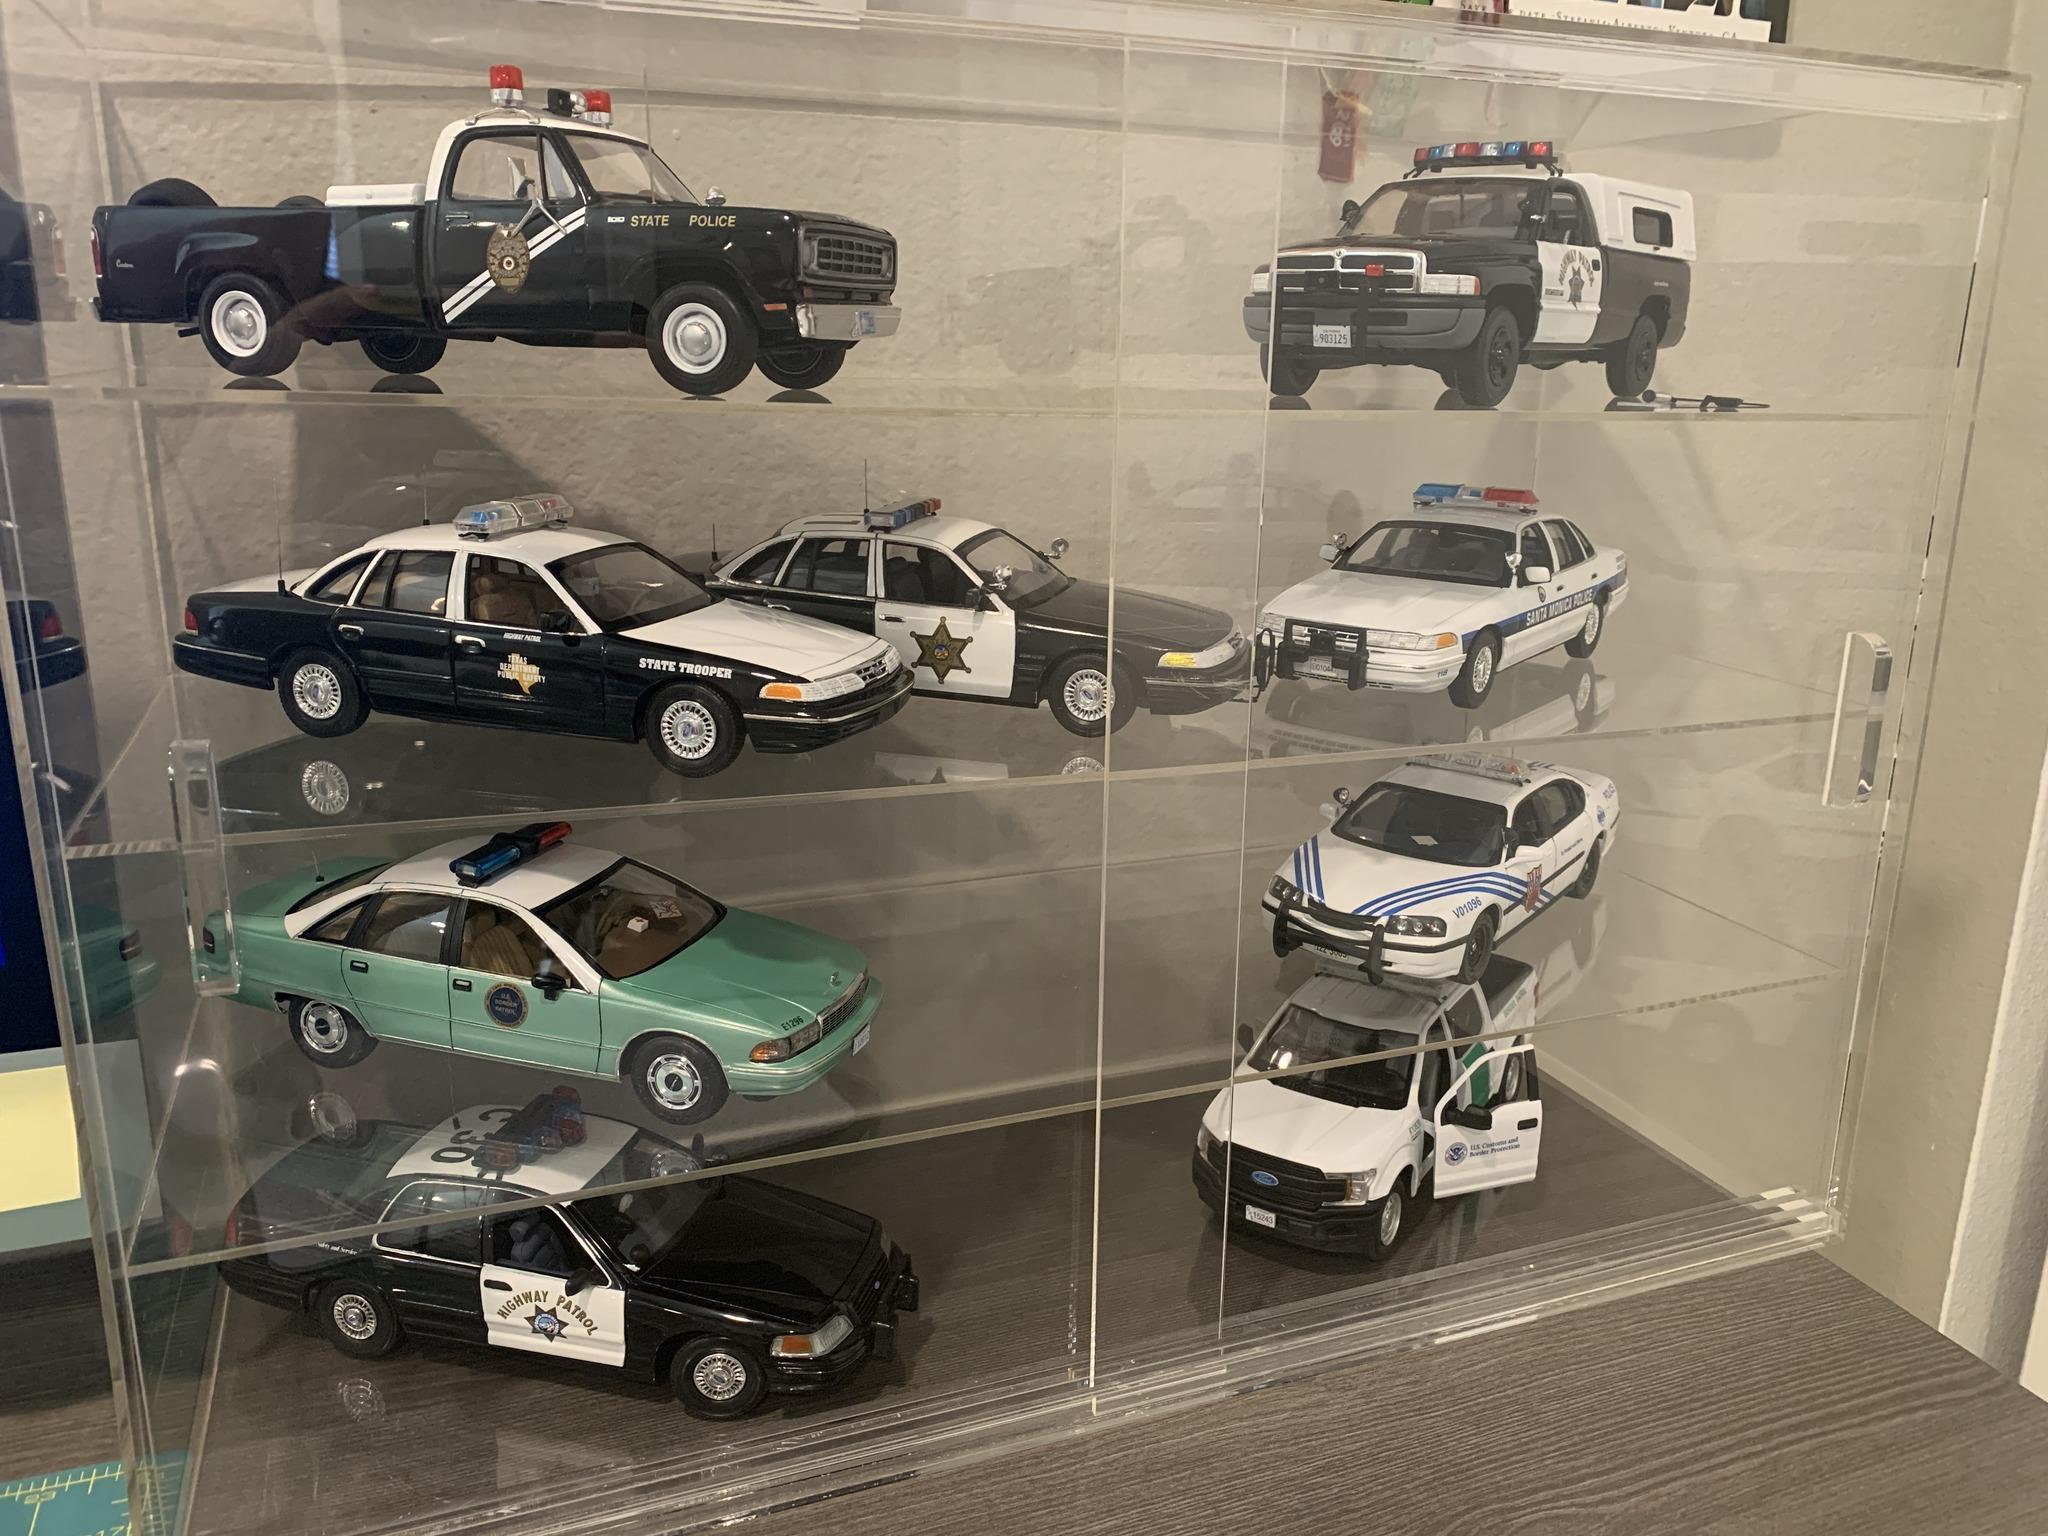
Lately the clear cases have been on sale at Hobby Lobby. I was able to scoop a bunch up at cheaper prices. If you're on Facebook, their marketplace is a great source for finding display cases of all sizes for good prices. If you're not on facebook, you can usually find these times of cases on most of the big online marketplaces/apps. I found this one last year. I liked it because I was able to put it on top of my desk since I don't have room for a larger standing display. Listed for $45, got it for $40. It'll fit 12 models. Definitely big savings over the individual cases.
-
Yawn. I guess I can't really complain though, the first 3 quarters of this year have brought/will bring a lot of things I've wanted. I suppose that's a good thing, a little bit of something for everybody.
-
Confused about 3d printing
av405 replied to jeffp60's topic in Truck Aftermarket / Resin / 3D Printed
Don't hold back simply because its from Ukraine. I can vouch for that seller, the quality of his work, and his ability to ship and deliver in a timely manner. He's in a part of the country not affected by the war. -
AMT 1/25 2021 Bronco First Edition
av405 replied to Jordan White's topic in Truck Kit News & Reviews
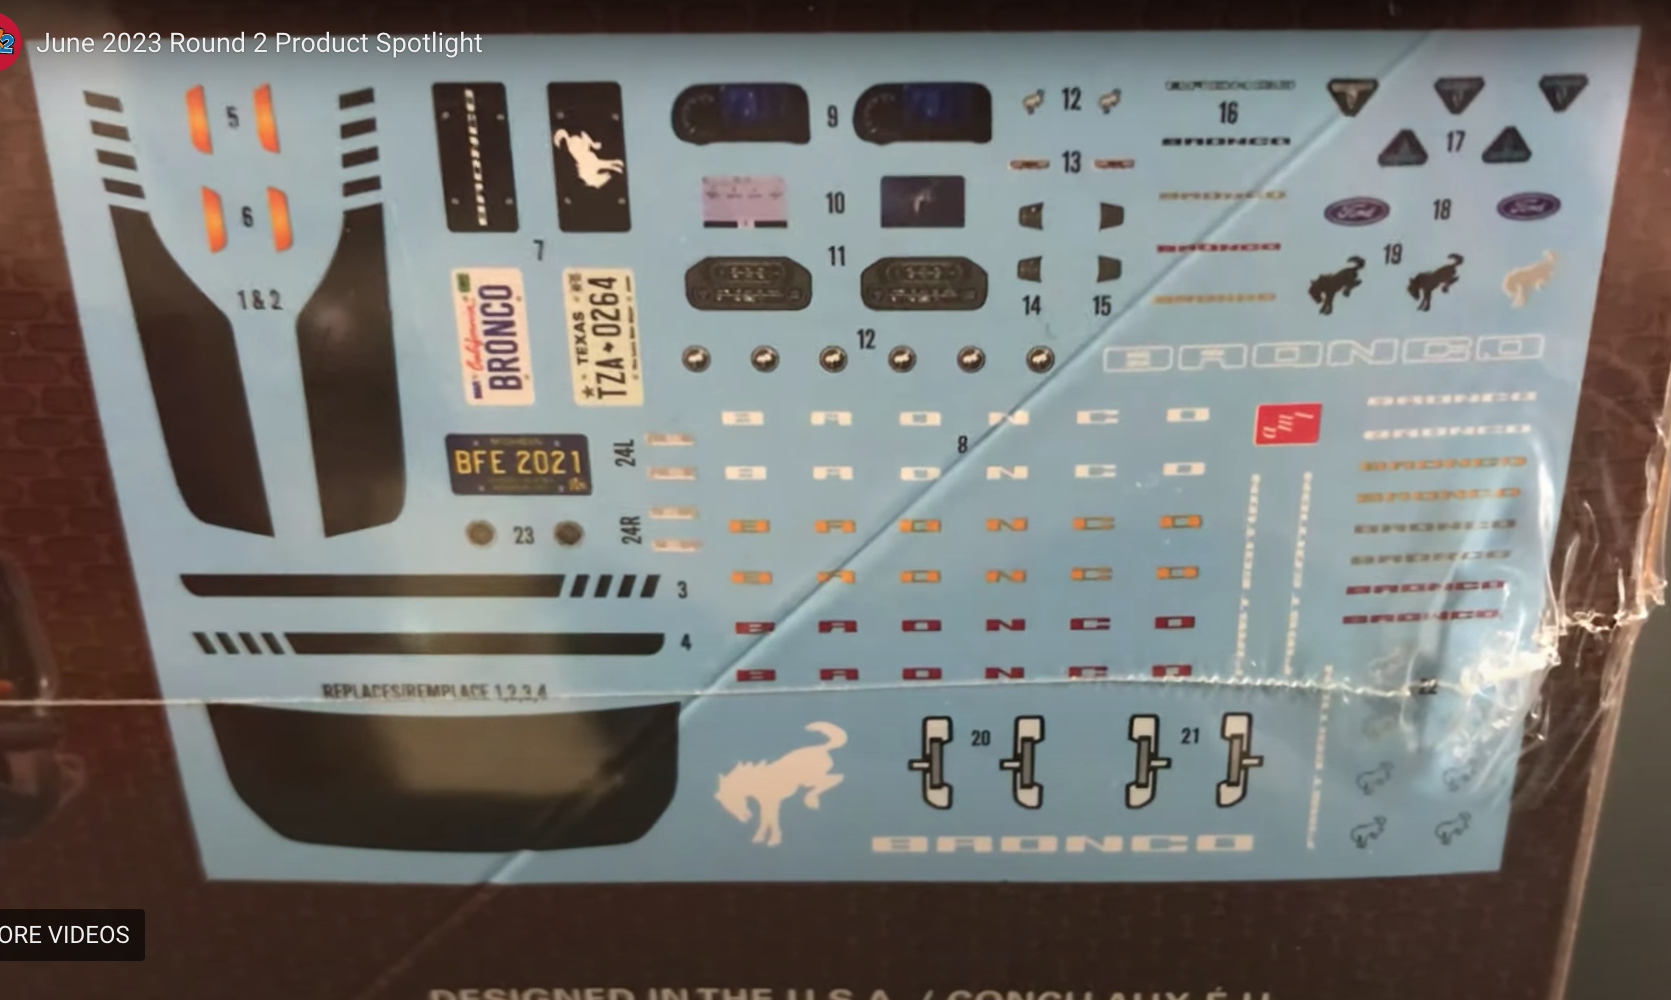
Screenshot of decal sheet:
-
DiOlex resin 77 Caprice four door
av405 replied to hedotwo's topic in Model Building Questions and Answers
I wonder if the Revell 1991 Caprice chassis would be a good option? It was the recommended chassis for the Modelhaus 1981-1985 resin Impala. As for wheels, check out CustomSquads: http://www.customsquads.com/uploads/1/0/3/6/10365684/cs_price_sheet_1-2018.pdf It looks like the CS-CWC-Type 8 wheel is one of the actual wheel covers that Caprices of the era would have had, if not close to it. -
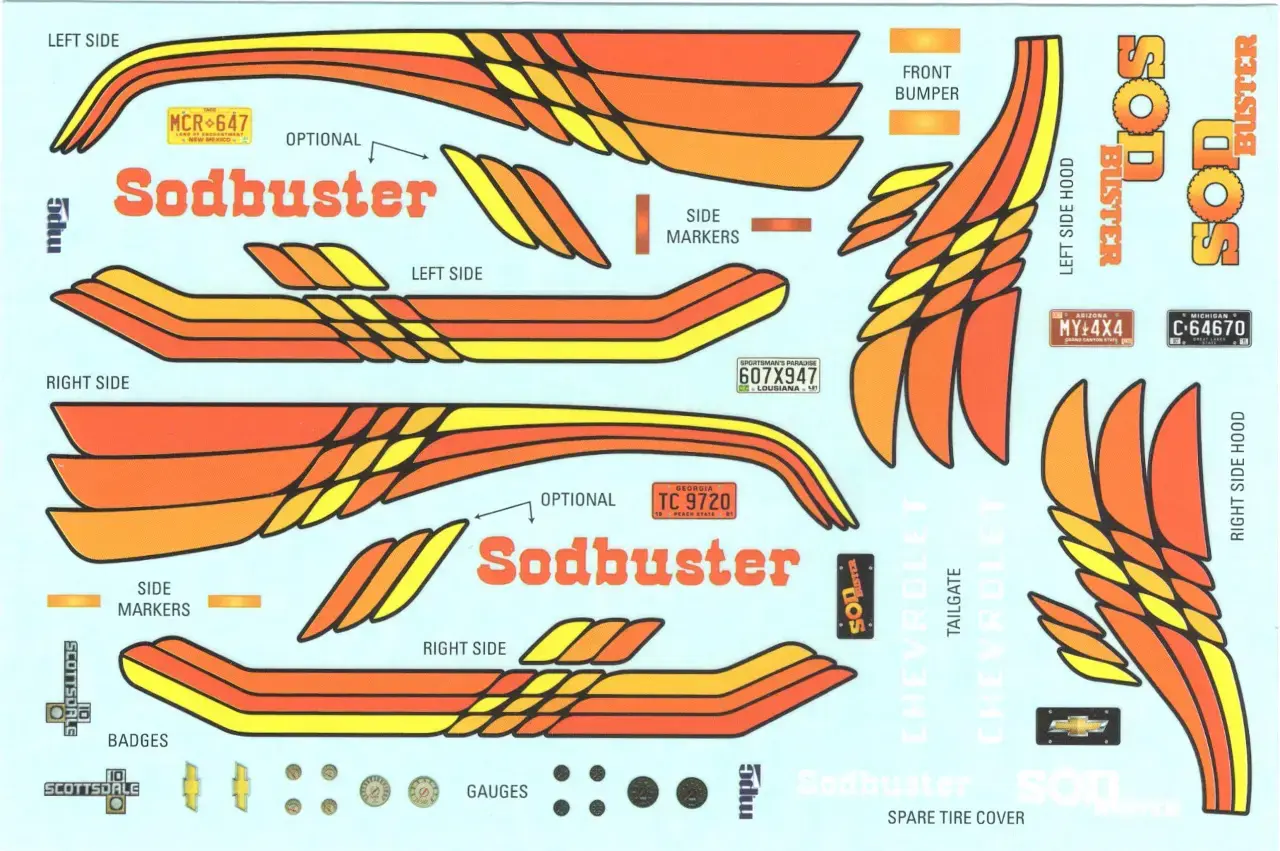
Decal sheet:
-
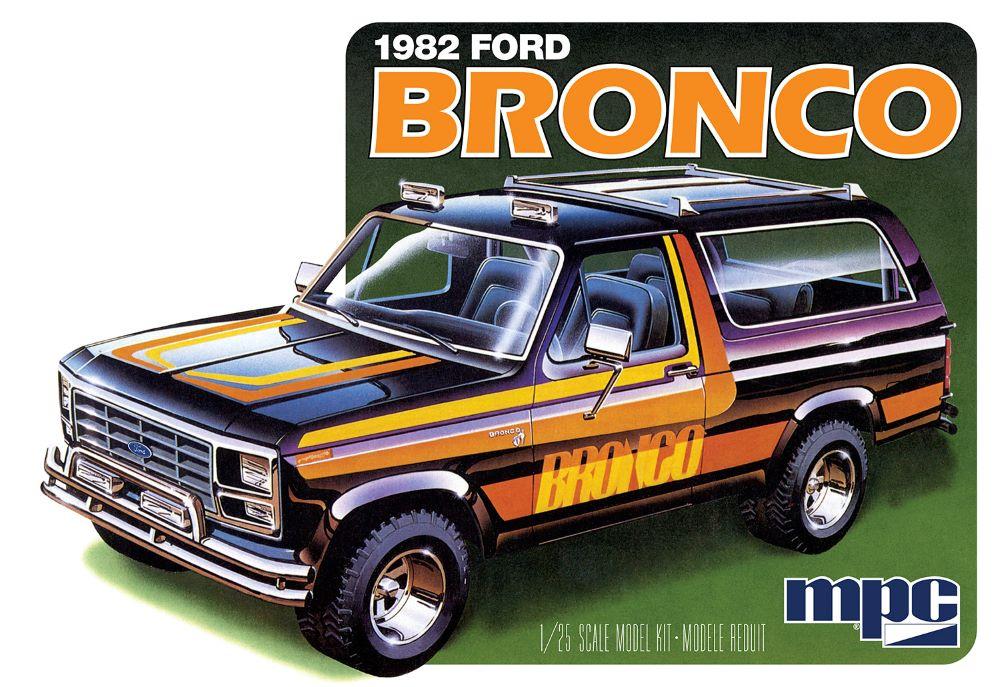
Here's the box art. I'm very excited it was changed to a 1982(-1987) model. It opens up a lot more possibilities. I'm looking forward to seeing the decal sheet on this one.
-
Old Hobby Room/New Work Bench
av405 replied to shoopdog's topic in General Automotive Talk (Trucks and Cars)
That roll out desktop is neat! -
To WIP or not to WIP
av405 replied to atomicholiday's topic in General Automotive Talk (Trucks and Cars)
I've done one WIP thread and in retrospect, it was a great way to stay organized and keep track of what materials, paints, paint colors, etc. I used. I've gone back to it a few times for reference on my current build (which is not a WIP). With that being said, I think everyone has to do it their way. I've seen some WIPs that documented every little thing down to a push button on a console and that had multitudes of photos. These are my favorites but I don't have the patience for this so I covered basic "accomplishments" on my own thread and kept it simple. It was more about "this is what I did" as opposed to "this is how I did it." I found this to be a good balance. -
Box art:
-
1994 Ford Mustang GT Convertible 1/25 Monogram (GT coupe/Cobra vert kitbash)
av405 replied to polybius's topic in Model Cars
Great save, beautiful finish! -
Gorgeous build! You really pulled it off!
-
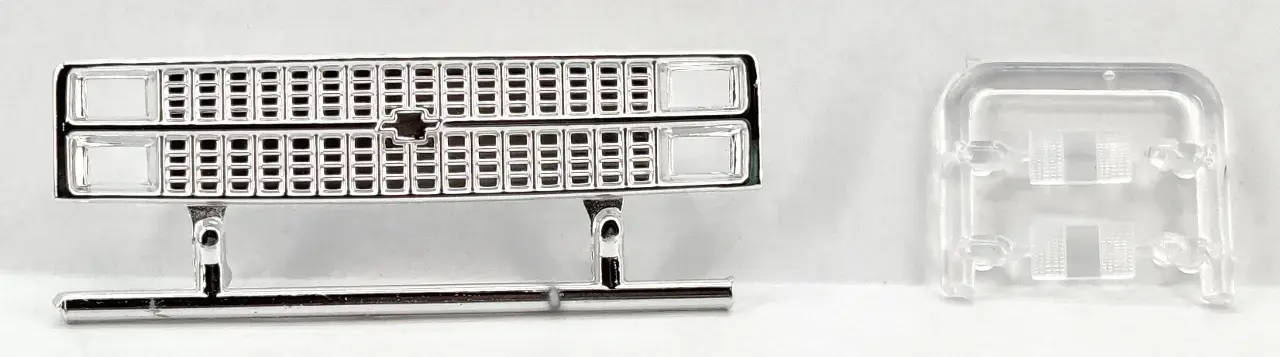
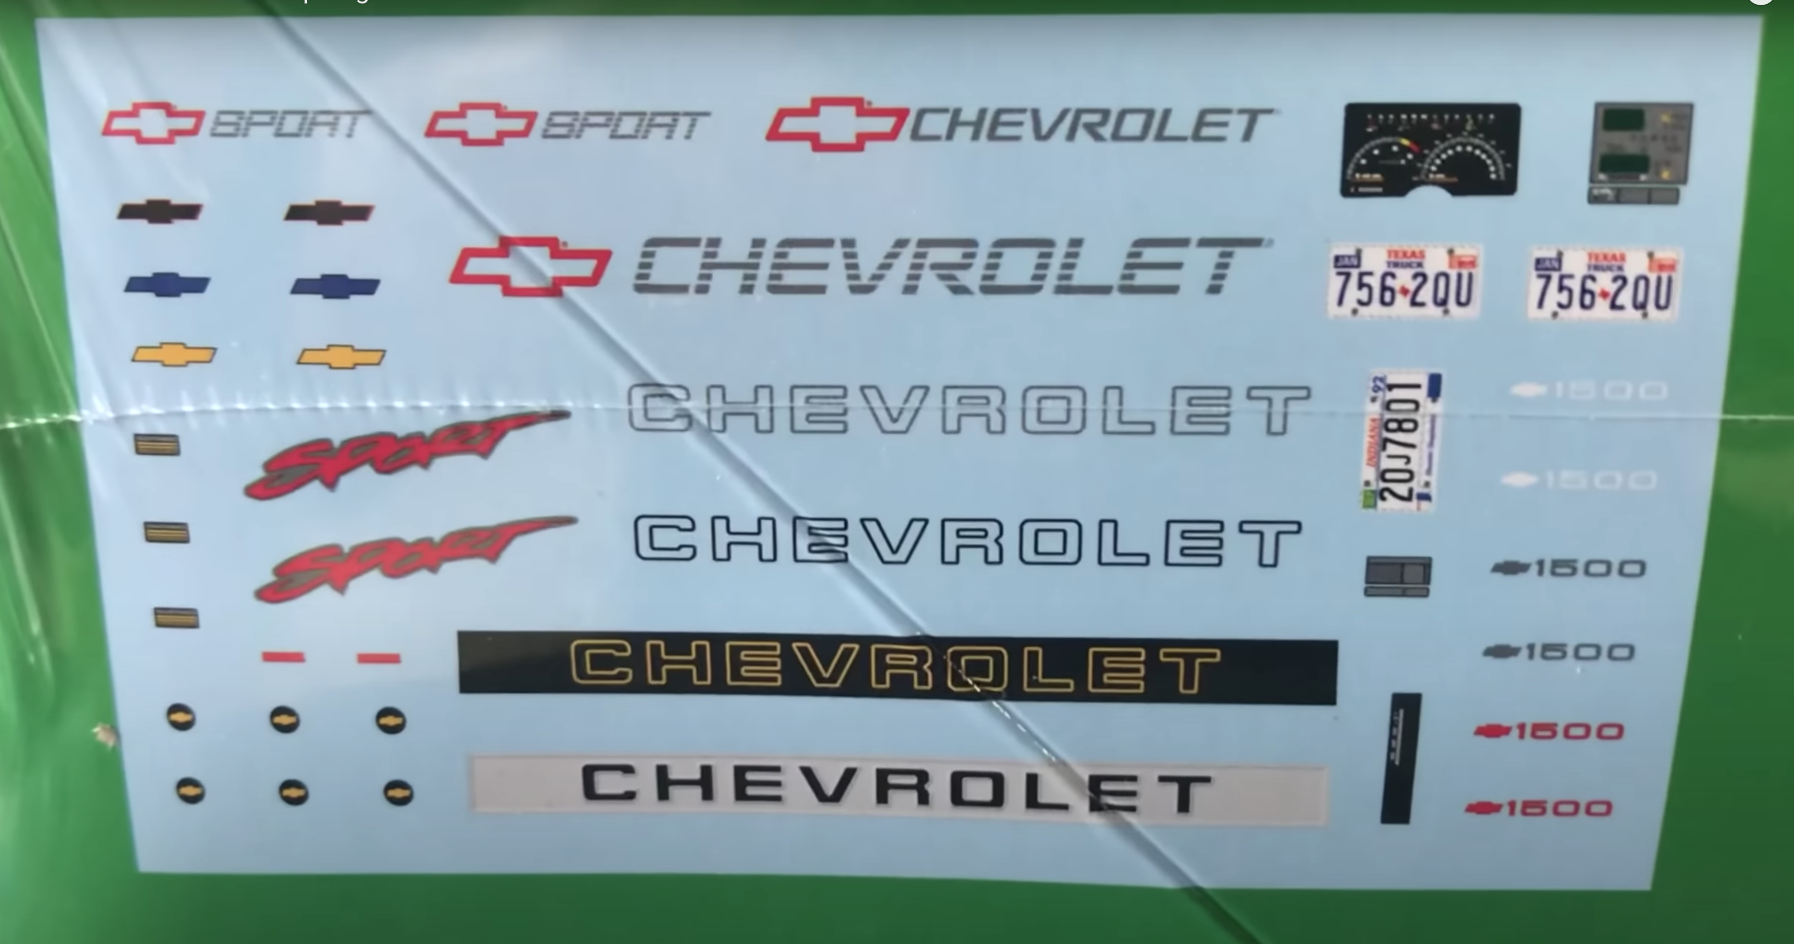
MPC 1981 Chevy Stepside Pickup Sod Buster (1:25 SCALE)
av405 replied to av405's topic in Truck Kit News & Reviews
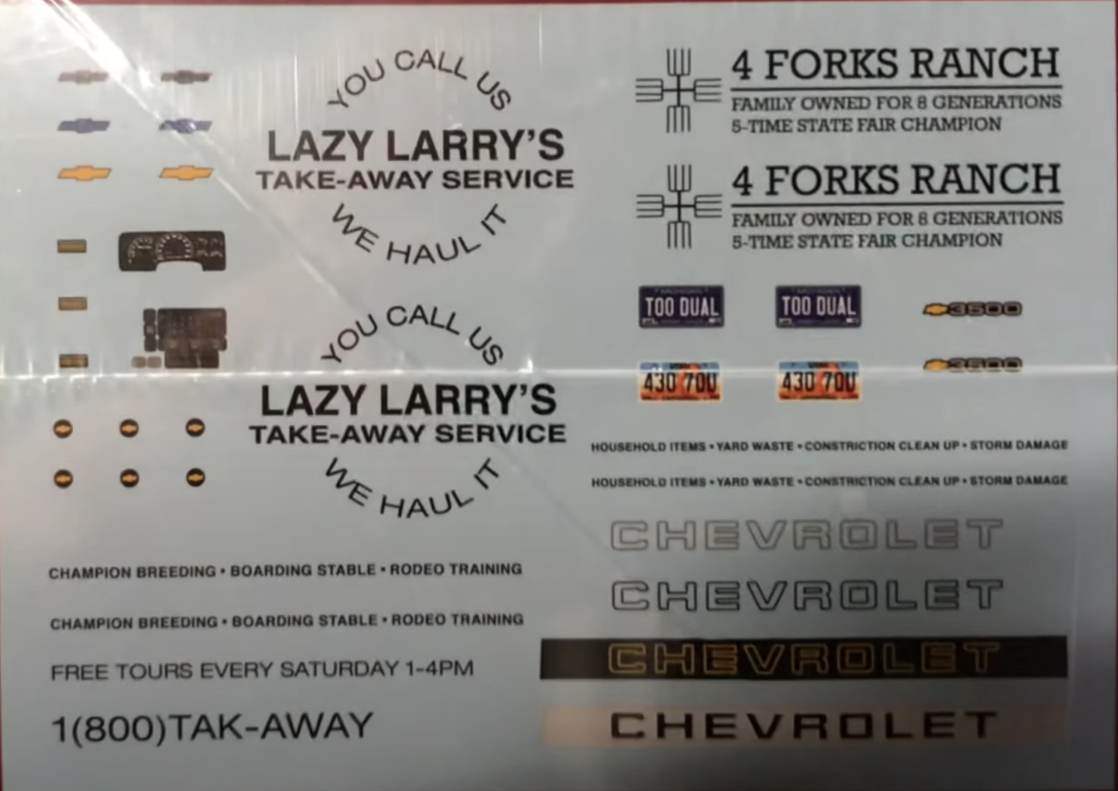
Here's the decal sheet and new grill and headlight setup. Really loving the expanded decal sheet:
-
Here's a better screenshot: