Tom Geiger
-
Posts
18,967 -
Joined
-
Last visited
Content Type
Profiles
Forums
Events
Gallery
Everything posted by Tom Geiger
-
Off on tangent
-

amt 1202 1/25 AMT 1963 Chevy II Nova Station Wagon - Craftsman Plus
Tom Geiger replied to Casey's topic in Car Kit News & Reviews
Depends on what you like. Per your name, if the most important car to you are Trans Ams, it’s just not for you. It’s just personal preference.. I won’t buy a white car.. but that’s all my daughter buys! -
I know I used a Testors flat gray for the bumpers.. I believe it was Panzer Gray
-
We can’t read!
-
Back when I sold on eBay I sold a guy a pristine 1968 Camaro dealer brochure. I carefully put it in a new rigid photo mailer. I owned a “Do Not Bend” rubber stamp I used liberally. I get contacted by the buyer that his postman put the package across his top step and bent it in half with his shoe so he could cram it into the mail slot, destroying the previously perfect brochure. The guy said he saw the postman do this ! Still somehow he thought I should replace it or refund him!
-
Looks great! I need to finally build one of these since I have a few!
-
St John Jeep
Tom Geiger replied to Tom Geiger's topic in WIP: Model Trucks: Pickups, Vans, SUVs, Light Commercial
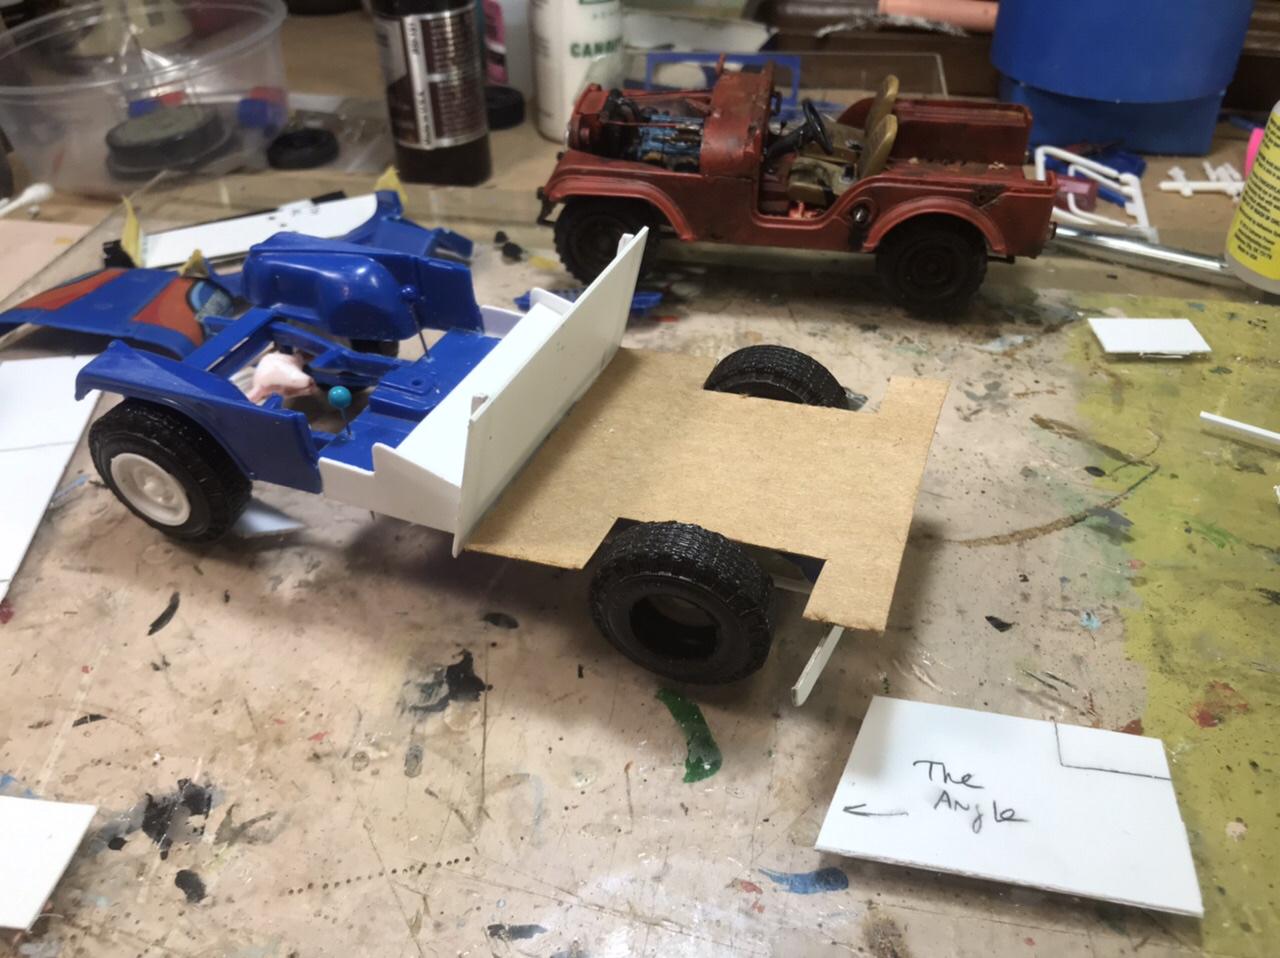
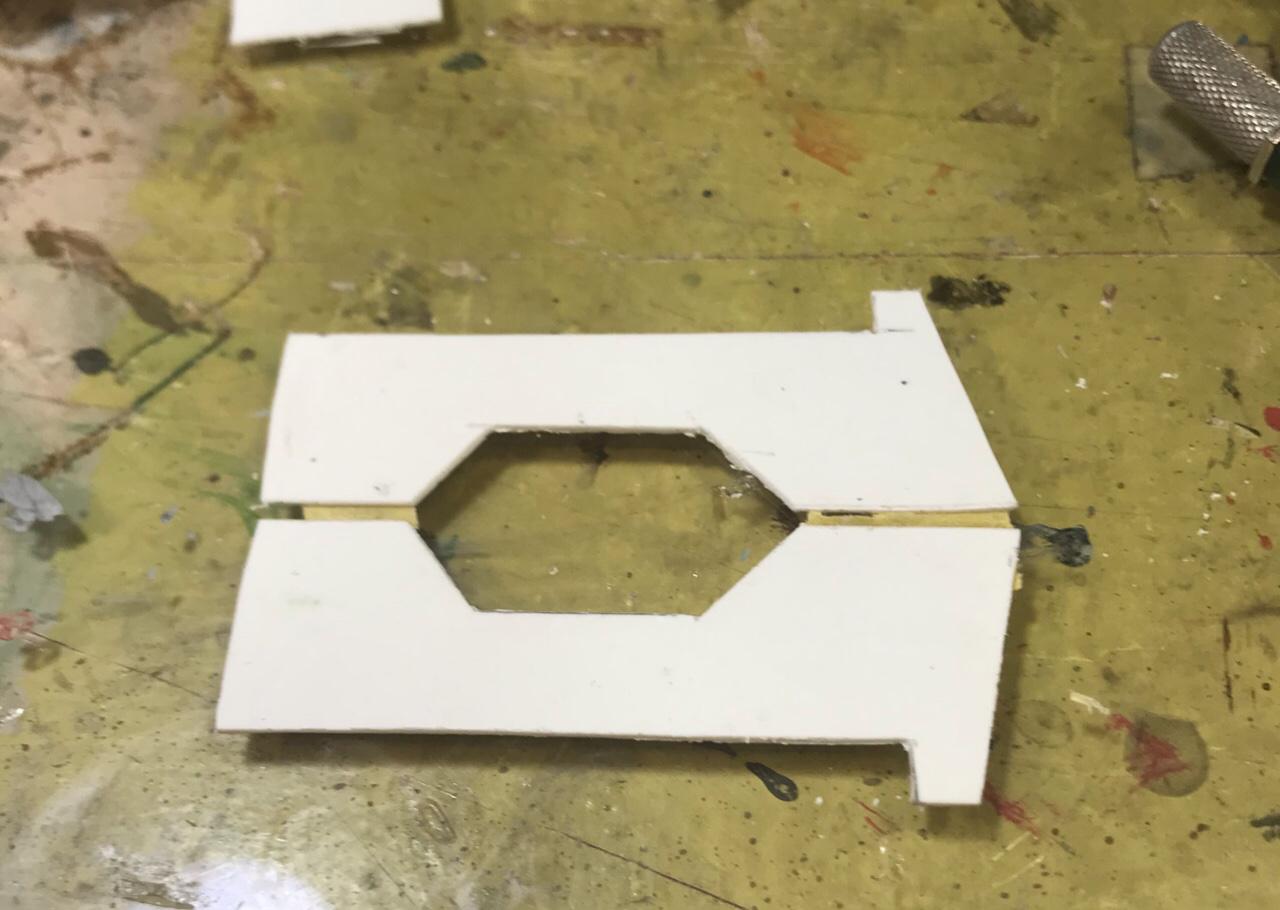
Next installment, Saturday’s progress... First I cut out the sides per the dimensions of my cardboard template. Note that they are taped together. Once I cut out two pieces that mirror each other, I tape them together and sand the edges together to assure they are the same size and shape. Next I fitted a cardboard template for the bed. It took two tries to get it the right size and wheel openings in correct place. Two things.. the white plastic out front is the template to match the sides with the angle of the seat back. I work on glass because it’s perfectly flat. I set the body on the glass, set a piece of scrap plastic next to it and traced off the angle. Once I cut the plastic I checked it against the body, and sanded the edge until they matched well. Now I can easily trace that angle anywhere I need. Second thing to note.. look in the front of the cab and you’ll see a couple of pins sticking up. I drilled out the pathetic match pins MPC provided and replaced with metal. This is important as I measure / cut / fit the body parts together, as this keeps the body true and square on the chassis. And where we are right now.. using my cardboard bed floor template, I committed it to plastic. I was pleased with it and it’s straight fit against the seat back / front wall of the bed piece. I wanted a bit more of a stronger joint than just the edge of the .040 sheet (which just happens to be one scale inch— .040” x 25= 1, which I figure into my calculations). I used Evergreen angle on that mating edge, hiding it under the bed.. once chassis is finished, it will appear the bed fabricator used some angle iron in this crude assembly! I just glued the mating edge right before I took the last photo. The tire is sitting on top of the piece to weigh it down until the glue dries. The bed floor is attached to the cab now, but not to the chassis. I will drill and pin this to the frame at the high point of the rear wheel arc. Very important to plan how it will all fit together and glue / mount now so I’m not stressing with I’ll fitting finished parts later! The next step will be to make the wheel wells prior to gluing the sides into the bed. I know the dimensions and will cut them out of the small pieces of scrap plastic we’ve generated. Once it all looks good, I will glue the bed sides and wheel wells at the same time.. I’m counting on the wheel wells to help hold the bed sides straight. Until next step!
-
amt 1202 1/25 AMT 1963 Chevy II Nova Station Wagon - Craftsman Plus
Tom Geiger replied to Casey's topic in Car Kit News & Reviews
Like this one Mark? Me, once I get one I think I will do something light commercial!
-
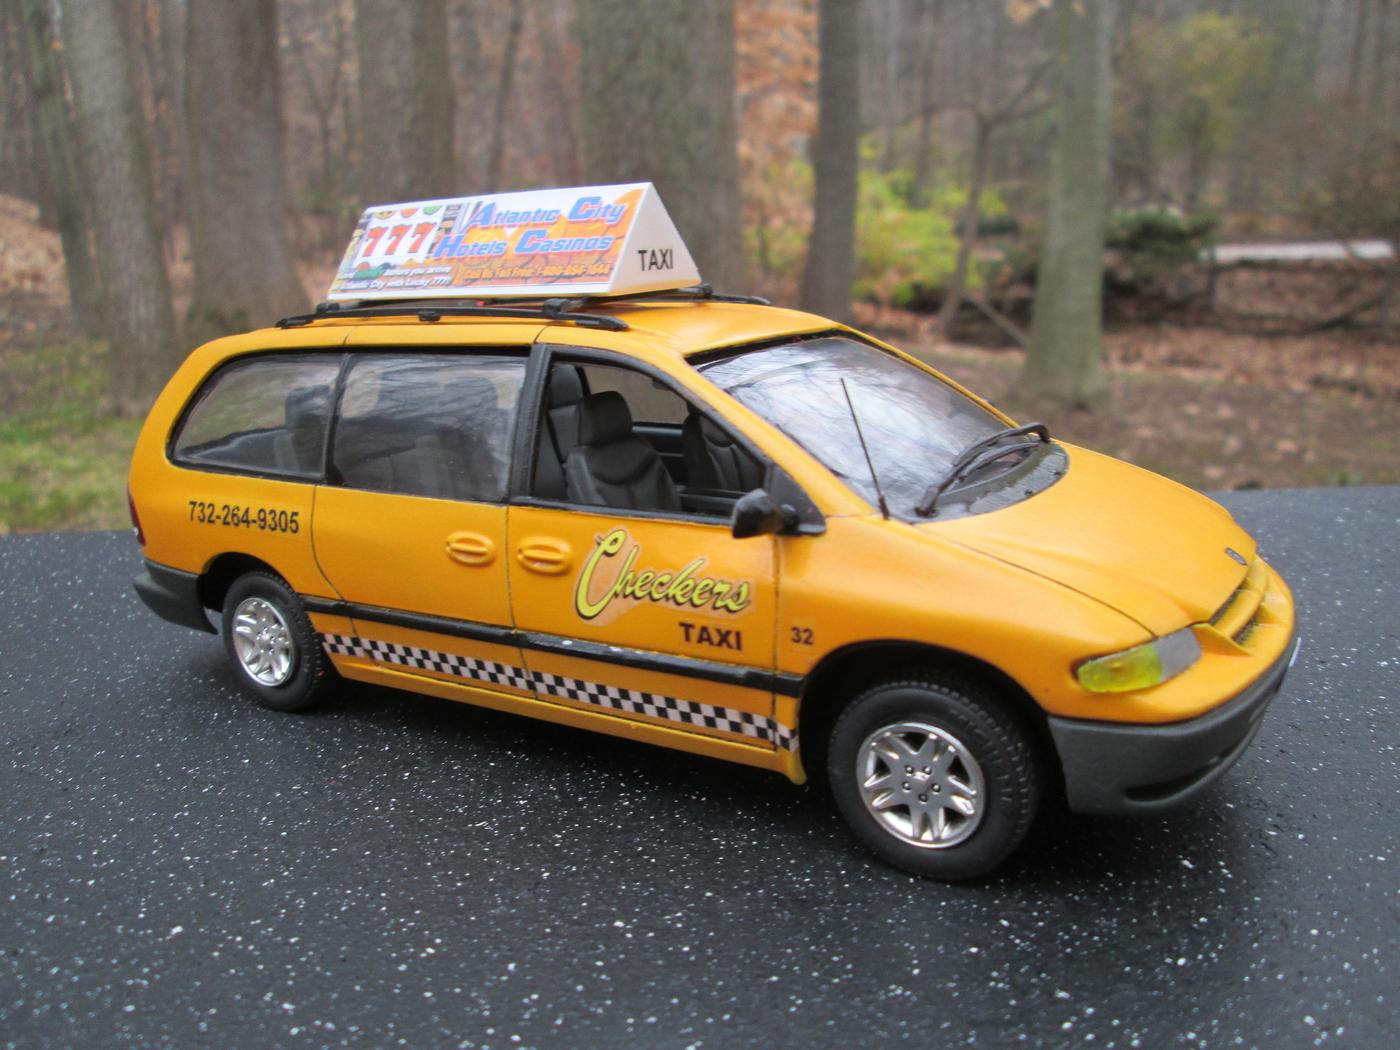
That would work! The only issue is that the 1996 Caravan is now 25 years old! Time does fly!
-
Redneck battle cry!
-
Yea Larry!
-
What did you see on the road today?
Tom Geiger replied to Harry P.'s topic in General Automotive Talk (Trucks and Cars)
Kurt, that is very cool, absolutely model worthy. -
In a Chevy
-
I do the same in Irfanview. First I crop the photo to just the item, eliminating the excess space. I hate photos with a little tiny model in the middle of a huge photo! One trick of getting an in focus photo of a small part is to have your camera / phone photo set to high resolution (very large photo), and take the photo at the distance necessary to get good focus. The crop it down to just what you need in your photo editor, then resize the photo! You can drop this on your phone in the iPhone photo function. Pull up a photo. See in the upper right corner it says “Edit”. Click that! New black frame pops up. You will see a bunch of photo editing tools. Look at bottom right for the icon that’s a box with two circular arrows around it. Click on it. There will now be a frame around your photo. Grab the edge with your finger and holding down, move your finger towards the center of photo. You will see you can easily edit photo from all sides. Mess up? Hit Revert and it will fix the changes you made. Then you can resize a photo as you upload it to this site. As you select pictures, notice bottom center of screen it says “actual size”. Once you select one or more photo, click that and it will give you size options. An example...
-
Thank you for your kind comment! The older Jeepster nose is the most attractive, I don’t like the later version at all! It’s said that Jeep changed it to add length to the nose to accept the AMC straight six engine since older version came with a Jeep four or Jeep / Buick V6.. which is what’s in the kits. Olson Brothers used to offer the older body but their mold wore out. Per Chris Olson they intend to again offer their Jeepster parts when they get the time. it would be very cool (and profitable) for Round 2 to restore this kit back!
-
Agreed Pete! There’s nothing like there being 2 or 3 of these taking up a whole page when the responses are one or two words!
-
Hey! From my advice posted on the 24 Hr page.. 1. (as I said above) pick a cheap expendable kit to have fun with. This is a quick build so you don’t have to be super careful. You may choose to forget about cleaning up mold lines and ejector pins. It’s okay not to wire your engine. Here’s the opportunity to “build like a sixth grader” with no remorse! 2. Choose a kit you are familiar with, something you have built before since you know the challenges. 3. Choose a kit that you have multiple copies of. This comes in handy when you come across a badly formed part, or screw something up. Don’t waste time fixing it. Just grab parts from the second kit. Worry about it later when you build the second kit and have more time. Having a second kit is also helpful as an assembly buck. On my Miss Deal funny car, I built the roll cage and fitted engine on the second chassis while the paint dried on my primary one. 4. Study your kit ahead of time. See how things fit together and plan ahead. In my conversion of the Model A woodie wagon into a woodie pickup, I had the whole conversion planned and parts out on the table. I had the body cut with an hour of the start! 5. Check all your supplies and tools ahead of time. You don’t want a spray can to be empty or find your glue dried up. And you don’t want to be searching for a missing tool. 6. Plan refreshments and snacks ahead of time! Take breaks at least once an hour to avoid stress. 7. Share your experience during the build! Take photos regularly and post your progress.. both the positive and the agony.. to the page during your breaks. There is no shame in not finishing. We all have not been successful some years! But we are richer for the experience. We plan to avoid the same mistakes next year. We become better modelers! 7. Don’t cheat! If you suddenly pull out a plumbed and wired engine after 2 hours, people know! This is not a race to finish first. Nor are you competing with the others. You are competing with yourself, and the accomplishment of building a credible model within 24 hours. Do not cheat yourself out of that accomplishment! And mostly have fun!
-
Looks great! And you are fast! Can you flip it over and post some chassis pix? That may help people thinking of same conversion.
-
Or once you’ve loaded the photo up to this website, and have it visible inside your post, click on it (or press on it on phone) and it will give you options to change photo properties. The most prominent is size. Change that to 600 or less
-
Today’s debacle.. yesterday I was scheduling my mortgage payment for today in my bank’s online app when it crashed. Logged in again, nothing was amiss, so I scheduled my payment. Today I look at my bank account and double my mortgage payment was missing with no evidence. I look at my checking account and there is my mortgage payment, but a second payment to the bank itself. I check my home equity account and no payment there. I drive up to my bank and they were zero help. Told me they couldn’t see anything and I needed to make a phone call. I go home and do so.. half hour on hold after going through phone tree hell. I finally get a human from the payment app who tells me I need to talk to the home loan department. Another phone tree and fifteen minute wait. This lady cannot find any evidence of a payment. She agreed to help me though. She needs to go back to the department I first talked to. Even she had to wait in the same queue. We chatted while we waited. The two of them went digging under the premise that I accidentally made a payment. They finally tracked it down to an account that wasn’t even mine! So final analysis is they agreed it was their glitch. But it would take a week or two to get me my money back! And it took me two hours to get that!
-
To another cop ?
-
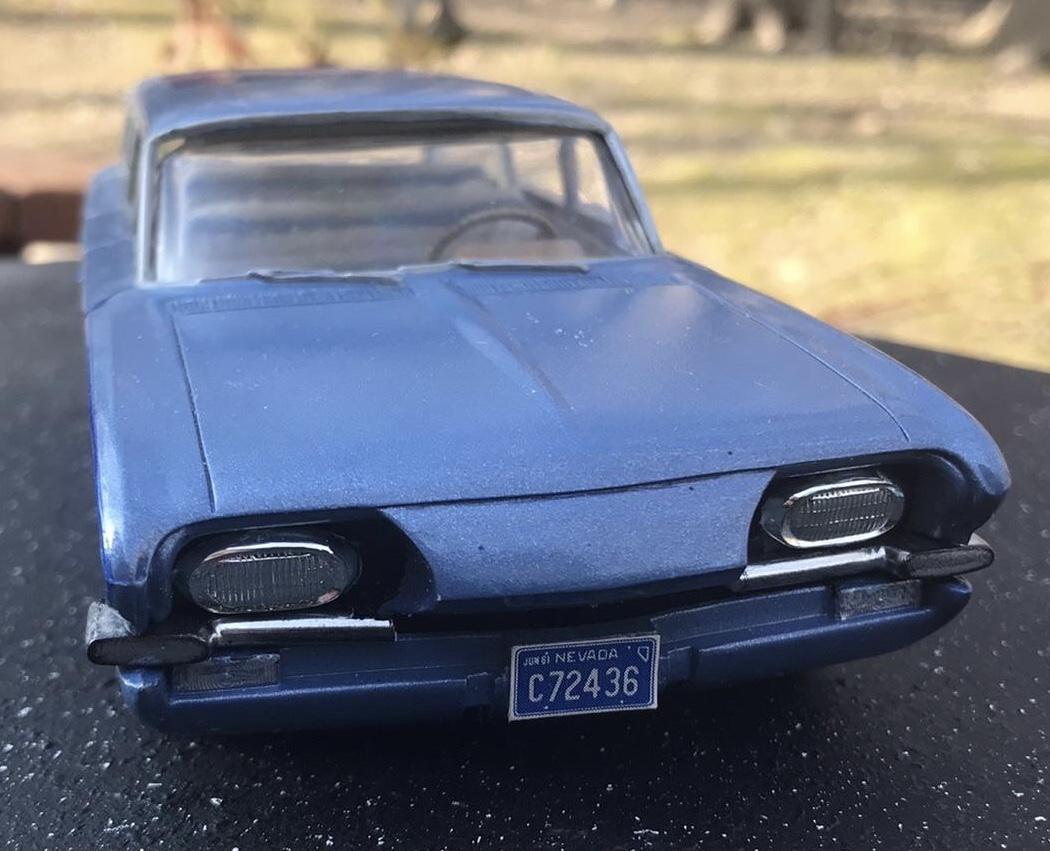
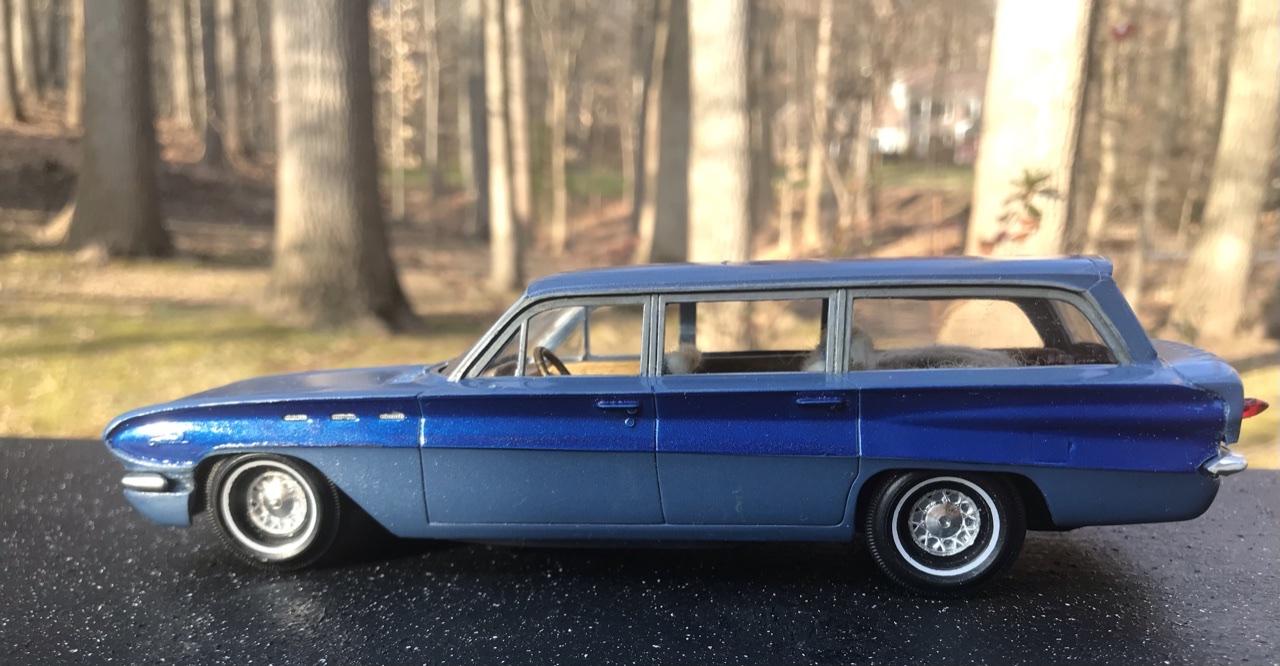
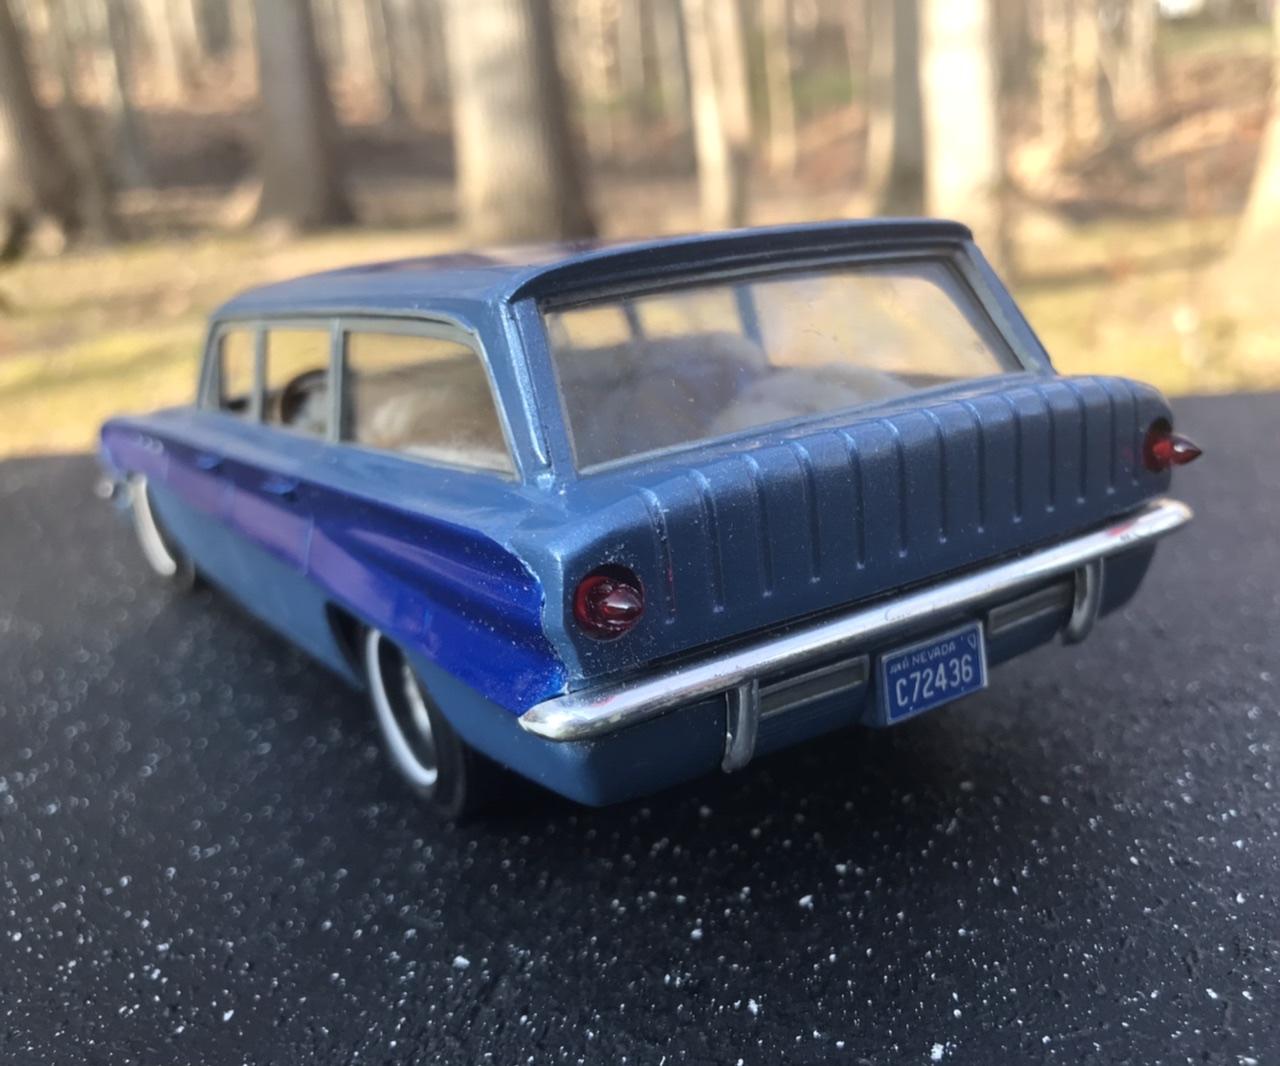
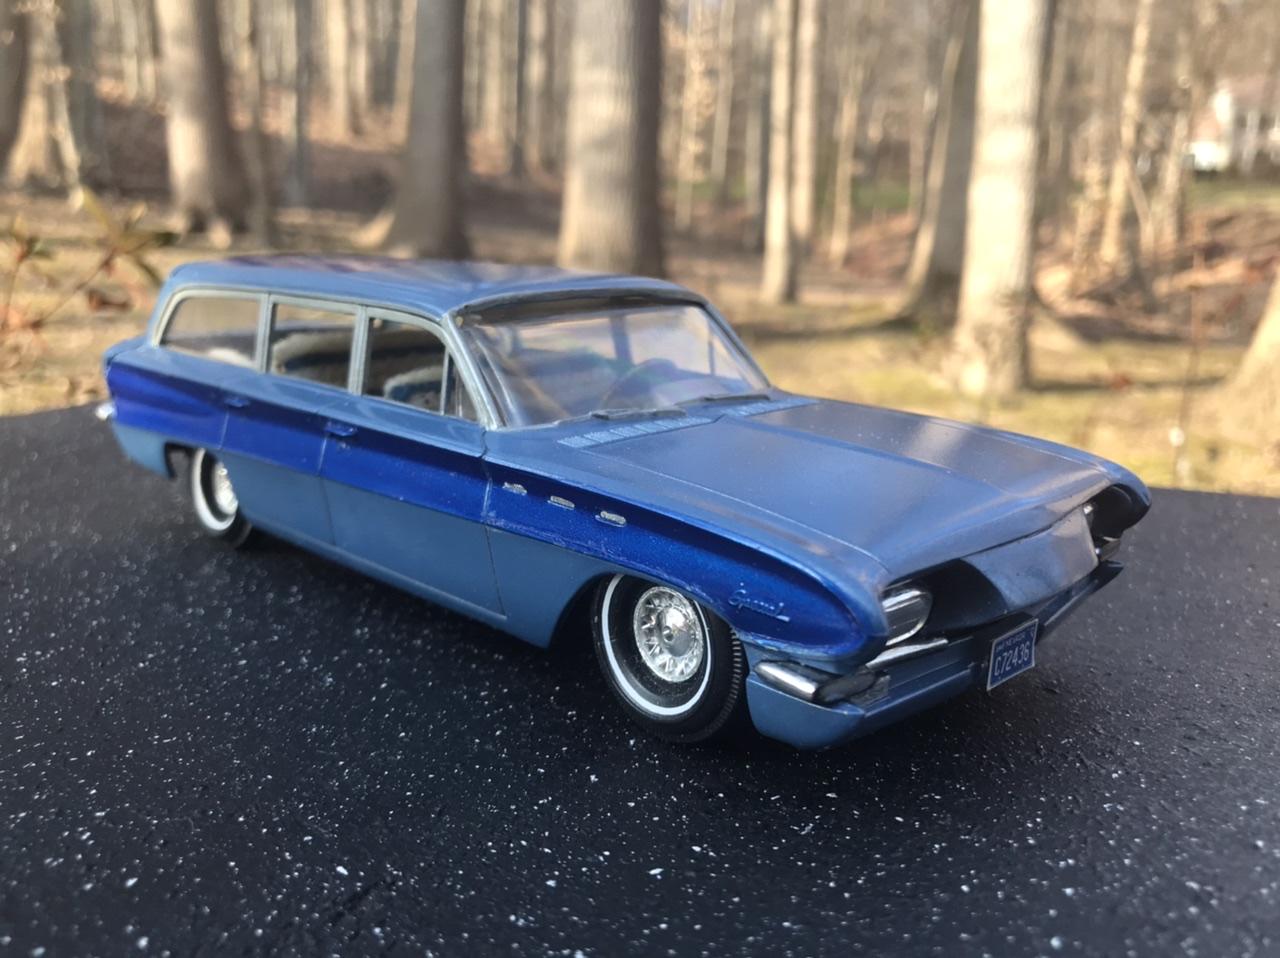
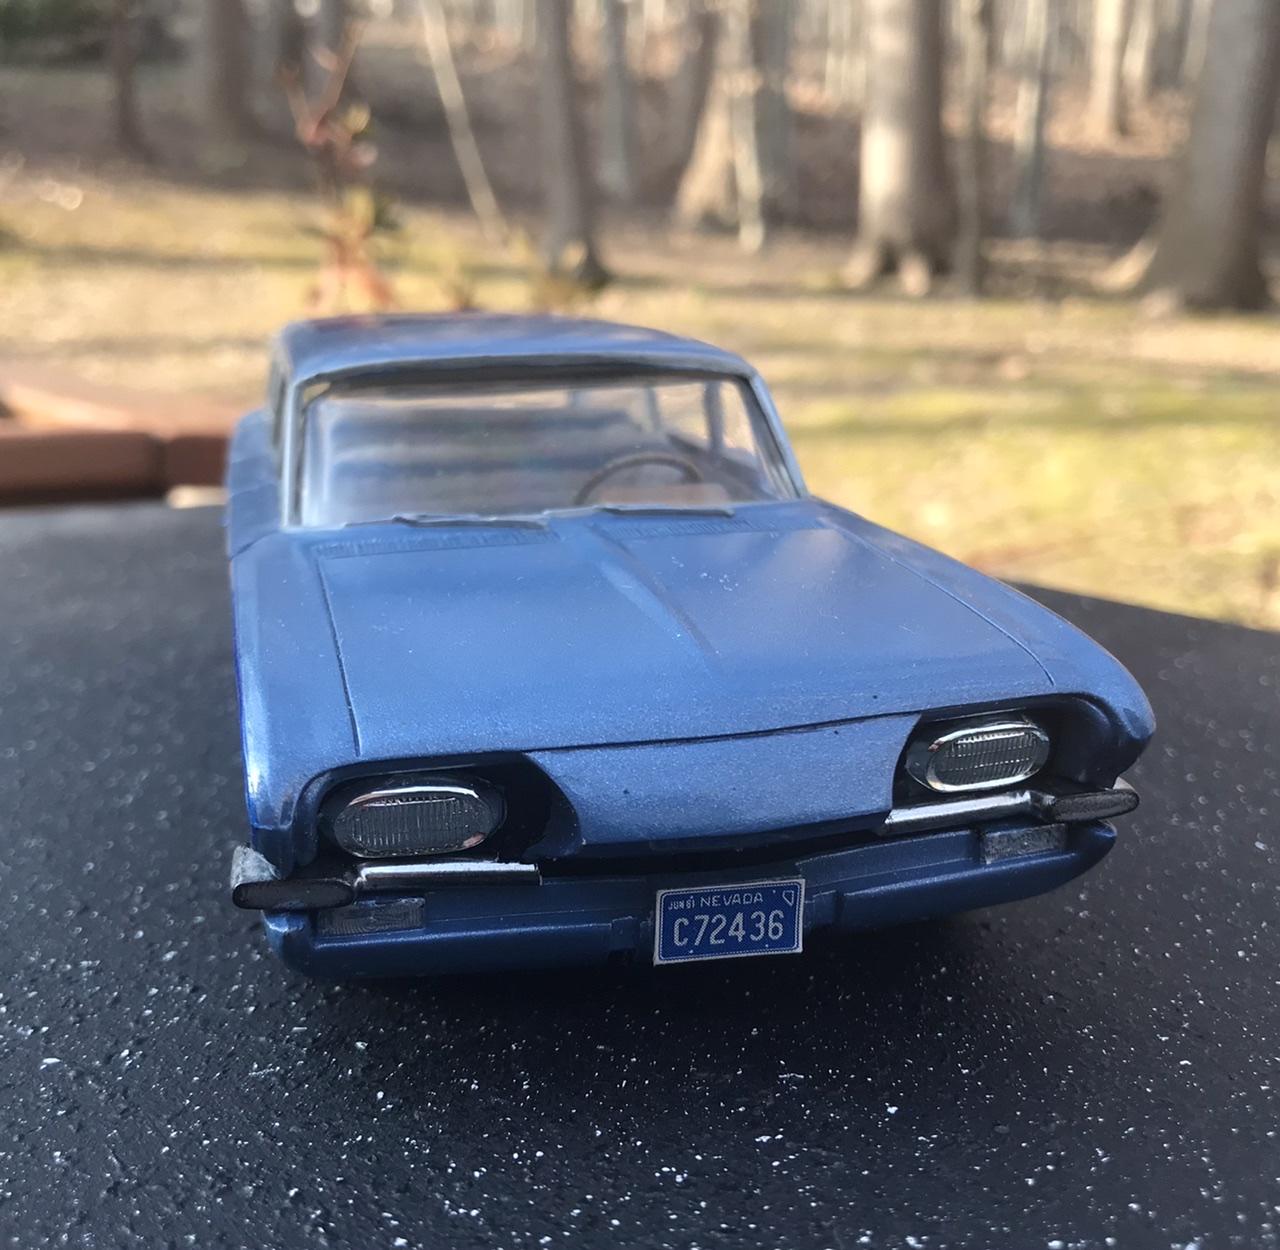
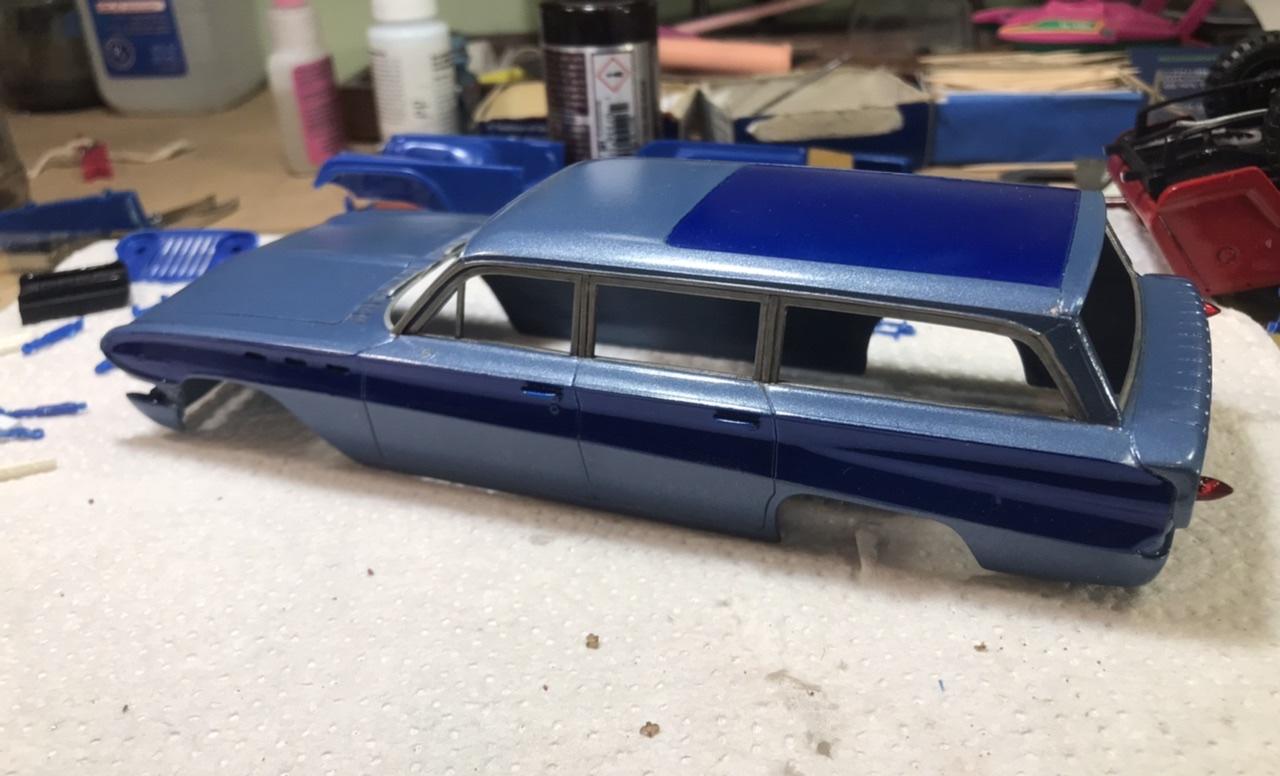
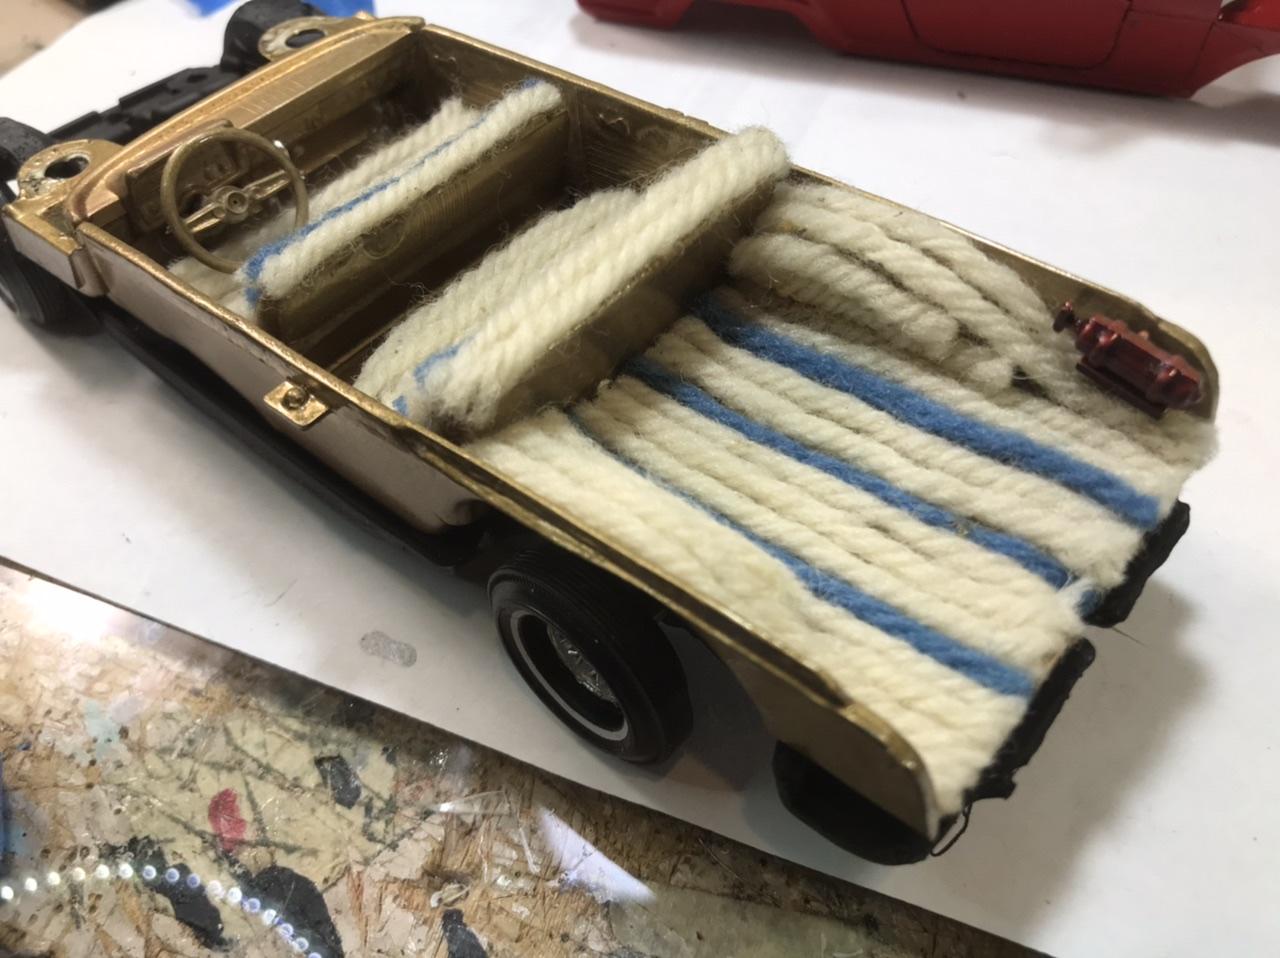
Folks who know me are aware that I have strong feelings for ancient old custom built models. I’ve saved quite a few, as I feel they are the folk art of our youth. I’ve had this old Buick wagon forever. It was built by some kid using the kit’s custom parts. It was never painted. Our young builder used his imagination and ingenuity to create the yarn interior. That was the factor that made it unique to me! Here she is finished! This poor Buick has been hanging out undone for a long time. I had painted it the lighter blue and did the chrome in Testors silver paint as that was what would have been used back in the day. It was sitting because I lost the rear bumper. Nothing is lost forever in the model room. I opened an old box and there it was! I knew what it was immediately. So I pulled out the Buick! I was fooling around one day and masked off the roof. I shot the darker blue left over from my Blue Beetle project. It looked good so I did the sides as well. One set of headlights were missing so I used the custom headrests from the Fireball 500 kit. All my old customs get ancient Autoworld license plates. The glue on my old sheet has long ago dried up so I glue them on with white glue. The tires and wheels were on the car when I got it. I have a number of these wagons and I don’t think I ever saw one with the kit’s stock tail lights. These were missing so I substituted in period ones from my parts stash. And here’s that one off custom interior. Quite spiffy and I’m sure the young builder was quite proud of it! So our 60 year old custom rides again. It is now sitting proudly amongst its peers in my Old Custom Collection showcase!
-
Much younger women
-
Their robot has called me every day this week, spoofing numbers from different states. Today I waited until it said “hit 2 to be placed on our do not call list”. We’ll see if that stops it any.
-
Agreed! One year I built the Dodge D50 pickup because someone at a club meeting was selling it for $5. A perfect throw away kit!