Fat Brian
-
Posts
4,439 -
Joined
-
Last visited
Content Type
Profiles
Forums
Events
Gallery
Everything posted by Fat Brian
-
I've been looking into ways to make his life miserable today. I'm reporting him to every consumer advocacy group in Nashville and a local reporter who works the consumer fraud beat. There's no way I'm the only person he's done this to.
-
I use water based paint for window, the cleanup when you mess it up is much easier.
-
We just need an all new kit of this generation. This kit is rough by any standard and the popularity of these trucks could support a new tool, especially if it included options for long bed, short bed, step side, and 4x4 along with various years and custom options.
-
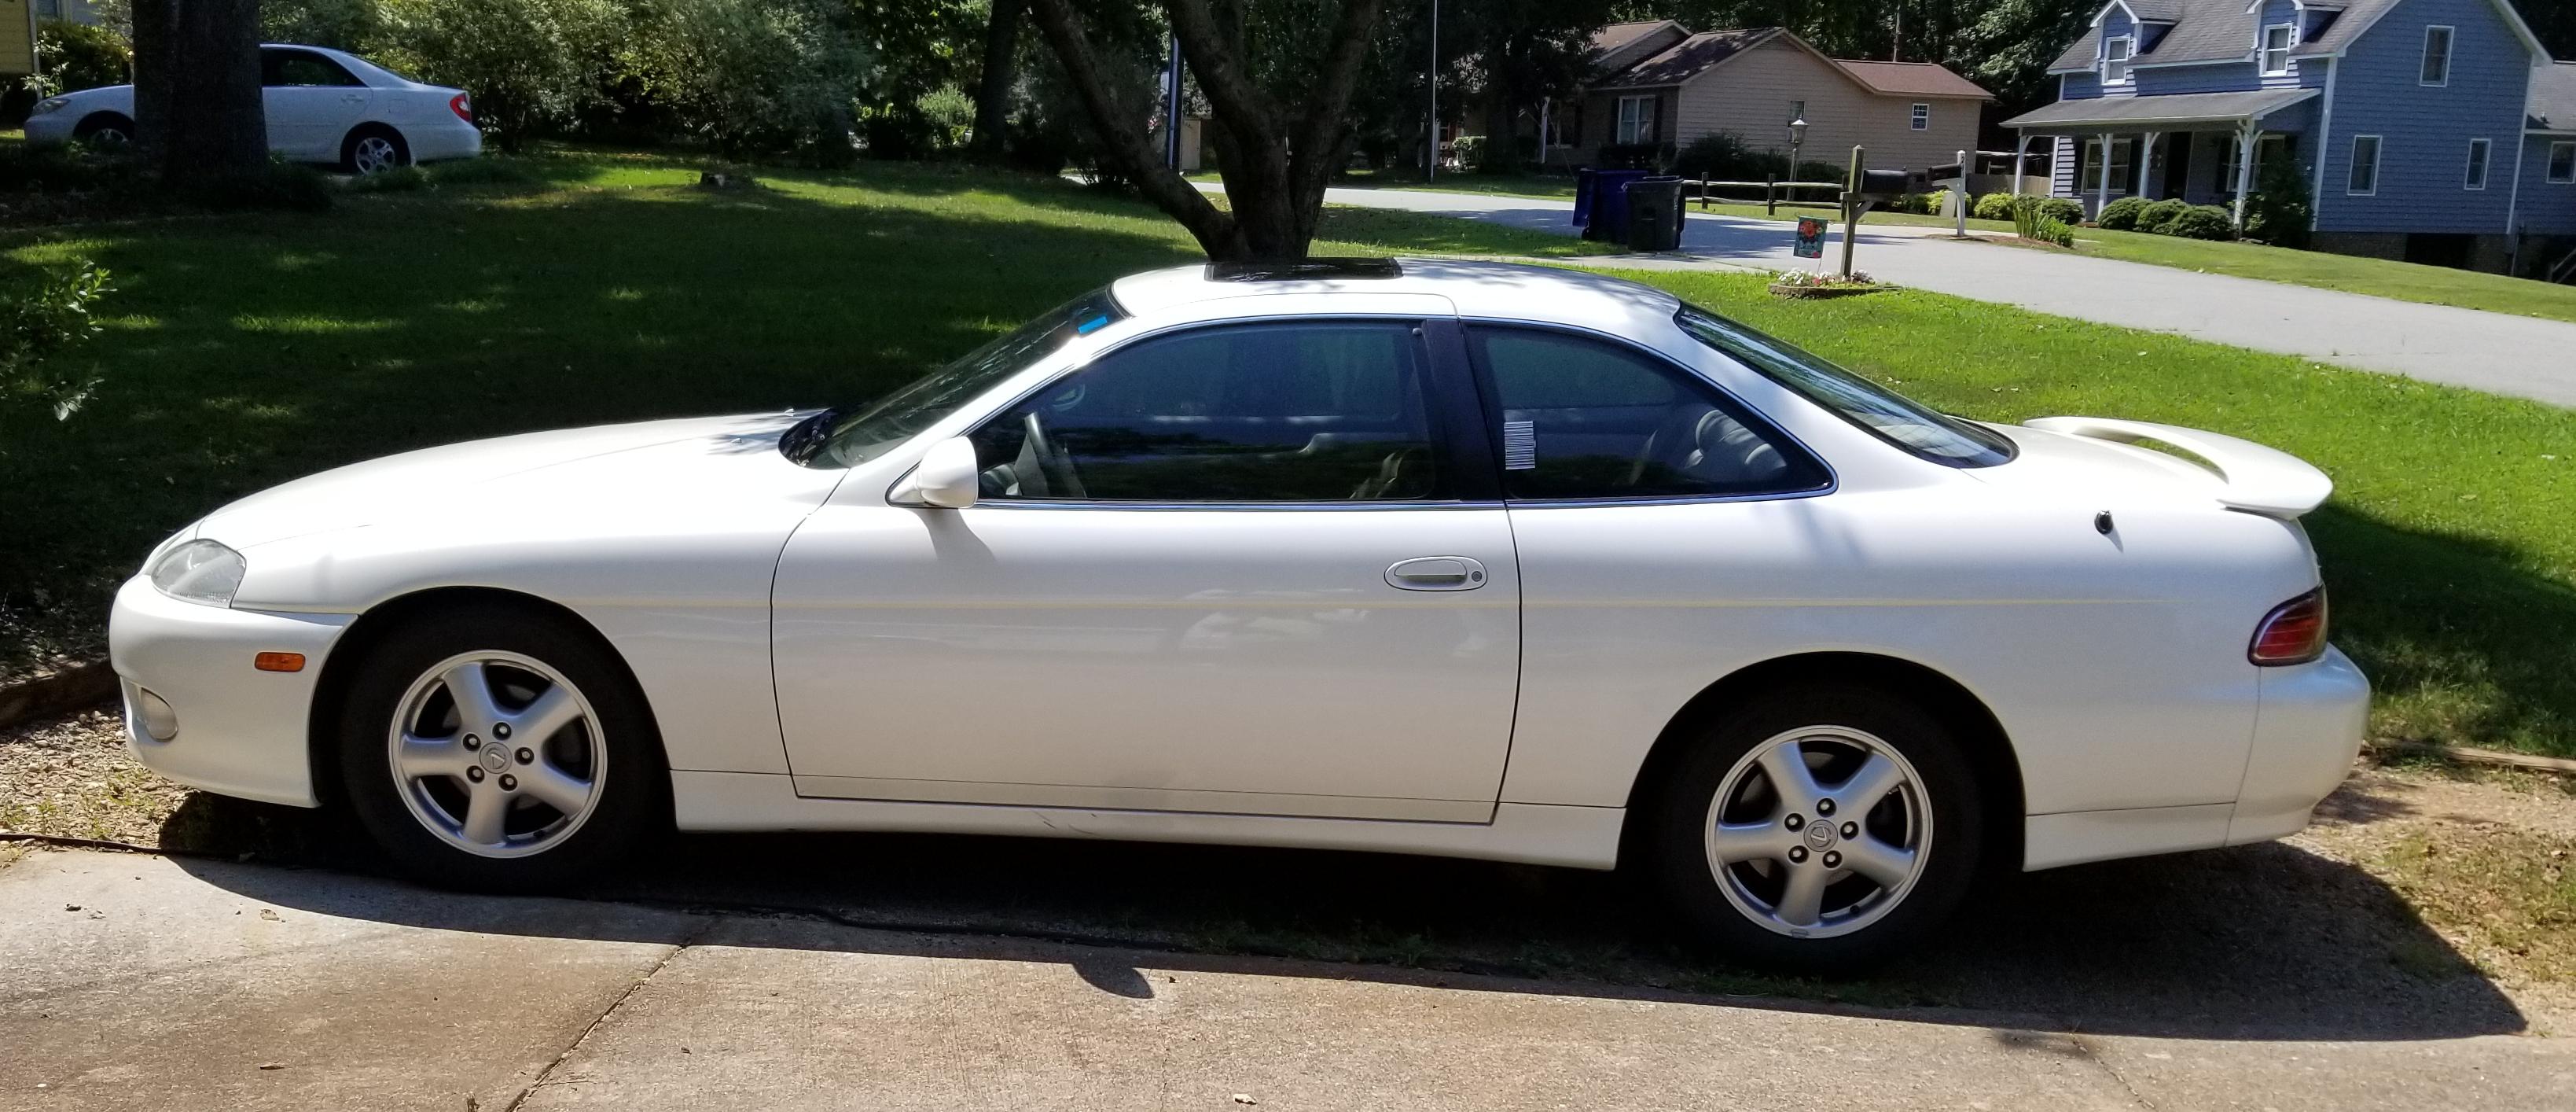
I think he thought after I drove that far sunk cost fallacy would kick in and I'd buy it even though it was worse than he let on. The thing is, it was practically the same car I've already got and he knew that. I have a pearl white 98 SC300 with a tan interior, the car was a black on black 98 SC400. The black interior is very rare in these cars and the 98+ 400s have a 5spd auto instead of the 4spd auto in mine, and the 400 is a v8 where mine is a straight six. My car has been maintained well and everything works though so why would I downgrade to a busted up car?
-
Friday I drove 8 hours to look at a car that looked to be in very nice shape and had been described as "perfect" by the salesman. The first problem was a large spot of flaking paint on the bumper cover that had been carefully concealed in the pictures. As we're walking to the car he pipes up that the passenger door handle doesn't work and that the power antenna has been broken off. I decide to take it out to see if it drives better than it looks, it does not. The brakes are spongy, the rotors are warped, the transmission shifts are mushy, and theres an odd feeling of resistance while drive like all the tries are pointed in a slightly different direction. When I get back I tell the guy I'm not taking the car because he hid all the stuff wrong with it, he told me I was supposed to be able tell this stuff from the pictures and he wasn't responsible to tell me anything over the phone. He also keep the deposit I'd put on the car. If I was a younger man he'd be in the hospital right now.
-
If I recall correctly the fix is behind the rear wheel wells in the lower body crease. I don't know for sure if the green car has the photoetch, I can look tomorrow.
-
But use the body from the green kit because I don't think Cobra version has been reissued since they fixed the rear quarter panels.
-
Duplicolor and LA’s Totally AWSOME??
Fat Brian replied to 2zwudz's topic in Model Building Questions and Answers
That is really hit or miss for removing Duplicolor. It will work for the primer but isn't so good for the paint. Did you use any primer under the paint? -
Changing Times, Changing Tastes
Fat Brian replied to Richard Bartrop's topic in General Automotive Talk (Trucks and Cars)
That's interesting Joe, I'm not sure of the white car is a donor for the Shelby or if they're both getting restored. He works on and sells all kinds of stuff, there was a mint British racing green MG out there too. -
Changing Times, Changing Tastes
Fat Brian replied to Richard Bartrop's topic in General Automotive Talk (Trucks and Cars)
I'm not saying I don't like the Caddy, just that I can appreciate it and newer stuff. There is room in my heart to love a lot of different cars. -
They're kidding, right?
Fat Brian replied to landman's topic in General Automotive Talk (Trucks and Cars)
Are you asking rhetorically or looking for a factual answer? The few kits I've built for people I charged double the cost of the kit and supplies for a basic assembling of the kit from the parts in the box. Aftermarket stuff and scratch building or heavy modification was charged extra depending on what exactly was wanted and how long it took. You're not going to make a living that way (I wasn't expecting too) and I honestly got sick of it for how little I was getting out of it. I'm sure I was making pennies an hour, I never gathered the numbers to find out. -
Changing Times, Changing Tastes
Fat Brian replied to Richard Bartrop's topic in General Automotive Talk (Trucks and Cars)
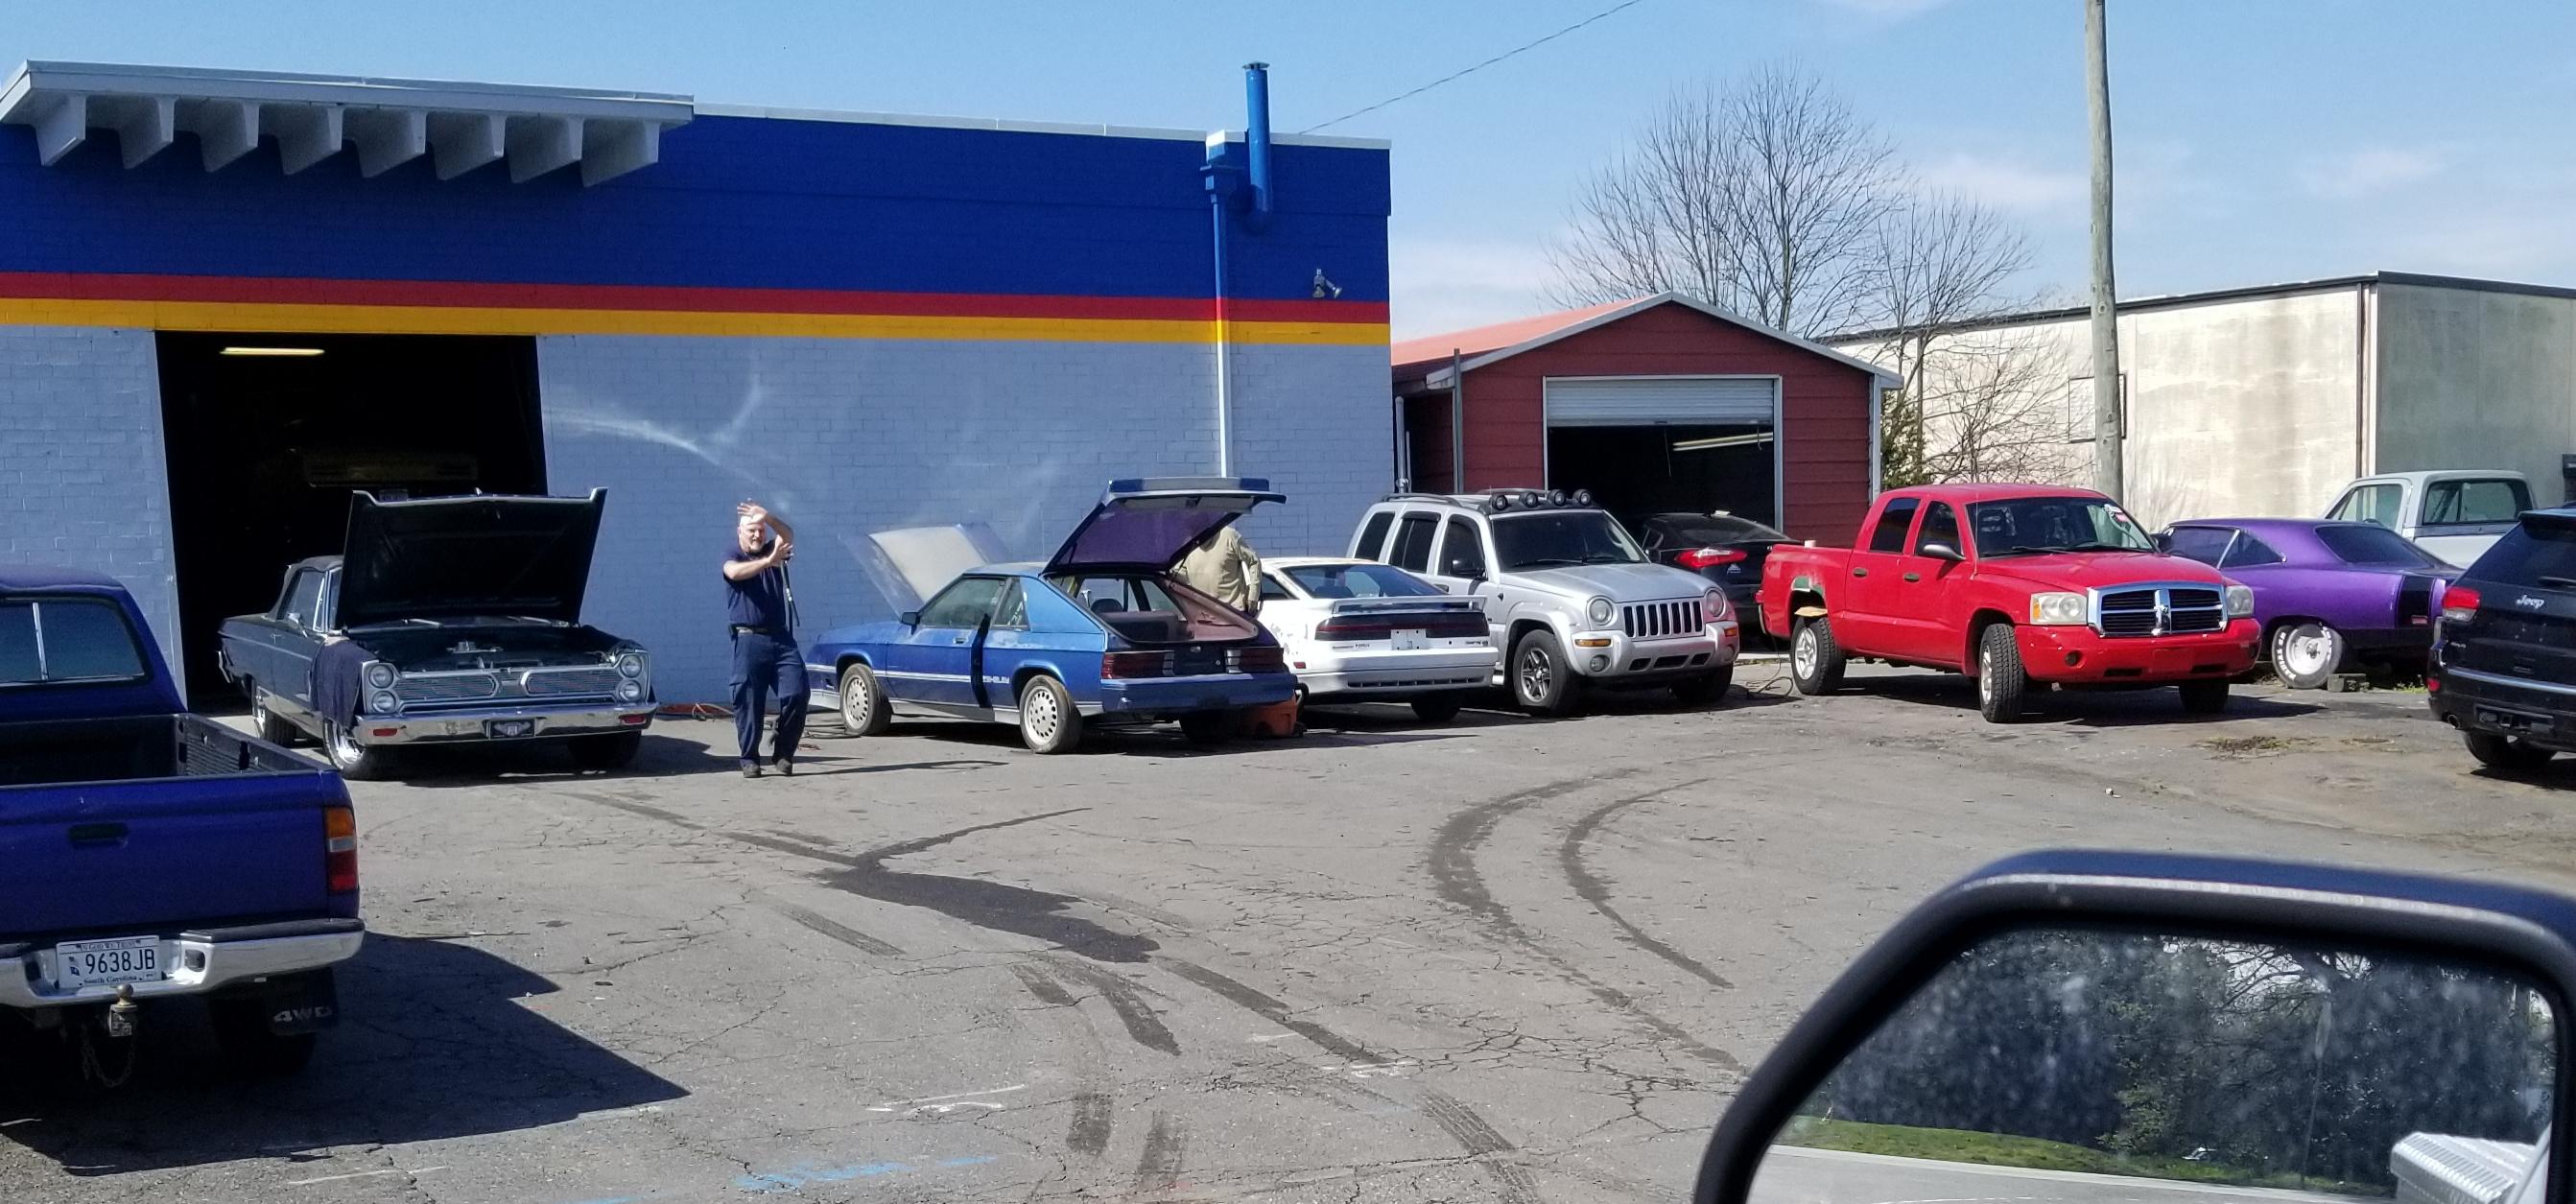
I was driving by a local shop where I bought my Lexus that does restoration work earlier today a was able to a picture that I think sums up the state of things in the classic car game. You can see the top of a purple Roadrunner on the right and the car they're pulling out of the shop. To the left just out of frame was a 73/74 Barracuda, 69 Firebird, and a 69 442. In the middle of all these classics they were just starting on the blue Shelby Daytona. People are starting to spend money on newer cars and build different things and hopefully the aftermarket will respond with parts like it has in the past.
-
Building Something From Nothing...
Fat Brian replied to Tom Geiger's topic in General Automotive Talk (Trucks and Cars)
I'm working on one now. After seeing a picture of a 63 Falcon drift car I started looking for unlikely American cars to build a track day style car out of. I had originally settled on using the 69 Falcon modified stock car as the base of the build but didn't want to pay the going rate for the kit to only use the body, bumpers, and glass out of it. I had had a 61 Ranchero body my father in law gave me kicking around my junk boxes for about 15 years or so and could never settle on what to do with it. After a member graciously traded me a 62 Falcon body that had seen better days I was able to convert my Ranchero into a coupe. I threw in a parts box engine and will be building most of the chassis from Evergreen so for a whopping $5 for postage to complete the trade I'm one my way.
-
Met my first Palmer kit today.....
Fat Brian replied to JollySipper's topic in General Automotive Talk (Trucks and Cars)
I don't understand how anyone could look at something like that Corvette and go "Yep, we nailed it boys. Time to fire up the molding machine!" Doing nothing would have been better than what was actually accomplished. -
So I bid and won on Ebay, a Revell 1948 Ford Custom Coupe......
Fat Brian replied to larman's topic in The Off-Topic Lounge
I would definitely keep an eye out to see if they relist it, keep the messages they sent too. If it shows up again start a case with ebay. You won't get the kit but they will get in trouble with ebay. -
AMT '65 Grand Prix, odd parts
Fat Brian replied to Roadrunner's topic in General Automotive Talk (Trucks and Cars)
Yep, before they had accelerometers and g-force meters and load cells a bicycle wheel and a rev counter was how they took performance data. -
It's going to take some work to get it to fit. The chassis plate is a little wide behind the rear wheel wells and for some reason the wheel base doesn't line up exactly. It's not impossible, just more work than it should be considering that stuff should be exactly the same.
-
It is pretty bad but typical for it's time. Poor fit, I'm pretty certain the engine is the wrong, held over from earlier versions. I've got one that I want to put the chassis and interior from the newer 70 1/2 Camaro in but it's going to take some work.
-
MPC Monster truck ?
Fat Brian replied to Jon Haigwood's topic in Model Building Questions and Answers
That kit is 1/25 and it uses the long bed Dodge truck body that was recently reissued by AMT. -
I believe it does as well, I only had one Ranger at it was a Coke version and it had all of the extra stuff.
-
Changing Times, Changing Tastes
Fat Brian replied to Richard Bartrop's topic in General Automotive Talk (Trucks and Cars)
These problems have been increasing in the SC community and a few folks have started companies that work on restoring the electronics that commonly fail on these cars. For us it's the capacitors in the ECUs and the dash gauge cluster, and the LCD screens in the HVAC controls and stereo head unit. -
Changing Times, Changing Tastes
Fat Brian replied to Richard Bartrop's topic in General Automotive Talk (Trucks and Cars)
Believe me, I'm there with you. I want an 80s 2 door Impala or Caprice in the worst way. The "loserness" is more in the eyes of car culture purists who only car about tri five Chevies and muscle cars. There is also character in loving something flawed. -
Changing Times, Changing Tastes
Fat Brian replied to Richard Bartrop's topic in General Automotive Talk (Trucks and Cars)
The car culture for younger people is just different than in the past. There is a large segment that rejects high dollar concours builds and embraces the loserness of late 70s and 80s cars. This gave birth to Radwood and the 24 Hours of Lemons. Young people now don't have as much disposable income as previous generations due to our broken and corrupt non-education system so ones who like cars have found ways to have fun on a budget. -
Changing Times, Changing Tastes
Fat Brian replied to Richard Bartrop's topic in General Automotive Talk (Trucks and Cars)
I just turned 39 the other day, I'm either the last Gen X or the first Millennial depending on when exactly they pin the transition. I grew up in a car household and caught the bug early. My main interests were 60s muscle cars but now that I'm in a financial position to own a project car the prices are astronomical for ones that don't need a ton of work and I don't have the space to do a full restoration on something. So I've decided to have a more attainable project car. My 98 SC300 has hit classic age and has the low production numbers that might make it collectable some day. Its Supra cousin is going through the roof right now and the SC community is debating when or if the SC will start to be brought along for the ride.
-
The kit I was looking at was older than I thought it was. The tires in the late 90s kits still have the molded in Goodyear markings.