Miatatom
-
Posts
2,250 -
Joined
-
Last visited
Content Type
Profiles
Forums
Events
Gallery
Everything posted by Miatatom
-
Best airbrush paint?
Miatatom replied to Dragonhawk1066's topic in Model Building Questions and Answers
I forgot to mention that one of the things I really like about Createx is that you don't need to use primer. Works great without it. -
Best airbrush paint?
Miatatom replied to Dragonhawk1066's topic in Model Building Questions and Answers
The original line of Createx is for T shirts but the Wicked line from Createx can be used on hard surfaces (plastic model cars). Mixing is easy. They have lots of help and videos at createx.com -
Best airbrush paint?
Miatatom replied to Dragonhawk1066's topic in Model Building Questions and Answers
Craft paint isn't going to teach you very much. I've tried it and failed. YMMV. Each type of paint is different and requires different techniques to get good results. I like the Tamiya lacquers and especially the Createx Wicked line. I decant the lacquers and airbrush them. -
Tamiya TS-29 Semi-Gloss Black lacquer works for me. Just used it on some suspension parts. There's also Tamiya TS-6 Matte Black. Haven't tried it.
-
Thanks again, Rob.
-
My avatar says it all. ?
-
Thanks, Rob. That's a great resource.
-
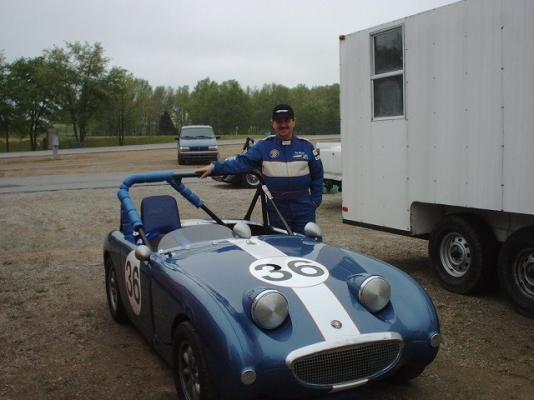
VIR, April 2003. Won my class in the Sunday morning Enduro. The guys with the cheater engines wouldn't run an hour race for fear of blowing up. My engine was built by Will and Bill Perry of Rivergate Restorations. The car was built by Bill and is a replica of his HP car from the 60s. Right hand drive made for some adjusting but I found it much better than left drives. You could see the apexes! ?
-
That's pretty cool! Mighthave to try that.
-
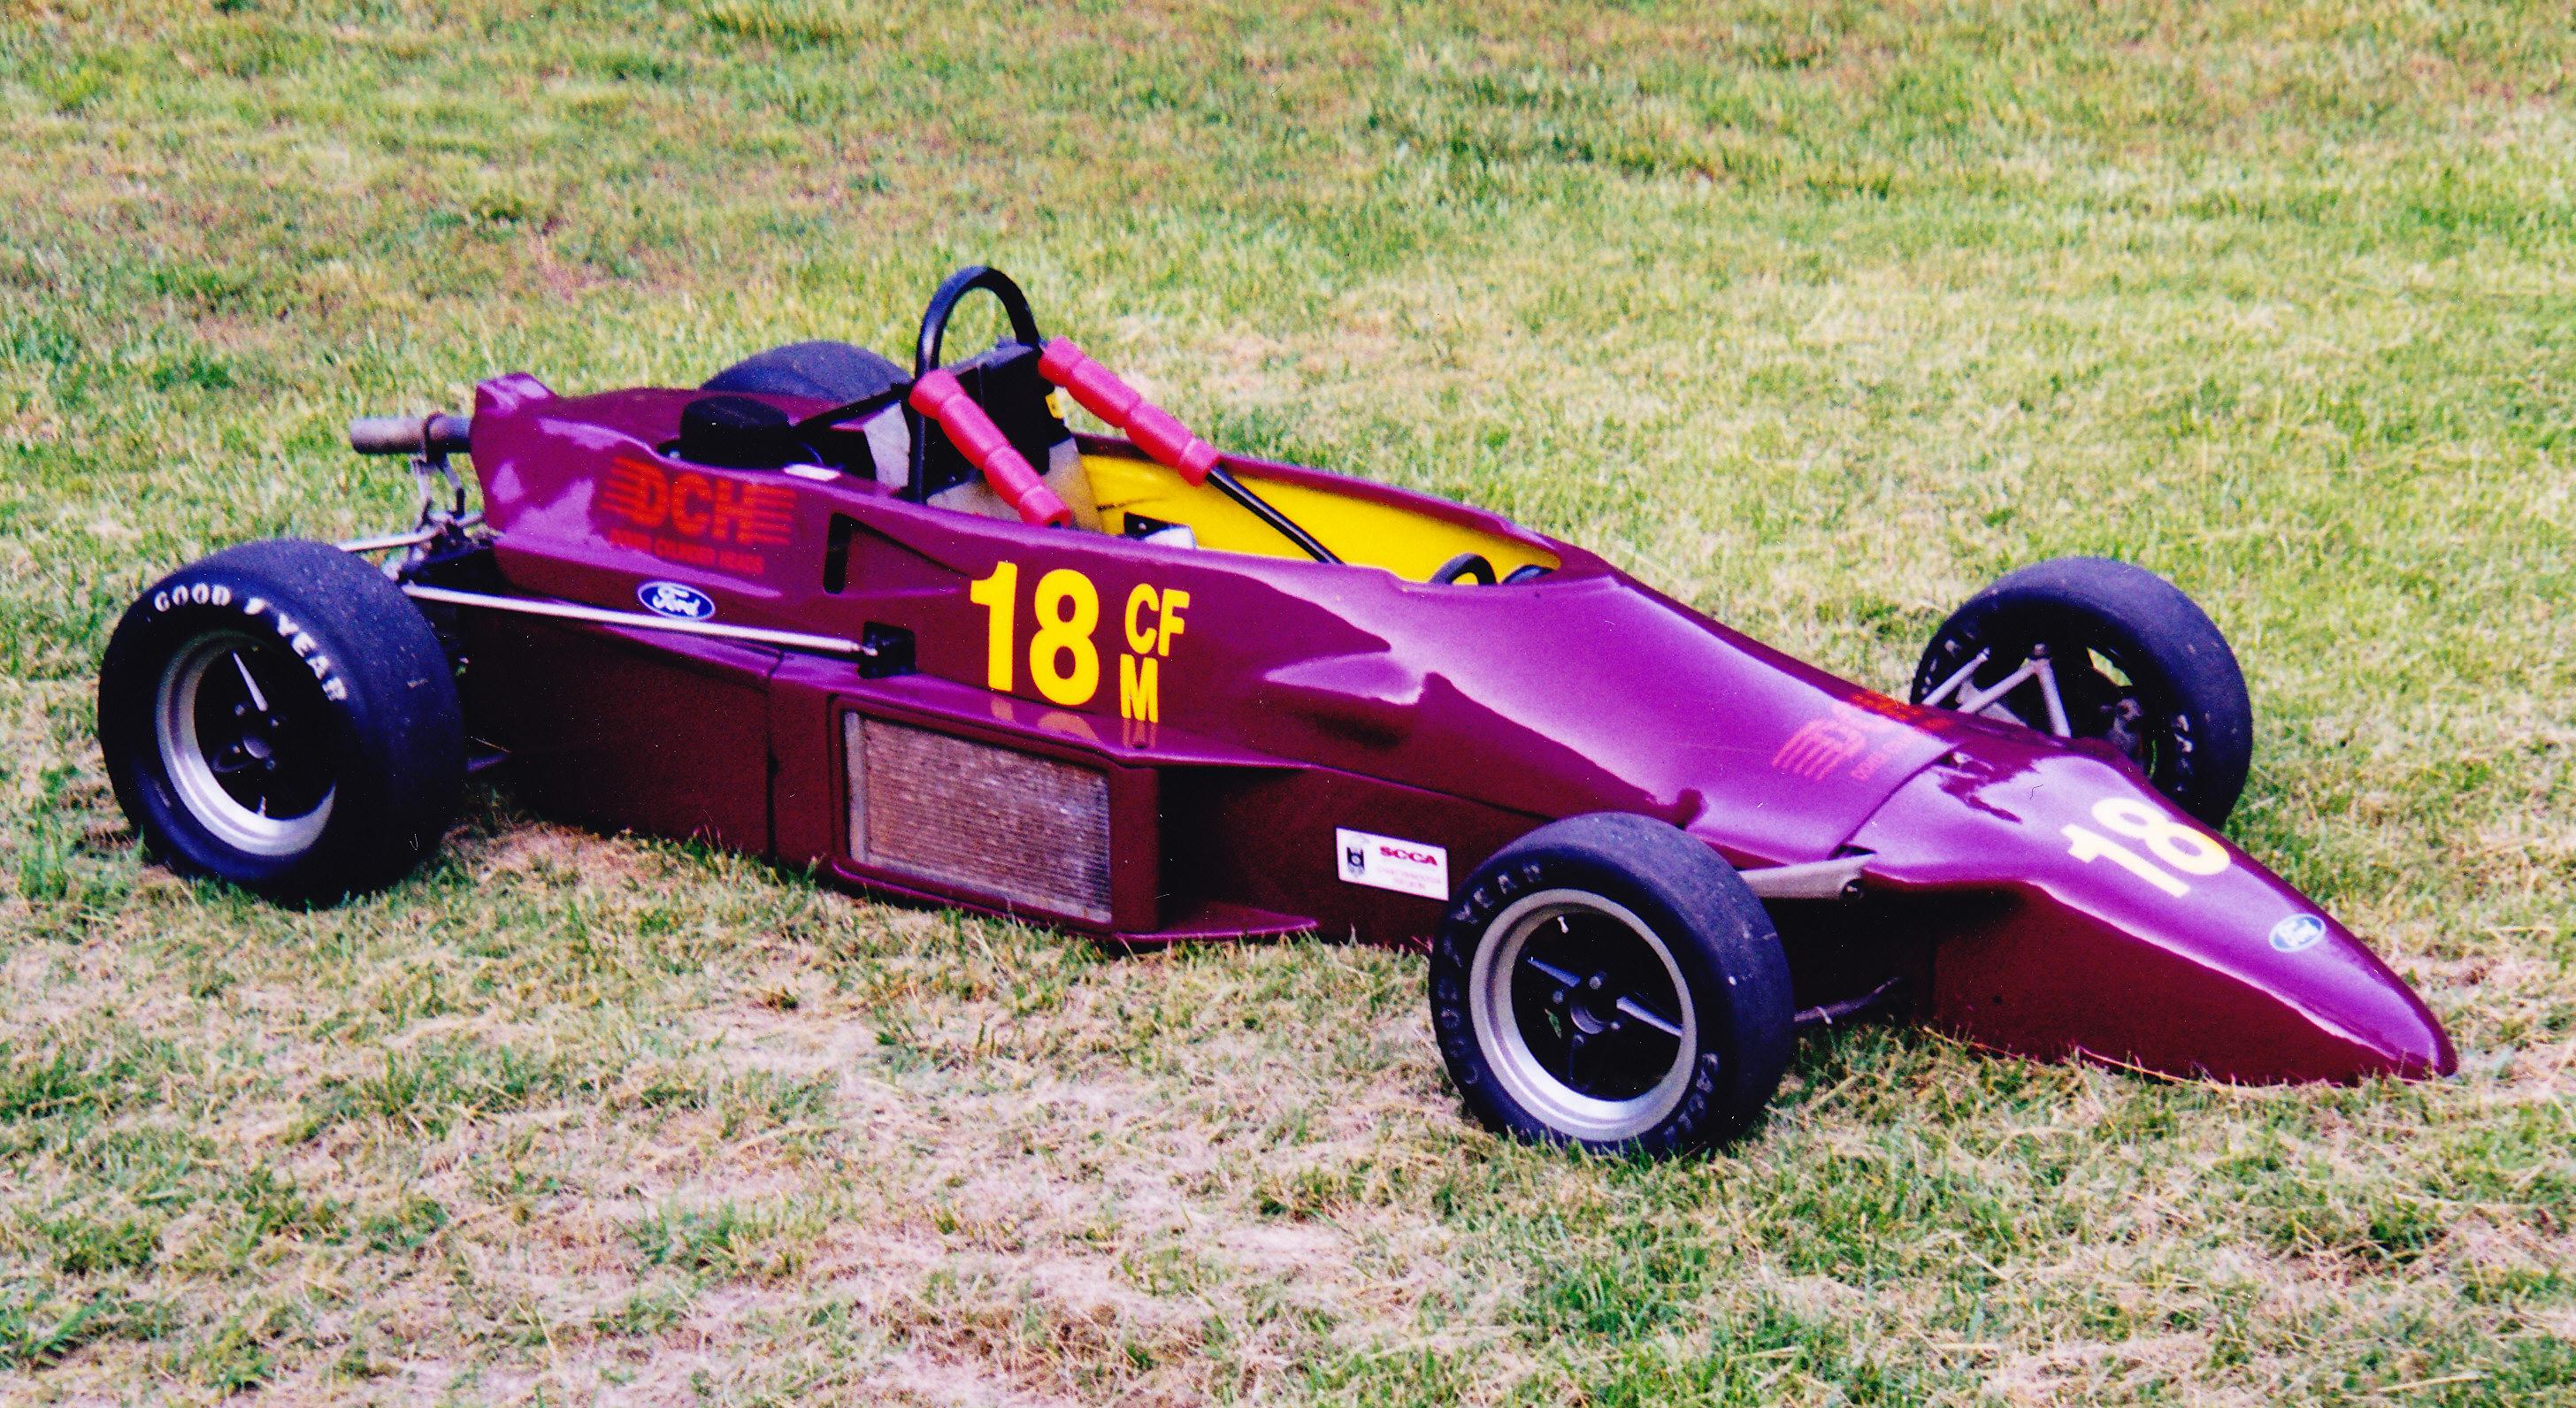
I ran the Bugeye with Vintage Drivers Club of America in the early 00's. Also ran a Zink FVee C4 with HSR in the 90s. I was late to racing but did get to experience it. I was the RE for the Chattanooga Region in 92 and raced autocross and Solo I with this Royale RP 31-M throughout the 90s. That FF was a SARC championship car. A lot more car than drive, in my case. ?.

-
Thanks, I'll make a note to look him up.
-
In another post, I asked which printer to buy. From the answers I got, I've pretty much decided there's none. So, with that being said, who makes good decals? I'm wanting decals made to complete a replica of my old race car.
-
Need a Good Printer for Decals
Miatatom replied to Miatatom's topic in Model Building Questions and Answers
I know everyone is saying laser but the prices for anything that isn't monochrome are high. Any suggestions for inkjet printers and associated materials? -
Your skills have diminished? It looks great to me. I wish I could do that well.
-
I need to replace a dead printer and I need one that can do a decent job on decals. I'd like to spend less than $200. Well, much less if possible. What do you giys recommend?
-
Reducing Paints and Clears?
Miatatom replied to SCRWDRVR's topic in Model Building Questions and Answers
Will do. Just getting started building after over a year lay off. I'll be in touch. -
Reducing Paints and Clears?
Miatatom replied to SCRWDRVR's topic in Model Building Questions and Answers
Dave, what's your mix ratio for the very clear clear and the more traditional looking clears? I'm thinking of giving the X-22 a try. I like the Tamiya canned lacquers. -
What’s everyone using for clear?
Miatatom replied to mariojr's topic in Model Building Questions and Answers
Tamiya TS-13 or sometimes Modelmaster clears. -
Nice build! I got to meet Ed at the Oakland Roadster Show in 1963. He sprayed a Mothers Worry sweatshirt for me.
-
Thanks for all the hard work. We appreciate it.
-
microwave-styrene experiment
Miatatom replied to STYRENE-SURFER's topic in Tips, Tricks, and Tutorials
Interesting technique. Gotta build the cage for my Bugeye in my avatar. I'll try this method. -
Since I live about 15 miles from the place, I have no excuse not to go. Hope they have some cars.
-
Bright lights help too! ?
-
Cleaning mixing bottles
Miatatom replied to Rich7284's topic in Model Building Questions and Answers
One tip I have for mixing bottles is to cover the mouth of the bottle with Press and Seal and then screw the lid on. No messy threads on the lid or bottle. -
Best spray paint match for Ford Acapulco Blue?
Miatatom replied to Hotrod 97's topic in Model Building Questions and Answers
I got mine from Scale Finishes, but that takes an airbrush.