zakdoggi
-
Posts
381 -
Joined
-
Last visited
Content Type
Profiles
Forums
Events
Gallery
Everything posted by zakdoggi
-
Chevy Nova Race Car
zakdoggi replied to zakdoggi's topic in WIP: Other Racing: Road Racing, Land Speed Racers
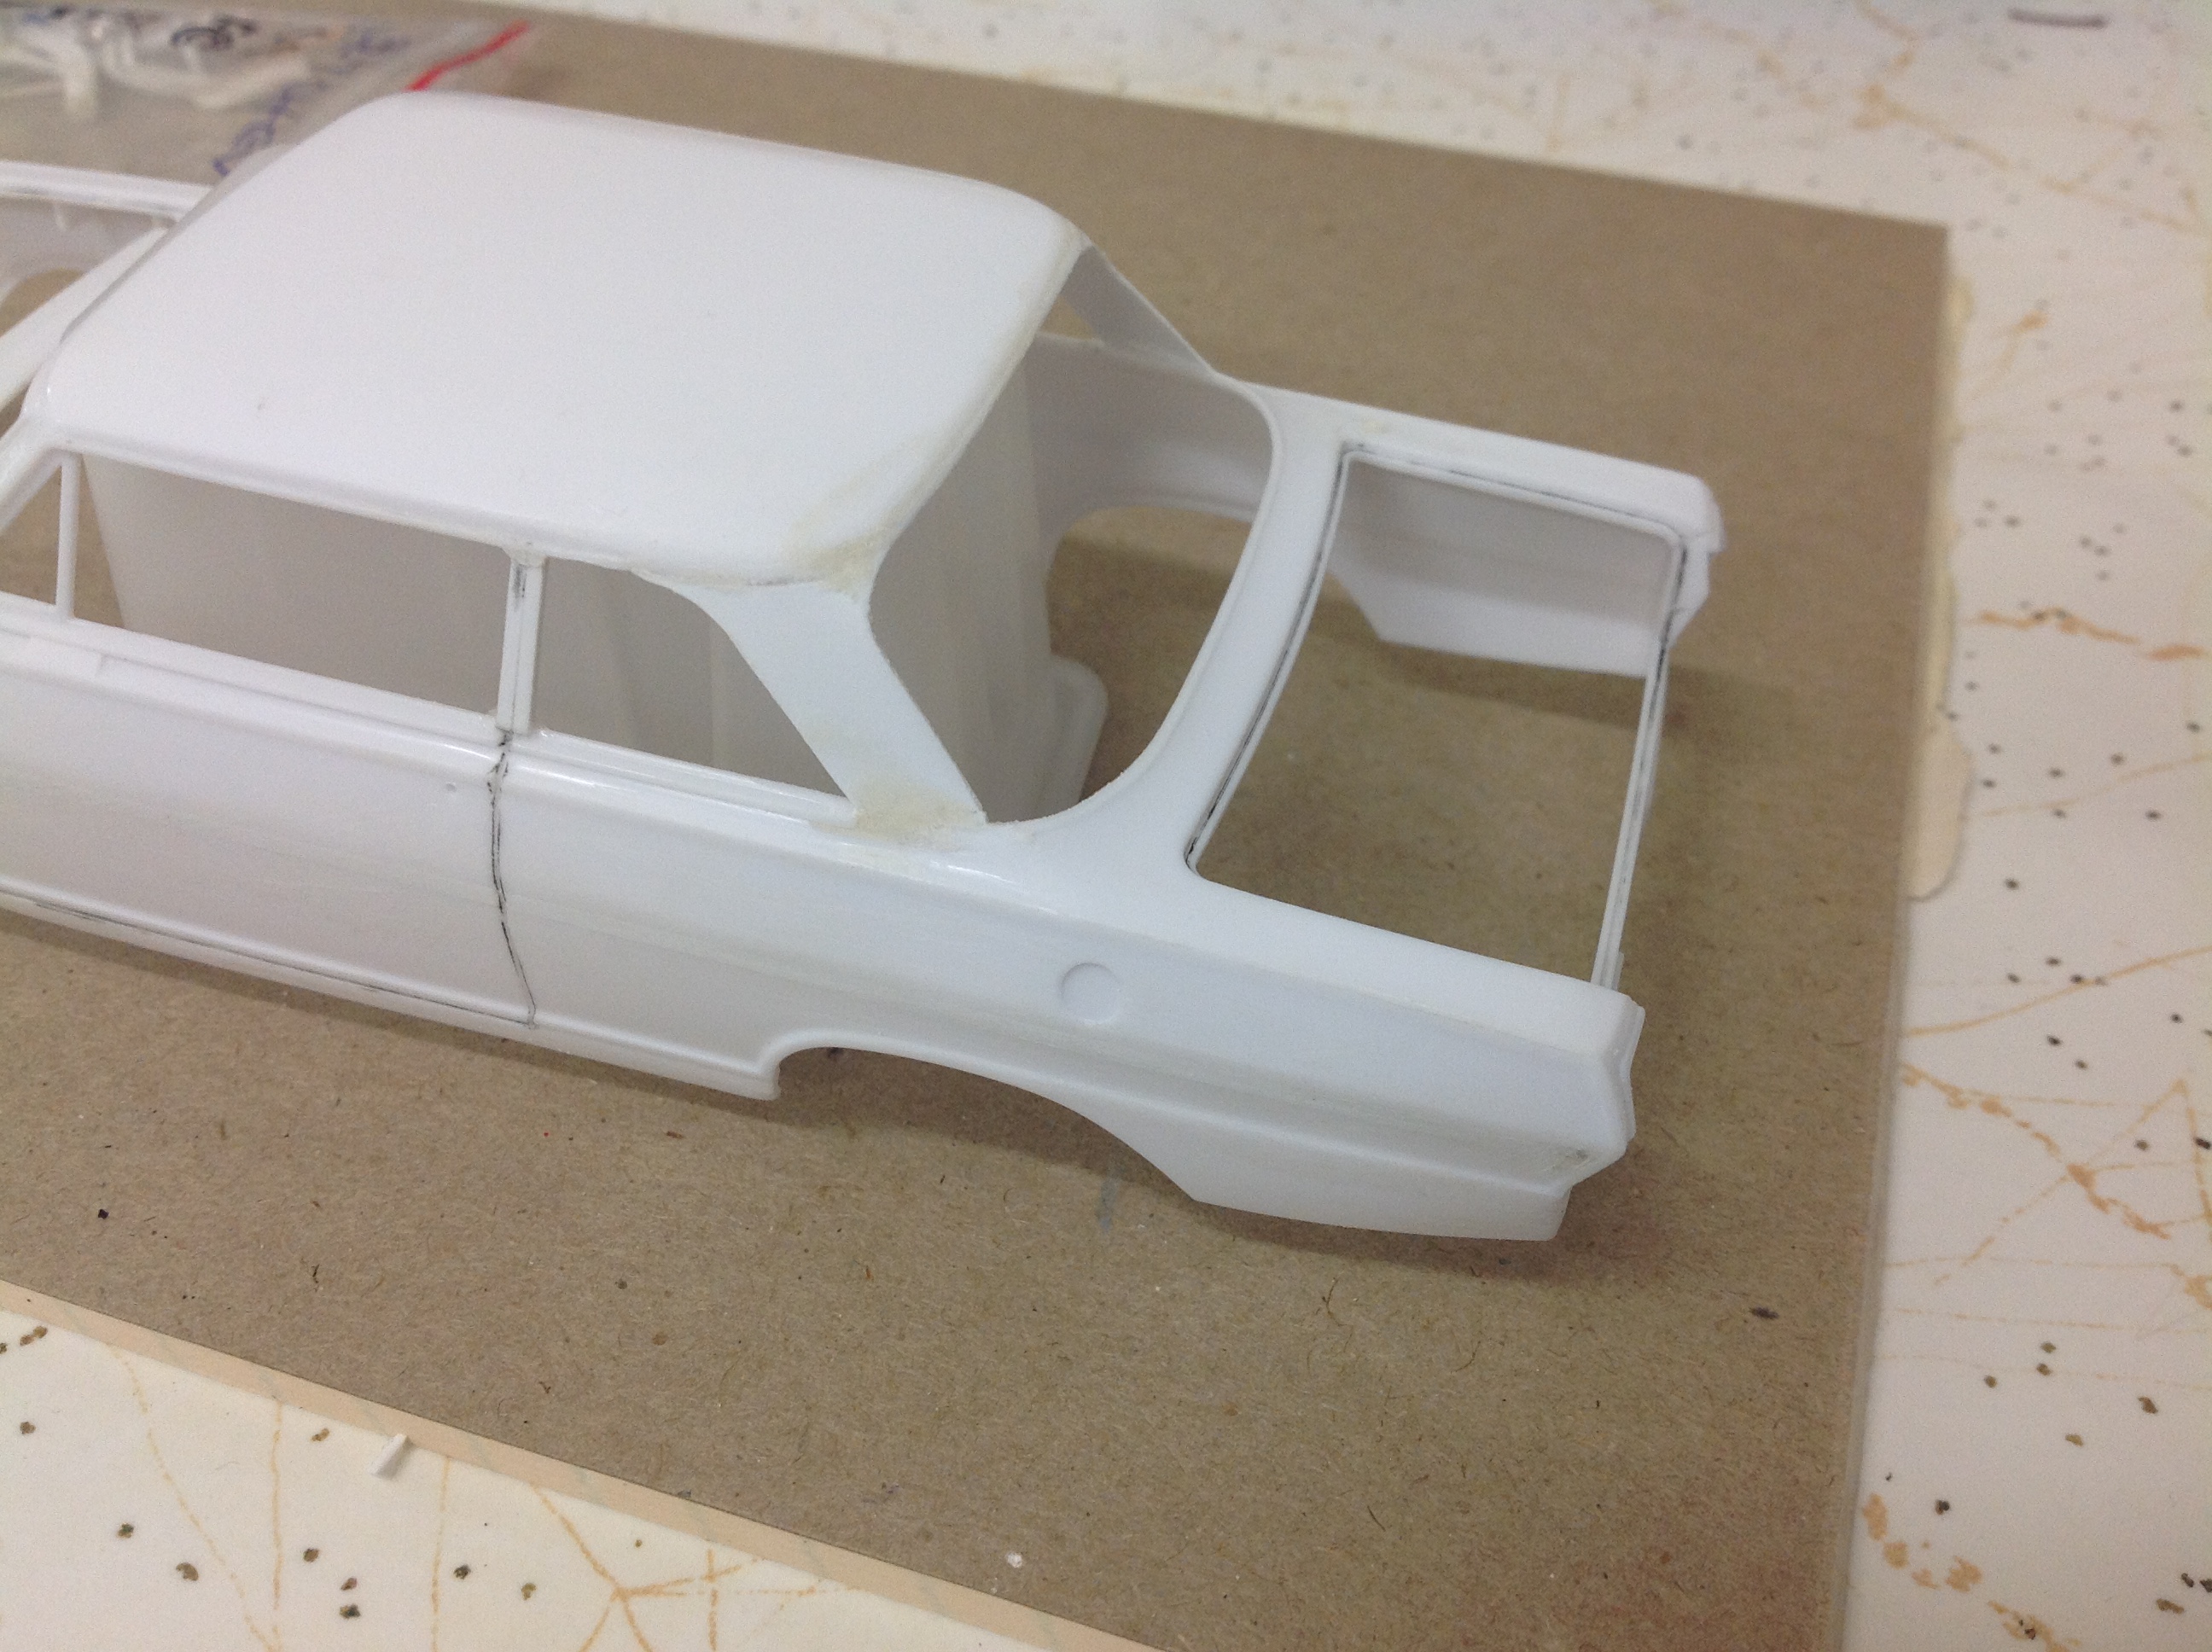
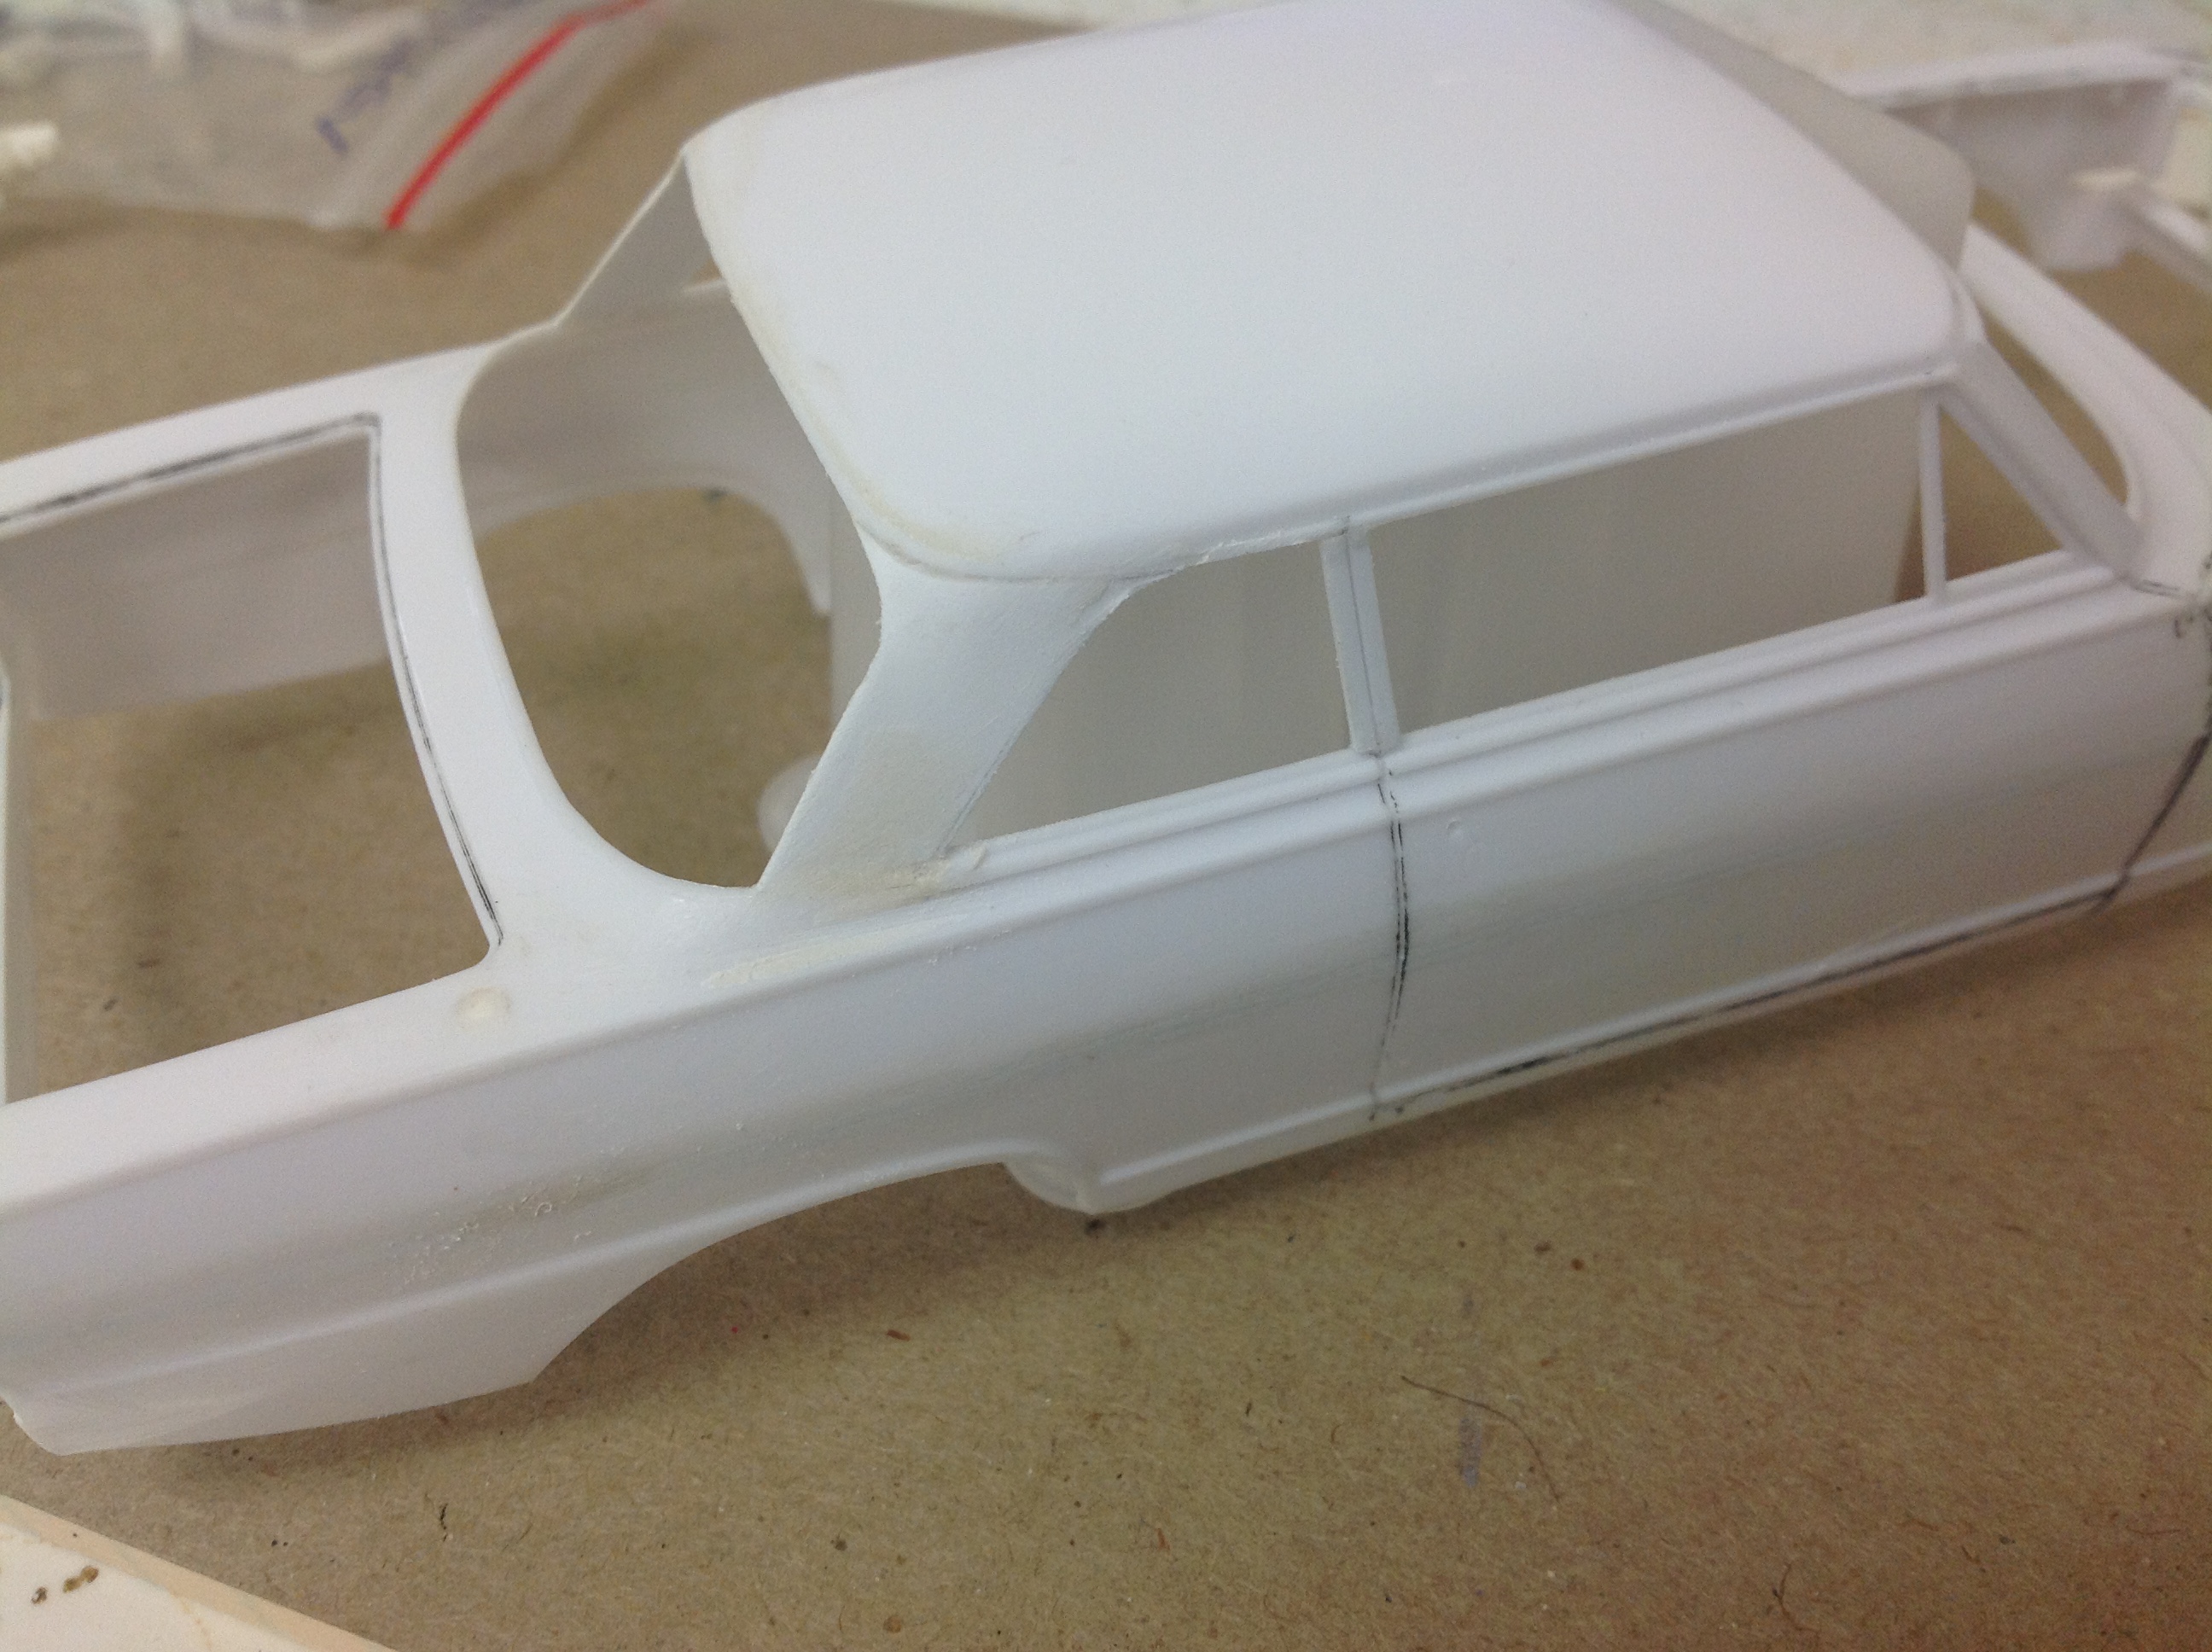
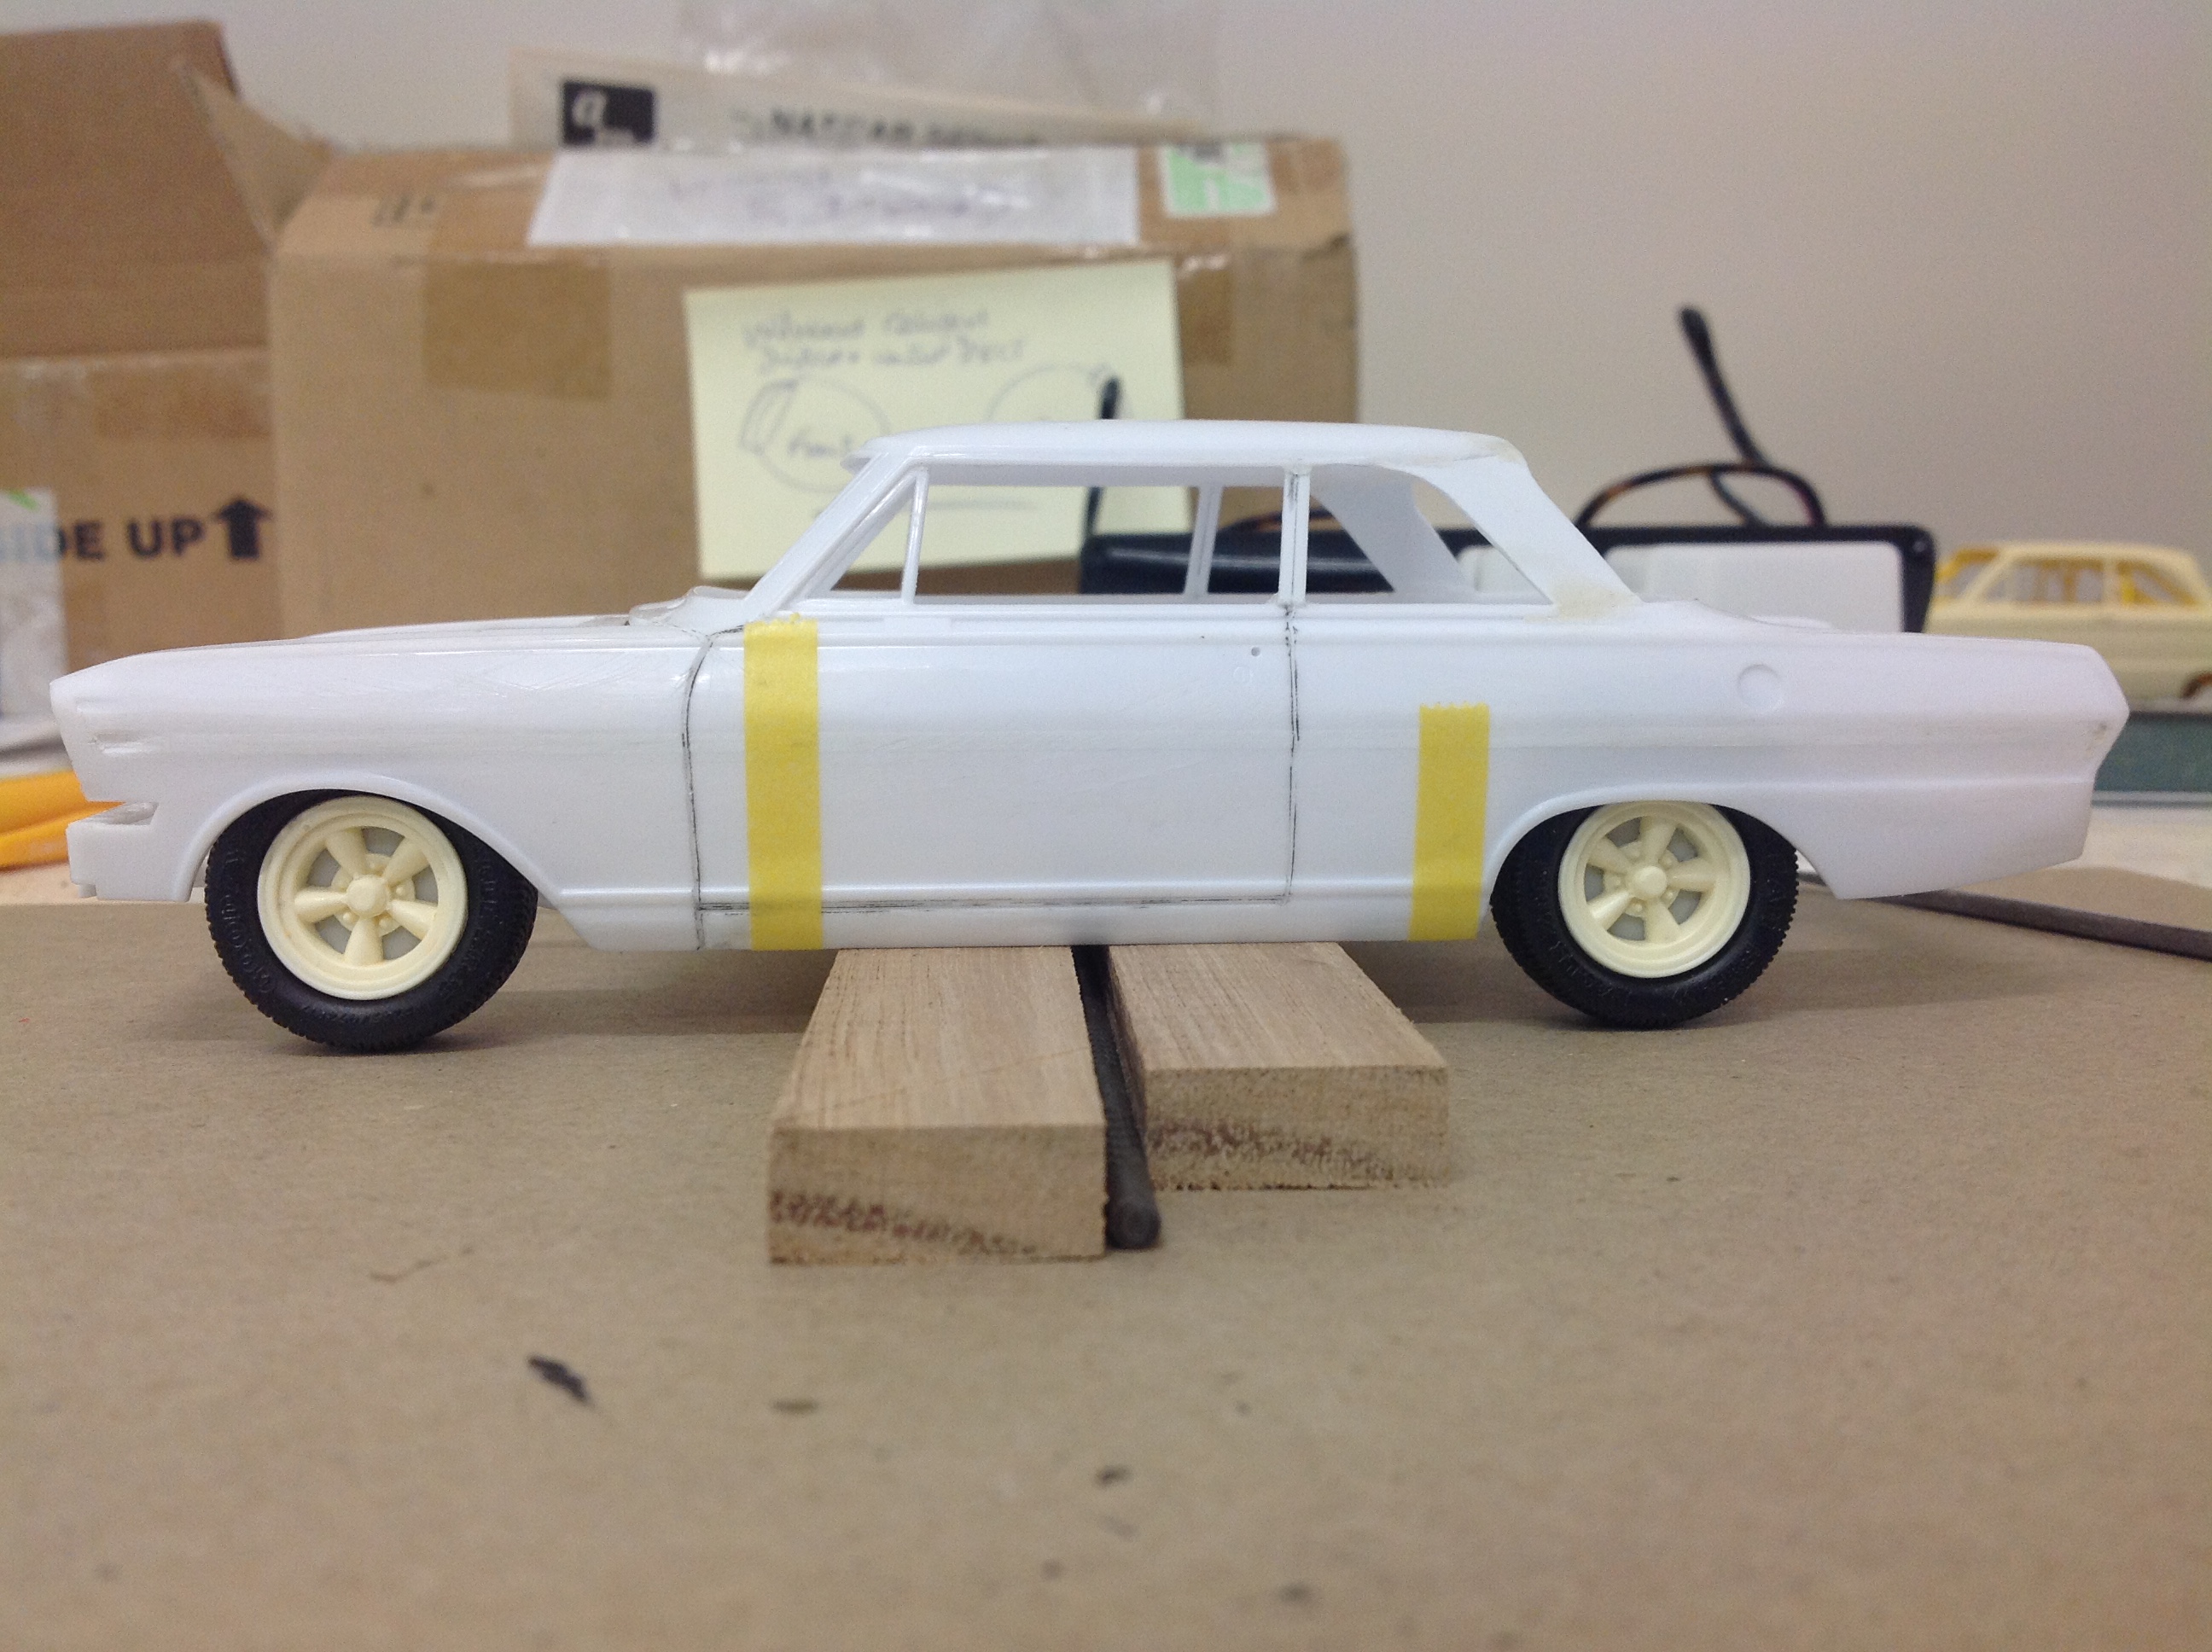
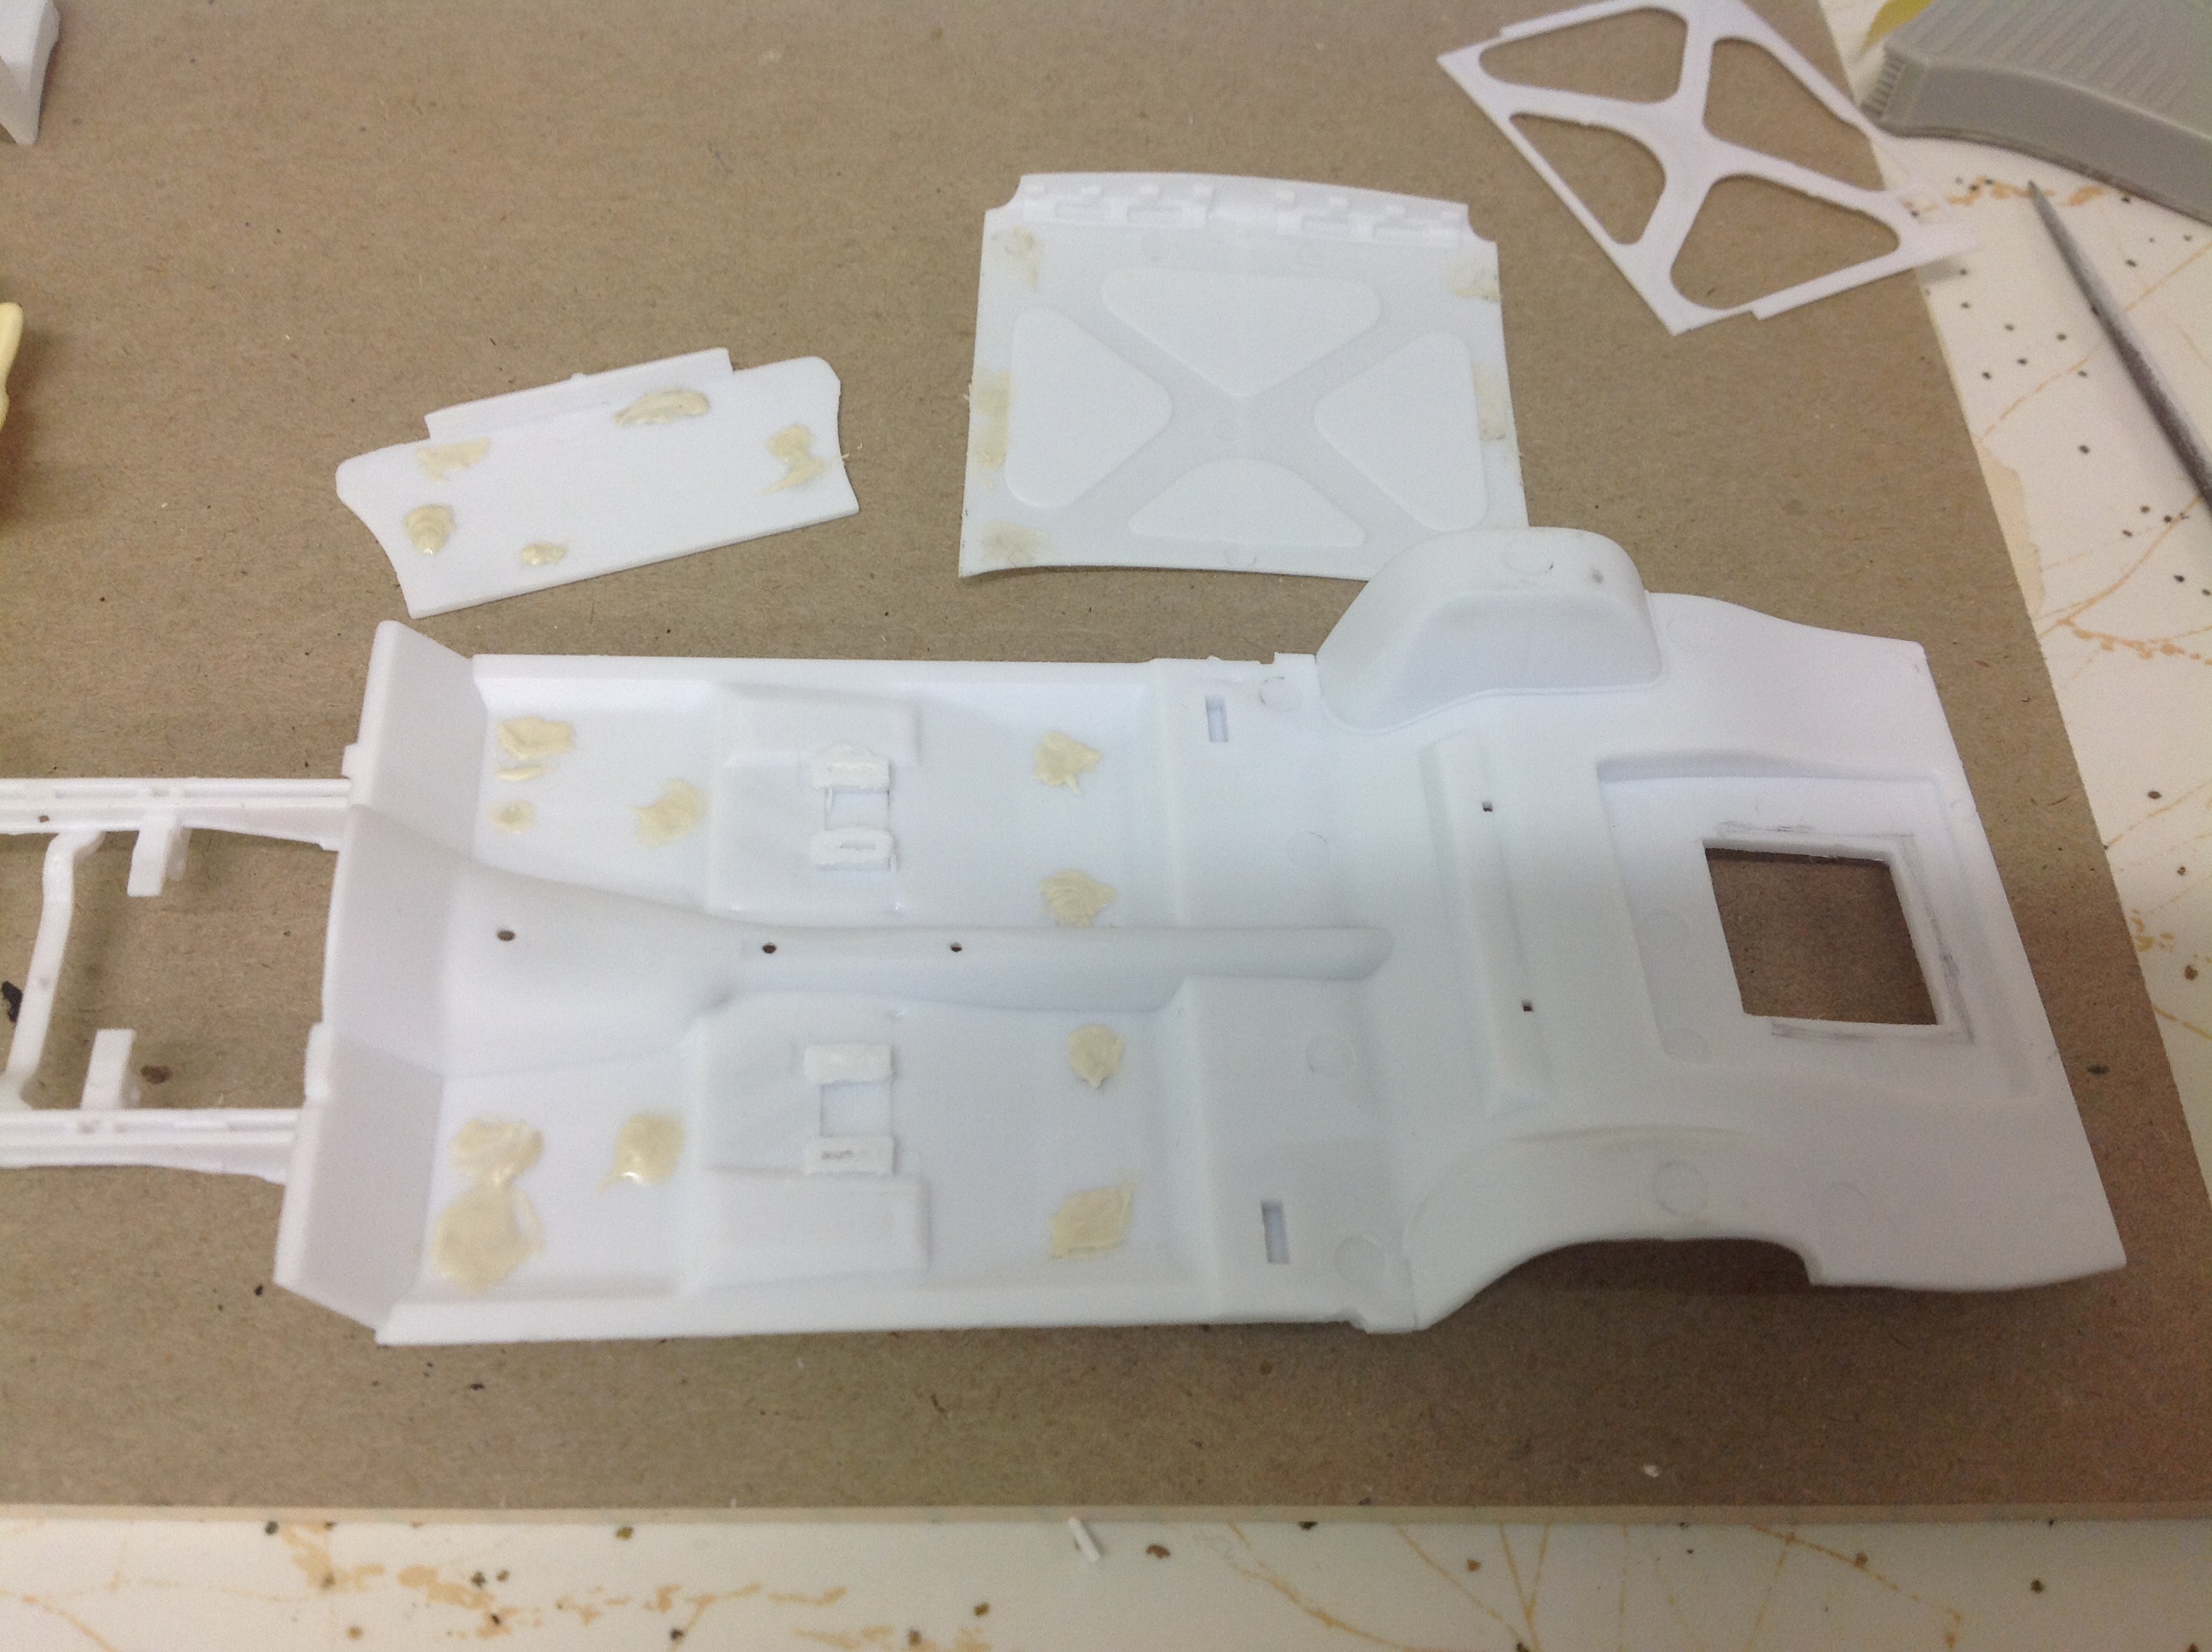
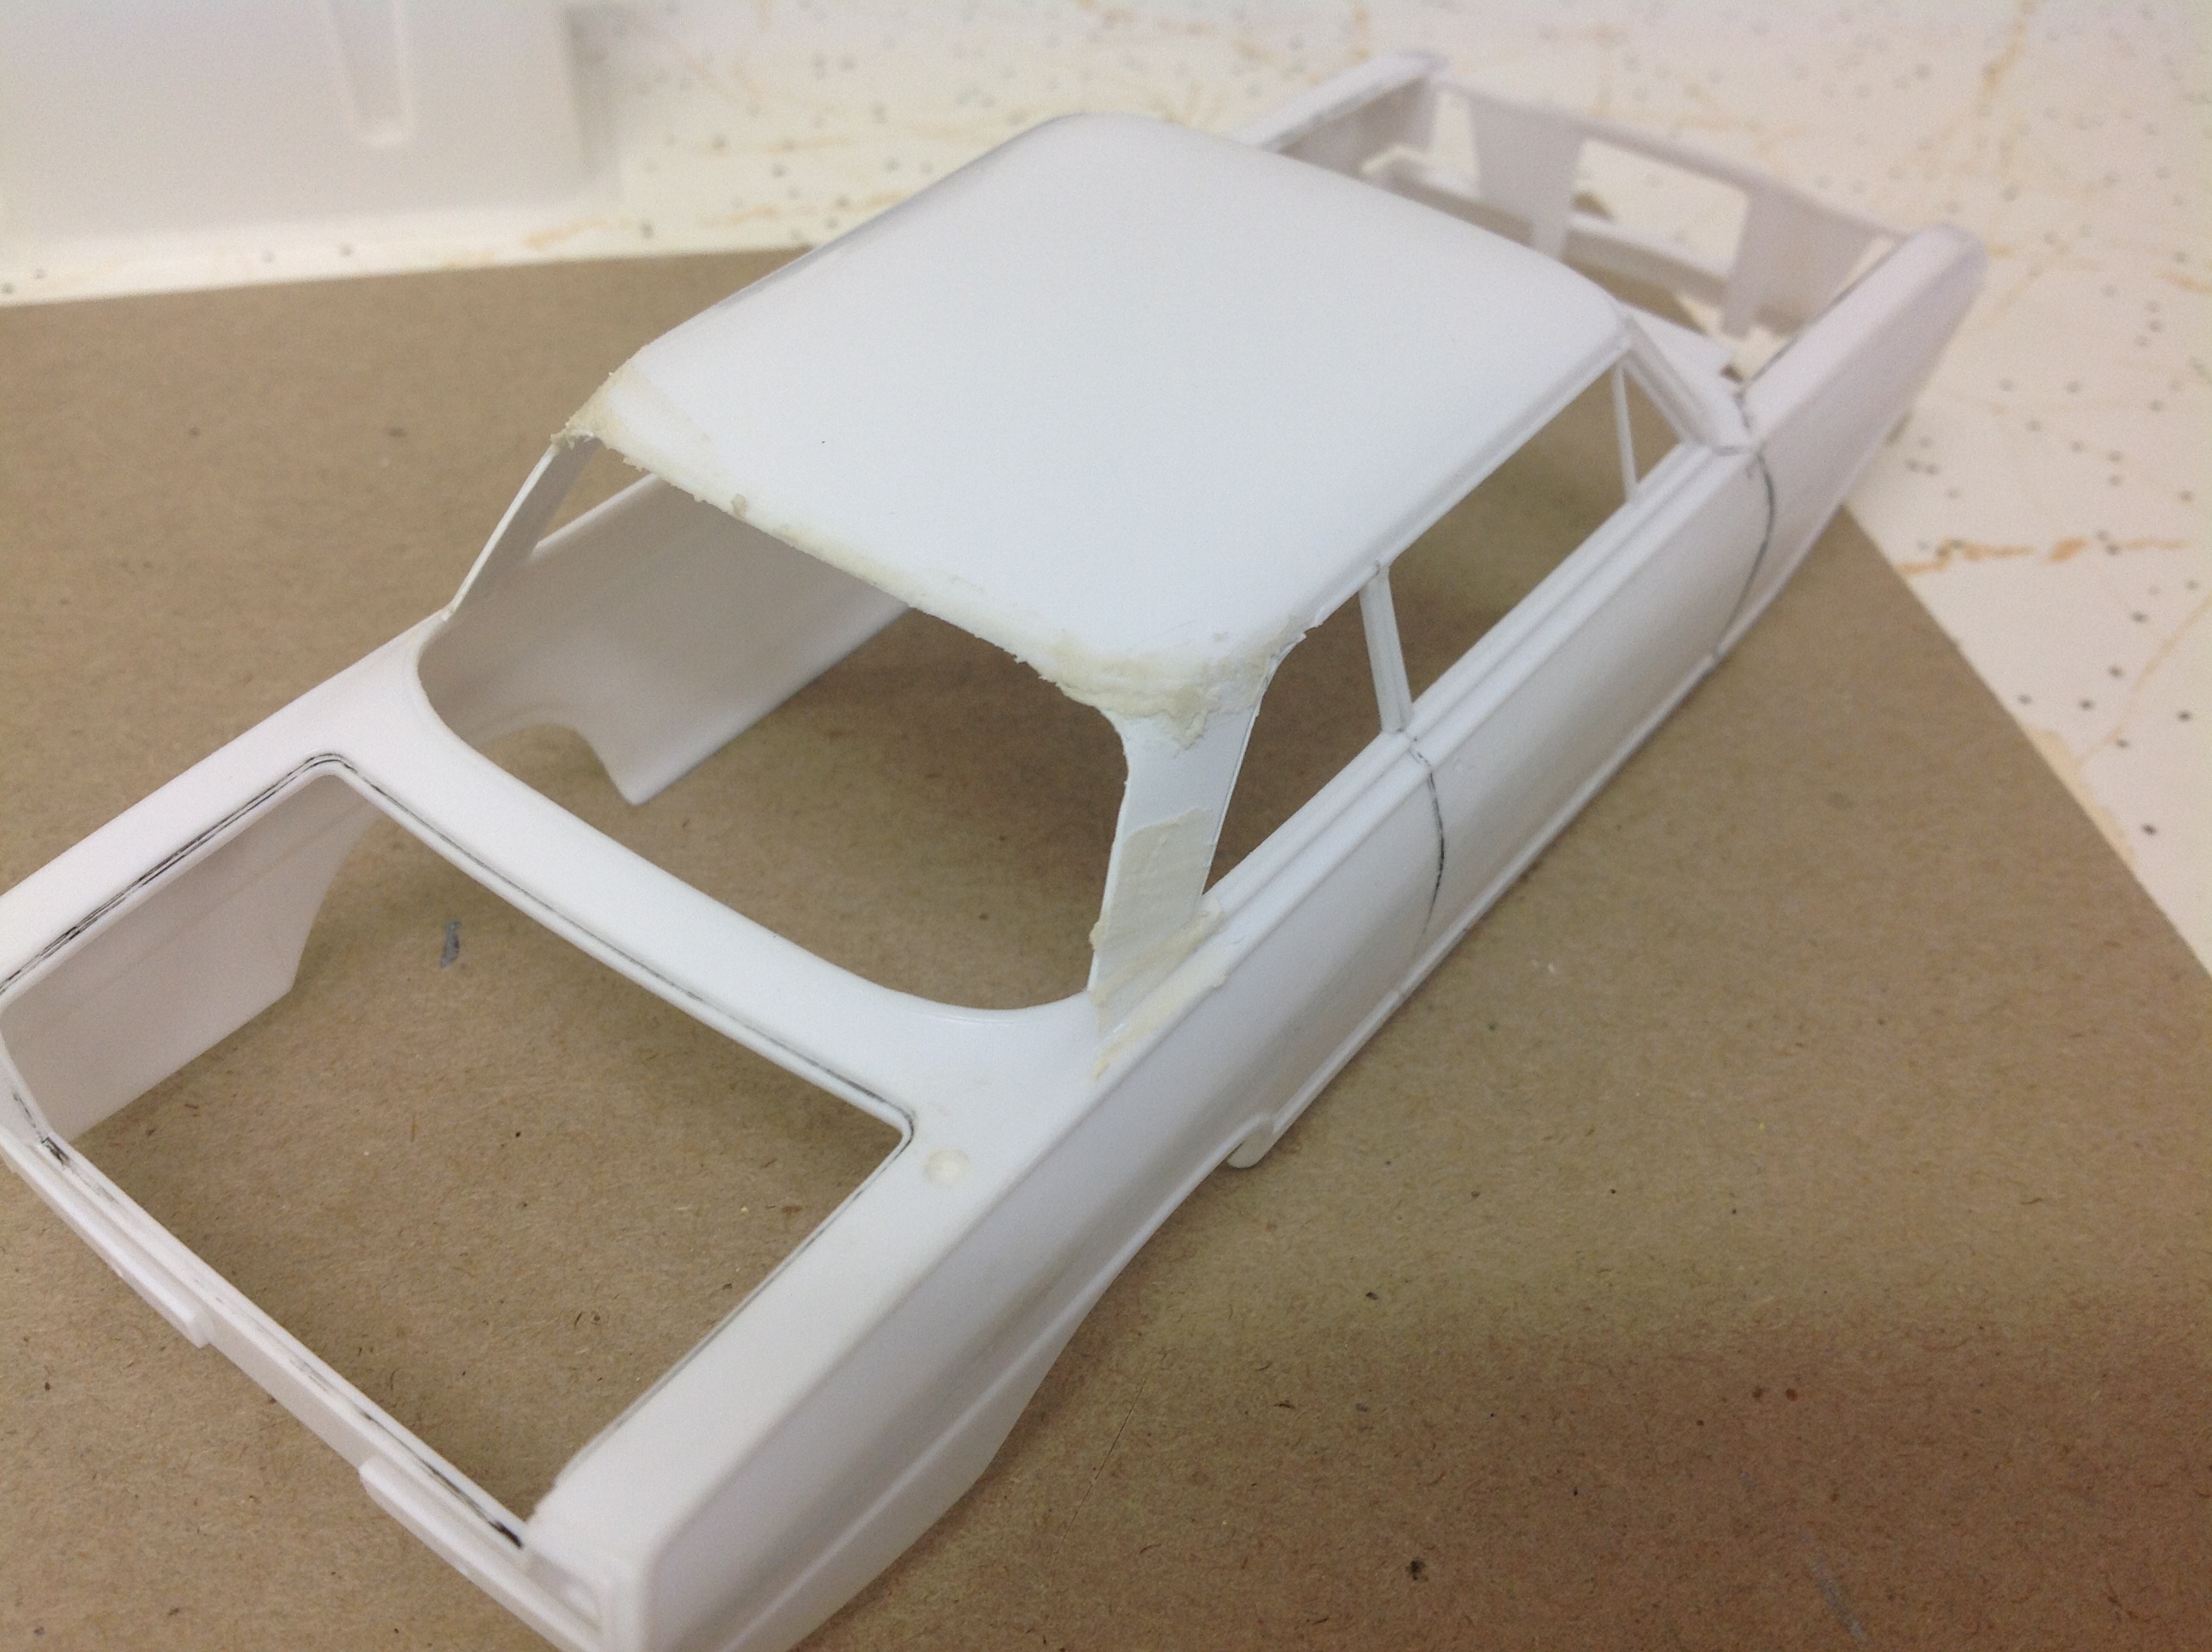
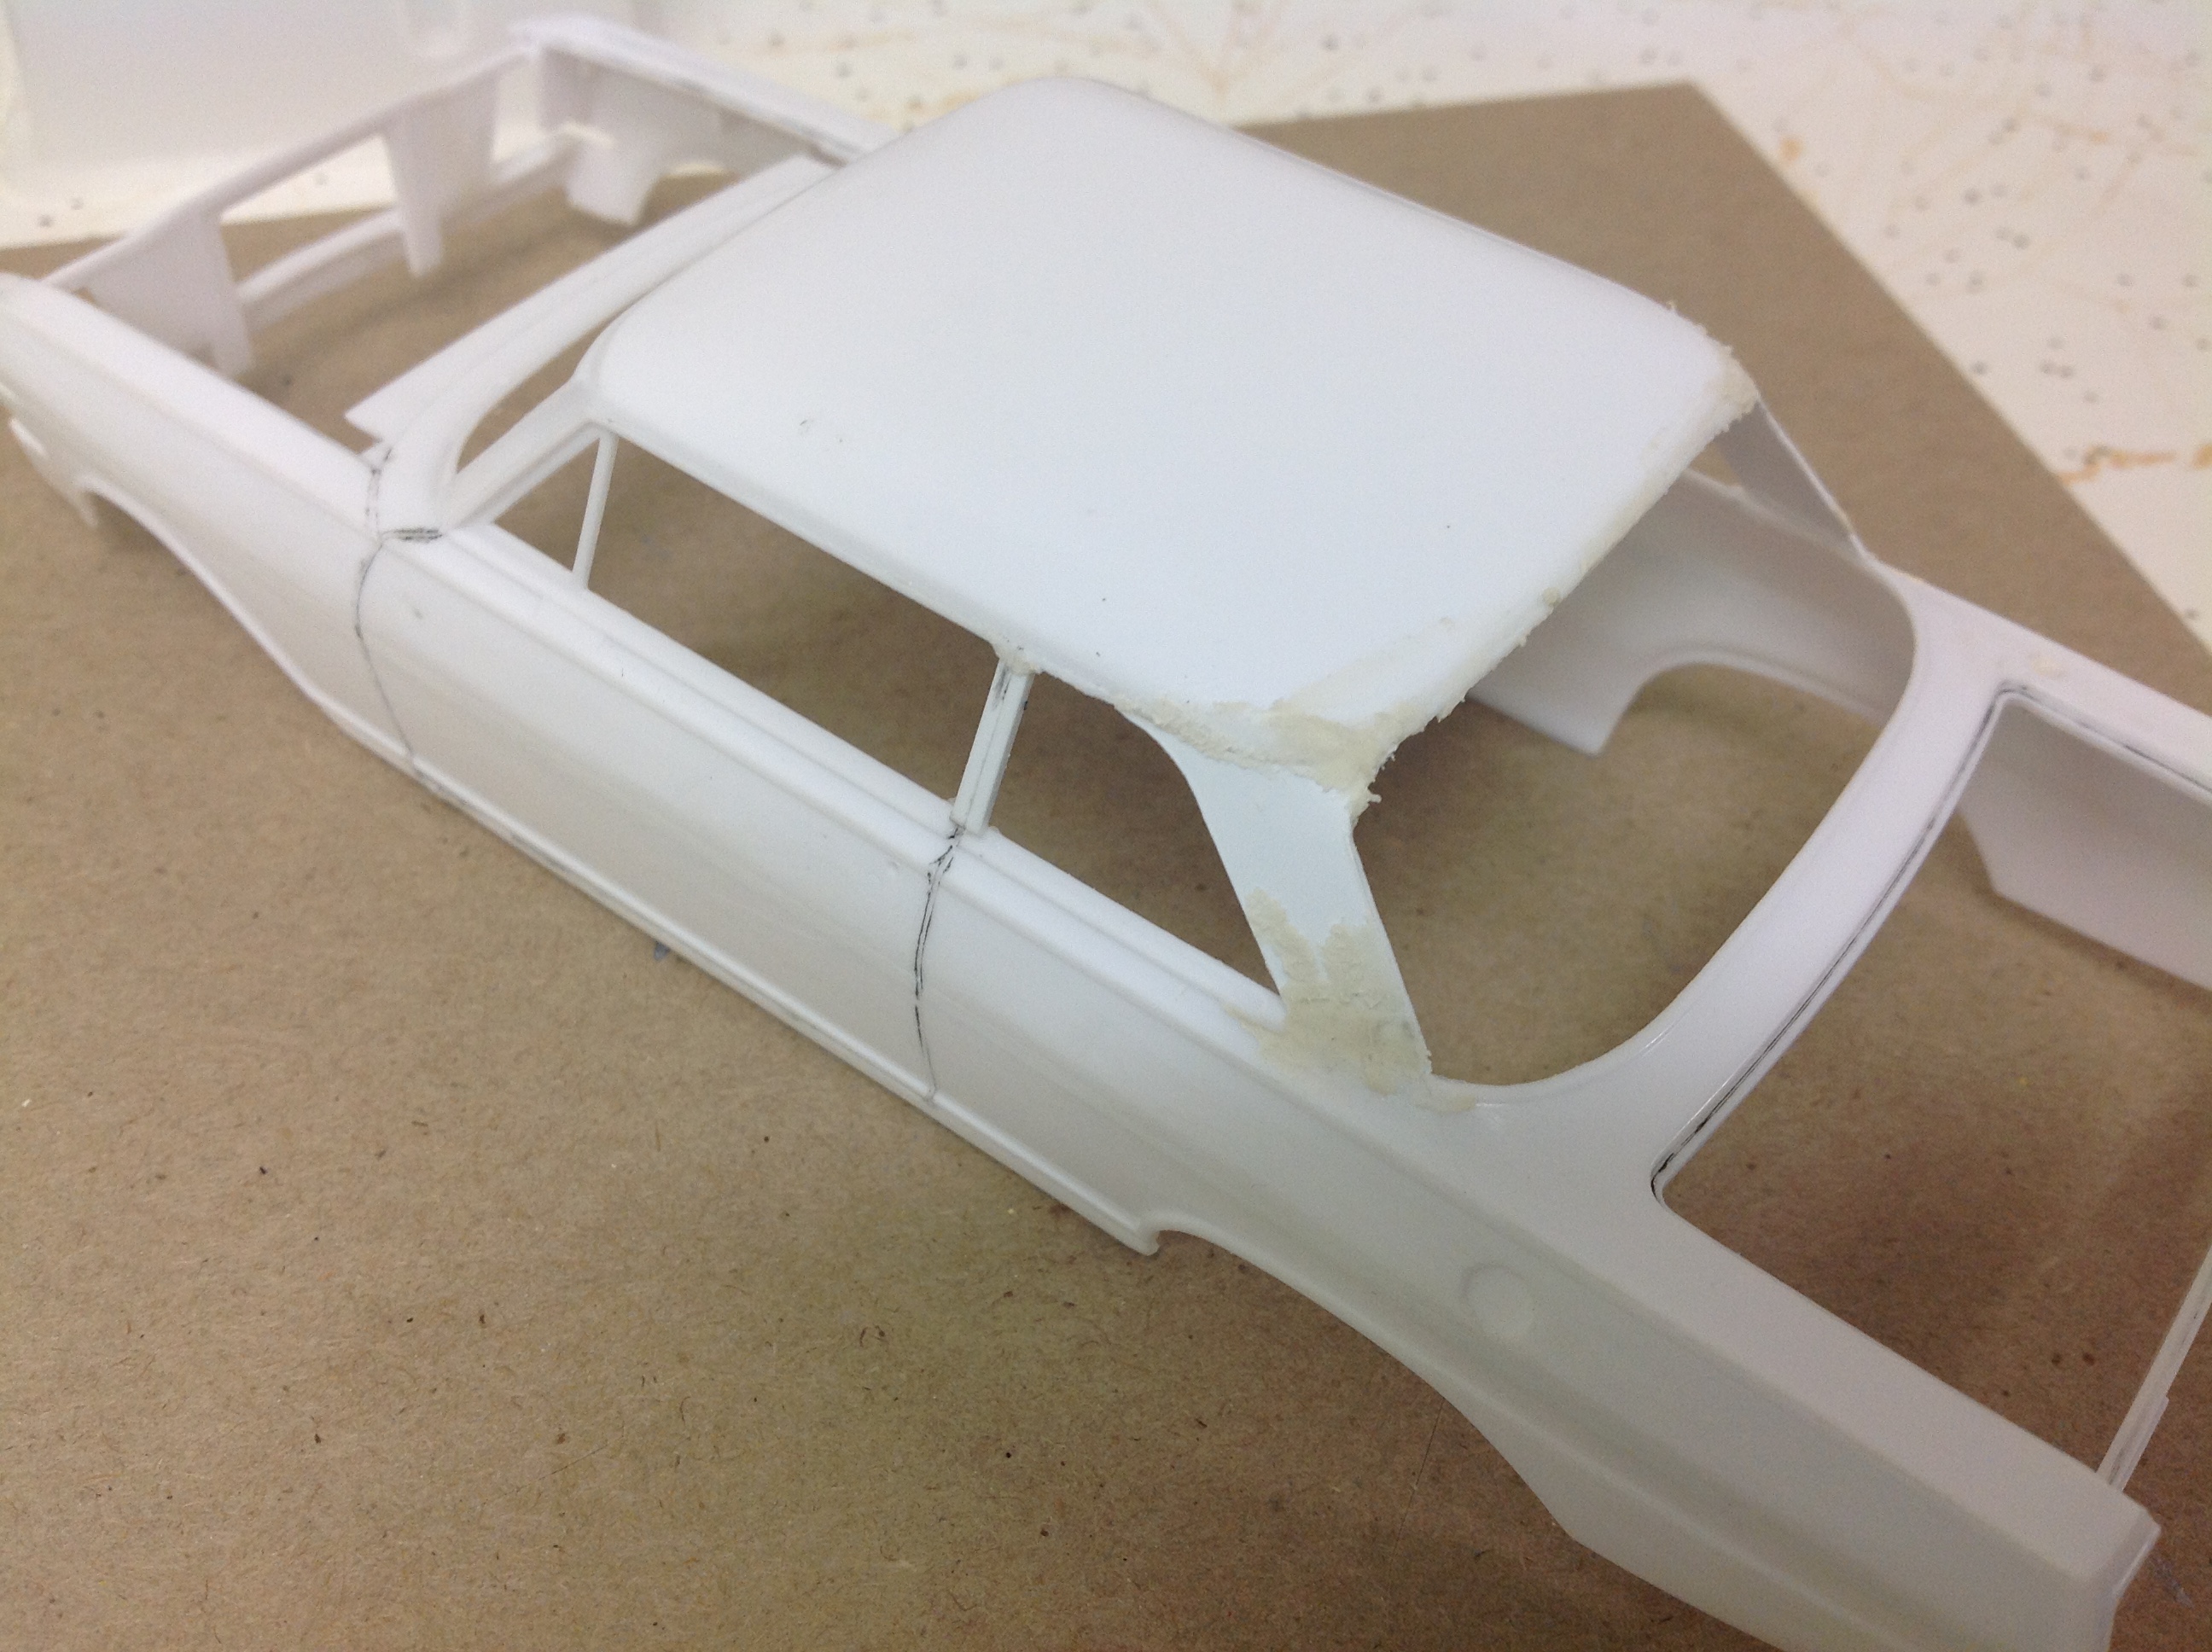
More time at the bench today and got a few more things done or at least started. Sanded the C pillars and really happy that its taken minimal filler to get them smoothed out.... Still final finishing to do. Decided to mate body with chassis and check the look of the wheels and ride height. Looking pretty good. As the top of the chassis plate is also the interior floor, started filling ejector pin holes. Also on underside of hood and rear seat backing which will be seen in trunk area. Continued next post......
-
Nice job!
-
Nice job Dann ?
-
Super clean build. Looks fantastic!
-
Forty-Mine: 49 Ford & Probe greenhouse mash-up
zakdoggi replied to Claude Thibodeau's topic in Model Cars
Hi Claude, Here's the link to the article I referred to: https://www.hemmings.com/blog/2018/12/07/fords-forty-nine-concept-promised-a-mainstream-retro-future-for-the-blue-oval/ Cheers..... Geoff -
Thanks guys, I guess my inspiration for the colours was the sea, sand and sun! The Lindberg kit was released many years ago in 1996, so I don't blame you for not knowing about it ? Cheers...... Geoff
-
Beautiful model. Love the red. Fantastic job!
-
Fantastic collection! Well done!
-
Patto also has the Diet Coke decals for the Paul Morris car, so you could do that one too and stage them in their coming together as shown in Shaun's earlier posted video. By the way, I was there that day and witnessed the whole affair, which happened to unfold right in front of me!!! Crazy stuff for sure. ?? Cheers....... Geoff
-
Sorry to hear about your decal issue. If you're wanting to get some replacements, a guy here in Australia has them. Pattosplace.com Look up B under decals and scroll through to 'BM 318i BnH Tony Longhurst - 1994' They come in both waterslide and vinyl and the 1/24 scale you need. Here's a pic. Good luck!! Cheers....... Geoff
-
Chevy Nova Race Car
zakdoggi replied to zakdoggi's topic in WIP: Other Racing: Road Racing, Land Speed Racers
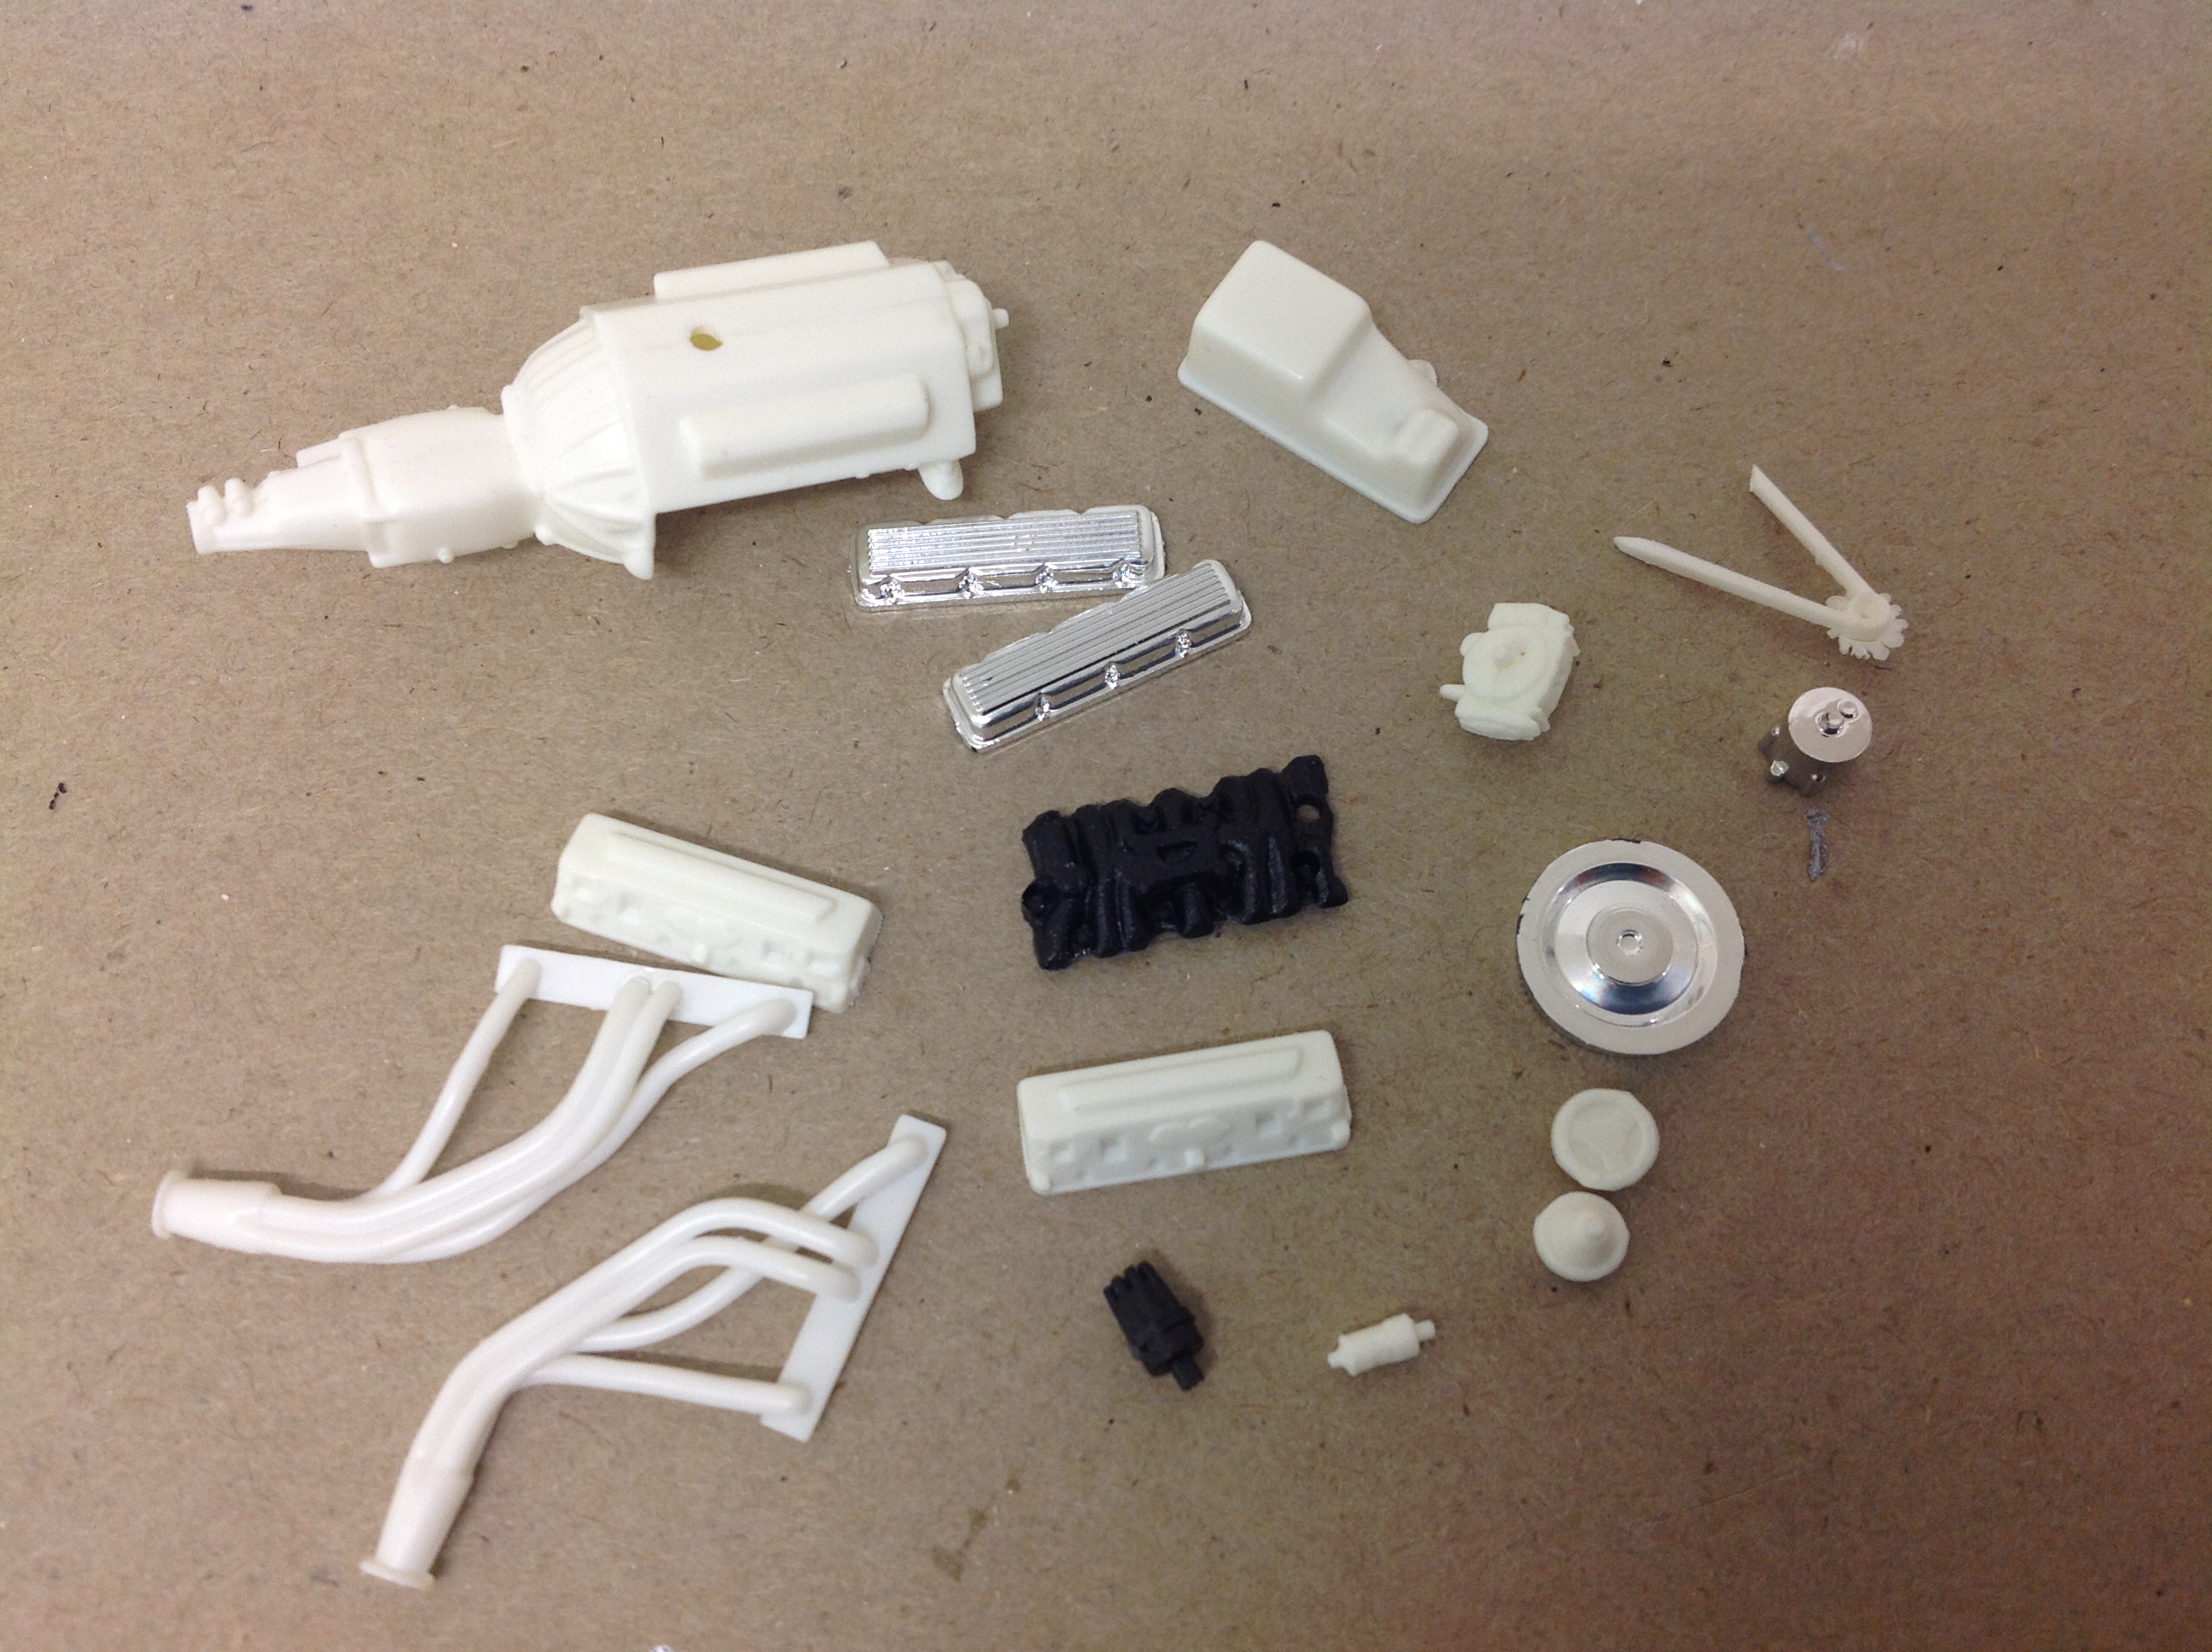
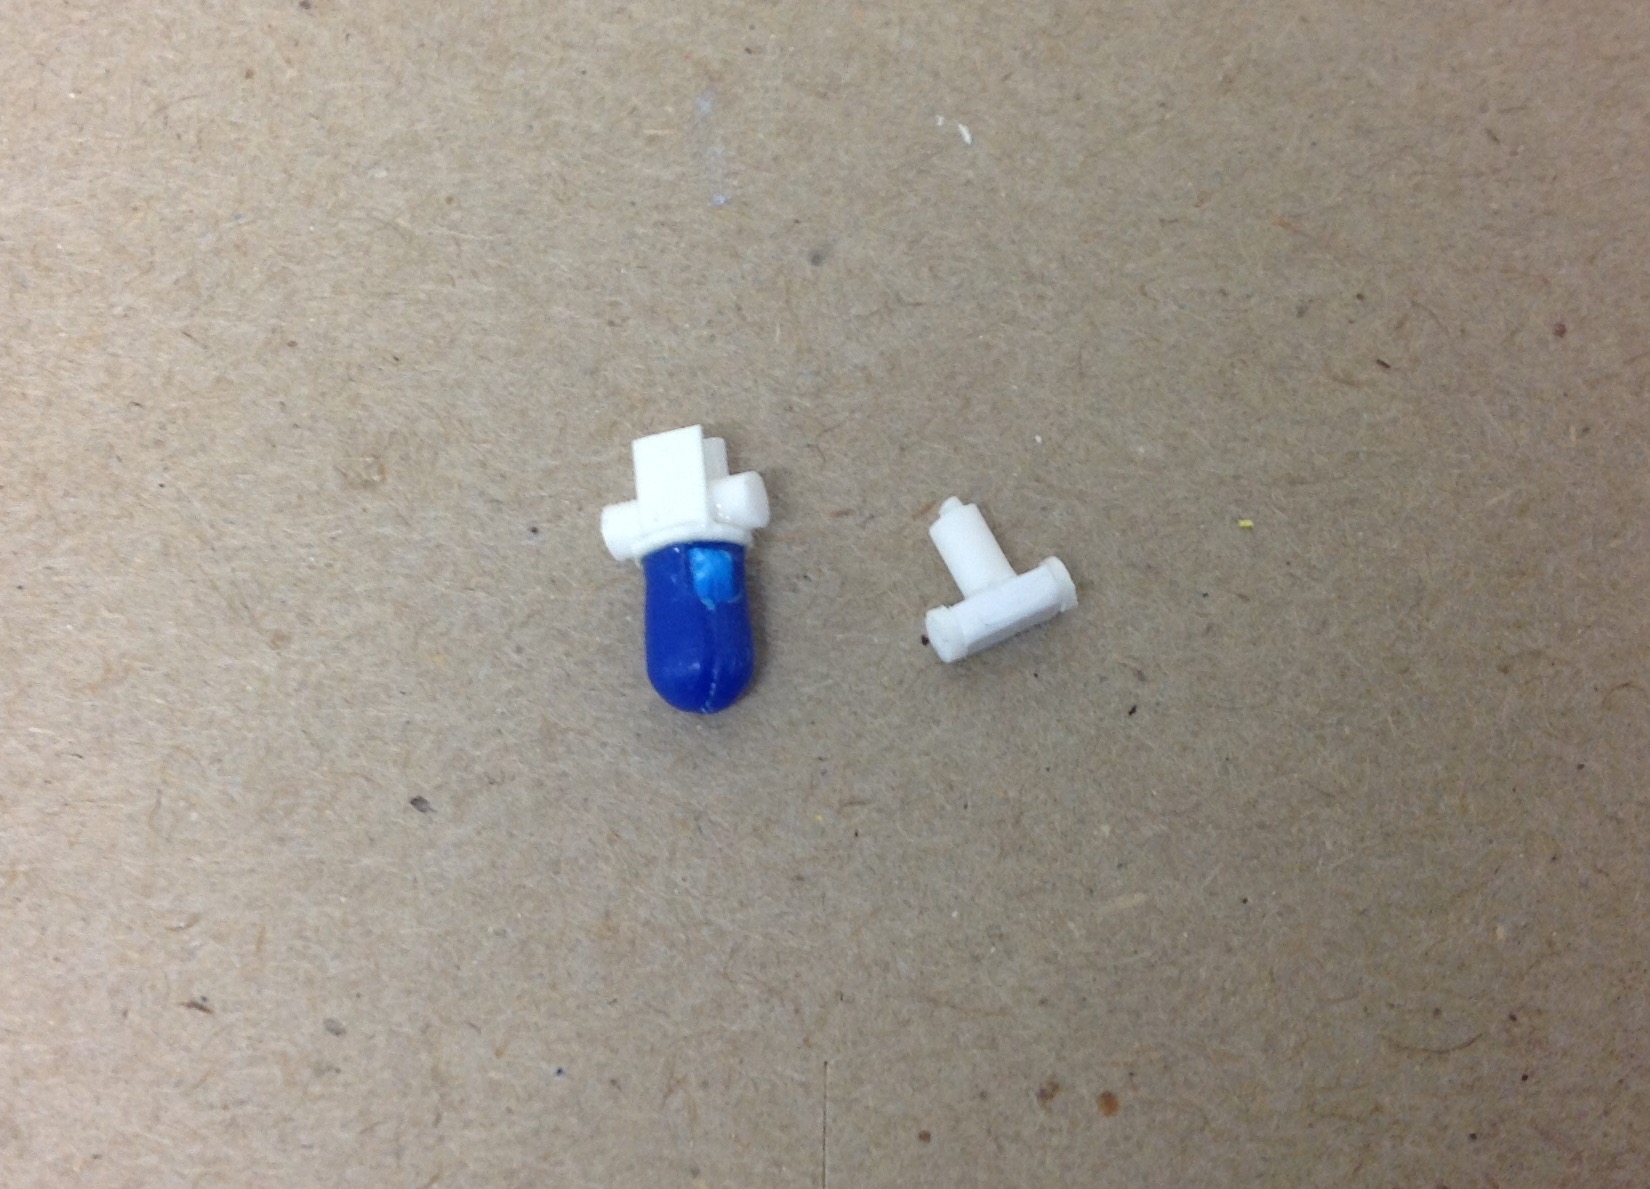
Got a little bit of time at the bench this afternoon after helping my brother locate an oil leak on his LS1. A bit more sanding and putty on the C pillars, then I got the engine parts out and glued the block halves together. To finish the day, I scratchbuilt the fuel filter and fuel pump to go in the trunk with the fuel cell. As always, all feedback welcome. Cheers......... Geoff
-
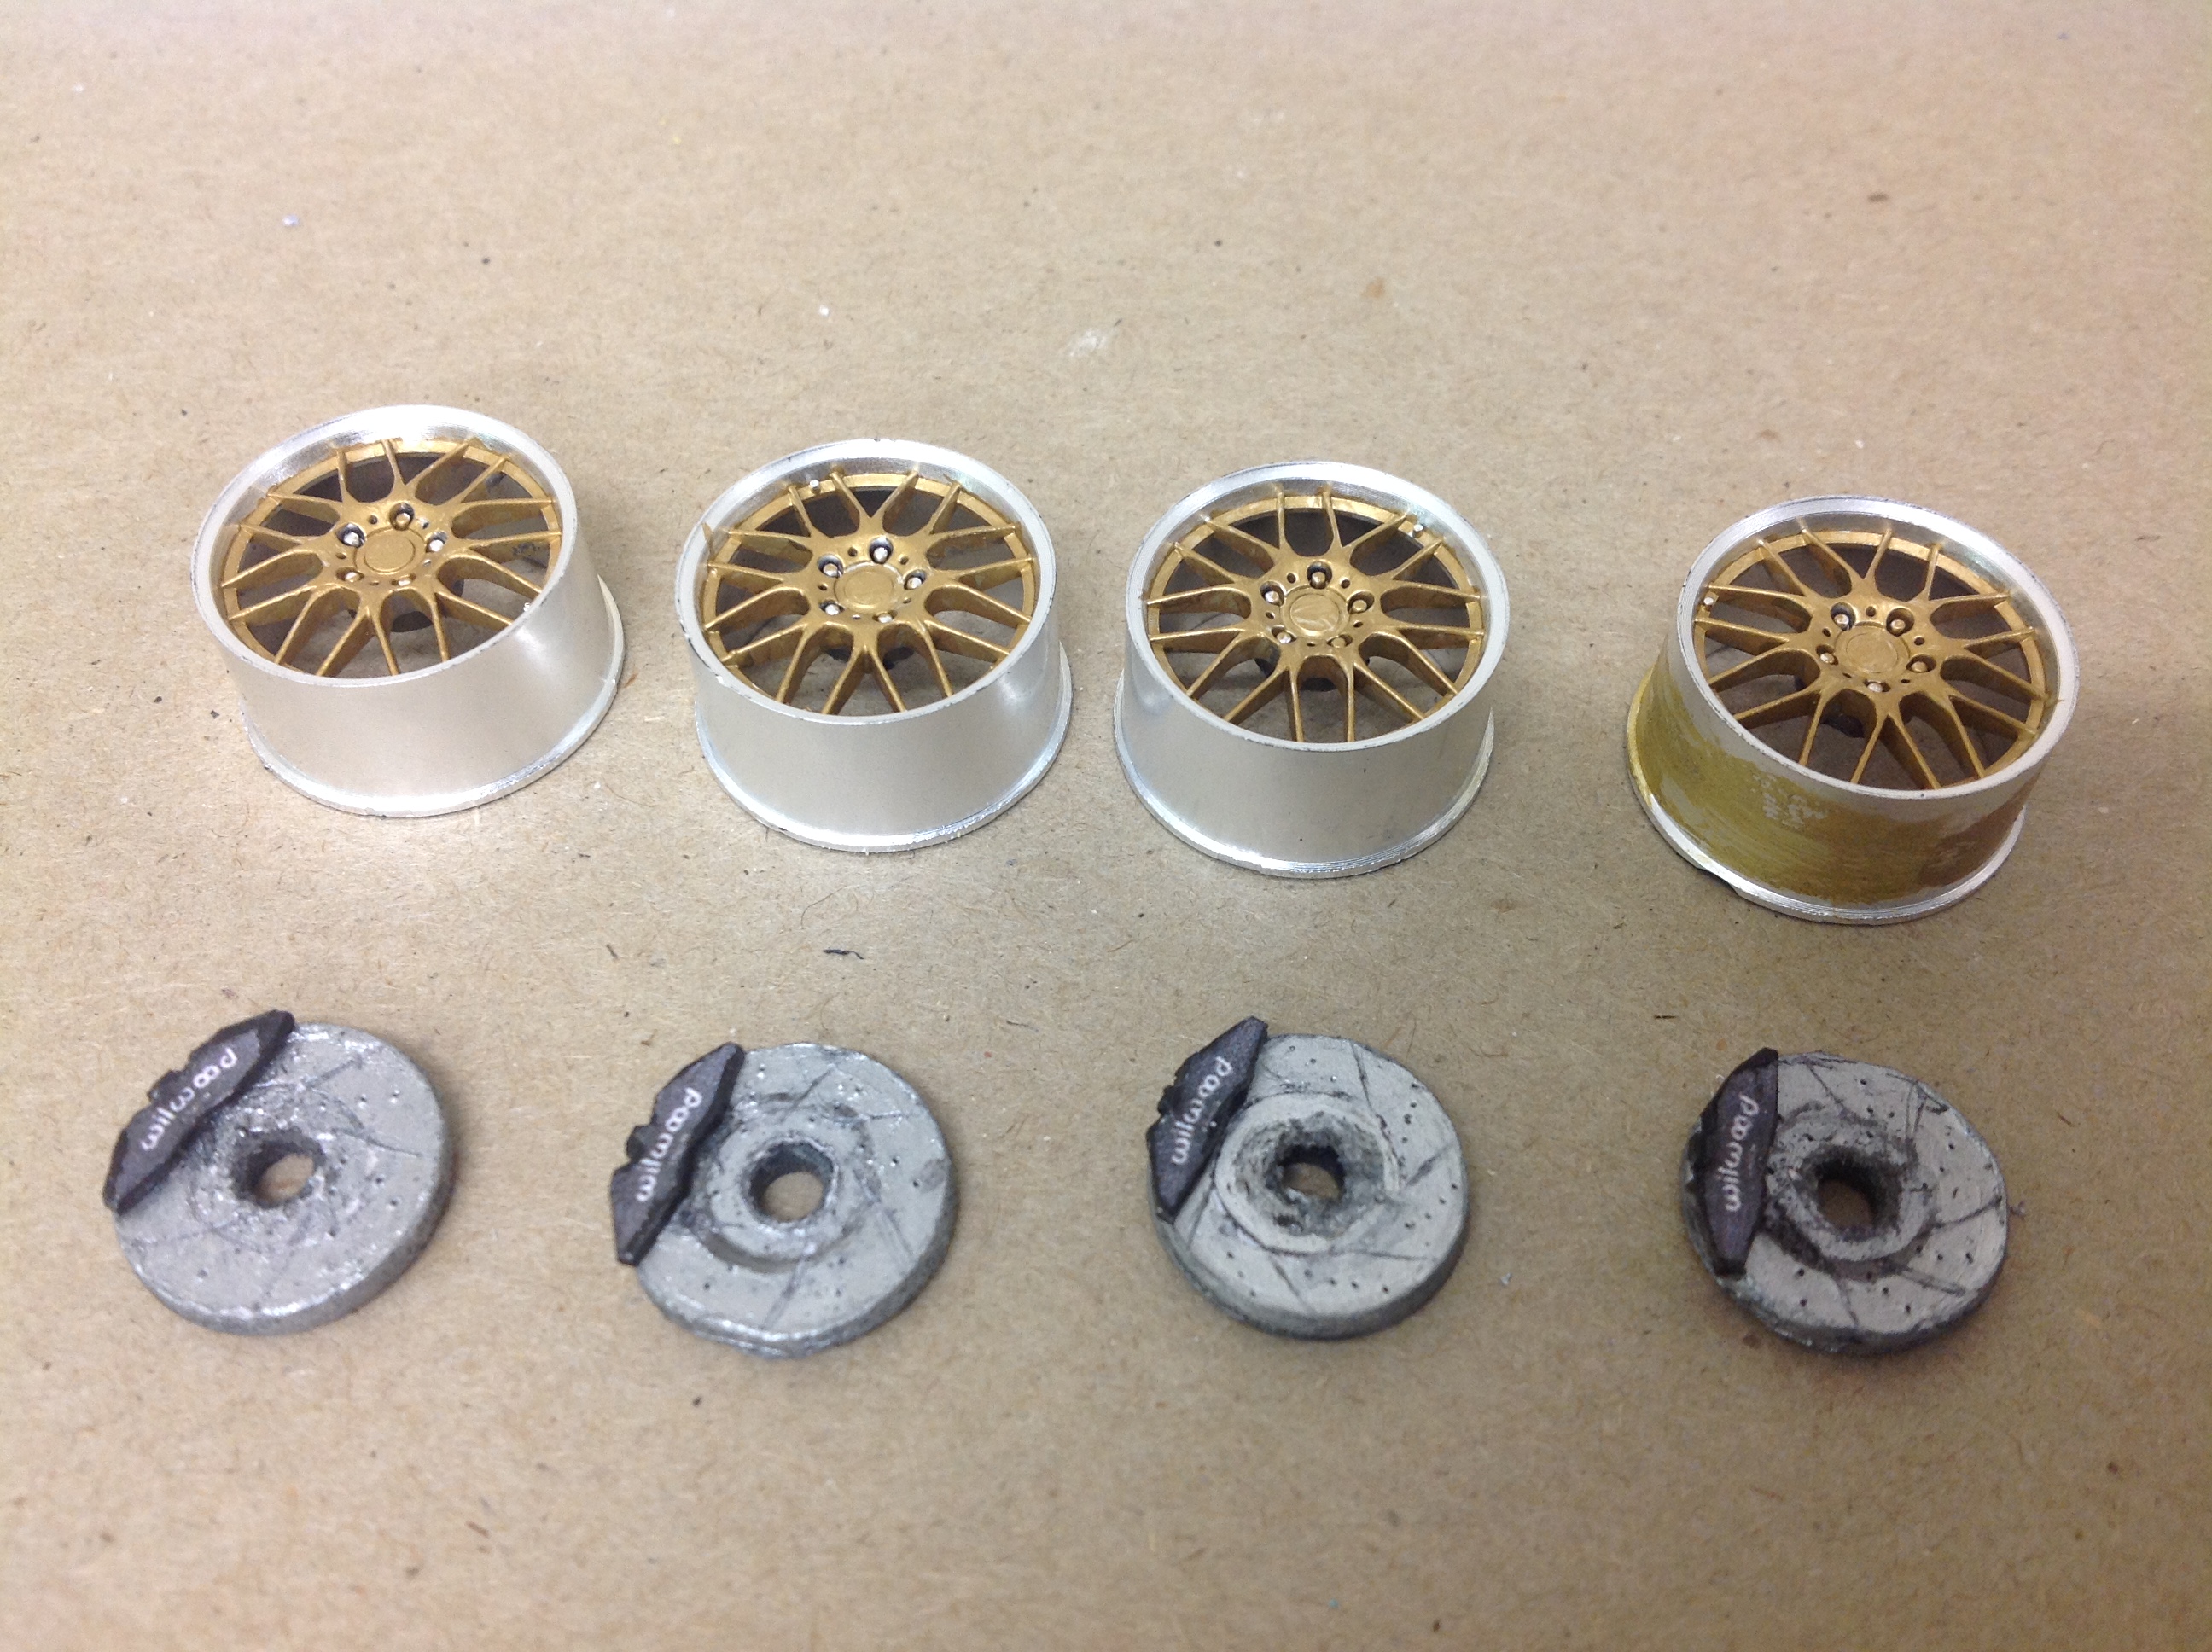
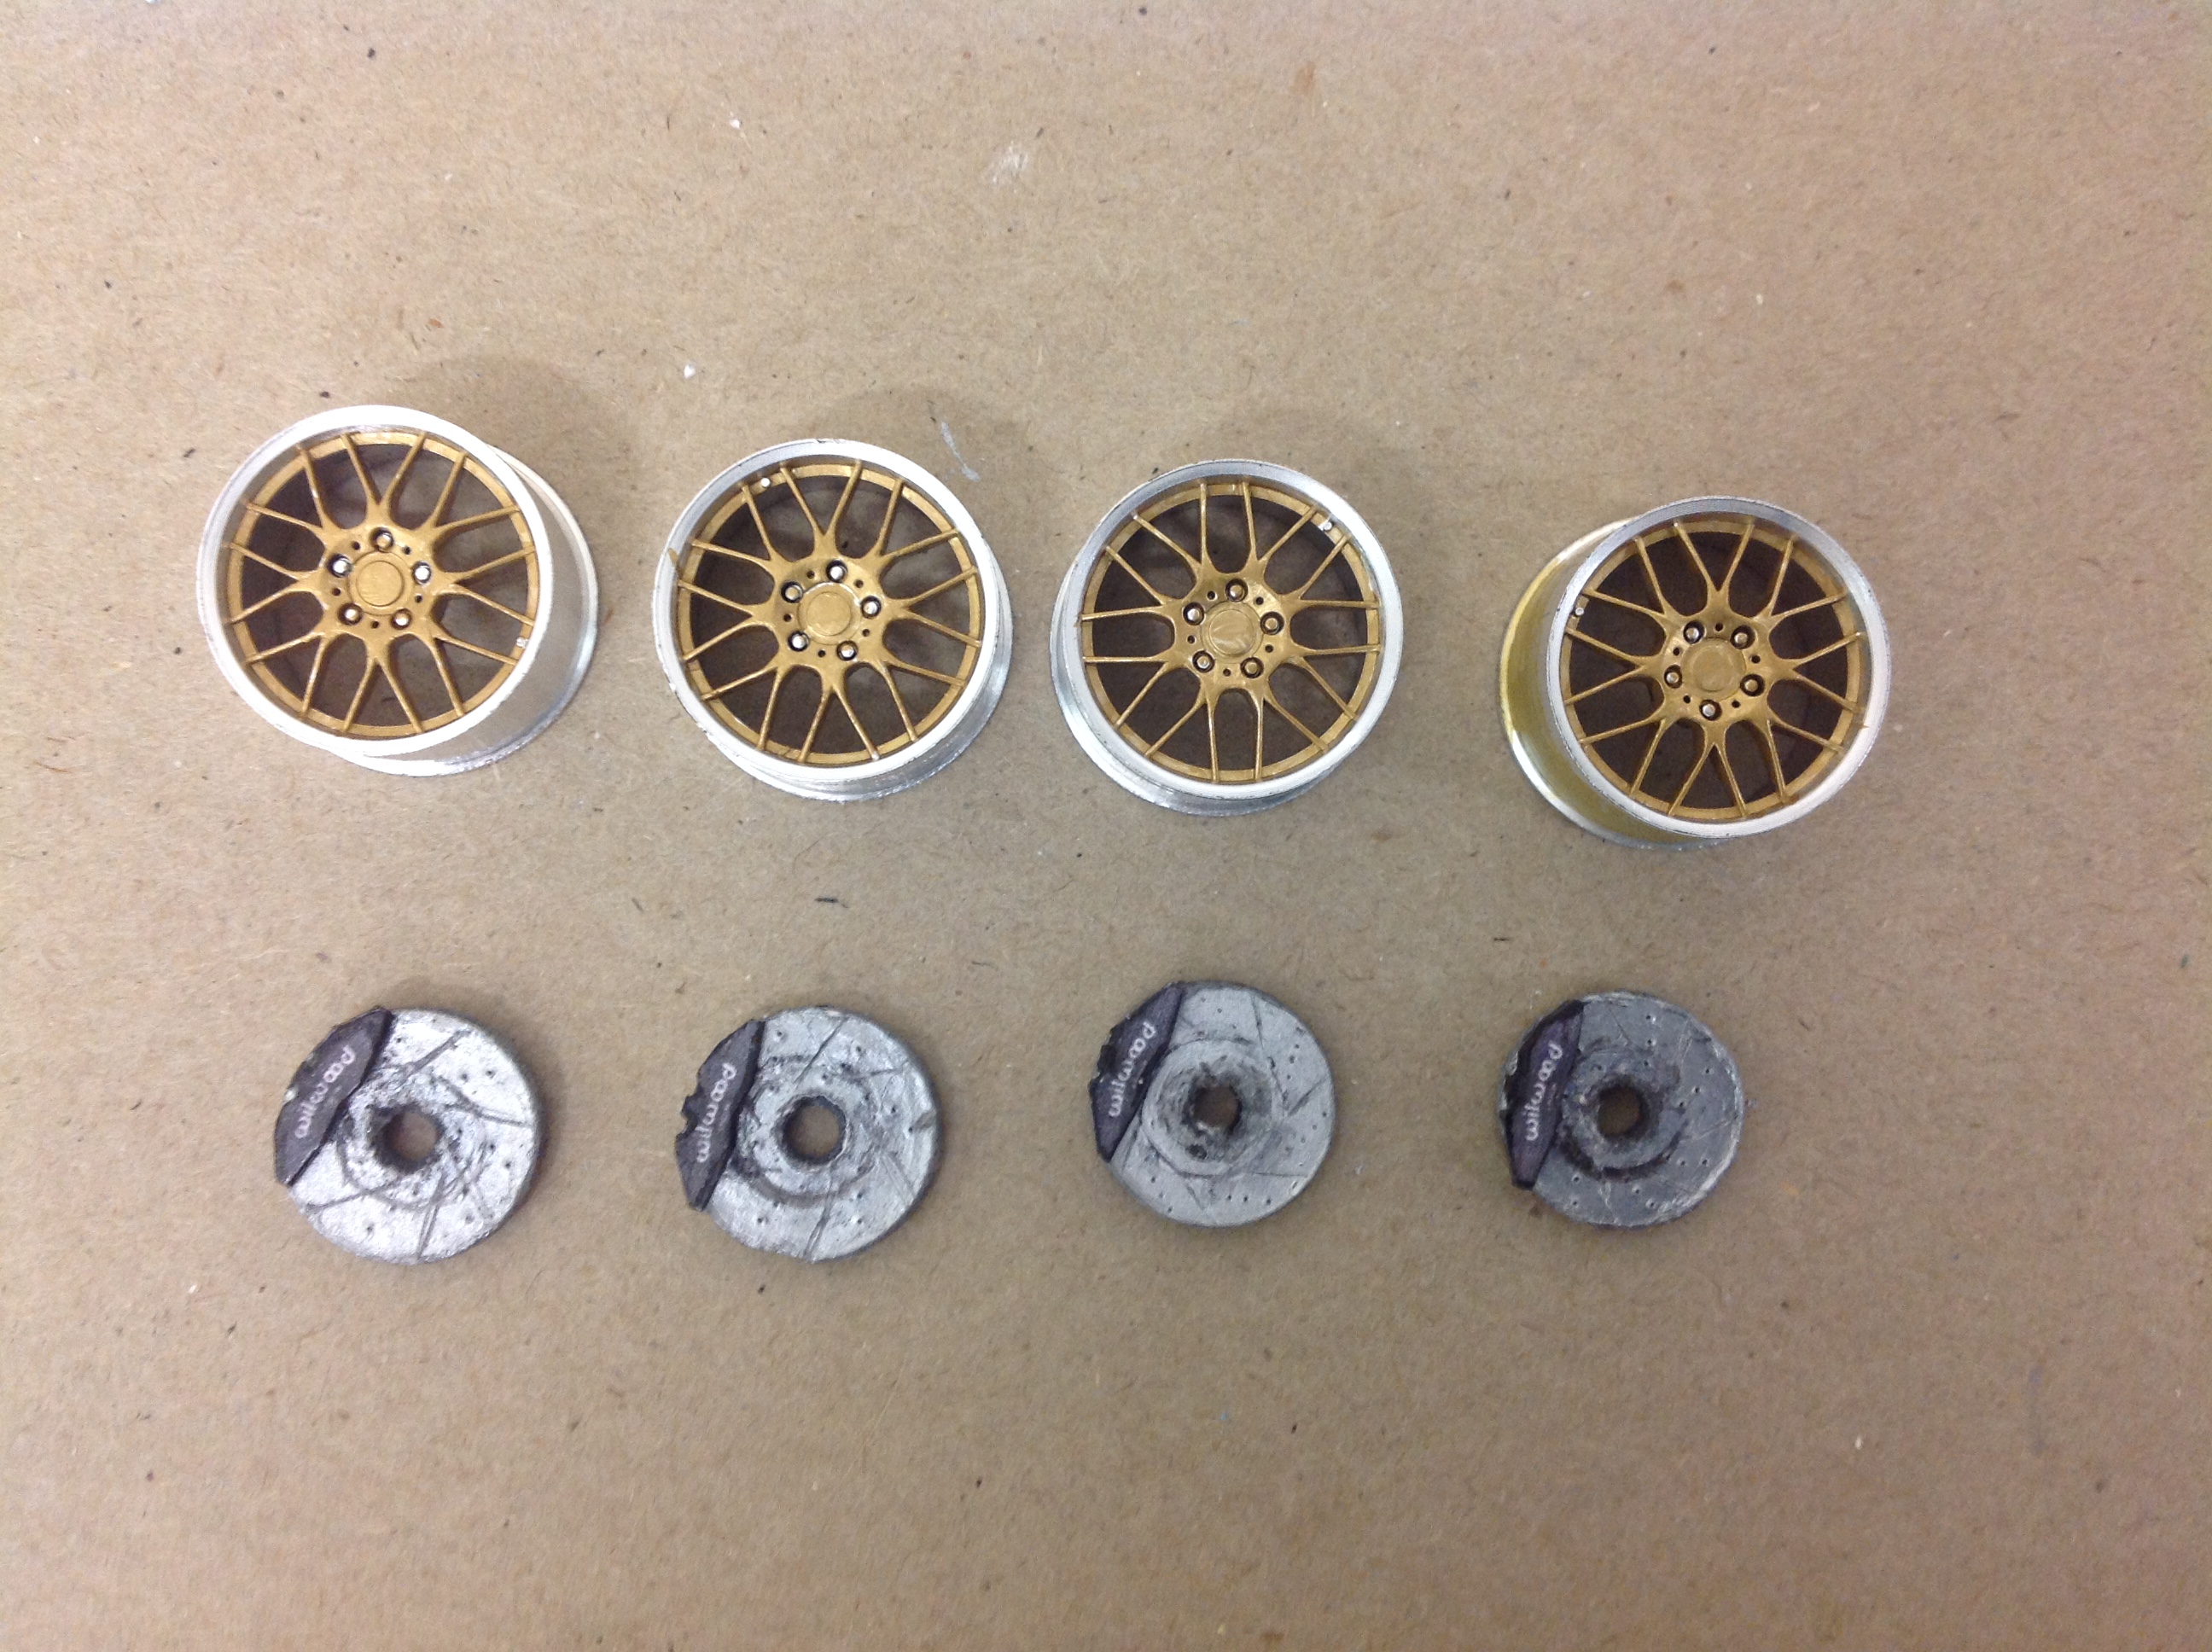
Got a free hour at the bench today and managed to knock out the rest of the disc brakes and paint the wheel centres. Still need to clean the wheels up, give them a black wash and highlight the valve stems. With the lousy weather we are having, I'm hoping to spend a few hours over the weekend on some more interior details. Cheers for now...... Geoff
-
Nice work. They look great together.
-
Nice job!
-
Nice work. I like the detail in this model and you're executing it well. Can't wait to see the finished build.
-
Looking good! I've got one of these kits on my watch list so very keen to see how it builds up.
-
Nice resto job. Love the color. What paint did you use?
-
Neat build and great color choice.
-
Nice clean build with a great stance and attitude!!
-
That's a wild ride! Great execution.
-
Super build. Excellent color choice!
-
Thanks guys. Appreciate your support and encouragement ? Cheers....... Geoff
-
Chevy Nova Race Car
zakdoggi replied to zakdoggi's topic in WIP: Other Racing: Road Racing, Land Speed Racers
Thanks Alan. Good luck with your conversion and good to hear from a fellow Aussie. My approach is to give it a good go and if it turns out looking right, then I've done well. If not, then I just pull it apart and try again. Taking a few days away to visit my mum, so hopefully back at the bench by the weekend. All the best......... Cheers Geoff -
Nice clean build. Great paint job. ?
-
You do great work Bernard! ????