gotnitro?
-
Posts
4,498 -
Joined
-
Last visited
Content Type
Profiles
Forums
Events
Gallery
Everything posted by gotnitro?
-

1940 Ford larger truck
gotnitro? replied to junkyardjeff's topic in WIP: Model Trucks: Big Rigs and Heavy Equipment
Cant wait for updates , farm vehicles could be bashed from anything useful around -
Fantastic work! Your dealing w the typical kit issues like a expert builder w years of rig kits under your belt. The metal finishes and gloss paint is jaw dropping, so clean w variety to the materials Looking forward to more updates
-
Thanks Dan..it definitely will need block work. I'd already done one overall coat in the photos, and found a few low areas needing more filler. I wish I was skilled enough to avoid the ridges between the sections of filler, but I have that doing drywall too My biggest hurdle now is locating Duplicolor primer to cover the filler once its ready. I don't trust rustoleum primer under tamiya paints.
-
Changing Gears
gotnitro? replied to J.B. Customs's topic in WIP: Model Trucks: Big Rigs and Heavy Equipment
Excellent information on kitbashing to achieve fire apparatus! Really admire the details on the hose beds and pump panels -
Excellent work
-
CCKW
gotnitro? replied to Chariots of Fire's topic in WIP: Model Trucks: Big Rigs and Heavy Equipment
Fantastic details right down to the Garand! -
I spent the weekend puttering around the house, and tried frosting a cake! Not really..its just a skim coat of evercoat filler on the roof. I grew up in my dads body shop, and always oddly found the smell of this filler pleasant. Cracking open that can brought back great memories The big blob was born after I laid the bus down before it was cured..oops more dust clouds ahead My plans aren't a glass flat roof, just blending everything front to back. Thanks for everyone's feedback its greatly appreciated

-
Fantastic details! Looking forward to your Cummins engine progress
-
That bus would be a nightmare to move around ! Very interesting photo, thanks for sharing
-
Excellent work
-
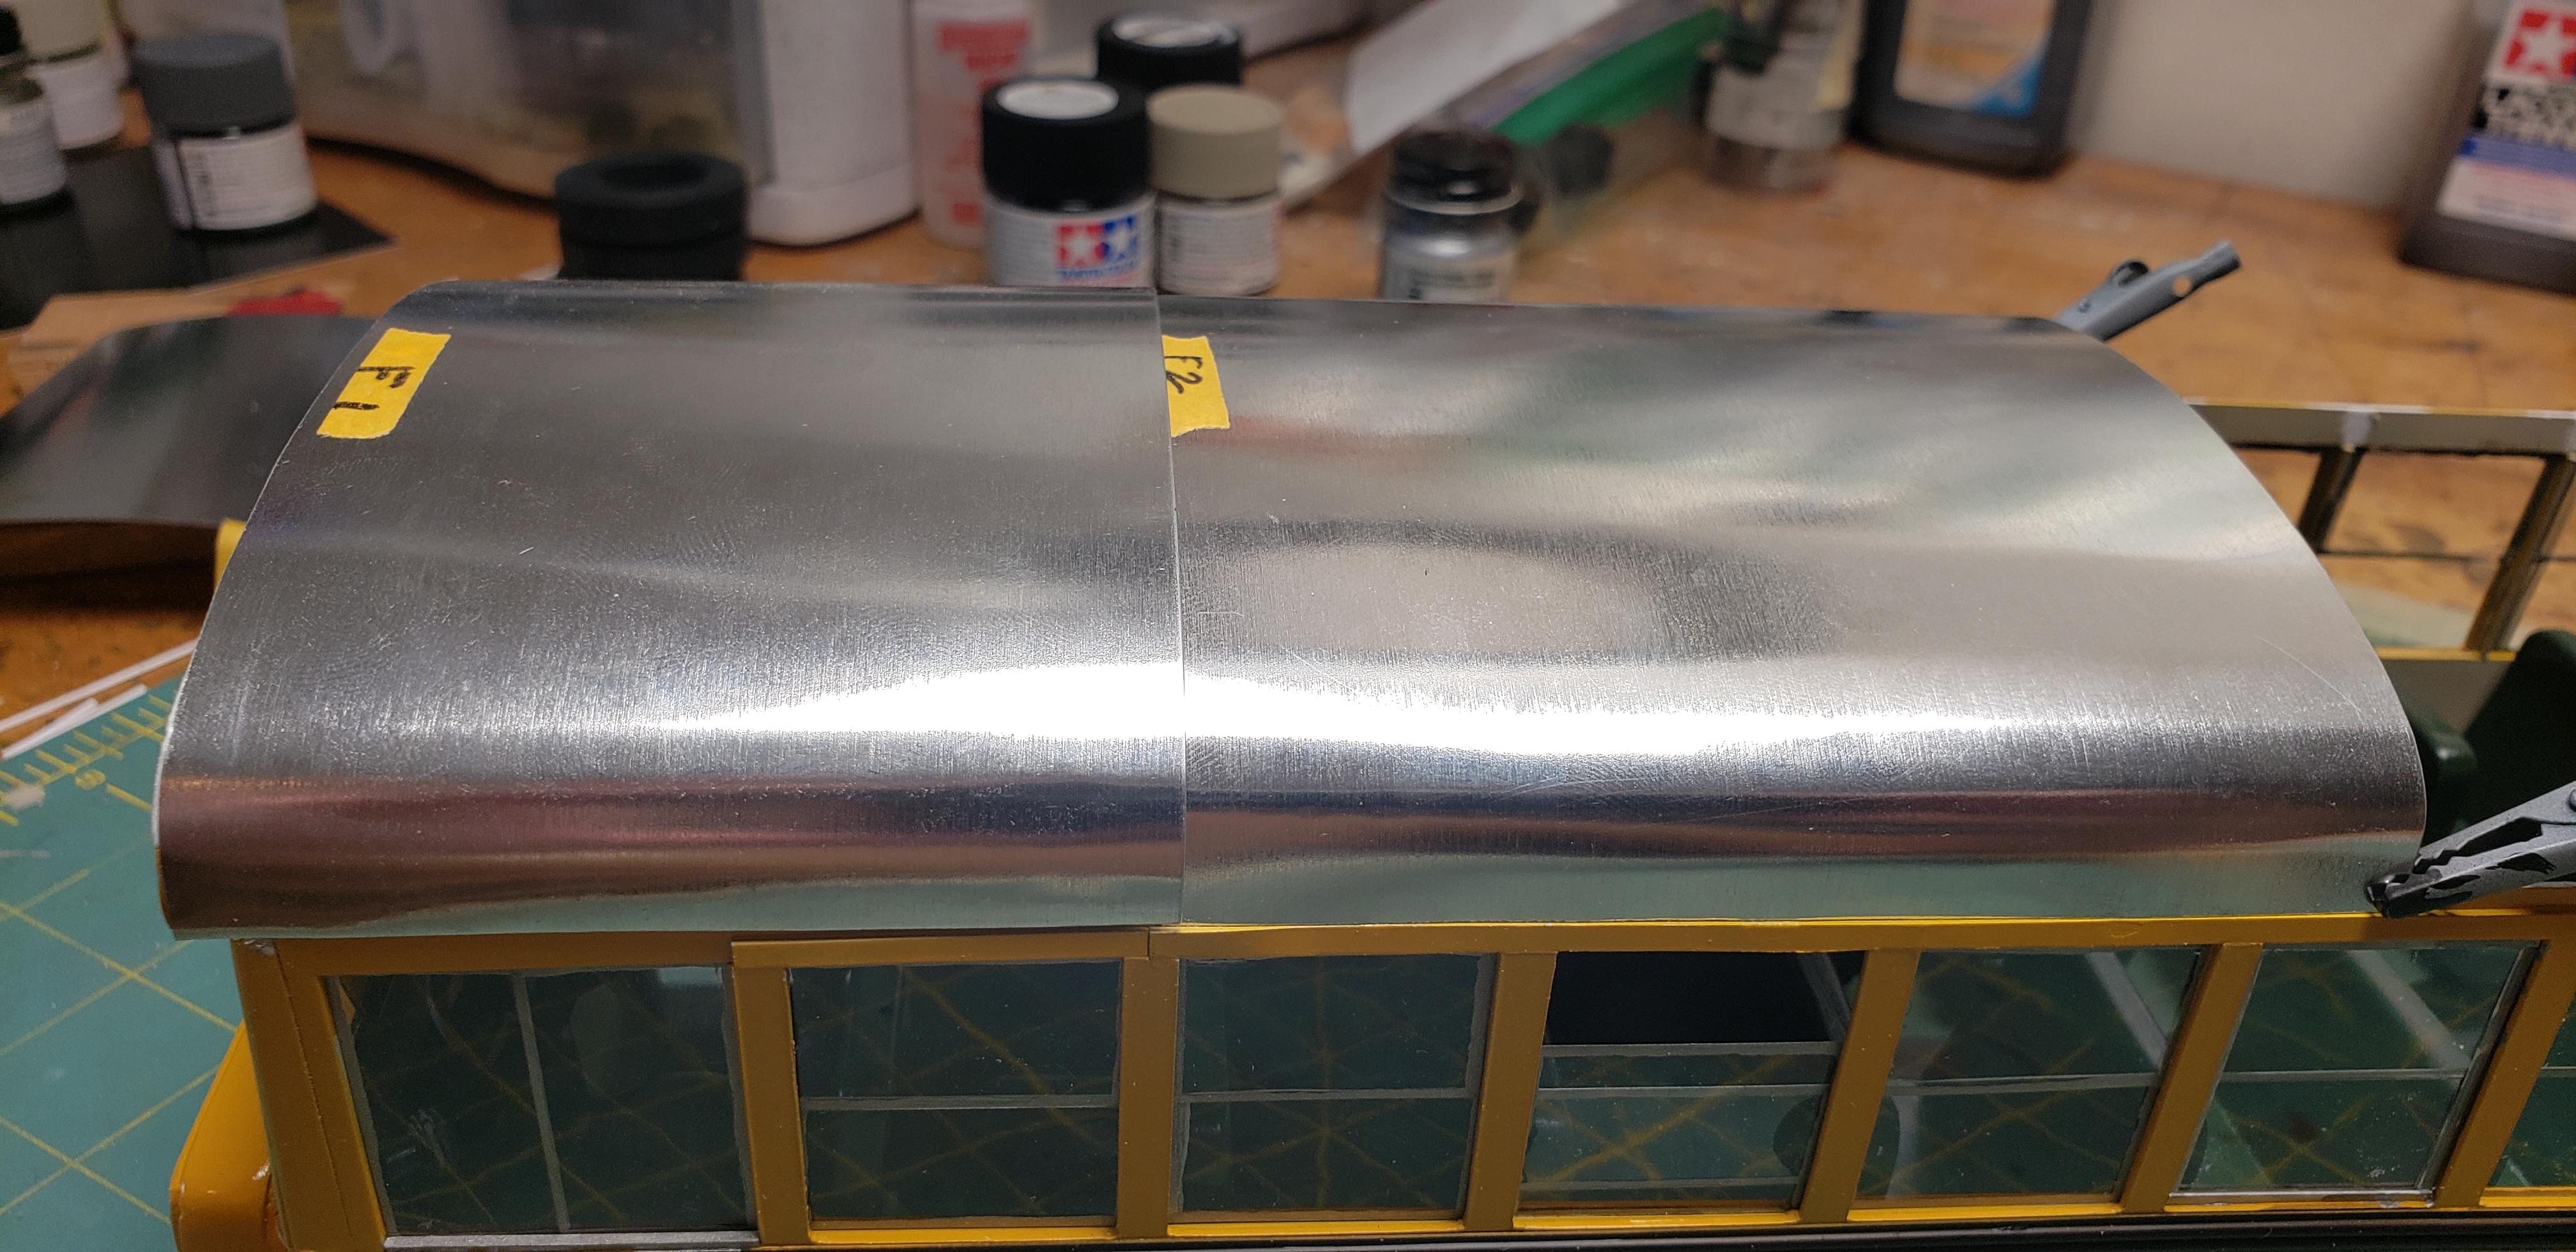
The roof is finally installed in its rough state, but everything handmade statts off that way. I used the old roof as an inner liner, then formed a 2nd over that. The inner keeps the walls tight, preventing the bowing I was dealing with. The inner roof in place , sealed w hvac tape The outer roof installed..ugly now, but will finish up smooth. Once the joints are sanded down, I'll give the entire roof a once over w steel wool to remove any fine marks. Prime and paint will follow
-
Definitely watching this !
-
1969 Peterbilt 359
gotnitro? replied to Needlenosehunter's topic in WIP: Model Trucks: Big Rigs and Heavy Equipment
Nice work so far -
Love these kind of builds !
-
Mack R600 with doubles from Convoy.
gotnitro? replied to White7000's topic in WIP: Model Trucks: Big Rigs and Heavy Equipment
Excellent job -
BRGB Kenworth Alaskan Hauler
gotnitro? replied to k100's topic in WIP: Model Trucks: Big Rigs and Heavy Equipment
Looking good! It tends to annoy me having to fuss around modifying parts to fit, a little more work before offering for sale would yield a better product. -
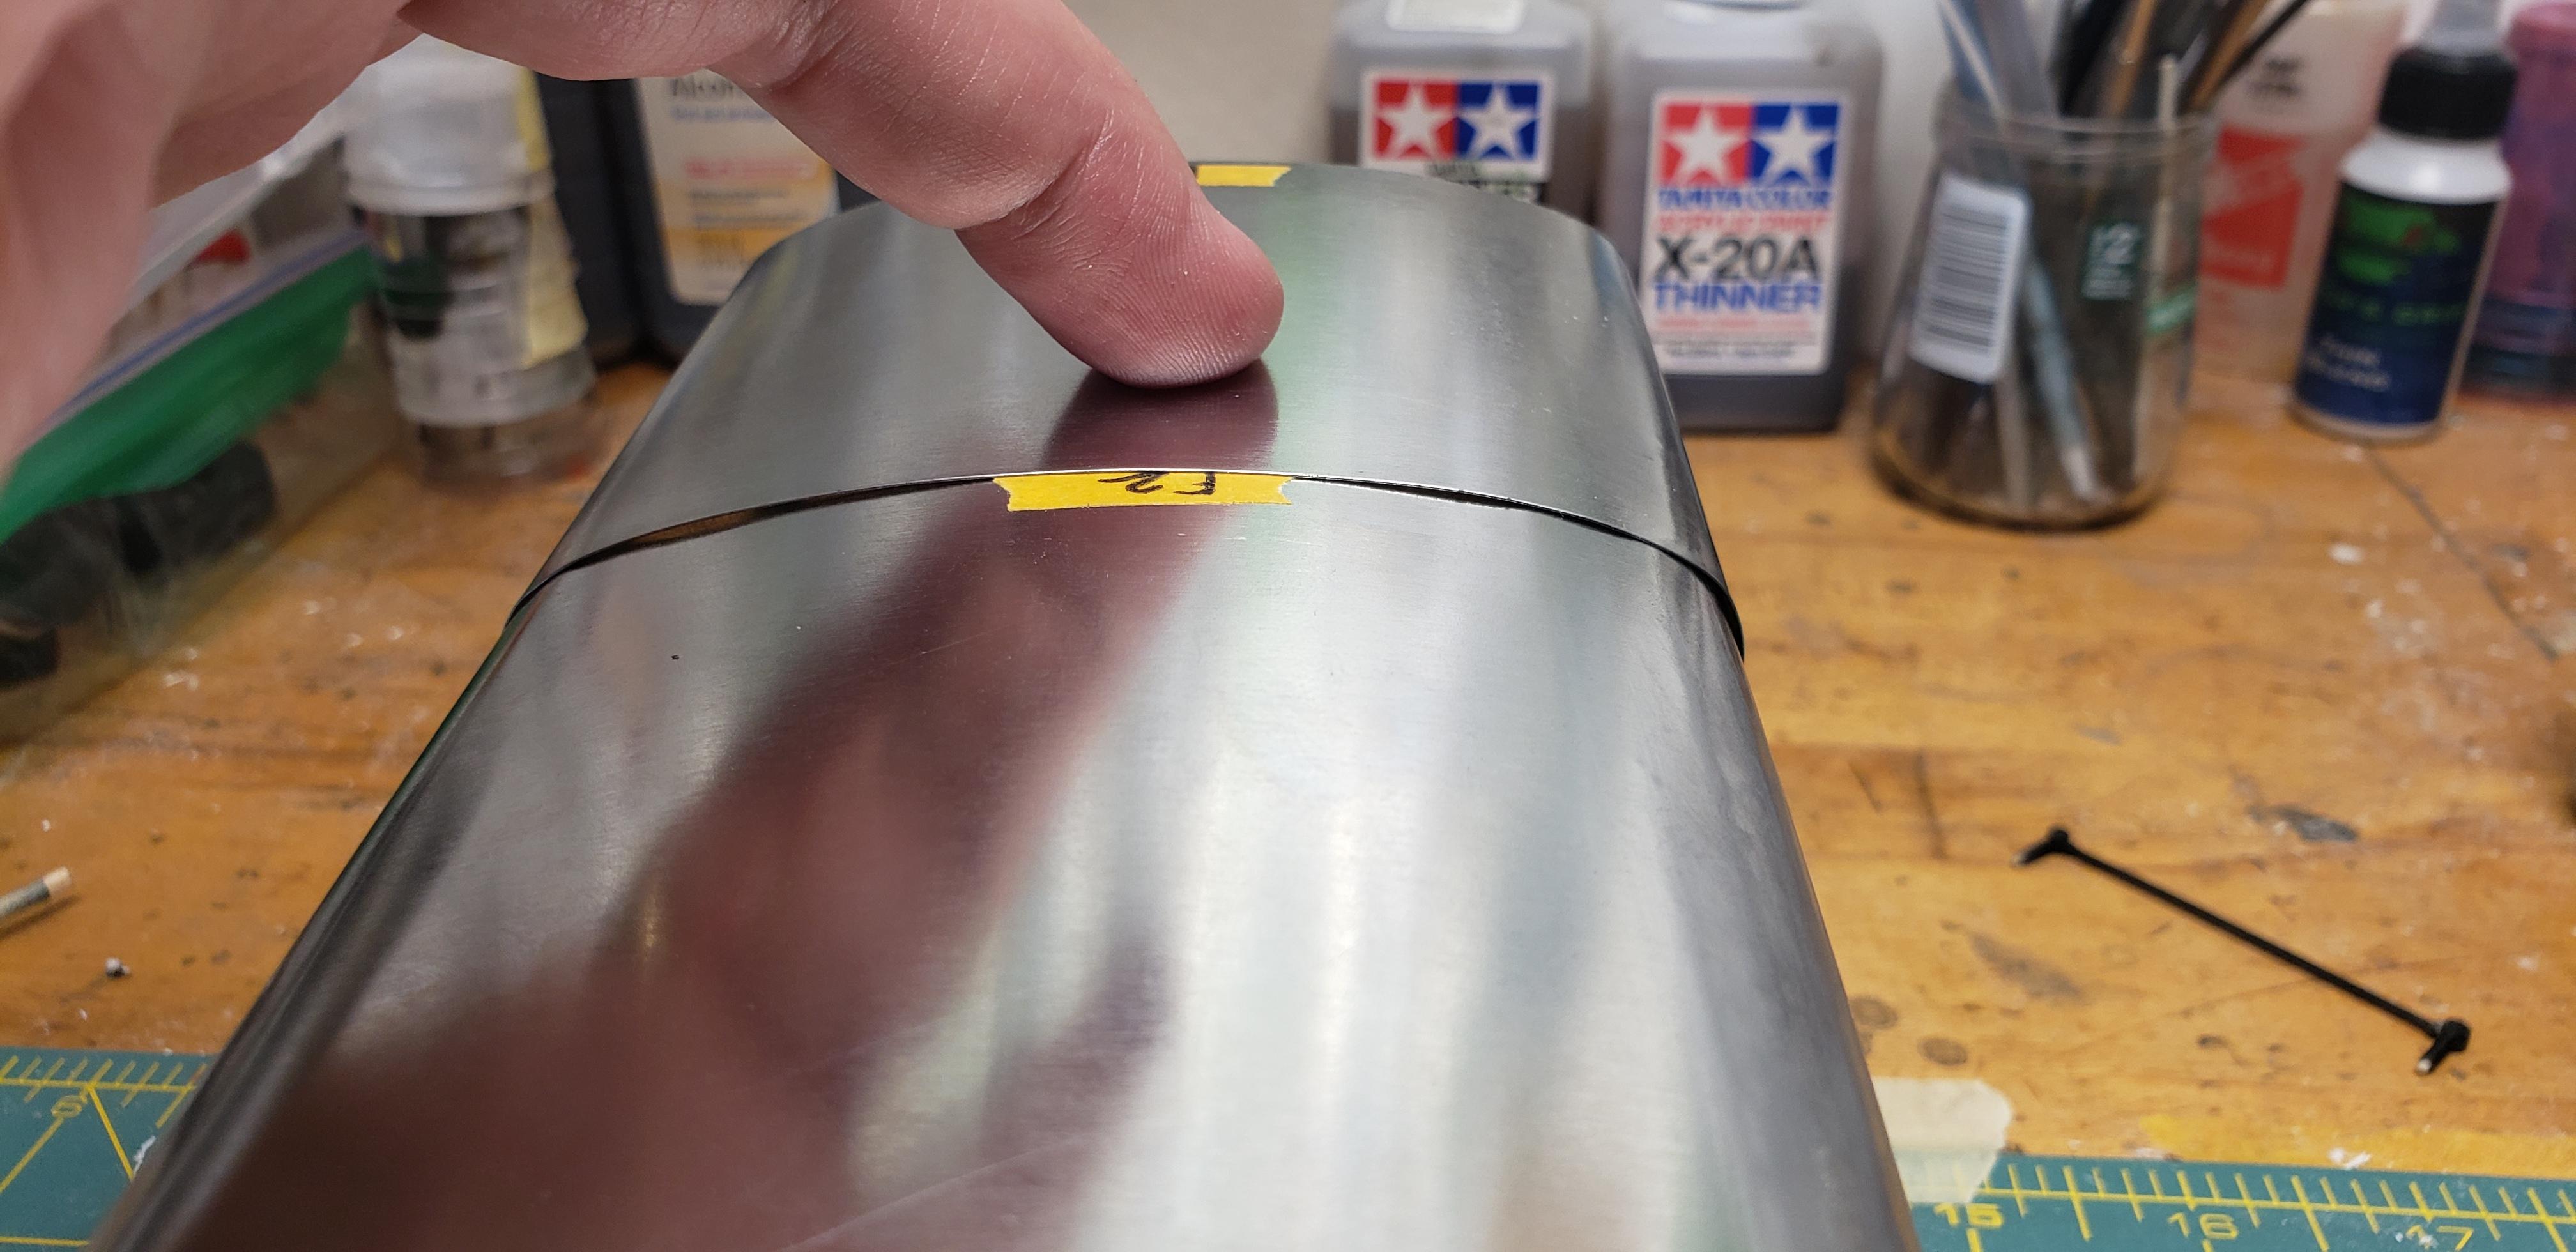
The middle of the roof is bent using a tamiya rattle can. The tighter edges I've been bending using a 1/4 styrene tubing. The tin bends (kinks) very easy, so I'm trying to ease the shape into it. Most of the time its resting on my leg while slowly rolling the edges. I found a neat trick for measuring the width before bending...by using a piece of string to lay over the body. Then transfer that to the ruler! Very little excess after bending
-
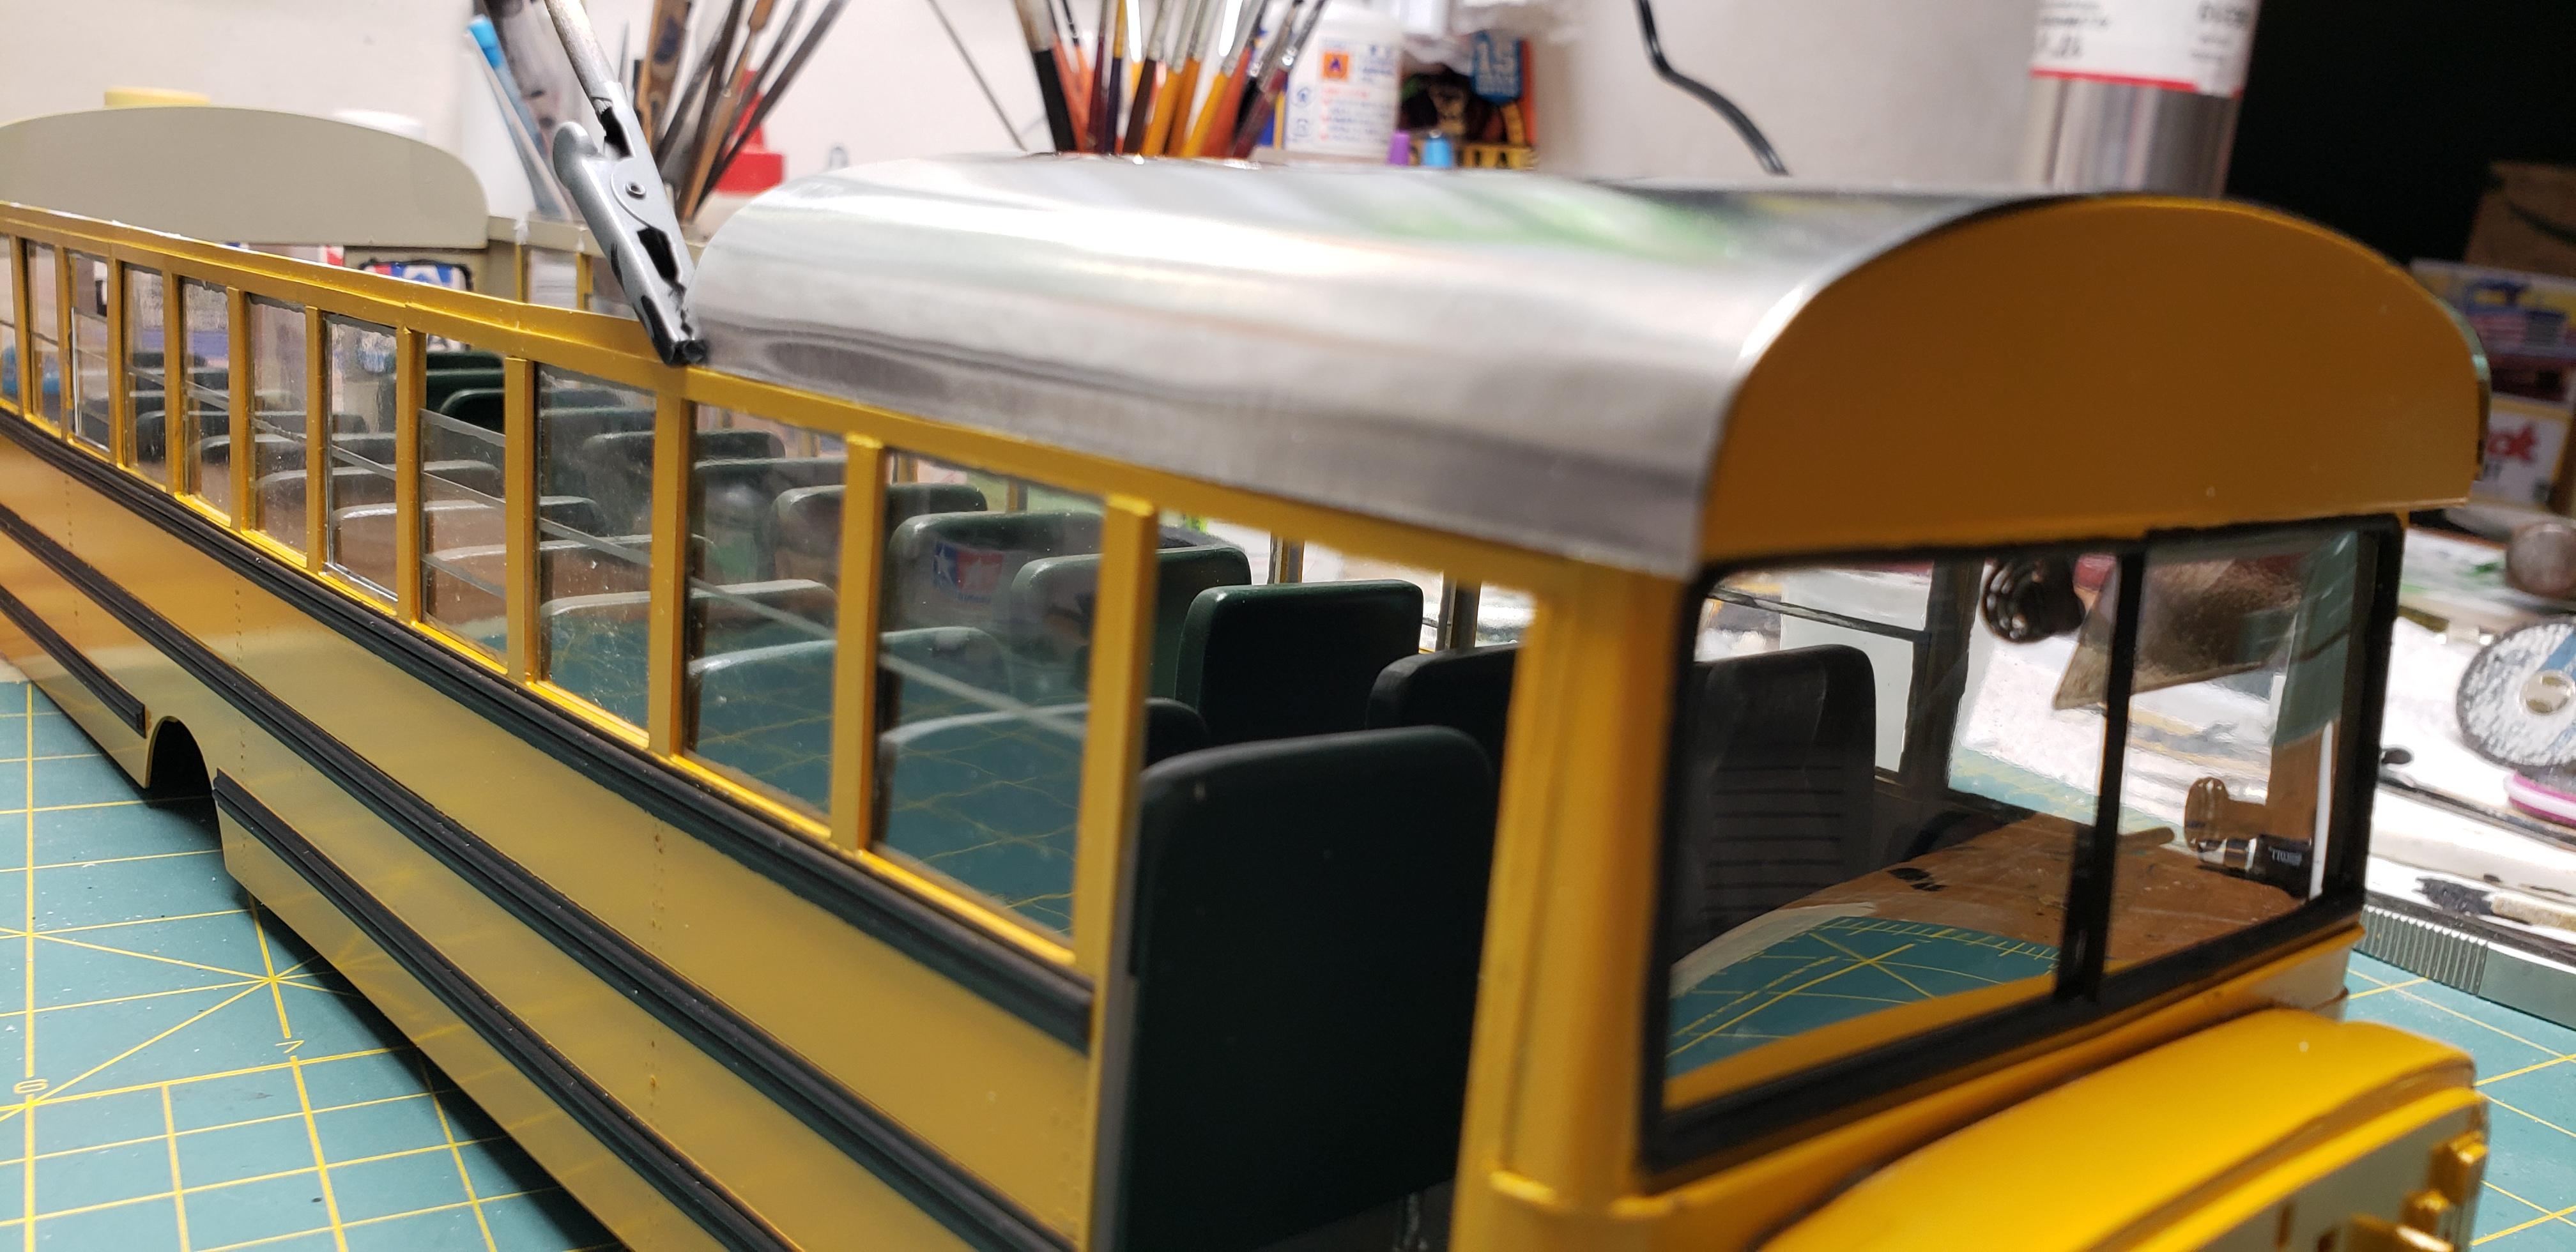
The rear roof went on this morning, and I'm really pleased with how tight it fit. The middle section is underway. I wanted to finalize the shape, but had to take daughter out delivering girl scouts cookies..yummy I want all the panels to end at a window frame, then after paint apply the Archer rivets Any feedback welcome!
-
Haha guess I forgot about those. These will end up squared off oops I had both options, the tin is working well. @DRIPTROIT 71- thanks ! Having a couple windows open should keep temps down too
-
Finally building mr rollback
gotnitro? replied to ncbuckeye67's topic in WIP: Model Trucks: Big Rigs and Heavy Equipment
Nicely done so far -
Excellent work! We had a 71 Cutlass Supreme convertible a few yrs back, you've nailed the engine bay
-
Looks great after the repaint !
-
2023 BRGB TRIAXLE FREIGHTLINER WRECKER
gotnitro? replied to Dutzie's topic in WIP: Model Trucks: Big Rigs and Heavy Equipment
Nice work on the tool boxes -
Thanks Dan , the ribs were an ugly mess. I'll keep pecking away at the tin @peteski- no idea about thermal reactions.
-
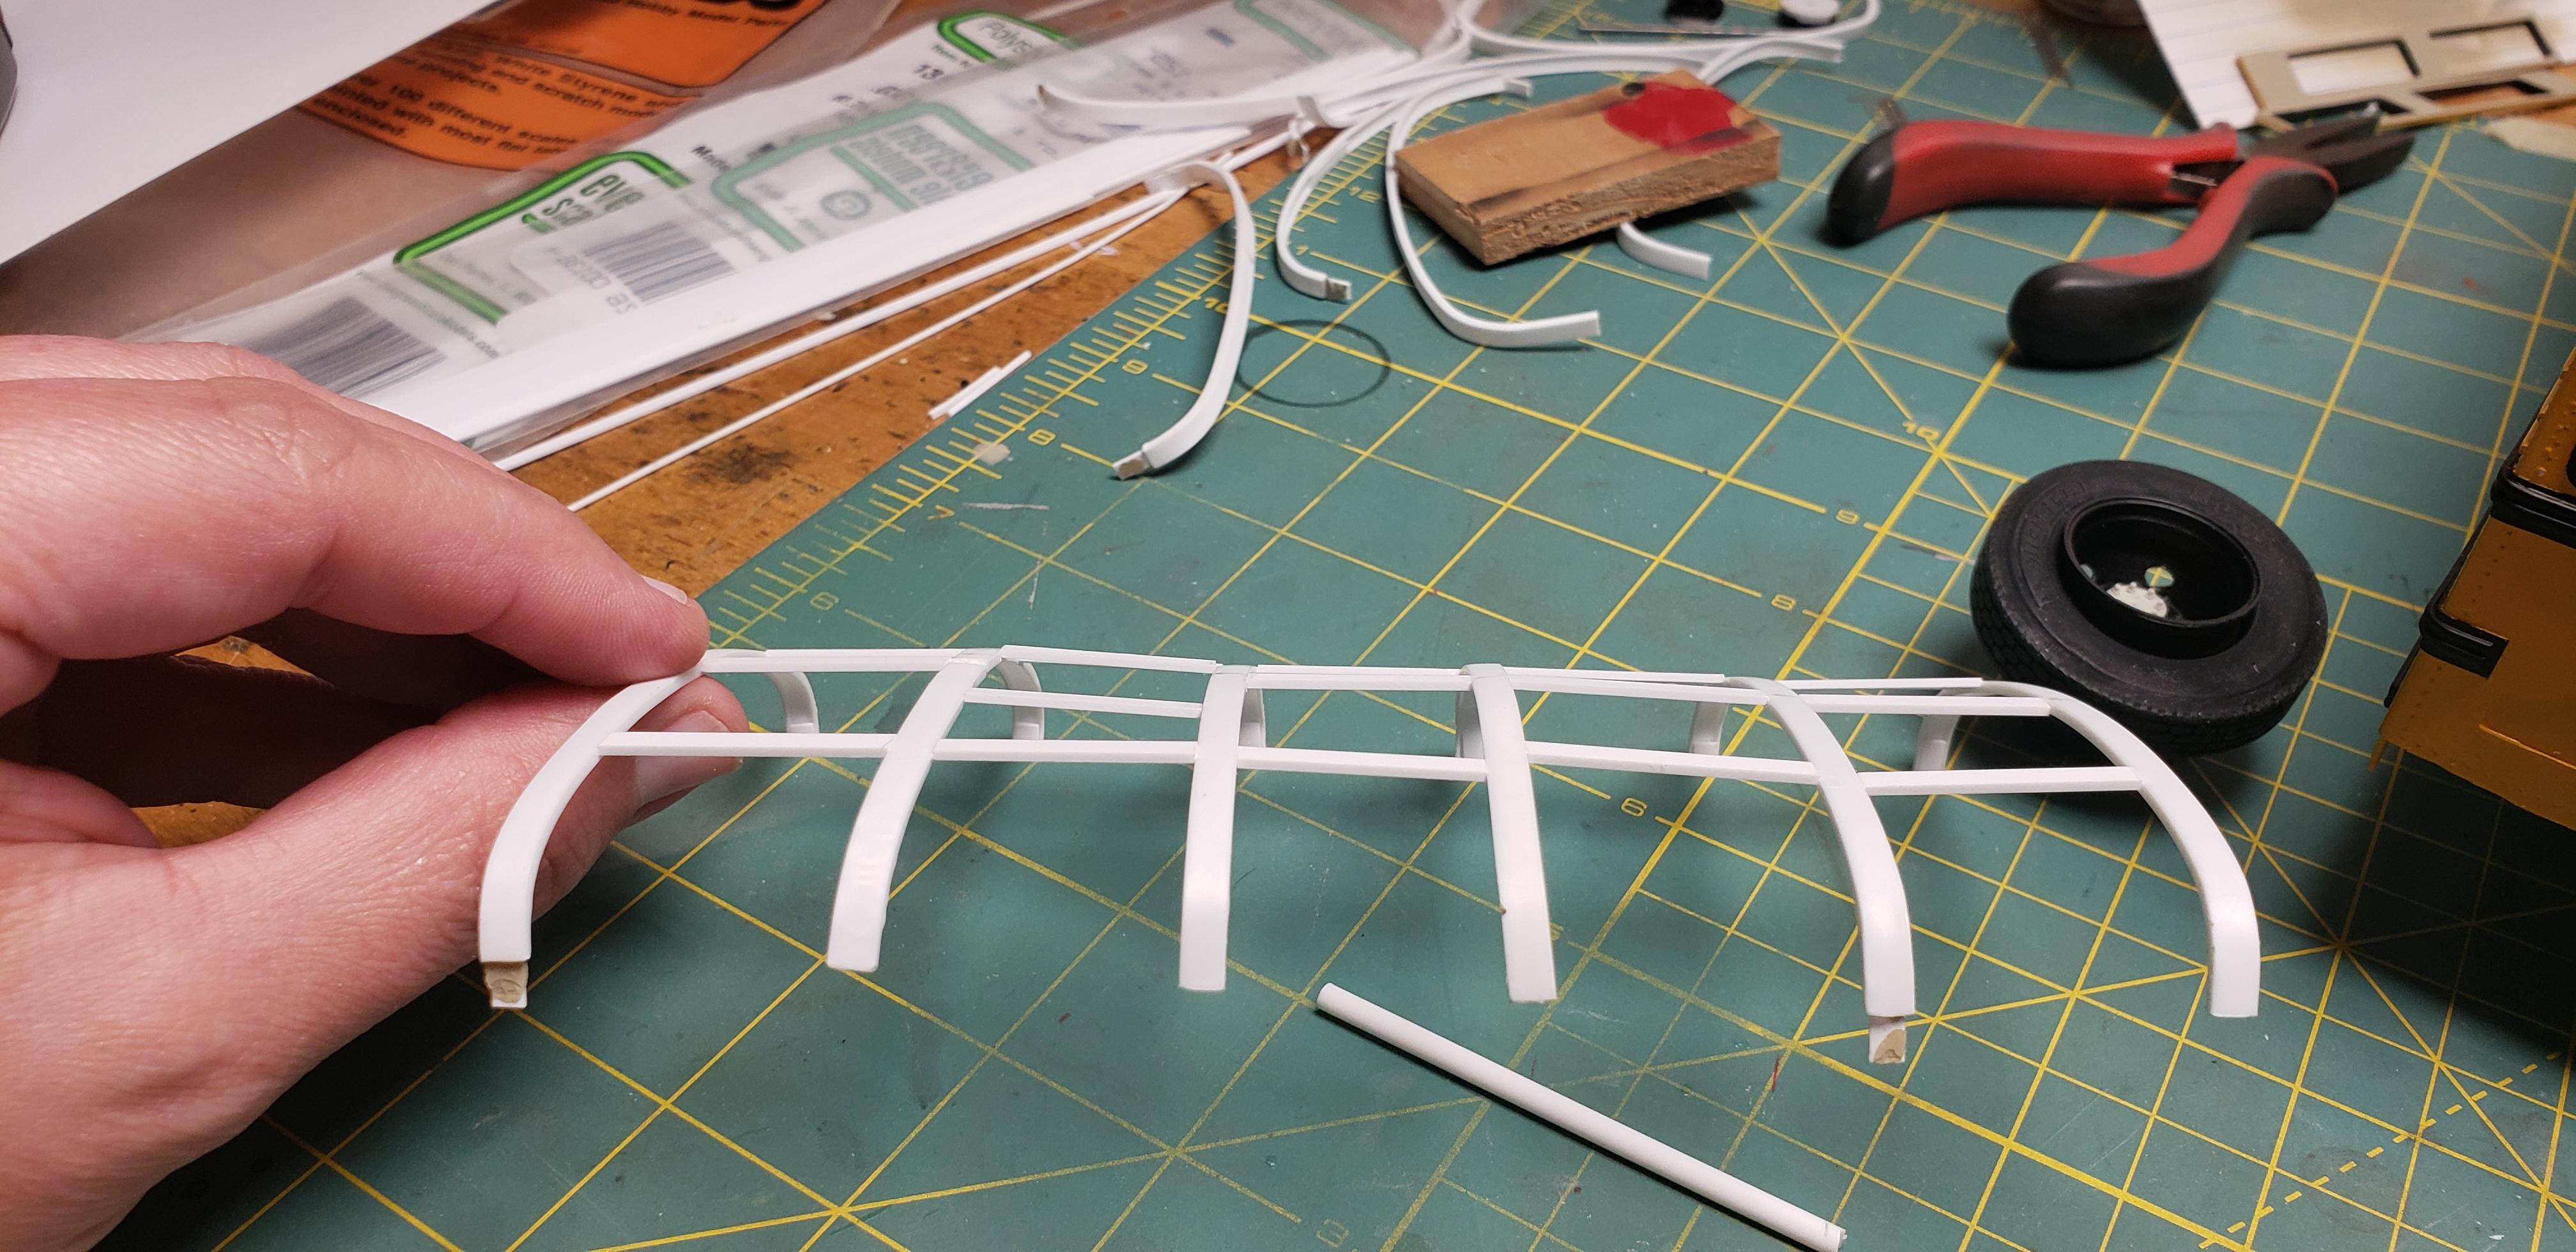
I finally found a method for the roof that seems to work. My plastic ribs didn't work out being uneven, so a tip was suggested about metal flashing. KnS sells thin tin sheet, so I thought I'd try it. This is just a guinea pig test piece, but looks promising. Here's what my attempted ribs looked like..so embarrassing . Even using a jig to create them, every one was slightly different