Straightliner59
-
Posts
5,725 -
Joined
-
Last visited
Content Type
Profiles
Forums
Events
Gallery
Everything posted by Straightliner59
-
 That steering is outstanding! Excellent work, Andy.
 -
Nice! I have most of them, but not all. Loved that magazine!
-
67 Camaro B&R Performance C/SM
Straightliner59 replied to Nitro330's topic in WIP: Drag Racing Models
It's coming along, nicely, Terry! I was always a fan of Modified Production, but, I think I recall reading, somewhere that it went away when Super Modified came about. -
Thanks, Ian! Like we were talking about, the other day, about doing things over--it took tries with three different materials, and then several to get the seam and the size right, once I'd decided on the trash bag material. I appreciate your comment!
-
Anyone know who made this?
Straightliner59 replied to redscampi's topic in Model Building Questions and Answers
I still have a few of their parts. I really like their spark plugs, for Flatheads or DOHC stuff. I have maybe enough left to do three engines. I have most of one of their 350 engines, a couple of starters, oil filters and a couple of HEI distributors. The best, though, I have one of their dropped tube axle front suspensions. I never did get one of the chassis kits, though. -
Beauty, eh?!
-
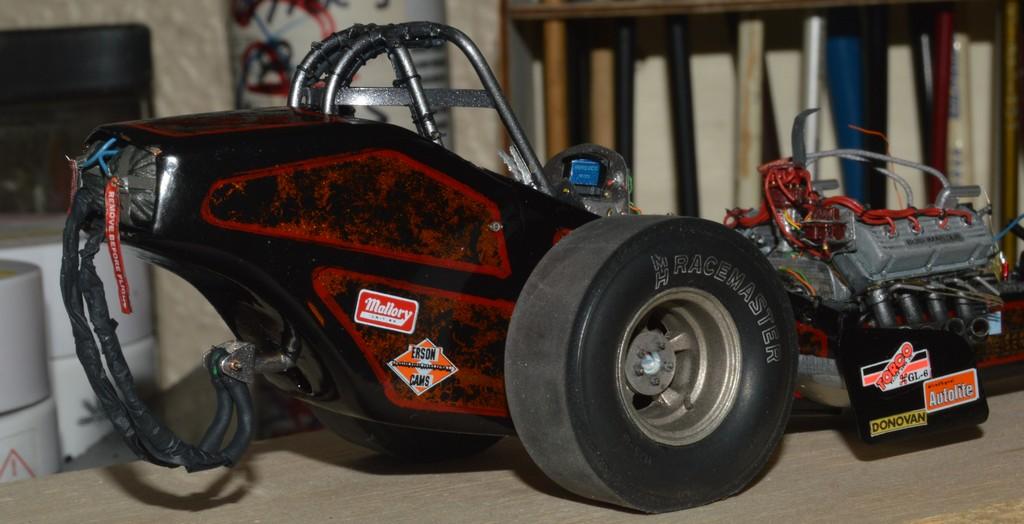
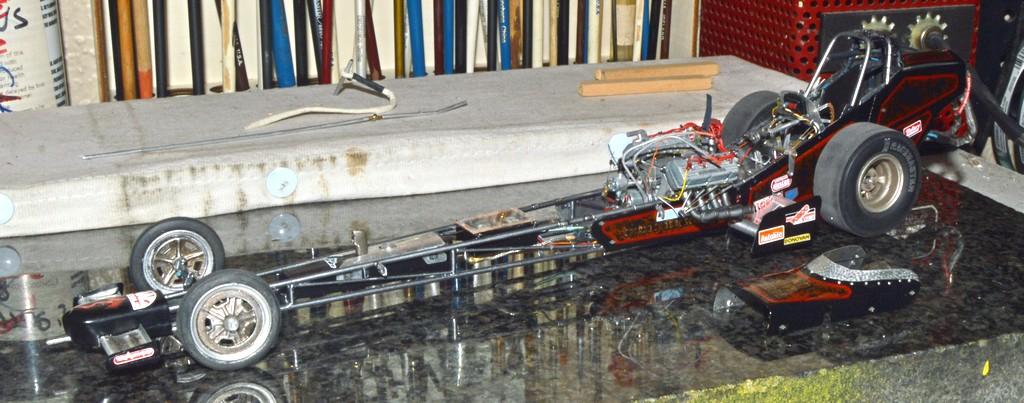
Chutes: It took me a few days to figure out what to use for the sheathing for the canopy lines. I wanted to replicate the look of the 1:1 'chutes, below. I didn't like the previous set of them, because they just looked too bulky, to me. What I ended up doing was to cut strips of black garbage bags, and fold them over, then seal the edge with the flame from a lighter, creating a tube of ultra-thin black plastic that could be slipped over a length of thermostat wire. Before that installation, I stripped about 5/8" of insulation from one end of the wire. I cut that bit of insulation roughly in half. I then flattened the exposed copper wire. I wasn't nuts about the result I got with my bench vise, so I used a chasing hammer, on the anvil. The purpose for this step is to create a neater, tidier-looking assembly. I then slid one of the short lengths of insulation over the now-flattened copper wire, until it was centered on the bare wire. I then looped the t-stat wire, at the point where the newly-installed insulation sits, careful to align the two bare segments of wire with each other. Next, I slipped the trash bag tubes over the thermostat wires, and slid a piece of heat-shrink tubing to the point you see in the photos. Once the tubing was shrunk, I taped over the heat shrink, and shot Tamiya Tire Black lacquer over the assembly. Great news! It dried, and hasn't begun to flake off, in spite of some rough handling! So, that's that. Comments, questions and critiques are always welcomed. Thanks for looking!

-
You are so correct, Ian. I often think that a big part of being a decent modeler is to be willing to do things over. I also think that, if you have that willingness, you're a little less afraid to try a new method, to solve a problem. Thanks for your kind words, my friend!
-
’72 Dodge Demon Drag Racer 1/25 scale
Straightliner59 replied to AmericanMuscleFan's topic in WIP: Drag Racing Models
I am just going to say "Wow!", and leave it there, for now! -
I've heard that the S/C Rambler chassis works for this body.
-
I have bought from him, too. Probably a couple of times. No issues at all.
-
Look through here: https://www.fireballmodels.info/ He has some Carter carbs. If he has the Thermoquads, they'll be as good as you'll find. His stuff is gorgeous!
-
I've been buying re-sharpened carbide drill bits in lots, lately. I just received almost 200, in usable sizes (100 are #74 bits) for right at $25, shipped. At that price, you almost have to!?
- 38,843 replies
-
- 3
-

-
- johan
- glue bombs
- (and 1 more)
-
Yes. Sometimes the stuff we liked, before, suddenly doesn't seem quite good enough!?
-
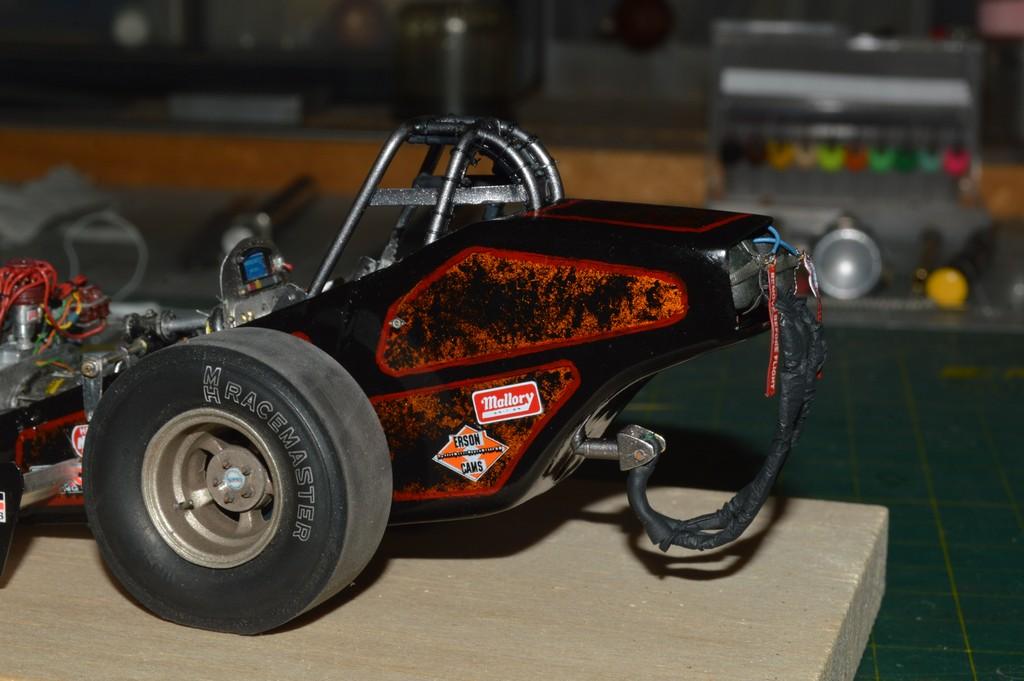
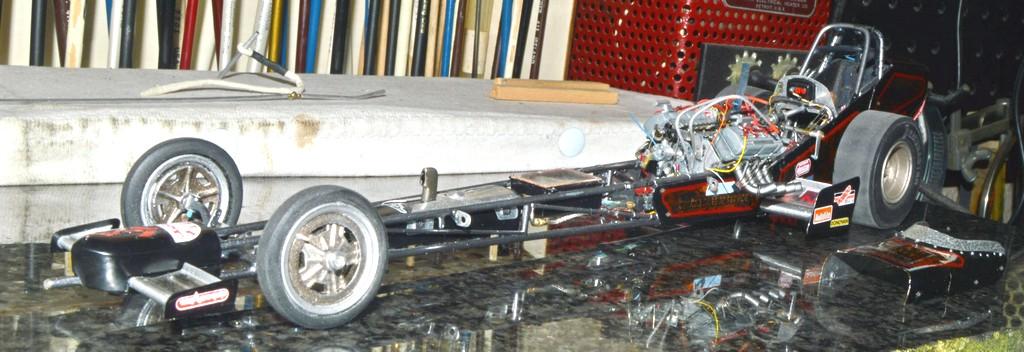
Working on more details. I didn't like the ball valve drain I had, originally. It was a brass model railroad casting, and was just kind of "lumpy"--not really defined. I made a new one using 1/32" and 3/64" brass tubing and a watch hand for the lever. I painted the handle blue, to represent a rubber-coated surface. I added some Strange tags to the rear axles. i am not very happy with the way they turned out, so I will likely print another set. I hand-painted a gold (Humbrol Brass, actually) outline on the arrow on the front of the car. I really felt it would set it off, nicely. It became one of those "just gotta go for it!" moments. I'm pretty happy with it! I'm currently finishing up the 'chutes and lines, after making a new bracket and new canopy lines--which may be happening, again. The bracket is fine, but I'm not satisfied with the sheathing for the cards. Anyway, as always, your comments, questions and critiques are always welcomed. Thanks for looking!
-
Billy the Kid Demon Pro Stock
Straightliner59 replied to dragcarz's topic in WIP: Drag Racing Models
Those things are never easy to fit! Trial and error is the only way to do it, that I know of. -
Billy the Kid Demon Pro Stock
Straightliner59 replied to dragcarz's topic in WIP: Drag Racing Models
That's a good call, I think. Springs and shackles would almost certainly be visible, here. Your tubs look great!
-
Billy the Kid Demon Pro Stock
Straightliner59 replied to dragcarz's topic in WIP: Drag Racing Models
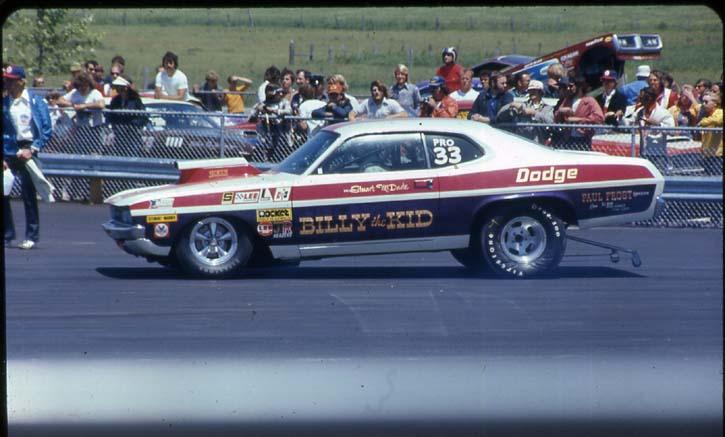
I have Hot Rod Yearbook #11. It has an article in it called "Pro Stocker Parade", it shows all of the following Mopars with leaf springs: Vanke Duster, Lambeck Dart, Leal Duster, John Petrie 'Cuda, Motown Missile Challenger. They seem to be more common than the coil overs. -
Your most difficult kits
Straightliner59 replied to T-Ray's topic in General Automotive Talk (Trucks and Cars)
And you accomplished it, beautifully! I'm not necessarily impressed by large-scale stuff, but your Fiat is fantastic! -
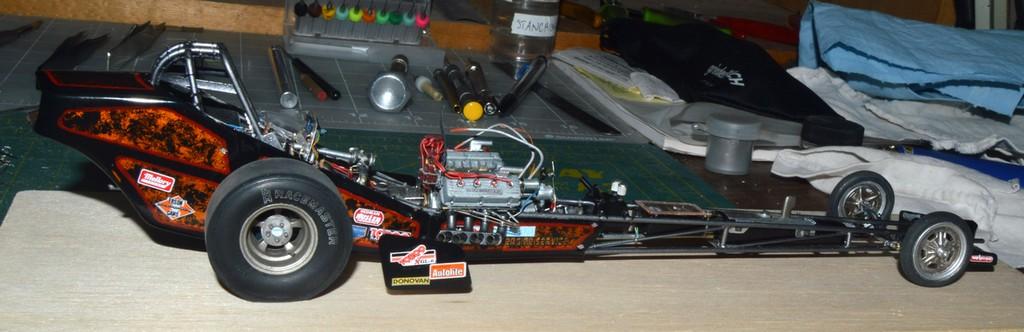
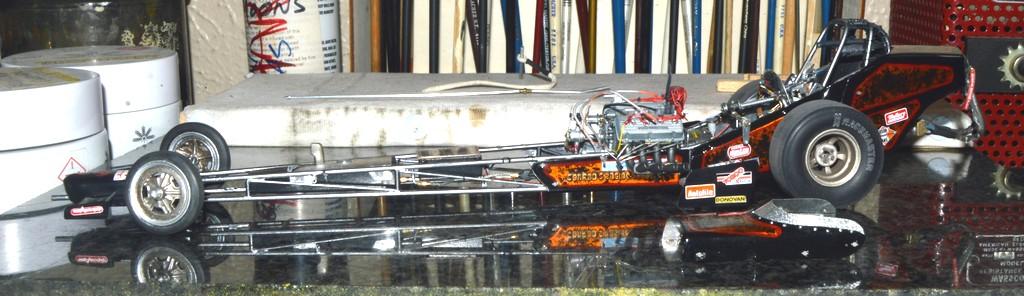
This is where she sits, now. Wings (airfoils) and wheels and tires are on the car! Except, I just noticed something that needs fixing, thanks to these photos. This is kind of a big day! Along with a couple of the very earliest photos I have of the car, for comparison. Thanks for looking!
-
Very cool! Congrats on that win! That was a very competitive contest, back then--one of the big ones.
-
Loosen the lid on Testors enamel square bottles.
Straightliner59 replied to R. Thorne's topic in Tips, Tricks, and Tutorials
That's why I have a valet!? -
’72 Dodge Demon Drag Racer 1/25 scale
Straightliner59 replied to AmericanMuscleFan's topic in WIP: Drag Racing Models
I say, "Whatever gets you there!" The result is all that really matters, beyond enjoying what you're doing. I'd say your results speak for themselves, my friend -
I'll say it! This is actually looking rather promising!?
-
’72 Dodge Demon Drag Racer 1/25 scale
Straightliner59 replied to AmericanMuscleFan's topic in WIP: Drag Racing Models
Very nice work, and a great idea for doing the rad-wall! You're a wizard with the styrene, my friend! Congratulations.