Straightliner59
-
Posts
5,809 -
Joined
-
Last visited
Content Type
Profiles
Forums
Events
Gallery
Everything posted by Straightliner59
-
 Your plumbing's looking great, Ian. I've been meaning to ask--which scale do you prefer working in? I can see advantages and disadvantages to both larger scales, and 1/25th. I don't think I'd ever complete a 1/12th model, because I would never feel like I could stop adding stuff!? This is going to be an incredible piece, my friend.
 -
1969 Nova F/SA NHRA Stock Eliminator
Straightliner59 replied to R. Thorne's topic in WIP: Drag Racing Models
I'll be watching this. I've developed a greater love for door cars, over the past few years. -
'27 Turtledeck T dry lakes racer
Straightliner59 replied to Rocking Rodney Rat's topic in WIP: Drag Racing Models
Love it! Great work! I've often wondered why dry lakes and salt racers aren't in this forum. It makes sense, to me--they're all straightline racers. -
I took some photos, as I was doing them. I intend to post them, when I have the time to do it properly. Thanks!
-
The fit of the floor is excellent. Some fine scratchbuilding, Ian.
-
Looking great, Marcos. It's really coming along!
-
Revell 29/30 Ford A kits. Extra Tires?
Straightliner59 replied to stavanzer's topic in Model Building Questions and Answers
No, no. They've showed us how they want us to do it, and we must conform! ? -
Washes and Weathering
Straightliner59 replied to bluestringer's topic in Model Building Questions and Answers
That's nice! I've always loved the 35Bs. I have the Monogram kit that I plan to "doctor up", one of these days. Beautiful work, sir! -
1/25 scale 10" 1960's slicks
Straightliner59 replied to ColonelKrypton's topic in Model Building Questions and Answers
I thought AMT had done a couple in their parts packs, but the Goodyears are 9" and the M&Hs are 10.5. -
Scratchbuilding-Where to begin?
Straightliner59 replied to olschoolkid's topic in Model Building Questions and Answers
I concur with Ace. I will say, however, that it's impossible to know what materials you'll need, until you've a specific project, in mind. For starters, I'd recommend getting an assortment package of Evergreen sheet (if they still sell those). With sheet, you can easily cut strips, rather than try to anticipate what stock you'll need. It's also handy to keep in mind that, in 1/25 scale, .040" is equal to 1". Extrapolating from there, it's a breeze to determine what size(s) you'll need for a specific project. An assortment of rod, tubing and strip will also be useful. I've attached a very simple scratchbuilding project I put together for an old website. It can help you get a feel for it, without grinding your teeth, to nubs. I scratchbuild a ton of stuff--that's the most enjoyable aspect of the hobby, for me. I'd rather build something, than scrape a bunch of mold lines! But, that's just me! I'm happy to help, in any way I can.
-
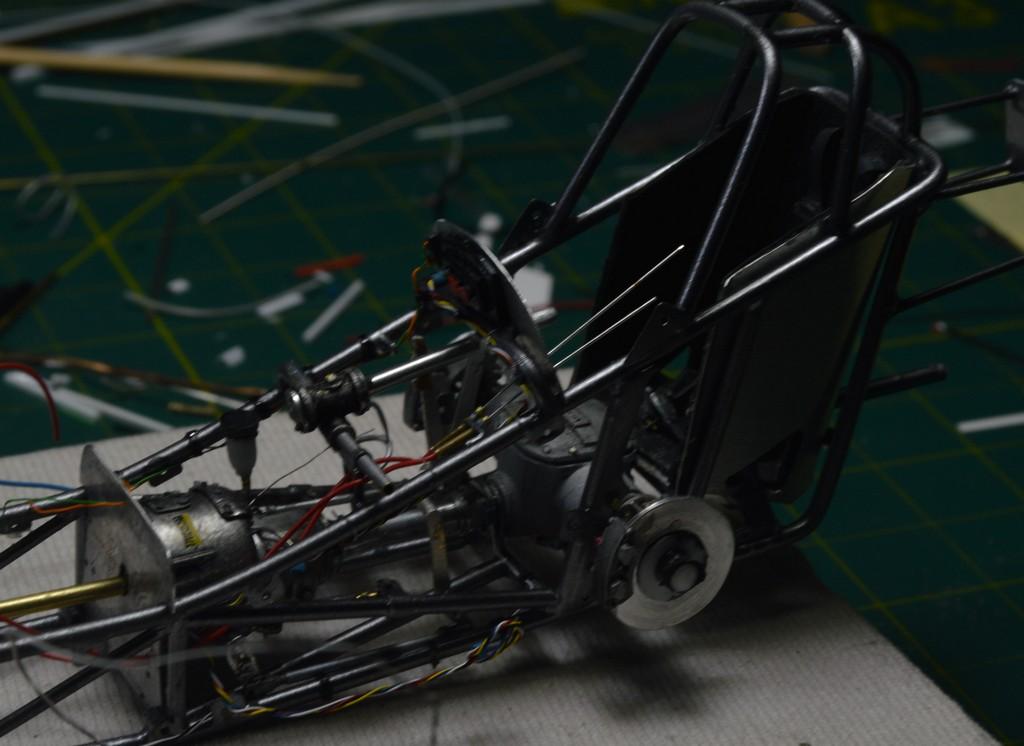
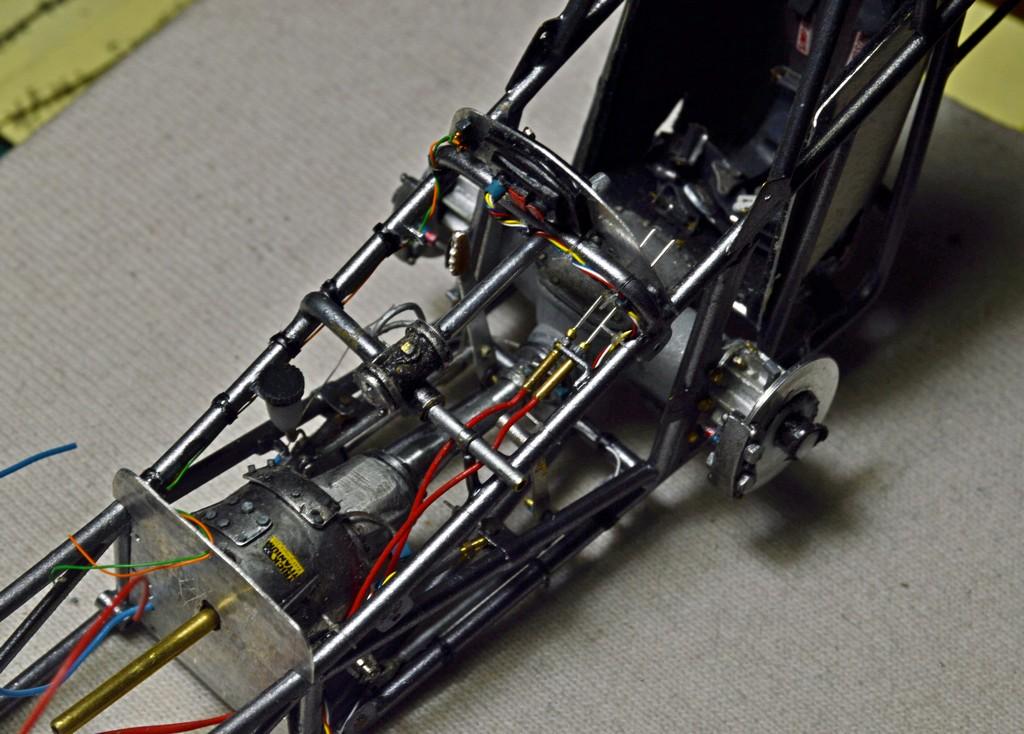
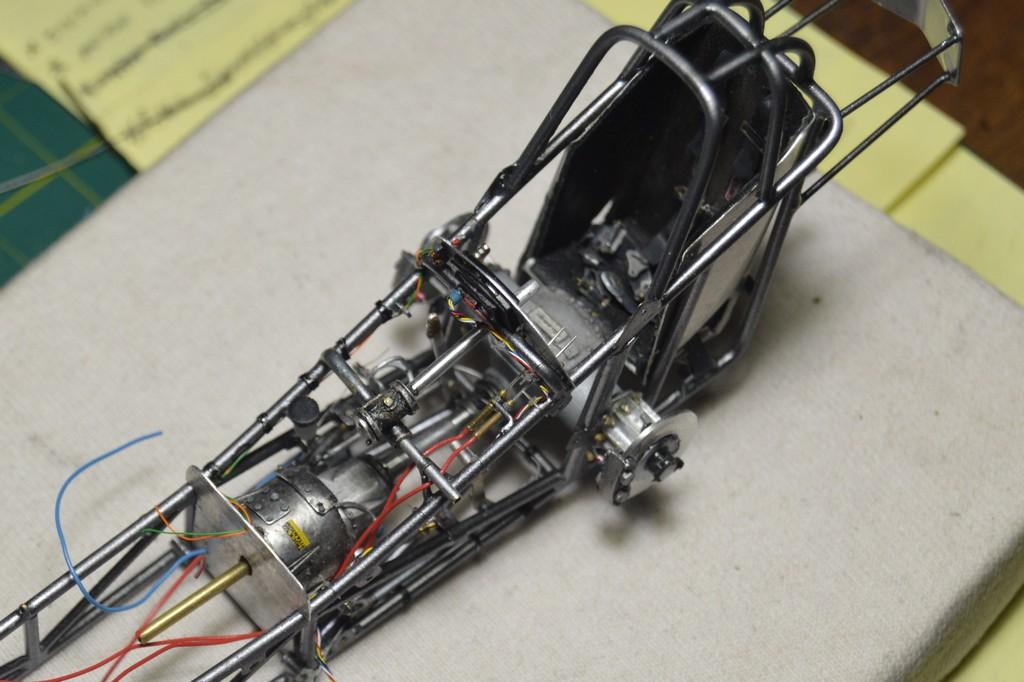
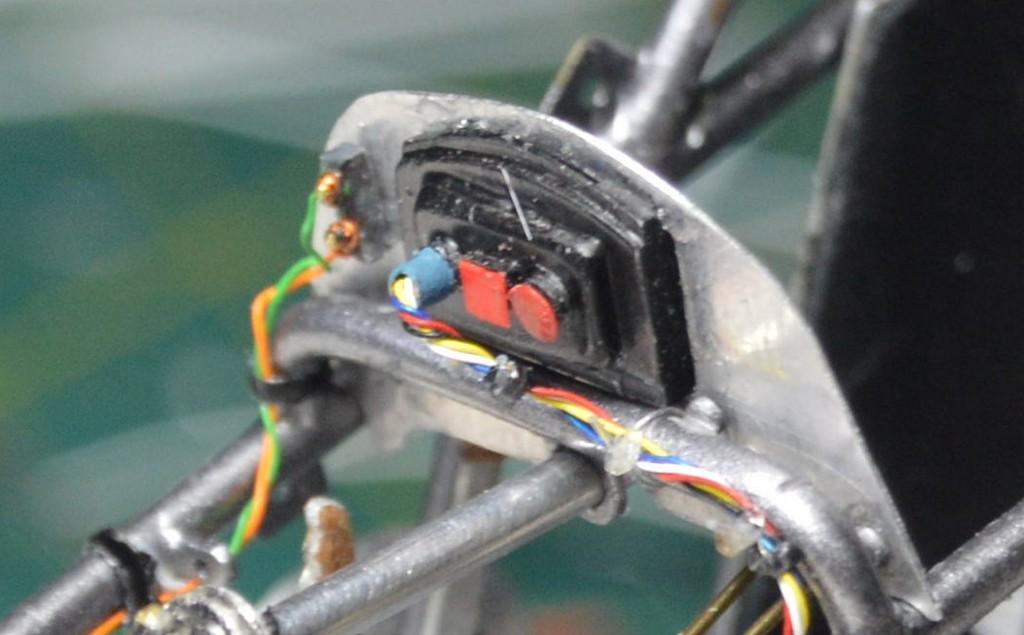
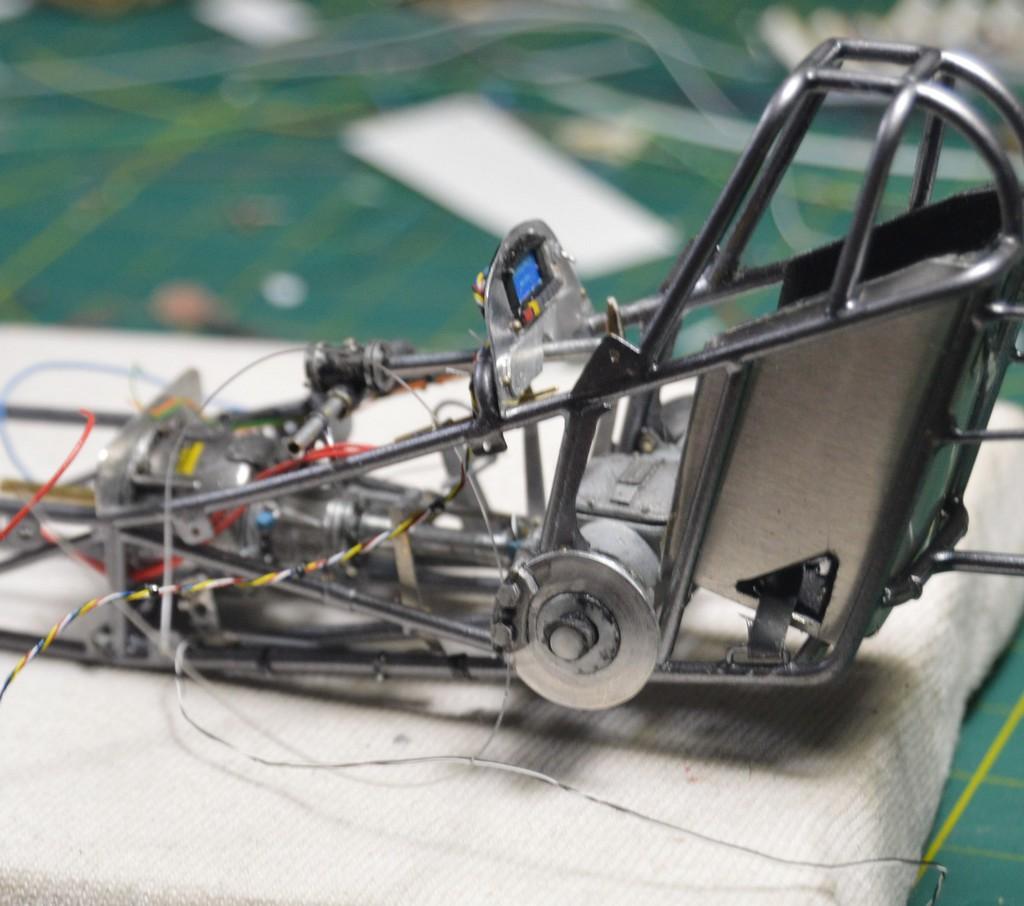
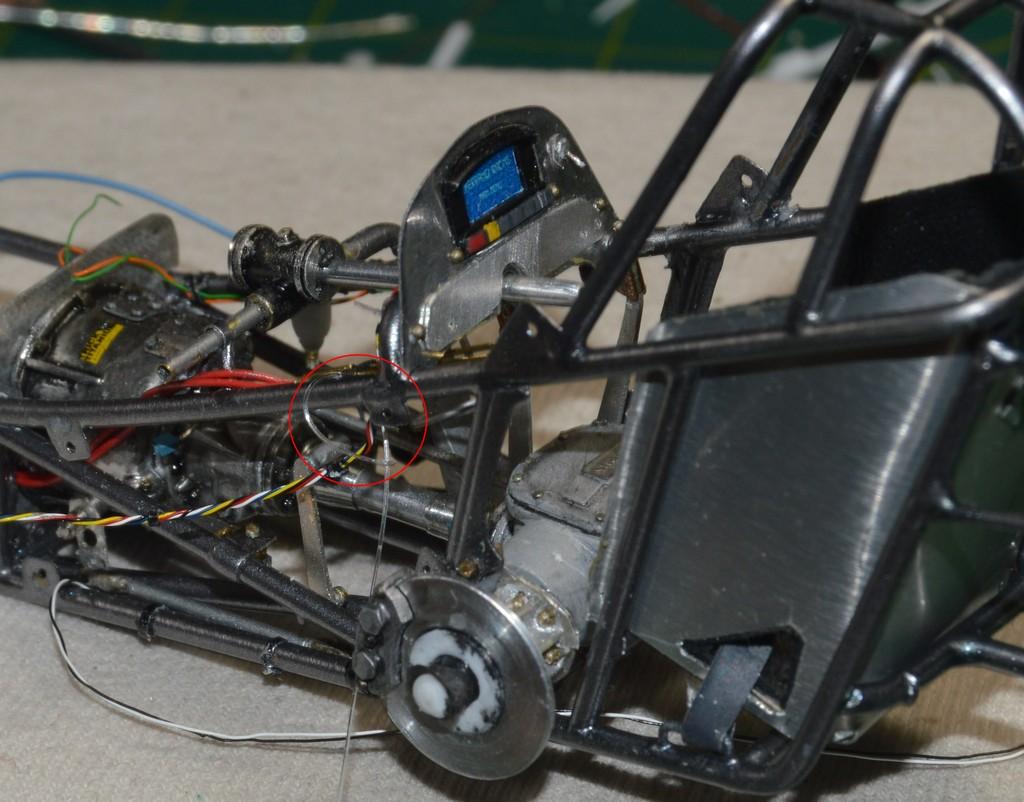
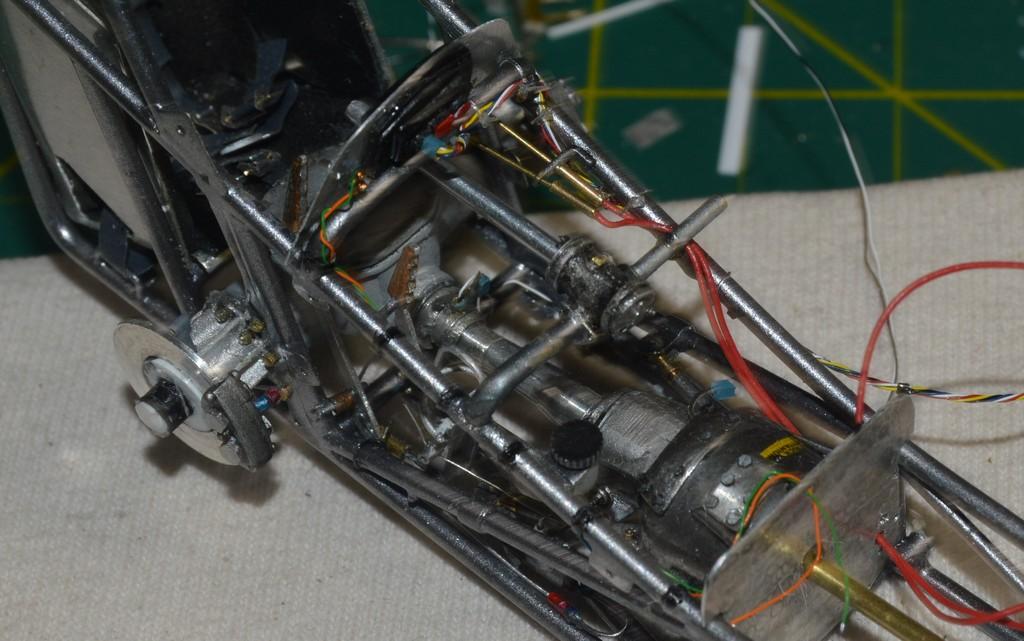
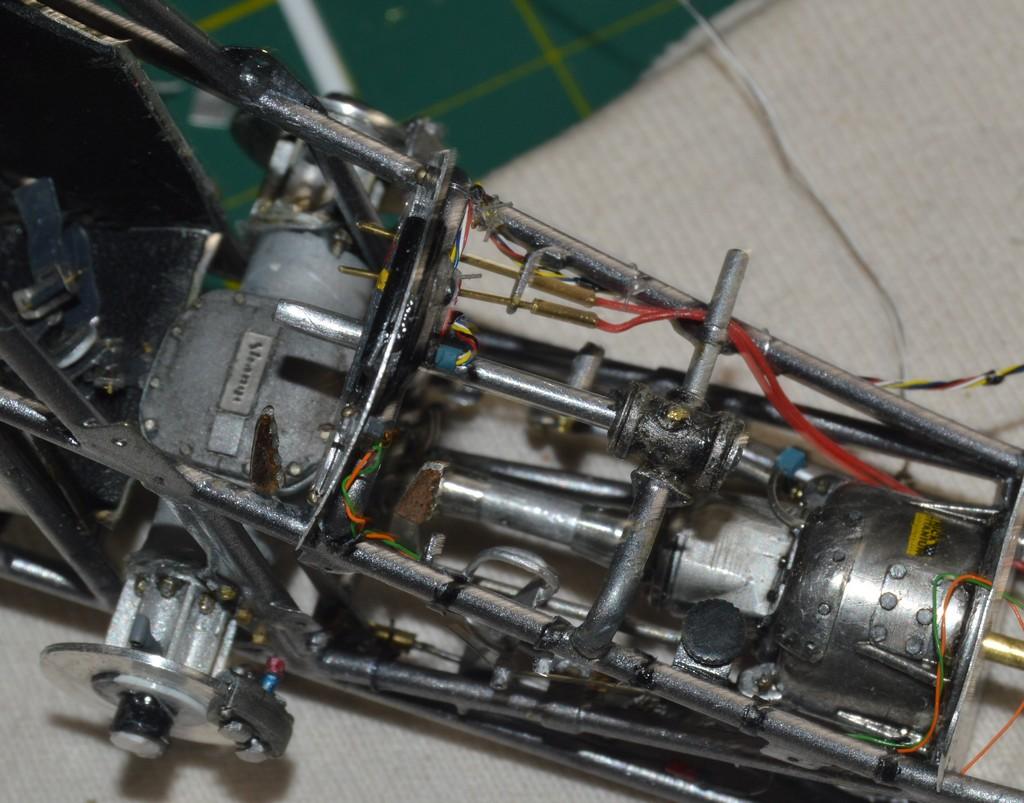
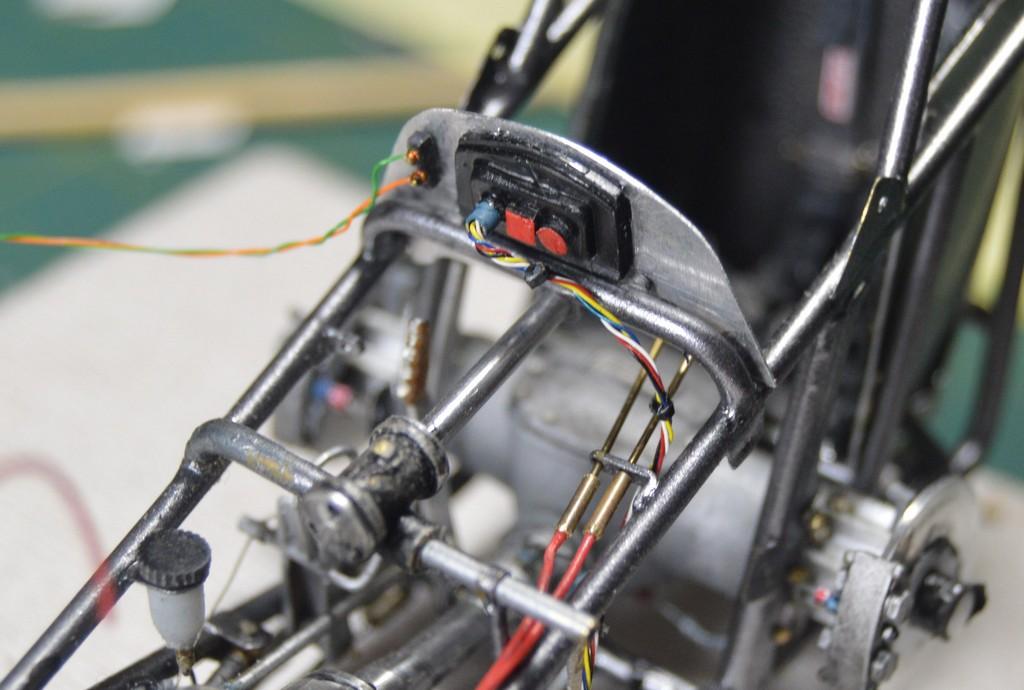
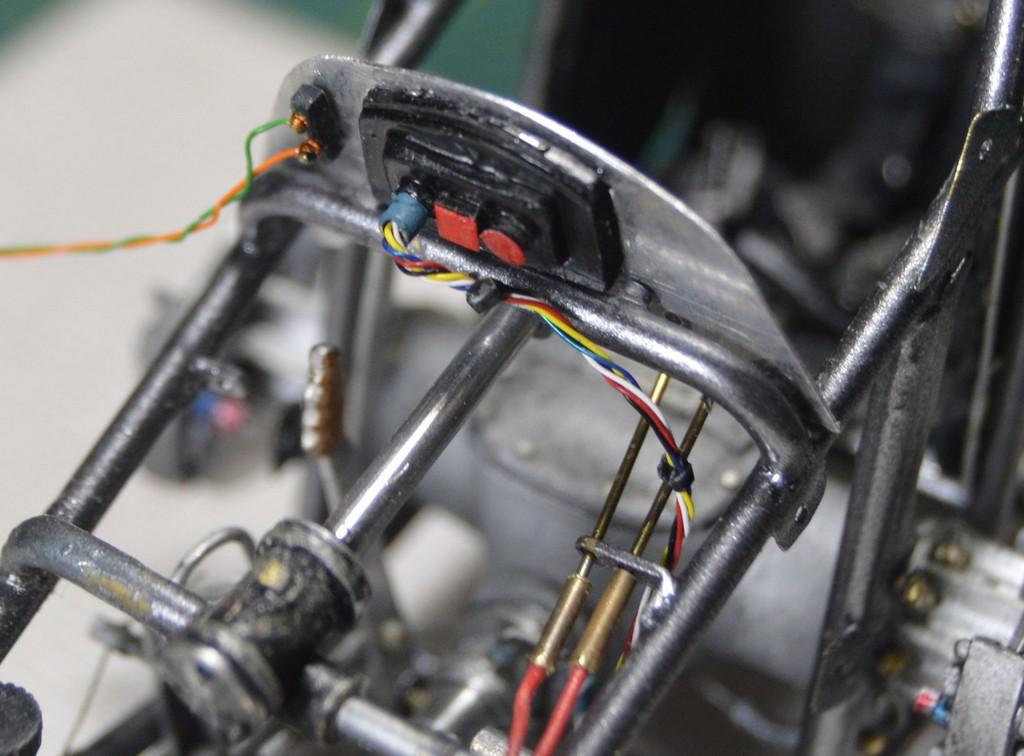
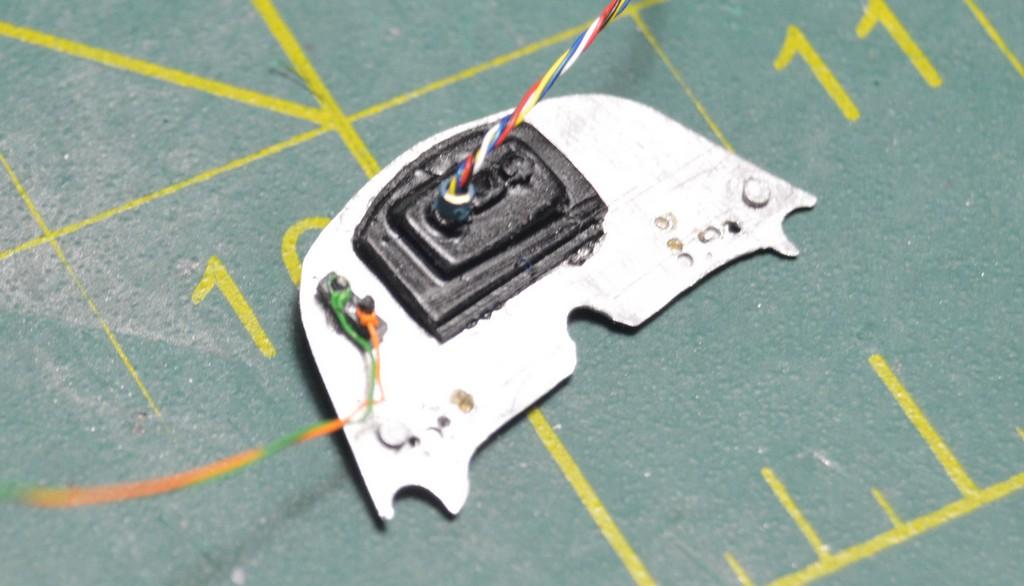
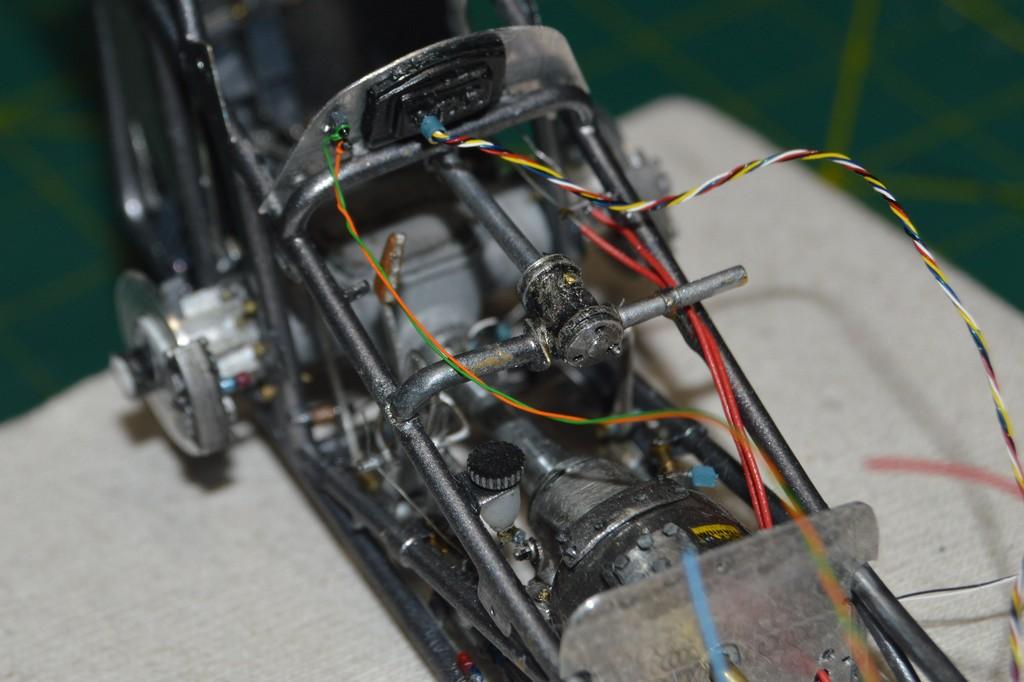
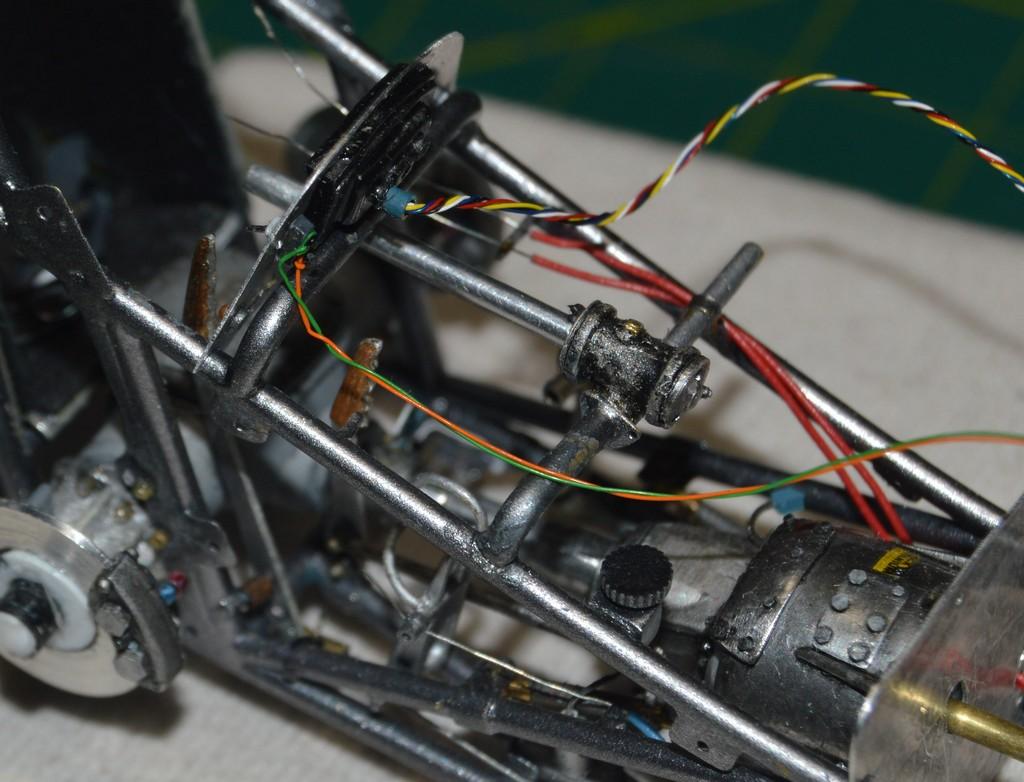
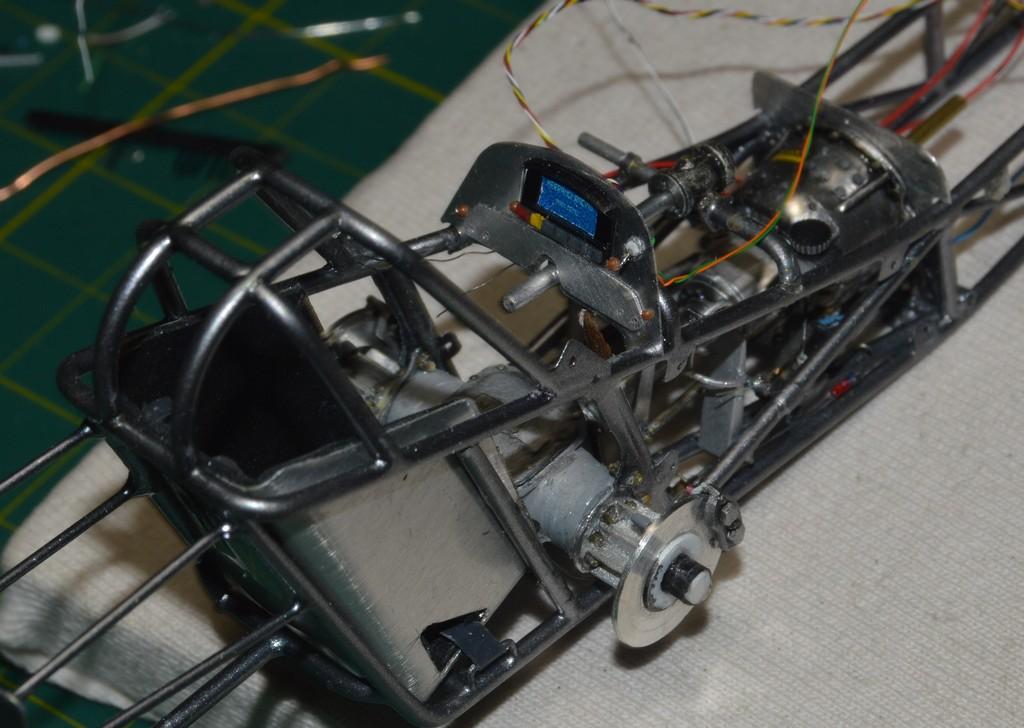
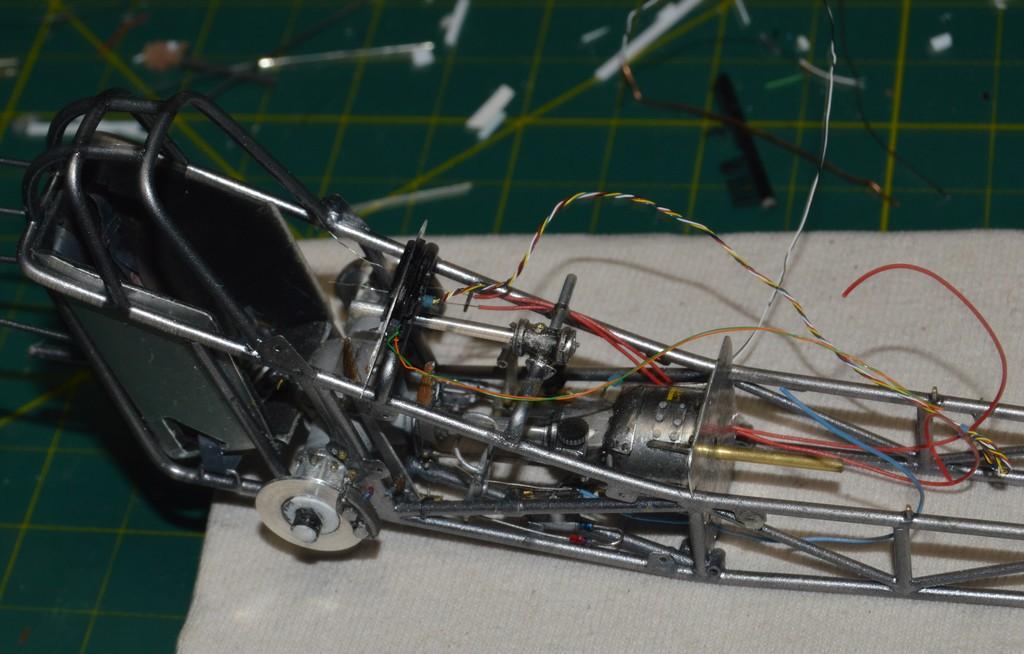
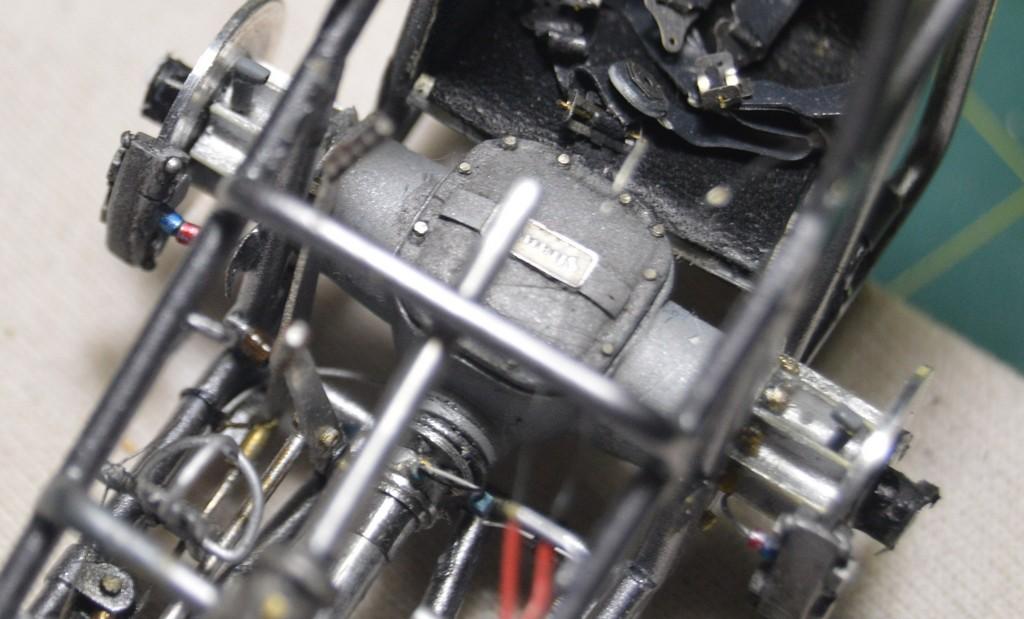
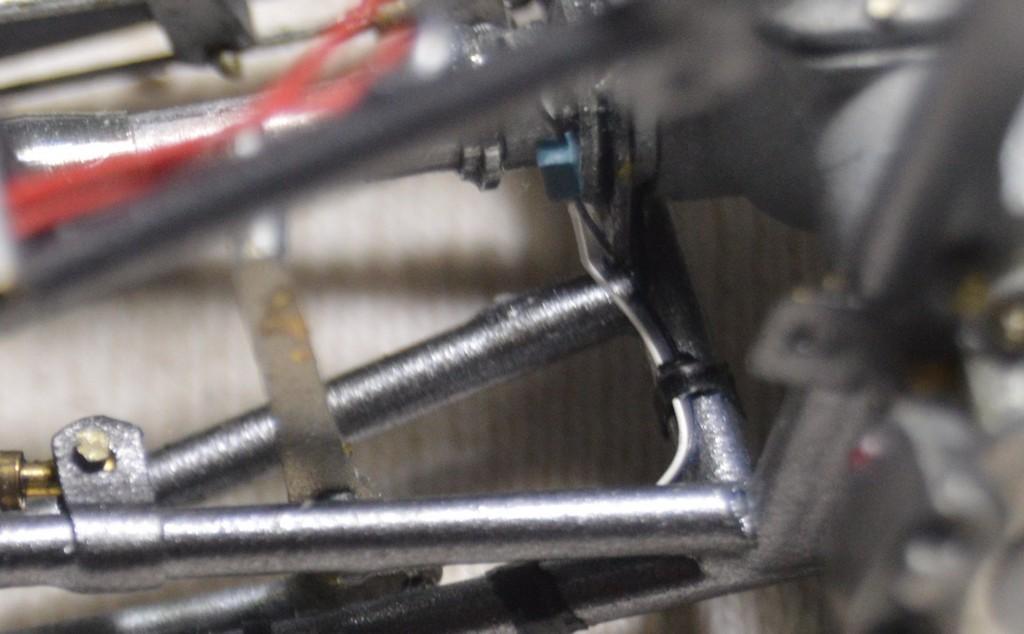
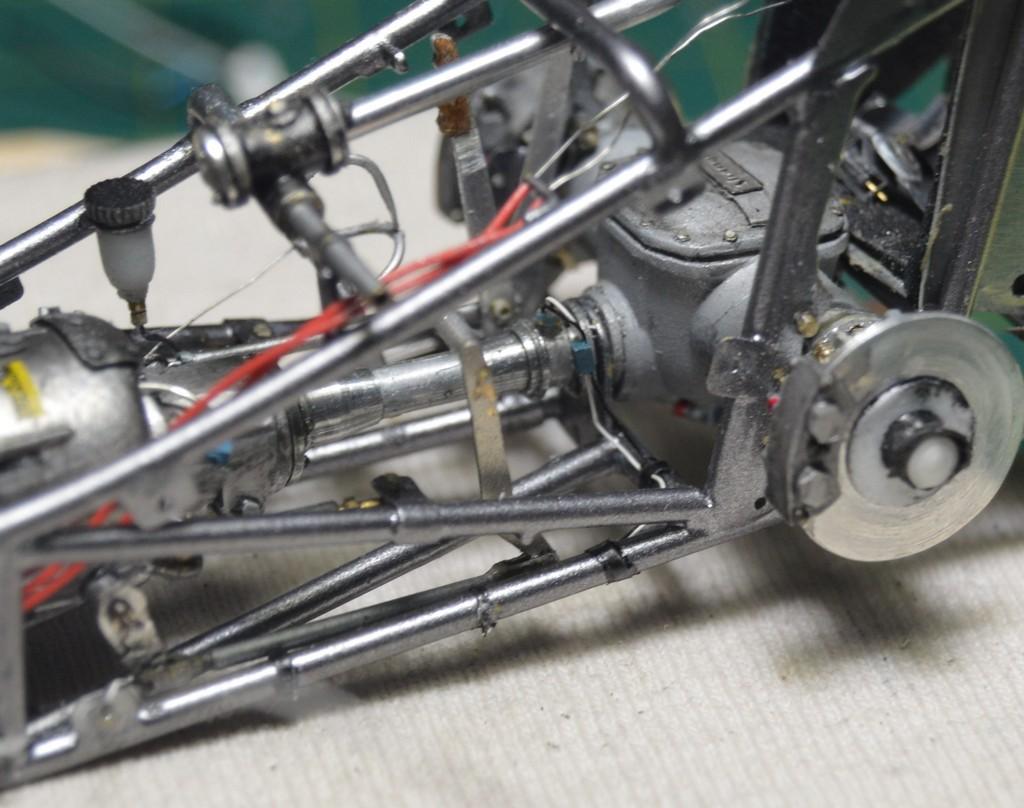
I did a whole bunch of housecleaning! "Tie-died" up the wiring. I used a combination of tape and zip-ties. I am very happy with the way it's turning out! I also got the control rods installed for the Manual hi-speed, and the hi-lo idle control valves. I still need to set up the one for the fuel shutoff. The kill switch it run through the motor plate, where it will meet up with the rest of the circuitry. Still work to do, but the crew really made some progress, today! I'll try to post the stuff about how I did the zip-ties, but, I want to see if I can get a bit more done, before bed. Photos are at various stages of completion. The first three are the latest. The red objects on the back of the gauge panel are dust caps for unused data ports. Thanks for looking!
-
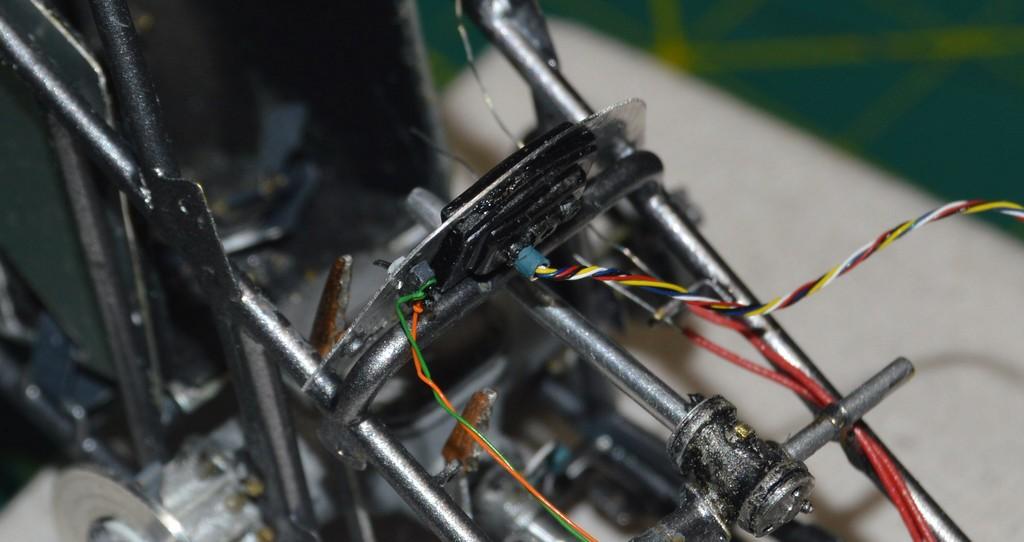
The dash is installed. I bundled the main harness with "electrical tape". I'll bind it to the chassis with zip-ties. The mag kill wires will be taped to the right side of the chassis, up to the motor plate. I am figuring out how to make the "T"-handles for the cables. I could easily do knobs, but I want the former. Questions, comments and critiques are, as always, welcome. Thanks for looking!
-
1/25 Revell Peterbilt 359
Straightliner59 replied to cifenet's topic in WIP: Model Trucks: Big Rigs and Heavy Equipment
It's funny, as many times as I've crawled under trucks to engage a PTO with a broken cable, or any number of other reasons, and seeing hundreds of those plastic plugs, I didn't even notice that. I was marveling at the colors he achieved. You're absolutely right. -
1/25 Revell Peterbilt 359
Straightliner59 replied to cifenet's topic in WIP: Model Trucks: Big Rigs and Heavy Equipment
What a wonderful piece of work. Your metallic finishes are simply fantastic. Enjoying this project, very much! -
1/25 Revell Peterbilt 359
Straightliner59 replied to cifenet's topic in WIP: Model Trucks: Big Rigs and Heavy Equipment
Your brake cylinders are freaking gorgeous! Well, so is everything else, but, these really caught my eye. Excellent work! -
Good job, on both counts! Man, does that thing sit nice!
-
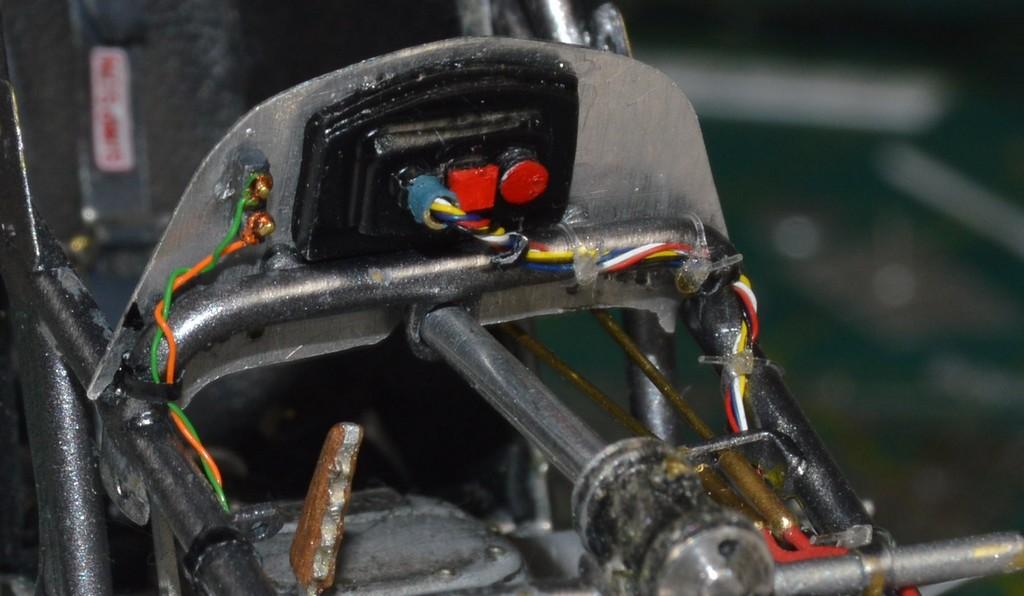
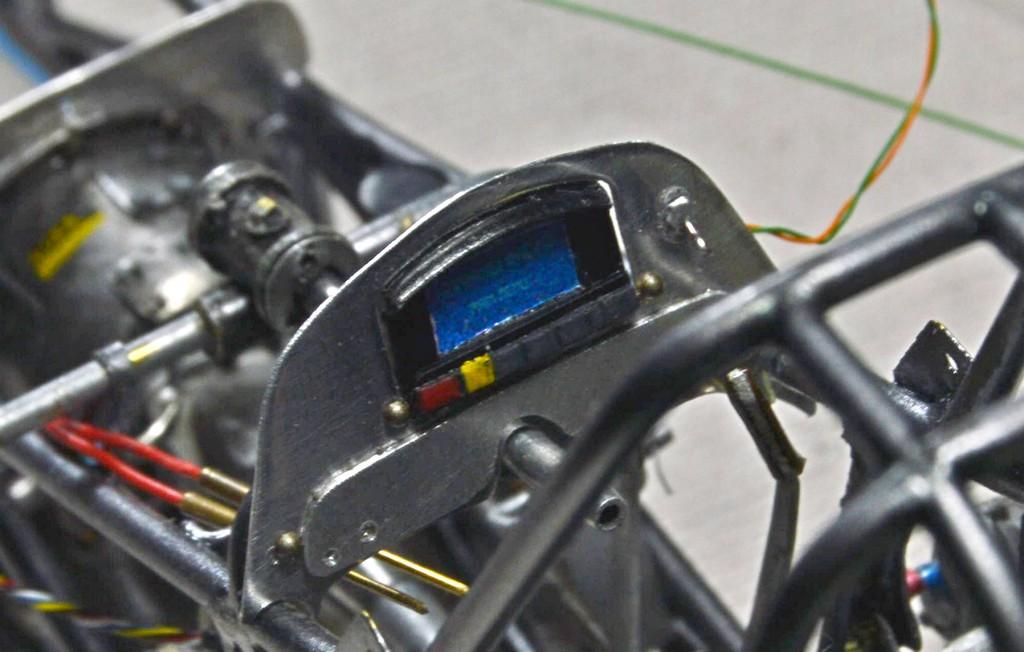
More electronics. I should have the dash mounted, pretty soon. I had to move the mag kill switch, as it interfered with the cross brace. I need to paint the "nuts" that mount the dash, and the terminals for the kill switch. Still work to do, but, we're makin' progress...Thanks for looking!
-
That was some good thinkin', right there!
-
I'm not a huge T-Bucket guy. Don't hate 'em, though. This one is really cool! I'm a fan!?
-
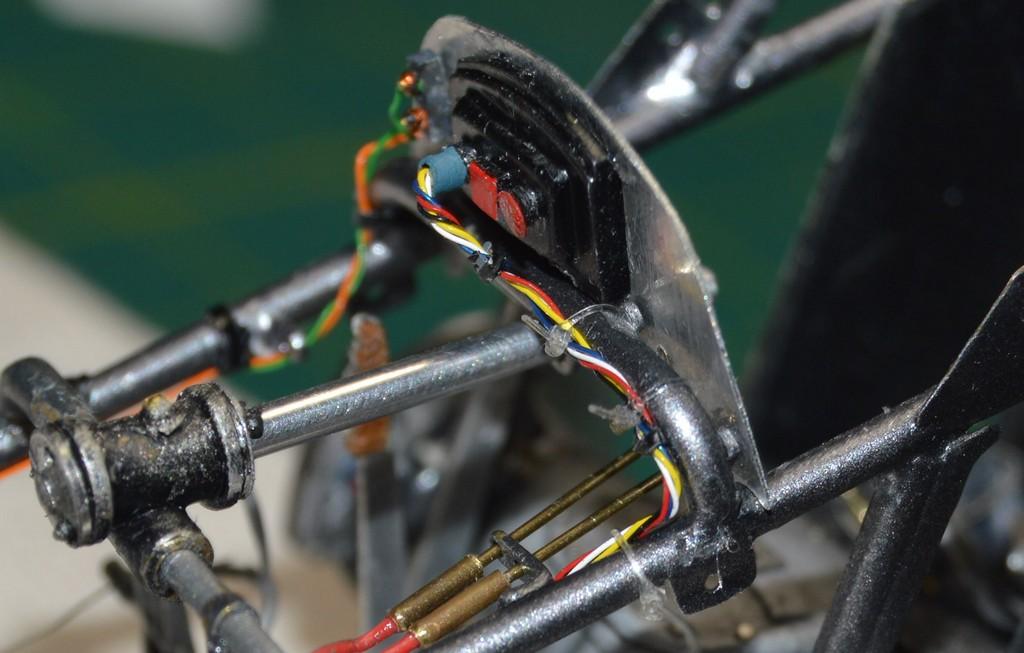
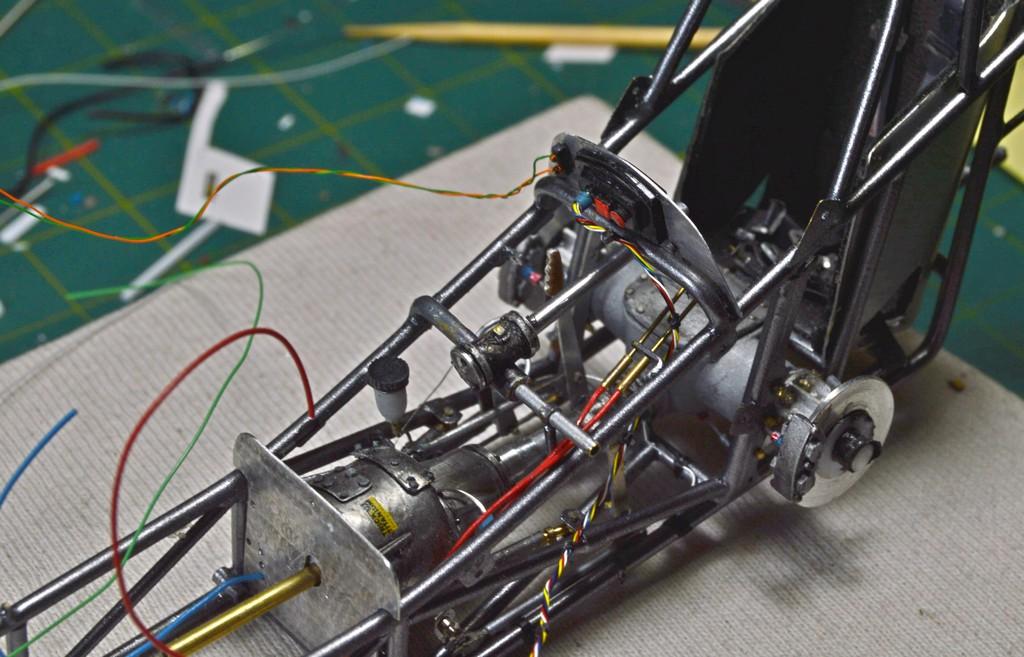
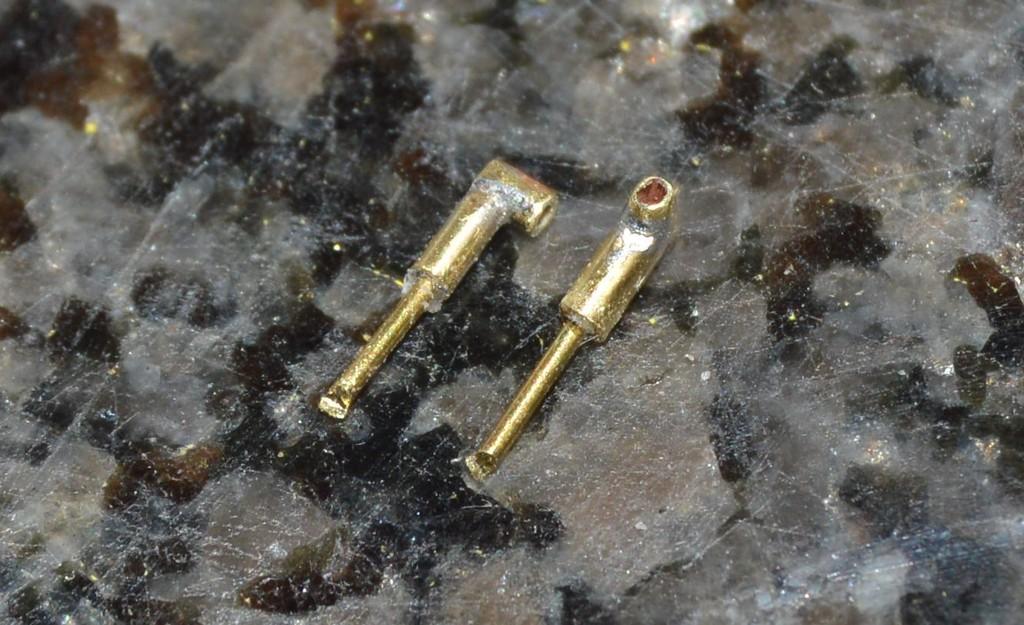
Got started with the wire-tying-down process. So far I have only done the shaft speed sensor. I used "electrical tape" to secure those two wires. I made axle speed sensors from .032" brass tubing, and got them installed. I am rethinking my approach--I may install the dash panel, prior to the E-box. Still not 100% sure which way I'll proceed, there. In the meantime, here are some photos of things I've been working on, the past couple of days. Thanks for looking!
-
Shirley Shahan’s Hornet Pro Stock
Straightliner59 replied to dragcarz's topic in WIP: Drag Racing Models
Honestly, I wouldn't. -
Shirley Shahan’s Hornet Pro Stock
Straightliner59 replied to dragcarz's topic in WIP: Drag Racing Models
Oh, yeah! Looks great! -
The art of scratchbuilding
Straightliner59 replied to ColonelKrypton's topic in Tips, Tricks, and Tutorials
That is really cool! -
It should start to really fill out, in the next couple of weeks. Thanks, Marcos!