stitchdup
-
Posts
7,123 -
Joined
-
Last visited
Content Type
Profiles
Forums
Events
Gallery
Everything posted by stitchdup
-

1/12 Lancia Fulvia teaser from Italeri?
stitchdup replied to The Creative Explorer's topic in Car Kit News & Reviews
the escort kits always sell out. within 6 months the price on ebay doubles. the other similar rally cars just dont have the following of the escort. my local shop got 6 kits in and they were all sold in a week and they couldn't get more. luckily i already had a few of the rally and track cars as i didn't know tey were getting rereleased -
Pre-crunched models from the factory?
stitchdup replied to asterisk's topic in General Automotive Talk (Trucks and Cars)
there is an article in a recent mcm on how to damage models. they car in the article replaced panels with heavy foil before doing the damage -
Kits containing hand tools.
stitchdup replied to 1st 700 Quad's topic in Model Building Questions and Answers
the fujimi garage sets have a decent sprue of tools and clutter. I think the amt garage kit does too -
I suggest reading through Donny's thread as he has asked the questions that will help you out. Welcome to model cars, its a great hobby to have. heres the thread
-
i've got a little hearing back in my right lug but the left is still done. My boss at the place i volunteer called the docs for me so have an app in 2 weeks.
-
Ordering From Overseas Still?
stitchdup replied to oldcarfan's topic in General Automotive Talk (Trucks and Cars)
purely because it tends to end up political, and then people end up on moderation or worse. none of us want that. i'll leave it for now but any politics and it gets locked. -
I woke up nearly completely deaf and my doc wont accept contact by email unless you phone them first. since i live alone i'm probably going to have to get the jobcentre to call for me since i cant hear
-
Forum Changes
stitchdup replied to Xingu's topic in Forum News and Questions (formerly: How To Use This Board)
its all modelling. if you can build a boat or a plane then you already know what to do.There are a lot of pro boards forums on model car/truck building and when you include the niche builders it soon adds up. My thinking behind the battle of the forums is it gives members something to watch and might entice new members to join up, which is good for the forum if it attracts advertising. I want to see model building grow as a hobby as i believe it is the best antidote to all the tech and phone based nonsense, my main thinking behind it is to make models a strong community. -
Post your truck mockups.
stitchdup replied to Mike C.'s topic in WIP: Model Trucks: Pickups, Vans, SUVs, Light Commercial
be sure you get all the mold release out of the edges, i dont know what release they use but its horrible to remove. those rims look sweet -
Forum Changes
stitchdup replied to Xingu's topic in Forum News and Questions (formerly: How To Use This Board)
that reminds me, i must work on my cannonball entry -
its been hot for weeks but we still got some rain. starting to cool for autumn now but i wouldn't be surprised if it gets hot during september too. might be some flashing lights and booms in the sky later cos the air feeling moist and warm
-
Forum Changes
stitchdup replied to Xingu's topic in Forum News and Questions (formerly: How To Use This Board)
to be fair on the emojis, some folk were worried they would reduce engagement between members but it hasn't worked out like that. instead members that weren't commenting are now using the emojis, while previous commenters are still commenting so it worked out in all our favour as it really increased engagement. has anybody got any wilder ideas? this is a great time to add them, even the silly ones as you never know where someone else gets inspiration. An idea thats been tickling the back of my head is to set up challenges between ourselves and other forums for bragging rights as i'd really like to see this place become a hub for all the model forums to really build up a strong modeling community. -
i hope you are wearing a very good mask. the 2k is rough on the lungs
-
BMF Glue Residue Removal
stitchdup replied to Horrorshow's topic in Model Building Questions and Answers
depend on the paint type. i'd try sticking masking tape on the residue first, it can sometimes remove the residue and is a good first step before more aggressive methods. even blutak might work -
next time i use the grafitti chrome i'm going to try it over gloss black or blue. i think i can get it more chromey as this is just over primer
-
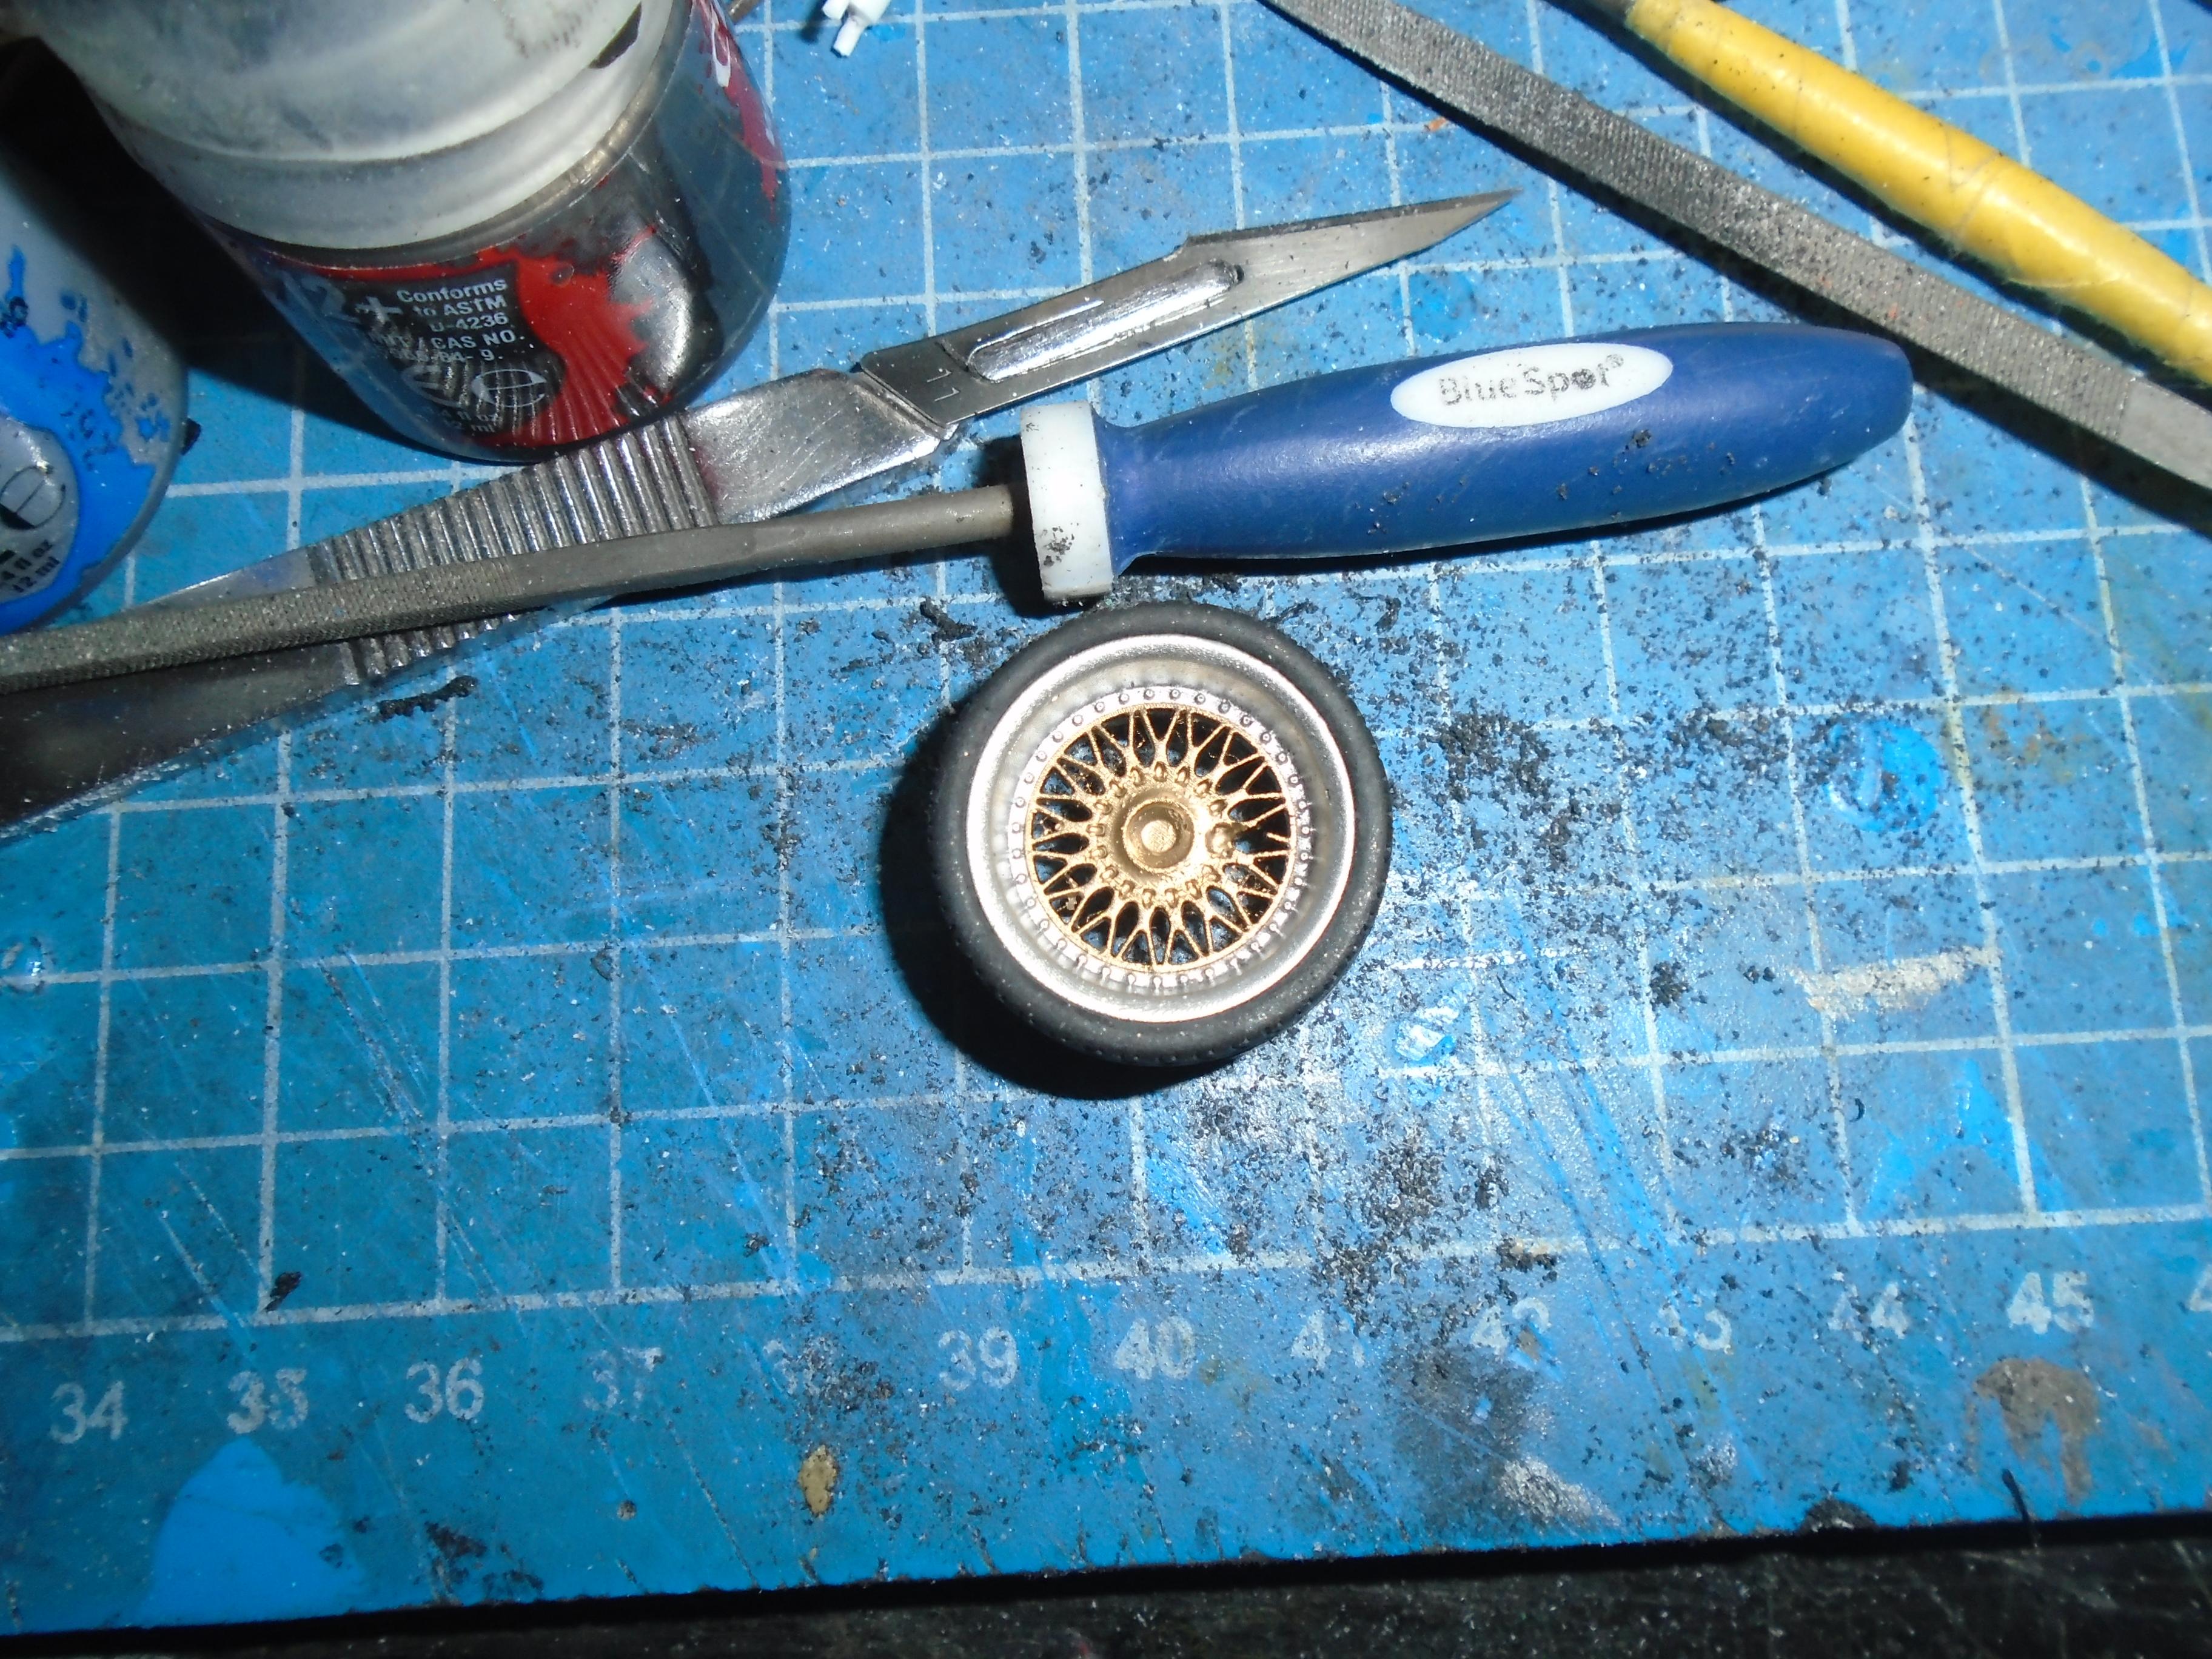
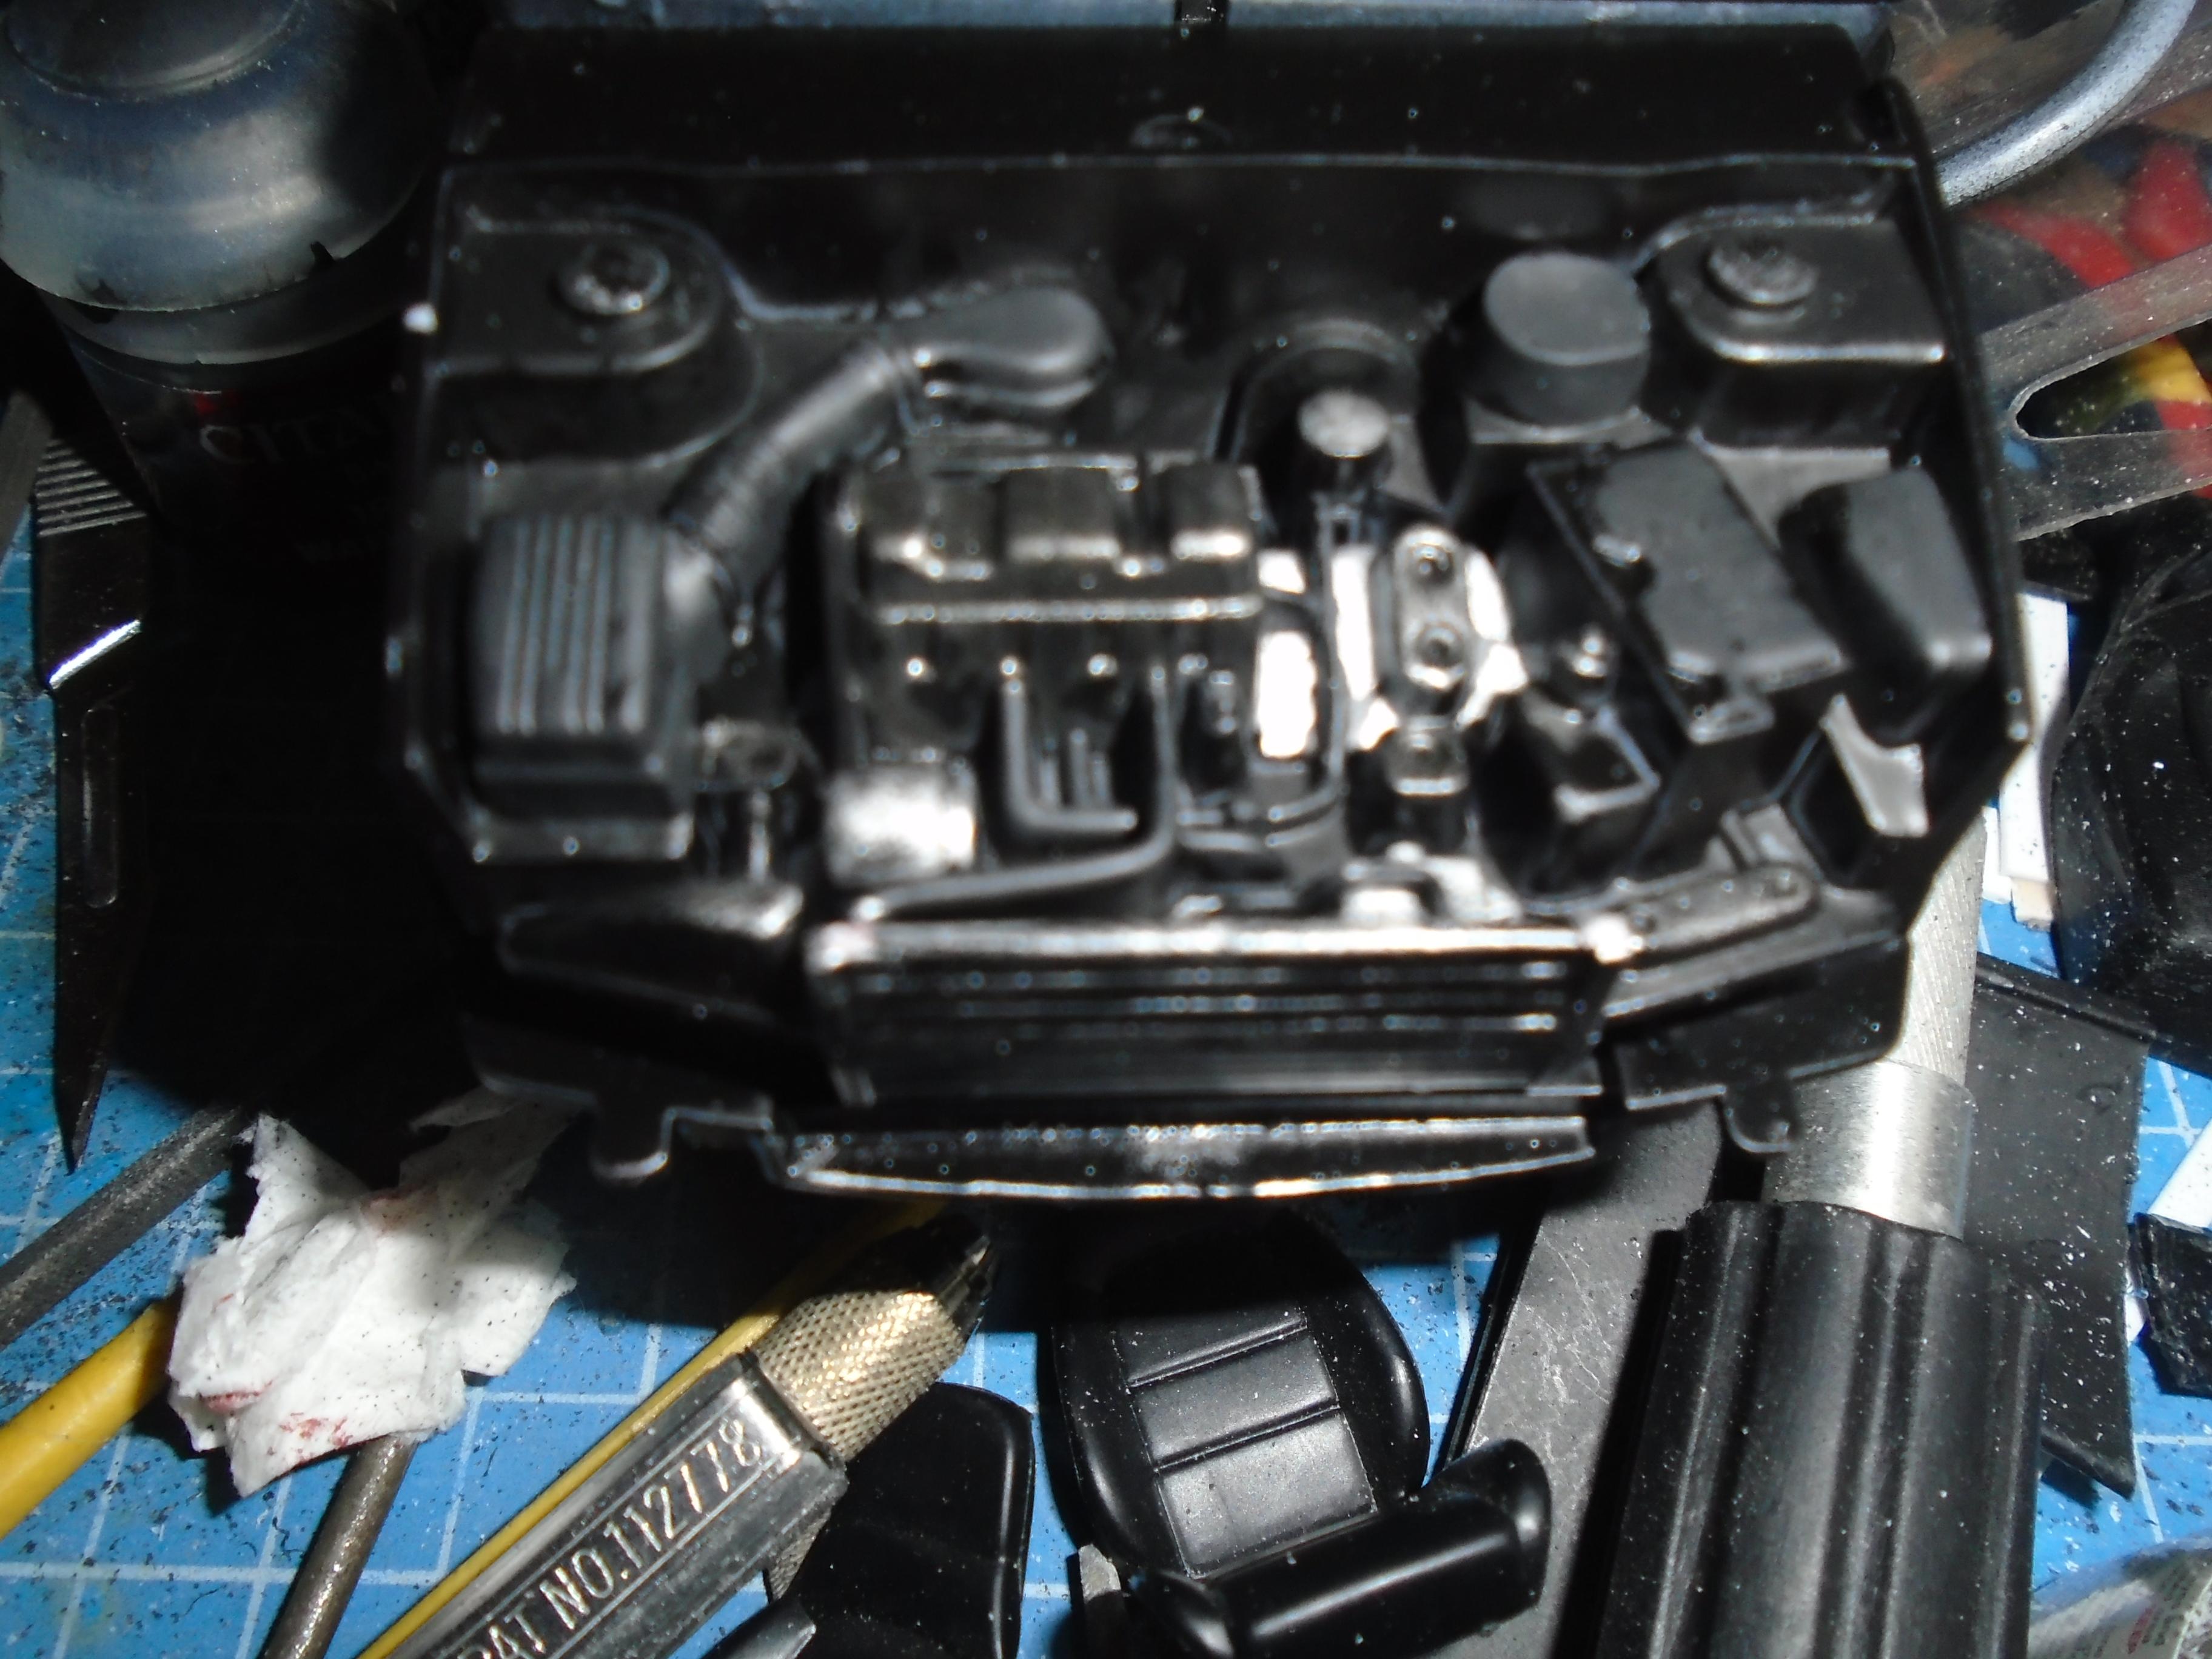
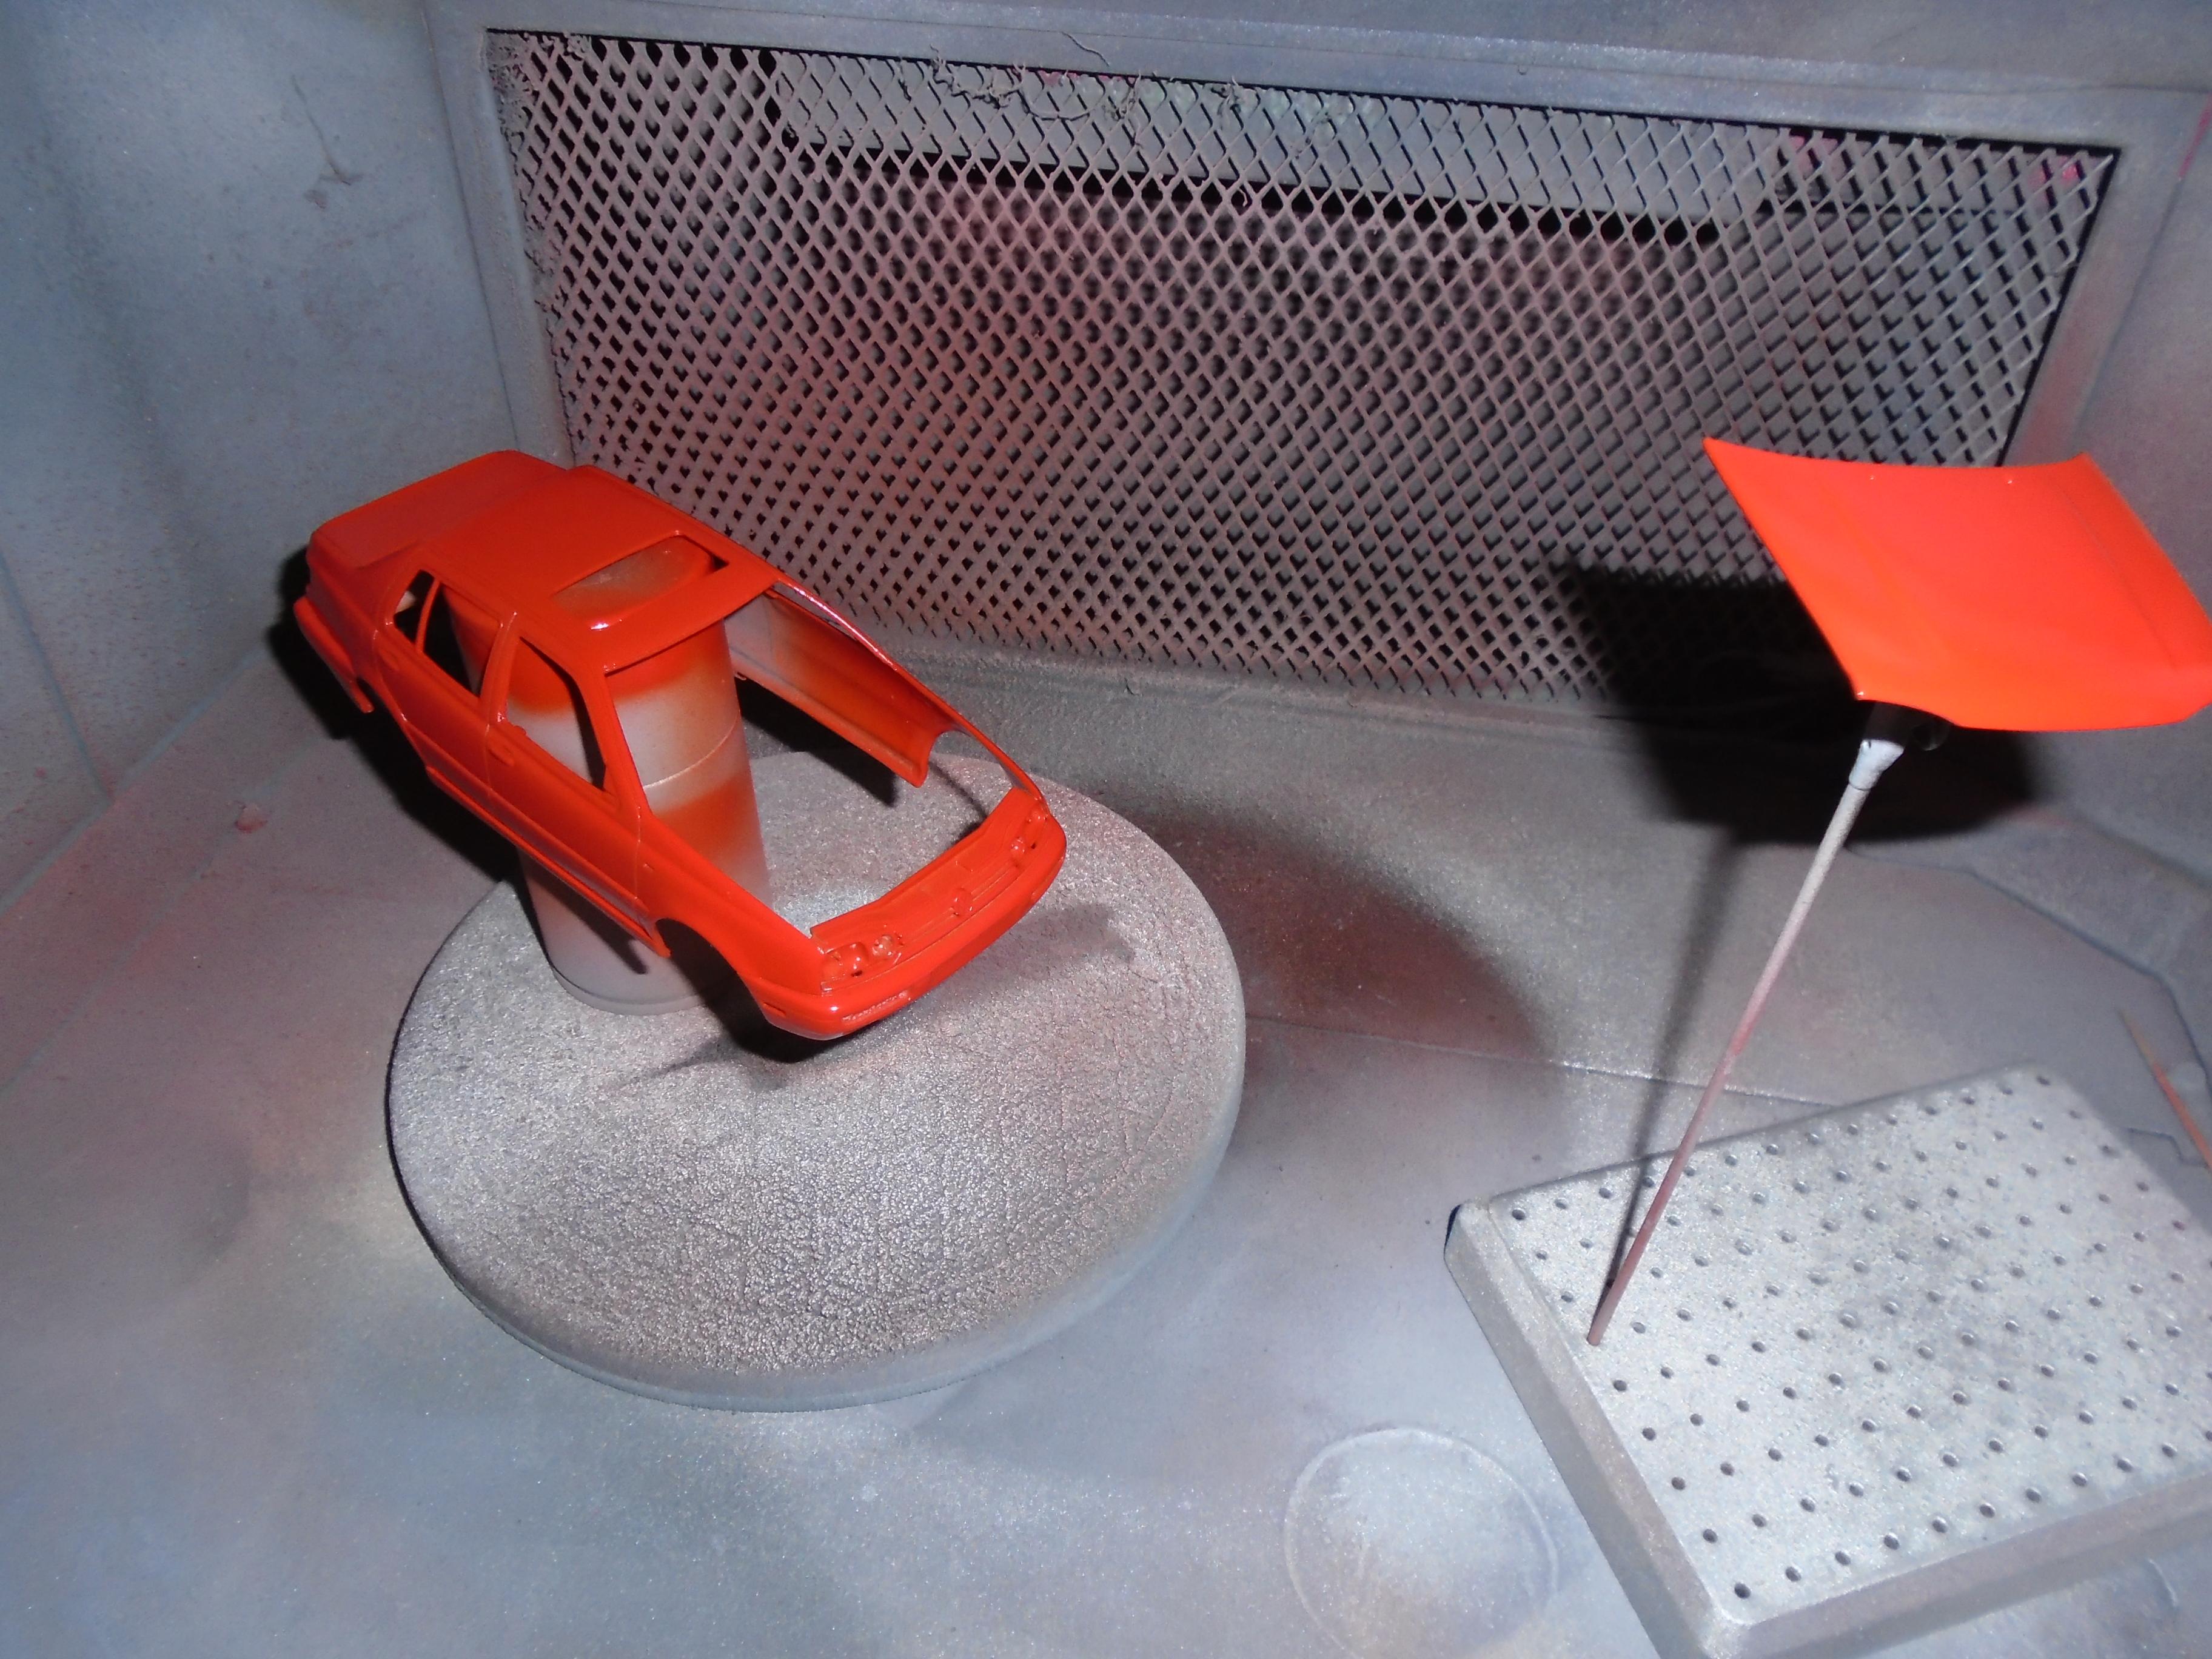
threw a very quick clear on the vento. I was going to do the black trim first but decided it will stay matt instead of the gloss i was thinking about. the body shows the colour best but it doesn't look like mars red now the clear is on. it'll do me though. I also painted up some bbs. the gold and chrome is grafitti spray bombs. finally i did a touch of detail paint on the engine plate and made a start turning the recaros into closer to the cl level seats. the gti plaid is still part of my plan, just not on gti seats. the wheels will probably change as i have a usa spec jetta to build too and i intend to copy an old feature car from florida that i fell in love with the look

-
I need to stop lol
stitchdup replied to kacitgirl's topic in General Automotive Talk (Trucks and Cars)
I sold off most of my 1/25 kits to make space for my first printer, then filled my extra space with prints. If you saw my flat you'd see how the addiction grows. I moved my bed into the front room so i could have a model room and if theres any space it has model stuff in it. i kept one kitchen cupboard for food and one for plates and one for pots. all the rest are model and printing stuff. my wardrobe is now more storage space (its my 15,000 reference magazine stash) I tend to get a bit excessive if something interests me and i go all in on my hobbies. -
1955 Ford Panel Truck
stitchdup replied to Zippi's topic in WIP: Model Trucks: Pickups, Vans, SUVs, Light Commercial
found them https://cults3d.com/en/3d-model/various/adv-bb1-wheel-set-with-3-offsets -
1955 Ford Panel Truck
stitchdup replied to Zippi's topic in WIP: Model Trucks: Pickups, Vans, SUVs, Light Commercial
i thought it was this set but i dont see the brakes on the current listing https://cults3d.com/en/3d-model/various/24-milled-slot-dually -
Nice work, the colour scheme suits it better than the r34
-
1955 Ford Panel Truck
stitchdup replied to Zippi's topic in WIP: Model Trucks: Pickups, Vans, SUVs, Light Commercial
they are from a wheelset, possibly from a full kit or maybe an mcsdesign off road set. i'll be printing later so i'll look through my files -
55 and/or 56 printed Buicks?
stitchdup replied to hedotwo's topic in Car Aftermarket / Resin / 3D Printed
i've seen 54s but nothing between then and 64 -
youtube is paid by clicks, their entire business model is based on our clicks so of course they will use titles to entice us. views means money. but you can also look through the forum and see many members use clickbait titles on their posts (and theres nothing really wrong with that). if its the choice between "old man builds model car" or "old man builds model car, you wont believe the transformation" the latter will get more views because humans are interested in stuff, and the second title teases something extra. As for content creator vids dronning on and on, its the same on ordinary tv. all those chat shows are doing the exact same thing, filling nothing with something so somebody buys an advert
-
1/12 Lancia Fulvia teaser from Italeri?
stitchdup replied to The Creative Explorer's topic in Car Kit News & Reviews
personally i like the escorts. the c1 versions will be going in my stash too, but they need to do a chassis too since they replaced everything else in the kit -
Monster truck photos
stitchdup replied to MonsterFan88's topic in Forum News and Questions (formerly: How To Use This Board)
1/1 reference