atomicholiday
-
Posts
2,281 -
Joined
-
Last visited
Content Type
Profiles
Forums
Events
Gallery
Everything posted by atomicholiday
-
Classic Monogram. Love it! That looks great.?
-
That is sharp.?
-
Great looking car!
-
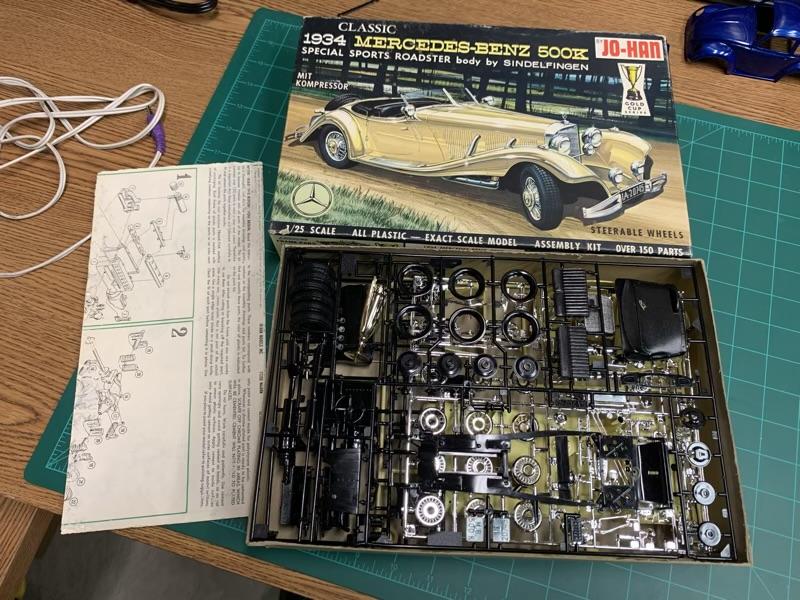
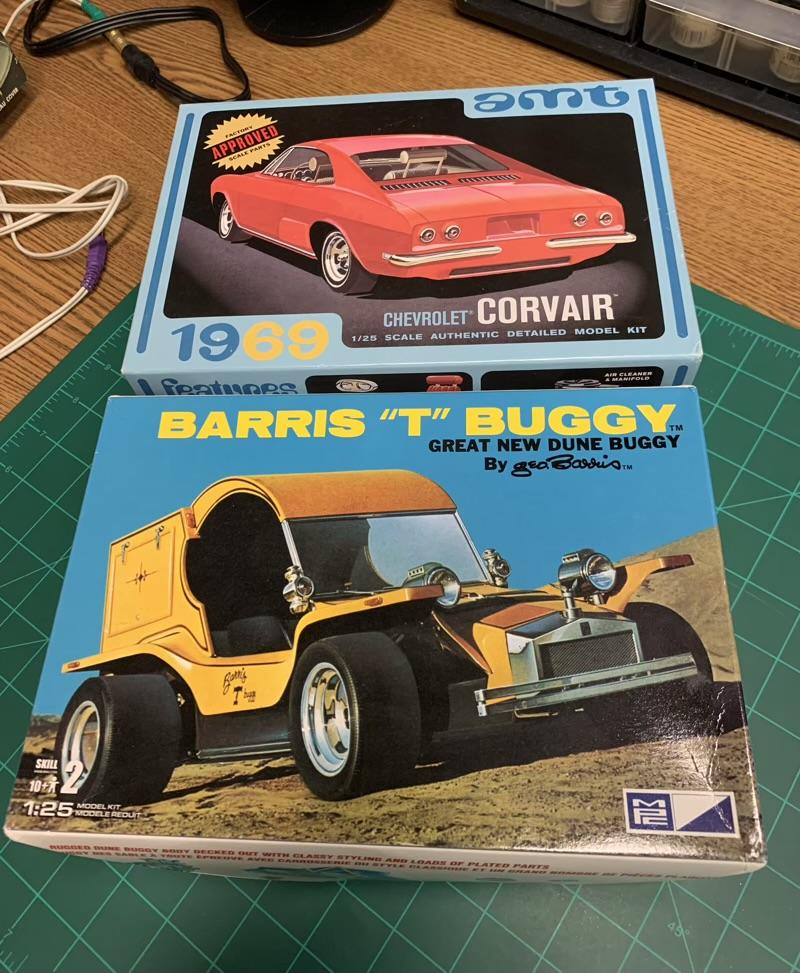
Flea market today. I got lucky and found my first Jo-Han kit today. I haven’t gone through it yet, but at a glance it looks untouched. Found a few other kits too.

- 39,127 replies
-
- 2
-

-
- johan
- glue bombs
- (and 1 more)
-
Looks great! These cars had such beautiful lines.
-
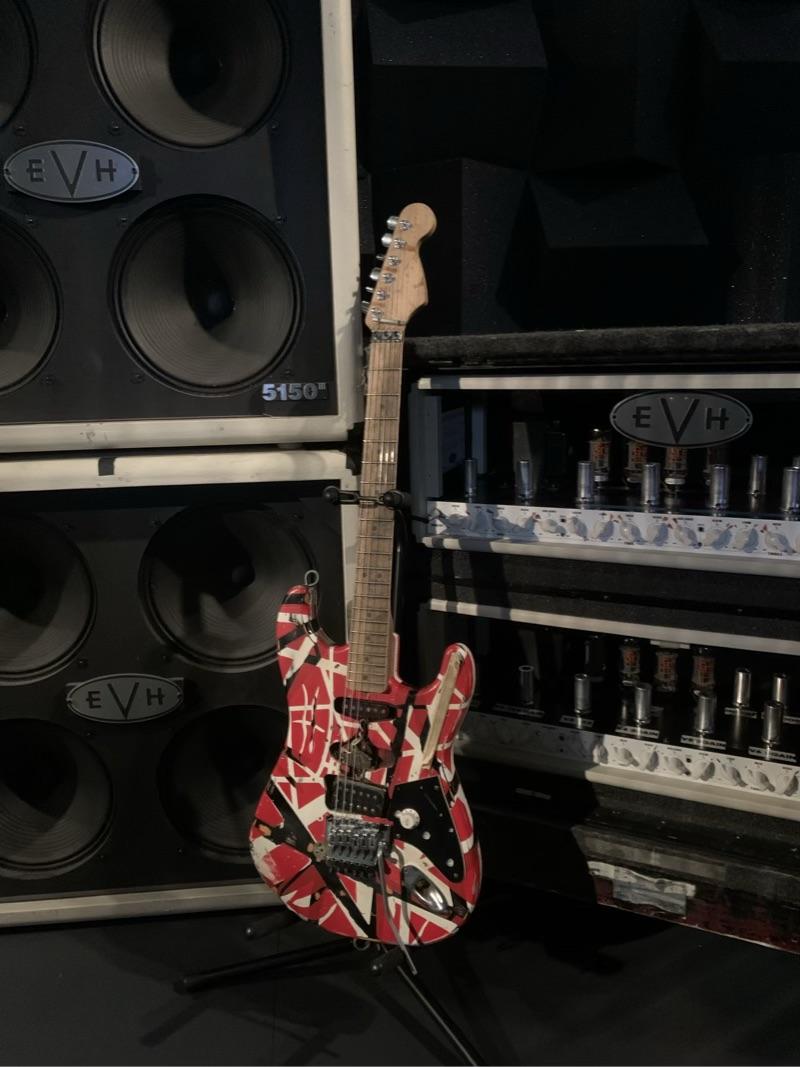
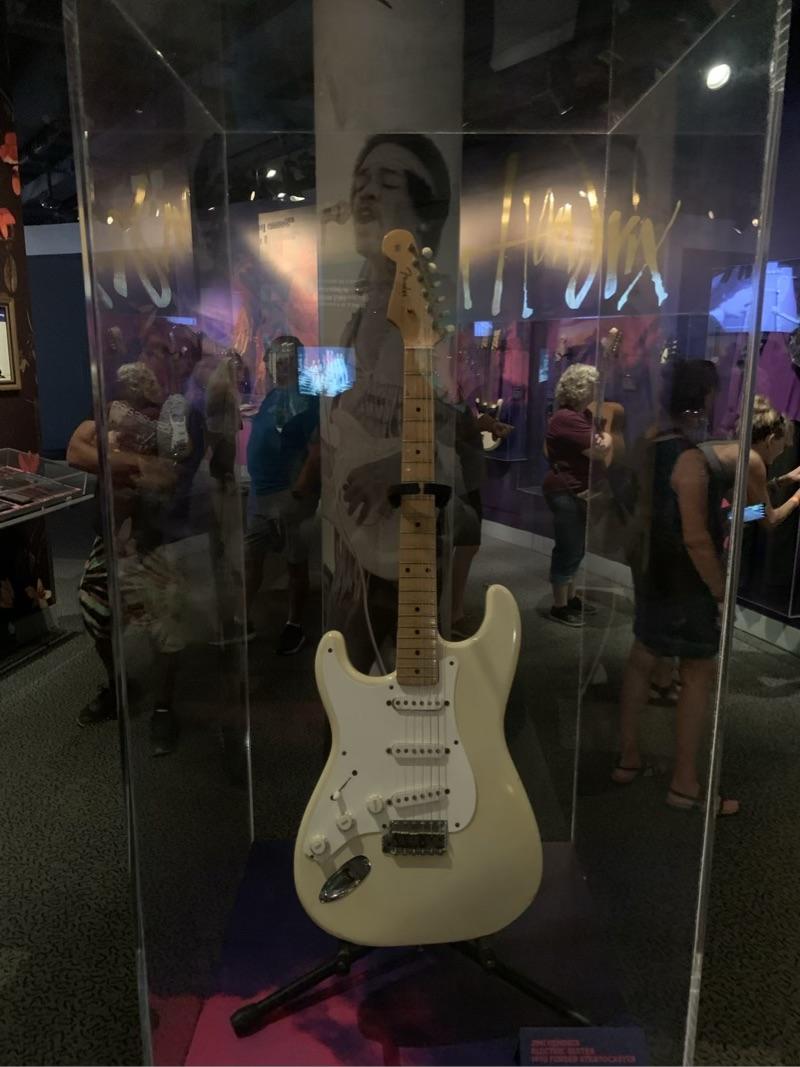
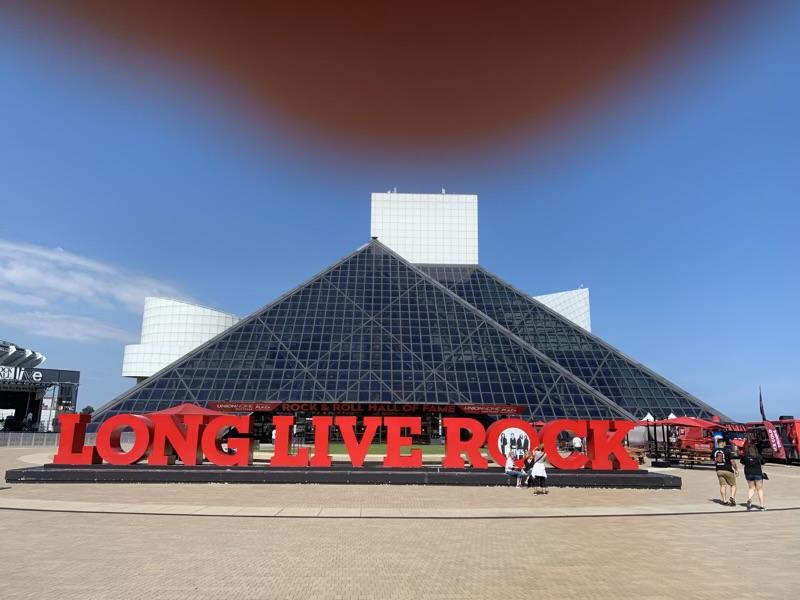
Had a great time with my wife yesterday. We went to the Rock and Roll Hall of Fame in Cleveland. Totally worth the trip! And I got to get up close to some of my heroes guitars. Notice the excellent photography of my thumb!?
-
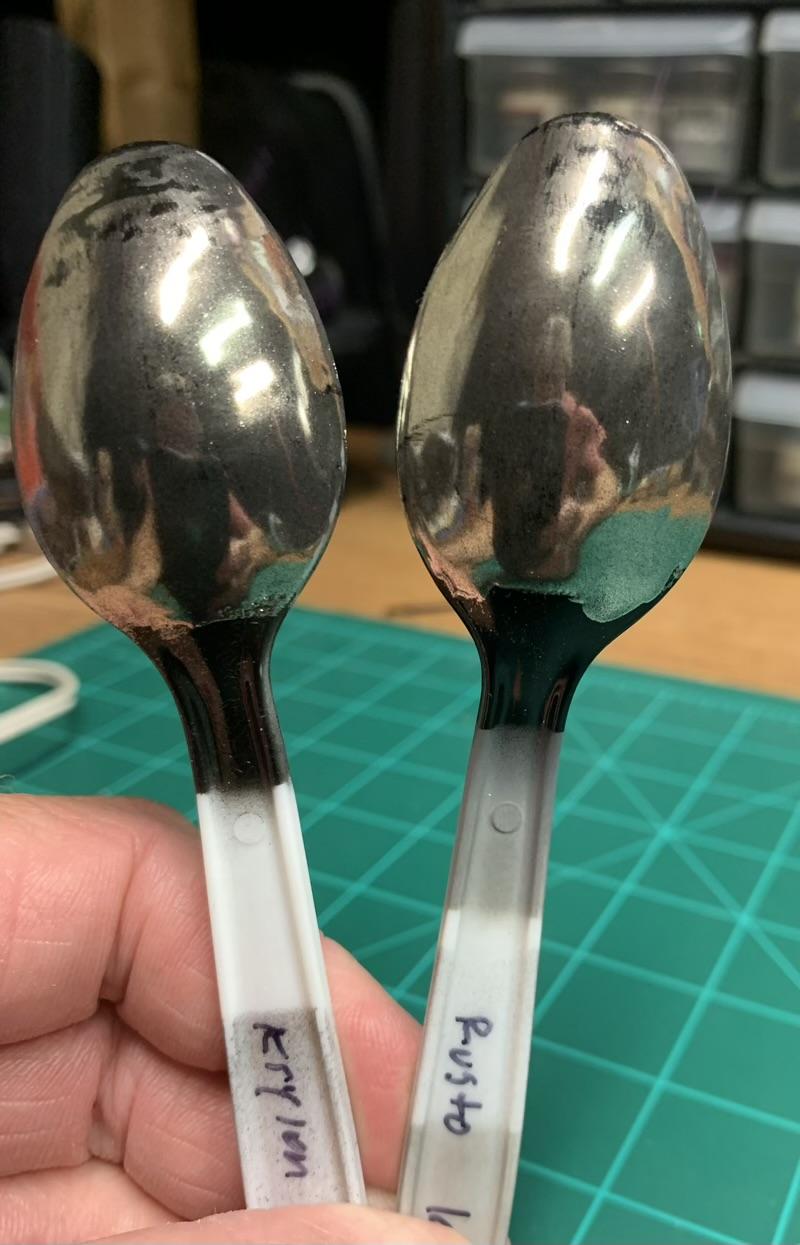
Finger nail powder chrome works great
atomicholiday replied to my66s55's topic in Tips, Tricks, and Tutorials
Looking forward to your findings. I ordered some thinner designed for gel nail polish, but it would be great to find a cheaper alternative. This stuff was $17 for 2oz. But if it works, I think it will be worth it. I totally agree with you about the possibilities. I'm curious about the gold. Could be a good product for brass era cars, and that's just the tip of the iceberg. Could be a game changer? Not sure, but I'll find out when I start the next round of tests. I'll keep you posted. I was watching a video tutorial by a girl doing her nails (yes, seriously ?), and one tip I learned was that if you don't put the powder on pretty soon after the gel, it won't stick. But all you need to do is wipe the surface down with alcohol and it will work again. The alcohol must reactivate the gel somehow. -
Oh wow, that’s just ridiculously cool! Very creative, excellent execution.?
-
I never got it either. I guess it was before my time. But to each his own.
- 39,127 replies
-
- 1
-
-
- johan
- glue bombs
- (and 1 more)
-
‘70 Corvette ZR-1 rims
atomicholiday replied to atomicholiday's topic in General Automotive Talk (Trucks and Cars)
That’s kinda where my head is going. But not beat up. I’m just in the concept phase right now. Who knows where I’ll end up. But right now I’m sort of thinking along the lines of a phantom factory-stock track-ready car like you used to be able to order from the big three back in the sixties. Sound cool to you guys? Those are pretty sweet. I think I have an older boxing of that kit around here somewhere.? -
That looks great! I've only tried it once too and was pleasantly surprised. I'm with you concerning burying it in paint. Many of the scripts we have to deal with are petty lightly molded.
-
Ollie's strike again
atomicholiday replied to GLMFAA1's topic in General Automotive Talk (Trucks and Cars)
Give it a week or two and try again Carl. They have new stock coming regularly. Fort Wayne was a bust the first time and two weeks later I scored. -
That's a sharp car. Really nice, clean build.
-
Finger nail powder chrome works great
atomicholiday replied to my66s55's topic in Tips, Tricks, and Tutorials
One more test. This time I shot one of the spoons with clear lacquer. Doesn’t seem to have had any negative effects. These spoons have been through a rough time. I started by sanding the top edge with 1000 grit just to see what would happen. Then they were washed and dried. Basically just wanted to see how much abuse the chrome could handle. Not very scientific, but what the hey, right? Anyway, here you go. The spoon on the left has the clear coat.
-
Great news! Nothing is more important than health.?
-
‘70 Corvette ZR-1 rims
atomicholiday replied to atomicholiday's topic in General Automotive Talk (Trucks and Cars)
I think you’re right. That’s one of the same sites I found before posting here. That, and another corvette site where a model builder was asking questions about the same kit and same options. But none of the answers were very clear and to the point. It could make an interesting “what if” car though. Maybe like a track pack option. -
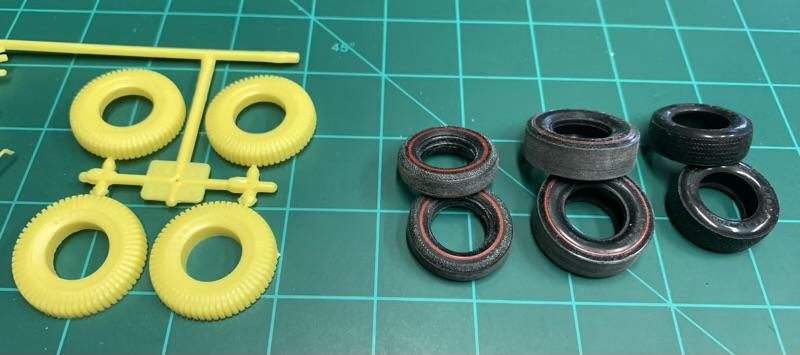
Just reading the car info in the instructions for the amt ‘70 Corvette ZR-1, and it talks about some of the factory deletes. It says the ZR-1 came with only plain steel rims, no trim rings or center caps. Intrigued and possibly inspired, I set off for Google to find pics. Nothing! I can’t find a single picture that shows ANY ‘70 Vette with plain steelies. They all have trim rings with caps. I’m guessing original owners put the parts on?? Any of you guys seen pics of one in stock trim, without the extras? The amt kit has both options.
-
Hey Craig, yup. The tires come with the kit as red-lines. Actually comes with eight tires total. This kit has quite a few extra bits and pieces, and a few different building options.
-
Noticed Ace-Garageguy hasn't been on site since 7/22
atomicholiday replied to bobthehobbyguy's topic in Where's Waldo?
I just kinda assumed he was busy with his move. Hope that all there is to it. His experience and skills have been a huge help to me, especially when I was really struggling with paint issues. As far as any drama, I never really saw that side, and it’s not my concern. -
MPC Taco Trike OOB
atomicholiday replied to ea0863's topic in All The Rest: Motorcycles, Aviation, Military, Sci-Fi, Figures
Looks great! You’re on a roll with the trikes.? -
Super clean build. That’s a beauty!?
-
Color combinations is spot on.?. Really nice build. Great work.
-
Oh man is that awesome! Great job!?
-
This is looking good. I like the interior.