jaymcminn
-
Posts
1,762 -
Joined
-
Last visited
Content Type
Profiles
Forums
Events
Gallery
Everything posted by jaymcminn
-

Testors Clear Parts Cement Dries Blue?
jaymcminn replied to TheCamaroKid's topic in Model Building Questions and Answers
Kristal Klear is the absolute best. I use it for mounting parts to craft sticks for painting, assembly of chrome and clear parts, attaching rear view mirrors and painted body parts and making glass for gauges. The Testors PVA you used will eventually dry clear. Less is often more when using this type of glue... a smaller amount will dry faster and still hold plenty strong. -
That looks fantastic and it's just in time for wiring the engine on my Porsche 911 build. These look way more like the plastic looms Porsche uses than the PE ones!
-
Tamiya primer and TS13 for Splash Paints?
jaymcminn replied to jaymcminn's topic in Model Building Questions and Answers
Partly because I didn't think to order it when I ordered my paint, but also because I'm comfortable with the Tamiya primer. I tend to stick to stuff that I know will work for me whenever I can. -
Review of Revell's new chrome spray paint
jaymcminn replied to Monty's topic in Model Building Questions and Answers
Another arrow in the quiver. I'll give the Revell stuff a shot at some point. When I started in this hobby, "chrome" paint was the holy grail. Now we have so many choices that it's tough to keep track of them all. I never got along well with Alclad. When Molotow came out I never looked back. The durability of the finish never bothered me, as a builder it's just a matter of planning your work accordingly. I still use BMF for window frames, body trim etc. and save Molotow for the parts that don't get handled quite as much. I did buy some cotton "inspection gloves" for when I handle these parts. If this stuff is as good as it looks, then it's got a valuable niche in the modeling ecosystem. $35 seems like a lot of money for a small can of paint but is it really? How many bumpers and grilles can you do with that can? Molotow refills for airbrushing are about $30. You'll get more bang for your buck with the Molotow but you also need to have an airbrushing setup. Honestly, any method of applying realistic chrome trim to a model car is going to have its downside. BMF is tricky to apply and one slip of the X-Acto will ruin your paint. Alclad goes from chrome to flat silver if you put on one too many coats. You can't handle Molotow more than a little after assembly. The Revell stuff is expensive and also doesn't like much handling. But they all have upsides too, and each have a place on the workbench. -
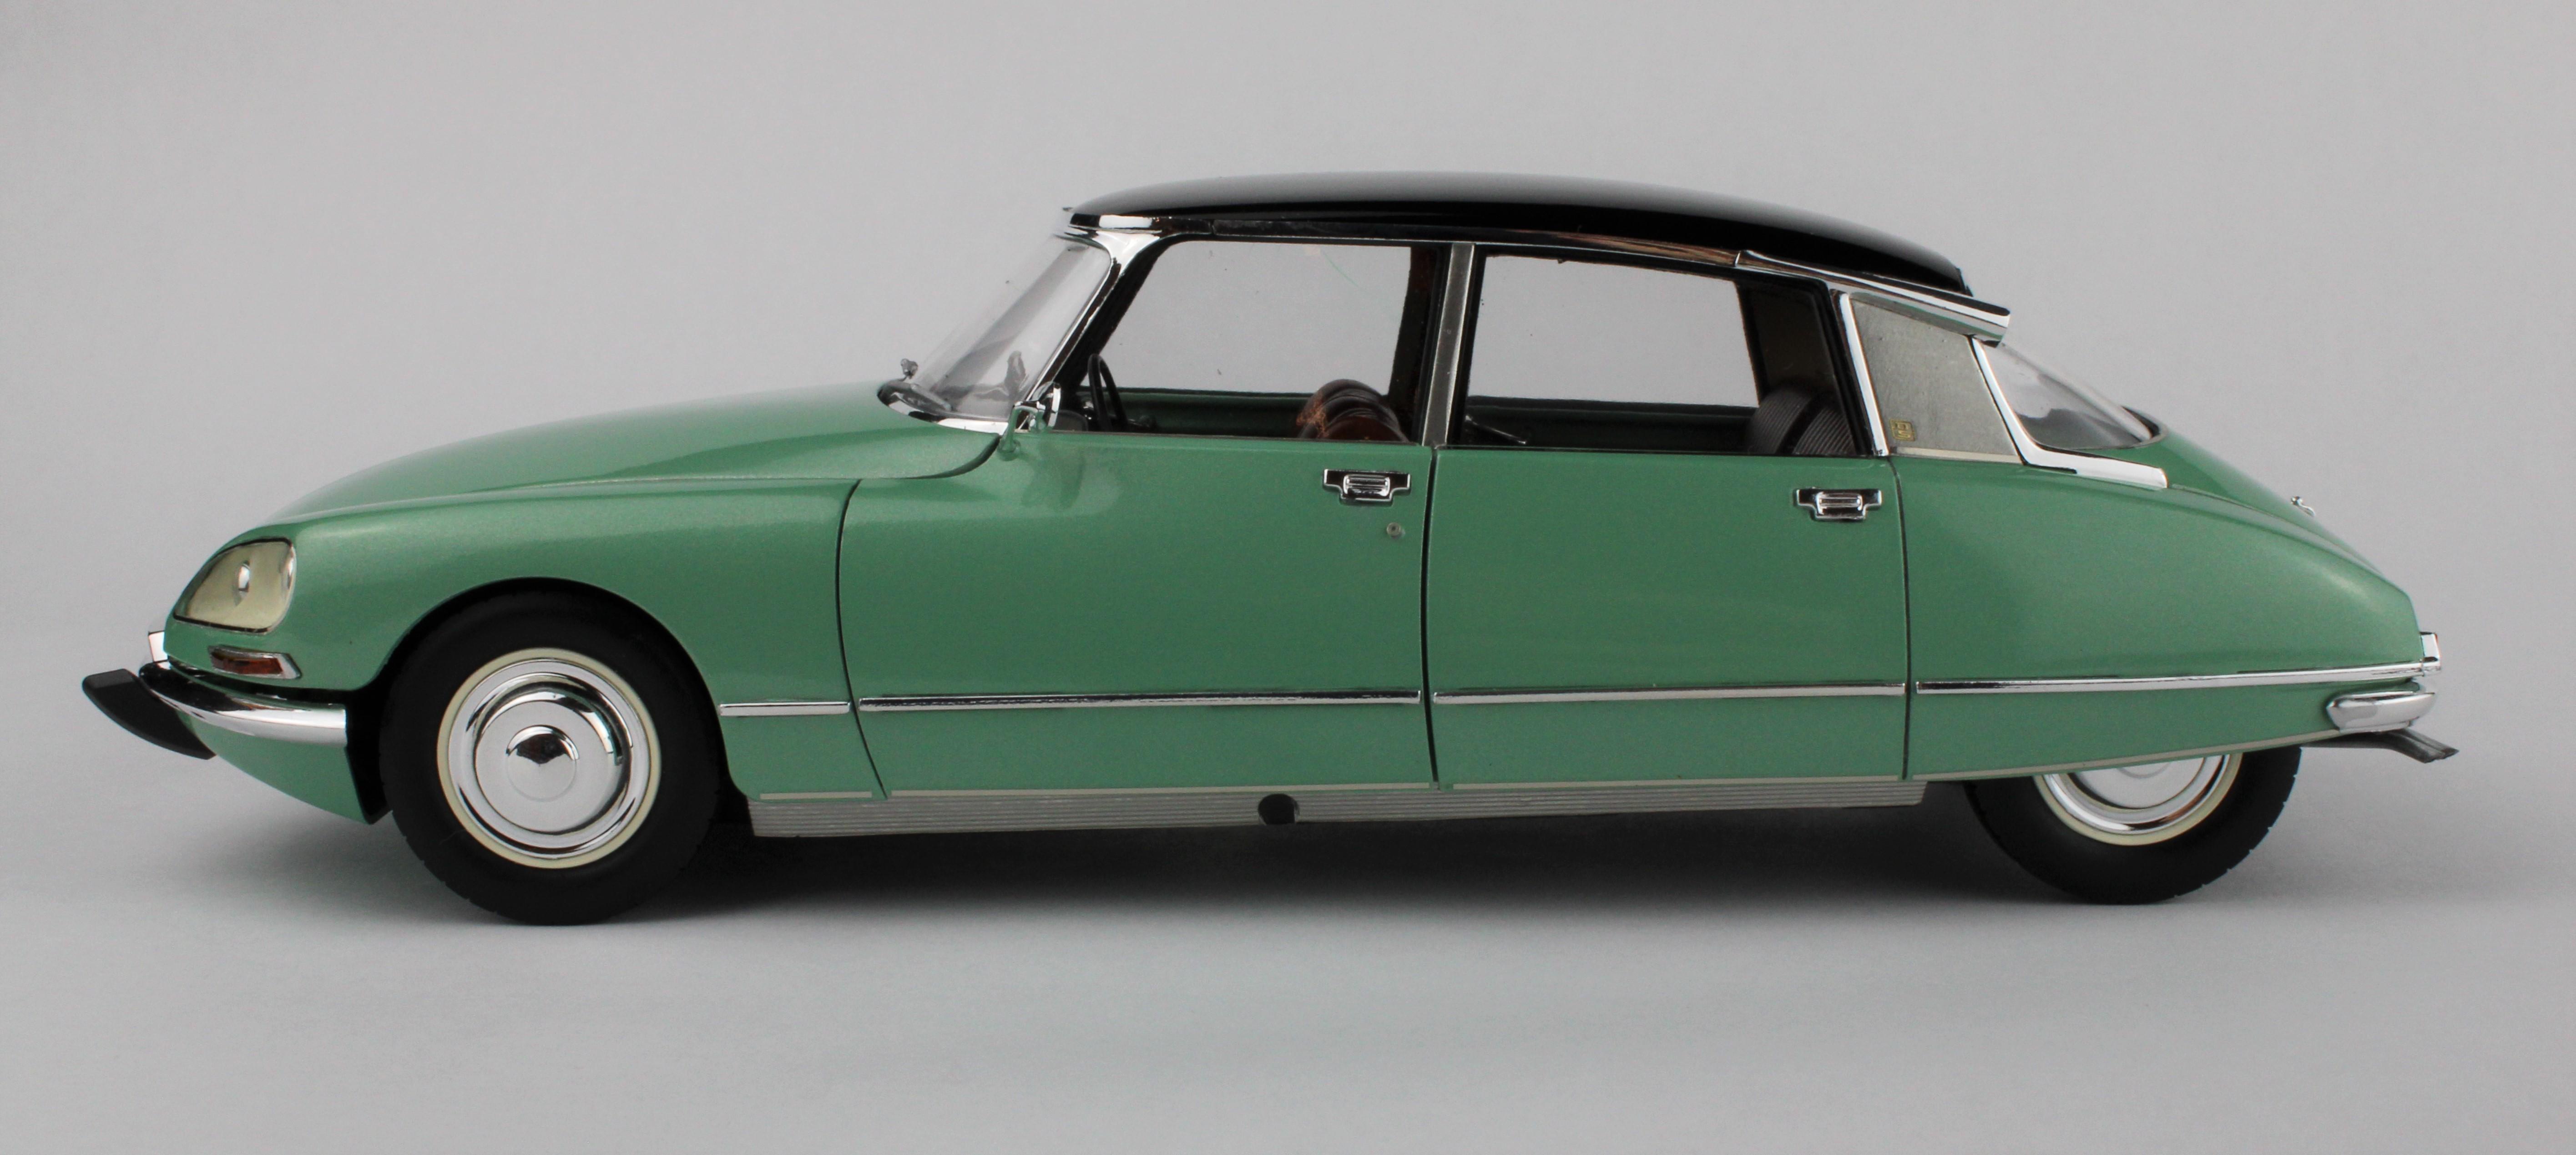
Great build of an iconic French car. I actually just built the Ebbro DS21 in this same color! Do the doors open on this kit or are they just separate pieces?

-
Tamiya primer and TS13 for Splash Paints?
jaymcminn replied to jaymcminn's topic in Model Building Questions and Answers
Thanks guys, I'm thinking about giving the LP clear a shot. My LHS doesn't carry it but I'm sure it's easy enough to order. -
I just ordered several colors from Splash Paints and am looking forward to trying them out as I've heard nothing but good things about them. I'm starting the 1/12 Tamiya Caterham soon and decided on the Bentley Racing metallic green for the non-aluminum bits since Tamiya can't be bothered to produce a nice metallic dark green. I don't mess with 2k clears, though, and I'm hoping that someone with experience here can tell me if Tamiya TS13 would work over the Splash paints. Also, has anybody used Splash over Tamiya primers? Obviously some spoon tests are in my future, but I was hoping for any insight that someone who's used the Splash paints before might be able to provide.
-
Drove up to K&K Hobbies in Port Charlotte (about an hour away) to pick up some supplies my LHS was out of. At the counter, they were selling fresh free-range eggs from a local farm for $6/dozen. I needed eggs anyway so of course I had to get them. Reminded me of when I was a kid and you could get model kits in the local Winn-Dixie grocery store, just in reverse.
-
Done. Good point about amending the title as well.
-
Torsion spring broke on my garage door last night. The one company that answered the phone today won't be able to make it out for another week or so. The spring is about 20 years old so I guess I can't be too upset about it breaking.
-
Beautifully executed. It really has the feel of the original in an updated package!
-
I love this stuff when I'm using flocking. I get much better results with spray adhesive than Elmer's. I tried using it with embossing powder and it was a mess, go figure!
-
Well, that was a premature rant. They got back to me today and are shipping the tire at no cost. Six week delivery time from Germany, but not the end of the world. Next time I'll step away from the computer and get a snack before posting in anger!
-
One of the tires on a Revell Porsche 911 Targa I'm working on has nasty mold lines on the face, almost like it was short-shot. Trying to get a replacement from Revell looks like it's going to be a nightmare! The order form is ridiculous. You can only file a "warranty" claim if you have proof of purchase, which would have been a generic receipt from my LHS if I still even had it after six months. So I went to the "spare parts" link, where you fill out your information and they inform you (in German) that they'll get back to you within ten days (more or less) with the cost of the part plus shipping. From Germany. Which will probably cost roughly the same as just buying another kit. All for a lousy kit tire with no sidewall detail! The kit, minus the tires, is fantastic but if this were a Tamiya kit I'd have the part on its way to me after a pleasant five minute phone call. Rant over... Note: it was suggested (correctly) that I amend this post and make everybody aware that, as I posted in one of my replies below, Revell did get back to me within a day and offer to send a replacement free of charge for the offending tire. I think the expectation of poor customer service these days has primed a lot of people to think that that's always going to be the case but I'm happy to report that it wasn't here.
-
Yeah, for a "dying hobby" that's a lot of product. 1/12 Stratos, Aston DB5, VW Corrado and GT350R (new Revell decals? Yes, please!) are definitely in my future. It would be nice if Round2 released the 280ZX with a new windshield (no rear view mirror molded in) but I'm not holding my breath for that one. And the "hot rod" N1 Starfighter from The Mandalorian. And the Tamiya Gordon Murray T50, which isn't in Rocketfin's post. Gonna be an expensive year!
-
Looking forward to this build. I've been thinking about picking this kit up, I've heard nothing but good things about it!
-
Preventing Tamiya Spray Can Runs/Bubbles
jaymcminn replied to TheCamaroKid's topic in Model Building Questions and Answers
50% humidity is fine for Tamiya sprays. Honestly, if you back off to 8-10 inches away from the body for your wet coats you should be good. Keep the can moving too... don't stop or go too slowly. For Tamiya clear I like to hit it within 30 minutes of the final color coat with 2 to 3 medium coats. -
Seeing it under construction, even in mockups, doesn't quite prepare you for the impact of the finished model. Absolutely beautiful!
-
I've been playing with the MFH embossed foil. It's nice stuff, but it has its limitations. It's thicker than BMF with very strong adhesive. It doesn't like too much burnishing, which will cause the pattern to disappear. It's going to get used for something, I just haven't figured it out yet!
-
This is going to be a good 'un. That stance is killer and the prep work you've done is flawless!
-
That is a work of art. I love those big Tamiya golden age F1 kits!
-
Advice needed - airbrushing with acrylic paint
jaymcminn replied to bh1701's topic in Model Building Questions and Answers
The Paasche H, as Dave mentioned above, does like a strong air supply. My Iwata Smart Jet compressor couldn't produce the CFM to operate it. A pancake compressor should work just fine, however. I used to just thin Model Master acrylics with water but recently switched to using Vallejo thinner medium for Vallejo and Revell acrylics and Tamiya thinner for their acrylics. Acrylics seem to go down smoother and cover much better using a specialized thinner. Water evaporates too slowly and can lead to paint puddling and poor adhesion. -
Tamiya makes an excellent anti-static brush. I use it for cleaning models as well as between paint coats instead of a tack cloth.
-
Airfix missed their chance to release the Top Gear Marina with Piano gift set...
-
Pocher Bugatti 50T coupe. Whenever they (rarely) show up for sale, they're well into 4 figures and as much as I'd like to, I just can't talk myself into it.