jaymcminn
-
Posts
1,757 -
Joined
-
Last visited
Content Type
Profiles
Forums
Events
Gallery
Everything posted by jaymcminn
-
Amazing. Some of the nicest weathering I've ever seen on a model car. It really looks like most of these looked by 1980 or so!
-
I'm a Florida boy. Snakes? No problem. Lizards? Love 'em. Gators? Awesome, as long as I'm not on the menu. But I'm not a fan of spiders. The worst ones are huntsman spiders, which can get up to 5" leg span and are not afraid of you. When one of those things gets into the house (rare, but it happens) the cat won't even mess with it!
-

Why is my coat so splotchy
jaymcminn replied to Milo's topic in Model Building Questions and Answers
When did you apply the base coat? Enamel can take weeks to gas out whether or not it "feels" dry and your acrylic top coat will react if it's being sprayed over "wet" enamel. Really, the best suggestion has been made several times in responses to your threads, which is to buy a pack of plastic spoons and practice until you get fairly consistent results. Learning how to airbrush is a lot less painful when you're ruining spoons instead of kits! -
This keeps getting better and better. Great idea using the chrome transfers for the headrest cavallinos!
-
I don't know if any plastic kit manufacturers even have the Ferrari license right now. For a while I was keeping my fingers crossed that Academy would just release all the Italeri kits as generic "Italian sports cars" like they did with the California Spyder, but no dice there either. I lucked out finding this one!
-
Dang, I missed this. Absolutely beautiful!
-
Rich, I promise the next Ferrari will be red! Thanks Bruce! My usual photo setup is an inexpensive ($50-ish) setup from Amazon with two lighting stands. I'll use either white poster board or, for large scale builds, white craft paper on a roll for the backdrop. Pics were taken with my Google Pixel 6 phone. The only manipulation was cropping and adjusting the color temperature a bit cooler. Sometimes I'll get fancy and bust out the DSLR but for website pics the phone is so much easier!
-
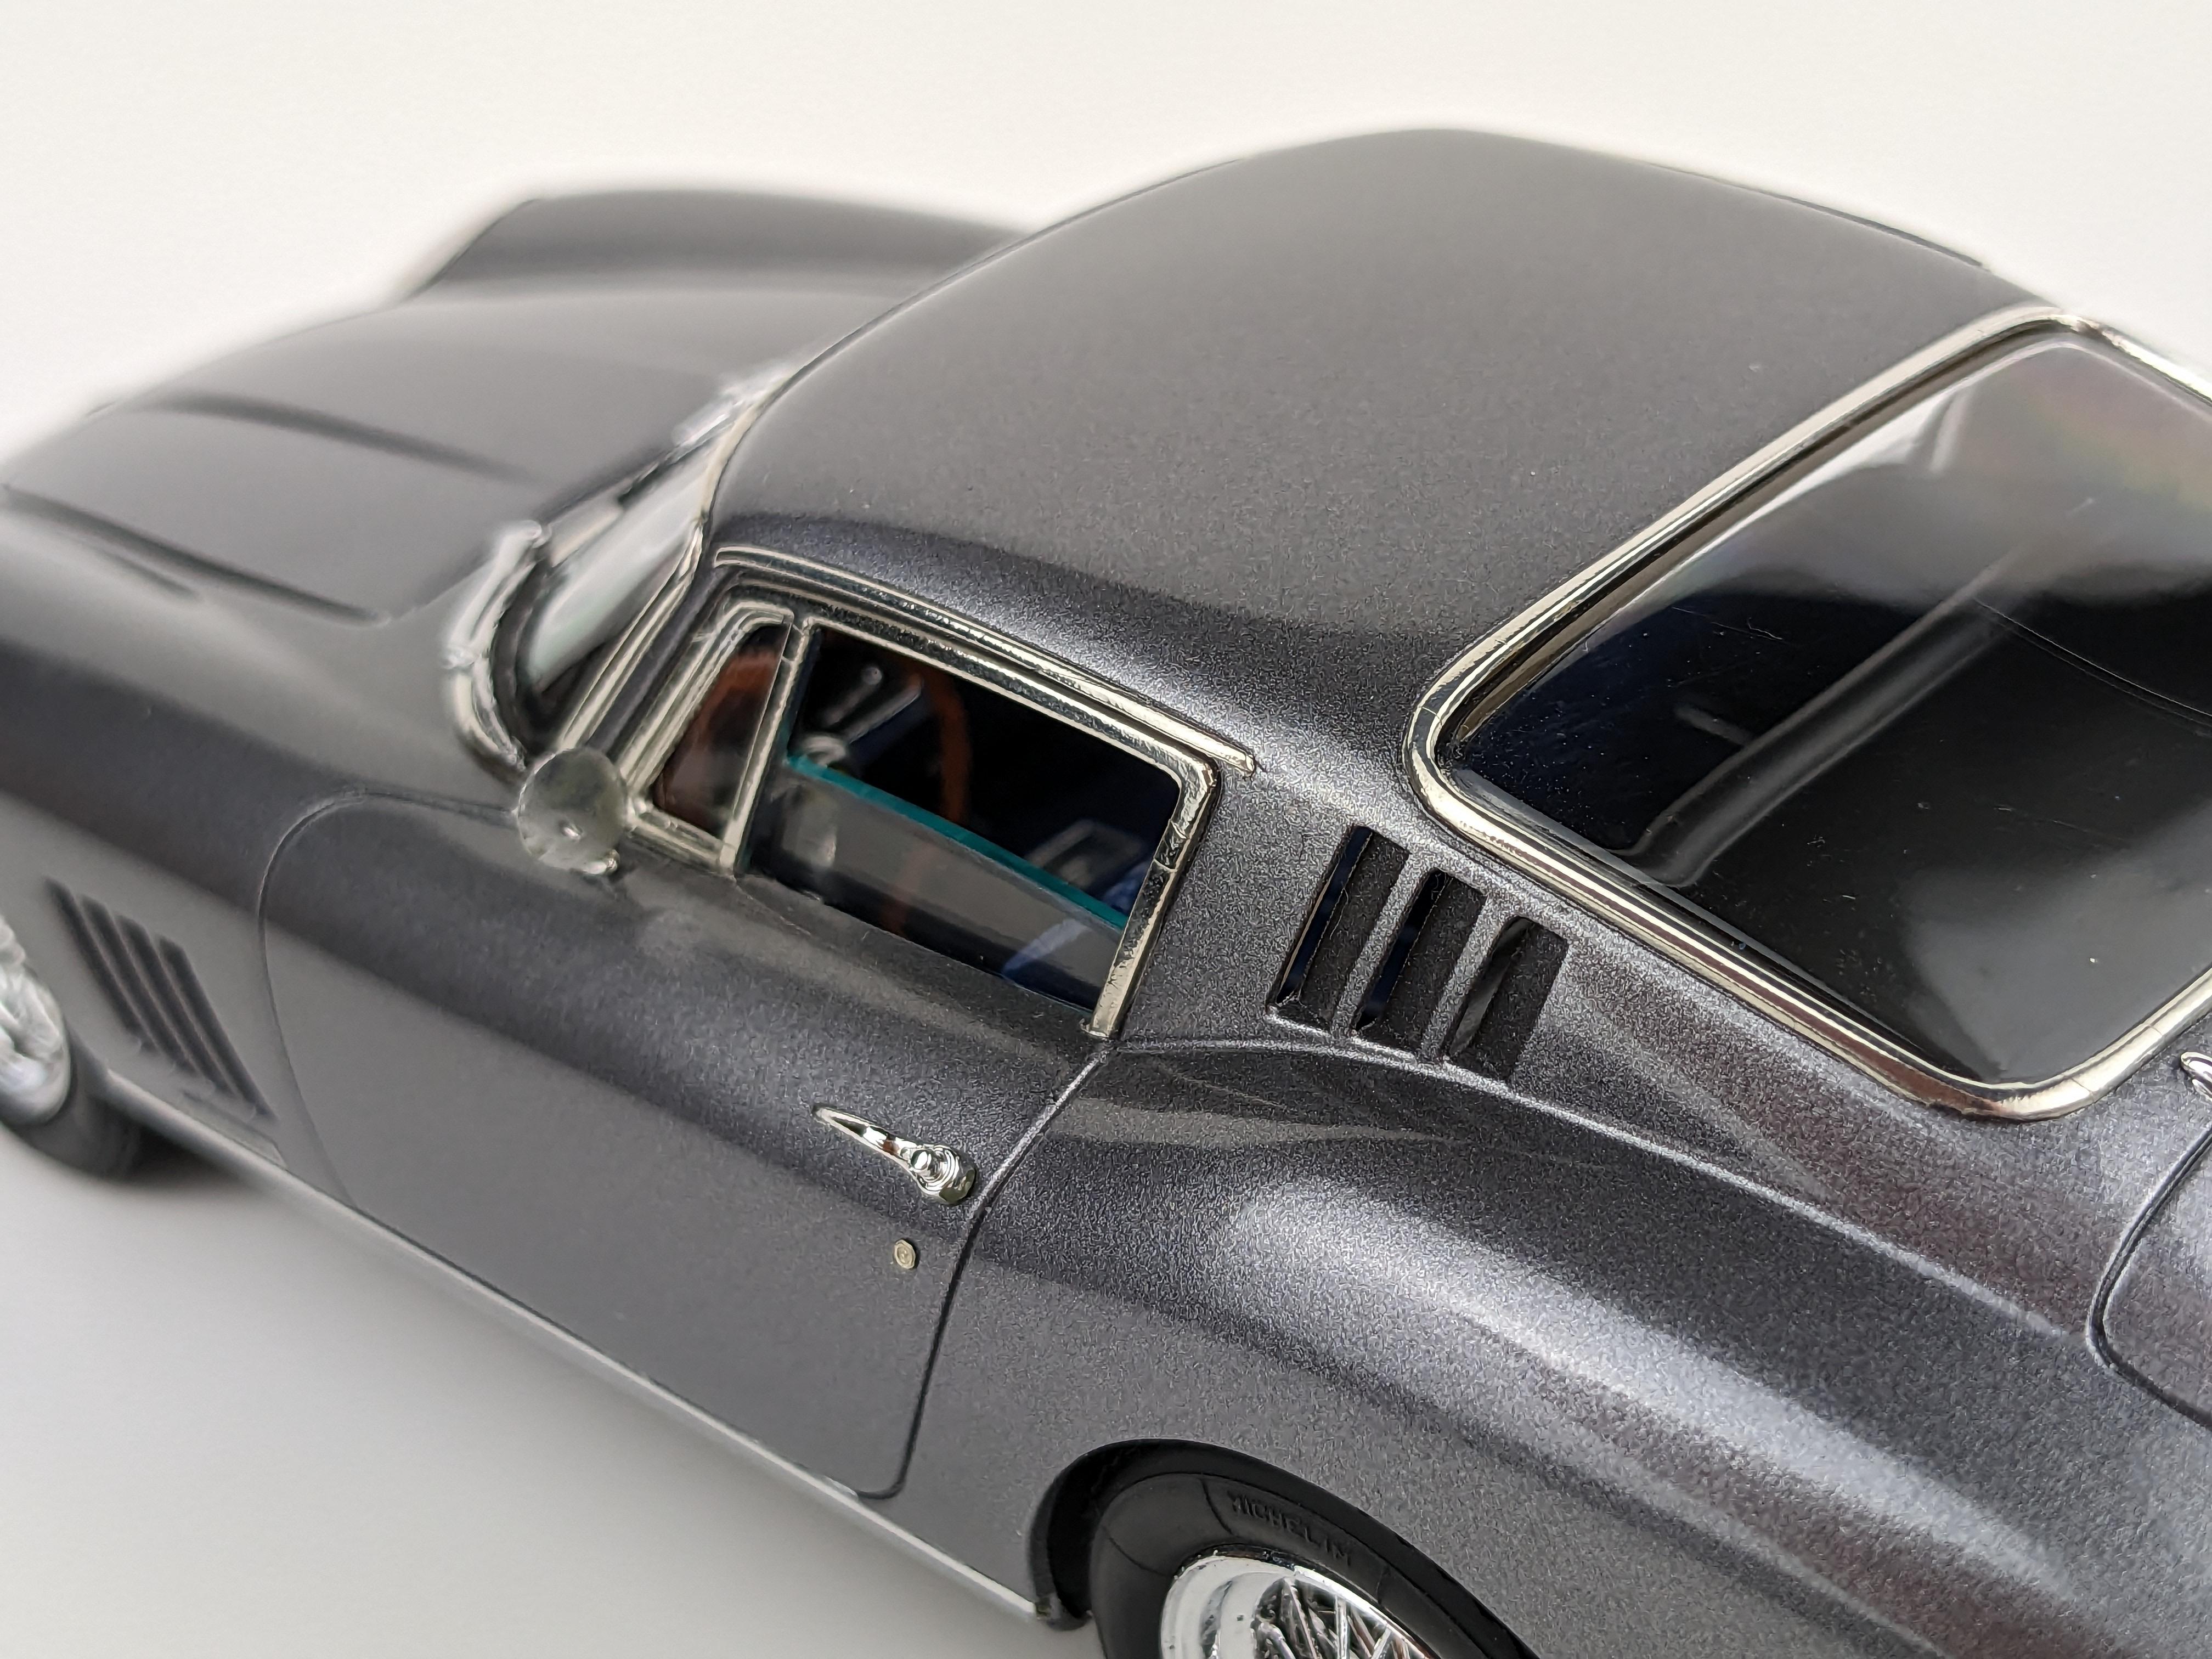
Thanks everybody! Sonny, the only thing I did with the headlight covers was to foil the edge trim. I think they look worse on the sprue than when they're installed. They even fit really well. I did replace the terrible kit headlight units with some parts-box pieces with actual reflectors. The script and logo on the boot lid are self-adhesive Crazy Modeler pieces. Really beautiful but fragile. I burned through three of the scripts trying to get one to settle down without damage!
-
Question about Gundam tool kits...
jaymcminn replied to JollySipper's topic in Model Building Questions and Answers
I'm guessing that the price definitely reflects the quality, given that a good pair of sprue cutters costs more than the whole kit. For something you're going to get a lot of use out of I wouldn't trust it. For beginners it's probably okay, though. -
Ferrari Boxer triple build - The 'Brigette Bardot' cars
jaymcminn replied to beeRS's topic in WIP: Model Cars
Looking forward to this. My wheel fix many years ago was the Fujimi Campagnolo wheel set (same wheels as the 330p4 kit) with the kit tires. Close, but these are better! -
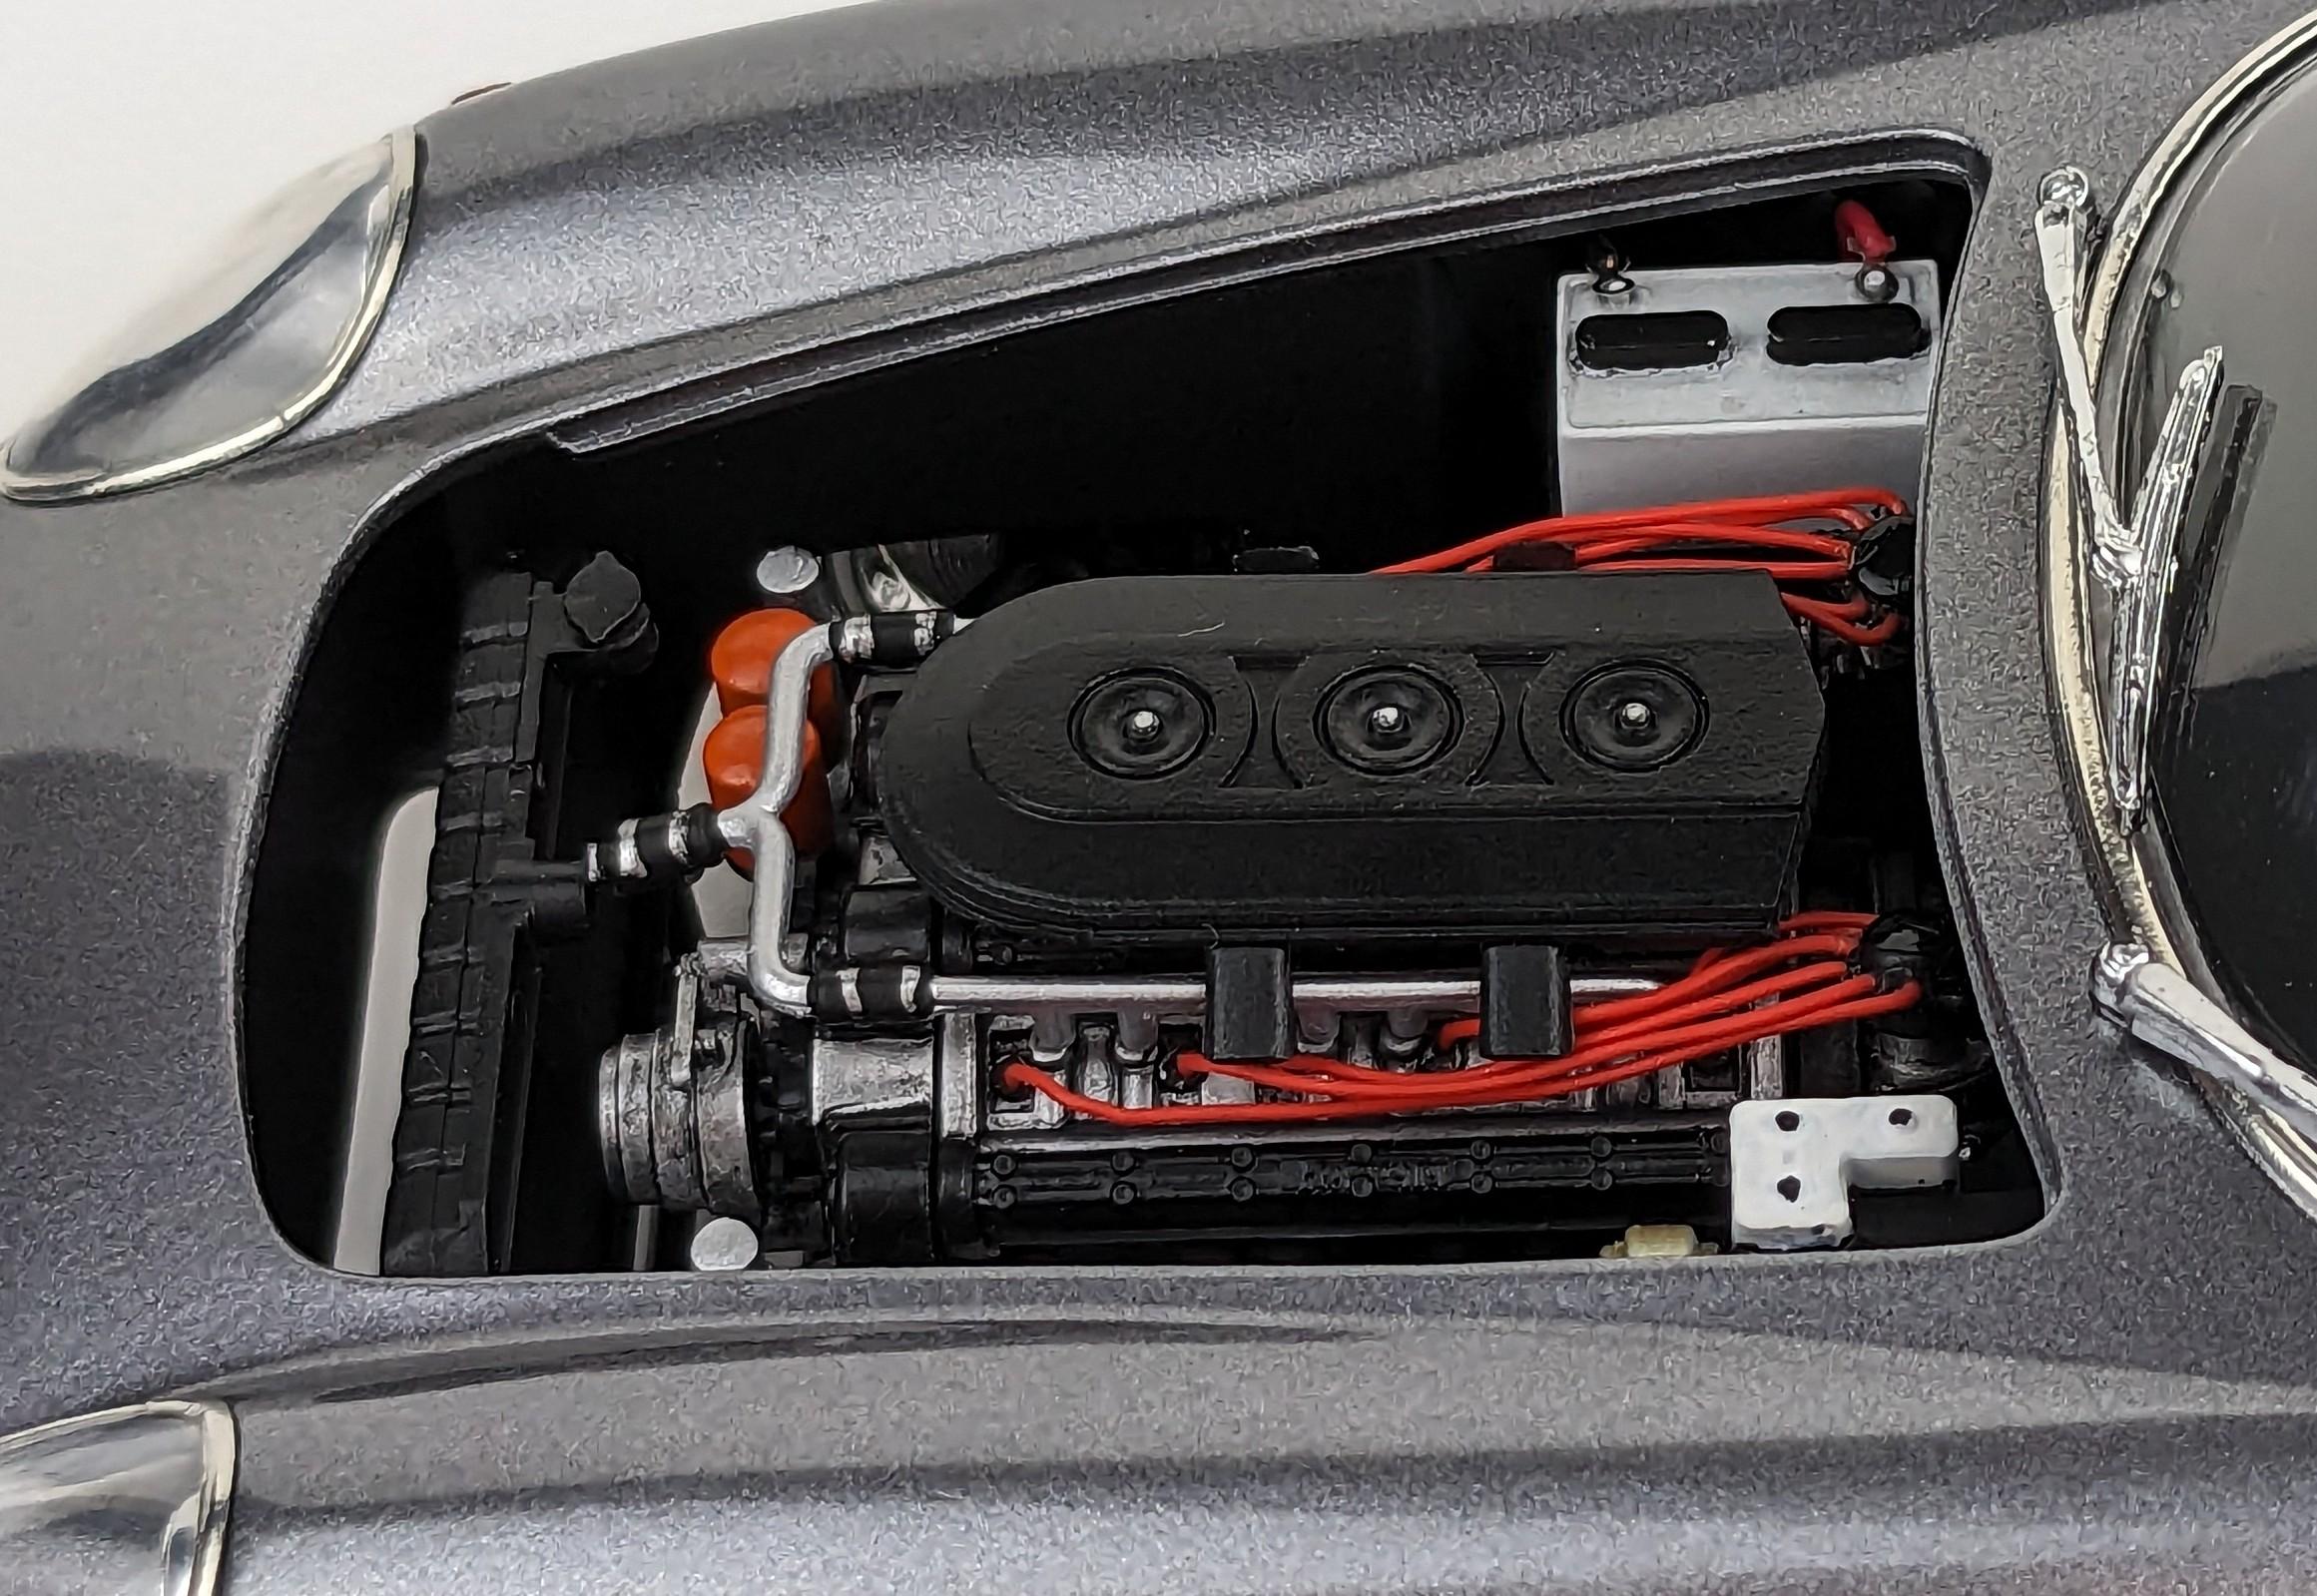
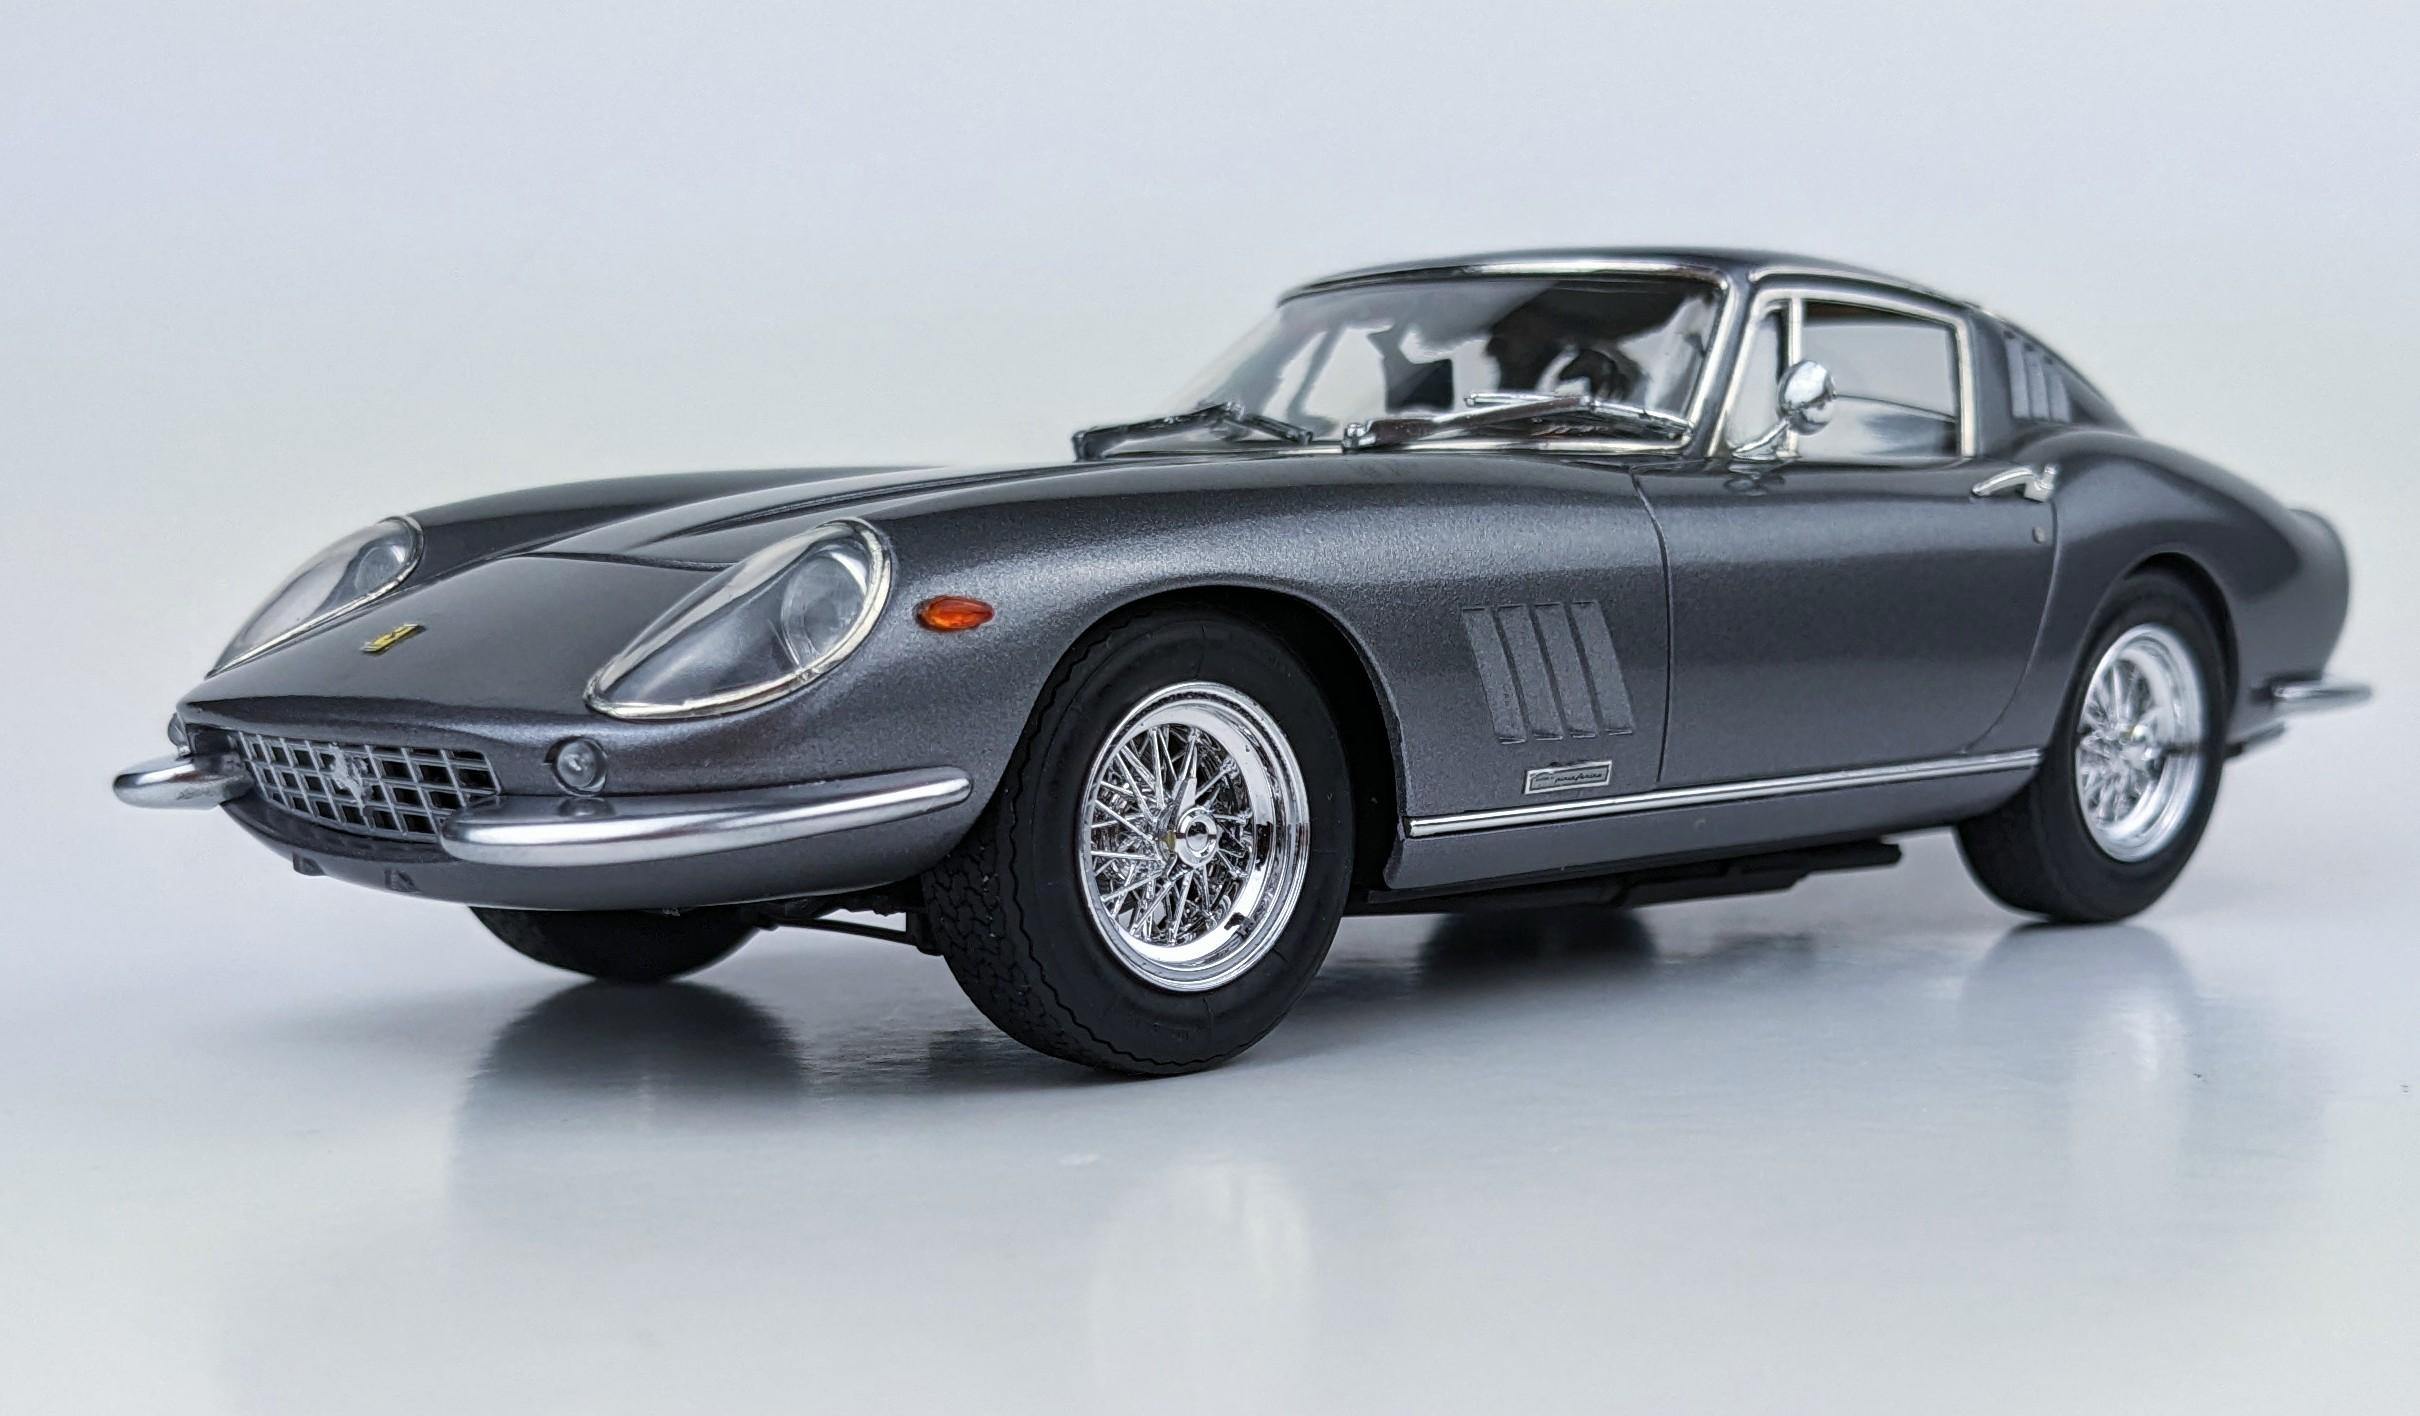
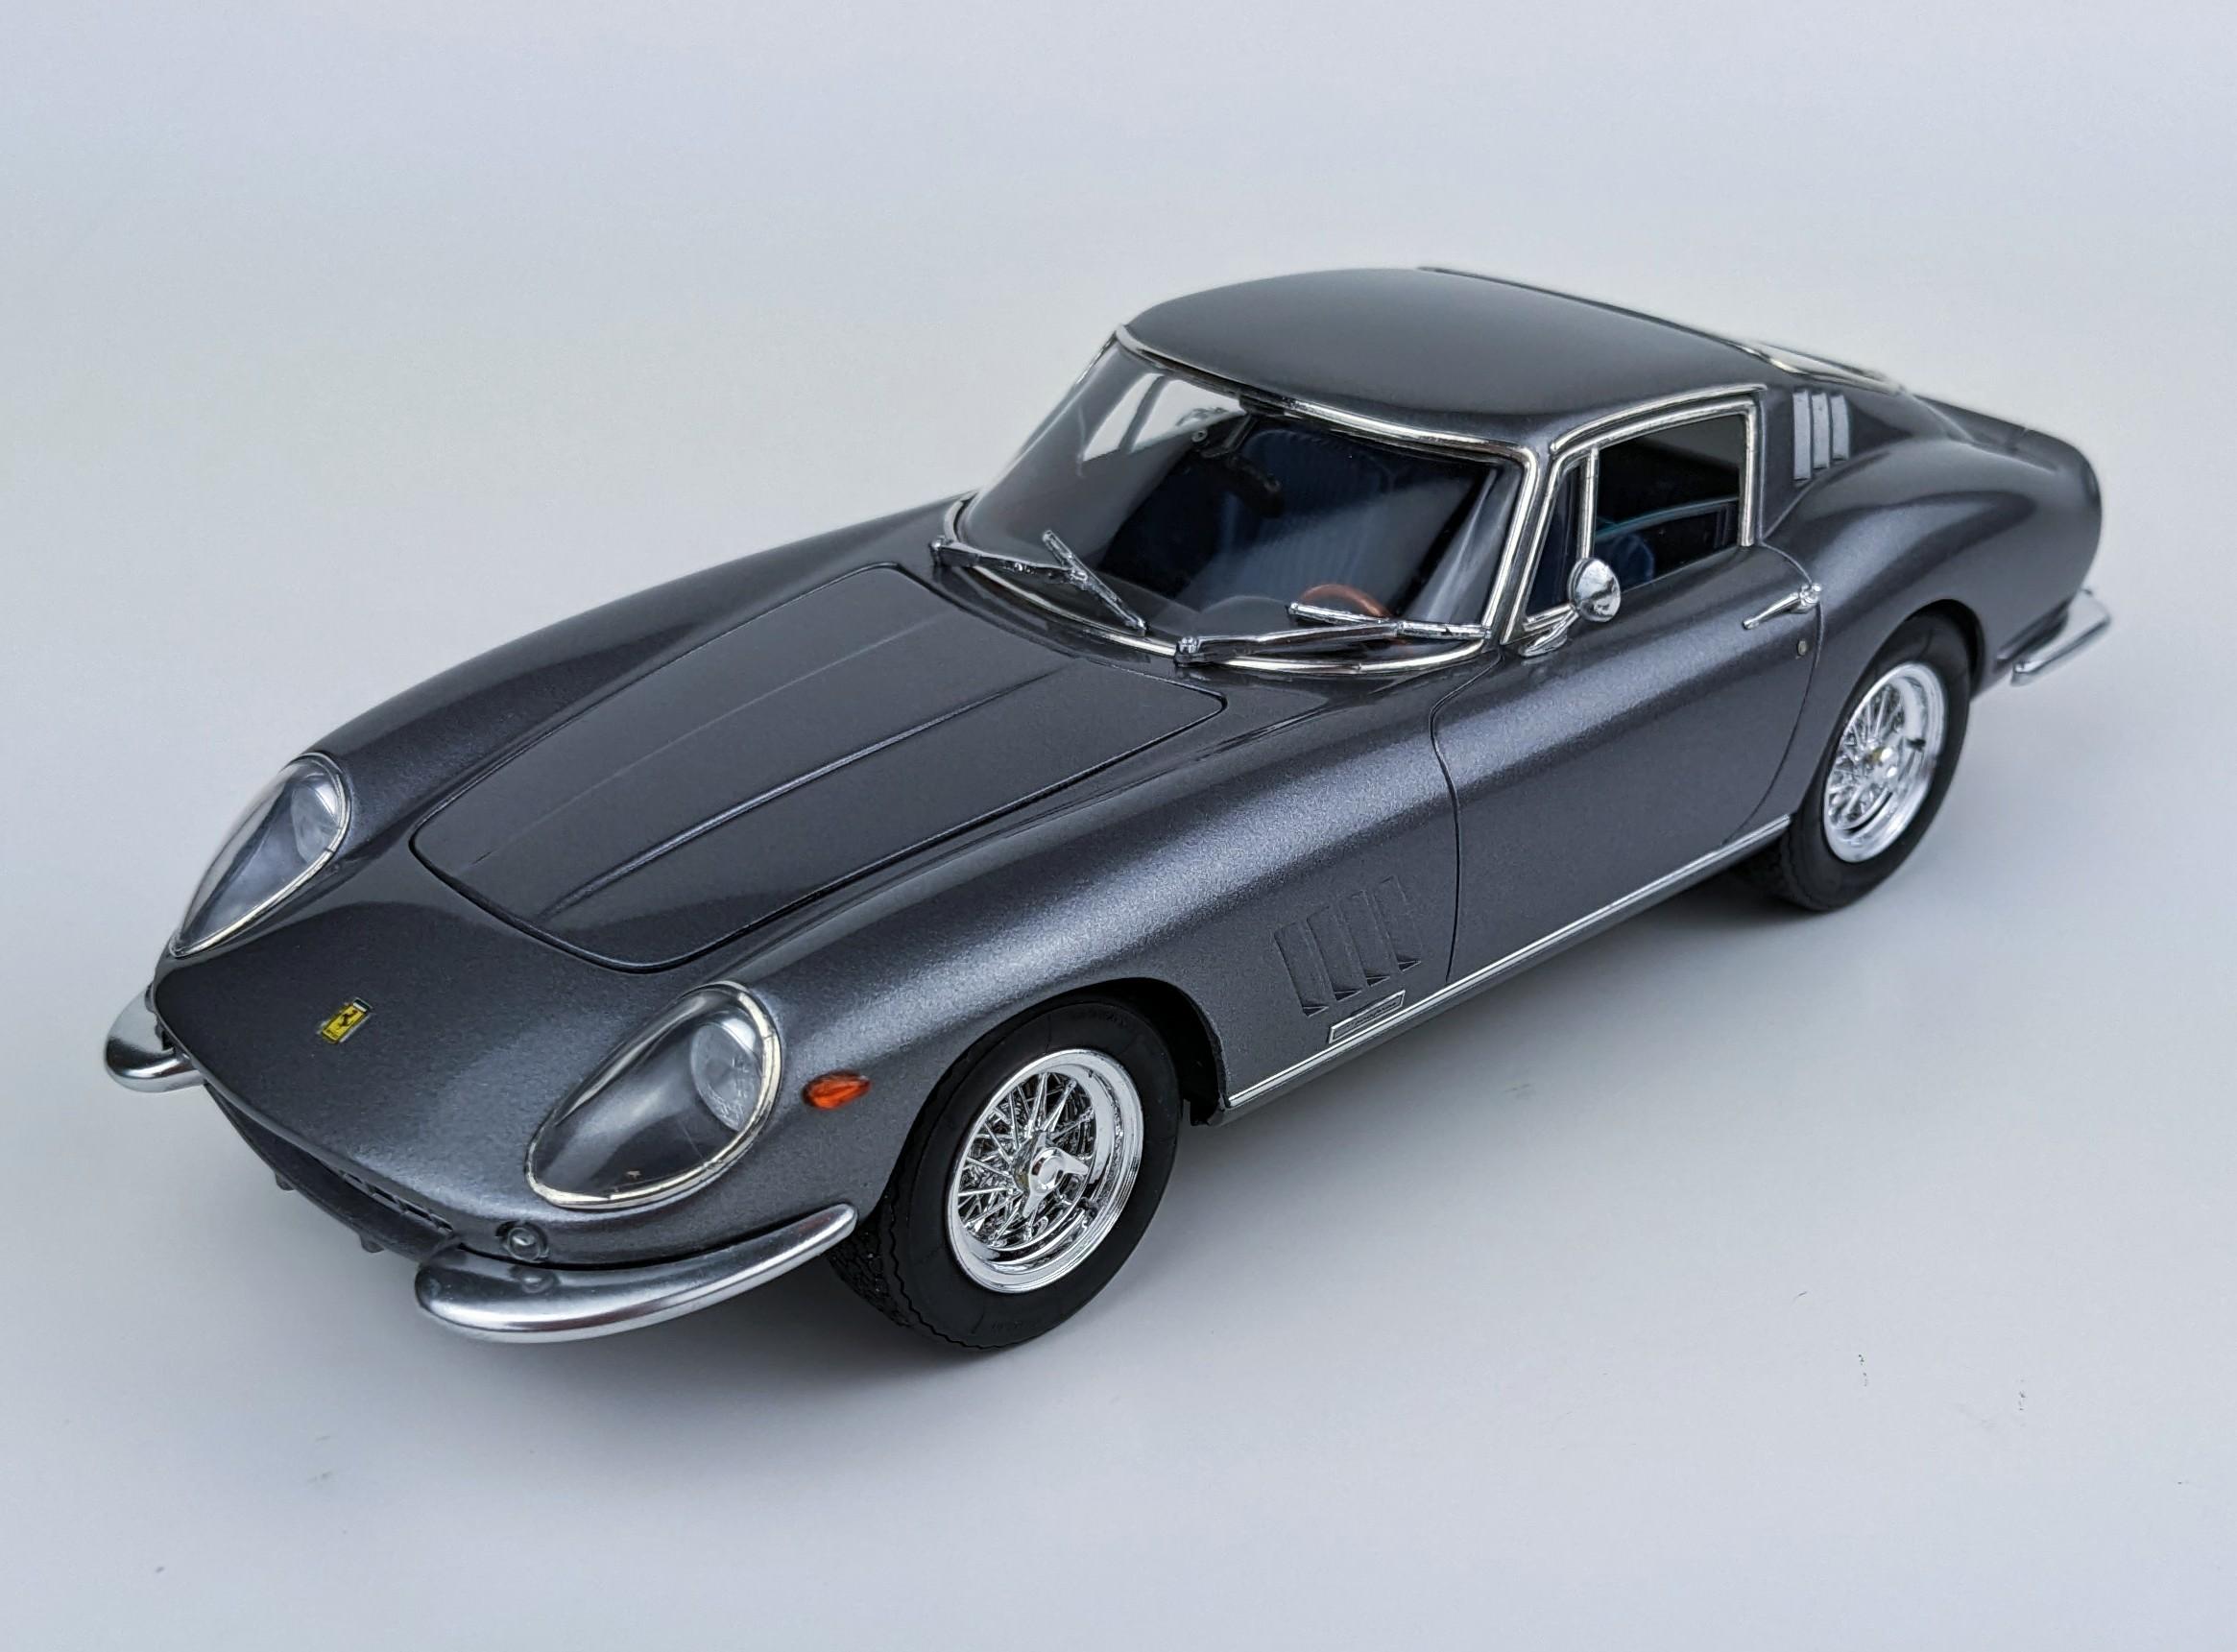
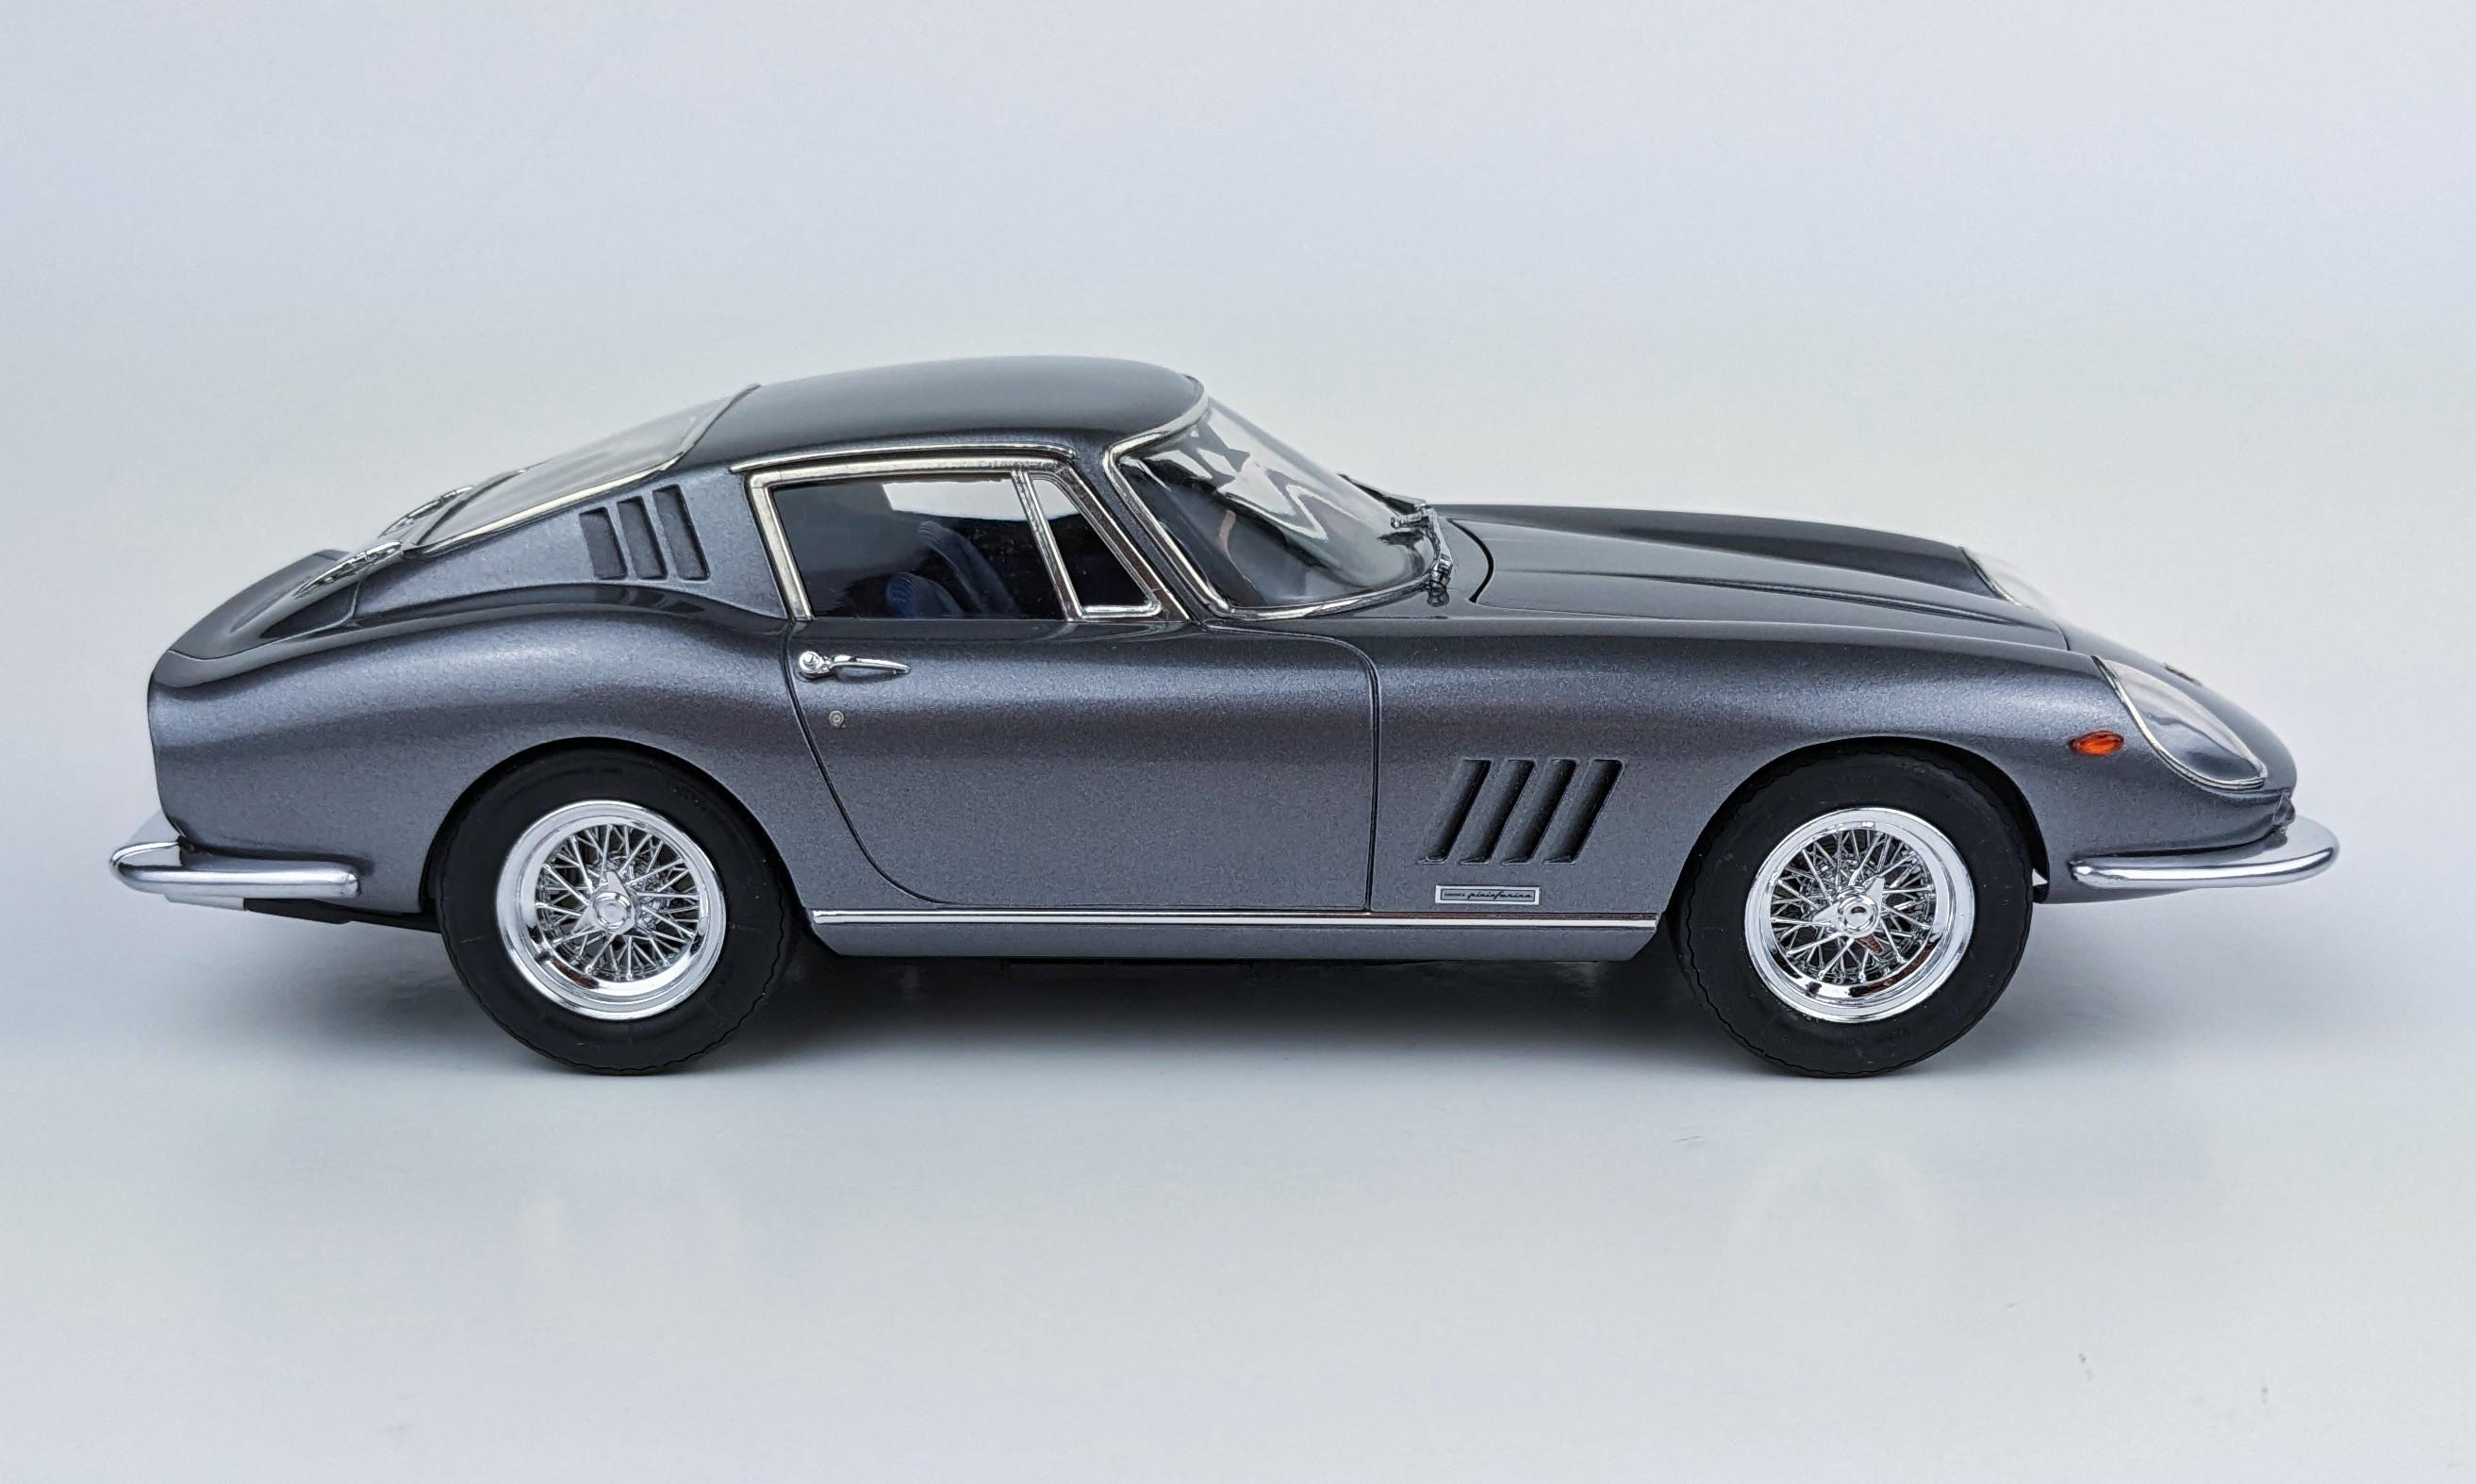
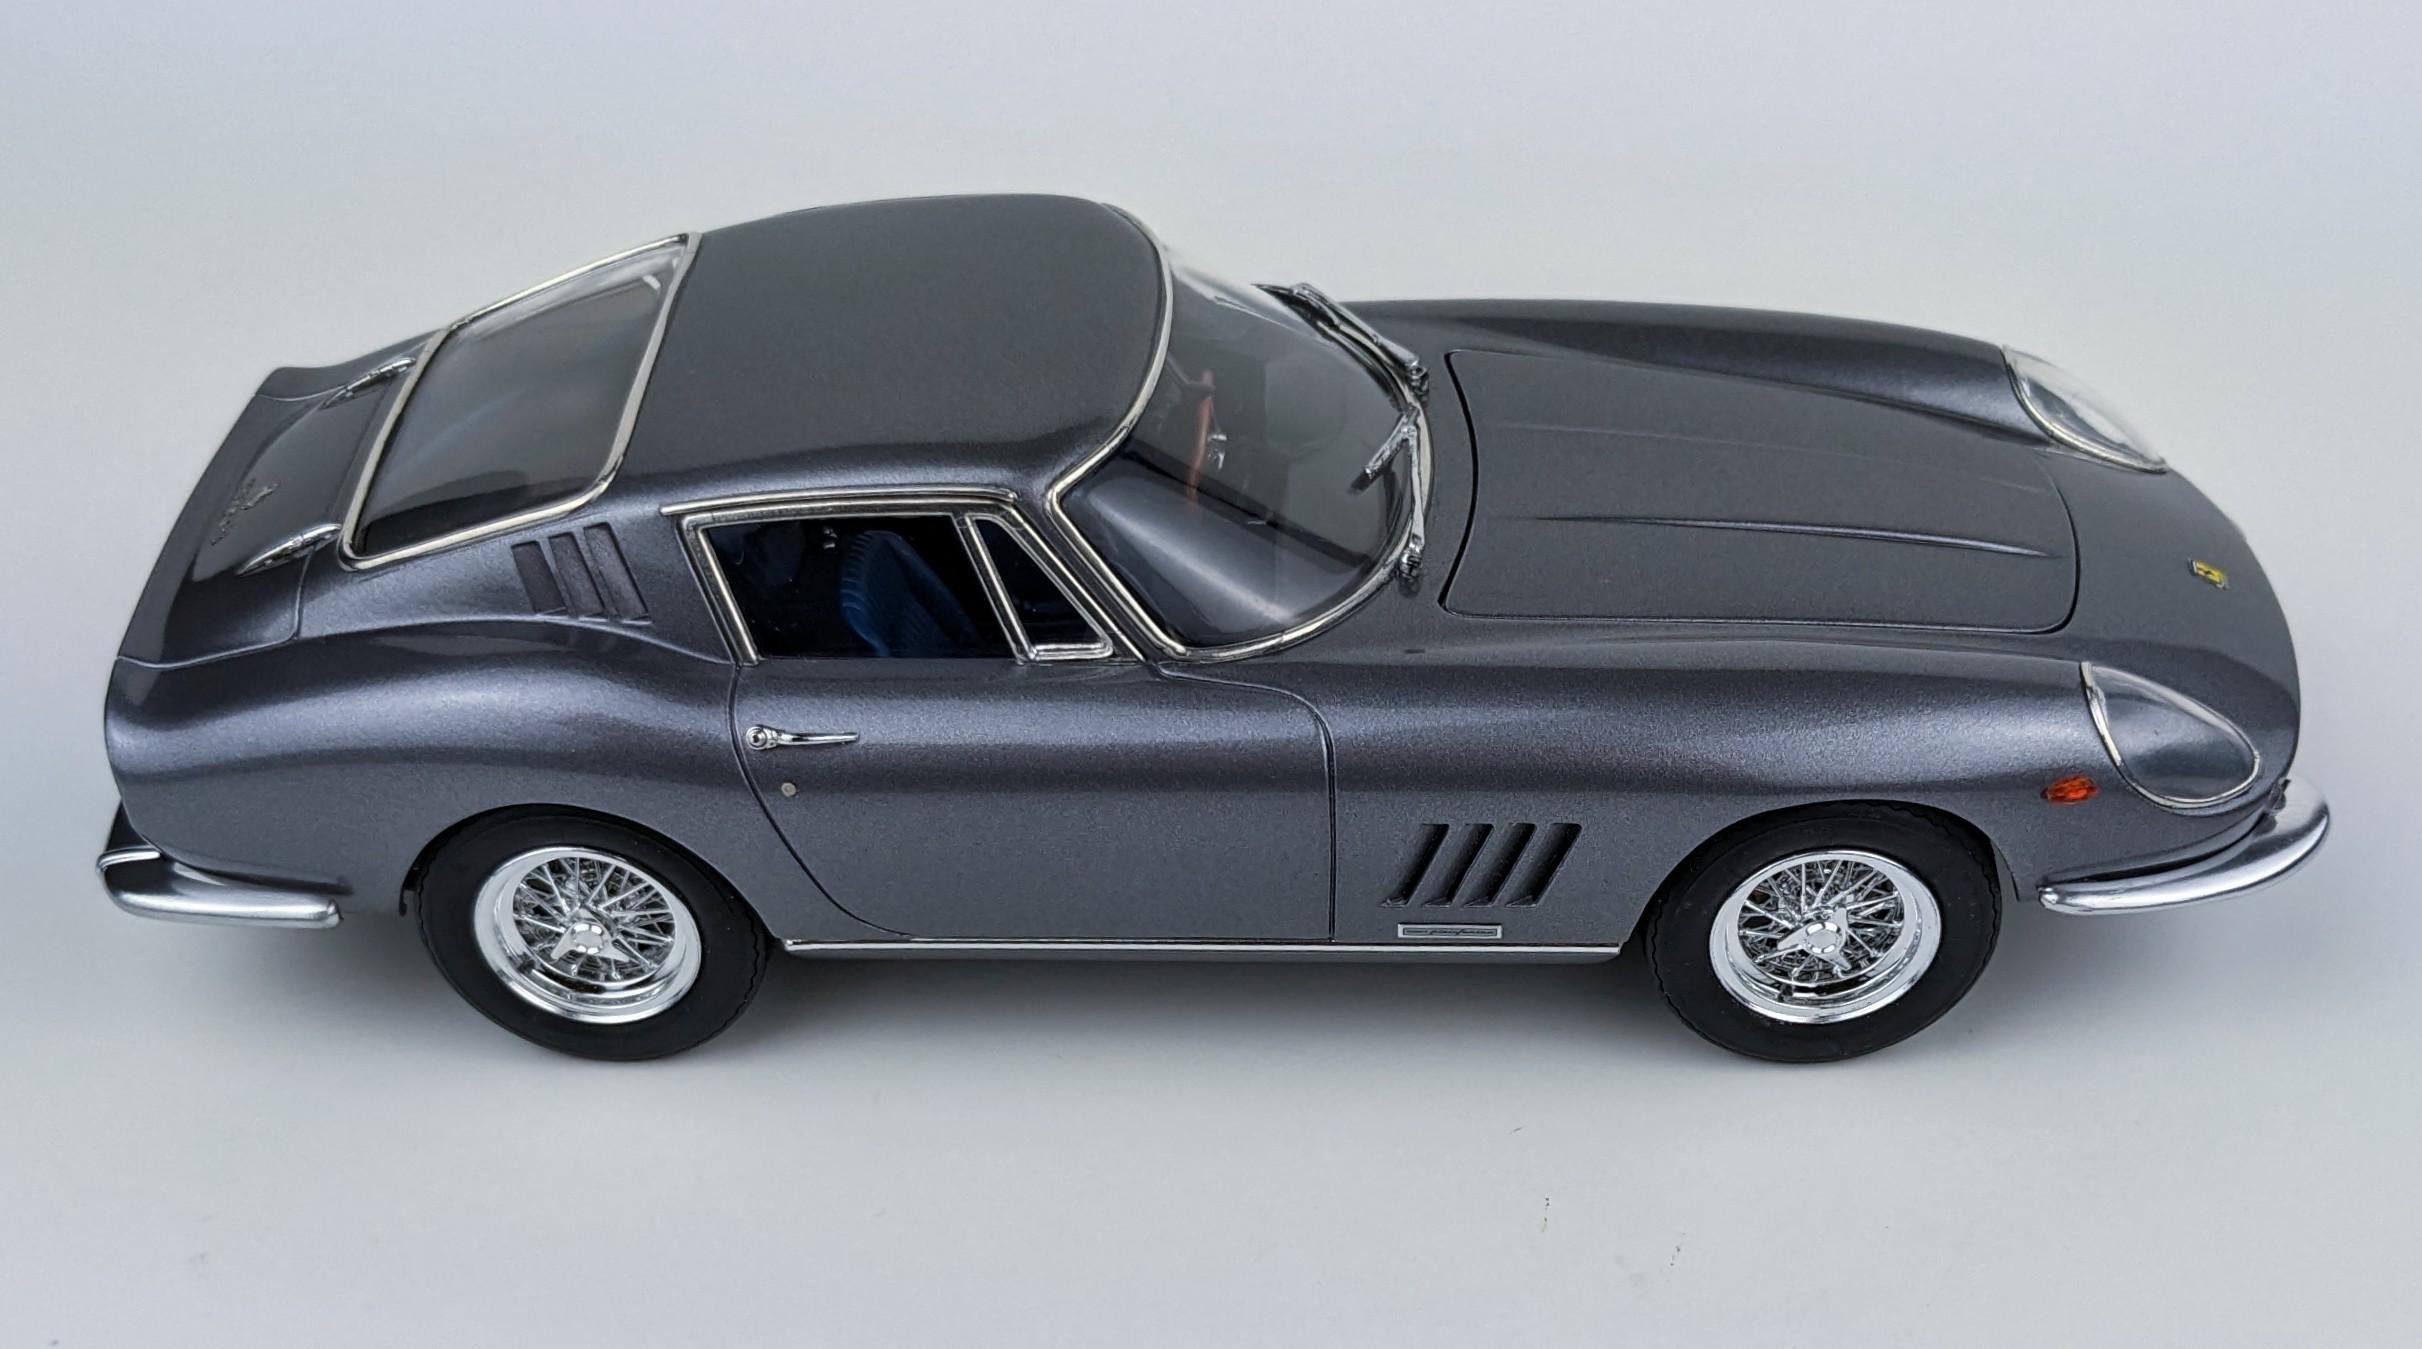
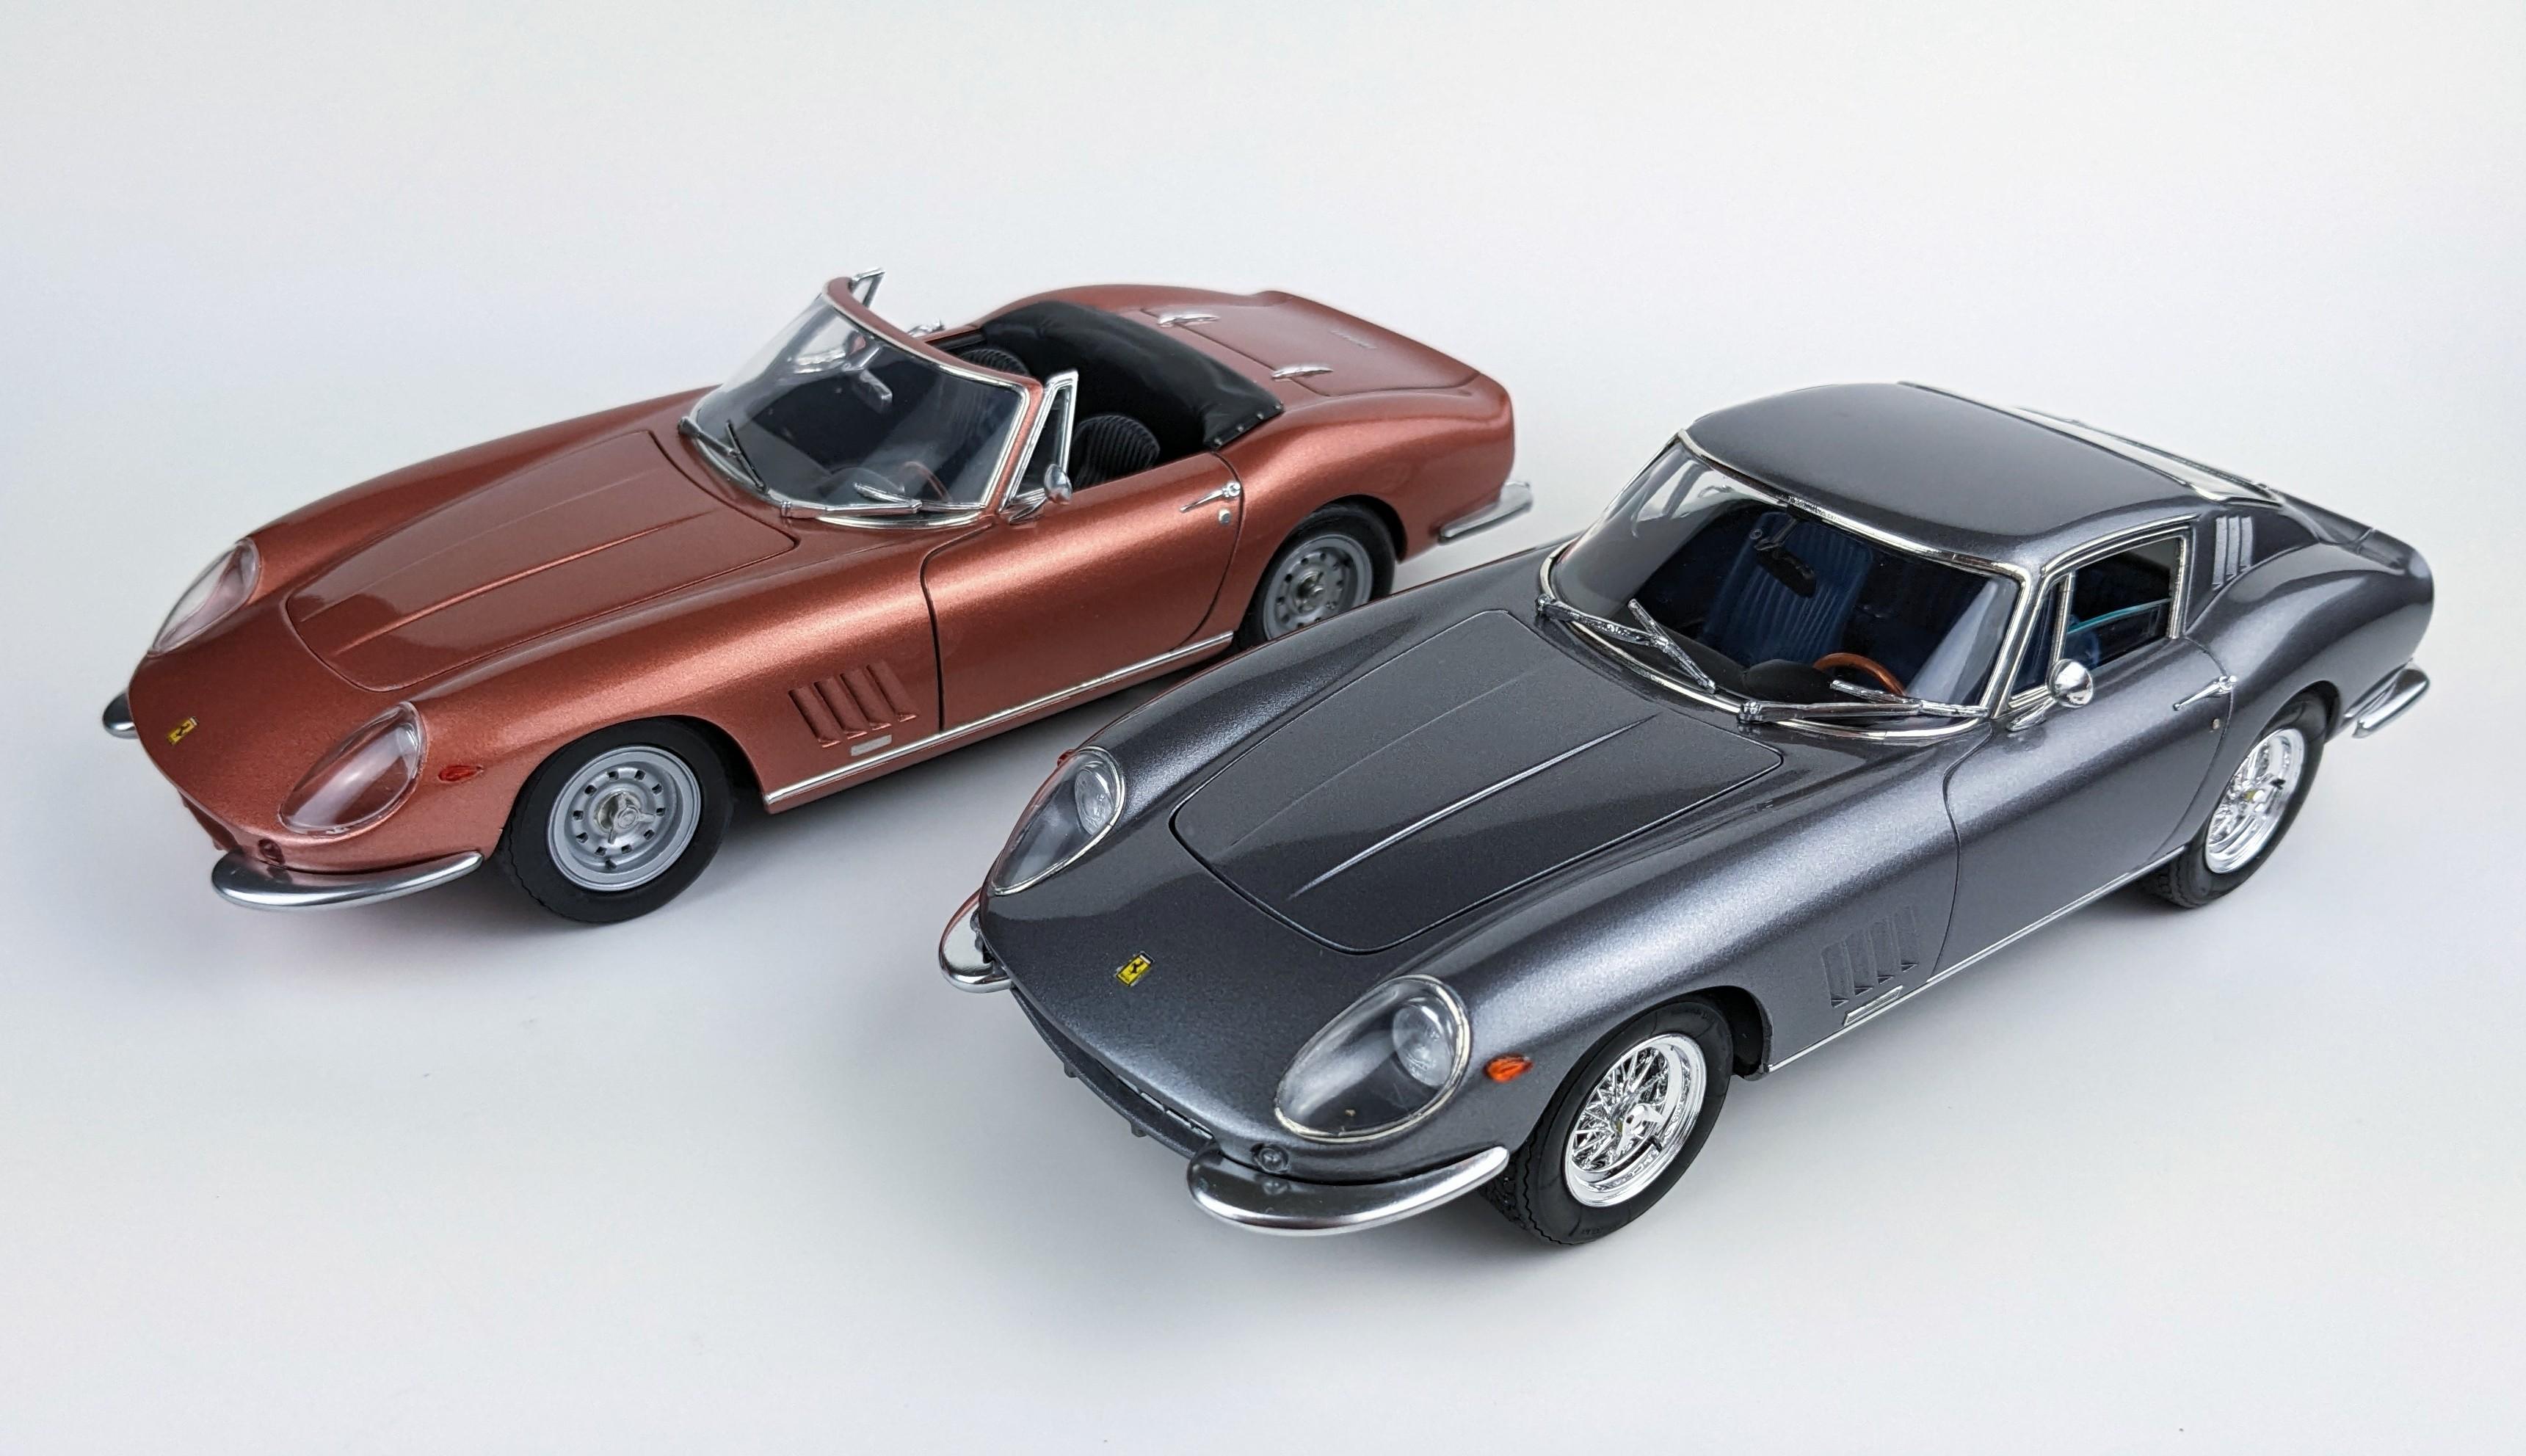
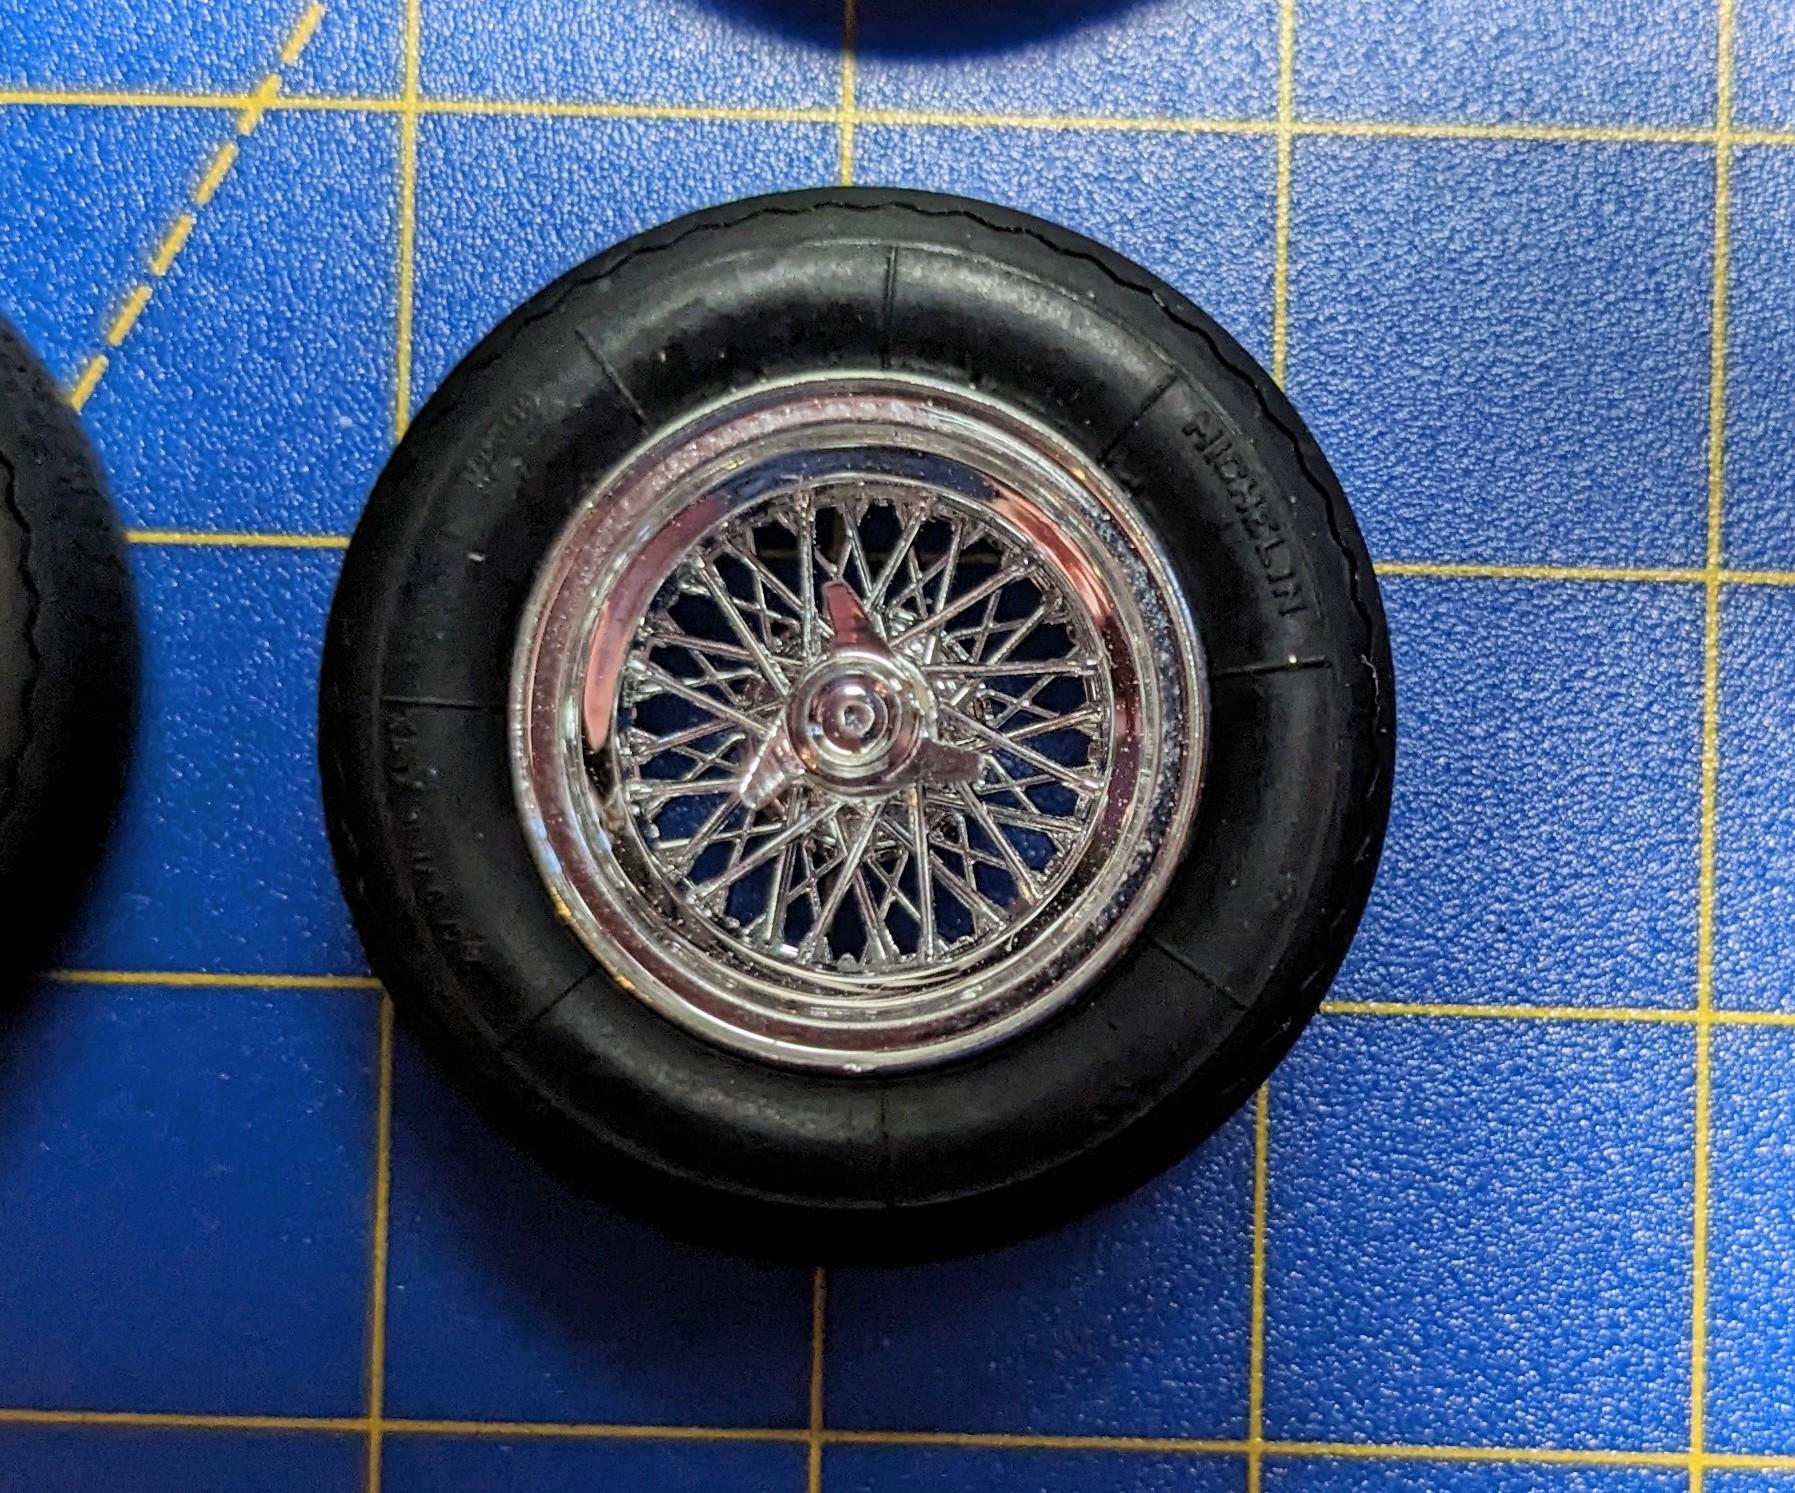
Several years ago, I acquired this kit at my LHS when they bought a model collection. The 275GTB was only released twice in the early 90s, once by Italeri and once by Revell. These little Italeri Ferraris are nice kits with very good detail right out of the box. A few additions can really make them pop. I replaced the mediocre kit wheels with Fujimi Borranis and Michelin XWX tires from the Ferrari Daytona kit. Bumpers were dechromed, mold lines and sink marks removed, and then airbrushed with Molotow Chrome. Body color is Tamiya Light Gunmetal under TS13 Clear and the interior is XF8 Dark Blue. Some basic wiring was added under the hood as well. This was a great "wind down" project after my 1/12 Bugatti 35b and I'm really happy about how it turned out. A couple of the pics below are with the Italeri 275 Spyder I built several years ago. Enjoy the pics!

- 39 replies
-
- 17
-

-
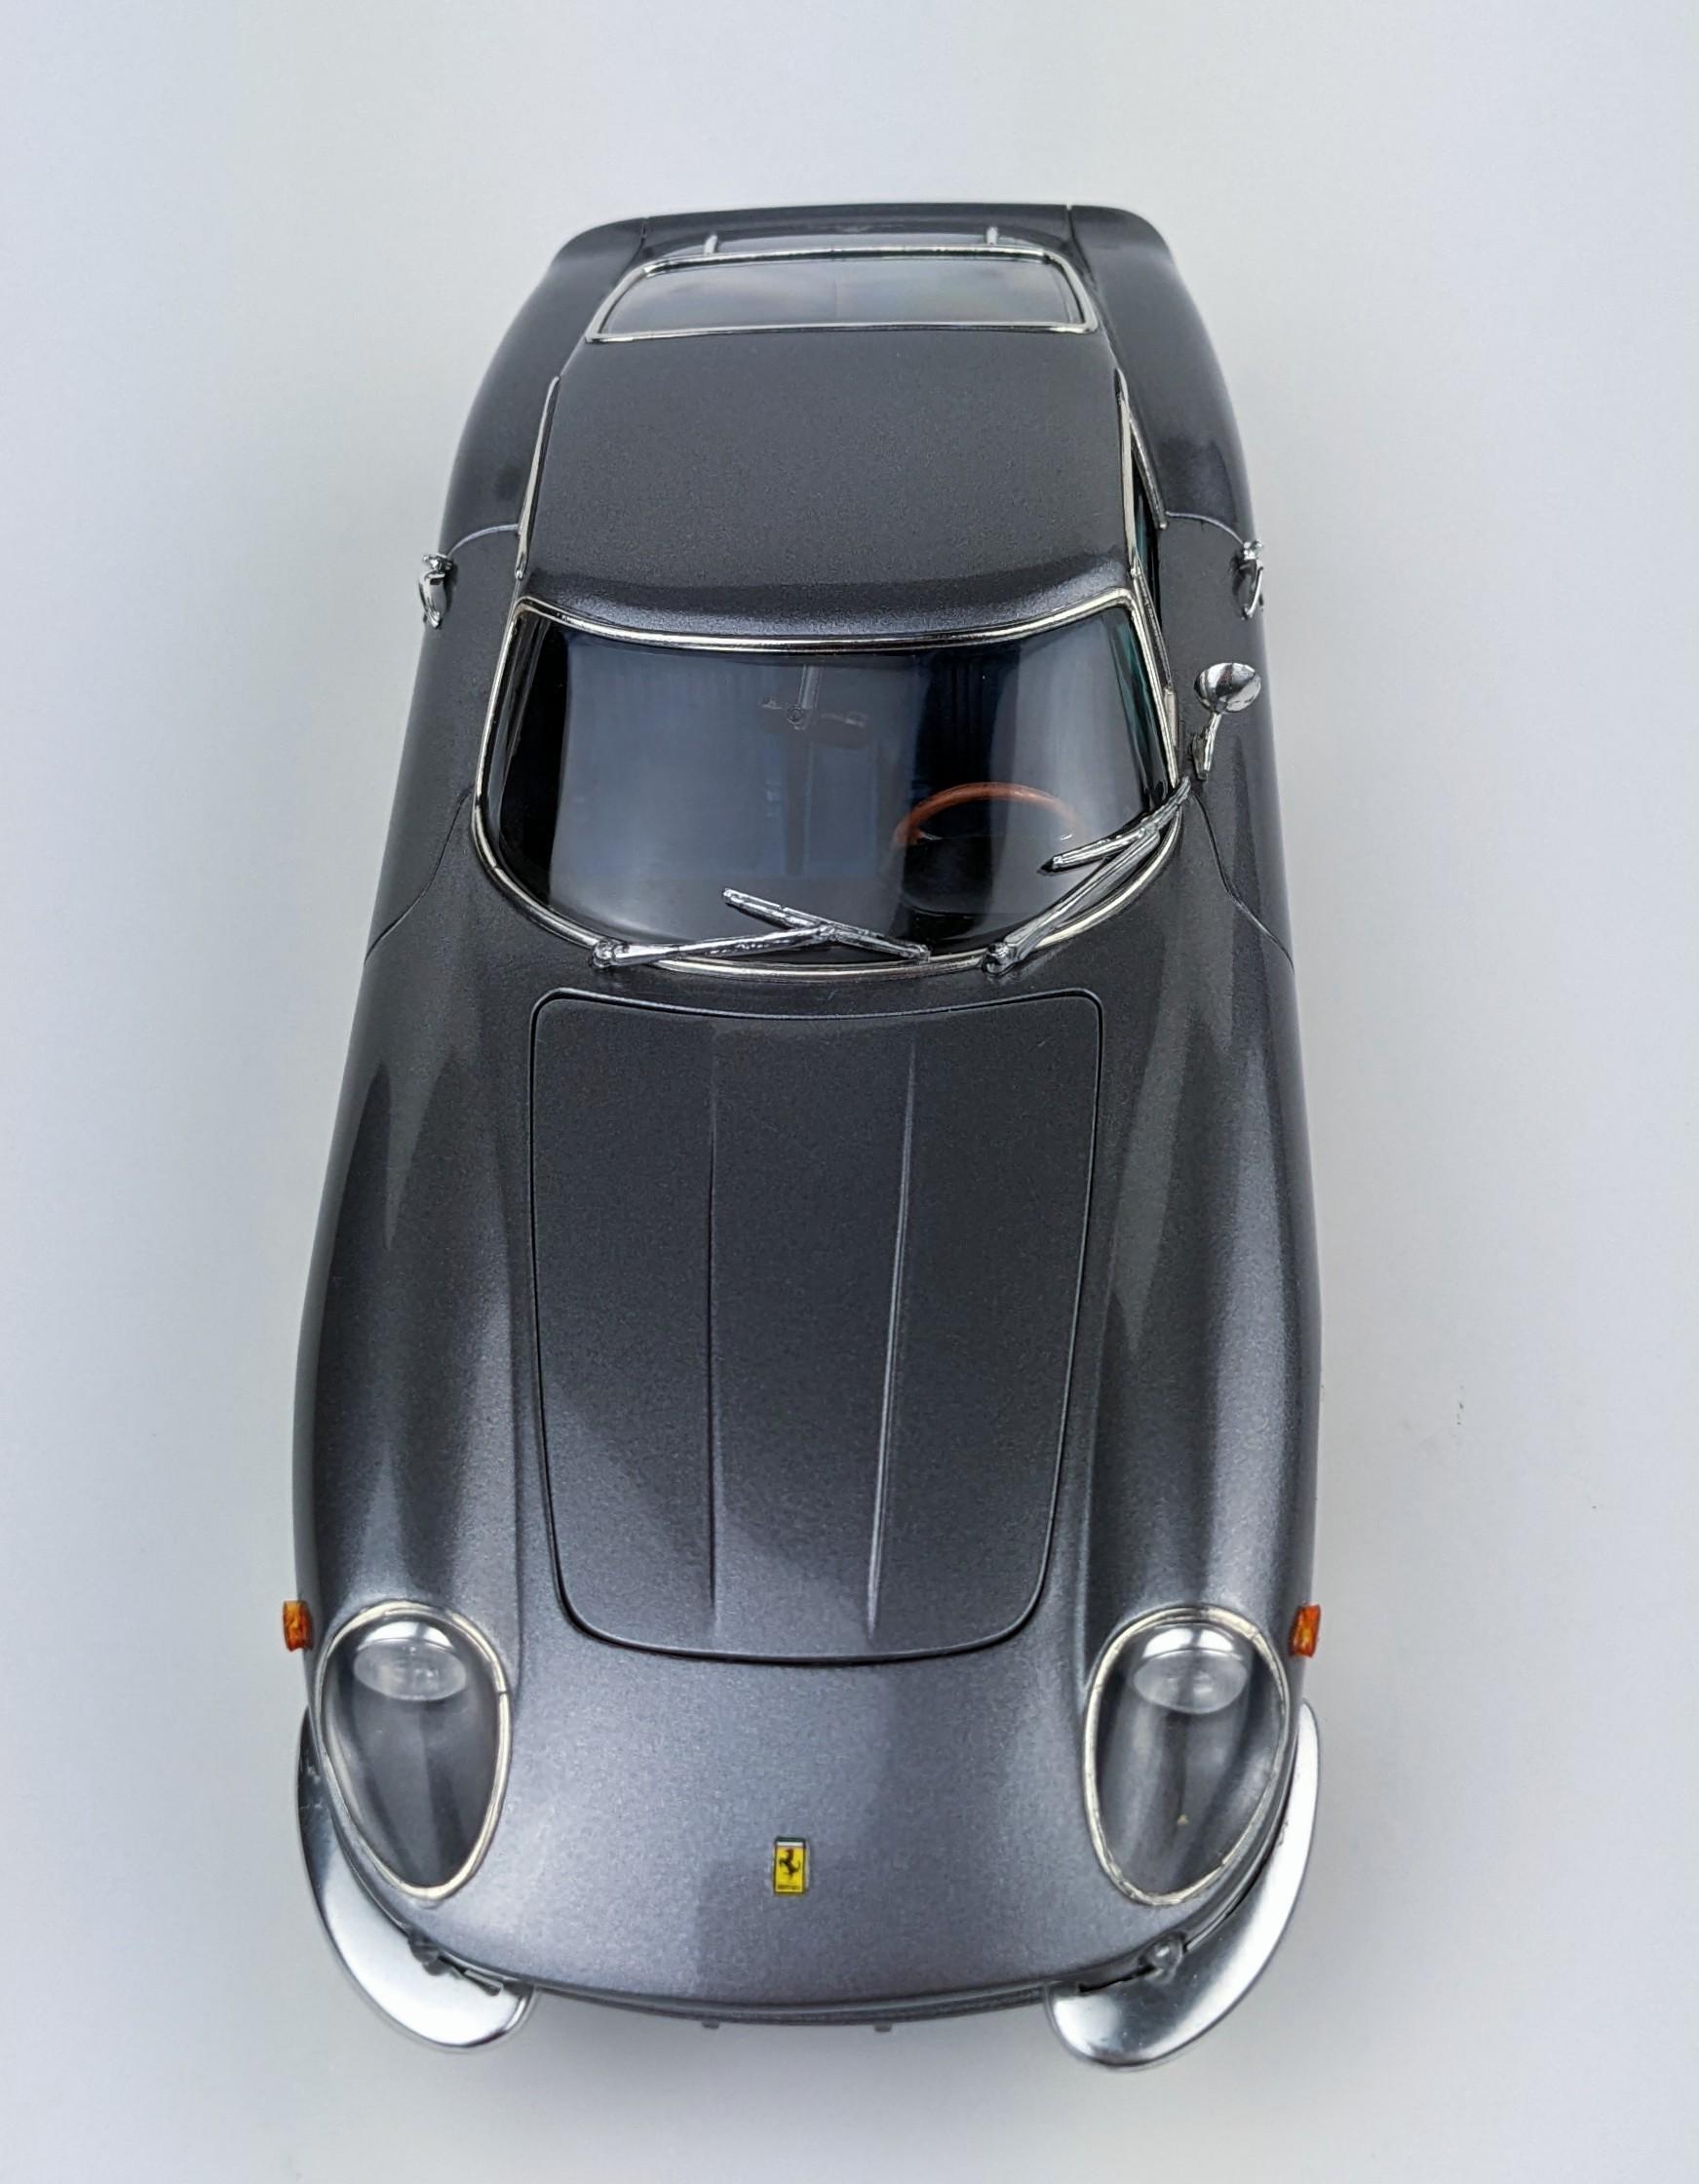
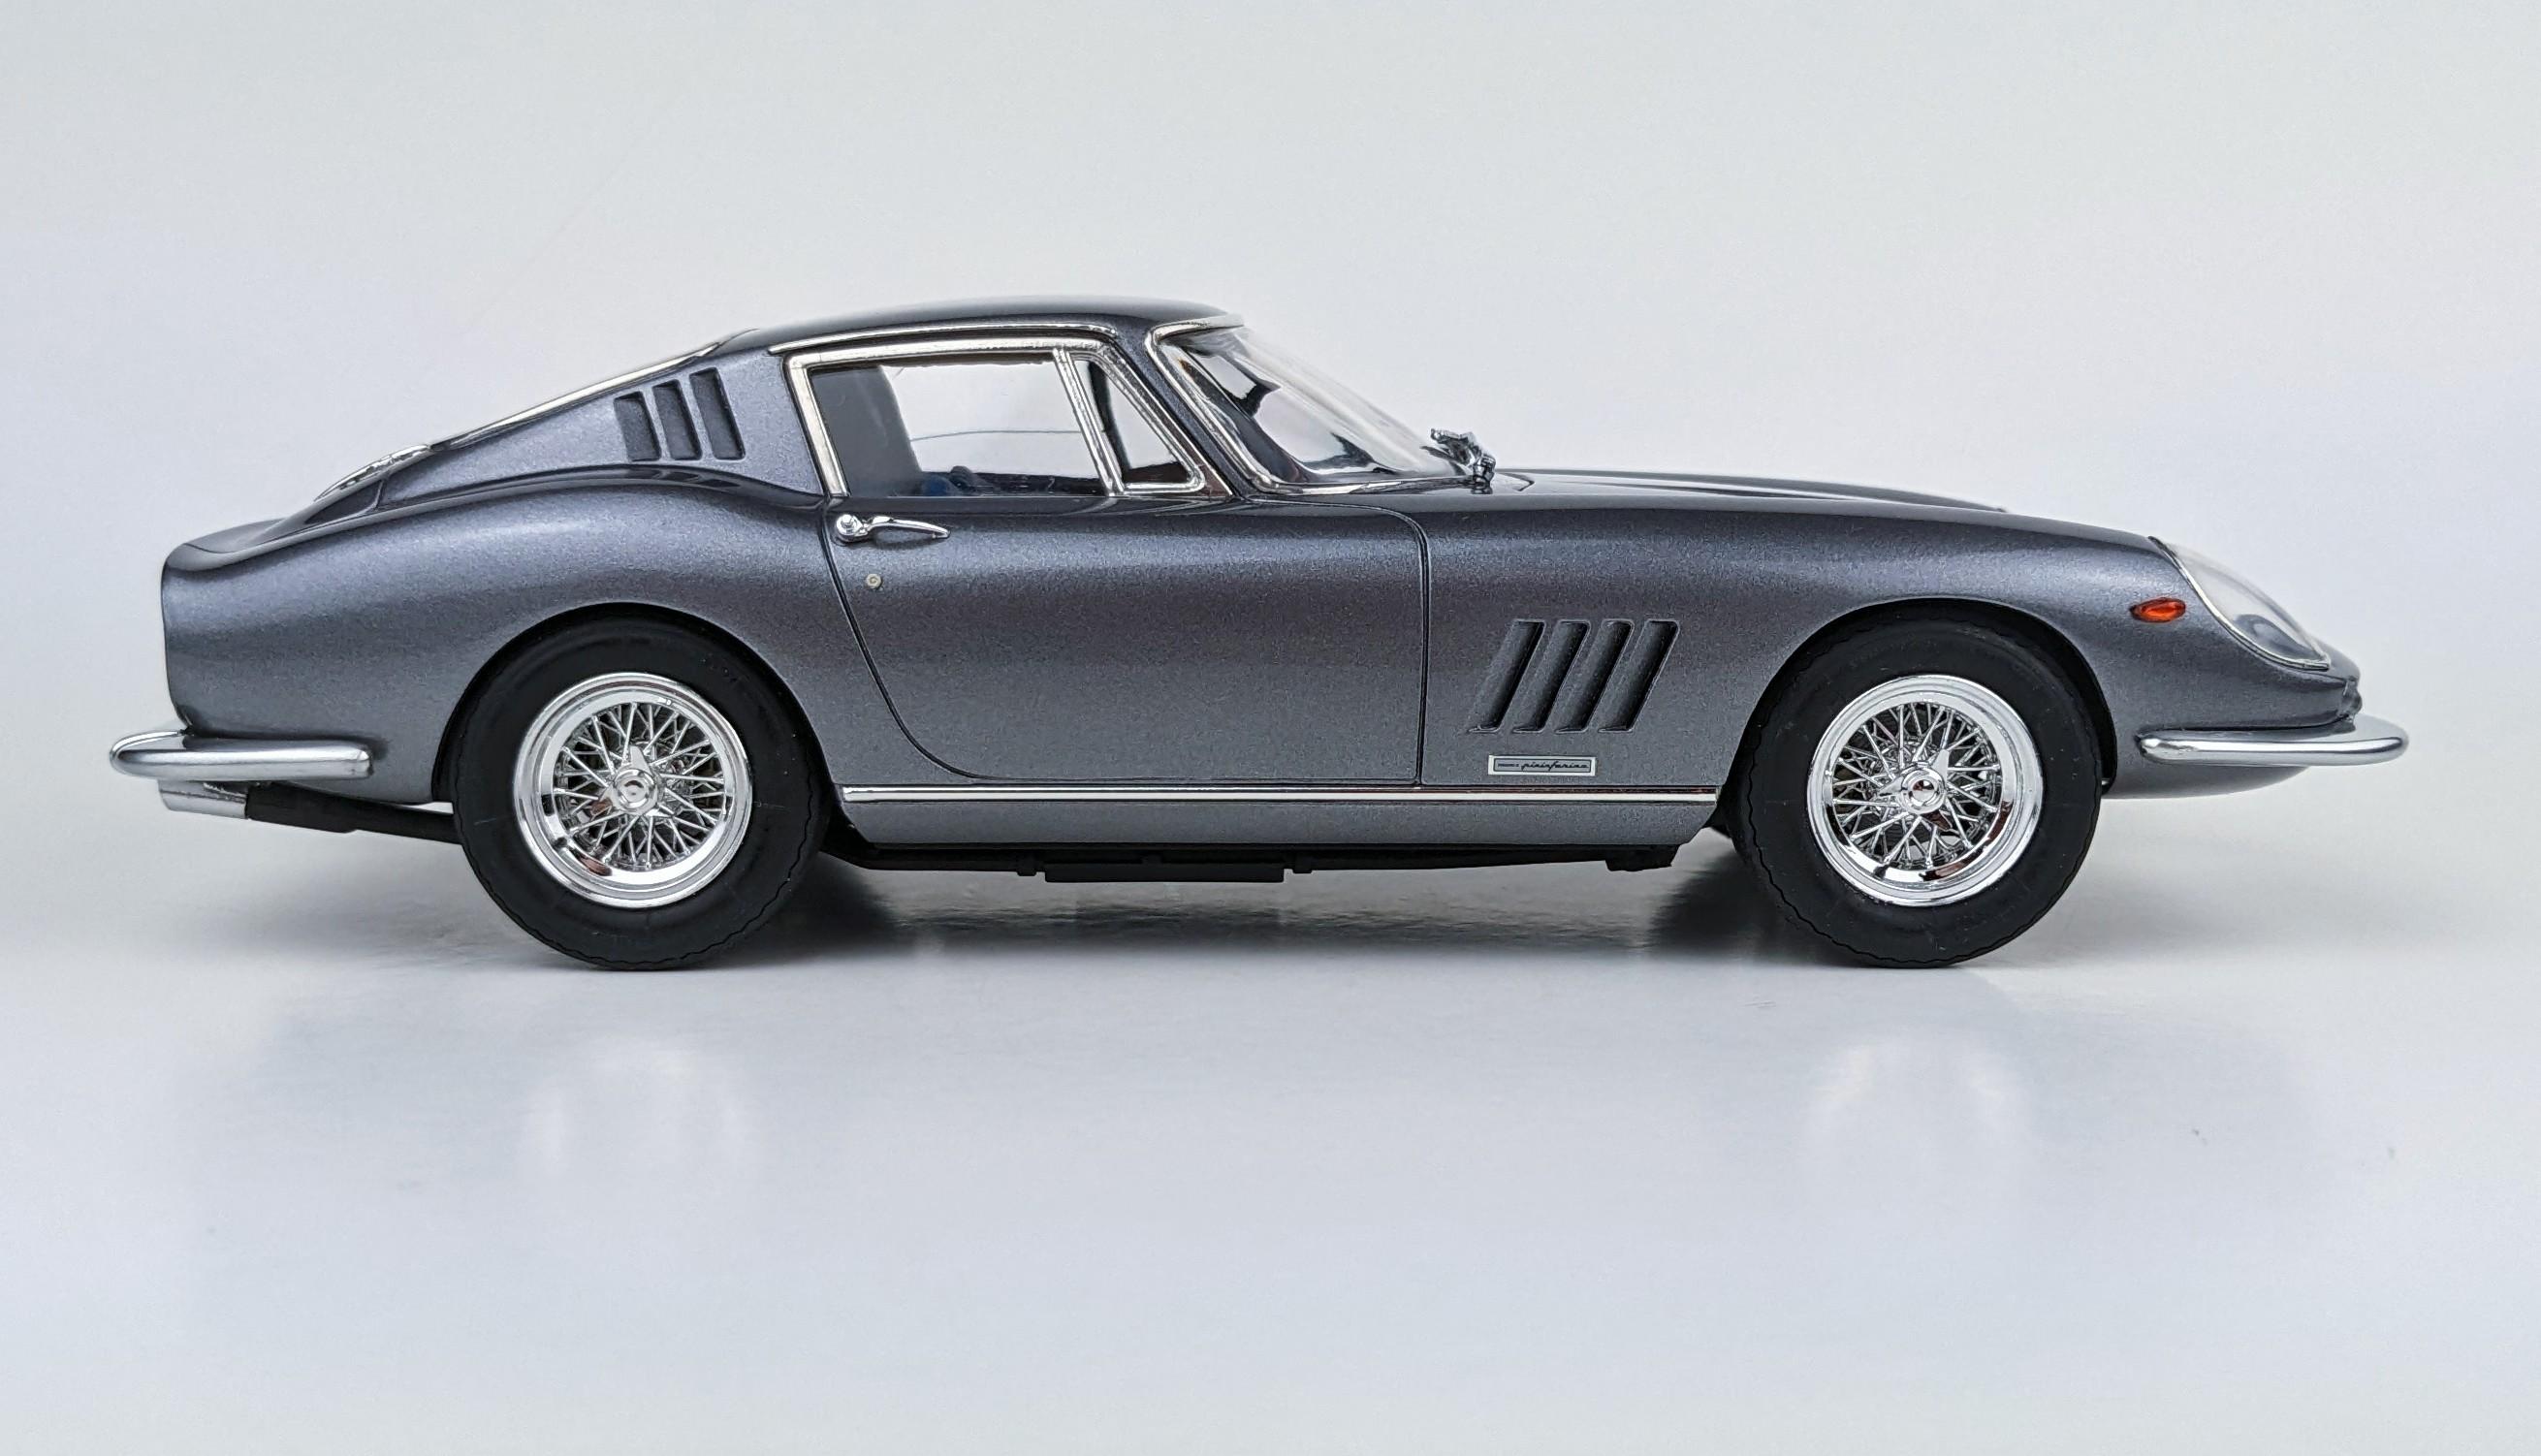
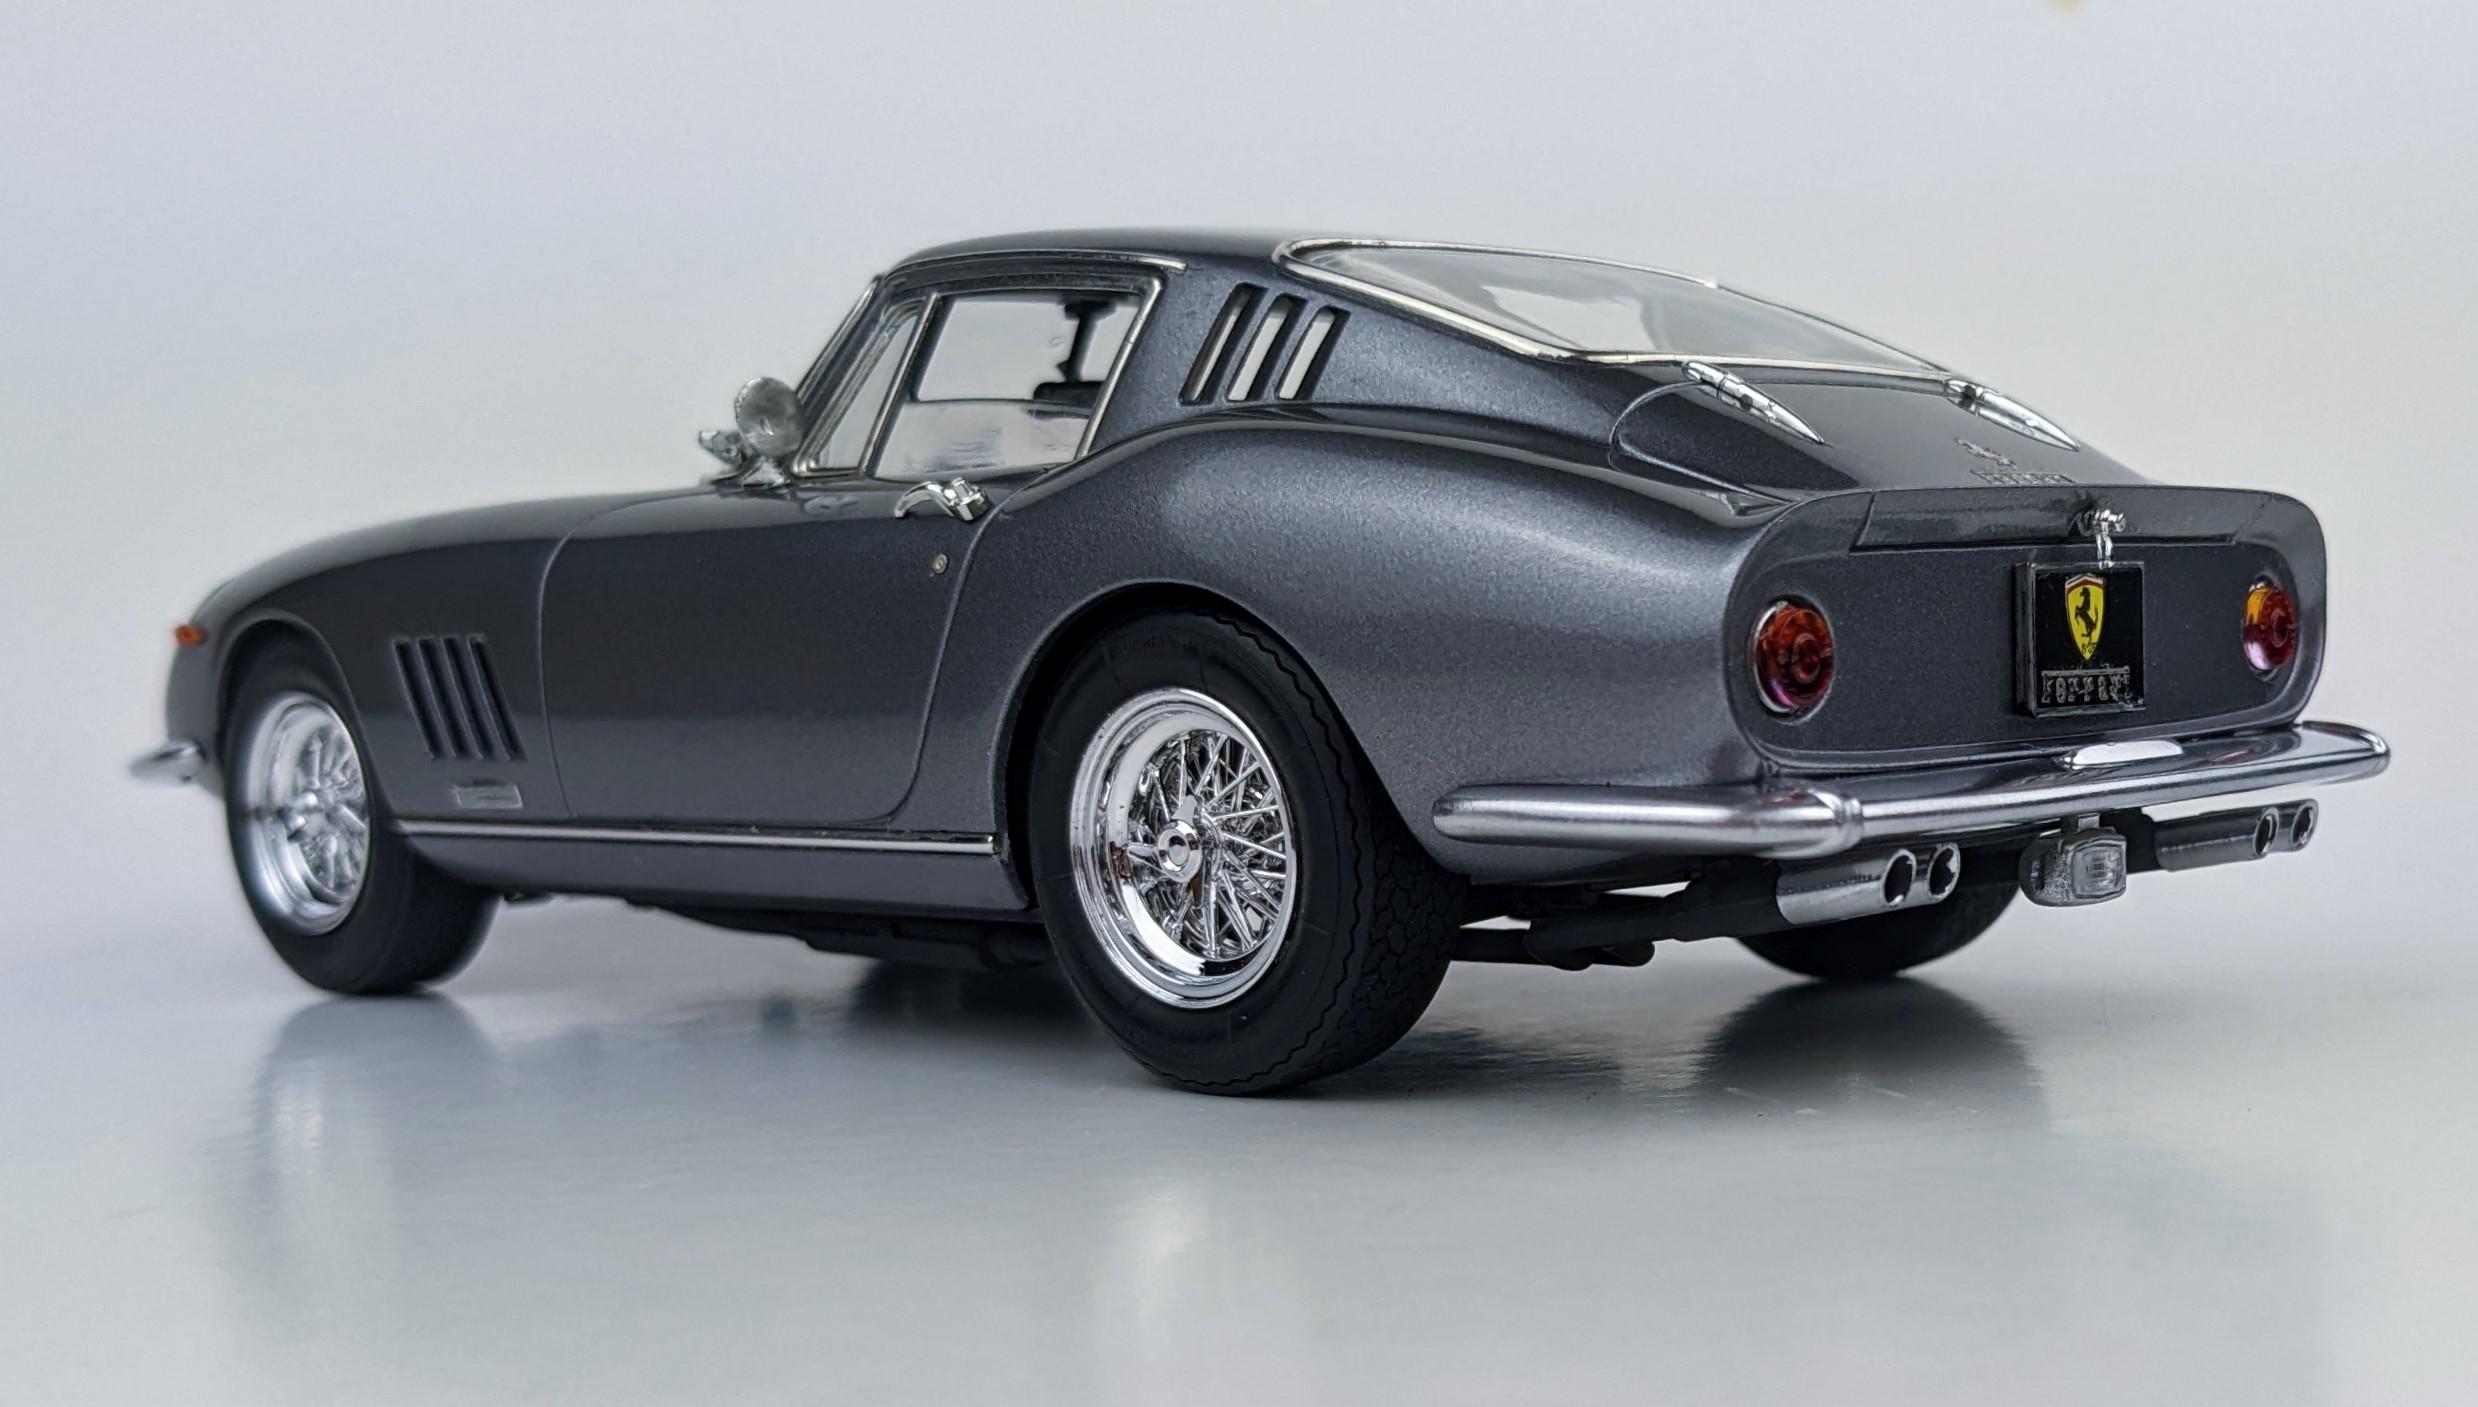
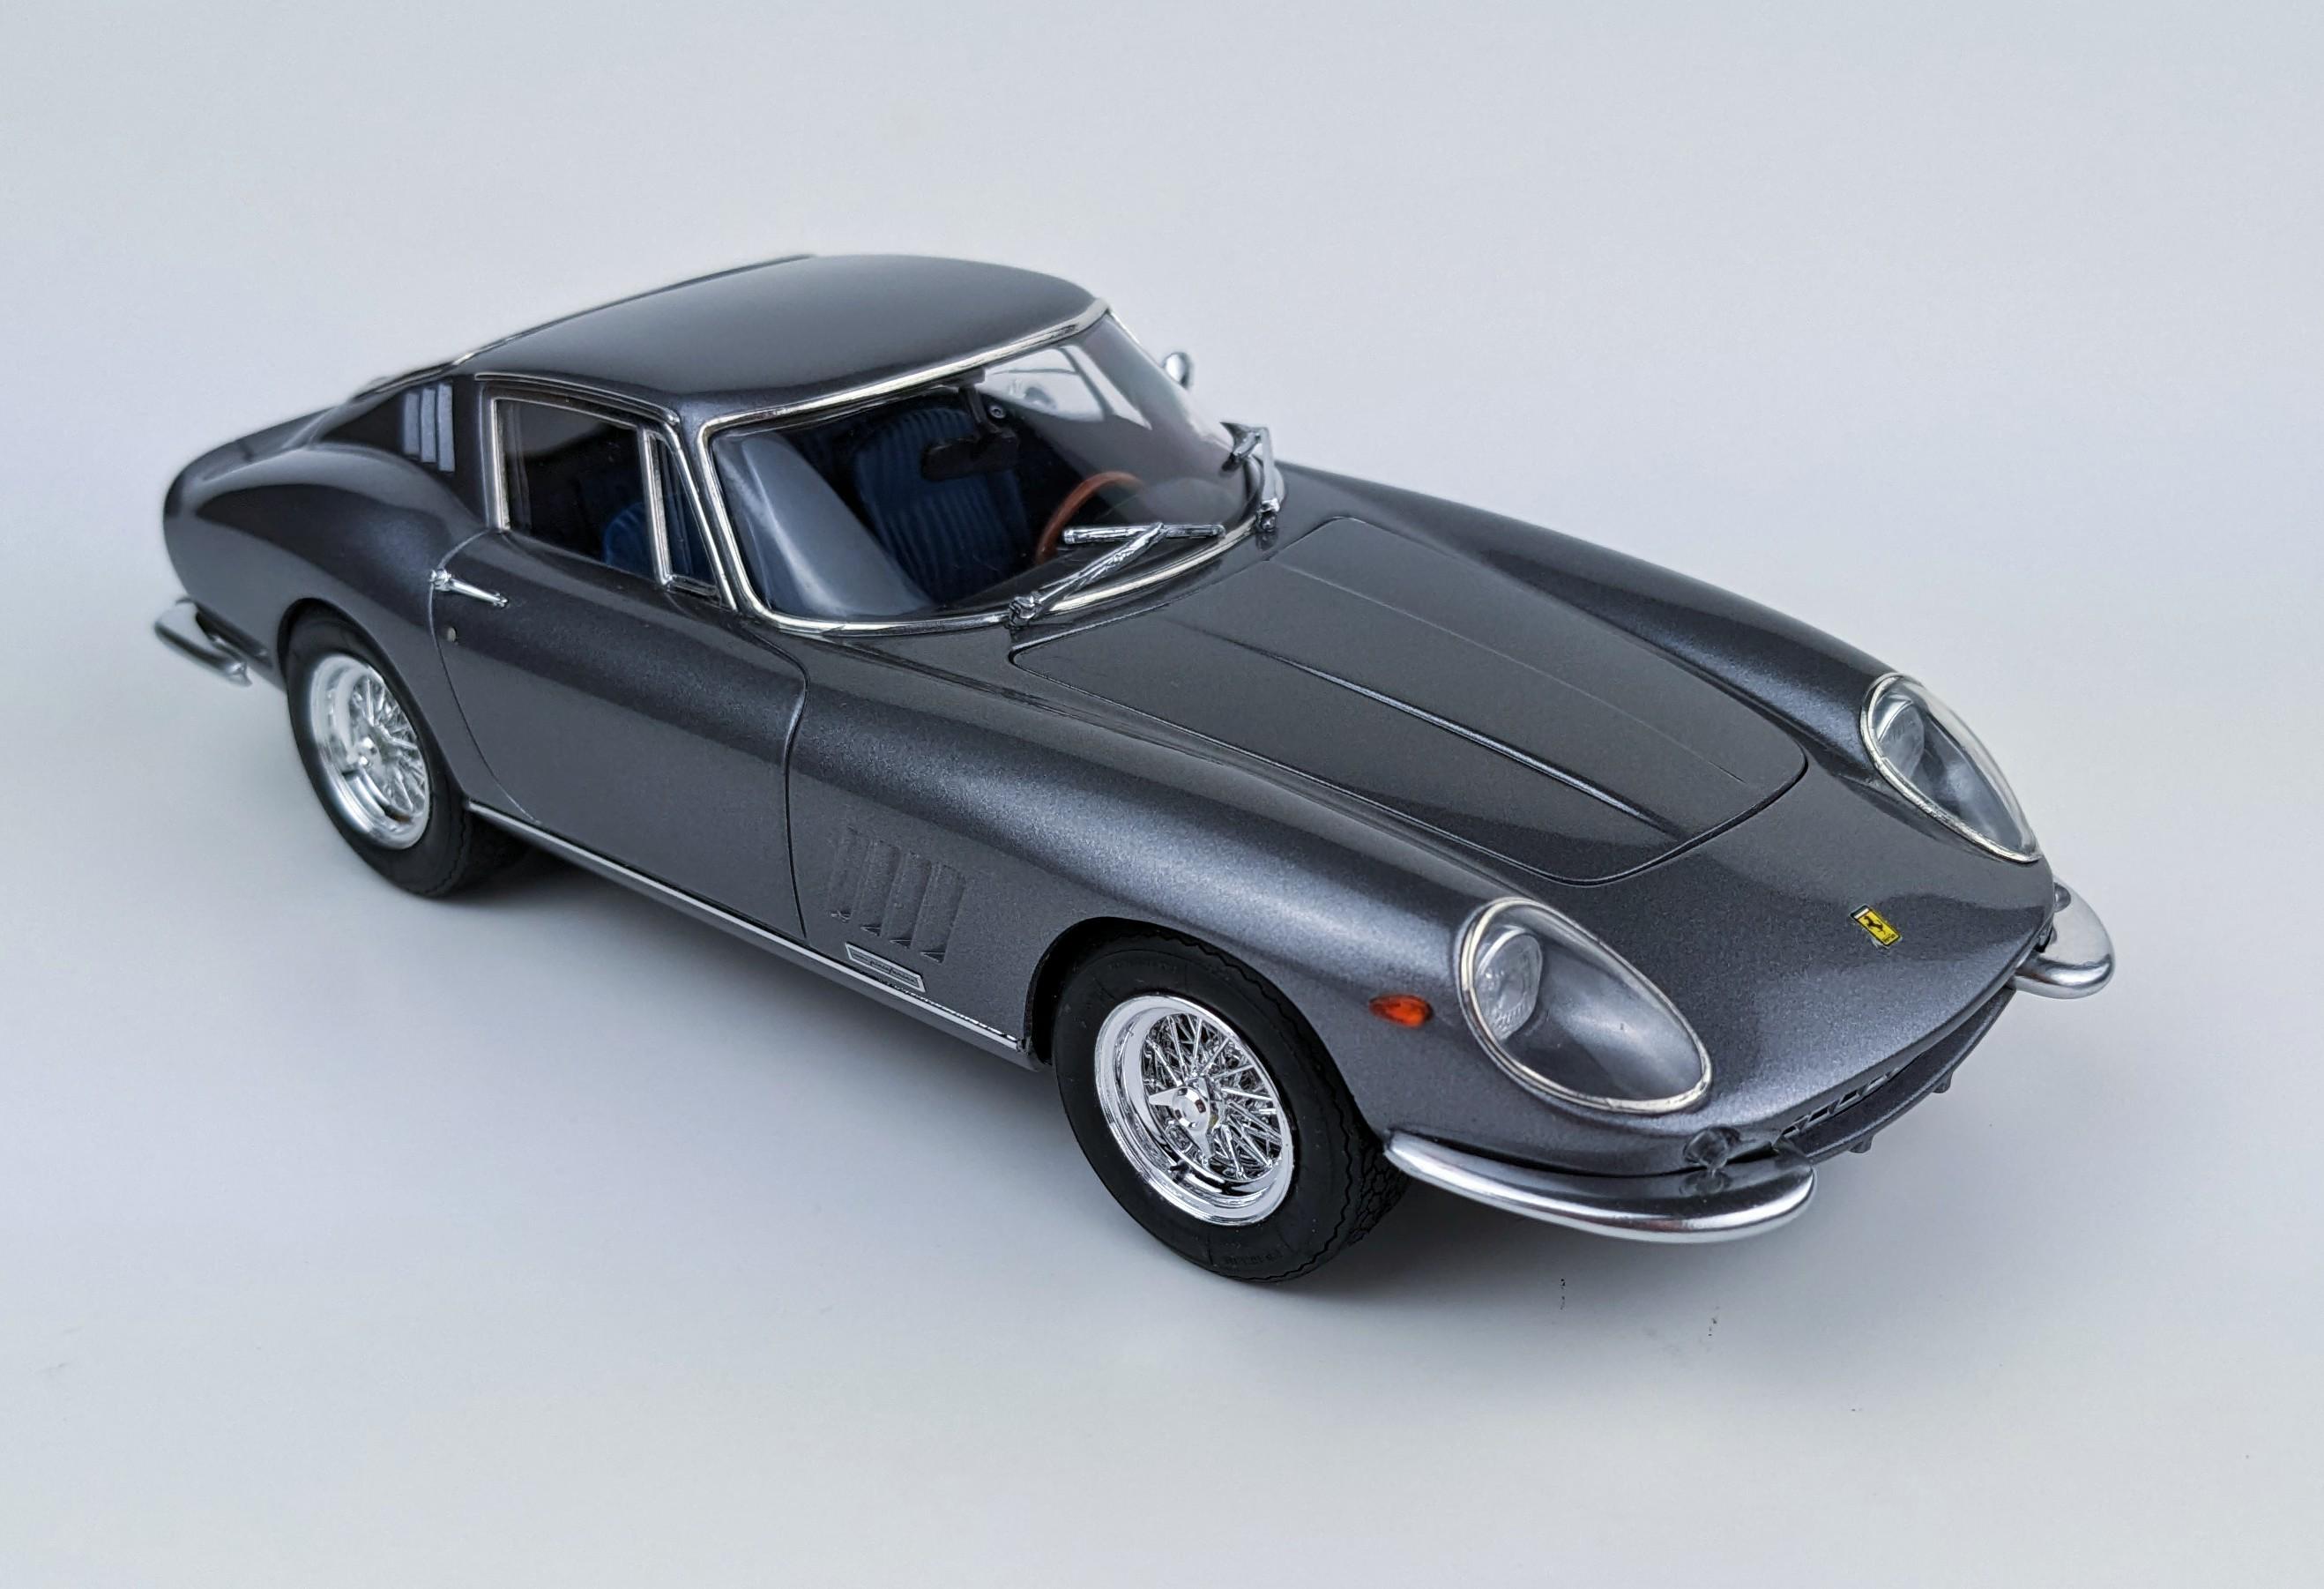
And she's under glass... these Italeri Ferrari 275s are seriously nice little kits for their time. The Fujimi wheels needed a 2mm spacer between the brake disc and the wheel to push the wheel out a little bit. I mounted a set of Pininfarina decals from a Fujimi Daytona kit on thin aluminum to give the Pininfarina badge some dimension. The Ferrari lettering and Cavallino on the boot lid are Crazy Modeler adhesive transfers. Under Glass thread with (probably too many) pics will be up soon!
-
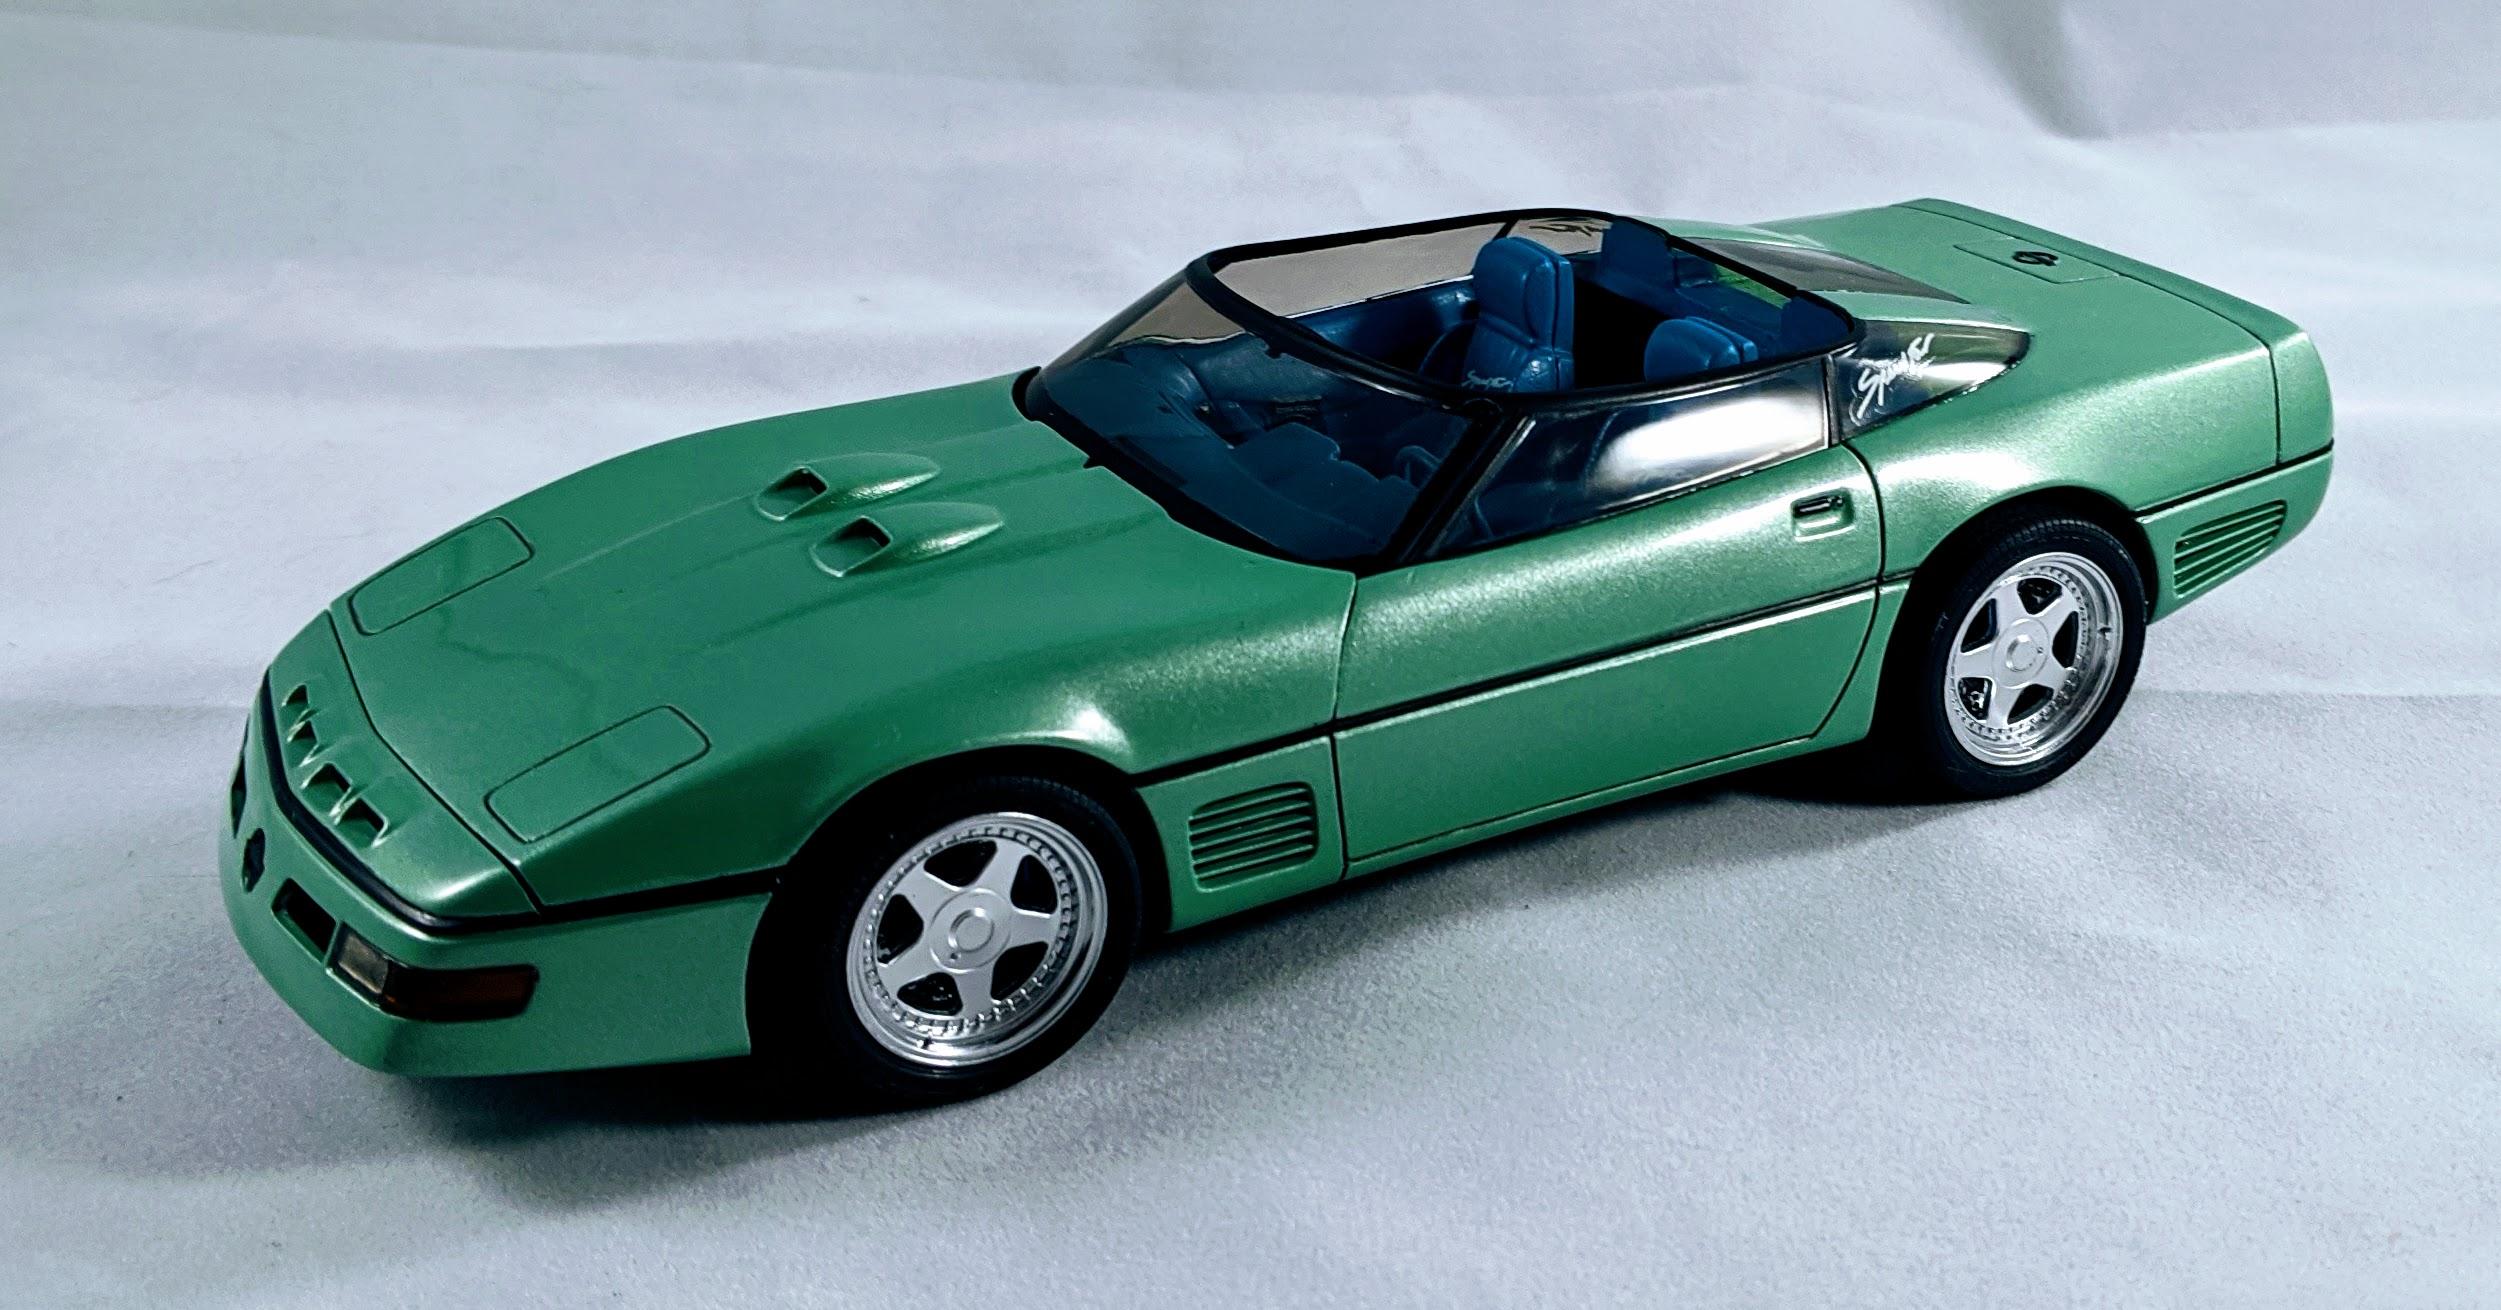
Very sharp. I like the dark green. I've got one of these in the stash with USCP resin interior panels and 15" Chromodoras that you have me itching to get started now!
-
Here are a few I've done...
-
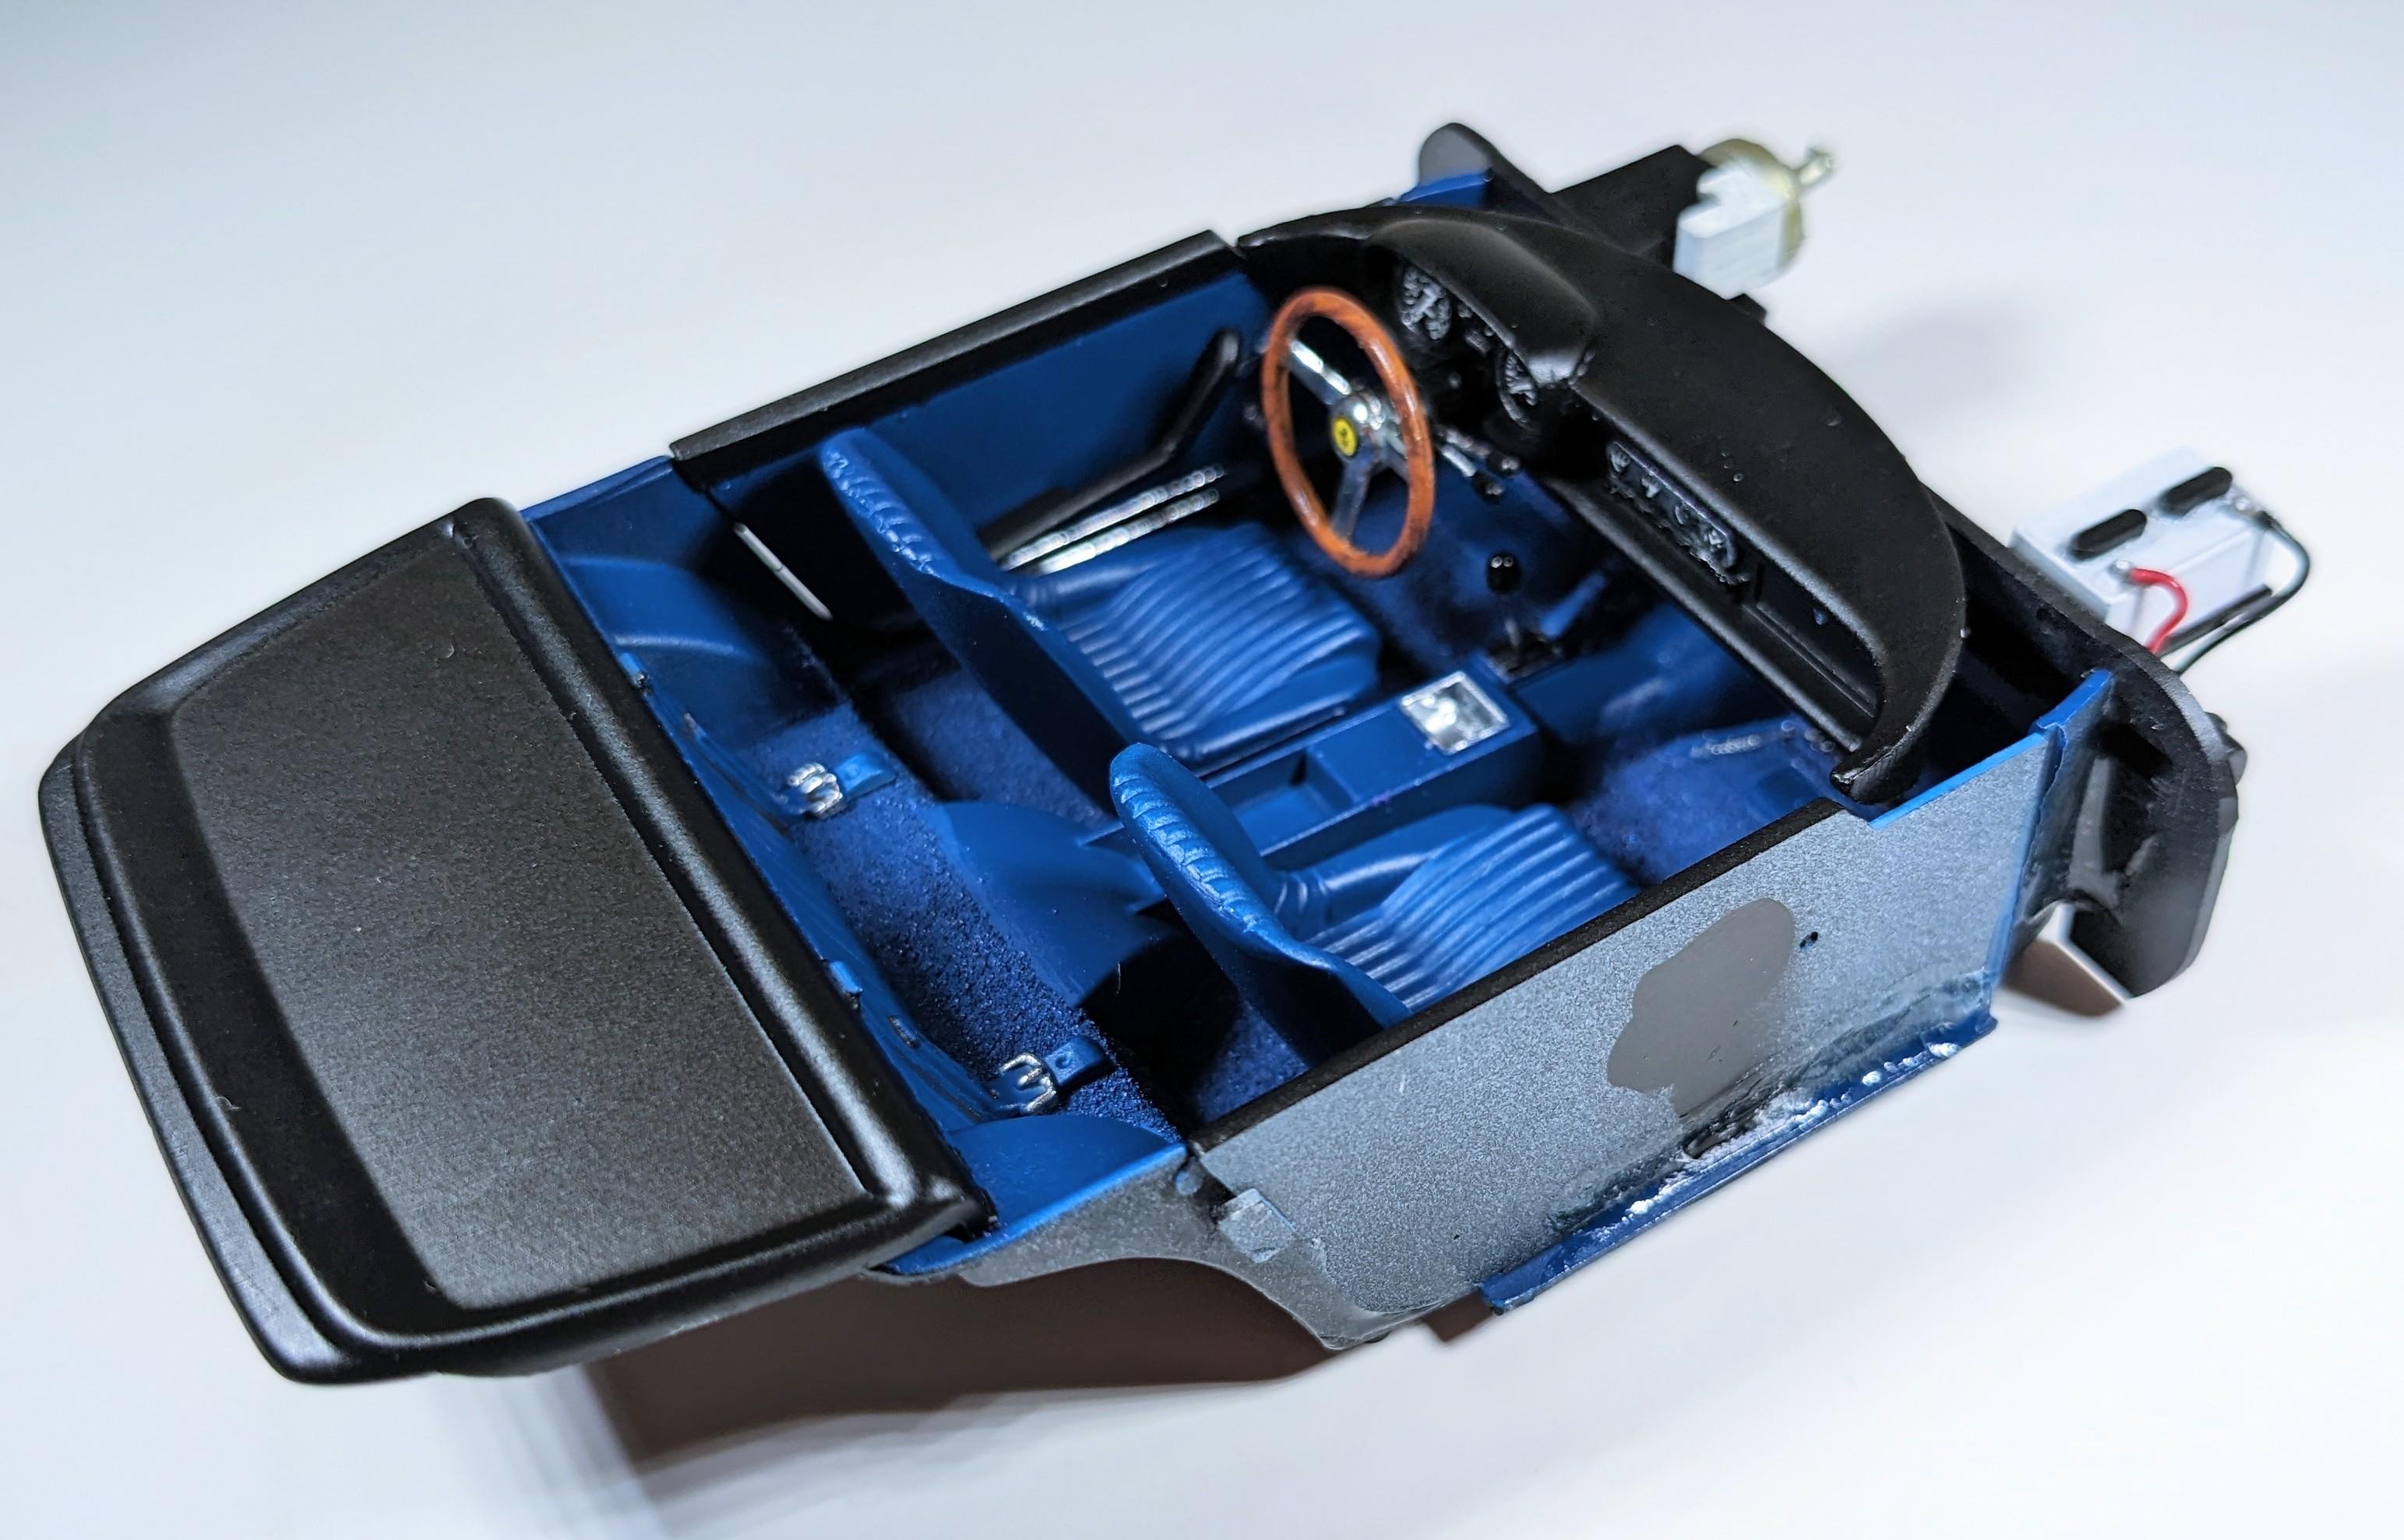
Lots to update today. Interior is completed. Paint is Tamiya XF8 with a Semi-Gloss clear topcoat. Accents are done in TS29 Semi-Gloss Black. Chrome is Molotow Chrome. Carpet is embossing powder that was painted with XF8 after the glue dried. Next, I polished out the body with Micro-Mesh polishing cloths starting from 6000 grit, followed by Meguiars Ultimate compound and polish. The trim was foiled and some of the exterior trim chrome was installed. Finally the interior, engine and chassis were mated up waiting for the body. The wheels aren't permanently attached yet. They'll need to be epoxied in and the passenger front wheel doesn't quite touch... some adjustments are going to be in order. Next pics will probably be under glass. As usual, I'll post some finished shots here and close out the thread!
-
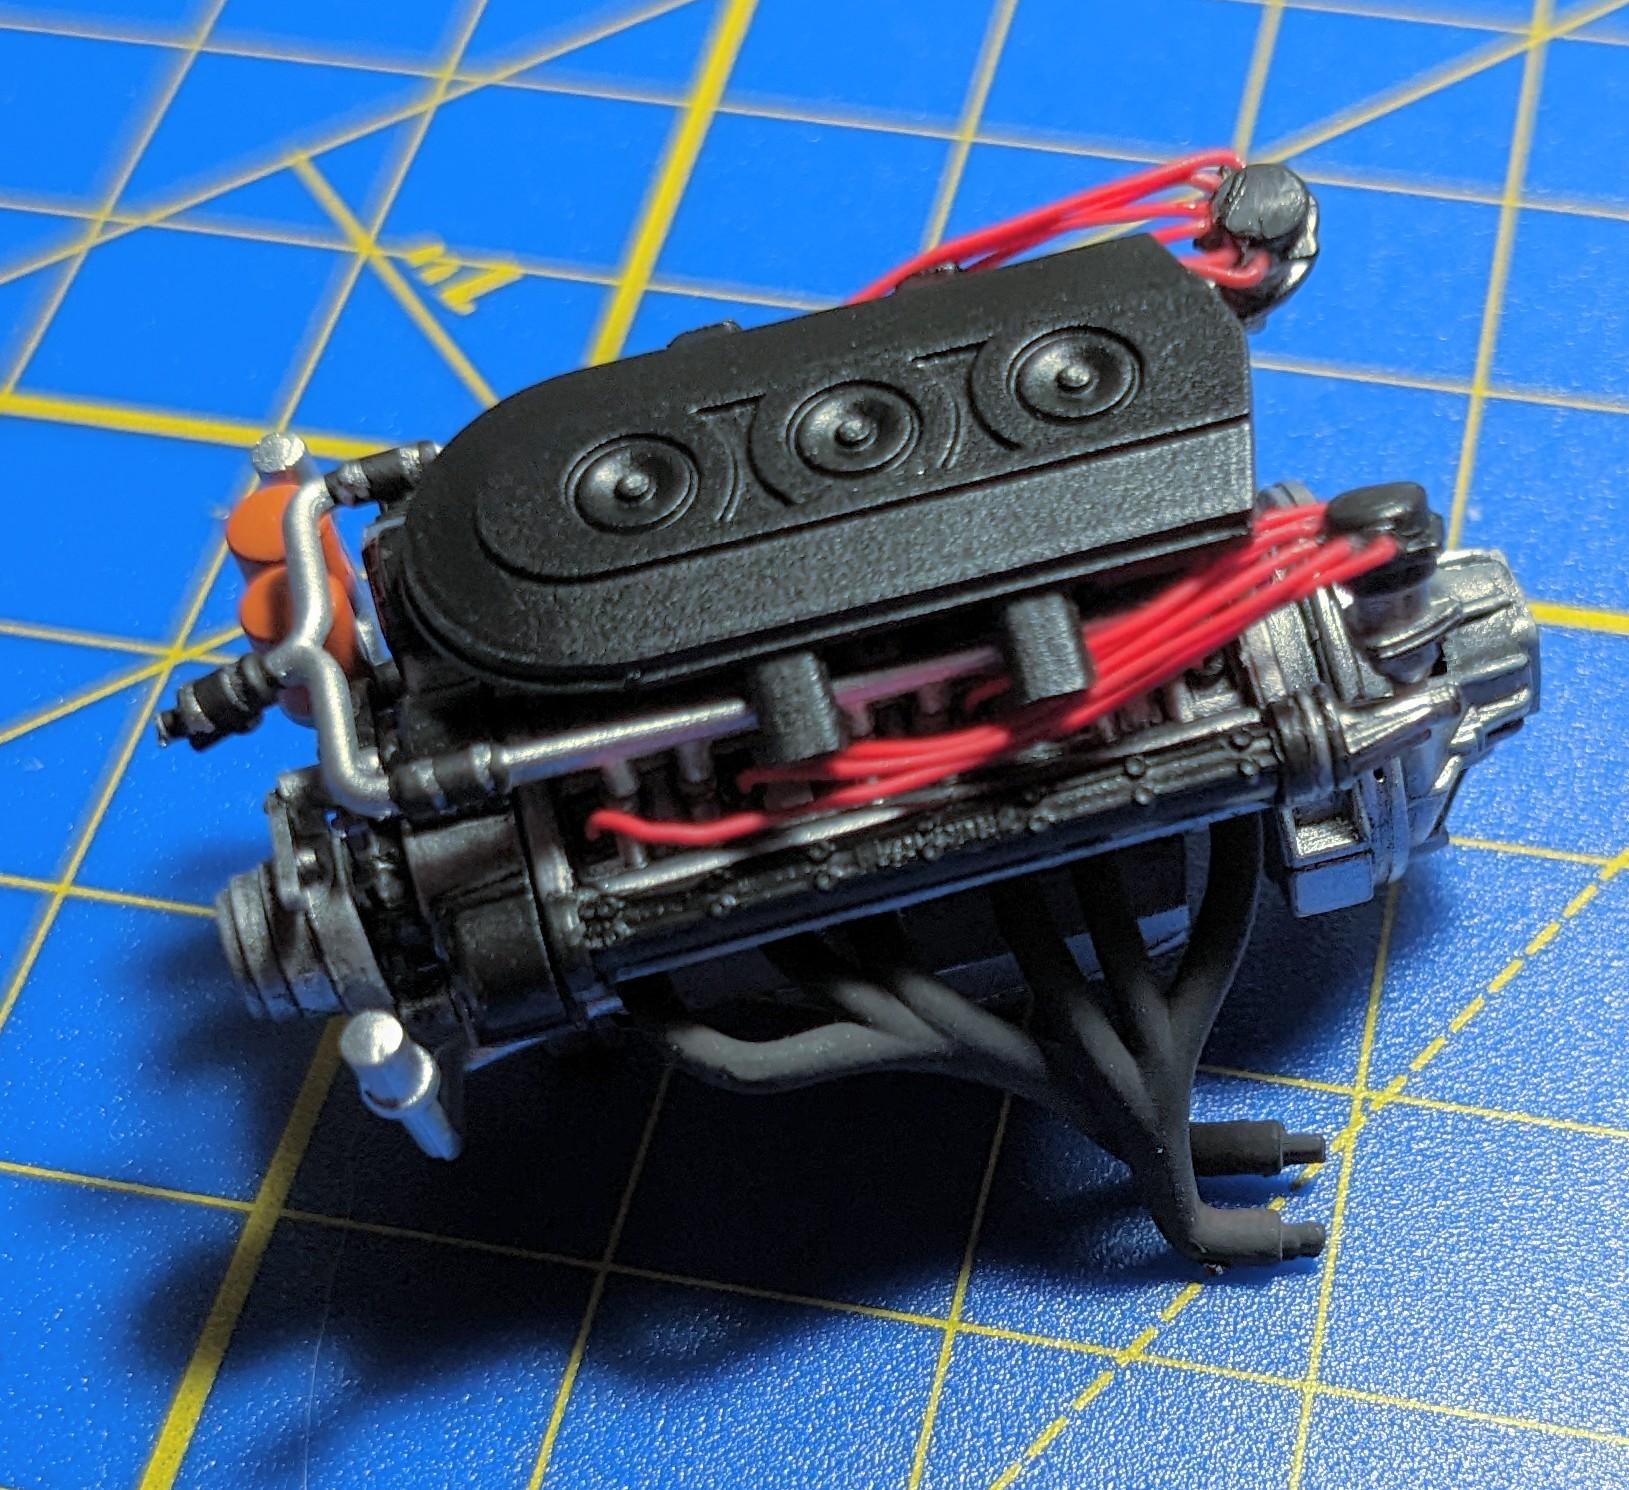
Wish I'd caught this thread earlier, I could have warned you about the distributor clearance issue. It's super tight in there. Beautiful job on this build, the color is great!
-
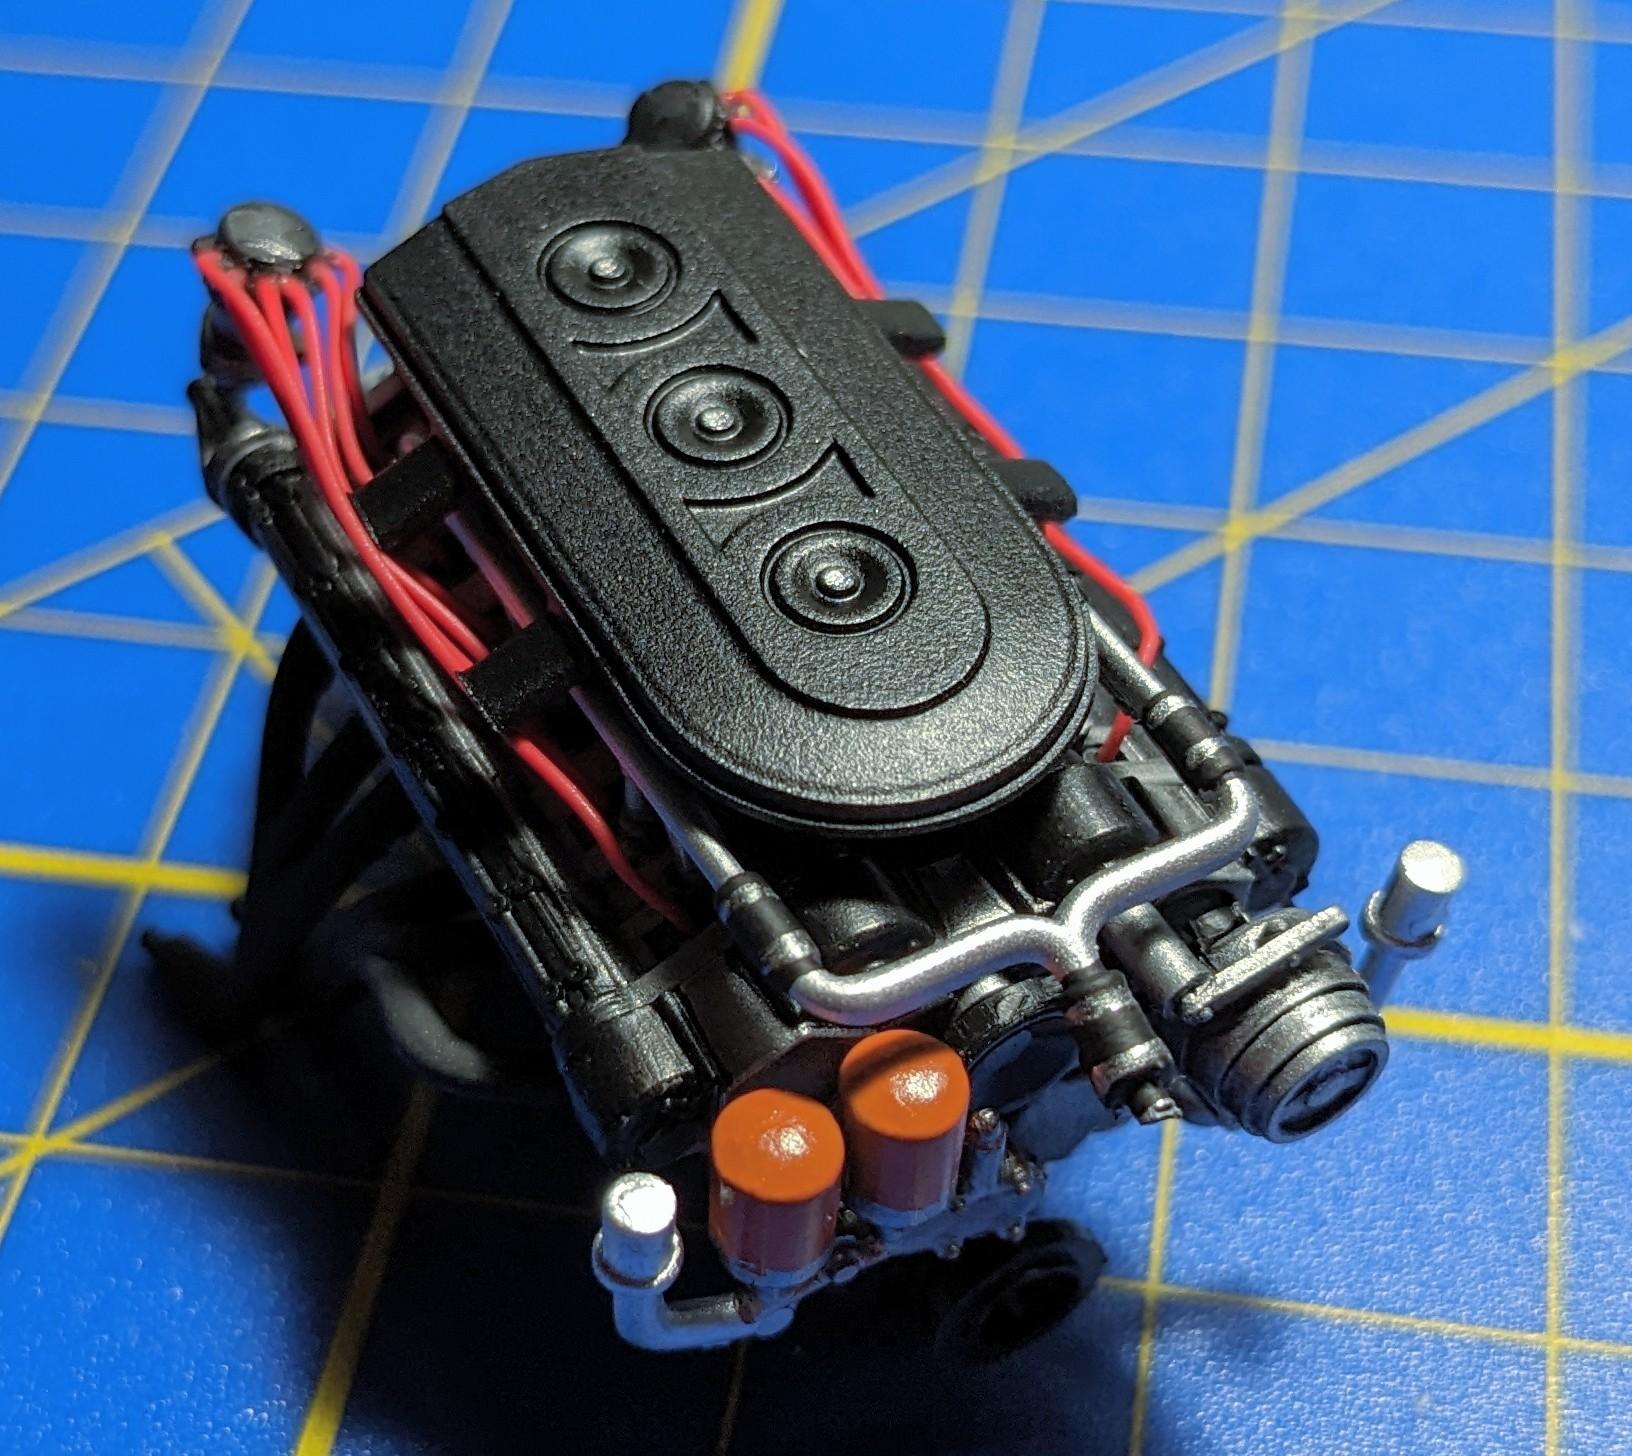
Engine is ready to go into the chassis. The engine in this kit has excellent detail and looks really nice built up. I added ignition wire to dress it up a little. I tried to match it up as closely as possible to the engine in the Spyder I built previously. The textured finish on the air cleaner was just done with TS29 from the spray can held far enough away (about 18") that the paint started to dry before hitting the surface. After three or four coats a nice scale crackle finish built up. Rolling stock is assembled as well. The Fujimi Enthusiast Daytona Borranis are fantastic. They build up from three layers of spokes. The Michelin XWX tires are beautiful as well. The wheel diameter is maybe an inch too large to be correct but I'm not going to split hairs. I do still need to add valve stems before I mount them. Next up will be the interior, stay tuned!
-
So pretty. Is that the Splash Paints Bentley Racing Green?
-
The Citroen 2cv (For Your Eyes Only) is being rereleased as well. Looks like they're retooling it with rectangular headlamps to match the movie car.
-
Or the DBS from On Her Majesty's Secret Service. Sadly I'm guessing that's gonna be a big ol' nope on either of those.
-
Looks like that old crock of a Gunze Sangyo kit is good for something after all! Can't wait to see how this progresses!
-
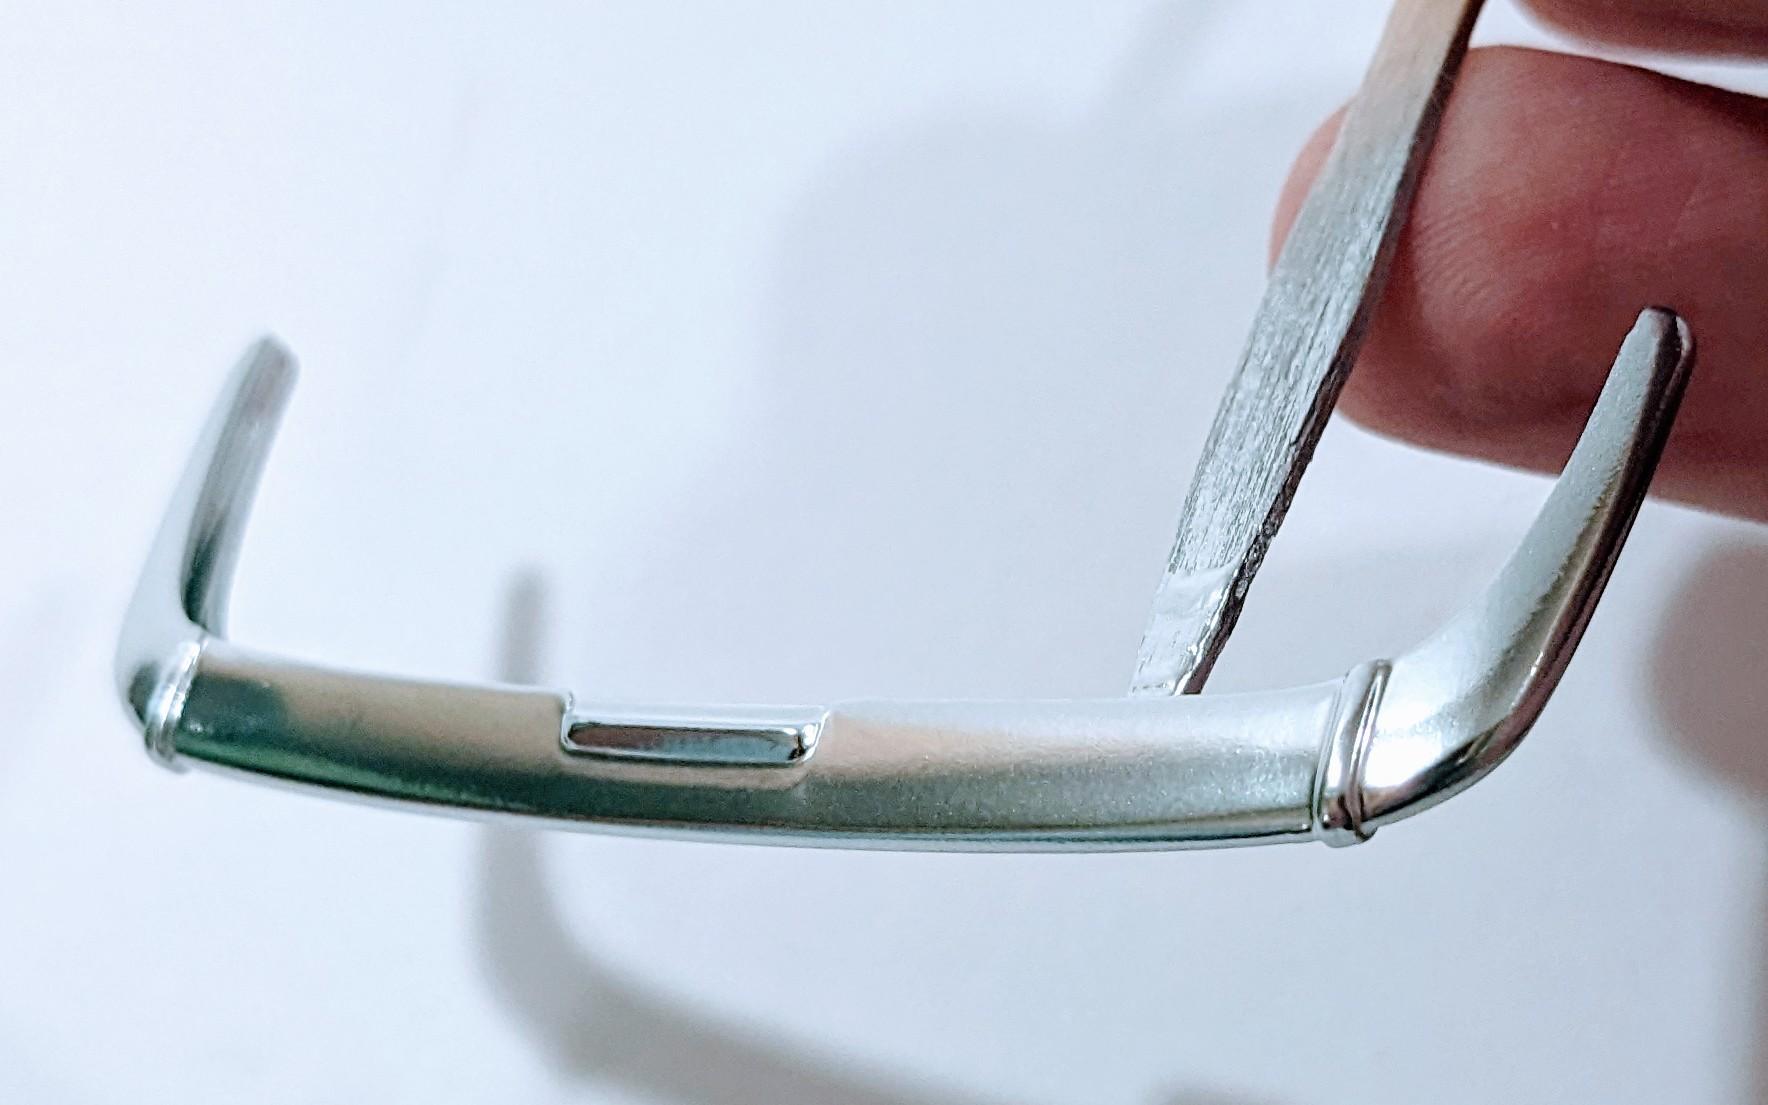
Mini update... the chrome plating on the bumpers was full of dust specks and what I swear was a cat hair. There were also sinkmarks and highly visible attachment points to contend with. I stripped them with Easy Off and sprayed with airbrushed Molotow Chrome. I've had good luck with airbrushed Molotow in the past. The key to a relatively durable finish is to allow the maximum drying time possible. A week or two is generally sufficient before handling. Airbrushed Molotow isn't quite as "chromey" as brush painted, but still looks great. When Revell Chrome Spray starts to be a little more available in the US I'll give it a shot.
-
Lol, the Big Guy is probably the most-photographed animal of all time. He even made it into the pages of MCM last year! Honestly my first time spraying TS13 over any of the Tamiya silvers. I've sprayed the old Testors Wet Look lacquer over them before without any bad effects. This was applied as normal, two wet coats after giving the color coats about 30 minutes to flash over. From what I understand TS13 was reformulated about 4 years ago since the old "hot" formula would dissolve decals. Maybe you were using the old formula?
-
Is this a gloss clear coat?
jaymcminn replied to Milo's topic in Model Building Questions and Answers
We haven't actually gotten any pics from the OP of the paintwork in question to be able to determine whether it's an adverse effect between base and clear coat or if it's an application issue. One thing the OP mentioned was building up multiple thin coats, which is not how the Testors Extreme Clear Gloss likes to be applied. Generally two or three medium-wet coats will provide the best finish. It sounds like it might be drying before it hits the surface and building up texture. That being said, I stopped using this stuff years ago because the spray cans are just so bad. They don't atomize the paint well and leave it prone to bubbling and even runs. The product itself is fine and works well when decanted and airbrushed. Milo, if you could post up pics of the issues you're experiencing it might help everybody out. -
I tend to stay away from red for 60's Ferraris as, outside of competition cars, red wasn't really as prevalent as it was from the 70's onward. There were so many great colors available for these cars that building a bunch of red ones just doesn't appeal to me. That being said, when I build my Fujimi 250GTO it will actually probably be in Rosso Corsa. Agreed the LP paints are fantastic, my LHS doesn't stock them yet so I have to stock up at the hobby shop in Port Charlotte about an hour away when I make it up there. My 250 Spider California was the Academy generic release as well. I'm not bothered about Ferrari losing out on the licensing... they already make almost as much off of selling branded tat as they do from cars anyway.