jaymcminn
-
Posts
1,762 -
Joined
-
Last visited
Content Type
Profiles
Forums
Events
Gallery
Everything posted by jaymcminn
-
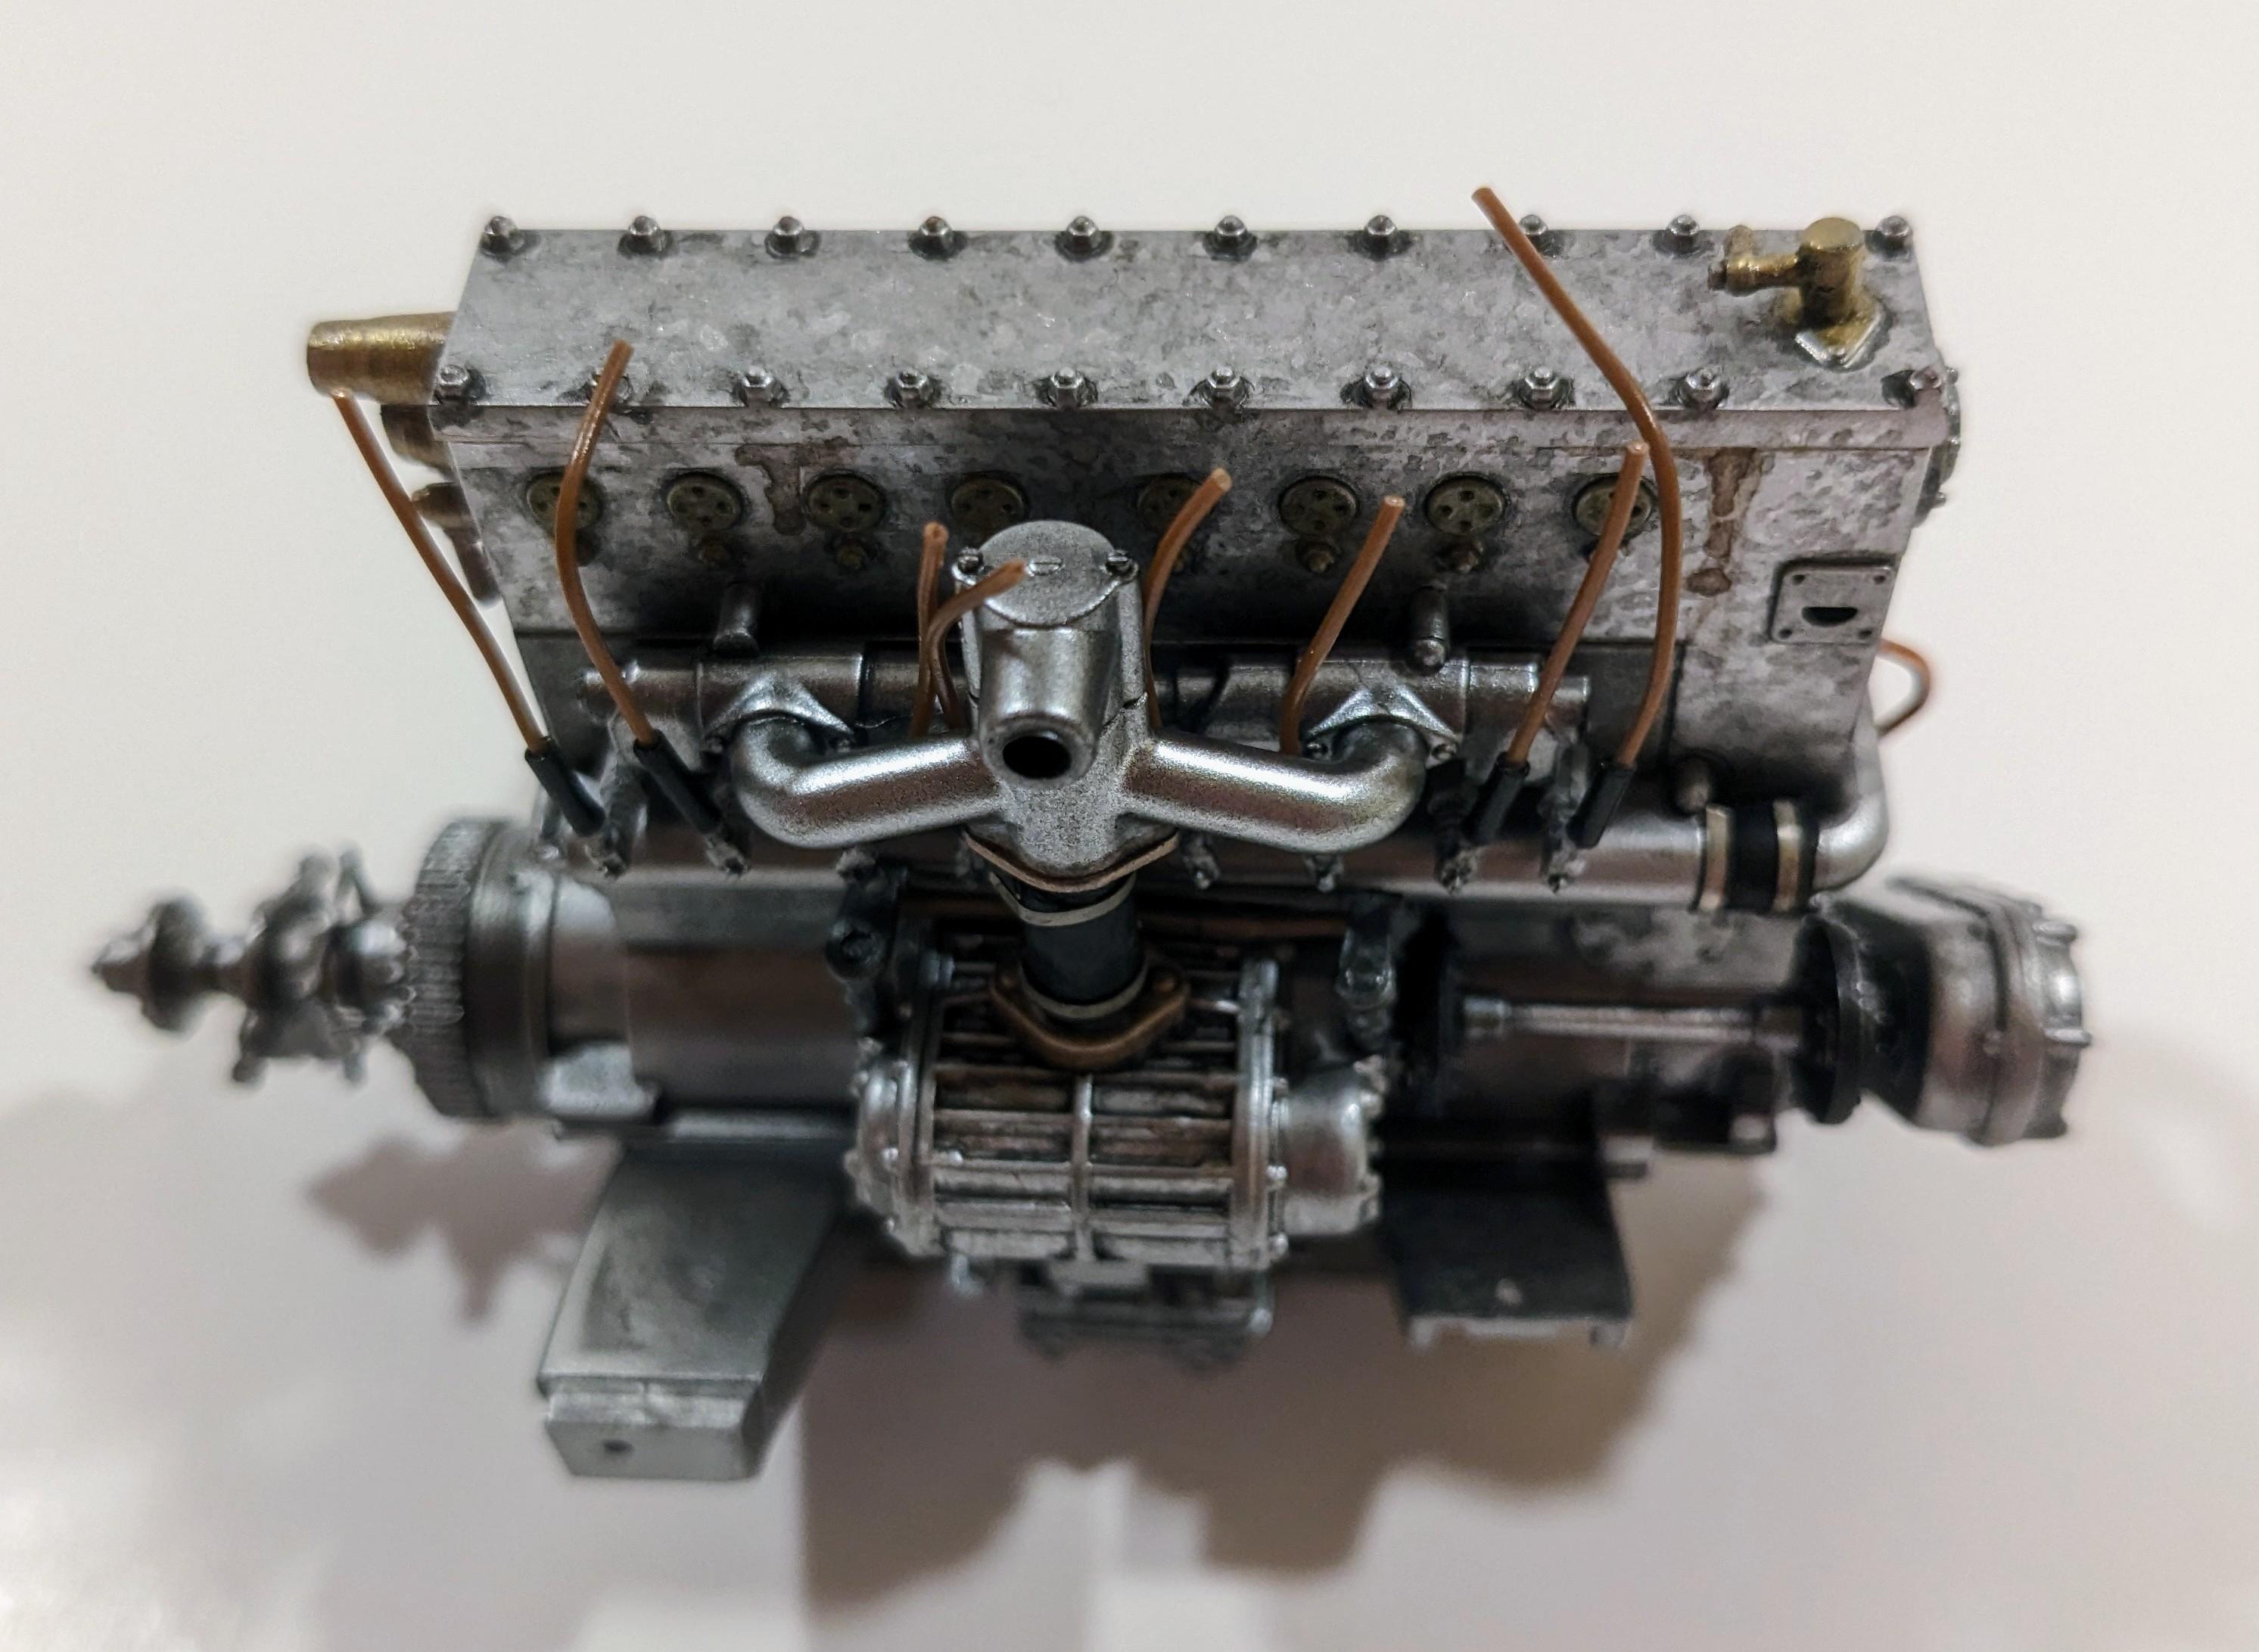
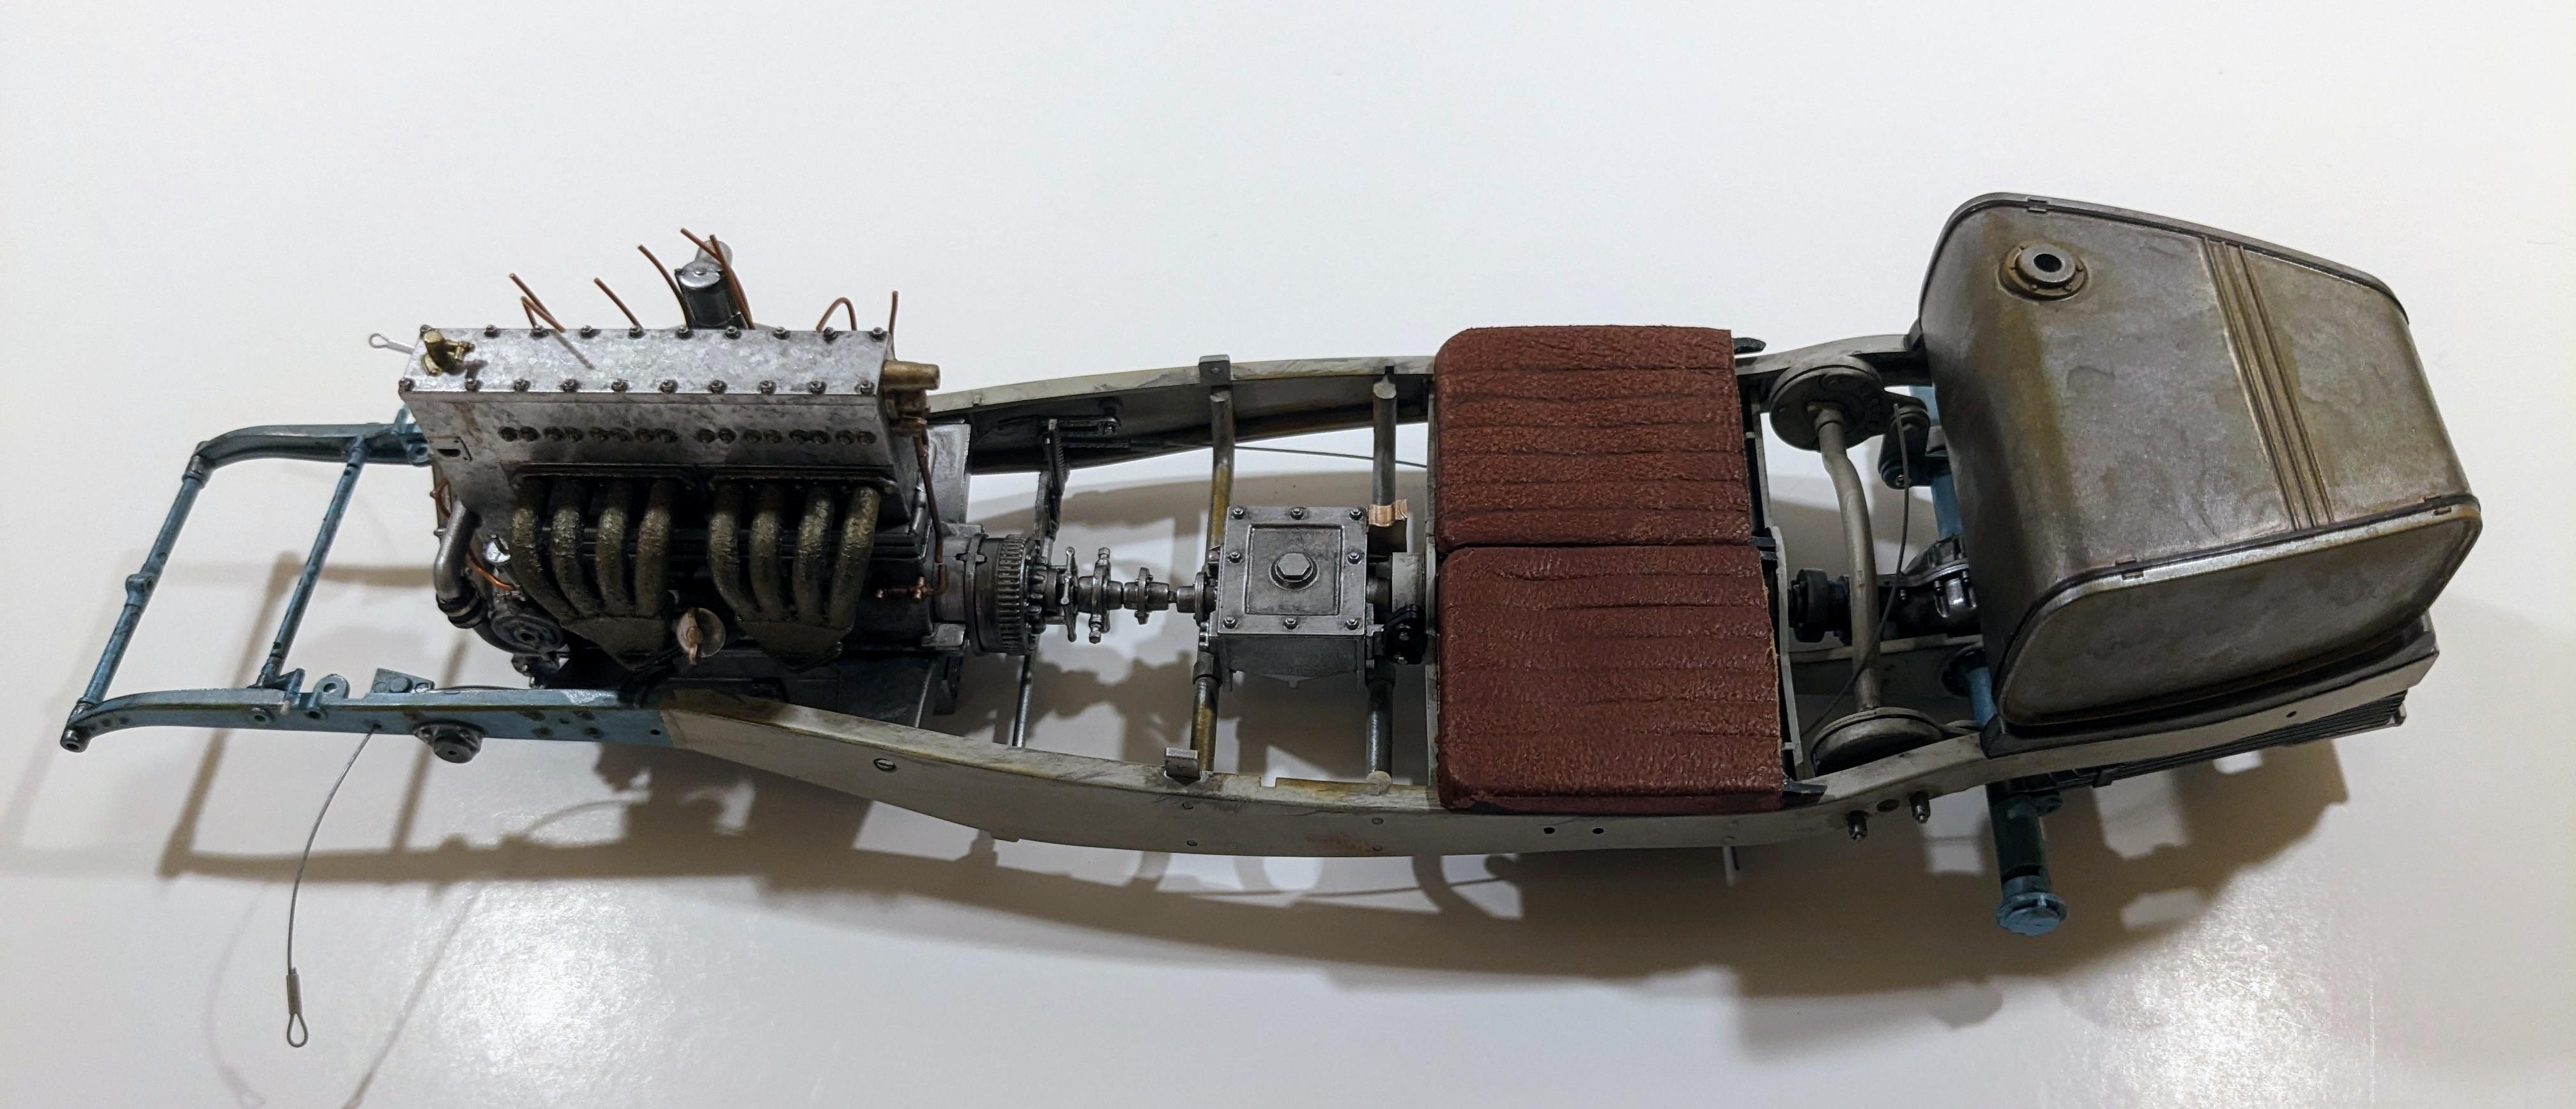
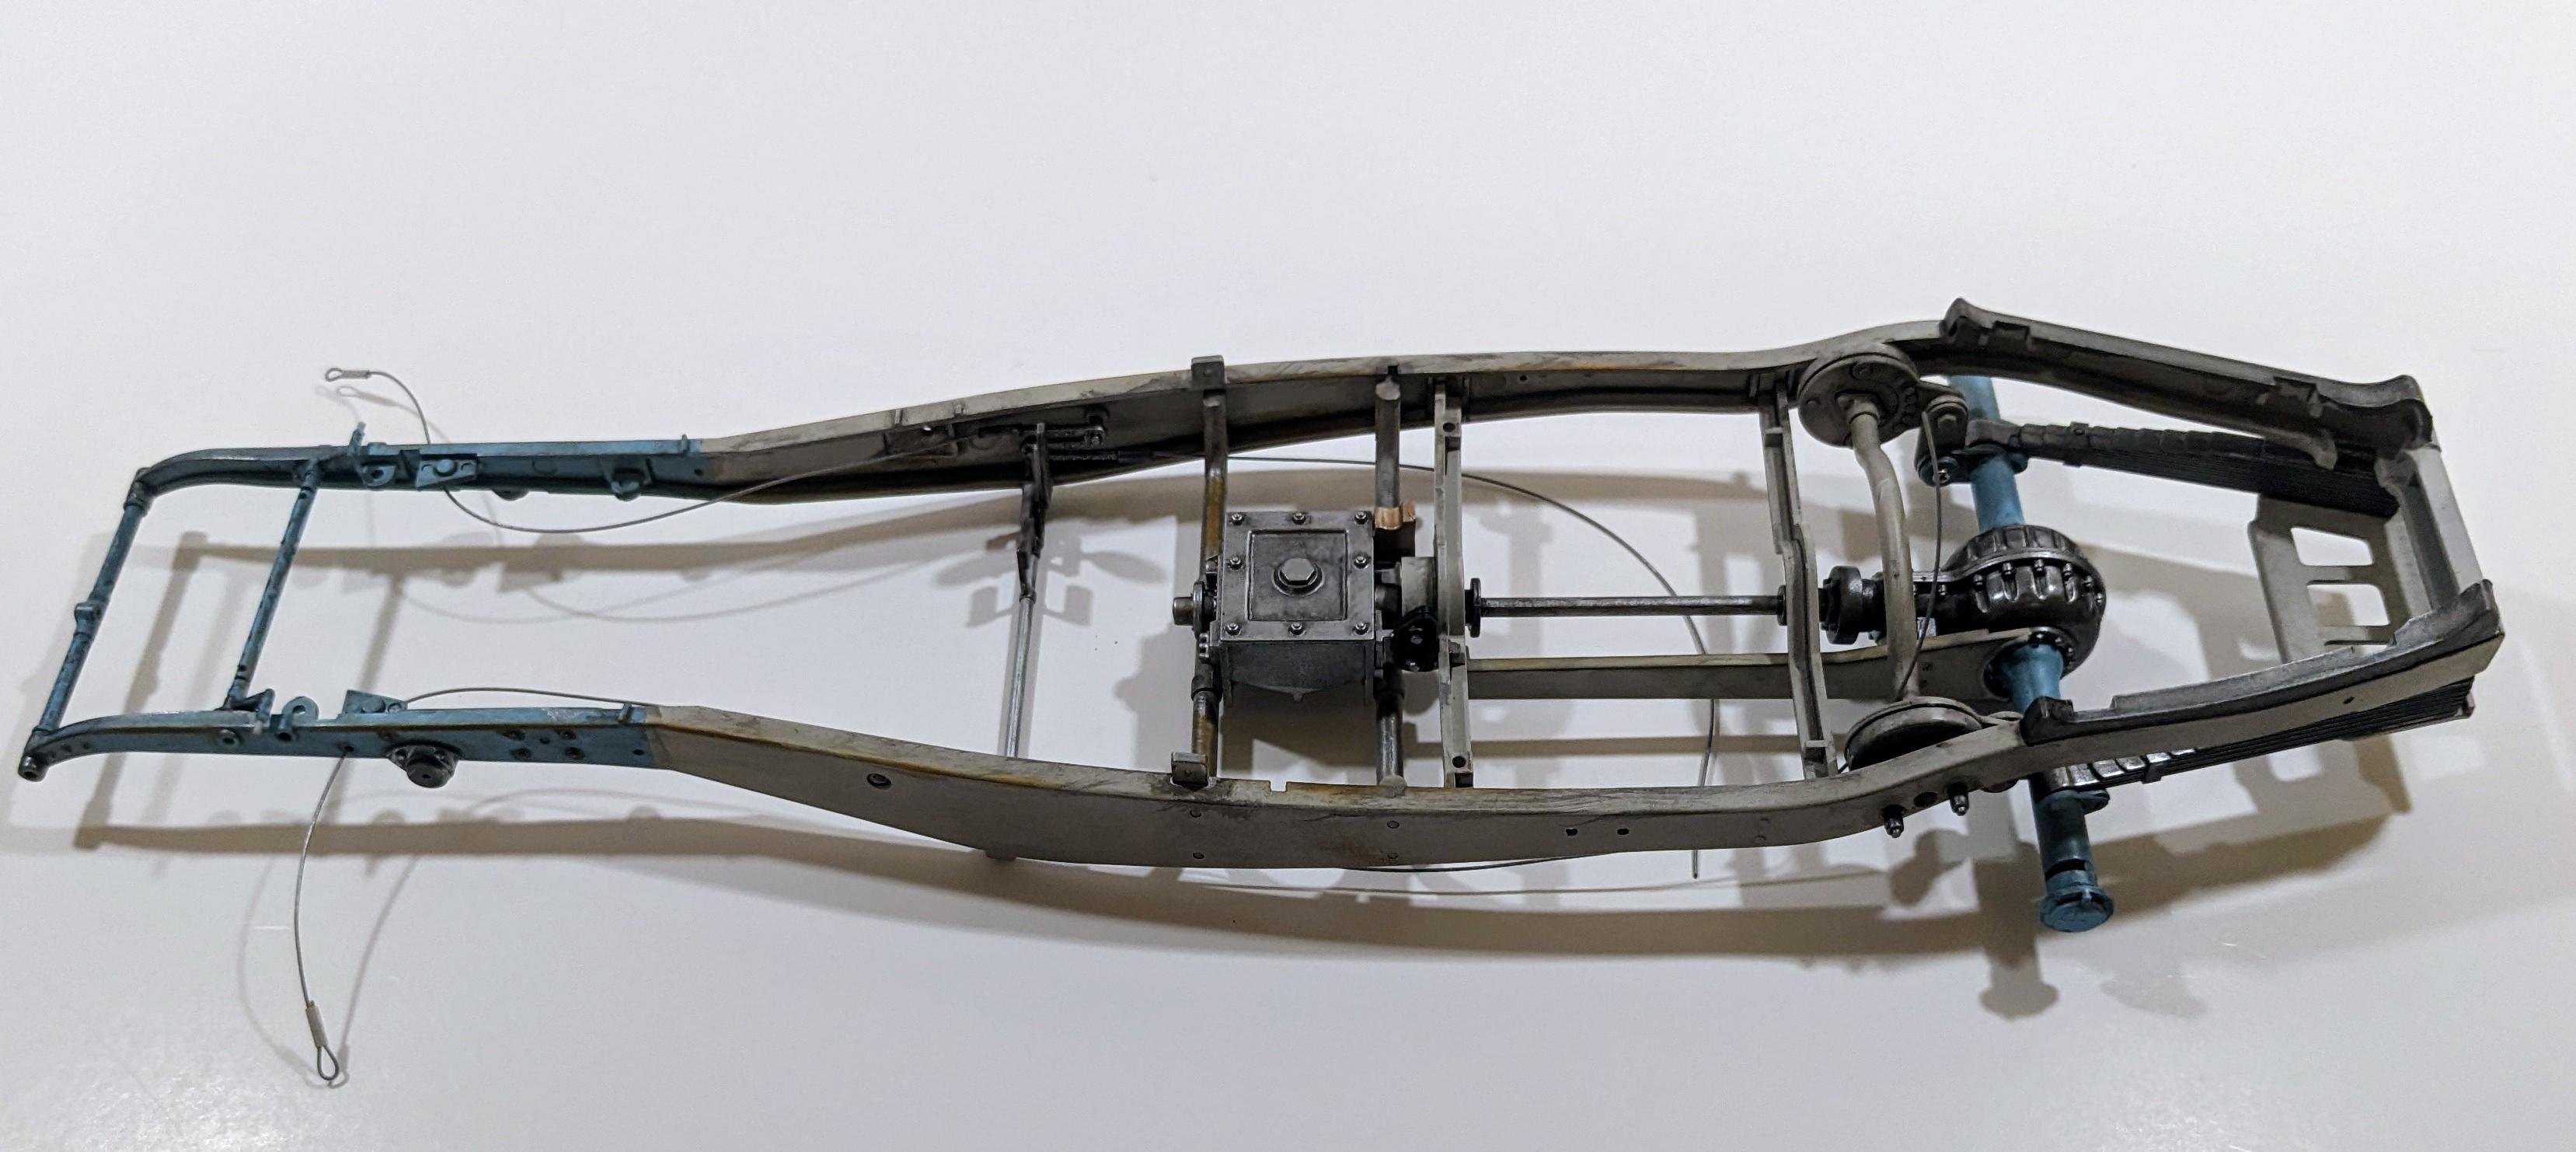
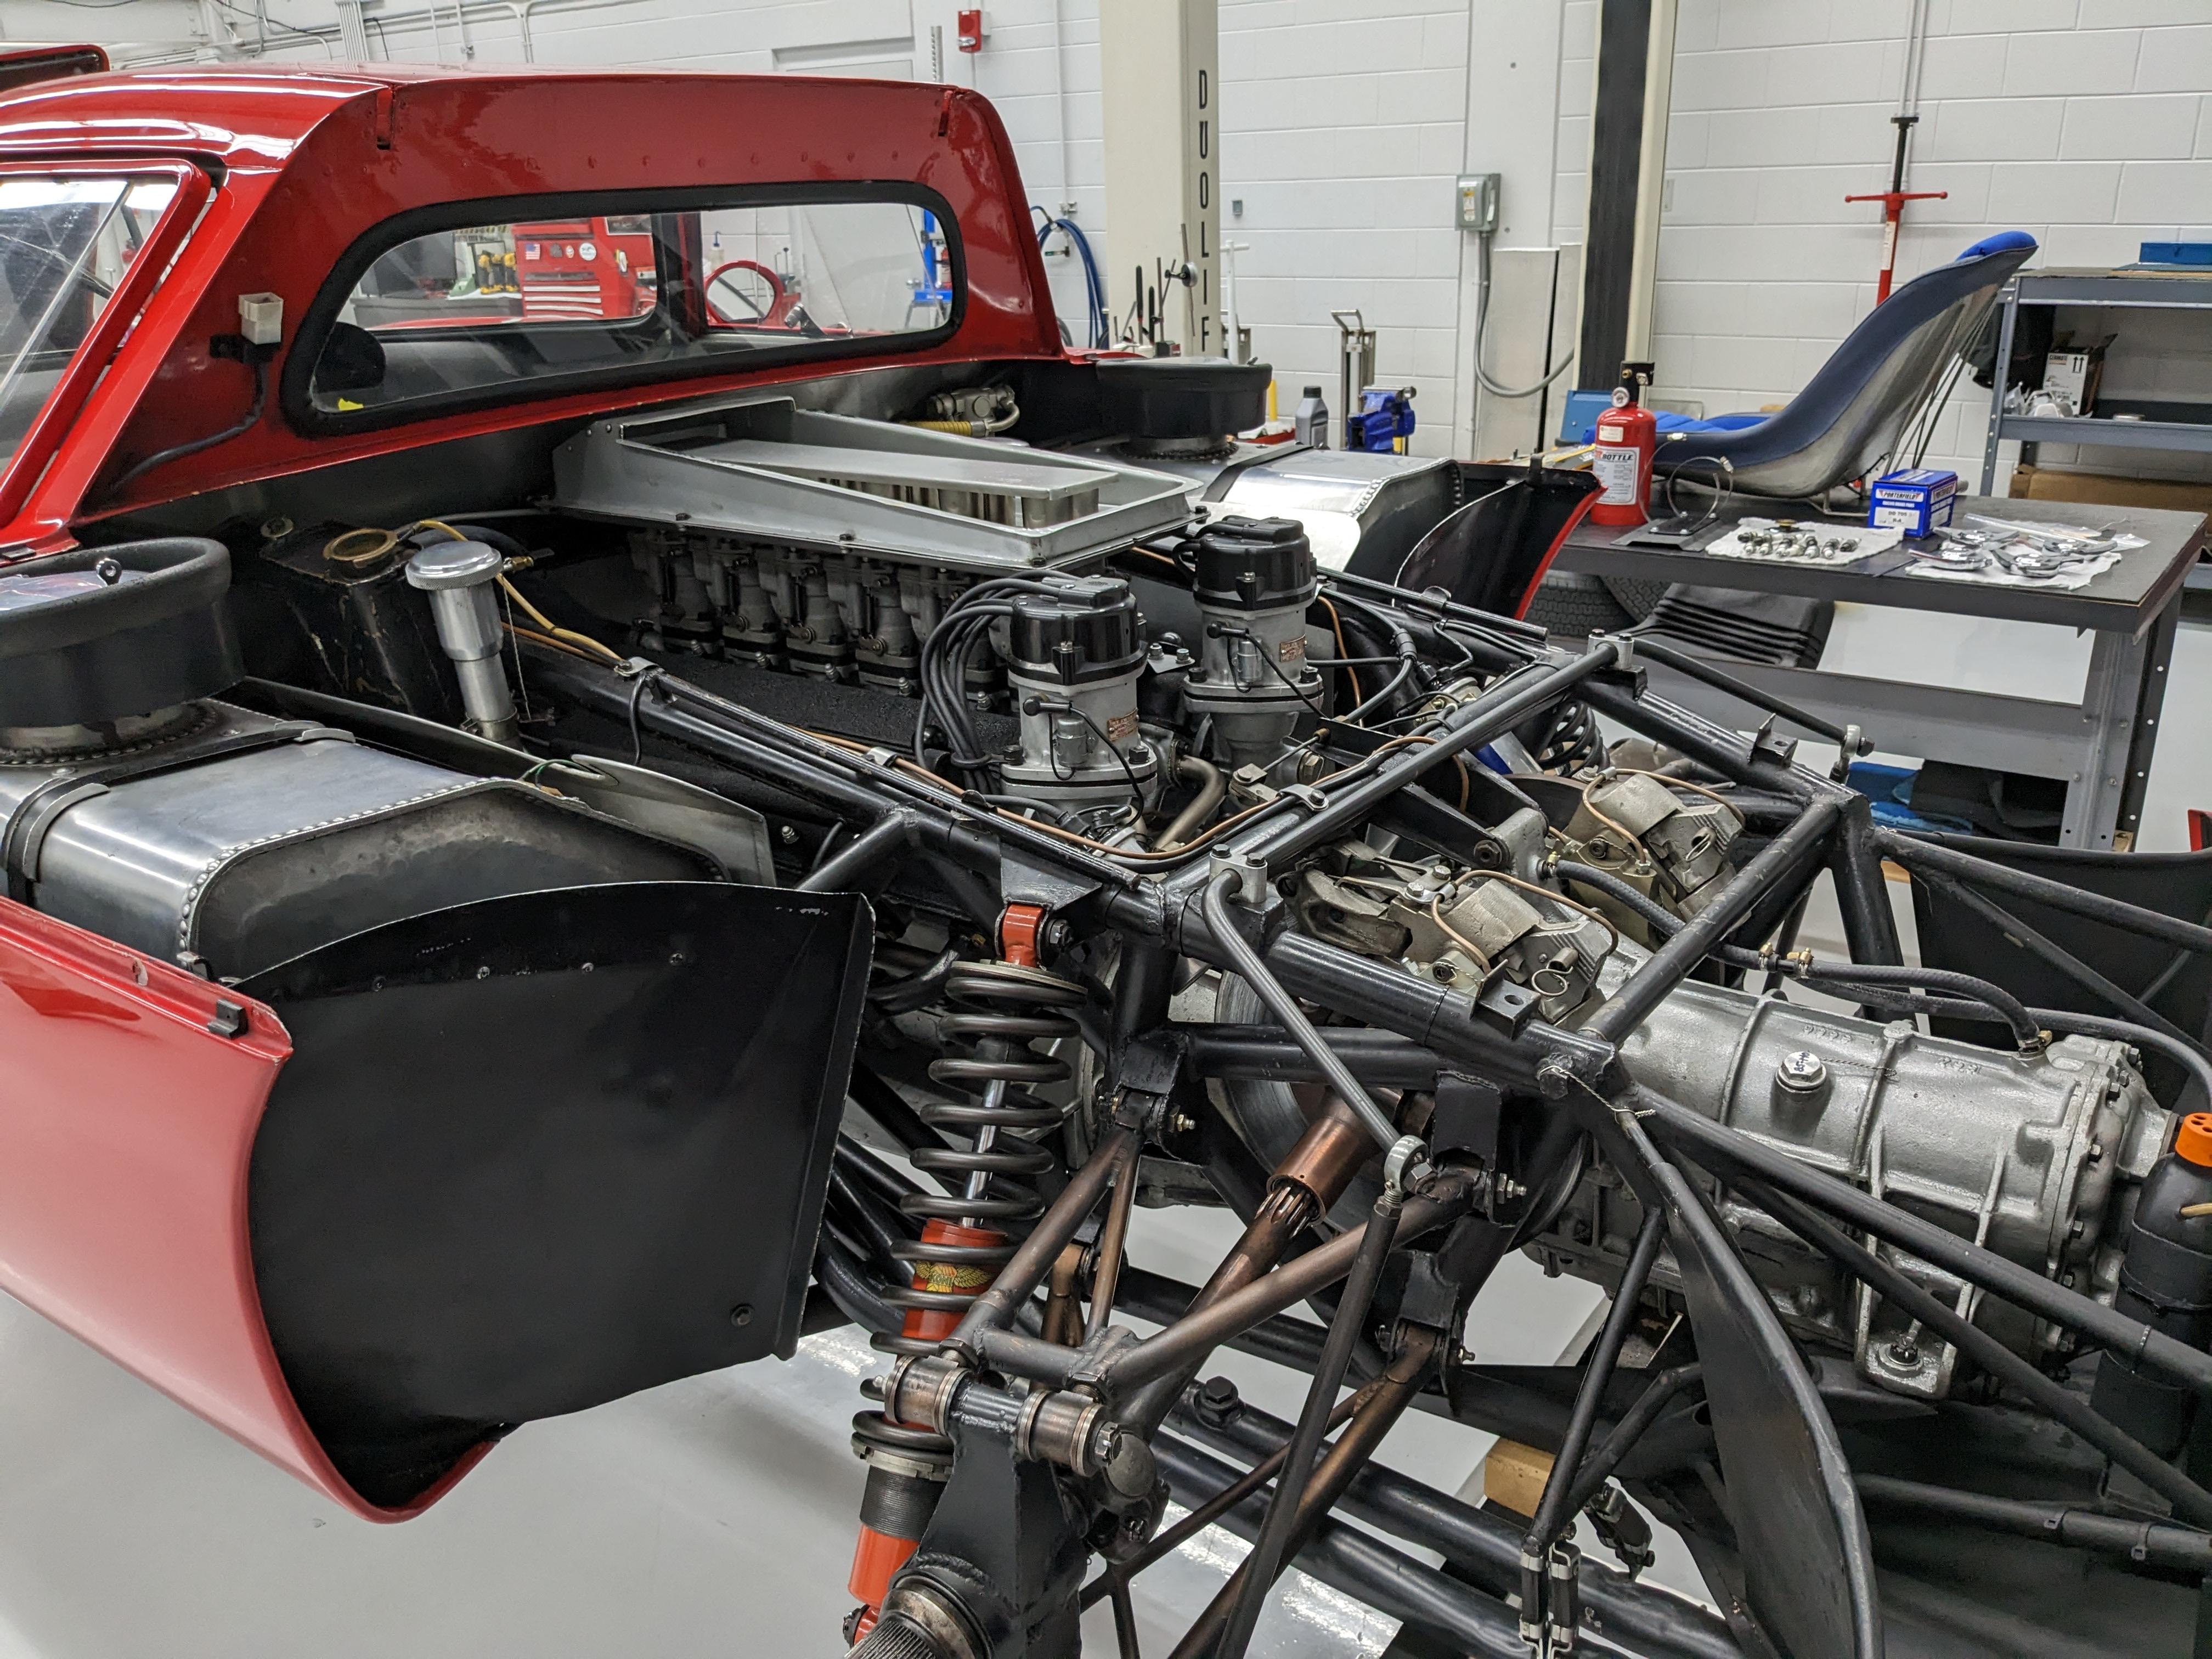
 Been a while since I did an update and I've gotten a lot done. The engine is complete, or at least as complete as it's going to get until the firewall is installed. The 1:1 has a machined finish on the block that I tried to represent. I used a base coat of Vallejo Metal Color aluminum followed by a stippled layer of dark grey wash and a final stippling of Vallejo chrome. The Vallejo chrome was also used on the intake manifold. It does a great job of representing polished aluminum. I'm not sold on the paint finish on the exhaust manifolds yet... I might try something else. They aren't glued on at this point as I want them to be positionable when the exhausts are installed later. The other end of the ignition wires will mount into a tube that runs into the firewall. The chassis is built up to the point where it receives the engine. Lots of washes and dry brushing to bring out the details. Most of which will never be seen again after it's enclosed by the body and belly pan. A quick test fit with the firewall and bodywork in place. It's starting to get tight. One thing I've noticed on this kit is that the tolerances are very... intolerant. Next will be the instrument panel and firewall... more pics soon!
-
I've seen a few of these built and have one I've been tinkering with for years. That's the best I've ever seen that fuel tank assembly done. Great job on wrapping the springs too!
-
Great job on engineering those doors. I've been thinking about picking up the Zonda kit but I've always had some trepidation about building a kit that has been out for a few years and yet somehow you never see built up. If your Huayra is any indication this will turn out great!
-
Ukrainian Scale Car Production does an engine bay transkit as well as interior side panels for this kit. I have the side panels and they're beautifully executed. Great job on this build!
-
Was this a bribe so he'll let the pug have the blanket once in a while?
-
National Lampoon's "Vacation" Wagon Queen Family Truckster
jaymcminn replied to spencer1984's topic in Model Cars
That color looks a little bright for Metallic Pea, but I guess it'll do. And everybody knows the "Princess Power" V8 was lavender, not lilac. ? (Seriously though, absolutely awesome build of an all-time classic movie car. I love it!) -
Nap time...
-
Momma- Household Name. A fantastic album that sounds more like 1992 than 2022. Lots of influence from bands like Breeders, Smashing Pumpkins, Pixies, etc. It's pretty much bangers from beginning to end!
-
Wish I'd gotten more, TBH. I think I got 4 or so, but it was the end of the tour and the docent was getting a bit antsy to move on to the next group. I don't know why he wouldn't just leave me in there on my own, I would have kept my hands to myself...
-
Great, super clean build of an underrated classic. I love it!
-
Bob Smith Industries Glue
jaymcminn replied to WizPorsche944's topic in Model Building Questions and Answers
Super Gold+ is excellent stuff. It doesn't fog and has the perfect consistency for a thick CA glue. I've been using it for many years. -
Online ads for Temu. 'Nuff said.
-
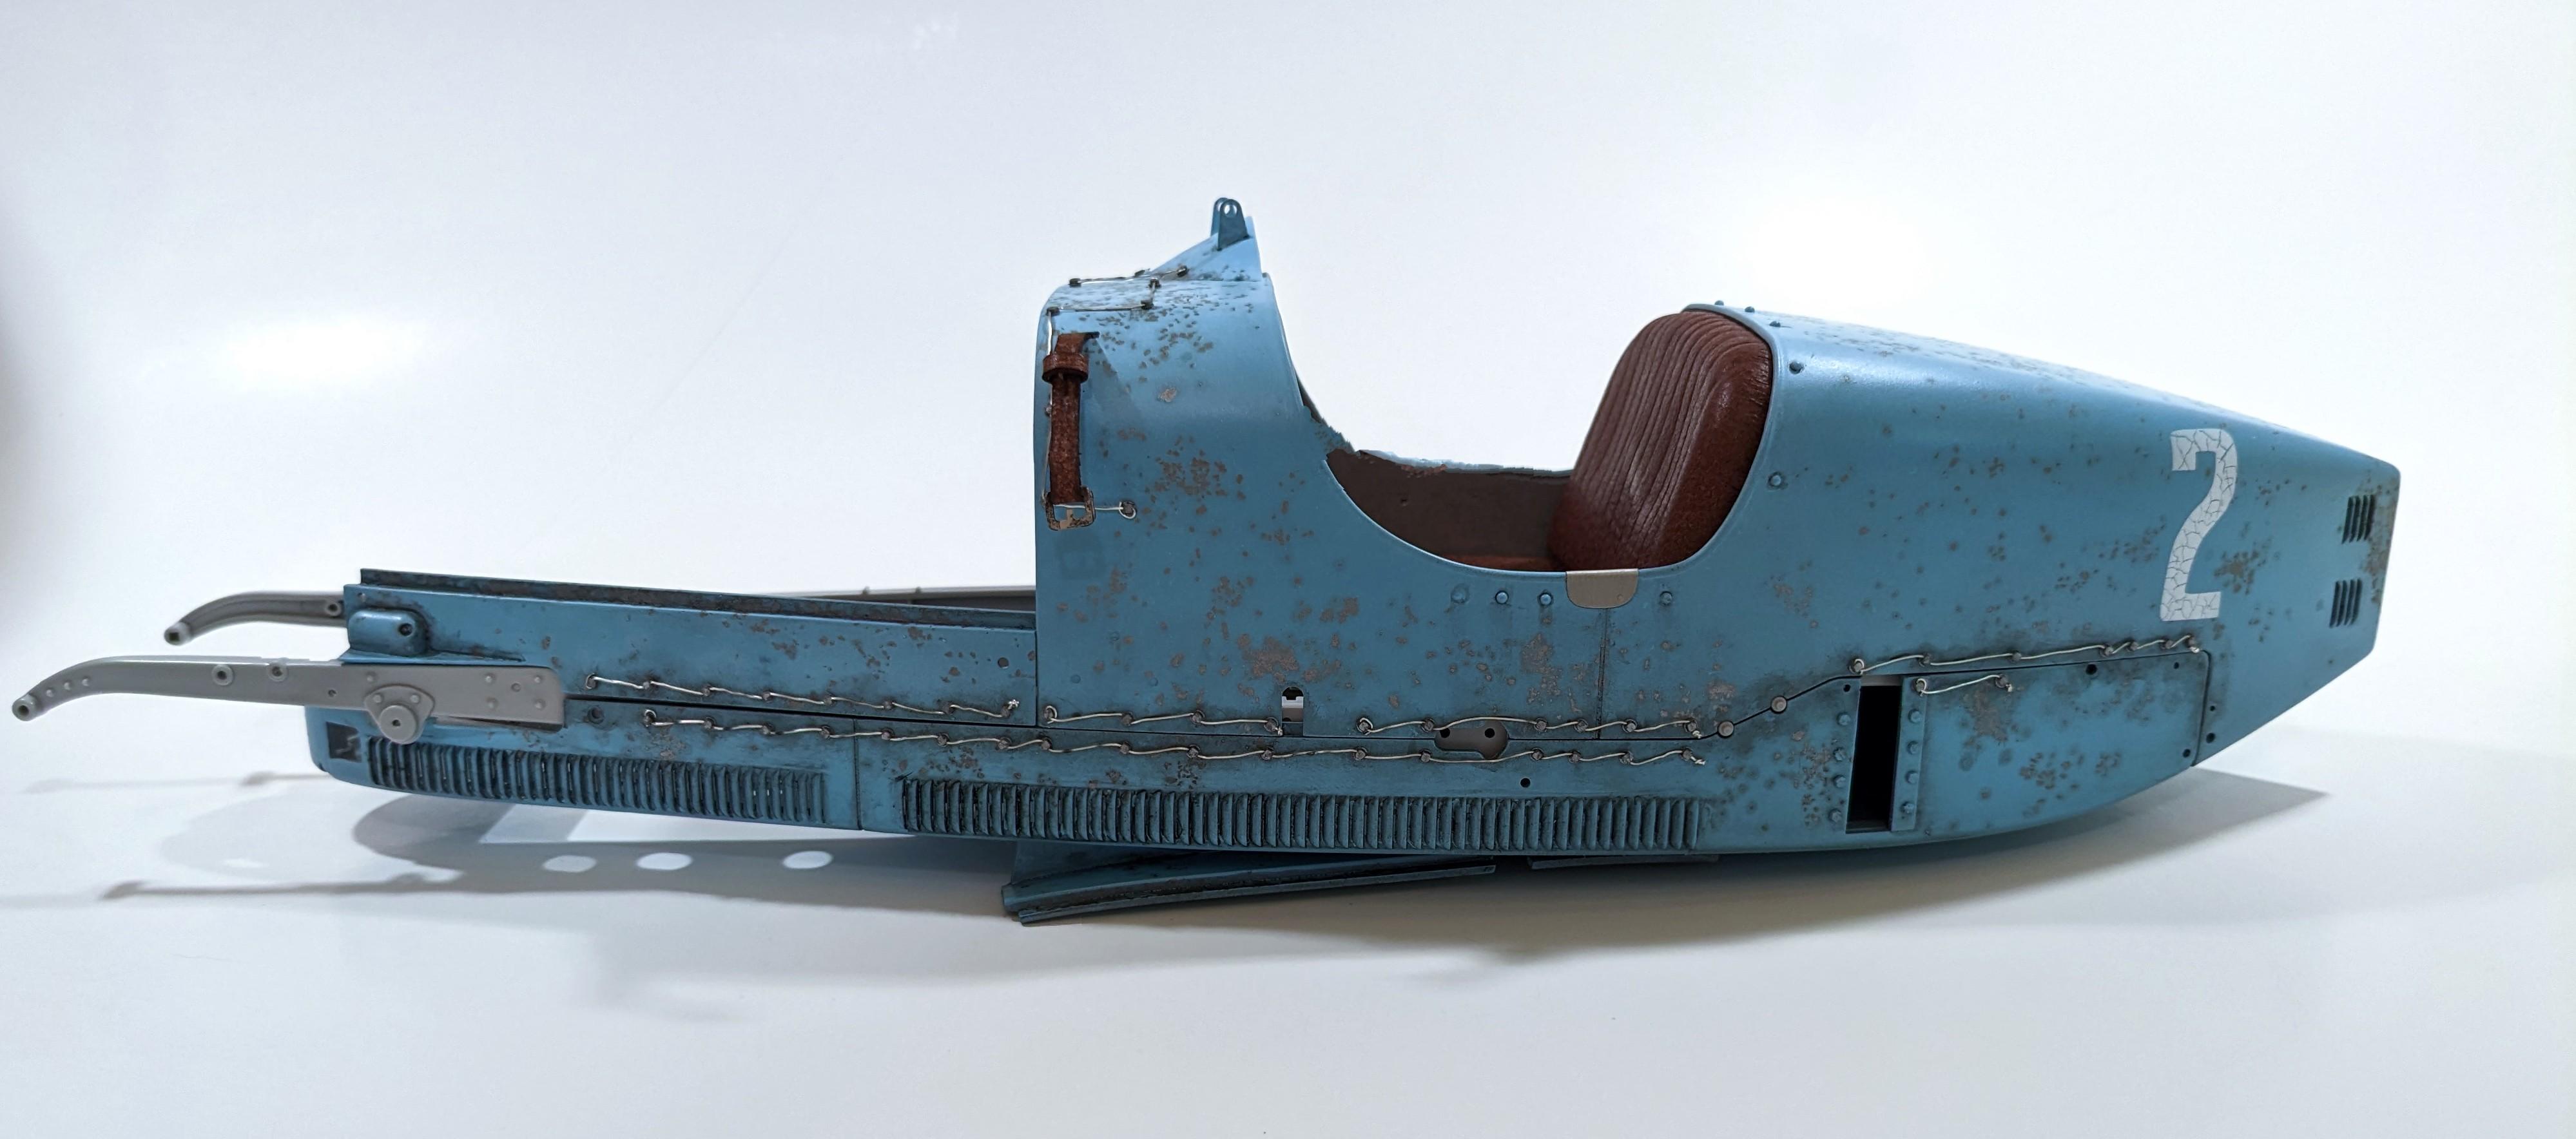
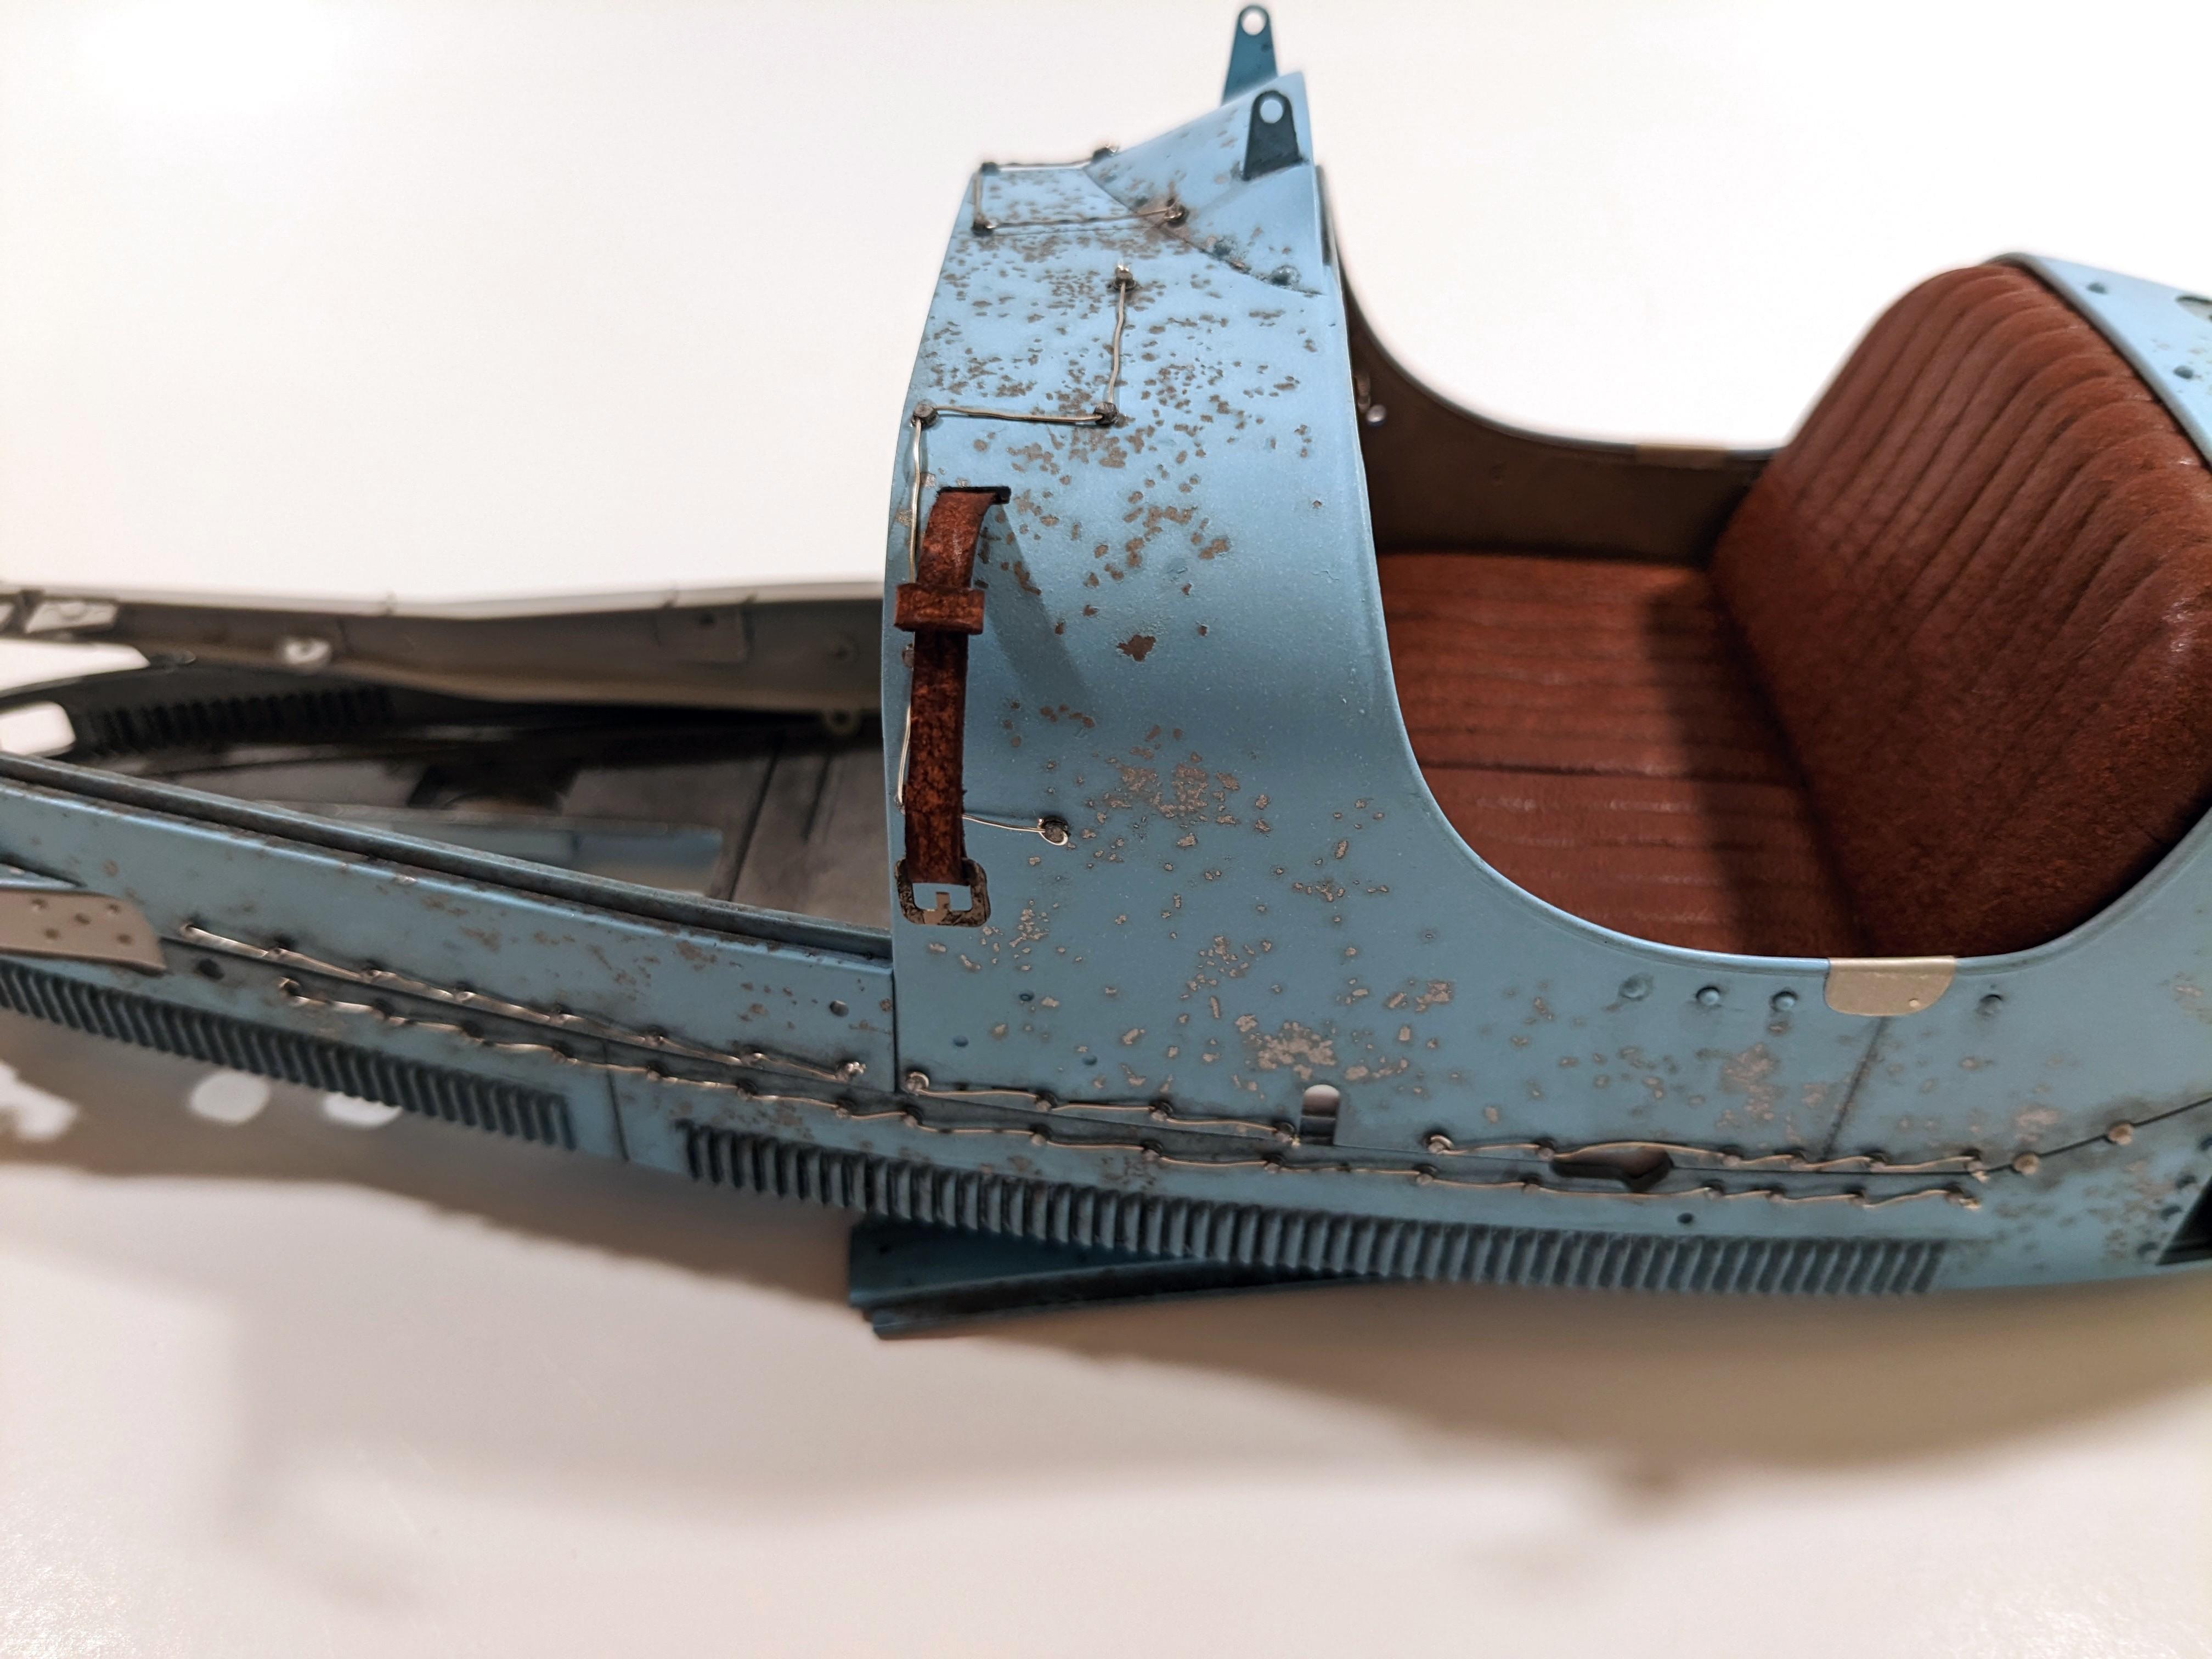
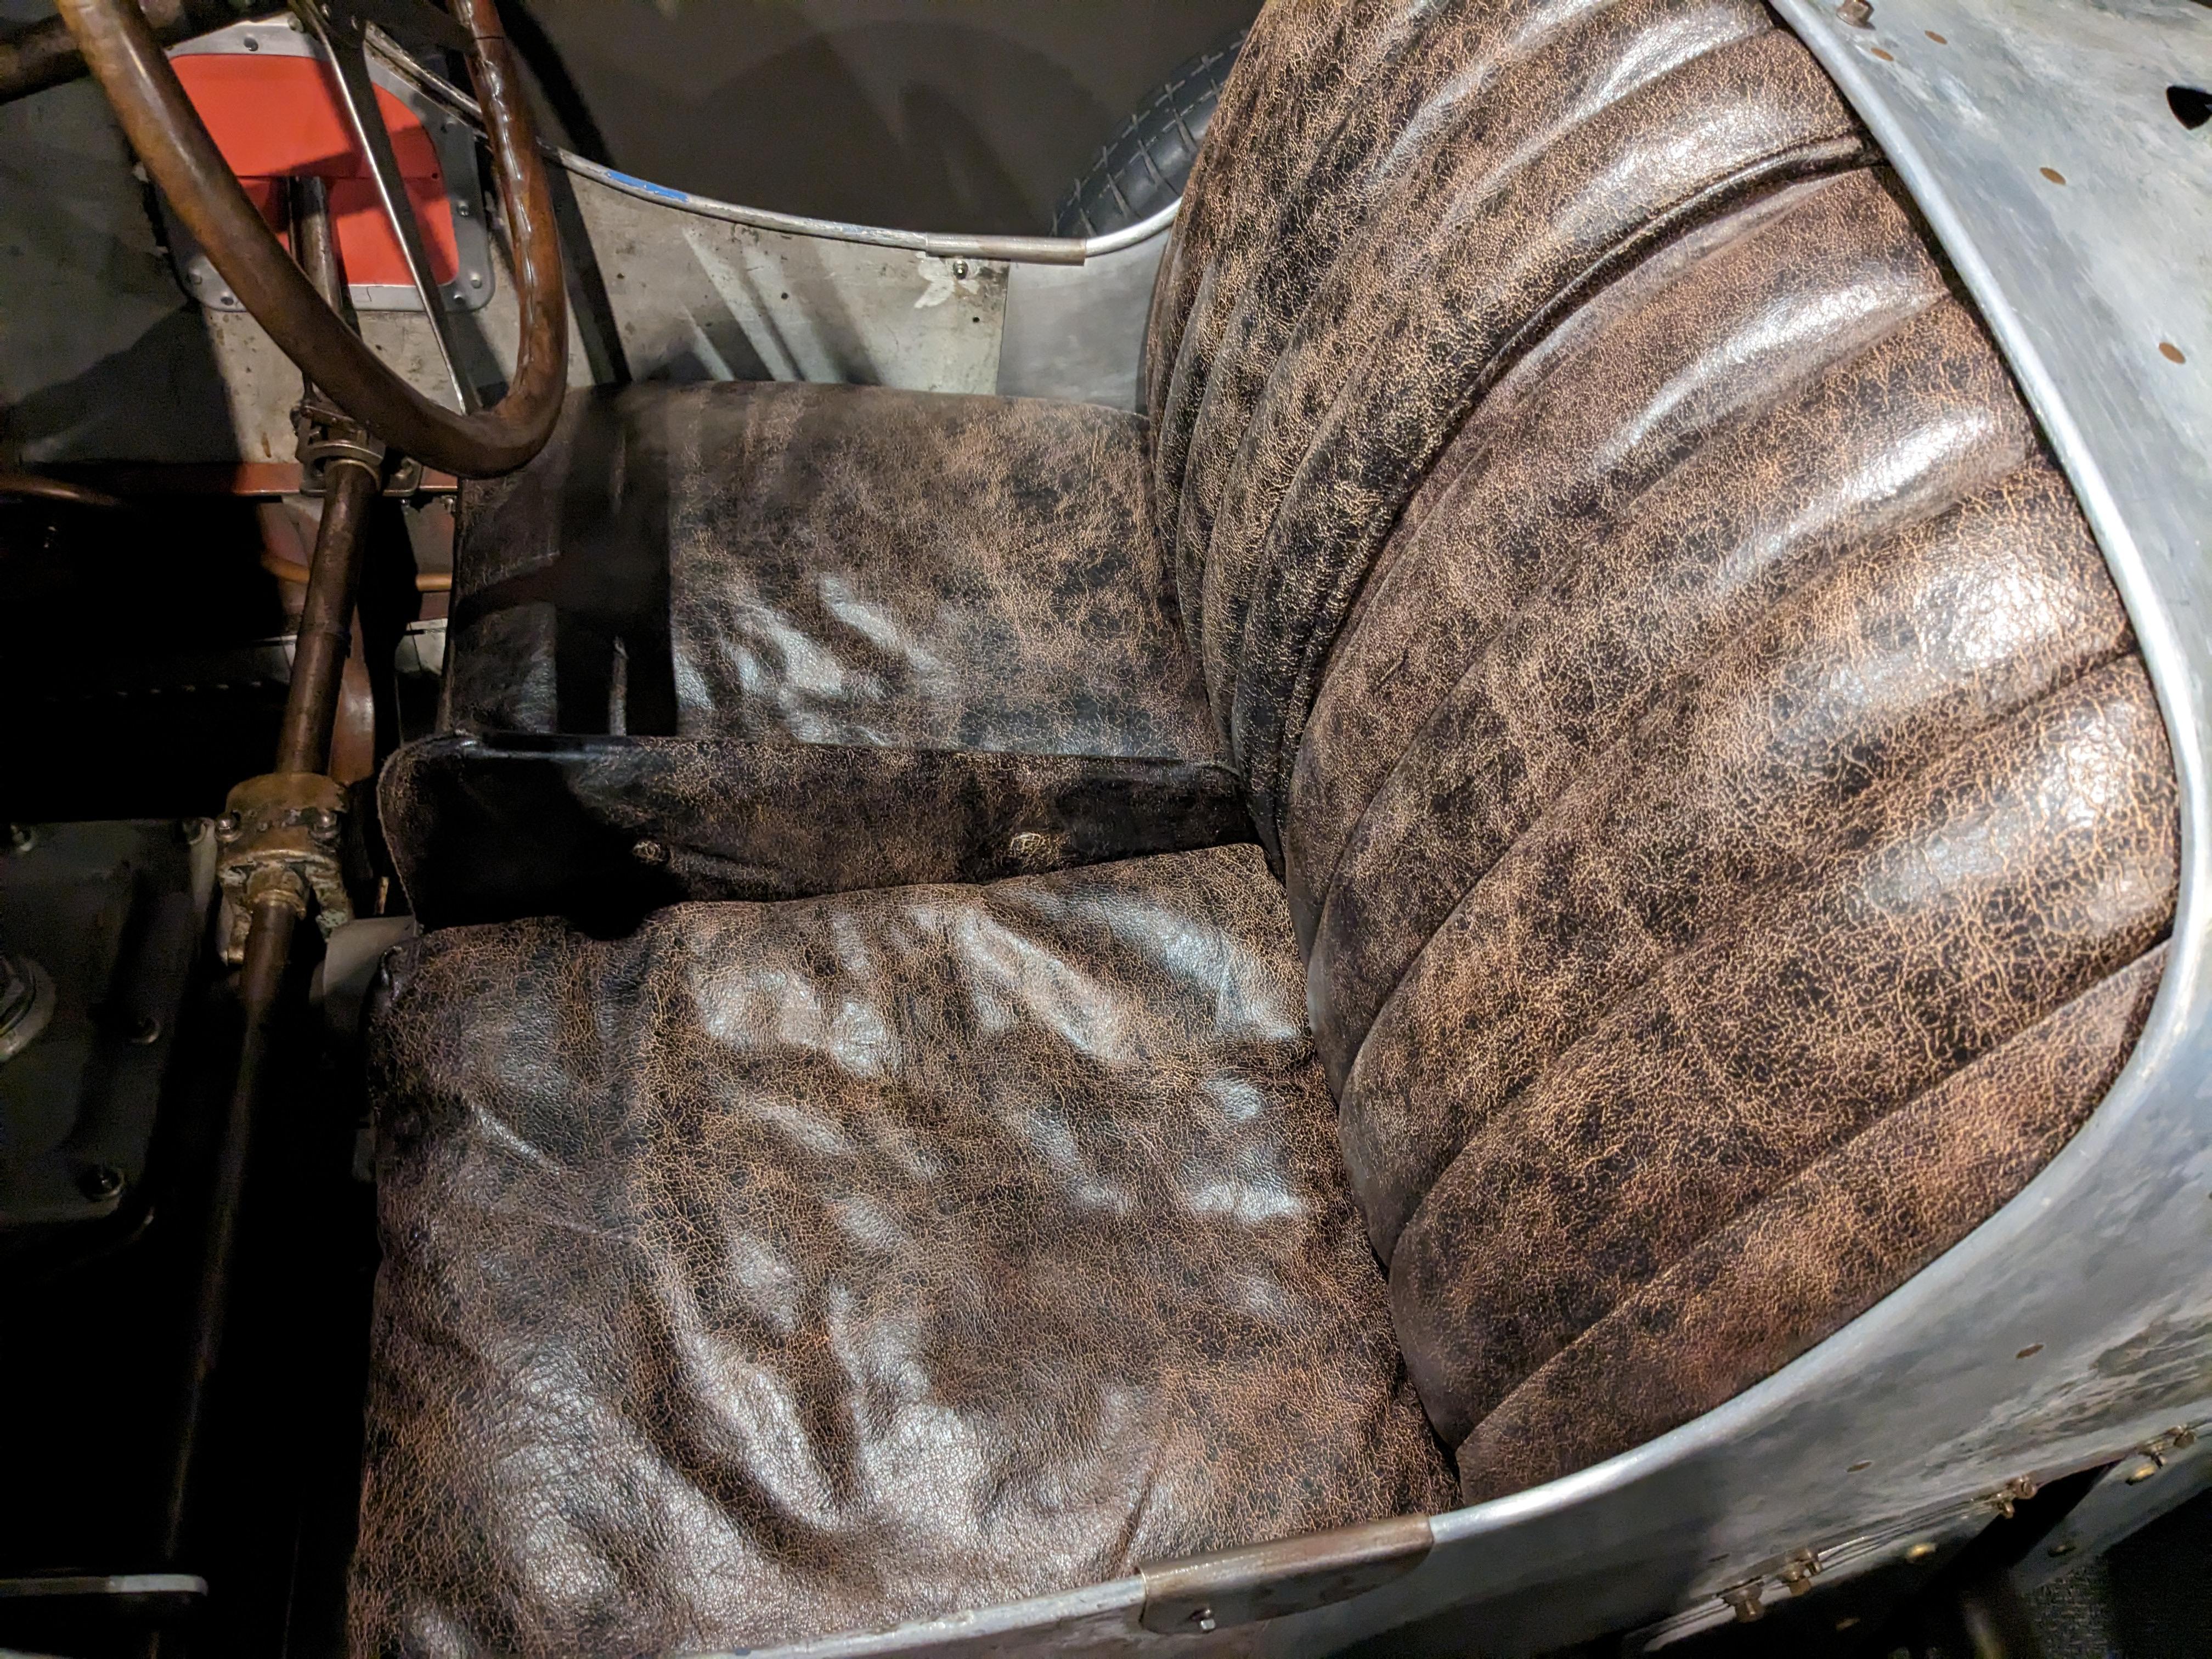
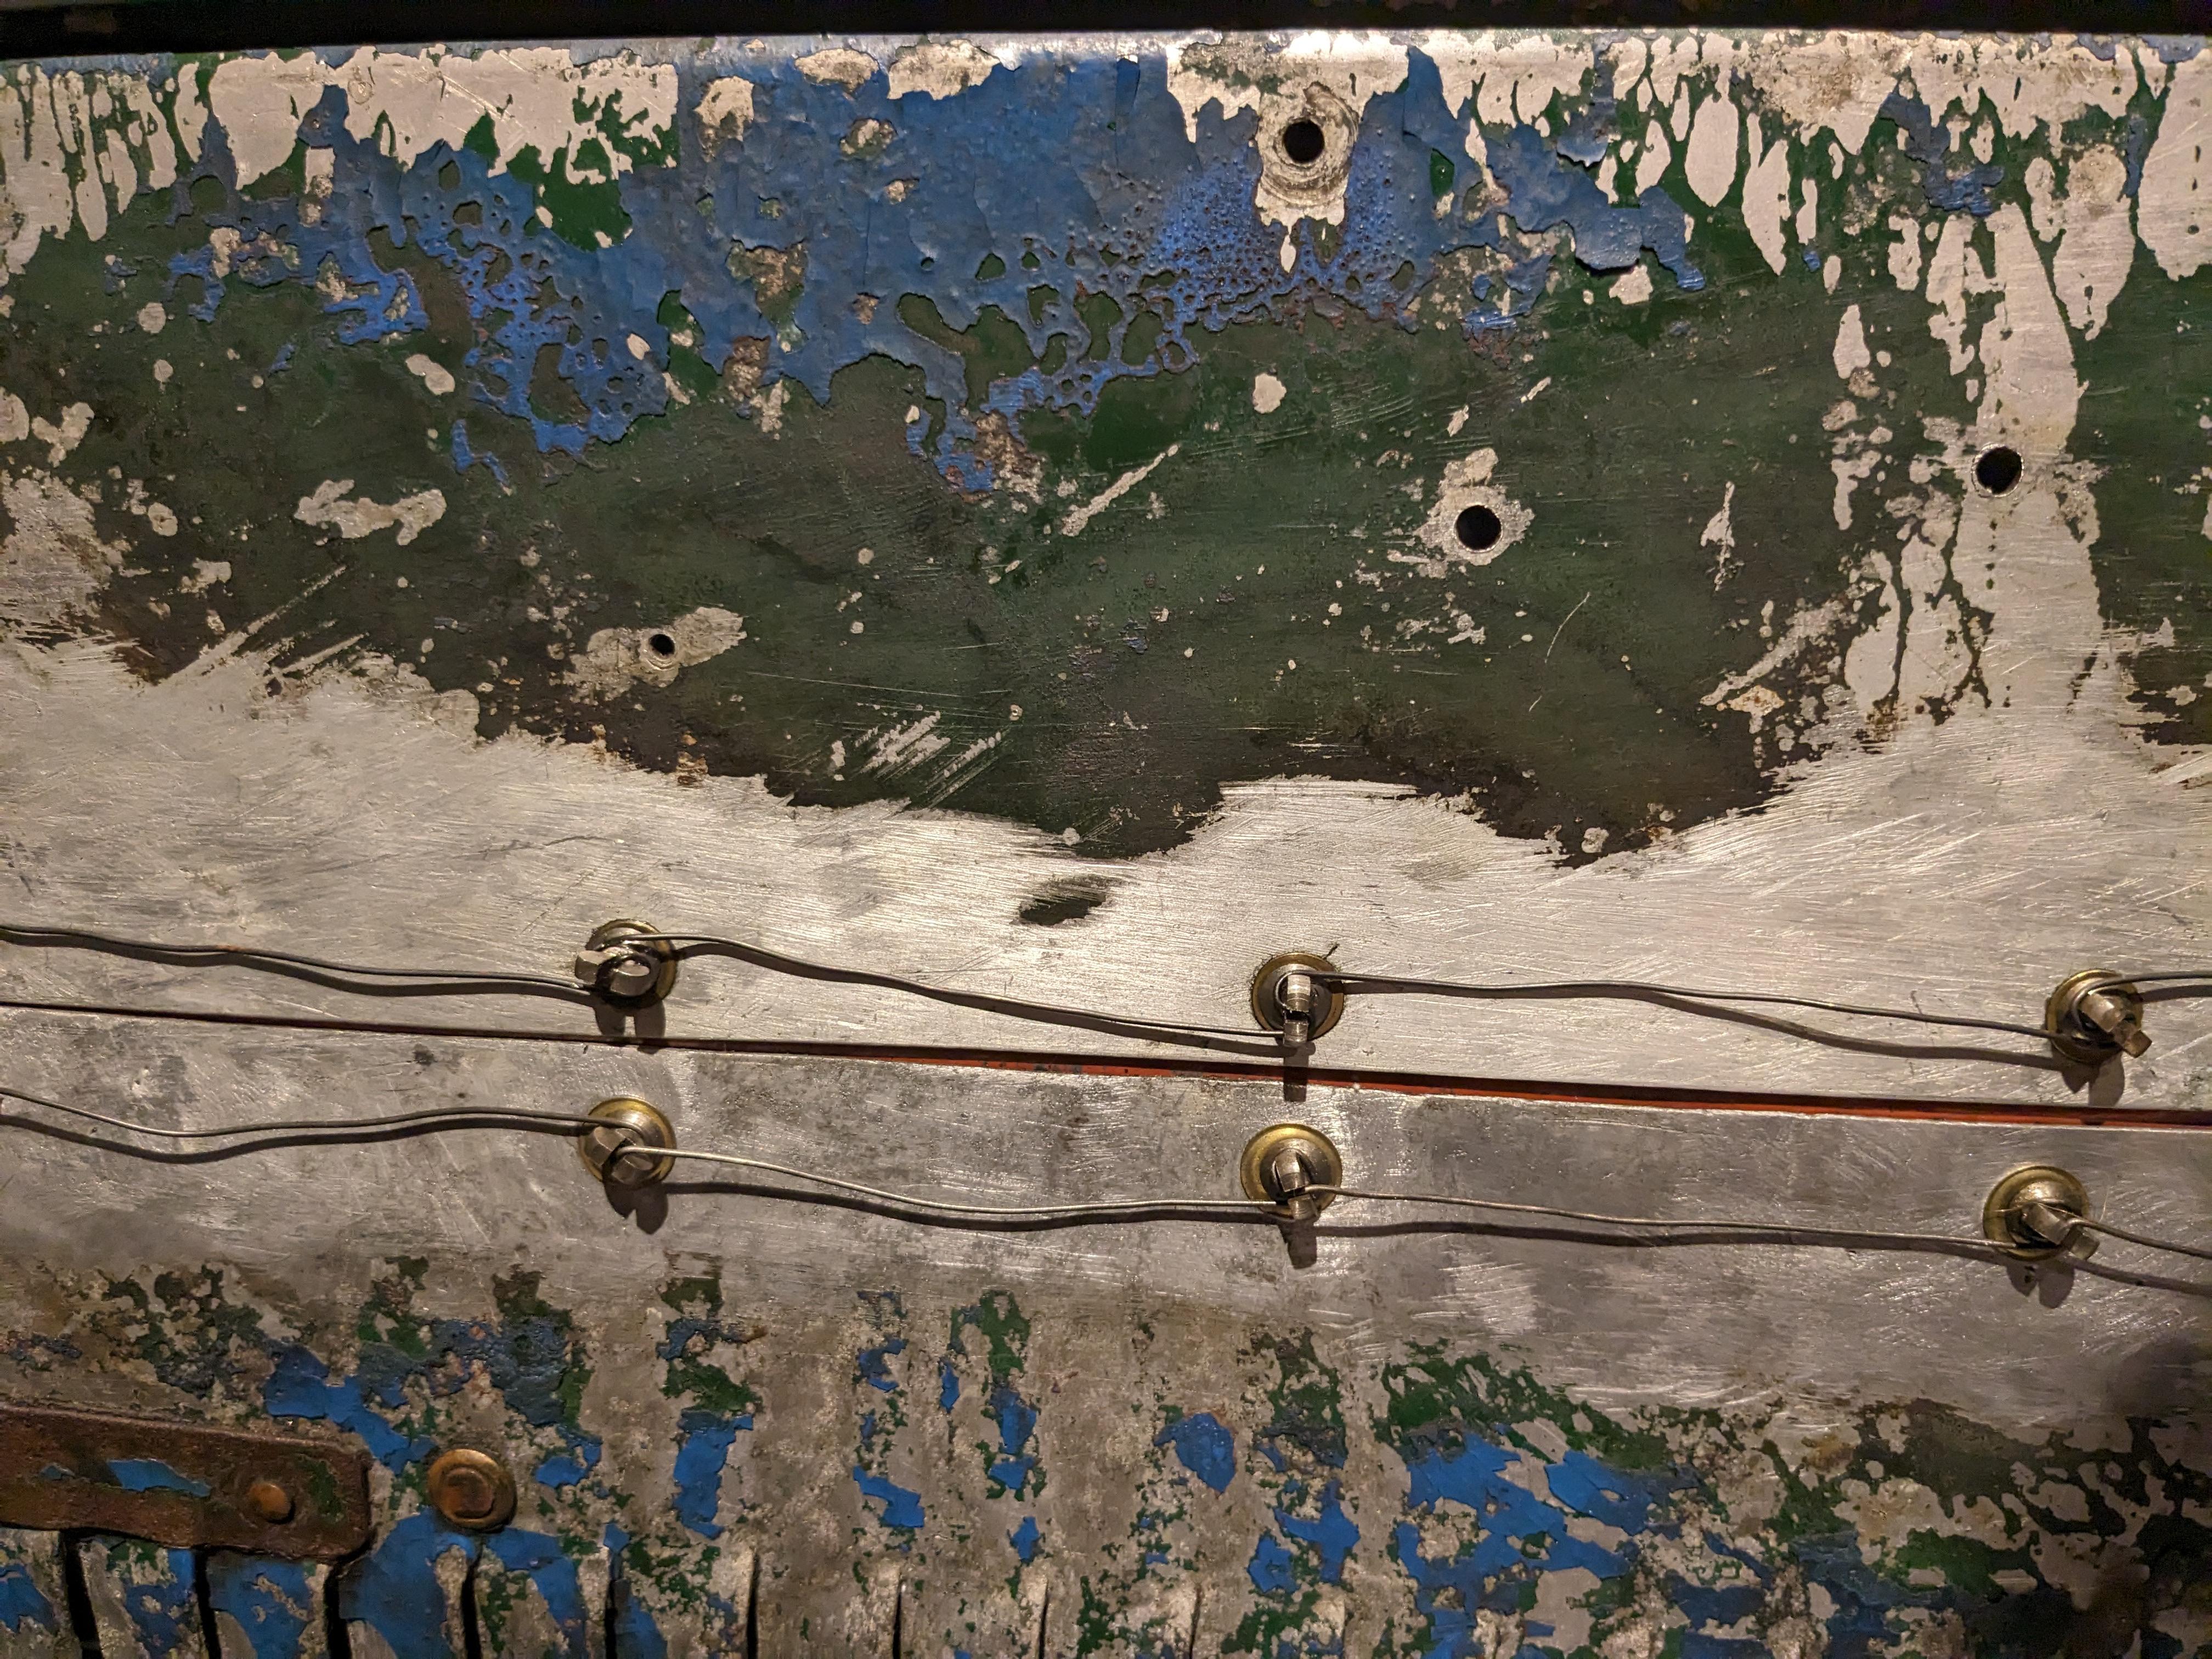
Well, I haven't gotten around to the engine yet. I decided to tackle the bolts and safety wire on the body and undertray as well as some simple leatherwork. This stuff needed to go on before final assembly anyway. The wire lock bolts are from Unobtanium in the UK and are designed for the Italeri Alfa 8c kit. They're the wrong style for the Bugatti but they work well. Unobtanium includes a jig that allows you to drill precisely through the bolts to insert the wire. I used 30-gauge soft beading wire, which forms to exactly the shape you need and holds the shape perfectly. Every Bugatti 35 seems to have a slightly different pattern to the safety wire, I just went with something that looks good. I used the same thin leather as on the seats for the leather gaiter on the driver's side as well as the top belt for the spare tire carrier on the passenger side. Simple enough, and good practice for the more complicated hood straps to come. I went ahead and glued the seat back to the bodyshell at this point. These pics have the partial chassis mocked up with the seat bases in place while checking clearances. Today I'm going to fire up the airbrush and start on the small mountain of engine and chassis parts that I've gotten cleaned up and mounted for painting. On to the pics!
-
Great job! Those old Hasegawa Ferraris are really nice kits.
-
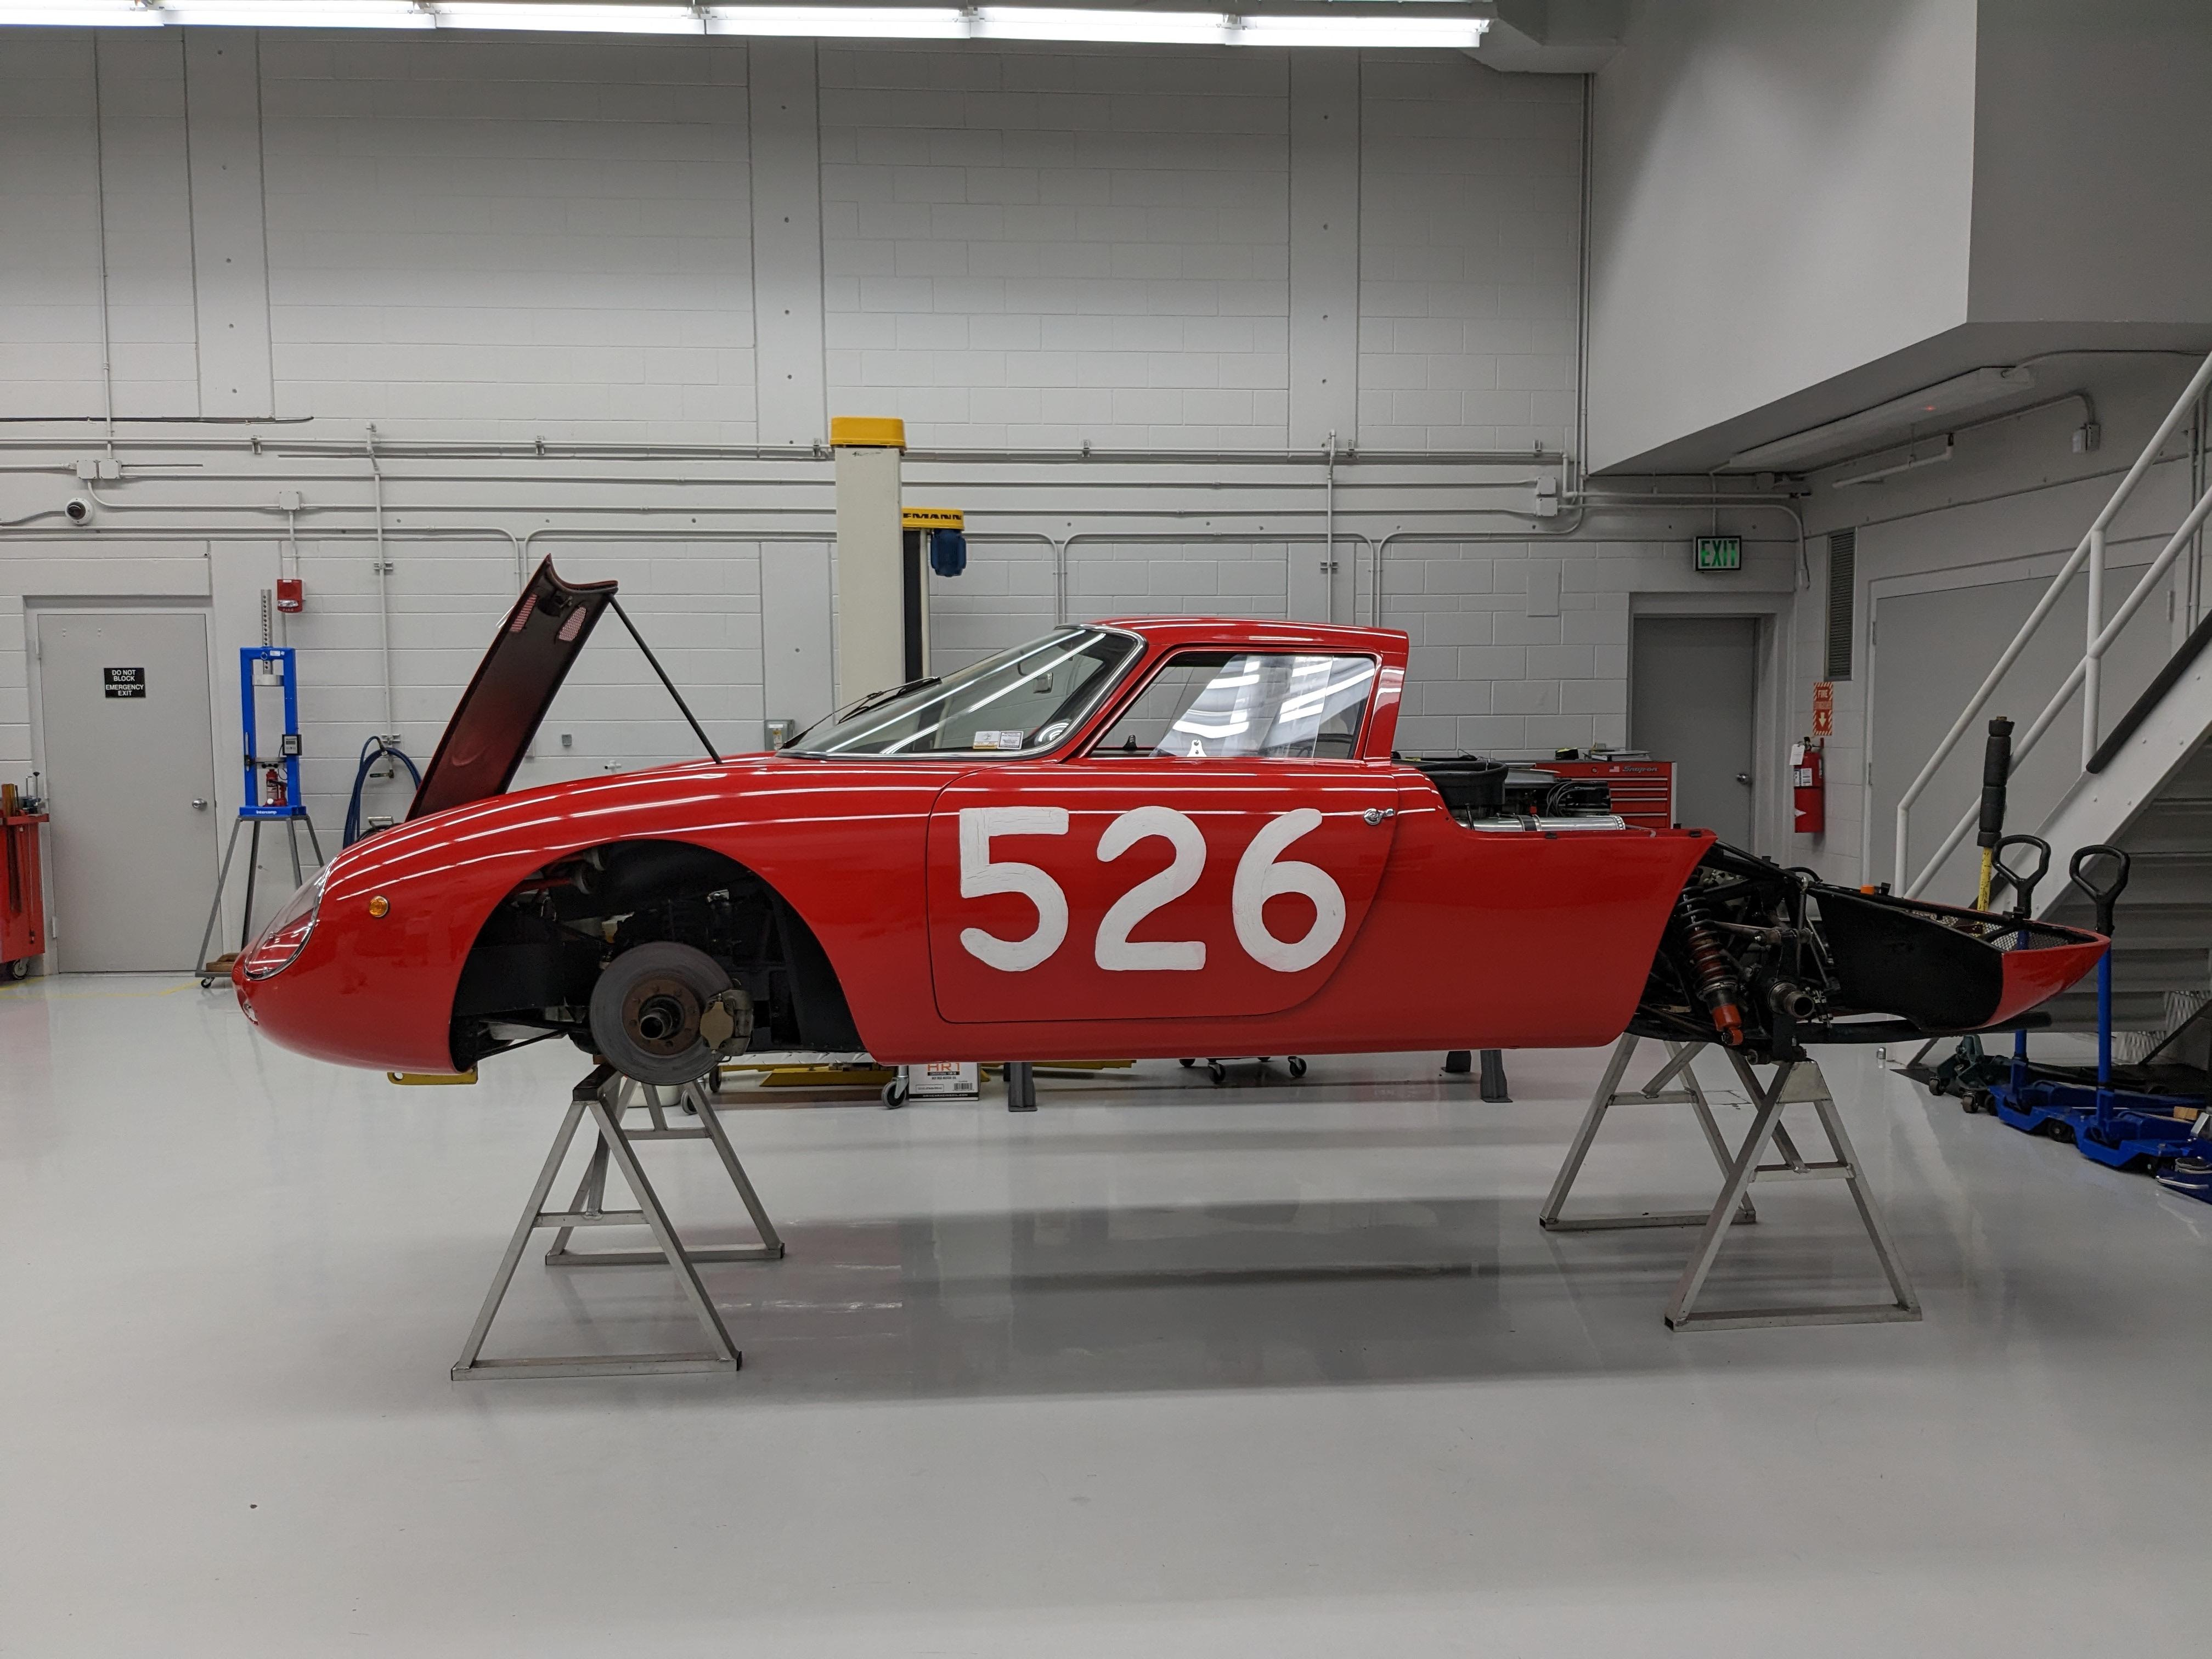
Lol, no worries about "building other people's models", I think all talented builders do that to some extent. That salt weathering technique is magic... just proof that spending some time seeing how the other modeling disciplines do things can pay off. I can't wait to see your Alfa, with your skills it's going to be a good one. Definitely going back for the hoods up display. Did the workshop tour this time as well. I was a bit disappointed that the Ferrari 250LM wasn't on display in the collection until I walked into the workshop and saw this...
-
Italeri includes some reasonably nice parts for these that would look good with some drybrushing and washes. The fusee chain is a good idea though. I'm already using thin stainless braided wire for the brake cables instead of Italeri's black rubber tubing.
-
Ah, another modeler who has discovered the joys of the Tamiya Magic Brush! That color is absolutely insane. Can't wait to see where it goes from here.
-
Yes, I've seen it used in some builds on here for hinges. How do you think I could incorporate it here? Possibly the chain tensioner for the brake lines?
-
Much as I love the timeless look of a stock 240z or a Fairlady ZG, these 70s custom versions are awesome in their own way. Great job on that bodywork and paint!
-
Washes and Weathering
jaymcminn replied to bluestringer's topic in Model Building Questions and Answers
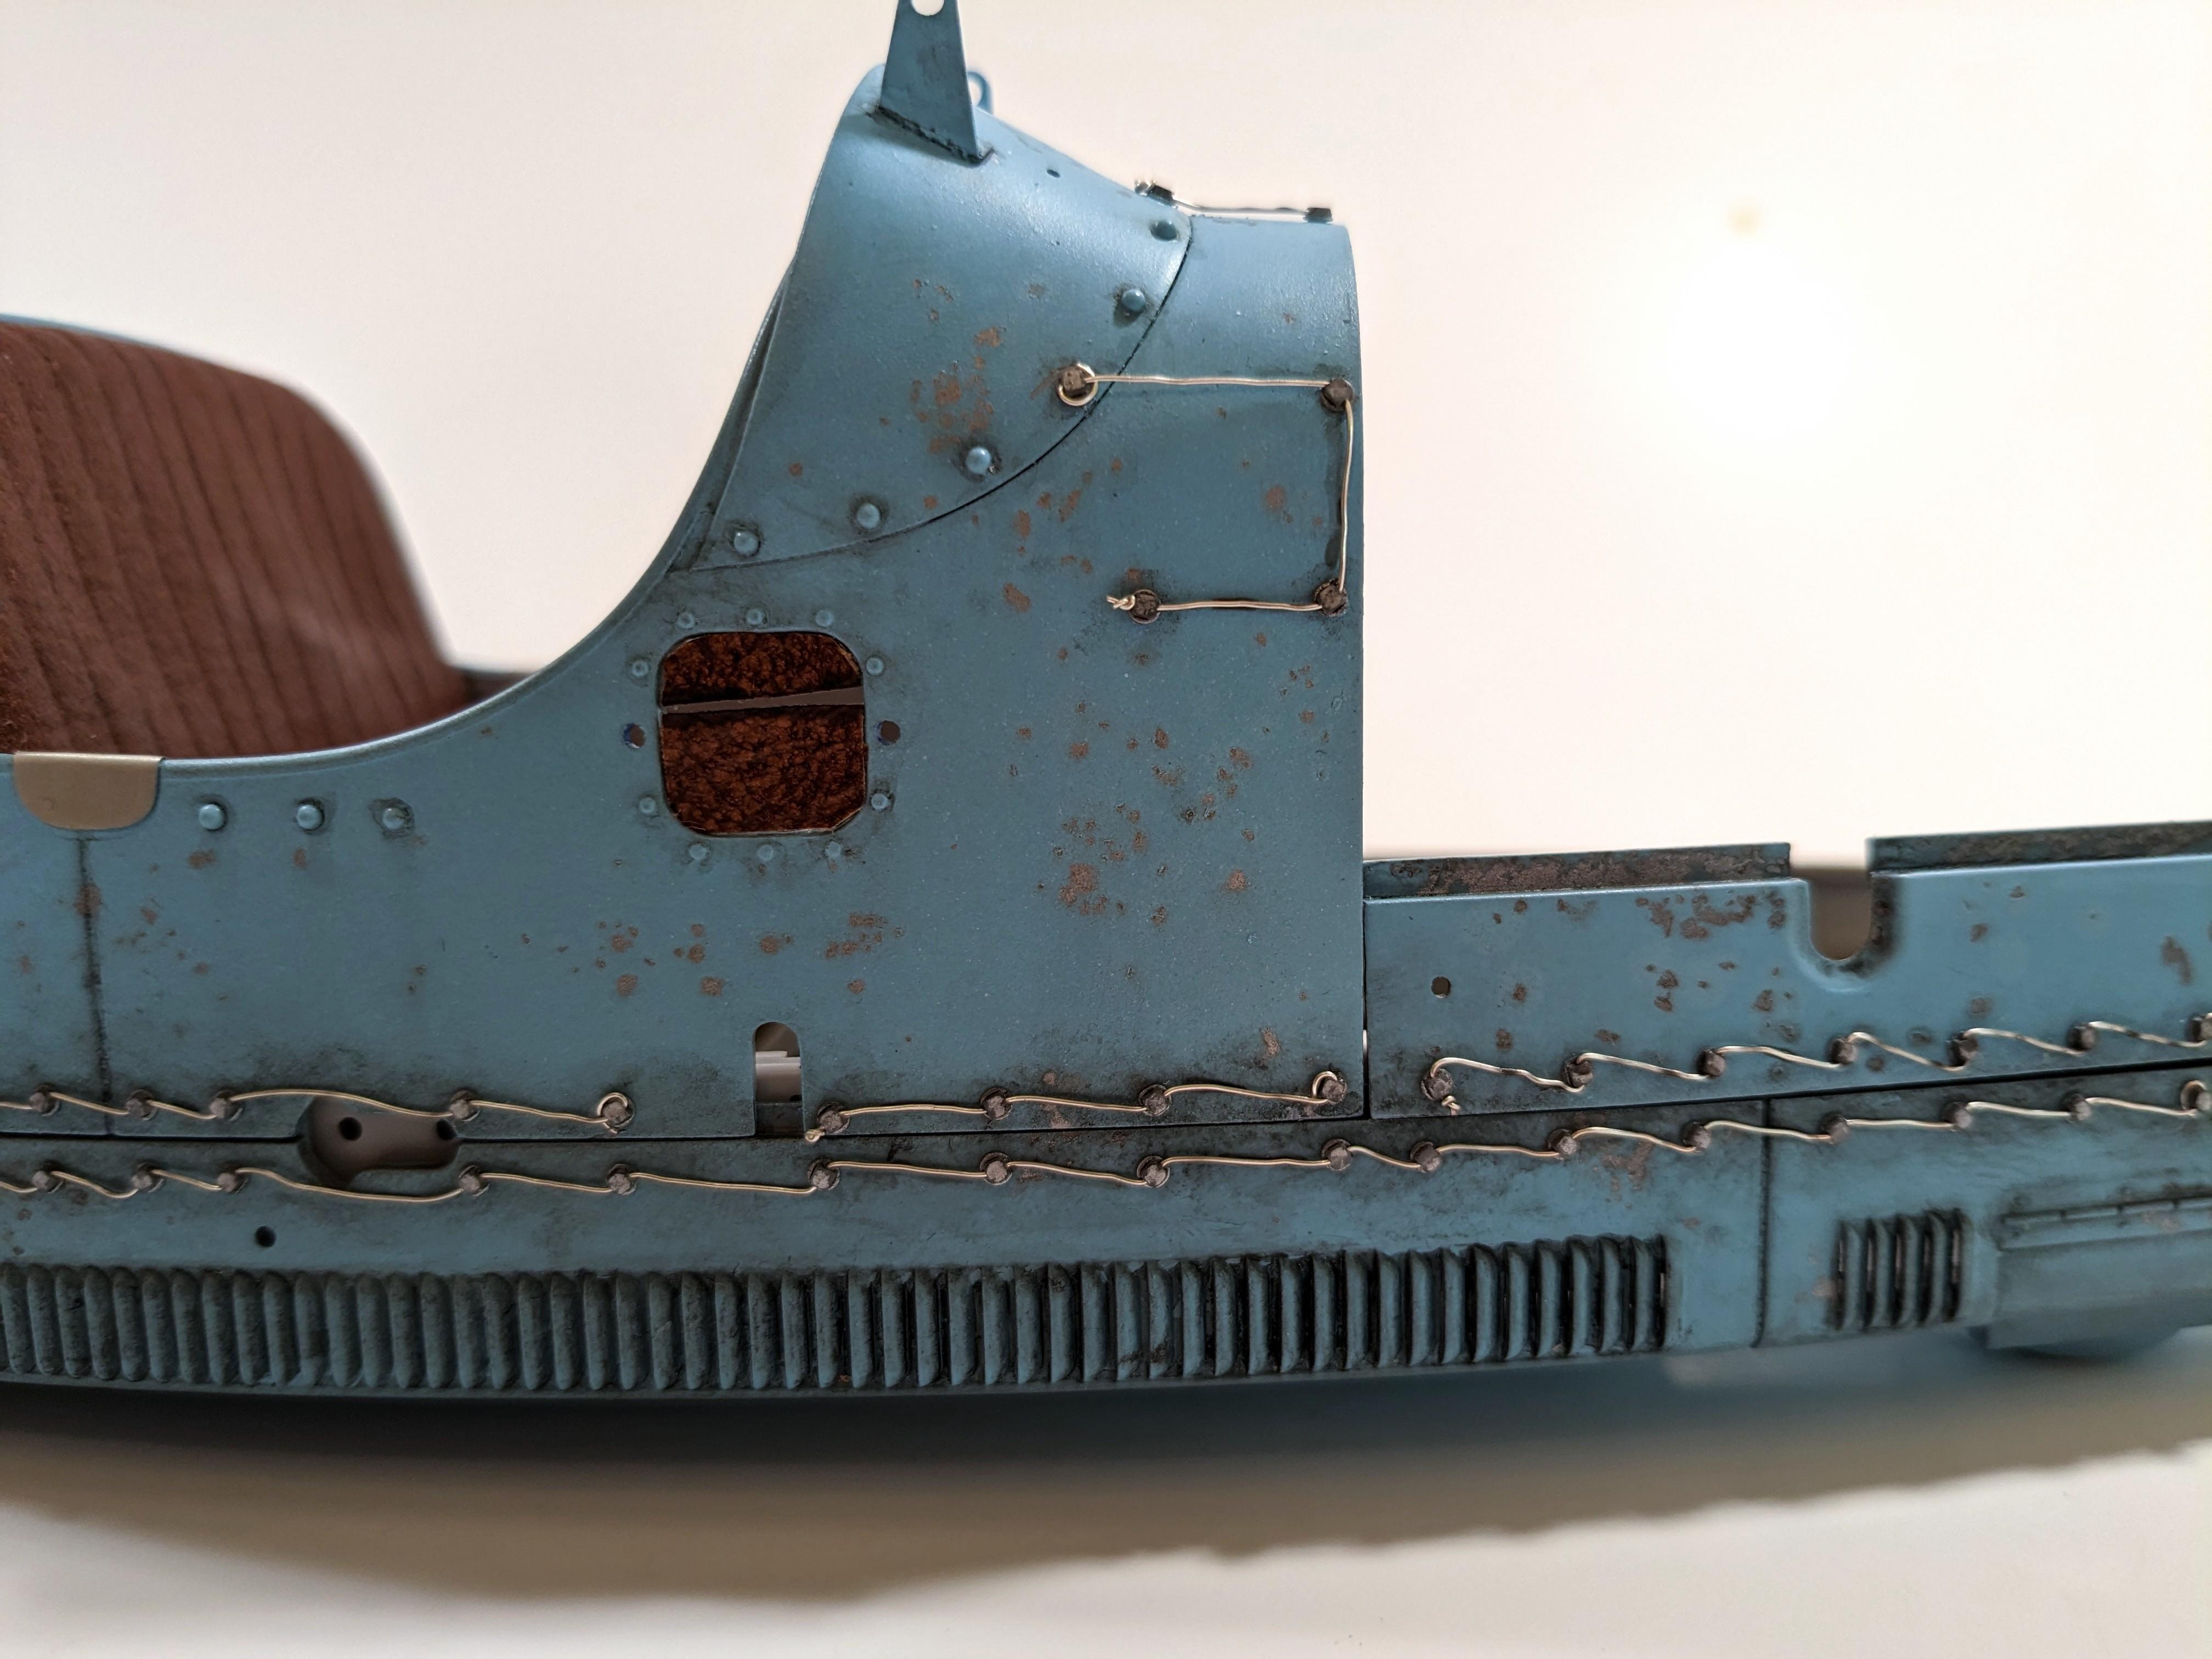
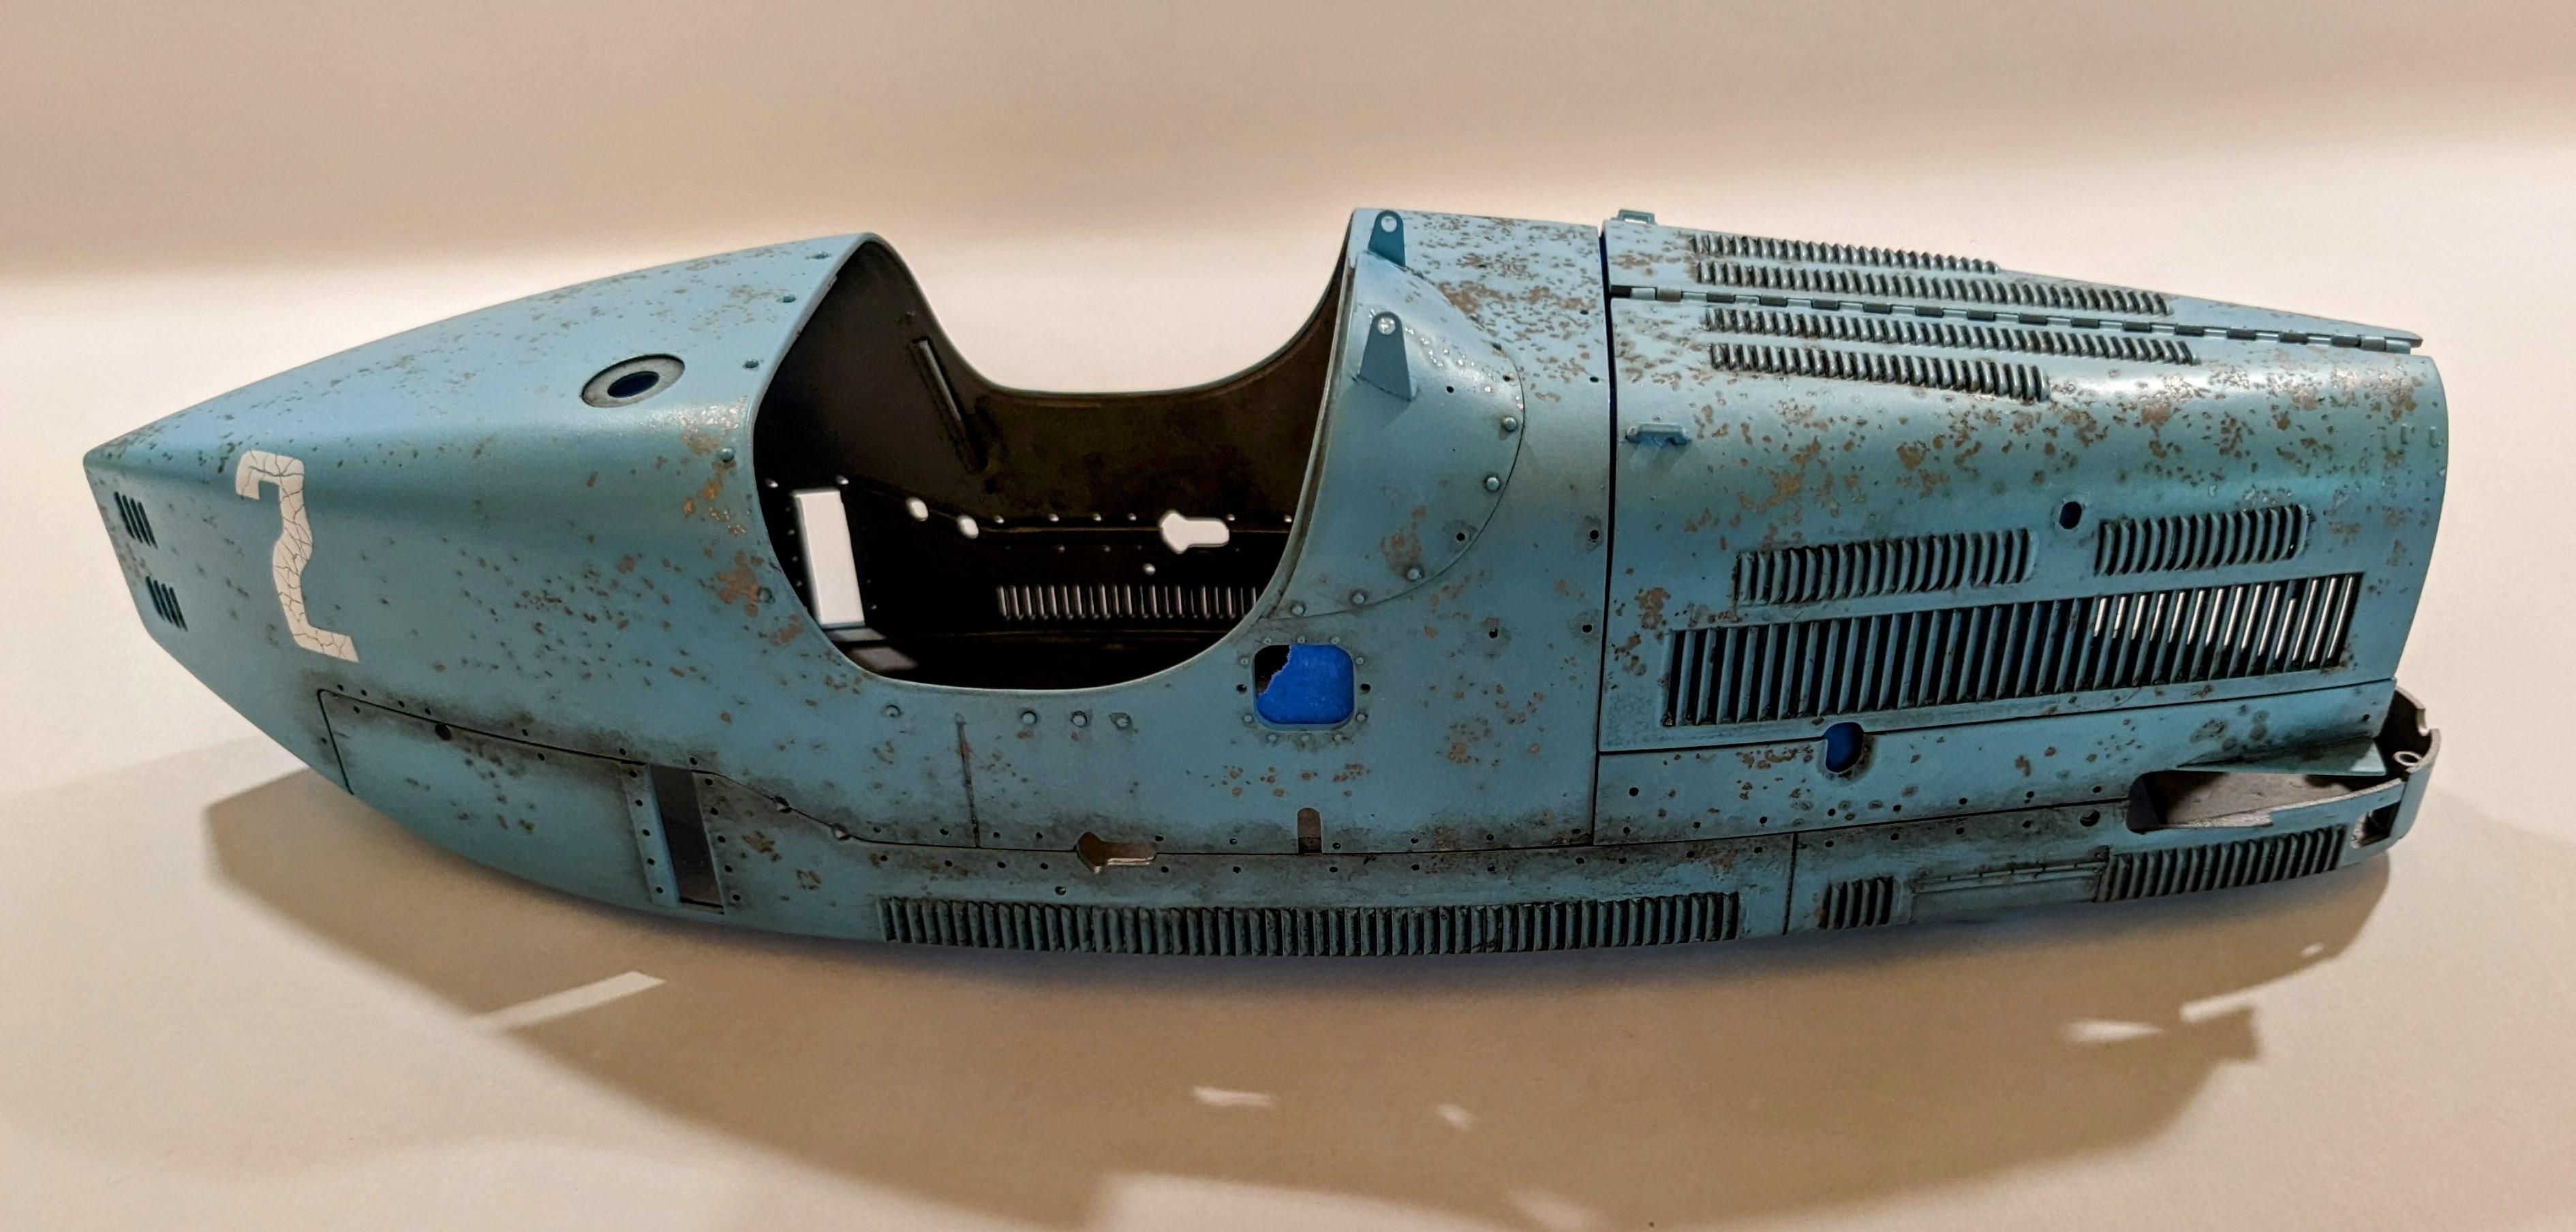
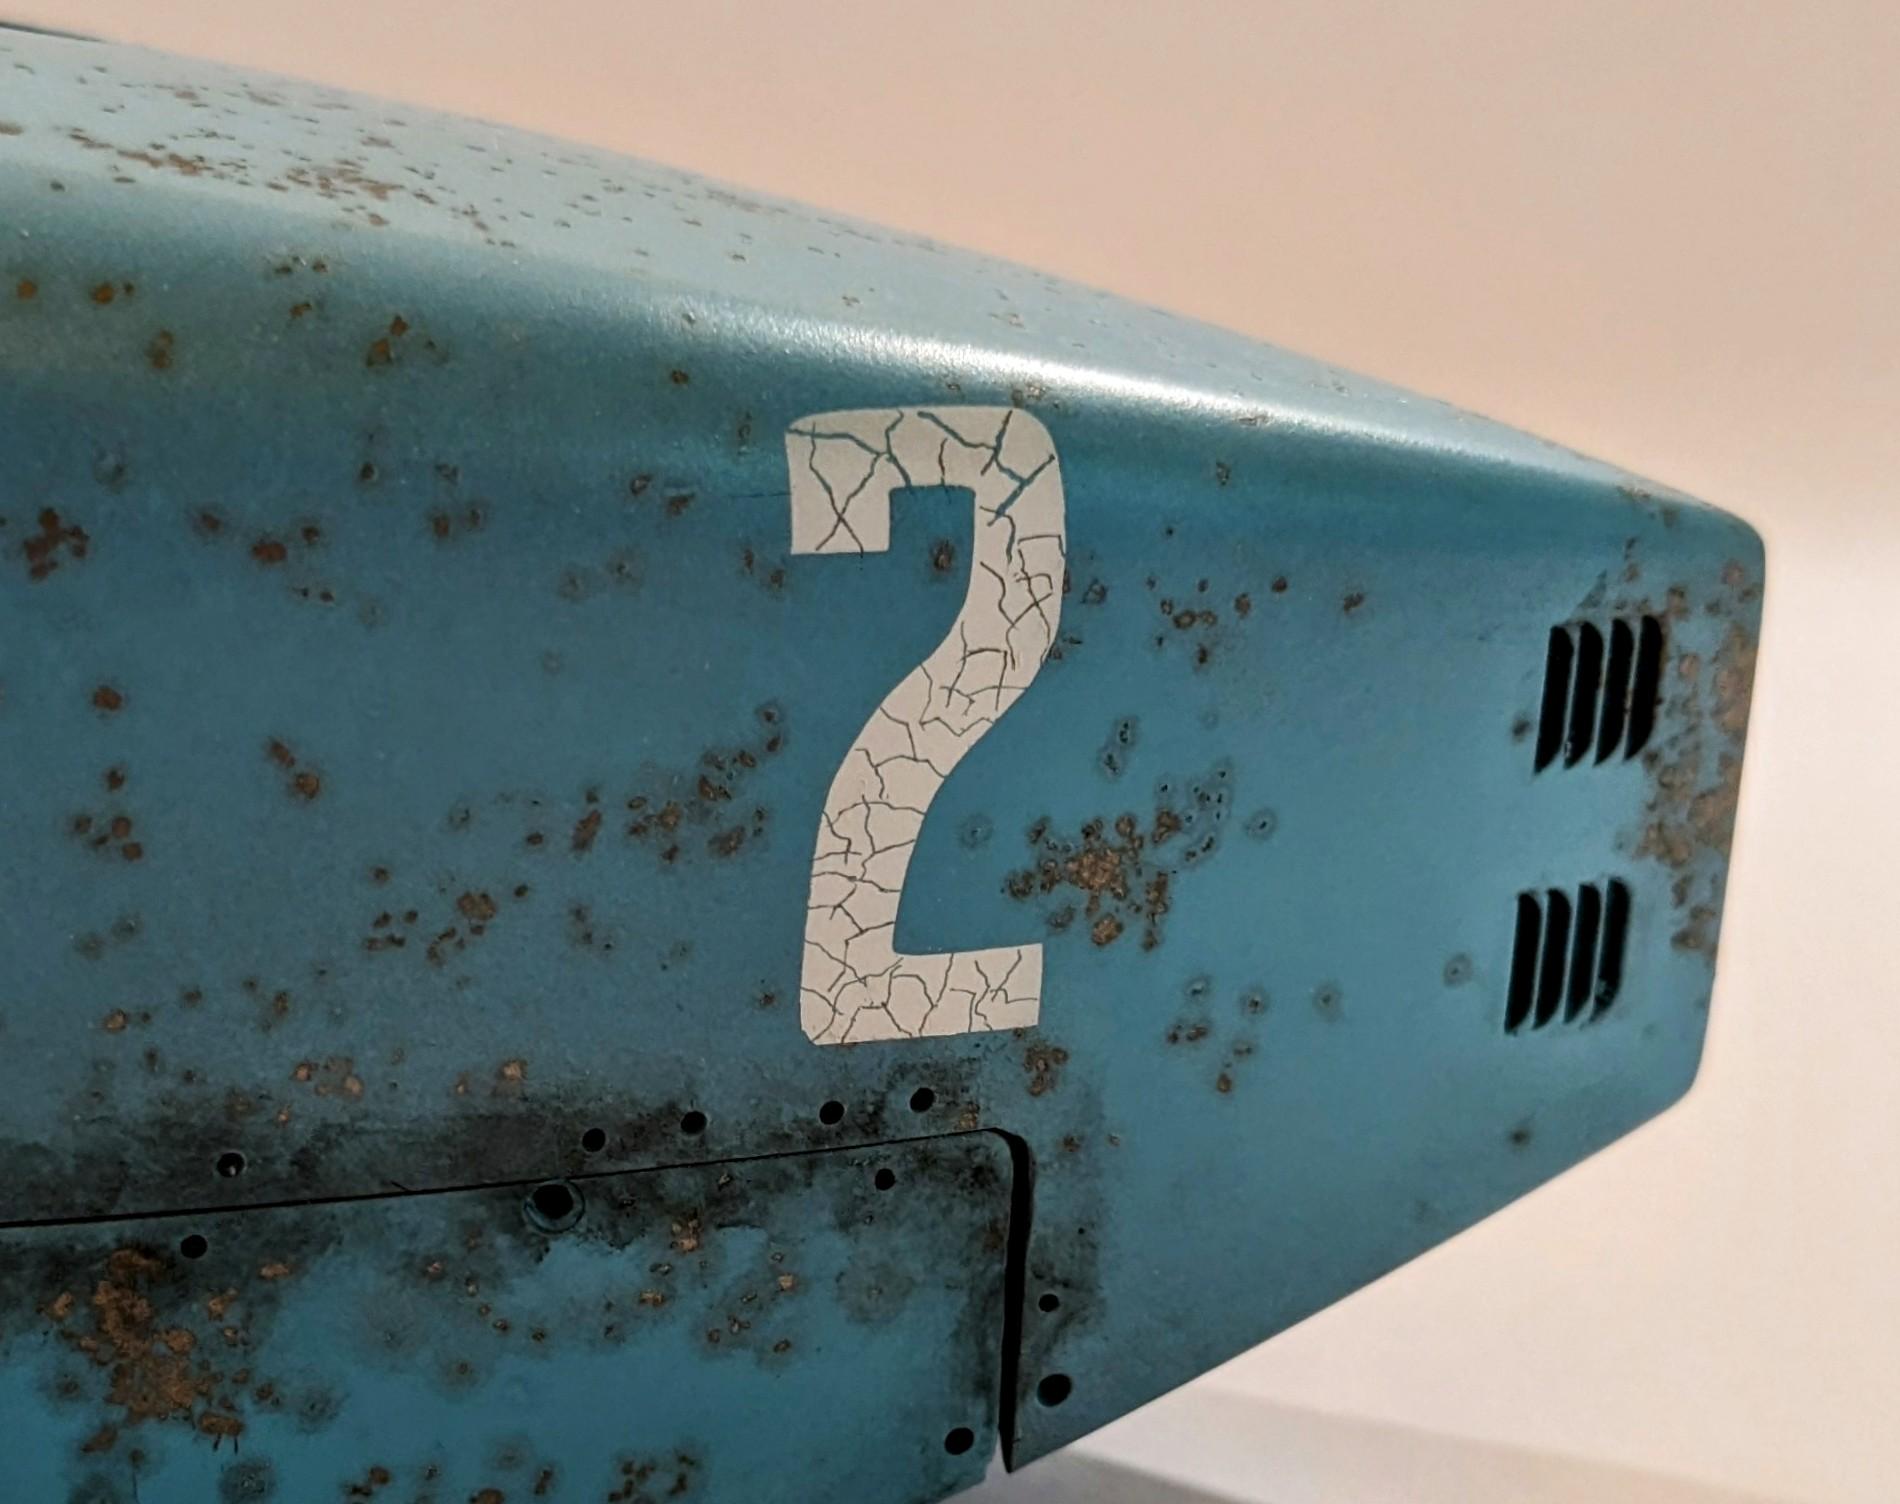
Since you're already using Vallejo Model Air, their Model Wash acrylic line is excellent. Lots of colors available and they can be manipulated quite a bit. I've had good luck with them over satin or semigloss clear topcoats and then you can hit them with a final coat of clear flat once you're happy with the effect. This is my current Bugatti 35B build from the Italeri 1/12 kit. Vallejo Dark Grey and Black washes were used around the louvers, rivets, panel lines and the area around the undertray seam where grease and dirt get trapped by the bolt locking wires. The paint is Vallejo Model Air Sky Blue with a top coat of Tamiya TS79 semi-gloss clear.
-
Orient Sun and Moon! I have the white dial version.
-
No pics (they didn't stick around long enough) but fresh-caught red snapper tacos with guac, Pico and pickled red onions. Black beans with brown Basmati rice on the side. Cigar City Maduro brown ale to wash it all down.
-
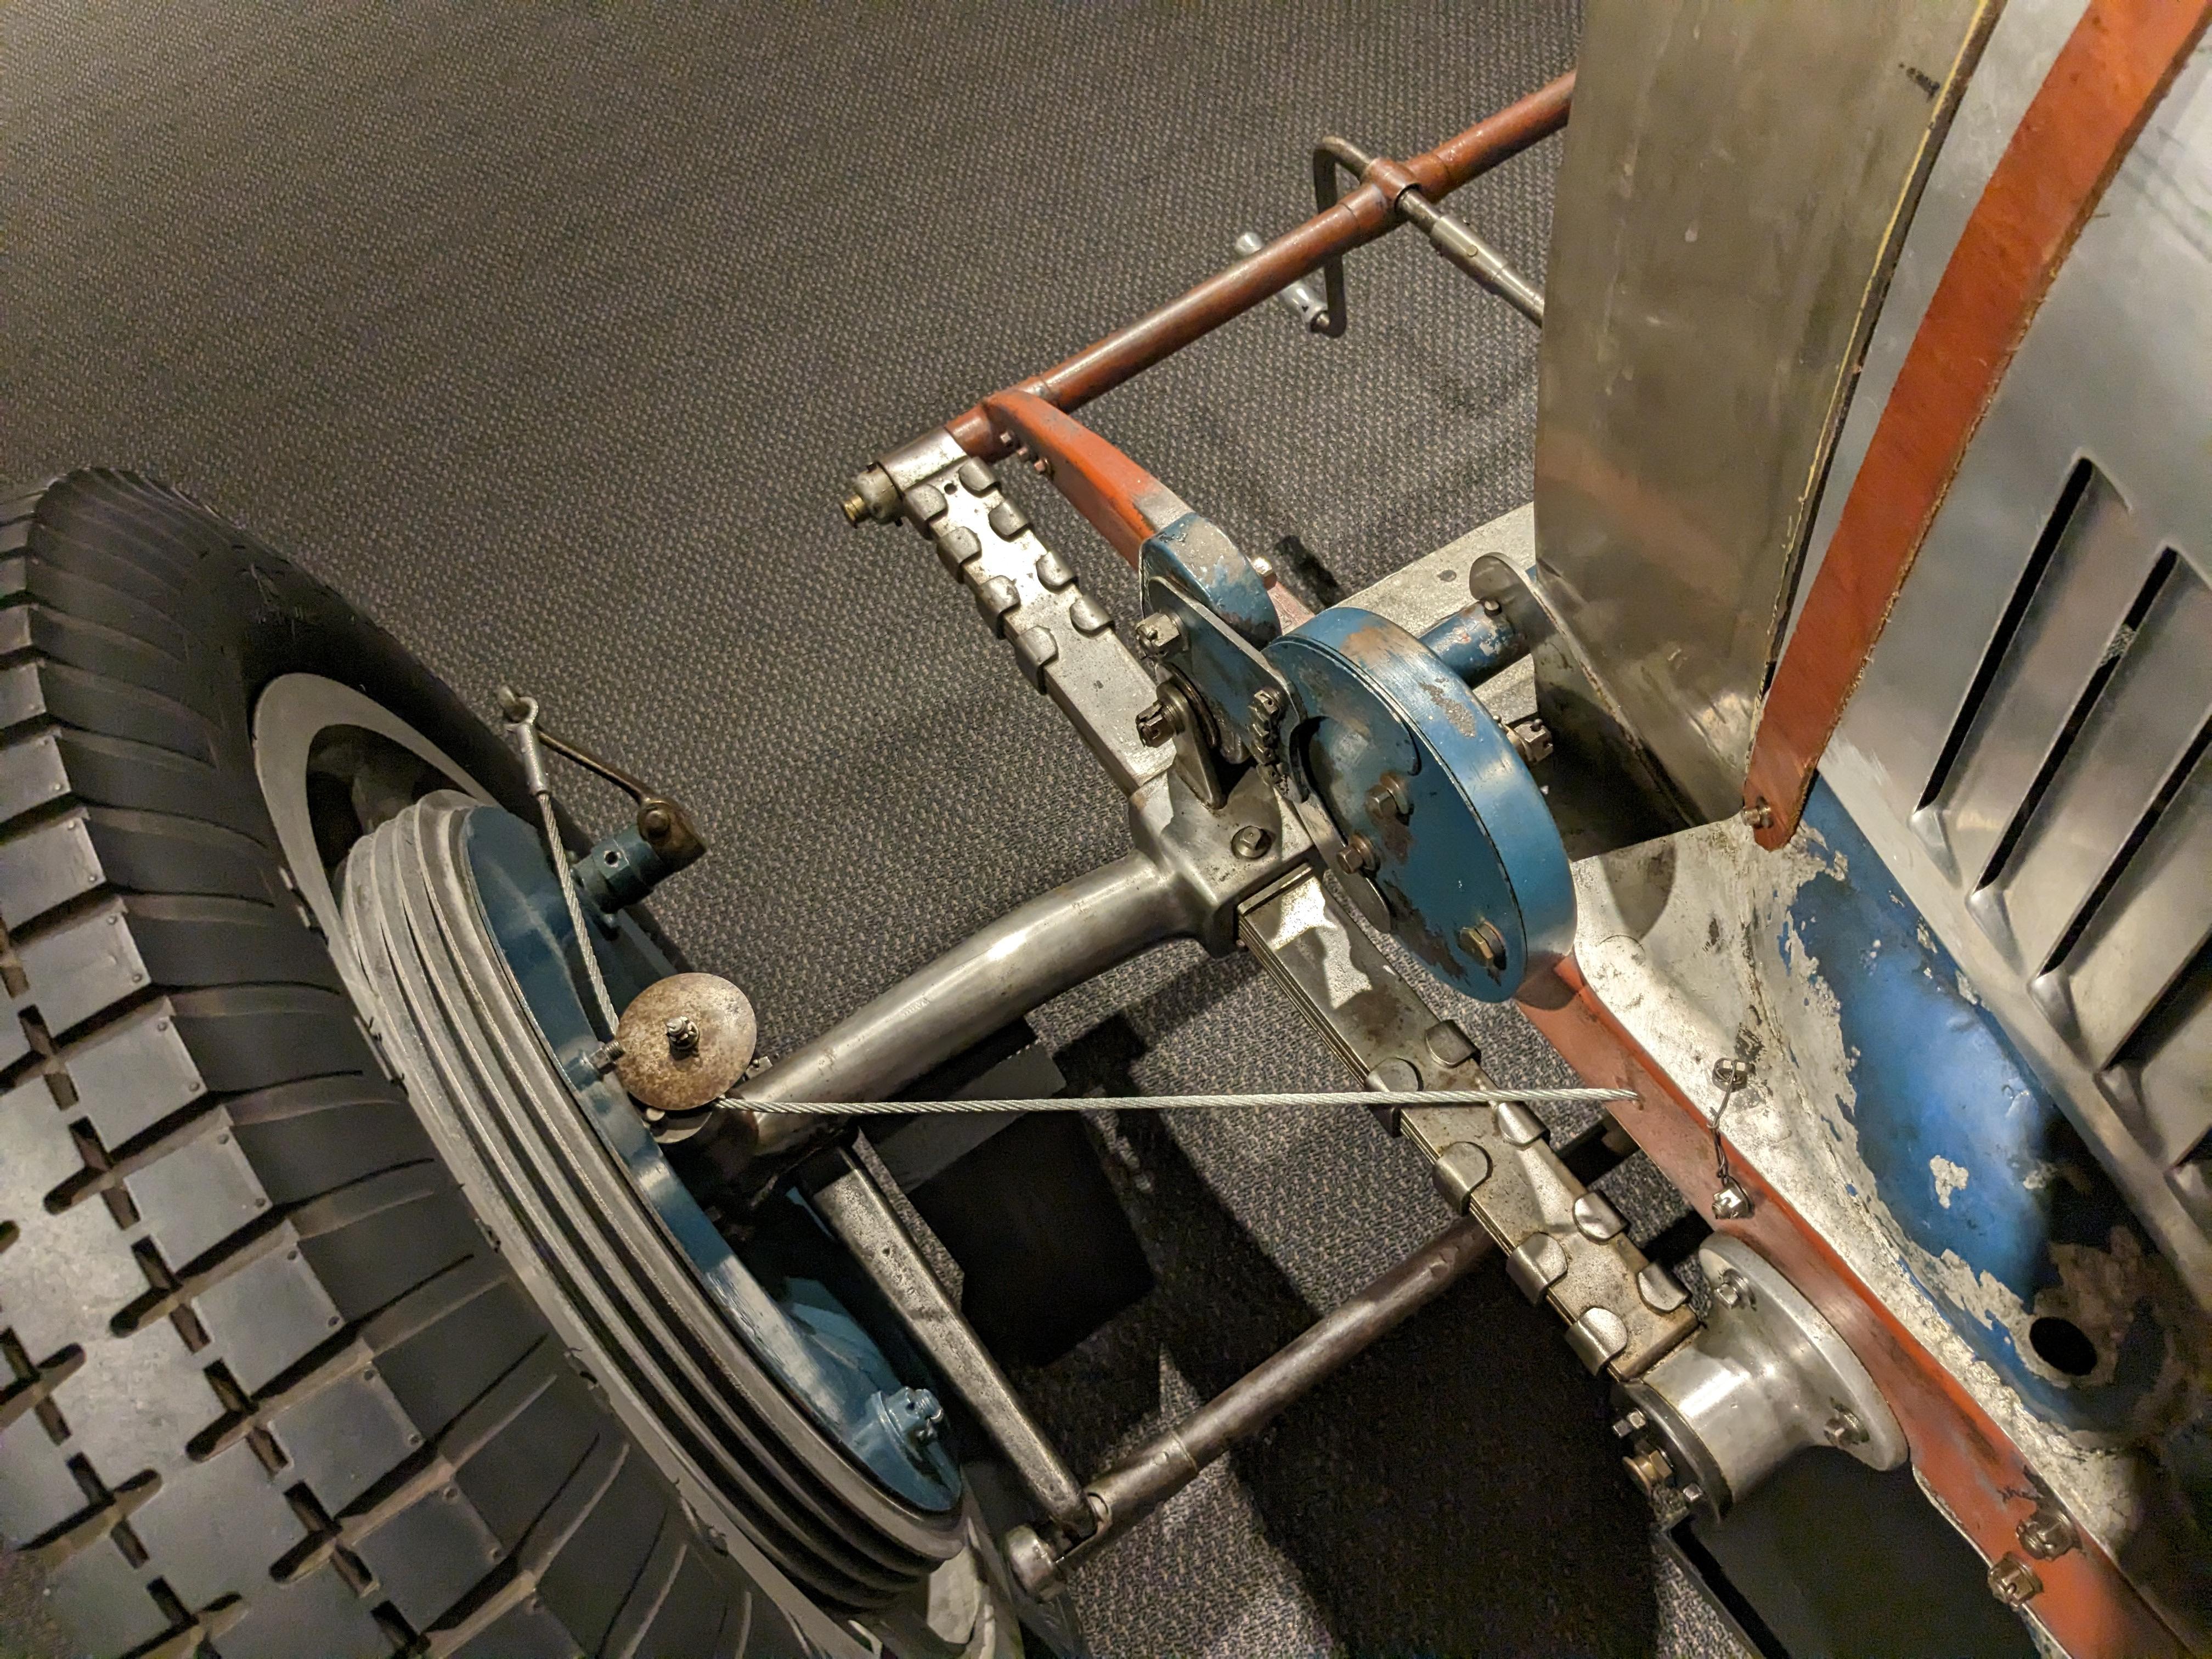
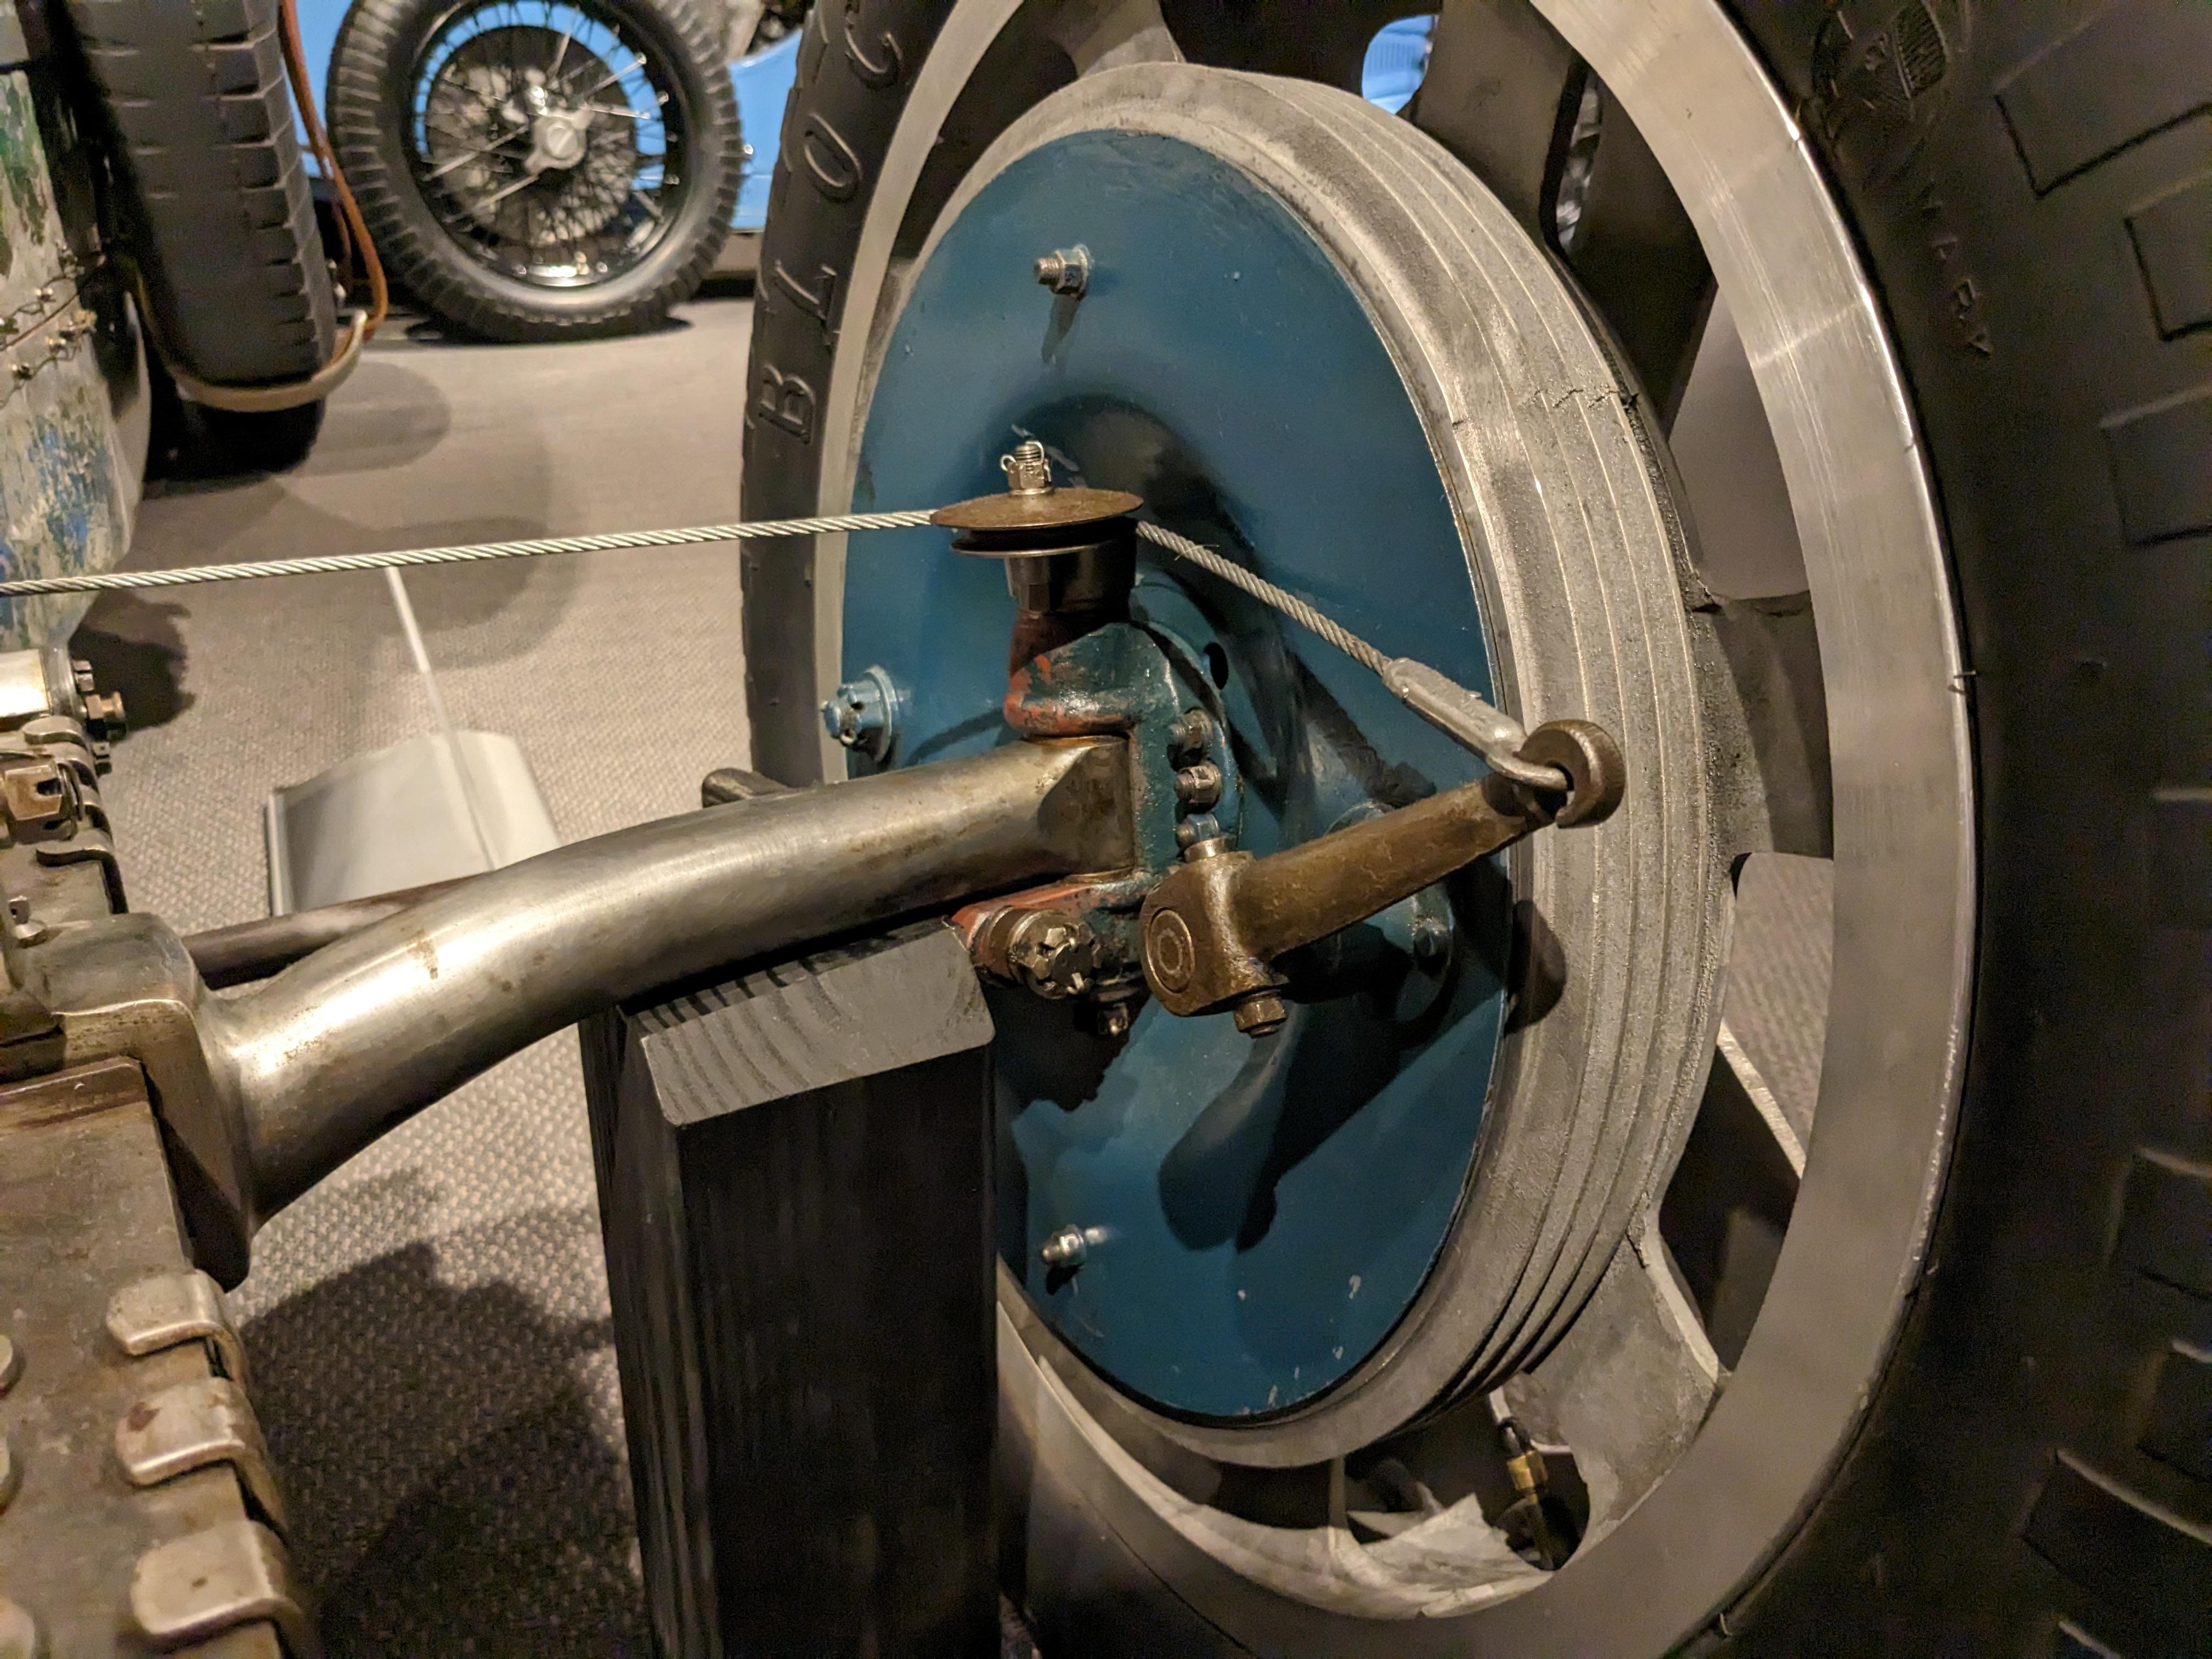
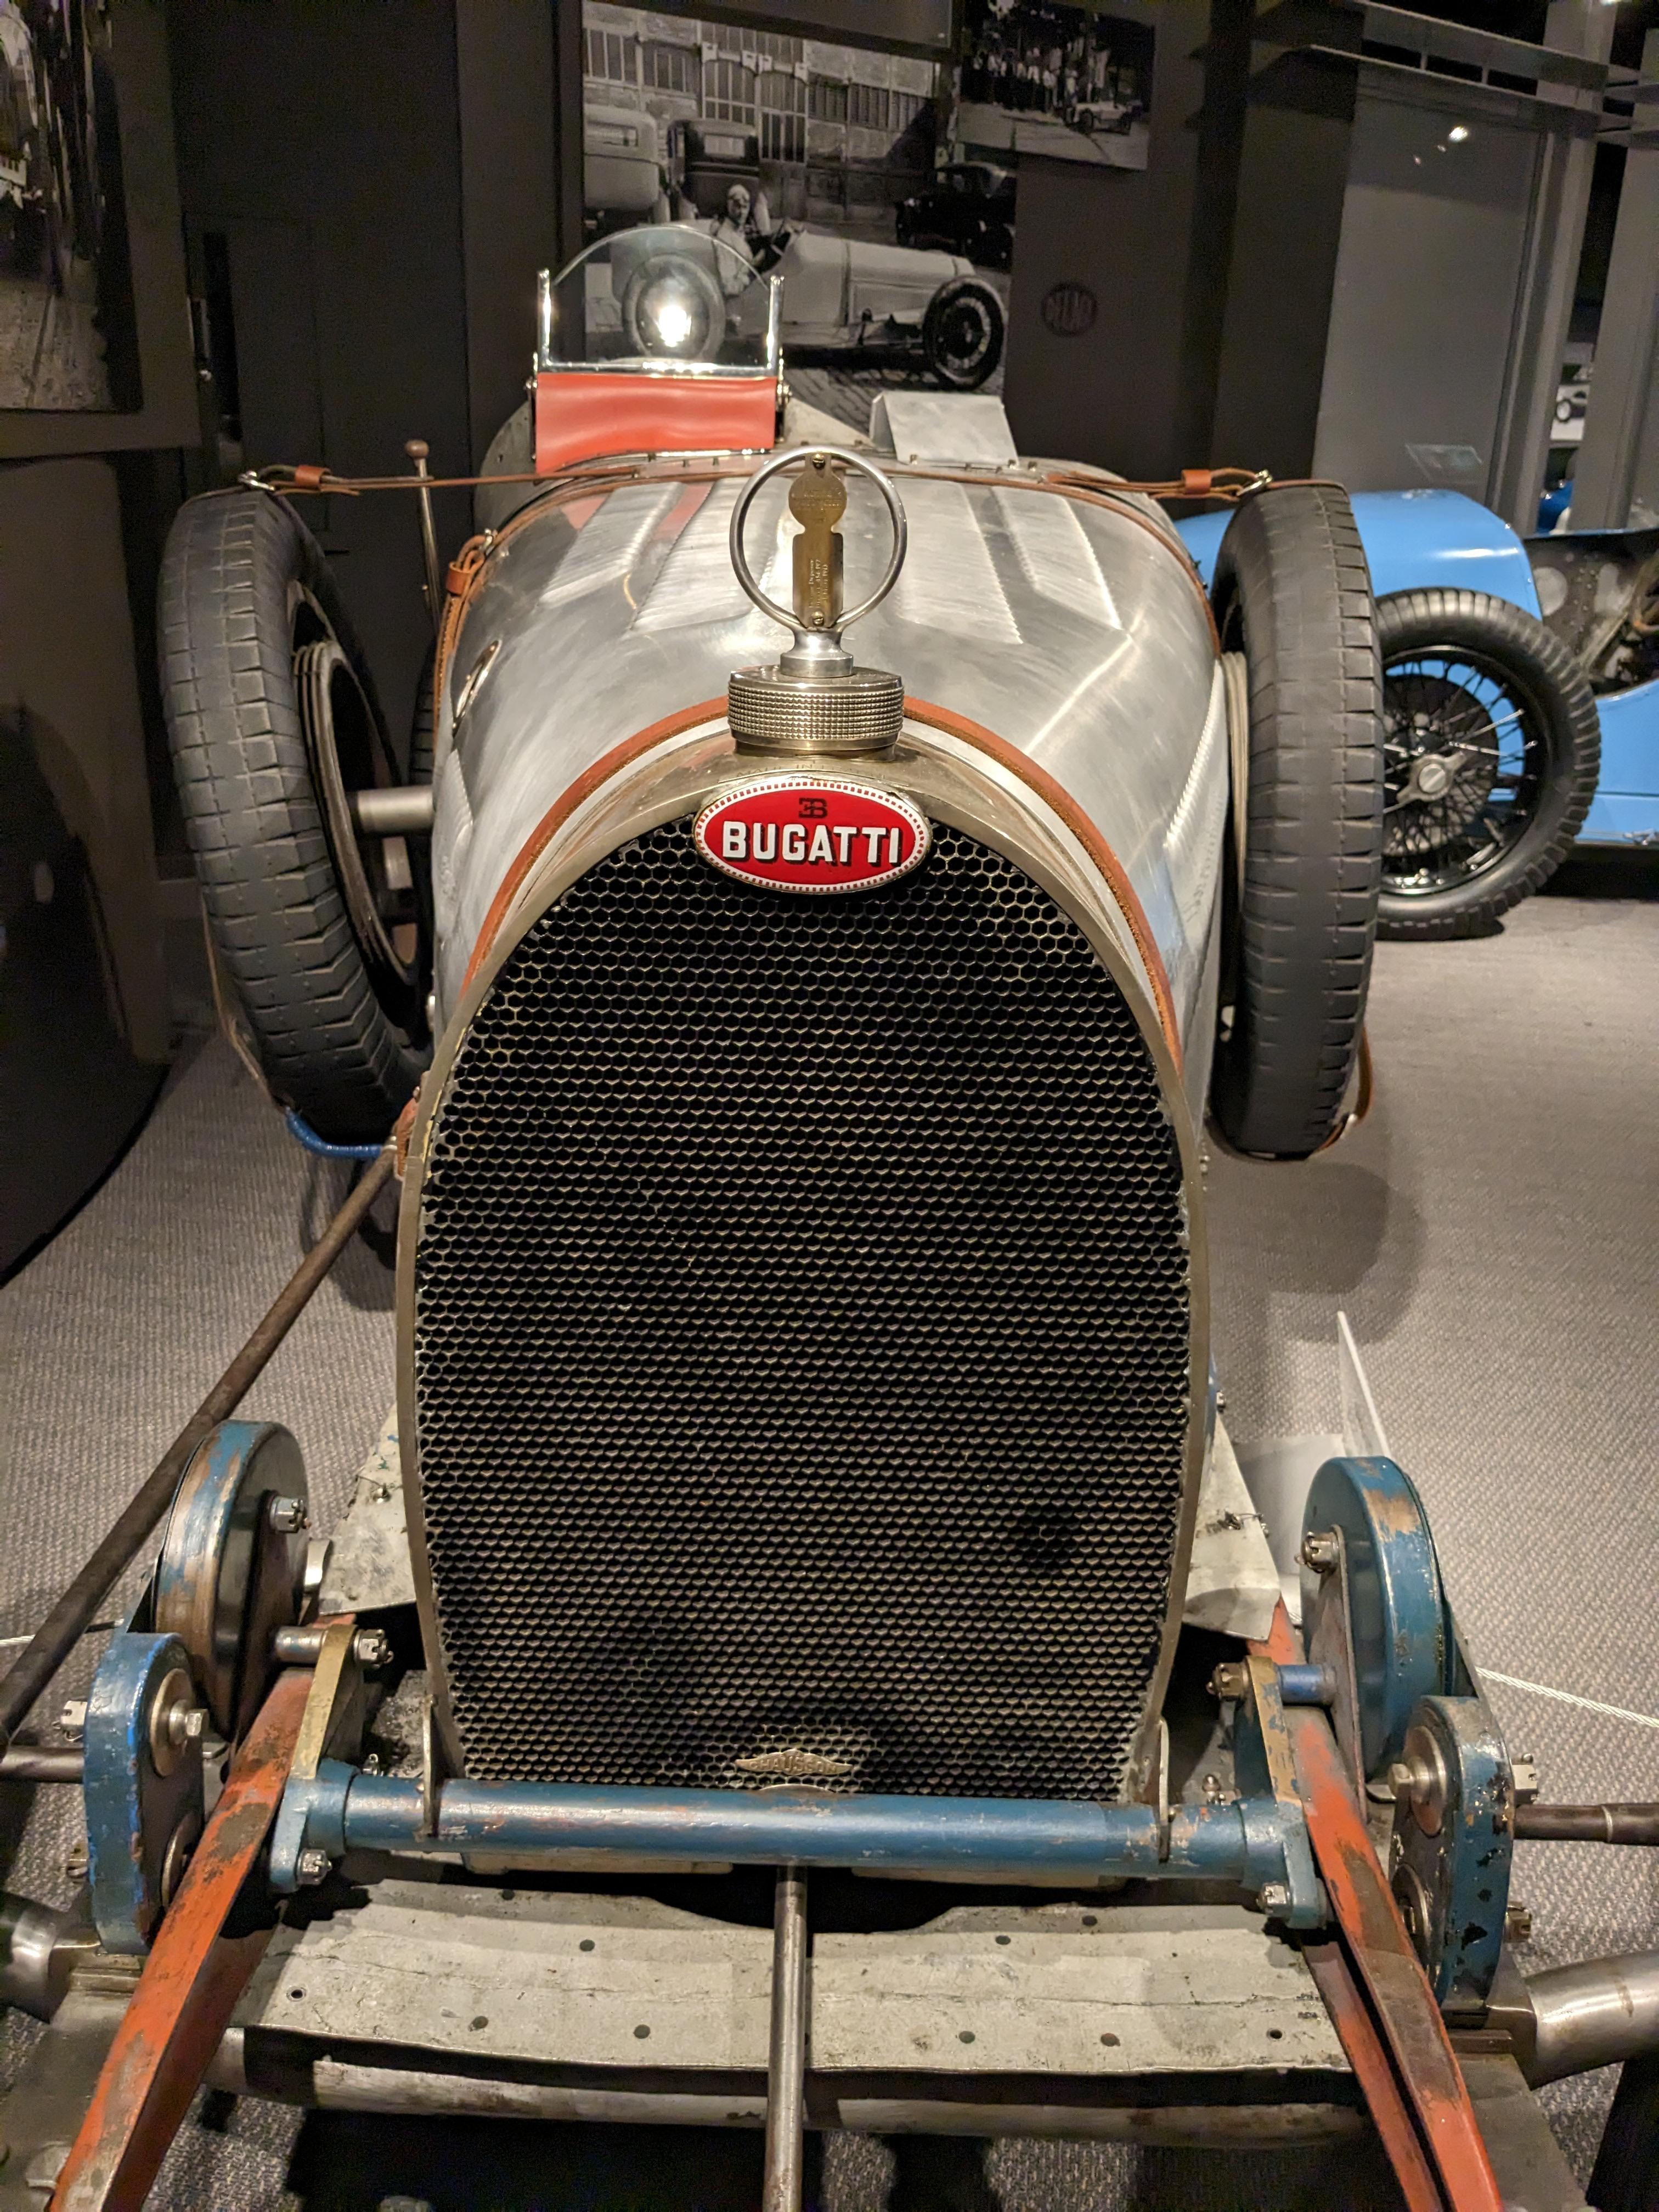
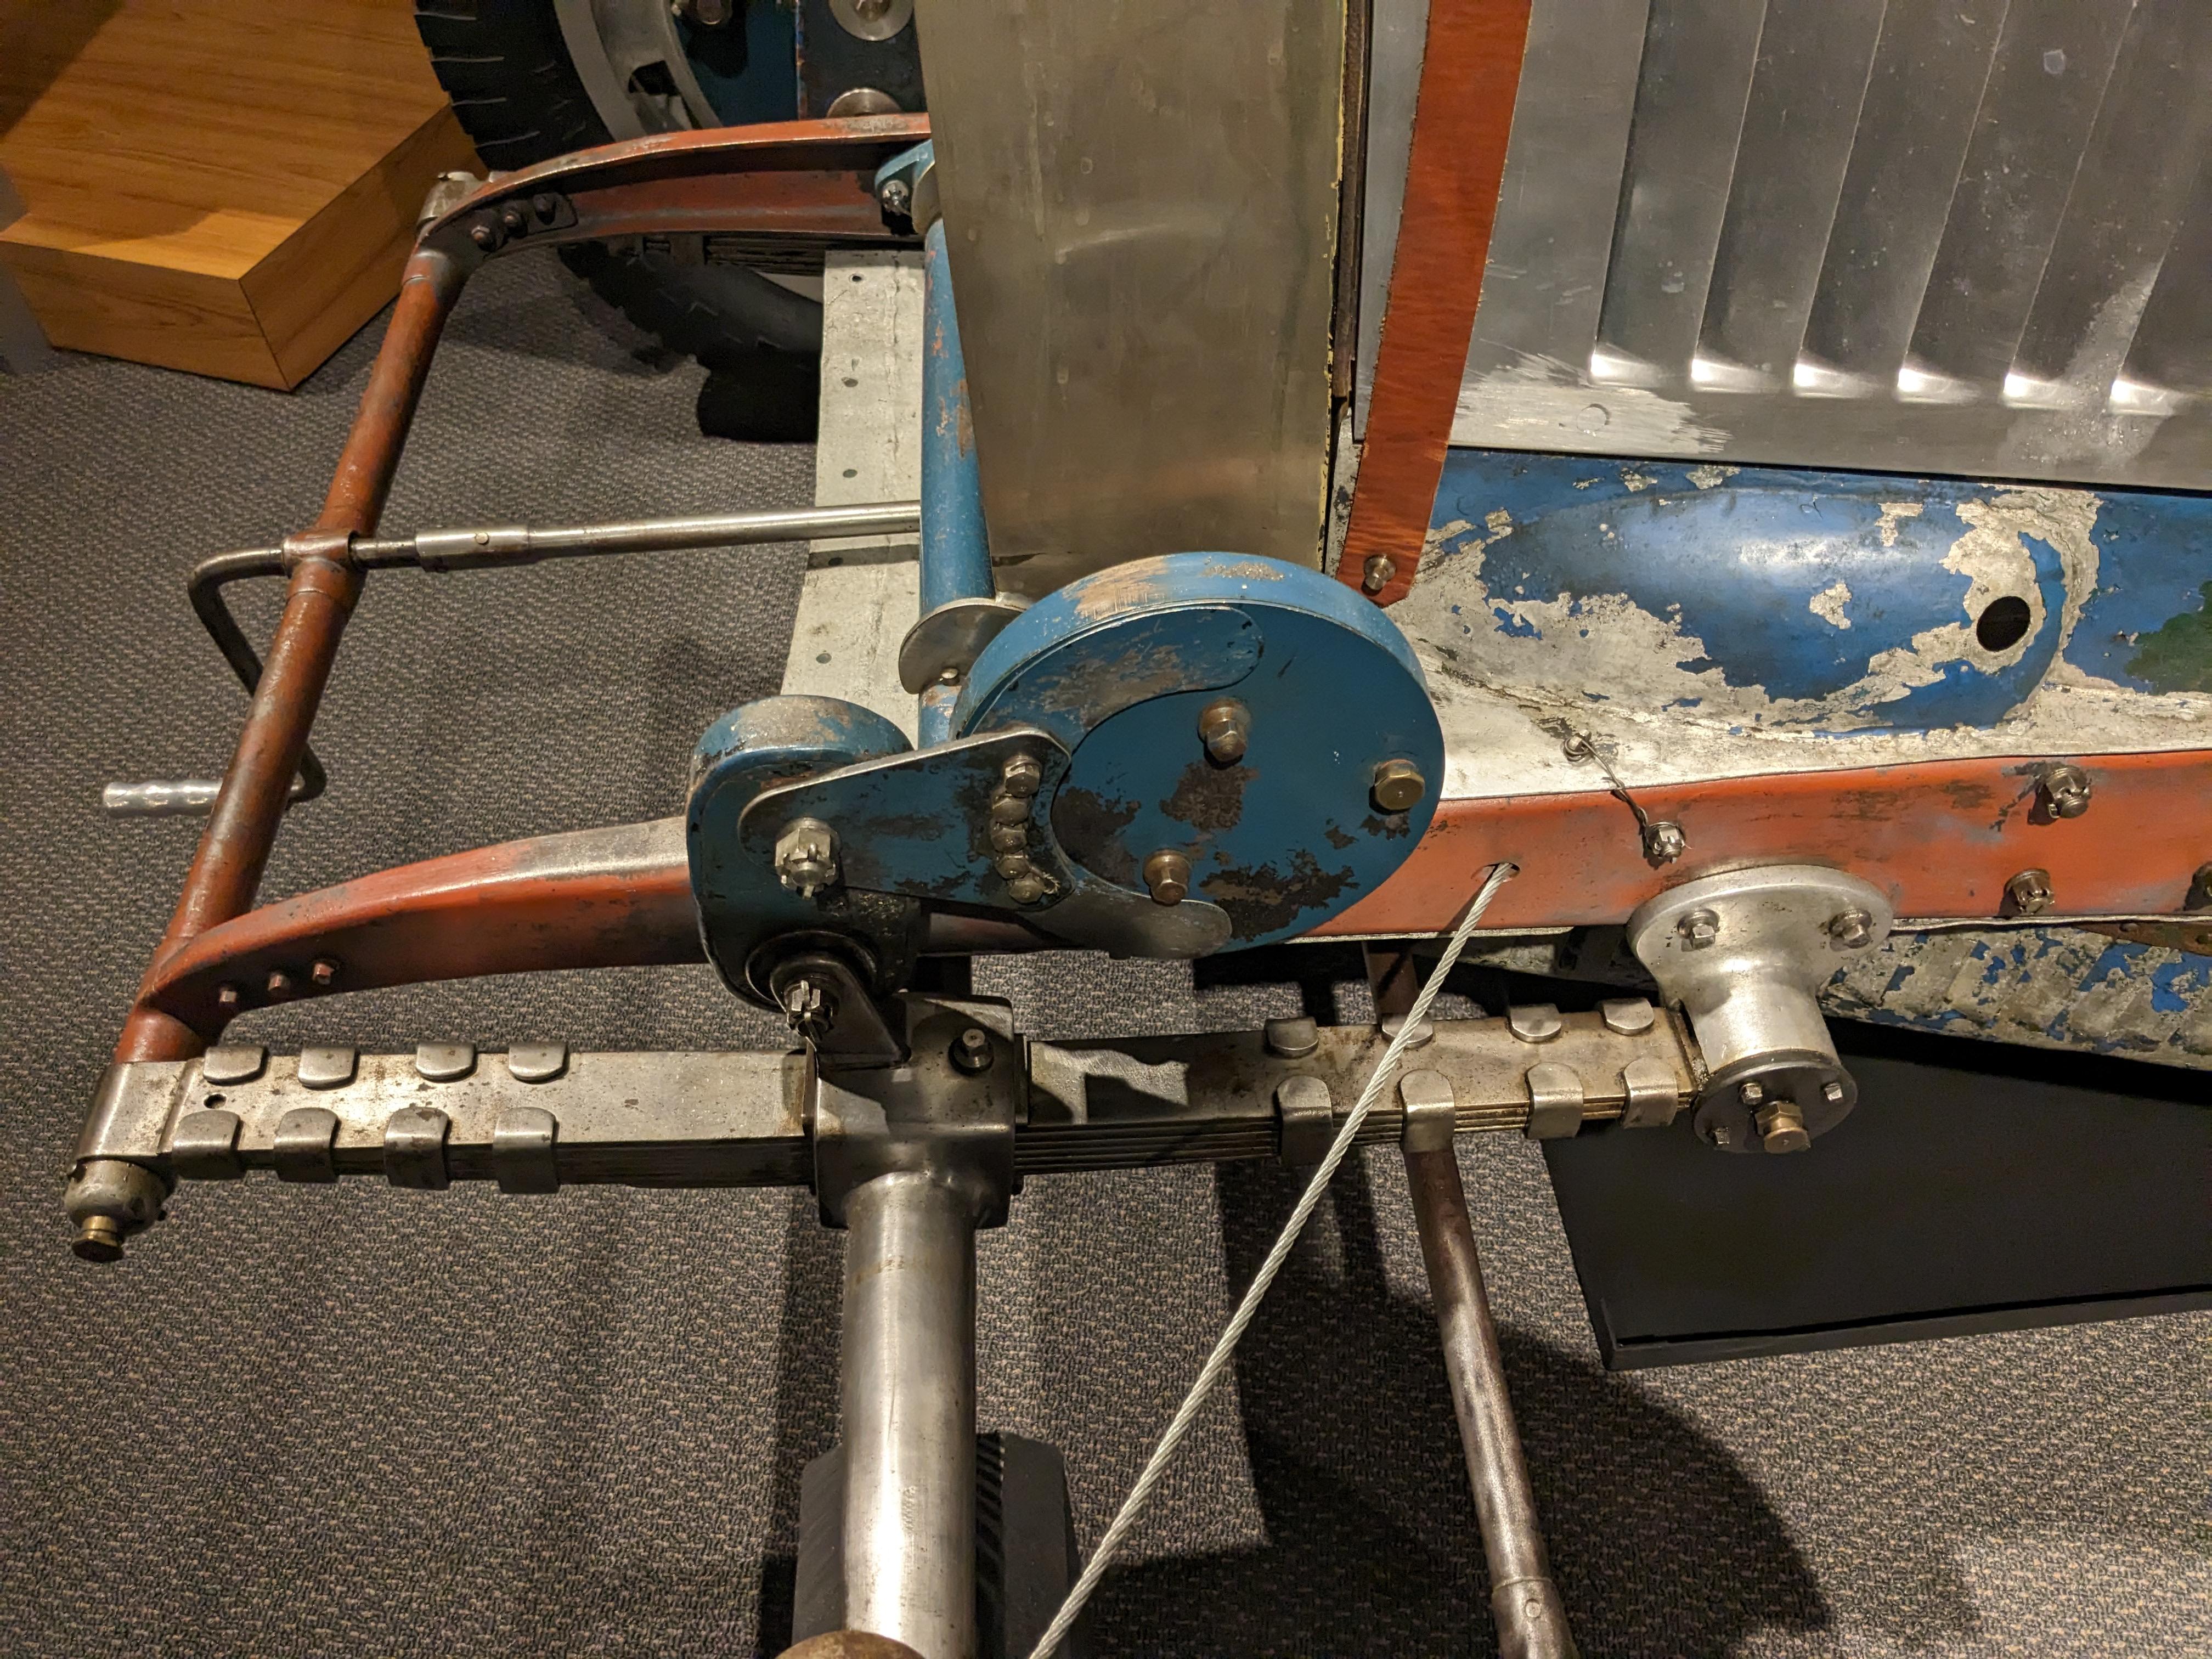
A few inspirational pics I just took of the ex-Louis Chiron Bugatti 35B barn find in the Revs Institute. I wanted to make sure I had good pics of the front suspension, brake cable configuration, radiator minus its nickel plating, etc.
-
Builders Slump
jaymcminn replied to Rich Chernosky's topic in General Automotive Talk (Trucks and Cars)
Yup, I generally get a slump after a big project that's really pushed my limits as a builder. After my 1/12 Fiat Mefistofele build a few years back, I cleaned up my work bench and didn't touch another model for three months. I'm working on another big project now, the new Italeri 1/12 Bugatti 35B. I'm a month or so in with probably another two to go. Whenever it starts feeling like a grind I'll take a few days off until I want to get back to work. When I'm ready to get back to the bench after a big project I'll build a "shelf model" or two... generally something easy that will look good on the shelf without stressing me out too much. Ironically quite a few of these "slump busters" have walked away with awards at contests. Slumps absolutely happen. I've gone a year plus without building until the right project catches my eye and I'm back in the game. As far as display case room goes, there's nothing like buying a nice new display case (I like the Ikea Fabrikor cases, myself) to give you the urge to fill it up! -
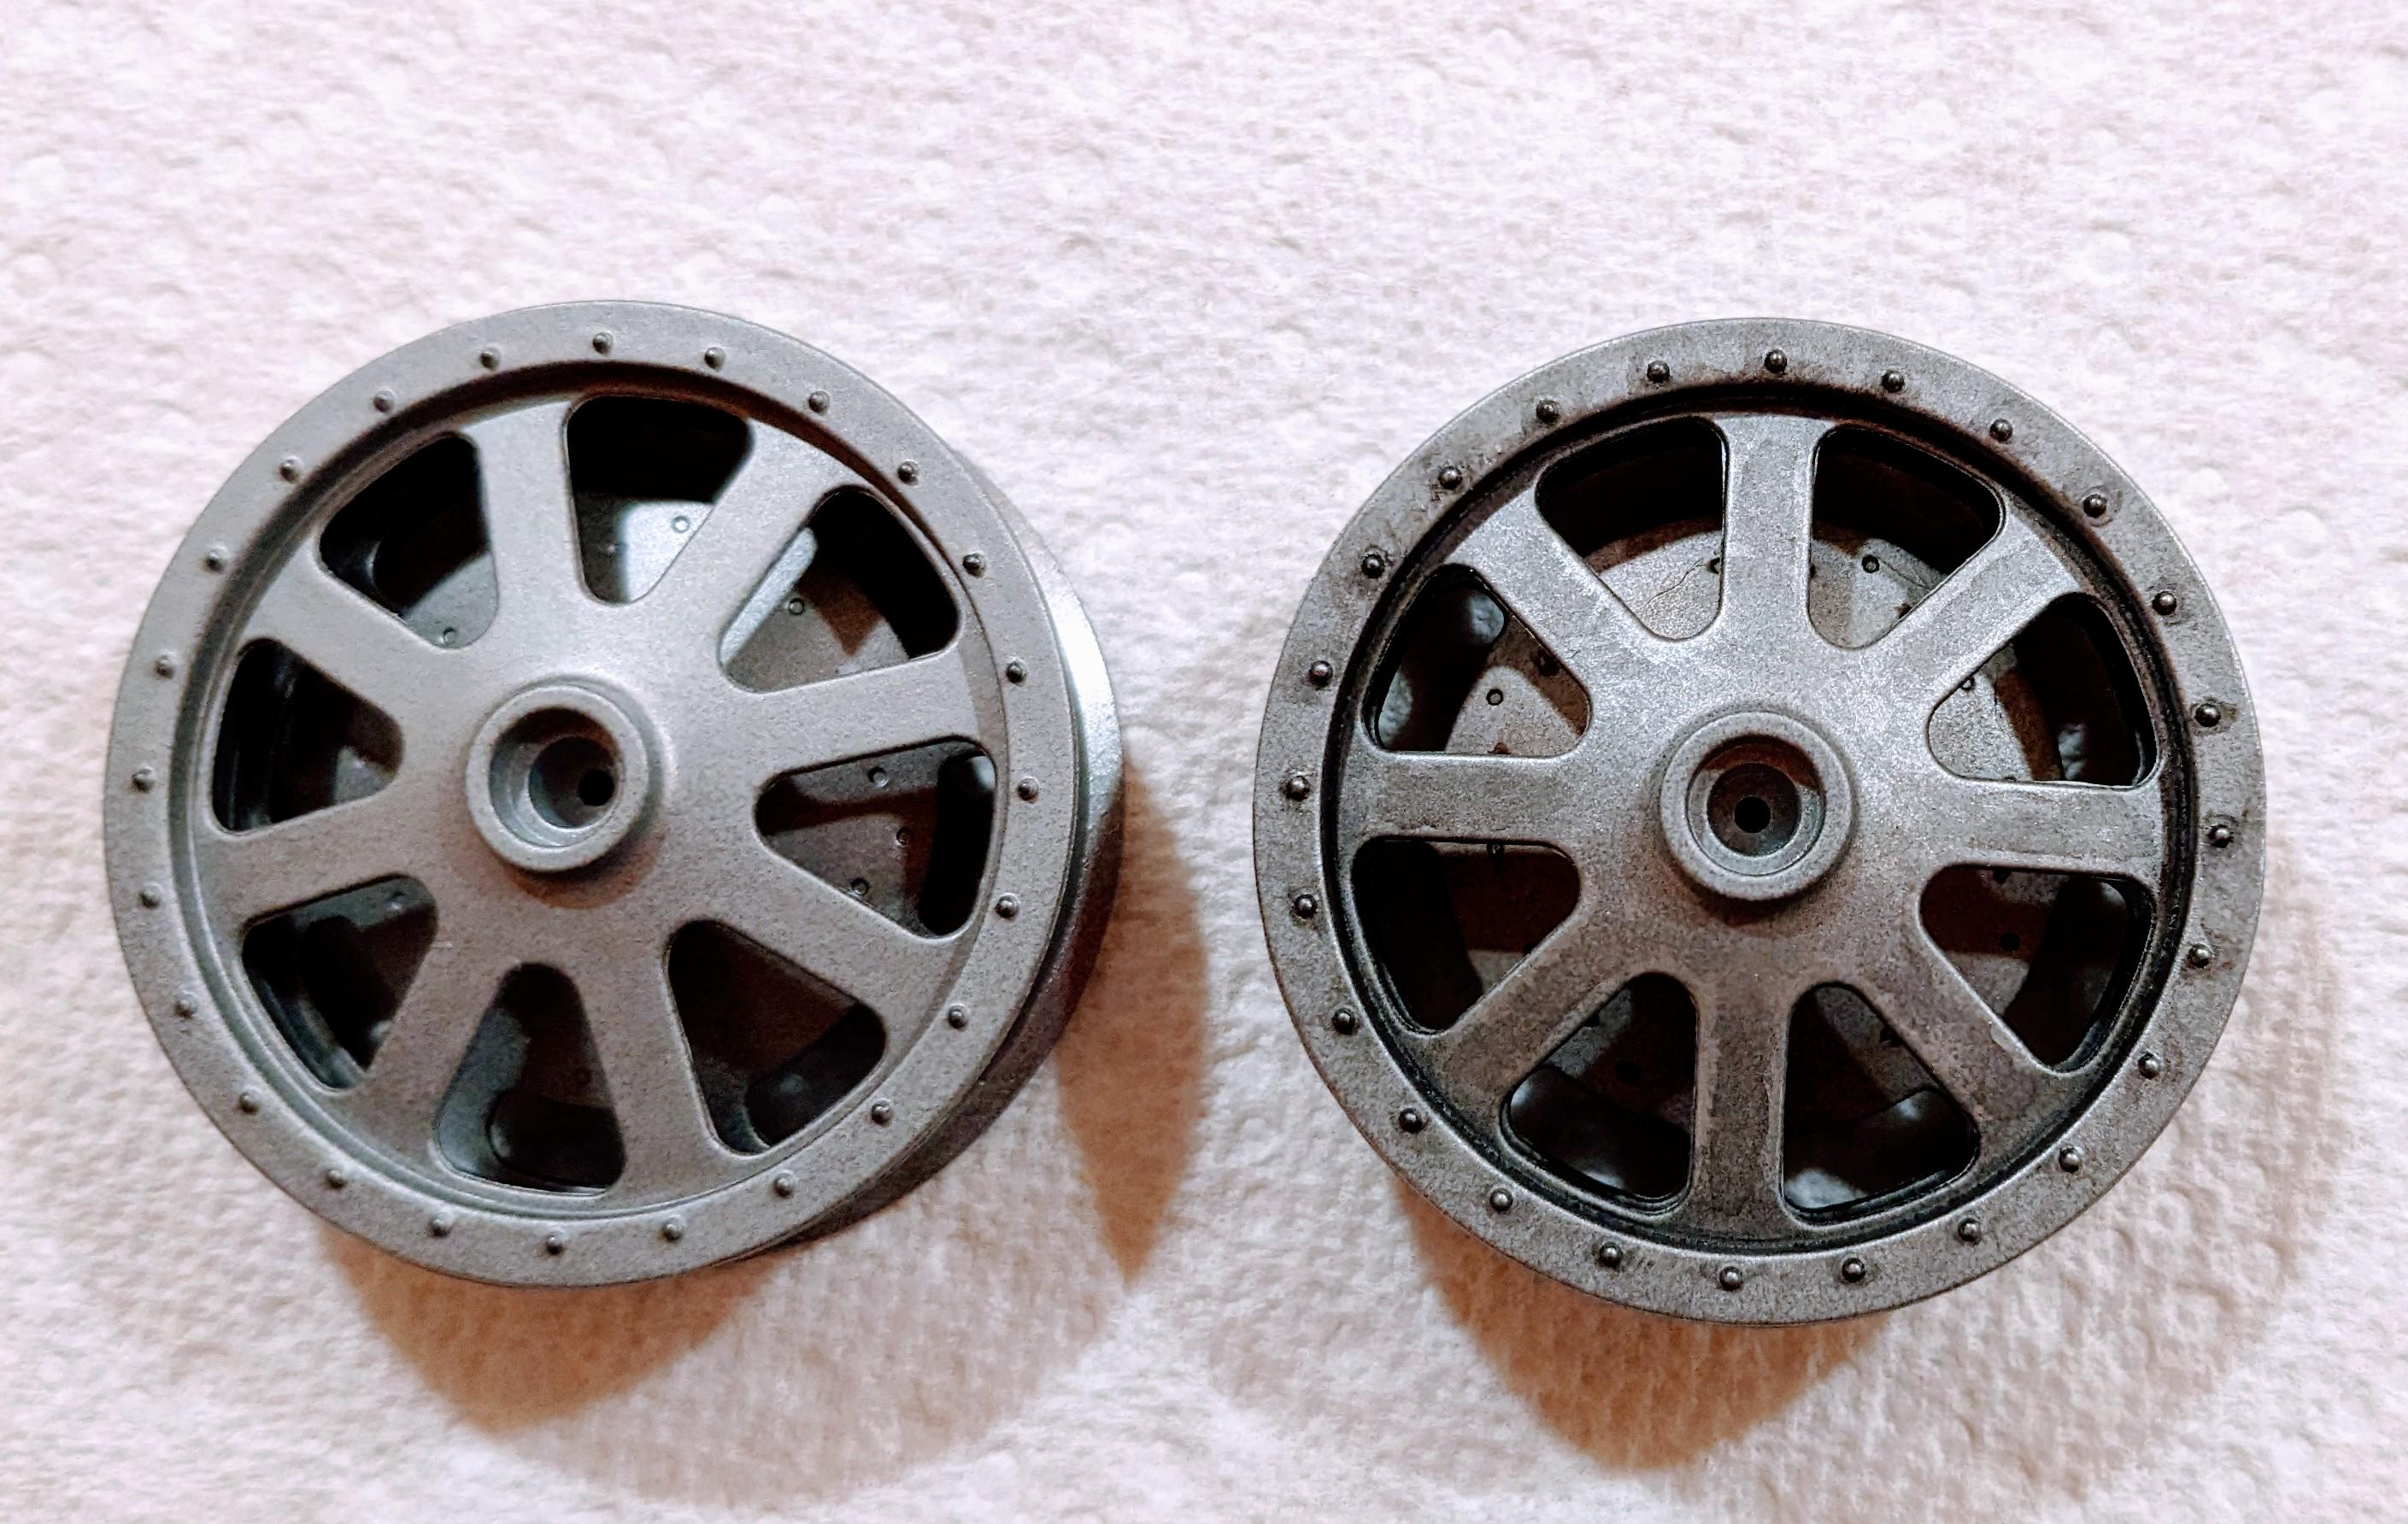
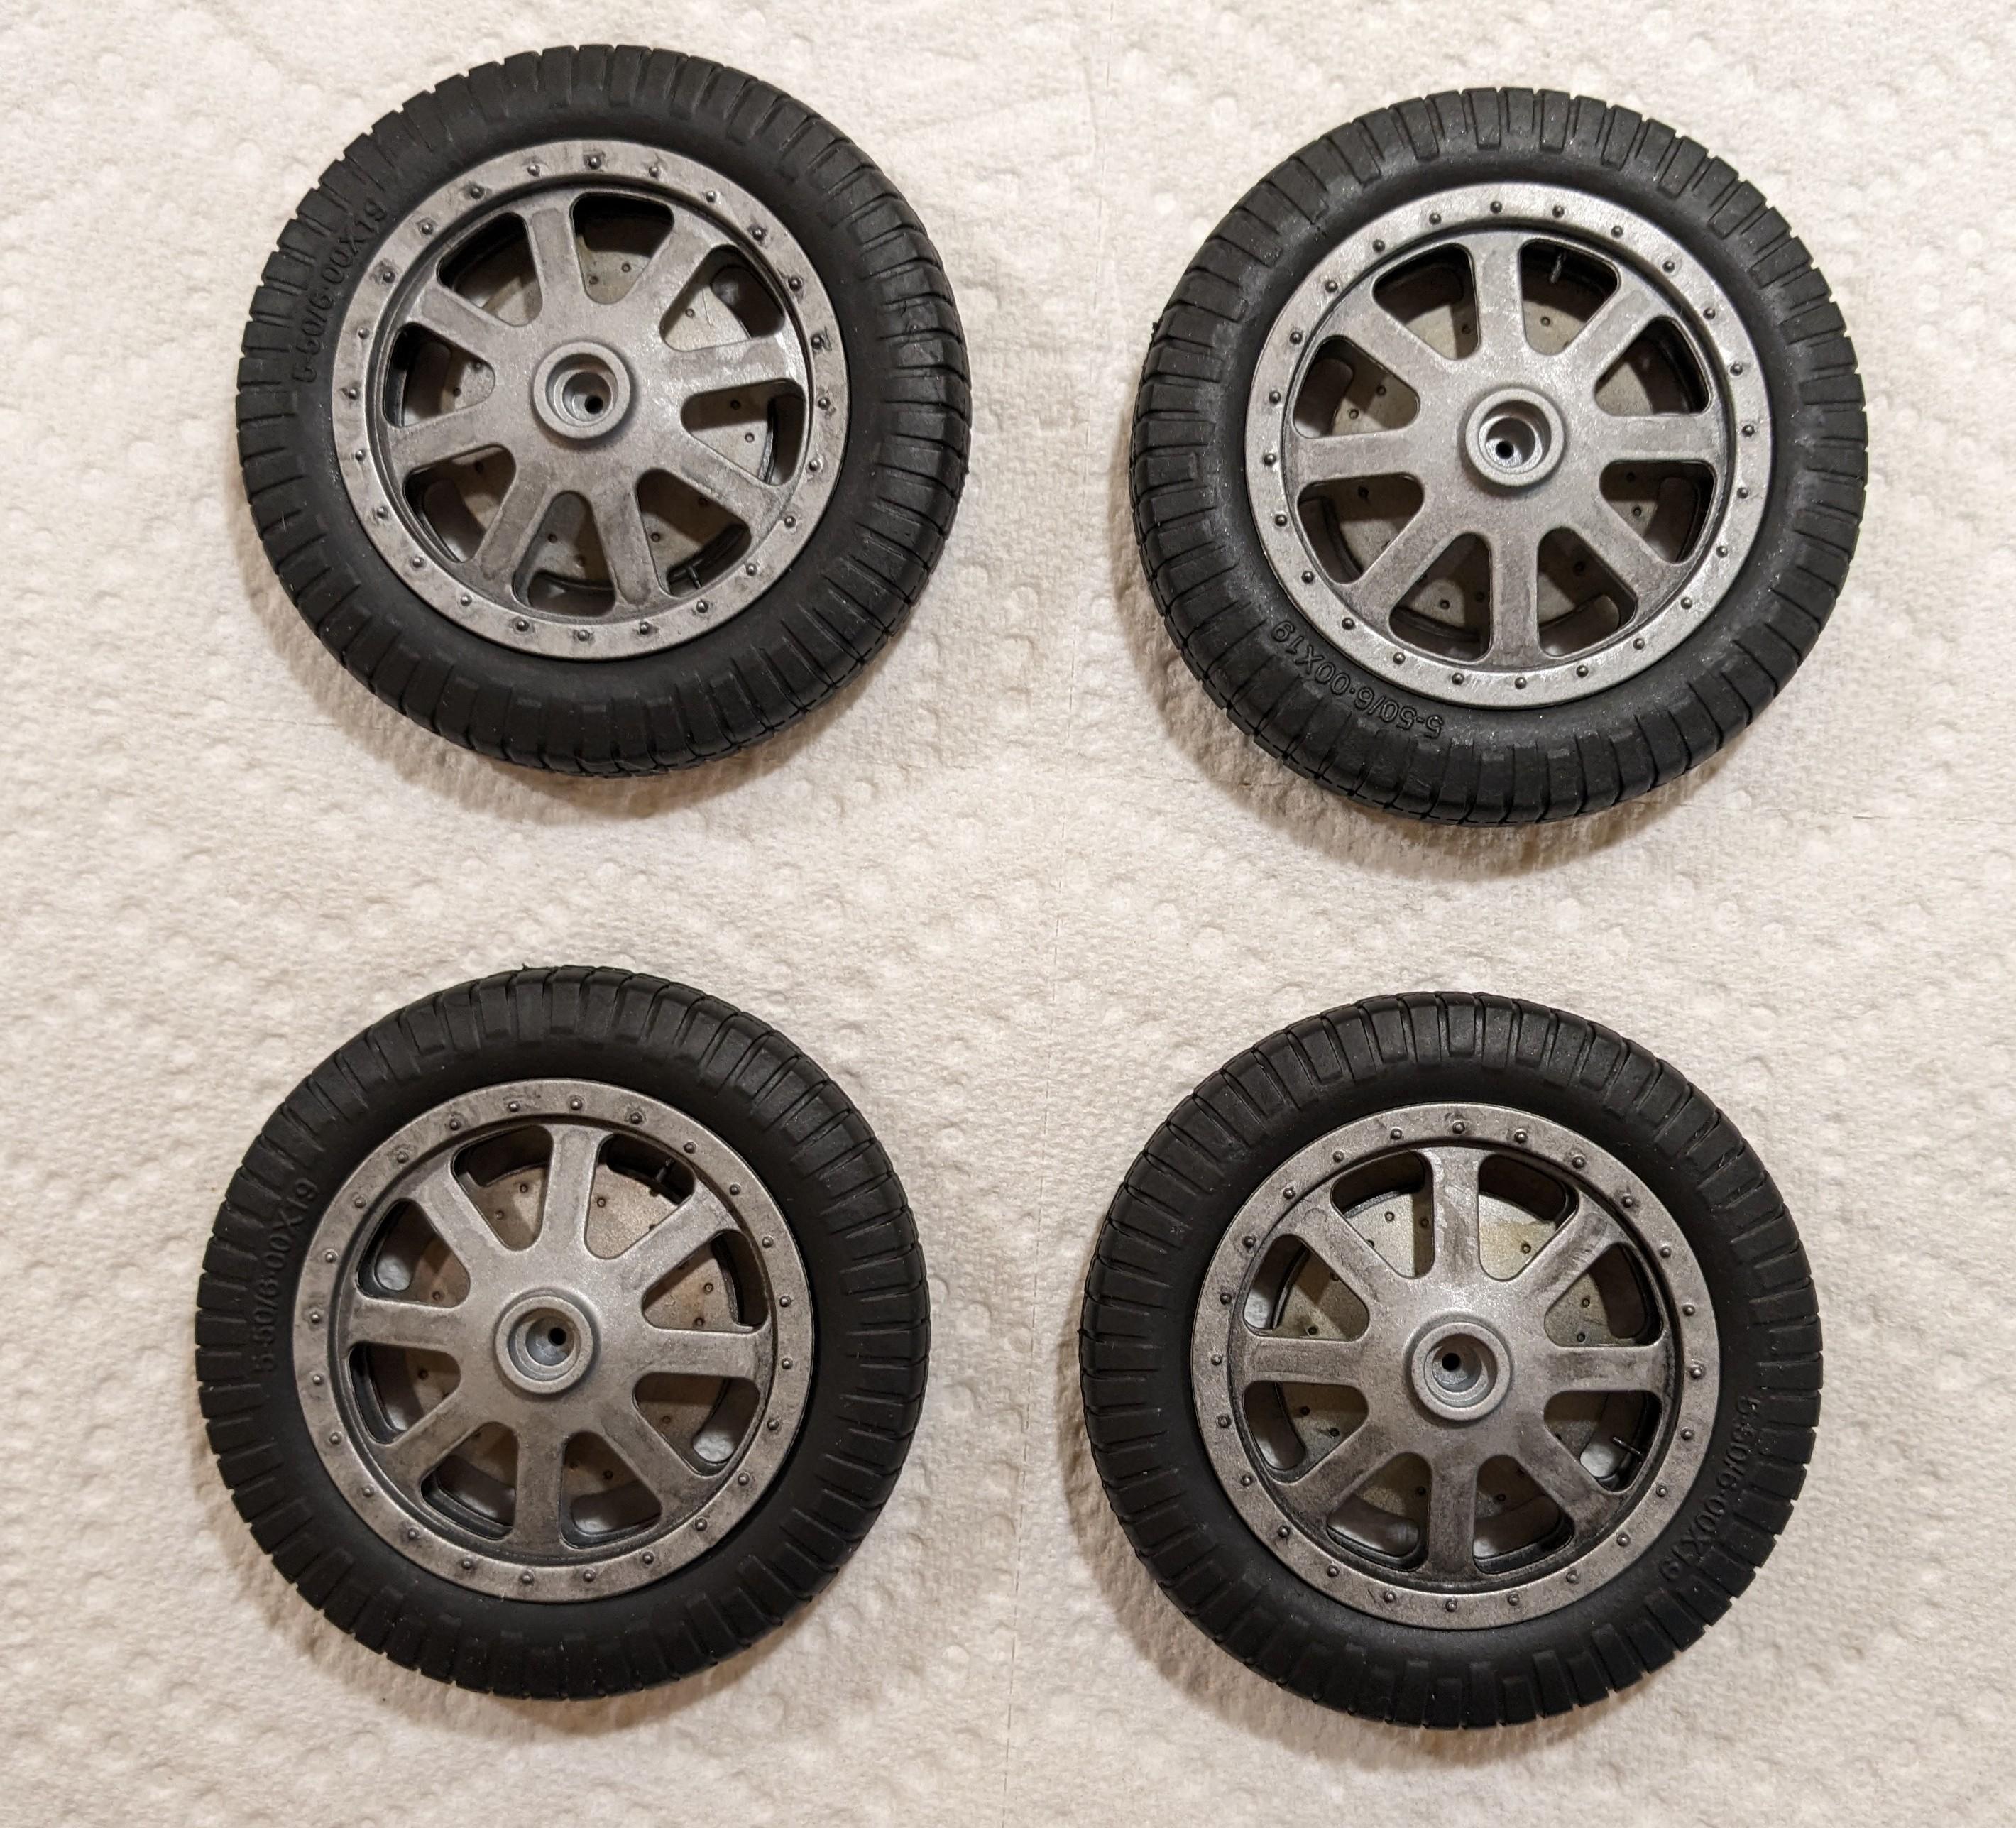
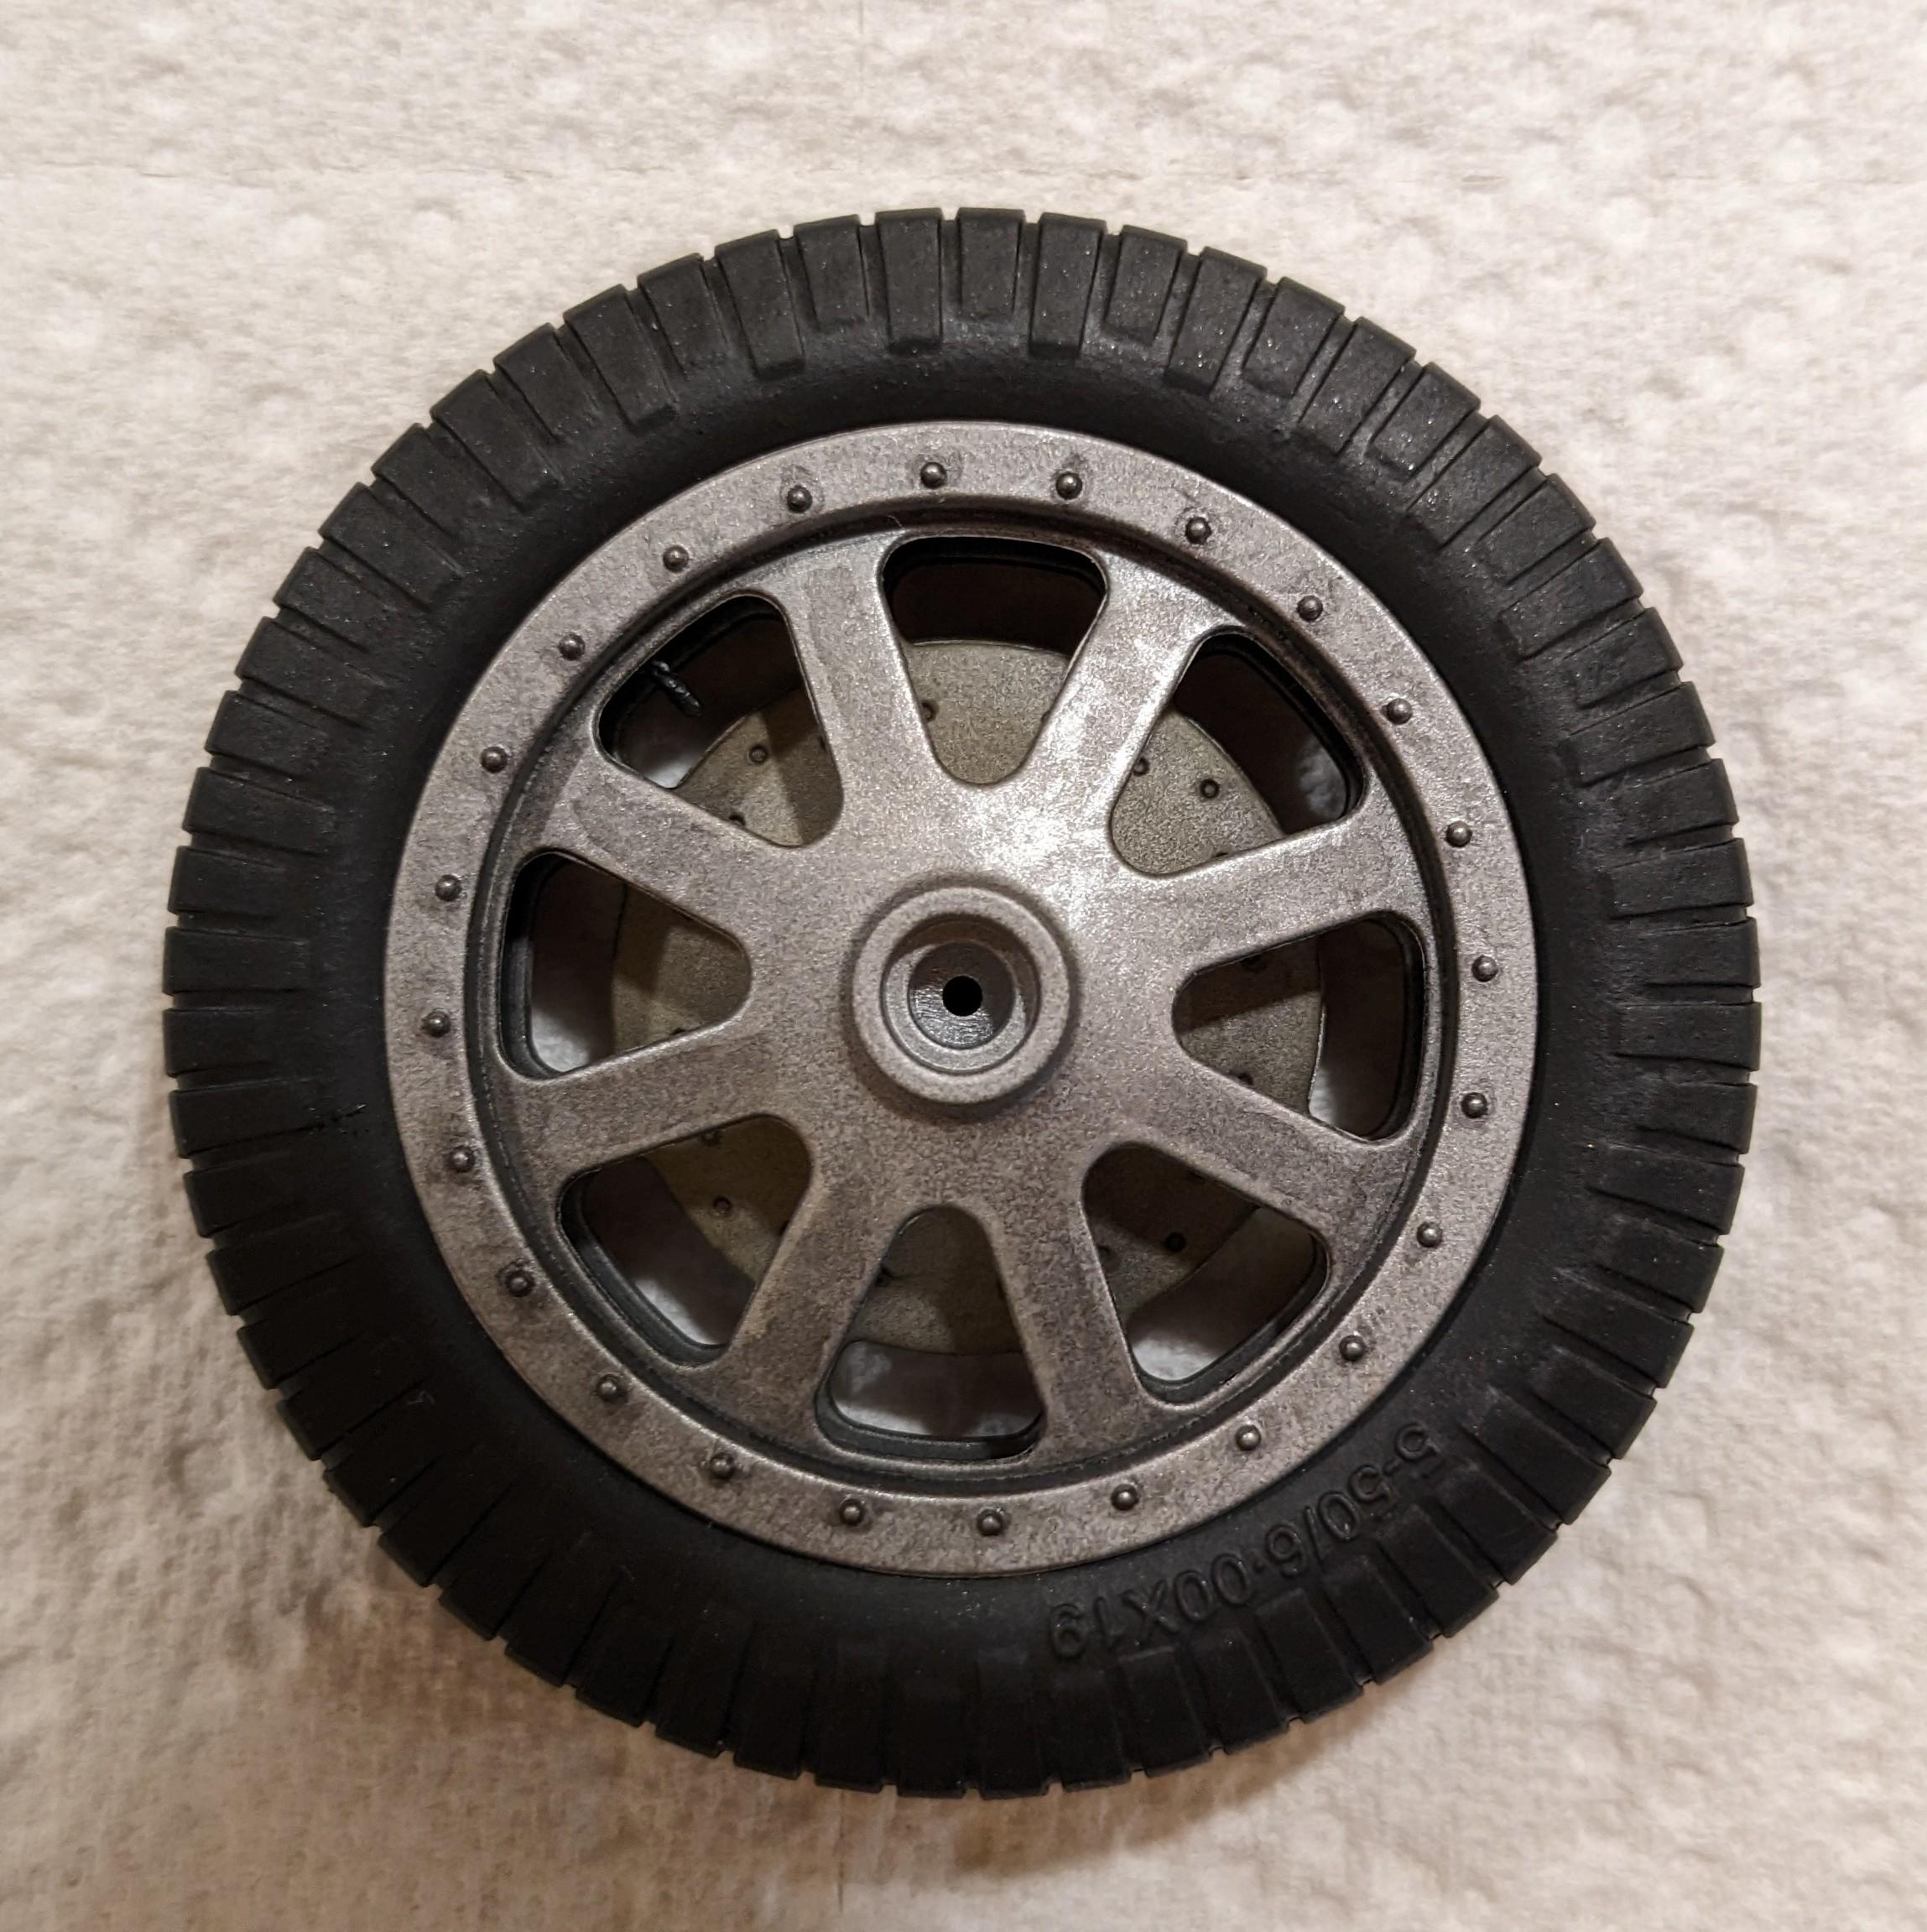
Wheels are a go... The Bugatti 35 series were the first cars to use aluminum alloy wheels. These were multi-piece cast-alloy units with integrated brake drums. Some restored cars show nicely polished wheels but they were rough-cast from the factory. The kit wheels are nicely molded in five pieces including valve stems. They're satin chrome plated, which I stripped using Easy-Off. It took longer than usual and I was left with white residue on the parts which came off after a soak in 91% Isopropyl alcohol. I painted the wheels in Vallejo Duralumin with mist coats of Vallejo Matt Aluminum and Gunmetal followed by a coat of Mr. Clear flat. Next was dry brushing with Matt Aluminum and a dark grey acrylic wash. Below is a wheel before and after the weathering process. Four finished wheels... they all look a bit different, which was the idea. Once the tires are given a nice application of dirt and grime they'll look the business.