

jaymcminn
-
Posts
1,762 -
Joined
-
Last visited
Content Type
Profiles
Forums
Events
Gallery
Everything posted by jaymcminn
-
I love it. I built the Monza when it came out and have been toying with the idea of getting the Spider as well... the fenders, spare and headlamps really change the character of the car.
-
That is lovely. Bold color choice that works really well on this car. Great photography as well.
-
That is a handsome cat. Tank is the perfect name for him! I had a Russian Blue named Samantha growing up. They have a lot of personality and tend to bond pretty strongly to one or two people. Sammy loved me and my mom, mostly tolerated my dad and absolutely hated my little brother, who came along after she did.
-
Got lucky here in Naples. Only lost power for 18 hours or so, probably because all of the power infrastructure in my area was replaced after being decimated by Irma. I live about 7 miles inland on a freshwater canal so I didn't have the storm surge that wrecked coastal areas. There's some cleanup I need to do in the yard but not too bad. I'm the front office manager at a 183 room hotel on the Gordon River where it meets Naples Bay. Our property was built 7 years ago to withstand both category 4 winds and worst-case storm surge and made it through with flying colors. We're open running on enormous generators and are accommodating FP&L crews who are working to restore power in the area. Our executive chef has been working hard to set up a "soup kitchen" to provide free meals to our guests who can't go out to eat with local restaurants closed. The downtown area sustained significant damage and the beachfront is a wreck. My old hotel on the beach had 8 feet of water inundating the ground floor. The devastation on the Lee County barrier islands is heartbreaking. Ft. Myers Beach, Matlacha, Sanibel, Captiva... these areas will take years to recover. So much history and local color was lost and it can never be the same. One of my favorite day trips would be to hop in the Miata and take the long route up to the Bubble Room in Captiva for dinner. Seeing all the places that I know well along that drive destroyed is... there aren't really words for it. That doesn't even take into account the human misery. The death toll, which won't be known for a while. People displaced and homeless. I love this area. SW Florida has its frustrations and annoyances like anywhere else but when it comes down to it we pull together. In that spirit we will rebuild. Hopefully smarter. Hopefully stronger. The reality is that storms are getting more powerful and major storms seem to be more frequent and damaging.
-

2024 Mustang GT, EcoBoost, and Dark Horse
jaymcminn replied to tim boyd's topic in General Automotive Talk (Trucks and Cars)
Not digging the interior, the iPads hot-glued to the dashboard are an automotive fad that needs to go away. Buttons and knobs are safer and easier to find while driving. Screen displays wash out in bright sunlight (not good in, you know, a convertible). The sweet spot has already been hit with a simple touchscreen in the center of the dash to access the settings you don't need on a regular basis and physical controls for everything else. Unfortunately, the need to keep up with the latest trends tends to overrule common sense. -
Whatever Johnny's rear leg just did, he's not happy about it.
-
Anyone Have A History On Otaki Kits?
jaymcminn replied to oldcarfan's topic in Car Kit News & Reviews
Those second-tier Japanese companies passed molds around like crazy back then. Otaki, Doyusha, Nichimo, Nitto, Arii... there was a whole host of kits that some or all of these companies released at one time or another. As one company would fold, another company would buy the molds and rerelease the kit. I think most of the surviving molds would be held by Doyusha and Arii now. IIRC, Otaki folded in the early 80s. They tooled up the 1/12 Countach LP400/500 series, which is an excellent kit on par with Tamiya models of the time. -
Bases, stands and presentation
jaymcminn replied to OldNYJim's topic in General Automotive Talk (Trucks and Cars)
Thanks! I got it from IKEA about 5 years ago. I just checked and it's still on their site, but not in the red color. It's called "Fabrikor". -
Best Online Hobby Shop?
jaymcminn replied to Calb56's topic in General Automotive Talk (Trucks and Cars)
My LHS is Family Hobby Center. It's a great little shop, I've been going there for 40+ years. Owned by the same family since 1959. I don't know that it's worth a road trip unless you were coming to the area anyway... it's not a big shop by any means and they tend to be a little conservative in terms of what they stock. K&K Hobbies in Port Charlotte is bigger and has a better selection. Can't wait for the Southland show! -
Best Online Hobby Shop?
jaymcminn replied to Calb56's topic in General Automotive Talk (Trucks and Cars)
Honestly, I look at the Internet as my hobby shop. Of course I still patronize my (very good) LHS. Different companies are good at different things. 1/12 detail stuff and aftermarket bits? Spot Model (out of Spain) rules. Good prices, fast shipping. Hobby Link Japan and Plaza Japan are great for a kit stock-up, but the shipping has gotten silly lately from Japan. I've gotten some good deals from Hobbylinc as well and of course there's always the dreaded eBay for vintage kits. Model Roundup was my go-to when I was building more American stuff and their service was always great. -
Bandit's a big (17lbs) boy. That pic doesn't show off his color to full advantage. This is more like it... The belly rub thing is my favorite. I start off scratching his ears, then he scoots down and flops his leg over my arm so my hand is pretty much trapped and I can't help but rub his belly. I have never seen a cat go for belly rubs like he does. He's like a freaky mutant cat-dog.

-
If I could find someone to rub my belly while I take a nap, I'd be all set...
-
Bases, stands and presentation
jaymcminn replied to OldNYJim's topic in General Automotive Talk (Trucks and Cars)
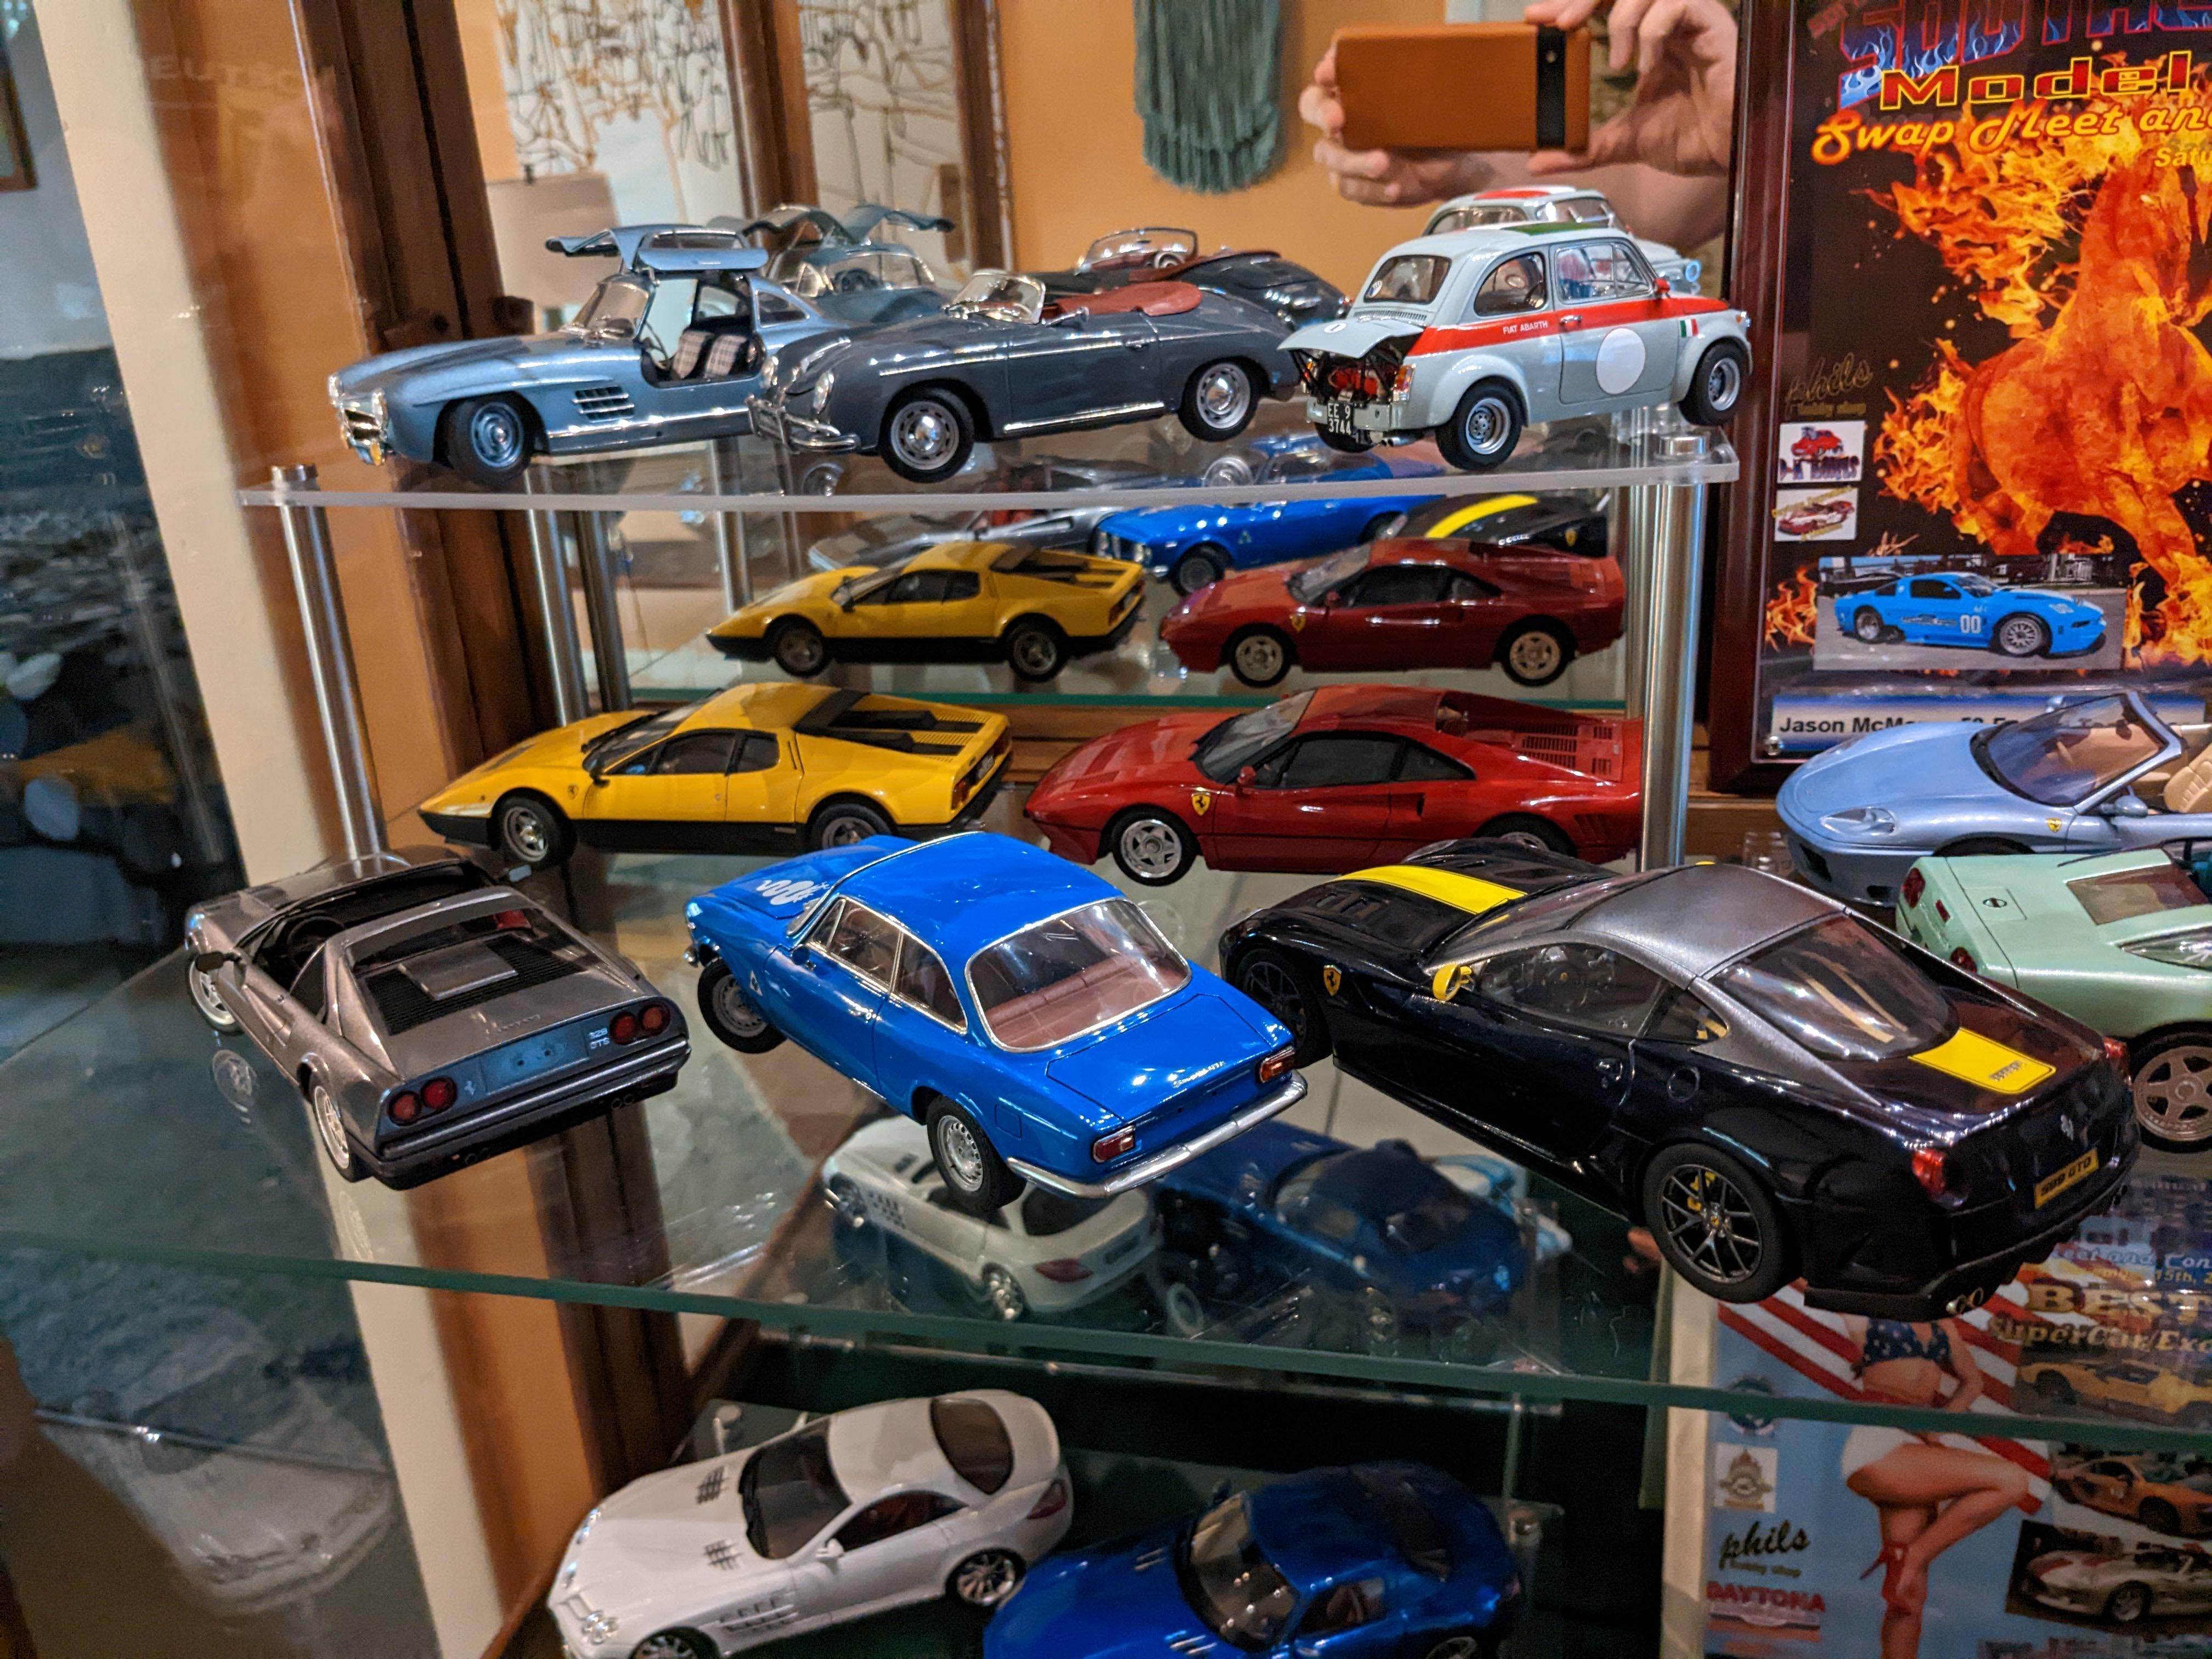
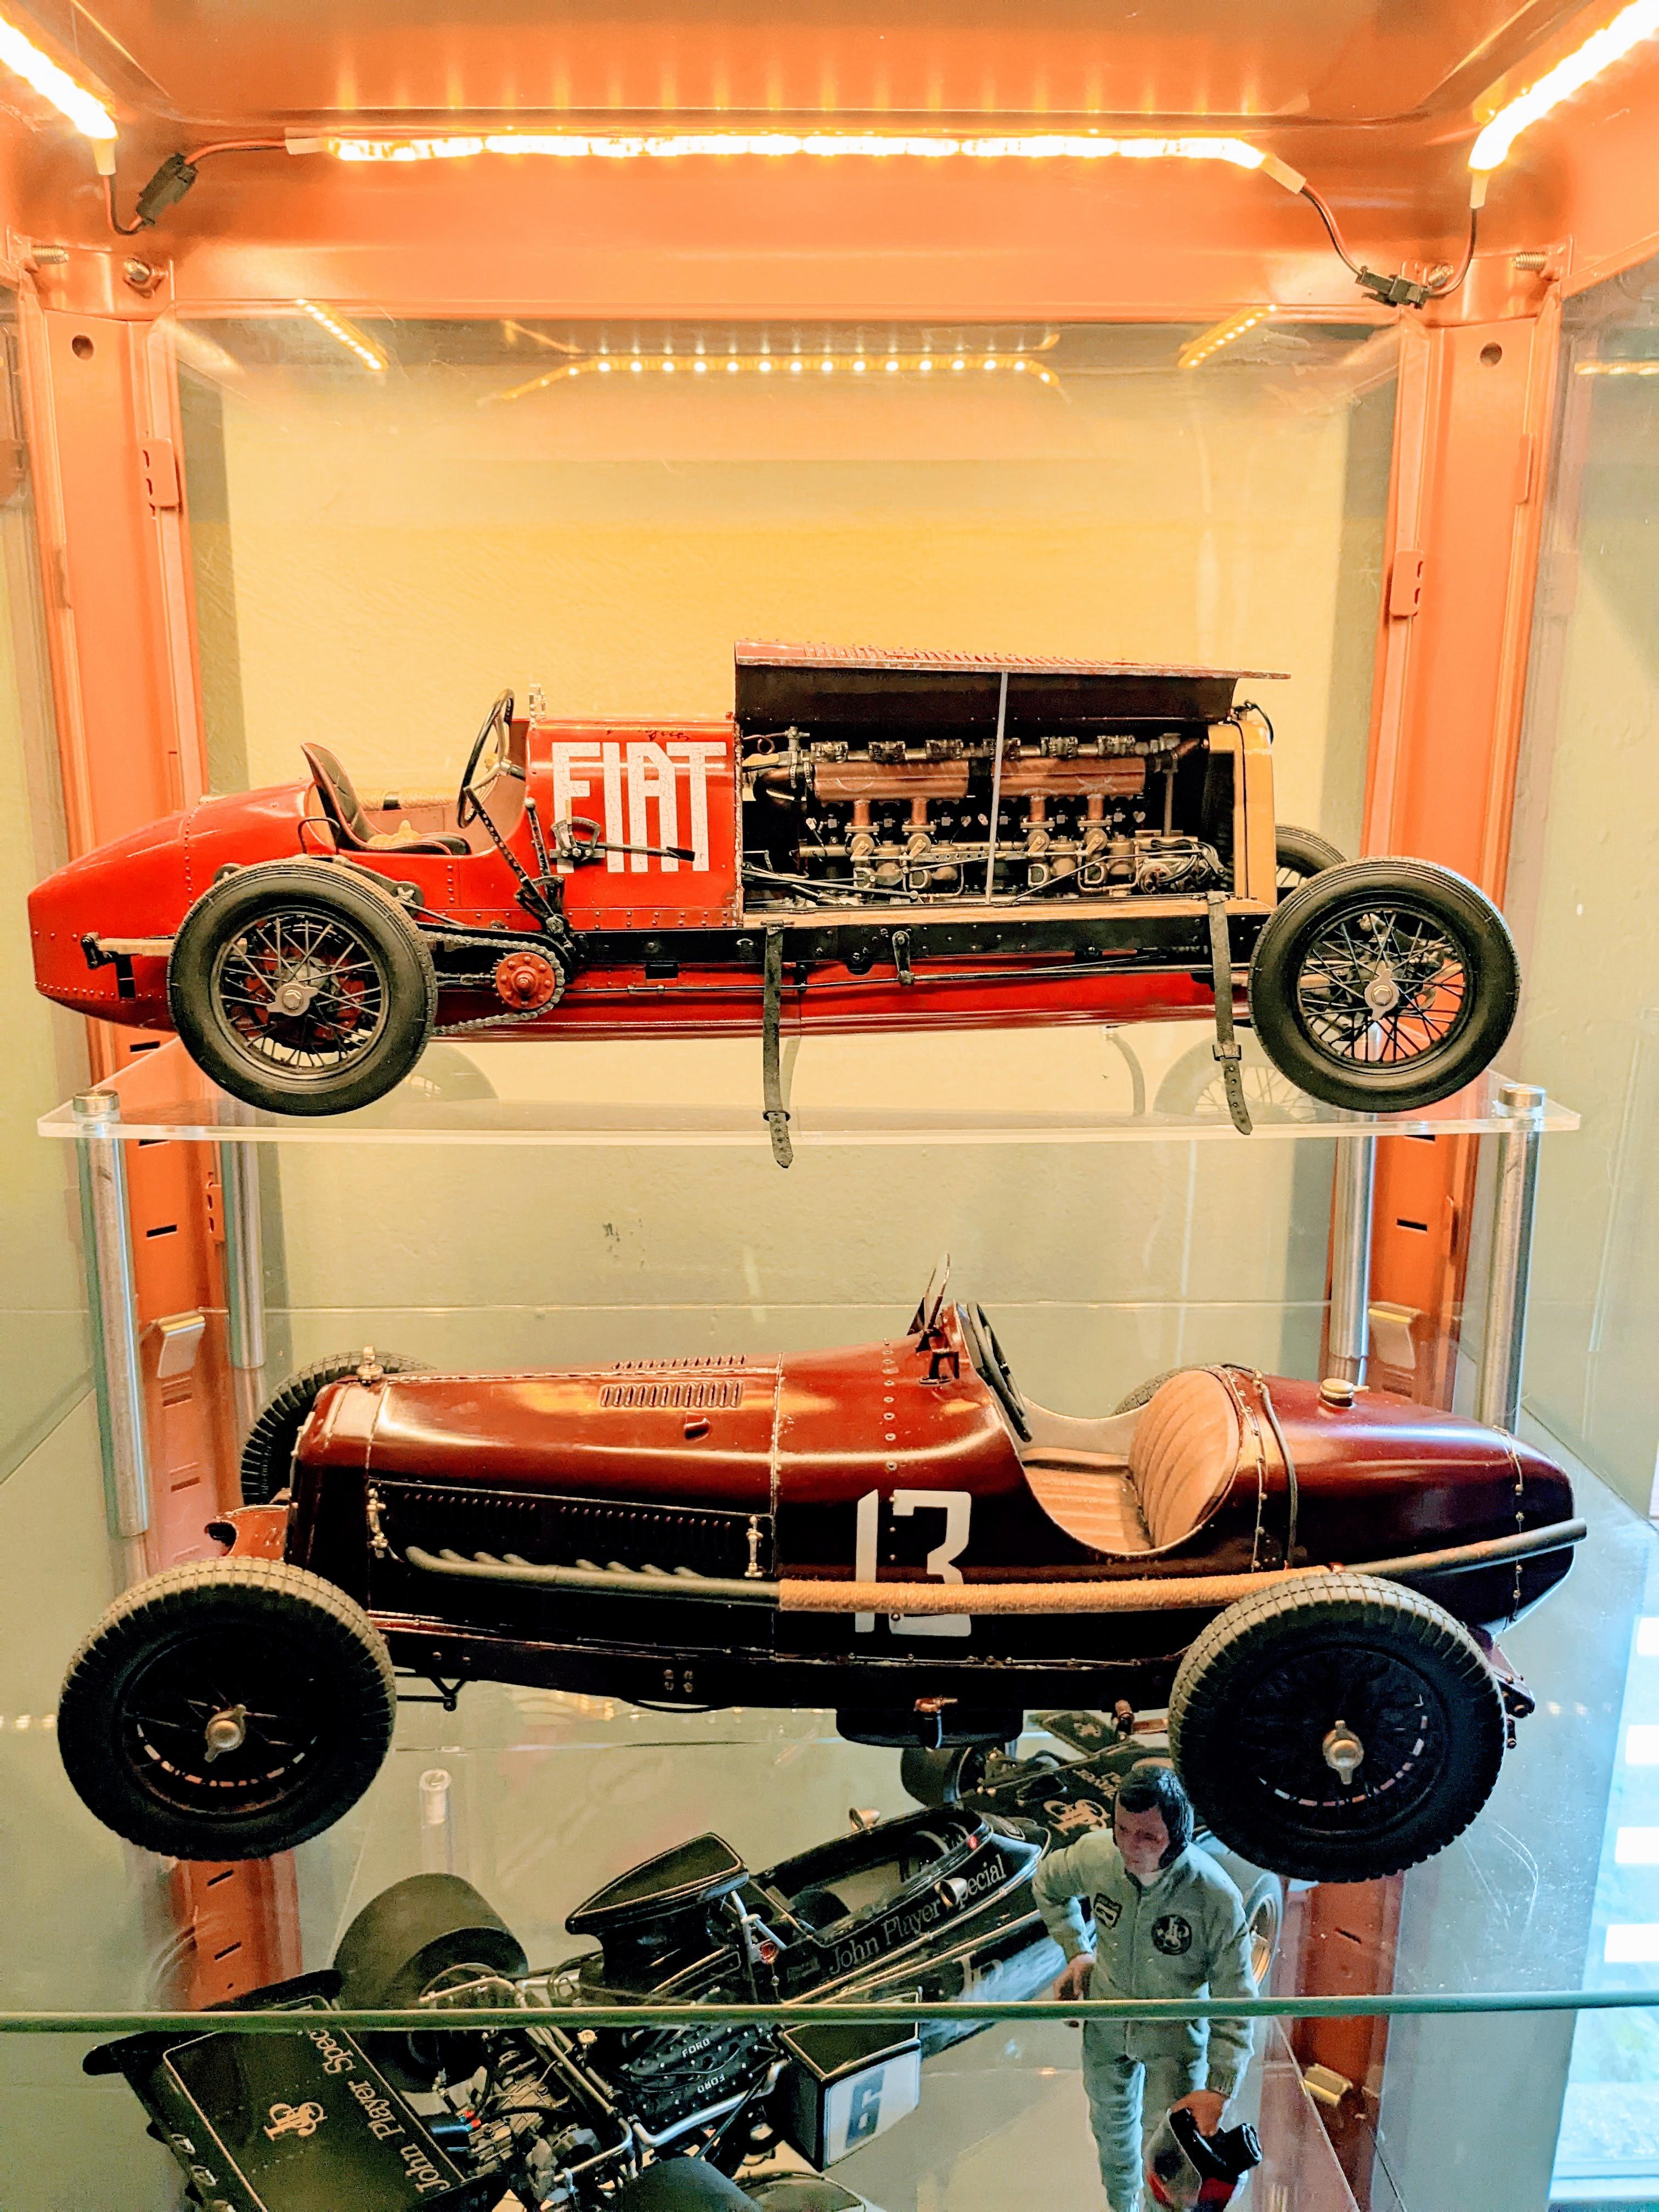
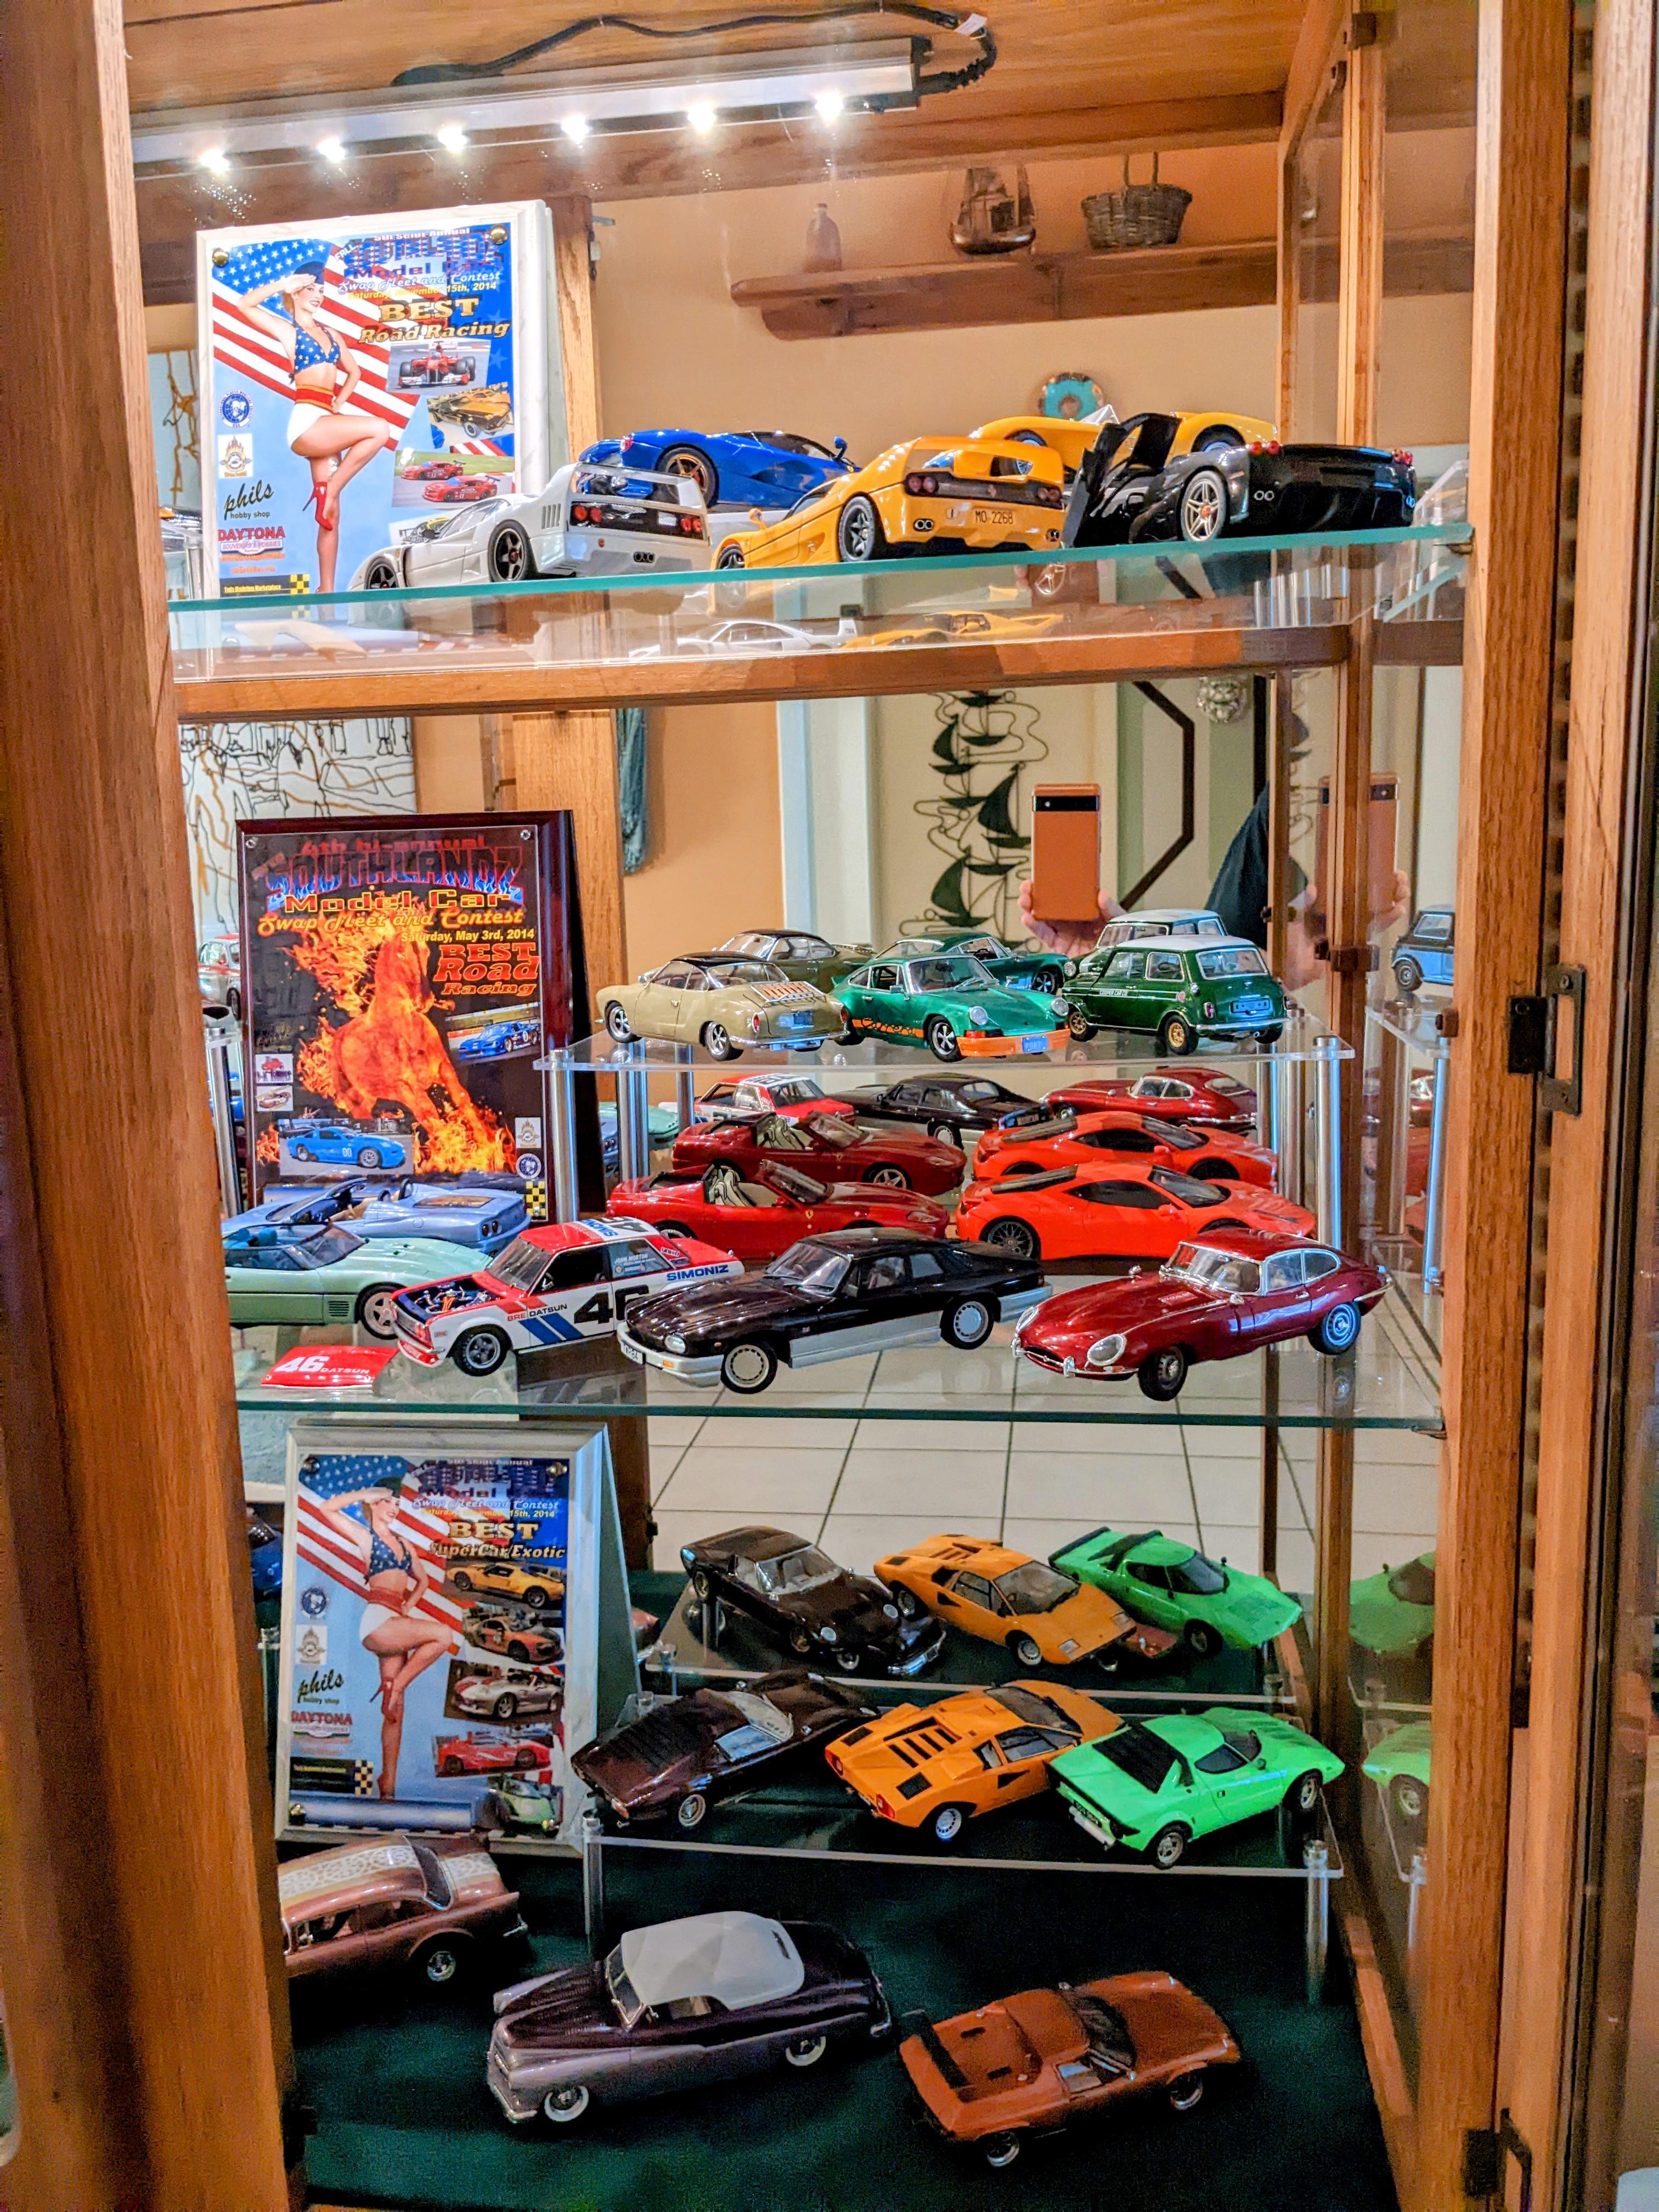
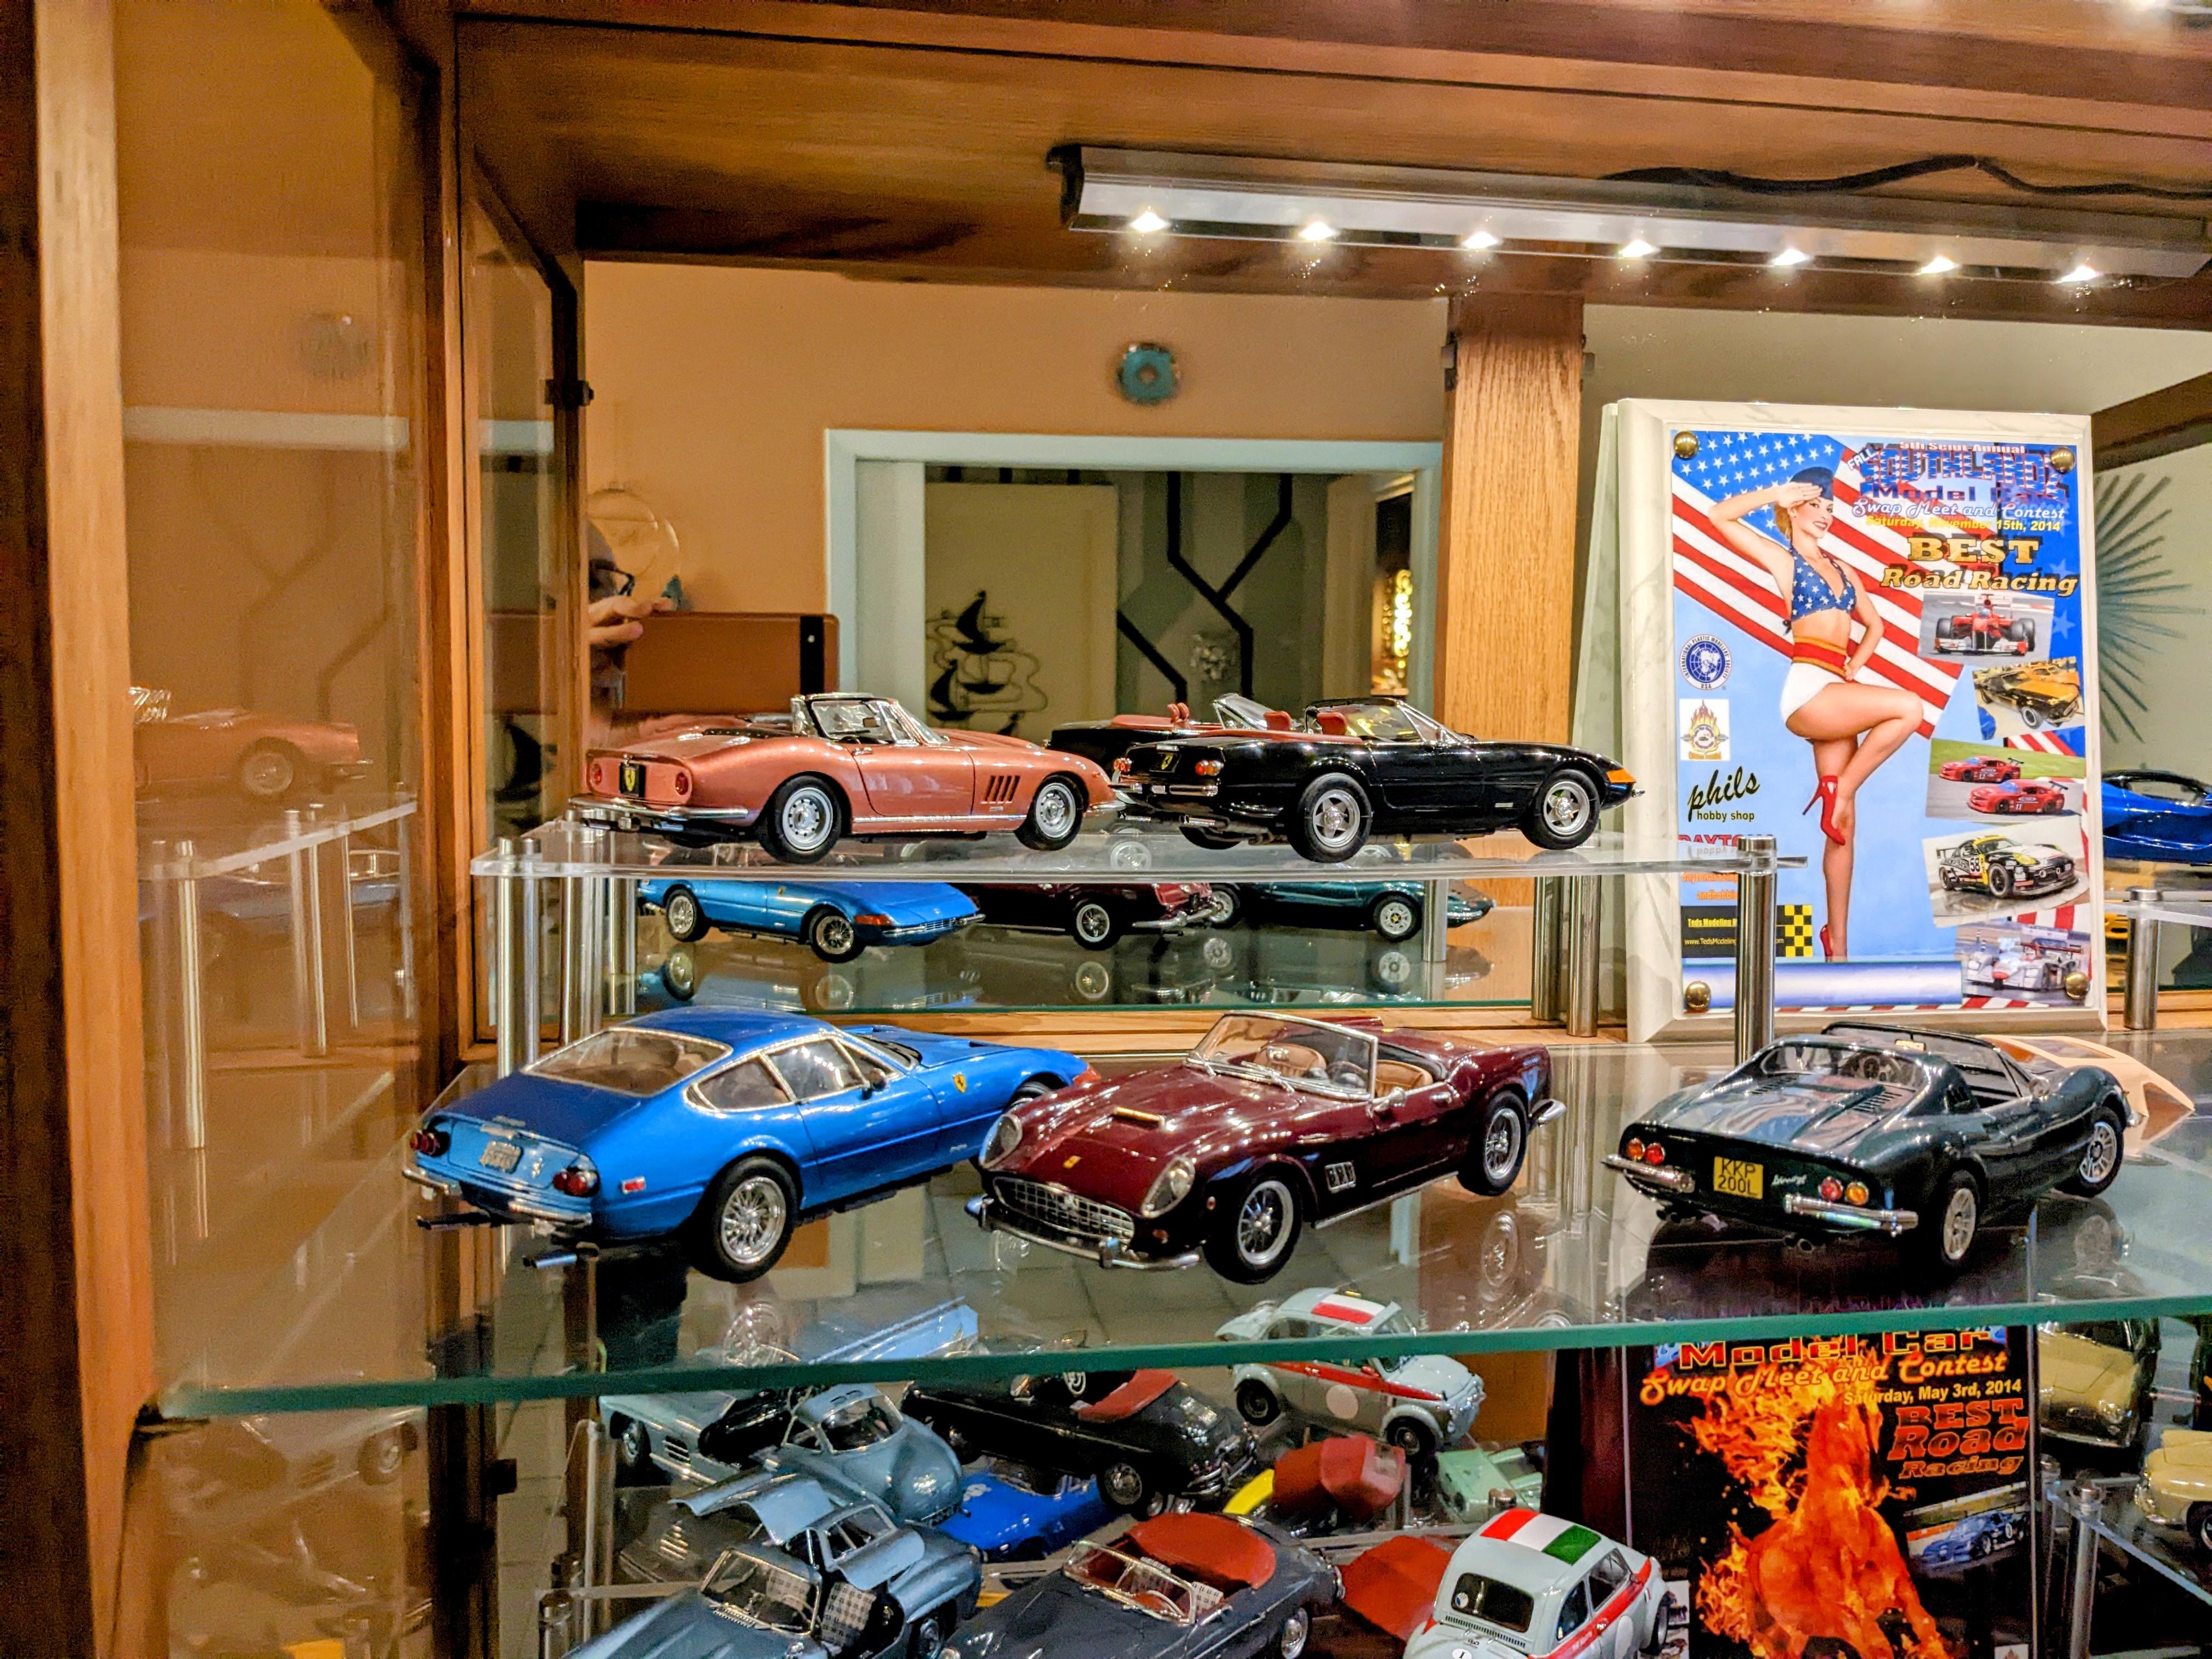
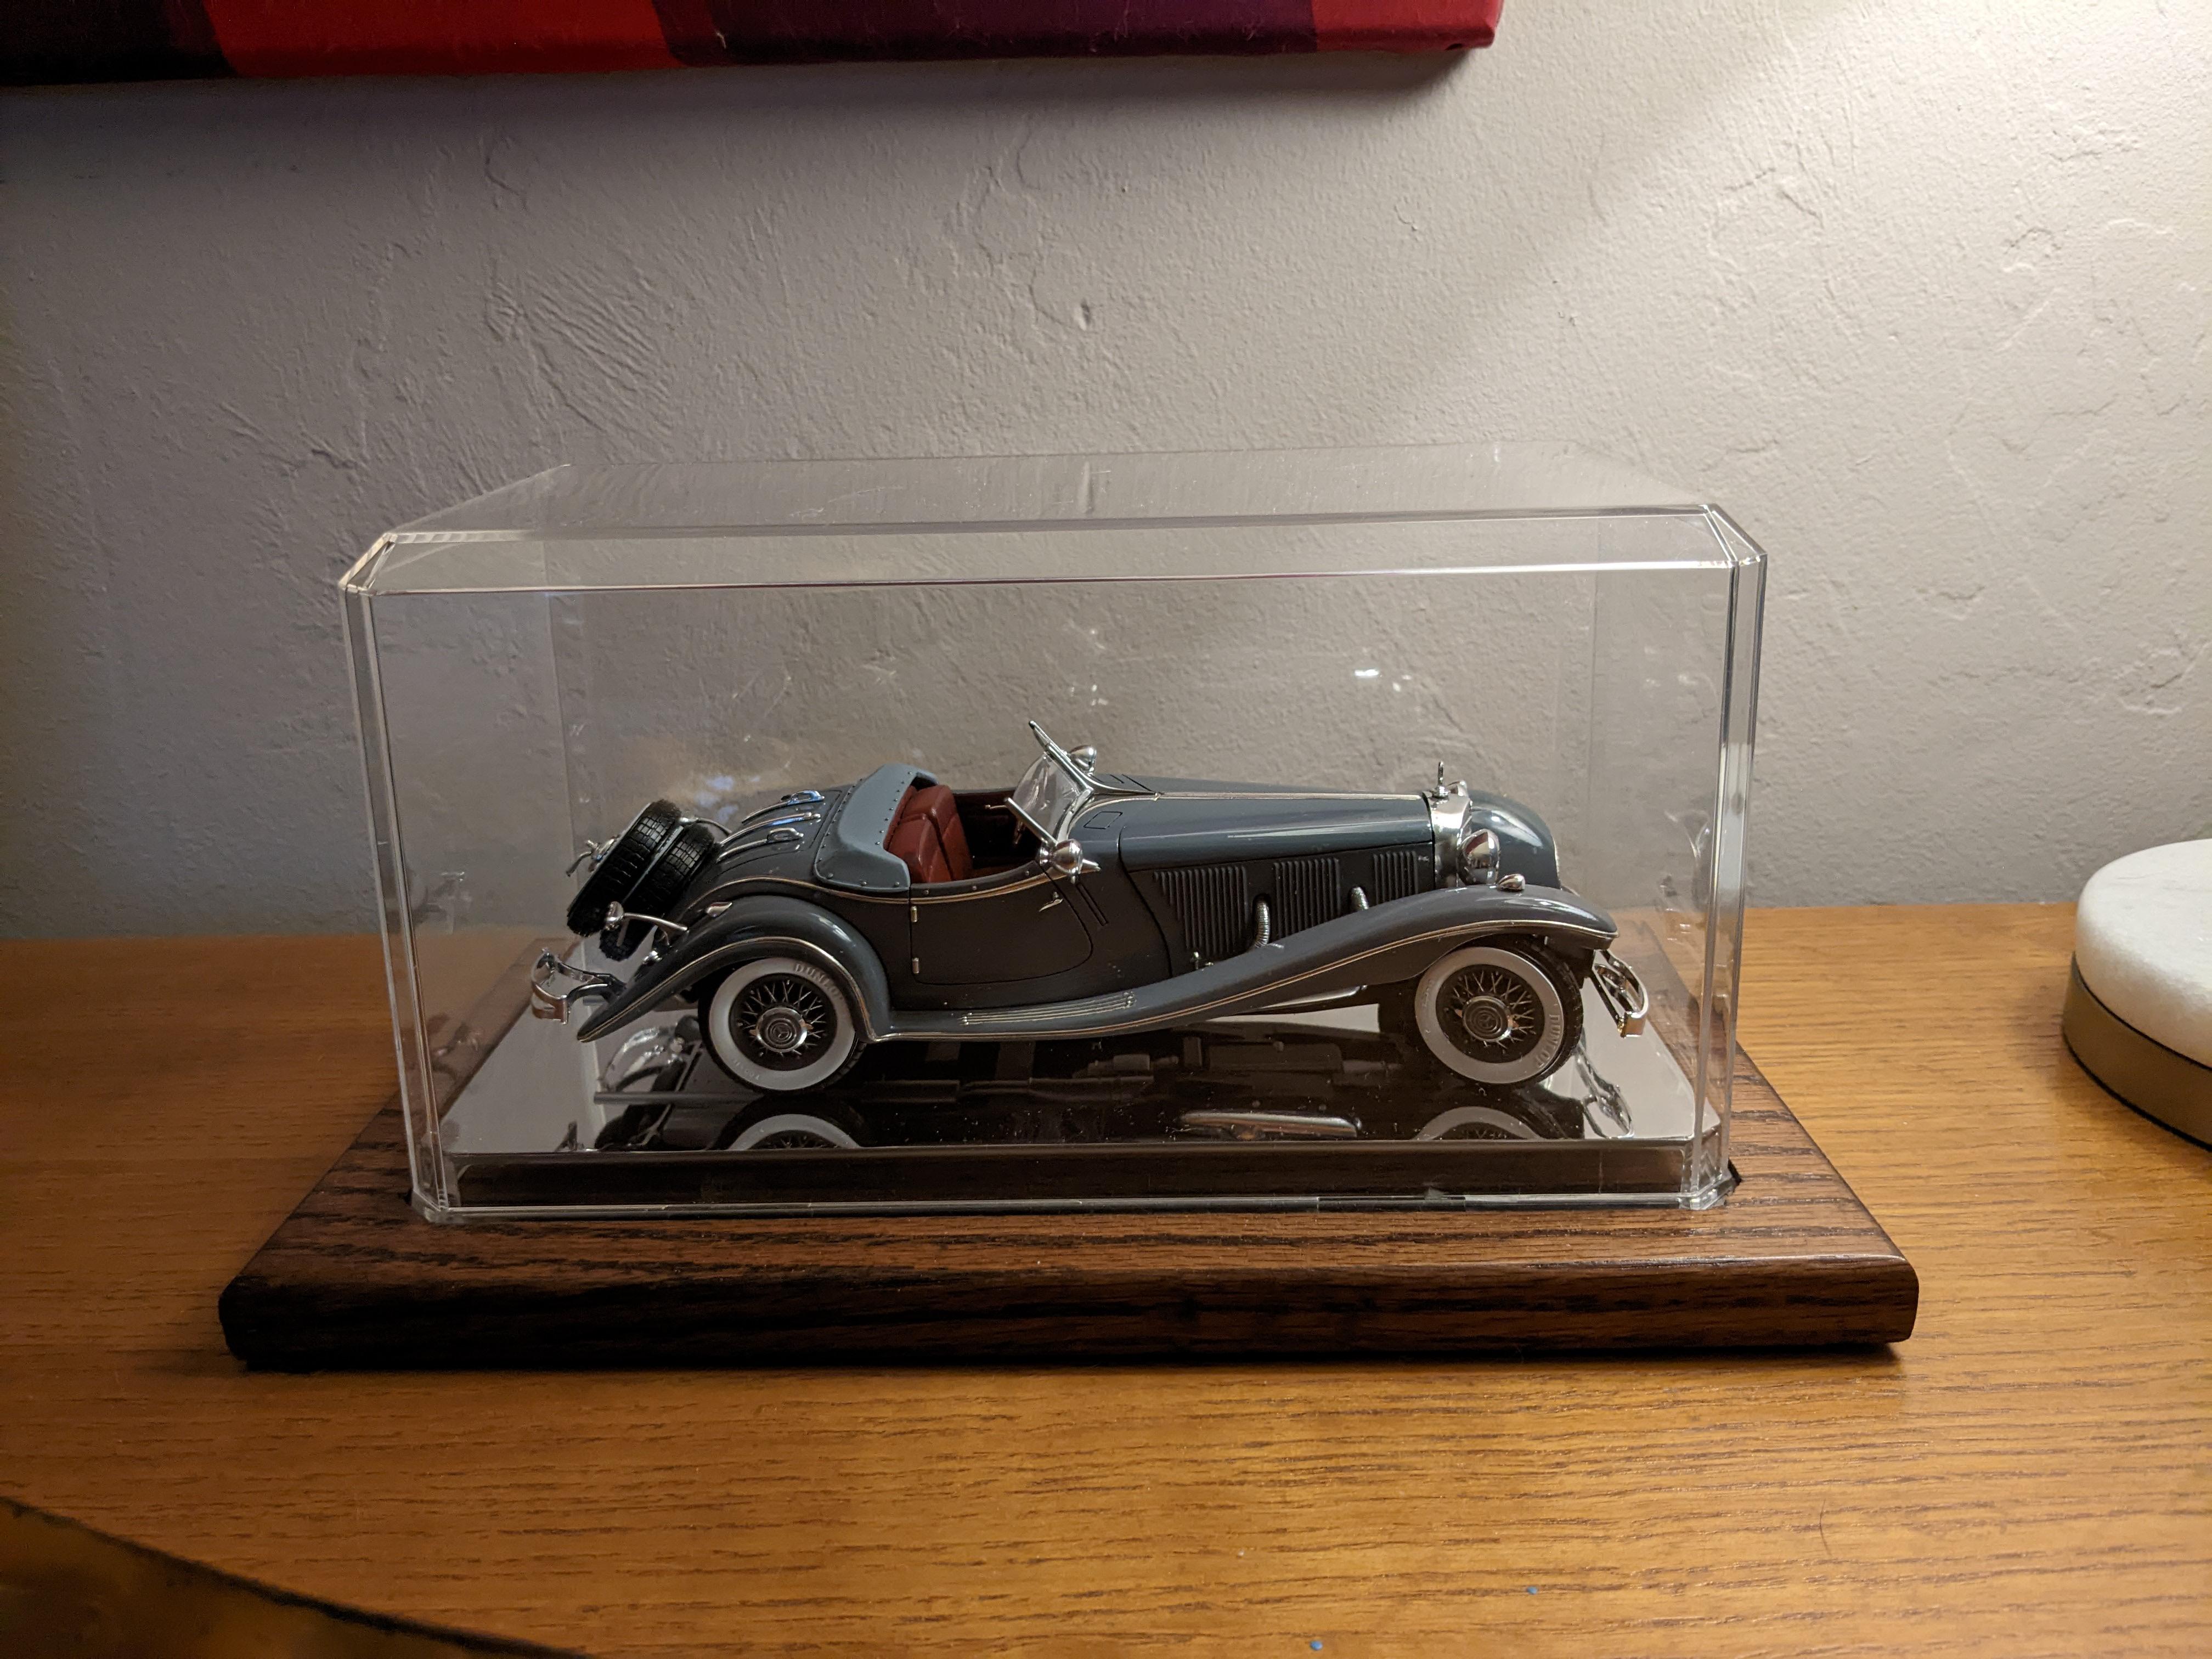
I'm a big fan of acrylic display stands to add dimension and space to my display cabinets. The effect can be almost like the cars are floating in midair. For some builds I really like I have a few small display cases scattered around the house...these get swapped out from time to time. Everywhere I go in my home I get to look at the models I've produced over the years. It's a good feeling!
-
Probably the Monogram Deusenberg SJ Murphy Convertible in about 1979. I was a big fan of classic cars as a kid. Still am, come to think of it.
-
Defect in clear parts
jaymcminn replied to Timonator's topic in Model Building Questions and Answers
Definitely contact Tamiya. I think the 935 is either in the current catalog or recently rereleased. My 934 had a thin mold line in the windshield but nothing like that. -
Magnifier 1/12 Ford GT 40
jaymcminn replied to cobraman's topic in WIP: Other Racing: Road Racing, Land Speed Racers
I probably spent the first 40 hours on my Trumpeter GT40 test-fitting and correcting the panel fit. It's my usual procedure when it comes to large-scale kits with opening panels. I still ran into issues when I got to the final assembly stage. It's not the worst-engineered kit I've ever built, but it's definitely in the top 5. If they hadn't nailed the overall look so well it wouldn't be worth it. -
Talbot Lago t26c Silverstone 1949 1/12
jaymcminn replied to maysula's topic in Other Racing: Road Racing, Salt Flat Racers
Breathtaking. -
marbelised plastic kits
jaymcminn replied to stitchdup's topic in Model Building Questions and Answers
I think this might be the most 80s thing ever. -
Naaah, I always wind up getting my packages but they sometimes take a pretty circuitous route. Just plain ole institutional incompetence.
-
Aaaaand back to USPS. Every time I look at package tracking and see "Ybor City Distribution Center" I cringe because it then turns into a huge crapshoot as to where it's going next and when. This time a package sat at Ybor for two days and has now vanished off the face of the earth. This only happens with expensive things... the $8 craft sticks I ordered from Amazon showed up on time but the $500 limited-edition Seiko watch is now in postal limbo.
-
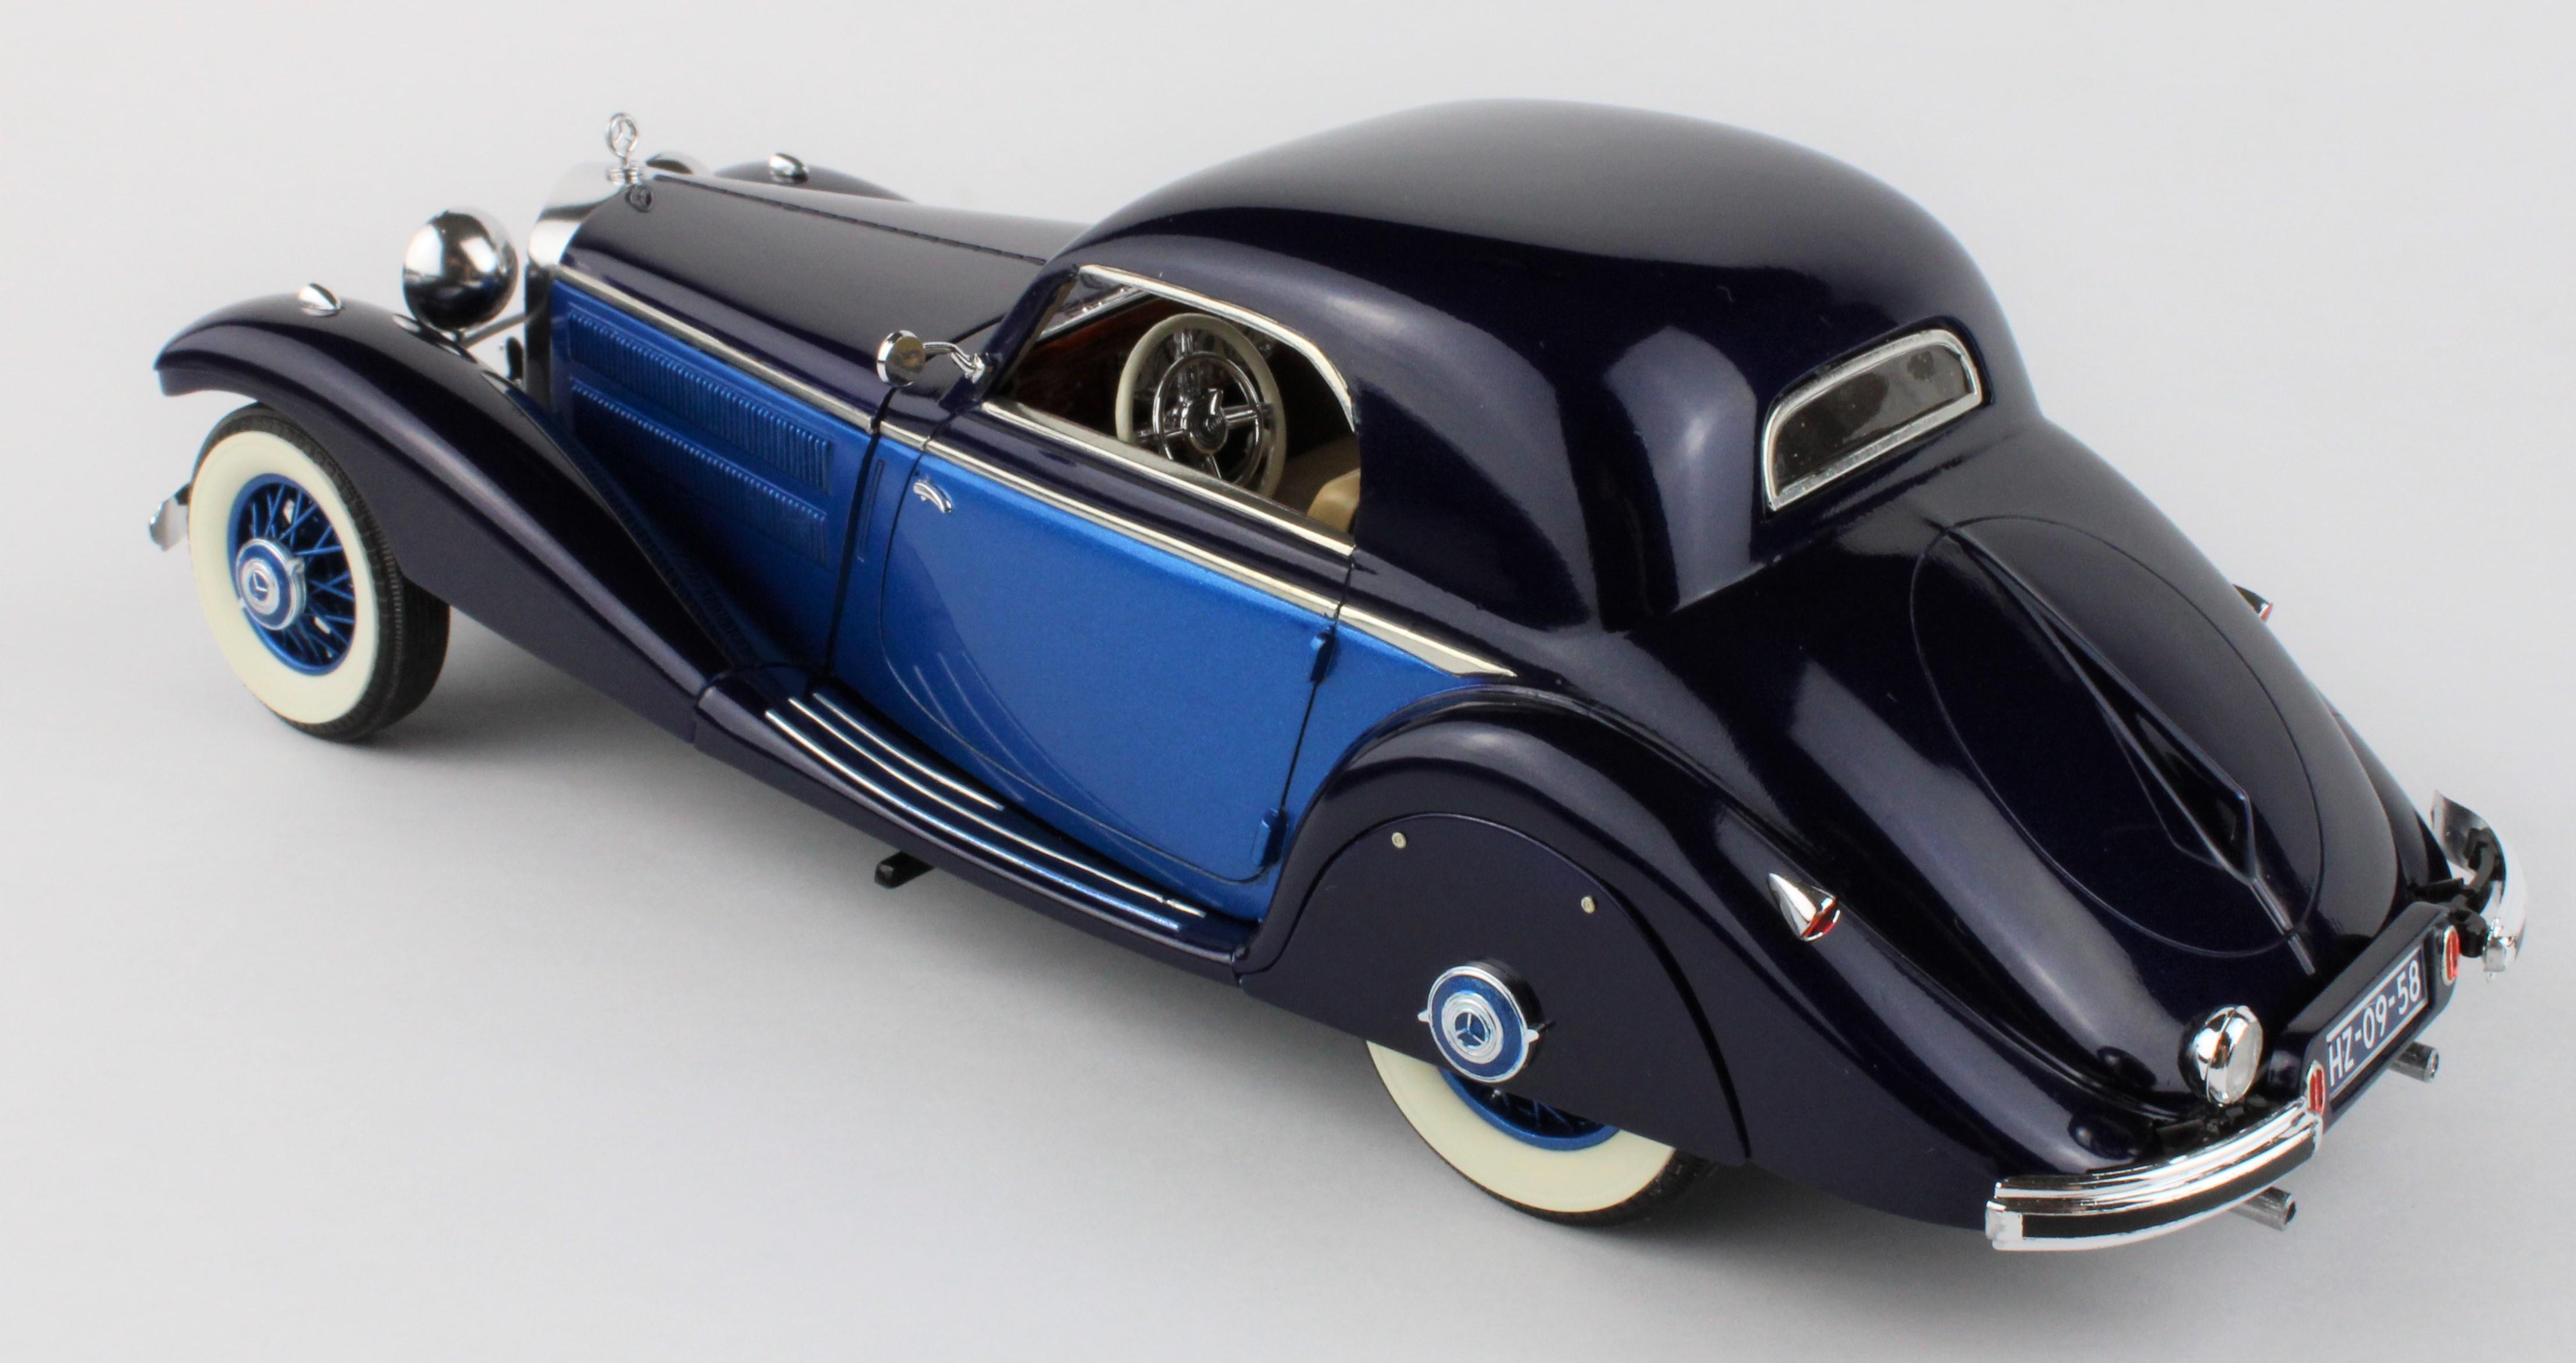
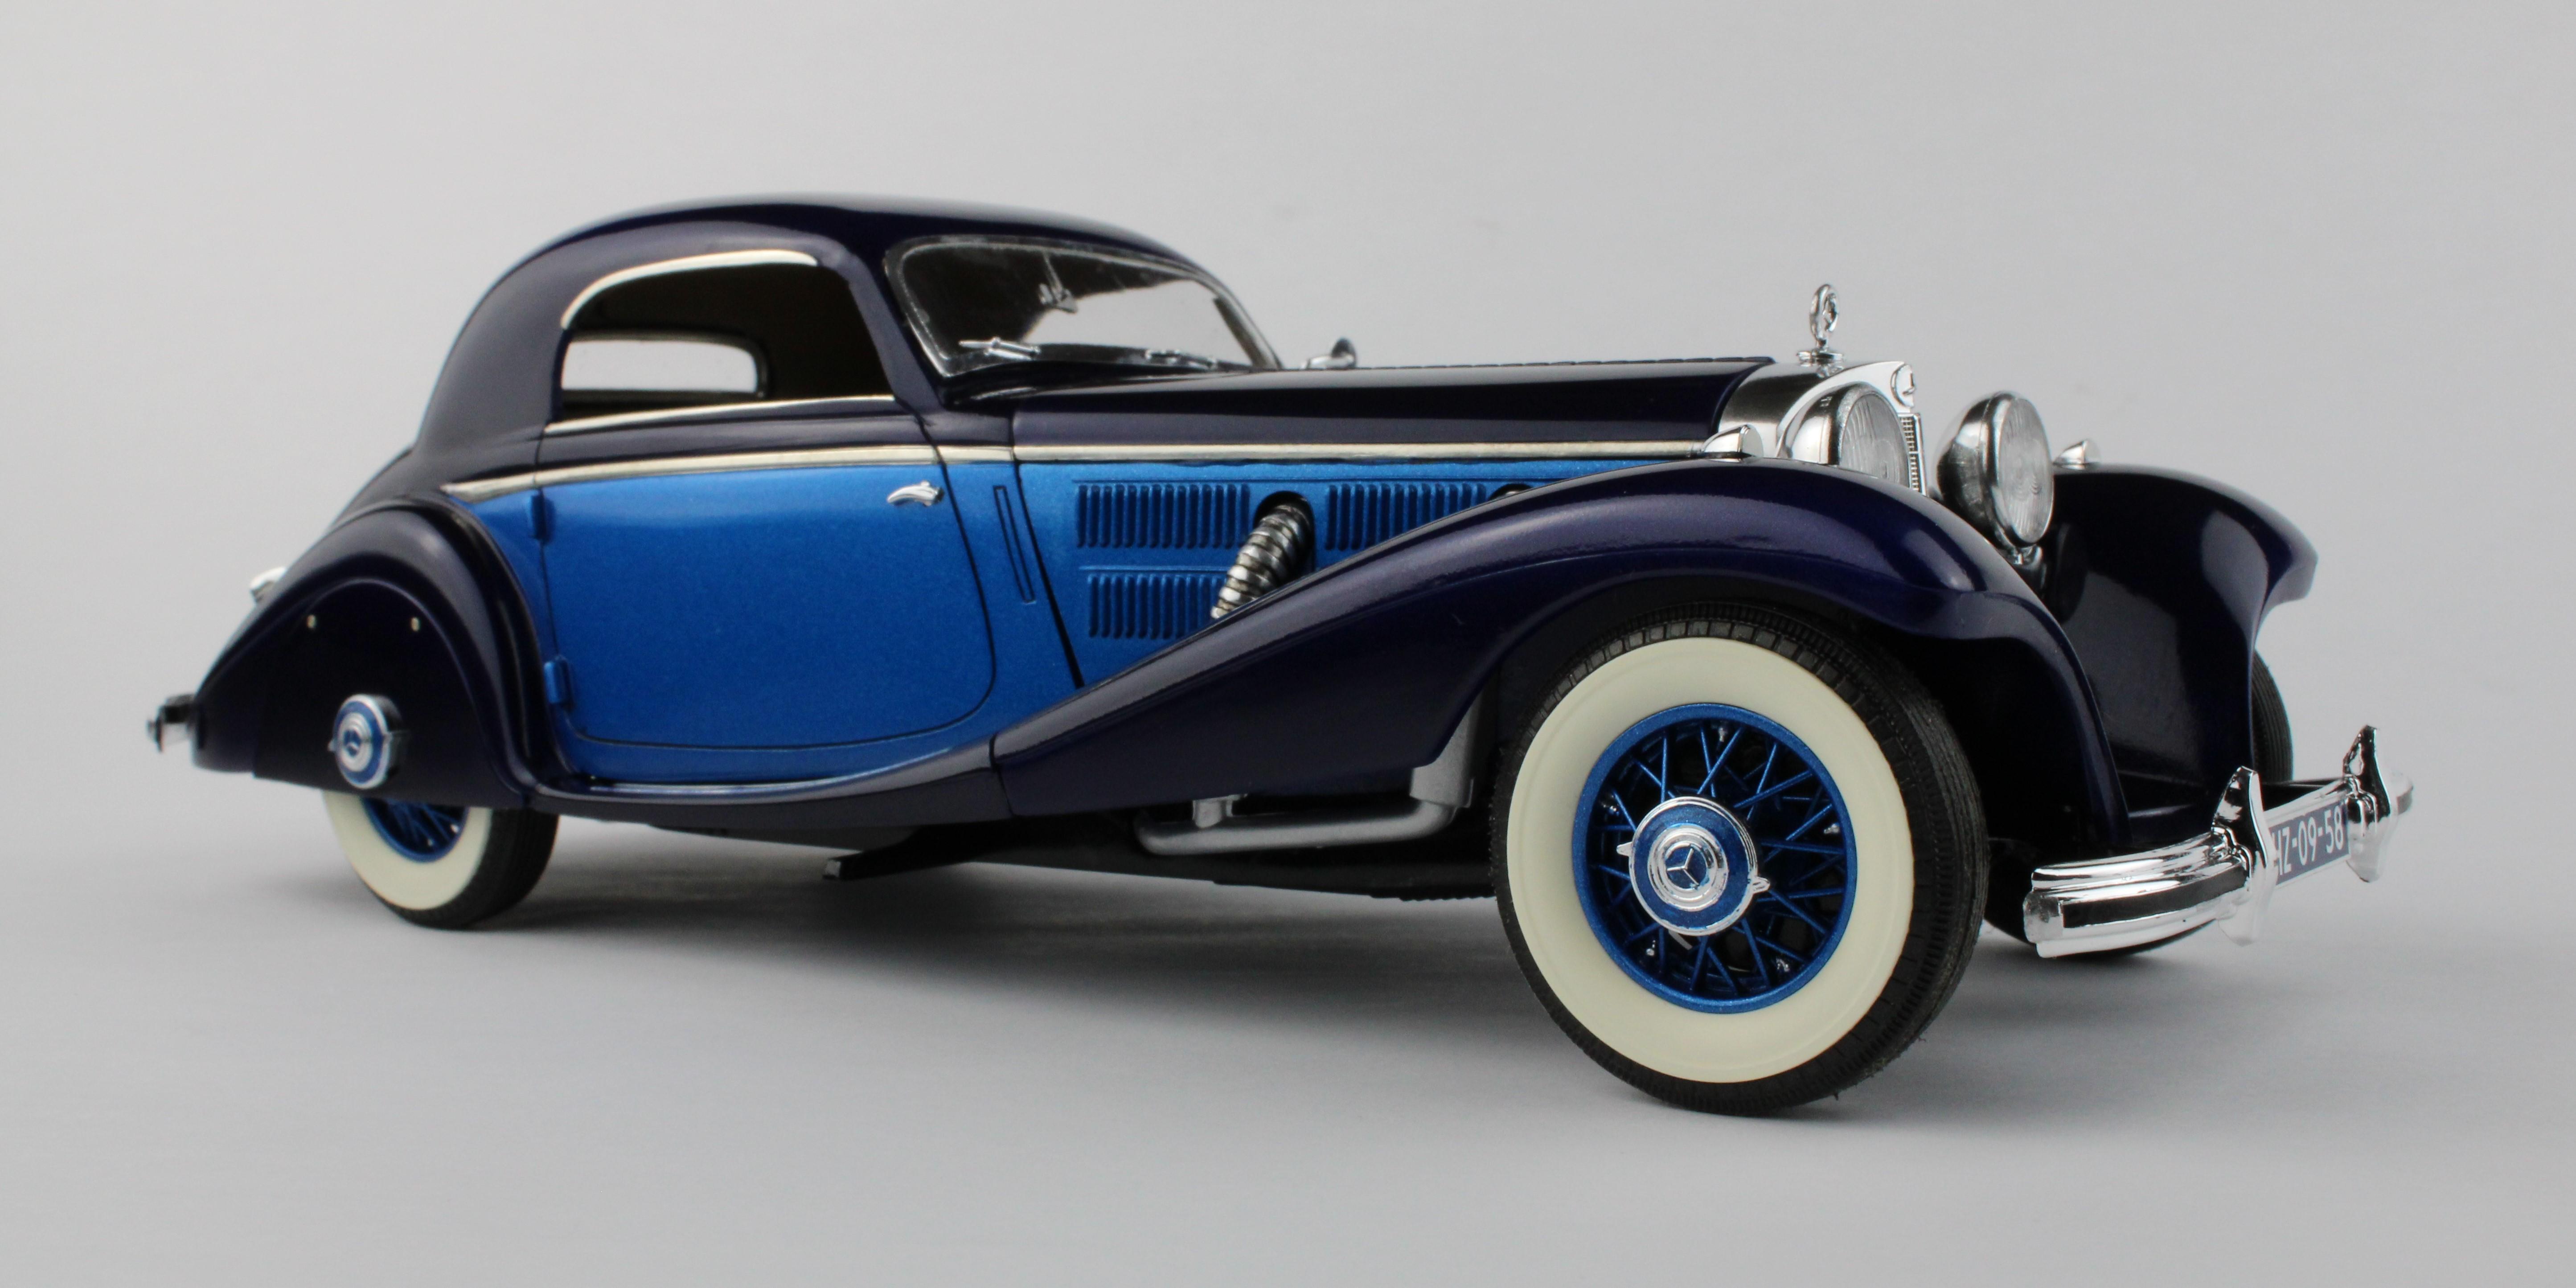
The Mercedes was a blast to build... the relatively low parts count meant I could concentrate on the fit and finish of the body panels, which all needed massive tweaking to get it to turn out as it did. The frame was warped as well on mine and needed some adjustments to get it to sit right. The chrome was terrible, so airbrushed Molotow was used. Pics below...
-
Beautiful work on this so far! I recently did exactly the same thing as you... after finishing up my labor-intensive 1/12 Porsche 934 build I built the old Monogram Mercedes 540k Coupe as a way to wind down. These old Monogram classics are great kits that build up into excellent replicas with a little TLC!
-
I tried the "Beyond Jerky". That's something you don't do twice.
-
Detail Painting the Edges of XKE Windows
jaymcminn replied to Miatatom's topic in Model Building Questions and Answers
BMF is the way to go here.
-
Simulated Metal Paint
jaymcminn replied to TransAmMike's topic in Model Building Questions and Answers
I've started playing with the Vallejo Metal Colors line... Just test pieces at this time, but I like what I see so far. They're pre-thinned for airbrushing and spray nicely at 15psi. Unlike Metalizers they can be applied with a brush on small details. The metallic particles are incredibly fine. The Chrome isn't even close to Molotow or Alclad, but it has a great sheen for polished aluminum... think Testors silver enamel but pretty much impervious to wear once dry. The Gold has a great polished brass look as well. The jury is still out on their gloss black polyacrylic primer that they recommend as a base coat. I'm going to try it with a couple drops of Flow Improver to see if that helps it spray out a bit smoother. Tamiya Flat Aluminum and Metallic Grey have been my go-to flat metal finishes for many years. The metallic particles are coarse, which looks great for cast metal.


.JPG.f4549bdf238da57c5987457cbfa04c20.JPG)
.JPG.4446c7e26621d2cceedc7ea34c4a5a55.JPG)