89AKurt
-
Posts
8,426 -
Joined
-
Last visited
Content Type
Profiles
Forums
Events
Gallery
Everything posted by 89AKurt
-

Why isn't there anymore 2d SUV
89AKurt replied to youpey's topic in General Automotive Talk (Trucks and Cars)
Yea no kidding! I bought my Honda Civic Coupe for same reasons, the top-of-the-line Type R only comes as a four door (I can't afford that anyway). Subaru had a two door Impreza, now all 4 door. Toyota had a cool looking 2 door concept SUV several years ago. What's with the Challenger being a 4 door, the original was 2 door. Marketing genius of appealing to fat Americans I suppose. -
Top notch workmanship! Holy cow. The station wagon, need to see pictures to help push you over the edge.
-
he was roped
-
I just had a bad experience with red styrene, used a little for scratch-building something, the white paint drew the red out! I'm going to have to remove offending parts and replace with white, throwing the rest of that scrap out! I looked for nail 'polish' last night, did not find anything close to the pearl yellow with green tint. ChinaMart is the next stop, then Sallys Beauty Supply! I'm always tempted to get purple, or a color shift, it's like a candy store. The white cars had RED seats.
-
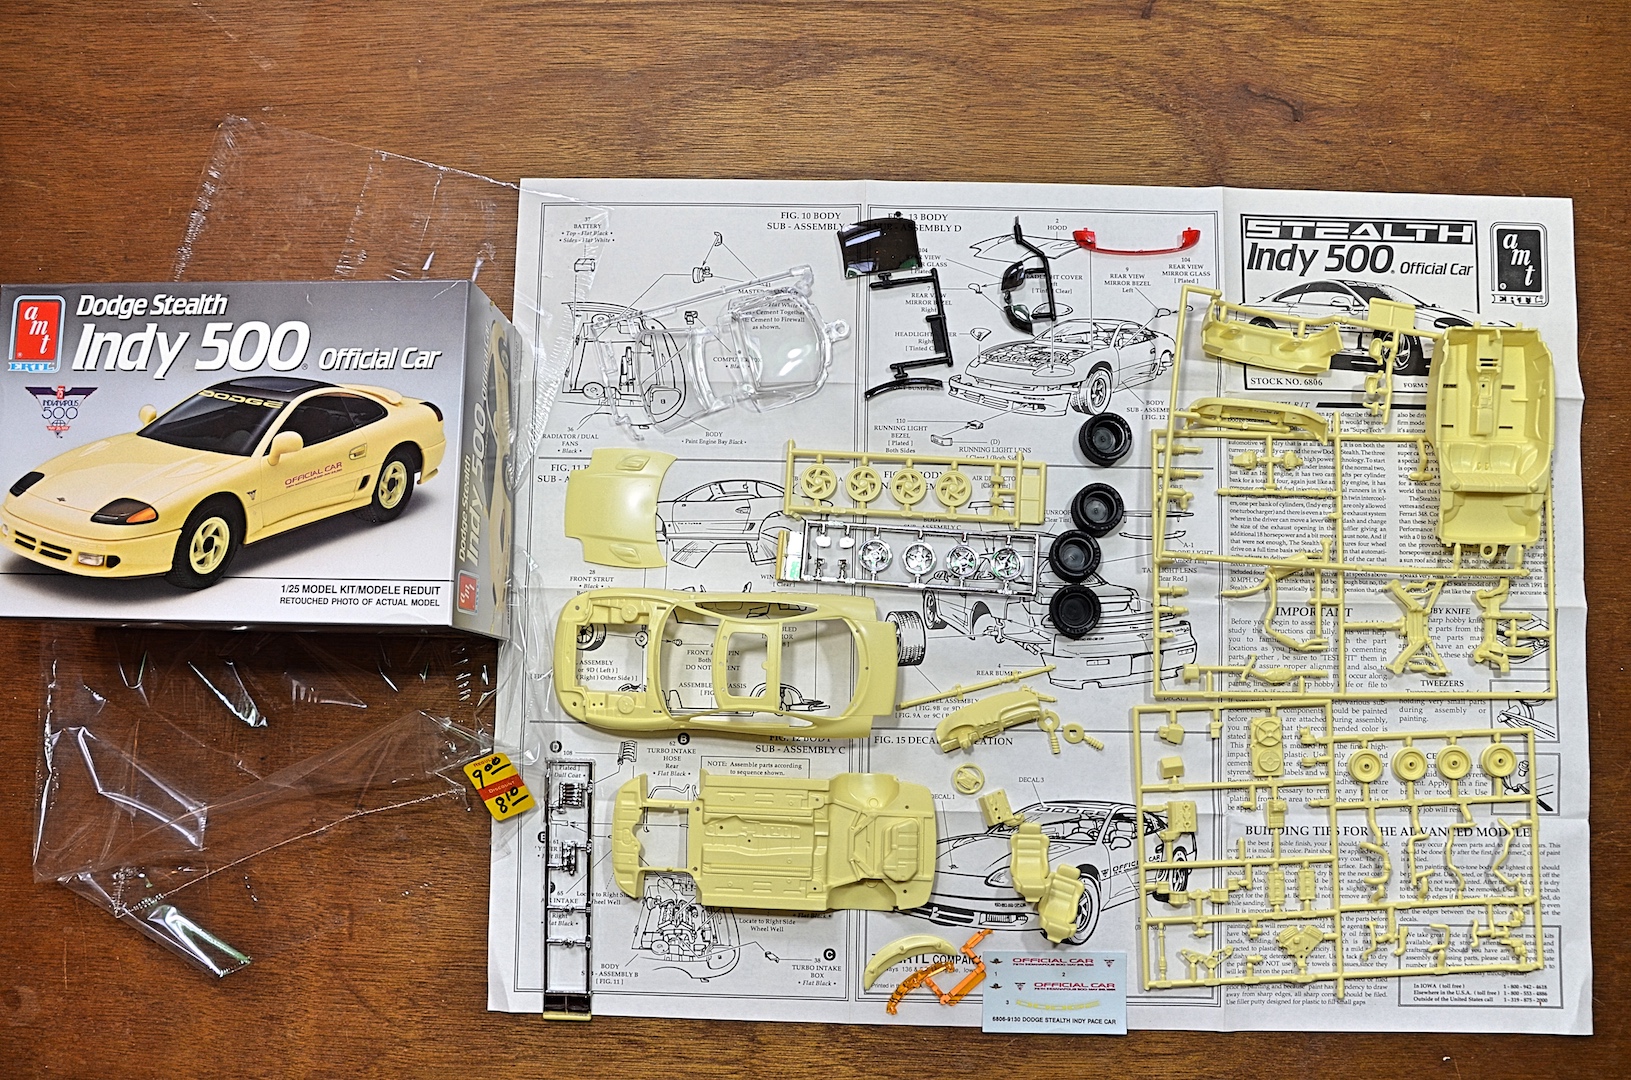
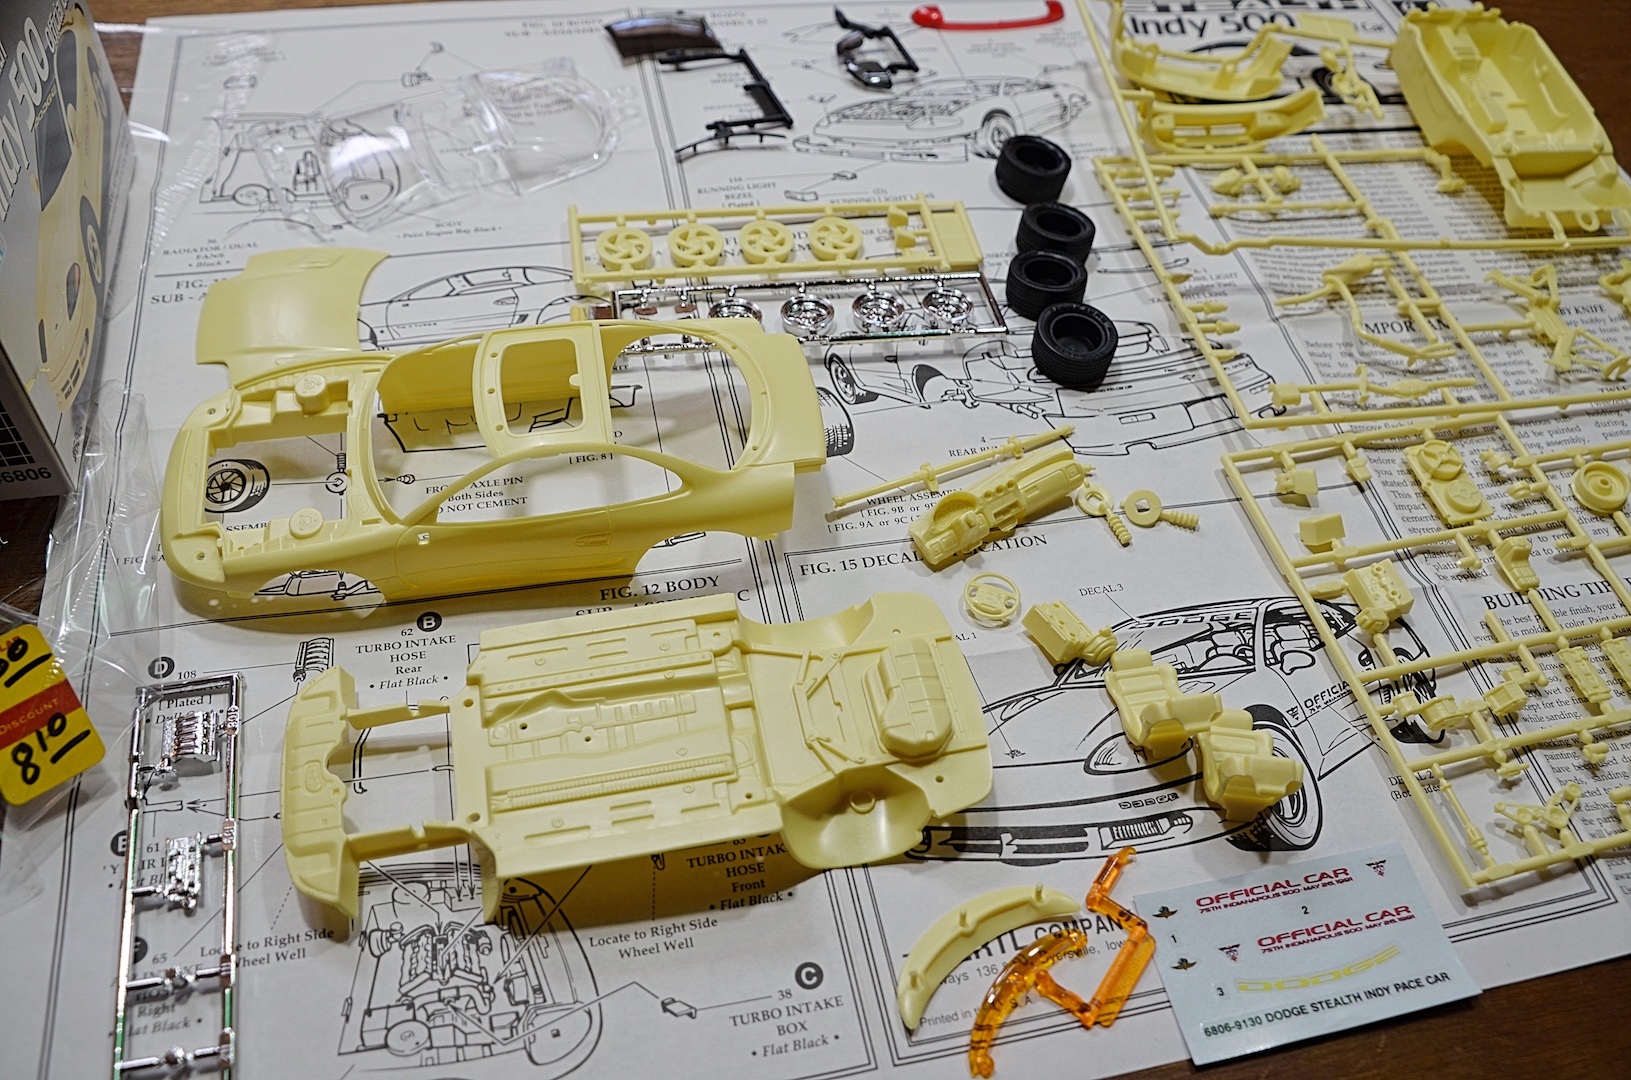
Making it official, AMT Dodge Stealth (rebadged Mistsubishi 3000GT) Indy 500 Official Car. Unsealed it, original sale price $8.10, according to eBay it's a "rare" collectible, can be found for $8.10, but some are asking $25. Molded in pale yellow with some metal flakes to simulate pearl, the hood has some really thin spots so not painting isn't an option. The strobe light is under the funky wing. Can have the sunroof open, with deflector. There are optional chrome rims, slightly smaller diameter and the offset is deep, not appropriate for FWD applications. Goodyear tires. Many parts were broken off, lucked out that the tires didn't melt the clear parts. Debating about color, it came in pearl white too, but I've done two models already and my daily driver is pearl white, so might look for this shade yellow nail 'polish'. Will be Box Stock.

-
Wait for it....
-
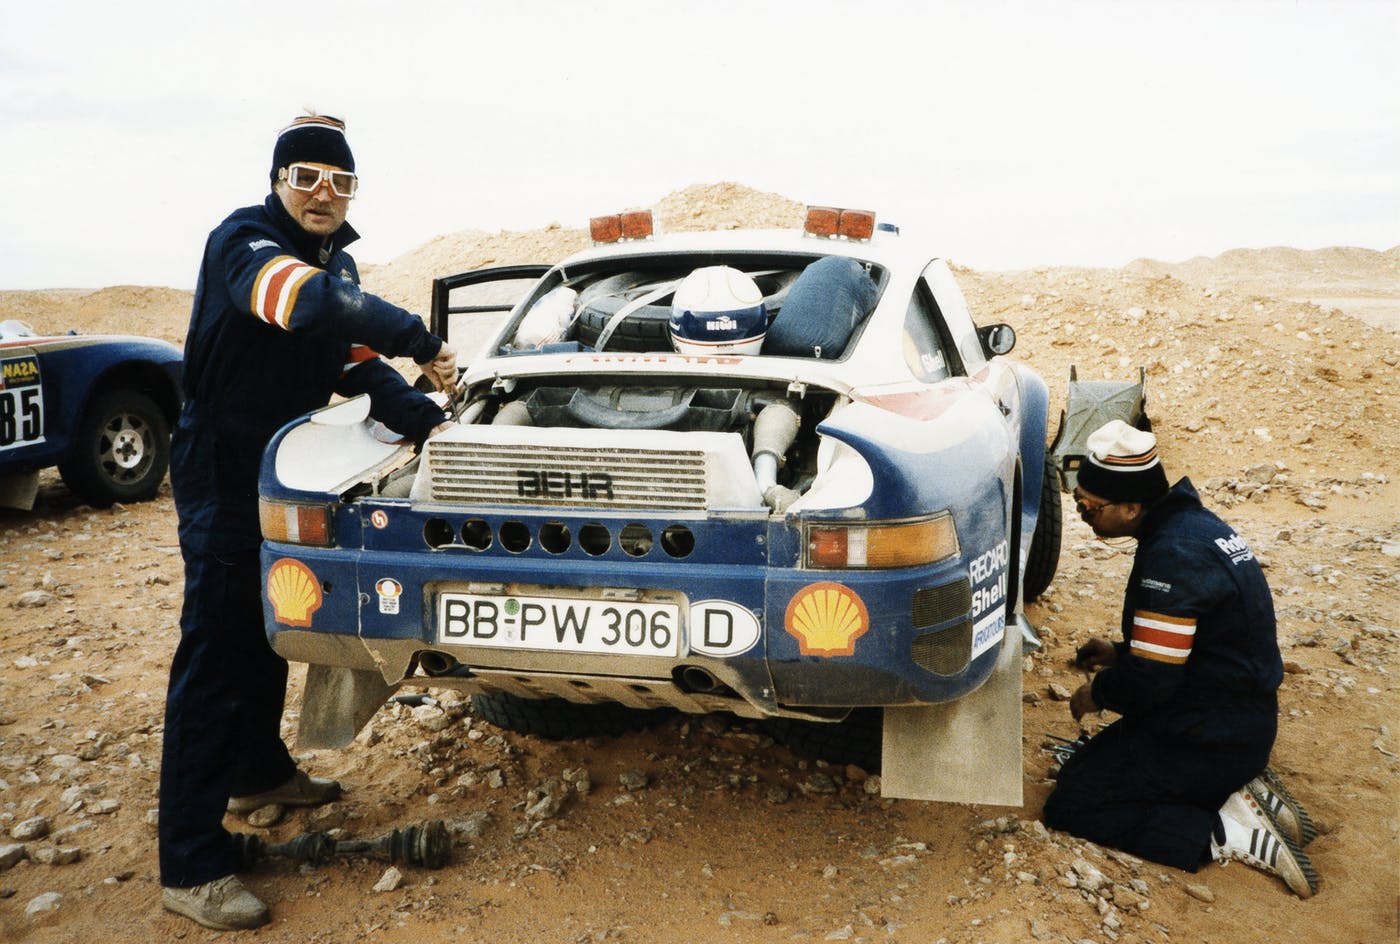
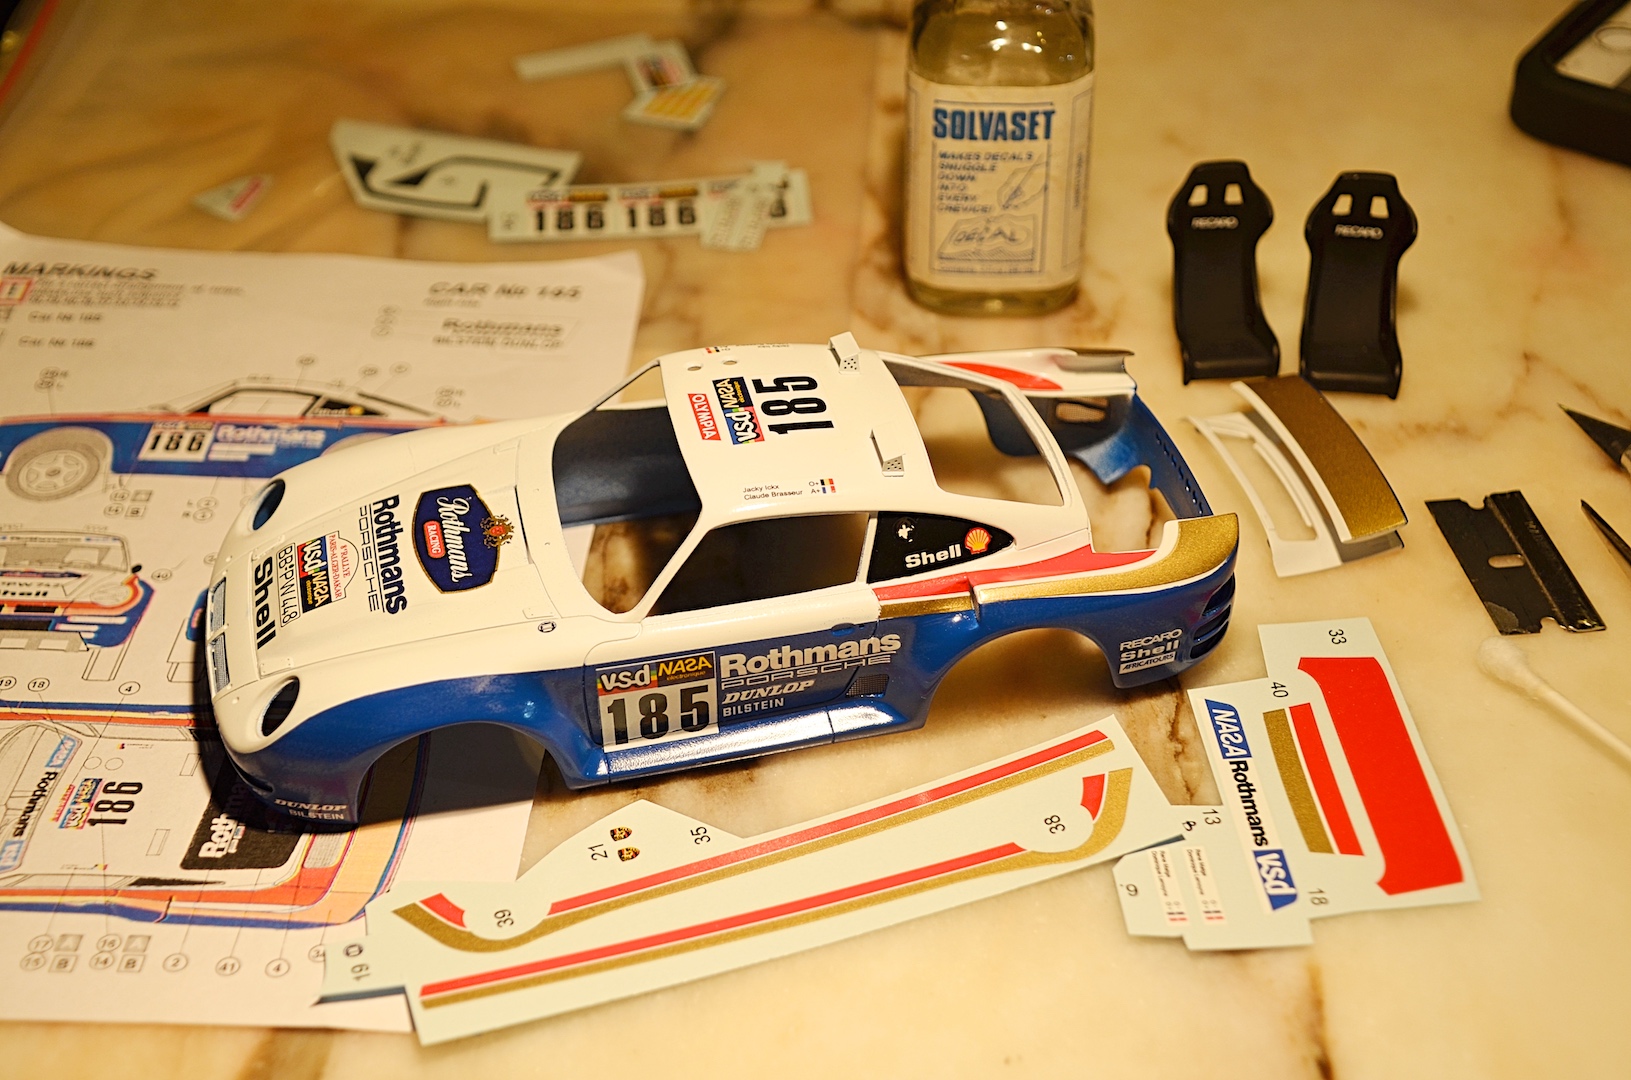
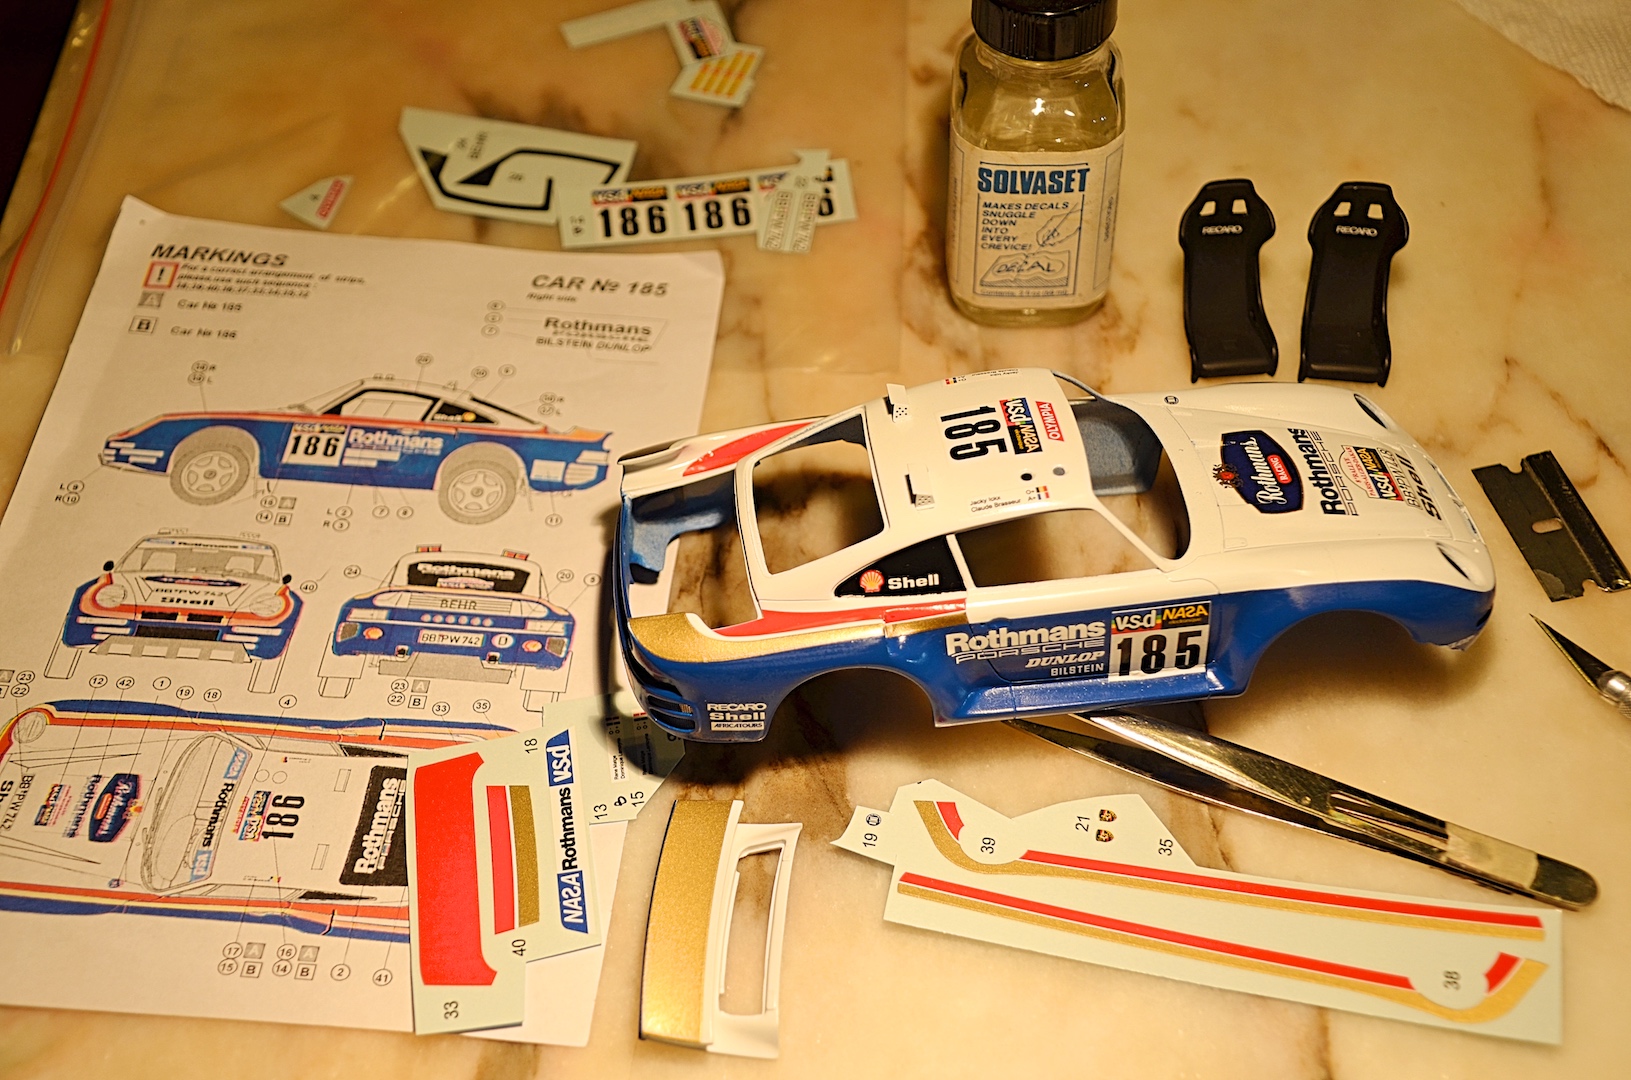
I skipping the blown spare, but will add straps. Me more than you! This shot is really helpful, shows intercooler, but plumbing is hidden. Note halfshaft on the ground. Started the decals. The multiple color ones are super thick, almost like a vinyl sticker, having trouble cutting the jamb lines after applying, and Solvaset does not do anything. They are very well done though! For the engine lid 33, and the nose 40, I better cut before applying. I've encountered some mistakes and overlooked decals in the instructions, the RECARO seat is a guess, and there are two Porsche 21 that don't show up anywhere, even in the photos. Wished I had painted the windows black, had trouble with size and the recess for the fuel cap.
-
used for ethanol
-
Referee calling only two words, you keeping count, and going to make up by using missing words as credit?
-
suitable for framing
-
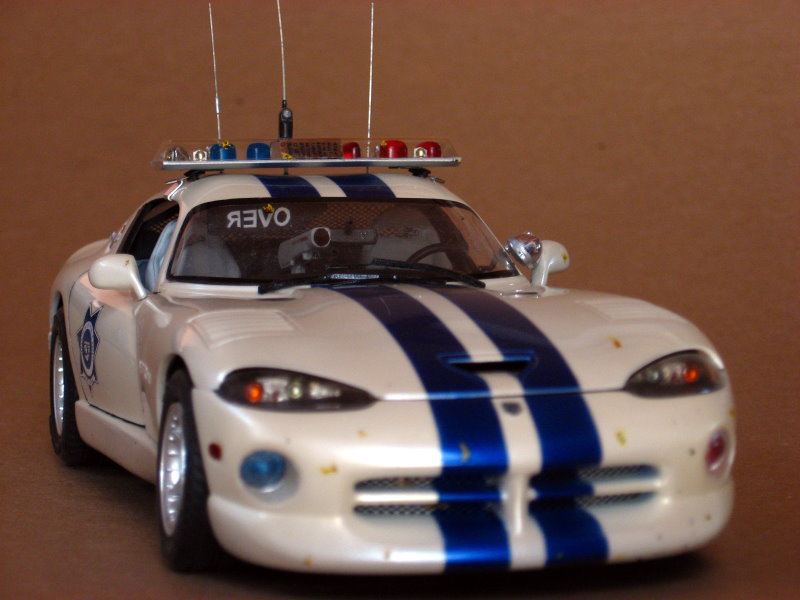
I know many will want to do a Viper. I did this last century. I'm also the type of person to be a contrarian.
-
I saw the idea in the RIP topic, have given some thought to opening the AMT/Ertl infamous Dodge Stealth Indy Pace Car. I got it on sale in '91, after I heard about the uproar about using a rebadged Mitsubishi, thought it would be a good investment. Little did I know that AMT popped a billion of them, always see a few at model swaps, and I see they are asking less than $10, the dreamers want $25 for "rare" kit on eBay. Story of my life. Might as well break it open, and build Box Stock. Curious to see the "strobe light assembly".
-
Your mouse pad.
-
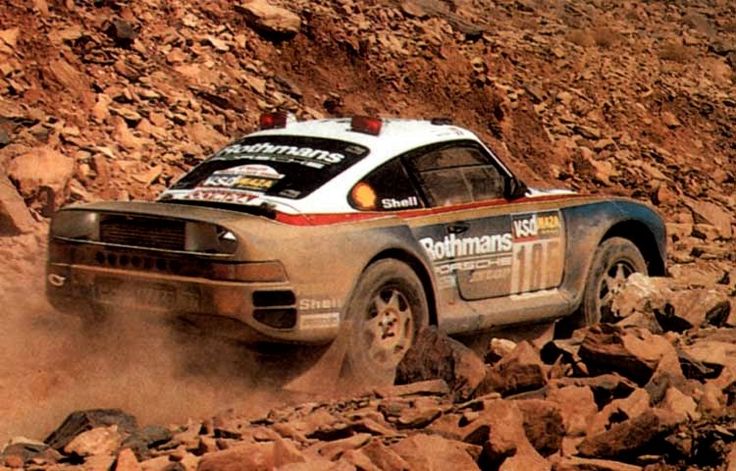
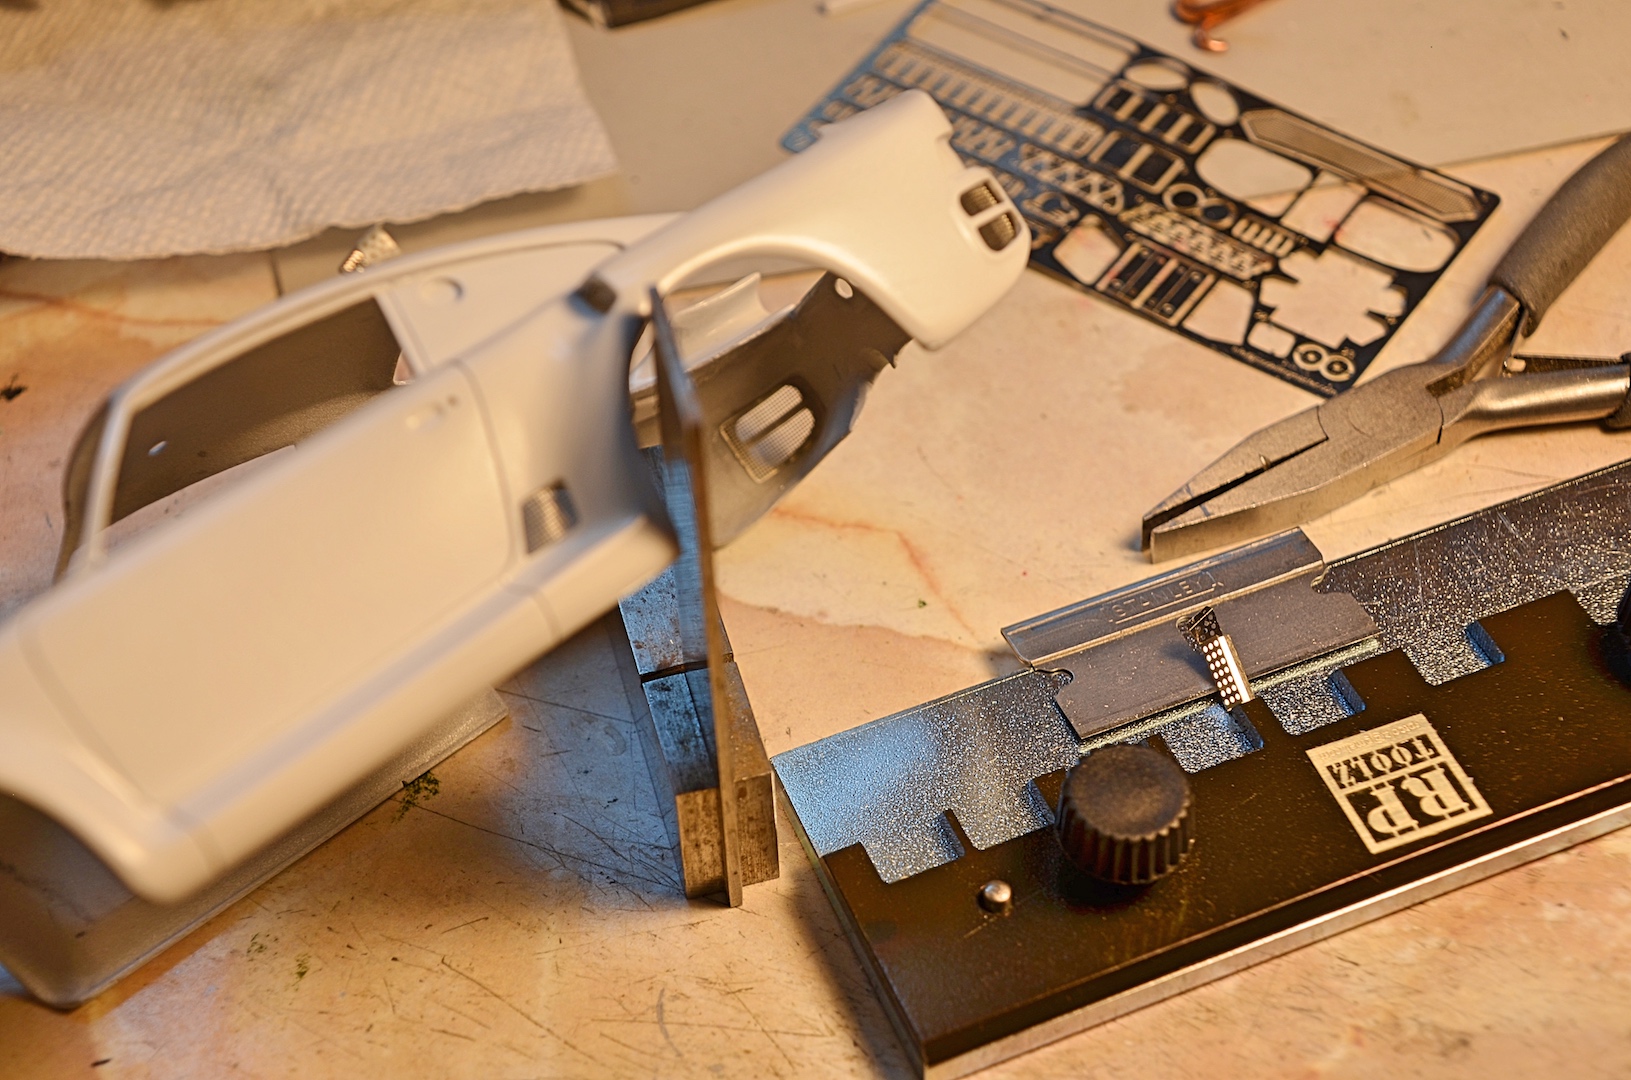
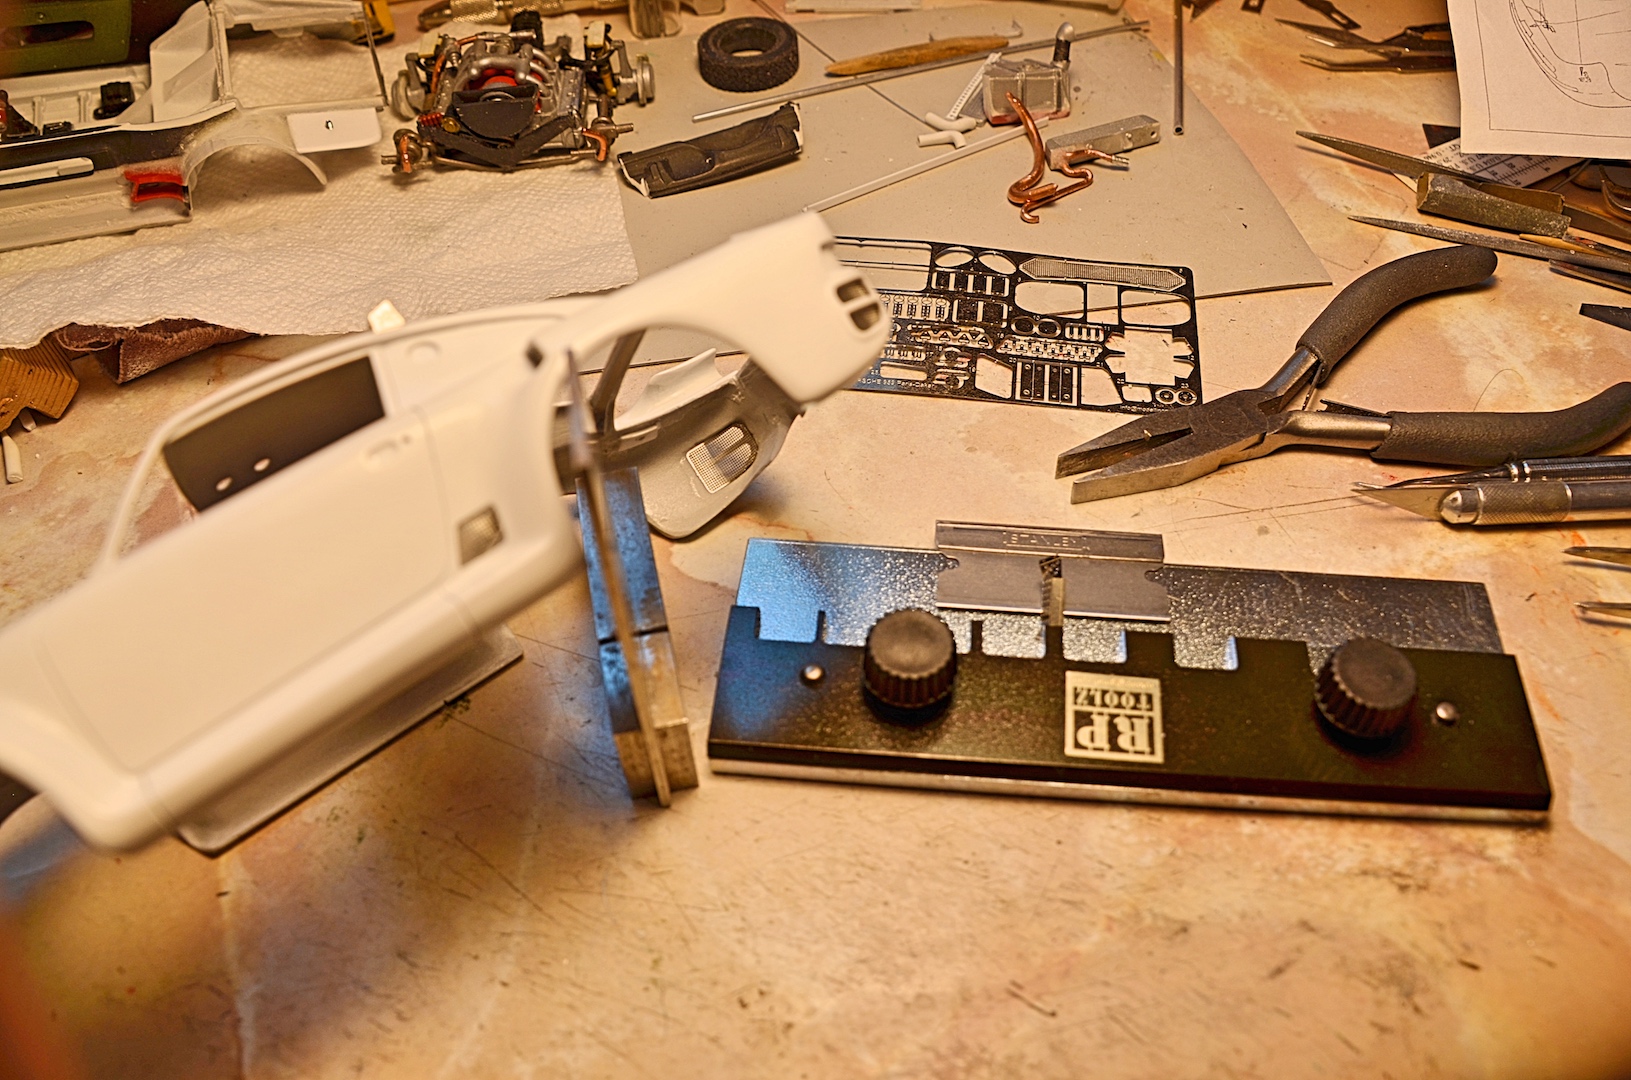
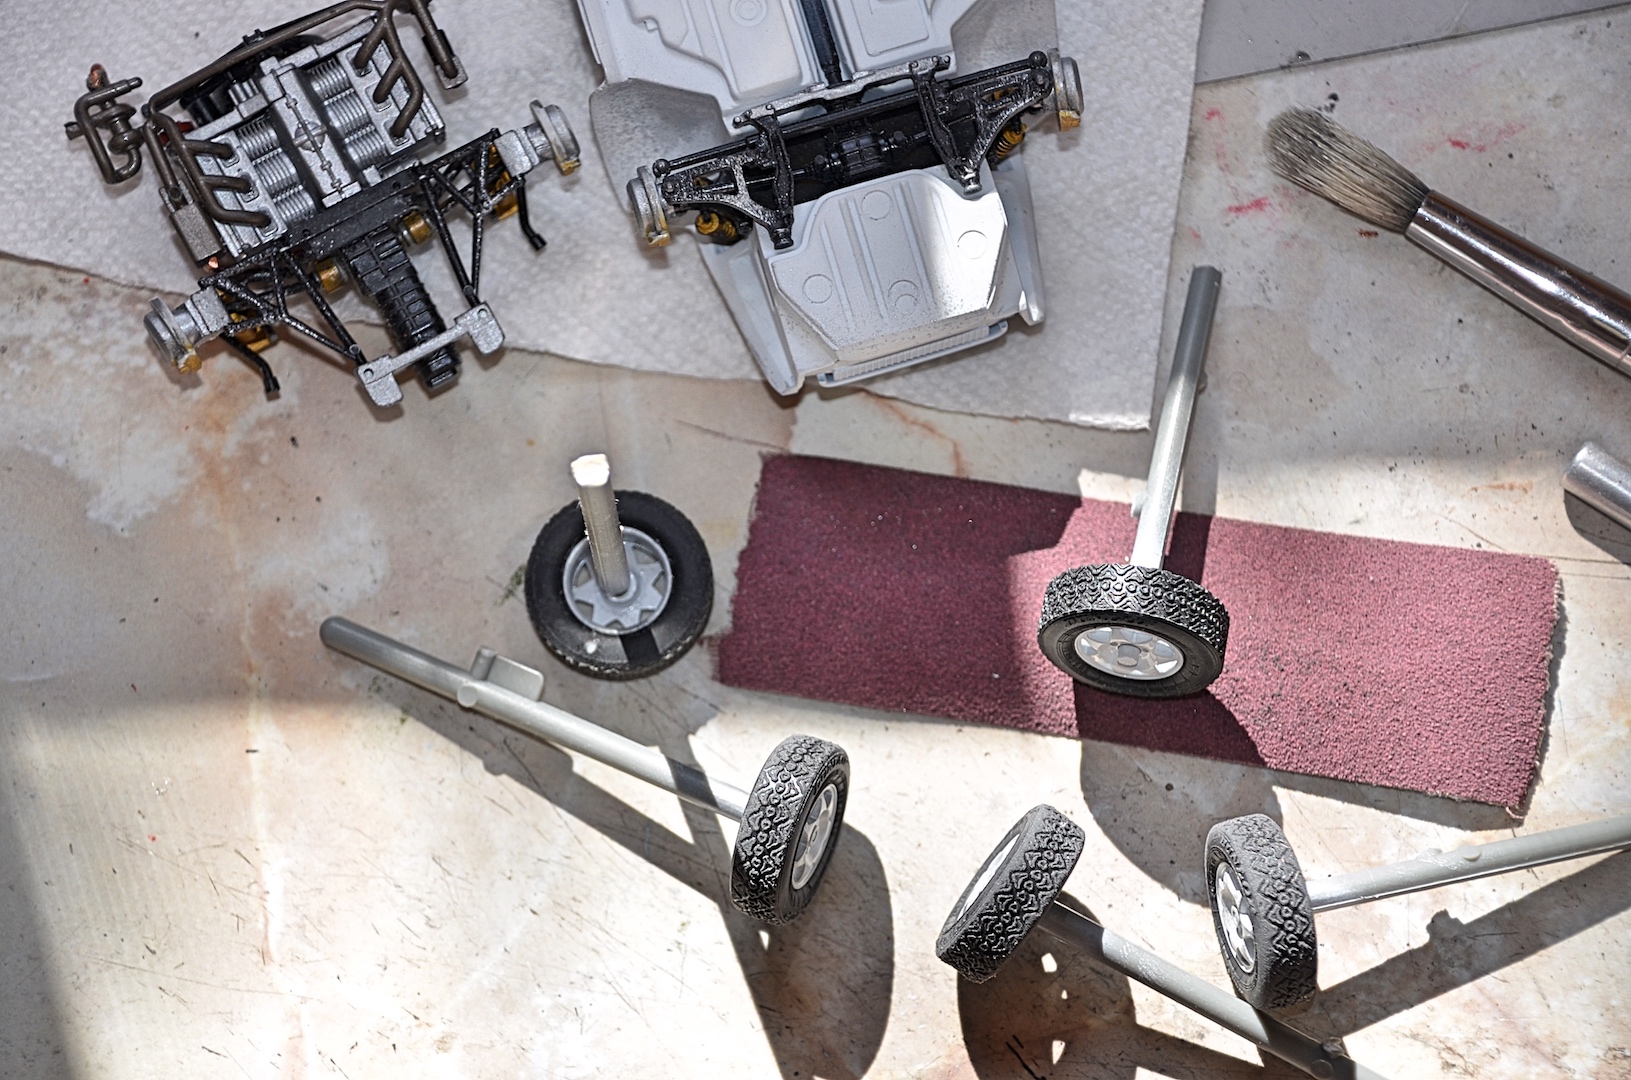
You're too kind. I looked at several kits thinking about starting a new project, but this was bugging me. I thought about the challenge of racing the real car, across the Third World of North Africa, because I was looking at pictures for reference. Man, they had to rebuild the suspension at least once, on the sand, no cozy garage to work in. I needed to decide which car to do, Jacky Icyx 185 was picked mainly for his famous name, but am also going to damage the body, right front fender (other car had damaged the left front fender). I will "weather" it really good, like this picture, because a pet peeve of mine is seeing a clean rally car. The kit has many photo-etch parts, but no tow rings! I tested the paint, by sticking on masking tape and, and peeling off, passed the test. Wet-sanded a little, then glued on the photo-etch grills. The roof lights have a shroud, that was a challenge to bend, the bender helped out because of the holes. I airbrushed flat white mainly over the p-e, then gloss white again. I airbrushed Alclad flat aluminum on the wheels, hoping to simulate the sand-blasted off white paint. I also did some Testors flat aluminum, including the leading edge of the suspension, and wheel wells; it's going to get buried under the mud/dust so not a big deal. Worked on the tires, used the gnarliest emory cloth to wear them down, except the spare tire, which I had considered making a blow-out but decided I wanted to finish this.
-
Beautiful blue!
-
leave the hotub
-
Man after my heart! I have two of the Fujimi kits, and have those same aftermarket emblems, slightly different photo-etch. Look forward to you getting this done!
-
with LED lights
-
Nicely detailed! I'm with you on steering, would much rather have that work, than wheels roll (because I flatten the contact patch).
-
Wow that's cool, never see those on the road anymore. I had an '87 Civic Si. Have you built the Tamiya kit?
-
Sold the '69 back to a family member of the original owner. Found this '68 on Facebook Marketplace, in Scottsdale. It has a 307 from a car, 4 speed, twice pipes. Runs really well, has cancer in the usual areas, was sold in Idaho. It's a survivor, was doomed to be given the bag custom castration. Watched the fireworks from the bed, was by far the oldest vehicle in the parking lot.
-
in tofu yogurt
-
New DeTomaso P72
89AKurt replied to Richard Bartrop's topic in General Automotive Talk (Trucks and Cars)
That's pretty. Copper plating? -
RIP Good idea! I have something that would qualify. I grabbed one because I heard about the Indy controversy, figured it would become a collector's item. Yea right, highest dream "rare" price is $25, average is less than $10 on eBay, story of my life. Some came in pearl white, I can do that instead of the puke yellow. https://www.nytimes.com/1991/02/26/business/a-pace-car-made-quickly-in-us.html
-
Round 2/AMT 1977 Pinto - Super Loser (out of box)
89AKurt replied to Faust's topic in Car Kit News & Reviews
I built the Poison Pinto when I was a brat. Completely different kit, but it was green! That '77, with the battering ram bumpers, and aerodynamic grill, that's the epitome of the era. I knew someone with the earlier year, small bumpers, just a trunk, I had a ride in the back seat, we were laughing the whole time, and it was dark metallic green. When the all glass hatch was introduced, I thought it was an improvement, could see the gas tank.