Oldmopars
-
Posts
2,058 -
Joined
-
Last visited
Content Type
Profiles
Forums
Events
Gallery
Everything posted by Oldmopars
-
Don’t bother with the MPC DM800 wheels, they are also way to wide. I had to cut down the axles to get them into a reasonable width.
-
KrAZ-255B Bro wrecker truck
Oldmopars replied to lwcolors's topic in WIP: Model Trucks: Big Rigs and Heavy Equipment
I love Russian trucks. They always look so tough and are designed with function over style. Your looks fantastic, keep up the great work. -
White Freightliner Cabover
Oldmopars replied to raisin27's topic in WIP: Model Trucks: Big Rigs and Heavy Equipment
I built this one recently,twice, there are a few challenges, but overall it is a typical AMT kit. Not bad for the era, well below standards for a modern kit. You are doing a great job so far. I like the weathering and colors so far. Have fun with it and don’t allow its issues to get you down. It’s just plastic. -
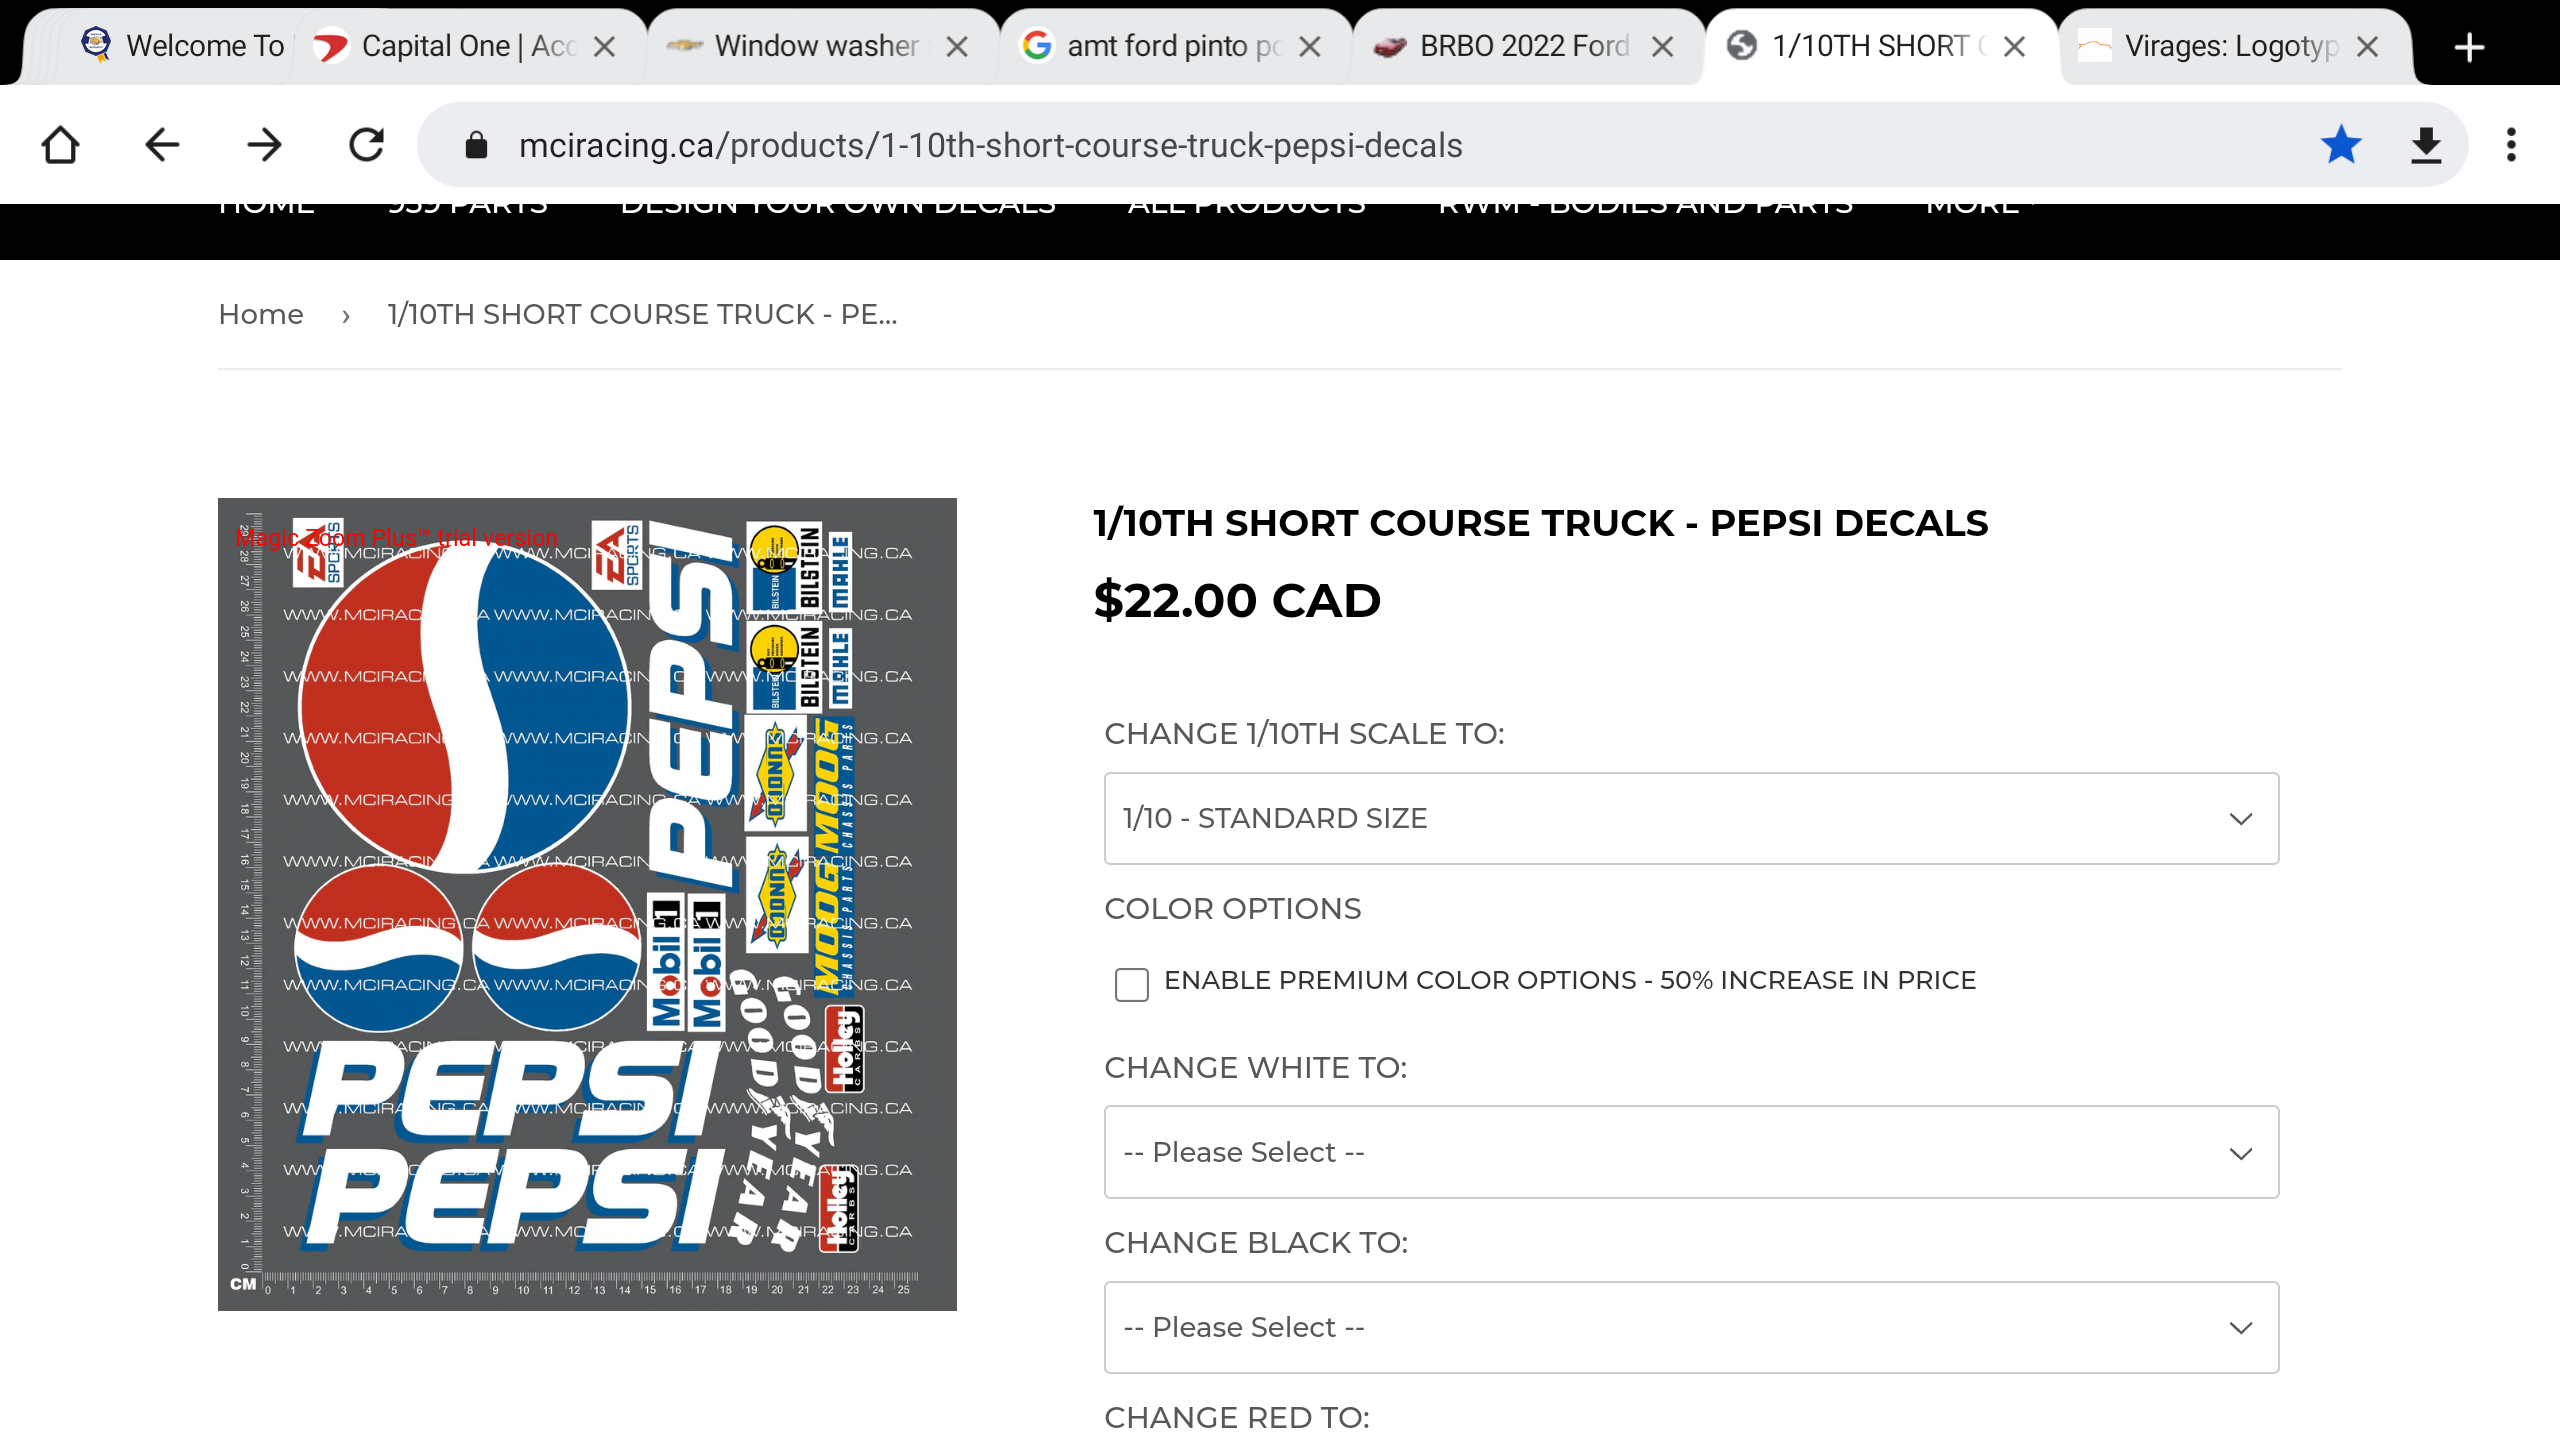
I may have found an option. You can sellect the decals in different scales. I will just need to do some measuring and see what scale I need to order it in.

-
I will look and see what I can find. I would like to go with Pepsi, there are just no easy to get decals. I will check Ebay.
-
There is a lot of stuff out there. Moluminum, Auselow(SP?), Ebay, Scratch build, etc. AITM, is another. I am sure I am missing several sites, others will list more. I do buy some stuff, waiting on an order right now, but I also like to scratch build stuff too. Kit bashing is always an option too. Junk kits from garage sales, flee markets, ebay, etc are good parts sources. So, many options. If you are looking for something very specific, let us know and we can point you to the right site. Sadly there is no one stop shop for all your detail needs. Nor is there one country, many items come from the USA, but even more from Eastern Europe, Austrailia and other places. Don't forget the 3D printed options too. Shapeways has some stuff and there seems to be a small surge of people here designing and printing their own parts. 3D printers are now reaching a price point of under $800 for everything needed to print great quality high def resing parts. Not everyone has the skills needed to design, but learning options like YouTube are out there if interested.
-
Paint sticker shock
Oldmopars replied to junkyardjeff's topic in General Automotive Talk (Trucks and Cars)
As much as I hate to spend $13 per can of paint, I can get it local. I have no Hoppy Shop local to me. I have also never had any issues with Duplicolor. It sprays great every time. (Minus my stupid mistakes) I hate the price, but unless I can find something that works better, I will still use it and just paint mulitiple cars with the same can. I am working on using craft paints, but I am still having issues getting the results I like. -
No pictures, but I did get a first coat of primer on the body and box this weekend. I can now start fixing issues and get it ready for paint. The new wheels I ordered have not arrived, so I don’t know how those look yet.
-
The 2022 Cannonball Run Year of Birth Build Thread
Oldmopars replied to disconovaman's topic in Community Builds
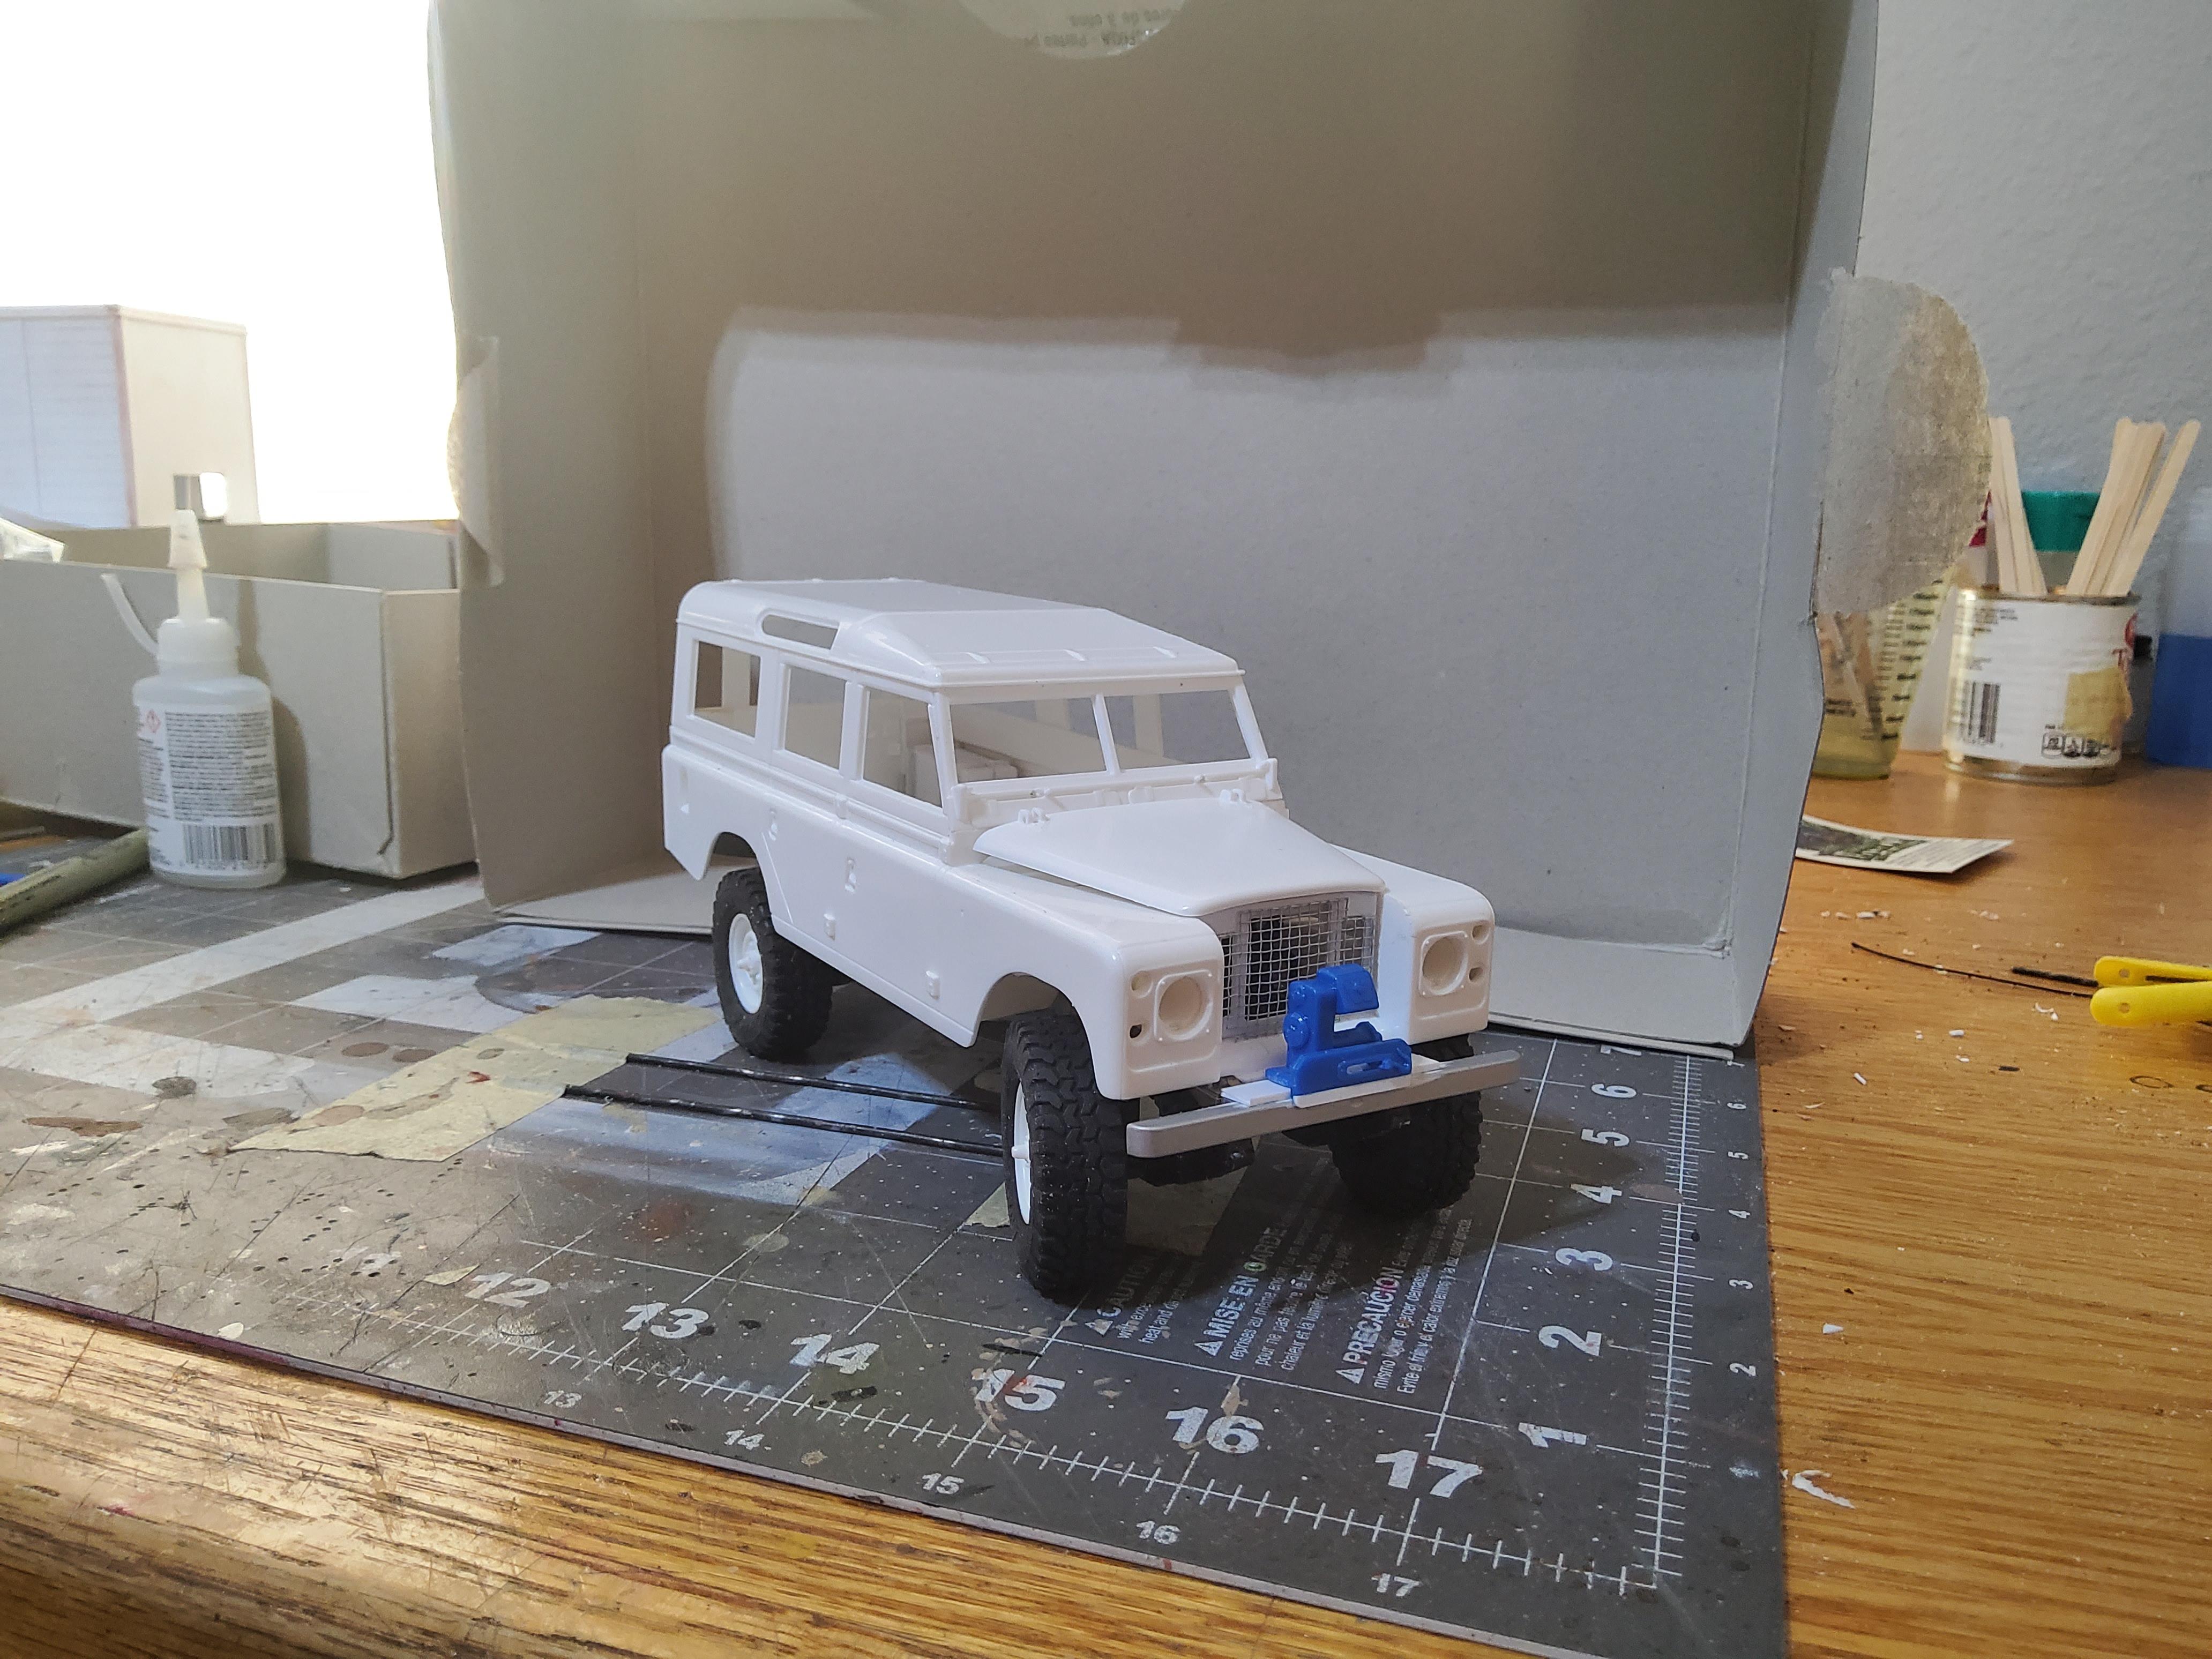
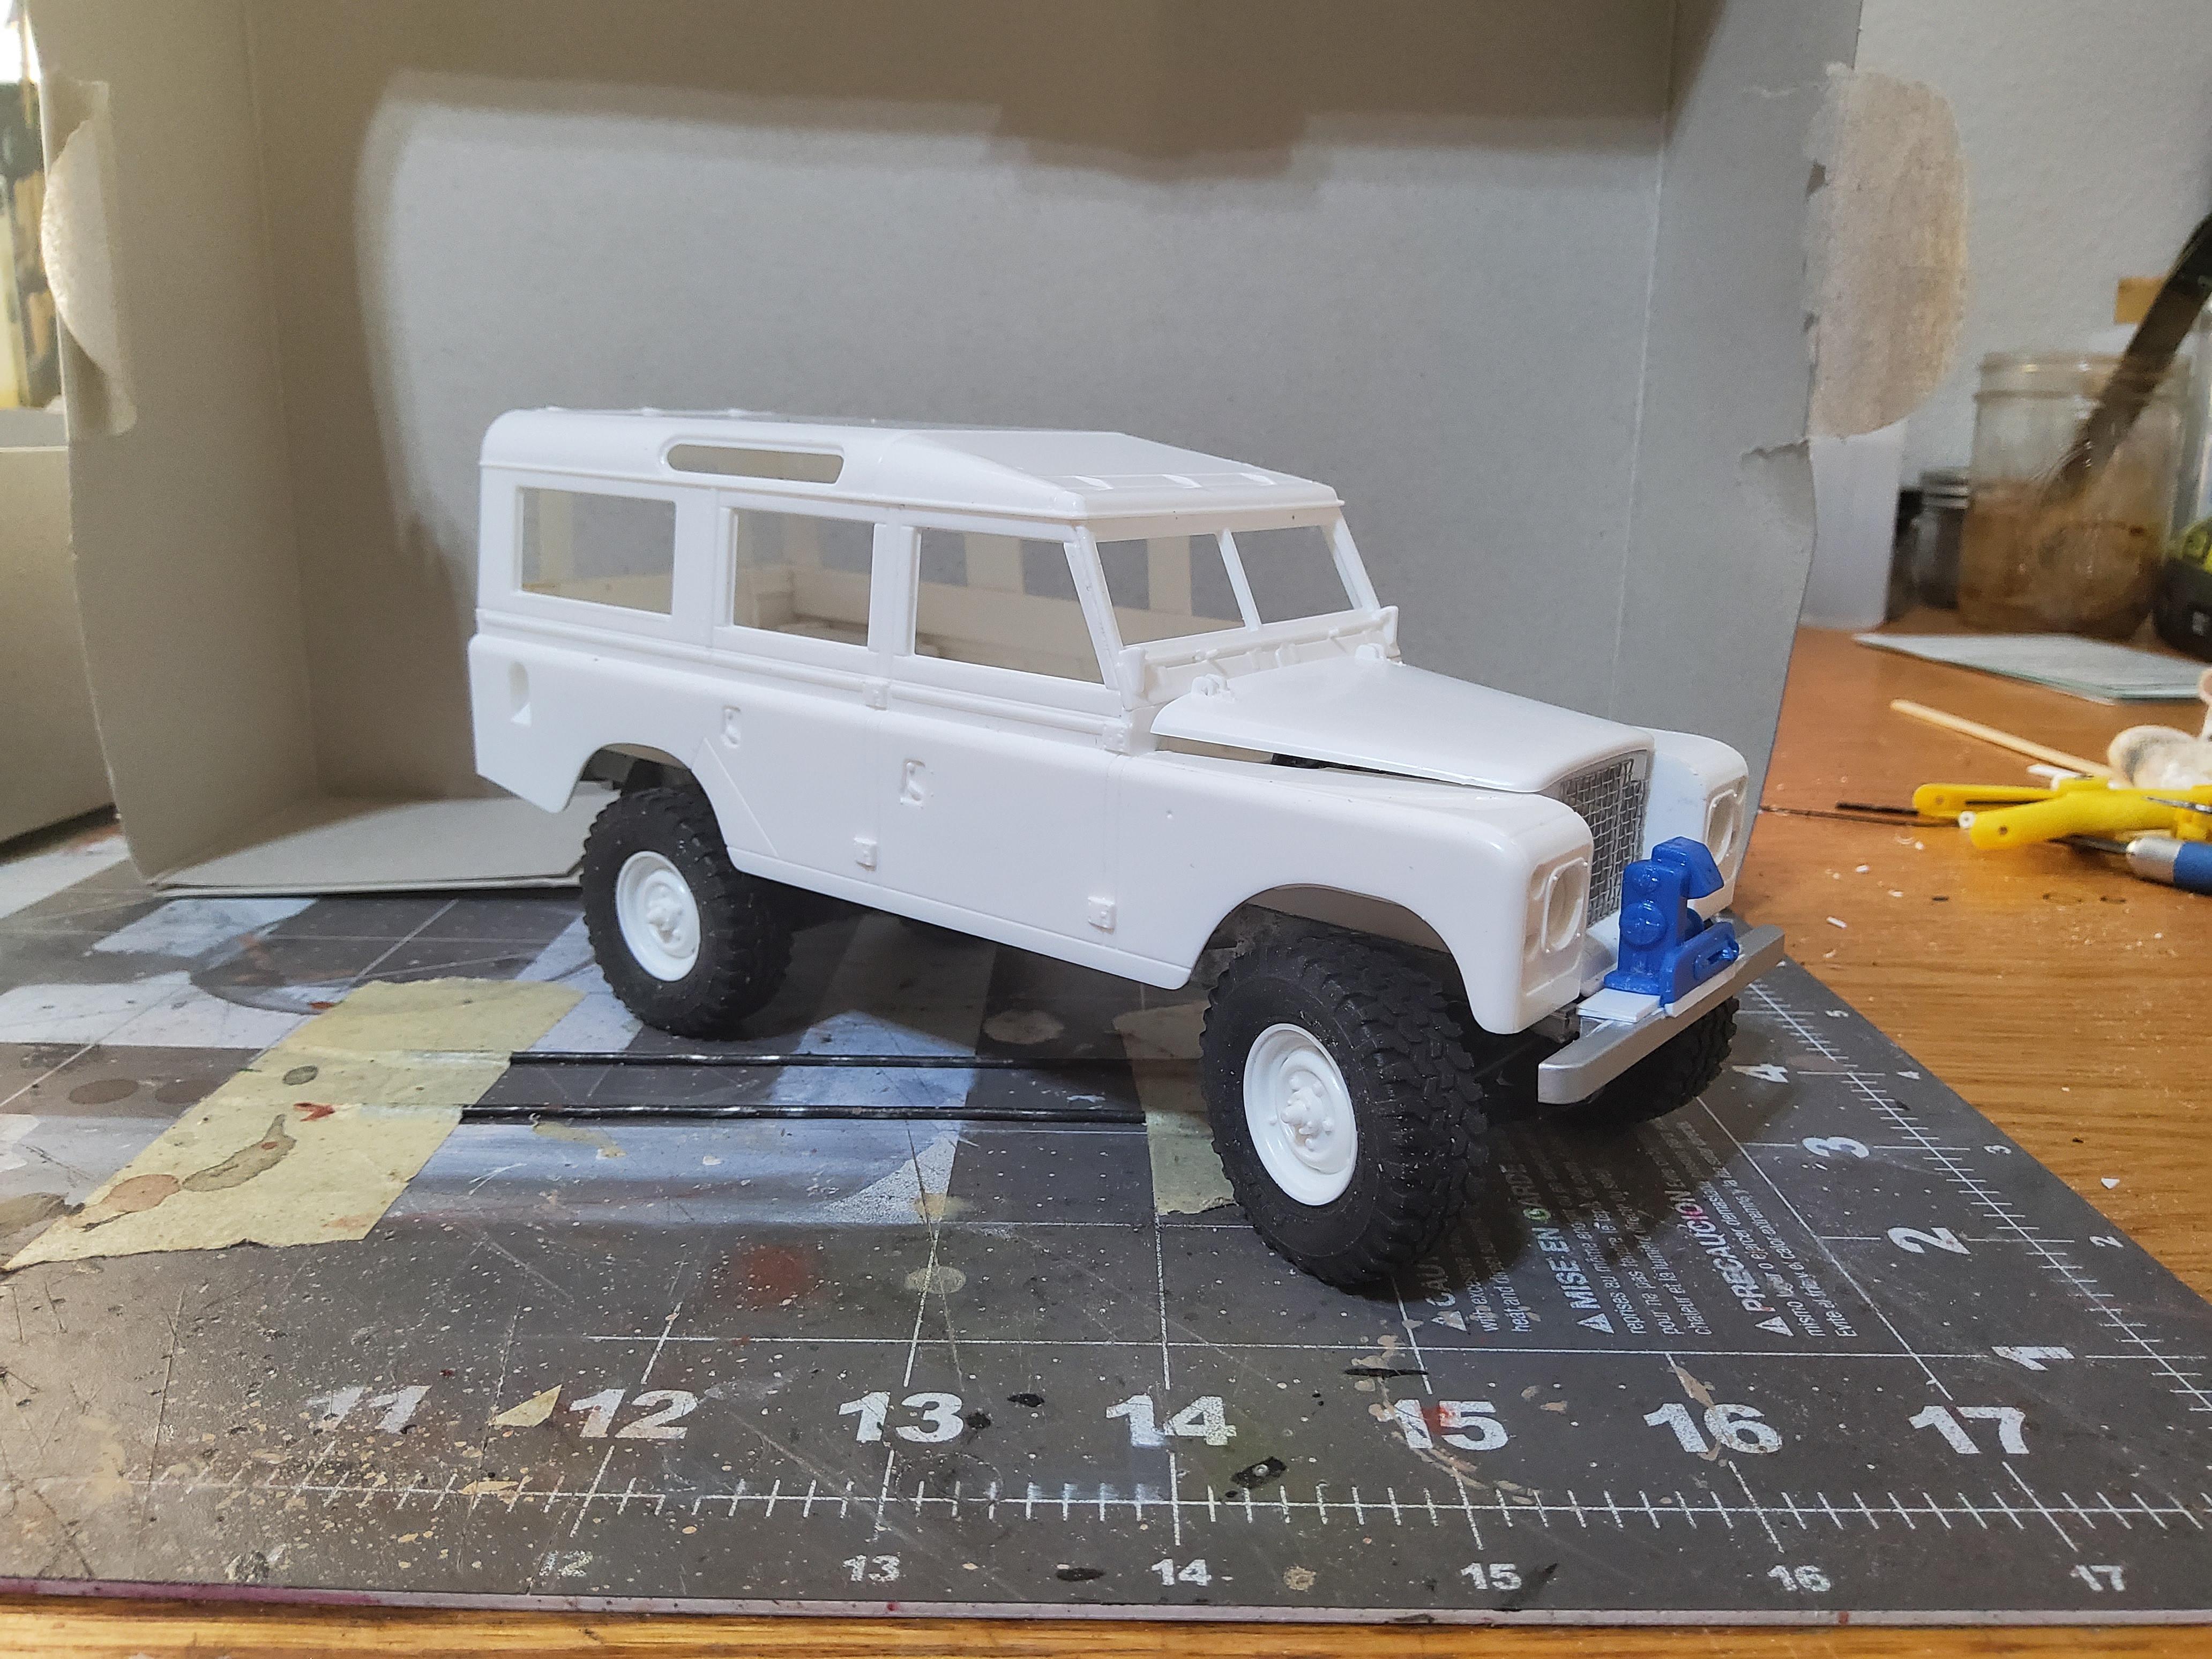
After waiting on wheels and tires to arrive from the Ukraine, they were not what I wanted. They only took a mmonth to get here. Oh, well. So, I ha some tires from Fireball that I wll use the stock wheels. I had to widen the wheels to make the tires work, but they lookk good now. I had to do a lift on the kit to ake the tires work, as they are 33in tires. I used the winch from the Revell CJ-7 kit and modified the bumper to hold it. Good thing this is a year build, I may need it this time.
-
Because I have too many irons in the fire right now, this project has been moving very slowly. I was waiting for the tires and wheels to arrive from Ebay, howeever when they did I was very disappointed in them and I will not be using them for this project. I had a set of tires I ordered for another project, but they didn't work for that one, so I am using them here. They are really nice Fireball weighted 1/24 Mud King 33x12.50x15 tires. A slight stretch allows them to fit over the 16in Land Rover wheels. This required me to lift the truck as these tires are taller than the stock tires. The easiest way to do this was to file down where the axle fits the springs and this lifted the axles. I like the tough look this gives the truck. I built the Monagram CJ-7 last year iinto a Daisy Duke Jeep, and there were left over parts. One of them is the winch. I put that together and mounted it on the modified front bumper of the Land Rover. After it is painted I will wrap it with some "Cable". Next step is more interior work. I need to add a bed, a sleeping bag, radio equipment, maybe a lap top. I think Fireball or Scenes Unlimited offers a High Lift Jack, I may add that also. I know as a "Race Car" this will not be the fasted thing on the road. But, I hope it looks good getting there.
-
Volkswagen T2 Bus
Oldmopars replied to mrmike's topic in WIP: Model Trucks: Pickups, Vans, SUVs, Light Commercial
The Plaid seats were only used in the Westfalia busses. Westfalia was a coach build of sorts. The plain jane bus was sent to Westfalia (not owned by VW) to be converted. They were "authorized" by VW, but not converted by VW. Westfalia would recover the seats to match the interiors. The Revell kit represents a "Late" Type 2 T2 or "Baywindow" bus. 1972-1979 had the type 4 engine in this kit. However the lack of an engine access panel in the cargo area means that this was a 1972. A one year only, 1973 the panel was added above the engine. However, the bumpers are 1973 and later. So, I'm not sure what year this is supposed to be. It looks to be a 73+ but missing the engine panel. The spare tire well is also missing from the kit. See photo. A little trivia, the rarest option for a US T2 was the Tripometer below the Odometer. I once bought a complete bus just to get that cluster. Automatics were also rather rare and that bus had one of those too. I have owned many of these. I am a fount of useless aircooled VW information. I am enjoying the work you are doing MrMike, keep it up. These are on my list to do in the future.
-
M-715 Pickup
Oldmopars replied to Chariots of Fire's topic in WIP: Model Trucks: Pickups, Vans, SUVs, Light Commercial
I really love this truck. I have always wanted a 1:1 of these. Around 1996 Uncle Sam sent me to Egypt with our C141s. We were helping to train the Egyptian army load and unload the planes. They had a bunch of these trucks, but they were new. Turns out that the designs were sold to Korea and they were making them from old Jeep tools and designs, with new parts. I also had fun running around the desert outside of Cairo in a 2 1/2 ton fuel truck. Good times. Keep up the good work on this. I love watching you build these things as I always pick up tips and tricks to improve my builds. You help push us all to improve our skills. -
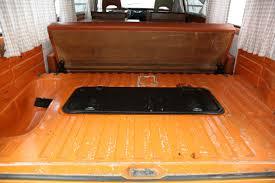
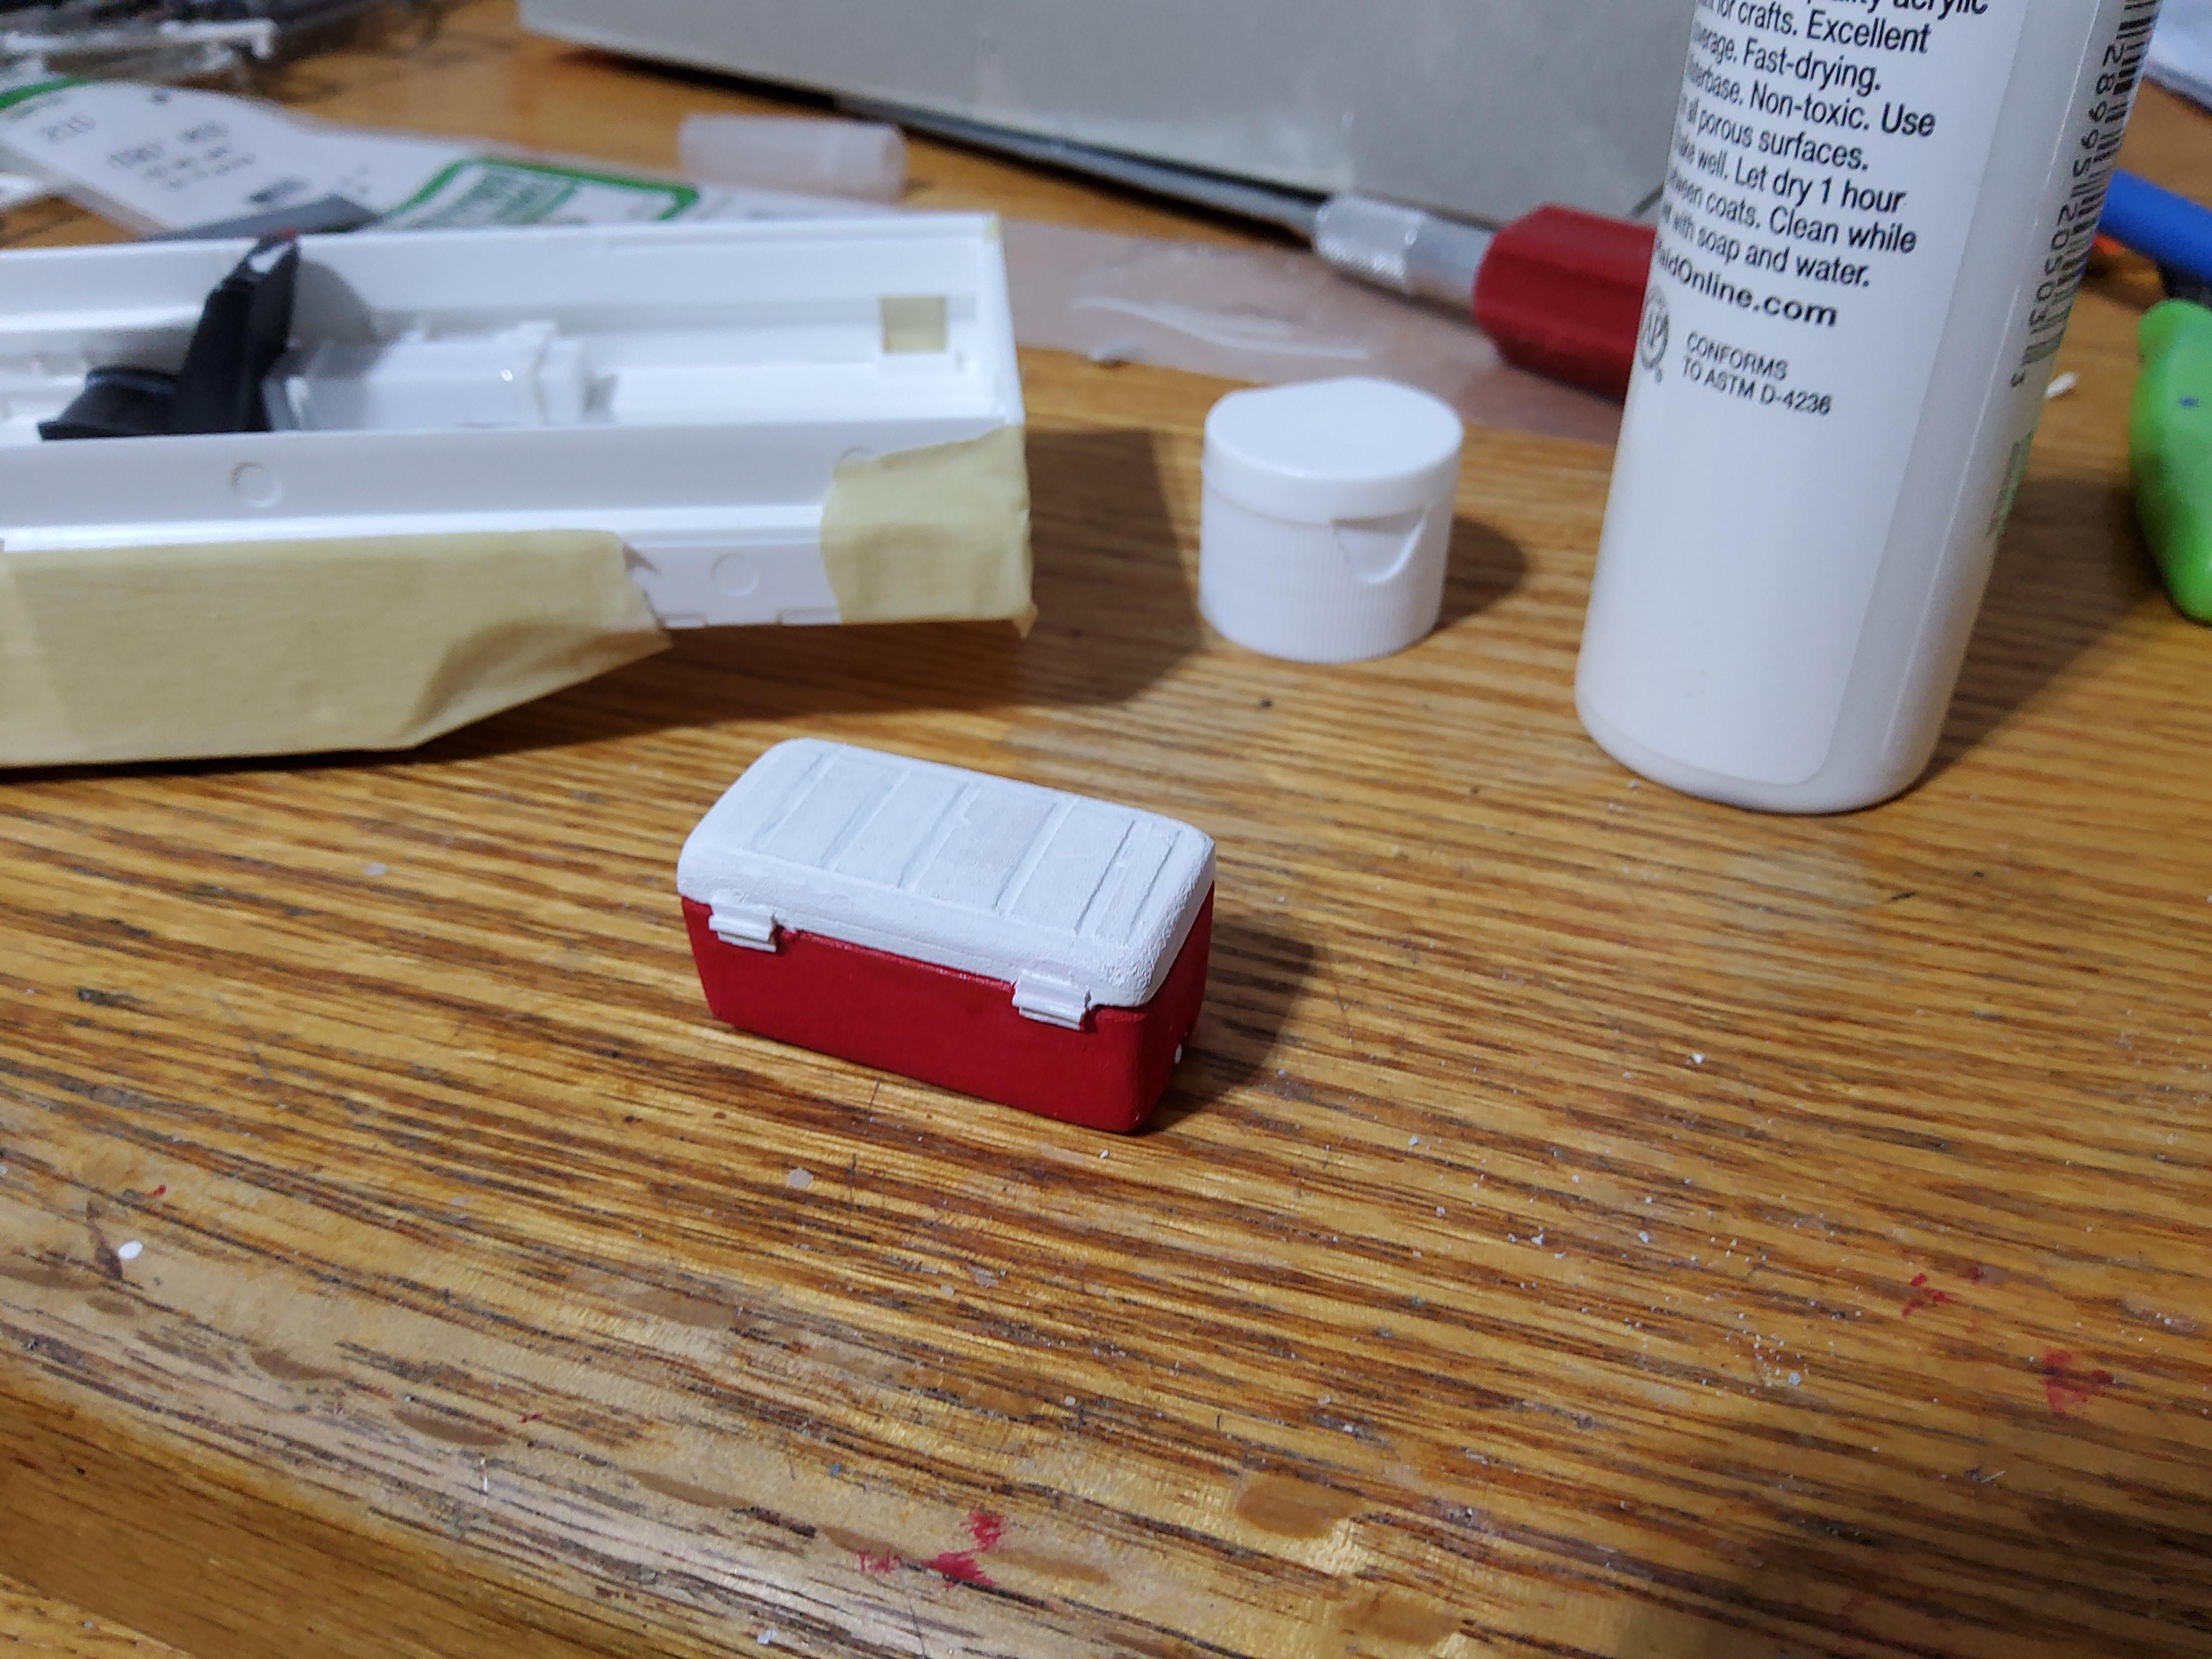
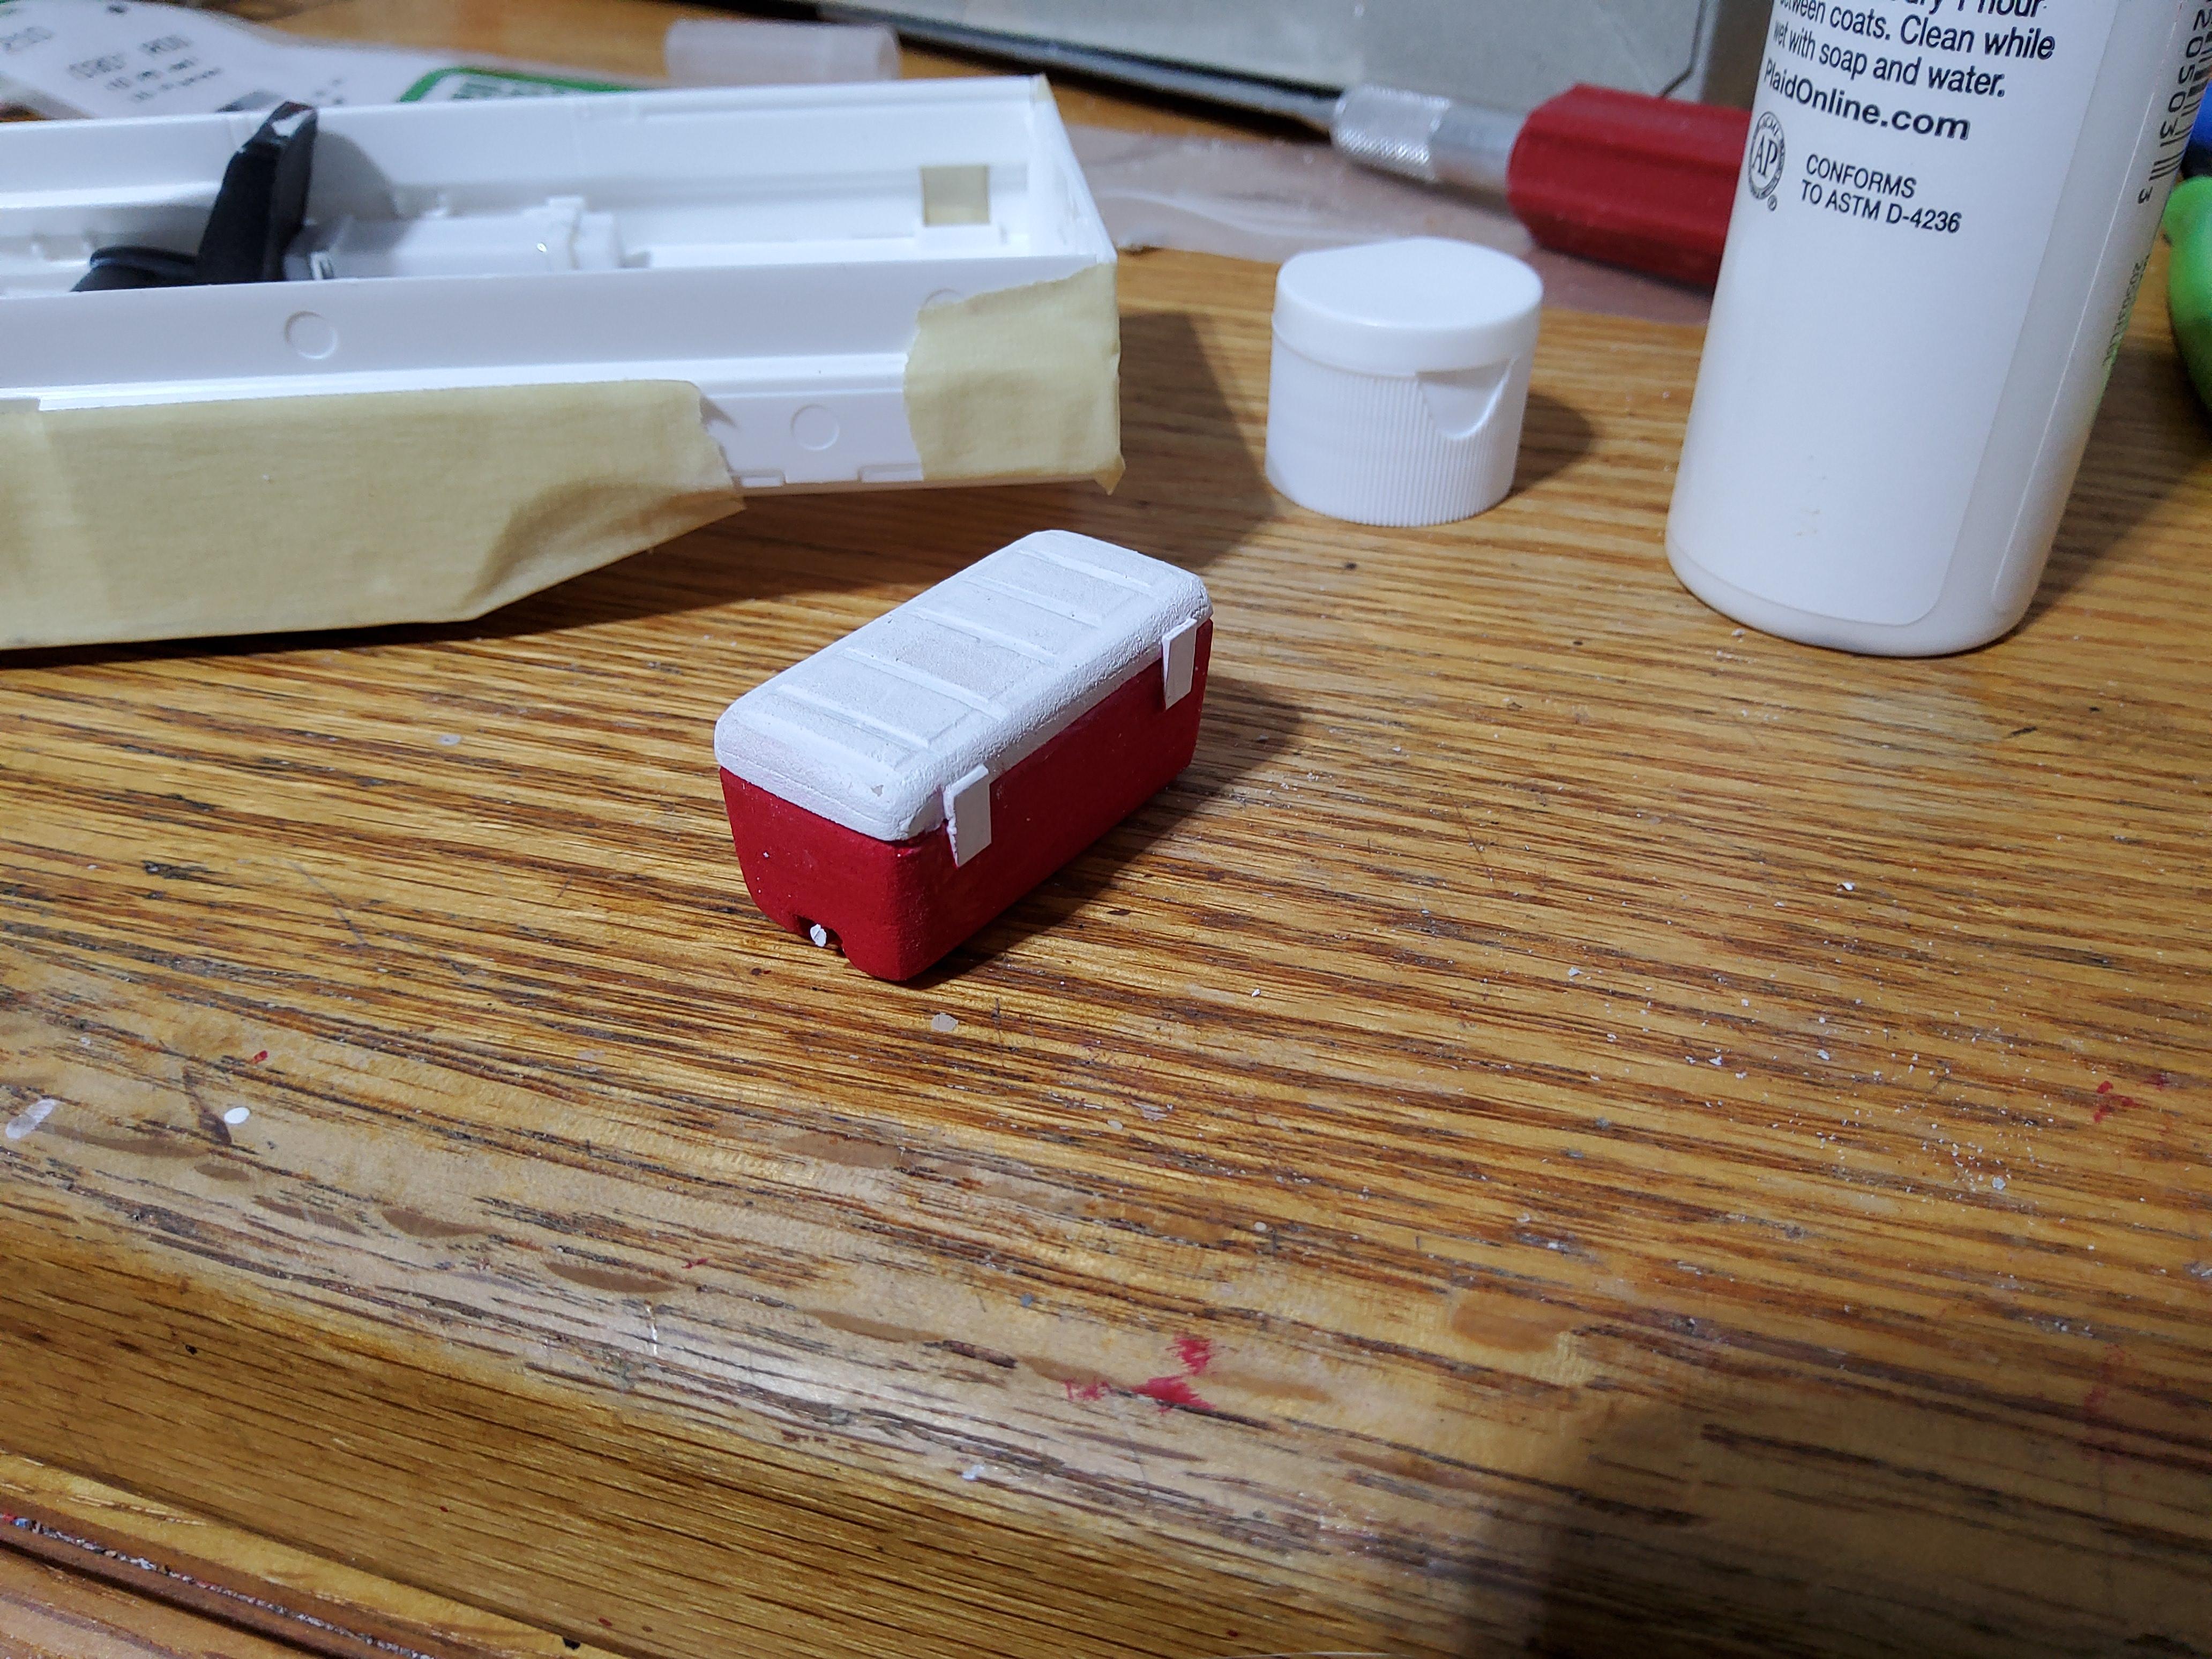
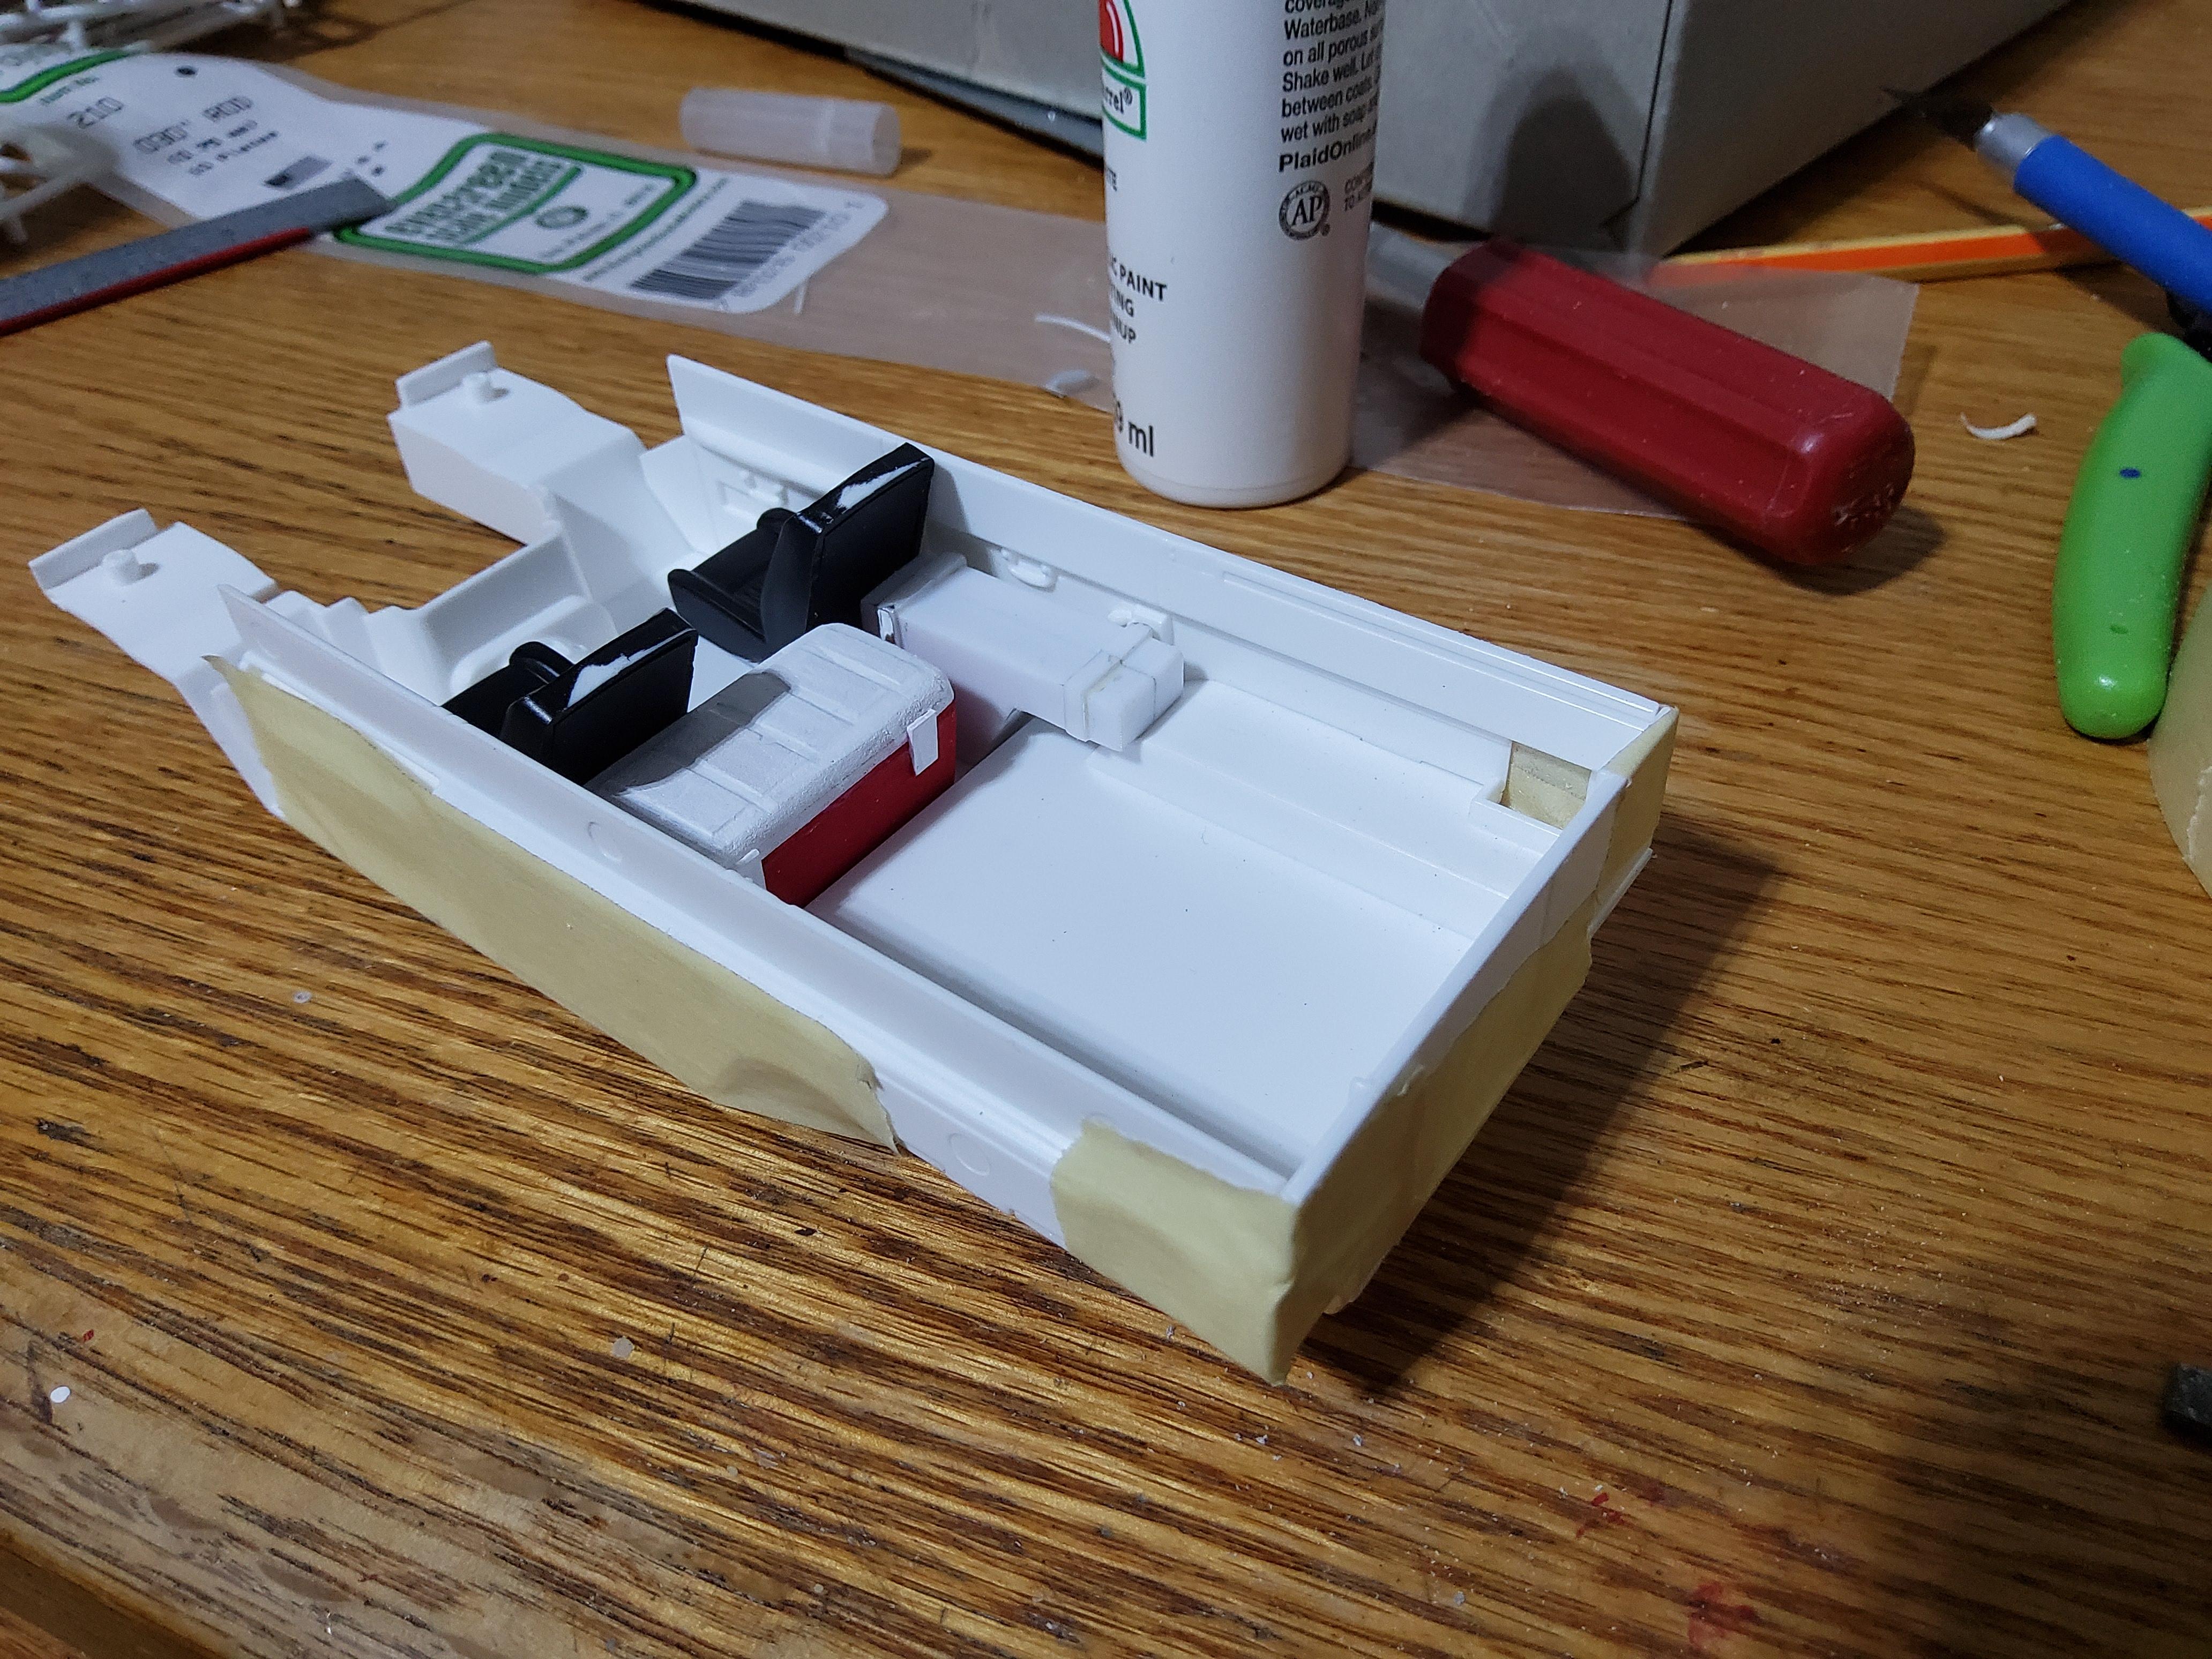
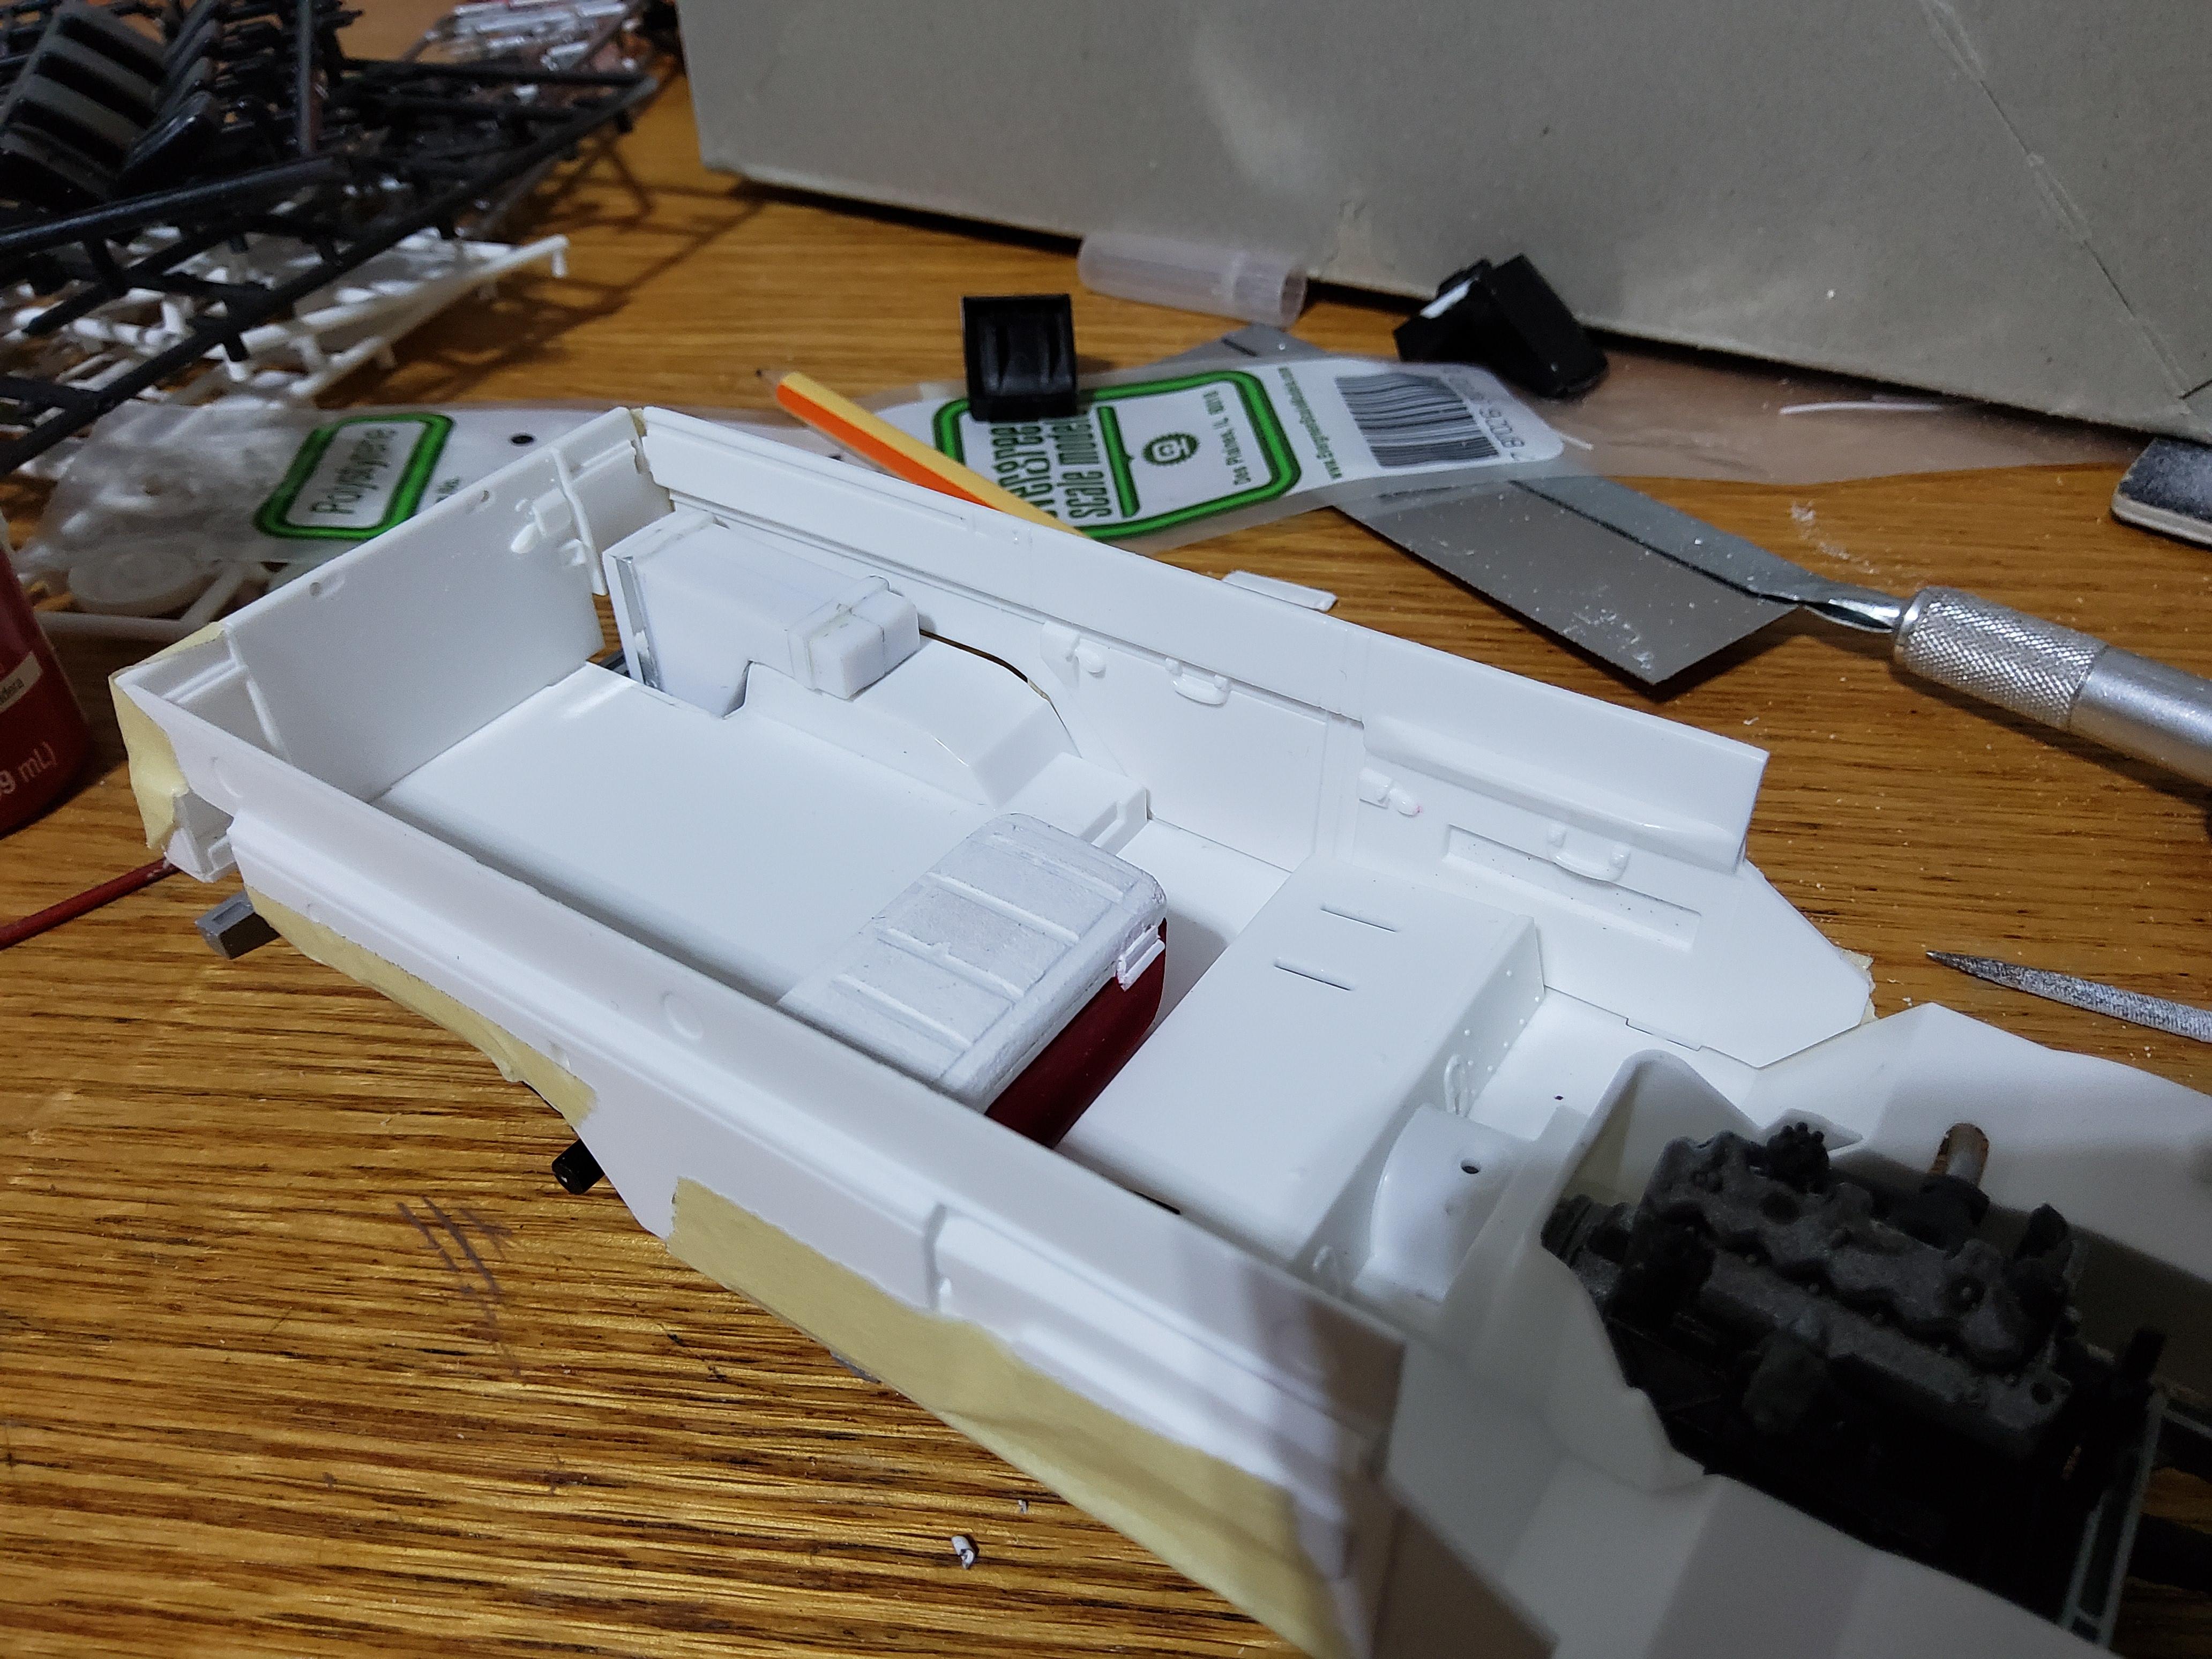
Here is the cooler I made fo the back seat area. I figure that the driver and co-driver will need snacks and drinks for the long drive. This was carved out of a dense sign foam. Kind of like Renshape or proofing foam. I like this stuff, I can carve anything I want out of it. Only limit is my lack of skill. In this case the texture of the foam worked to my advantage as it replicates the texture on the real Igloo style coolers. Also shown is the extended range fuel tank I got from the latest AMT Jimmy kit. I have cut and modified the floor at the rear to sink it down into the rear floor.
-
It has been a while since my last update. I am on hold right now for two things. 1. The wheels and tires I ordered before Christmas are still on the way from the Ukraine. I need these to make sure the ride height is correct before I can move on. 2. Snow, we still have snow on the ground and cold weather. Painting is not ideal right now. I did create a cooler for the back seat that I will post shortly. So, not forgotten, just slightly delayed. Good thing I have 10 more months to finish it.
-
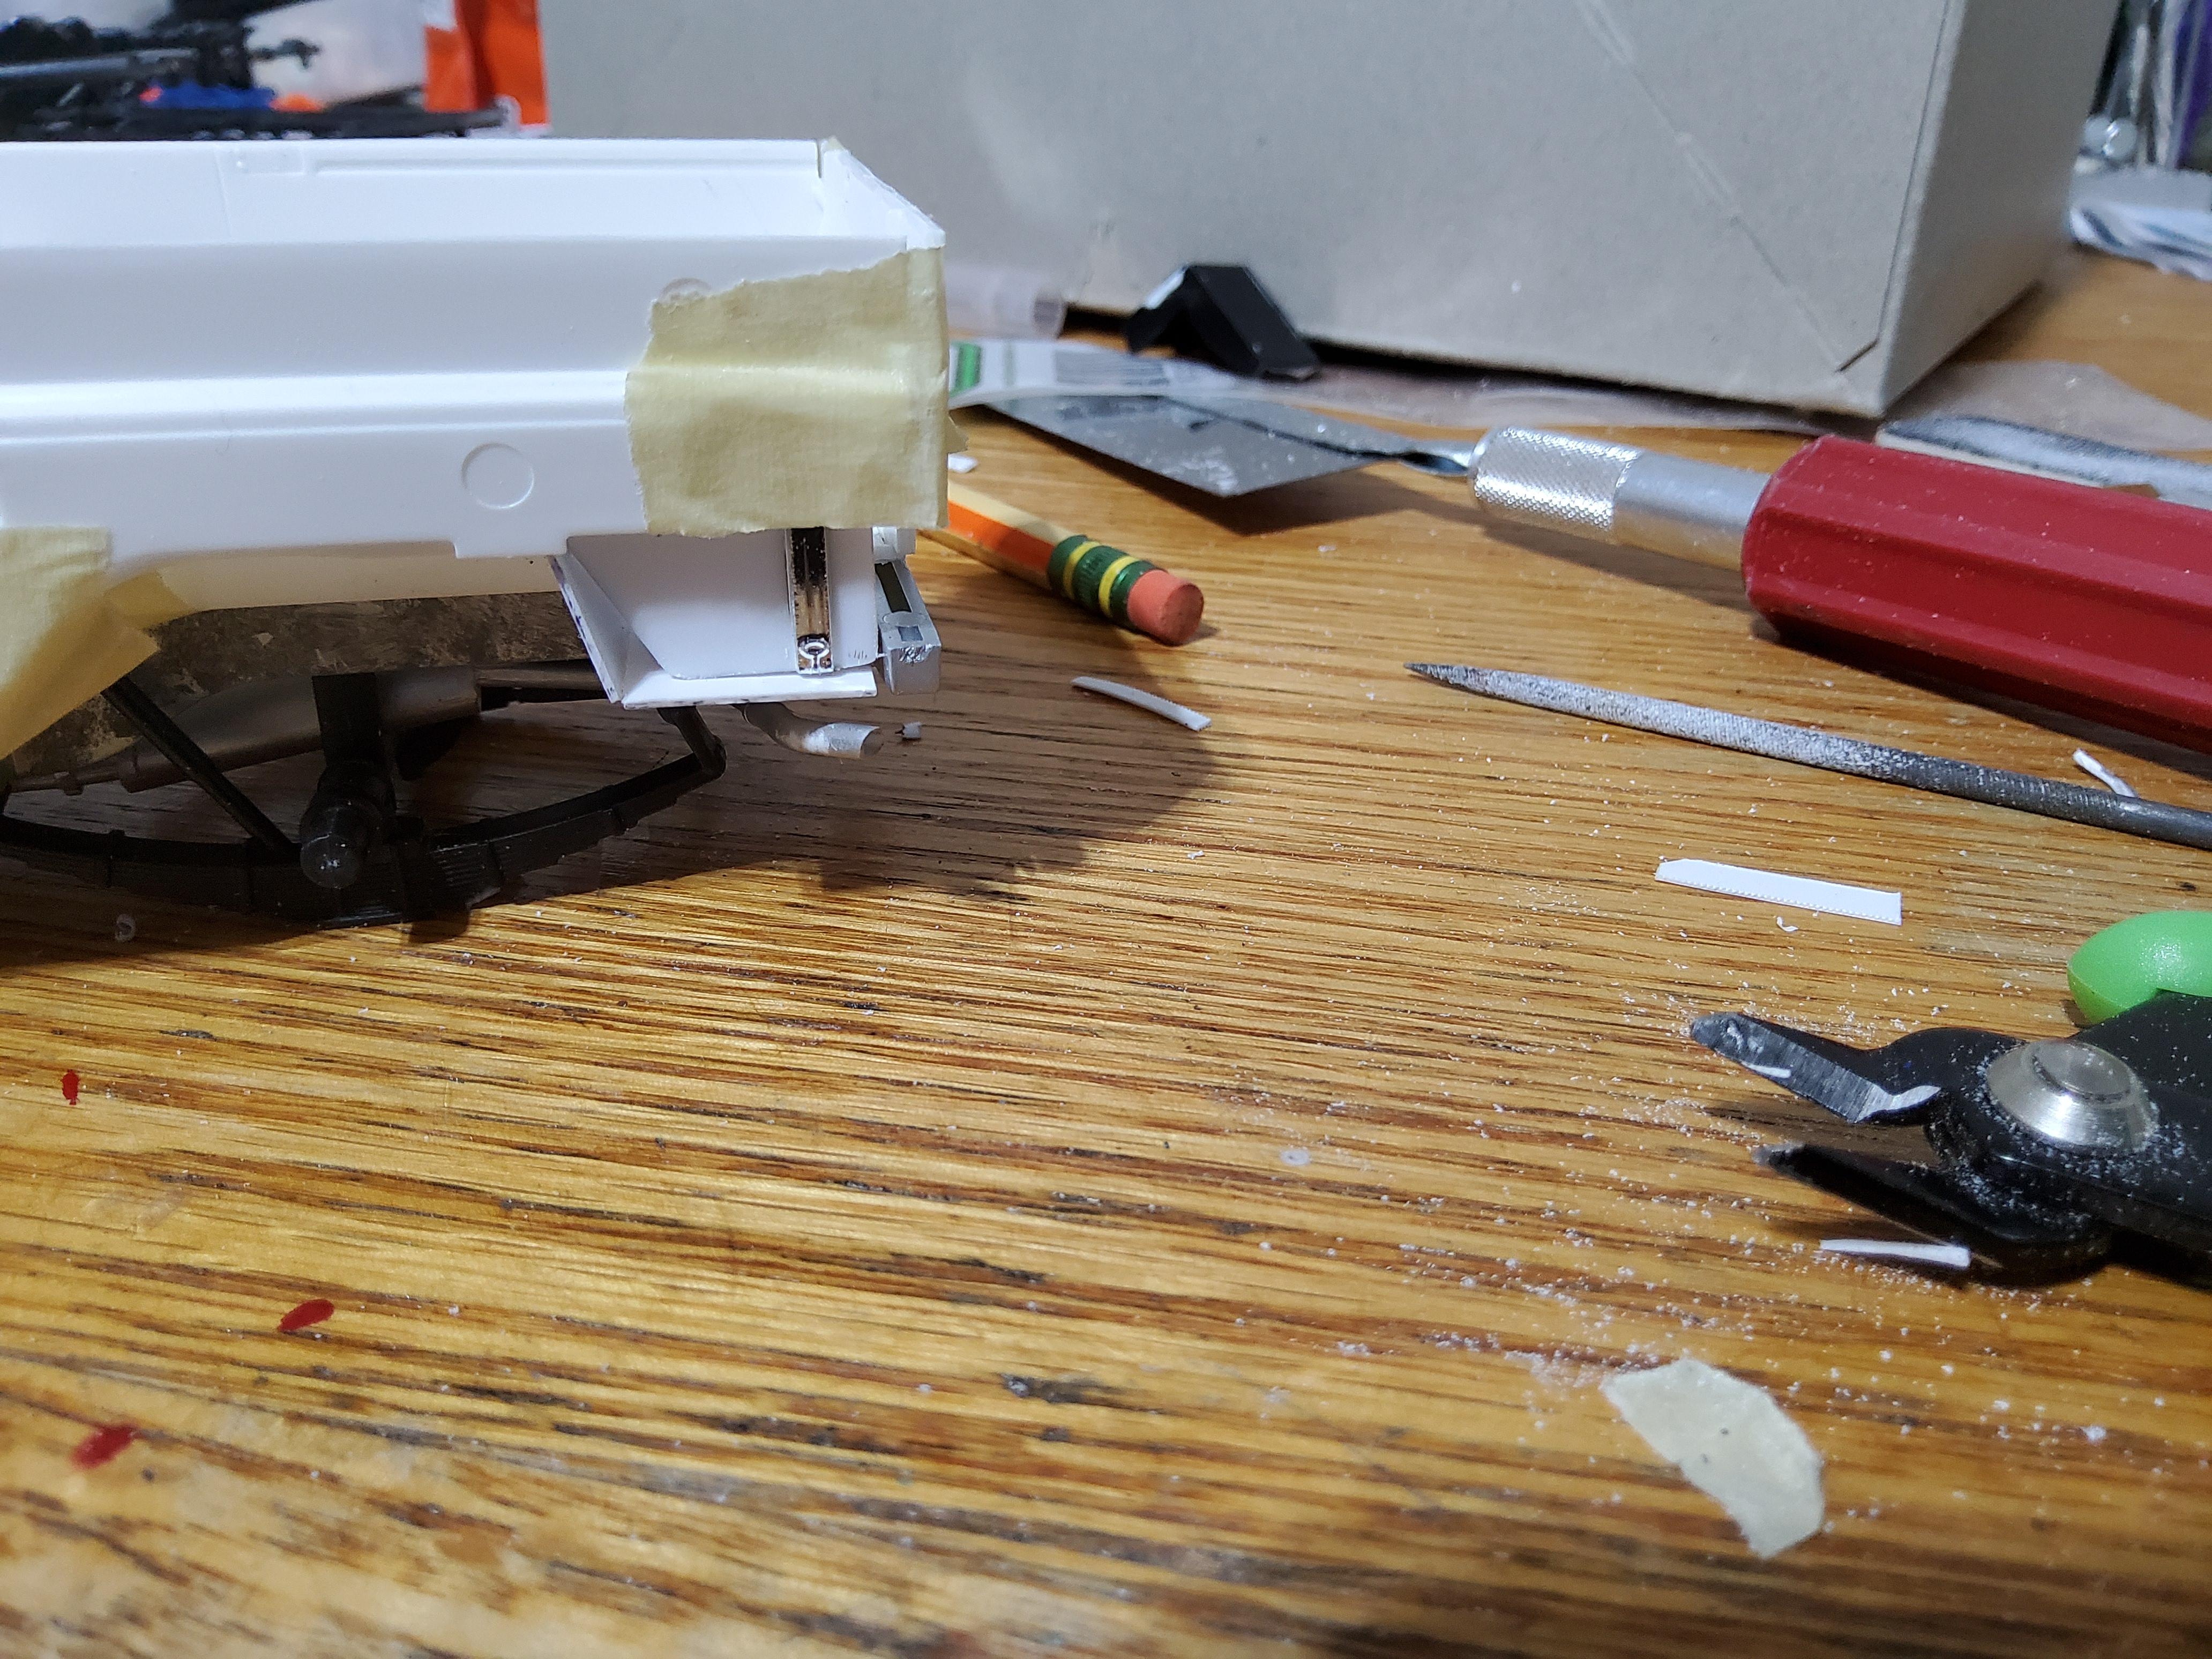
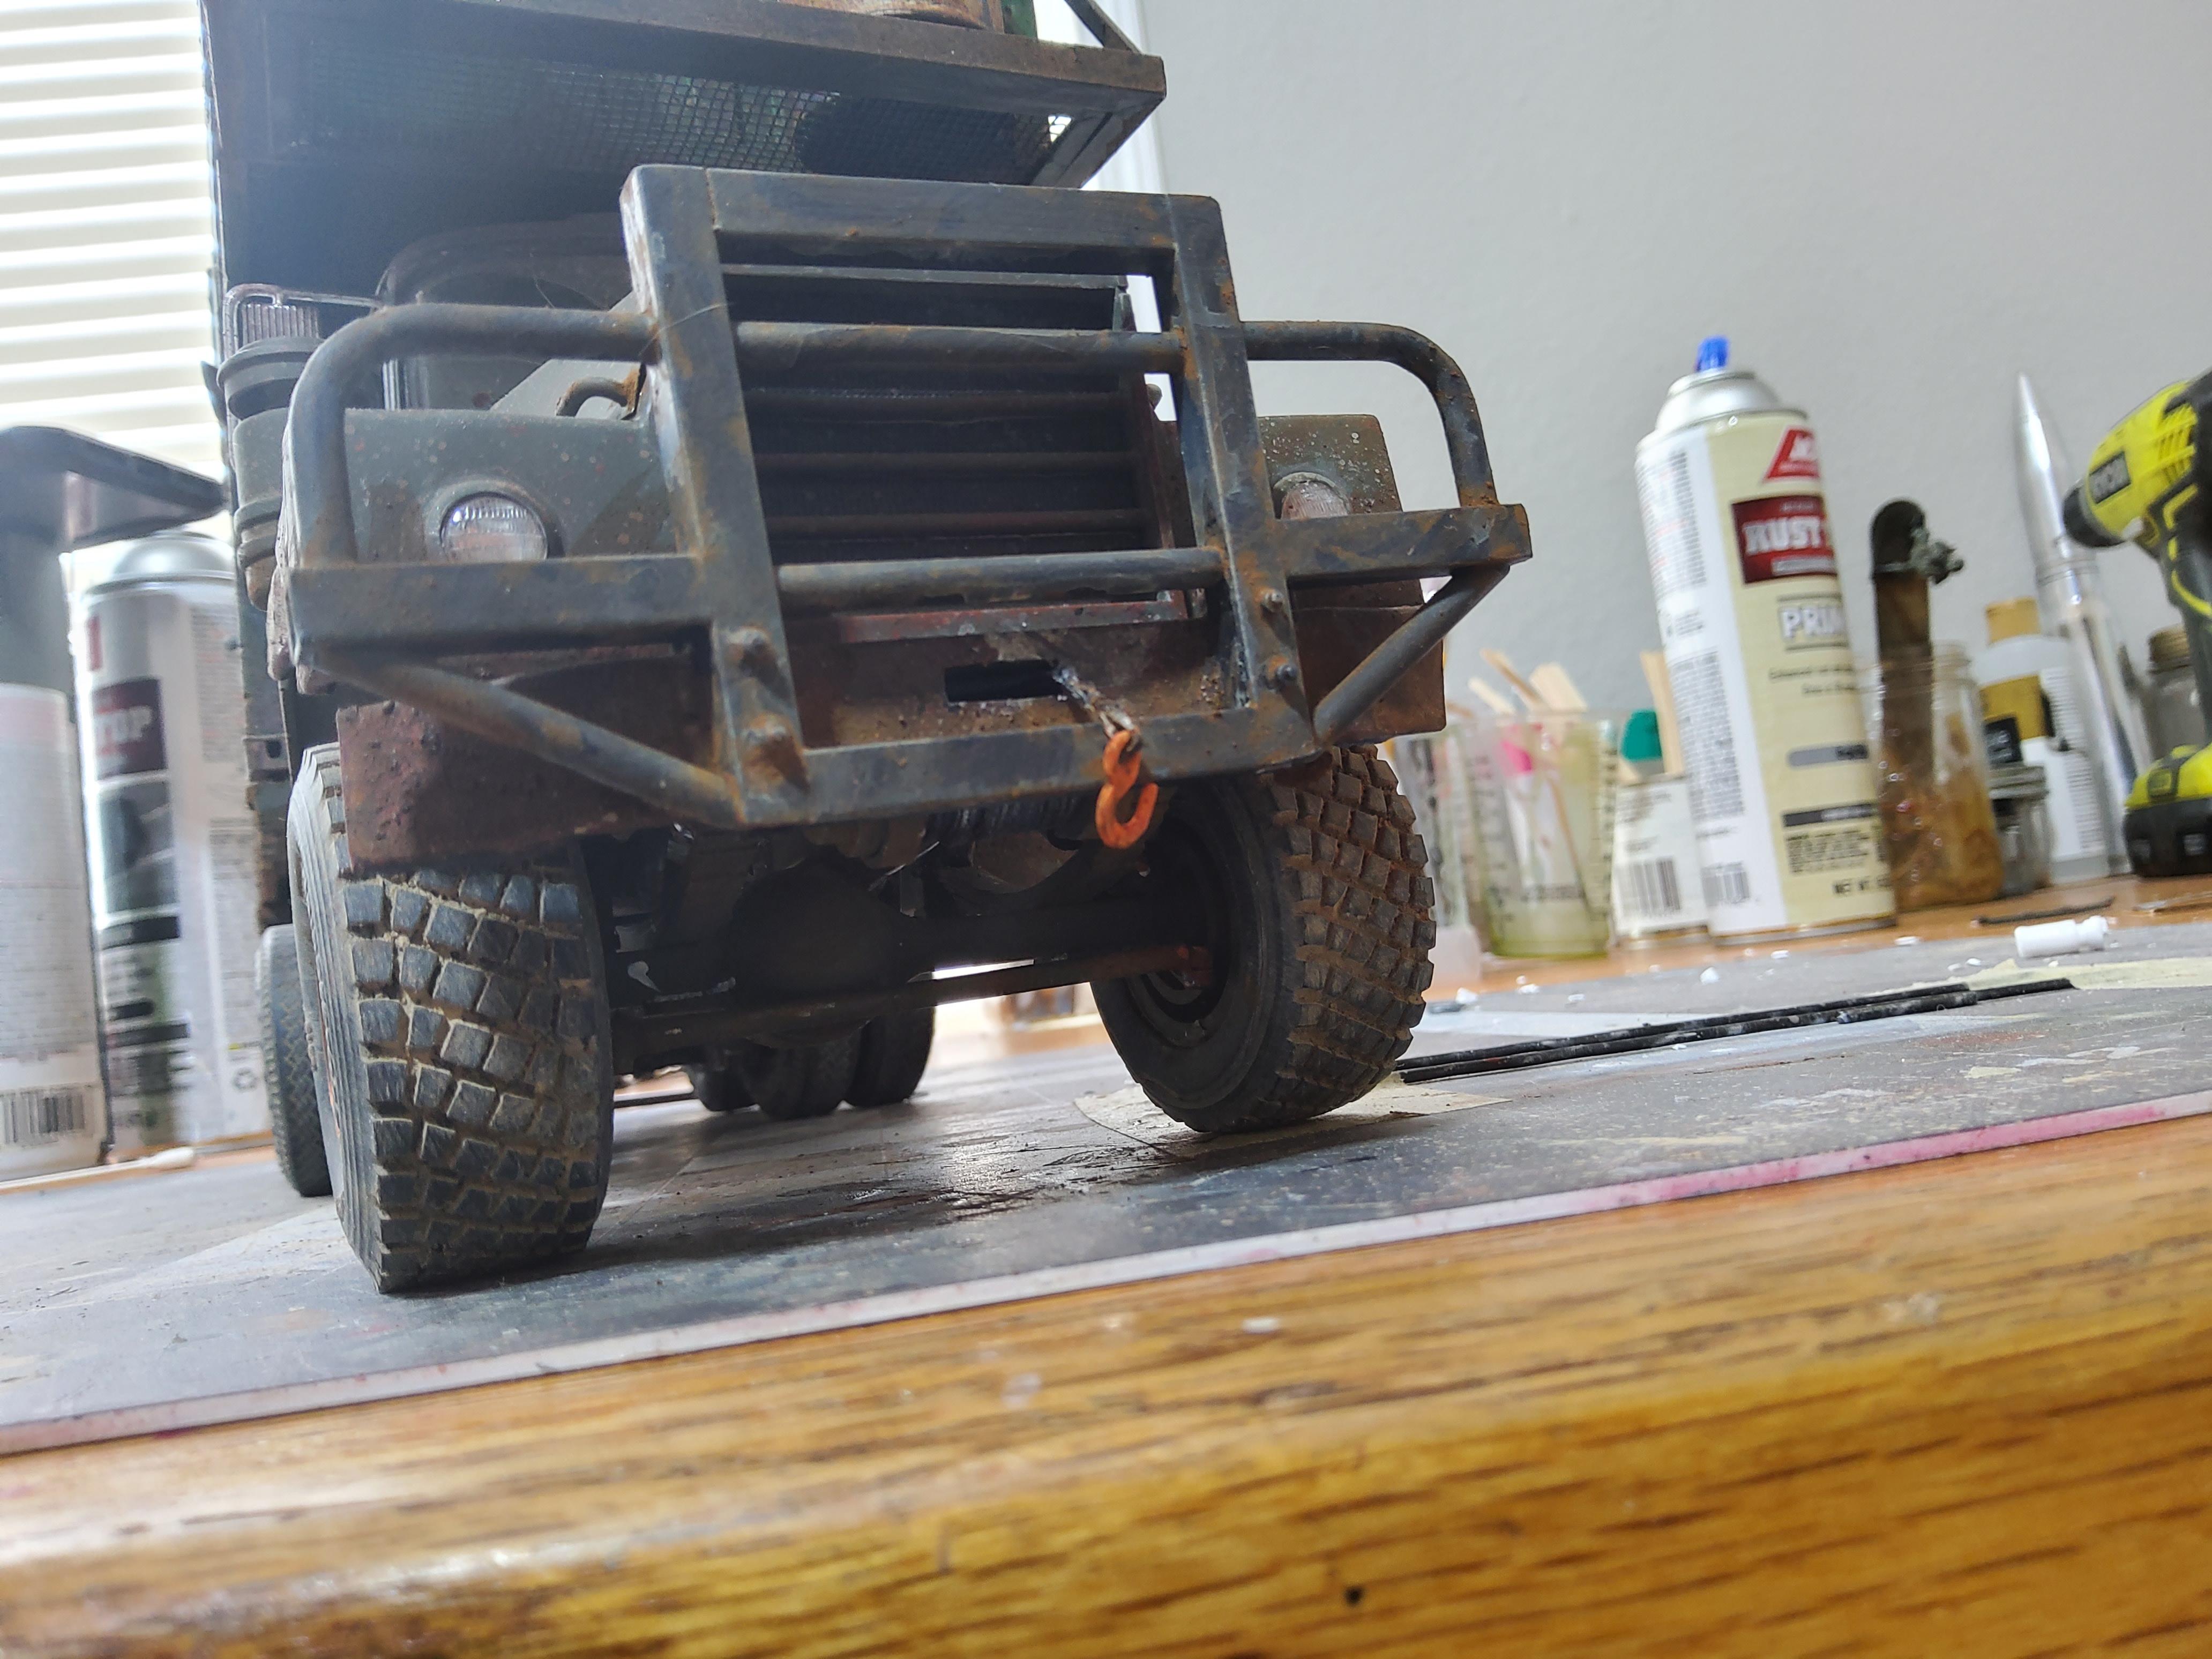
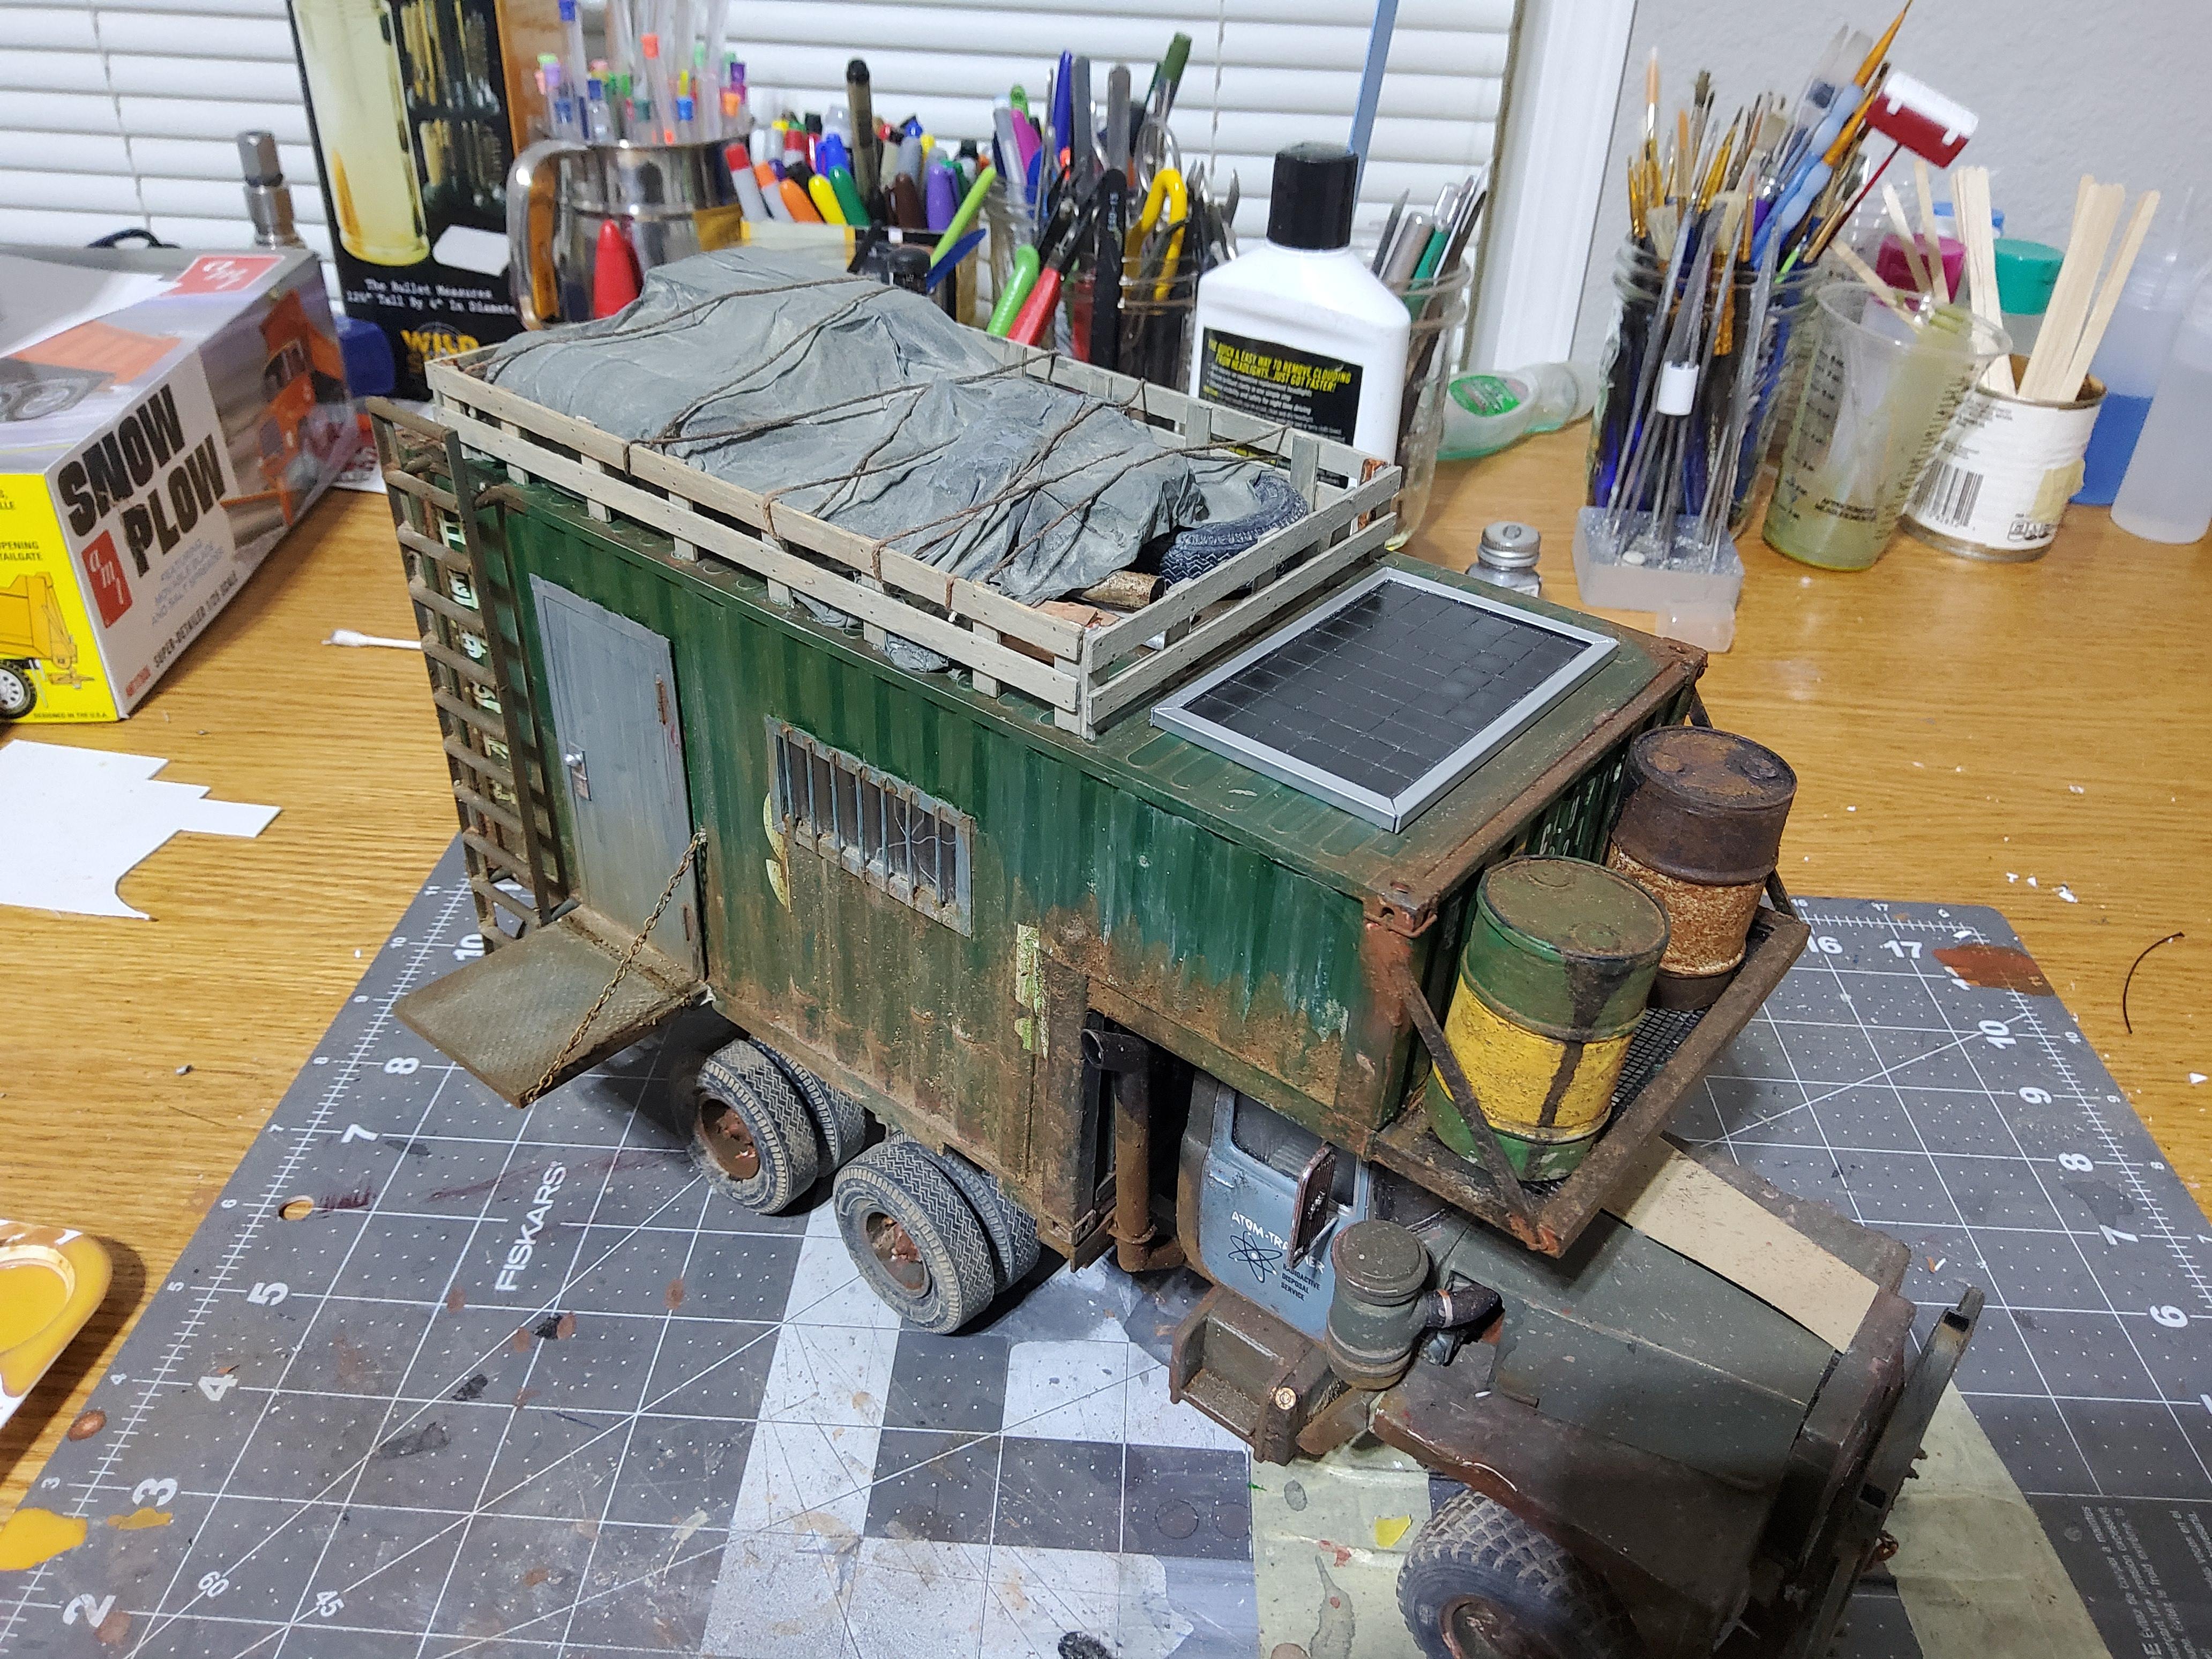
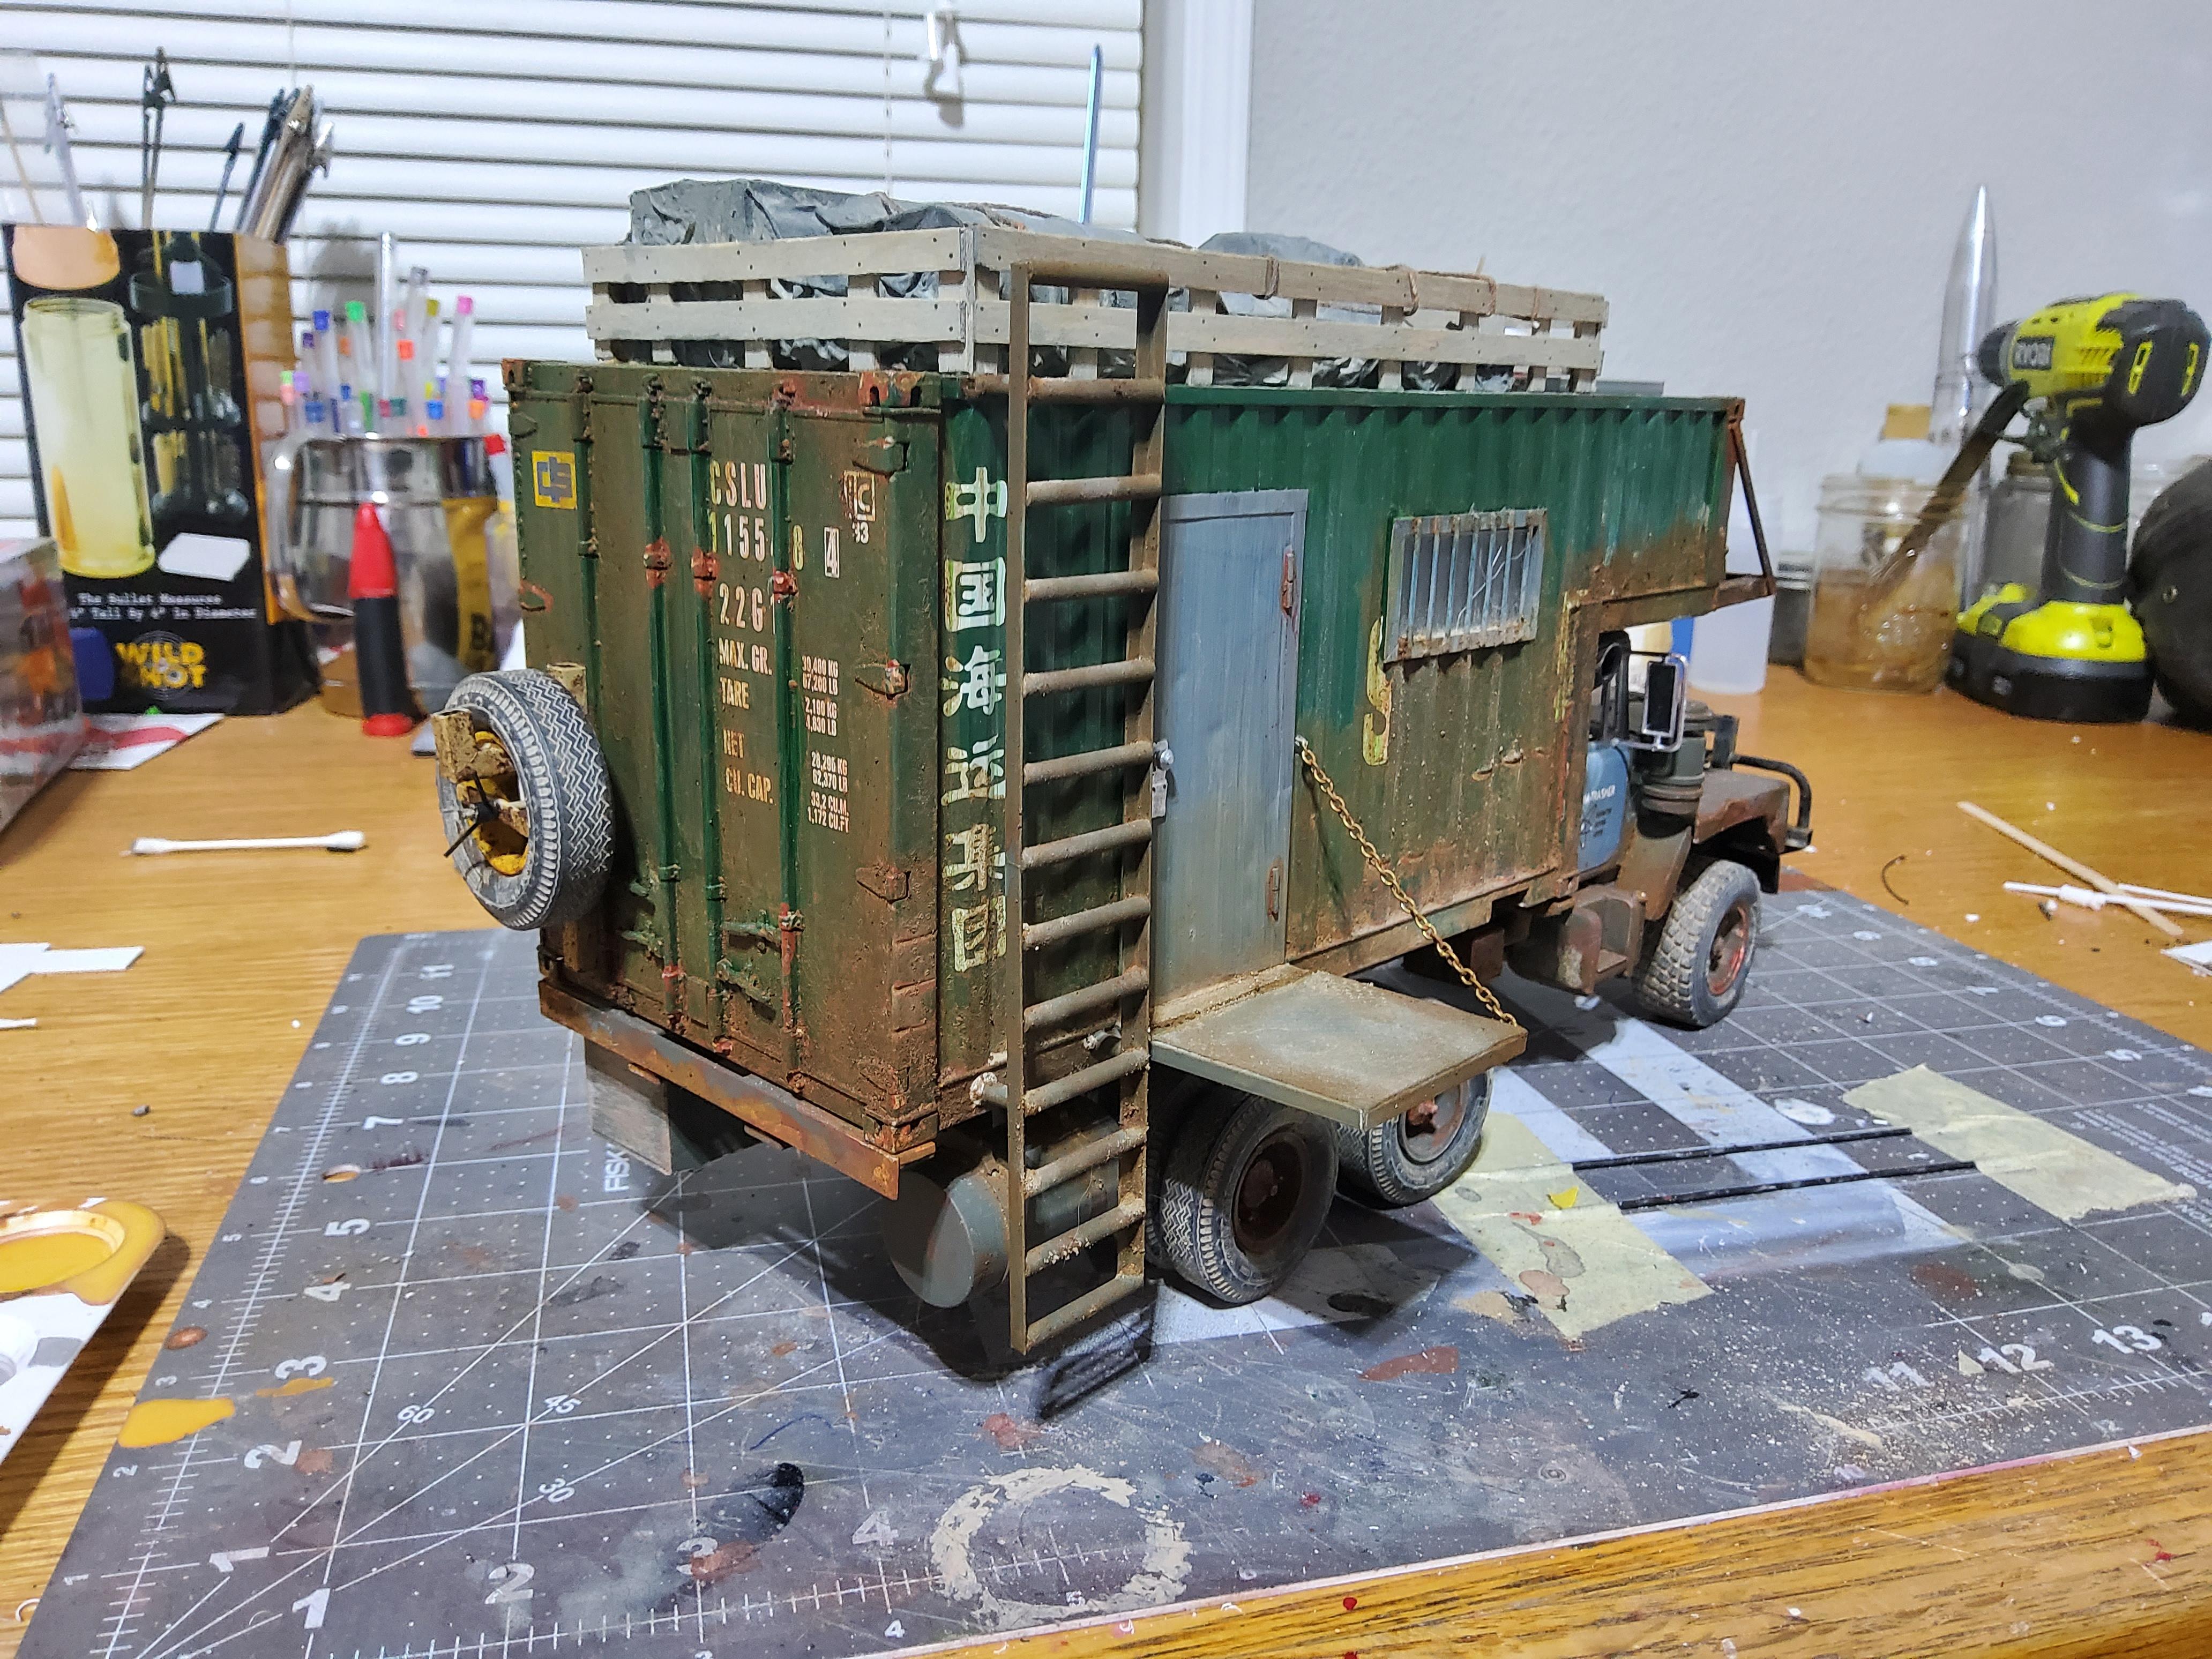
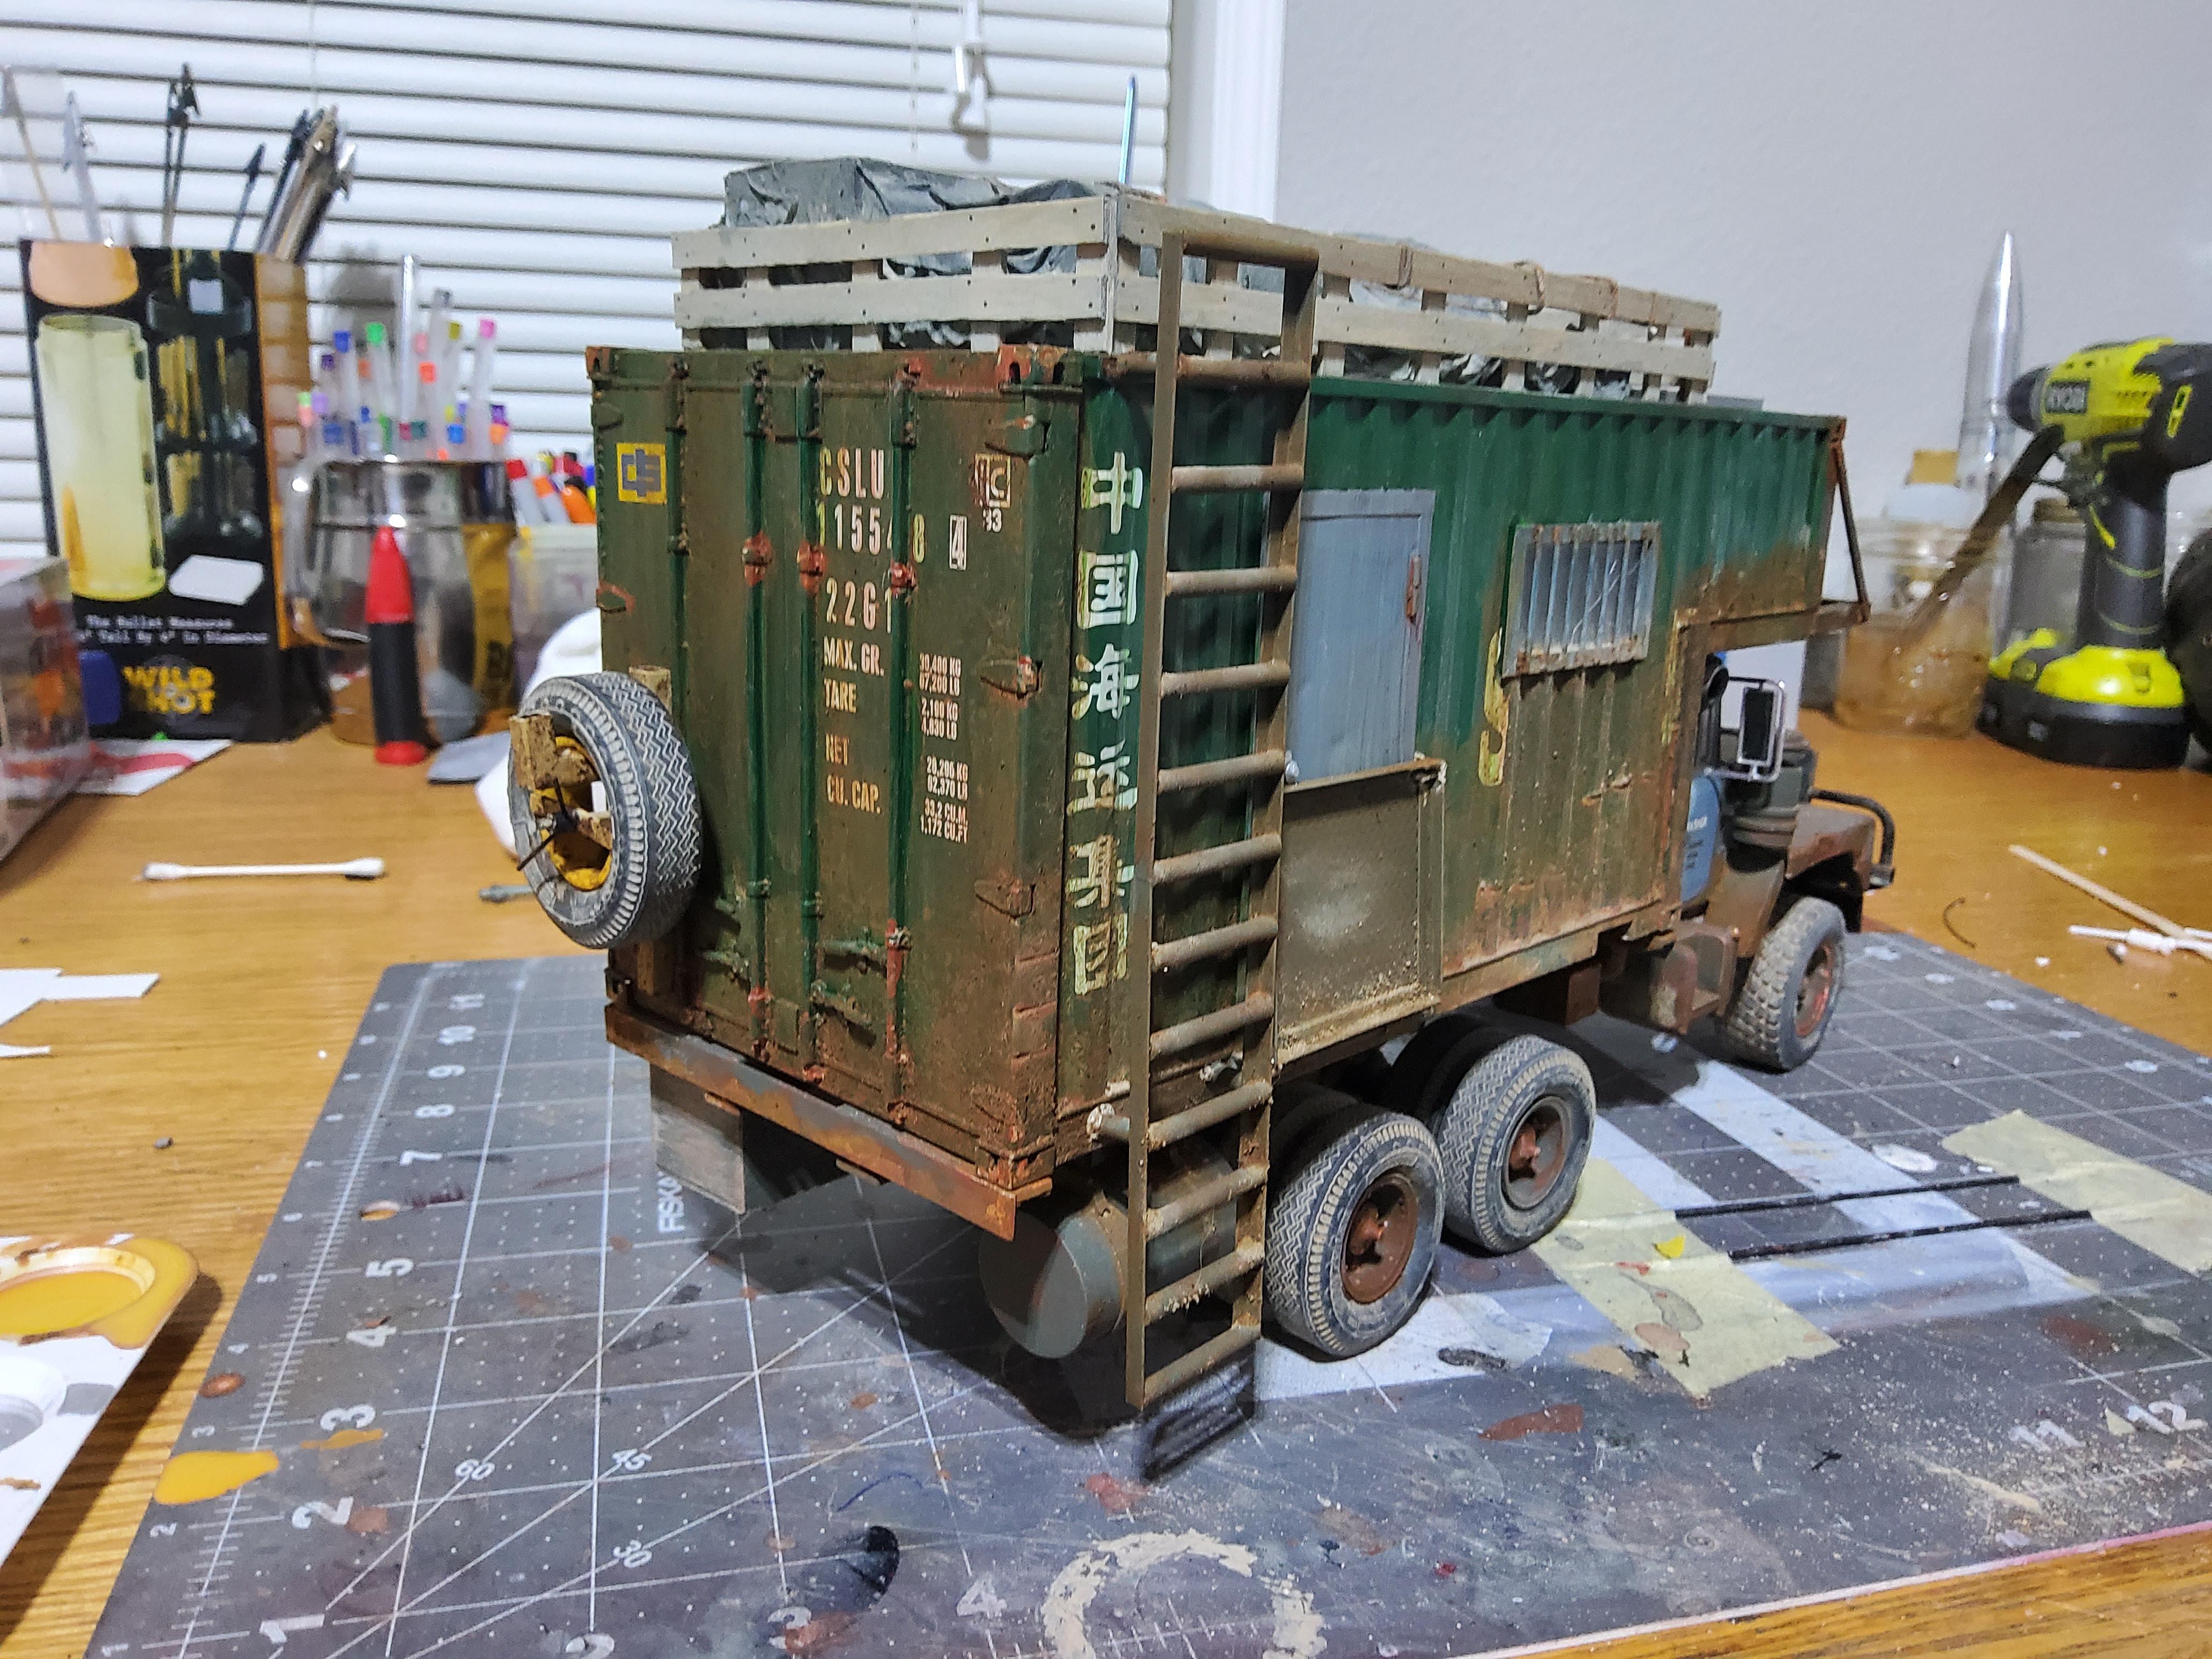
I got some more work done on the truck this weekend. I was told it needed a Bull bar and a winch. I created the winch out of parts box junk and the Bull Bar out of Evergreen. The hook was filed out of .040x.250 Evergreen also. The winch is hidden behind the bumper and is not easy to see without flipping the truck over, but it can be seen hanging down if you look close. I also have been working on a Solar panel. It is currently not attached and is clean and shinny because I just got it done. I will dust it up after I attach it. I also created a platform that folds up to enter and a ladder to get in and to reach the roof. My son suggested I add a water barrel to the back door, so I will do that. Unless I can think of anything else to add, I should have this done in the next couple of weeks.
-
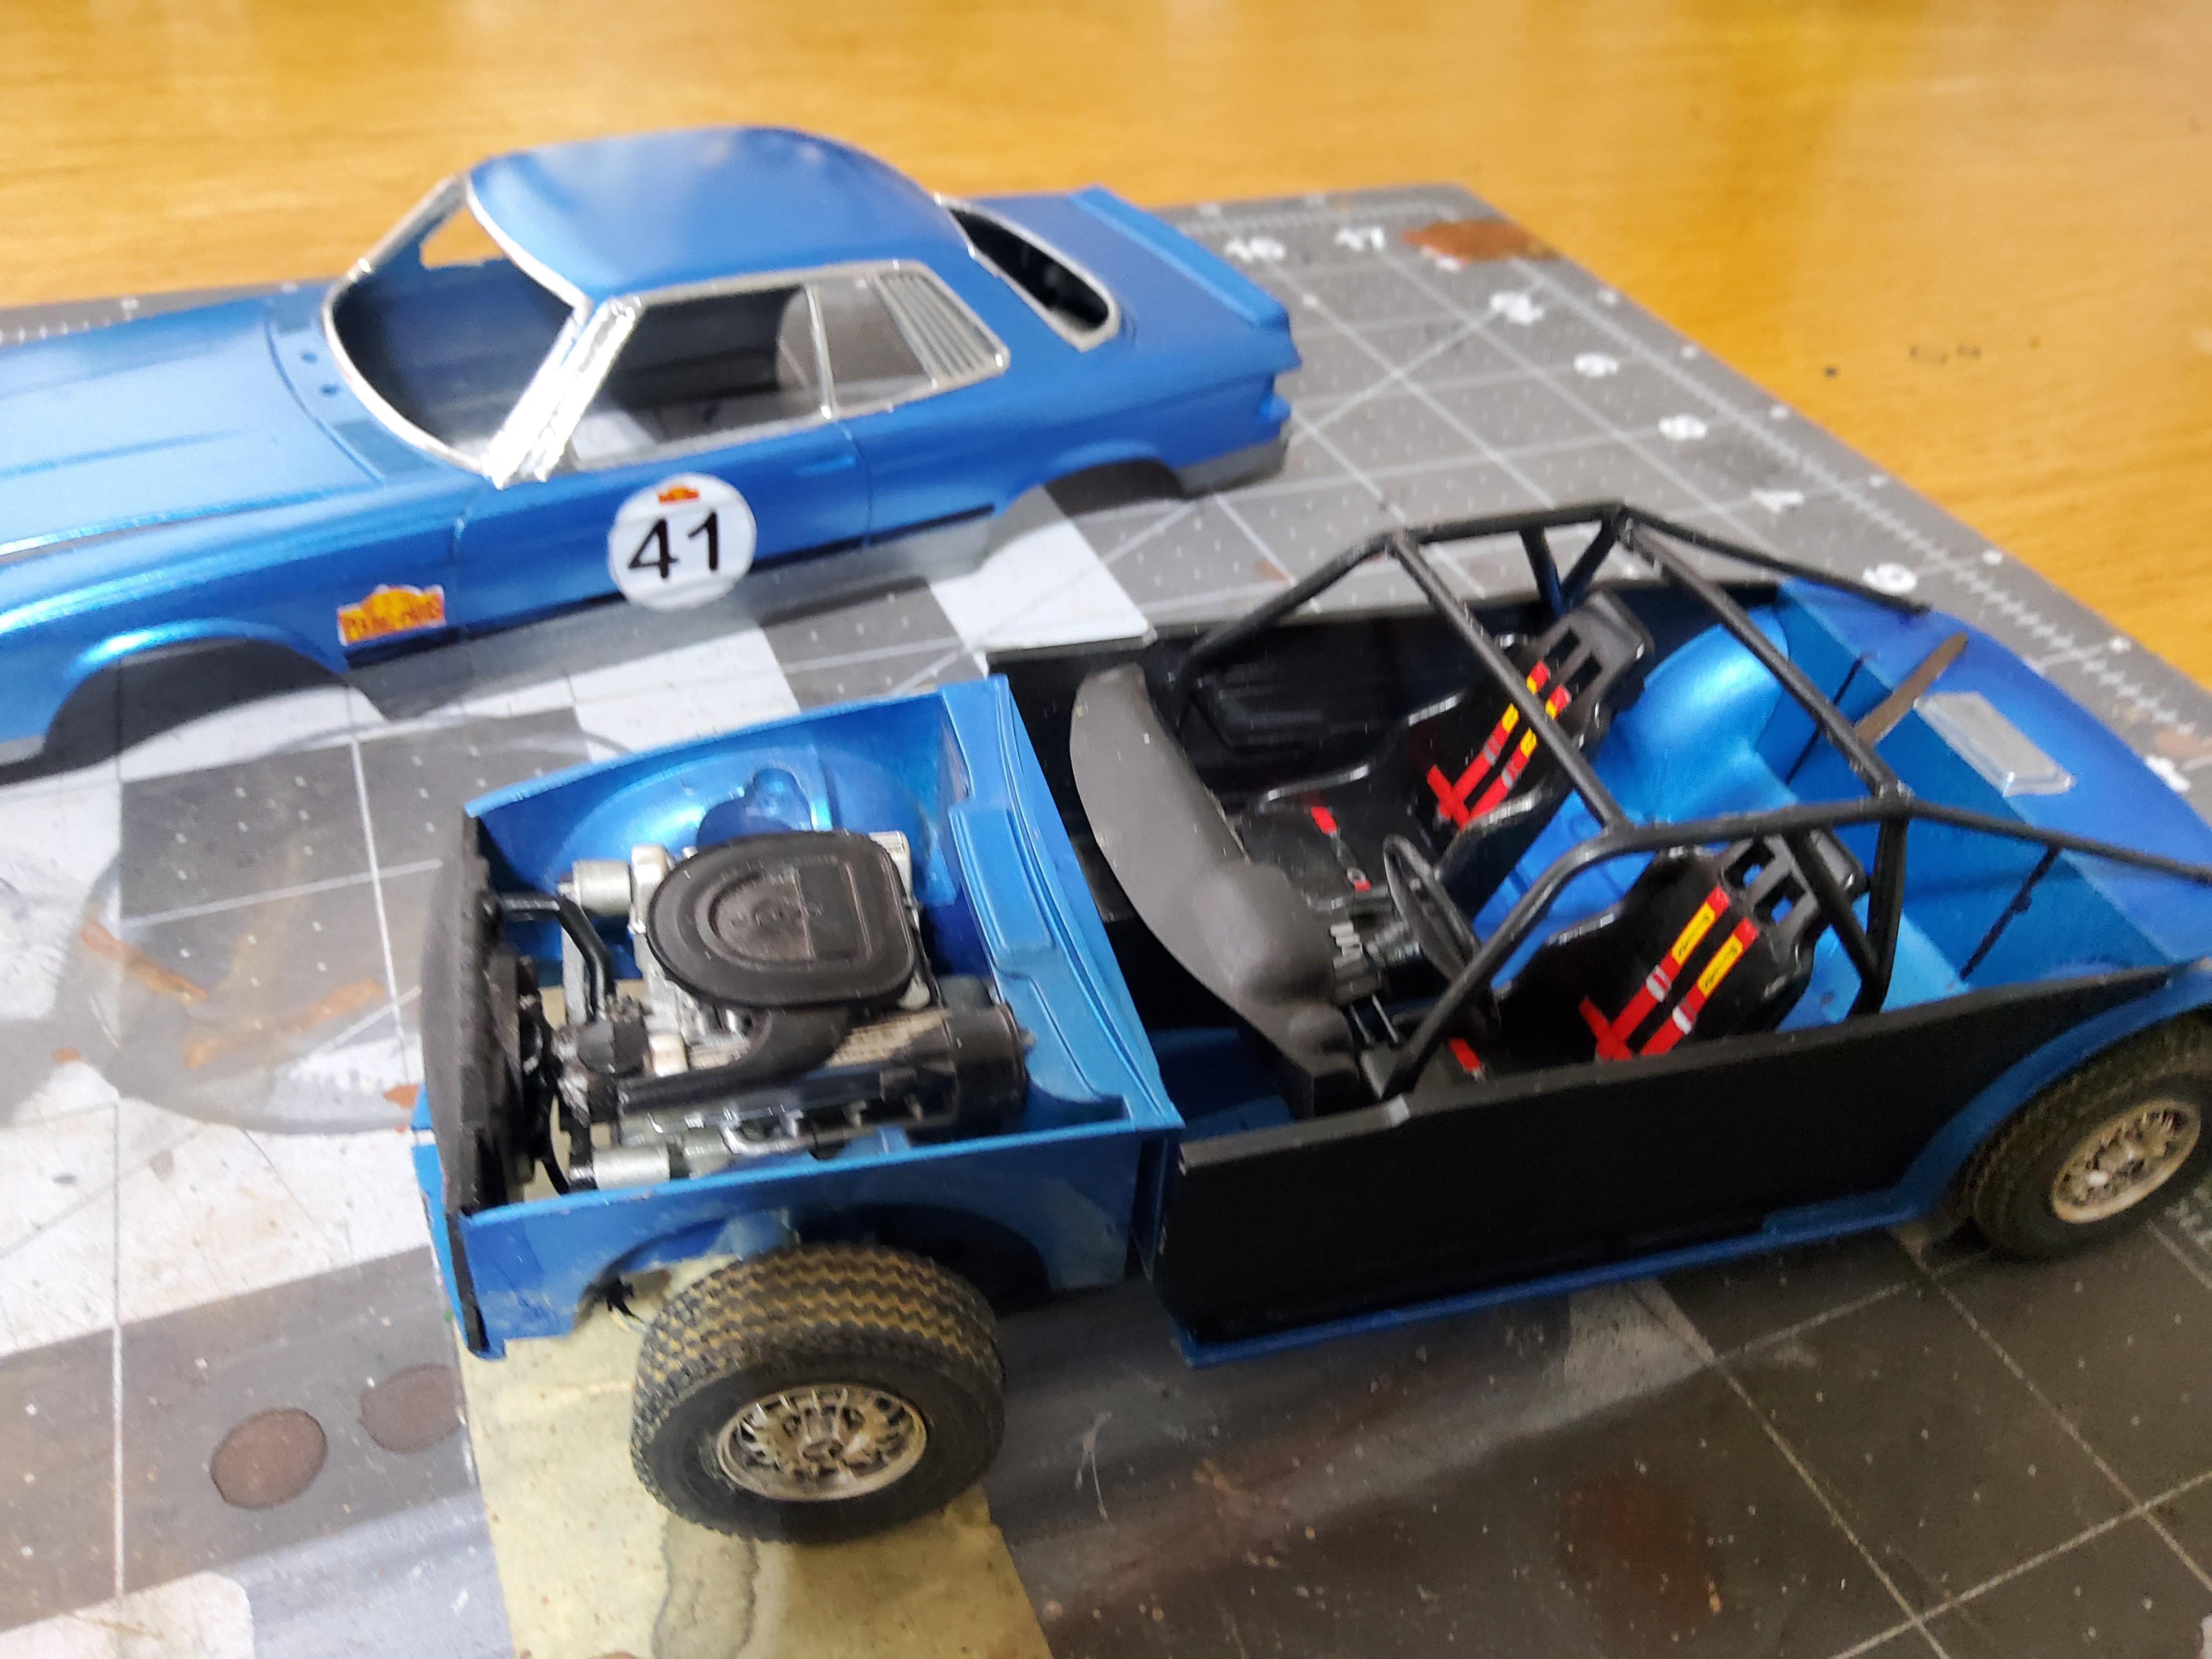
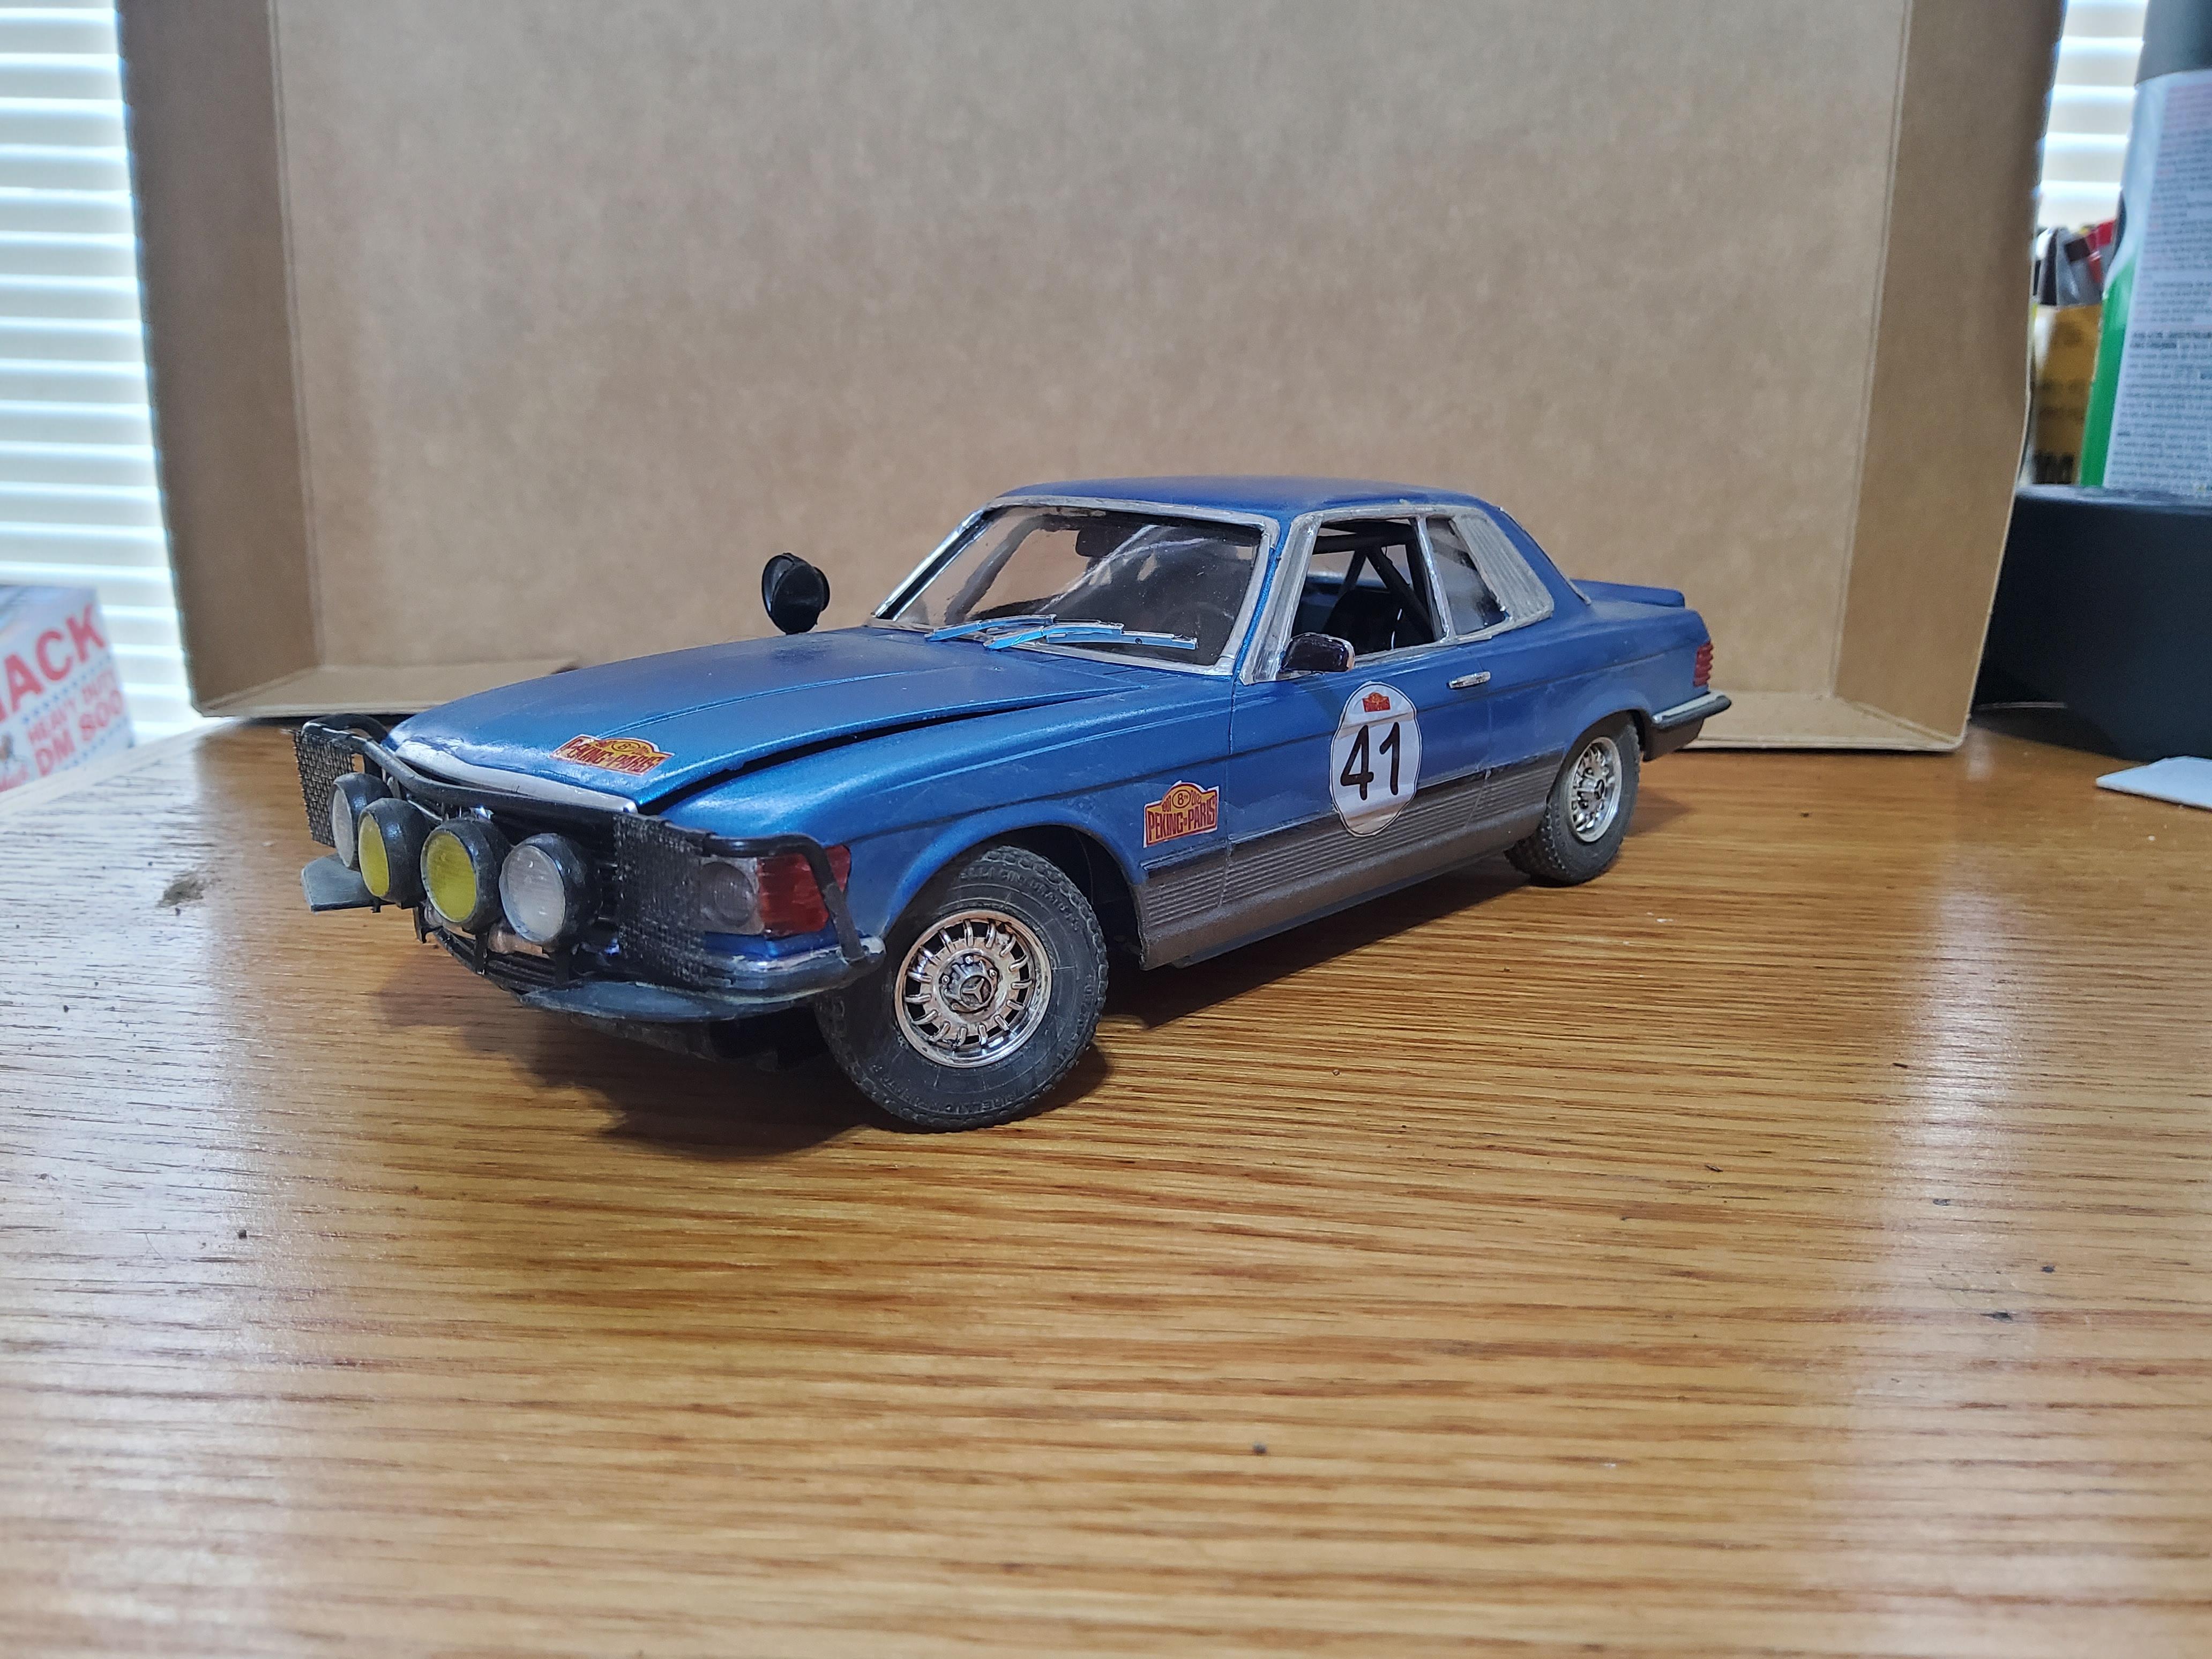
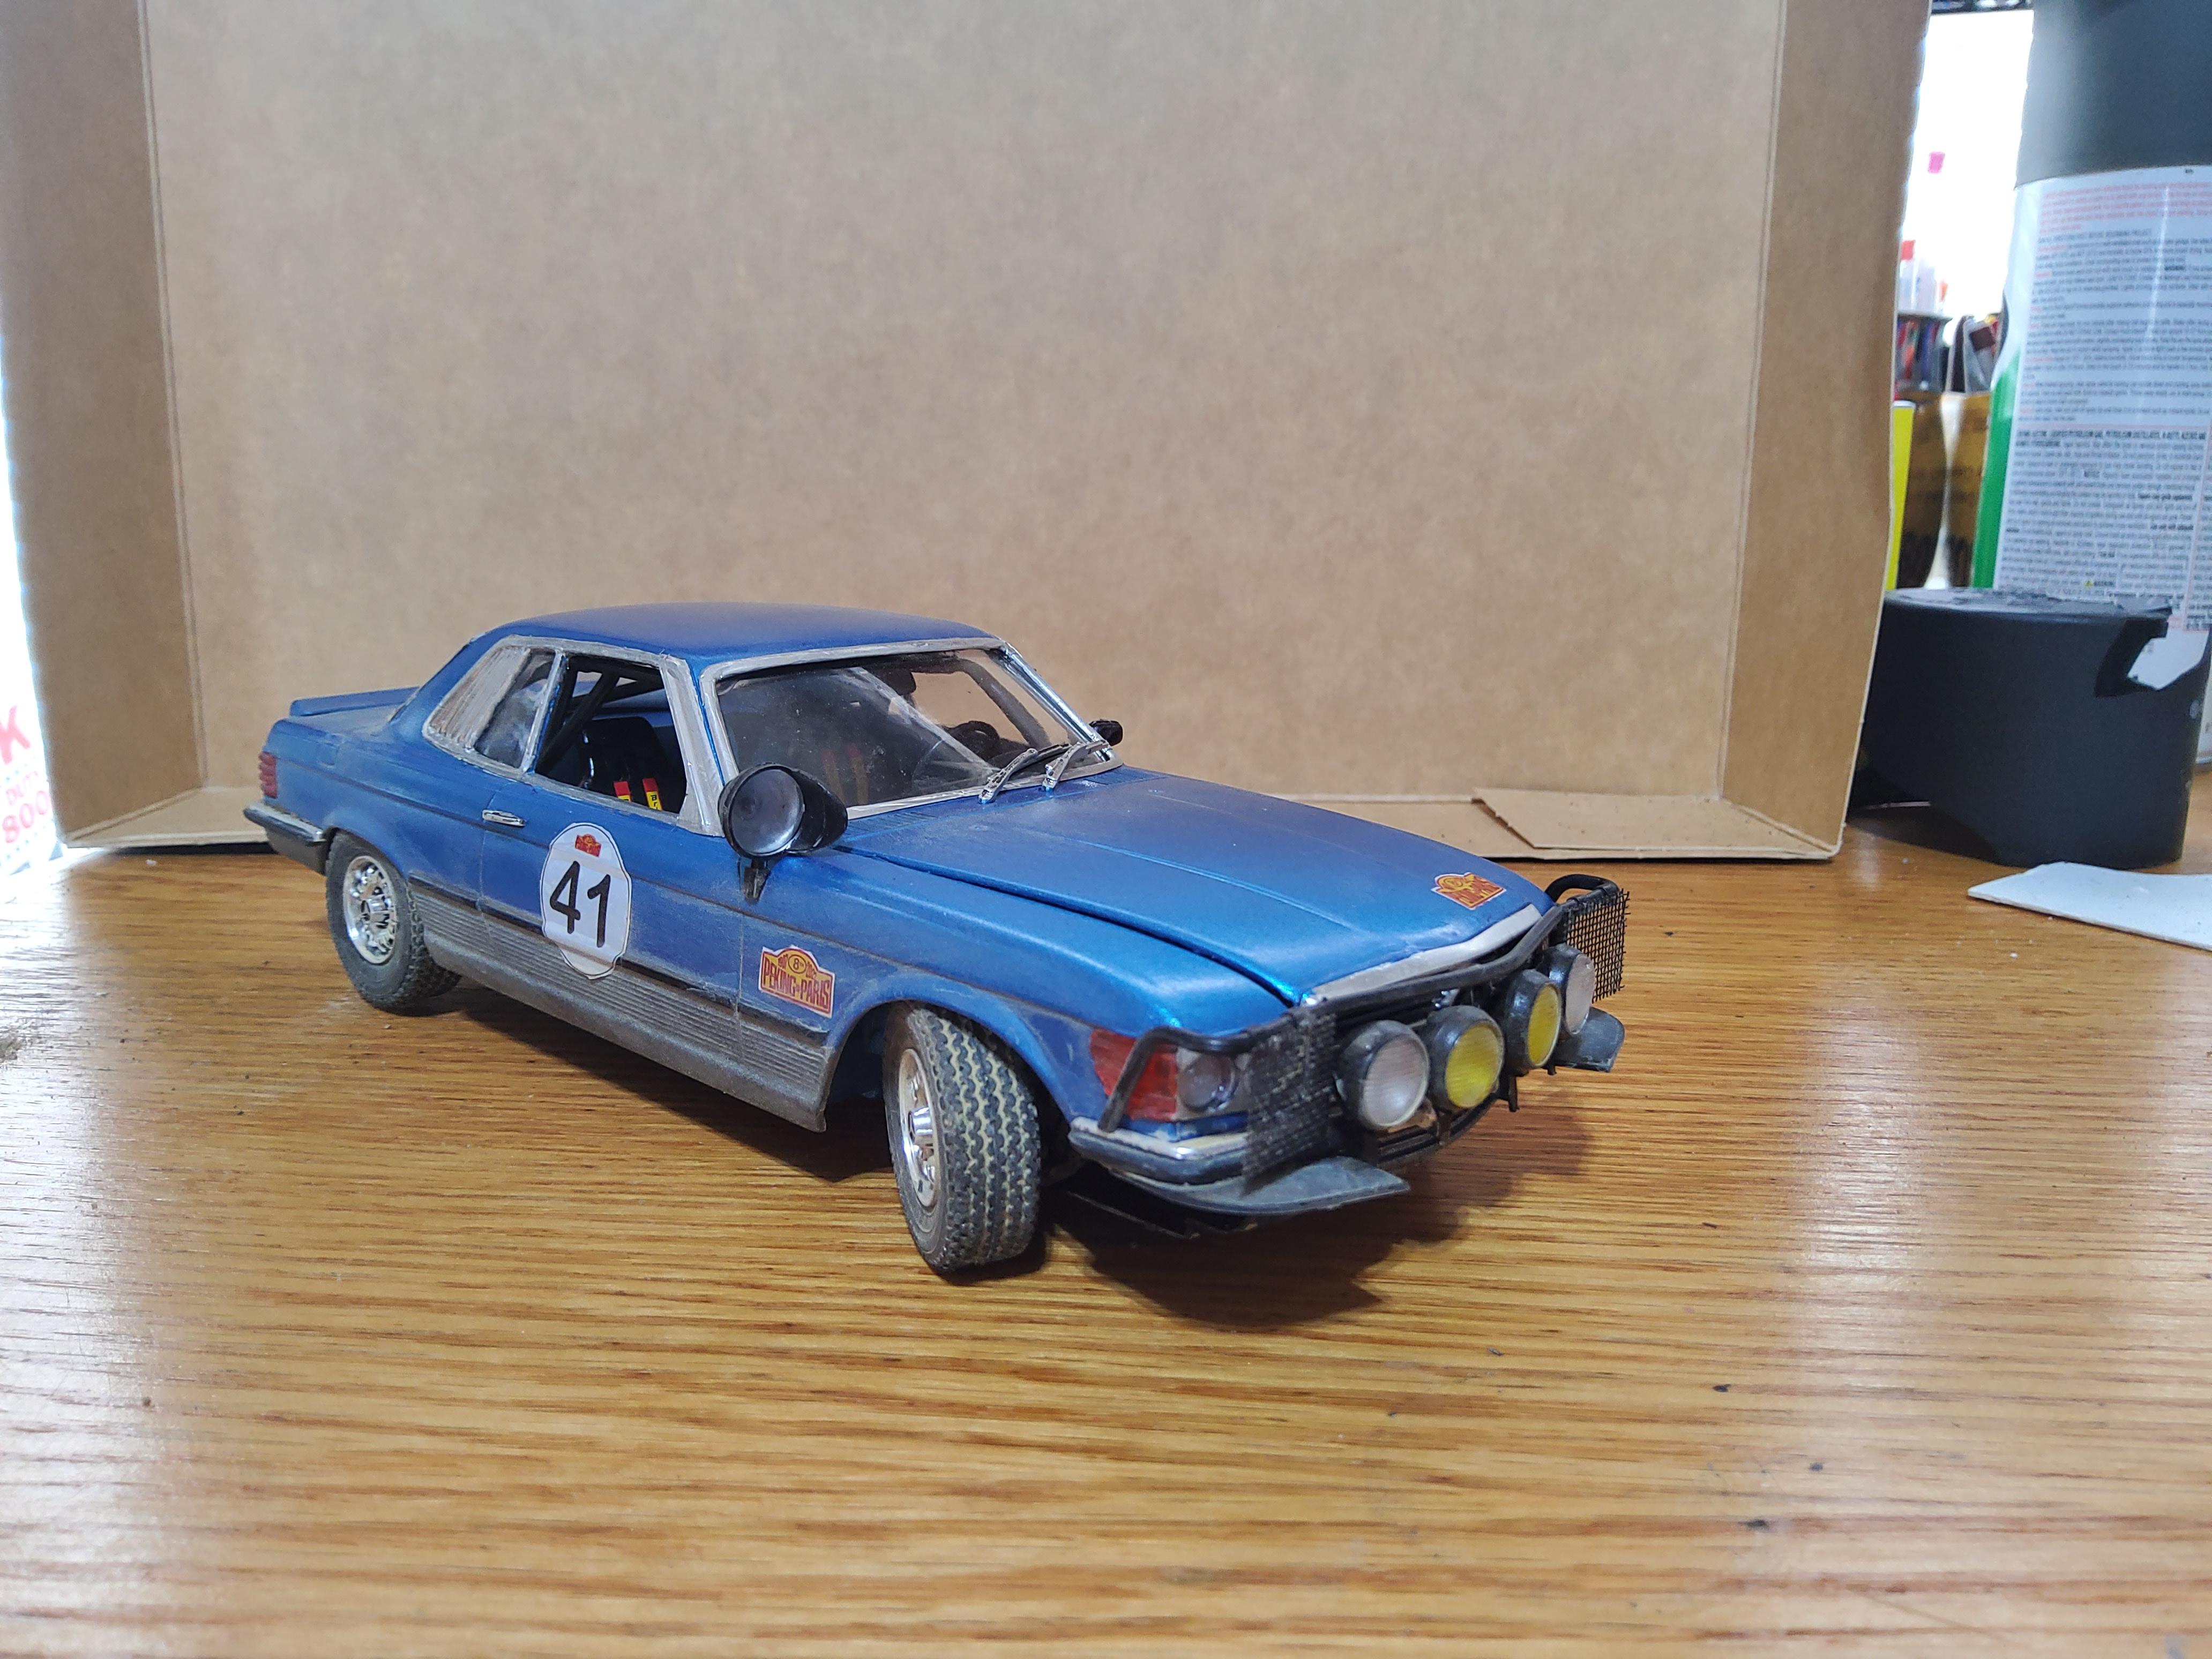
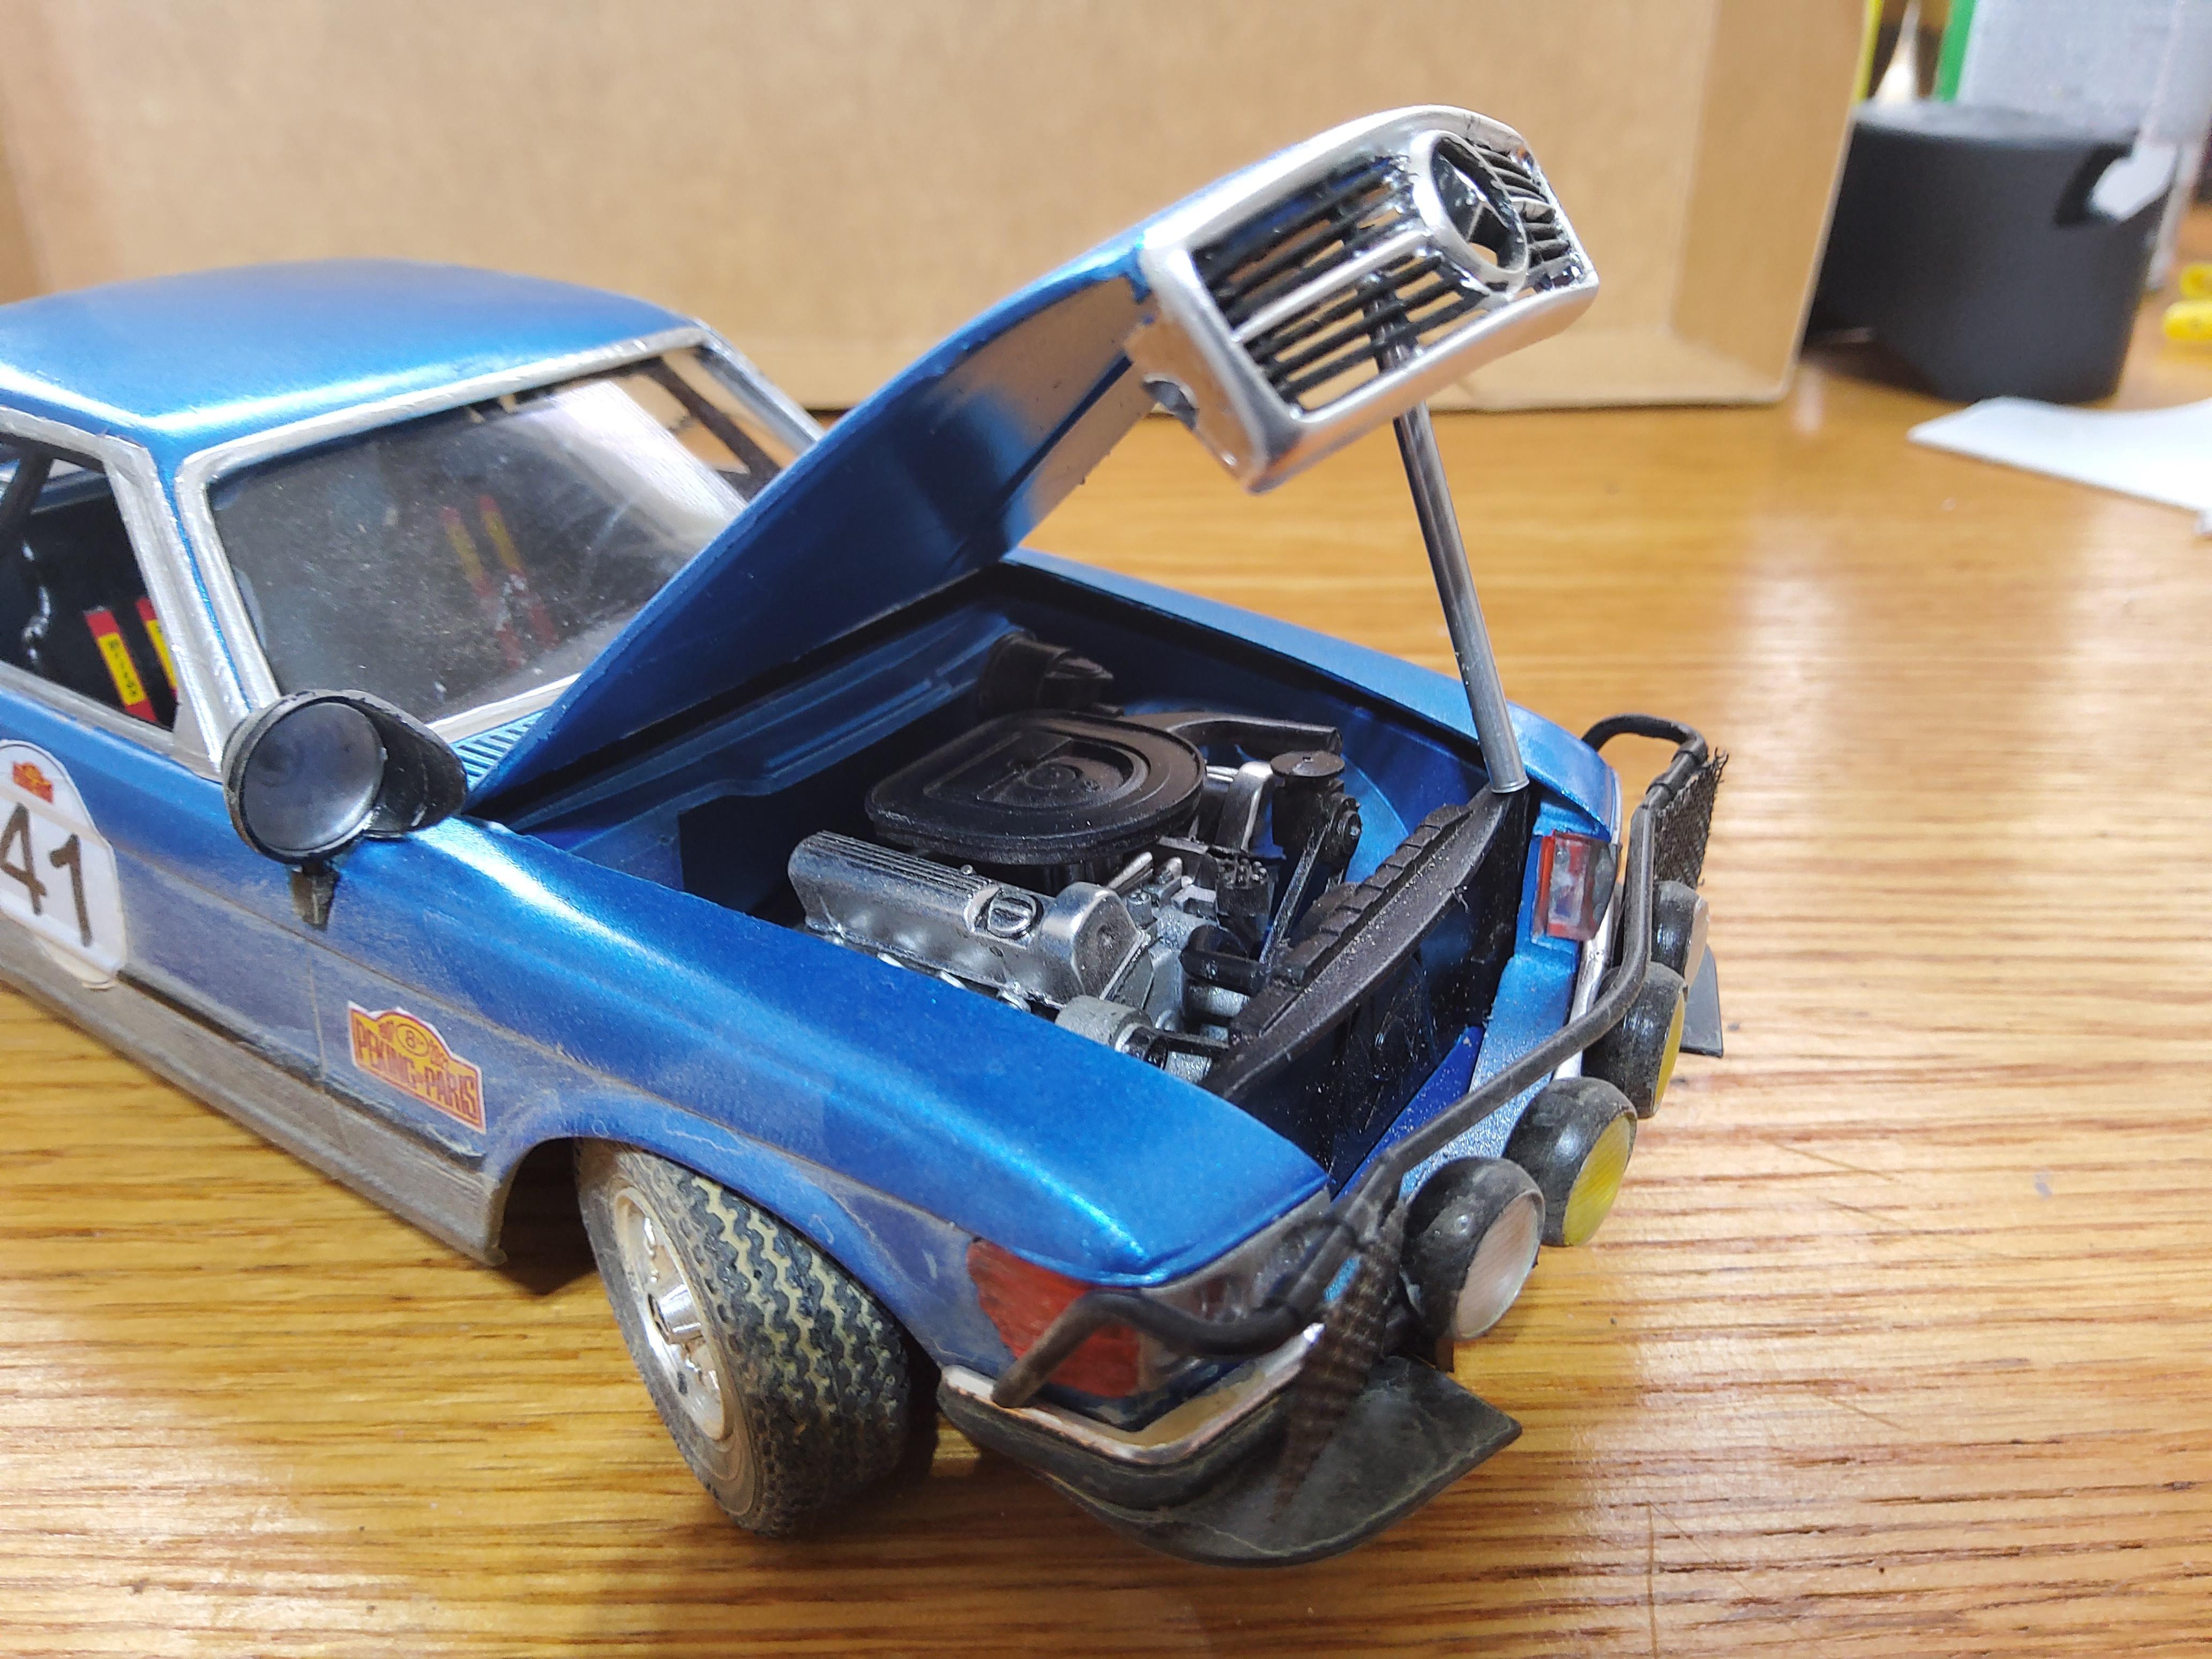
Well my 450 SLC kit finally arrived. I ordered it before Christmass and it arrived on Friday. I had a lot of time this weekend and soI was able to get it completed. I di not do a lot to add to it, as the kit included everything I wanted to upgrade. I am not impressed with this kit, but it is an old ESCII kit. The fit of the wheels/tires were really bd, they stuck out 1/8in on each side. There were several other fit issues I had to address. Anyway, it has 5 point harnesses, skid plate, spot and fog lights, roll cage and rear seat delete. I did soe very light weathering to give it the look that it is early on in the race, so a little dst and dirt, but not beat up.
-
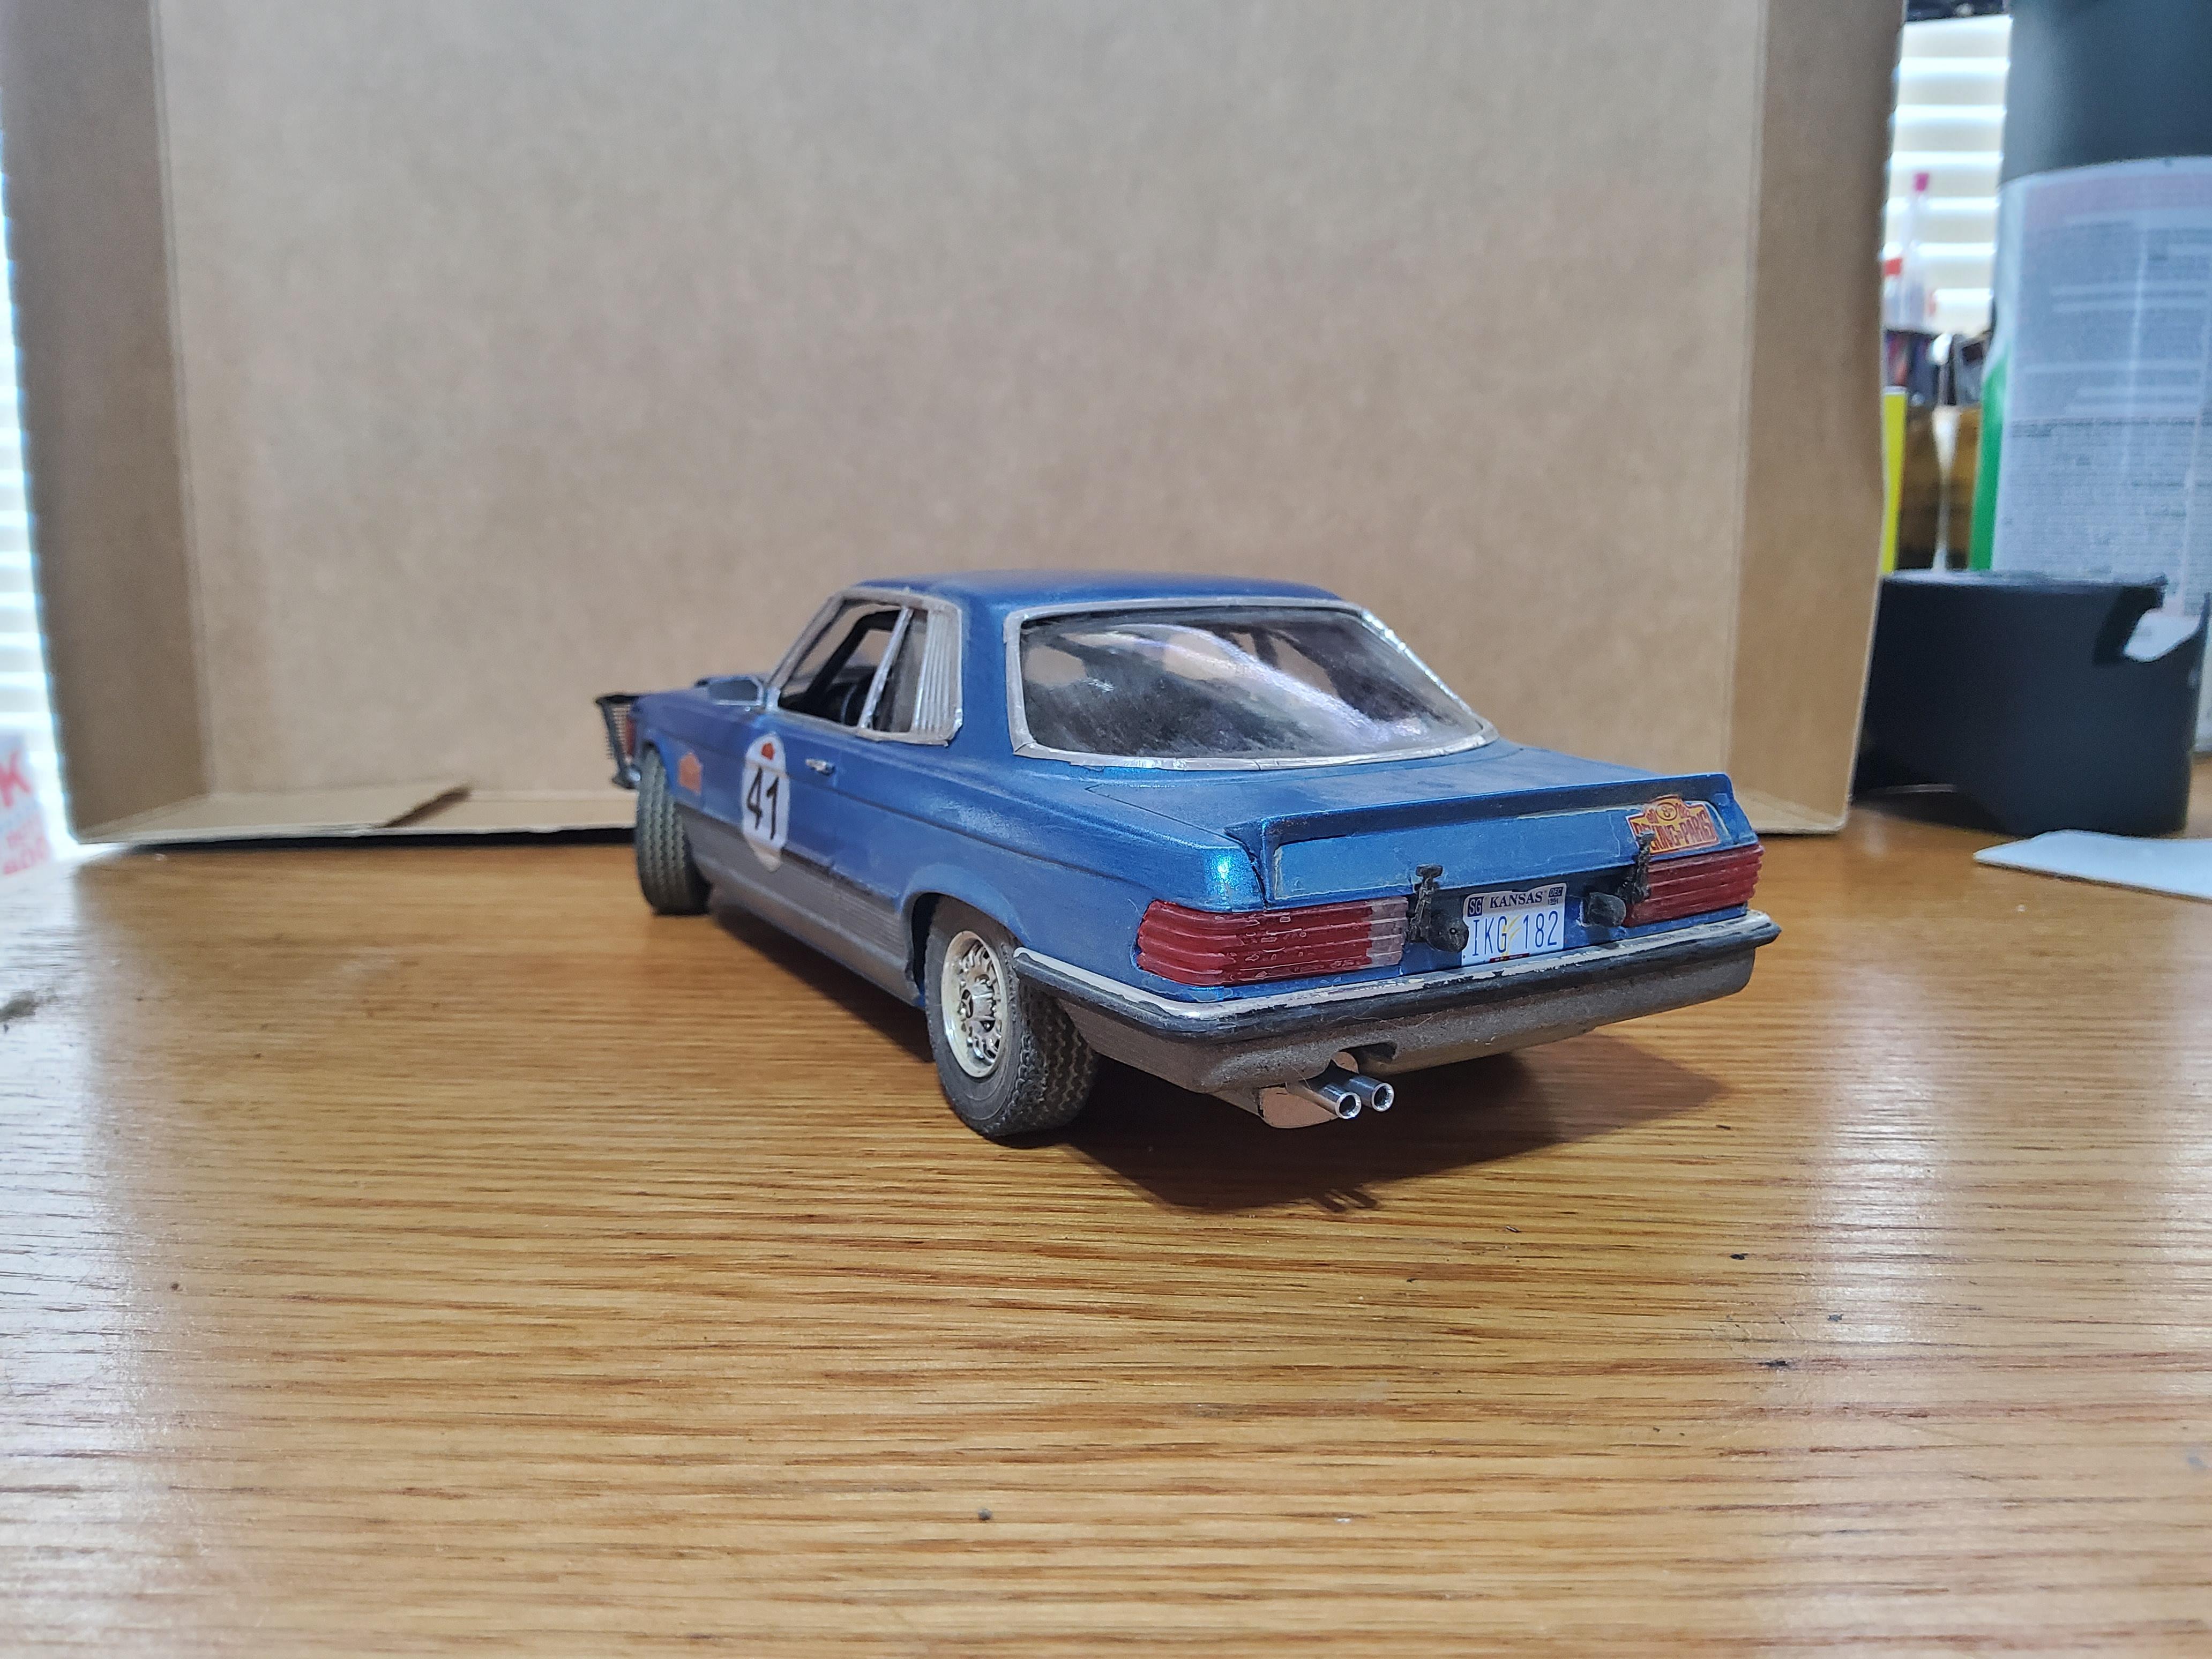
And we are calling this one done. I did some light weathering to reflect it being in the race, but only near the first few days. Not trashed yet, just a little dirty/dusty. I built this mostly OOB because everything I wanted was included in the kit. I had to replace the light covers with mesh, the kit ones looked stupid. I replaced the exhaust tips with aluminum. Other than that it was mostly justorrecting the fit issues with the kit.
-
Well, the kit I ordered for this buid showed up Friday. I started it Satuurday and was able to make good progress. This is not the greatest kit. The wheels need to be modified because thy stick out way too far, the hood has no hinge, you just cut it all but the a small part and that makes the hinge. There are a lot of other issues. However it goes together good fo the most part. I fought with my BMF and had to change over to HVAC tape and that dd not go well either.
-
At Walmart (at least one store)
Oldmopars replied to Classicgas's topic in General Automotive Talk (Trucks and Cars)
As I mentioned, I travel to a new place every week. I am finding more Walmarts that have new displays. My local one didn’t have them, now they do. I’m in Rapid City SD and this one has a full display, everything. They even have ones I have not seen at other stores. Still full price, but less than the LHS. -
BRBO 2022 Krupp straight truck
Oldmopars replied to jacobus's topic in WIP: Model Trucks: Big Rigs and Heavy Equipment
Very unusual subject, I like it a lot. I will be following this. I have always liked the European trucks. -
That is a great looking Dozer. Weathering looks great. Can't wait to see the Truck
-
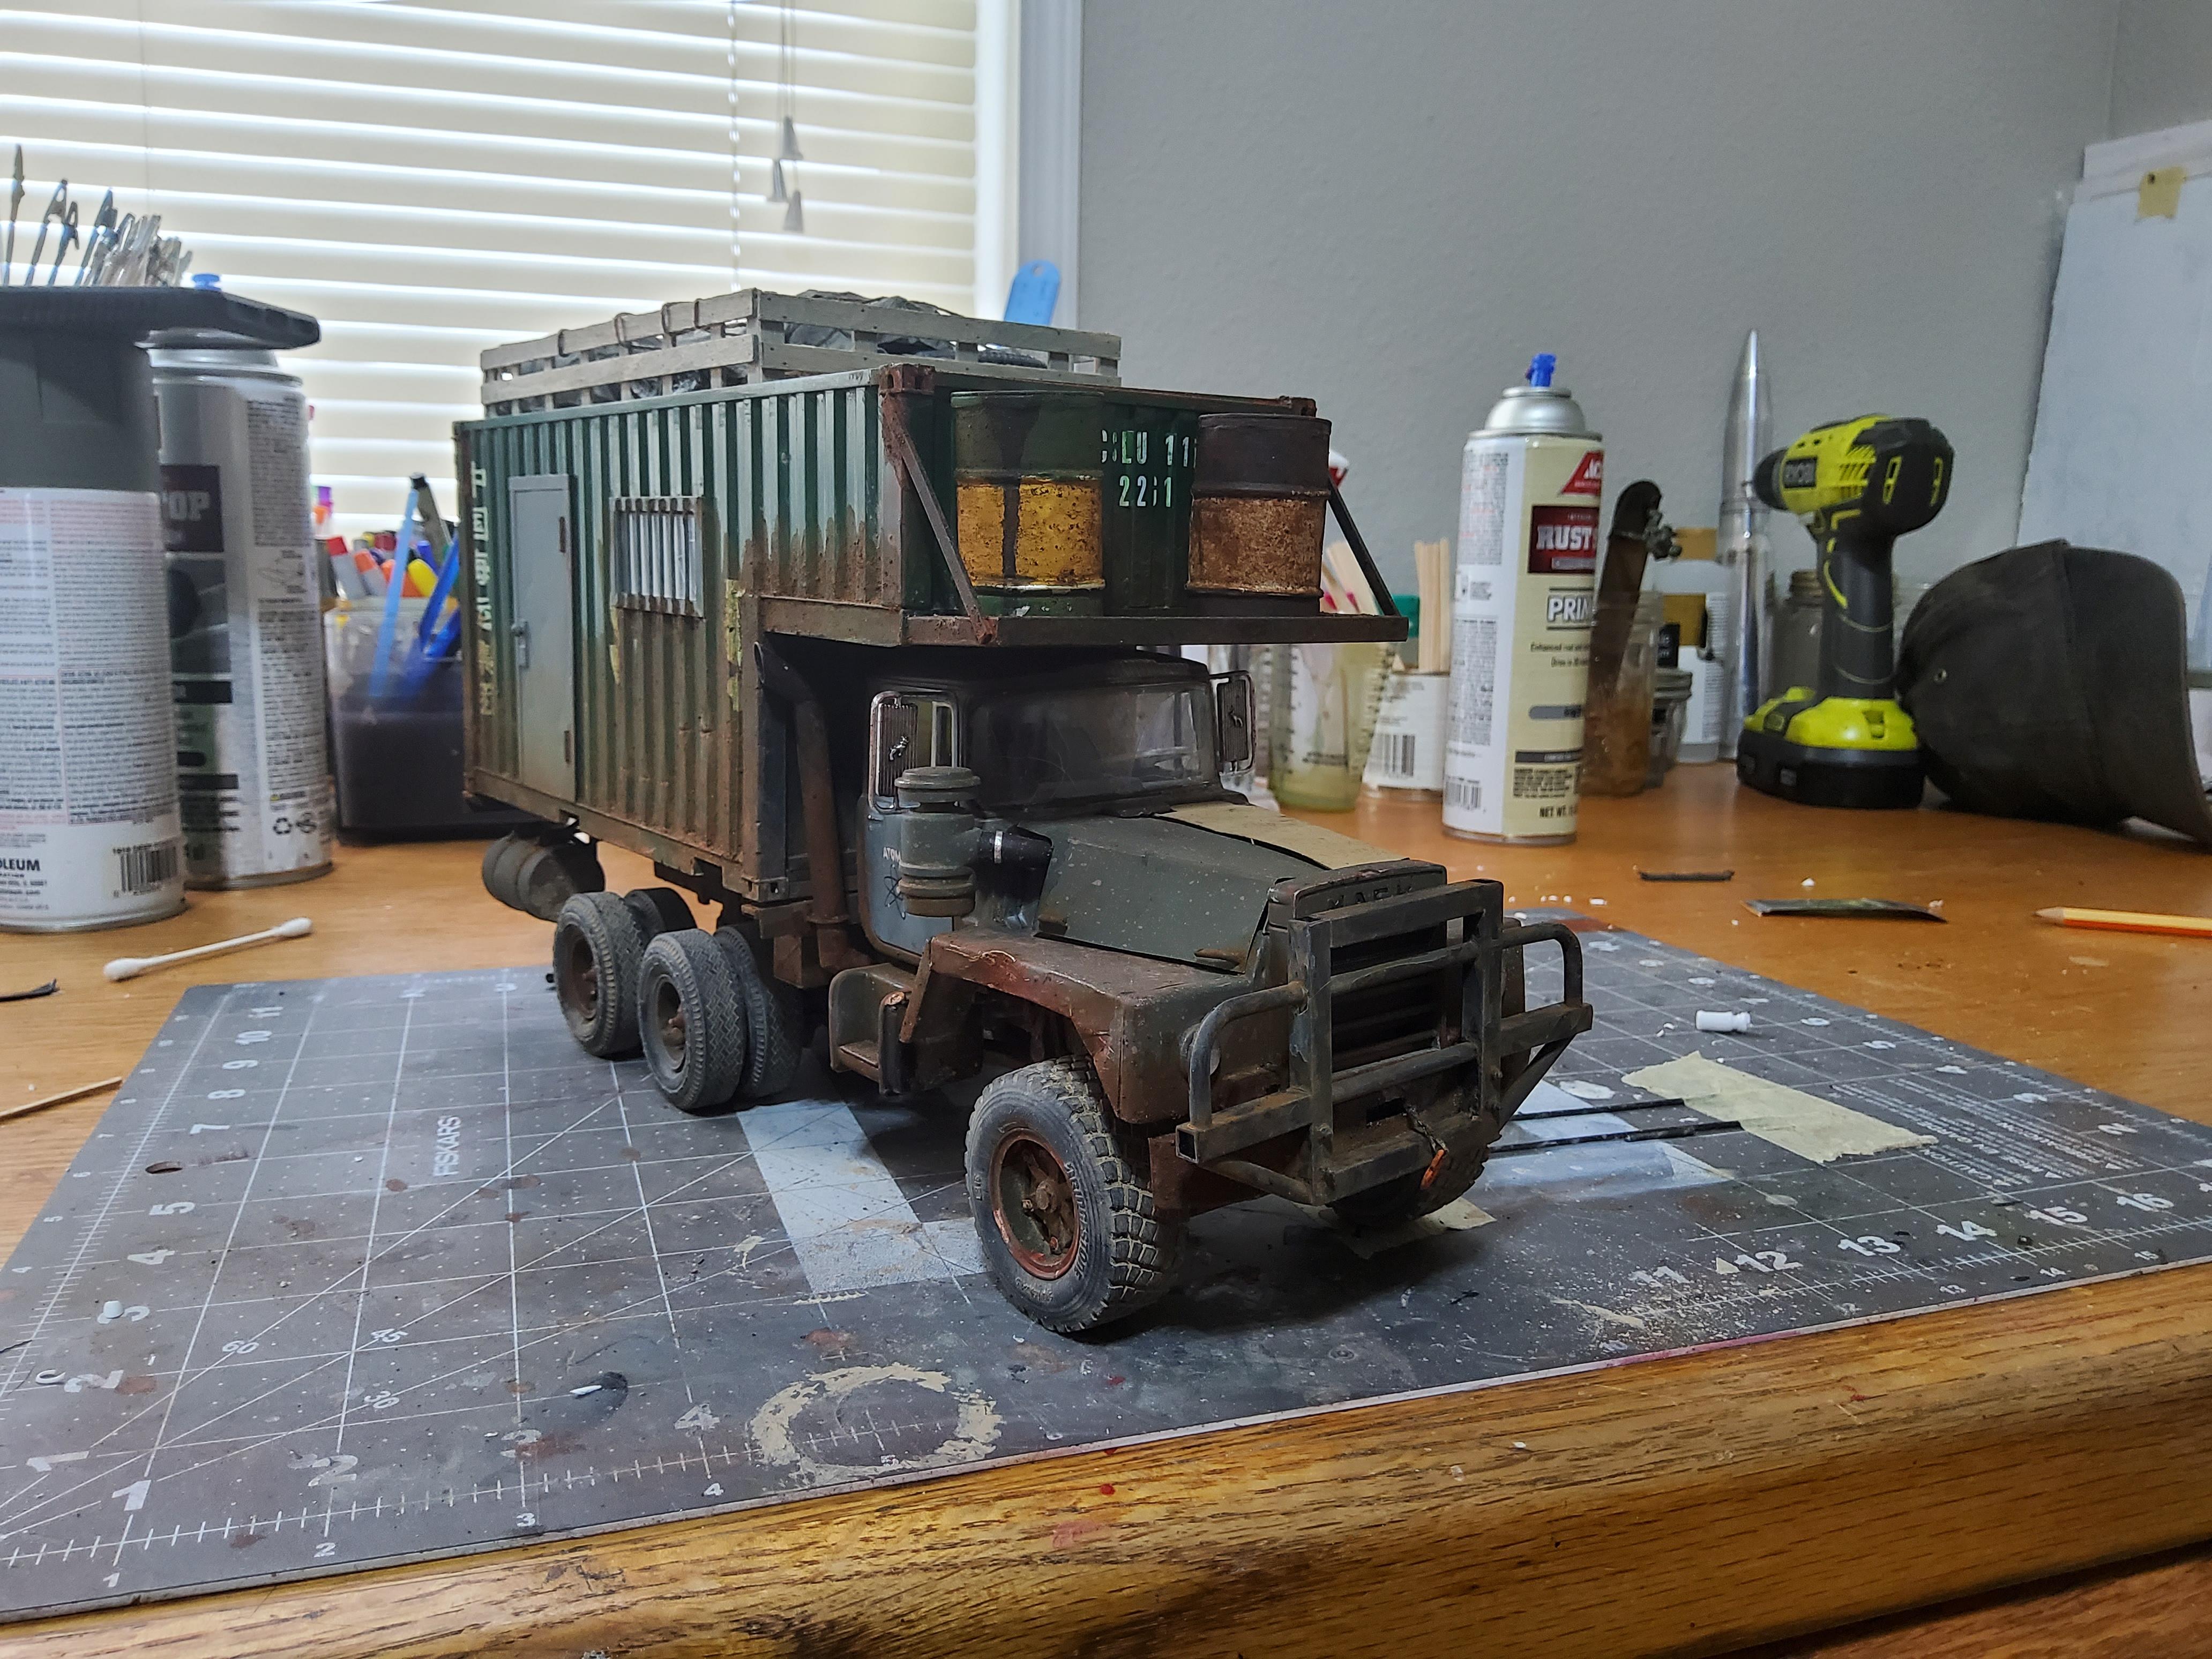
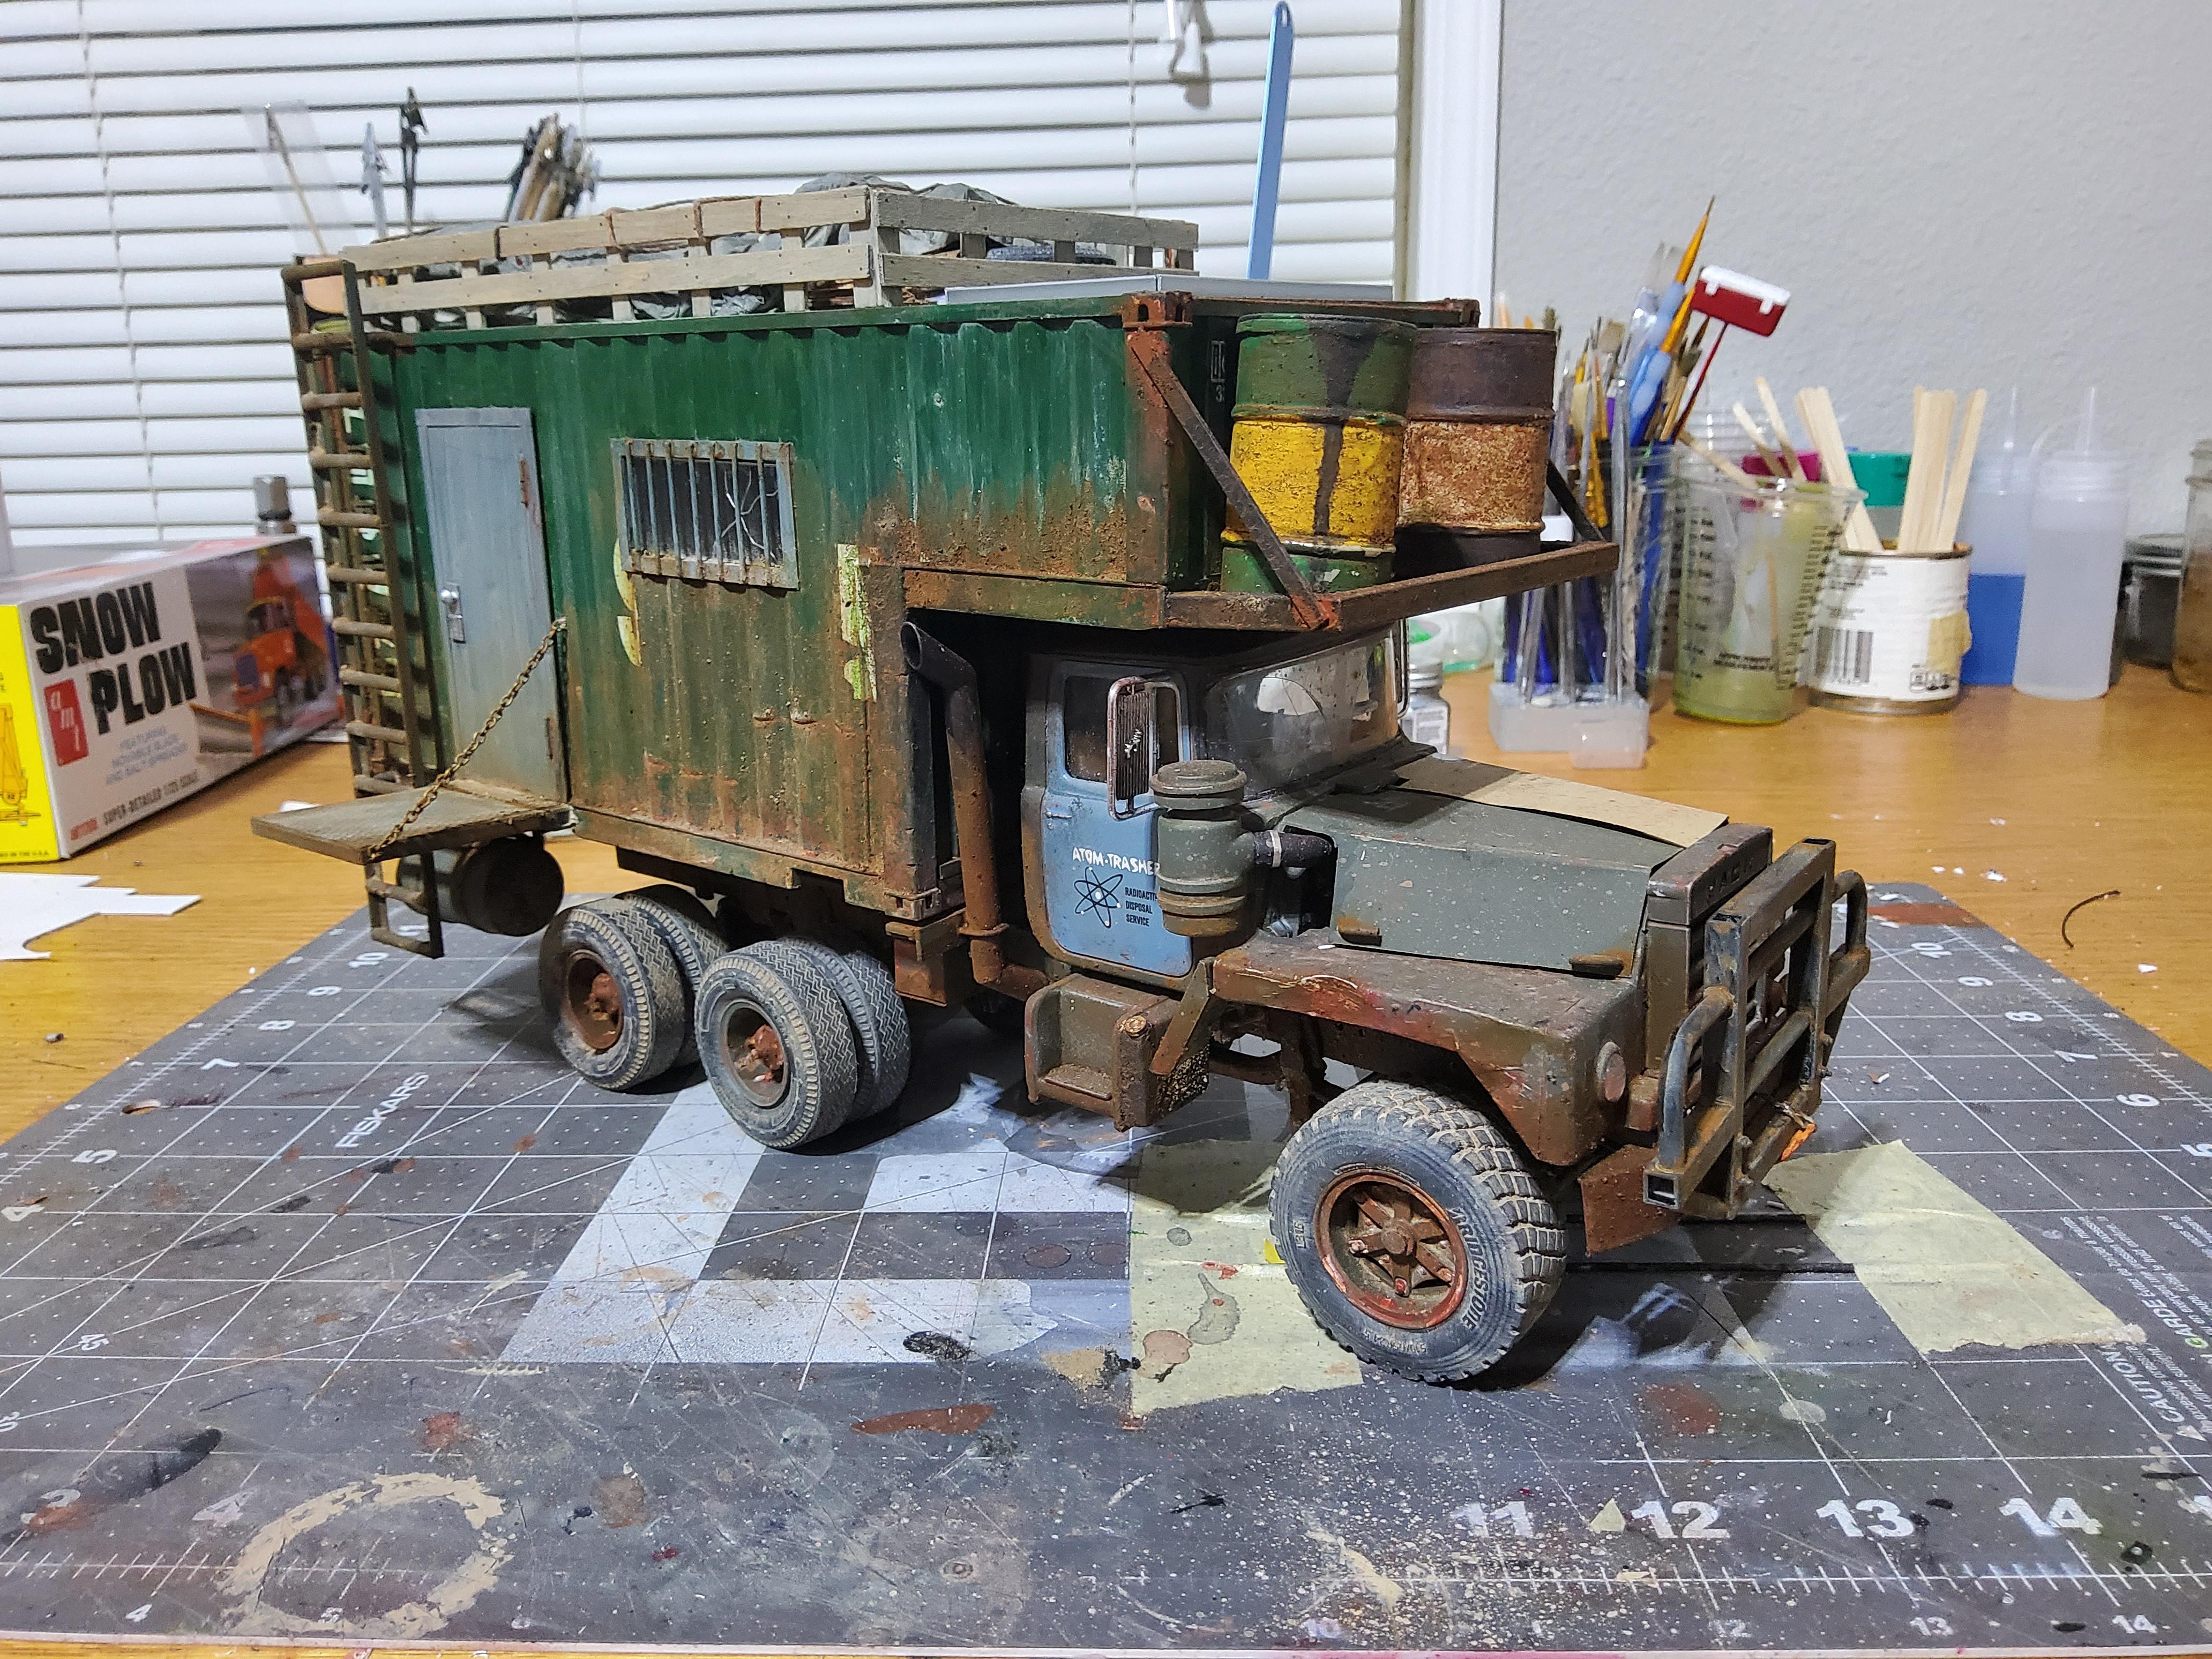
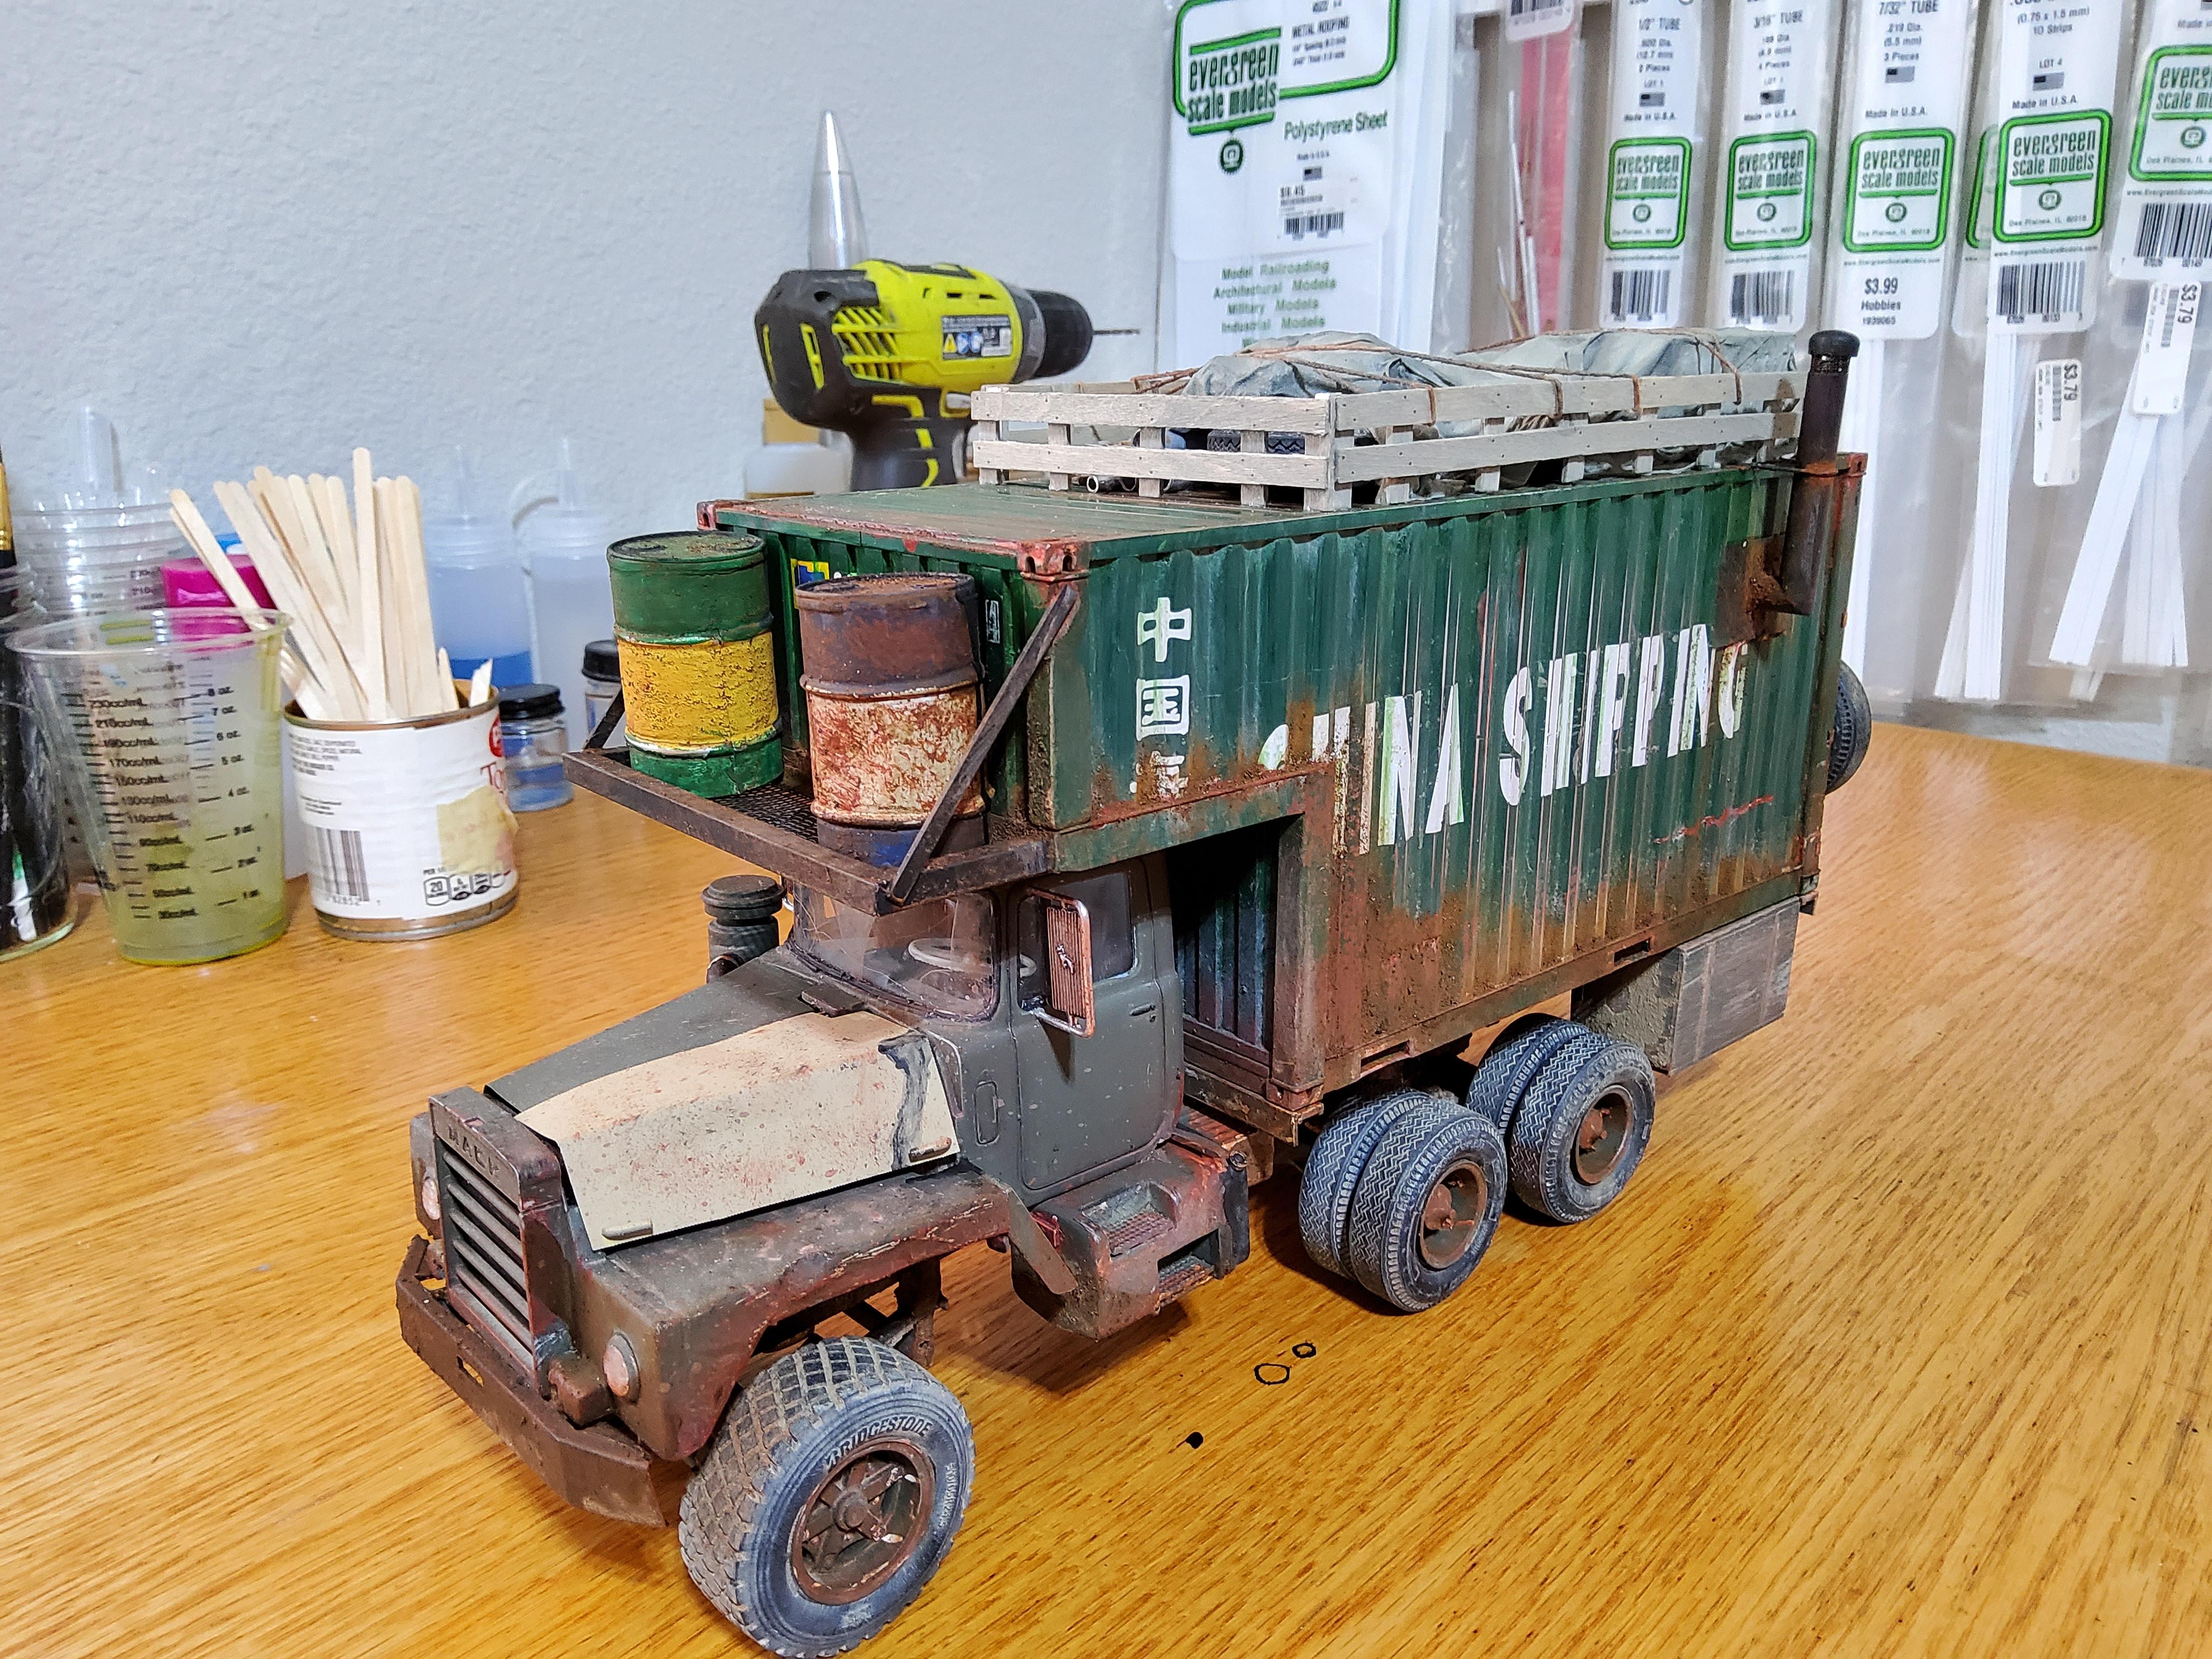
I have found acrylic craft paint works really well due to the dead flat look. Brush some "pavement black" into the treads and sand off the tread after dries. I have also used more sandy/dirty colors to get the weathered look like seen in the picture below. BTW, the truck in the picture is not finshed, I have a way to go, but the tires were painted and simply rubbed off with a rag leaving "Dirt" in the treads and dulling the side walls. I know this will be too extreme for a normal show/street car, but if you are doing a beater or old truck it works well.
-
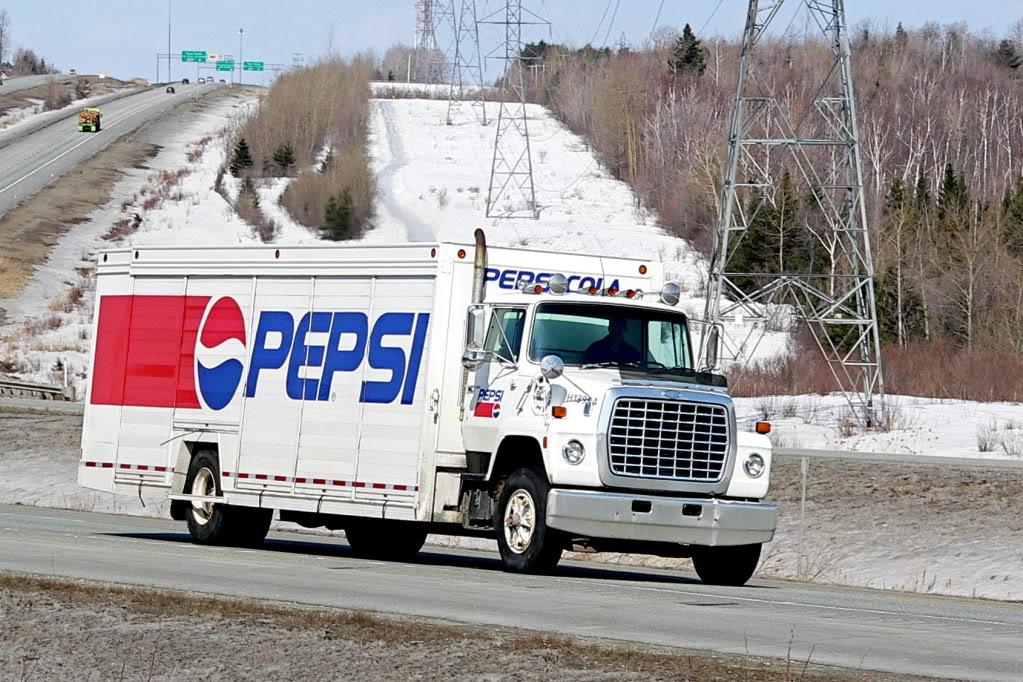
After some internet searching I found a truck very close to what I am building. This one is much longer and even seems to have sme kind of extension on the back after the last set of doors. However it is a straight side like the one I am building. This one looks to be for more rual routes and larger loads, while mine is a city truck, smaller loads and more manerverable in town. I have the rear fender area round, while most I see are angular. I am on the fence about changing it. Input? I just ordered some non-chrome 2 hole style wheels from Scenes Unlimited. I like the chrome wheels, but they seem a bit too much bling for a working truck and I can find very few examples of beverage trucks with the Aluminum/Chrome wheels. I love the look of this Pepsi version and I am a Pepsi fan, I have a ton of Coca-cola decals from all f my coke models, plus vending machines and bottles. So, going with Coke theme will save me money.
-
The 2022 Cannonball Run Year of Birth Build Thread
Oldmopars replied to disconovaman's topic in Community Builds
I agree about the paint. With the current weather at my house (snow) I will not be doing a lot of painting for a while. -
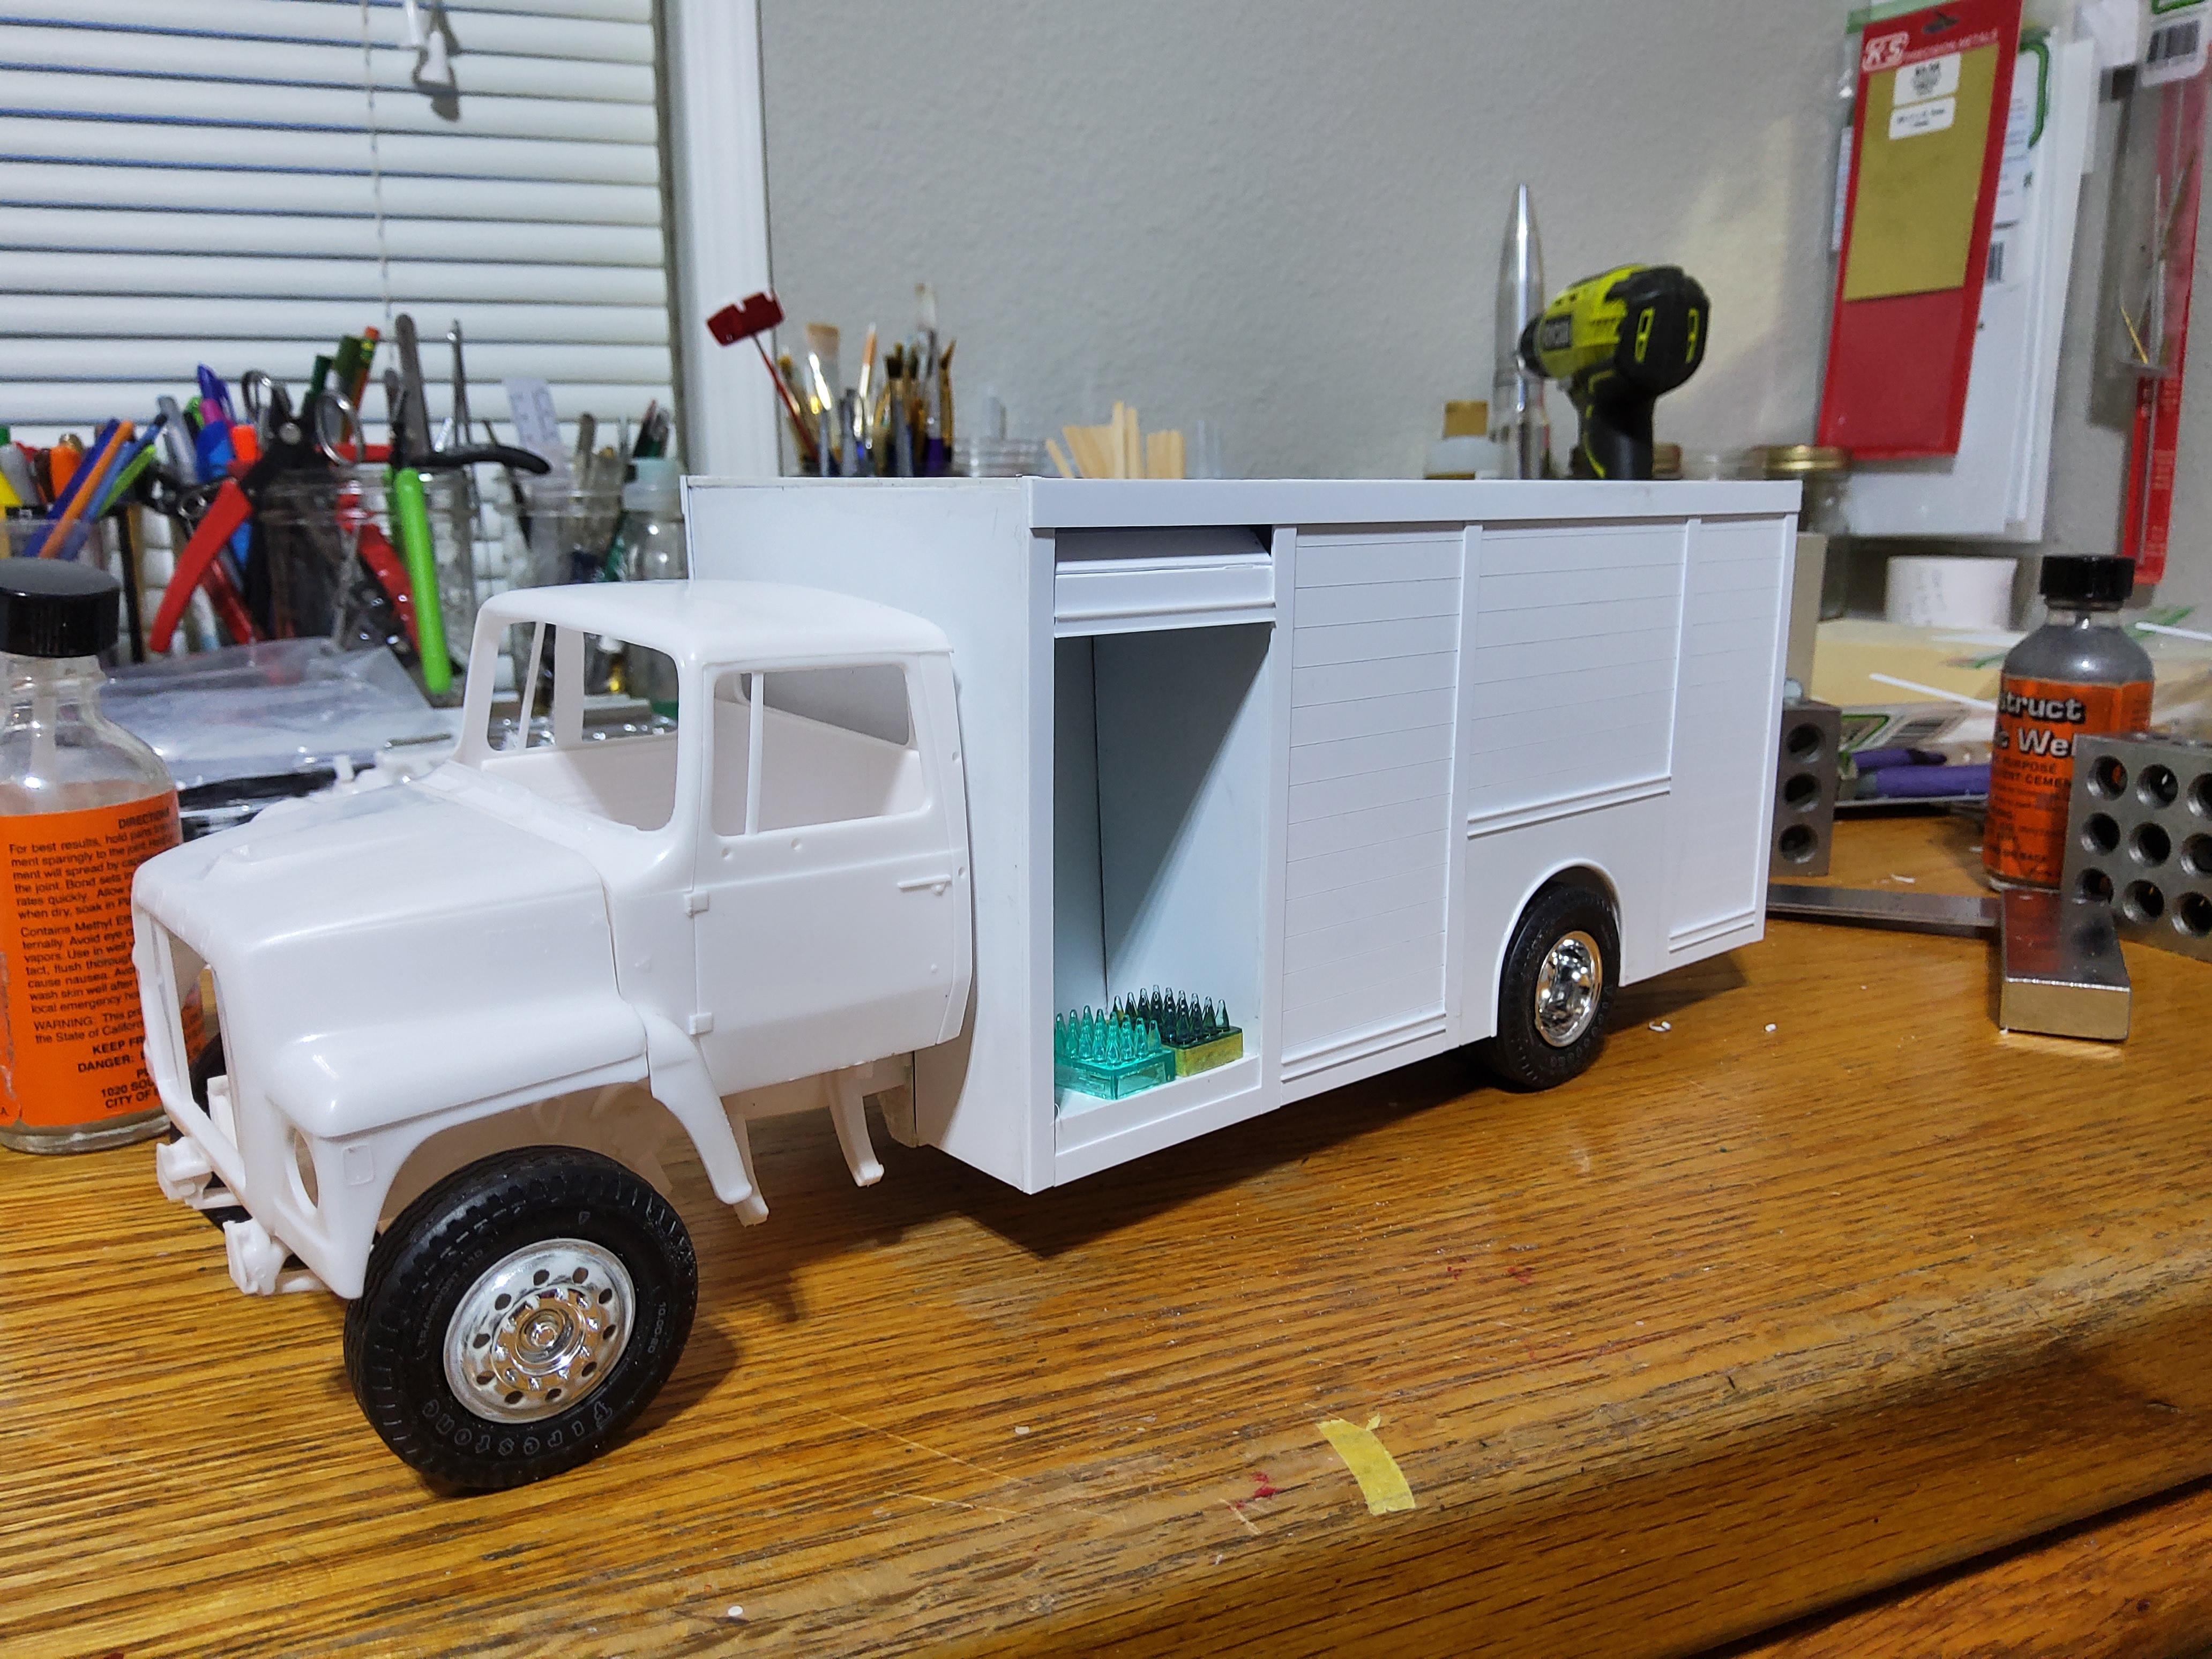
Well, some time later. I now have the left side done. There is still much to do, lots of seams to fill, lights to add. I may add some more details and moldings, etc. But the basic box is there.