Dragonhawk1066
-
Posts
3,932 -
Joined
-
Last visited
Content Type
Profiles
Forums
Events
Gallery
Everything posted by Dragonhawk1066
-
Outstanding!
-
Outstanding!! I did mine in red as well.
-
Thanks guys! Thanks! The background was a lot of fun to do, and I'm always looking for things to add to it. Thanks Joe! That's exactly how this one was, perfect until final assembly. The '69 442 I built a couple years ago was lower at all fours, with only a slight difference from one side to the other.
-
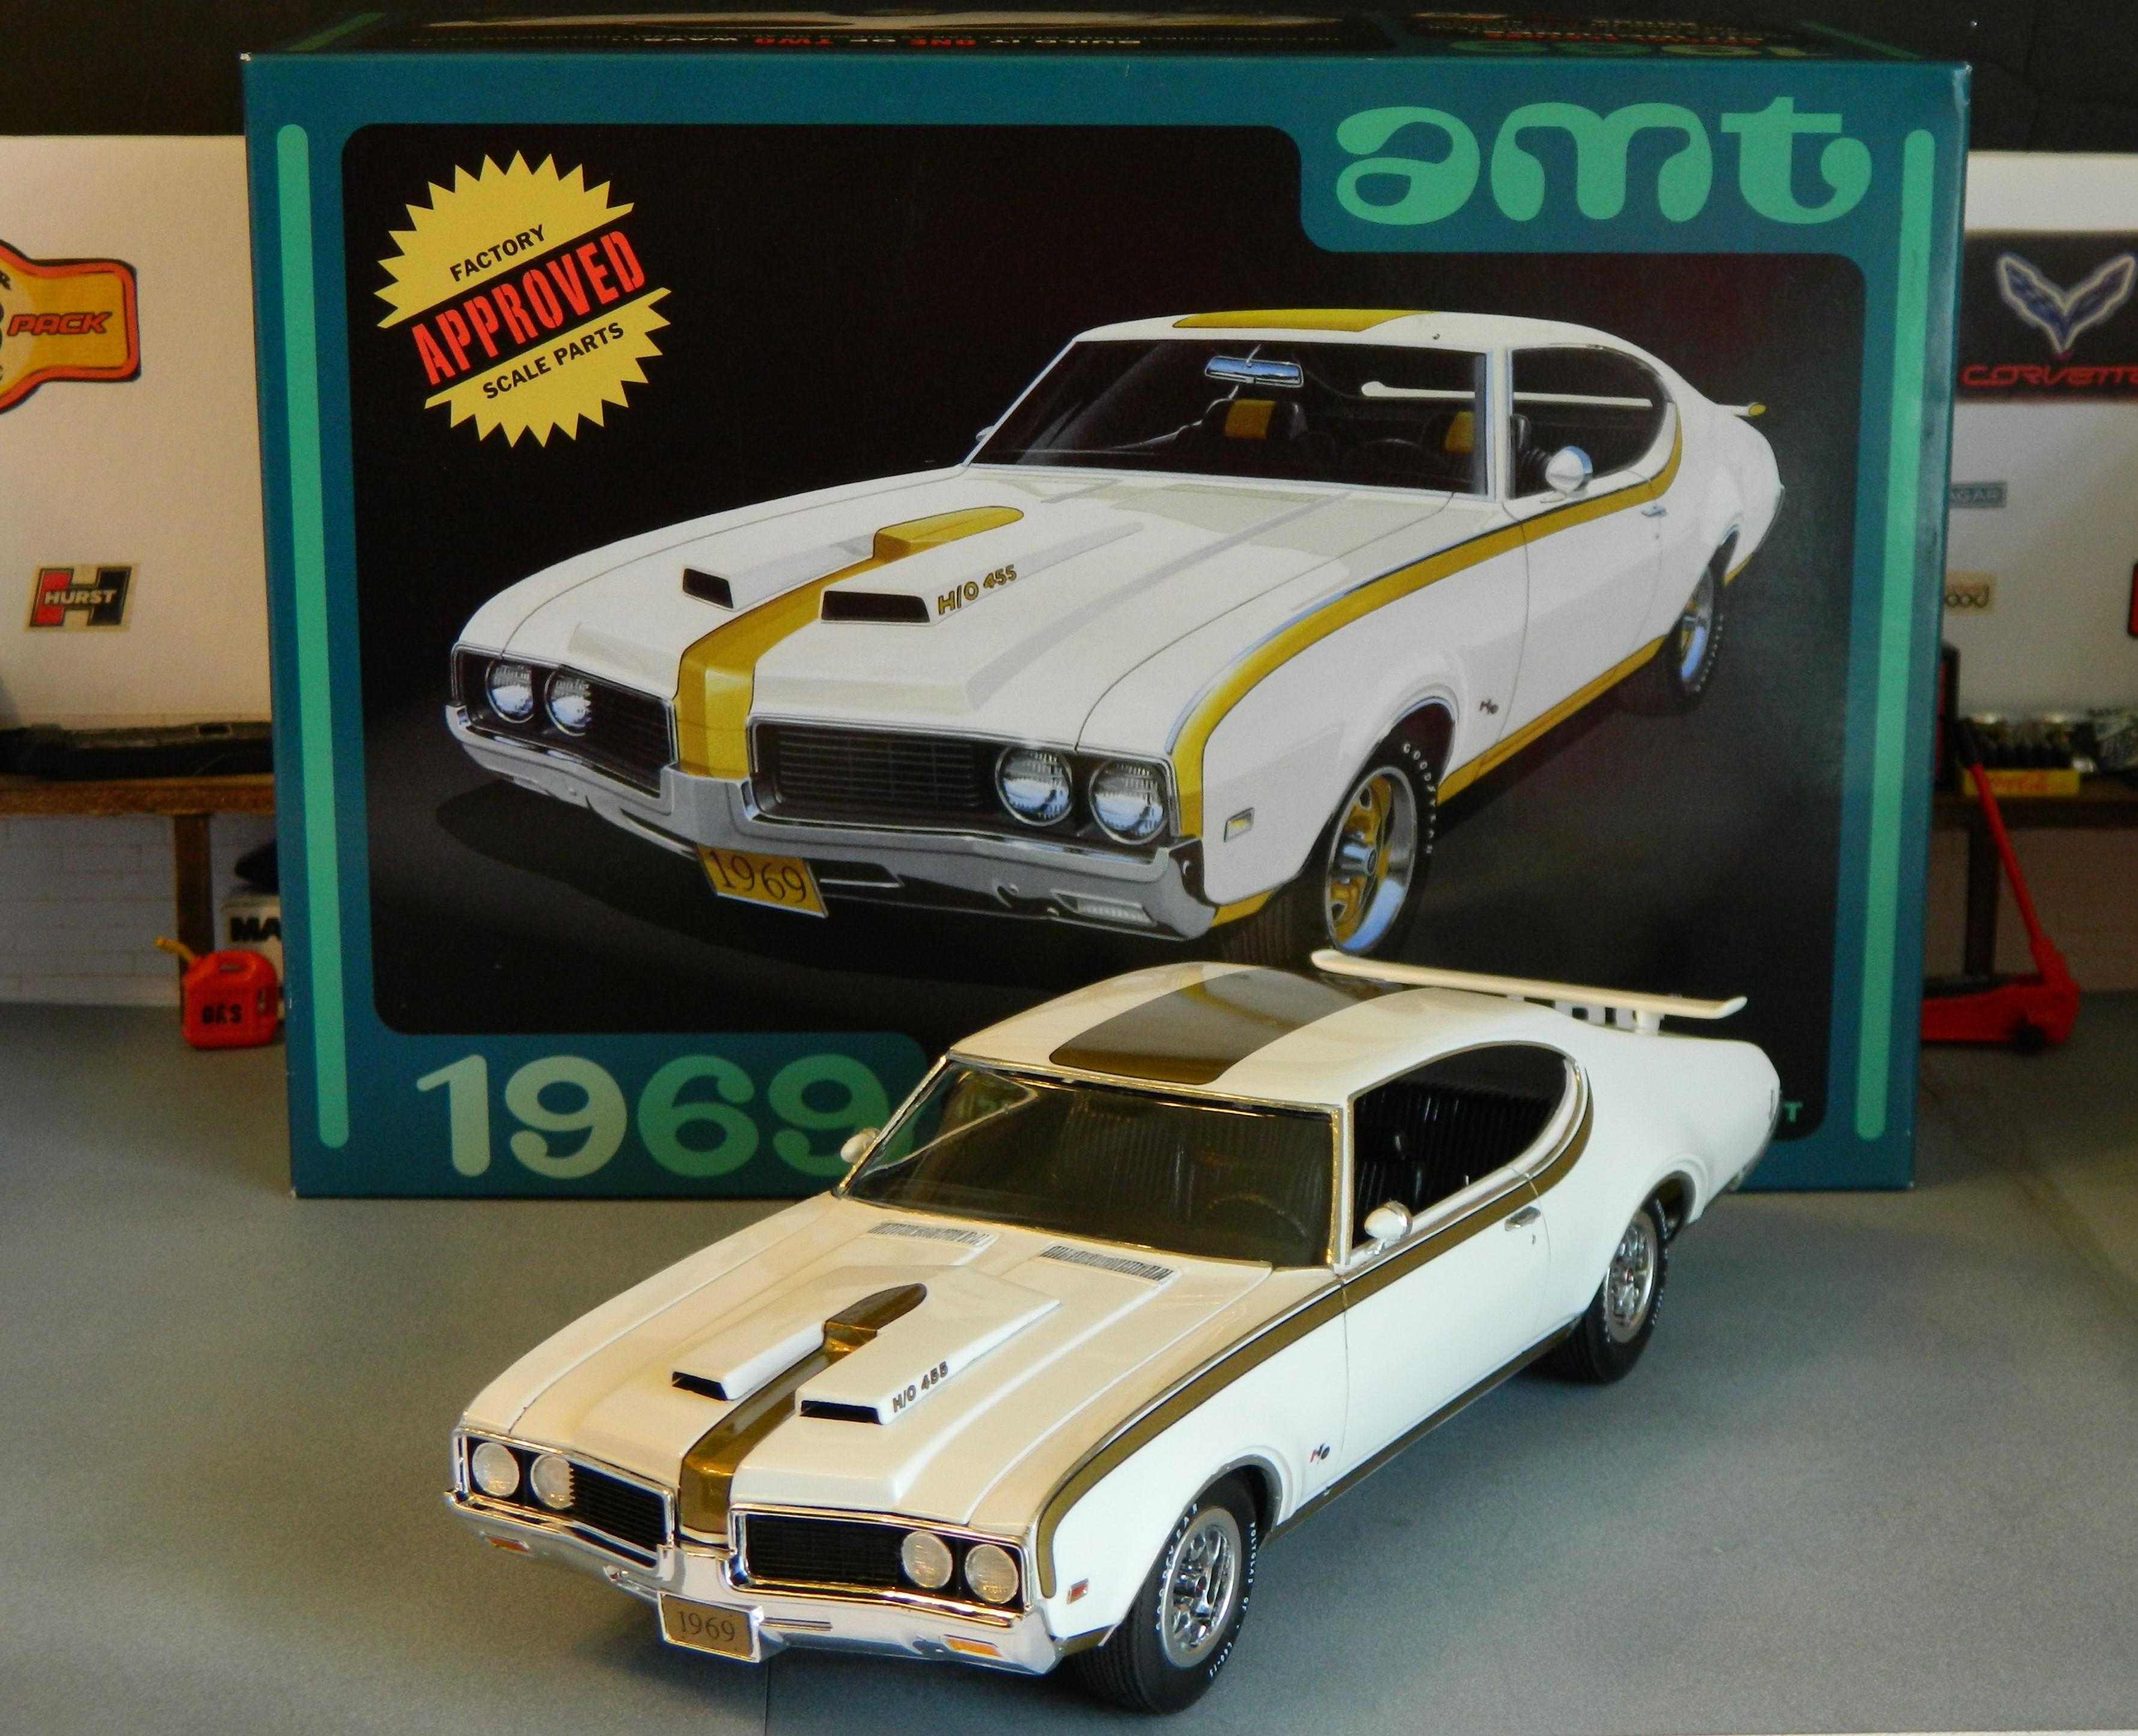
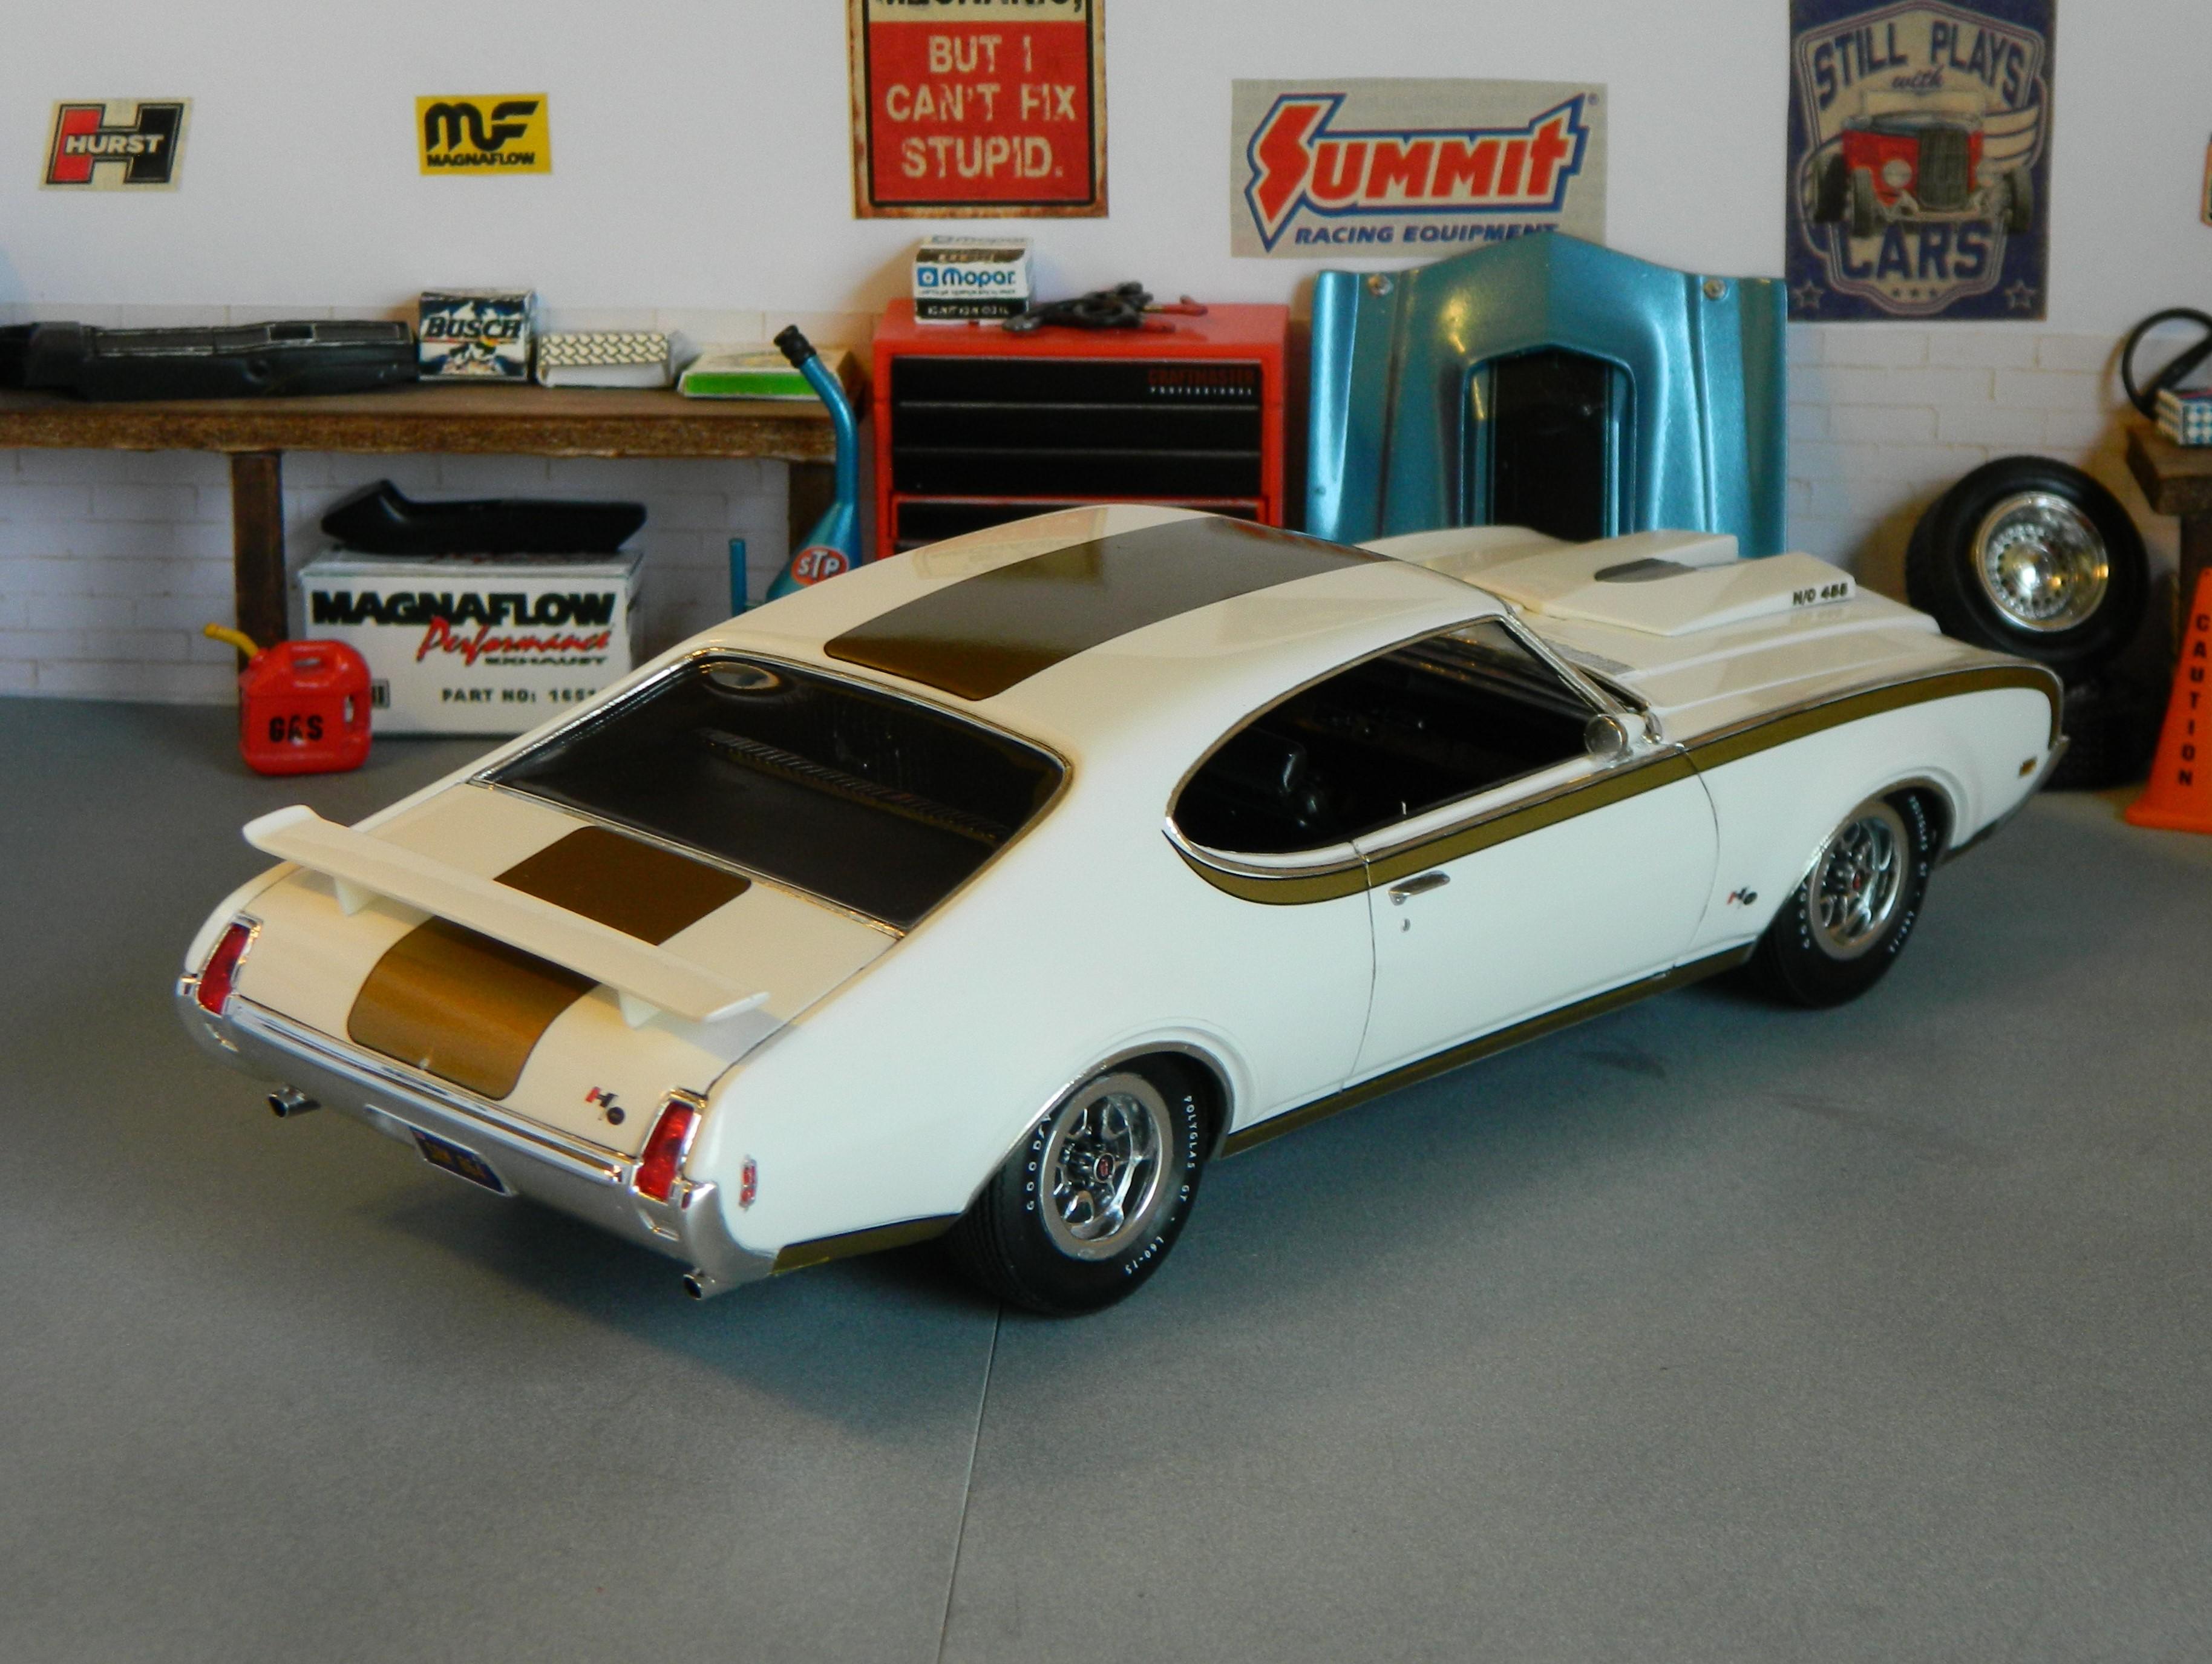
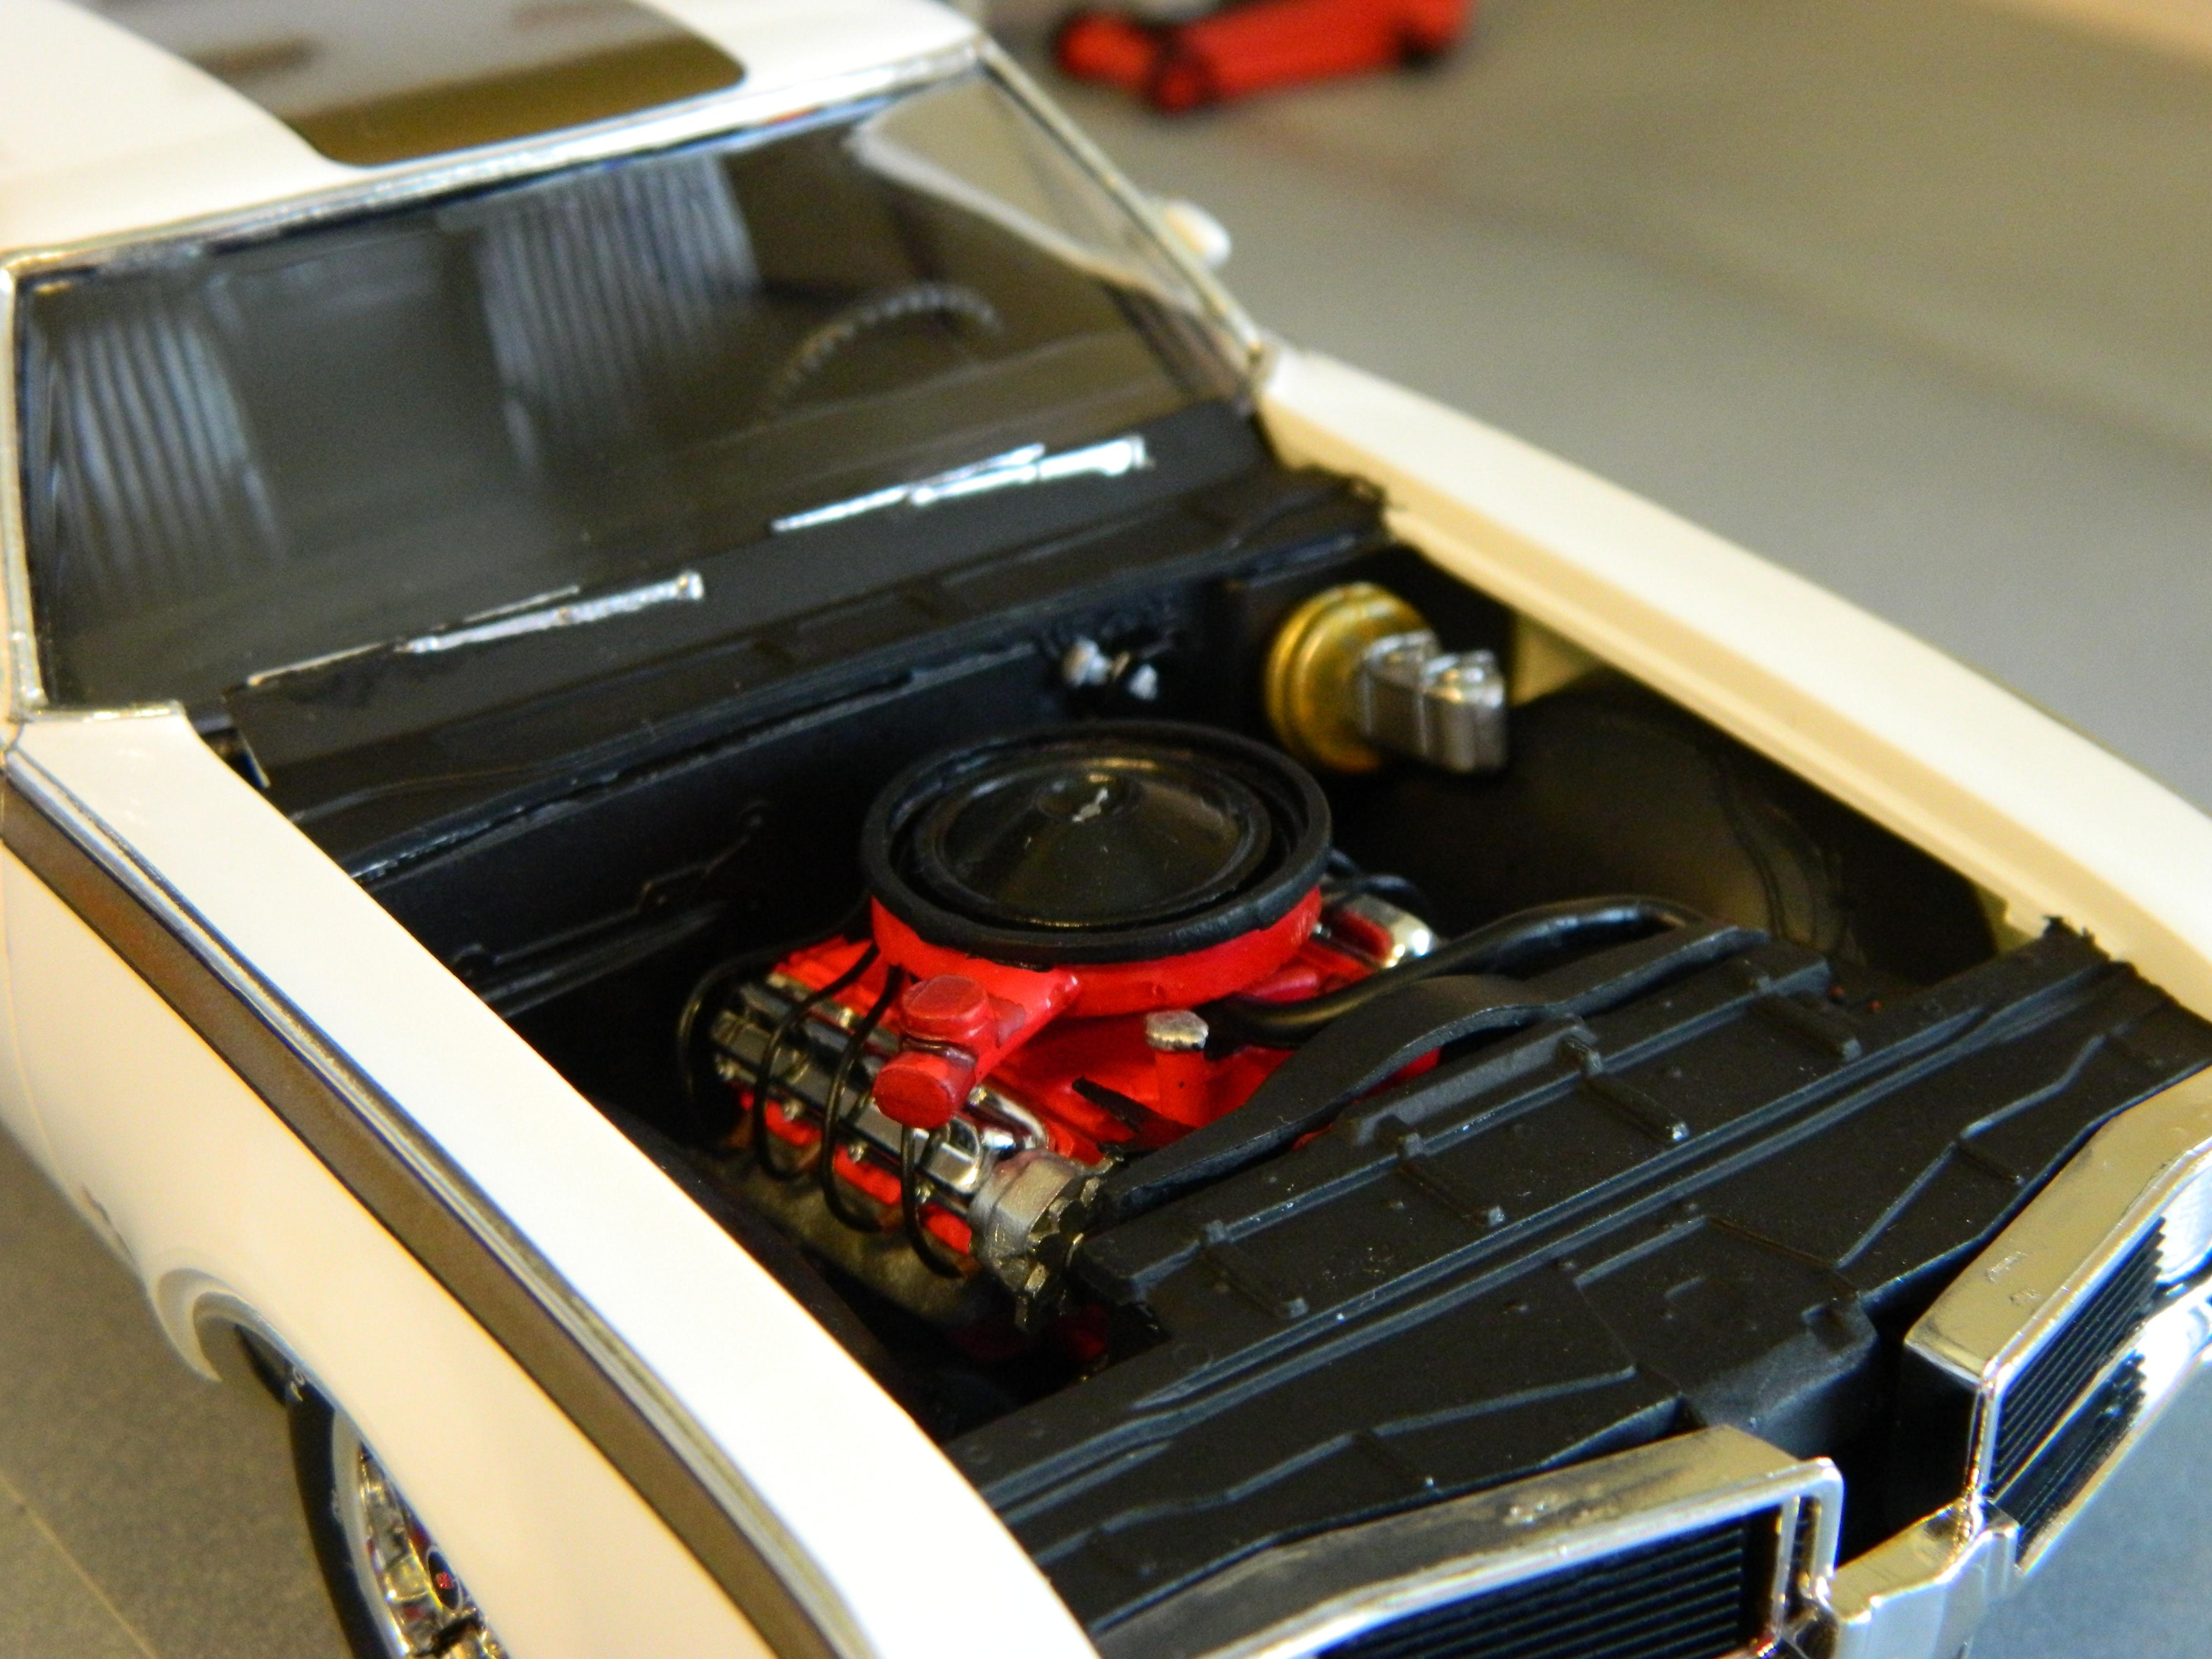
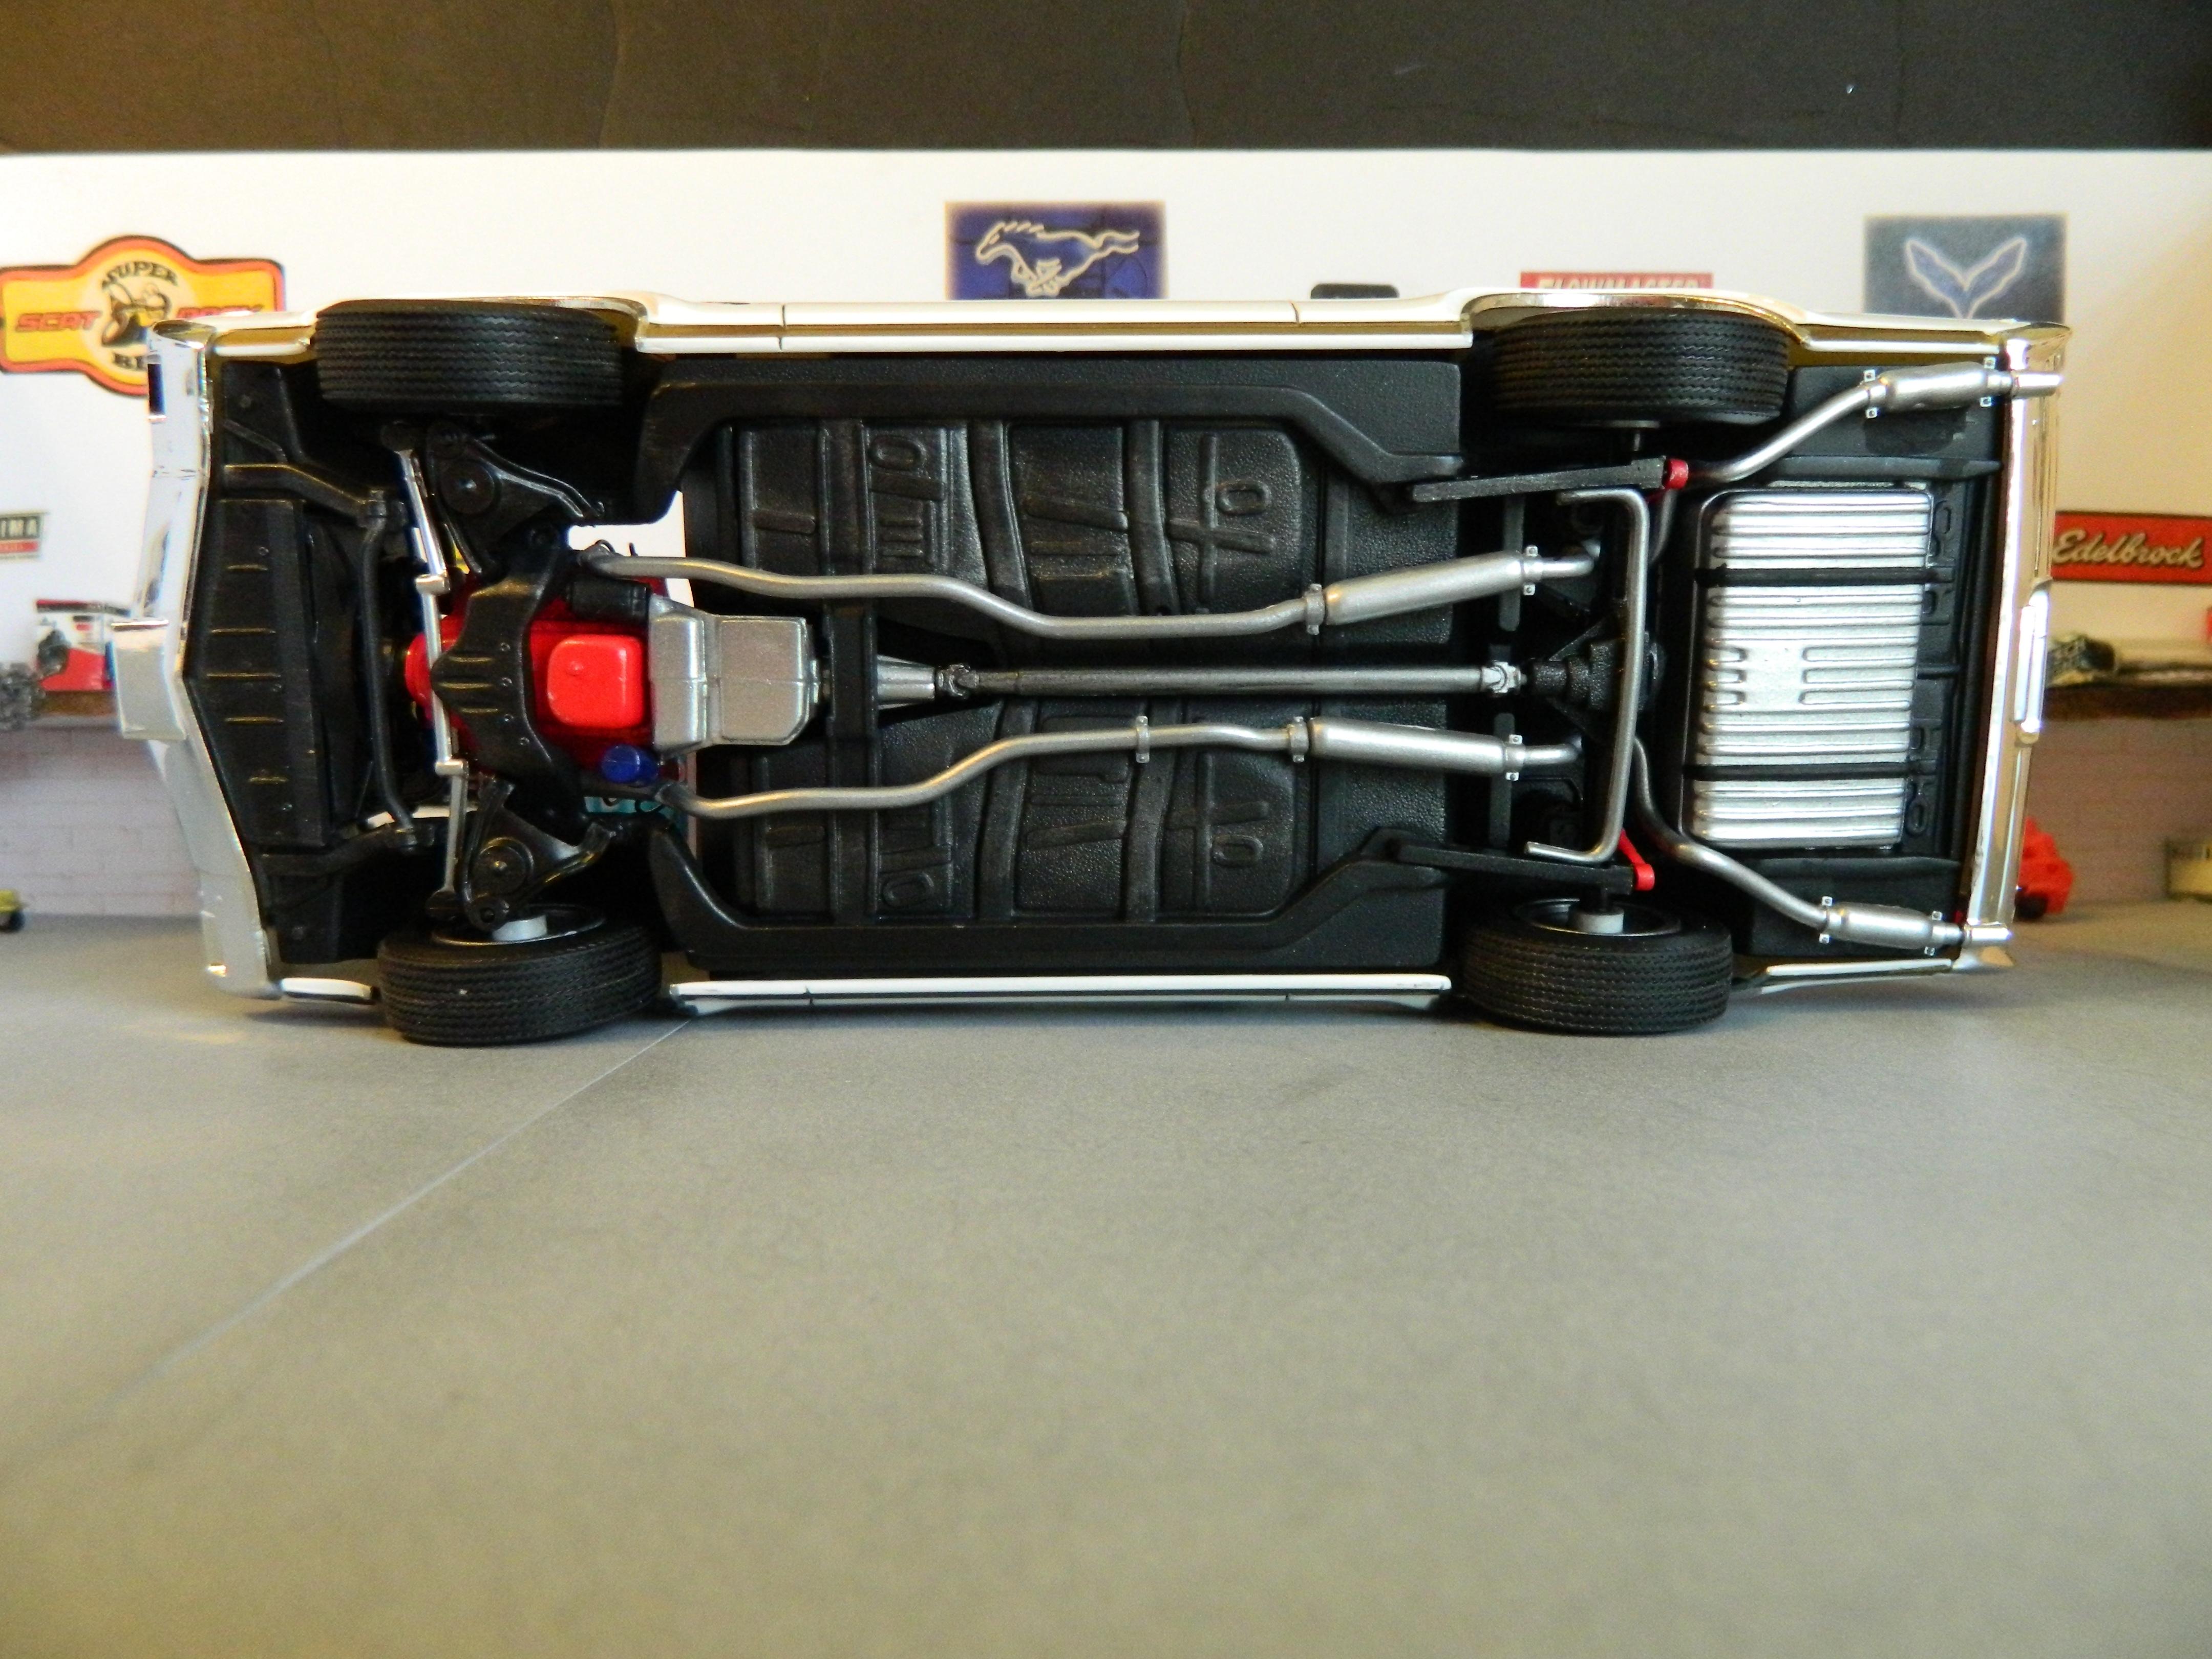
Here's AMT's 1969 Hurst/Olds. It's painted in Tamiya TS-26 Pure White from the can. I wet-sanded, polished, and waxed the color and did not use any clear. The interior is mostly Anita's Glossy Black craft paint. The wheel spokes were painted with Tamiya x-10 Gunmetal. I added door lock knobs, valve stems, and spark plug wires for added details and used BMF for the trim. The decals were a little tricky on this one particularly the hood stripe. If I had it to do over again, I would measure and cut the hood stripe in a couple of spots for easier application. The passenger's side does sit lower than the driver's side, but I couldn't figure out why. It's a nice kit with no real surprises or fitment issues otherwise. I've also done the '69 Olds 442 kit, and have another '69 Olds 442 kit on my to do list later this year, so I'll probably really look into the stance issue if it crops up again. Thanks for looking!

-
Very sharp! Excellent idea!
-
Nice work, sharp color!
-
Well done!
-
Well done! Great color!
-
Looks good! That's a great color choice!
-
Nice work on the Chevelle, and those were some great bargains on those kits!
-
Most impressive!!
-
Outstanding!! You did a phenomenal job getting the "stainless/aluminum" look for the interior, in fact the whole interior looks amazing. I had to fix that same issue on my front end, and I like how you got your front end nice and low (mine sits too high and I will probably try to fix it someday). I like the clean look of the bumpers too.
-
Nice, smooth paint job! Looks sharp!
-
Very nice!
-
Fantastic!!
-
Looks good, great color choice!
-

"The Pennsylvanian" - my take on MPC's "The Californian"
Dragonhawk1066 replied to Karl LaFong's topic in Model Cars
Nice work! I like your version better! Those roof lights, or whatever they're supposed to be, just threw the whole thing off. -
Well, I'm probably in for the '81 Z28, '85 Z28, '32 Ford Roadster, '70 Plymouth Road Runner, and hopefully at least a couple of the '71 Olds'. With these and everything else Revell is planning to release this year, I'm probably going to have to sell a couple of body parts, LOL.
-
Very nice!
-
Looks great, well done!
-
Revell 1969 Chevy Nova SS Street/Strip.
Dragonhawk1066 replied to Dragonhawk1066's topic in Model Cars
Thanks everyone! -
1/12 `65 Shelby Mustang Cobra GT350 Finished!
Dragonhawk1066 replied to Hawk312's topic in Model Cars
Outstanding!! -
Absolutely fantastic!!
-
AMC Javelin in "Trans Am Red" (Jo-Han kit resto)
Dragonhawk1066 replied to Tommy124's topic in Model Cars
Very nice! Great job on both!! -
Well done and great color choices on all!!