Dragonhawk1066
-
Posts
3,932 -
Joined
-
Last visited
Content Type
Profiles
Forums
Events
Gallery
Everything posted by Dragonhawk1066
-
Pretty sweet wagon, and very well done!
-

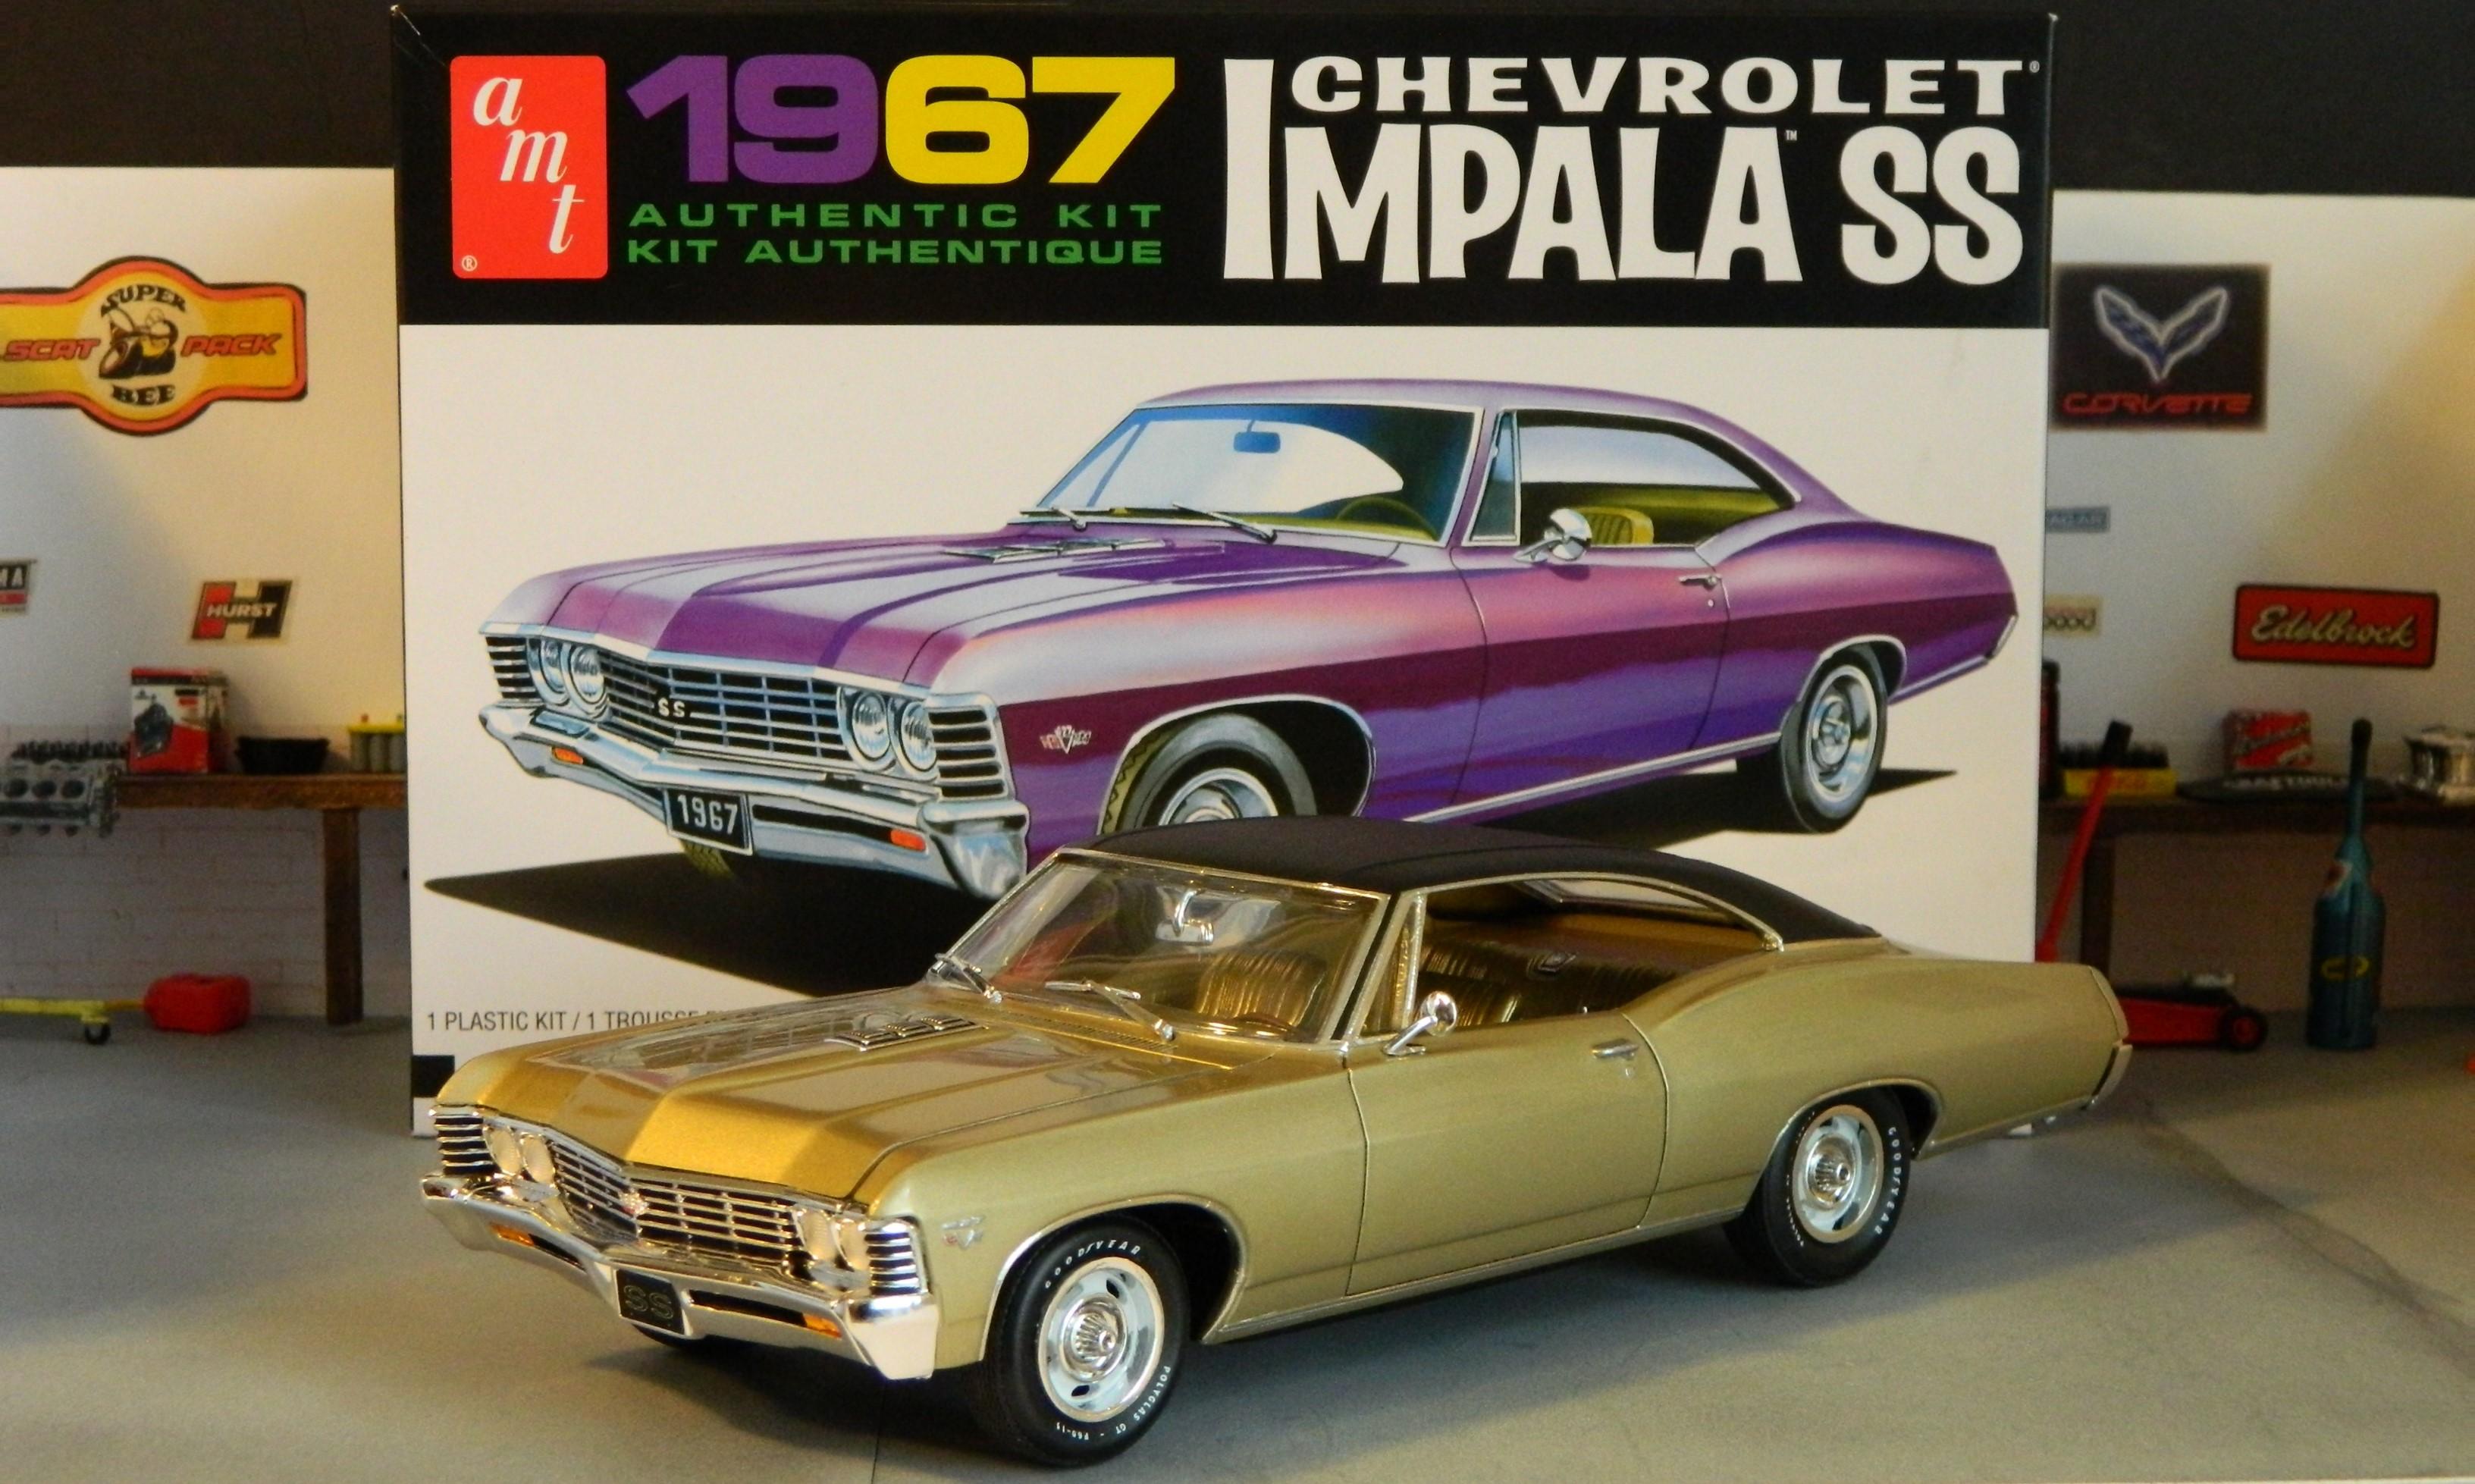
AMT 1967 Chevy Impala SS427. Factory Stock 1/25 Scale.
Dragonhawk1066 replied to Dragonhawk1066's topic in Model Cars
Thanks everyone! -
AMT 1967 Chevy Impala SS427. Factory Stock 1/25 Scale.
Dragonhawk1066 replied to Dragonhawk1066's topic in Model Cars
Thanks guys! -
Thanks everyone, I didn't realize I forgot to put the paint/color in the original post. It's Model Master Plum Crazy from the 2-part Lacquer System line (Unfortunately no longer being manufactured) sprayed straight from the can, and I think I used Testors Wet Look Clear on it.
-
2 guys 2 kits , 2 69 Z 28 Camaros....
Dragonhawk1066 replied to gotnitro?'s topic in WIP: Model Cars
Great looking Truck/Trailer builds guys! And a great pandemic build theme! Looking forward to seeing the Camaro's finished. -
Turned out nice!
-
Looks good! That was a nice kit, I really enjoyed building mine.
-
AMT 1967 Chevy Impala SS427. Factory Stock 1/25 Scale.
Dragonhawk1066 replied to Dragonhawk1066's topic in Model Cars
Thanks guys! -
Looks great! I like the color!
-
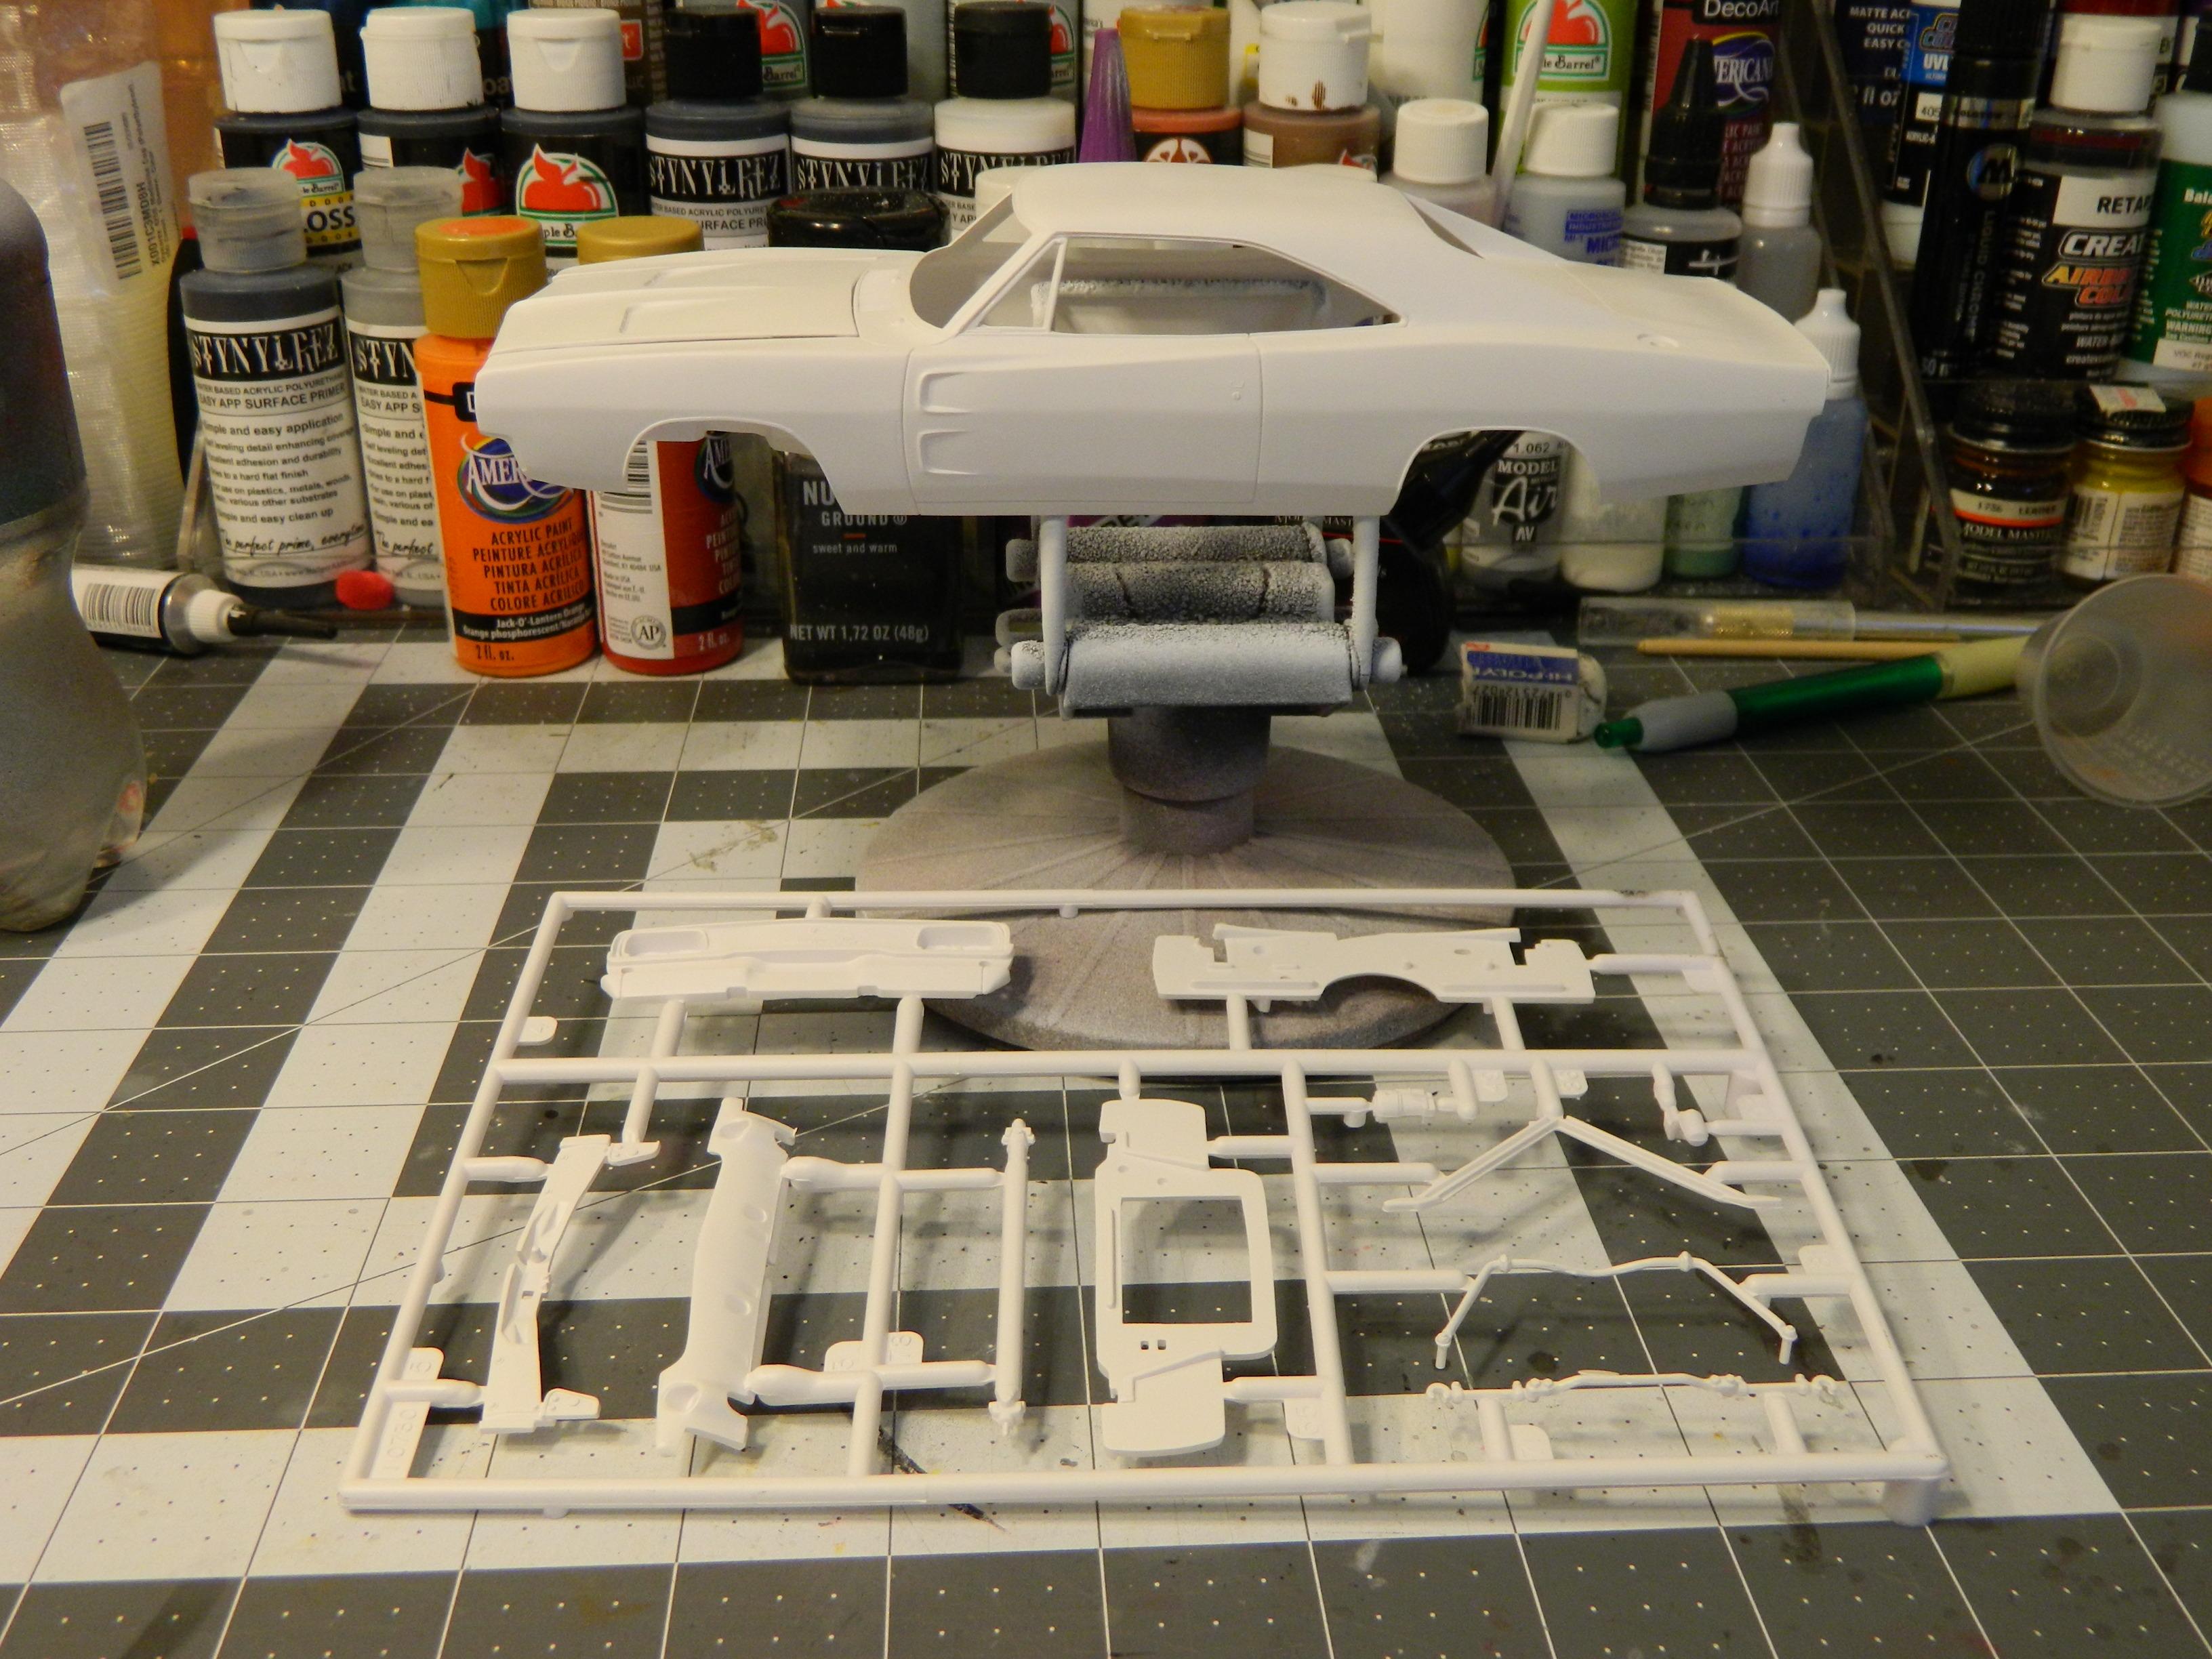
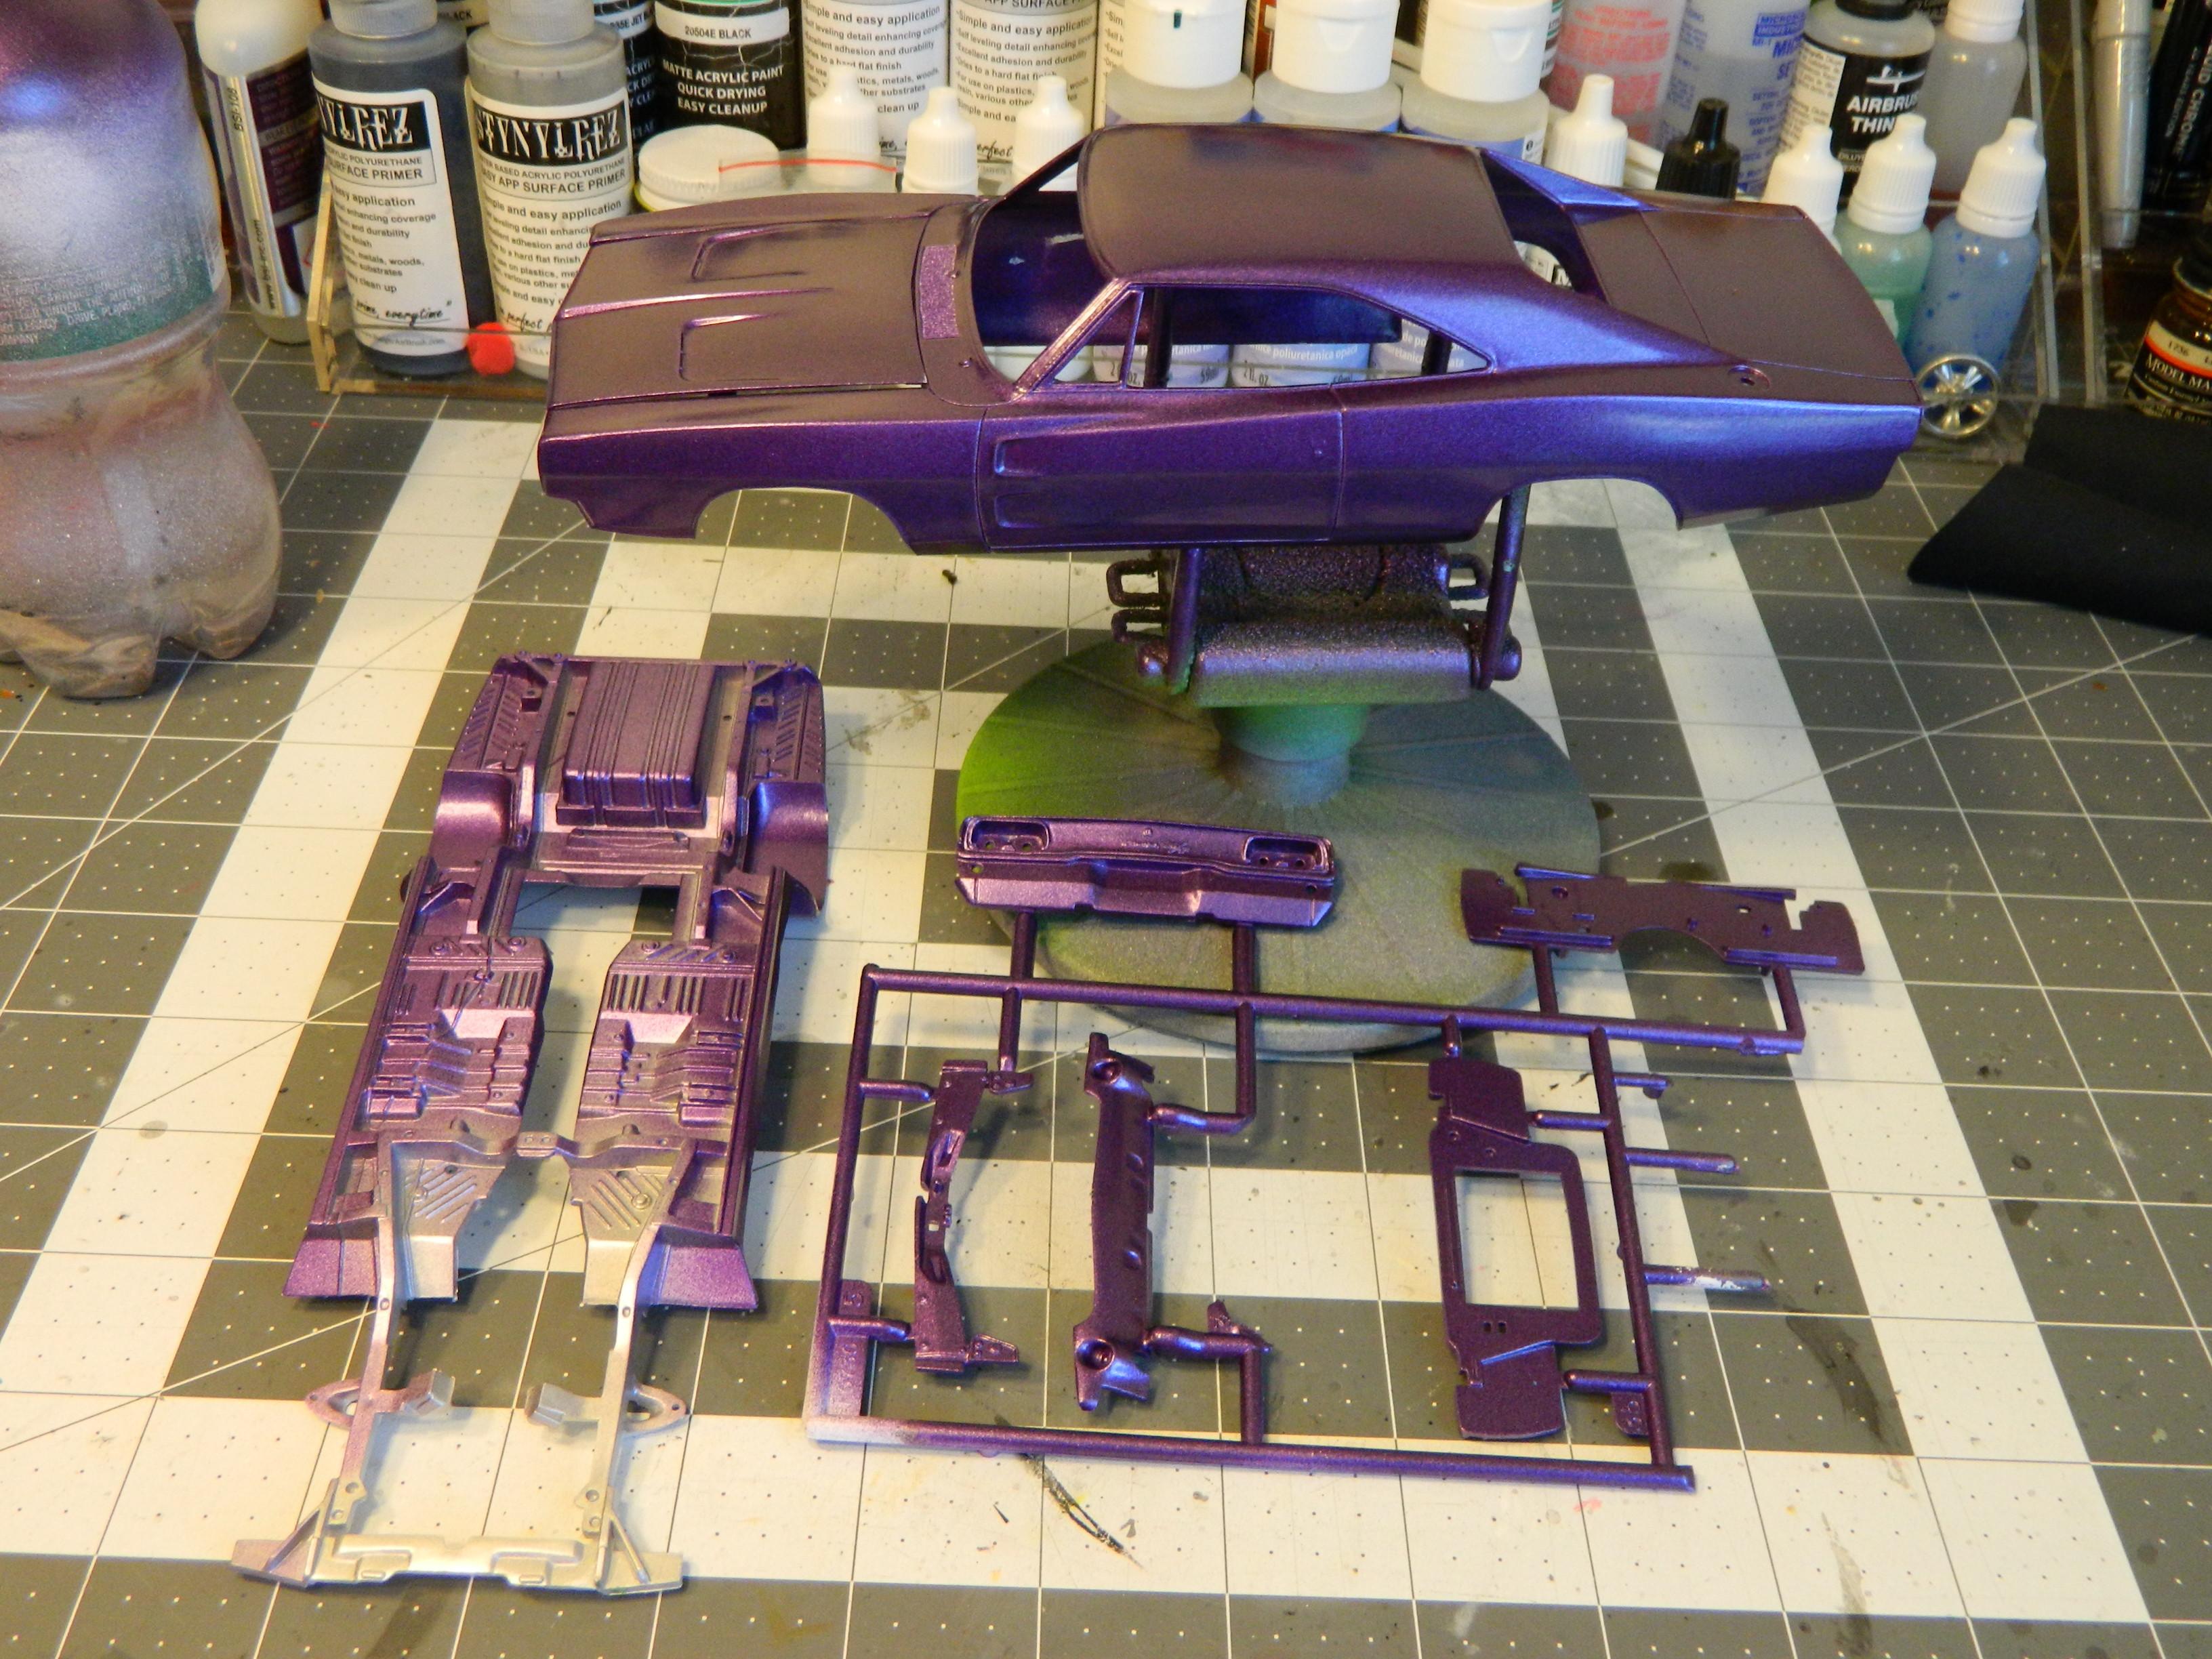
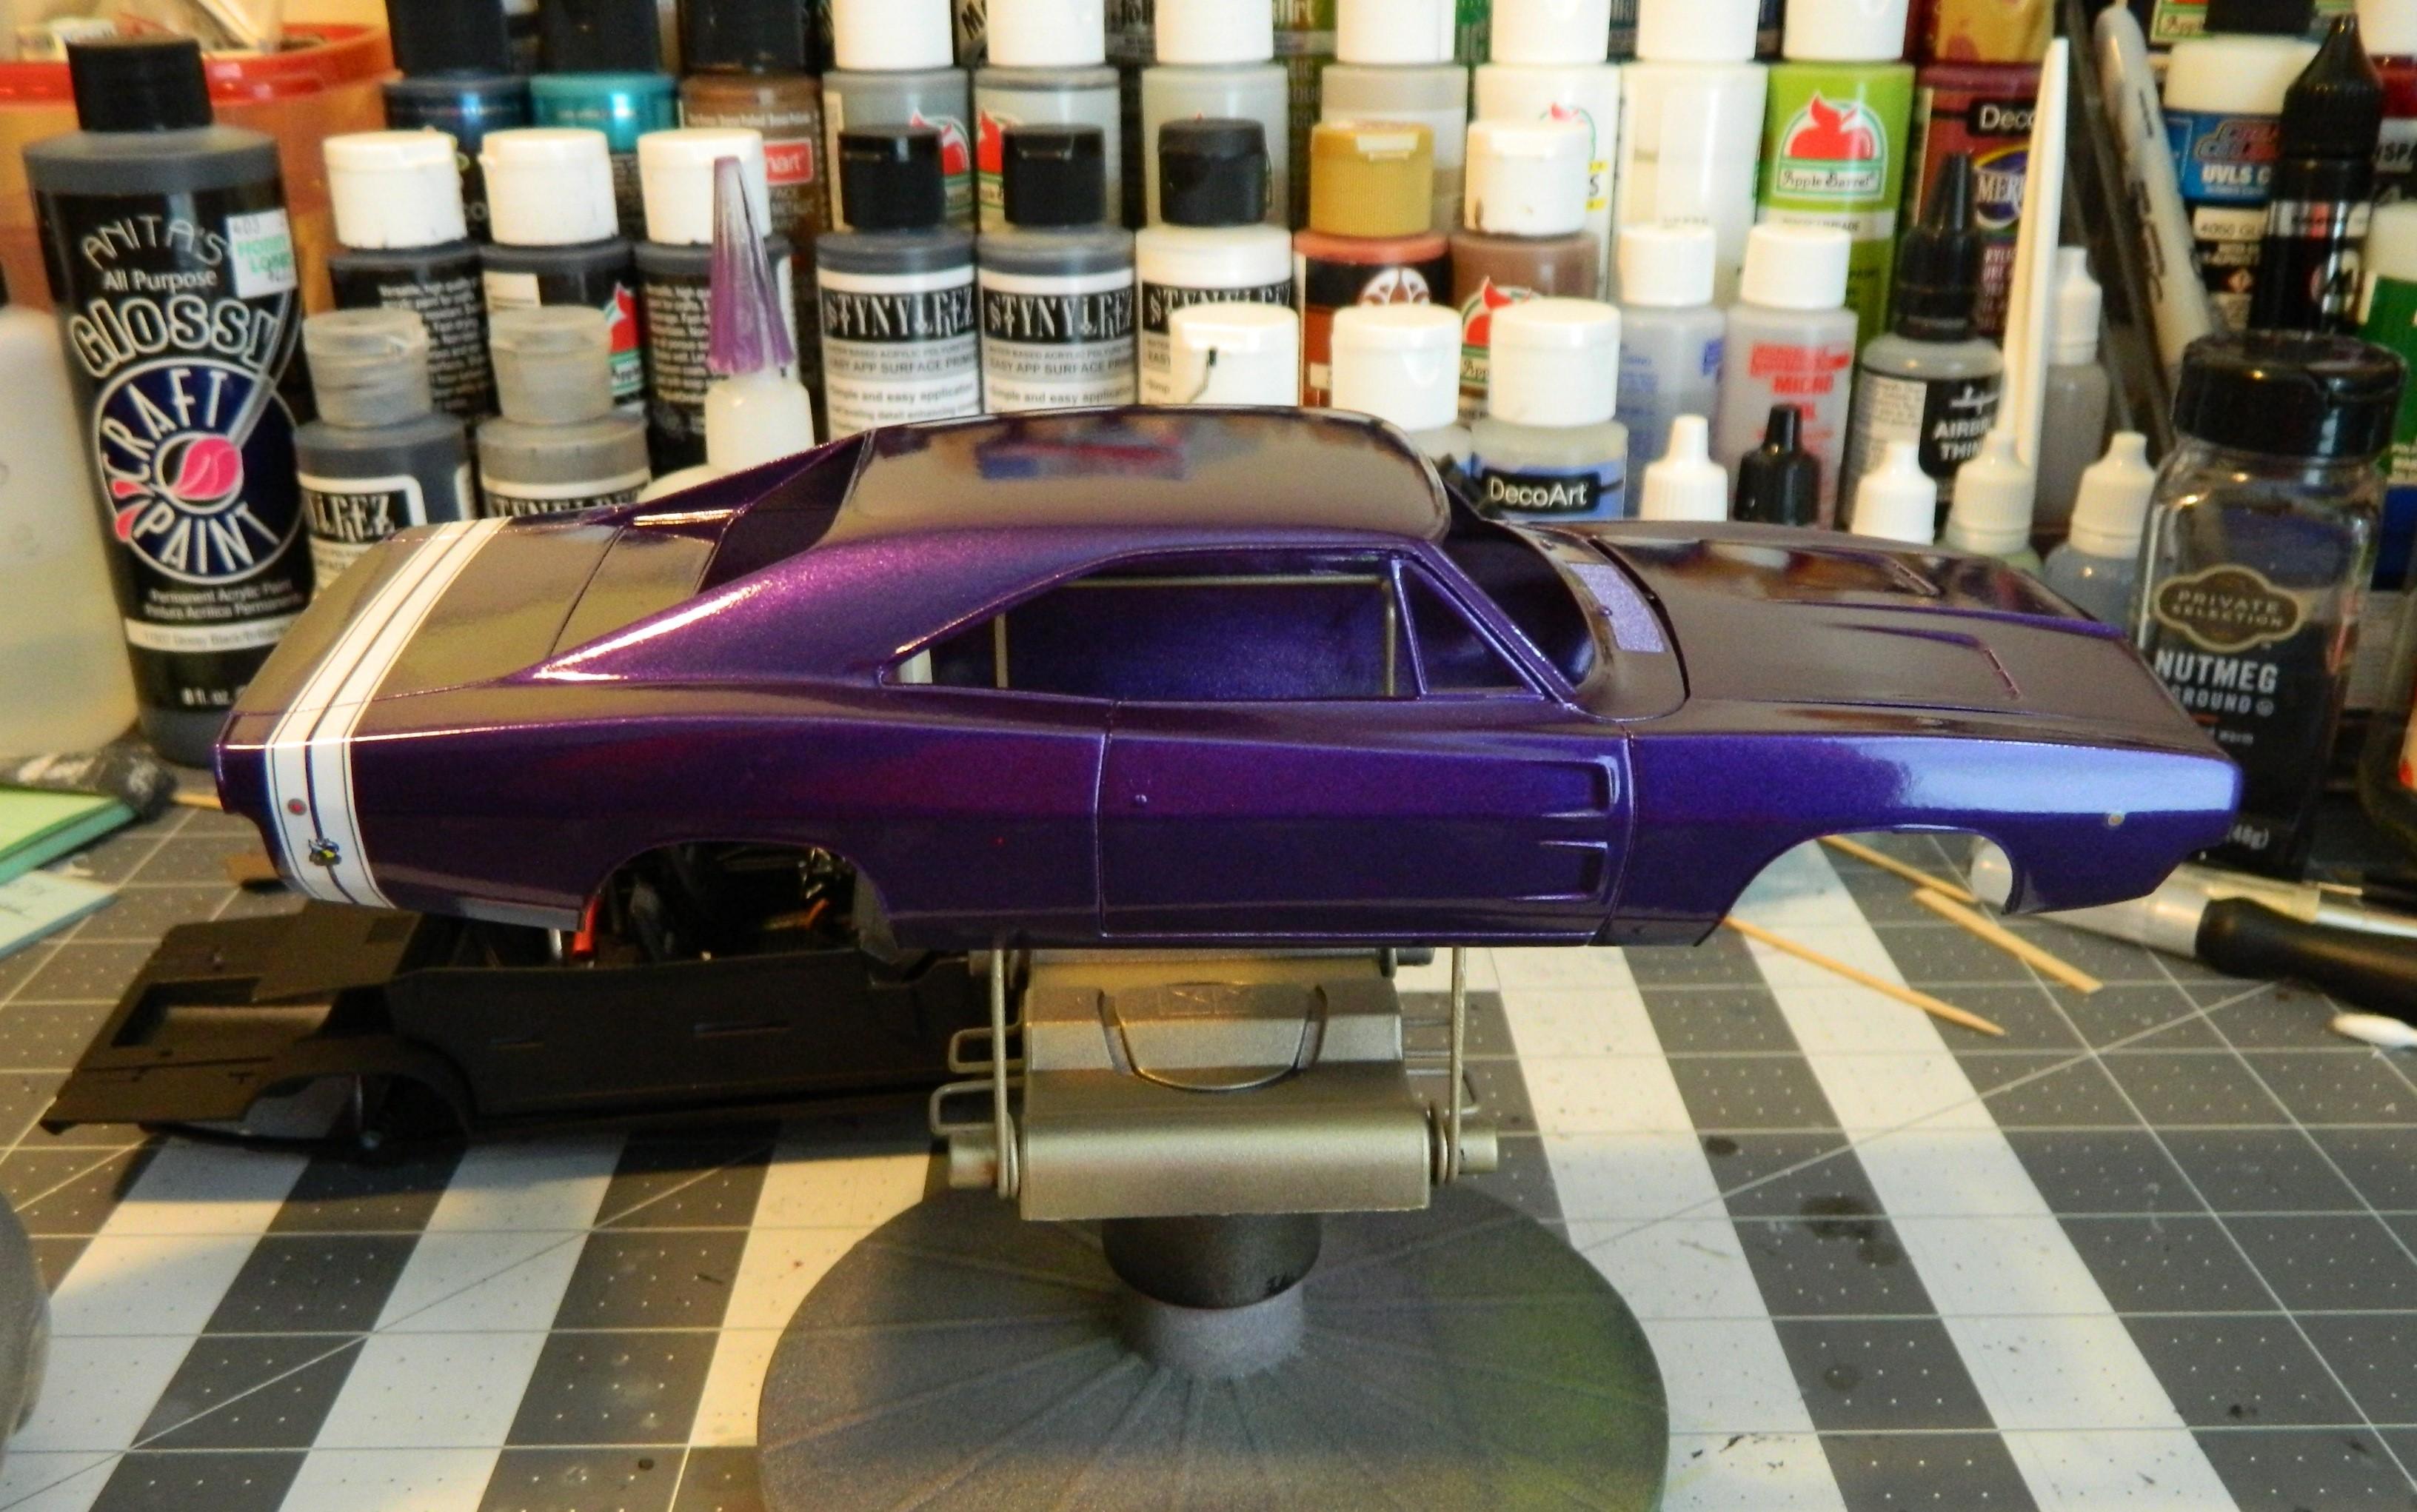
I'll be getting started on this one probably on Monday. I primed it with Rustoleum 2X flat white primer on July 27, then painted it on July 31. Decals went on around August 13, and the clear on August 16. First pic is the 1:1 car this will mostly be based on, although I'm a little dark on the color.

-
Looking real good so far. I love using craft paints, and have actually sprayed the Shimmering Silver on the bottom part of my Hurst/Olds build from way earlier this year. I'm also just about to start this same kit in a few days, although I did already paint, decal, and clear it.
-
2 guys 2 kits , 2 69 Z 28 Camaros....
Dragonhawk1066 replied to gotnitro?'s topic in WIP: Model Cars
Love this truck and trailer! -
2 guys 2 kits , 2 69 Z 28 Camaros....
Dragonhawk1066 replied to gotnitro?'s topic in WIP: Model Cars
Both are looking very good! Seems like a lot of fun to have a specific kit build-off! -
AMT 1967 Chevy Impala SS427. Factory Stock 1/25 Scale.
Dragonhawk1066 replied to Dragonhawk1066's topic in Model Cars
Thanks everyone! -
Nice looking Jag in a great color with excellent details!
-
Well done! Nice weathering!
-
Nice looking 442! Looks good in white!
-
Looks good!
-
Very nice! Great photos!
-
Sharp color, looks good!
-
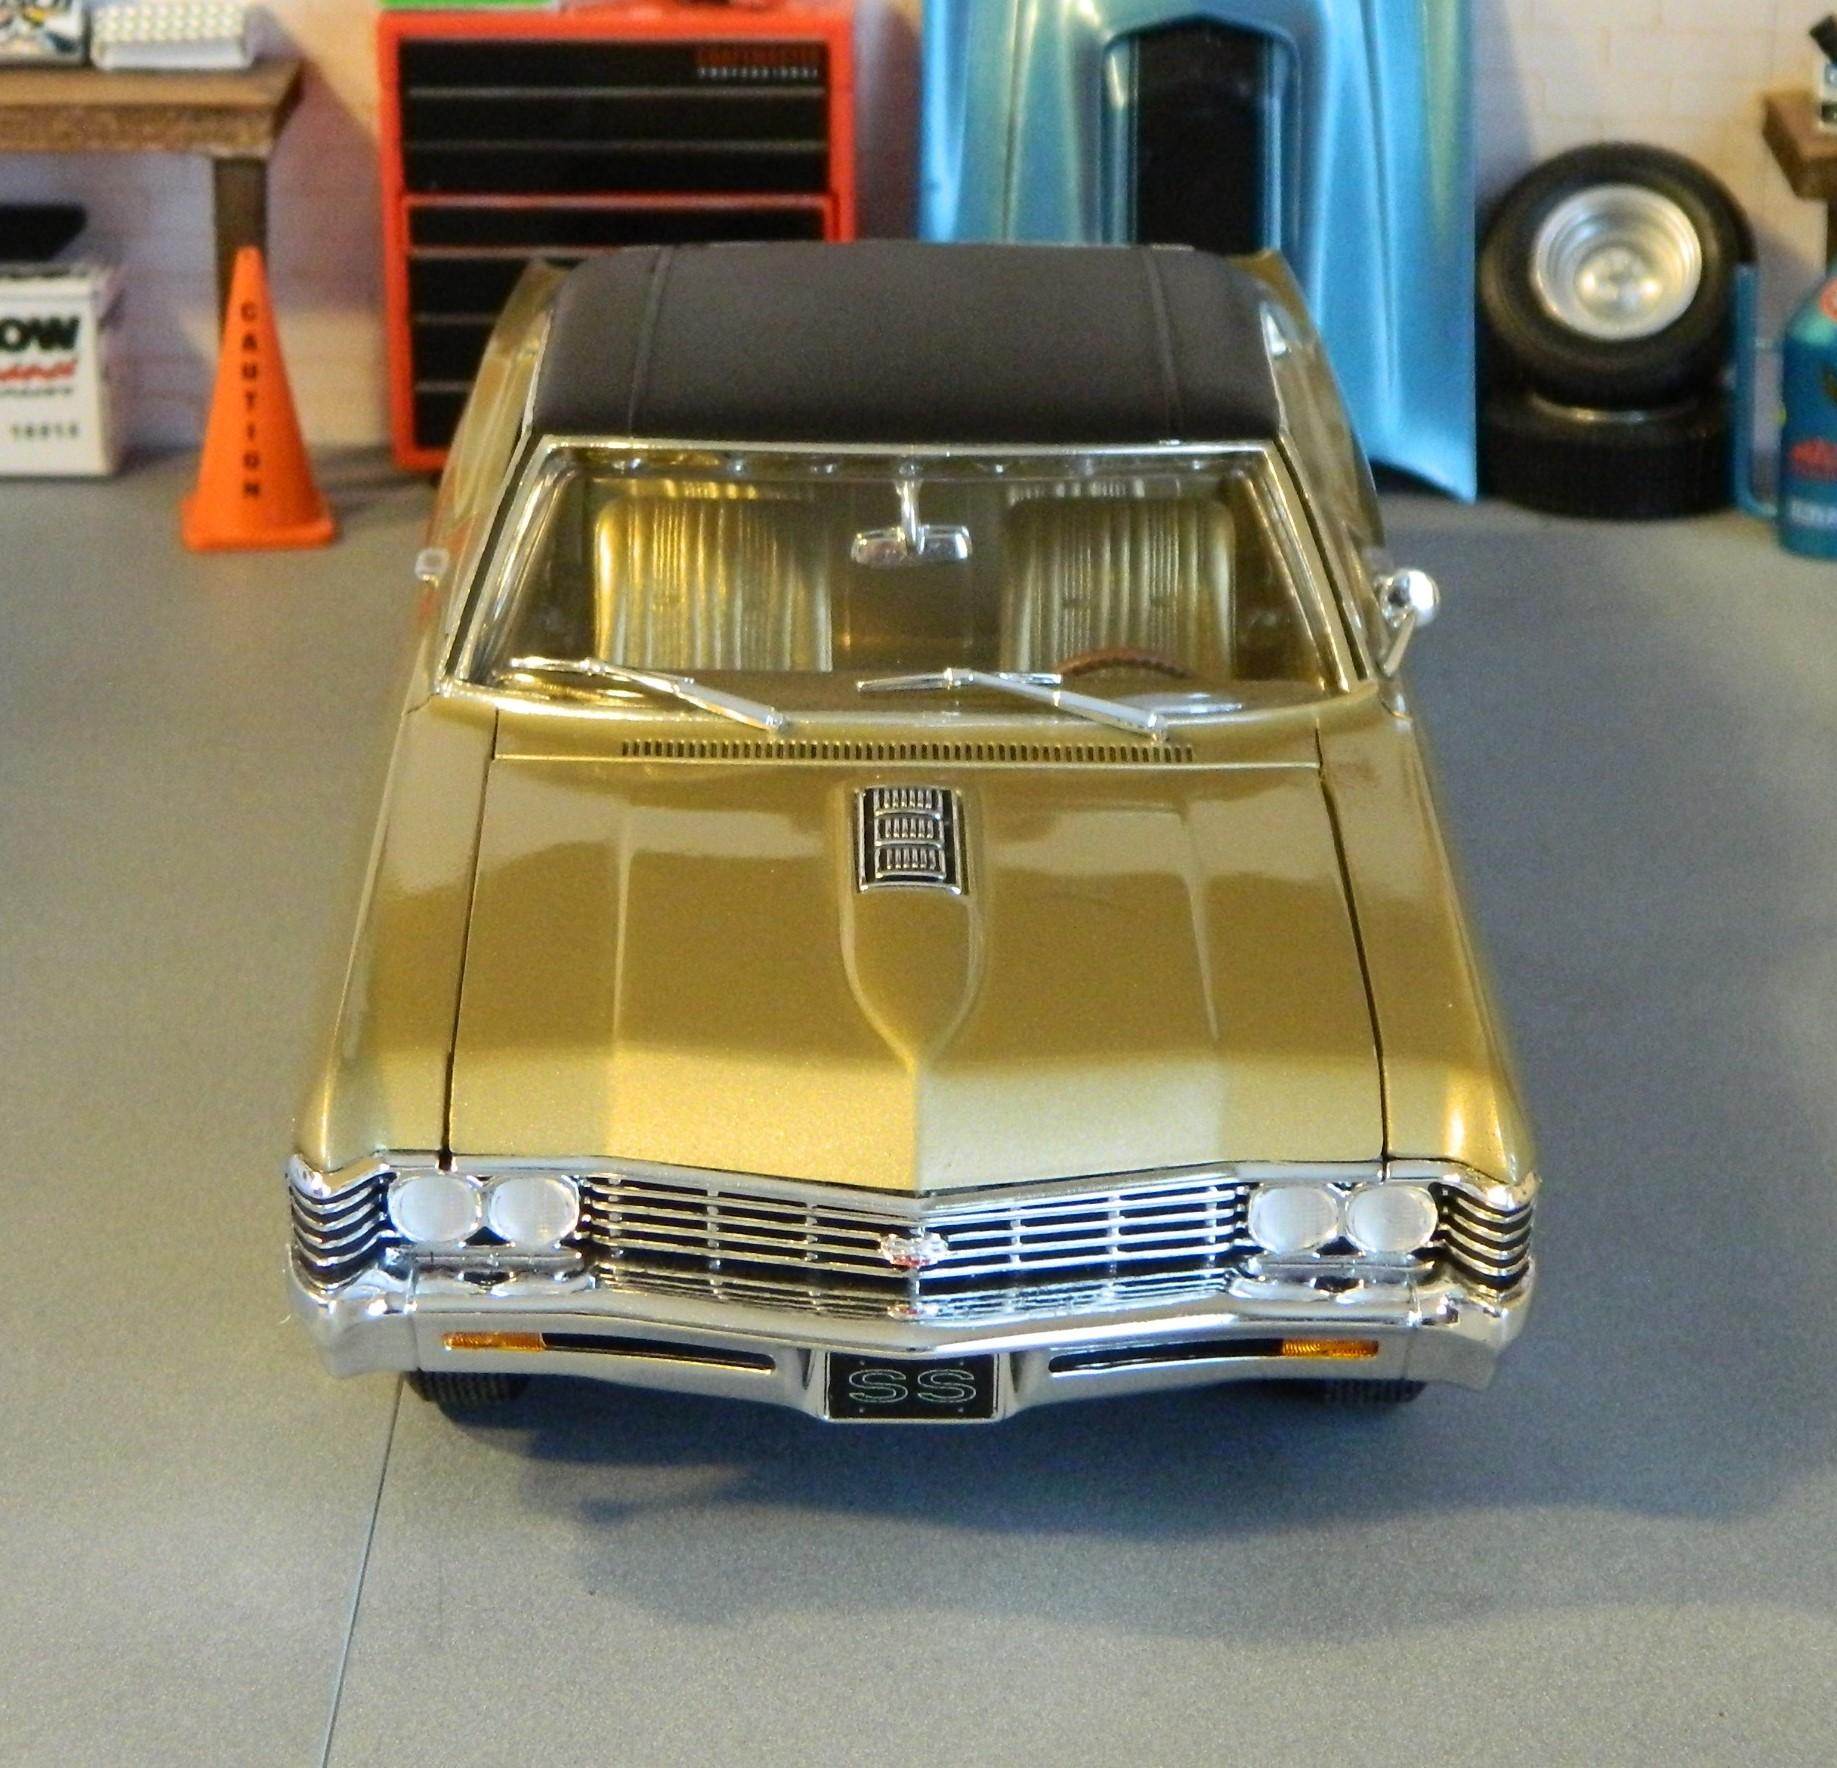
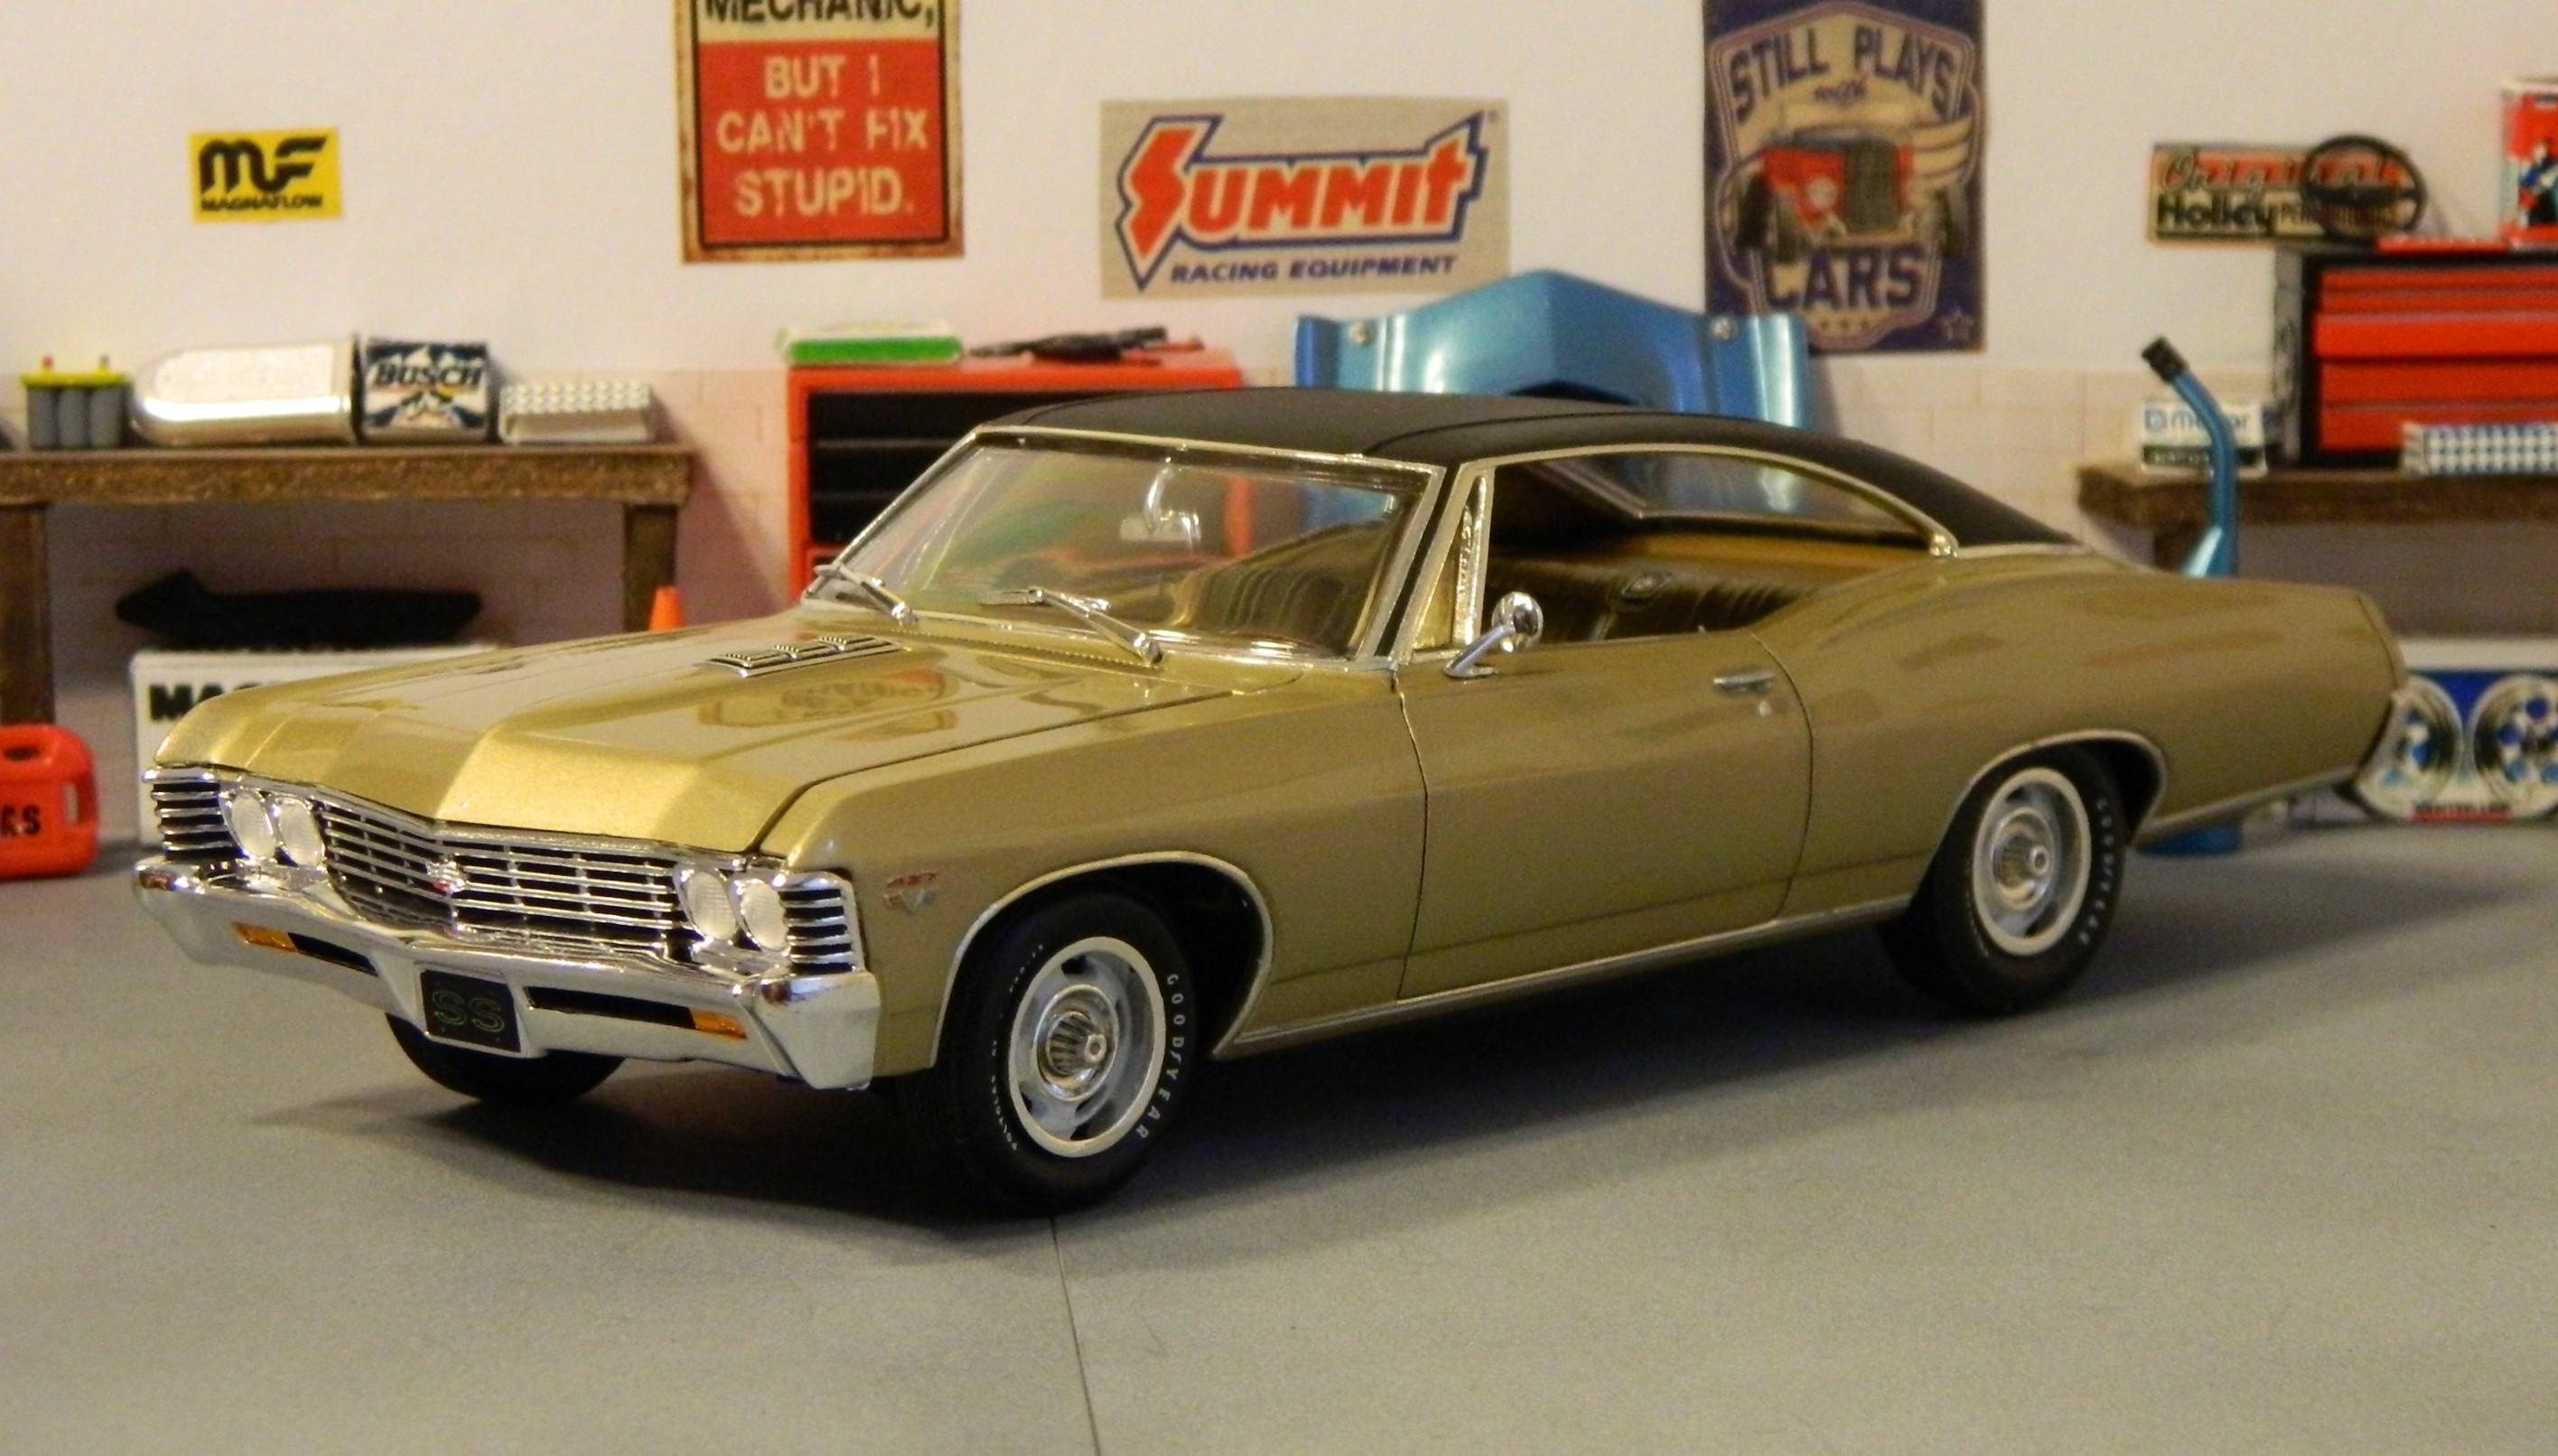
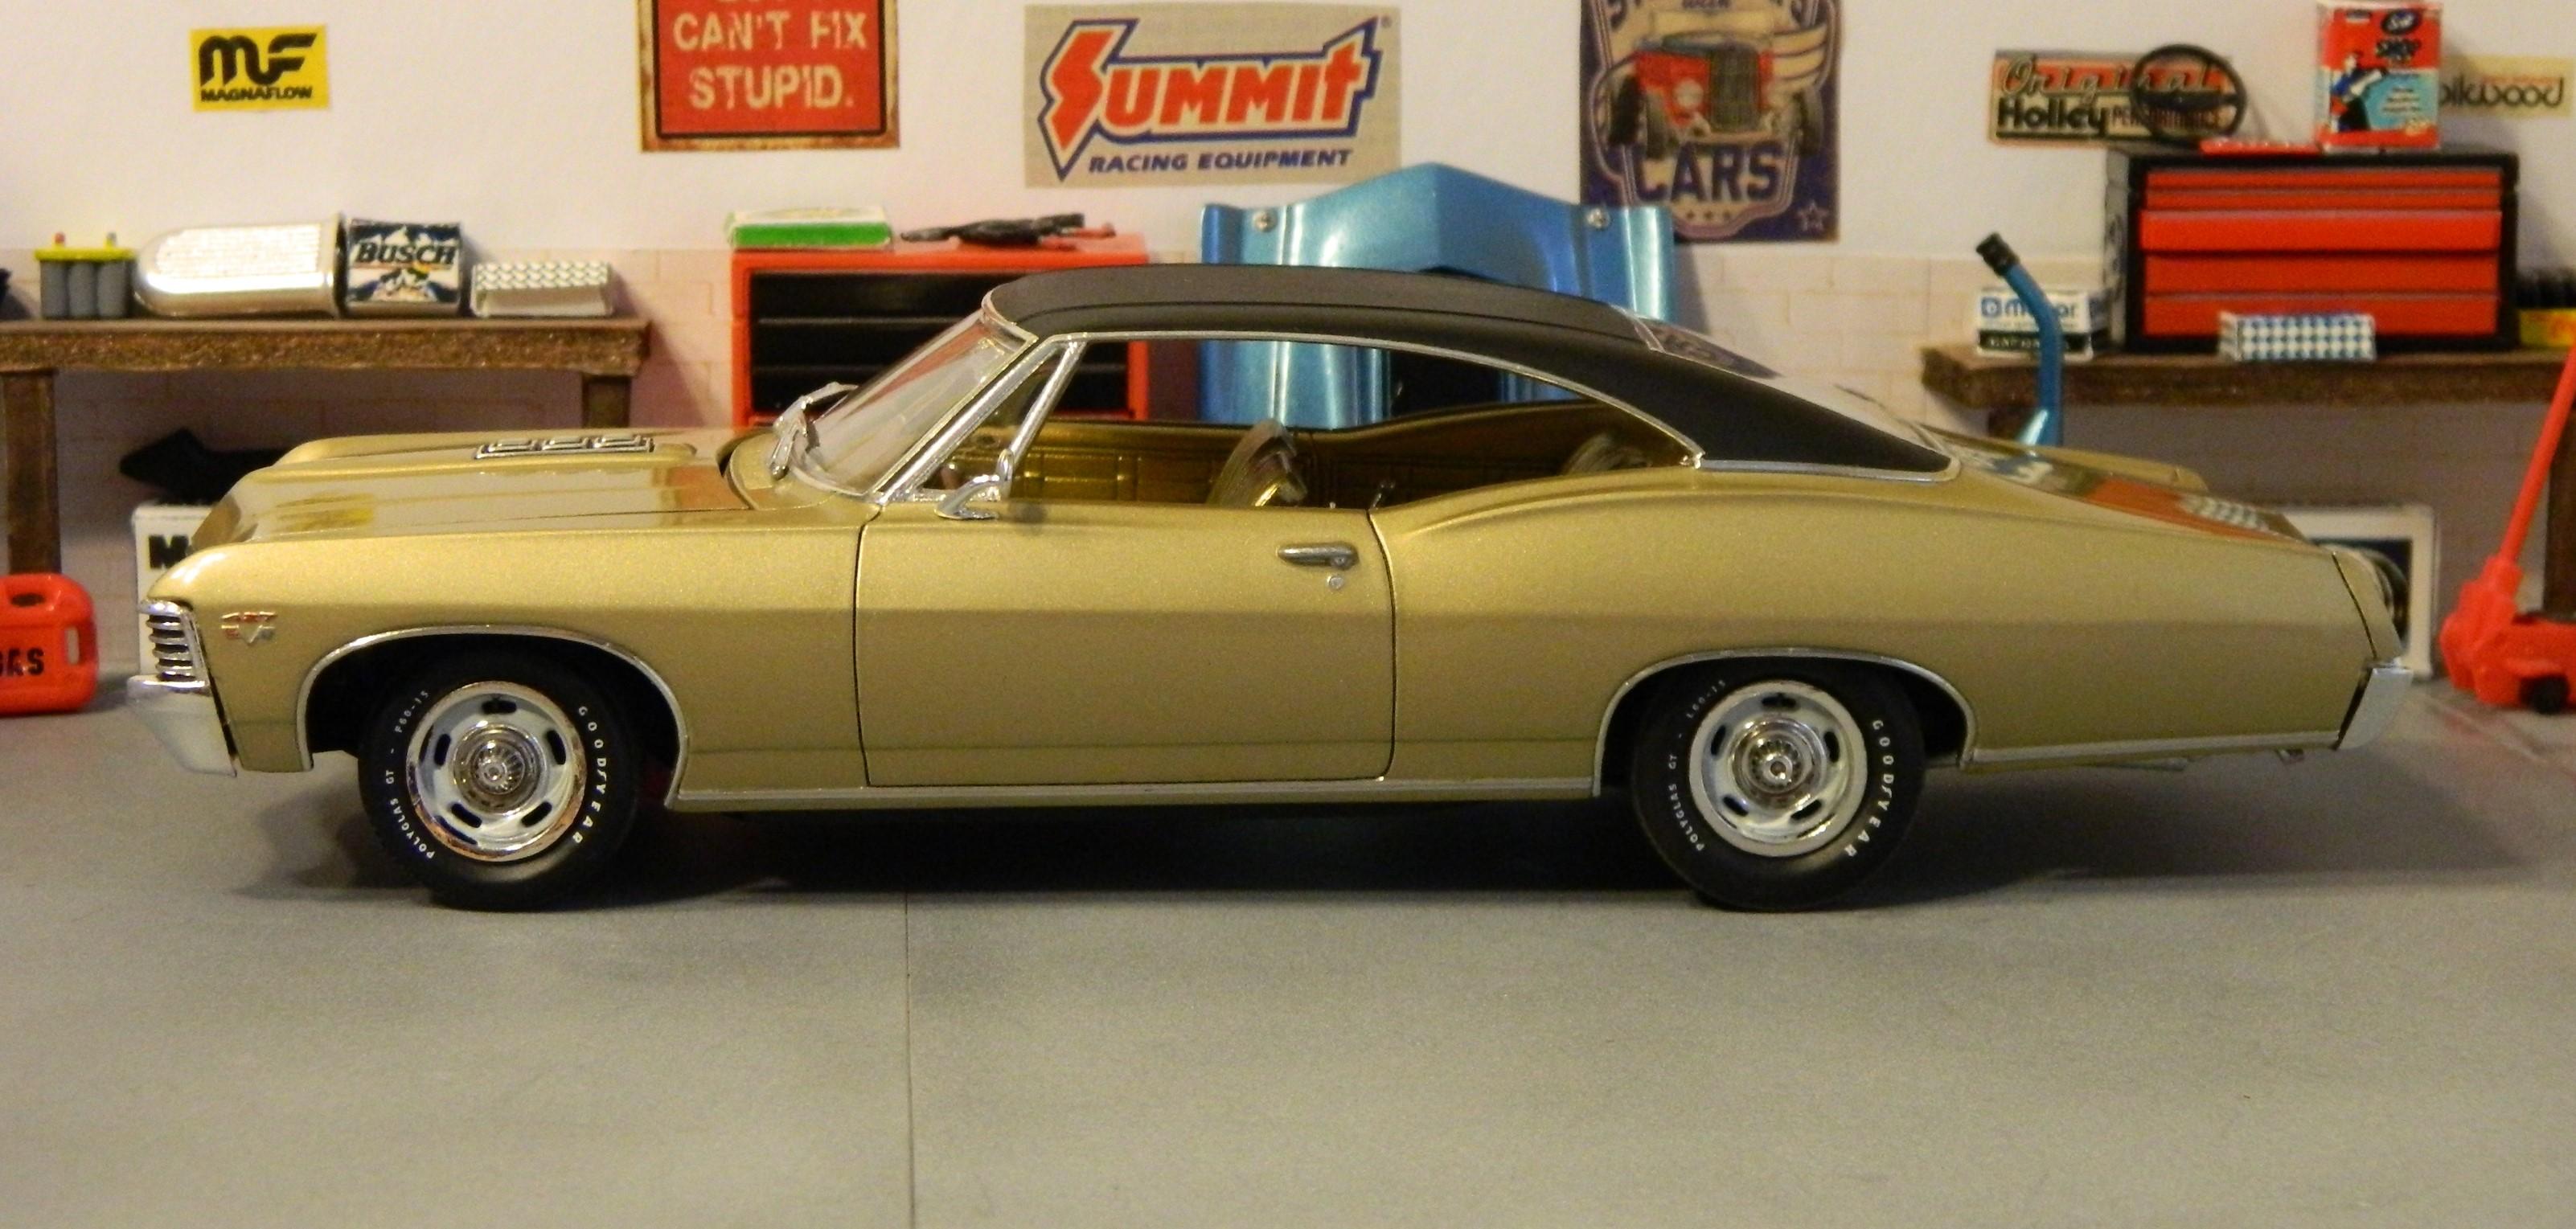
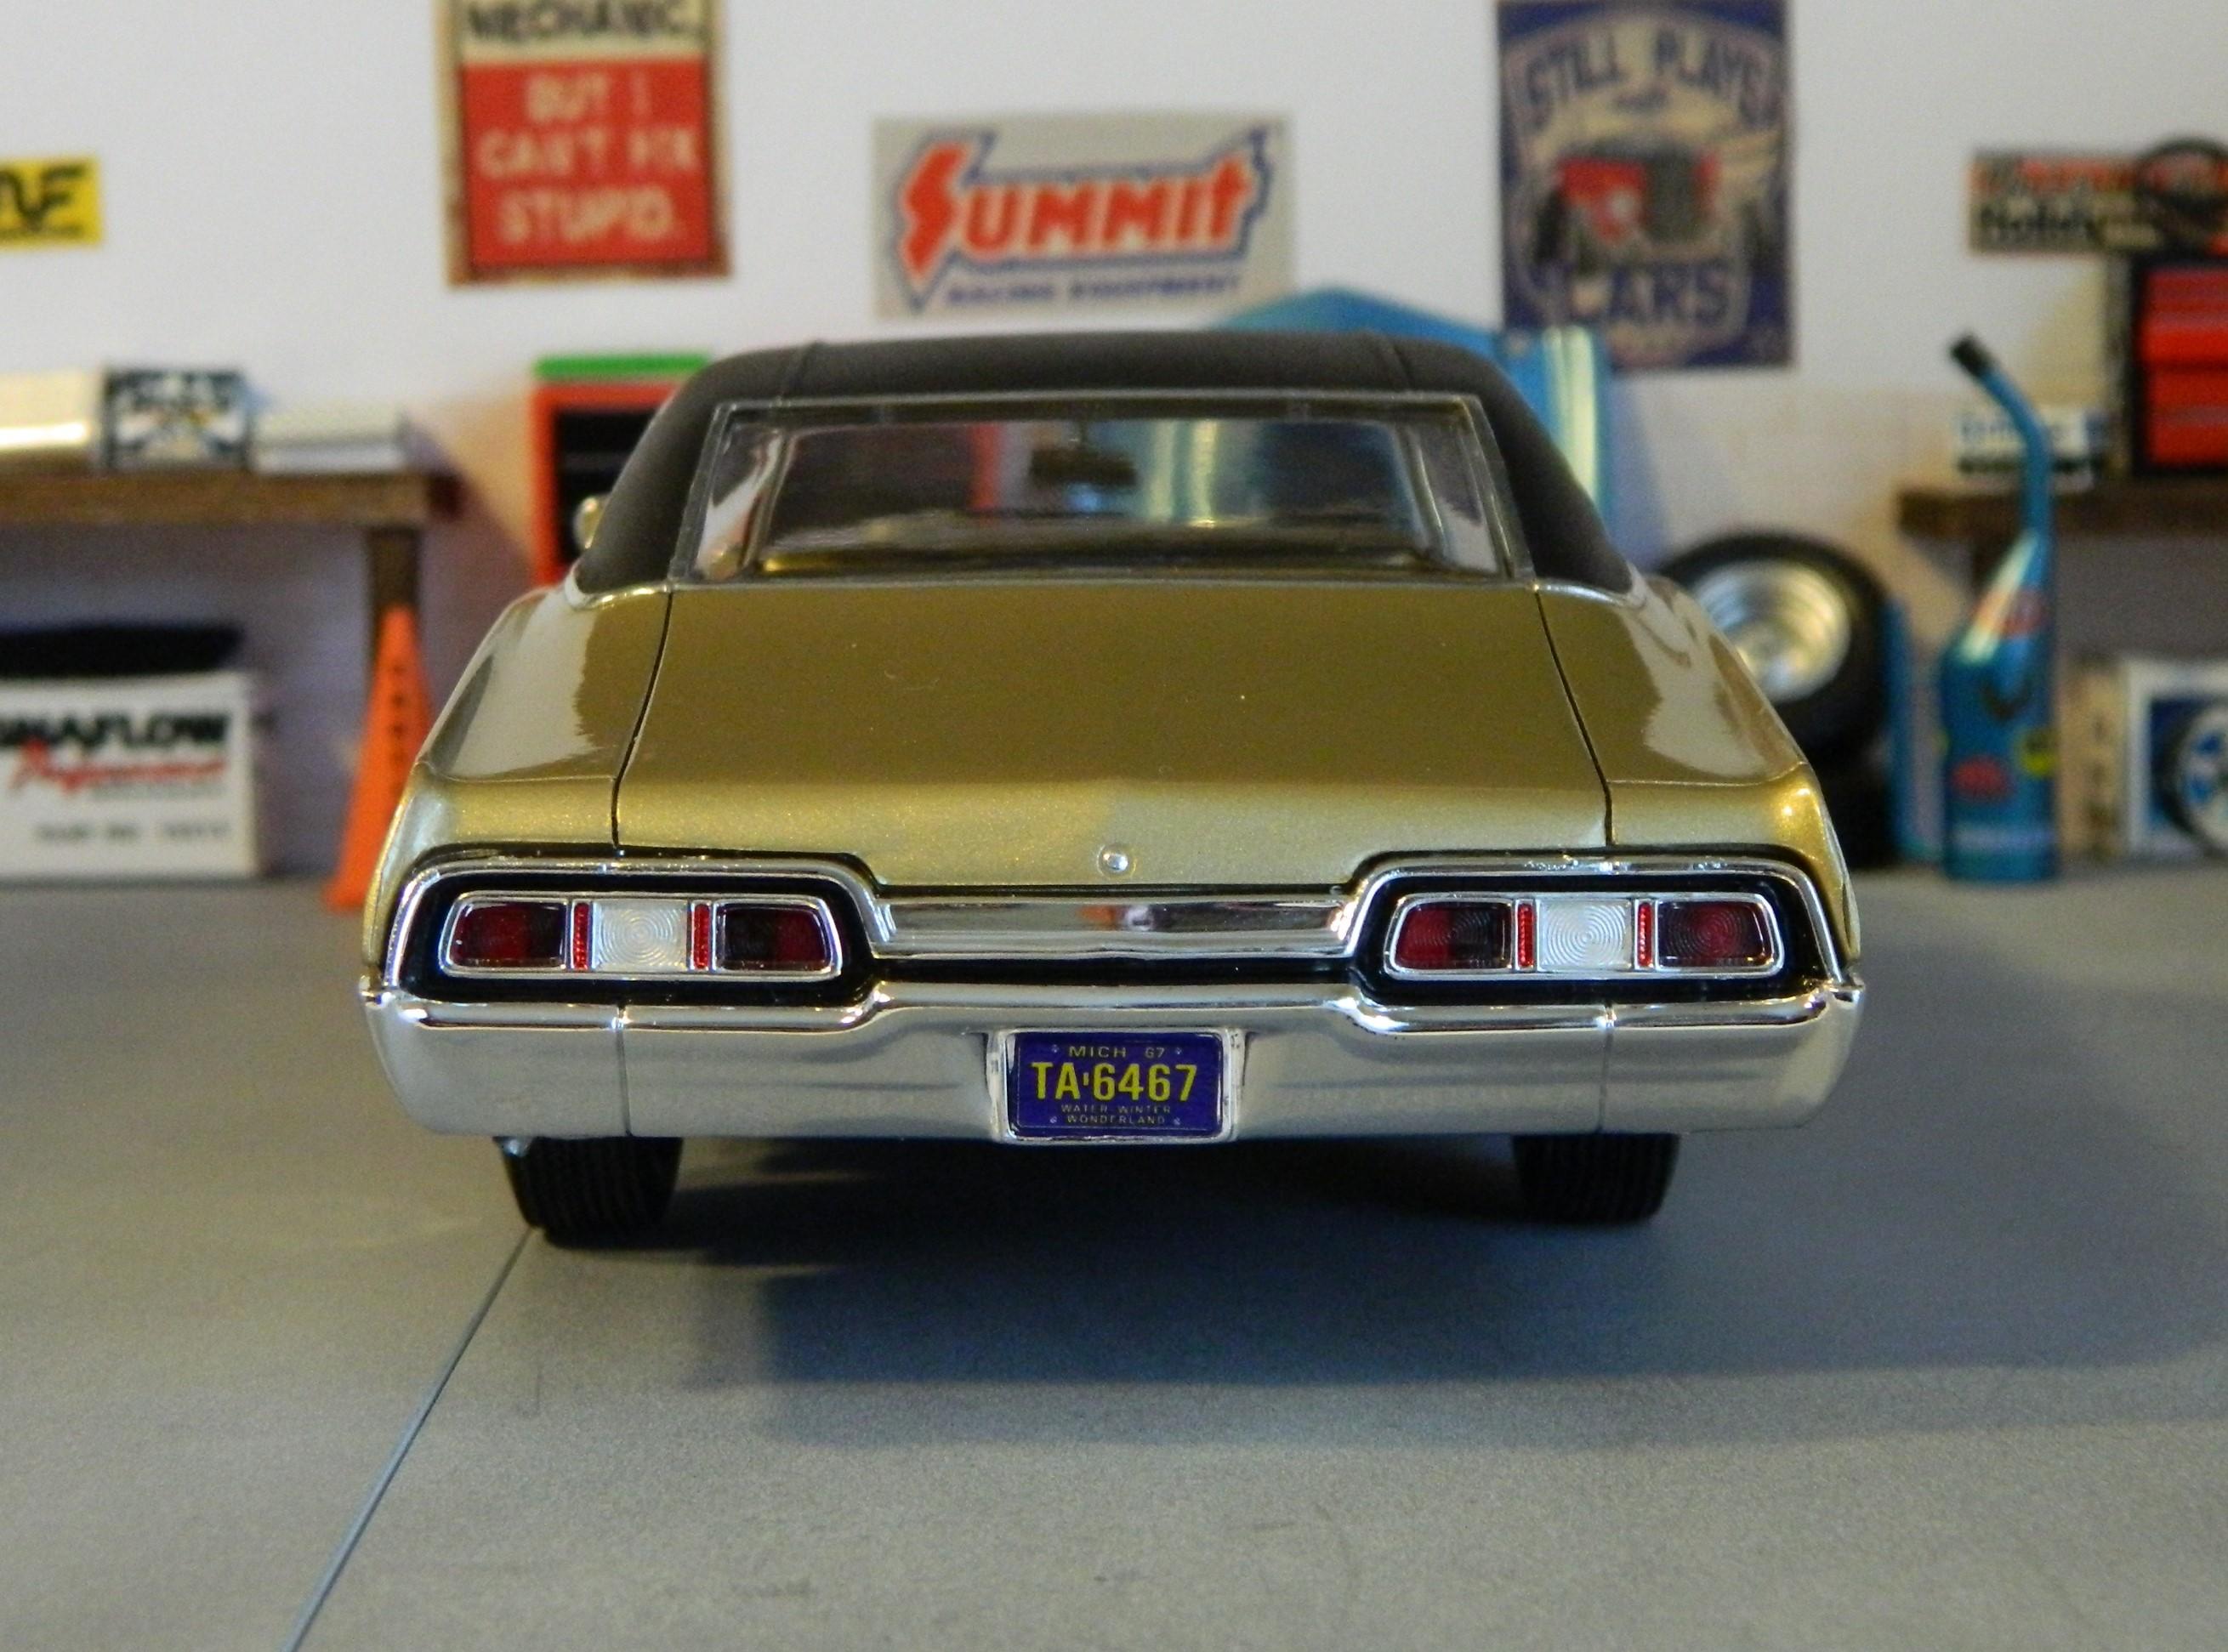
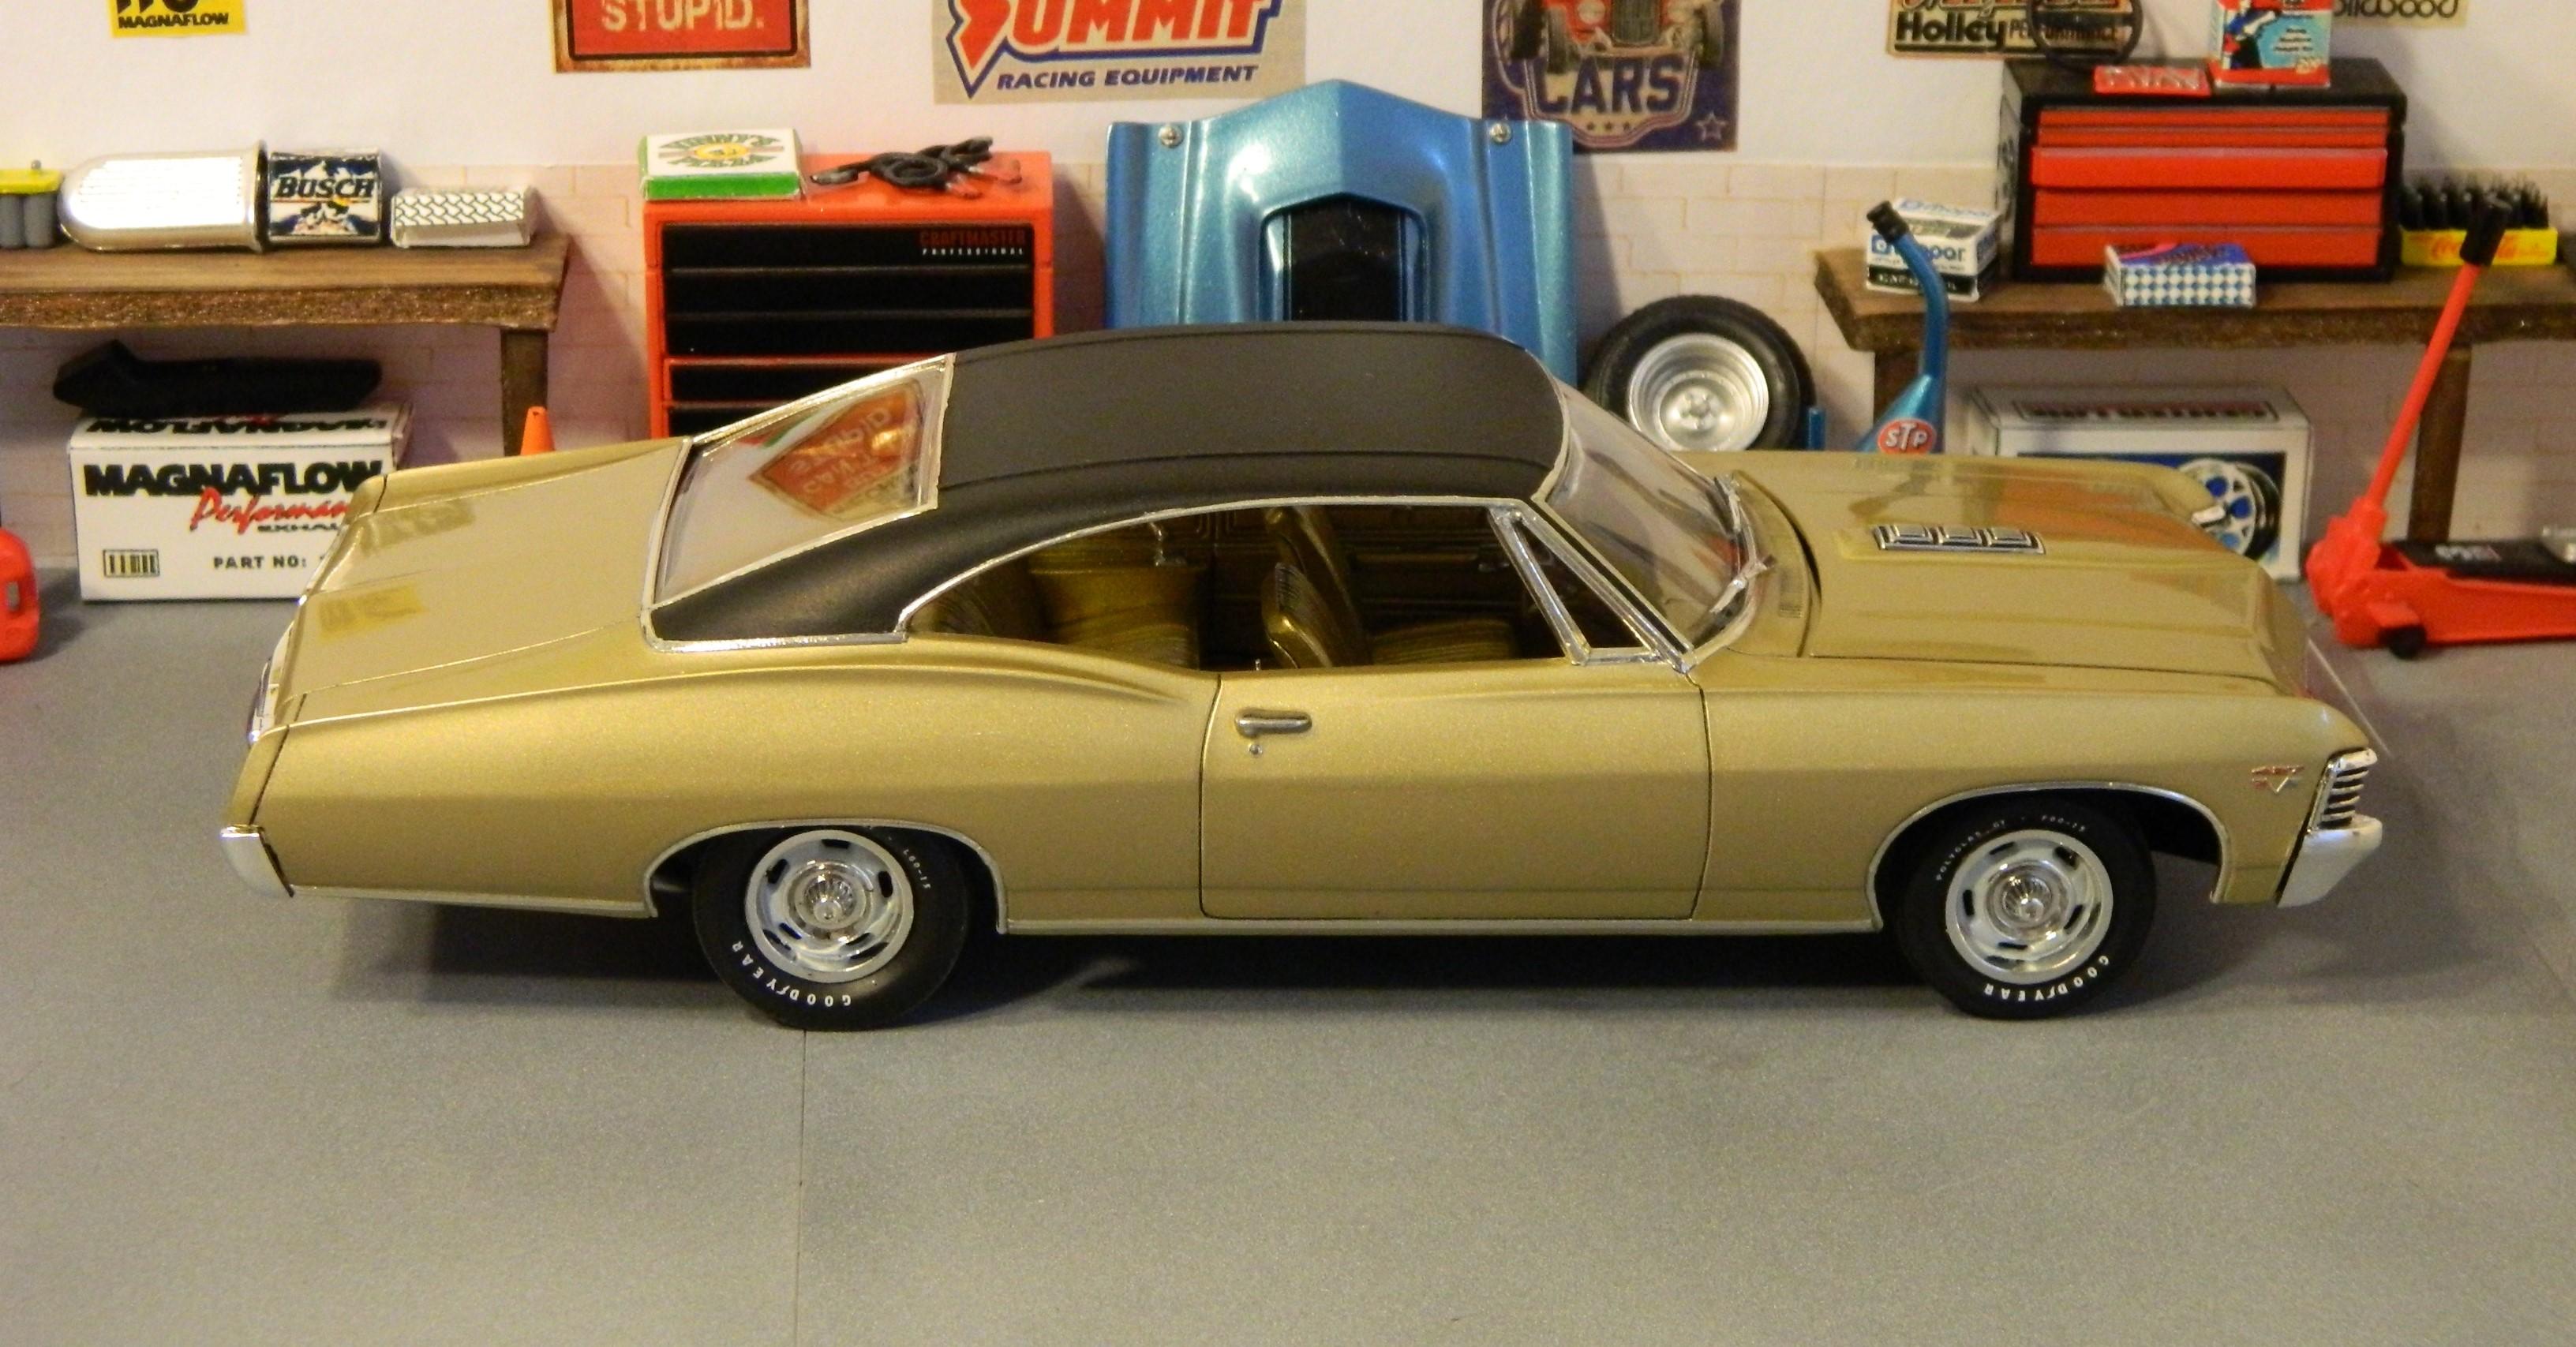
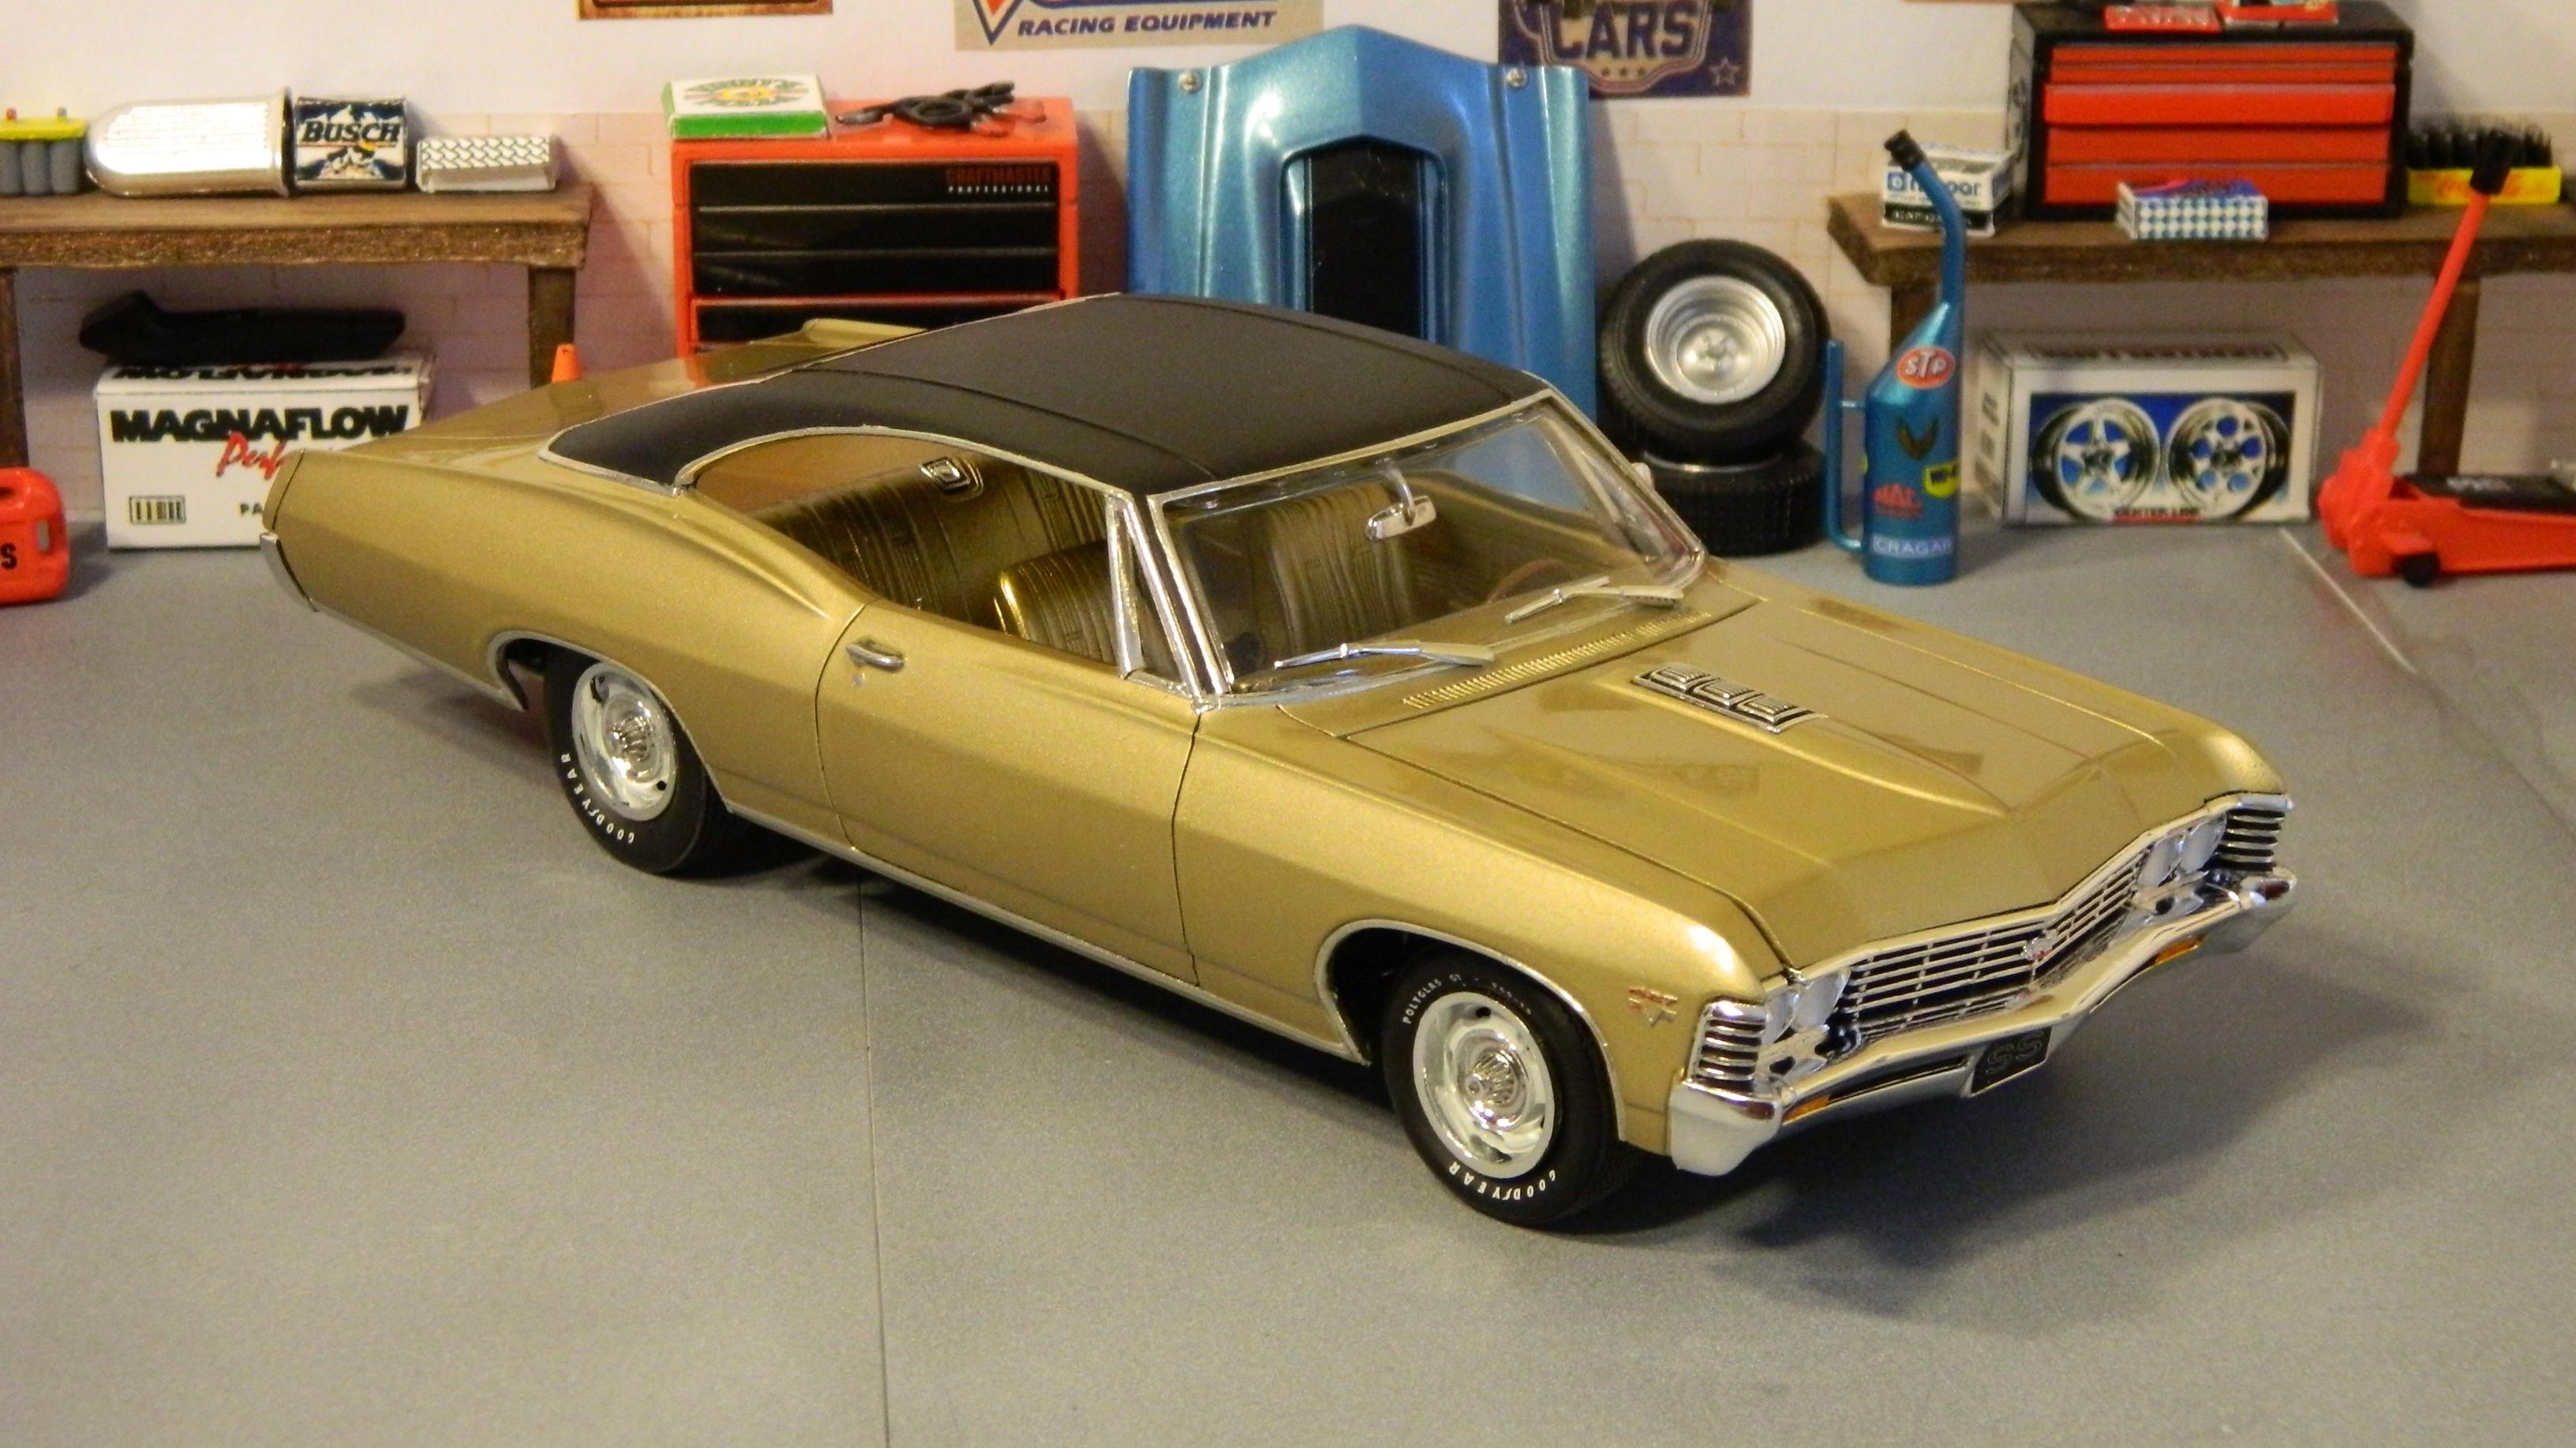
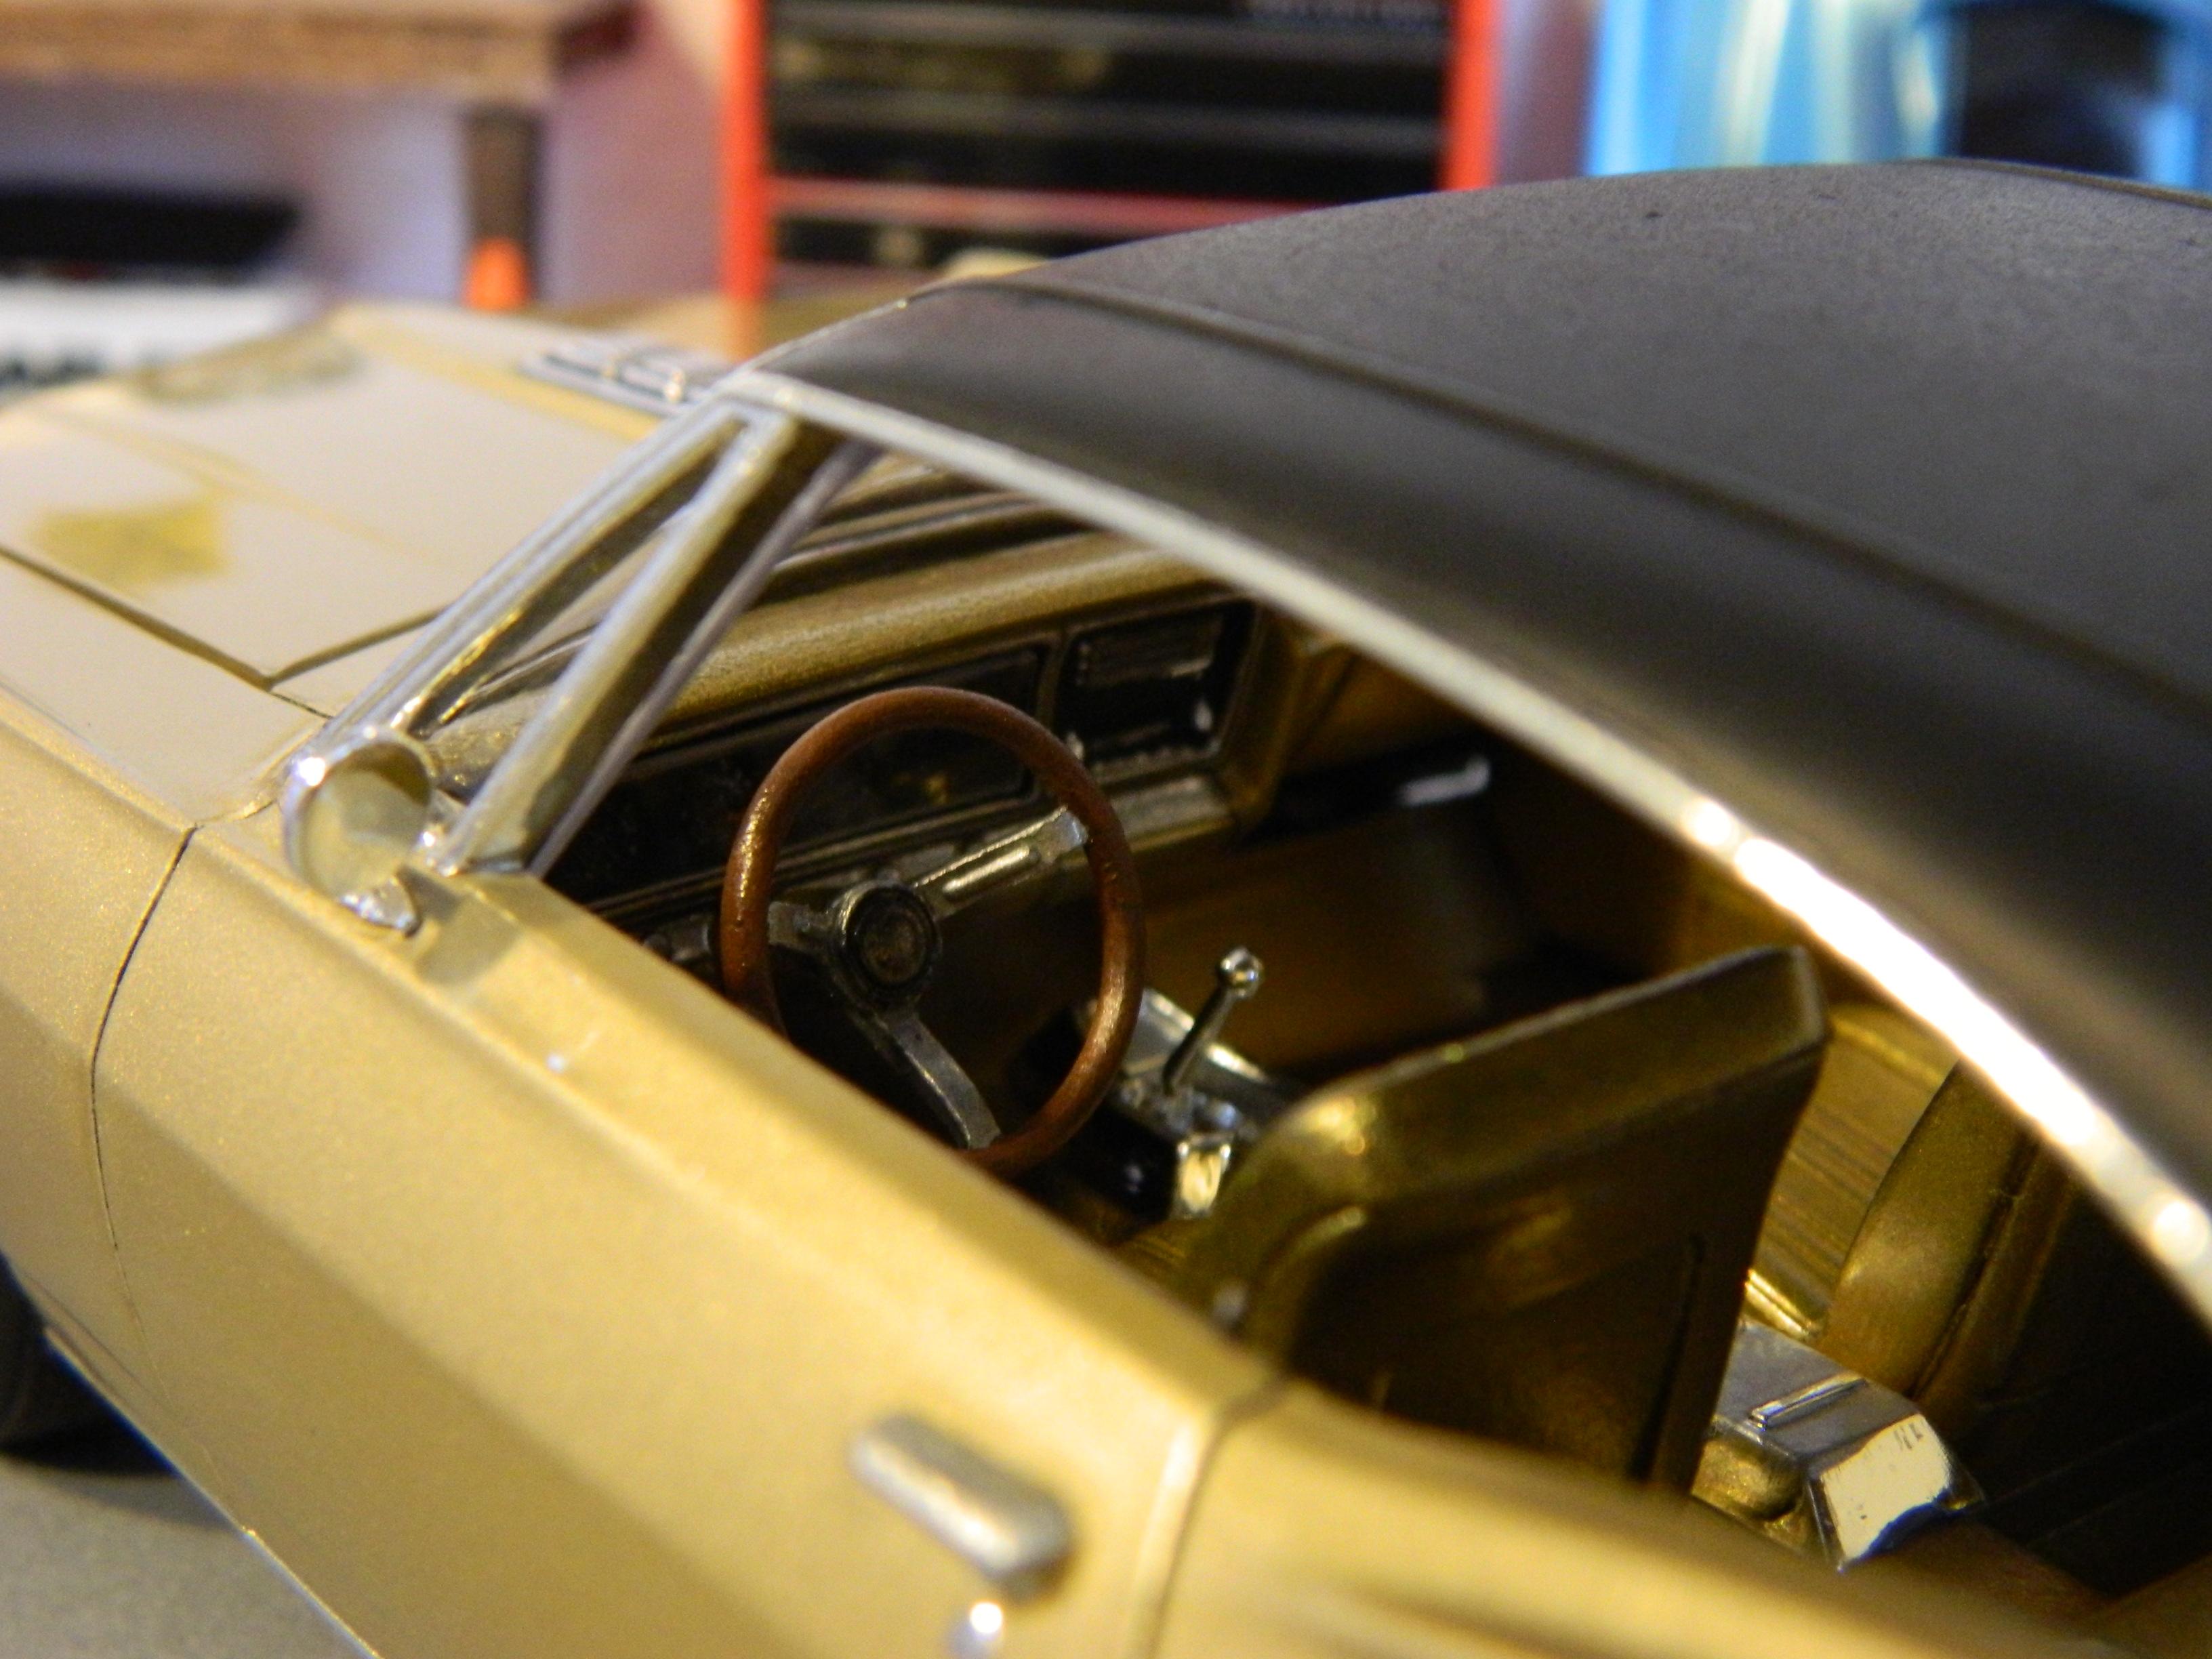
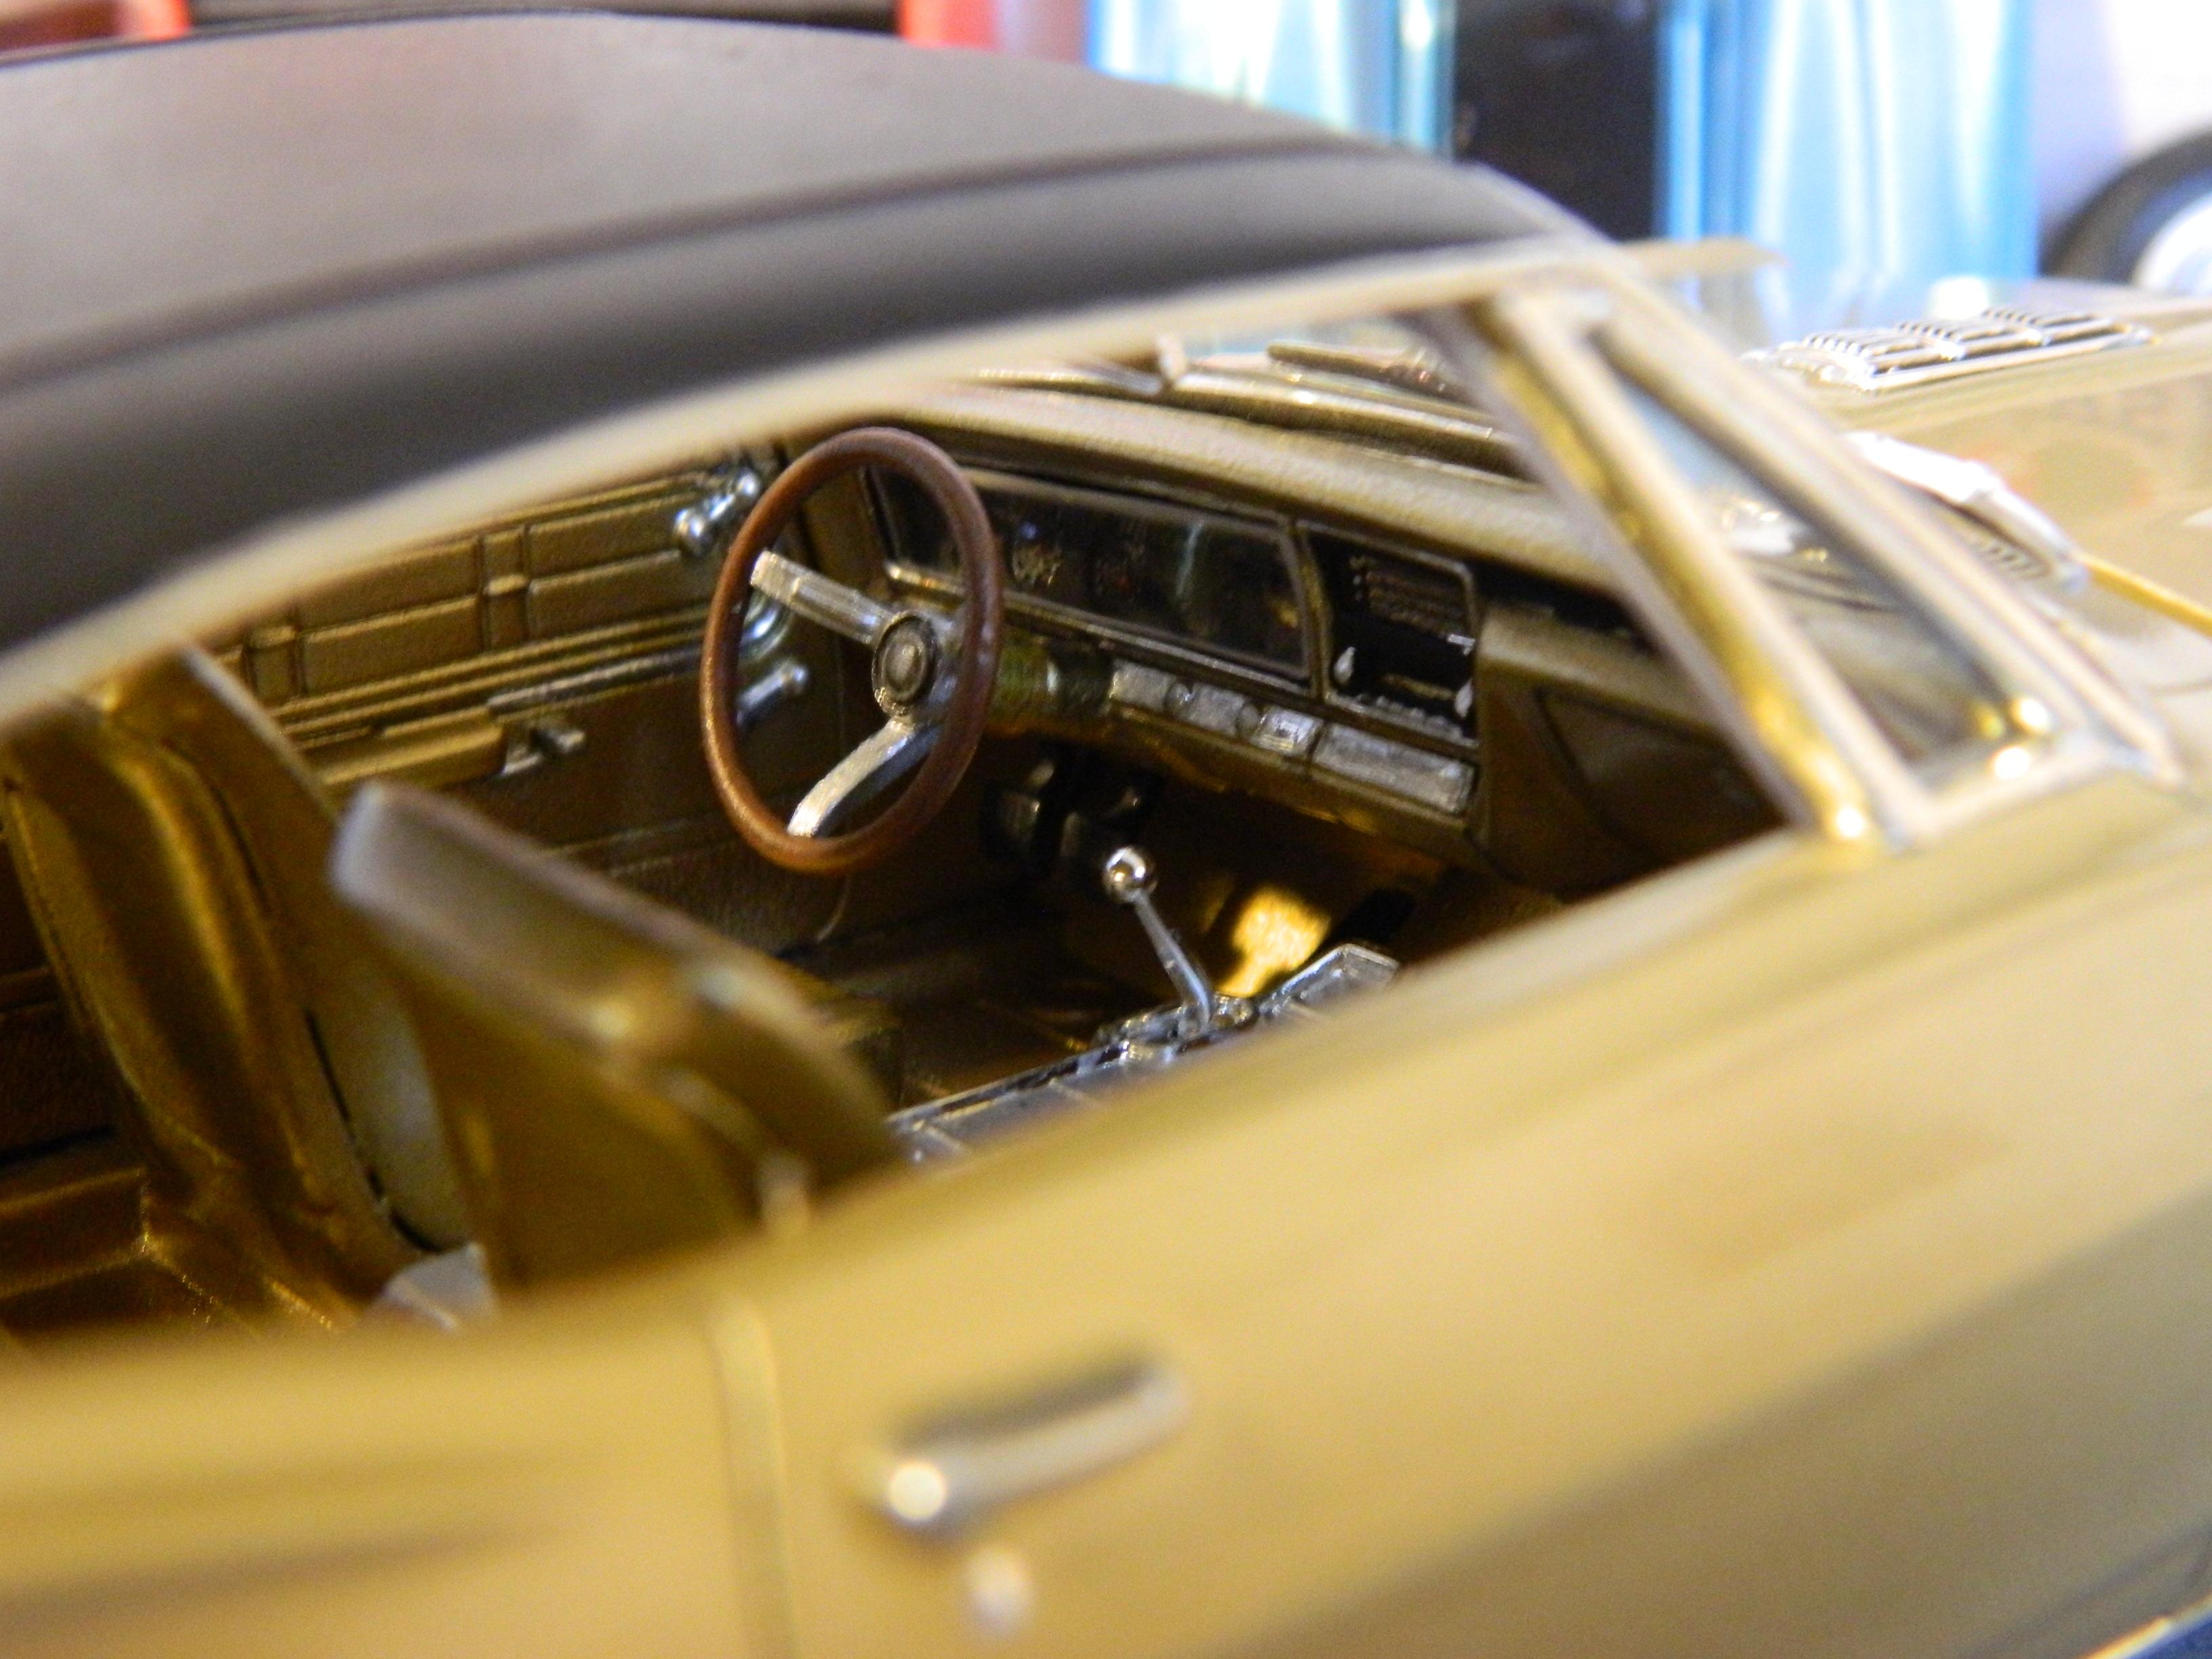
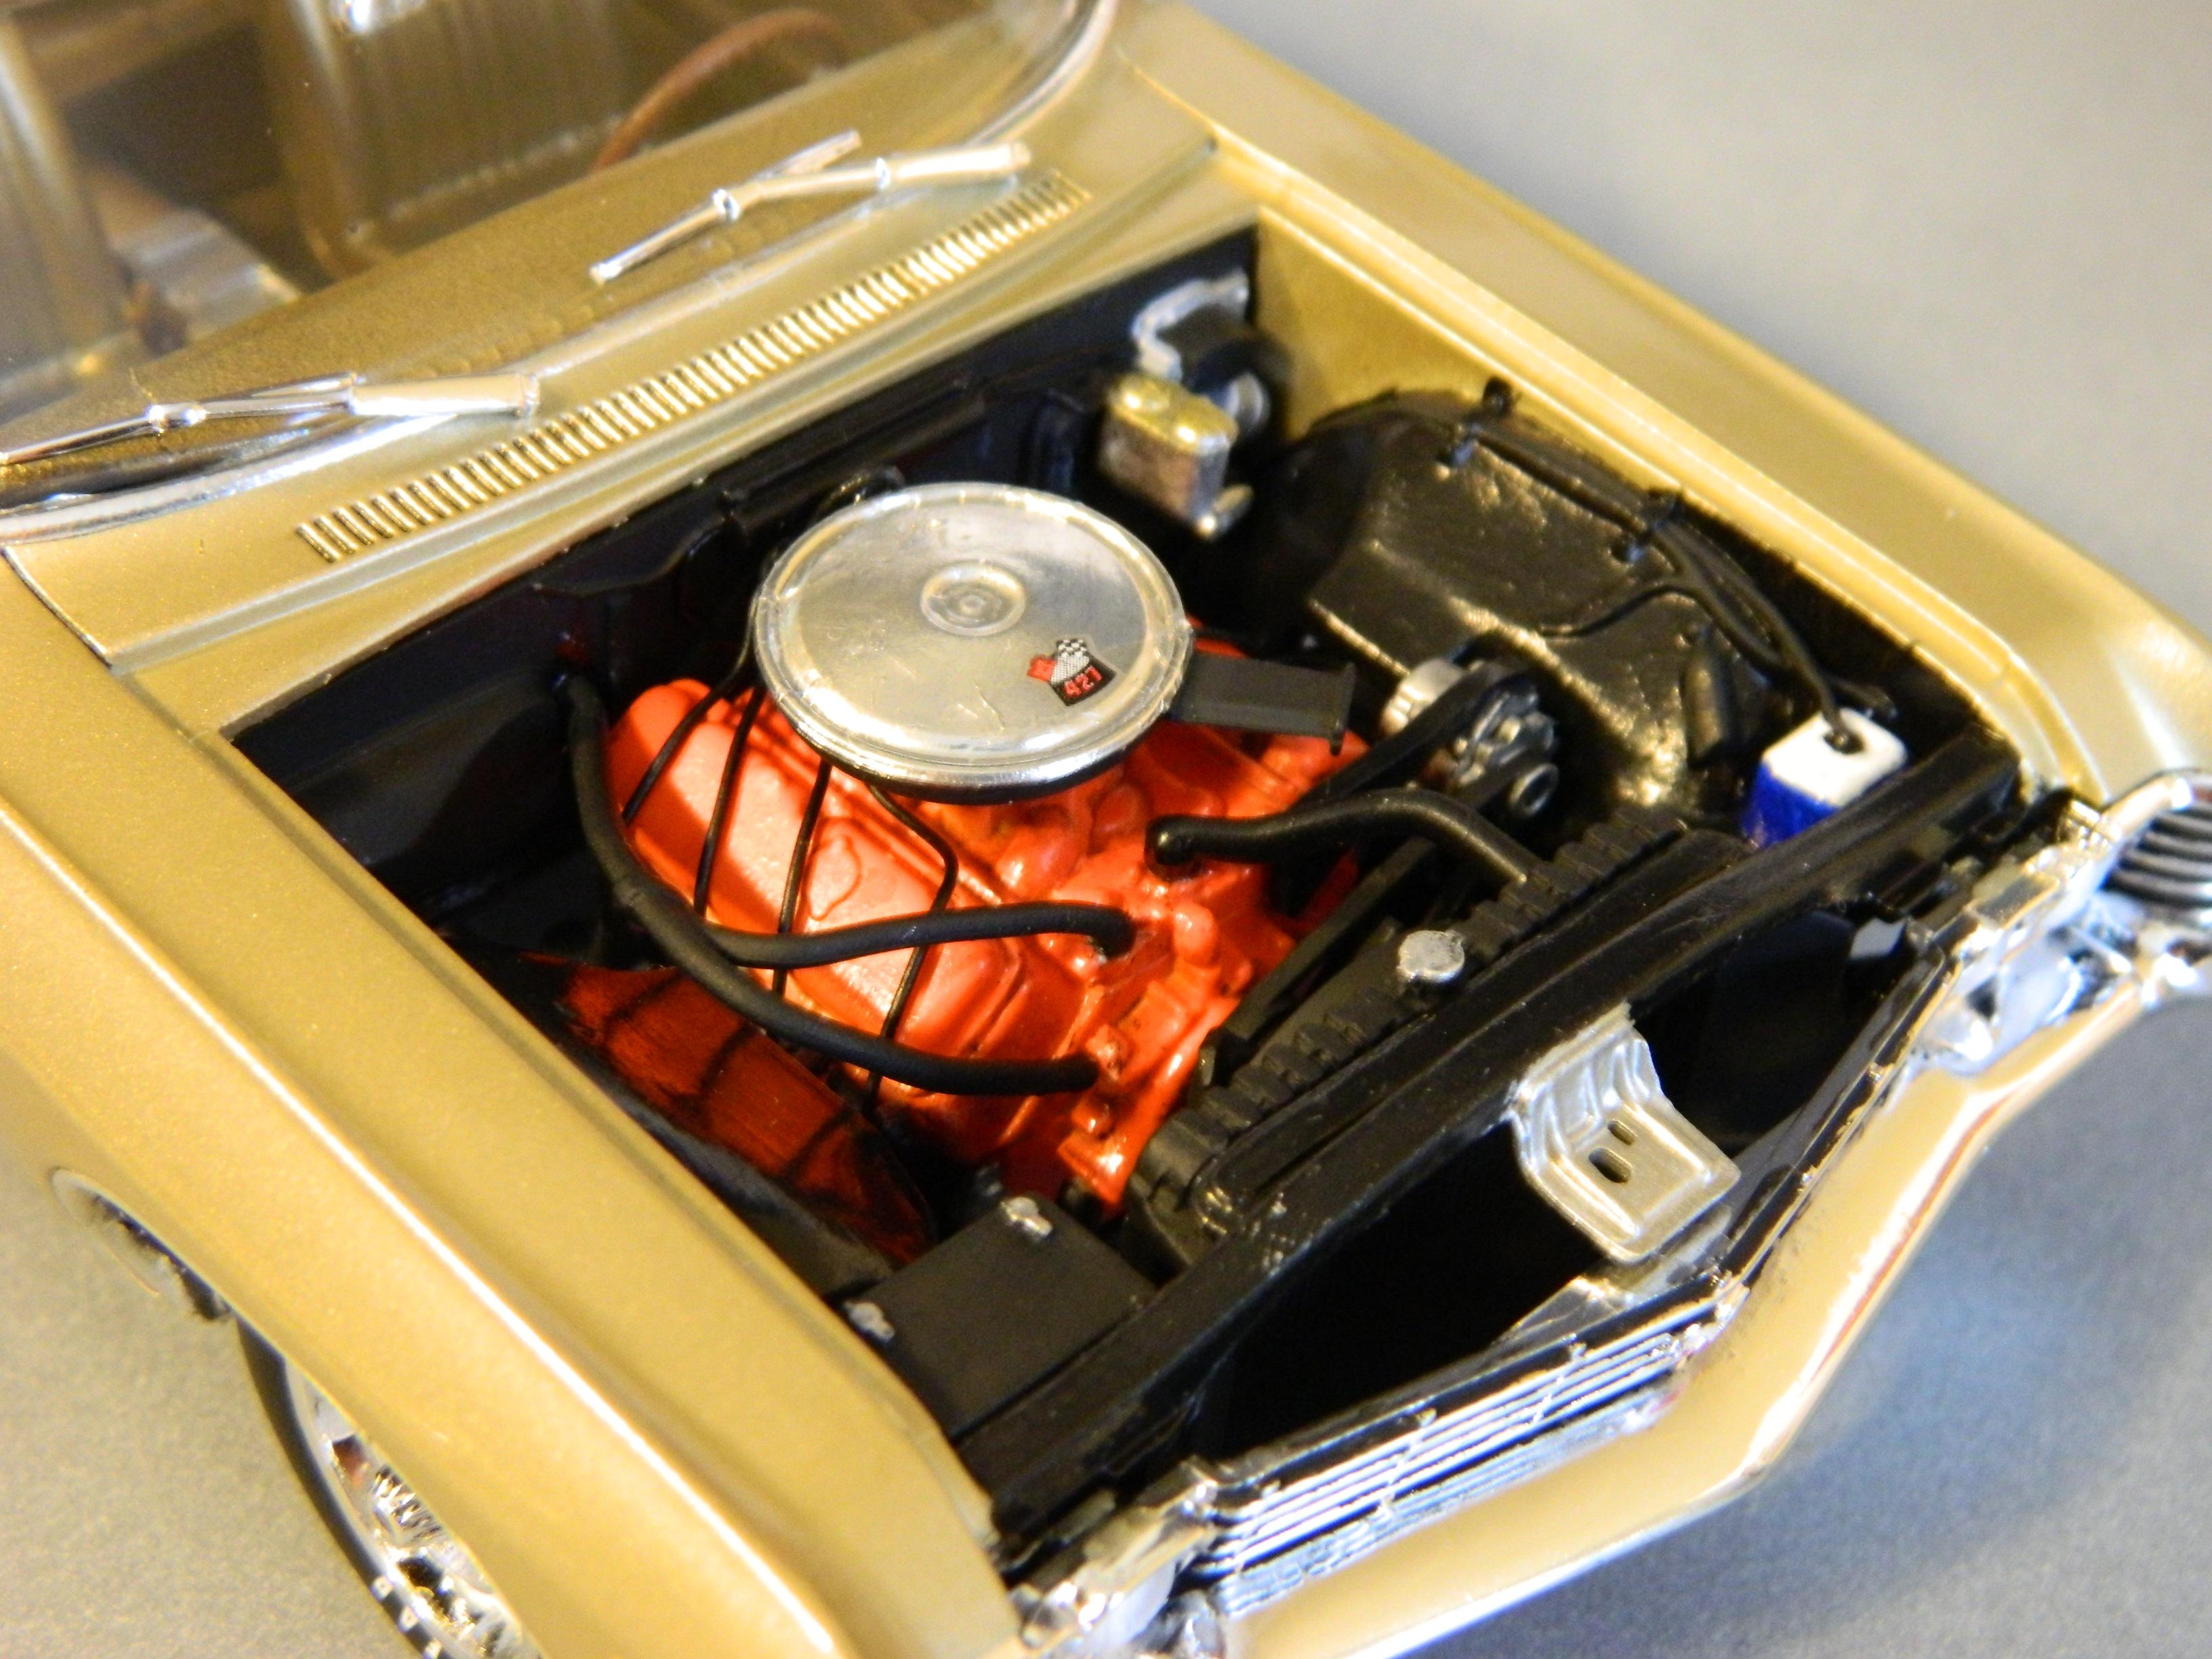
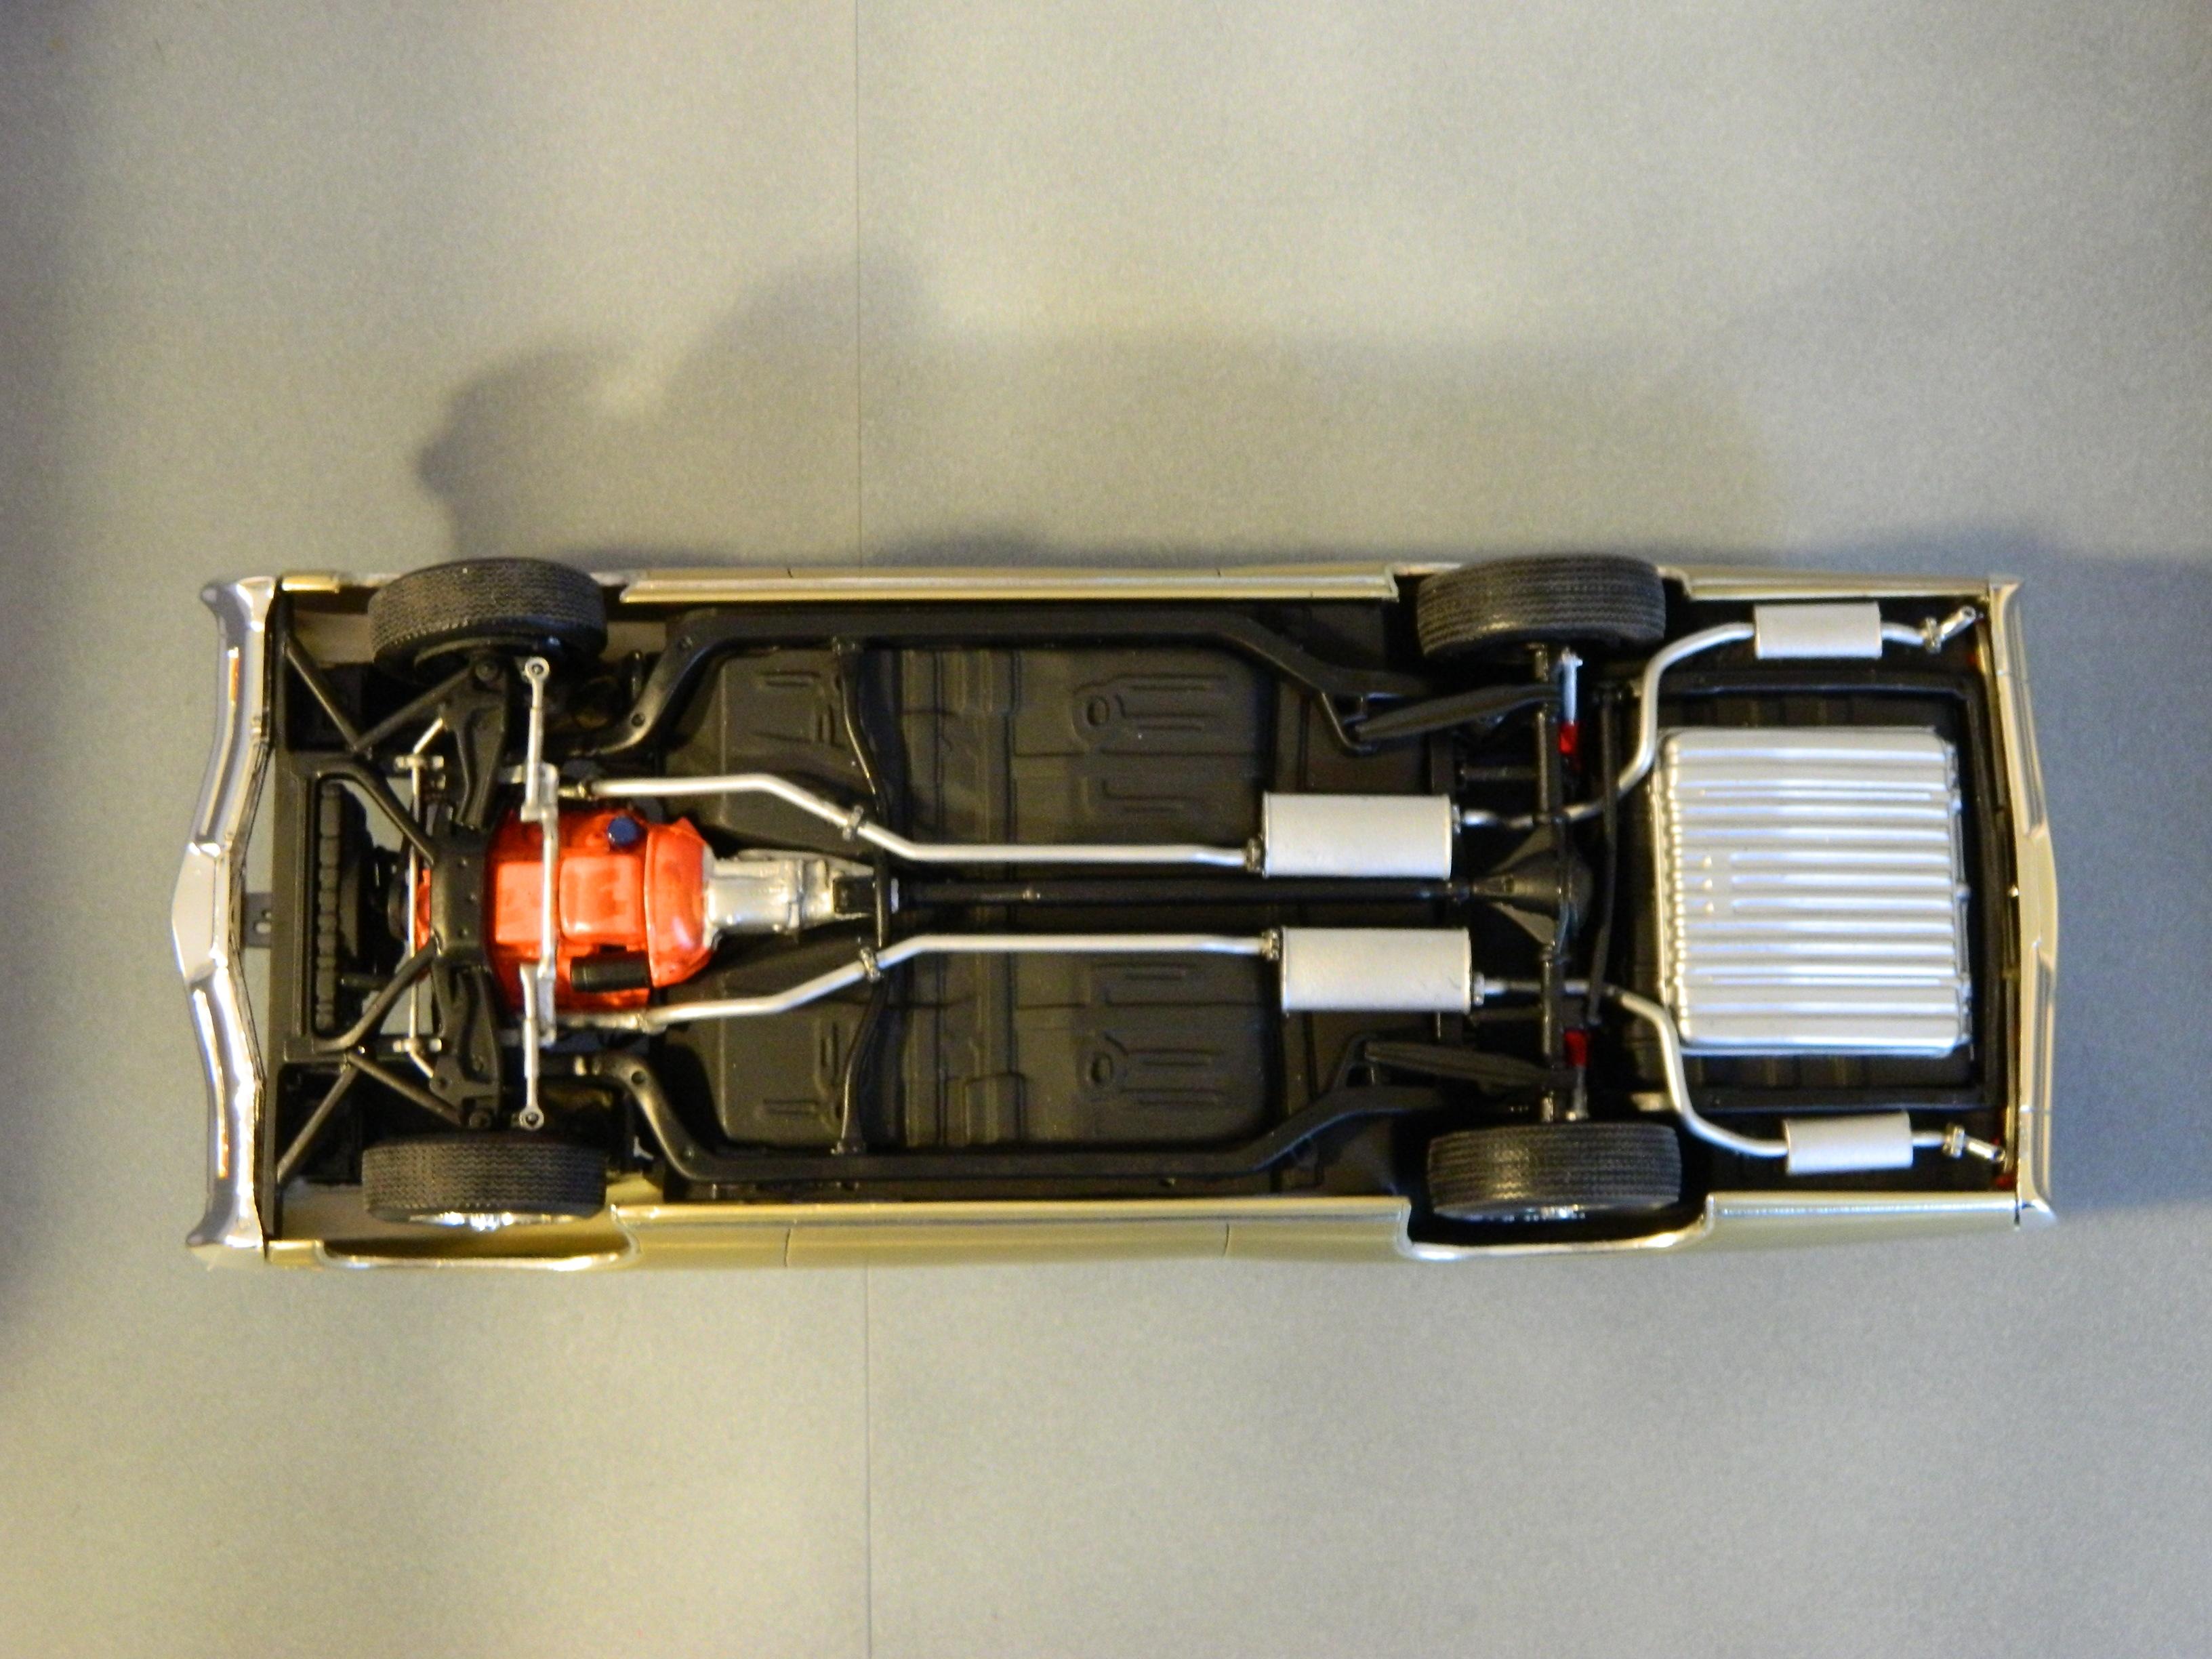
Here's the AMT 1967 Chevrolet Impala SS427. It's done in Tamiya TS-87 Titanium Gold and cleared with Tamiya TS-13. I used Evergreen .010 x .030 styrene strips to trim in the vinyl top, and just used Apple Barrel Black craft paint airbrushed from a distance to get a bit of texture before moving in closer for the final cover coat. The interior is a mixture of craft paints as well, and so is the engine. I wasn't too keen on the tires from the kit, so I used the extra set from the AMT '68 Camaro Z28 kit. The trim is all Bare Metal Foil, and I added valve stems, door locks, and ignition wires for extra details. This seems like one of AMT's nicer kits, and it was a really fun build. Thanks for looking!
-
Very nice work! Great paint/color! The Impala is a stunner as well!
-
Very nice!! It looks like quite the challenge, to say the least!
-
Very nice and well done! Hard to make a 4-door Taurus look cool, but you aced it!!
-
Very nice, especially for being that old! Foil from a Nestle candy bar wrapper, now that's using some resources!!