NOBLNG
-
Posts
9,963 -
Joined
-
Last visited
Content Type
Profiles
Forums
Events
Gallery
Everything posted by NOBLNG
-
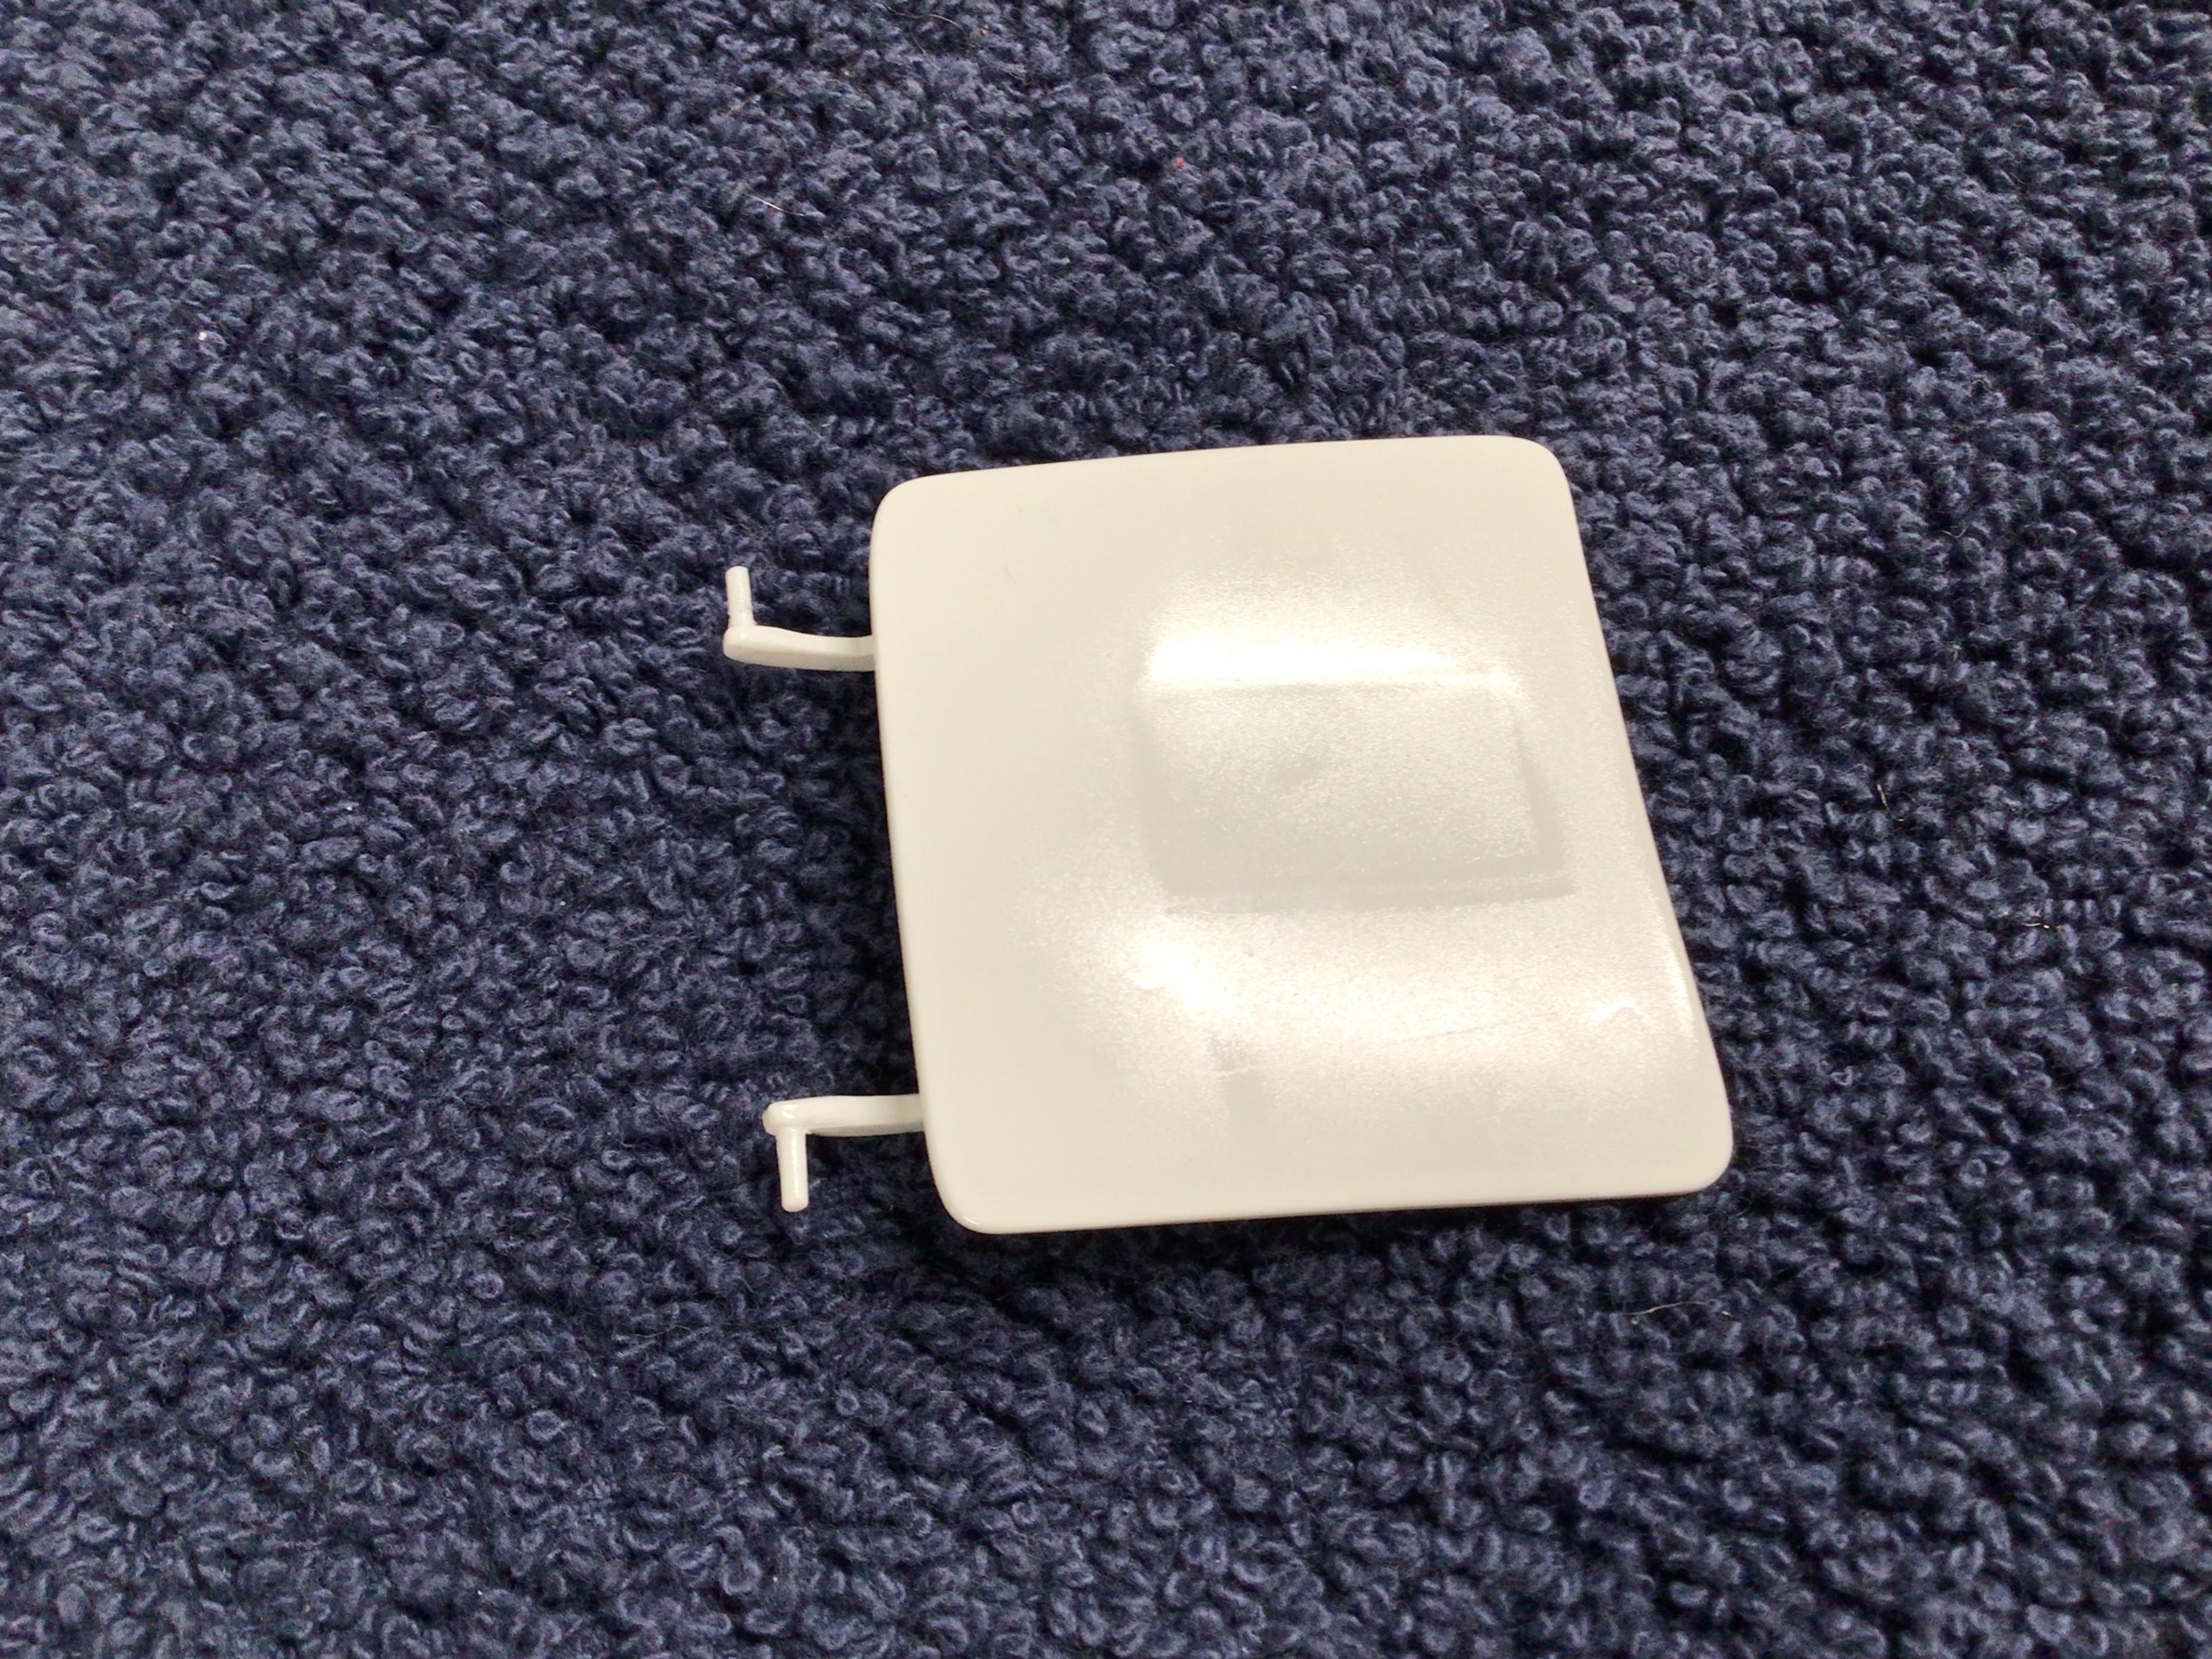
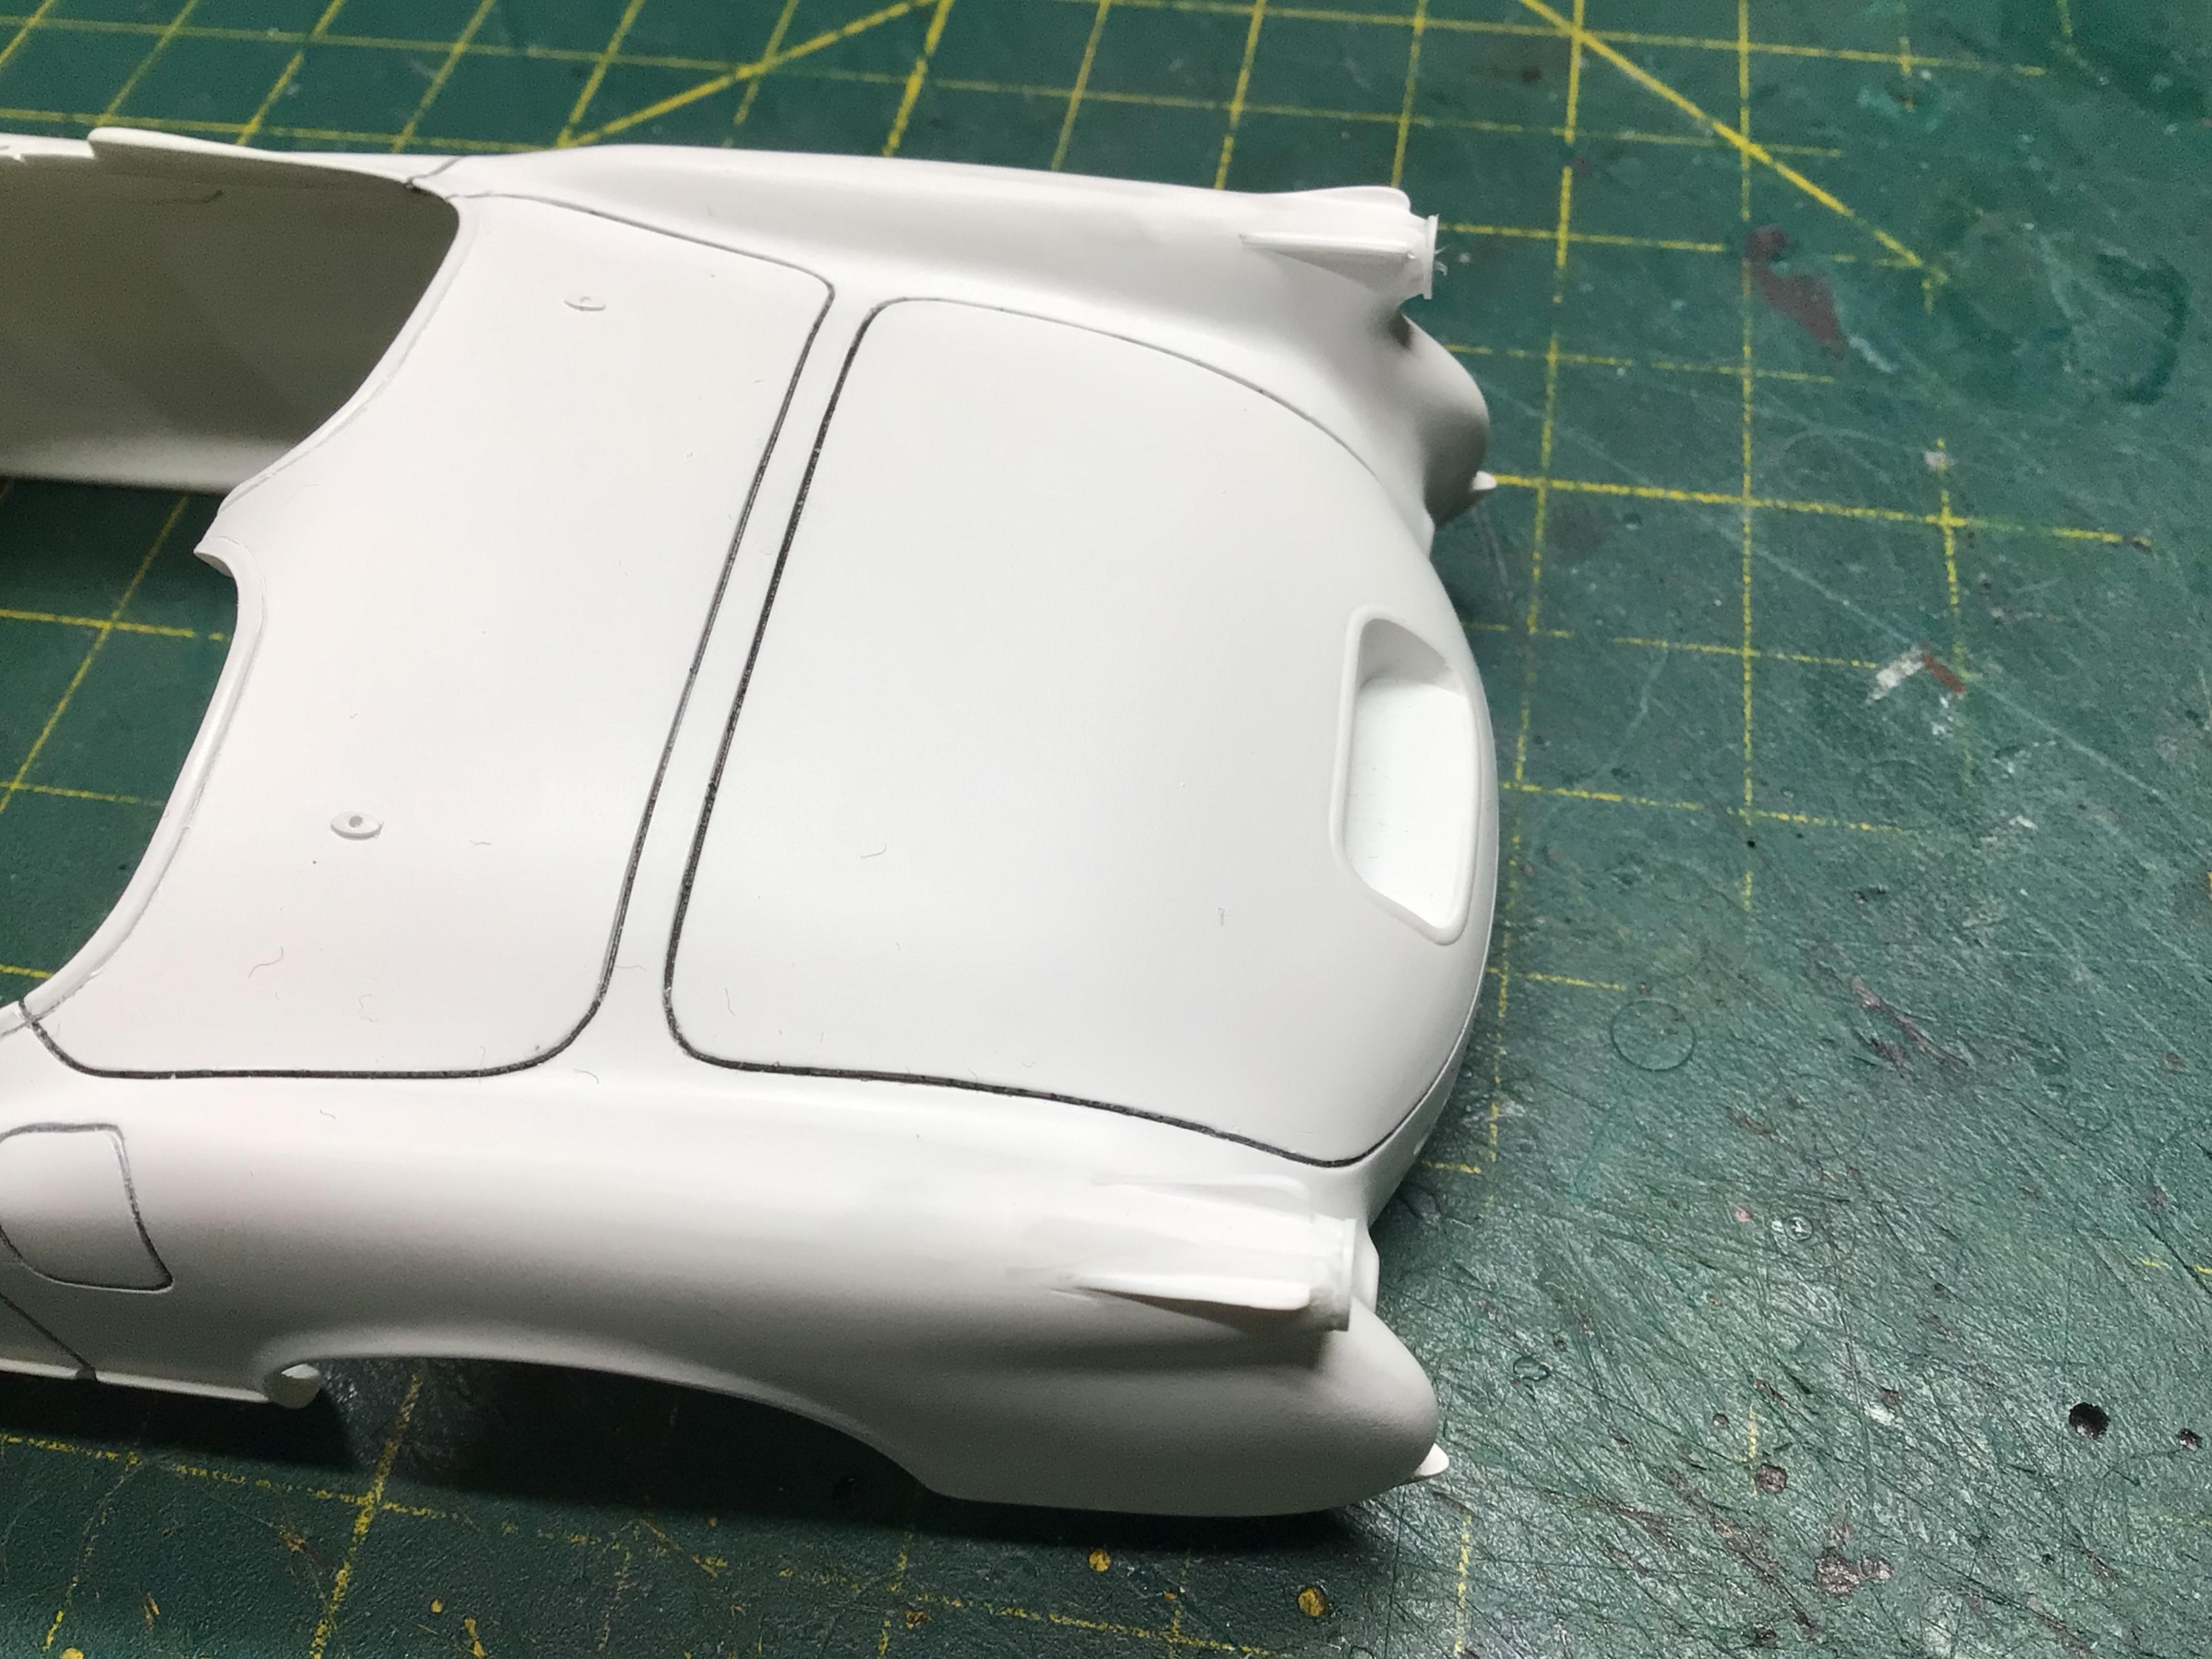
I made a new side mirror since I didn’t like the kit piece.? My first attempt on the right, second on the left…and what it’s supposed to look like. Close enough for me.? And the kit piece.? And I managed to get some paint on it. I used Tamiya TS-26 pure white (I know it’s not quite the same as polo white?) from the can. The hood scoop outline telegraphed through even though I filled the groove with styrene and sanded everything smooth.? So It’s in the pond and will get a coat of Zinnser before another attempt. Then I got to work on the foil this morning, and I think it turned out OK.? The script and front emblem I foiled before painting. Now to fix that hood.

-
Nice rebuild, looks like the real deal.?
-
Nice, clean looking El Camino!?
-
It certainly does look good Dan!? I understand the frustration resulting from parts that don’t fit properly or have no precise mounting points.? It looks like you conquered the issues.
-

AMT 50 chevy 3100 p/u
NOBLNG replied to Tom Kren's topic in WIP: Model Trucks: Pickups, Vans, SUVs, Light Commercial
Looking really good Tom!? -
King of Queens was a sitcom that made me laugh.
-
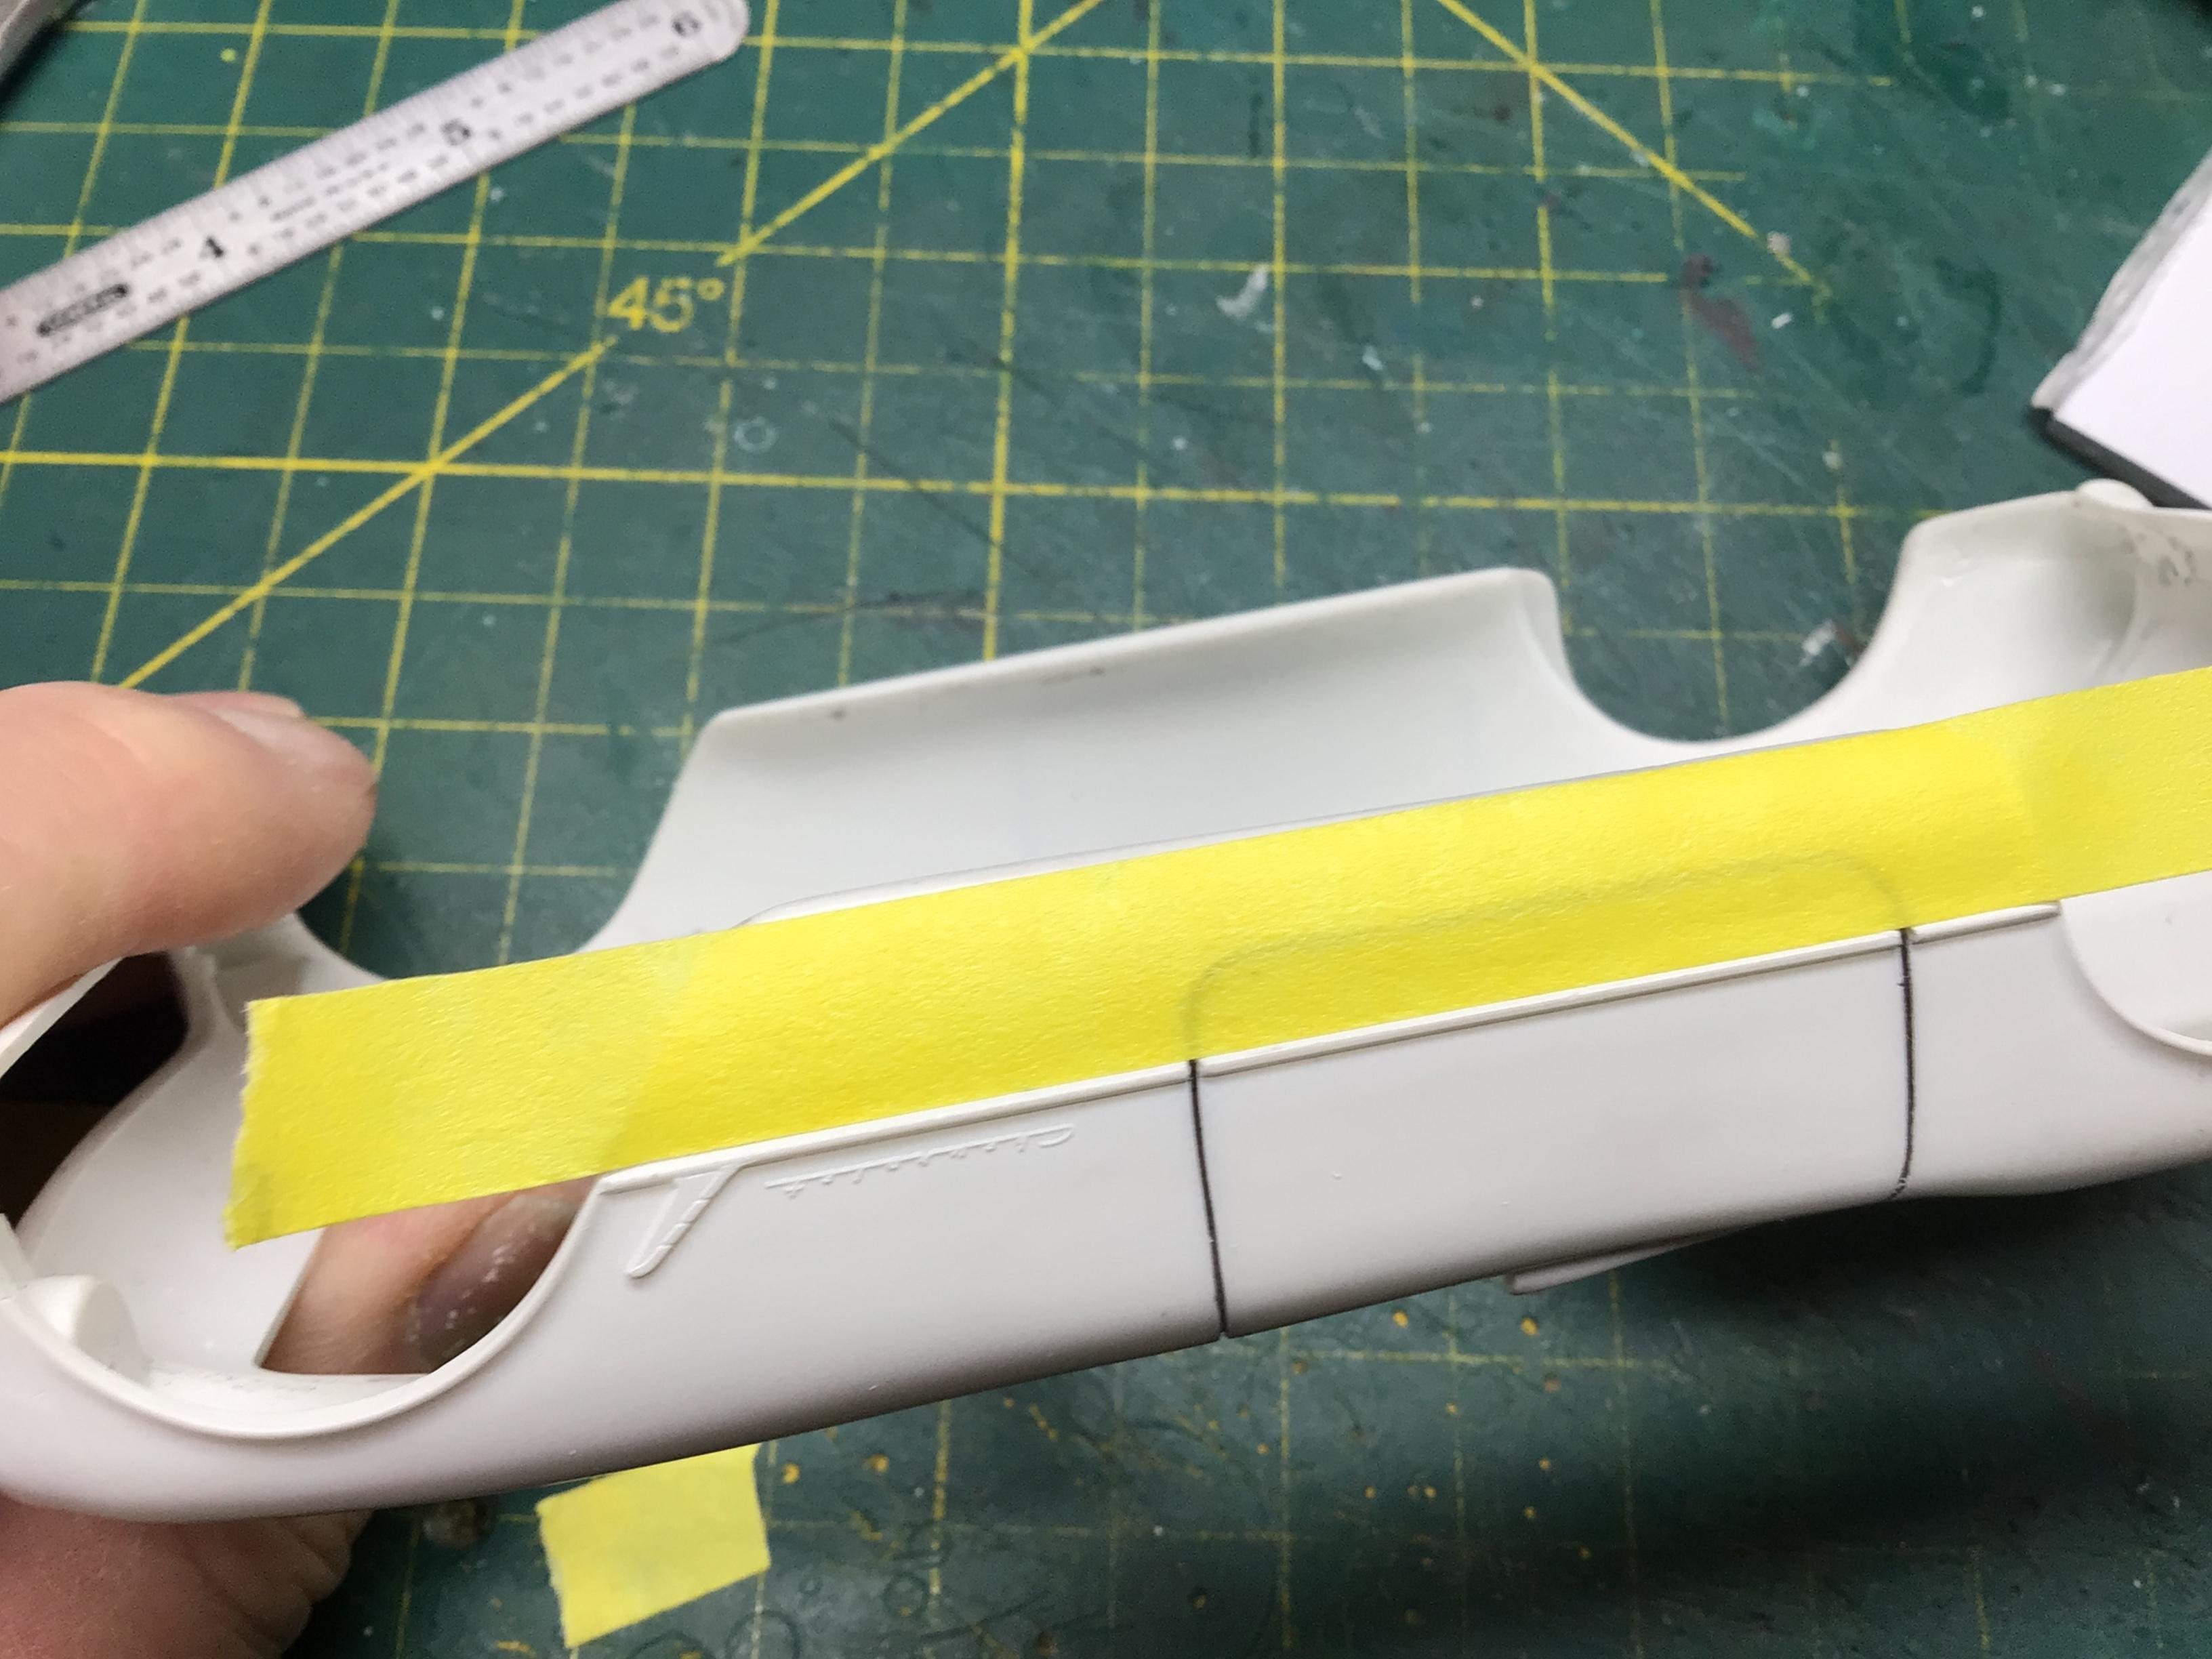
1/64" width tape (Masking?)
NOBLNG replied to BDSchindler's topic in Model Building Questions and Answers
This^^use a good quality tape and make your own any width you need. -
Song about a boy named Sue was a hit by Johnny Cash.
-
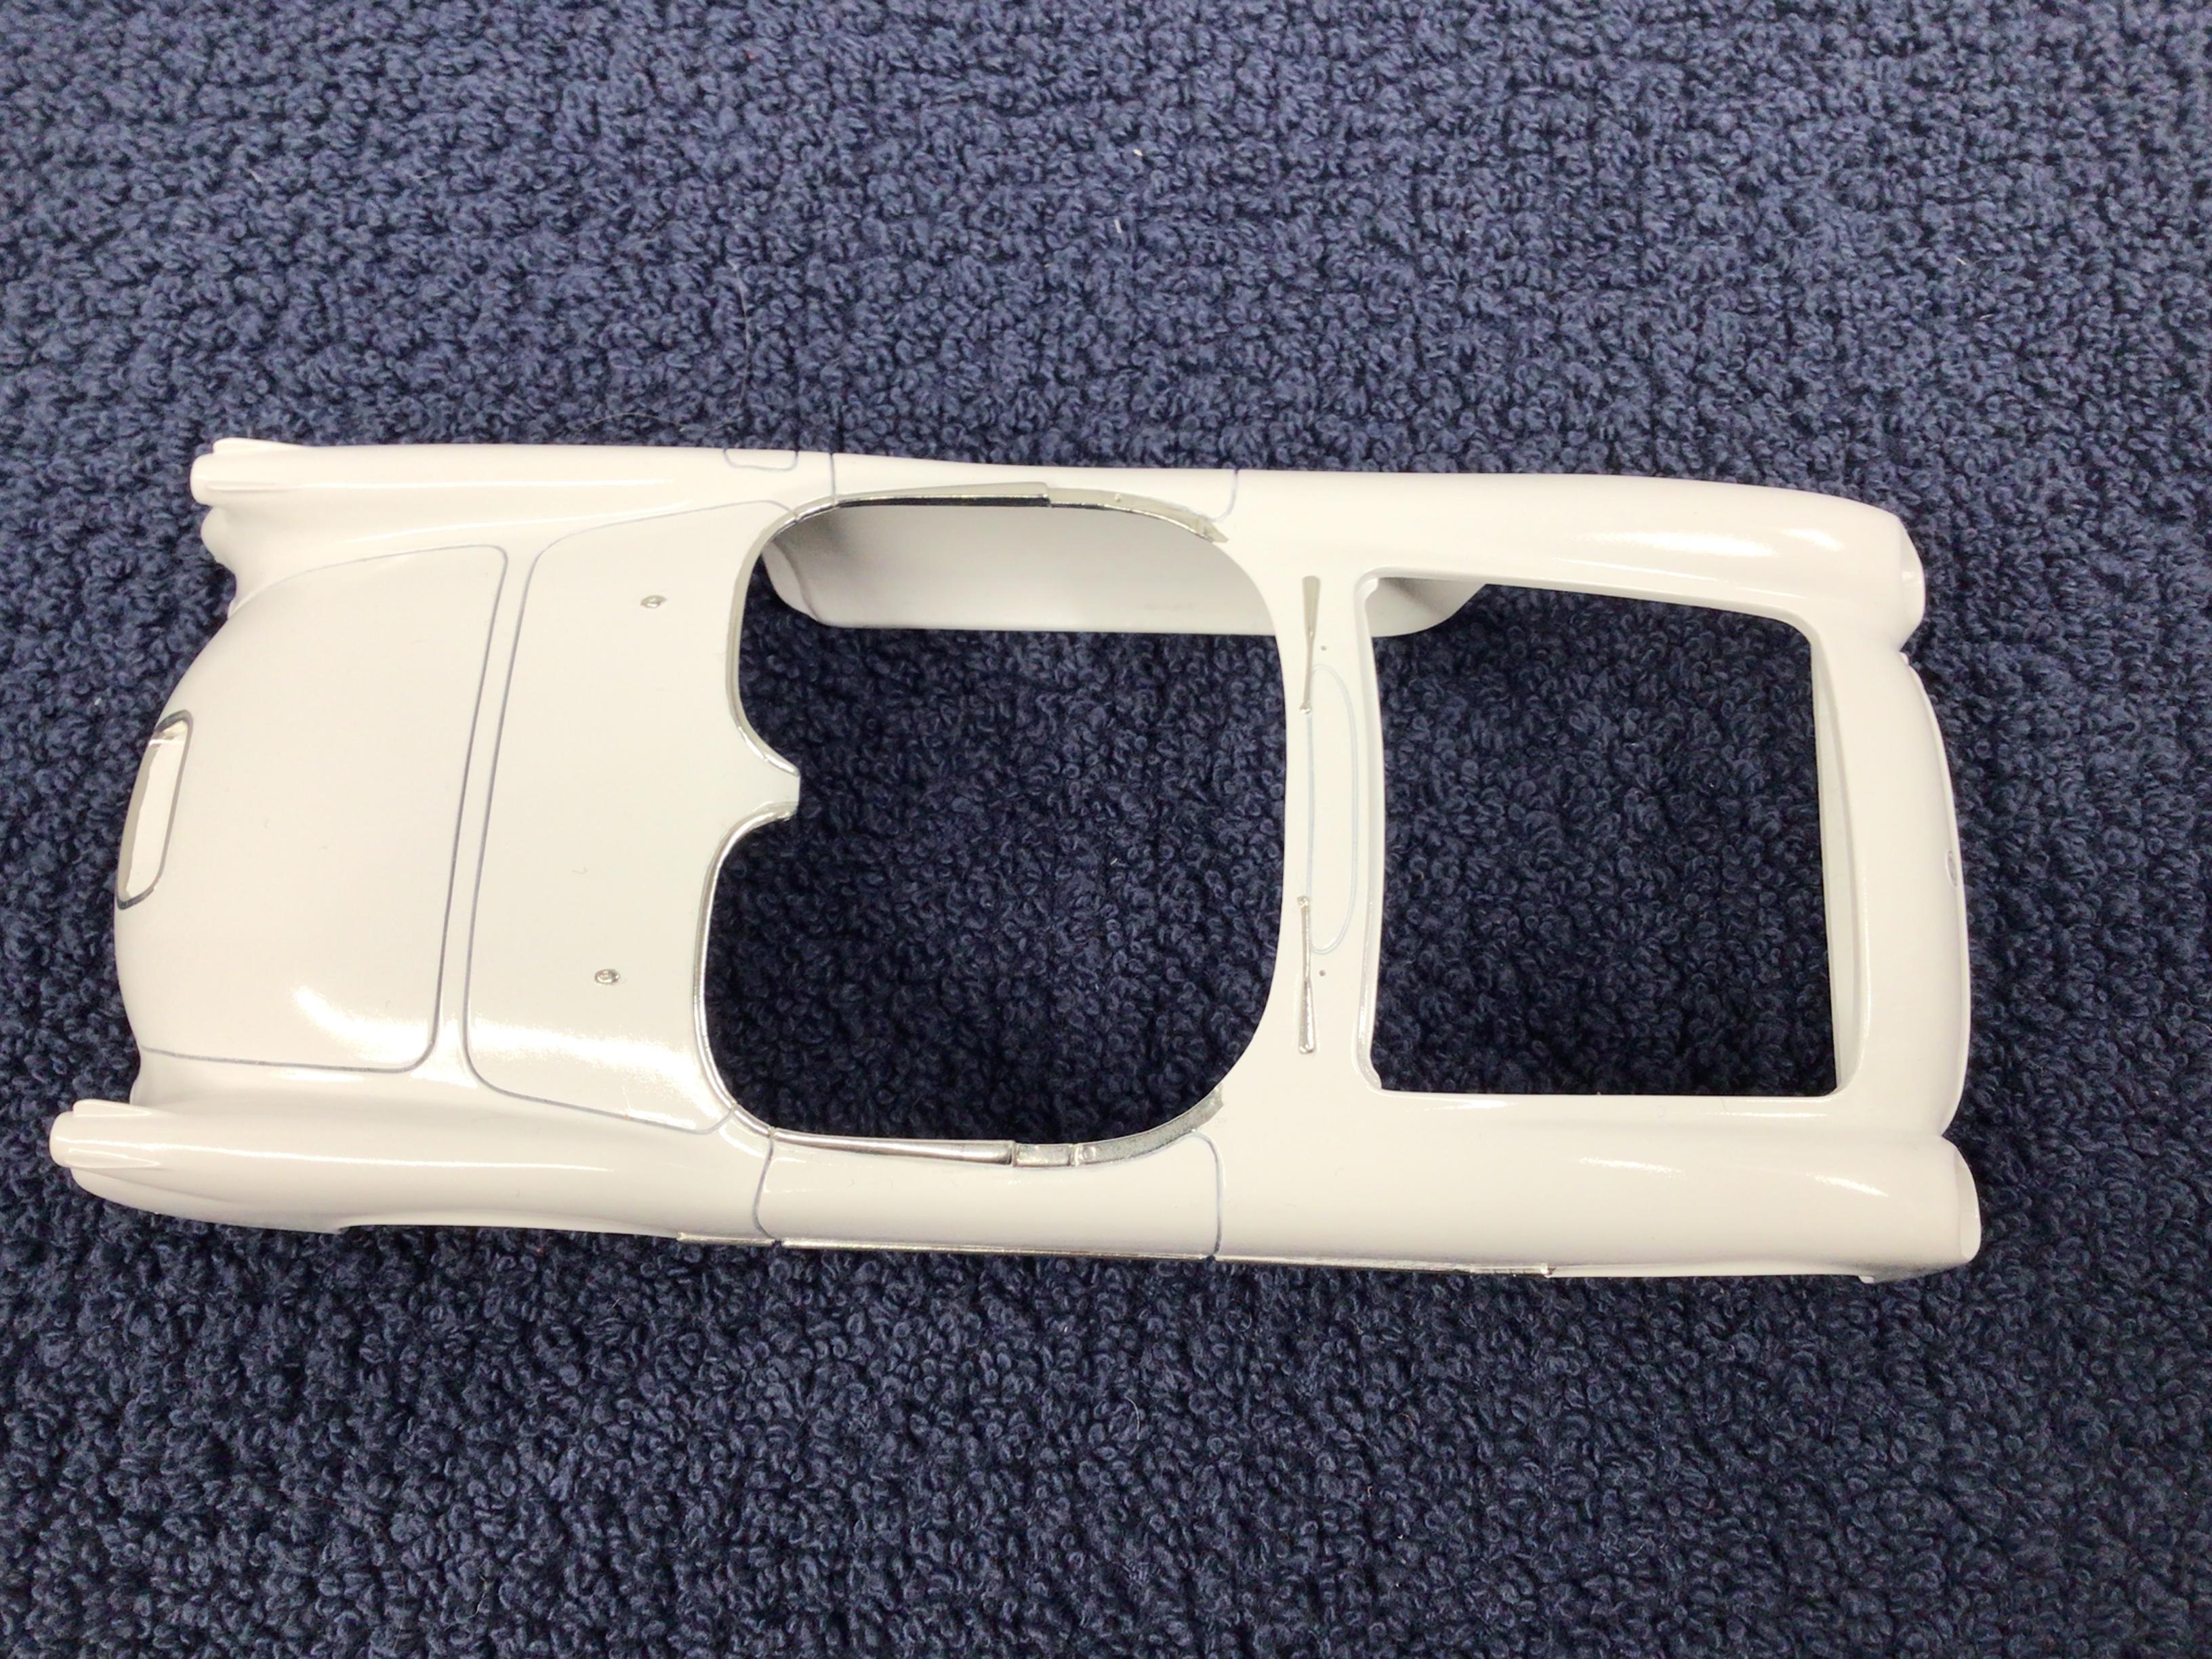
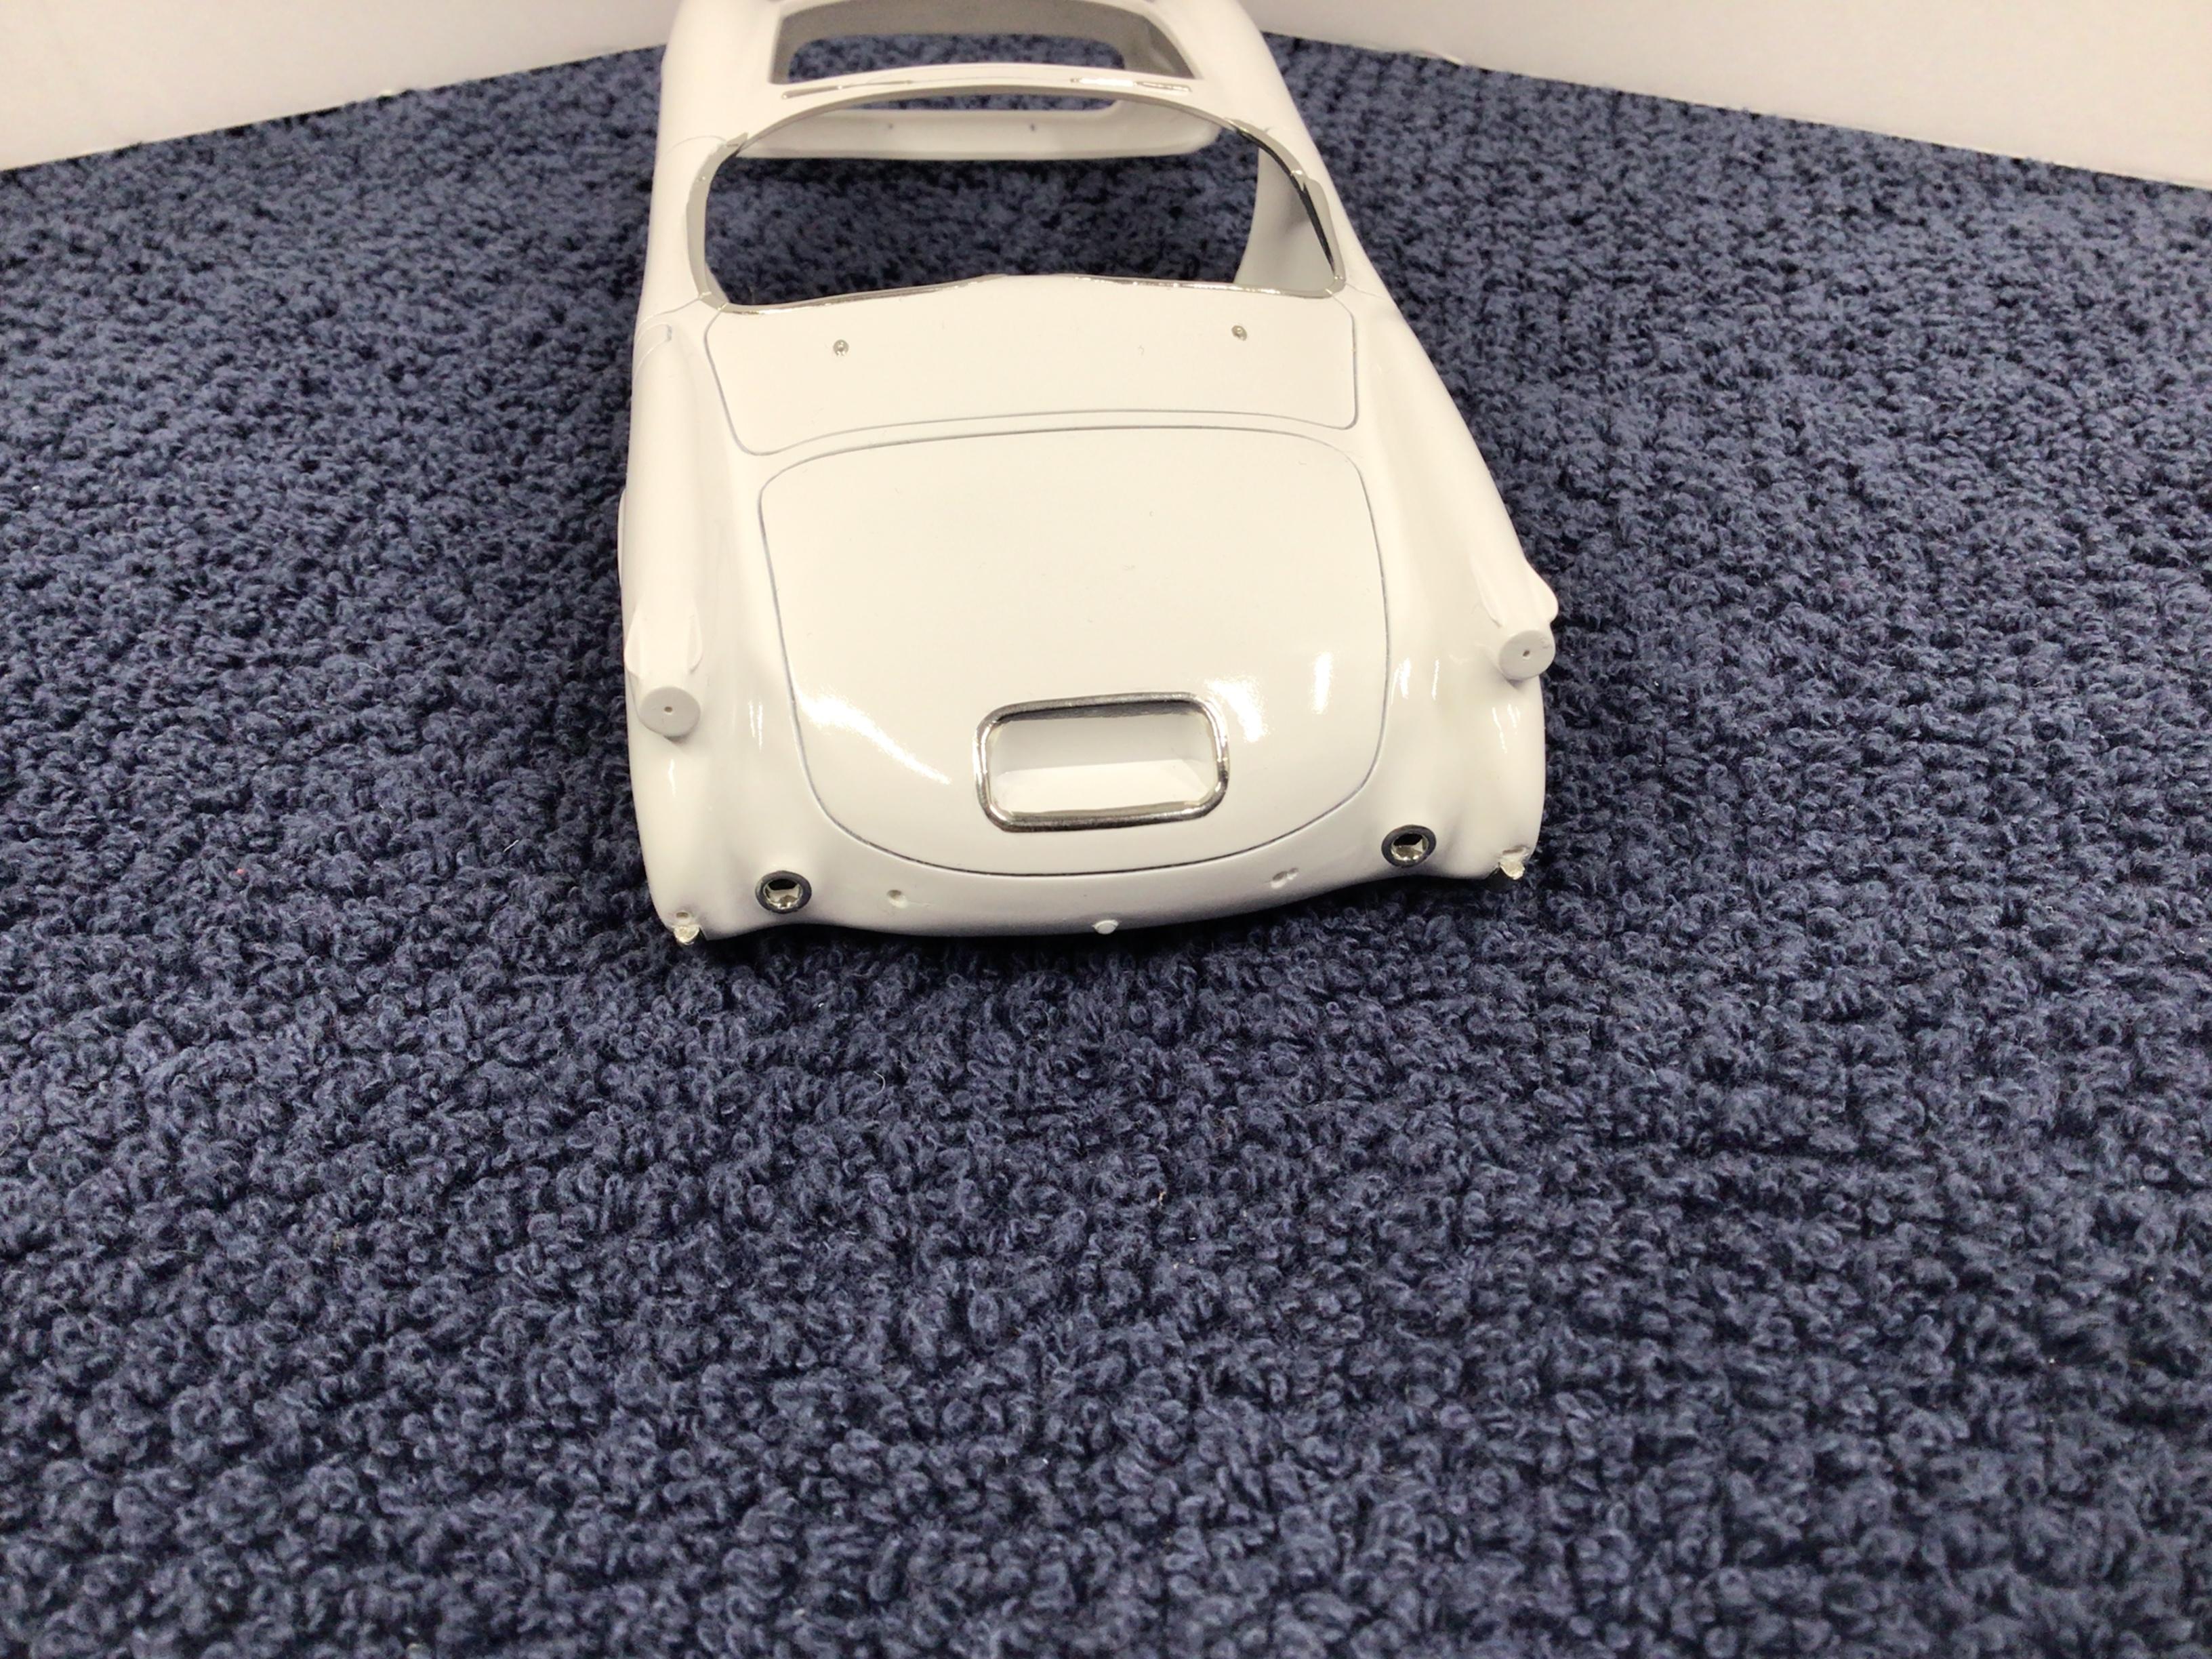
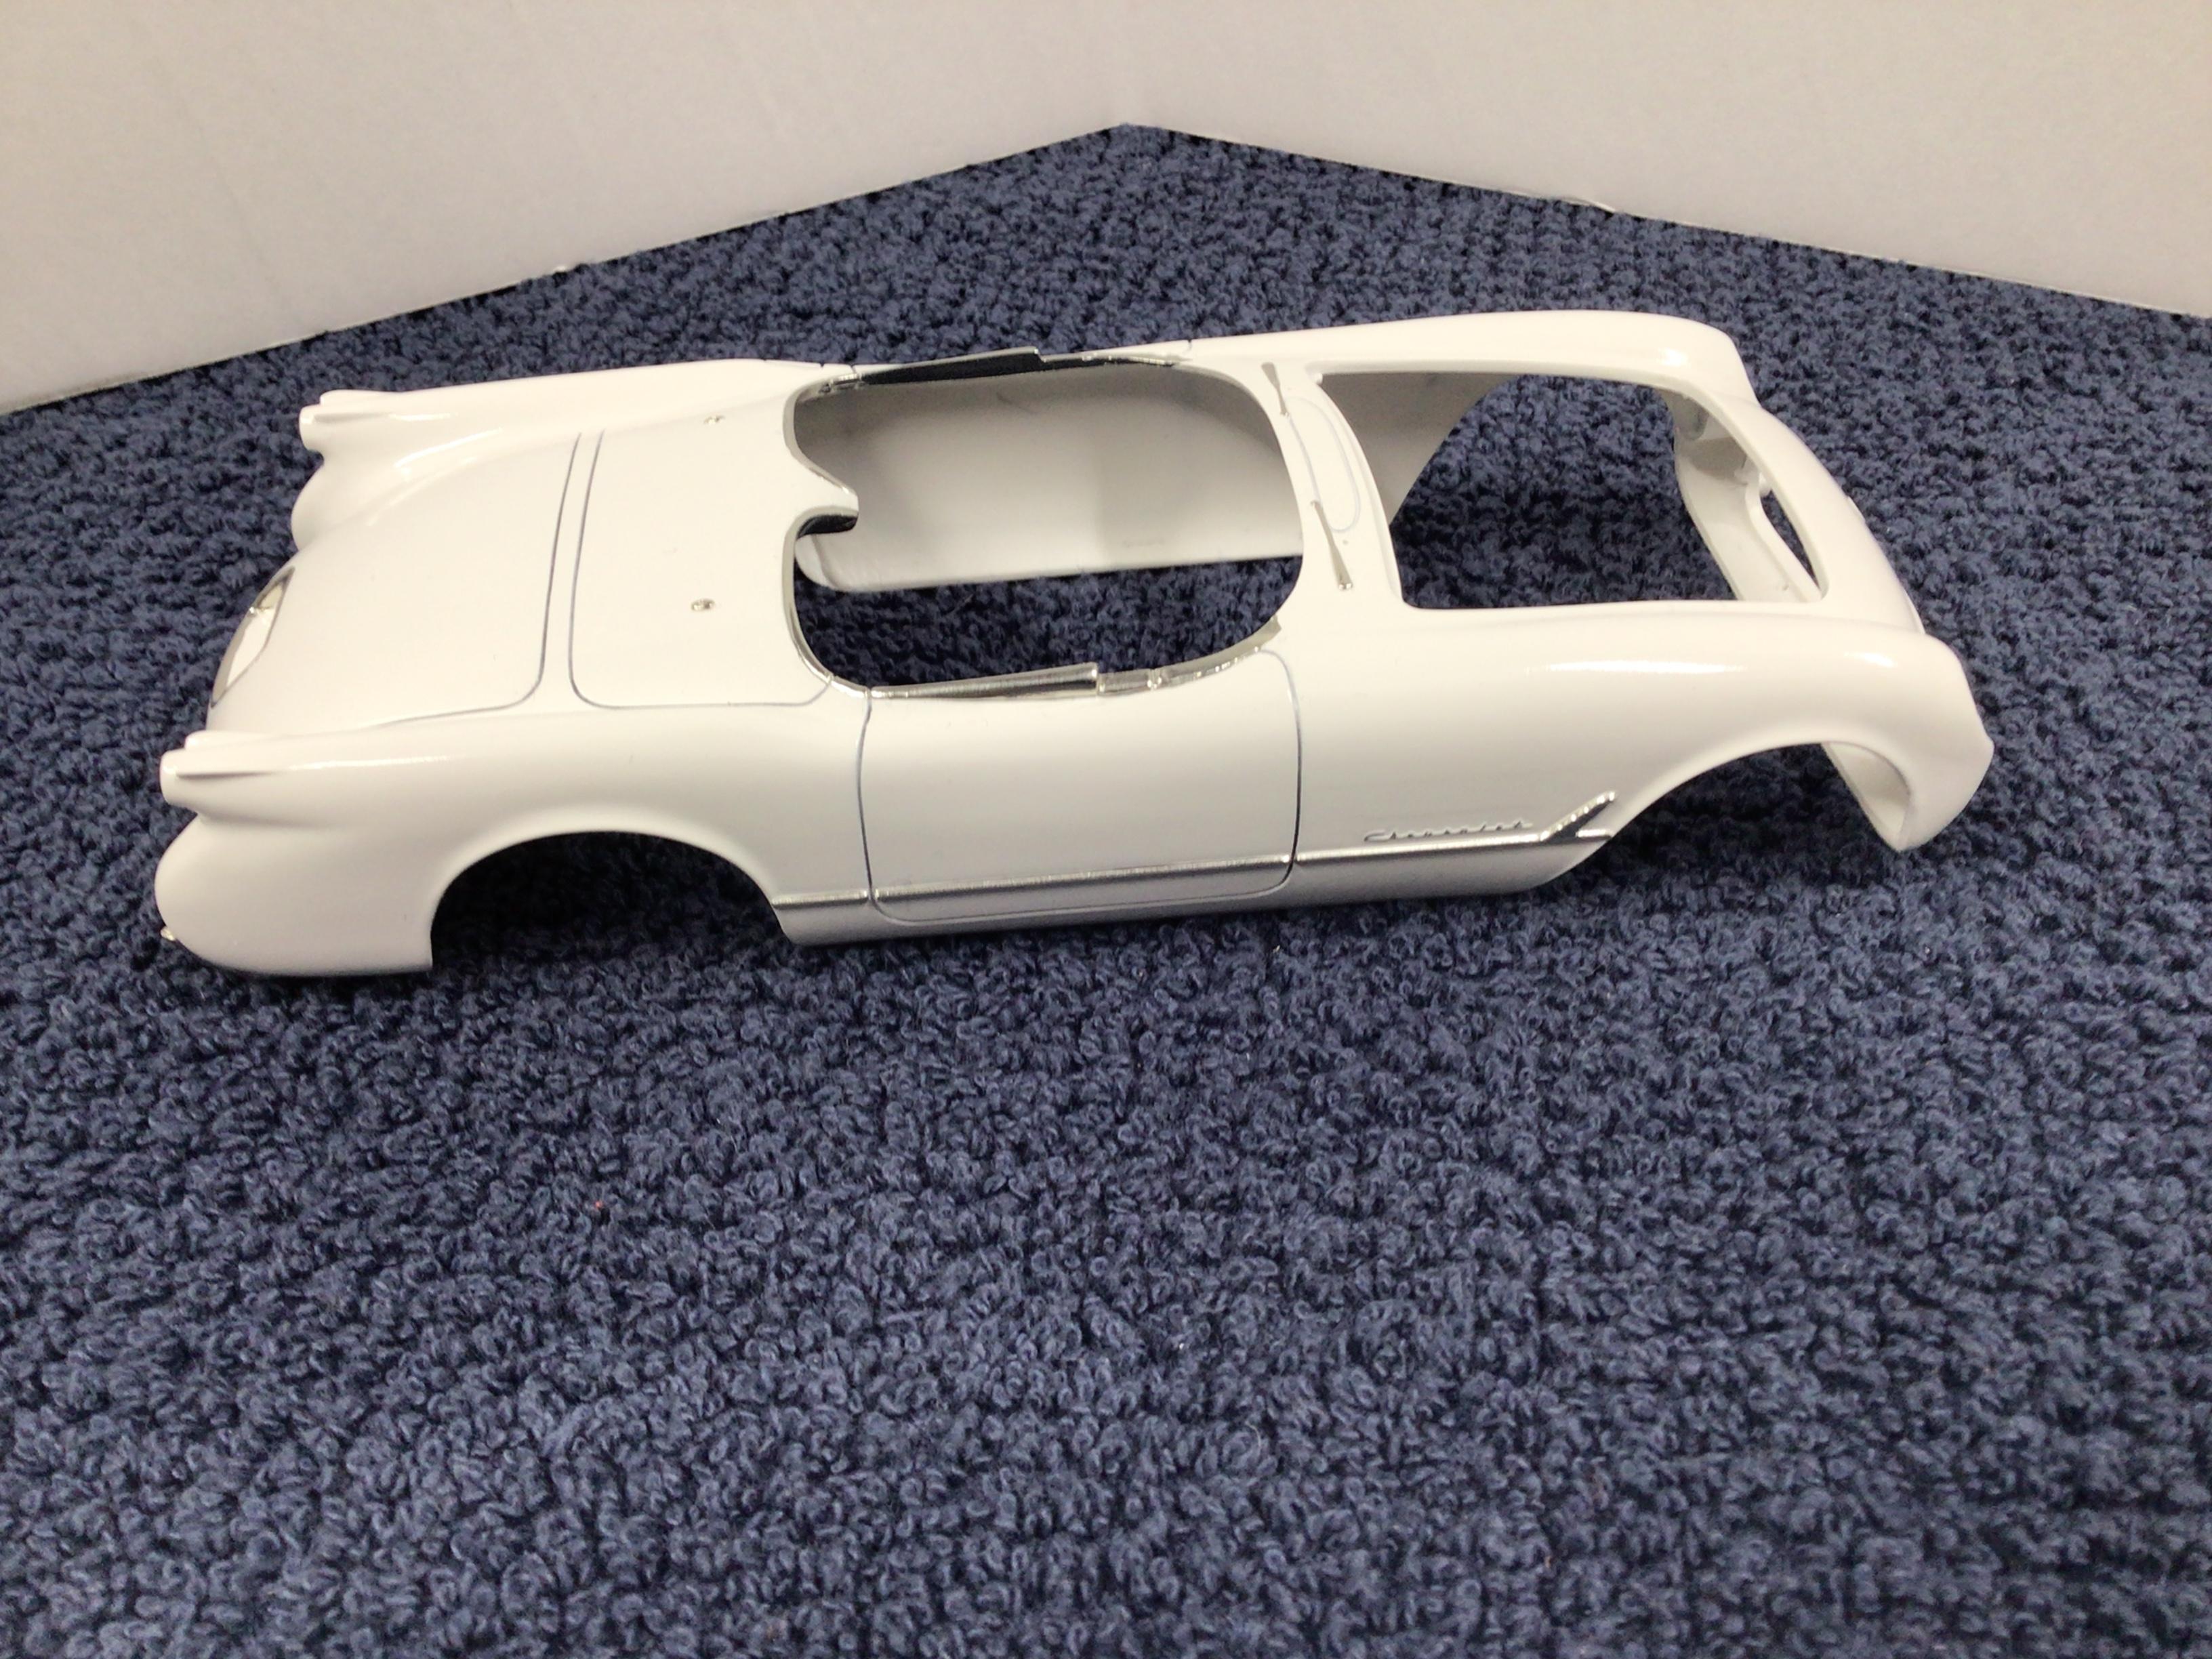
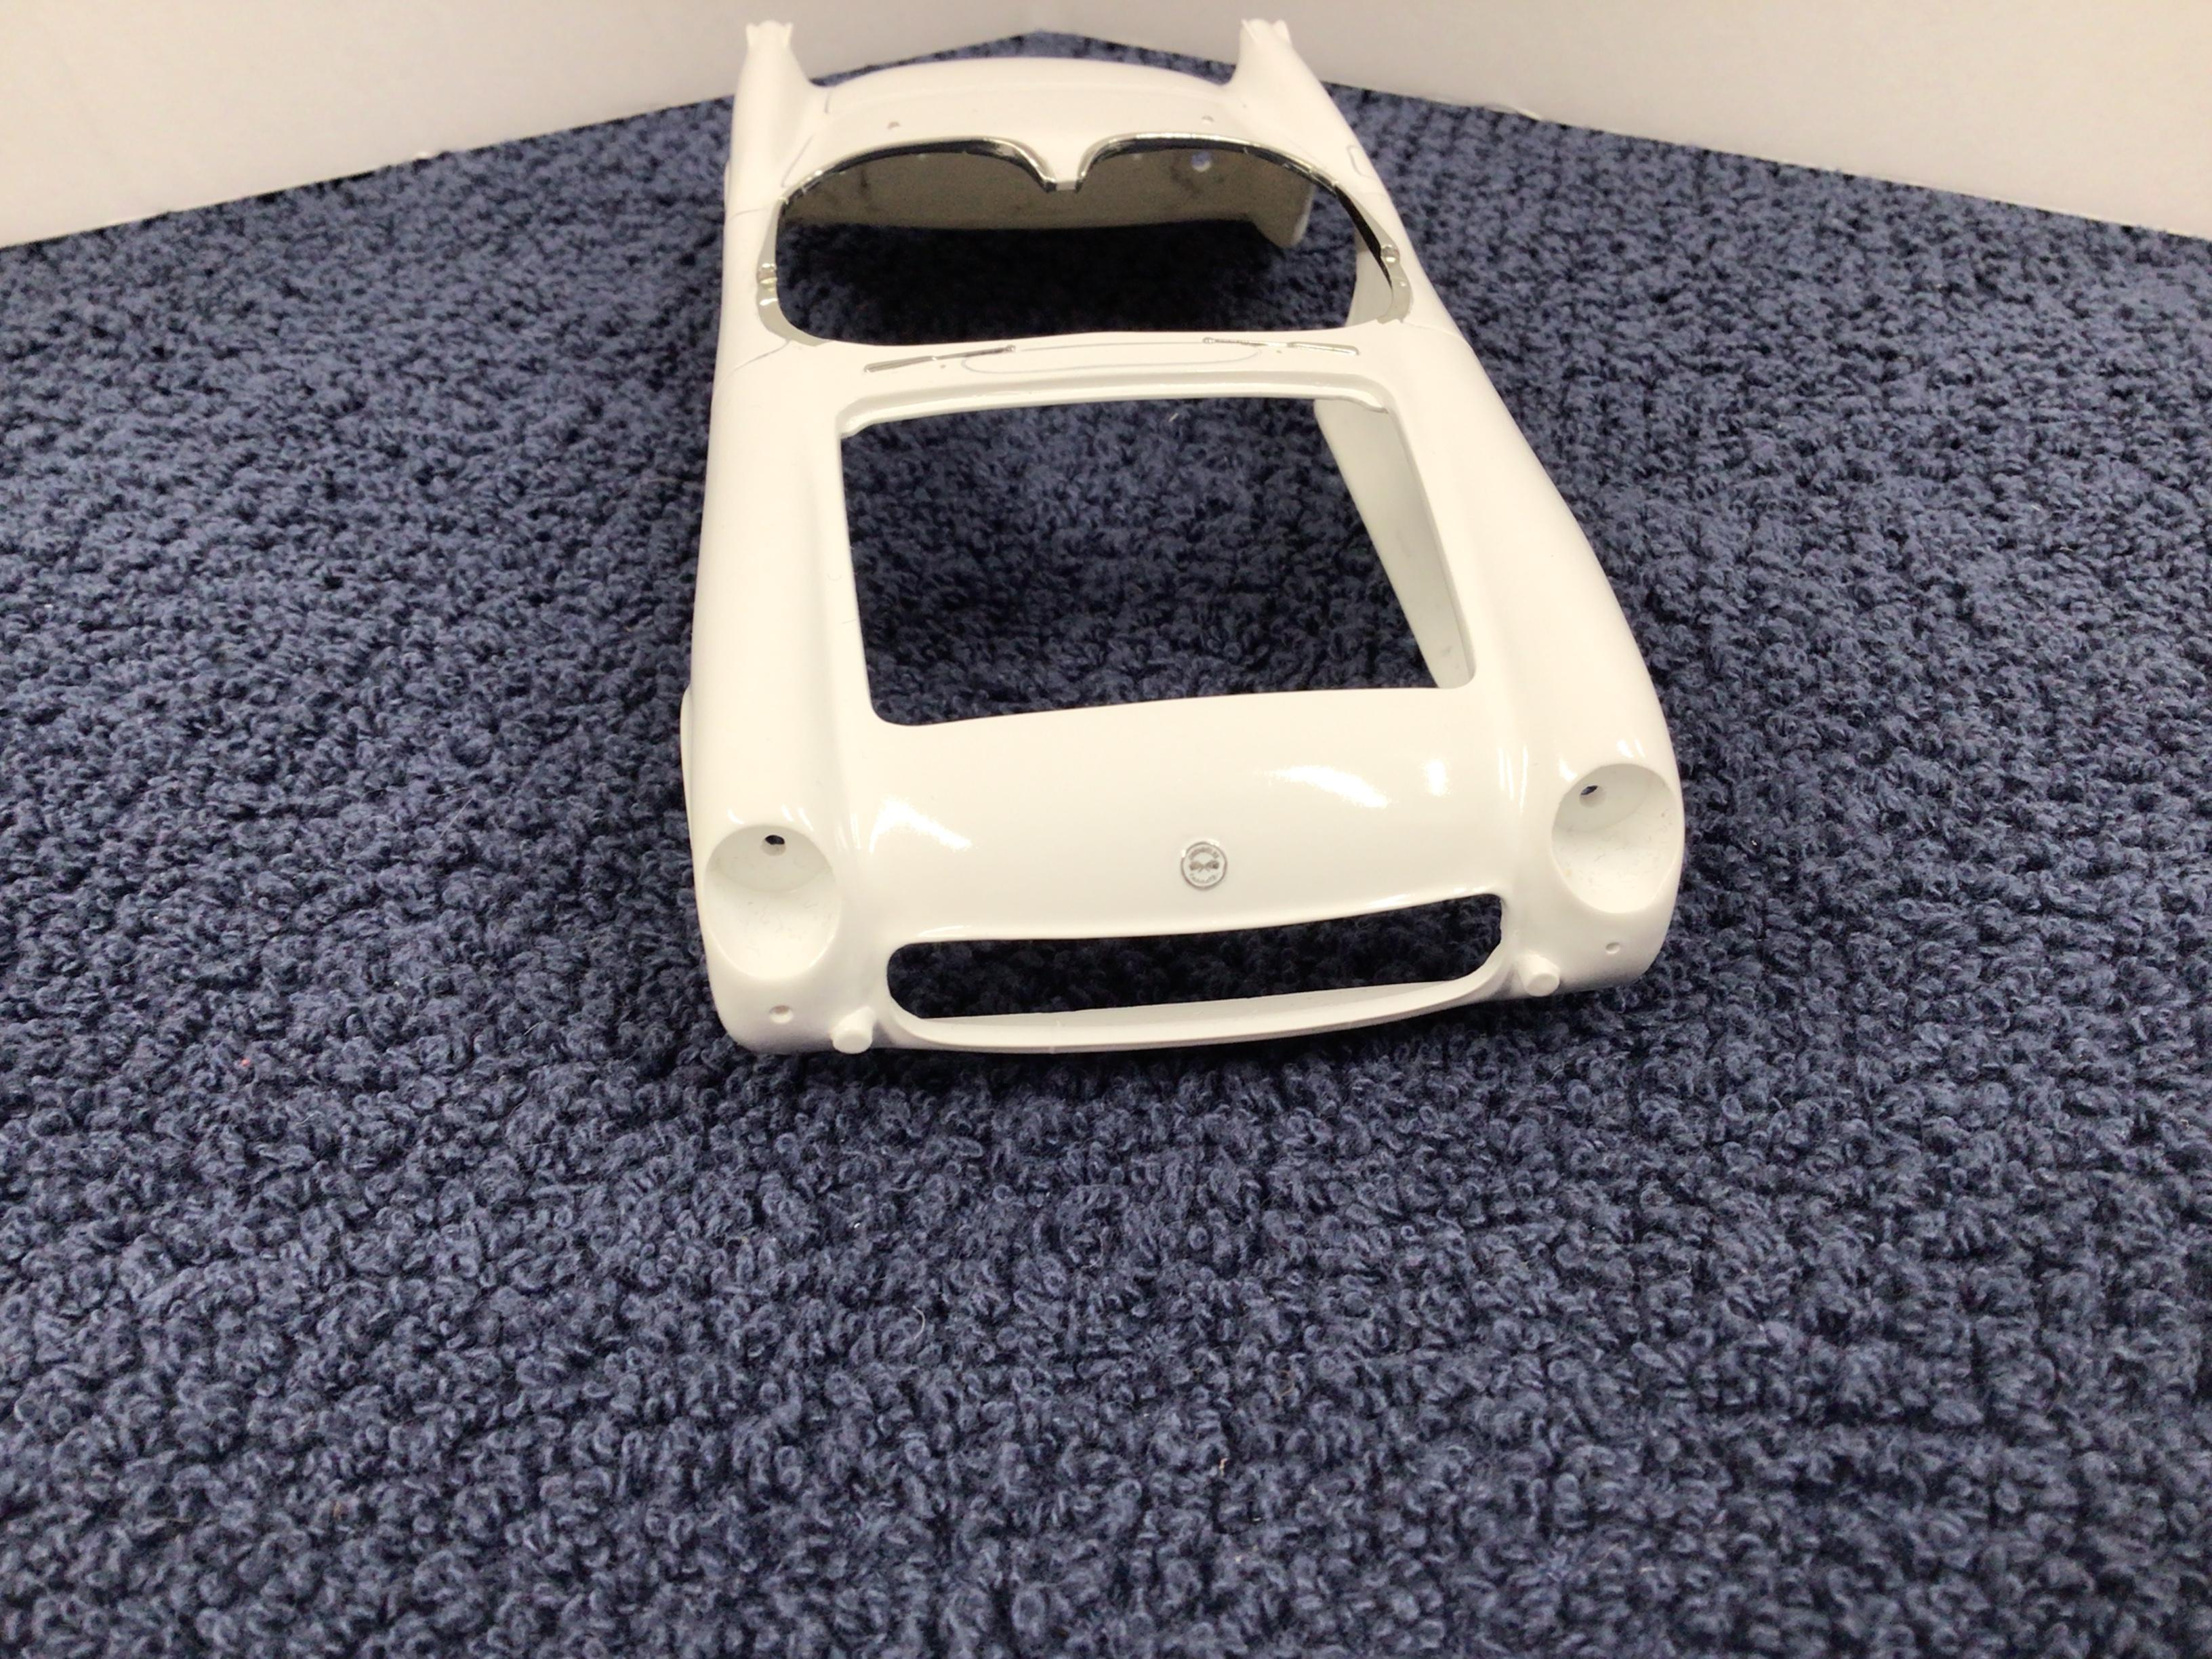
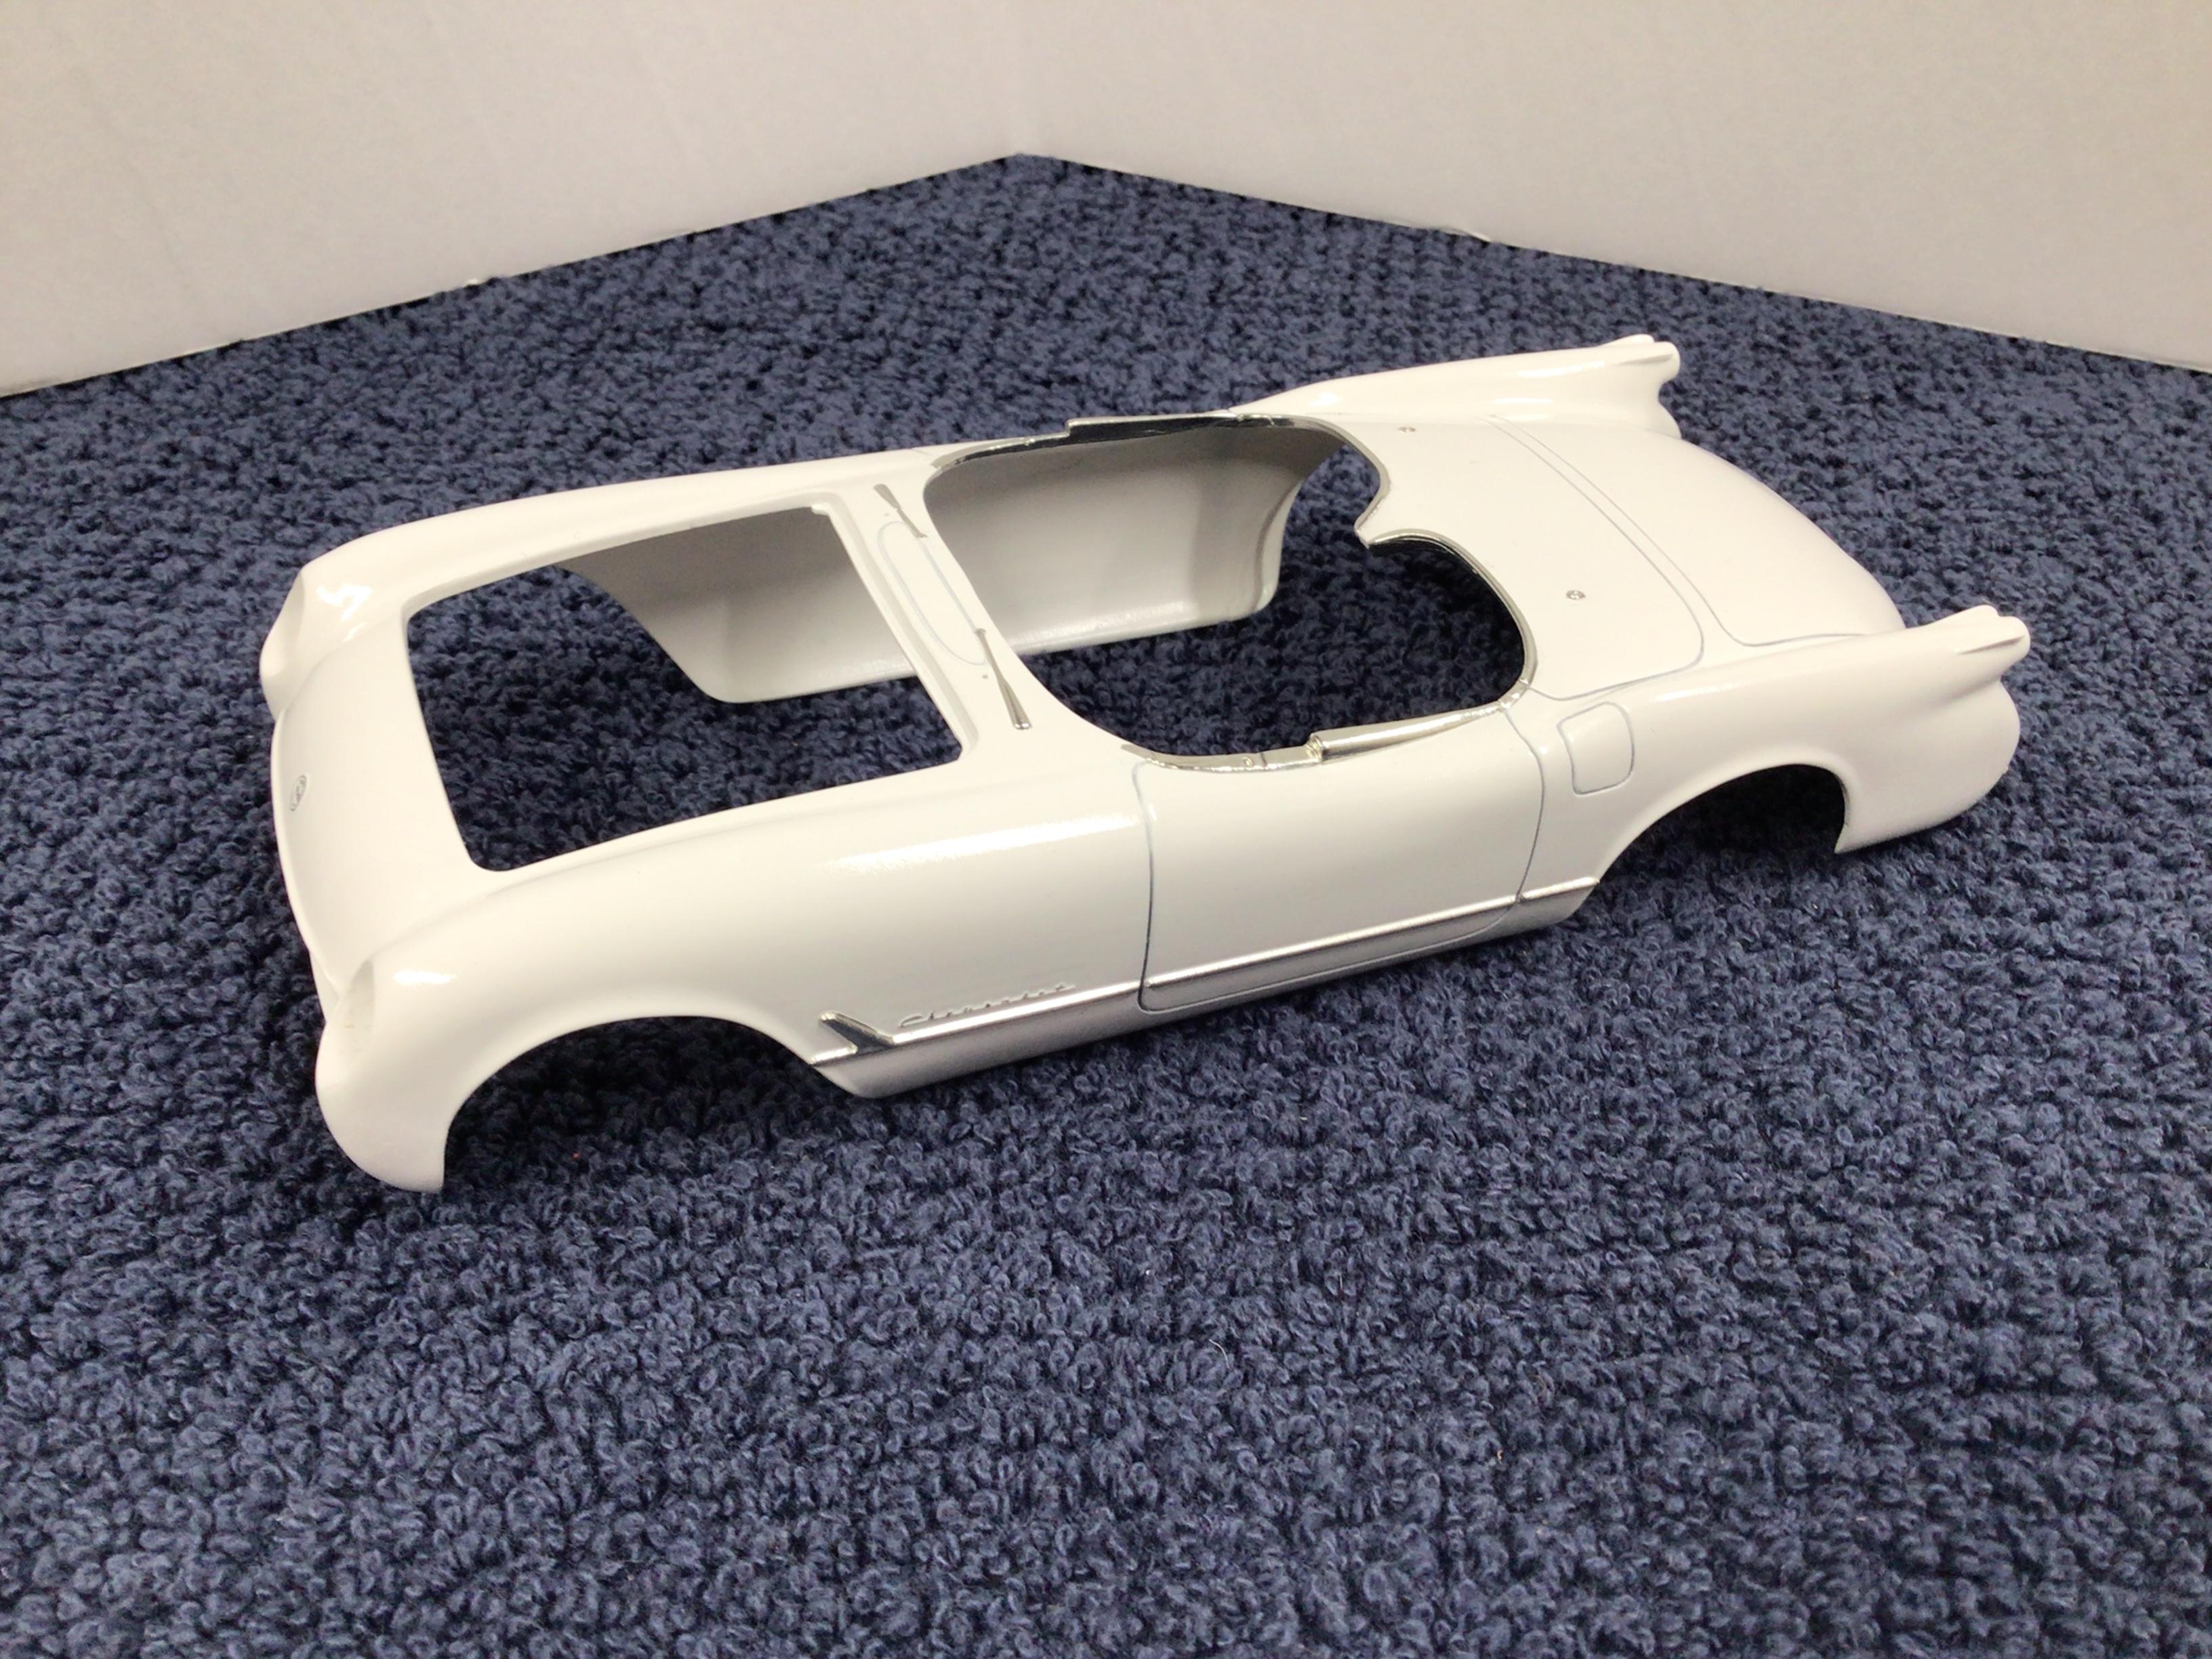
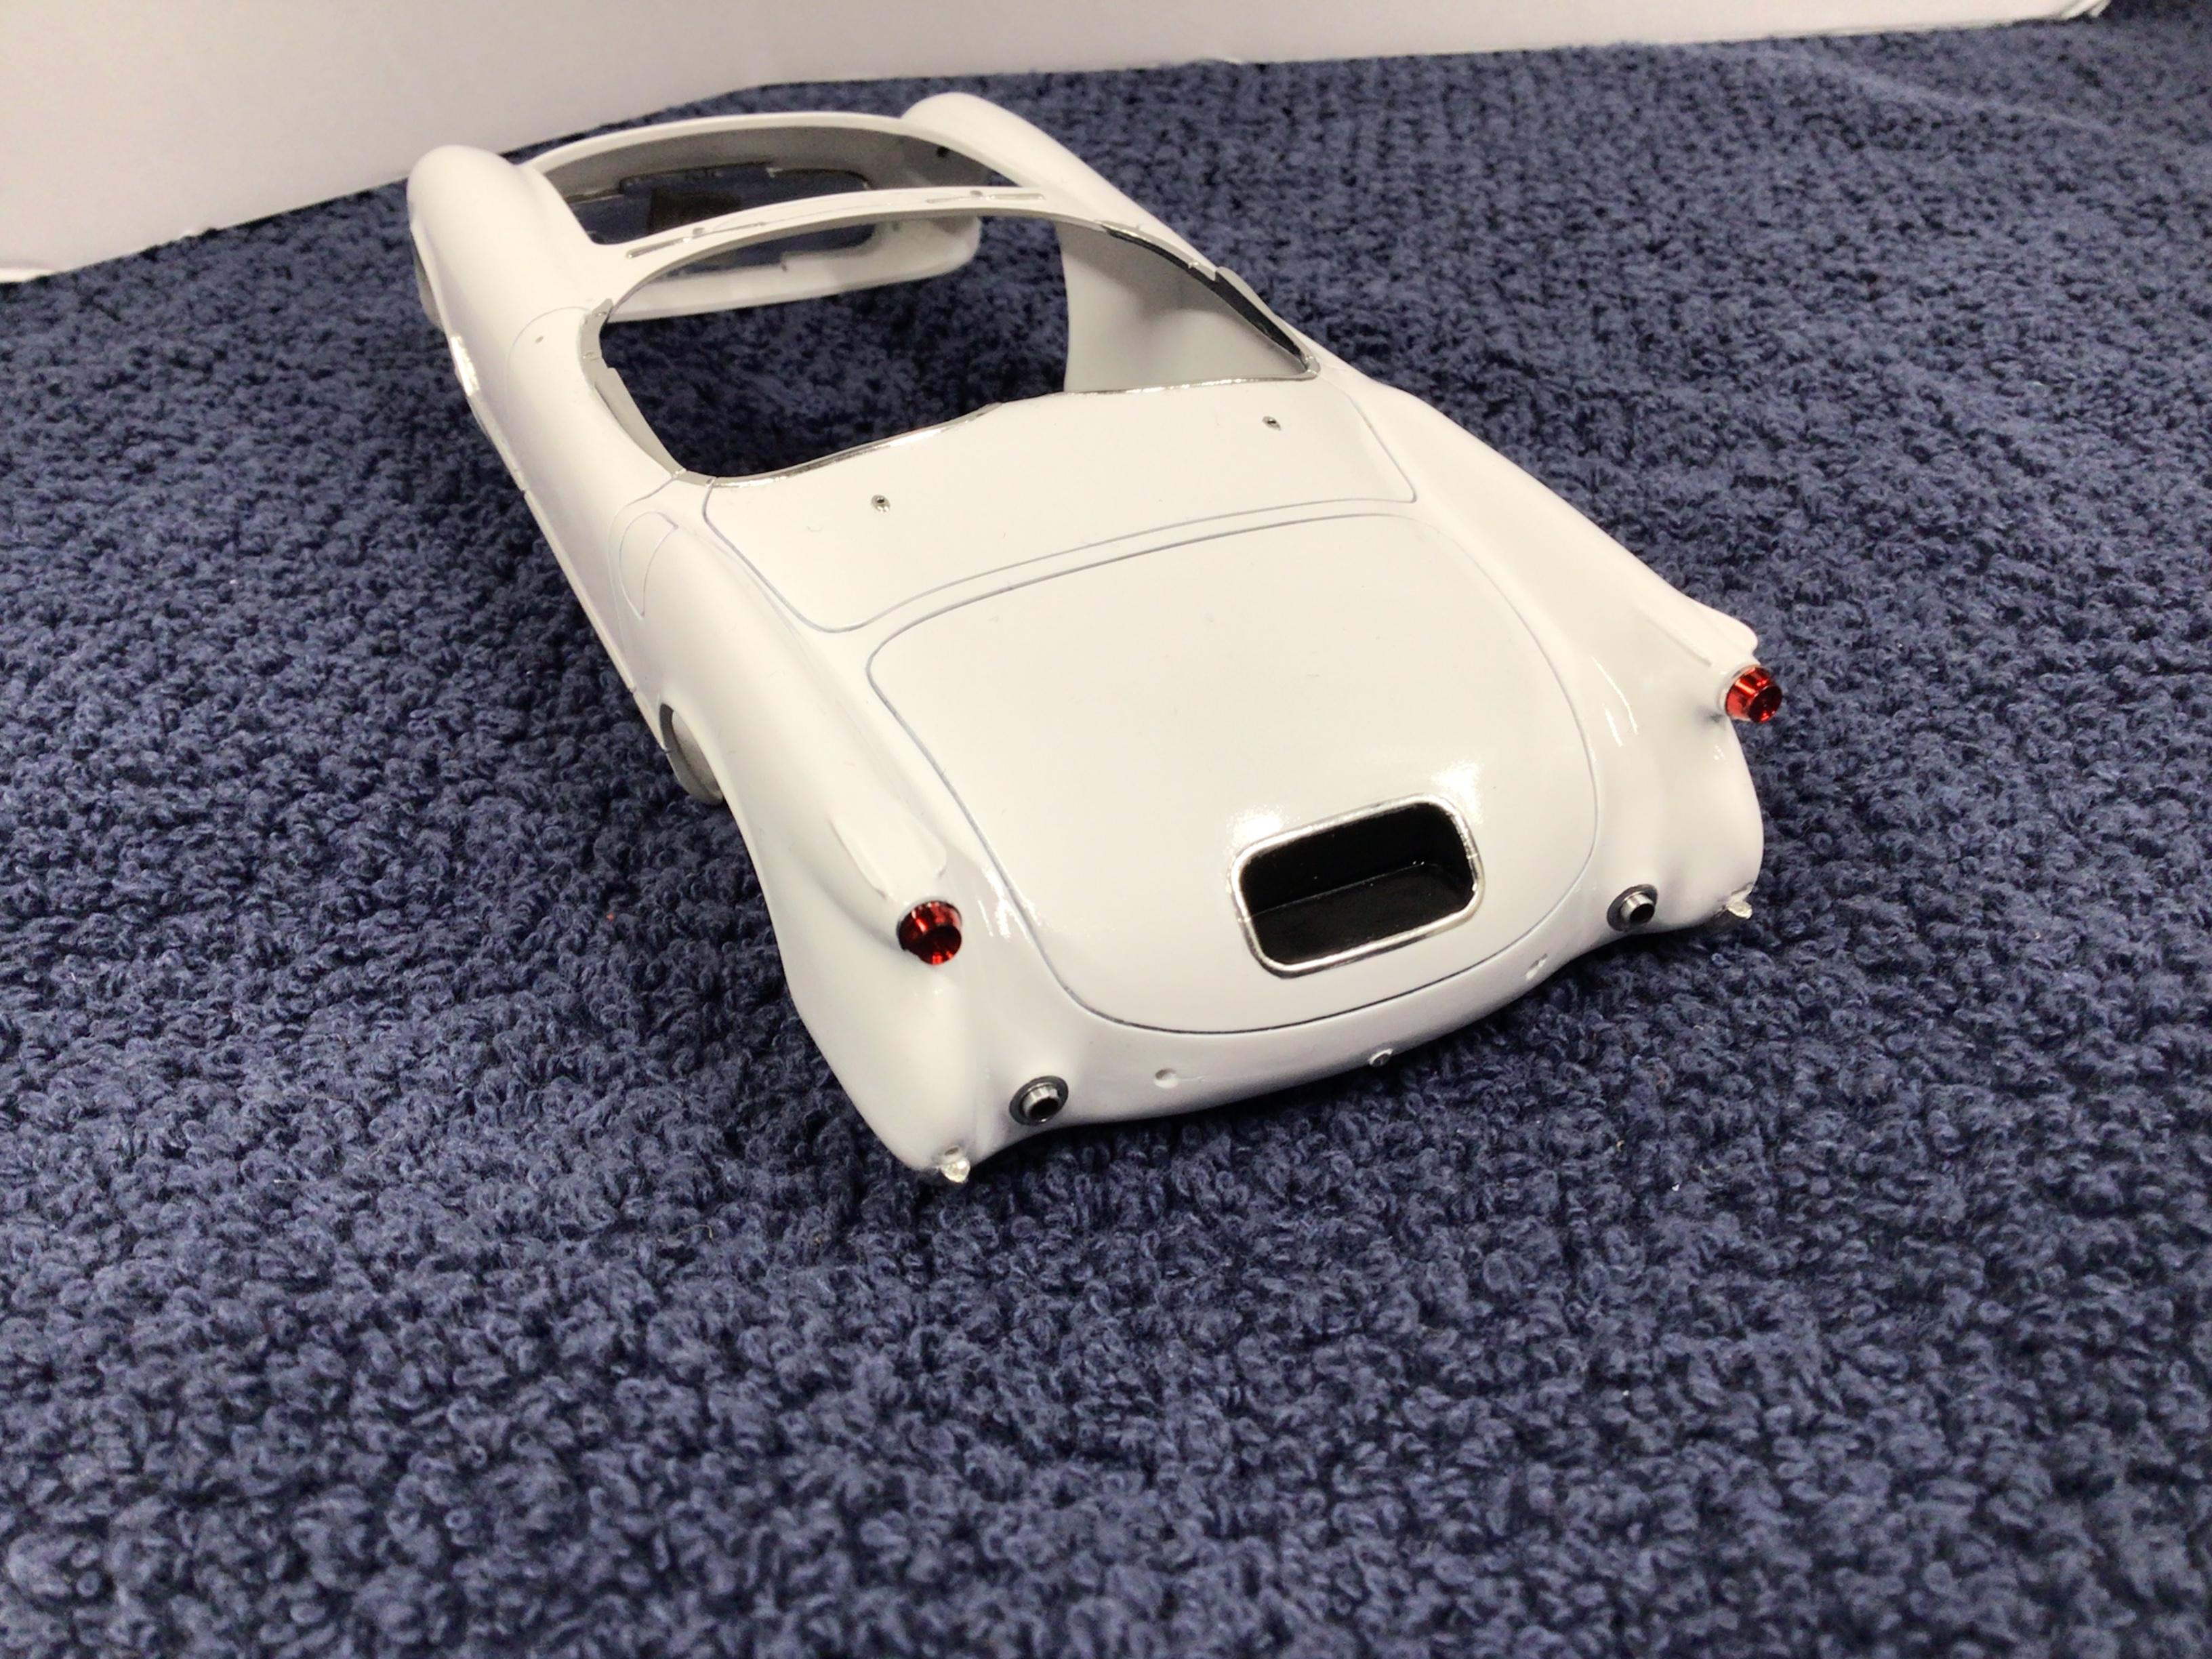
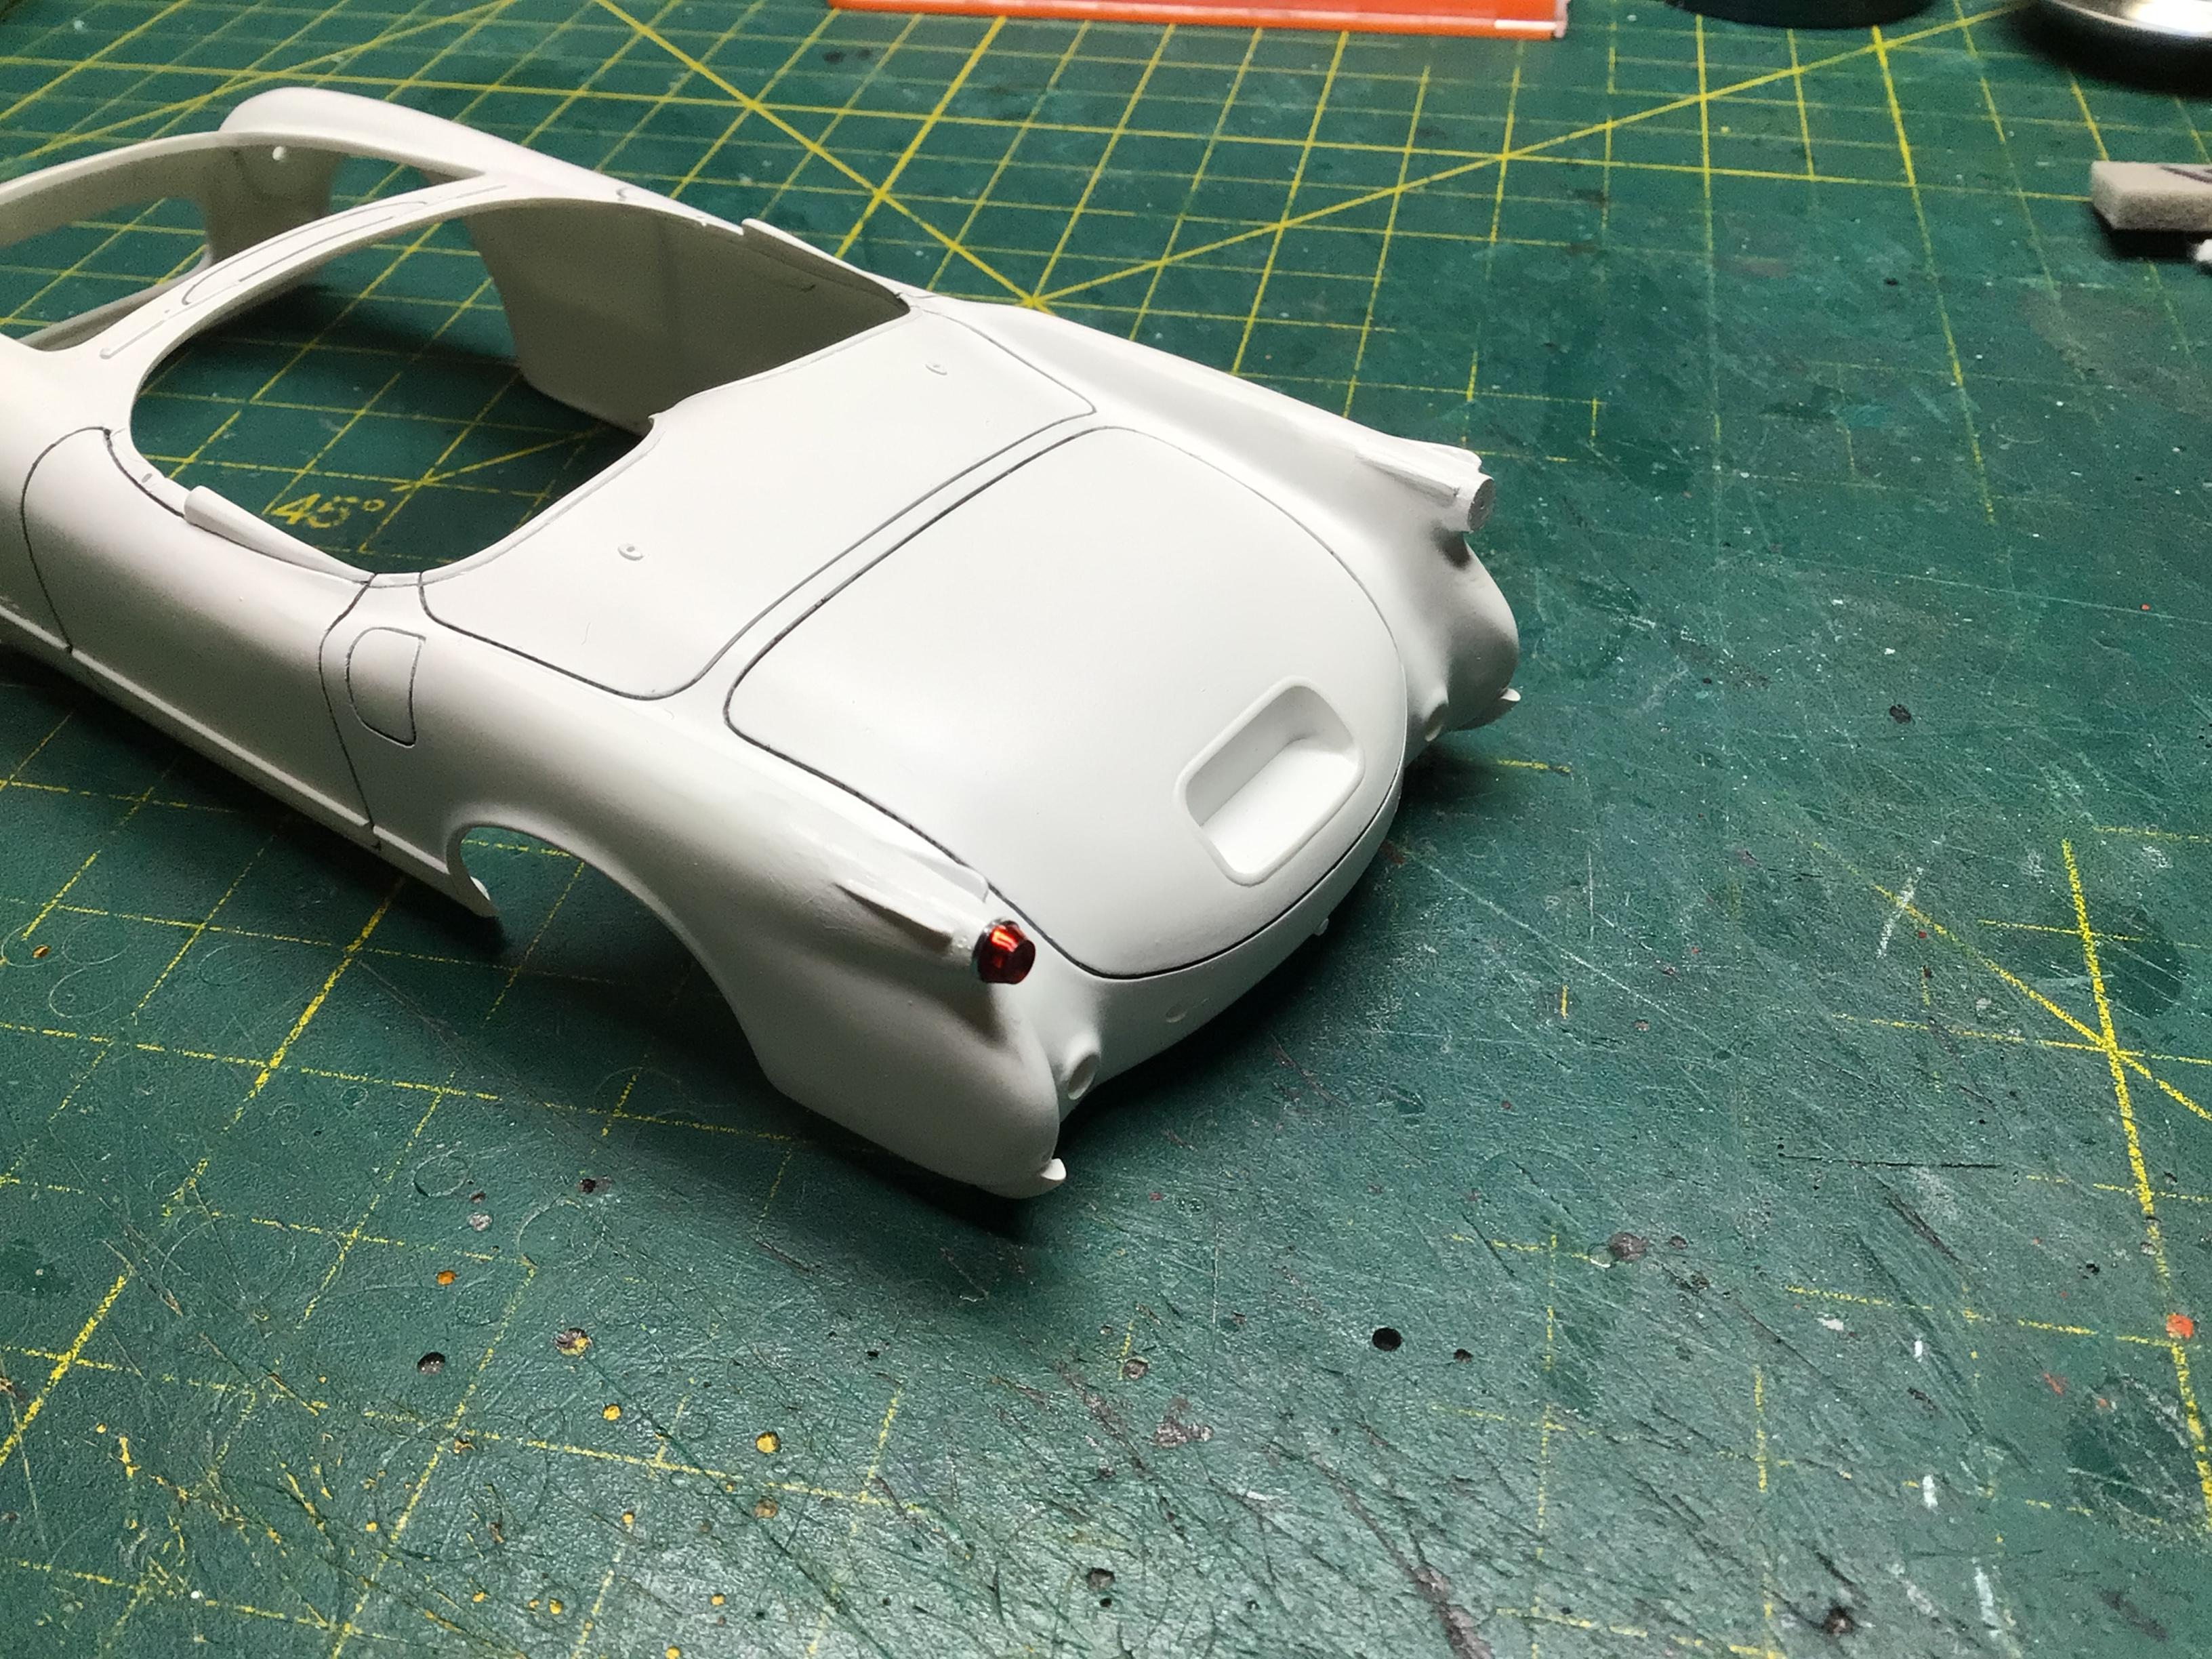
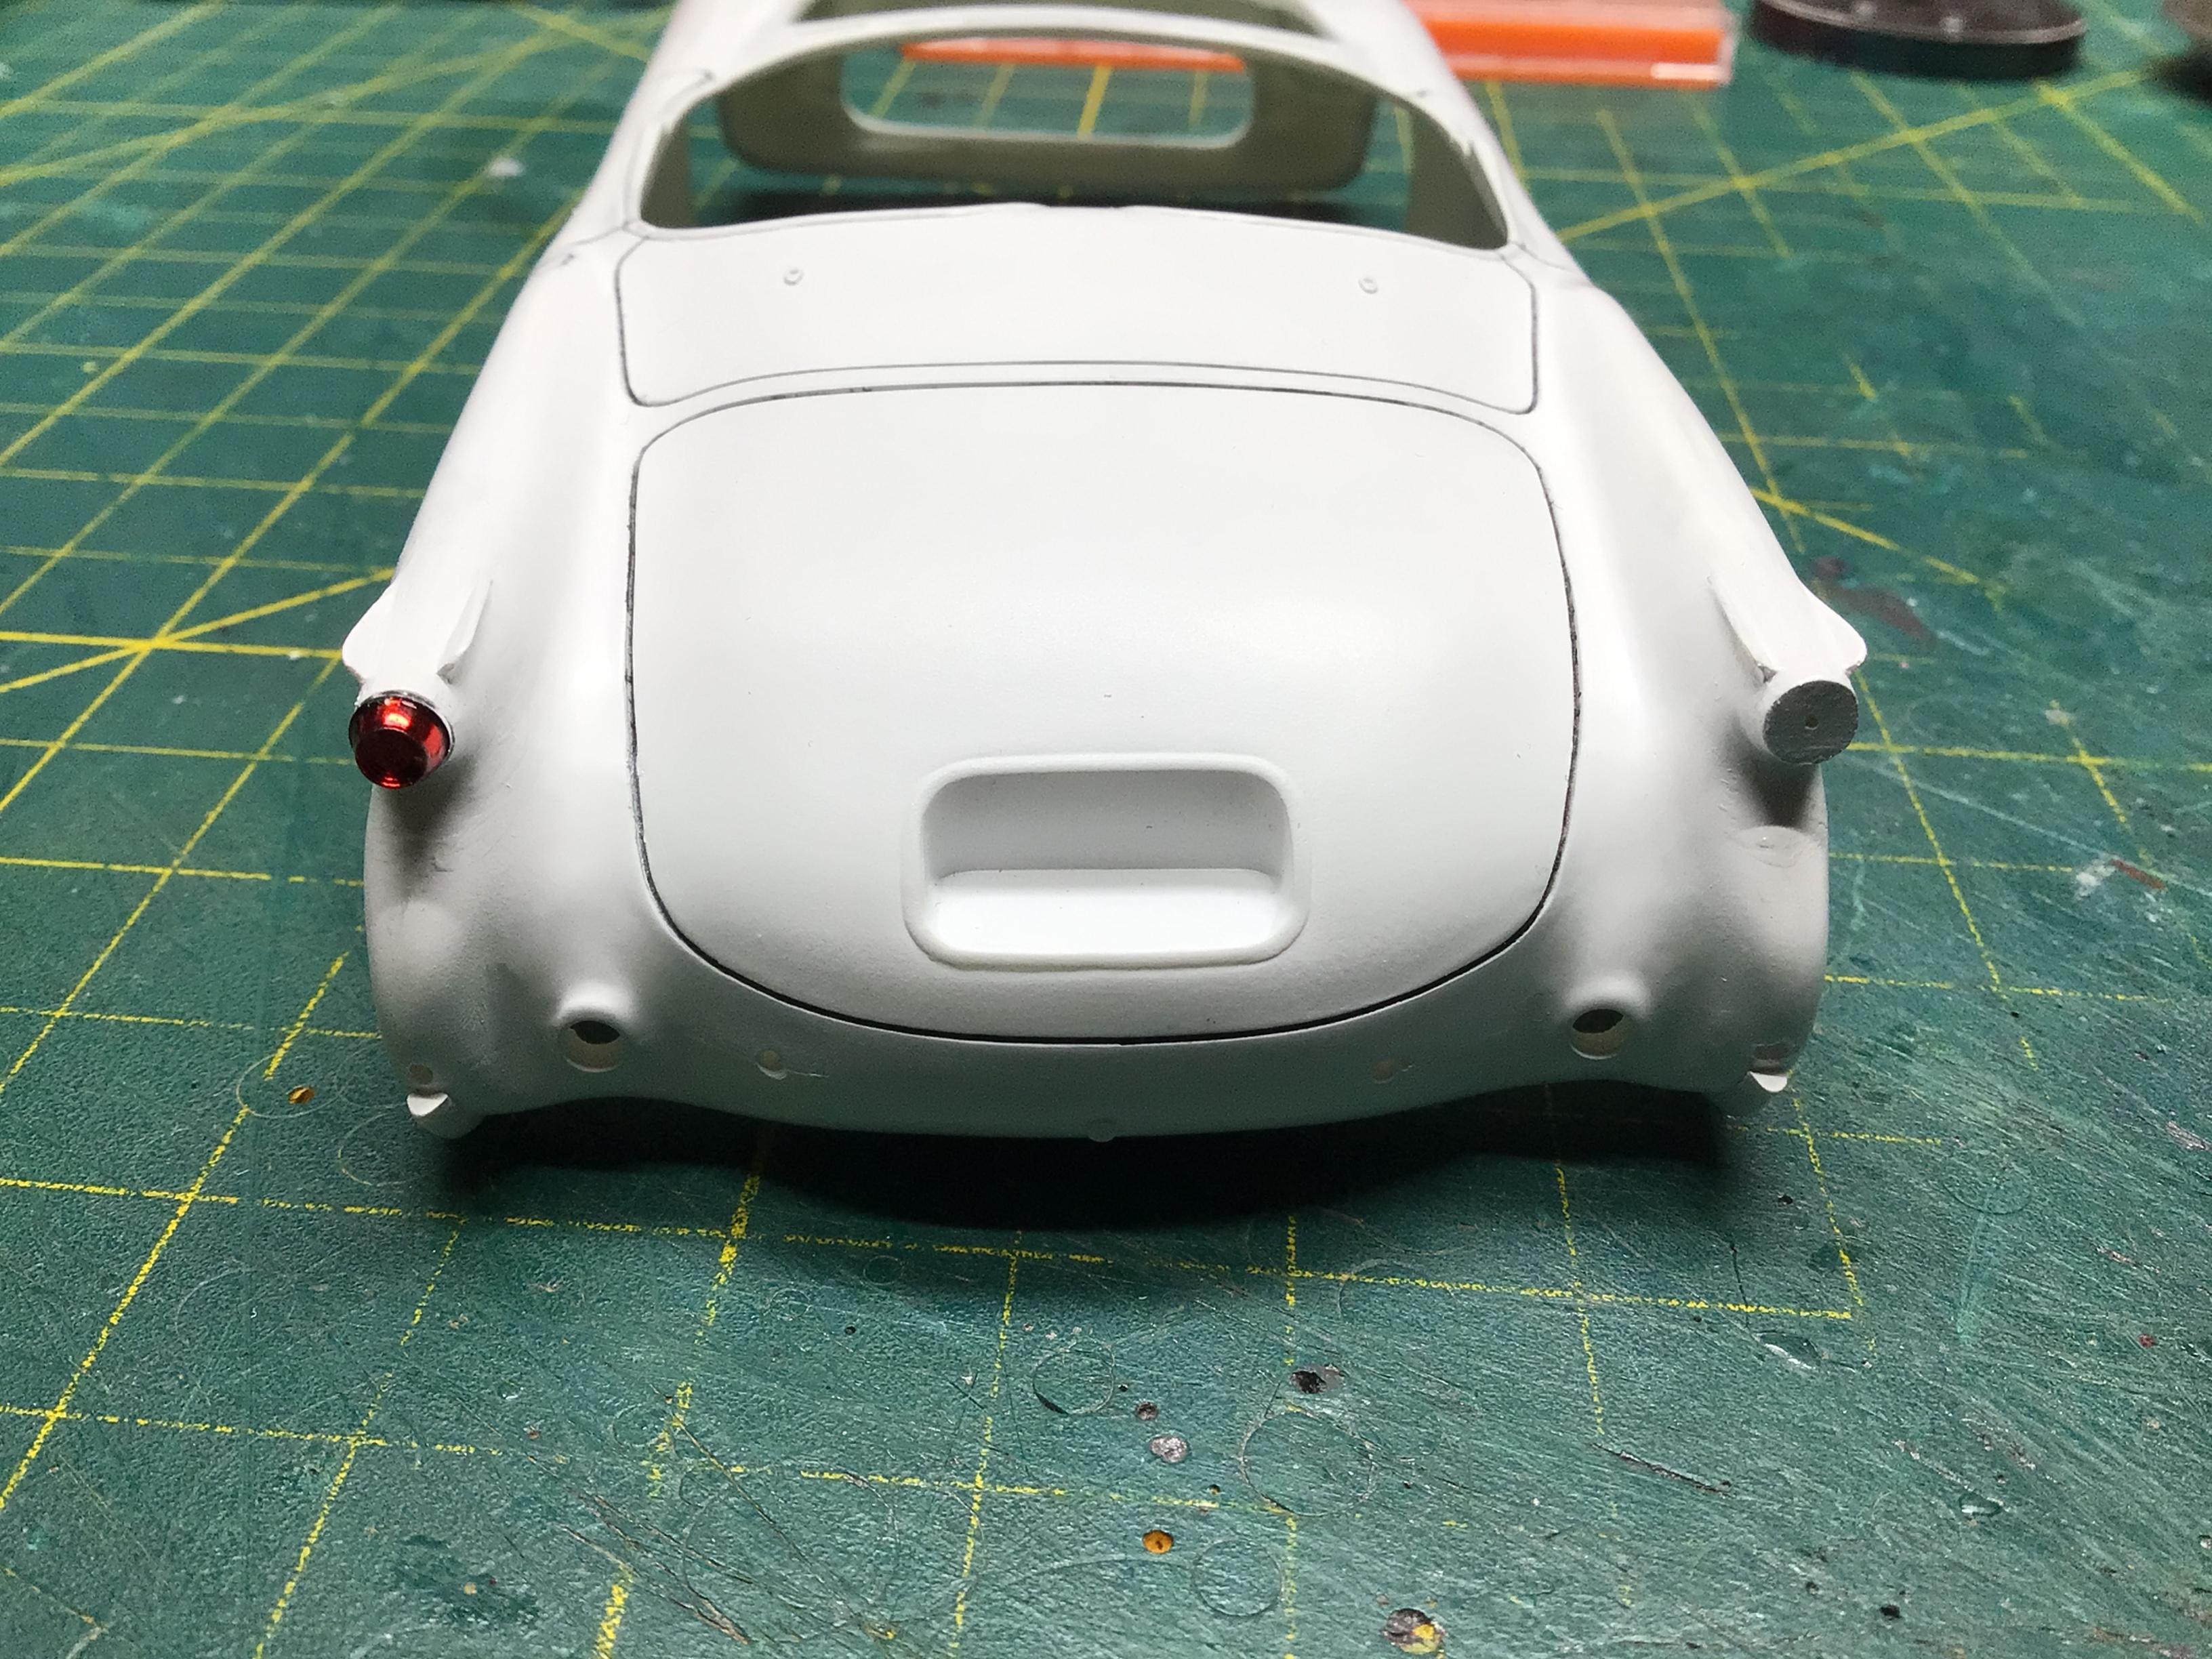
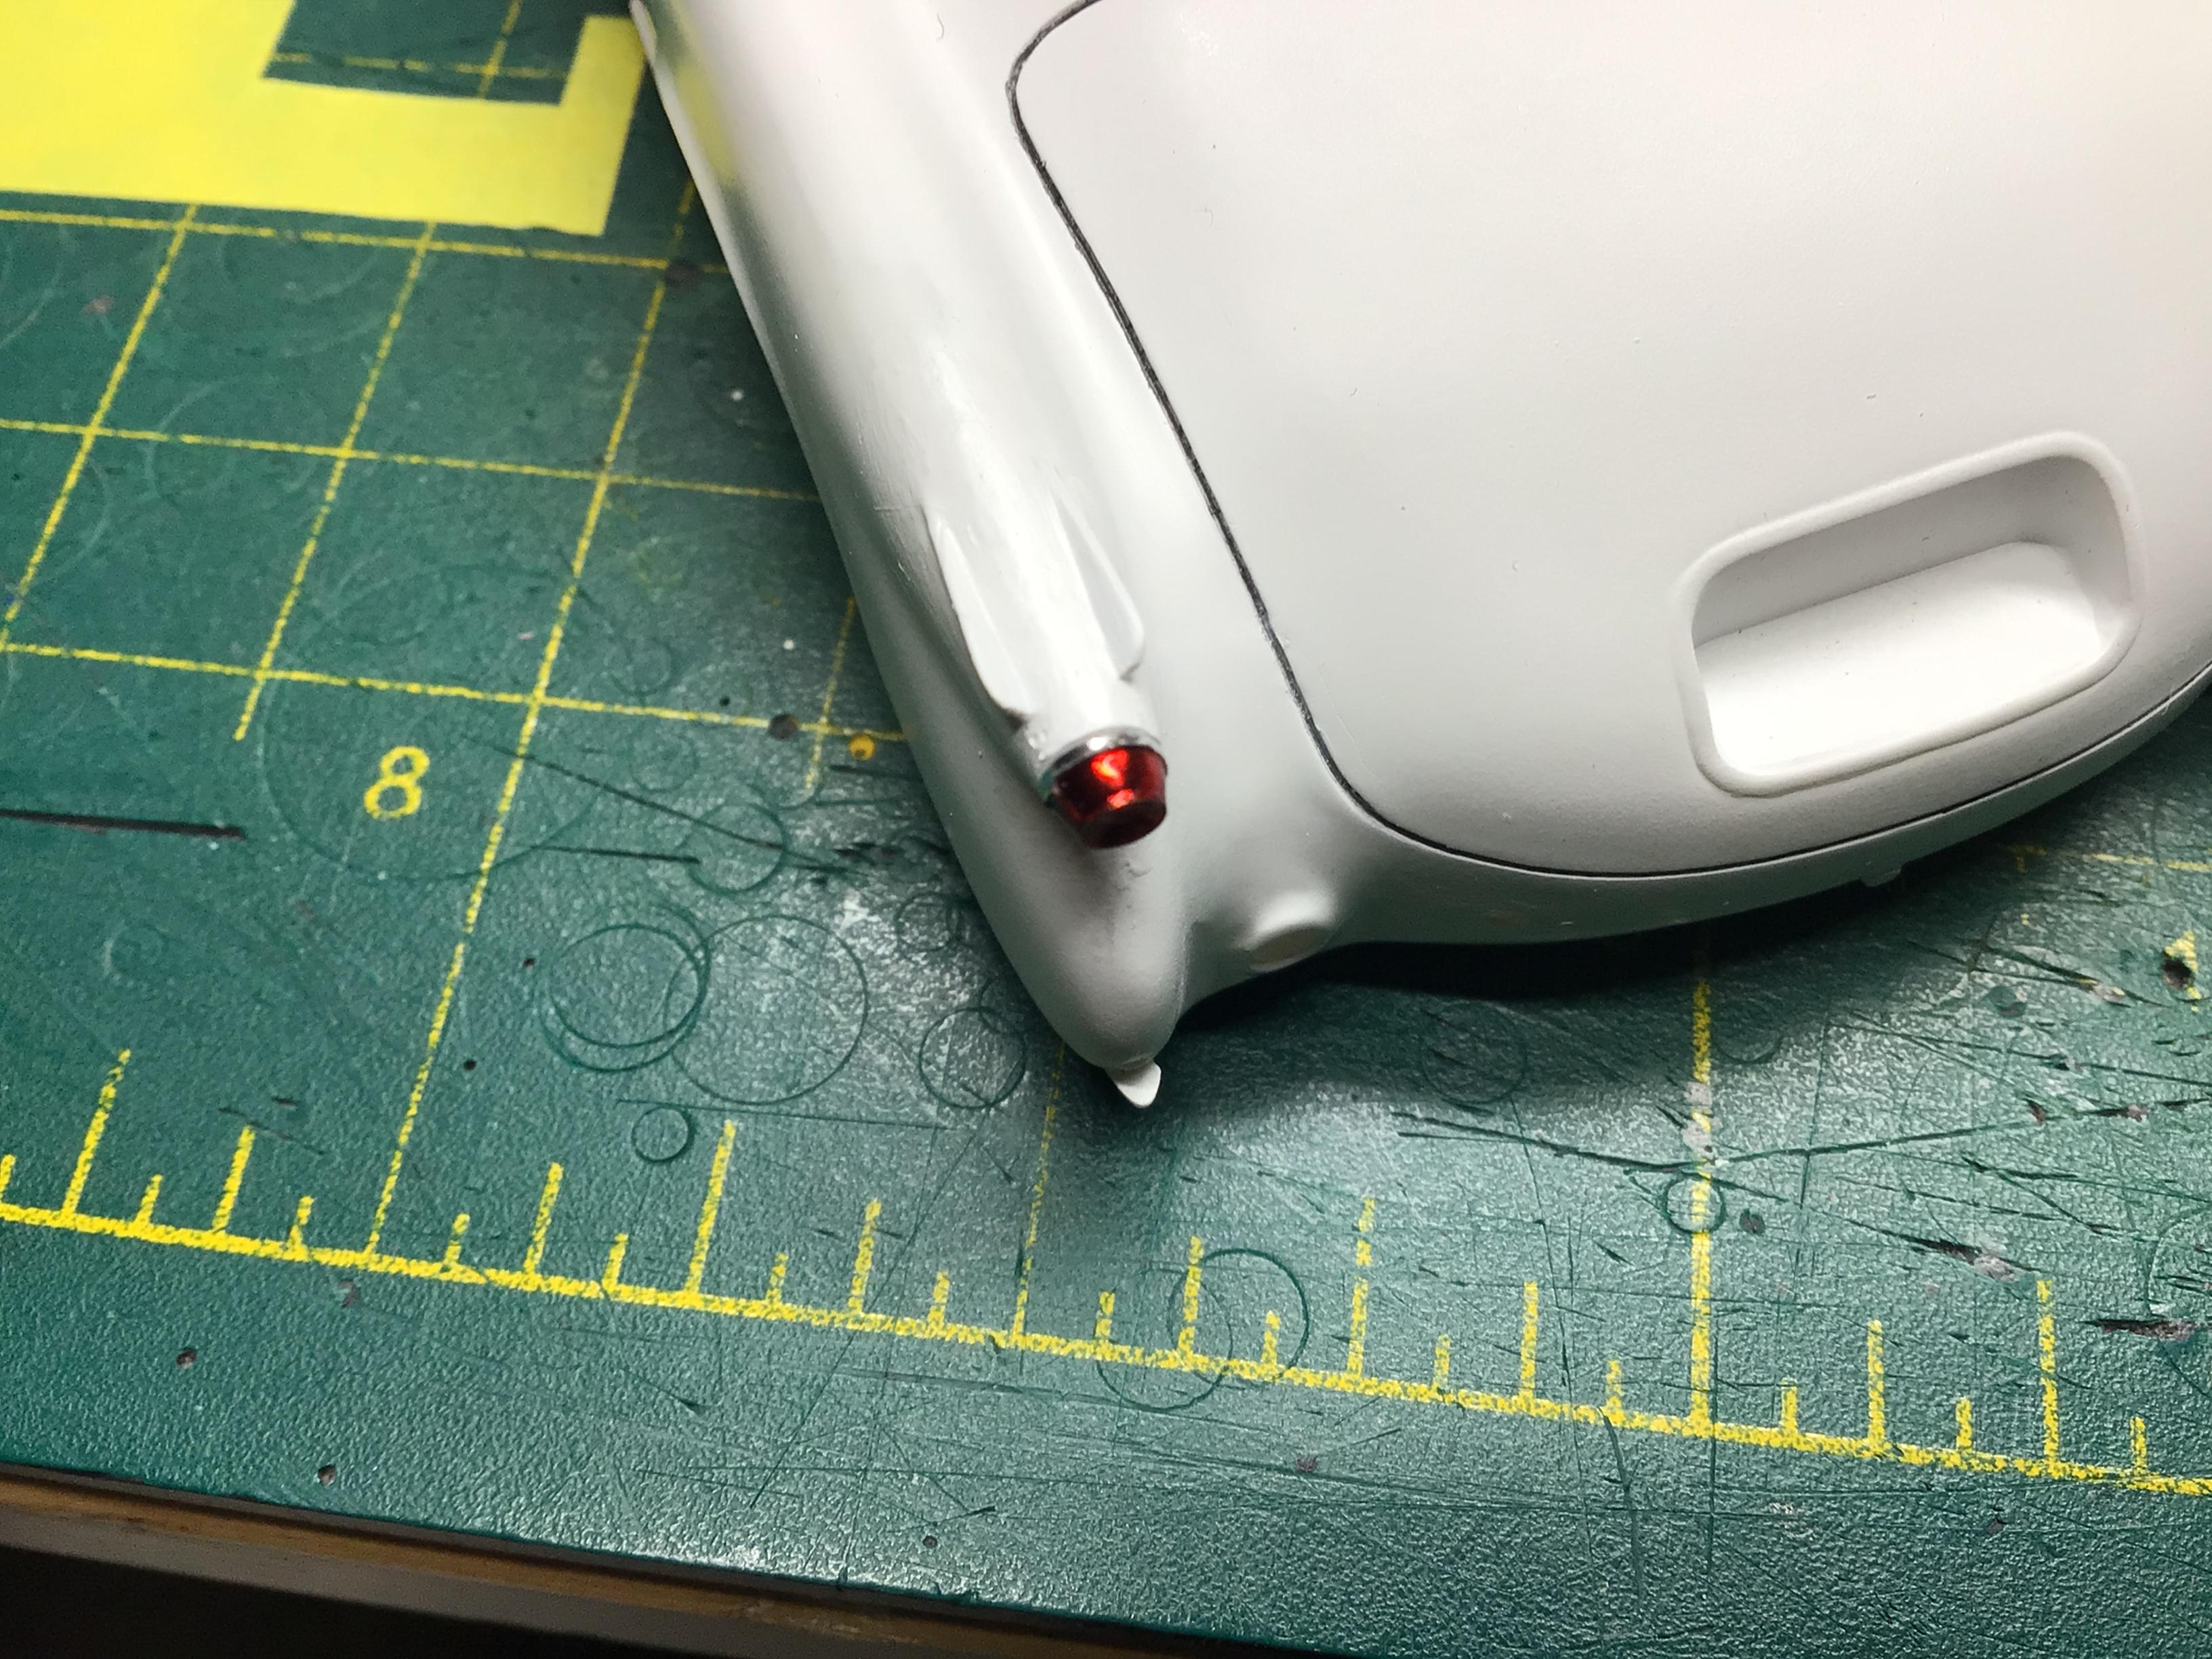
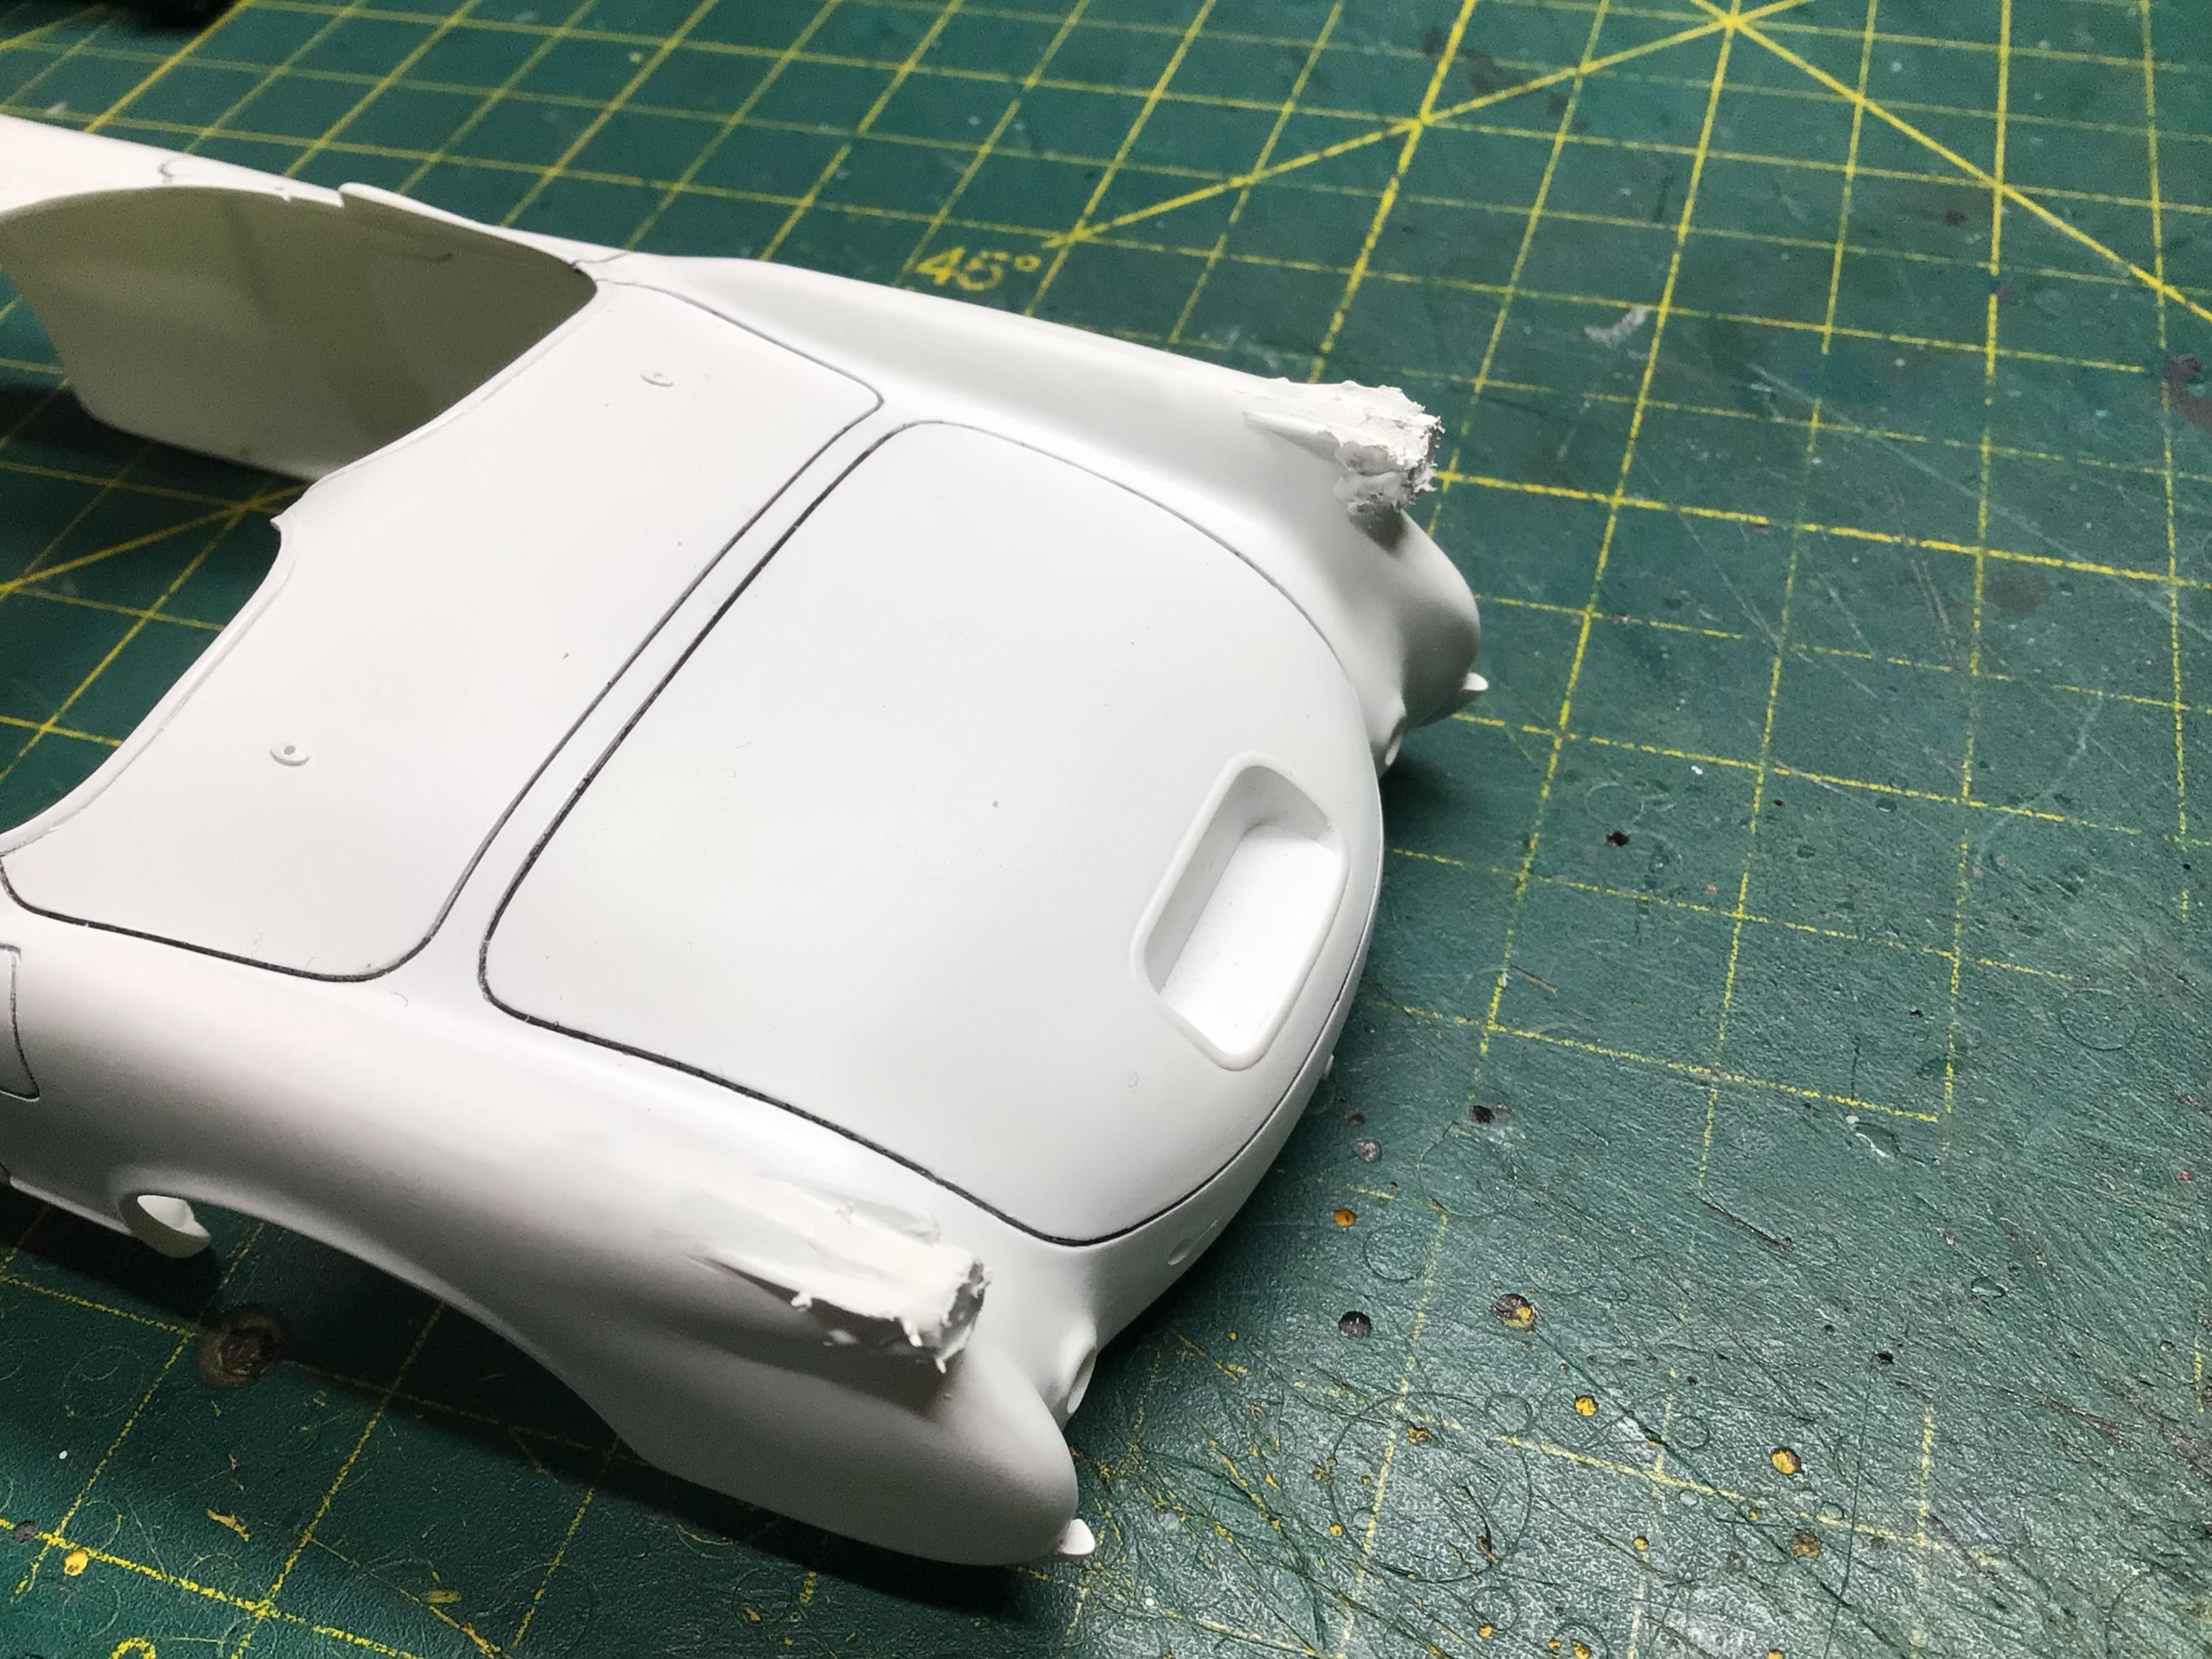
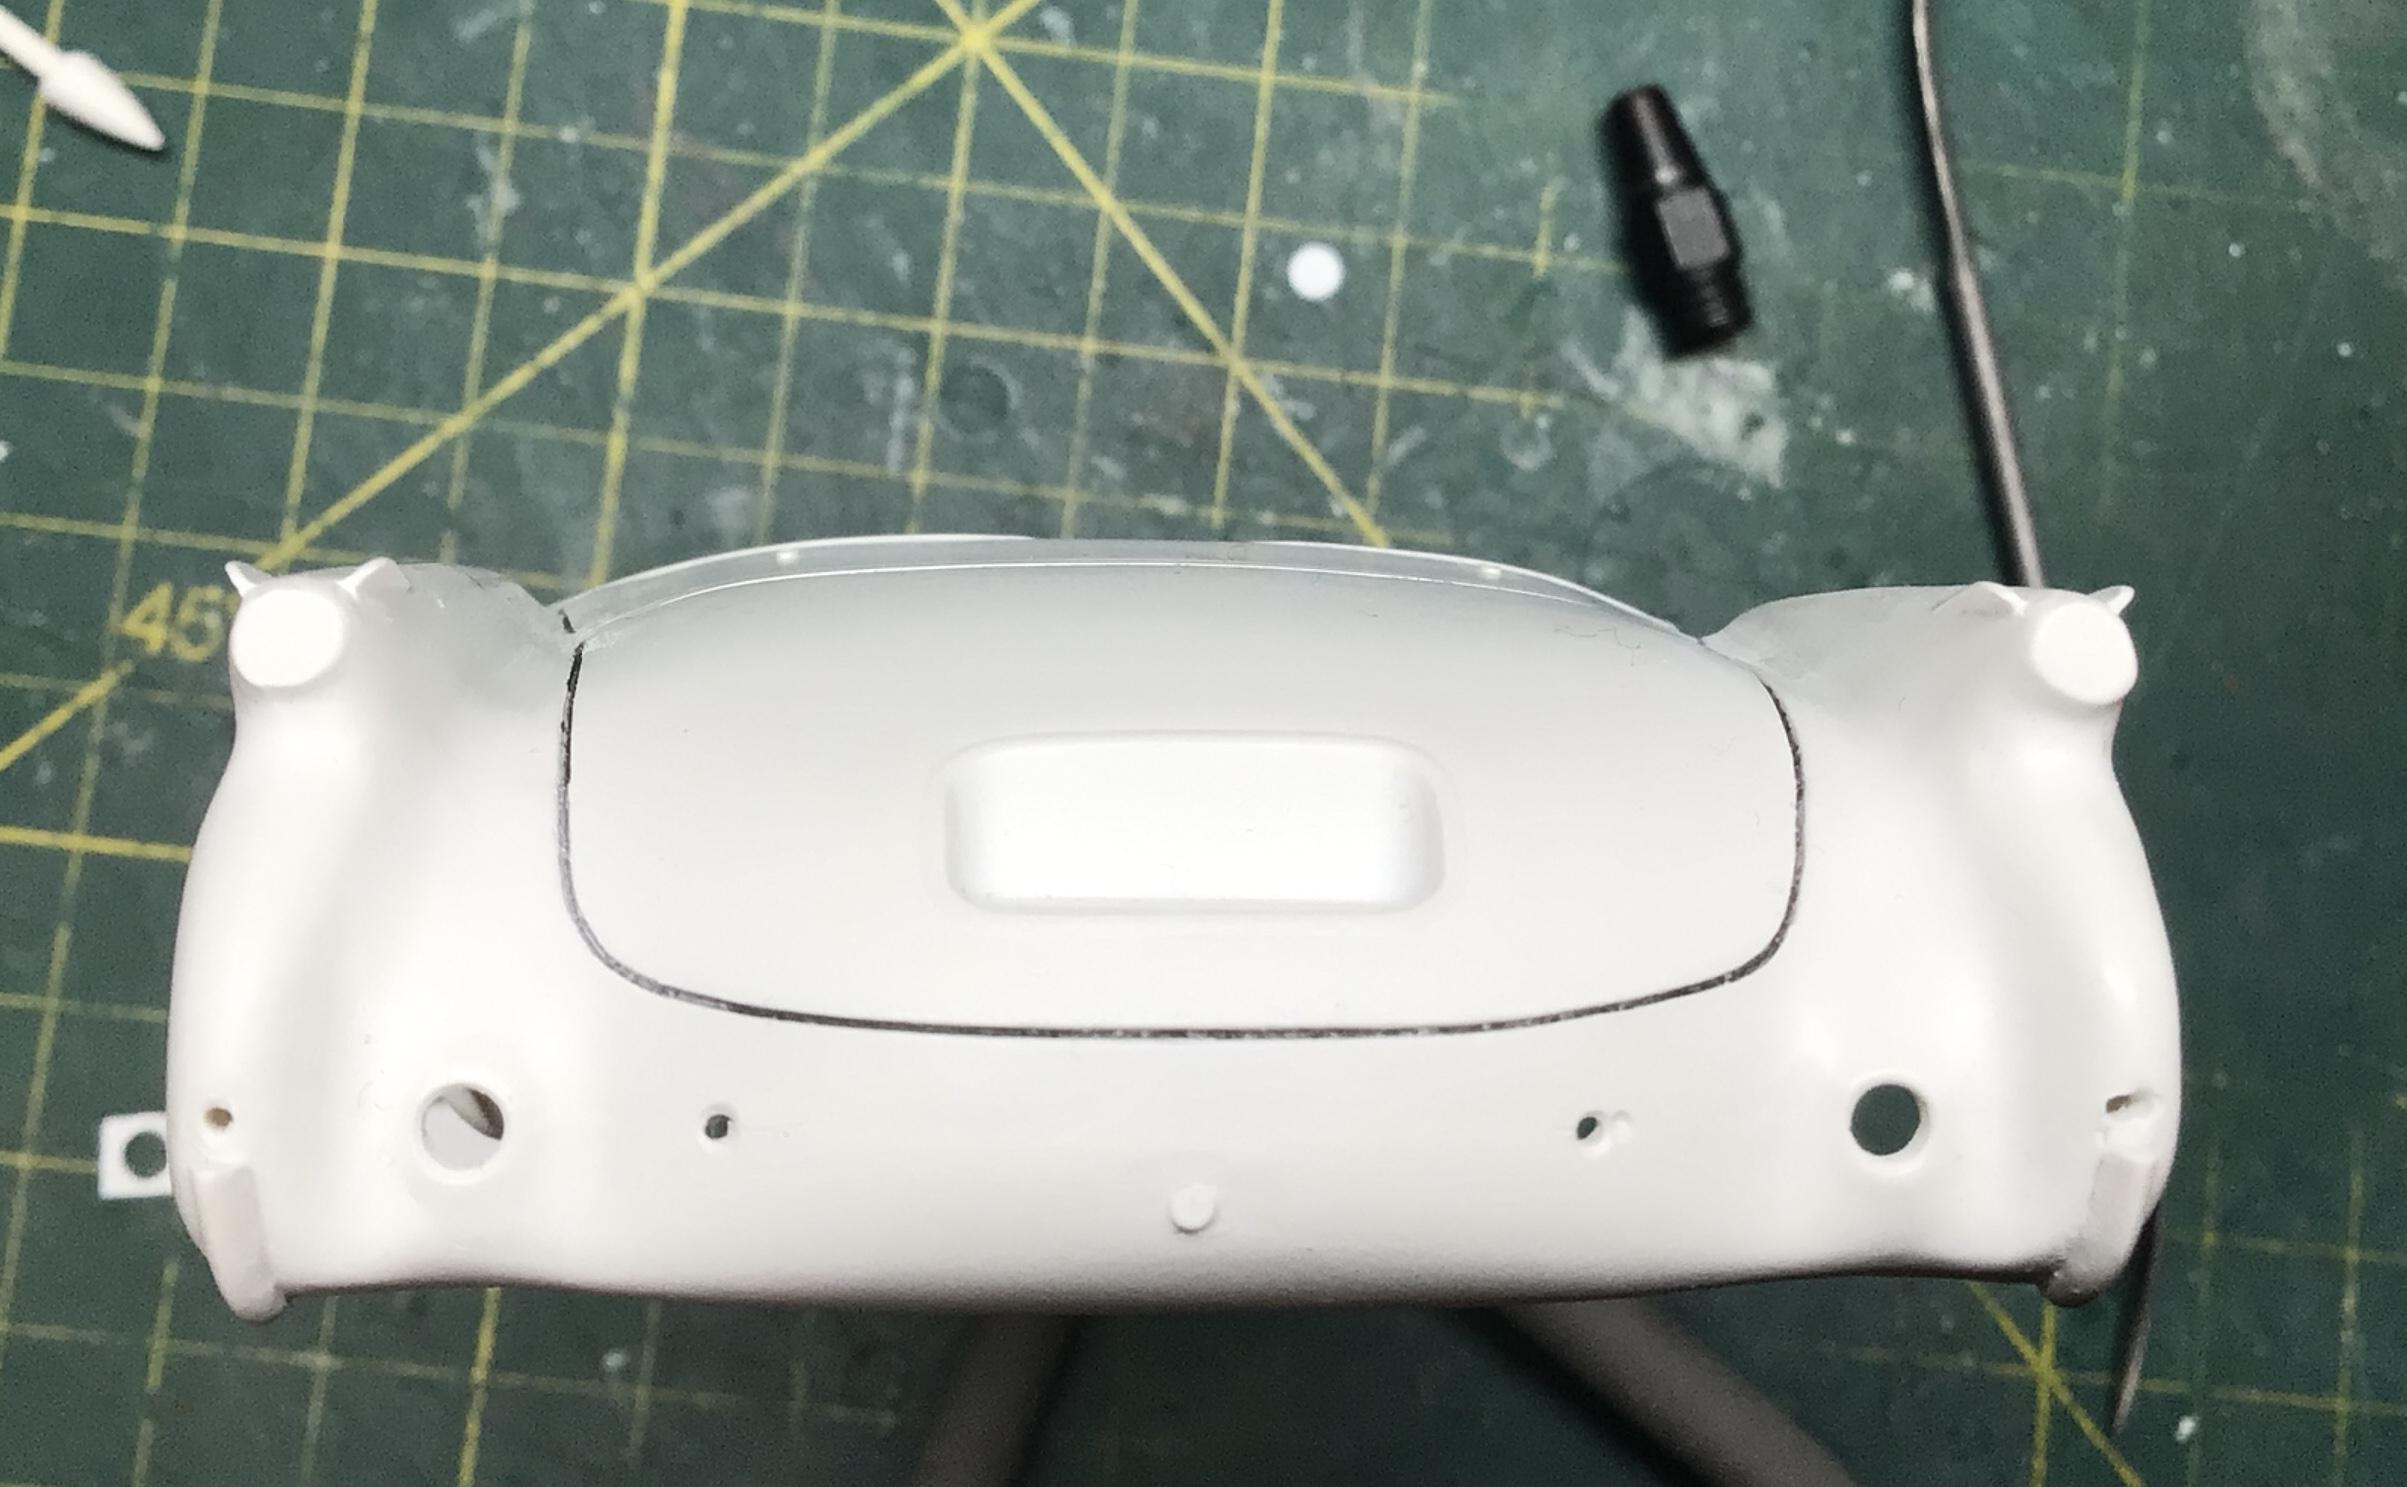
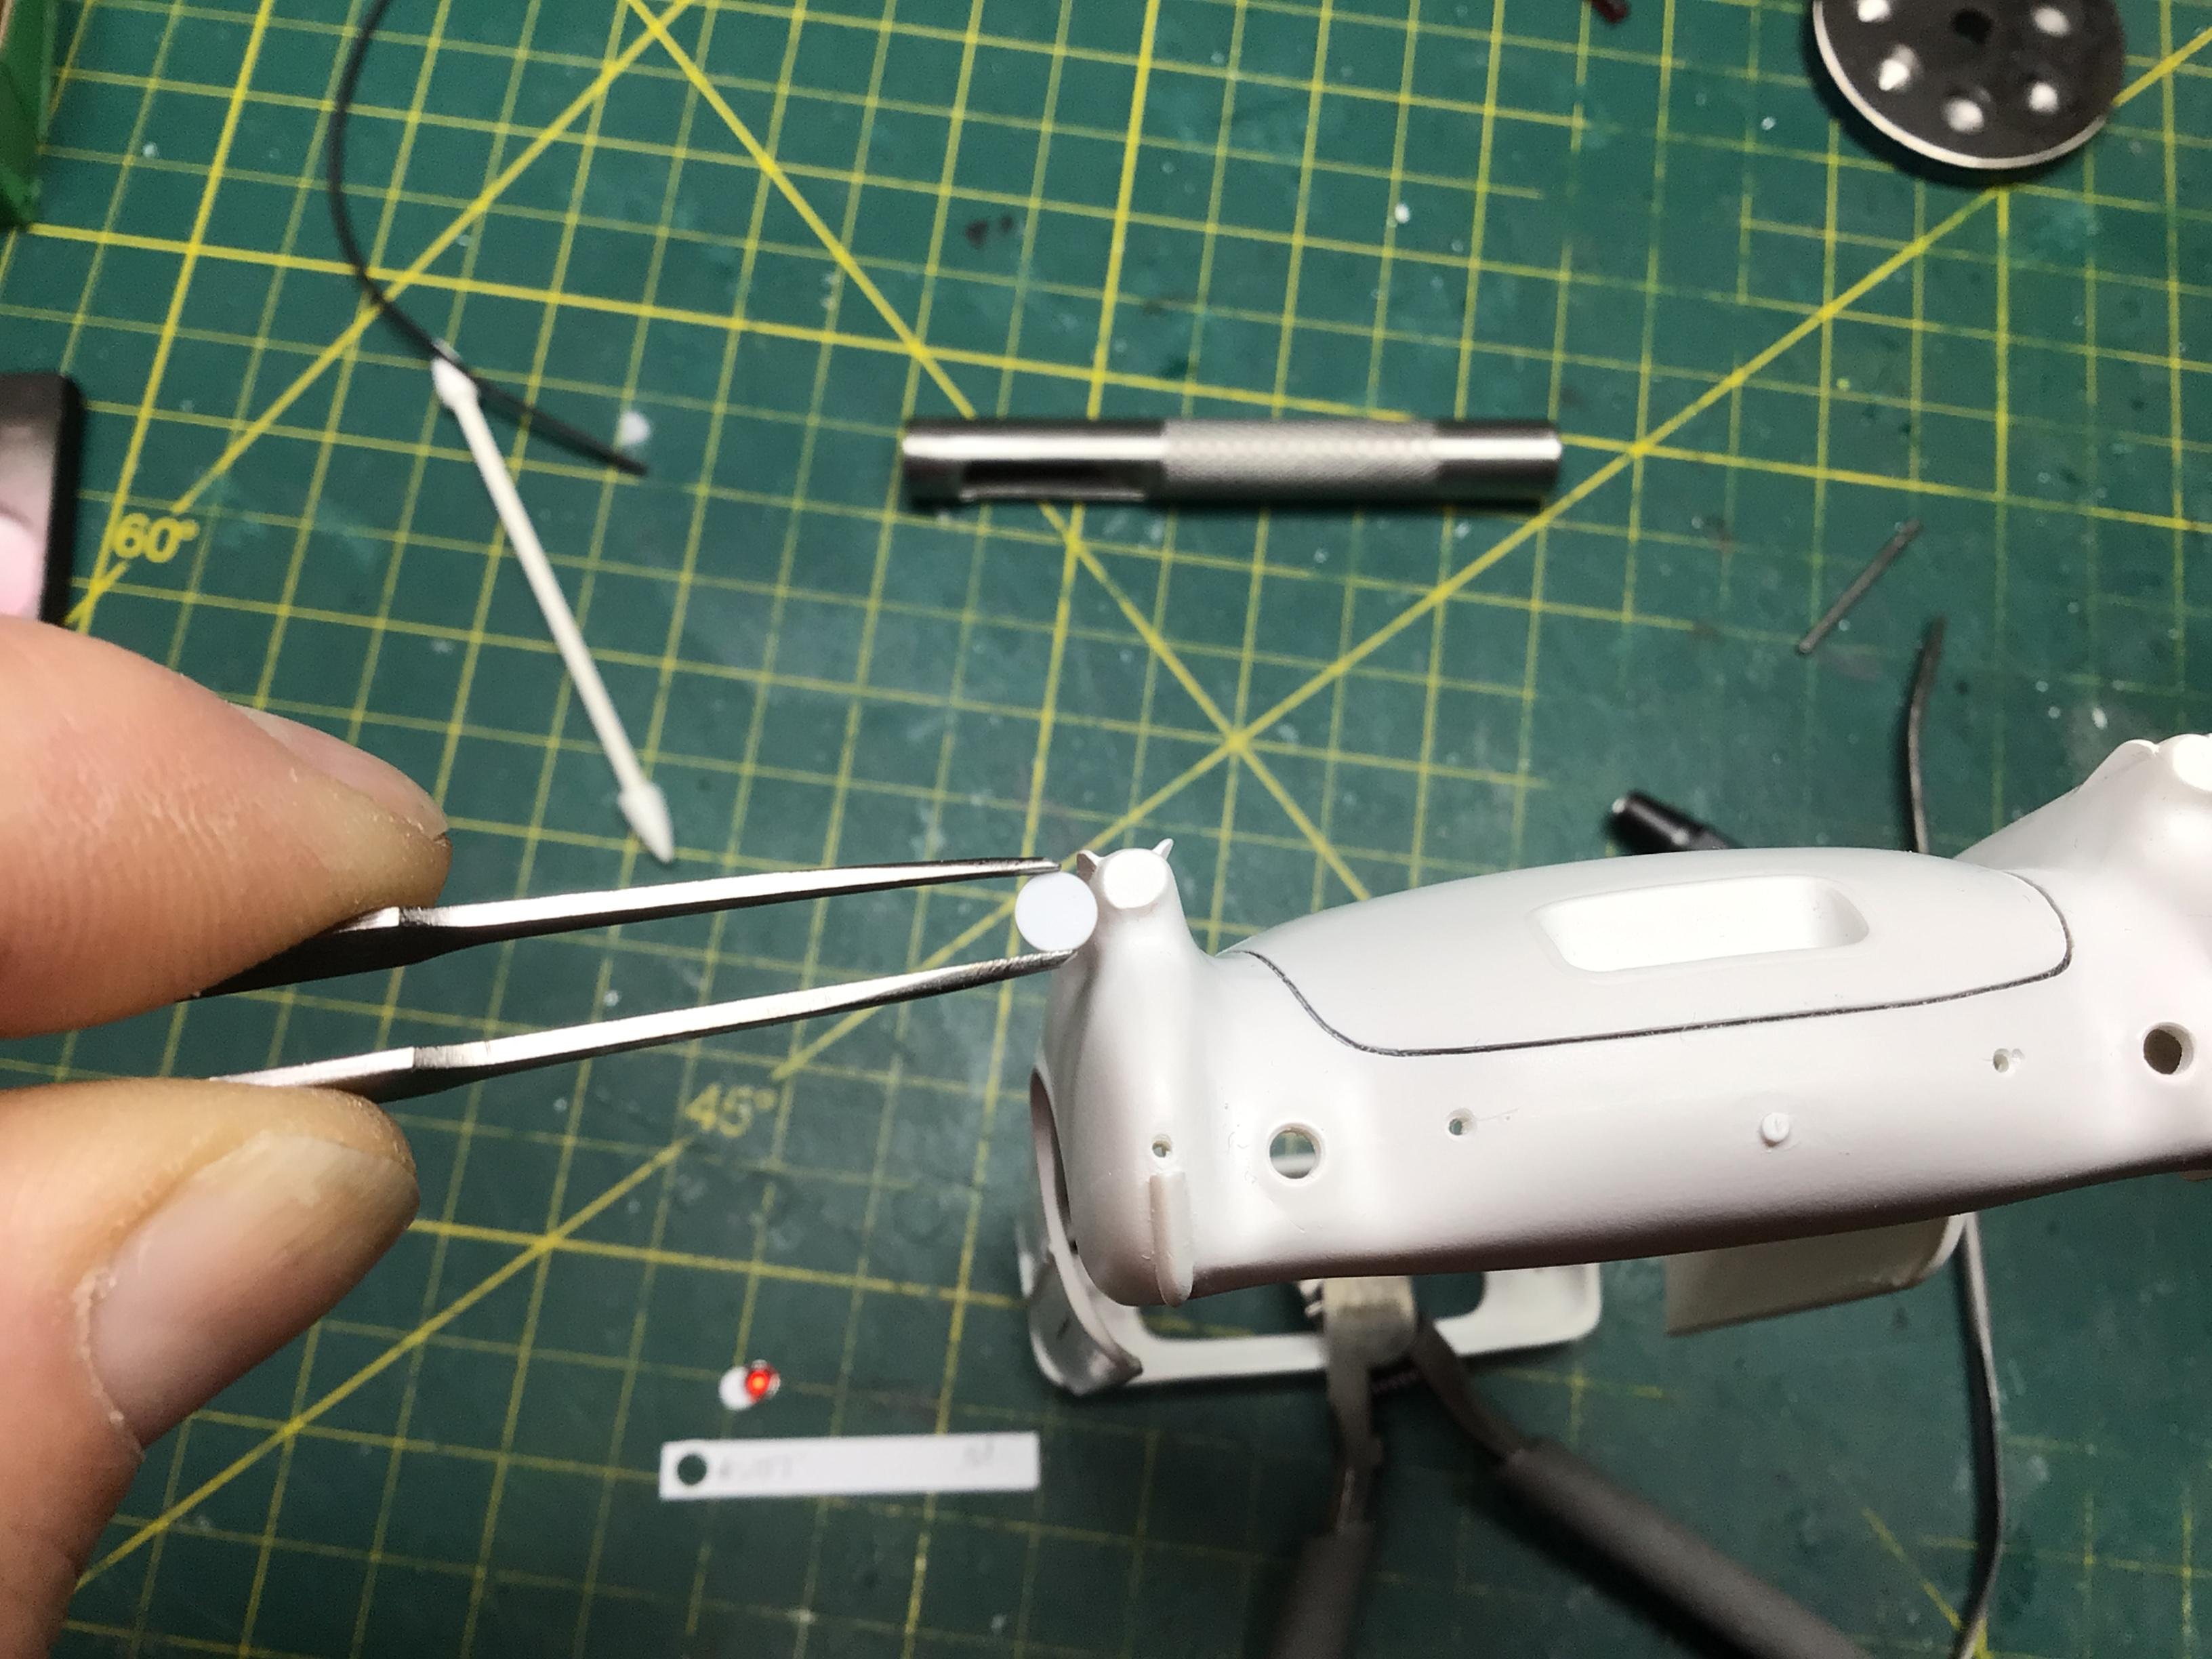
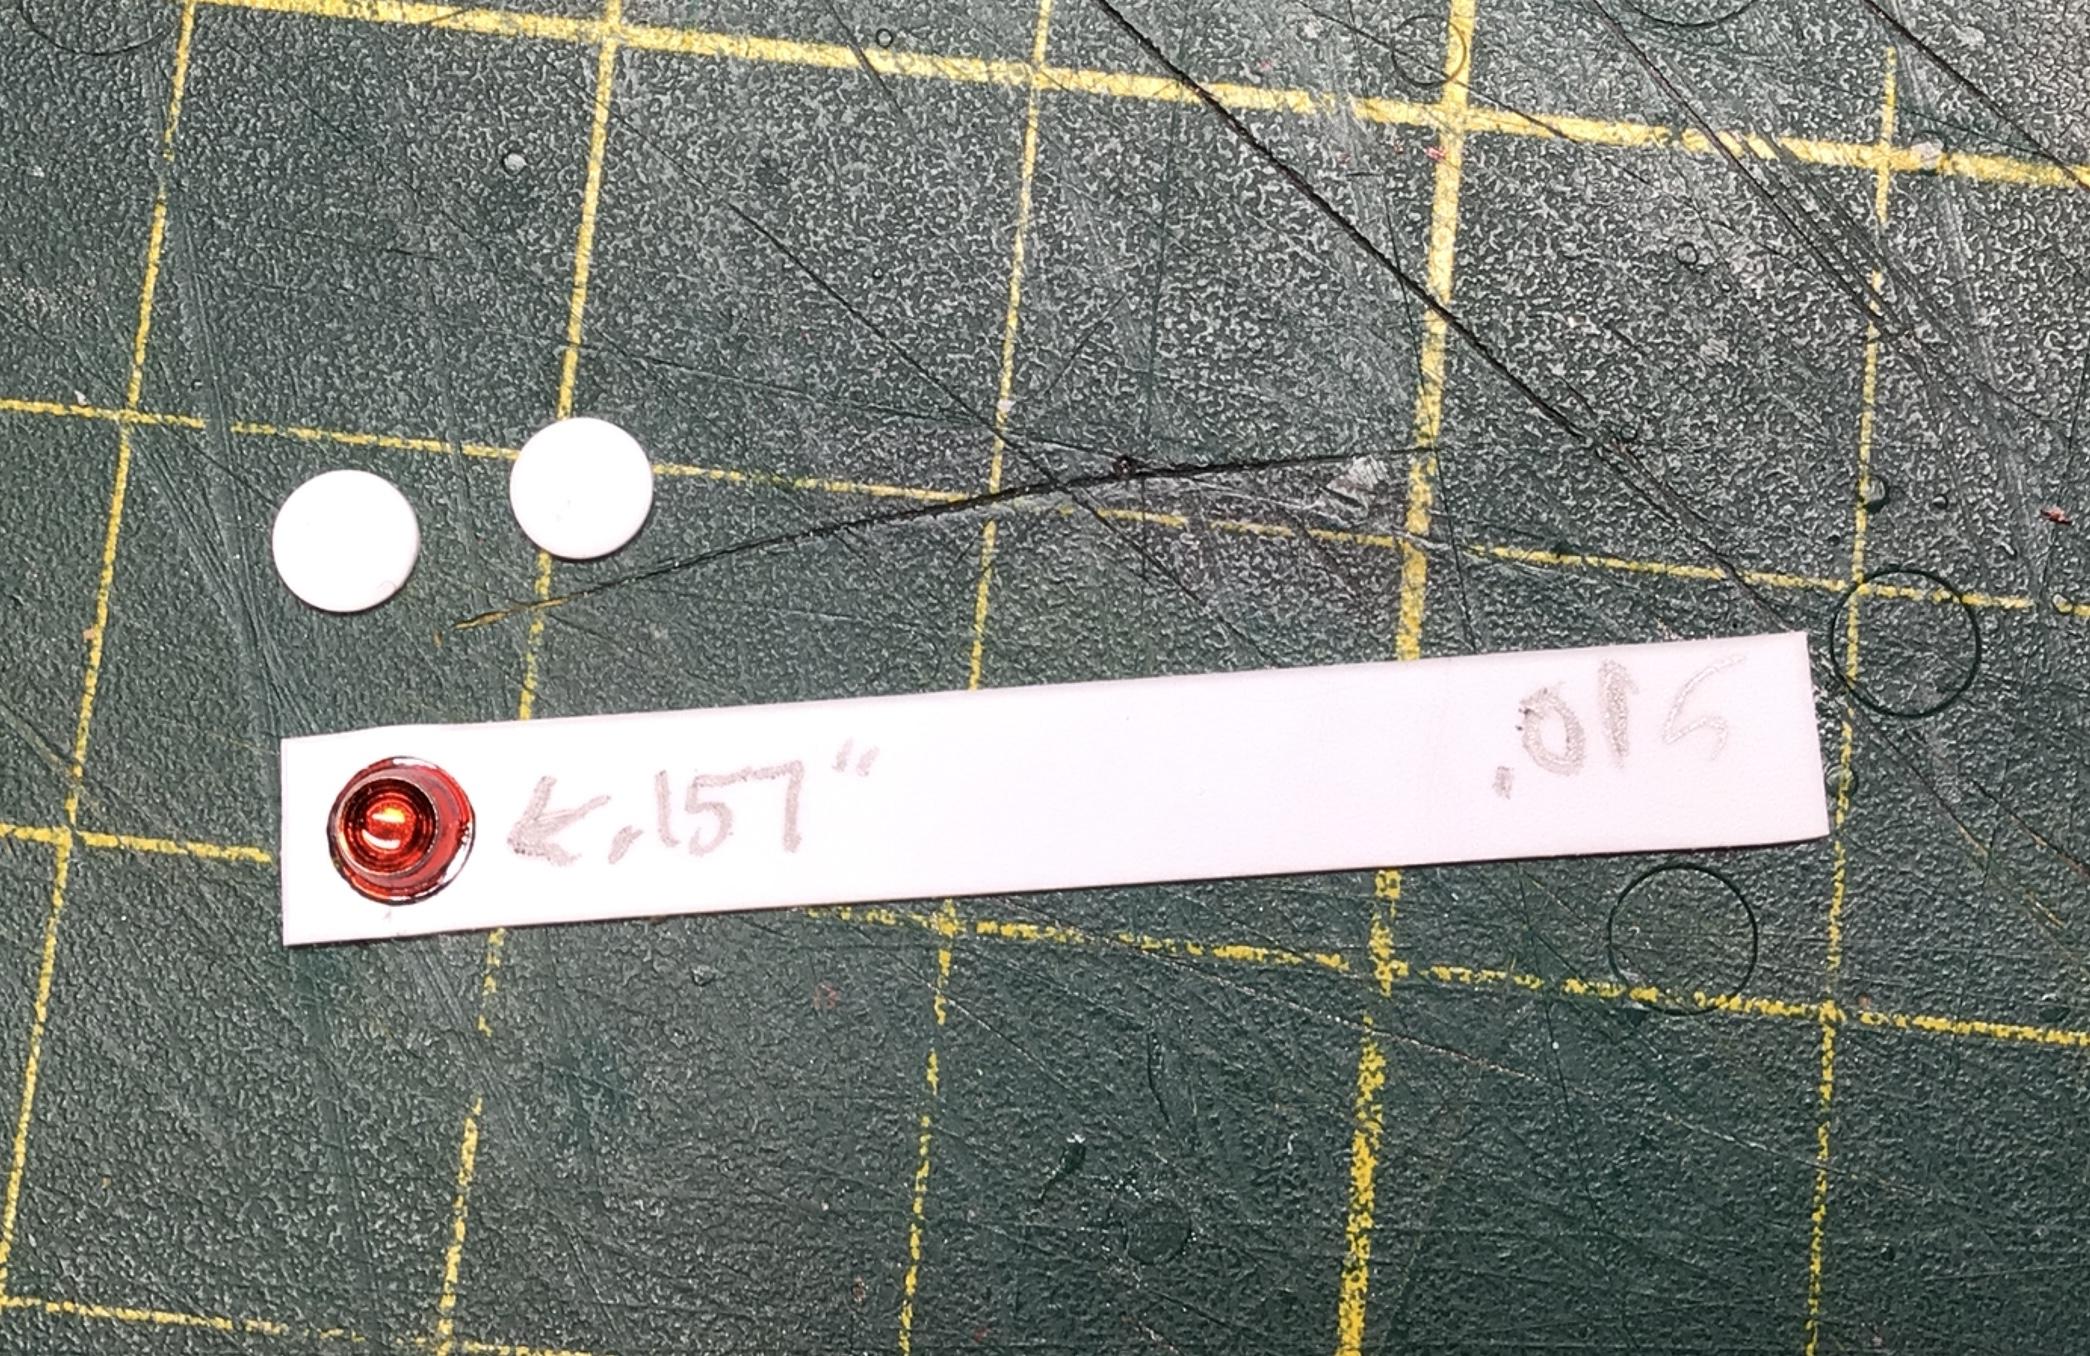
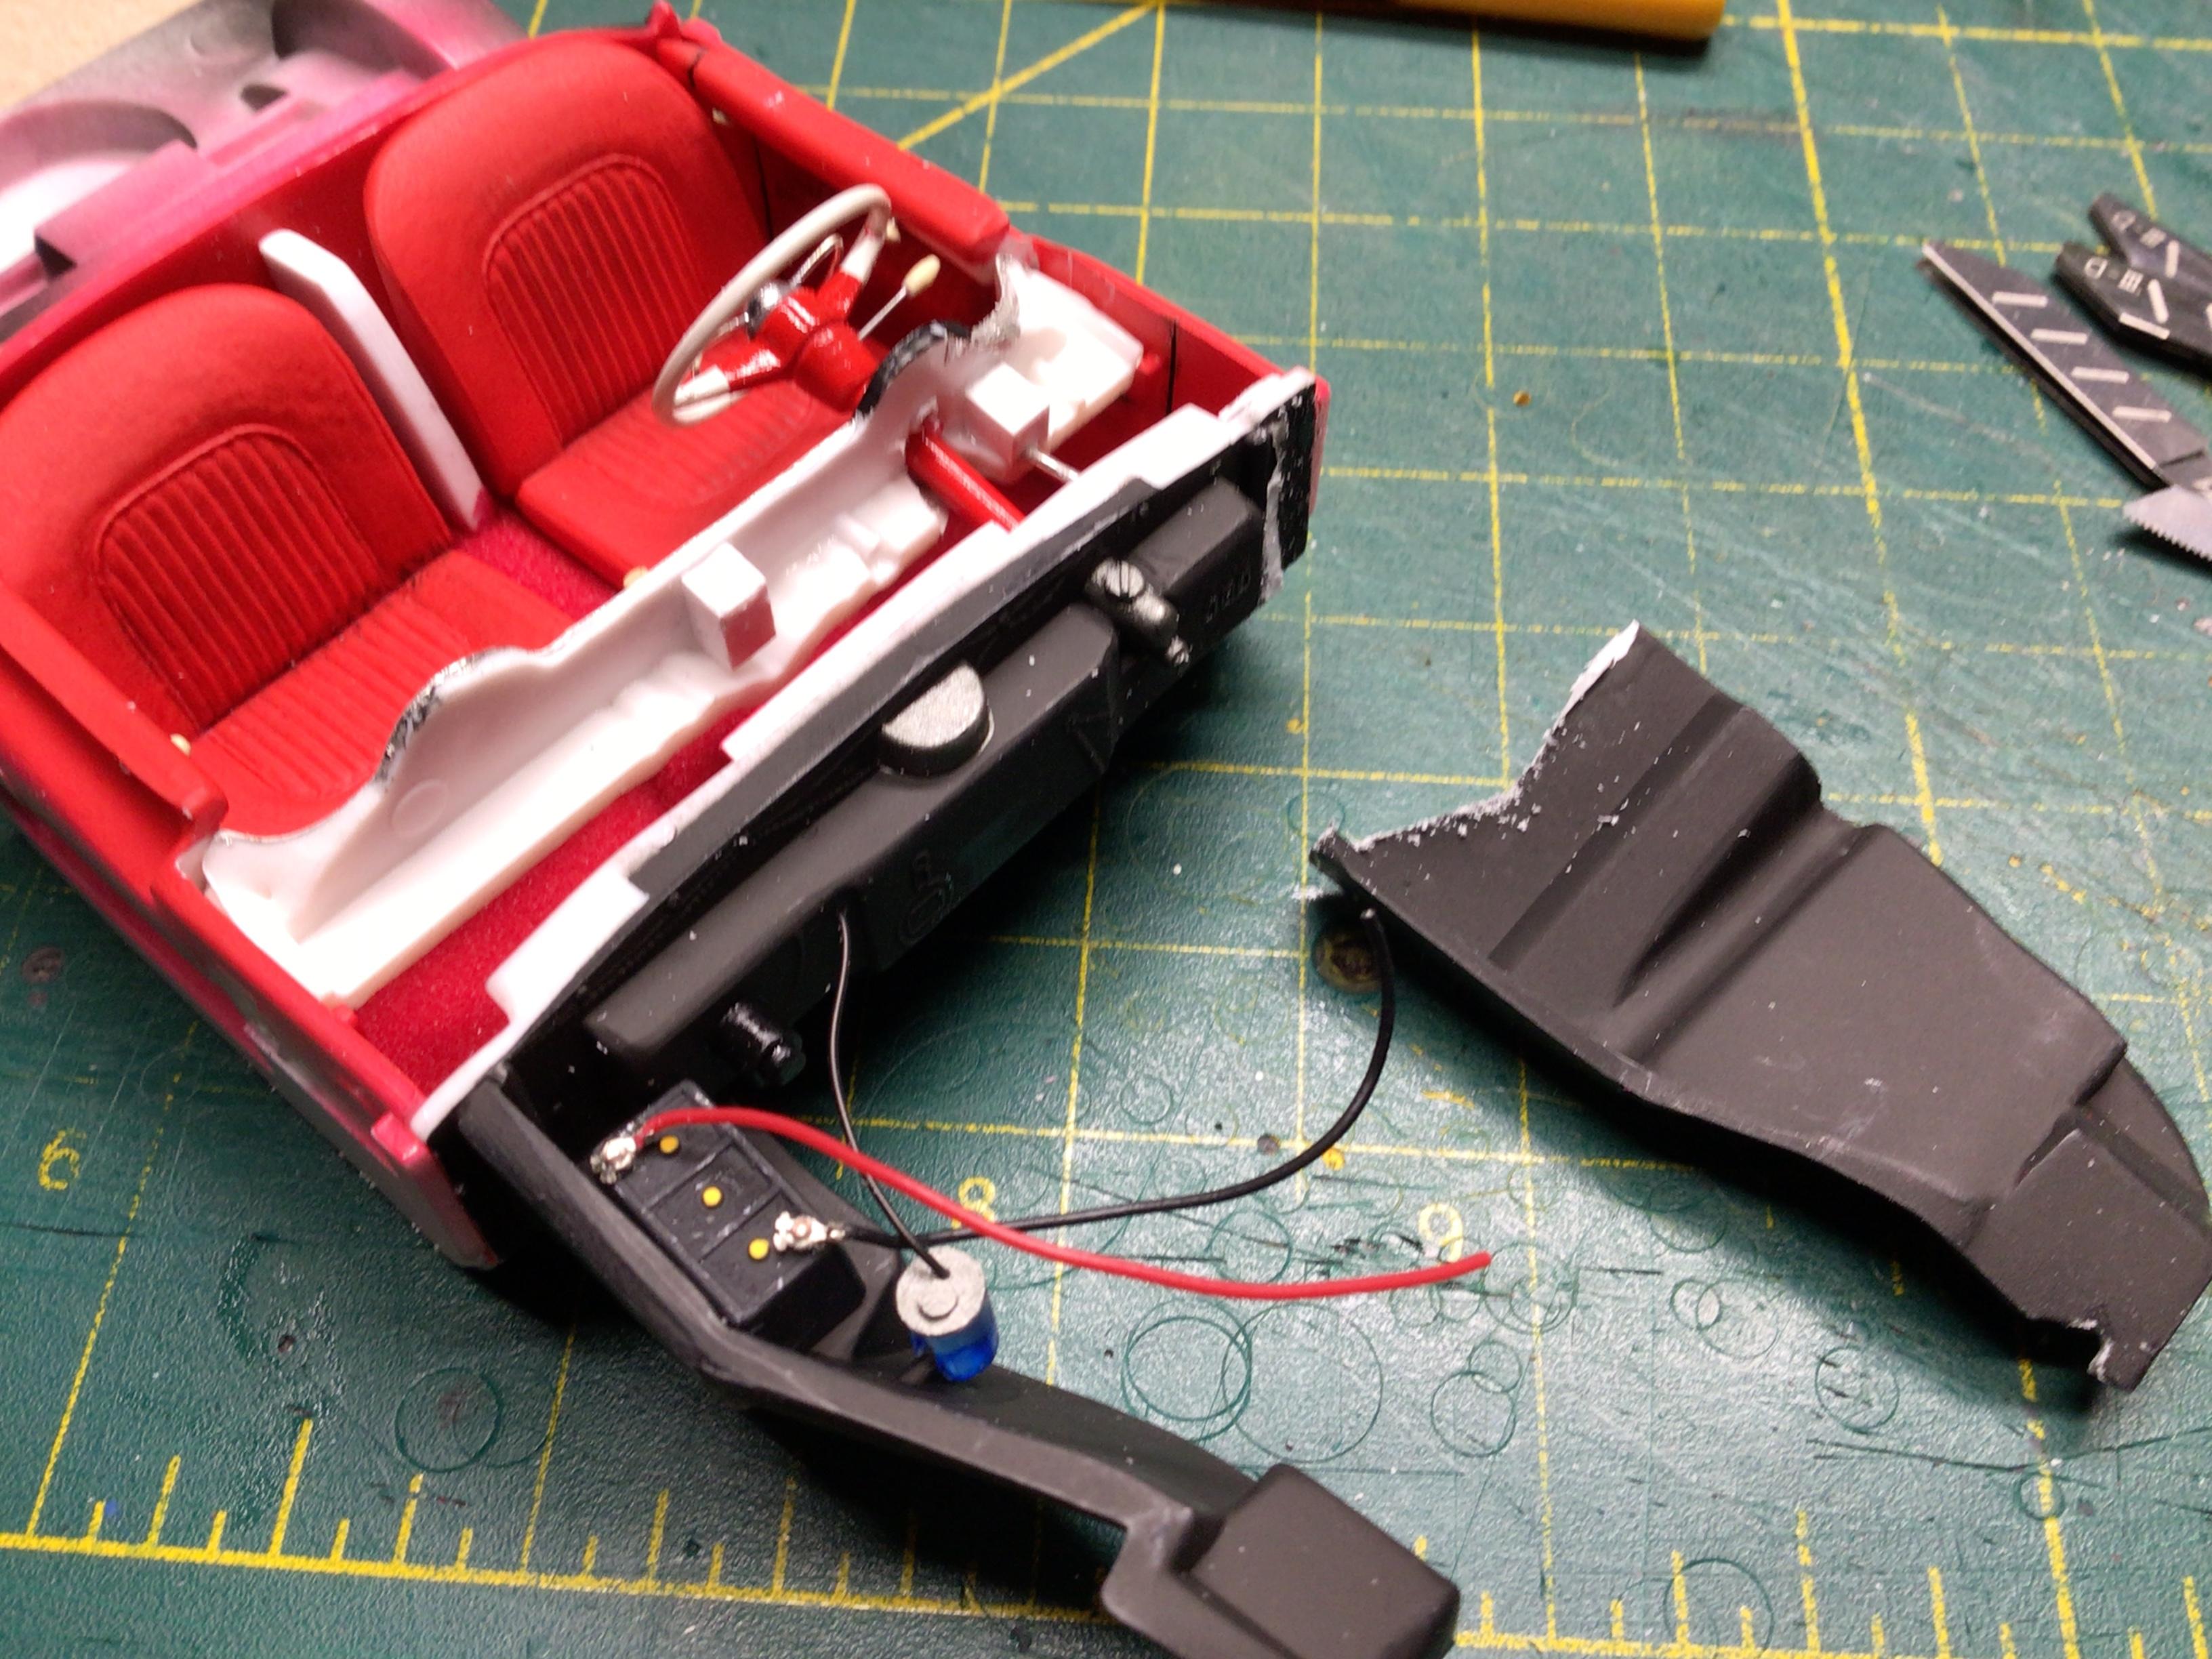
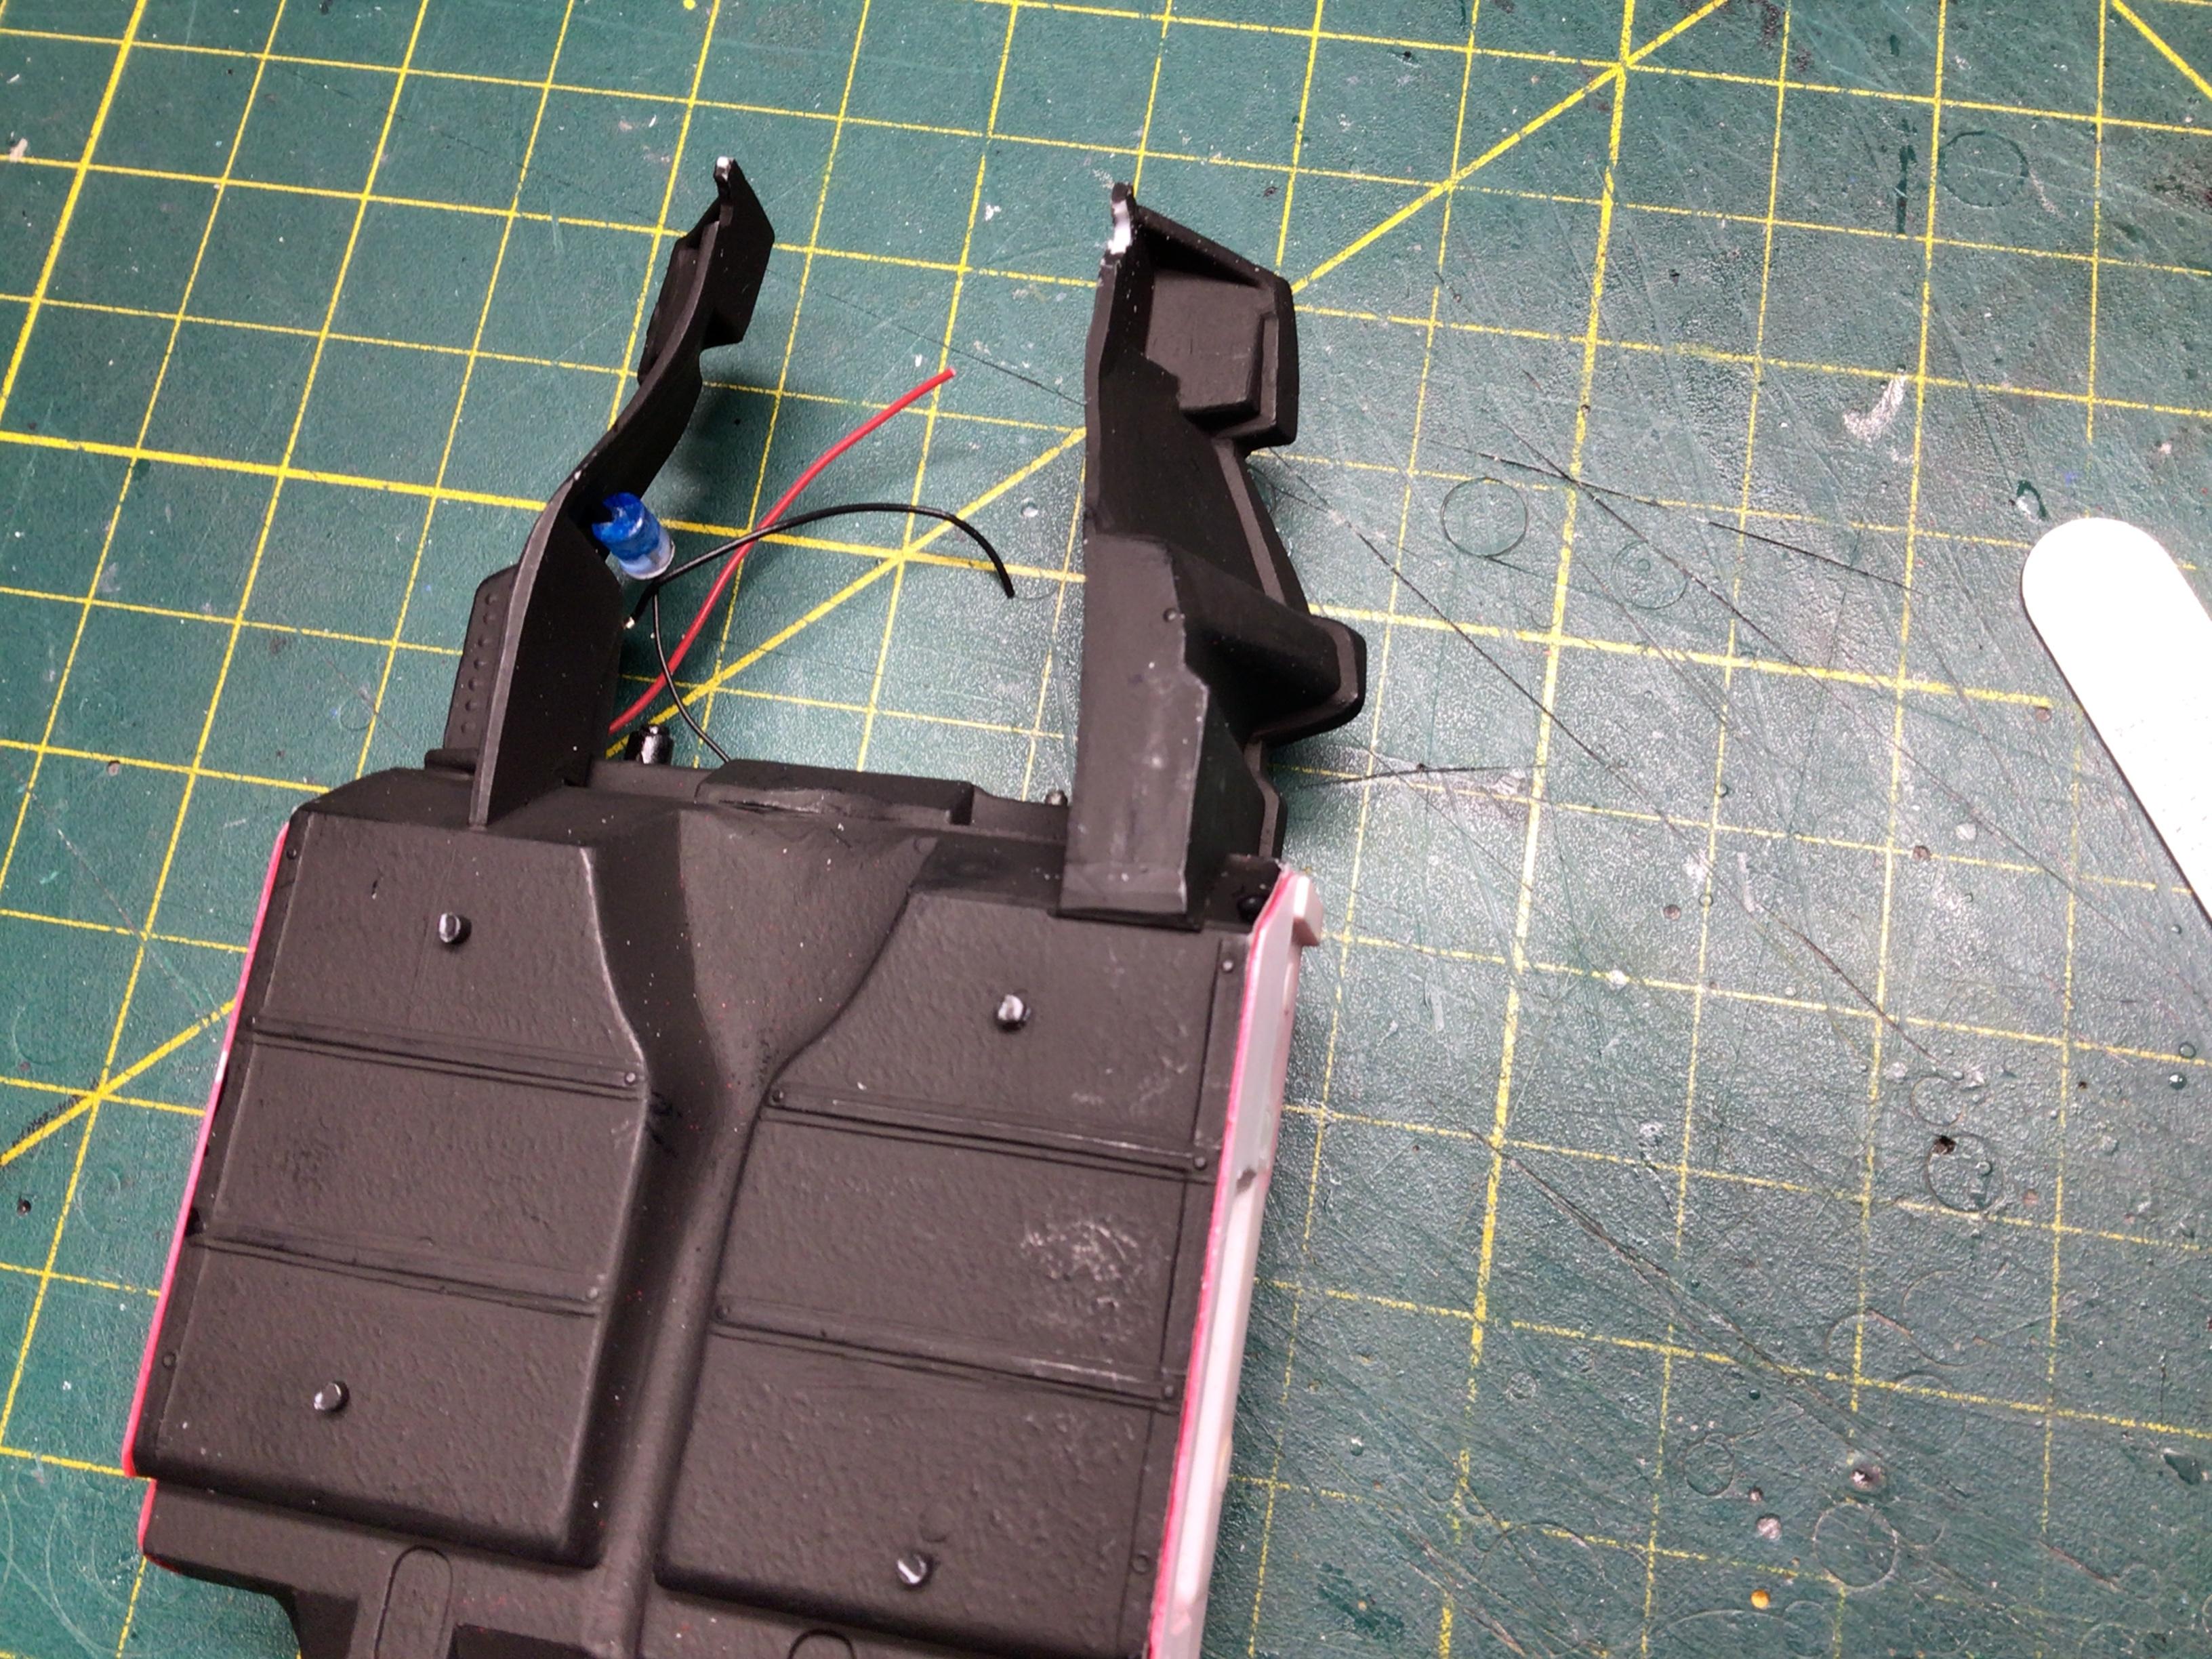
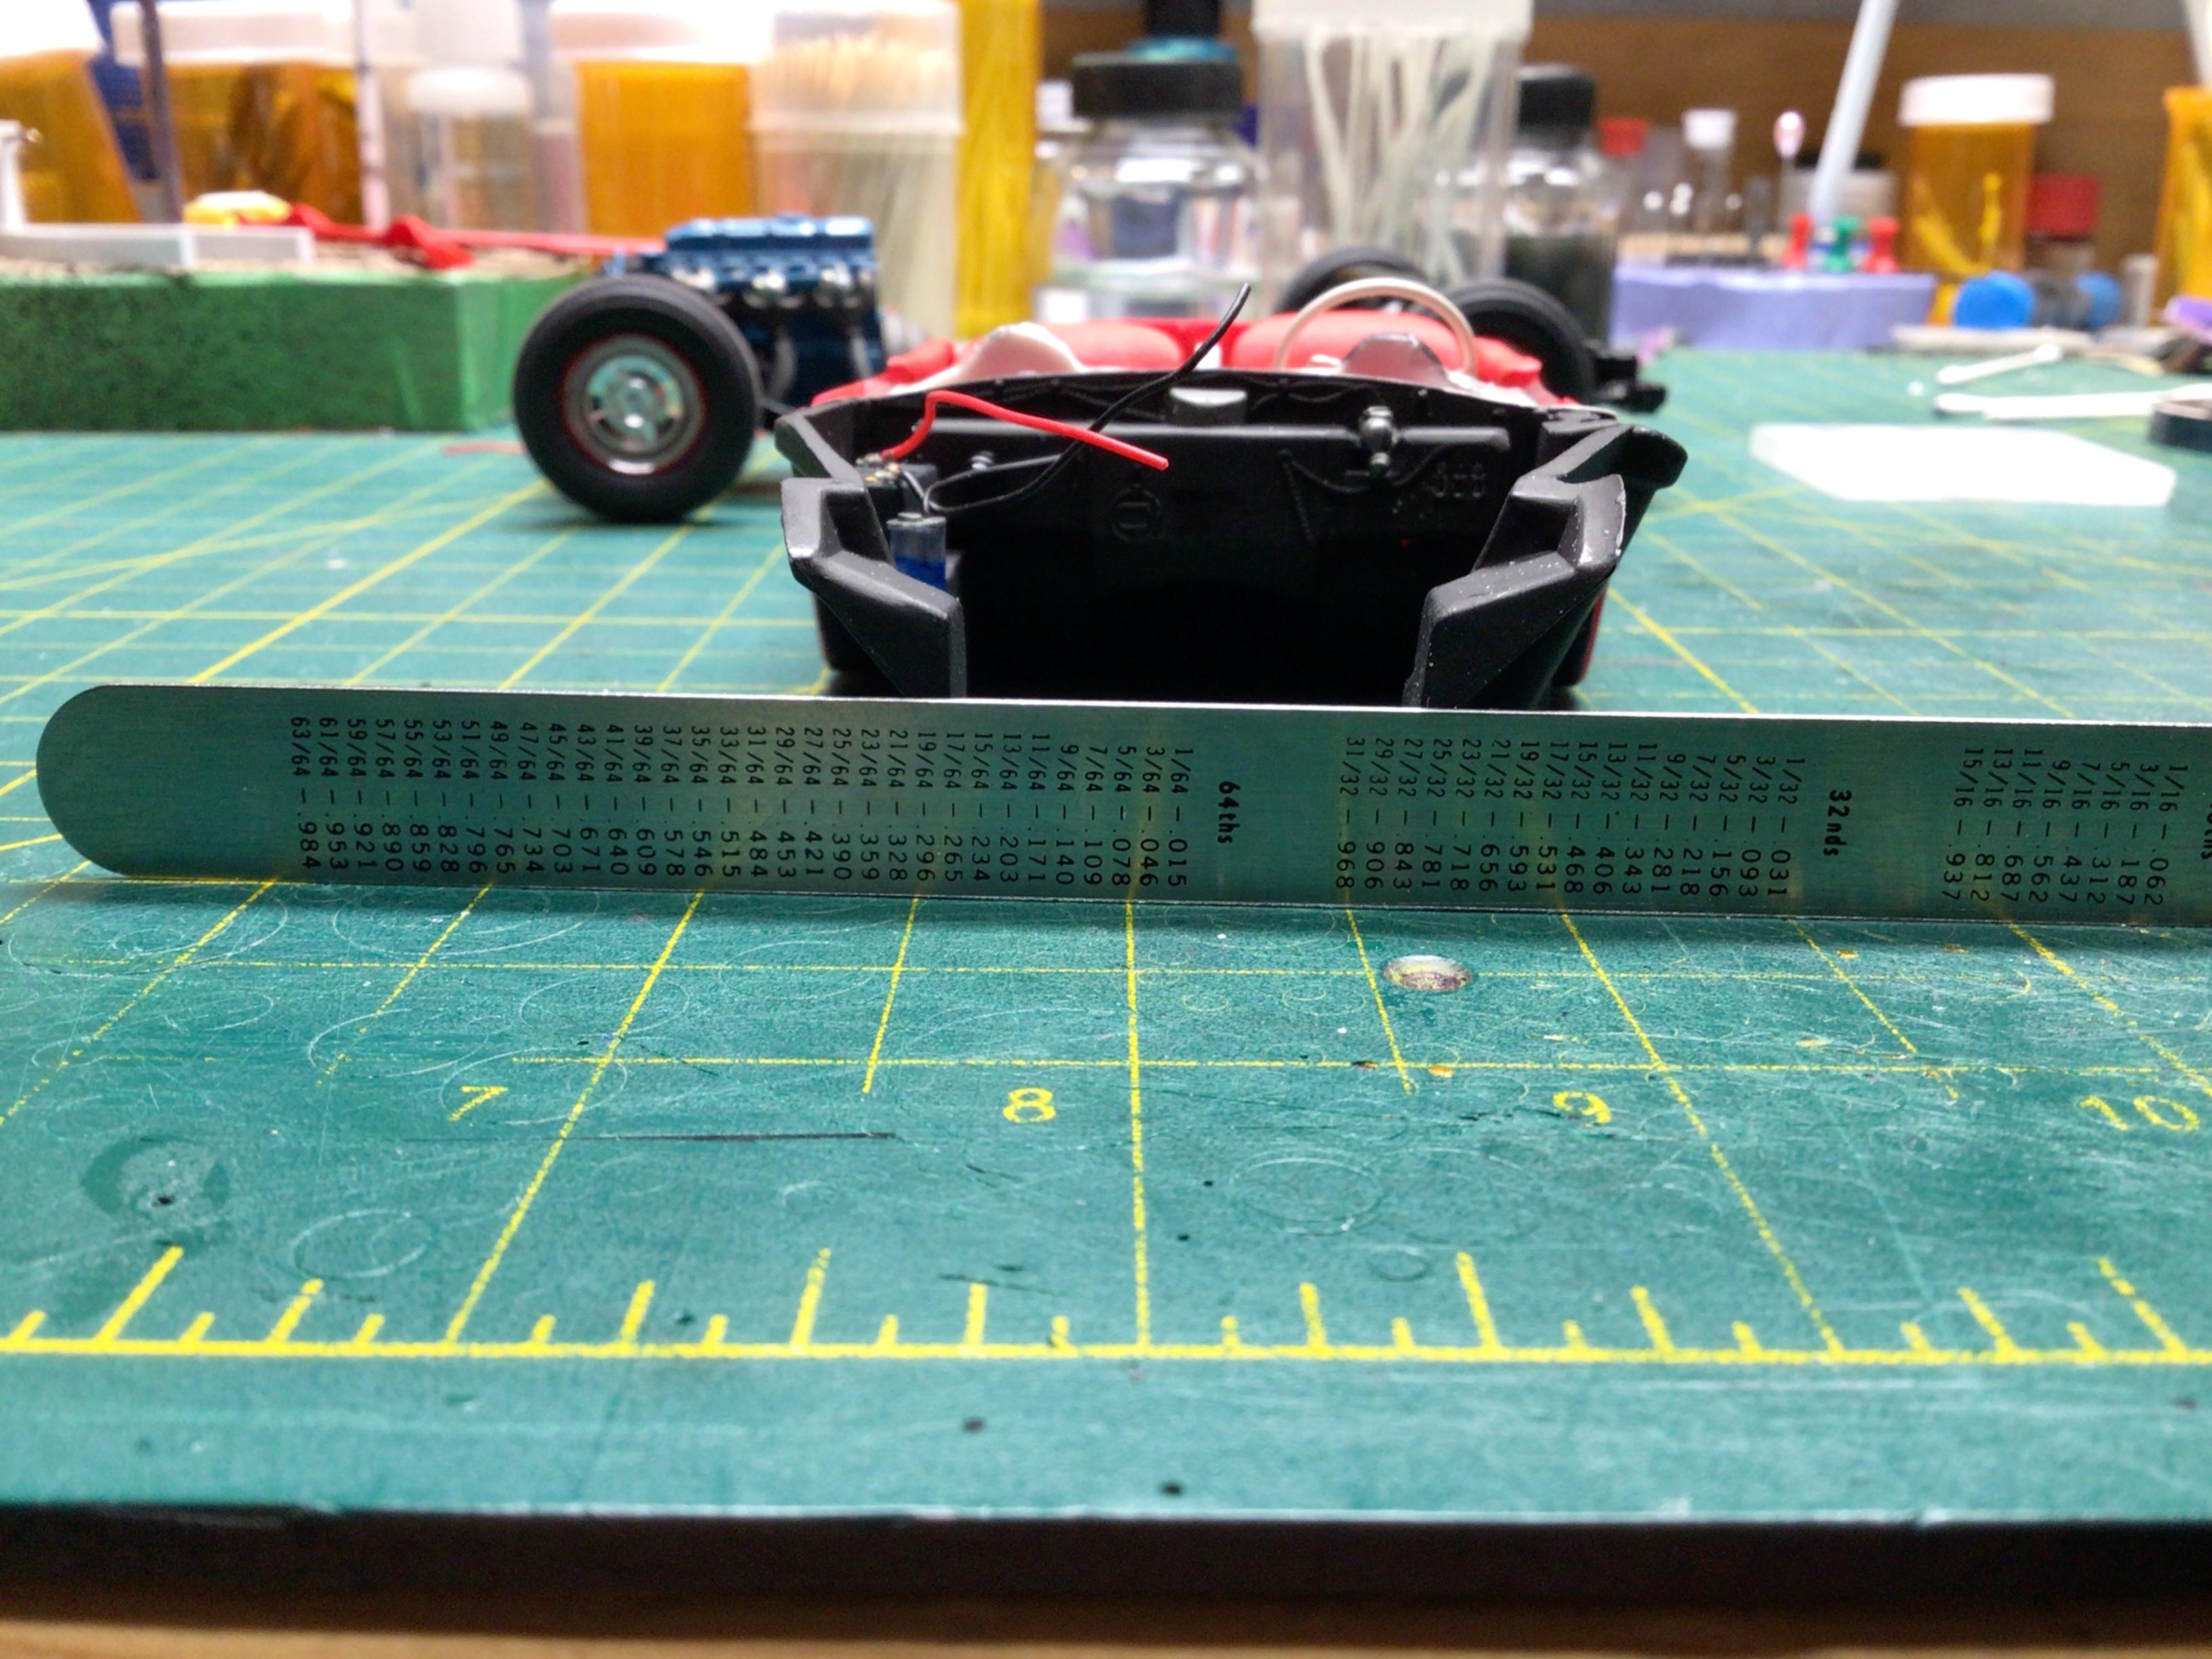
I scratch built a rear view mirror for it since the kit piece was ugly. I’ve been working on the body, smoothing some blemishes and I realized that the tail light mounting surfaces are too small and not even close to round. So I glued a couple of .157”x.015” styrene discs in place and added some Tamiya putty. It still needs a bit of finish sanding, but they fit a lot better now.?
-
Thanks Garry.? I try to do it on all, but I sometimes get ahead of myself and forget to do it.?
-
It’s looking good Bill!?
-
Sprayng Molotow chrome; anyone here ever done it?
NOBLNG replied to Roadrunner's topic in Tips, Tricks, and Tutorials
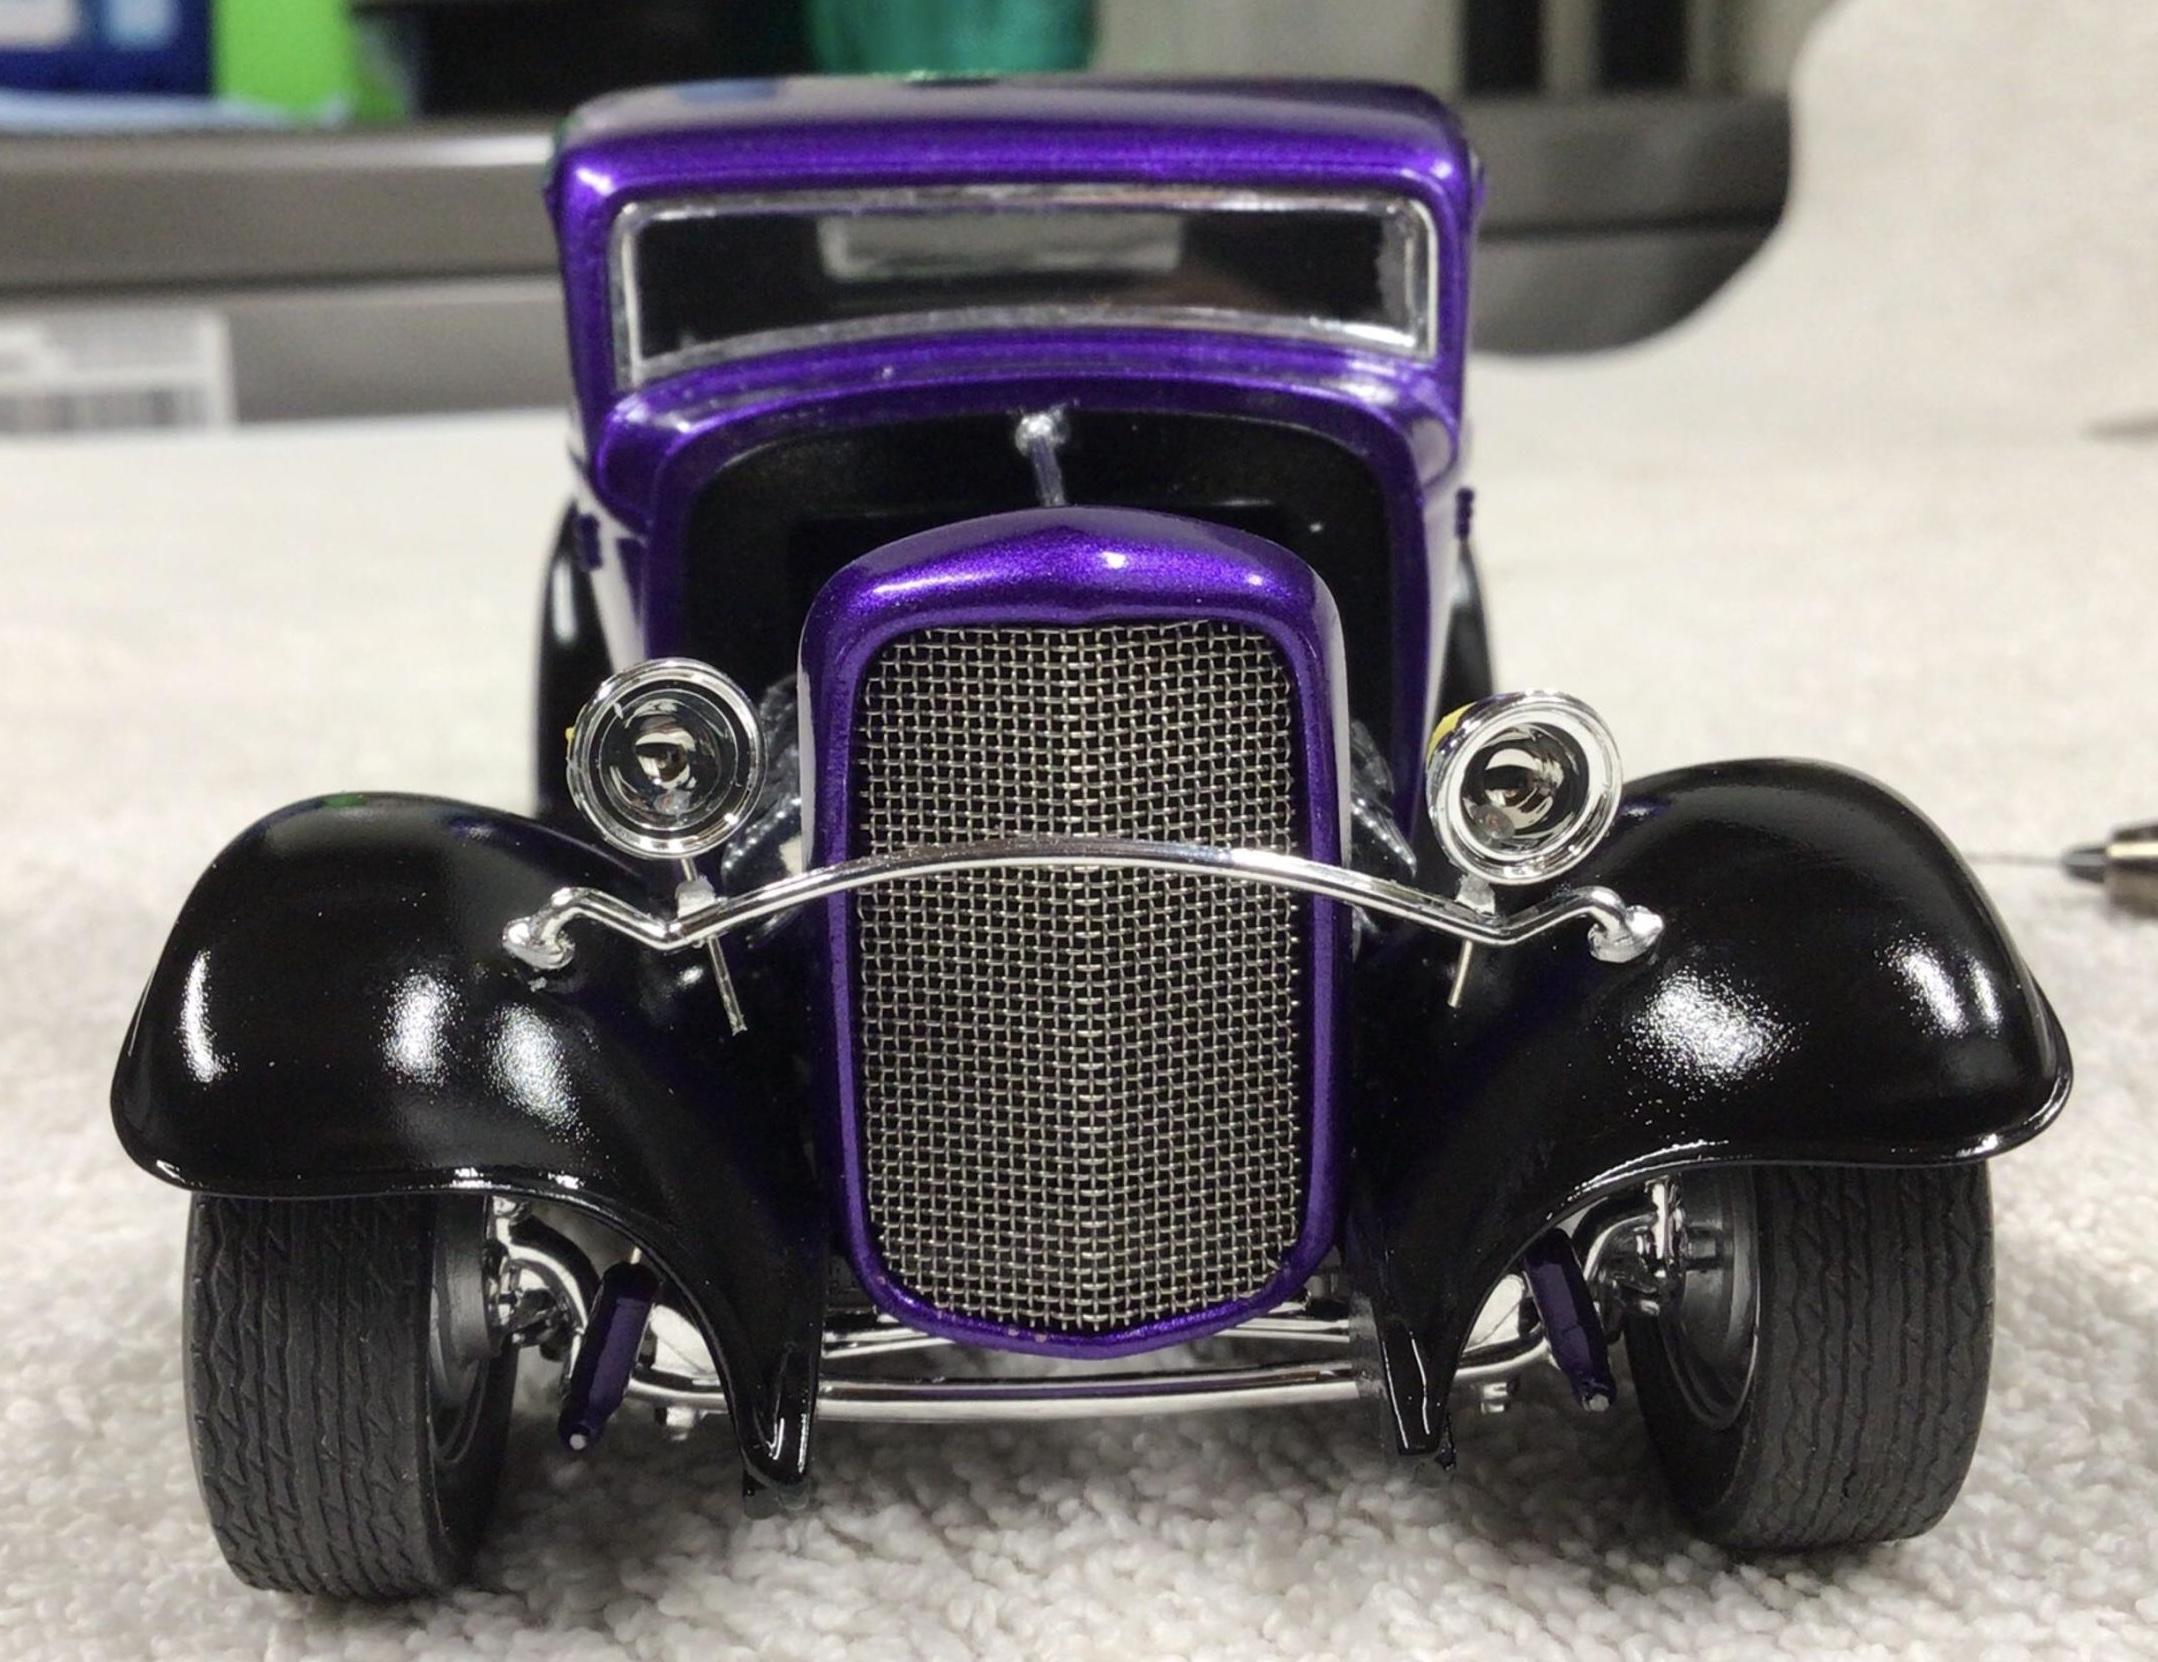
A couple of things I did on the only ‘32 Ford I’ve completed, is to add pins to the bar ends and the headlight buckets. The bar can then be attached with a drop of CA under the fenders. To the headlight buckets I added pins of soft .020” beading wire. This allowed the wire to be tweaked slightly to align the buckets. Then glue and clip off the excess wire.
-
Dang…that all looks fantastic!?
-
Sprayng Molotow chrome; anyone here ever done it?
NOBLNG replied to Roadrunner's topic in Tips, Tricks, and Tutorials
So you don’t need a primer or black base? -
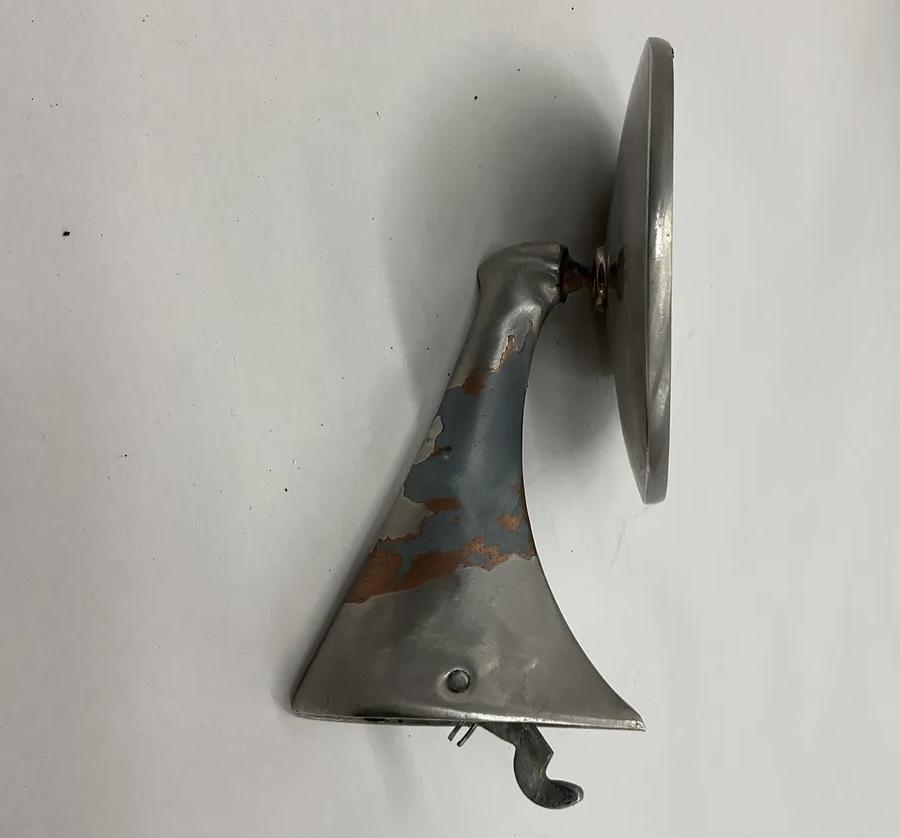
Wow! Those are not easy to replicate!? I think I’ll stay away from ‘50s mopars.? You did a fine job on them though.? Here’s a site with lots of good pics and info on them. https://www.chrysler300club.com/tech/mirror/all.html
-
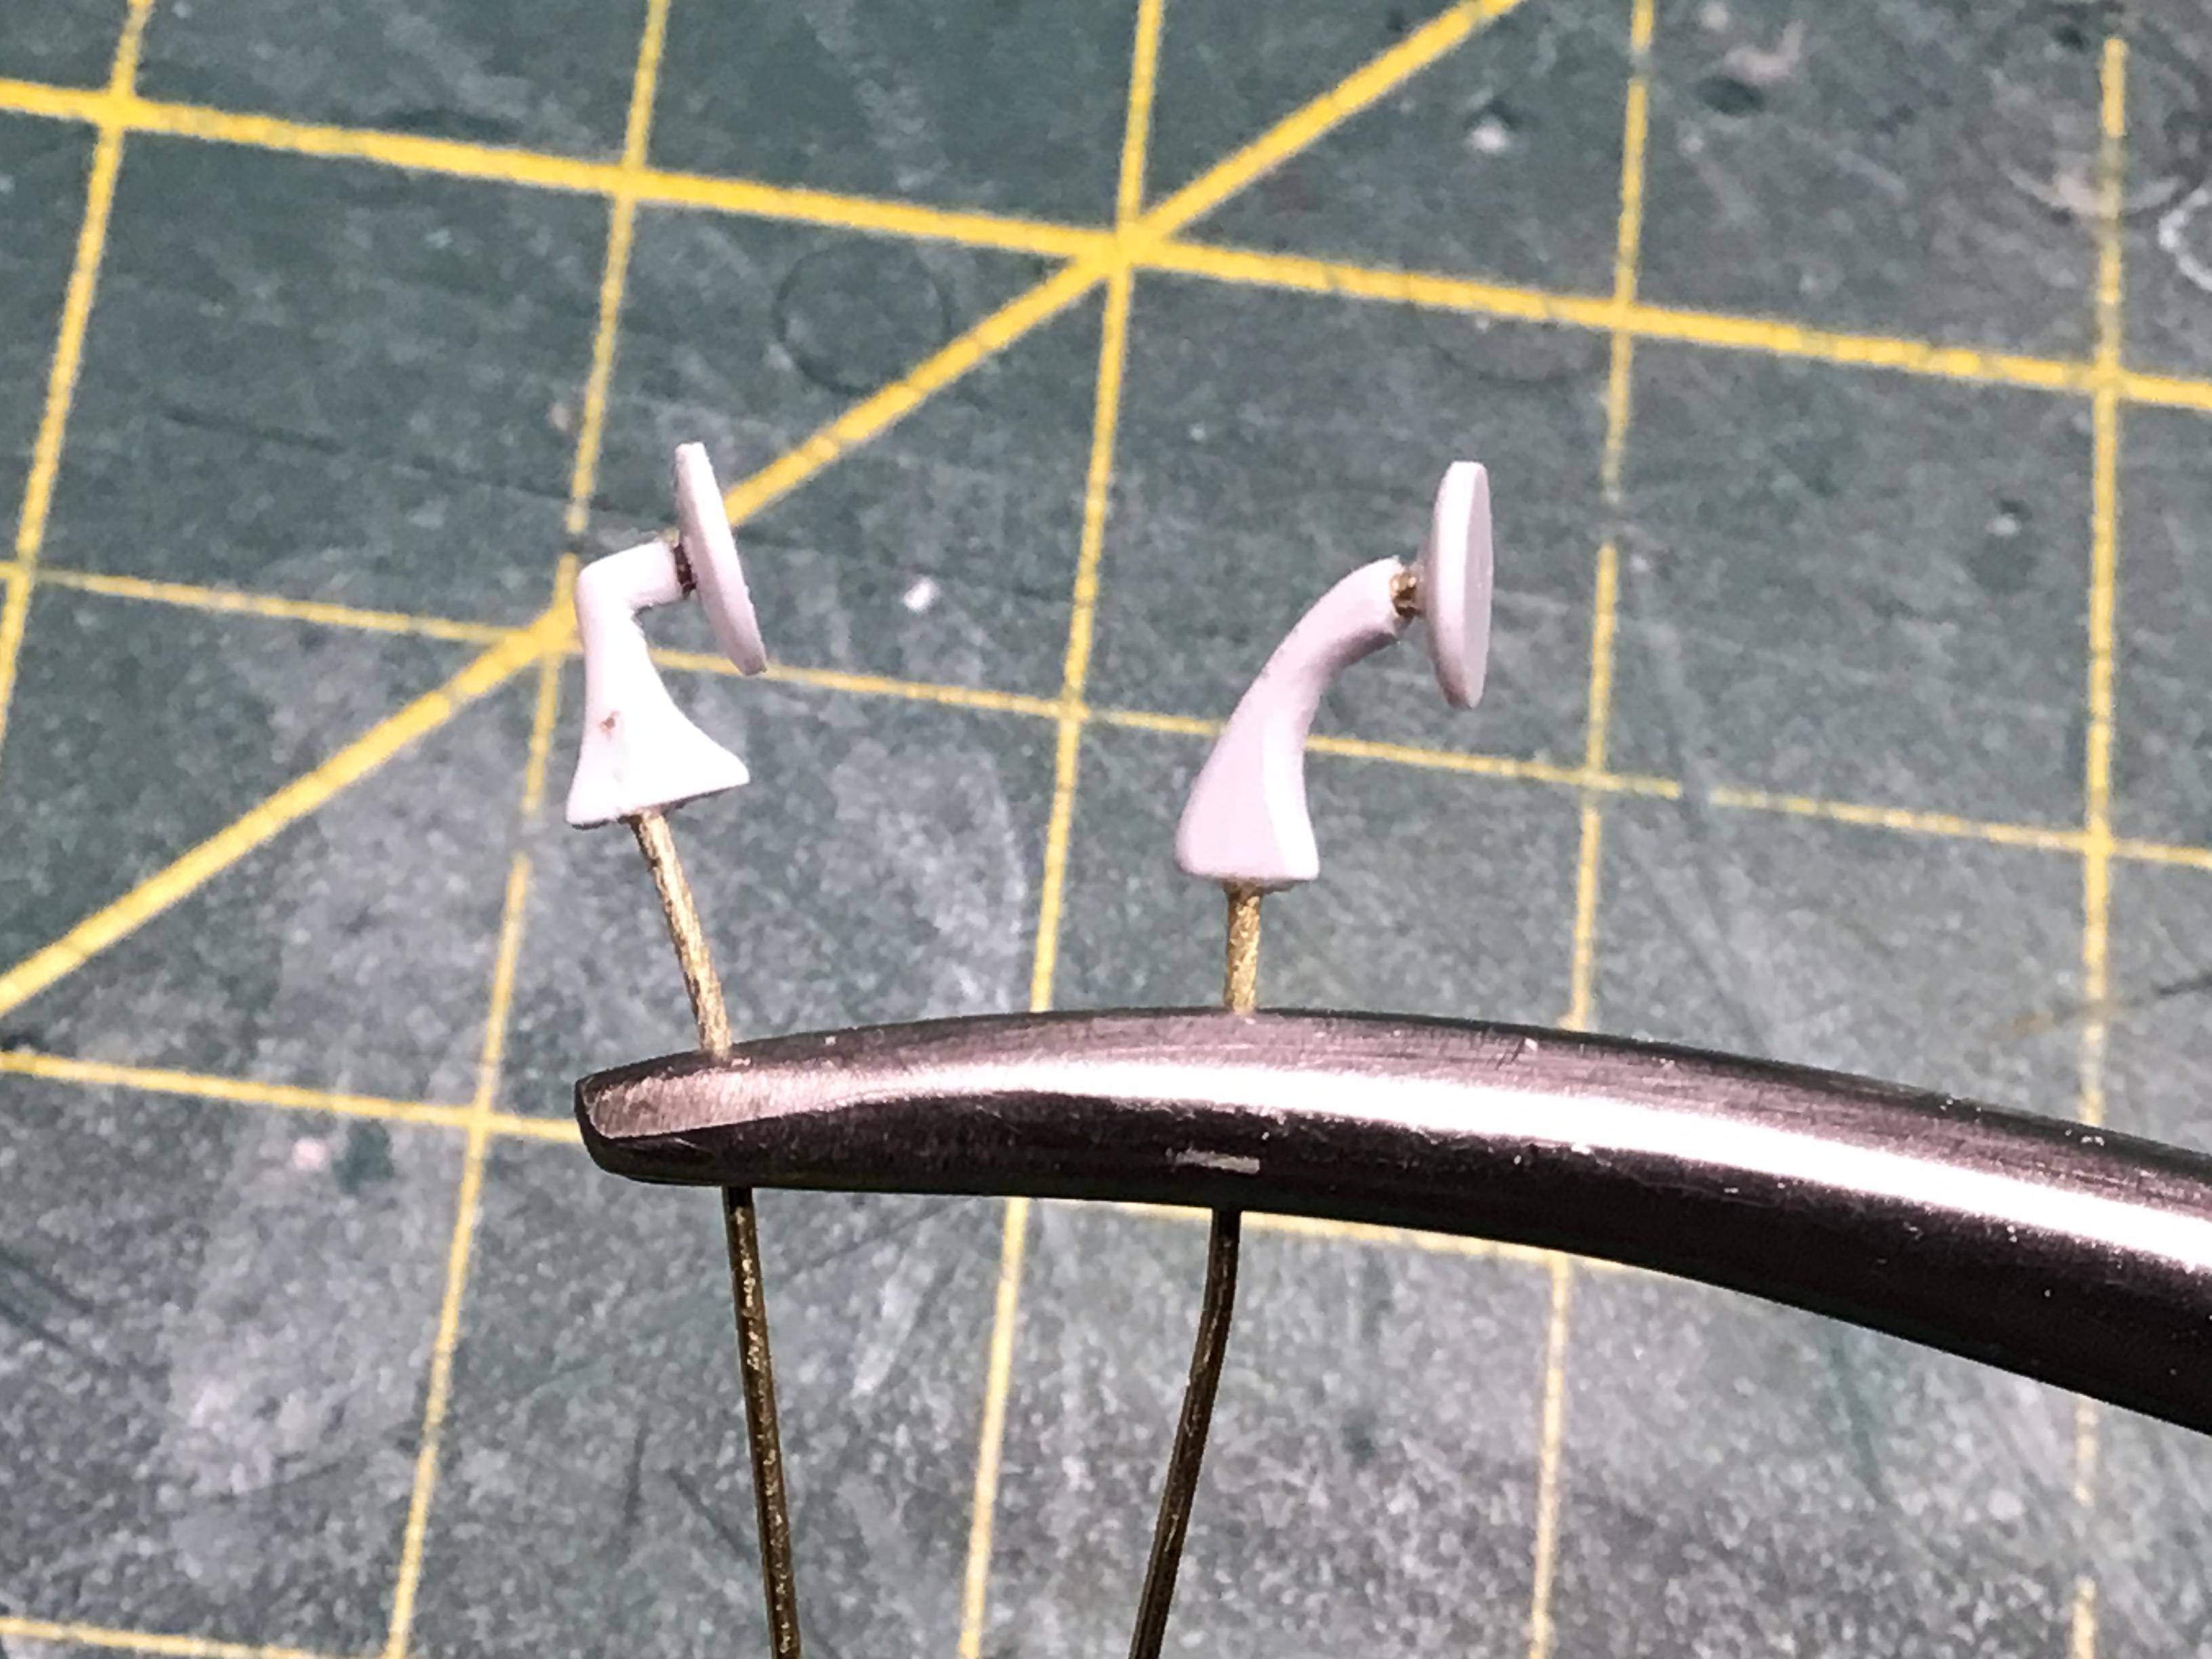
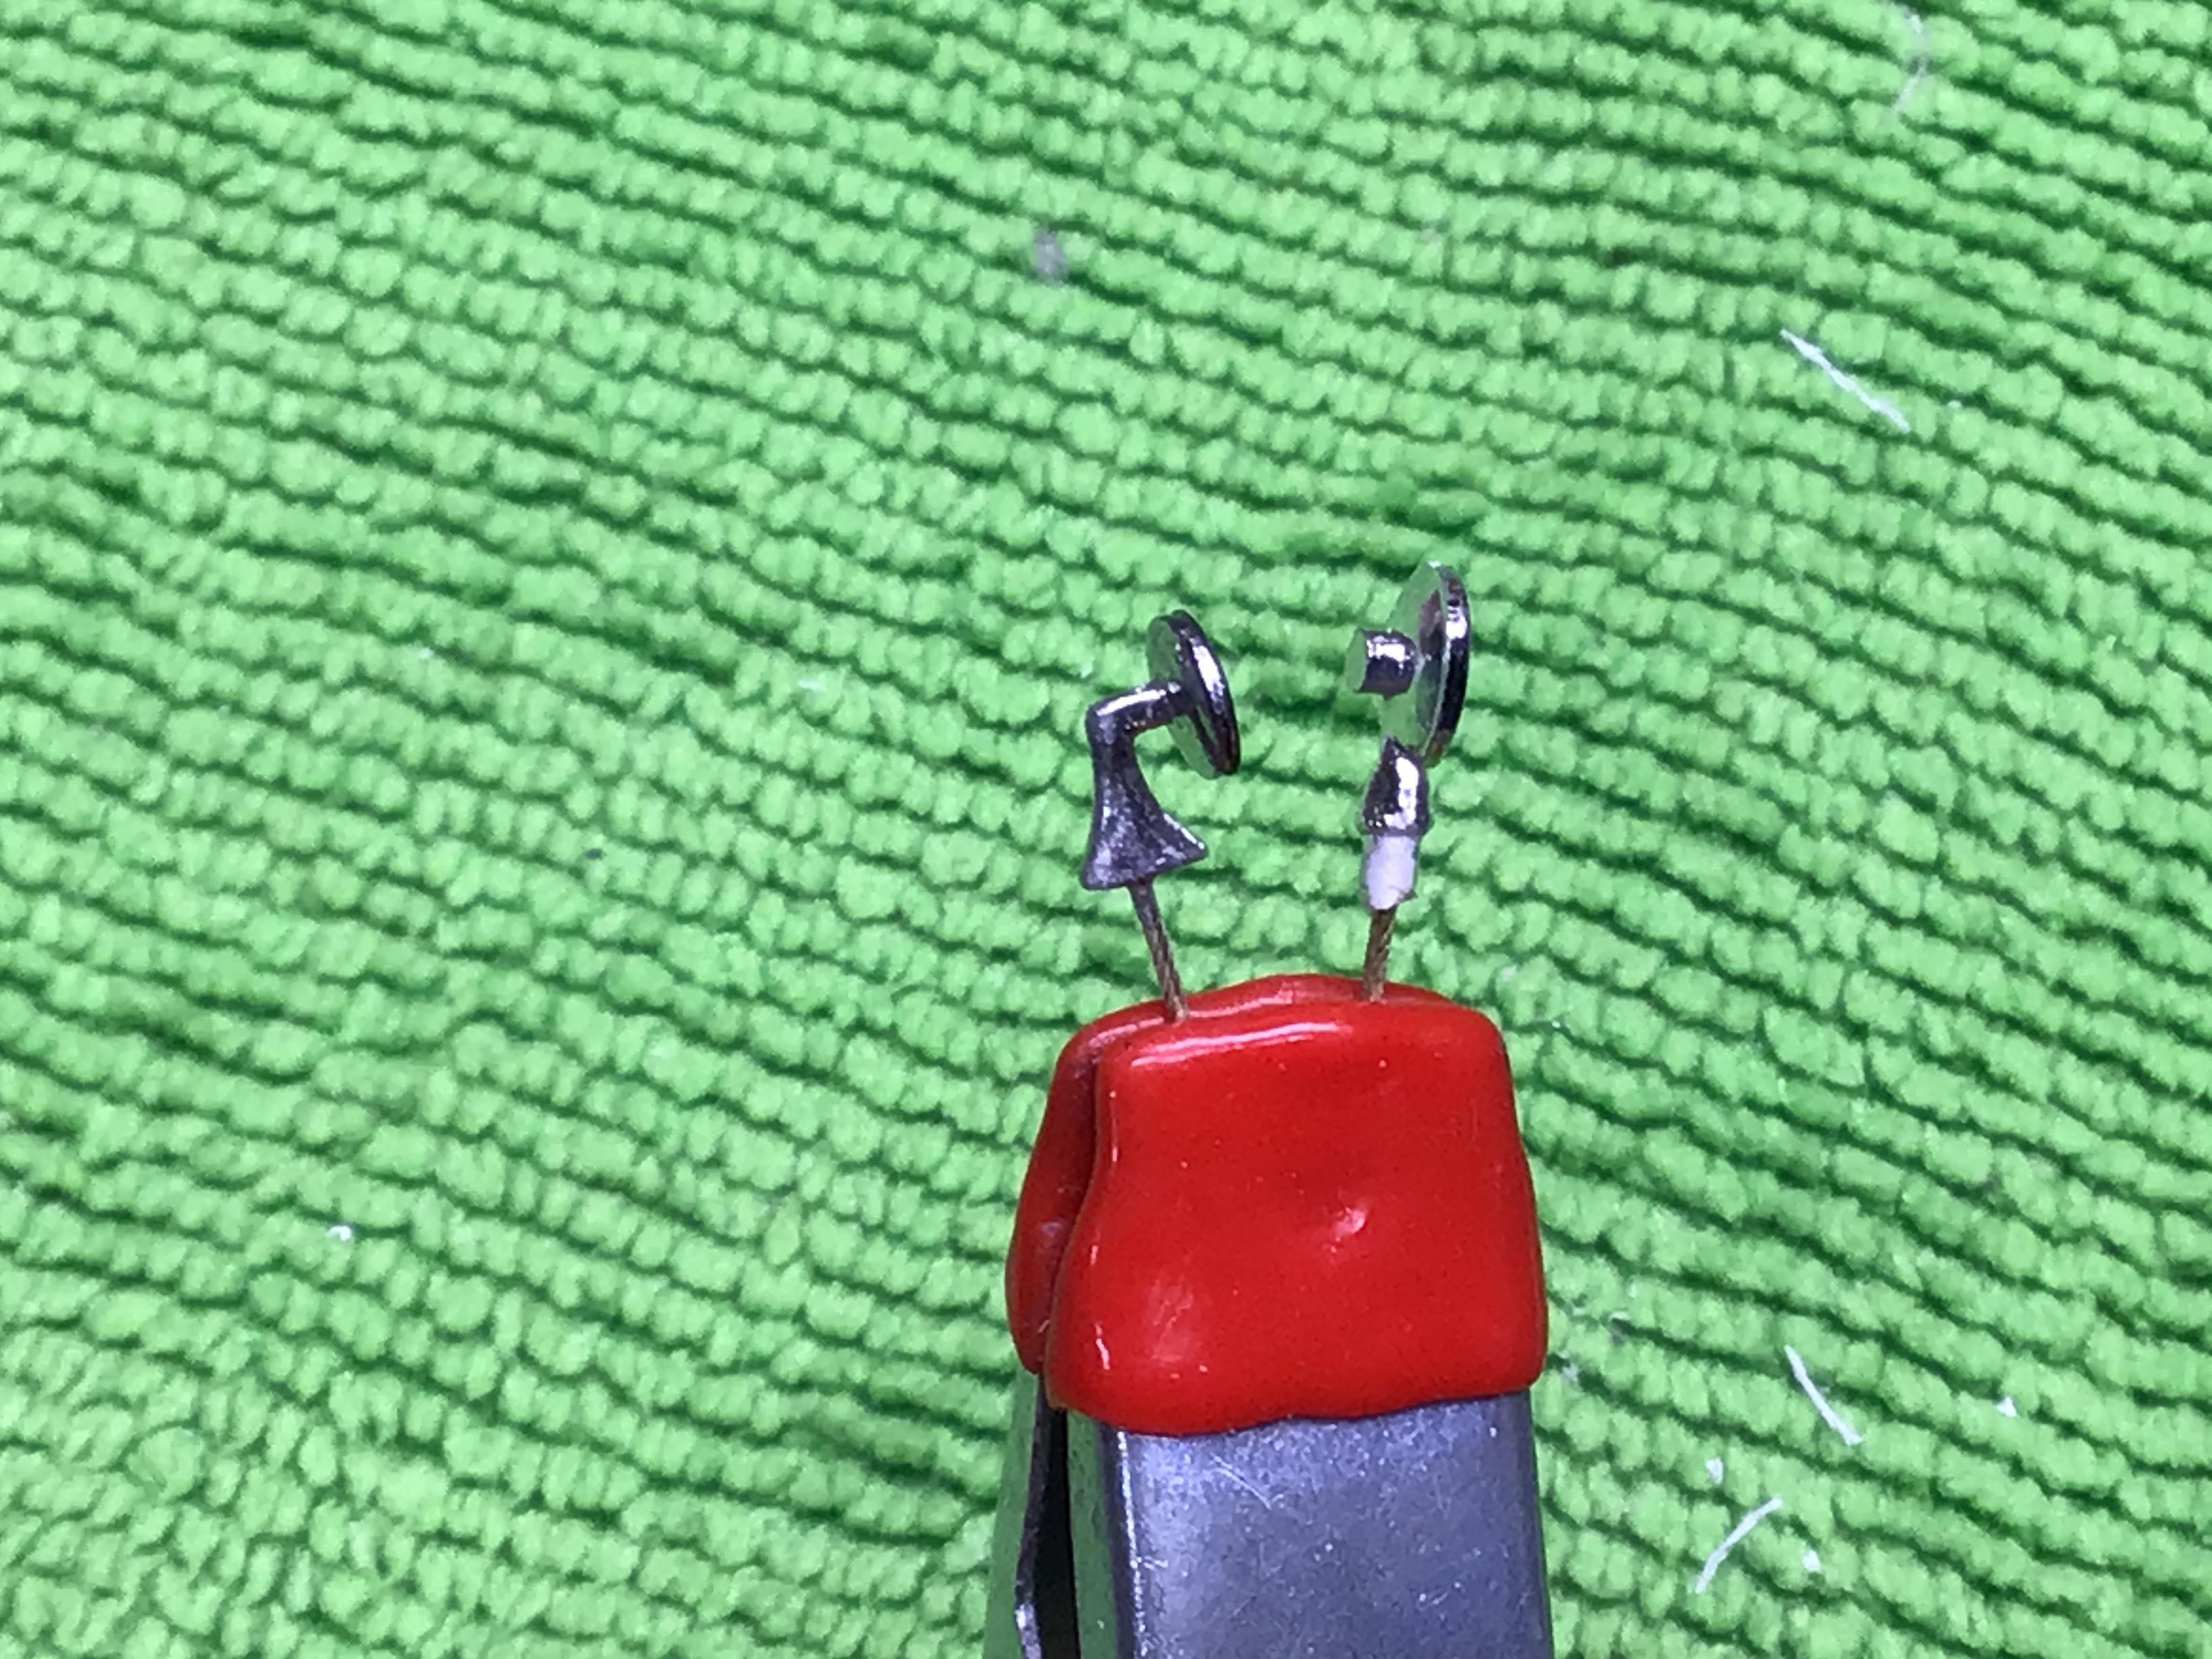
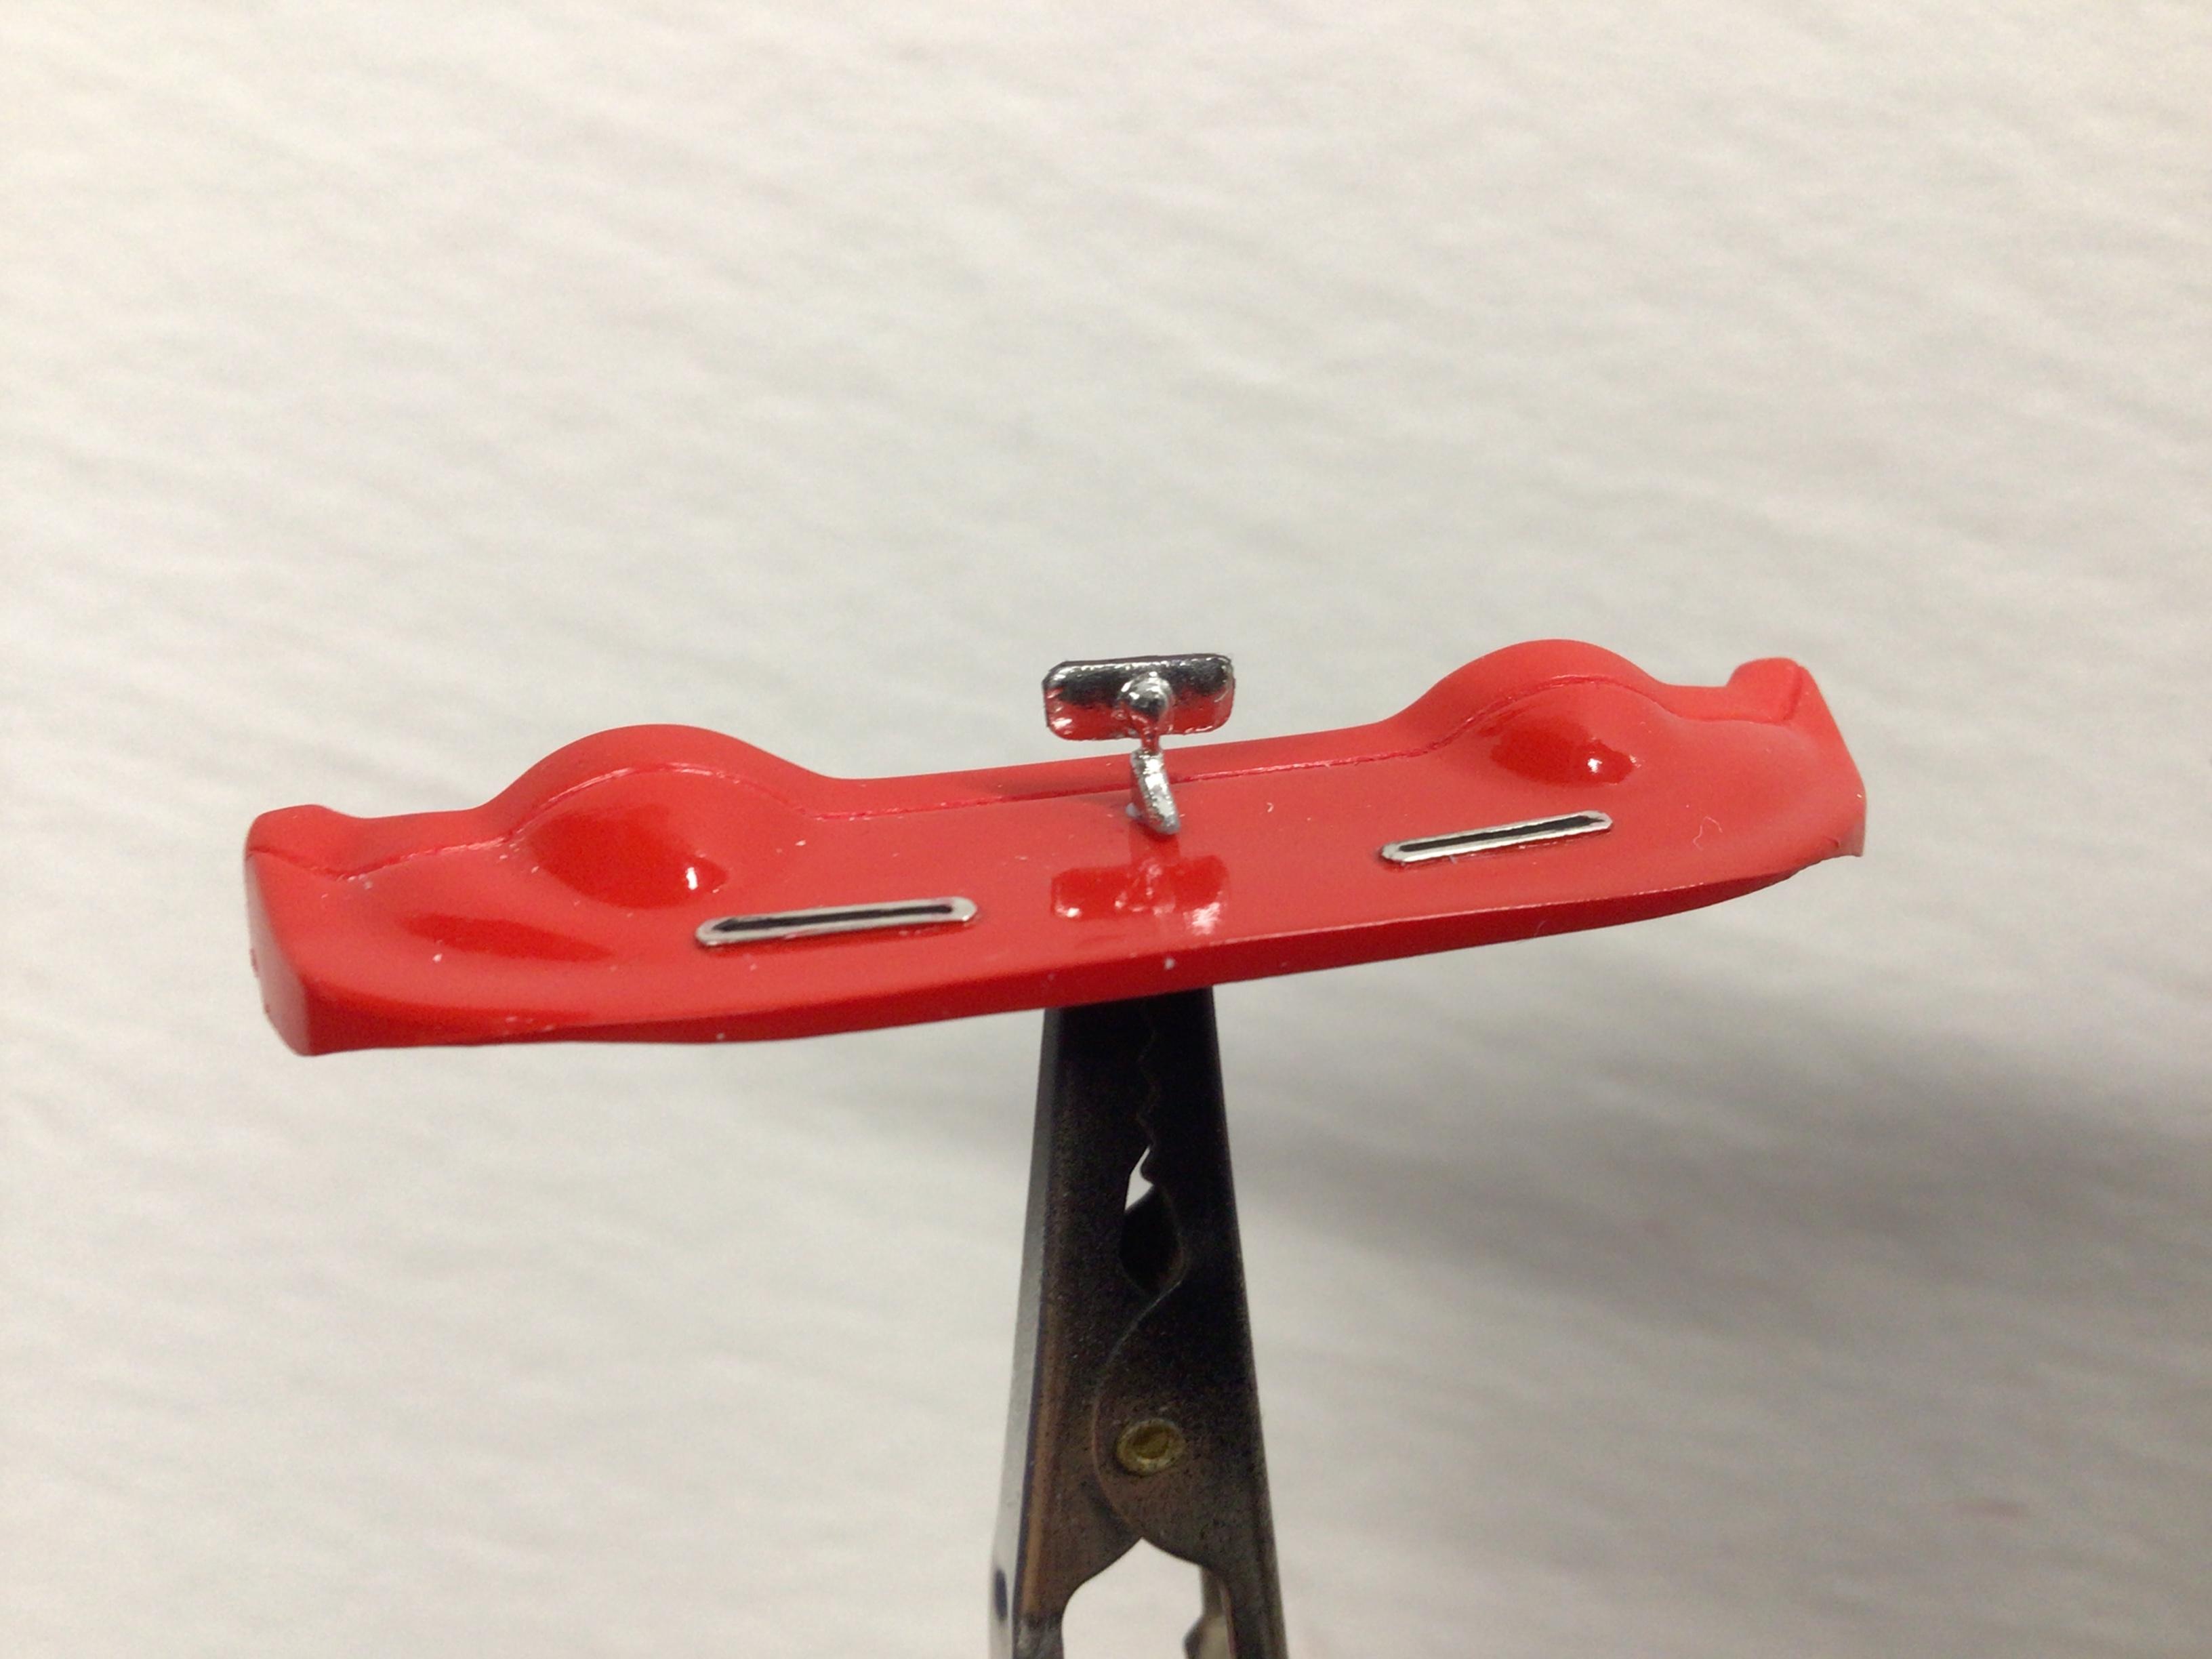
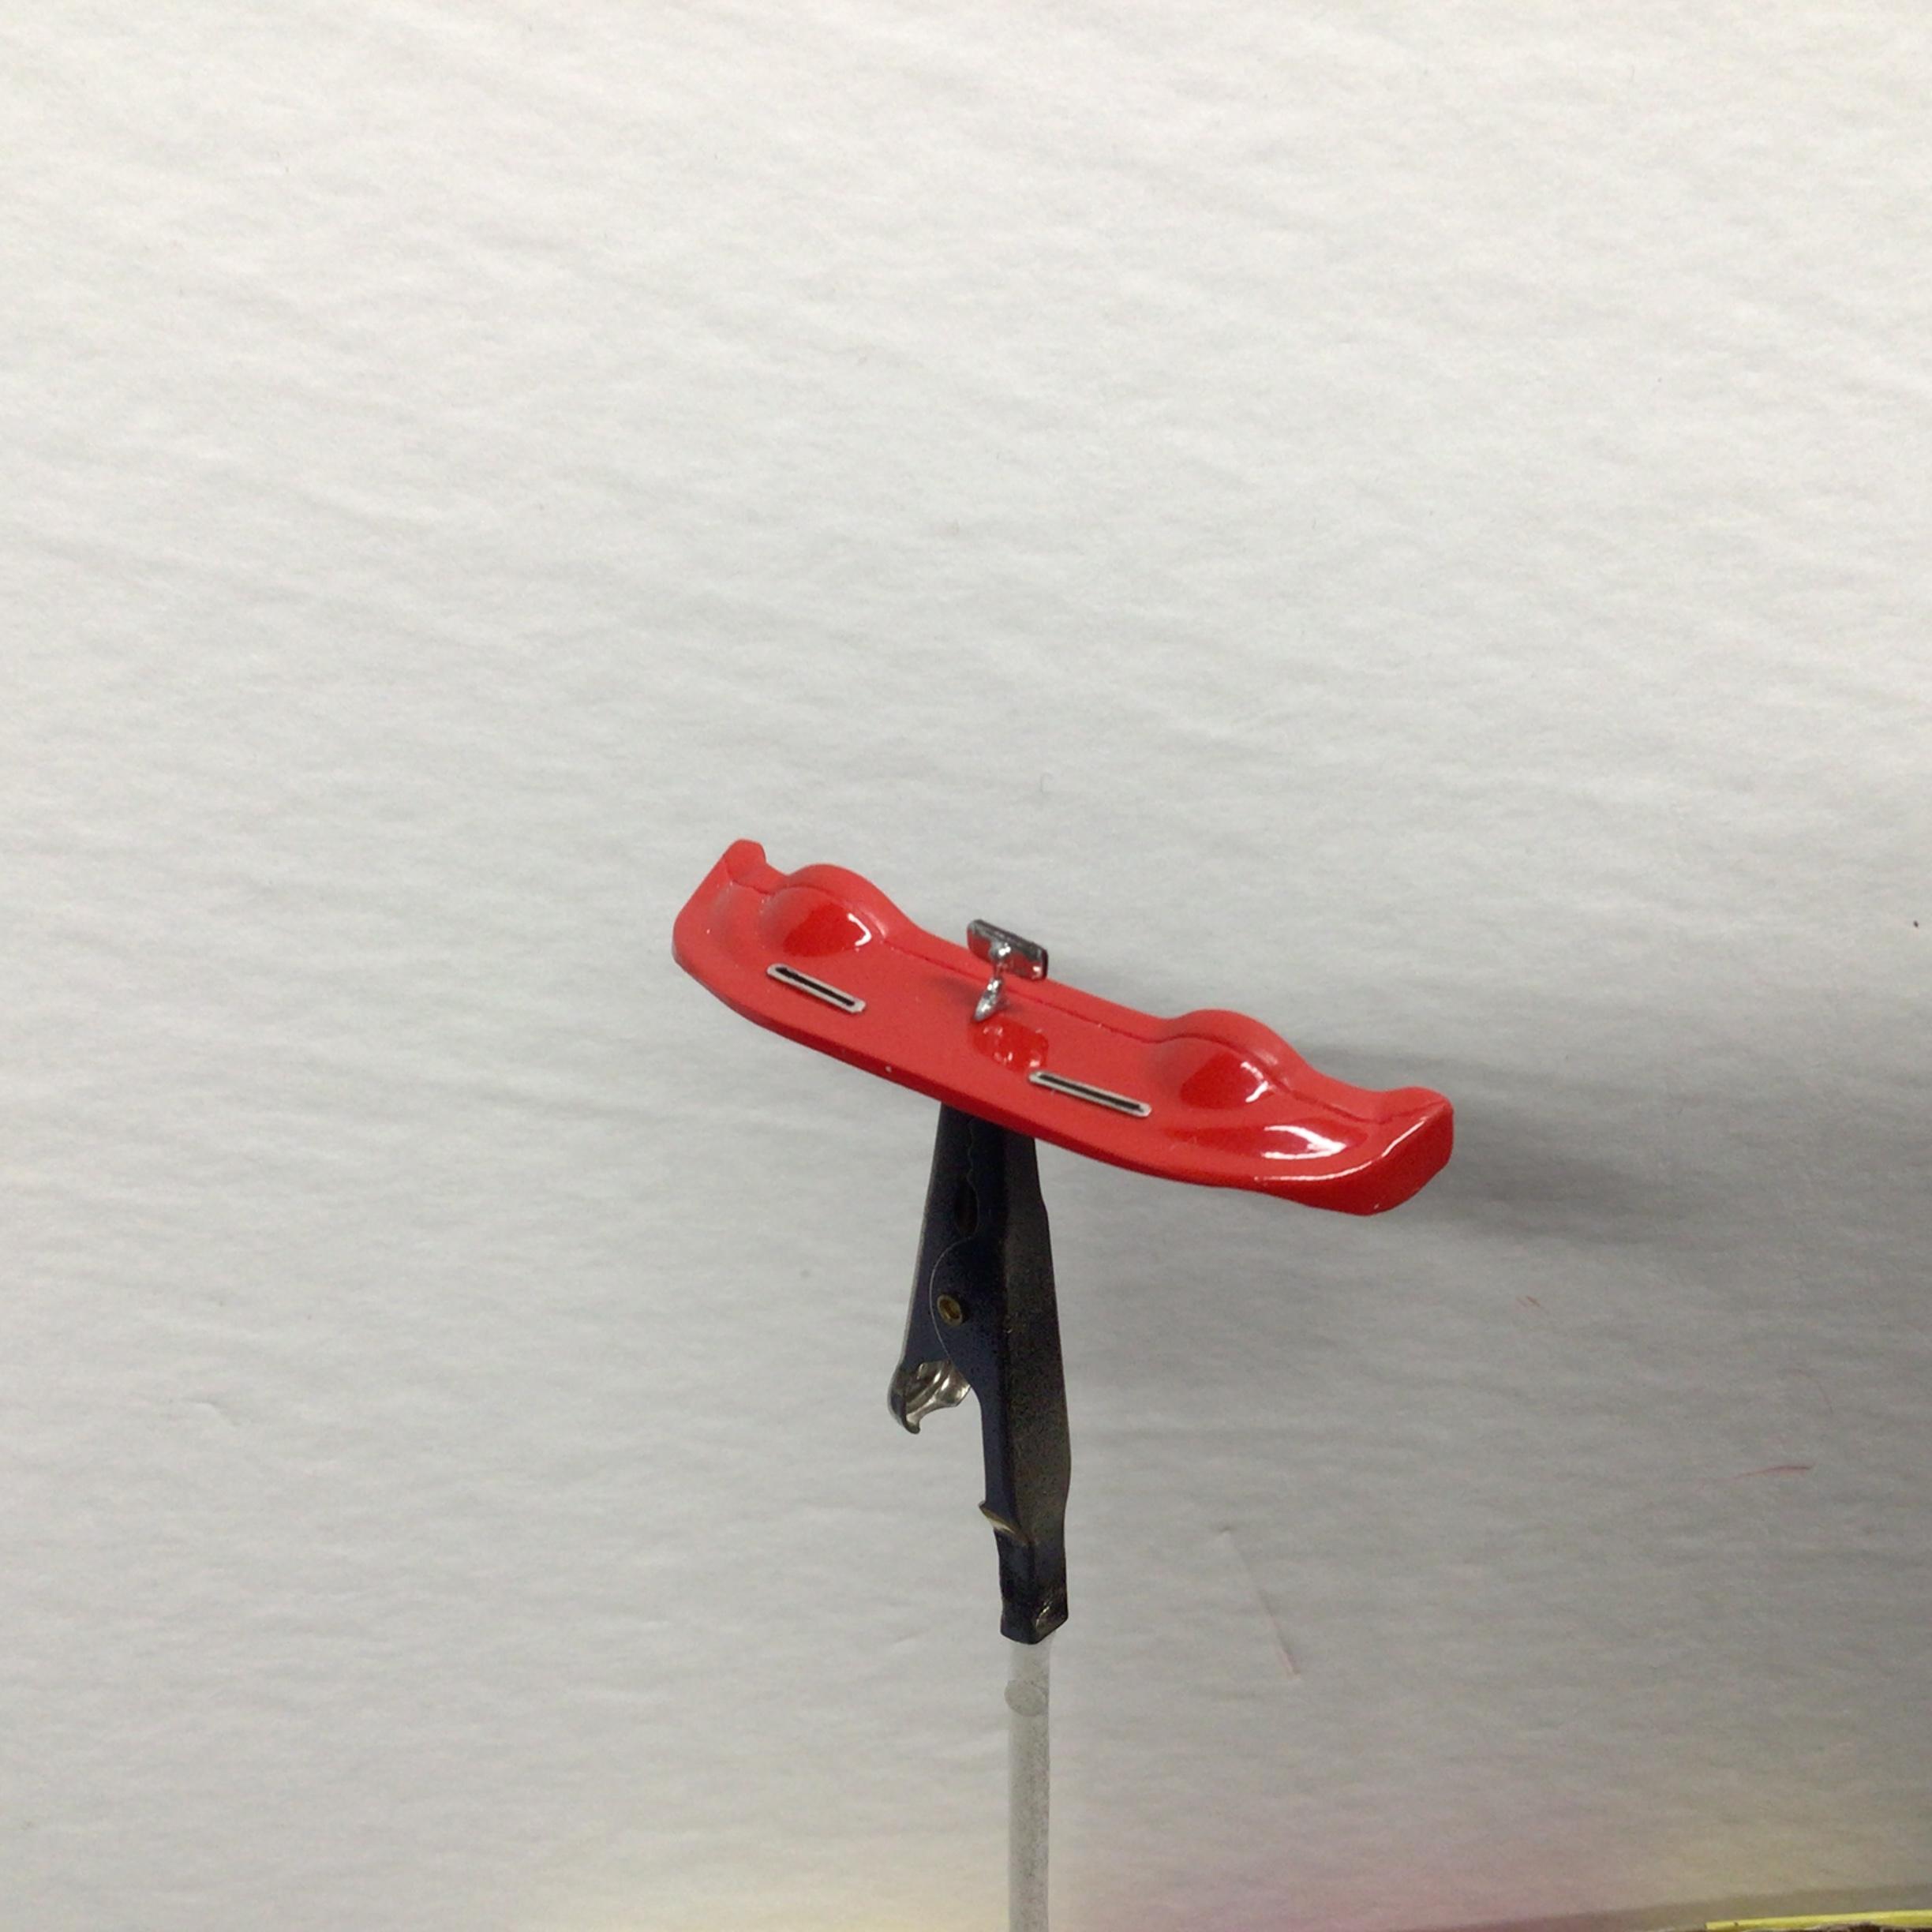
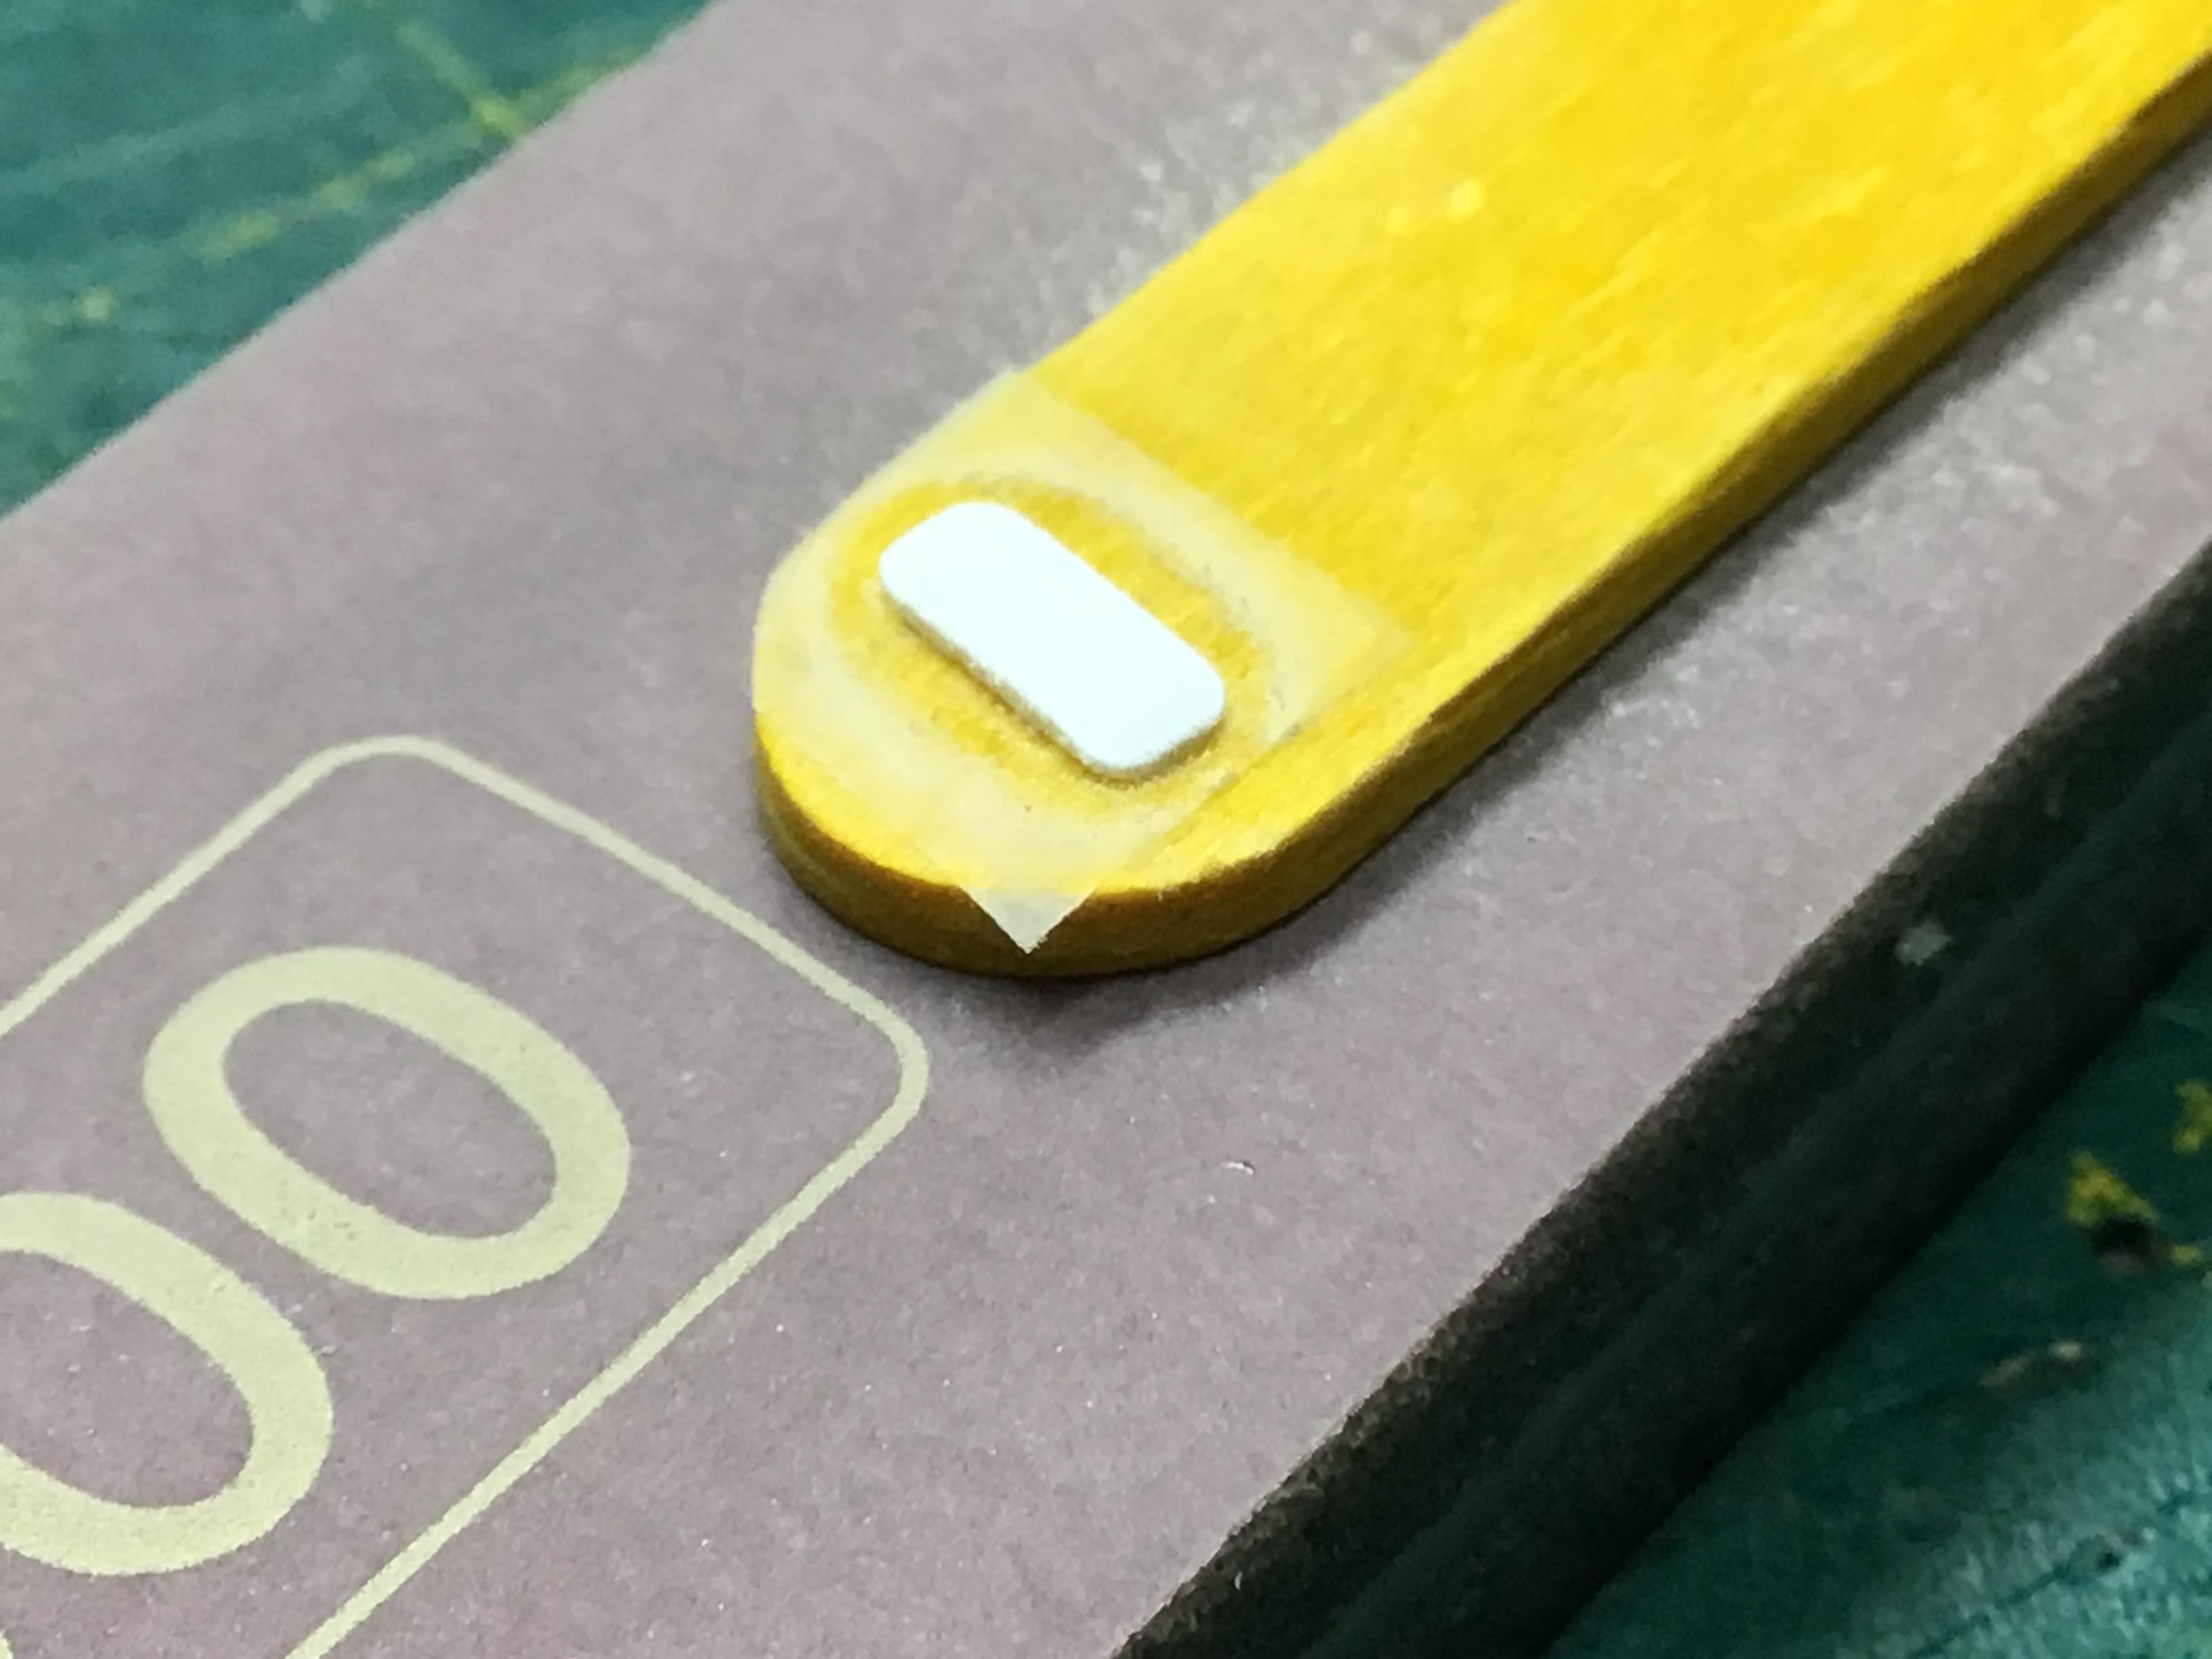
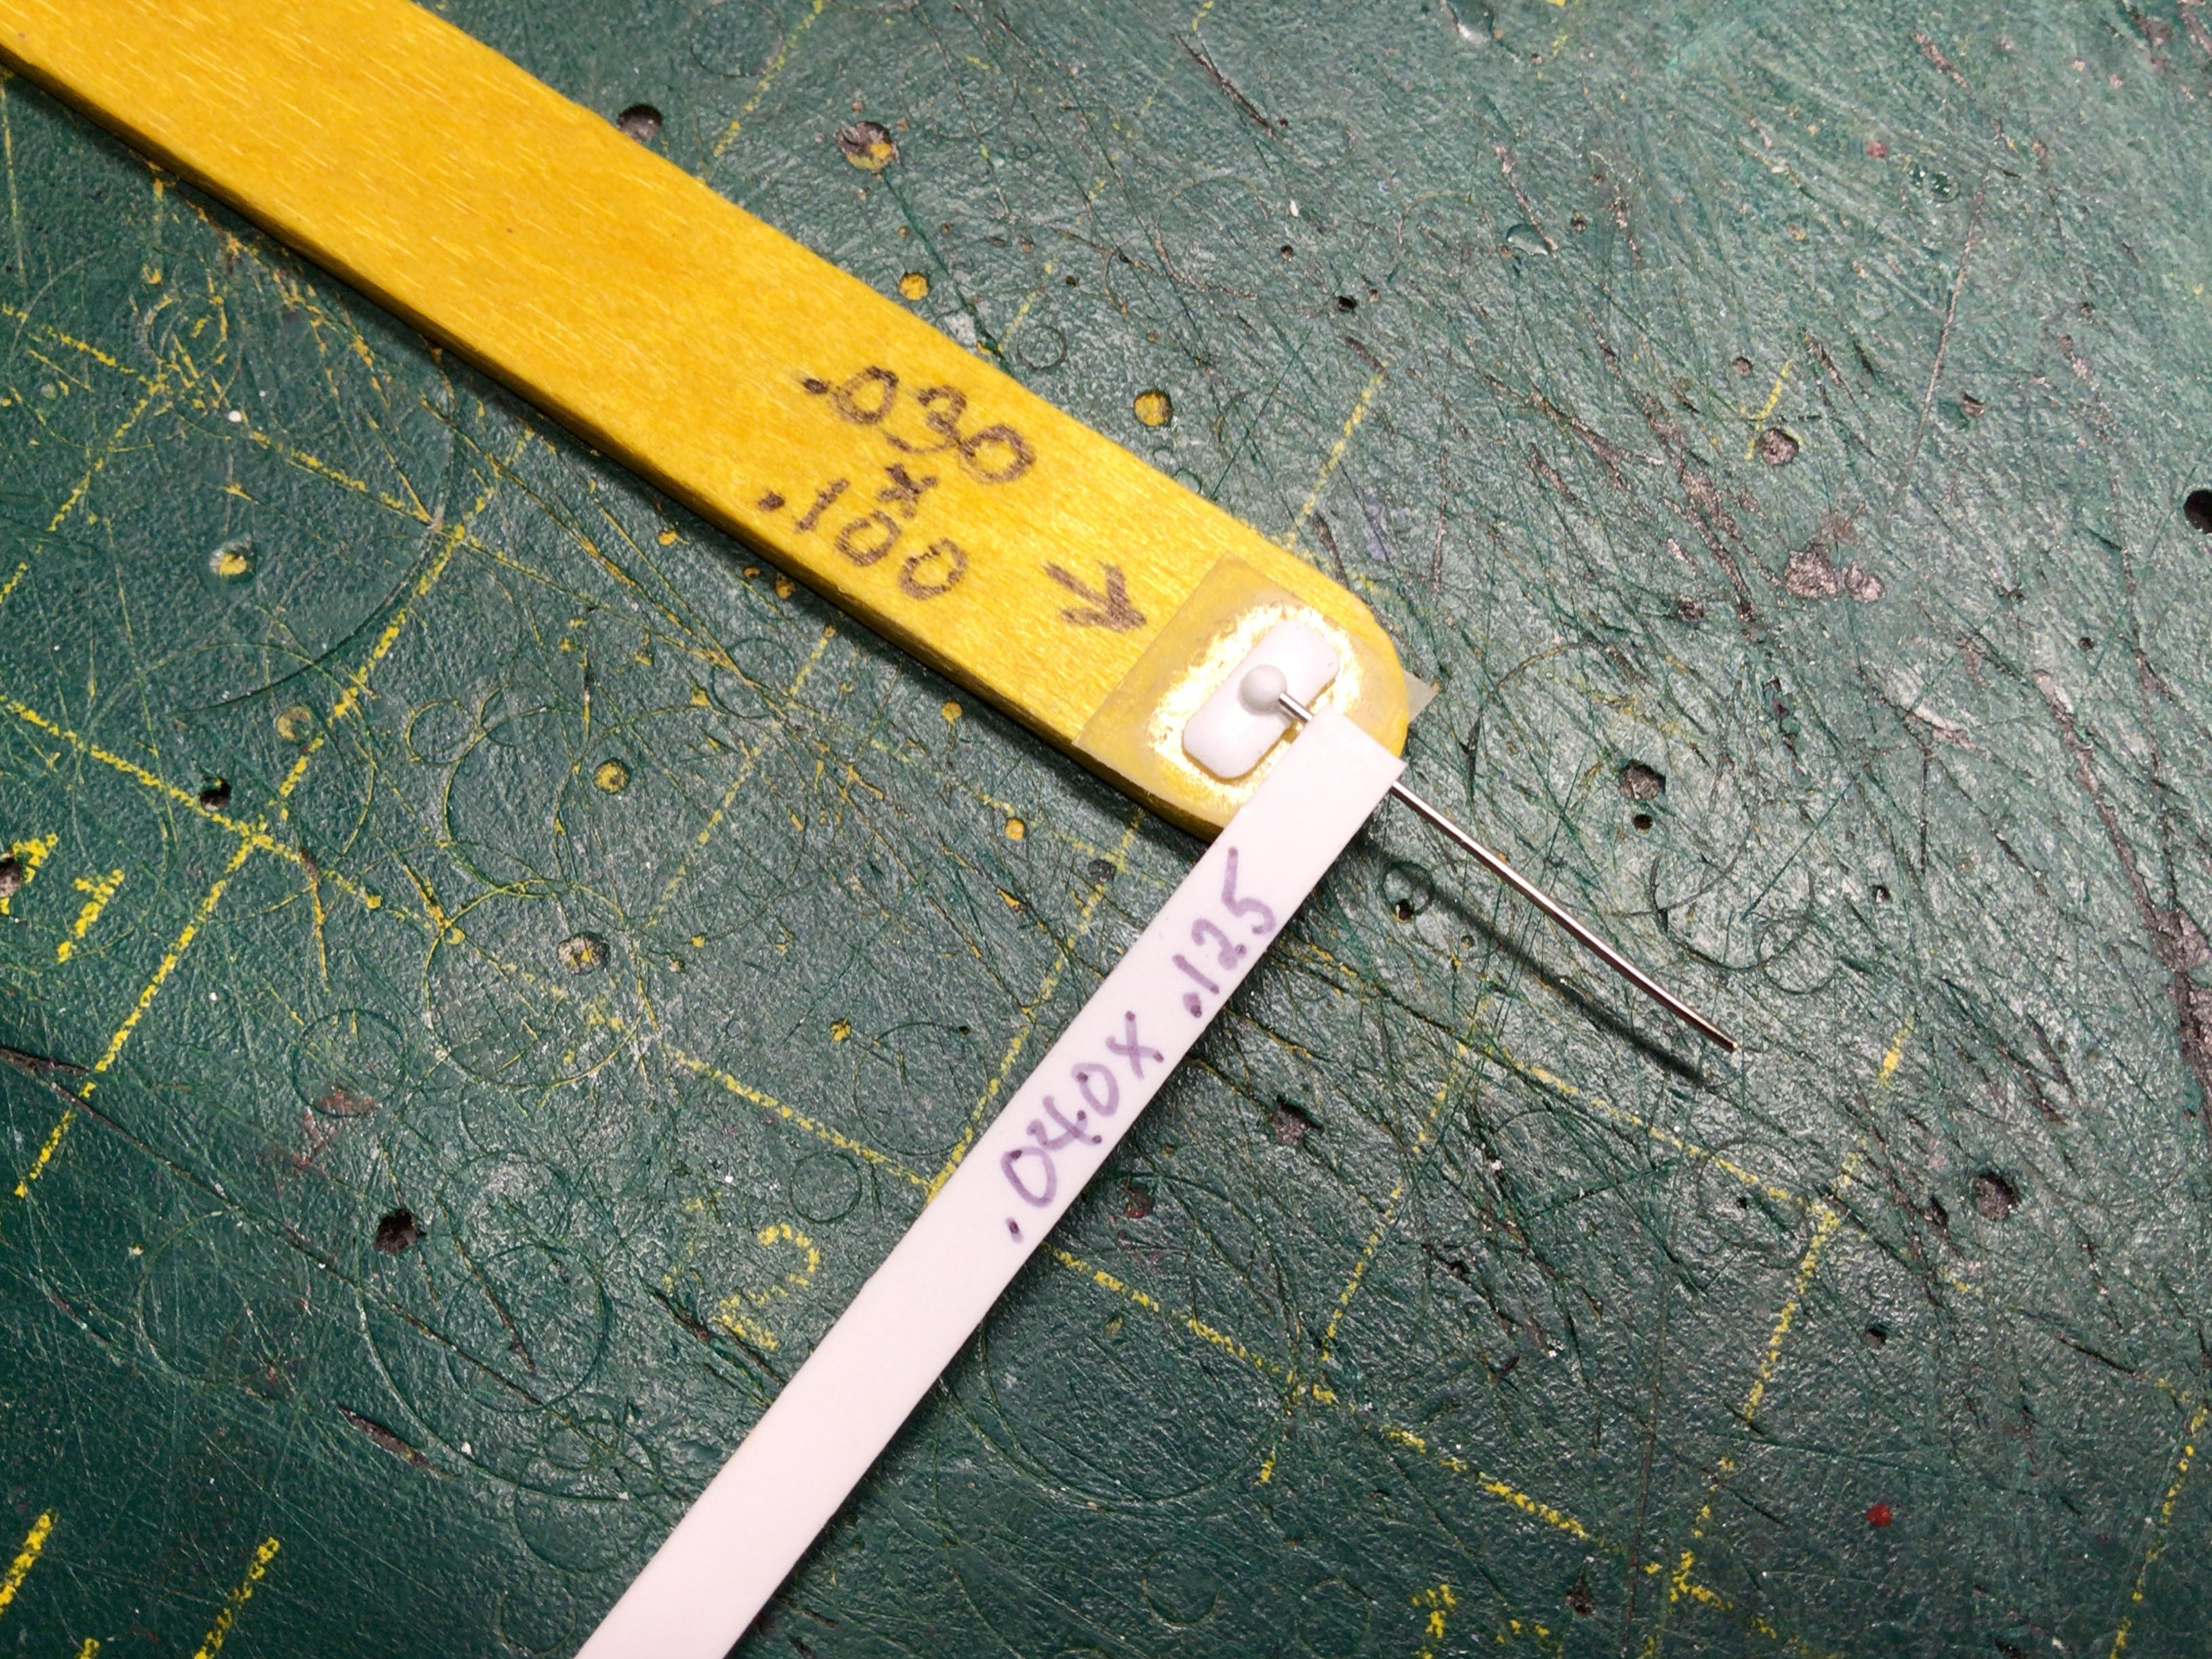
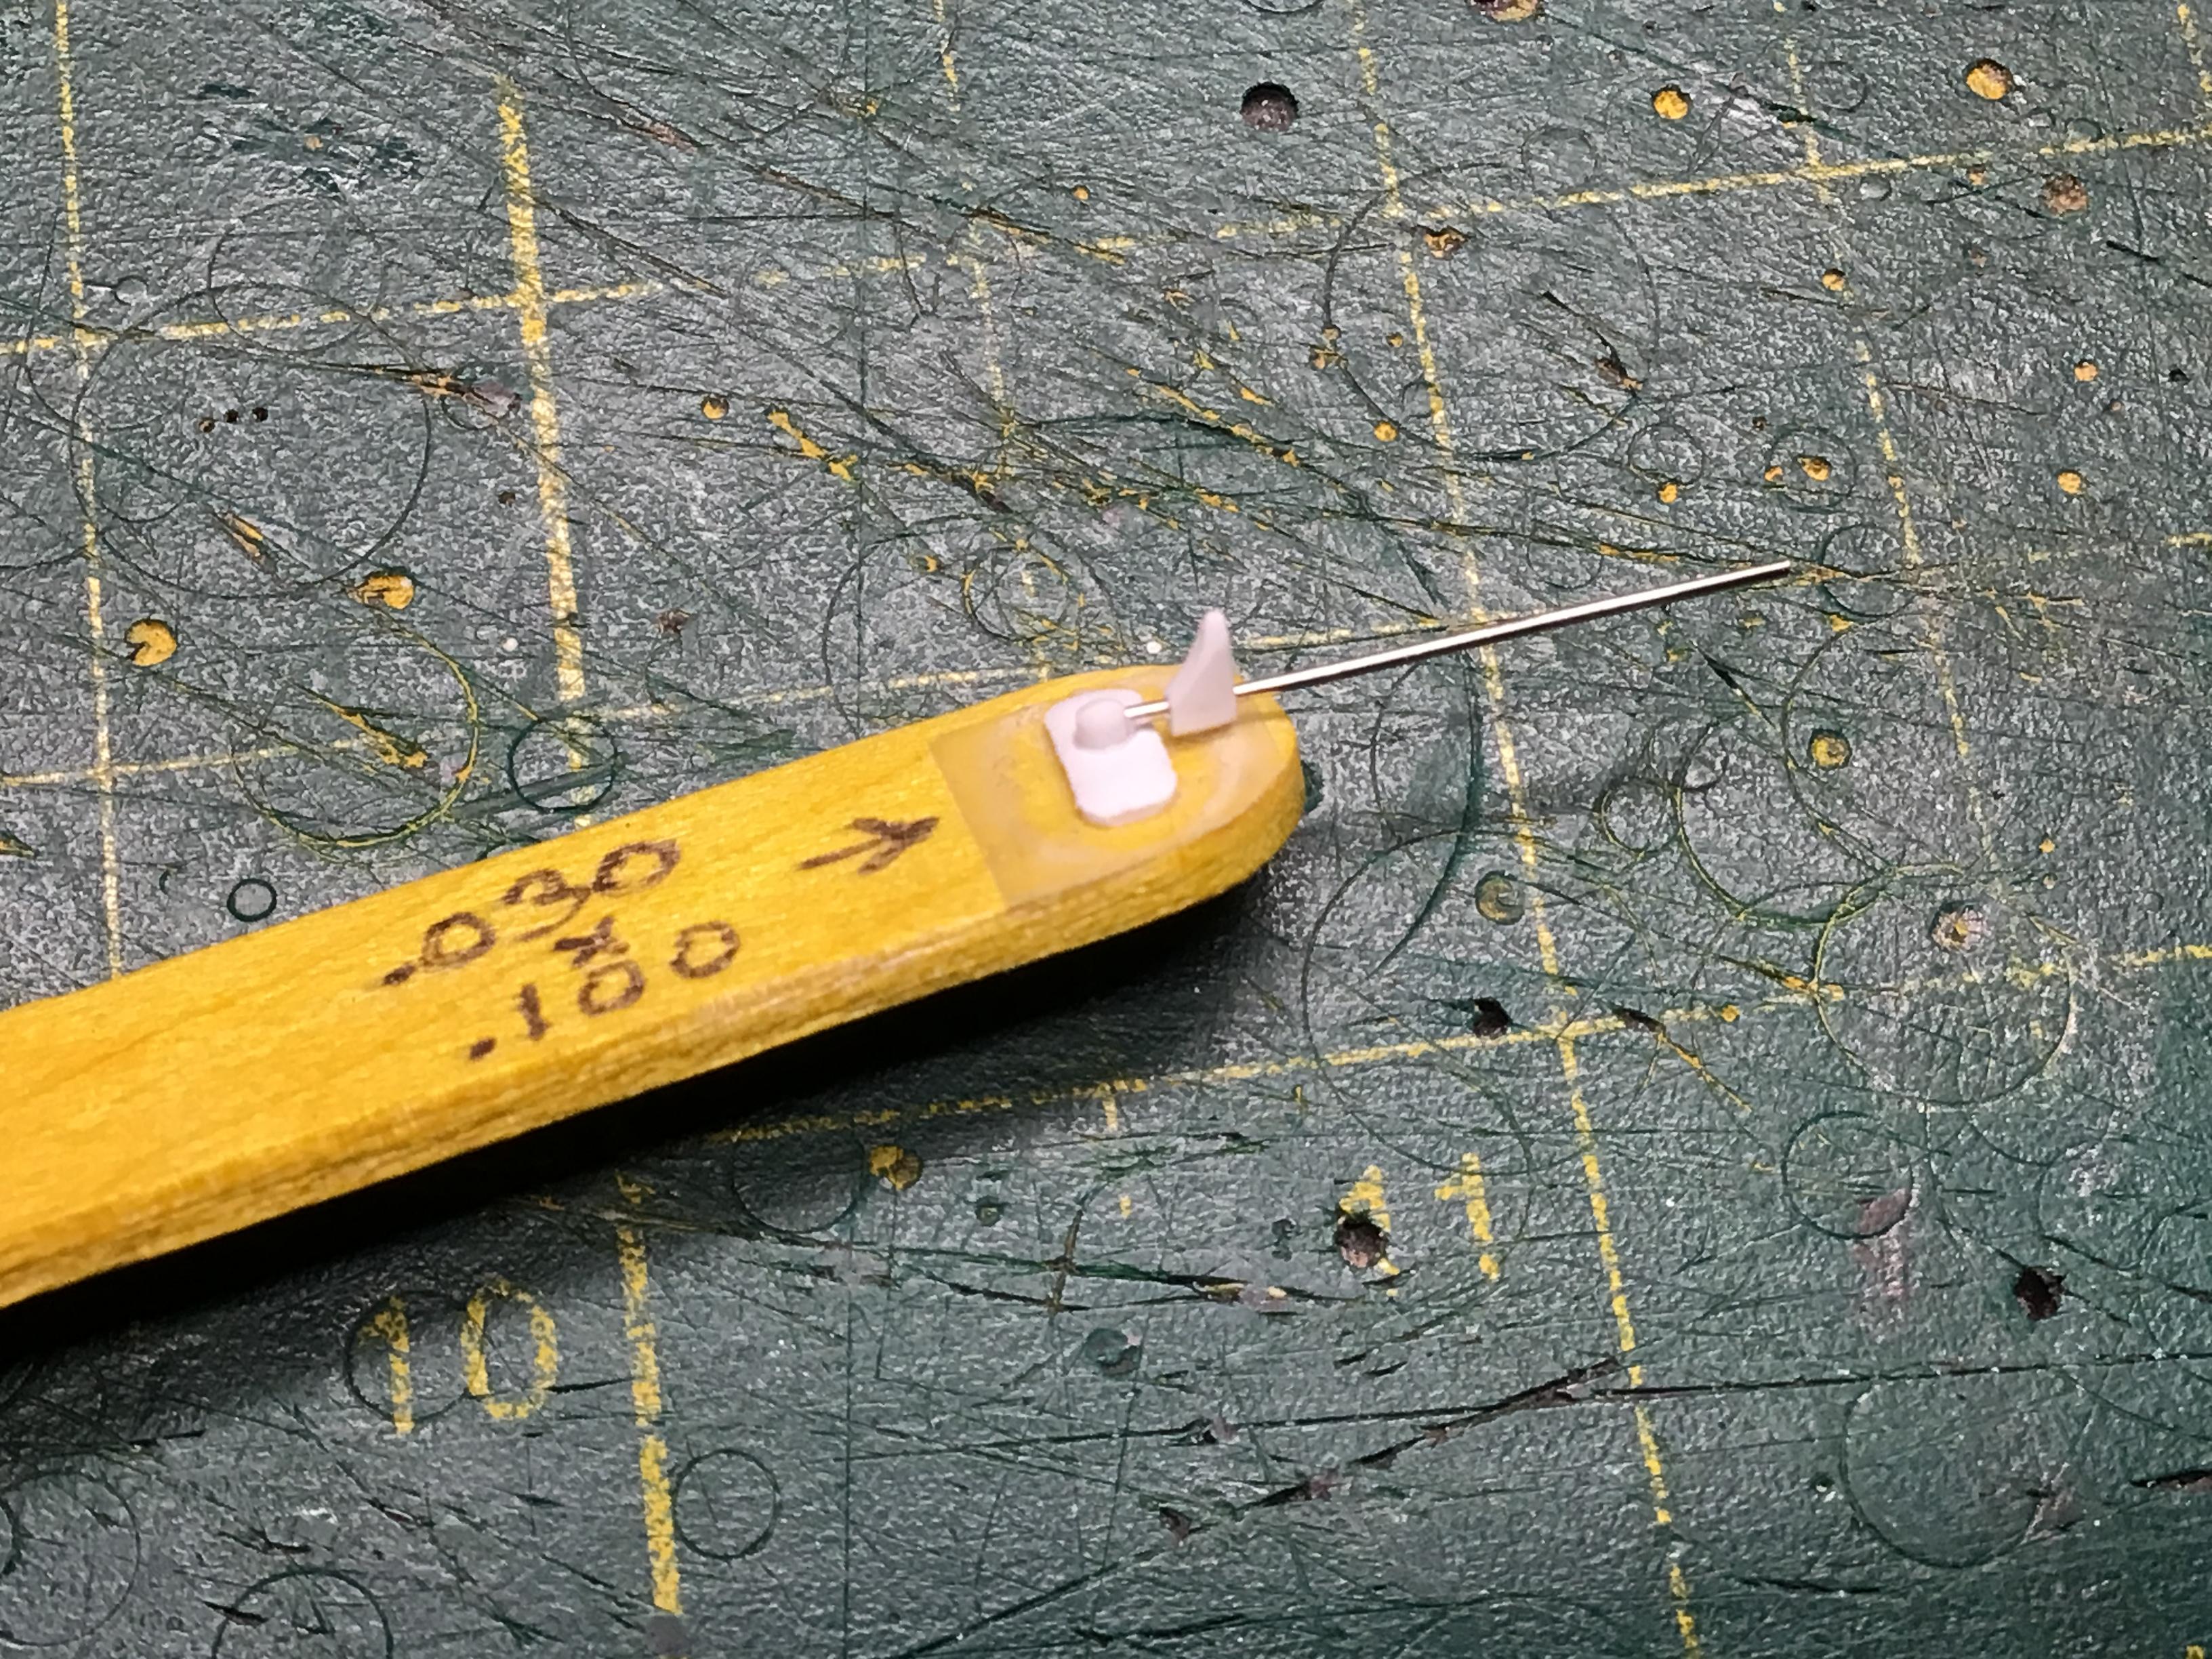
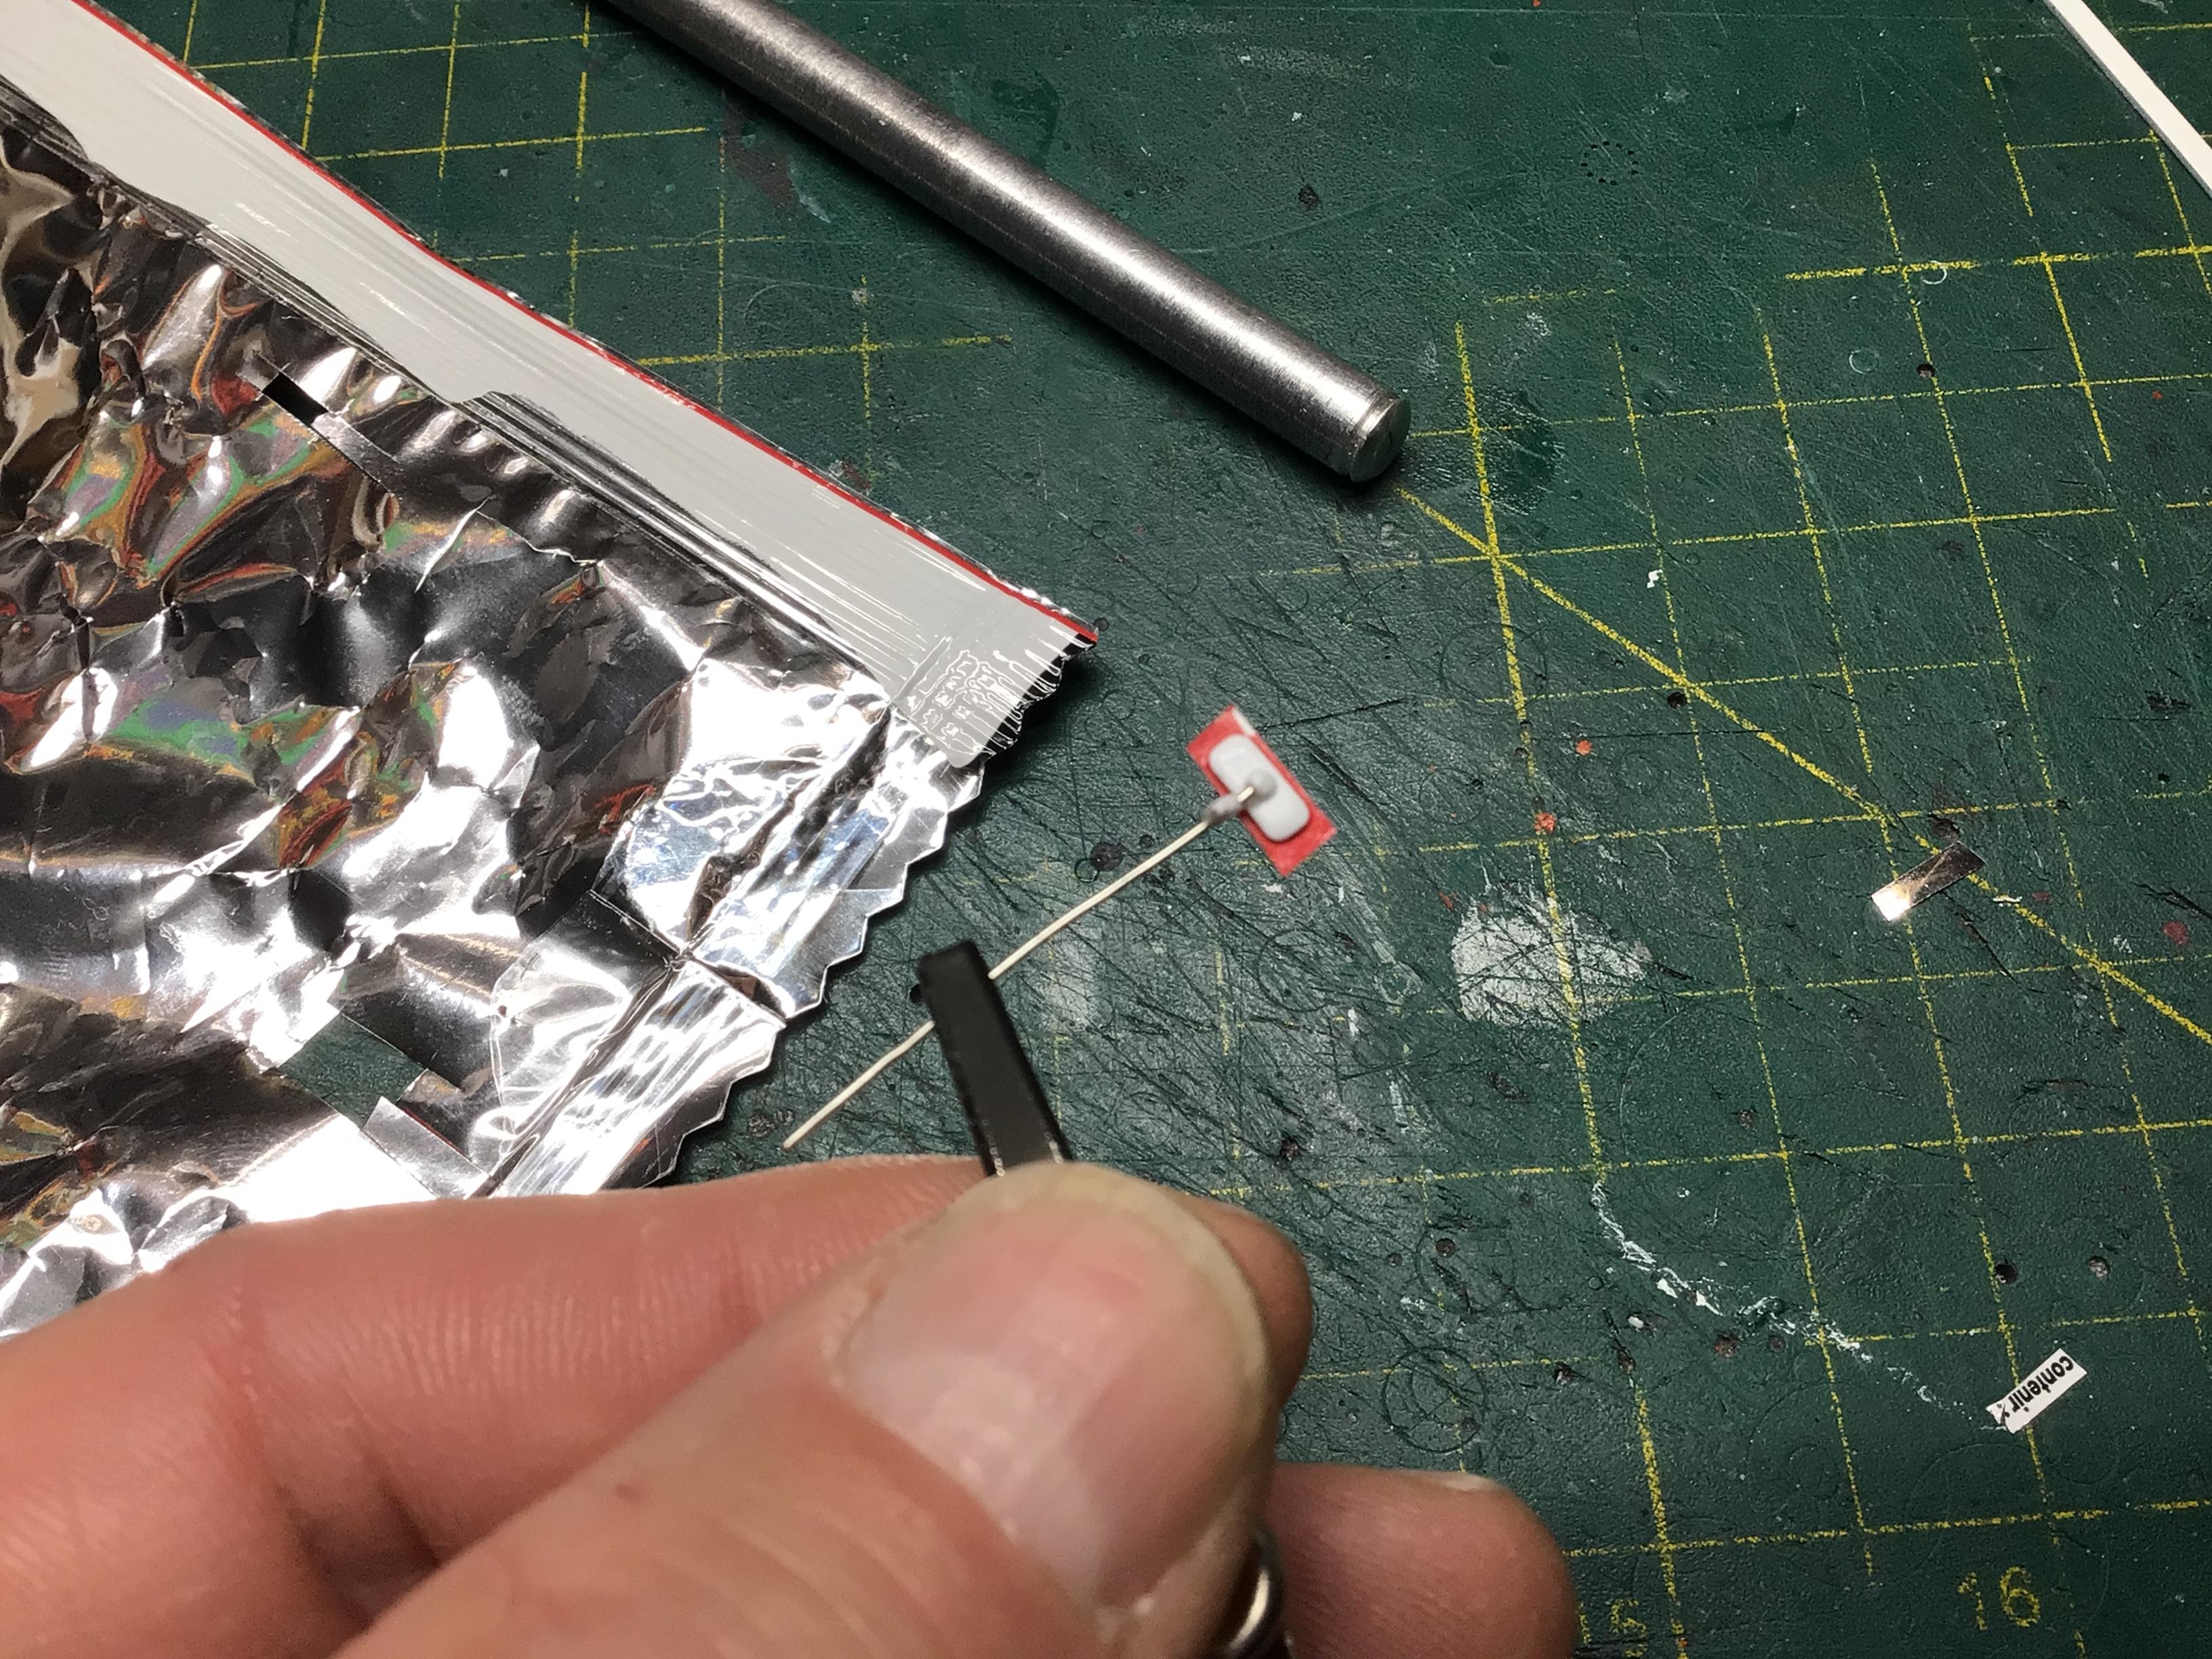
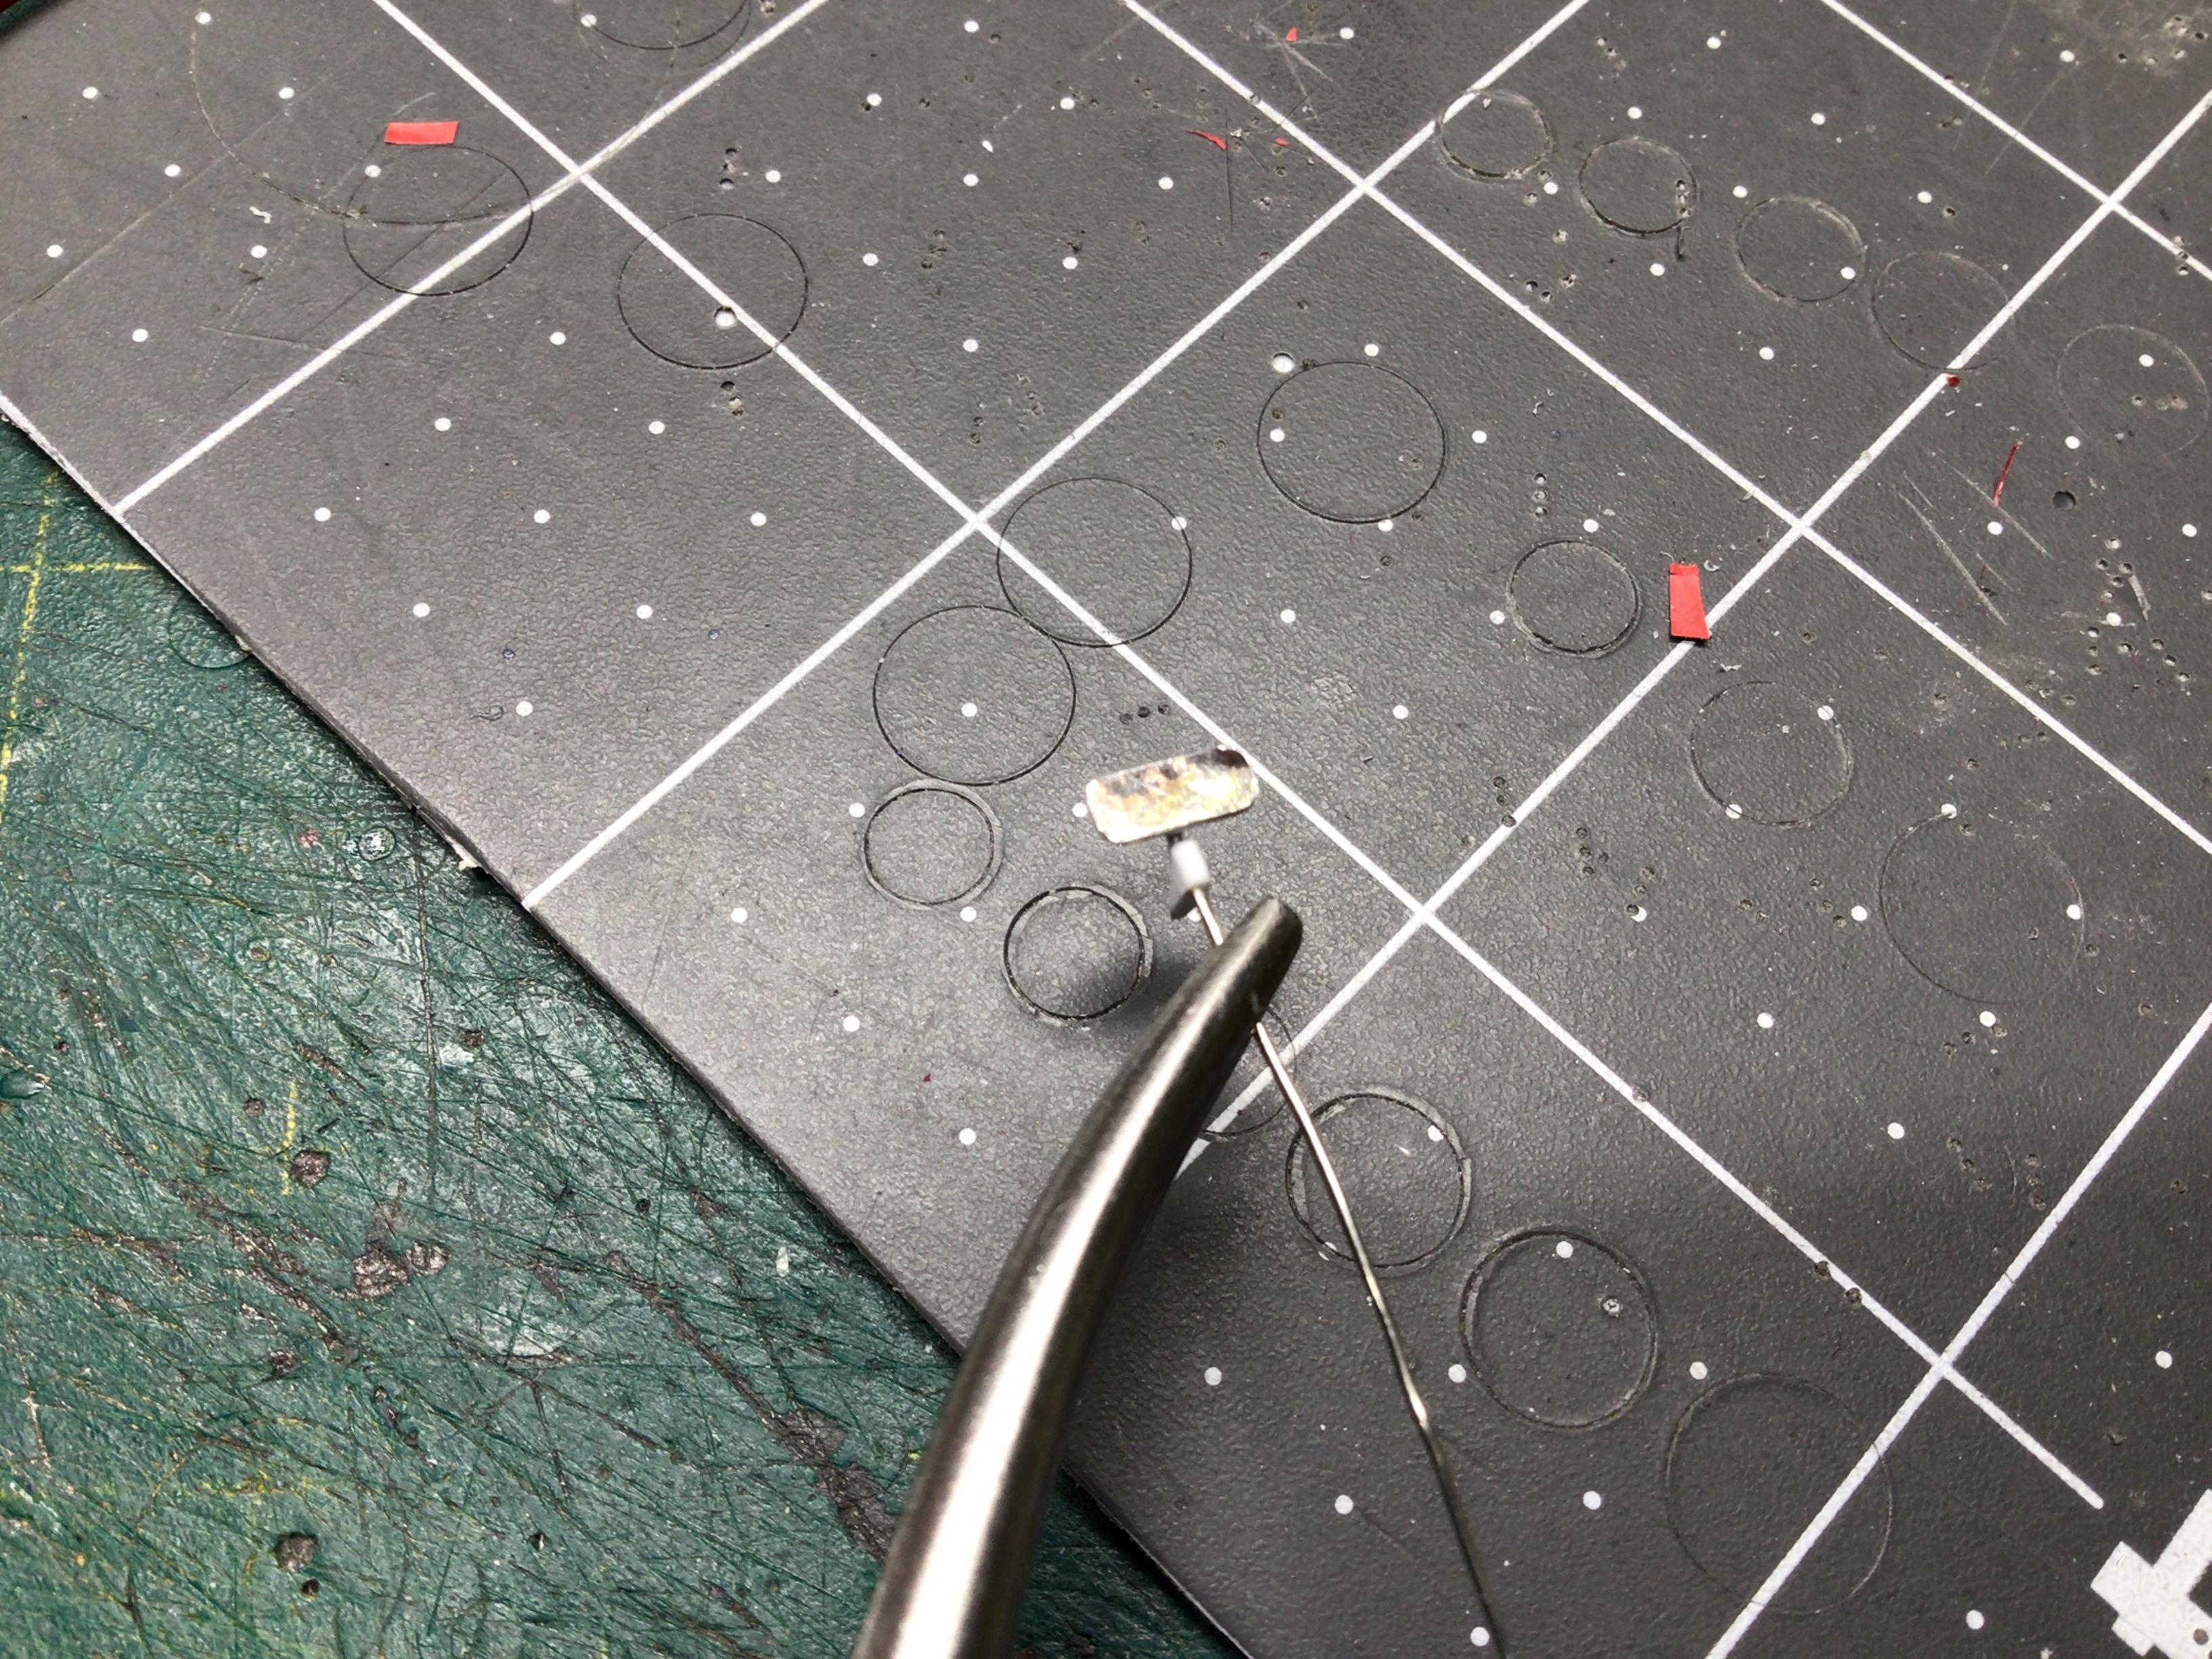
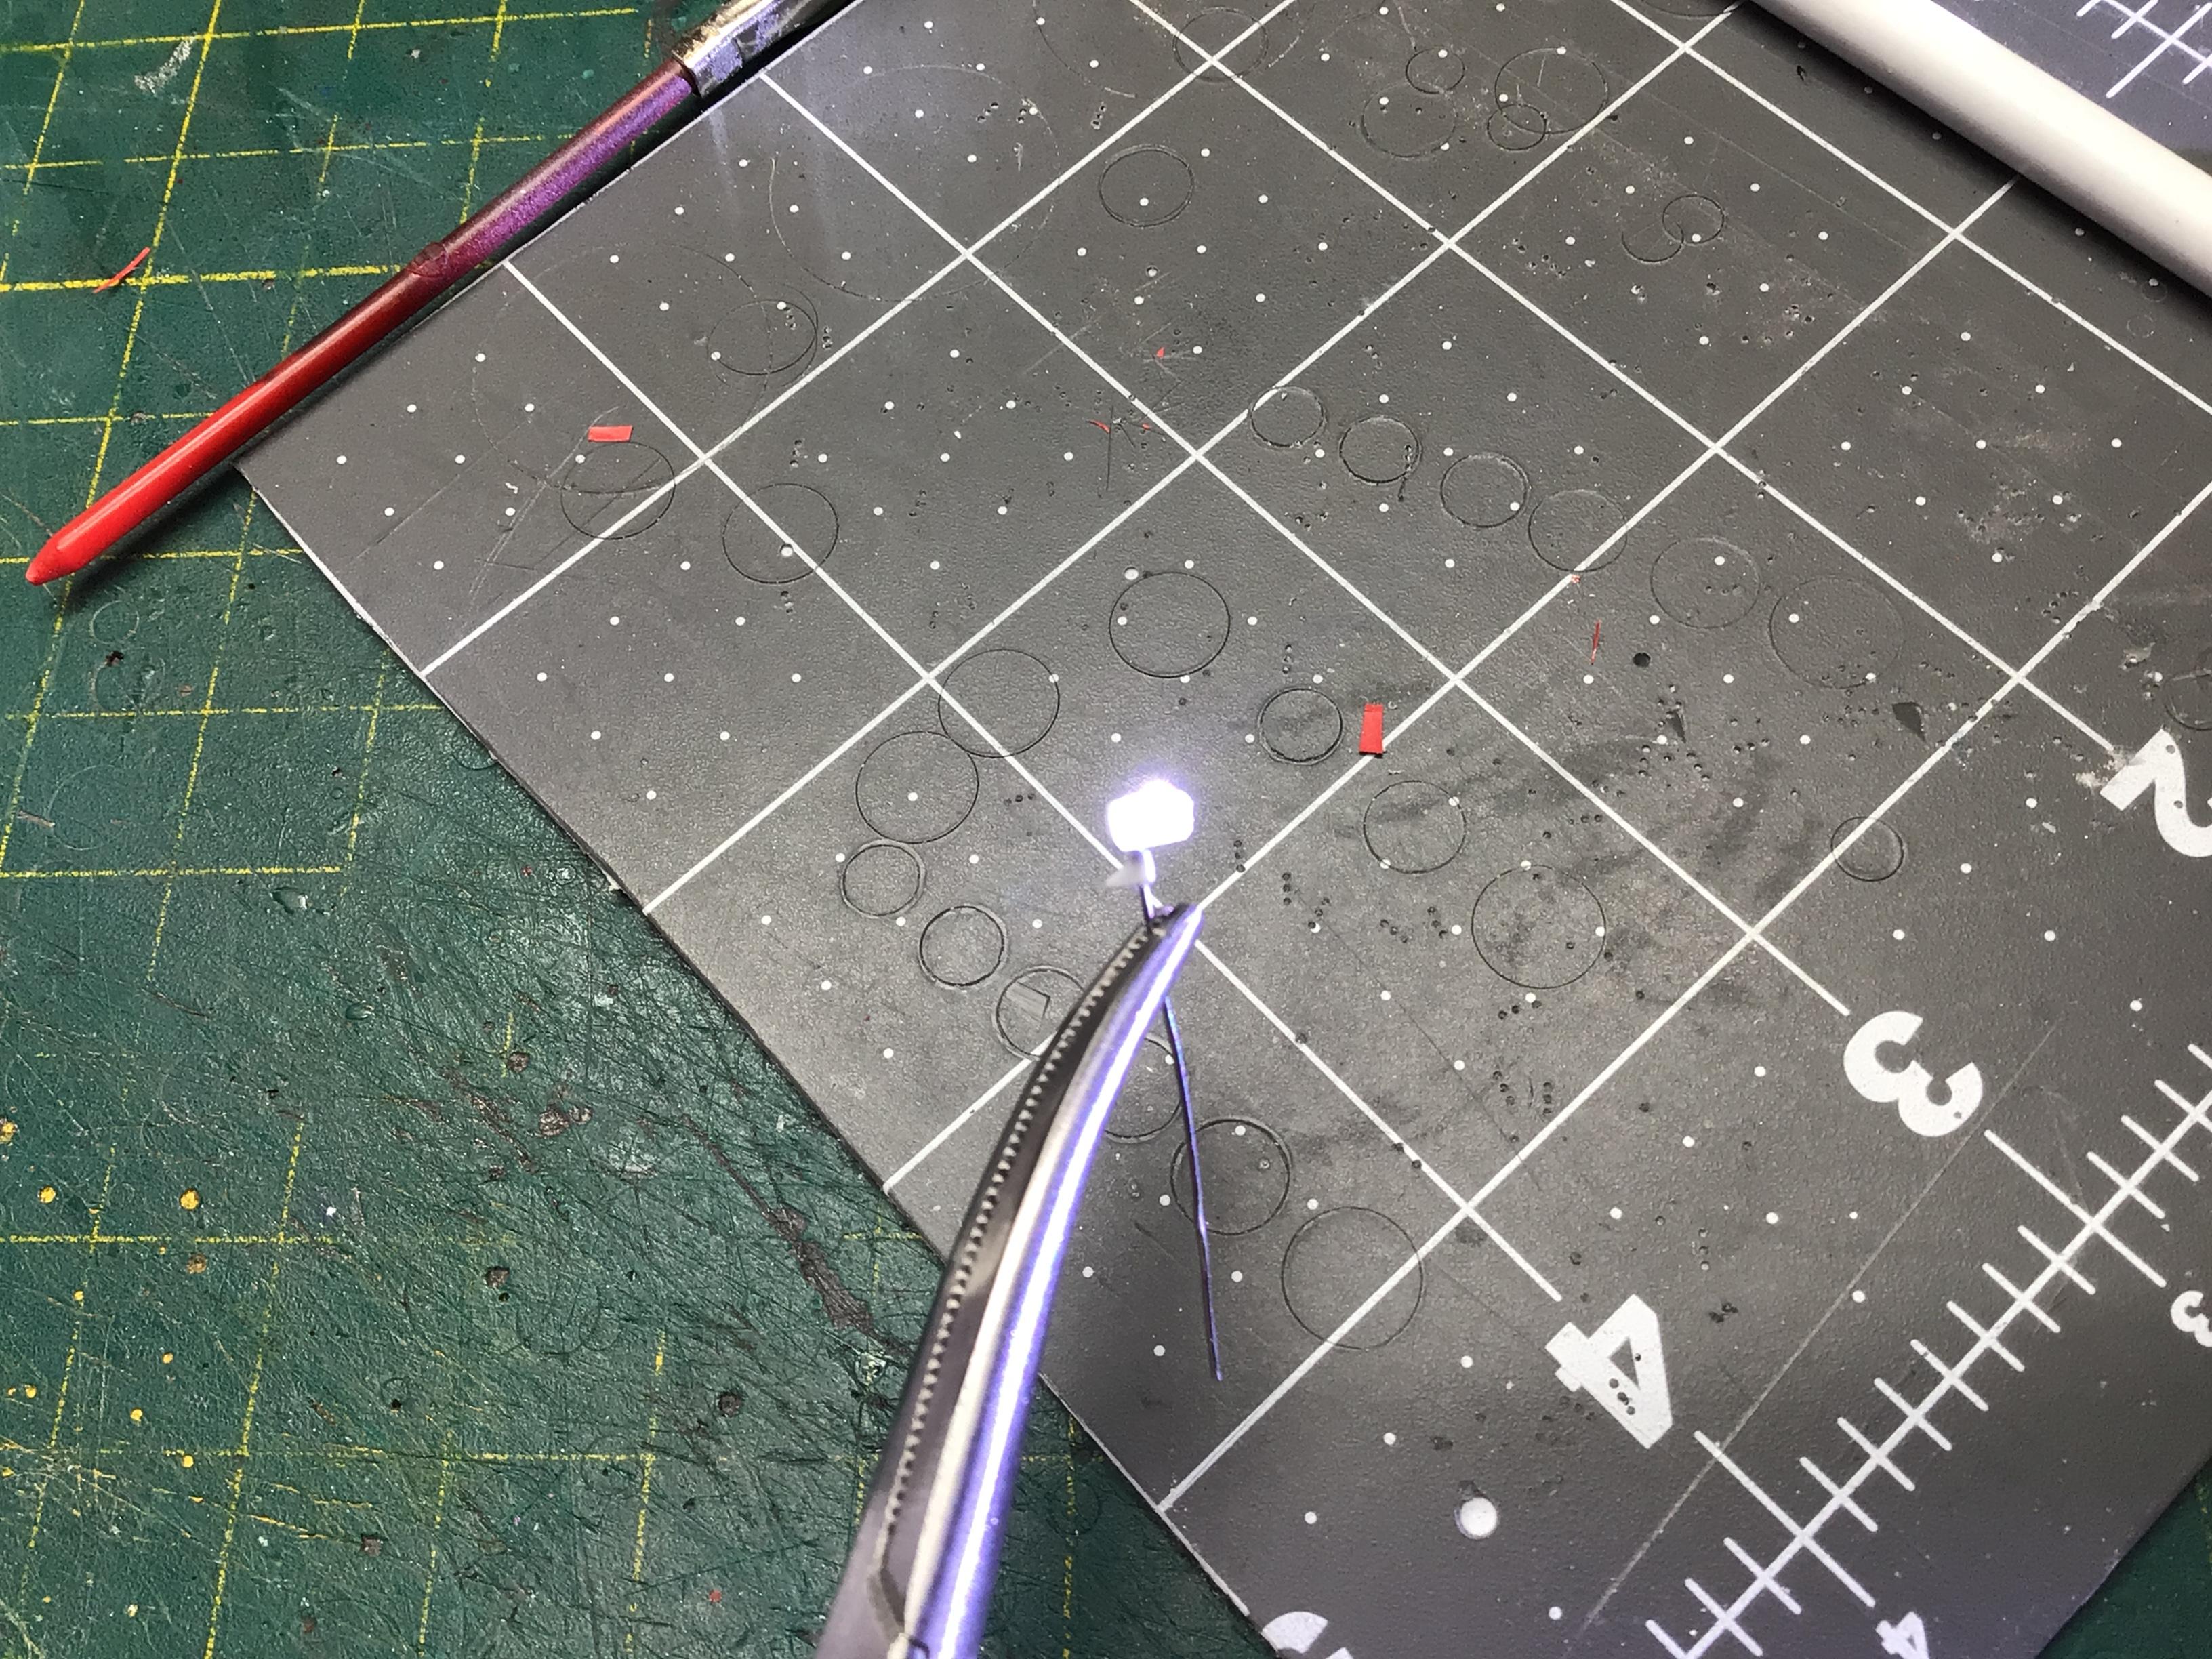
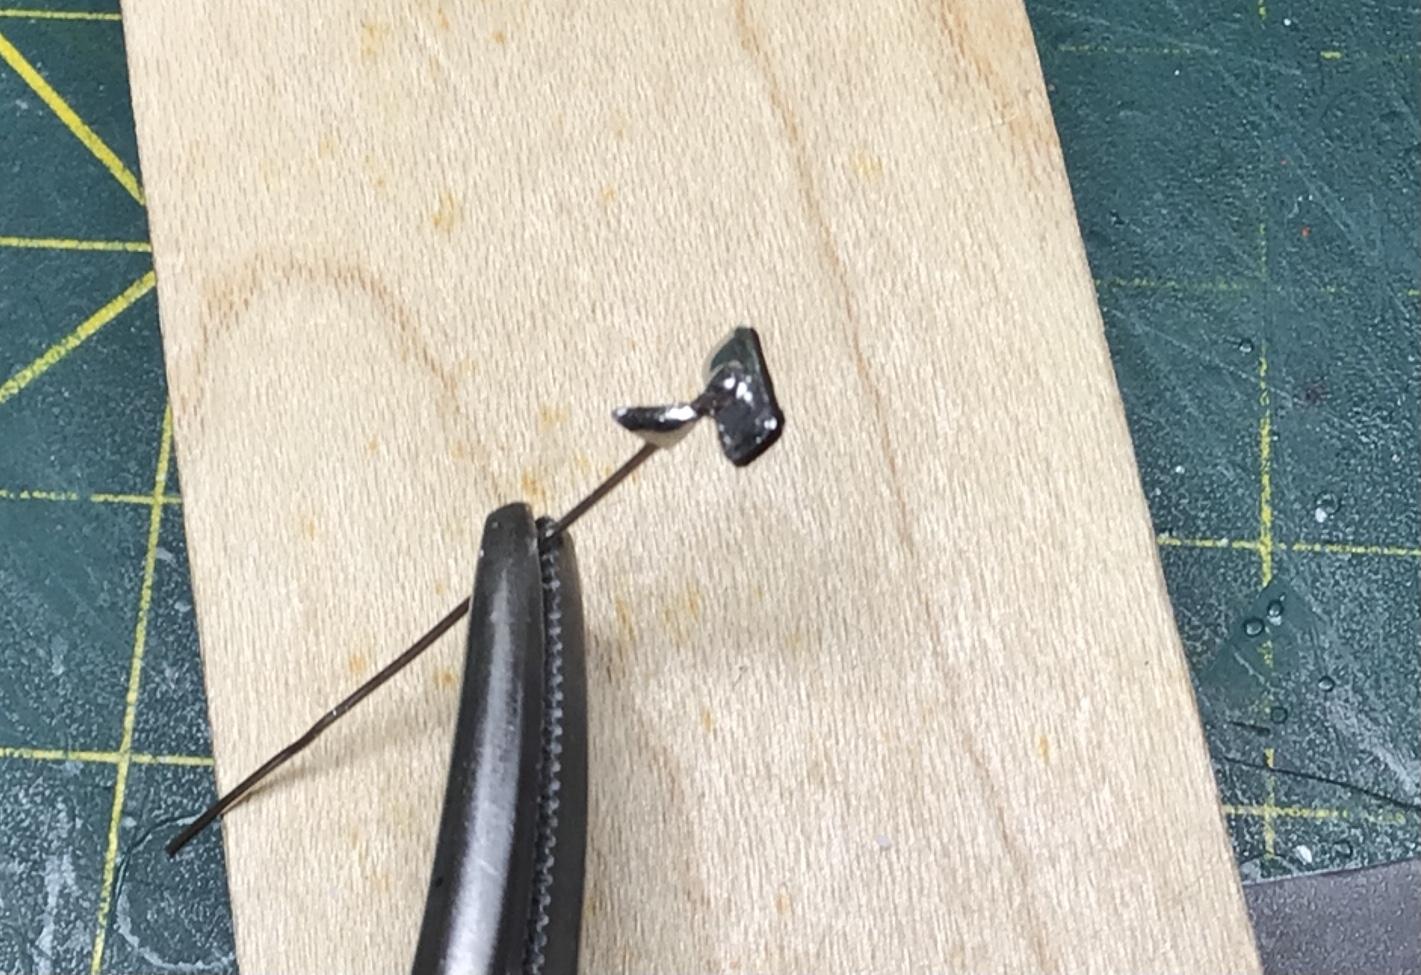
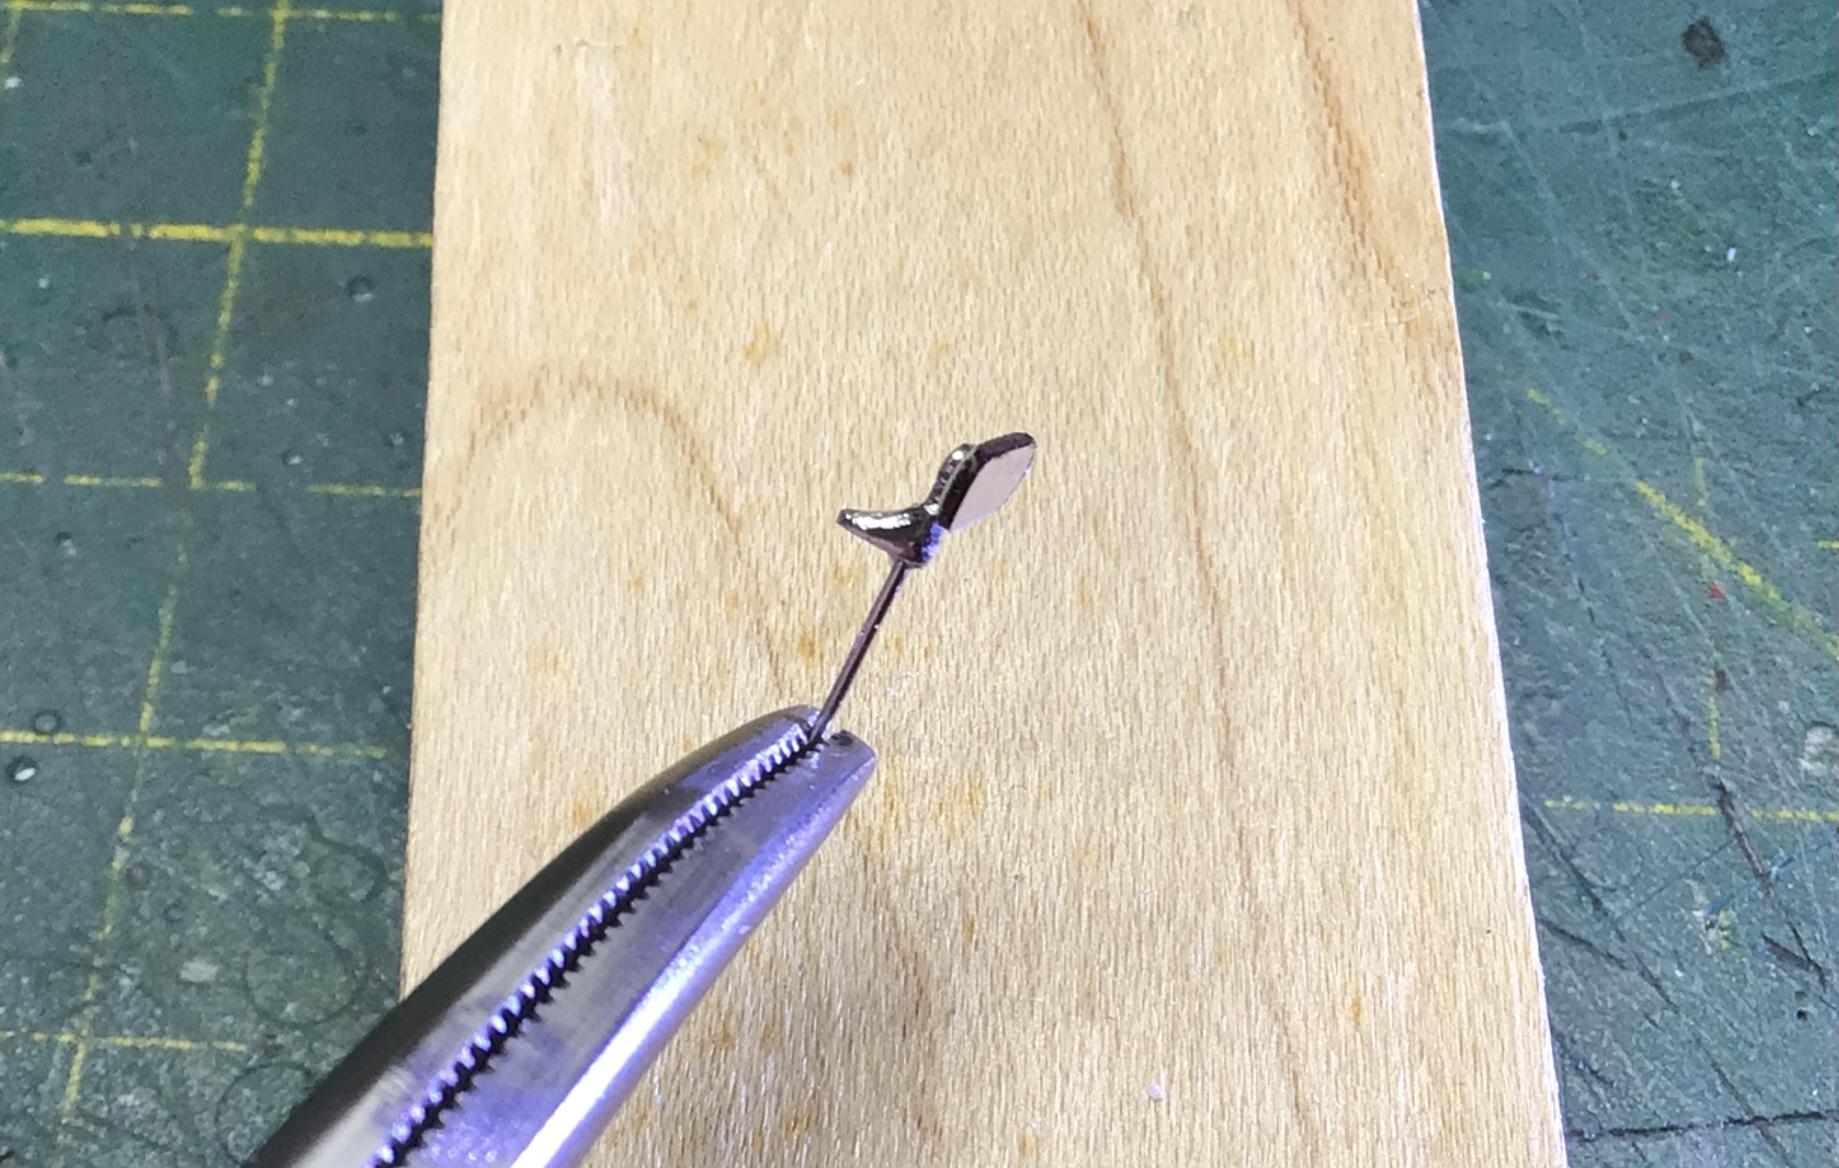
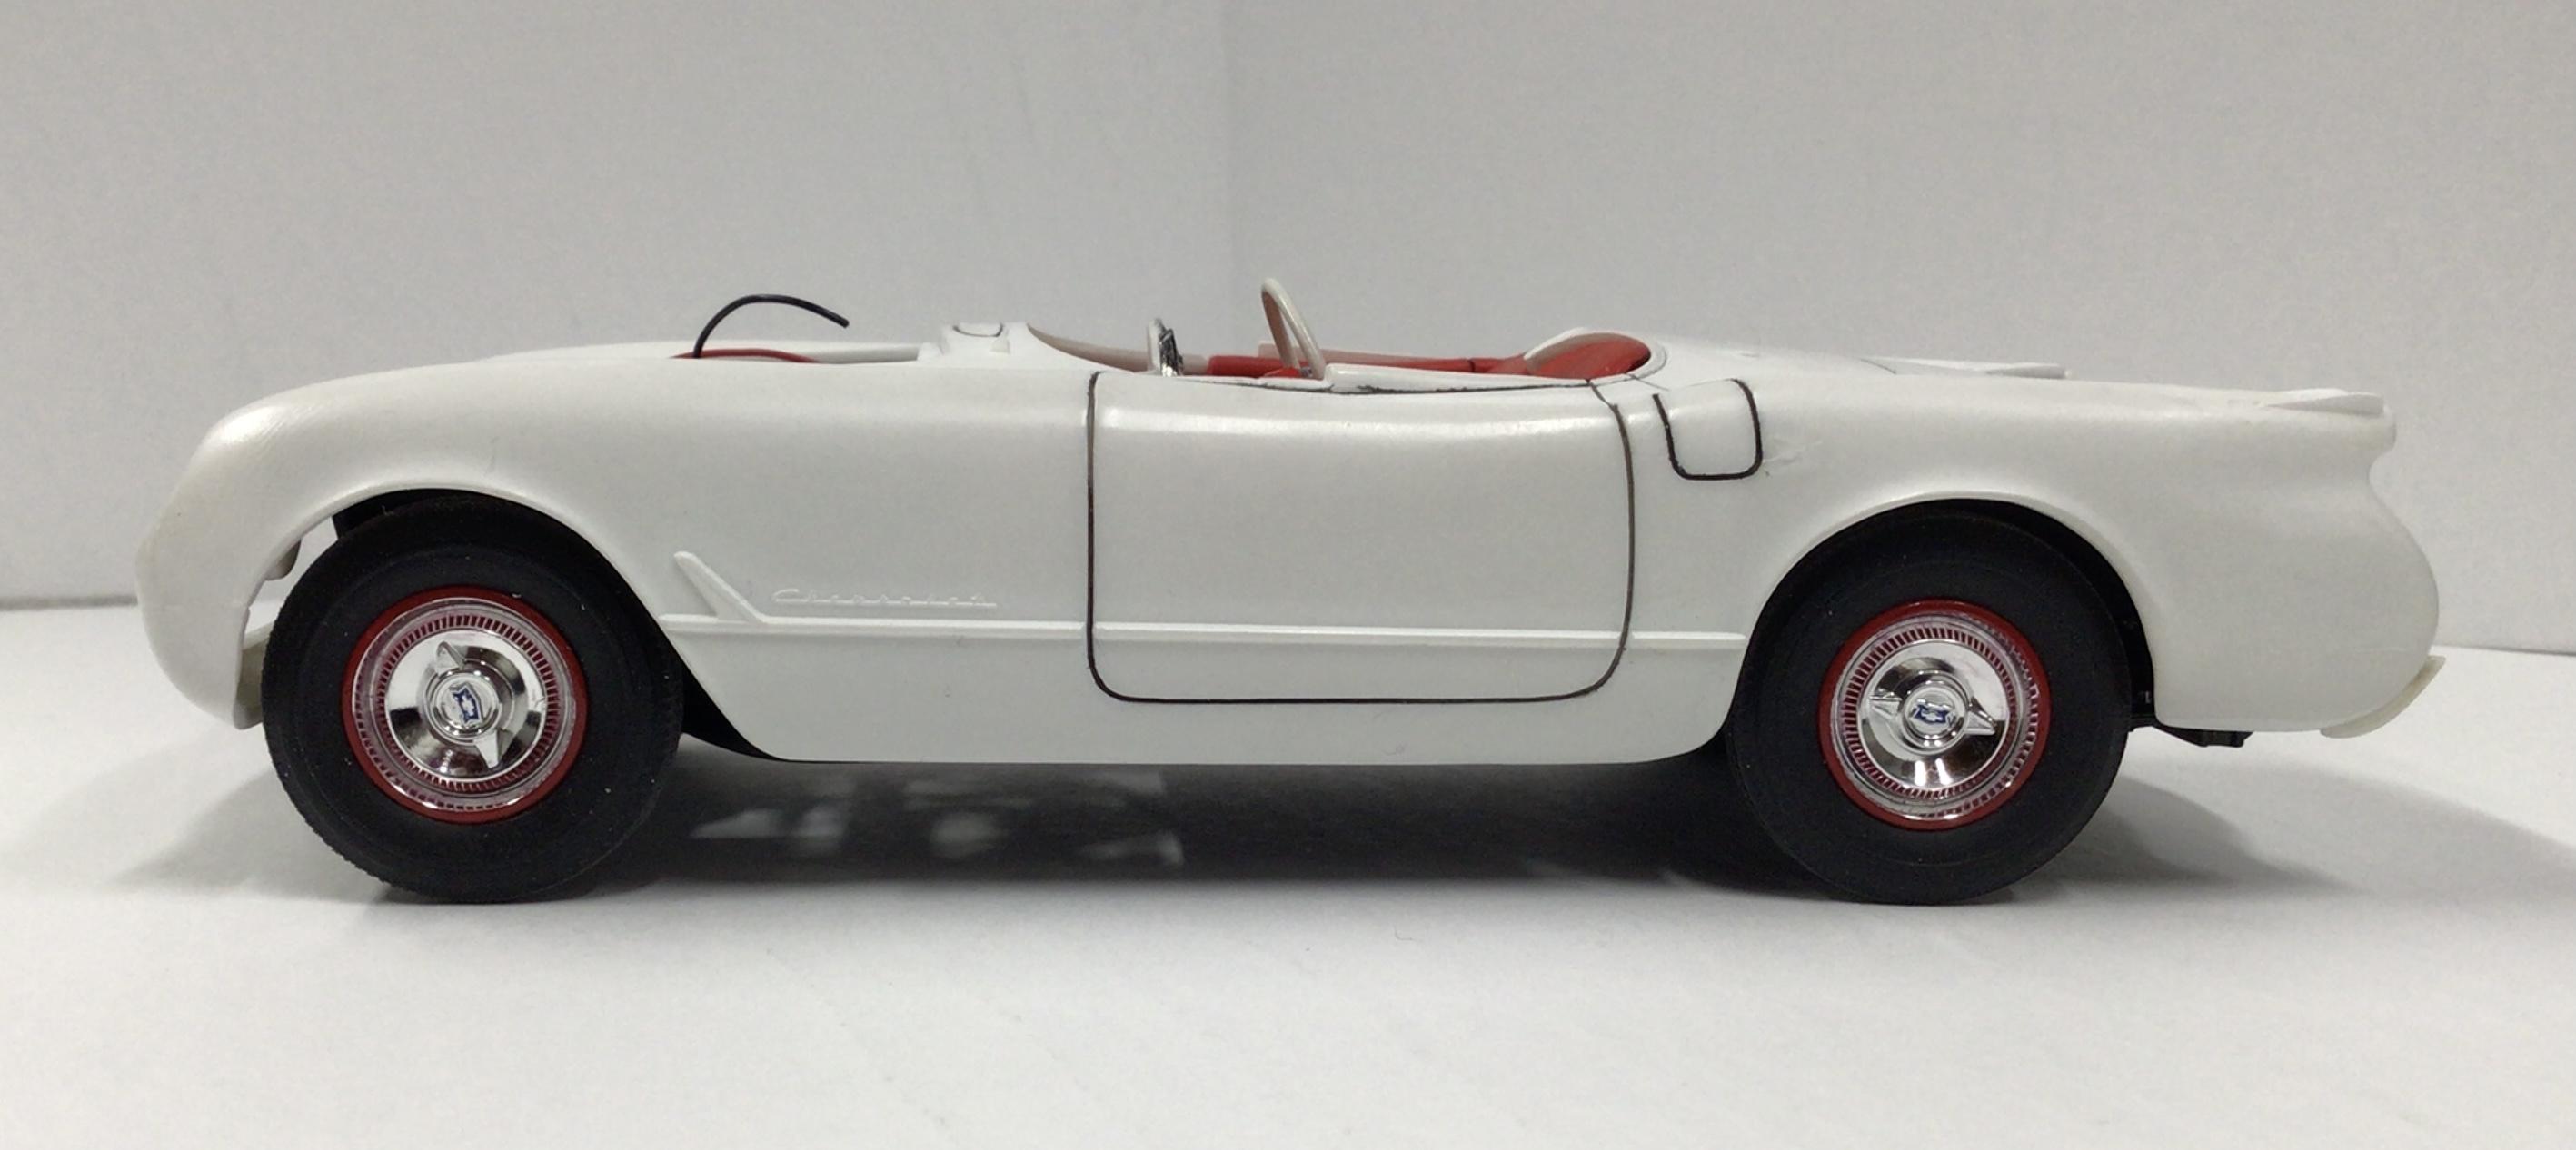
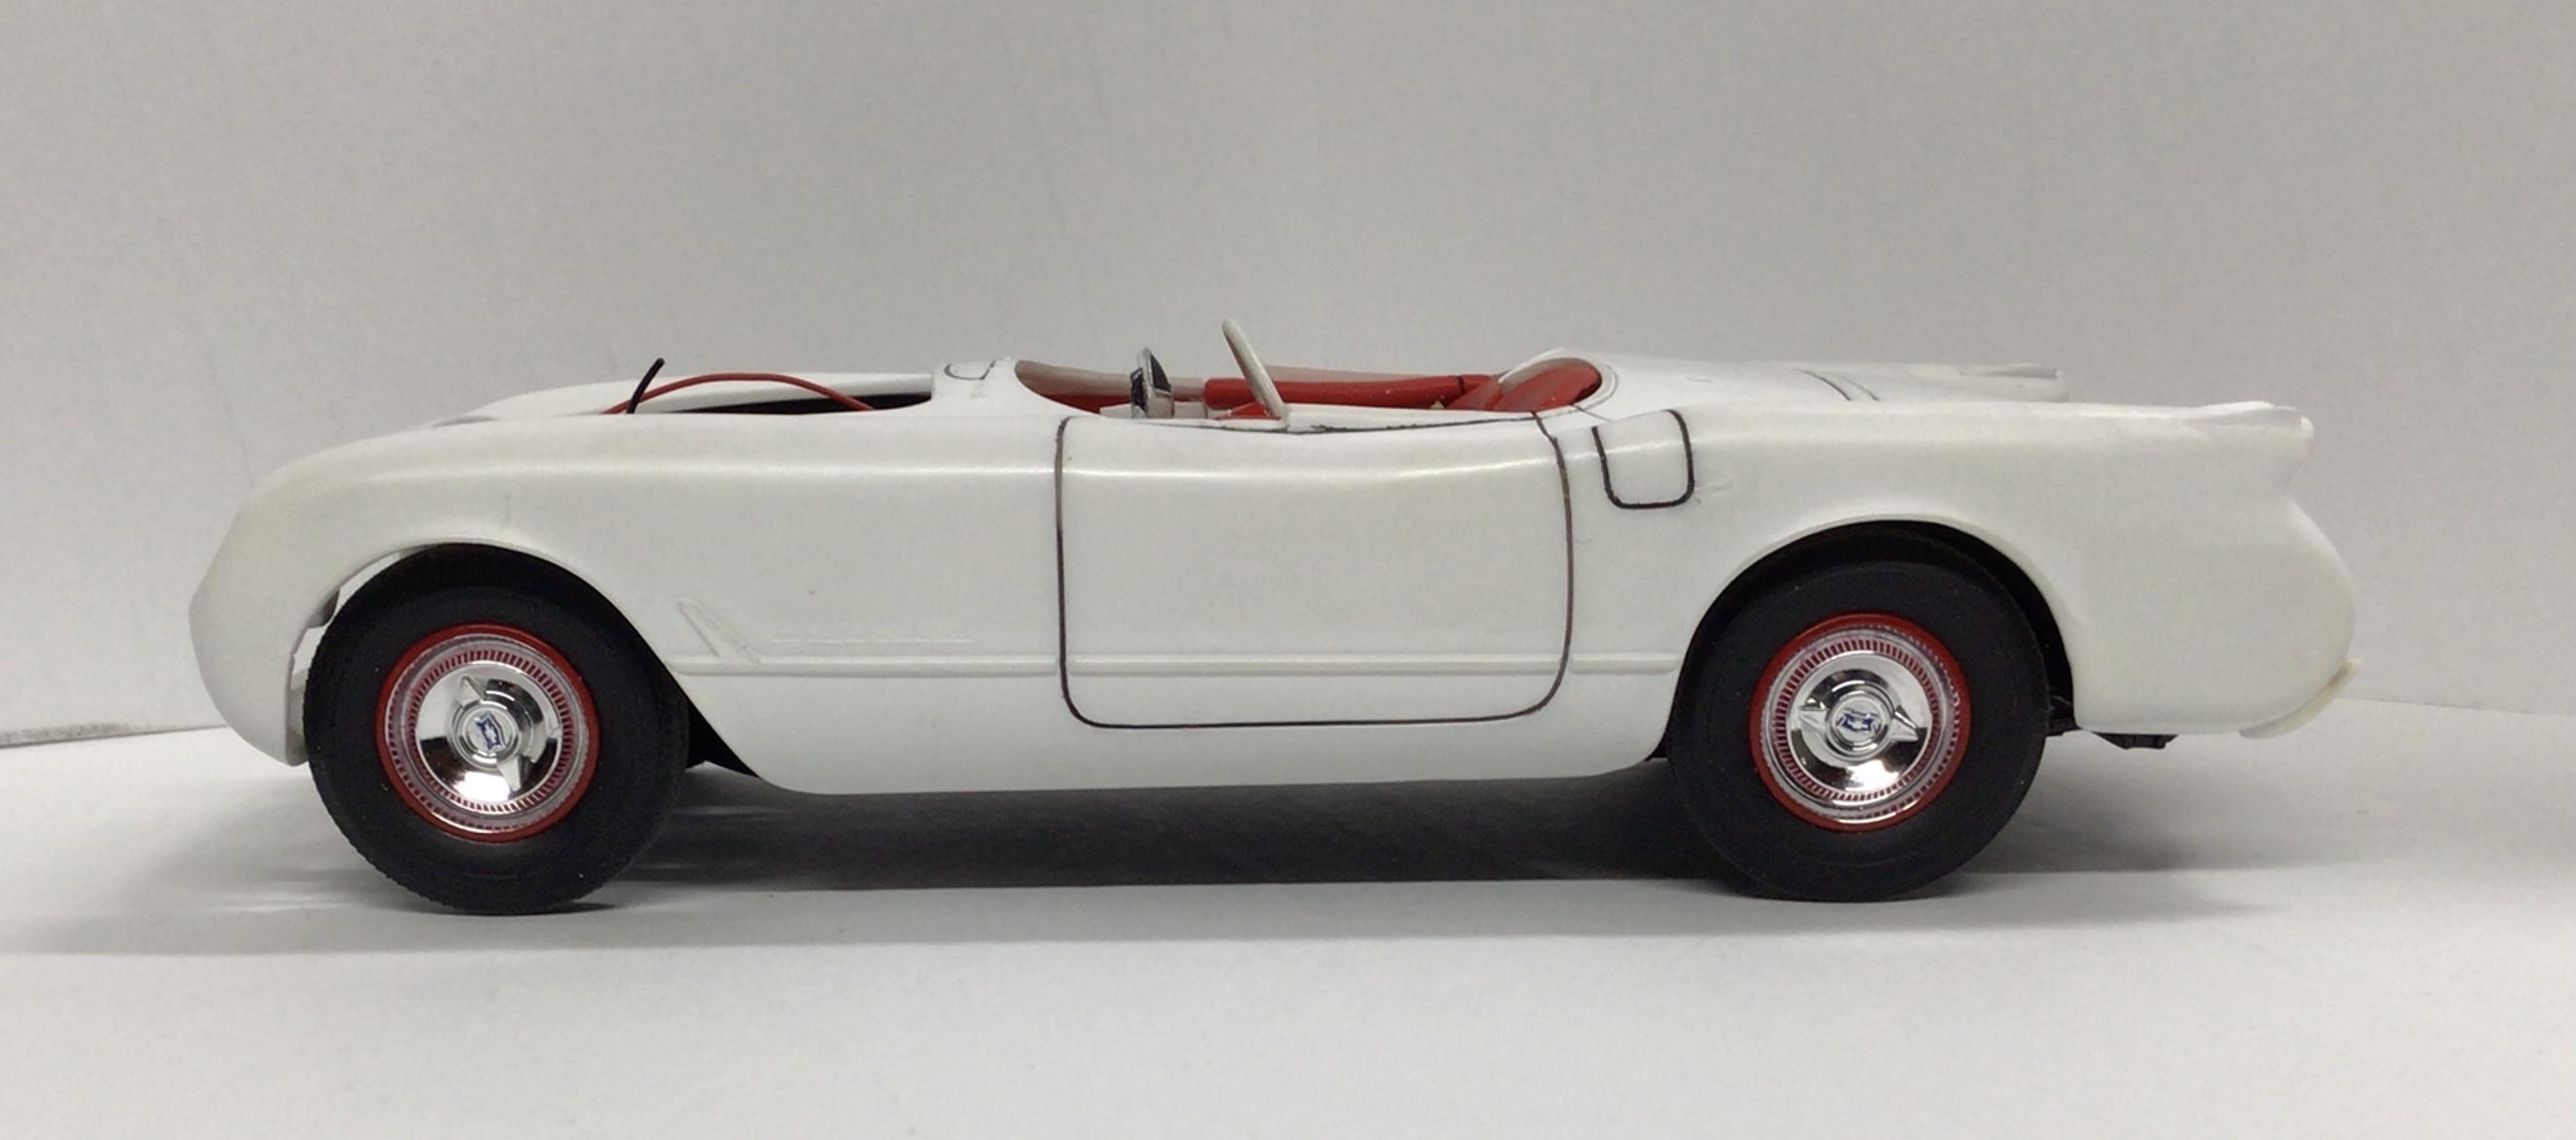
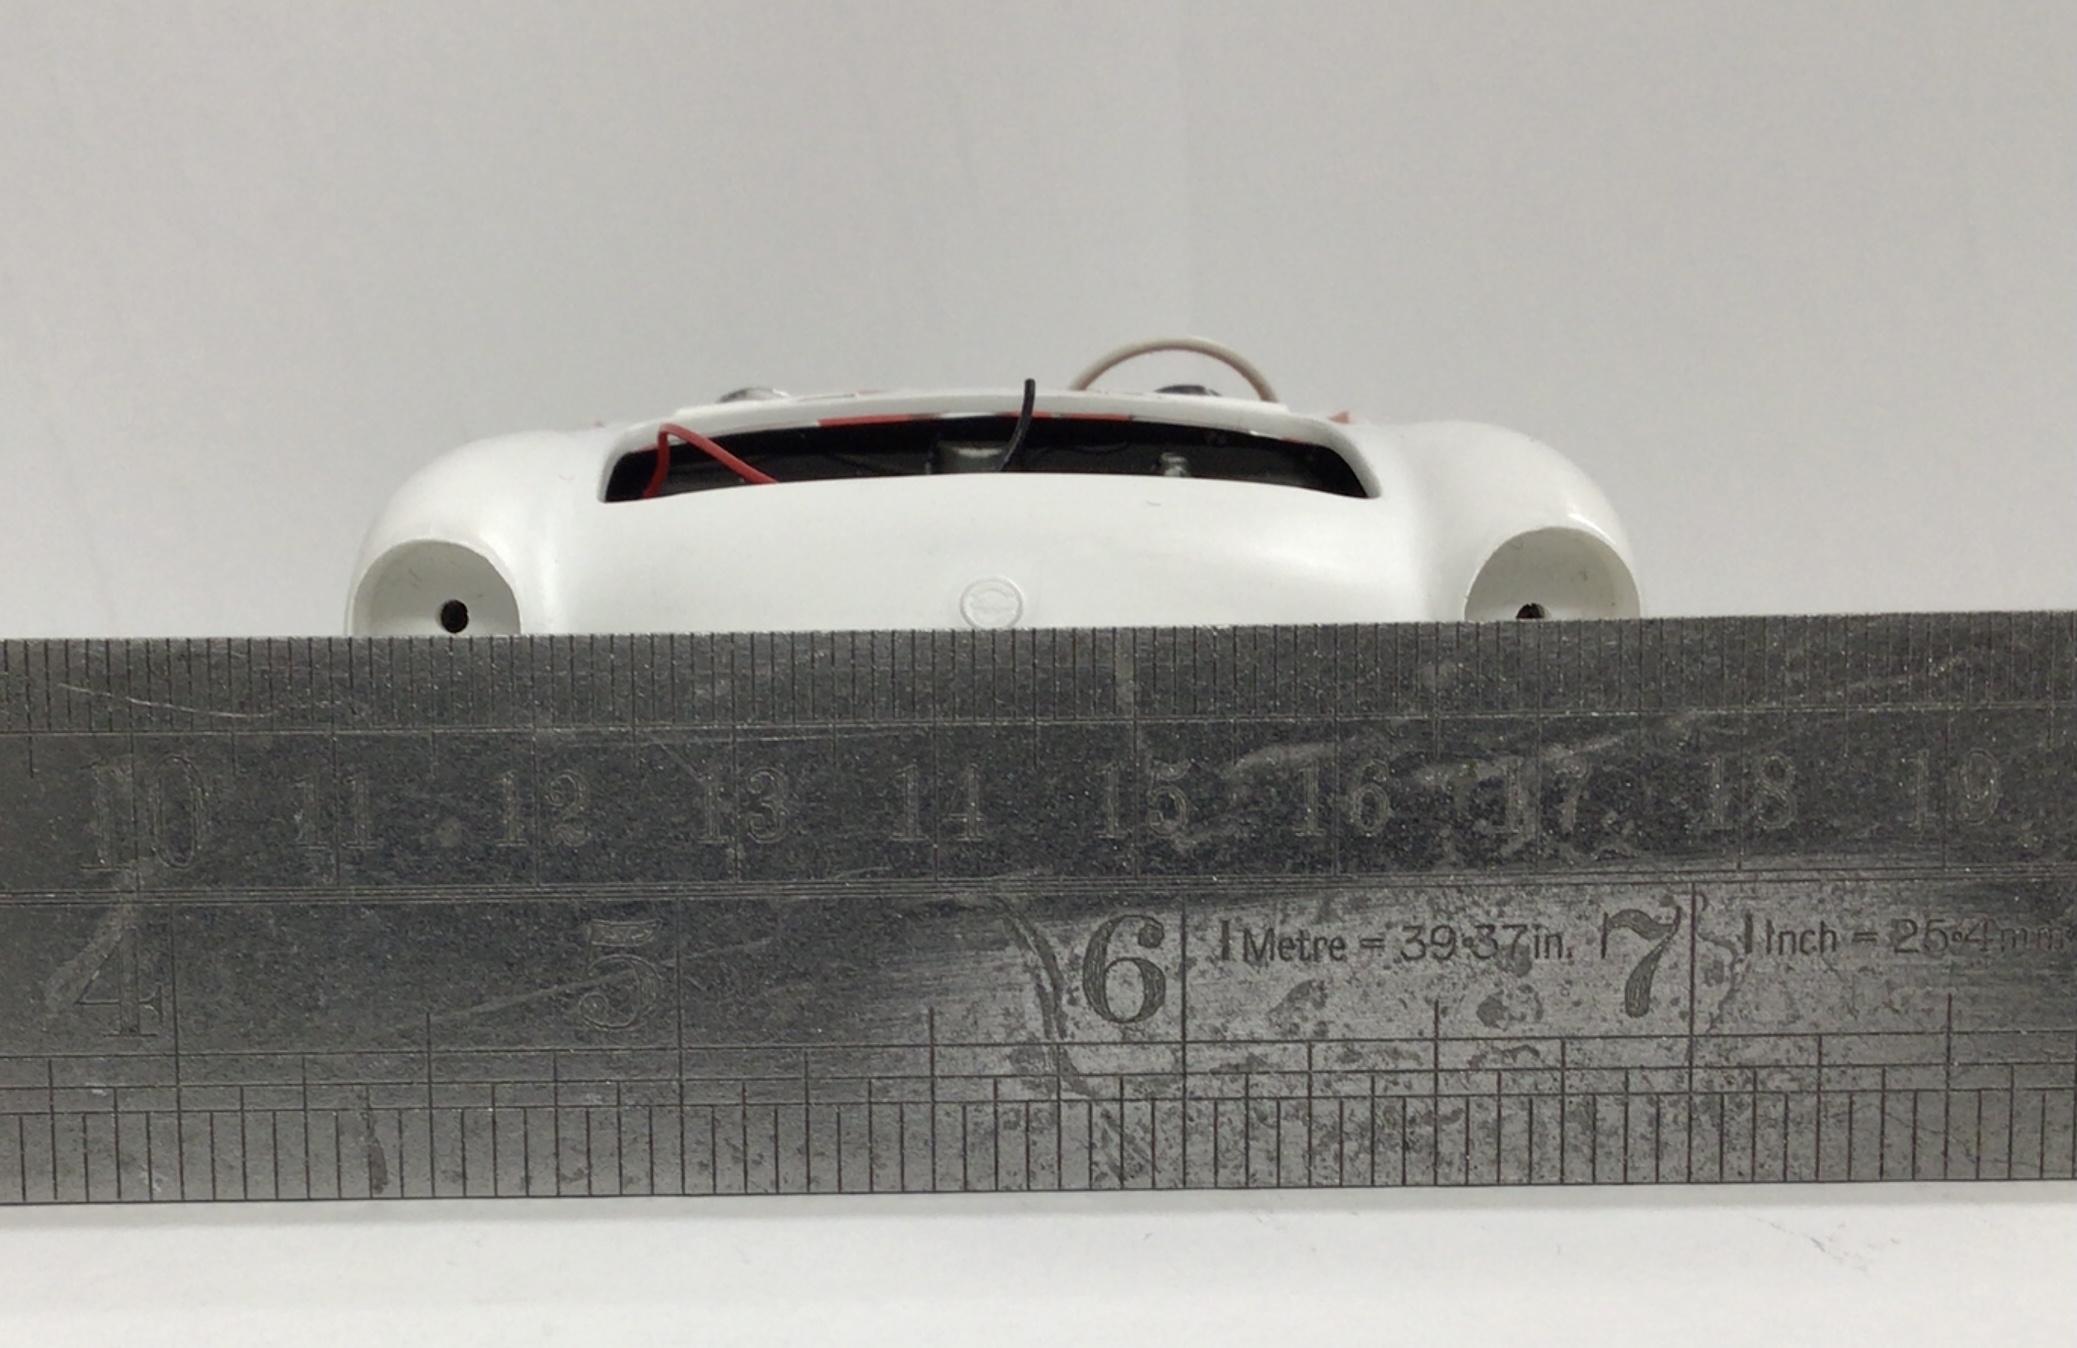
A lot of kits have ugly, lumpy mirrors.? I decided to scratch build one for The AMT Corvette I am working on. I wish I could find the kit piece to compare, which had a big ejection pin mark right on the face…but it somehow disappeared.? I started wth a piece of .030”x.100” evergreen strip 1/4” long. This makes a 2-1/2”x 6-1/4” mirror which should be close to the correct size? Chamfer the back edges and round the corners a bit and drill a shallow .050” hole to receive a chunk of evergreen rod. Then drill a hole in the .050” stub to accept a piece of .020” beading wire. A pin or brass would work as well, but I figure the soft beading wire can be tweaked slightly after installation for angle adjustment if needed. The wire will also double as a mounting pin. Next, drill a .0225”(#74) hole in a piece of styrene for the base. Cut and file the base to shape. The farther away you get, the better it looks.? Add some foil candy wrapper to the face with CA, and carefully trim to size with a sharp blade. A touch of Molotow and it’s finished. I ran a sharpie around the edge to give some contrast and it sorta looks like a mounting gasket.? This could easily be a side mirror too by adjusting the size of the mirror, or using a round slug for the mirror. If anyone has any alternate tips or techniques, or just pics of your scratch built mirrors…please post ‘em up.?
-
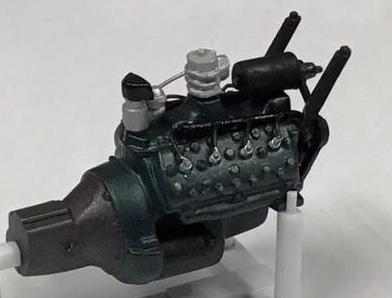
This one didn’t either. I just used some evergreen rod bent to fit and drilled holes at an angle to stub the plug wires into.
-
My first WIP here; '70 Dodge Challenger T/A, Parts
NOBLNG replied to Roadrunner's topic in WIP: Model Cars
Great detailing going on here Kevin.? -
1962 Rolls Royce Silver Cloud II by Minicraft Models: WIP
NOBLNG replied to David G.'s topic in WIP: Model Cars
The body is looking good now David. Nice work!? -
That paint and foil work came out looking awesome Andreas!? And I am really loving all the chassis detailing too.?
-
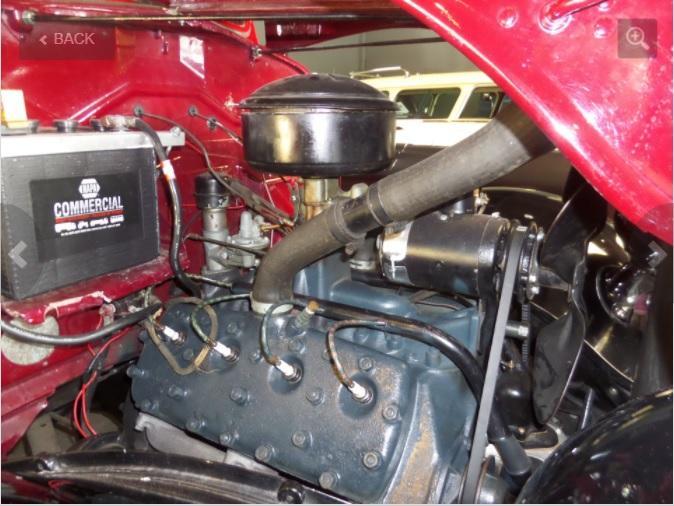
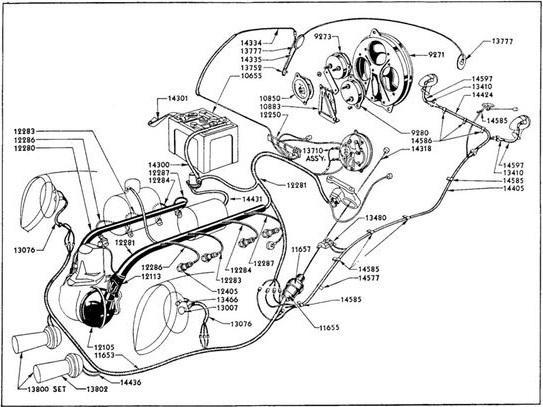
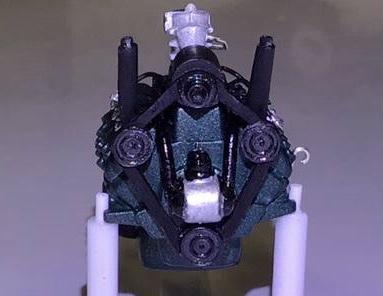
Here’s a couple pics of the AMT ‘36 Ford Coupe I did. Sorry about the crappy pics.? And a pic of the real thing and a schematic.
-
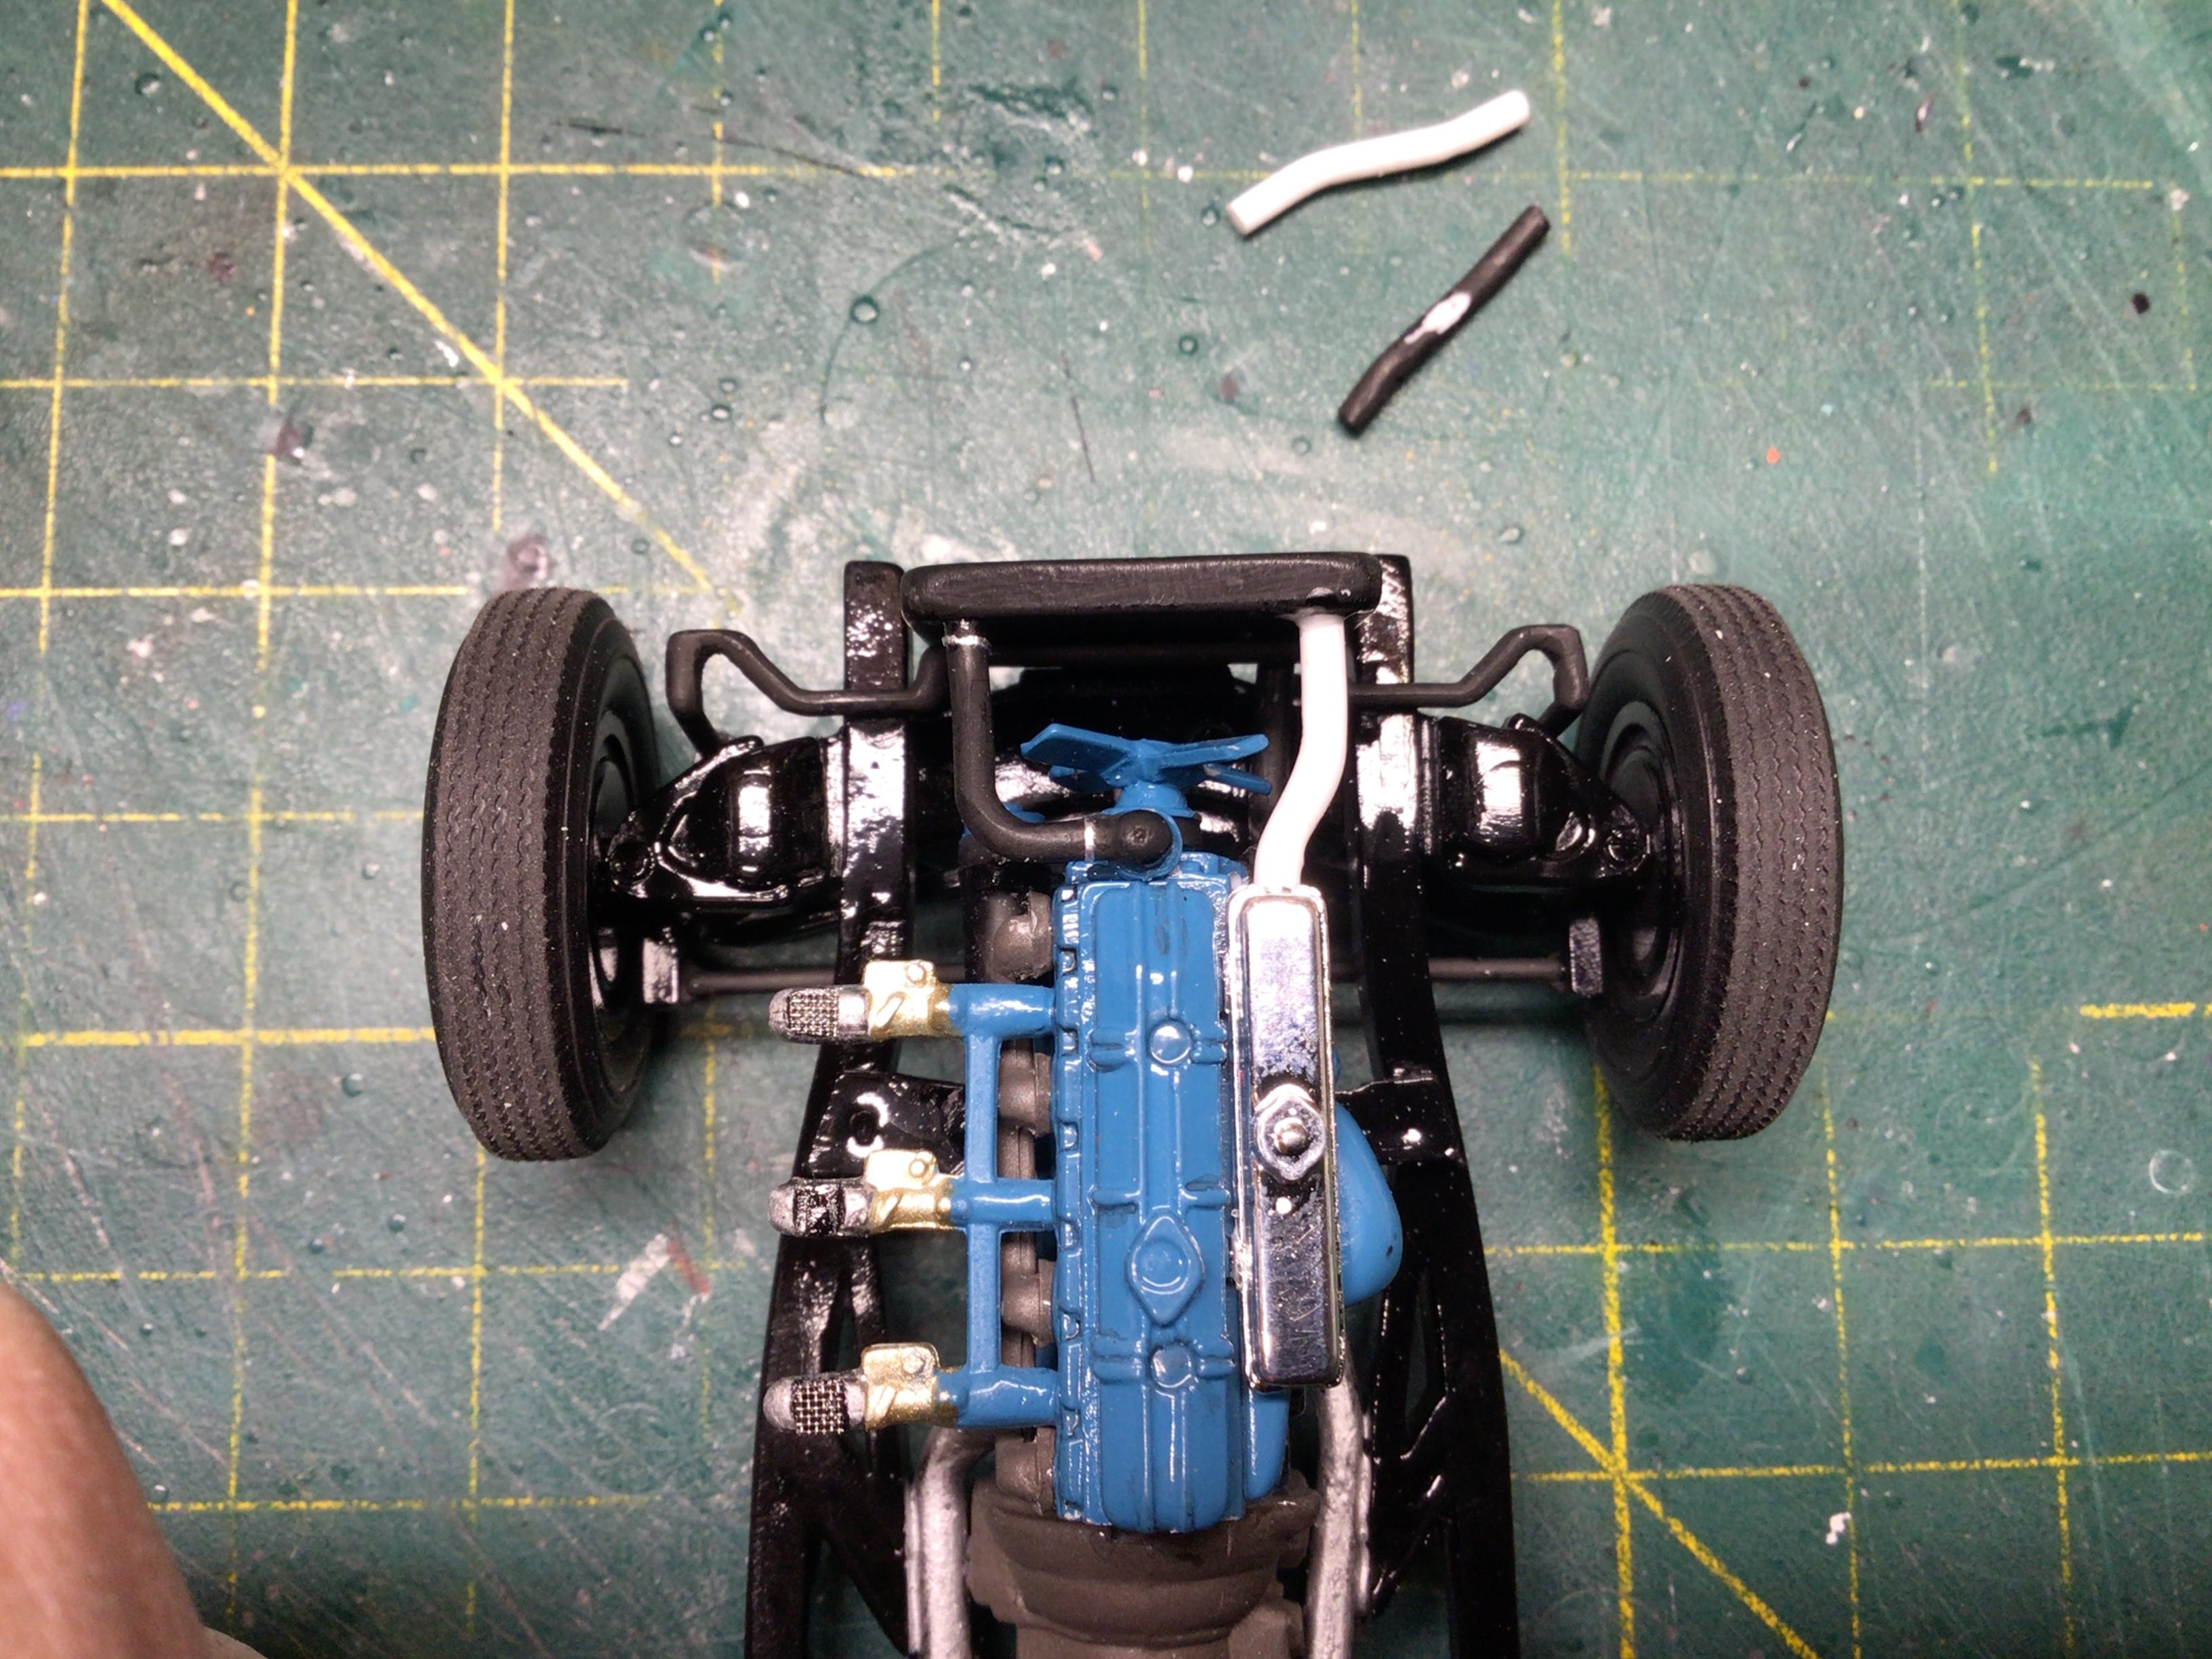
I relocated bth of the upper rad hoses to clear the fan. I cut a strip of masking tape as a guide and filed the rocker panels slightly until they are more parallel to the body side moulding. It’s not perfect because the moulding is not parallel with the door bottom, but it is a little less noticeable now in my eye.
-
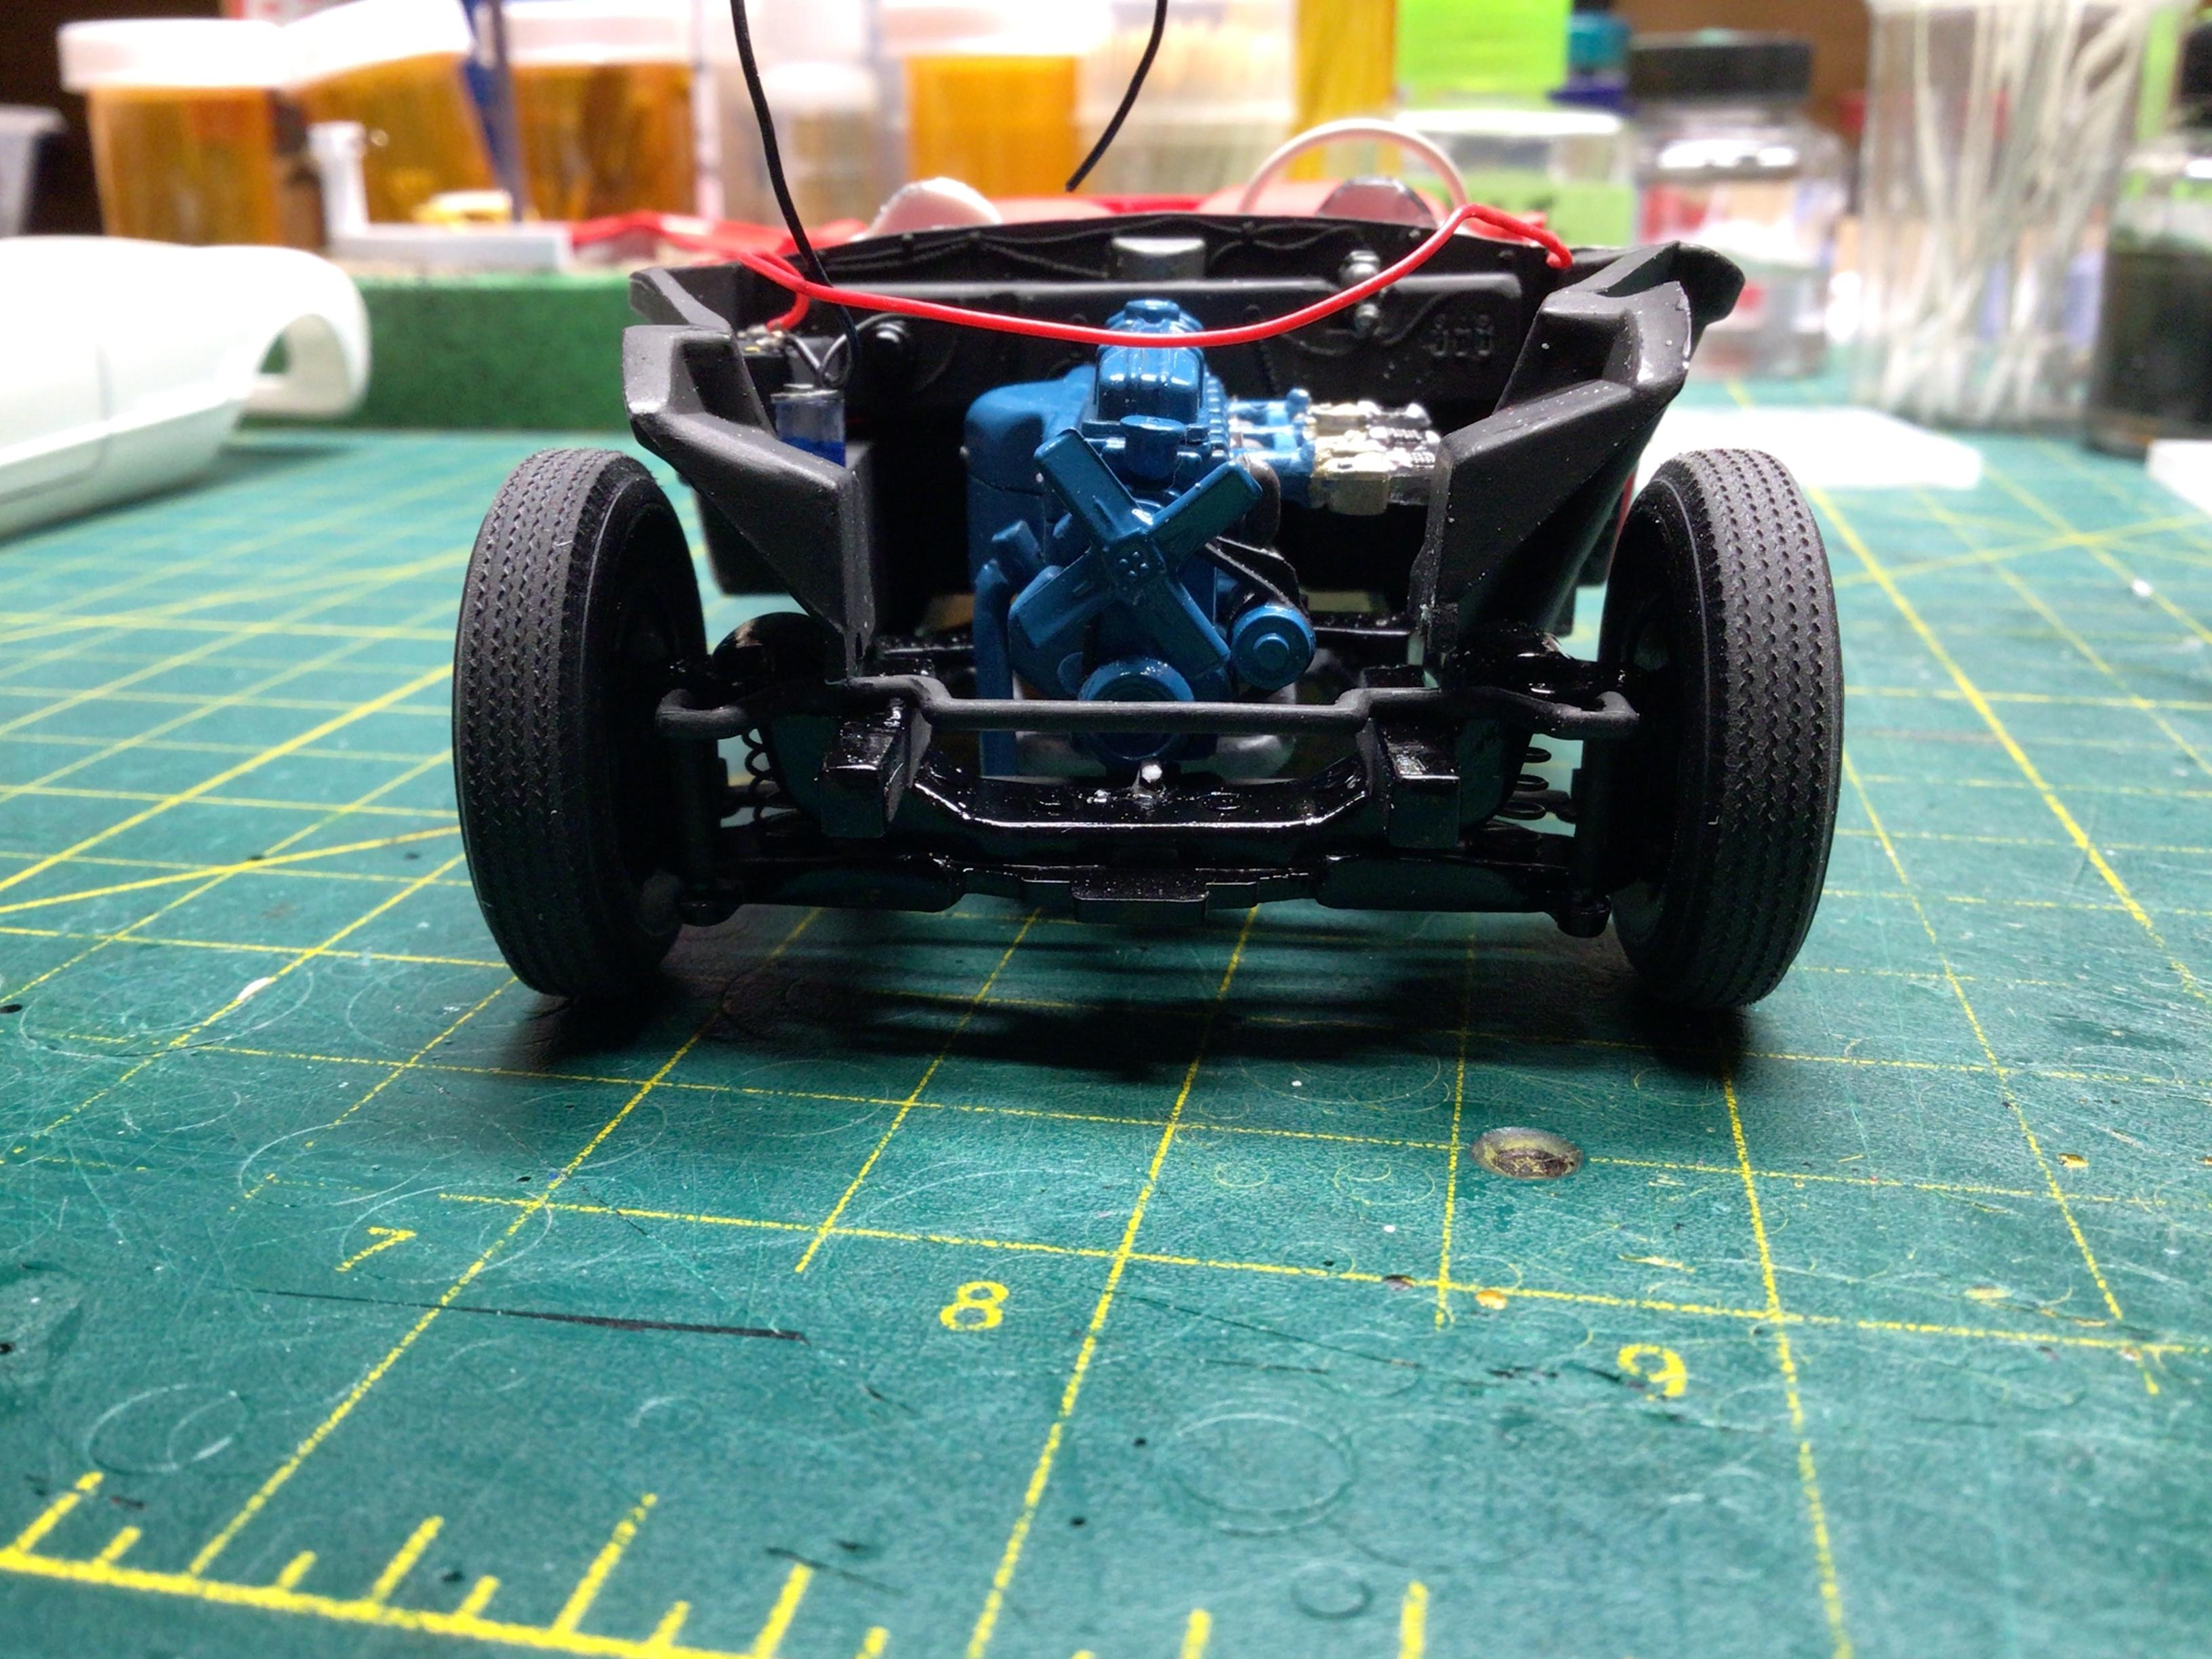
I found one major error I made. I used the door panels to locate the upper firewall and then butted the inner fender panels up against the firewall. This left a gap where the LH one meets the floor pan…so I filled the gap.? I didn’t notice that this left the entire fender panel sitting too high.? So I hacked it off and everything sits more level now. The frame by itself still rocks and has only two wheels on the ground. And the body rocker panels don’t both sit level by themselves. But when I put everything together and give it a little twist, it will sit with all four wheels on the ground. So I think I will give it the required twist and use some epoxy for the final assembly. I have adjusted and re-attached the offending fender well.?
-
Thanks for looking!? Boy…you can say that again!? The stance is probably one of the easier fixes.? Thanks!? Thanks, I’ll be careful.? It’s definitely got its issues.?
-
Thanks for the offer! By all means…please start a build thread on all of these.??