Plowboy
-
Posts
3,434 -
Joined
-
Last visited
Content Type
Profiles
Forums
Events
Gallery
Everything posted by Plowboy
-
What happened to the '68 Impala molds???
Plowboy replied to ranma's topic in Model Building Questions and Answers
Thanx for the info Mark! I thought my '69 promo had to be an MPC. -
Degreasers don't seem to work well on Tamiya. I had to use 91% alcohol to strip one.
-
What happened to the '68 Impala molds???
Plowboy replied to ranma's topic in Model Building Questions and Answers
Did AMT and MPC both make '69 promos or just AMT? -
There may be a resin conversion. You'll also need the hood as they're quite different. The only other option is an original from a '68. Personally, I would find an original and backdate it. Then you have to have a tailgate from the MPC kit.
-
'62 Ford Galaxie 500 Update! 12/23/22 Finally Done! Pic pg. 7
Plowboy replied to Plowboy's topic in WIP: Model Cars
Thanx for the feedback guys! I'm using those from the AMT '60 Starliner custom version. -
Disassembling a promo...
Plowboy replied to ClassicDarts's topic in Model Building Questions and Answers
You're welcome! I use a Dremel with a router bit(ball shape or cylindrical) to grind away the swaged locating pins. You can also use a drill bit that's a larger size than the pins. Best to do that by hand, not with a drill. -
Disassembling a promo...
Plowboy replied to ClassicDarts's topic in Model Building Questions and Answers
The rear of the chassis just slides in above the bumper. Take the two screws out, pull the front down and it should slide forward and out. Word of warning: Do NOT force anything on these particular promos! If it doesn't come loose, keep working on it until it does. I had an '88 Beretta interior explode in my hand trying to push it forward. The styrene they're made from is super brittle! Handle it like it was made out of glass. -
Thanx Tony! This was way out of my wheelhouse. But, I'm glad I did it.
-
Thanx Claude! I doubt any car builder would be willing to take on modifying an old Taurus. It would be cool to see someone do it. This build has got me wondering what other mundane cars would benefit from a similar treatment.
-
'62 Ford Galaxie 500 Update! 12/23/22 Finally Done! Pic pg. 7
Plowboy replied to Plowboy's topic in WIP: Model Cars
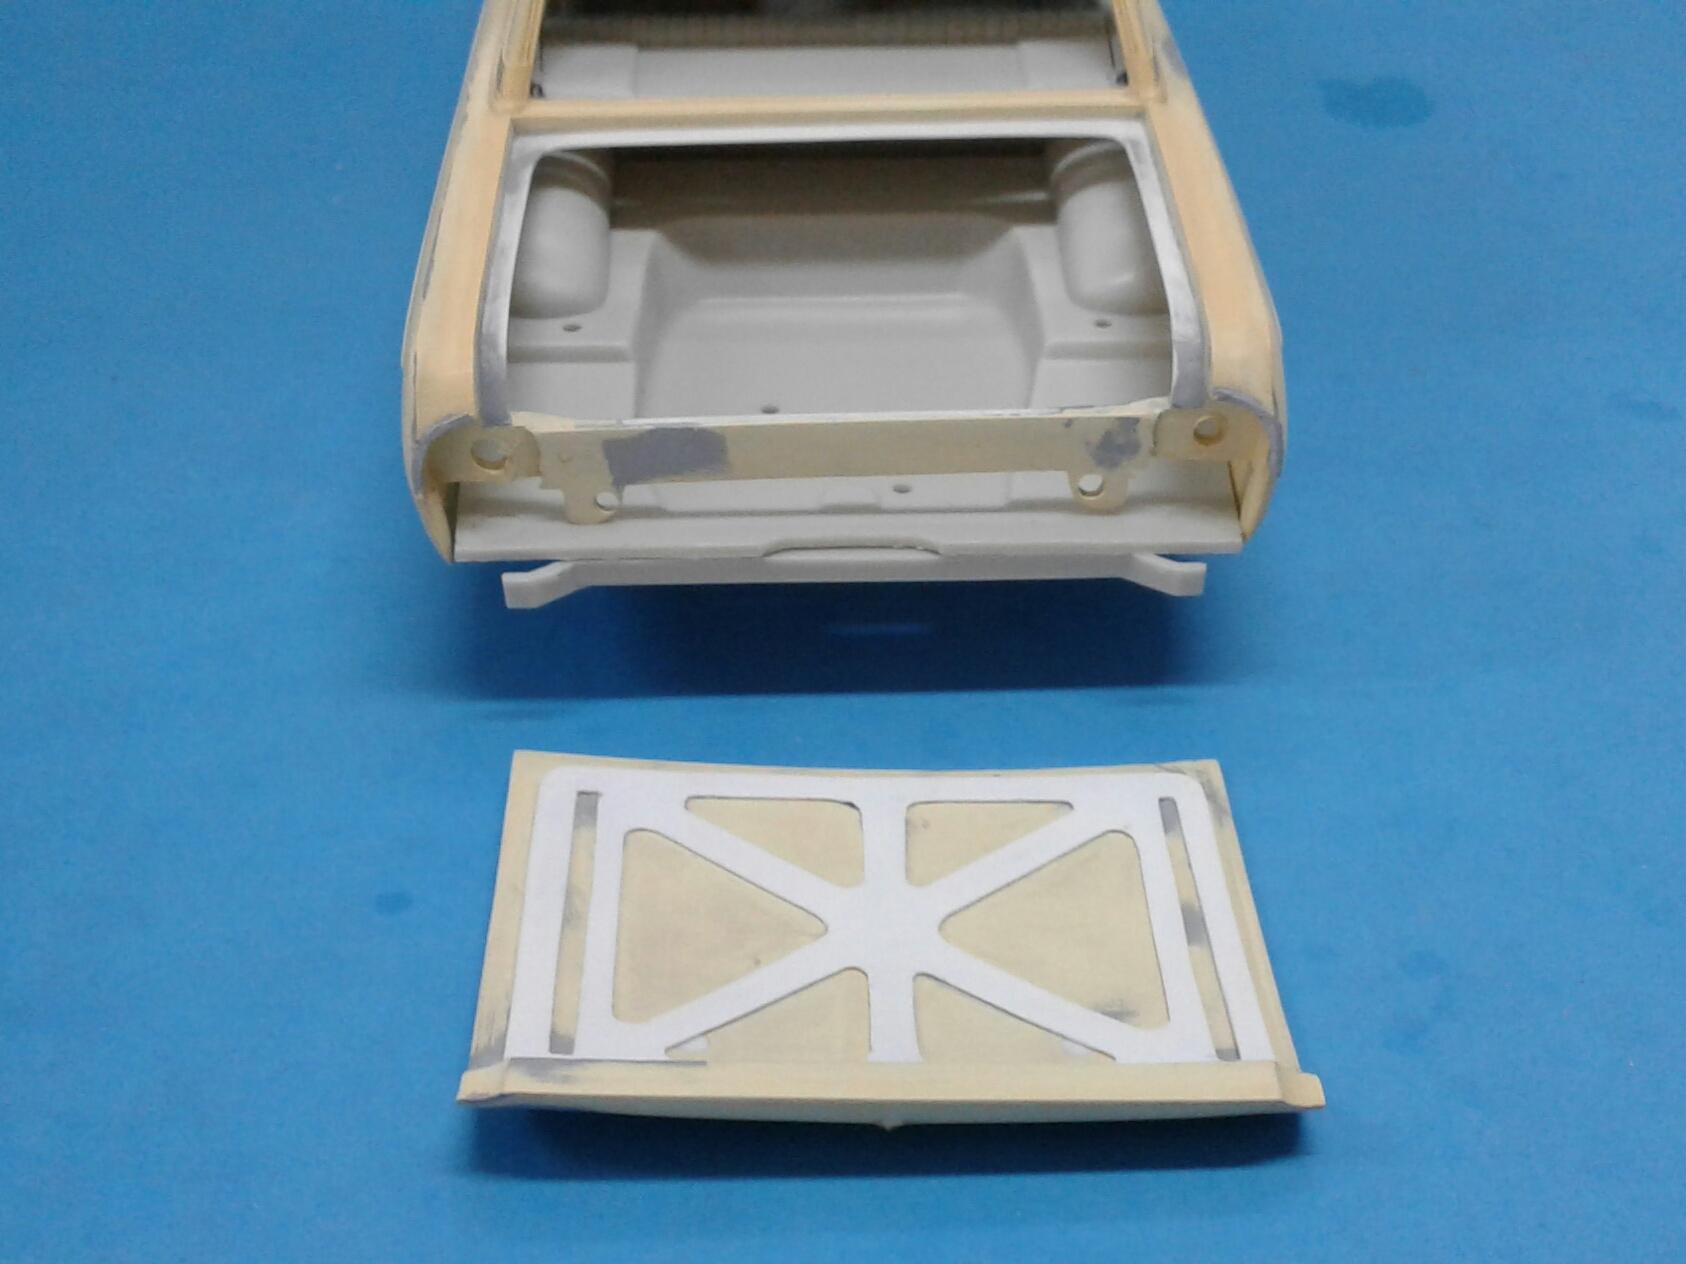
I got the rain gutters added to the body. The underside of the trunk smoothed and brace detail added. I still have to fill in the holes in the trunk pan and make the trunk hinges. I'm going to have to re-engineer my typical method. I usually glue the pivot to the package tray or tulip panel once the interior is installed. That method won't work with this model since it has virtually no tulip panel and the interior installs to the floorpan. So, I'm going to have to come up with a different method on this one. I have an idea in mind. Just have to see if it'll work. I also added flanges to the fenders for the hood to rest on and improve the look. I modified the radiator core support so that it doesn't quite look as obvious that it came from the '60 Starliner. I originally had the flanges meeting the top of the inner wheel wells. But, it didn't look to suit me. So, I cut them down. The majority of the body work is done. I still have some more scribing to do. This body has been a tough one to work with! Even scribing panel lines has been a pain! In some instances, I've had to resort to using an Xacto to scribe with.
-
Tamiya Putty, Tamiya Primer and repaint.
-
Revell Land Rover Series III LWB
Plowboy replied to Keavdog's topic in Model Trucks: Pickups, Vans, SUVs, Light Commercial
Very nicely done! Weathering is spot on! -
I've done a few roof swaps and one thing I learned is that you want to use as much of the donor roof as possible. If the cowls are the same, swap those also. Try to keep the donor roof as a unit. That way, your windshield and backlight will fit like they should. Also, don't cut horizontally. Cut vertically. You won't lose any roof height. I usually cut just behind the vent window. Then, either cut some of the door with the vent window or right against it. I'll cut the cowl right on the panel line. At the rear, cut in front of the C pillar, take a little of the quarter and cut a straight line across the tulip panel or cut right with the panel line of the trunk if they're the same. You can add a strip of styrene underneath for strength. The most important thing to work like this is taking your time to plan and execute the cuts. This model is nothing like yours. But, it demonstrates my method pretty well. The roof actually slid down inside the body.
-
1976 Chevrolet K10
Plowboy replied to Dhgfx4's topic in WIP: Model Trucks: Pickups, Vans, SUVs, Light Commercial
You can glue it before the interior goes in. You just have to install the interior carefully. You have to spread the bottom of the front fenders, slide the rear of the interior between them and then slide it up and in. -
1992 Ford F150 Nite
Plowboy replied to Chuck Most's topic in Model Trucks: Pickups, Vans, SUVs, Light Commercial
That is a sharp looking F-150 Chuck! Paint, wheels and stance are on the money! The '92-'96 F-150s are my favorite! Ironically, I don't have one on the shelf. -
'62 Ford Galaxie 500 Update! 12/23/22 Finally Done! Pic pg. 7
Plowboy replied to Plowboy's topic in WIP: Model Cars
Thanx for the photo Sam! I thought that's how the panel line was supposed to be. -
I'm surprised they haven't done one as a gasser. They did it with the '62 Corvette, '57 Ford sedan and Del Rio.
-
The TV show "The Neighborhood" has models scattered around on the living room set. Plus, Calvin has a nice old '65 F-100 setting in the driveway.
-
'62 Ford Galaxie 500 Update! 12/23/22 Finally Done! Pic pg. 7
Plowboy replied to Plowboy's topic in WIP: Model Cars
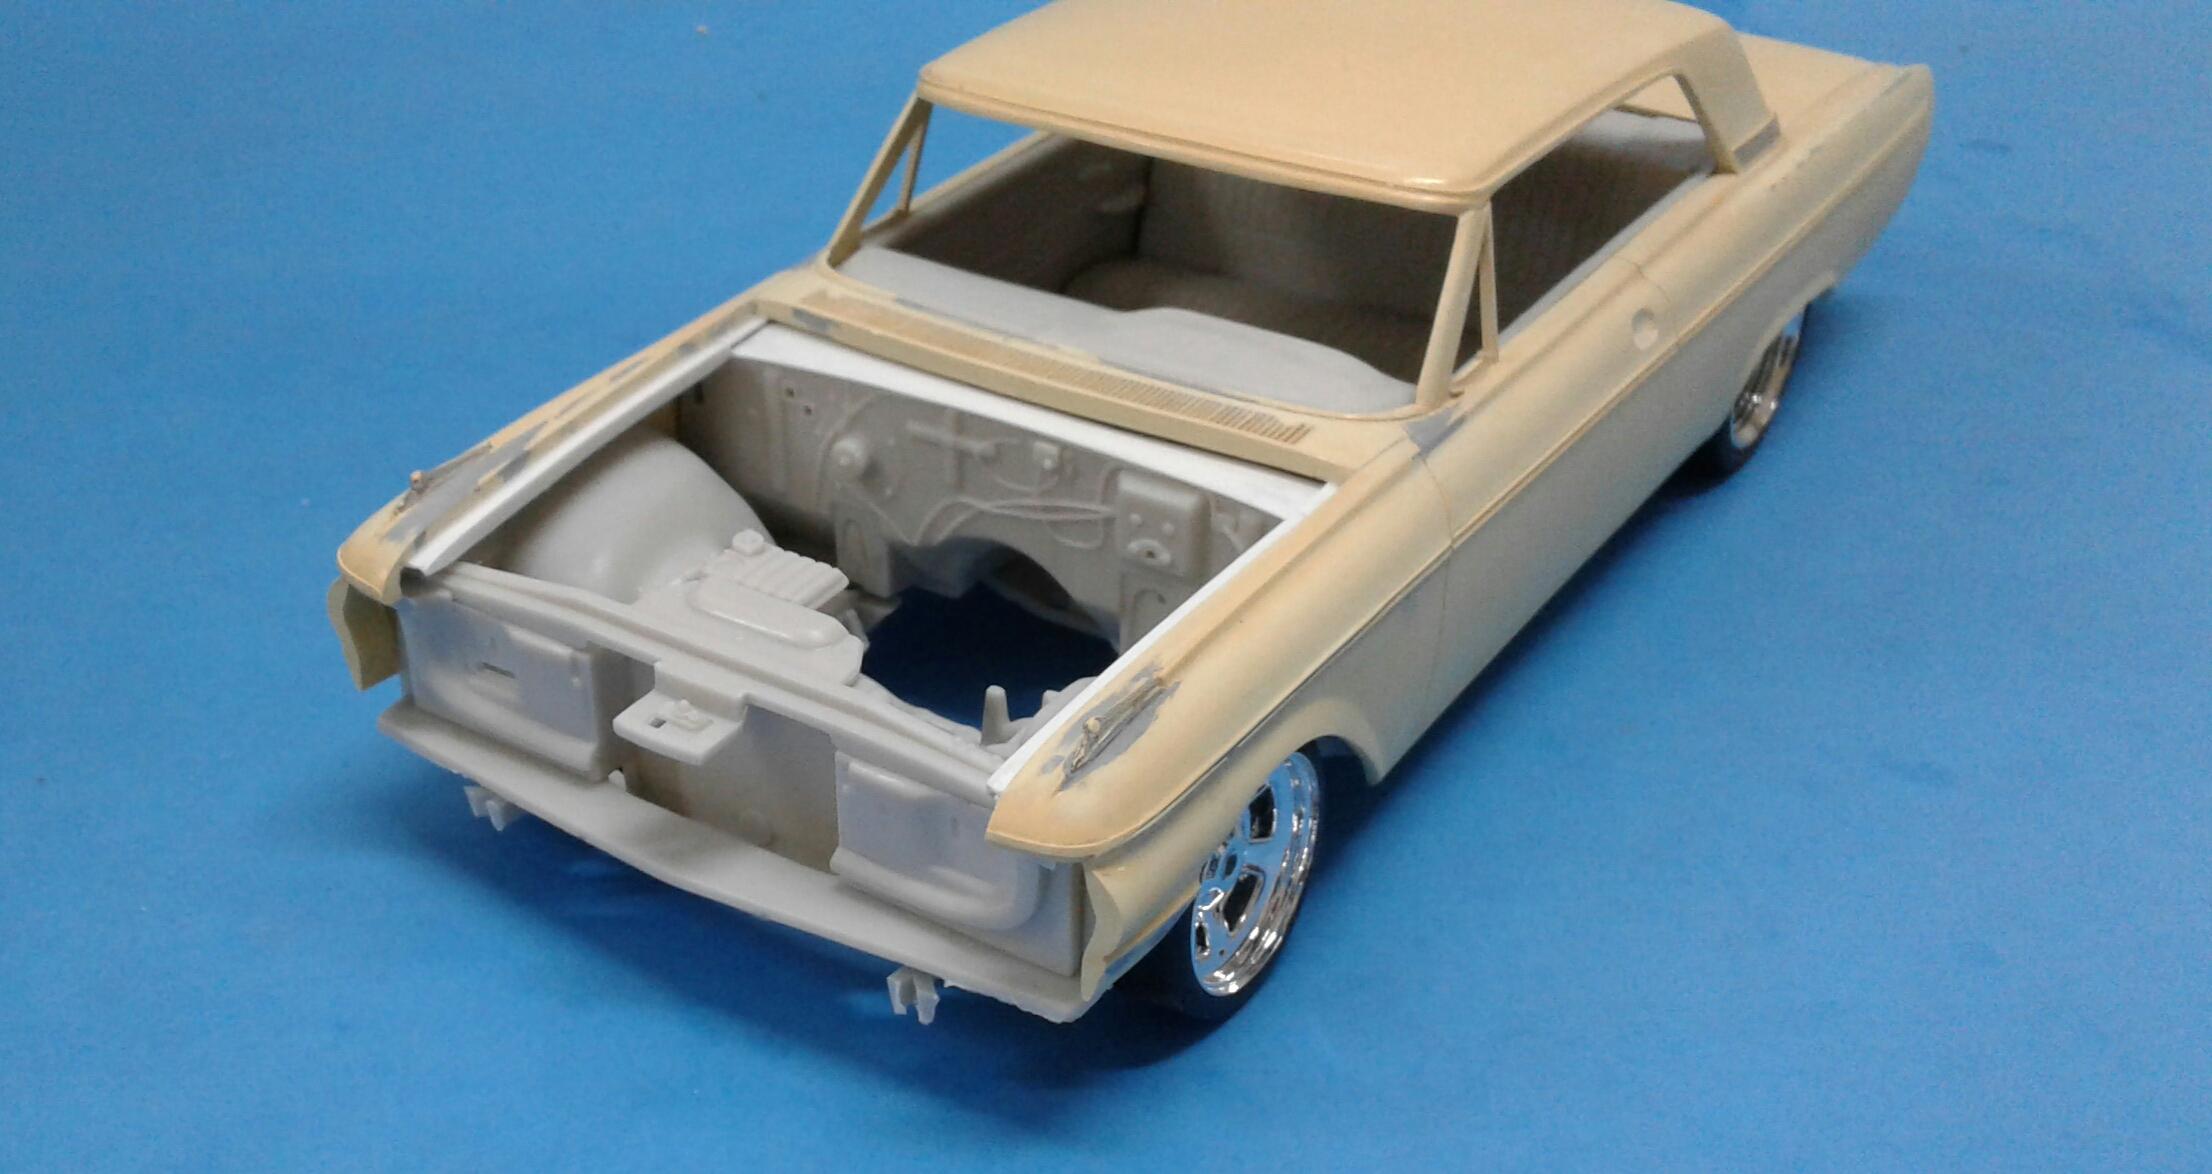
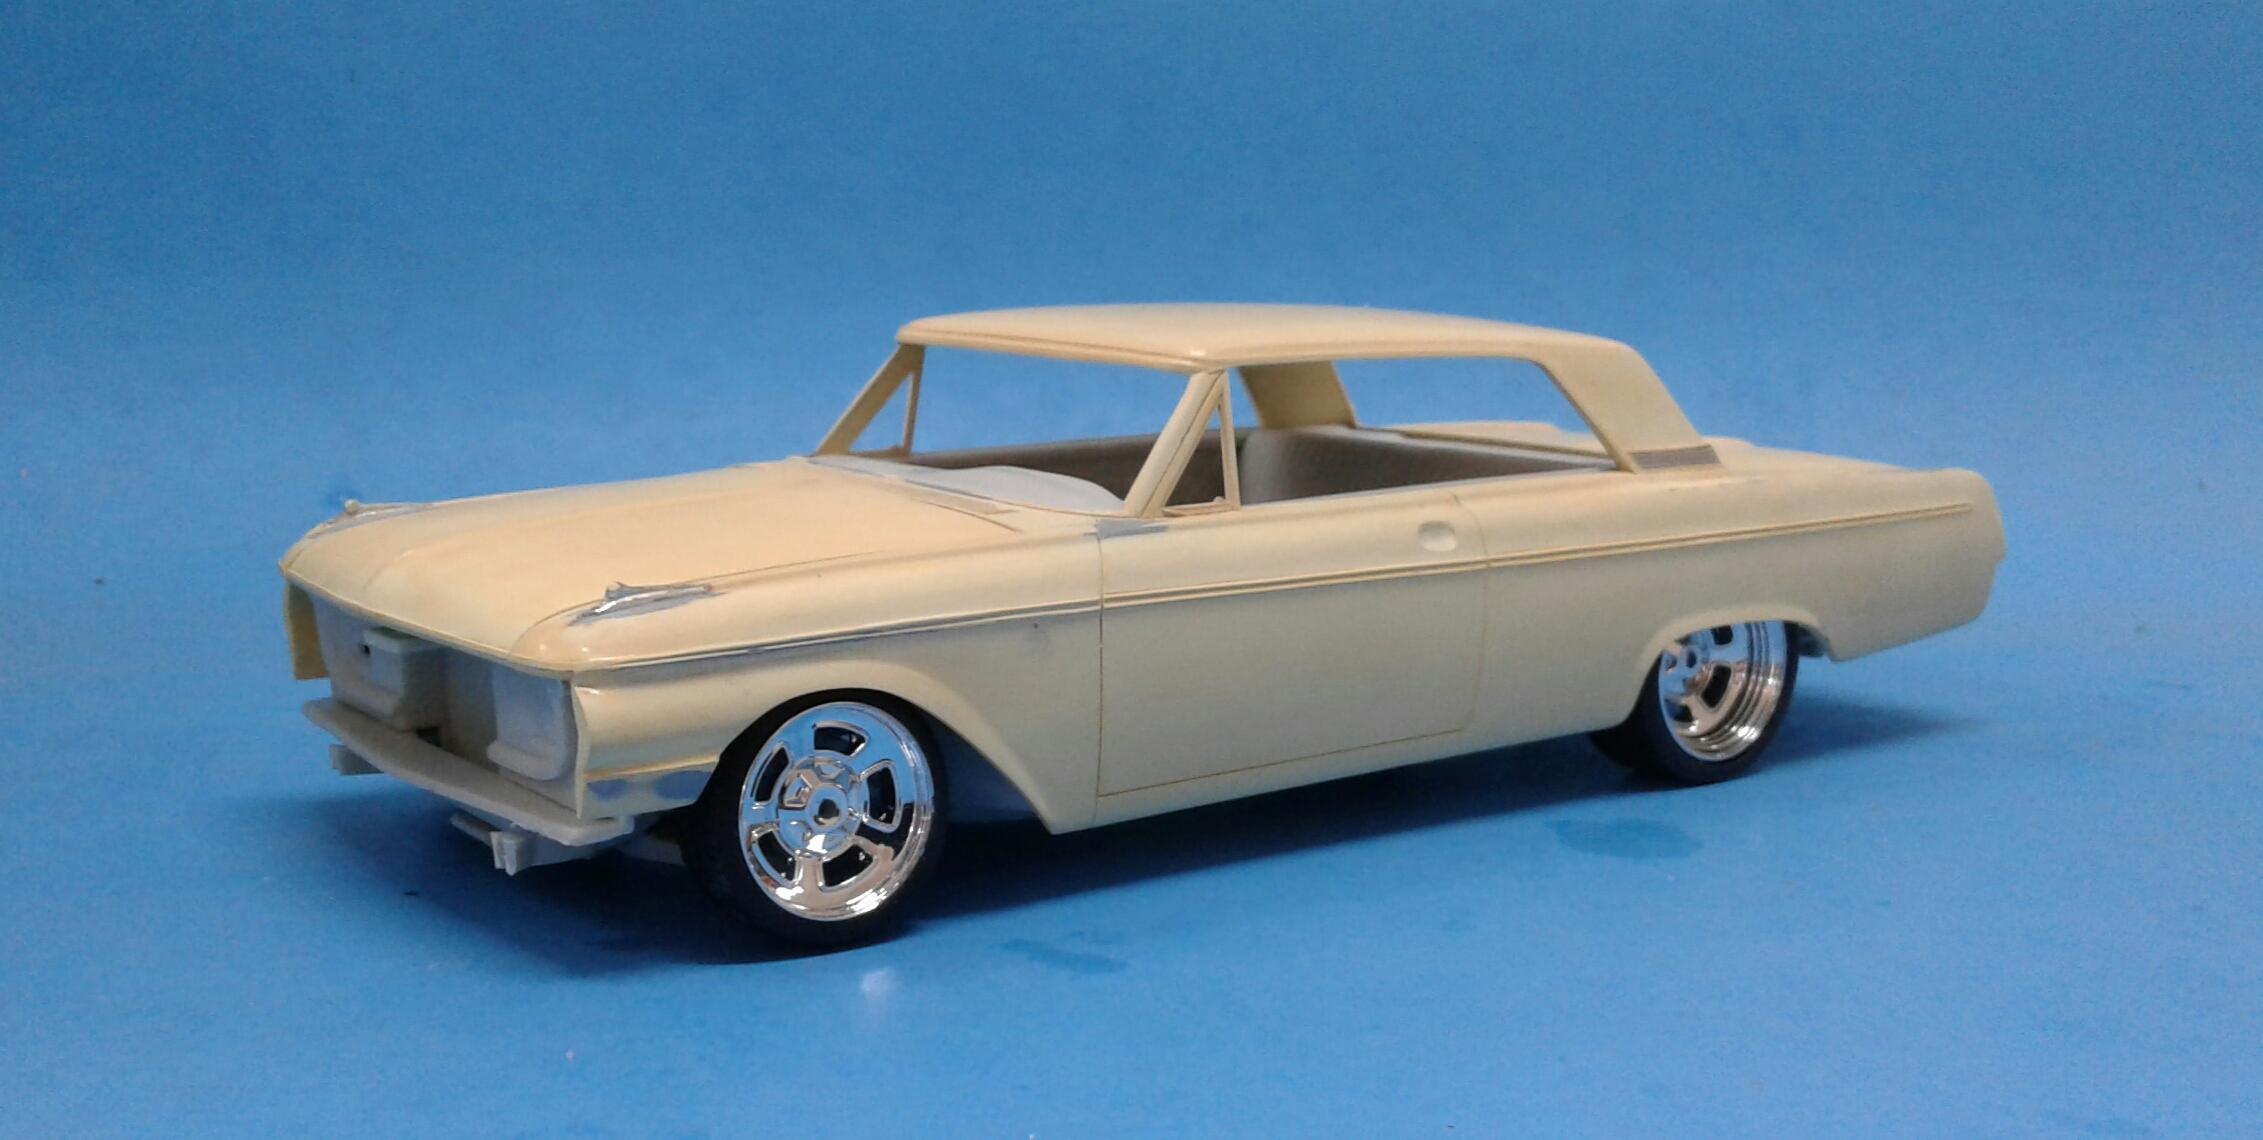
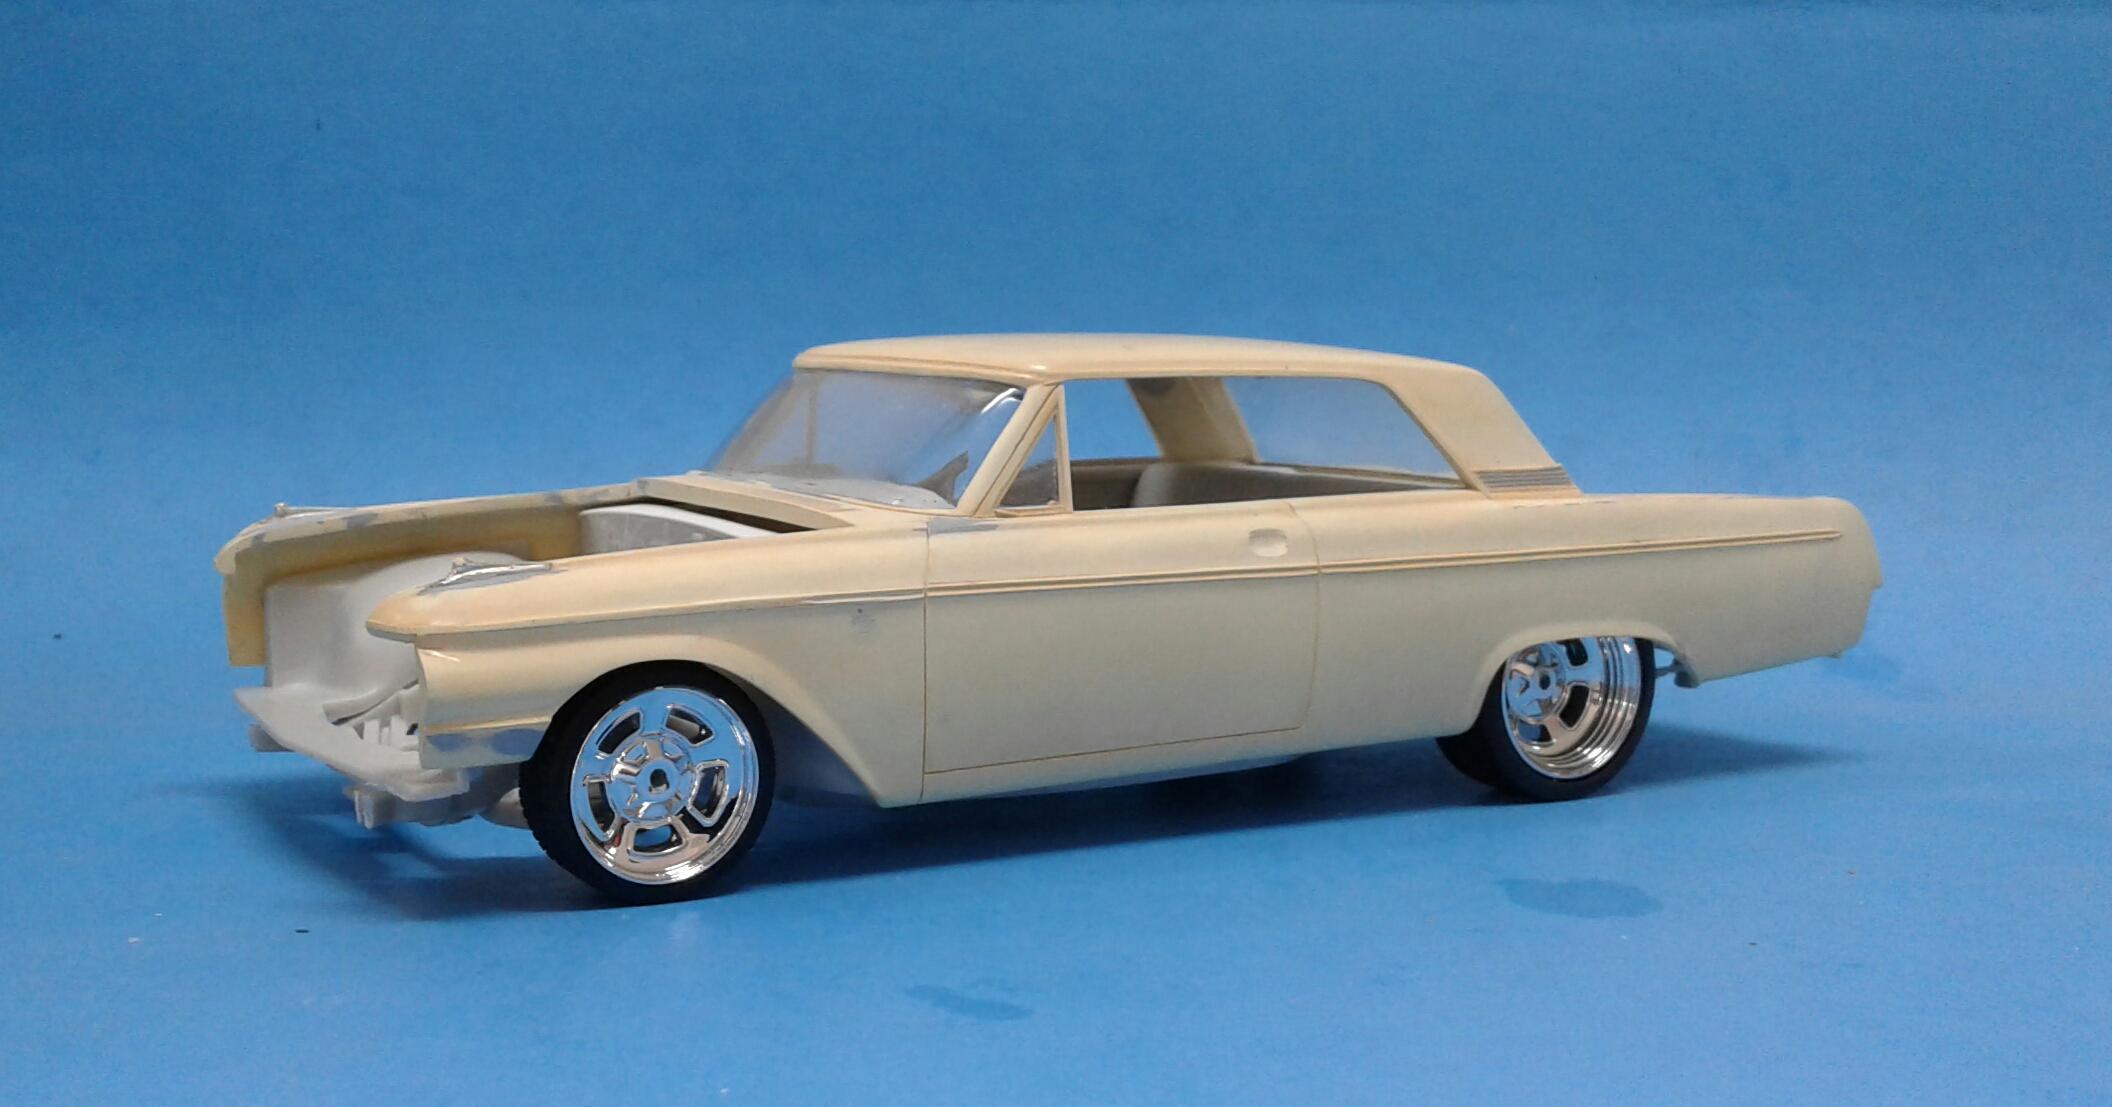
I now have the body cleaned up and almost ready for primer. Just have to add some detail to the hood and trunk openings. It was a task reducing the wide trim down to a single strip! I need to make the recess in the chrome strip on the front fenders extend farther forward. It's getting closer!
-
Looks nice and clean in the white paint! Makes me want to build one! Nice work!
-
AMT 1967 Chevy Impala SS427. Factory Stock 1/25 Scale.
Plowboy replied to Dragonhawk1066's topic in Model Cars
That is a super nice looking Impala Craig! Perfect colors! The vinyl top really sets it off. Nice work! -
Looks nice Dominik! I like the color on the body! What's the source of the engine? I need one of those for a project.
-
'62 Ford Galaxie 500 Update! 12/23/22 Finally Done! Pic pg. 7
Plowboy replied to Plowboy's topic in WIP: Model Cars
That reminds me. I have the '62 T-Bird in the stash. I'll have to check out the seats and console. -
'62 Ford Galaxie 500 Update! 12/23/22 Finally Done! Pic pg. 7
Plowboy replied to Plowboy's topic in WIP: Model Cars
Thanx Sam! -
'62 Ford Galaxie 500 Update! 12/23/22 Finally Done! Pic pg. 7
Plowboy replied to Plowboy's topic in WIP: Model Cars
That's a nice looking Sunliner Sam! One detail photo I could really use is an overhead where the A pillar, cowl and door meet up. It appears that the panel line between the door and fender ends right under the A pillar. It's not how it is on this promo body.