Plowboy
-
Posts
3,434 -
Joined
-
Last visited
Content Type
Profiles
Forums
Events
Gallery
Everything posted by Plowboy
-
....
-
It's been mentioned before that a cash transaction via PM is OK. You just can't advertise kits or parts for sale on the forum. That's my understanding. There's times a trade can't be worked out and the only option is to buy outright.
-
Trumpeter/ Magnifier 1/12 GT40
Plowboy replied to Mr mopar's topic in Model Building Questions and Answers
Not on the Magnifier kit. It's there on the Trumpeter kit. -
1960 Ford F-100
Plowboy replied to Plowboy's topic in WIP: Model Trucks: Pickups, Vans, SUVs, Light Commercial
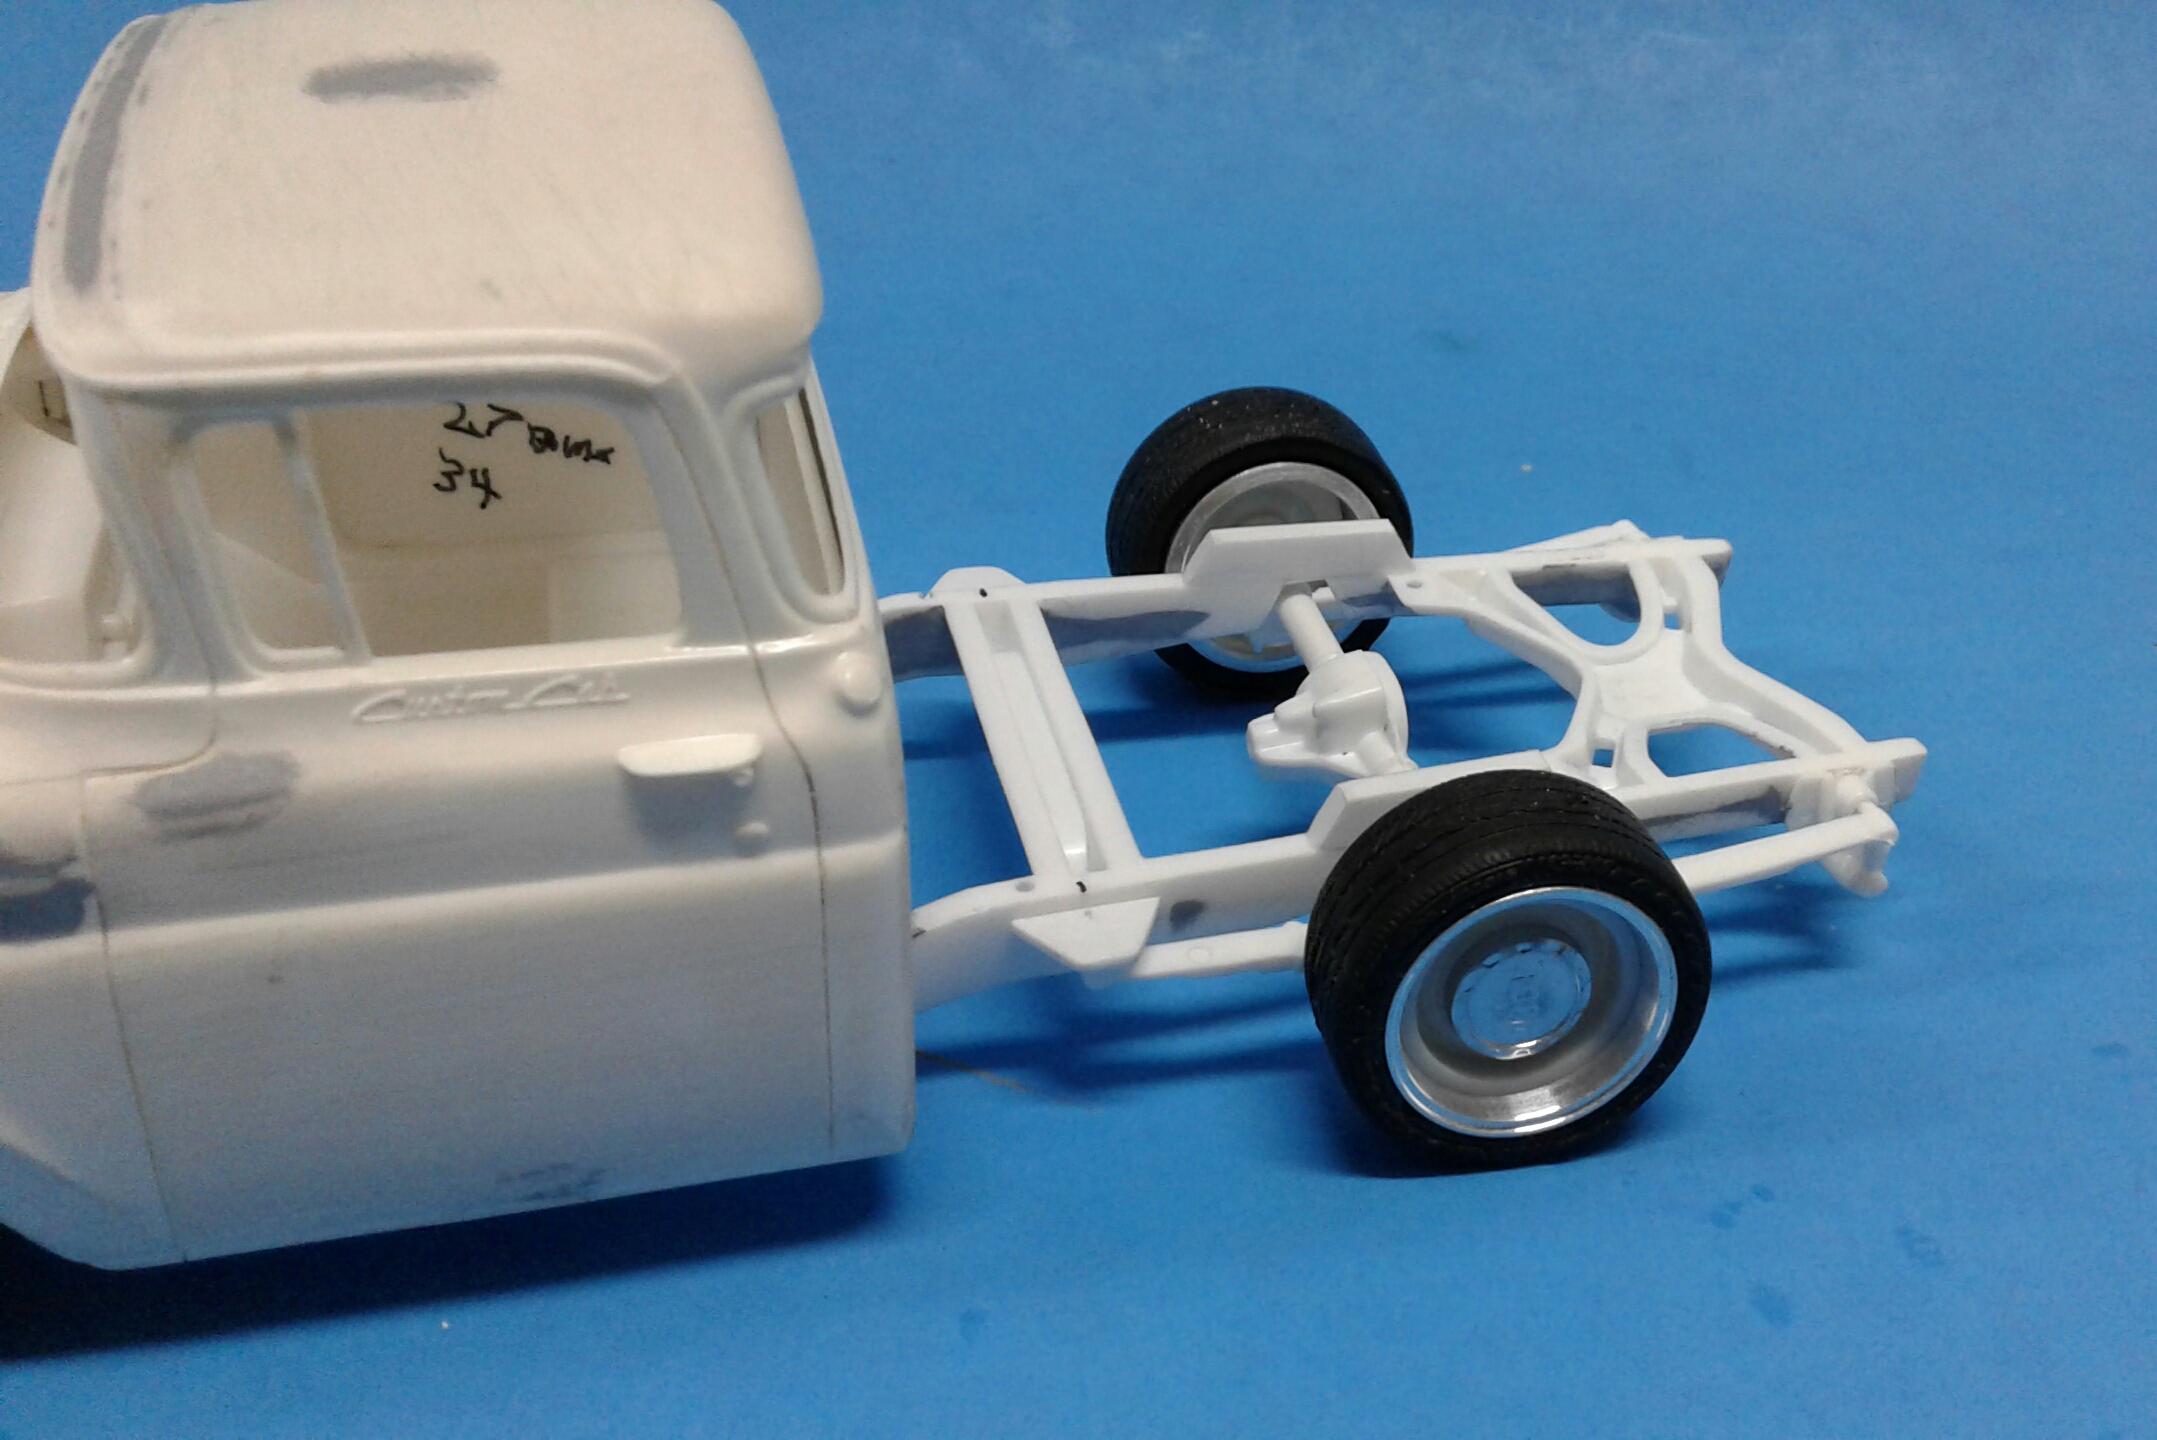
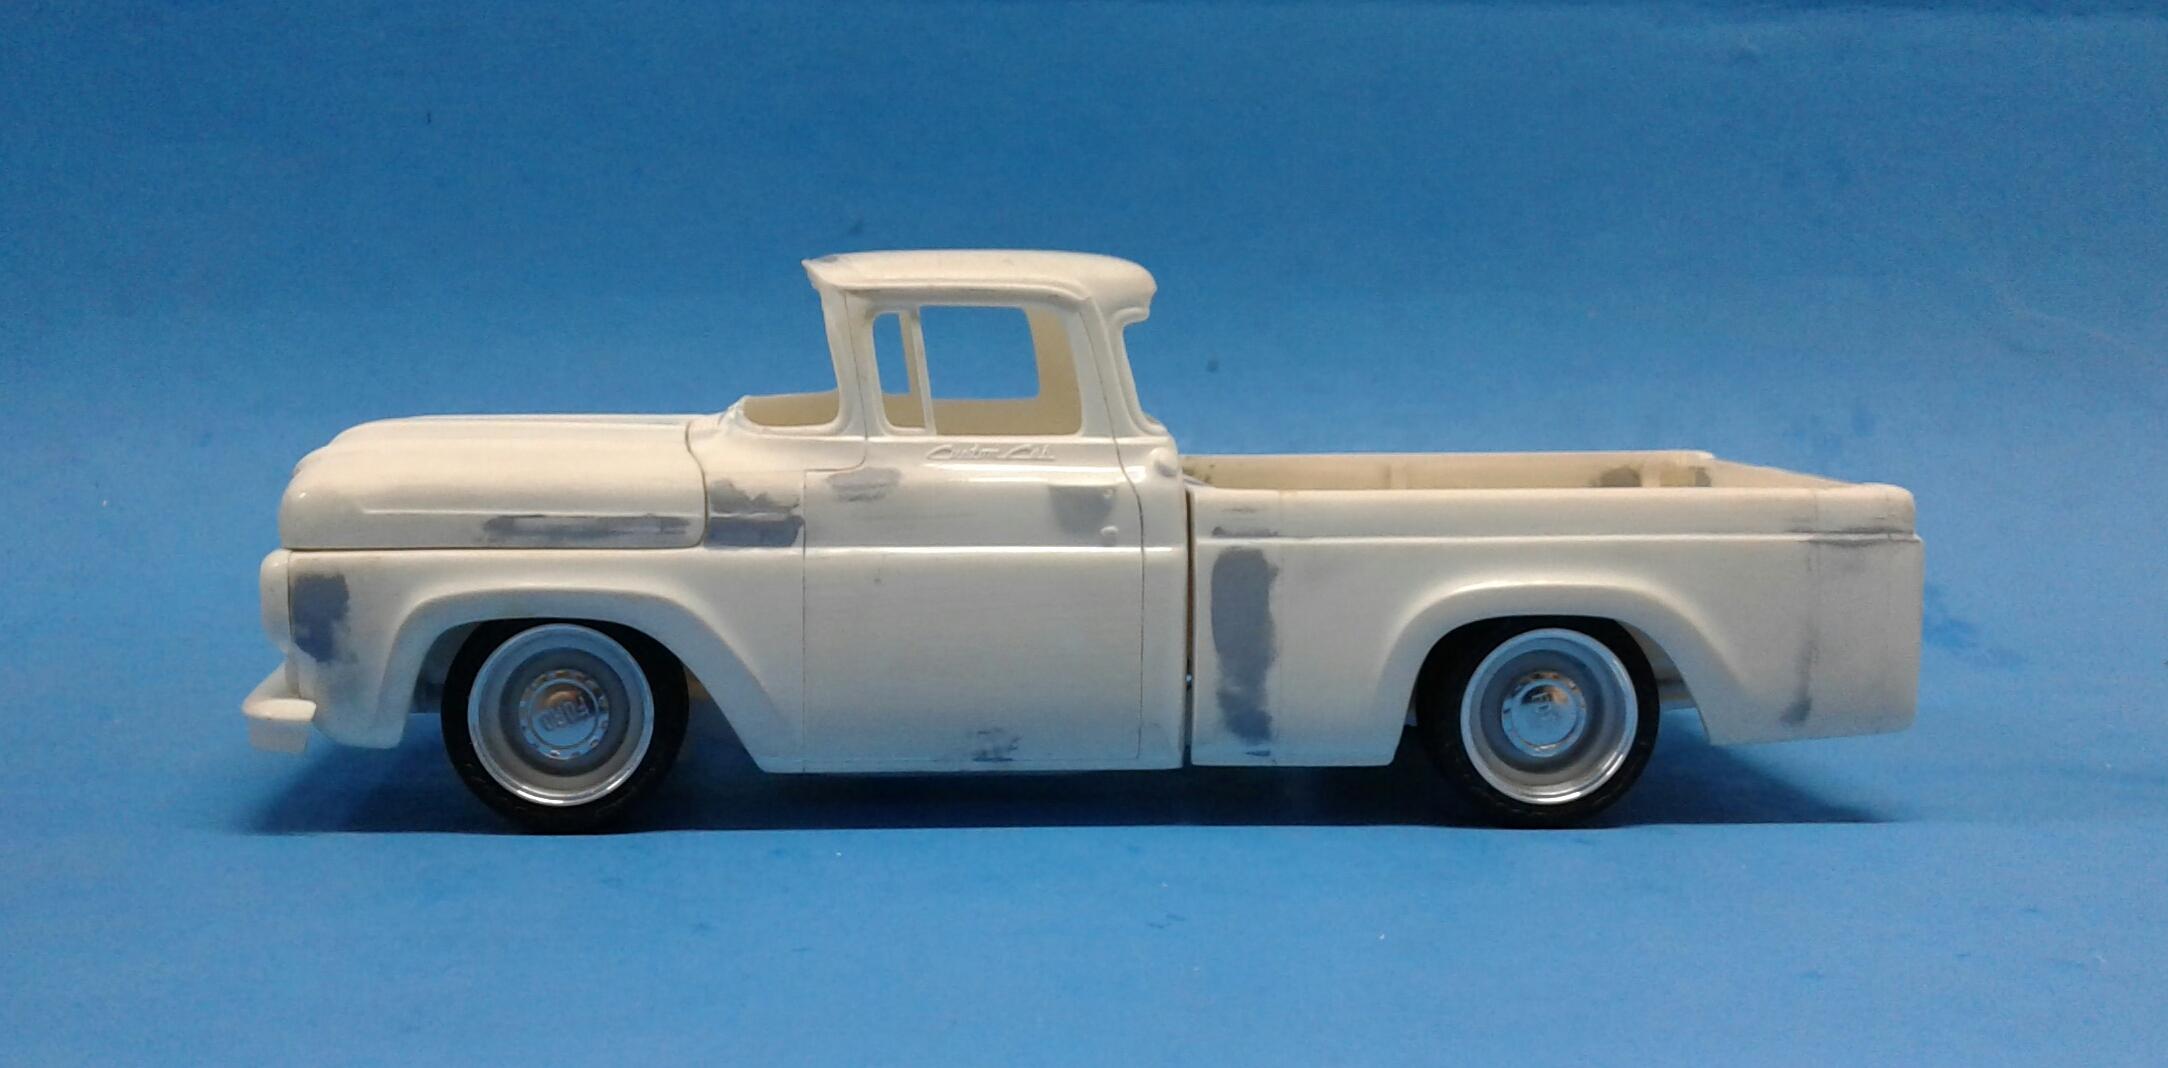
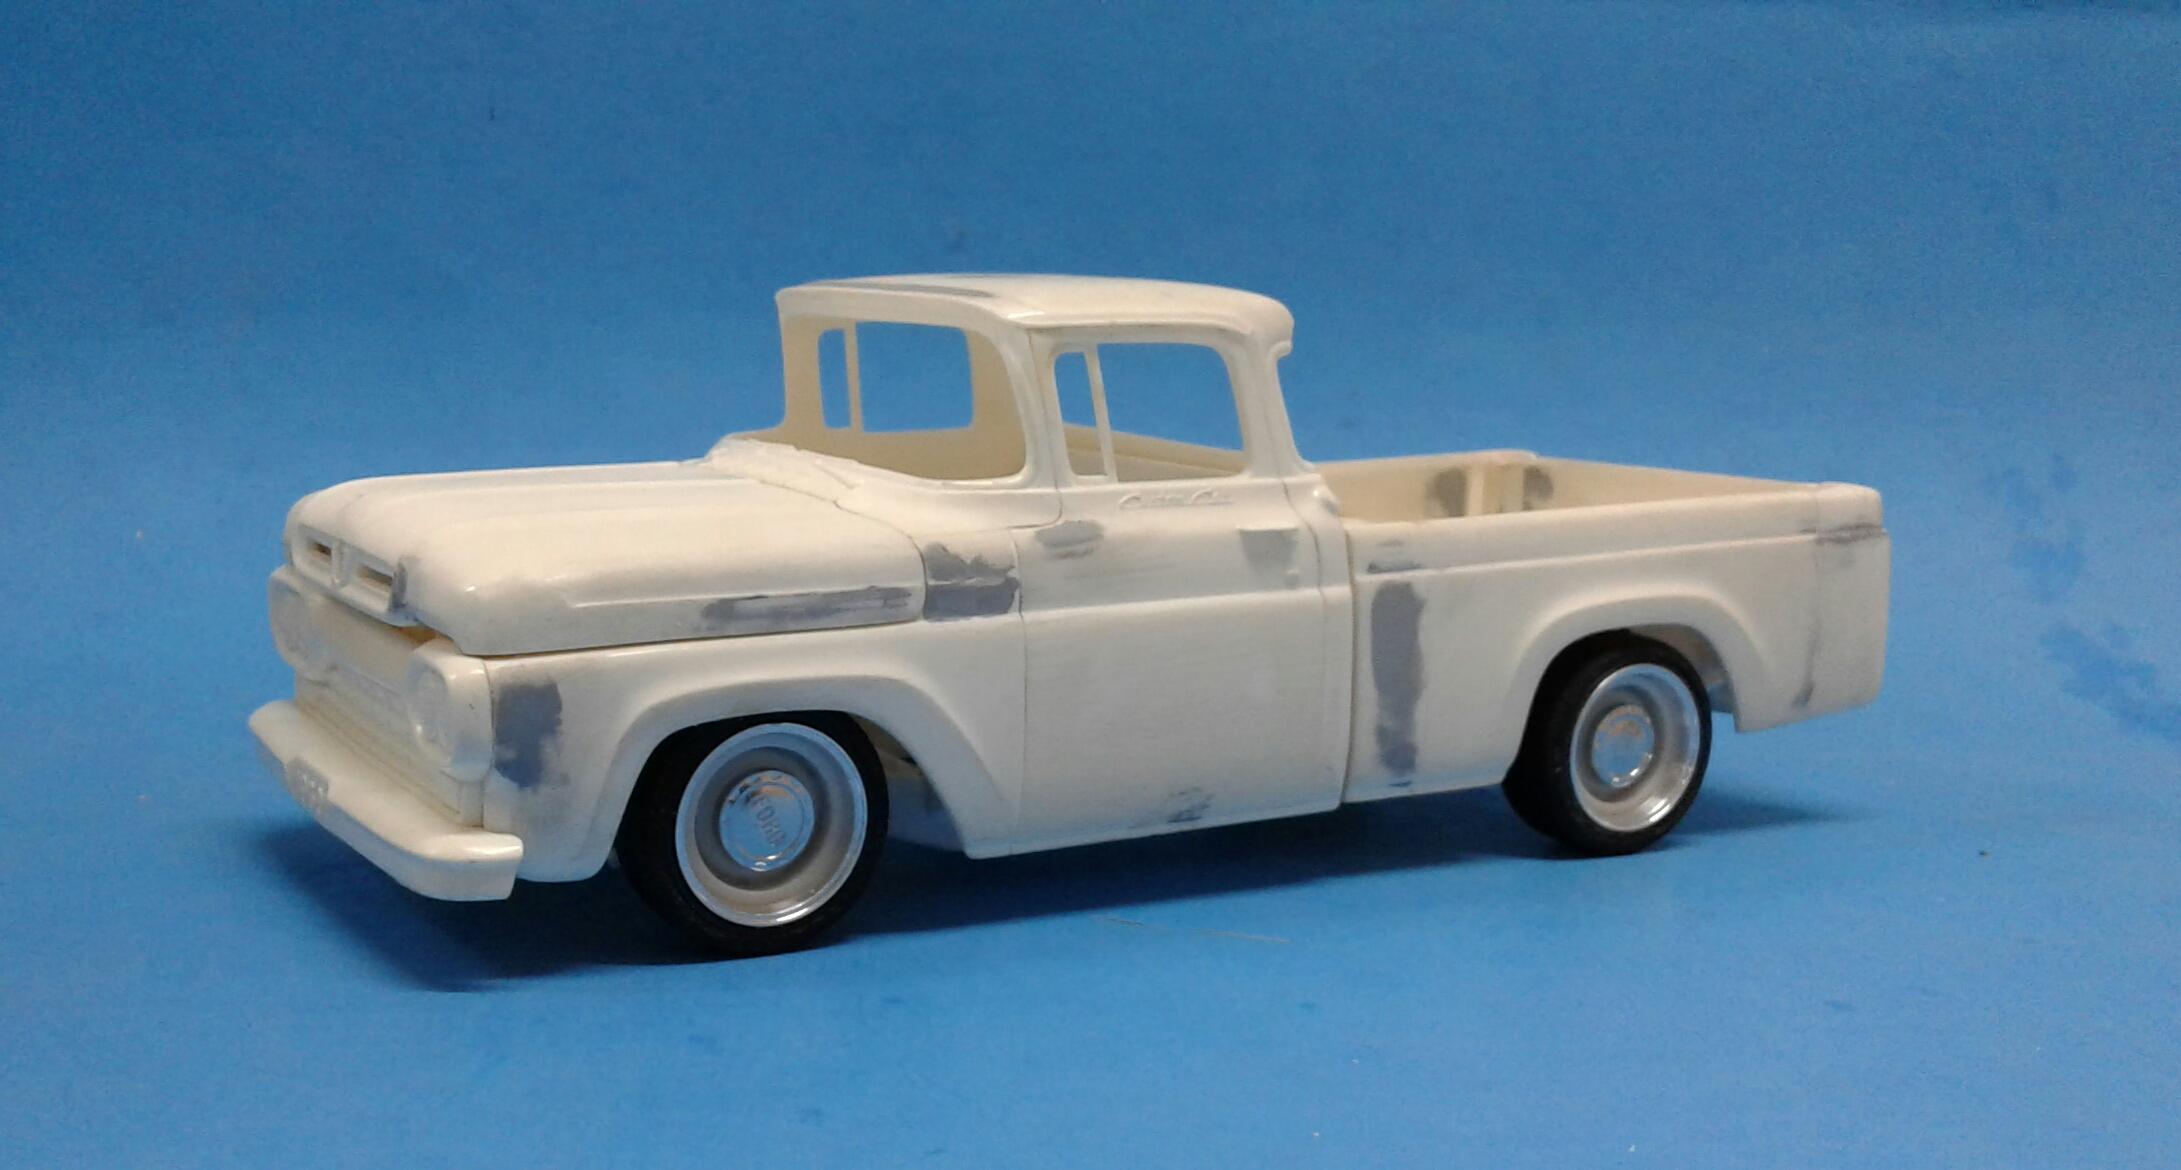
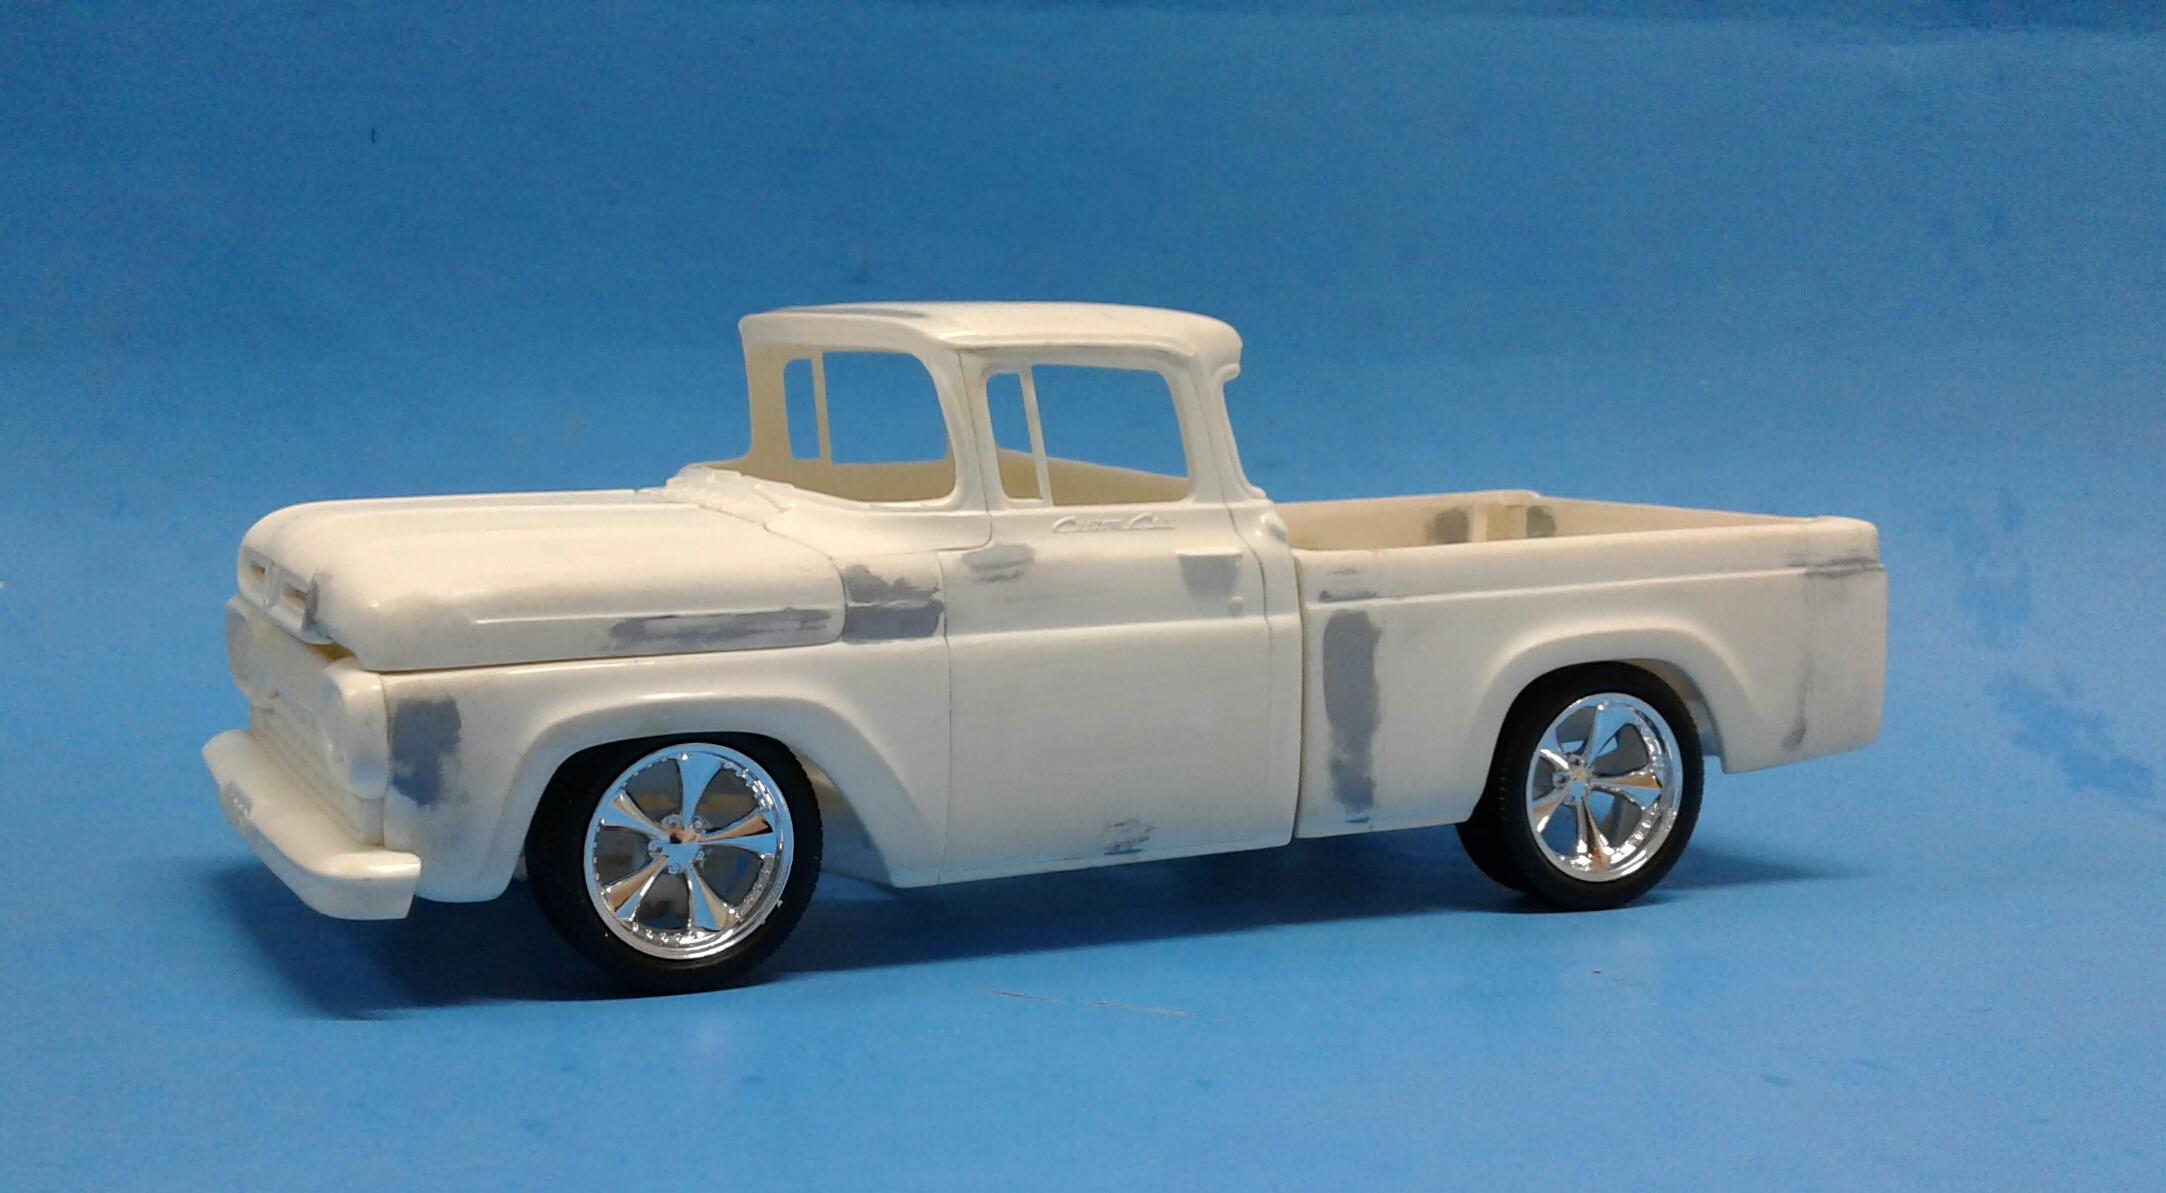
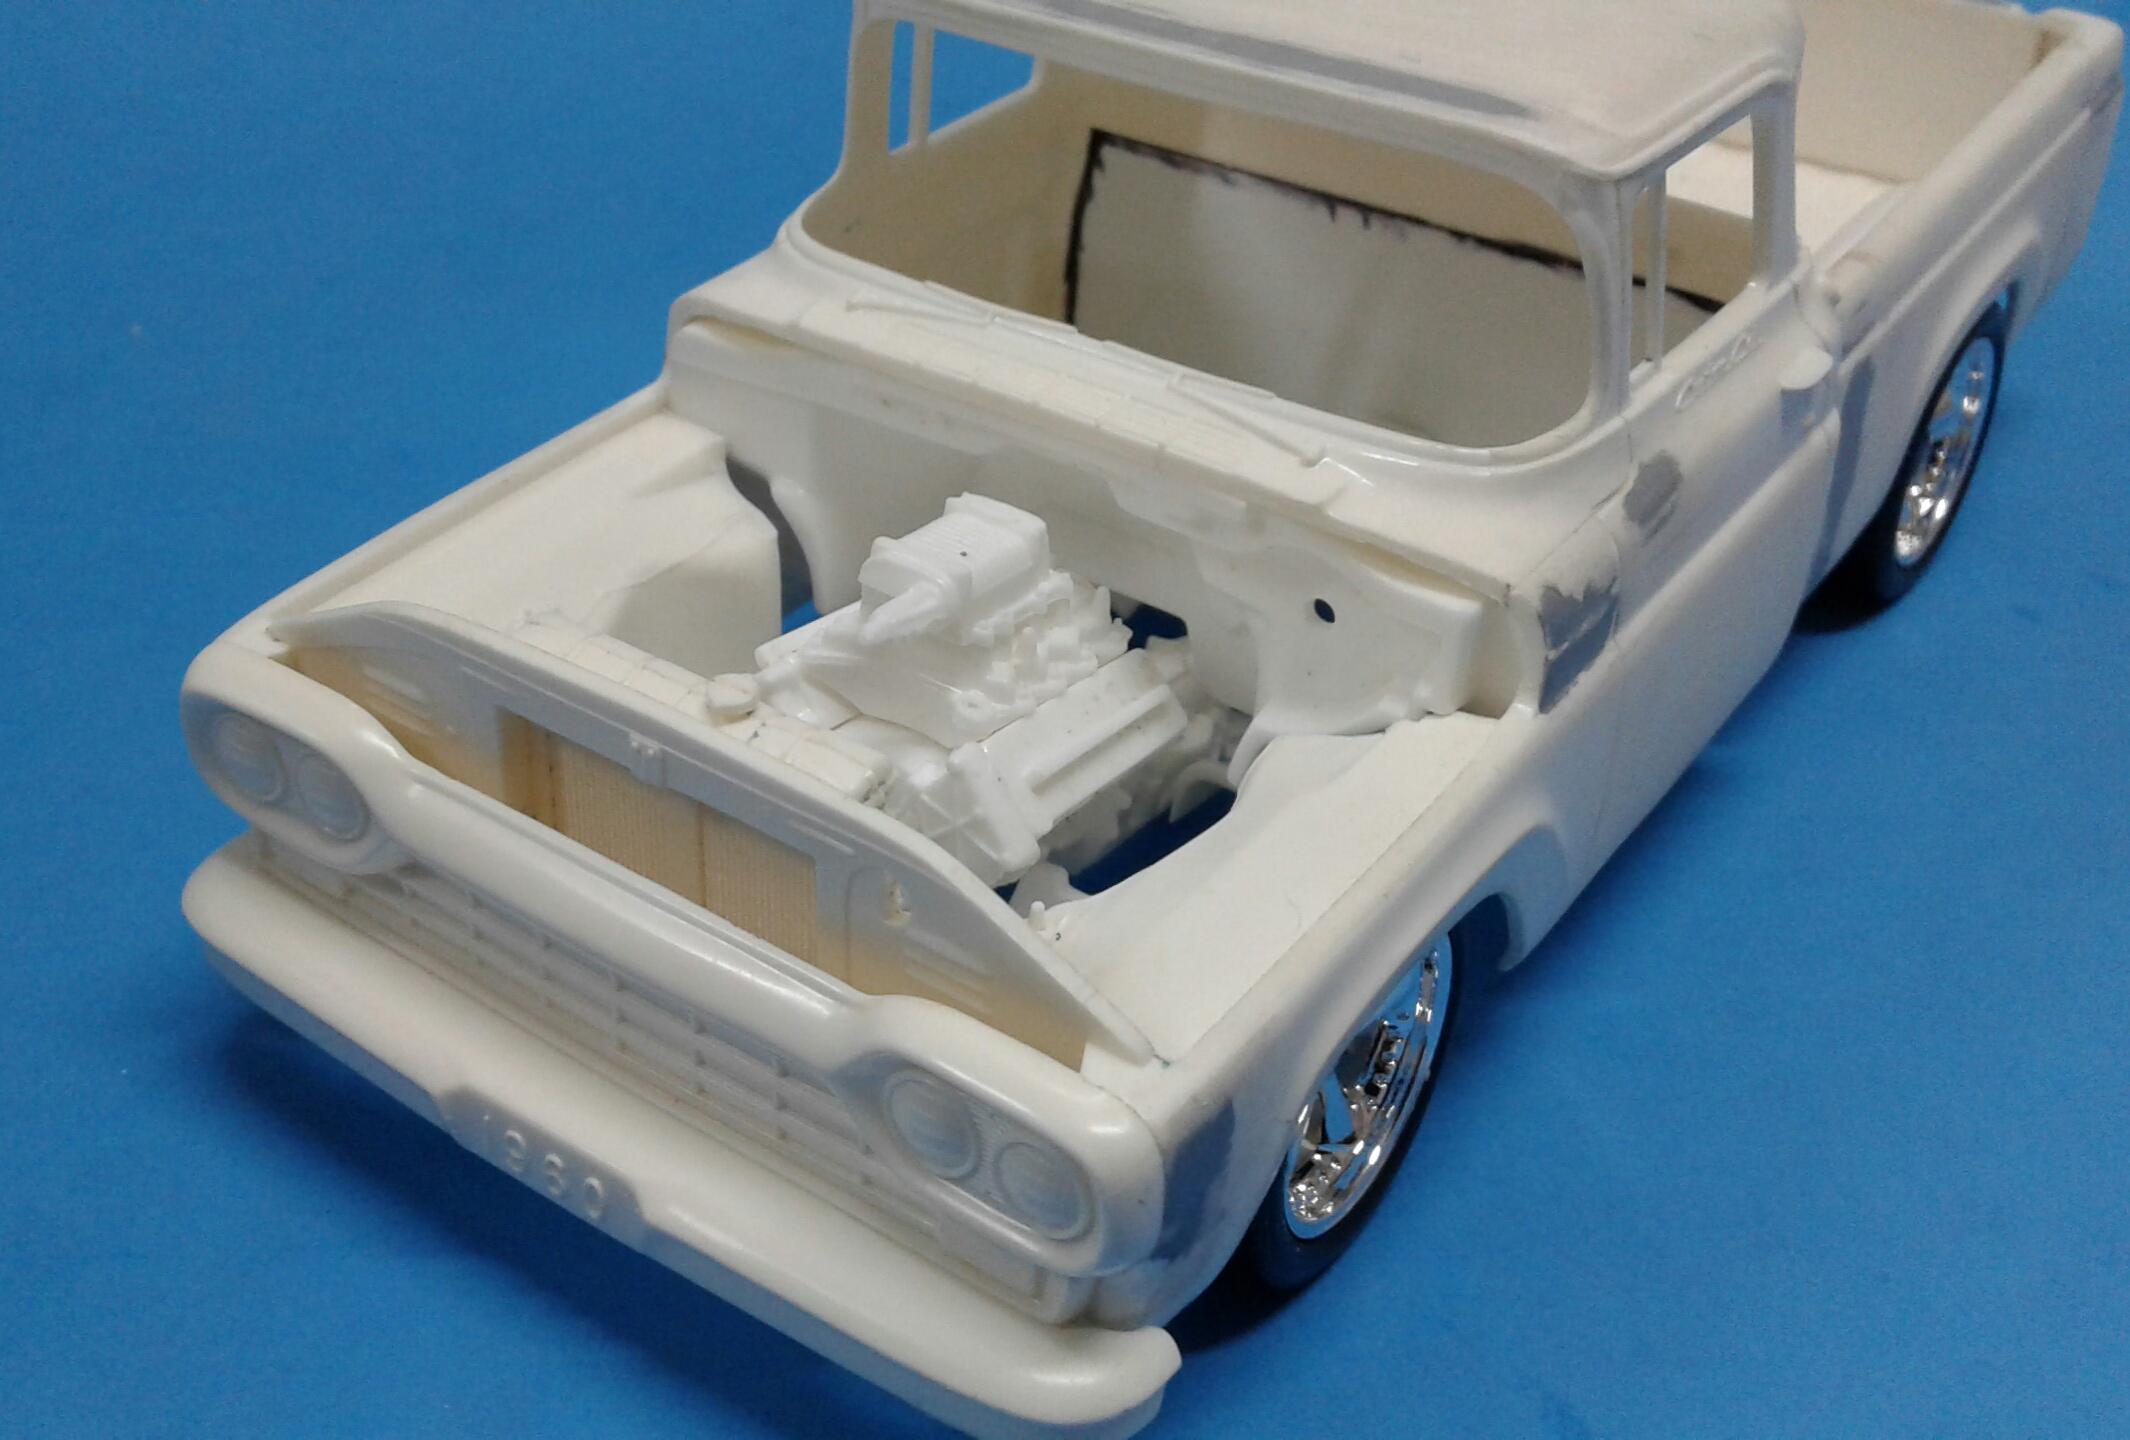
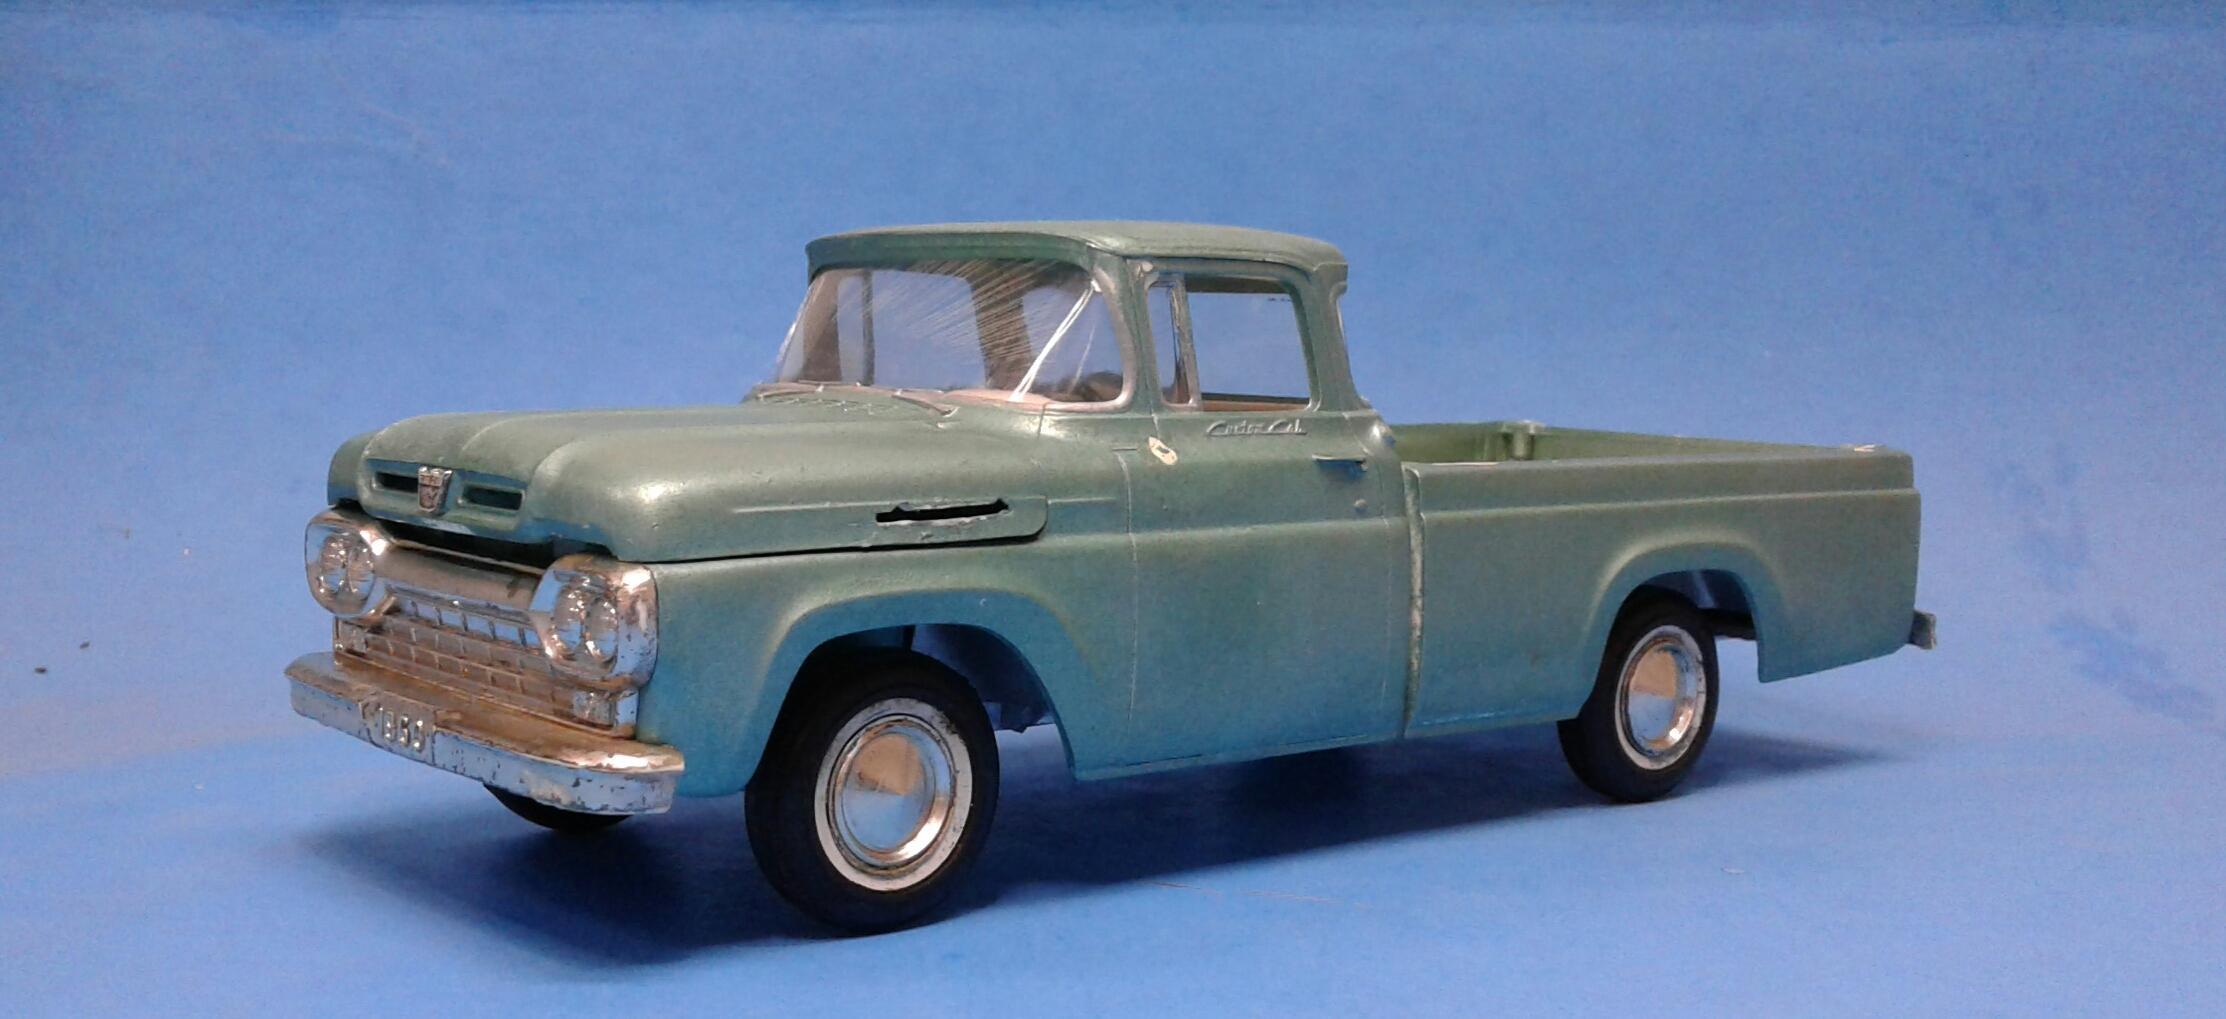
I want level or close to it. Not on the ground. The blue one has a touch too much rake. But, it can get by with it being a long bed. To me, a short bed doesn't look right hiked up in the rear. I spent yesterday getting the stance the way I want it. I didn't want to do a C notch. But, there was no way around it. I glued a strip of 2.5 x 4 mms styrene on top of the frame rails and then simply cut out the notch. I also had to get rid of the original spring perches and make new ones in the lowered position. Back to the bed. I cut the section needed for clearance out. Added pieces front and rear from the leftovers of the bed floor. Good thing I saved those! I had to do a little shimming on the ends to get a good snug fit. But, it fits like it should and gives the floor a more finished look IMO. Stance check. Right where I want it! No more stink bug stance! Next will be getting the interior worked out. All I could use from the original interior was the seat and dash. I'm going to have to make the door panels. They won't be back to stock. But, similar.
-
So sharp and well put together! Love the color and the stripes! That had to put a smile on your face when you added the last detail! Nice work Craig!
-
Thanx to everyone for all of the great comments! I appreciate it!
-
1960 Ford F-100
Plowboy replied to Plowboy's topic in WIP: Model Trucks: Pickups, Vans, SUVs, Light Commercial
I like those wheels also. But, the more I look at the stance, the more I don't like it. I gotta fix it. Whatever it takes. -
1960 Ford F-100
Plowboy replied to Plowboy's topic in WIP: Model Trucks: Pickups, Vans, SUVs, Light Commercial
I think the small red lenses from the Revell Del Rio will work. If not, I have some other red lenses that I can cut down to fit. -
1960 Ford F-100
Plowboy replied to Plowboy's topic in WIP: Model Trucks: Pickups, Vans, SUVs, Light Commercial
Thanx! I didn't. But, I wouldn't have used them if I had have had them. -
1960 Ford F-100
Plowboy replied to Plowboy's topic in WIP: Model Trucks: Pickups, Vans, SUVs, Light Commercial
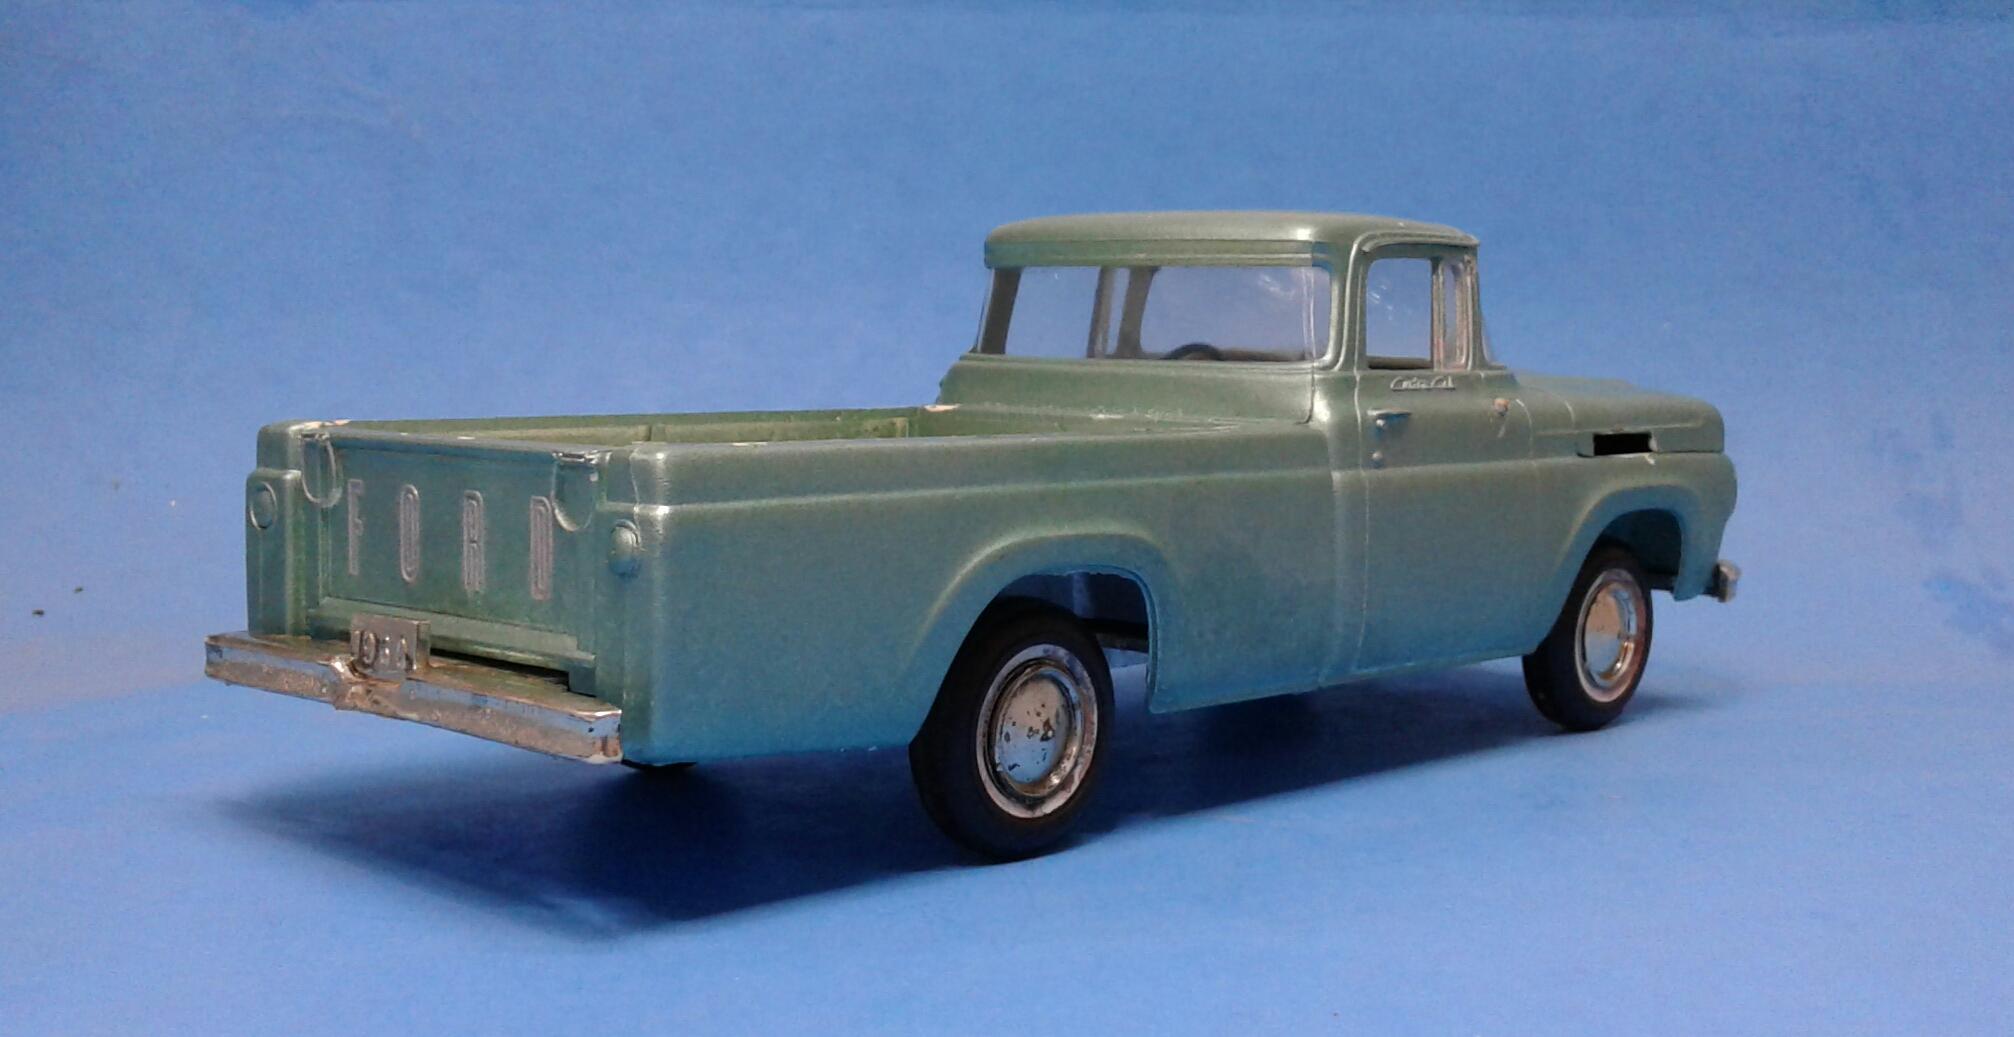
I got the second set of wheels and tires made up last night. The centers are from an AMT '62 Bel Air stuck inside a set of Pegasus sleeves with '61 or '62 hubcaps. Tires are from the Lightning. Not 100% on these either. Almost too stock looking. I have one more idea that I want to try before I make up my mind. Not real happy with the stance. The rear can't go any lower without making a ton of modifications to the frame and bed floor. But, I may do it to get it the way I want it. I wasn't able to salvage both tail lights. So, I drilled out what was left and replaced them with aluminum tubing. On the inside of the bed, I simply added a piece of styrene to close up the hole ànd give it a finished look. I'll have to come up with some tail light lenses for it. I haven't decided if I will use the rear bumper or just fill in the slot. I ordered the paint last night also. I'll be using Tamiya Gray Green and Racing White. If I use these wheels and tires, the body will get Gray Green with a white roof, grille, bumpers and wheels. If I use modern wheels, the lower section will be Gray Green and the top section will be white or visa versa. Either way, the grille and bumpers will be white. Here's a photo with the Foose wheels.
-
Sharp as a tack! I'm going to have to see if I can get a can of that Hampstead Green. That is a really nice color!
-
That's a really nice looking little wagon Bob! I really like the color on it! Bonus points for adding backing plates to the wheels. ? Well done!
-
1960 Ford F-100
Plowboy replied to Plowboy's topic in WIP: Model Trucks: Pickups, Vans, SUVs, Light Commercial
Thanx Tom! Originally I had two plans for this truck. One was to use the Foose pickup chassis and drivetrain. The other was to use the AMT '53 chassis with the blown Y block from the Revell Del Rio. But, then I came up with this plan. -
1960 Ford F-100
Plowboy replied to Plowboy's topic in WIP: Model Trucks: Pickups, Vans, SUVs, Light Commercial
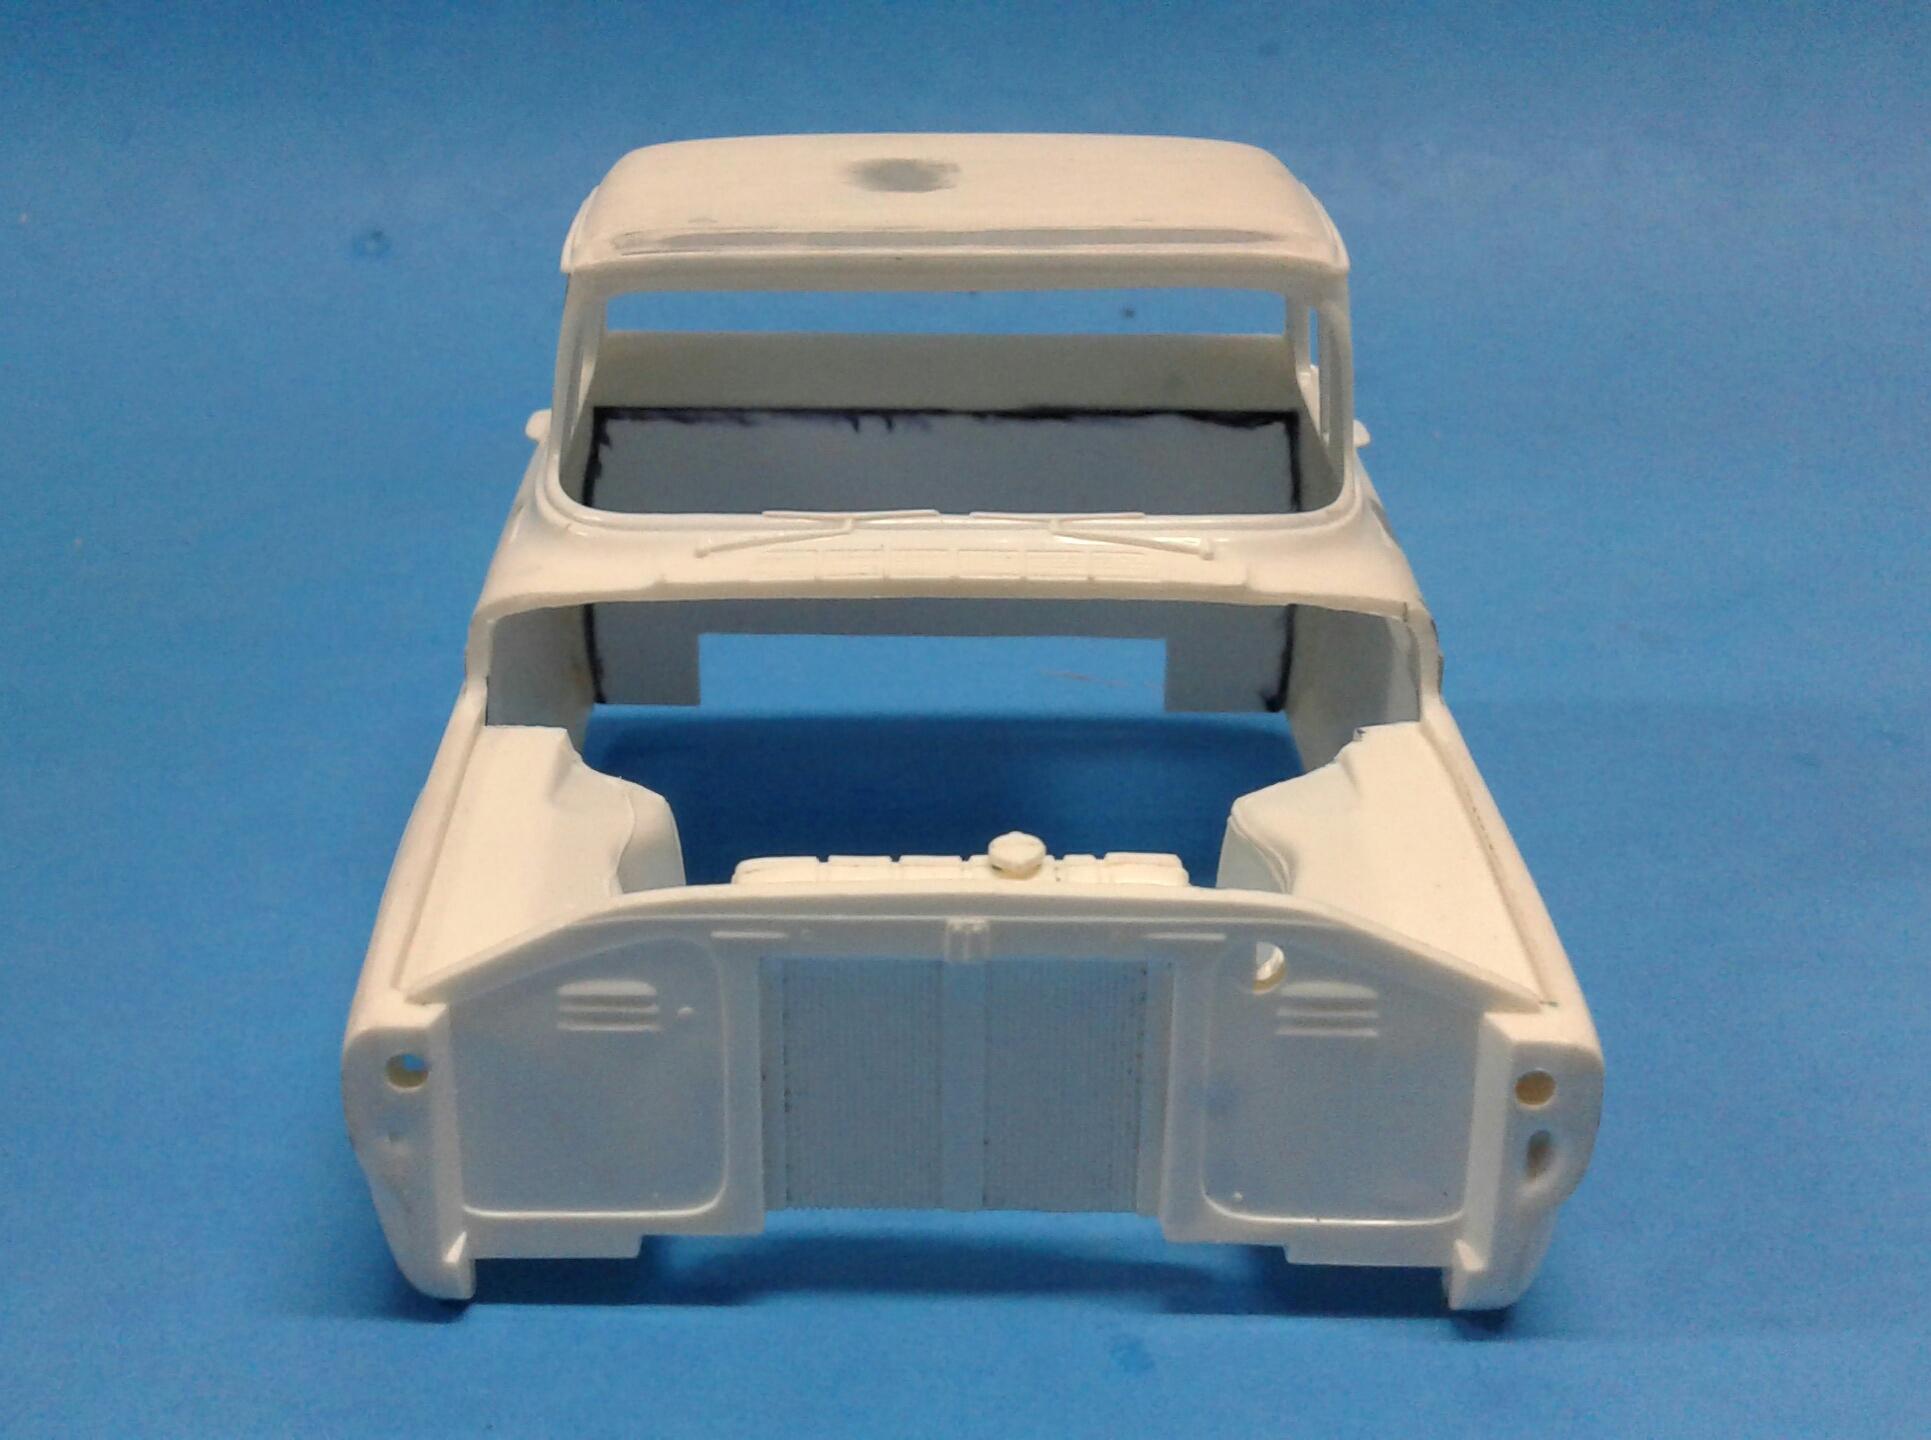
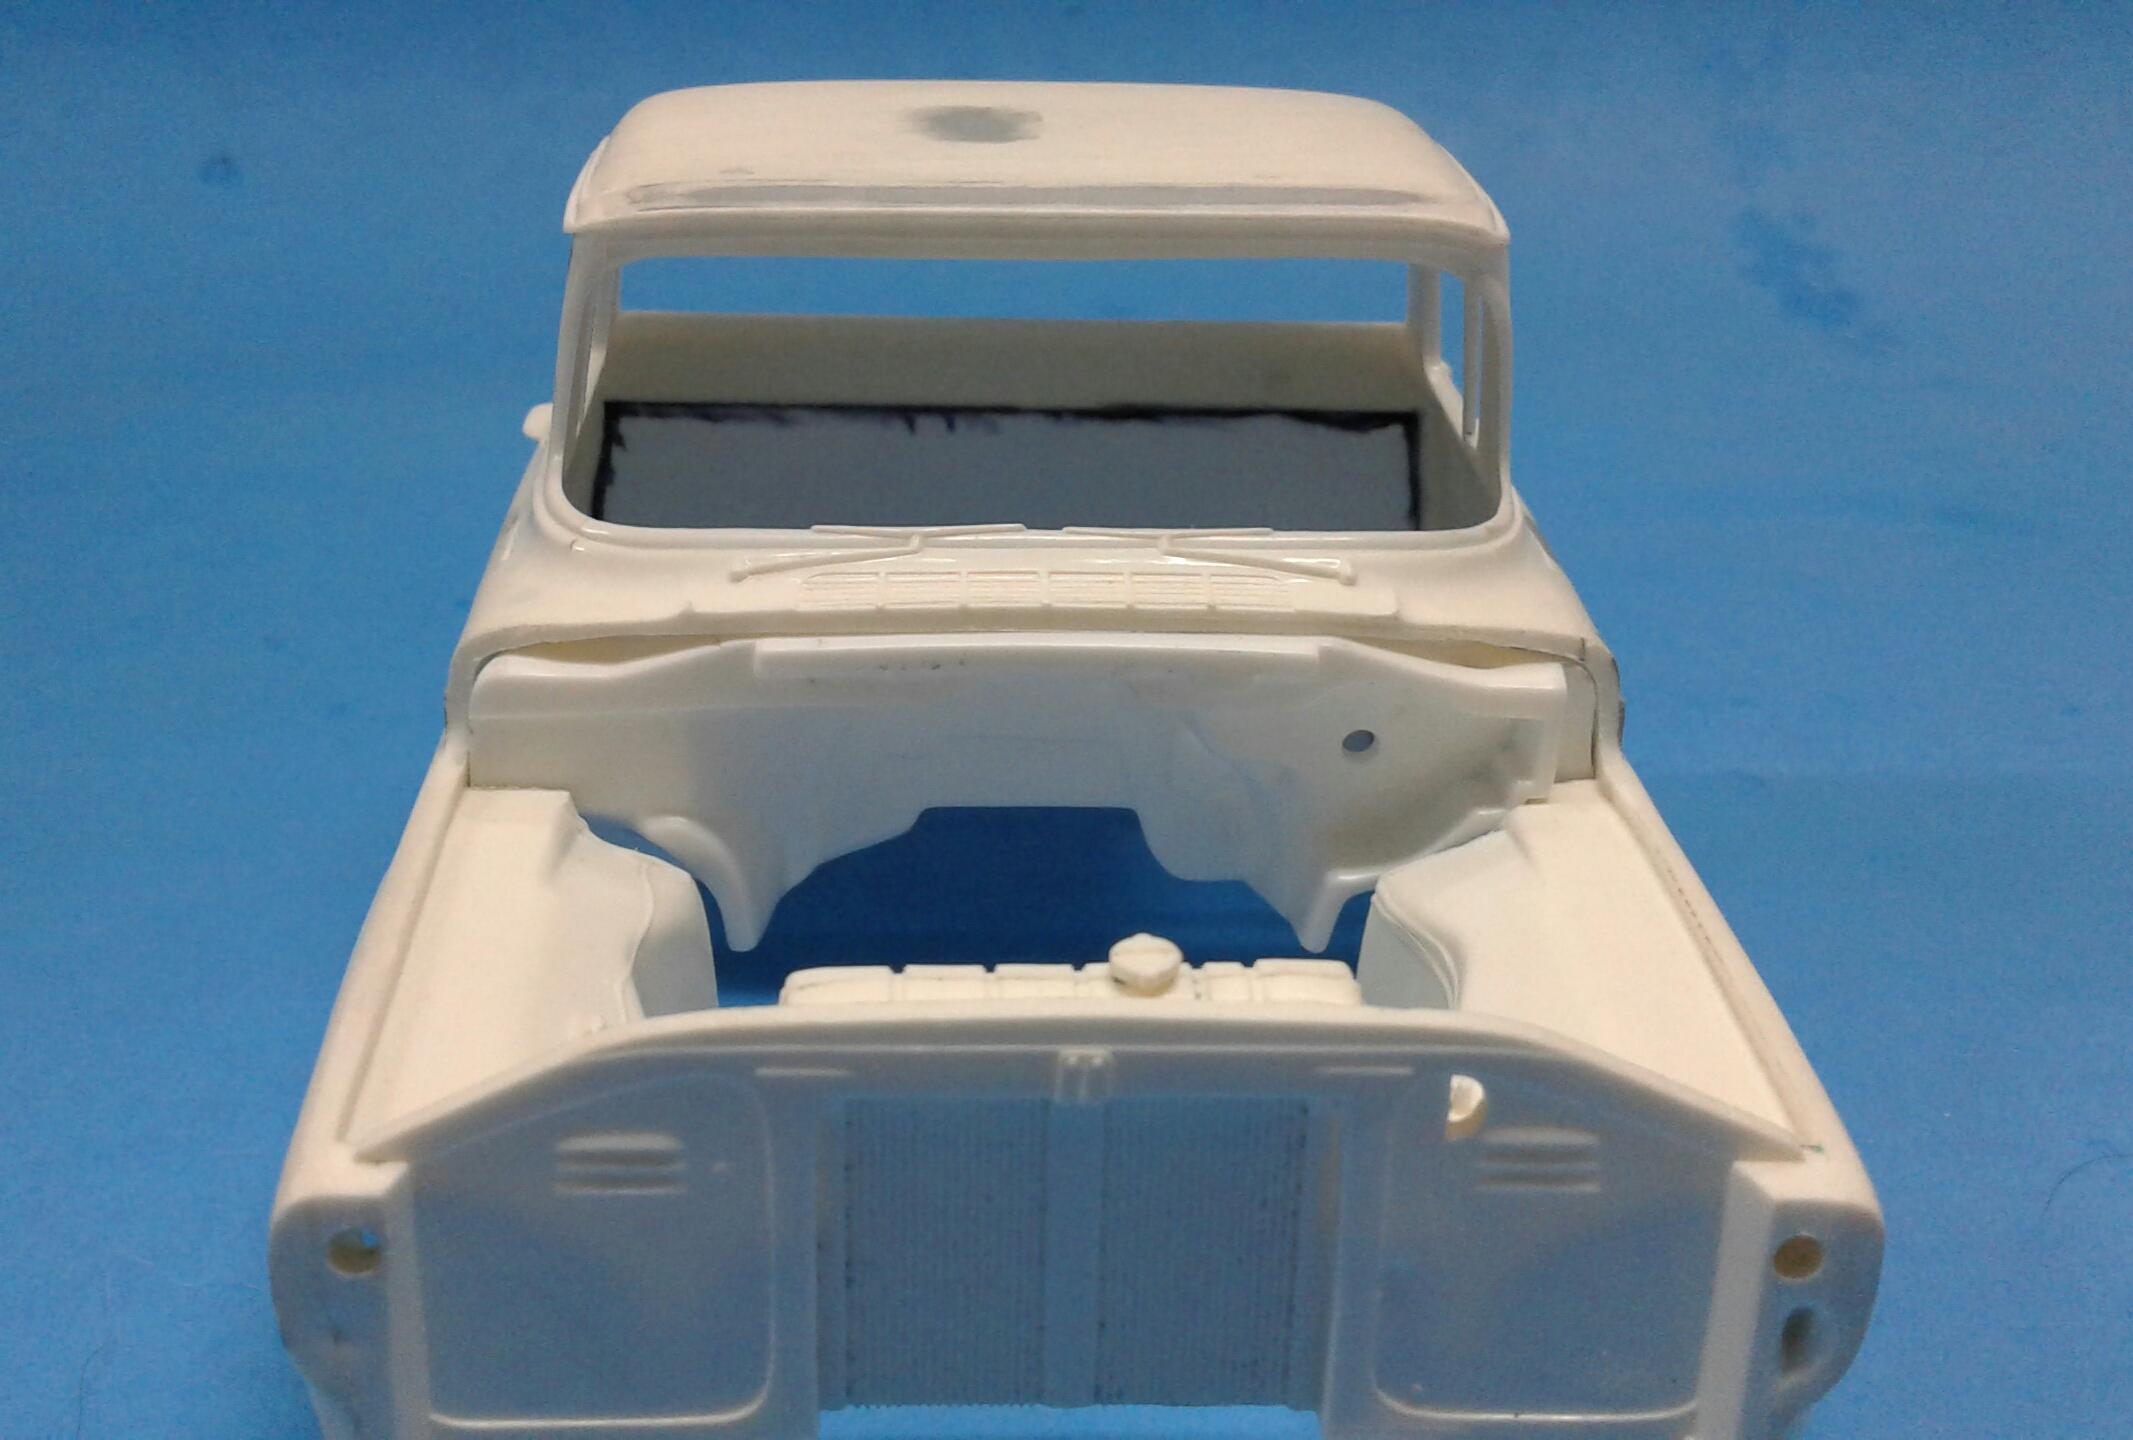
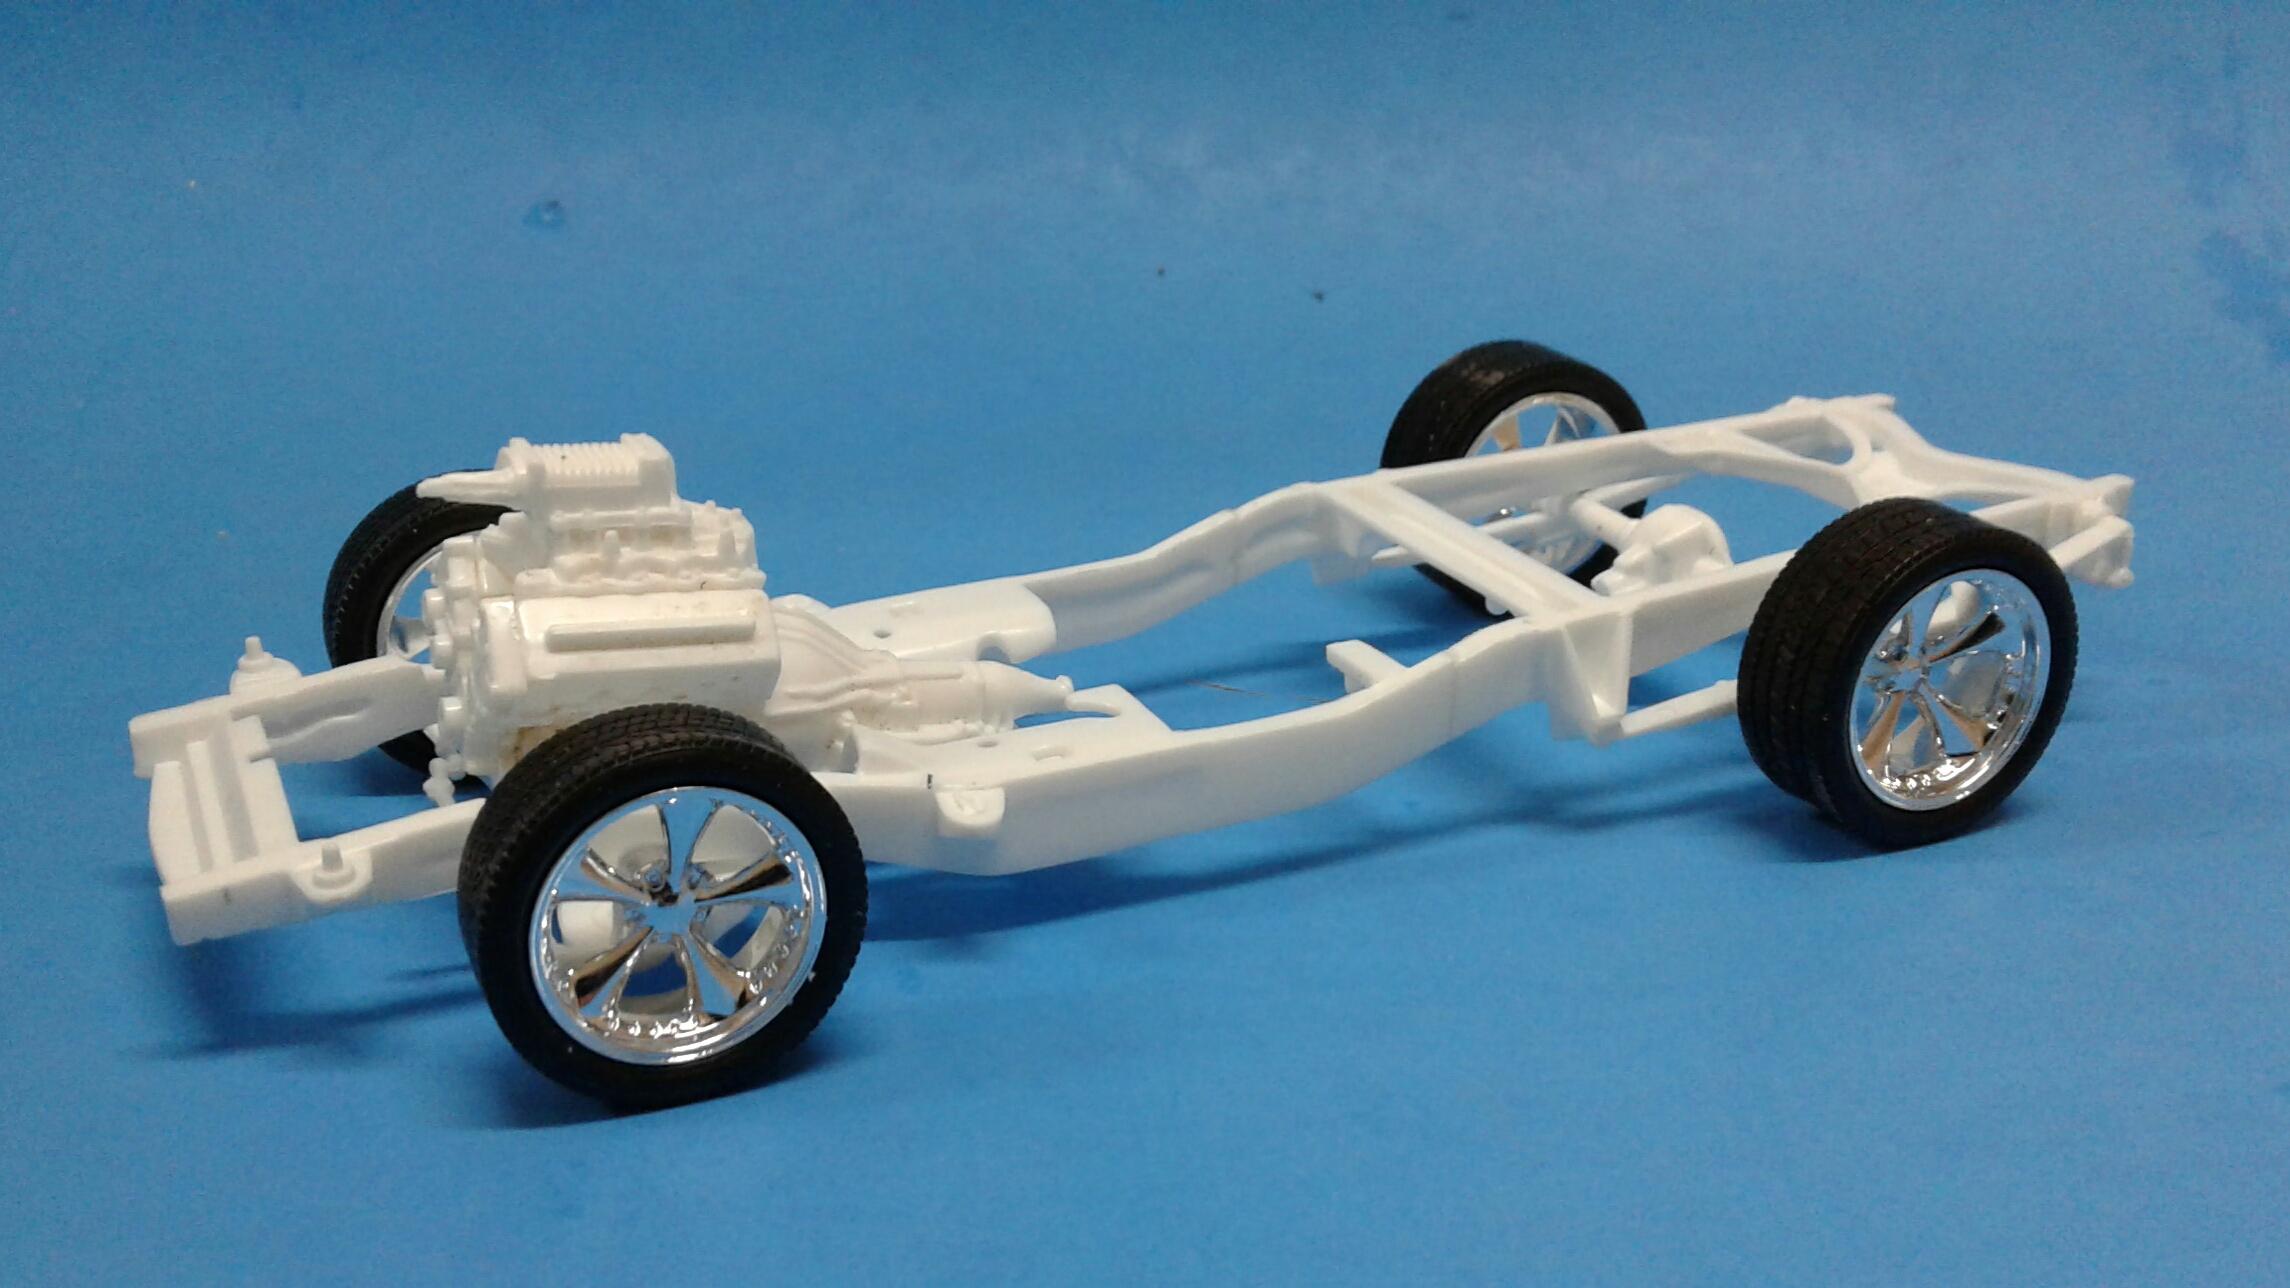
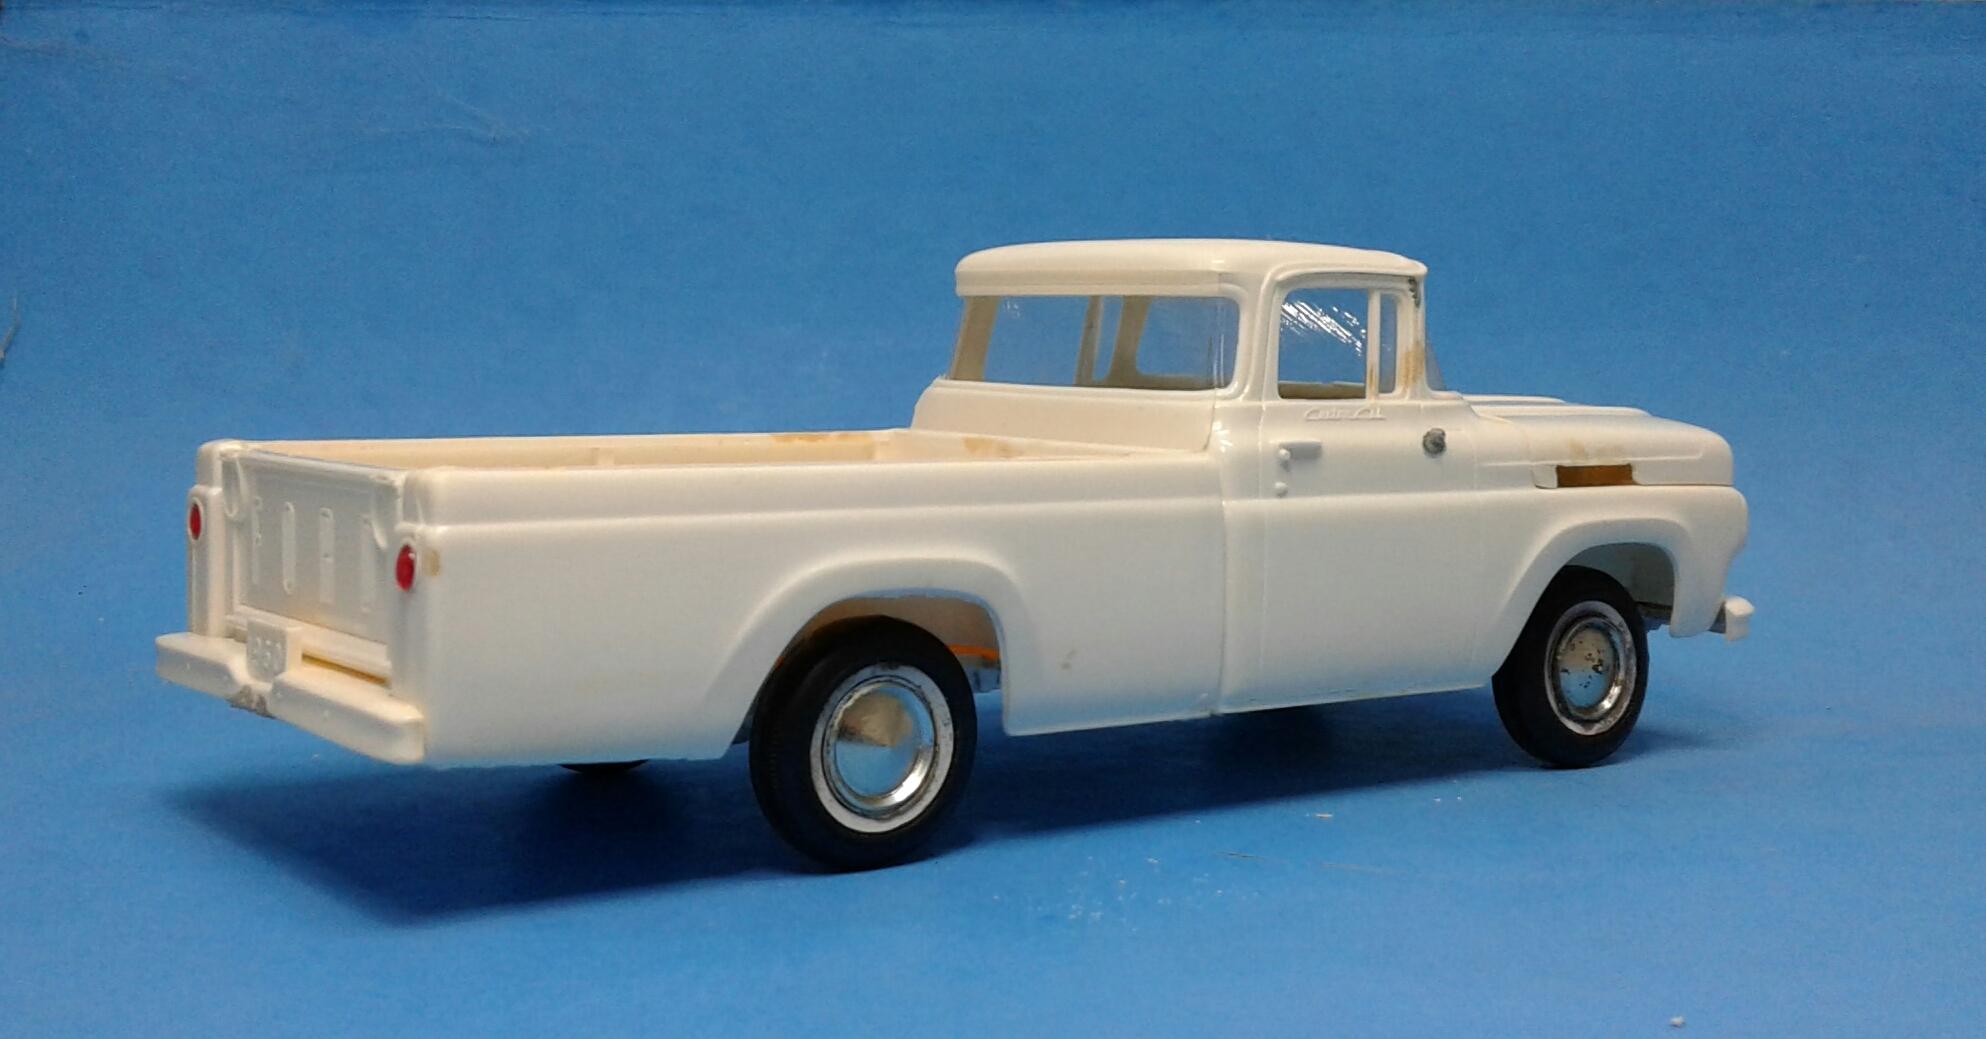
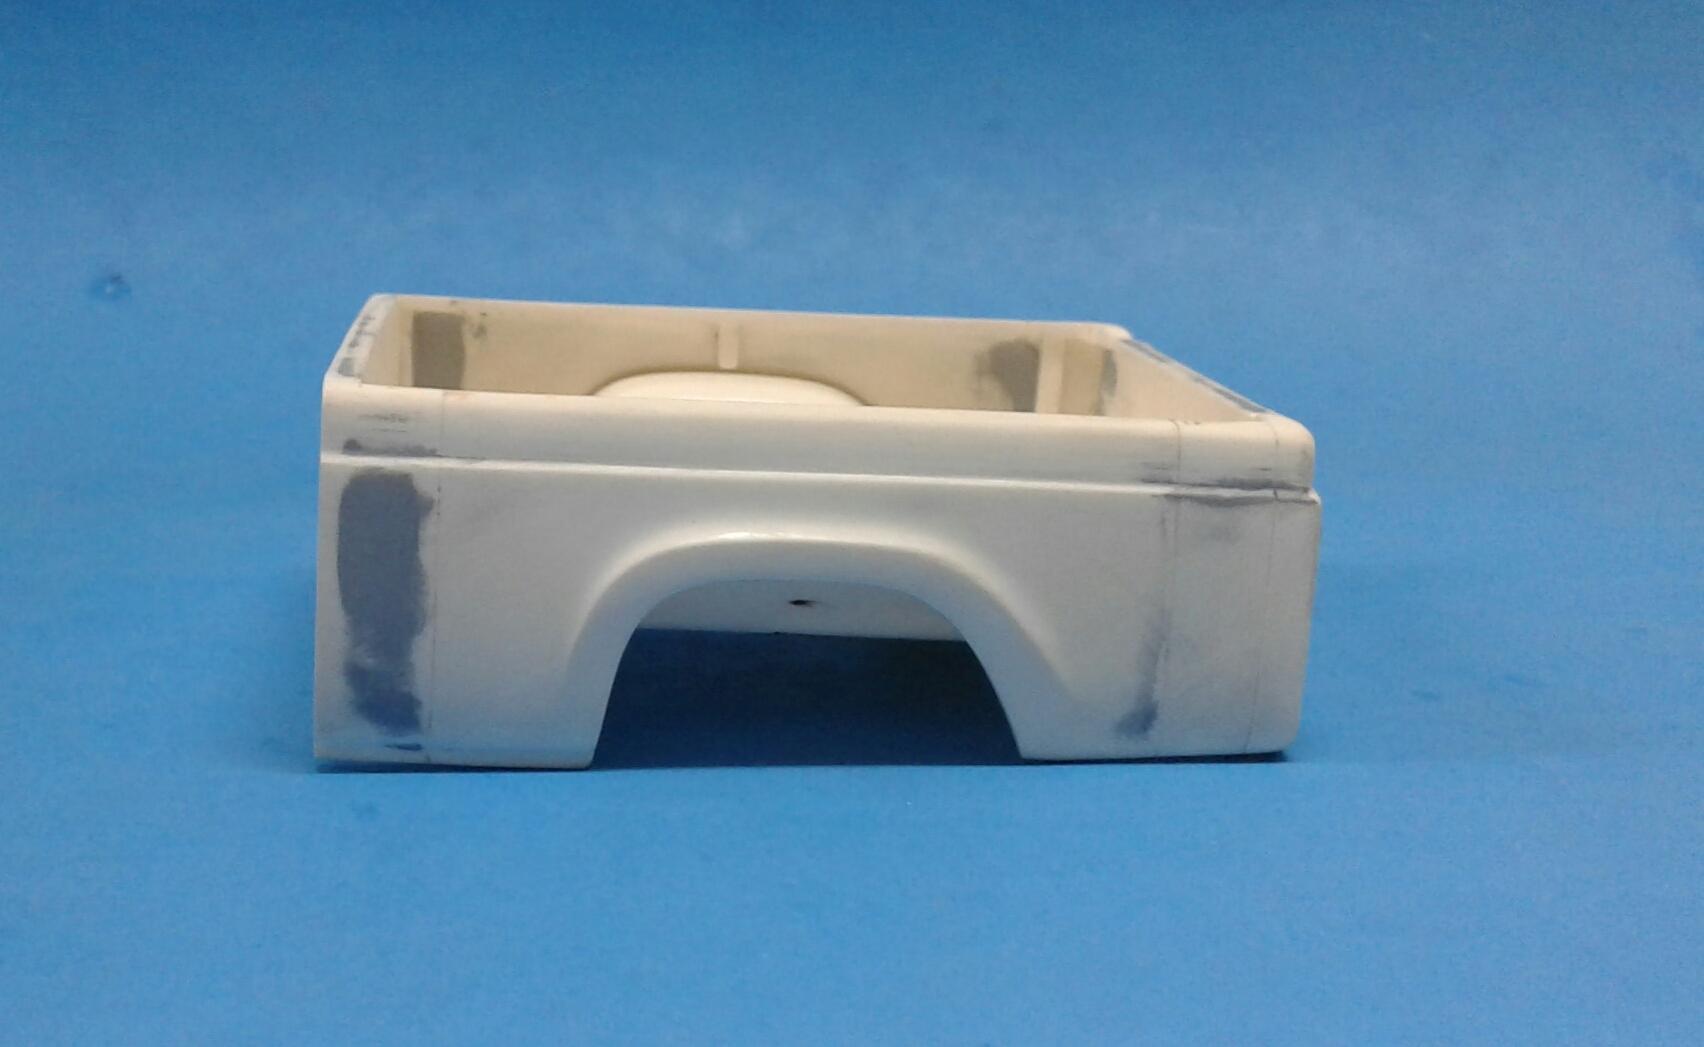
Back to the cab. I cut away the old firewall to make way for the new one. I took the firewall from a '99 Lightning. Yeah, I'm bashing this with a Lightning! I was surprised at how little trimming was necessary to get it to fit. Just needs a little filling in on the wheel wells. Next, I cut the floor pan from the Lightning to fit. I cut all of the length from the rear and trimmed the sides to fit. Chassis is shortened to fit. Basically I set the cab on and cut the chassis at the cab wall. Then set the bed on and cut it at the front of the bed. Then I just glued the two halves back together. I assembled part of the engine for mockup purposes also. I still have to make a C notch in the frame above the rear axle. When I stuck the engine in the frame and saw how far it set back, I just knew I was going to have clearance issues. But, when I stuck the cab on, I have plenty of room!
-
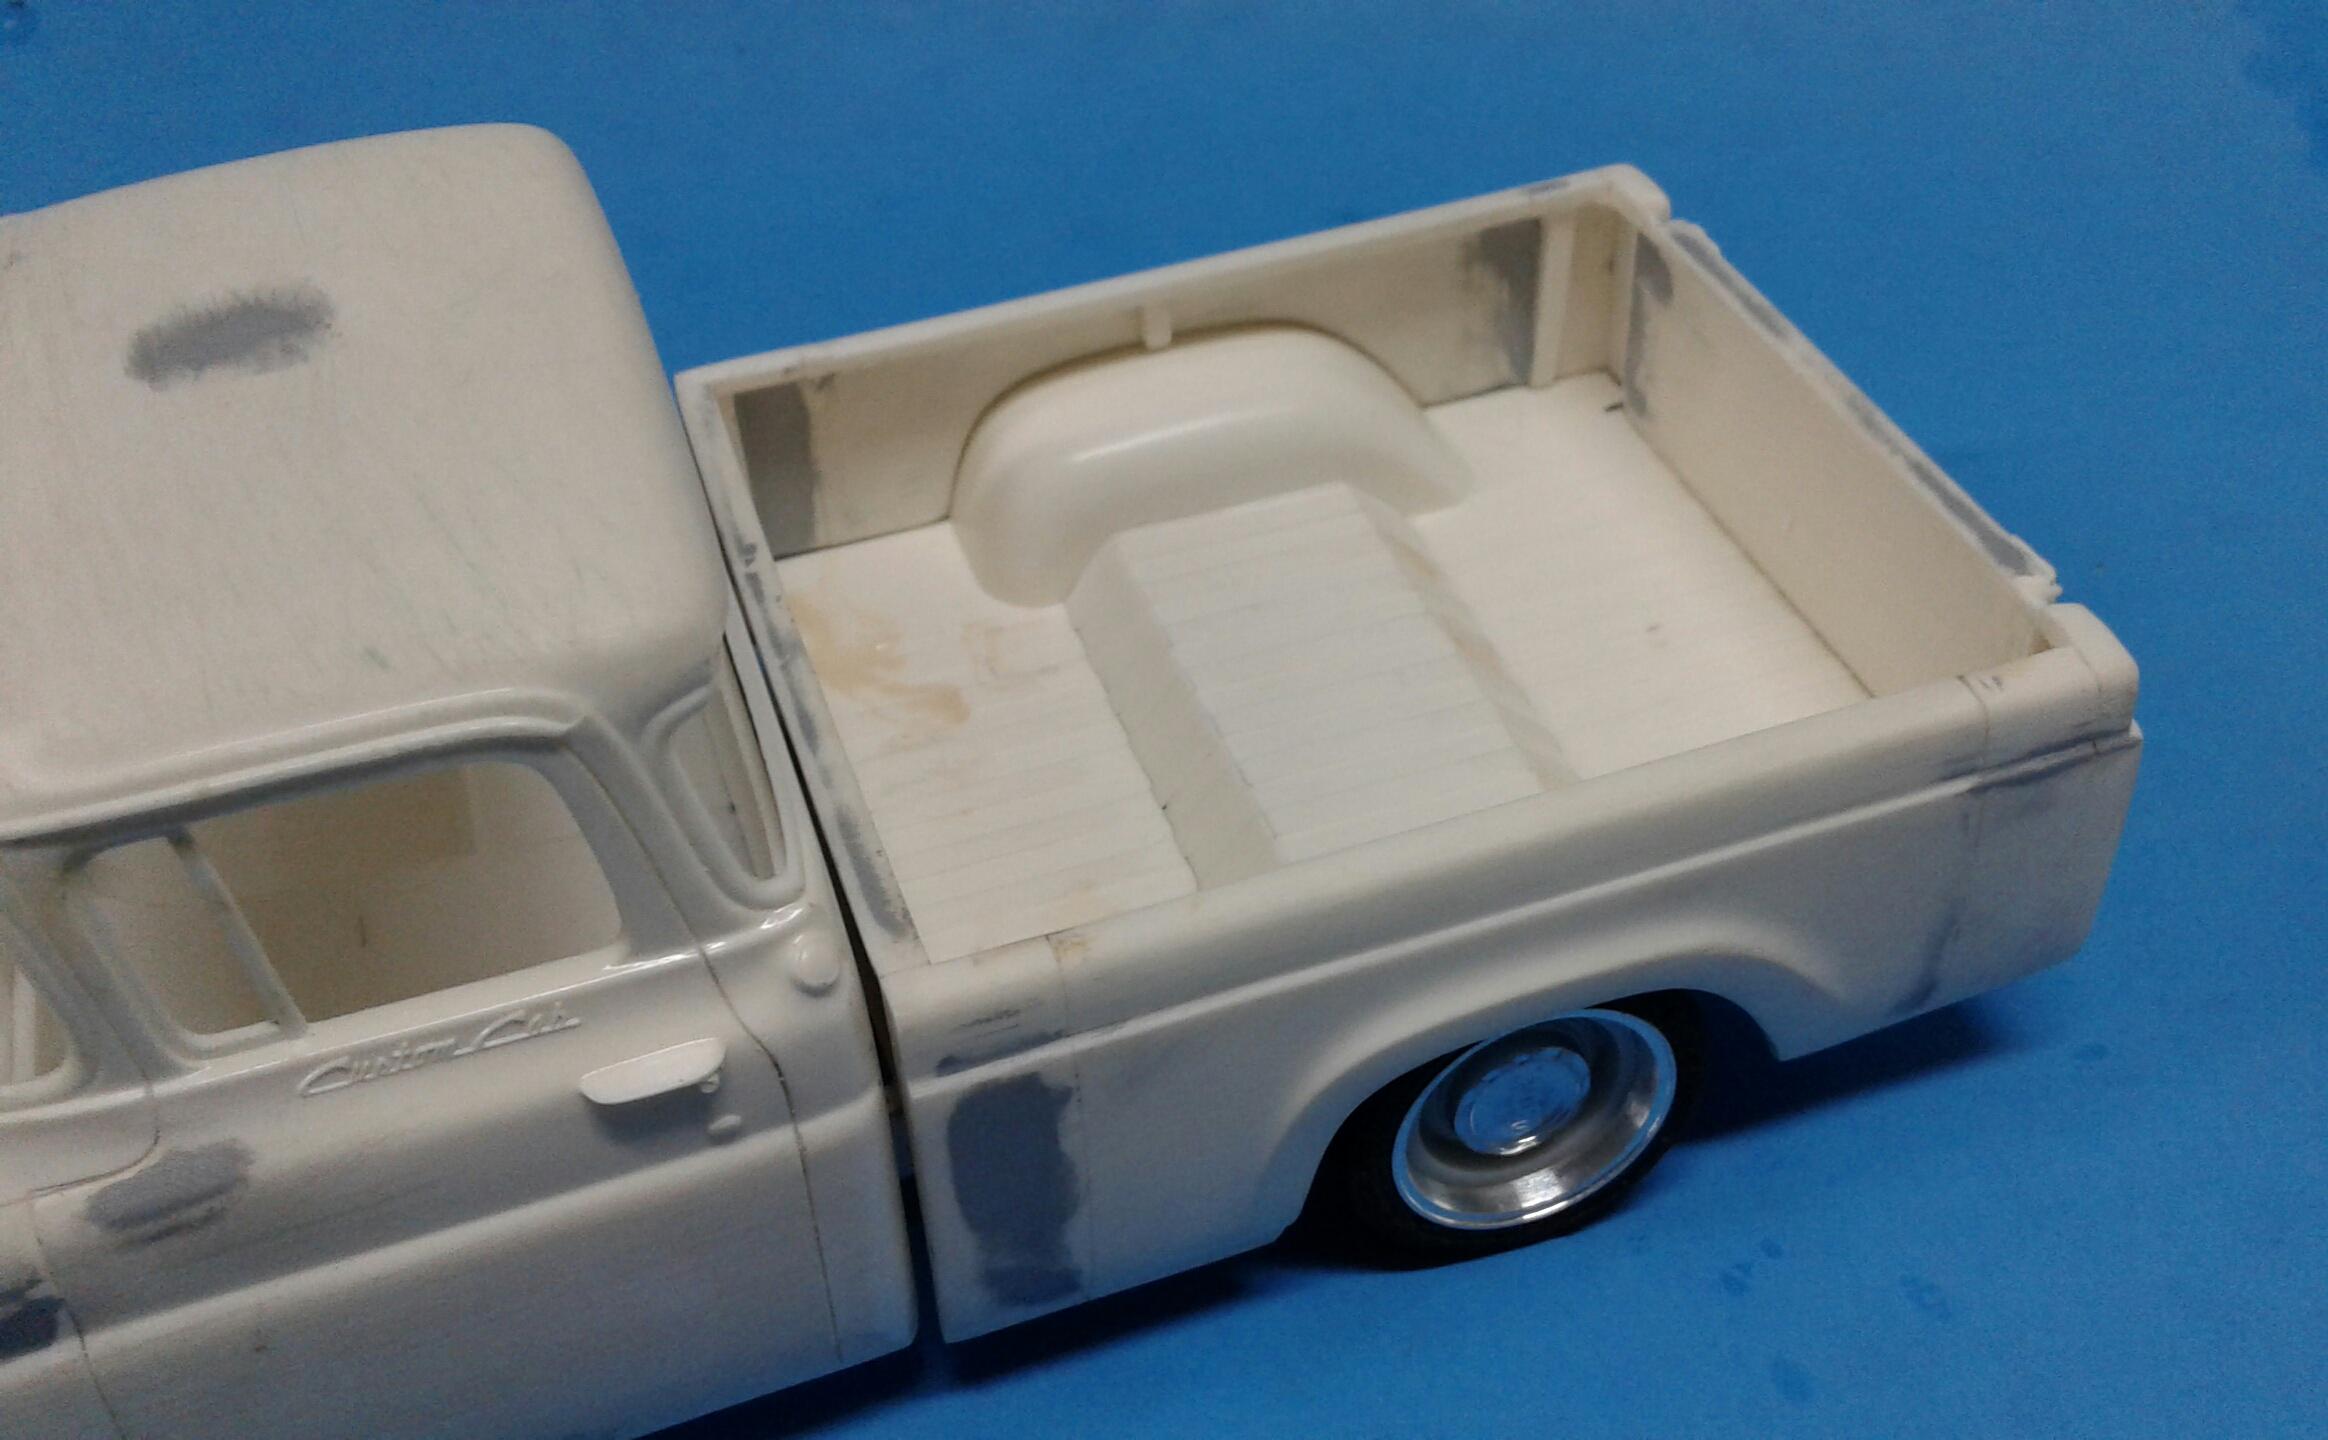
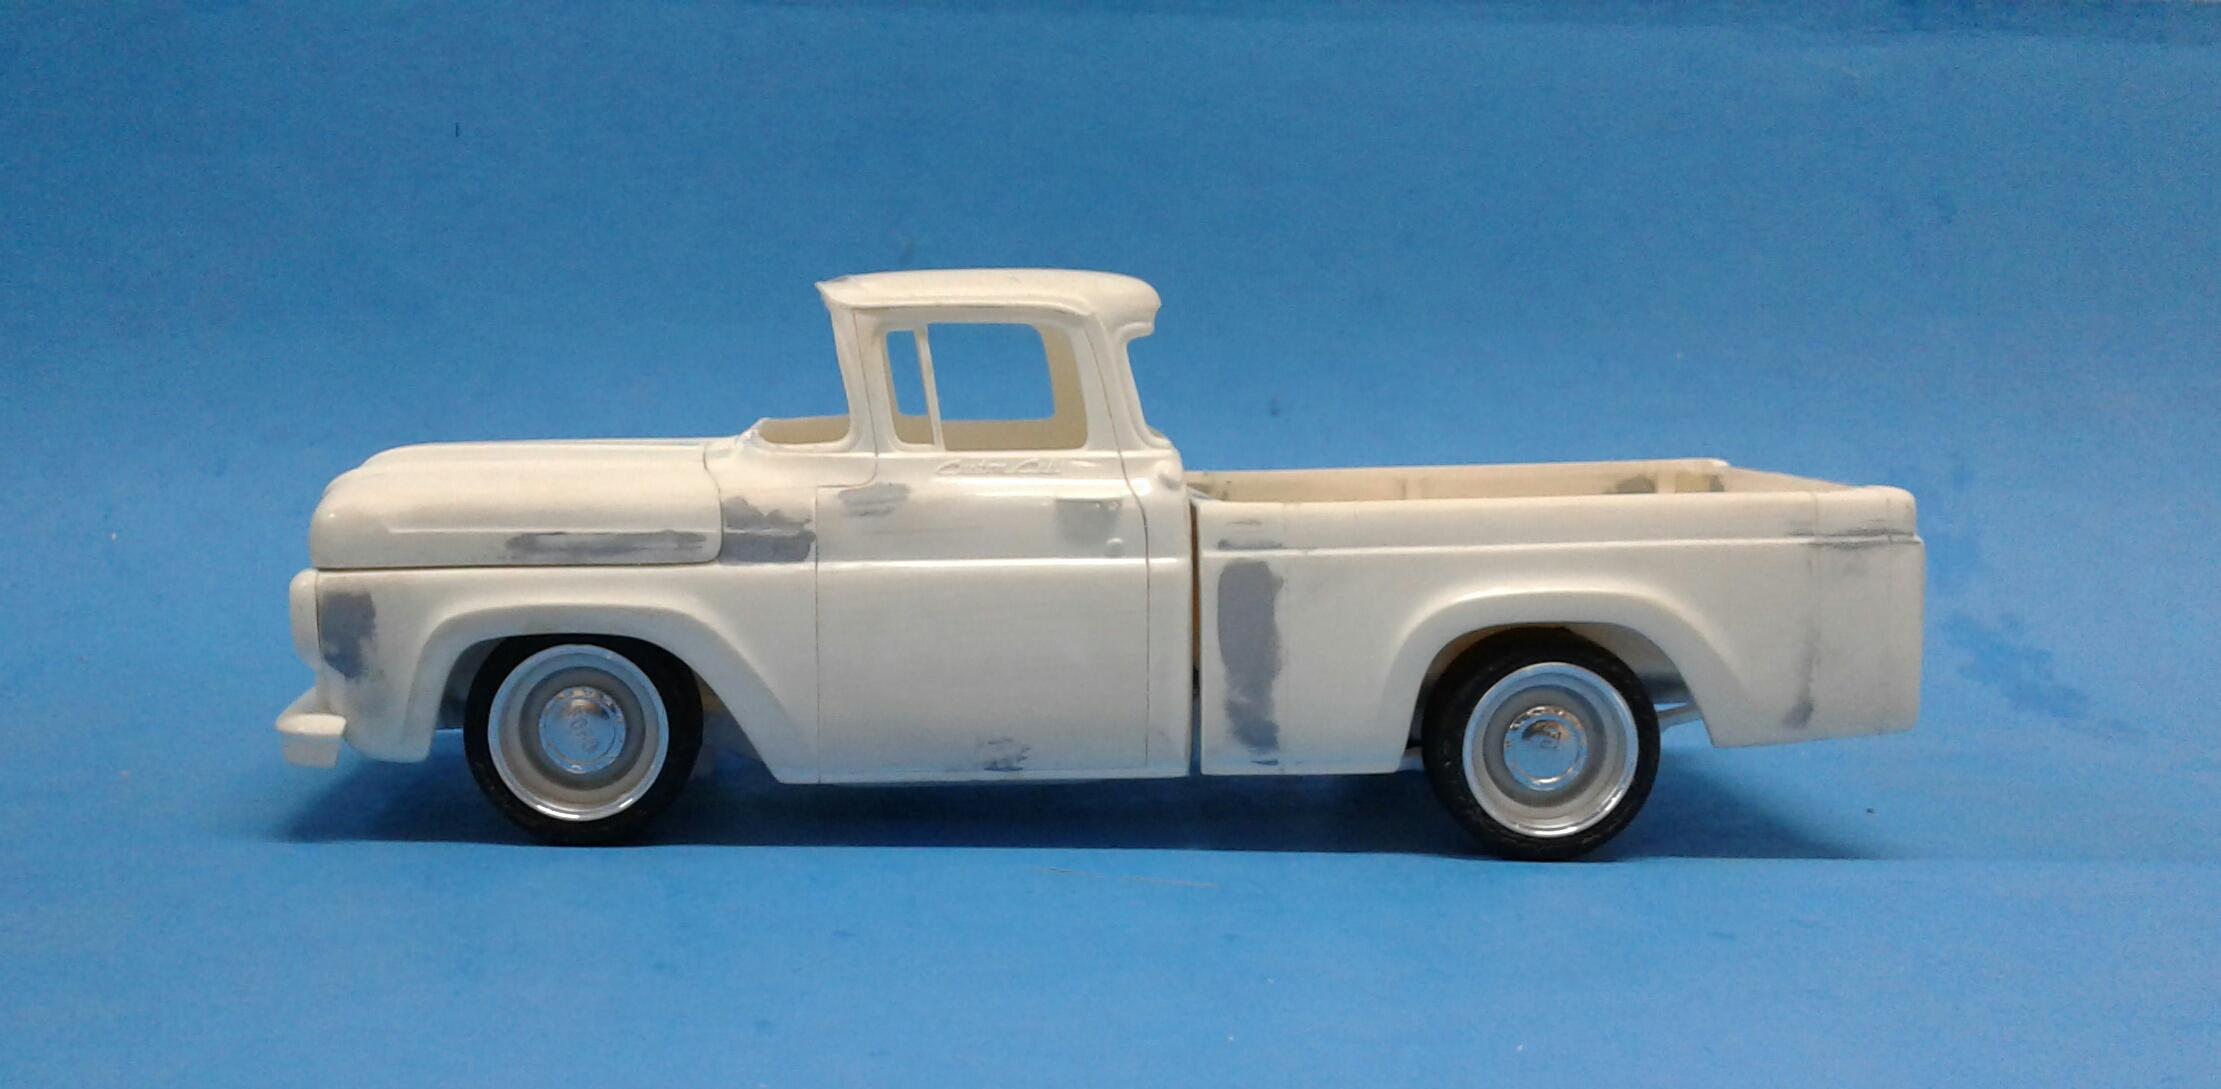
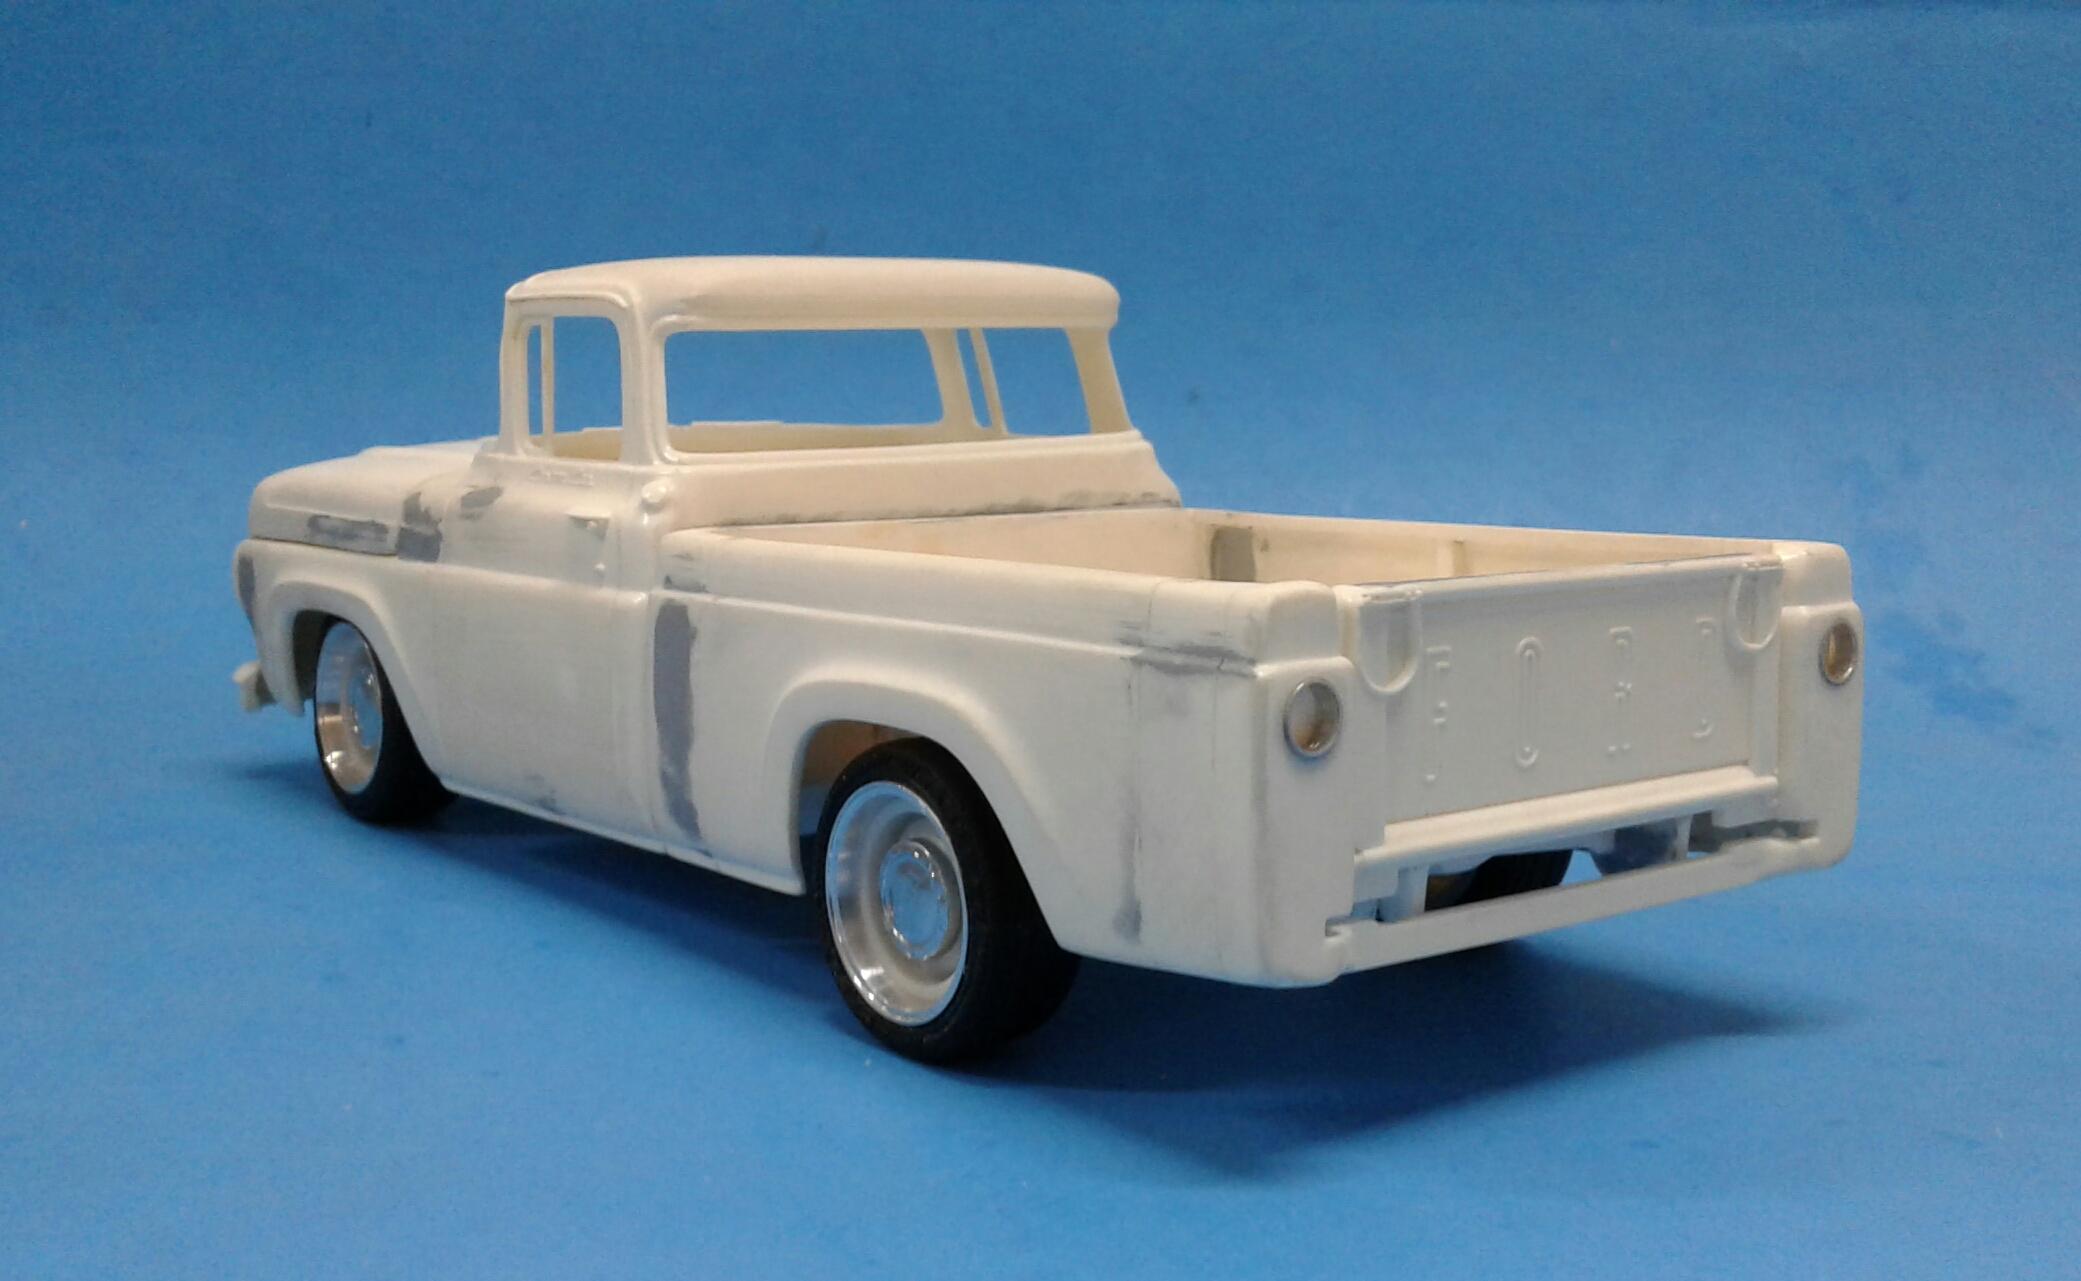
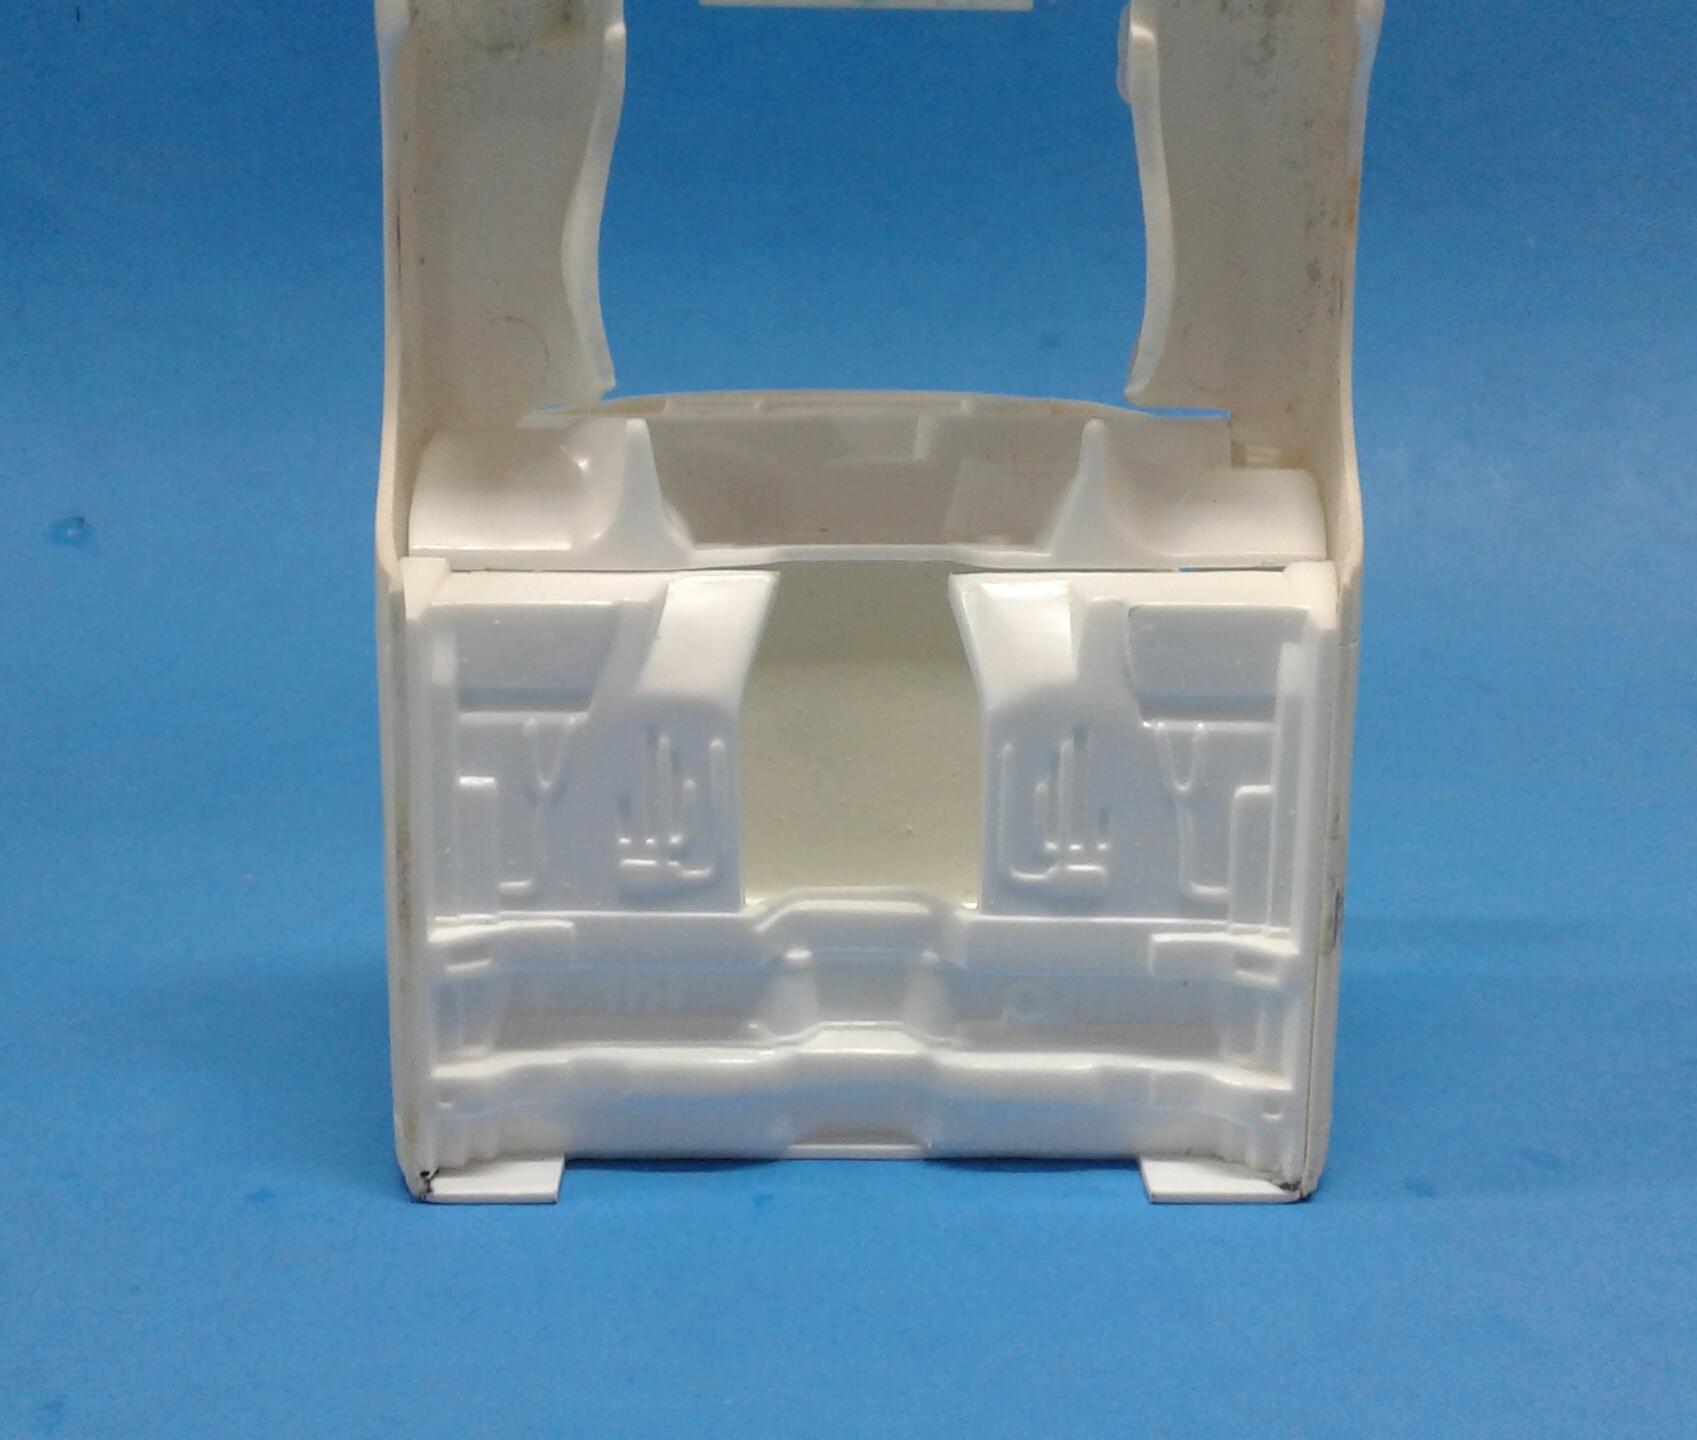
Ever since I built my first '60 F-100, I've wanted to build another one with more detail and as a short bed. But, they don't come around very often and when they do, they'll hurt your wallet. I was actually thinking about blowing this one apart and giving it the treatment. But, I kept putting it off thinking one would eventually pop up. So, when I got the chance to trade for this builtup, I jumped on it! Thanx Scott! This is what it looked like when I got it cleaned up a bit. Stripped clean. First task was to separate the cab from the body and fill in the rear of the cab. Next was getting the bed cut down to a short bed. I removed eight scale inches from the front of the bed and ten from the rear. More later.
-
This is a really cool Mustang! Nice color and the wheels suit it perfect! It may have given you problems. But, you got them all figured out! IMO, this is some of your best work Ray! Well done!
-
Closest you'll get from a kit is the Revell COPO Nova or Camaro.
-
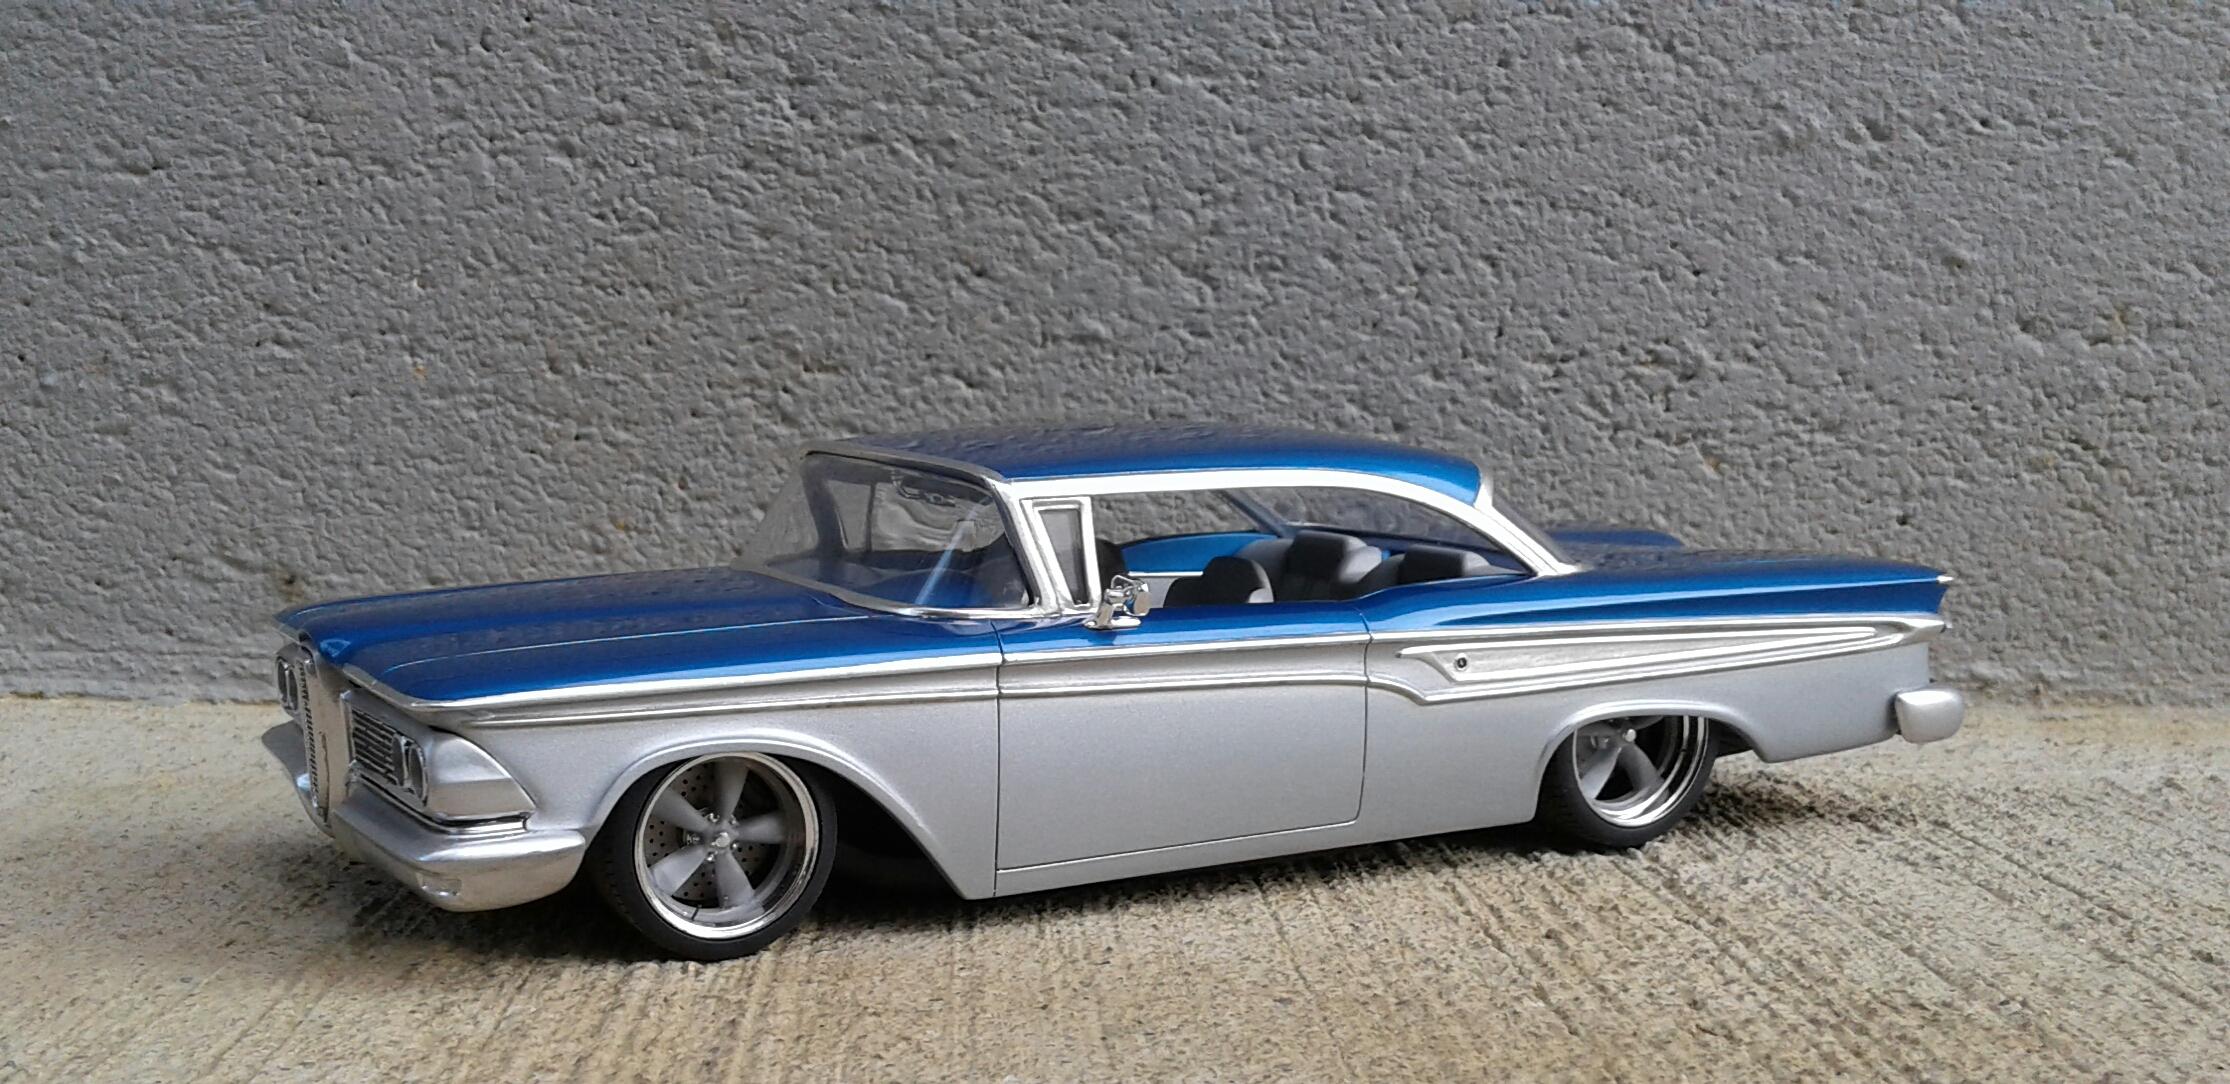
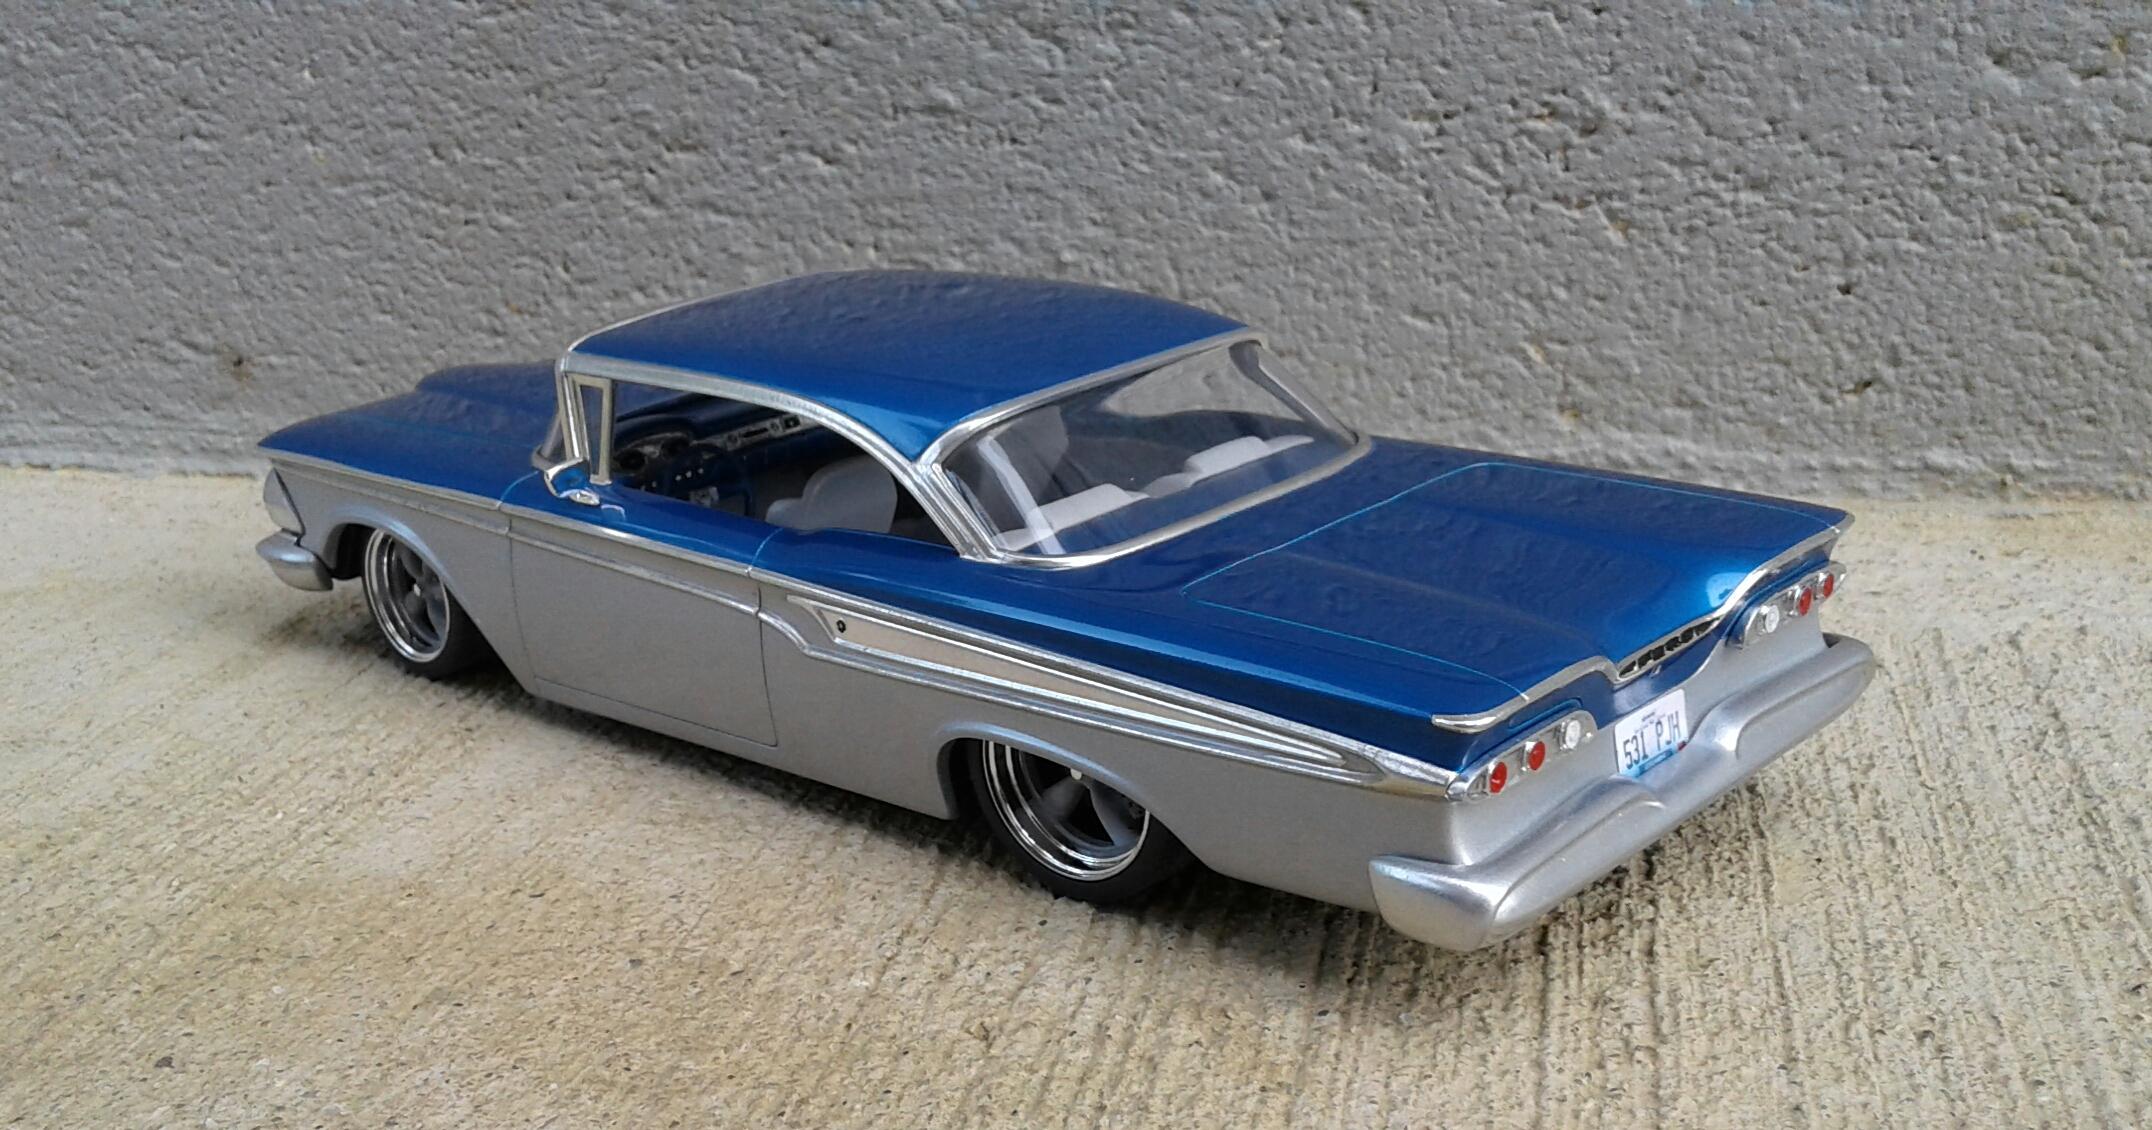
Thanx! If you like this model, you may also like the '58 Edsel Phantom Wagon I did a couple of months ago.
-
Thanx! I used Dupli Color Chrome. It has more of a brushed/satin chrome look to it. It may look better airbrushed.
-
Adding a "crease" to a model car body?
Plowboy replied to Hawk312's topic in Model Building Questions and Answers
If you're going to scribe it, definitely do it on the inside. That way, the line will close and it can be glued easily. Scribing on the outside will cause the line to open up and require filling. Before scribing on either side, check to make sure the fit between the body and chassis has enough room for the amount you'll be bending the body to make the crease sharper. Bending both sides in at the bottom will reduce the width even if it's a small amount. -
Just finished this one up. Another stalled project out of the pile! It started out as an old painted up convertible promo with a cracked windshield frame. I'm not a big fan of convertibles (especially ones with no top) and the interior isn't that great either. So, the decision was made to turn it into a hardtop. I had an old built up '57 Fairlane that donated it's roof. I was going to attempt making the roof as it should be. But, after looking at photos of the full scale, I decided I liked the Fairlane roof much better. To me, it looks a lot sleeker with it. Besides, it was going to be a custom anyhow. I actually had the body in paint and clear (Tamiya Mica Blue and Silver) when I decided to build a different interior for it. Not recommended BTW! I used the interior tub and custom seats from the '57 Fairlane. I sanded the panels smooth and created my own design with styrene rod and .020 styrene. The seats and door panels got Tamiya Gray Primer with a coat of floor polish. The dash, top of the panels and package tray got Mica Blue. Wheels, tires and disc brakes are from Pegasus. Thanx for checking it out!
-
Adding a "crease" to a model car body?
Plowboy replied to Hawk312's topic in Model Building Questions and Answers
I just use putty and careful sanding. Anyone familiar with this kit knows how rounded and misaligned the body crease is as well as the top corner of the bed. -
Nice looking models! I thought that the HAMB was only for traditional full scale cars and pickups. Didn't know they had a section for models.
-
I've always preferred the full bumper over the split bumper. I like the grille, bumper and placement of the turn signals much better. My only complaint is I wish it had more modern wheels and tires as an option. That's something I wish both Round2 and Revell would do.
-
I'm going to wait until I see a few built before I pull the trigger on this one. I want to see how the grille fitment is mainly. I can see that the dash will need to be replaced, door panels will probably need to be cut down at the top and the wheelwell lips reworked. I want a couple. But, I don't know if I want them bad enough to do the work it takes to make them better.