.jpg.b9265433dc8c3b550370b1d0e4e4d2fc.jpg)
MarkJ
-
Posts
4,697 -
Joined
-
Last visited
Content Type
Profiles
Forums
Events
Gallery
Everything posted by MarkJ
-
.jpg.b9265433dc8c3b550370b1d0e4e4d2fc.thumb.jpg.915f5b46e3c9402eeaa6972073121c87.jpg)
1991 Harry Gant Oldsmobile
MarkJ replied to MarkJ's topic in Stock Cars (NASCAR, Super Stock, Late Model, etc.)
Thanks, Jim, for that inside story. No wonder he dominated so much in that 55. I heard he won over 20 some races in 1965 in that car. But he probably didn't have that setup he had in 1967 yet. -
1991 Harry Gant Oldsmobile
MarkJ replied to MarkJ's topic in Stock Cars (NASCAR, Super Stock, Late Model, etc.)
Thanks for weighing in Jim. I feel honored that a real person from the sport we are so interested in, Nascar racing, shared some real-life info about one of my builds. Thank you very much for your comment. It is so much appreciated. -
Jaguar E-Type 1962 Le Mans
MarkJ replied to Pierre Rivard's topic in WIP: Other Racing: Road Racing, Land Speed Racers
I'm really liking the extra goodies. Especially the cool looking mudflaps. Can't wait to see some color coats on this baby. -
2022 NextGen Camaro part deux
MarkJ replied to MarkJ's topic in WIP: Stock Cars (NASCAR, Super Stock, Late Model, etc.)
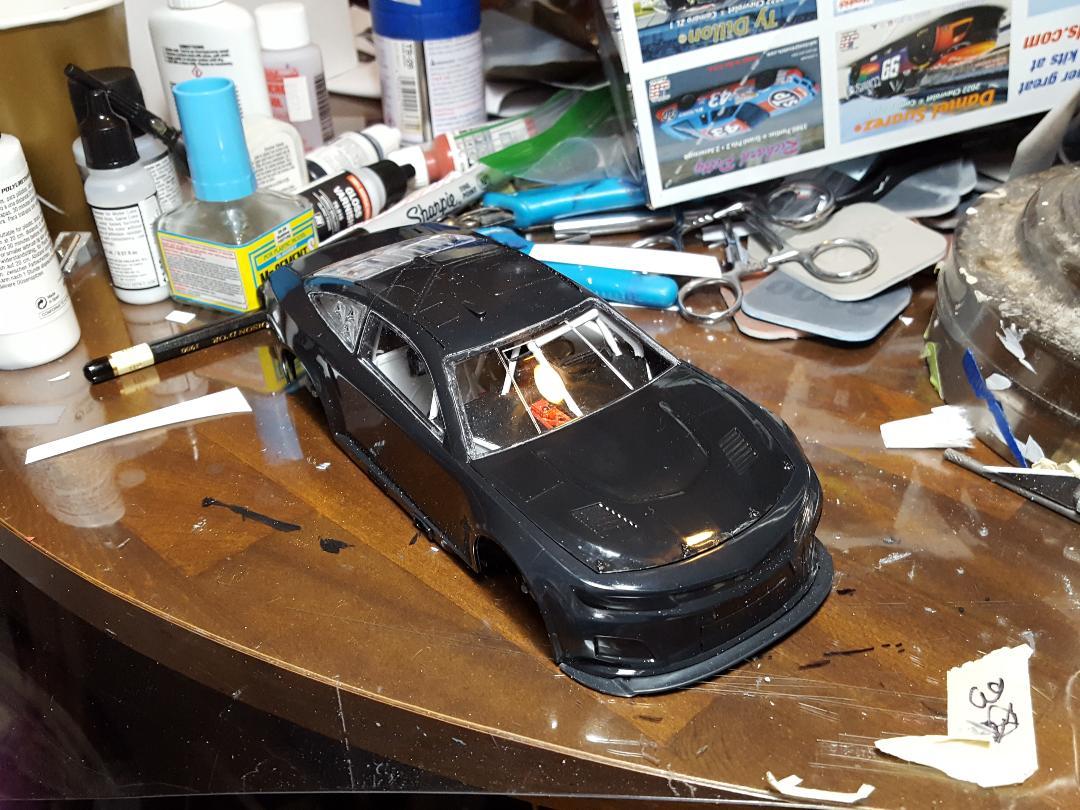
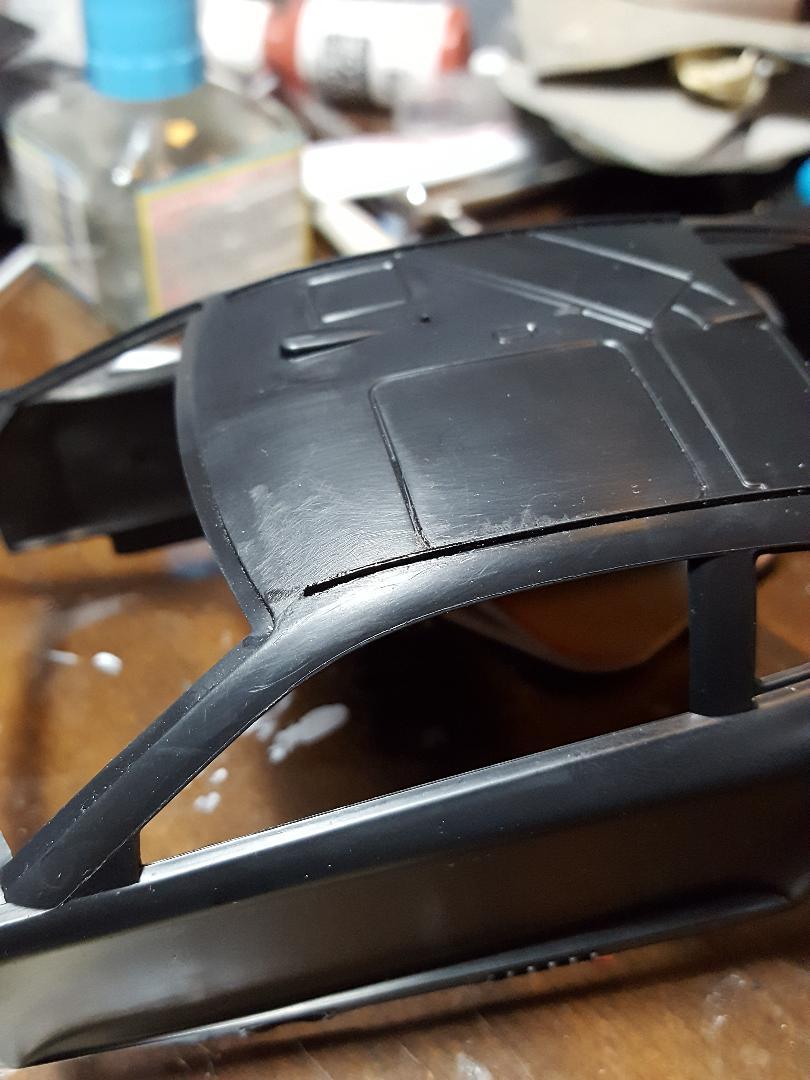
Got the glass installed except for the left front side glass. I wanted to keep the body set down over the chassis till I'm sure the windshield glue is cured completely. If you try to install the windshield on the body with it not in place, it will not fit correctly. At least that is what I have discovered. The body has to be bowed out a bit to get the windshield to fit flush.
-
Jaguar E-Type 1962 Le Mans
MarkJ replied to Pierre Rivard's topic in WIP: Other Racing: Road Racing, Land Speed Racers
Anothe oob looking part. Actually better than what would have come in the kit. -
2022 NextGen Camaro part deux
MarkJ replied to MarkJ's topic in WIP: Stock Cars (NASCAR, Super Stock, Late Model, etc.)
Yes. The model is 75% decals covering the body so it just needs to be black between the many decals. So, I think it should work out okay. It just seemed like a lot of work to prime it gray and then paint it black and then polish out the black paint that would not look as good as the future over the polished body. I would then future over the decals which is what I will do after I put on all the decals. We shall see how the finished product looks. I hear that some people are just putting the decals on the raw body and that's all their doing. Thanks for checking in on the build. -
2022 NextGen Camaro part deux
MarkJ replied to MarkJ's topic in WIP: Stock Cars (NASCAR, Super Stock, Late Model, etc.)
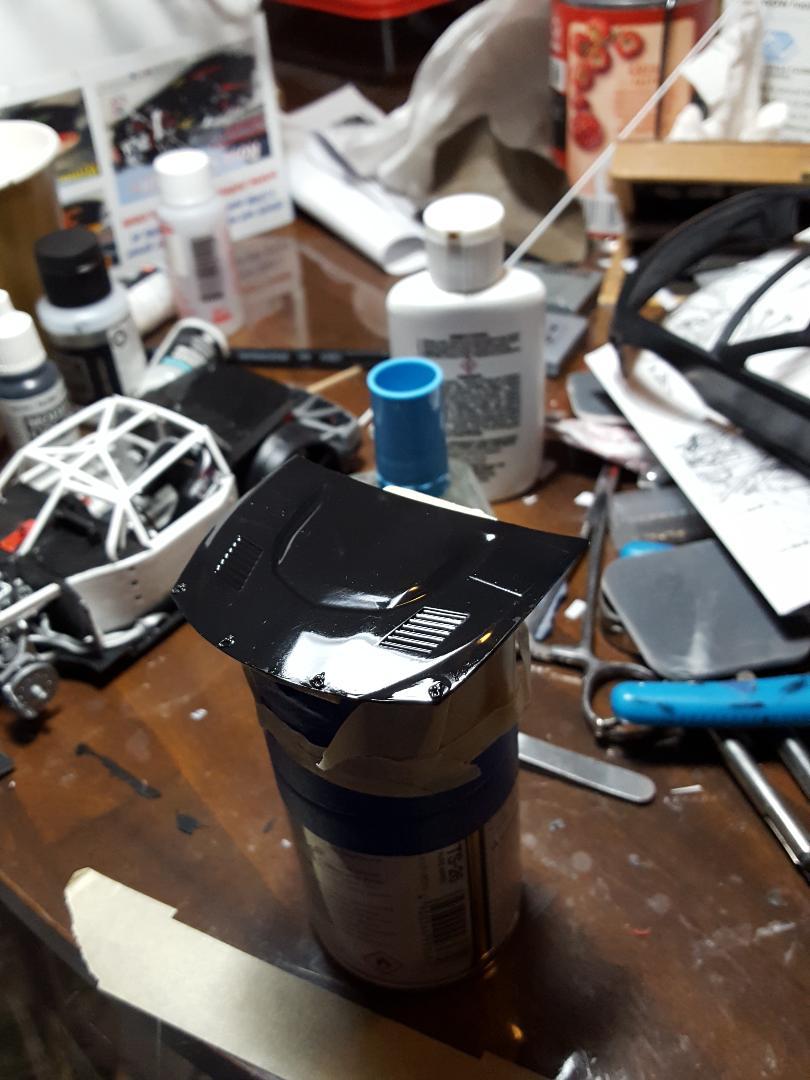
Weird. The best black paint job I ever did and the only black paint on this body is where I added a rib to the roof that Salvinos left off. And I did it with a brush. Go figure.
-
2022 NextGen Camaro part deux
MarkJ replied to MarkJ's topic in WIP: Stock Cars (NASCAR, Super Stock, Late Model, etc.)
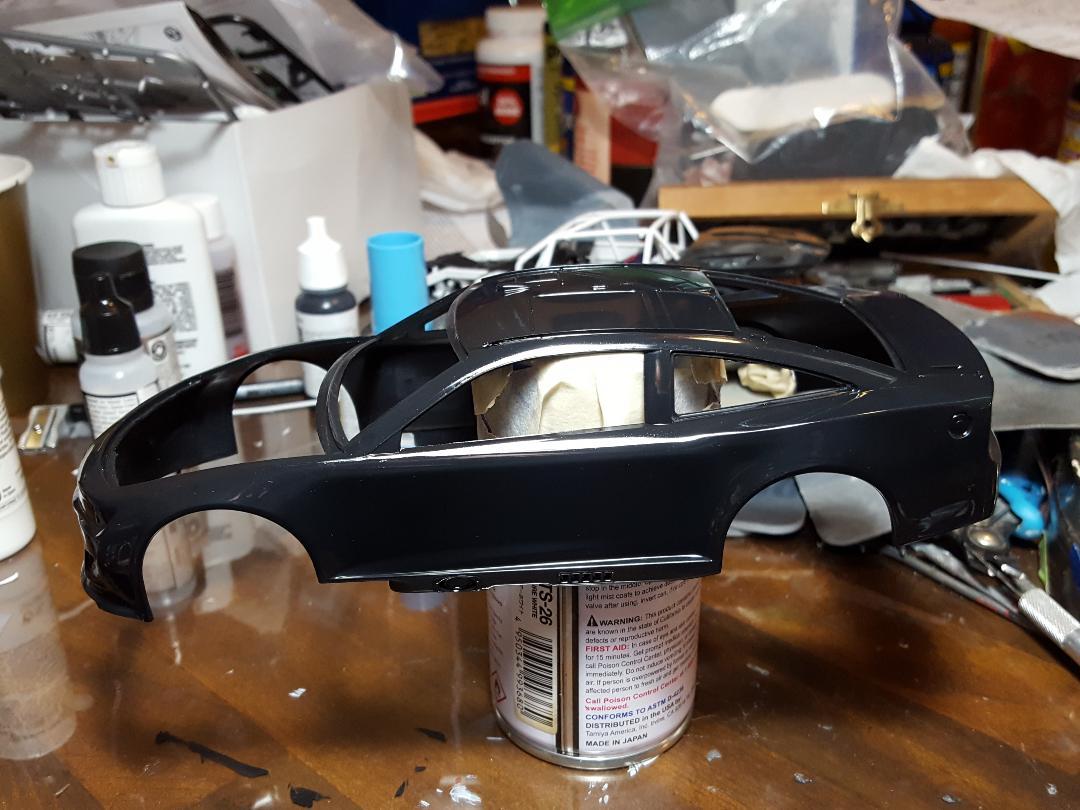
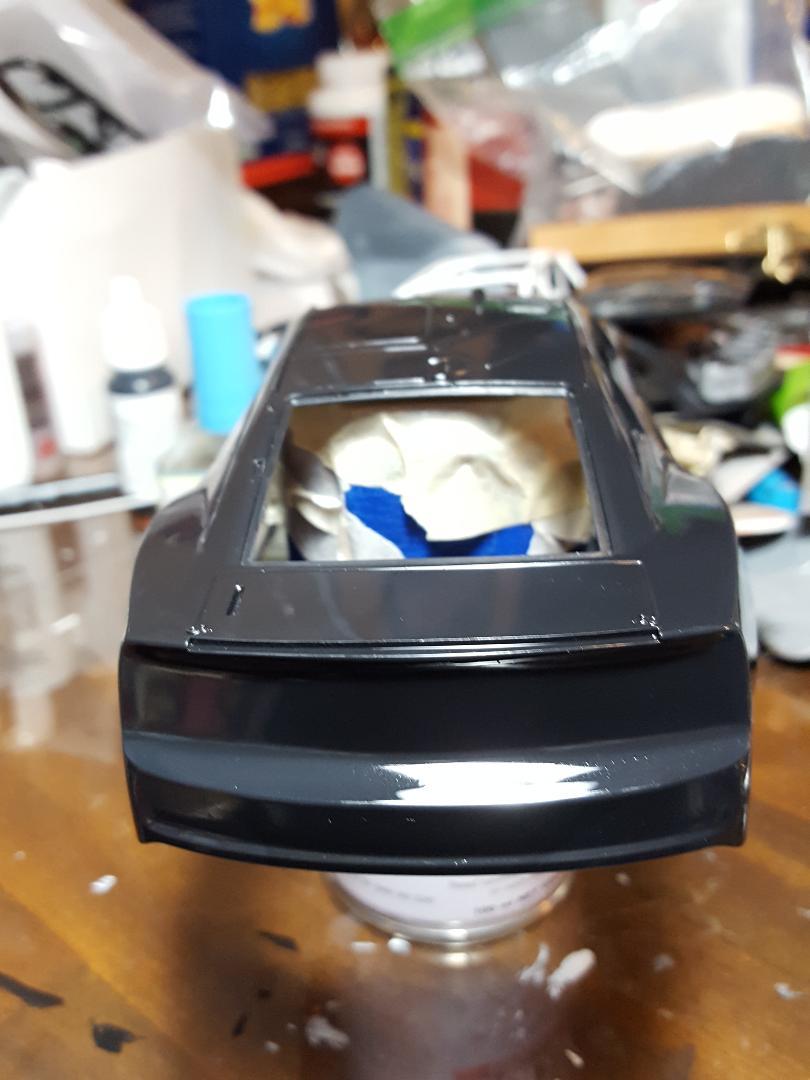
Well, I tried Future as a finish for my body and really like it. I just did the hood as a test, and it came out better than I thought it would. I went ahead and polished out the whole body and will future it today.
-
Ebbro/Tamiya 1:12 1968 Matra MS11 F1
MarkJ replied to Nacho Z's topic in WIP: Other Racing: Road Racing, Land Speed Racers
John, thanks for opening my eyes to the use of clay. I did not know that was a possibility. I might have to try it someday. Looks great for your seat. -
Jaguar E-Type 1962 Le Mans
MarkJ replied to Pierre Rivard's topic in WIP: Other Racing: Road Racing, Land Speed Racers
Excellent job making a precise pattern to get a precise looking grille. No one will think that grille is not oob. What color were you thinking to make it? -
1969 Bobby Allison Daytona Charger
MarkJ replied to jjsipes's topic in Stock Cars (NASCAR, Super Stock, Late Model, etc.)
Awesome build, Jason. Super clean build, paint and attention to detail. Sits perfectly too. That gold is really impressive. -
Salvino's JR - '71 Petty Plymouth
MarkJ replied to TooOld's topic in WIP: Stock Cars (NASCAR, Super Stock, Late Model, etc.)
All the attention to detail is really working out nicely. I like all your doing to make the build more authentic. Are the hood hinges something you came up with or is that oob? -
2022 NextGen Camaro part deux
MarkJ replied to MarkJ's topic in WIP: Stock Cars (NASCAR, Super Stock, Late Model, etc.)
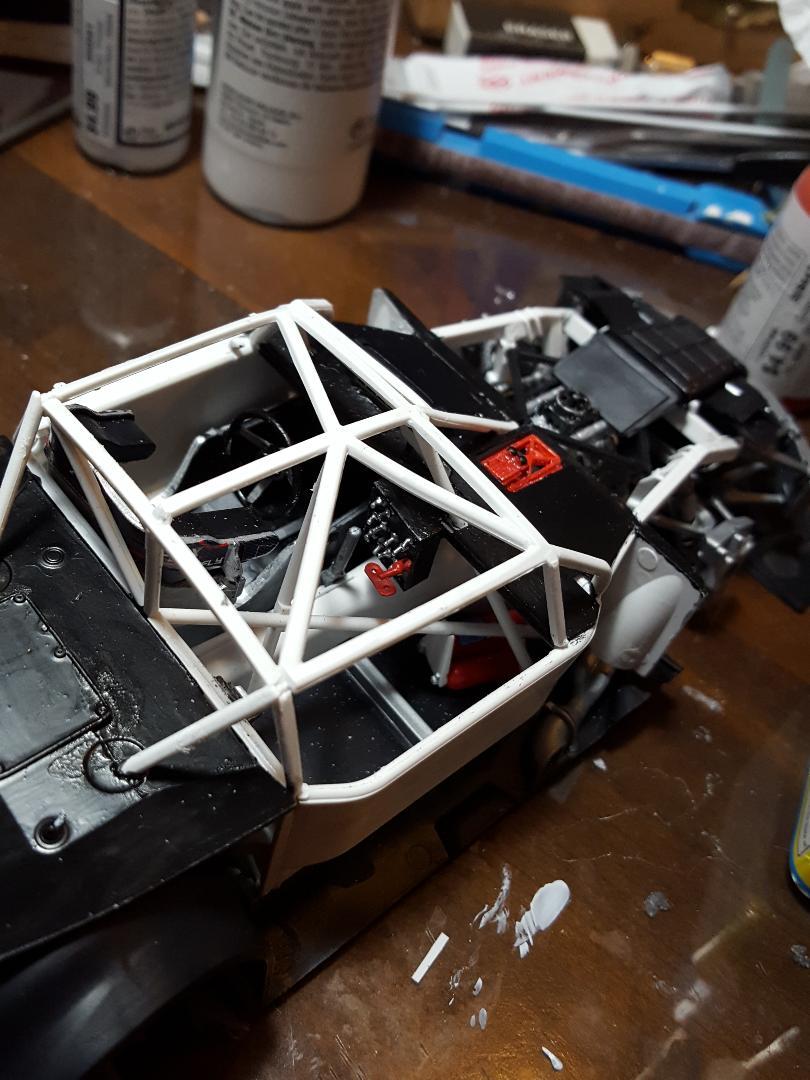
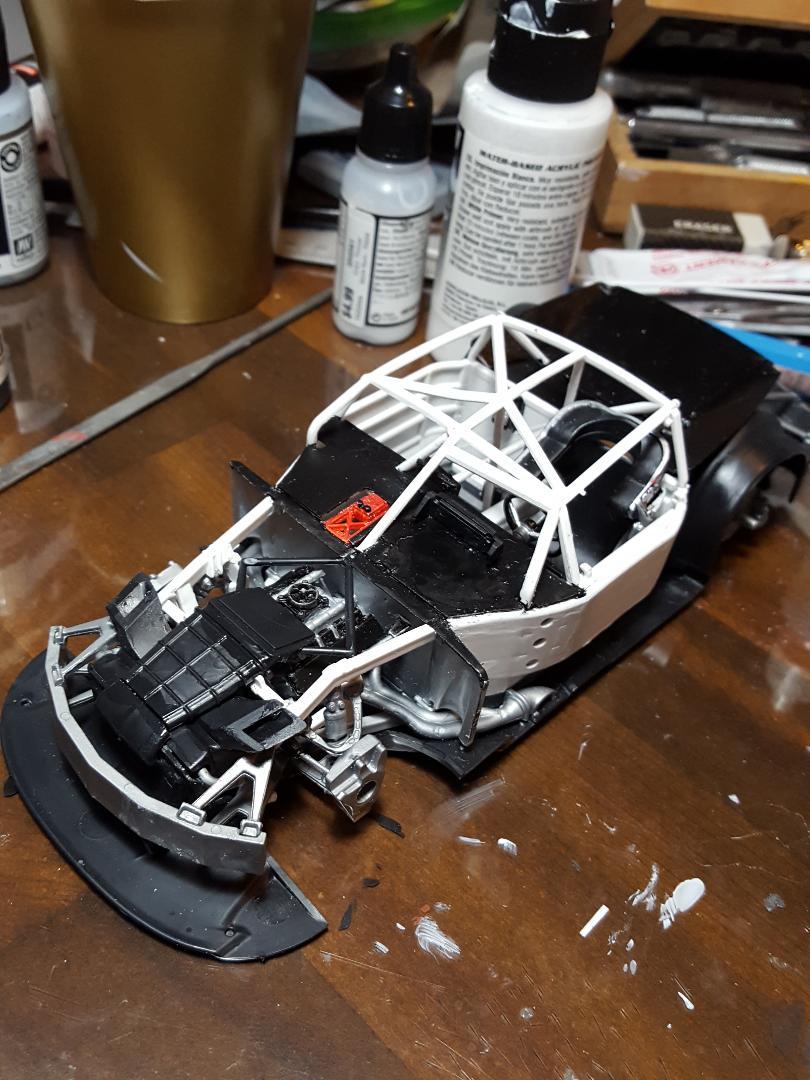
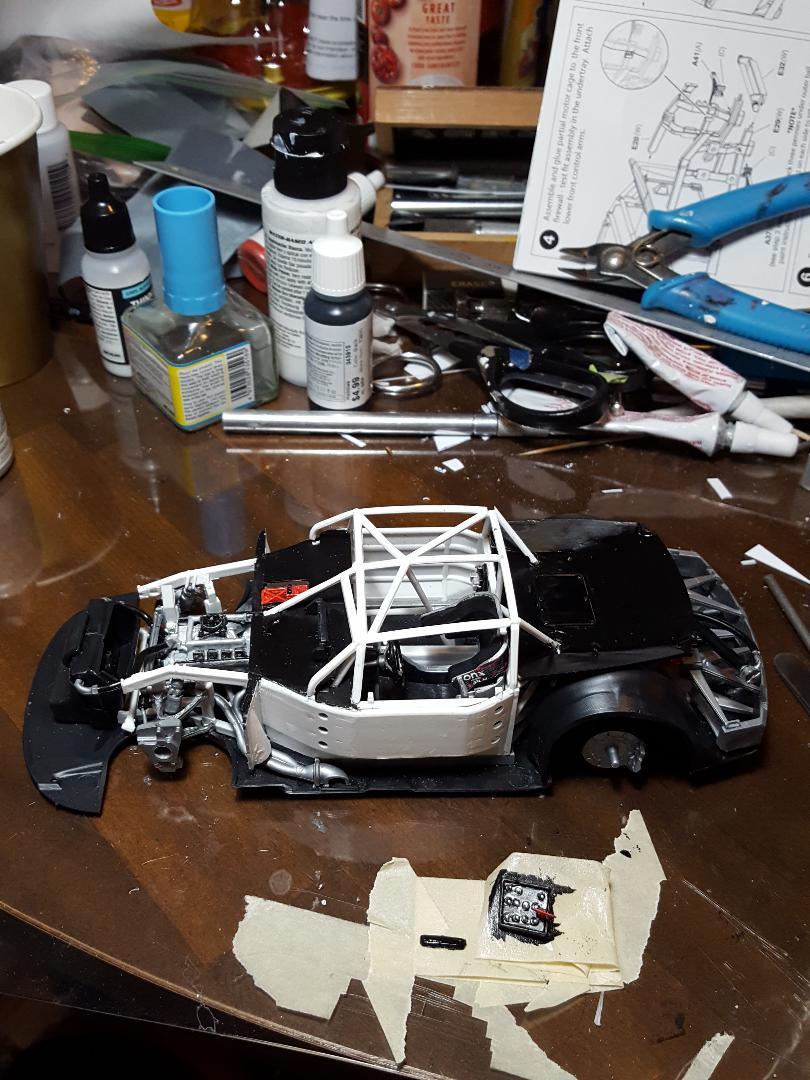
Thanks, Bob. Like I said, I think the switch plate is a little too big but that's about as small as I can work. I finish the chassis and am feeling good about it and then I realize I put the rear brake rotors on backwards. I can either leave it that way or cut off the calipers and try to make new ones to install in the correct position. Don't know if it's worth the effort. Bummer. -
Jaguar E-Type 1962 Le Mans
MarkJ replied to Pierre Rivard's topic in WIP: Other Racing: Road Racing, Land Speed Racers
Pierre, I'm glad I'm getting in fairly early on this wip. This is really going to be great. That blue is very deep and stunning. Curious it's not Green? I wonder what the story is behind that. Looking forward to more progress on this one. -
Pennzoil Porsche 911 GT1
MarkJ replied to Pierre Rivard's topic in Other Racing: Road Racing, Salt Flat Racers
Another Wow, Pierre, That yellow looks spectacular. If you had a wip on this one, I totally missed it. Looks perfect as usual. If you can build one of these, A NextGen nascar would be nothing for you. I might need your help on the recipe for a yellow I'm going to have to do on a Nextgen Penske Mustang in the future. Again, some fabulous work on this one. -
Wow, Pierre, I had no idea you had finished this one. Really excellent build and driver too. Looks just like the ref photos and the paint looks perfect as usual. Now I need to find the 911. I guess I'm getting too old to keep up.
-
2022 NextGen Camaro part deux
MarkJ replied to MarkJ's topic in WIP: Stock Cars (NASCAR, Super Stock, Late Model, etc.)
I was following along on the 64 Sebring deal, but it hasn't updated lately, and I did not know you had finished it. Didn't know anything about the 911. -
2022 NextGen Camaro part deux
MarkJ replied to MarkJ's topic in WIP: Stock Cars (NASCAR, Super Stock, Late Model, etc.)
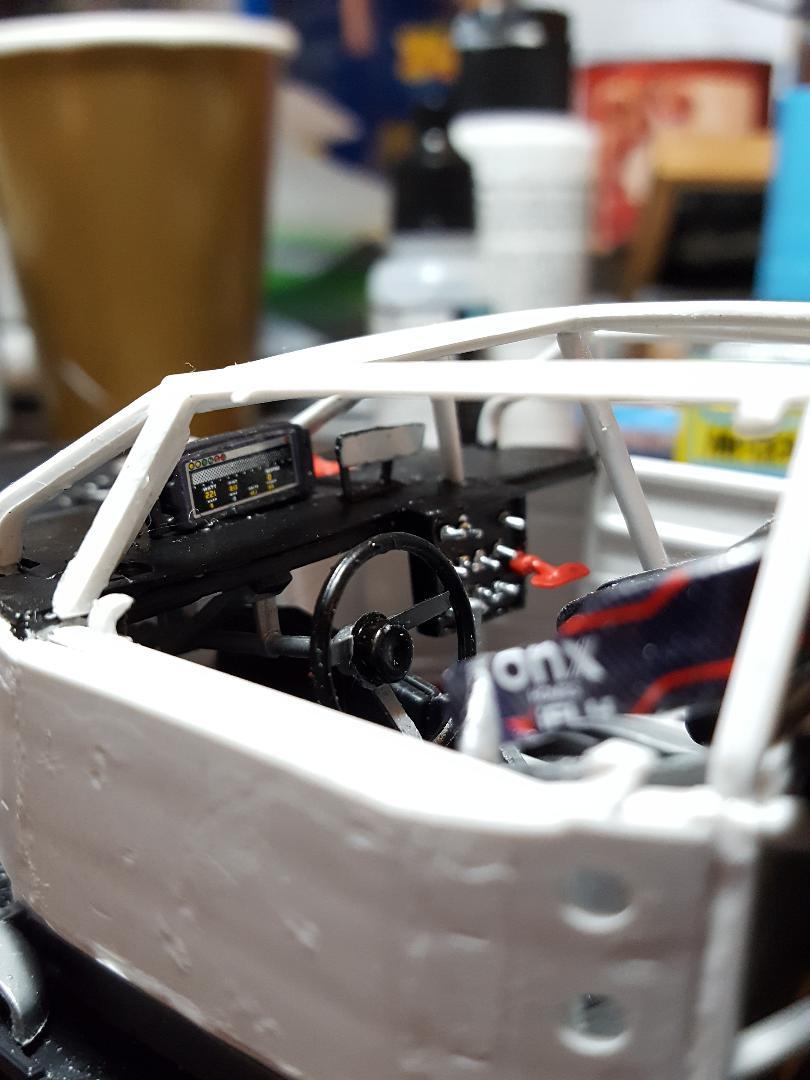
Thanks, Pierre. The switches are .020 rod. When you use enamel chrome paint touch it on with a tooth pick a couple times on the tip which makes the tip a little bigger like a toggle switch. Jag project? where will it be? -
2022 NextGen Camaro part deux
MarkJ replied to MarkJ's topic in WIP: Stock Cars (NASCAR, Super Stock, Late Model, etc.)
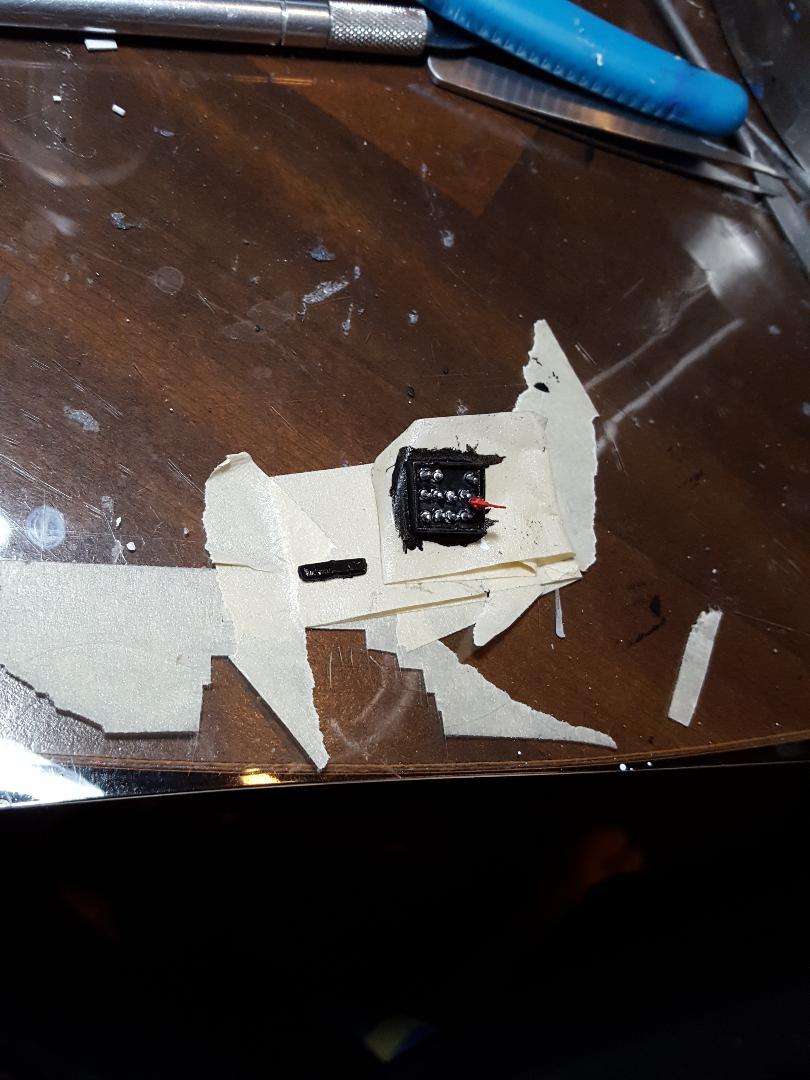
Finally got the switch plate and the digital mirror installed. The switch plate is too big, but I couldn't make it any smaller. My hands and eyes can't work any smaller. Just a couple more things to do to the chassis.
-
Marty Robbins Charger
MarkJ replied to yellowsportwagon's topic in Stock Cars (NASCAR, Super Stock, Late Model, etc.)
Tim, don't know how I missed this one. Sharp and clean and beautiful as usual. Just like all your fantastic builds. -
Mark Martin #6 Stroh Light Ford
MarkJ replied to Goodwrench3's topic in Stock Cars (NASCAR, Super Stock, Late Model, etc.)
Super clean beautiful build. Stance looks perfect. -
2022 NextGen Camaro part deux
MarkJ replied to MarkJ's topic in WIP: Stock Cars (NASCAR, Super Stock, Late Model, etc.)
Thanks, Jason. Thats the picture I used loosely to do mine. My switch box is a little different from that one but basically the same. I had to make mine thinner to get in behind the shifter. -
2022 NextGen Camaro part deux
MarkJ replied to MarkJ's topic in WIP: Stock Cars (NASCAR, Super Stock, Late Model, etc.)
Not correct, but without ref images, I'll just have to guess. It's hard to see this stuff when its installed anyway. the teams are sure secretive about what they let out there. Not a whole lot left to do on the chassis. Lookinf forward to moving on to the body.
-
Okay guys. Any updates? This is very interesting building you got going on here.
-
Very clean and beautiful , Jason. I see no flaws at all. Love the attention to detail.