Steve H
-
Posts
2,535 -
Joined
-
Last visited
Content Type
Profiles
Forums
Events
Gallery
Everything posted by Steve H
-
Hi Mike, good looking build going here. I agree with Greg and Mike above, that gold will look nice on it.
-
Fantastic work Dave. The interior details look spot on. Crisp foil work on the body too. Looking very nice indeed. Cheers, Steve
-
This is my favourite part of your builds…
-
Nice build you have here S.K. The weathering on the engine looks great. Chassis looks really good.
-
Looks killer Bob!!! Very nice chassis. I need to get some of Tamiya’s rubber paint, thanks for reminding me… Really looking forward to seeing this come together.
-

Tired of switching chucks in my pin vise
Steve H replied to Camaro lover's topic in Tips, Tricks, and Tutorials
Excellent idea. I also went a slightly different route and bought 2 sets of drill bits that all have the same shank size. Drill bits are in mm’s which makes it easy to know what size hole you are drilling. 1mm equals one inch in 1:25 scale… I also have a older pin vice with a similar chuck to the one pictured for any odd size stuff. You have inspired me to perhaps upgrade my old one. As Bill said above better more efficient tools are a win. -
71 Olds 442 W30 (replica of my brother in law’s car)
Steve H replied to Steve H's topic in WIP: Model Cars
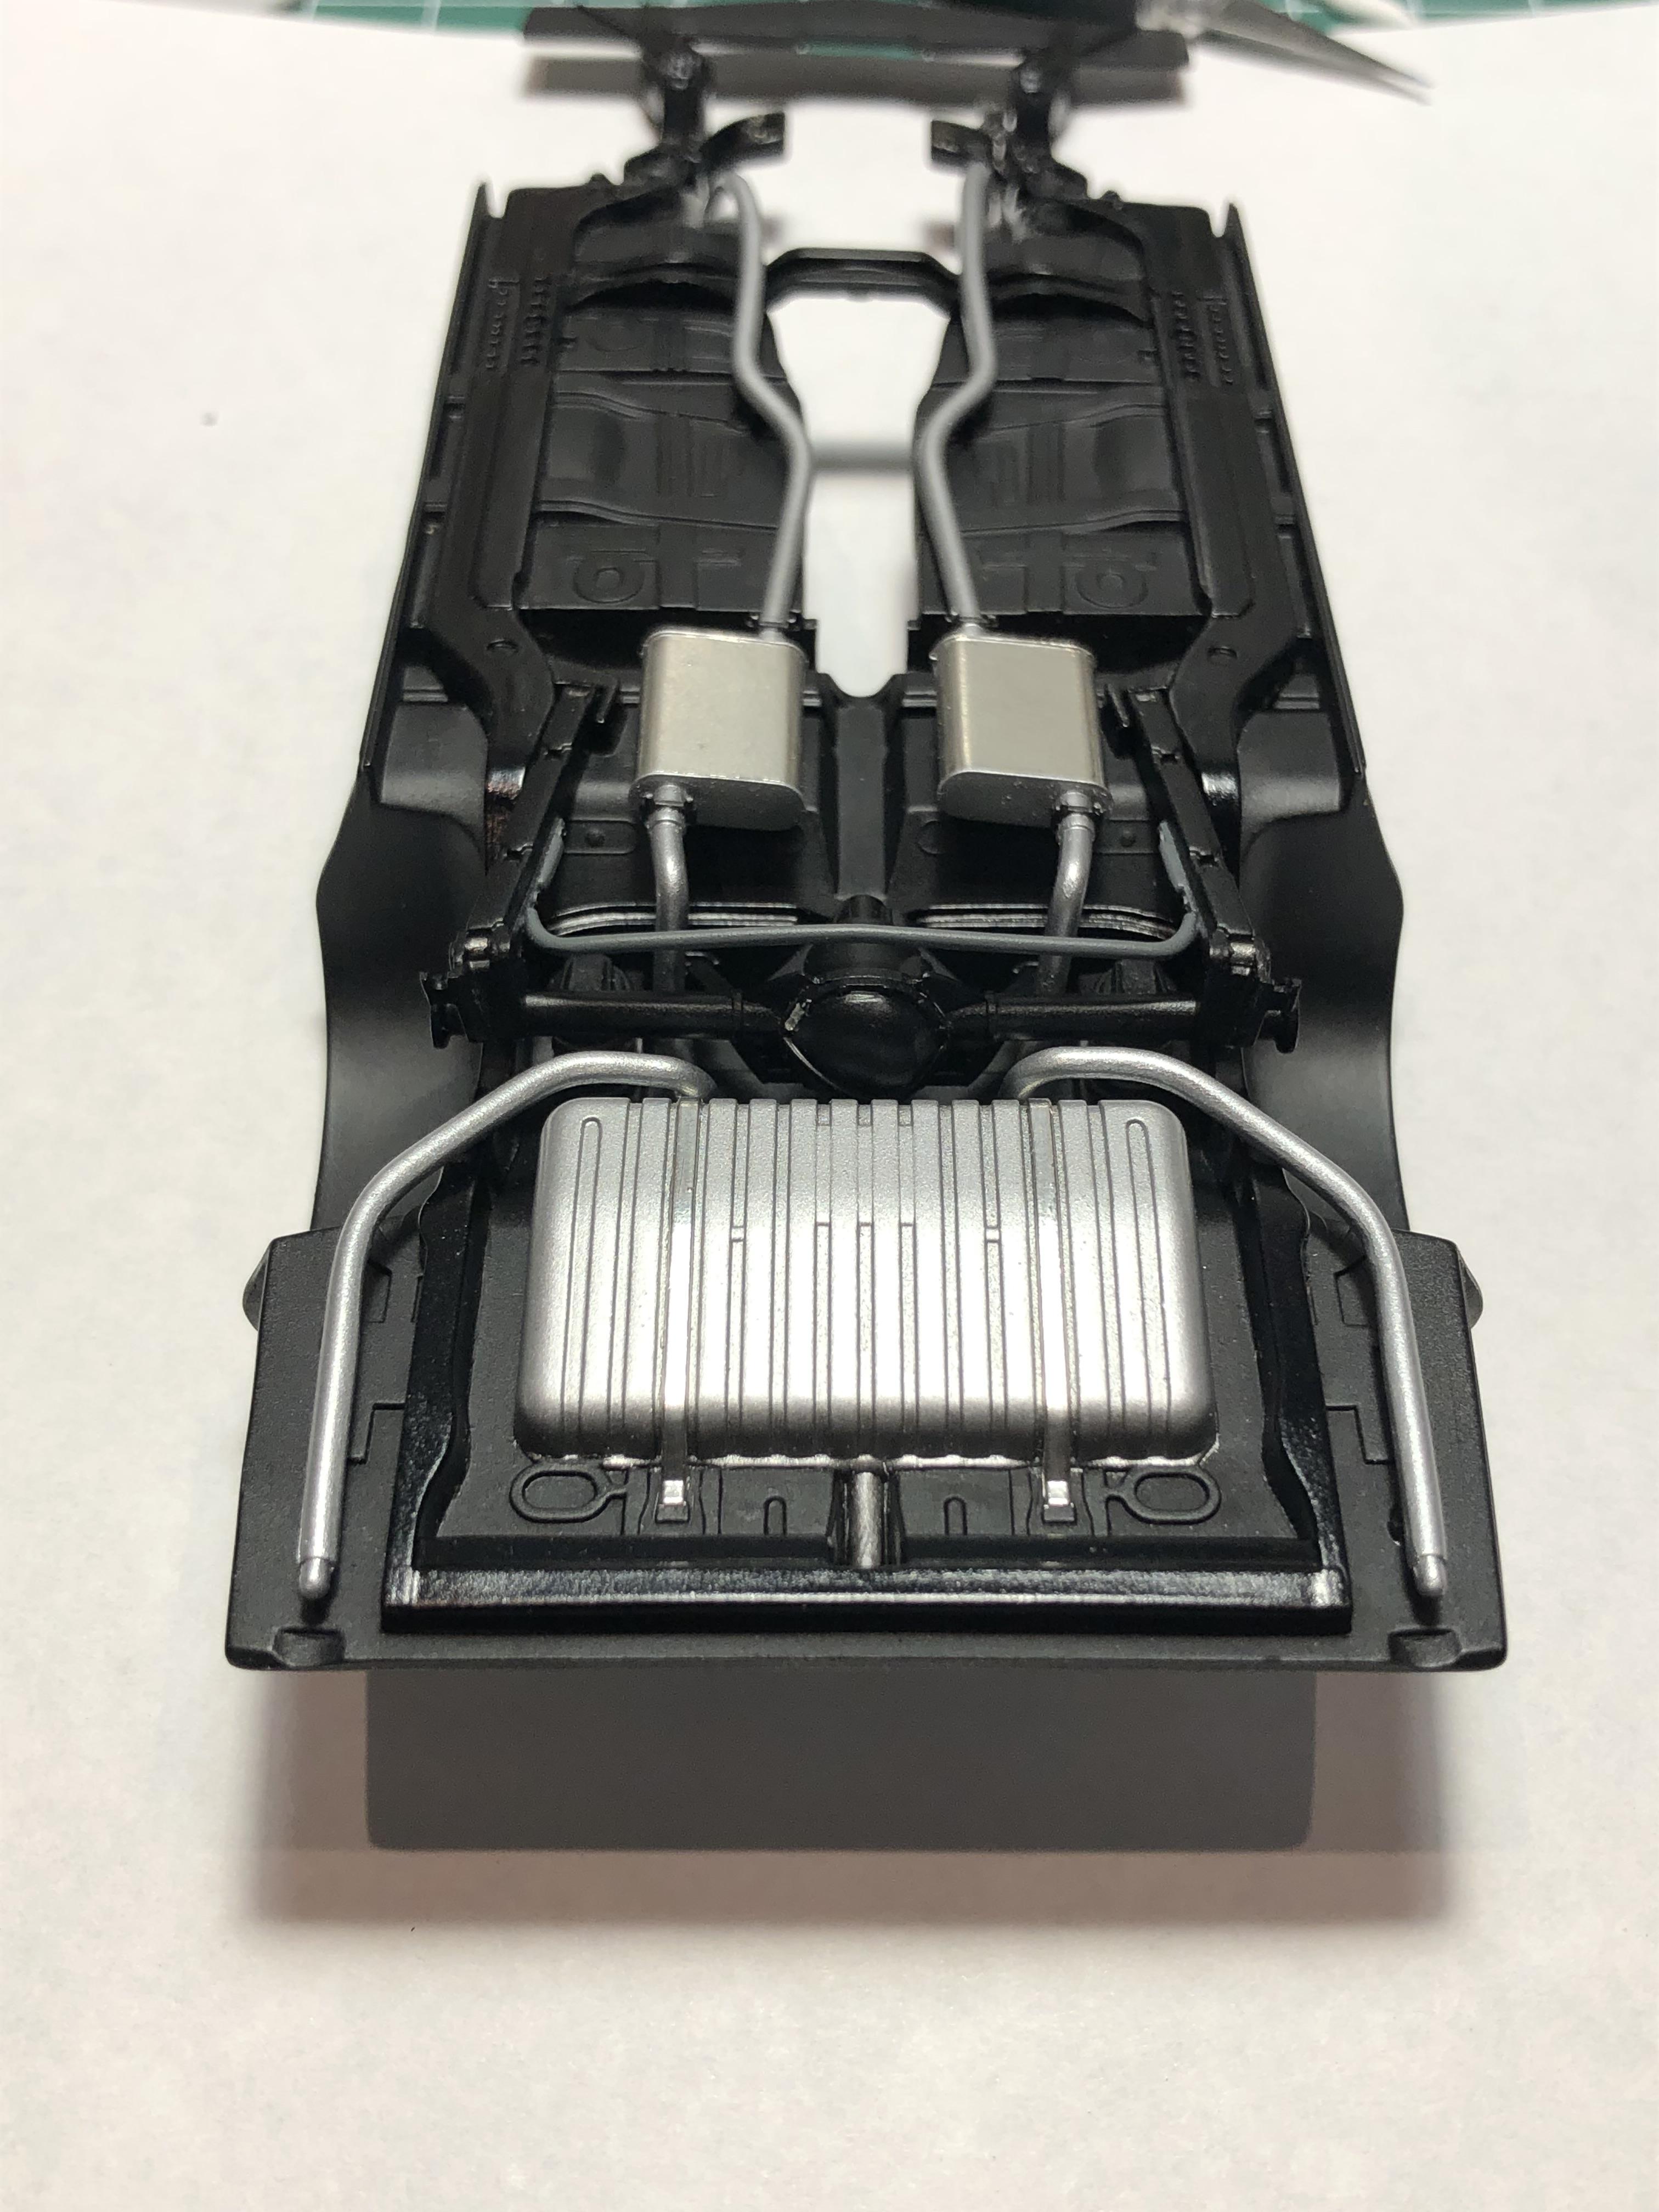
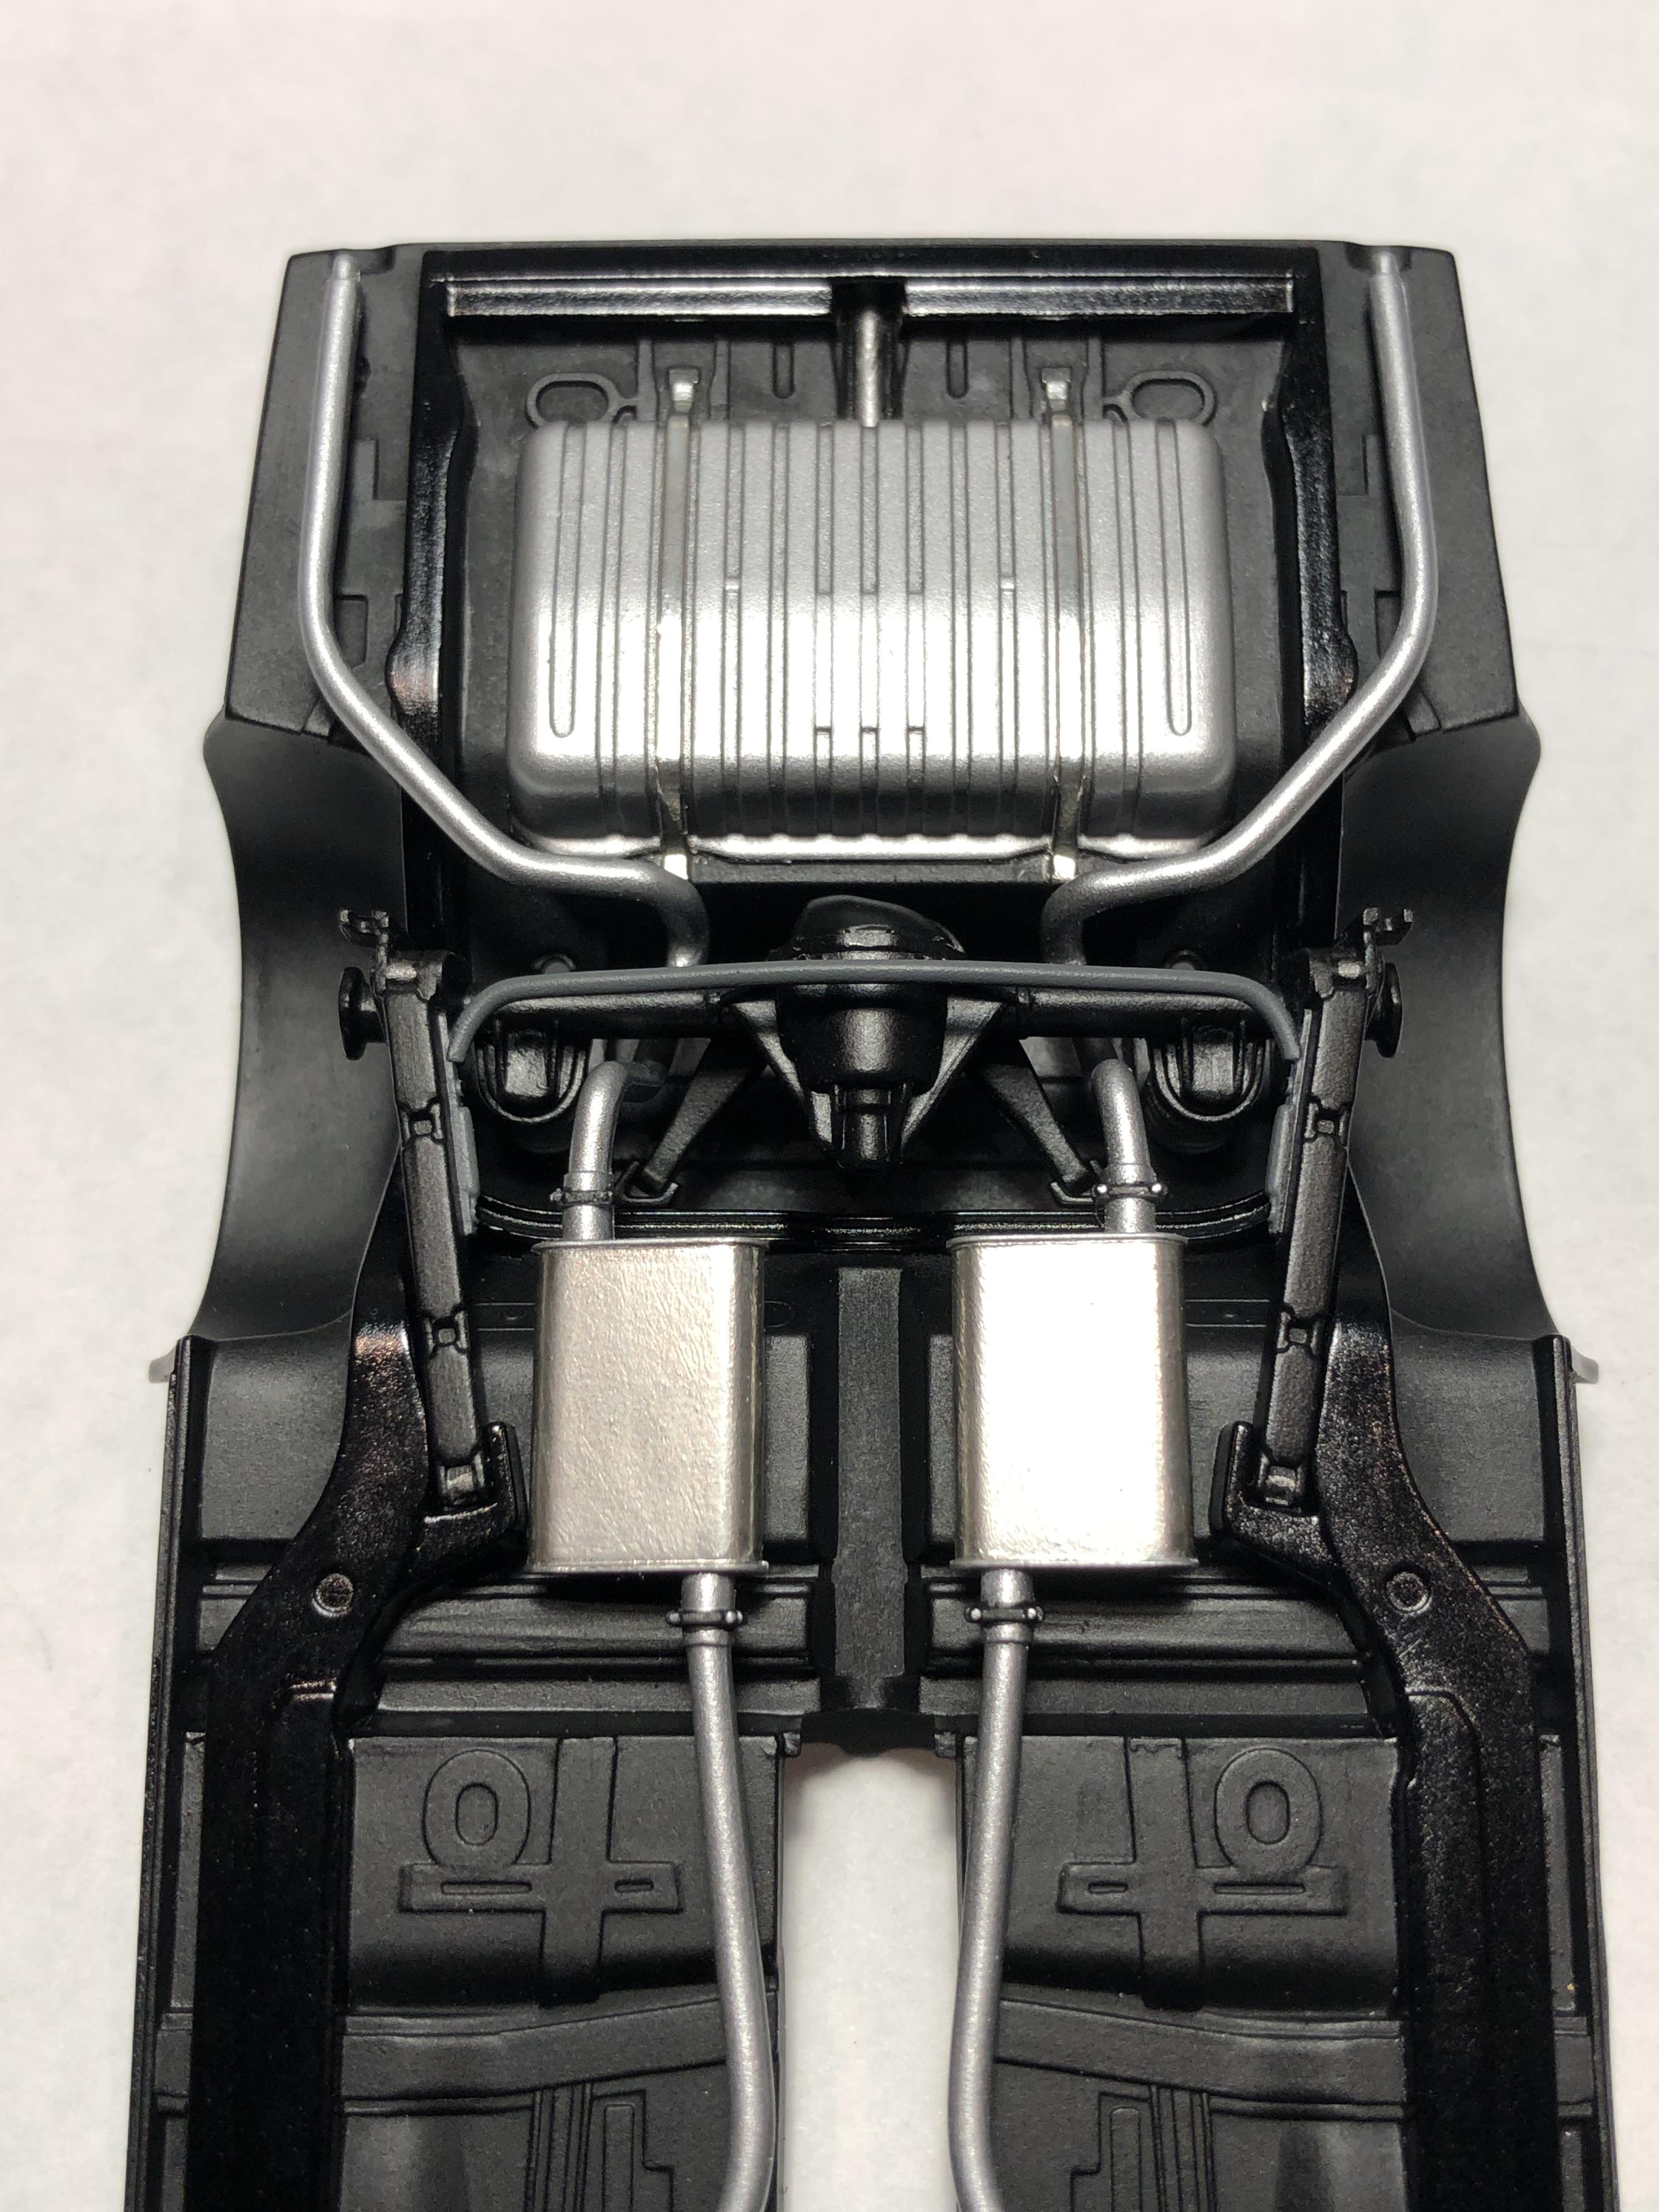
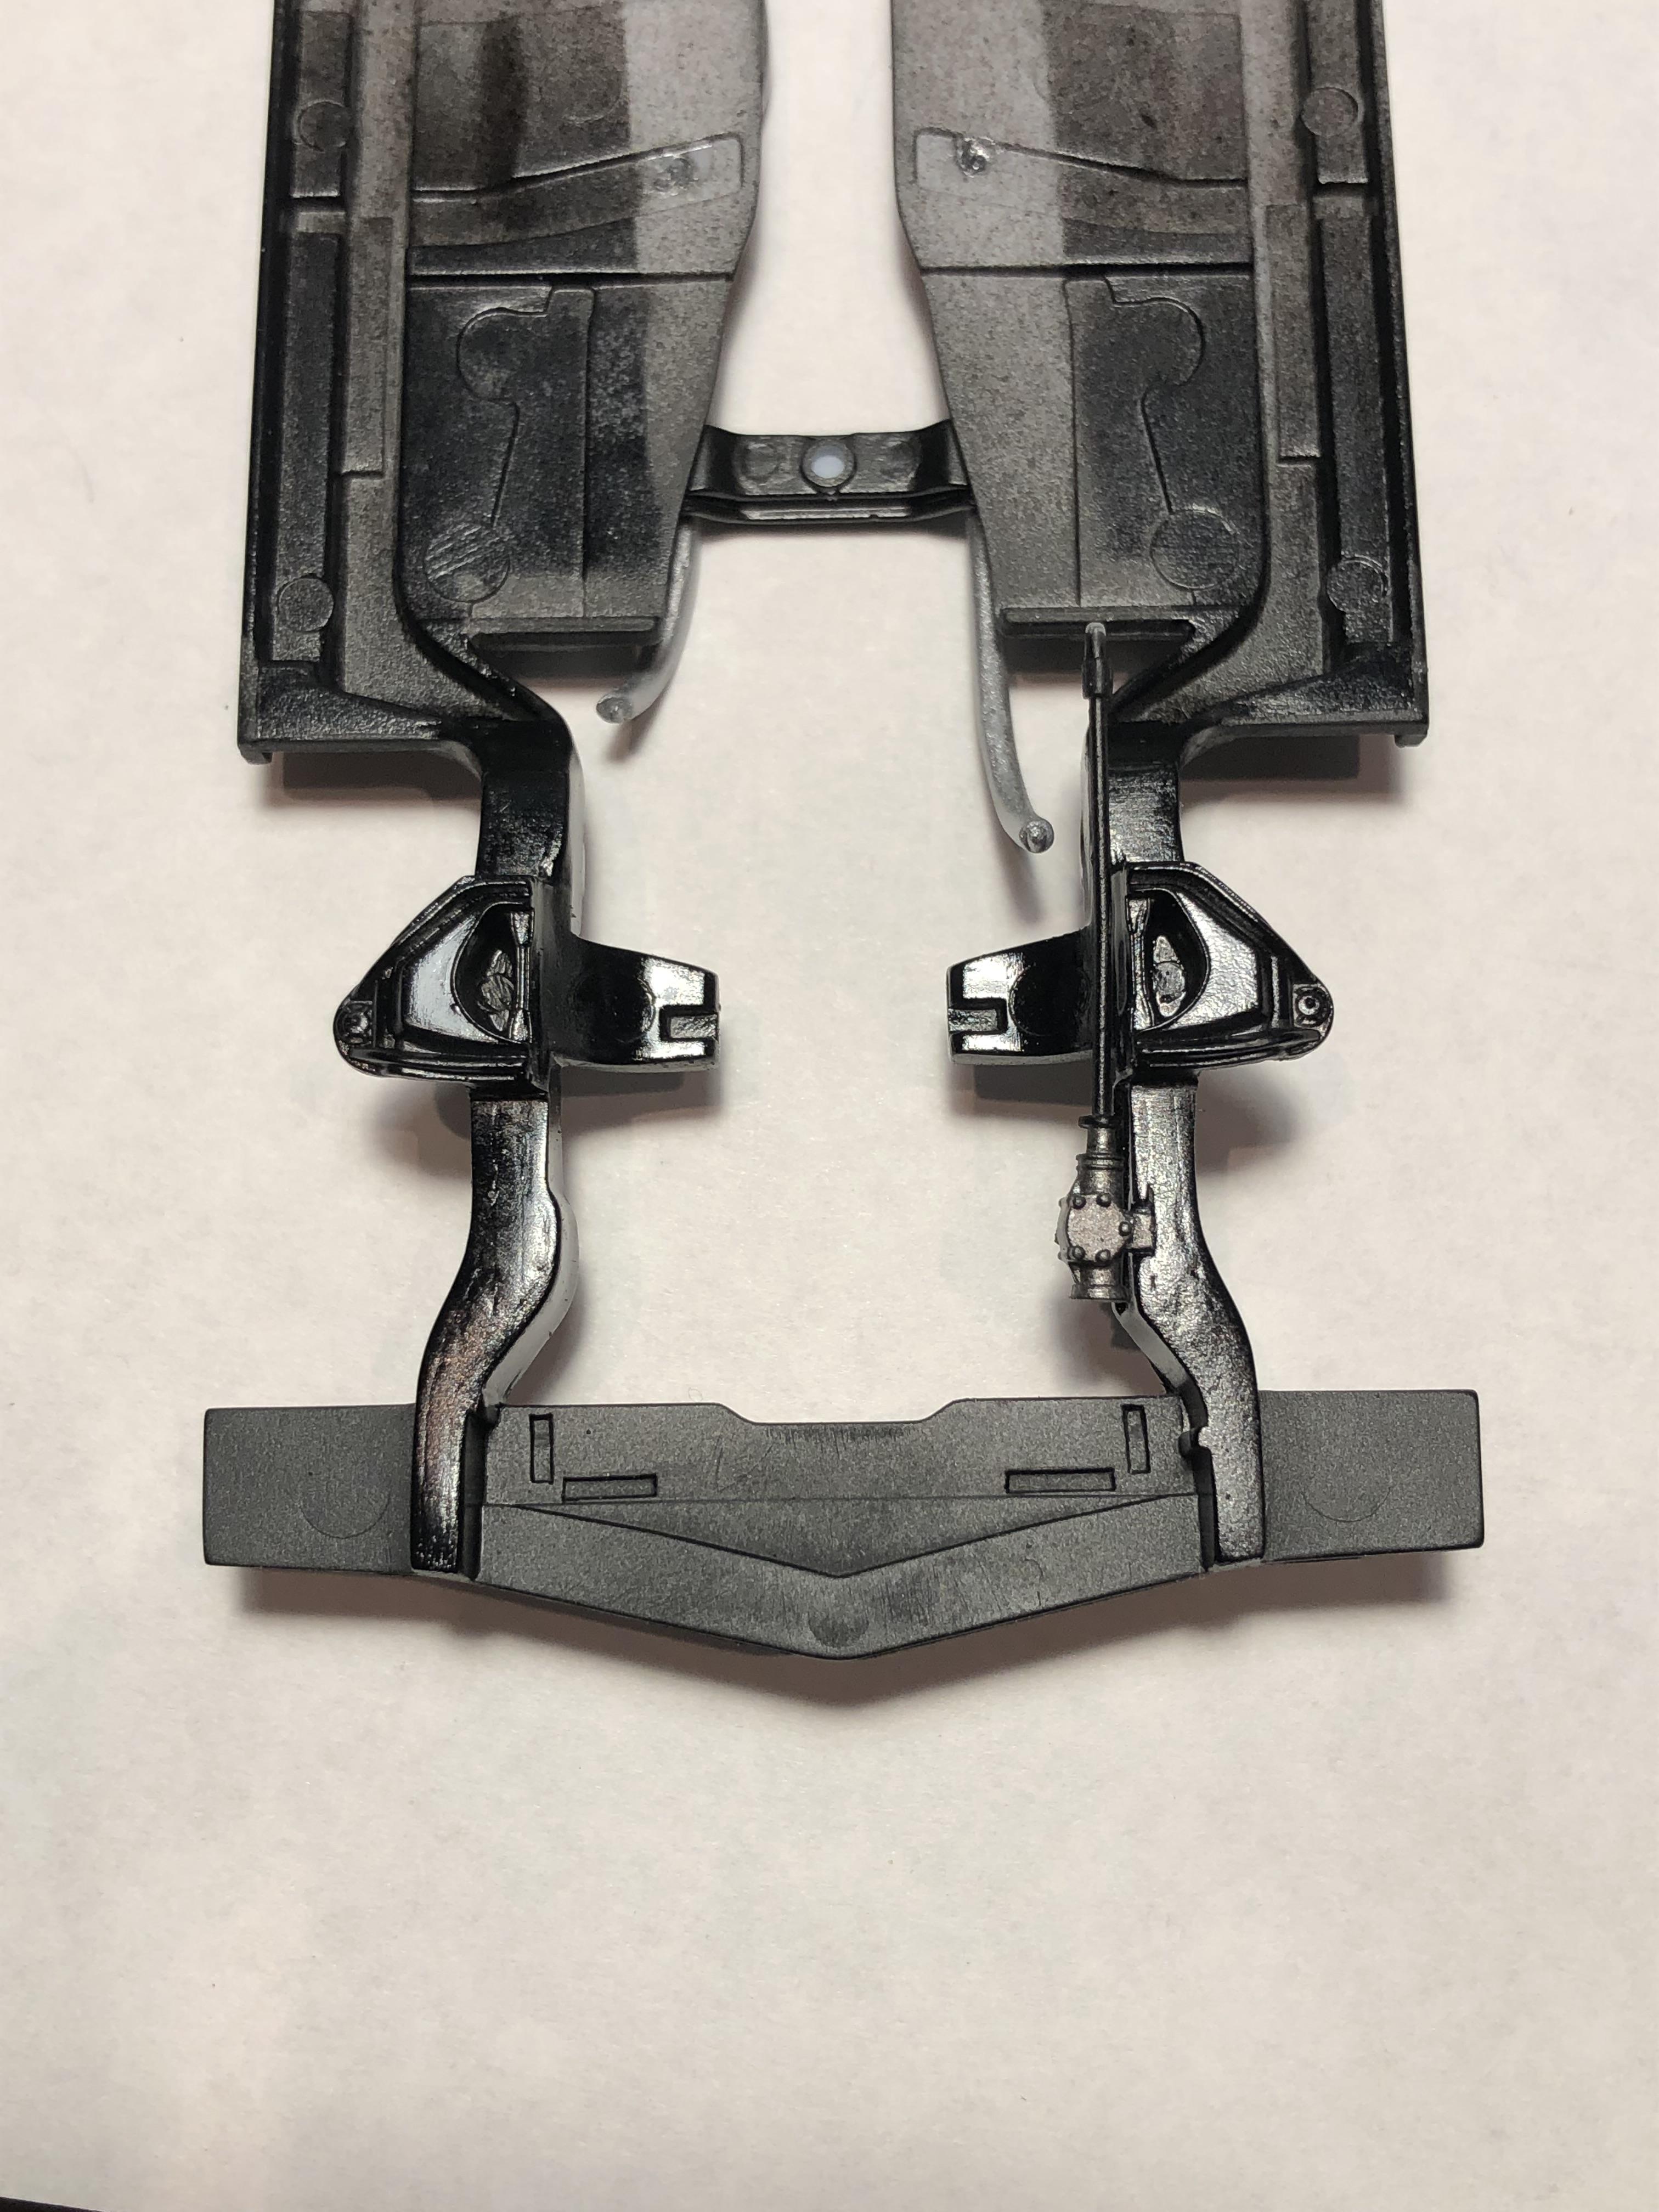
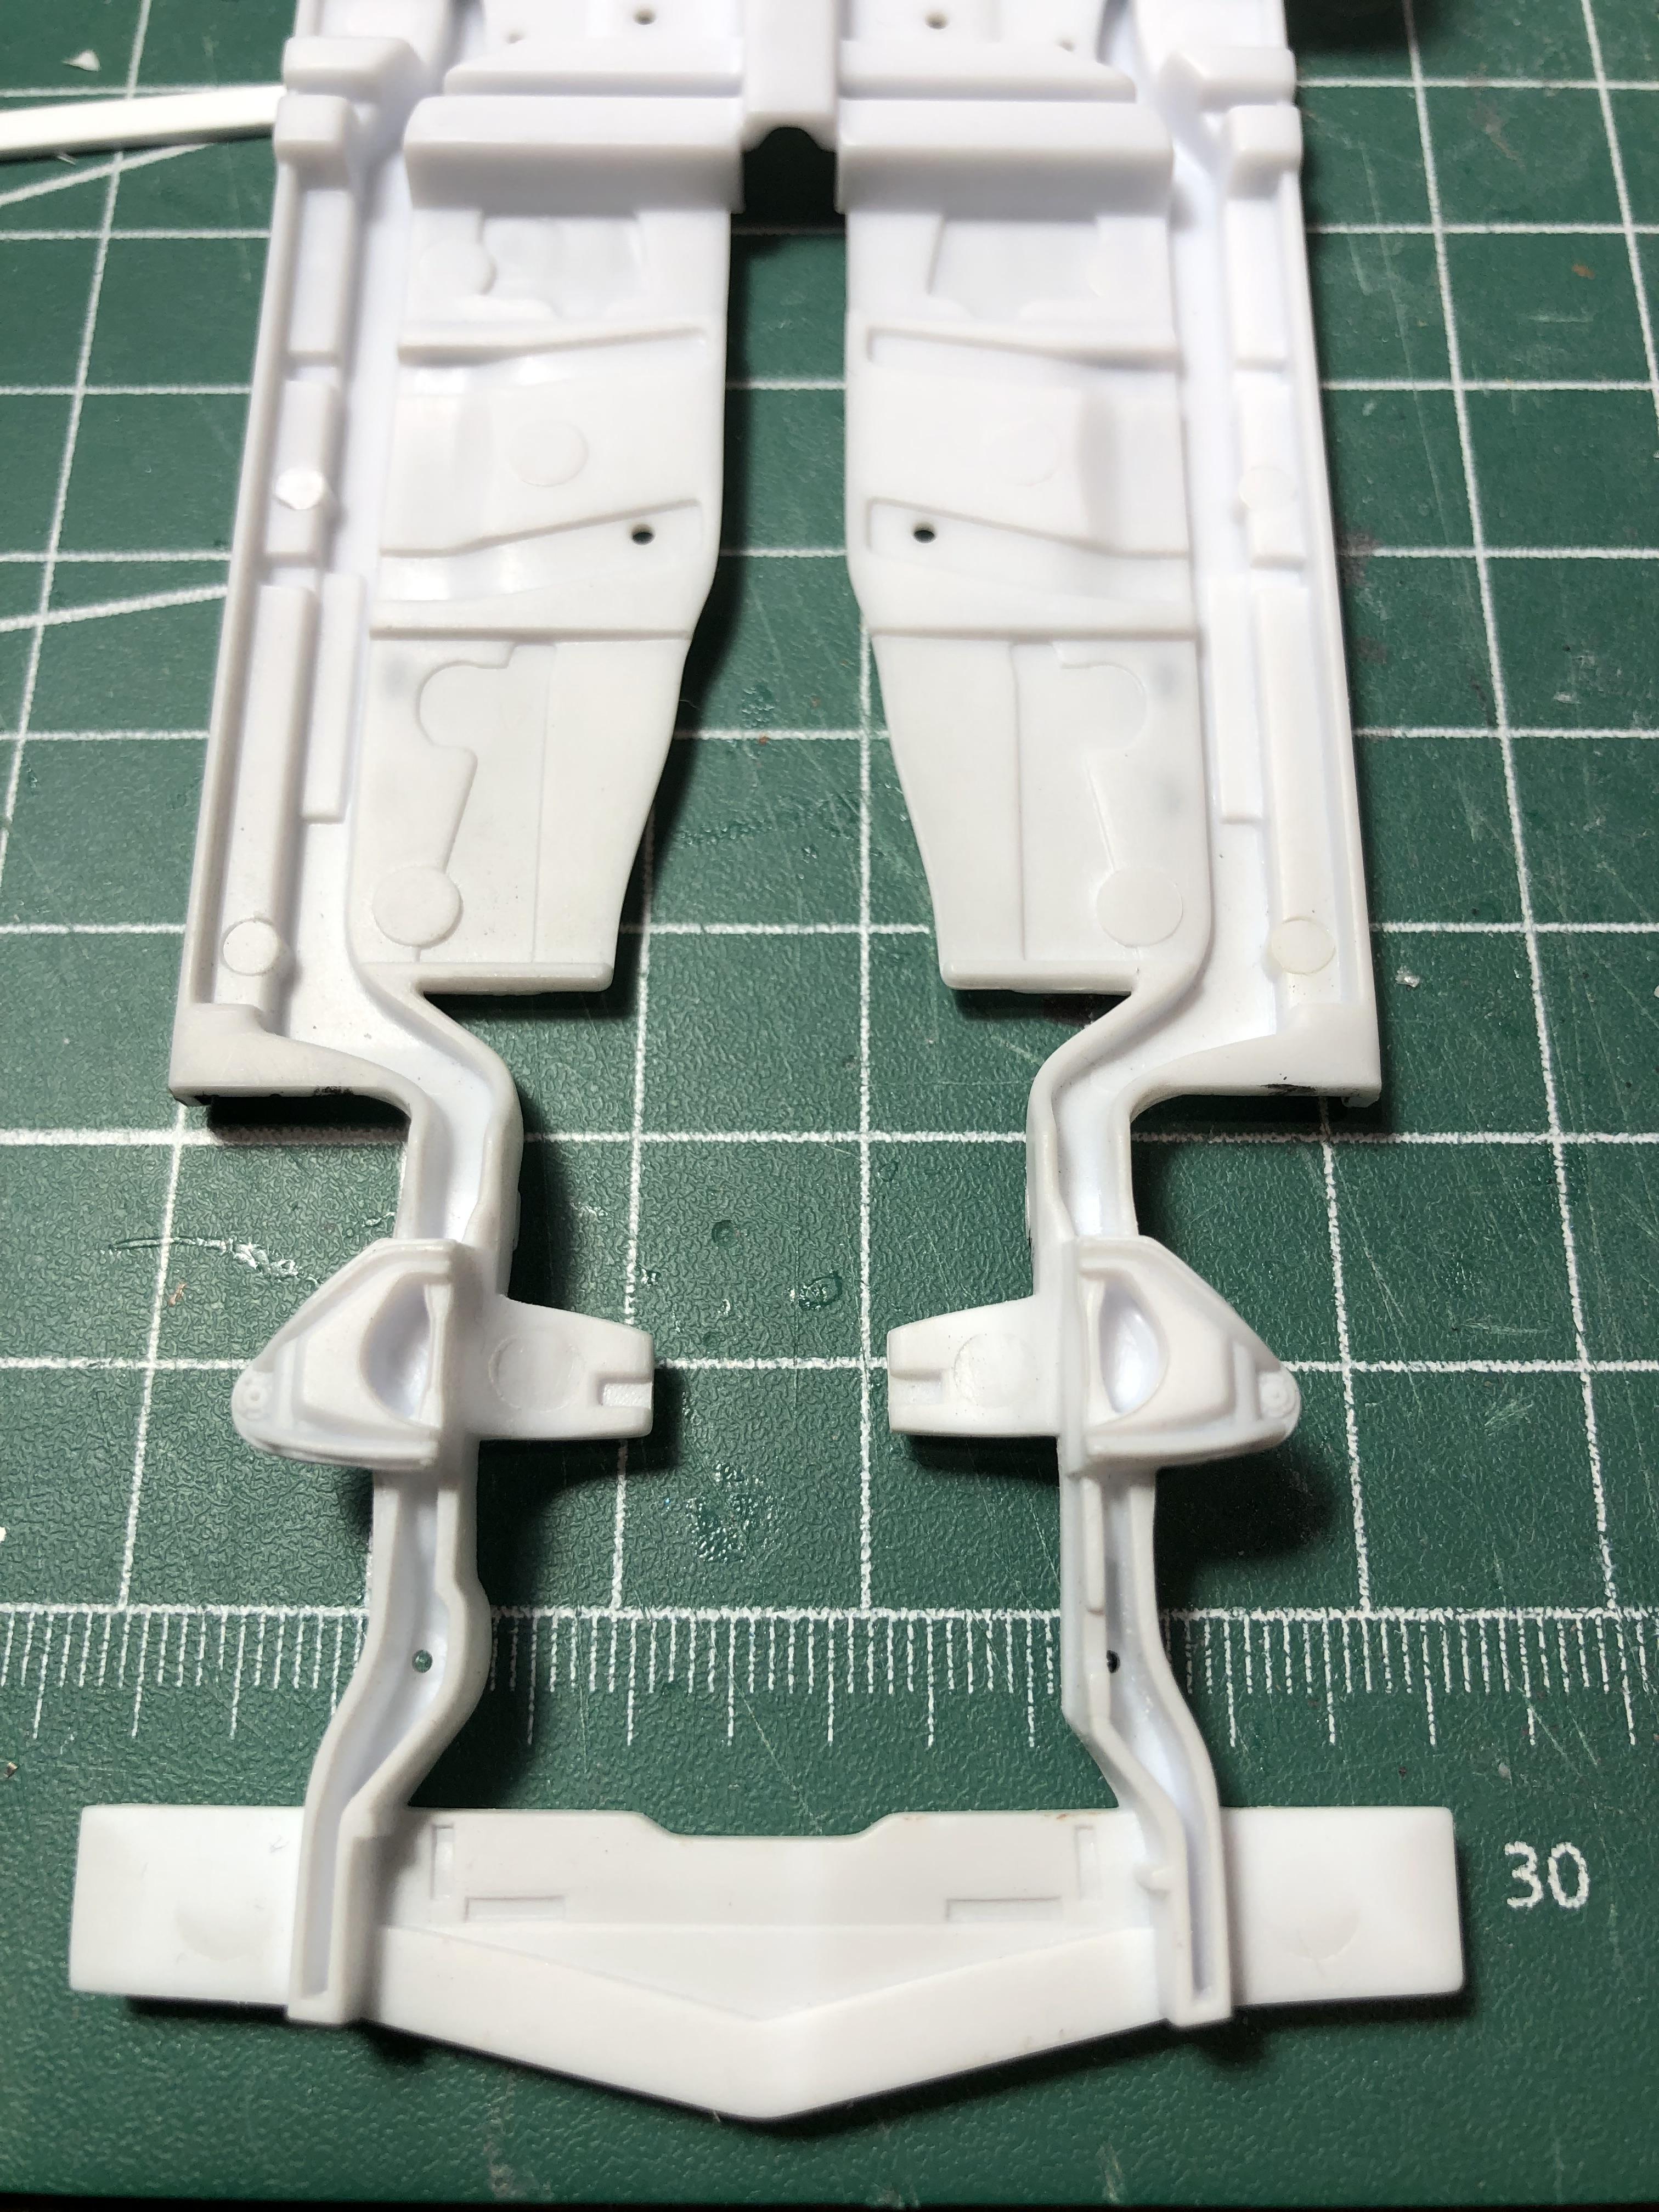
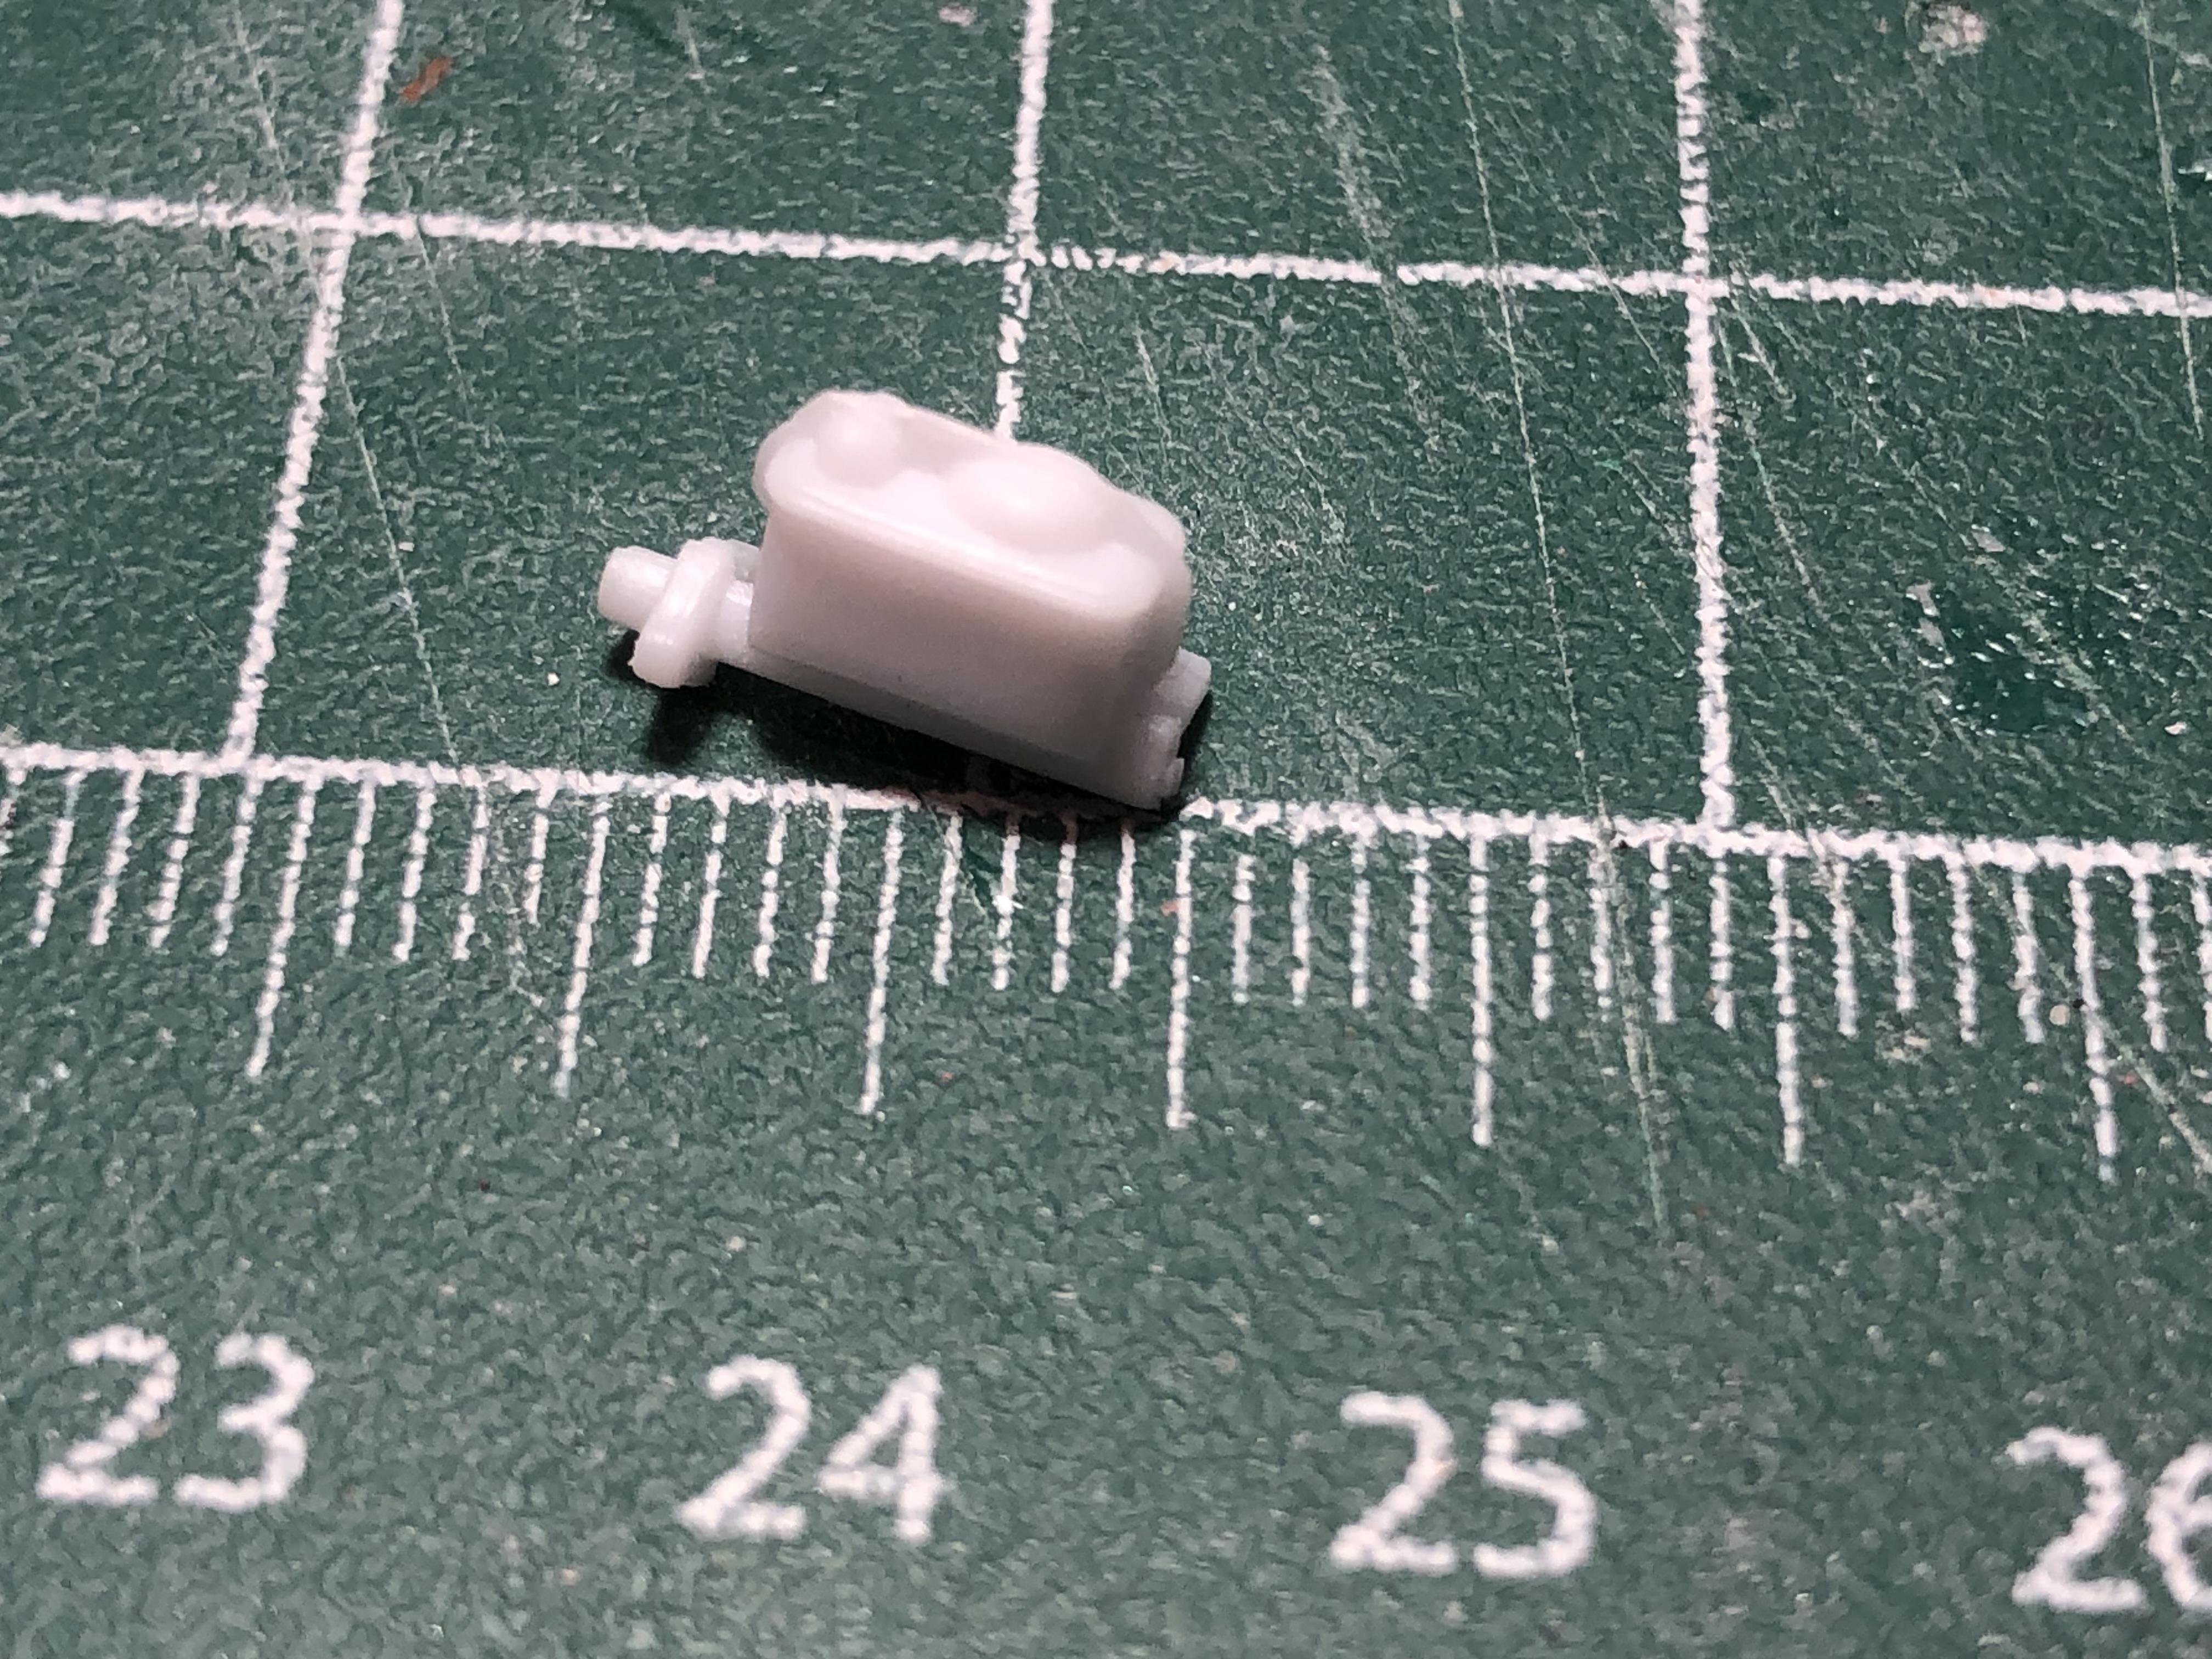
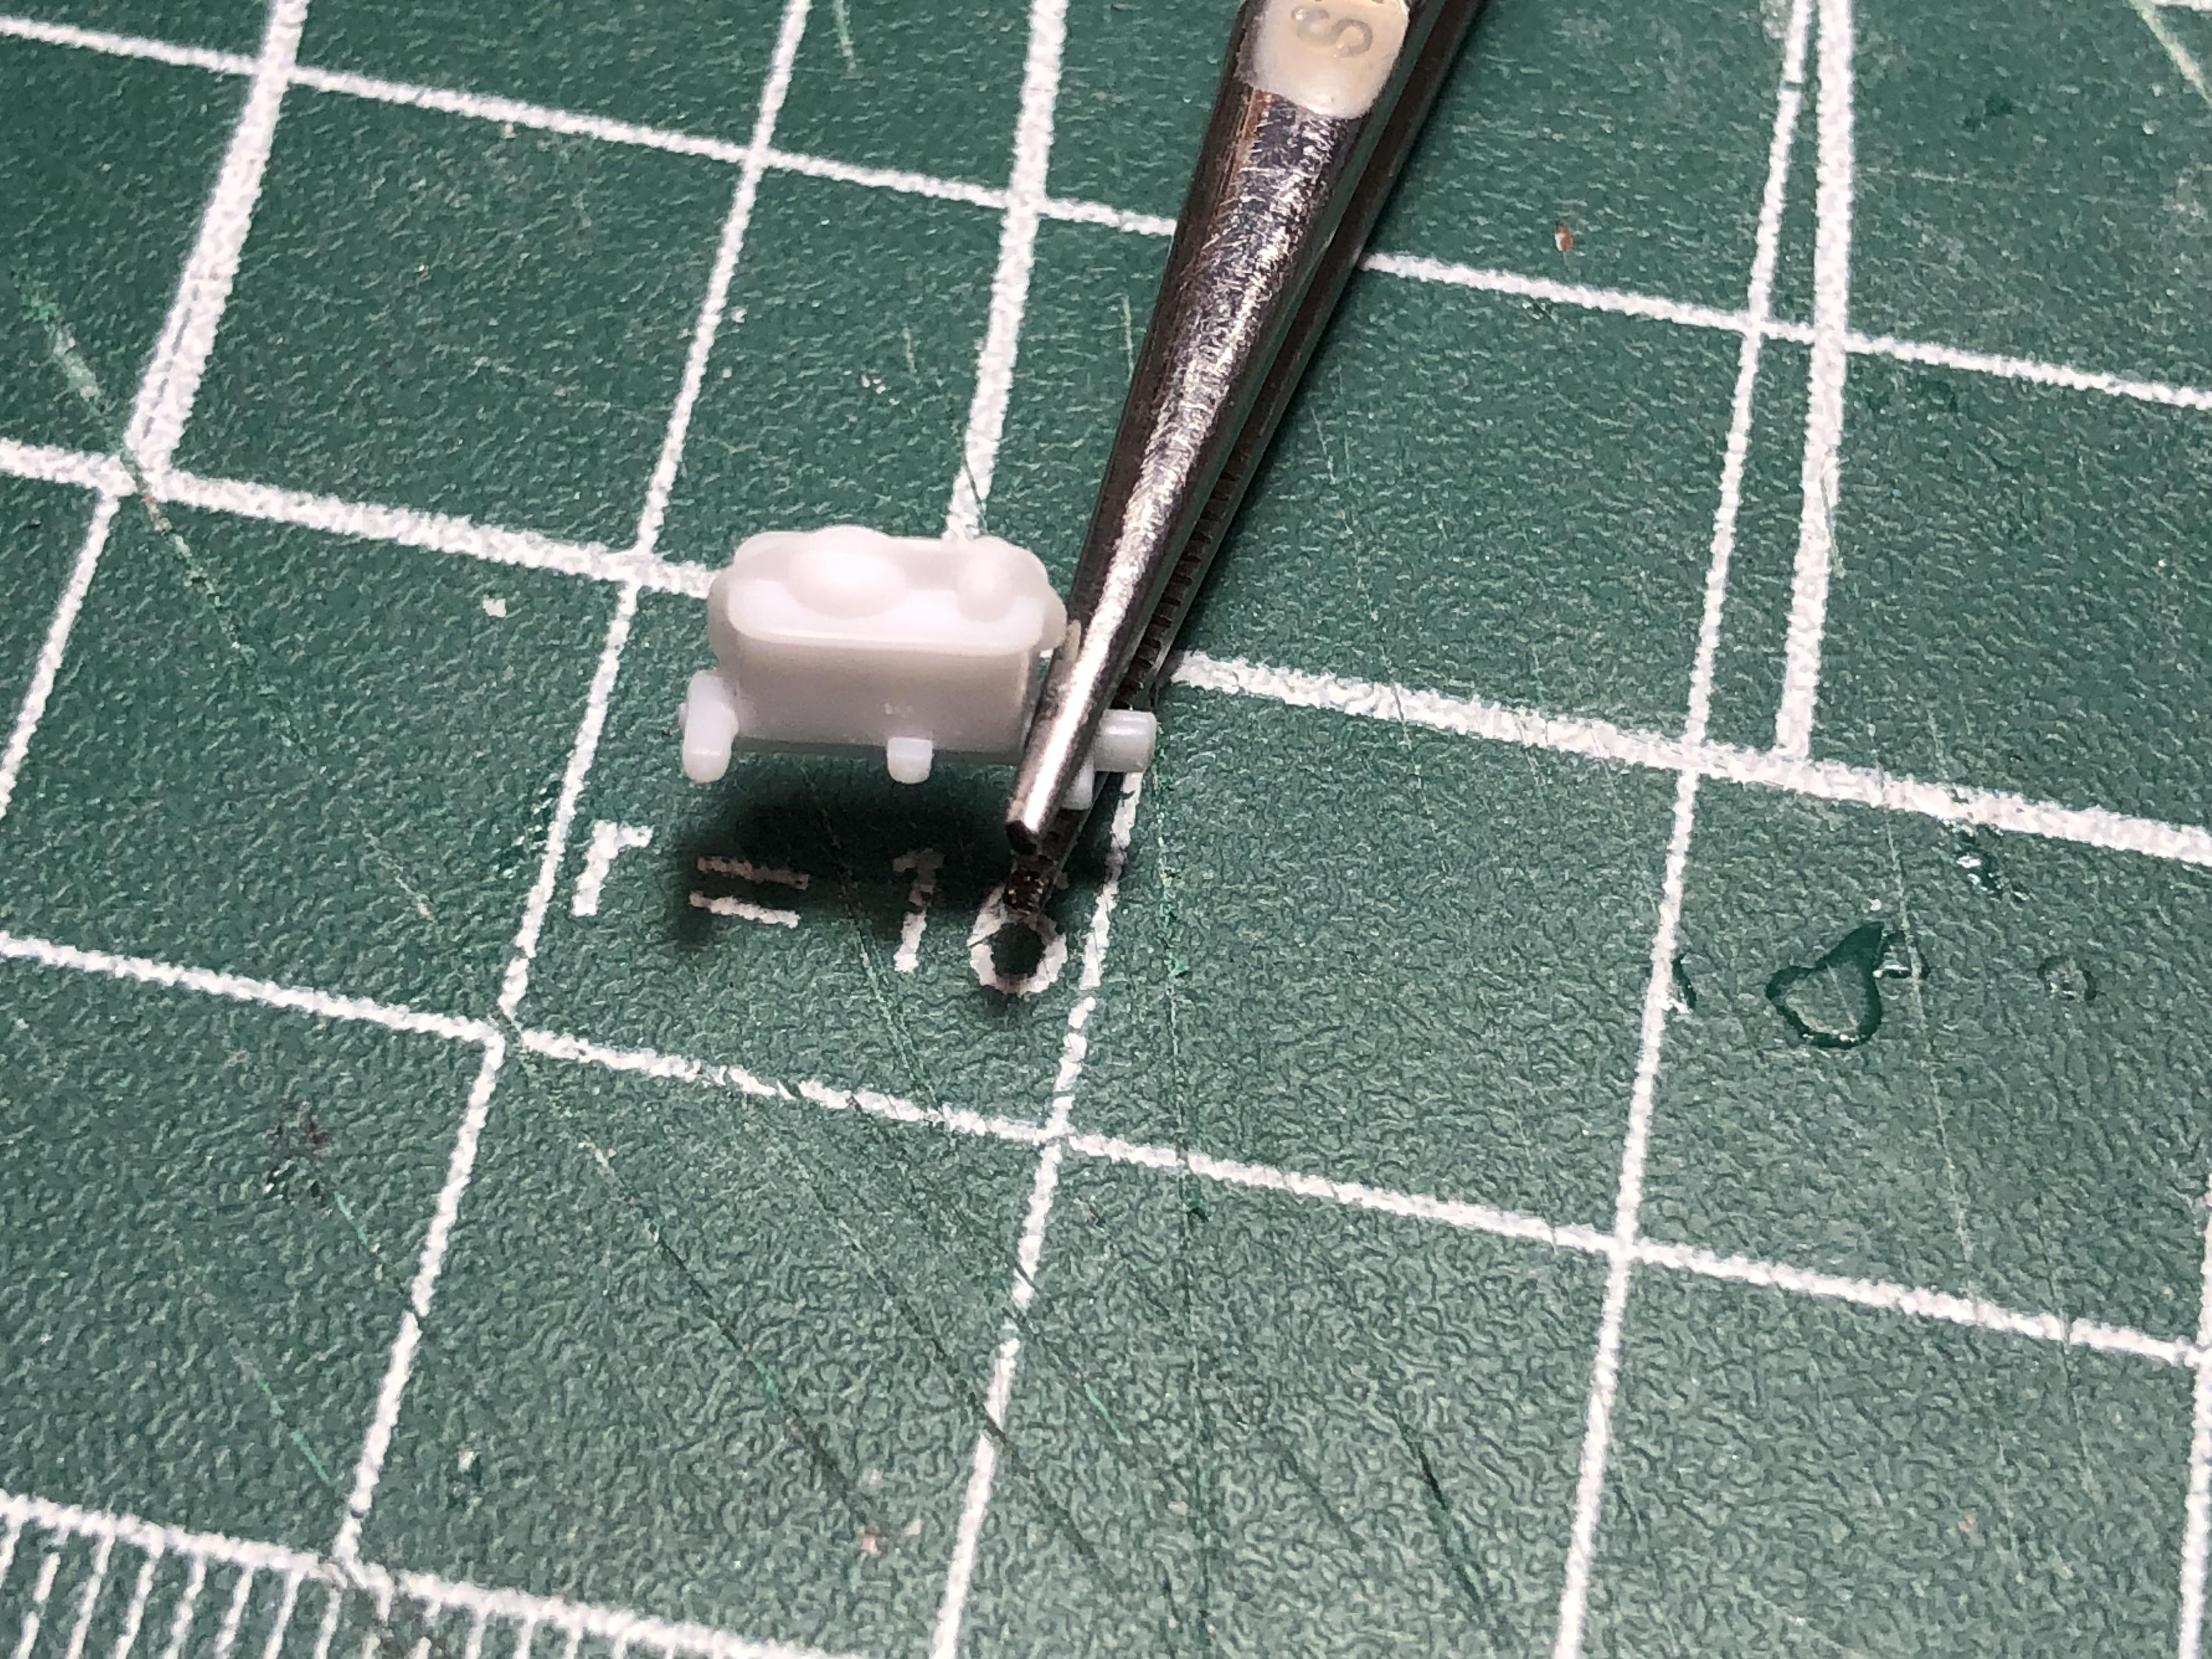
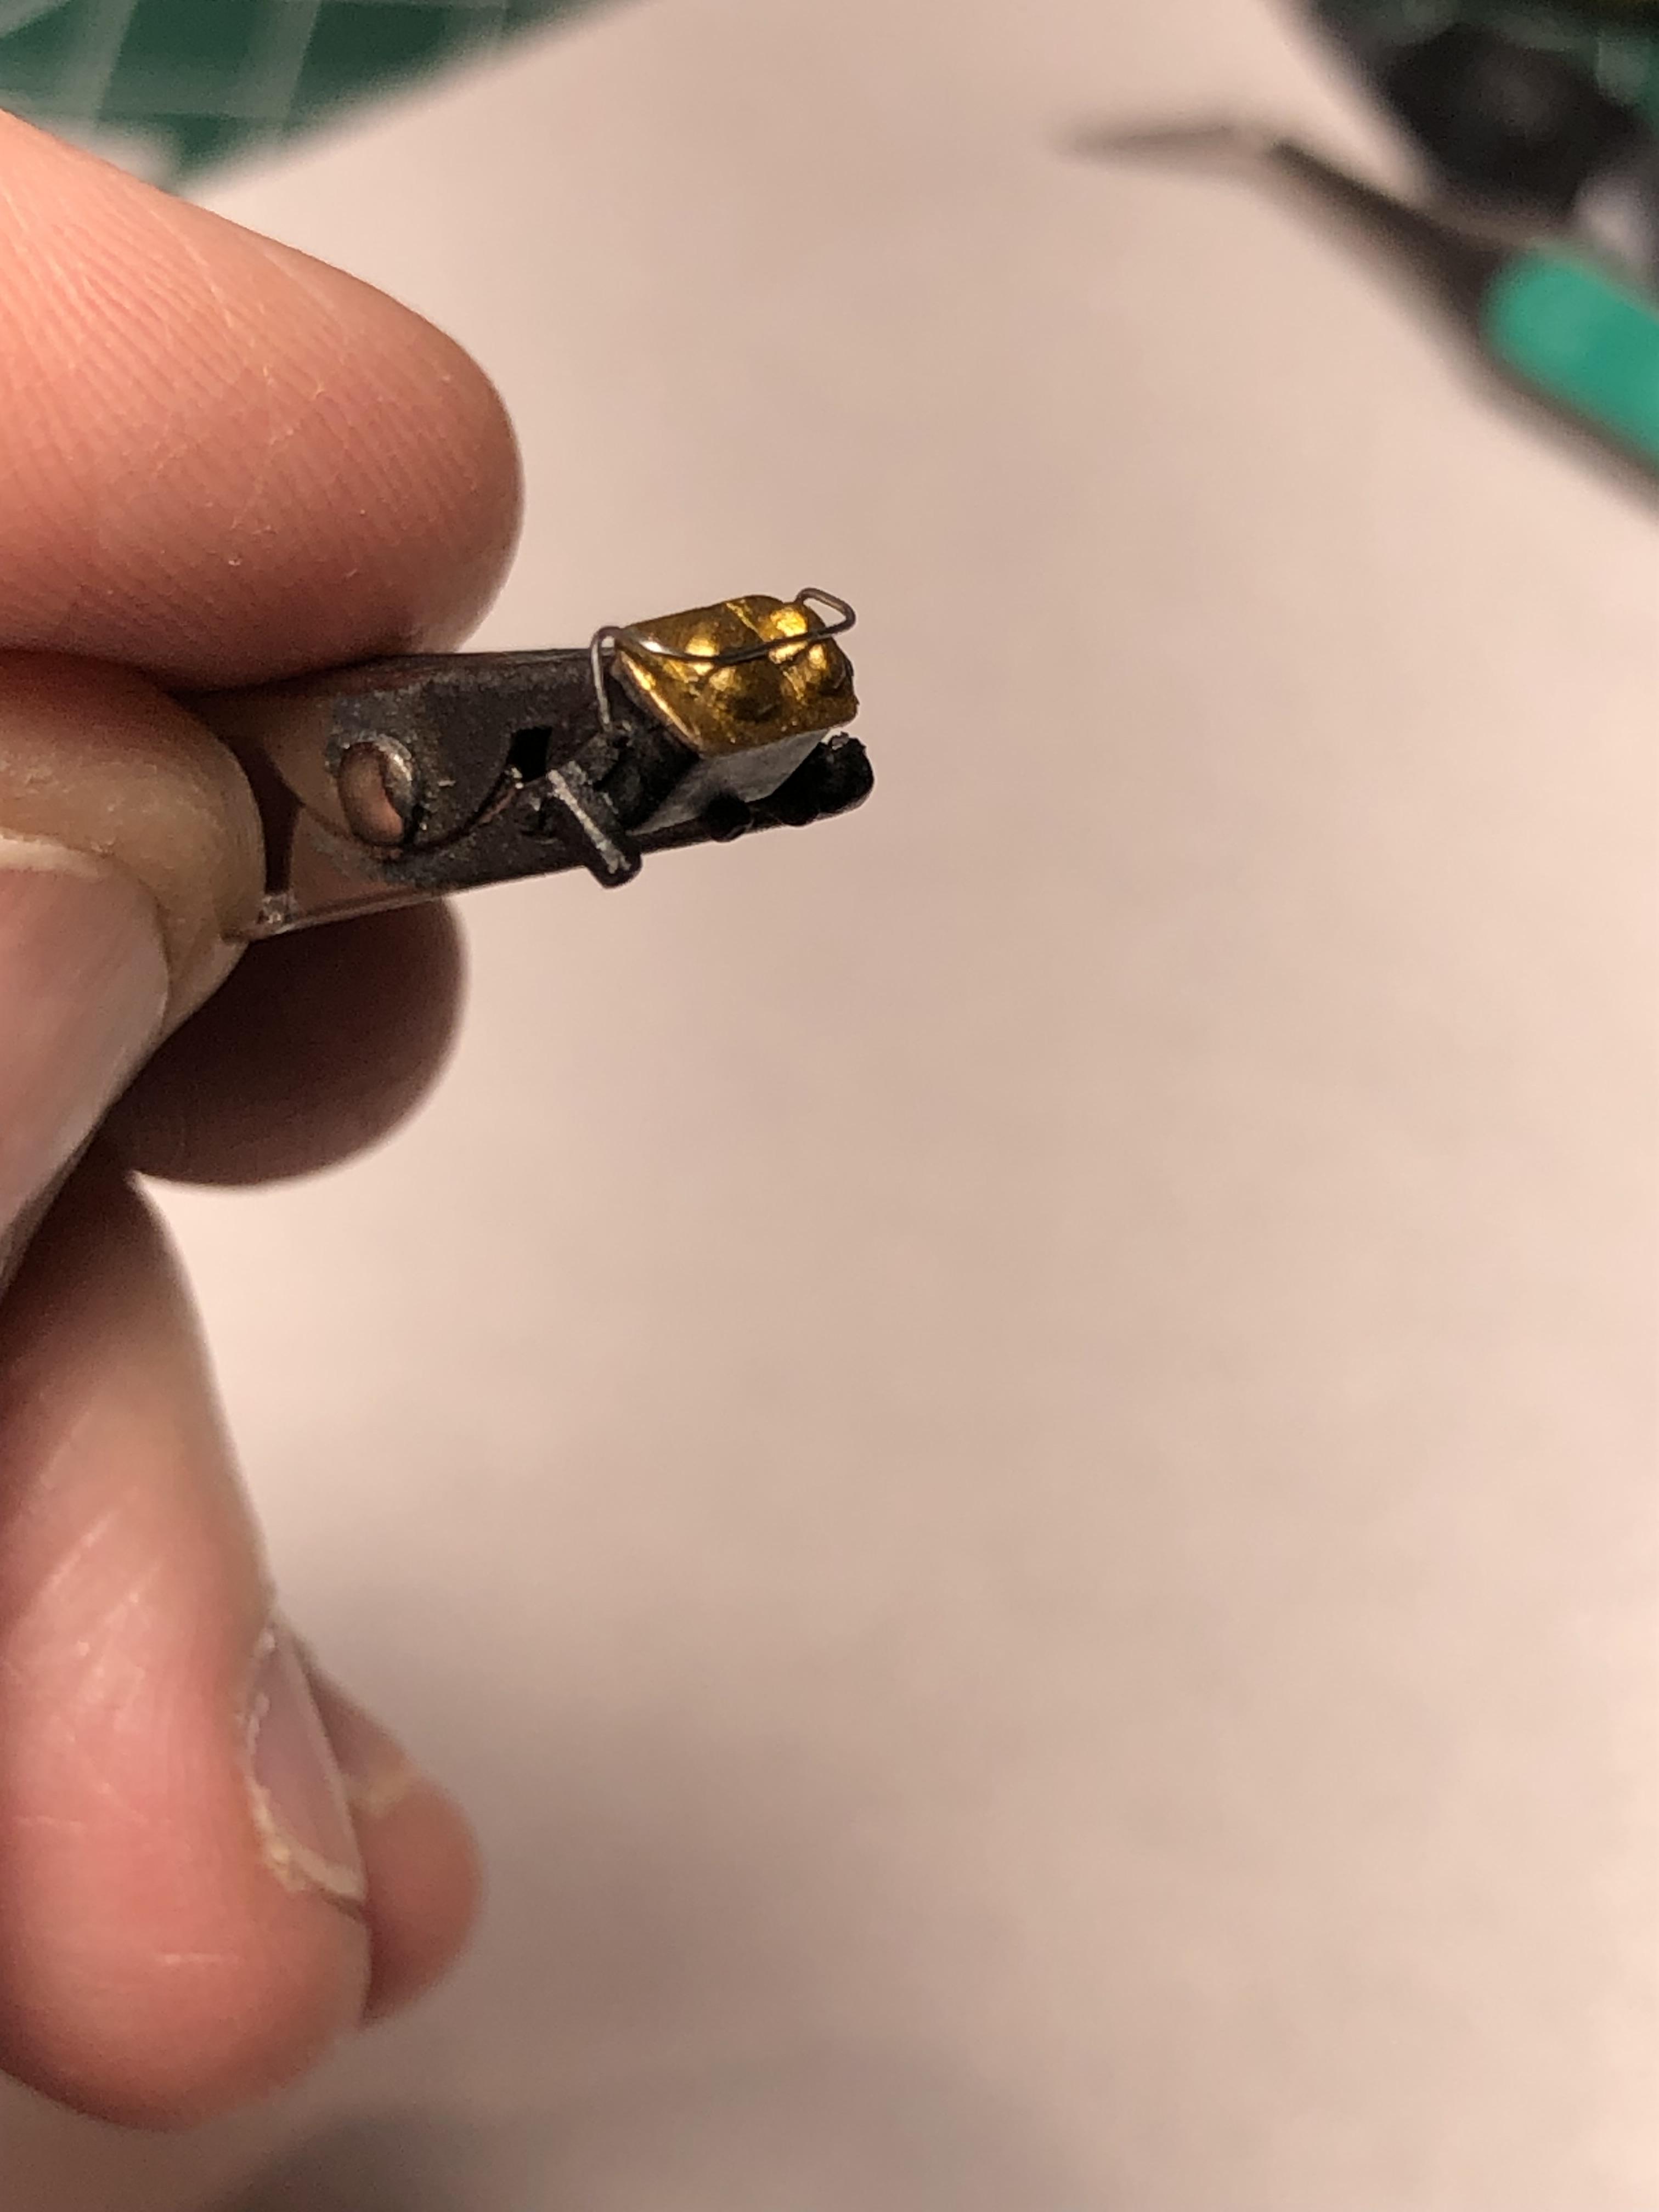
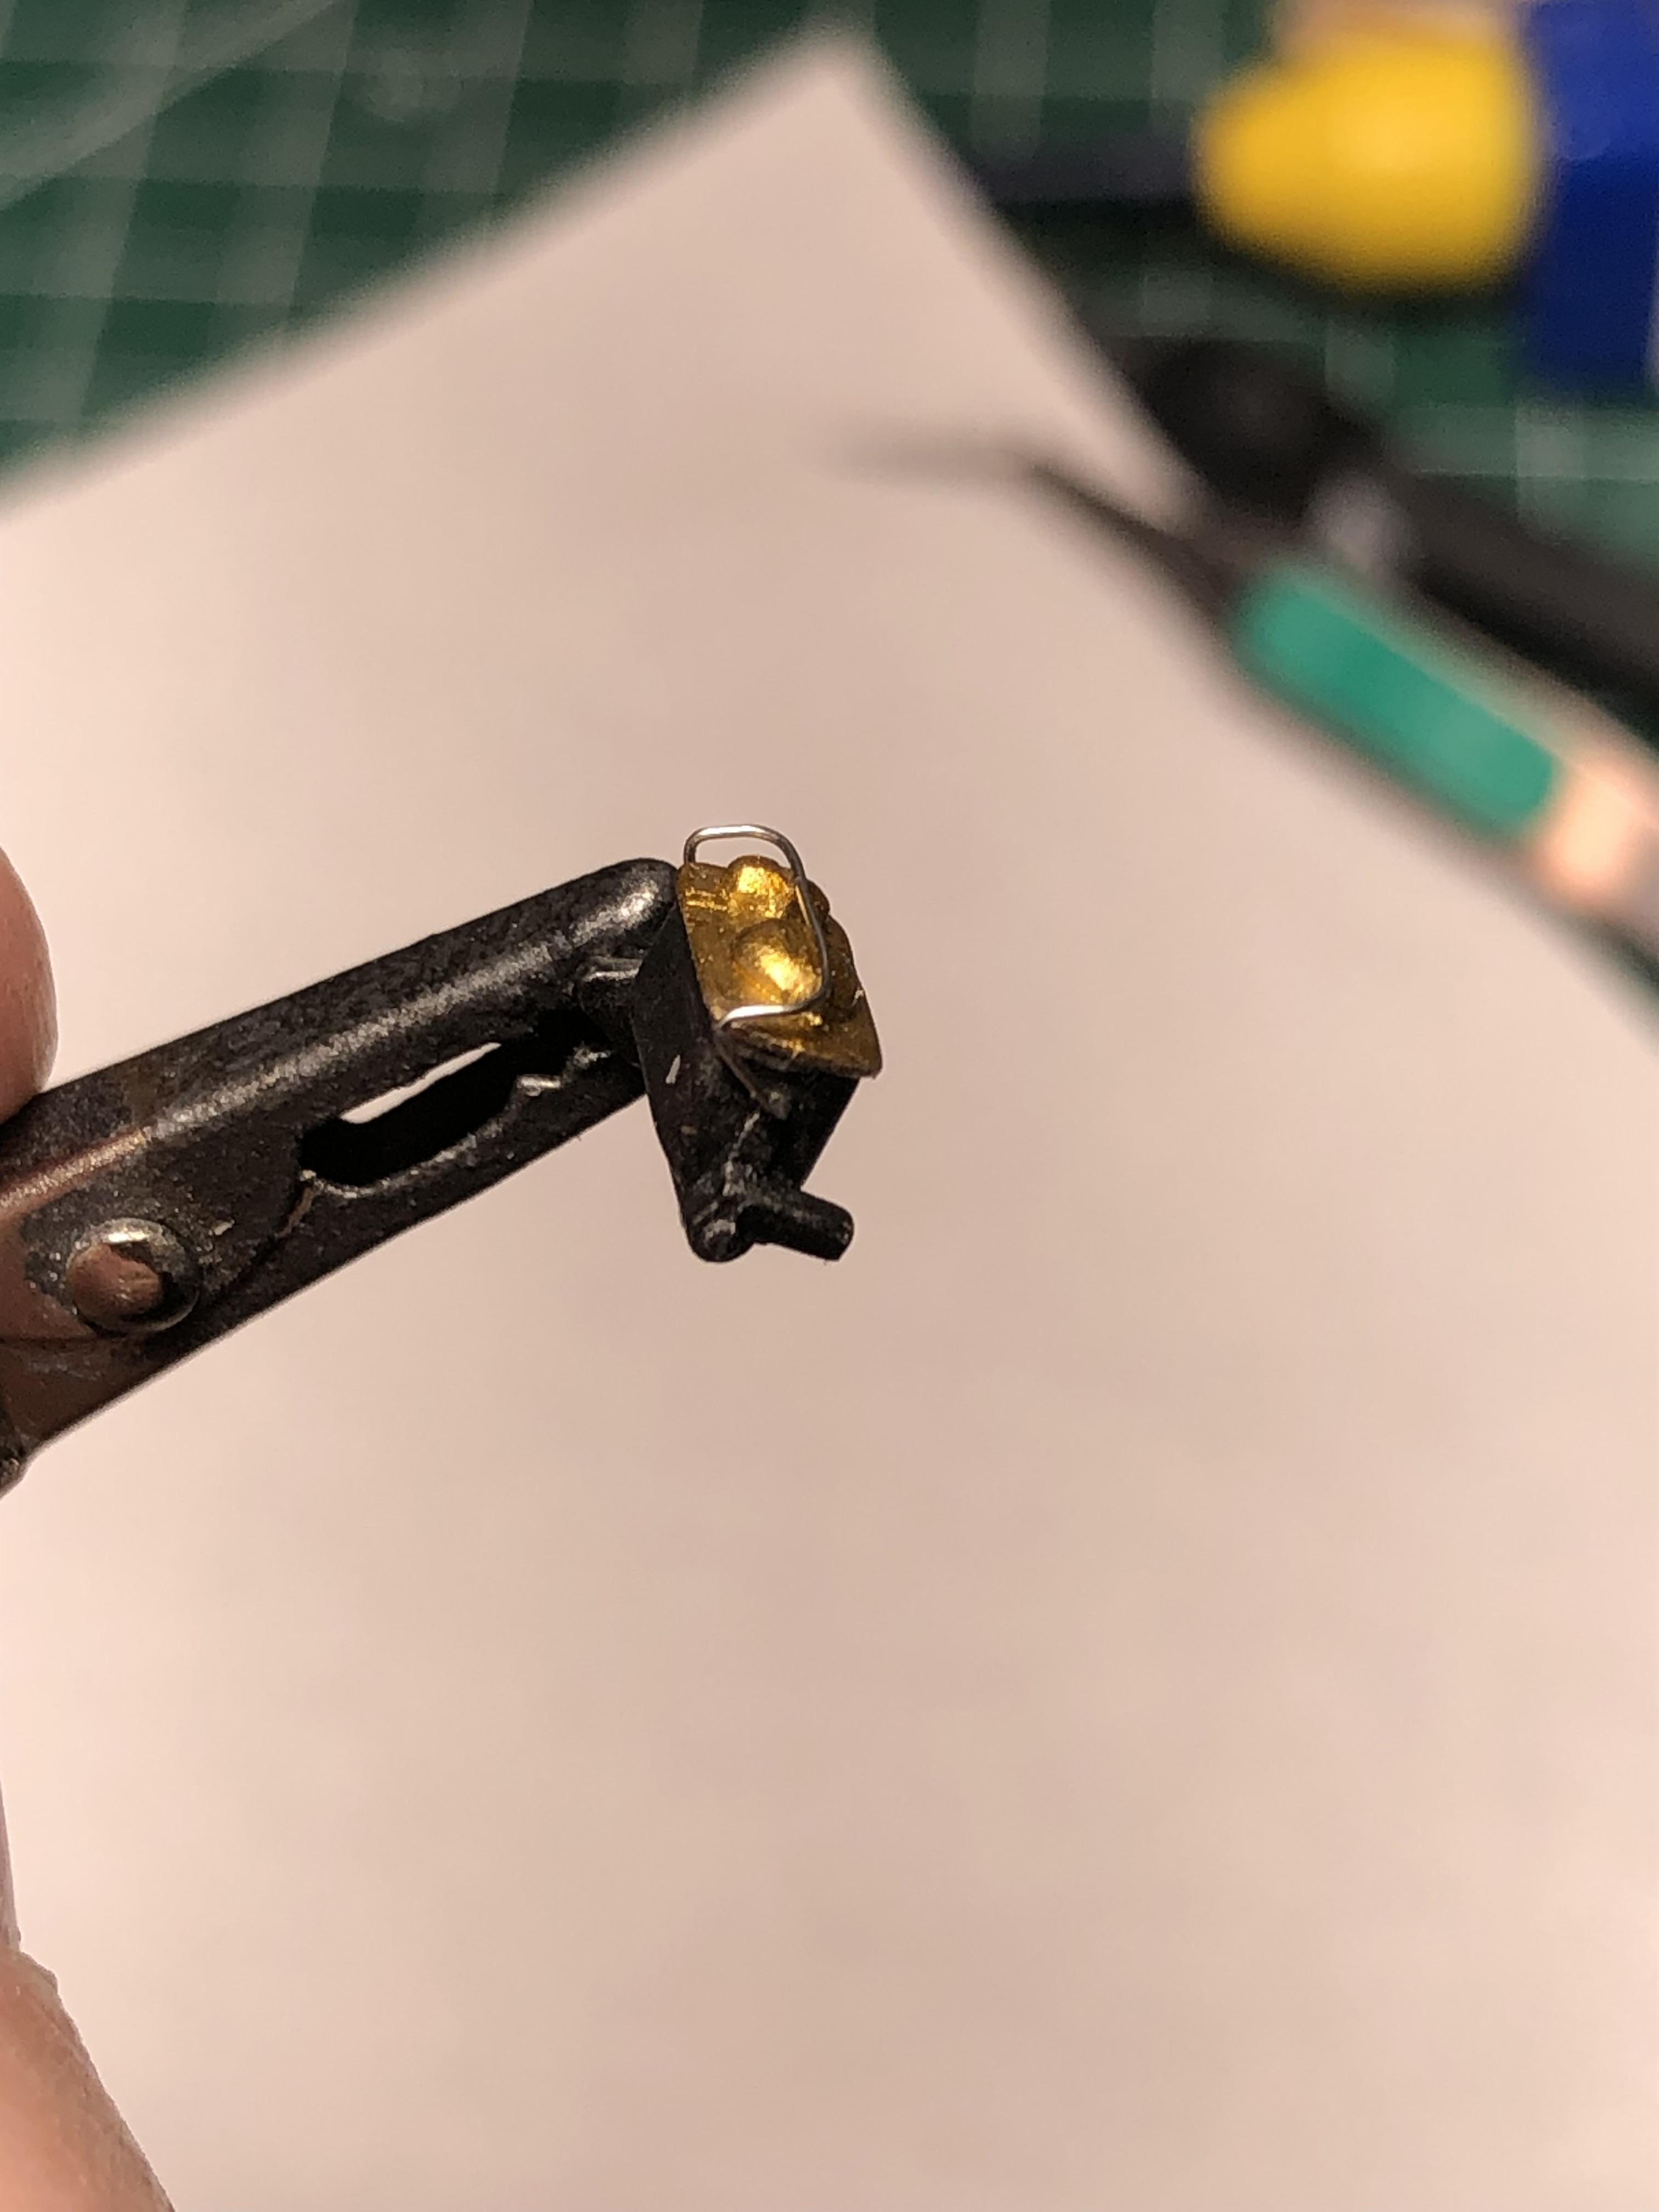
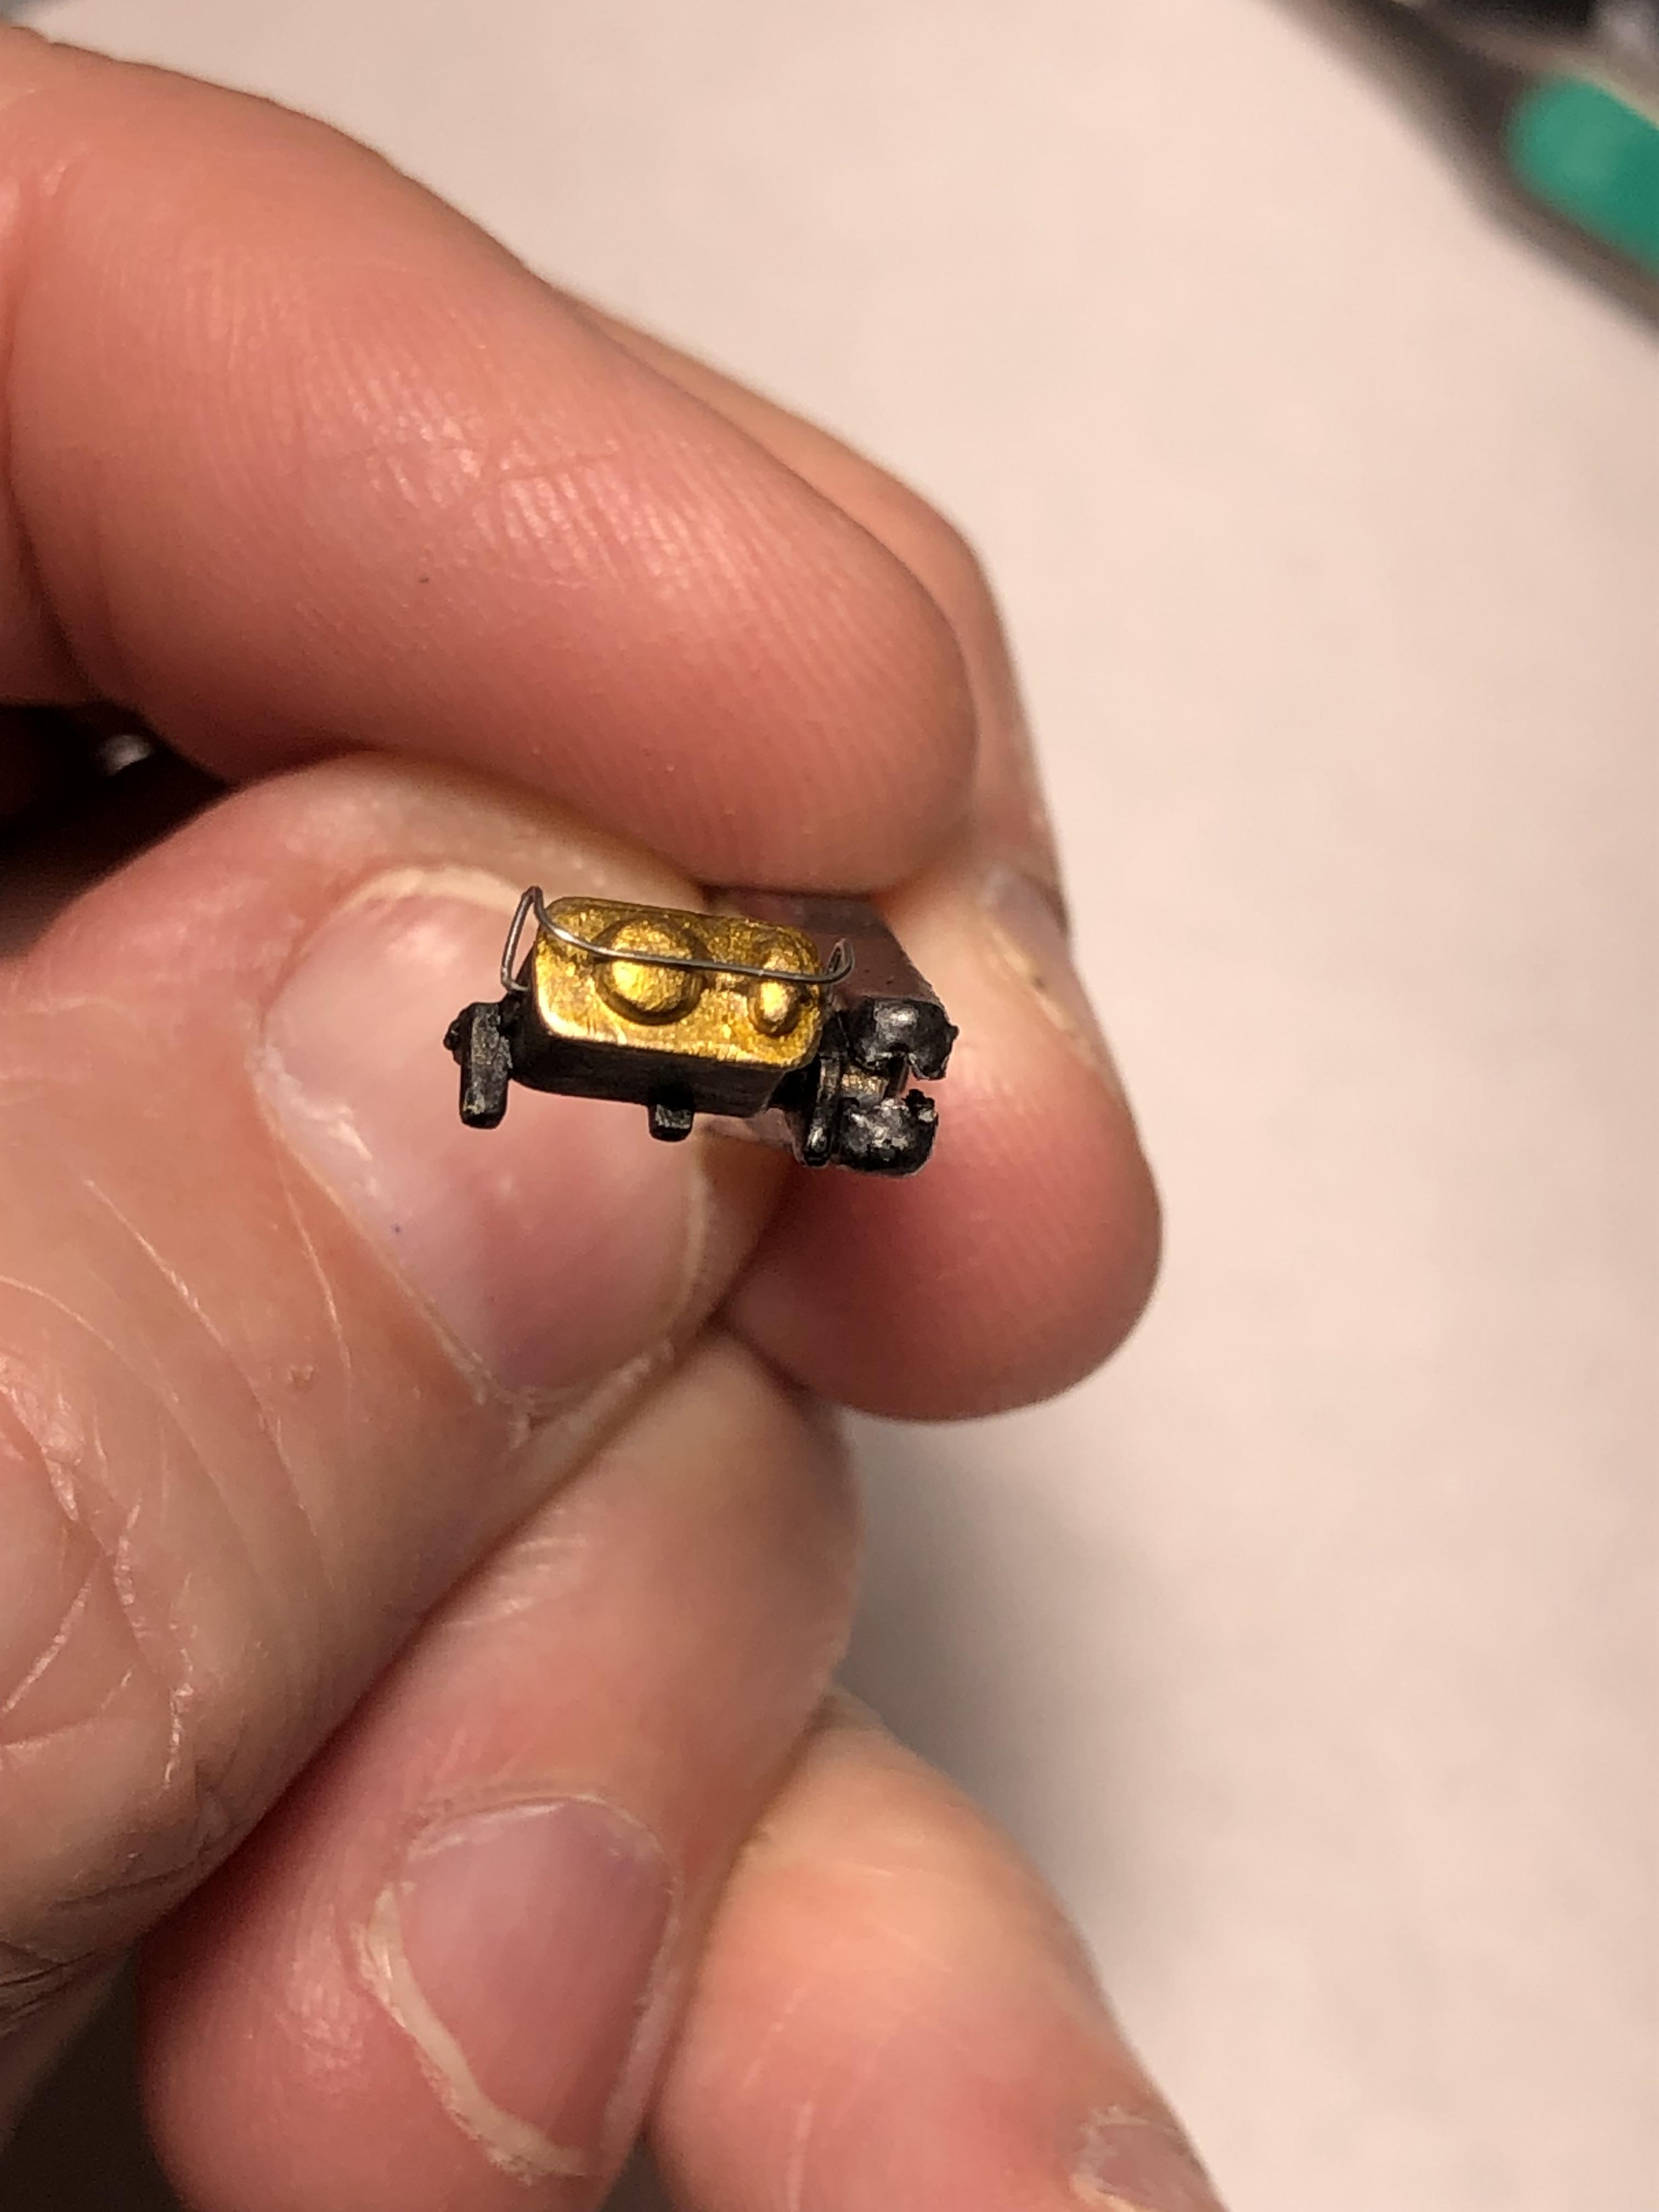
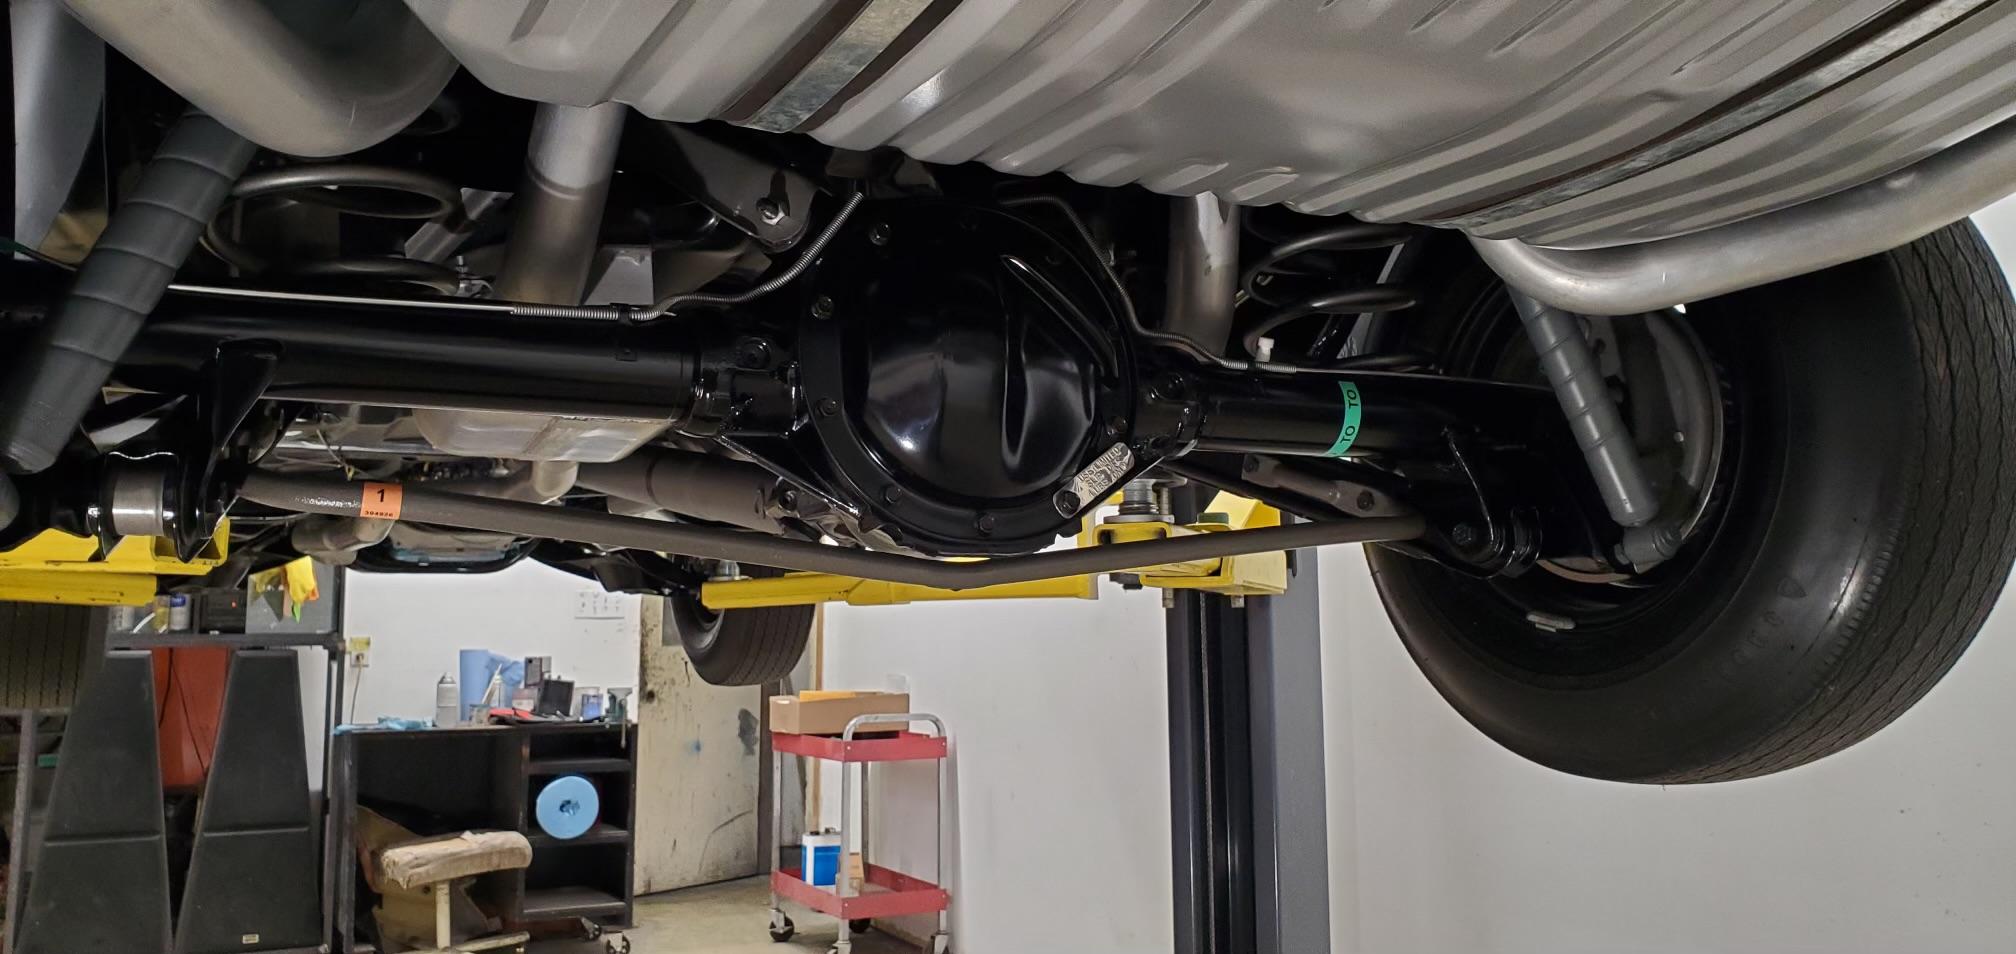
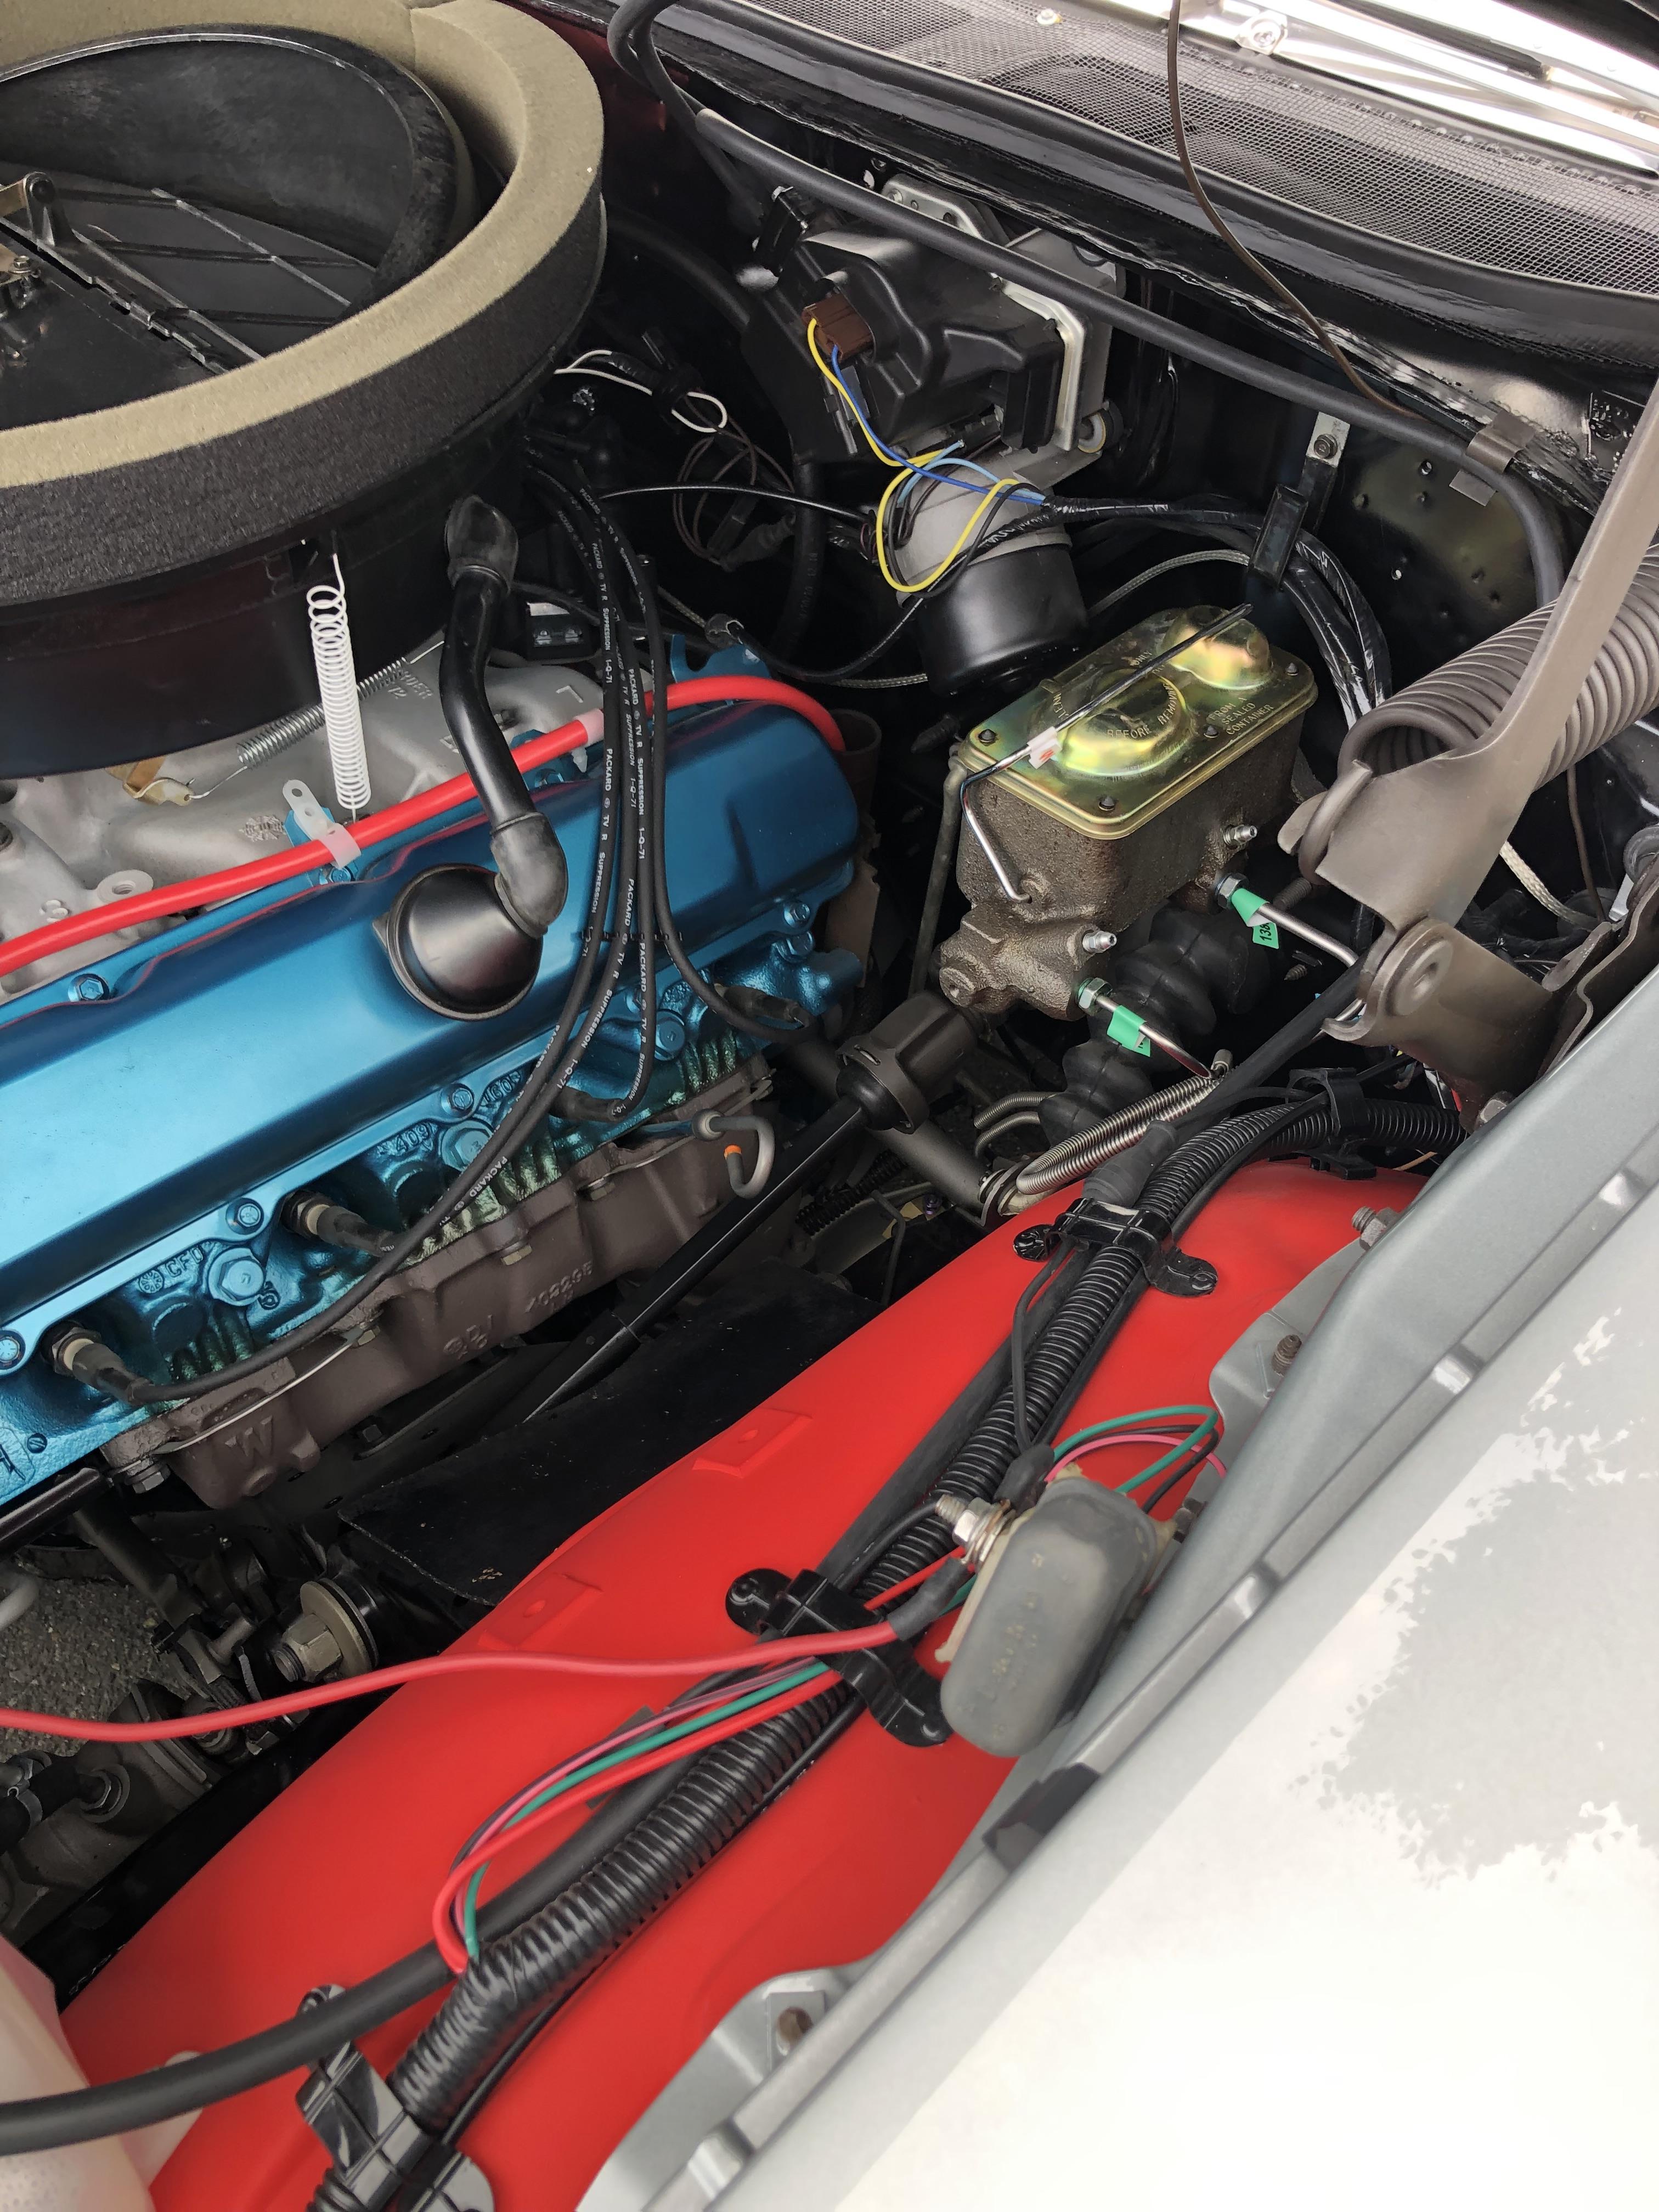
Progress… So, one of the things I have tried to improve on recently, is hollow front frames. So I boxed in the frame, it’s not perfect, but much better than hollow, and once the engine bay is detailed, the flaws won’t be noticeable. I thought it would be fun to add a little detail to the master cylinder. First time trying this, but it turned out ok I think. The real car… kit piece before… After… I will add some brake lines later. The cap was painted gold, then I brushed on some clear yellow. The chassis assembly has begun. Exhaust pipes are mica silver, mufflers are wrapped with matte aluminium BMF. Chrome BMF straps for the fuel tank. I still need to add the shocks. I’ve included a photo of Wayne’s car for reference. If you look close, you will see I added the small aluminum tag on the rear differential cover, just for fun. Smallest piece of BMF I have ever applied… That’s it for now, thanks for having a look.
-
71 Olds 442 W30 (replica of my brother in law’s car)
Steve H replied to Steve H's topic in WIP: Model Cars
Thanks Greg! Yes, having photos has been super helpful. I’m trying to push myself a bit with added detail, hopefully it pays off. I’ll be doing a replica of my Beaumont some day so this is good practice ? Thanks Rich, I appreciate the kind words. -
The "Illusion" by Rick Dore.......on the Bench 12/9/23
Steve H replied to John Teresi's topic in WIP: Model Cars
Another amazing build John. Had the pleasure of seeing several of your models in person at NNL west in 2020. Cool to see the in progress photos for one of your builds, thanks for sharing. Cheers, Steve -
Hi Paul, lots of great work here. Sometimes on this forum, you guys will do something that makes me say, “well duhhh” that’s an obvious thing to do. I have so many Moroso valve covers, and I like them, but dang, those look good all cleaned up. What a simple, yet effective solution. Sheesh, sometimes I can’t see the forest thru the trees ??♂️. I really like your dive in and let’s see what happens approach. I’m sure you already have a very good plan in your head, but sometimes you just need to start cutting and see where it goes. That chassis is obviously in. Rey good hands. I’m following along sir. Cheers, Steve
-
71 Olds 442 W30 (replica of my brother in law’s car)
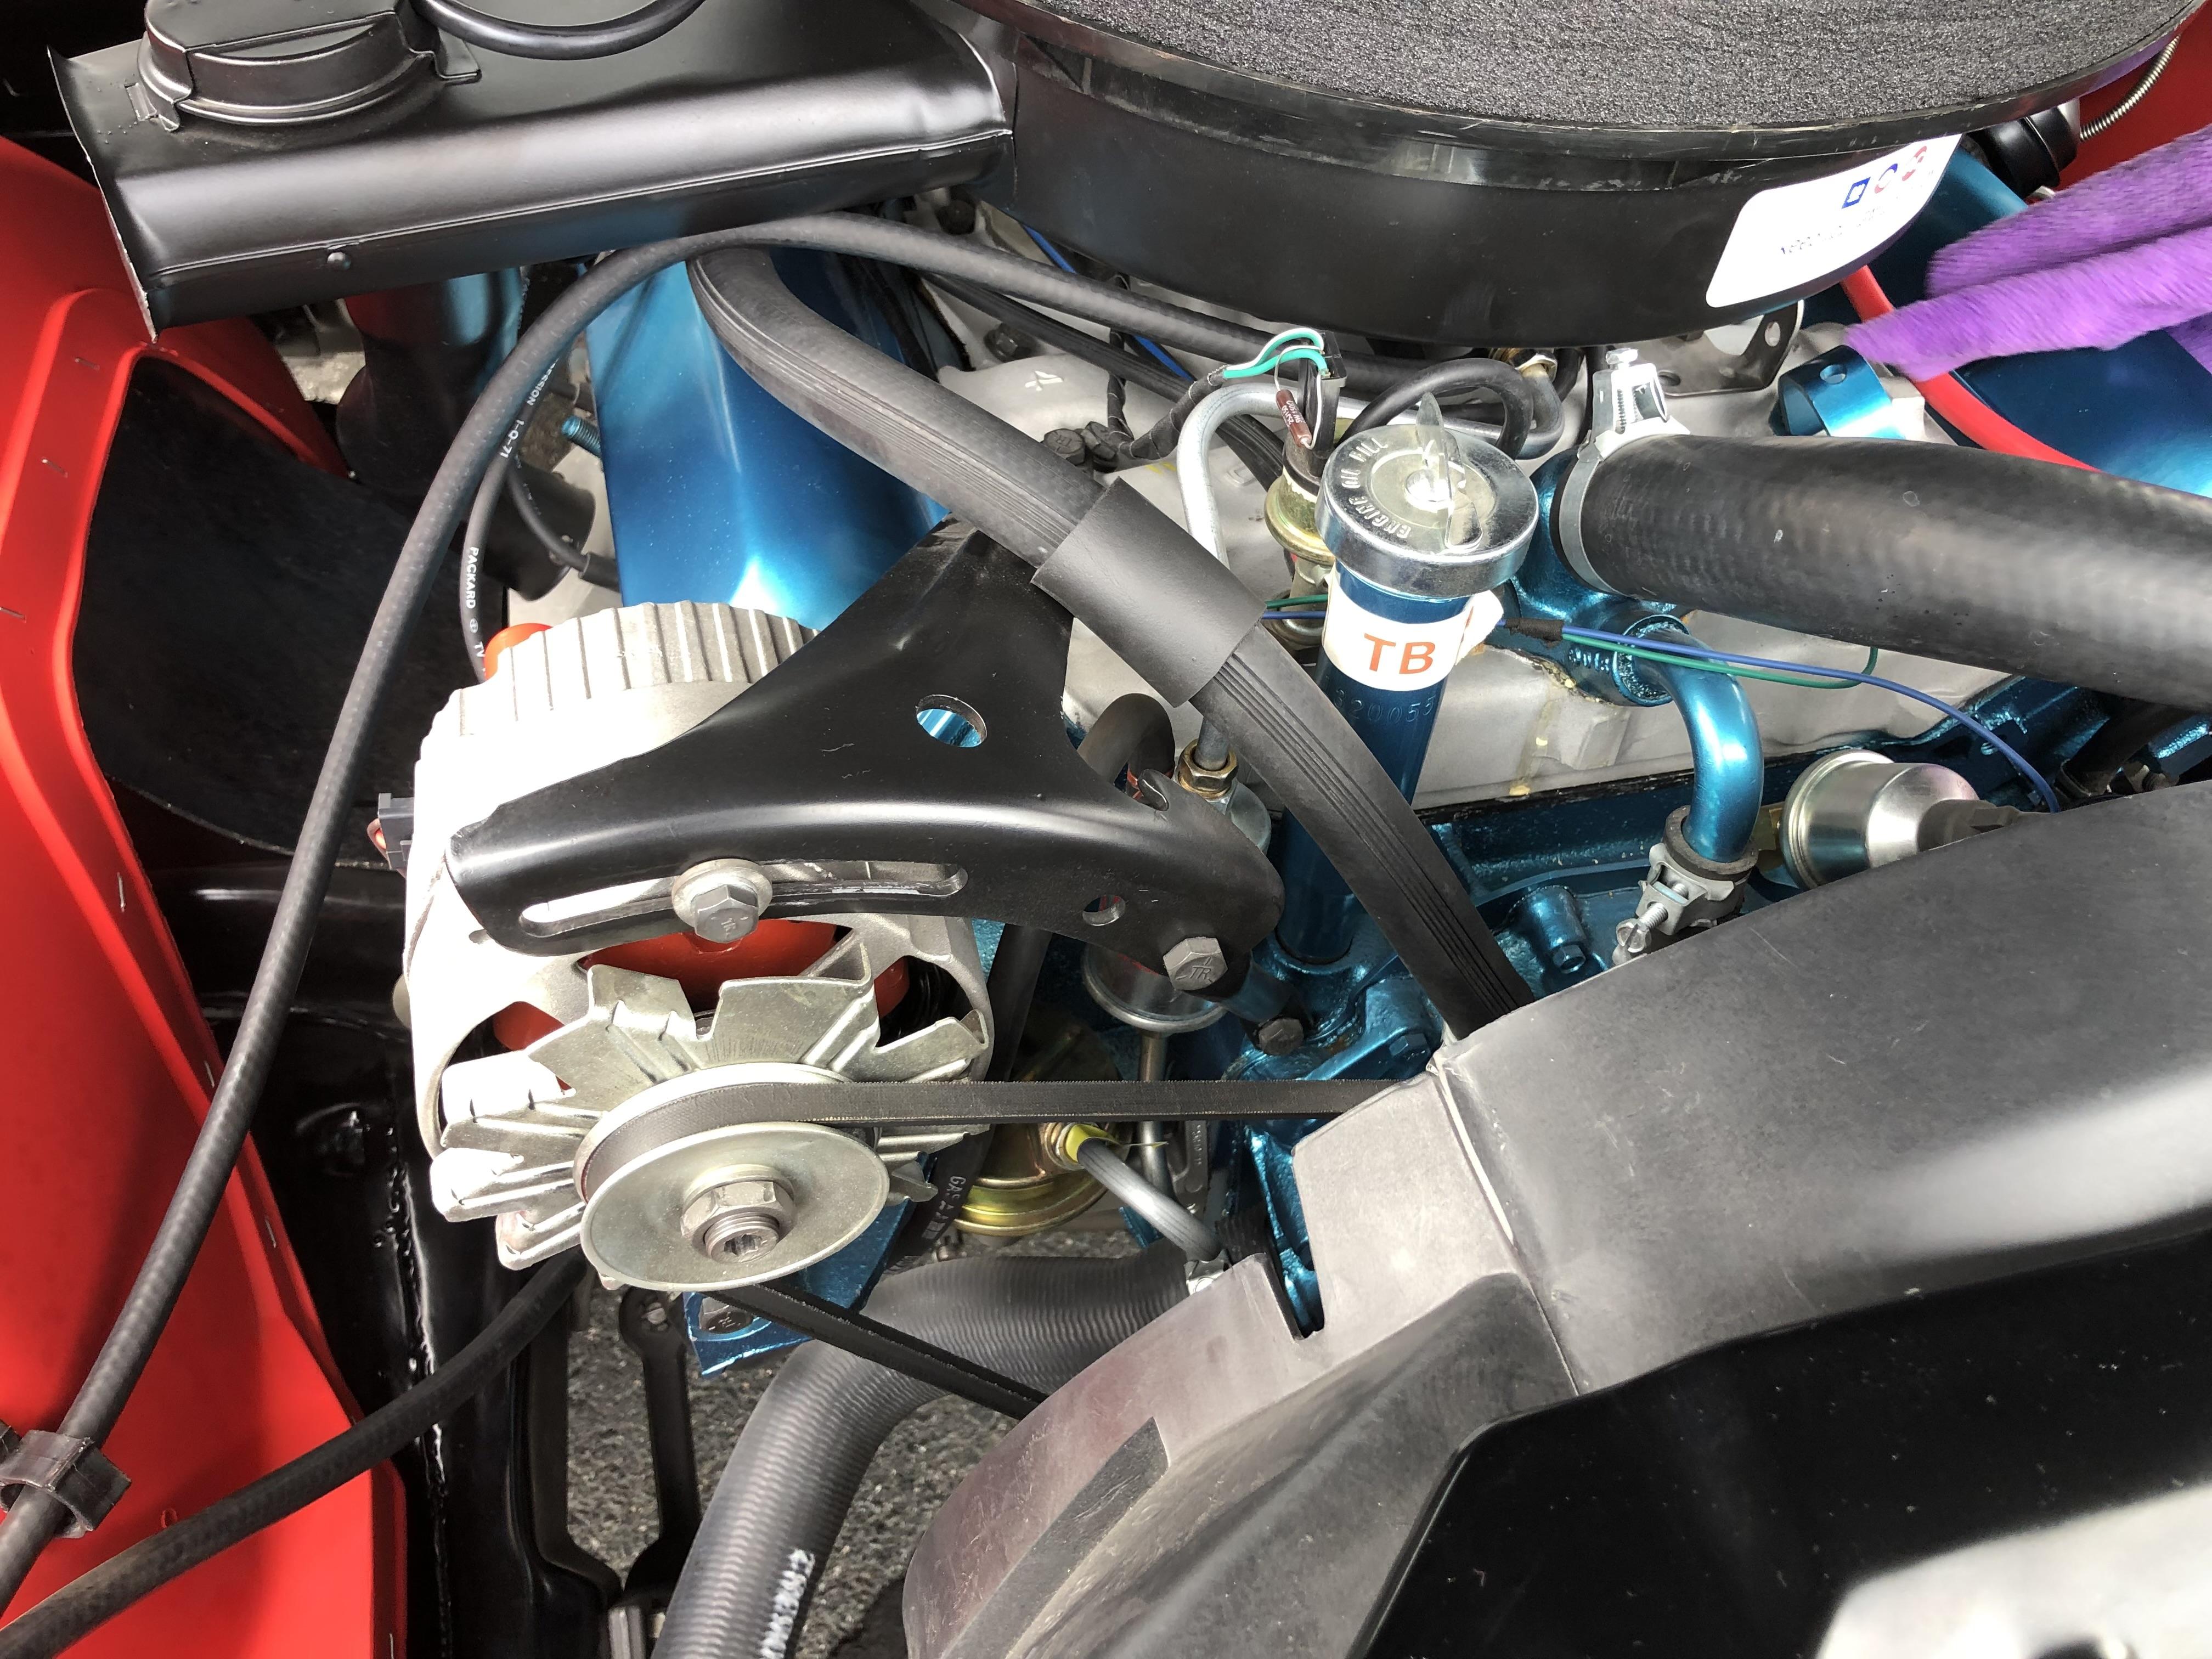
Steve H replied to Steve H's topic in WIP: Model Cars
Added a few more details to the engine. Scratch built the box that fits over the passenger side exhaust manifold. I will add the hose from that to the air cleaner later. Scratch built a bracket for the alternator. I have some photo etch ones but I wanted to try my best to replicate what is on the car. I’m trying to get away from alternators floating in mid air as they often do in 1:25 scale… Added the other heater hose which has a clamp made from a thin strip of BMF, and a piece of heat shrink tubing to replicate the protective sleeve on the car. I also added the little metal hoop on the manifold. It’s a piece of photo-etch fret painted in the same blue as the engine. This is the first time I’ve used photo-etch bolt heads. I just got some and thought this is a good opportunity to try them out. I used them on the metal hoop, the alternator bracket, and I will likely use a few more before I’m done. I have decided not to do throttle linkage as it will be lost under the air cleaner. So, now the engine is getting really close to complete, and chassis is ready for assembly. Thanks for looking and I truly appreciate the comments guys. Cheers, Steve
-
71 Olds 442 W30 (replica of my brother in law’s car)
Steve H replied to Steve H's topic in WIP: Model Cars
Hi Bill, I loved that build of yours! Thanks for checking in. Hi Paul, yes, I “HAD” access to this beauty, but to try and keep this as a surprise for him, I can’t go look at specific details. Still, I have enough to get things close. I will see it again in the summer, and be able to see how close it looks. What a great job! Restoring classics cars would be an enjoyable career. Thanks for following along. I need to check back in on your awesome gasser project. Cheers, Steve -
71 Olds 442 W30 (replica of my brother in law’s car)
Steve H replied to Steve H's topic in WIP: Model Cars
Thank you Dave. I have only done a couple of replicas, this will be my most detailed so far. -
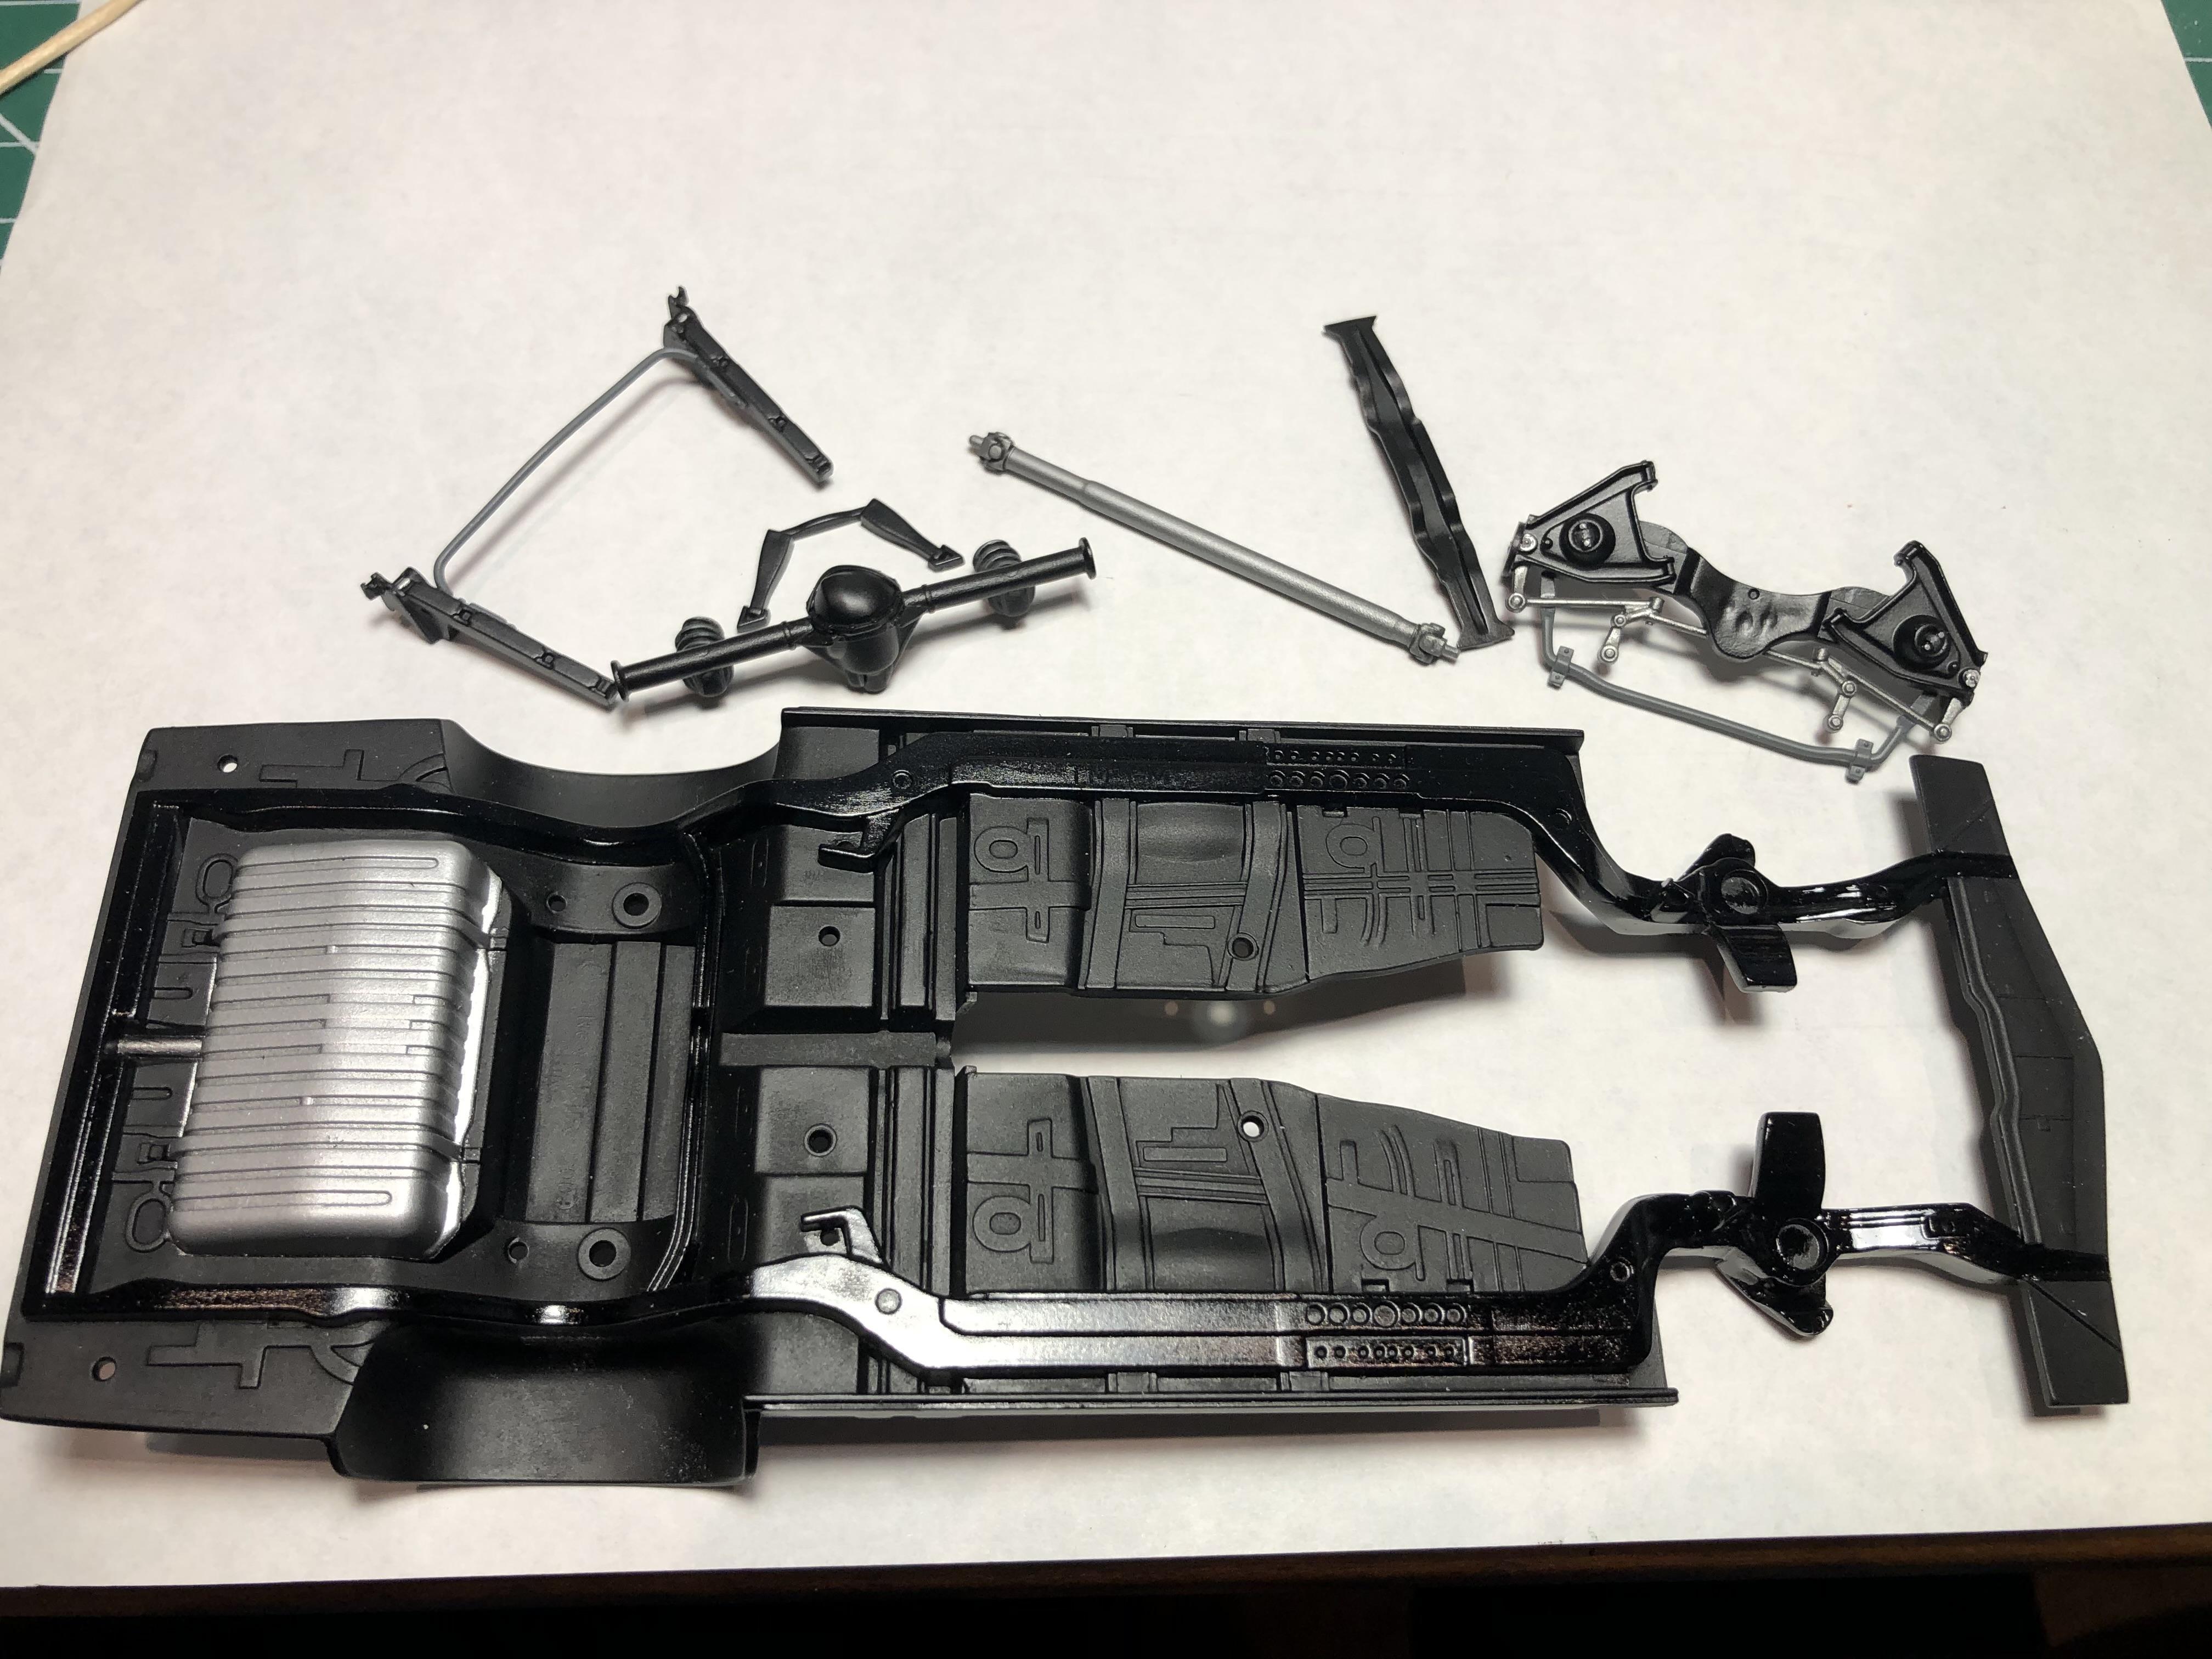
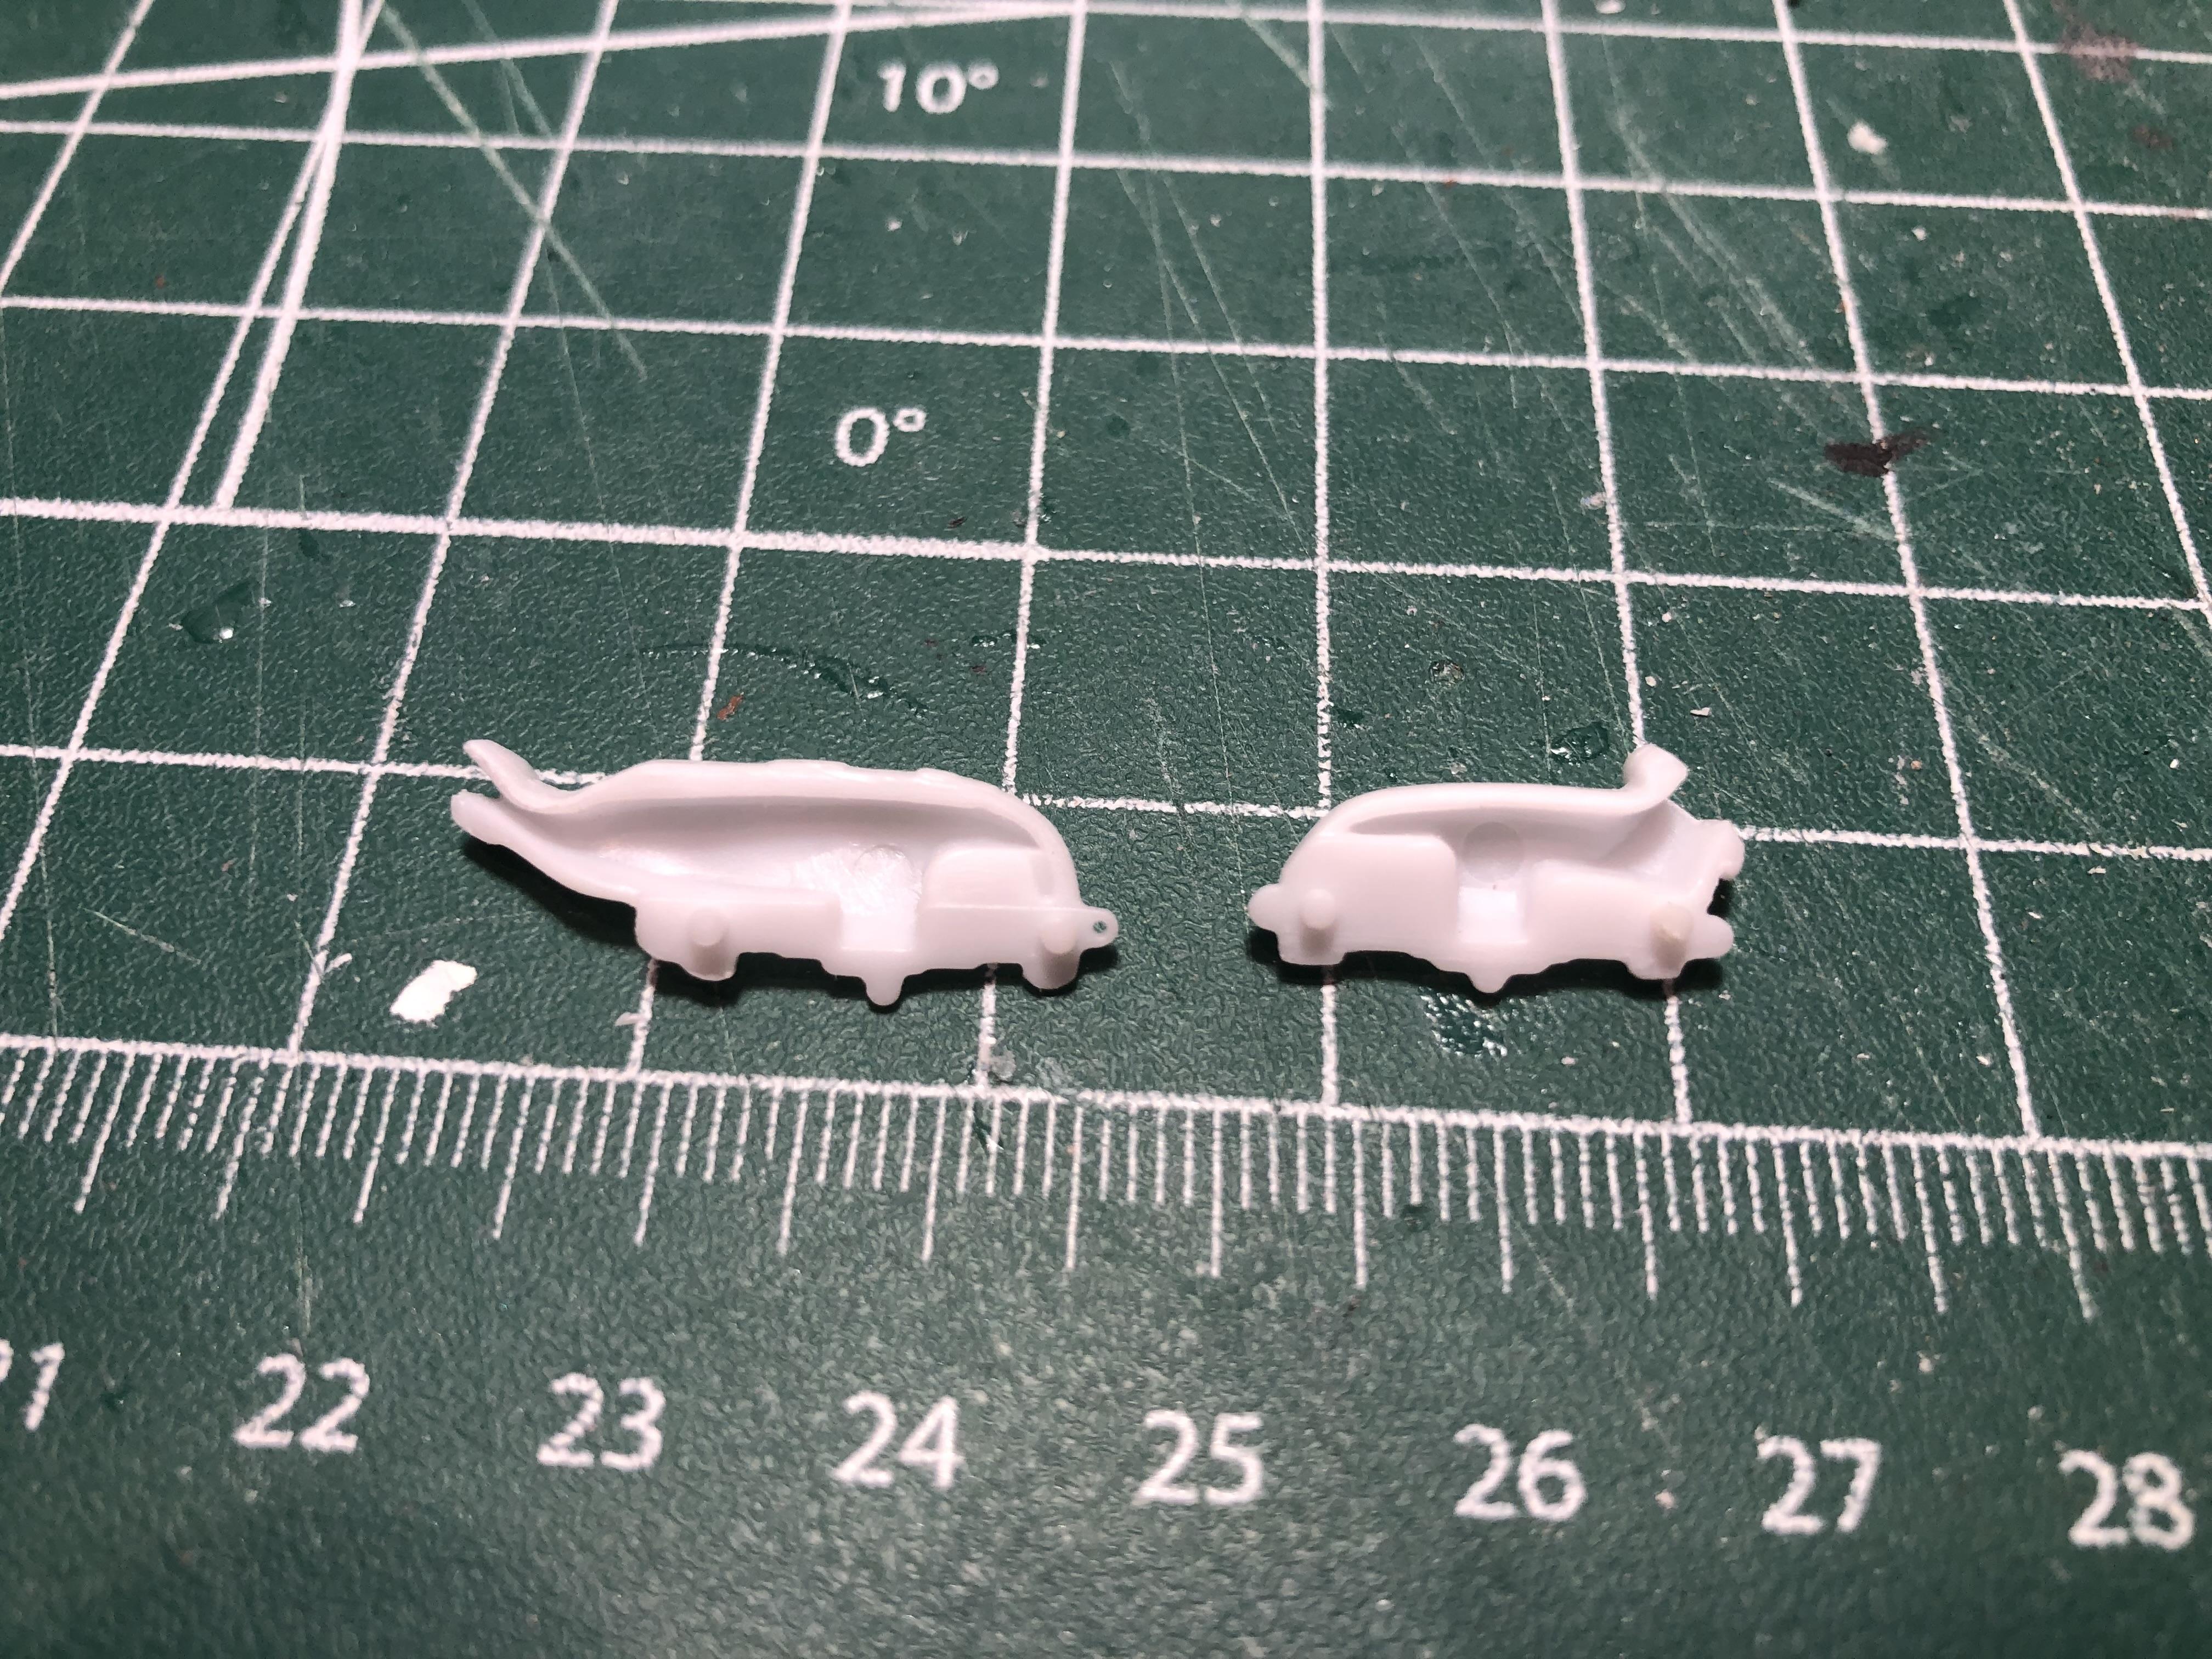
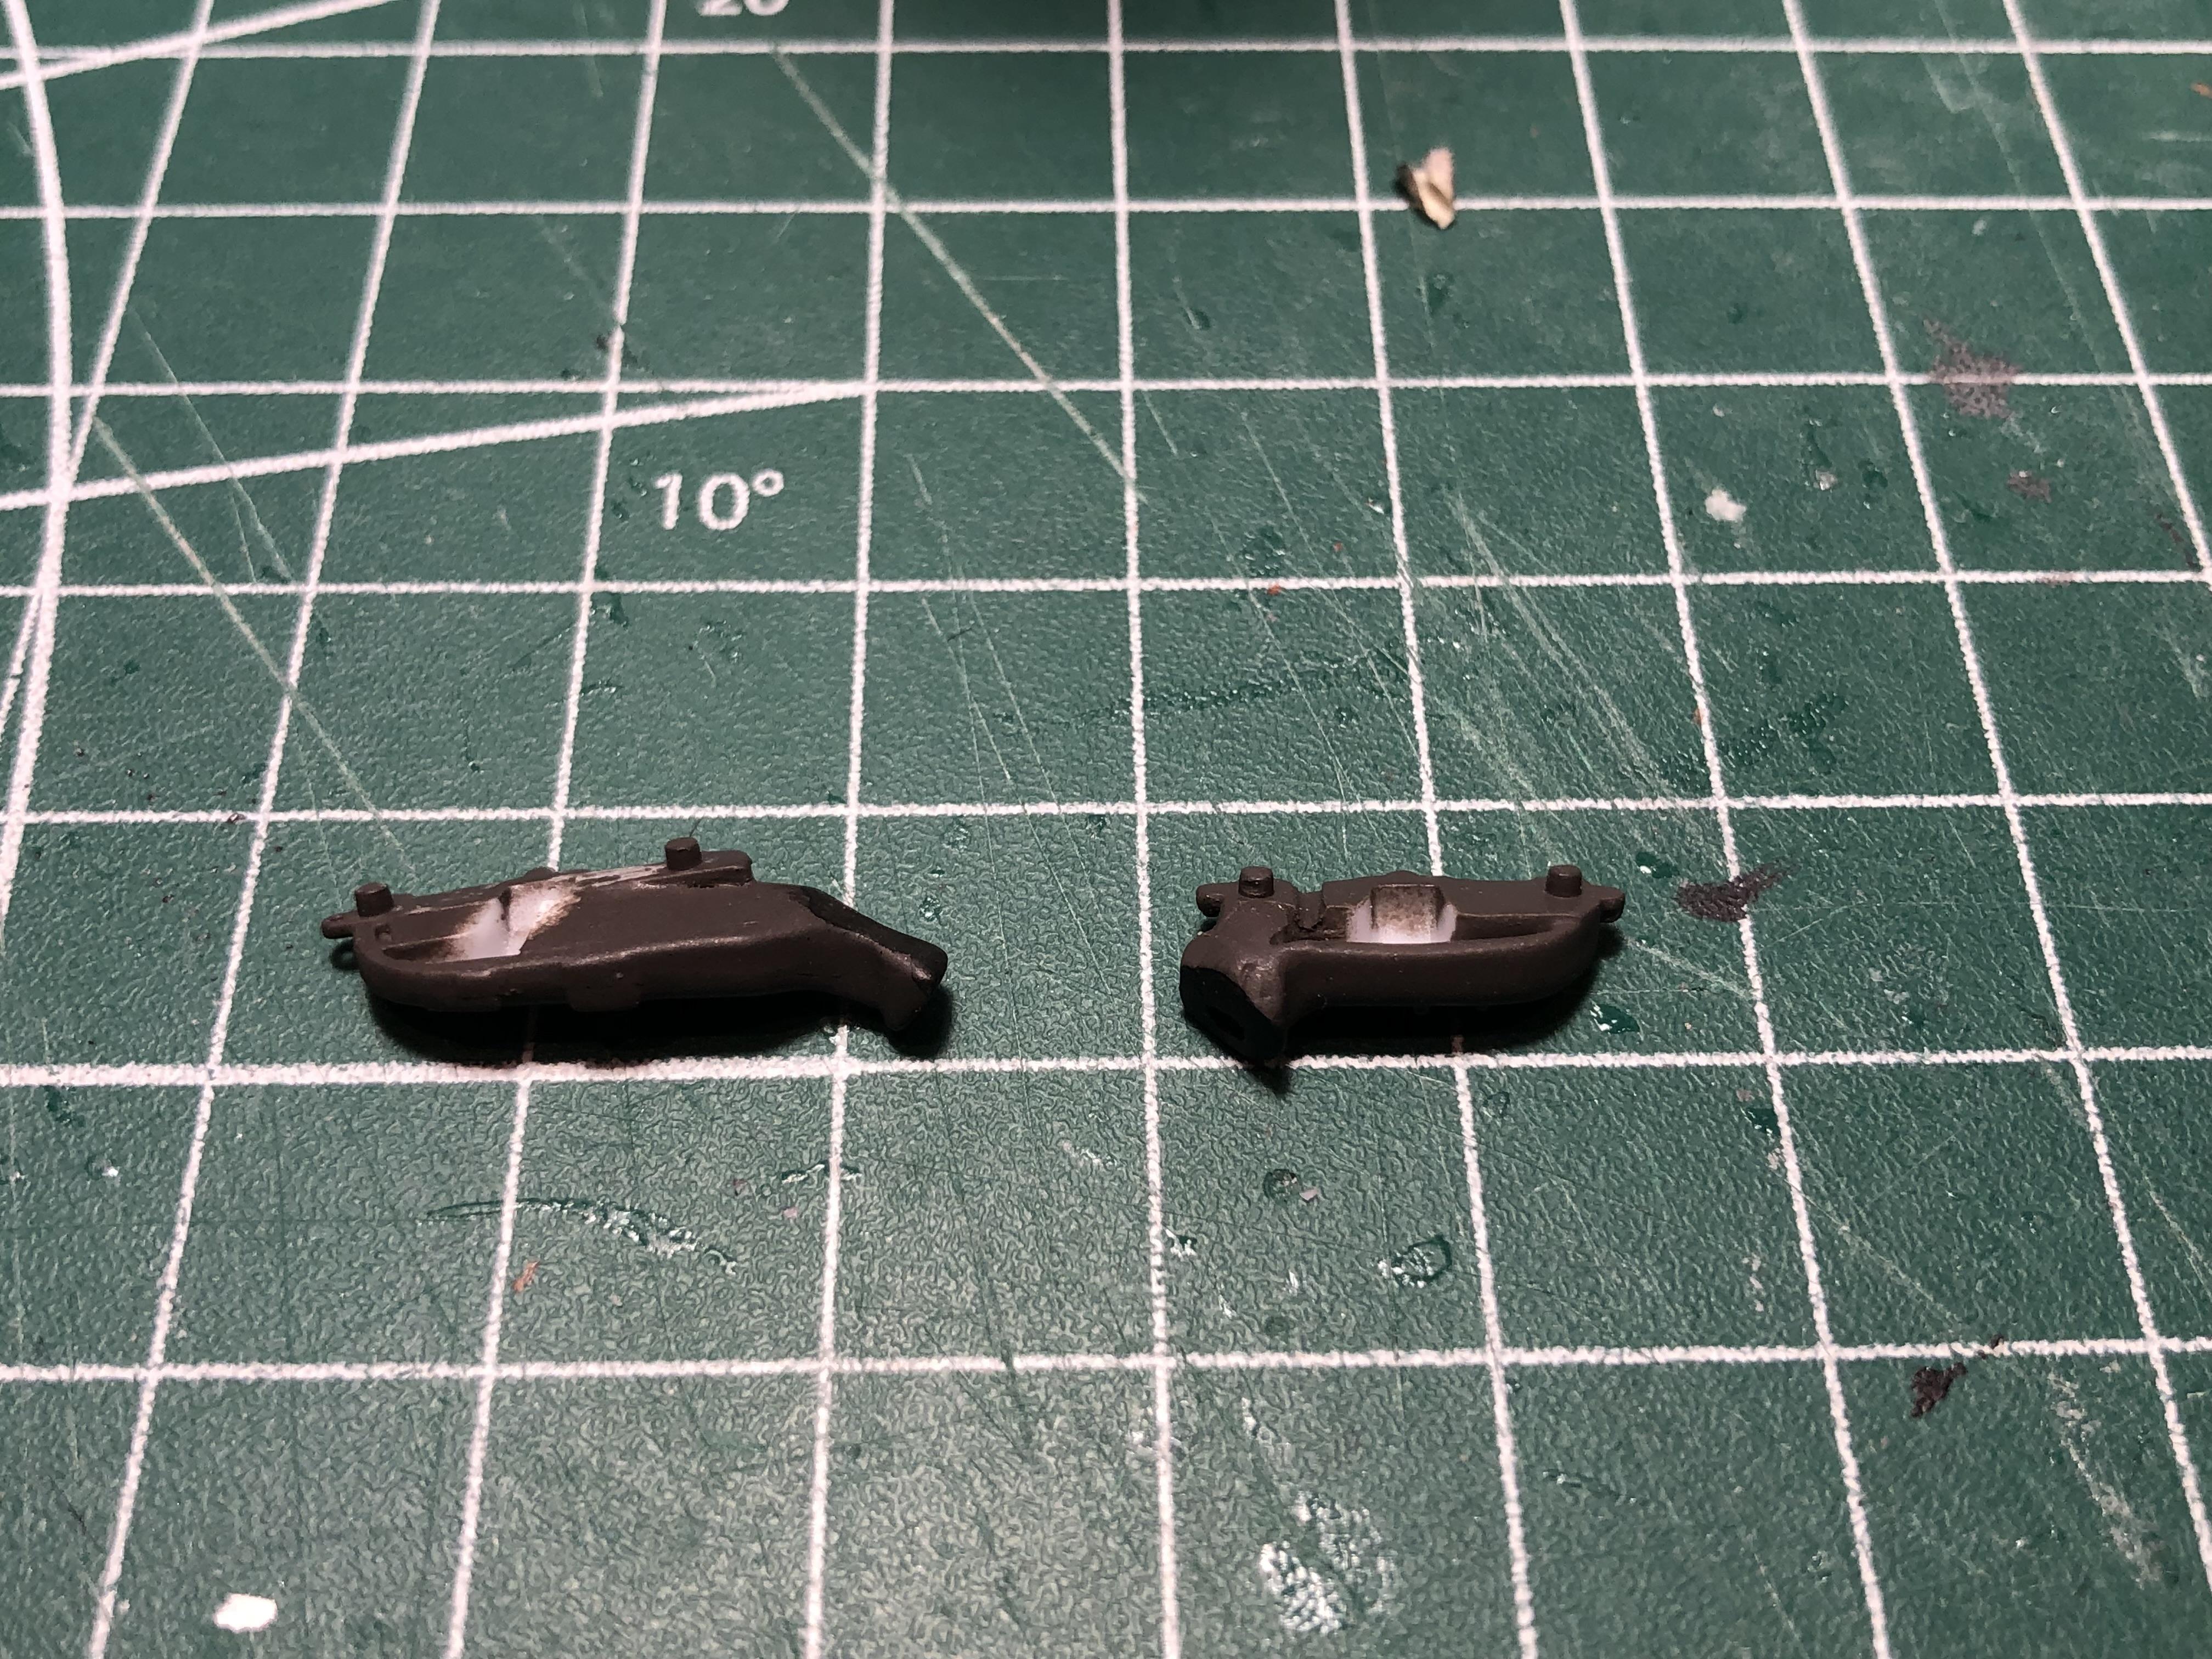
71 Olds 442 W30 (replica of my brother in law’s car)
Steve H replied to Steve H's topic in WIP: Model Cars
Another small update. I forgot to show the exhaust manifolds before and after. The backs are hollow, and although not too visible, I wanted to fill in the portion that would be seen. I didn’t get too fussy with a perfect finish as it will be difficult to see, but much better than the gaping holes… Most of the chassis, and suspension is in paint. Still some touch ups and details to add but almost ready for assembly. Flat black, gloss black frame, and semi gloss black axle etc. More photos during assembly. More soon!
-
Hi Jim, wishing you a full and speedy recovery from Covid. I had a fairly nasty bout with it back in November, not enjoyable… Great new project you have going here. Was there a sale on VW bugs?! ?
-
Looks great “finished” Jim, it just needs some paint now ?. Thanks for sharing yet another, really cool build.
-
Another beauty Tim. Looks killer with those wheels and tires, and the “just right” stance. Very well done. Cheers, Steve
-
Ryan, your builds, and photography, are exceptional. Love the stance on this one. Very crisp, clean build, and black on red is a perfect colour combo. Stunning craftsmanship. Did you paint the wheels with alclad too, or is there a coat of smoke on them? I will wait patiently to see what you do with the 67 Camaro… Cheers, Steve
-
Looking good with the added details David. I won’t be surprised if you get to 1002… Would the old ambulance’s have had the spotlights like a police car? Cheers, Steve
-
71 Olds 442 W30 (replica of my brother in law’s car)
Steve H replied to Steve H's topic in WIP: Model Cars
Thanks Guido, I’ll take a thumbs up, and cool any day! I appreciate you taking the time to look. Great to have you on board Dennis. This is something a little different for me and I’m enjoying it to. Hi Charlie, yes, I remember when I first saw the cast aluminum colour on one of Dennis Lacy’s builds I had to ask him how he achieved it. So for the aluminum it’s all Tamiya spray paint: grey primer, silver leaf, (I believe it’s TS30), then flat clear. Bahama blue is a GM colour if I’m not mistaken. I actually have 2 different brands, but the one on the engine is DupliColour automotive touch up paint in a spray can. As mentioned, I also used some clear blue here as well, but… Bahama blue is a beautiful colour. Thanks for your interest. Hey Russell !! Great to hear from you. I don’t know if I’ve seen that build of your dad’s car. If you have a photo of it please feel free to share it, I’d love to see it. Thanks for checking in. Thanks Scott, I should have some more progress by the end of the weekend. Hopefully you will find some useful information, so far it seems to be a good kit. There have been a few little things I didn’t like, but nothing major. I will try to mention any trouble areas. Thank you all for taking the time to comment, it is much appreciated. Cheers, Steve -
71 Olds 442 W30 (replica of my brother in law’s car)
Steve H replied to Steve H's topic in WIP: Model Cars
Hi Phil, I couldn’t agree with you more. These types of builds as gifts are always rewarding. I am fairly confident that Wayne will get a kick out of this when sees it. Not a bad choice for your first muscle car ride, well played!! Thanks for checking in Phil. Hi Keith, thanks for the kind words. I’m finding it interesting building a kit “mostly” stock, instead of kit bashing. I’m seeing areas to detail that maybe would be overlooked in the midst of a full blown custom/kit bash project. So, I actually think I’m learning something!?? It’s been fun so far… Hello Francis my friend, really good to hear from you sir! I’m really enjoying the process, it’s good to know that you have a little soft spot for some GM cars too, not just Mopars. I just realized I’m overdue to check in on your amazing craftsmanship. Thanks for having a look. Thank you Curtis, much appreciated. A bit more to do yet, but it’s starting to look like an engine. -
Yes sir!! That looks fantastic Bob. It’s a shame you had to strip the first paint job, but the extra effort has paid off, and that blue is stunning. Very nice. Steve
-
Hi Donald, amazing build you have going on here. Lots of fantastic modifications to the original kit, to create a very nice looking replica. Your white glue mock up really got me thinking. I often do mockups, but not the entire kit like that. Wow! Very thorough . I’m really looking forward to seeing the lighting when complete, that dash looks killer! I have done working lights on a few builds, but only on curb side builds, not full detail. Something I will do eventually, (I was thinking on an ElCamino, battery in the back under cover) so I am watching with interest. Cheers, Steve
-
Datsun 240/280Z & Nissan Fairlady Z/ZG multiple builds
Steve H replied to Spottedlaurel's topic in WIP: Model Cars
Really nice looking build Nigel. I have not built any of the Nissan “Z” cars but I will one day, as I do think they are a great looking car. I love the bold colour choices! The pearl clear should make that lavender colour pop. I will be curious to see how the light pearl red looks with flat clear, something I was considering for a future project myself… The chunkier tires suit the car better that the super low profile ones in my opinion, good choice. (Not that my opinion matters?) Cheers, Steve -
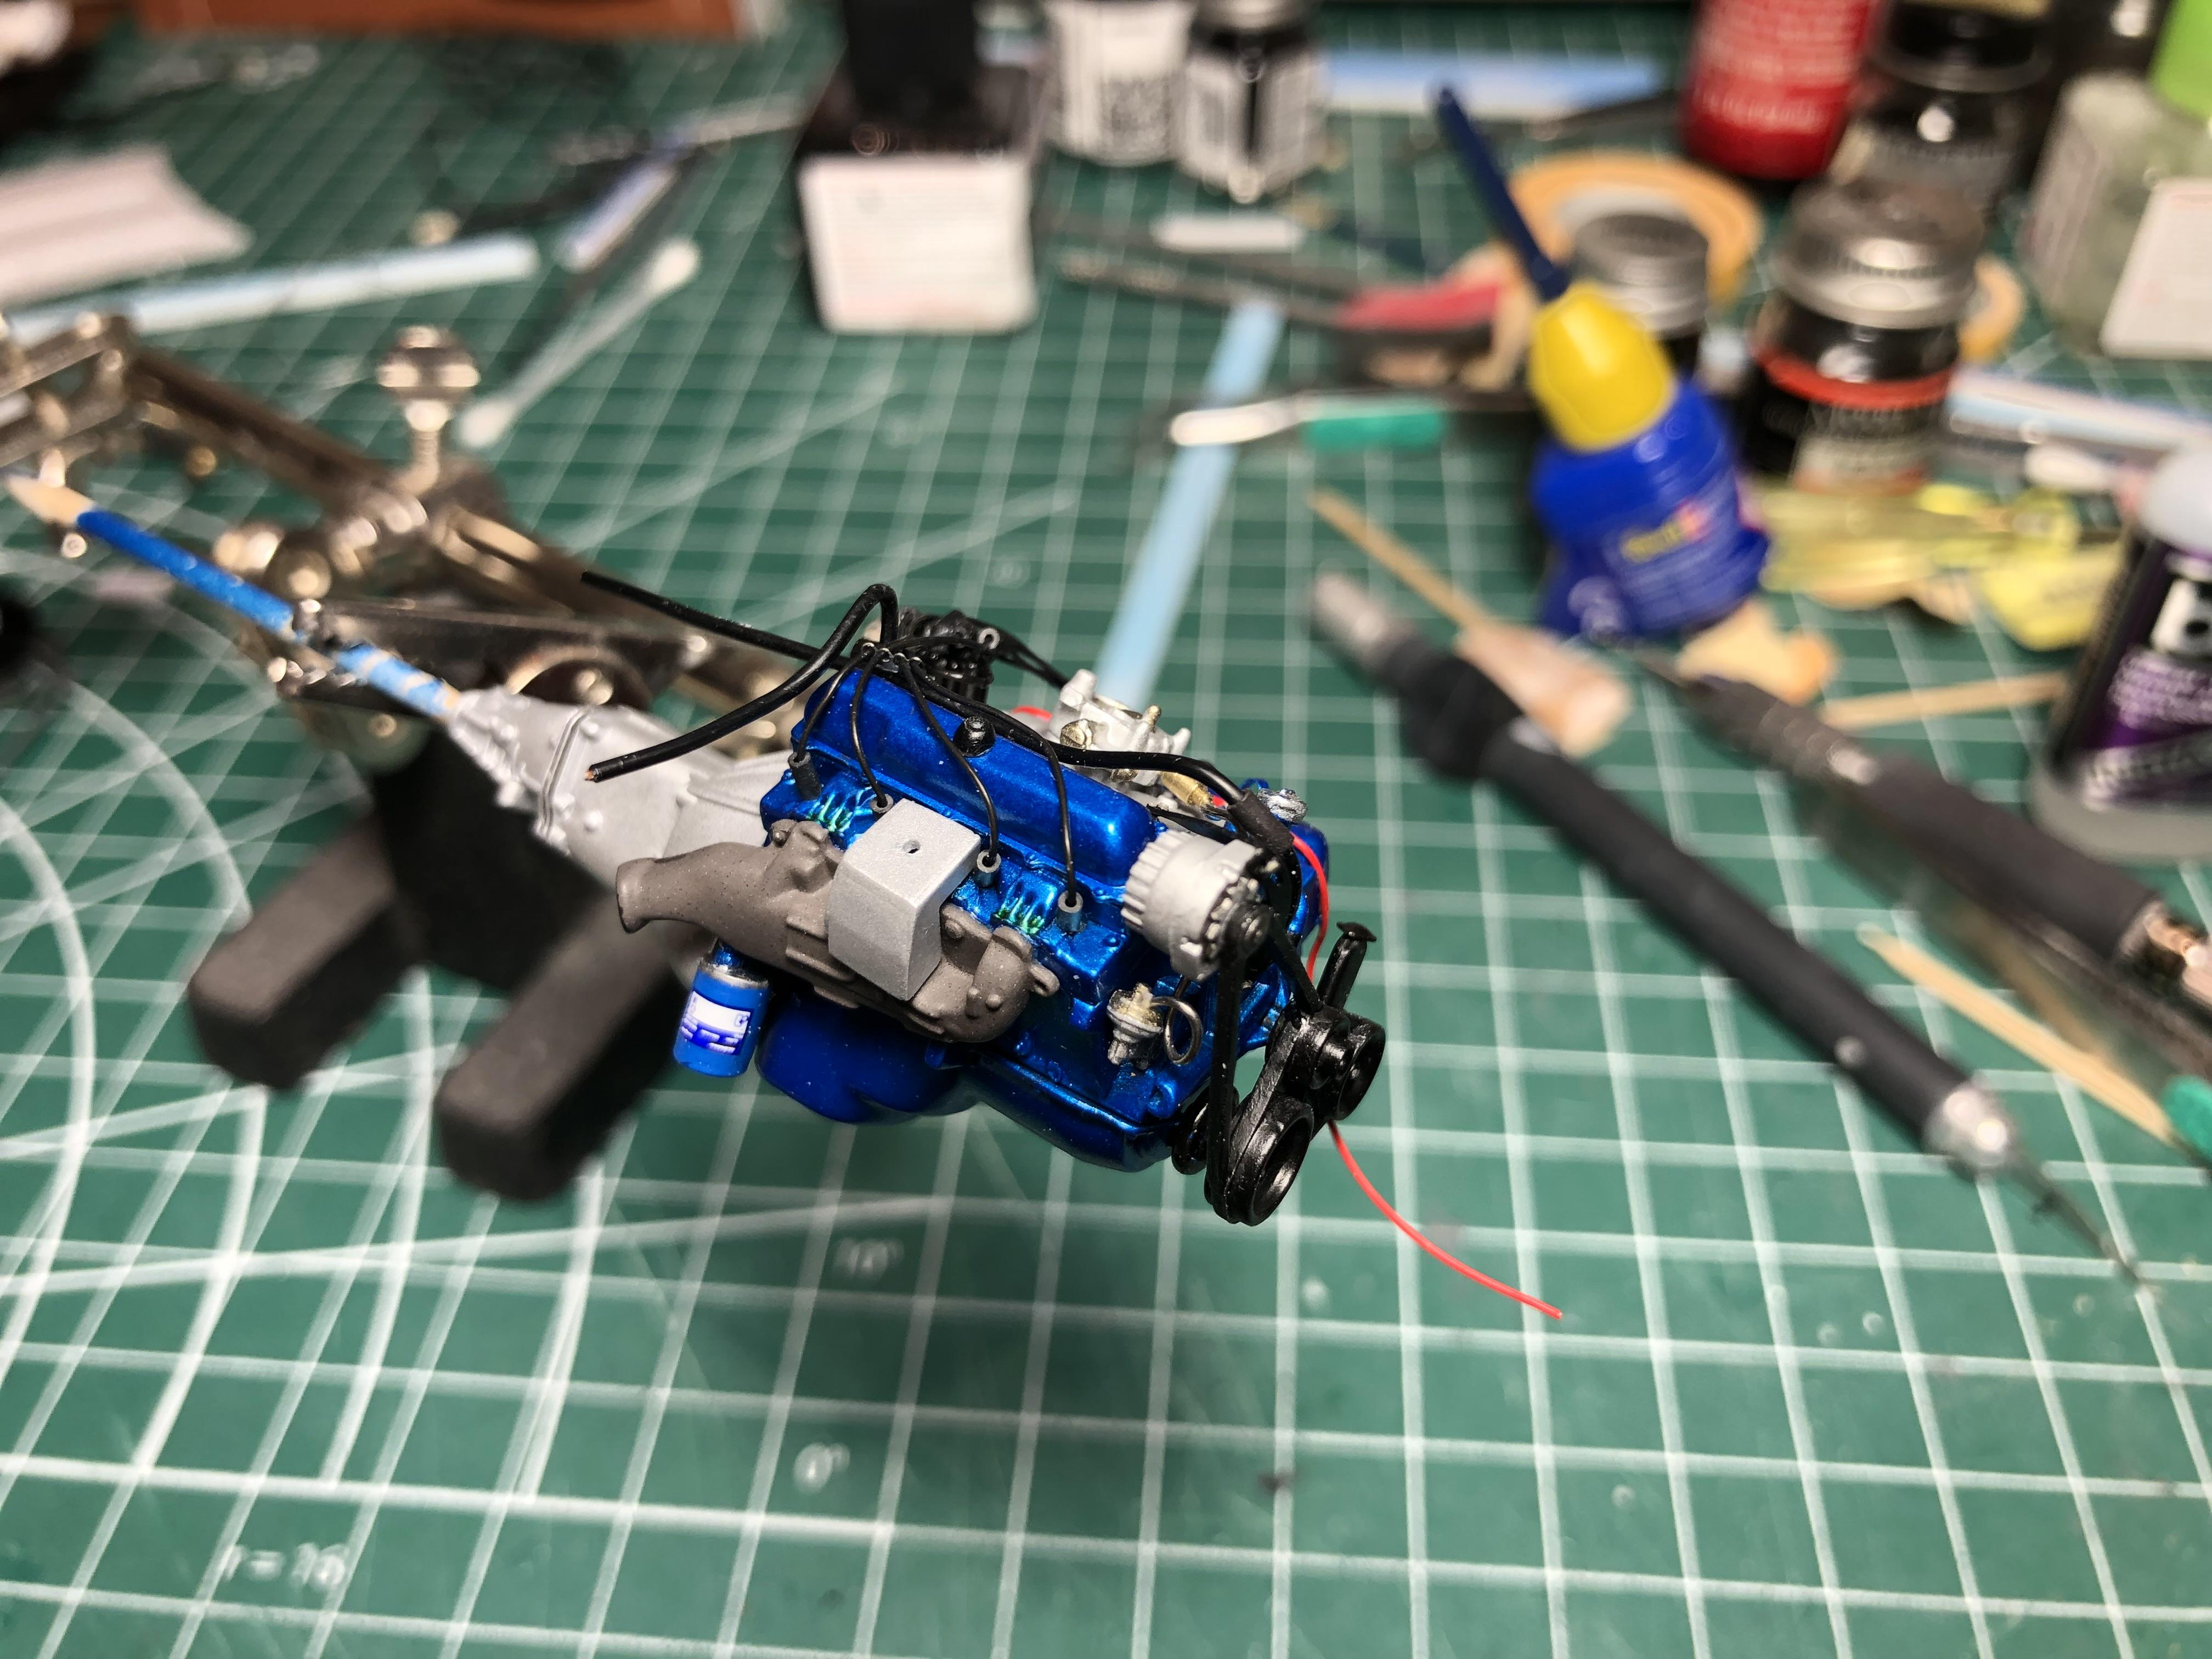
71 Olds 442 W30 (replica of my brother in law’s car)
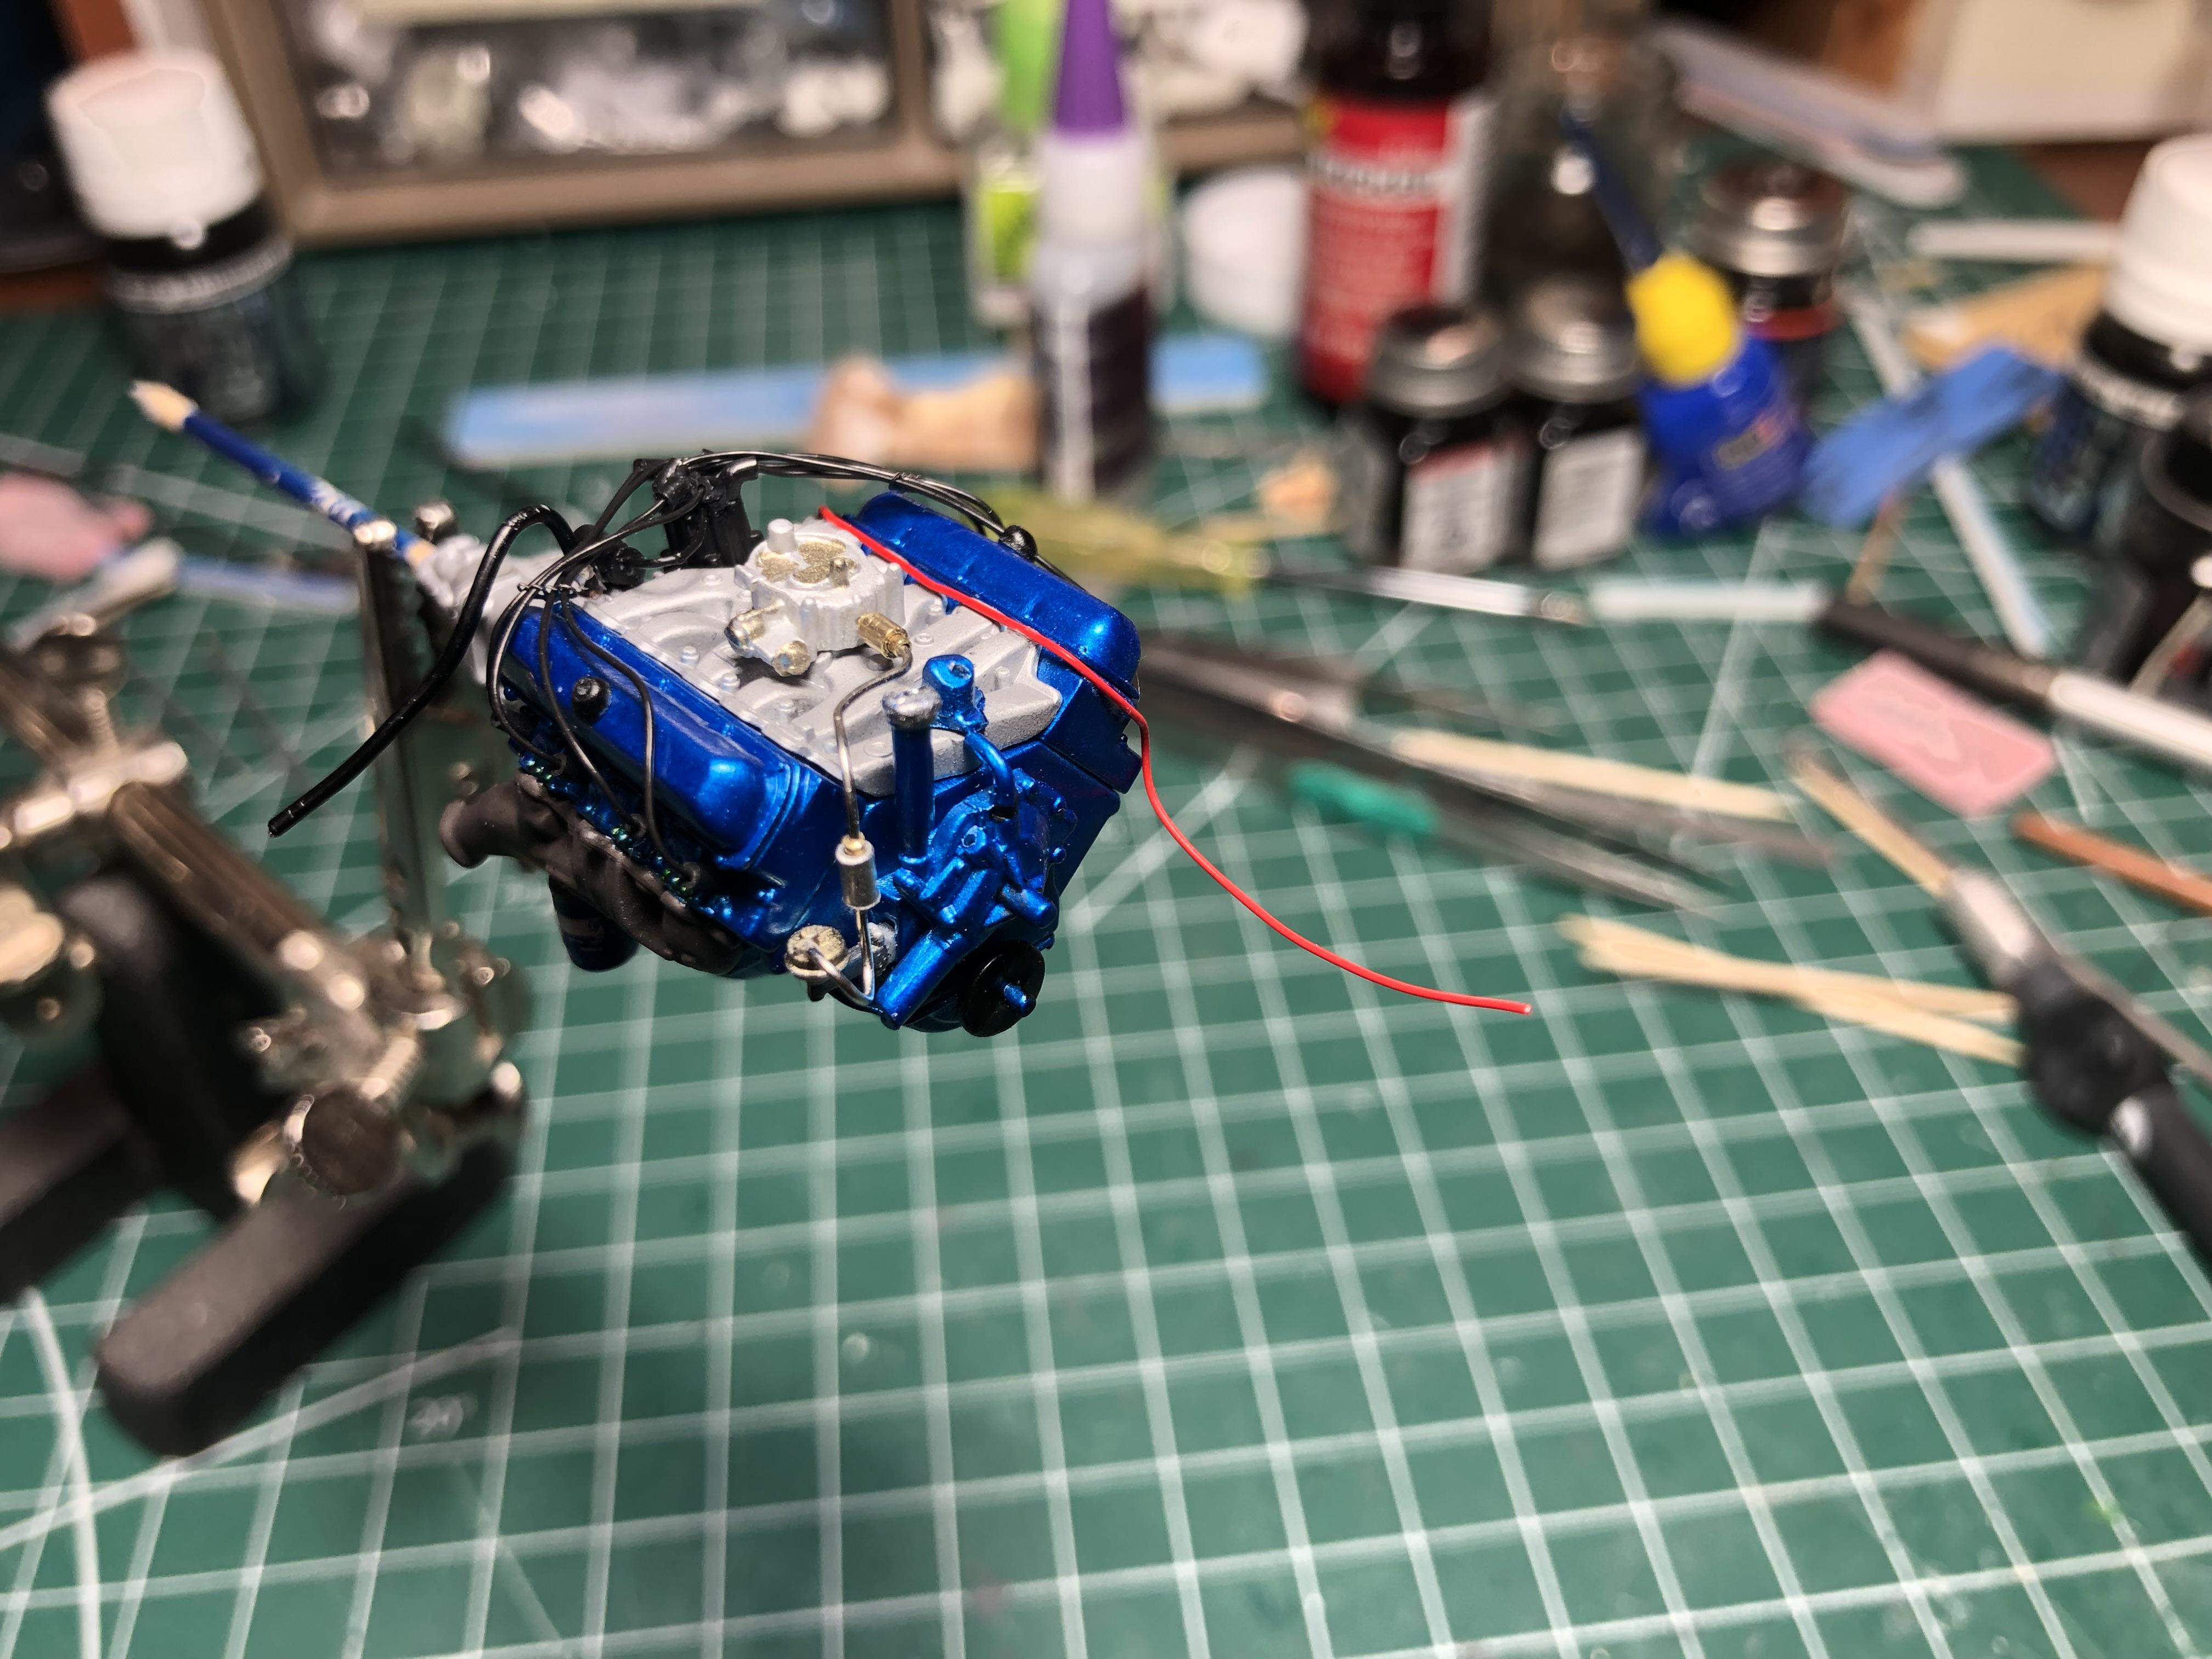
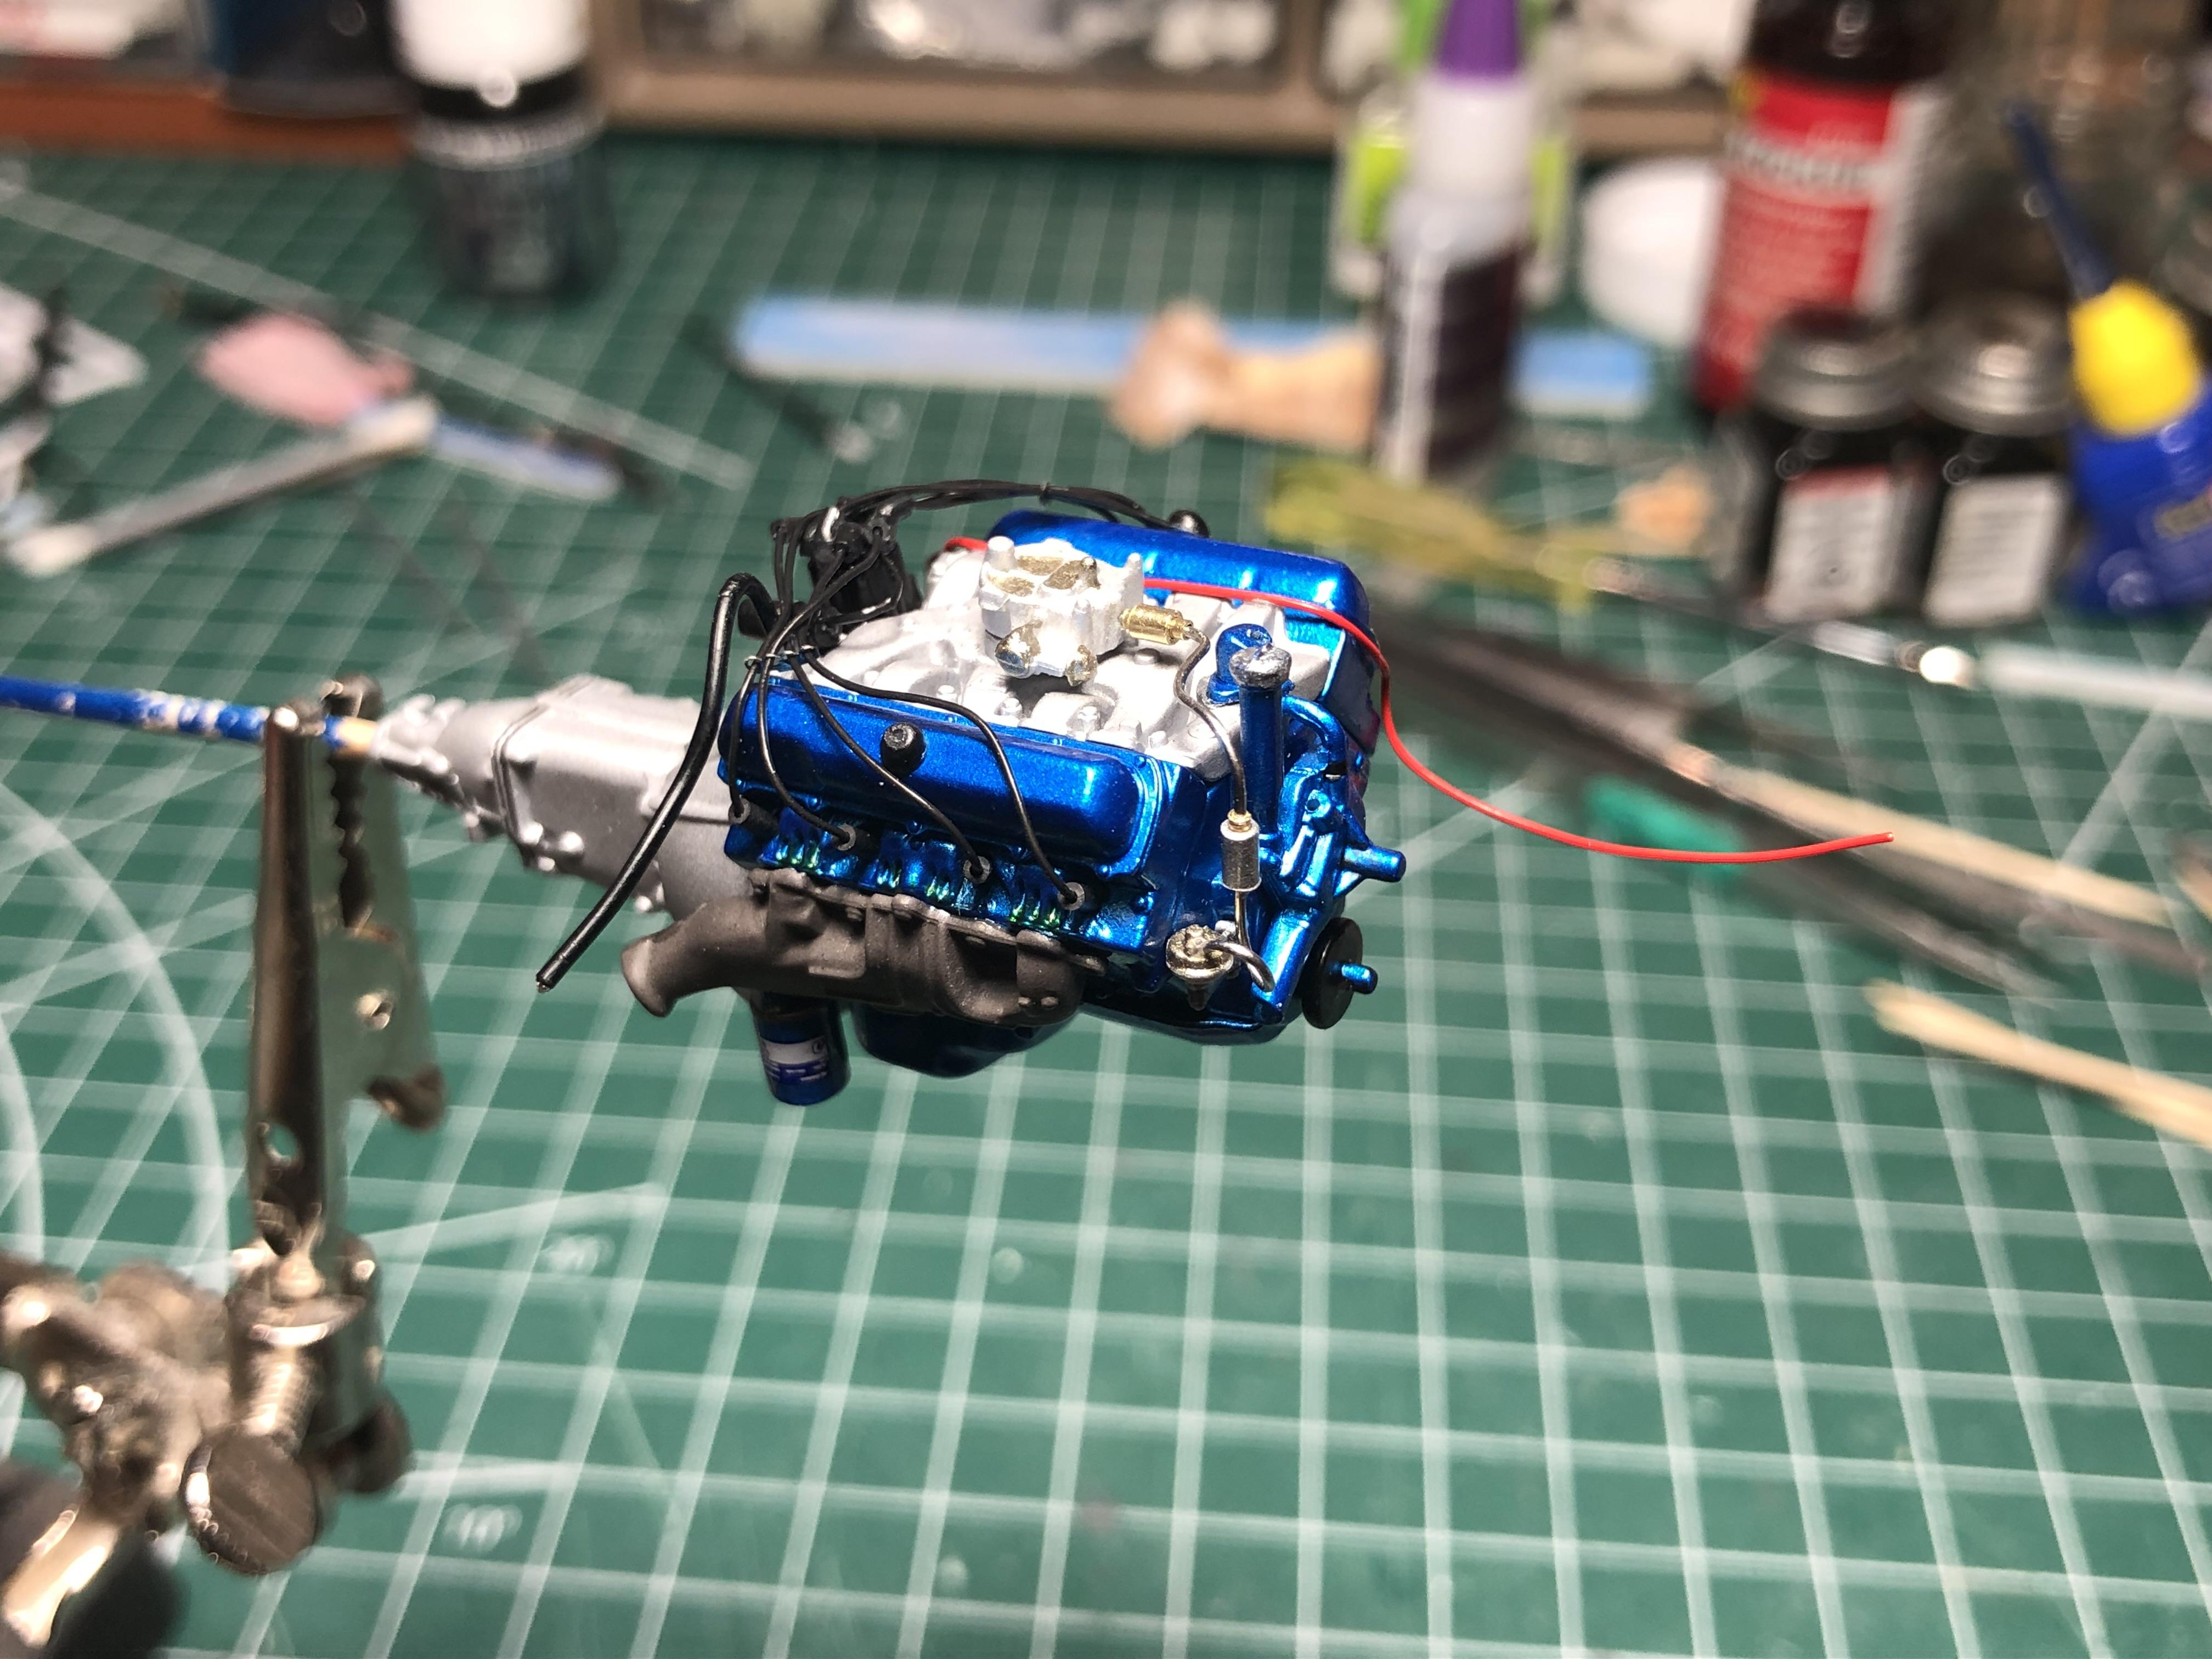
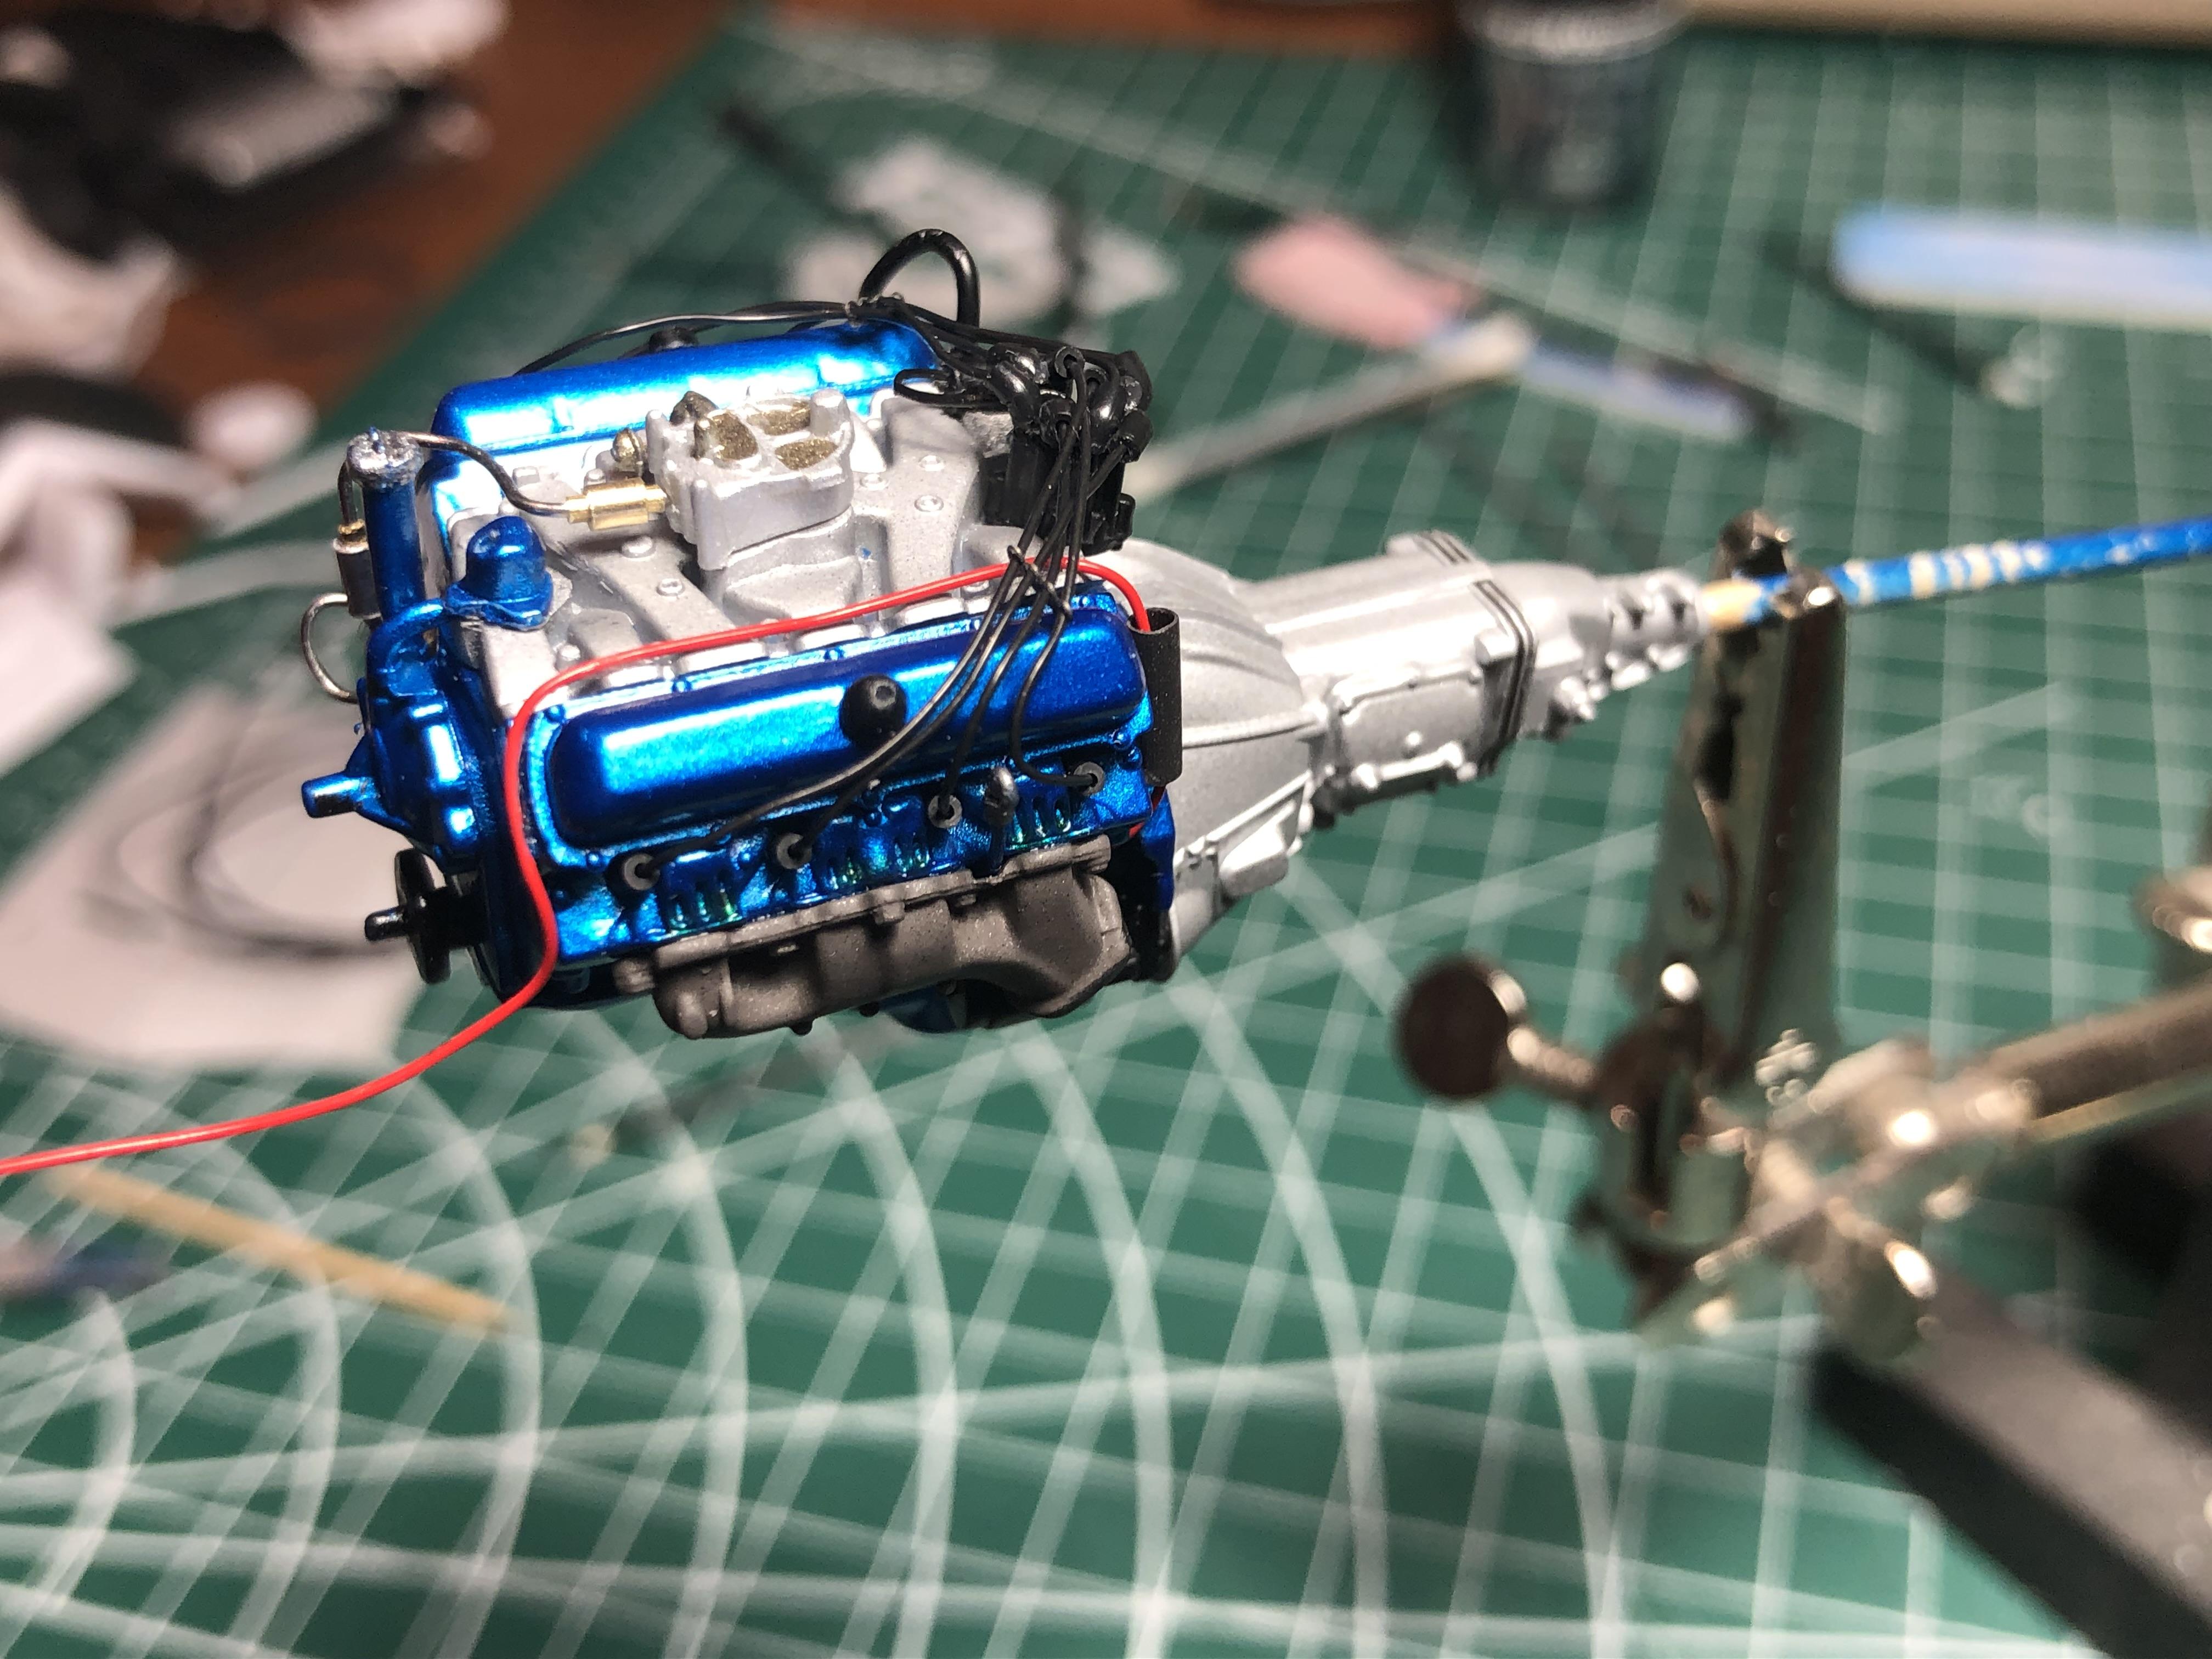
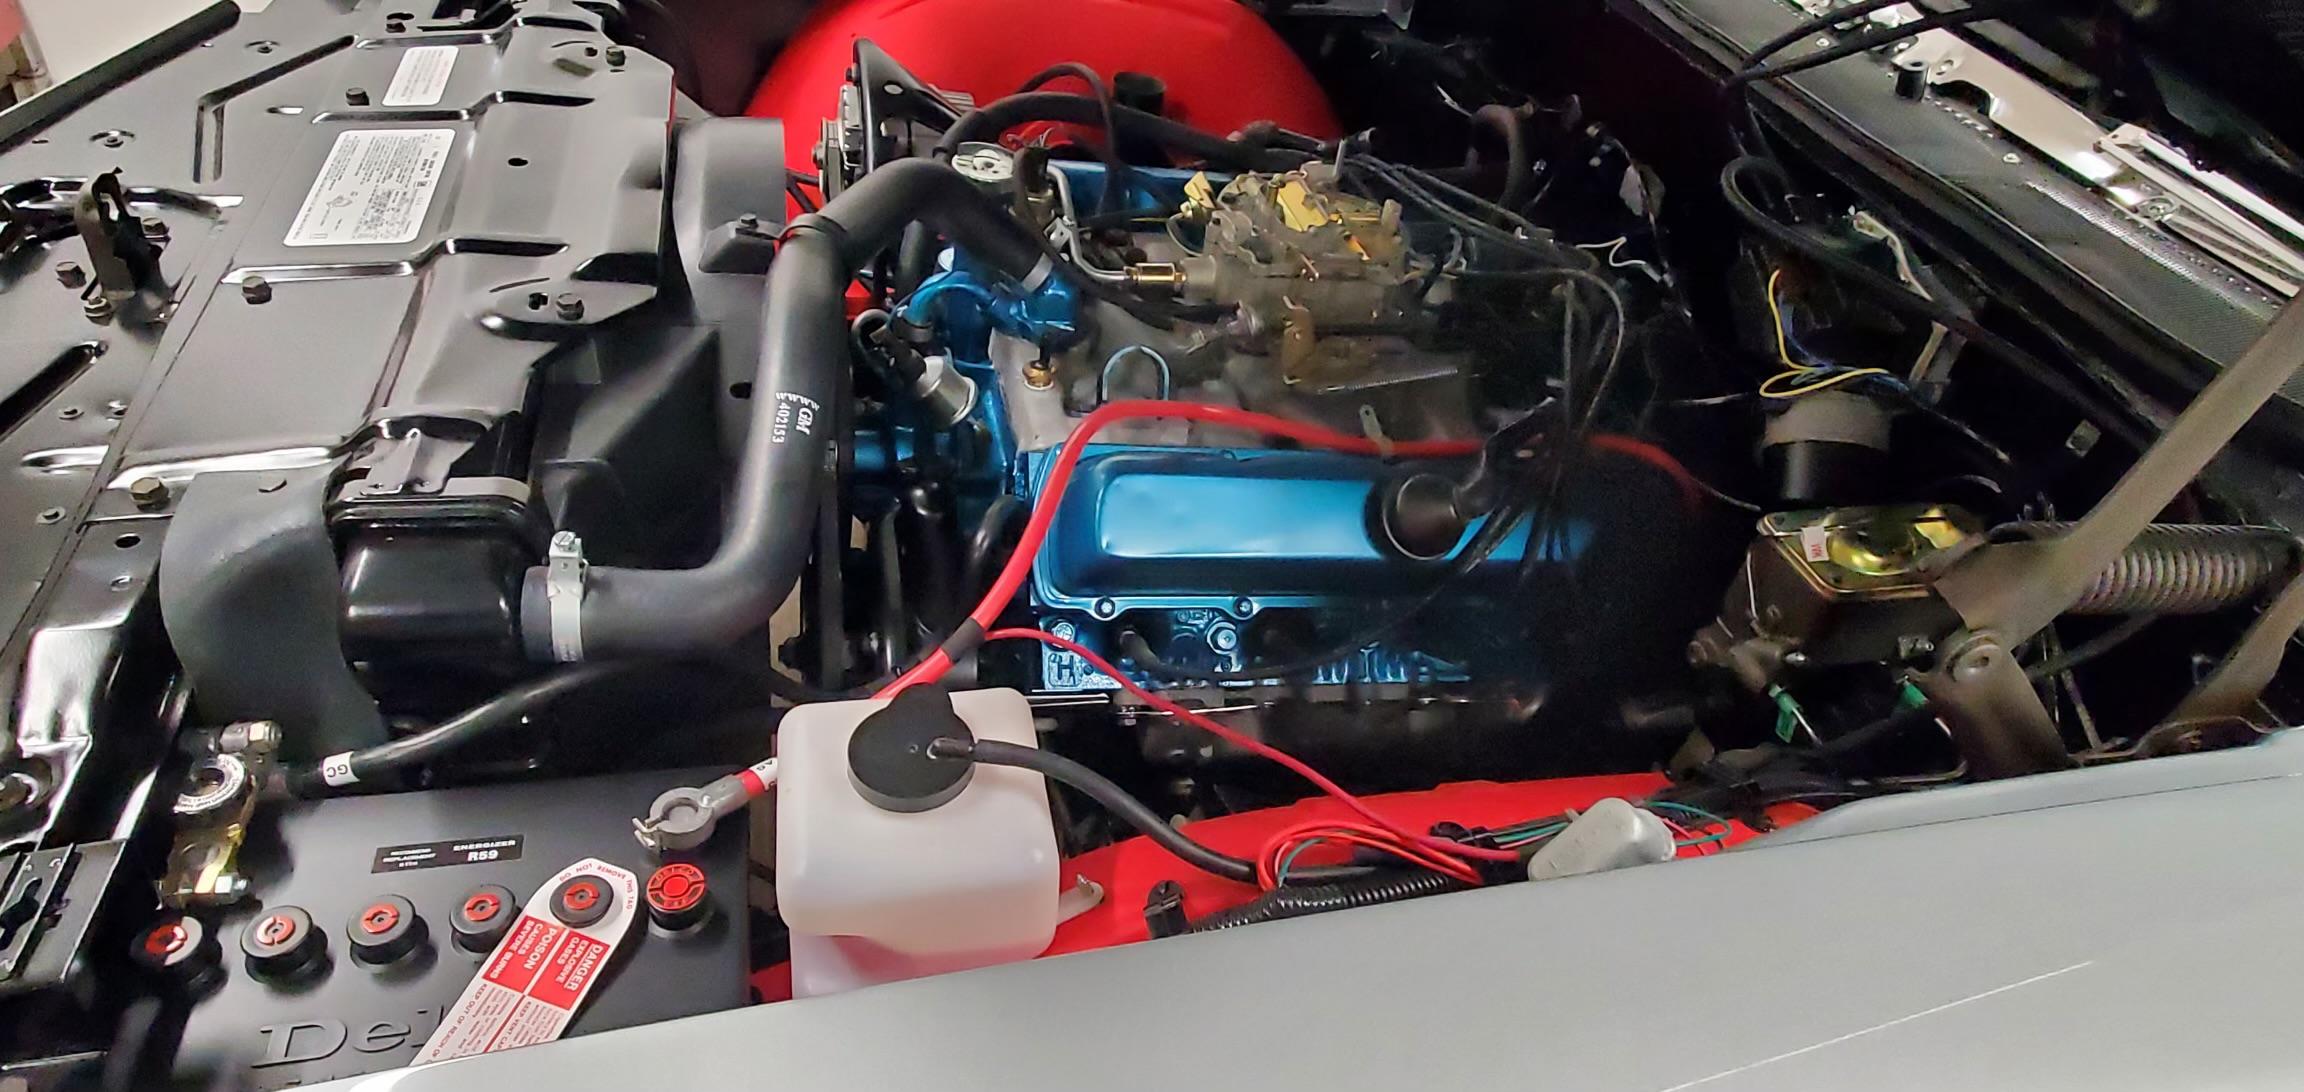
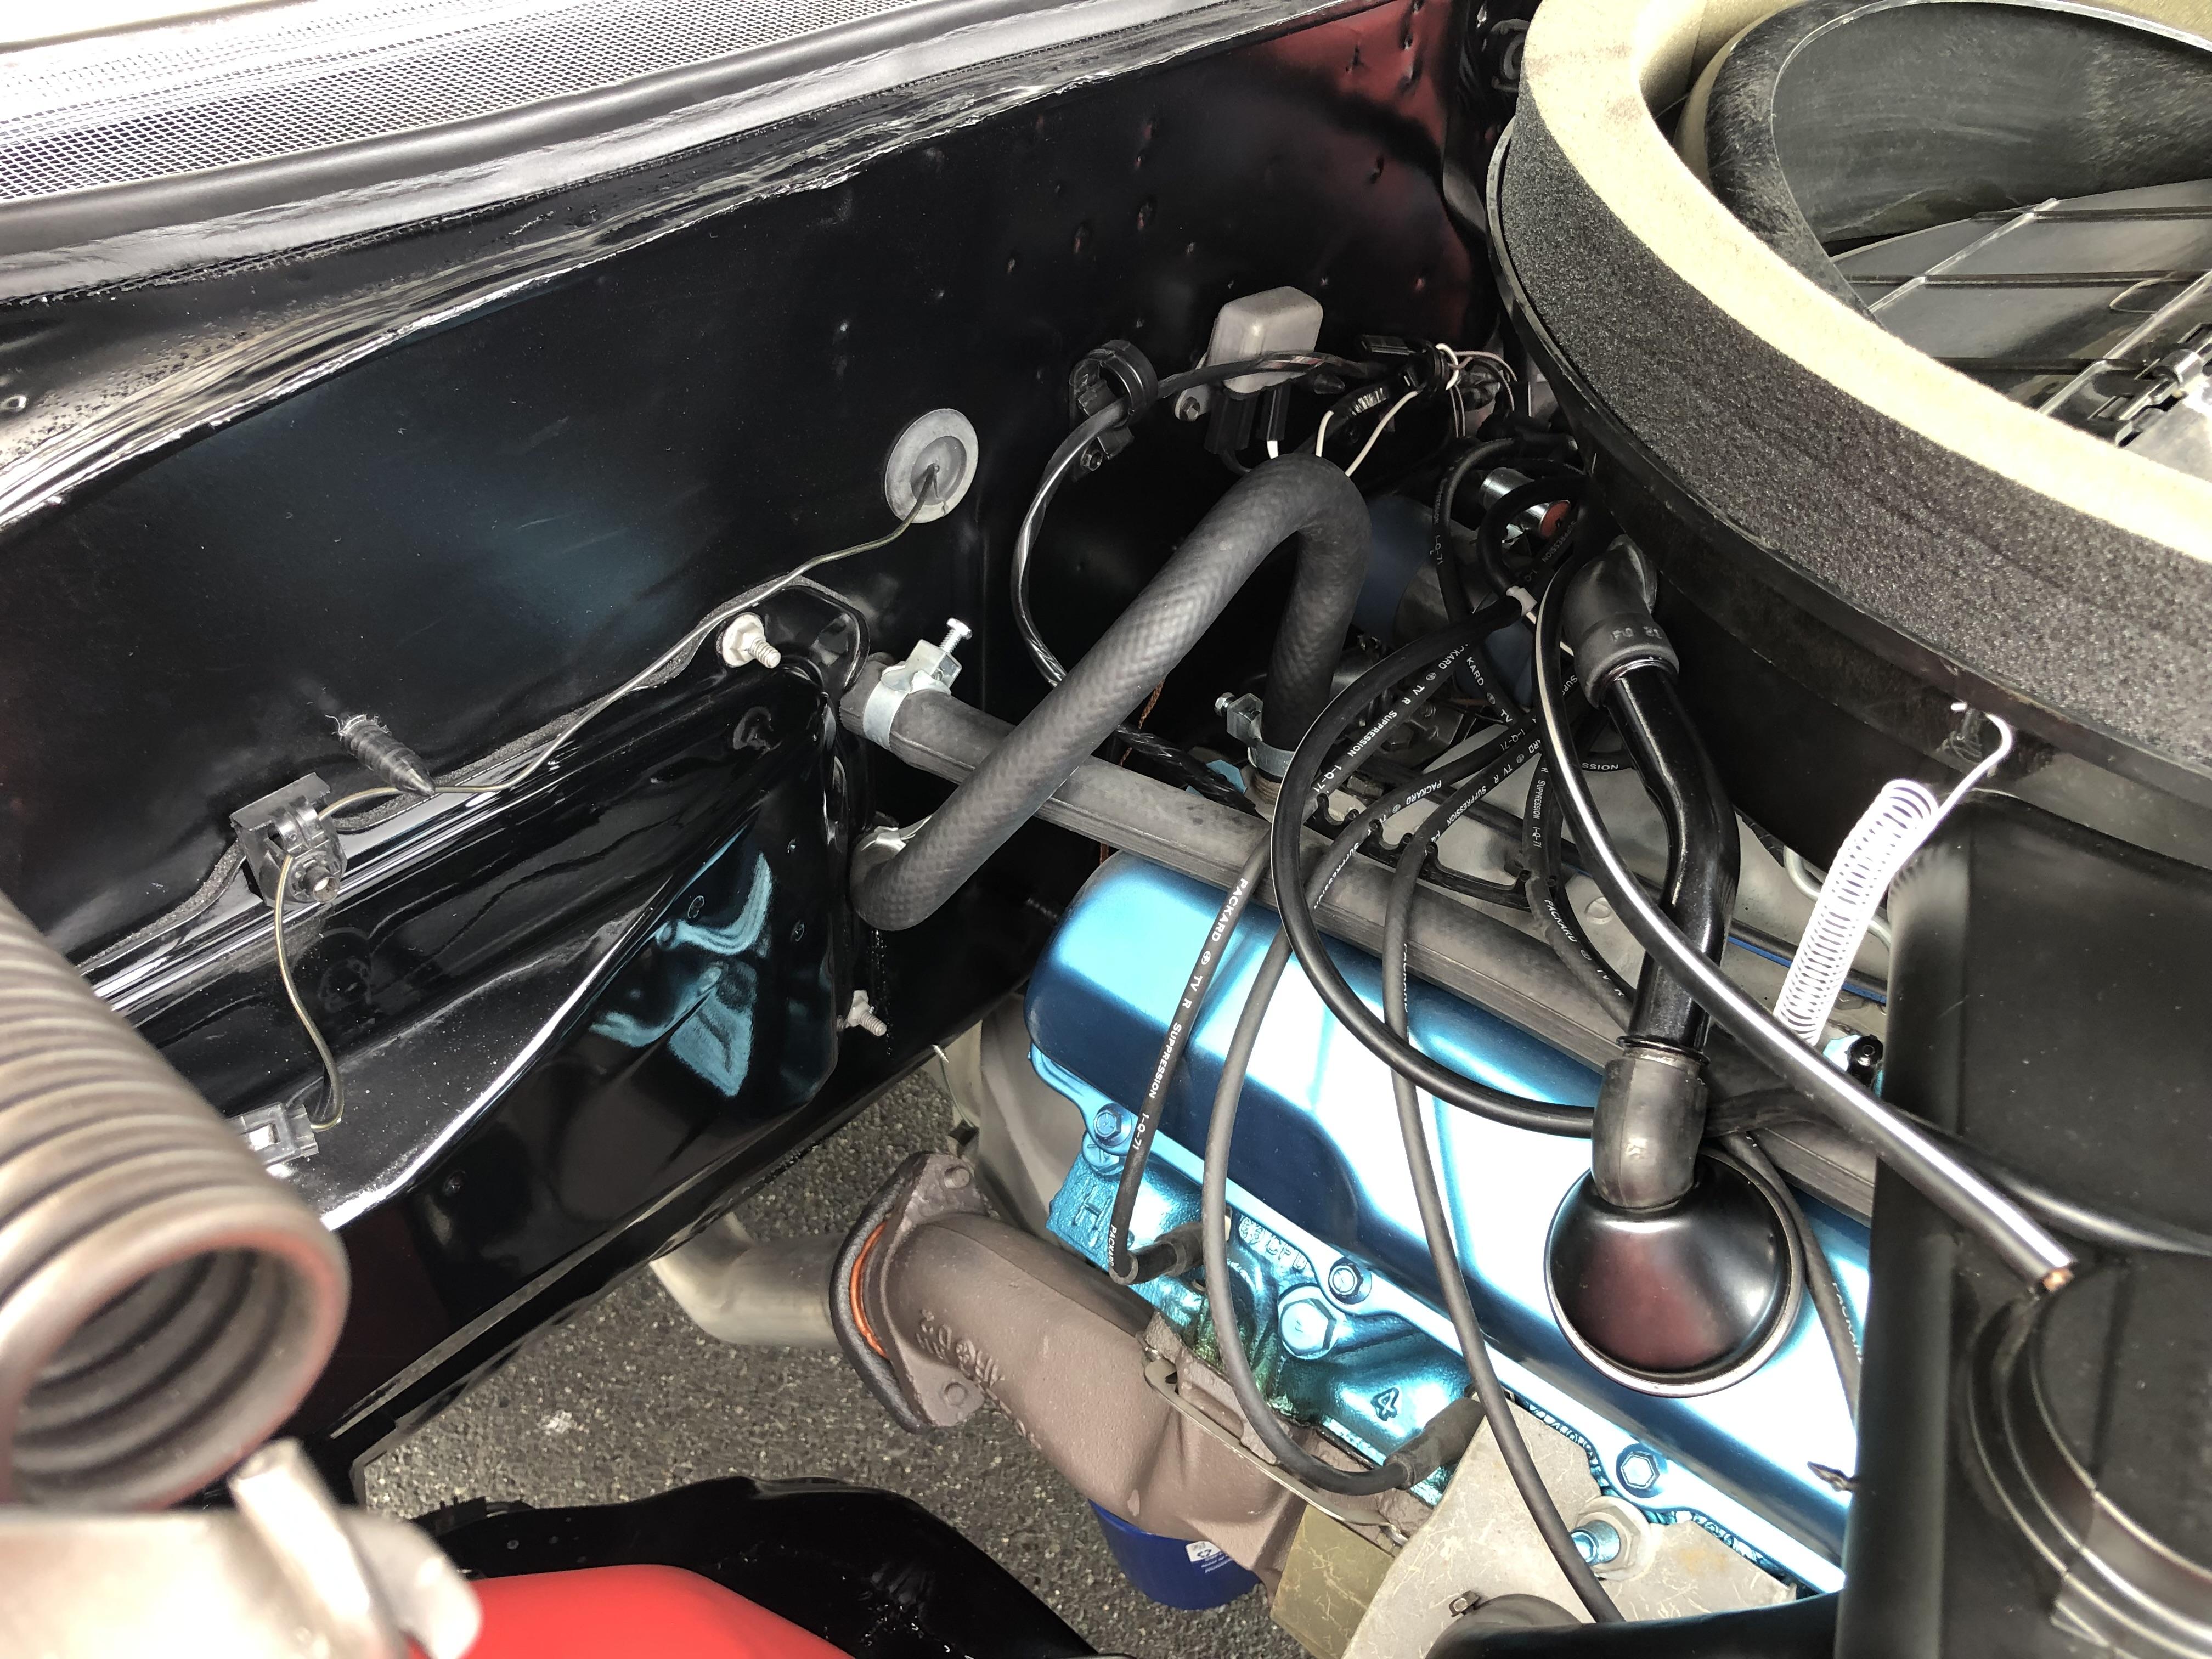
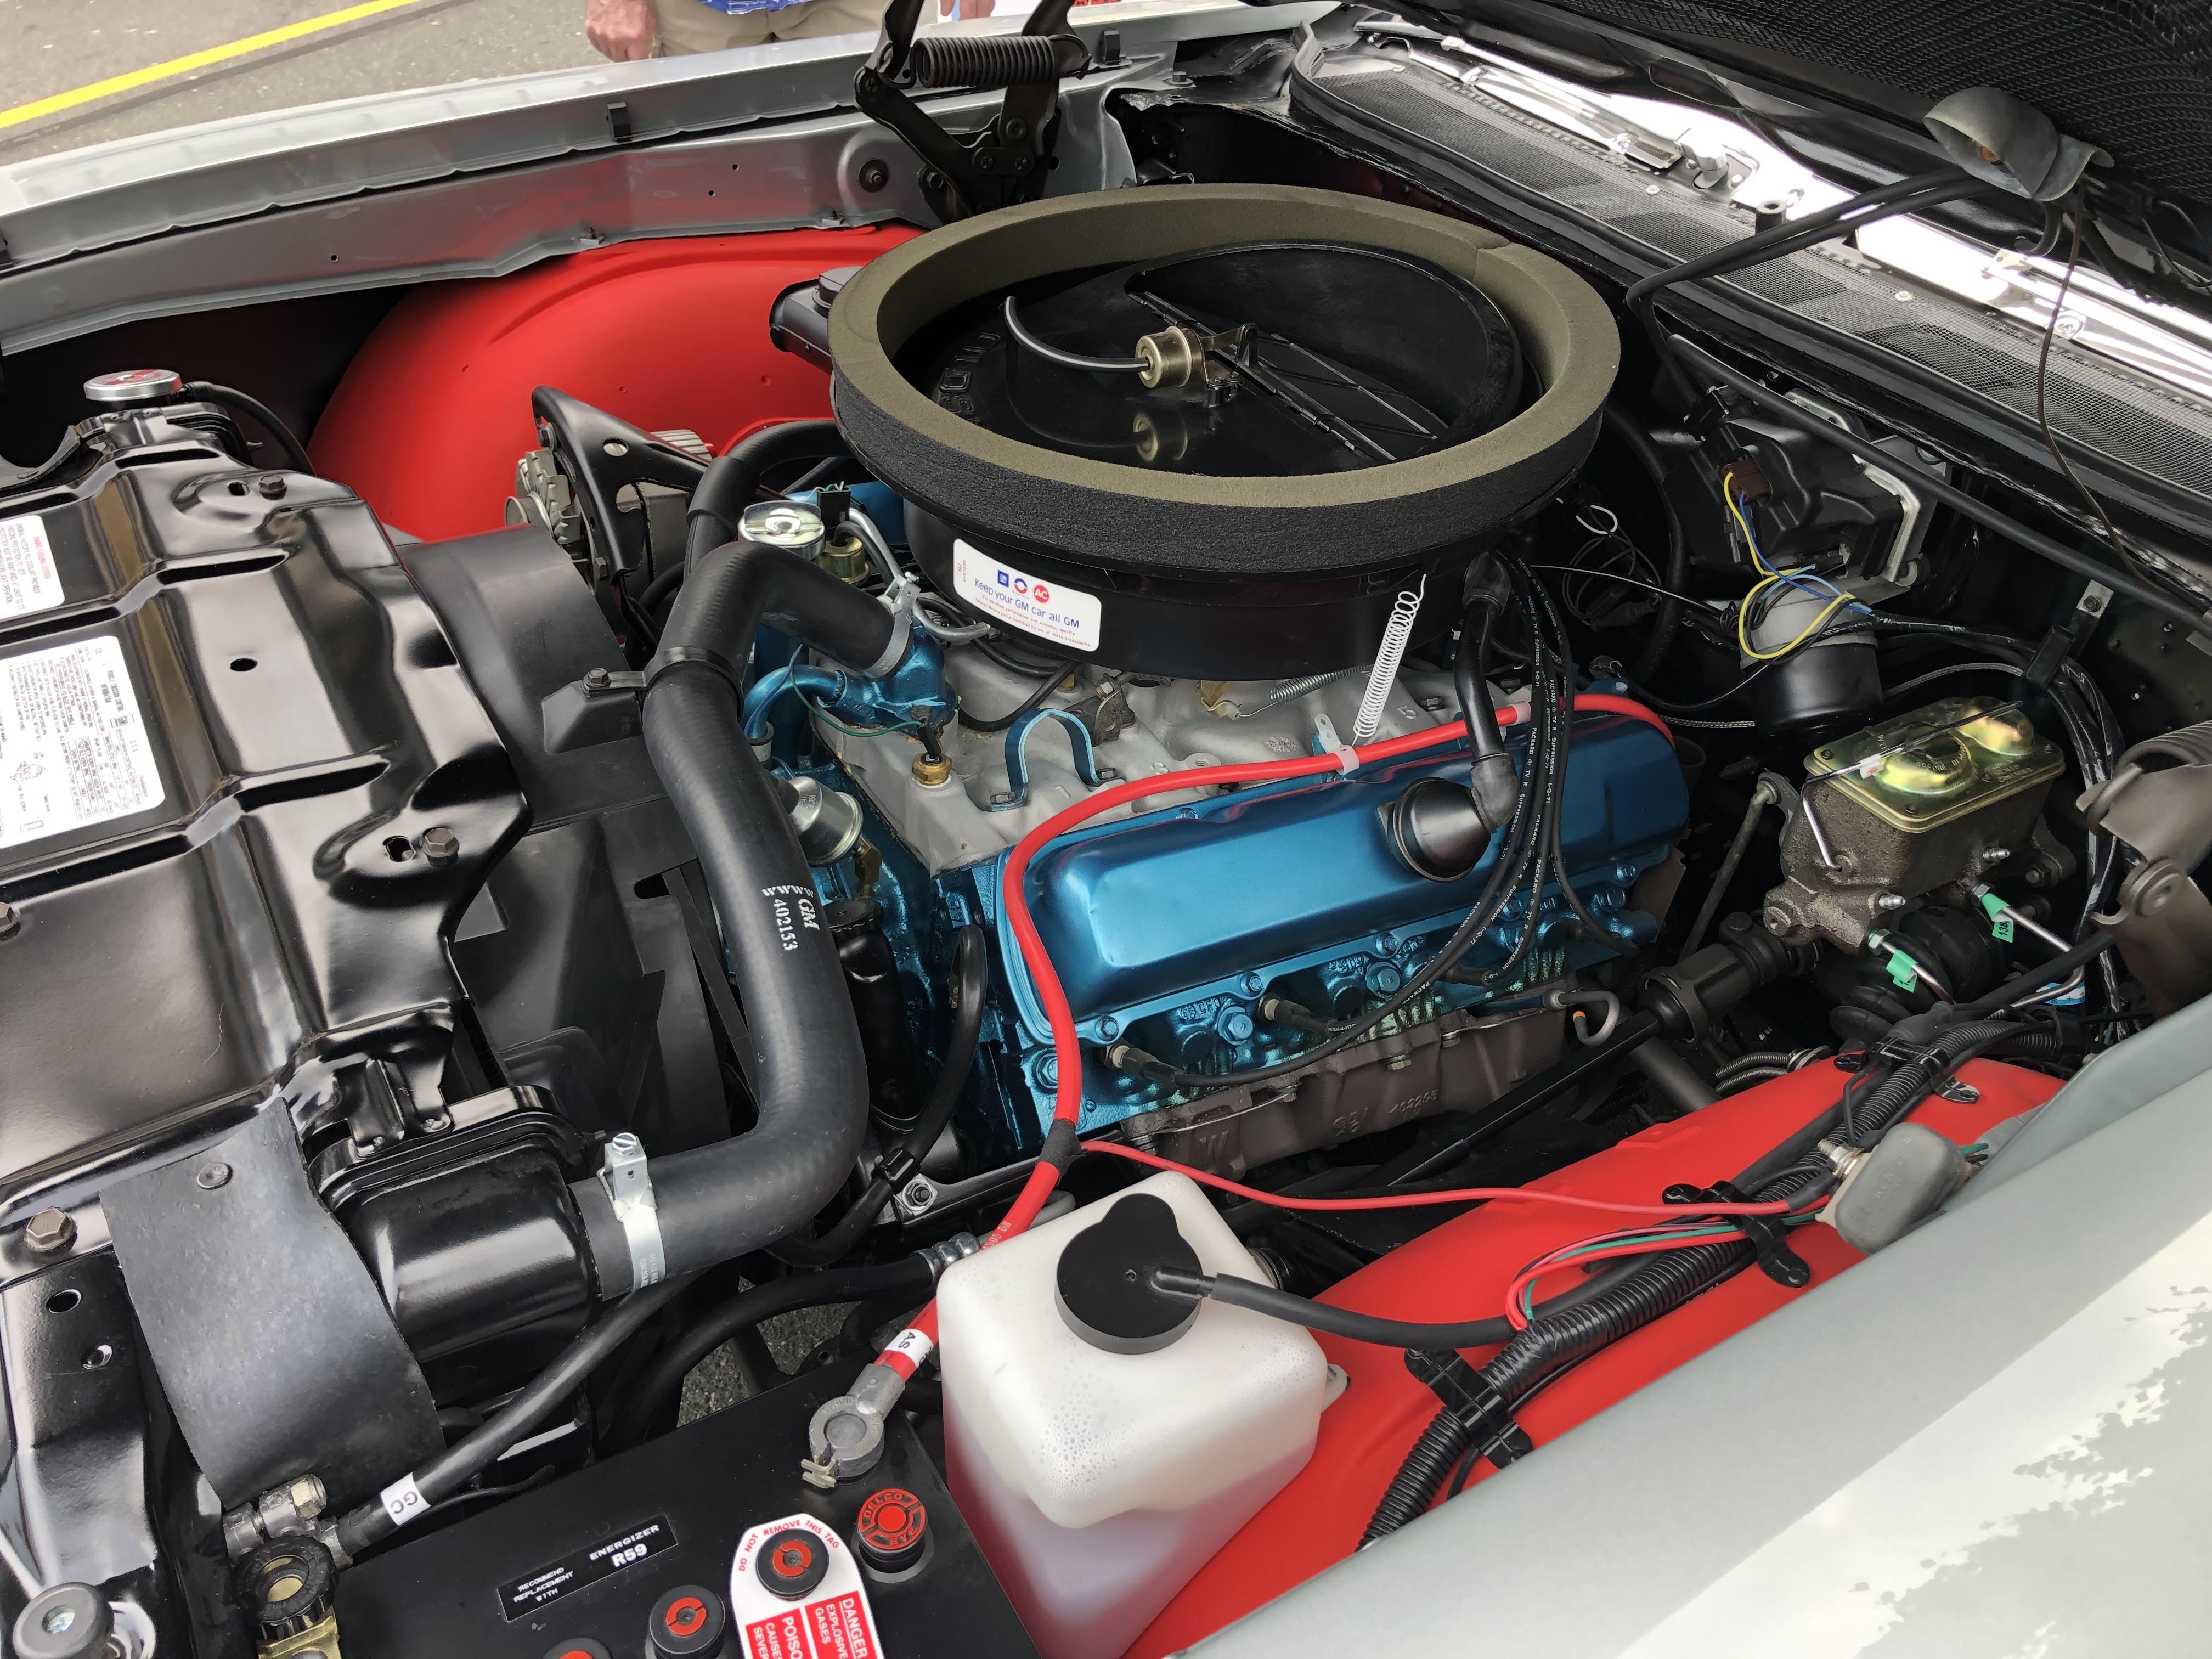
Steve H replied to Steve H's topic in WIP: Model Cars
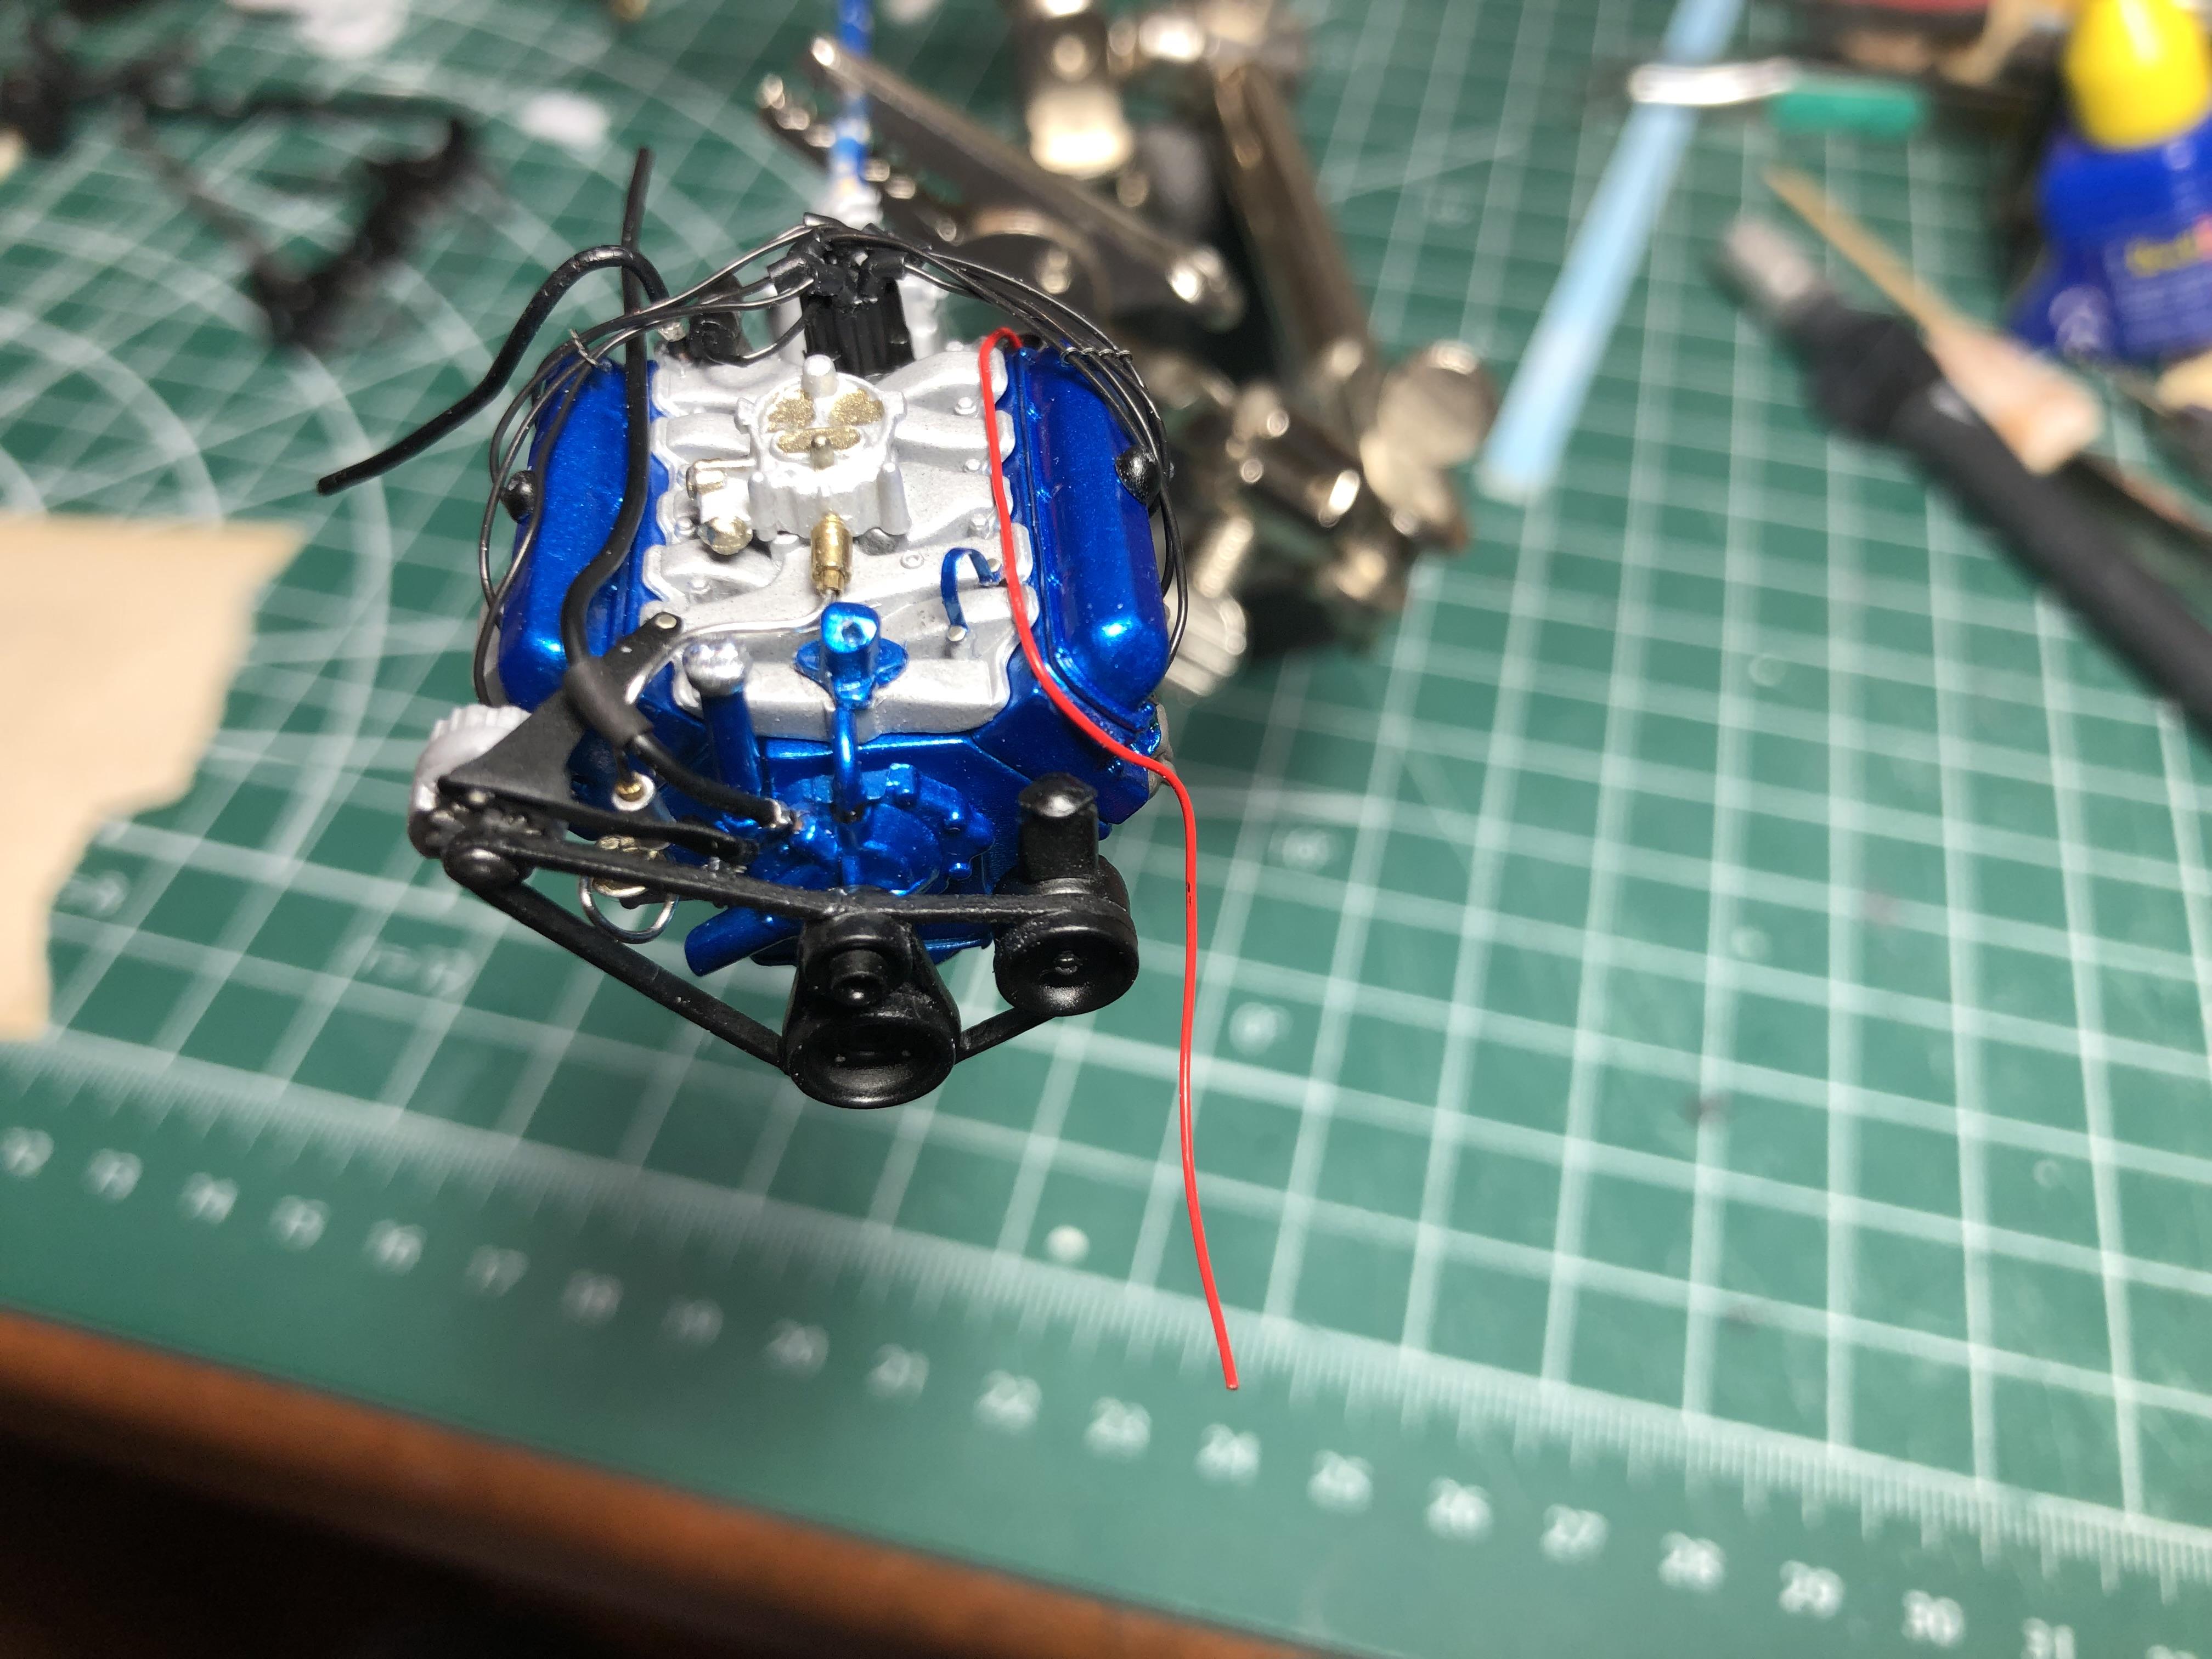
A small update. I have a majority of the engine details done. The goal is to capture the overall look, without going too far down the rabbit hole… I have included photos of the 1:1 engine for comparison. I noticed after looking at these photos I need to straighten up the driver side plug wire loom ? The heat shield for the starter cable is heat shrink tube. When I do plug wires, I’m guilty of NOT worrying about correct firing order, I just aim for looking about right. Hopefully the real car was done in the correct order!! Trying to route the wires I do add, similar to how the actual car is done. The fuel filter is a piece of aluminium tube, with smaller diameter brass tube inside. 2 different sizes of brass tube at the front of the carb. Not much of an update but progress nonetheless. I still have a few small details to add, and obviously a few big things. I was playing with the idea of using a micro magnet to hold the air cleaner on so it could be removed, but decided against it. There will be 3 tubes connected to it, so it will get glued in place. I am also playing with some magnets and hood hinges. Haven’t quite got things sorted out yet, but more on that once I have it figured out. The chassis, and most of the chassis parts are in paint, no photos yet. I will hopefully start assembling that in the next few days. As always, thanks for taking the time to look and all comments, advice and observations welcome. Cheers, Steve