Steve H
-
Posts
2,535 -
Joined
-
Last visited
Content Type
Profiles
Forums
Events
Gallery
Everything posted by Steve H
-
Sheesh! That’s a lot of fiddly work on those headlights, your patience certainly paid off. They look amazing! I’ve never built one of these kits, but if I do, this WIP will be my reference for sure. Very nice work happening here as always Greg. Cheers, Steve
-

Revell 71 Olds 442 W30 questions
Steve H replied to Steve H's topic in Model Building Questions and Answers
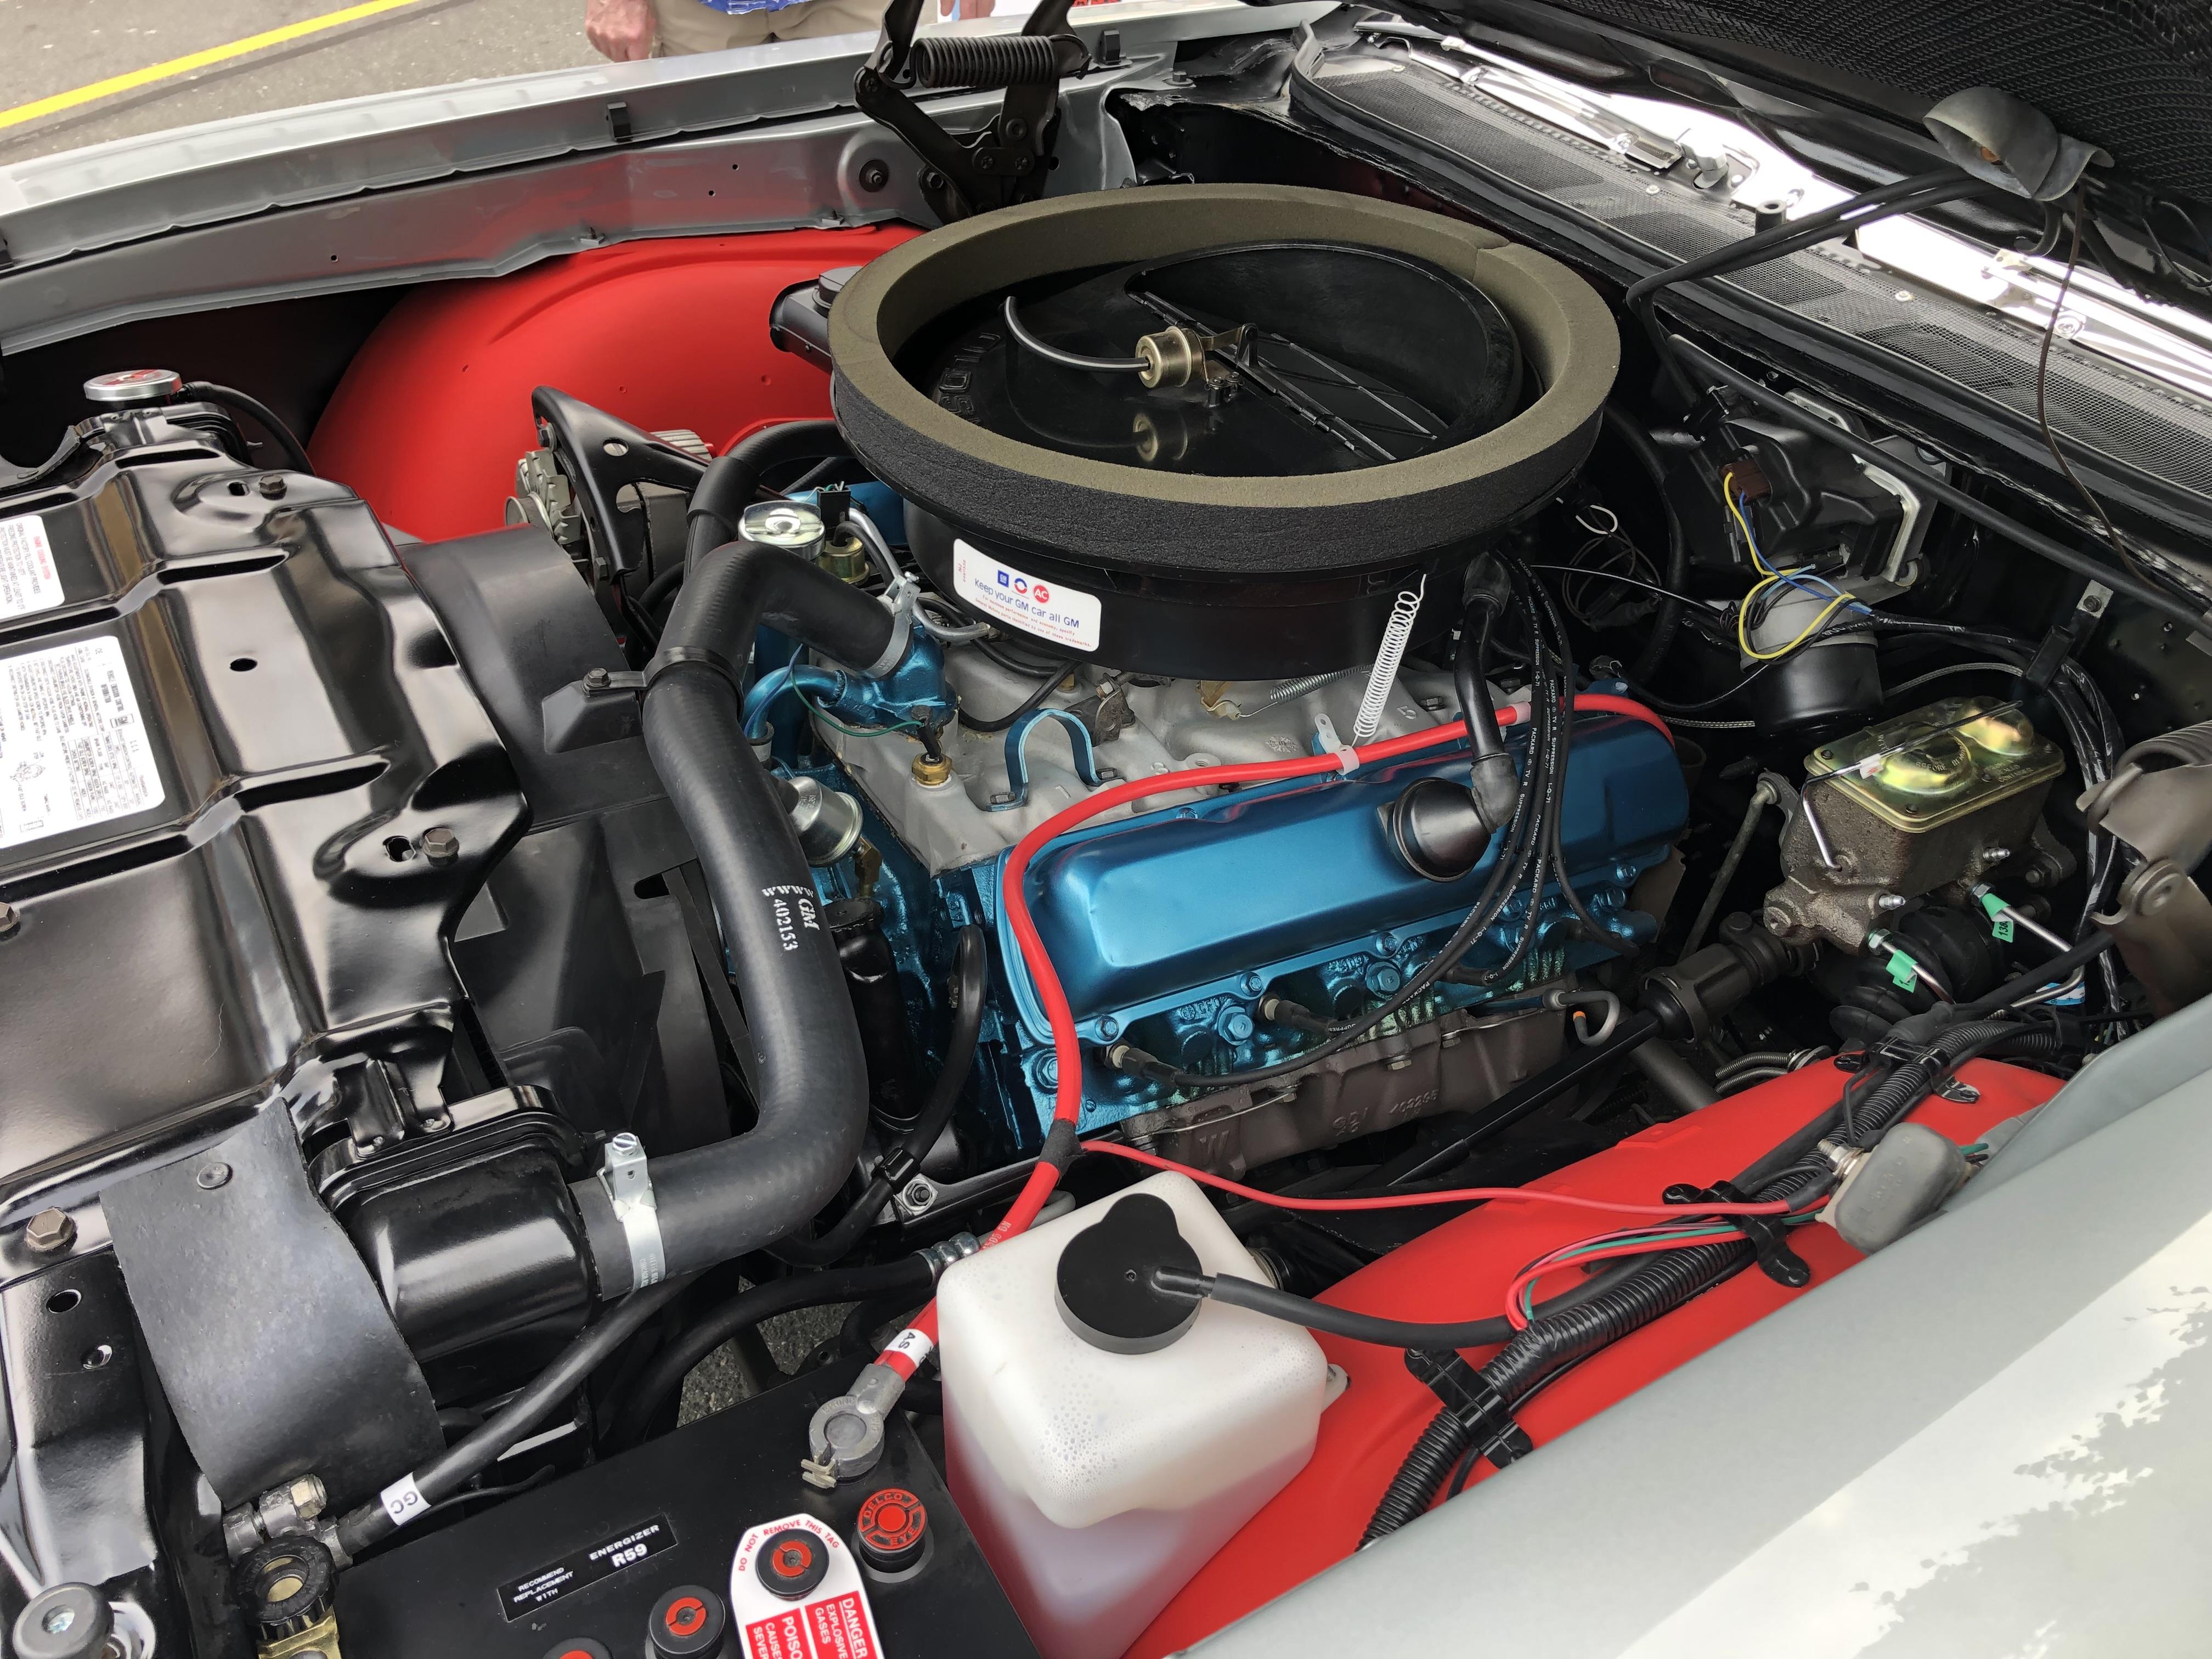
Hi Tom, that looks to be REALLY close to the factory engine colour. I just might have some of that in the paint stash… Thank you for sharing this, much appreciated. Beautiful engine! -
Yes sir, it was you Jim! Thanks for the input. Pretty sure I will try them first. Thank you ?
-
Johan ‘70 Cadillac ElDorado pro touring (low and aggressive)
Steve H replied to Steve H's topic in WIP: Model Cars
Thanks Keith! It was a slow weekend with not much to show for progress. I did sort through some of the small detail/decision type stuff though, so hopefully I can have a decent update soon. Thanks for your support, I appreciate it. I hope so!! I’m glad you like it Dennis, and appreciate your comment. I had a vision for this kit a few years back. With the knowledge and sharing of all the talented builders on this forum, the kit is coming together much nicer than my original vision. So glad to have joined this community, and learn from all of people like yourself on here that are so willing to share their expertise. Cheers, Steve- 220 replies
-
- 1
-

-
- johan
- pro touring
- (and 1 more)
-
Thank you VERY MUCH for the information guys, much appreciated!! I will do some digging and see which way I go. Always good to have input from people that have purchased products from the company they recommend. Good service is also a factor for me so I appreciate hearing that as well. Thanks again, Steve
-
Revell 71 Olds 442 W30 questions
Steve H replied to Steve H's topic in Model Building Questions and Answers
Thank you David. I have only tried a few of the AS paints, and definitely need to get more familiar with them, as the colours I have tried I really liked. Tamiya has been my go to paint when possible. Sure wish I had access to the car… I appreciate your input. -
Whoa dang!! Excellent topic Claude!! Beautiful builds guys. I love these rare old kits. I have one in the works that will be finished “soon”, and only one built so far. 3 more in the stash… I’ll add this when done…

-
Hi all, I am looking to have some custom decals made for a few different projects. I do not have a good enough printer , so hoping some of you could share any information on who makes good quality custom decals for 1/25 scale cars. Preferably someone you have experience dealing with. Thanks in advance for your input.
-
Revell 71 Olds 442 W30 questions
Steve H replied to Steve H's topic in Model Building Questions and Answers
Thanks Jim, I appreciate your input. I will definitely start a WIP for this one. Just need to finish the Caddy first. Yes, silver is a tough one. I was hoping maybe someone had built one of these in a close colour match using Tamiya paint… Optimistic Thank you Michael Thanks Monty Thank you for the detailed reply David. As for the ride height, yes his car is definitely factory ride height. What I’m not sure about is, is the model kit accurate. I will ultimately have my build match the photos of his car, just wondering how close the kit is. I have the red, and plan to do exactly what you suggested for the inner fenders. The issue is, I’m doing this as a surprise, and I unfortunately don’t have access to the car. I wish I had been more organized and had some test spoons done to hold against his car at this show. ??♂️ I have silver leaf, and it’s definitely too bright, I will do a bit more research to see if Dupli Colour has a match that is currently available. I very much appreciate your input, always good to hear from you sir. -
Hello Martin, your builds sir, are absolutely stunning. The realism you bring to scale modelling is nothing short of spectacular. The bar has been raised. It’s not just the incredible paint jobs, and clean detailing, but you have an unbelievable way of capturing “metal finishes” in scale. Can’t wait to see this in person next week. Hoping you might have the gas station dio available to view as well… Cheers, Steve
-
Johan ‘70 Cadillac ElDorado pro touring (low and aggressive)
Steve H replied to Steve H's topic in WIP: Model Cars
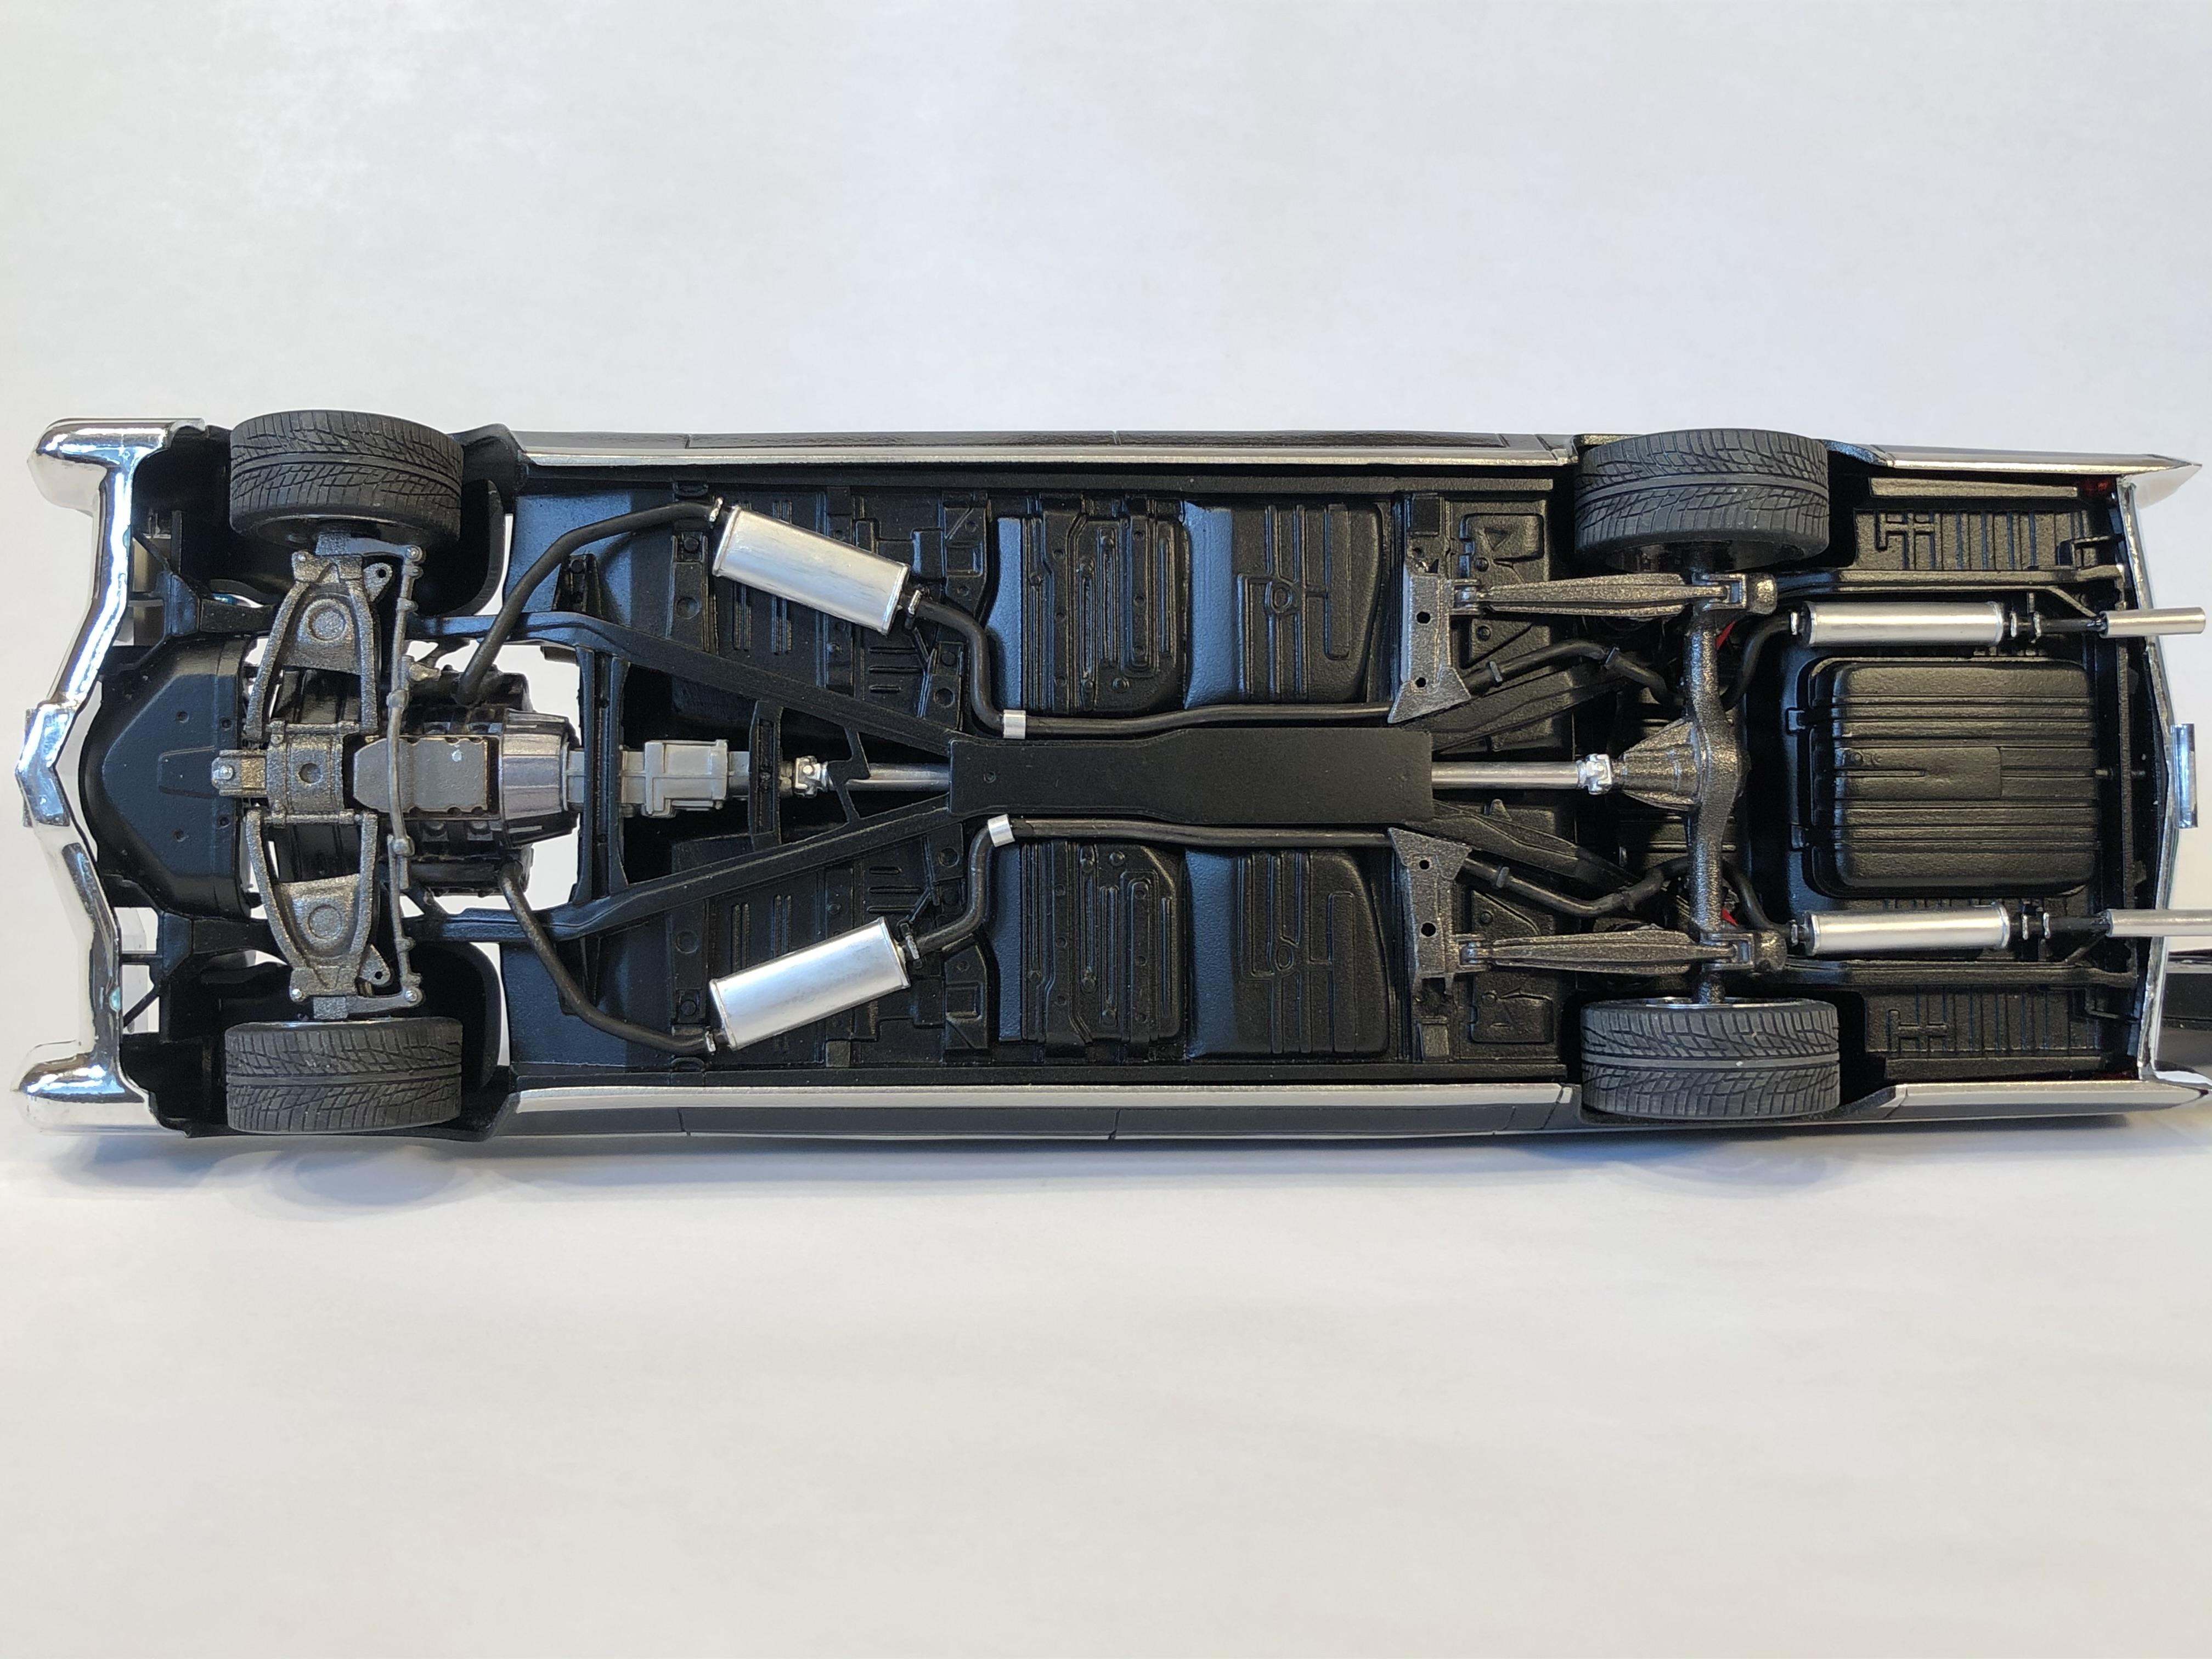
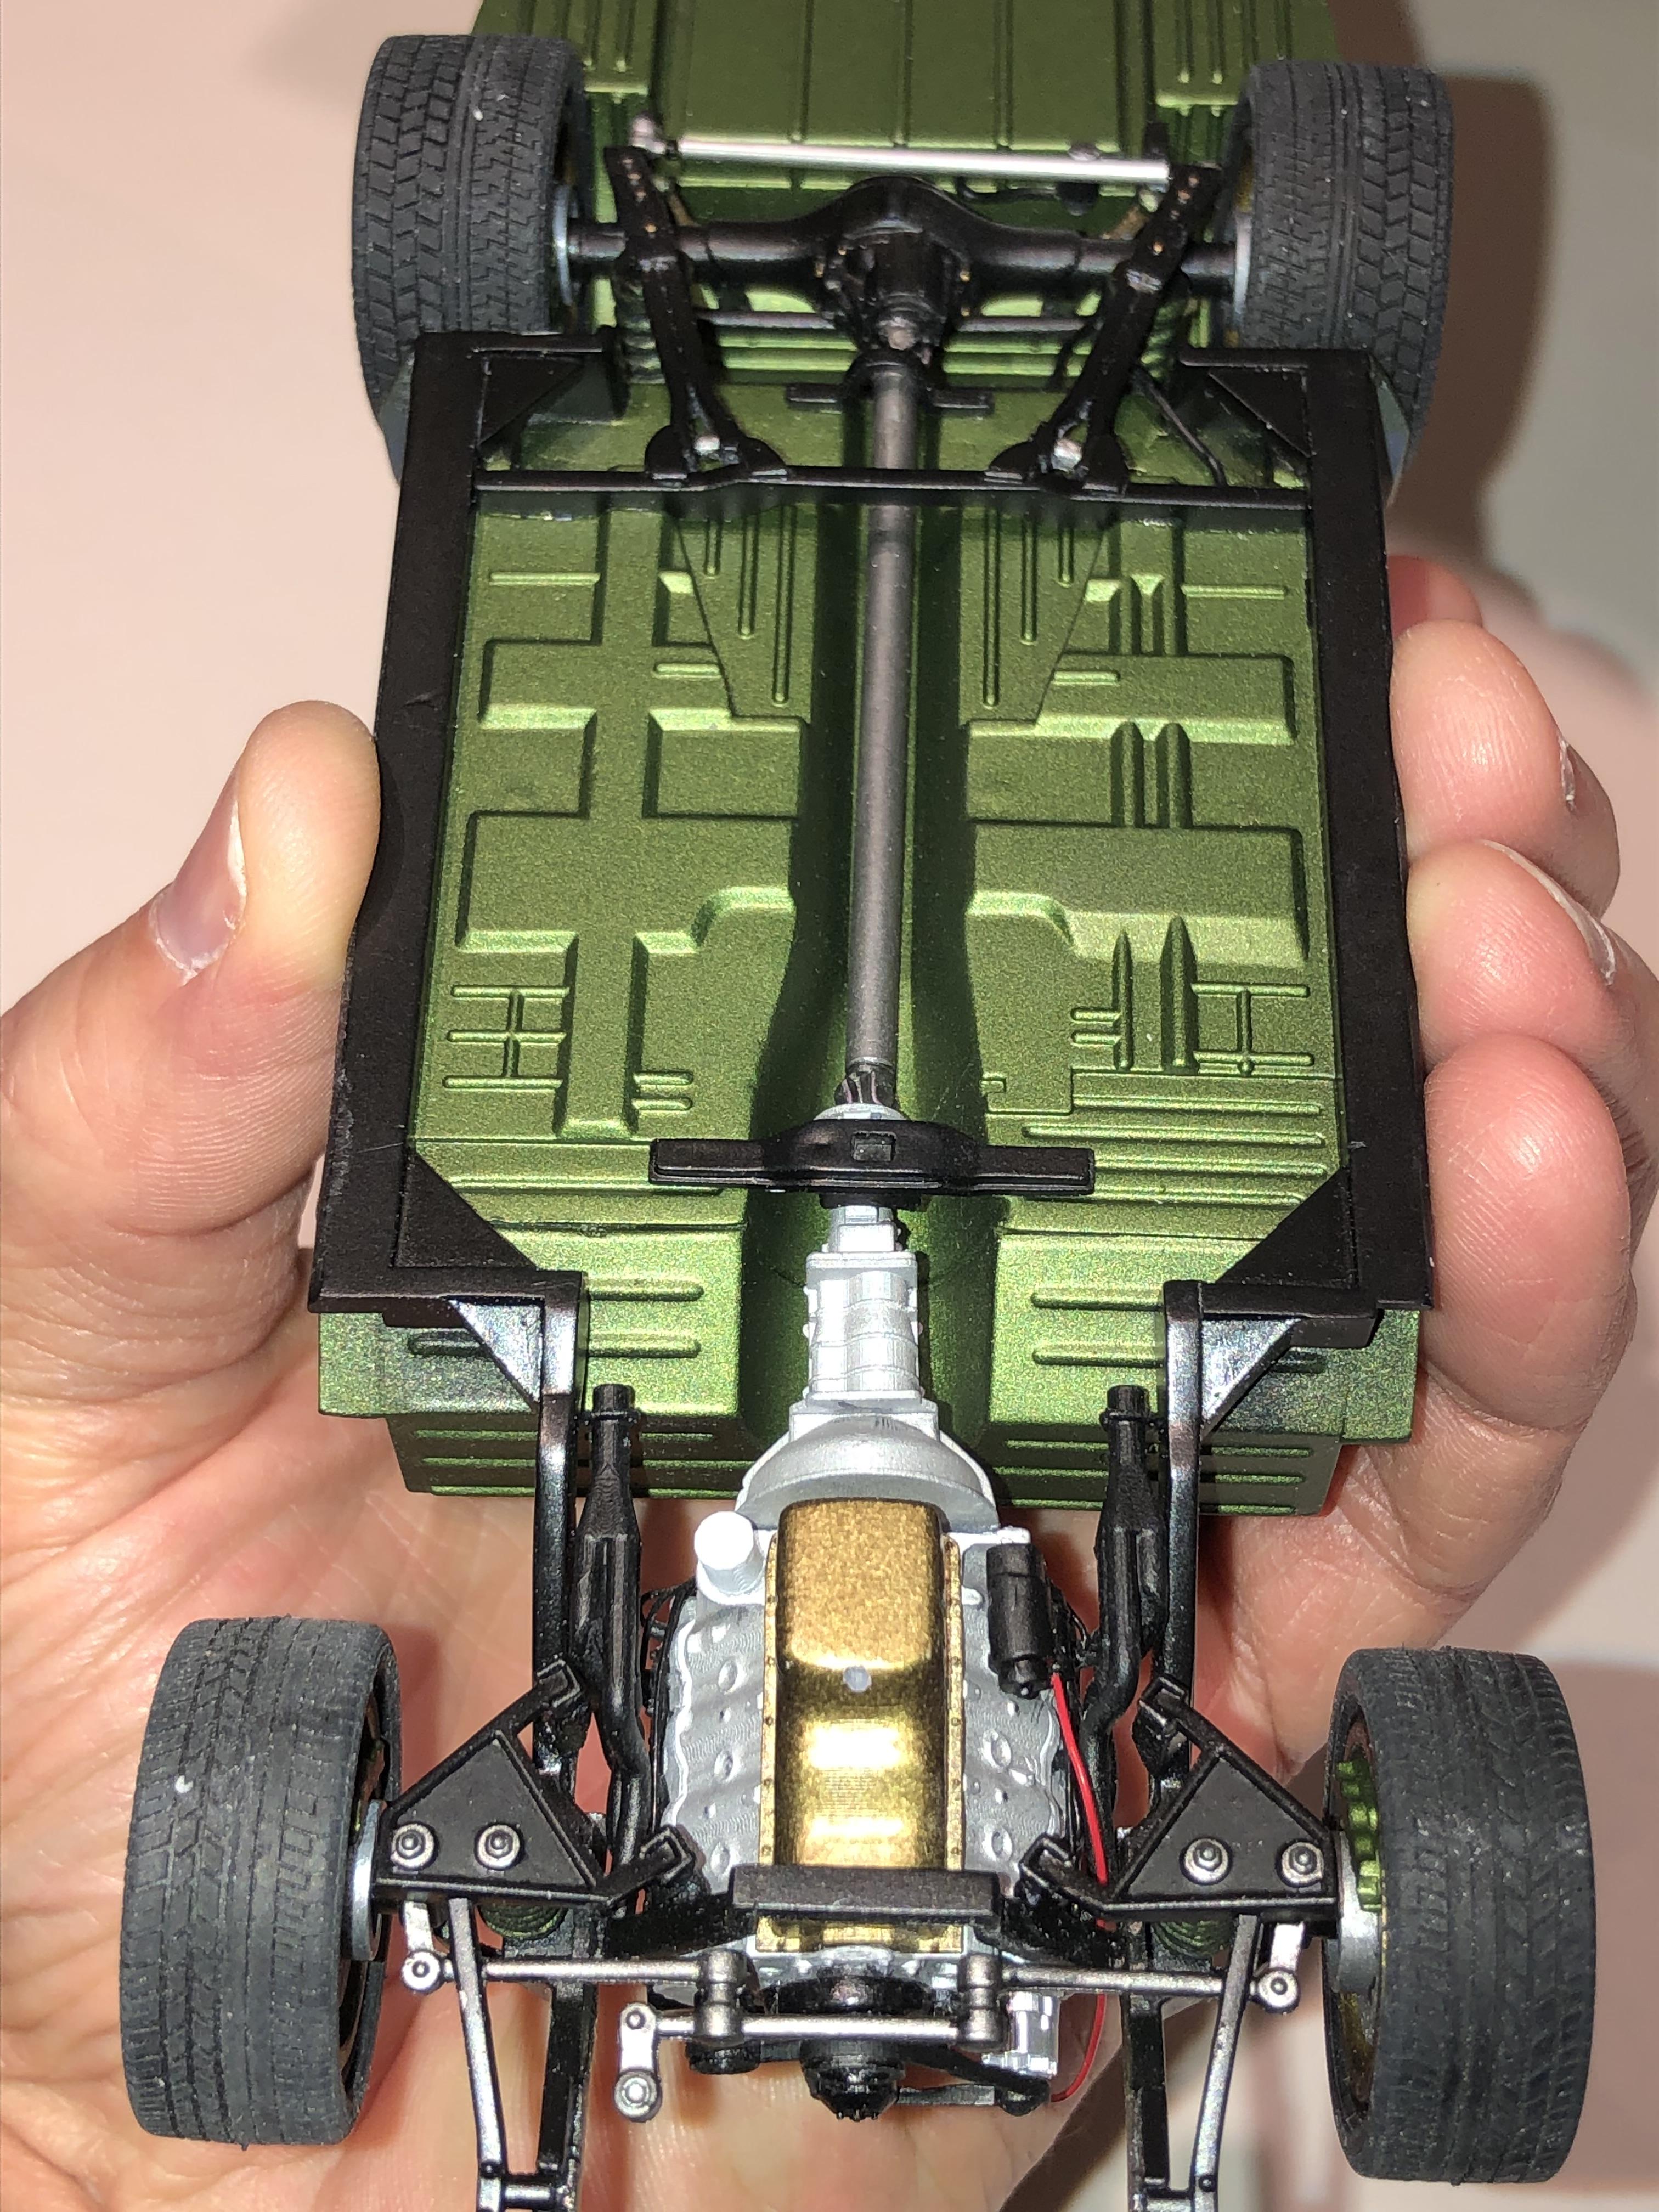
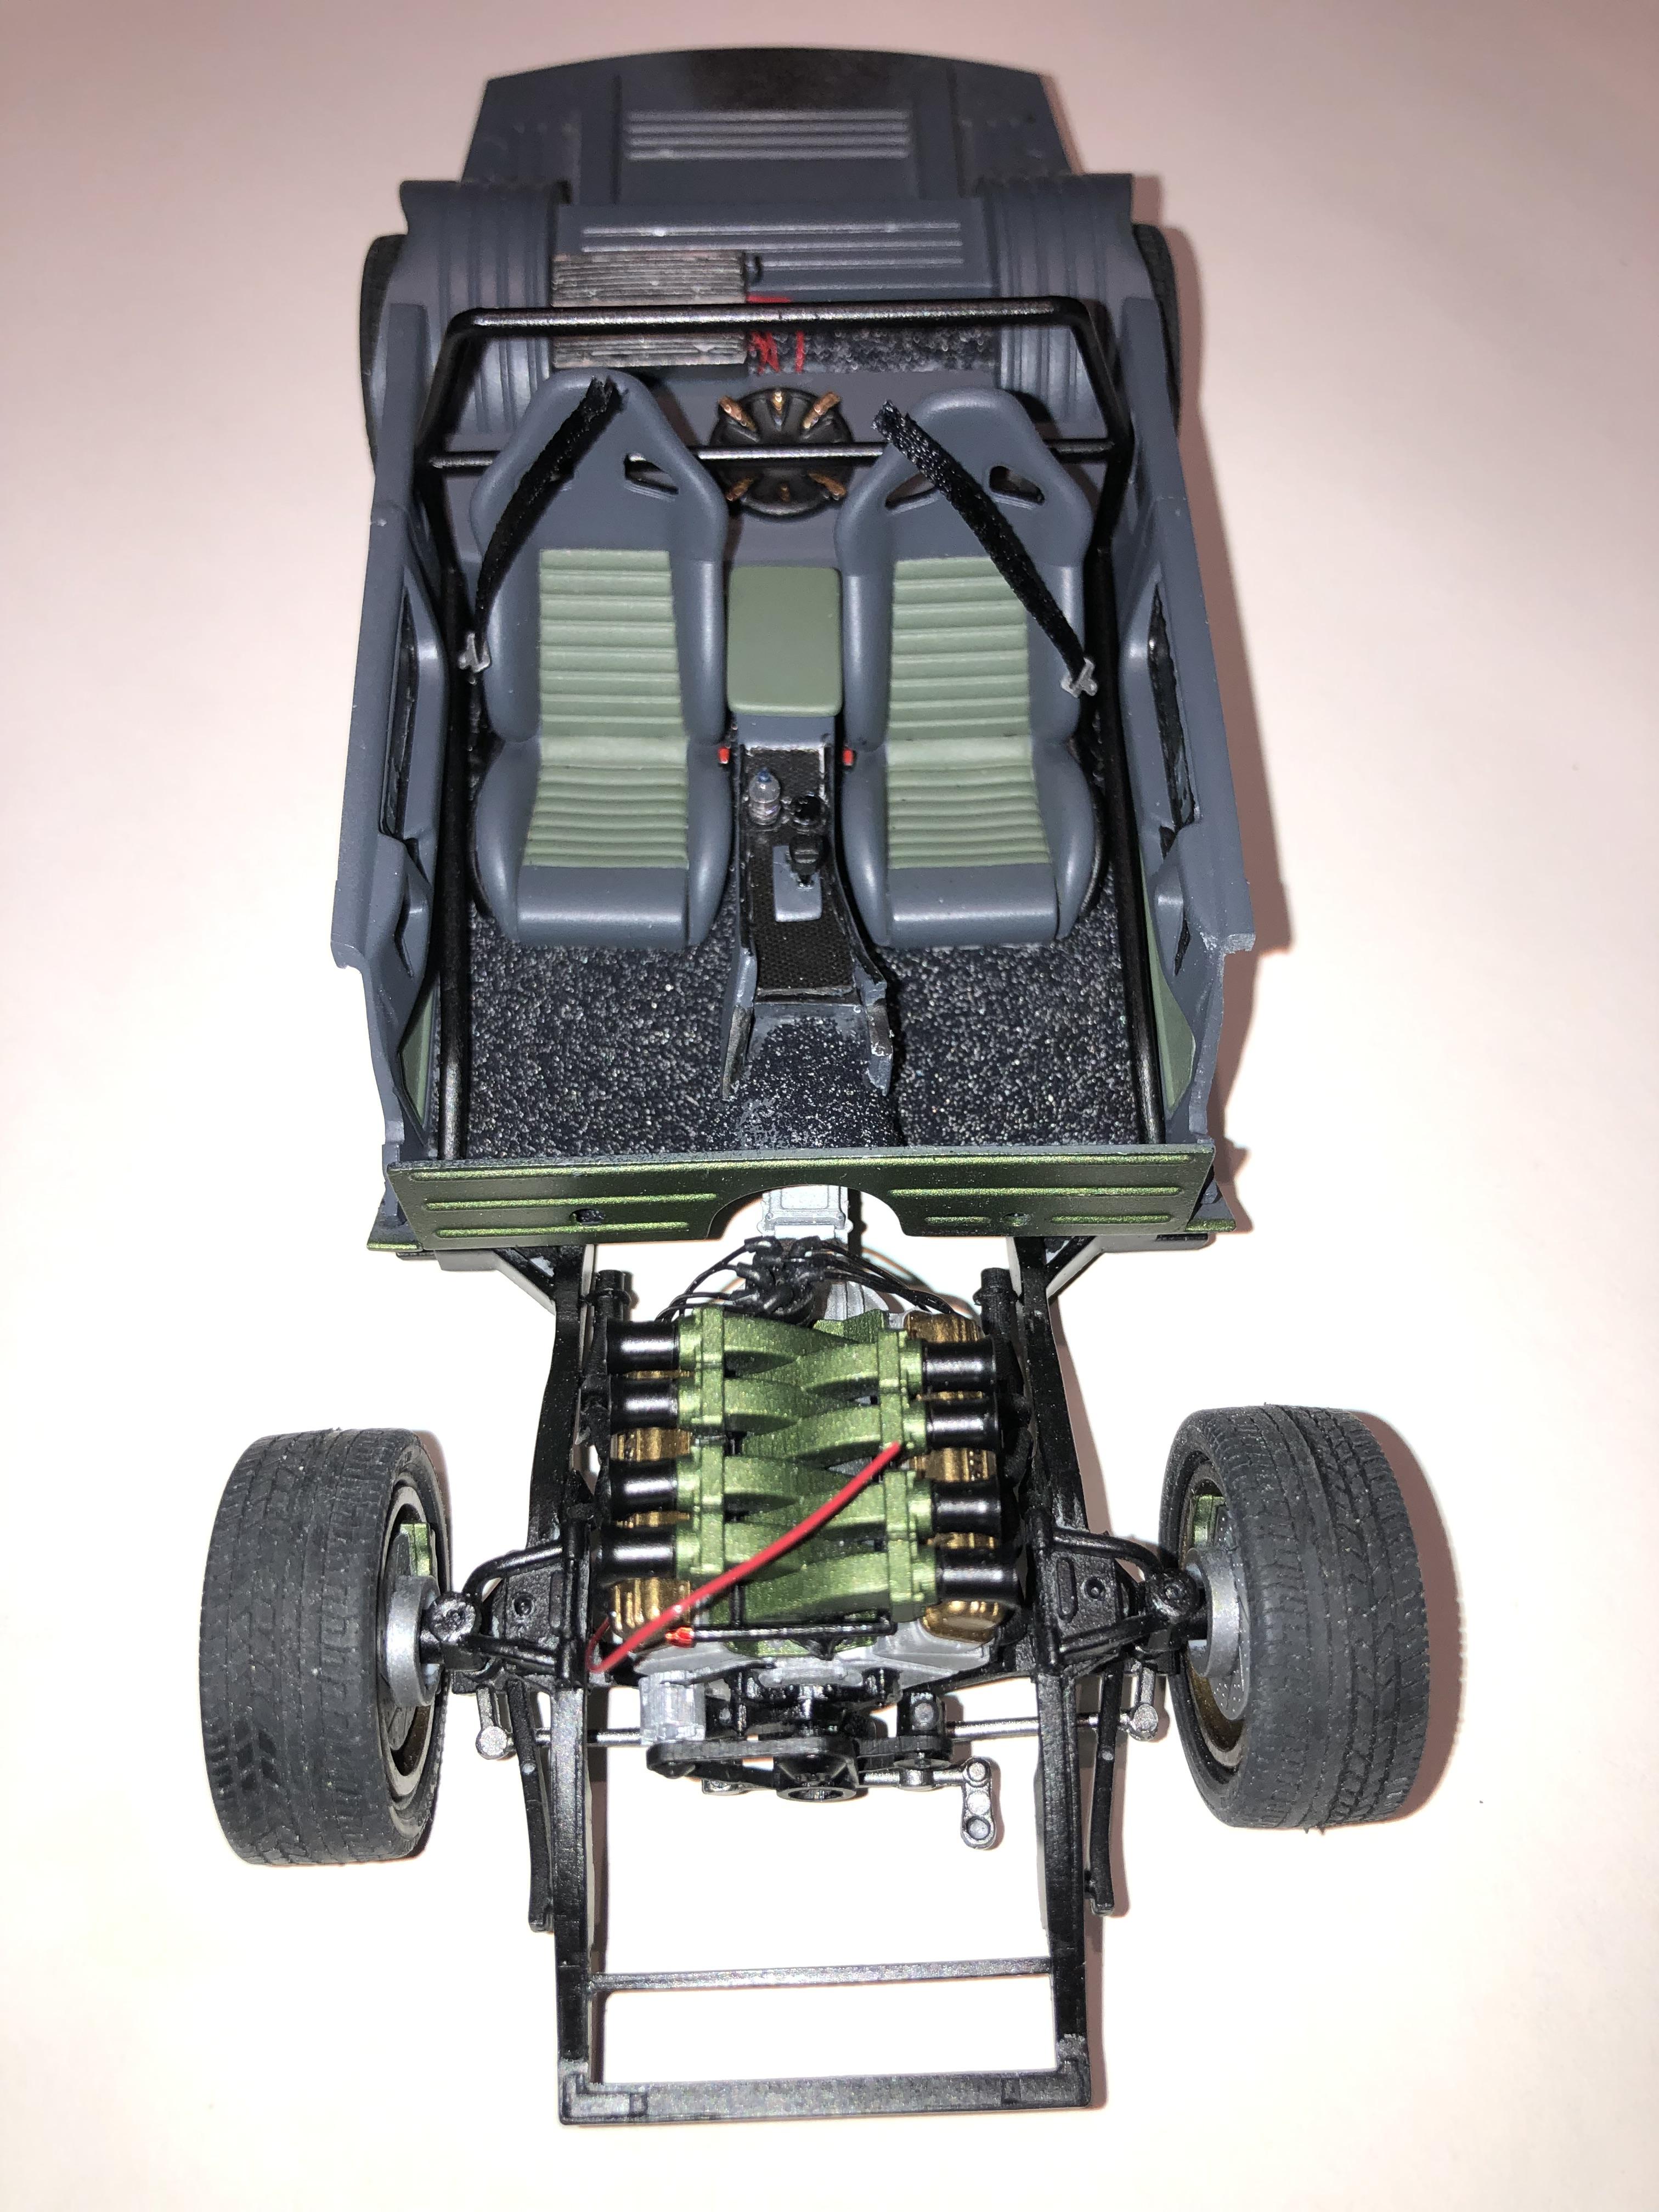
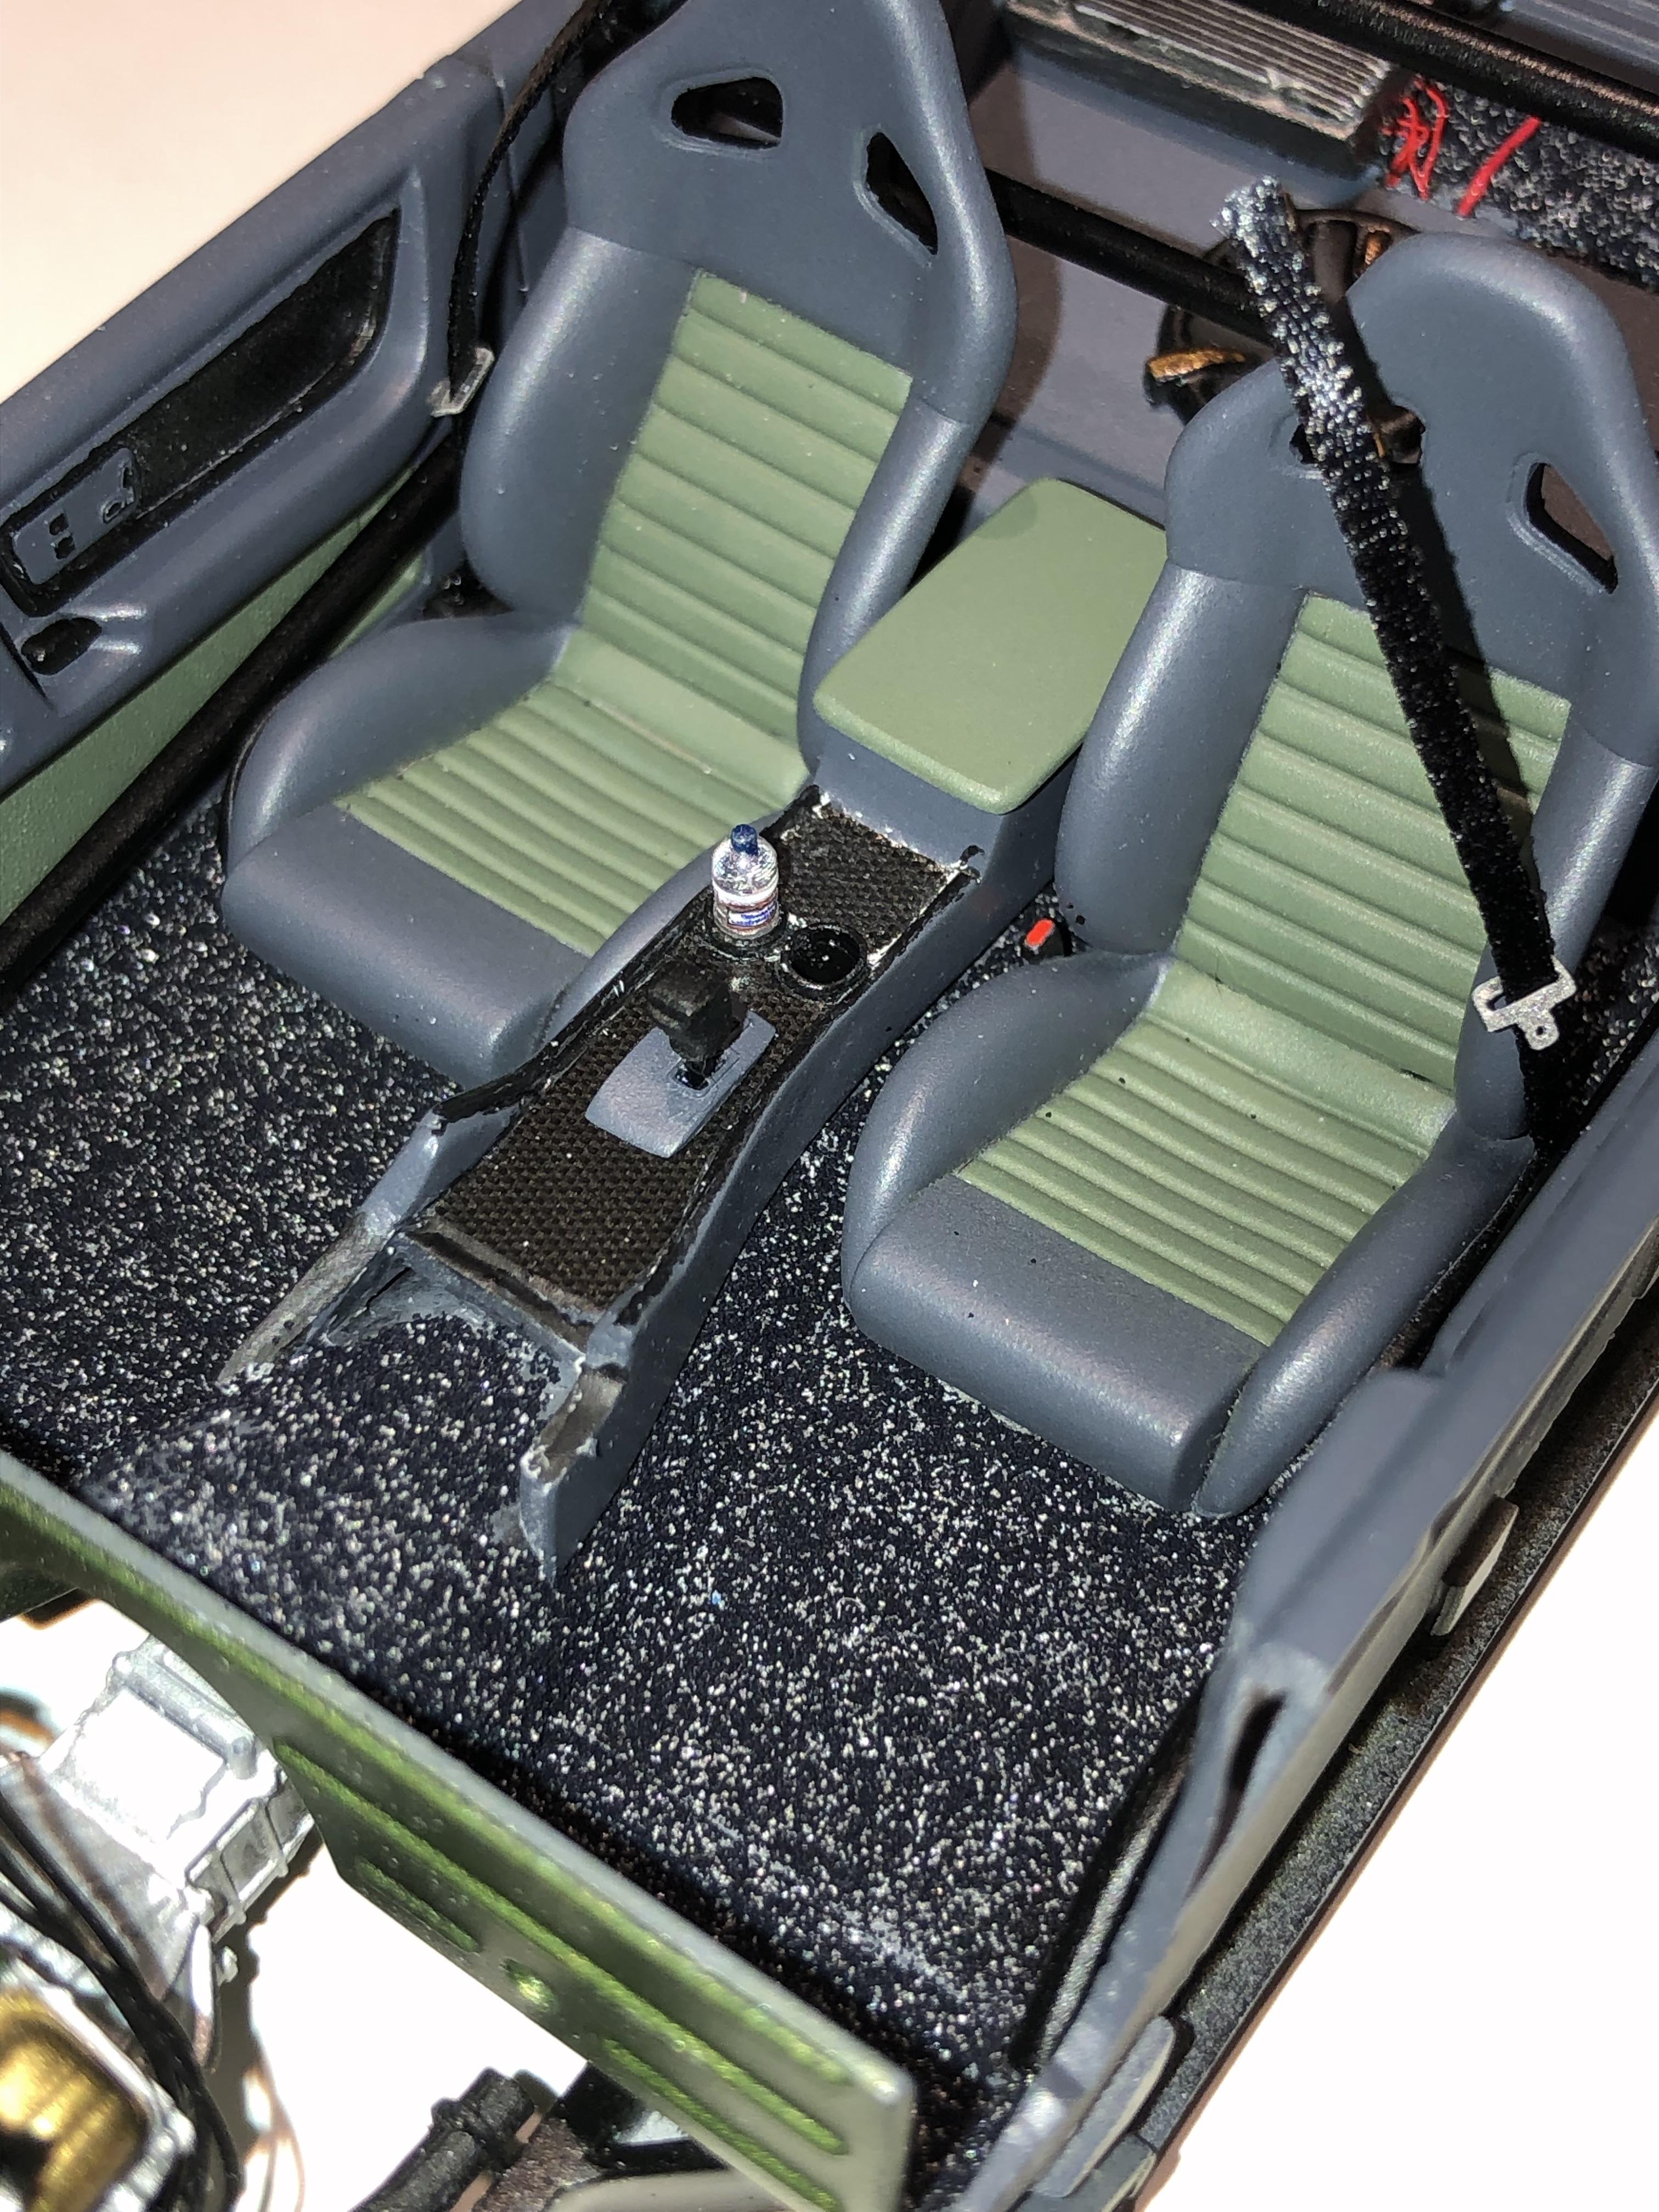
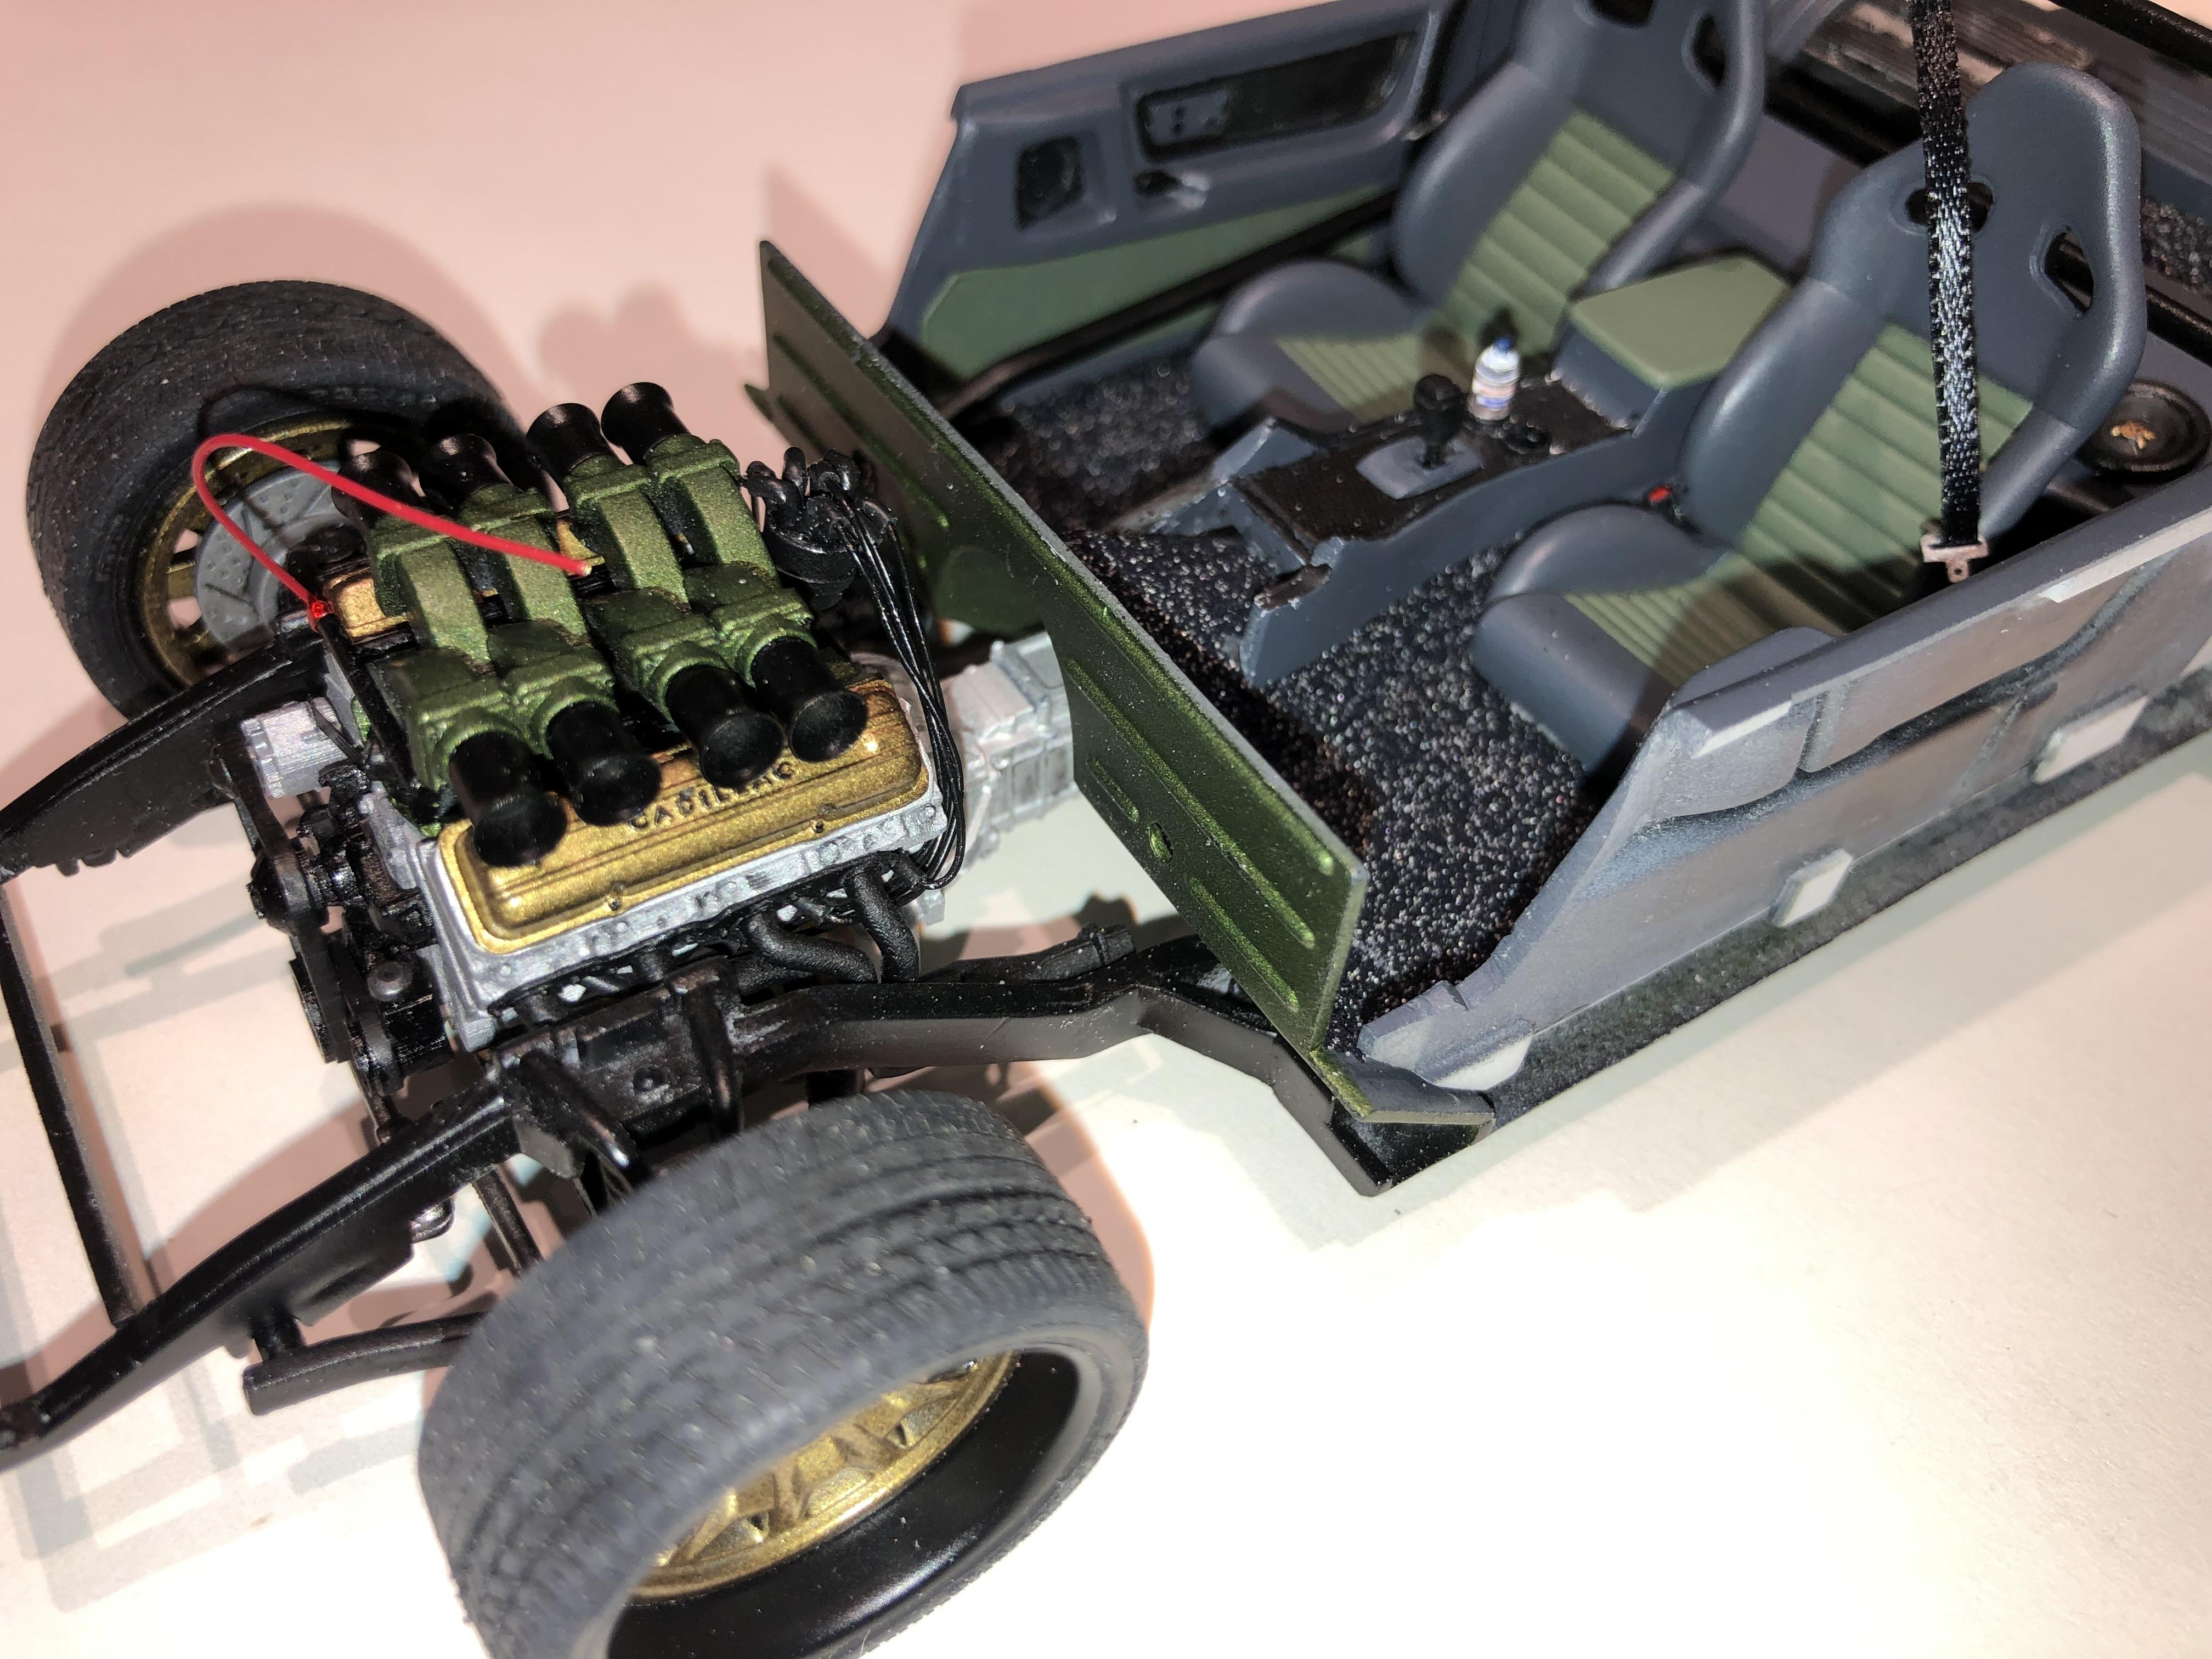
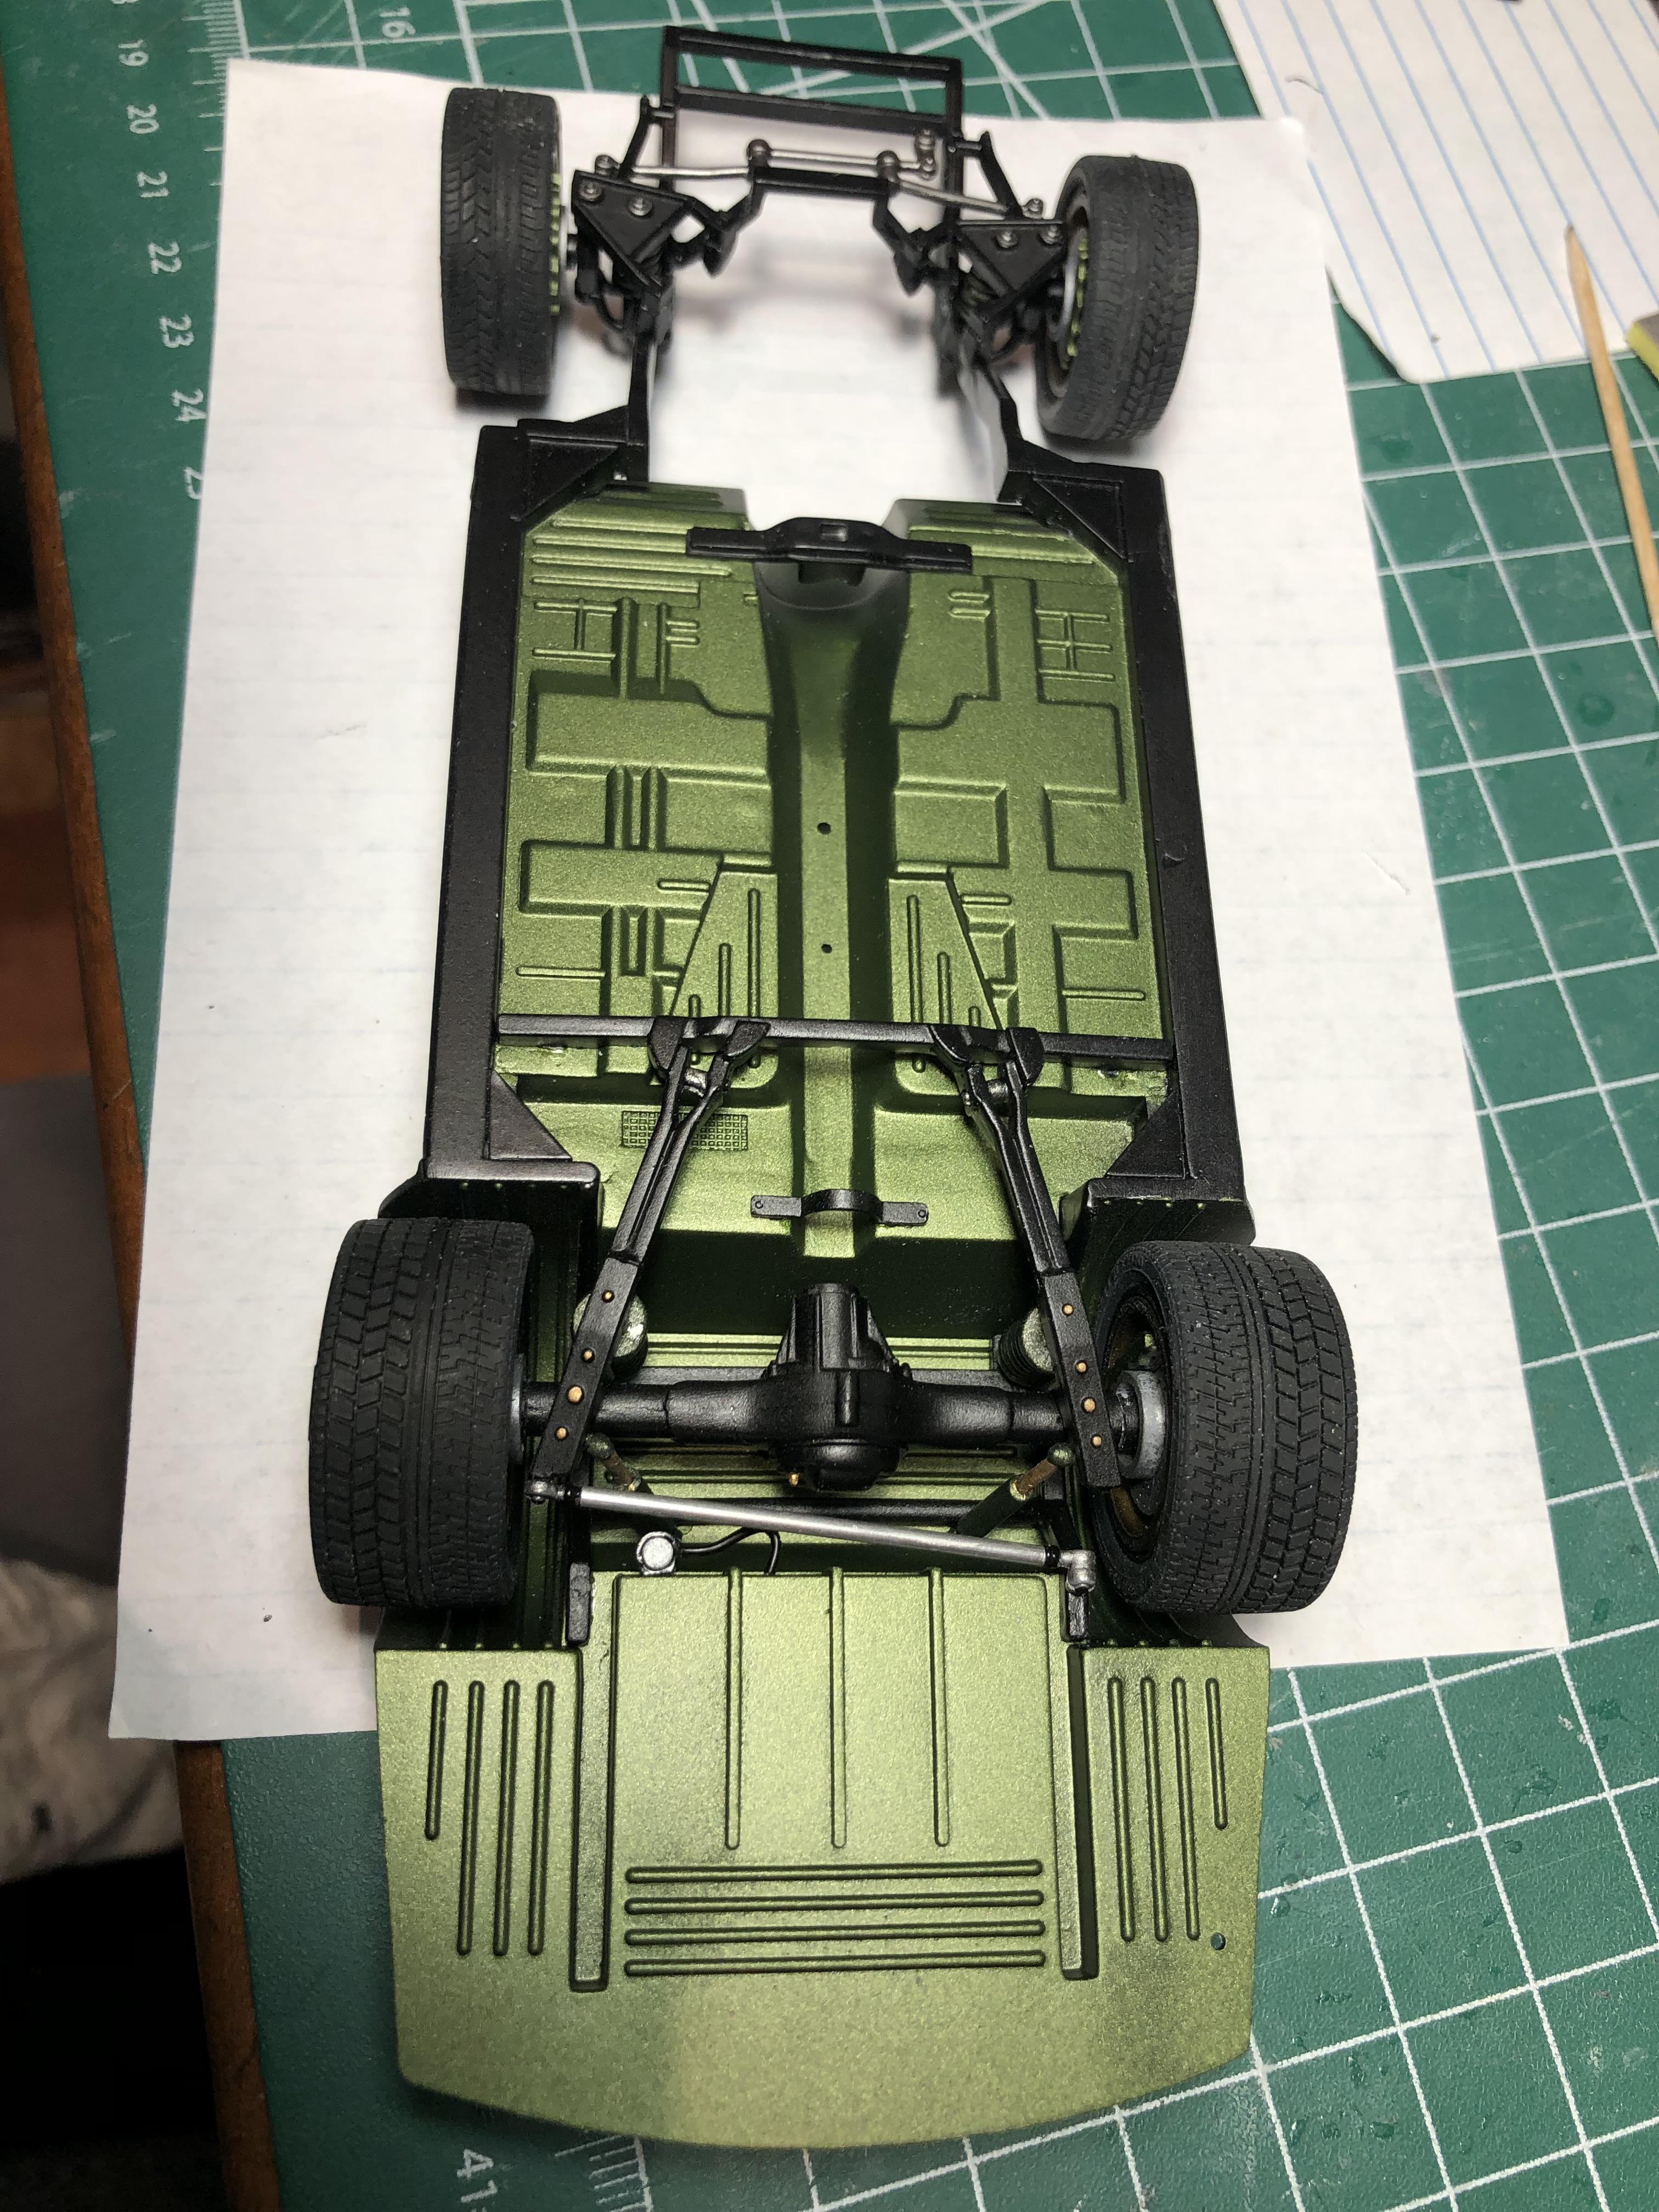
I managed to spend a few hours at the desk last week, and actually have a little something to show for it. The engine and driveshaft are now installed, so chassis is “almost” complete. I did add the drain plug in oil pan after the photo…? The interior platform is coming together. I mixed black and grey embossing powder for the “carpet”, it’s not quite as “disco” looking as it appears in the photos. I made seat belt “retractors?”, still need to add a few “bits” to finish off the shoulder belts. I had to make the seat belt buckle as the photoetch ones I had didn’t quite work out. Added a water bottle in one of the cup holders, the amp has power/ground/and speaker wires. The intake trumpets are now installed. Yes, they are different lengths, and that was intentional. Slightly shorter ones in the middle to show a bit more of the Cadillac valve covers. Ignition wires have been added, still need to complete some wiring once body is installed. That’s it for now! Thanks for having a look. Oh… yes I will dust the embossing powder off the seats! Cheers, Steve
- 220 replies
-
- 4
-
-
- johan
- pro touring
- (and 1 more)
-
Johan ‘70 Cadillac ElDorado pro touring (low and aggressive)
Steve H replied to Steve H's topic in WIP: Model Cars
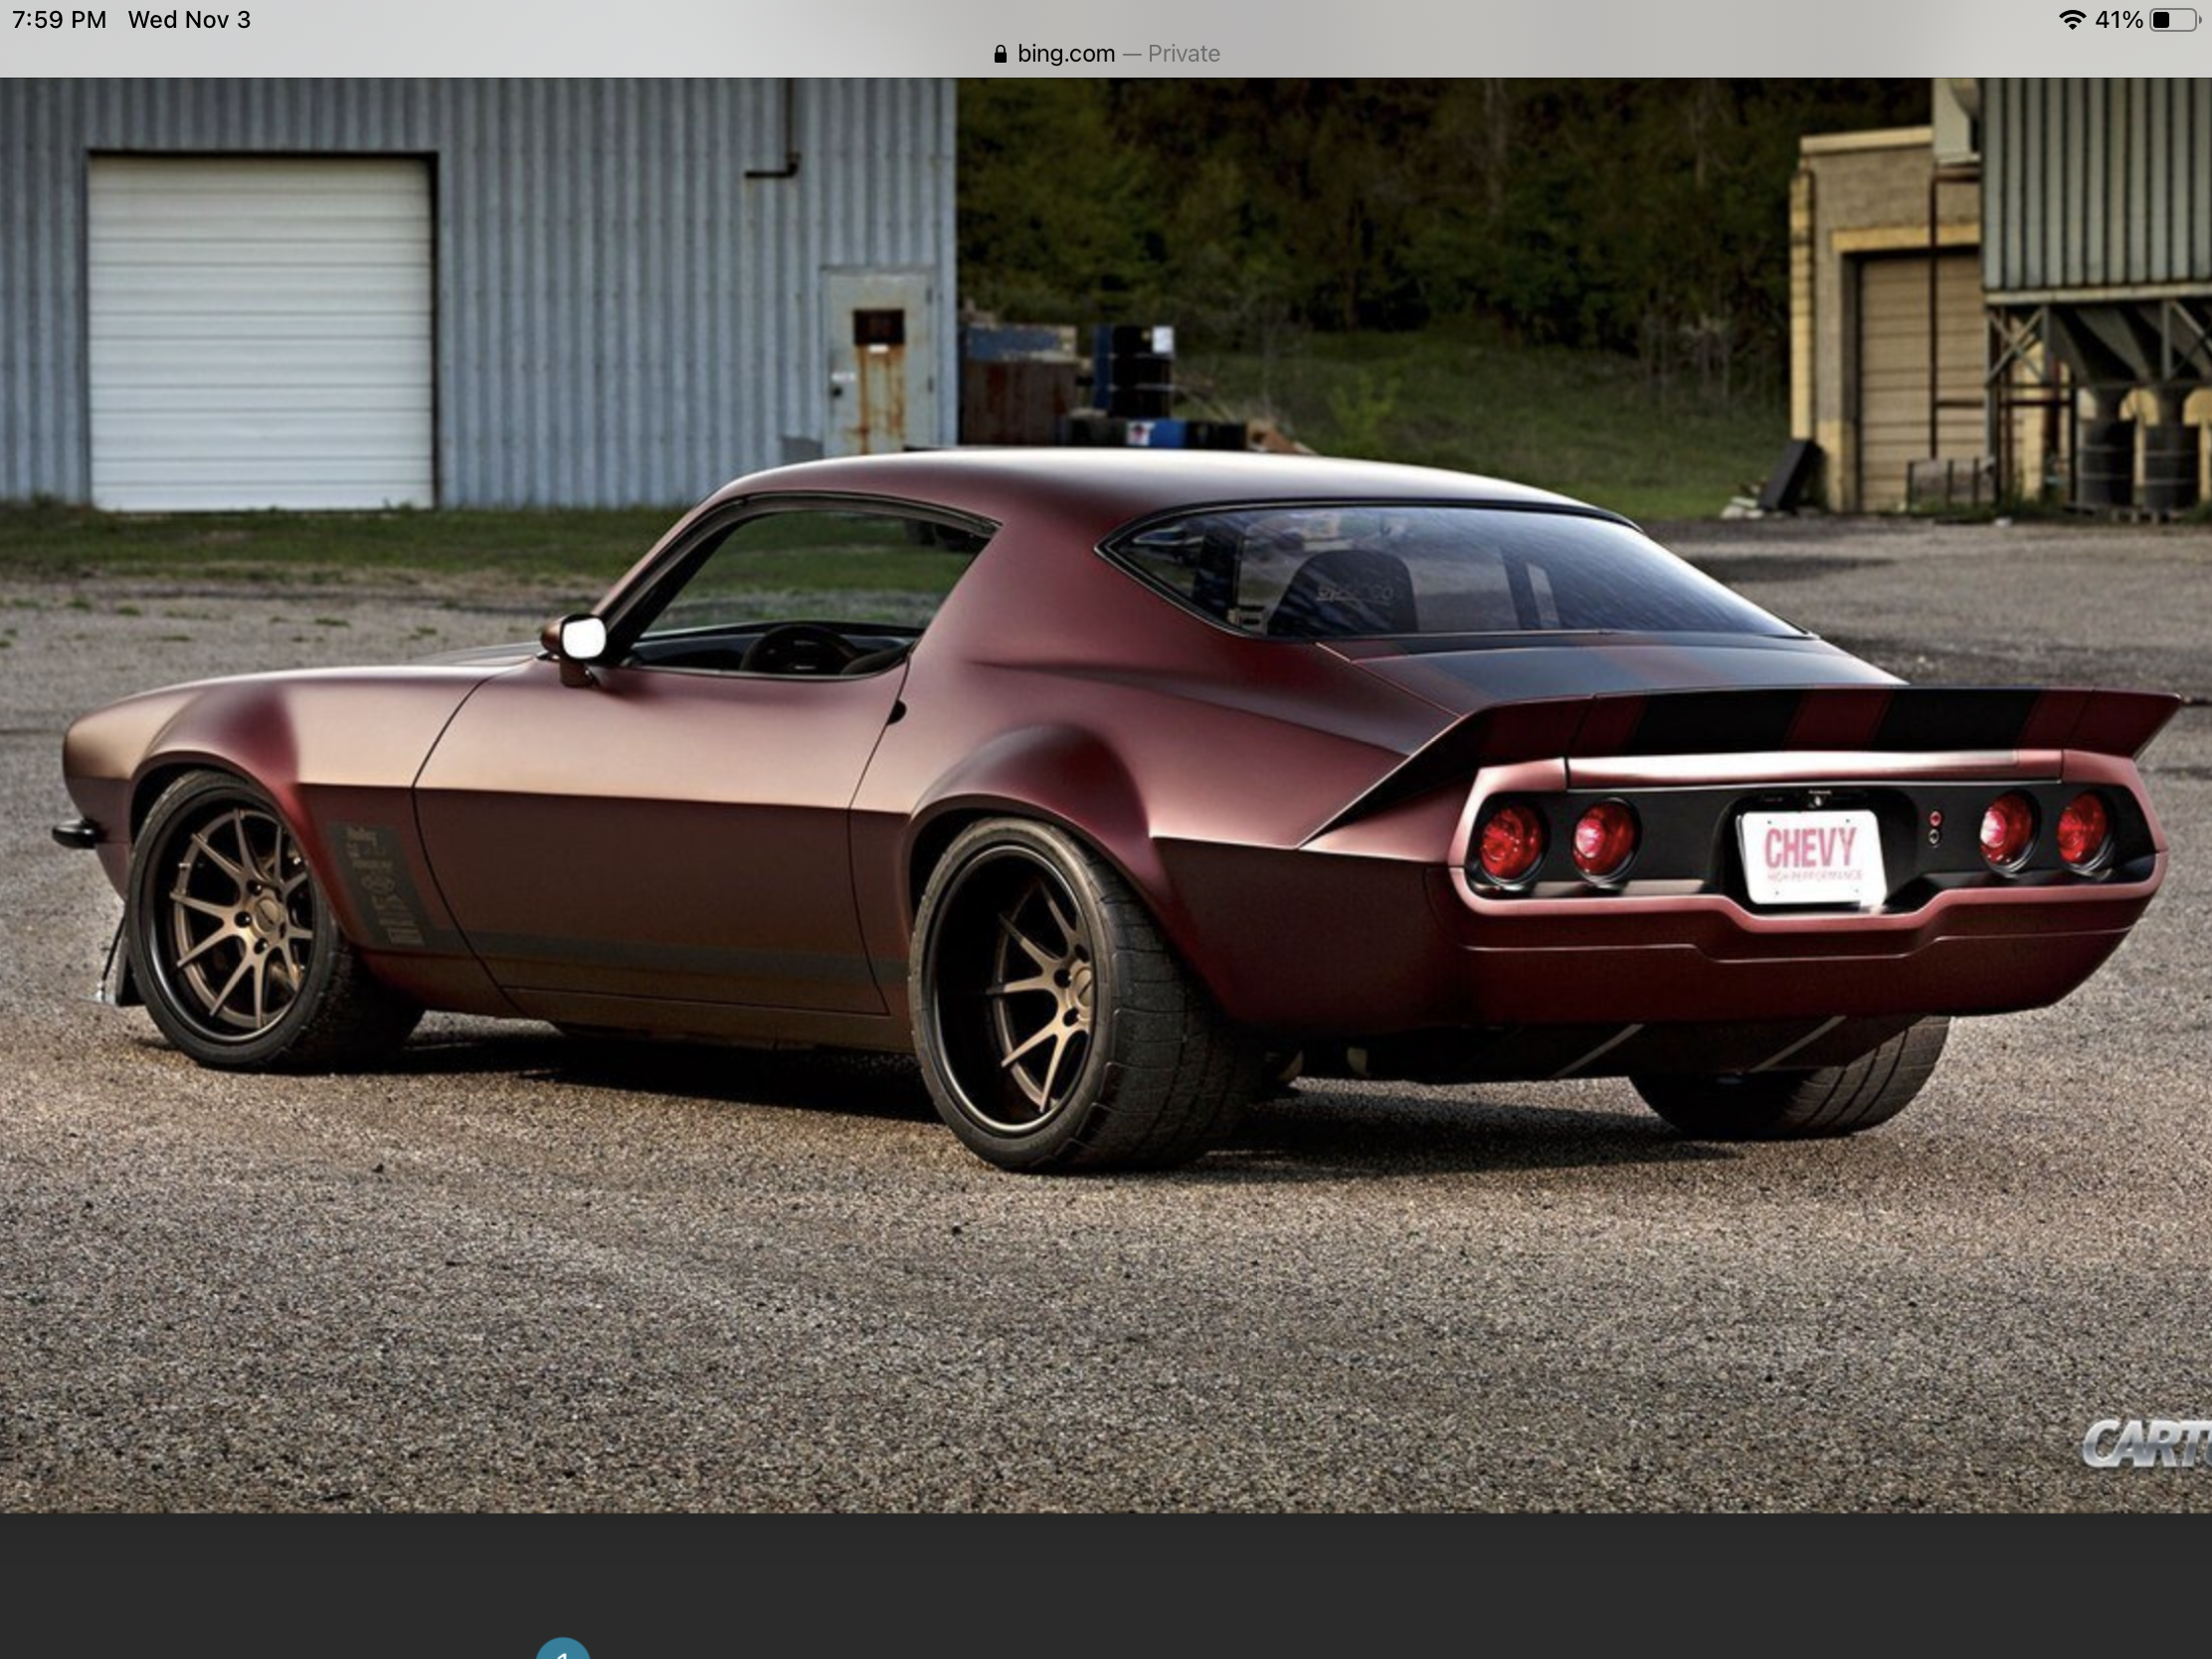
Thanks Anton, the tires are from Scale Productions. I’m not certain, but I think he gets them from other sources and uses him on his wheel sets. But again. I am not 100% certain on that. They are rubber and appear to be molded not printed. I placed a large order from him early this year, and all of the wheels and tires are beautifully done. Website has lots of detailed information and I highly recommend his products. Thanks Greg. Ya when I saw the door latches on the Dutch Boys Camaro, I had to try to replicate them. They turned out ok the first time so I thought I’d do it again. My thought is that it adds a bit of detail, rather than just shaving off the door handles. Well, this is fantastic news, and very embarrassing. I definitely read somewhere he had passed. Just proves that you can’t trust everything you read. Thank you very much for correcting this Phil. Juha, if you happen to read this, please accept my sincere apologies, and also thank you for inspiring this build!! Sorry for the delayed replies guys, it was a busy week! Thanks you for for your interest.
-
Johan ‘70 Cadillac ElDorado pro touring (low and aggressive)
Steve H replied to Steve H's topic in WIP: Model Cars
Thanks Bob! I really like matte finishes on certain types of cars, it definitely suits this build in my opinion. Awesome that this has inspired thoughts for a future build for you, I love it. I hope you go for it, I’d follow along for sure. This one, as I mentioned at the beginning, was inspired somewhat by the late Juha Aurio. Thanks for checking in Bob, should have more soon. -
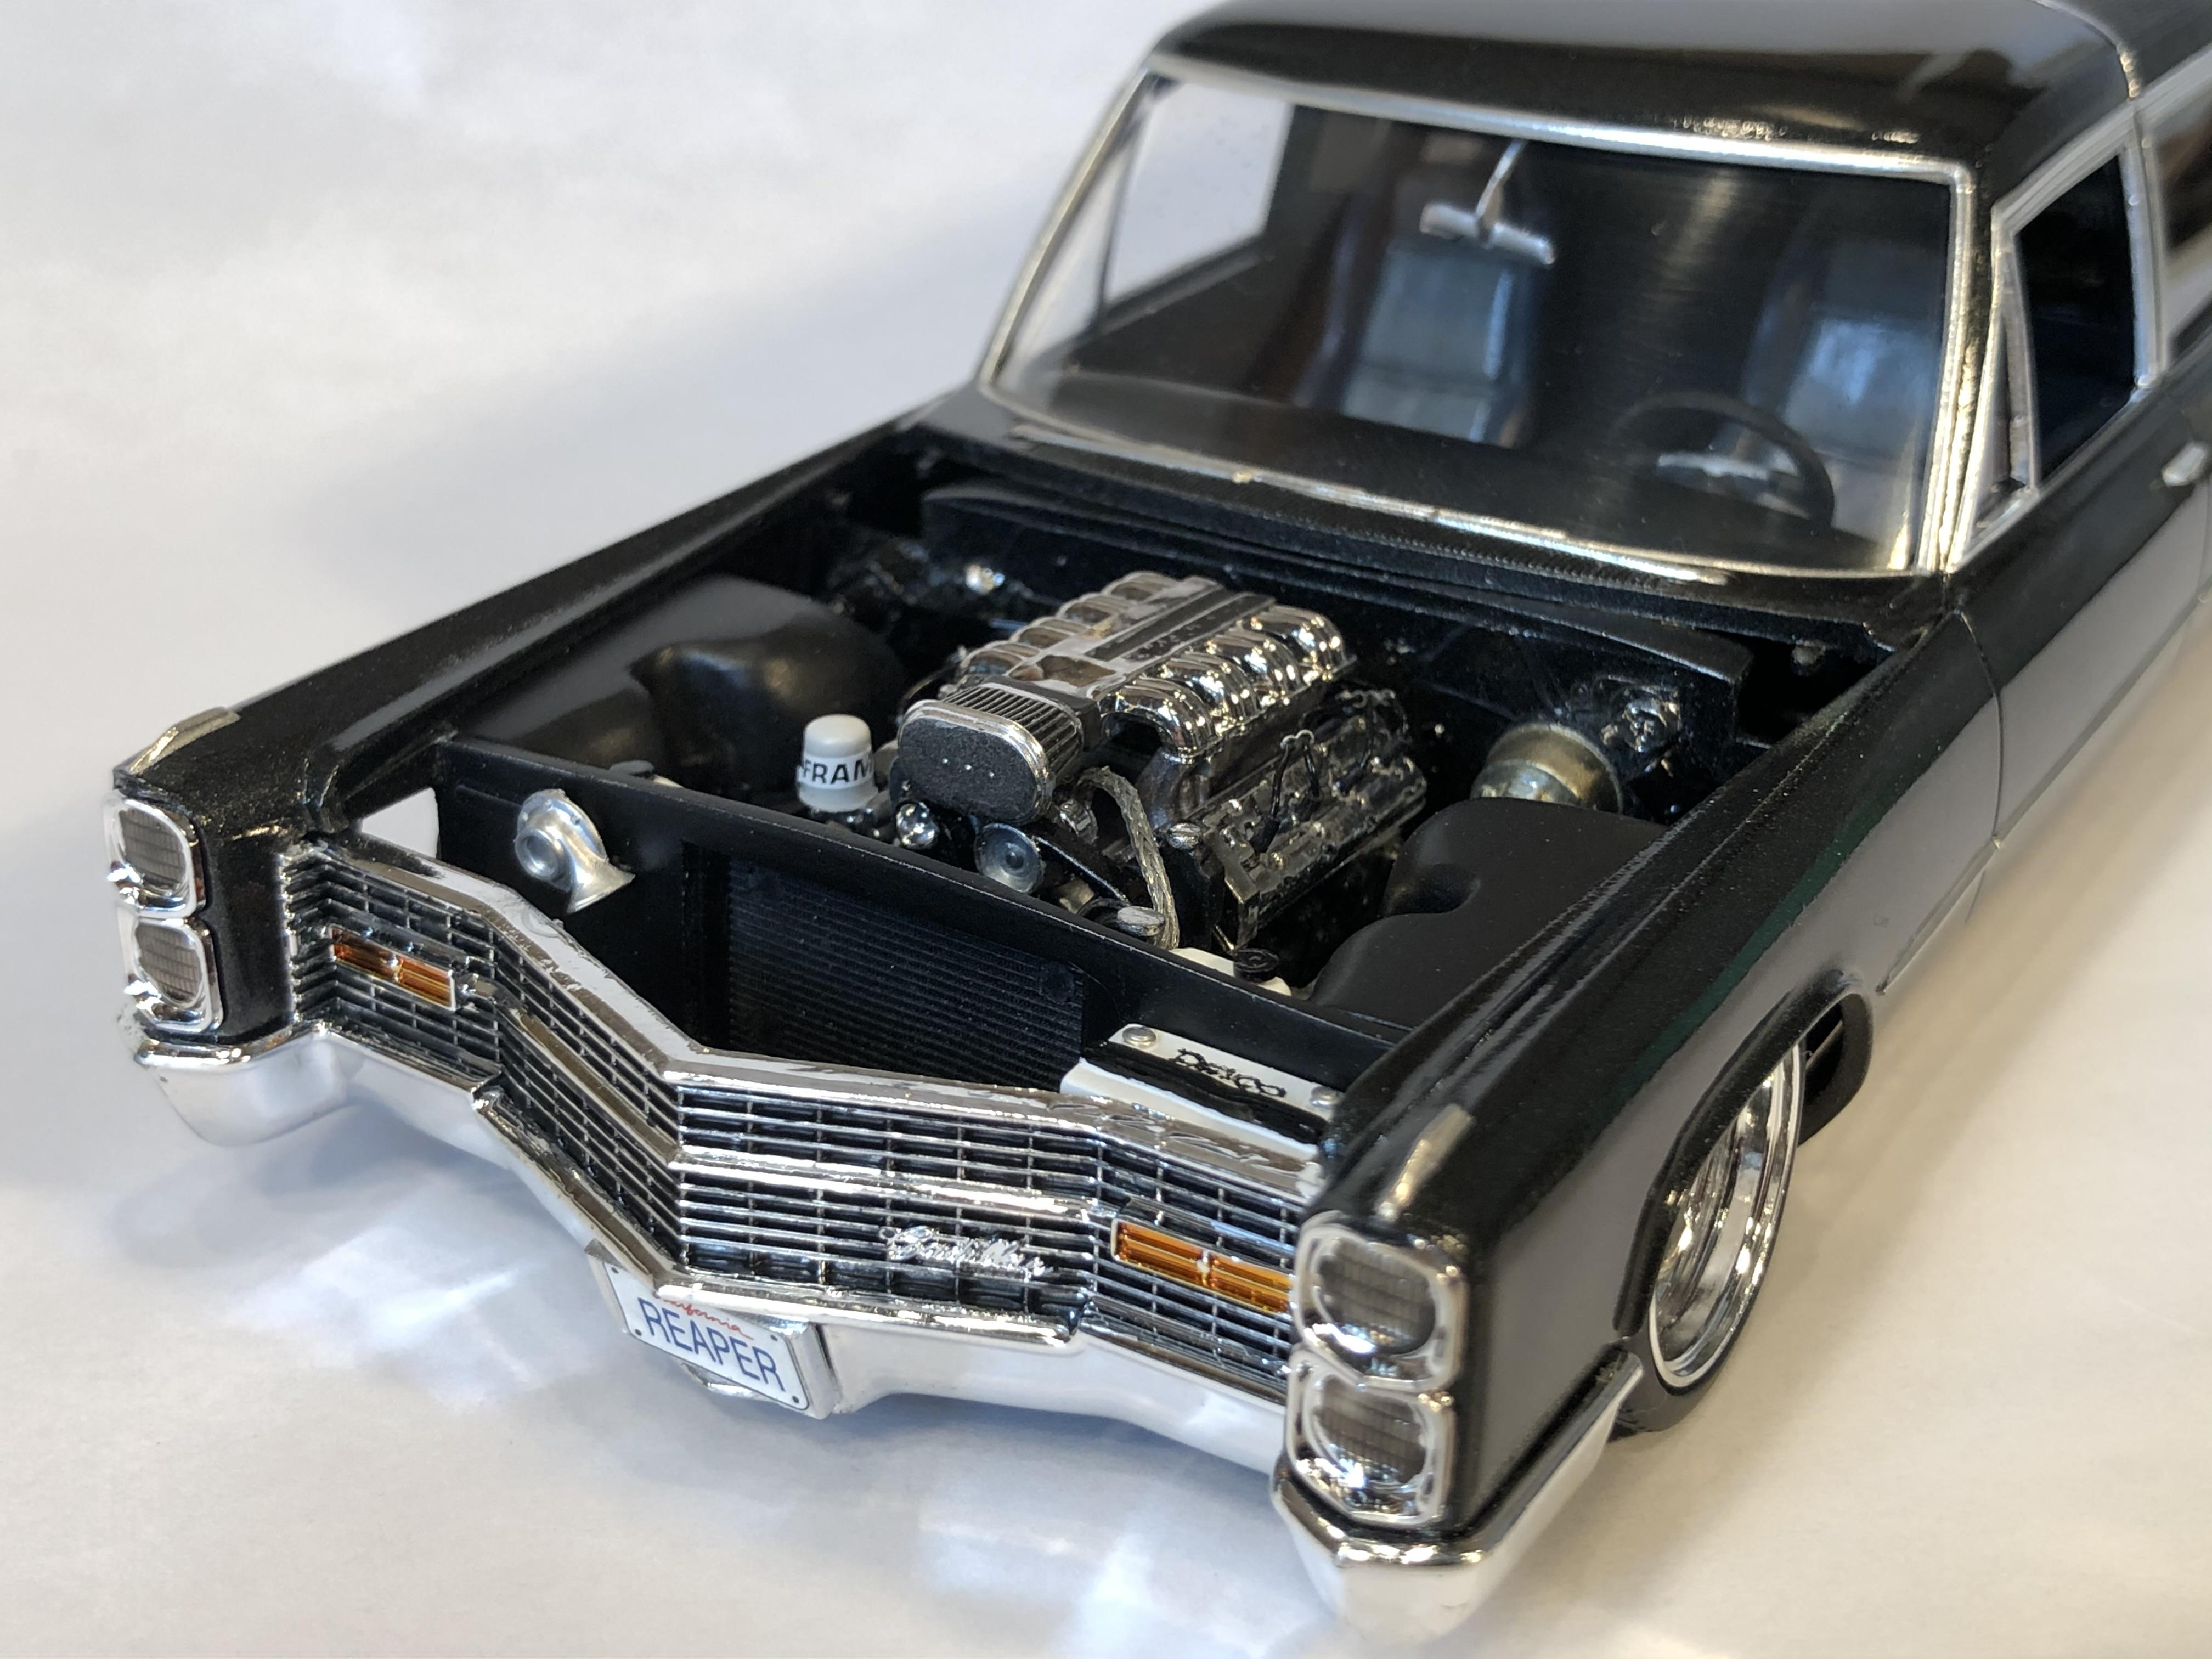
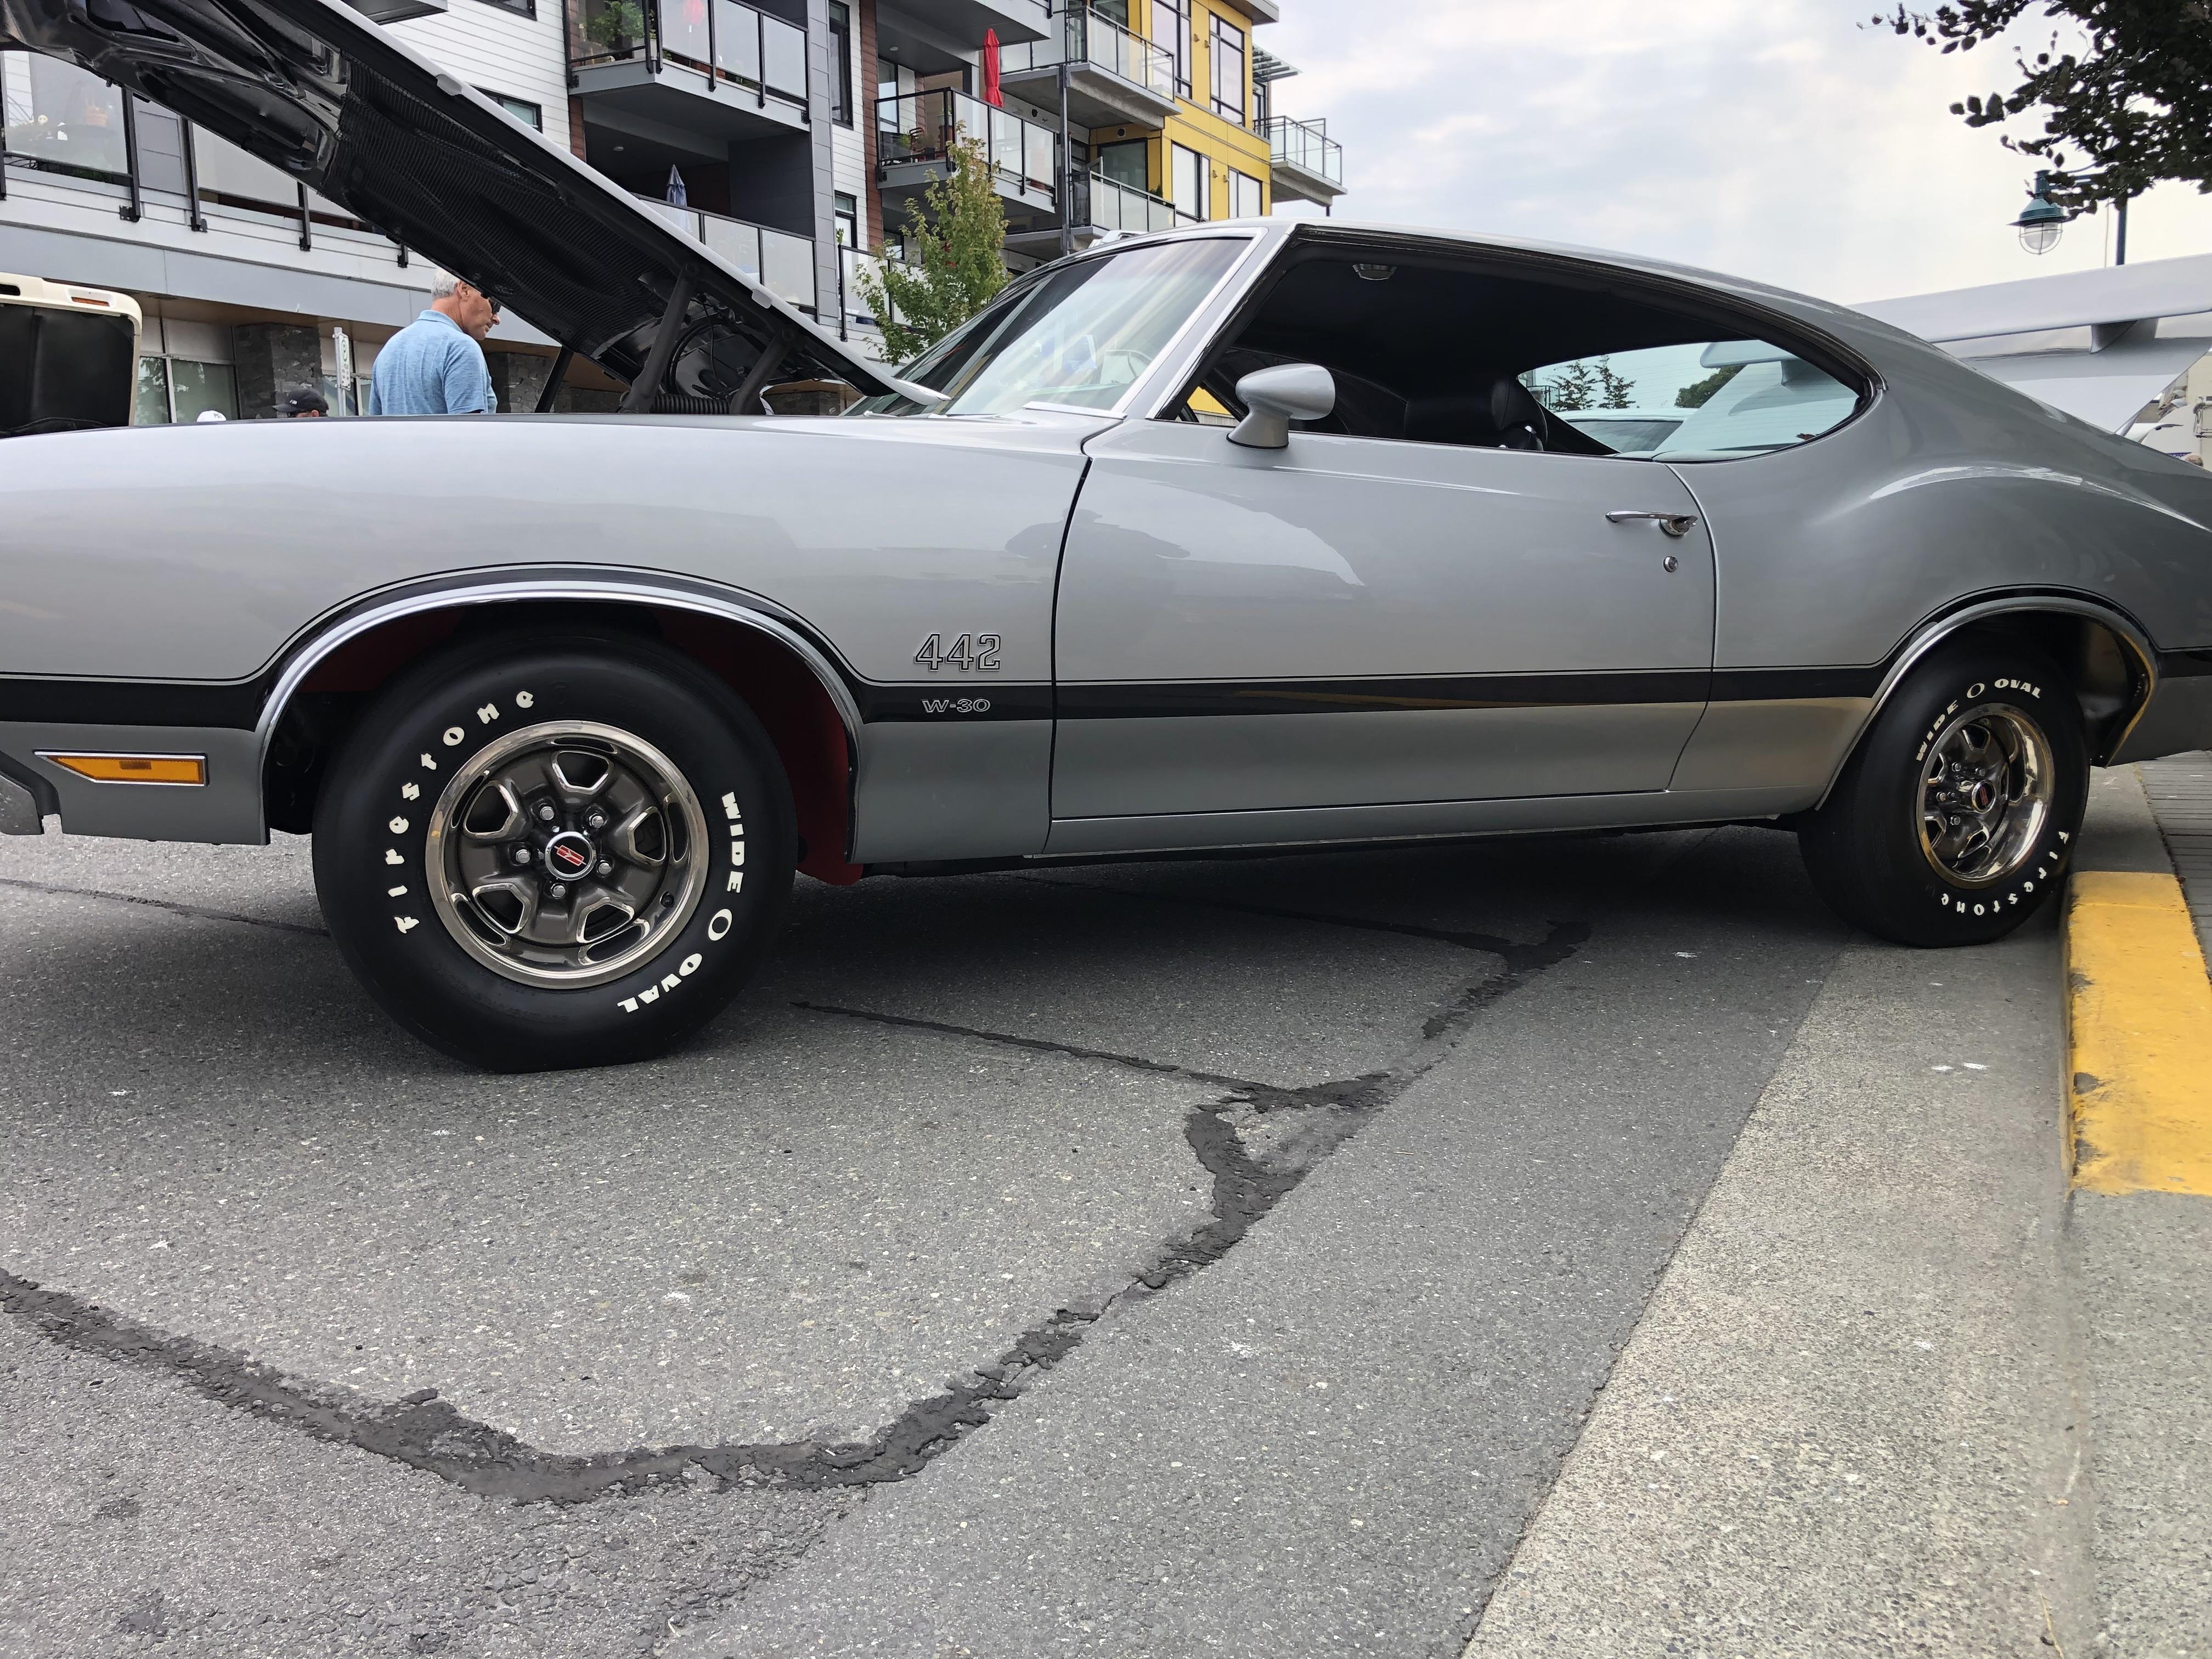
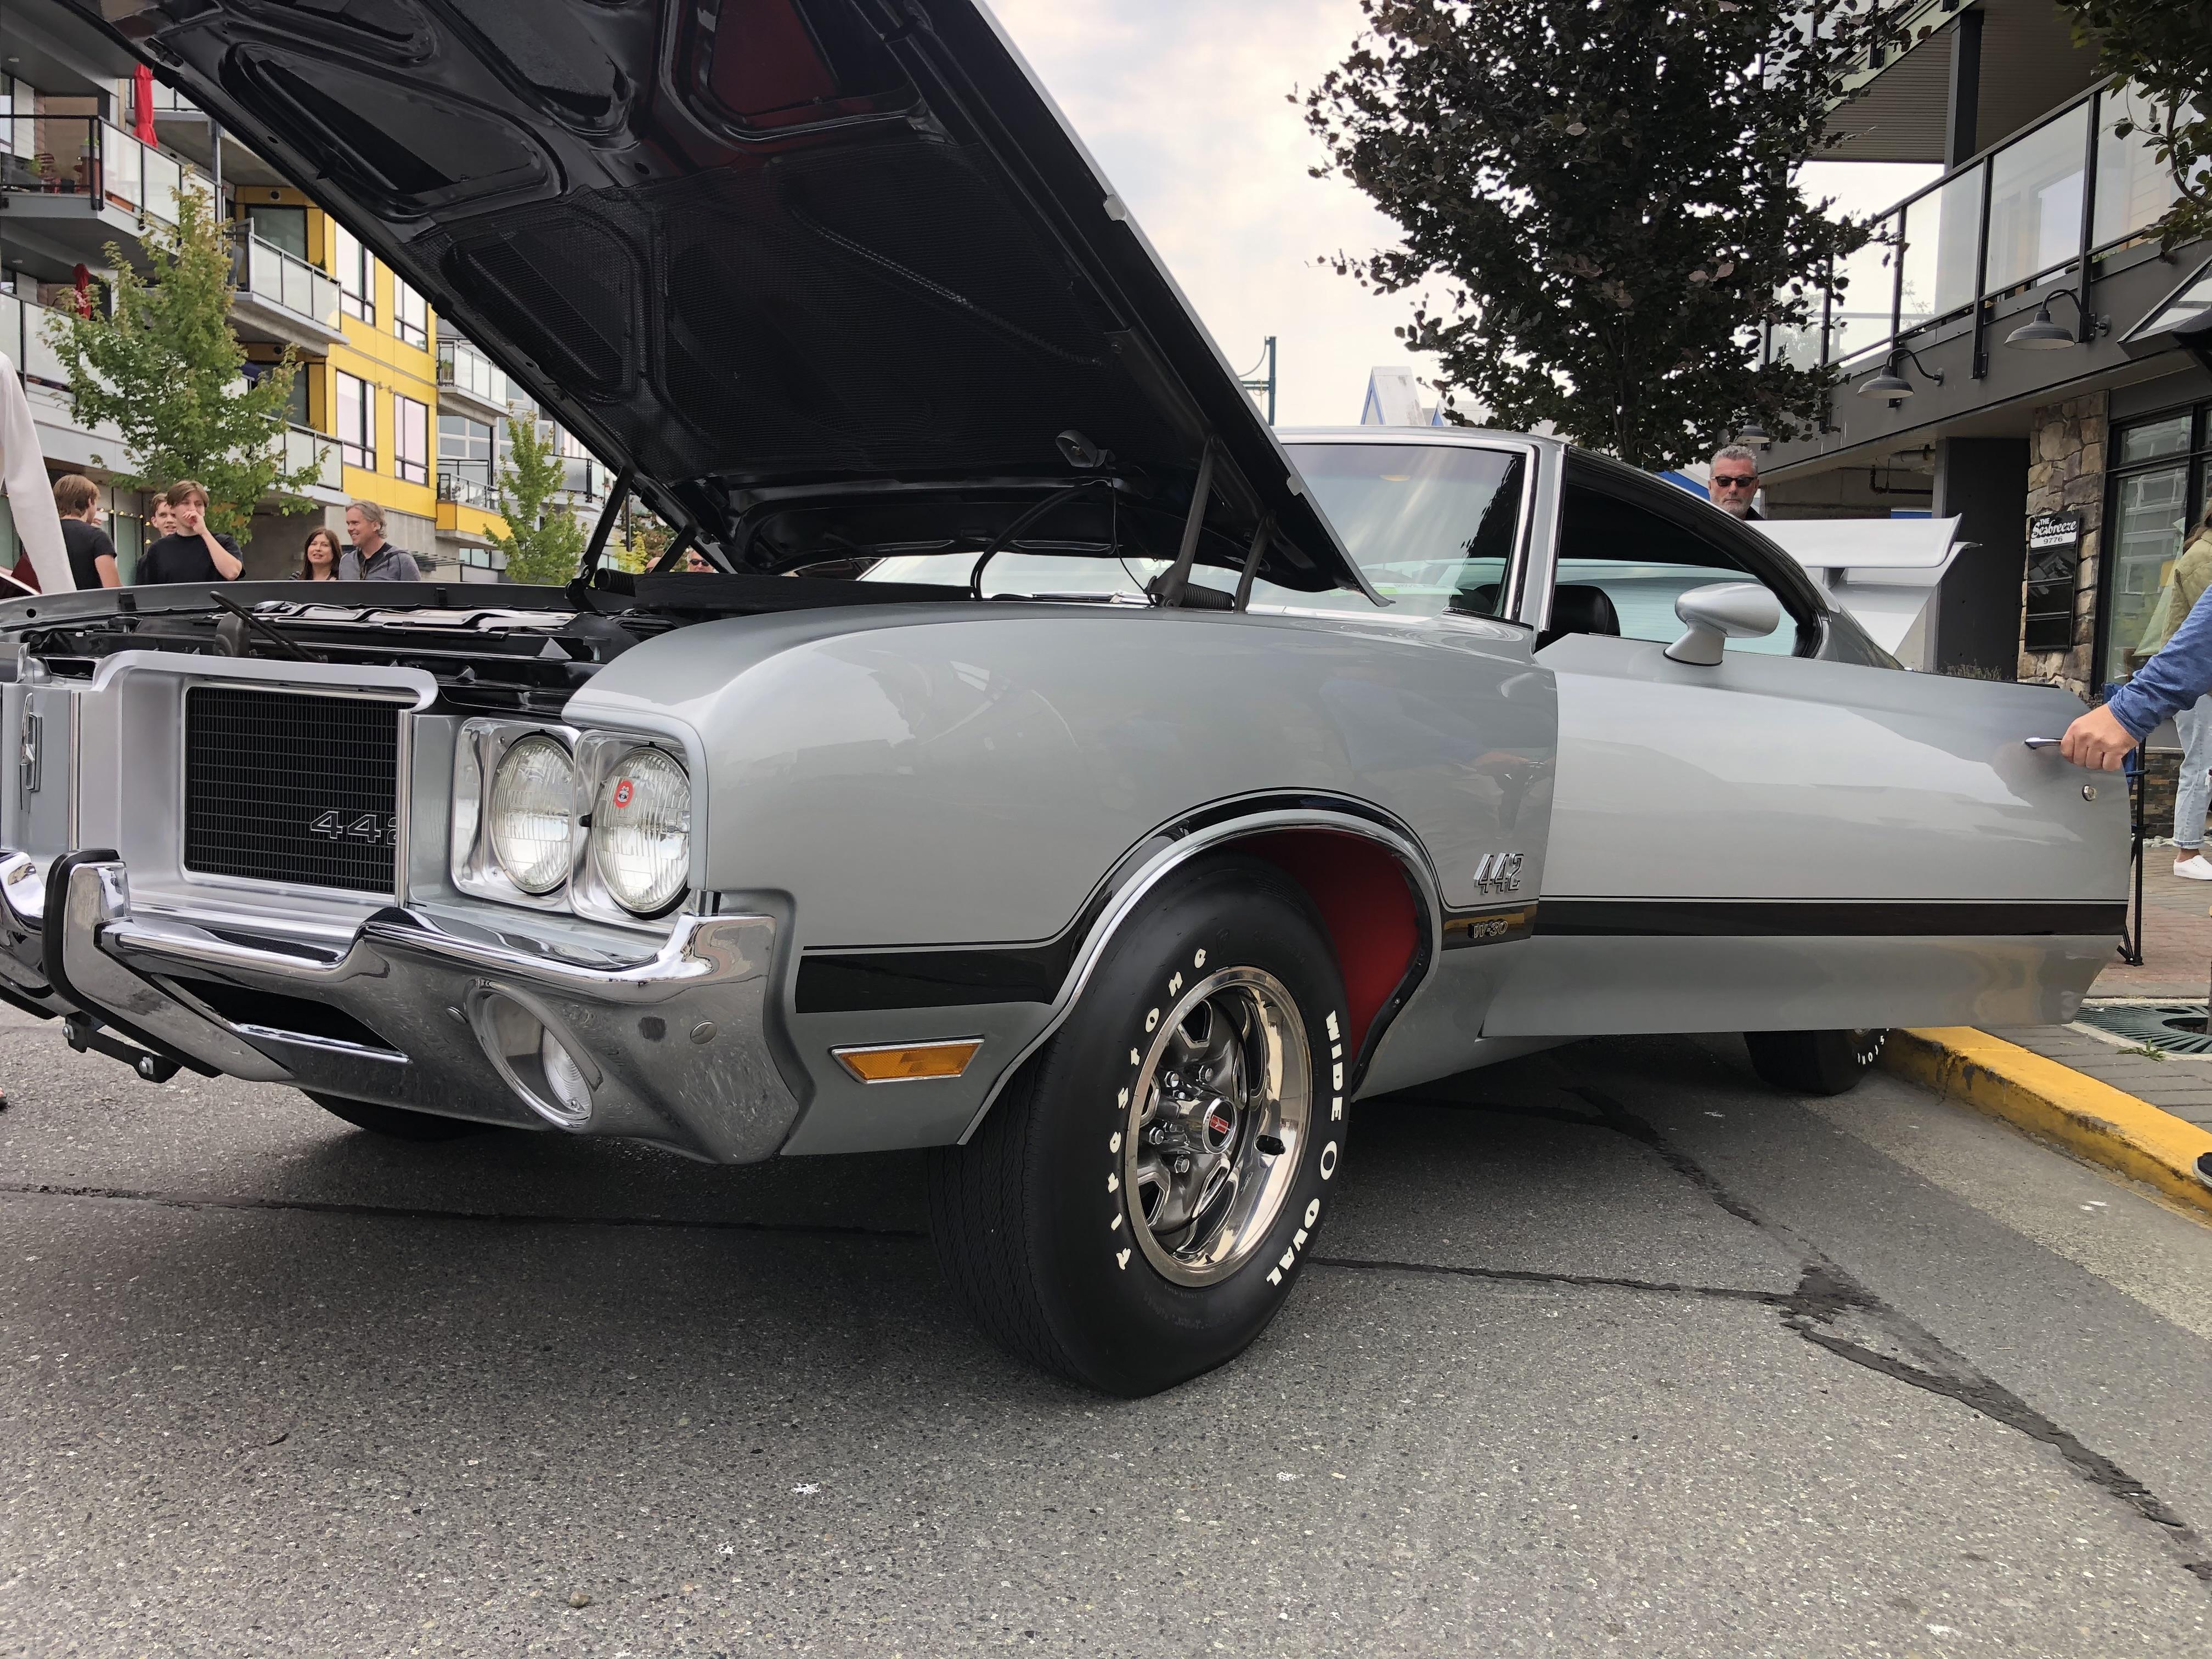
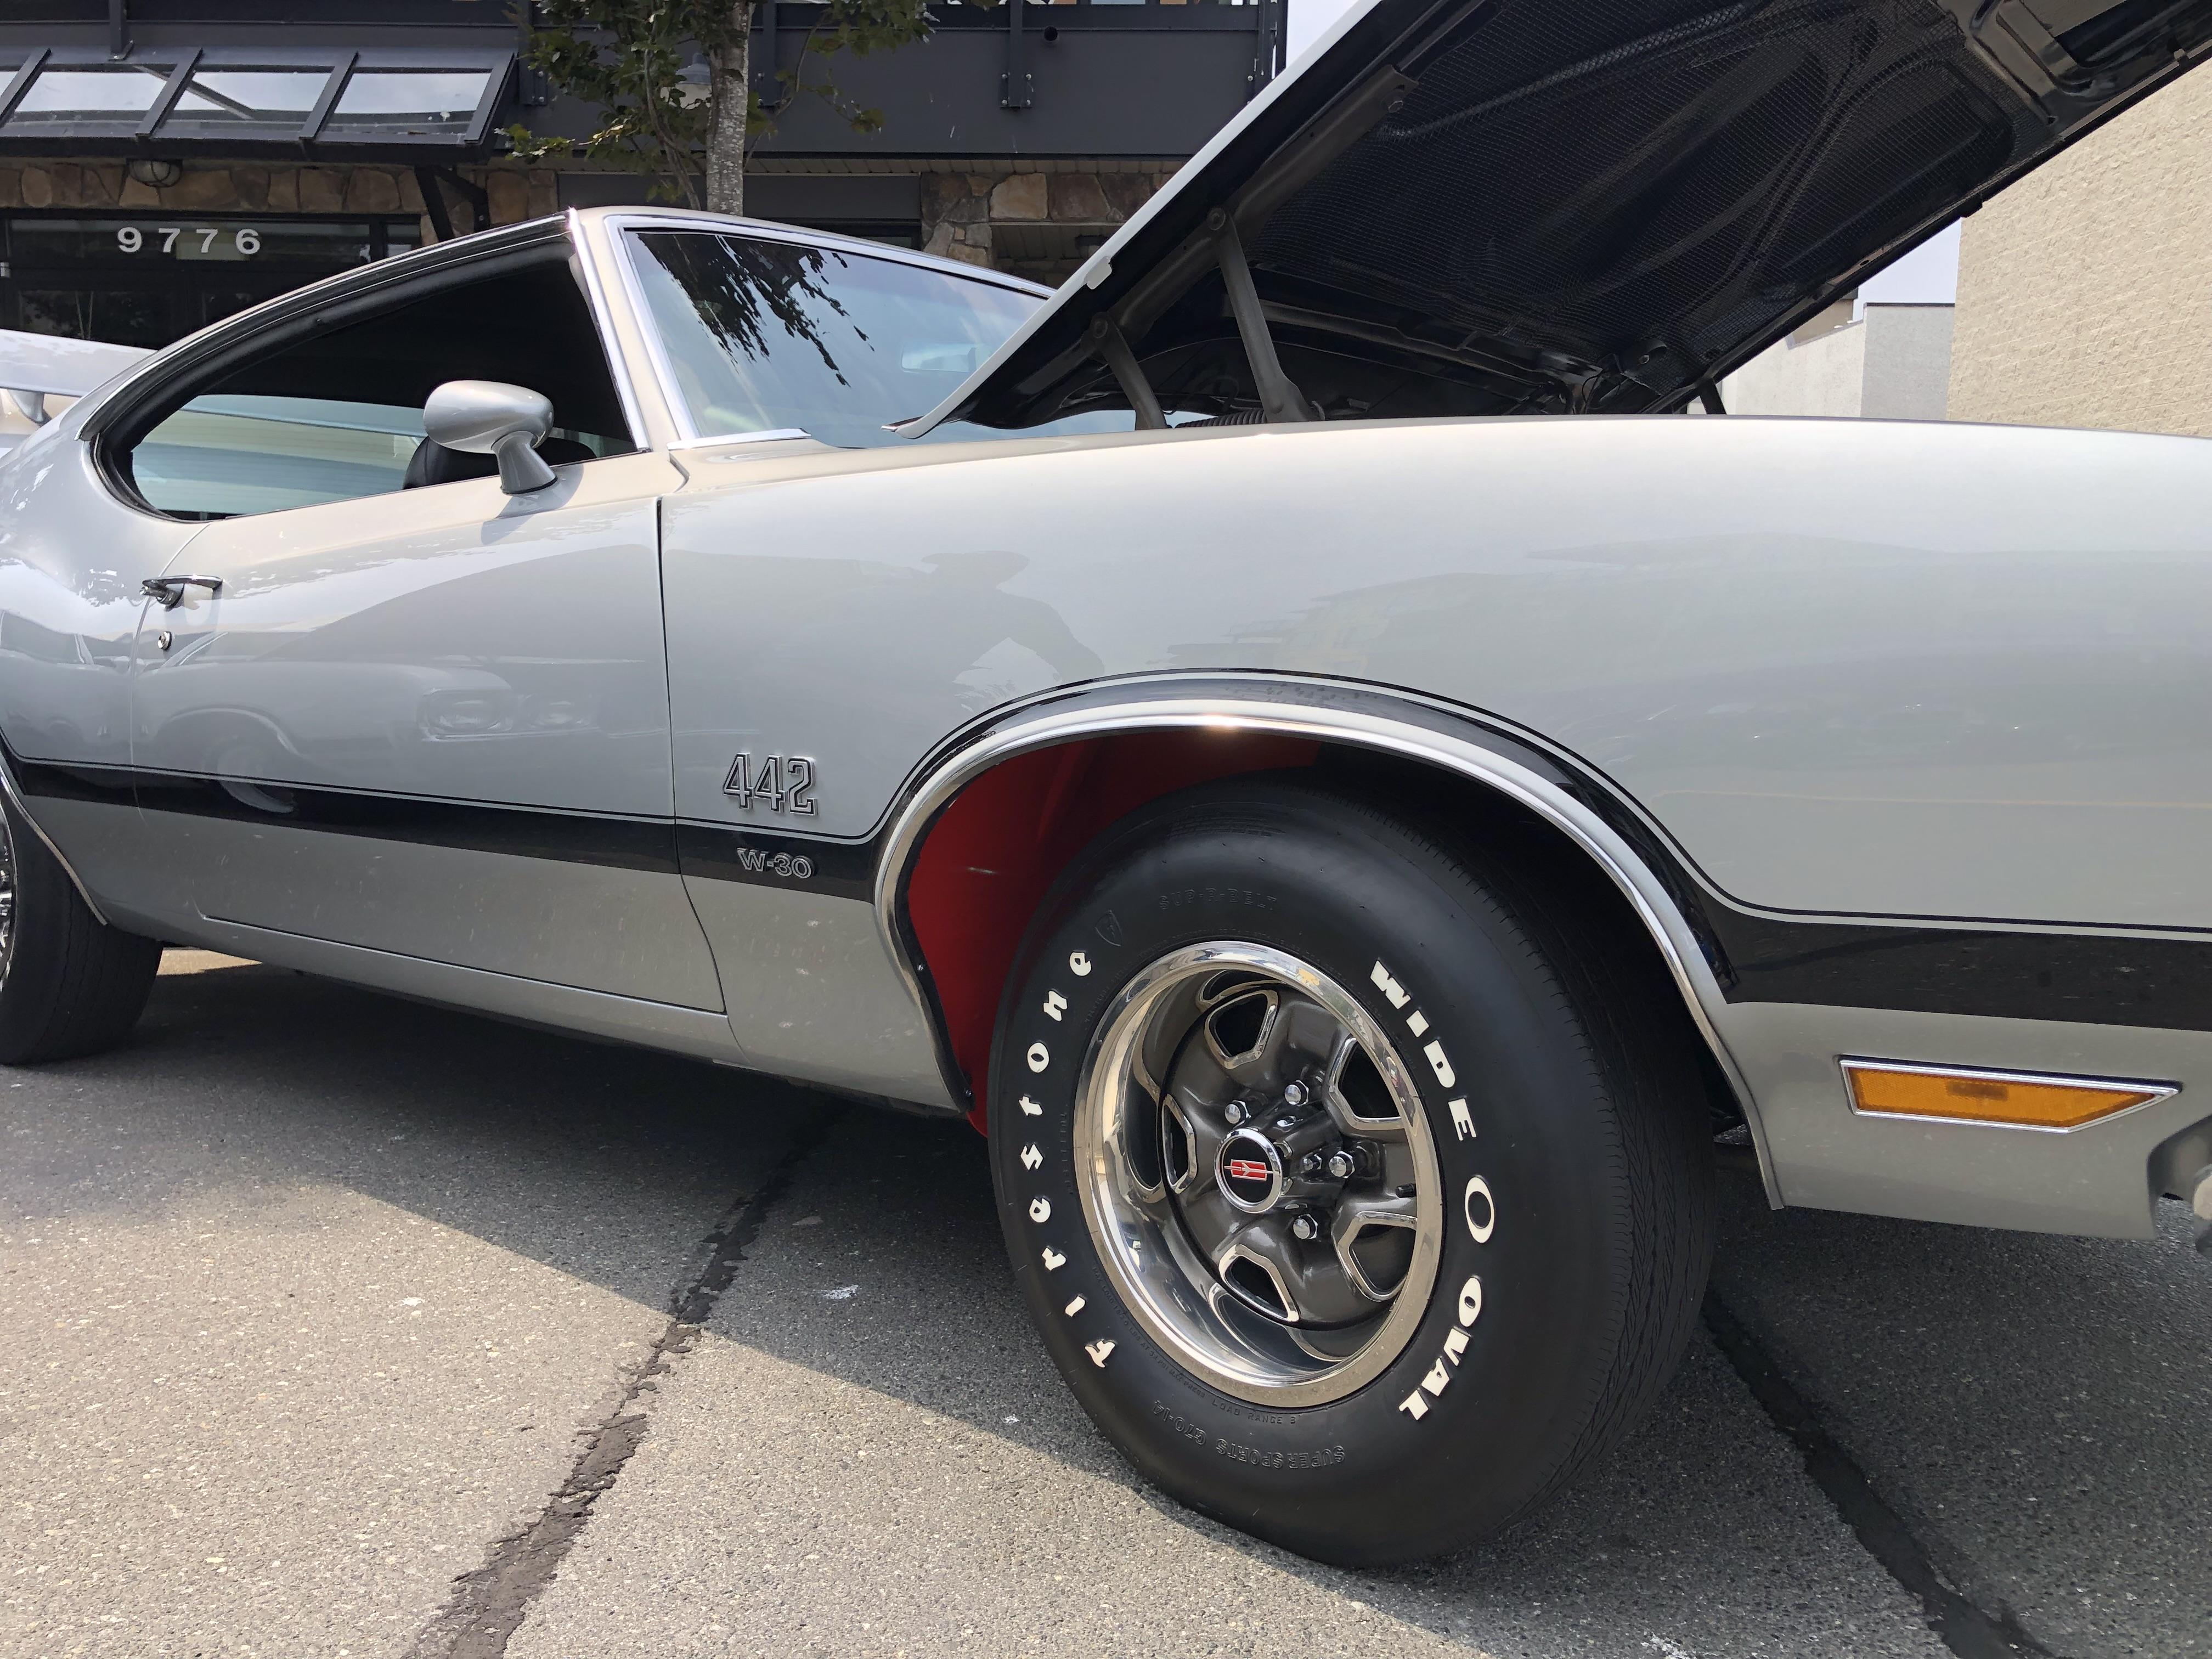
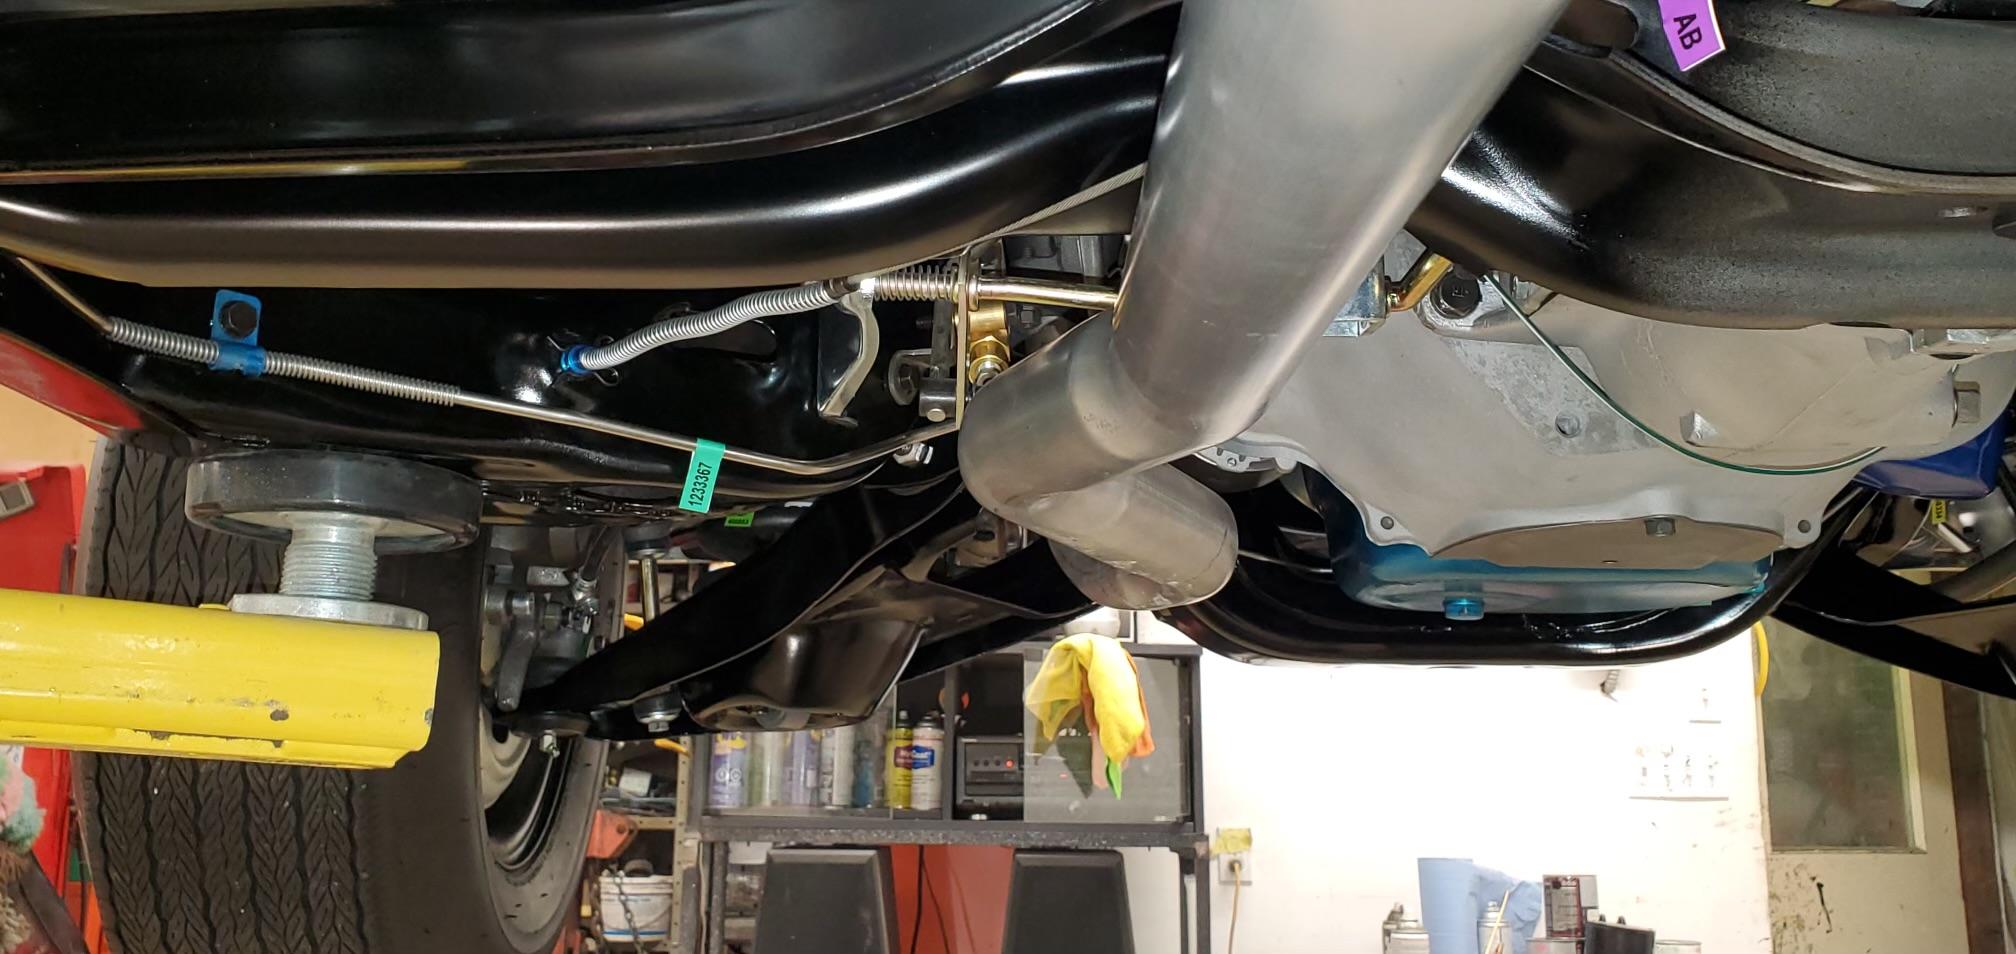
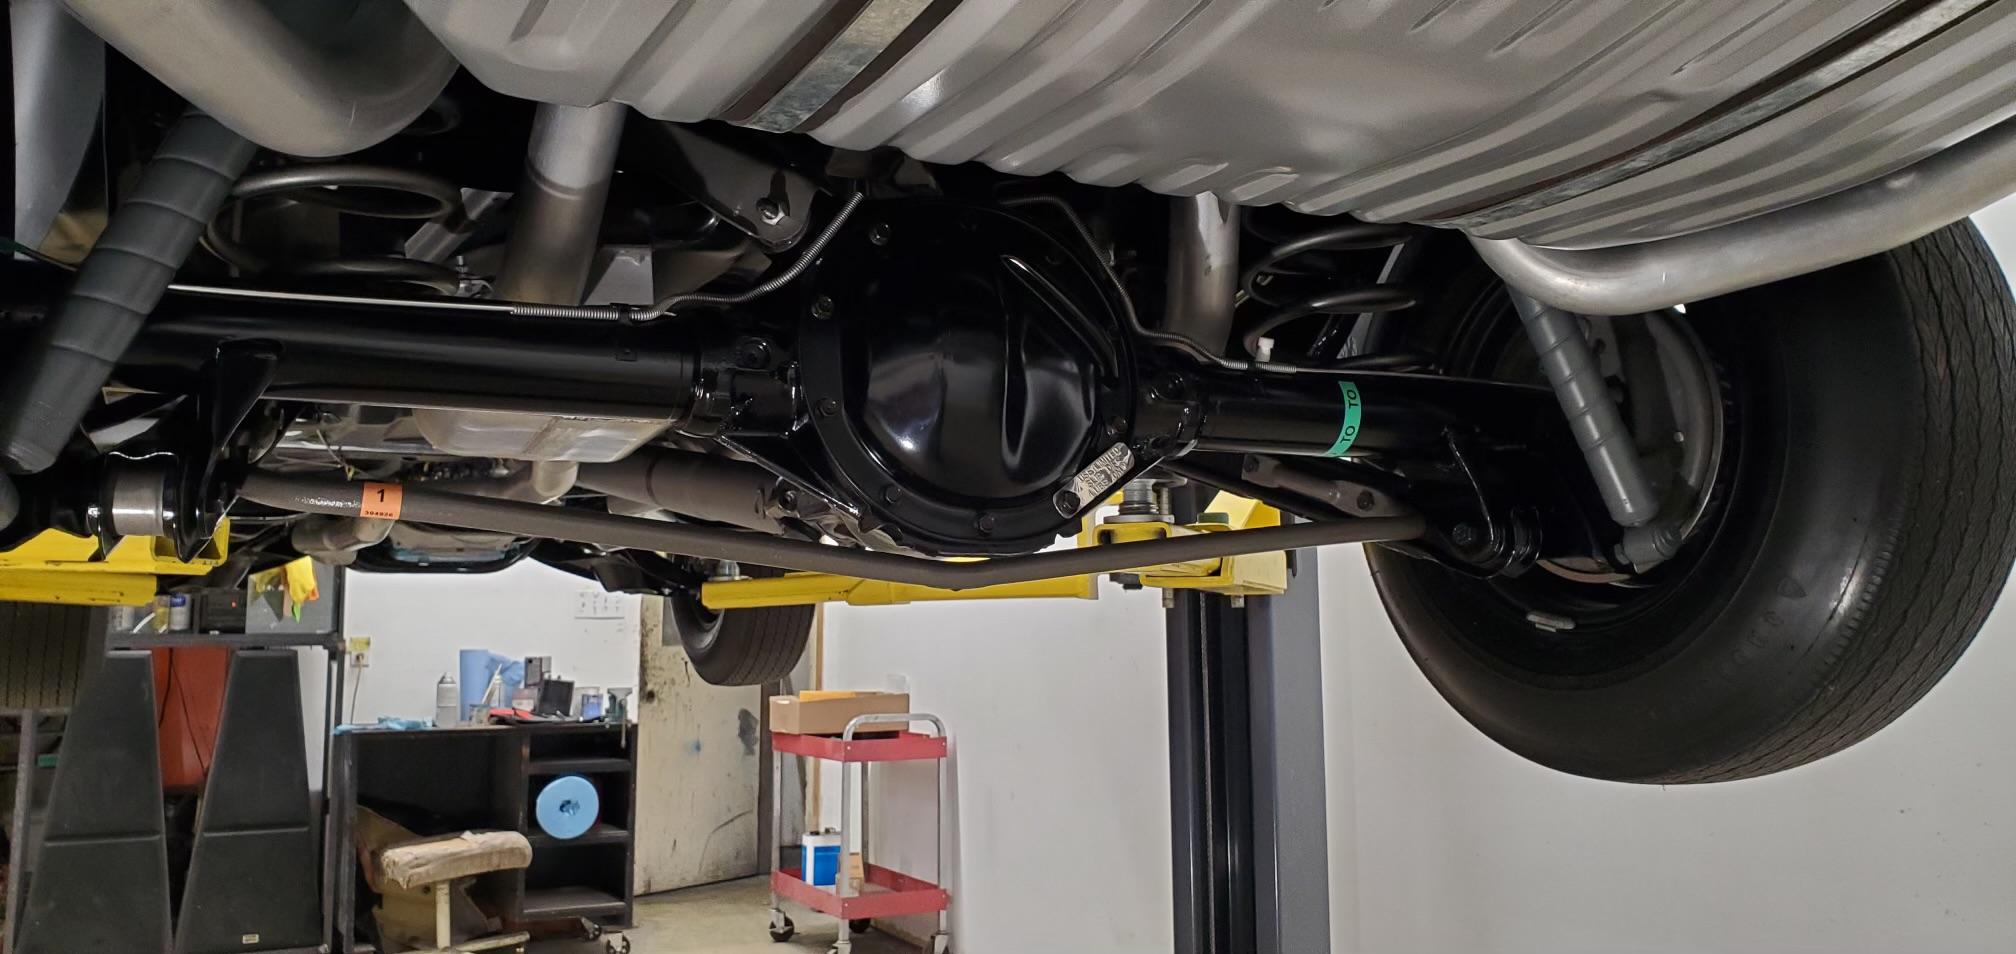
Hello fellow builders, as the title suggests, I have some questions about the new Revell kit. I am going to build a replica of my brother in-law’s car for him as a Christmas gift. He just had a full restoration done, and as you will see it’s pretty spectacular. So I need some input from you smart car guys!! Factory stock, and “out of box” are not my usual type of build… My first question is, does Tamiya have a silver that would be close to the factory silver colour? Maybe Mica silver? I want to get as close as possible, but want to avoid needing an air brush. I am aware of the company’s that make factory colours that require an air brush. Next, is the kit accurate, (I have the North American version, not Revell Germany) and is there anything specific wrong that needs to addressed. Are the decals decent or should I order aftermarket decals. I believe I can get the engine colour at Lordco, but again is there a hobby paint that would be suitable? Is the ride height correct, or is the usual front end too high? I not going to get too carried away with super detail, but plan on doing the basic wiring, and I thought I might add some of the “tags” and “labels” to the chassis. If anyone has any thoughts on replicating those that would be helpful. Lastly, I need some custom decals made both for this build and a future build, any good suggestions? The decal I need for this car is the one in the rear window. I will probably have more questions as I get closer to starting the project. Any input and information will be welcomed. Thanks in advance. cheers, Steve
-
Johan ‘70 Cadillac ElDorado pro touring (low and aggressive)
Steve H replied to Steve H's topic in WIP: Model Cars
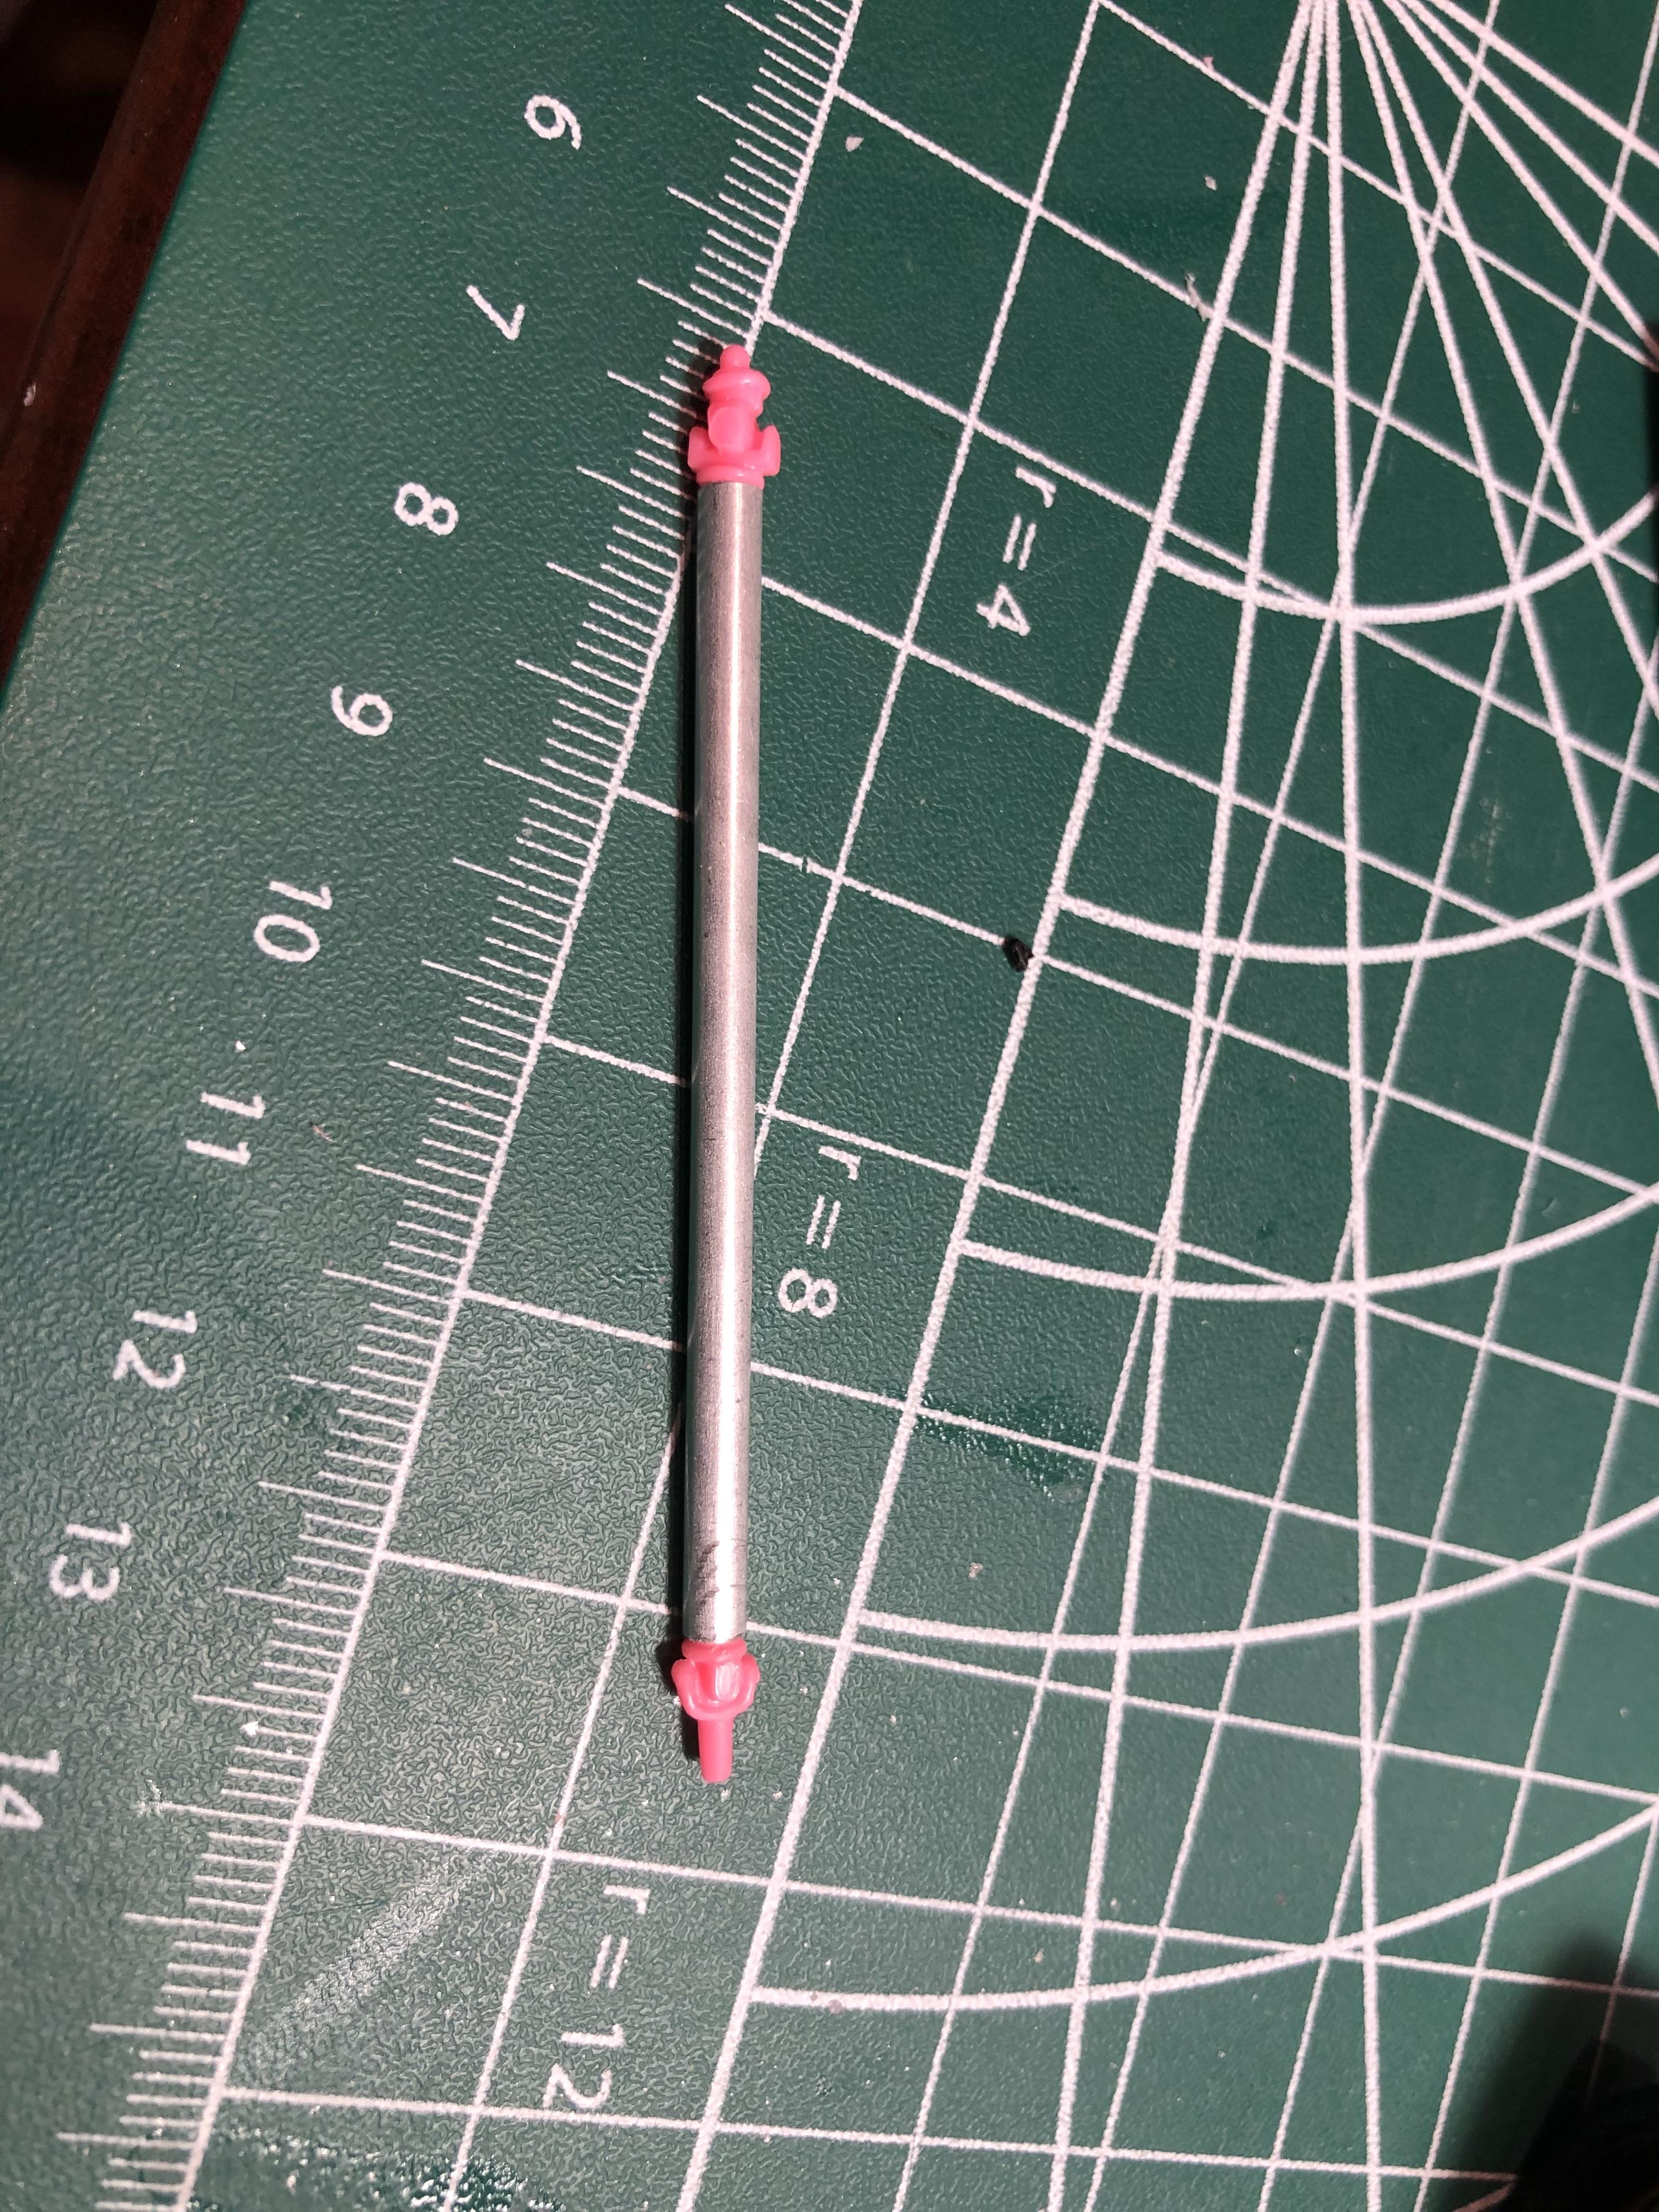
Getting some of the smaller details sorted out now. Disc brakes are painted and mounted. Next was the track bar. Rather than clean the mold seams, I just cut the ends free and added a piece of aluminum tubing. Bringing that work together, wheels mounted, track bar installed, added a fuel pump and fuel line while I was at it. For the drive shaft, I used the u-joints from the Hay’s pro street T-Bird and used aluminium tubing to connect them. The paint is still drying on that… I also got some small bits painted and prepared for the interior, but nothing worth showing at this point. Thanks for having a look!
- 220 replies
-
- 5
-
-
- johan
- pro touring
- (and 1 more)
-
Johan ‘70 Cadillac ElDorado pro touring (low and aggressive)
Steve H replied to Steve H's topic in WIP: Model Cars
Thanks Keith! It is starting to come together which has me highly motivated to bring it to the finish line. Gotta love test spoons, they sure help. Thank you Claude. This definitely won’t be a popular colour scheme for some, but I’m pleased with how it’s looking. Thank you Anton!! -
Johan ‘70 Cadillac ElDorado pro touring (low and aggressive)
Steve H replied to Steve H's topic in WIP: Model Cars
Yep, mock time…
- 220 replies
-
- 7
-
-
- johan
- pro touring
- (and 1 more)
-
Who doesn't love a mock-up? Let's see yours!
Steve H replied to Belairconvertable's topic in WIP: Model Cars
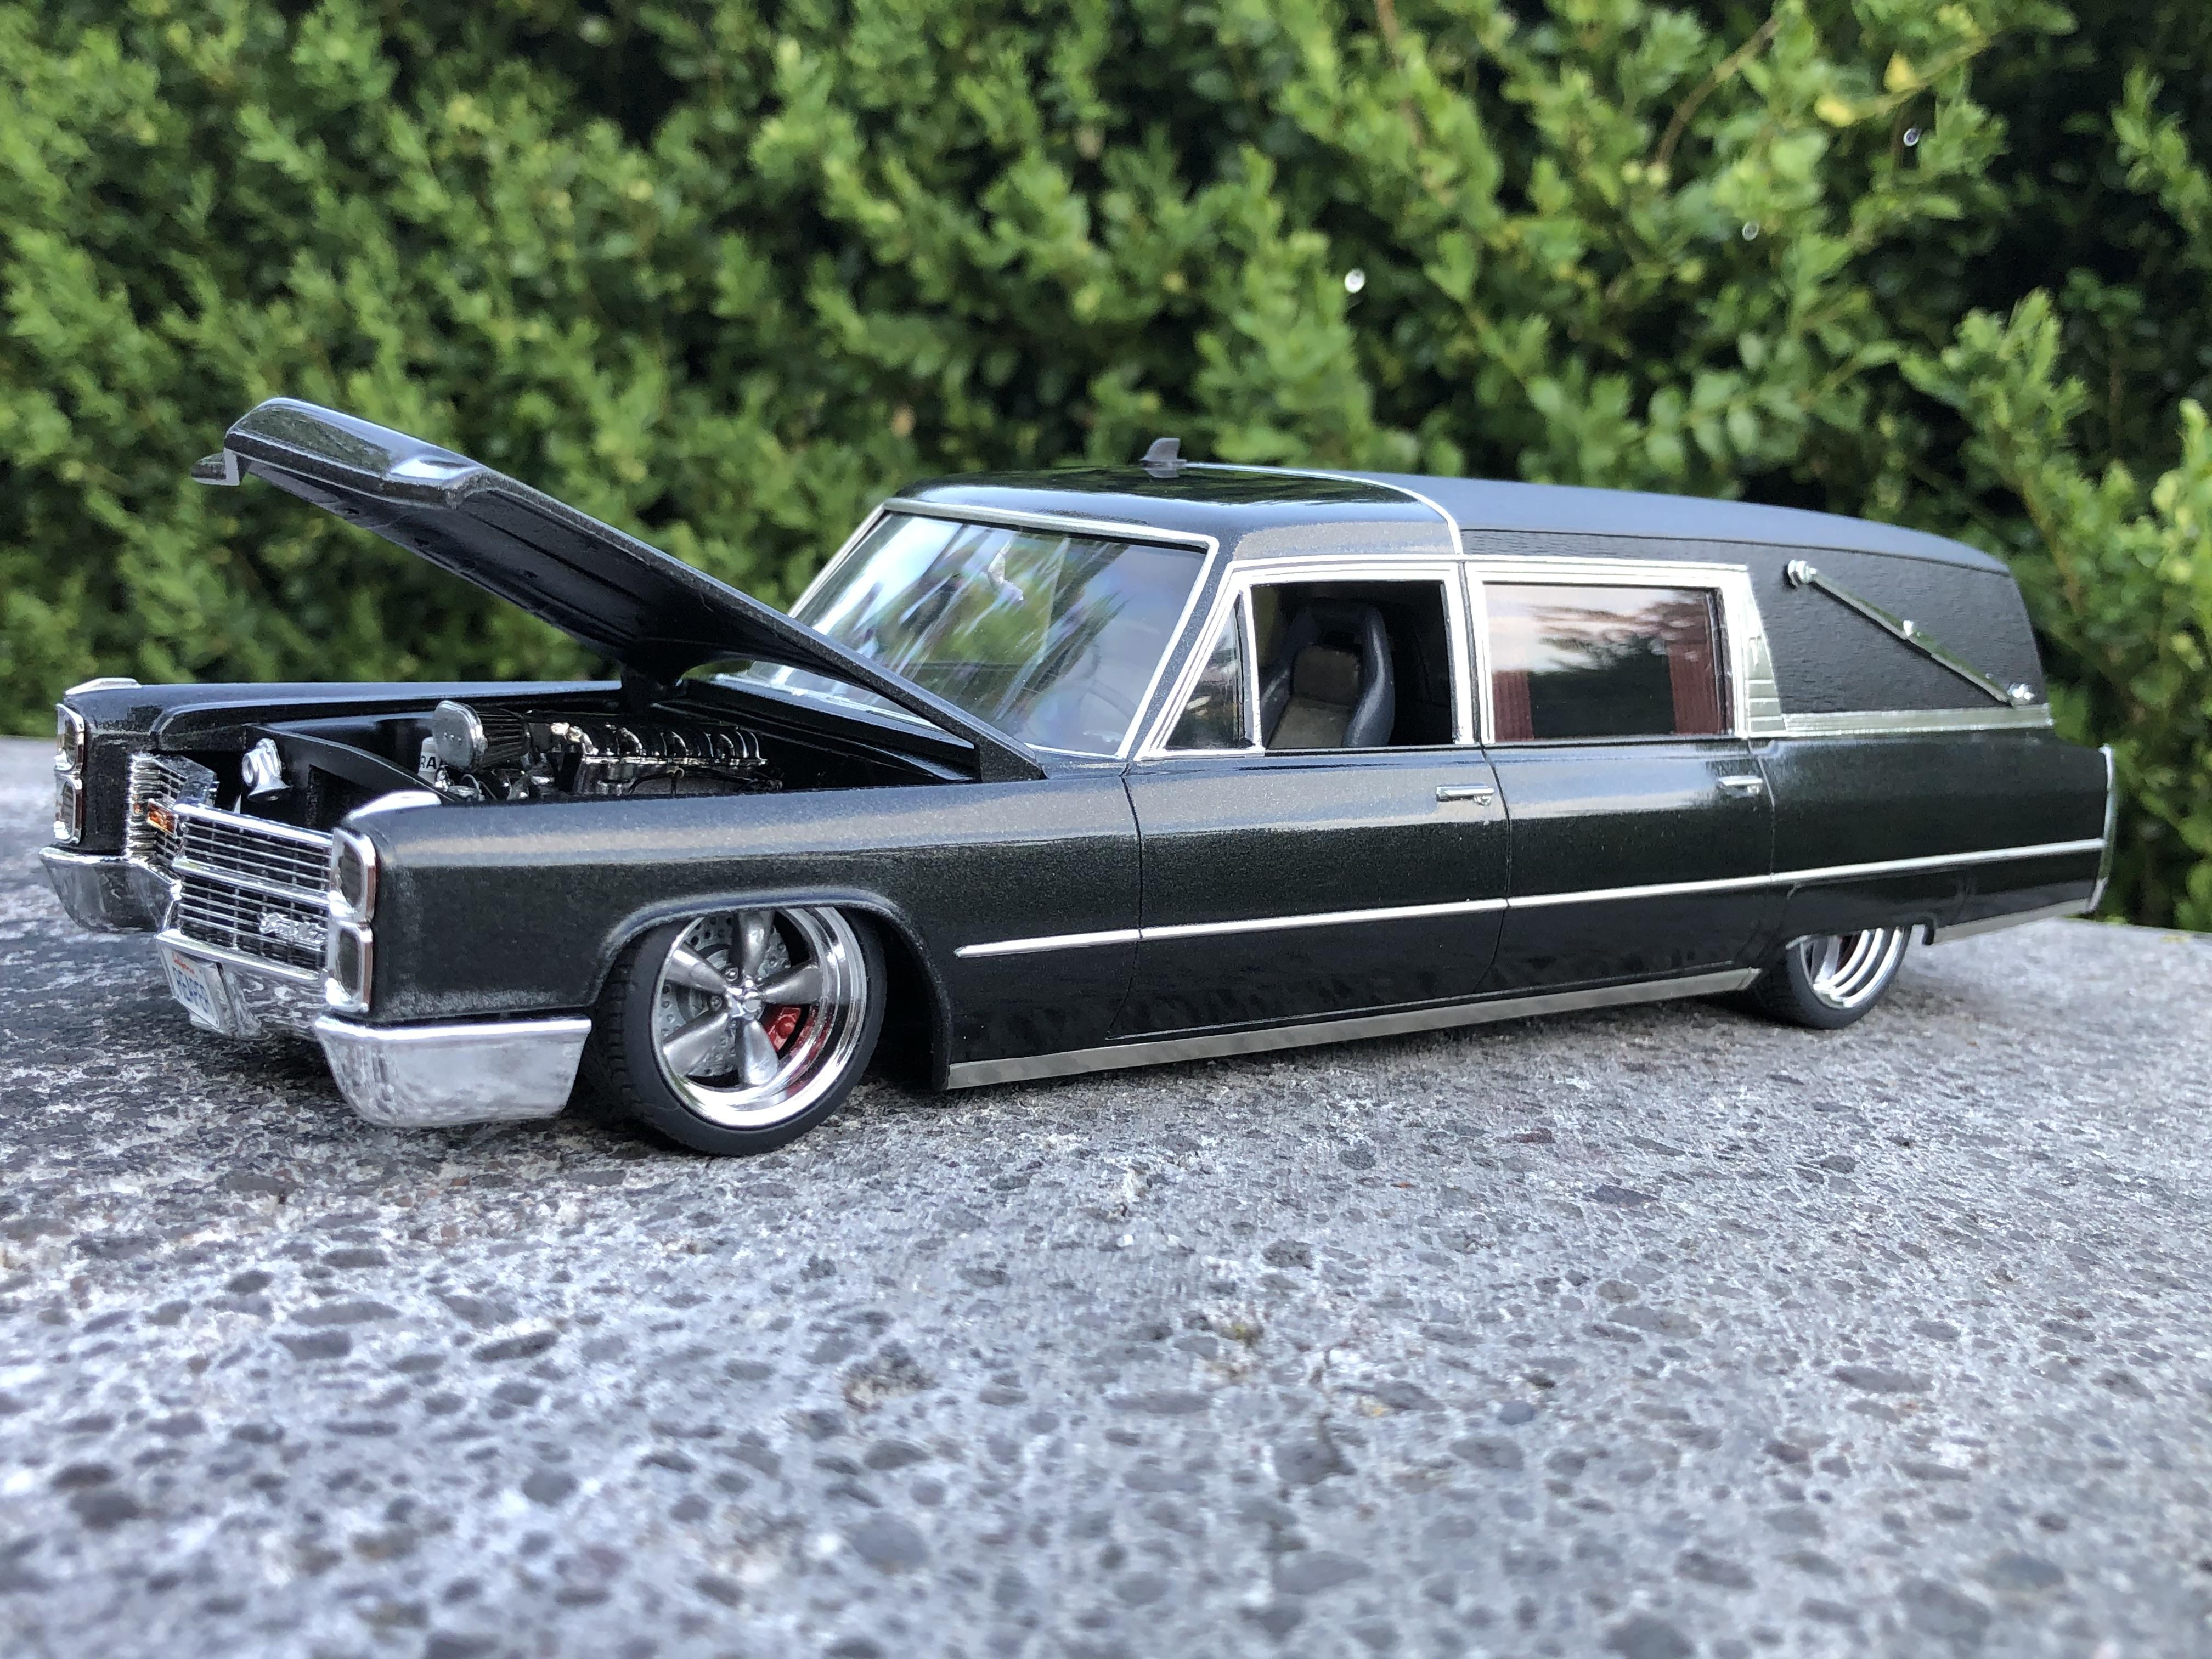
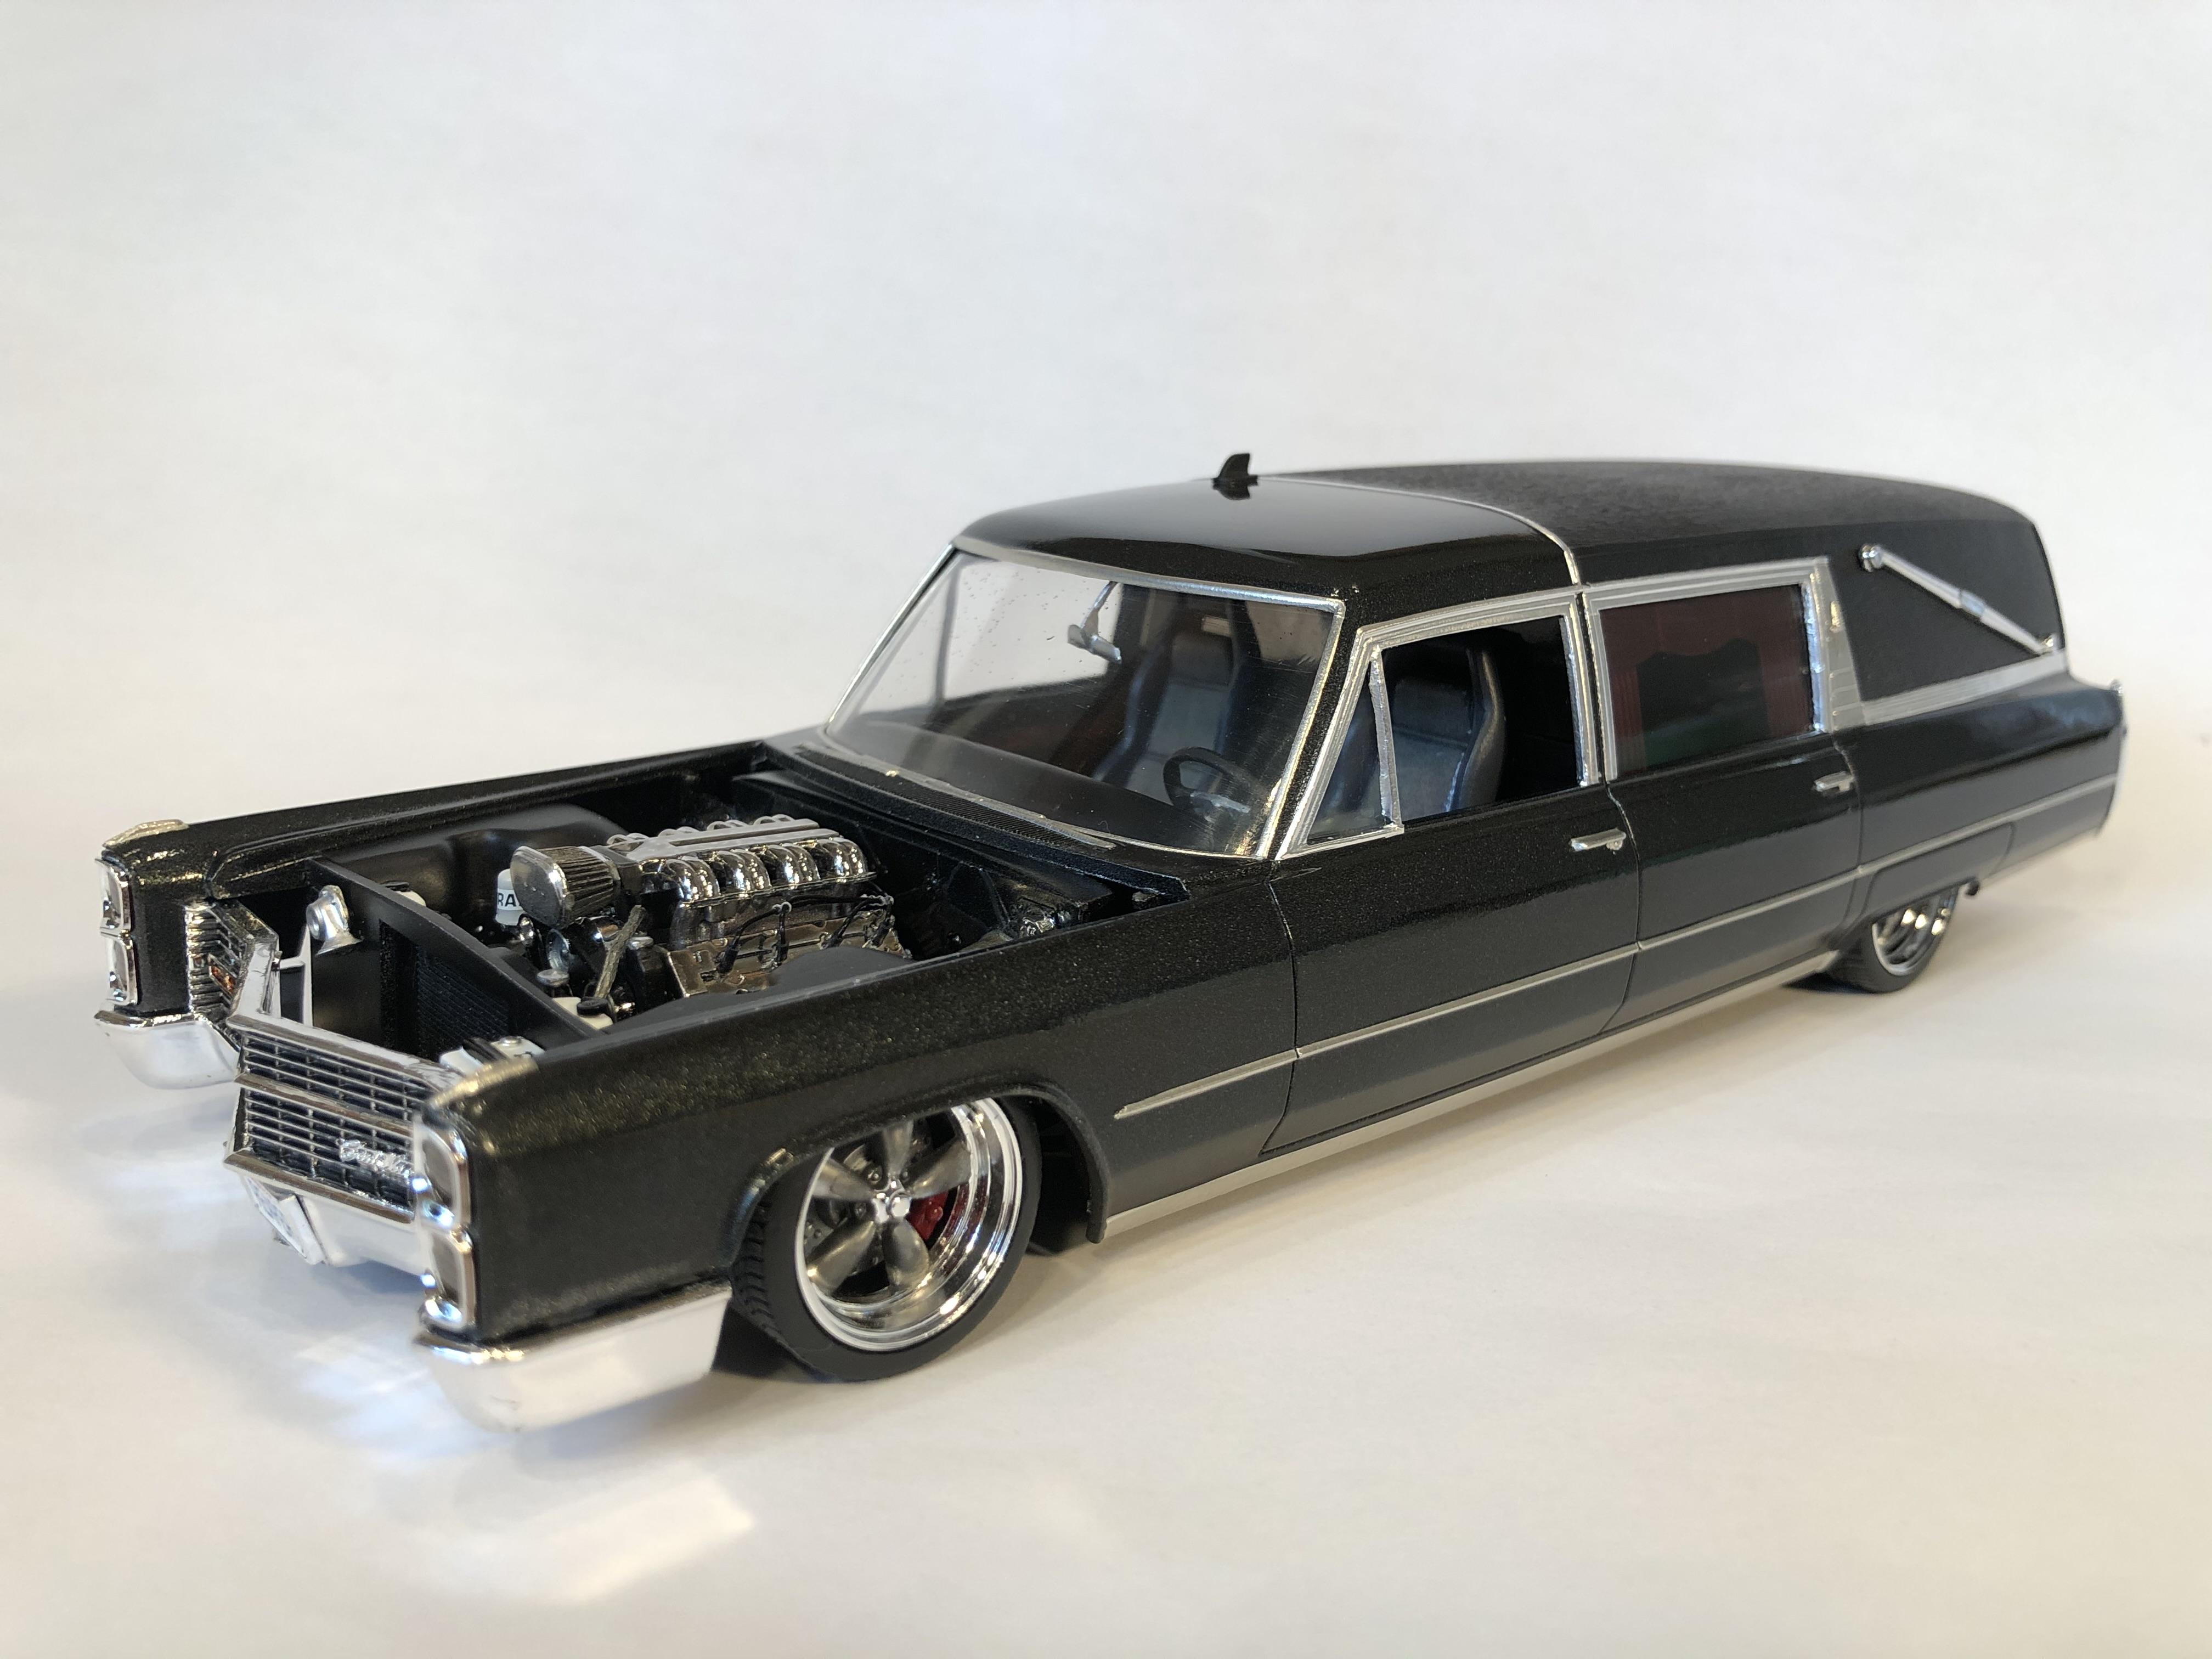
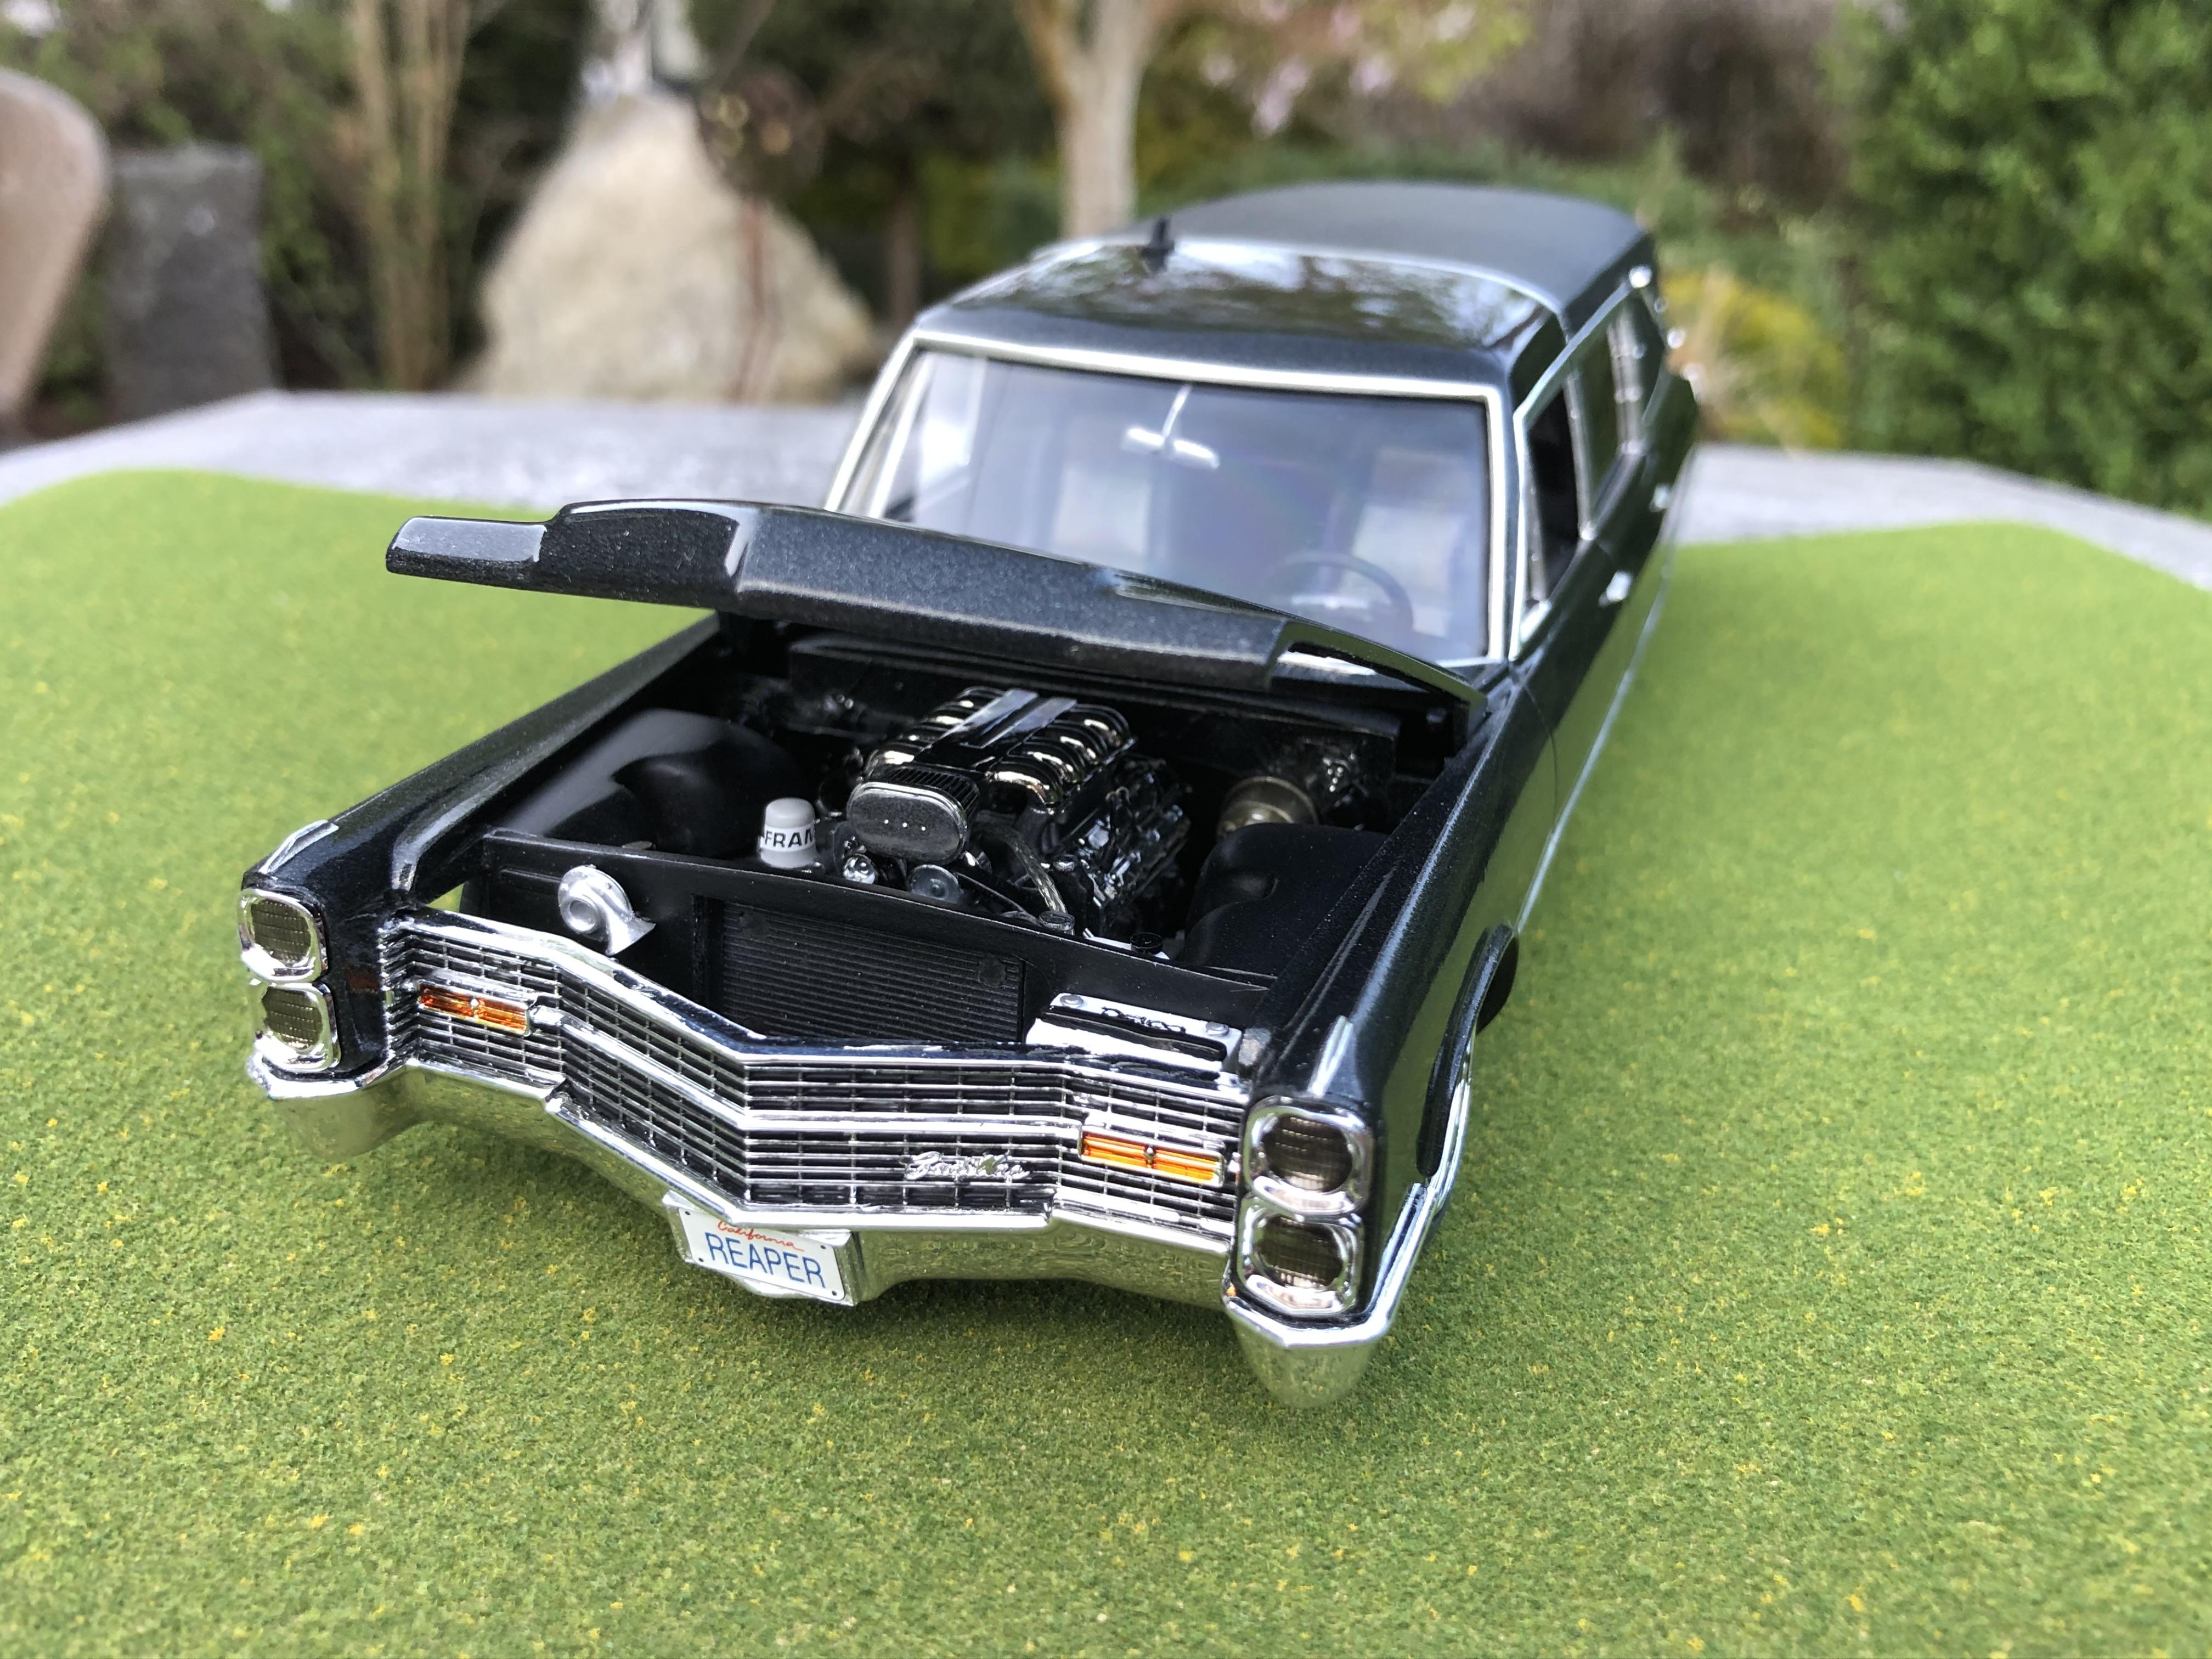
Finally getting closer to the finish line with my Caddy build…
-
1962 Rolls Royce Silver Cloud II by Minicraft Models: WIP
Steve H replied to David G.'s topic in WIP: Model Cars
Lots of great work here as always David. The service trays are a nice touch. Ueschi makes some beautiful burl wood decals if you are interested , they have many types of wood grains actually. Your paint work looks great, just offering another idea that you might find useful. Cheers, Steve -
Very crisp build Tom! Nice work on the “rub strips” very effective and adds some nice detail. The colour scheme looks great together. Cheers, Steve
-
1950 Chevrolet 3100 Pickup
Steve H replied to Zippi's topic in WIP: Model Trucks: Pickups, Vans, SUVs, Light Commercial
Great work Bob! The trim pieces you added look spot on. That colour combo appears to be a perfect match to the photos, and will be a great looking combo. Cheers, Steve -
Johan ‘70 Cadillac ElDorado pro touring (low and aggressive)
Steve H replied to Steve H's topic in WIP: Model Cars
Hi Bill, I thought maybe I had lost you cause I was taking so long… Thanks for checking in again sir. Finally got those Cadillac valve covers on!! Cheers, Steve -
Johan ‘70 Cadillac ElDorado pro touring (low and aggressive)
Steve H replied to Steve H's topic in WIP: Model Cars
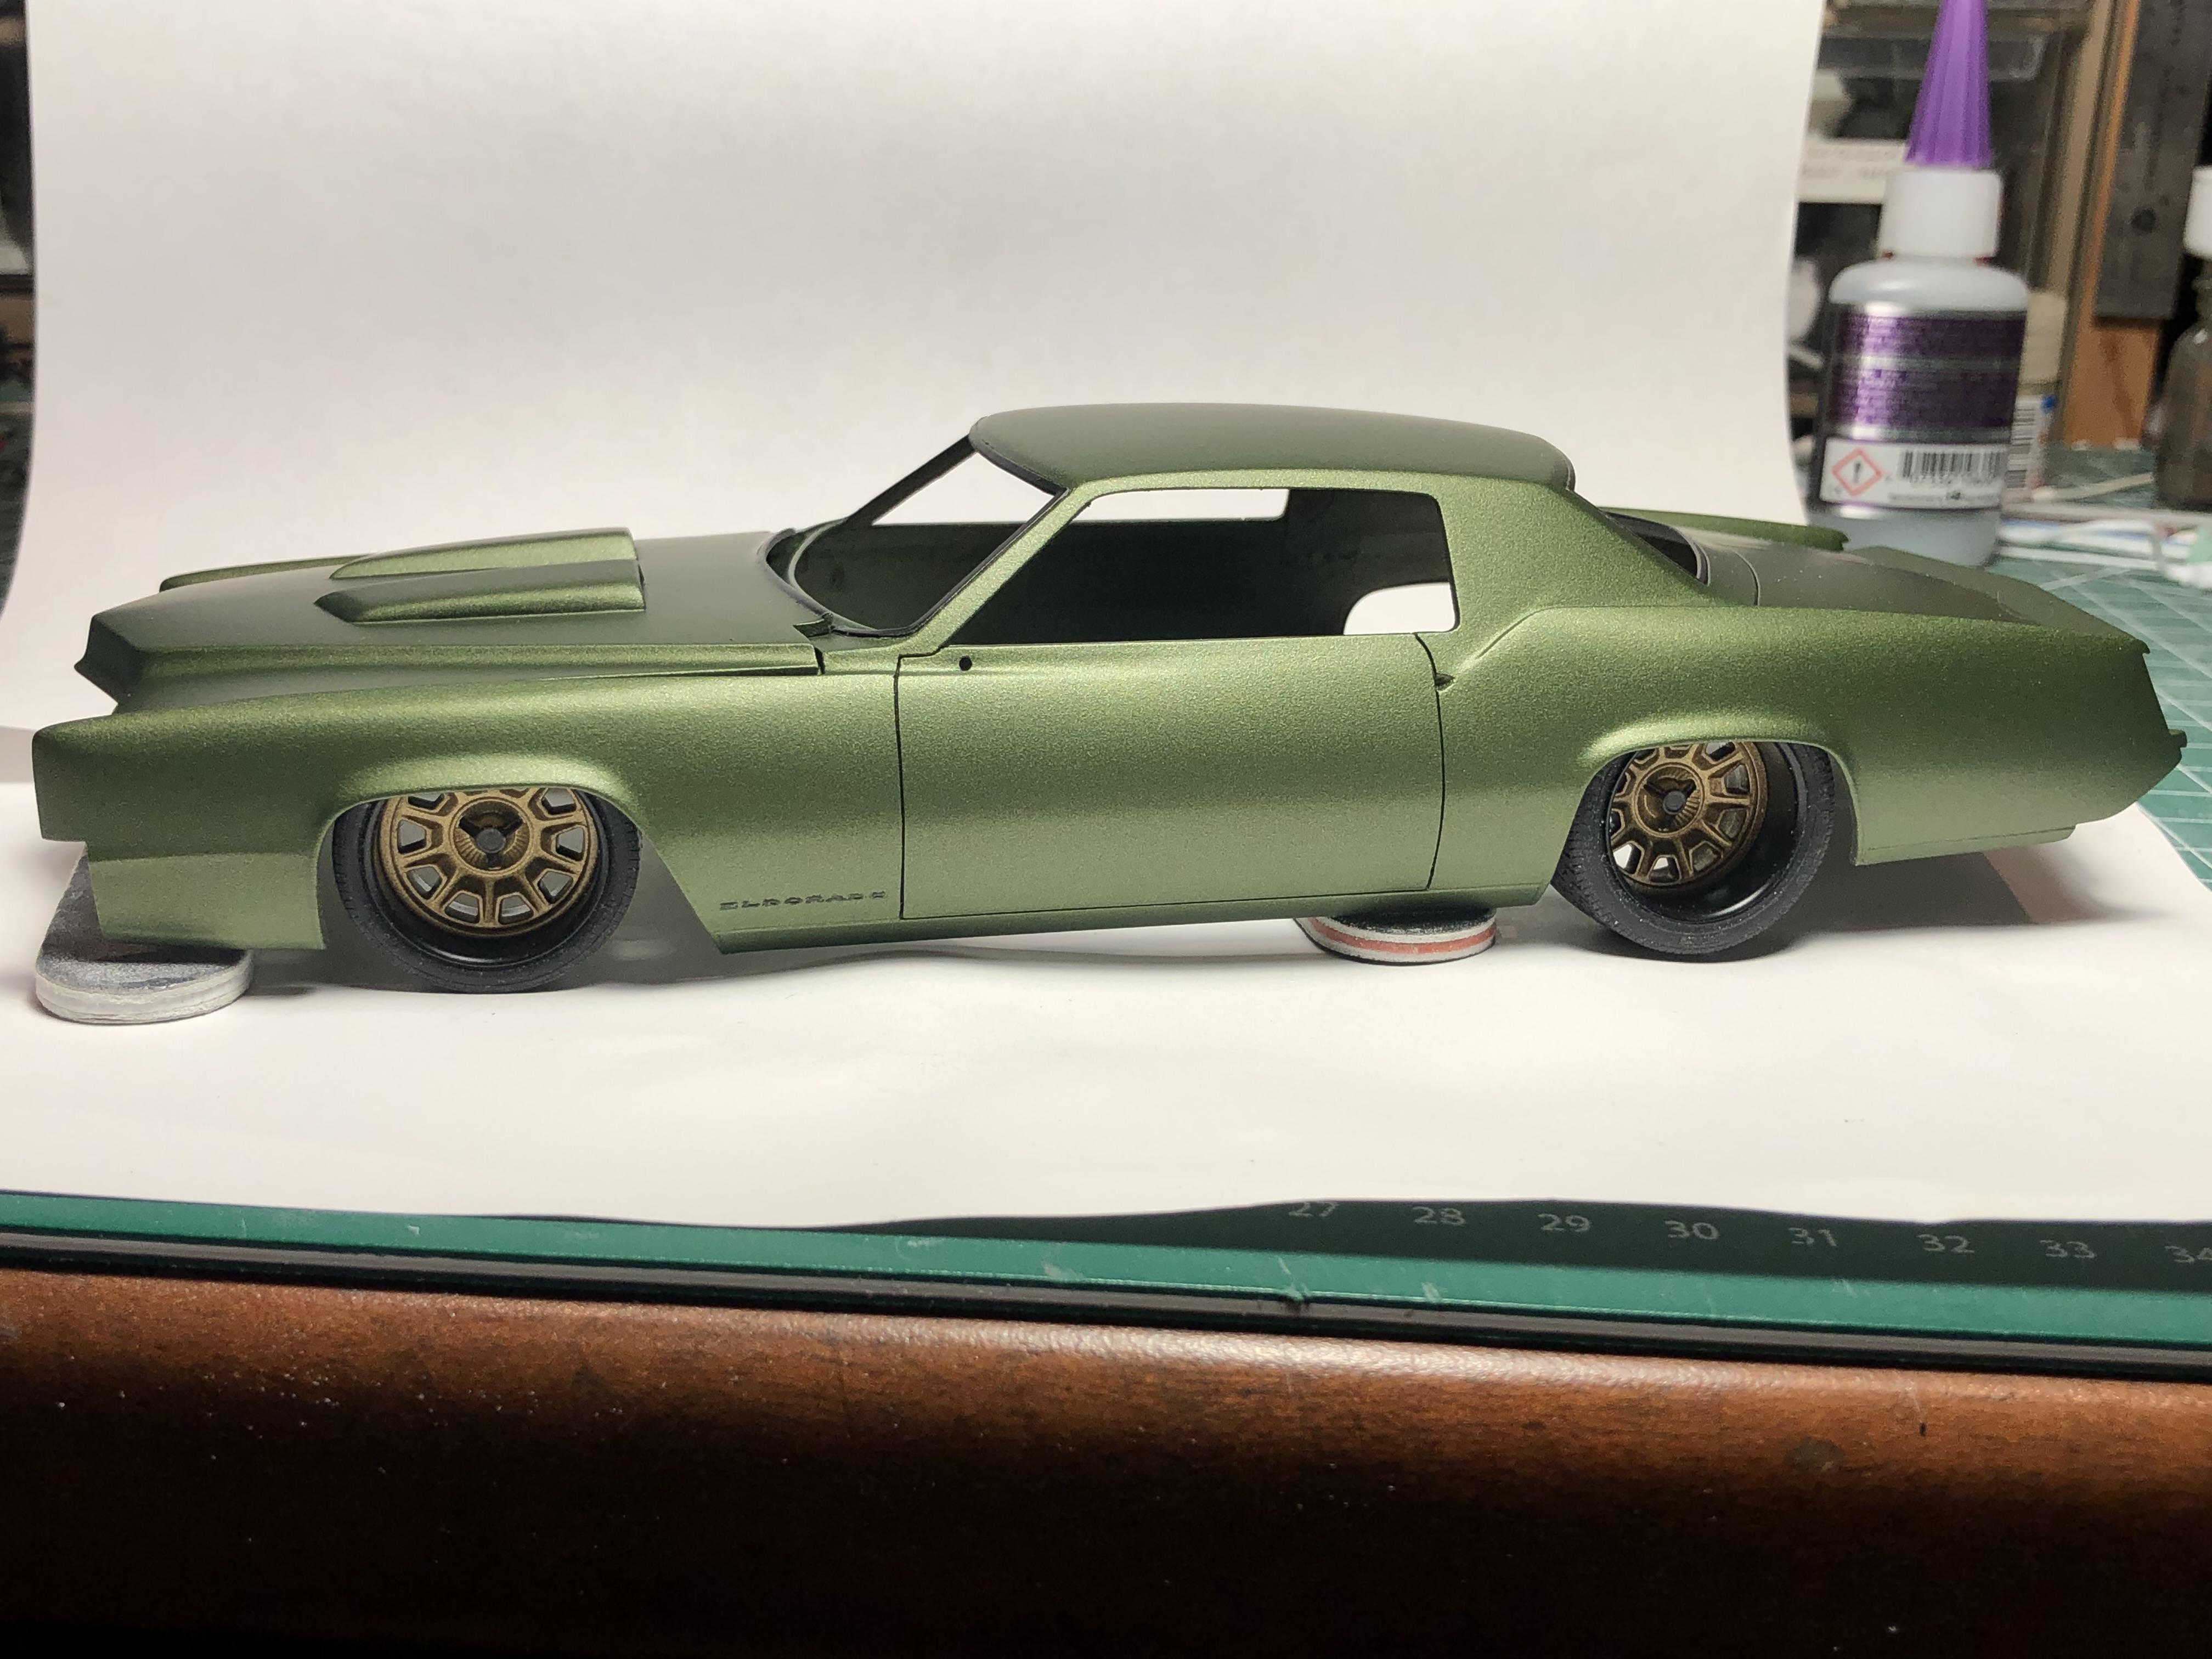
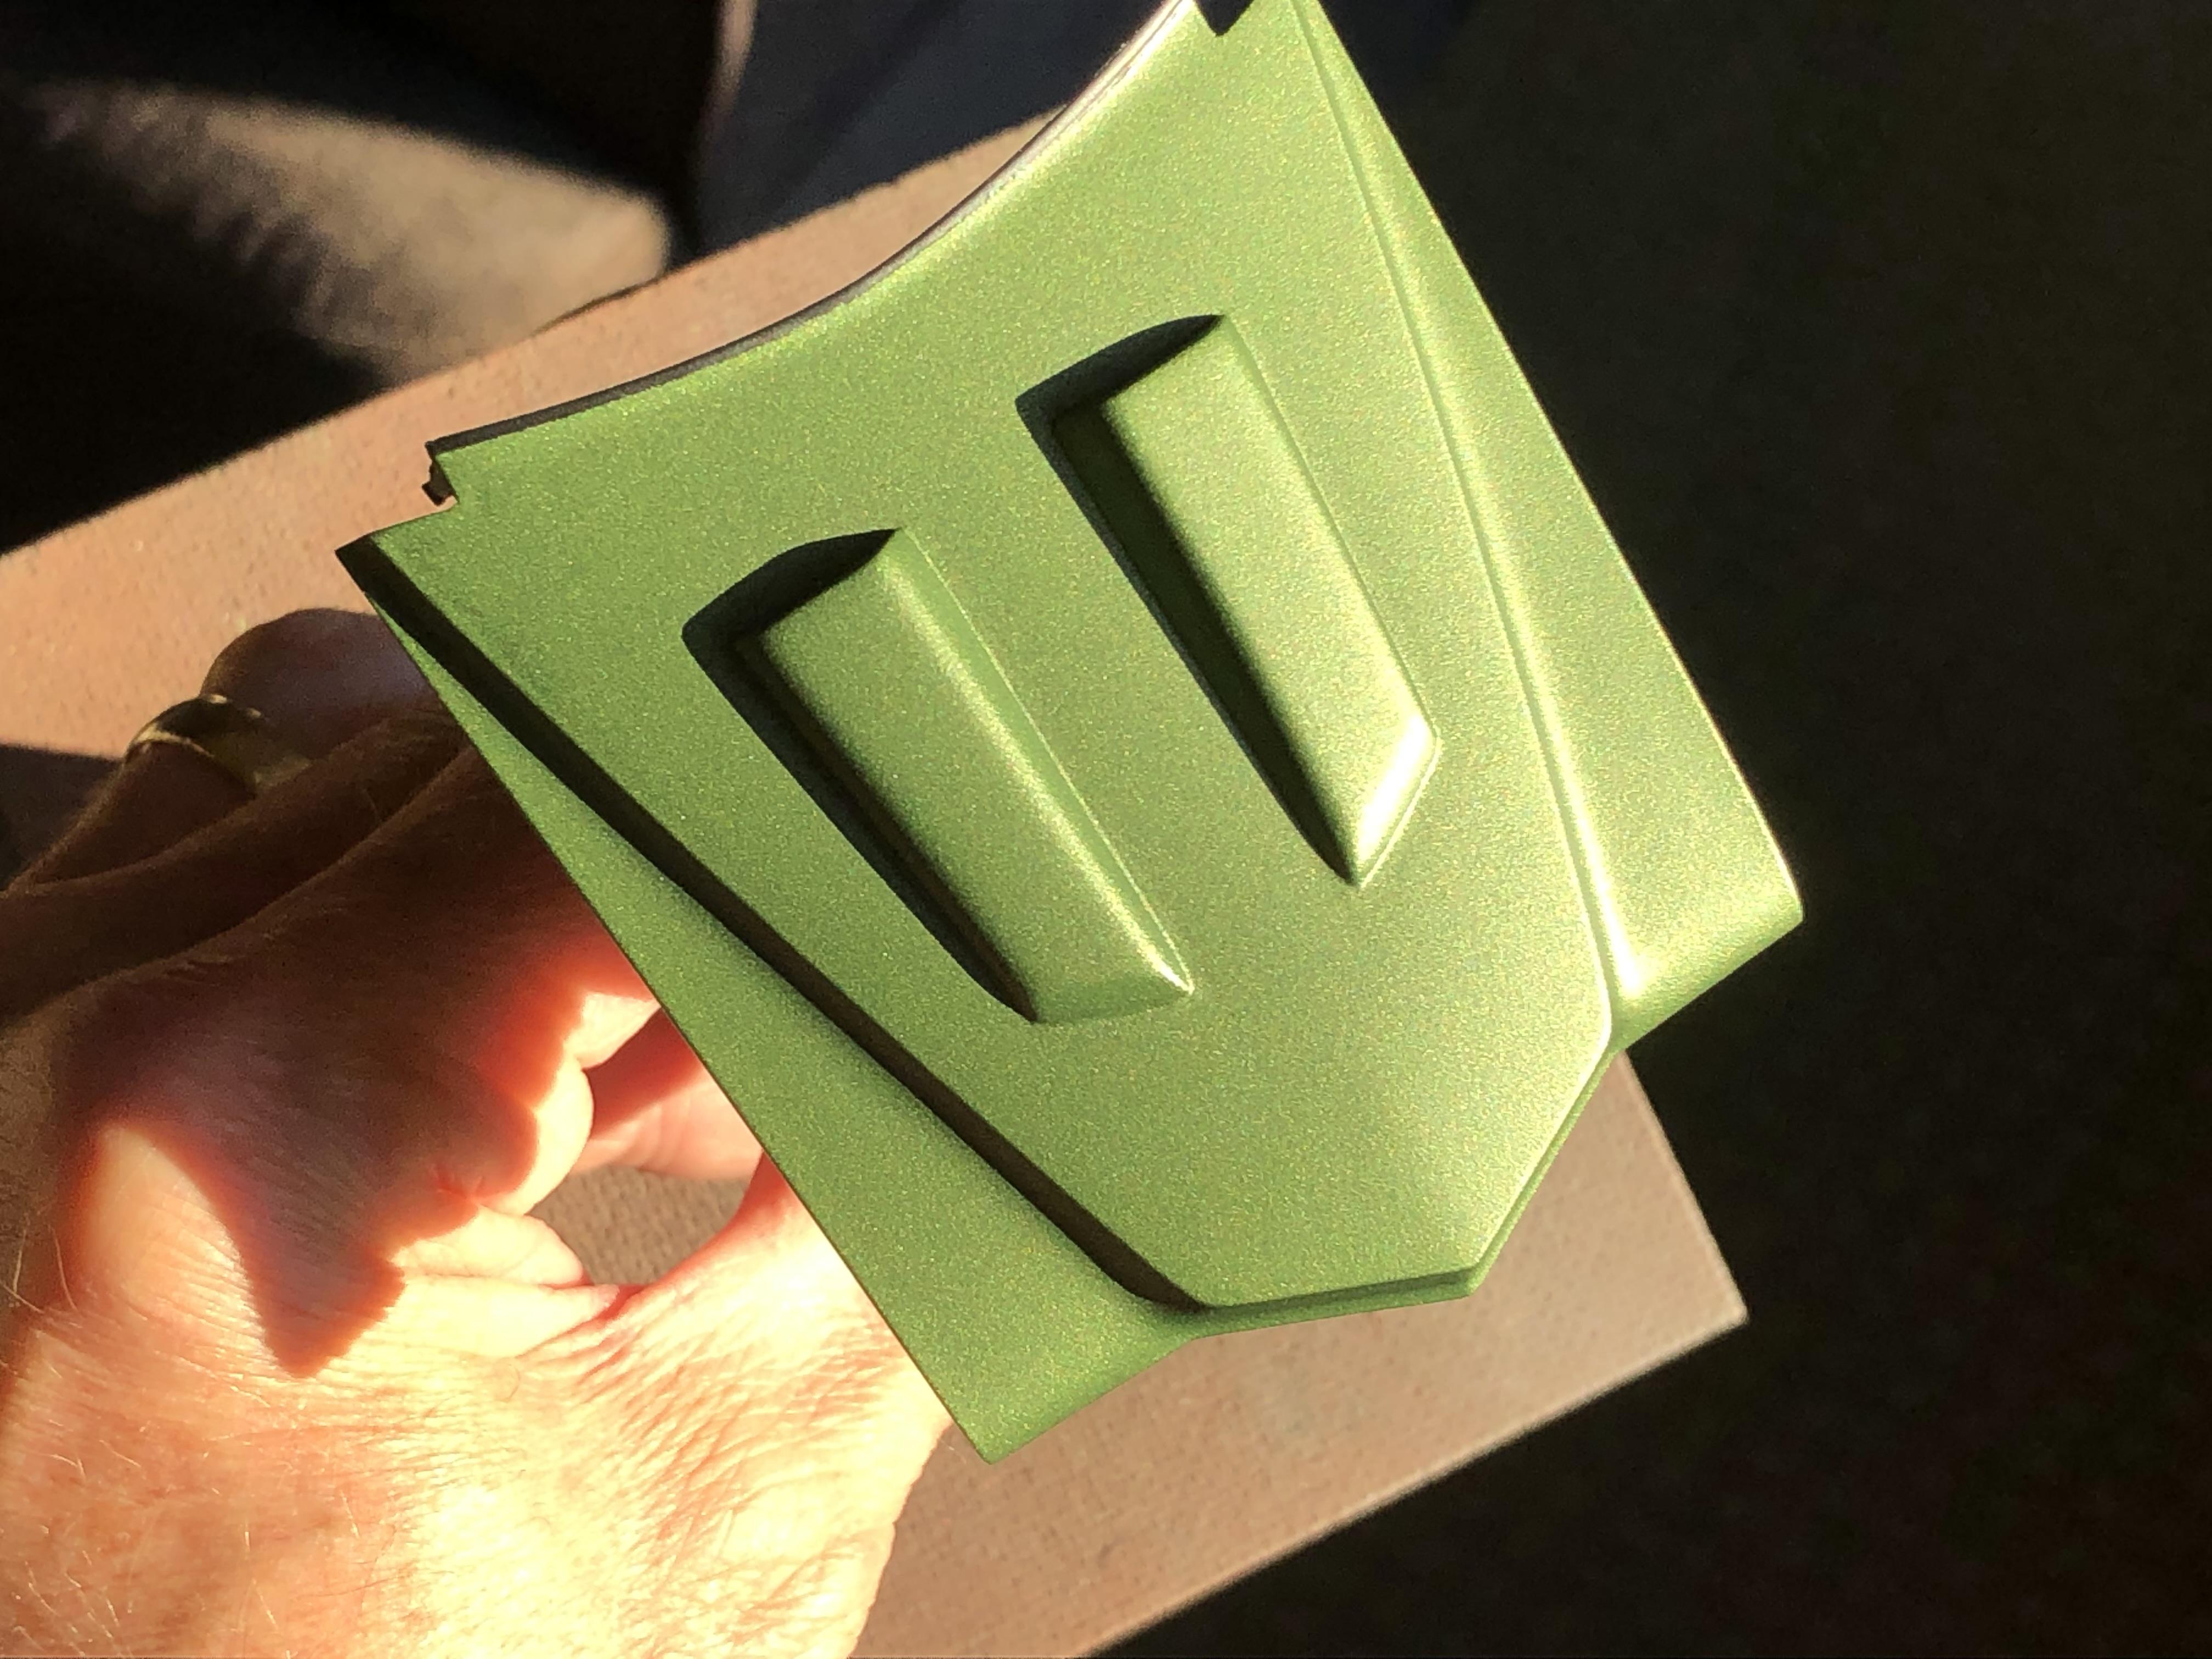
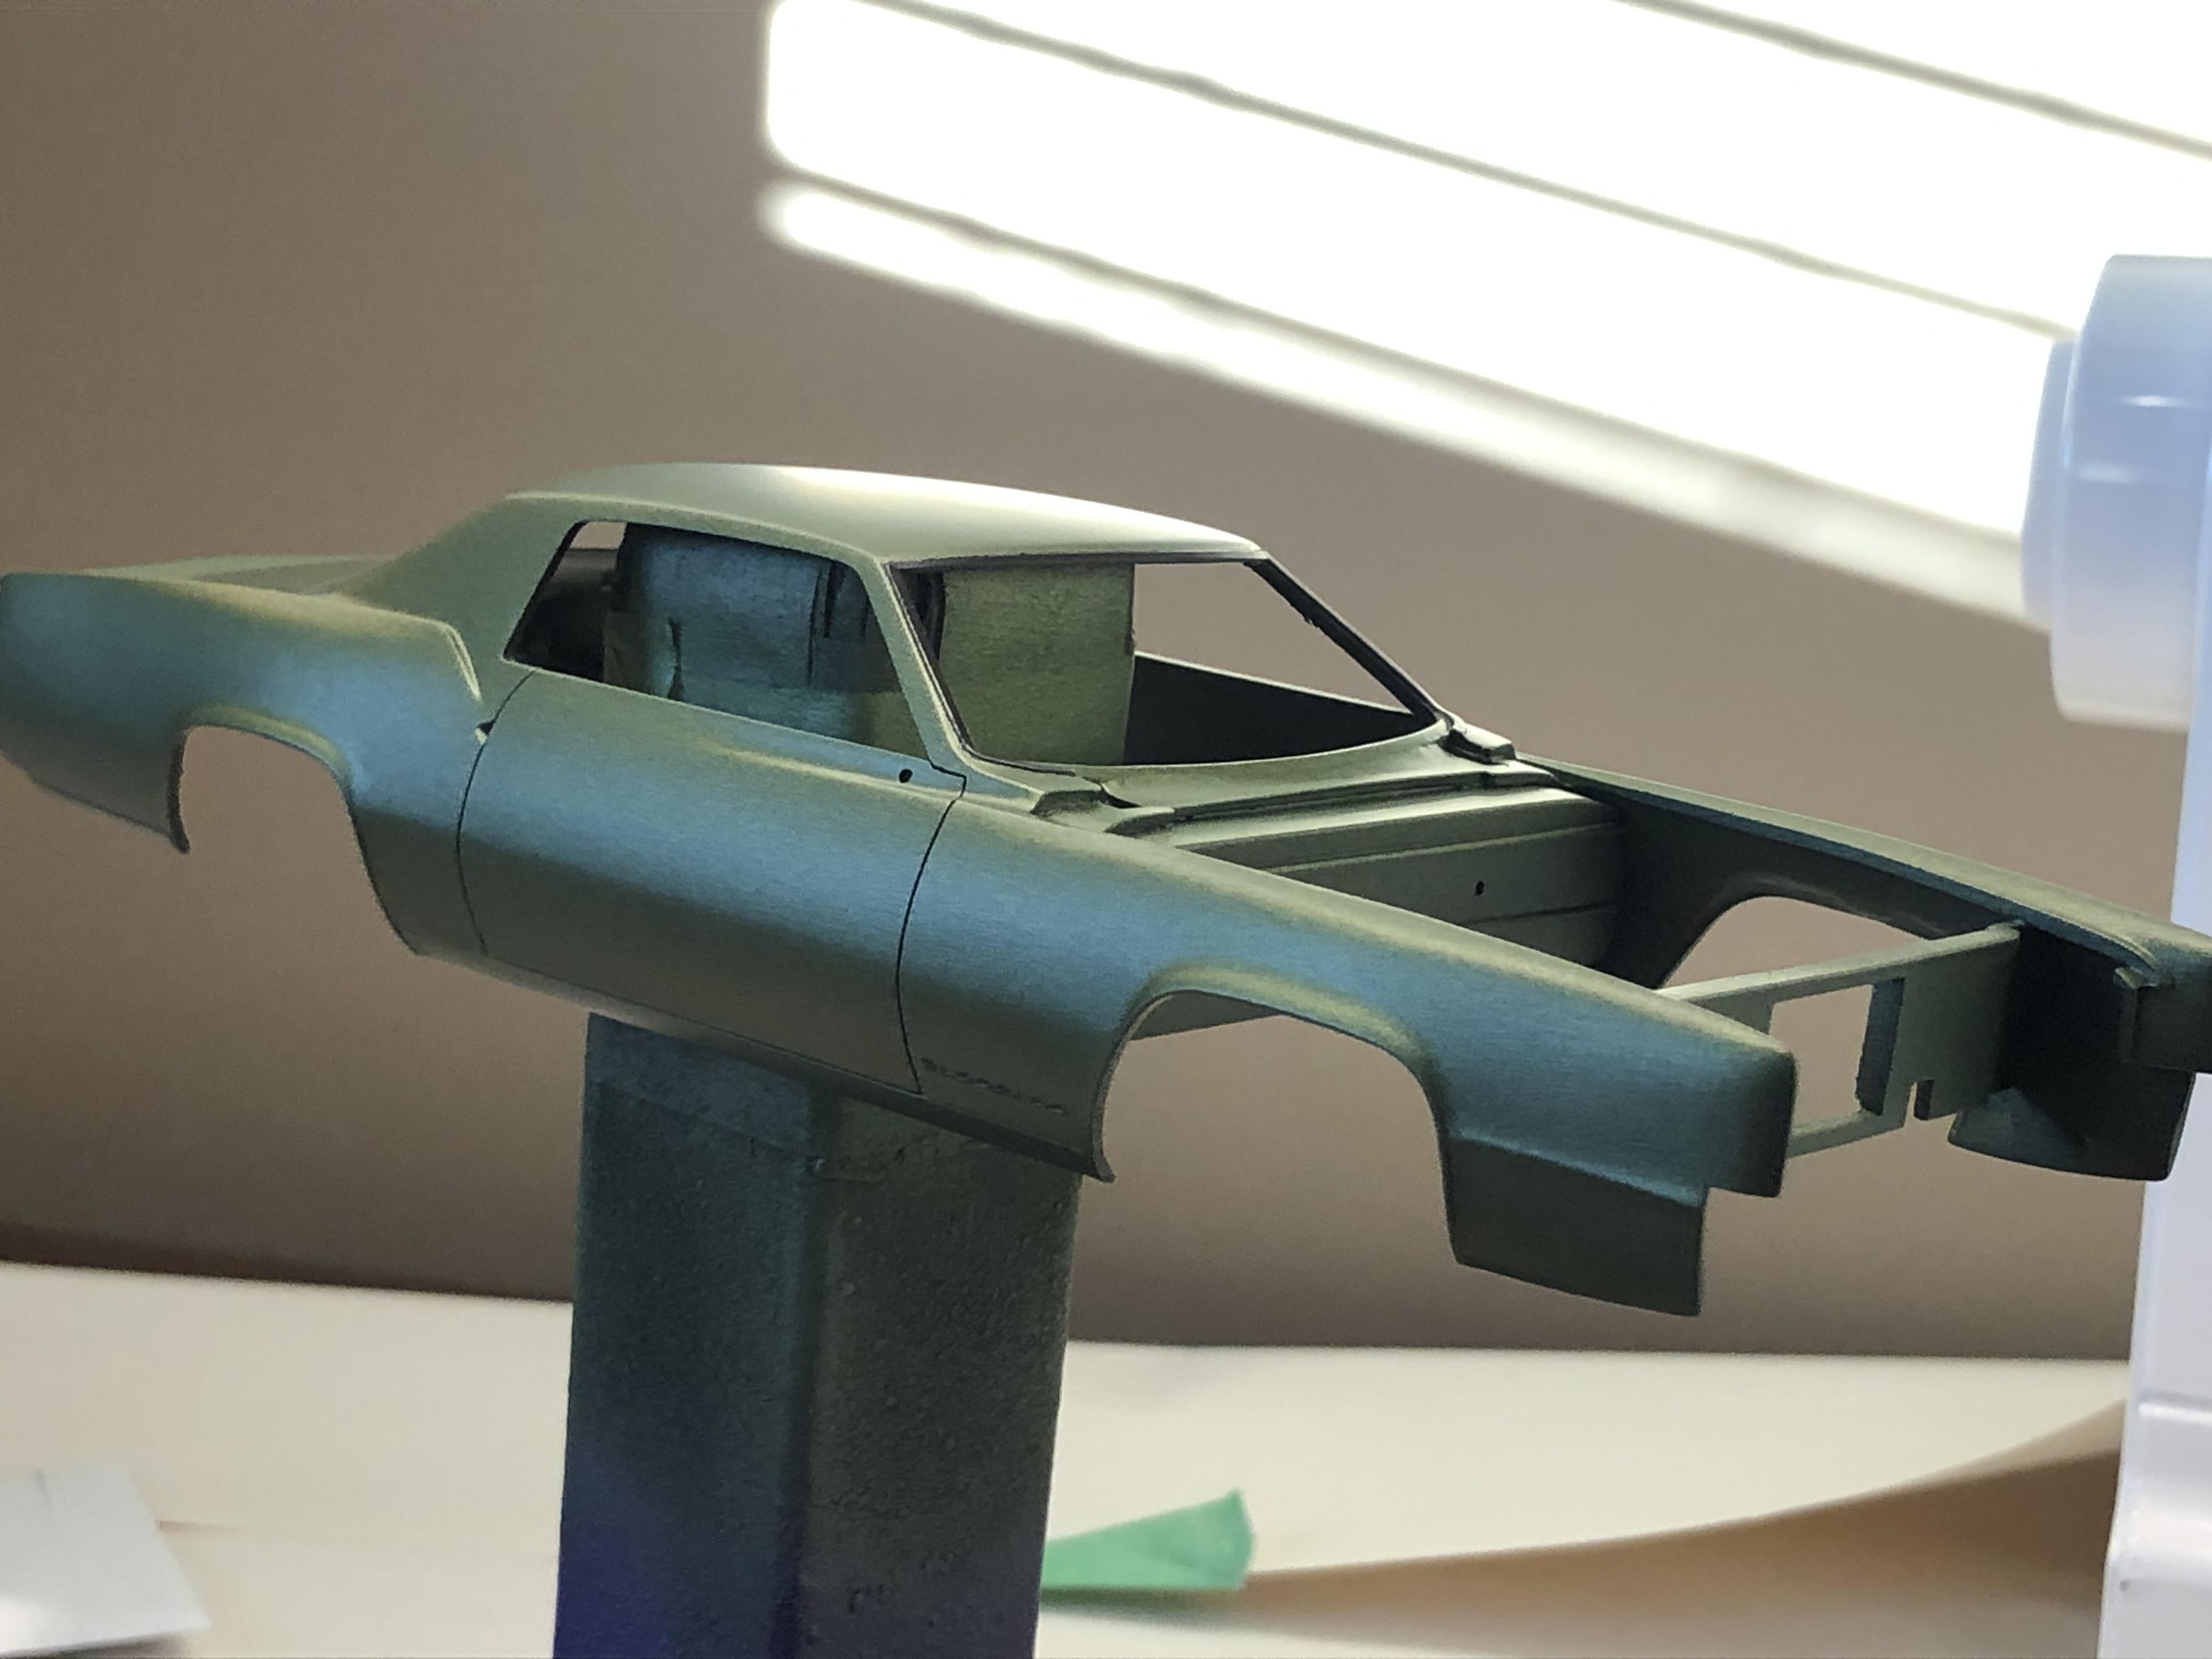
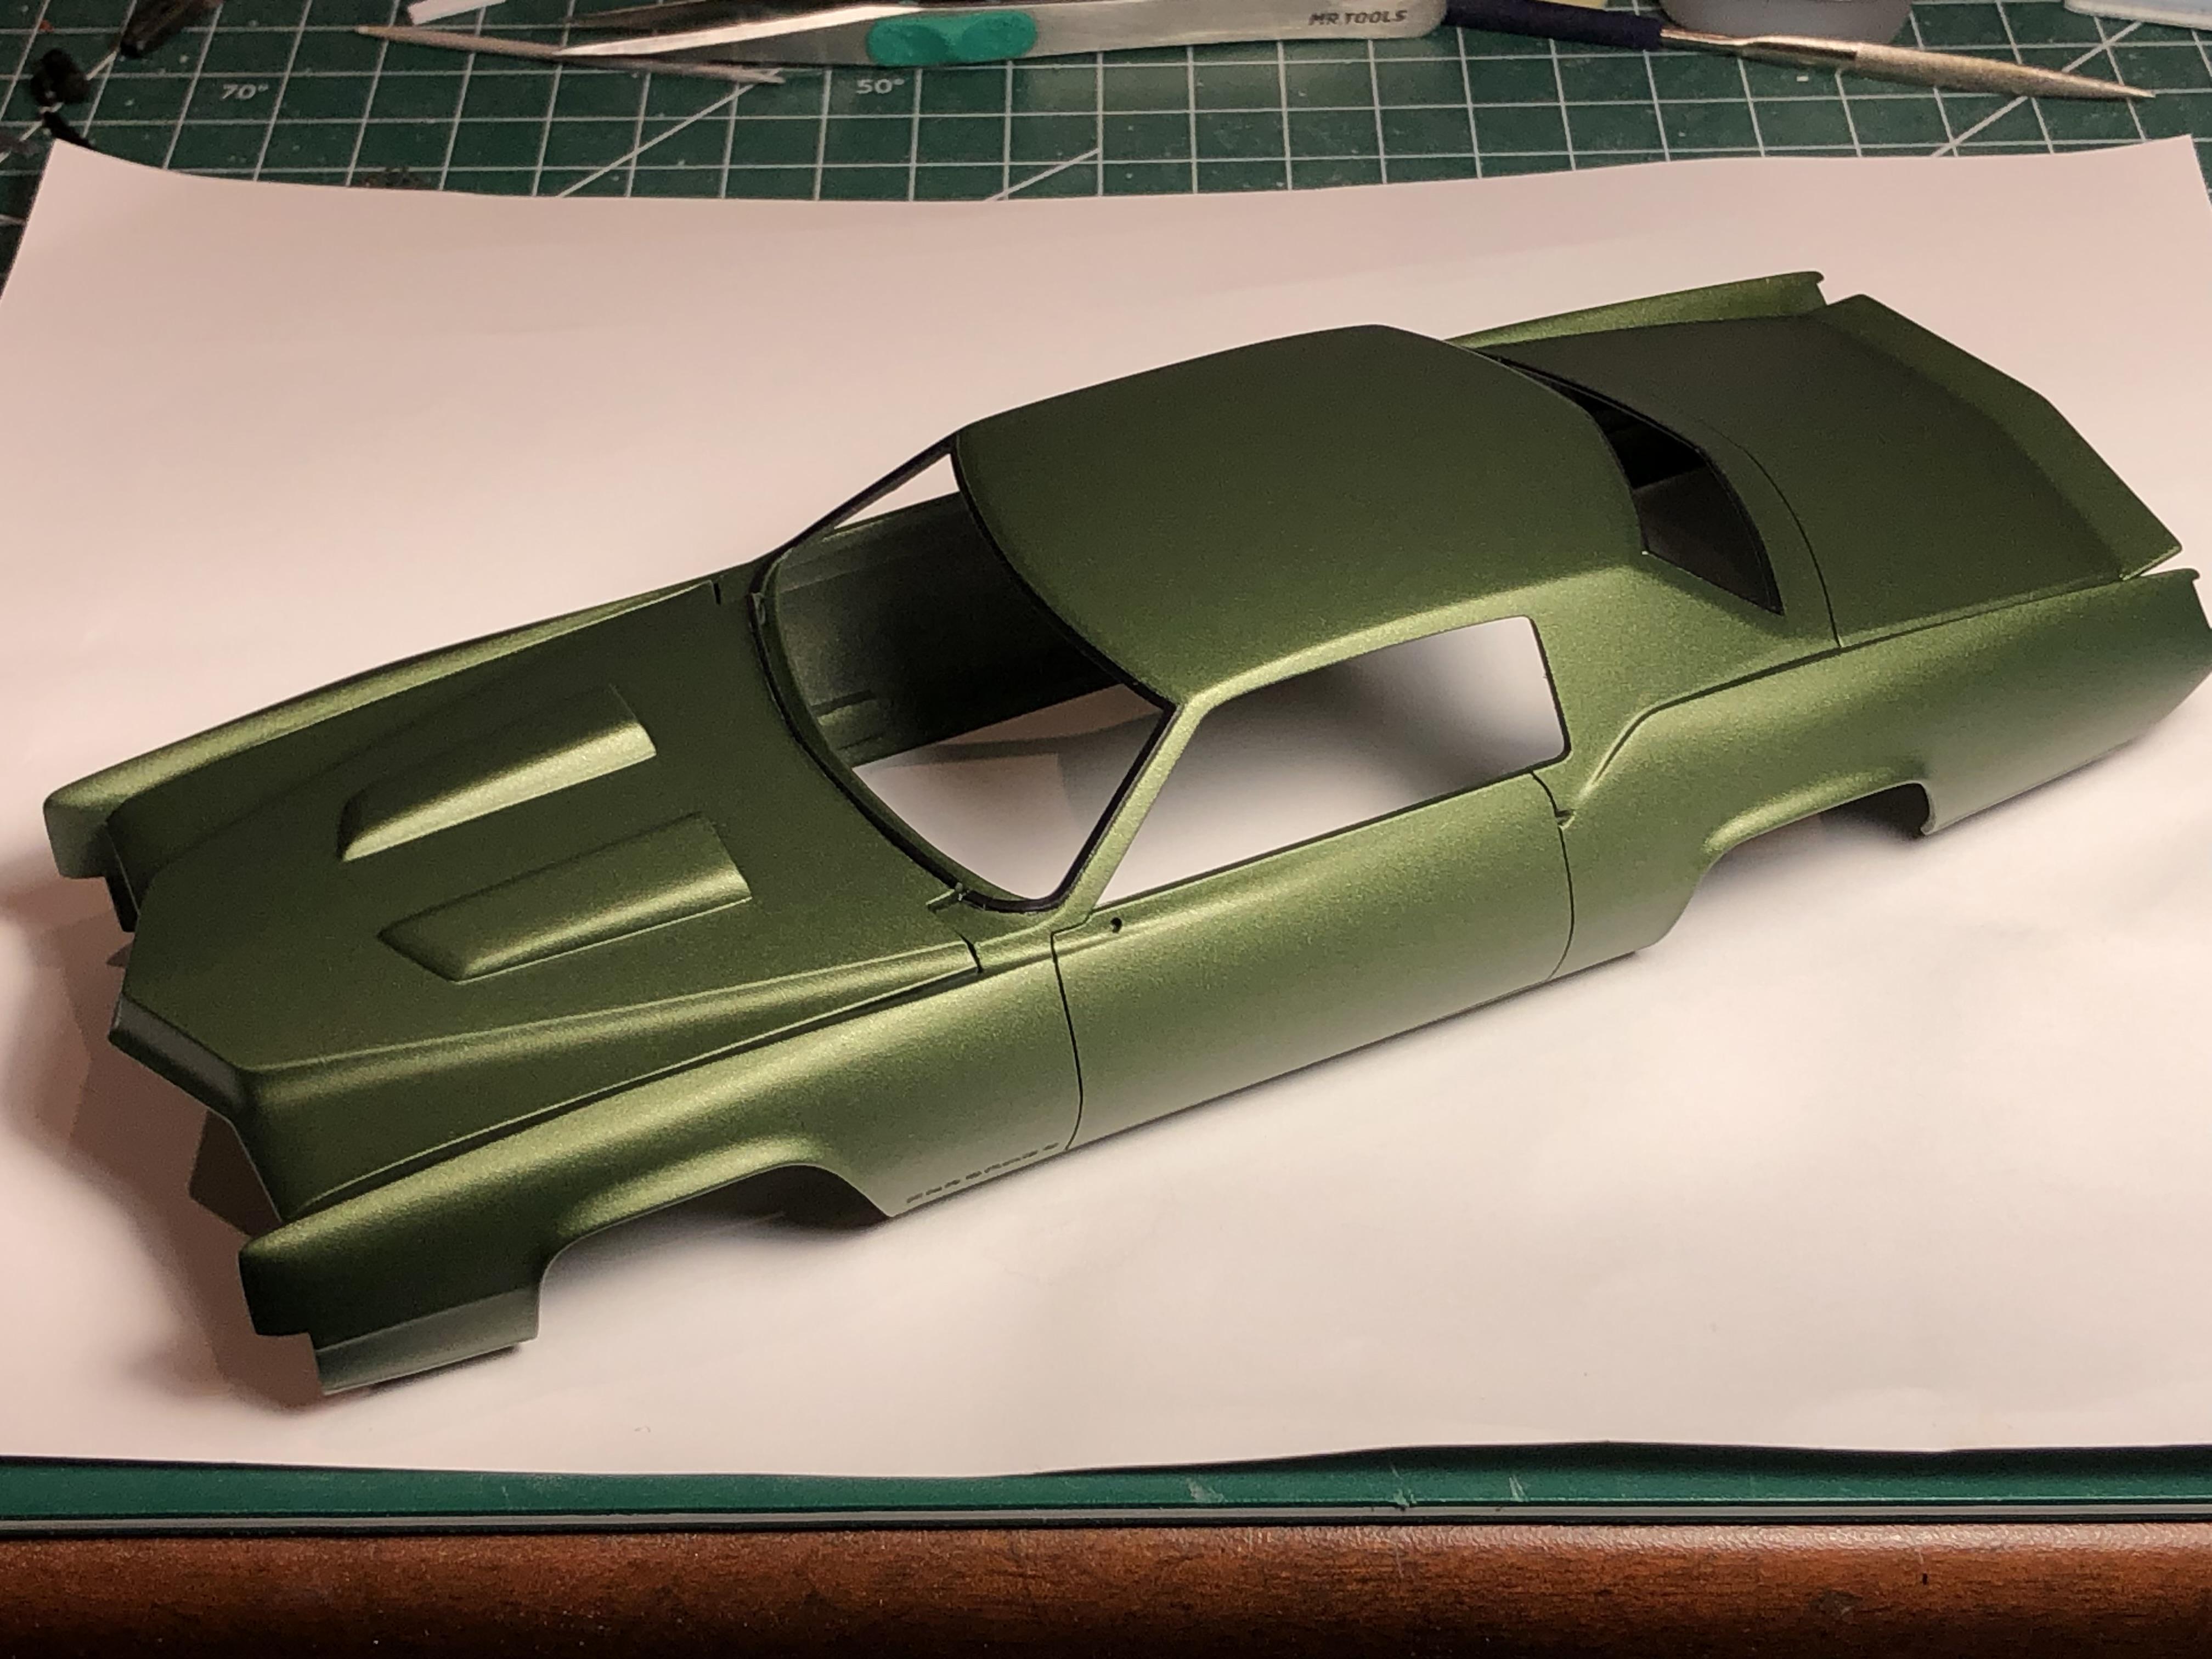
PAINT!! At long last, the body is now in colour. It’s very hard to capture the matte finish well. I will need to get some outside shots with indirect sunlight later. It turned out as I was hoping, and the matte finish ties in the stealth aggressive look I wanted. No mock up yet, but you know I’ll have one up soon. So, after the base coat of Tamiya semi gloss black, it was 2 light coats of Vedoro green, then a medium coat. After that it was 2 light coats of Tamiya pearl clear, then one mist coat of Mr. Hobby super smooth matte clear, followed by a medium/heavy coat. I masked the window trim before applying the green. First two photos are in direct sunlight, then under artificial lighting. I cut down some bootlace ferrules to use on the intake. They are now painted black, no photos of them finished yet, hoping to glue them in place tomorrow… The exhaust headers would not fit between the frame rails, so after an extensive search thru kits and parts bins turned up no suitable options, I decided the easiest solution was to modify the headers that came with the engine. Cut the flange off, removed some length off the tubes and reattached. Yes… those flanges are both beautifully printed, and extremely fragile.? Not getting too carried away with engine detail, spark plug wires, fuel rail, and I will add heater hoses later. And the finished seats which I may already have shown.??♂️ Very pleased to finally have this thing in colour!! Should have the engine complete tomorrow, also have some disk brakes ready for paint. With any luck, it could be a “rolling chassis” by end of Monday… As always, thanks for having a look, all comments welcome
- 220 replies
-
- 6
-
-
- johan
- pro touring
- (and 1 more)
-
Johan ‘70 Cadillac ElDorado pro touring (low and aggressive)
Steve H replied to Steve H's topic in WIP: Model Cars
Hello Donato, thanks for having a look! If things go as planned, the best is yet to come. Cheers, Steve -
Johan ‘70 Cadillac ElDorado pro touring (low and aggressive)
Steve H replied to Steve H's topic in WIP: Model Cars
Hello Claude!! Thanks for the comments on the body. I hope you are right. The goal has always been to have a modified wide body, but to have it subtle enough that you have to look twice. I am really looking forward to seeing this beast in green, aiming for Sunday. I checked out, (and saved a few photos from), your 70 Eldo. Stunning work as always sir. I will definitely check for those ferrules at the local Michaels, sounds like something else I need in the stash… I have my ferrules cut down, and painted. Should have some photographic evidence of that soon… Always good to hear from you Claude, I admire your work, and truly appreciate you taking the time to check in with my progress. The pace should pick up here quite a bit now!!??