.jpeg.4c7adcf30d18ed99893024ed0cd4cd57.jpeg)
Quiet Eric
-
Posts
333 -
Joined
-
Last visited
Content Type
Profiles
Forums
Events
Gallery
Everything posted by Quiet Eric
-
The 308, Testarossa, and F40 will forever be my favorite era of Ferrari. Great looking cars!
-
.thumb.jpeg.8c79d9534dc815ba827147ab721a20d4.jpeg)
Patina’d 34 Pick Up
Quiet Eric replied to OldNYJim's topic in WIP: Model Trucks: Pickups, Vans, SUVs, Light Commercial
Killer job on the weathering and door innards! Hot Rods for life. -
This is one of the hot rods I have built over the years. The body itself it a steel Brookville reproduction, but the frame, grill shell/insert and hood are real '32. I did everything on it myself including building the chassis. It's a pretty basic hot rod, has a Pontiac 350 and Muncie 4-speed, 9" Ford rear end. Buick brake drums and '40 Ford brakes (up front at least), 15x6 vintage American Racing wheels, an early Corvette steering column and wheel. Before I got the car to the point of being painted and upholstered, I sold it to its current owner in Sweden. So with the model build, it will be a replica of this car but it will be as I intended to finish the 1:1 with paint and interior, and maybe an slight engine upgrade. I figured starting with the Revell kit was best despite its shortcomings. The interior provided is a design like what I would have gone with so I decided to use and improve upon it. If its assembled per the instructions, you have to install the whole interior before you glue the rear wheel wells in. I'm not a fan of that as the wheelwells should be one with the quarter panel. The wheelwells have been glued to the body and will get some filler and bodywork to look one piece. That means the interior needs to be installed from the top which I actually like better. To make this possible I cut the back wall section off of the main floor piece of the interior. It'll go in the trash. Real '32s don't have anything like that, just some support pieces and then the seat itself. On this model, the rear wheelwells to a fine job of locating the body on the chassis so that rear wall area is kinda redundant. The side panels of the interior and the tops of the doors/quarters together out of the box are way too thick. I thinned out the tops of the interior panels quite a bit, then beveled the top edges of both the body and the interior panels so the panels set almost flush. I also separated them into individual pieces for ease of assembly, and more realism. Finally, the kit seat is a little too street roddy for this build, or for what I would have done in the real car. I took the seat from a 3-window kit and sectioned out the top area where the button tufts were to lower the seat back. I want it just visible from the side profile. Had to cut the sides of the seat off too but just enough to fit between the interior panels. This will make for a pretty nice looking interior I think. Out of the box (back panel cut off) Thinned out: Seat fit...a bunch of filler/sanding work to come on the seat back. The picture is kinda washed out, but you get the idea I don't care for the kit supplied dash either. I have started to fit the dash from a 3-window kit too, but it with still require removal of the glove box doors and a/c vents. Thats where I am so far. I thinks I've got the wheels and tires to use figure out. I have a number of other kits to supply appropriate front suspension goodies. Using the 421 from an AMT '62 Pontiac as a start for the engine/trans. The '32 kit has pretty correct ladder bar rear suspension and a 9" ford rear but I'll be converting it to a transverse spring. Pretty excited to make progress on this but also planning to take my time to get it just right. The color will be 1956/7 Corvette Aztec Copper.
-
'55 Chevy 210 Sedan - Just like the '70's bro
Quiet Eric replied to Quiet Eric's topic in Model Cars
Wow, that is a great car! Thanks for sharing. One of the best eras of hot rodding. Thanks for all the kind comments folks, really appreciate it! -
Nice build and excellent paint work!
-
While this is up to the top, I love it! Reminds me of...
-
I like it, and vote keep the wing.
-
Where you lost others is where you picked me up, love the wheels and engine choice. Cool build.
-
'55 Chevy 210 Sedan - Just like the '70's bro
Quiet Eric replied to Quiet Eric's topic in Model Cars
Thanks everyone!! Glad y'all dig it. I've got another green tri-5 210 sedan build coming up soon to look out for. Stay tuned! -
Great color choice.
-
This is brilliant. Thank you for sharing!!
-
Looks great!! Big scale is fun, just hard to find a place to put them when finished. Really like the green. For what it is worth...these early Ford transmissions to not have a seal like that for the shifter. It is a spring supported domed steel washer inside a collar/retainer. There would have been a rubber boot on the floor to keep the outside stuff from coming inside the car, but it wasn't really a seal of any sorts for the transmission.
-
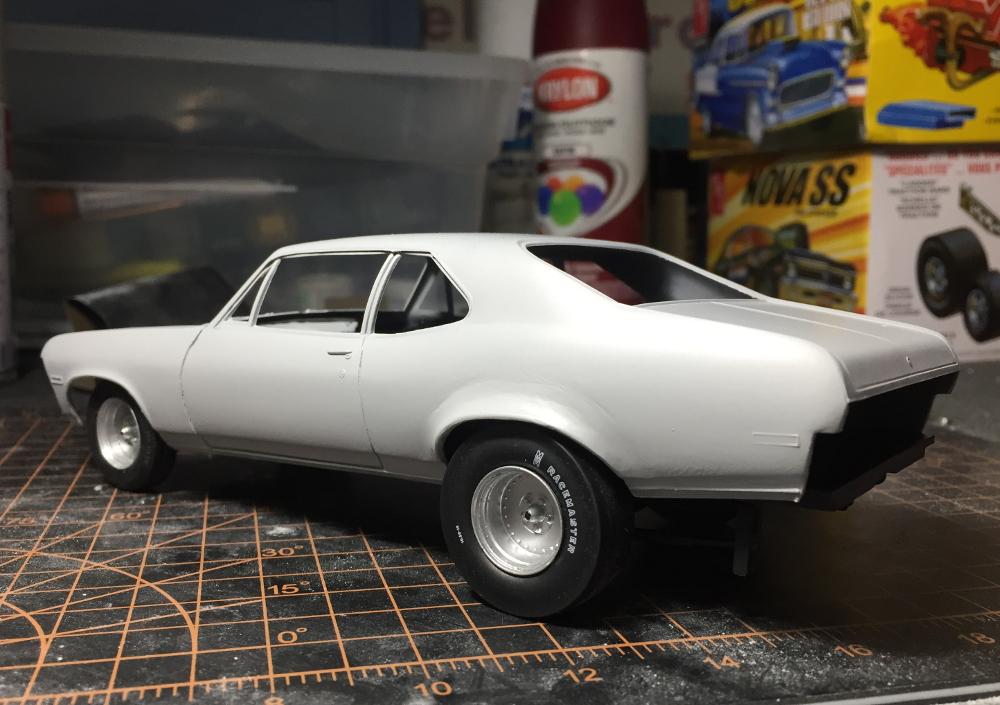
The problem there was the detail of them is pretty light to start and sanding on the rear fender flares kinda made that worse. They've since had the marker lenses painted as I didn't have the right colors before. I'm steadily relearning what I need to pay closer attention to on the finish work though.
-
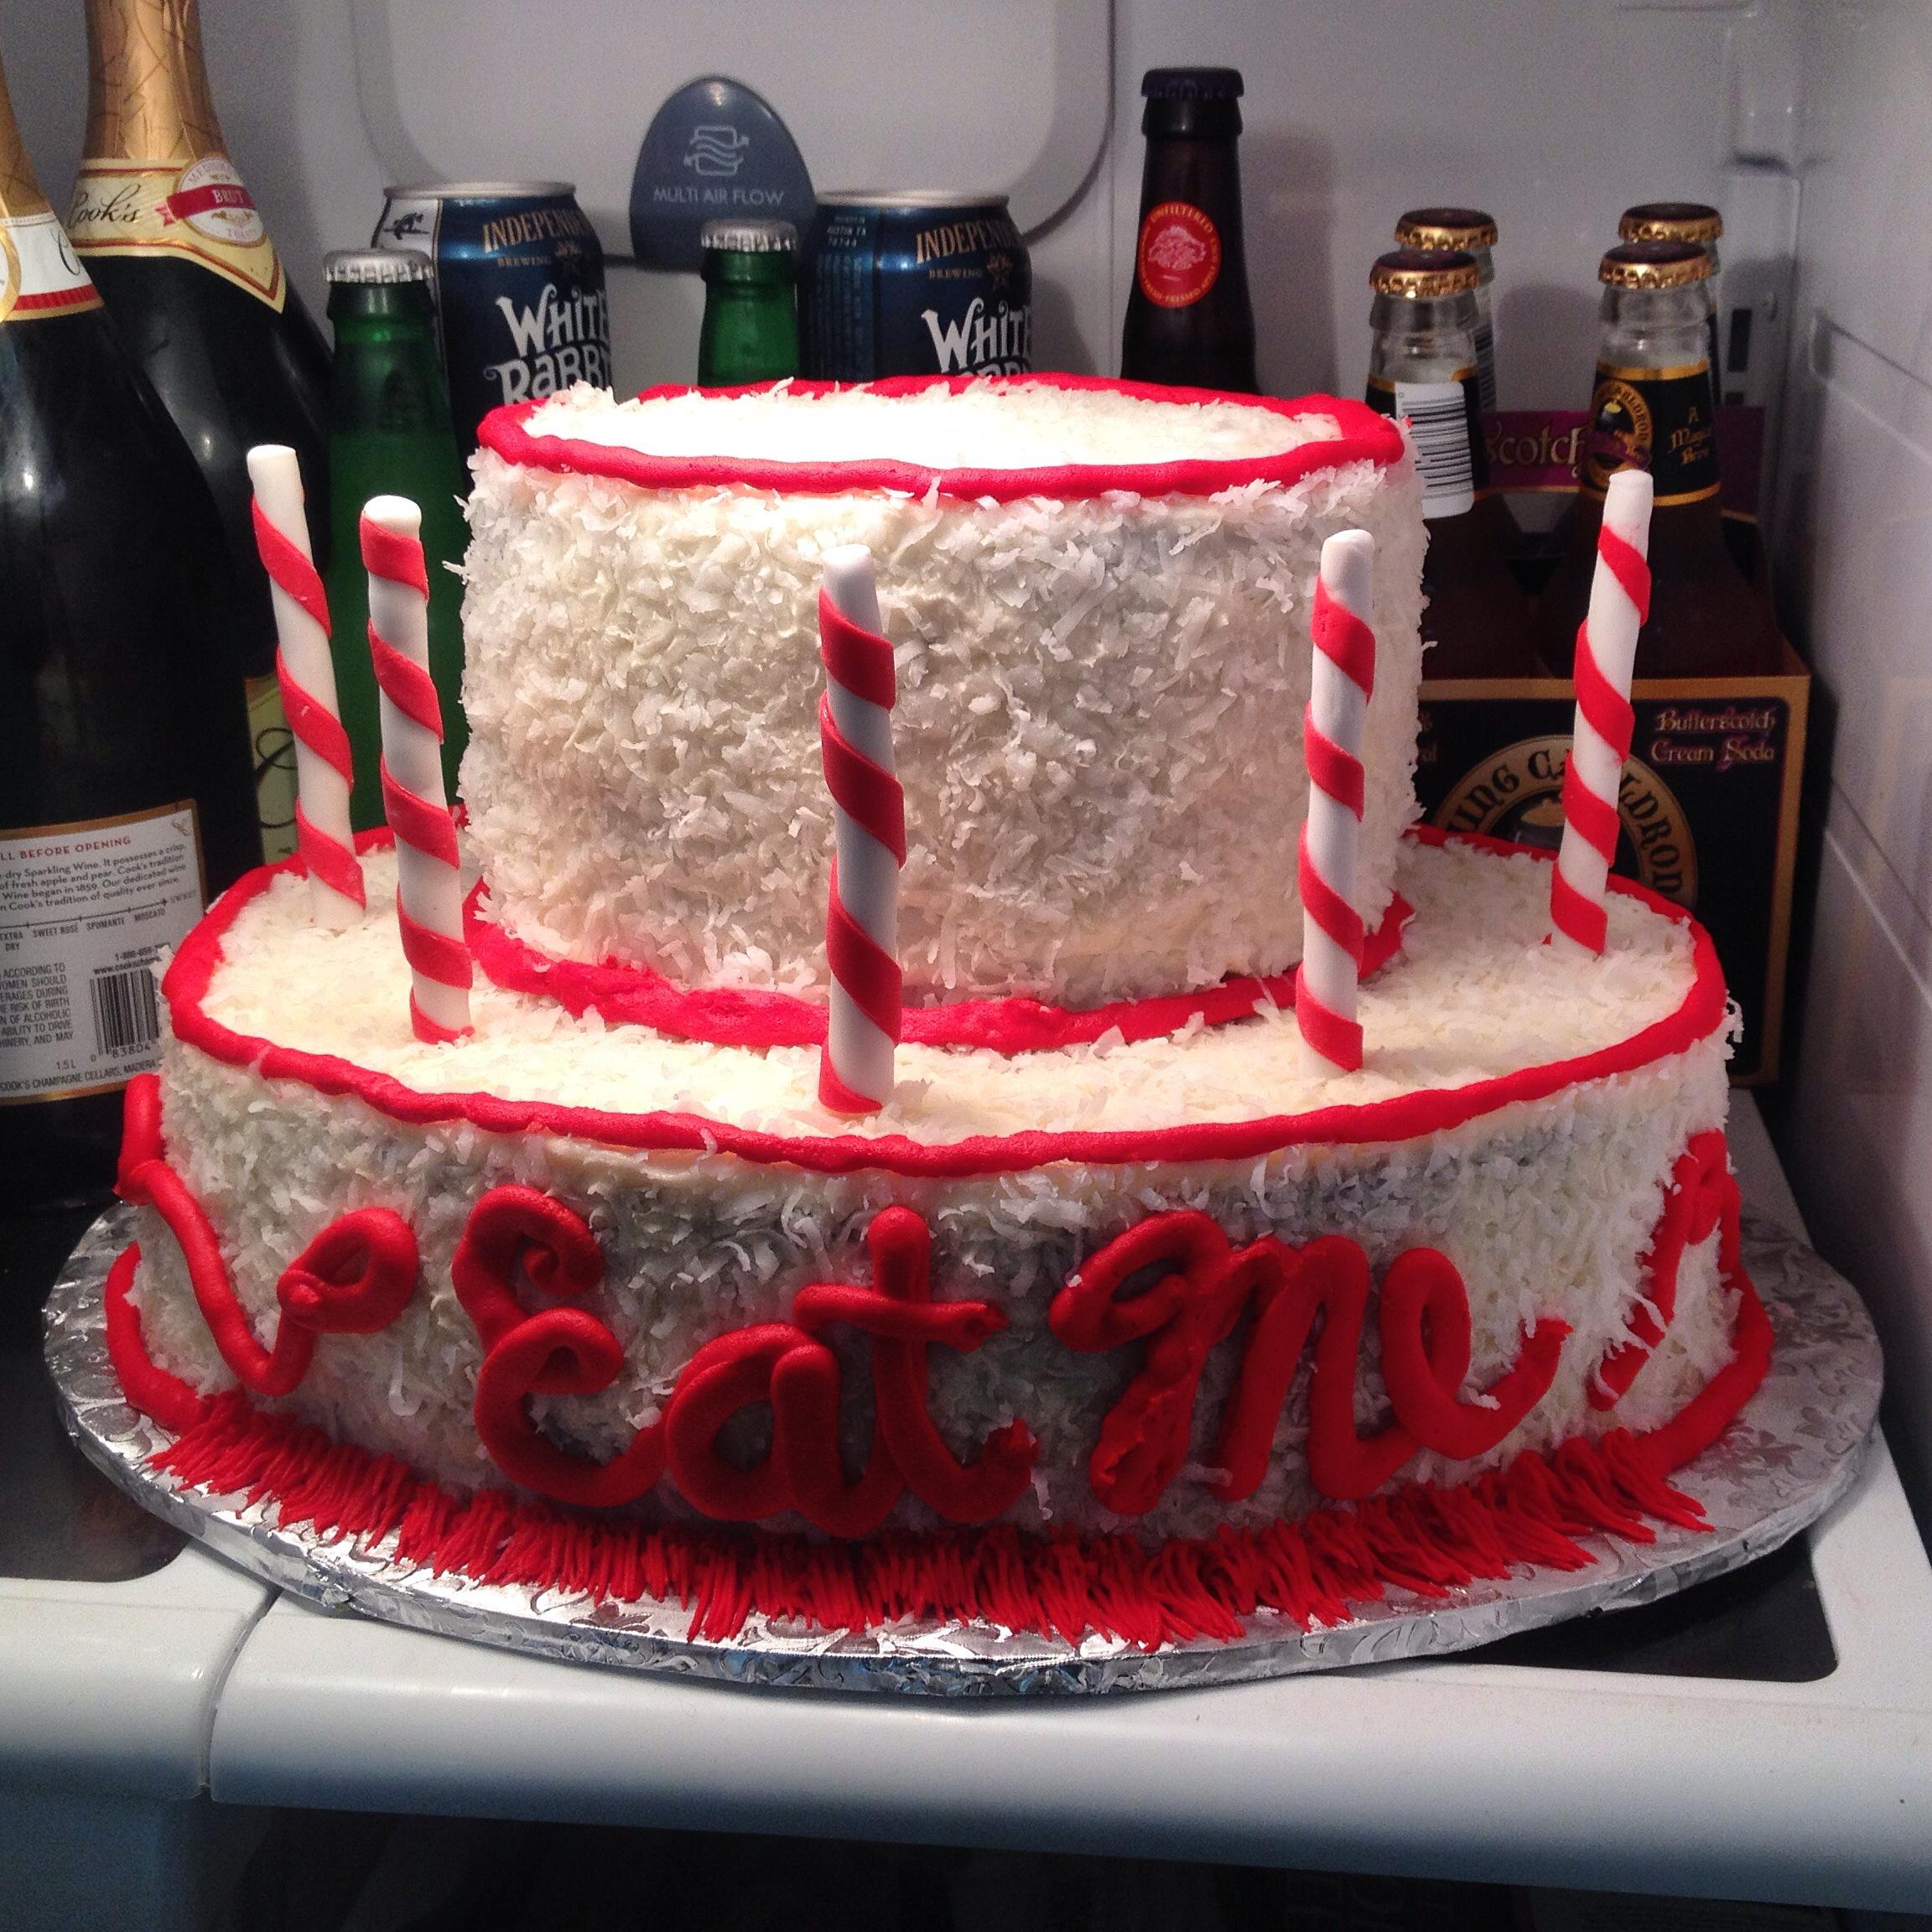
Love the subject matter!! This was my grooms cake at my wedding...

-
This is one of my favorite builds to date. I don't think I ever finished anything when I was building years ago quite as thoroughly as this one. AMT '55 Bel Air kit to start. Shaved the trim to 210 level. Raised the rear wheel openings to the bottom of the trim. Thinned the front bumper filler to look more accurate. Shaved molded in wipers and door handles to use separate ones from the parts box. Molded in exhaust removed from the chassis. Bellhousing mounts and stock rear spring mounts removed. Rear springs relocated in line with the frame rails, 9" Ford rear end added and lift shackles made. Scratch built Lakewood traction bars. New engine and trans crossmembers made. Added the frame mounts at the firewall. Revell '56 firewall added, and core support from the same with the radiator moved to the 6 cylinder spot. Engine (block, heads, front accessory stuff) is from a Revell '66 El Camino with a modified tunnel ram from an AMT Old Pro Nova and resin valve covers that are copies of Revell Pro Stock stuff. Cut the hood bar area out of the grill and made one that actually attaches to the hood, added the grill support and hood latch detail behind the grill. I would like to re-do the grill on this as the wash didn't work out at all and looks pretty bad, a phoho etched grill would be nice...maybe someday. Wheels are from an AMT '65 El Camino kit, front tires are from the Moebius Don Nicholson Cyclone kit, rear tires are Mickey Thompson N50-15's from Fireball Modelworks and I LOVE them. Rear bumper is the kit supplied nomad version, mold lines cleaned off and bumper bolts added then Alclad coated (I need a lot more practice with that but it does look better than it did out of the box). Parts box steering wheel and seats. Color is Tamiya British Green and clear. I did miss a couple things like rear shocks and a license plate which I'll be adding shortly but for now, this one is off the bench!
-
Excellent duo, I really like the Boss.
-
Excellent execution!
-
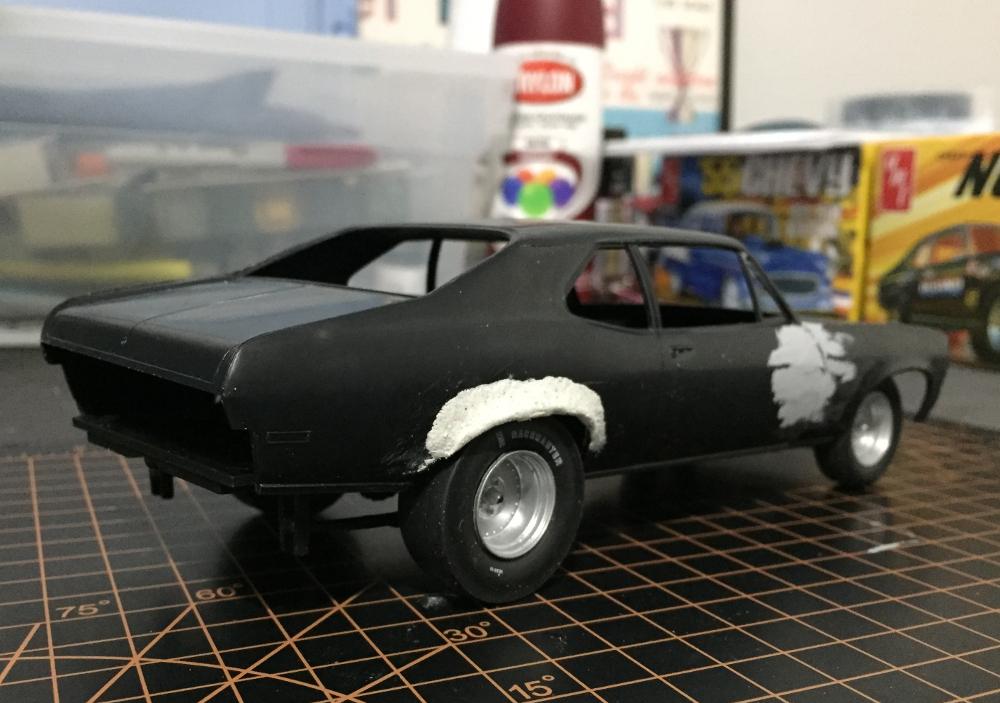
I thought I could get away with heating and deforming the fender lips but that was a miserable failure. So I used some Apoxie sculpt for the first time to make them.
-
Finally! ..Pics of my '34 5-window on a black background
Quiet Eric replied to traditional's topic in Model Cars
Looks straight from the pages of The Rodder's Journal. Nice! -
Yup, I'm in the thick of it now. Costing me almost as much as the 1:1 hobby haha. I've posted a few things but have a sorta replica of my '32 roadster coming up soon in the build schedule. Loved the old wheels but the new ones look perfect too.
-
Thanks again everyone!! Thank you. My first car was a '64 El Camino and that got it all started for me. I'd kinda like to have a '78+ one some day.
-
I'm very glad to find you posting here....used to lurk at your stuff on IG but this is a much better experience. Coming along quite nicely.
-
Beemax Starion Grp A
Quiet Eric replied to ShawnS's topic in WIP: Other Racing: Road Racing, Land Speed Racers
Brilliant. I tried something similar to get some aftermarket wheels to fit but didn't think about a release agent which would have helped a lot. -
Aw man, that is one of my favorite show rods as is! I love it. But welcome a different take on the kit.
-
Masterful work on those tail lights and interior detail.