Zippi
-
Posts
14,181 -
Joined
-
Last visited
Content Type
Profiles
Forums
Events
Gallery
Everything posted by Zippi
-
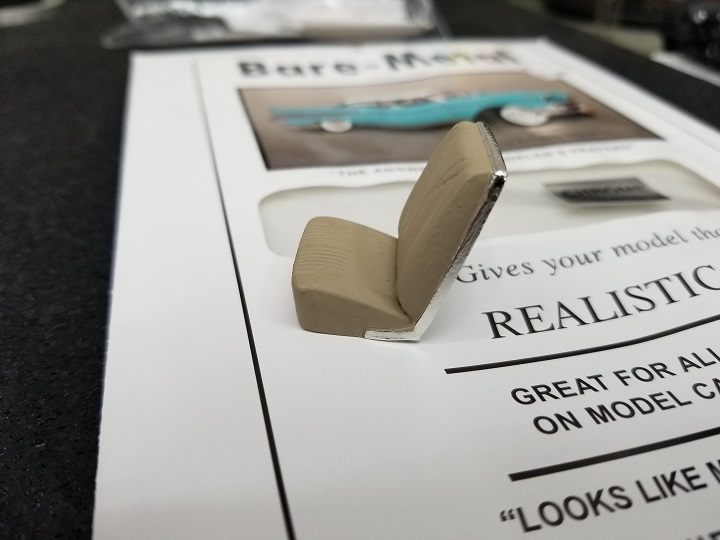
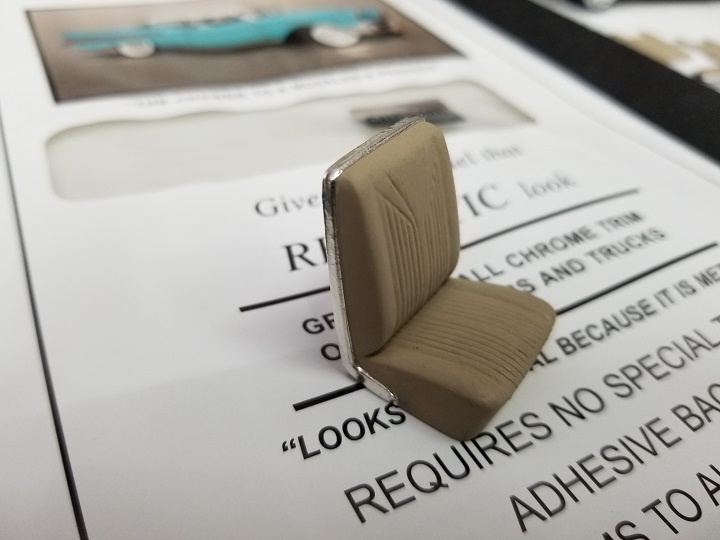
Ok....I tried the bmf this morning on my seats and I gotta say, you guys that apply this so nicely my hat's off to you. I guess I've had to much coffee this morning but it was a bear to trim and keep on the part. How does it look to you guys before I continue on? Do I need to peel it off and take another run at it???

-
 Haha....didn't your momma tell you not to drink the water ?
 -
Good looking Anglia. Nice work.
-
65 Chevy Stepside
Zippi replied to bluestringer's topic in WIP: Model Trucks: Pickups, Vans, SUVs, Light Commercial
Nice. My next project is the AMT 1960 Chevy Fleetside Pickup. -
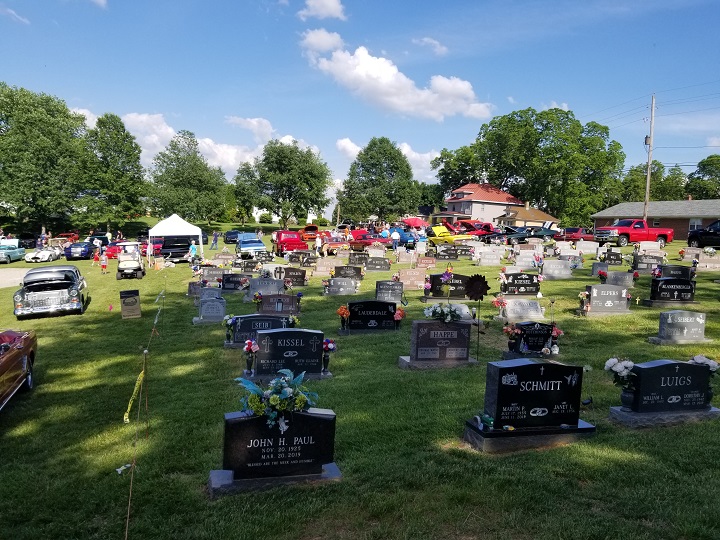
Thanks Mike. It was a great car show. It was our first time to attend this car show. The weird thing was.....it was in the cemetery at the church.
-
Thanks Mike. I may need it ☺
-
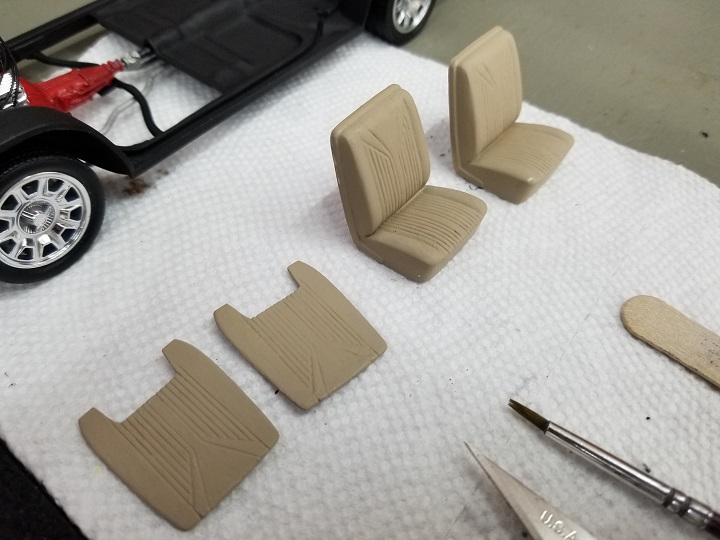
I now have a rolling chassis. I have the bucket seats painted. Next step is to try my hand at bmf on the chrome trim around the seats.
-
Nice work. It's coming along nicely.
-
1955 Big Block Truck
Zippi replied to Lorne's topic in WIP: Model Trucks: Pickups, Vans, SUVs, Light Commercial
No matter how you slice it or dice it, that is a very kewl 55 pickup. -
69 Ford Ranger
Zippi replied to bill lanfear's topic in Model Trucks: Pickups, Vans, SUVs, Light Commercial
Nice looking pickup. Color looks great. -
Now that just looks bad ass dude. Nice job.
-
Looking for accurate 1/25 45 degree distributor boots
Zippi replied to Monty's topic in Model Building Questions and Answers
Yup....thanks Steve. Just doing a dry run to see if it would fit. -
Nice looking old beater.
-
Jeep Rubicon 4-Door 4 x 4
Zippi replied to ModelcarJR's topic in Model Trucks: Pickups, Vans, SUVs, Light Commercial
Jeep looks good. The blue and black works together nicely. -
Revell Bronco
Zippi replied to cobraman's topic in Model Trucks: Pickups, Vans, SUVs, Light Commercial
Your Bronco look sharp. Looks like a little 289 HP in the business end. -
Looking for accurate 1/25 45 degree distributor boots
Zippi replied to Monty's topic in Model Building Questions and Answers
I had some old phone wire so I cut the insulation off and cut a piece off one of the wires and sure enough it slipped over my 30 AWG wire. It took some doing but it did go on.
-
This looks pretty kewl. Nice little Hot Rod.
-
Thinking about coming back into it...
Zippi replied to FEENIX's topic in Welcome! Introduce Yourself
Welcome back to the hobby Ozzy. -
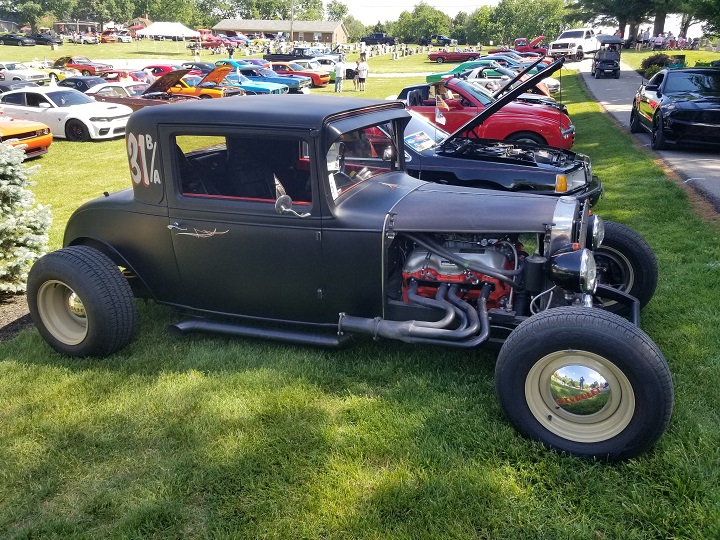
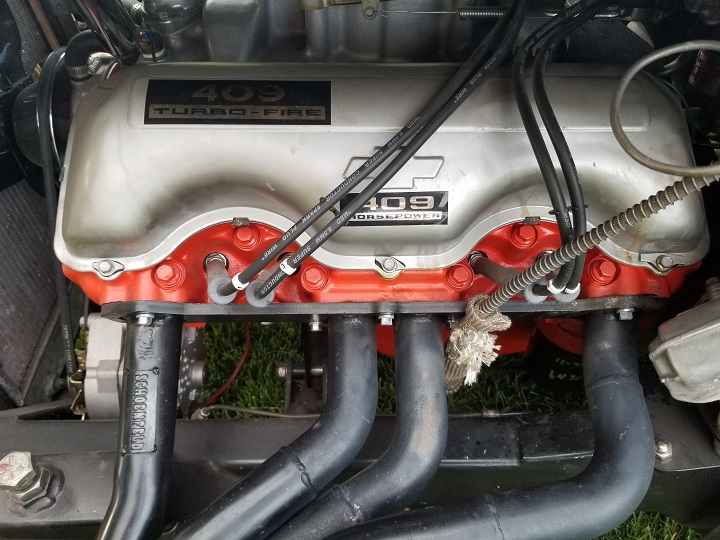
Same here. Love those 409 engines Michael and yours looks great. Saw one in a 32 Ford coupe yesterday at the car show.
-
Nice looking coupe. Love the 409 engine. Saw a coupe at the car show yesterday with a 409.
-
Nice. Wife and I took our 49 Chevy pickup to a car show yesterday. Had a great time.
-
Nice looking Nova. I always like the tunnel ran setup as they look good on any car/truck.
-
AMT (2018 re-release) 72 Chevy Nova Pro Stocker
Zippi replied to Mile High Scale Modeler's topic in Drag Racing
Good looking Nova. I always liked the Nova's from 61 on up. -
Nice looking Caddy. I like the stereo system in the trunk.
-
Great looking Woody. The color looks fantastic. The undercarage looks super nice and clean.