BK9300
-
Posts
1,827 -
Joined
-
Last visited
Content Type
Profiles
Forums
Events
Gallery
Everything posted by BK9300
-

Mack and heavy equipment project
BK9300 replied to TrucksMT's topic in WIP: Model Trucks: Big Rigs and Heavy Equipment
Really coming along nicely, Dan. Great start to all the builds you'll have going on in this project! -
FDNY Wrecker
BK9300 replied to Scott Eriksen's topic in WIP: Model Trucks: Big Rigs and Heavy Equipment
Looking good, Scott - getting more and more complex! Going to look great. -
It is a marvel to look at your work on the trestle, and, well, all the rest of this diorama and think about all the hours of enjoyment (maybe frustration, too) that have gone into its construction - wonderful job!
-
FDNY Wrecker
BK9300 replied to Scott Eriksen's topic in WIP: Model Trucks: Big Rigs and Heavy Equipment
I agree with Dom - lots of patience - and good eyesight, getting all the small valves hooked up! -
My 1st Big Rig "Blue Collar"
BK9300 replied to James2's topic in WIP: Model Trucks: Big Rigs and Heavy Equipment
Maybe your inspiration truck didn’t have a stock engine colour either, so, pretty much up to you! -
I’ll say it again - you’re a brute for punishment! So many parts in a very small space - great job.
-
Western Star 4900 FA plow truck
BK9300 replied to BK9300's topic in WIP: Model Trucks: Big Rigs and Heavy Equipment
Found Scalemates a few months ago - great site for kit release history and copies of instruction sheets -
Off to a good start, Lee - that colour reminds me of the old Ministry of Transportation fleet colours up here. Lots of orange trucks back then!
-
Ford LS Rescue truck
BK9300 replied to gotnitro?'s topic in WIP: Model Trucks: Big Rigs and Heavy Equipment
Yes, the colour is bright - coming along great! -
Western Star 4900 FA plow truck
BK9300 replied to BK9300's topic in WIP: Model Trucks: Big Rigs and Heavy Equipment
Thanks, Scott - here's hoping! I don't have any experience with the AMT kit - I just happen to prefer the overall quality of the Italeri kits -
Western Star 4900 FA plow truck
BK9300 replied to BK9300's topic in WIP: Model Trucks: Big Rigs and Heavy Equipment
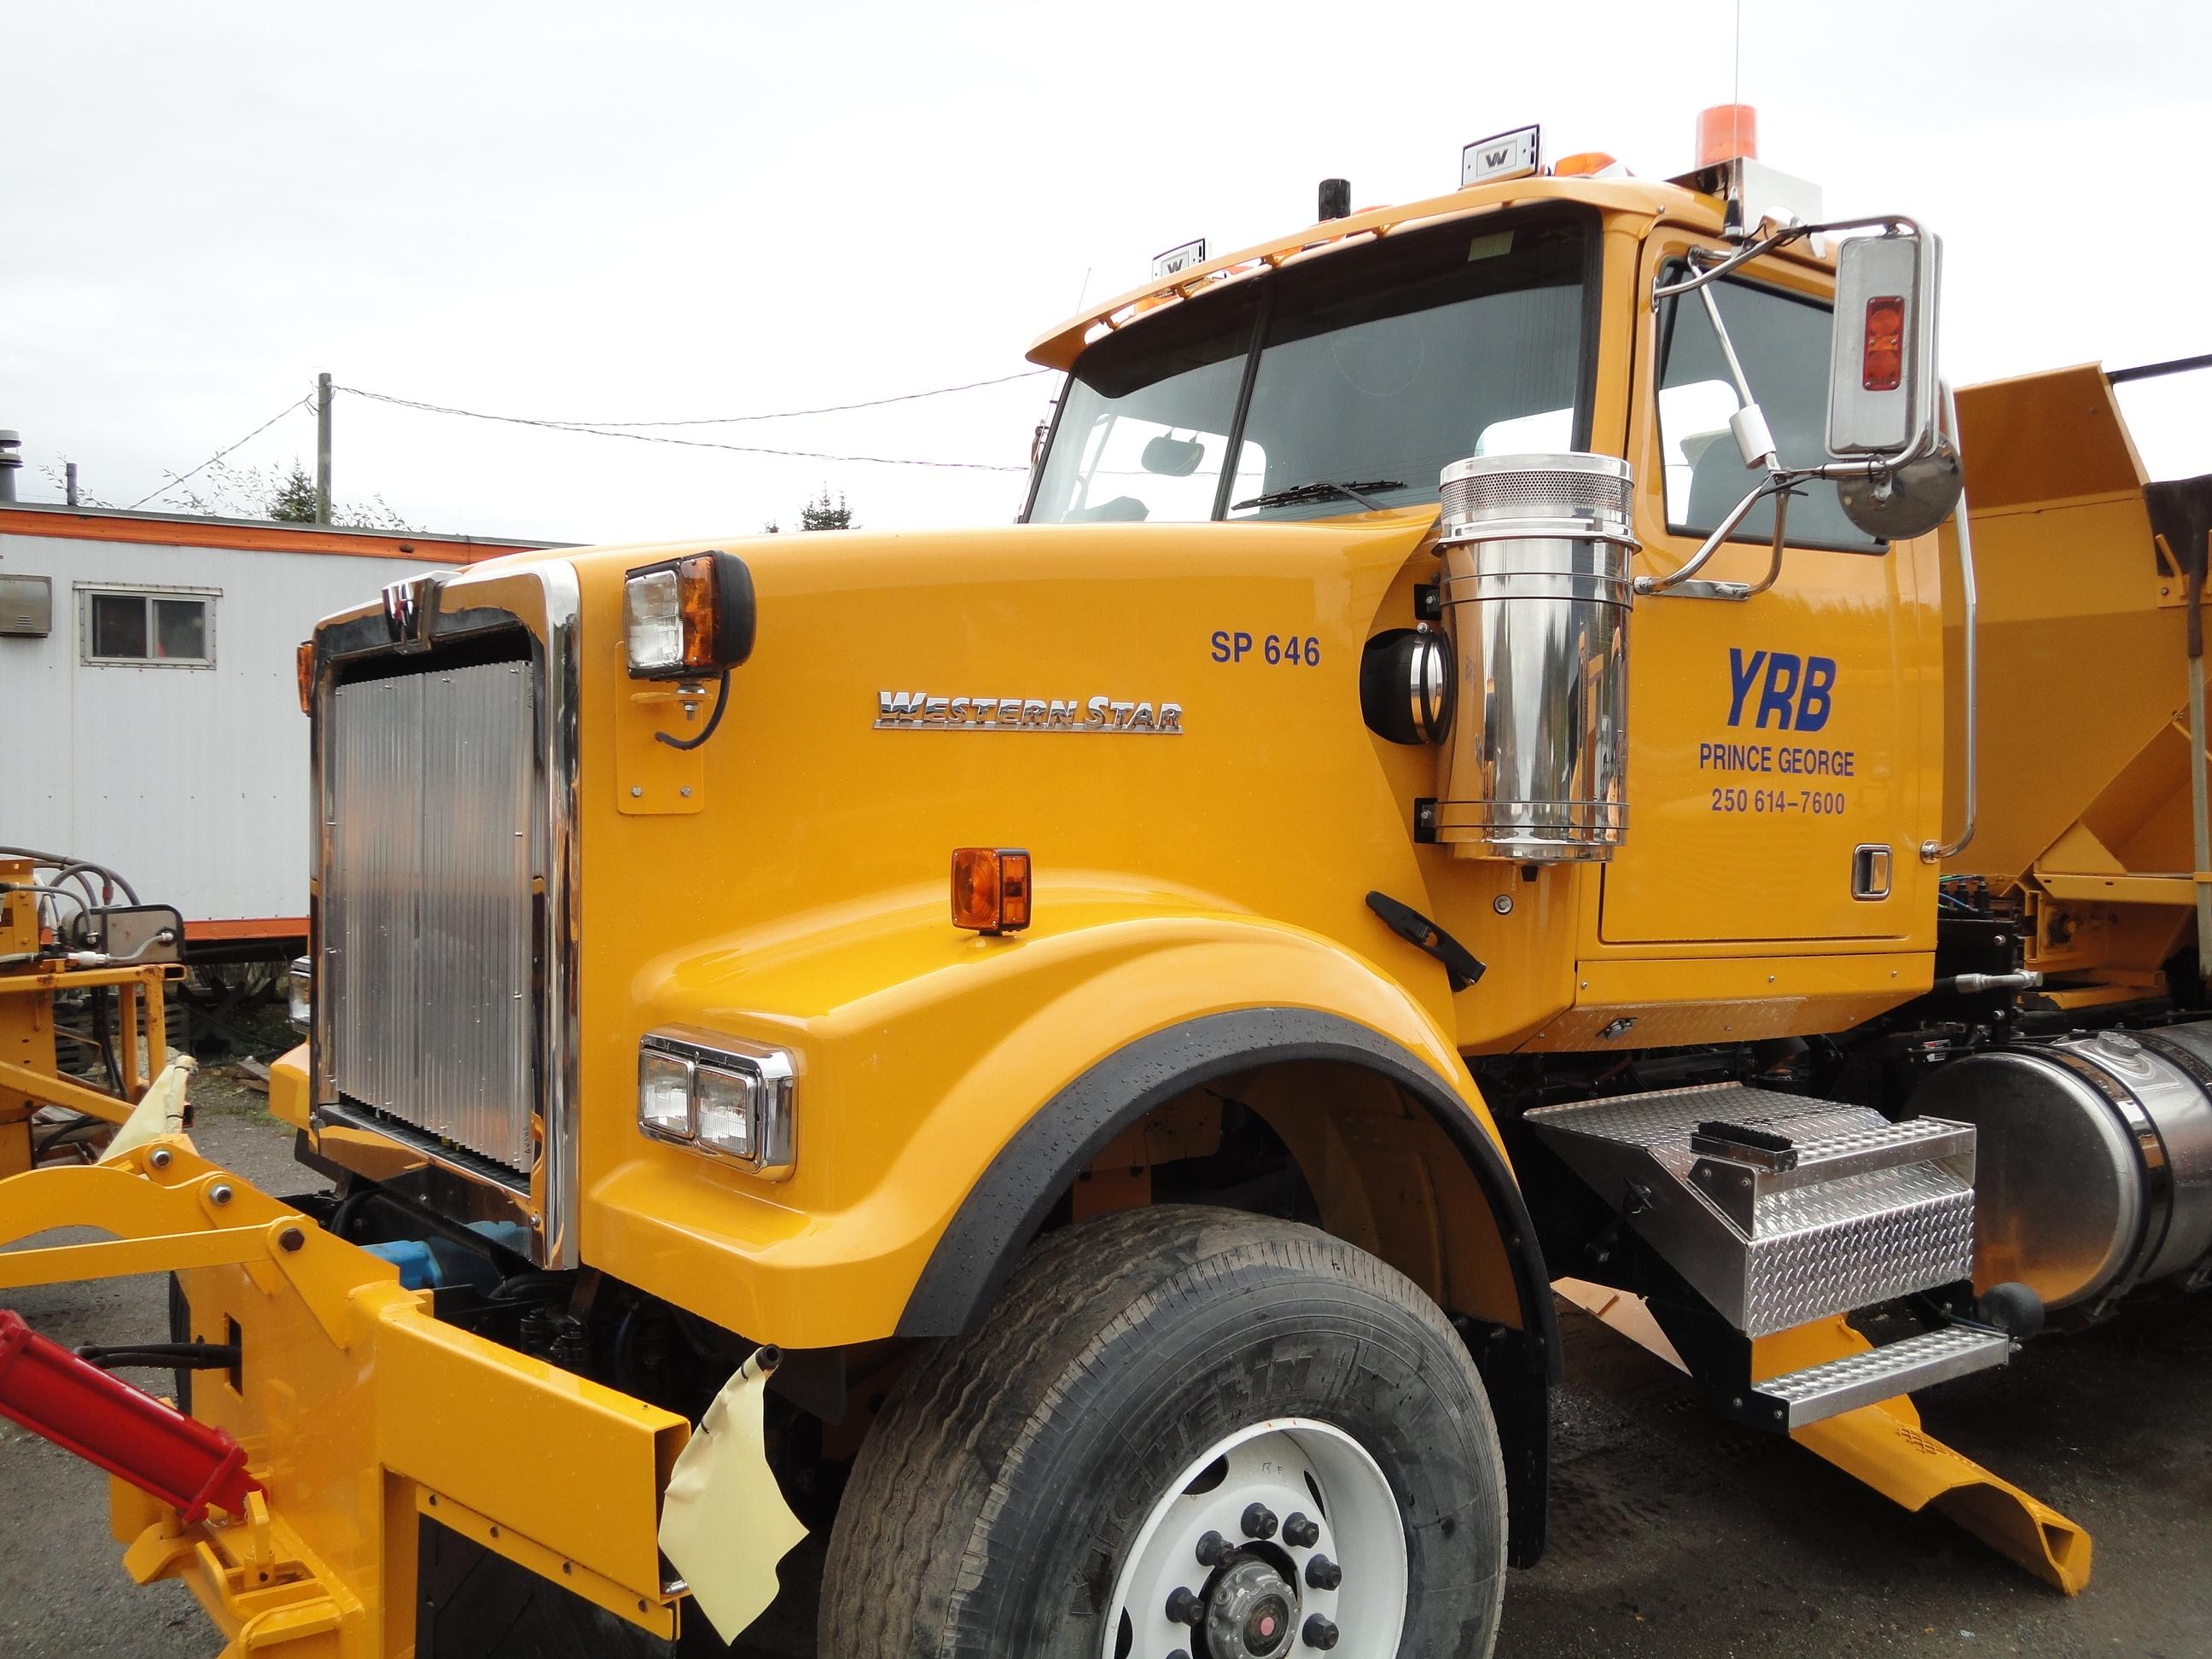
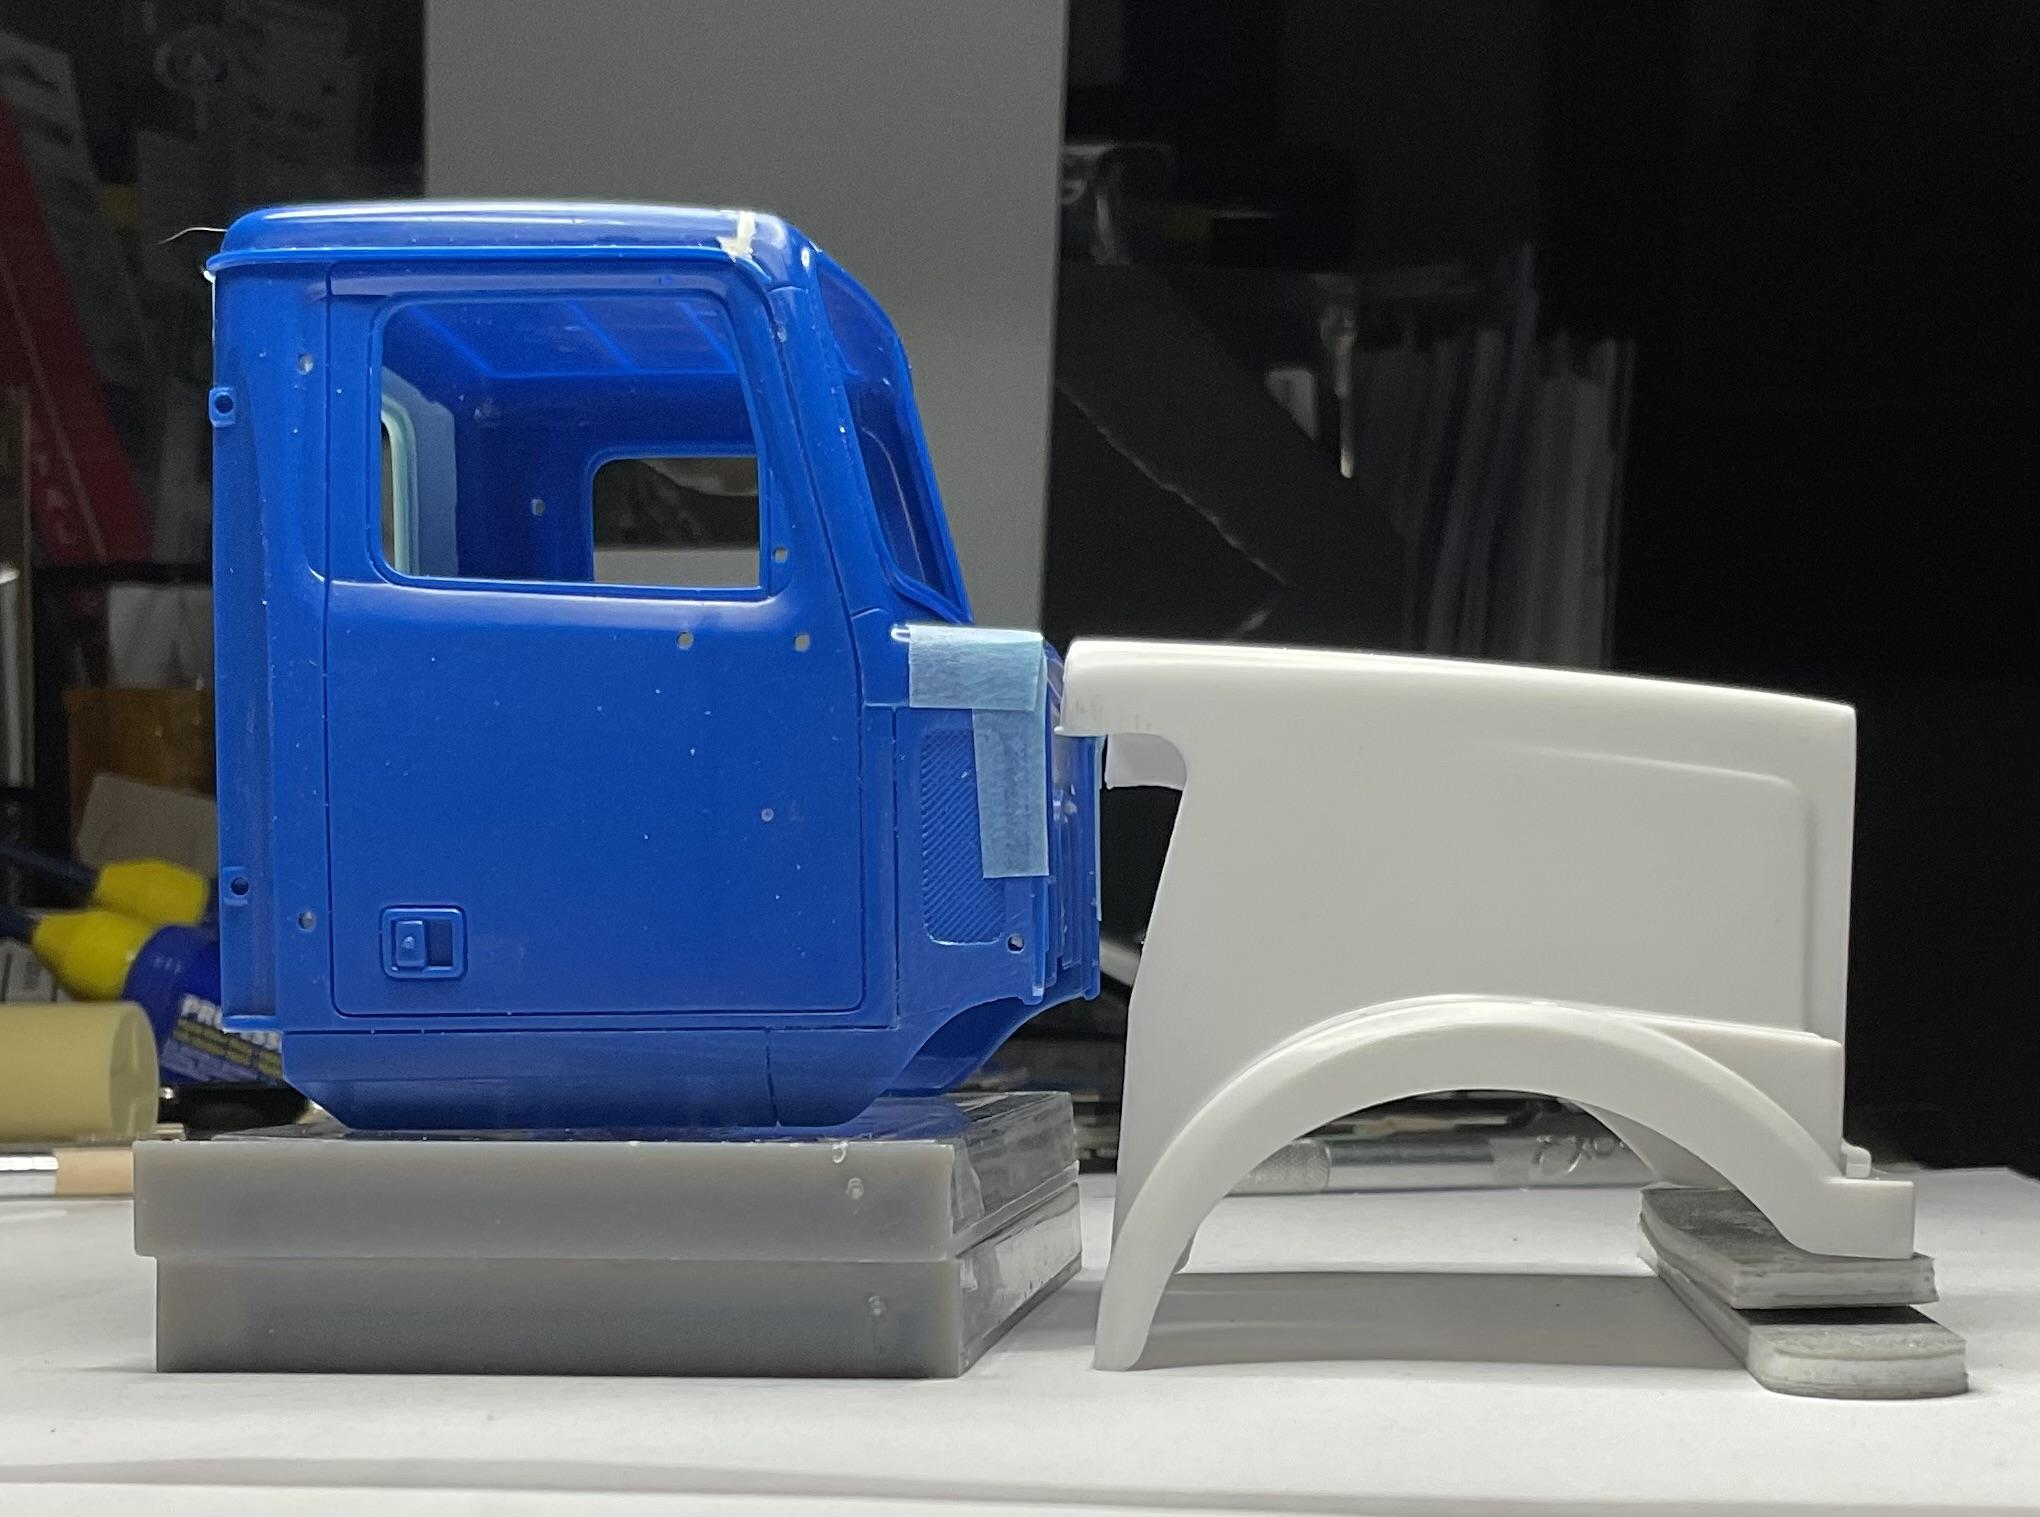
Spent some time this afternoon, thinking about what I need to accomplish with my cab and hood modifications. For the cab, I'm using Italeri's Western Star 5964SS Constellation kit, which is fairly close to what I need for the Western Star 4900FA cab. The hood is from Italeri's Western Star 4964 kit, which has the fender shape I need, but is too narrow where it meets the cab. Have it mostly figured out, just need to execute it properly! The cab and hood configuration I'm striving for - only one air cleaner - one on the other side might suck in too much snow when plowing! I need to create this curved indent and sidewall projection on both sides of the Constellation cab The Constellation cab - in addition to making the curve in to the firewall, and projections, will need to have the lower edge profile of cab extended forward on both sides; the Constellation kit had a sleeper opening in back of cab - I'll convert it to a day cab with the WS back panel from Auslowe The 4964 hood has the fender profile I need but I need to remove slight flare on sides of hood and fill in cutouts for the air cleaner clearance at the back edges of hood Light blue tape edge closely defines how much I need to widen the hood at the back edge; also need to remove the raised portion on top of the hood - the 4900 hood has a wider, raised element, and I need to remove the raised ribs on top of the fenders. The hood will be widened by cutting along each side of hood where the fenders meet the hood, and make a cut back to front on the top, center of the hood and all across the front edge of the hood, to allow the hood to be spread at the back. Then glue sides of hood back down on top of fenders, fill in the gaps with styrene, add back a wider raised portion on top of the hood and do the finish work. Sounds straight forward enough, but I screwed up an earlier attempt, about 8 months ago! I didn't make the hood wide enough at back, and messed up the curved profile of the top, back edge of hood. Anyway, you can get the general idea of what I hope to do better this time around. Not going to get it perfect but closer than last attempt. Could use a little luck! As always, I appreciate you having a look and your comments are welcomed! Thanks.
-
ALF Industrial Pumper
BK9300 replied to Firebuilder's topic in WIP: Model Trucks: Big Rigs and Heavy Equipment
Wow - going to be an impressive looking truck! -
Western Star 4900 FA plow truck
BK9300 replied to BK9300's topic in WIP: Model Trucks: Big Rigs and Heavy Equipment
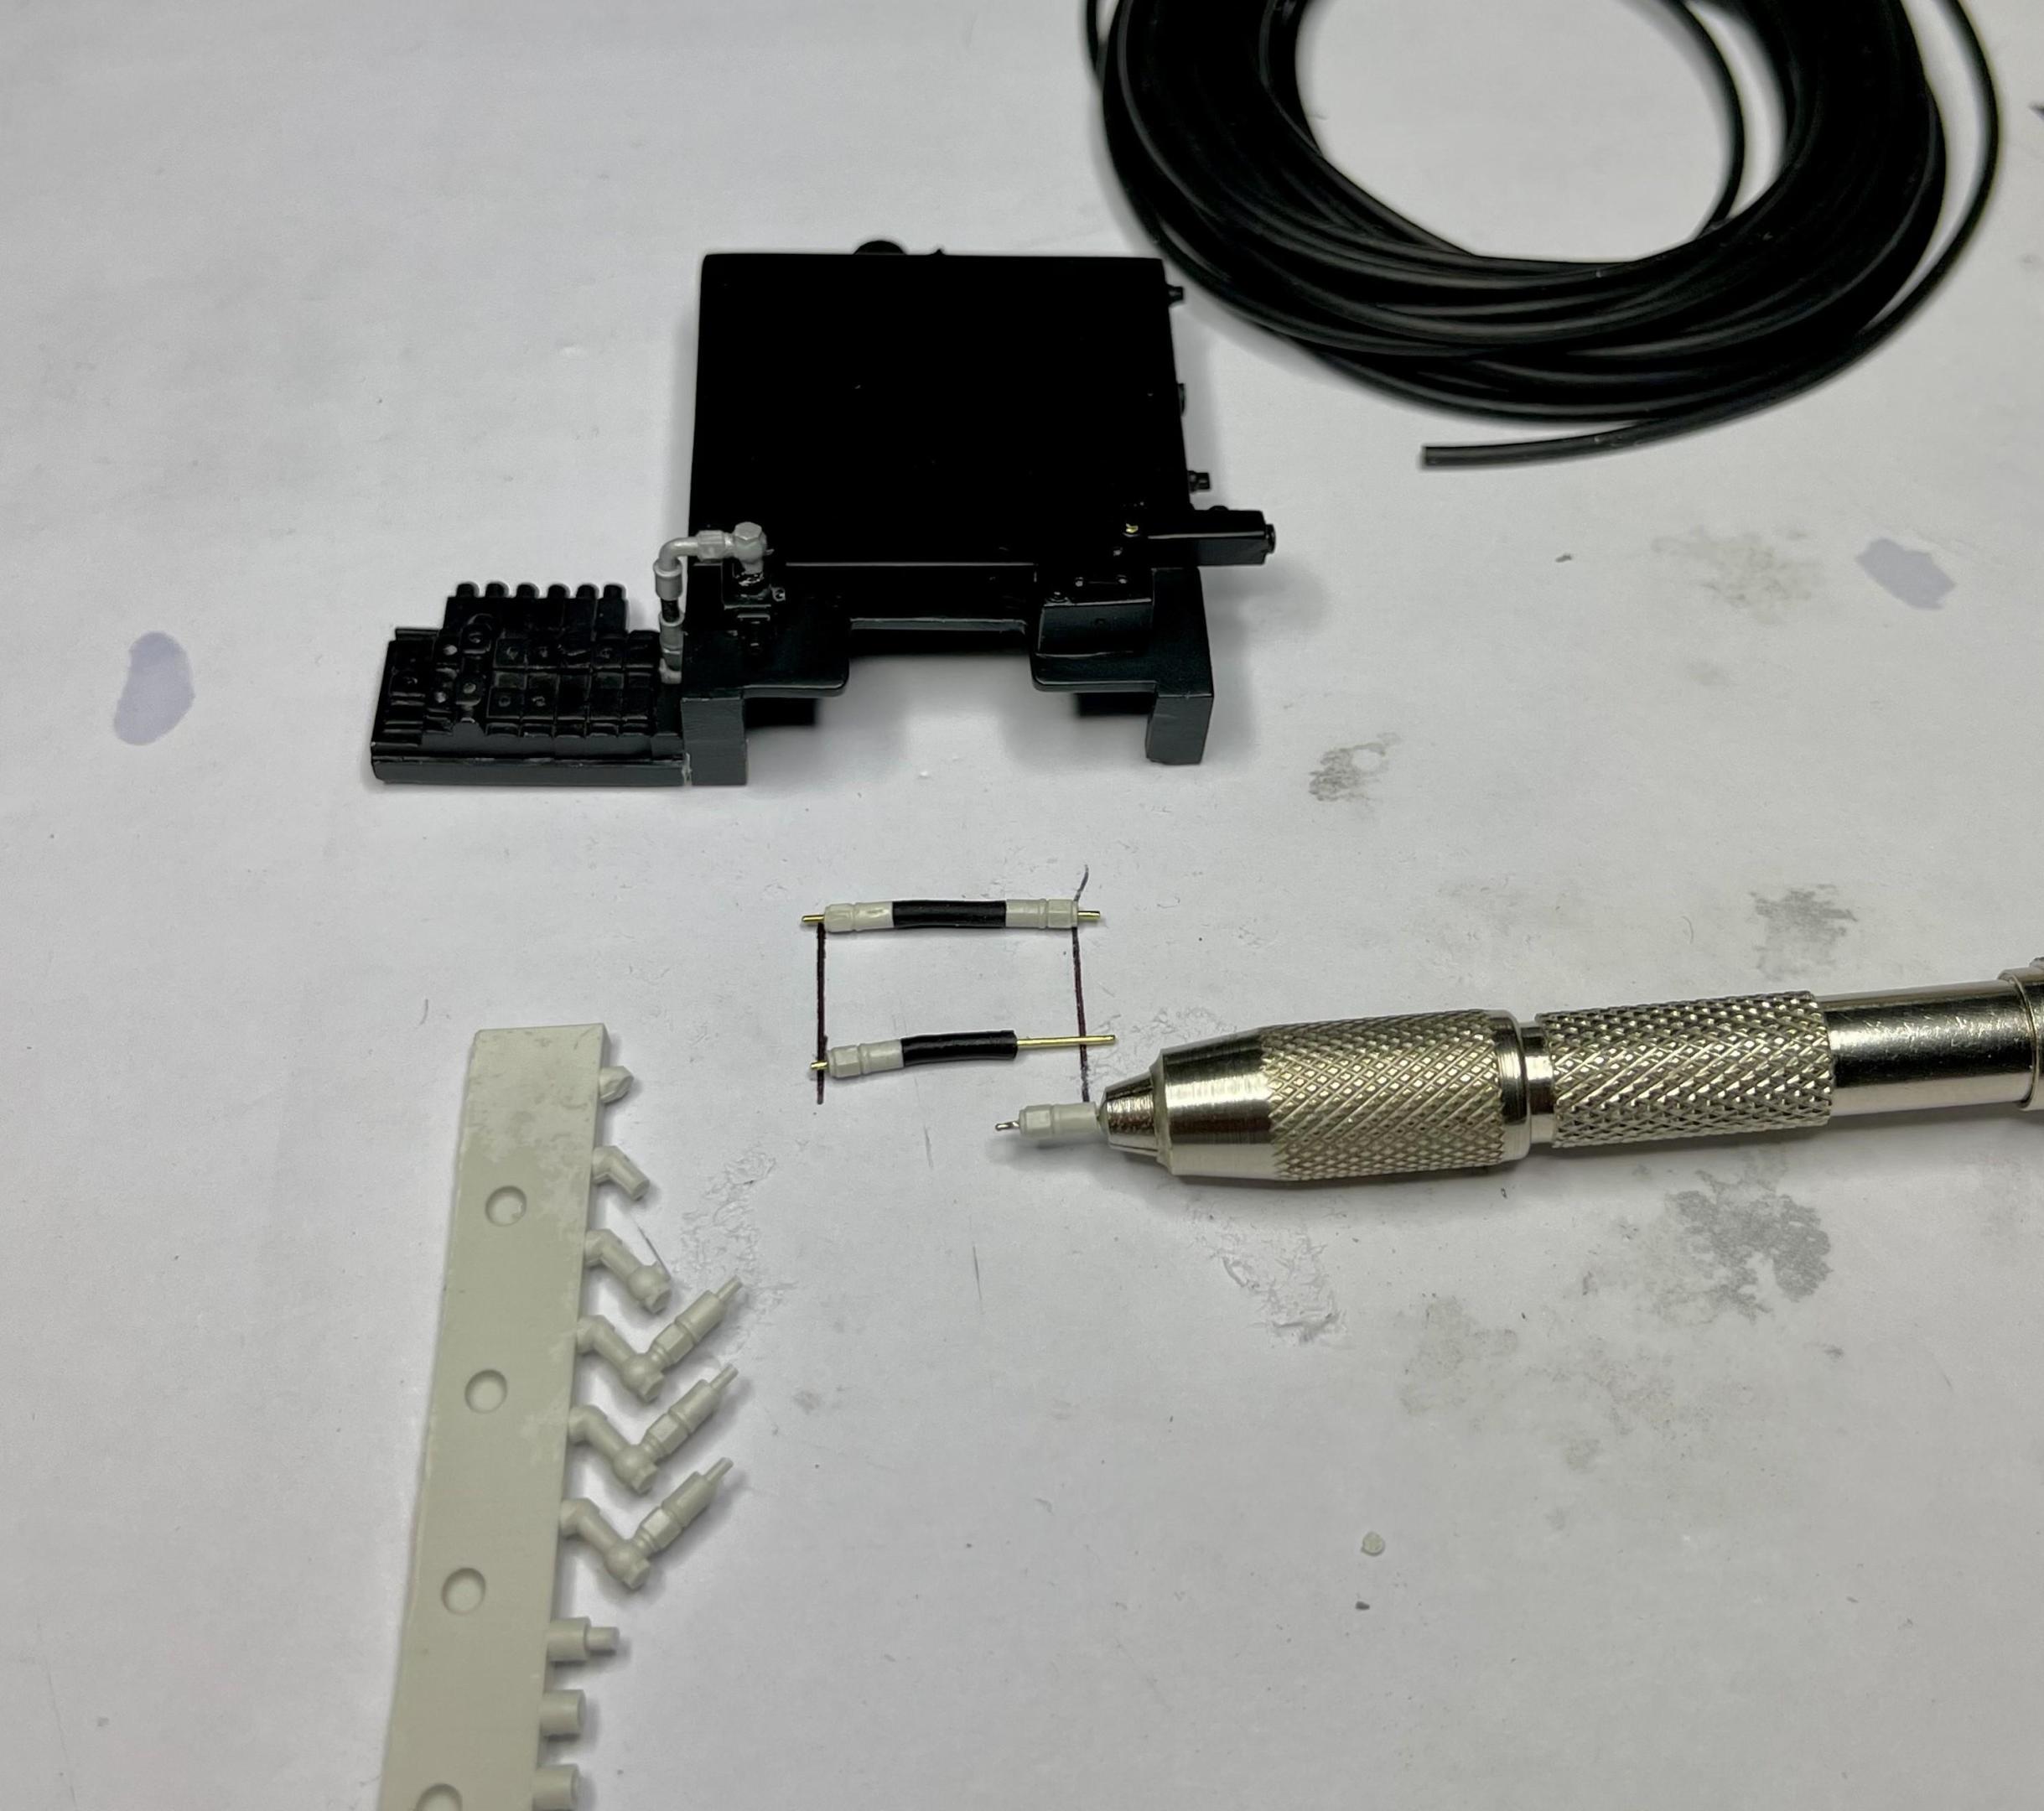
Thanks, Scott - made me laugh! The resin fittings I am using are Top Studio, purchased from different suppliers, and they are very fragile! Early on, after breaking too many, made the decision to drill out the fittings and replace the tube portion with brass rod - maybe there’s a better process, but haven’t found it yet! The aluminum fittings used on the bulkhead fitting are from R&B Motion and are described as AN fittings, but they look the part that I needed. Thanks again for the compliment! The magnifying desk lamp sure came in handy doing this work!
-
Revell's Auto Transport Trailer: WIP
BK9300 replied to David G.'s topic in WIP: Model Trucks: Big Rigs and Heavy Equipment
David, given the thoroughness you bring to all your other builds, this project will turn out great! I’ve never seen the kit up close - are the upper, individual sections height adjustable? -
I agree about the tape - great idea! Need to keep that in mind for future builds.
-
Marvel's Hydra coupe 1/12 scale full scratch build
BK9300 replied to François's topic in WIP: Model Cars
Very impressive, as always, François! -
Western Star 4900 FA plow truck
BK9300 replied to BK9300's topic in WIP: Model Trucks: Big Rigs and Heavy Equipment
Yes, even more so once I get the cab and hood on - guess I've taken so long with that because I'm reluctant to do the cutting and modifications to cab and hood I need to do to make it look more like a 4900 FA. -
Western Star 4900 FA plow truck
BK9300 replied to BK9300's topic in WIP: Model Trucks: Big Rigs and Heavy Equipment
Thanks, Jeff! -
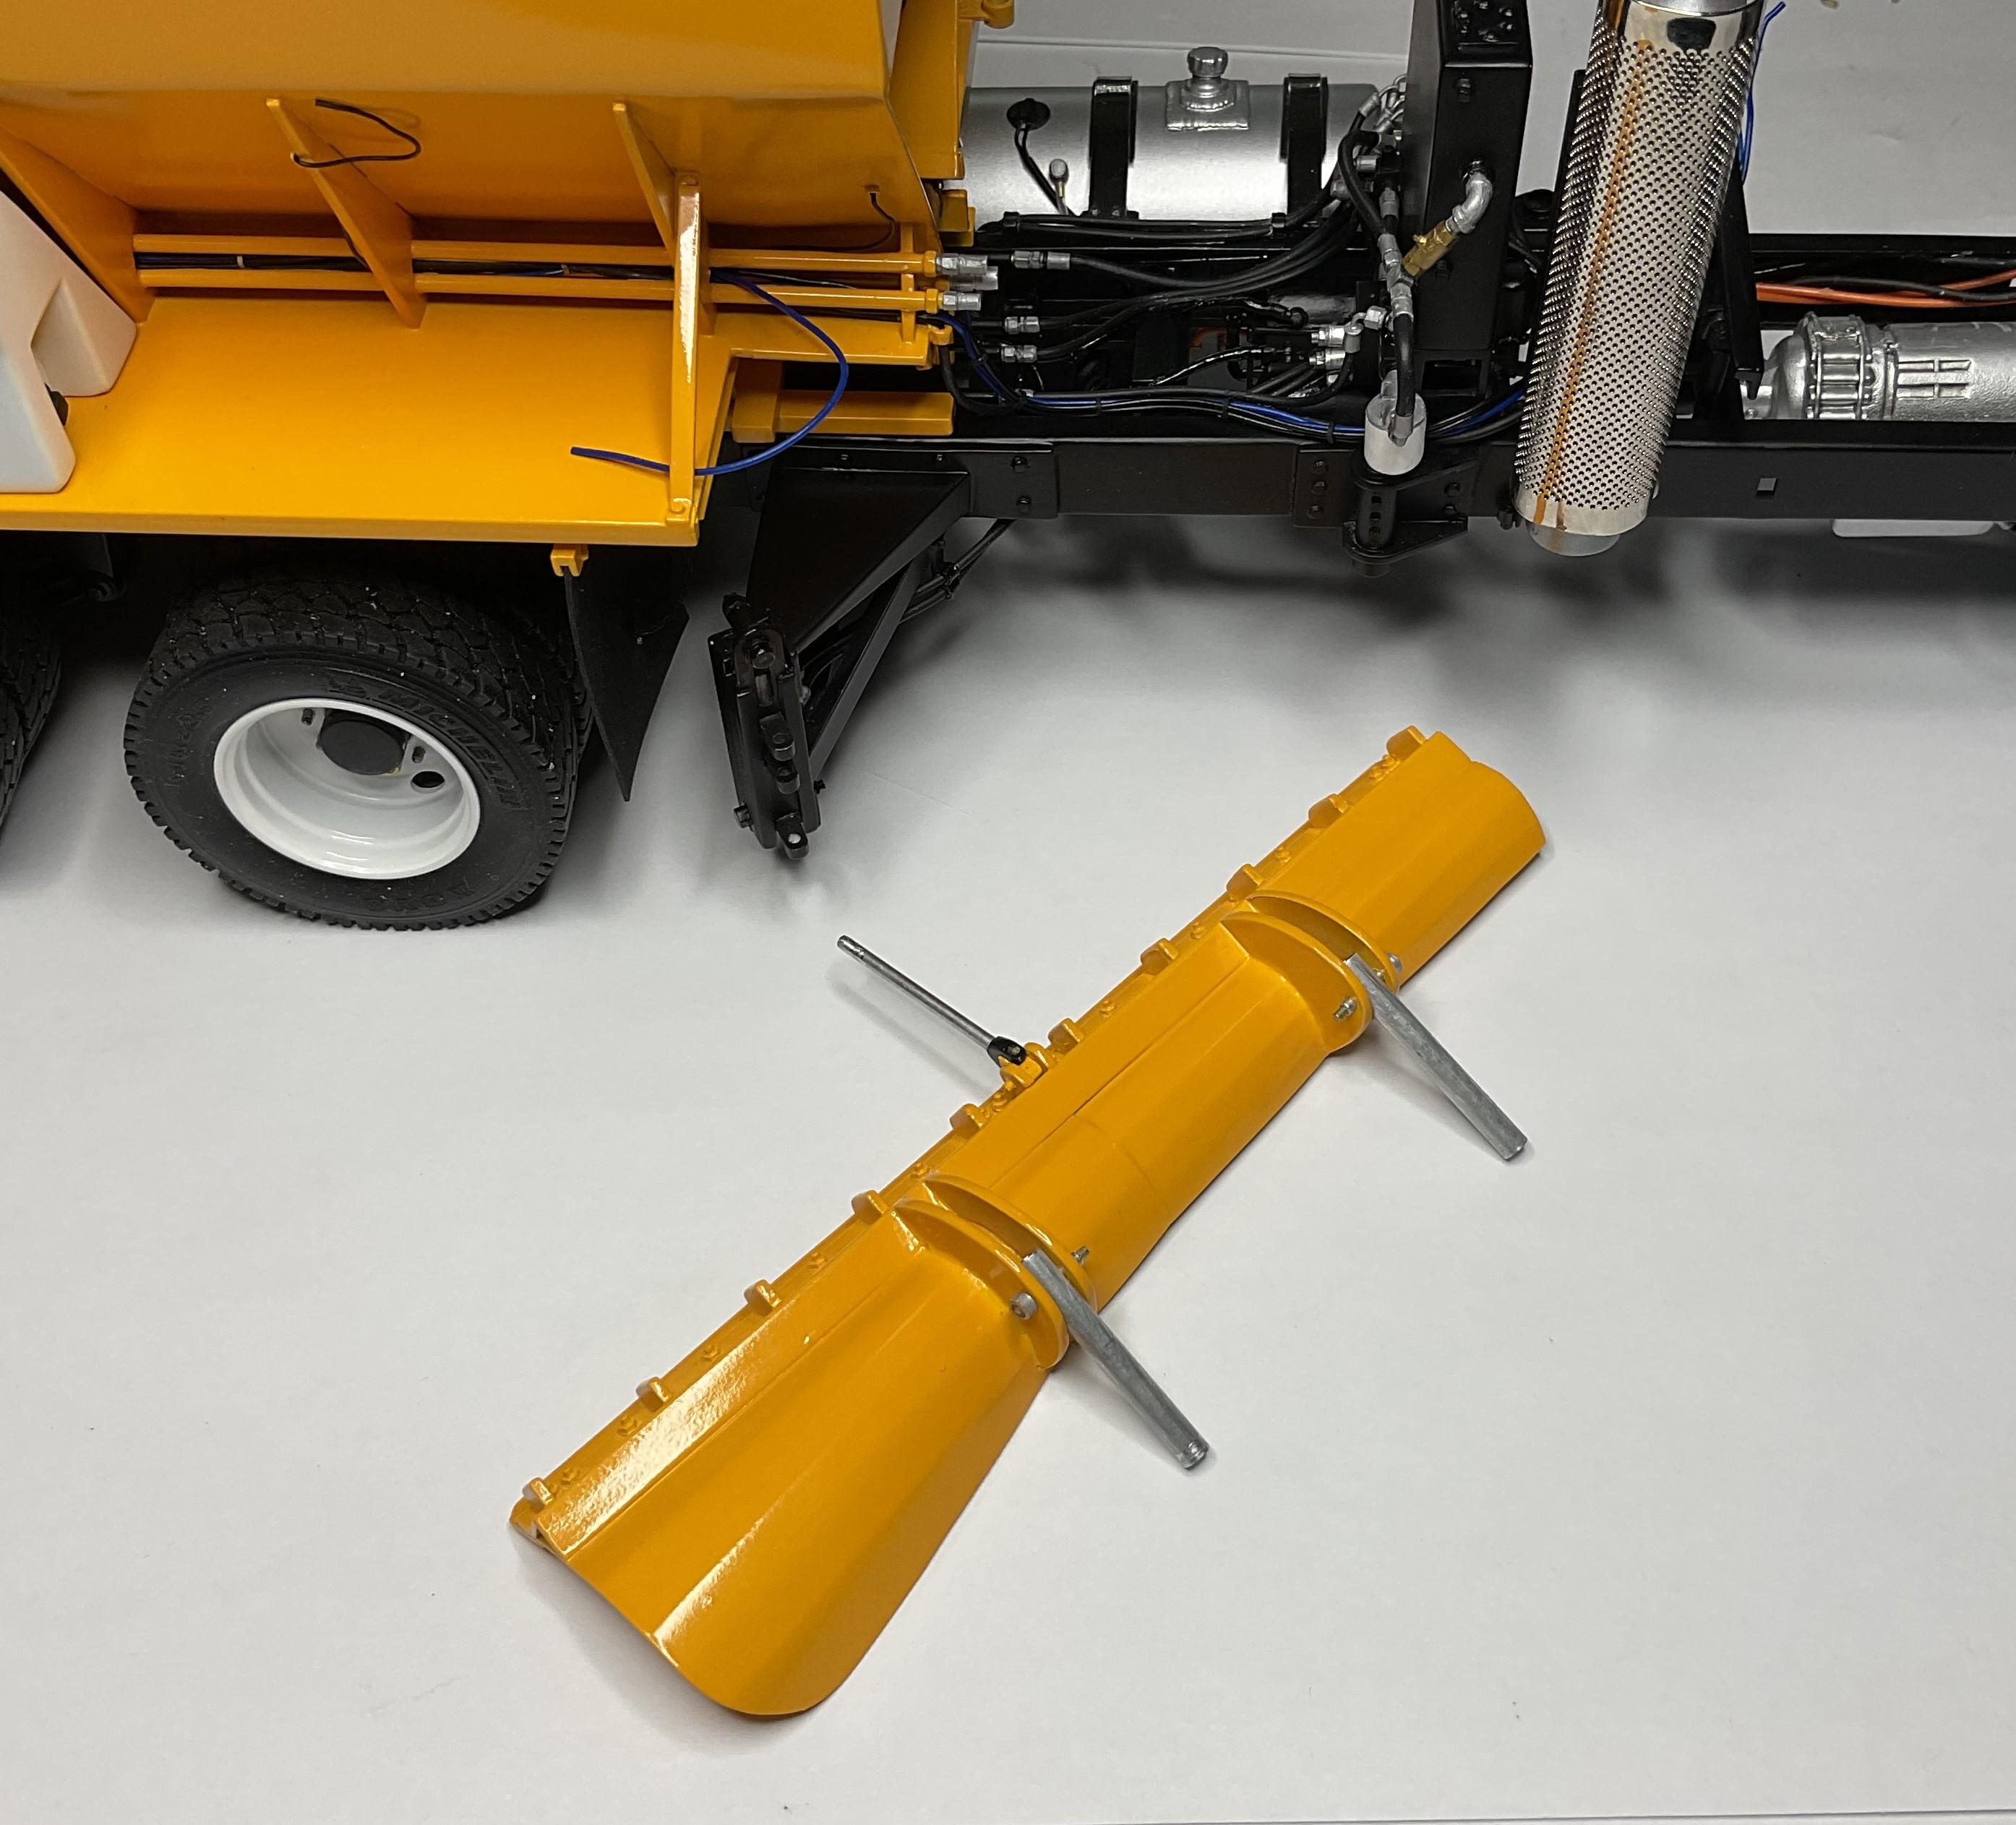
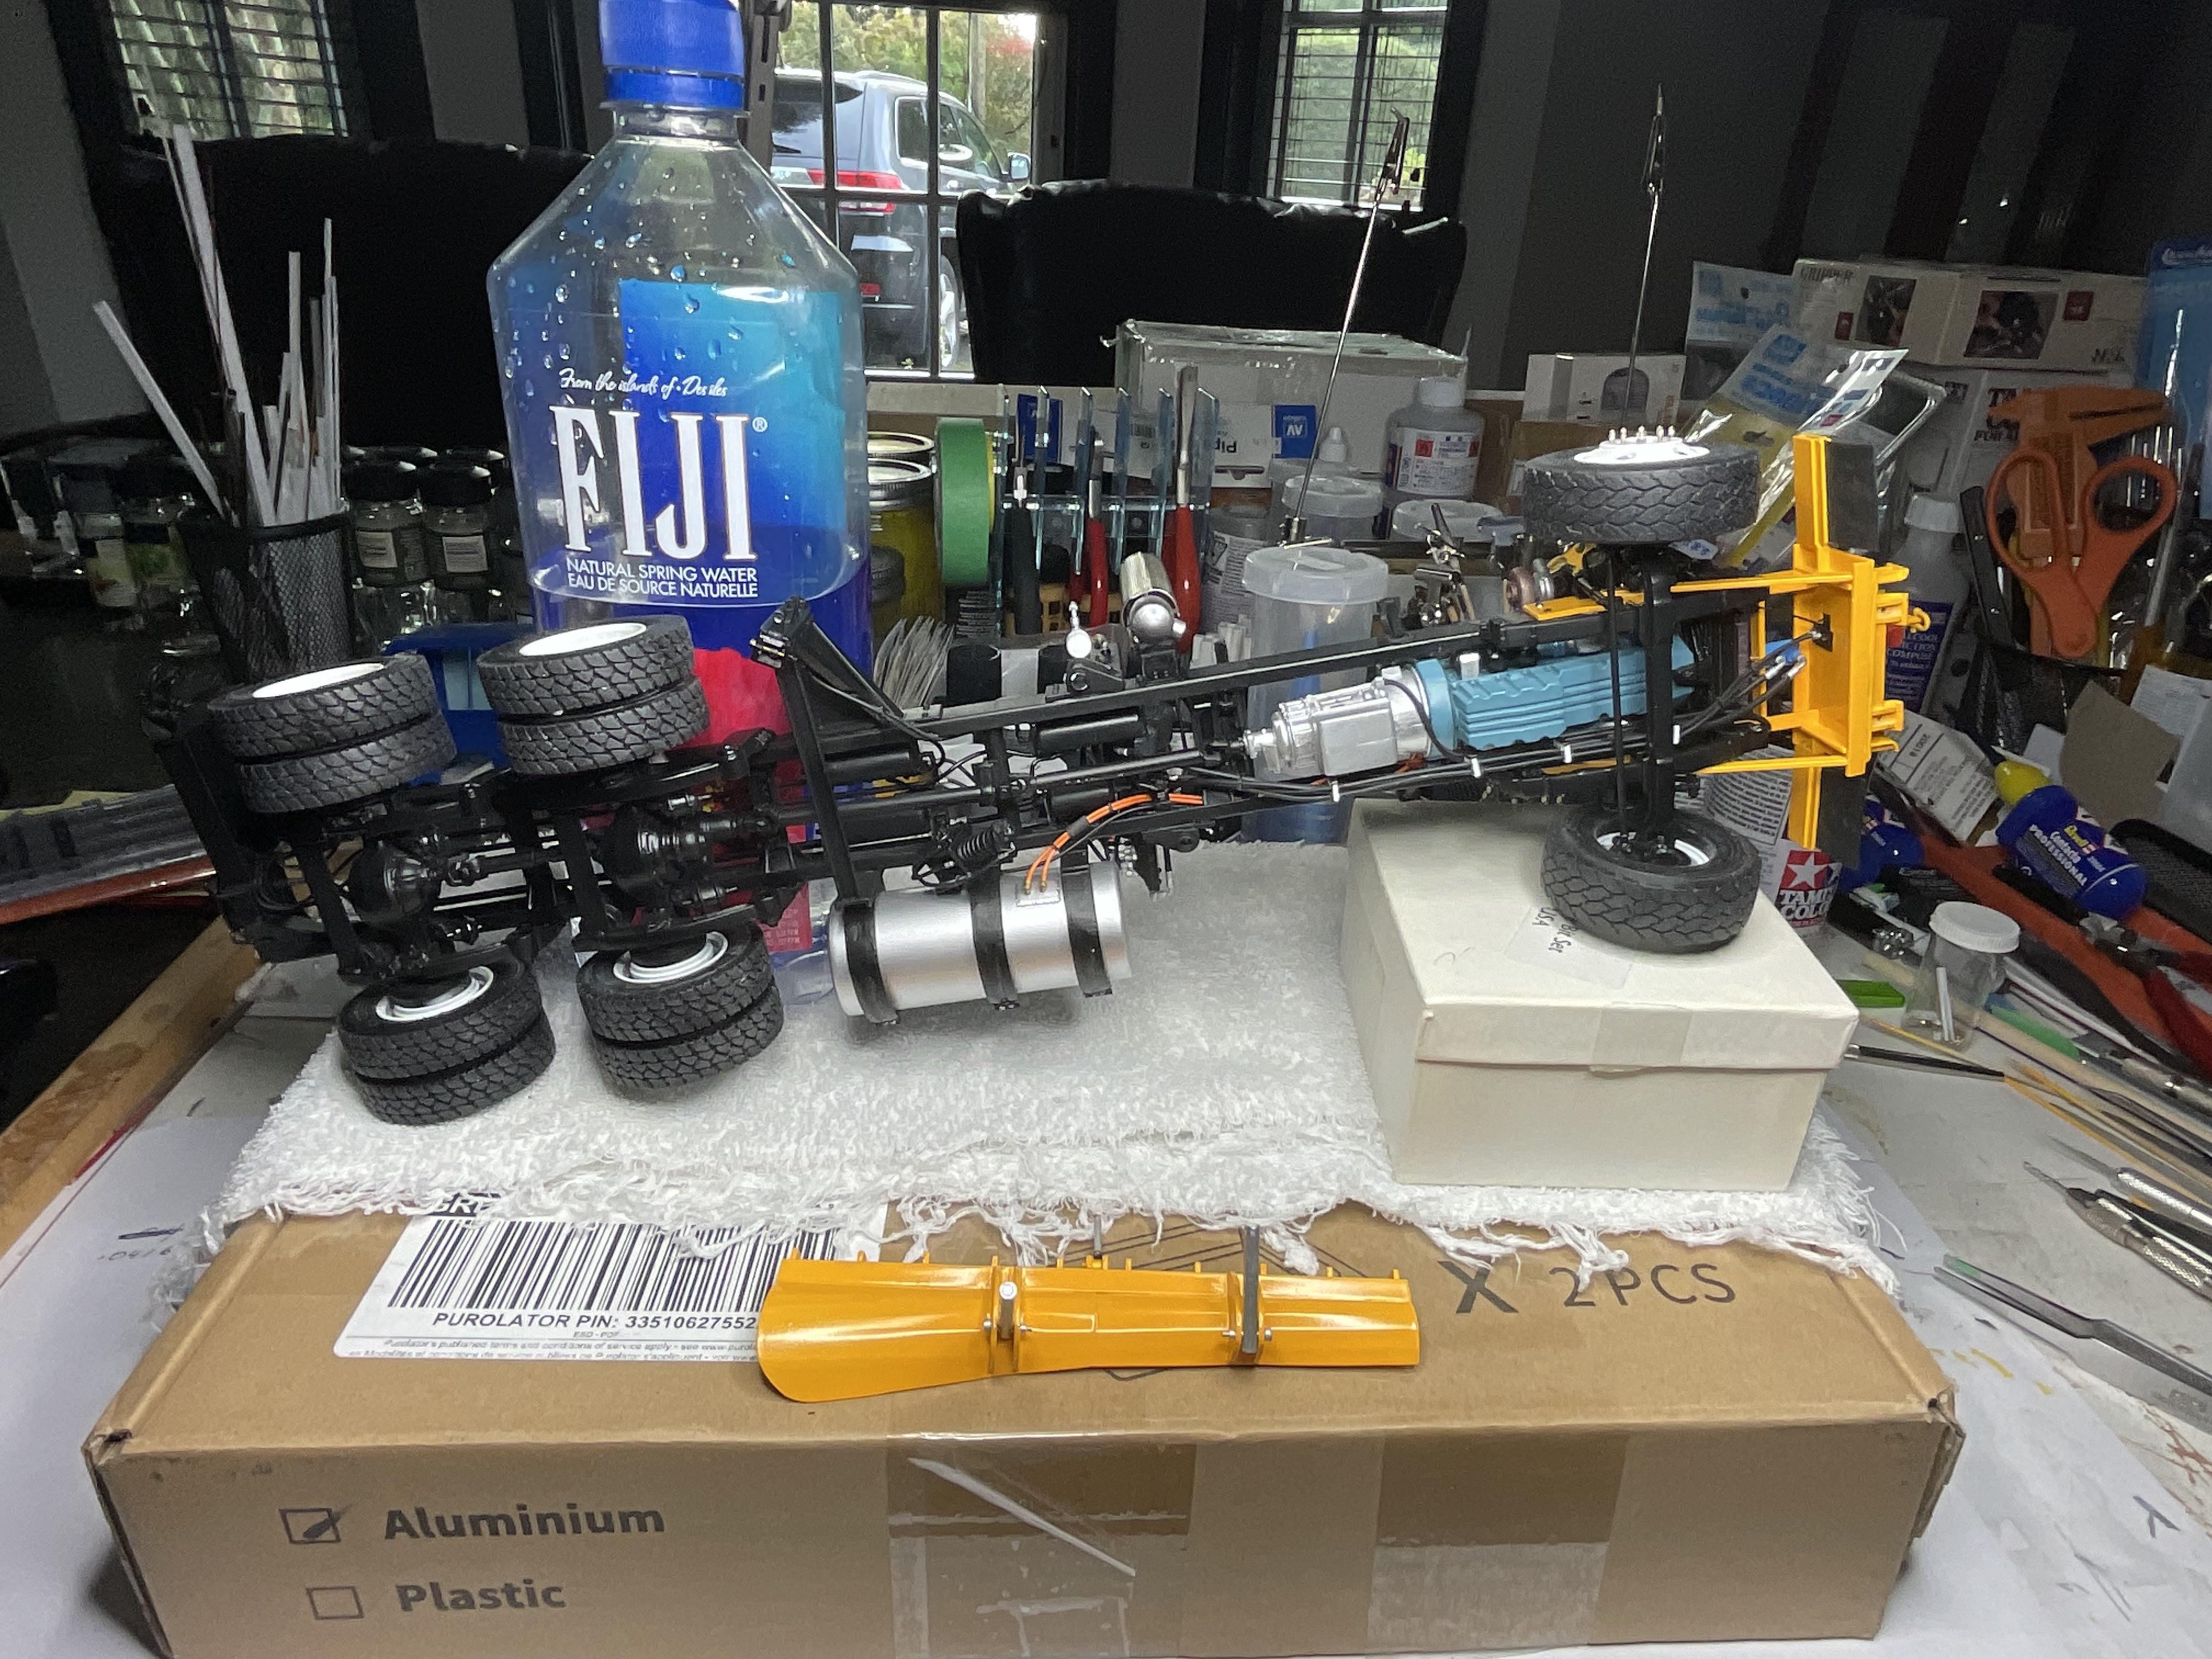
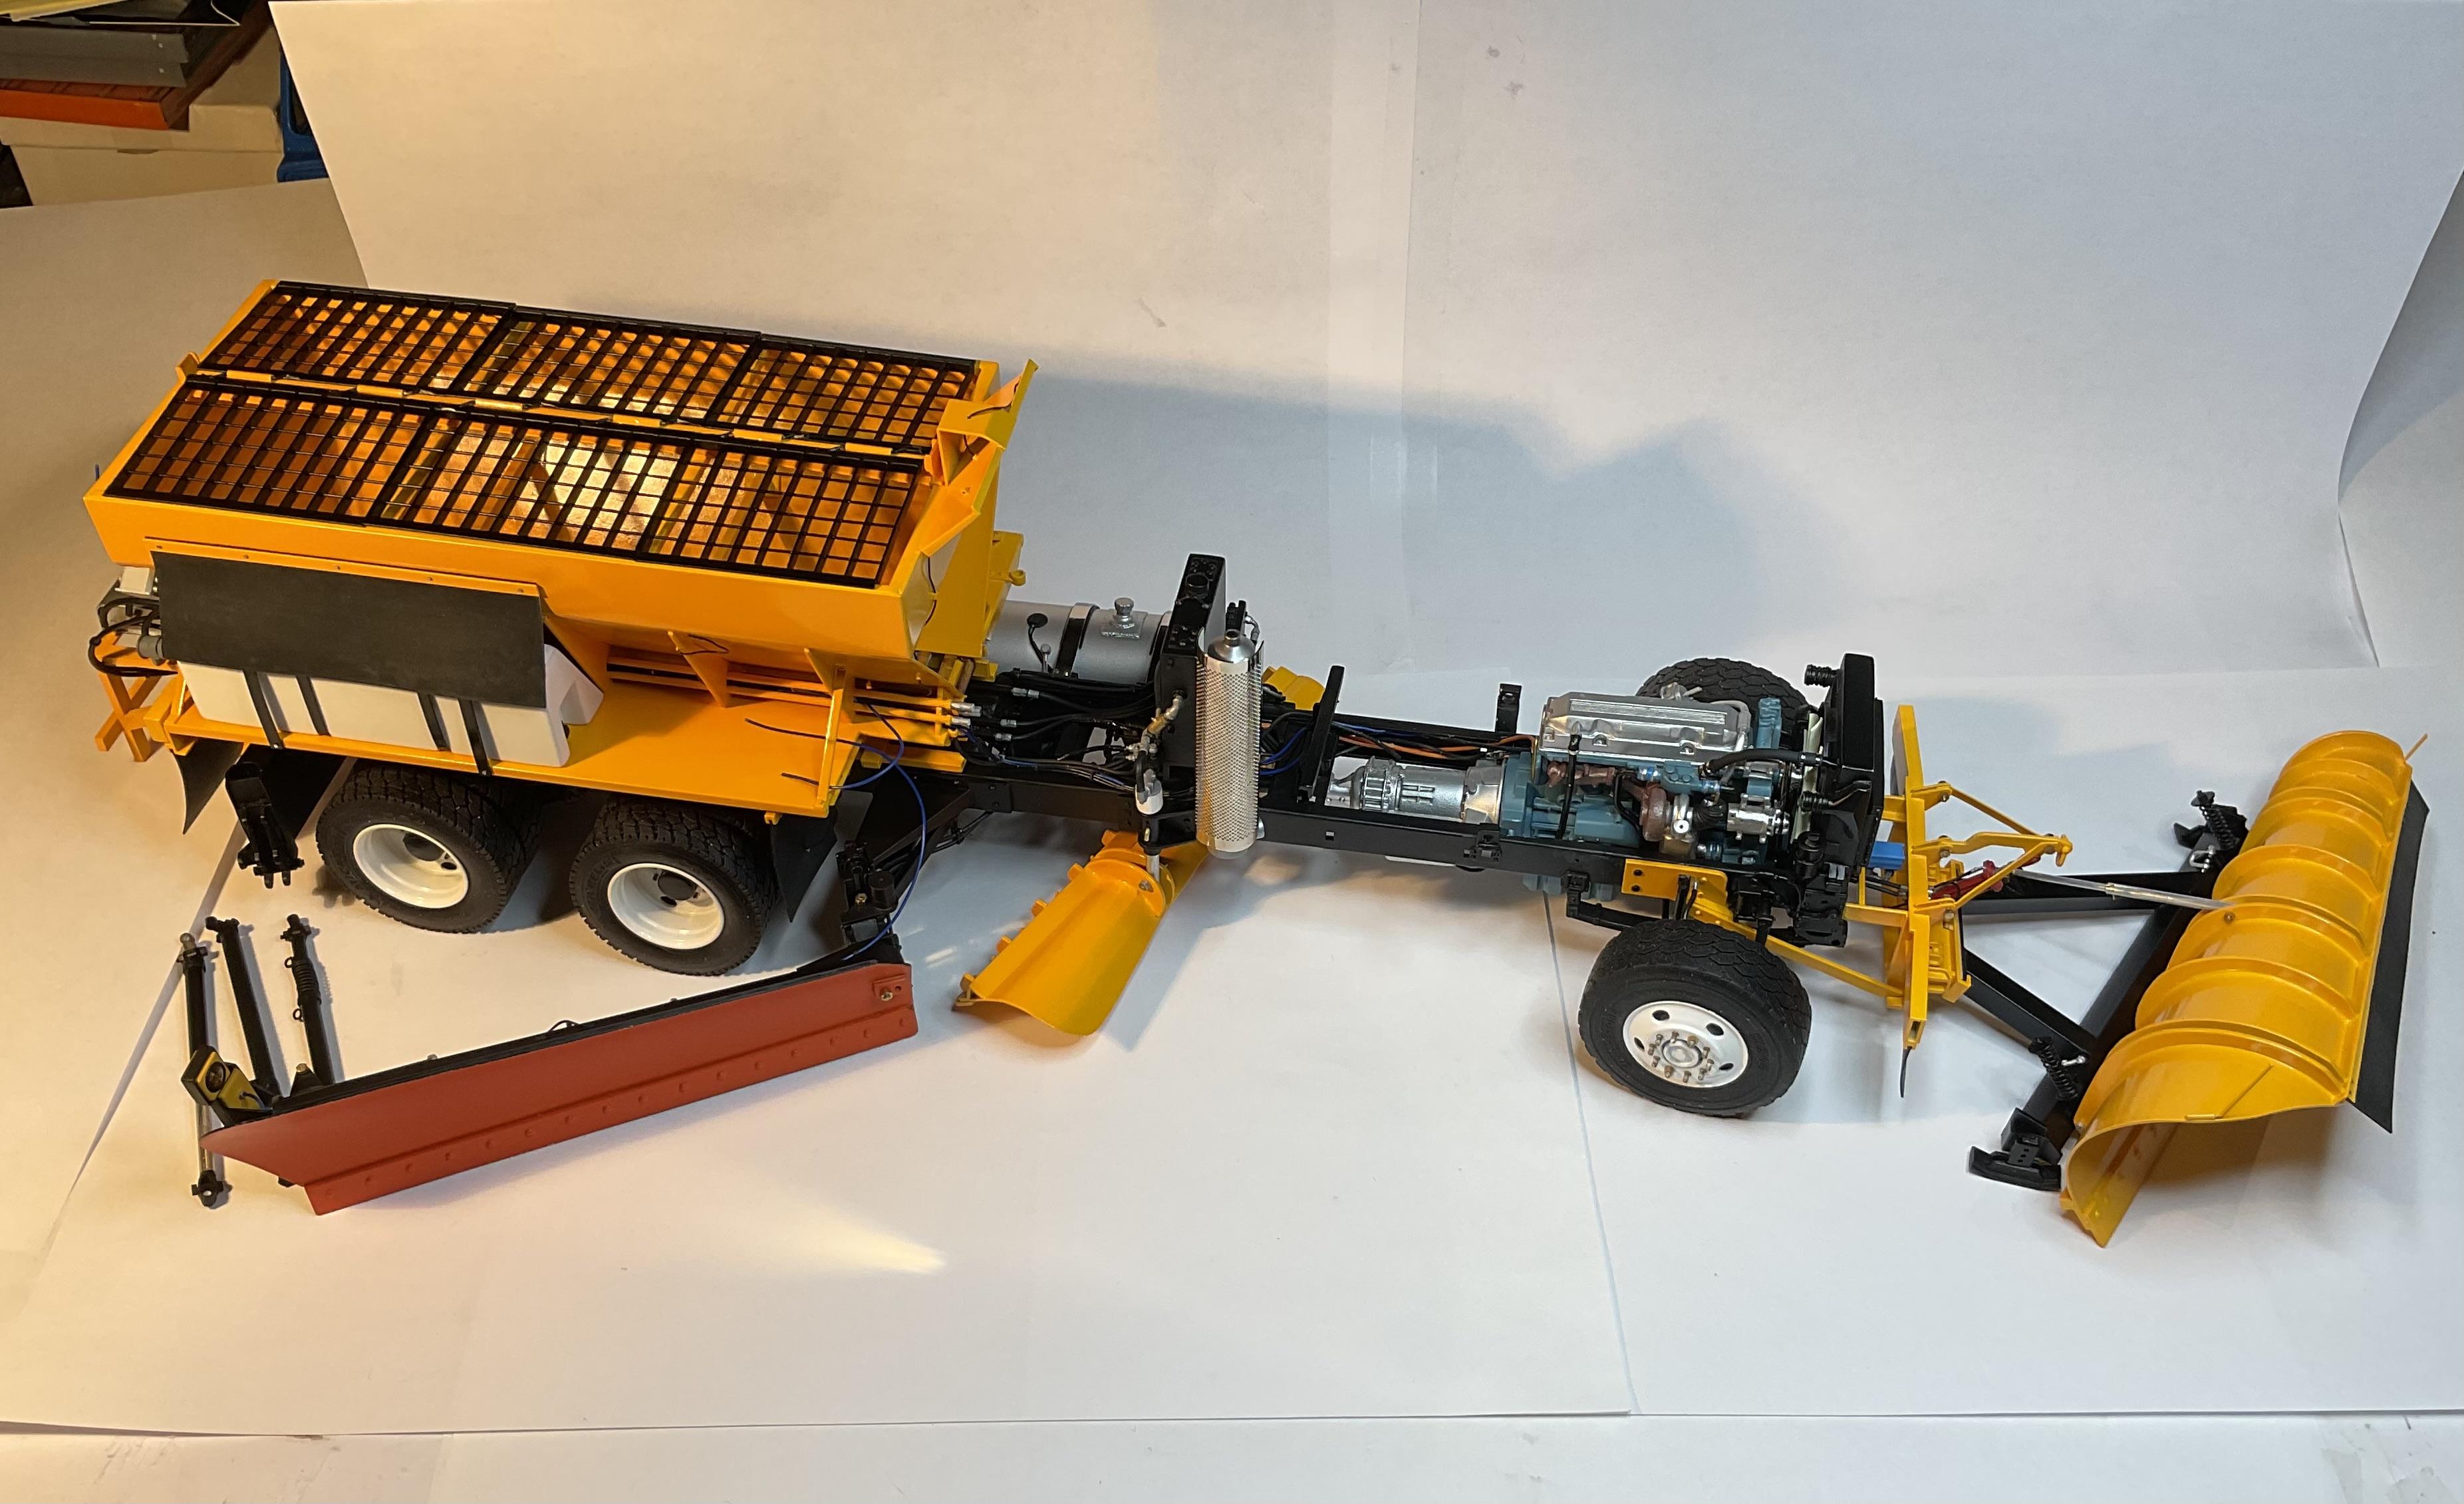
Western Star 4900 FA plow truck
BK9300 replied to BK9300's topic in WIP: Model Trucks: Big Rigs and Heavy Equipment
So, motivated by having the sander back on the truck, I carried on this afternoon with some re-assembly of the other two plows. Everything had to go together differently than when first built, because now it was difficult to turn truck upside down. It all turned out good, after about three hours of fussing, and its going to be a long truck - 23" from the back of the sander frame to the leading tip of the front plow. Exciting moment to see it all (mostly) together! Got the the adjustable pins and part of lift cylinder back on the underbody Had to remove sander again and precariously perch the truck on its side to install the underbody's pins in the sleeves on side of truck frame Looks real close to being done but still lots to do on engine, hood and cab; didn't put push arms and cylinder on wing plow, because paint tends to easily come off the aluminum tubes - she's long! Two different lights used here so, not great result, but you get the overall look! (may need to re-do lift cylinder ram - not that happy with looking at it in this pic - a bit out of proportion?) Have to get the sander decals on and figure out how to take the sander body off in the future, but still another good day - thanks for having a look.
-
Western Star Classic heavy haul
BK9300 replied to Biggu's topic in WIP: Model Trucks: Big Rigs and Heavy Equipment
Engine looks good, Jeff and I noticed your posable steering - did you modify the kit linkages? -
Western Star 4900 FA plow truck
BK9300 replied to BK9300's topic in WIP: Model Trucks: Big Rigs and Heavy Equipment
Lee, the fitting turned out to be a real life solution for a problem in my model - just would have been a lot easier to do before I put the bumper on the truck! -
Western Star 4900 FA plow truck
BK9300 replied to BK9300's topic in WIP: Model Trucks: Big Rigs and Heavy Equipment
Thanks, Steve - very pleasing to get to it to that point! -
Western Star 4900 FA plow truck
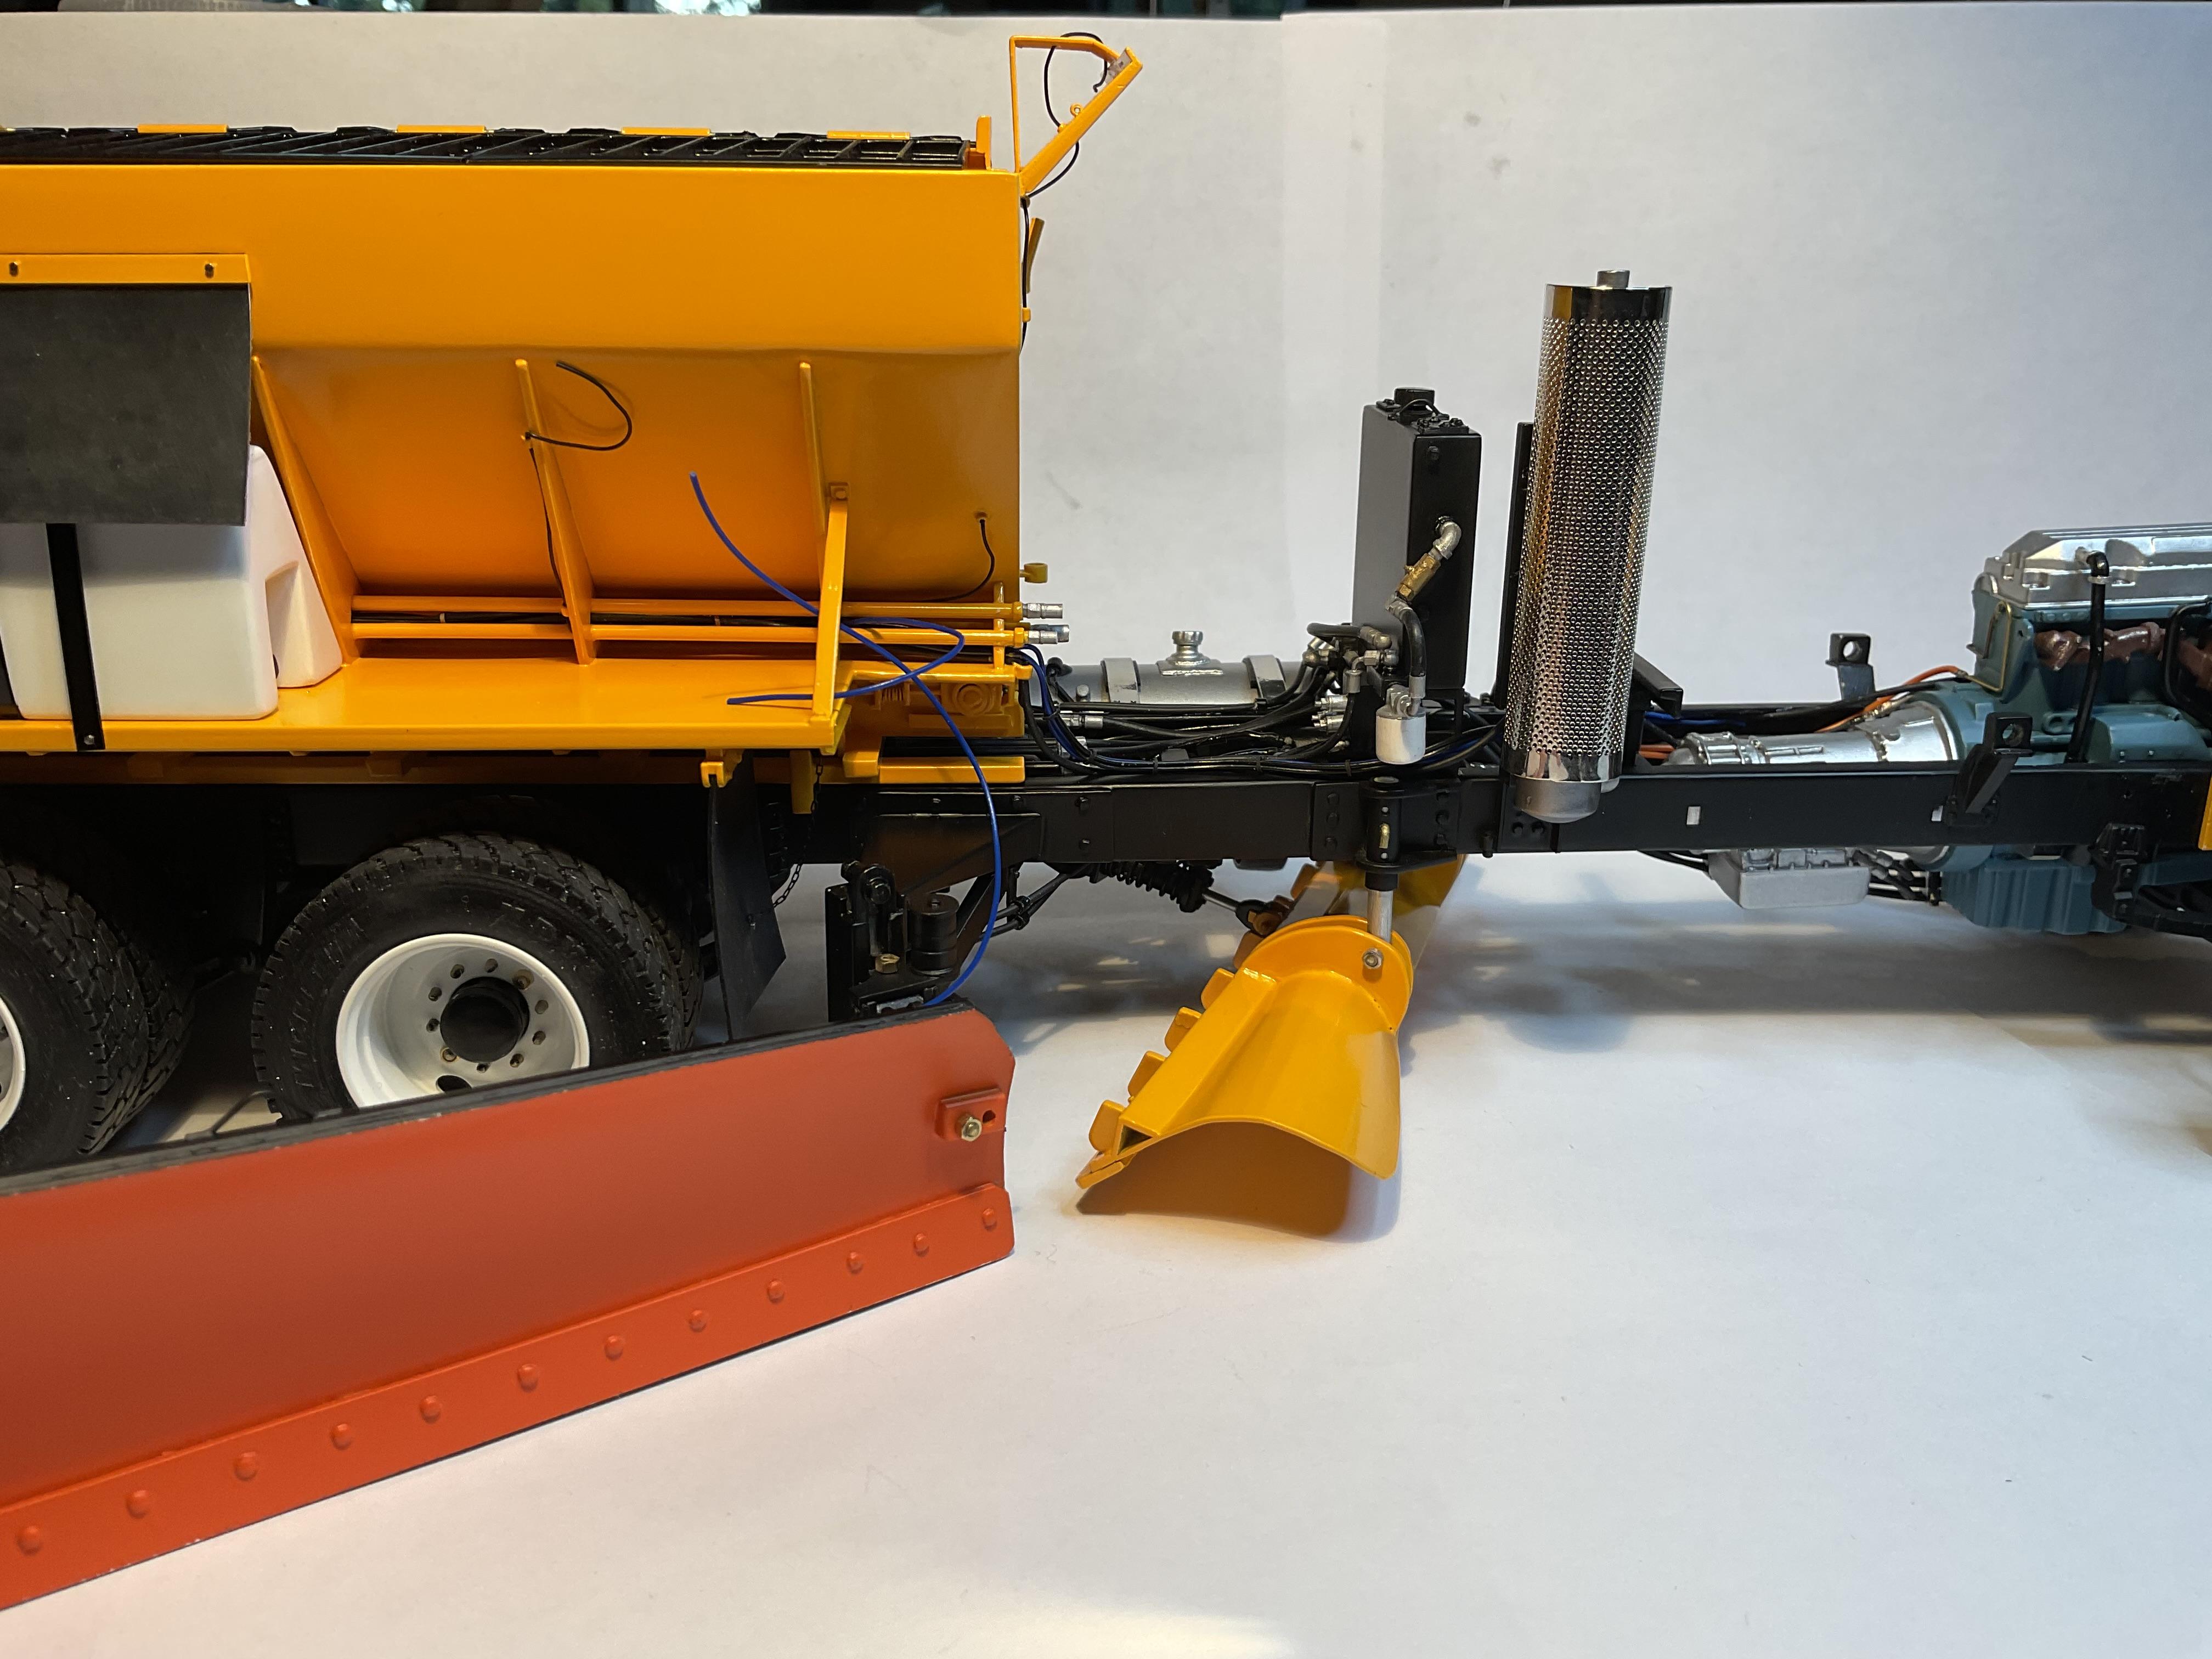
BK9300 replied to BK9300's topic in WIP: Model Trucks: Big Rigs and Heavy Equipment
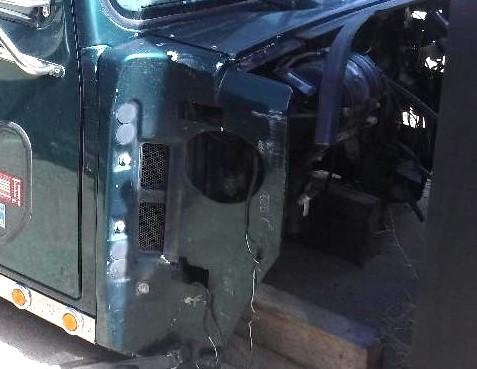
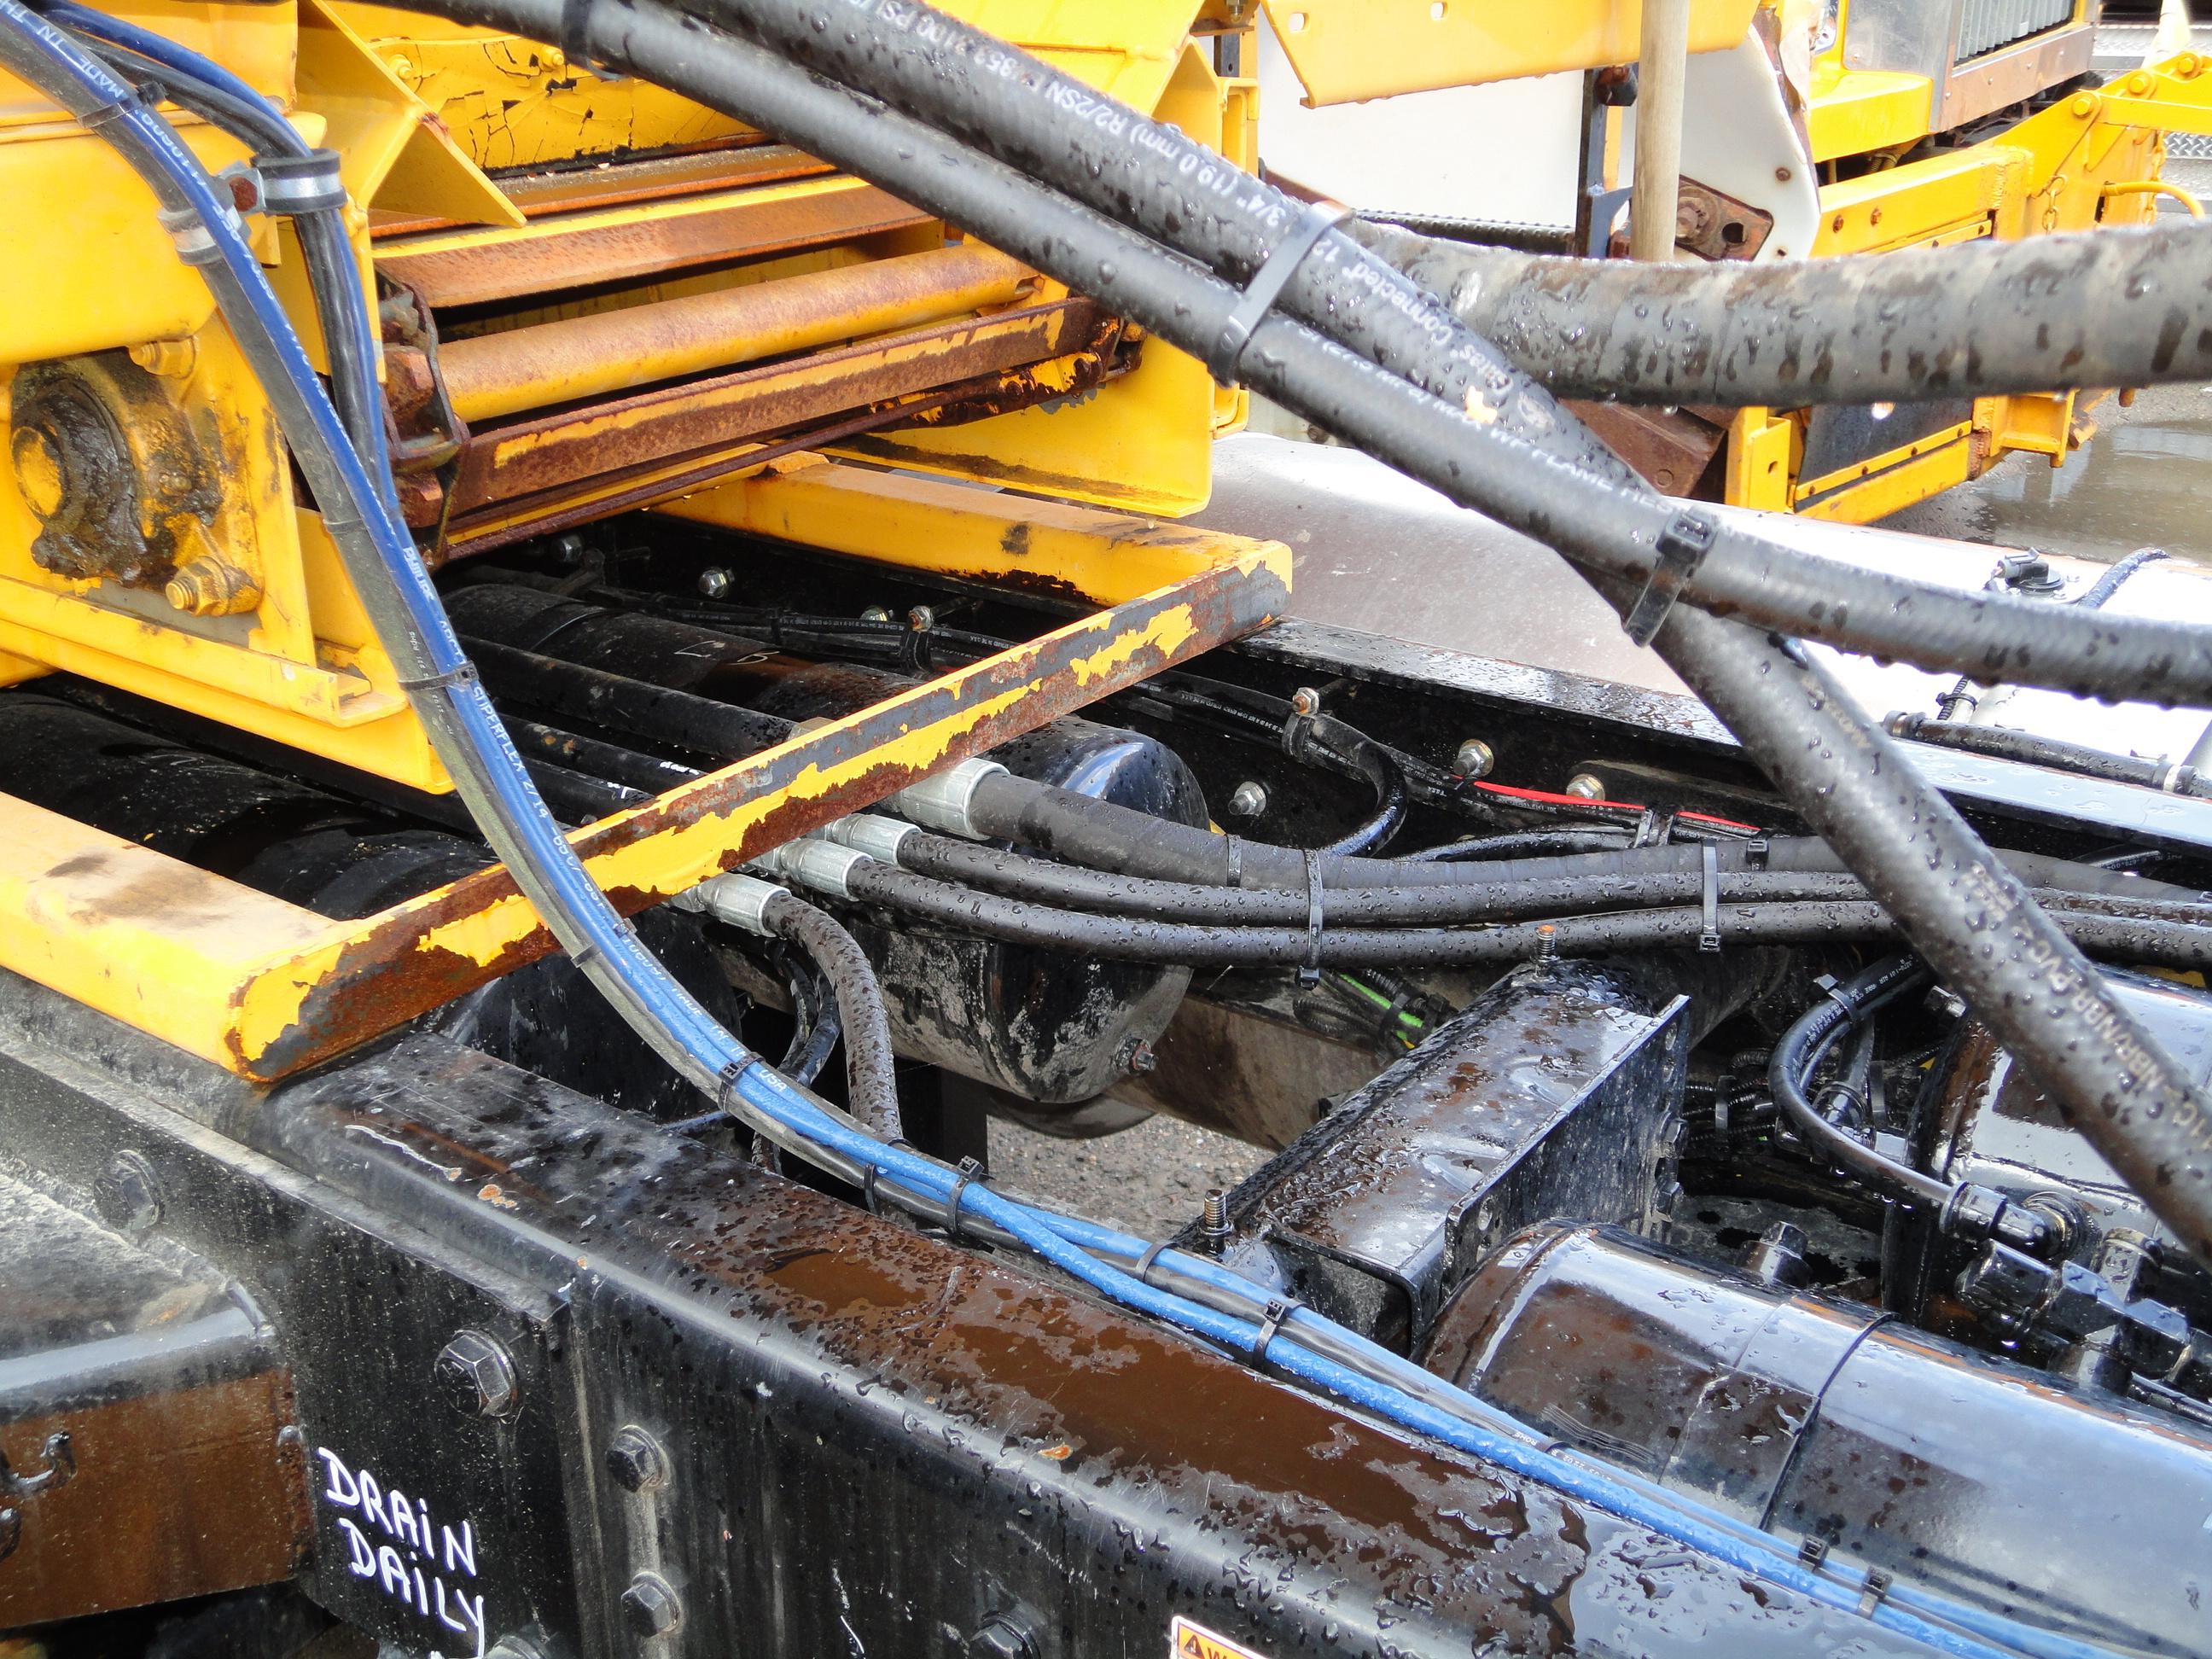
Got a bit side-tracked today - had wanted to get onto the front lift cylinder today, but found I still needed a small part to finish off. Then I took a couple pics and realized that a lot of little paint touchups are going to be needed from handling the frame. Started doing a few paint touchups, then got distracted by trying out some acrylic black wash on the fittings underneath the sander, to see if it improved the look of the fittings - I think it did, a bit. Then, got distracted even further by starting on tidying up the wiring at the front of the sander. I finally got back to doing a temporary assembly of the front plow - without lift chains, yet, and, of course, took more pics! Couple things going on here - a picture like this has been posted before, but now that the frame is off the rotisserie, I could finally complete the hydraulic hose run through the rear cross member, and 'plug' it until needed for summer dump box duties! Also applied some of the acrylic black wash to the hose fittings - although only slightly better than before, there is a definite improvement in the detail visible in the fittings Some wash applied to connector lids and hose fittings on wing plow's rear mount Decided to tidy up the sander wiring a bit, because I need to figure out how make it so the sander can be removed from the truck in the future, if need be, just like it can on the real truck. Made little rubber wafers to gather the wiring together This is a real truck's wiring at the same location - I don't yet have these final three hydraulic lines in place on the model yet Has a similar look to the real truck . . Finally back to the front lift cylinder and temporary assembly of lift group - need one more bit of Albion tubing to finish attaching the hydraulic lines to the bulkhead fitting Mocked up front plow - two mounting pins for the push frame to attach to the bumper need to be made. Again, the fasteners in the pic might be replaced by slightly smaller ones. Still got a bit more on the go for the rest of the afternoon and might post again later today - thanks!
-
Western Star Classic heavy haul
BK9300 replied to Biggu's topic in WIP: Model Trucks: Big Rigs and Heavy Equipment
Good idea! That company does make good parts - I just got an order from them, too and looks like good quality. -
Ford LS Rescue truck
BK9300 replied to gotnitro?'s topic in WIP: Model Trucks: Big Rigs and Heavy Equipment
What would you think about making the hinge point for the hood at the bottom edge of the hood and lower edge of your frame rail extension? Just make the notches for hinge in your frame extension low enough on the end of the rail to match up with the bottom edge of your hood. Might need to round off the bottom corners of your frame extension, but should be able to make it work. That way, the hood could tilt forward and not by affected by frame. Don't know what it would be like in real life, but I'm sure you could make the hinge hidden from view and get your hood to tilt ok.