rightrudder
-
Posts
300 -
Joined
-
Last visited
Content Type
Profiles
Forums
Events
Gallery
Everything posted by rightrudder
-
Wow, great attention to all the subtleties that make it look right and authentic. Very nice captioned pics too. Keep those photos coming!
-
1967 Impala in Aclad II Holomatic Spectral Chrome
rightrudder replied to carl63_99's topic in WIP: Model Cars
Cool effect! Crazy what paints can be made to do. -
My continually updated thread with fresh HOT ROD mock ups.
rightrudder replied to chris chabre's topic in WIP: Model Cars
Yeah, a letdown for sure. But your version will be completely your own. -
I really like the silver/blue combo, and thanks for showing us all the pieces. Good call on getting rid of the T-top.
-
My continually updated thread with fresh HOT ROD mock ups.
rightrudder replied to chris chabre's topic in WIP: Model Cars
Chris, that looks wicked amazing! Love the concept. -
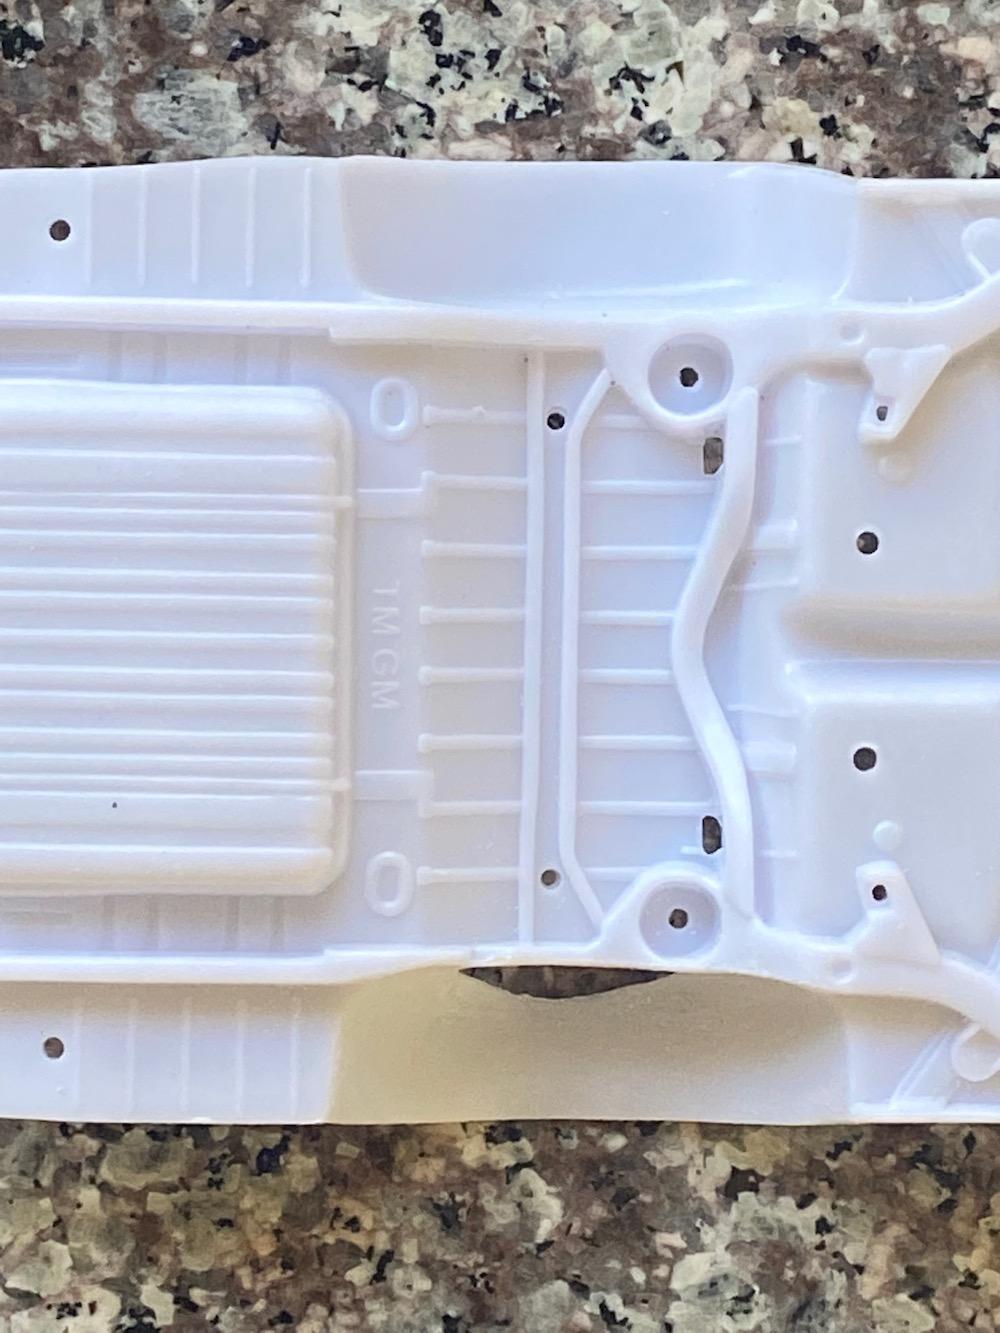
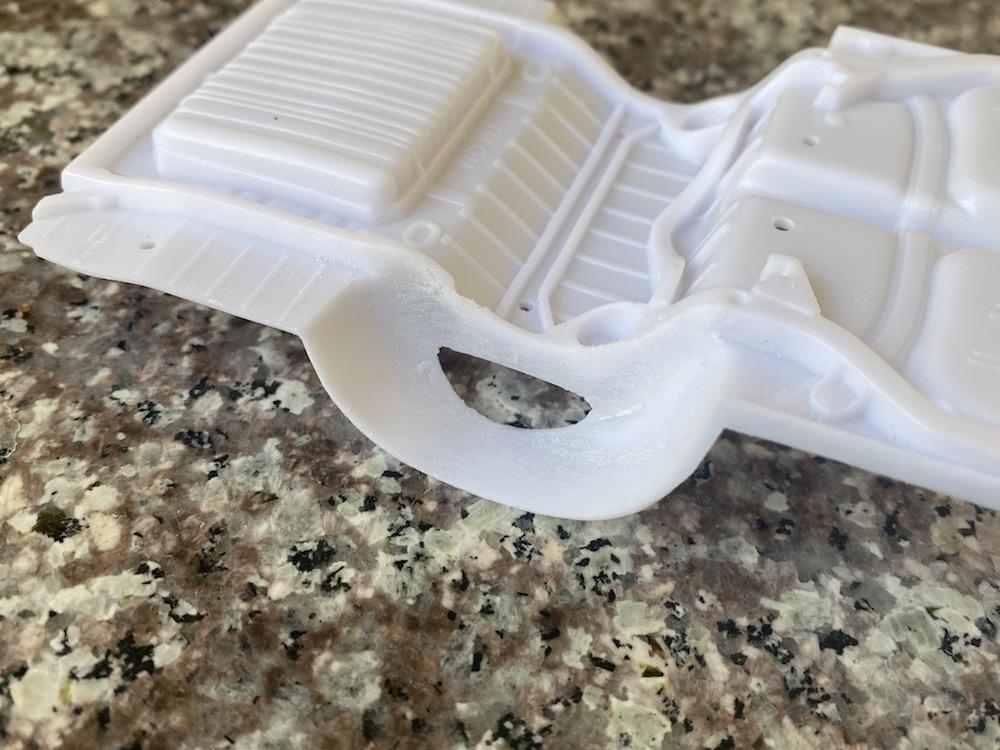
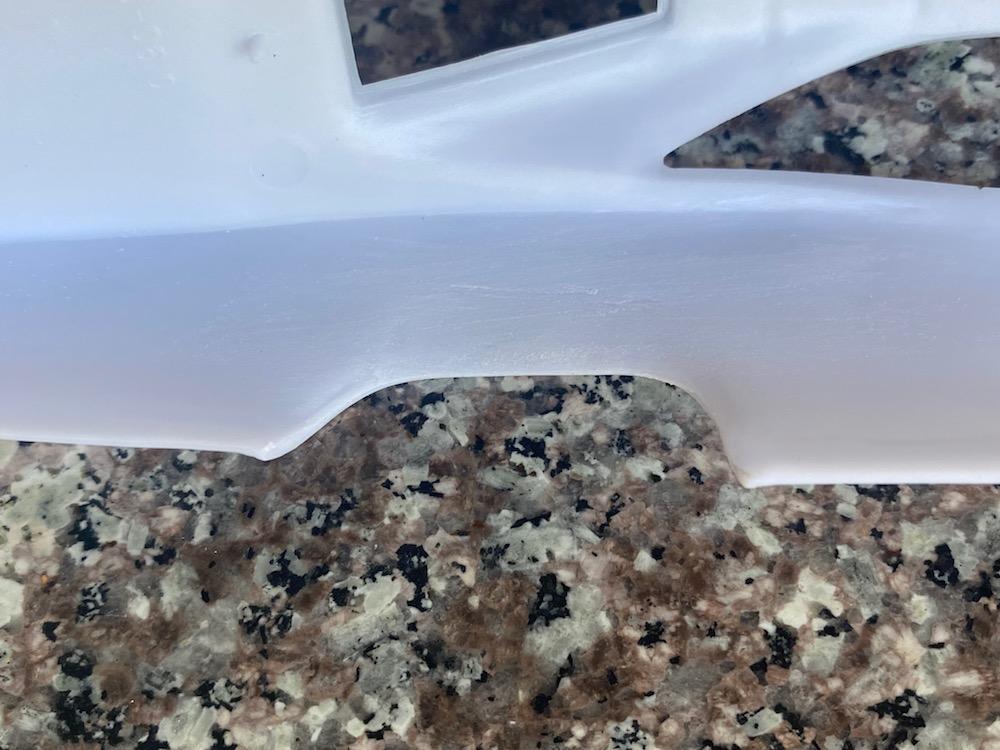
Got some putty...geez, this stuff really stinks! Good ventilation a must. Getting close to painting; I think I'll prime this afternoon and shoot color tomorrow. I shimmed the front bumper down with some styrene stock. 0.5mm seems just about right. Rear bumper fits perfectly.

-
Check out some recent posts in my '53 Studebaker thread in WIP. Rattle can paint just seems to go on smoother over primer. I think they always look better painted, provided the paint goes on smooth, and that takes practice. I'm no expert in this category, but my finishes have improved as I learn more. That said, I've seen bare plastic that looks pretty good. Polish it with a good automotive polish/wax, and it'll look even better. I really like Tamiya spray paint, a synthetic lacquer. On the coats question, most like to put on a mist coat first, let that dry for an hour, then put on at least a couple heavier coats, with maybe an hour between coats. The trick is put the heavier coats on thick enough that the paint looks glossy, but not too much that it runs. Hold the can too far away and the paint dries in the air more than it should and you get the dreaded orange peel. Then, have the patience to not touch it for two days! At that point, shoot some clear coat over it, and let it dry for another two. Good luck!
-
Thanks! I'm a longtime road racer/autocrosser, so it's totally in my wheelhouse.
-
Thx! I dig the Impala's lines; they just need to be set off by fat slicks and a moderate drop. My build was inspired by a yellow Plymouth Satellite I saw on a road rally years ago that had the race treatment done. It looked so cool and unexpected, and the owner drove the wheels off it! Tired of waiting on my supplies shipment from back east (it's been over two weeks!), so I'm making the trek to Pegasus hobbies today for some other stuff I forgot to order, including styrene sheet, rod, racy decals and aluminum tubing. And more paint, of course!
-
Some progress on the interior. I shortened up the Carrera GT's flying buttress center console and it fits really well! Still needs putty work and paint. The hard part will be scratch-building a partial cage. I'm thinking a main roll hoop that's X-braced, door bars that extend under the dash, and braces rearward from top of hoop to rear parcel shelf, or maybe more steeply angled down between rear seat cushion and door panel.
-
Looks good! Building models as a kid, I always appreciated the kitmakers who'd mold the parts in different colors, as you'd be able to put together a decent looking model without paint. Mom appreciated that too....no paint fumes in the house.
-
Thx! I guess the skinny whitewalls don't bug me to the point of chasing down another set.
-
Thanks for that, Michael. Will definitely try it over gold sometime...Mica over Inca? ?
-
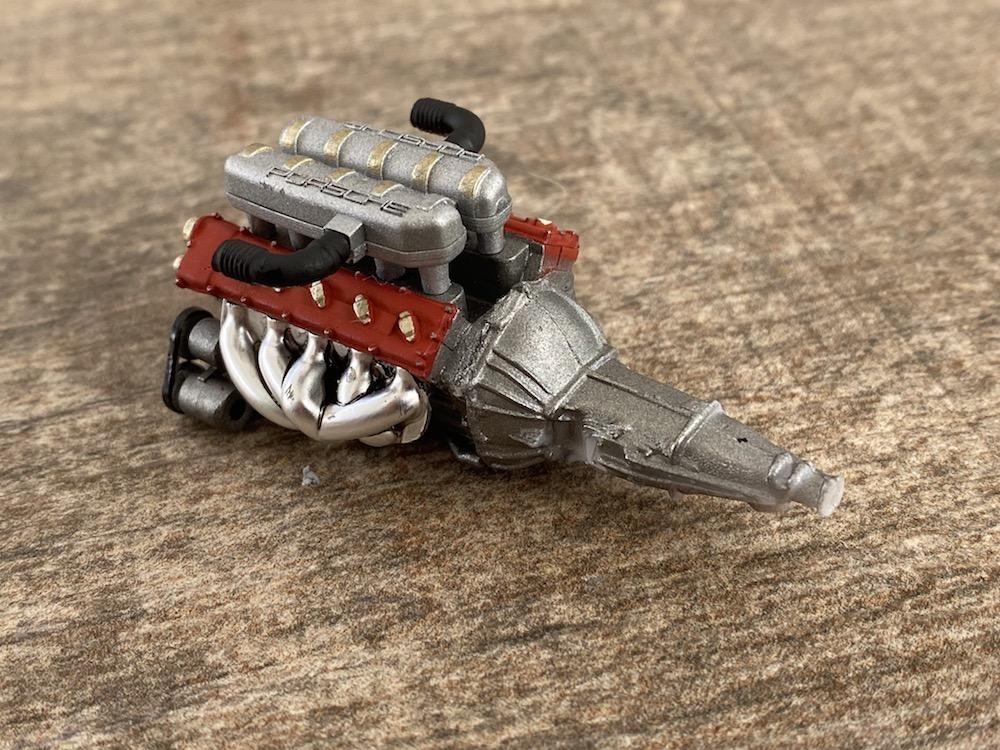
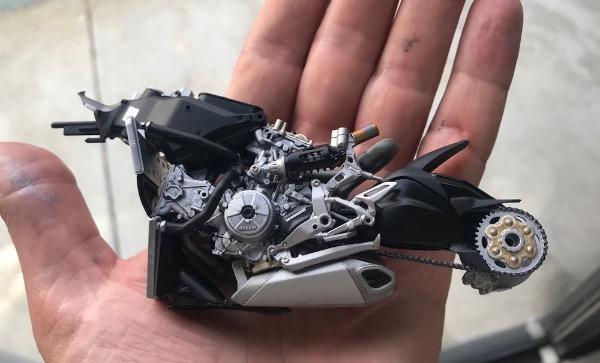
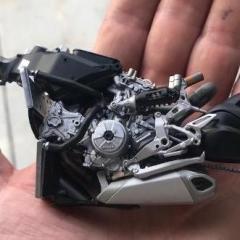
Got the engine refreshed with a new coat of paint. It's a Porsche Carrera GT V-10, and I never liked how buried it was in the Porsche's structure; you could see the intake plenums and exhaust, but that was about it. Thought about titling this "When Porsche Comes to Chev." ? After slicing off the original transaxle, the GM slushbox fits nicely. The headers, which I think are absolutely gorgeous, stuck out at 90 degrees originally so I had to bevel them quite a bit to get them to tuck in alongside the engine. Even so, it's a very tight fit with the headers right up against the the upper control arms. Accessory drive is really wide too, but it only required a little notching of the body to fit. I know, the red cam covers are typically a Ferrari thing, but I wanted it to pop, and it'll go along with other red accents elsewhere in the build.
-
Yeah, I was surprised at the gloss...almost looks like it's clear-coated already. I think I found my new favorite primer!
-
Thx for taking a look, Chris! I'm planning a partial rollcage, chin spoiler, pipes exiting ahead of rear wheels, some tow hooks, etc. I did a dry fit with the interior tack-glued together, just so it would prop the body up to the correct height, and rear ride height looks a lot better. Rear was droopy in the pic I posted.
-
Thx! Itching to lay some color on.
-
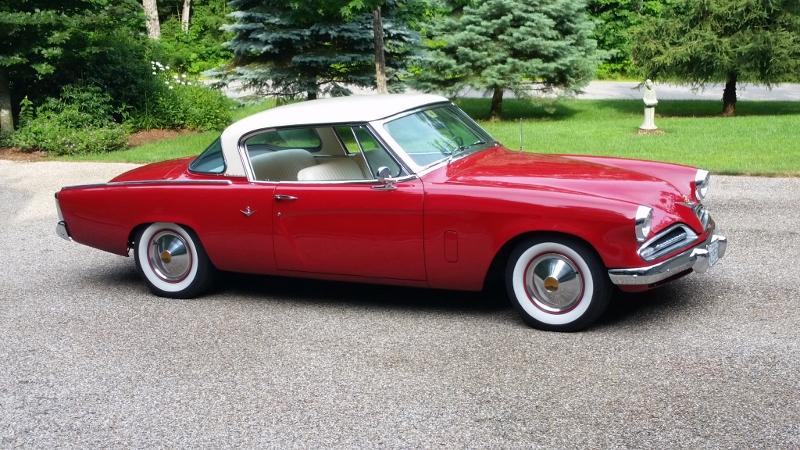
Here's the car I'm using for reference. I just wish the kit had wide whitewalls... ?
-
Super cool resto-mod! I had a 1:1 C7 a while back and I liked to tell people I had an old car with a pushrod V-8, perimeter frame, leaf springs and drum brakes (discs too, but drums inside the rotors for the parking brake ?).
-
Beautiful result! Your photos really show it off well...I'm a fan of outdoor lighting (and I don't have the patience to build a diorama!).
-
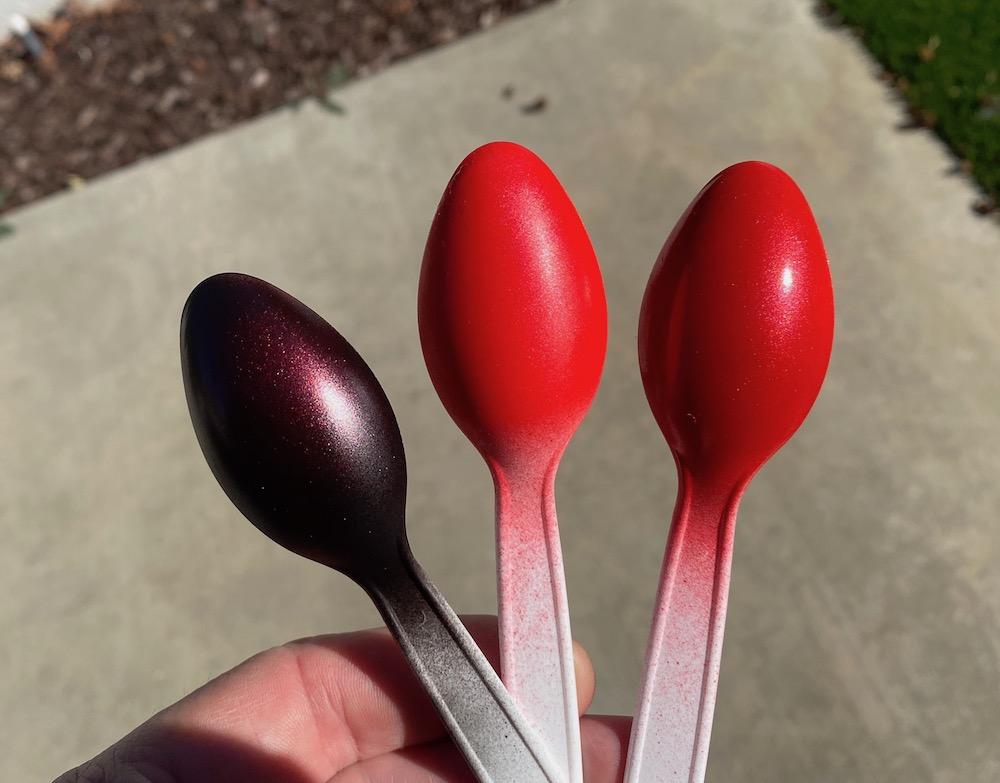
Spoon test! These are all Tamiya rattle-can Mica Red, TS-39, applied over the following: Left: Mr. Finishing Surfacer 1500, black. Not the effect I was going for, but interesting! Center: Bare plastic. Nice, but a little too bright, and kind of a matte appearance. Right: Tamiya Fine Surface Primer, light gray. I love it!! Just a shade darker, and man, does it go on smooth. This will really pop after clear coat. I didn't realize that this paint was a very fine metallic, only noticeable in bright sun, but it'll be great for the Starliner. Now, just waiting on shipment with the putty...
-
Fortunately, the Dremel work allowed me to get the ride height down to where I wanted it..not slammed, but proper race-car stance. Rear will be slightly higher than in photo; with the mockup, it was hard to align the body with frame in back. I absolutely love the BBS 3-piece modular wheels, from a Tamiya 911 kit.
-
I like it! Big fan of the Duster here.
-
Thx! A nice change of pace. Working on the rear axle now, so hopefully I can post a stance shot by day's end.
-
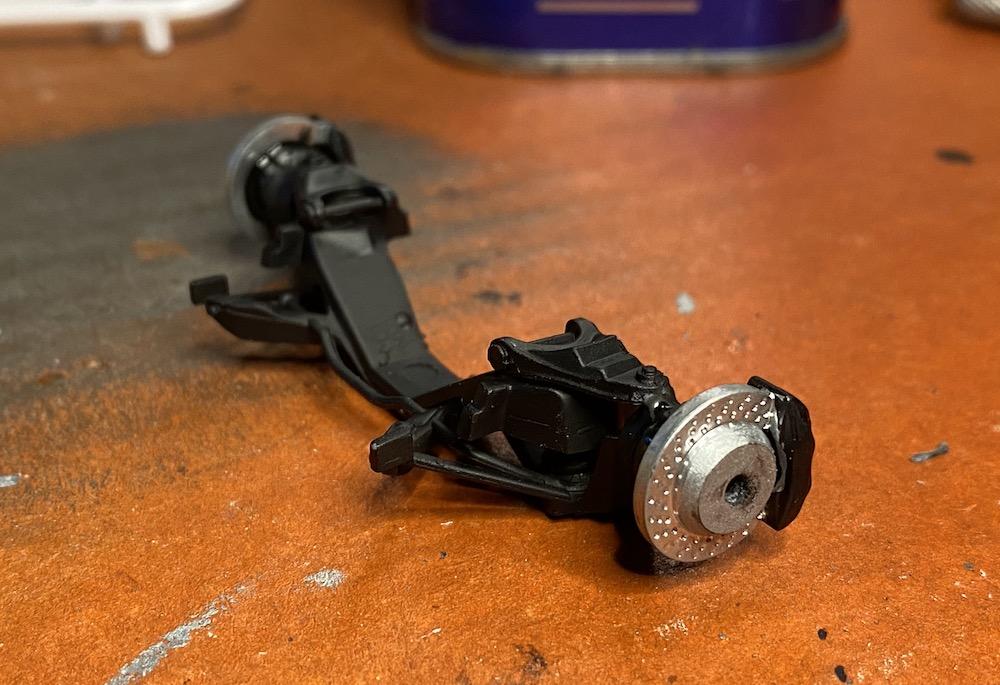
I've been building models for a long time, but I've never done a kit bash. Well, that ends now! I'm waiting on some supplies for the Studebaker, so I dove into the Foose Impala kit in the interim. Thanks to everyone on the board for all your cool projects that have inspired me to take the next step. Kinda wacky, but I'm building a road race Impala with an unconventional engine choice that I'll reveal when the motor's in a presentable state. Will use Tamiya wheels/tires, and the cool thing here is they use poly caps in the hubs that allow the wheels to press on in a very precise way. Here's the front suspension and Brembo brakes. Hubs were first glued with styrene cement, then a fillet of 5-minute epoxy applied, so it's super stout. Hardest part was getting final alignment right, shooting for zero toe and a slight bit of negative camber. I wanted to get the widest meats in the back as possible without tubbing it, so here's Dremel progress so far. I had to narrow the rear wheels/tires by about 3 mm to make them fit, but thankfully the slicks are solid rubber so it wasn't too difficult. I probably won't get too crazy with the chassis, but there are lots of cool possibilities with the engine, interior and paint scheme.