rightrudder
-
Posts
300 -
Joined
-
Last visited
Content Type
Profiles
Forums
Events
Gallery
Everything posted by rightrudder
-
You're so right, Rusty. I am in absolute awe of the mold makers who did this stuff back in the 60s, long before the advent of CNC machining and other advanced techniques. I mean, to machine the tiny gauge markings in 1/25th scale, the ones I can't even paint neatly? Crazy!! Cool build, Painted Black. I know how it is with a completed model sometimes...better to take it to the styrene chop shop and free up parts for a new build! So much of the fun is in the building process, and having a finished model is just icing on the cake.
-
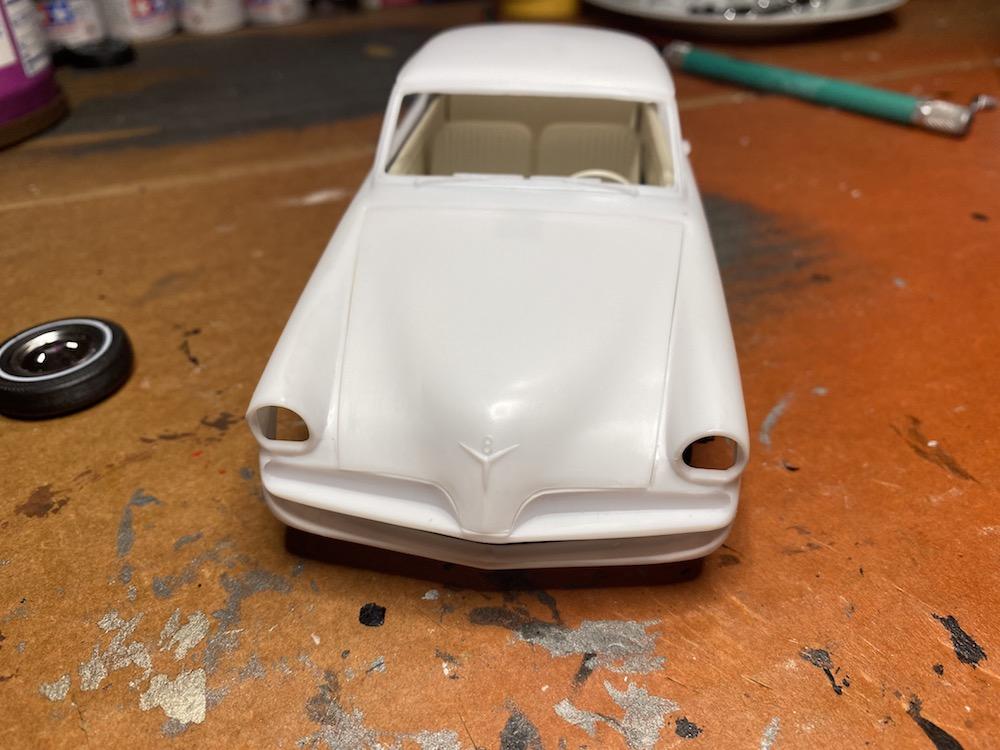
Great suggestions for the Tamiya acrylics, guys. Mike, I've opened Testors bottles exactly as you described, and have been lucky enough not to break one. But it's scary! Gregg, in retrospect, I probably shoulda done just that. In fact, just painting them in would have been closer to the real thing, as they're just slightly recessed. Anyways, here's how they turned out. I gouged out all the detail, painted the recess with Molotow chrome, and sanded the lenses to about half thickness. I'm pleased with the result. Here are a few shots of the body. Front pan needs a little sanding to conform, and I'm waiting on some putty. As I said before, the bumper covers up most of this seam, but where the parts mate in the wheel opening is visible. Note how low the front anti-roll bar/crossmember is in relation to the body. I'm sure it's by design, but something you don't see too often. Bumper mounts to the underside of the beak with tabs, but the bumper rides slightly too high, so I'll shim the tabs with some scrap styrene. The only other work needed aside from the usual deflashing, etc. was the on the right side where the door meets the front fender. Fender was high relative to door, so block sanding was needed to get them flush. Also, the mold parting line runs in the door cutline which makes it a little messy. In this "after" picture, I've done most of the sanding and re-scribed the line on the door's upper part. Last one: the hood fits great! A relief as the '62 T-Bird's hood was a little warped and I couldn't get it to sit right. There is a single center-mounted hinge provided, but I'm gonna leave that off and go the lift-and-remove route.

-
Thank you for the tip, David. I'll try that. I have a bad habit of removing excess paint by brushing the rim of the bottle, which nicely cements everything in place when I put the cap back on! I need to do this on the underside of the cap, or on a paper towel. Funny how some colors seem to make better "cement" than others!
-
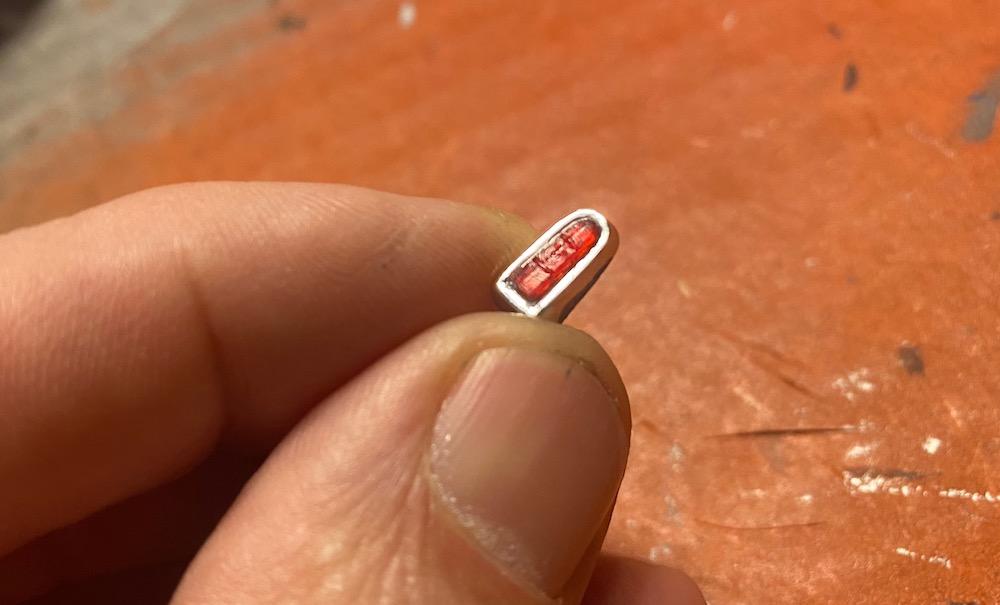
Thanks guys! Will definitely keep the iPhone camera humming. Carl, I use regular scissors. I thought about using an X-Acto but the radius is so small it seemed it would be too difficult. To make it easier with scissors, cut a square around the gauge, getting right down to the black of the gauge face. Then cut those corners to make and octagon, and so on. Even if you want to cut curved lines, making a square first will break down the curved cuts to four 90-degree segments, which is a ton more manageable. I wish the manufacturer would figure a way to cut them out for us, right? Trimming parts and doing test-fits before paint. Bumpers fit very nicely. I glued on the front pan, and the fit is such that I'll want to use a little putty. Not totally necessary as the front bumper mostly covers that seam, but I don't want to shortcut it. Worked on the taillights, and to do it right, you need to scrape out all the detail in the chrome housing. A tedious job. I think they'd probably look fine with some Tamiya clear red and a lot less work!
-
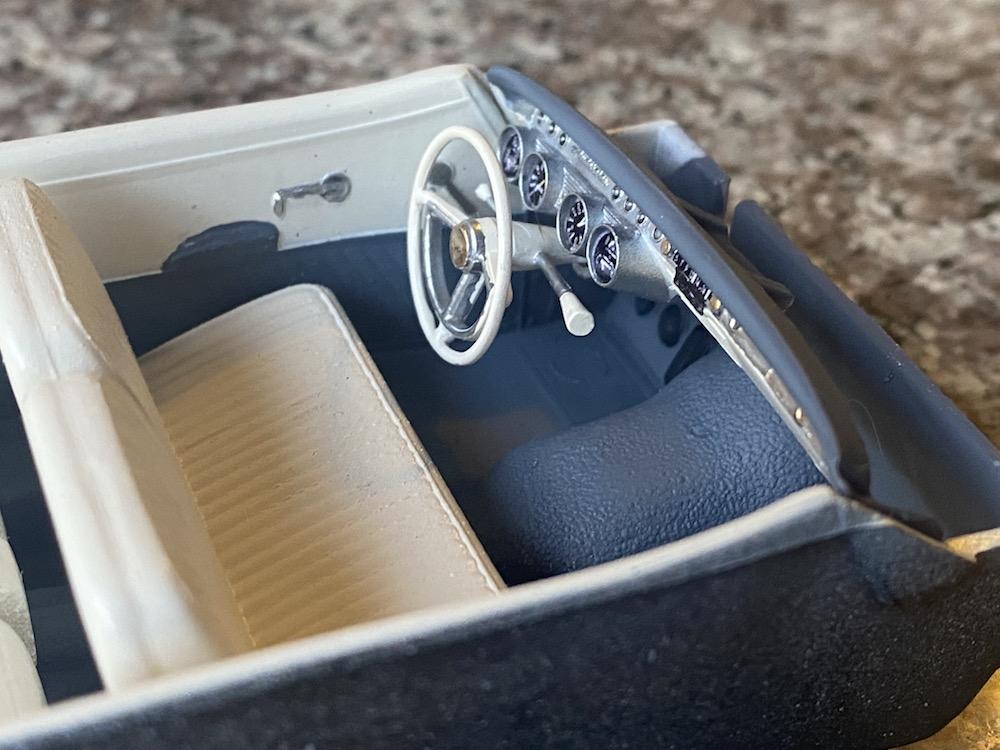
I finished up the interior this afternoon. I used Rustoleum Painter's Touch Heirloom White satin, and airbrushed Testors flat gray enamel. Gauges and radio dial are from Best Model Car Parts...they're printed on photo paper, so you cut 'em out and glue 'em in. Really a good way to go! The photo paper is glossy, so it reflects a little like gauge glass. Not obvious in these photos but you see it at certain angles. I mounted the front bench too far forward initially (no locating pins or holes, just a flat floor), so I had to break it loose and reglue. Things I'd do differently next time: I love the cream color of the paint, but even after a full day's drying time it's still tacky to the touch. I think some Krylon is in my future. I'd go a shade or two lighter with the gray I hate that I blobbed too much silver paint around the glovebox area. I figure at this point an attempted fix would make it worse, so onward!
-
Awesome! It's a fun kit to build.
-
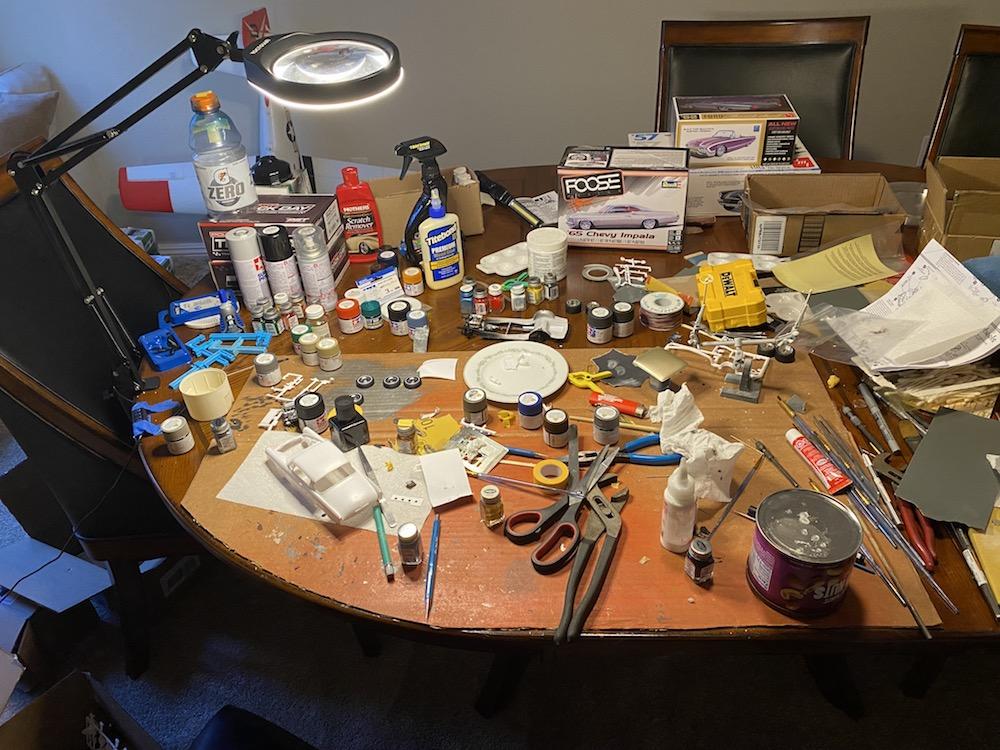
Well, I think it's time to declutter the workspace! Note the use of fine china for my parts tray, and slip-joint pliers to get the caps off those Tamiya acrylics. ? Also, Impala kit finally arrived!! Here's some close-ups of the taillights/housings. The kit includes the larger custom lenses that do away with the chrome housings altogether, and the standard lenses. Note that the lens detail is molded into the chrome part, so you could paint it red and call it done. Previous builders of the kit have noted that the stock lenses stick out too much. I think I'll sand them down to reduce thickness, and maybe modify housing if necessary. Interior is proceeding apace...I went with a two-tone light gray/cream scheme, which should look good with the red body.
-
Sweet! Awesome result. Keep your builds coming!
-
 I'm glad you had success, and thanks for sharing the result. No doubt I'll use your technique in the future. ? Truck looks great, BTW!
 -
Sure, it's annoying and I hope it can be changed. Maybe ads alongside the posts instead of over them? What advertisers don't realize is that when an ad becomes so intrusive and annoying, people just get mad and the subject of the ad doesn't even register. Very counterproductive. But it's a small price to pay for such a great site! I've learned so much here, and really enjoy checking out everyone's builds. Michael (Xingu), thanks for putting up with the headaches. Running this forum can be a thankless job, but we totally appreciate it. ?
-
Bullet Bird Mild Custom ('62 Thunderbird)
rightrudder replied to JollySipper's topic in WIP: Model Cars
Nice! It just pops with the foil. ? -
Really nice! Those wheels have some real depth. My mom had a Bonneville back in the day, and I remember riding around with her as a kid. I left a bunch of crayons on the rear shelf and they melted in the sun...got in trouble for that. ?
-
Thanks, guys! I can't wait to put some paint on the body. My Tamiya Mica Red showed up today, and the shell is about 90 percent prepped. I'm waiting on an order that contains some putty as there's just a few spots that need attention. In the meantime, I'll work on the interior. I was going to go with the individual front buckets and center console, but unfortunately the pleats are molded very poorly. The front bench looks great, so I'll use that instead.
-
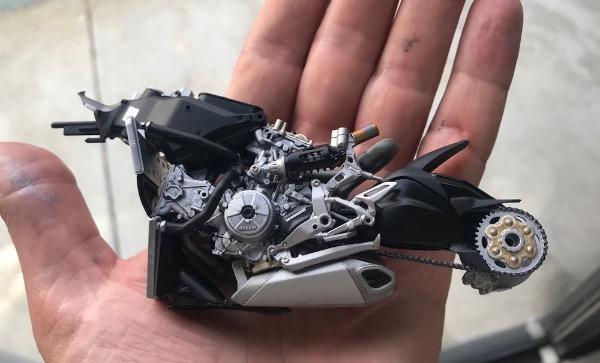
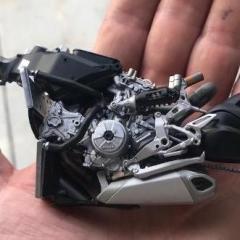
I'm making a ton of progress today! Mounting the motor and getting it to sit right has been a challenge. I shaved the inside edges of the chassis motor mounts and bent each one outward (pretty easy as they're thin plastic) and got it to locate decently. But that generator is hanging waaayyy out there and sure enough, there's some interference with the body that I wasn't happy with. It's possible to cram it in there, but the belt distorts and the generator gets cocked a little. I thought at first I'd shorten the generator by half and shorten the belt, to tuck it in near the rocker cover, but ultimately I decided to notch the inner fender. It's already a semi-custom with the shaved firewall, right?
-
The Tamiya acrylics...kind of a hybrid in that they're alcohol-based--stick to bare plastic really well. I've done test panels where I haven't even scuffed the plastic, just a wash is dish soap, and the paint is locked down. Fumes aren't too bad; they have a very sweet smell to them.
-
Front looks like the driver did too many Dukes of Hazzard jumps and landed hard on the crossmember!
-
Thanks for that, David. I'm thinking I might have to use two different primers, one for the body and one for the white top. Will get some spoons to test. Chassis is nearly complete. I went overboard with the weathering and it looks like a 200,000-mile junkyard dog (!), but it's better than the too-new shiny appearance it had before. I guess less is more here.
-
Good to see a roller, and the green is killer! Why are hoods always problematic? On my T-Bird, the body came out great, but there were a couple chunks of something in the hood paint that required a respray. What paint did you use for the interior? Looks like sort of a cream/yellow...a great shade.
-
Super kewl! Wonderful concept and craftsmanship. I think the white headers with the megaphone tips totally make it work. ? Now I've got Folsom Prison Blues stuck in my head!
-
So I'm 90 percent there with smoothing out the engine bay. I might add a couple details back in like the voltage regulator, but it seem easier to shave the whole works off. Here's a pic of the steerable front suspension. I ended up assembling and gluing everything first, then shooting it with a can of splattery 10-year-old Krylon satin black. Turned out too glossy, so I'll spray it with matte clear coat later. I'm gonna attempt some slight dry-brush weathering before that. I never spend too much time on the underside, and devote more effort to engine, body and interior. I decided on doing rattle-can exterior paint, with Tamiya Mica Red. I wanted to airbrush in acrylic but I couldn't find the right shade, and my experience with Tamiya can lacquers is that they atomize finely and go on pretty smooth. Question: Will a dark primer affect the final shade of a solid color? I know they make a big difference with metalllics. I bought some Mr. Hobby 1500 surfacer and will experiment a little before final paint.
-
Yes, David, thank you for sharing!! I love this kind of shot. I have a color slide of my dad in his '59 Ford Galaxie Skyliner, top down, elbow on the windowsill, with a huge grin on his face. Rear 3/4 shot, so he's turning back to look at the camera. It was the only car he bought new. I need to make a huge print and frame it. I'm sure that pillar helped shore things up...cool little vent window back there too. For sure, and it's narrow! Previous project was a '62 T-Bird, which seems about 25 percent wider.
-
Bullet Bird Mild Custom ('62 Thunderbird)
rightrudder replied to JollySipper's topic in WIP: Model Cars
Well, it's obvious we both have excellent taste! USPS is so slow...Impala is still in the mail, so I got the Studebaker locally. Thanks for the explanation. I didn't have the courage to do the super-fine trim on the sides with foil. -
No chop for me, but I agree...subtle would be better on this particular car. I'm already sold on the two-tone. I hear you on the continuity of the lines, but the single color to me looks too plain.
-
Bullet Bird Mild Custom ('62 Thunderbird)
rightrudder replied to JollySipper's topic in WIP: Model Cars
Looking great! Did you use your technique for both the top trim and the side trim? I've got to try that. Are two blades taped together to generate the width of the strip, or do you simply move the straight edge over a mm or whatever? I found that even with a sharp blade I got tiny tears in the foil, so i had to re-do certain sections. -
Started shaving/sanding all the spaghetti off the firewall and engine bay. I always mess up when I try to paint the wiring, etc. and it detracts from the engine, so off it comes. Still ruminating over colors for body & interior. The box (tin?) art looks great with dark red w/ white roof, so I'm leaning that direction.