cifenet
-
Posts
856 -
Joined
-
Last visited
Content Type
Profiles
Forums
Events
Gallery
Everything posted by cifenet
-
Wow, looks fantastic and it looks very unique! And either you have done great work cleaning that 3D part, or your 3D printer is superb! So smooth and proper~
-
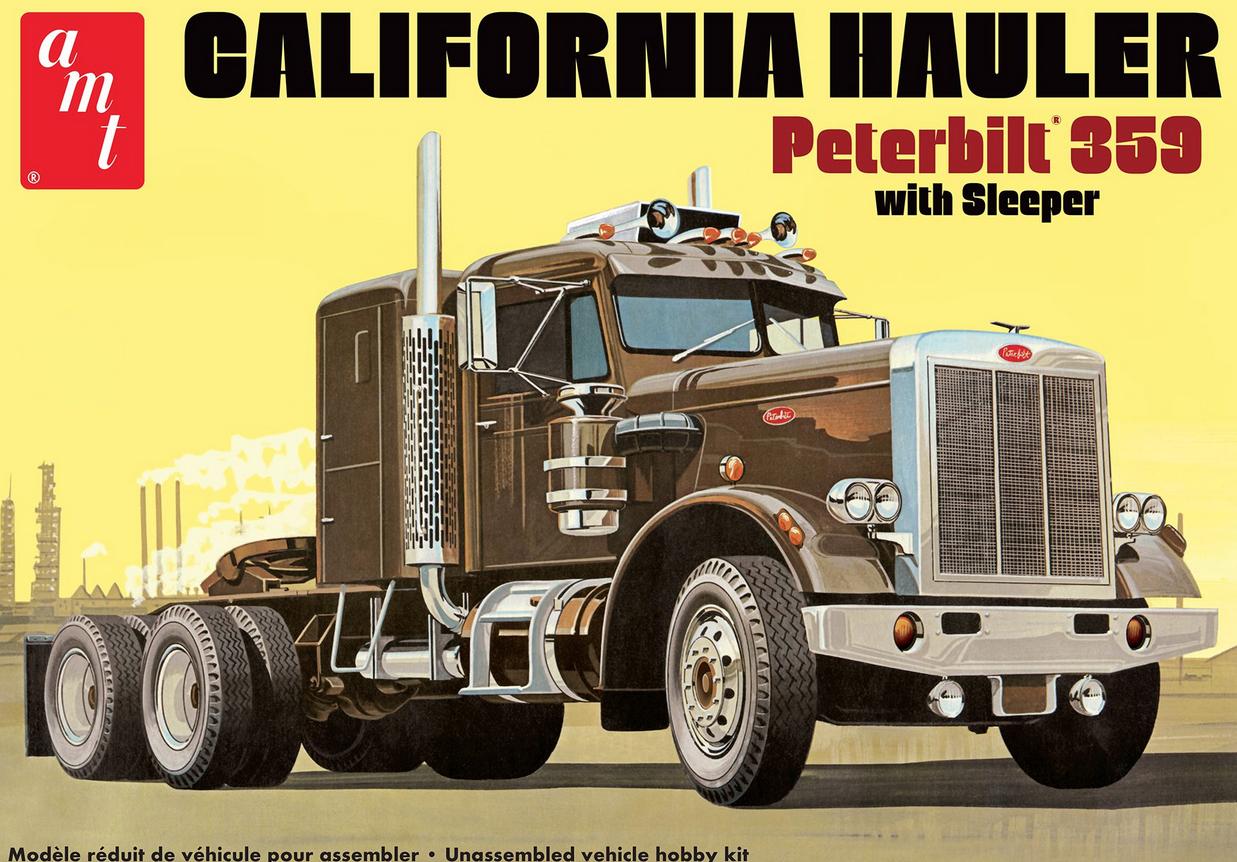
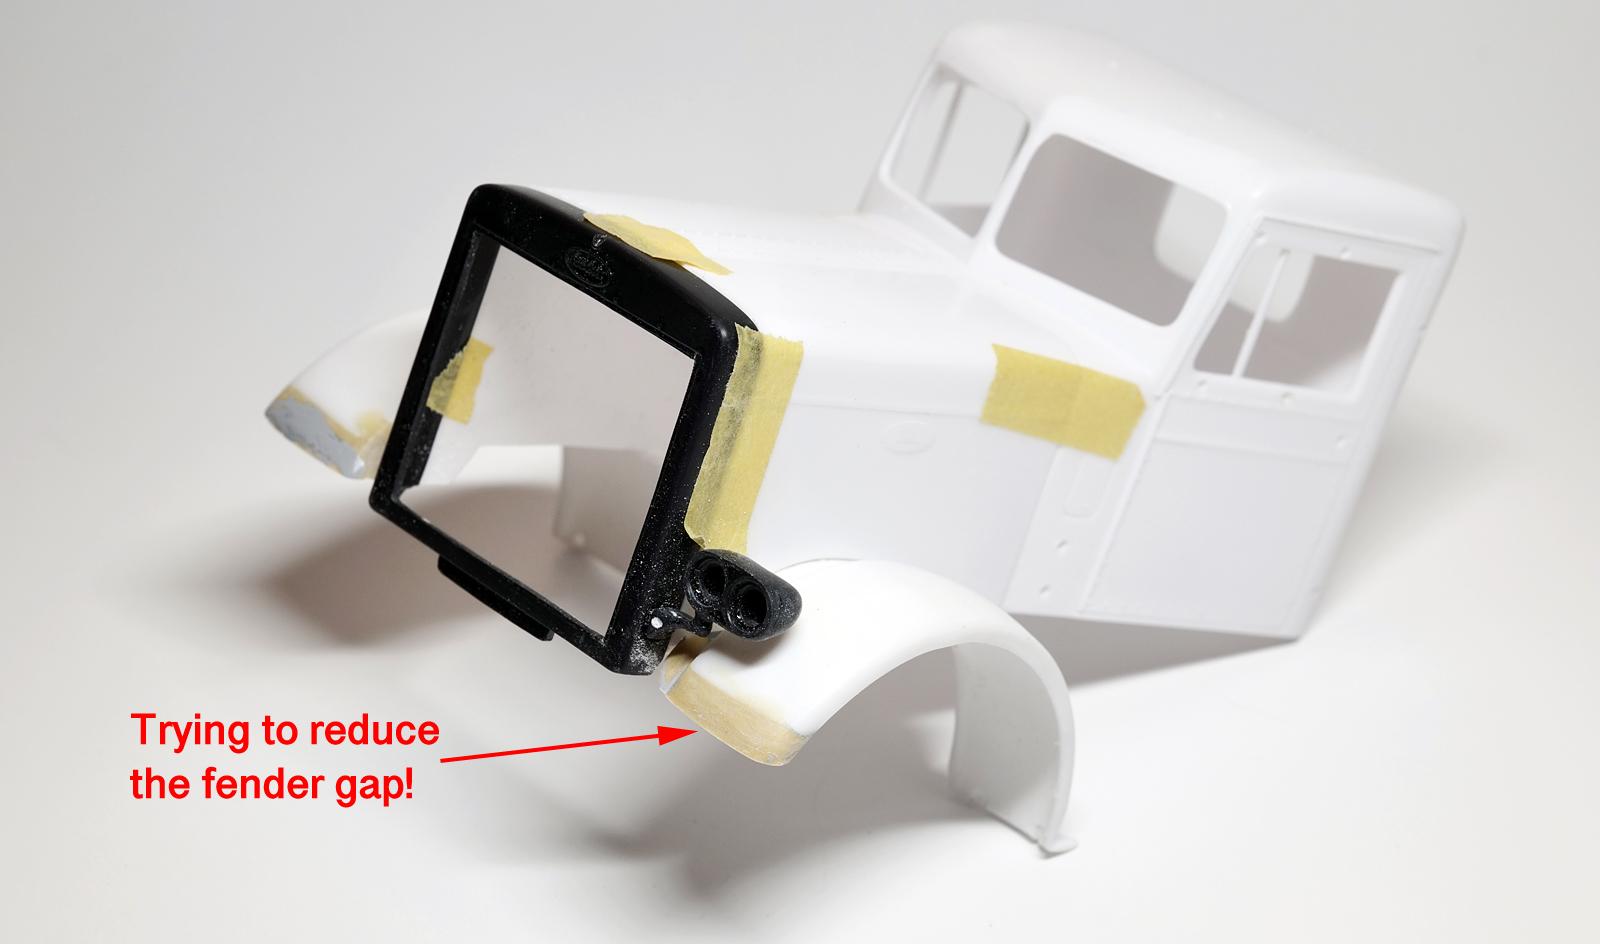
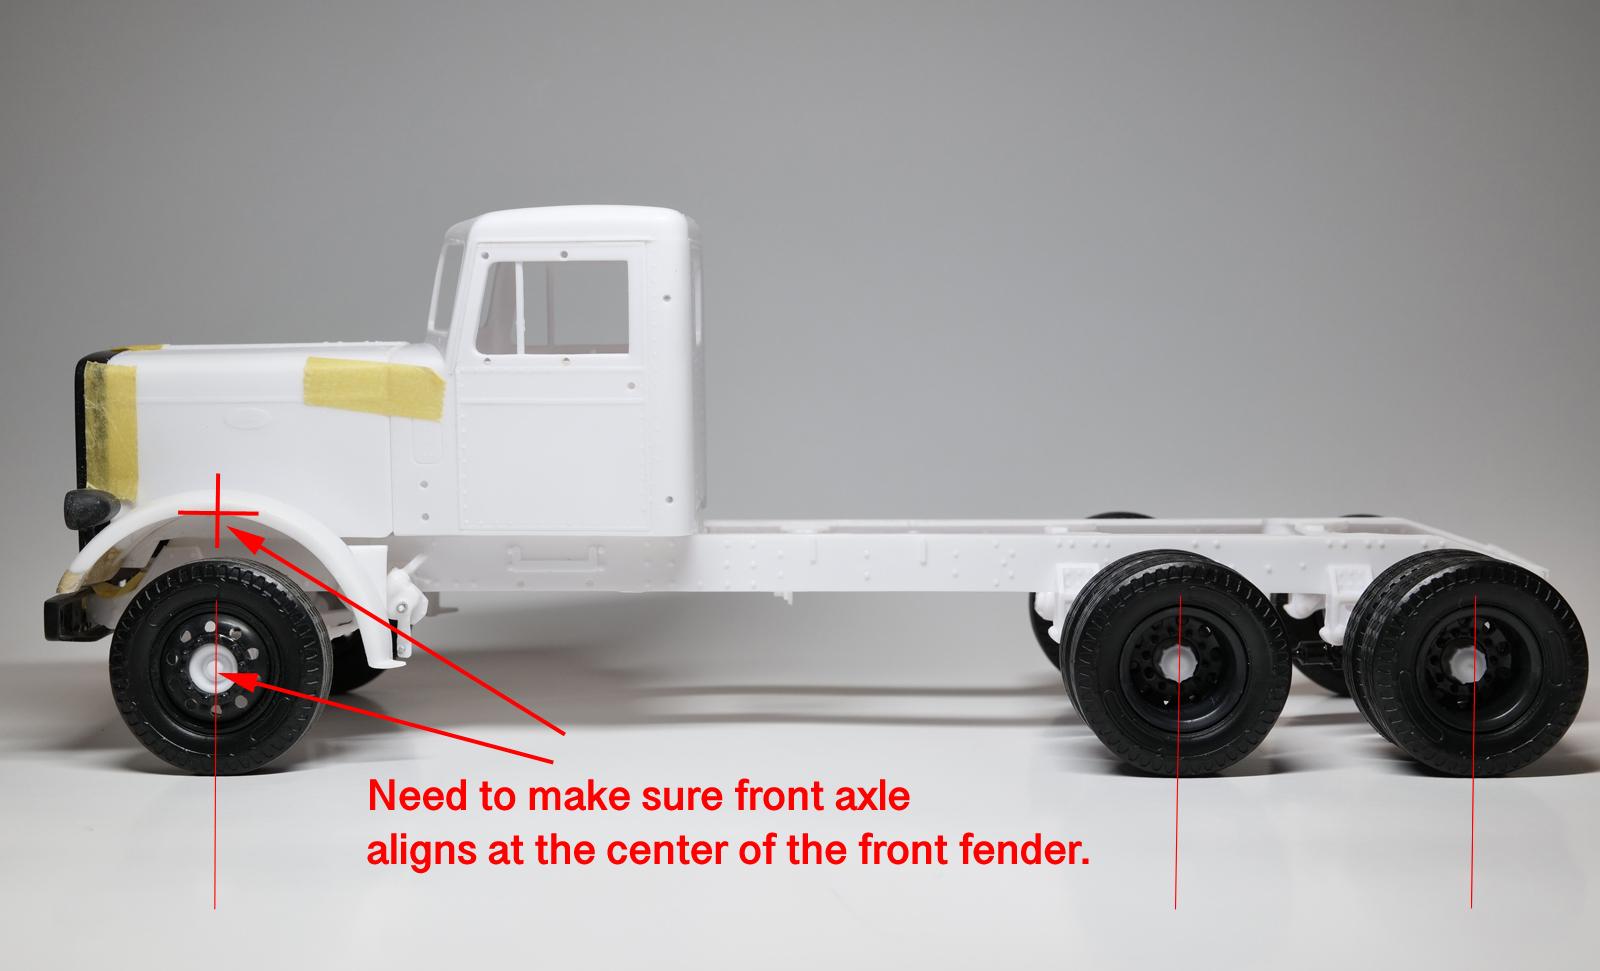
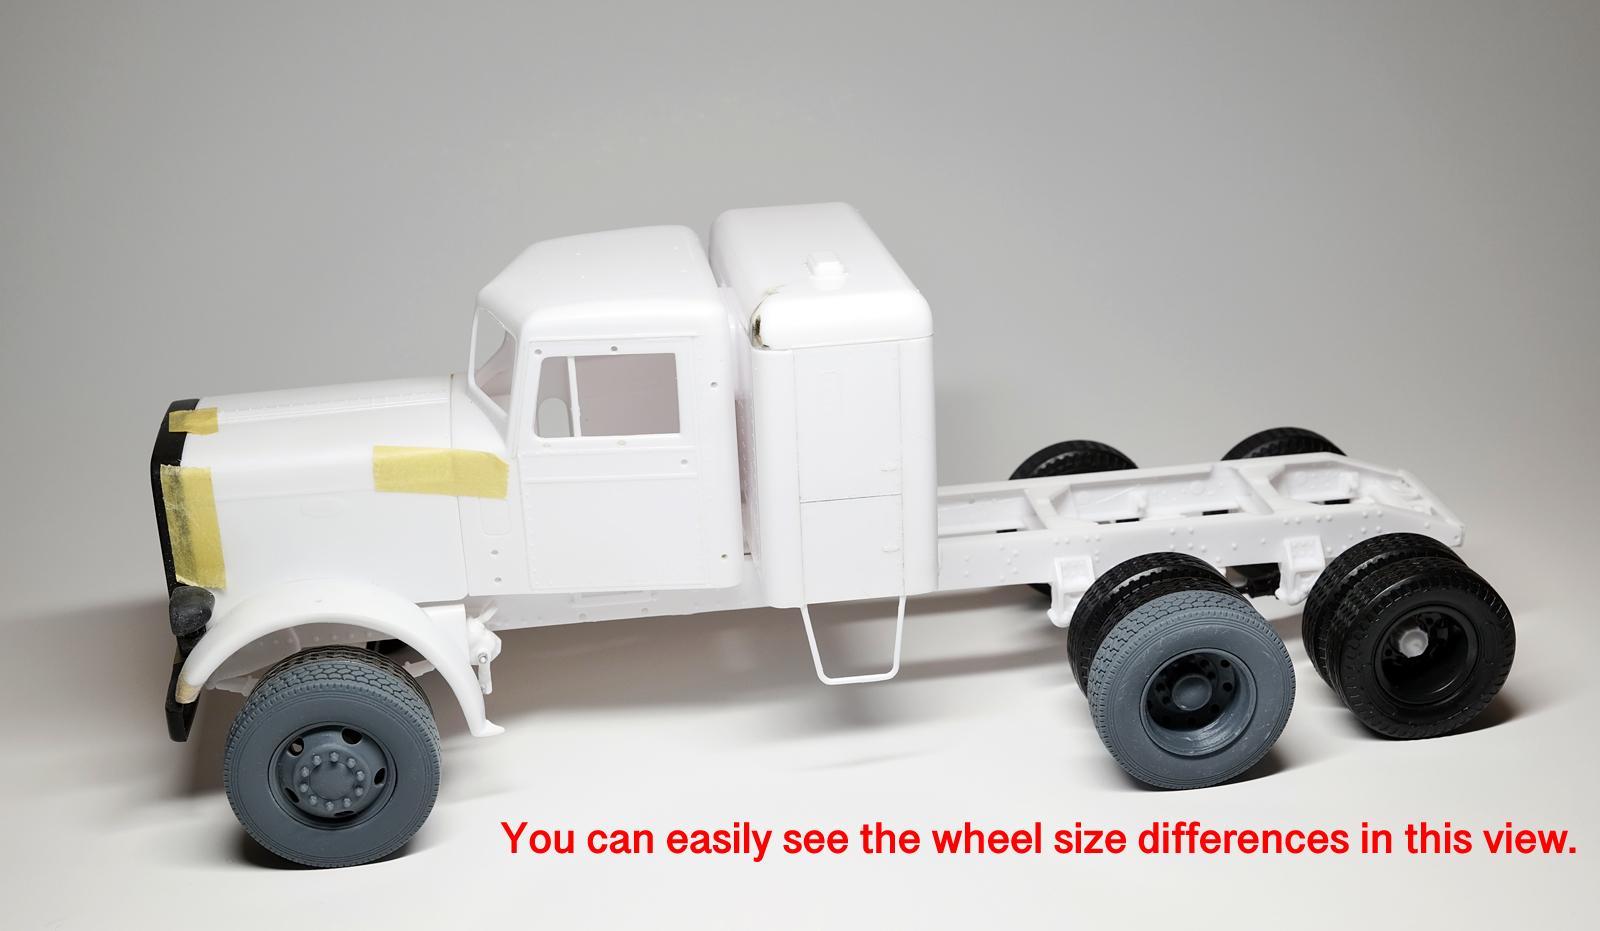
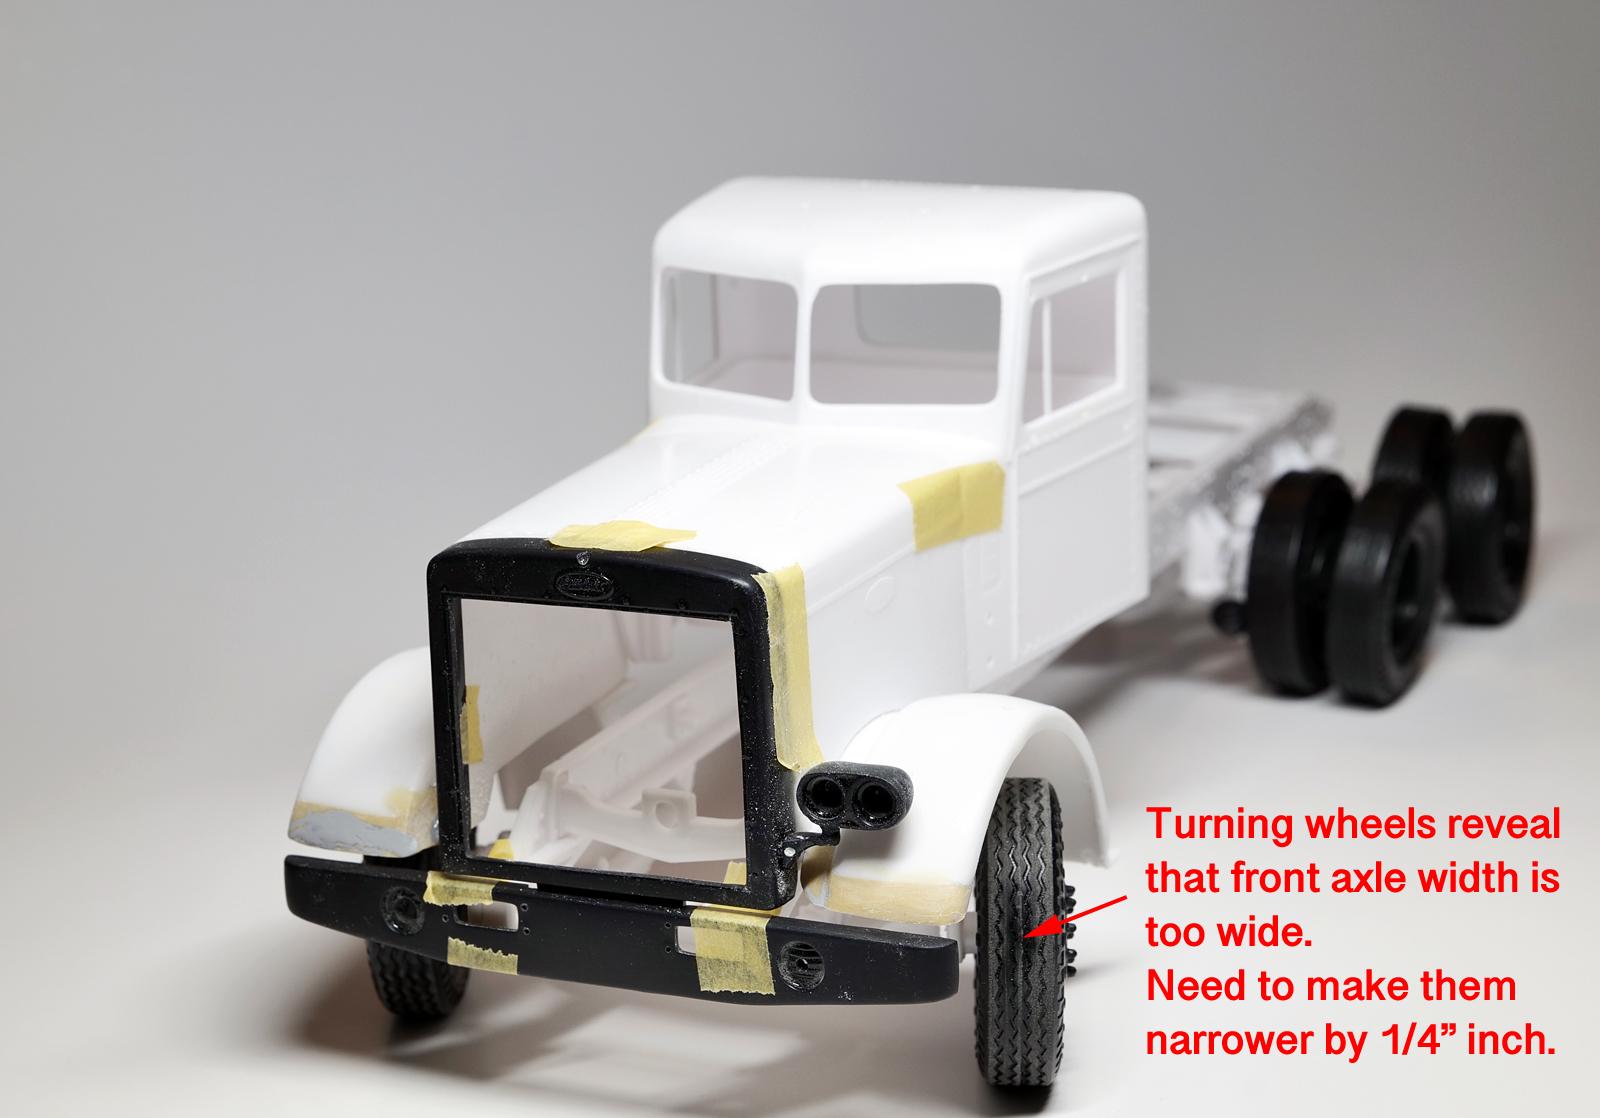
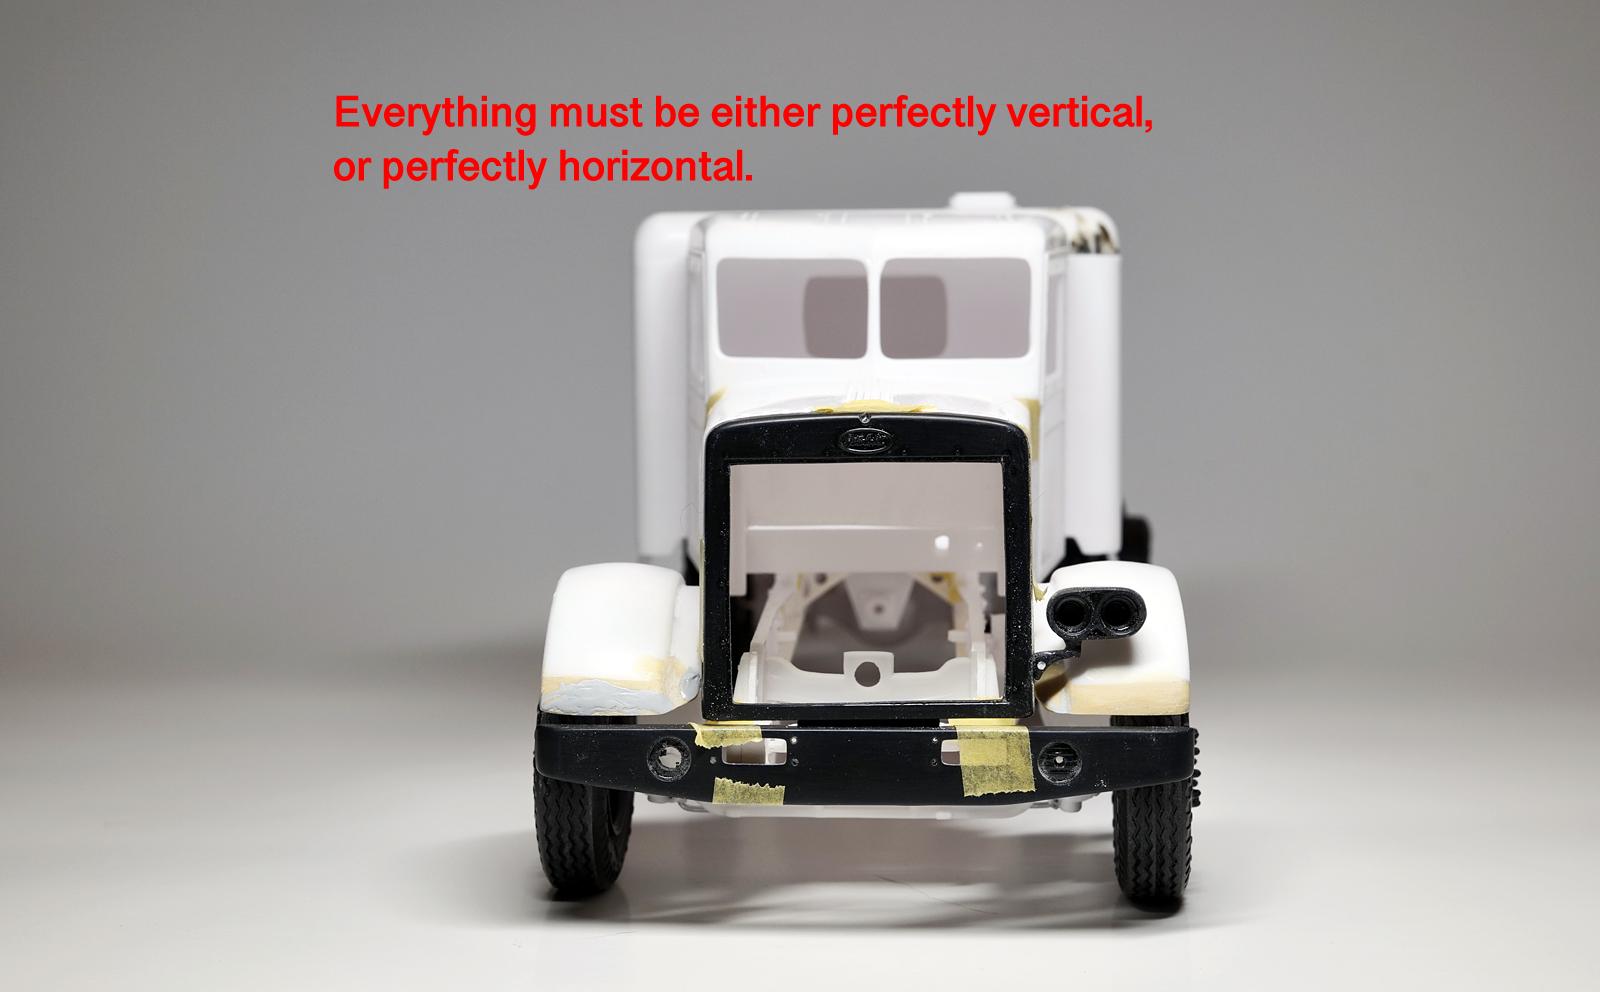
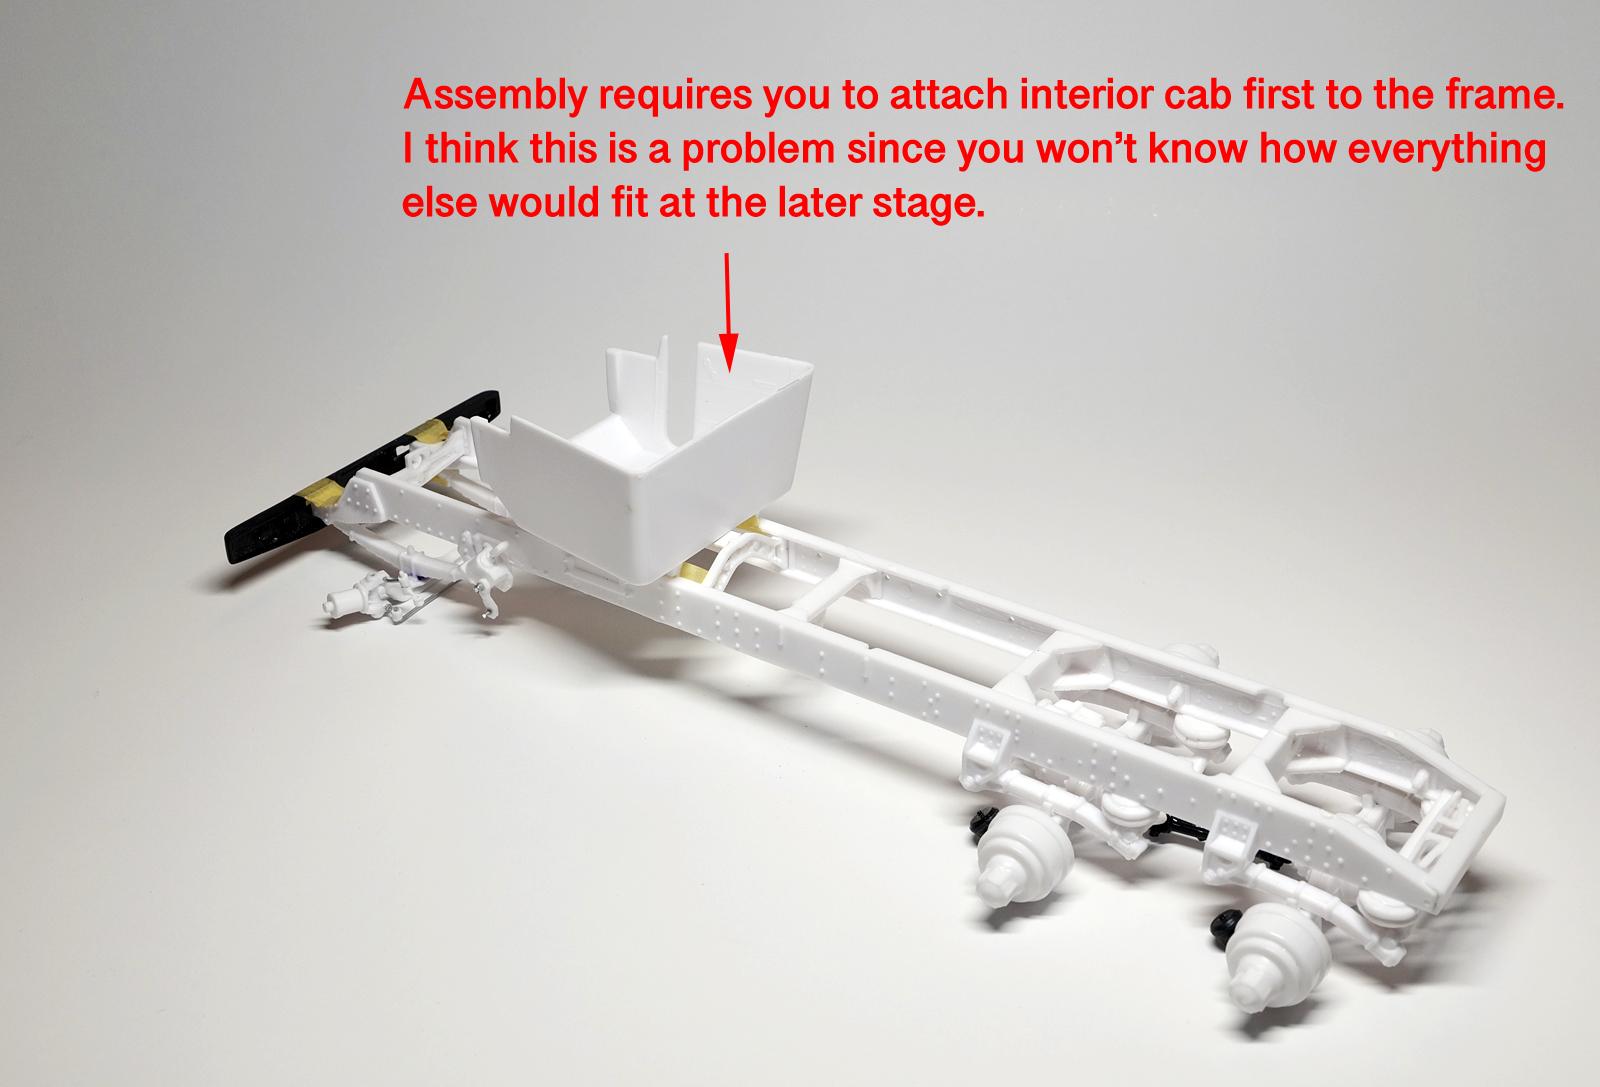
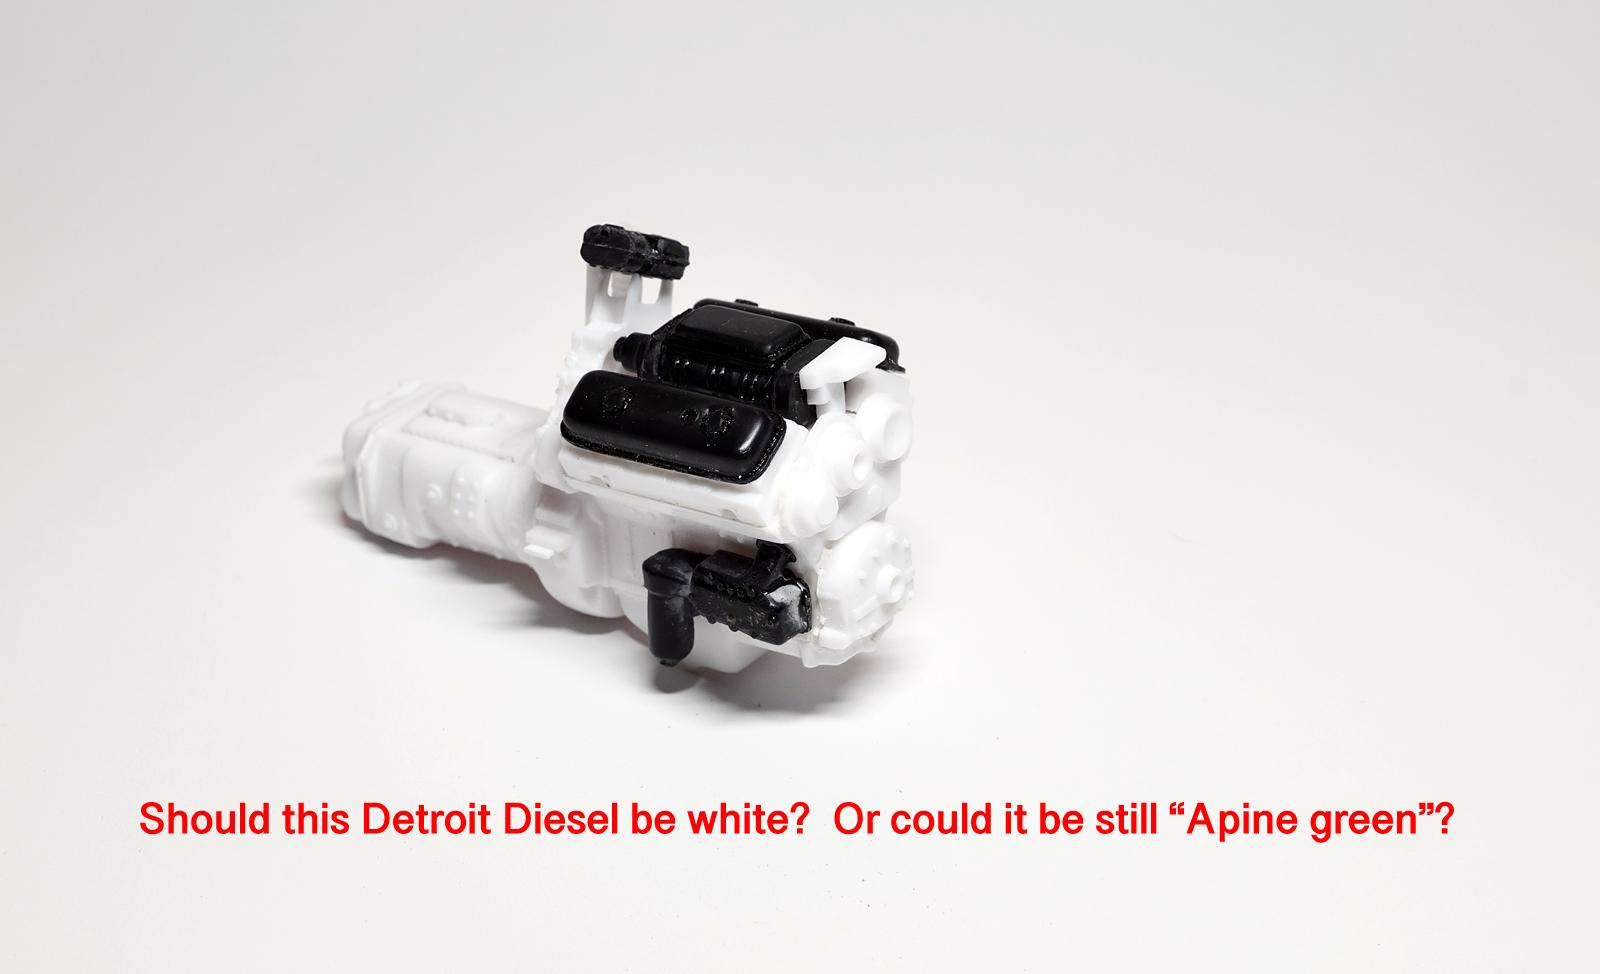
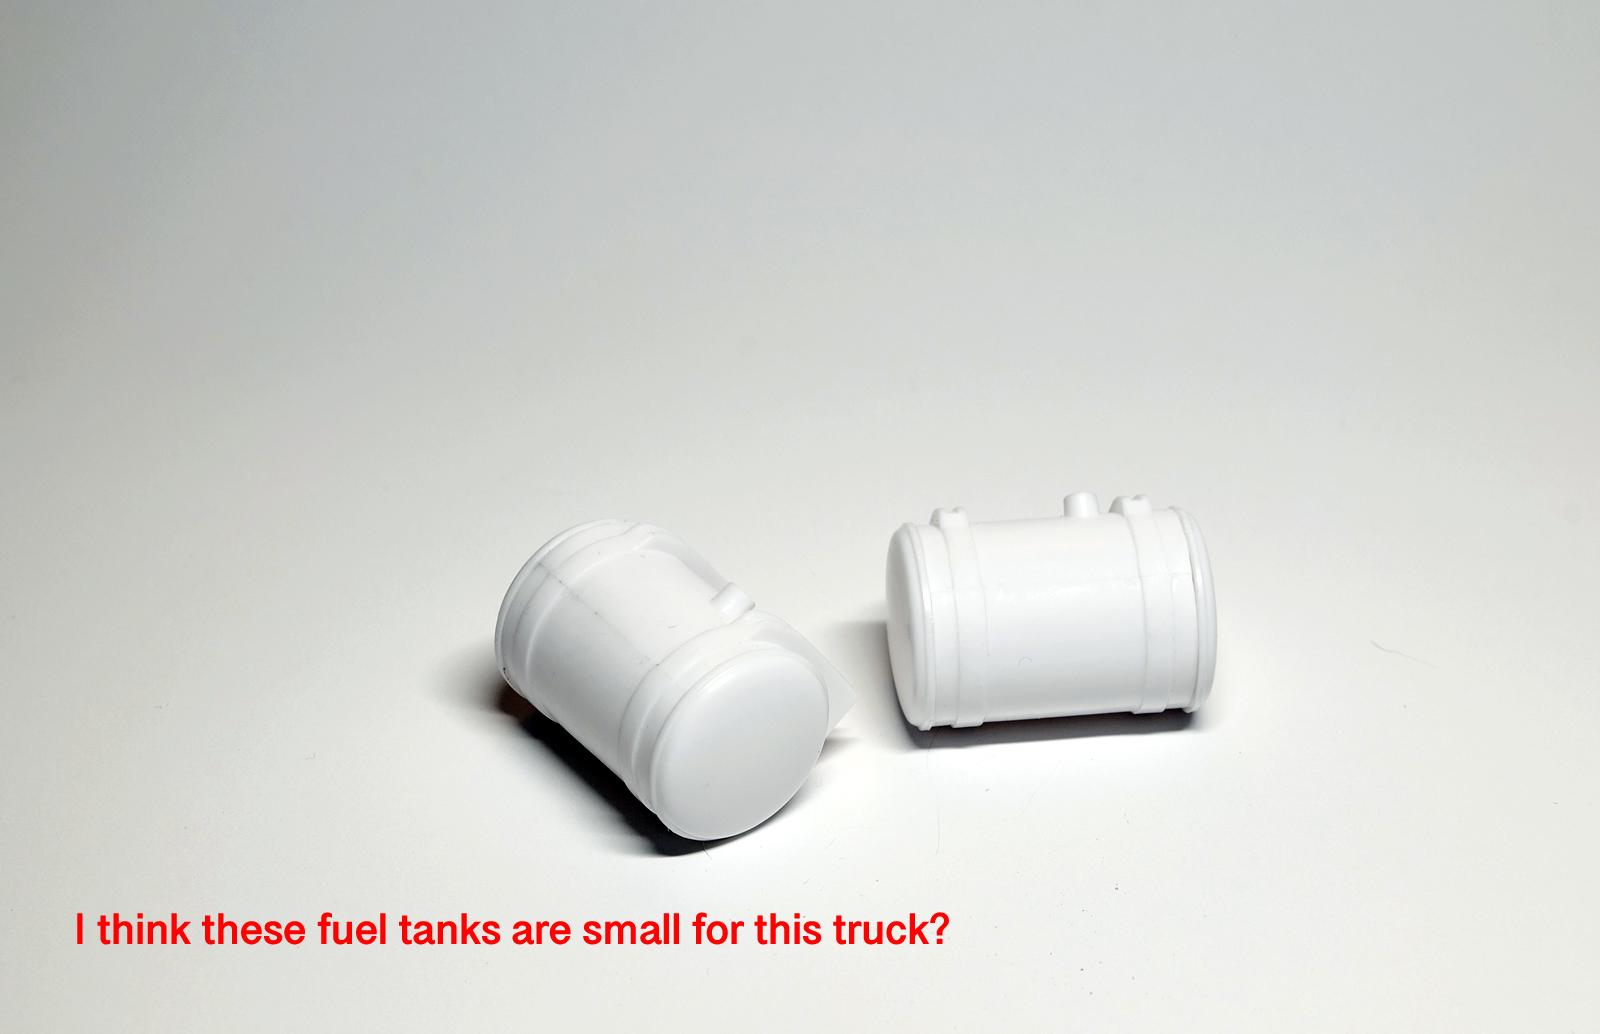
 Hi guys, I thought I share my initial building experience on this ever so popular AMT Peterbilt 359 California Hauler kit here hoping to get some insights. I know many of you already built this kit multiple times, I hope to benefit your experience. I personally think that this has to be the best looking cover art among Peterbilt 359 kits. I am definitely trying to keep the box undamaged hoping to have it for a long time. CHALLENGE 1 I think the most obvious issue with this kit is the unwanted front gap between the front fender and the bumper. The fenders are too short and so far, none of the reissued kits addressed this problem based on my finding. I have done some homework and these are known methods to mitigate: Roll the fenders forward (to front) and then extend the back down to complete. Some fabrication is required to make them look natural. Acquire Revell's Peterbilt 359 fenders and attach. I have seen the result and they do look proper to me. Extend the front using putty or plastic piece. Labor intensive. Hide it by adding thin aluminum panels in front (as if they are protecting front side of fenders). I chose the option 3 using Tamiya's epoxy putty. I have some experience using the epoxy putty so the work wasn't too bad for me. CHALLENGE 2 I couldn't locate the exact spot to mount each axle as there was no guide pin/spot marked on the kit. You can easily mount them by eye, but the problem may show up when trying to connect drive shafts. I think the best way is to mock up the build with driveshaft temporarily attached. CHALLENGE 3 Unfortunately, another problem shows up when mounting the axle. This one requires some "trial and error" approach (at least that is what I did) and it involves aligning the front axle so that the center of the front wheel aligns vertically with the center of the front fender. Building step by step per instructions can get you into unexpected trouble. I know many things will get misaligned later on. It is always best to proactively mock up the build and confirm all of the component dependency by connecting all the way till the end (i.e. connecting exhaust pipes). CHALLENGE 4 I personally think the truck sits way too high. I corrected this problem by sanding away the lower mount point (the bottom end of the leaf suspension) by 1/4" of an inch. This picture shows that I can even go lower which I may end up doing. And I made sure the frame is parallel to the ground. CHALLENGE 5 The more I look at the truck, I think the wheels are just too small. I don't remember seeing anyone mentioning this, so it could be just me thinking this way. These are the same wheels I used on Revell's Peterbilt 359 and they feel right here as well. CHALLENGE 6 I modified the front axle to turn and the work is actual quite straight forward. But as soon as the wheels are turned, I found them to be bulging out too much. I think it can be narrowed and they can still sit correctly under the fenders. CHALLENGE 7 Most importantly, I want to make sure everything is aligned. This will make the build look so much better and proper. This includes the bumper, headlights, front cab, sleeper, wheels, fenders, etc. They need to be either truly vertical or truly horizontal. Aligning requires some time and effort, but I think it is worth the result. CHALLENGE 8 I do want to point out that the build has another challenge when it comes to aligning things. Unfortunately, the way it builds, you would need to attach the interior tub first on the frame. Then you blindly add your cab, the hood, and the sleeper. Mock build is needed here, I must proactively confirm/mark the position of cab, hood, bumper, and sleeper with the interior firmly fixed. Question 1 The instructions say "white" on this Detroit Diesel. I did read about how Peterbilt painted the engine white at one point, but I personally don't want to paint this white... I know at the end it is my model and I could do whatever I want, but I would like to know if green Detroit Diesel on this Peterbilt 359 exists from the factory? Lastly, another thing bothered me is that the tanks seem to be too small for a such truck that travels long distance. It even has the sleeper which indicates long distance driving is norm on this vehicle. I may replace them with some PVC piping... So far the building experience has been definitely challenging, but at the same time incredibly fun in a very positive way. PS. I am writing this at late night, please go easy if you see grammar/spelling mistakes.
-
Very refreshing to look at, and nicely constructed too. Excellent finish and modification on this~
-
Alaskan Hauler refurbishing project
cifenet replied to Jürgen M.'s topic in Model Trucks: Big Rigs and Heavy Equipment
It is very interesting how you are able to improve your existing build turning it into "ver 2.0"! Awesome work as always! -
1967 Kenworth narrow nose tanker and pup
cifenet replied to leafsprings's topic in Model Trucks: Big Rigs and Heavy Equipment
Nice setup here, fantastic work! What a flawless build and the tankers look great too! -
AMT Kenworth Challenge mixer 1/25
cifenet replied to truckabilly's topic in Model Trucks: Big Rigs and Heavy Equipment
I can definitely see you have put some great effort here making this mixer this beautiful! Very convincing weathering and highly detailed! Good work! 👍 -
Wow, this one actually looks realistically good! Rusted everywhere and worn out or not, the trust is simply amazing to look at!
-
Ladies and Gentlemen, presenting my '67 Impala street/strip racer
cifenet replied to ismaelg's topic in Model Cars
One sweet ride here and superb details! -
These look awesome. Nice job, indeed. These Caddies look big and massive, I do remember these back in the 90s. To be honest, never thought they looked cool back then, but they look cool now!
-
What a great result and highly detailed work! Bravo~
-
T41 Bugatti sport coupe
cifenet replied to charlie libby's topic in WIP: Other Racing: Road Racing, Land Speed Racers
Simply amazing work so far, and it is very entertaining (in an absolutely positive way) to follow! -
1974 Peterbilt 352
cifenet replied to DRIPTROIT 71's topic in Model Trucks: Big Rigs and Heavy Equipment
Superb work! A fine looking Peterbilt here. -
Peterbilt 379 RV
cifenet replied to vincen47's topic in WIP: Model Trucks: Big Rigs and Heavy Equipment
Extensive work showing fantastic outcome. Looks perfect! -
Kenworth aerodyne cabover
cifenet replied to Bronzekeg's topic in WIP: Model Trucks: Big Rigs and Heavy Equipment
Great progress with high quality result! The doors operate nicely too, looking very good. -
International 9670 KFS
cifenet replied to Hessel Hemstra's topic in Model Trucks: Big Rigs and Heavy Equipment
This one is one handsome looking truck! Awesome painting scheme as well! -
It is really looking nice and clean, so far so good! Keep up the good work!
-
Steve, your creativity on this is very impressive. I also like how you are adding each section using different materials to construct what you need.
-
Western Star 4900 FA plow truck
cifenet replied to BK9300's topic in WIP: Model Trucks: Big Rigs and Heavy Equipment
What an amazing WIP so far, covers incredible progress and I really enjoy seeing details getting implemented! -
Penthouse / Rizla / Super Cad Porsche 962C
cifenet replied to Nacho Z's topic in Other Racing: Road Racing, Salt Flat Racers
Amazing work, and the photography is brilliant also. What a good looking Porsche! -
The level of details is just mind blowing. Incredible work!
-
Perfect on all areas, just stunning to look at!!
-
Citroen Xsara WRC
cifenet replied to Technics's topic in Other Racing: Road Racing, Salt Flat Racers
Awesome build, and realistic weathering on the back. Superb! -
Nice work on this, smooth chassis finish looks great!
-
1/12 Tamiya Williams FW14B
cifenet replied to okazaki0511's topic in WIP: Other Racing: Road Racing, Land Speed Racers
This is just stunning and fantastic to look at! All of the details are wonderfully managed and beautifully crafted. Keep up the great work! -
A solid build, beautifully executed! The stance is also perfect!