cifenet
-
Posts
856 -
Joined
-
Last visited
Content Type
Profiles
Forums
Events
Gallery
Everything posted by cifenet
-

Canadian Kenworth LW 900
cifenet replied to lwwoodss's topic in WIP: Model Trucks: Big Rigs and Heavy Equipment
Beautiful work, I can already see how great this will look once everything is put together and painted! Keep it up! -
1944 Autocar U-7144T
cifenet replied to Chariots of Fire's topic in WIP: Model Trucks: Big Rigs and Heavy Equipment
This is looking fantastic! Nicely curve cab front too! Brass work looks awesome, it is almost worth displaying without painting! -
That is a good start, Alex! The cab is looking good. I like how everything is proper and flawless. The custom decals match the real thing also. At the end, it definitely looks like an interesting project trying to reproduce this rig for a buddy!
-
Super impressive! I like how you are focused to reproduce things one by one carefully! And the results are definitely worth the effort here! Nice going so far.
-
1/25 Revell Peterbilt 359
cifenet replied to cifenet's topic in WIP: Model Trucks: Big Rigs and Heavy Equipment
That is a big compliment coming from you, Daniel! -
1/25 Revell Peterbilt 359
cifenet replied to cifenet's topic in WIP: Model Trucks: Big Rigs and Heavy Equipment
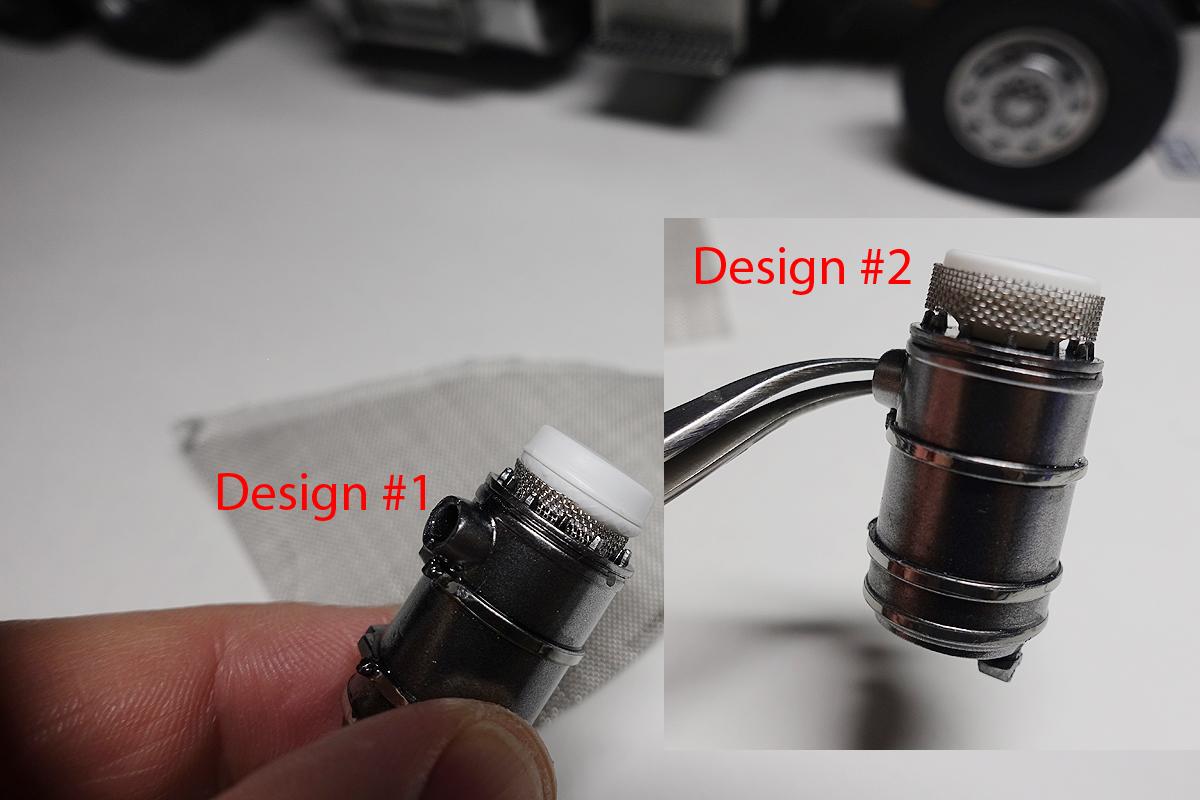
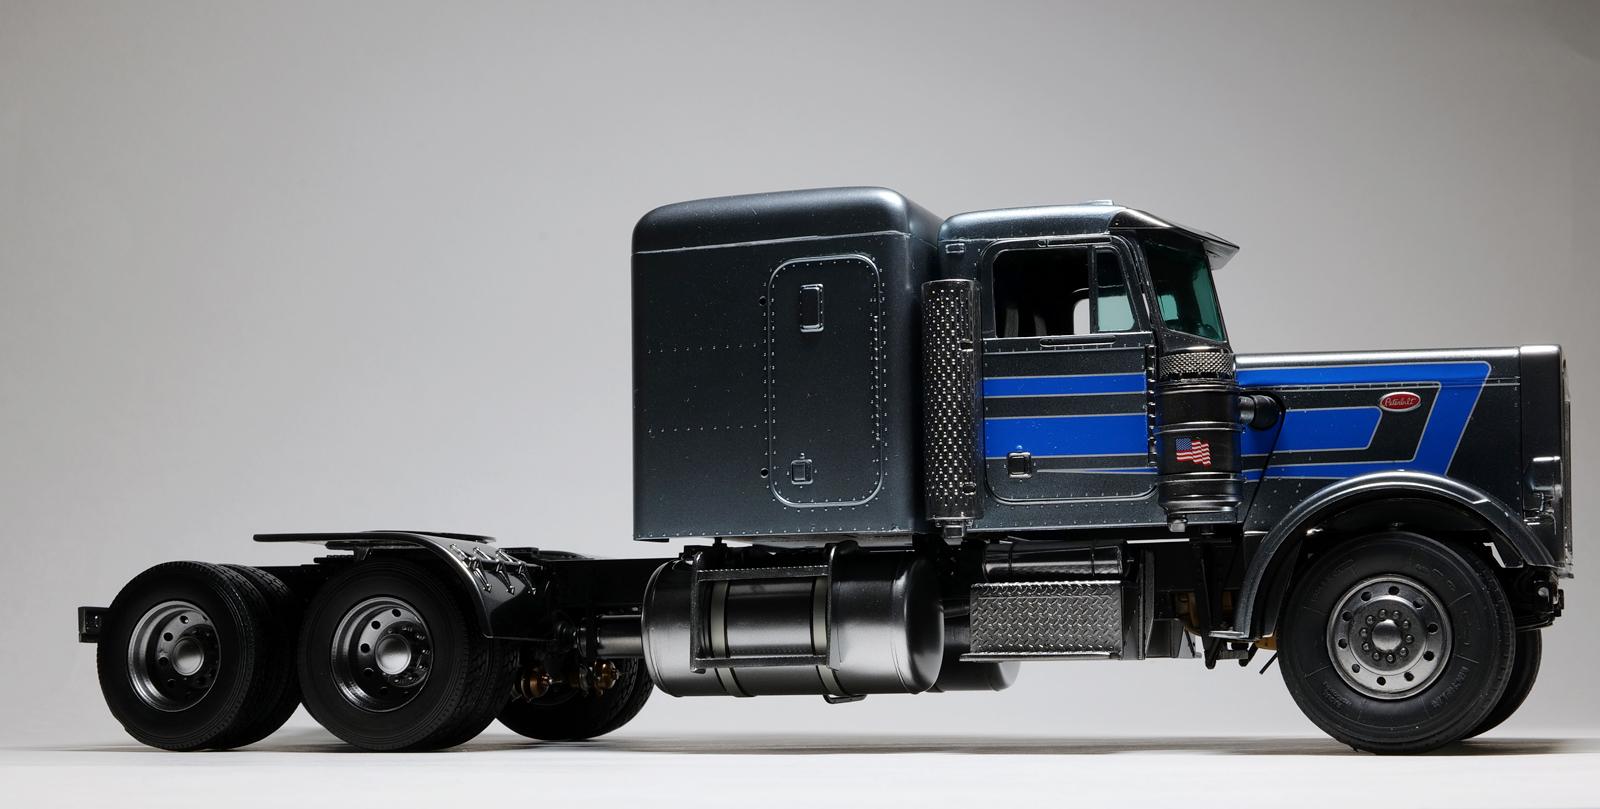
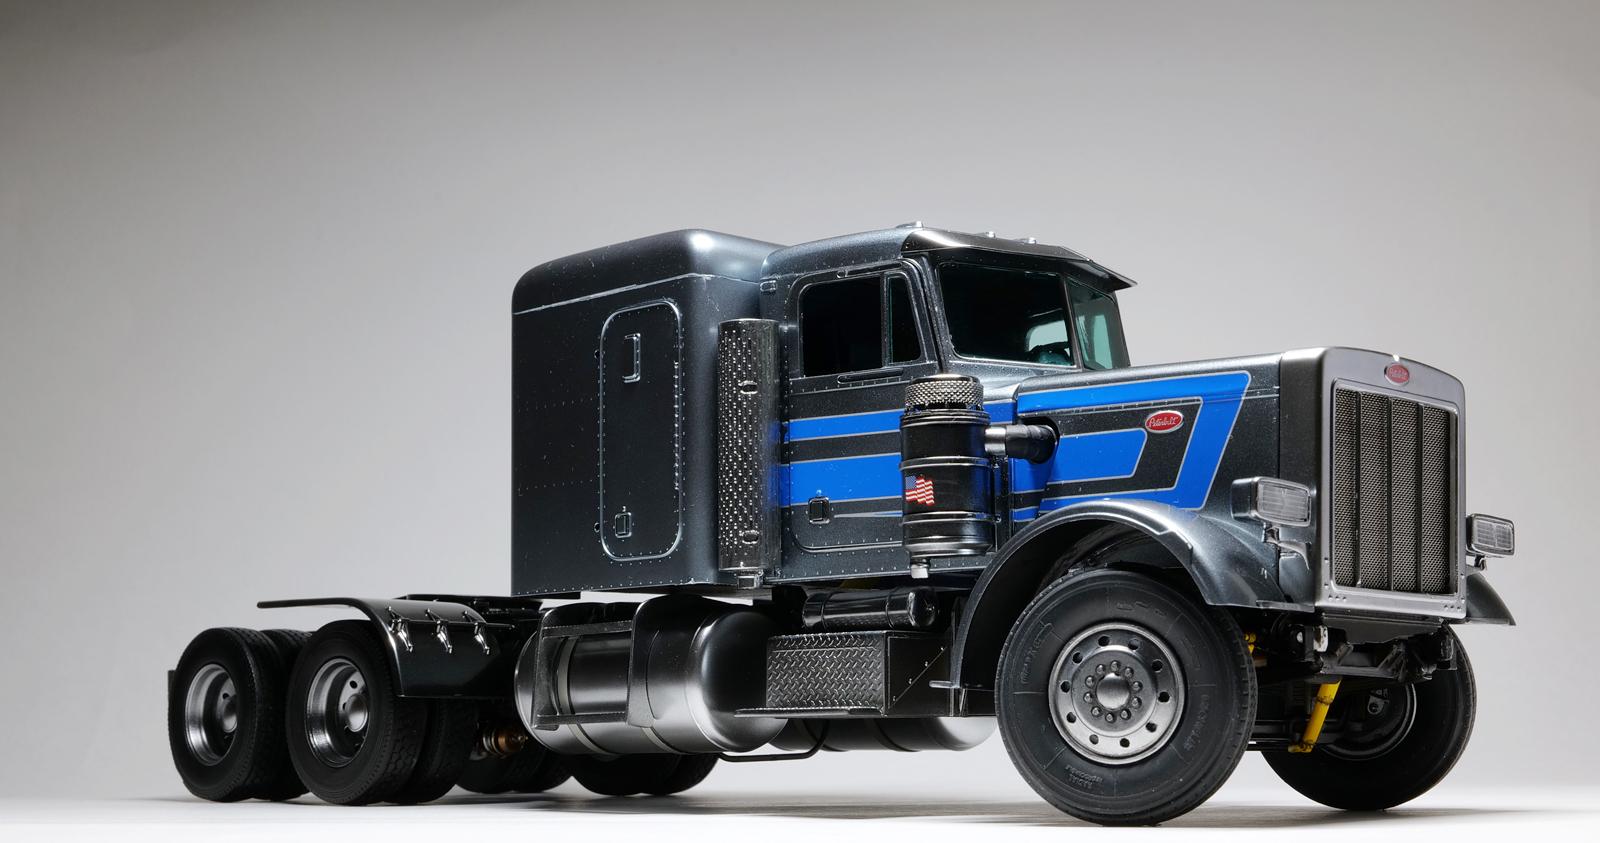
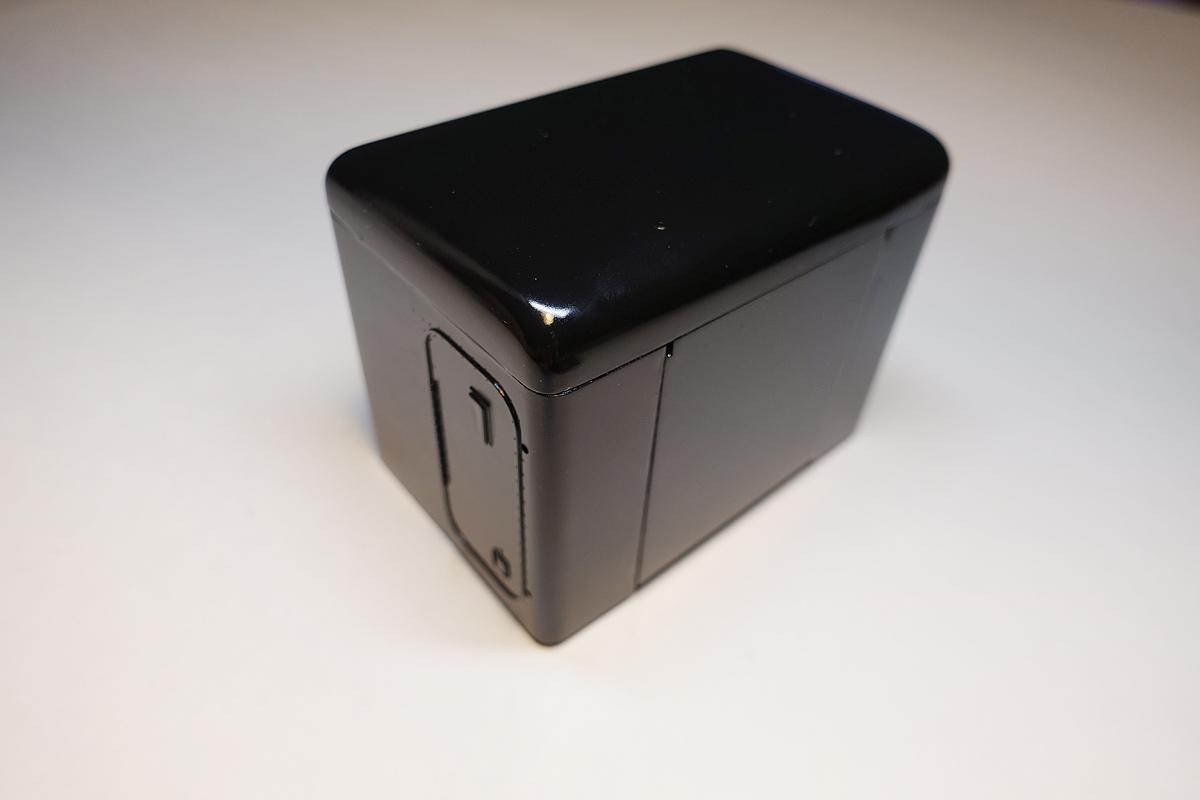
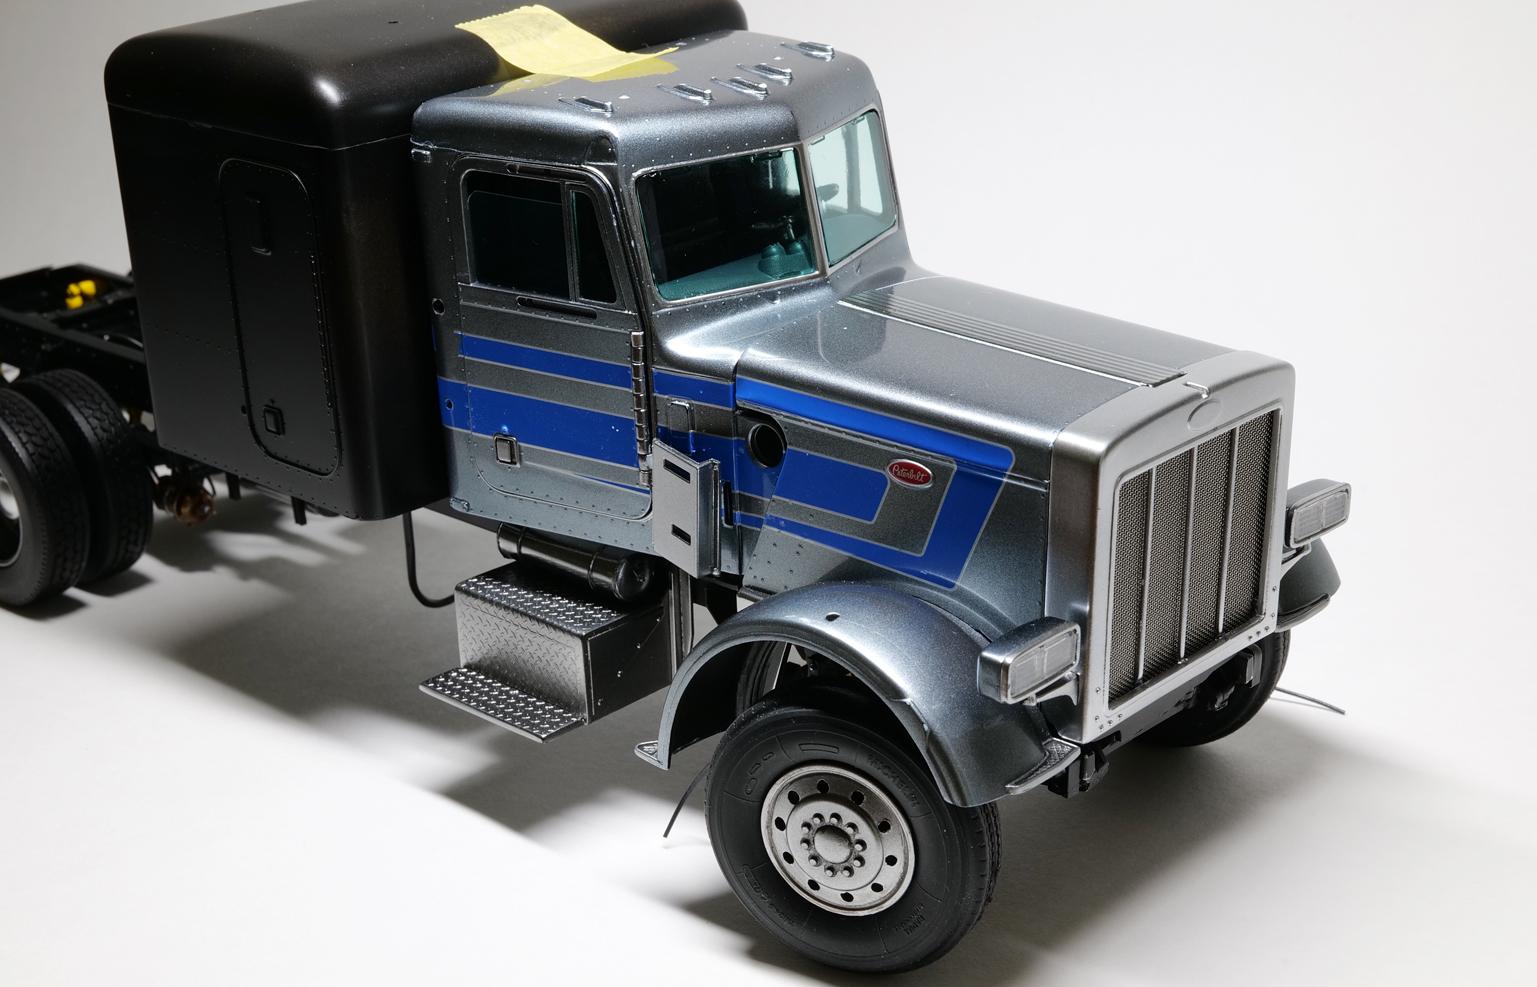
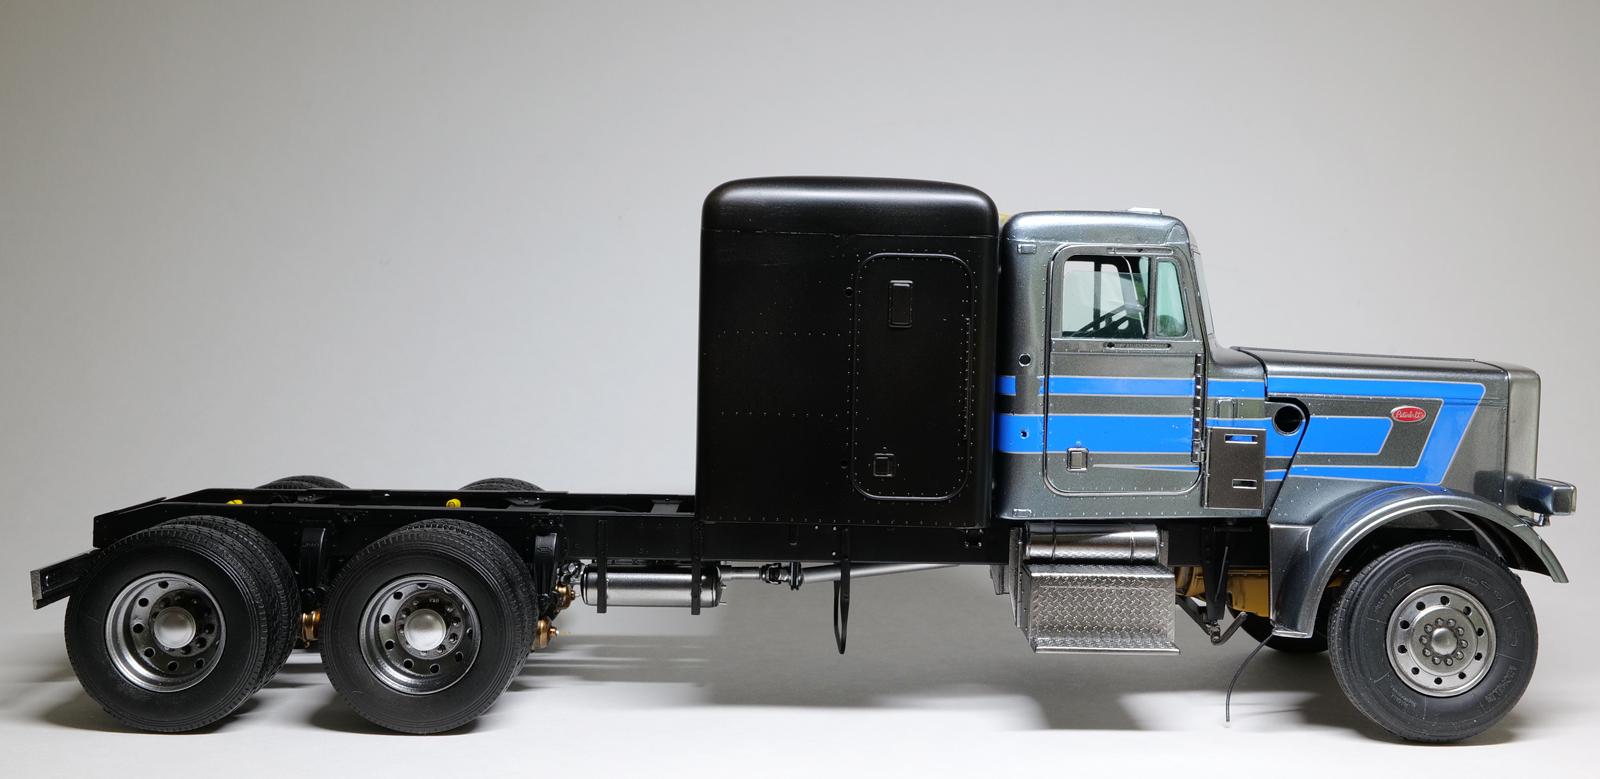
I am getting excited as the truck is looking like how I envisioned before I started the build. The interior work is done and my problem with this decal getting ripped should be solved once I mount the exhaust here. Overall, I wanted to have cool exterior looks for this truck and I tried to focus my attention on components such as fuel tank, wheel guards, and also air intake tanks. The air intake tanks seem somewhat boring as they are, I gave some enhancement by adding this filter mesh. And yes, the mesh material is the same material that I used for the front grille which came from a frying pan splatter guard! After several trial and error sessions adding this mesh, I picked my design that I was satisfied with. I preserved my custom made paint mix pre-thinned, I can always paint the same color anytime. The sleeper painting process has started. I can confess that I did a bad job assembling the sleeper, but it is too late to go back and re-do. As mentioned before, all four side panels don't quite fit well including the floor piece not sitting at the correct level. If I were to make this once more, I will definitely do a better job. I am moving forward. I mounted the air cleaner tanks and exhaust components. The kit only supplied license decals and I didn't like that. So I decided to improve the look by: 1. made two license plate frames using plastic sheet 2. Painted the plates frames with silver 3. Applied the license decals 4. Applied two layers of clearcoat 5. Polished clearcoat 6. Added two stainless pins on each plate to simulate bolts The result? Still mediocre looking license plates. Sometimes things do not come out and planned! Fuel tanks mounted, wheel guards (quarter fenders) attached. The frame is ready! Now testing fitting sessions... Air filter tanks mounted. The front bumper is mounted. And one driving lamp is misaligned. Need to fix it. Air filter tanks, exhaust components mounted. I need to start thinking about what to do for my headache rack (literally). Thanks for following!
-
1/25 Revell Peterbilt 359
cifenet replied to cifenet's topic in WIP: Model Trucks: Big Rigs and Heavy Equipment
Thank you, Bill! Looks like I am always breaking things as I build. And it seems to be a repeating offense for me lately. -
24ft round front van trailer
cifenet replied to carsntrucks4you's topic in WIP: Model Trucks: Big Rigs and Heavy Equipment
Impressive! I like the round front and how you managed to bend the plastic sheet! And it goes very well with the truck, nice work! -
FXI Trucking Hot Rod Peterbuilt.
cifenet replied to Scott Colmer's topic in WIP: Model Trucks: Big Rigs and Heavy Equipment
These scratch built components are super sweet! The vented brake rotors came out nice too. Great job! -
This is interesting! And being 1/43 scale, the details are nicely represented! Very well done putting these together!
-
This took some time for me to read up all of the WIP till now and I must say it is fascinating! I like the methodical approach on detailing parts and just overall procedures to get things implemented. Very entertaining for sure!
-
Nostalgia Fuel Dragster--Blower Manifold (01/28/23)
cifenet replied to Straightliner59's topic in WIP: Drag Racing Models
Ok, this is super fantastic! I found this WIP just now and this is purely impressive with efforts to make things proper. Keep up the good work! -
Super cool! Nice job using brass the material, those covers are looking sharp and the thickness fits the scale!
-
Nothing is easy here, but I feel your efforts to make things proper! I think this is how we get better as well! Good job!
-
Lindberg Big Rig Trailer
cifenet replied to OldTrucker's topic in Model Trucks: Big Rigs and Heavy Equipment
NIce job on this, the color looks awesome and it fits the "old school" look! -
Bravo on the frame details! Love intake piping work too! I really like the overall look of the frame setup.
-
1/25 Revell Peterbilt 359
cifenet replied to cifenet's topic in WIP: Model Trucks: Big Rigs and Heavy Equipment
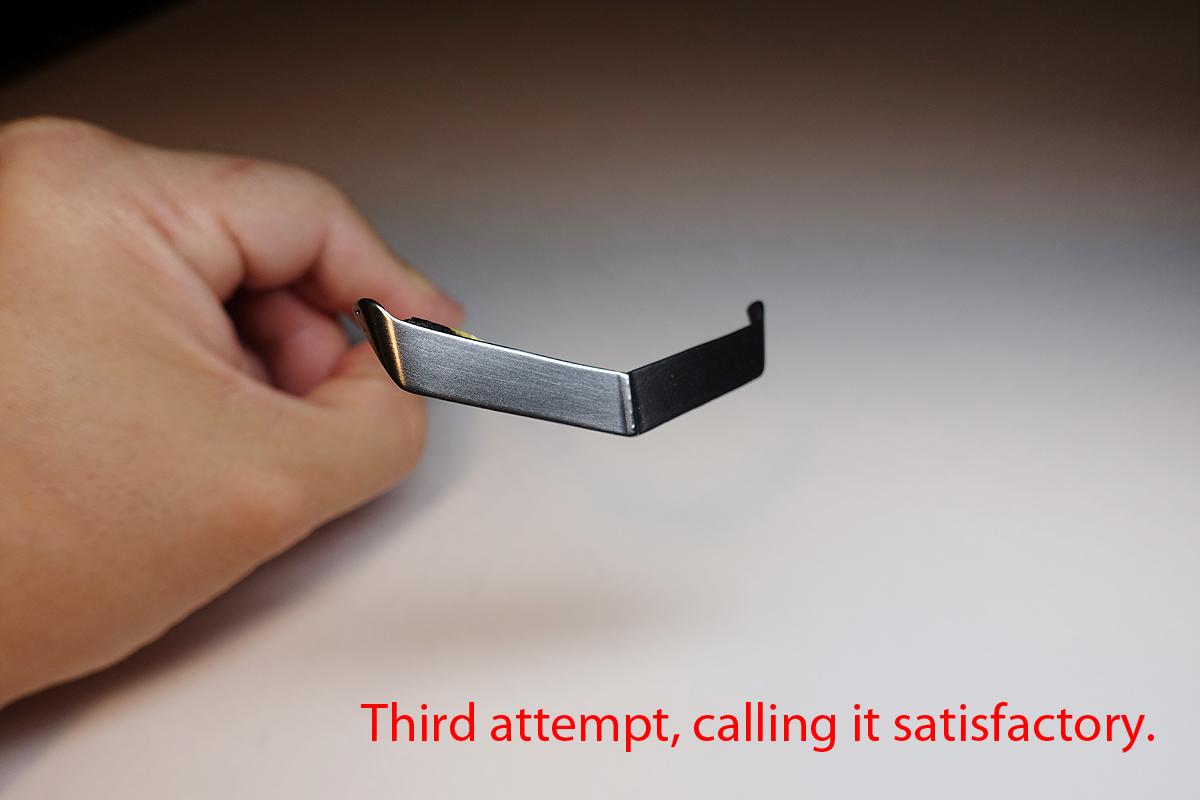
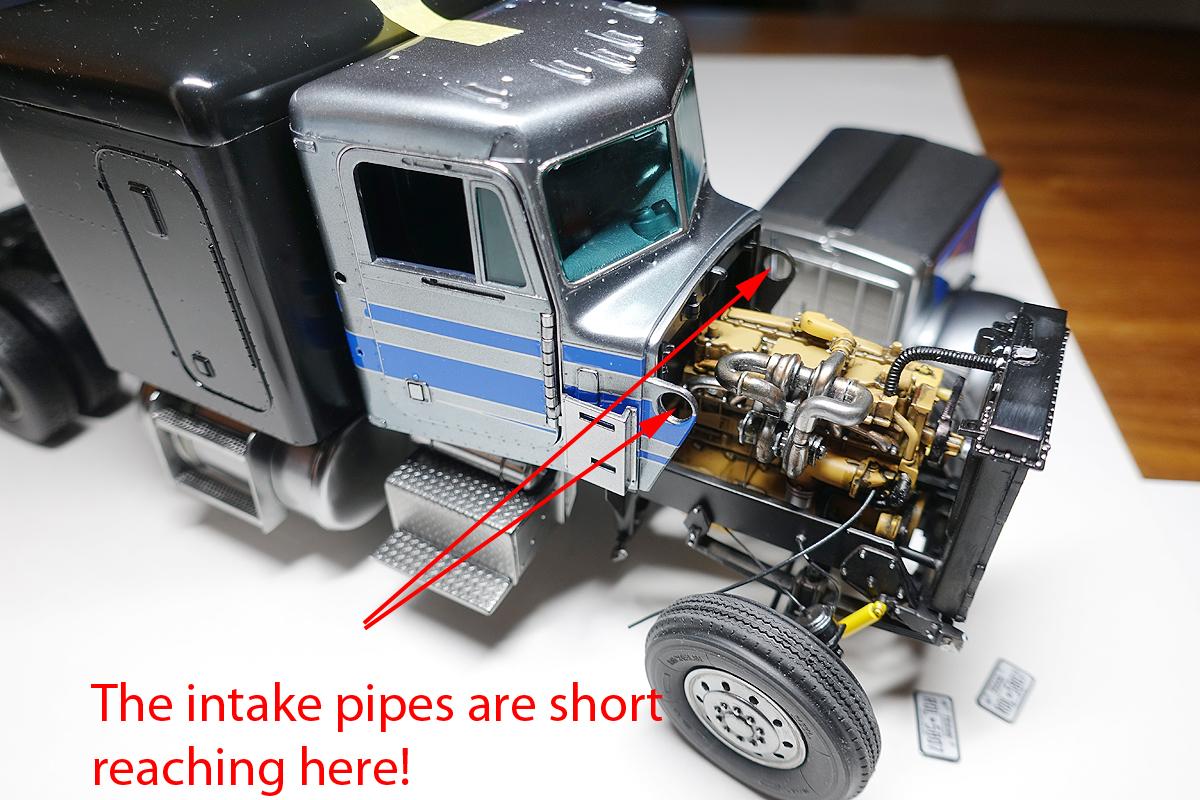
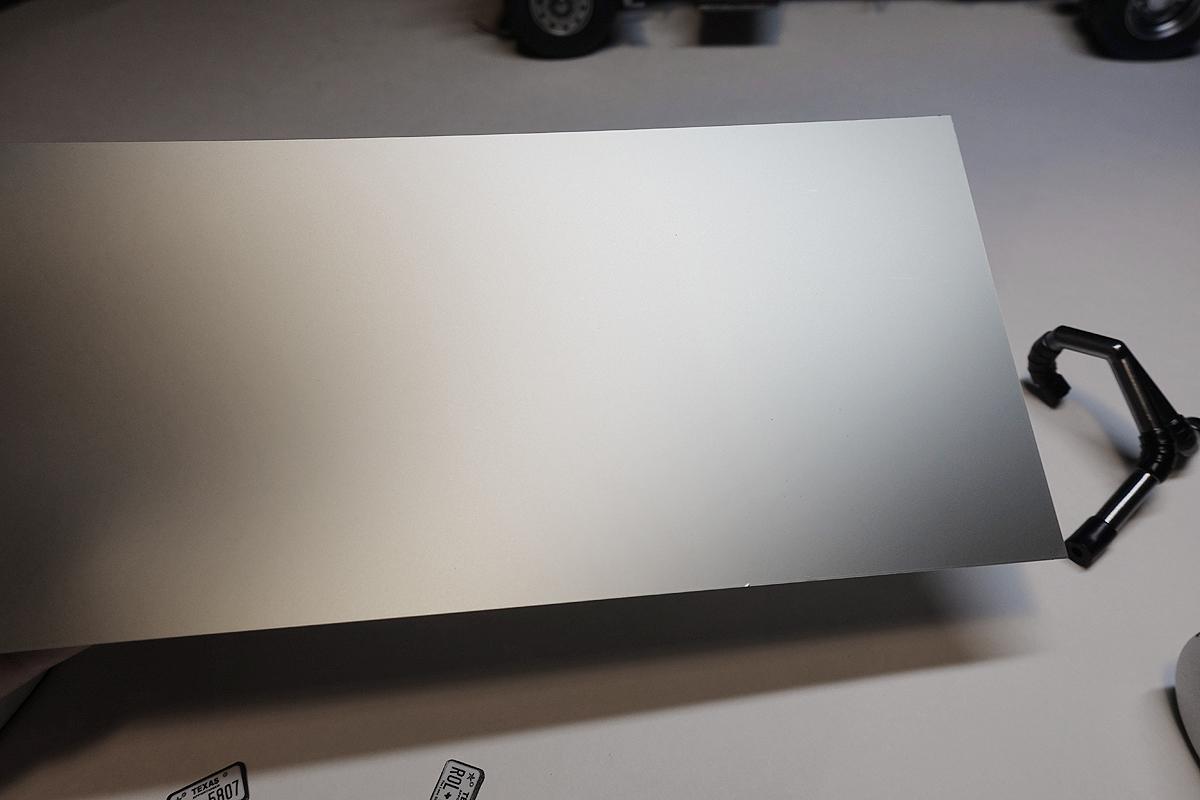
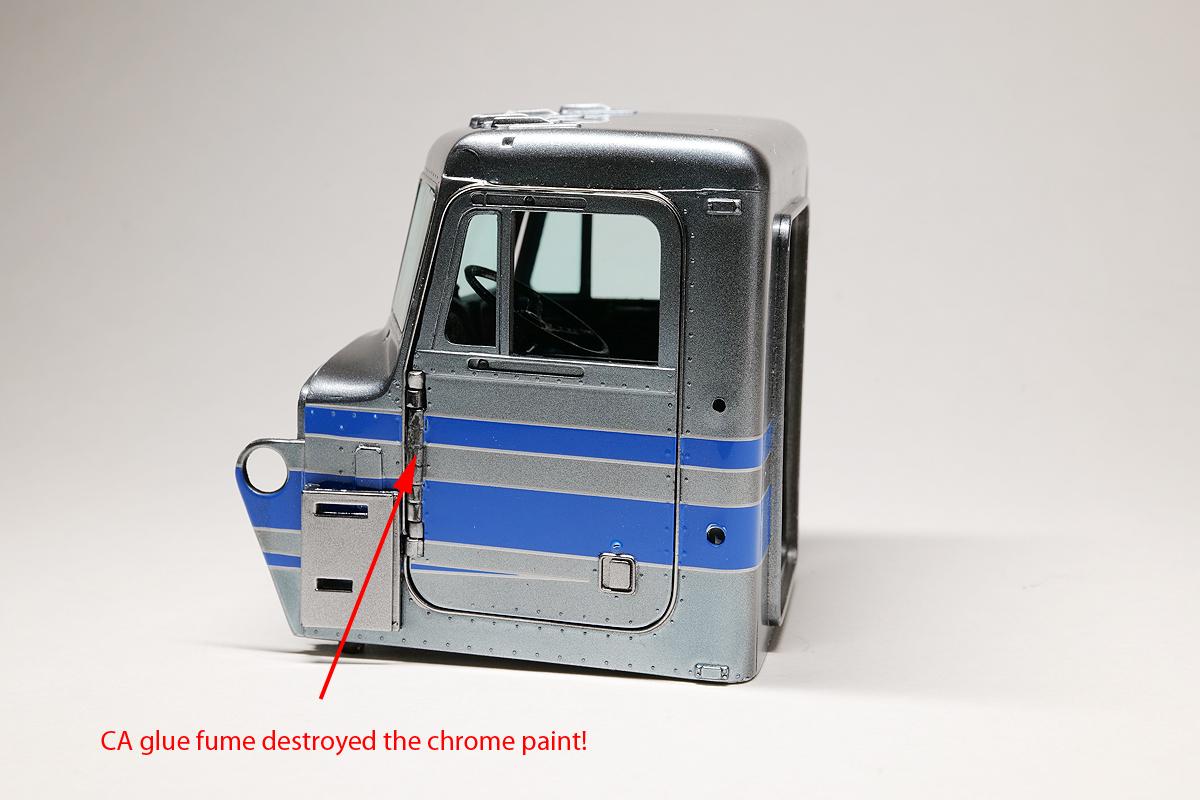
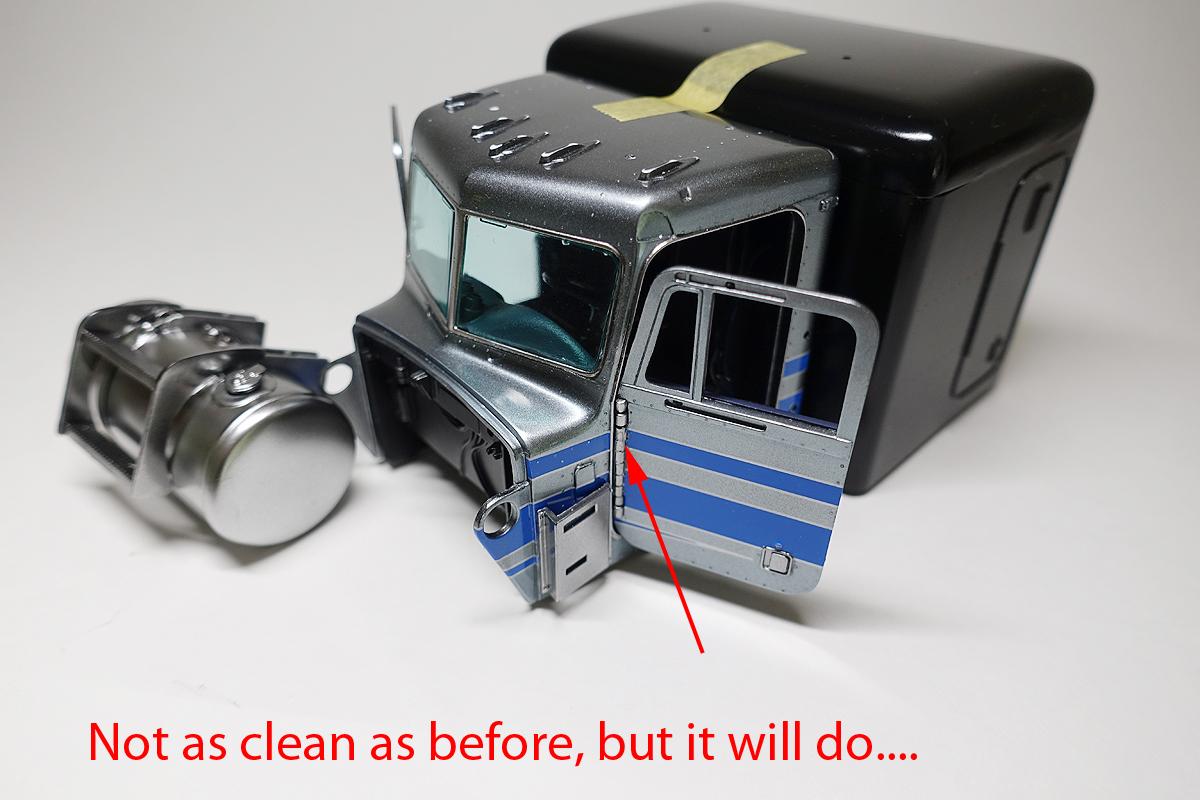
Hi guys! This WIP continues. I began focusing various sub components this time. I see the end is near, but I still do not have my sleeper painted. The sleeper will be my main focus soon. Time to add details to the bumper. I drilled out the molded driving lights from the bumper. Using an aluminum tube, I will make two light housings. Using a mini tube cutter, I made two small light housing components. Using some beads and UV clear resin, I assembled two yellow driving lights. The lights are in. The left light seems to be misaligned, I will fix these small issues later. I want these lights to stick out ever so slightly so you know they are there. Spent time detailing the air intakes. These will look good once mounted on the truck. The visor came out "satisfactory" finally. The camera is not able to show off the shine, but it is there. The exhausts were painted too. I will have to mount the long pipes on the top later on. I also began the painting process of my sleeper. I repaired the glue mishap too. I started the exercise of detailing these tanks. Also intake pipes... Simulating rubber wraps for the tank straps here, but damaged surface while lifting another masking tape. I will repair the damage later. I bought this tape back in 2013 while visiting Japan and kept this unopened till today. It is made by Hasegawa. My other reflective tape is super shiny one (see air intakes above), but this has super flat finish. It is similar to Bare Metal Foil, but feels thicker and has no wrinkles to deal with. I find them easier to work on flat surfaces. I used these (Transtar 4300 as well) to represent the tank straps and they are fantastic! Somehow the pipes are short on each end. Is my cabin front wider than it should be? Another homework I need to figure out later. While mounting these doors, I had to use CA glue on door hinges. Unfortunately, the glue fume destroyed the chrome finish (yes, chrome finishes are delicate if not protected), so I spent more time fixing it. As I said before, "I measure once, cut twice"... I mounted the fuel tank on one side. Slightly skewed, but I am okay with this. Thanks for watching!
-
1/25 Revell Peterbilt 359
cifenet replied to cifenet's topic in WIP: Model Trucks: Big Rigs and Heavy Equipment
Appreciate your support! Yeah, mine got cloudy at first, but as I was applying paint layers (to achieve wet coat), the windows became clear. And I sprayed inside of the clear part, BTW. -
Carolina Ford WT 9000
cifenet replied to DRIPTROIT 71's topic in WIP: Model Trucks: Big Rigs and Heavy Equipment
It is advancing nicely and I like the progress so far! I have to mention that the choice of red color does look very classic and retro here. I like it! -
Changing Gears
cifenet replied to J.B. Customs's topic in WIP: Model Trucks: Big Rigs and Heavy Equipment
I can see why building firetrucks may give you joy! You have done a great job making this look good! -
Two Reefer Trailers
cifenet replied to Rockford's topic in WIP: Model Trucks: Big Rigs and Heavy Equipment
These trailers look straight forward in terms of building, but now I am realizing they do require some work! Good progress so far. -
1/25 Revell Peterbilt 359
cifenet replied to cifenet's topic in WIP: Model Trucks: Big Rigs and Heavy Equipment
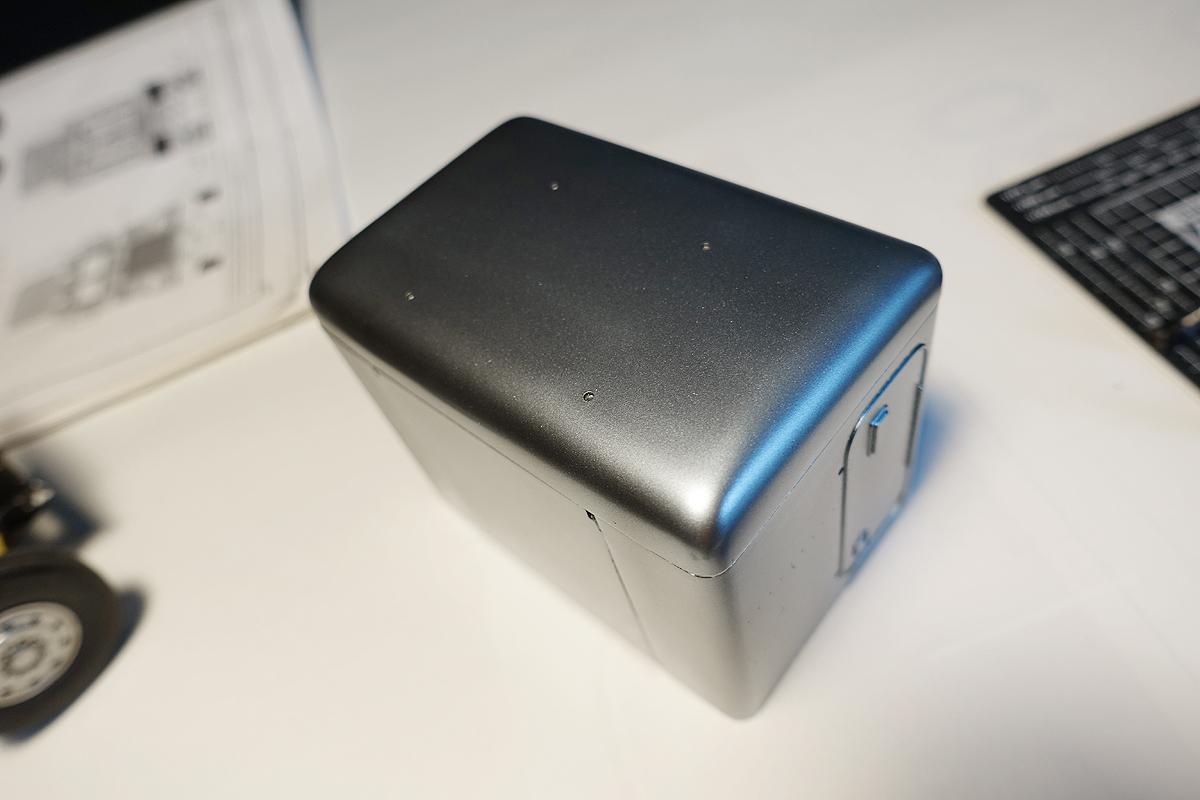
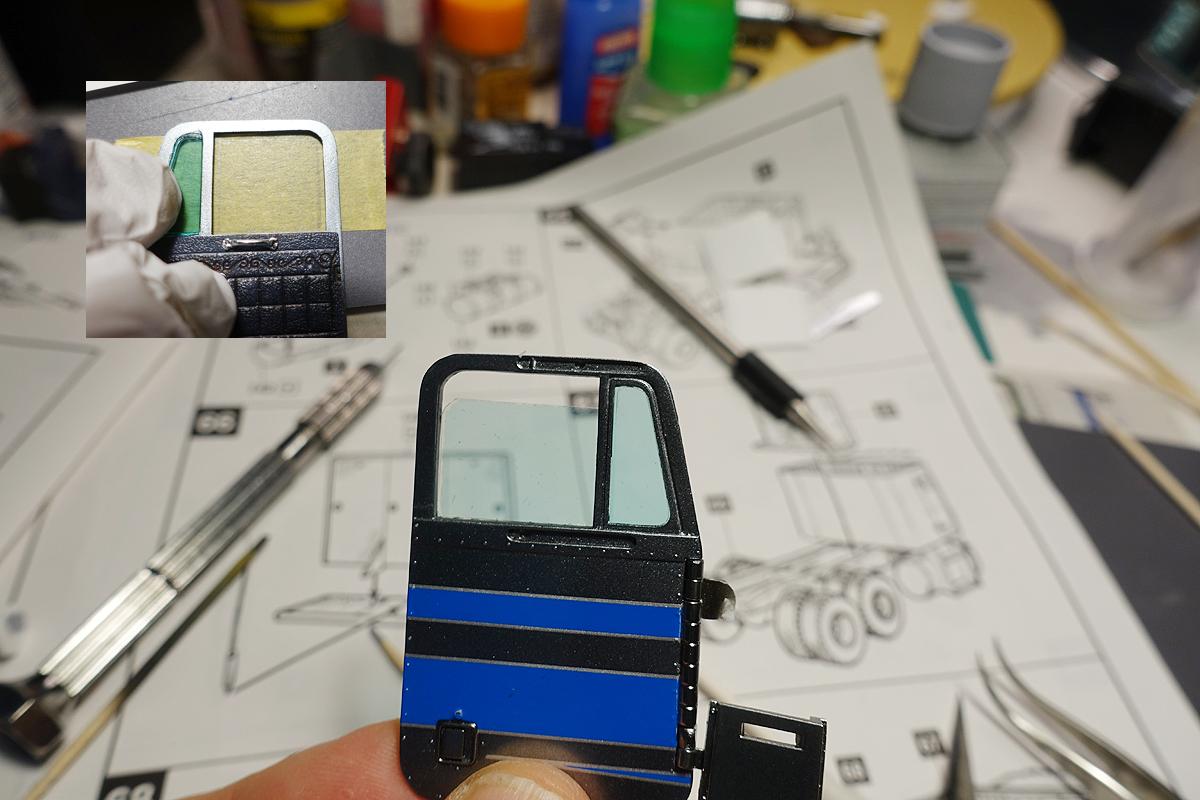
Looks like I am hitting 2k views, I feel obligated to add more contents. Unfortunately, multiple problems occurred this time around and I have been dealing with issues and some frustration. I started to paint several parts including the cab and doors. Lifting masking tape was never a problem before, but this just happened again (I had a similar problem with Transtar 4300). It took a section of decal and clearcoat with it. I usually shoot 3-4 layers of clear on top of decals and this never happened. Too early to panic just yet, but it was definitely frustrating to face a problem like this. As it turns out, the smoke stack hides most of the problem, I can barely see the destroyed decal here. Worst case, I can probably match the paint and spray stripes manually. The positive side was that painting of the stainless trim around the door came out decent, I was happy with it. My black primer is telling me how sloppy my gluing job was... I need to fix this. Another issue was that this fuel tank (I have only built one so far) finish isn't done to my liking. The metal finish is coarse and showing dark grain spots. It certainly is going to take some effort to redo this. I will need to make a decision soon whether to continue as is or redo the finish... The air cleaner canisters came out somewhat better so I decided to continue on these. I game simple black wash on edges and this enhanced the overall look. I did manage to mount two doors and I must admit that it was somewhat difficult. I struggled to mount things based on the instruction steps, I ended up altering the order of assembly. First, the instructions are written so you install in the following order: 1. dashboard 2. front windshield 3. seats/steering wheel 4. doors This seems like a logical order, but I found out during the test fitting session that my doors wouldn't mount easily if the dashboard is attached first. There is small gap that you need to insert the upper door hinge and this gap became very tight when the dashboard was attached. I didn't want to shave the mount so it can fit into the gap as it may weaken the strength of the hinge mechanism. And lastly, it was harder to mount windshields and also gluing with this dashboard in place. As you can see, the dashboard blocks the access inside. The last thing I want is dirty windshields from glue marks, scratches from handling too much. I want to attach the clear parts correctly the first time. One chance! Instead, I installed in the following order and it made the assembly actually easier! 1. windshields (attach from outside) - use clear glue inside. 2. doors - you can open them wide and insert the dashboard/seats next. 3. dashboard / steering wheel - tight, but manageable. 4. seats - easy! I have been experimenting what to do with the side windows. I like this "slightly rolled down" look. Third issue is the fitment problem shown here with windshield parts. The windshield is definitely short, I see gap on the top! Again, no need to panic just yet, I think I have the visor piece that goes on top of the front roof which will hide this gap... This Revell kit doesn't contain license plates, so I quickly made them. I think the decals look better on plates. The rear bumper has been mounted. I think I will scratch build mud guards. Then add the license plate and the rear area is done! My next step would be to fix existing problems (sleeper, windshield gap, ripped decal, etc) and then face more problems! Thanks again for following~
-
Love the details here. I am thinking another major component to be built is a swinging stop sign? Awesome progress so far!
-
2023 BRGB Movin' On Kenworth
cifenet replied to leafsprings's topic in WIP: Model Trucks: Big Rigs and Heavy Equipment
The frame looks quite sweet right now and as you add a bunch of chrome/aluminum parts around it, things are looking much better! -
Two Reefer Trailers
cifenet replied to Rockford's topic in WIP: Model Trucks: Big Rigs and Heavy Equipment
I didn't even know you were building these. I guess I am still too new to this forums. The A/C unit has the right amount of details, I like it! And the trailers do make the truck look complete when attached, they are nice to look at!