OldNYJim
-
Posts
252 -
Joined
-
Last visited
Content Type
Profiles
Forums
Events
Gallery
Everything posted by OldNYJim
-
Michael’s had all their Martha Stewart supplies marked down to a buck or two...I didn’t much care for any of the paint in her range, but I got a big stack of tape! ? Thank you sir! You’re always so generous with your comments - I’m very much enjoying your Dodge build!
-
Plastic spoons and ping pong balls might be a good start maybe?
-
https://www.ebay.com/itm/283894967358
-
Love that color! There’s a Miata in that red color at my local dealer...it GLOWS in the sun, looks amazing! Glad to see some more on this one!
-
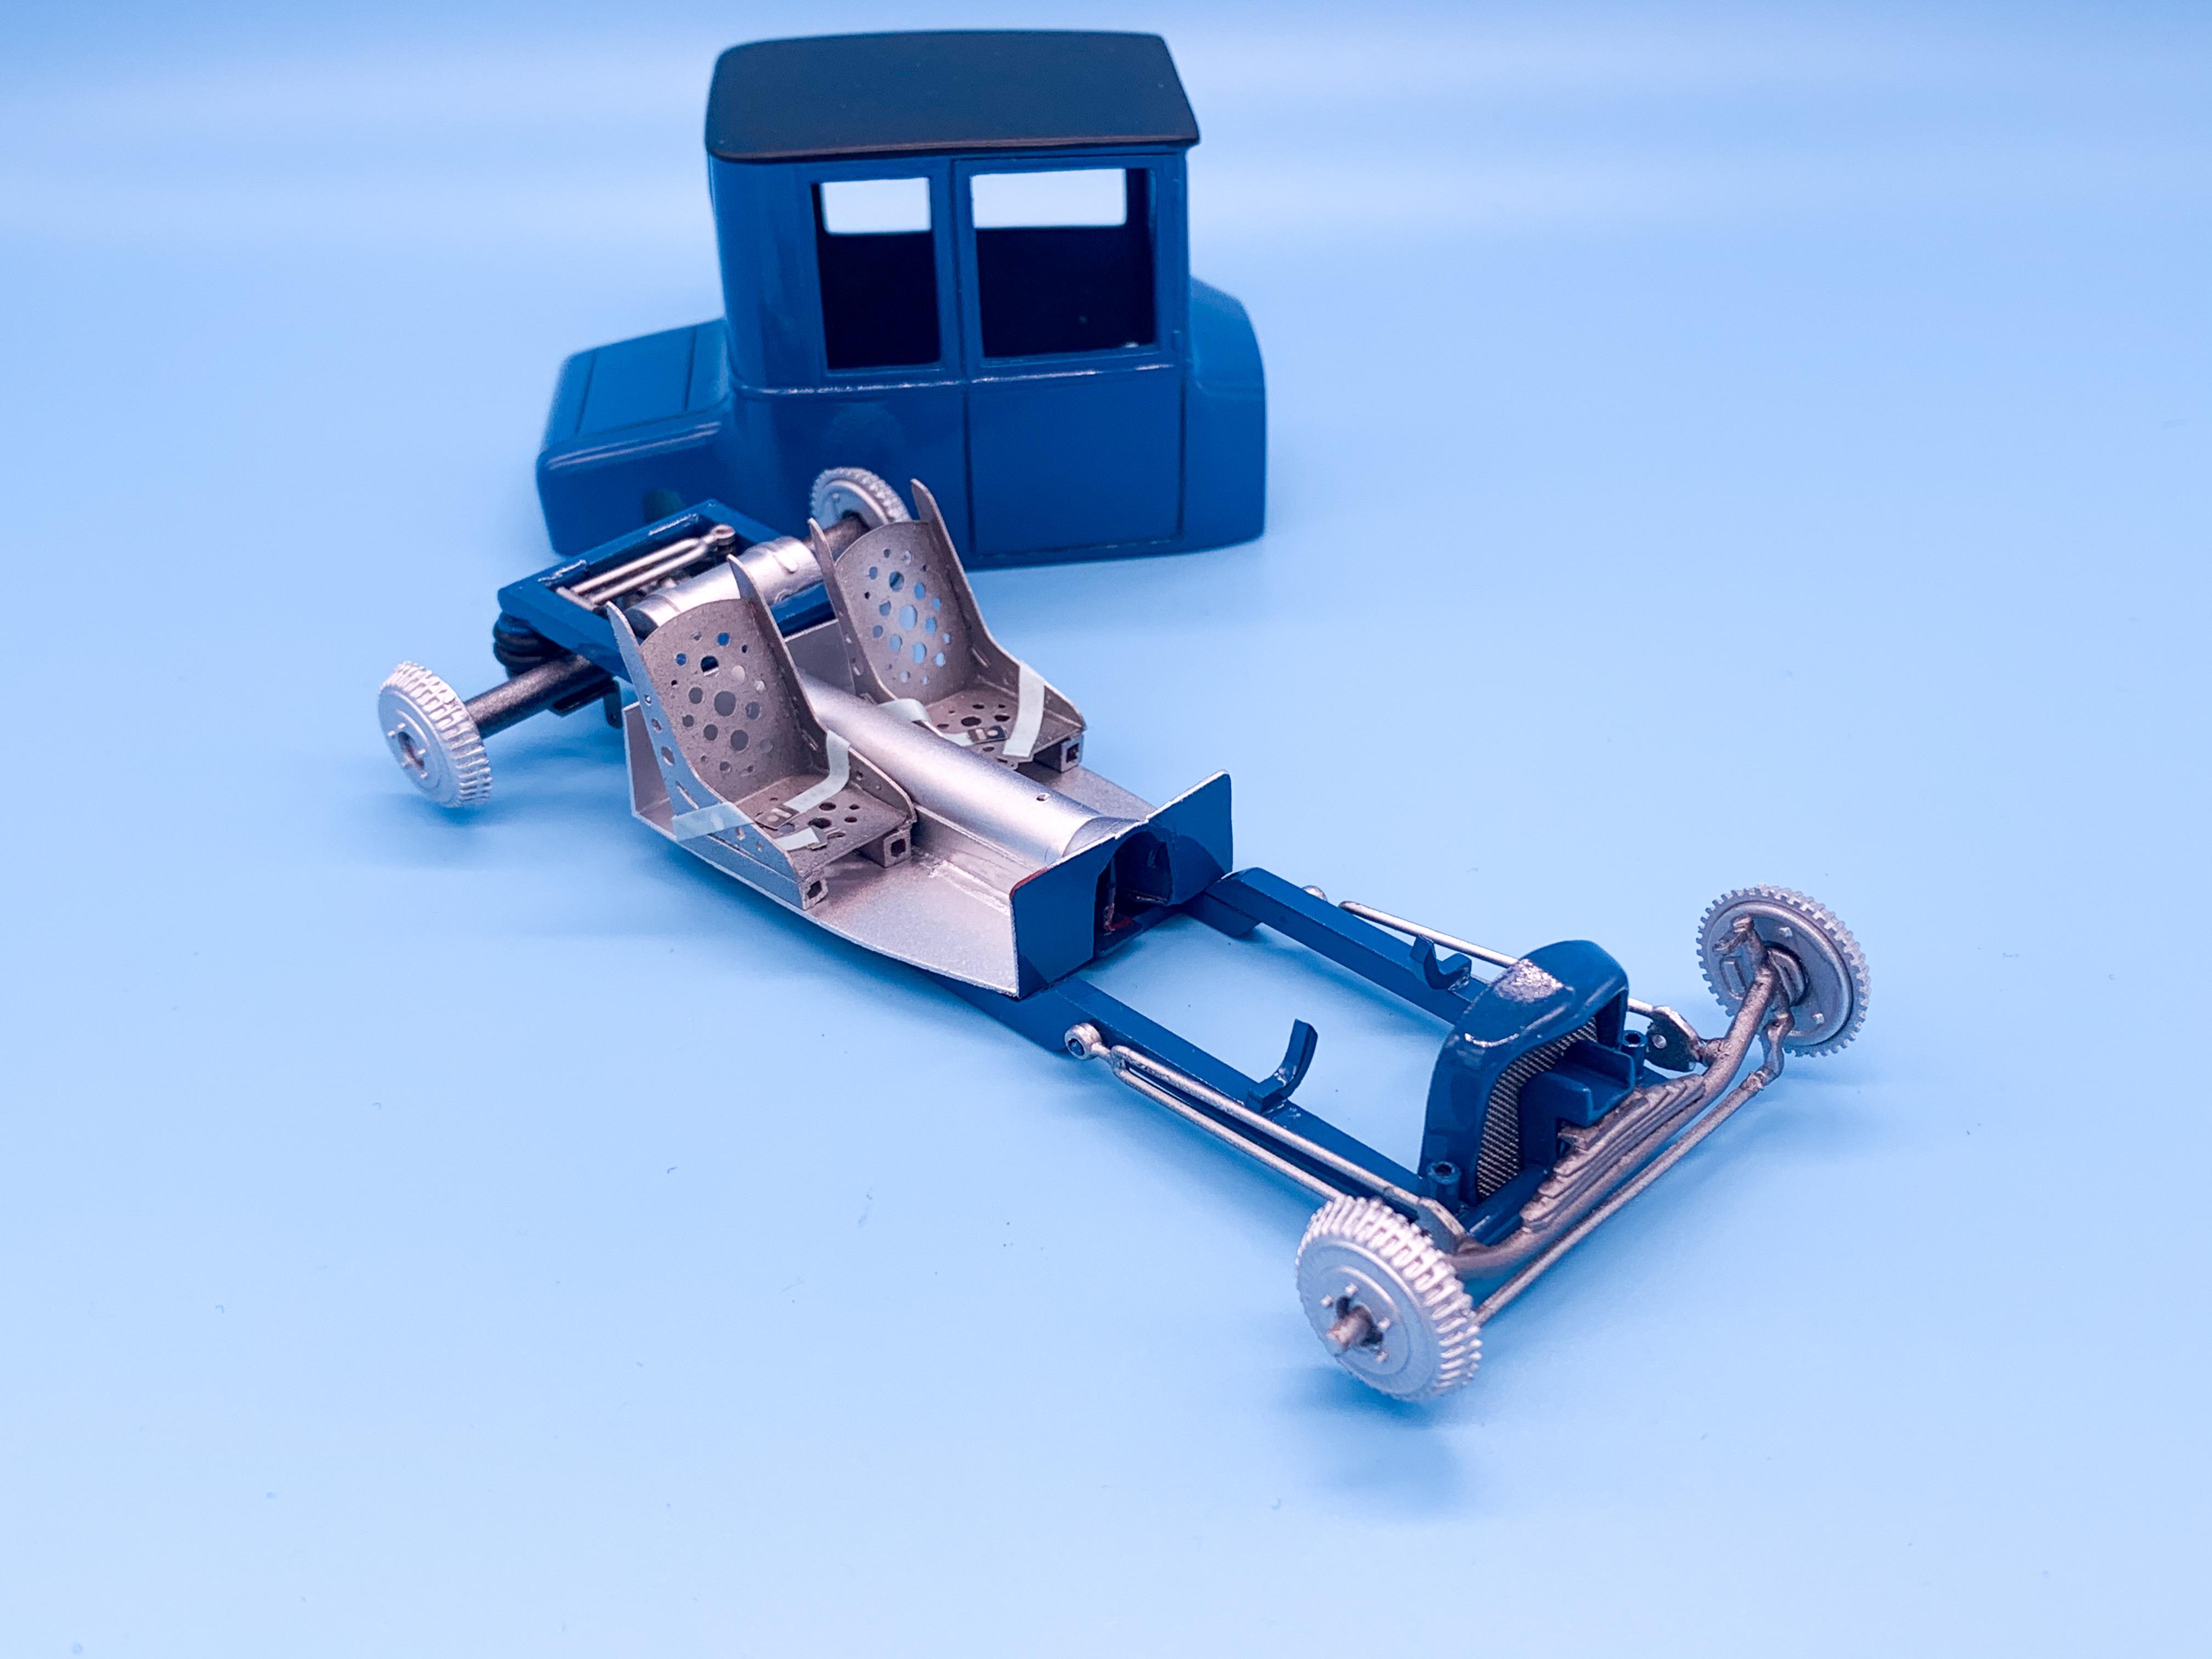
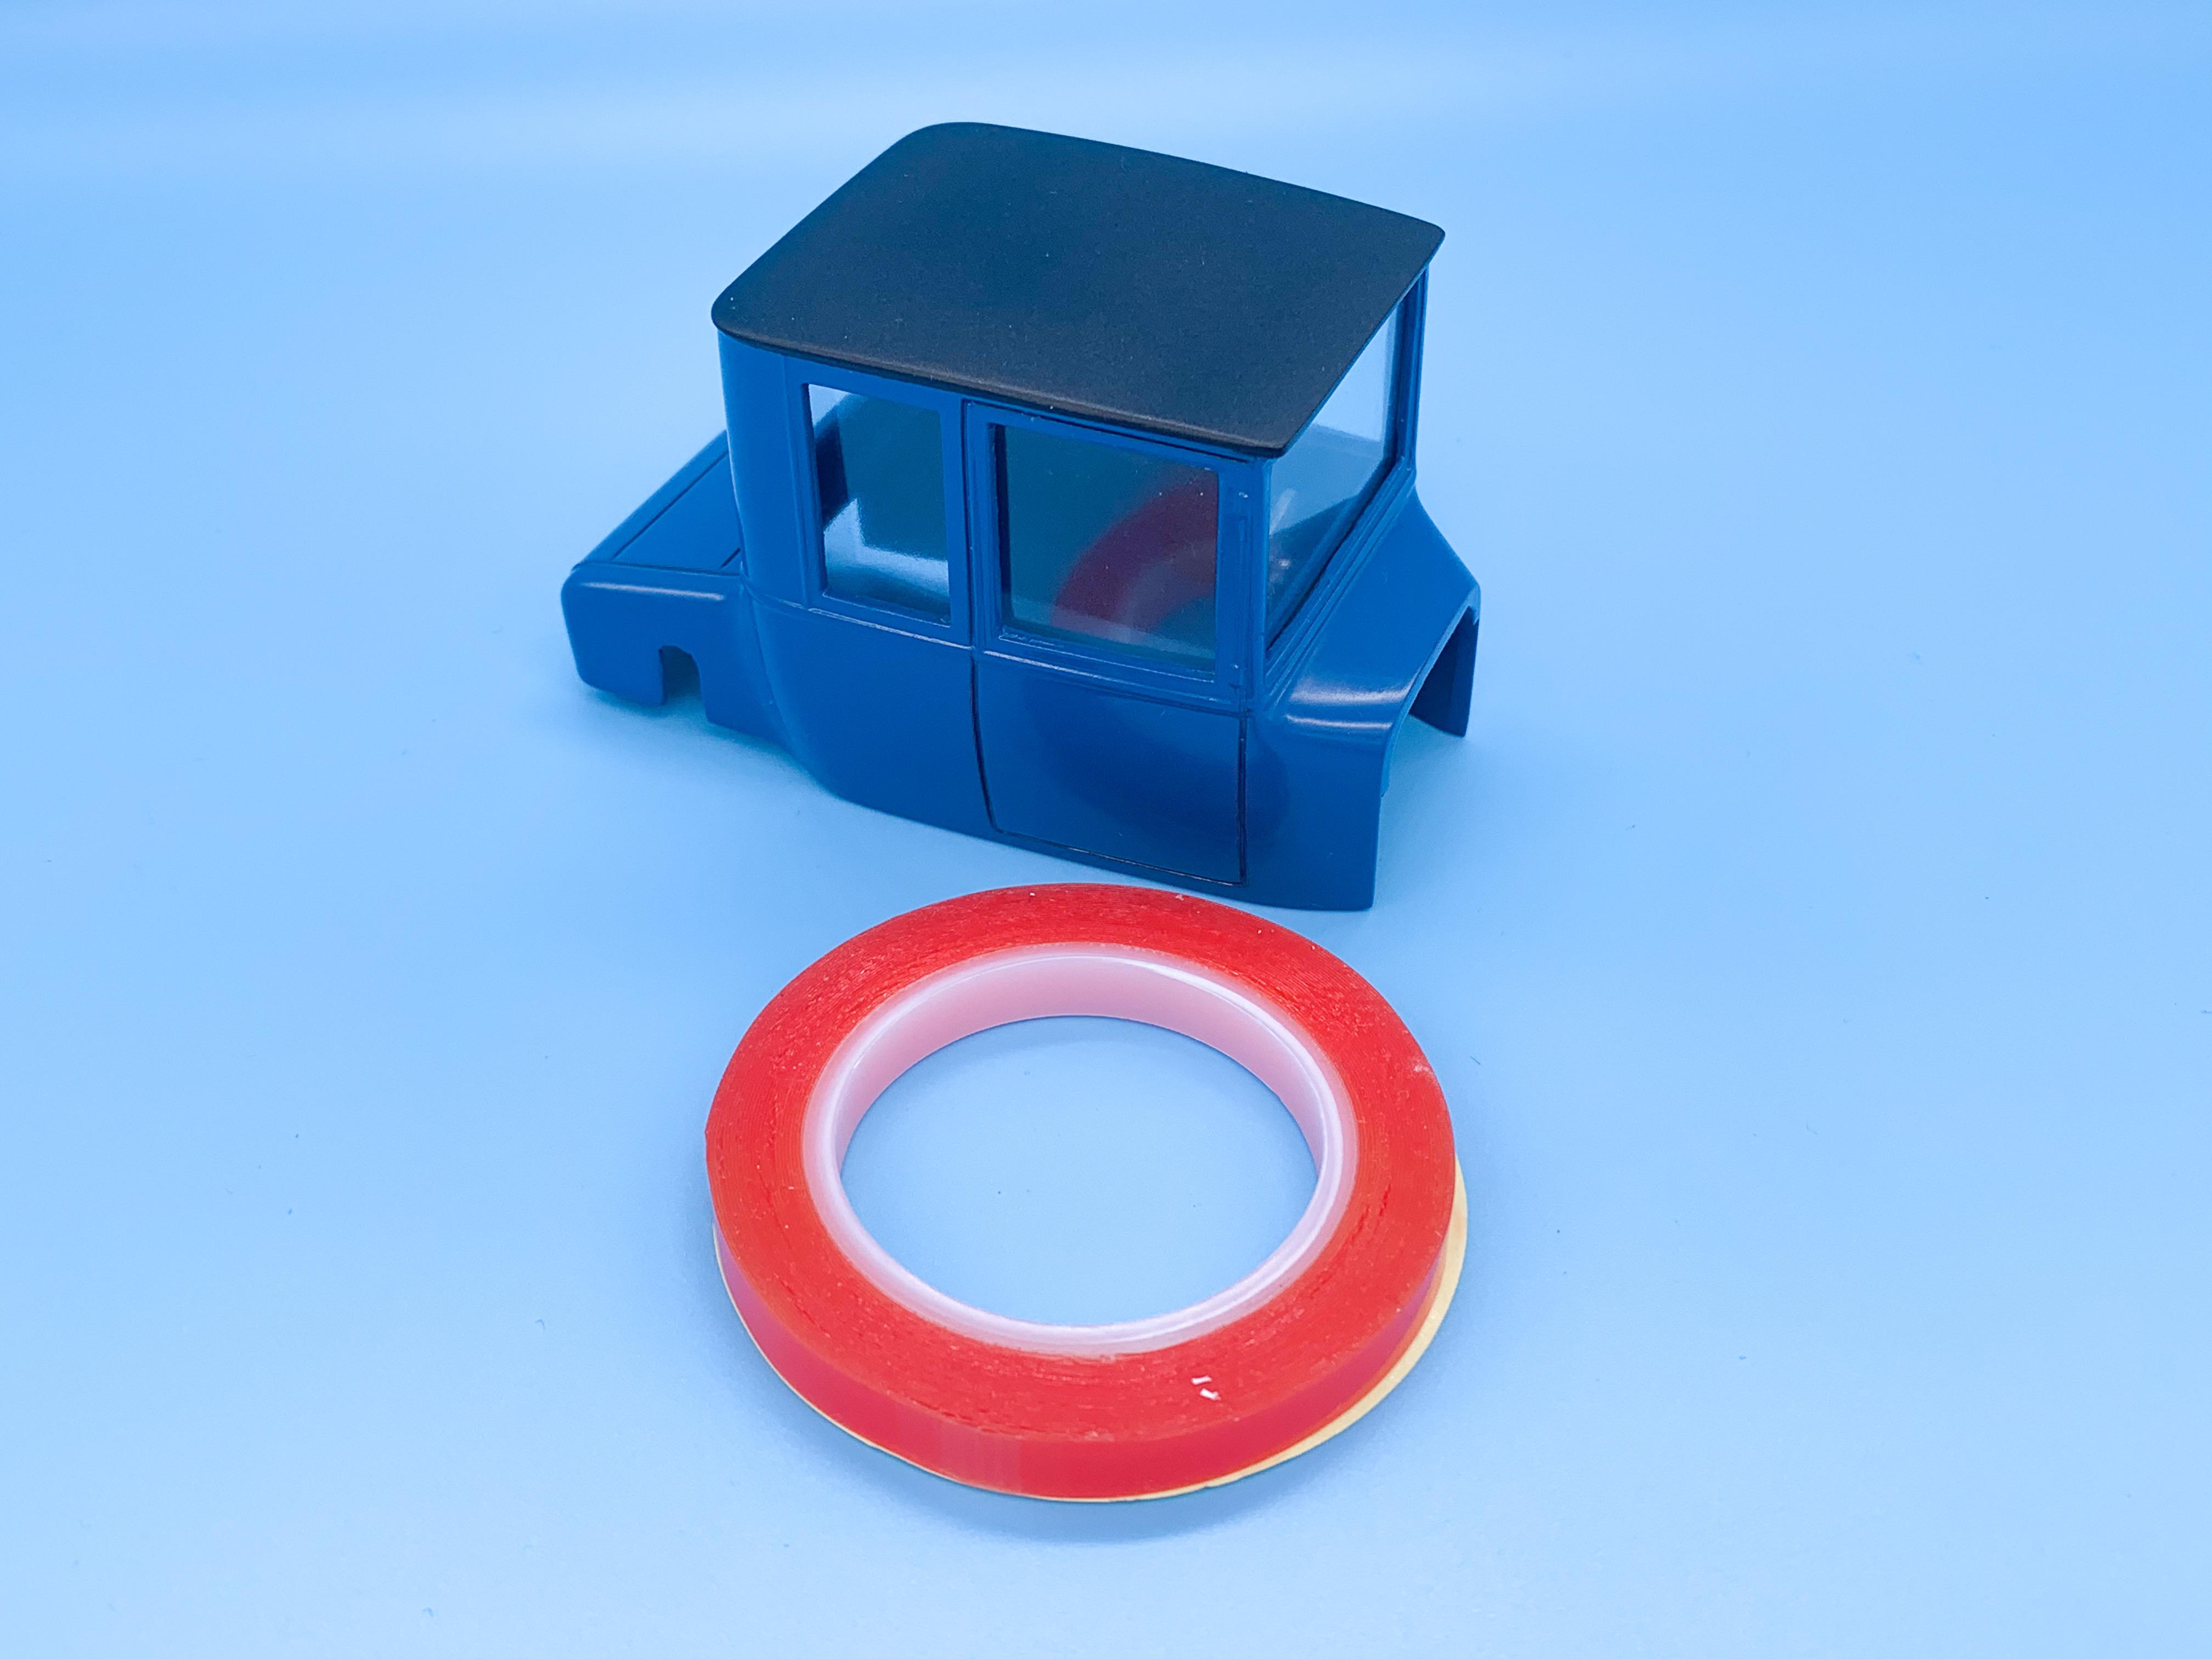
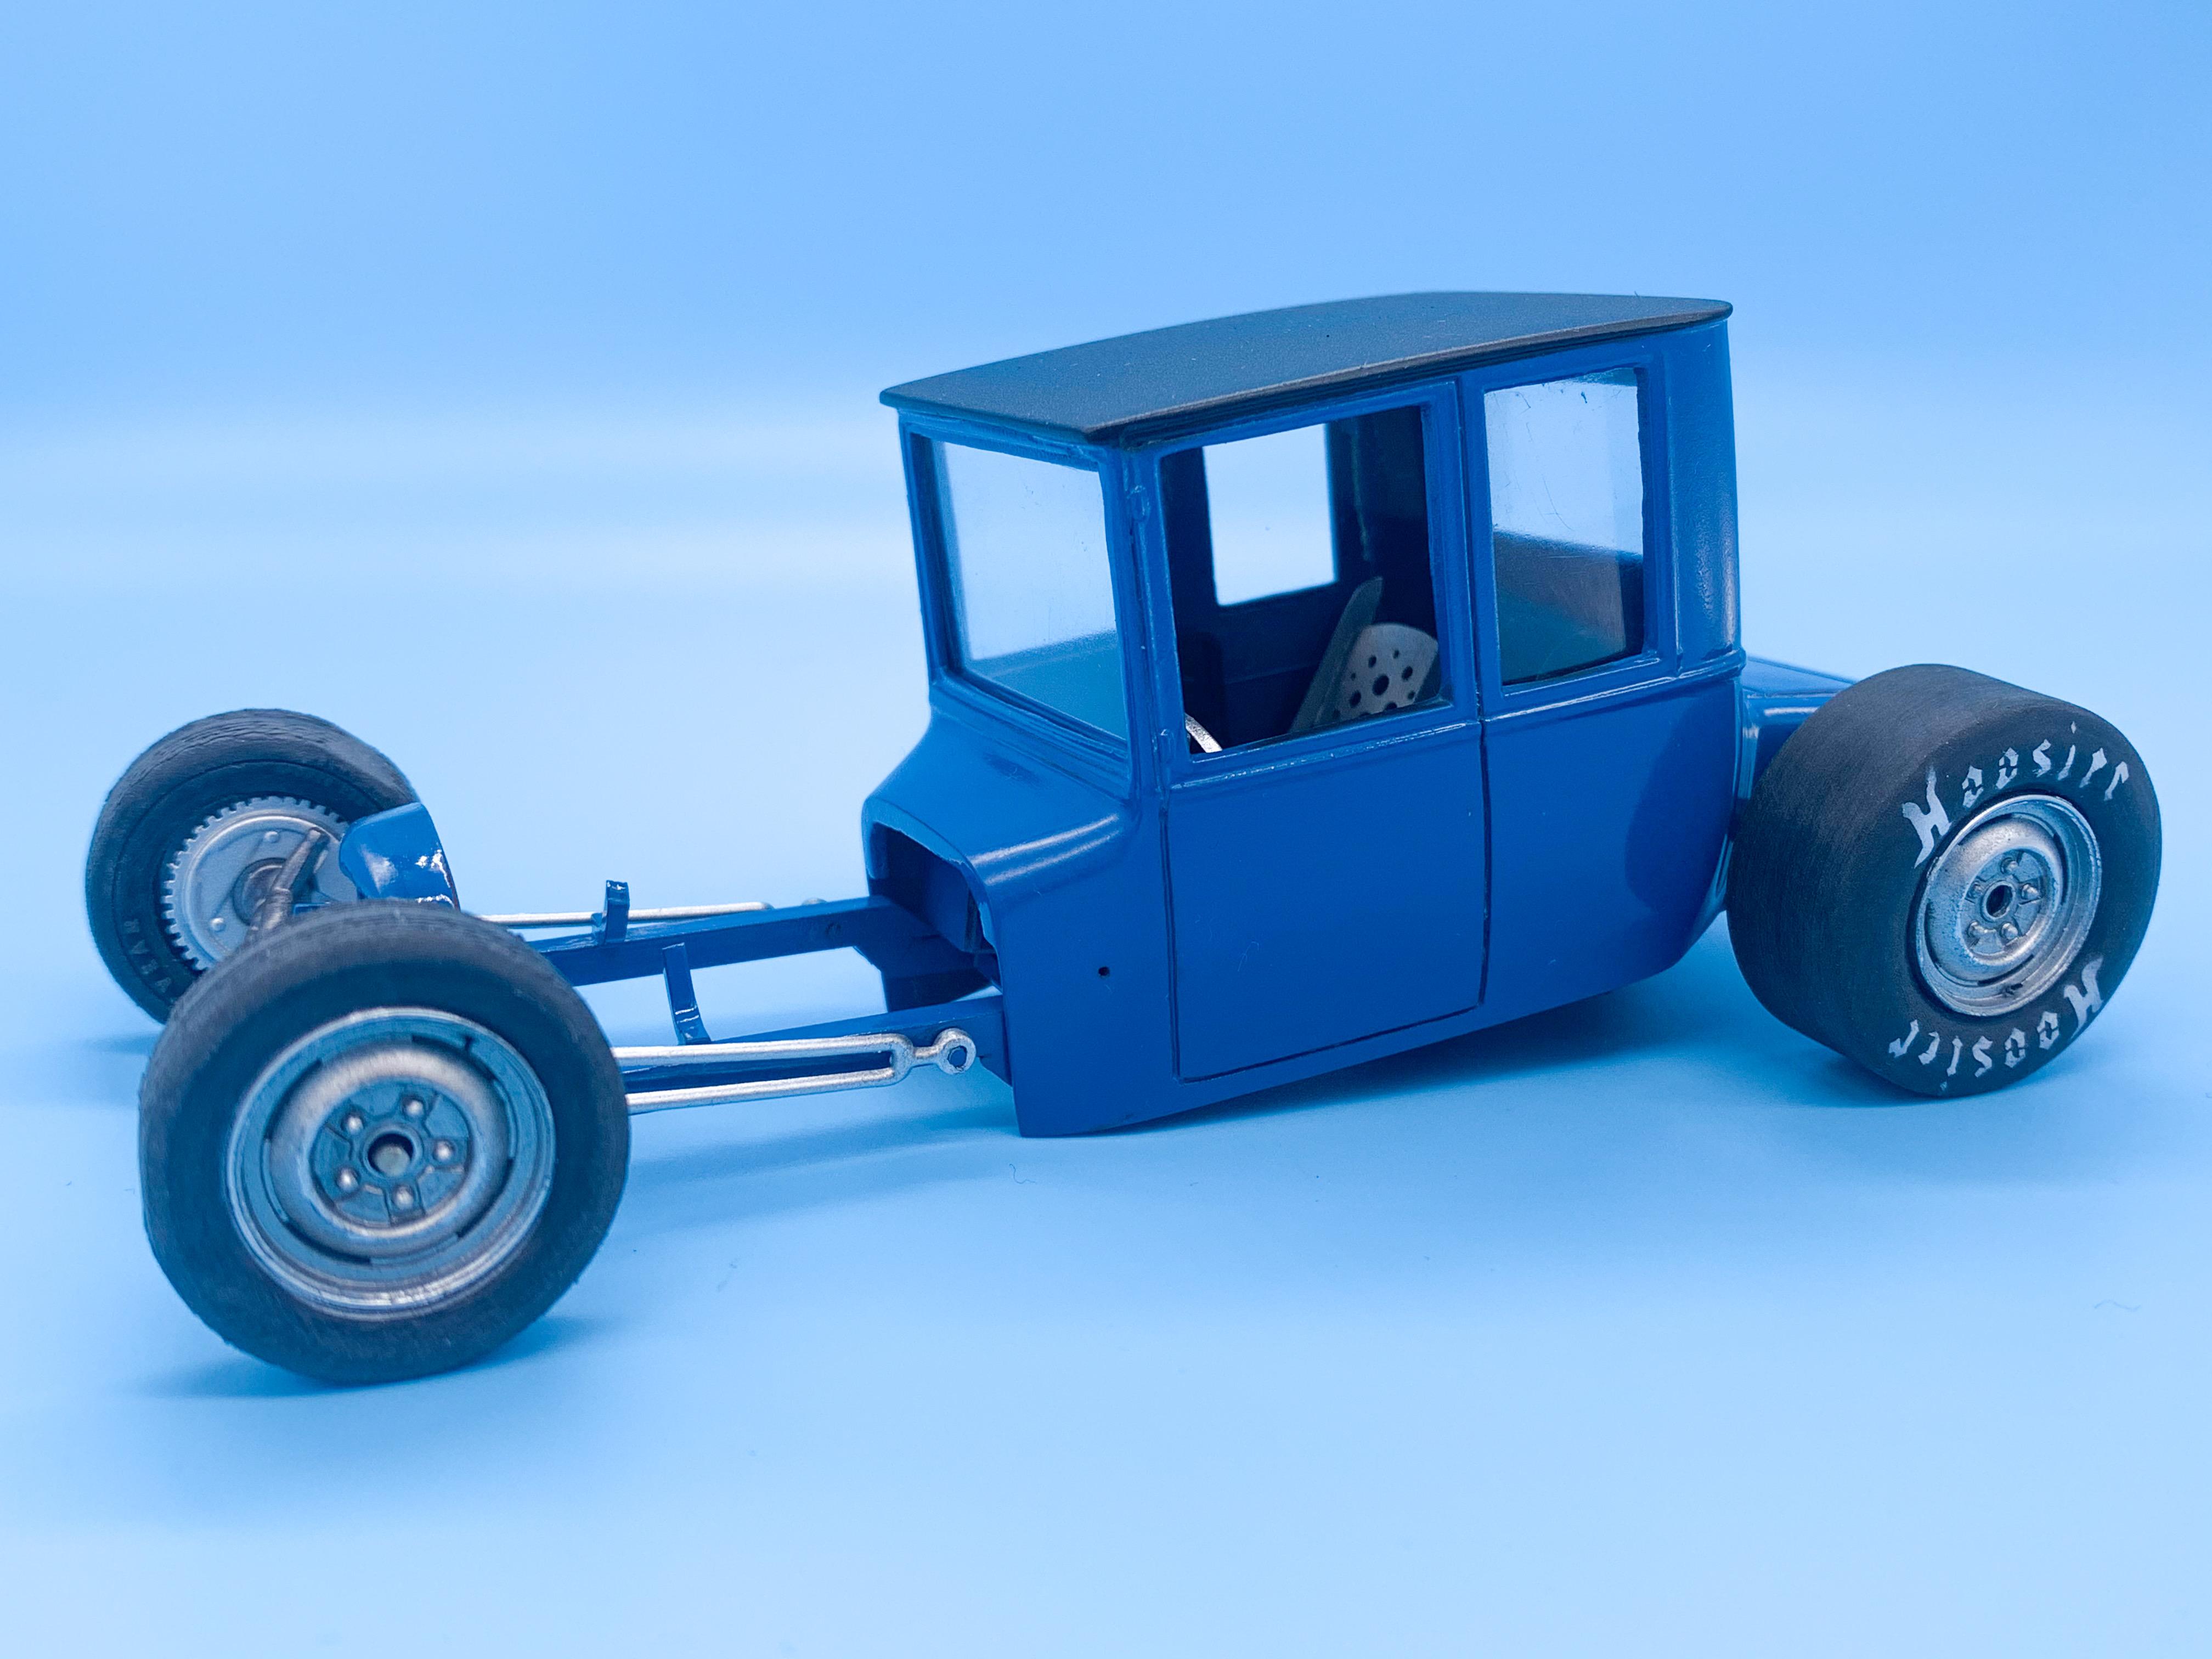
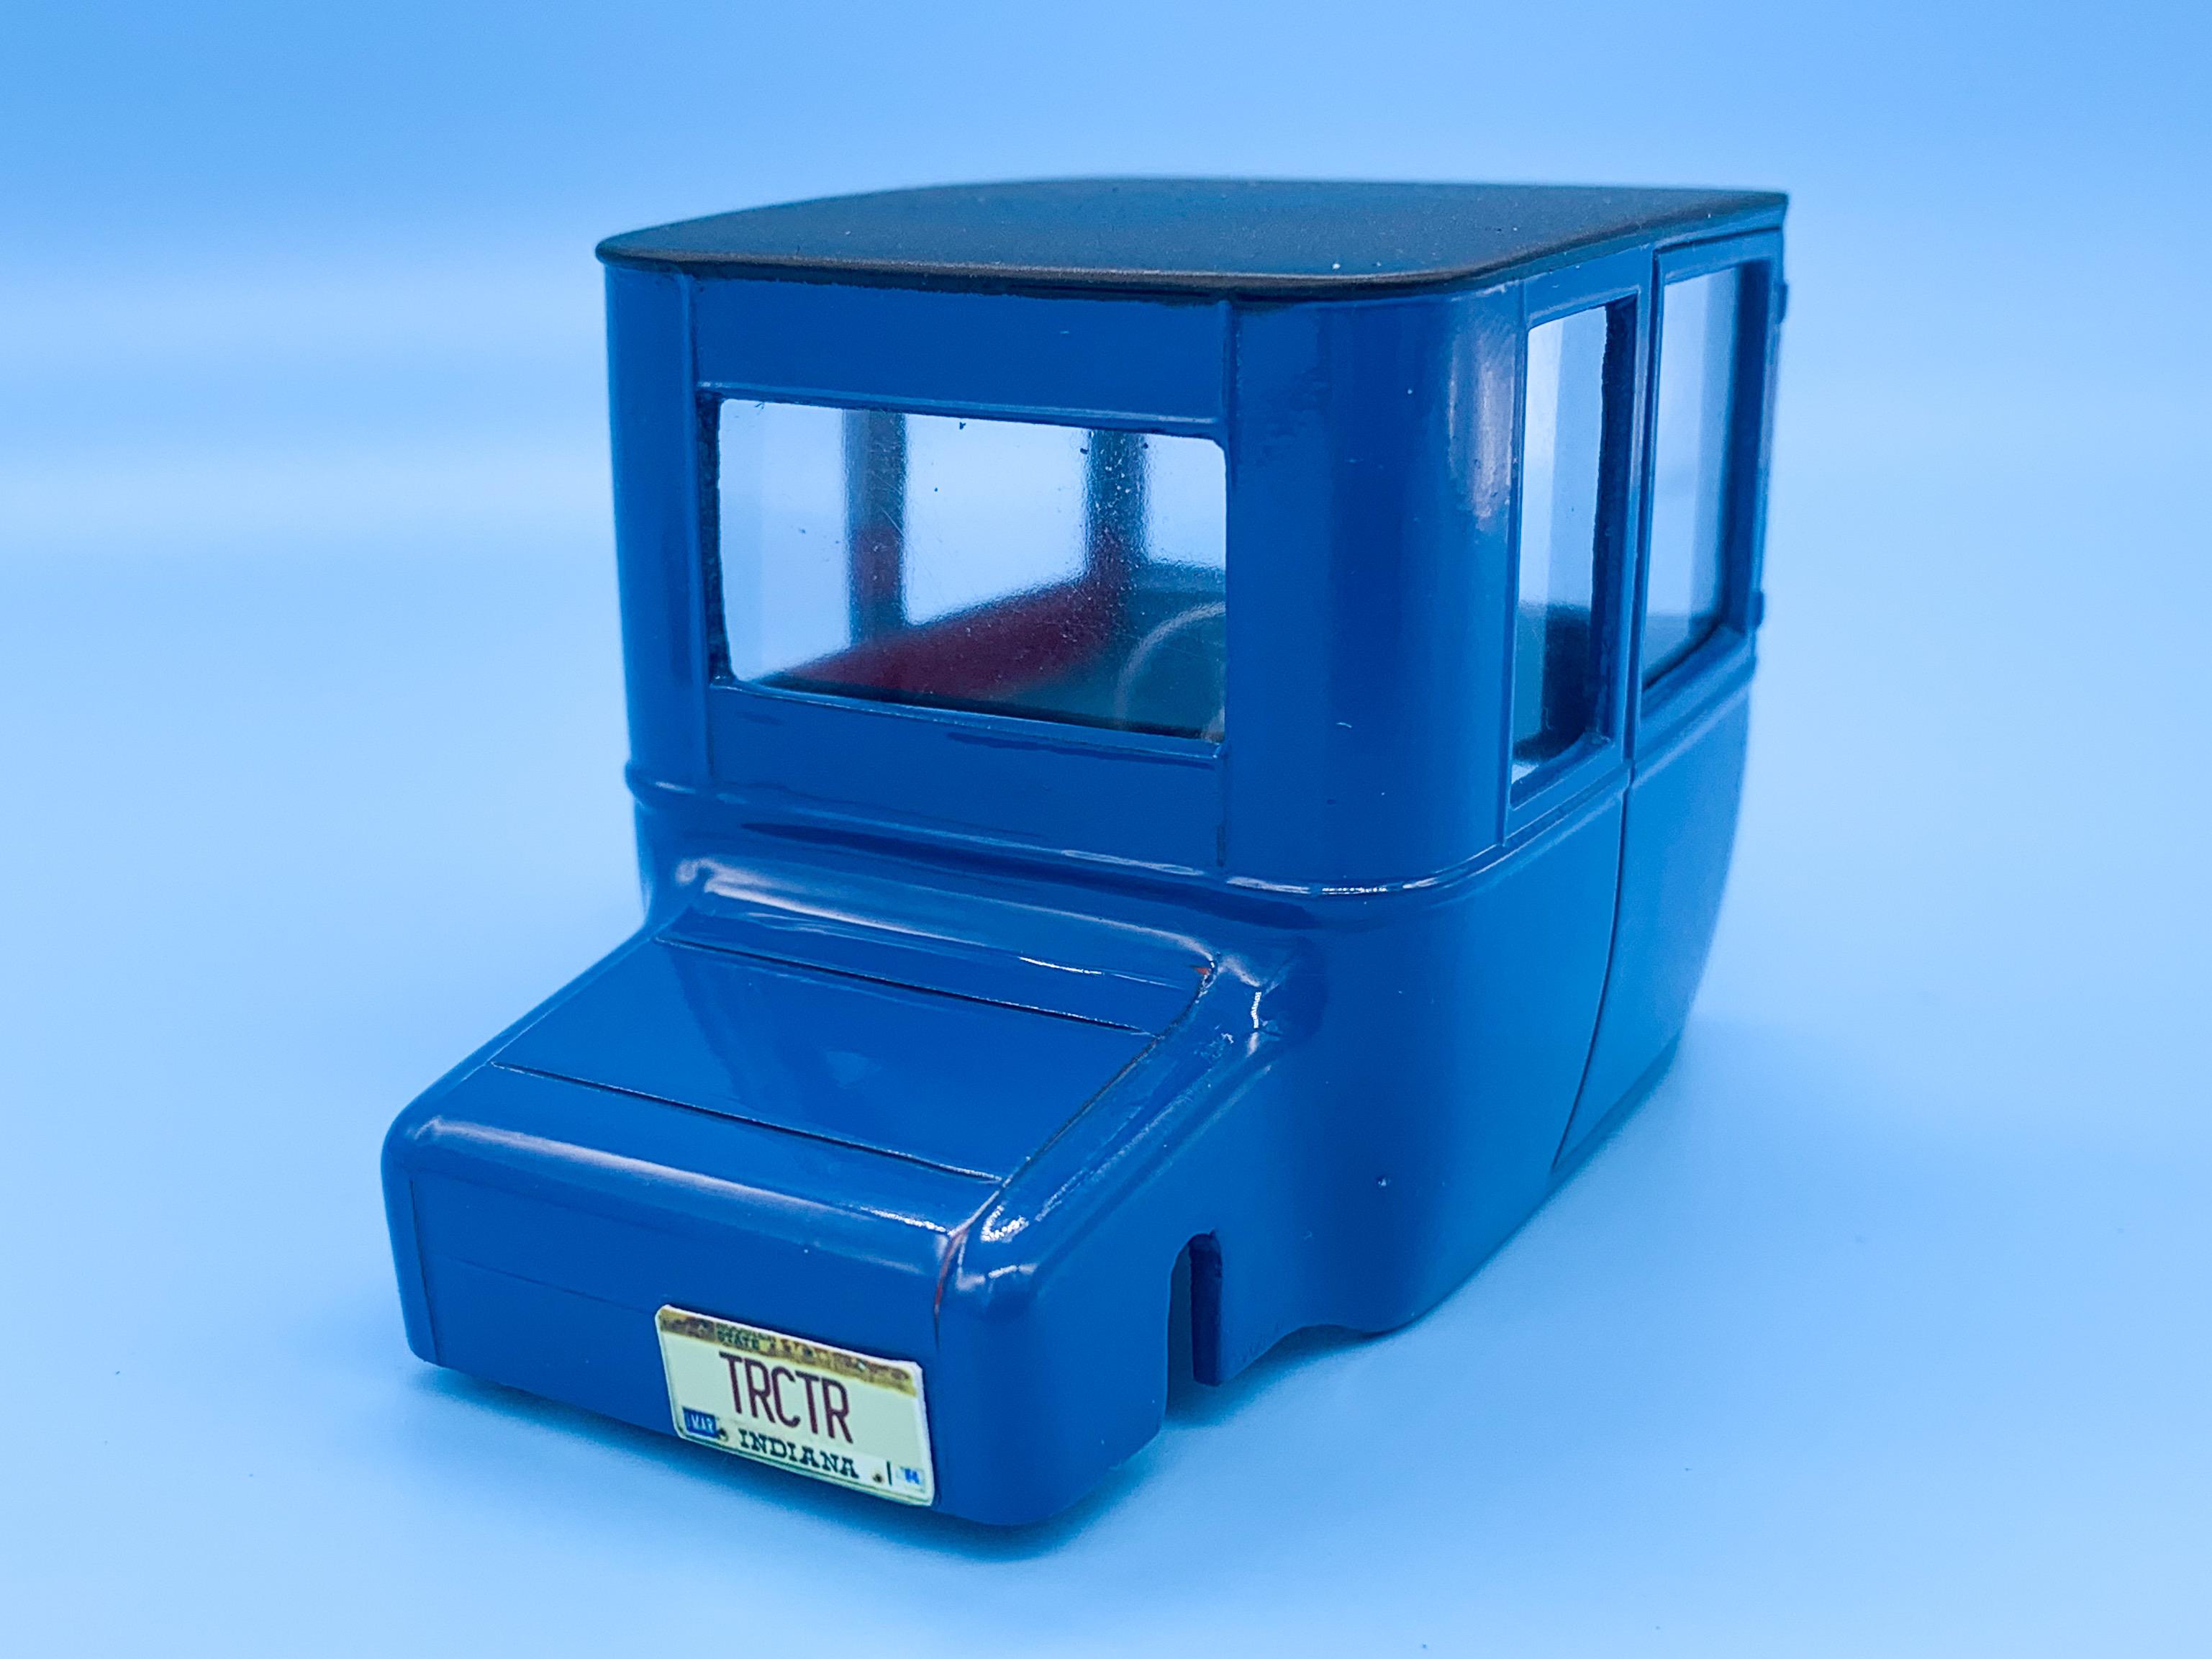
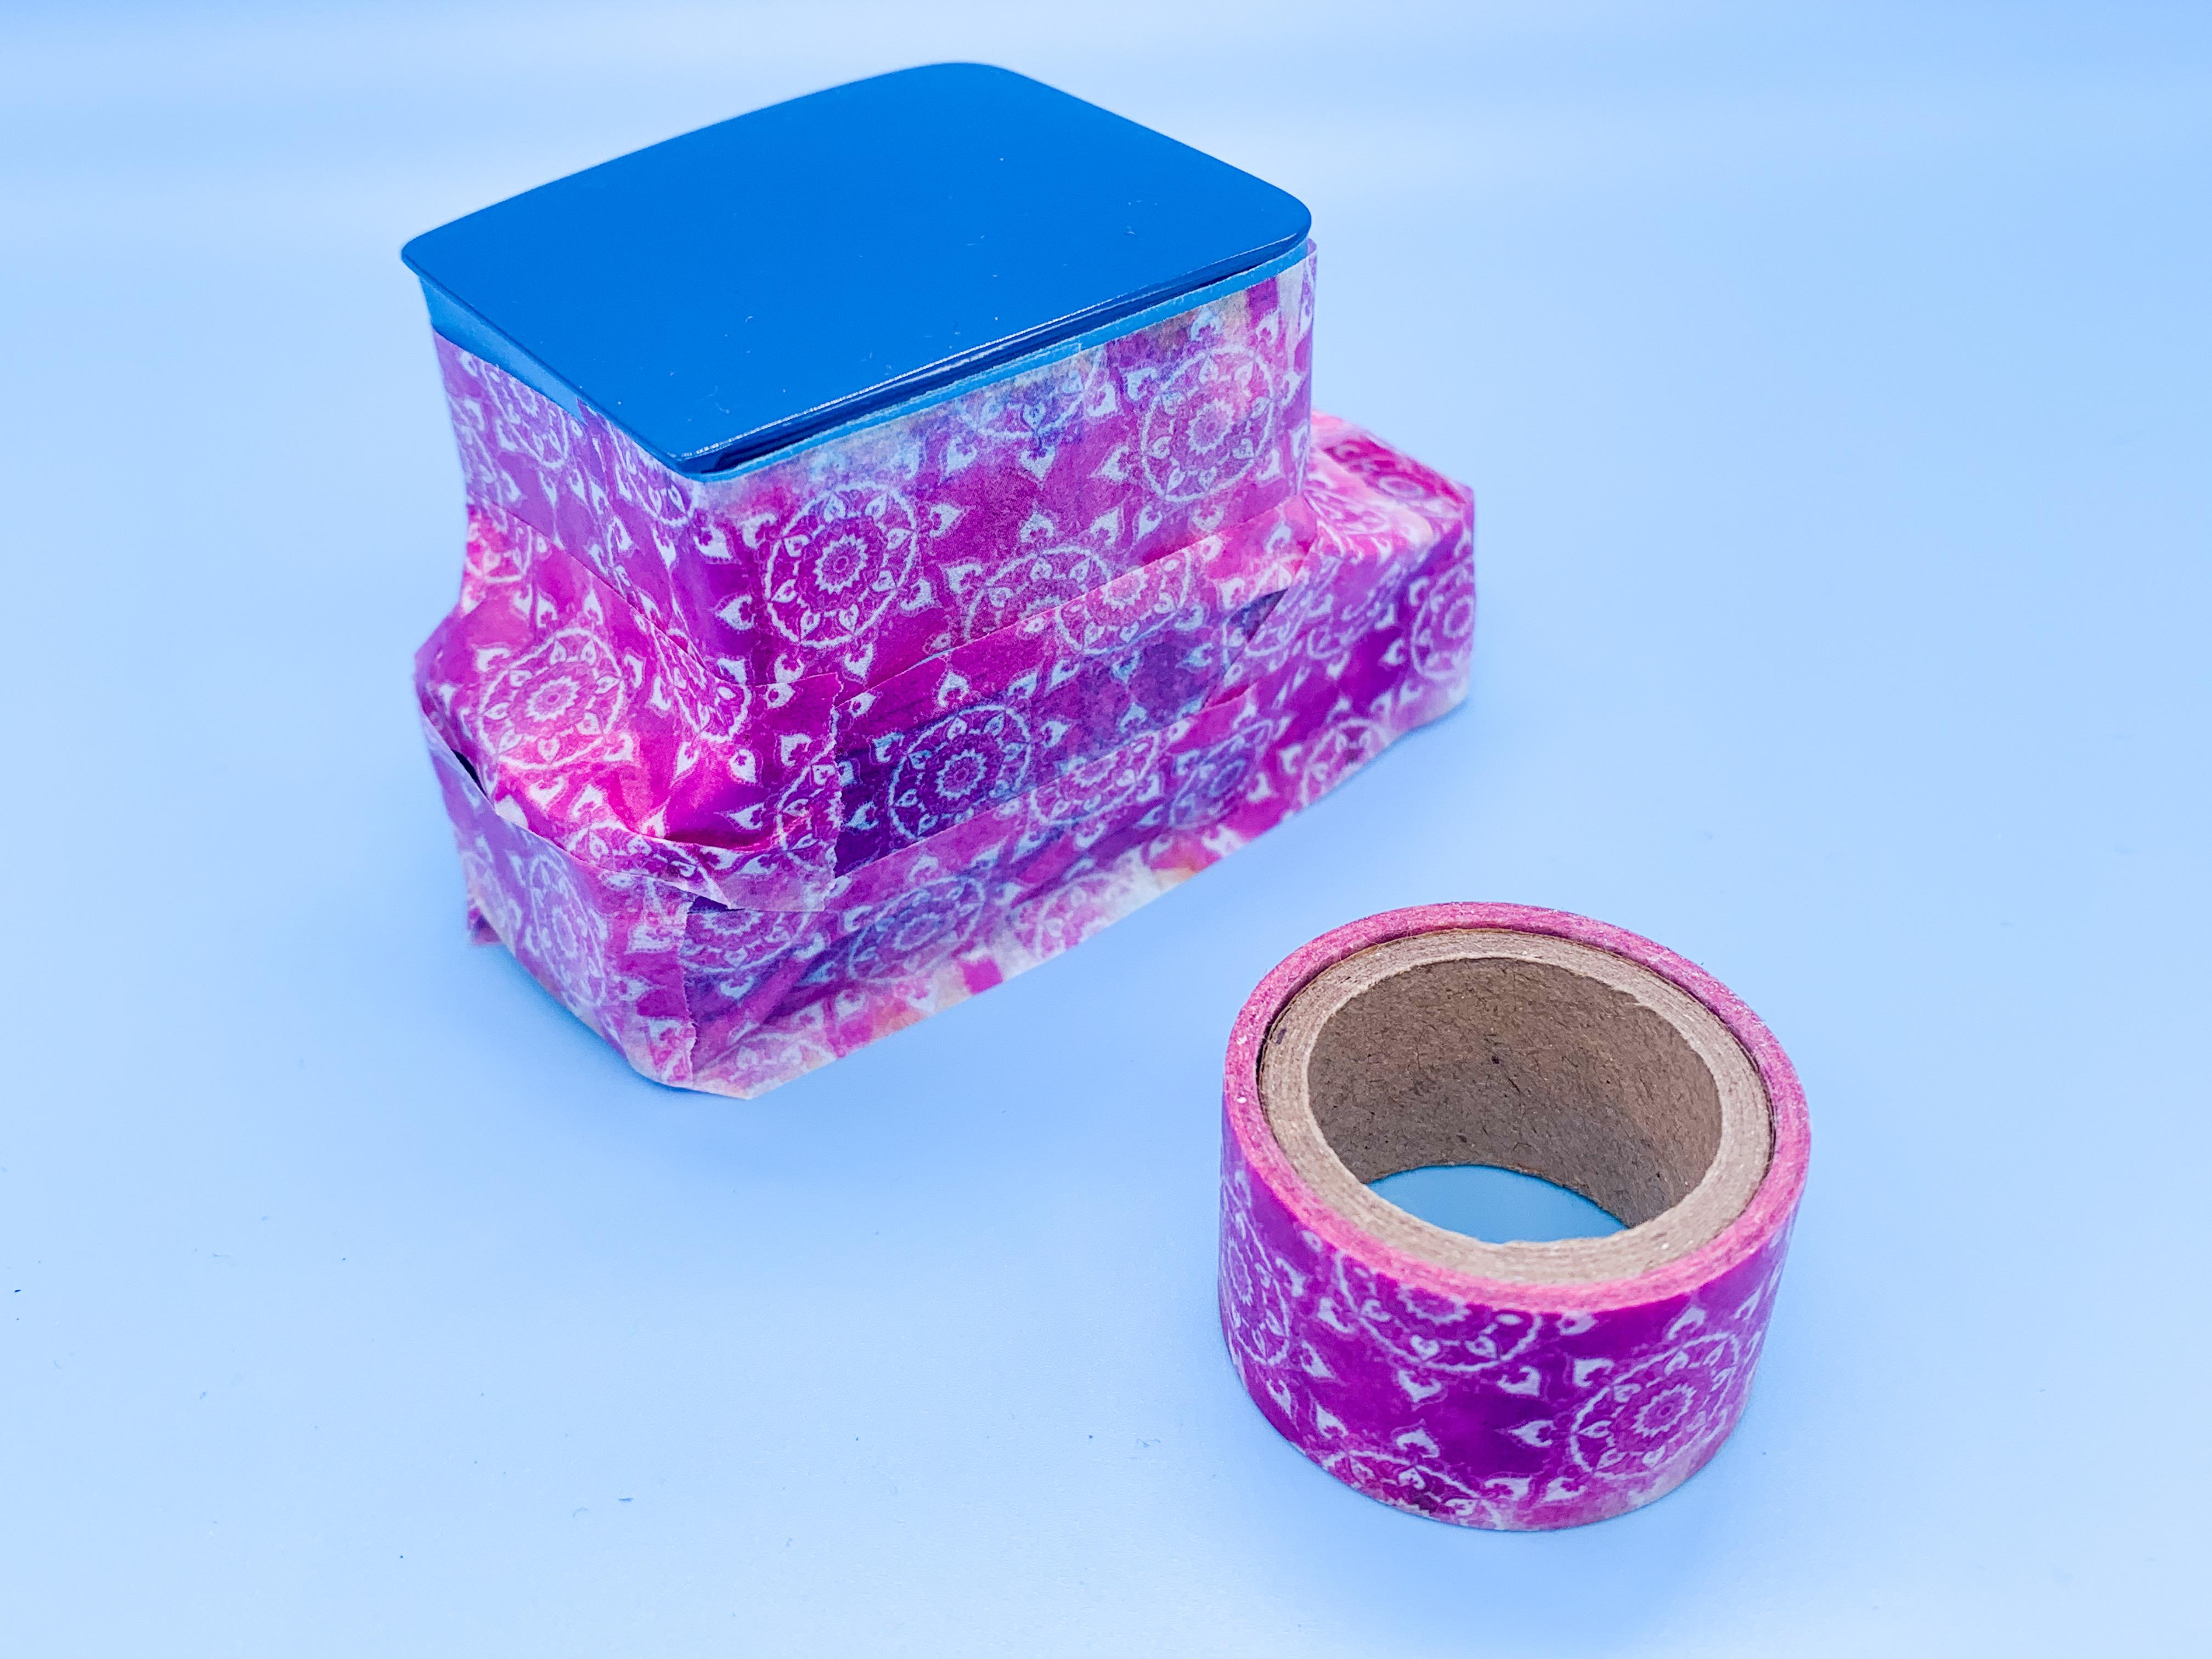
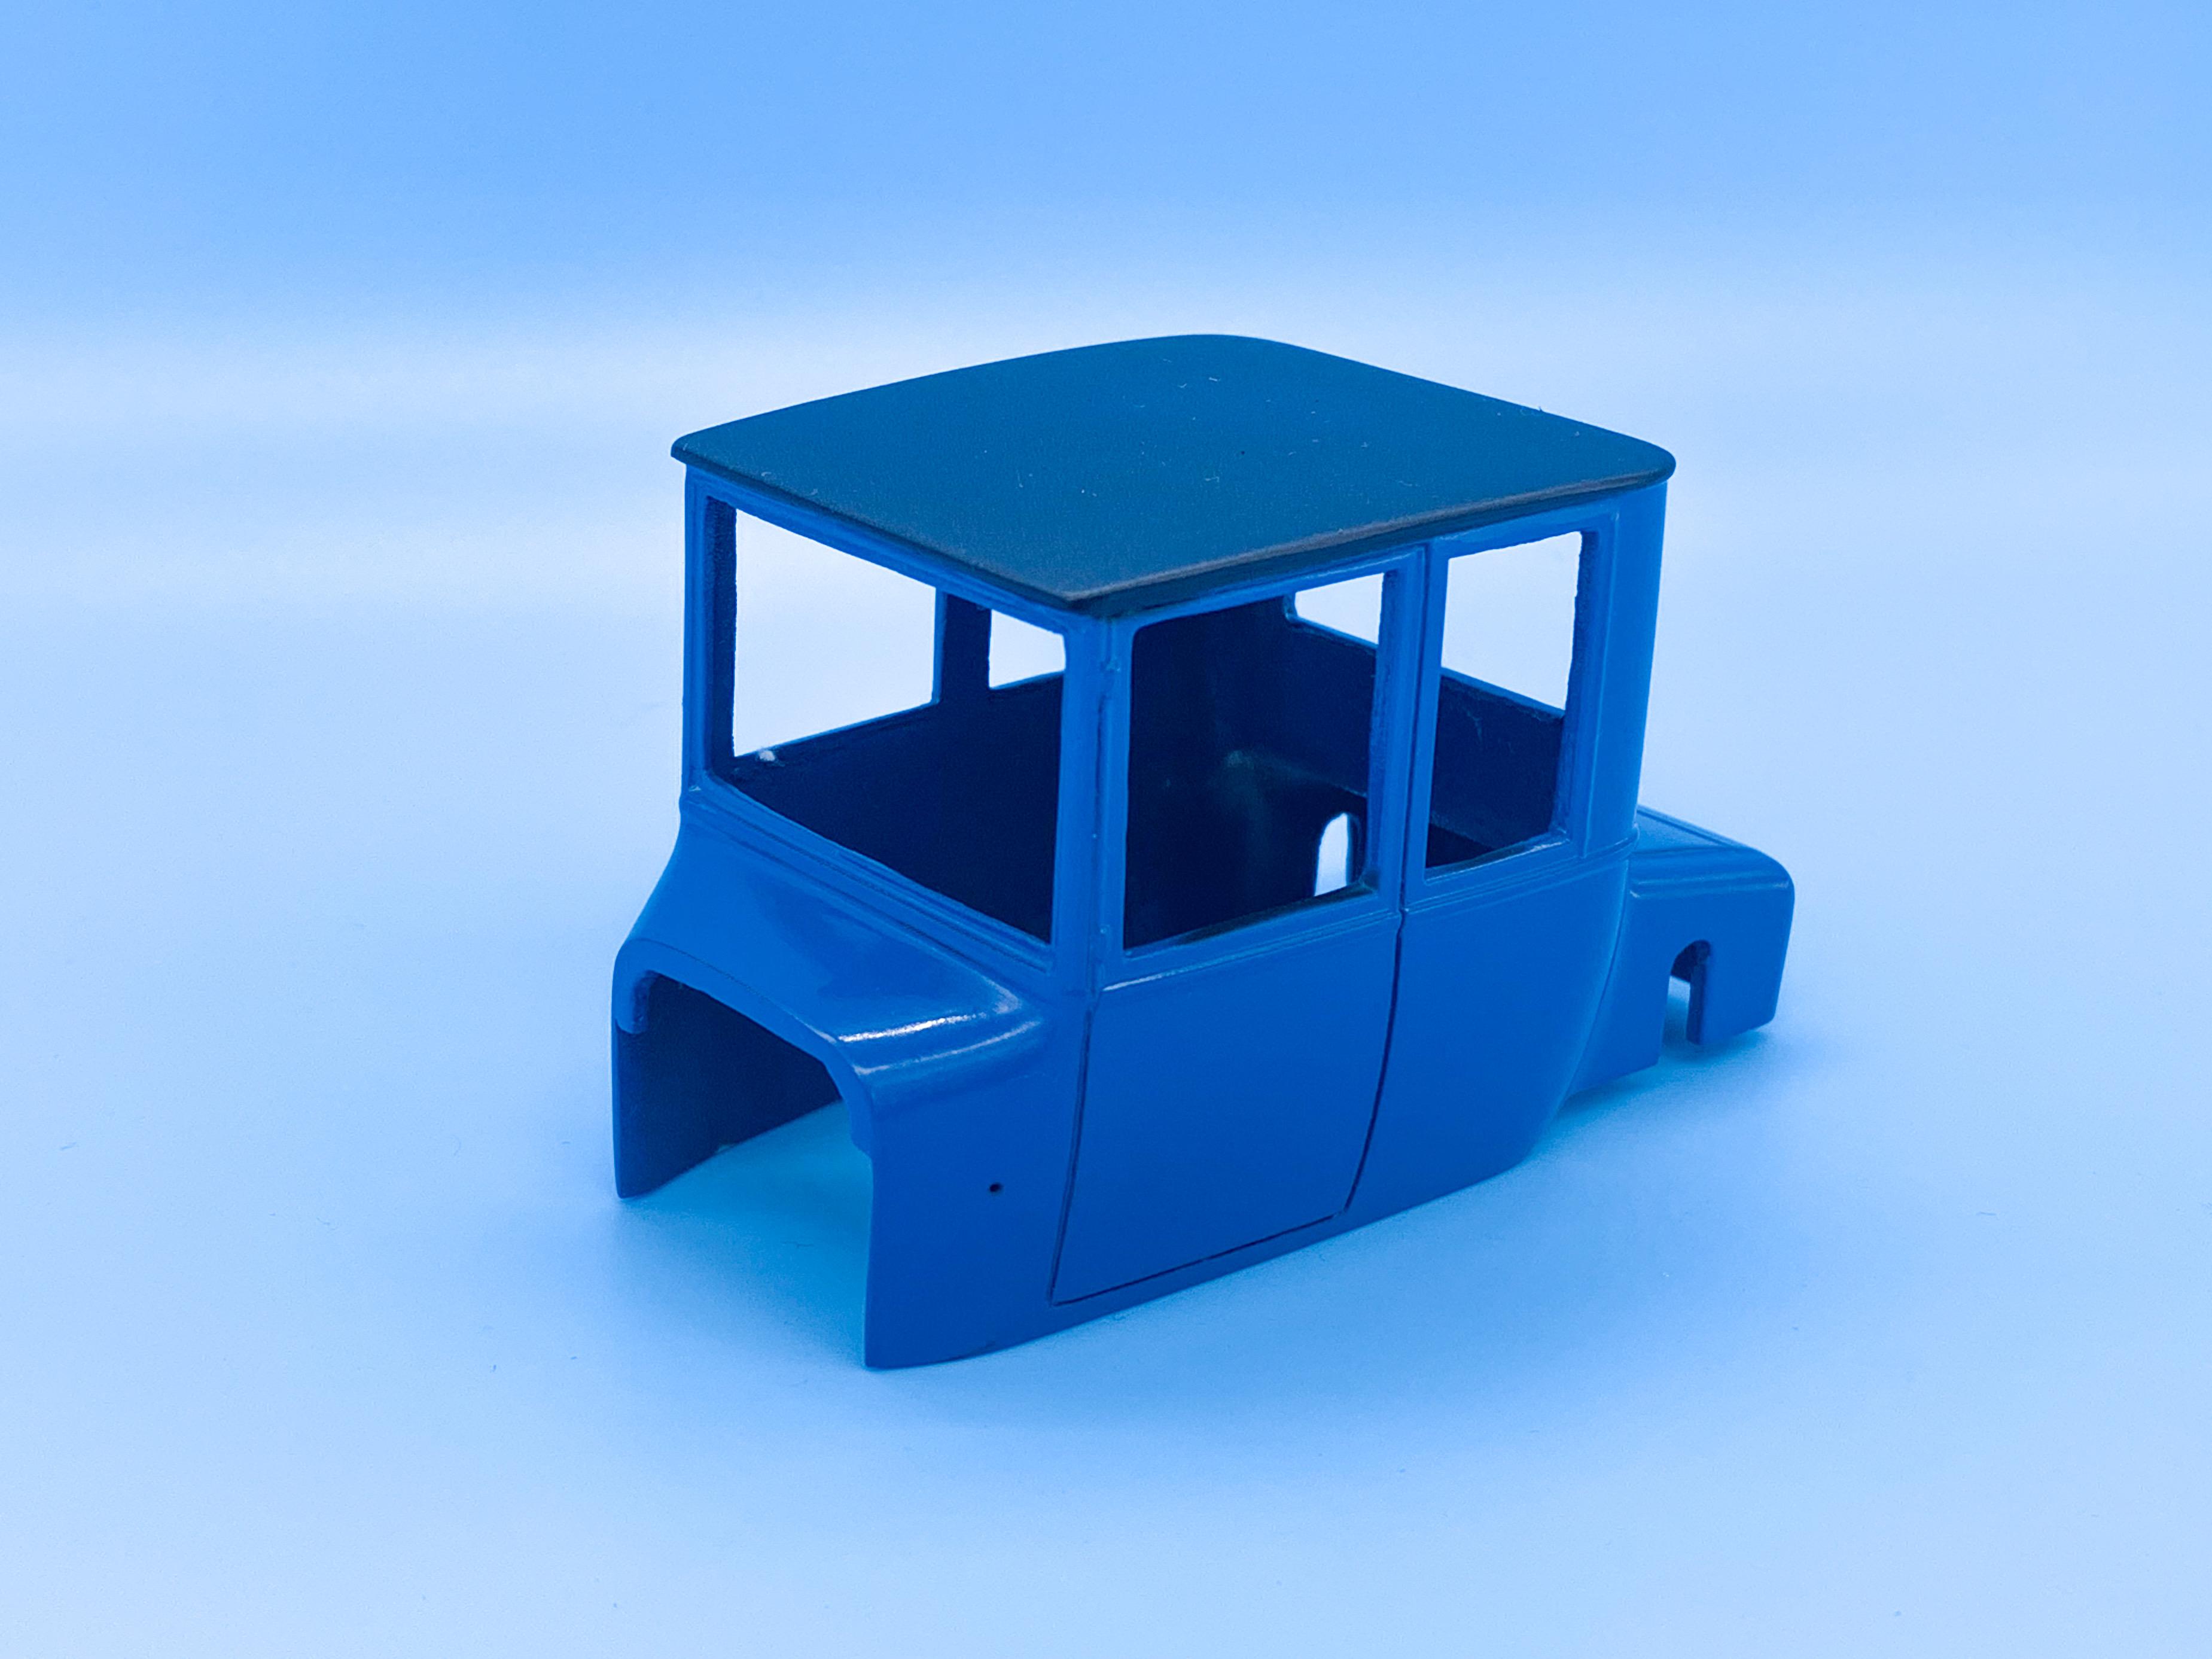
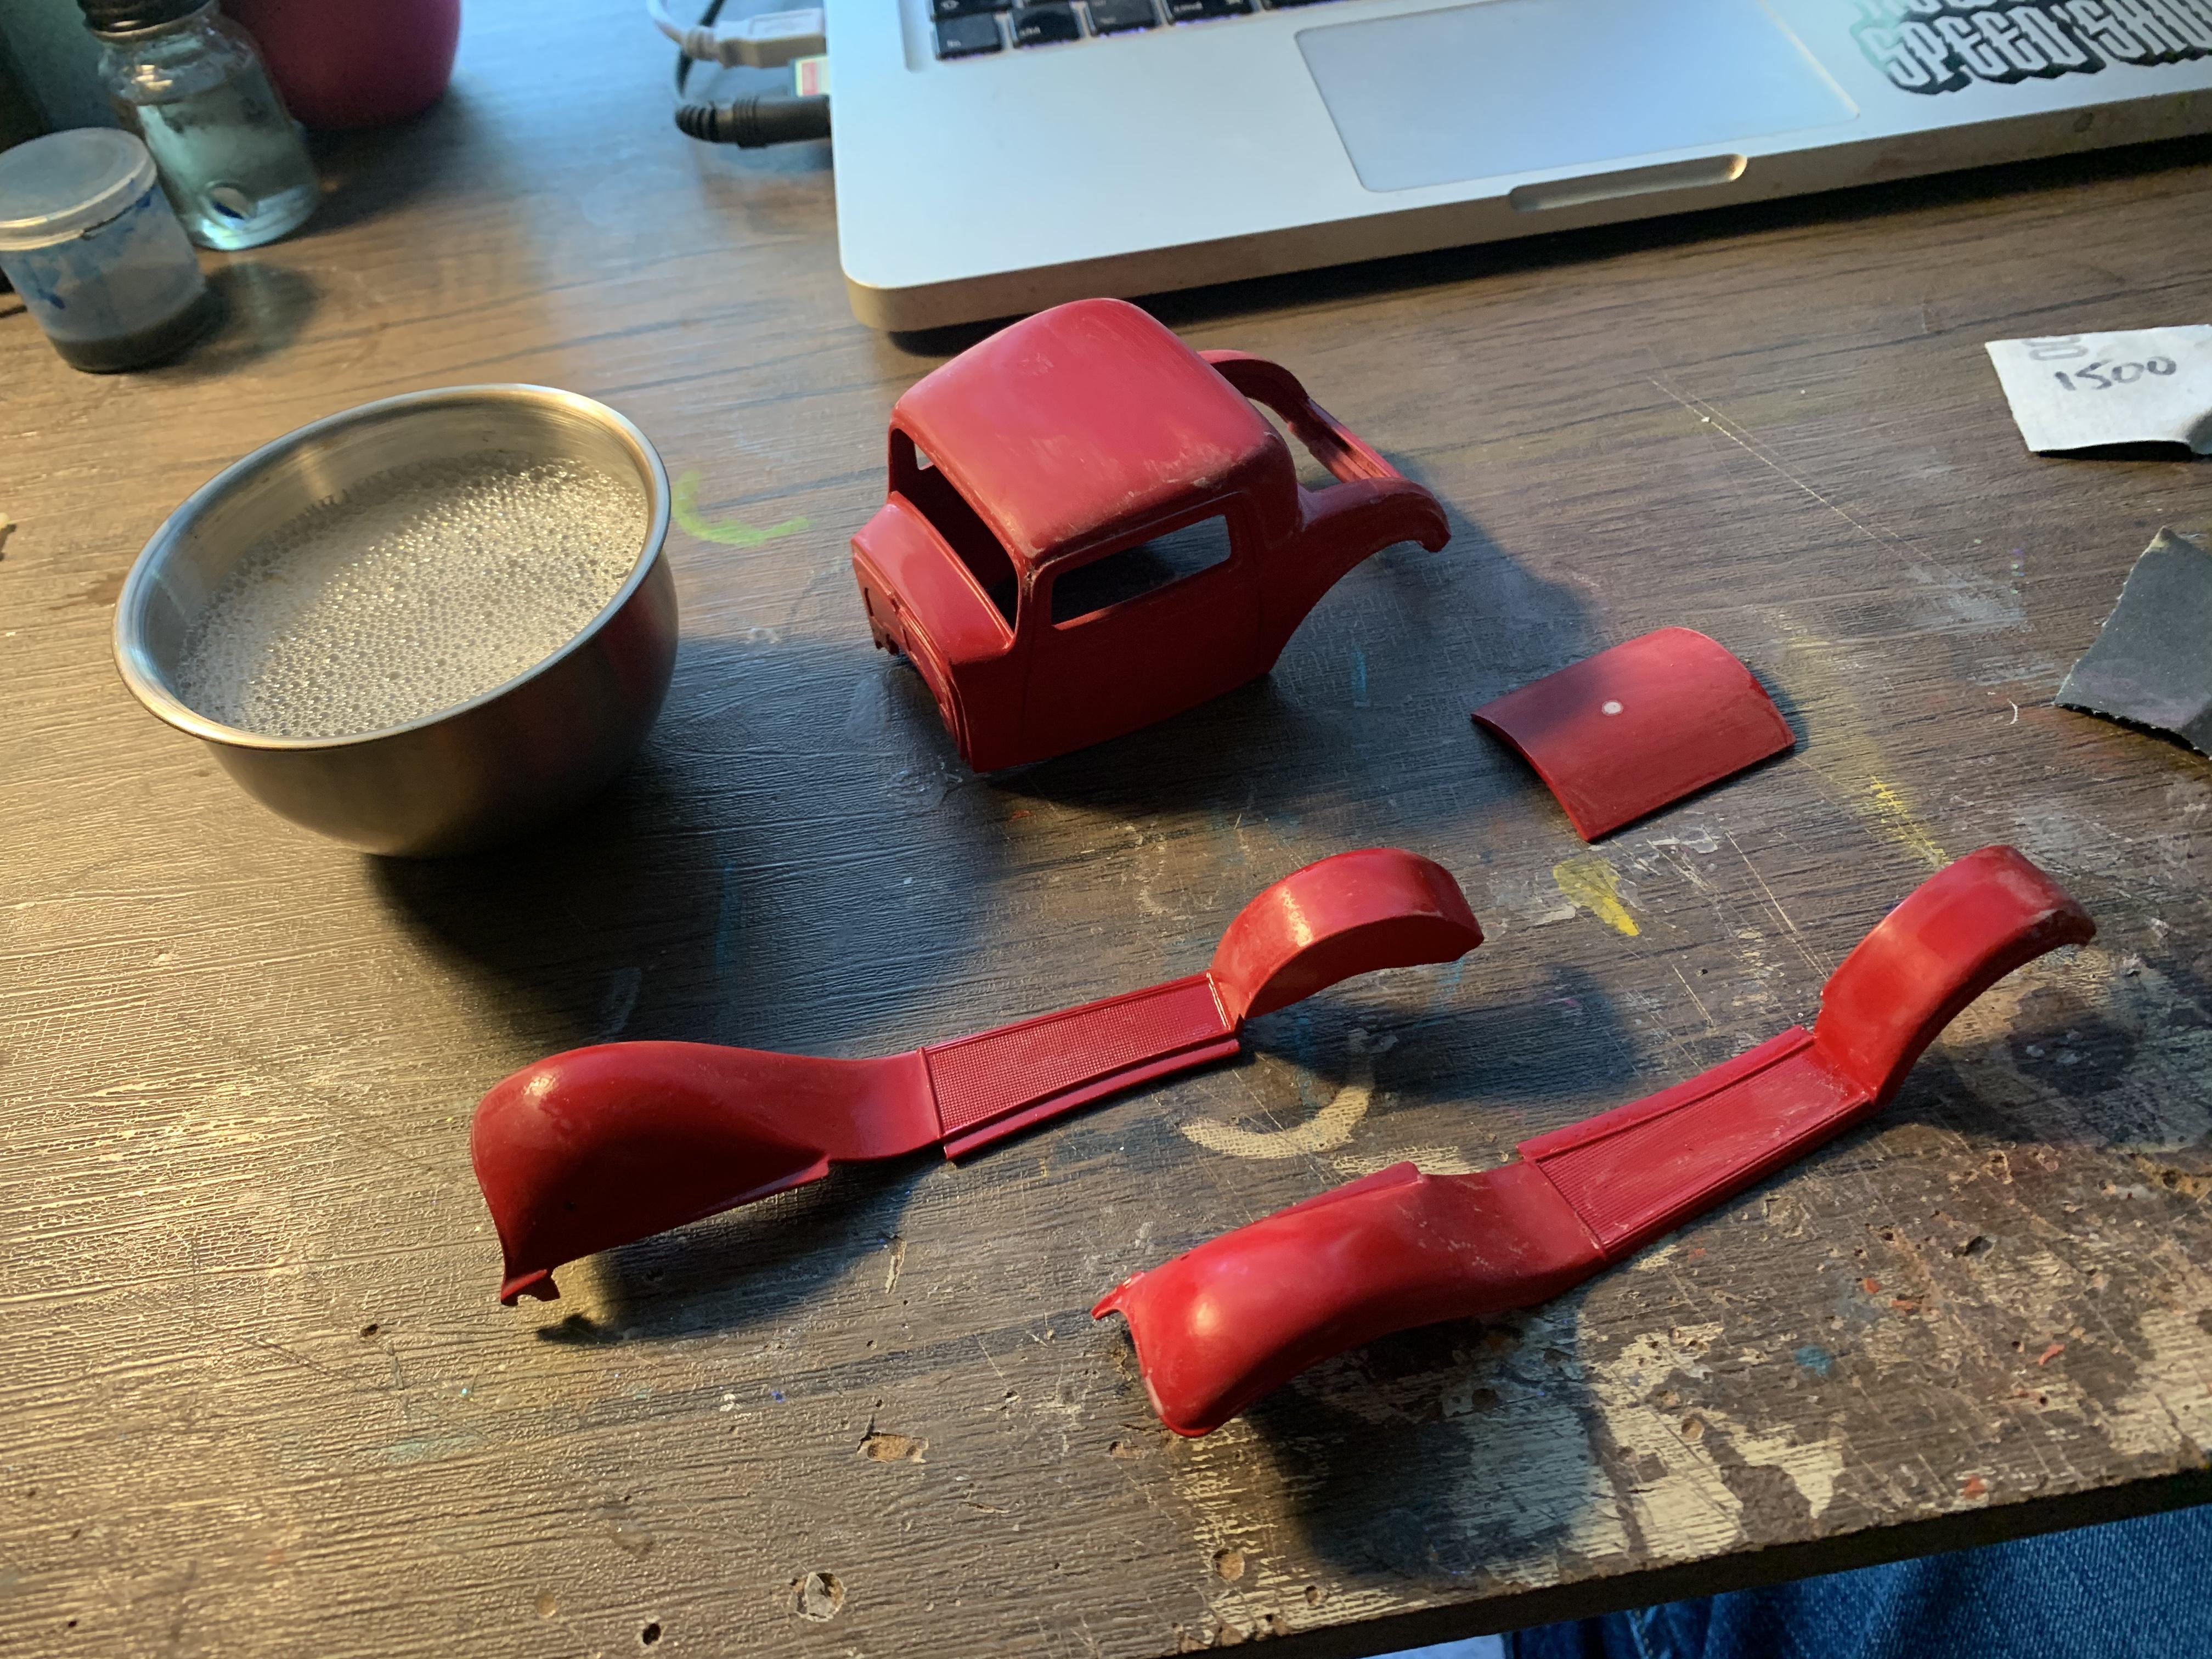
Thanks fellas!! A little more on this today... Got some work done on the frame and interior (what there is of it...) Made and mounted the glass - this tape was a tip I saw @Tom Geiger post up about. Worked great! Contemplated a change of wheels and tires... And made a license plate...when in Rome... ? More soon!

-
That’s really interesting- thanks for sharing Tim!
-
I would love to hear the story of why Ford had people take a speed reading course. No doubt it was intended to boost productivity - but did it actually work? Do they still have people take such a course?
-
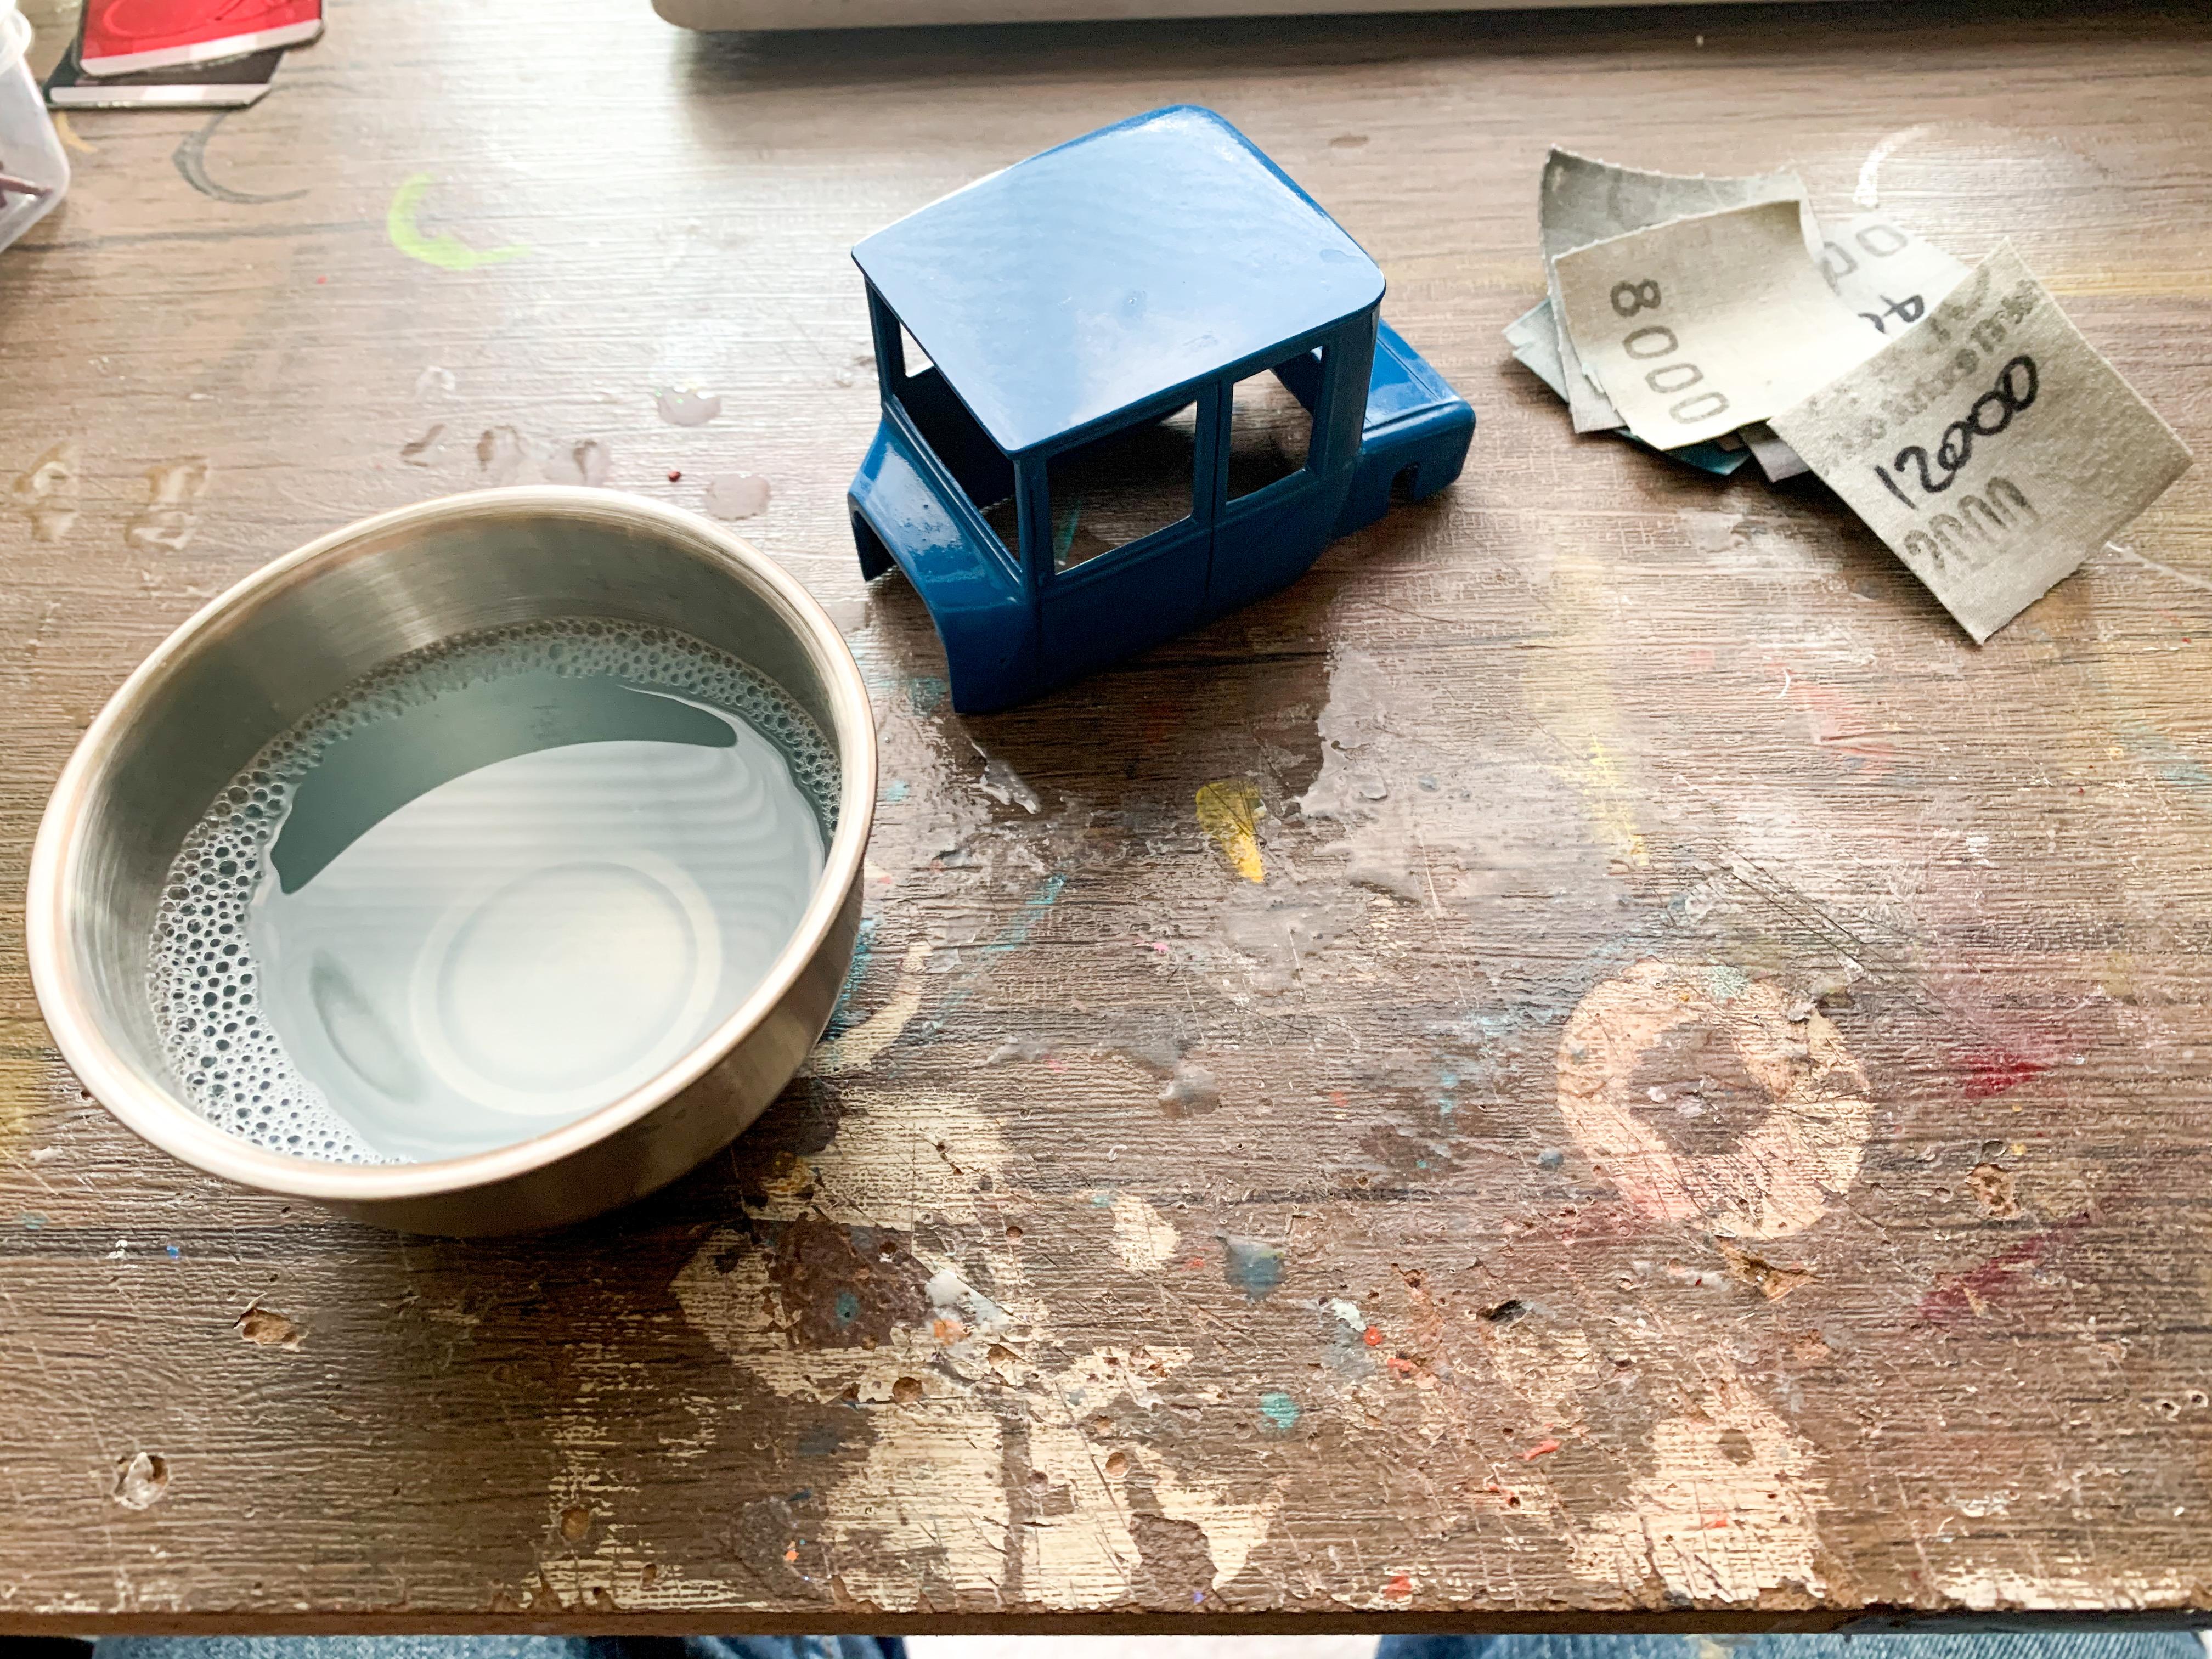
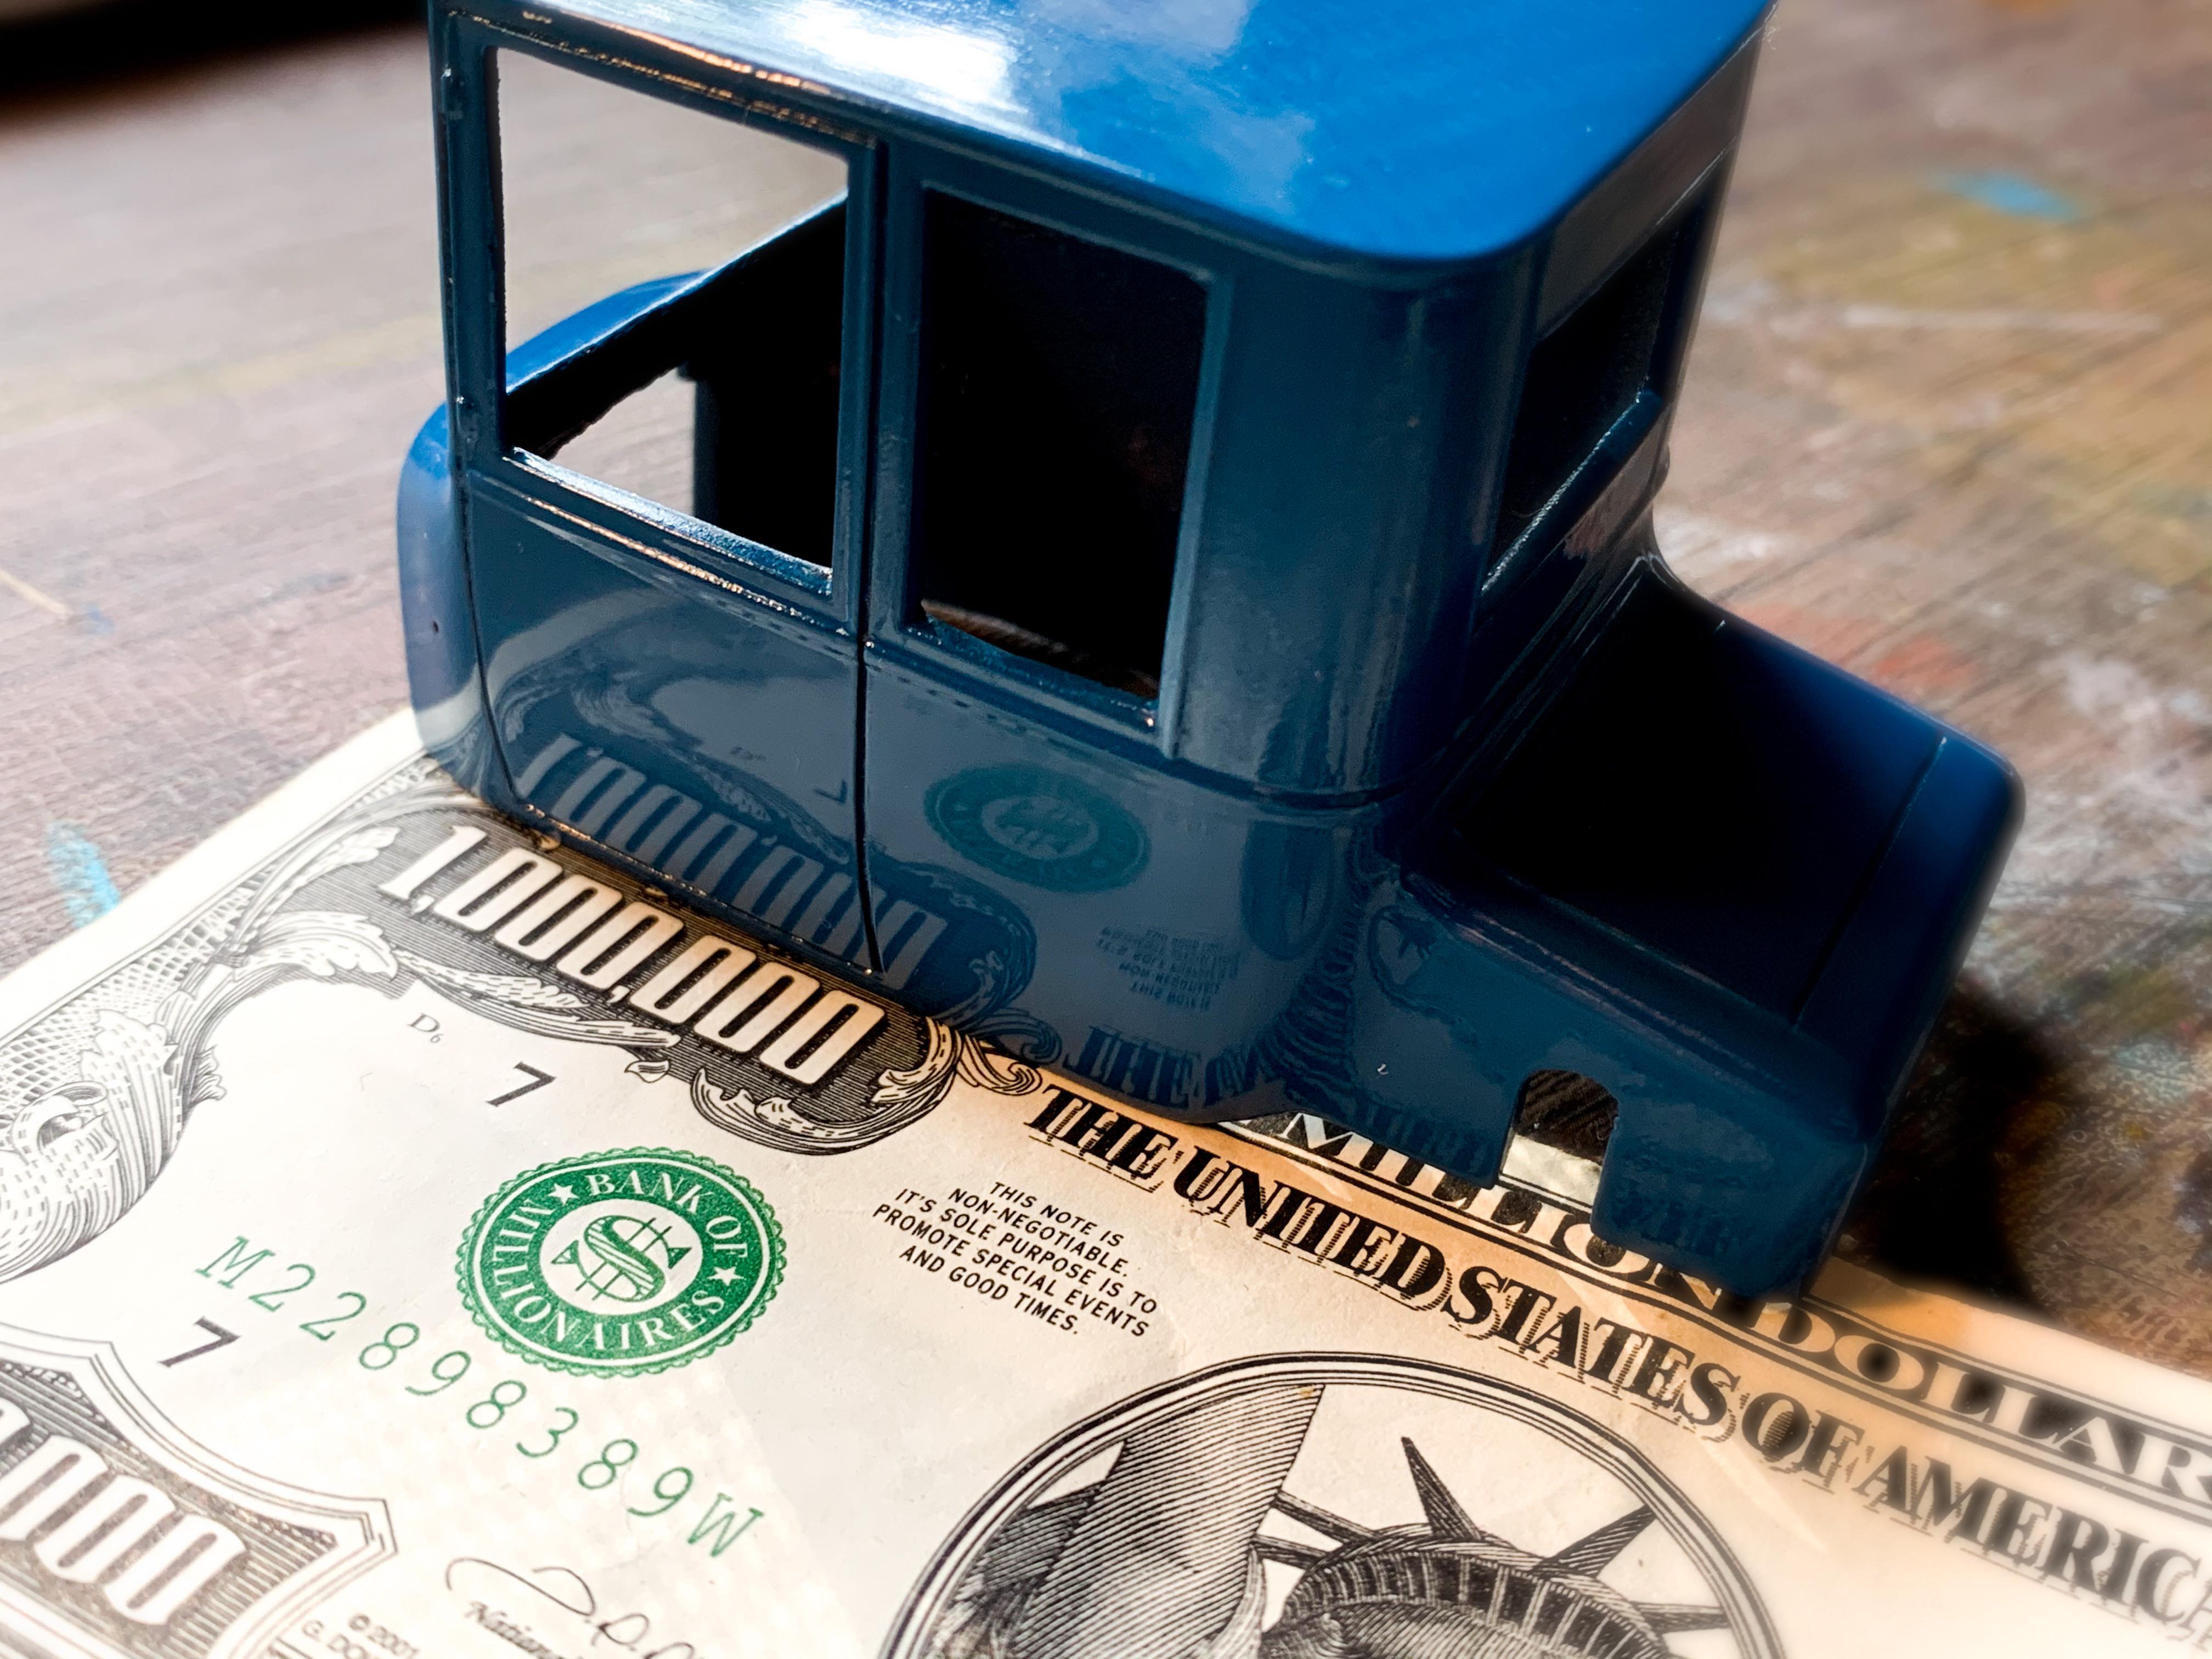
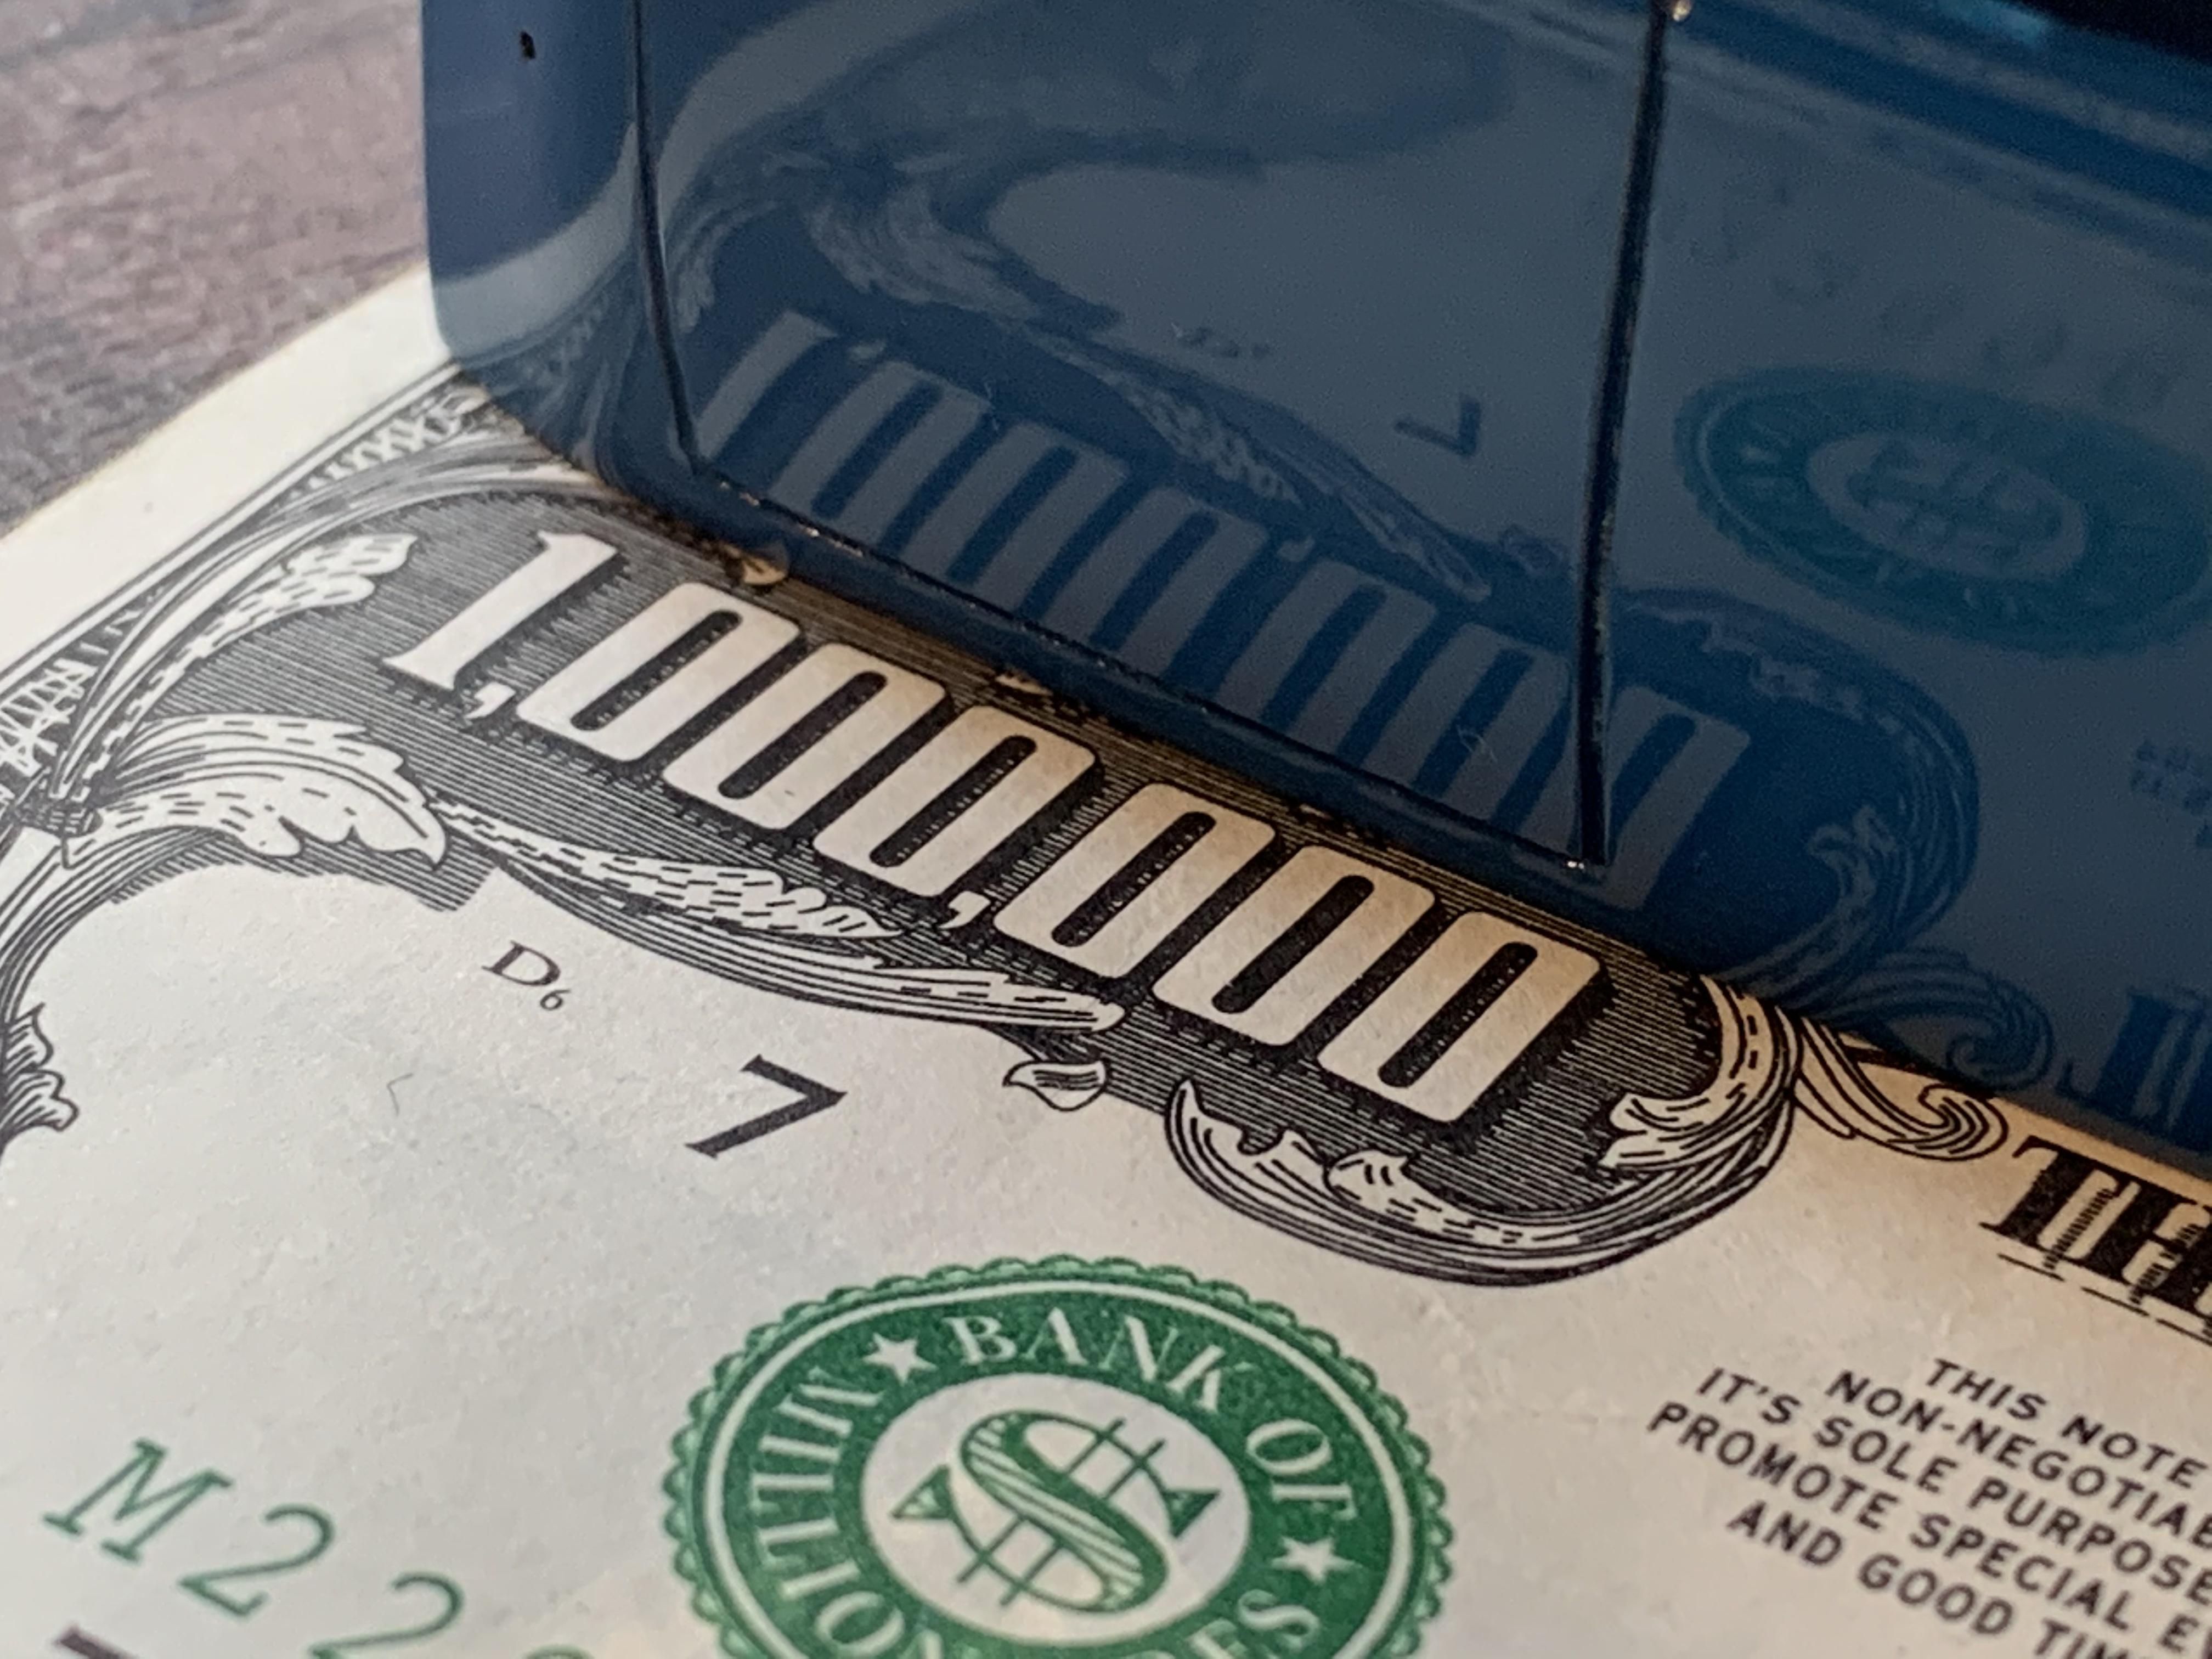
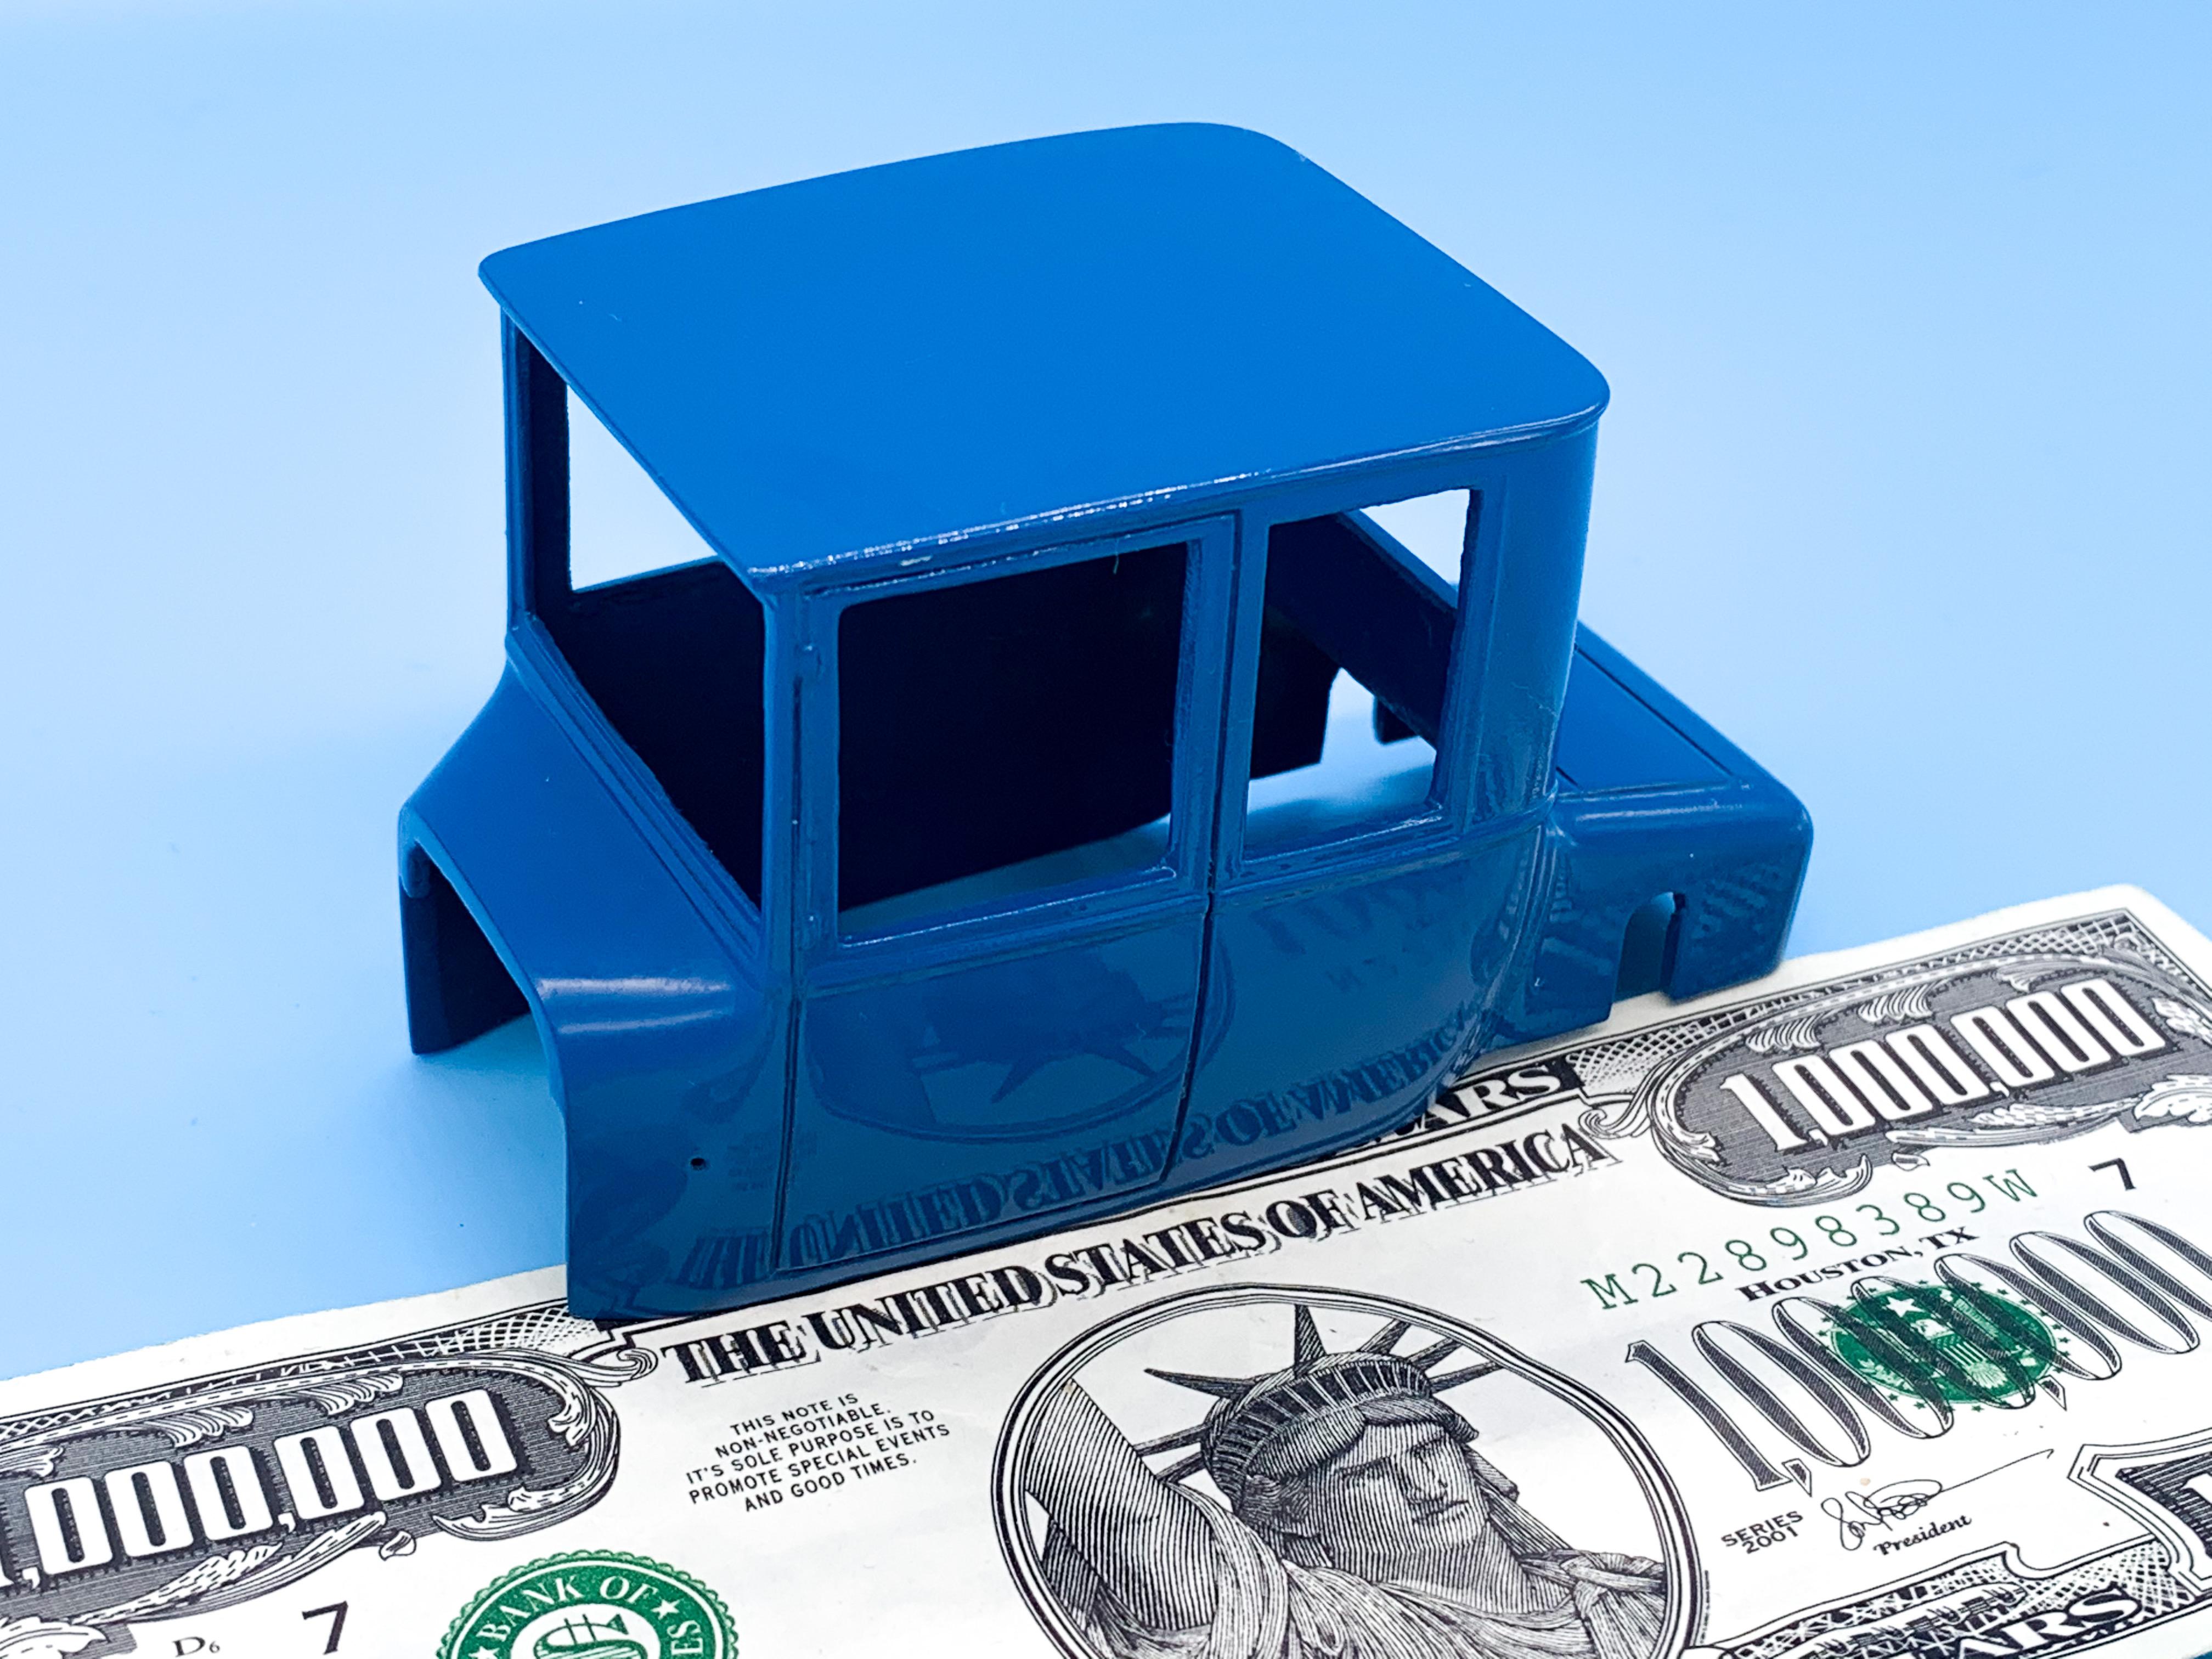
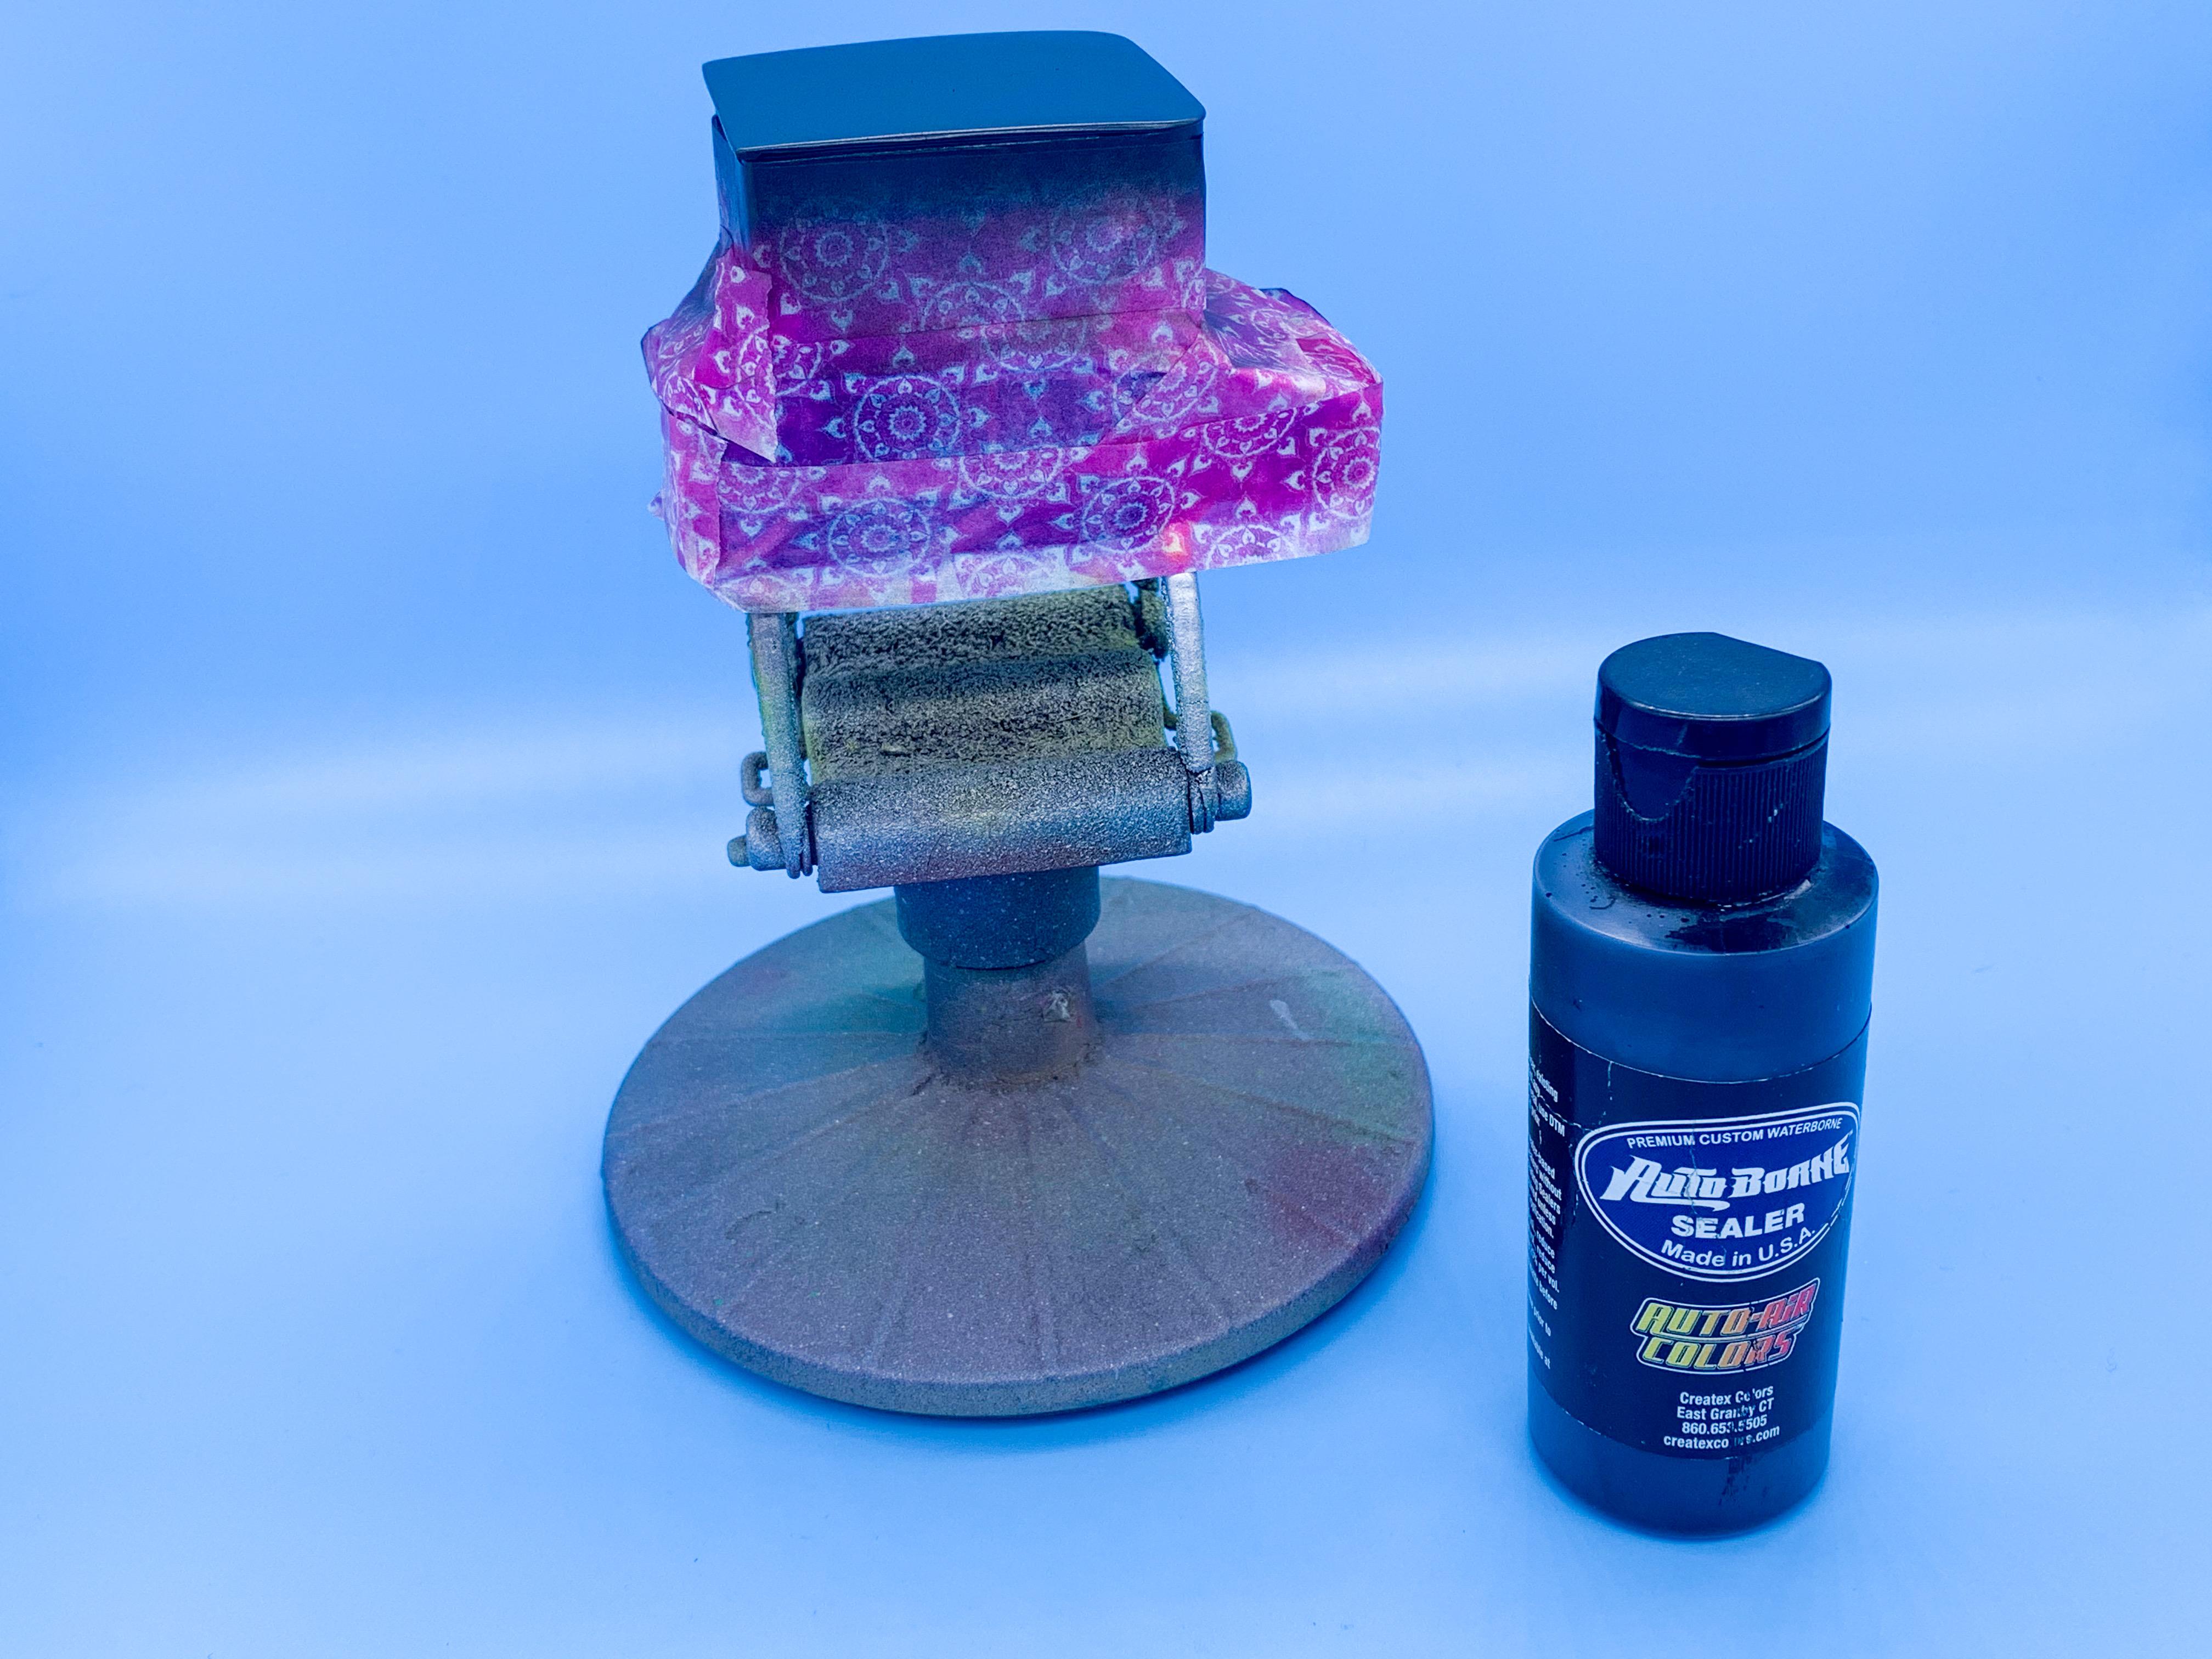
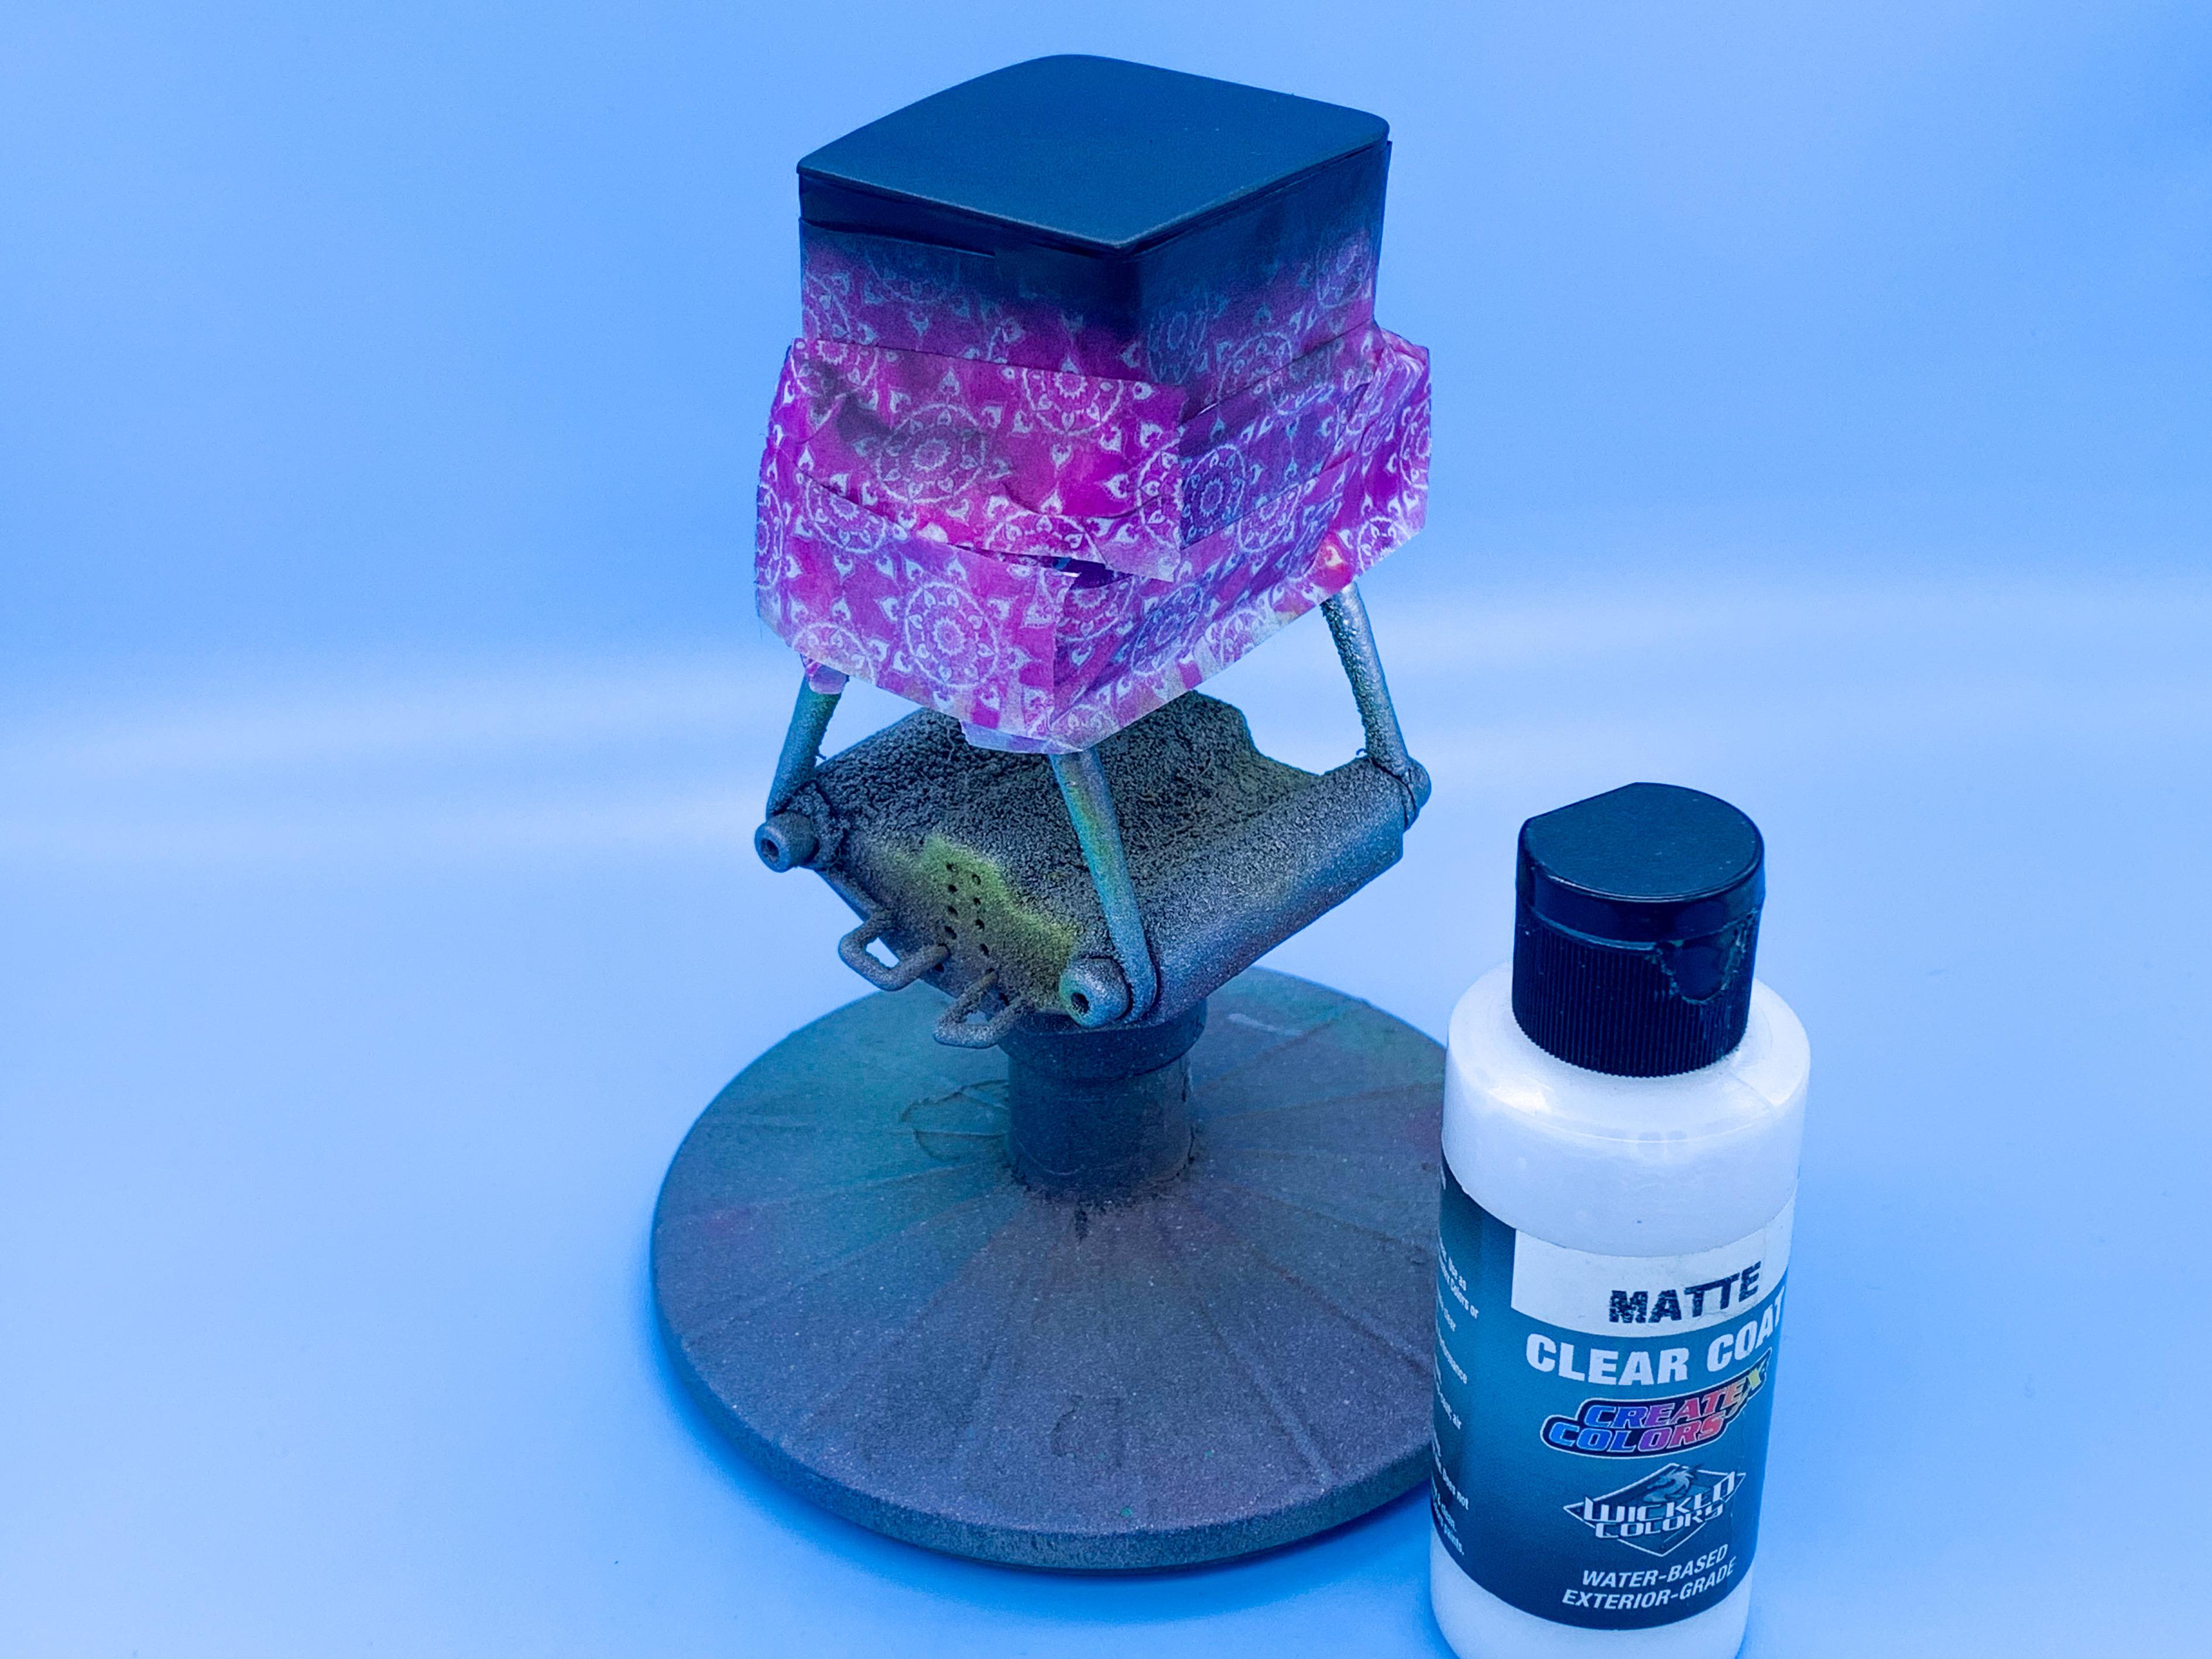
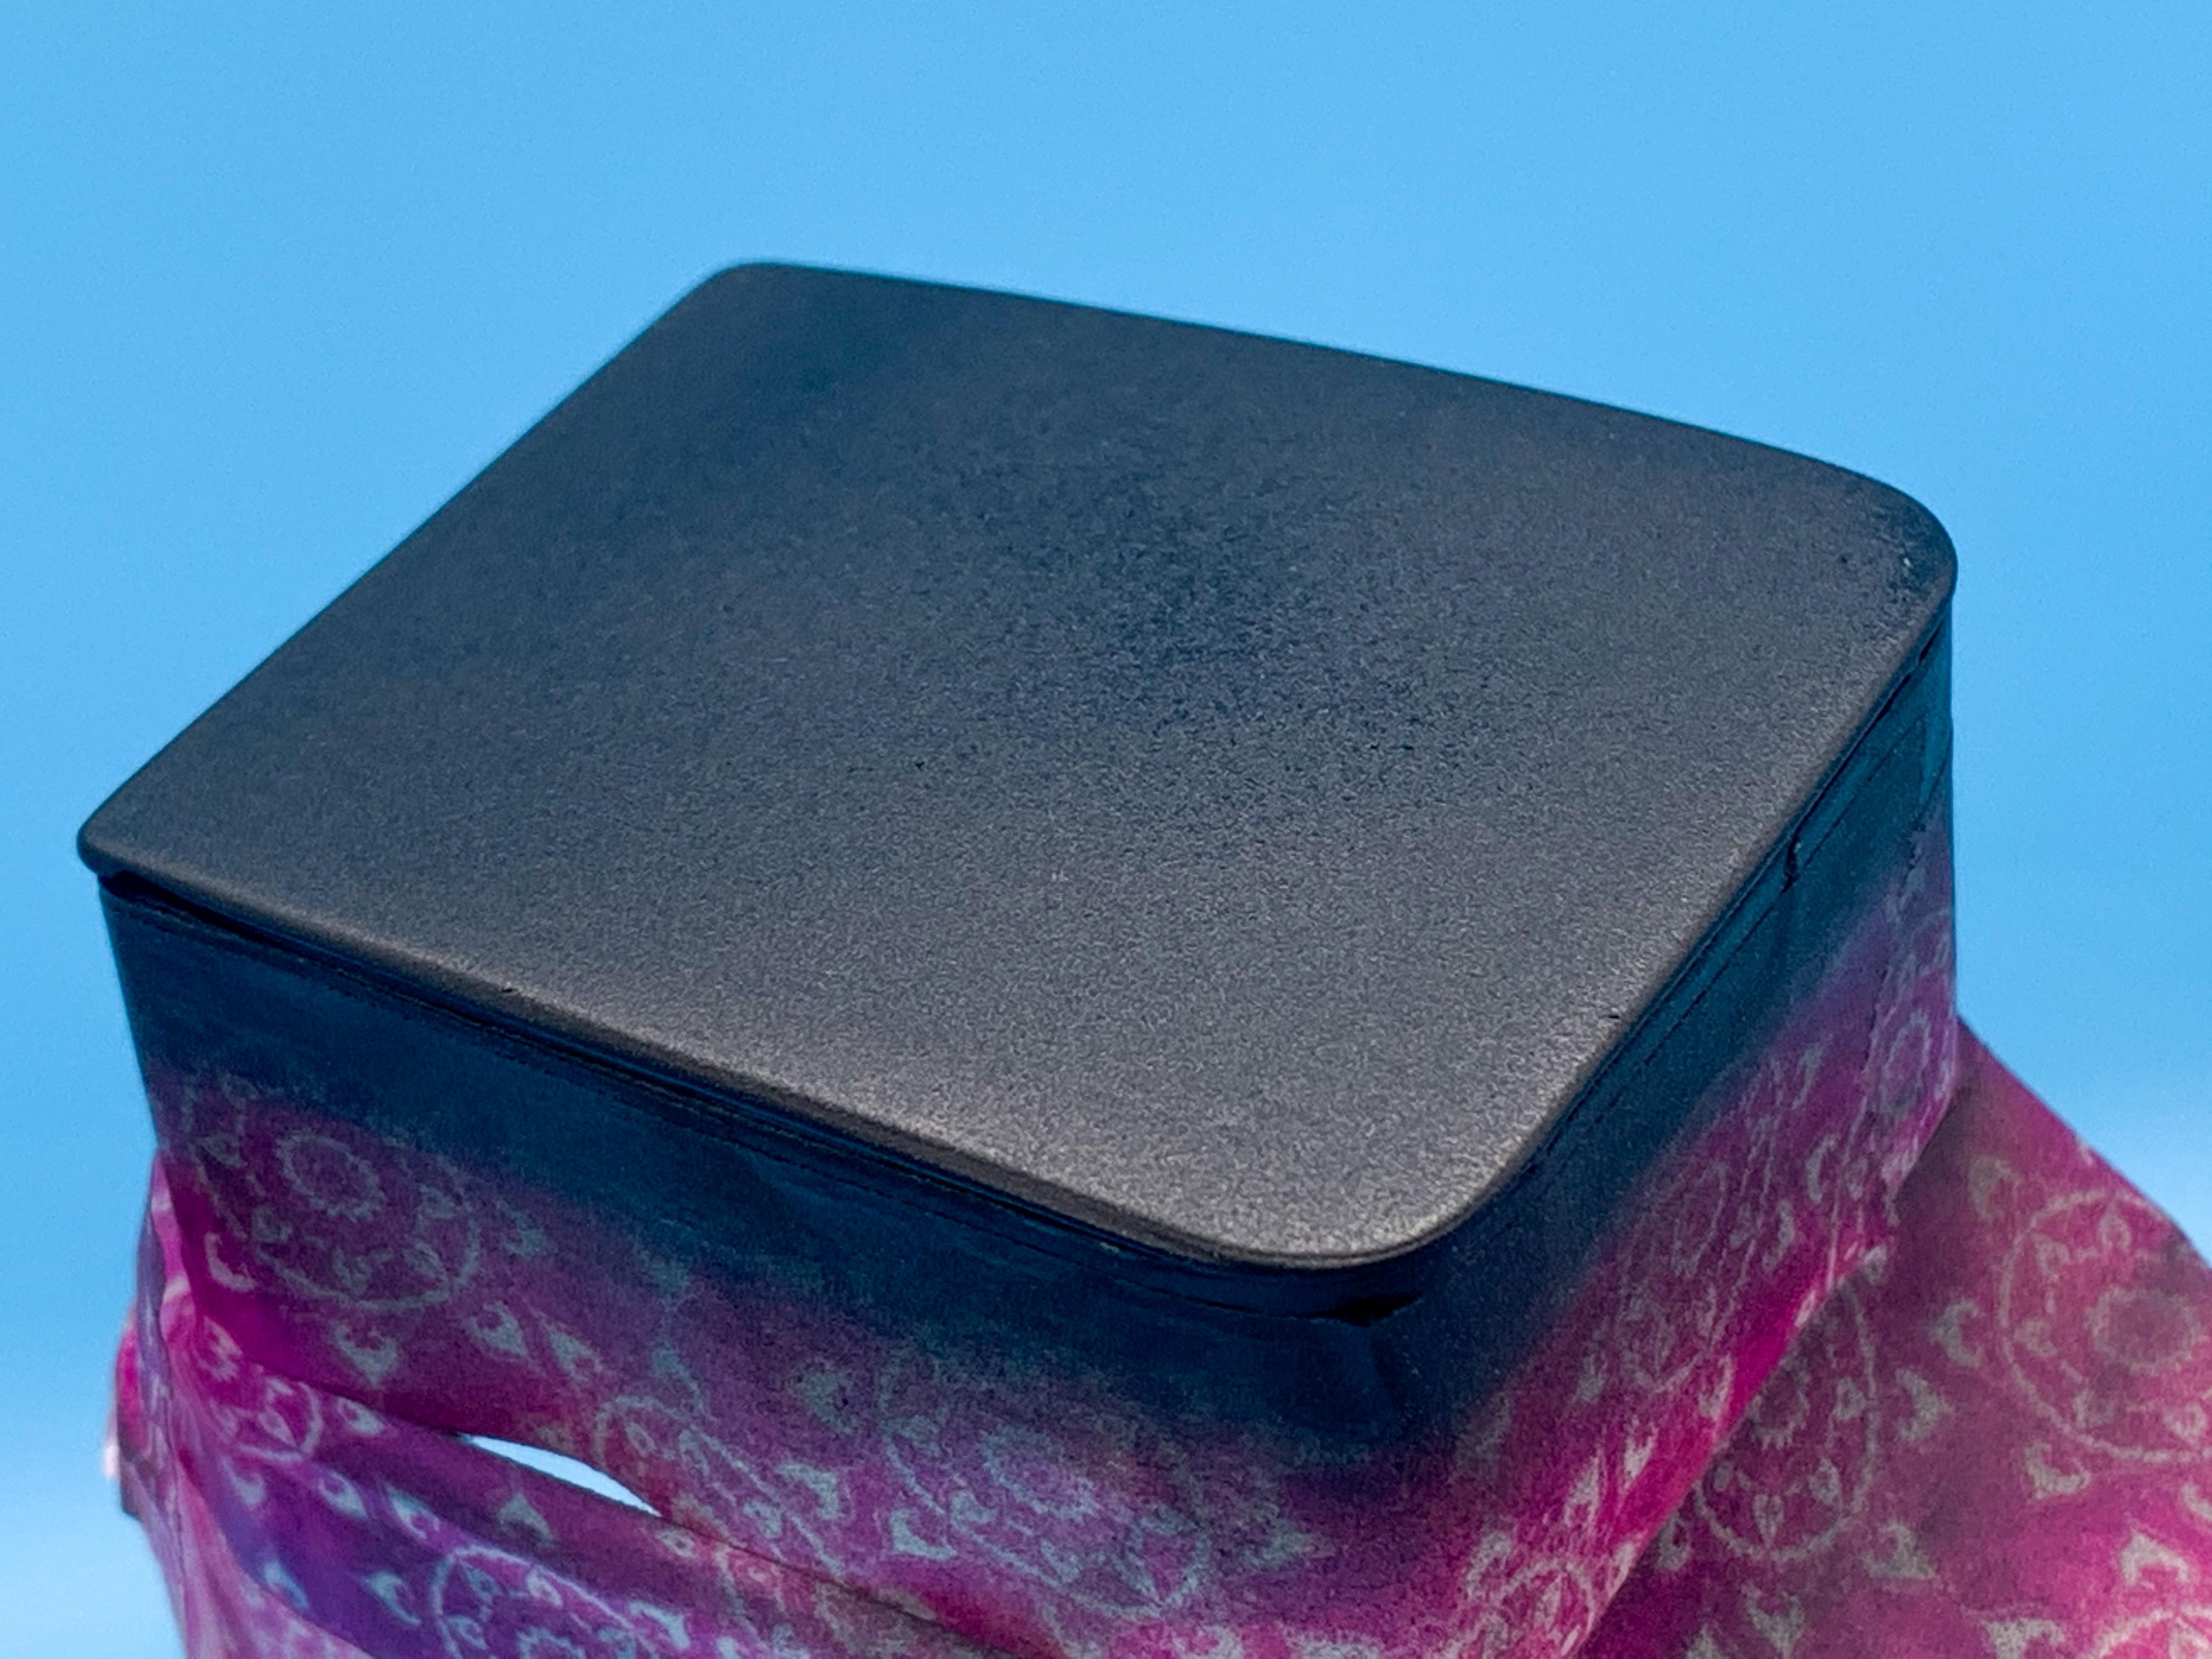
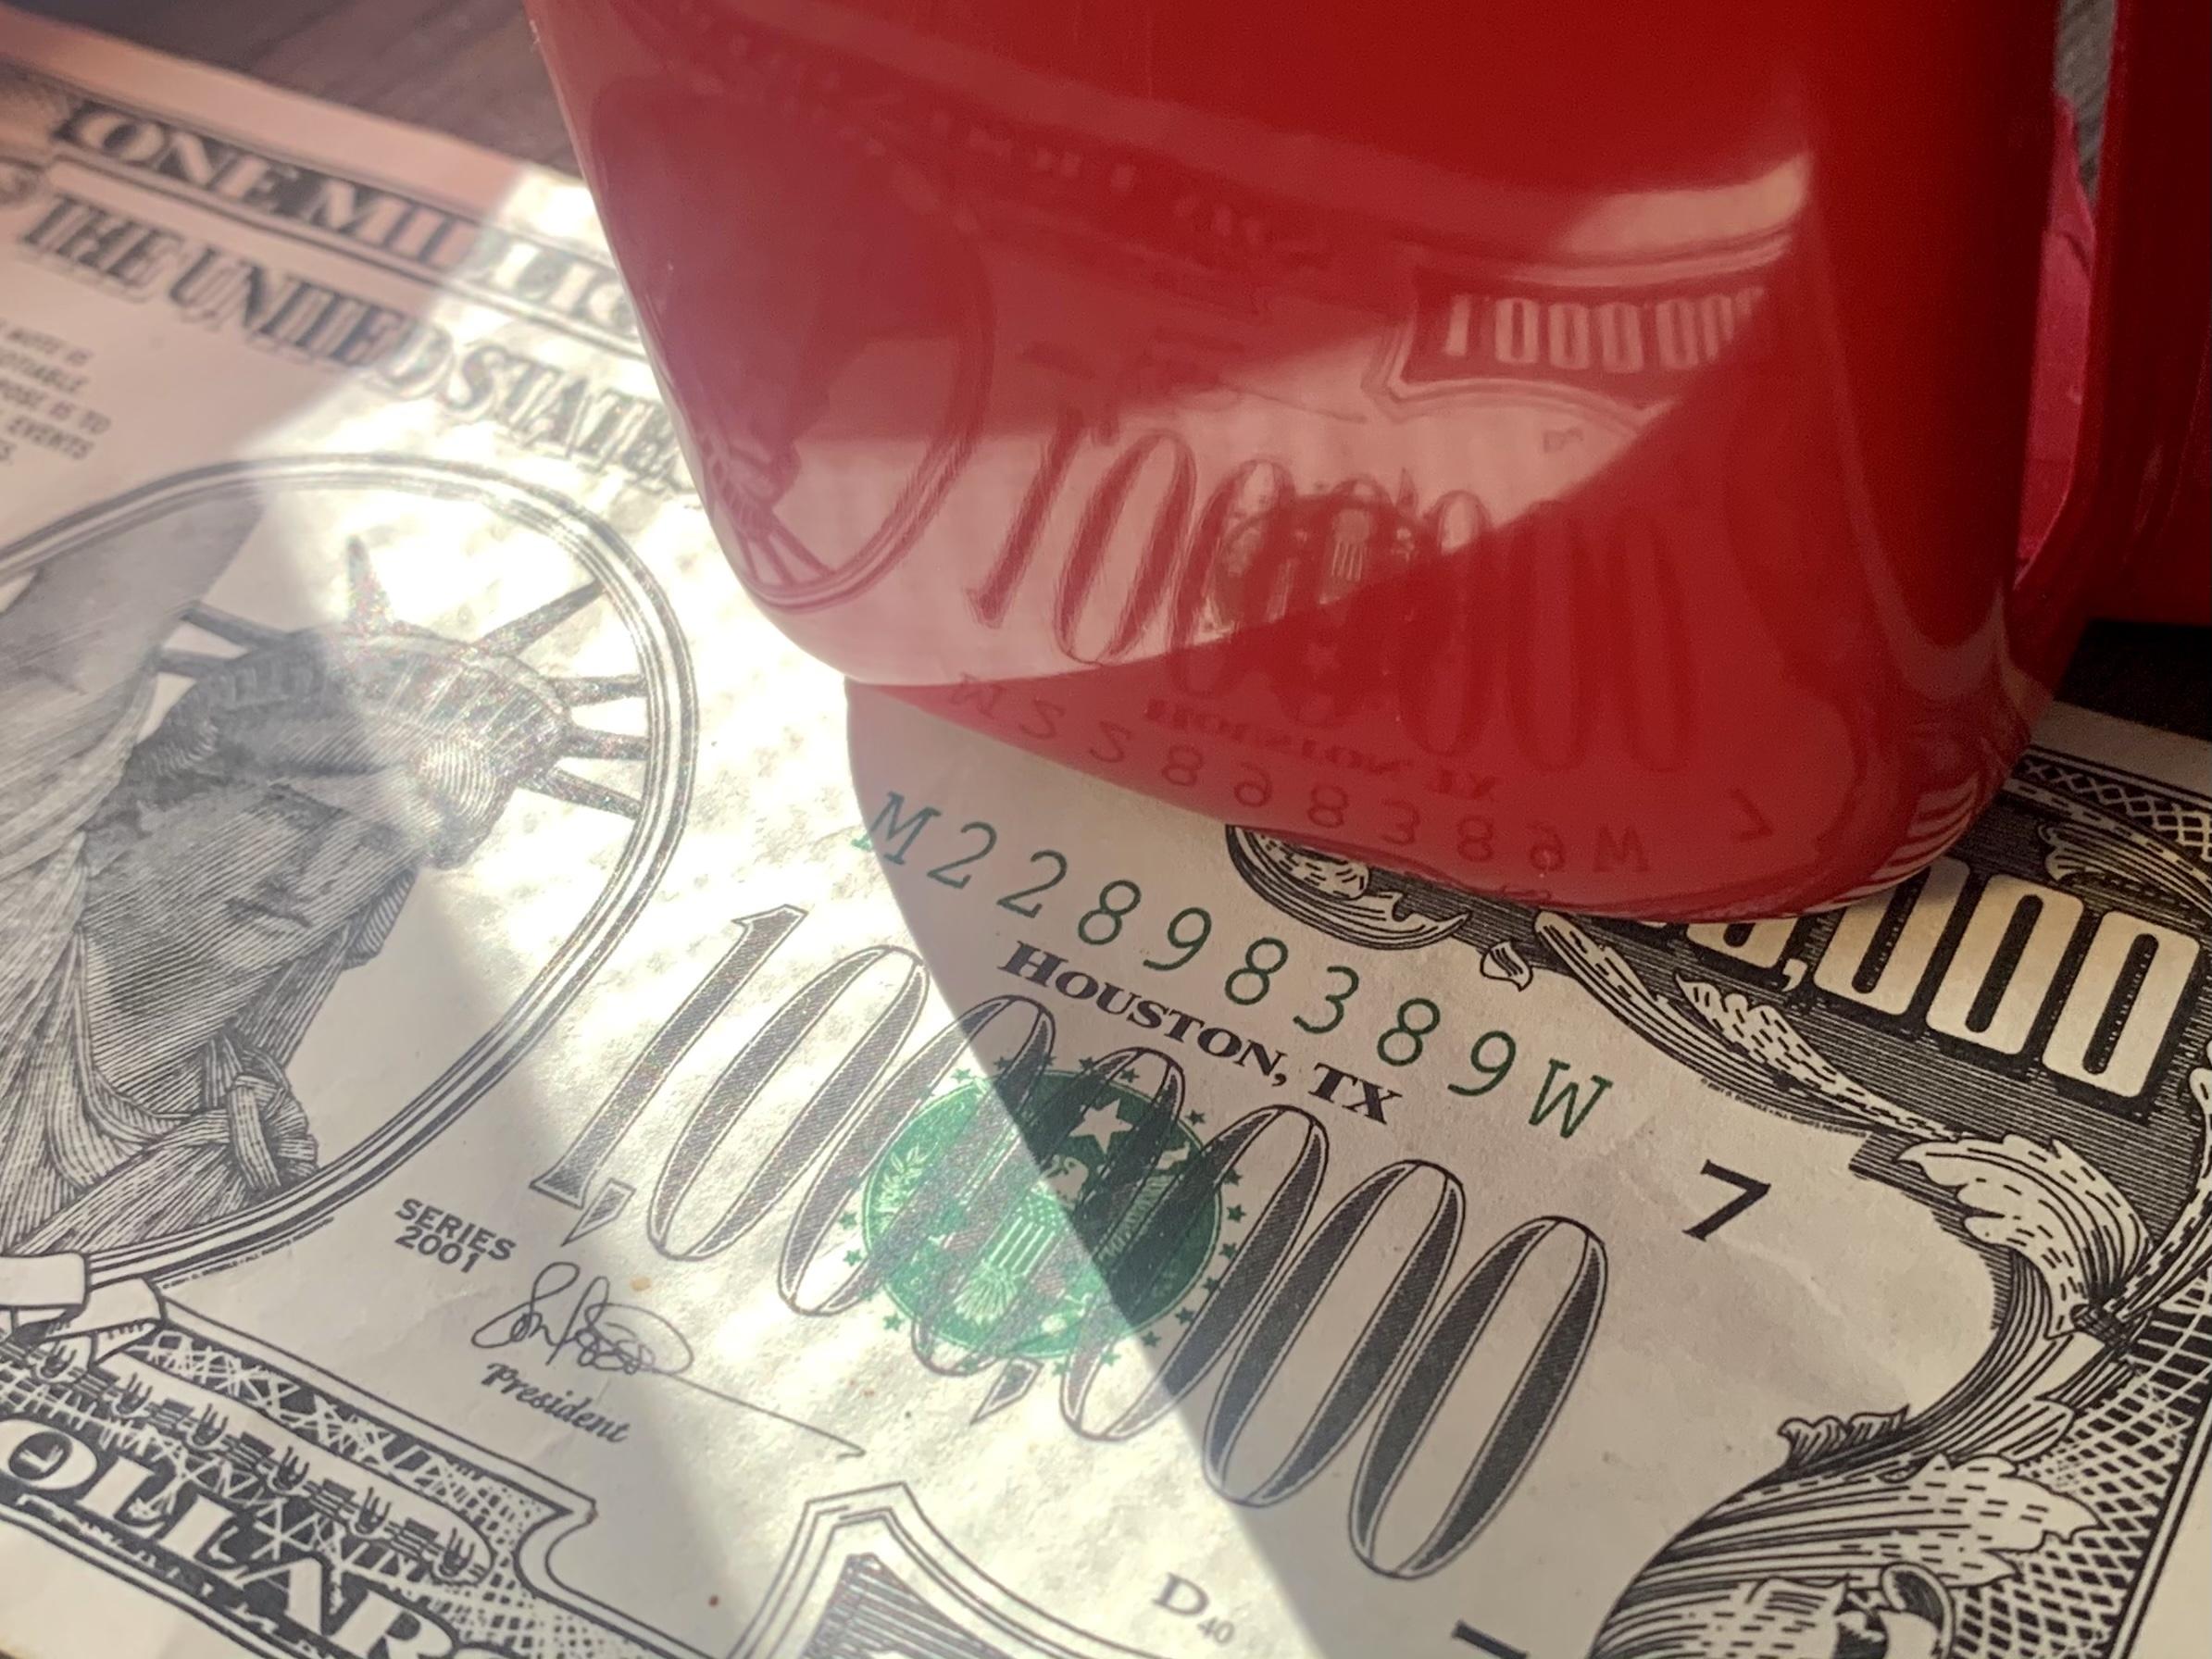
Polishing day! Was nervous to see if this stuff WOULD polish - do people polish out tractor paint-jobs? ?? Turns out that they should - this stuff polished up pretty nice! The million dollar bill test... I’m not quite done with it at this point, still needed a round of buffing with Scratch X and Novus but it’s not bad! Some Scratch-X and buffing later... I’ll give it my traditional second-round of buffing tomorrow when I’ve got the daylight to work with, but it isn’t too bad! With that done, I can mask up the roof ready for a fabric top panel: Then hit it with a coat of my favorite black: Followed by a coat of matt clear, to stop it getting dinged: I shot this clear coat from a few inches further back than I would normally to try and add a little texture to the surface - worked out ok! And now we just need to finish the polishing process and get a frame for this thing to sit on! I did mock it up on a stock T frame last week for my own amusement - looked kinda cool on there too! More soon!
-

1929 Ford Sport Coupe hot rod -update 10/4
OldNYJim replied to Rocking Rodney Rat's topic in WIP: Model Cars
I’m really enjoying the scratch building going into this one - really nicely done! -
Great start! Seems like this body would be a good way to get an A Coupe until Revell reissues their kit. I’ll be watching!
-
No sir, it didn’t - but someone I follow on Instagram did exactly that and added a Perspex front. Seems like a good idea!
-
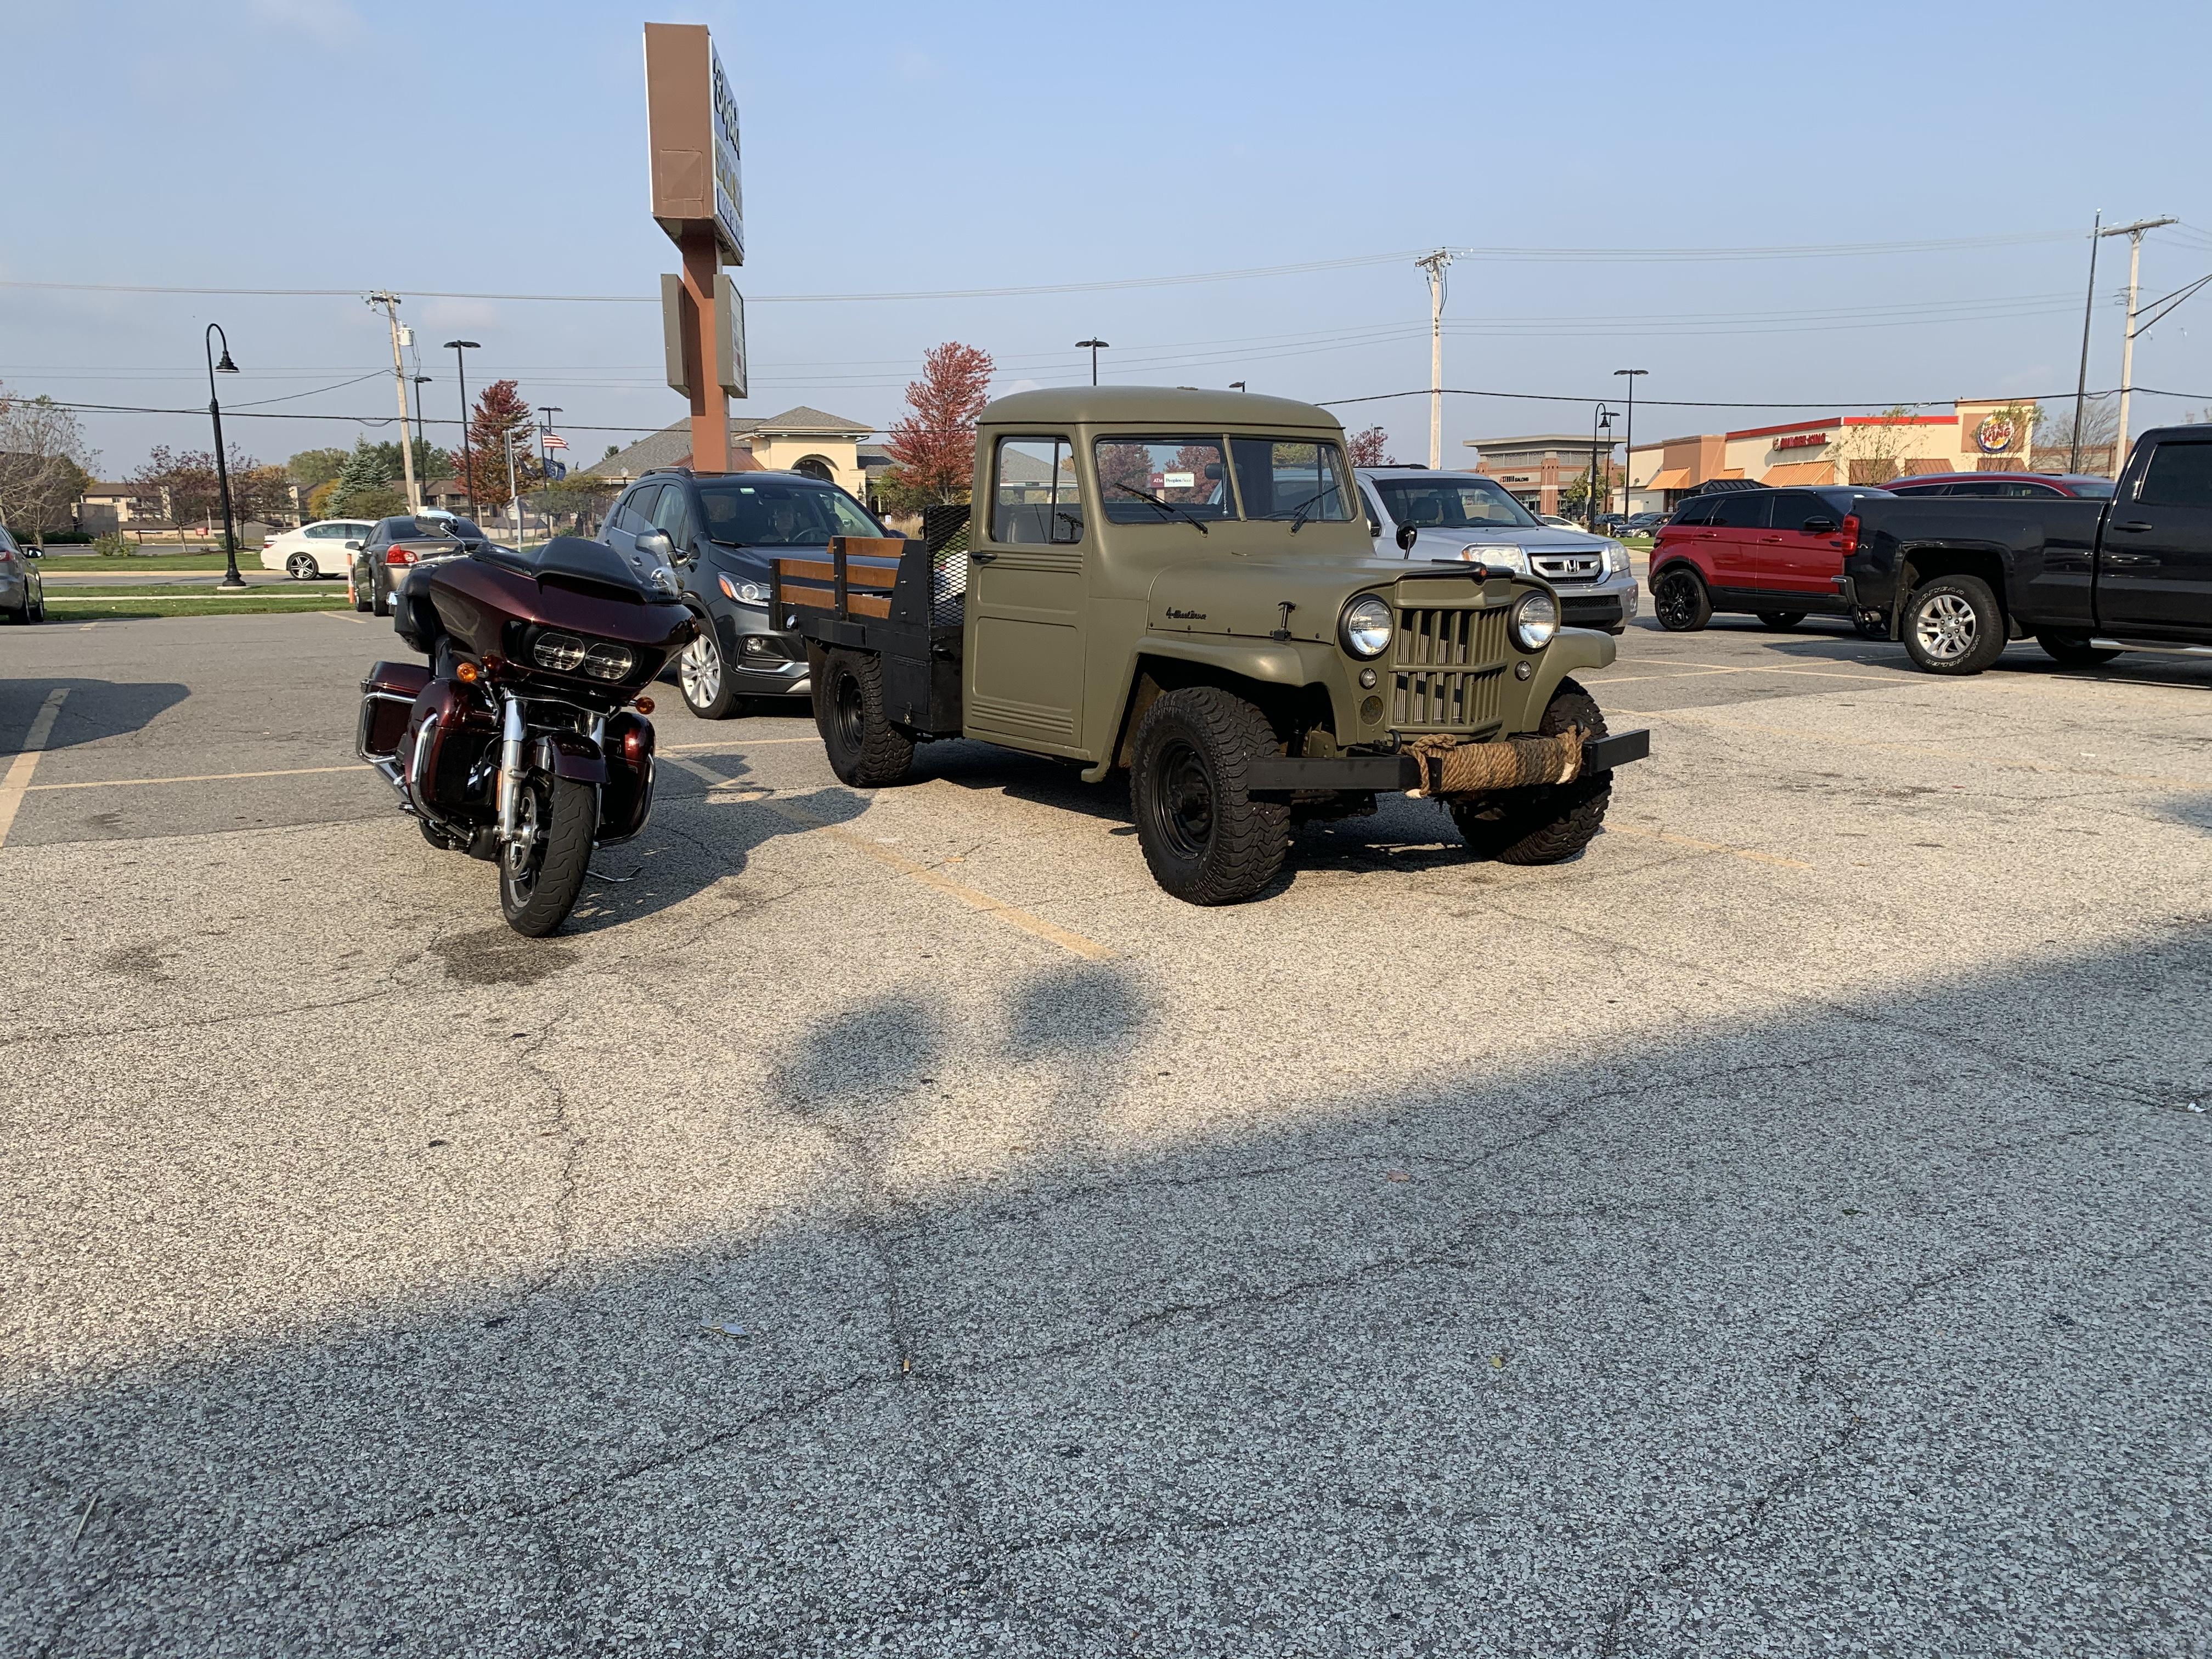
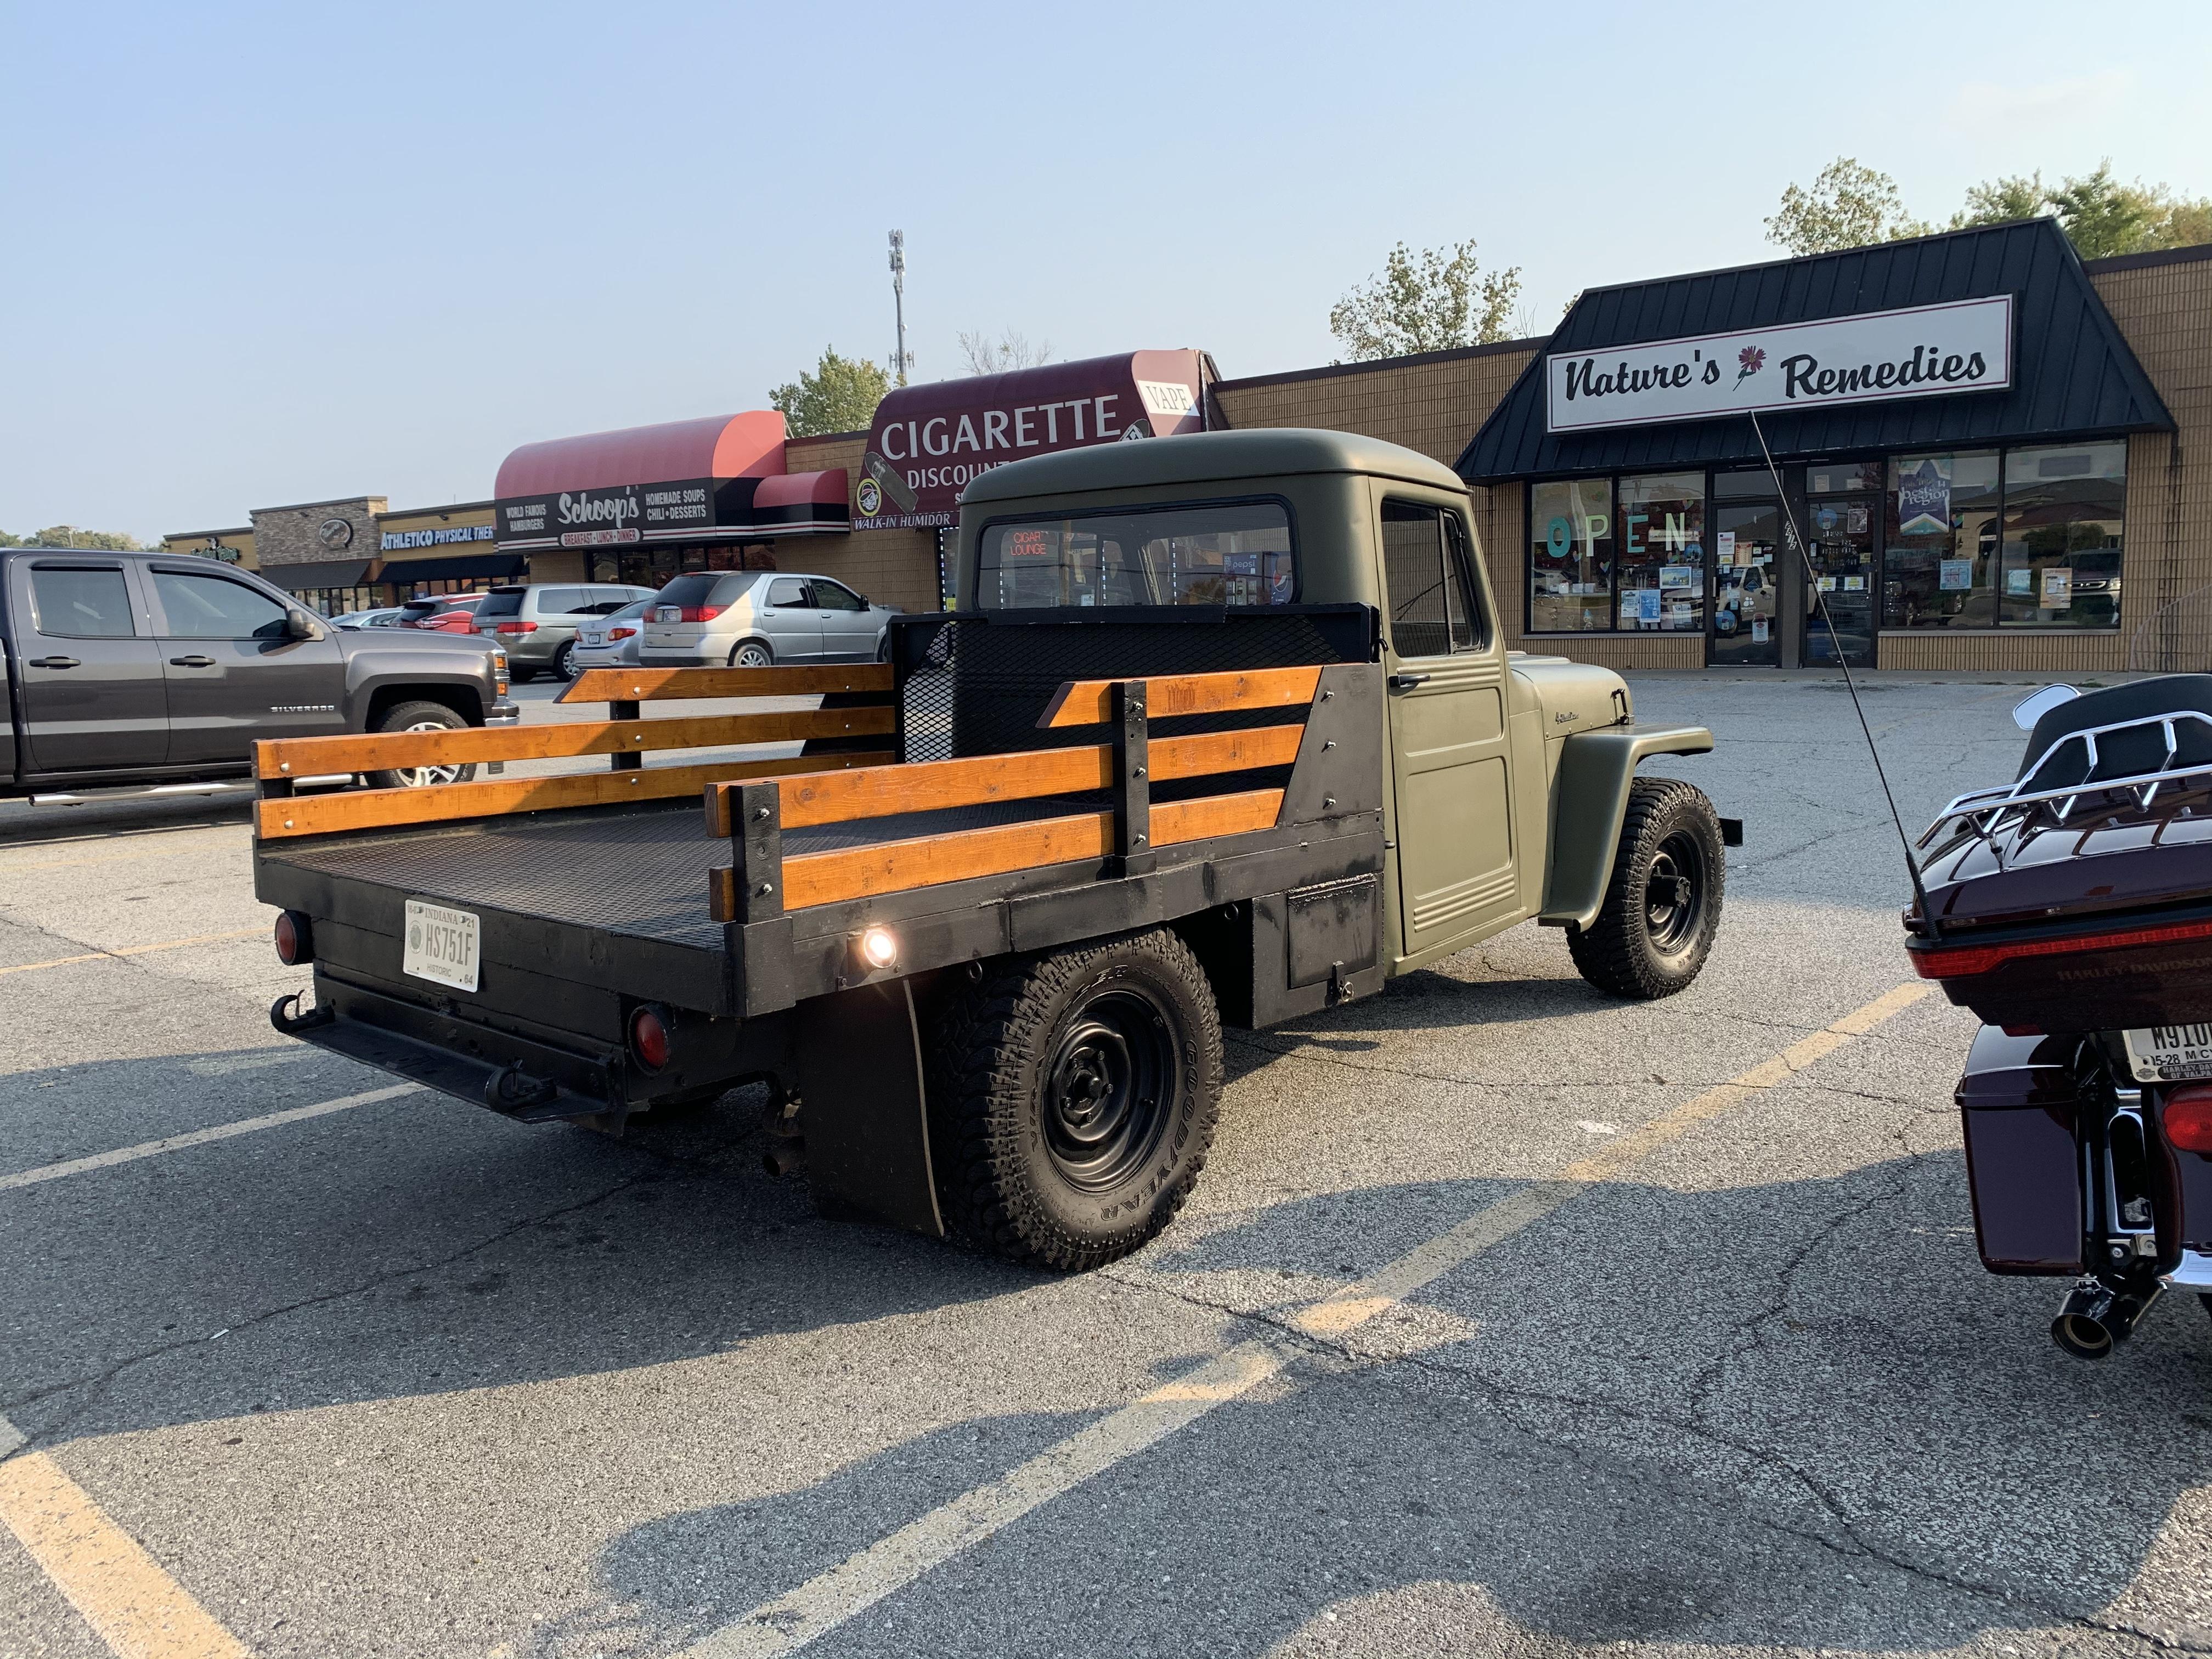
What did you see on the road today?
OldNYJim replied to Harry P.'s topic in General Automotive Talk (Trucks and Cars)
Today’s sightings from Indiana - anyone able to ID the jeep?
-
I do something similar but with 1 cup...assuming a 50/50 mix for the resin I’ll put the cup on a digital scale, a 1oz or whatever of resin A and then add resin B until I get to 2oz. This way, ol’ cheapskate me gets to only use half the amount of cups ??♂️
-
Oh, and the Million Dollar Bill test again - still needs a little more buffing but I can read the serial number in the reflection ??
-
Thanks everyone! It’s not perfect, but I’ll keep giving a little more attention until i get it as close as I can... Haha, I like using my million dollar bill to check the reflection - if I can read the numbers and text in the reflection it’s getting closer ? I use a similar technique to Donn Yost (although probably not as well as he uses it...) In this case, I shot the base red, then gave it three coats of Testor’s enamel clear gloss, thinned 50/50 with lacquer thinner. First couple of coats are mist coats, then a wet coat to get it to gloss up. Then, because I don’t have a dehydrator, I let it sit for three weeks before polishing or messing with it any further. I’ve tried polishing out at two weeks before and it ALMOST works as well, but the paint is still JUST soft enough that I can’t get it as perfect and micro-scratch free as I’d like. The extra week seems to let it harden up enough that I can polish as thoroughly as I’d need to to get the best shine. Next step, buff the whole thing with a 2400 grit Micro mesh polishing cloth from their polishing set, used wet, until the clear completely smooth and free of lumps and bumps and dust and whatever else fell in it whilst it was drying. Get to a nice completely smooth (but dull) finish. Of all the steps, this is the most important - if there’s imperfections at this stage they won’t get any better by rushing to get to the next steps. Then, work through the rest of the Micro Mesh cloths (I forget the exact grits right now, but whatever comes in the set...I can check if you like) all the way up to 12000. Again, I use them wet so they don’t clog, and rinse the body off after every round of polishing and carefully dry it with a soft towel to make sure I’m not running grit or sanded-paint-dust or whatever else across the surface. At this point it’ll be PRETTY good - kind of nice and smooth and shiny but not AMAZING. Just a good factory-stock kind of sheen, but not “WOW” show-car shiny. Next up, I use some Scratch X to buff the whole paintjob again, using as soft of a cloth as I can find. I think of the cloth I’m using to polish at this stage as an even finer grit version of the wet n dry cloths - so it makes sense in my mind that the softer they are the better the finished result. Next up, I like some Novus 2 fine scratch remover - use a nice new square of whatever cloth you’ve got and polish in a circular motion and just keep buffing until it’s as nice as you can get it. I’ll usually come back to mine the next day with fresh eyes and look again and have a second go at anything I missed the first time. No point in rushing to have a build finished but with lumpy paint... Then, last step, I’ll use a little Turtle Wax just to bring the shine out some more and protect the finish - I’d like to mess with some different polishes actually and see which works out best for me, but I’ve still got two HUGE bottles of Turtle Wax on the shelf so I keep going back to those ??. And that’s about it! Nothing super complex or difficult - and I’m FAR from being as good of a painter as a lot of people on the site here, but I’m getting better and closer to where I want to be with this stuff! Hope that helps a little!
-
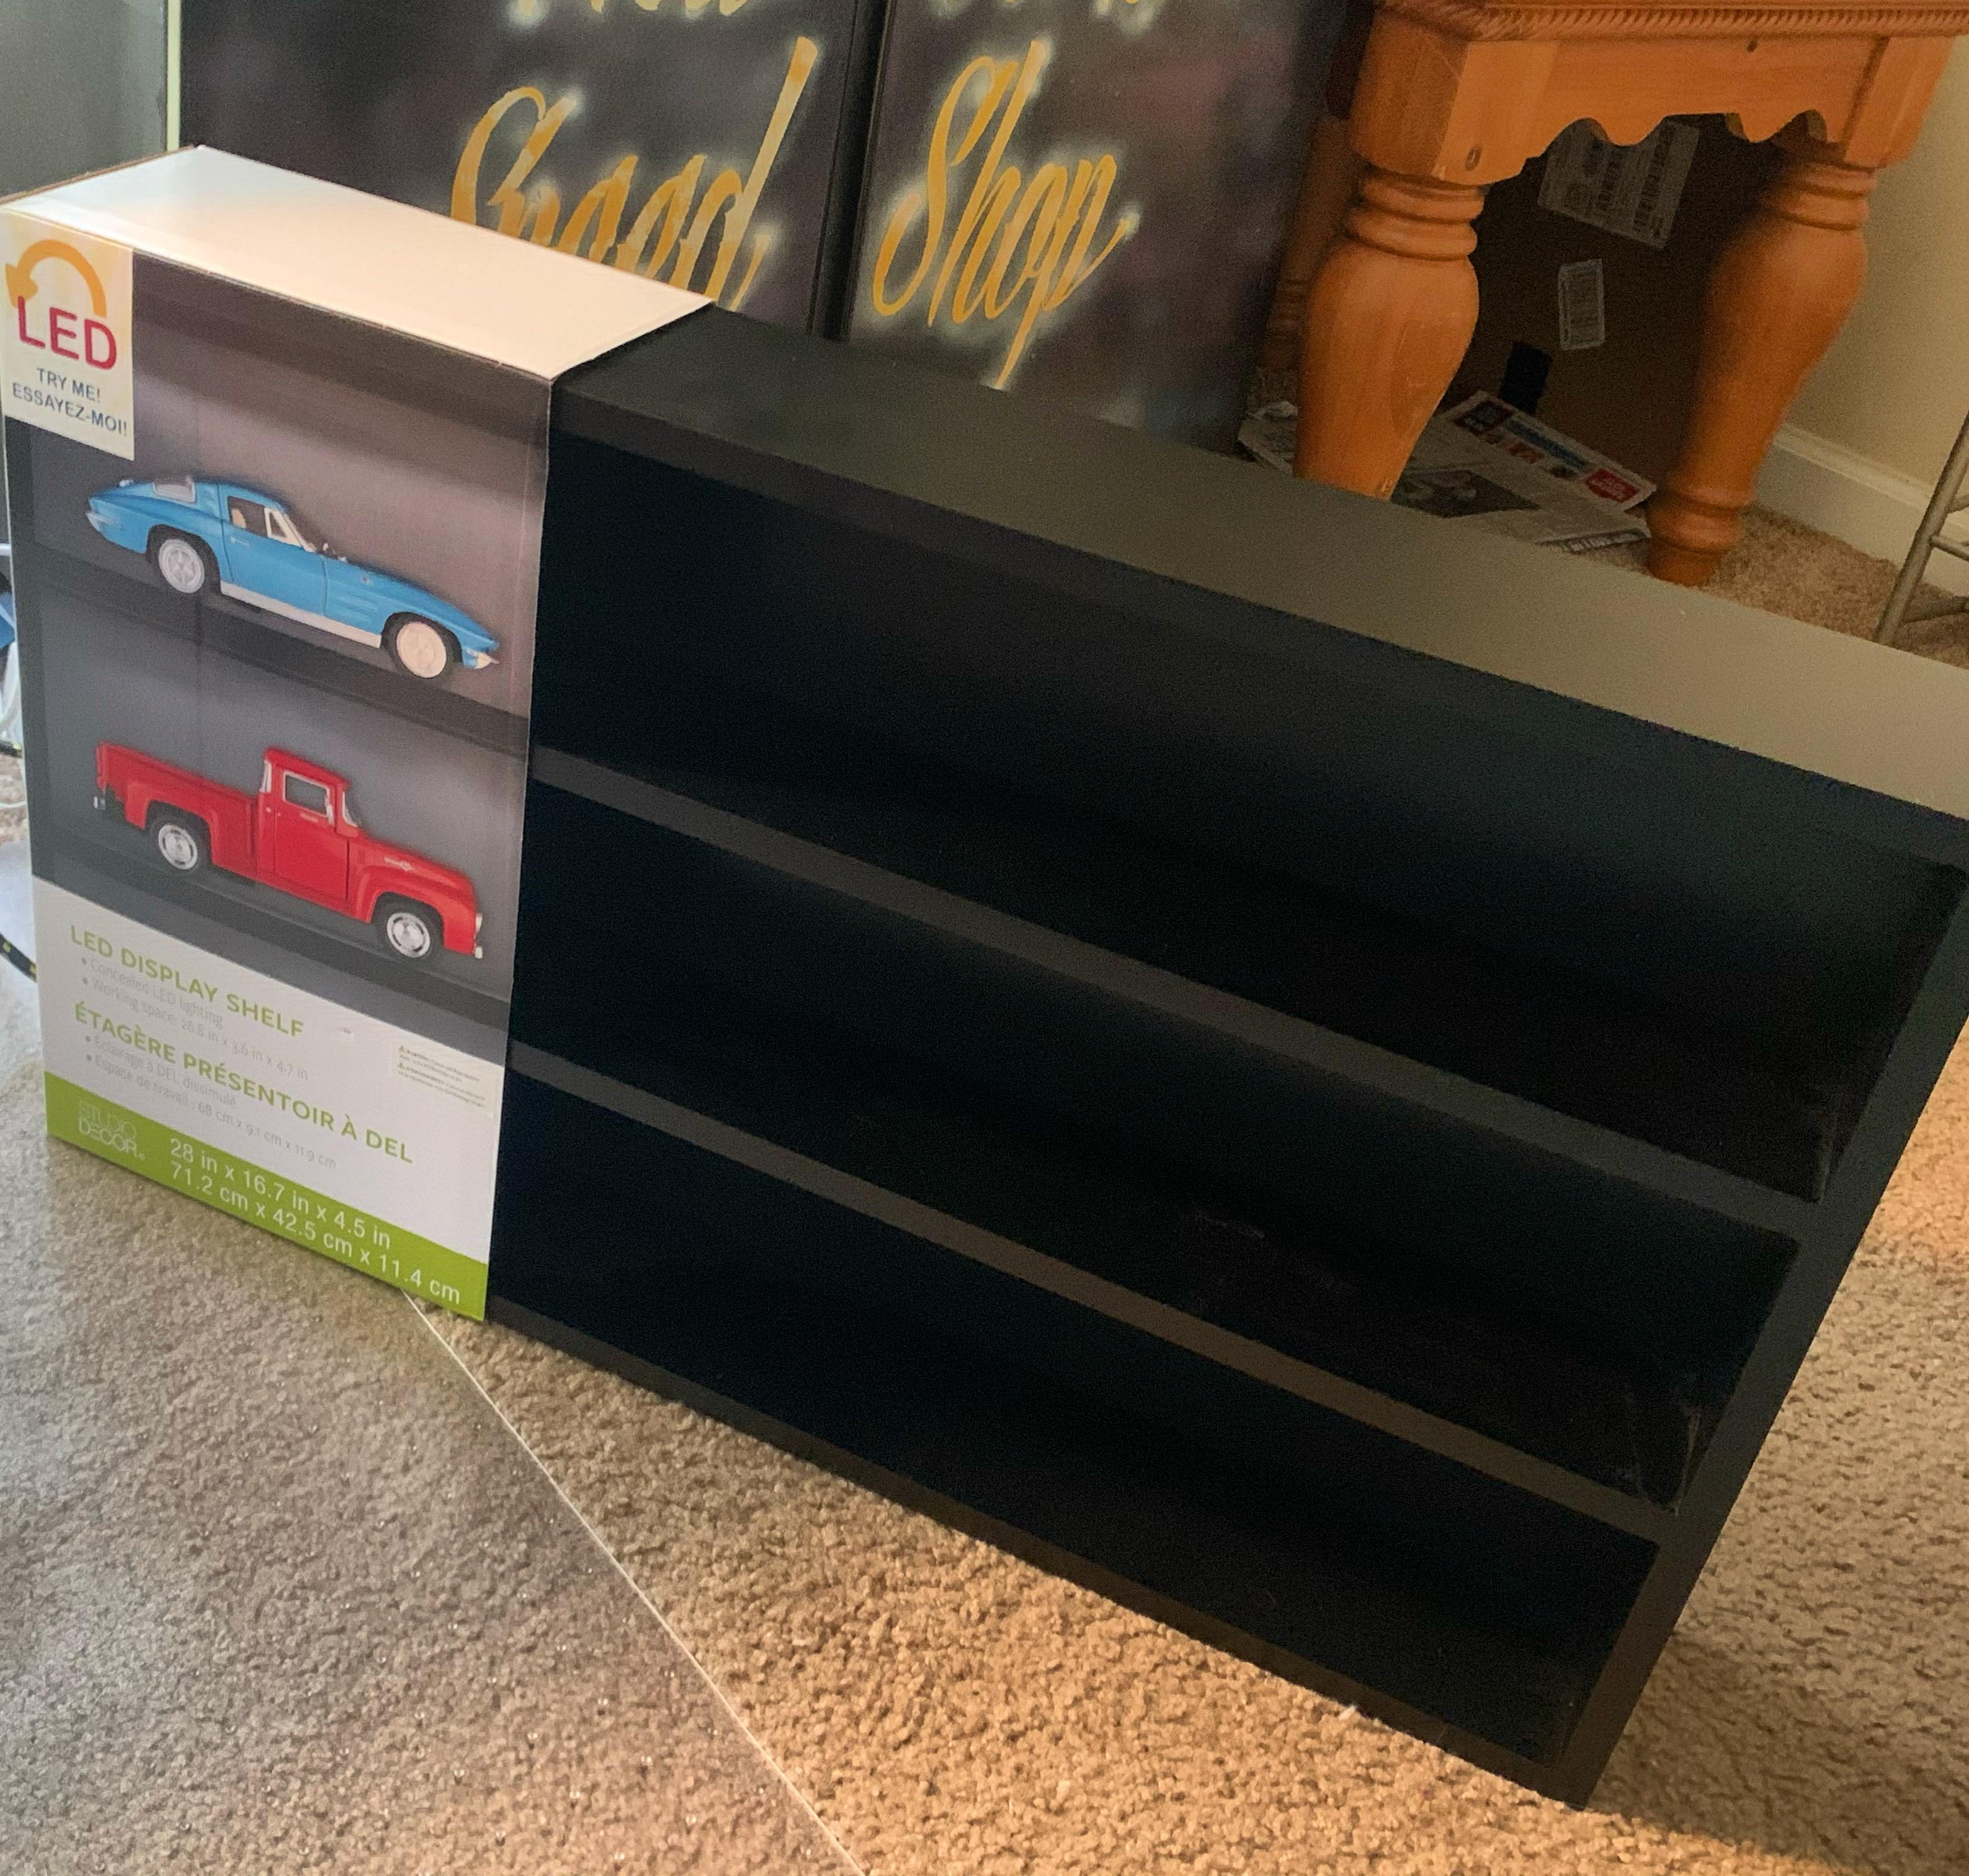
Already posted this in the “what did you get” thread but seeing as it was most of what I accomplished today that was Model related here it is again...got my new display case hung and mounted! Nice to have a spot to display some of my finished builds - already need a second though ?
-
Thanks fellas! I’m pretty pleased with it! Didn’t trust the mounts (not that I have any reason not to, but I wanted some redundancy) so I picked some little ones up at Ace Hardware this morning and I think we’re all set now...
-
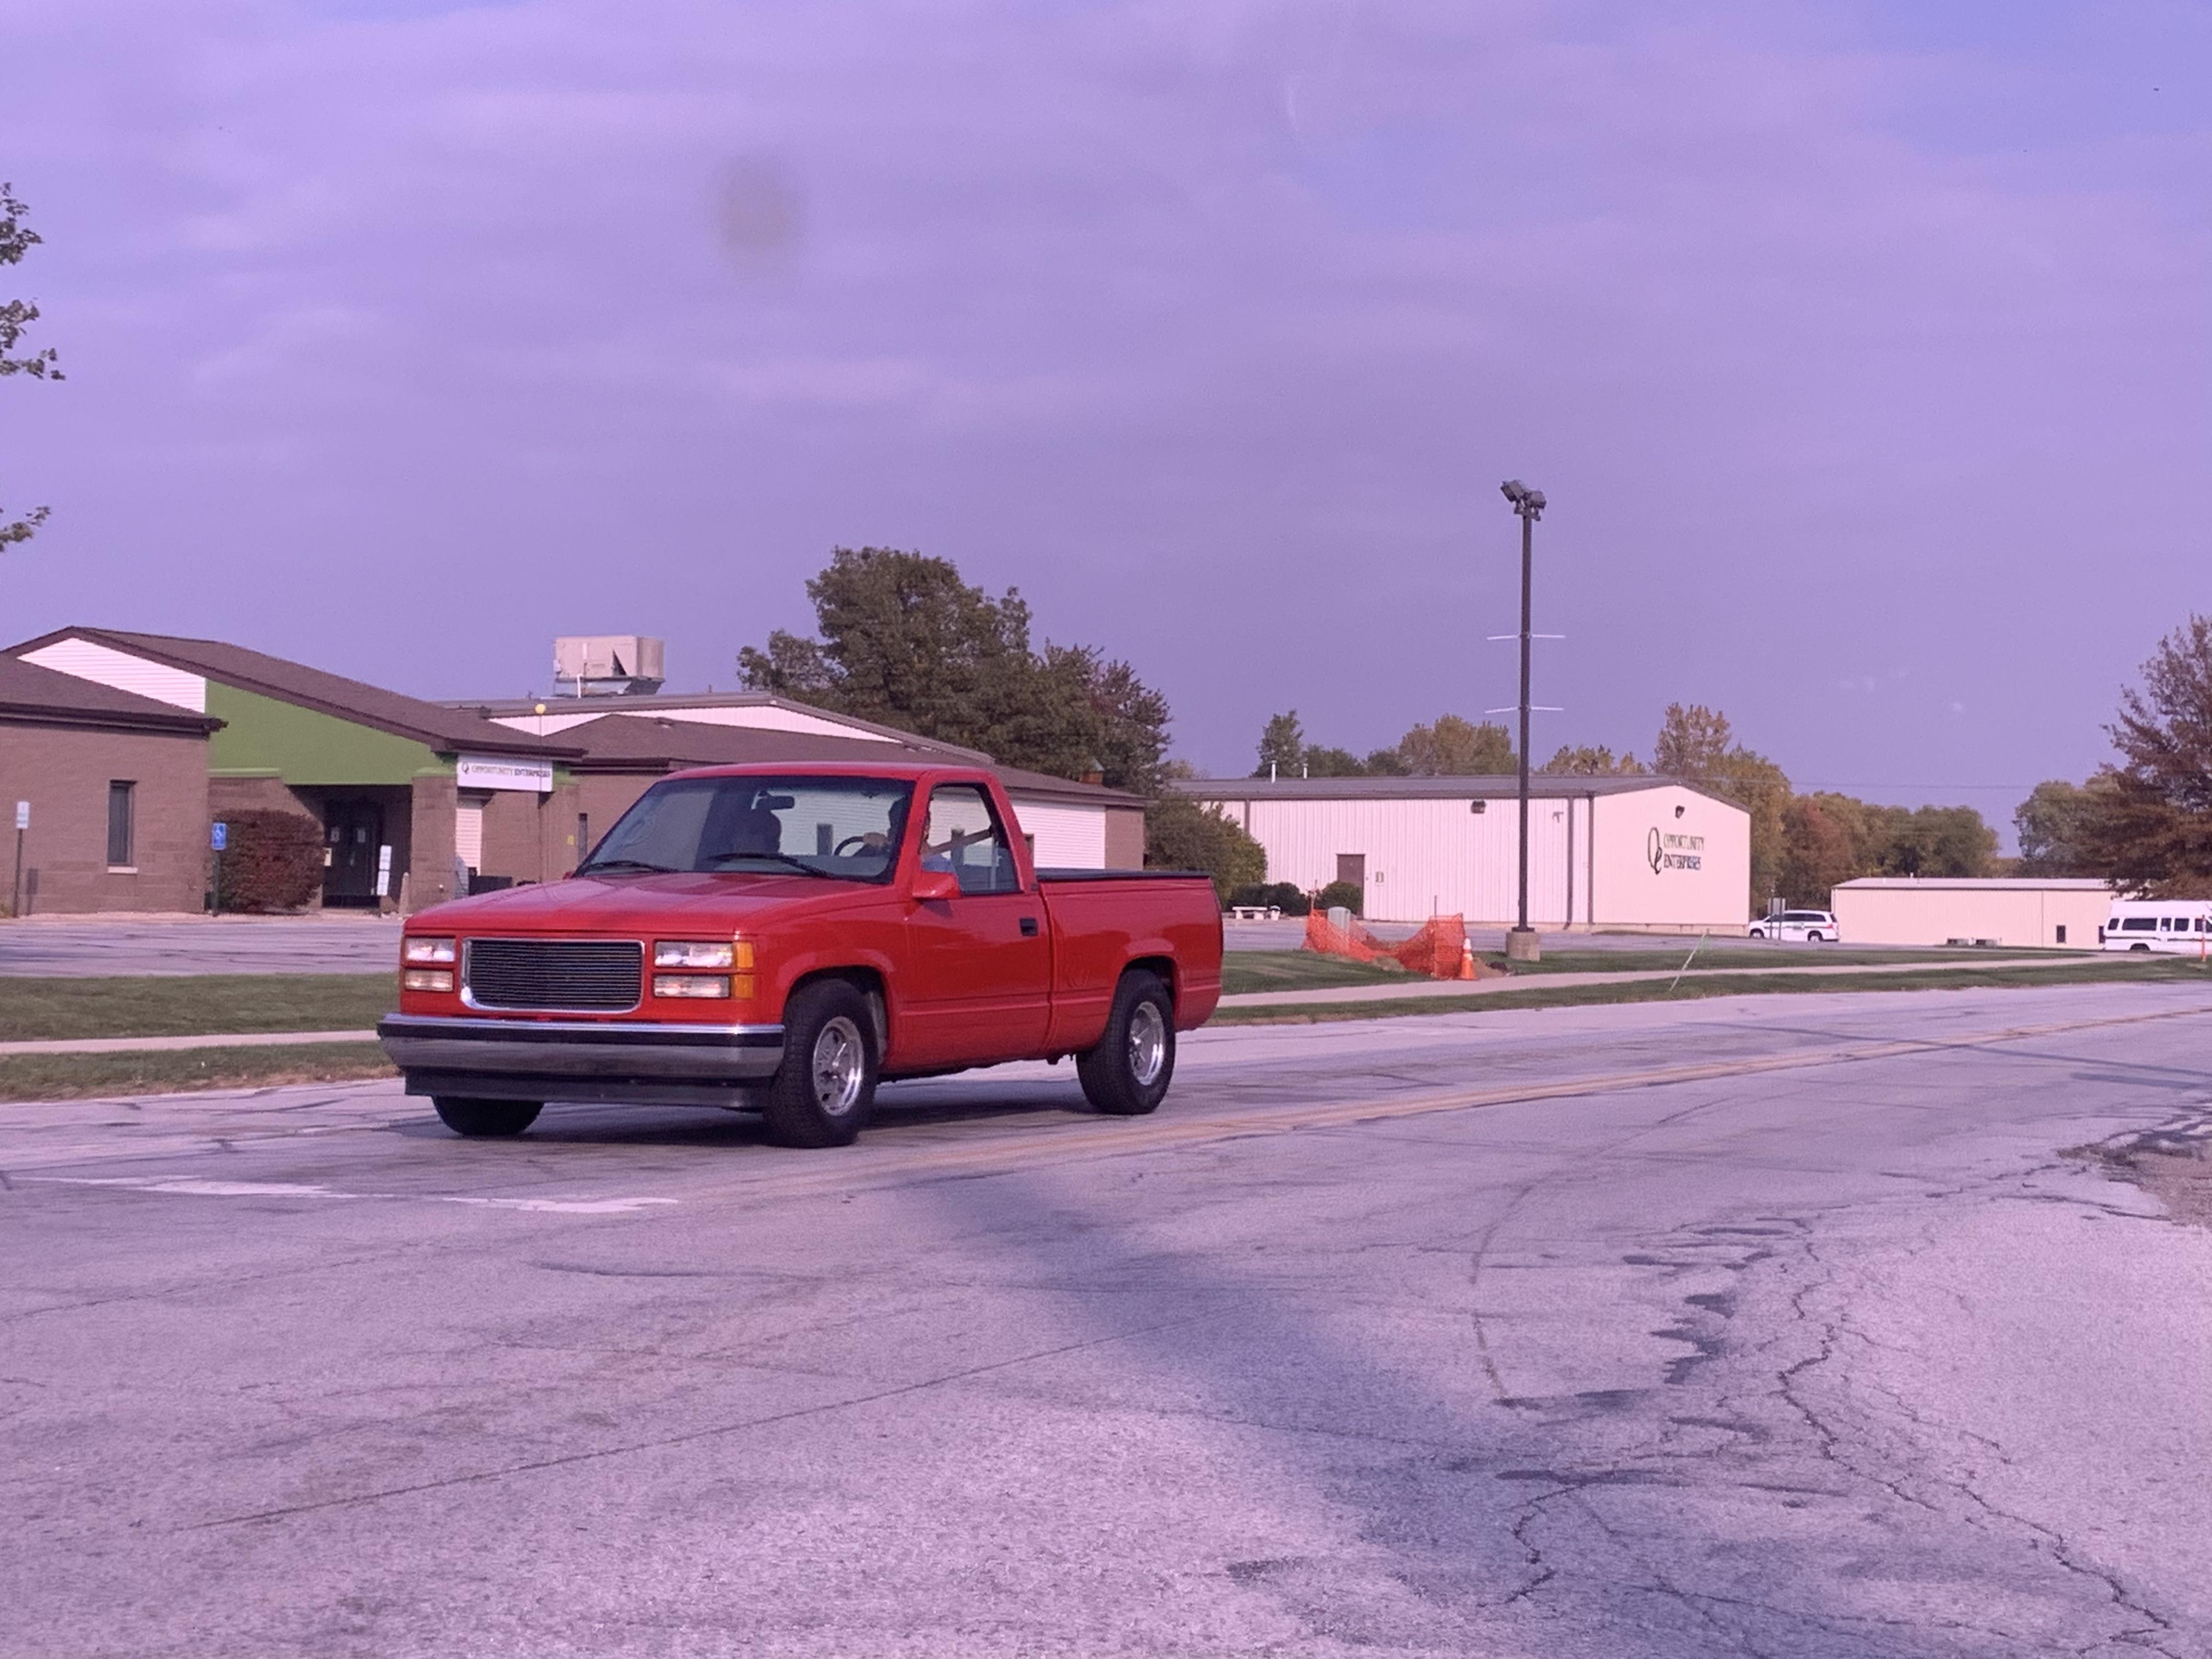
What did you see on the road today?
OldNYJim replied to Harry P.'s topic in General Automotive Talk (Trucks and Cars)
Huh! Interesting! Thanks Tom! That’s a cool little detail that one could add to a build! -
I’ve been eyeballing this one...looks killer (albeit pricy...) Micro-Make Doctor DryBooth/Dehydrator https://www.amazon.com/dp/B07KFLLBY4/ref=cm_sw_r_cp_api_i_x.sGFbW6XCWF5 When I ordered the paint I asked for “Boyd Red” and the guy was like “which one?!”. He had five or six bottles labelled simply “Boyd Red” all in different shades ?. Thank you!!! Huh!! Fascinating! What a cool story! Thanks for sharing Claude - I’d never heard that before! Polishing day finally came around (again)... Looks nice, all shiny! Still a couple of little bits I wanna buff some more when the light’s good tomorrow, but I’m pretty pleased with how it looks: More soon!
-
I don’t recall the article - but even a simple black wash works WONDERS on making kit chrome look better
-
I’ve been eyeing this in Michael’s for a couple of weeks and finally broke down today - I’ve been wanting a lit display case and this fit the bill...$65 instead of $130 provided I ordered online but collected in store: Looks cool on the wall! I want to add some brackets underneath tomorrow to support it to make sure we don’t have any issues, but I’m pleased with it!
-
What did you see on the road today?
OldNYJim replied to Harry P.'s topic in General Automotive Talk (Trucks and Cars)
Today’s cool spot - anyone know the story with the oval license plate? Is that an original German one?
-
Thanks everybody! I can’t take any credit for the flame idea, I’m sure it’s been done a bunch before, but this is where I got the idea: Mine aren’t as good as these, obviously...but I’d like to try them again now I know they (kinda) work on a car too!
-
Scale Auto Web Site
OldNYJim replied to Chuckyg1's topic in General Automotive Talk (Trucks and Cars)
One of (the only remaining?) mods on the SA site was trying to contact the publishers or ANYONE who had the power to maybe at least keep the forum running for now...got universally ignored apparently. He did recommend people check this place out though, which I thought was cool. -
Has Anyone Tried this New Vacu-Forming Machine?
OldNYJim replied to Danno's topic in Model Building Questions and Answers
https://www.michaels.com/coupons