OldNYJim
-
Posts
250 -
Joined
-
Last visited
Content Type
Profiles
Forums
Events
Gallery
Everything posted by OldNYJim
-
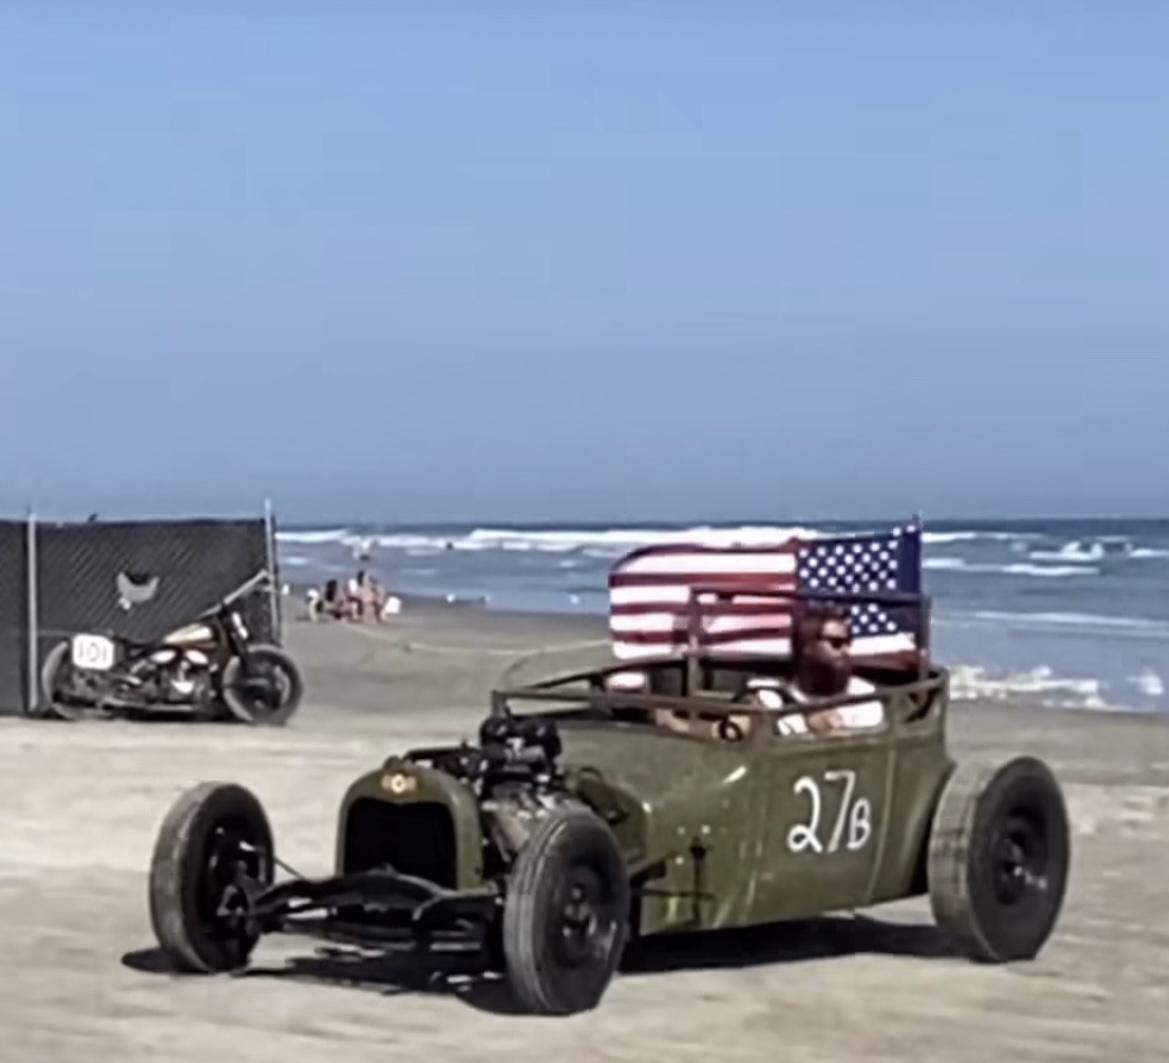
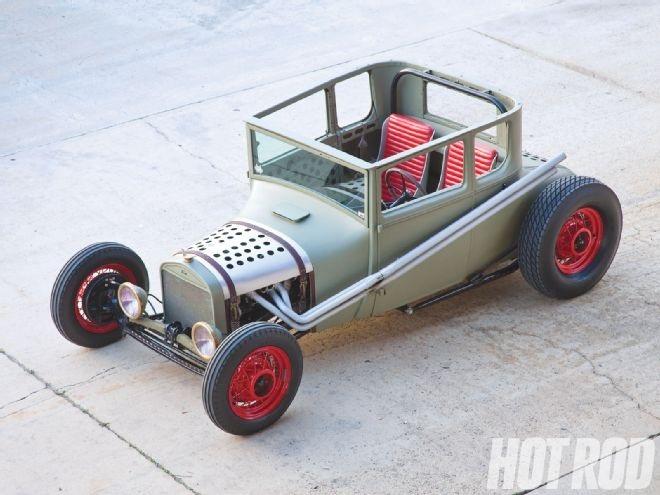
Having the coupe body with no roof is also a perfectly valid option:

-
 I’ve used this! A model train store near our place in Brooklyn carried this and another brand by the name of Humbrol which looked near identical. My experience is that it’s SUPER thick and gloopy compared to anything we’re used to for models, but lacquer thinner works great to thin it and it glosses out to a really nice finish when it dries (the gloss colors anyway…the matte ones stay matte). I suspect this would be most useful for people who like brush painting, and as with all enamels the dry times can be long if you don’t like to thin it with lacquer thinner to speed it up. If you like enamels, they’re good to work with - but not really any better than say the Testor’s bottles for example - so I wouldn’t personally pay more for this product unless they had a specific color I was looking for.
 -
That’s not any kind of pen at all, it’s a roll of metal
-
Does Anyone 3-D Print A Ford 300 Six Cylinder?
OldNYJim replied to Plowboy's topic in Model Building Questions and Answers
Here's that same link in English, in case any of you don't habla español... https://cults3d.com/en/3d-model/game/1-24-scale-ford-300-i6-motor-scale_auto_model_works That guy's files are great BTW, I have a few of his (and I'd like to pick up that engine kit too...) -
I never used that specific product, but plain old Dymo tape does great for that too: https://www.amazon.com/DYMO-Plastic-Embossing-Labels-1741670/dp/B001XQ7ZP8/ref=sr_1_4?crid=NC76SN30WLAW&keywords=Dymo+Embossing+Tape+3%2F8"&qid=1676301769&sprefix=dymo+embossing+tape+3%2F8+%2Caps%2C95&sr=8-4
-
At Walmart (at least one store)
OldNYJim replied to Classicgas's topic in General Automotive Talk (Trucks and Cars)
Nice deals! -
Late to the party on this one, but it looks GREAT! Love it! Well thought out, and I love the color you picked
-
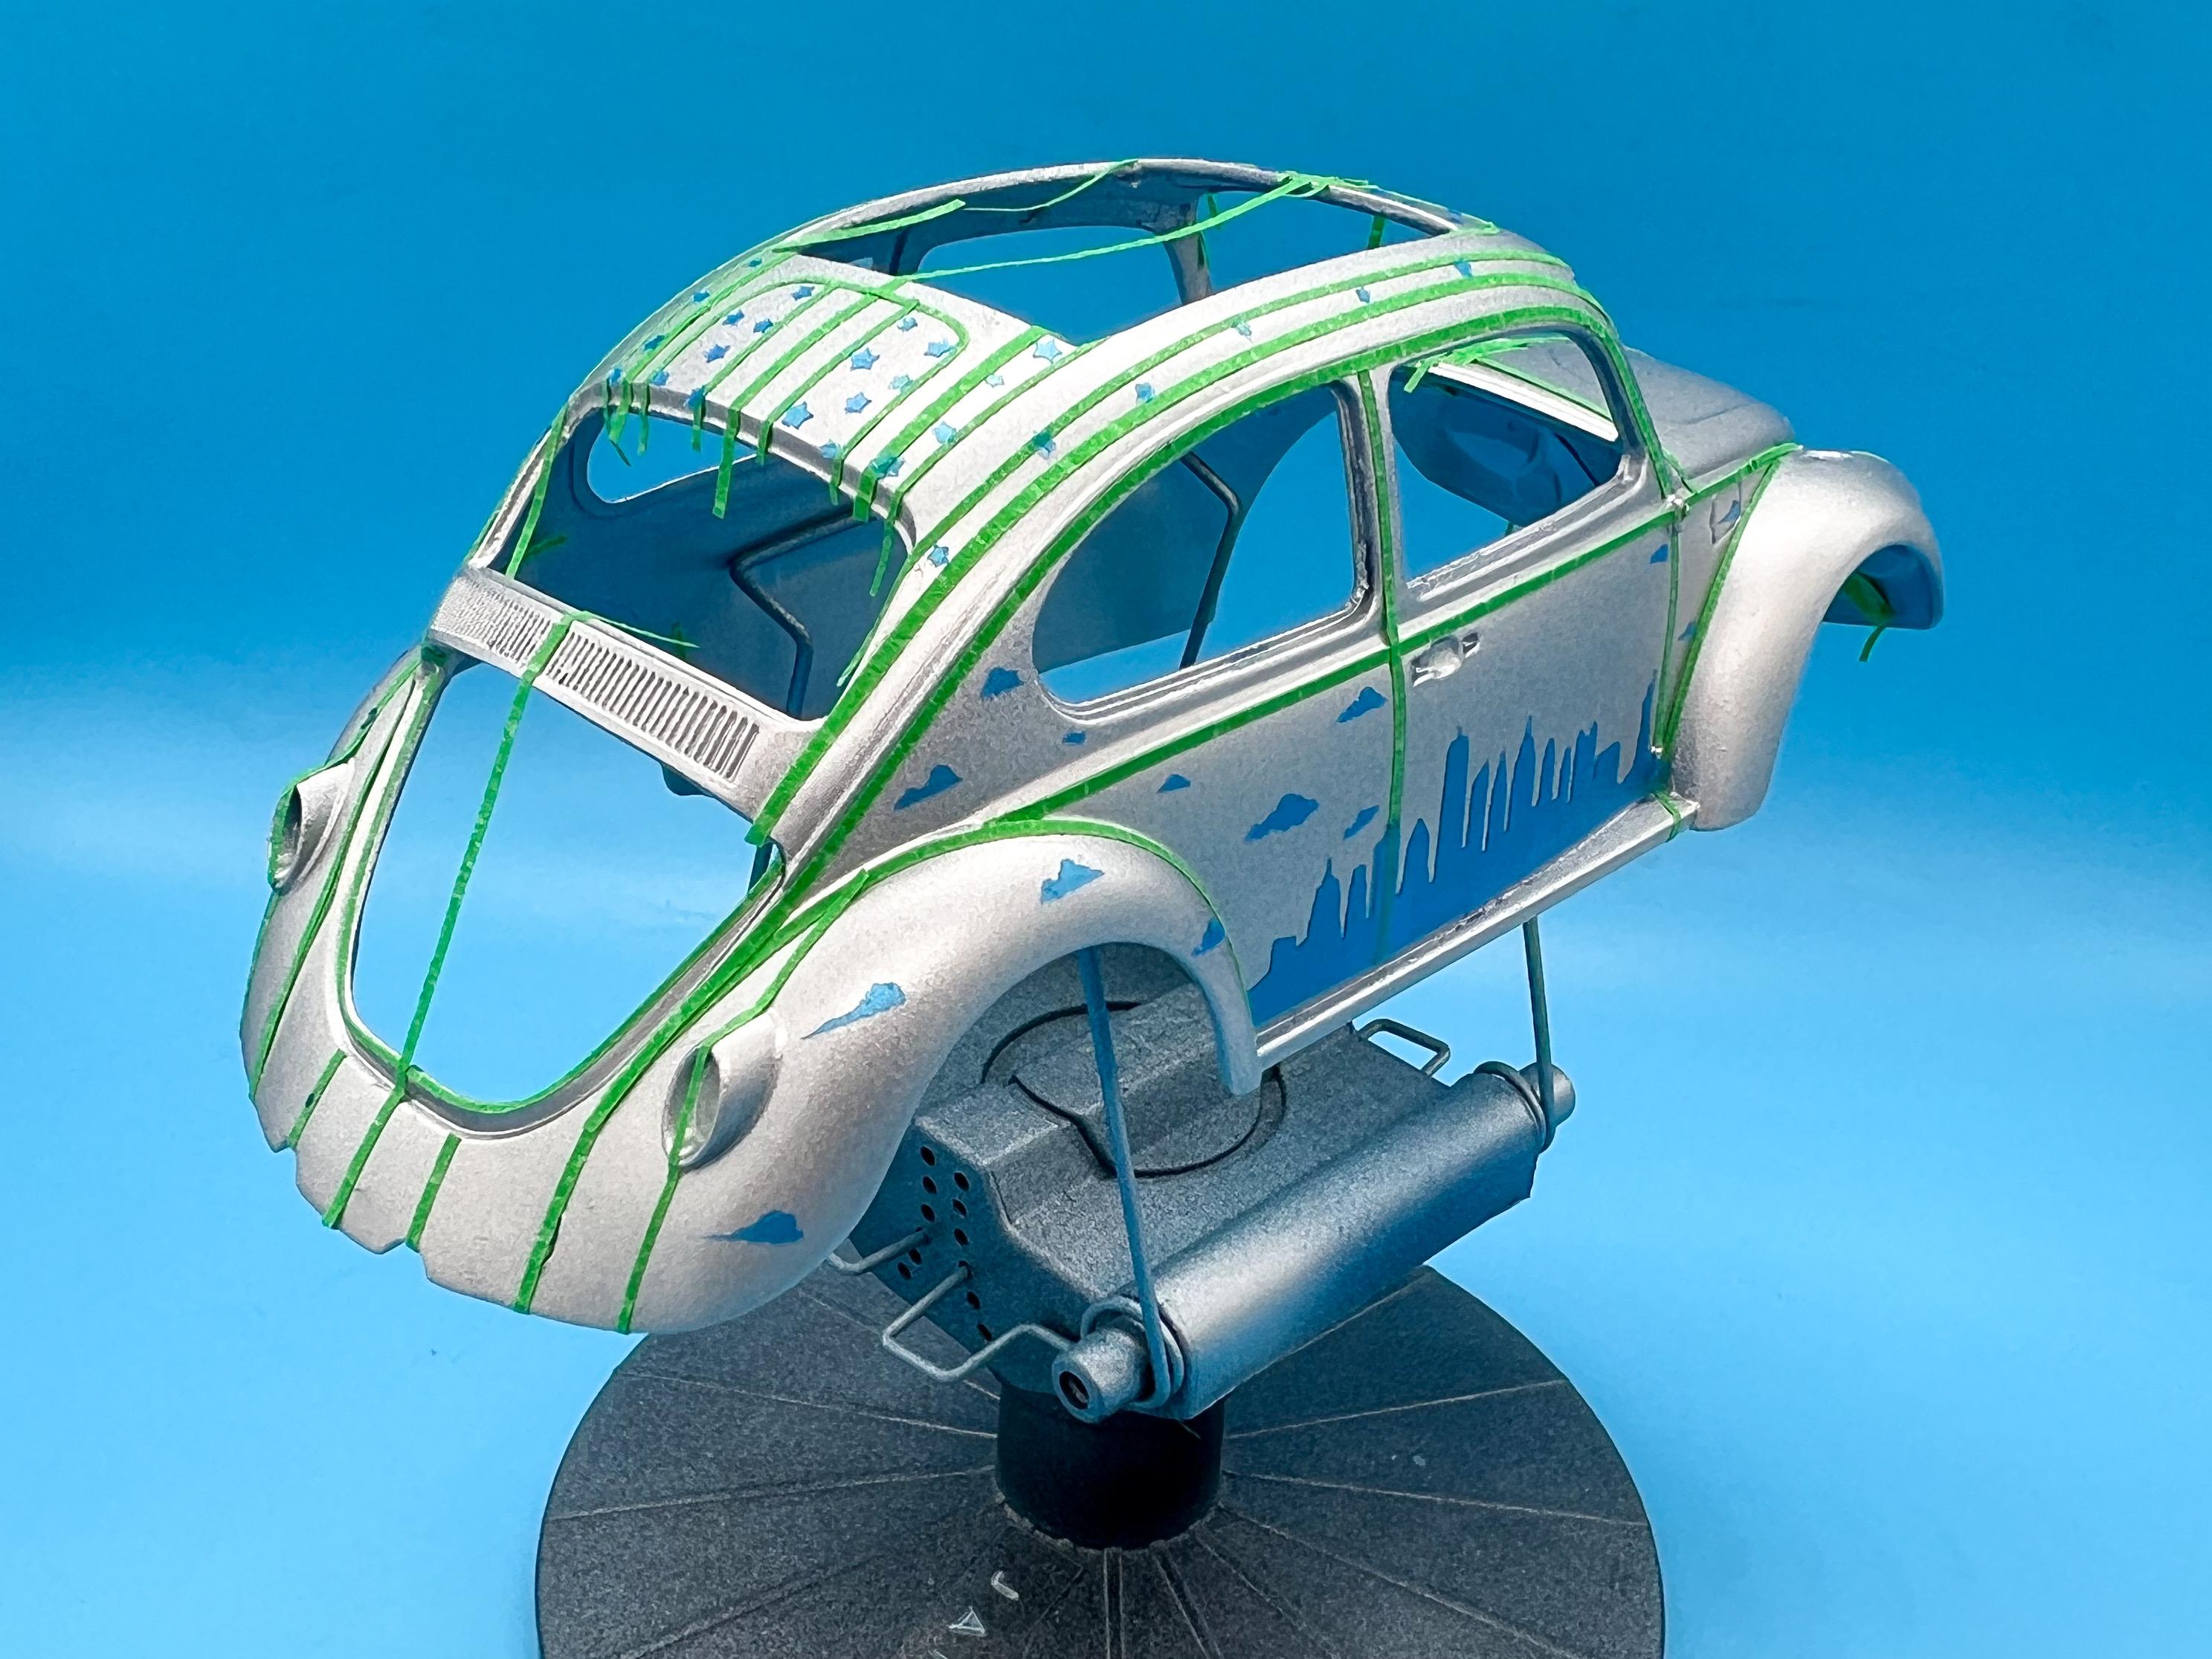
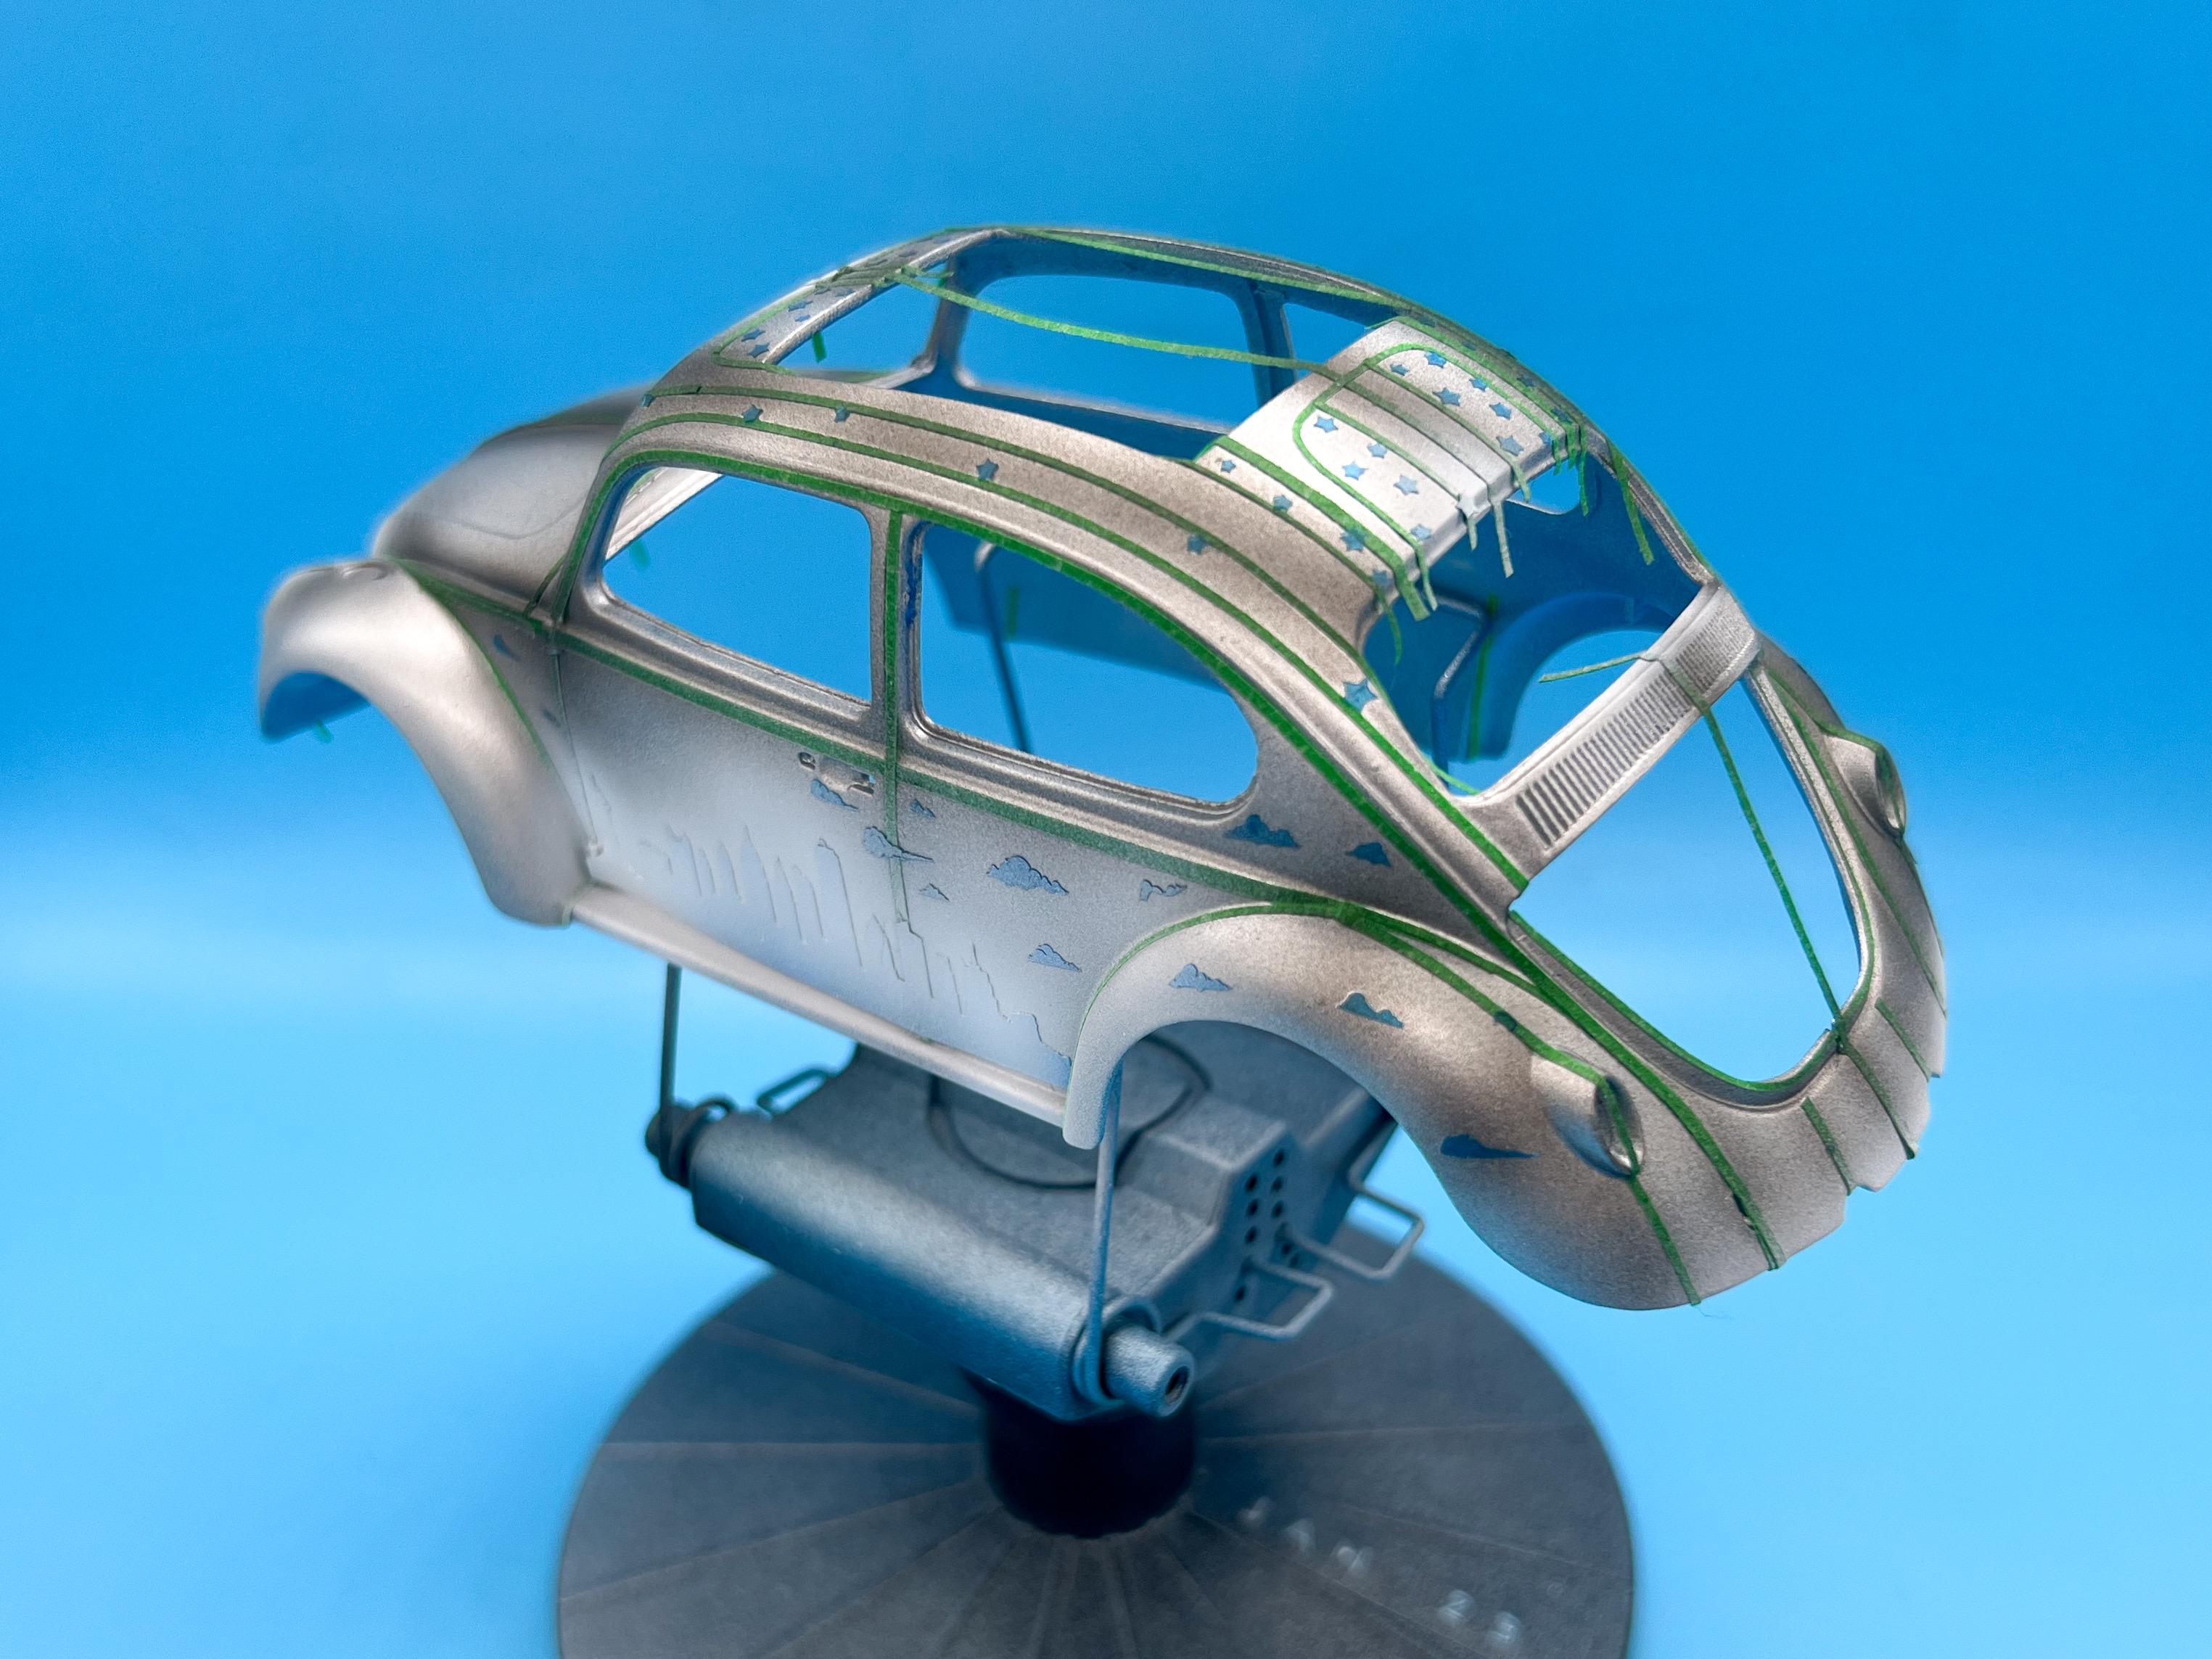
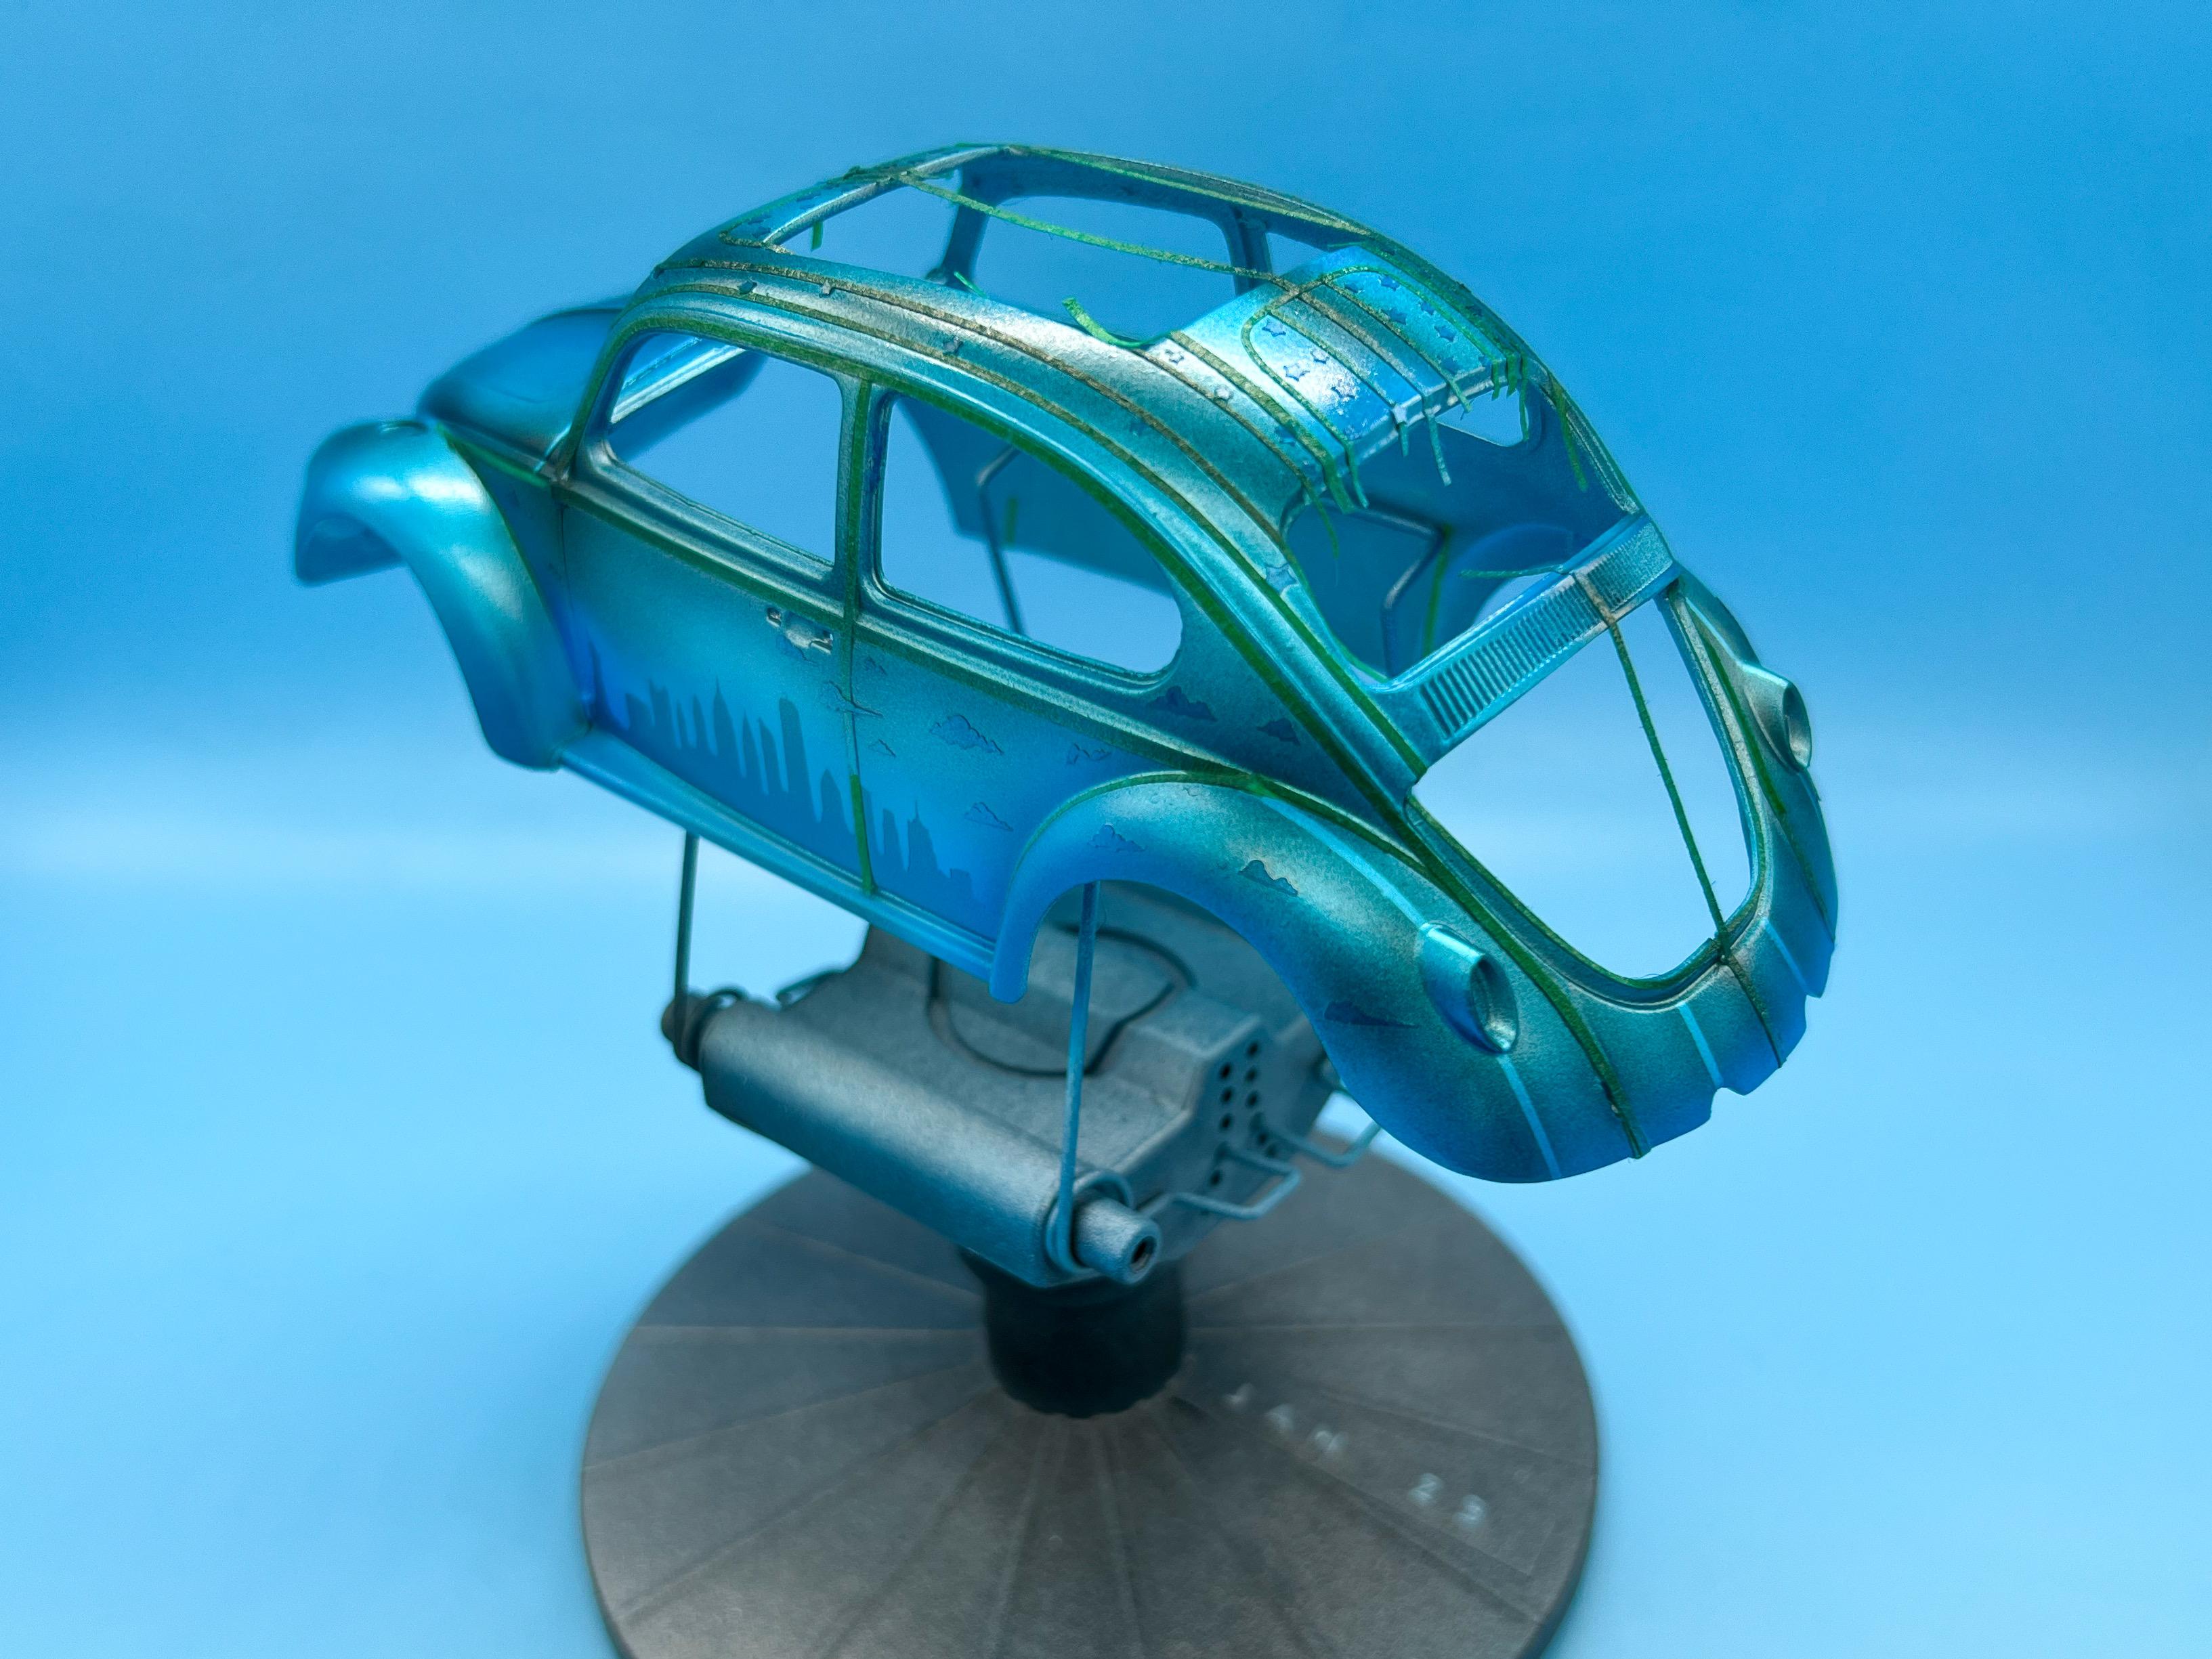
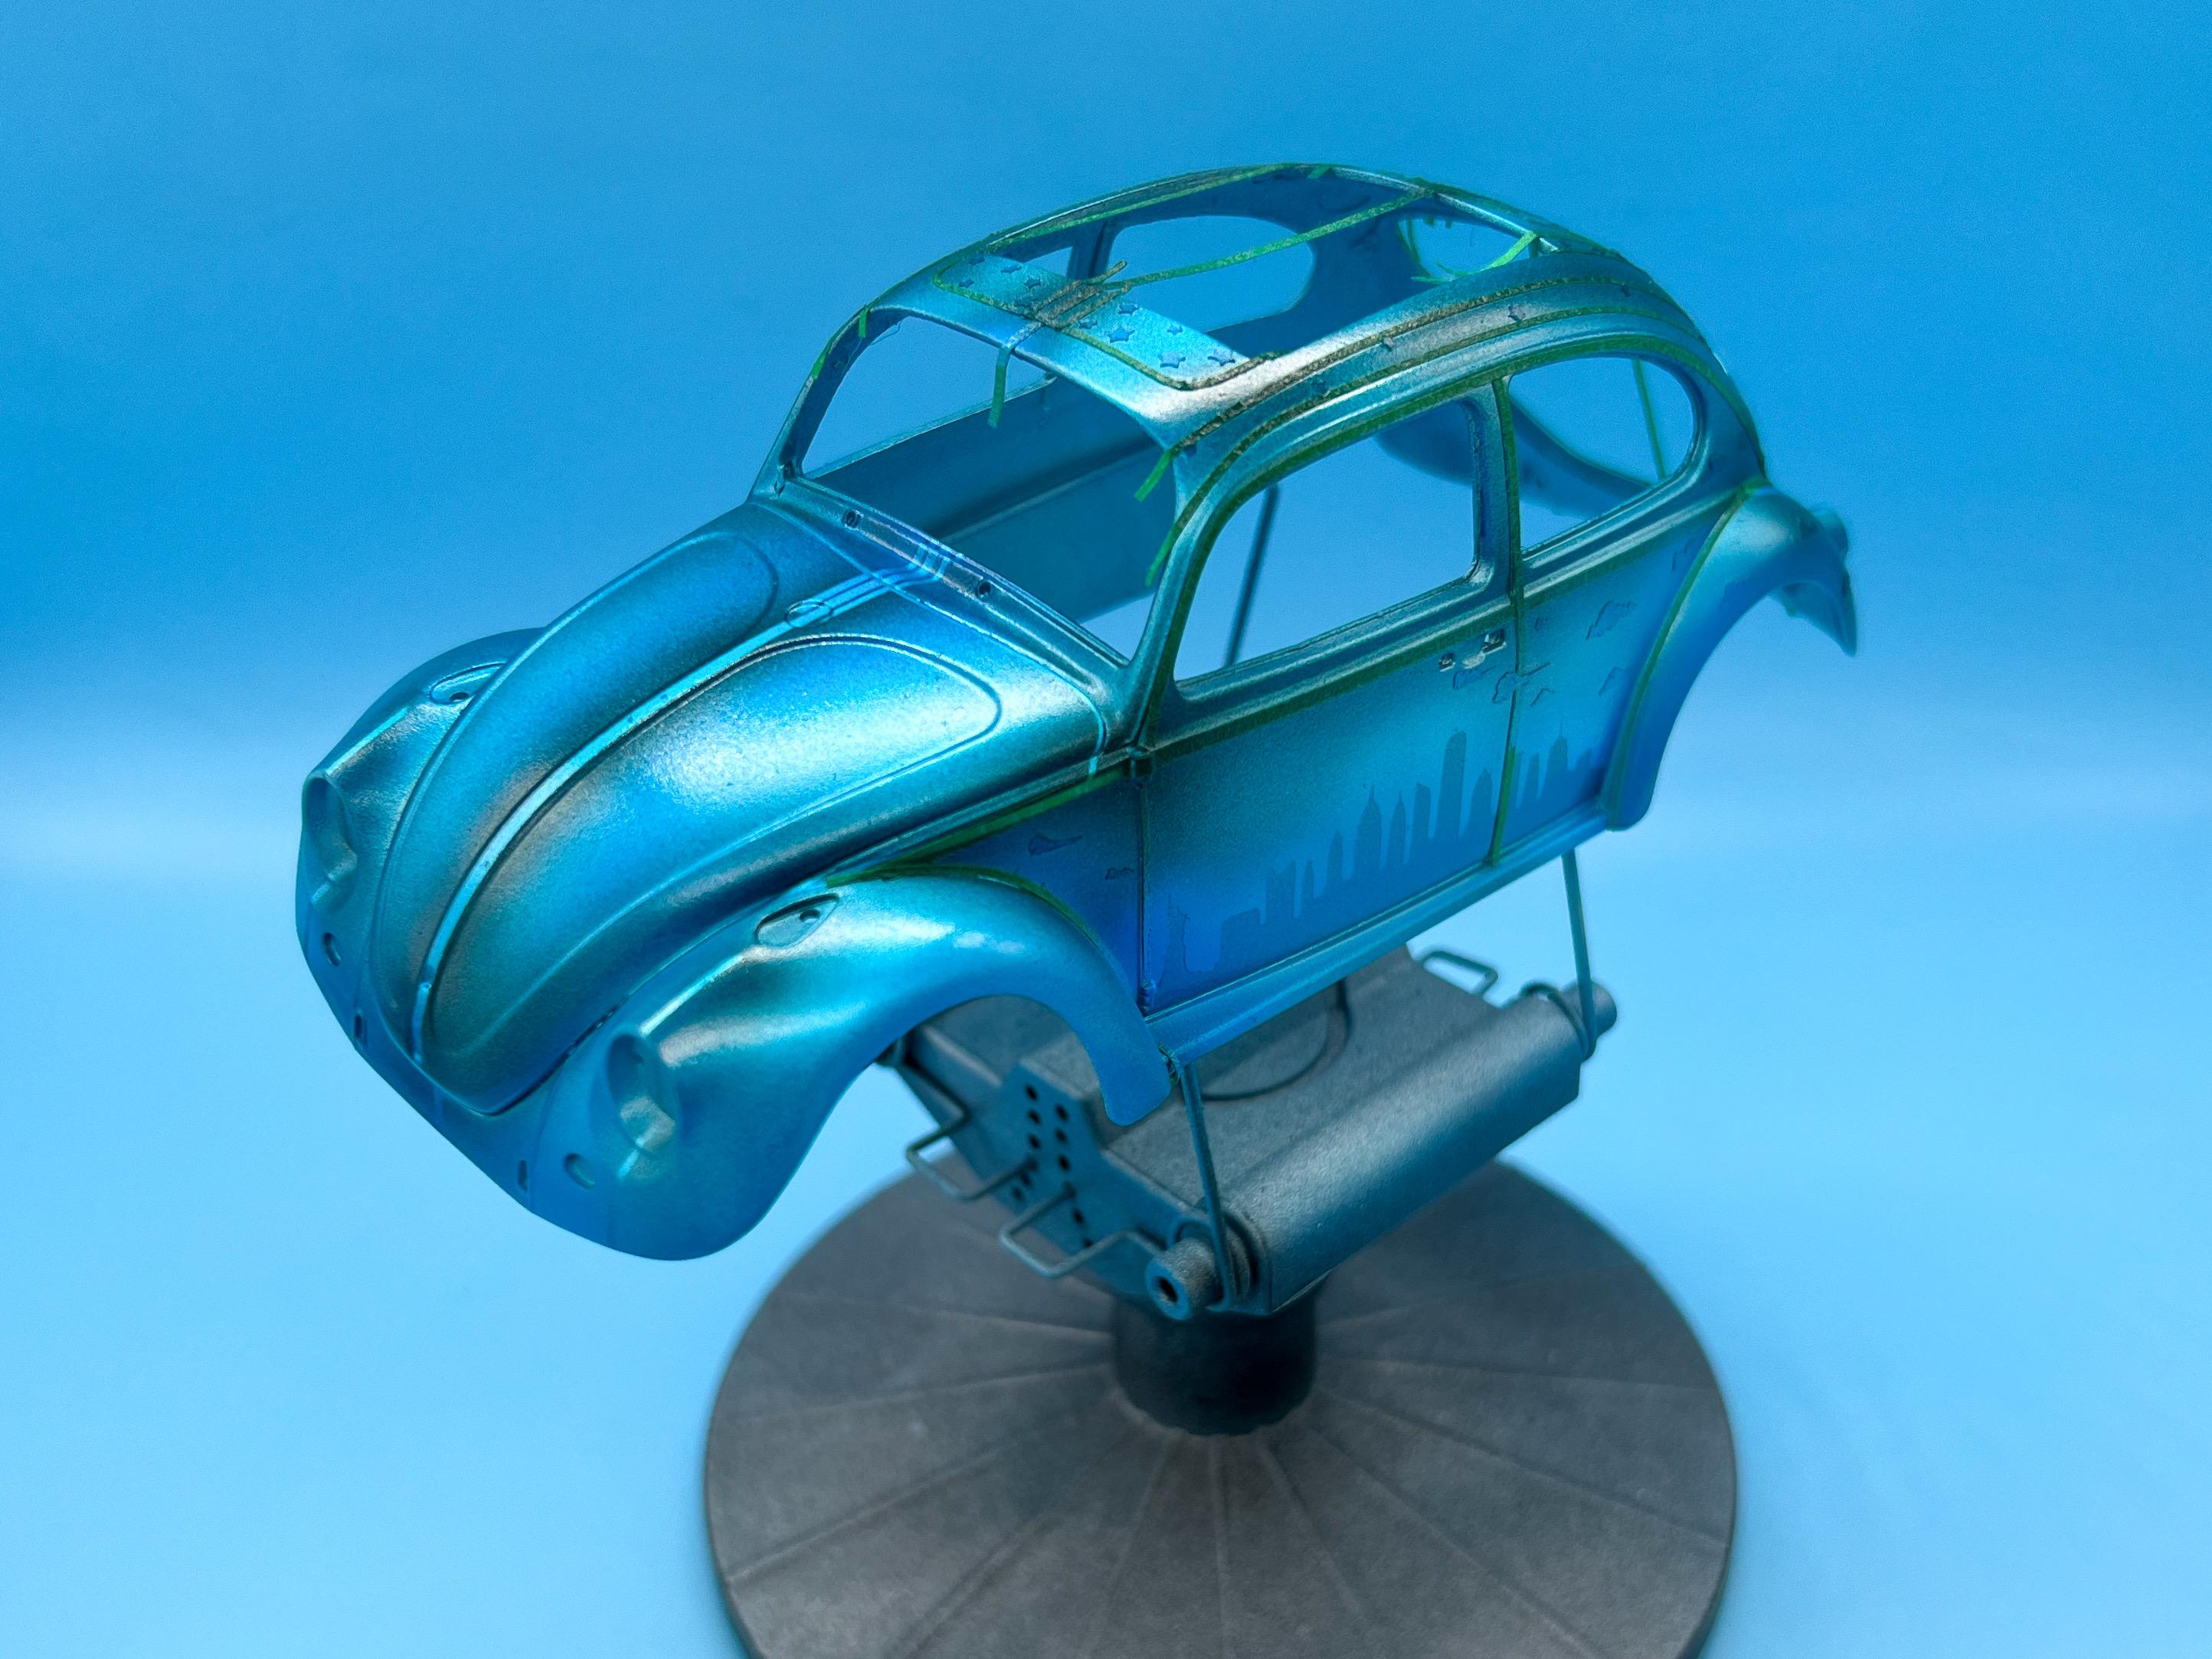
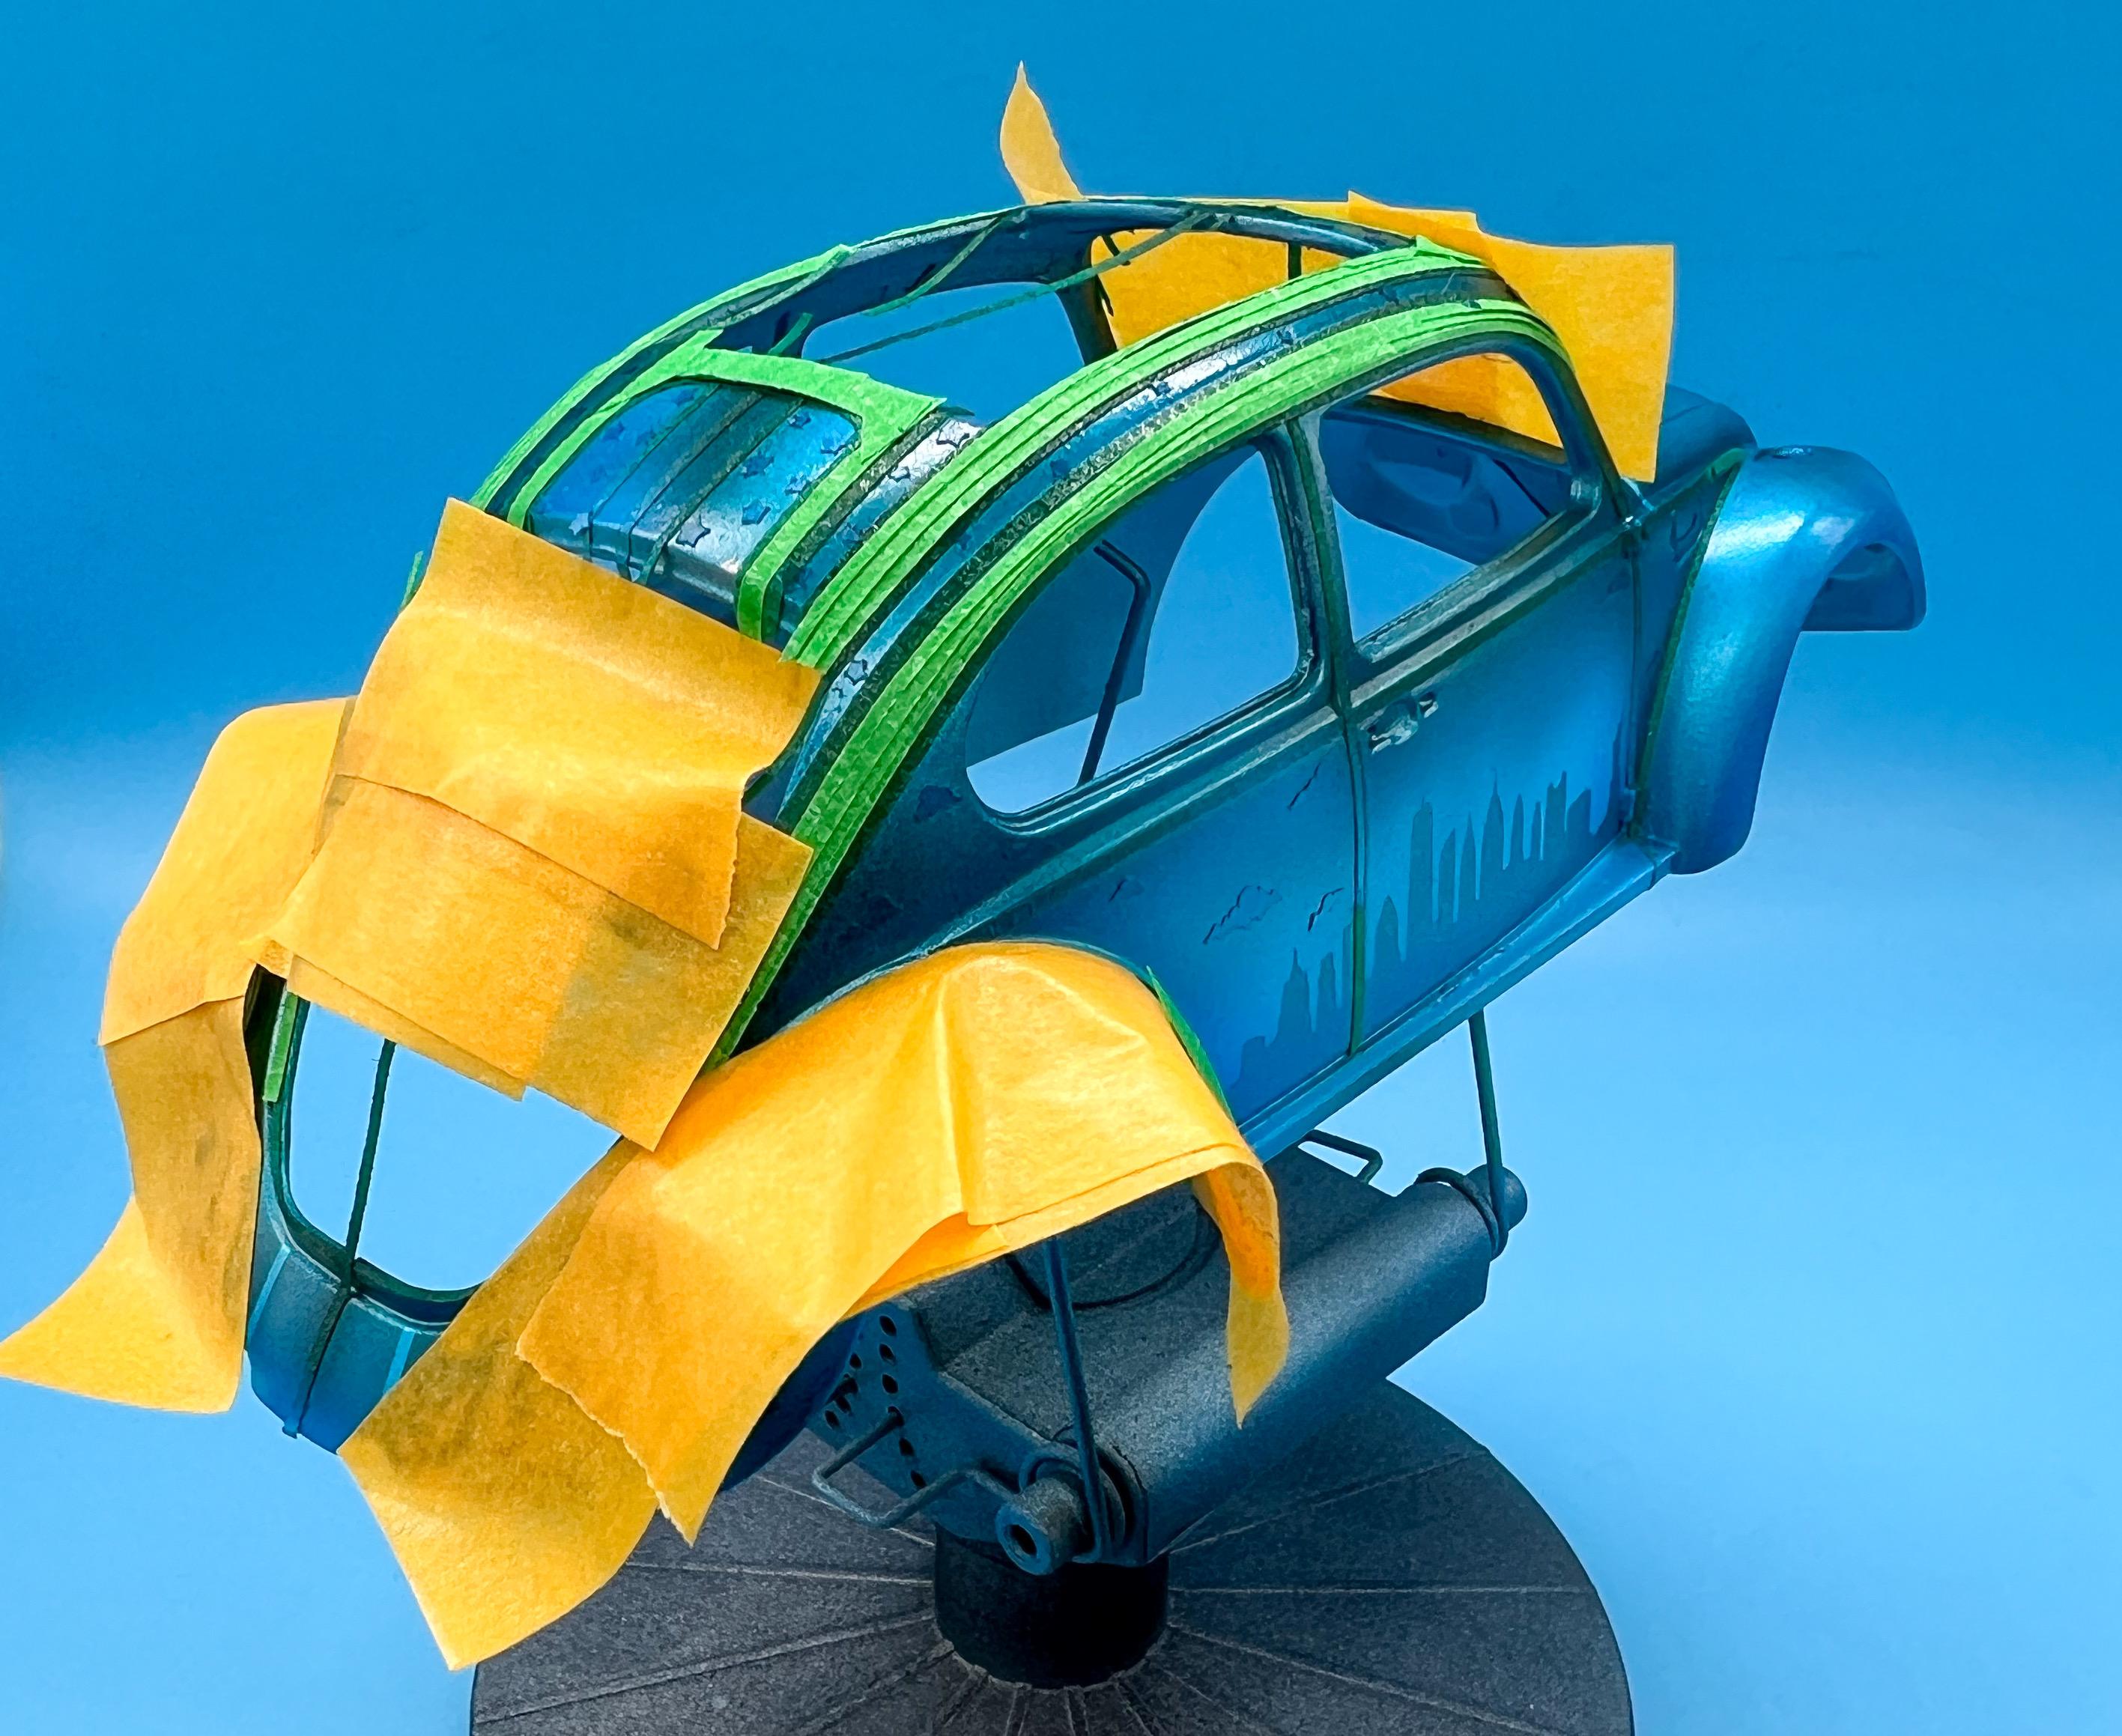
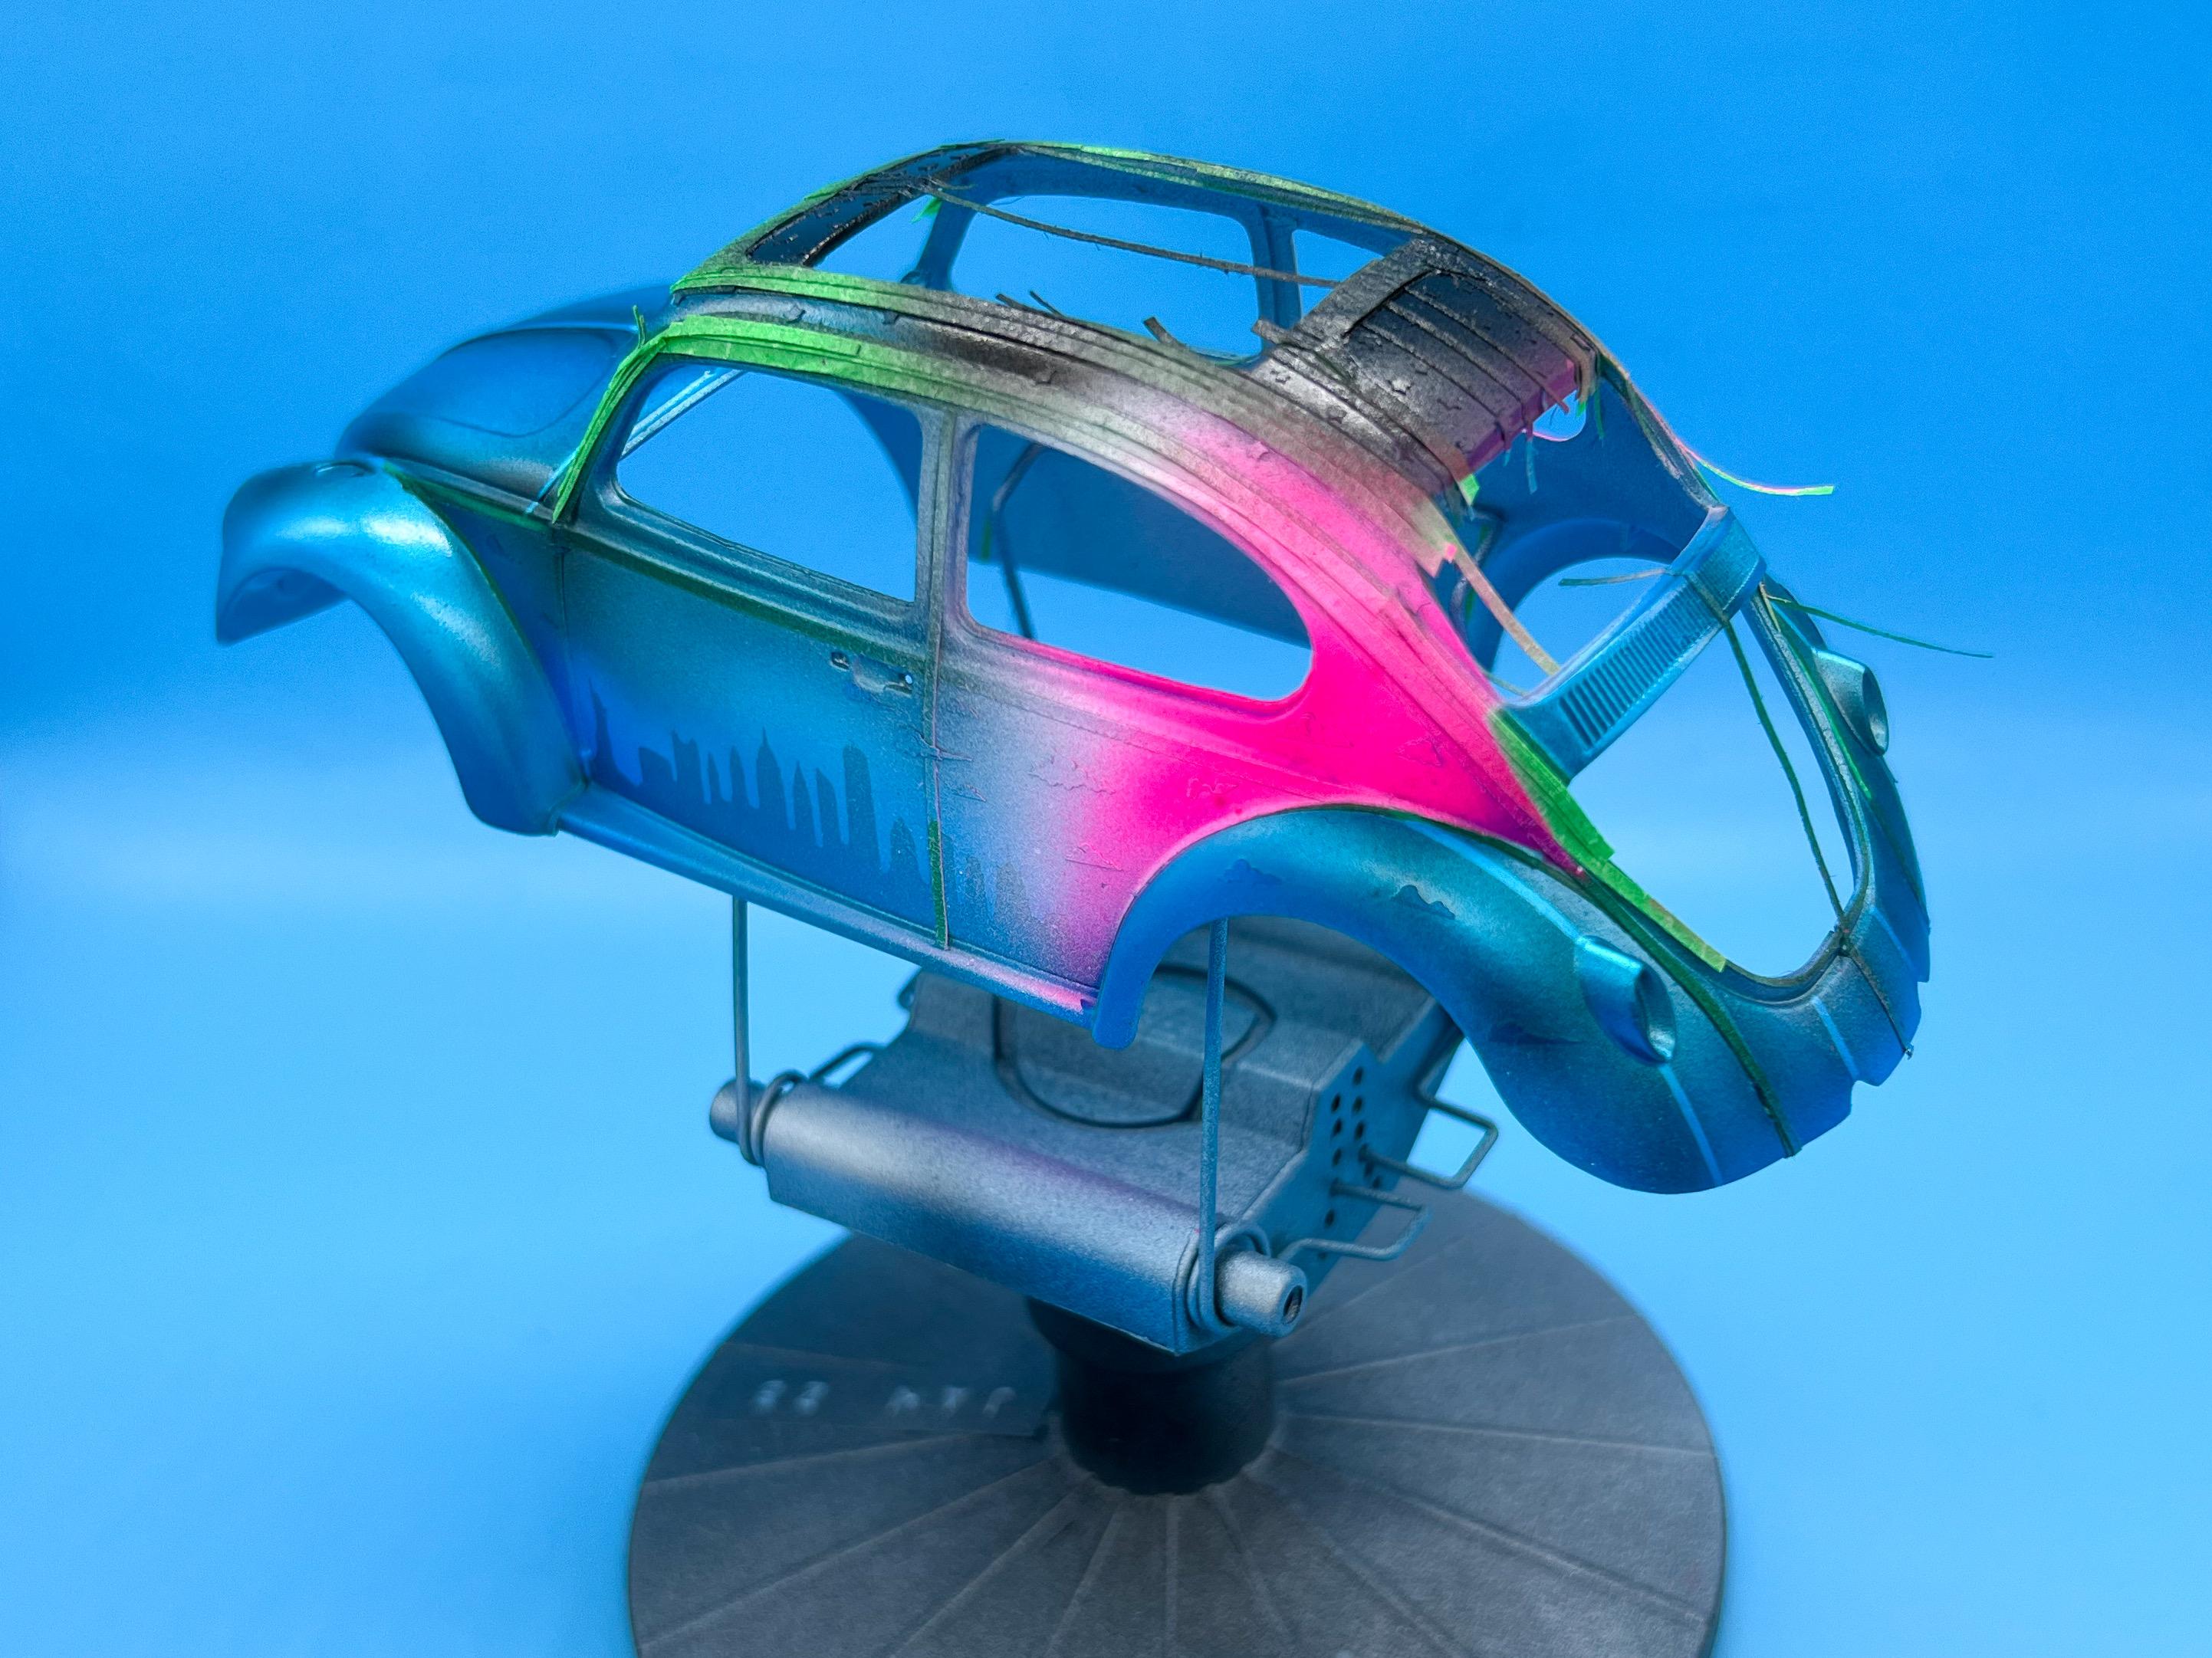
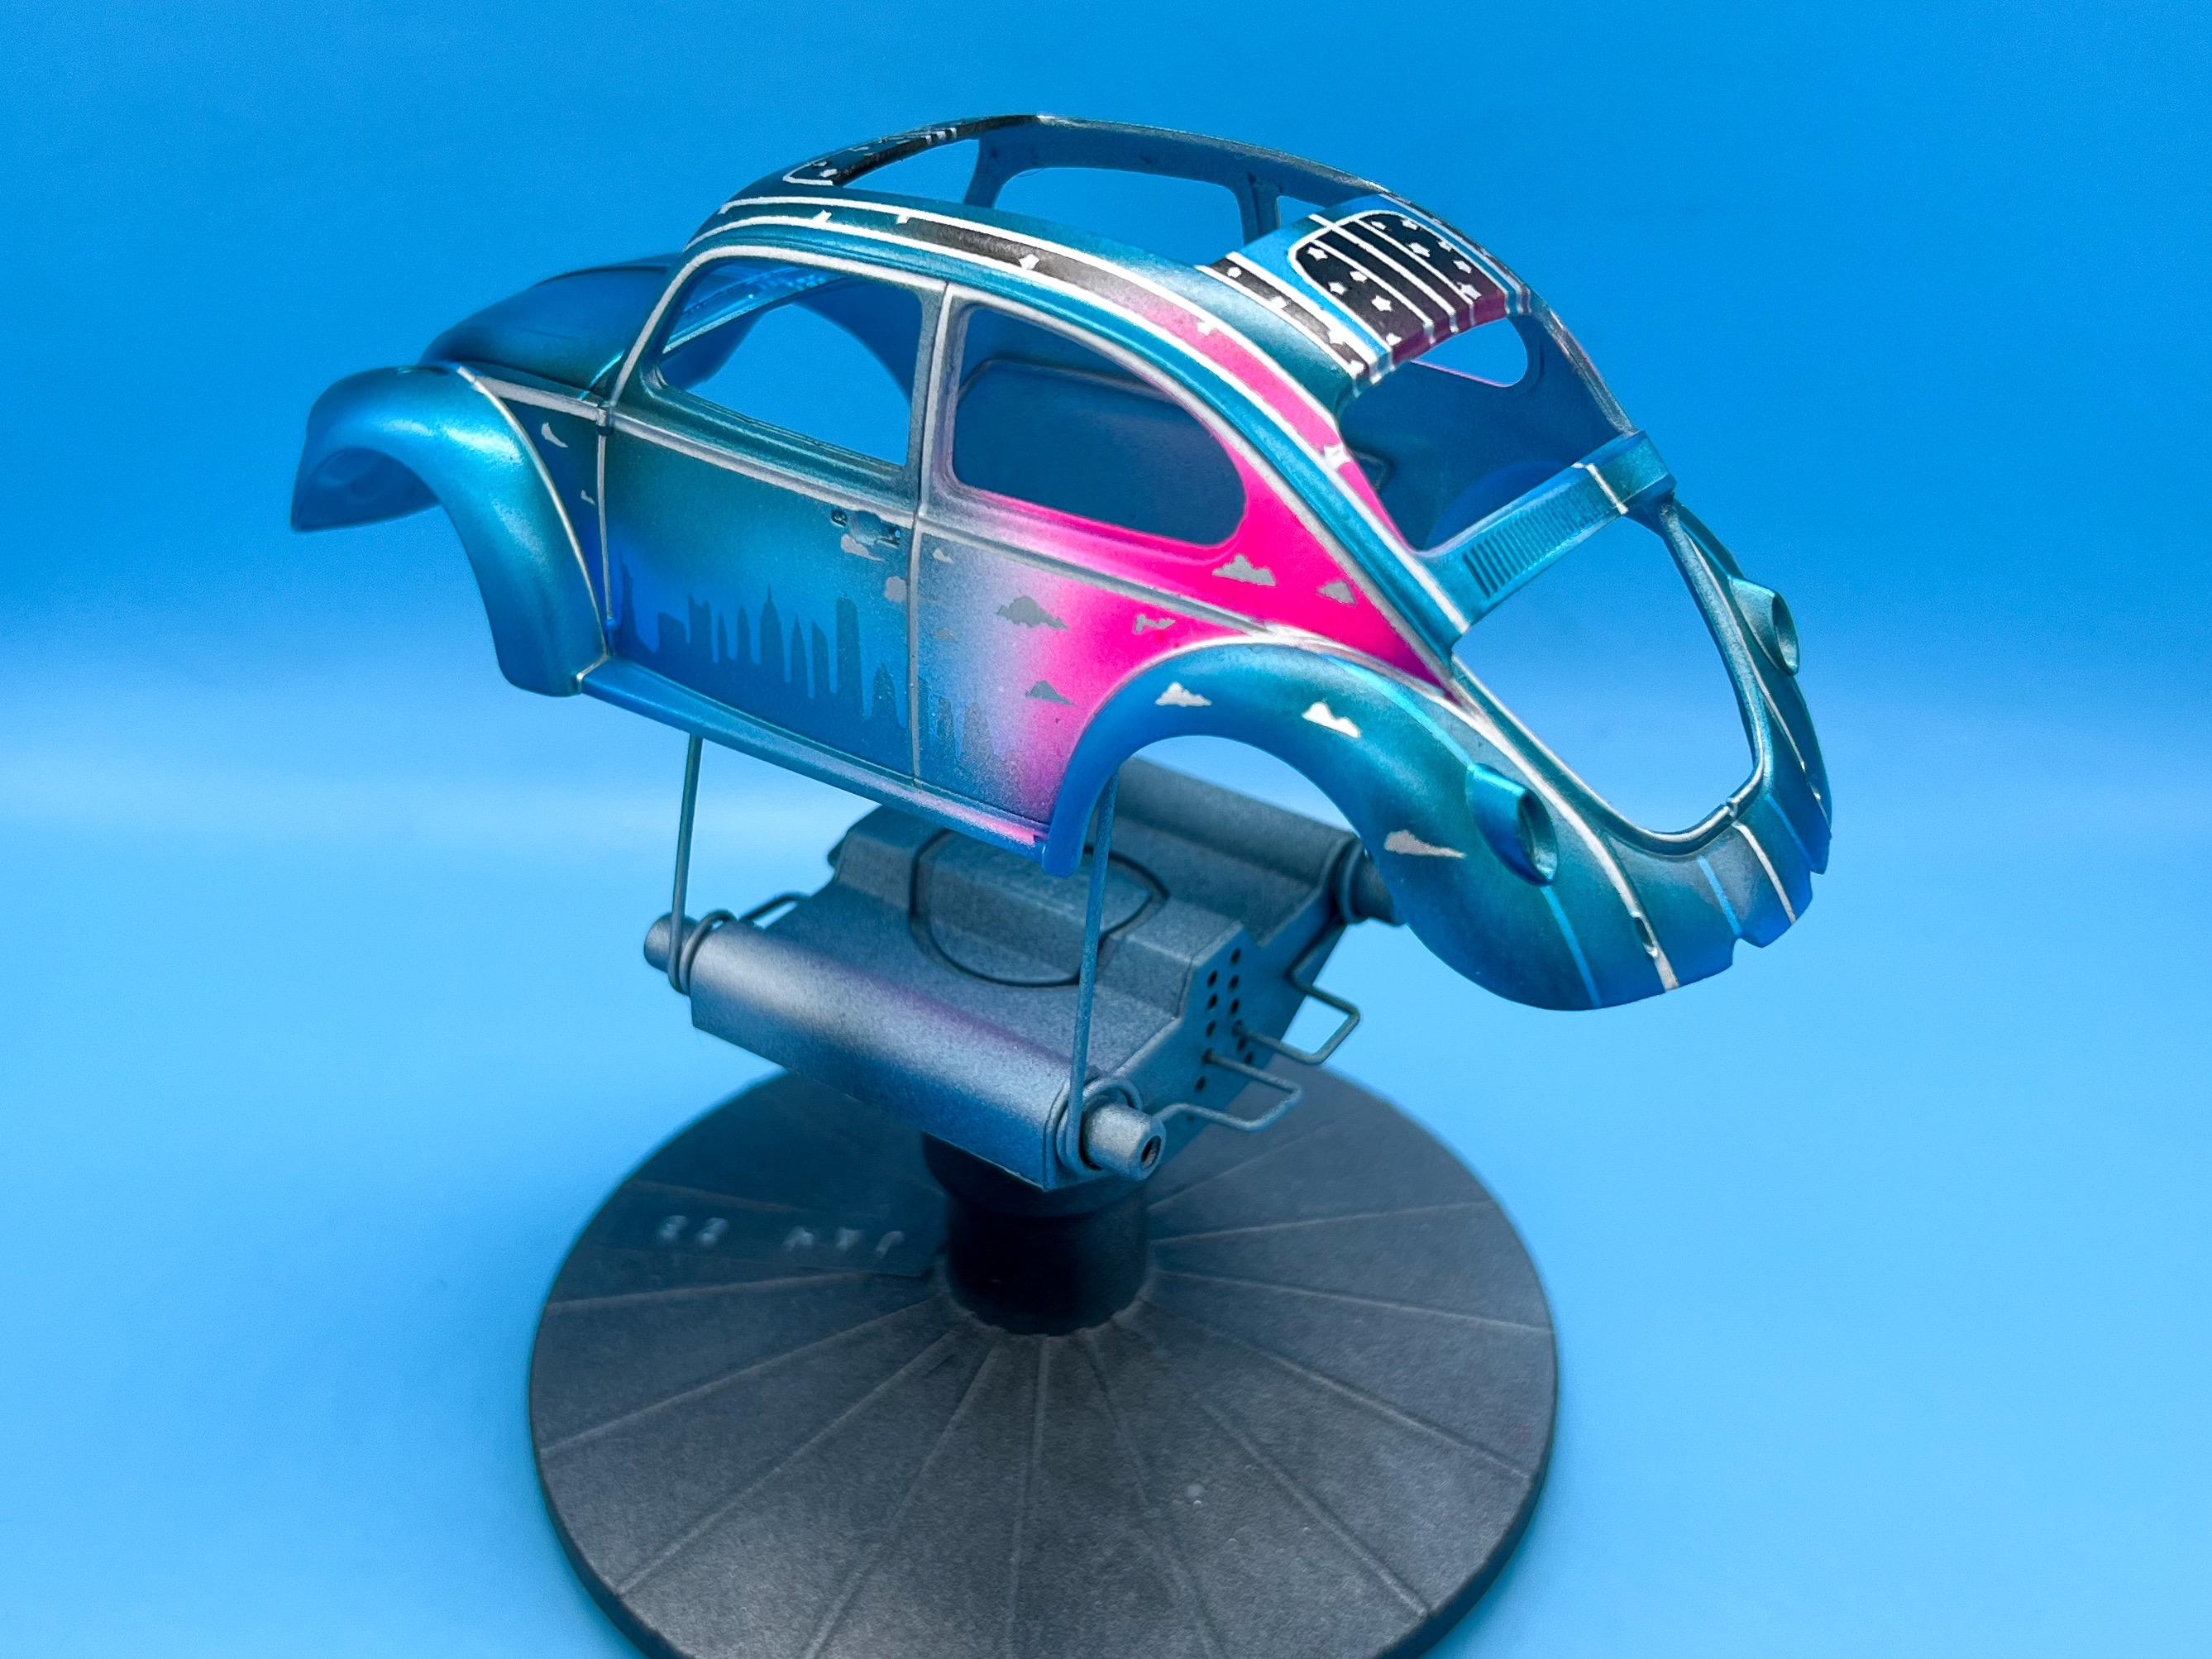
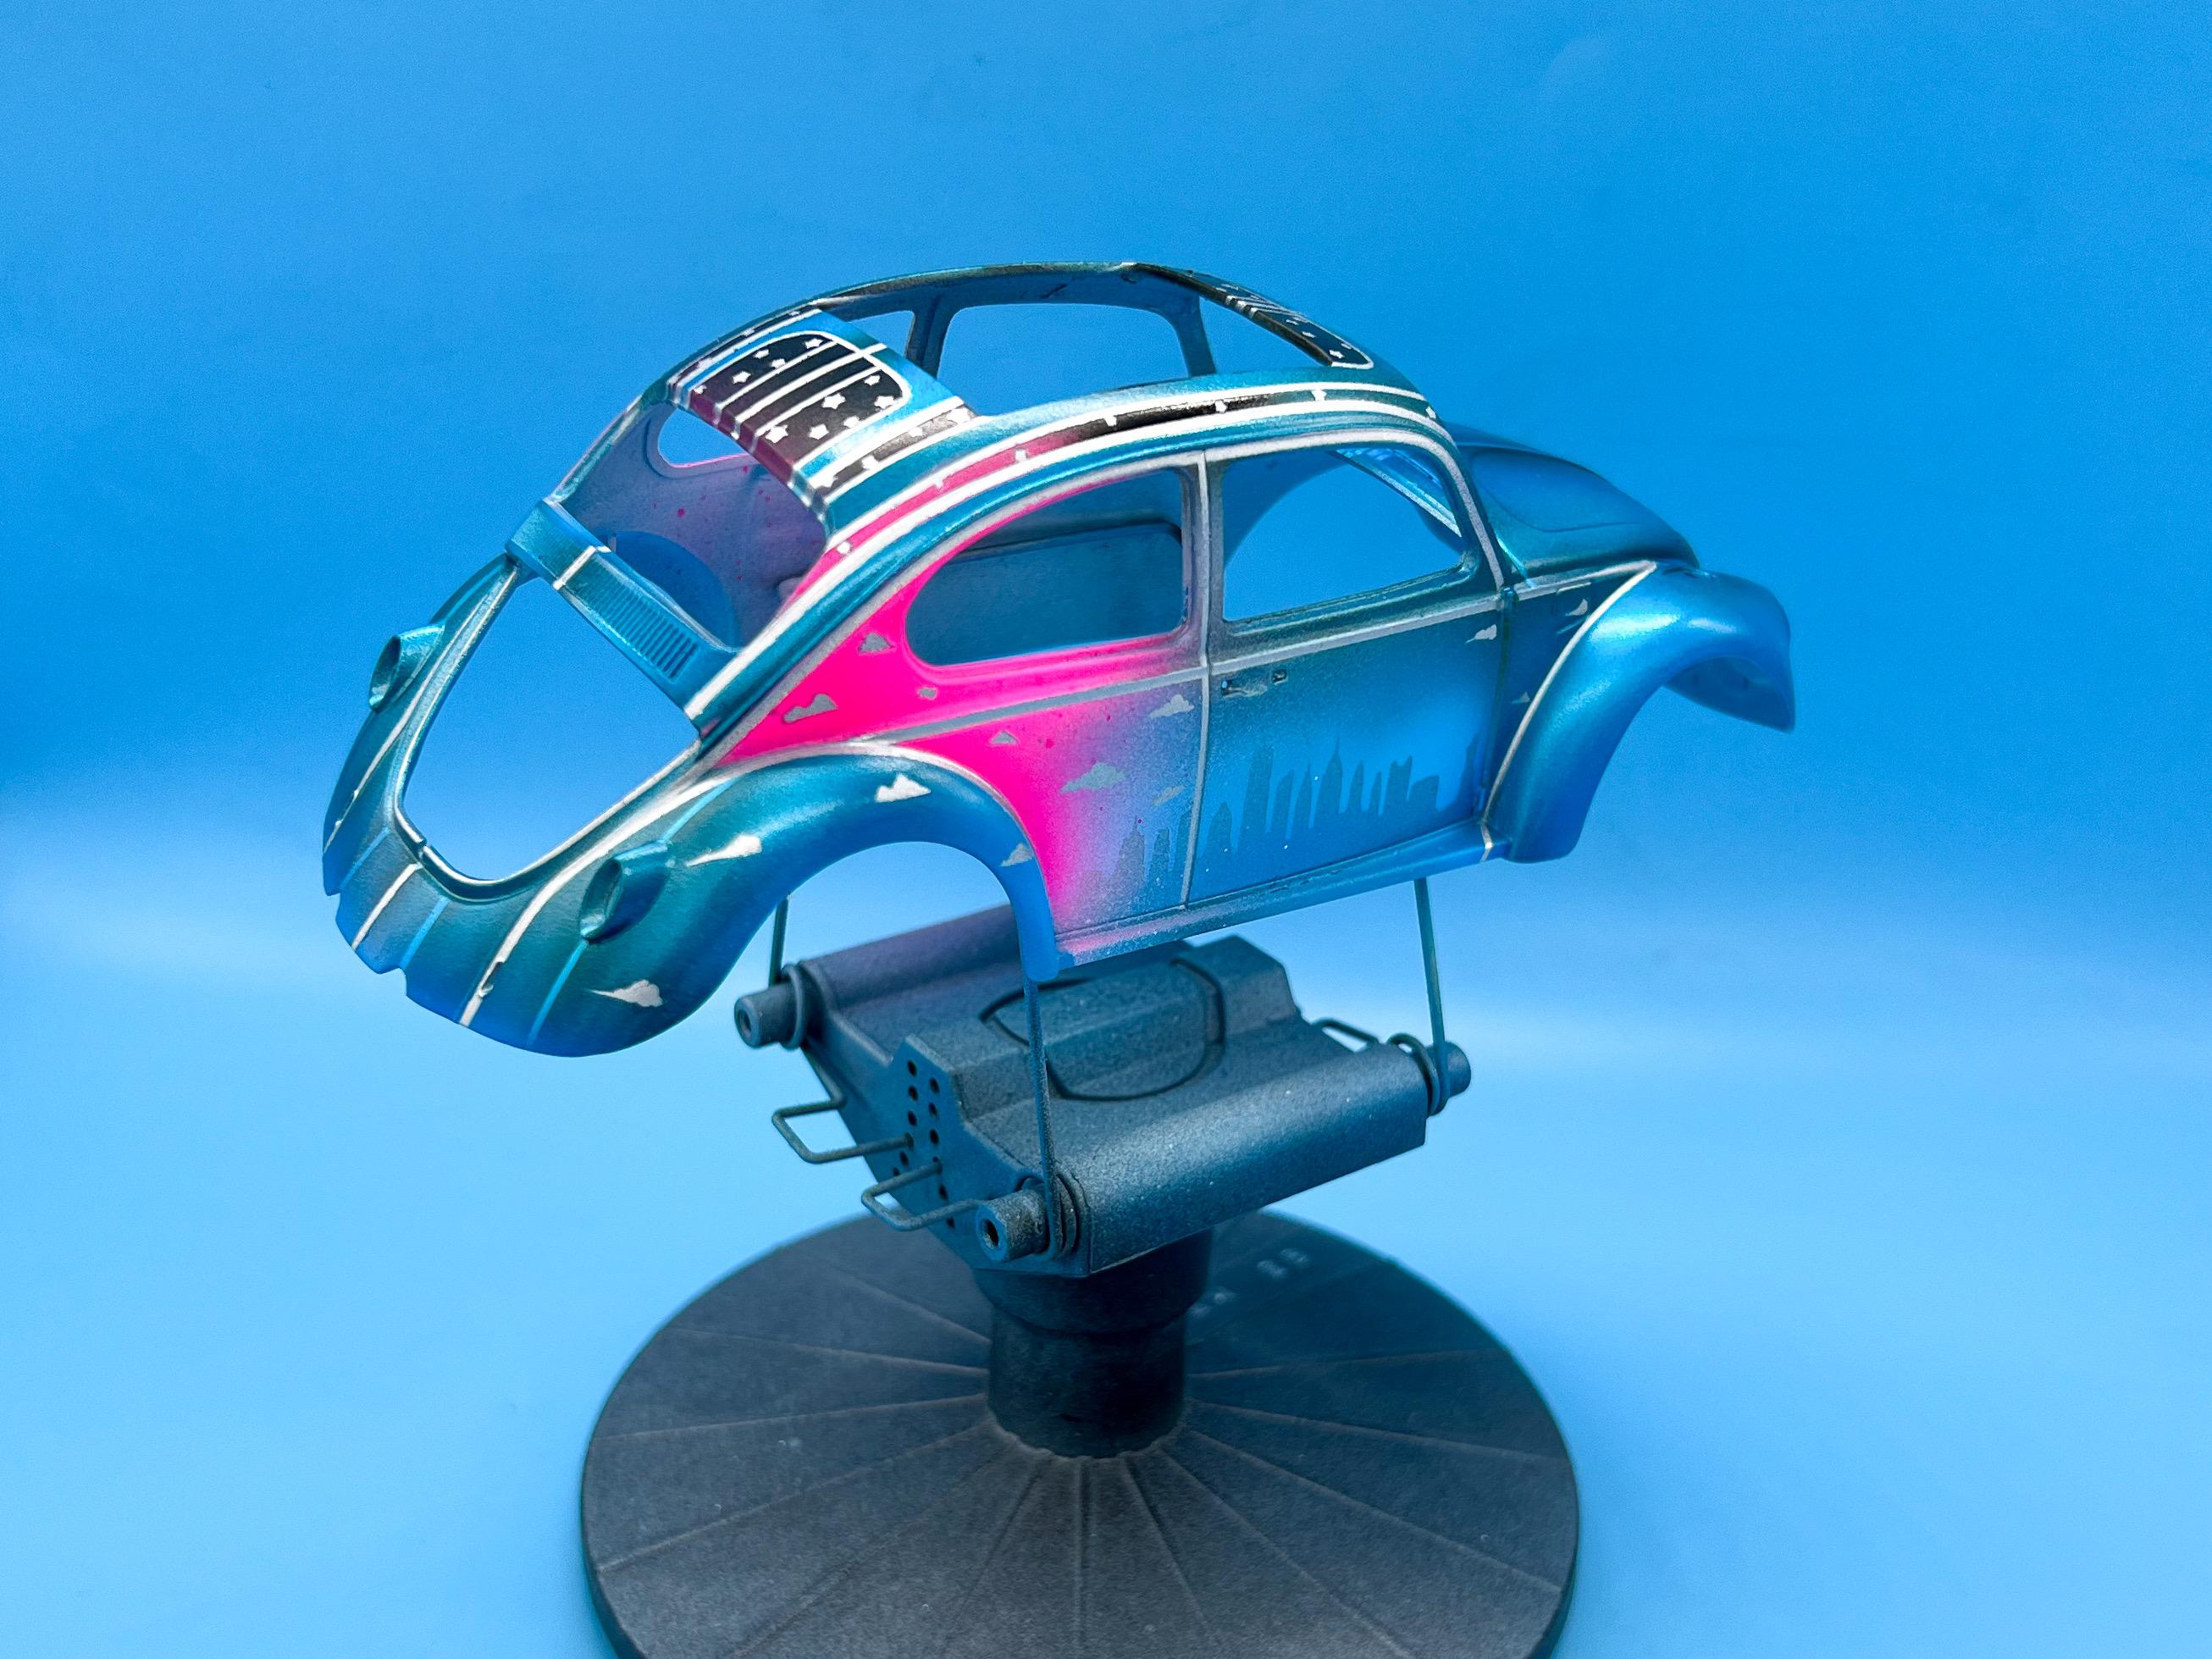
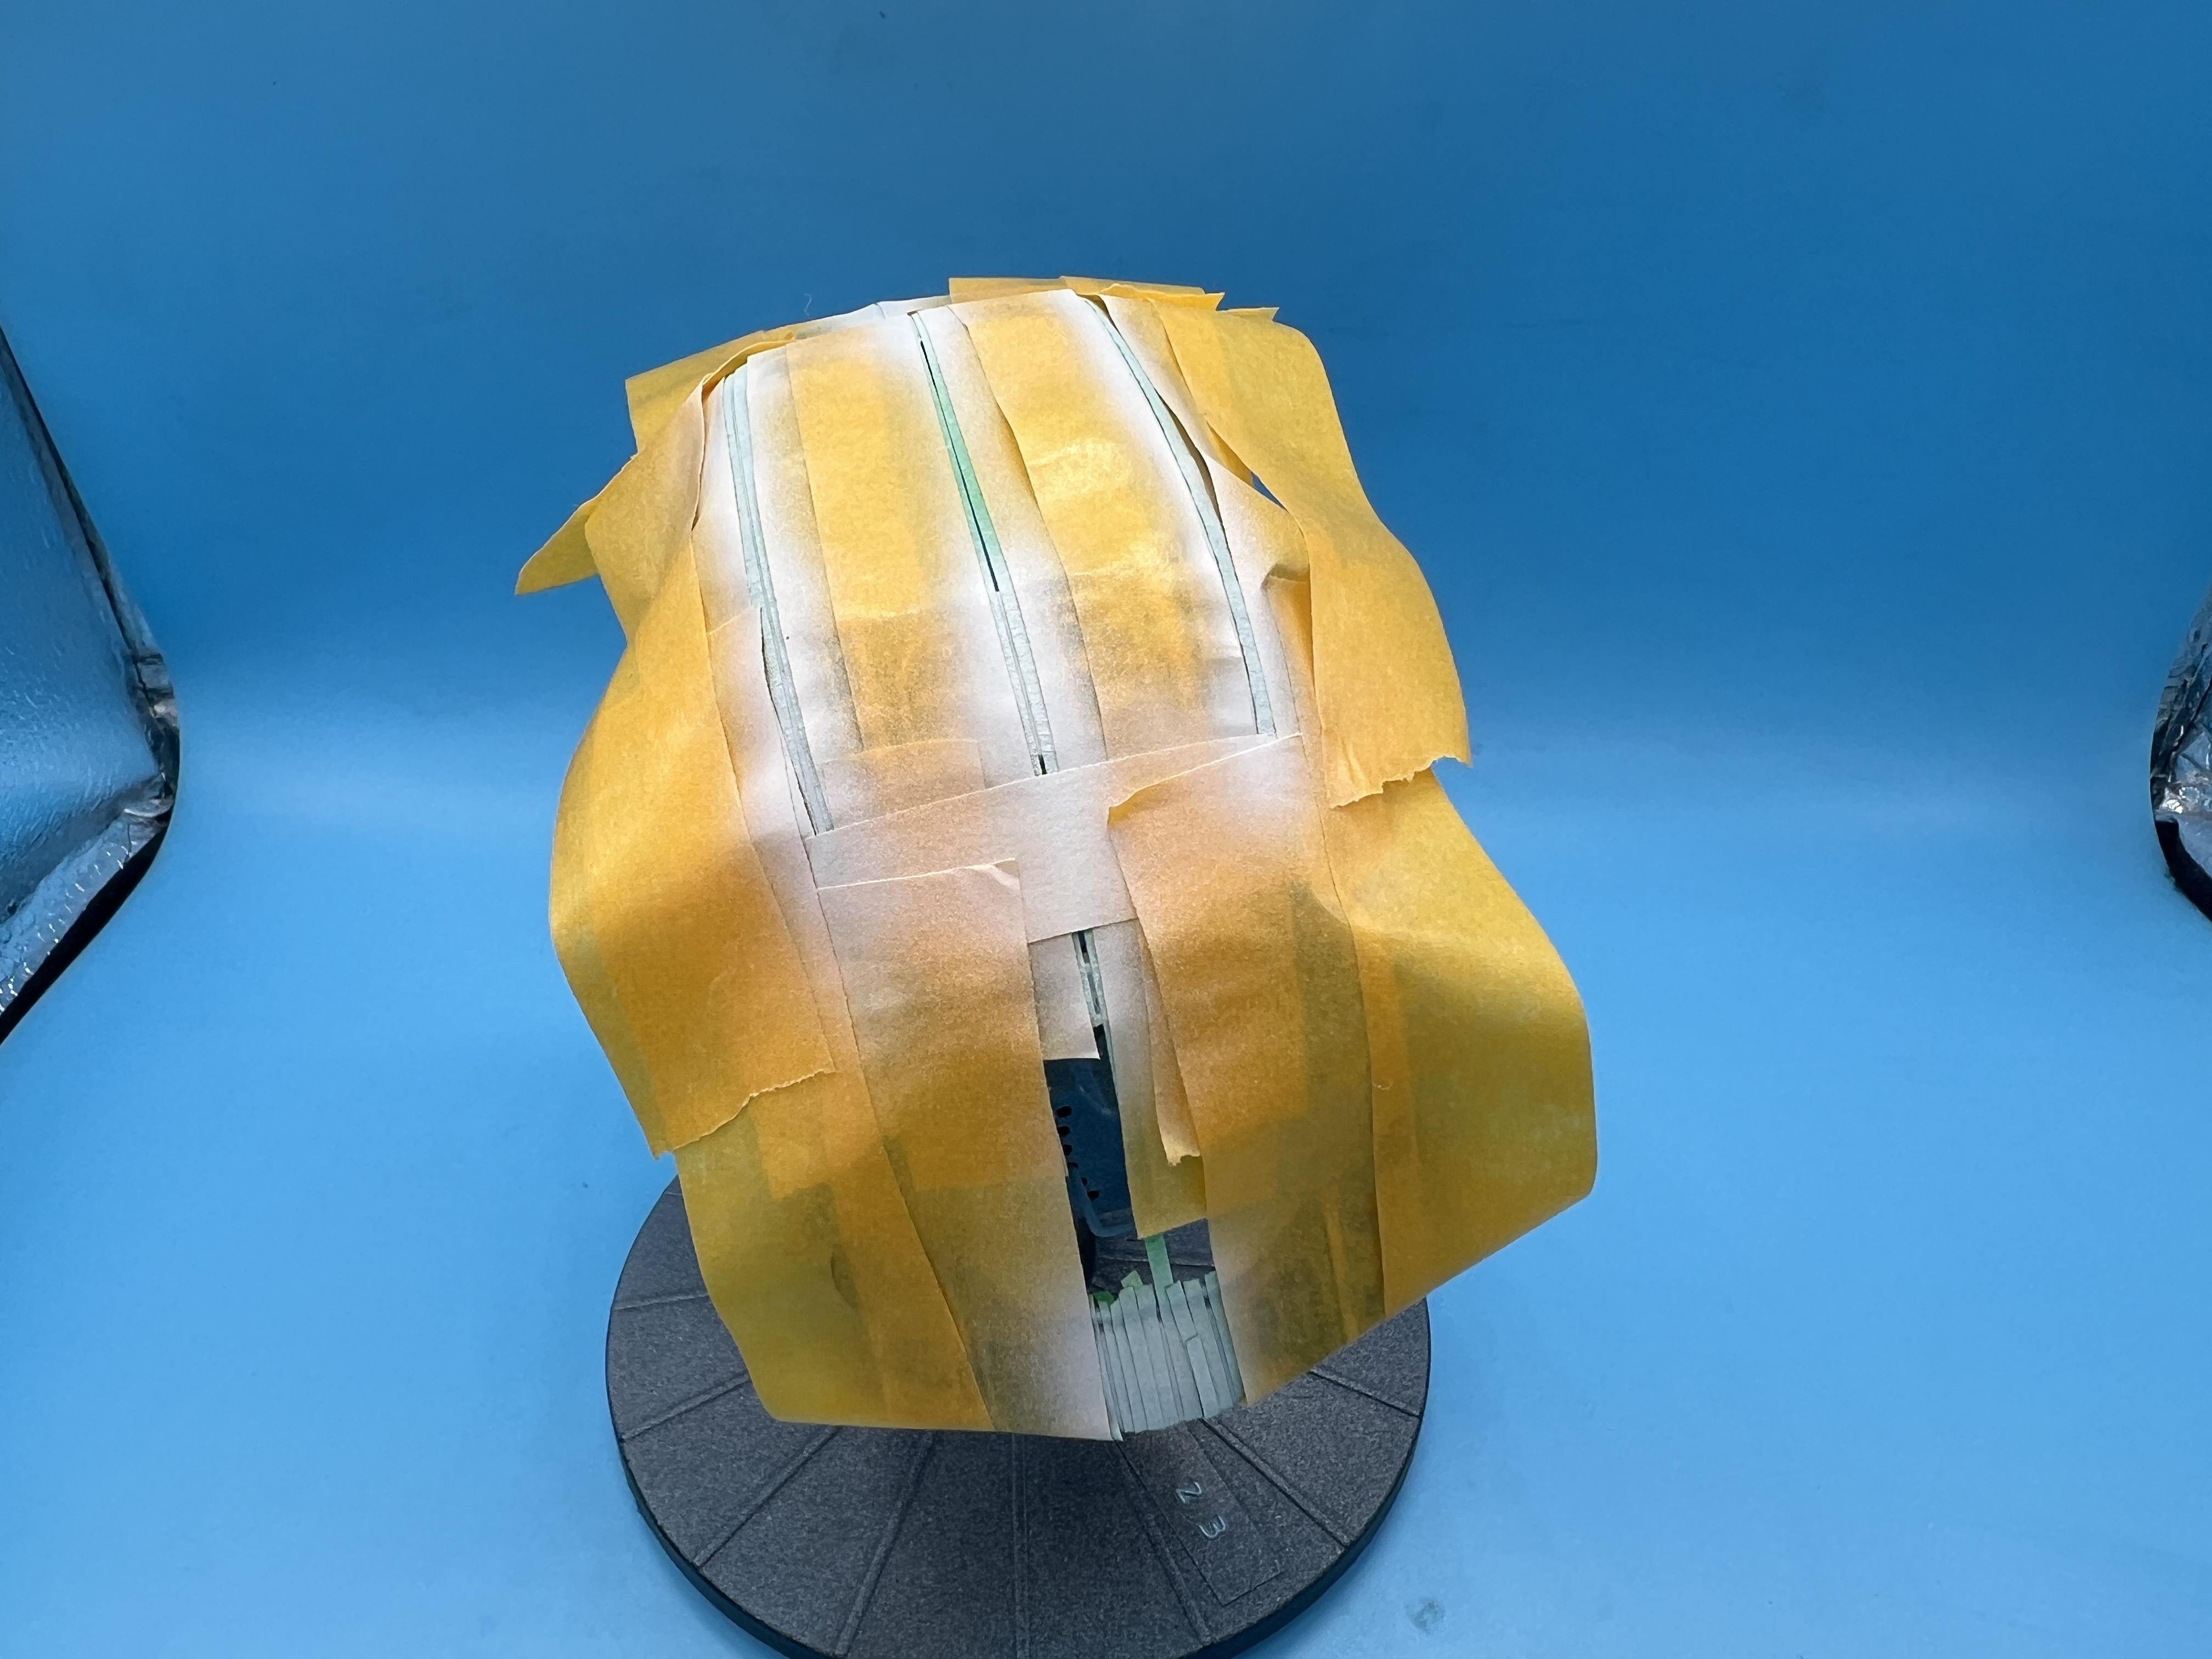
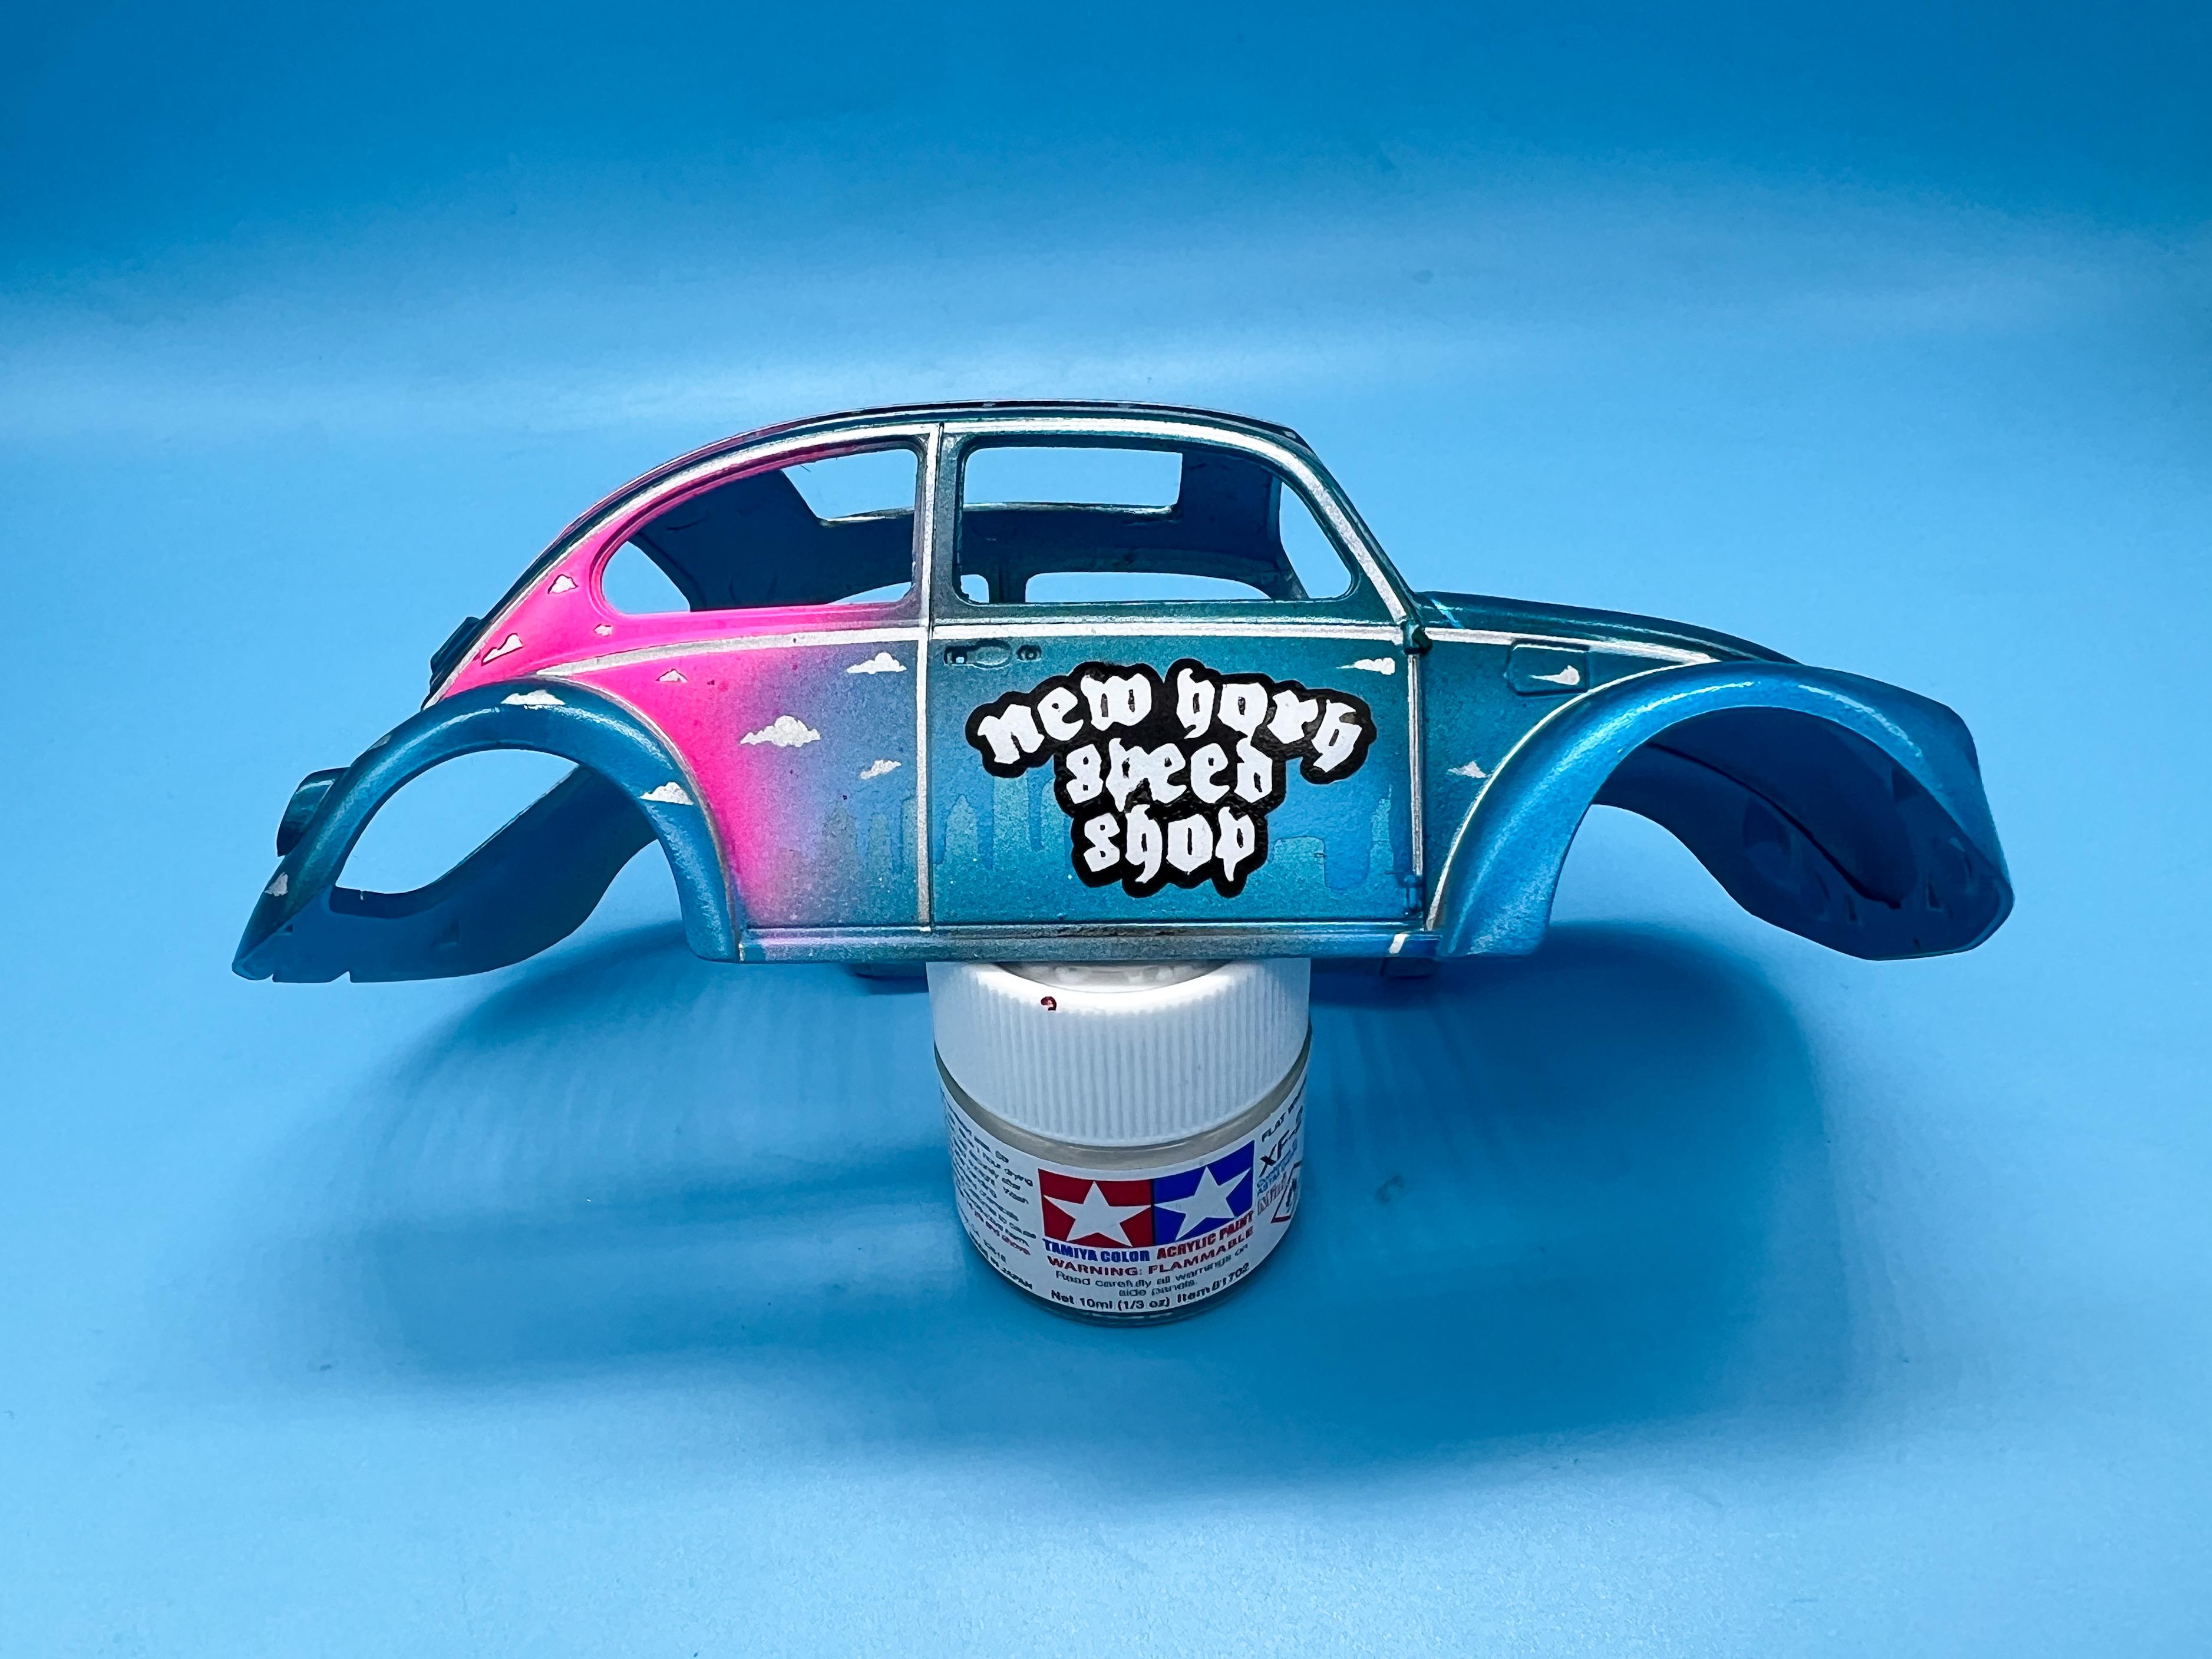
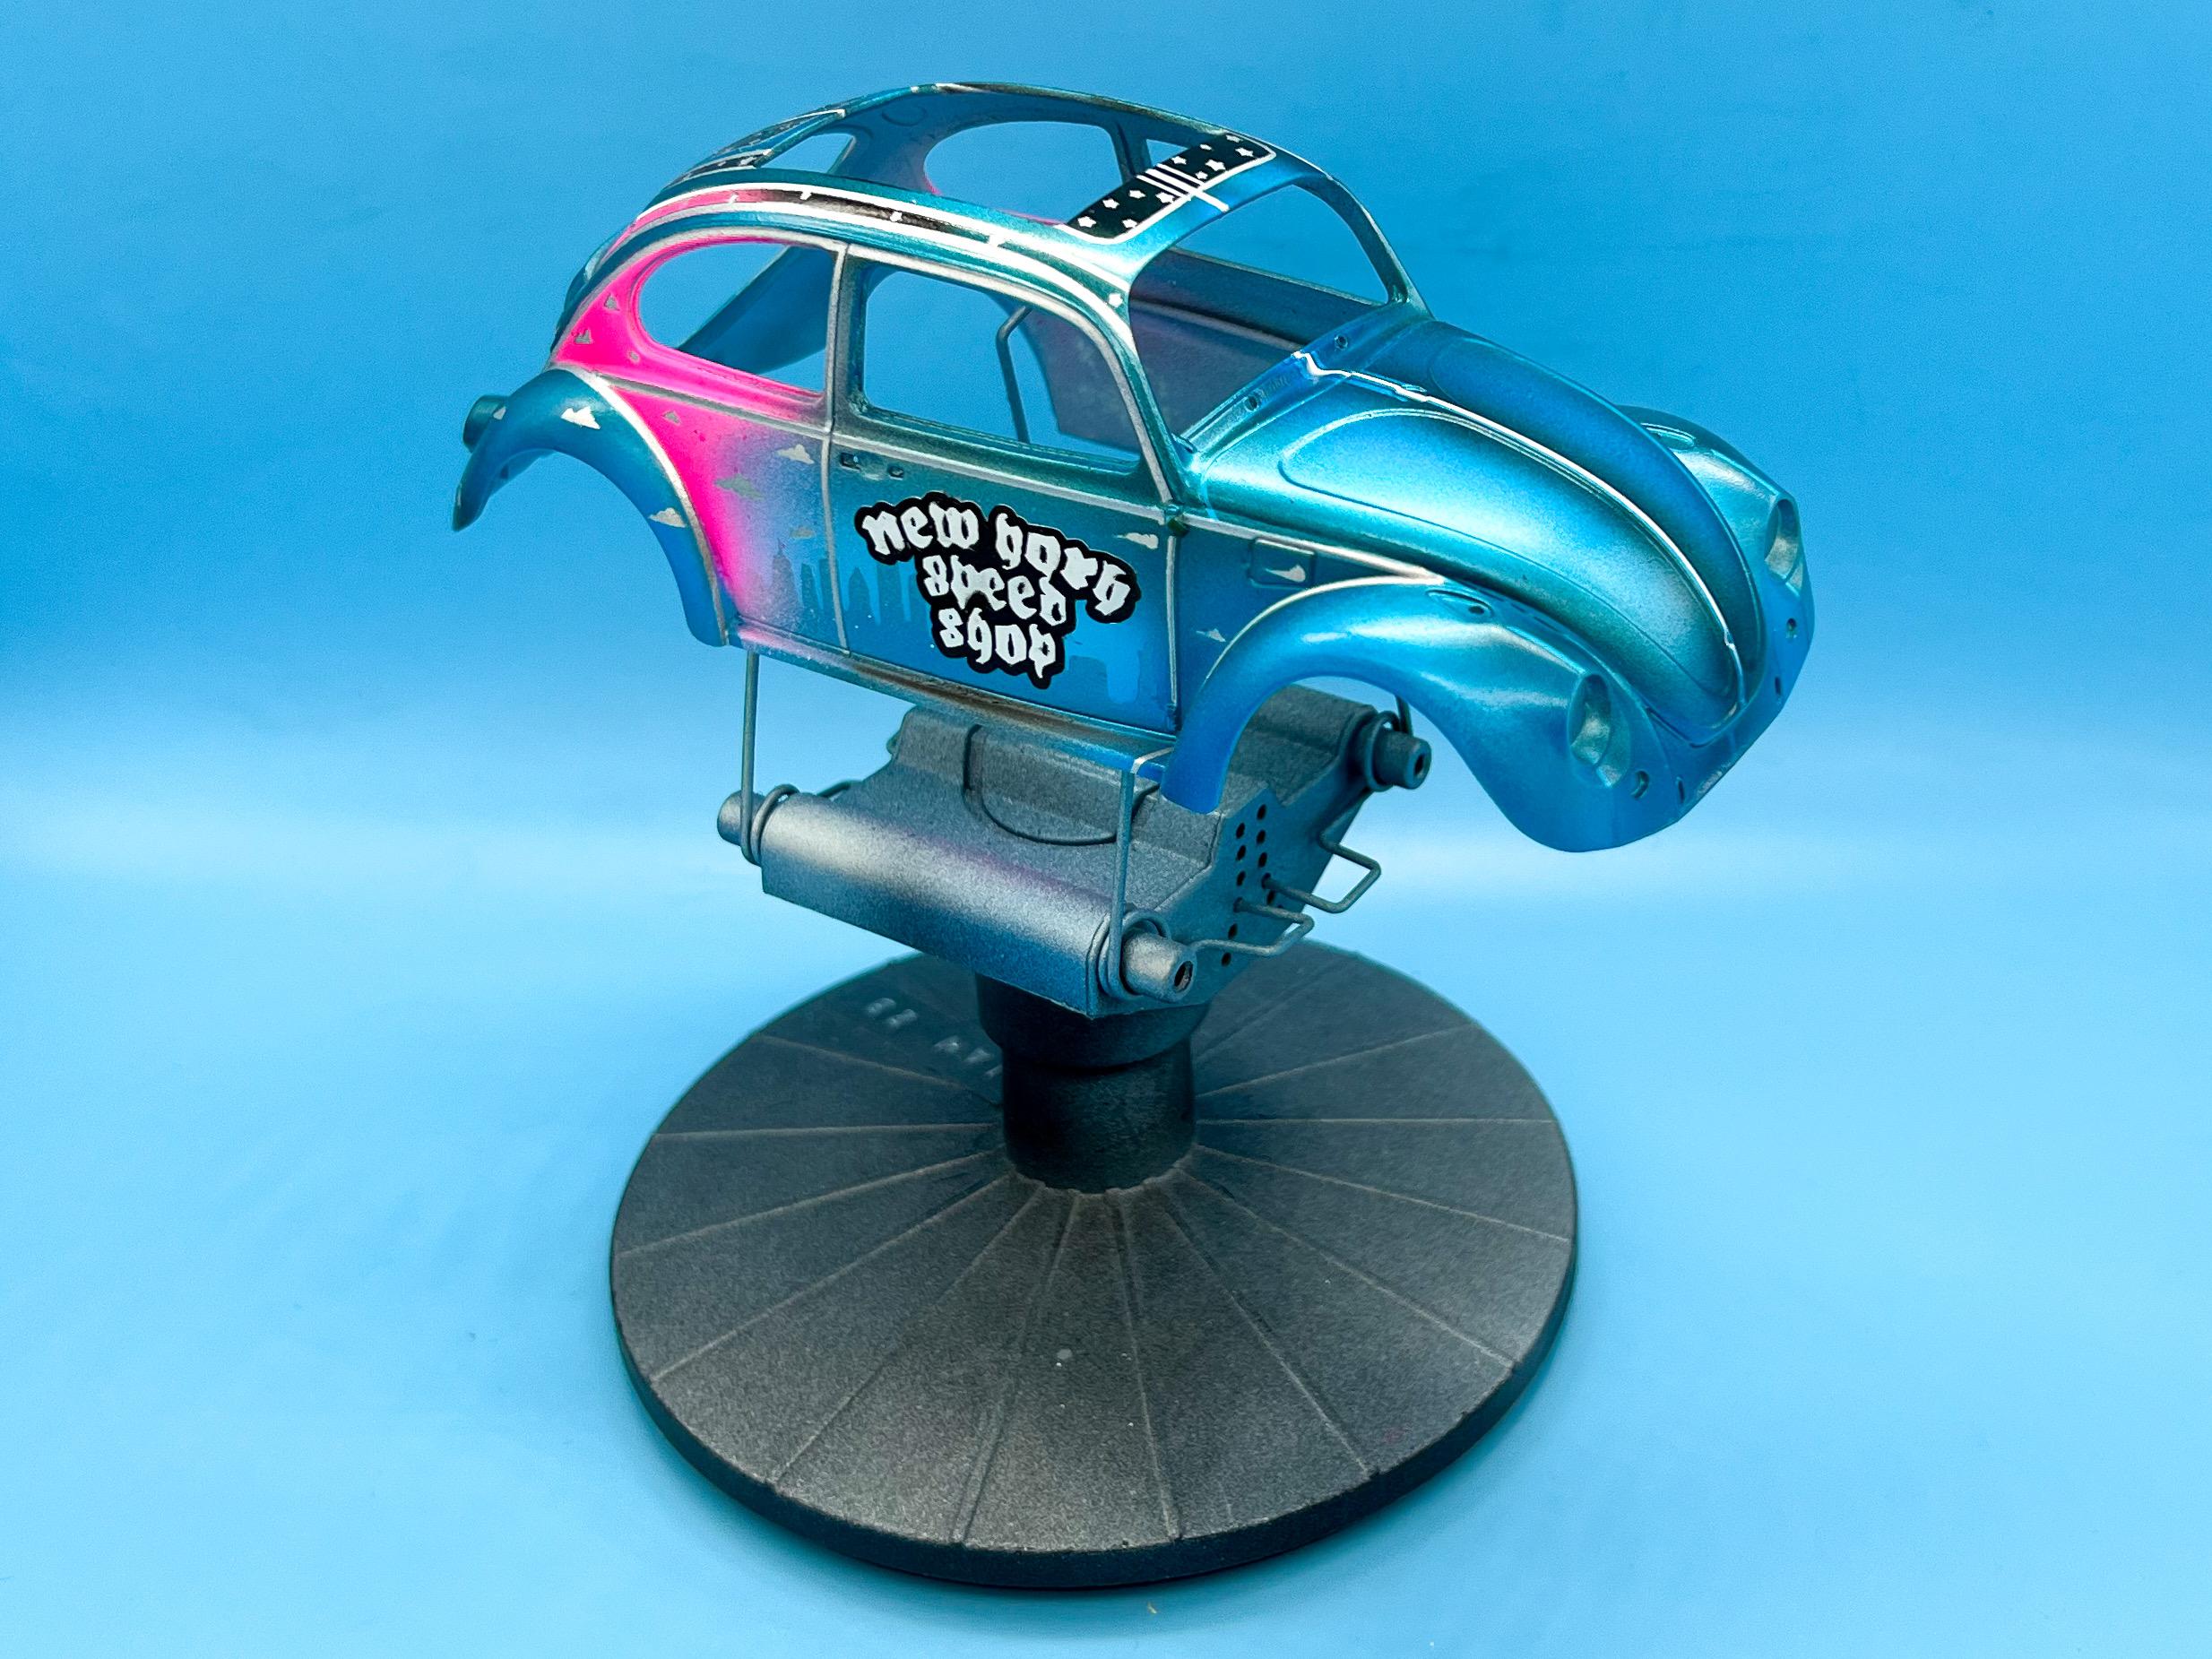
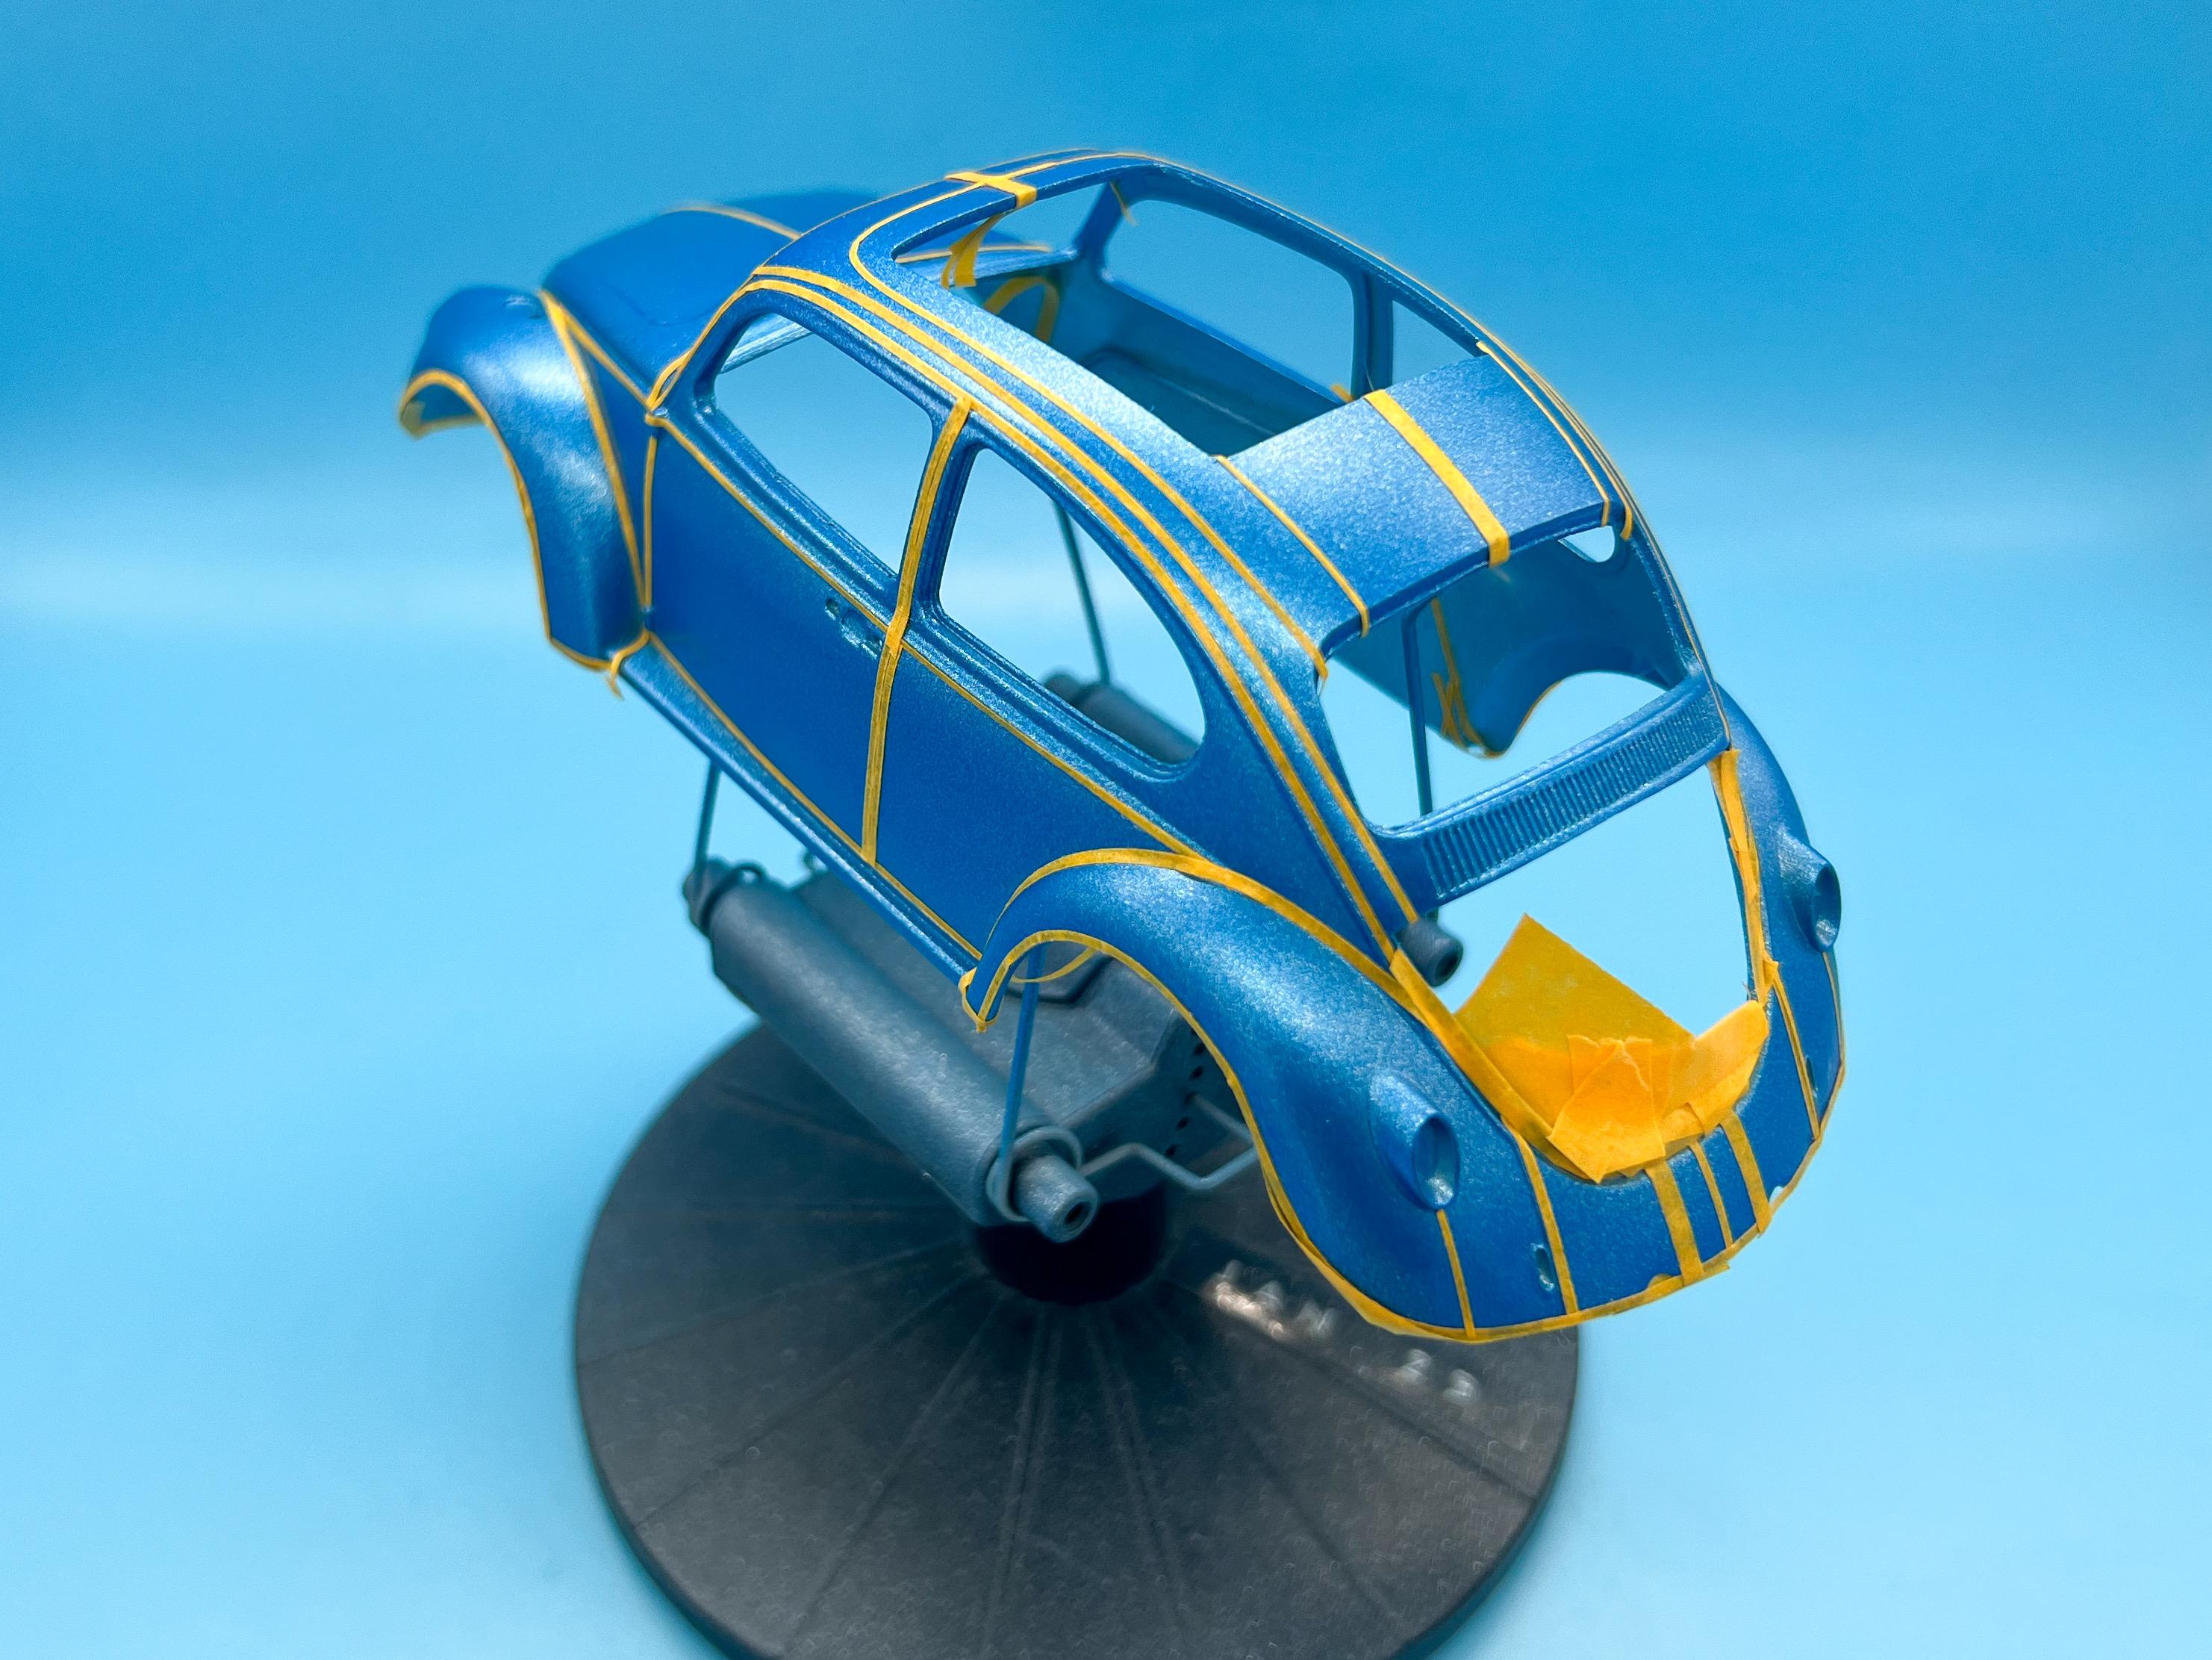
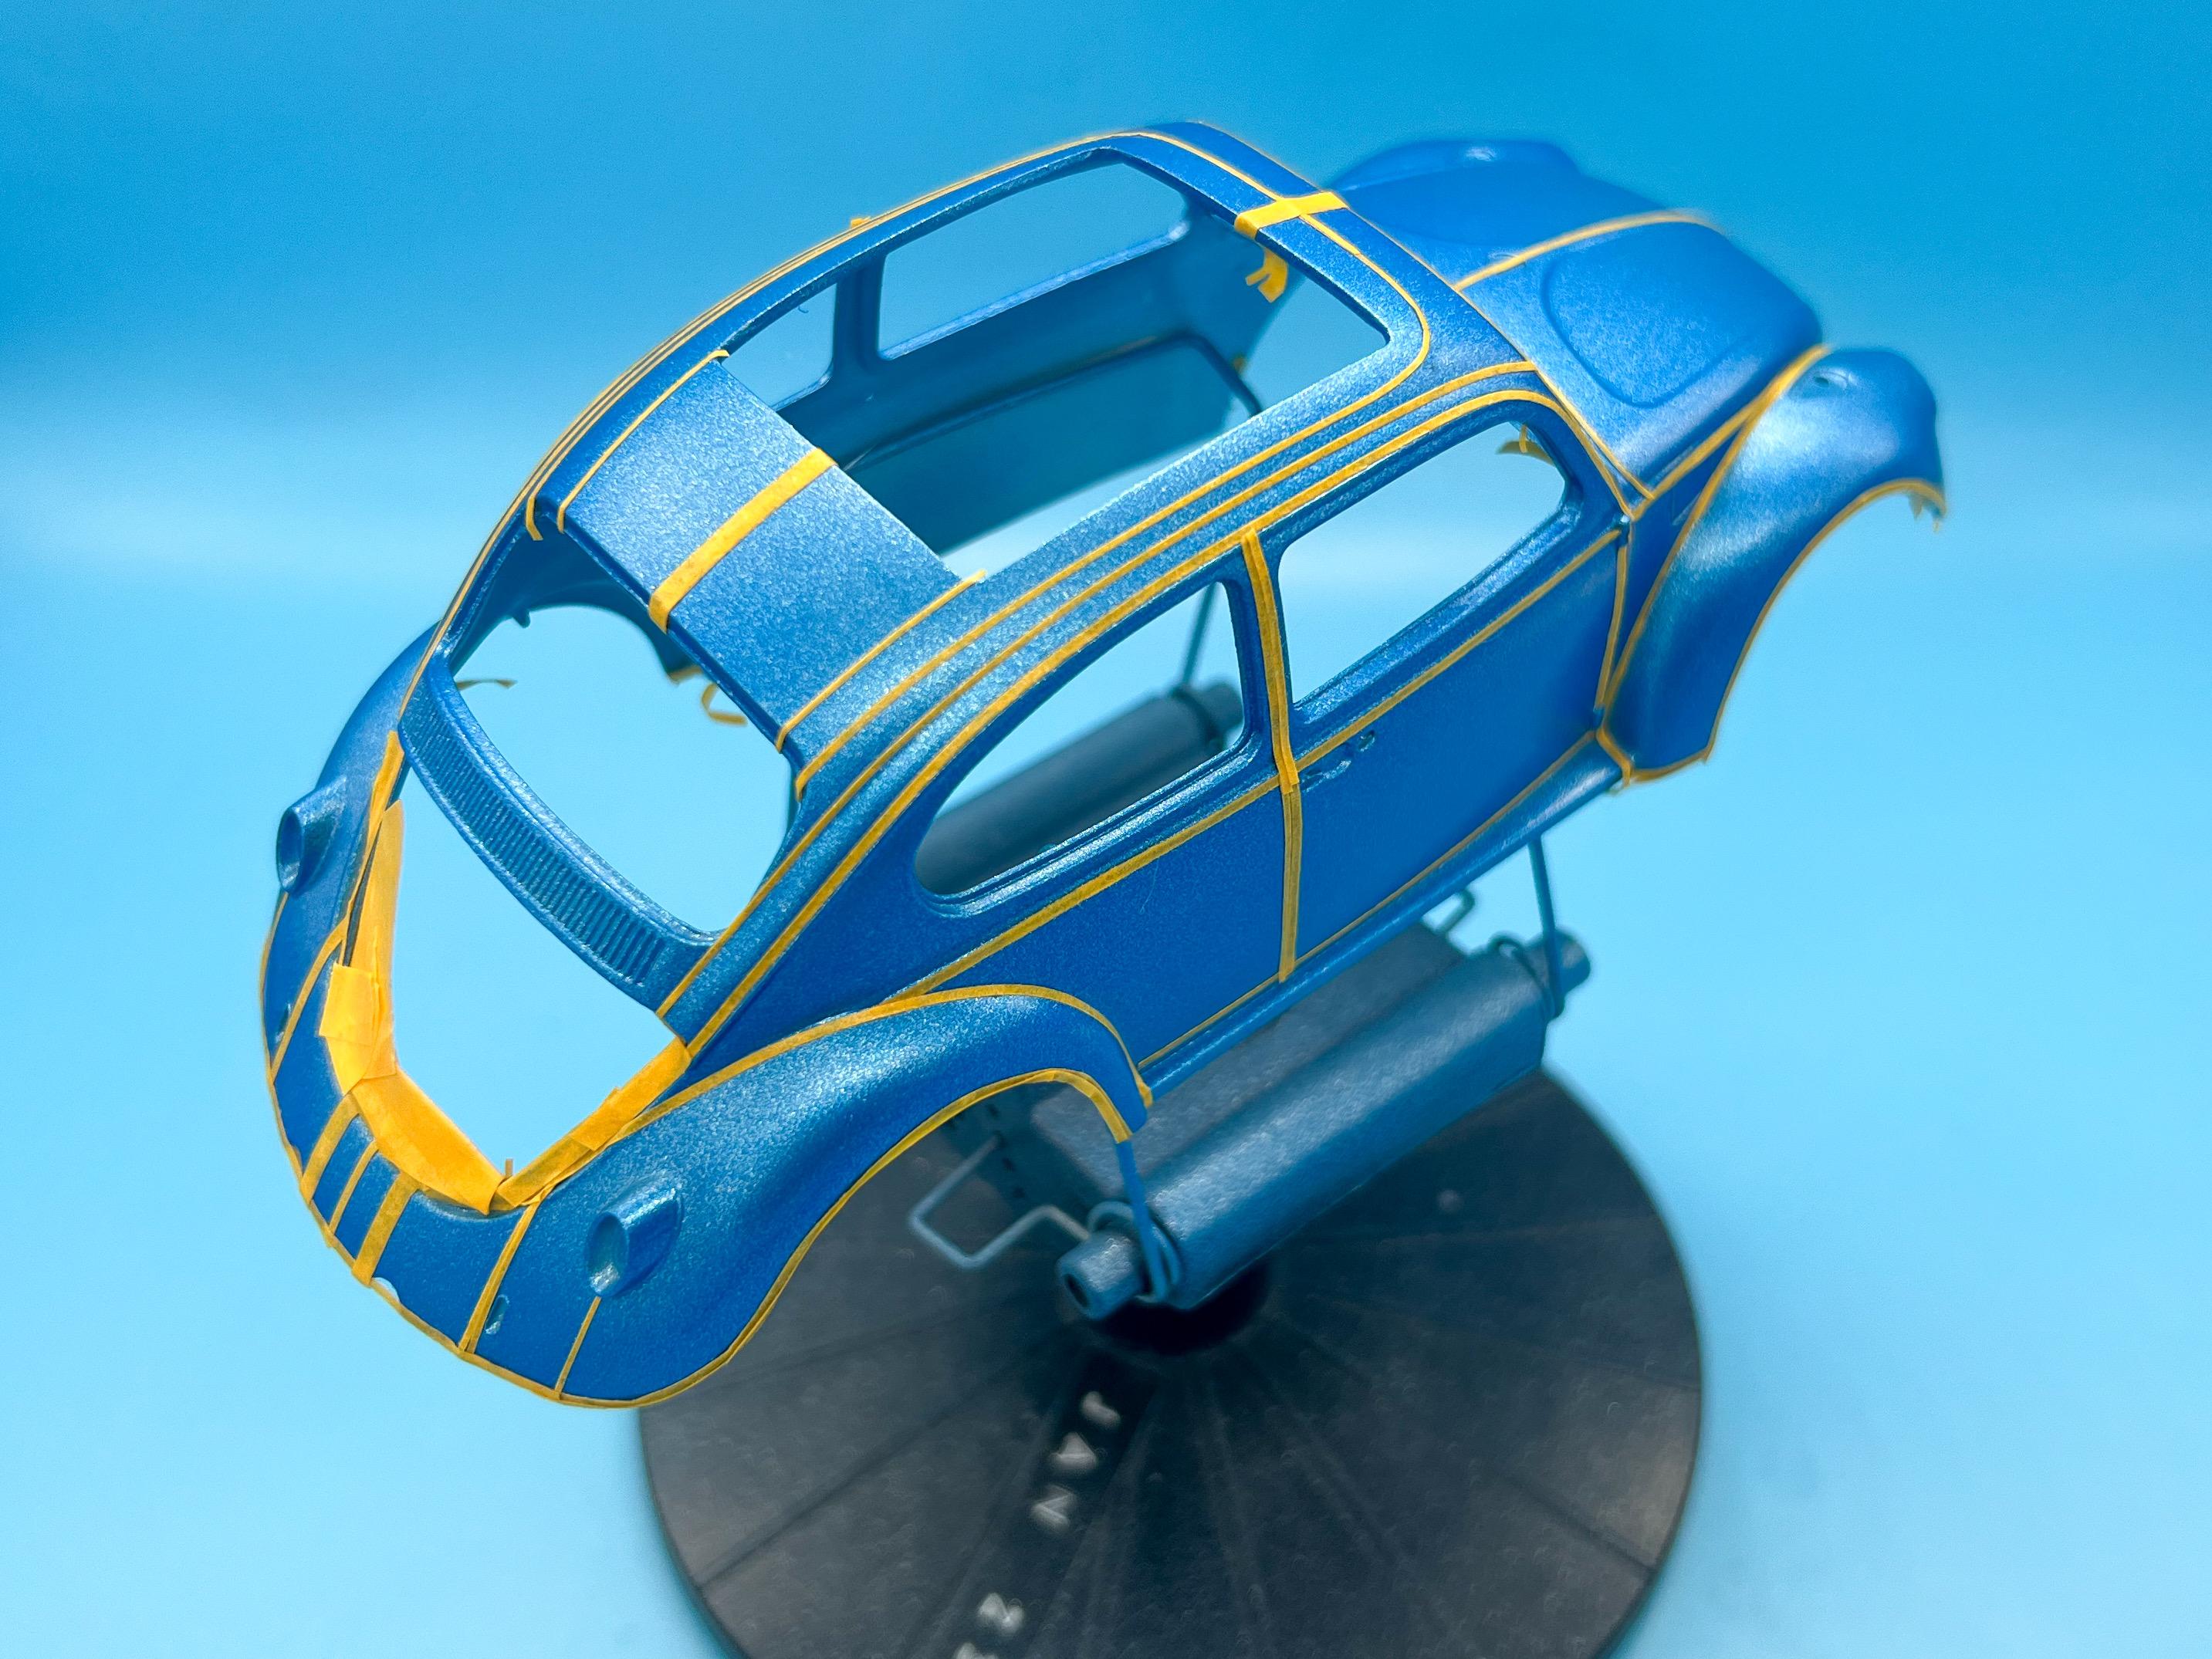
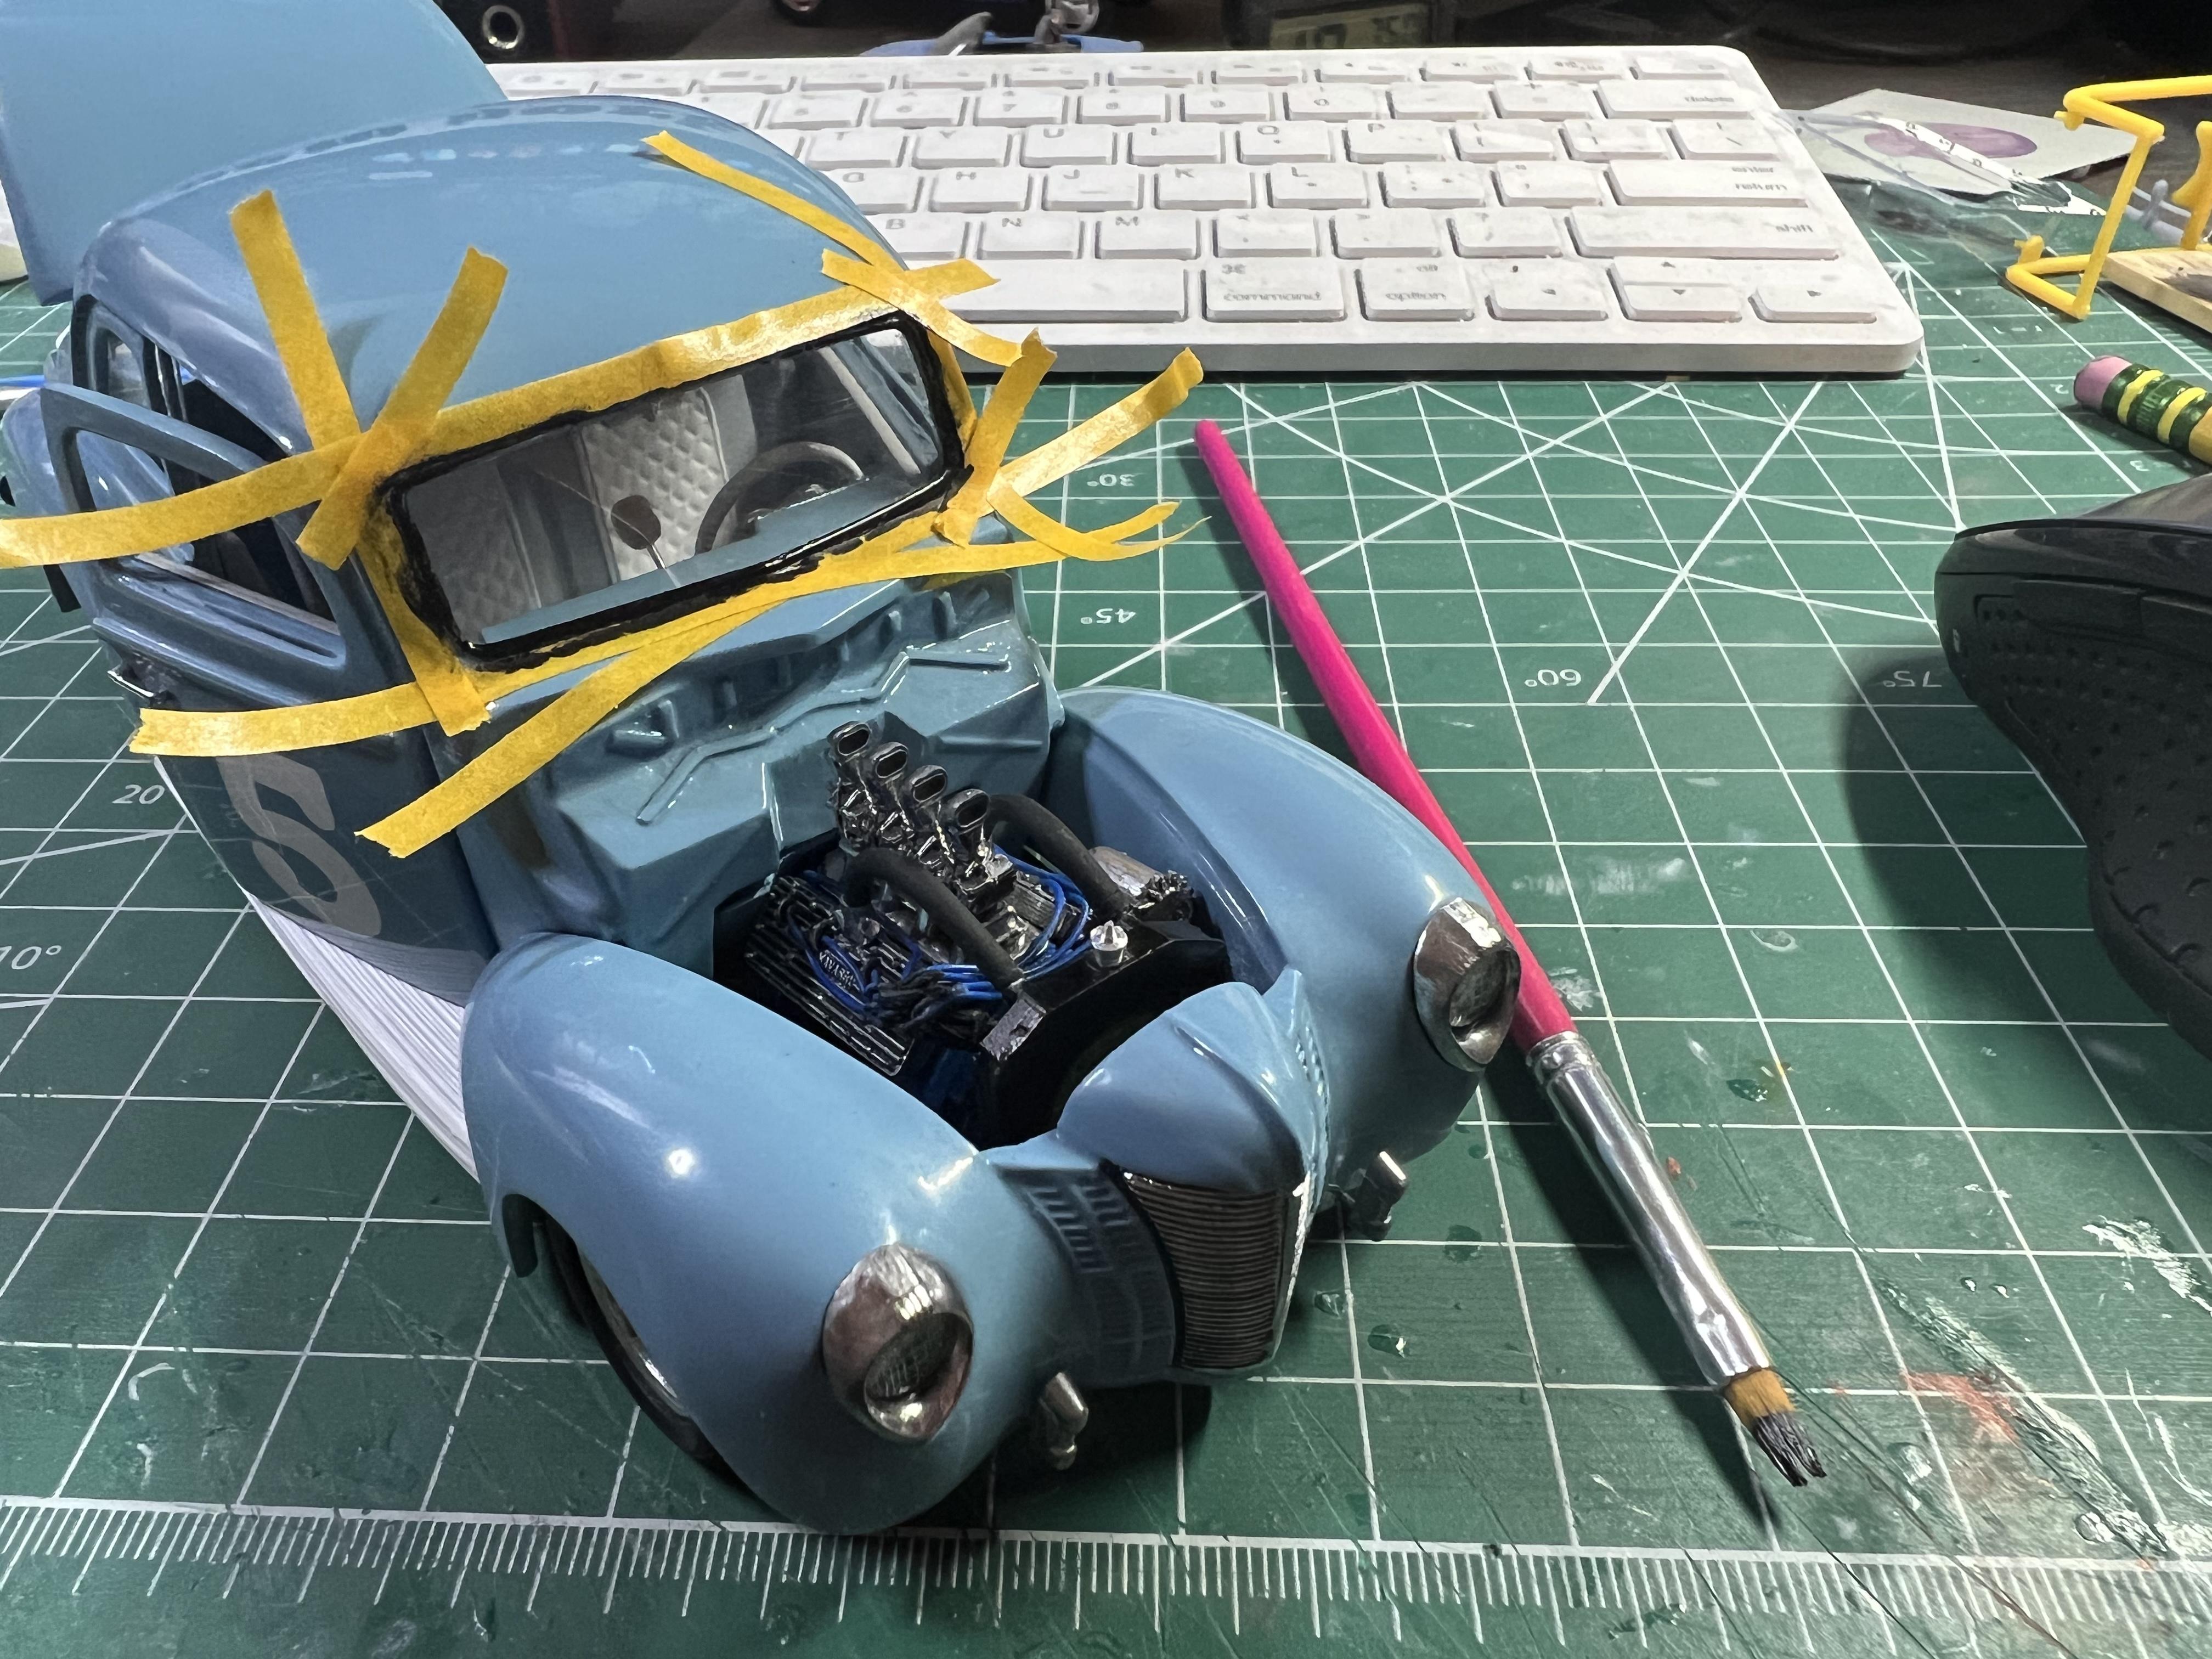
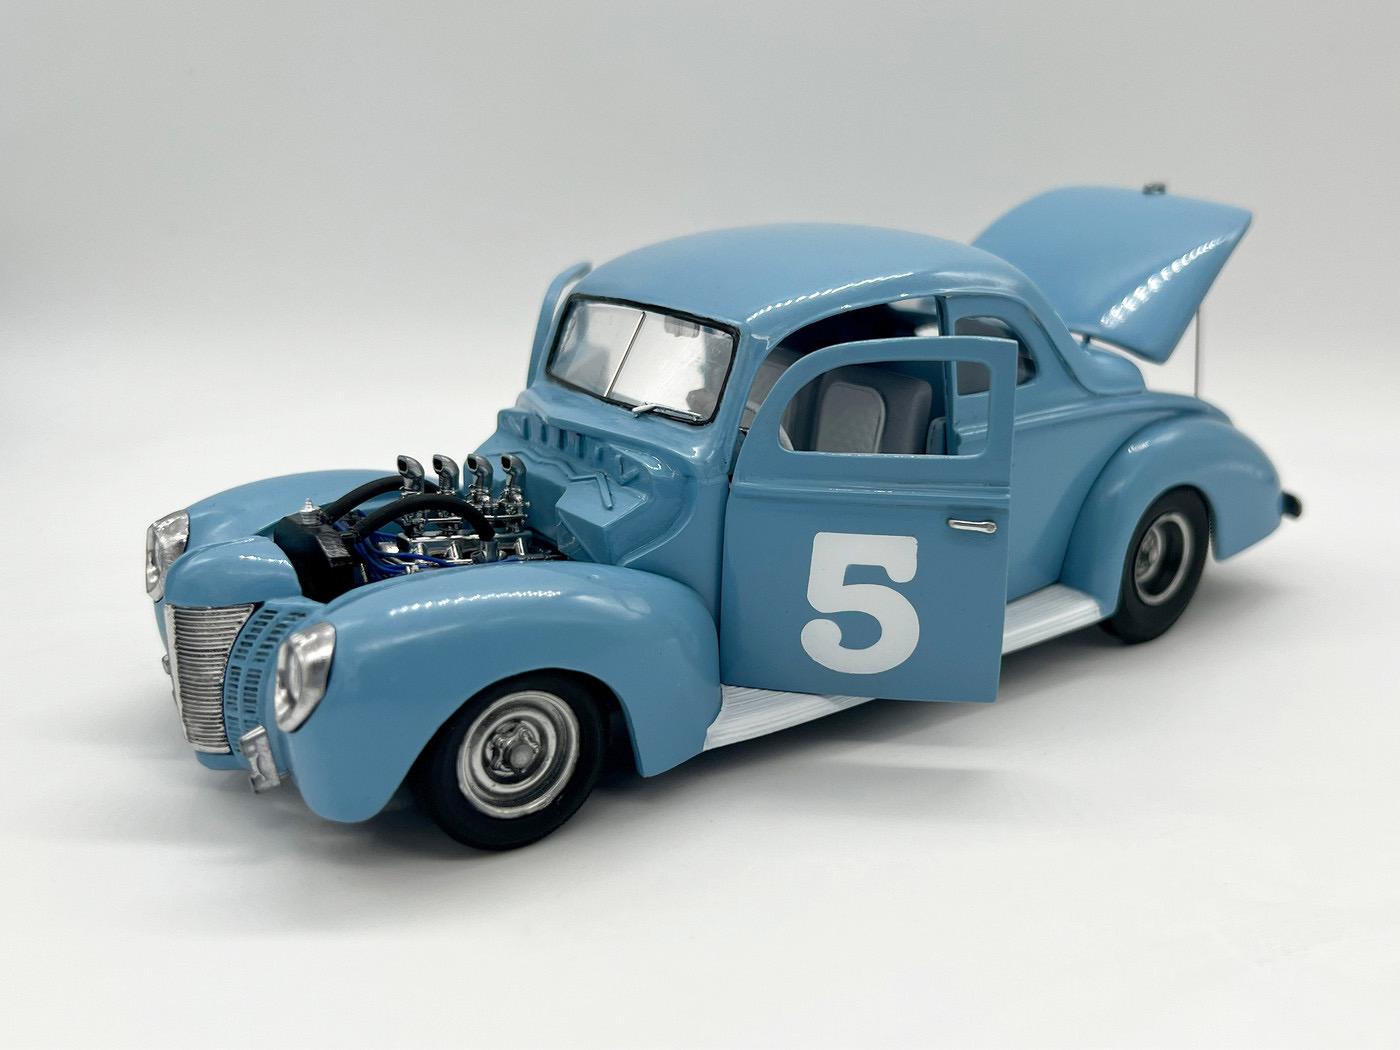
This weekend’s progress was a BUNCH of painting. I’m trying to push myself and do something wild, paint wise, and play with some high-contrast colors. I figured out a better way to do what I wanted to achieve so I shot silver over the blue I had painted already and used that as a base for the rest of today’s work: My plan is to mix some traditional airbrushed paneling with some graphics and a BRIGHT colorscheme. First step after masking was some black and white, for contrast: After that I removed SOME of the masks, but not all, and then shot Createx candy blue over top of the silver, black and white: Next up, masking ready for some more white, black and hot pink - I’m planning to make the sky behind the skyline fade from blue to white to pink then finally to black on the roof panels: Some BRIGHT paint later… Looks kinda chaotic right now, but the subsequent layers will (hopefully) bring it together some… Removing all the masking so far to reveal some silver: Lots of touch up needed but nothing too difficult…. Next up, masking for some white pinstripes: Then add some door lettering: And that’s about the progress so far this weekend: Plenty still to do, but I’m having fun playing with paint! Thanks for looking!
-
Atlantis Models has bought another lot of tooling/molds.....
OldNYJim replied to Dave Van's topic in Car Kit News & Reviews
Note for clarity: it could be something completely different...I'm just spitballin' here... -
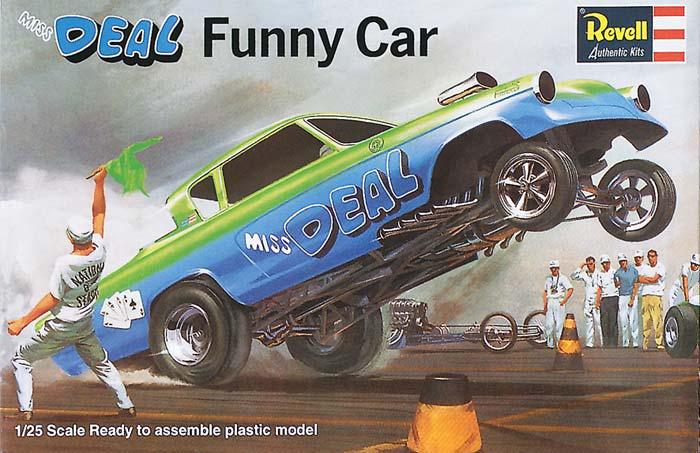
Atlantis Models has bought another lot of tooling/molds.....
OldNYJim replied to Dave Van's topic in Car Kit News & Reviews
New car kit announced this morning - presumably the old Miss Deal kit?
-
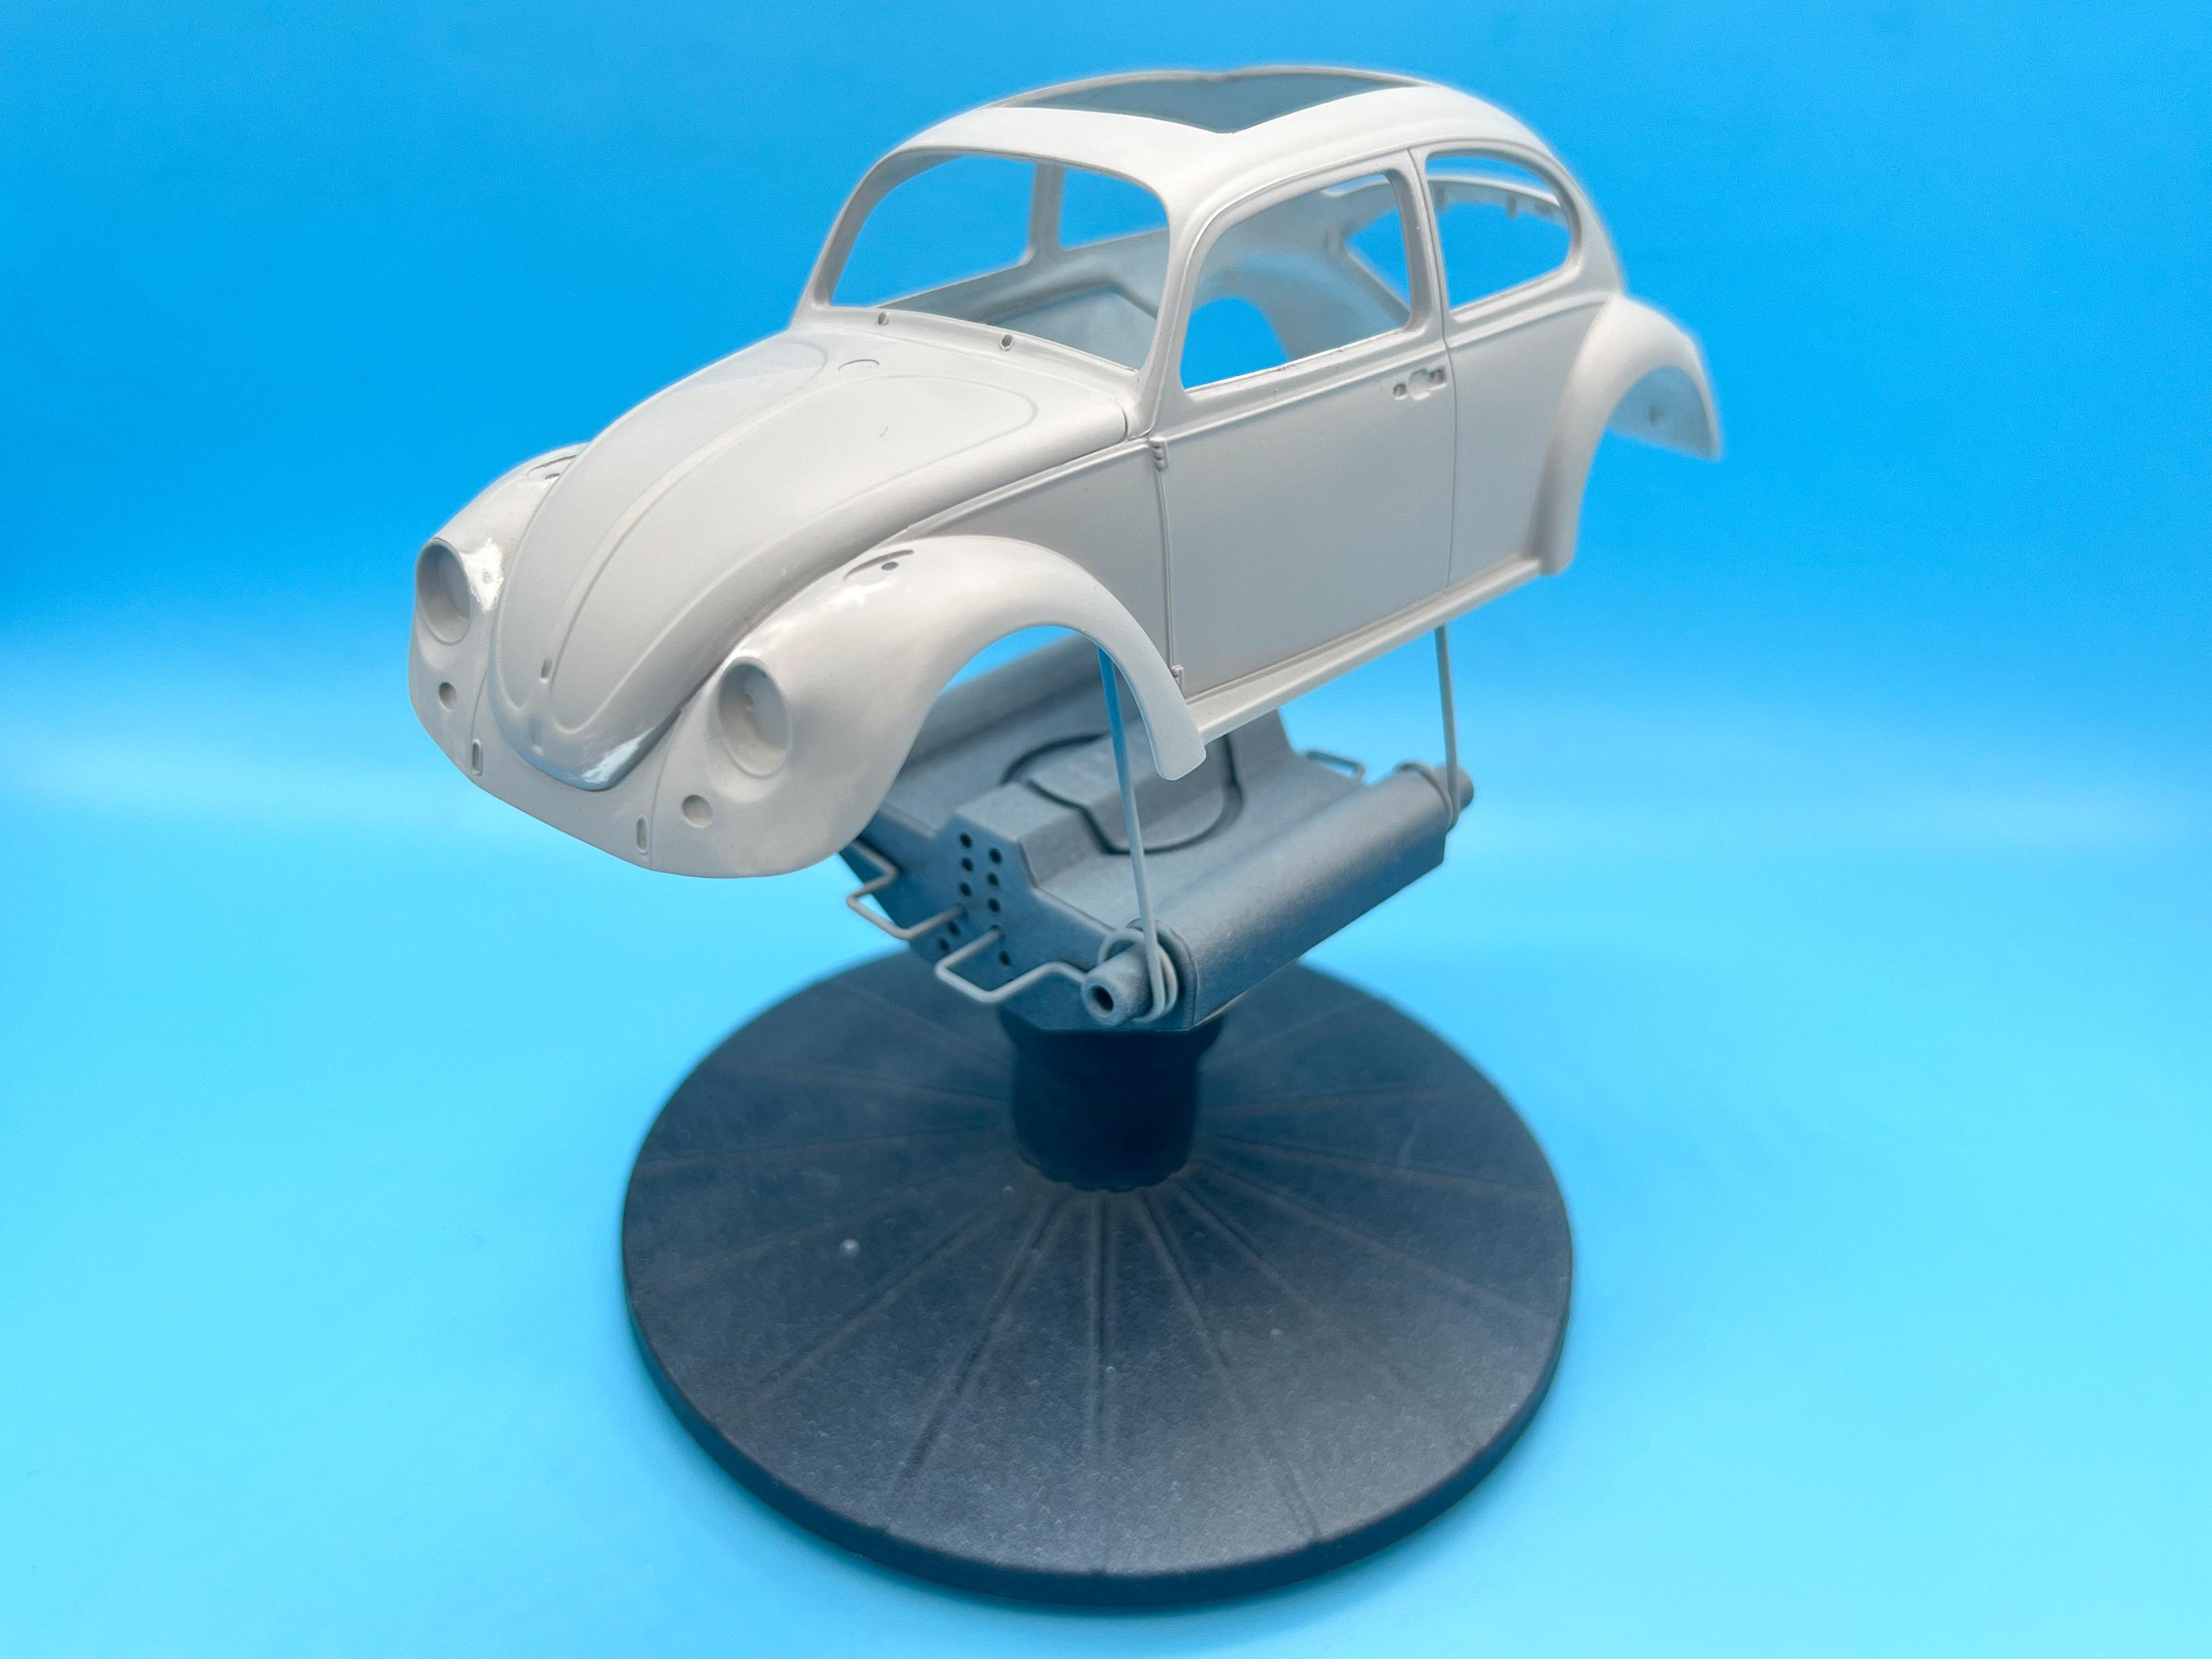
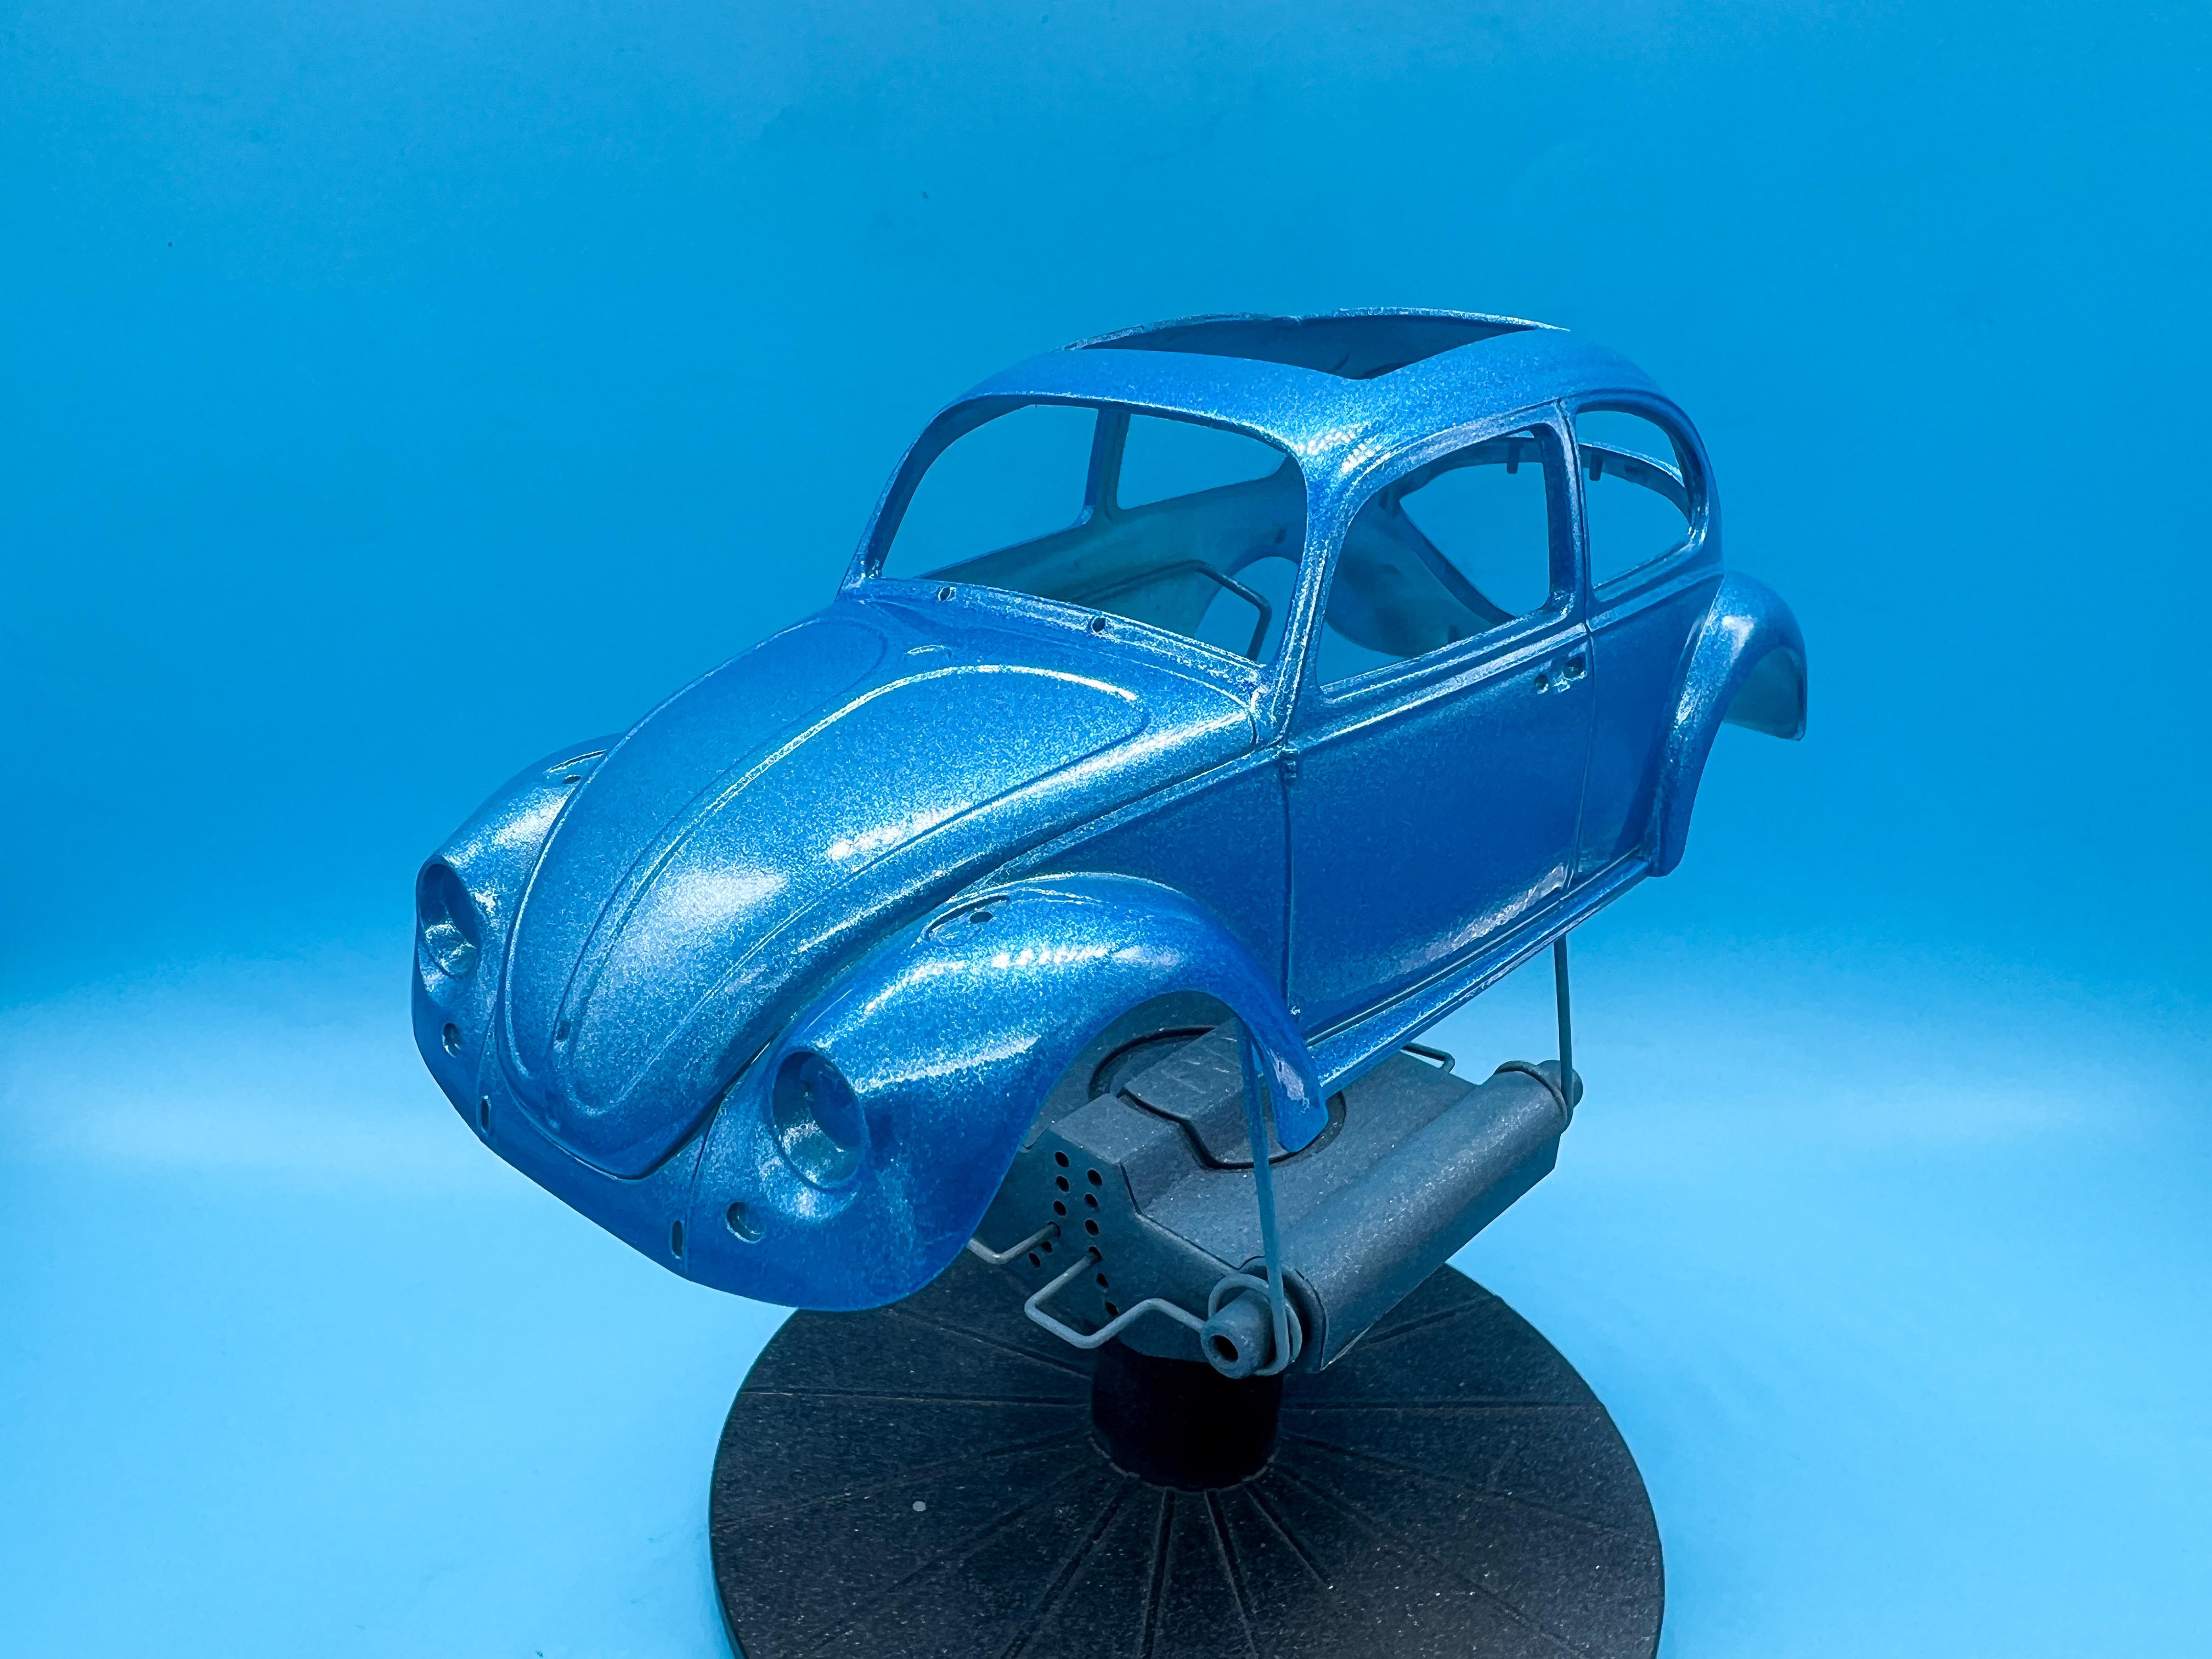
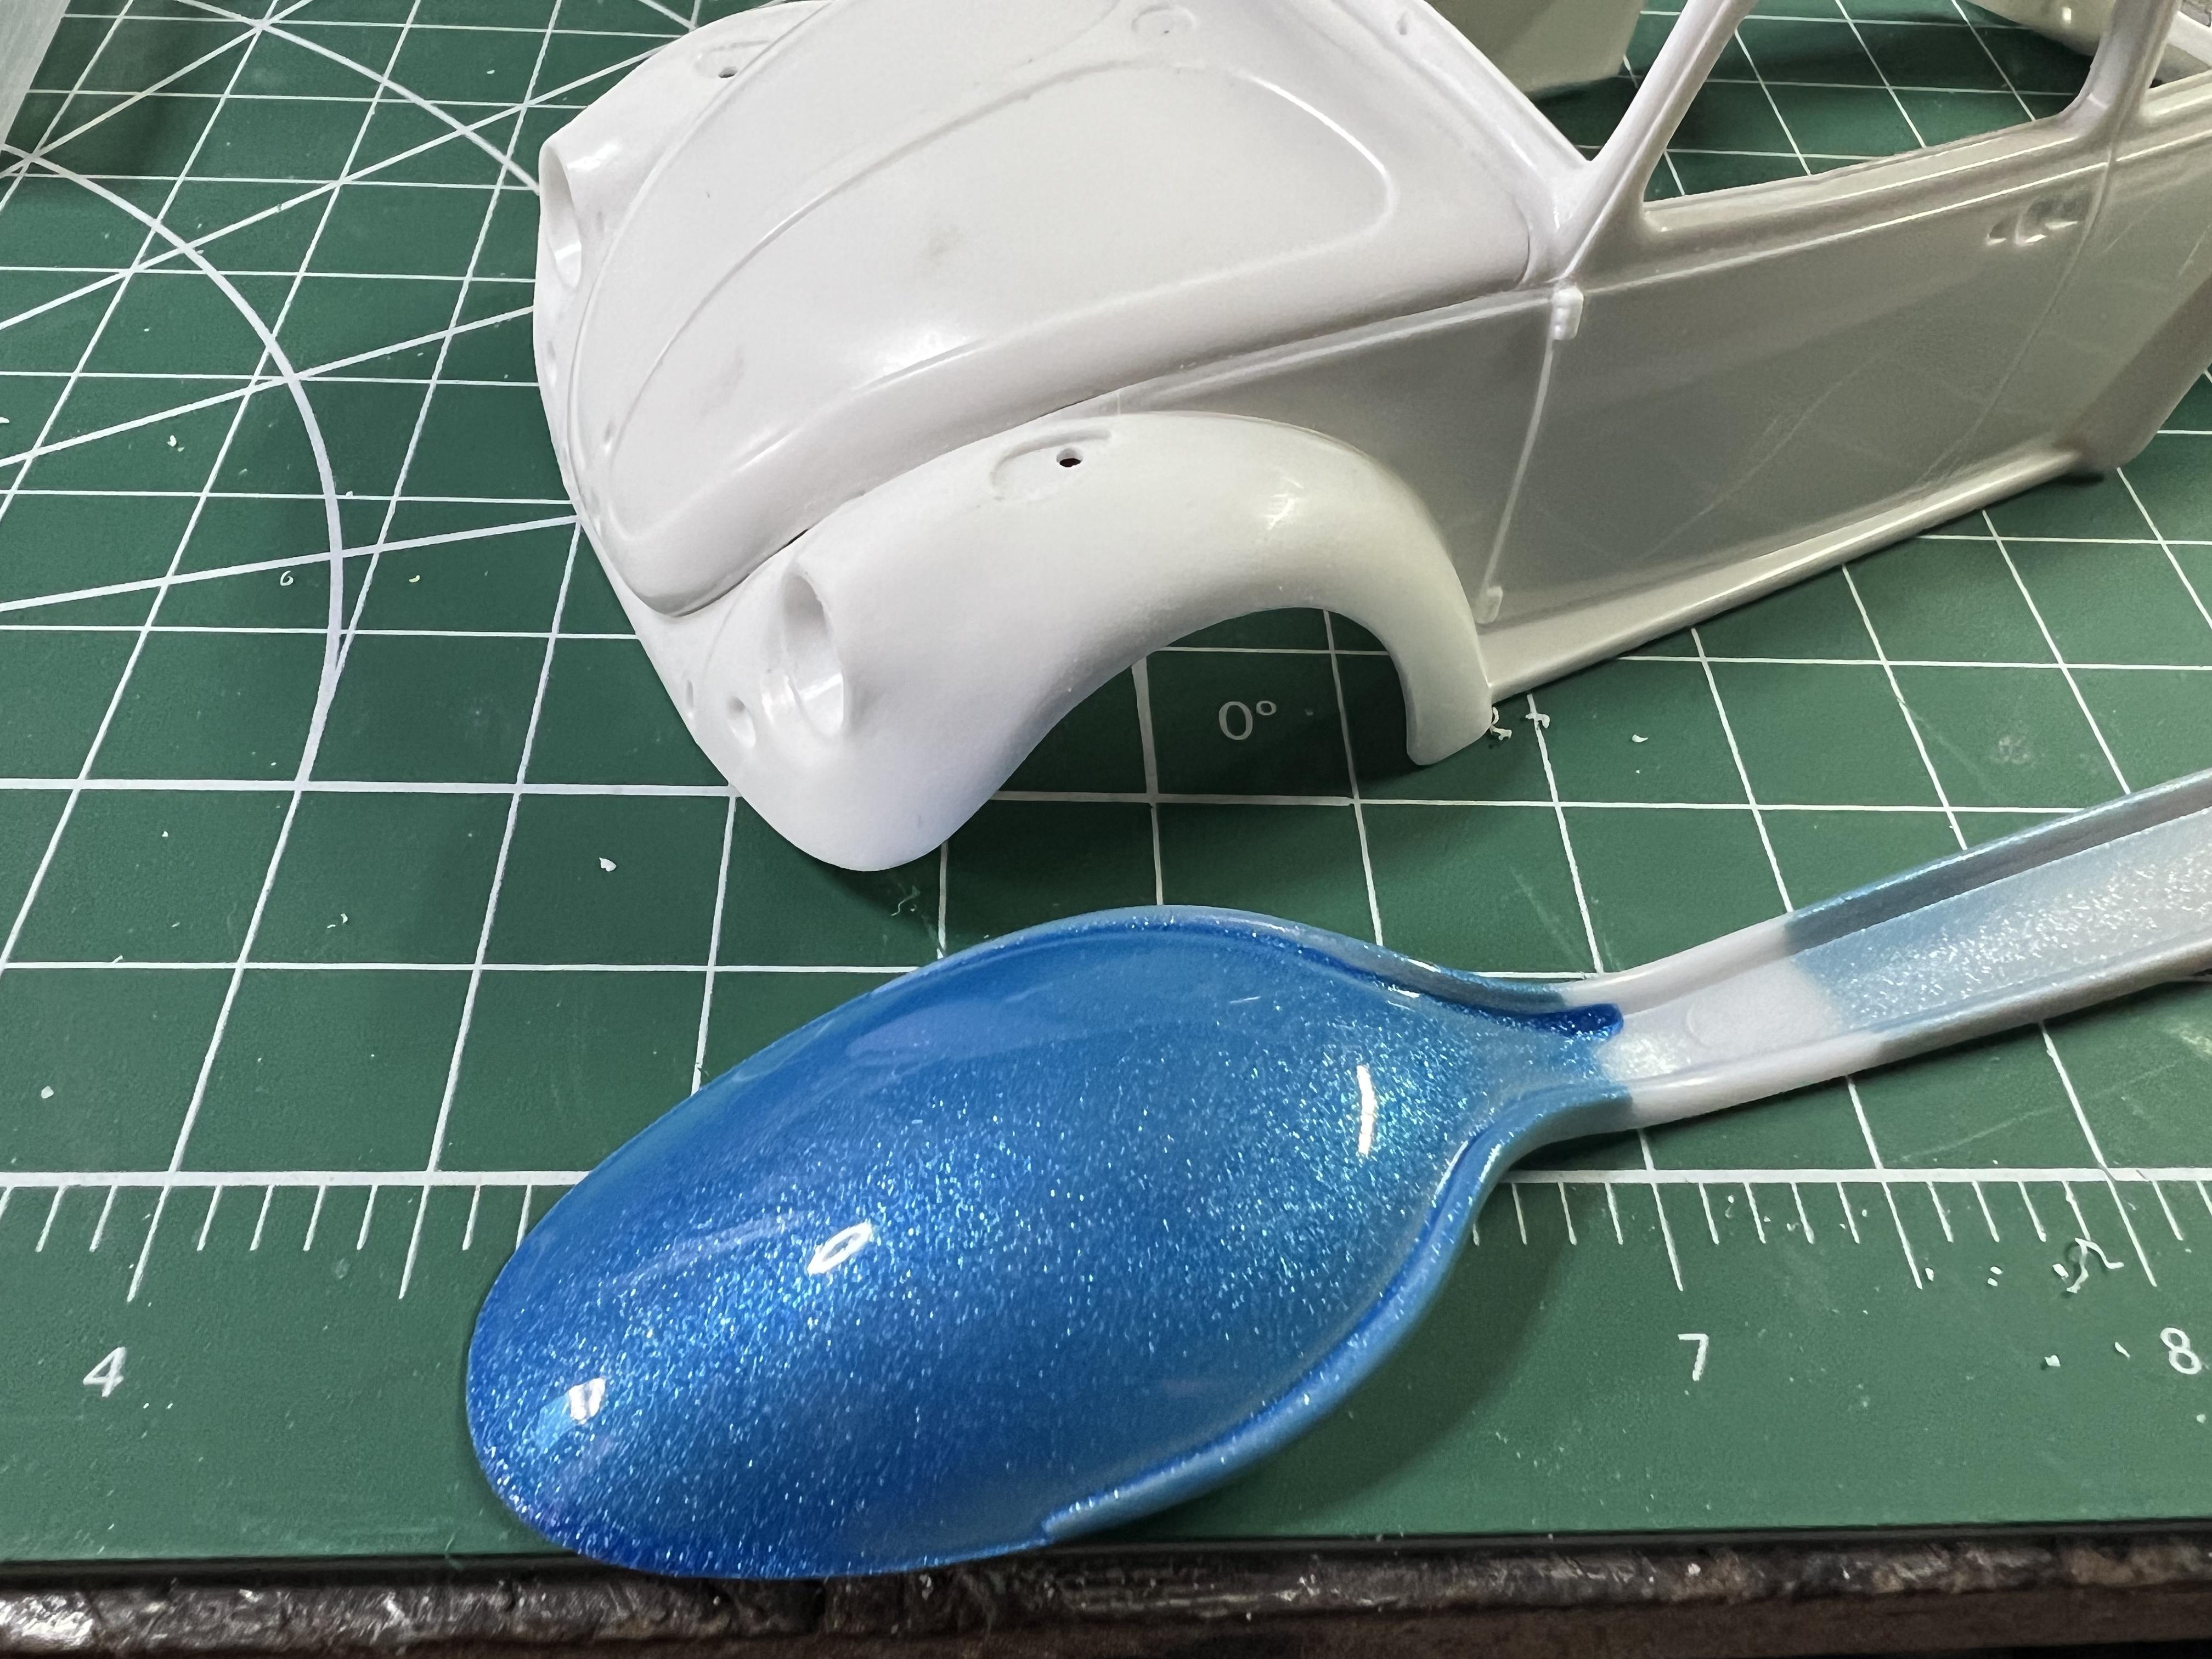
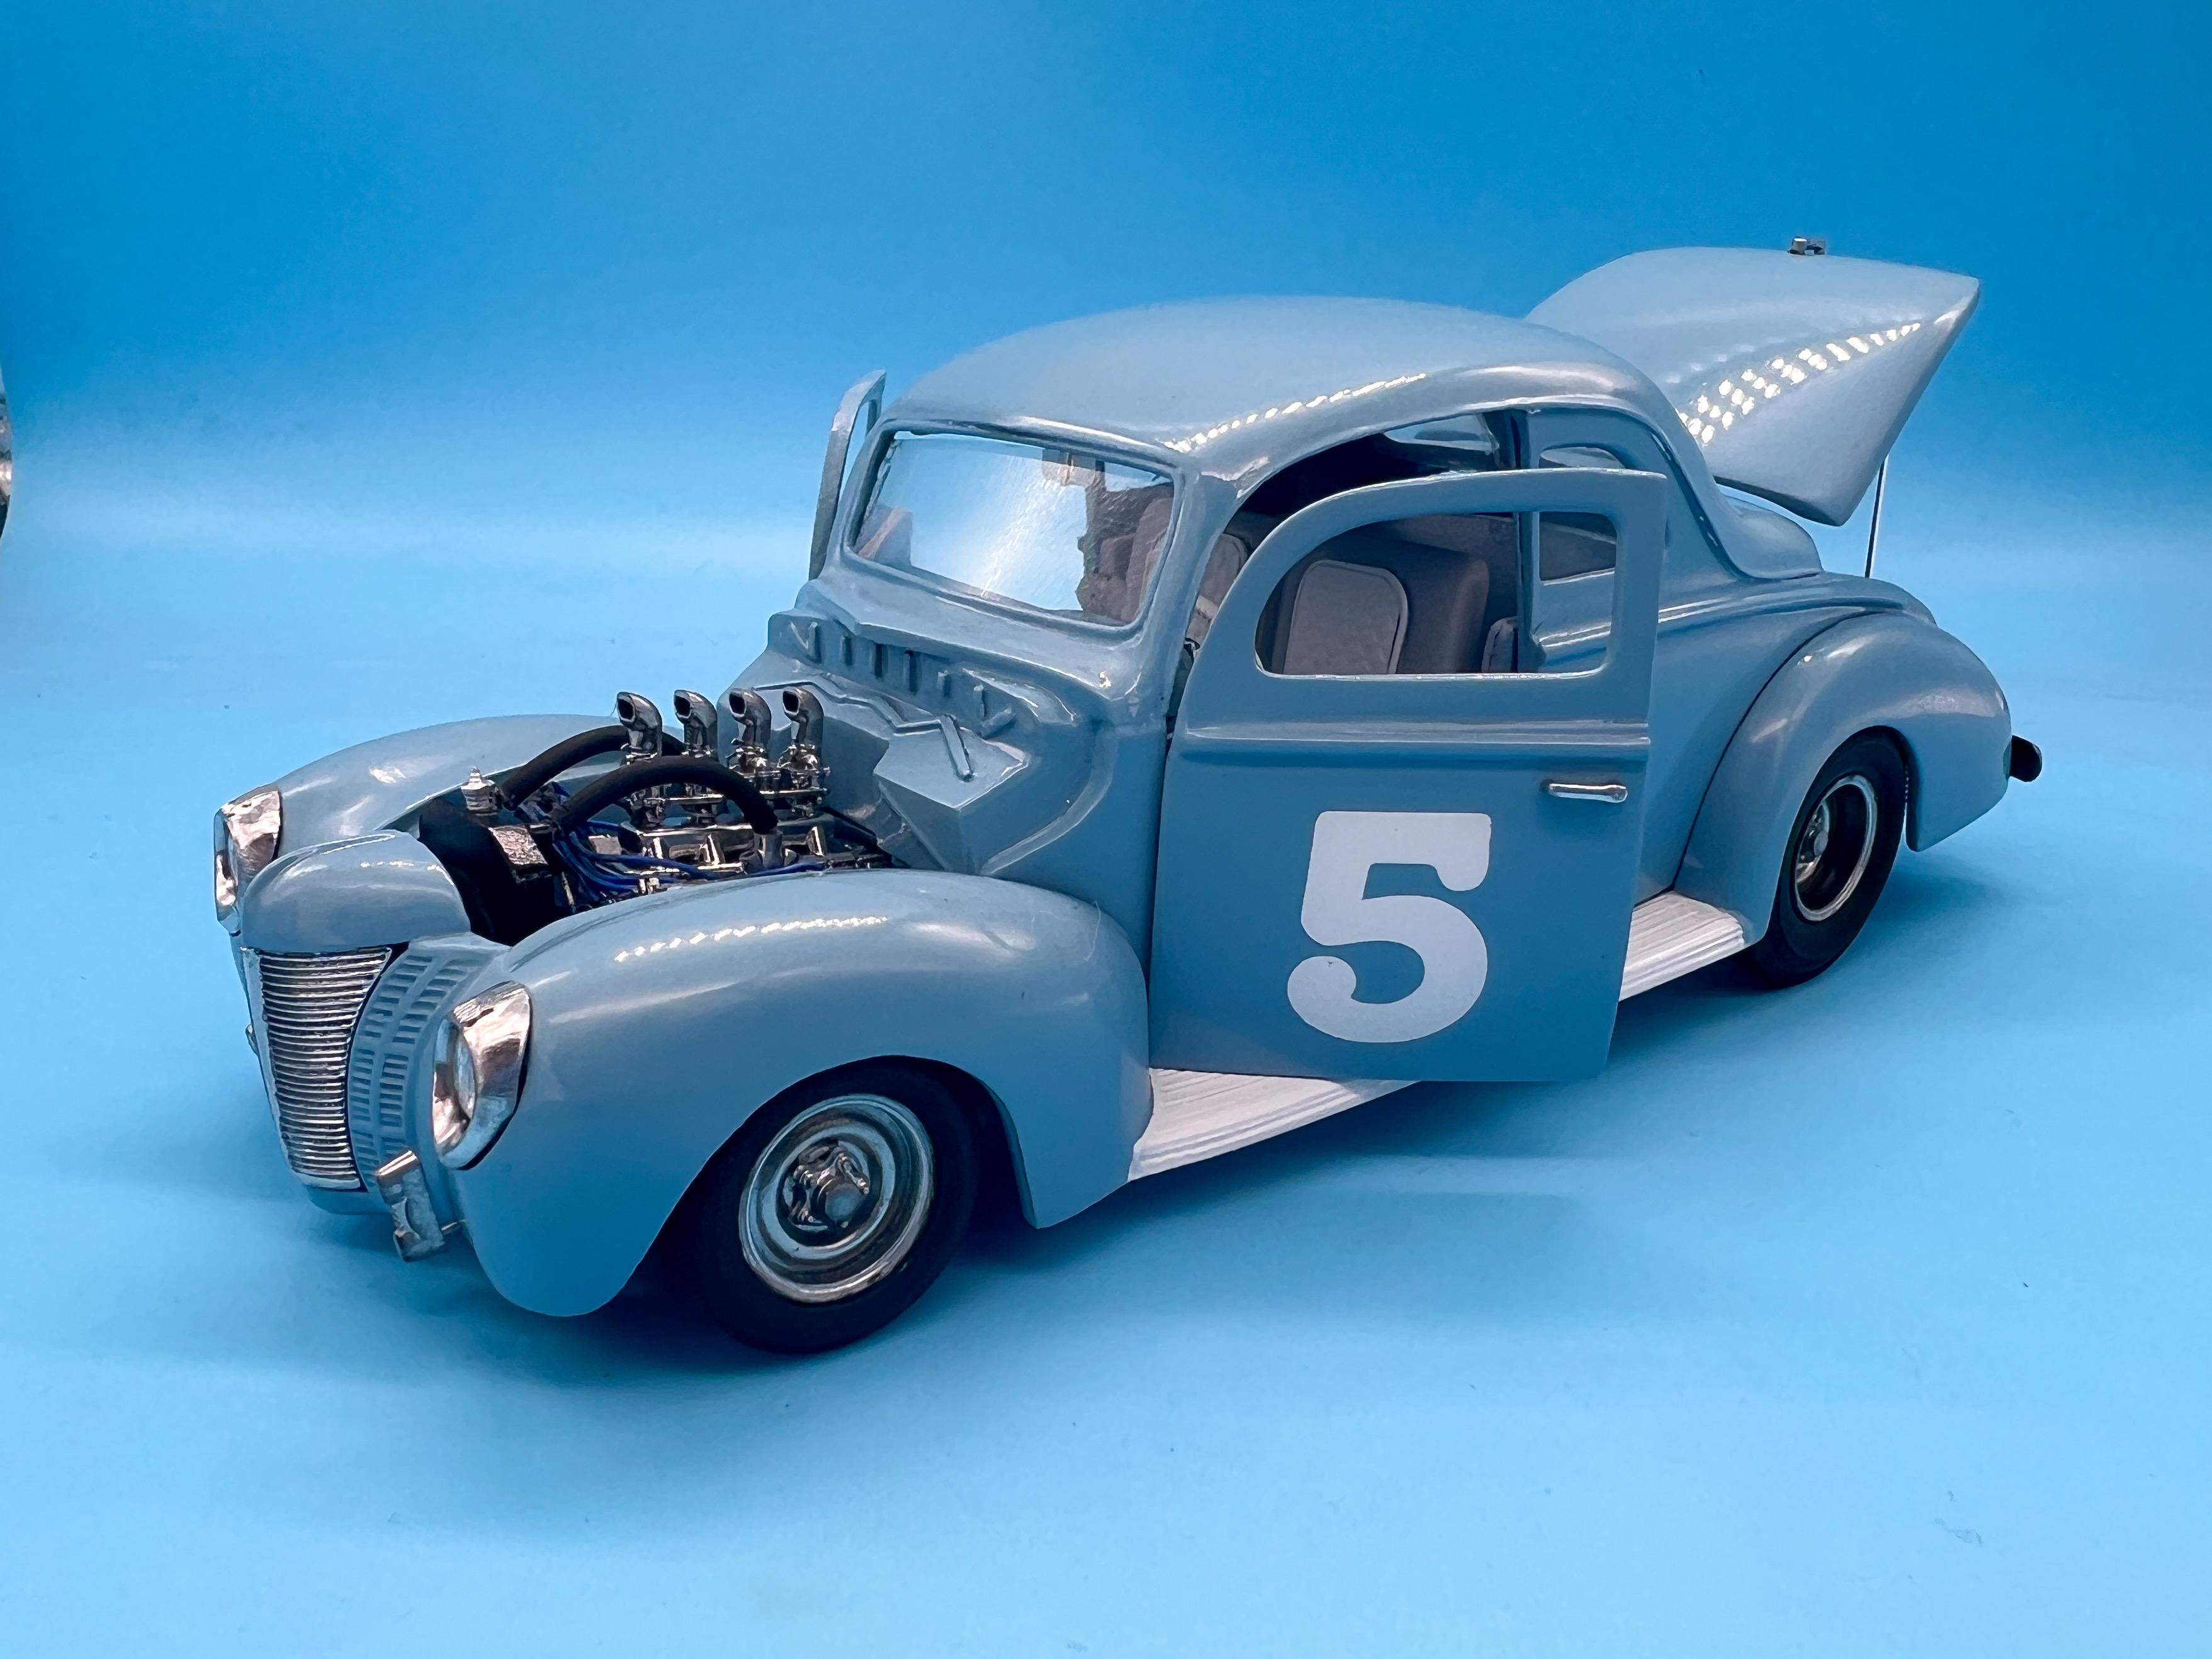
Haha! Not as much as most of the cars I see in the Midwest now I’m here…some of them have more holes than car ?. Thank you sir! And thank you too! Today’s tiny bit of progress was getting the body straight and into primer. The nose took the most work, but it wasn’t terrible… I’ve got some semi-complex airbrushing ideas that I’d like to try on this one, so I’m getting a jump on the body before anything else - laid down a base color of that nice Testor’s Ice Blue as a starting point: And then after a shot of intercoat to protect the blue, I got to start taping up for some airbrushing fun… Got a bunch of ideas for this one…hope I can pull off what I’m shooting for…I’m excited to lay down some more paint tomorrow! Thanks for looking!
-
1960’s Traditional Blown ‘23 T Bucket UPDATE 10/31/22
OldNYJim replied to Dennis Lacy's topic in WIP: Model Cars
It’s cool when you build Mustangs and Broncos and wagons and stuff (and a balanced diet is important)…but I LOVE your hot rod builds. I learn so much from them…great work so far buddy! -
Model Kit rescue: MPC 32 ford sedan delivery custom flat nose van
OldNYJim replied to John06's topic in WIP: Model Cars
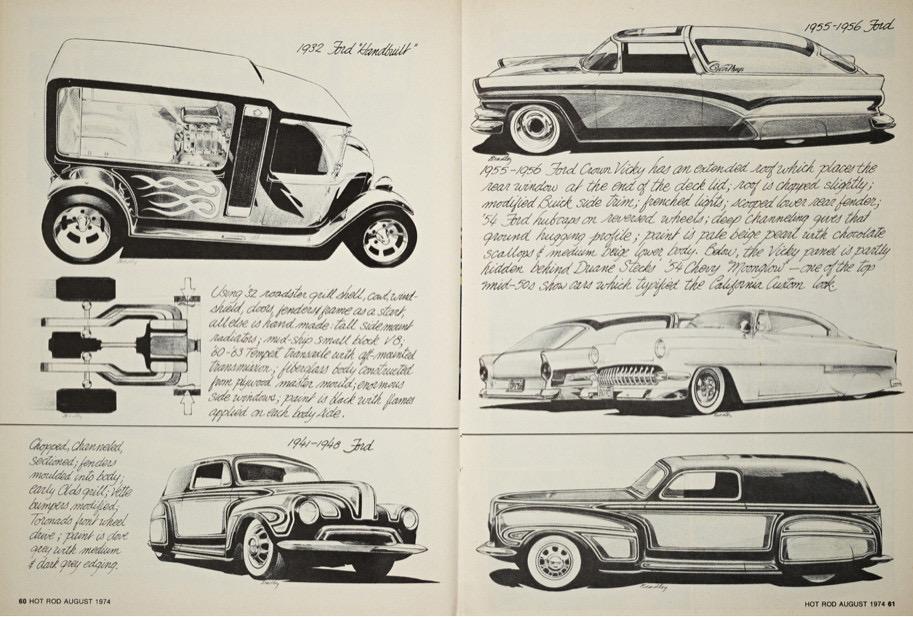
The concept makes me think of this, too left, from a 70s Hot Rod magazine: Certainly won’t be easy to pull off - but the idea has some potential I think! It’s hard doing something new with a Deuce!
-
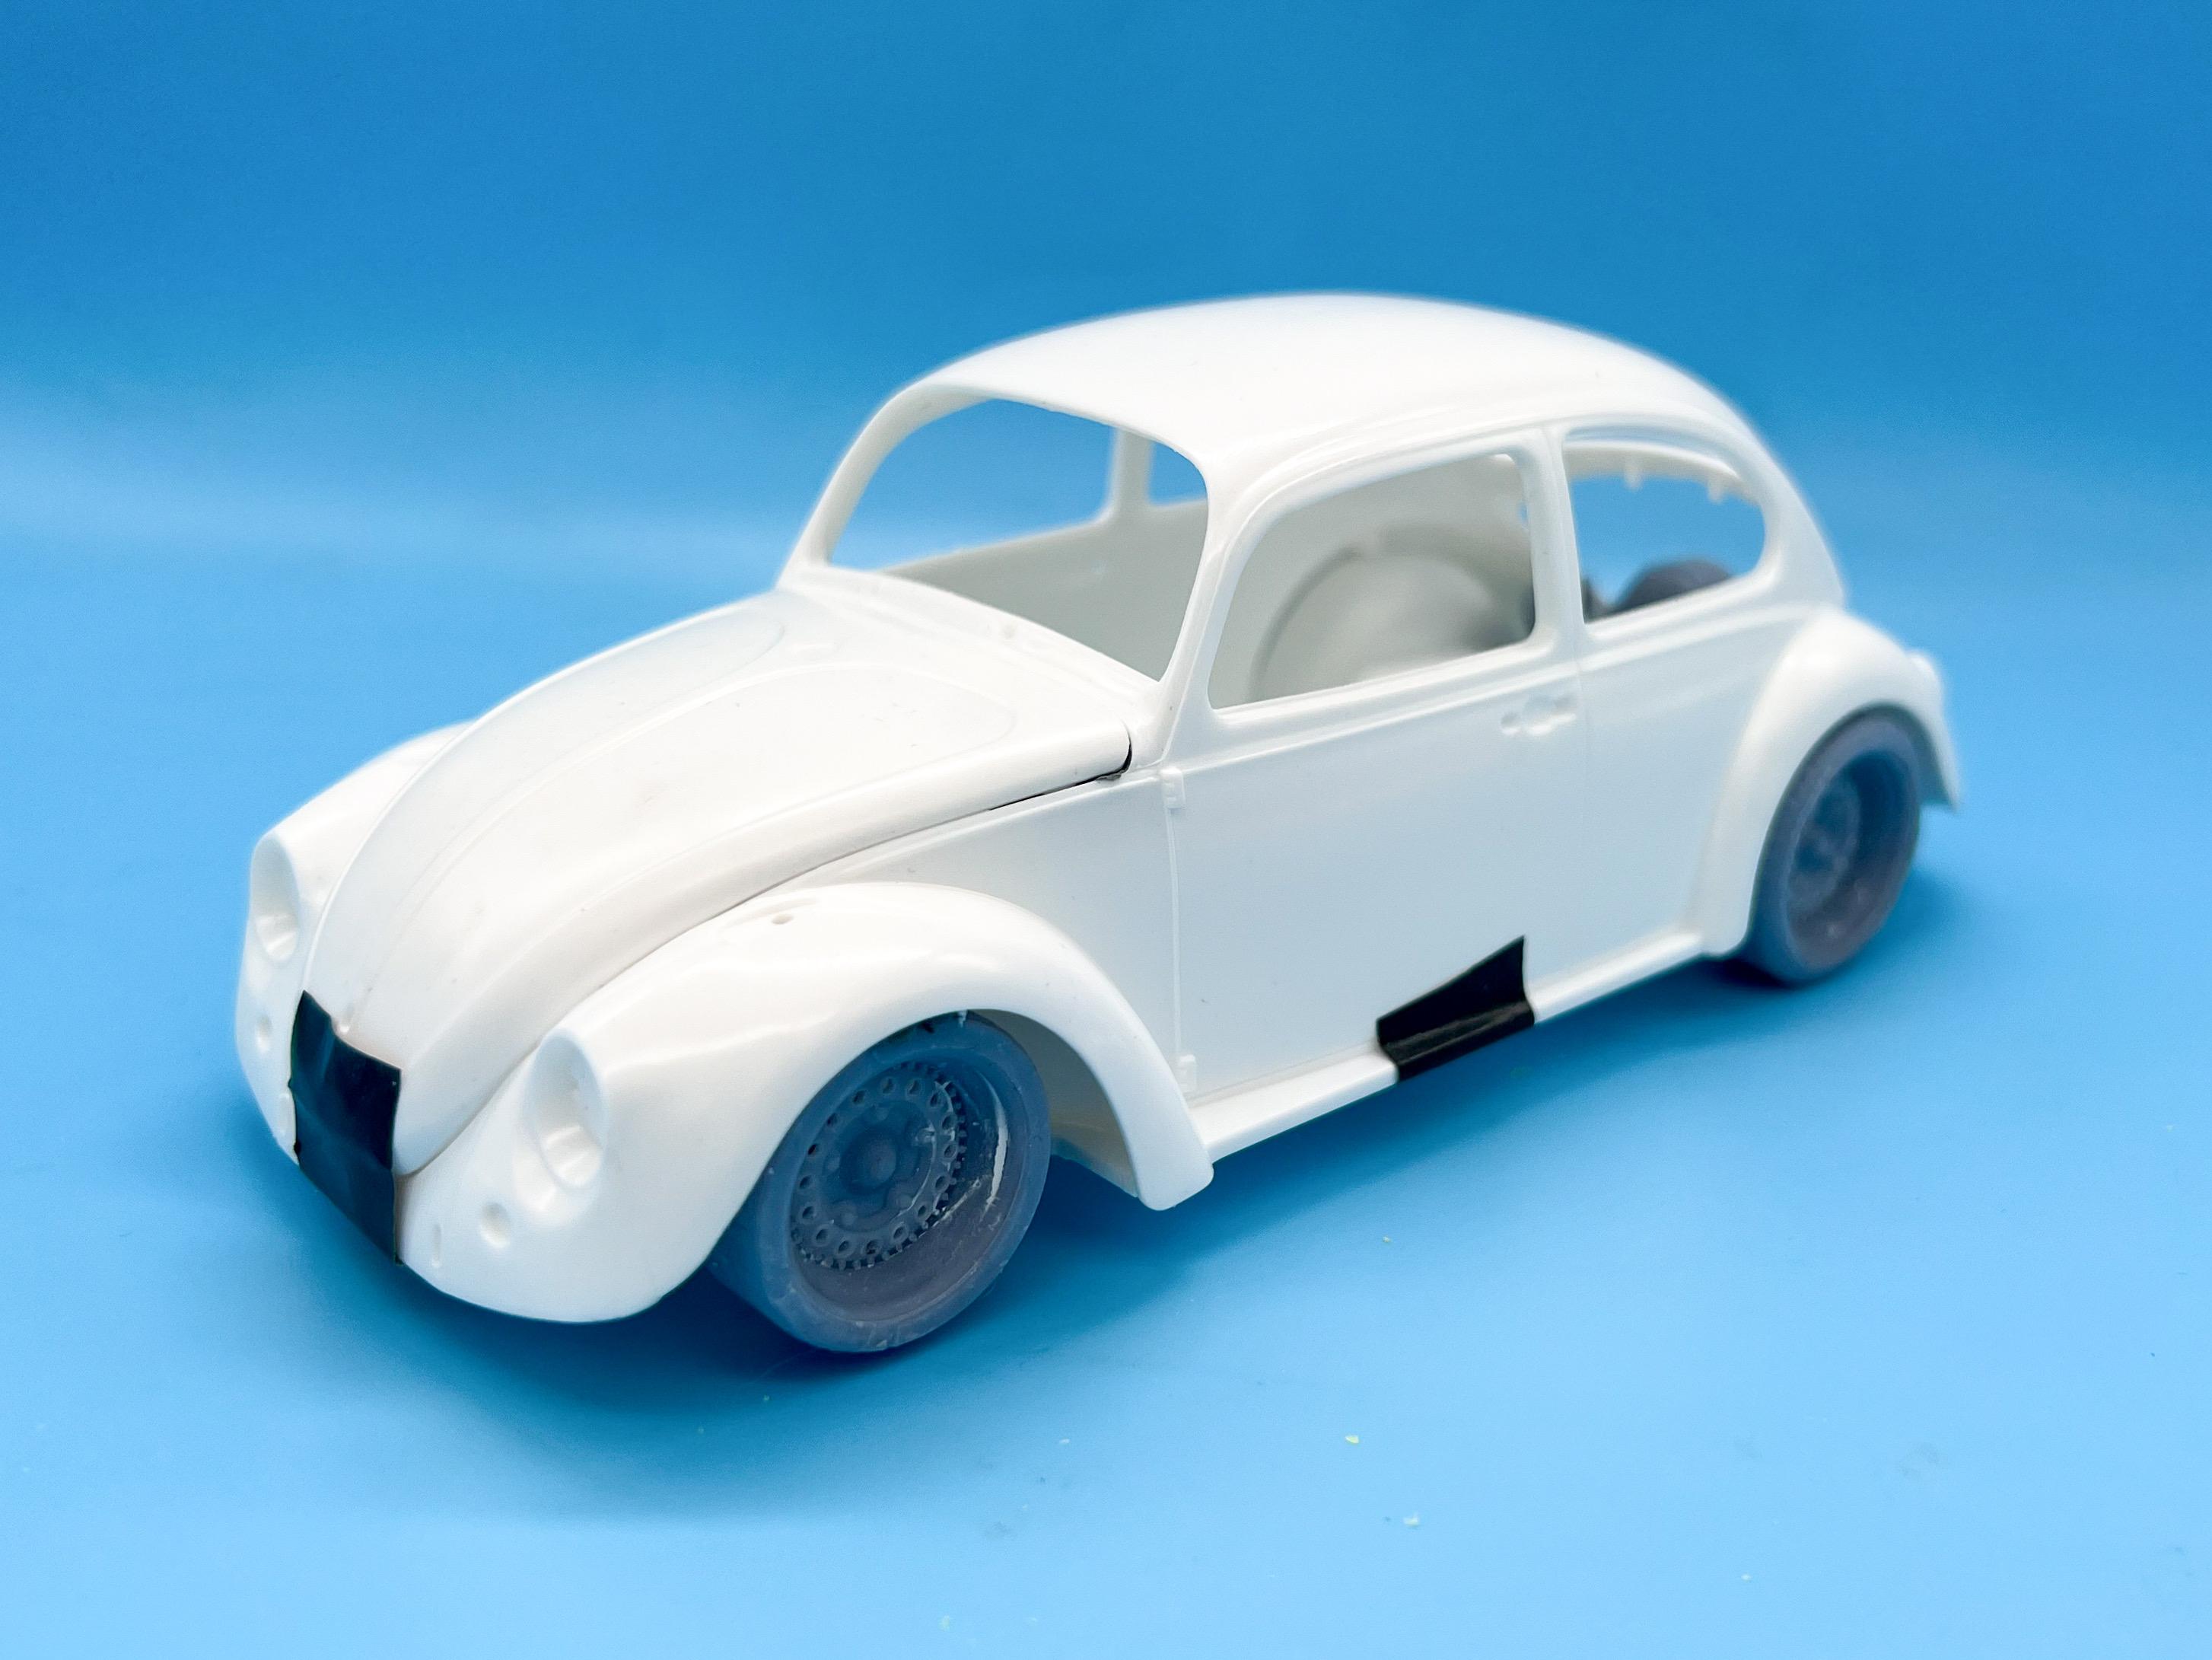
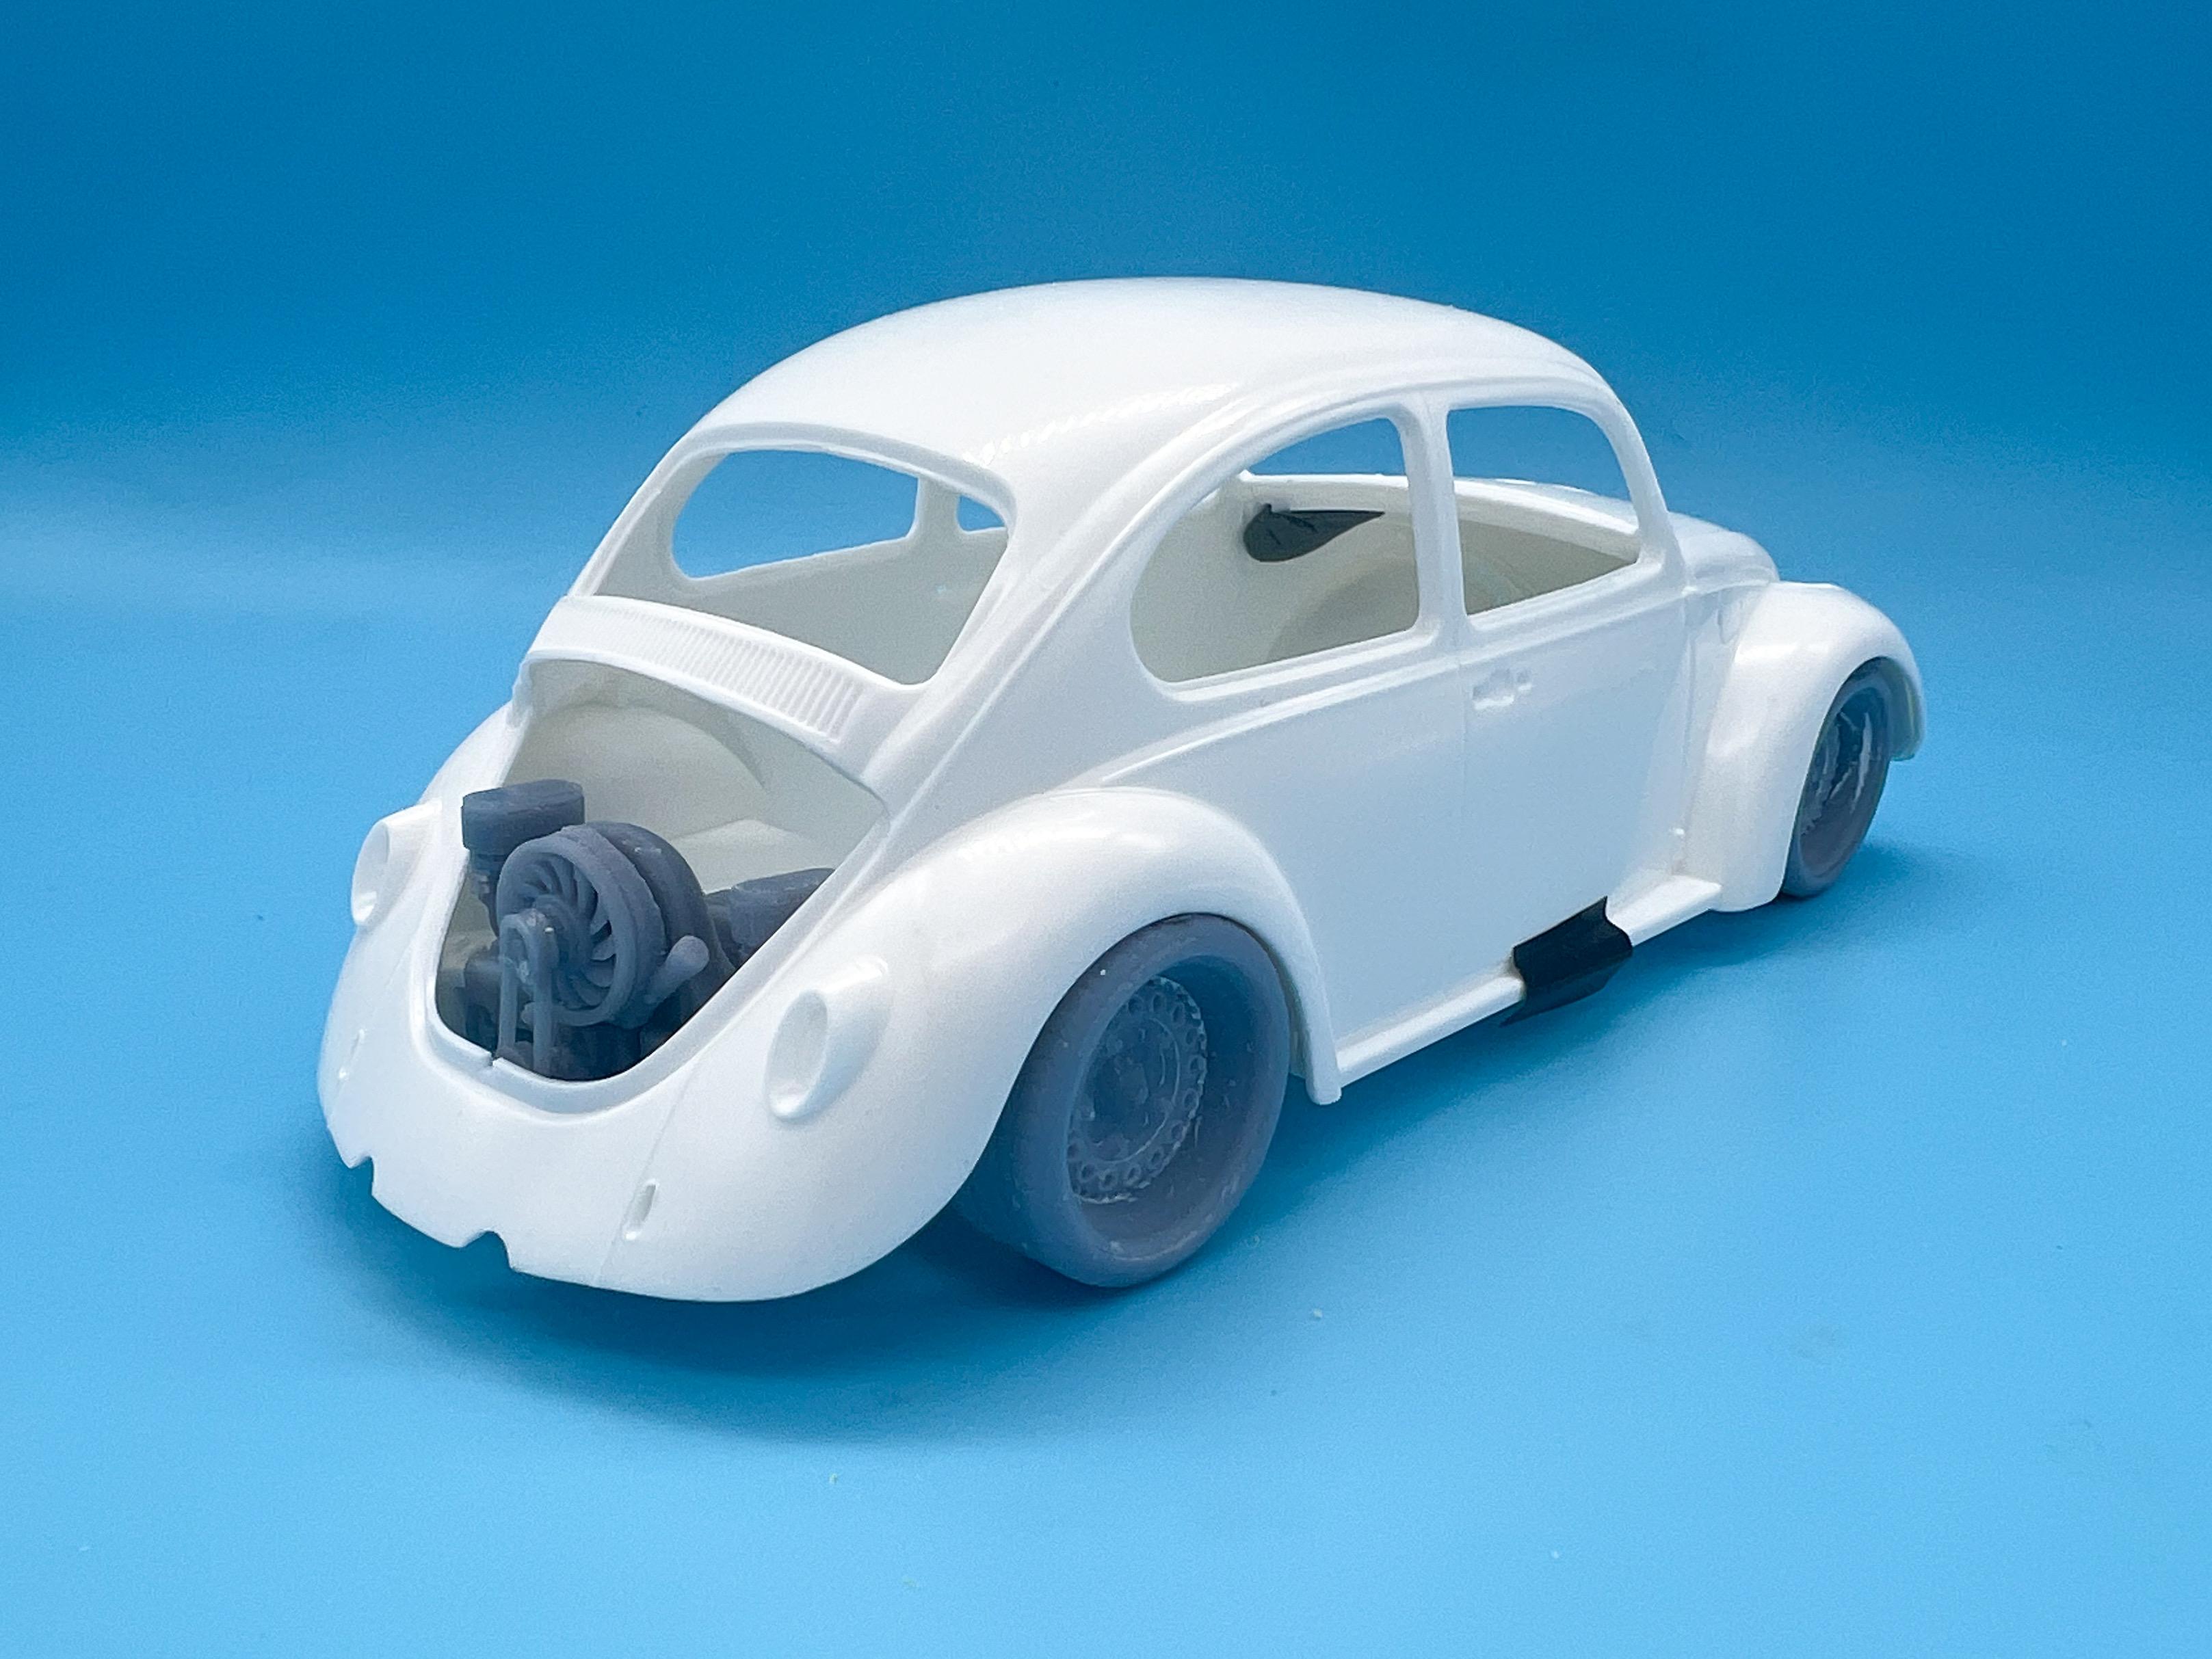
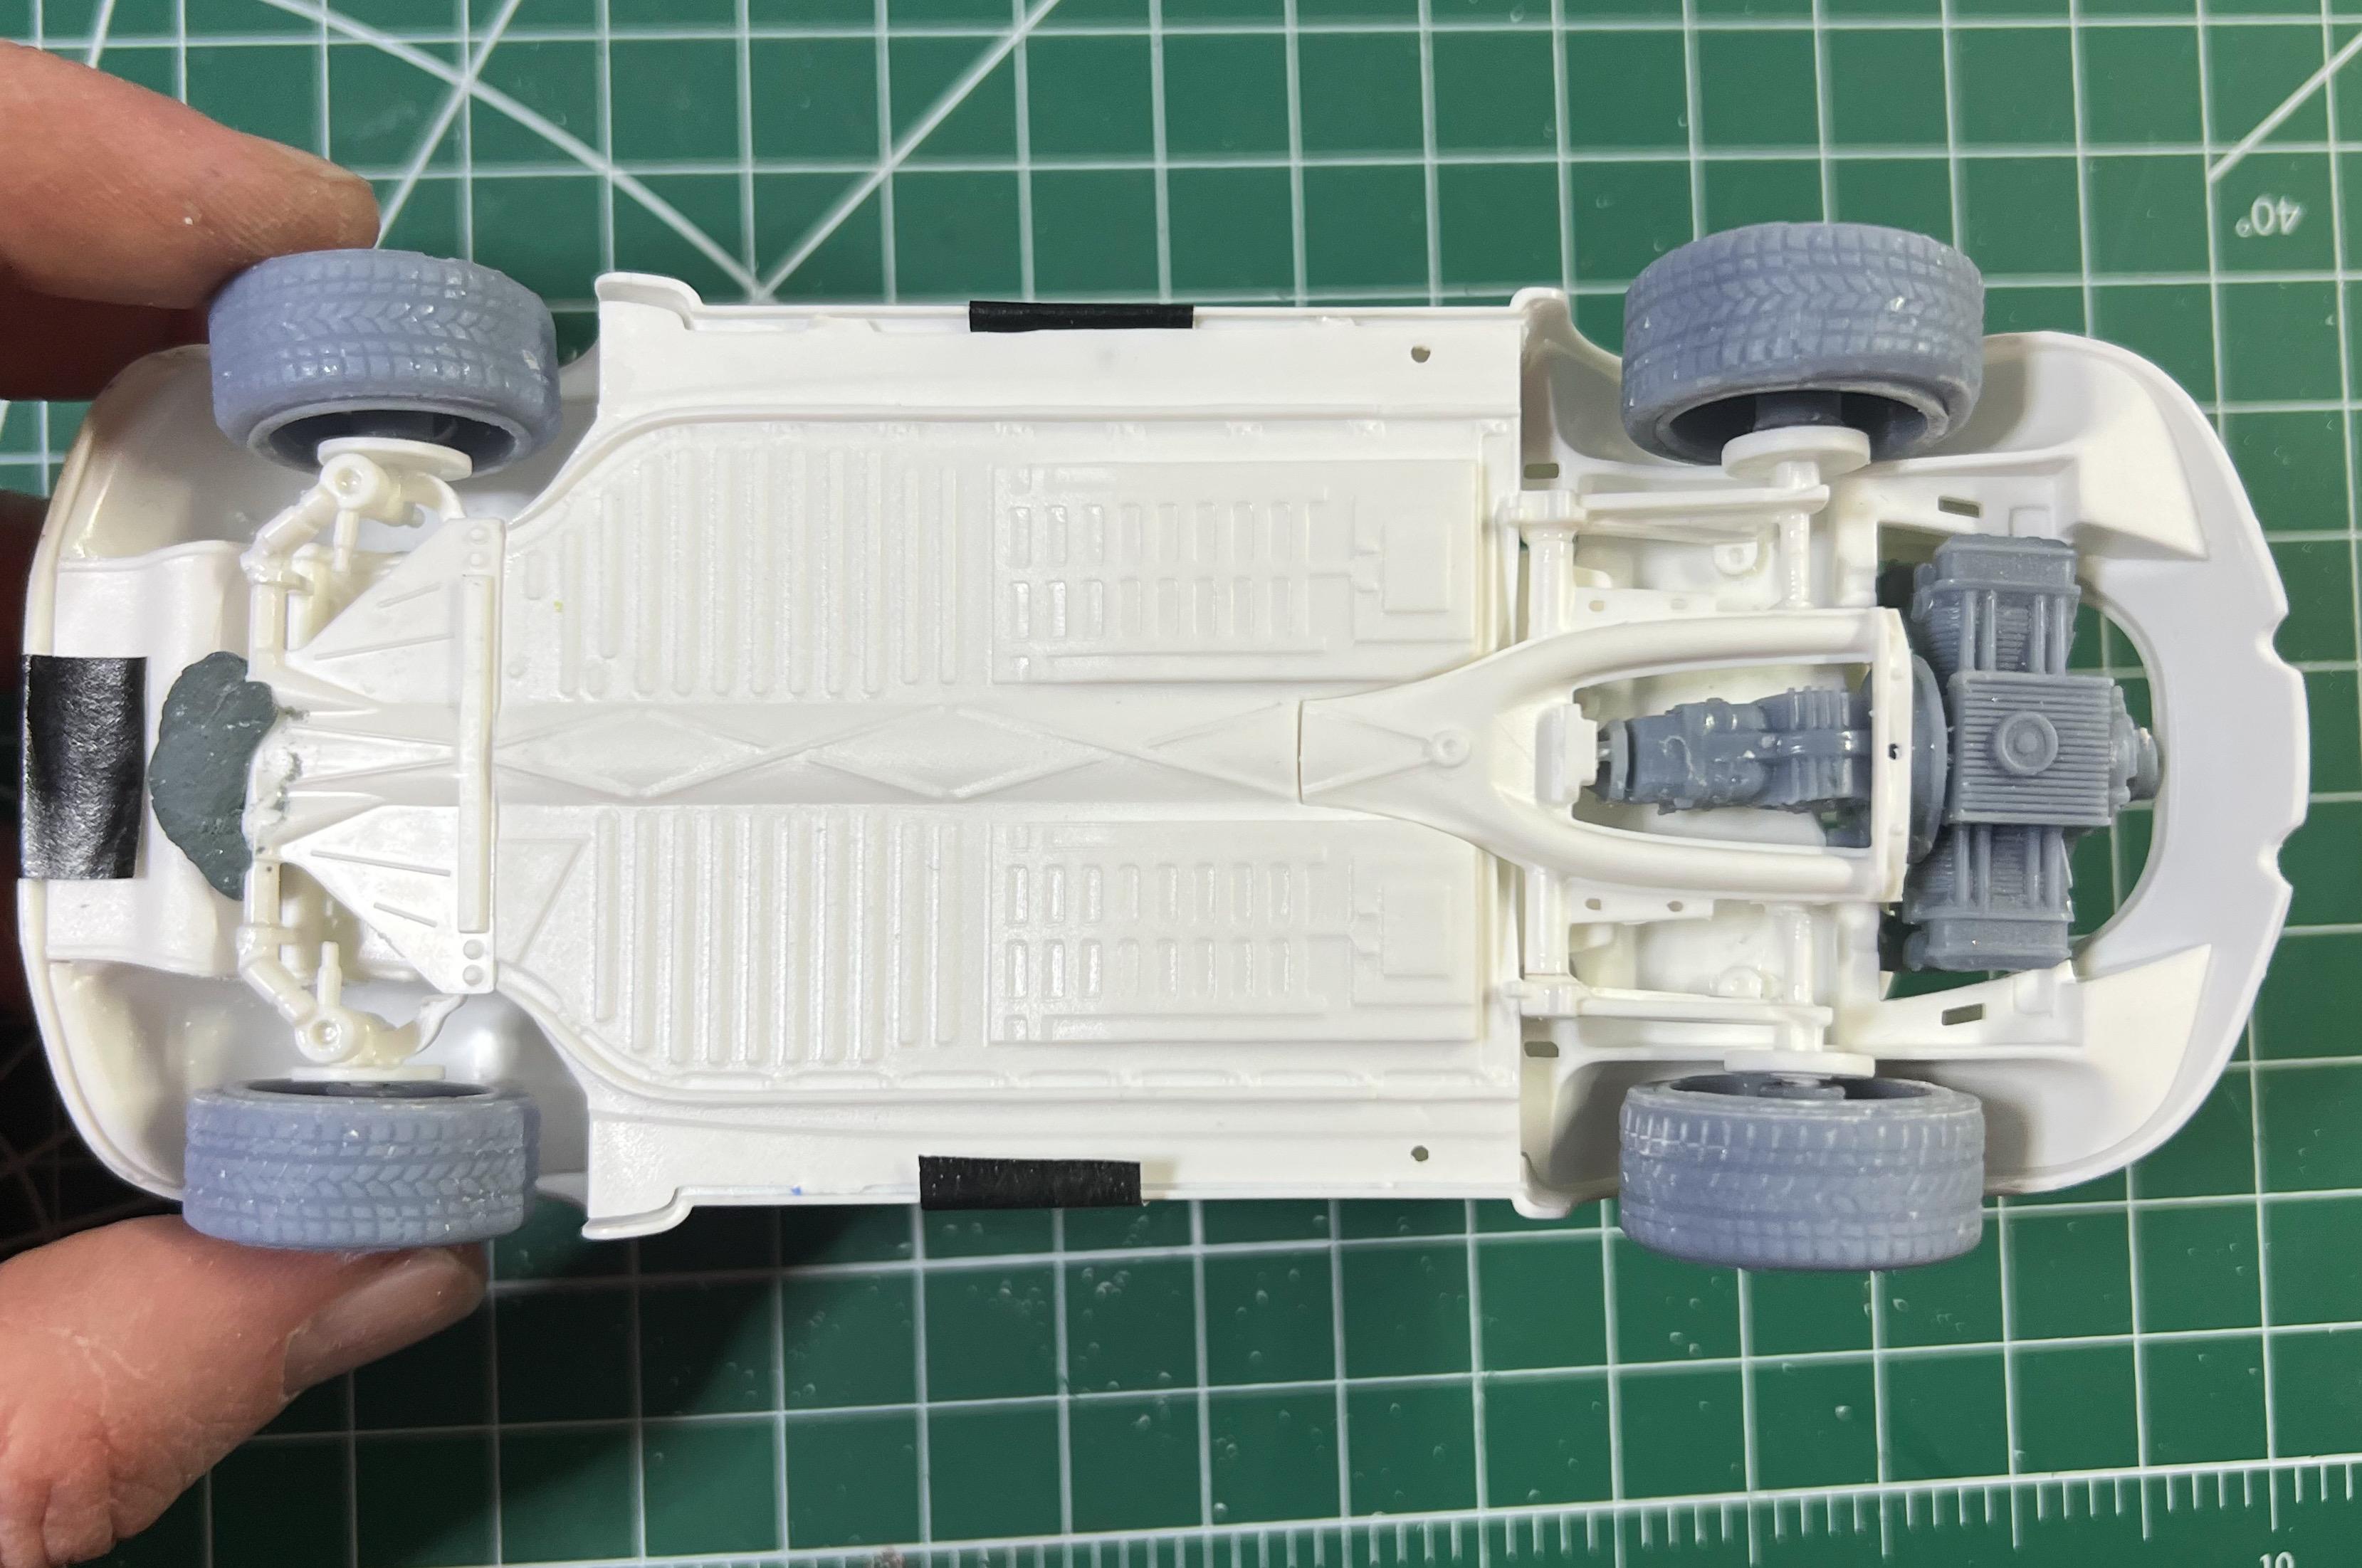
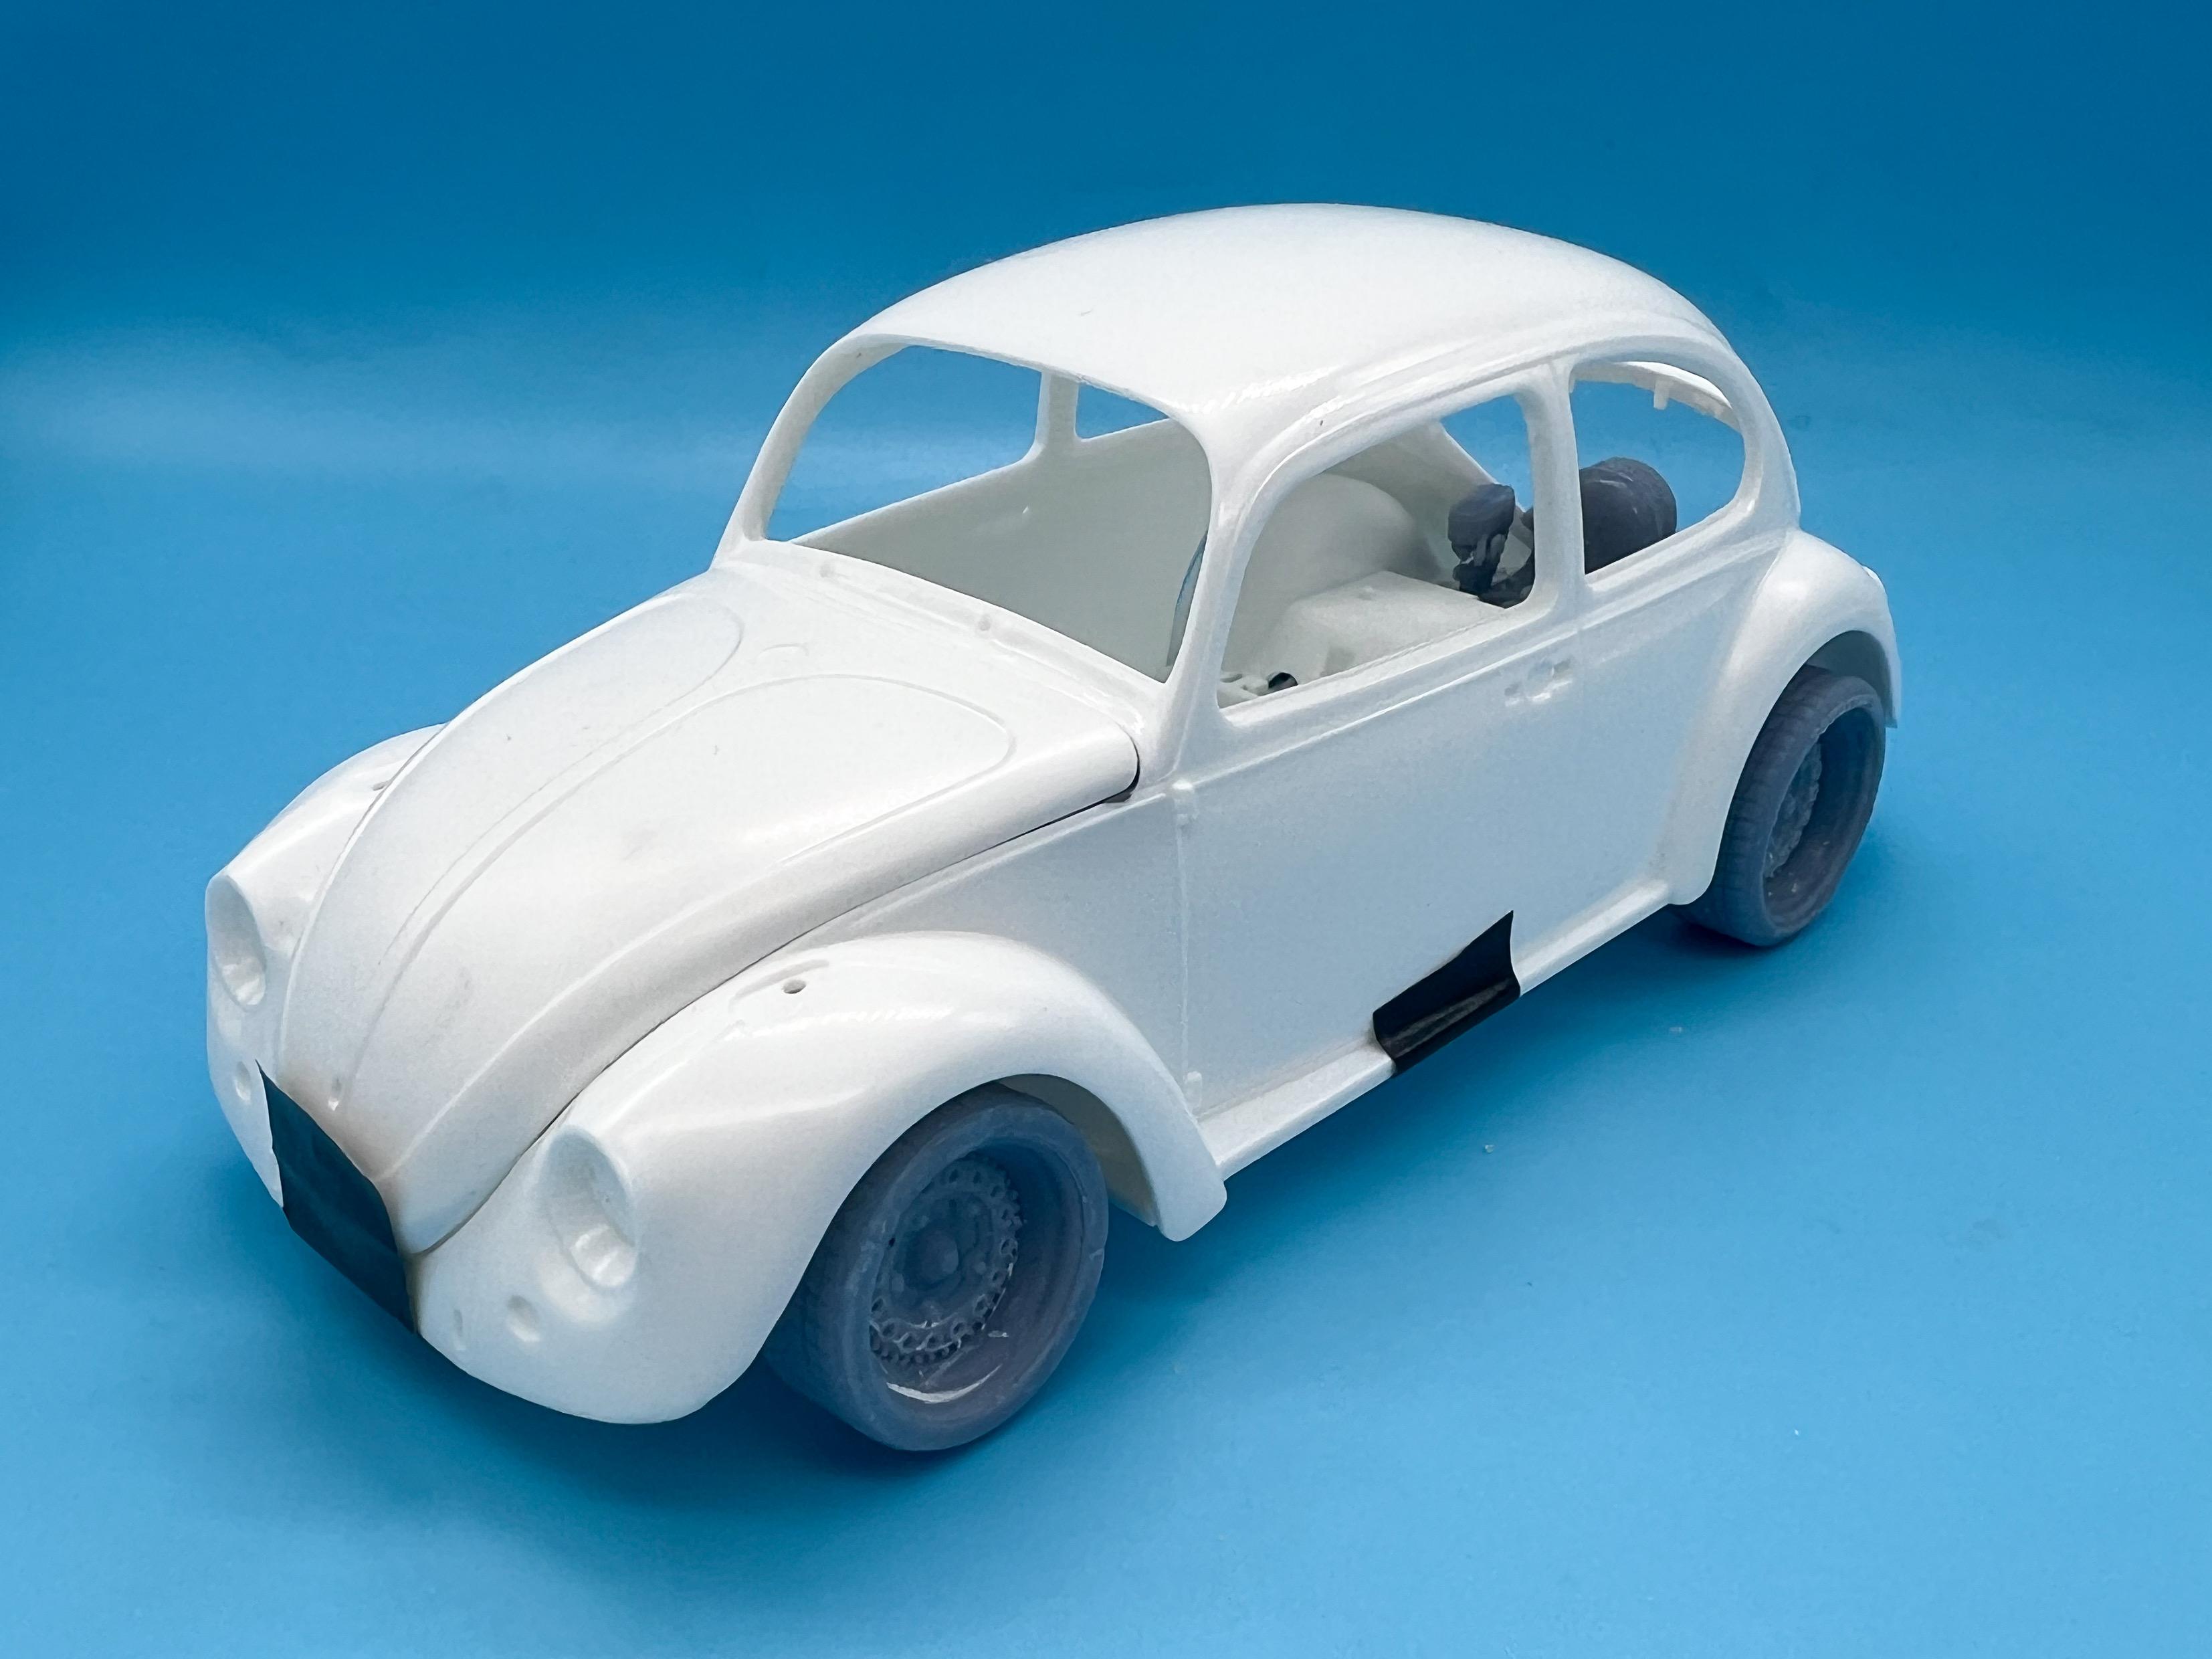
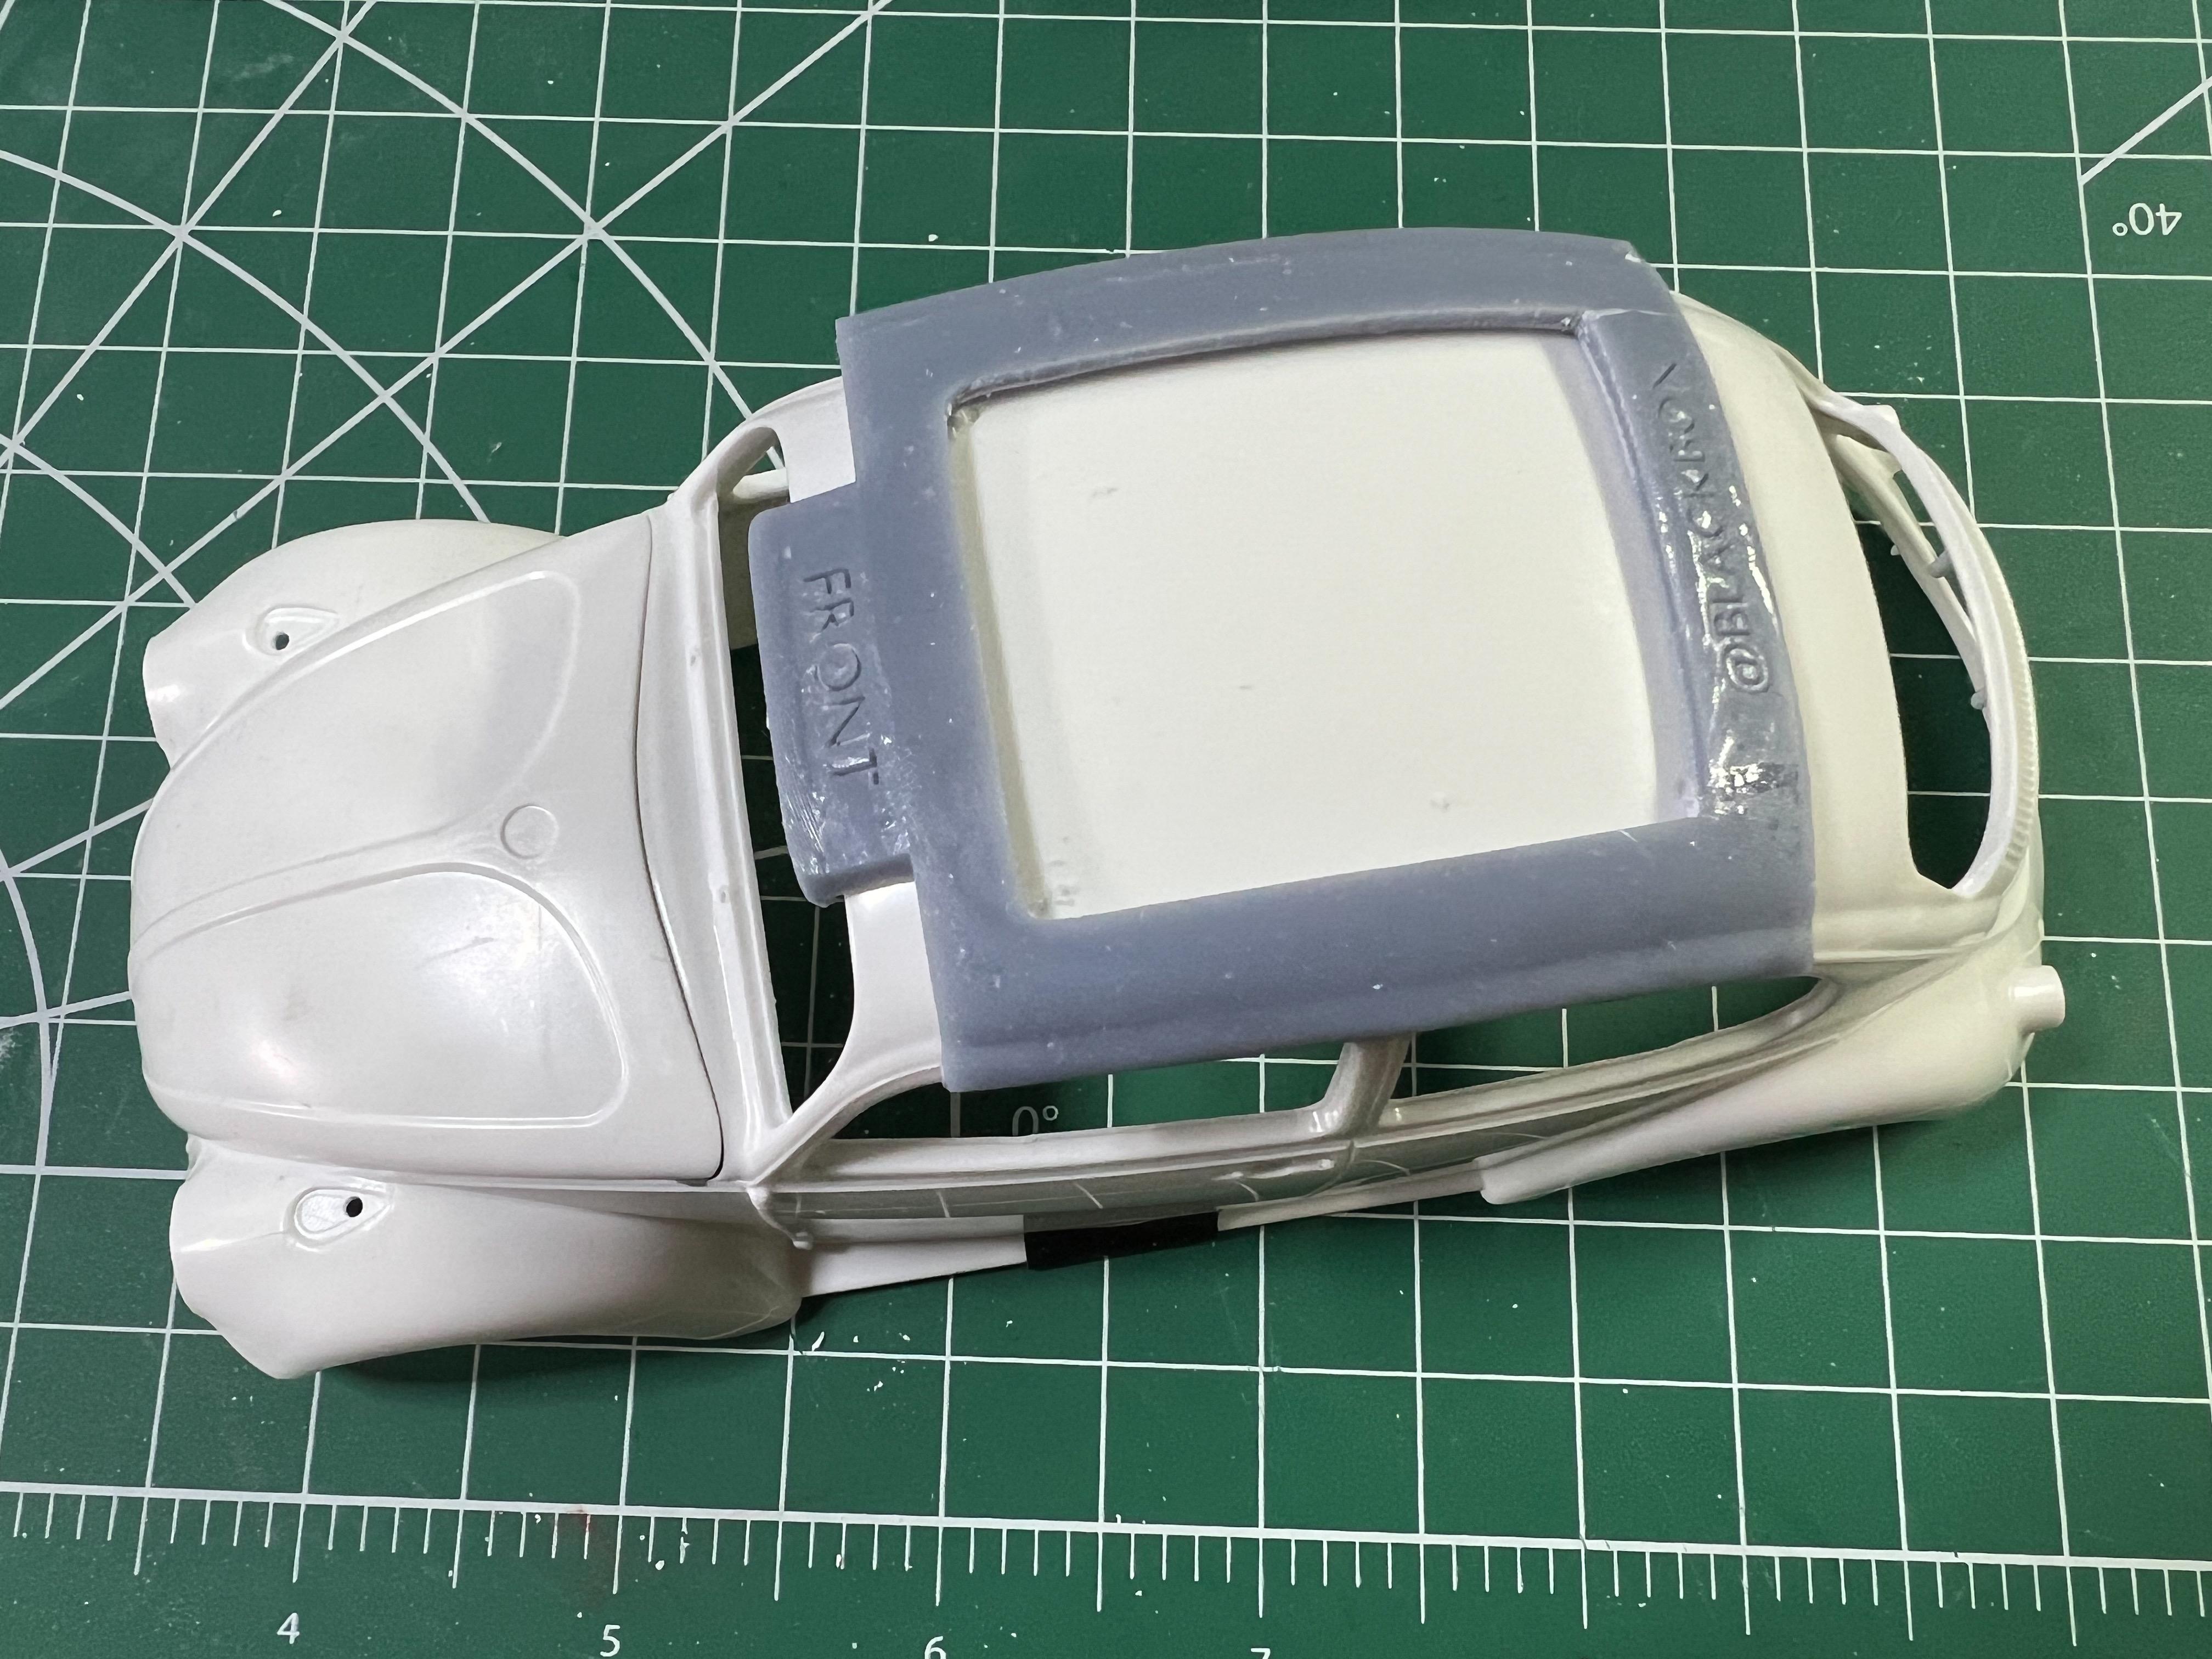
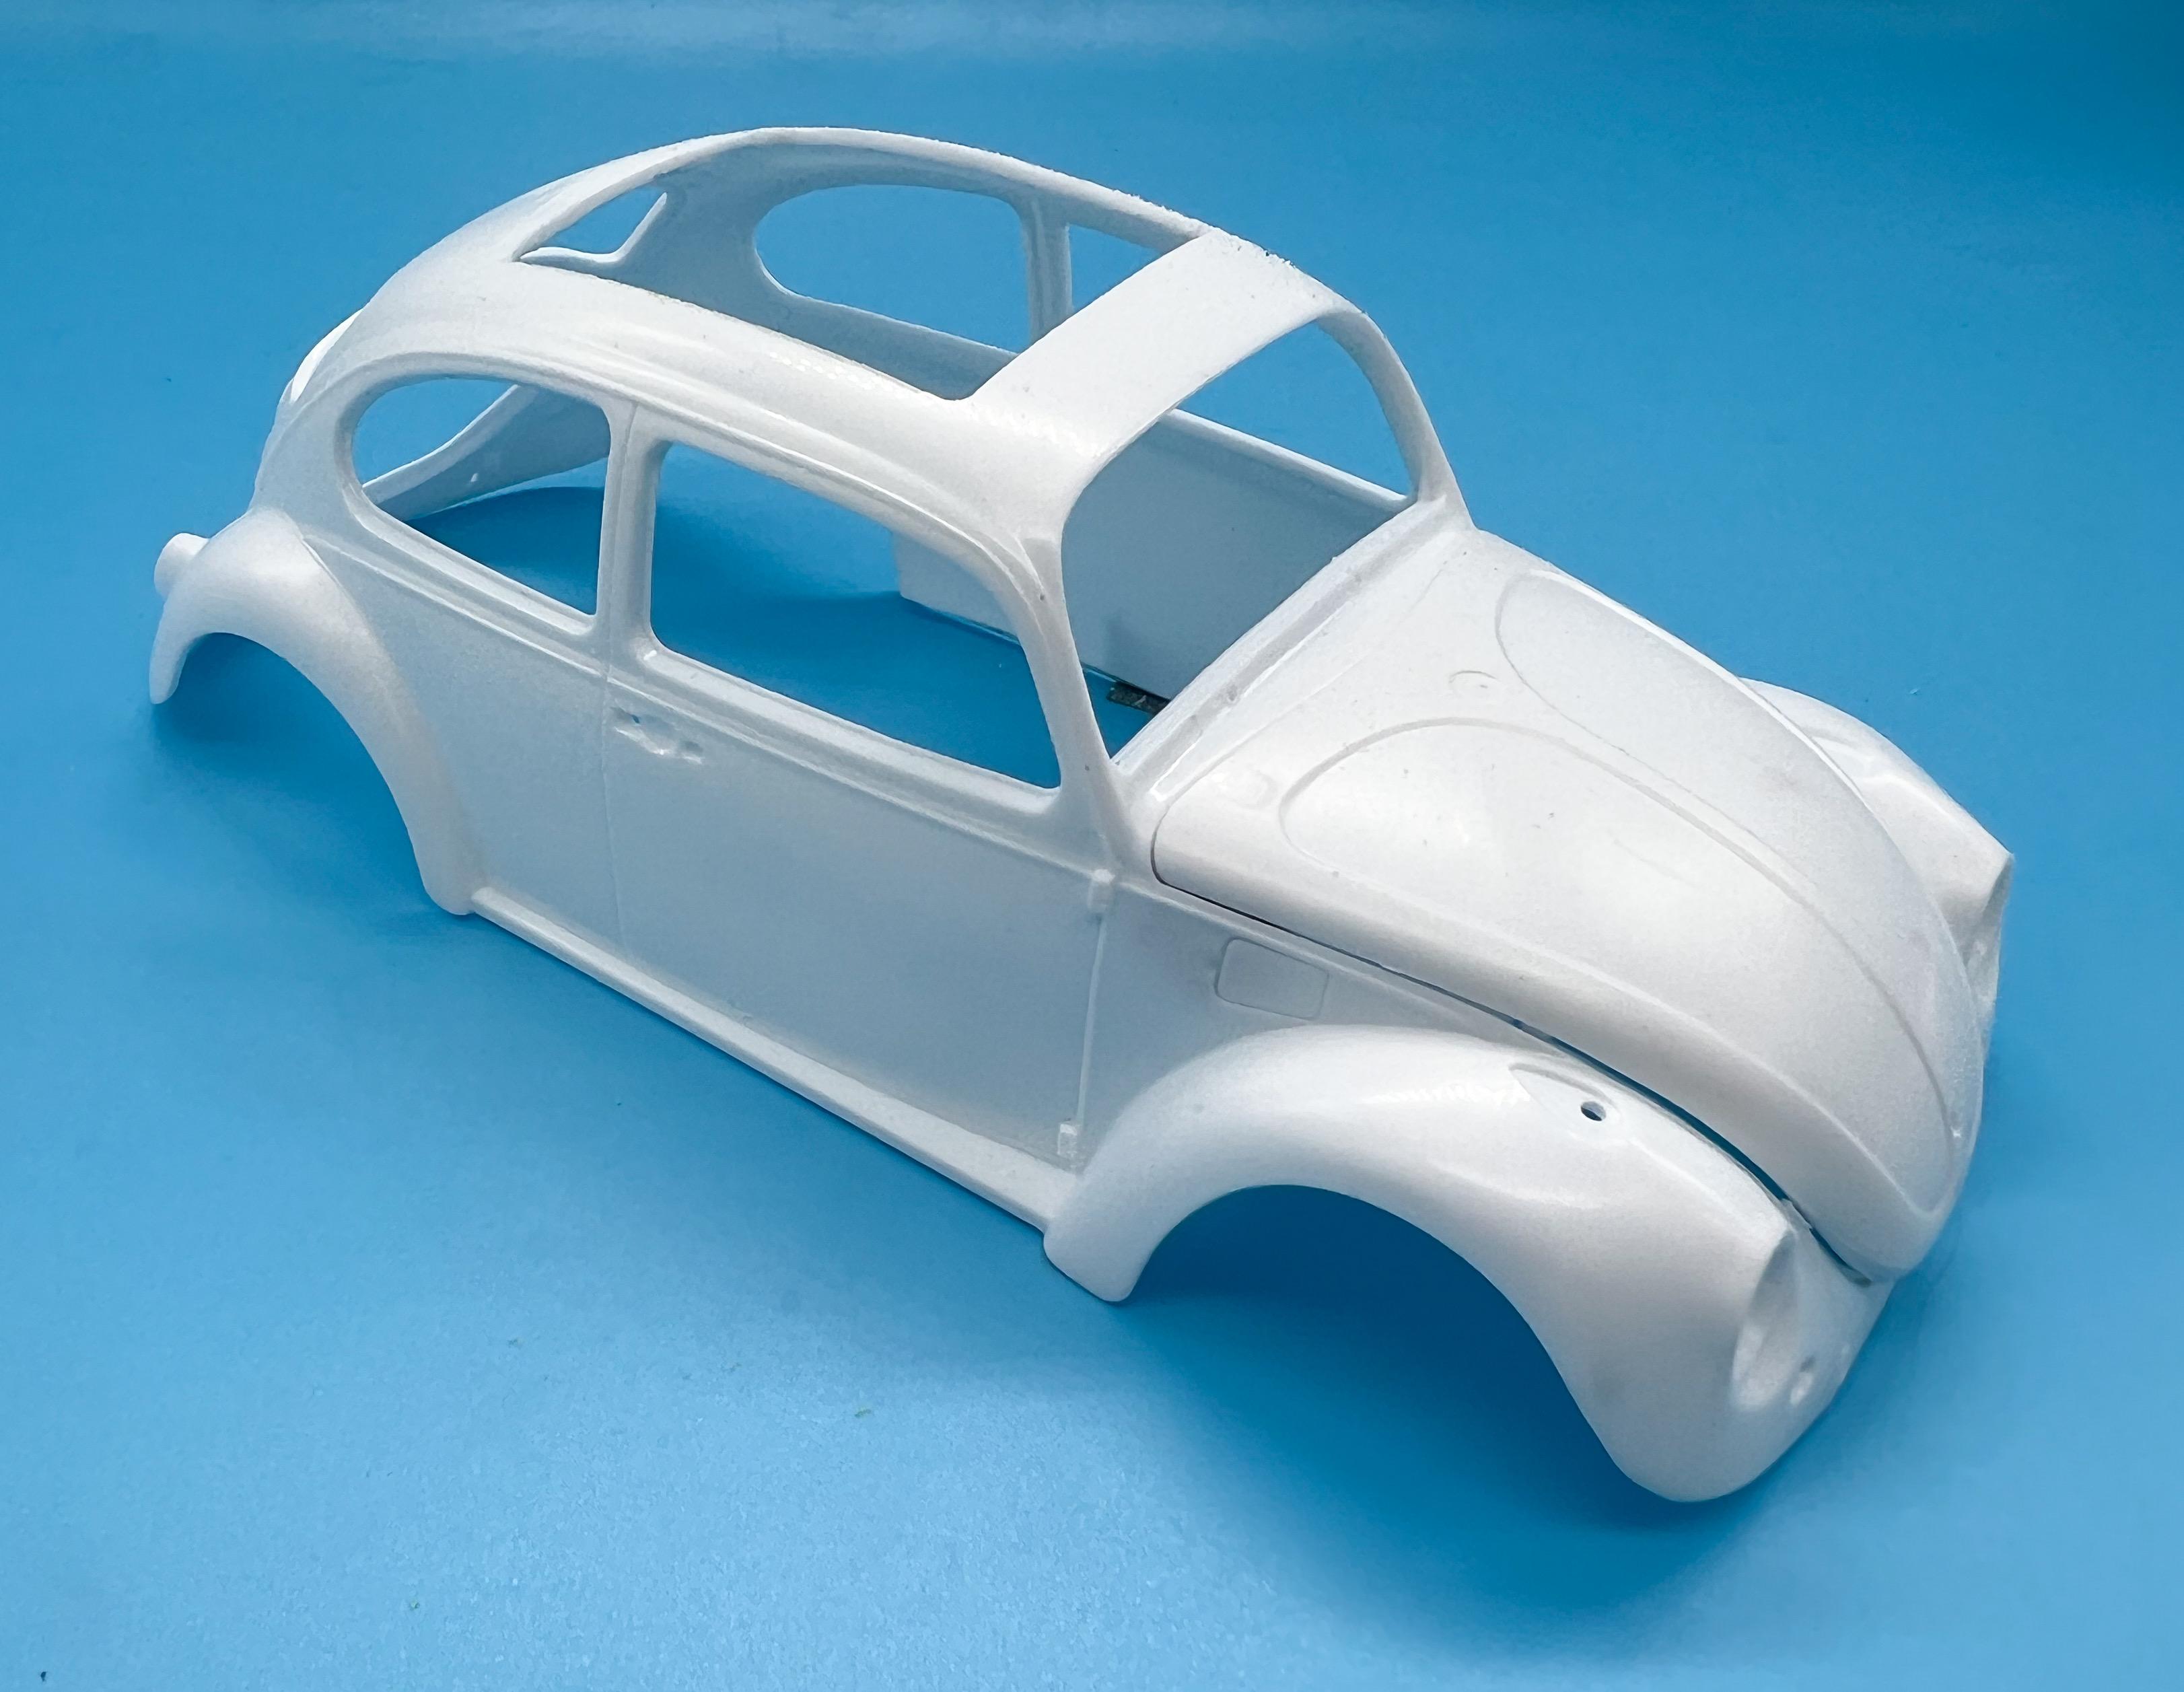
Last year I came up with my take on what the whole Cal-look Beetle trend would’ve looked like if New York got there first and built this: I tried to think what an east coast bug would look like compared to a west coast build - probably a little more ride-height for those potholed city streets, less emphasis on performance and less drag influence - and I figured the cars would look a little tougher and would probably need those bumpers front and rear because people park by feel, not sight, in the five boroughs. Anyhoo, I enjoyed building that Revell kit and wanted to do a companion piece - kinda the same but a little different. Here goes… I’m gonna use the same 356-inspired wheels I used last time - I like the ‘jewelry-ness’ of them (I know that’s not a real term) but I want to fix a couple of things I didn’t like about the Revell kit. The kit engine is built in two ‘layers’ - and it looks ok-ish when it’s done, but the construction is a little weird to me…anyone who’s built one of these will know what I’m talking about. So, I’m ditching the kit parts and swapping in a 3D printed version from Blackbox STL: First job is to drop the kit suspension some - I’m not going for ‘slammed’ here, but a realistic practical-ish drop. To go that, I had to separate the rear trailing arms and reglue them, whilst narrowing them a little in the process to fit wider wheels, and do a similar process on the front axle too: It’s all a little wobbly here but I tested with some Elmers and it all works how I hoped. Ride height check: Going to drop it a smidge more in the rear, but it’s close to what I imagined… Next job, use this handy dandy template (also from Blackbox…): To open up a moonroof: The interior on these kits is so nice, it’s a shame to hide it… I’m going to try and really push myself on the paintjob for this one and try some new stuff…more on that later, but it’ll definitely have some sparkles: And that’s about how far I got so far…more soon, soon as I’ve done more!
-
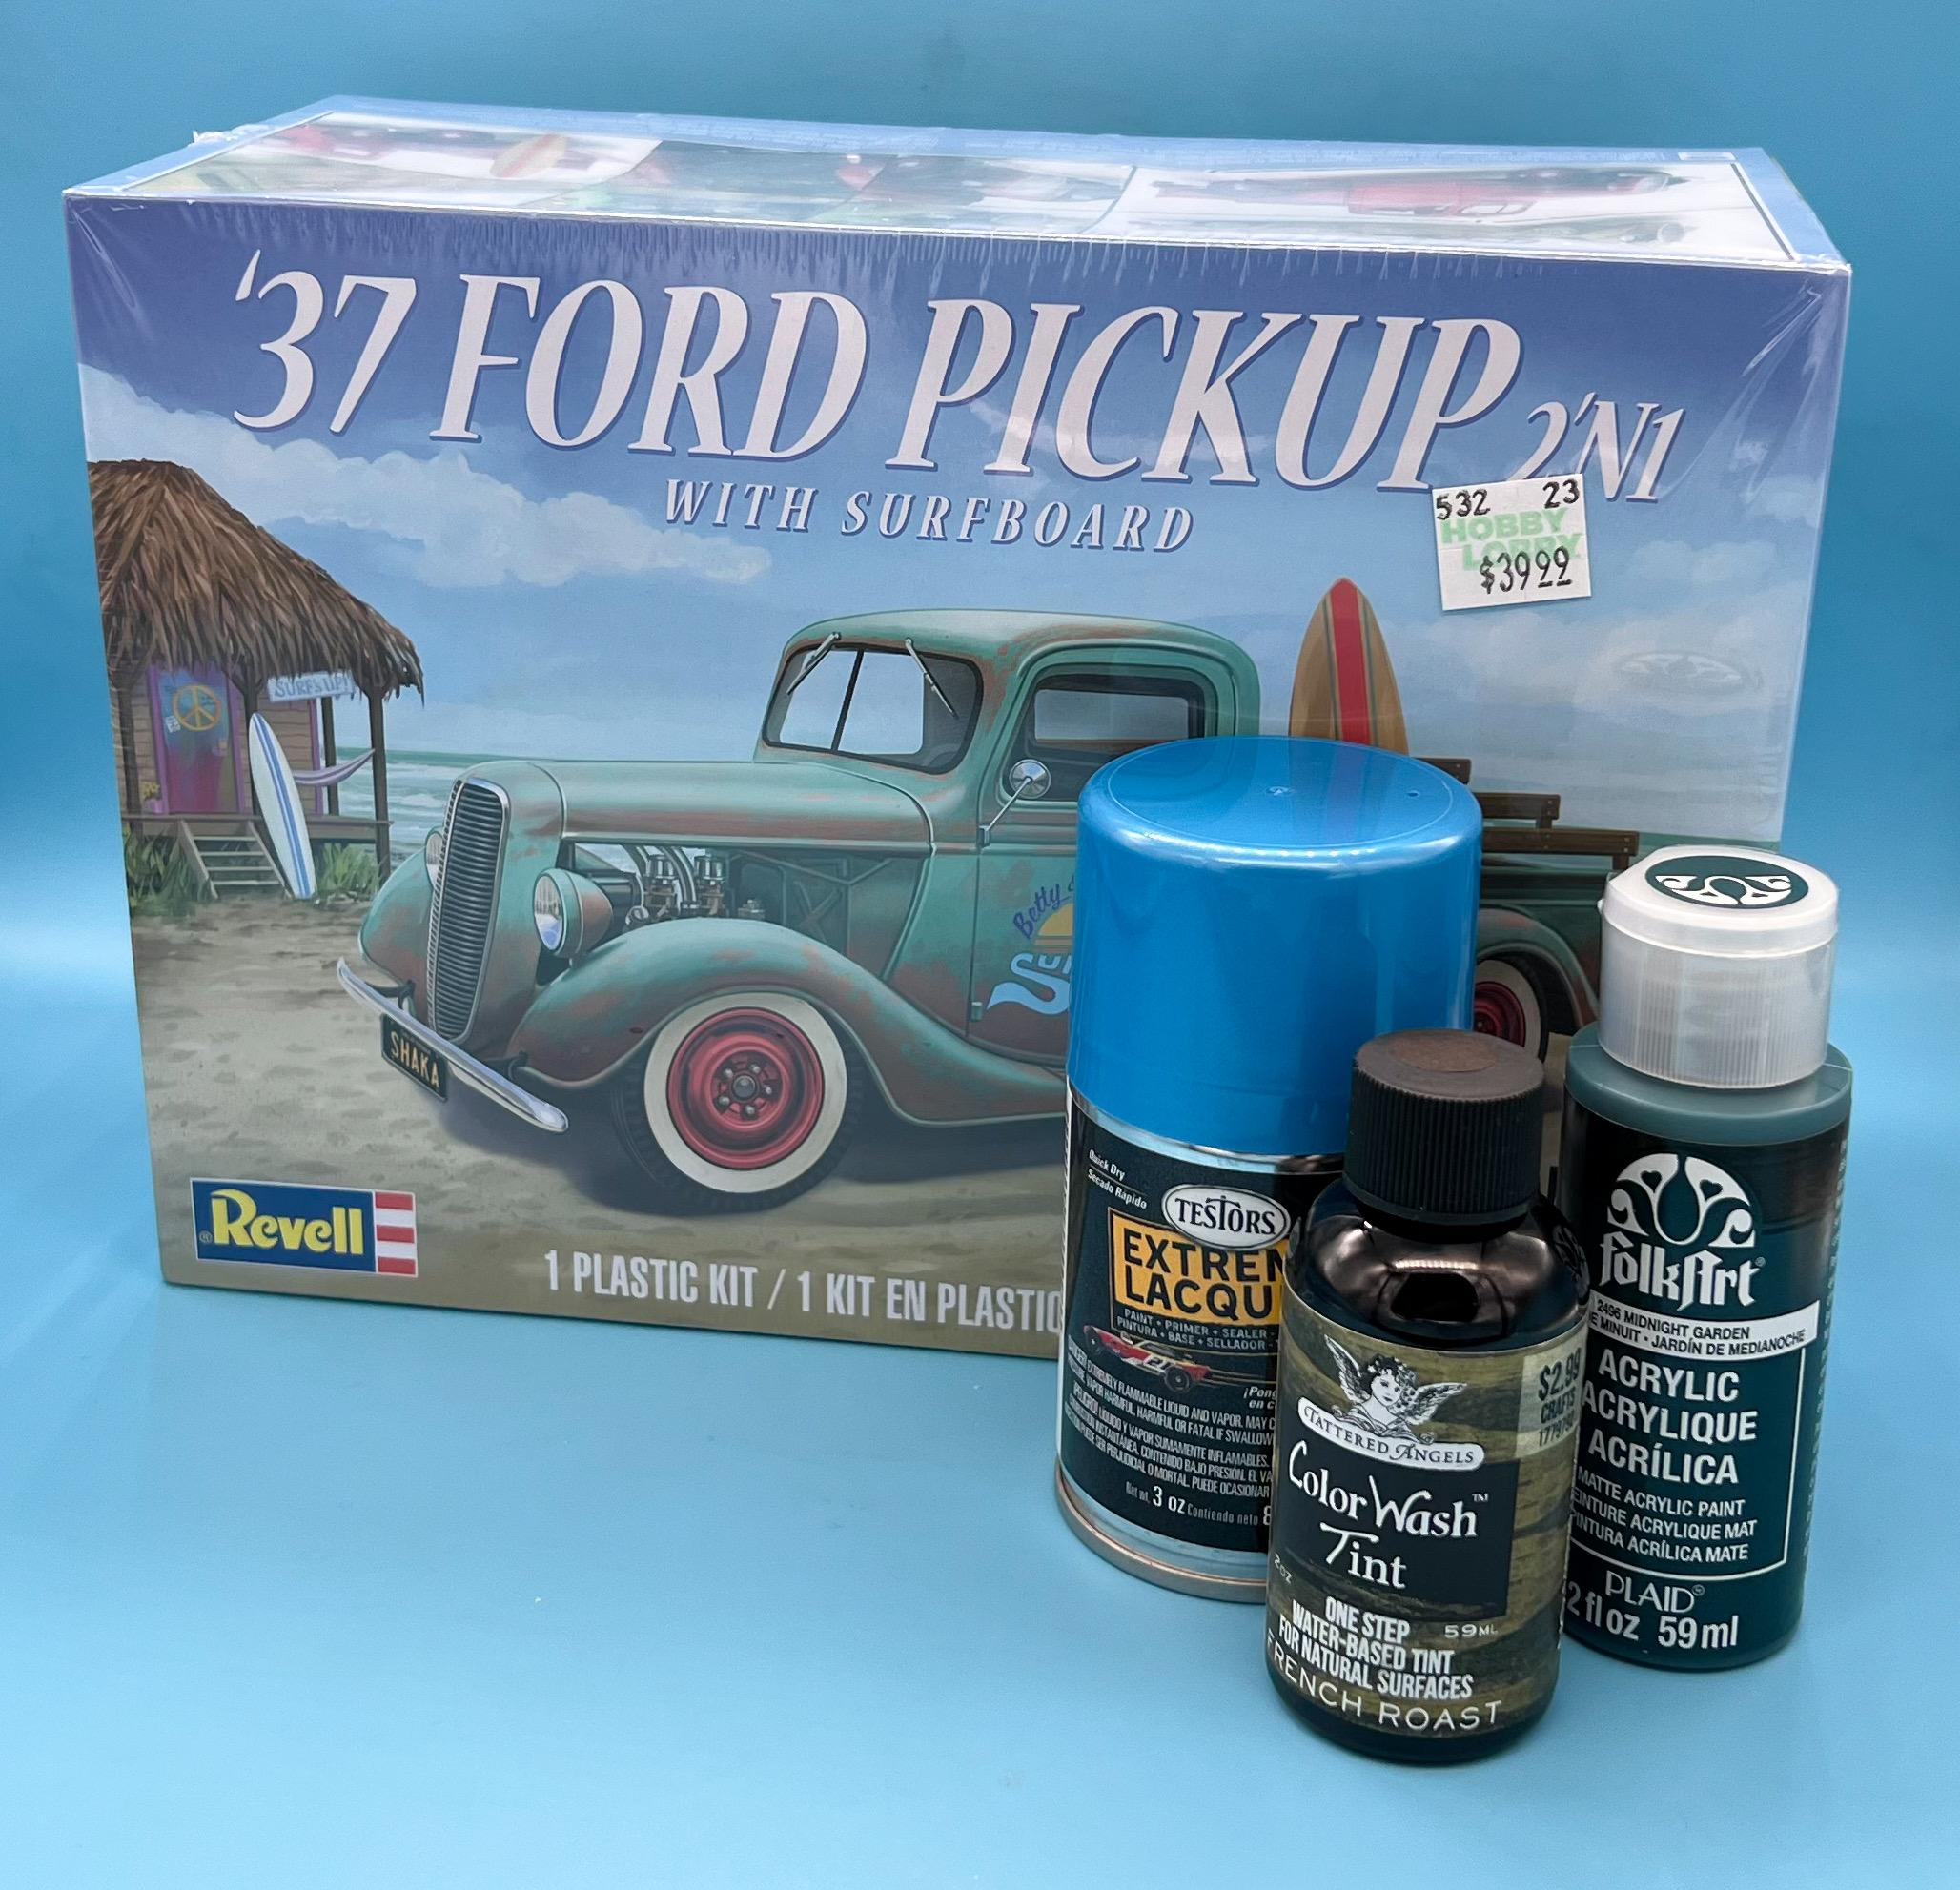
My local HL got a restock since my last visit - still doesn’t have any of the Revell 55 Gasser kits; but I had wanted one of the Revell 37 Fords so that followed me home: Plus some lacquer, a new color of a wash I’ve been enjoying experimenting with lately, and some acrylic for a diorama piece I’m working on…
- 38,884 replies
-
- 3
-

-
- johan
- glue bombs
- (and 1 more)
-
Mailcall! I’ve been wanting to build one of these: Funny thing - I forgot I had ordered one of these already, so I had two arrive from different places a day apart ??
- 38,884 replies
-
- 2
-
-
- johan
- glue bombs
- (and 1 more)
-
Gseeds (Gary's ) YouTube channel
OldNYJim replied to Scott8950's topic in General Automotive Talk (Trucks and Cars)
Ohh, this channel looks great! Something to watch tomorrow during Saturday bench time! Thank you! -
Revell 29 closed cab pickup
OldNYJim replied to Bullybeef's topic in WIP: Model Trucks: Pickups, Vans, SUVs, Light Commercial
That’s a great way to look at it! Love the wheels, they look good from where I’m sitting -
That color looks great @jaymcminn! Im gonna build a NY taxi, so I needed to draw up an sign for the roof: Not ‘real’ modeling work I know…but it will be once I print one and glue it to something!
-
Thank you sir! Speaking of extra touches, final part of this build was finishing up the windshield…firstly, painting the rubber gasket… Then printing and painting a windshield wiper… And once that and the little chrome divider bar were fitted to the front glass that’ was about a wrap on this one: Far from perfect, and if I did it again I’d change about twenty things - but I learned a bunch and had fun! Thanks for following along and all the nice comments!
-
Not the most fun process...thanks for the info on the decals! Appreciate the info Bill!
- 38,884 replies
-
- 1
-
-
- johan
- glue bombs
- (and 1 more)
-
I do not - I was planning on ordering a set from SOMEONE - how was the quality on the ones you received? Thanks for the heads up! I can mask and paint the bigger graphics, but I would need a sheet for the smaller stuff anyway so I'll probably end up picking up a set...
-
Got tired of waiting for Hobby Lobby to restock so I ordered online…excited to build me a Badman!
- 38,884 replies
-
- 1
-
-
- johan
- glue bombs
- (and 1 more)
-
I apparently missed this the first time around…outstanding collection Bob! You should be proud! I always enjoy seeing your work - and you always present it so well! Kudos!
-
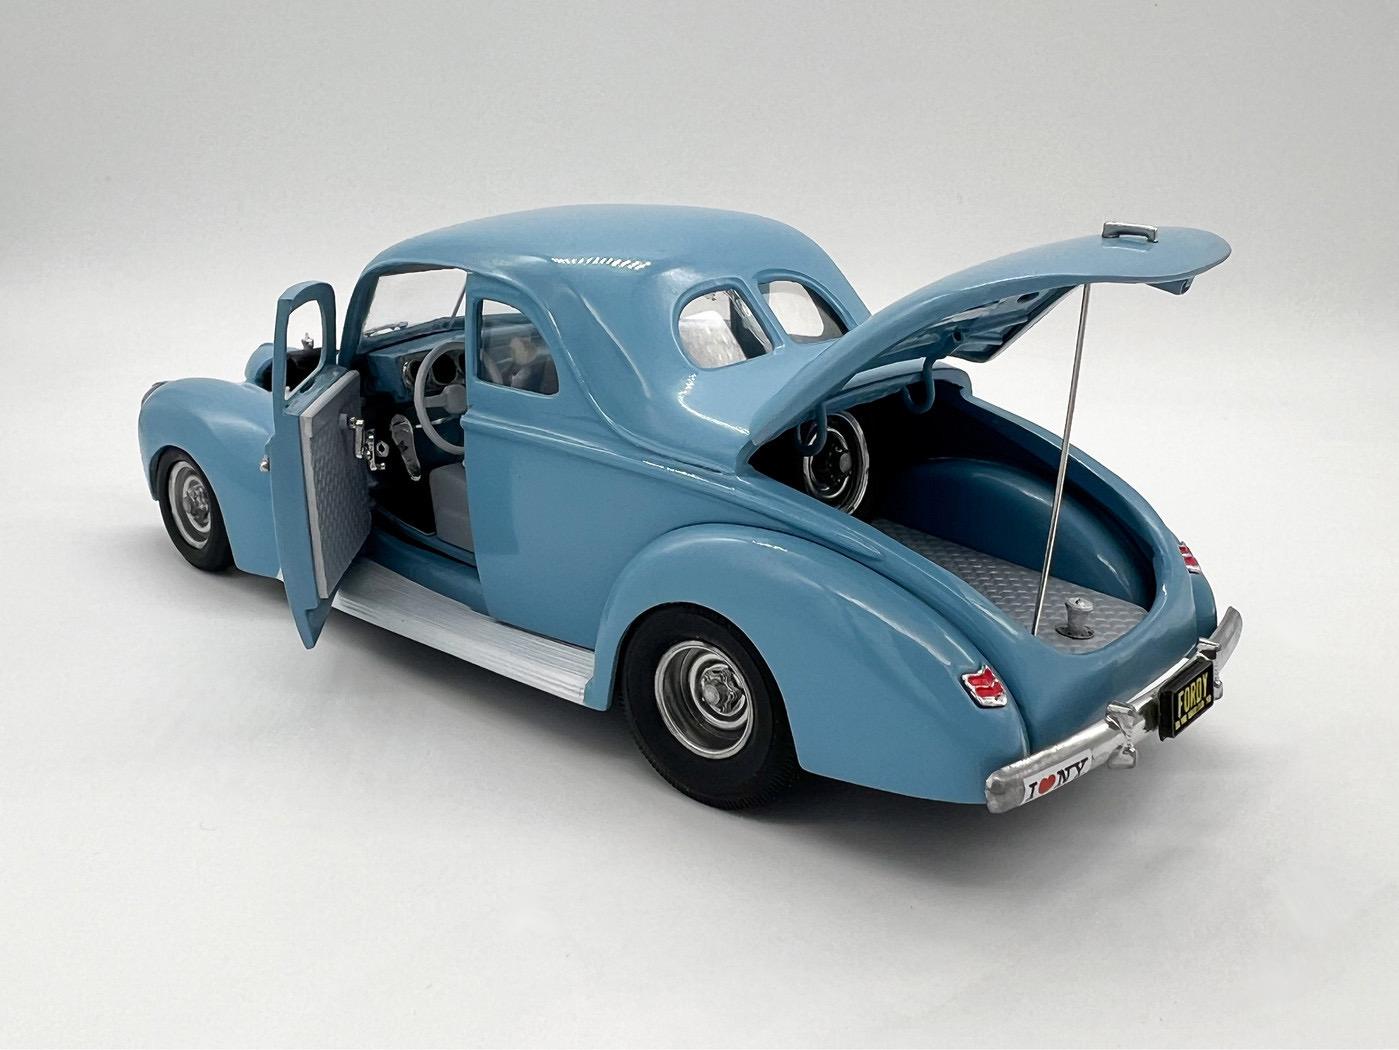
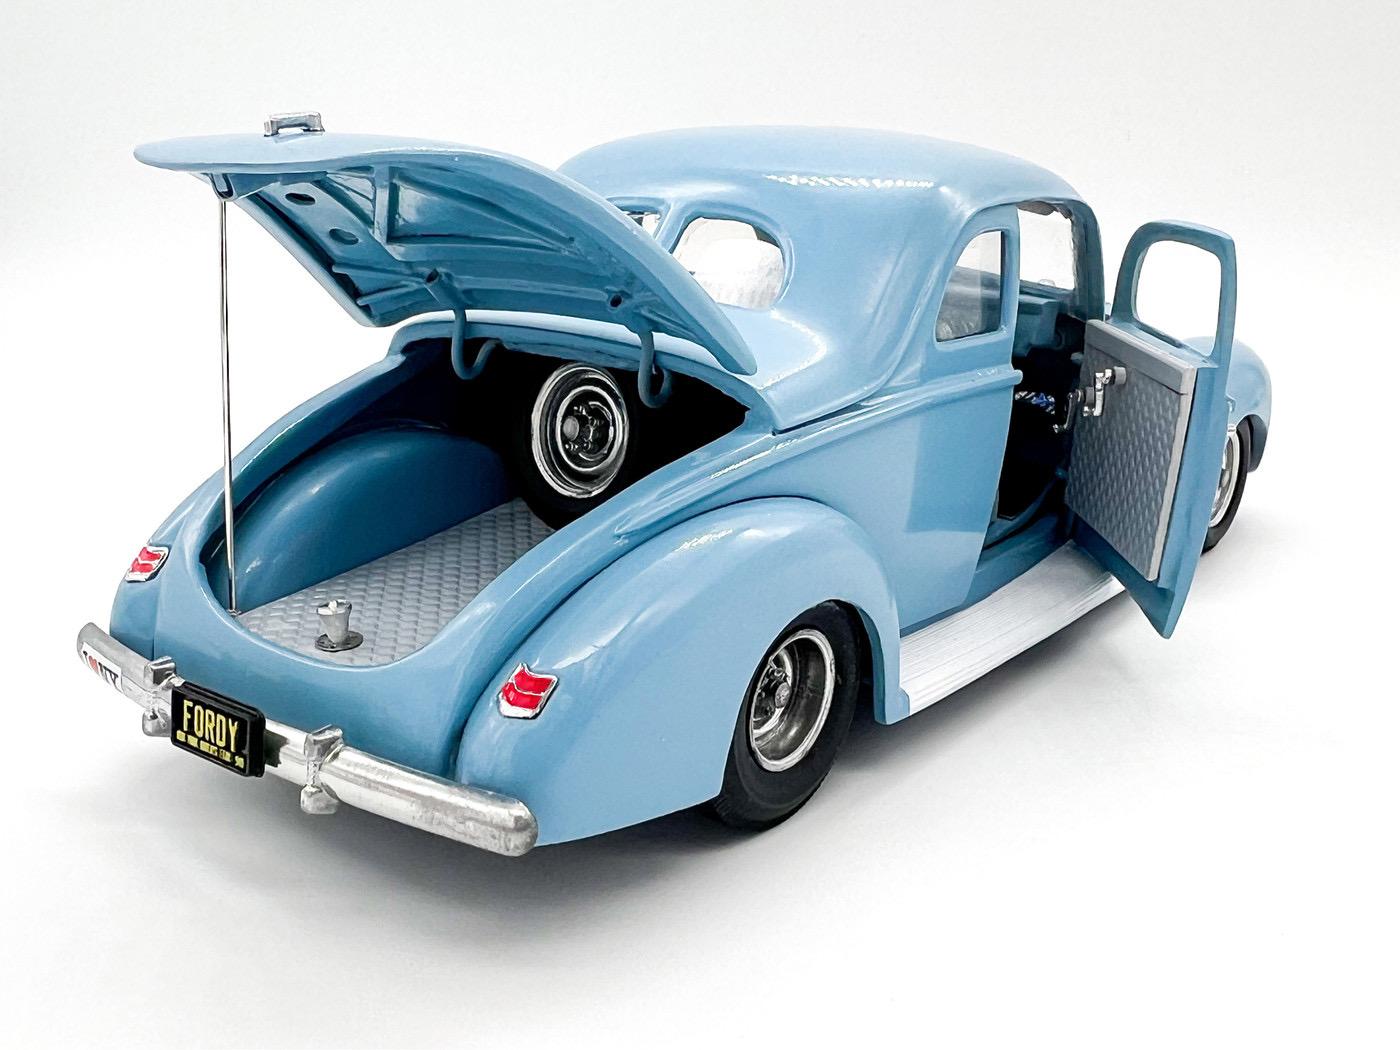
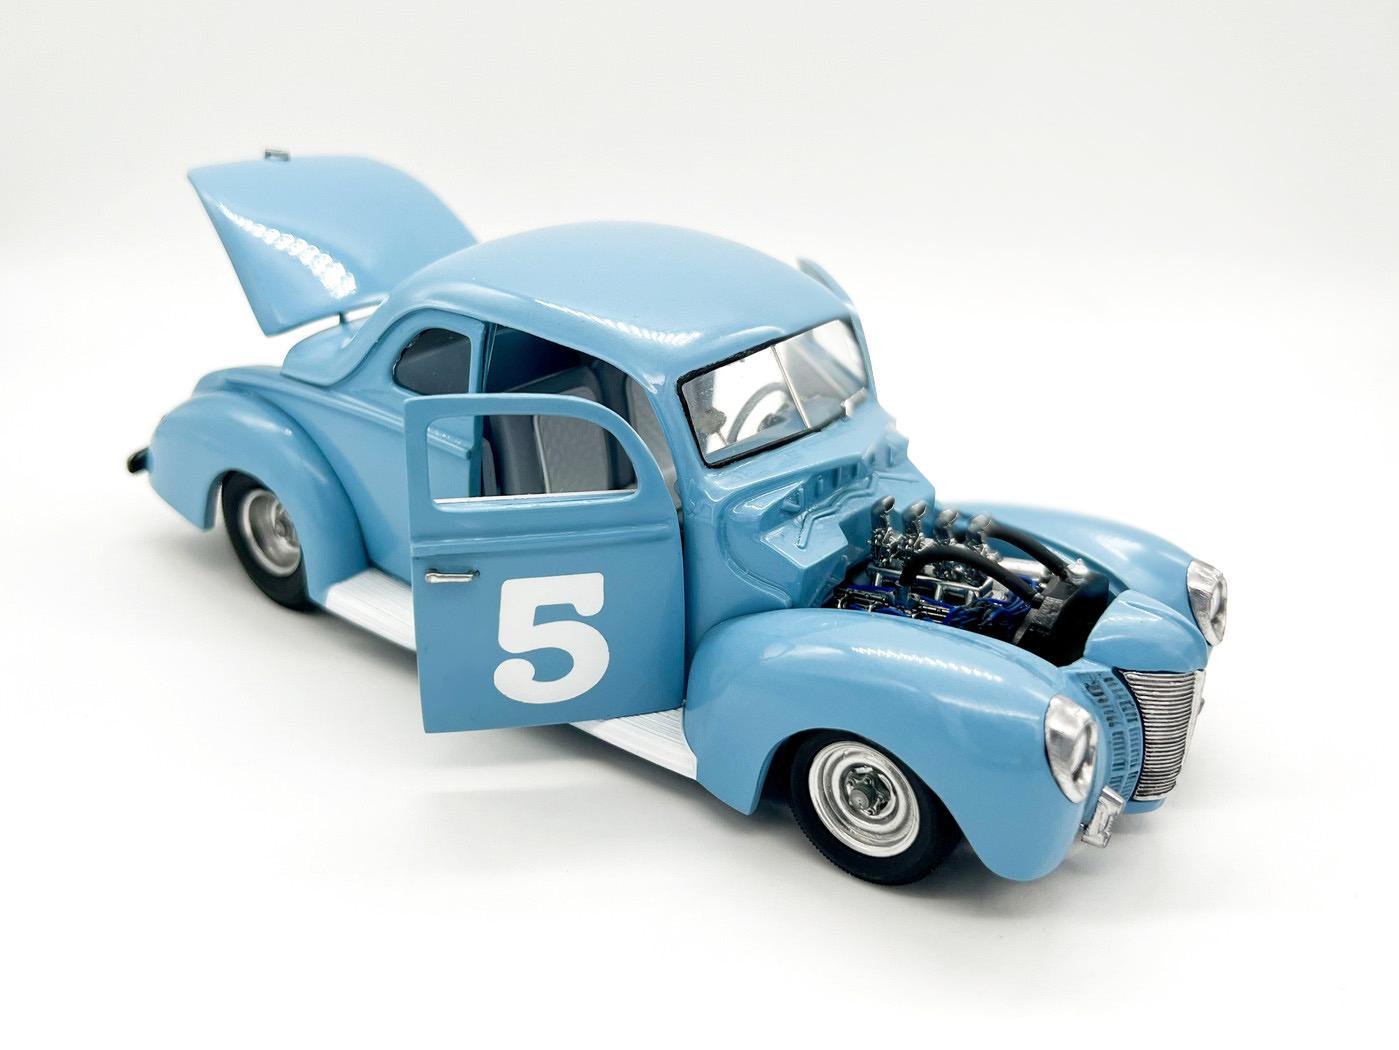
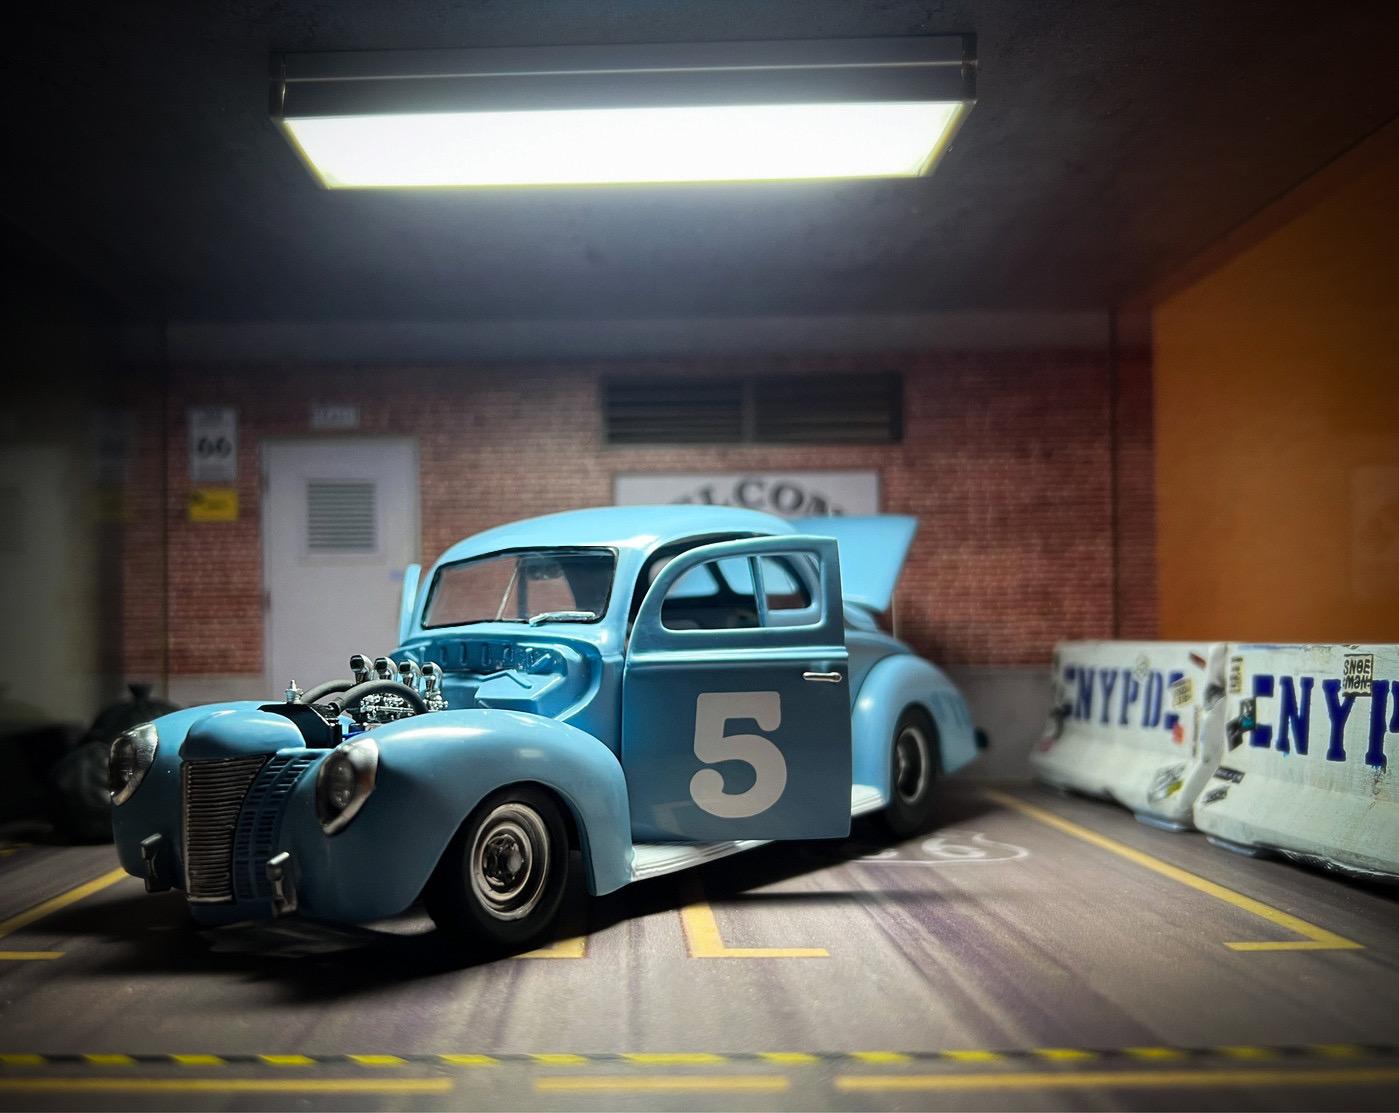
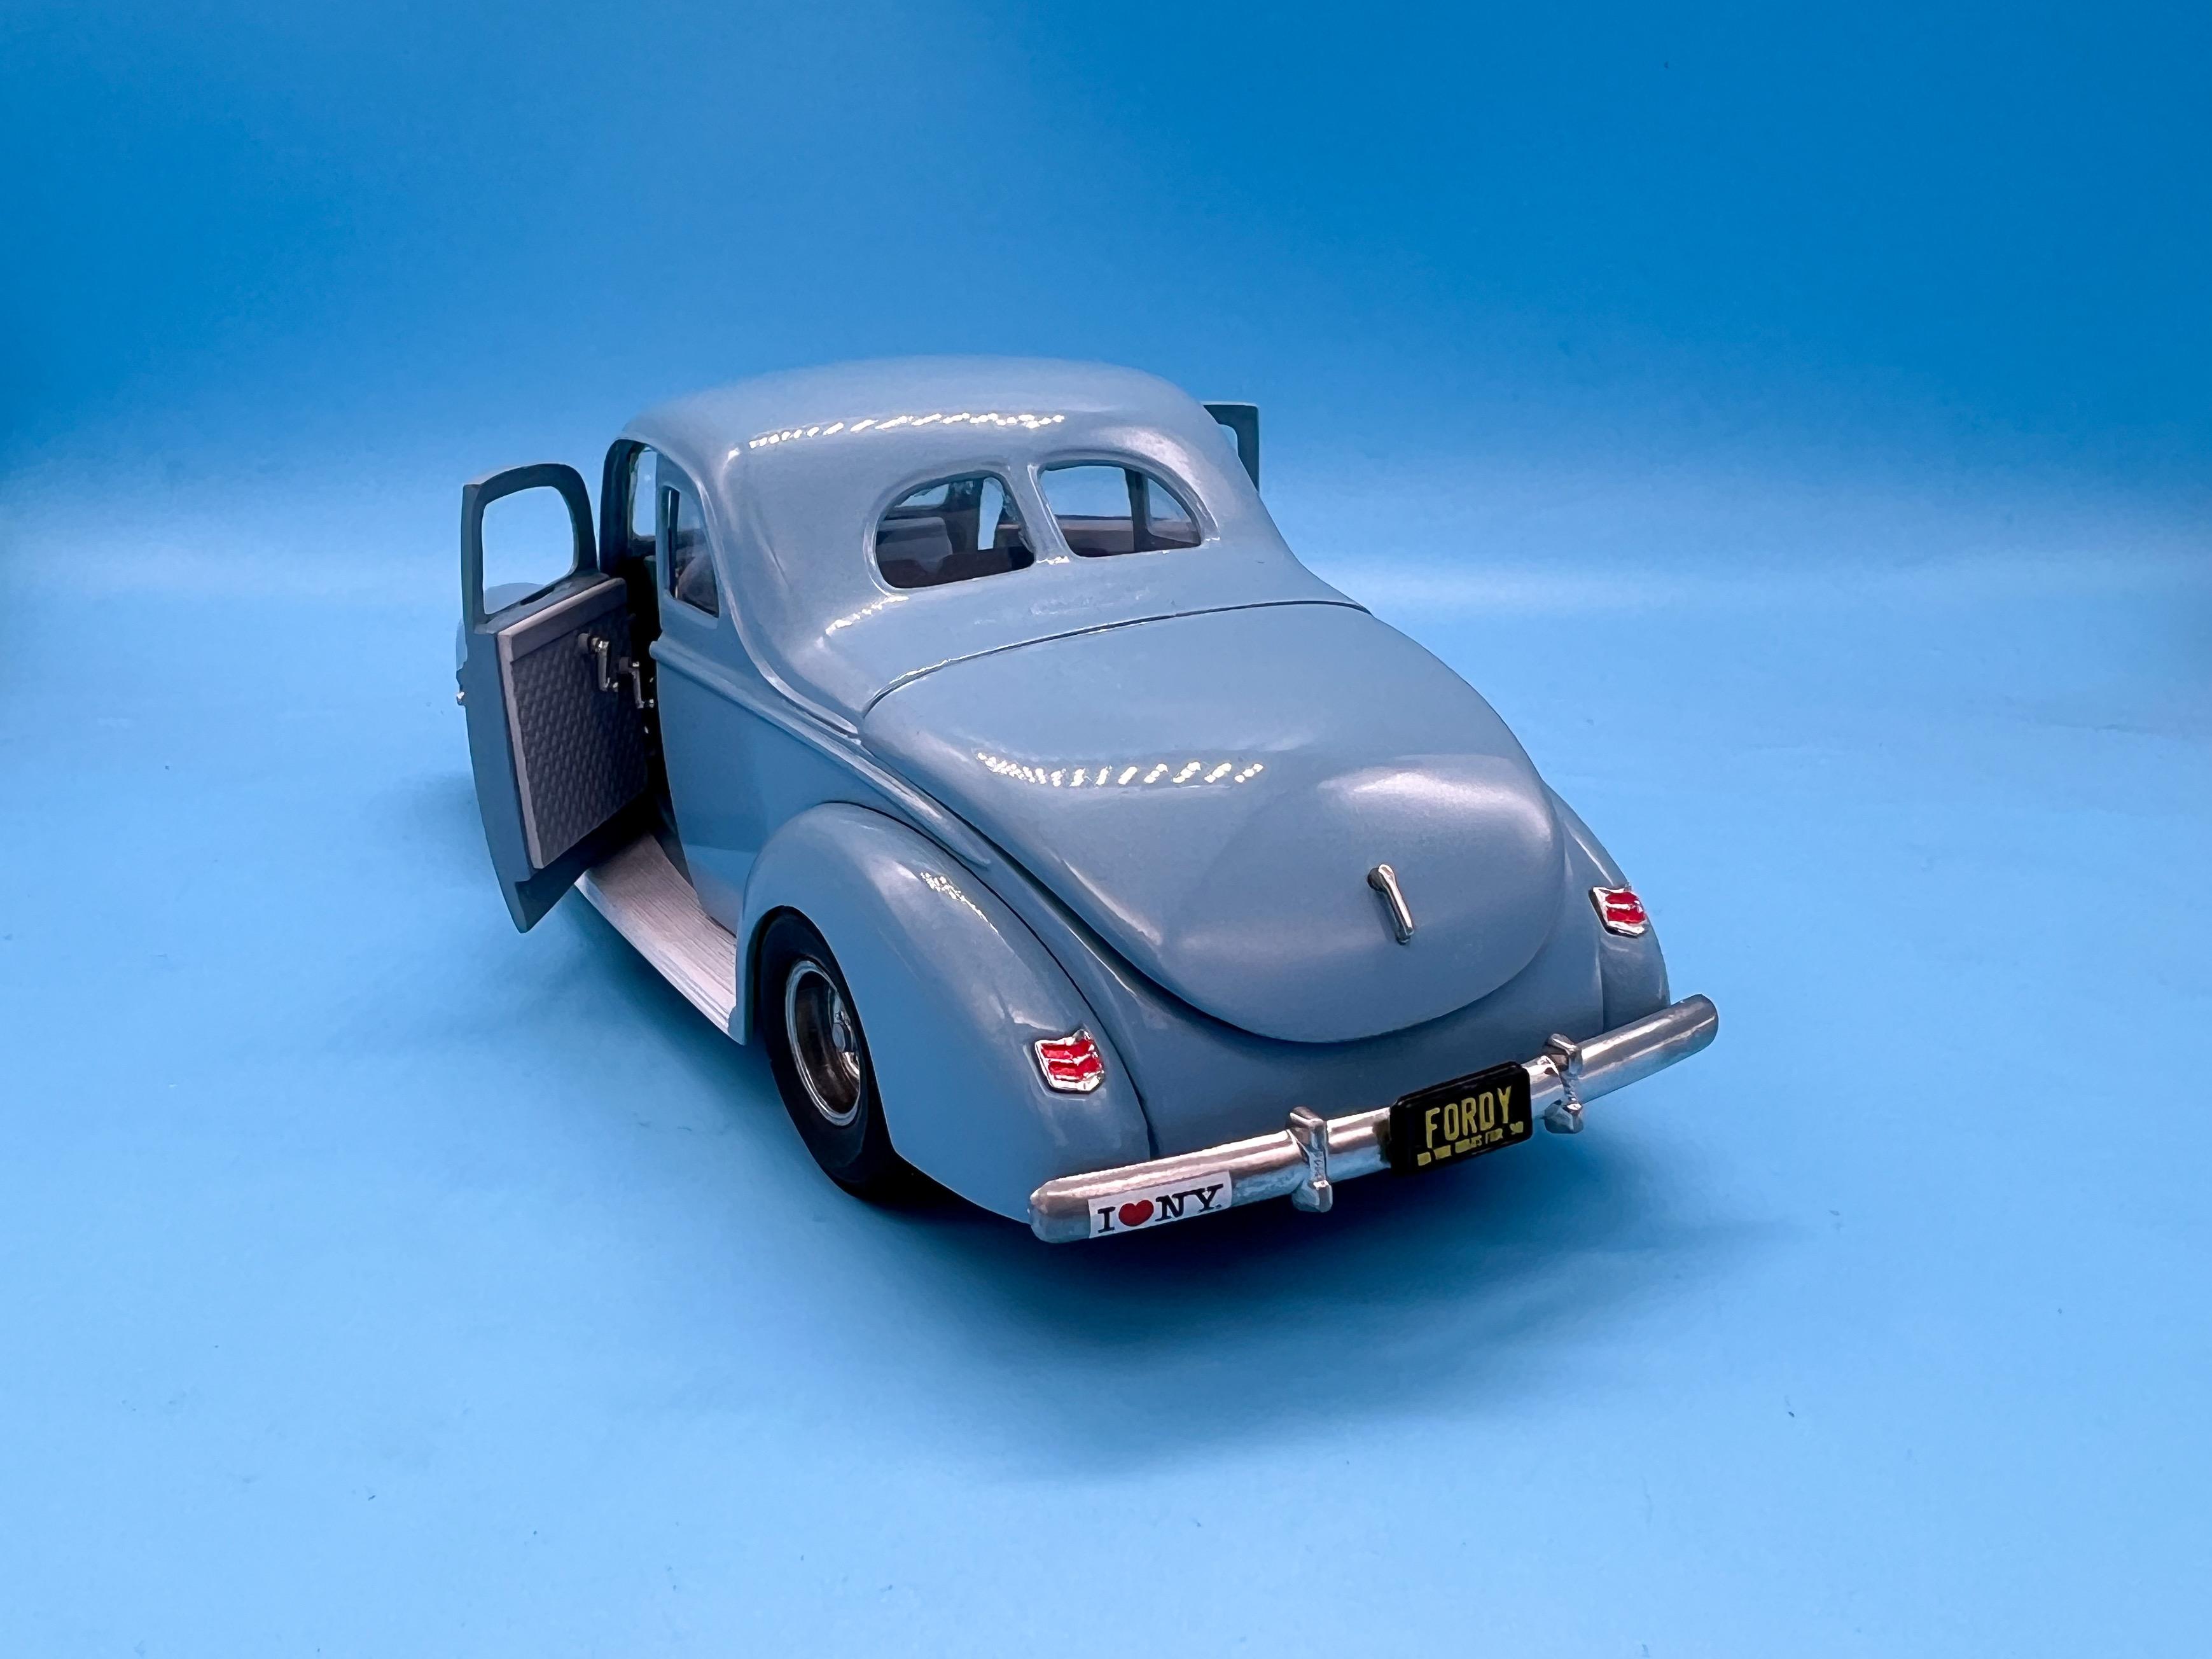
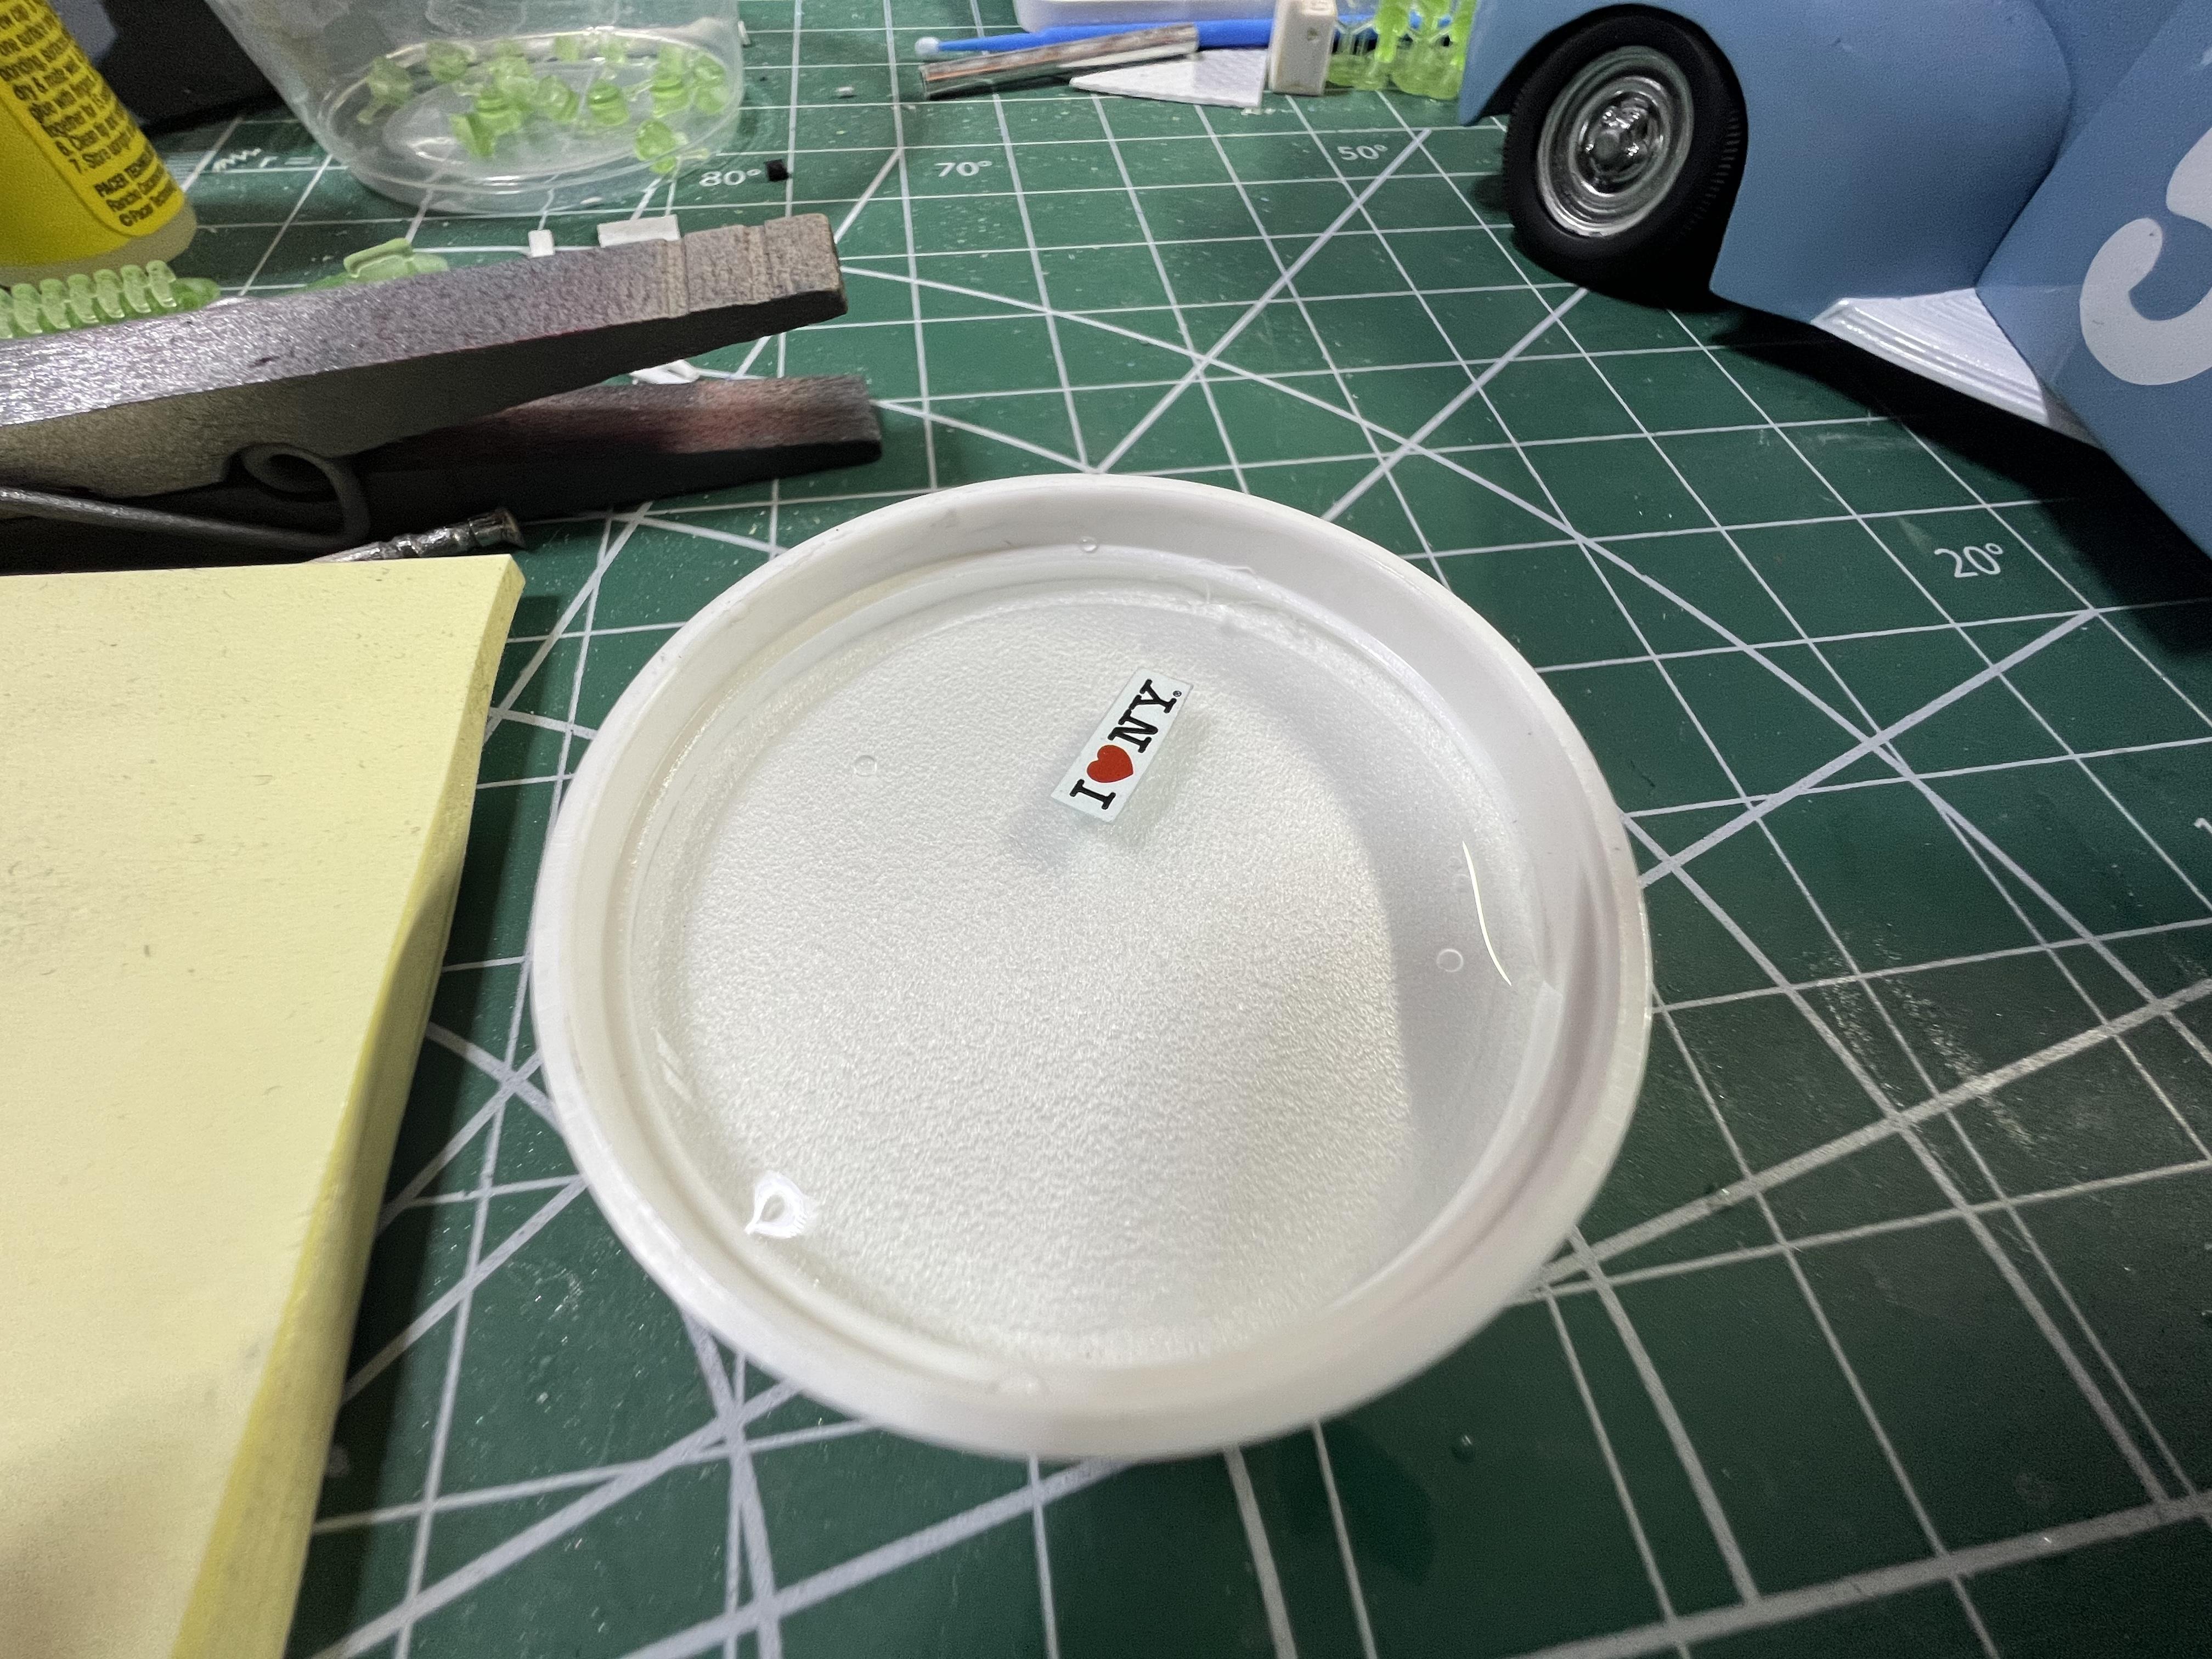
Thank you! Tamiya polishing compounds are my current favorite - they do nice work! Man, I hear that - right up until I started piecing everything together and doing some assembly I was thinking I’d made a mistake, even though the color is just what I imagined. I think seeing it with the white and chrome really helps bring it together. That said, I may hate it again tomorrow ?♂️? That’s actually the strip of LEDs in my photo booth, if you’re talking about the photos with the blue background…although I do like similar ones on my workbench because they’re so ‘clean’ and white Thanks Bob! Thank you!! Steal all you like - I stole most of the ideas myself anyway… Couple of little bits of progress tonight…got a chance to try my custom printed bumper stickers for the first time, plus got the license plate mounted and the taillights in place. For anyone building one of these, you need to remove about half the material from the back of the taillights in the kit to make them mount nicely…plus I got the door and trunk handles attached: I need to do some touch ups on the red lights and give them a wash once they’re dry… Machined a fuel filler and cap, and got the spare tire mounted… And I’m close to being done…needs some little touch-ups and some washes and some little bits but I’m almost there now…thanks for looking! More soon…