OldNYJim
-
Posts
251 -
Joined
-
Last visited
Content Type
Profiles
Forums
Events
Gallery
Everything posted by OldNYJim
-

1964 Pontiac Bonneville Convertible.
OldNYJim replied to StevenGuthmiller's topic in WIP: Model Cars
Ohh, this will be a good one! Great start Steve! -
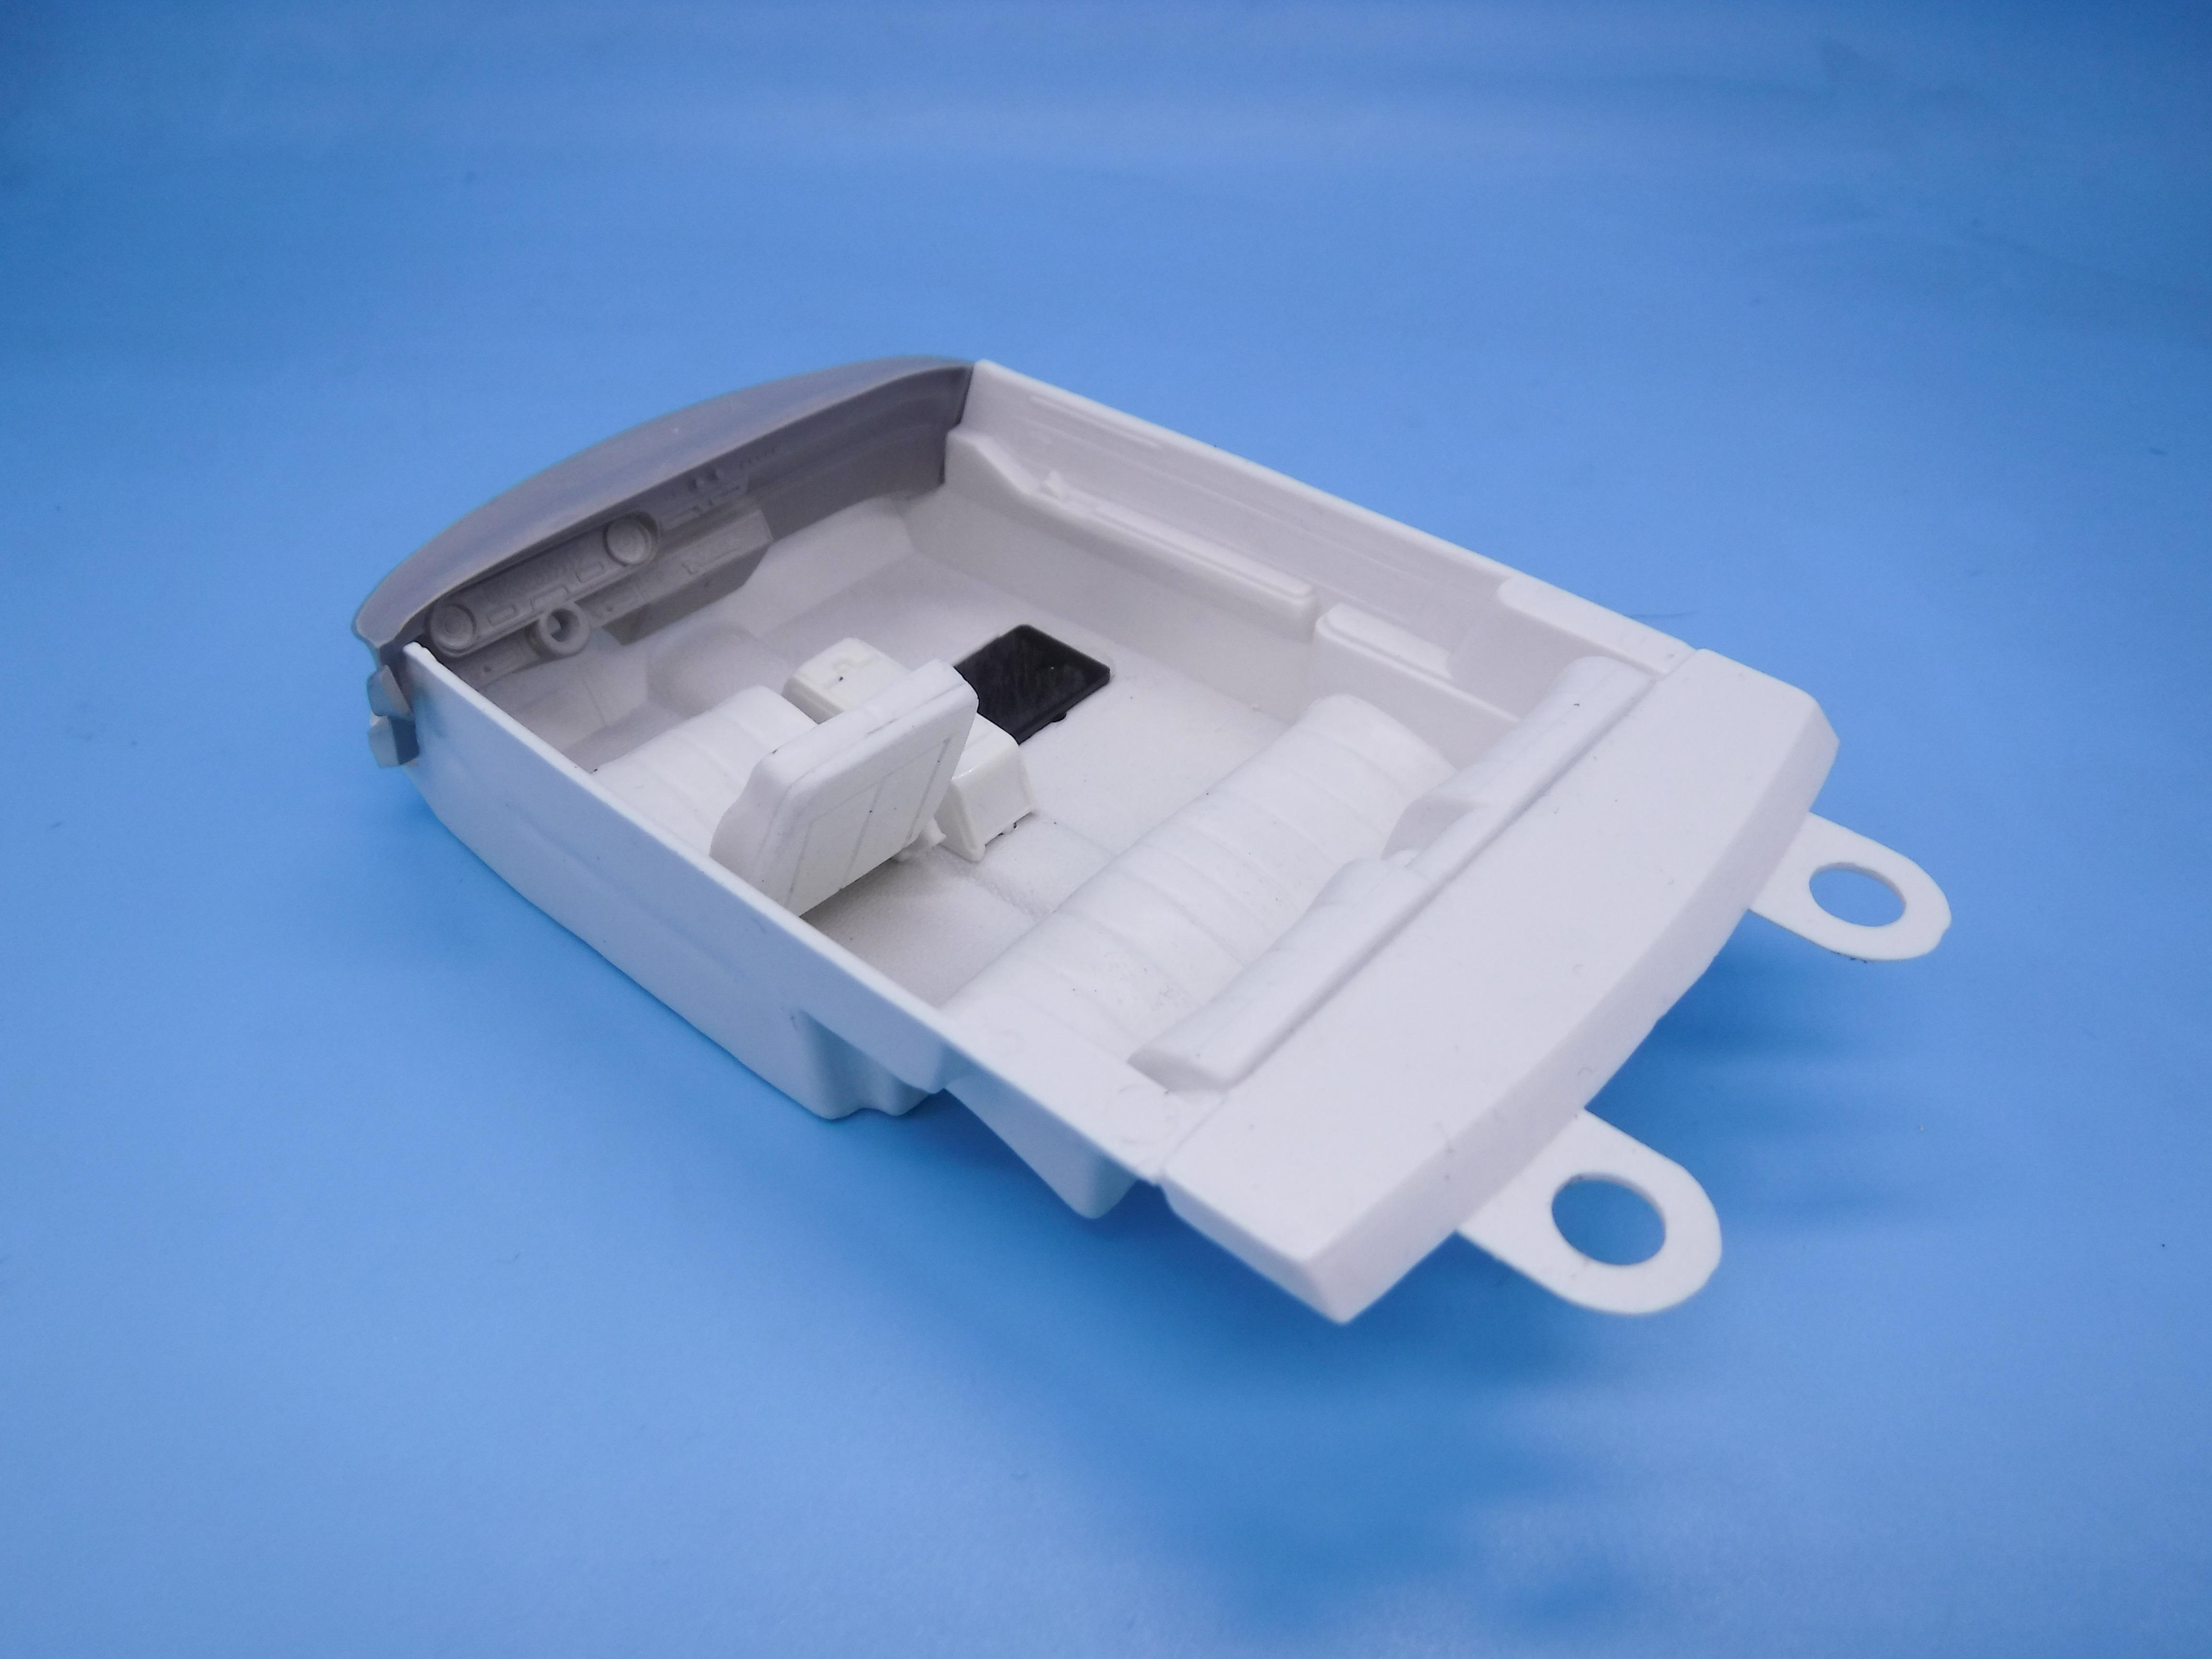
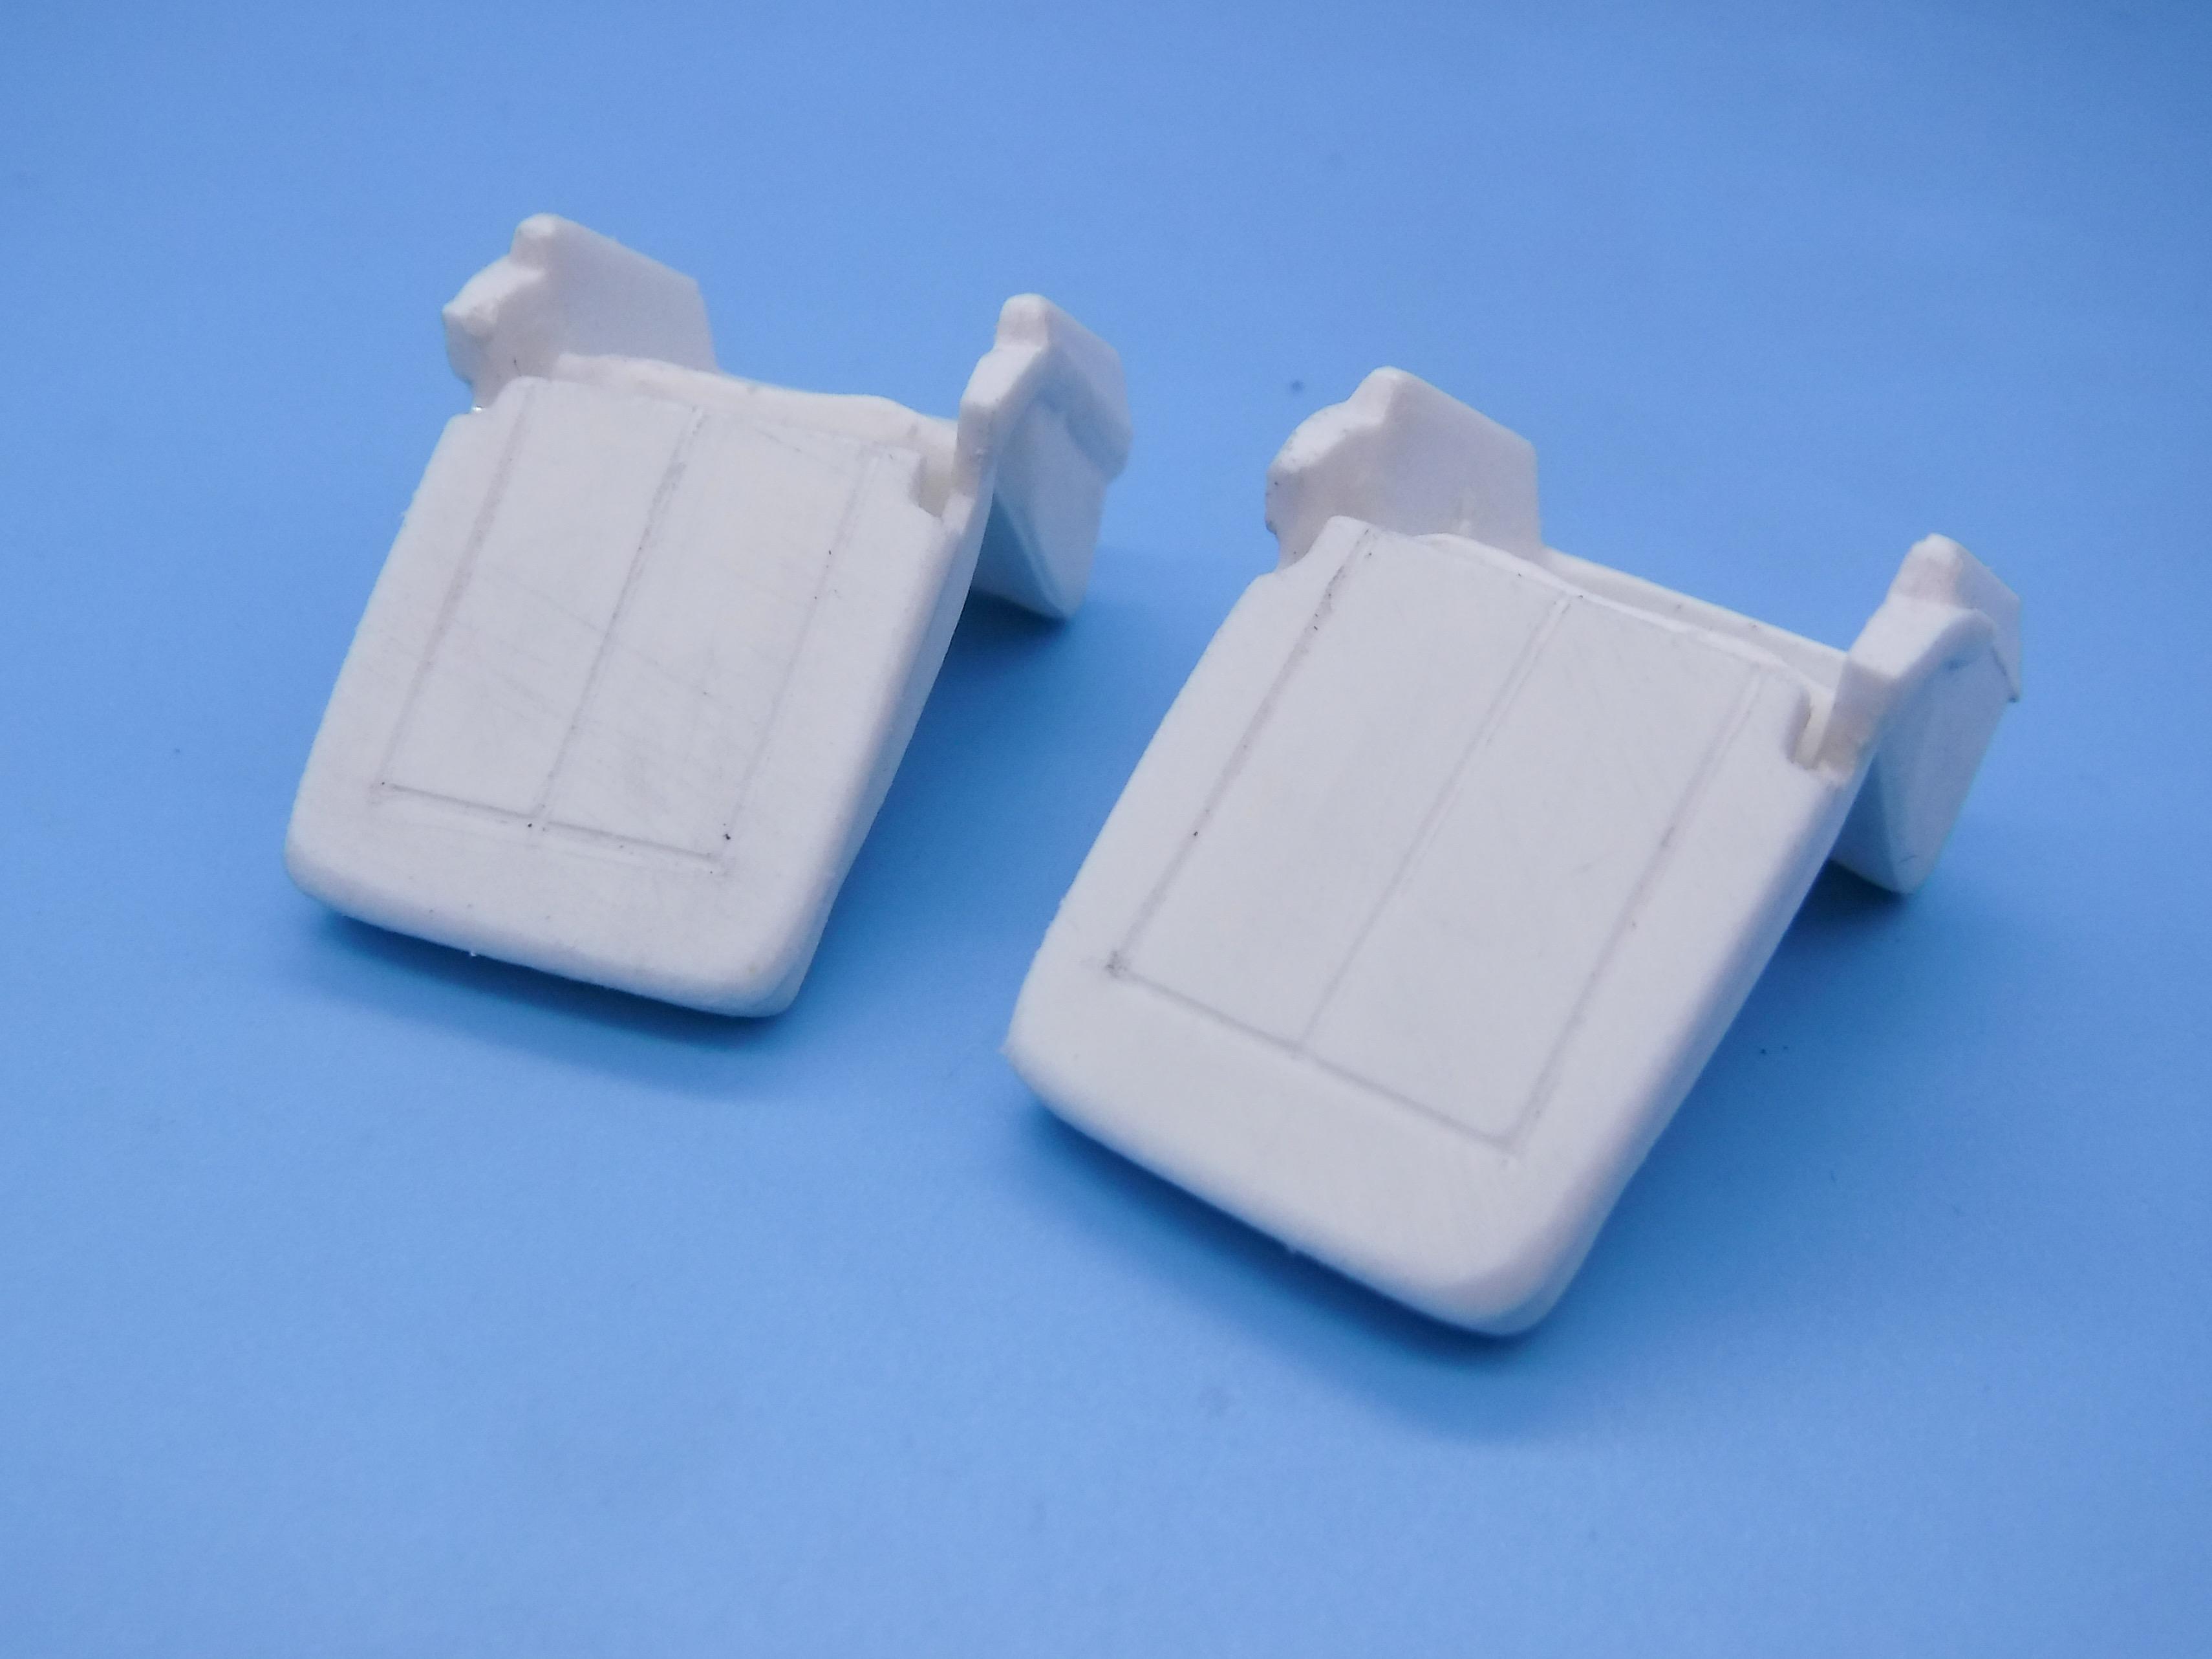
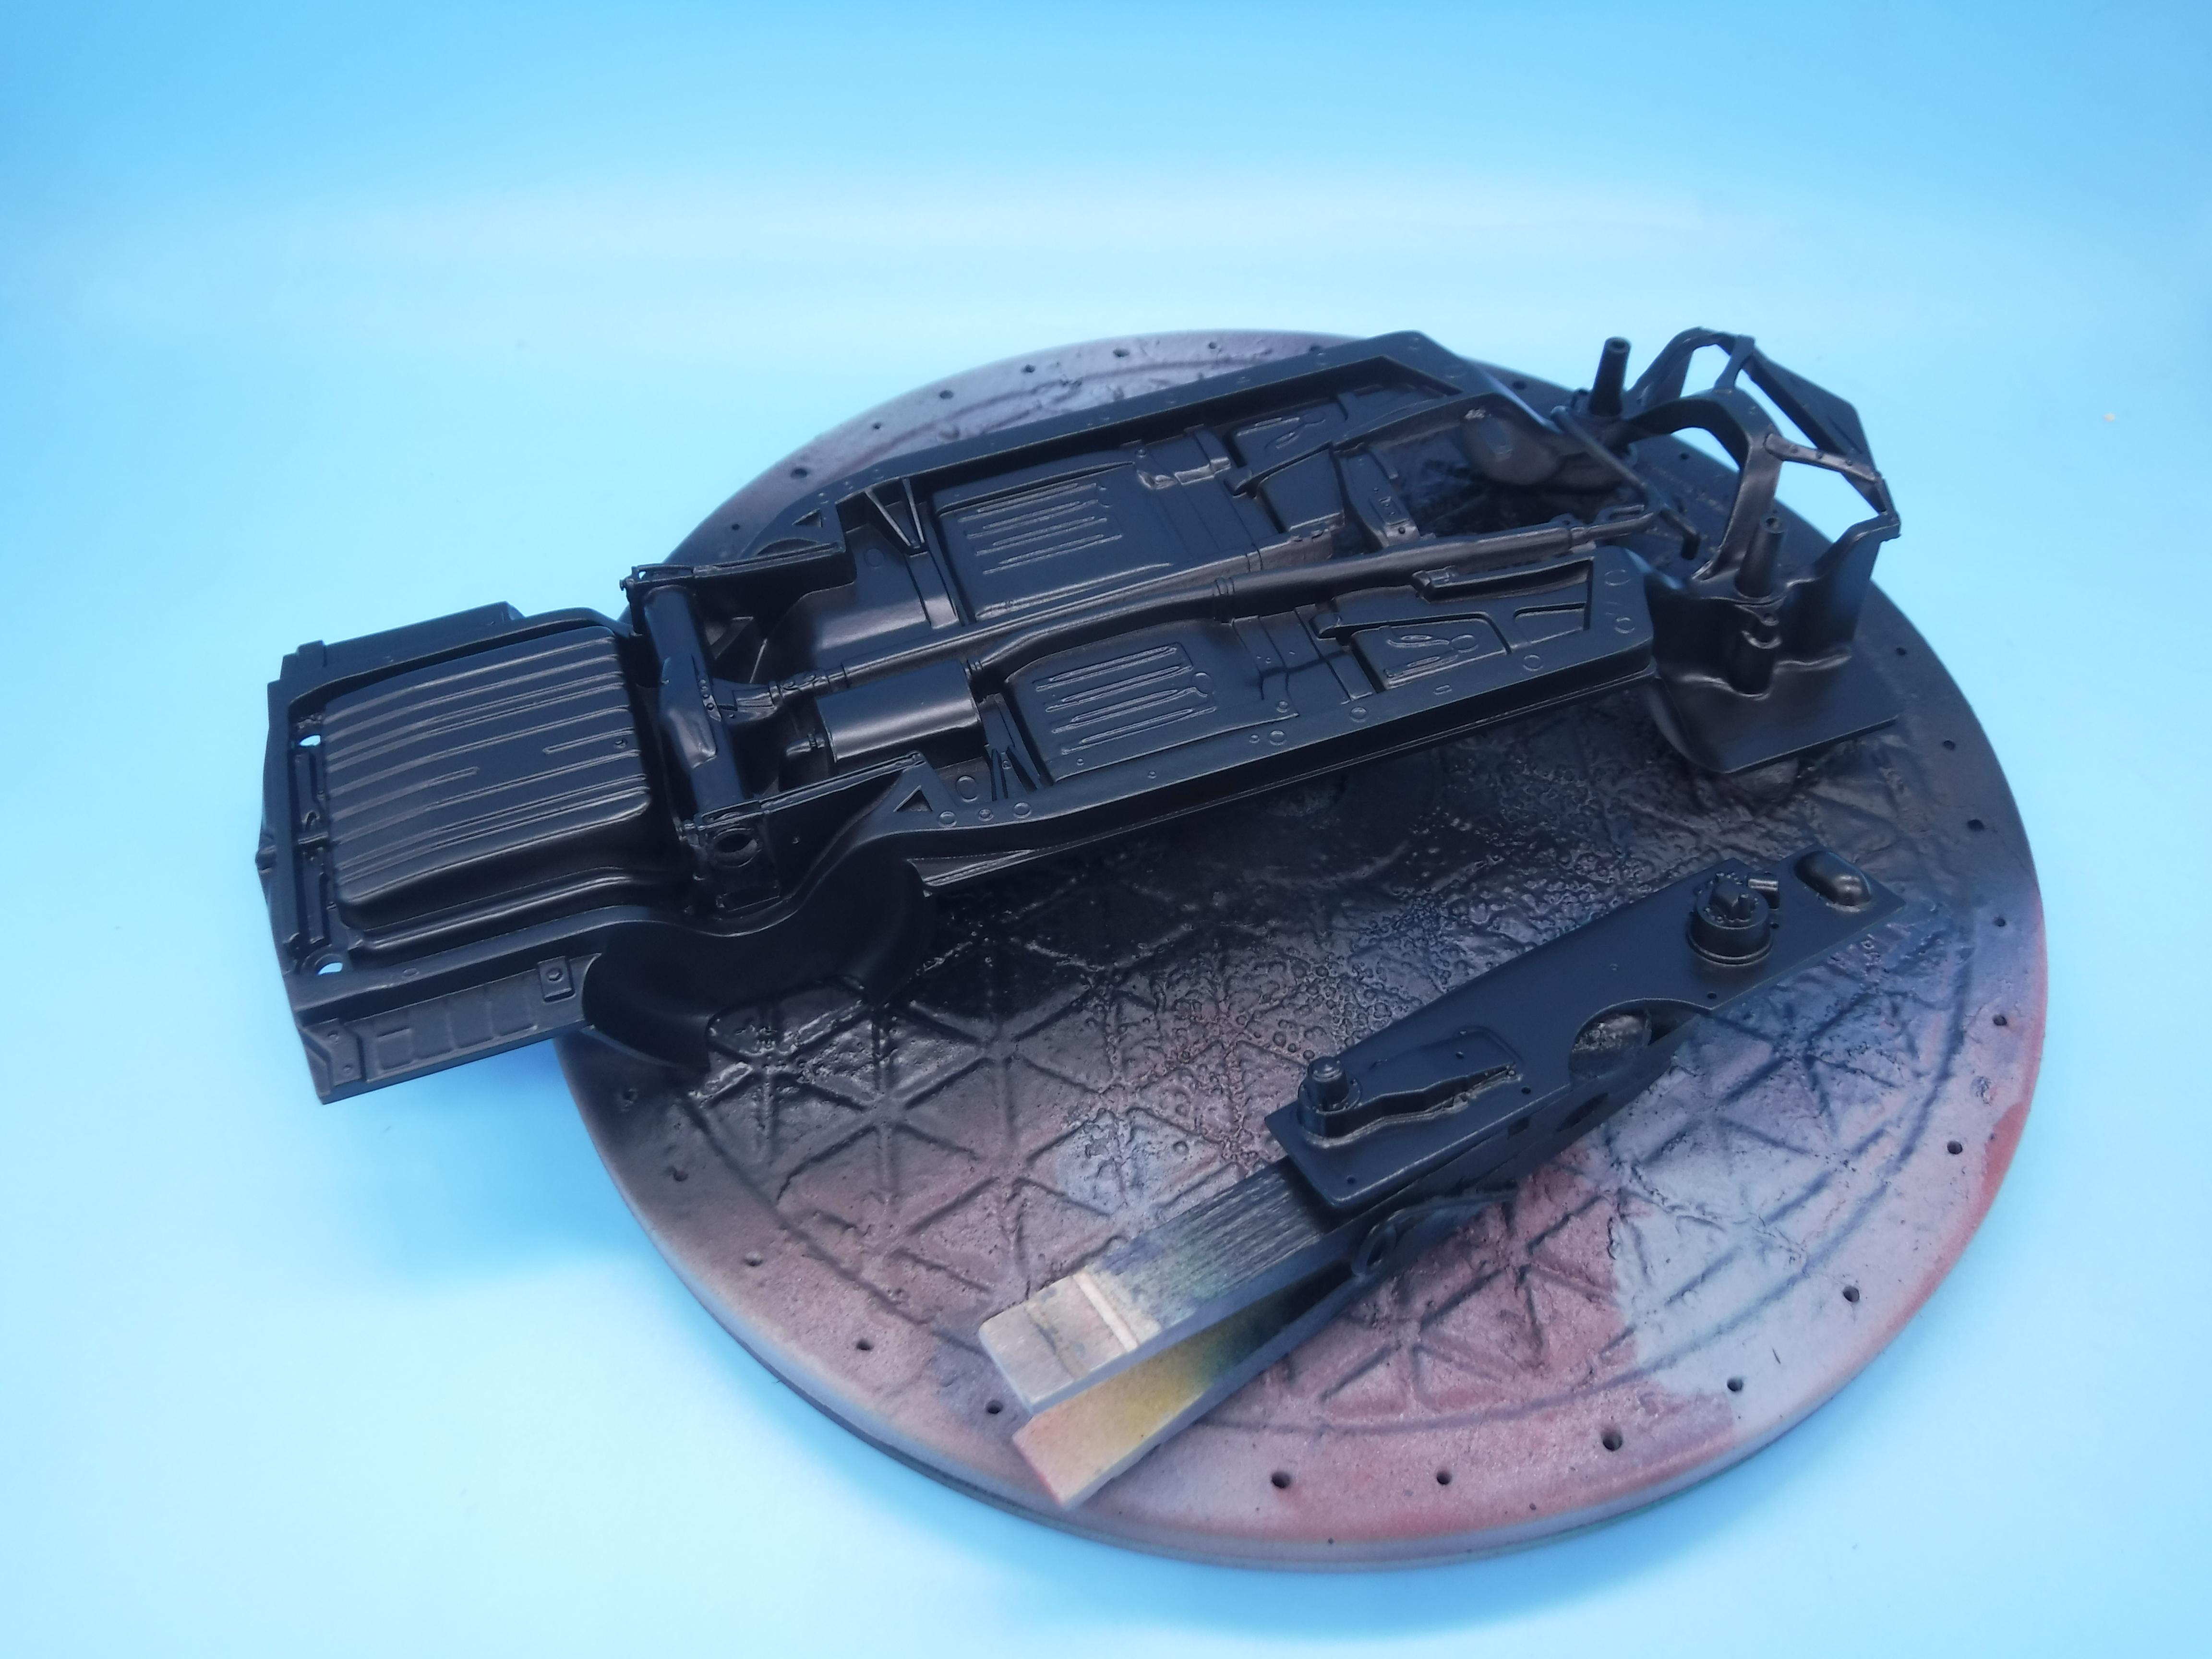
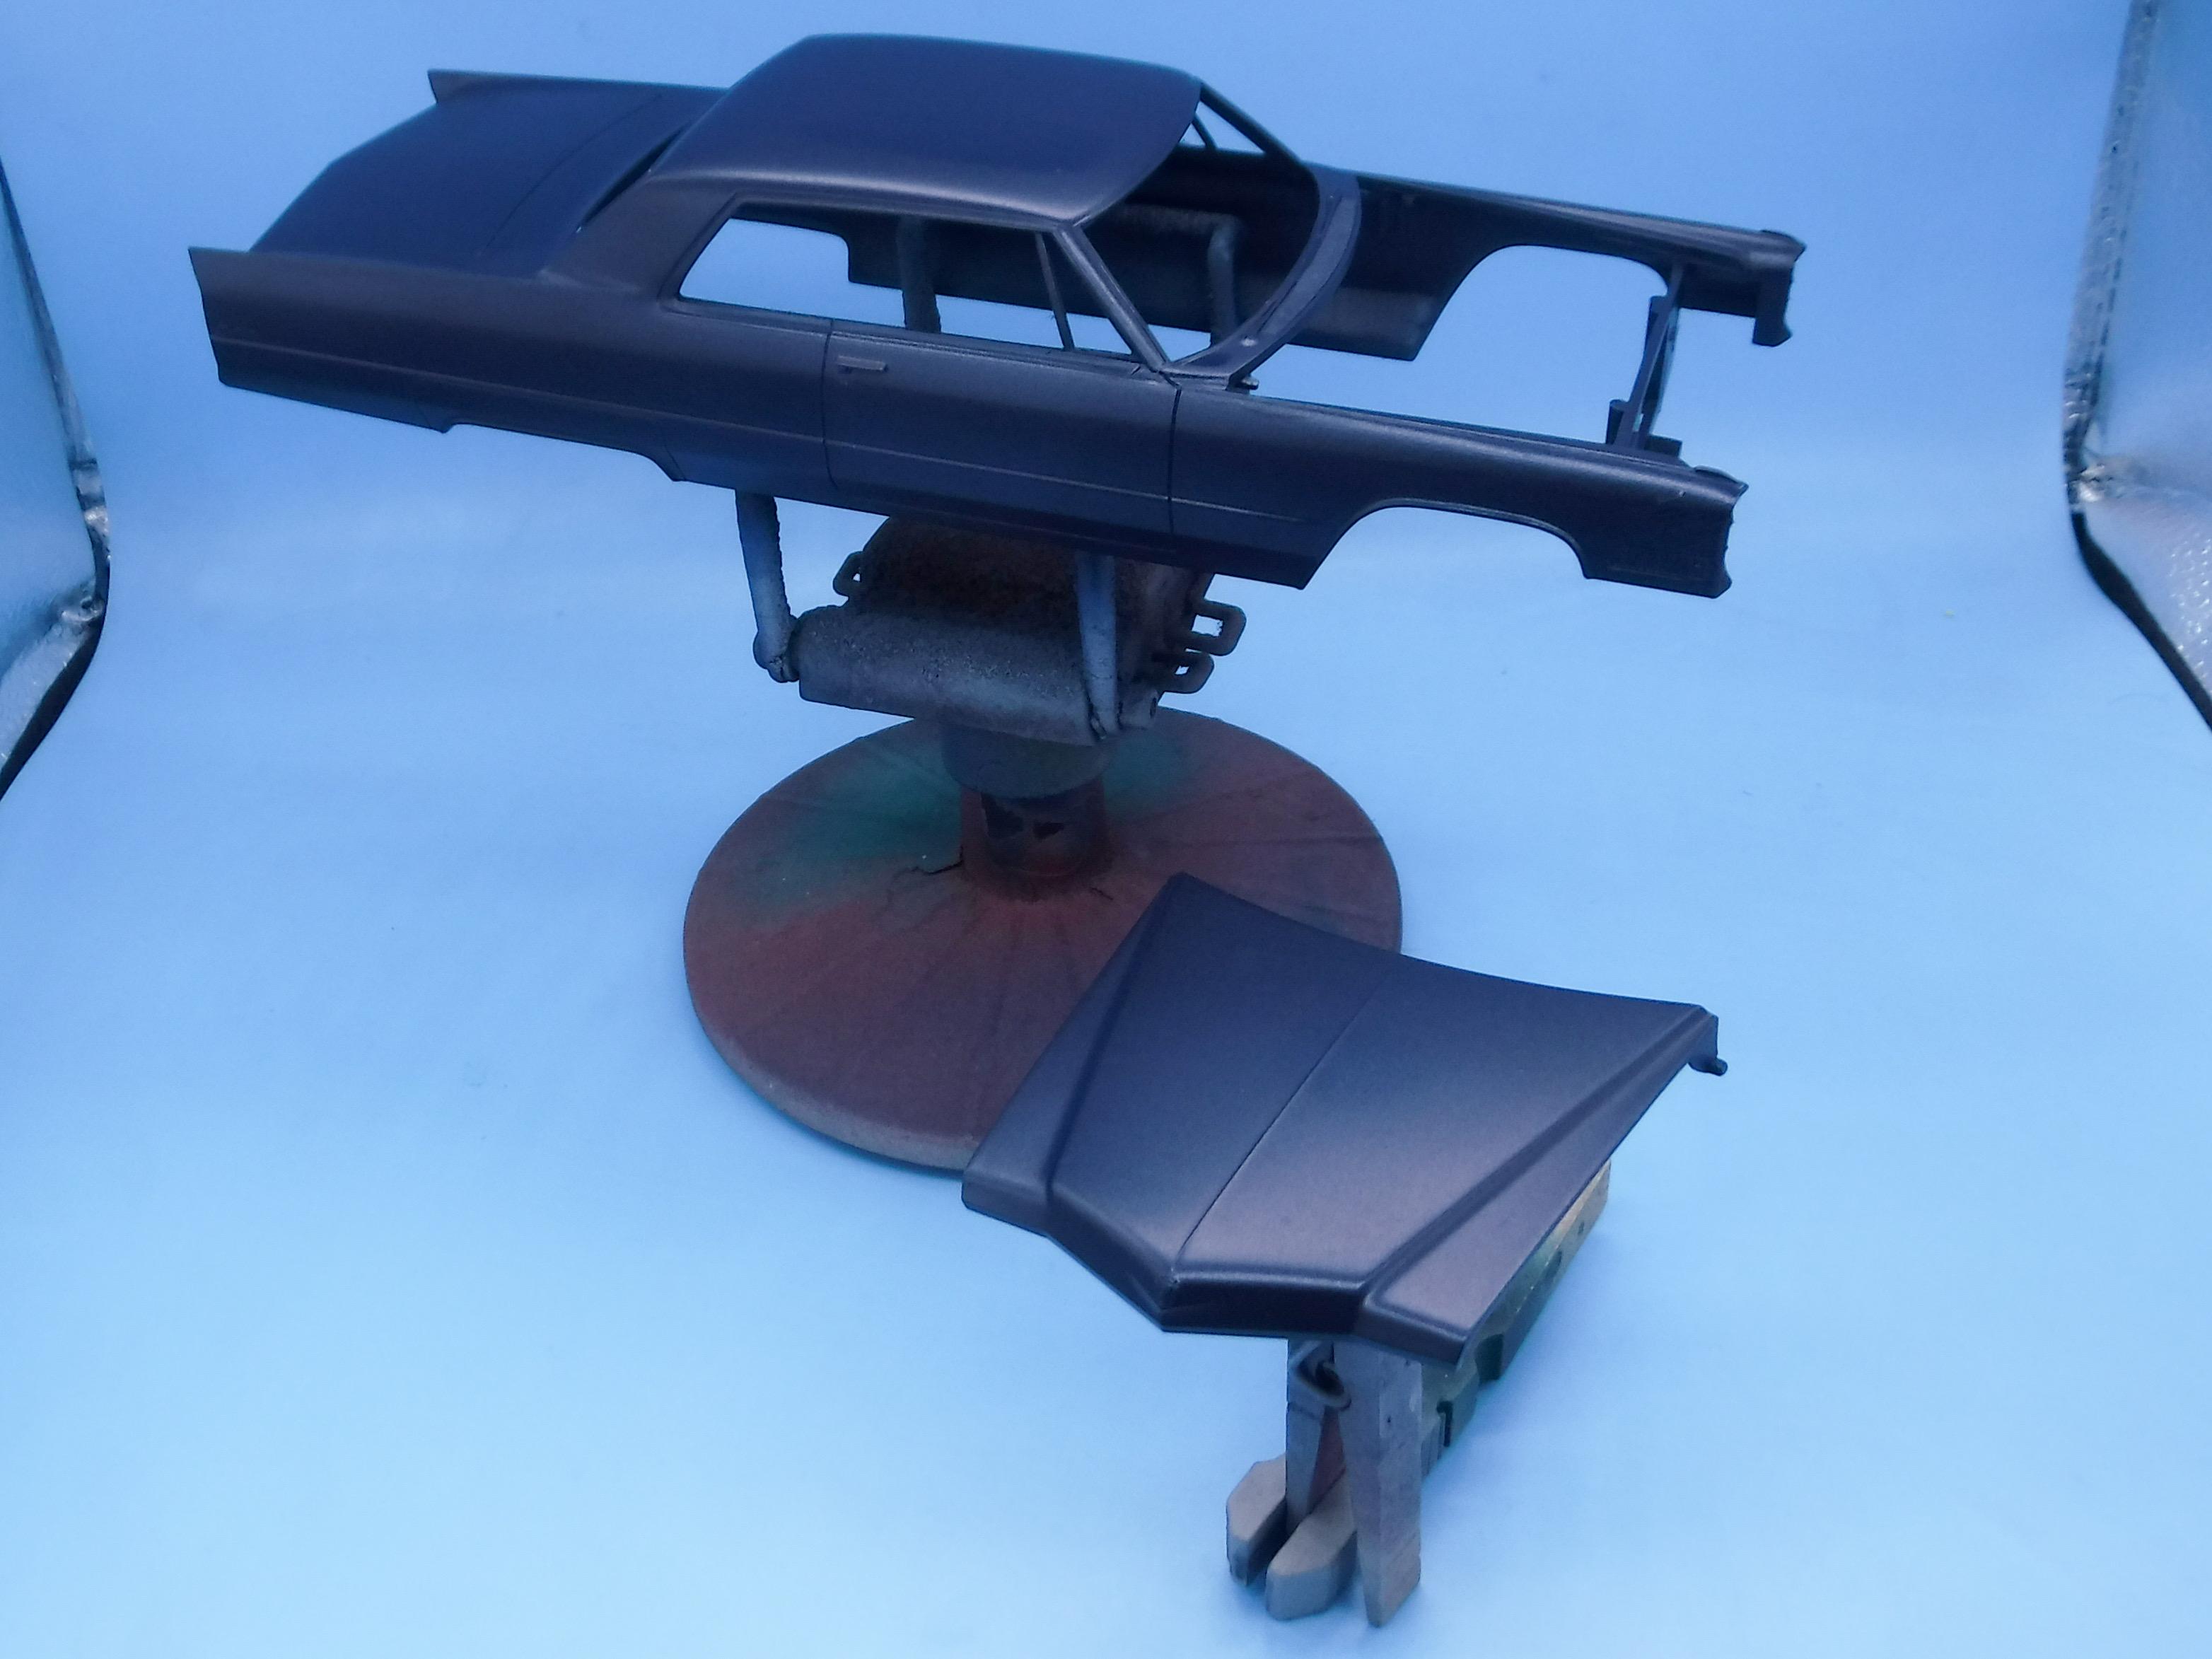
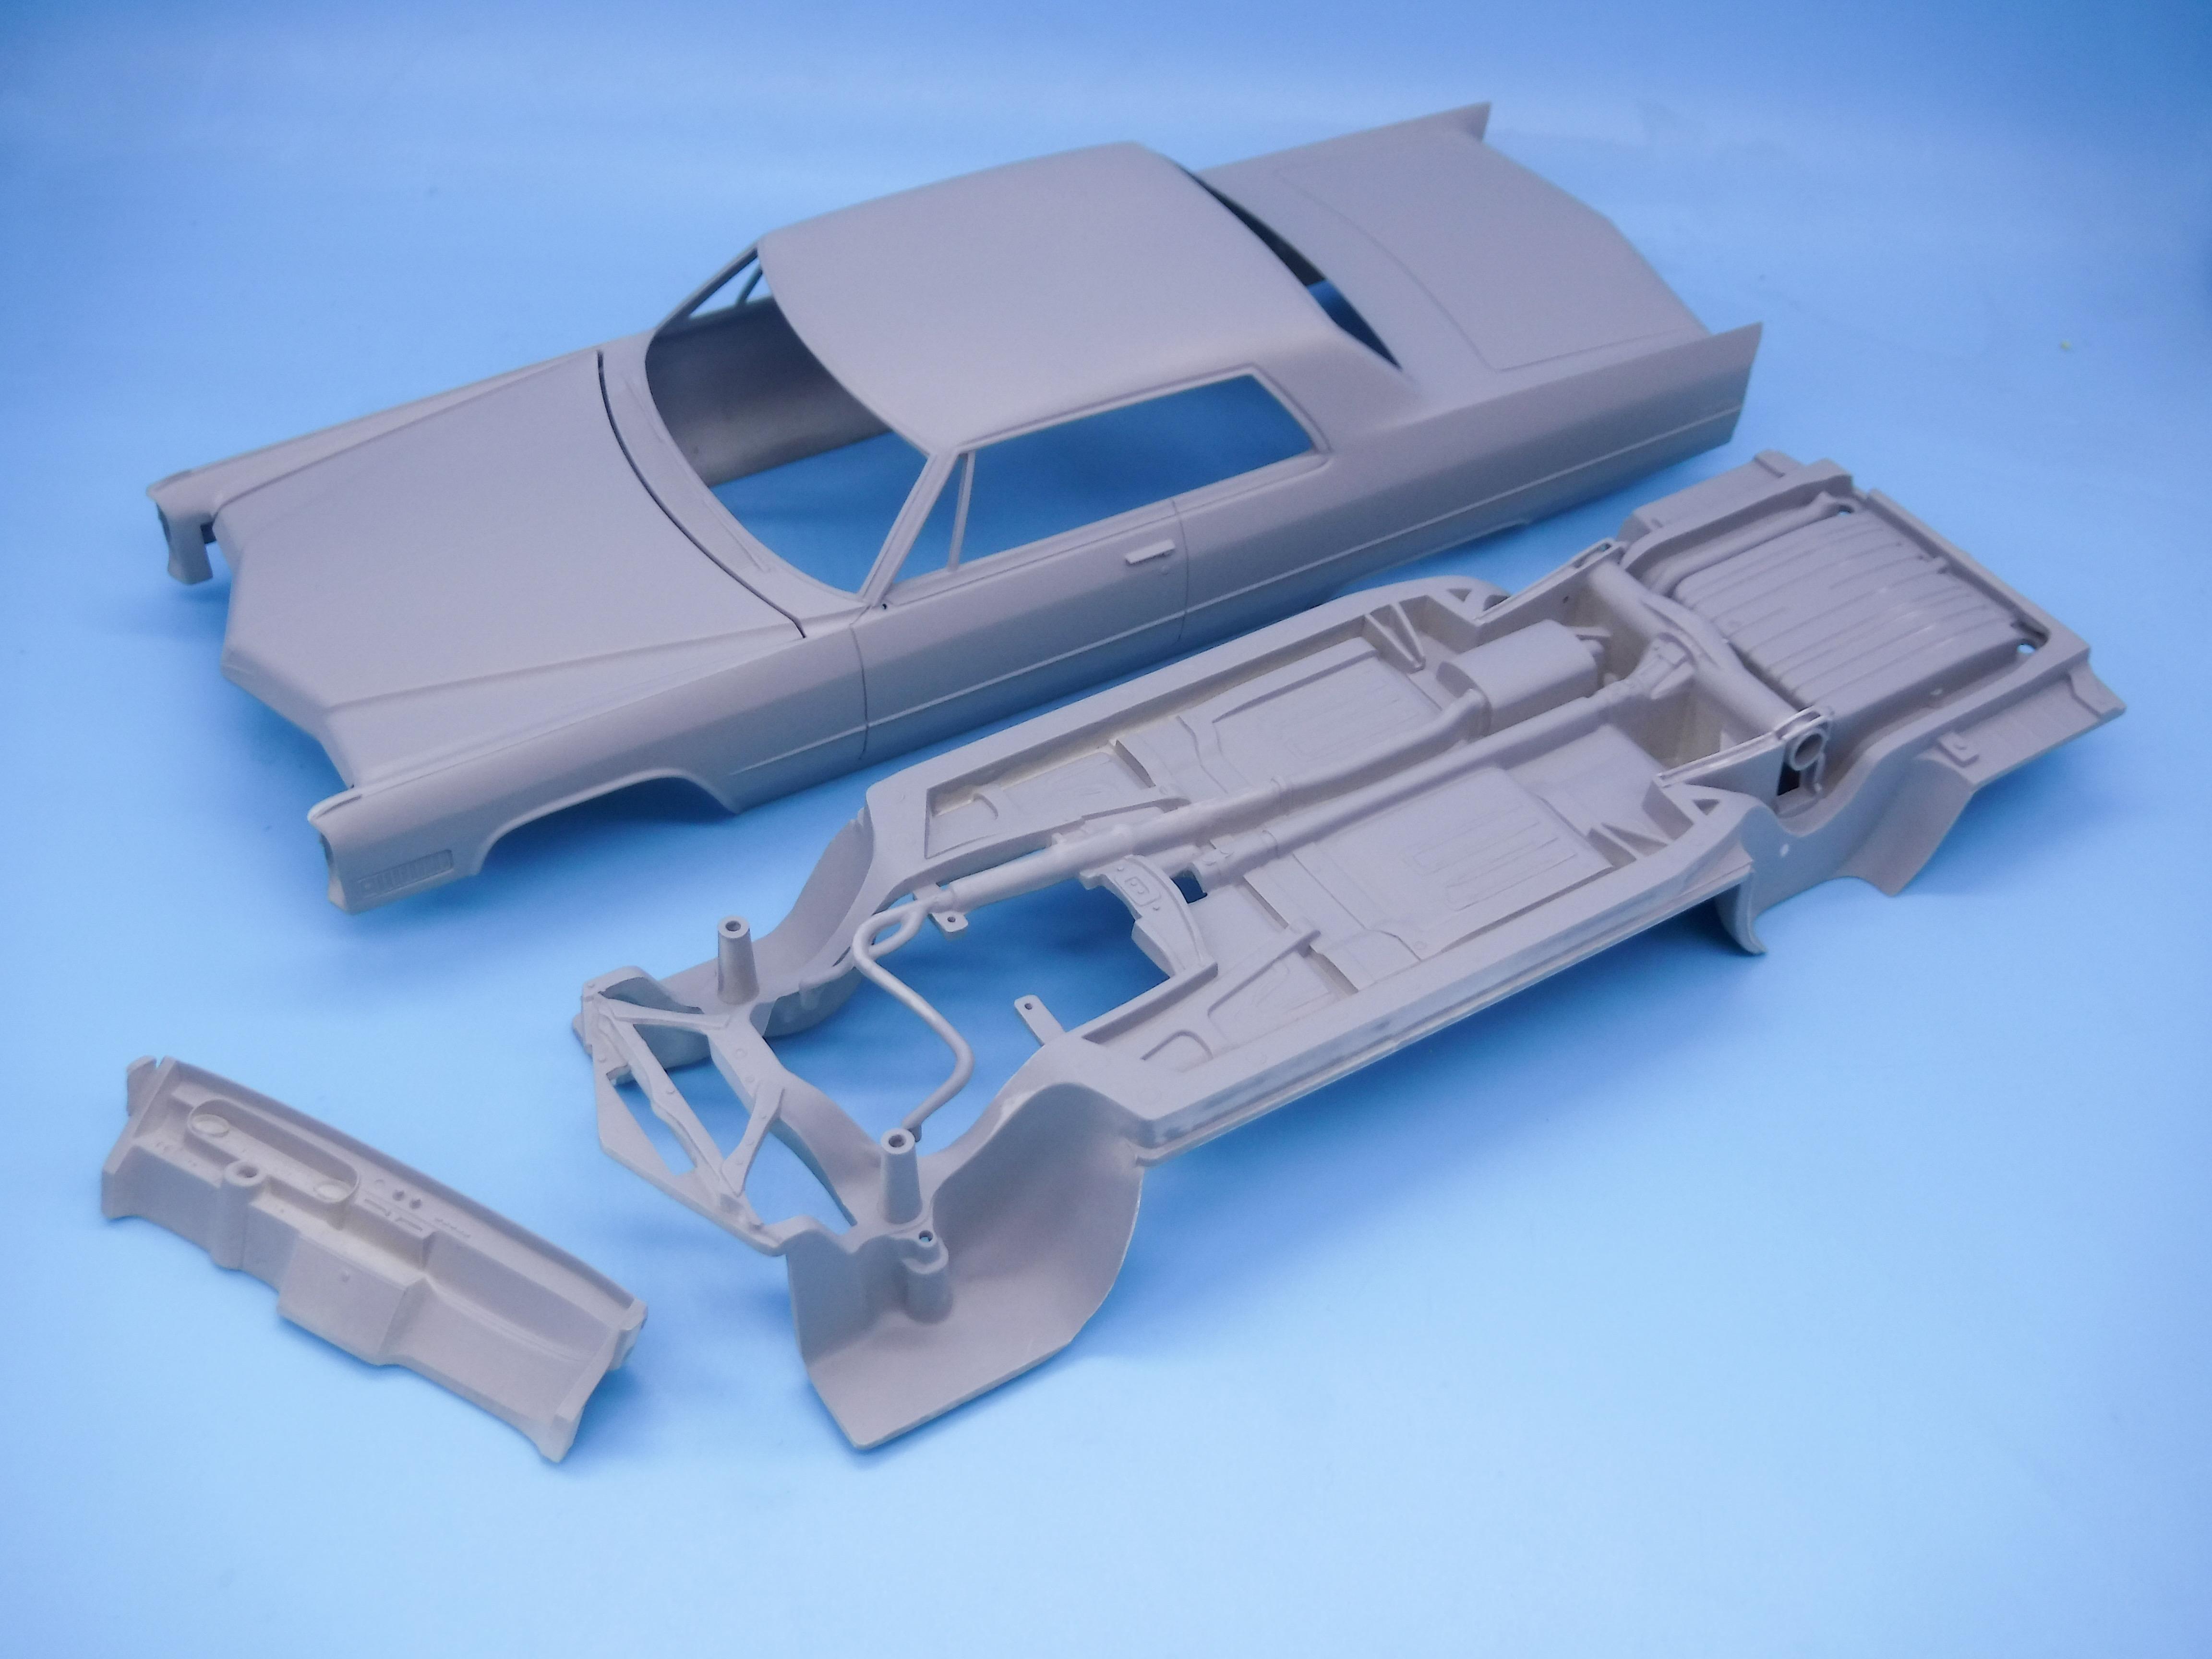
Thanks everyone! And thanks for the detailed tips @Claude Thibodeau…humidity was around 25% (I have a hydrometer that I keep a constant eye on in the shop) so I think I was within an acceptable window on THAT count. The lacquer didn’t smell particularly either, it was a nice warm day, let it bake, it was a couple of nice thin mist coats to no real build up of thickness that would take longer to cure…apparently I did SOMETHING wrong, but I tried really hard to take all the right precautions to make sure this DIDN’T happen. Really bummed that it went south so easily. ANYHOO, I wasn’t planning on letting that issue slow me up, and then I got a stomach bug all through the Memorial Day weekend which limited my bench-time considerably. Only just feeling better now, but got a couple of tiny bits done… Started some prep on the interior - the seats on these kits don’t have anything to help locate them nicely when you assemble them to the tub, so I added a couple of pieces of styrene to give me something to glue to. I didn’t feel like trying to glue to carpet, so these will help… I’ve got some embossed felt-type material that I’m going to use for carpeting on this one with a SUPER fine ‘grain’ - much less than flocking and even finer than embossing powder, so I made templates of the floor with some tape before I get into painting the tub. I was missing a seatback, so just made a couple - pretty simple little pieces, nothing too exciting: And finally, made a start on painting the chassis - used some black sealer as a starting point…need to go through in various stages and mask out the frame rails for a different finish, then the floors, then the axles and suspension parts and so on - LOTS of masking to go before this is done, but it’s a start! Thanks for looking everyone - more soon!

-
Or he should stop buying tooled-in-the-sixties AMT kits…
-
Here we go again…
-
Great results! Looks like you nailed that effect!
-
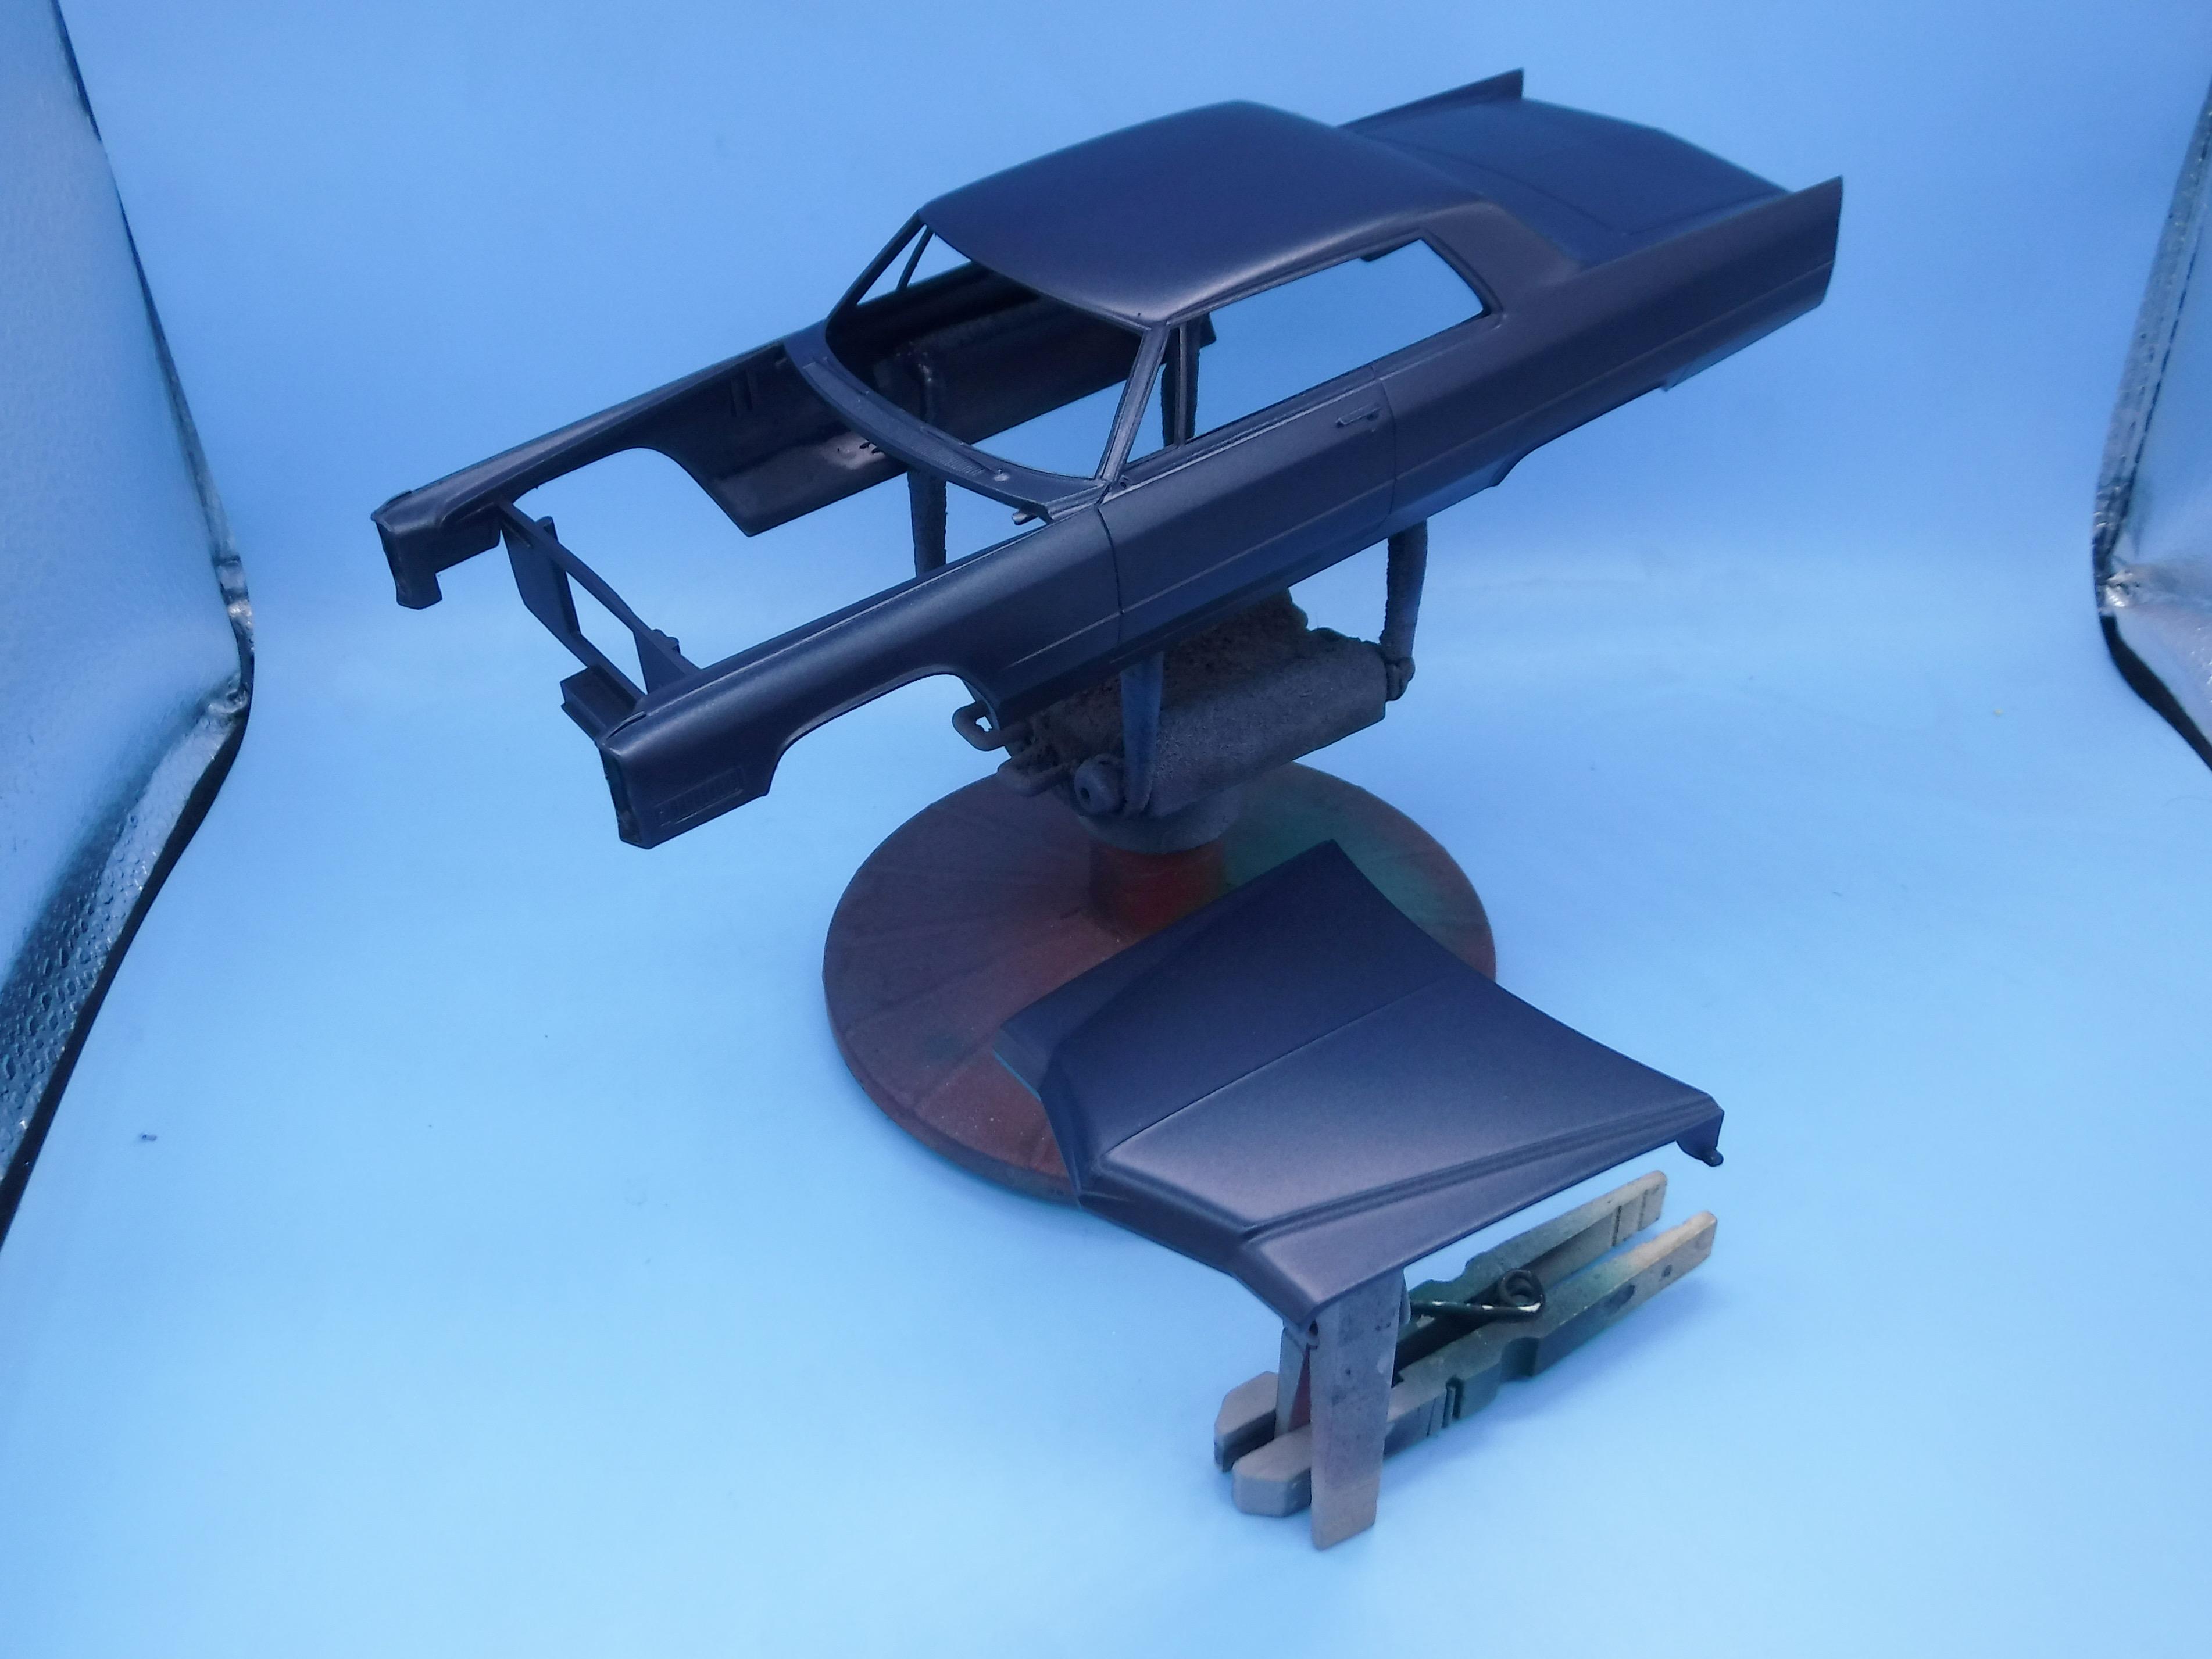
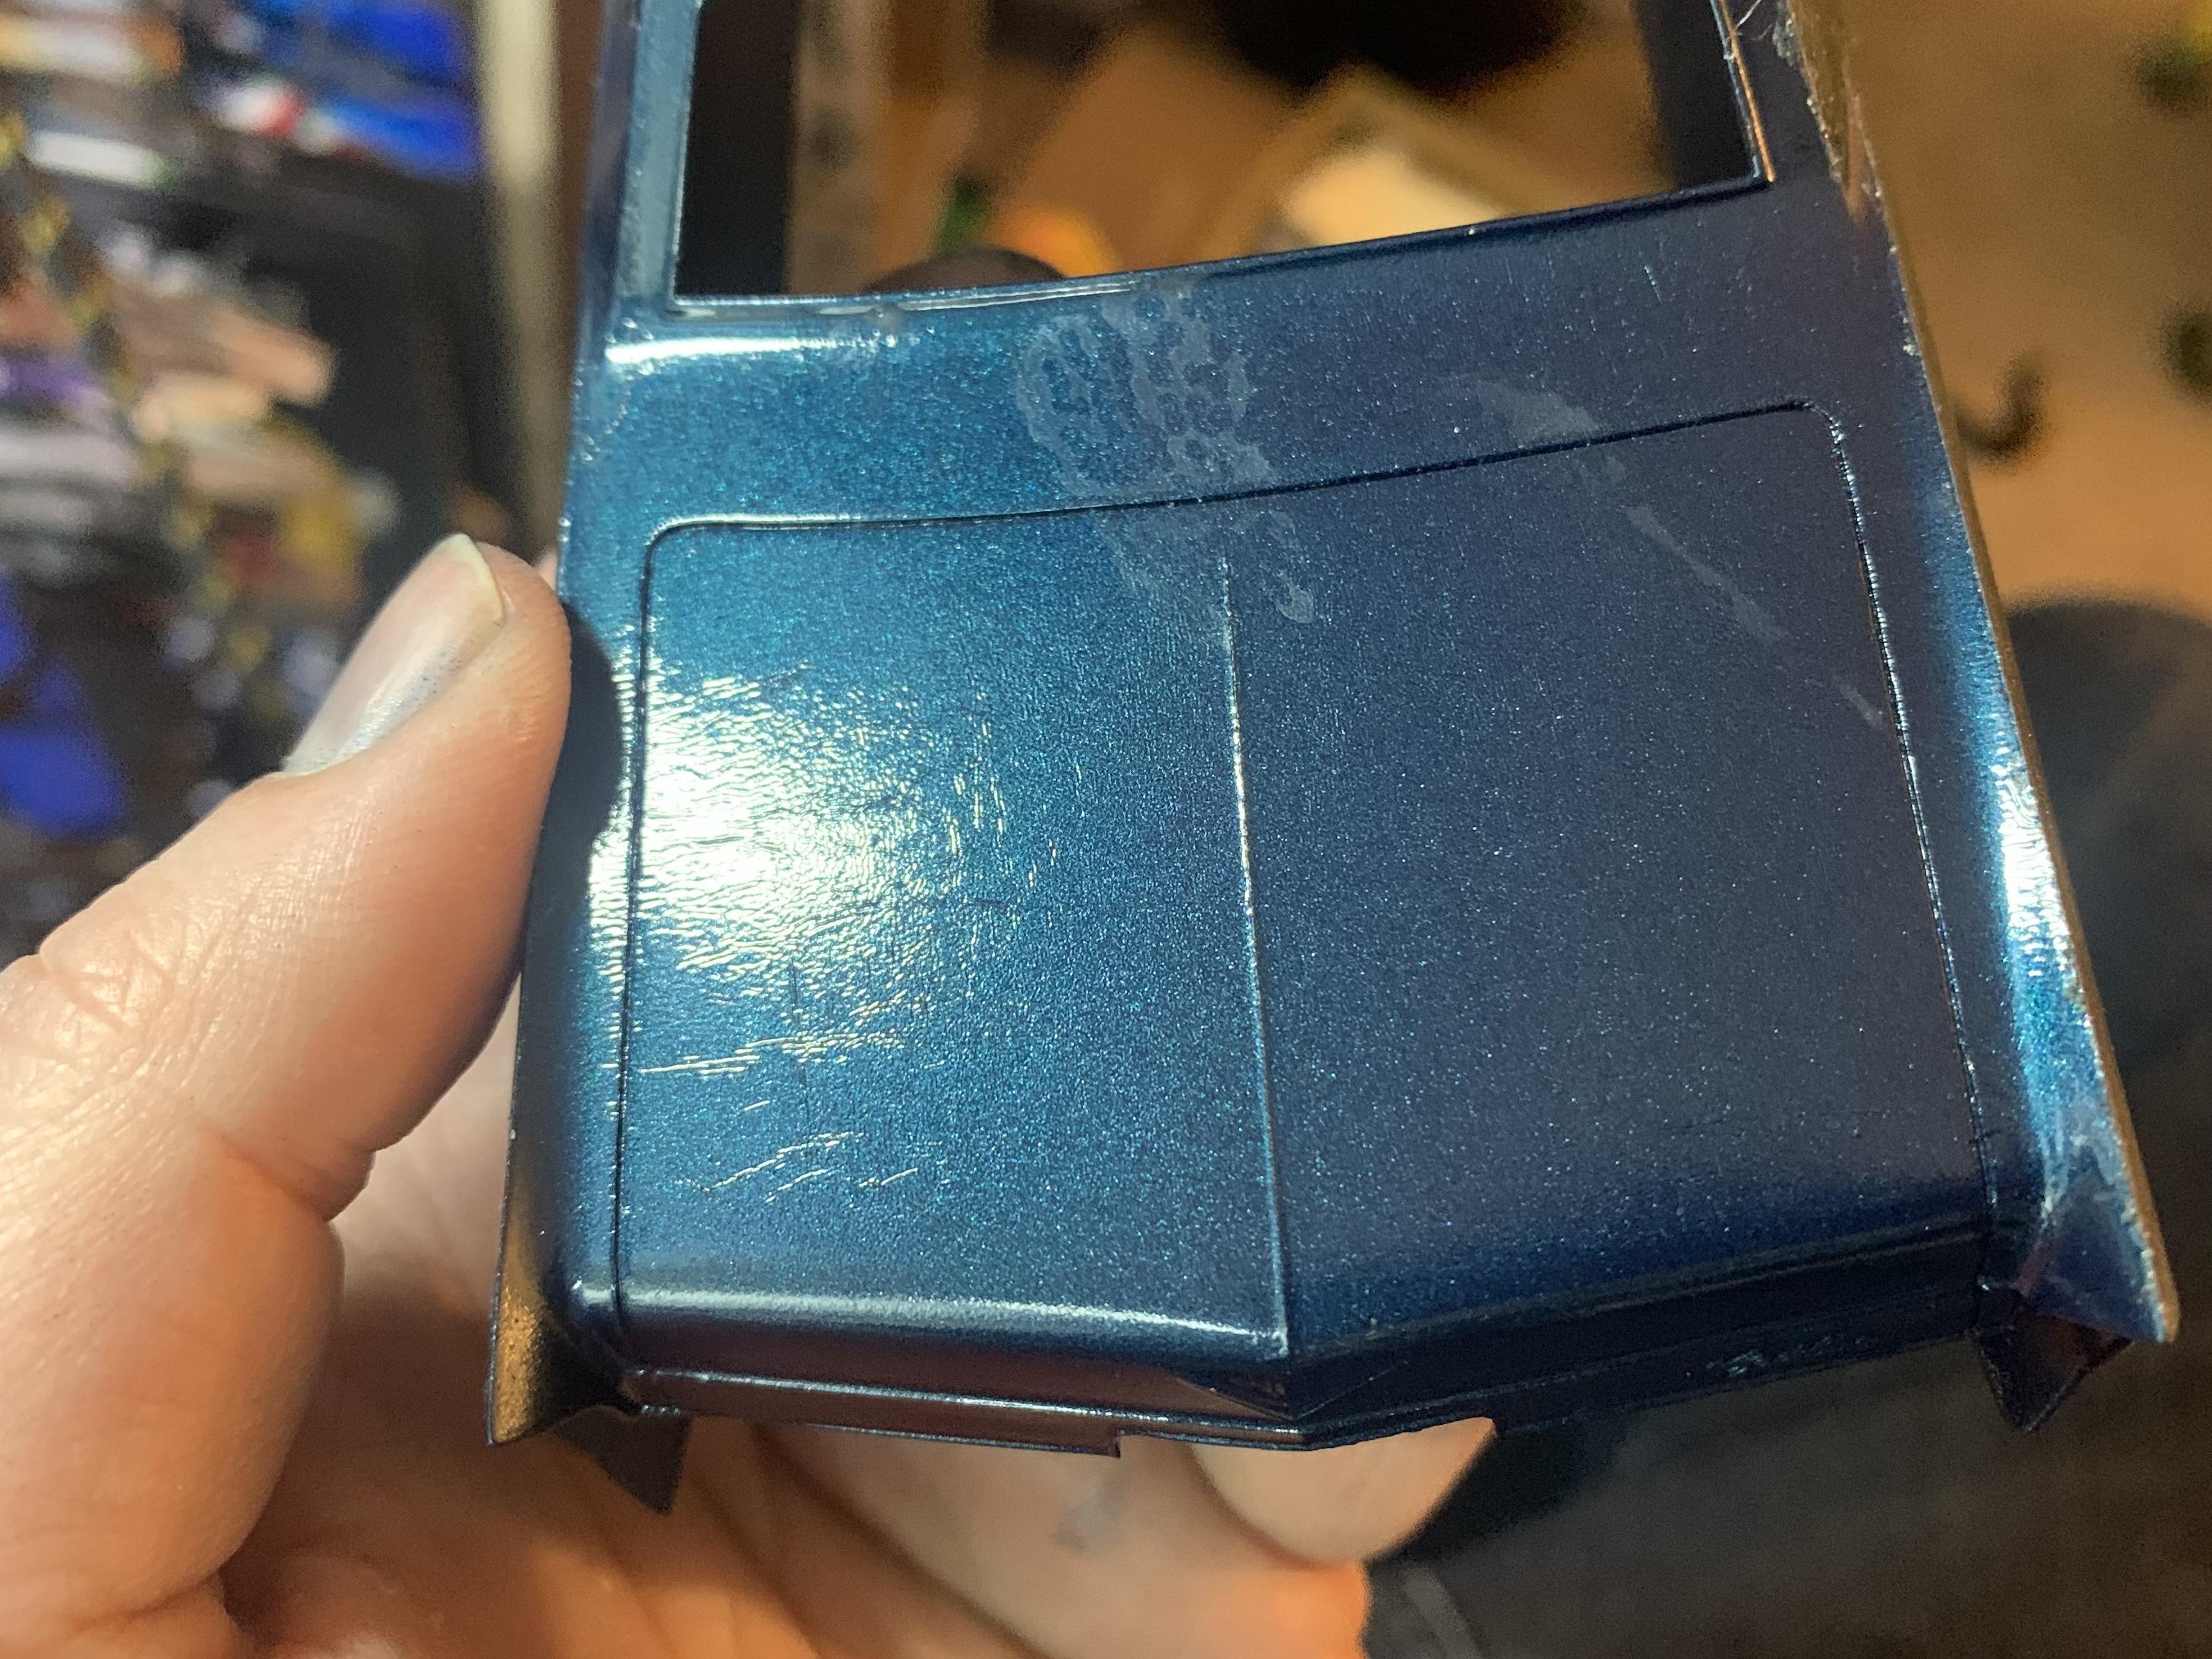
Thanks @David G., @slusher and @Steve H! Had a great day, initially, then a disappointing day… Shot one last coat of primer last night, smoothed out the body, and shot the Scale Finishes Nocturne blue…it laid down BEAUTIFULLY! No crazing, no problems; I had shot a test piece to make sure, and all good: Then, once the lacquer had had 12 hours or so to dry, shot a test piece with their enamel clear (also all good), and then started some light mist coats of clear over the body. It started frosting up almost immediately and then wrinkled the lacquer underneath: ????????? What happened?! The lacquer didn’t even touch this old styrene, I laid down multiple barrier coats, I’m convinced that once I strip this thing it’ll only be their lacquer than wrinkled - so what gives?! Into the pond it goes. I’m almost certain the clear was mixed too hot - I’ve never ONCE had ANY enamel do this over ANY lacquer (or even something less tough, like regular artist or airbrush acrylics)…irritatingly, the much wetter coat I shot on a test piece (the top side of the frame) was absolutely fine. Bummer ??
-
Thanks buddy! Me too! Need to find the factory-matching paint now…mine was a special edition so it was a non-standard color
-
I haven’t picked up an FSM for a while - I take it the automotive content is slim pickins now huh?
-
Yep, you’re right. I already have a few of the Mooneyes kit, but I still ordered an extra when I saw their email this morning. Actually, I was gonna order a few, just to have them, but by the time I posted about it on here, ate breakfast, fed the cat, talked to my wife, got gas, etcetera etcetera there was only one left ??
-
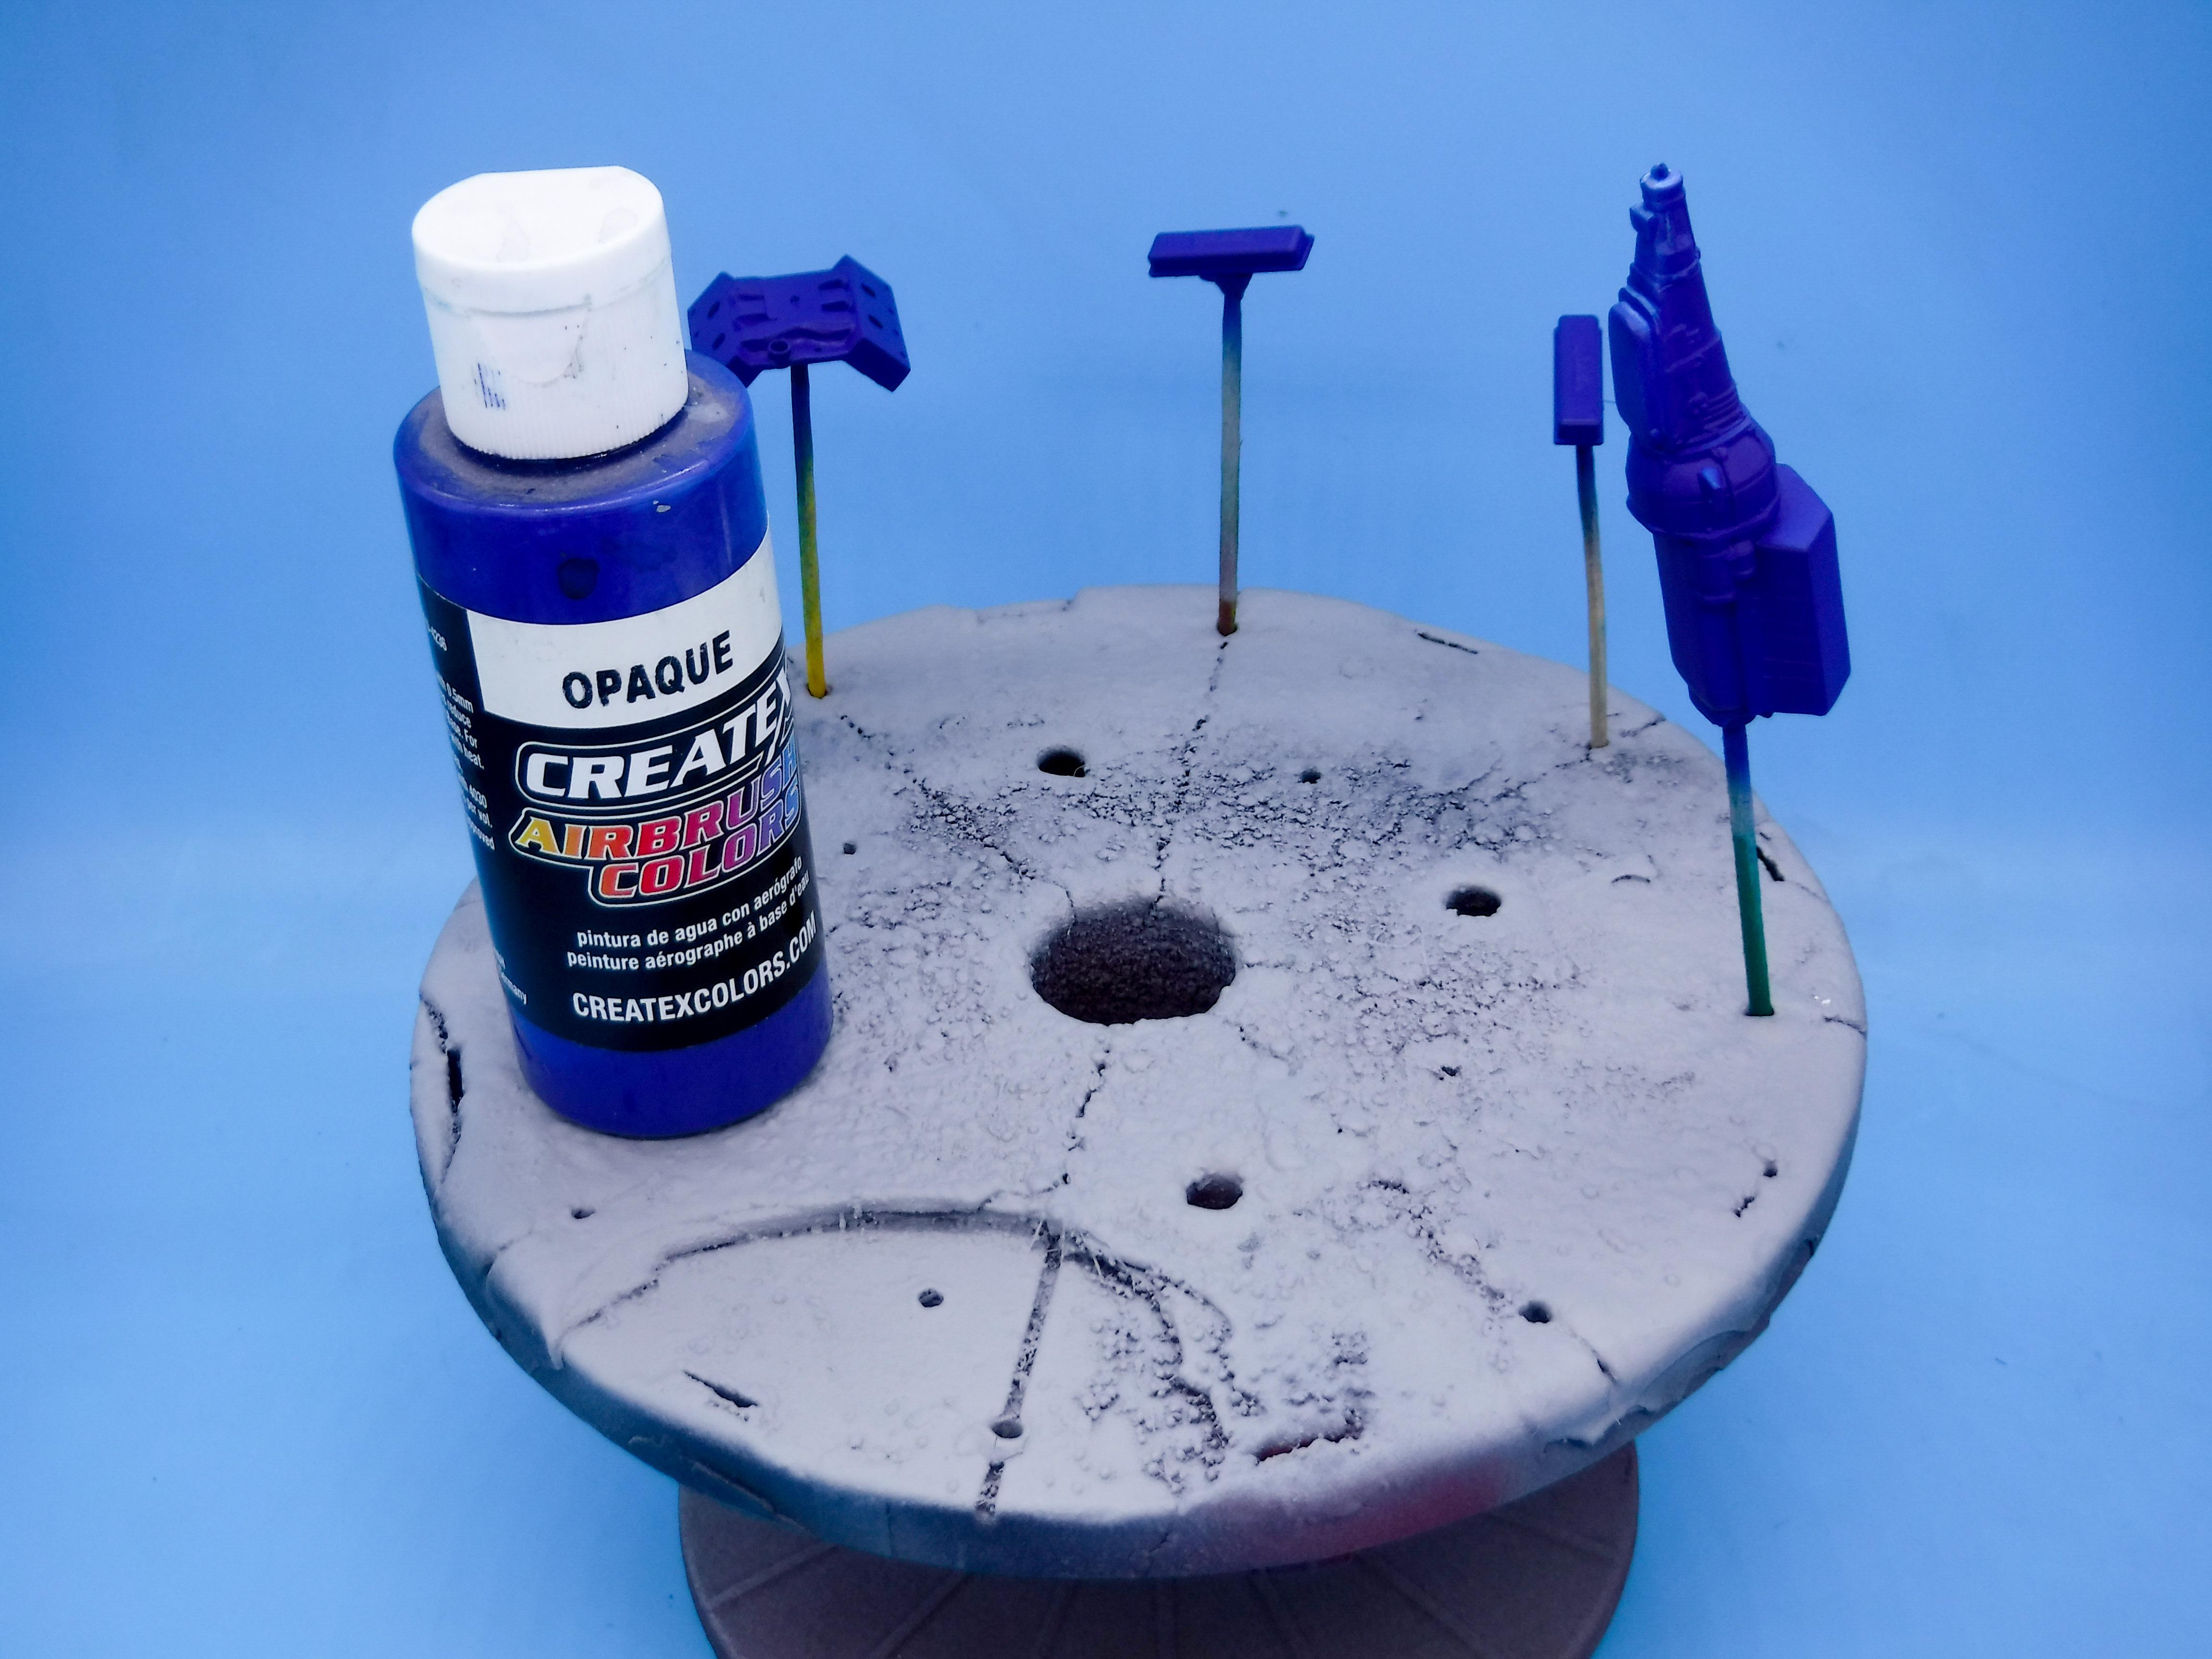
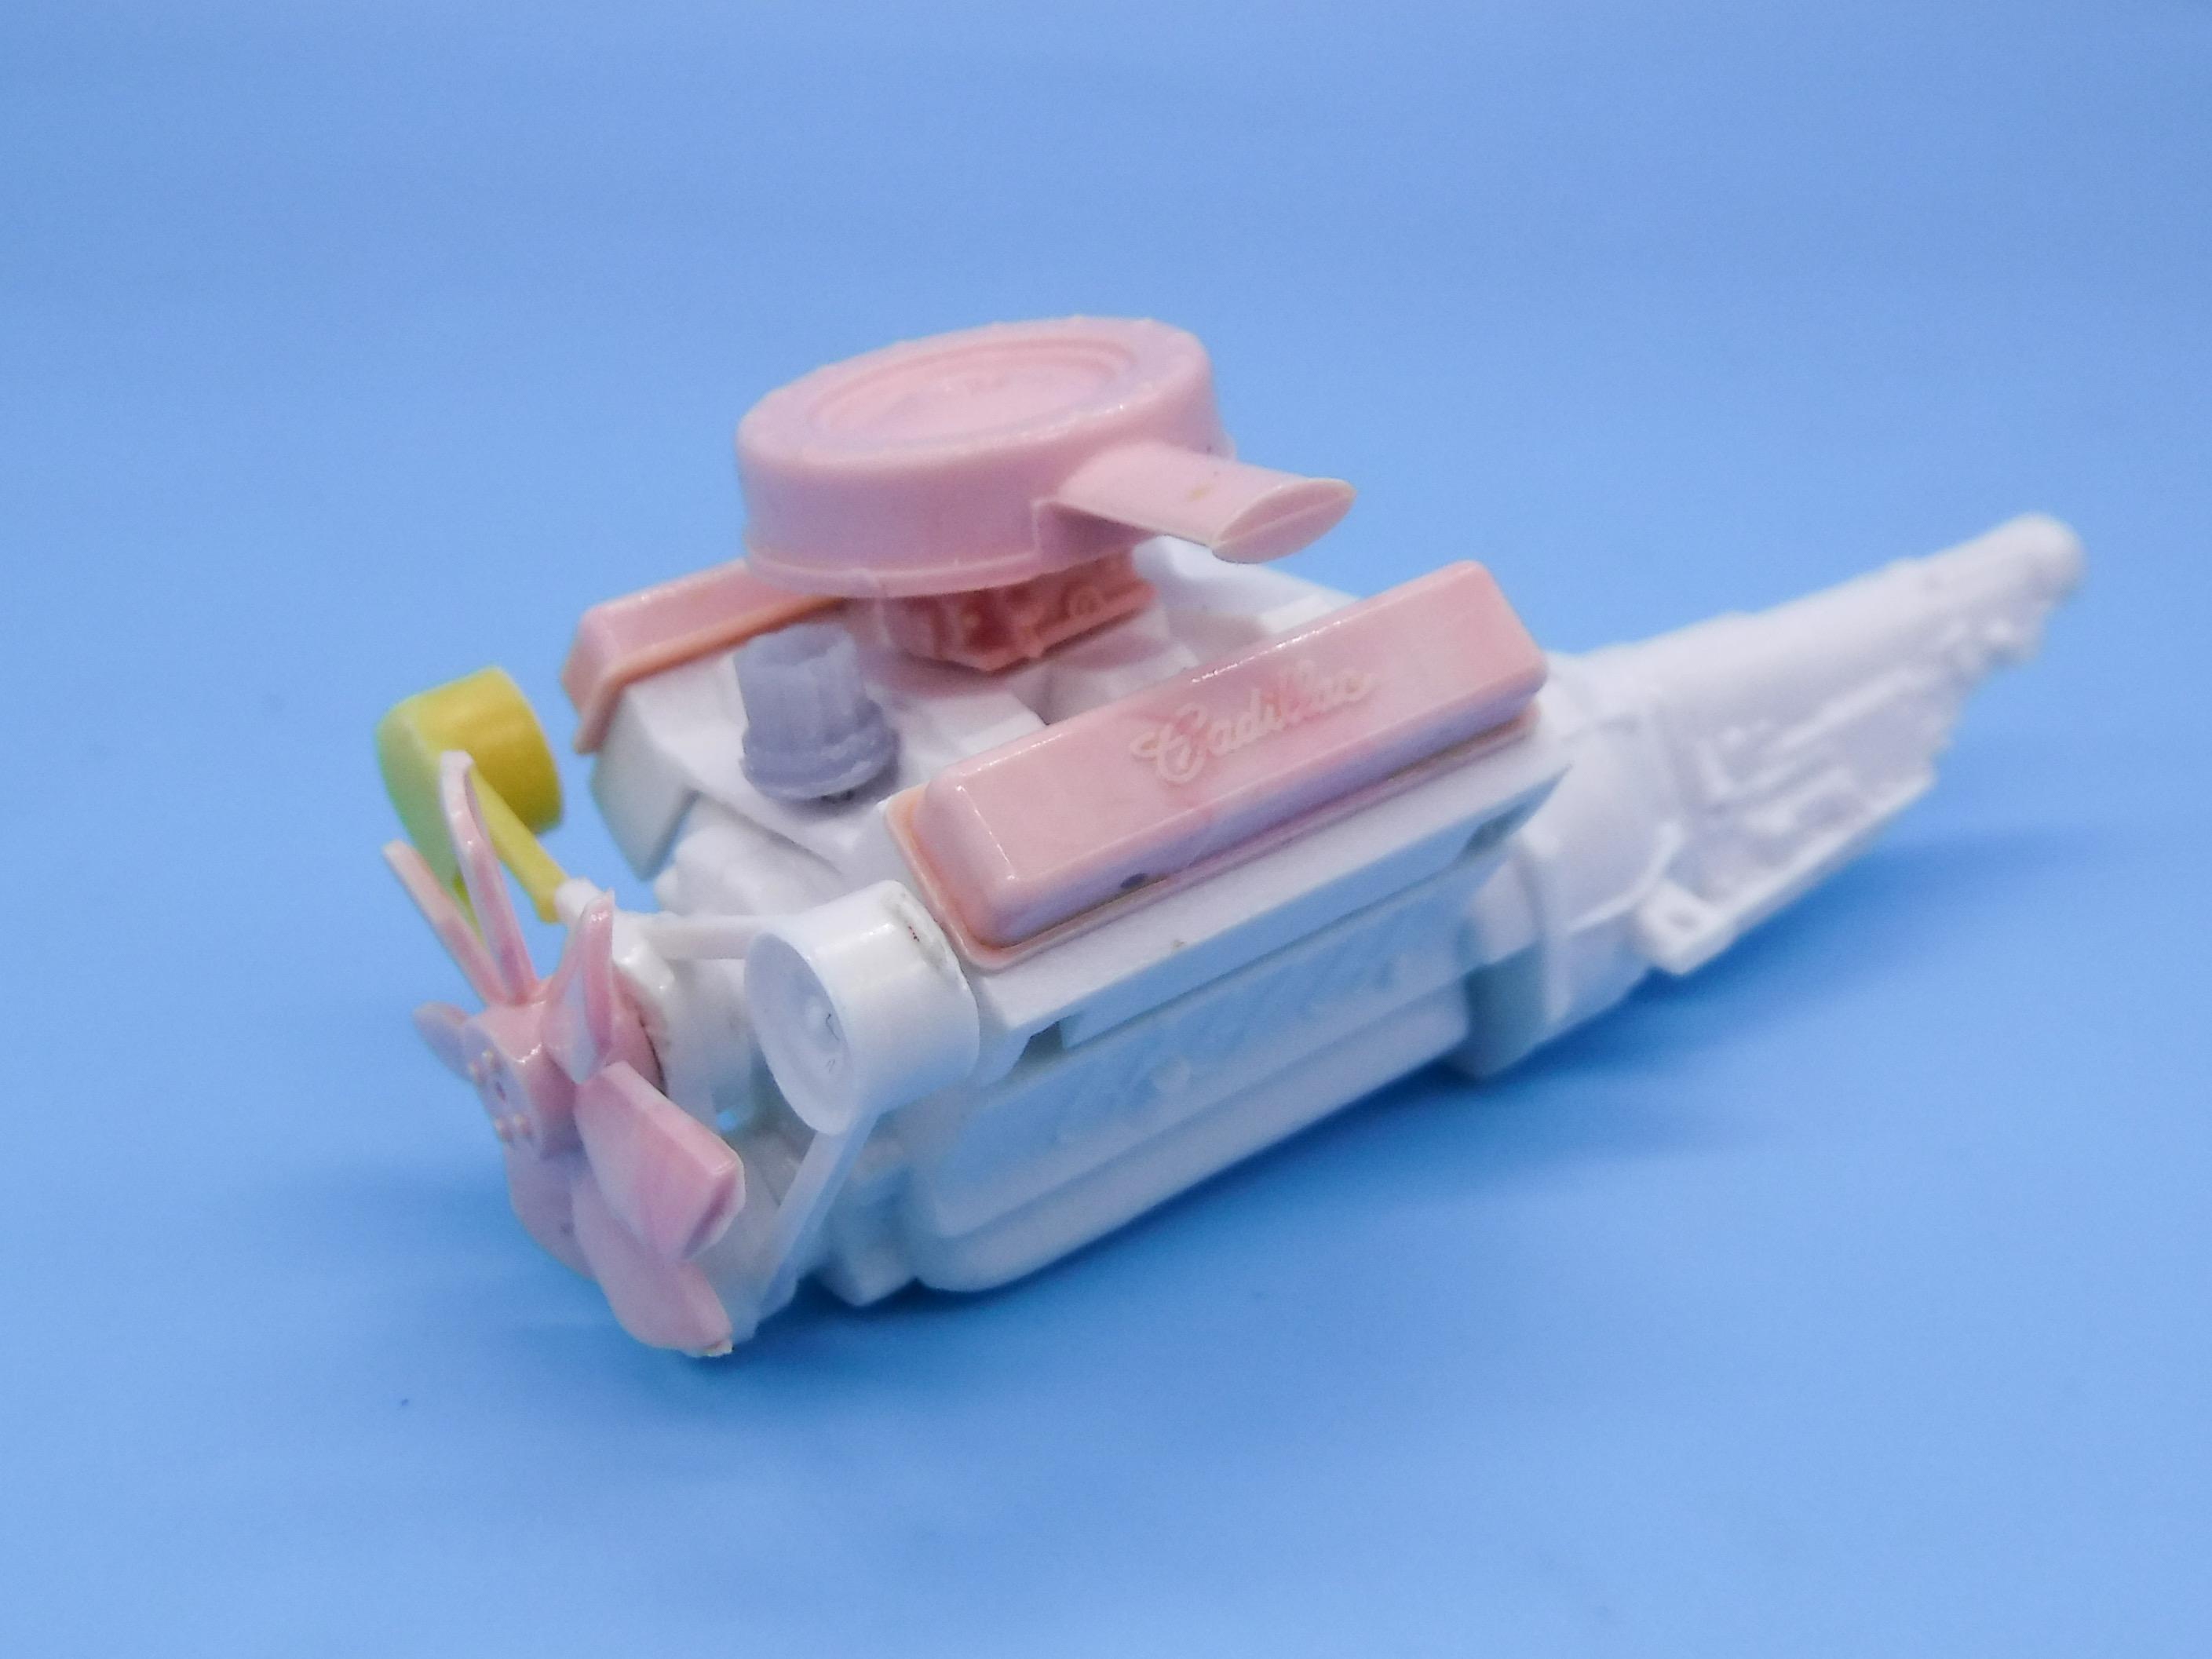
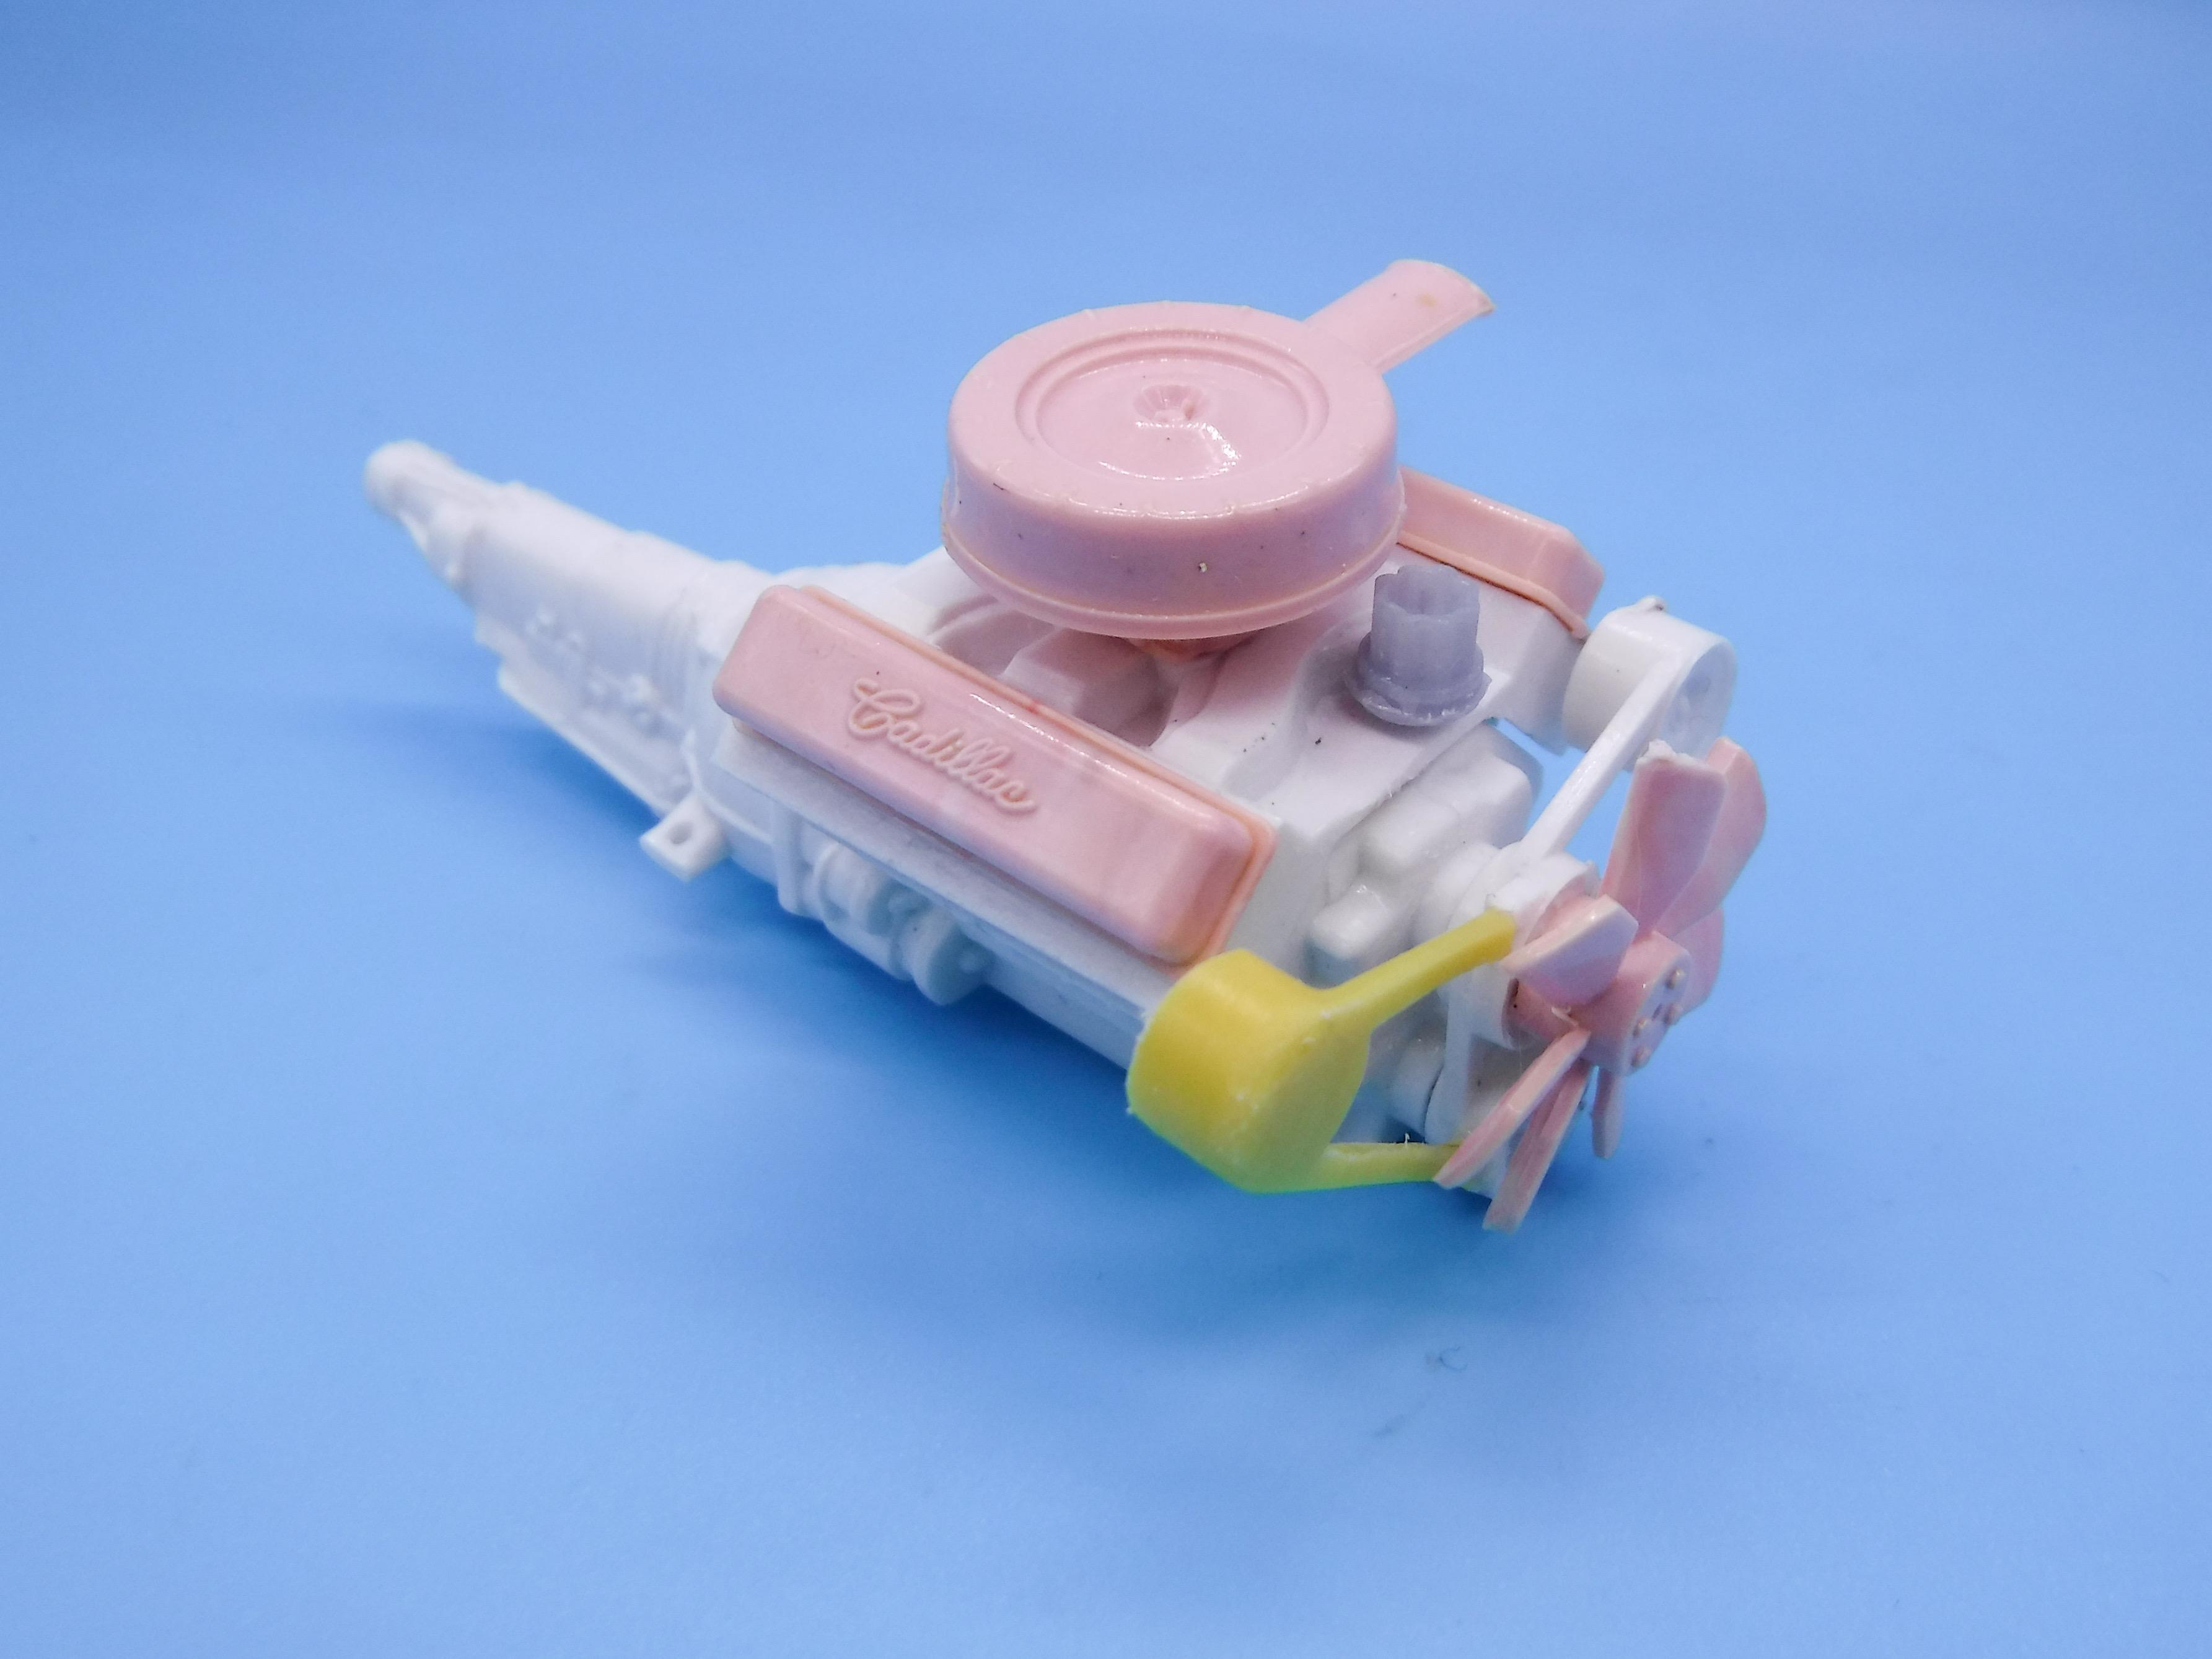
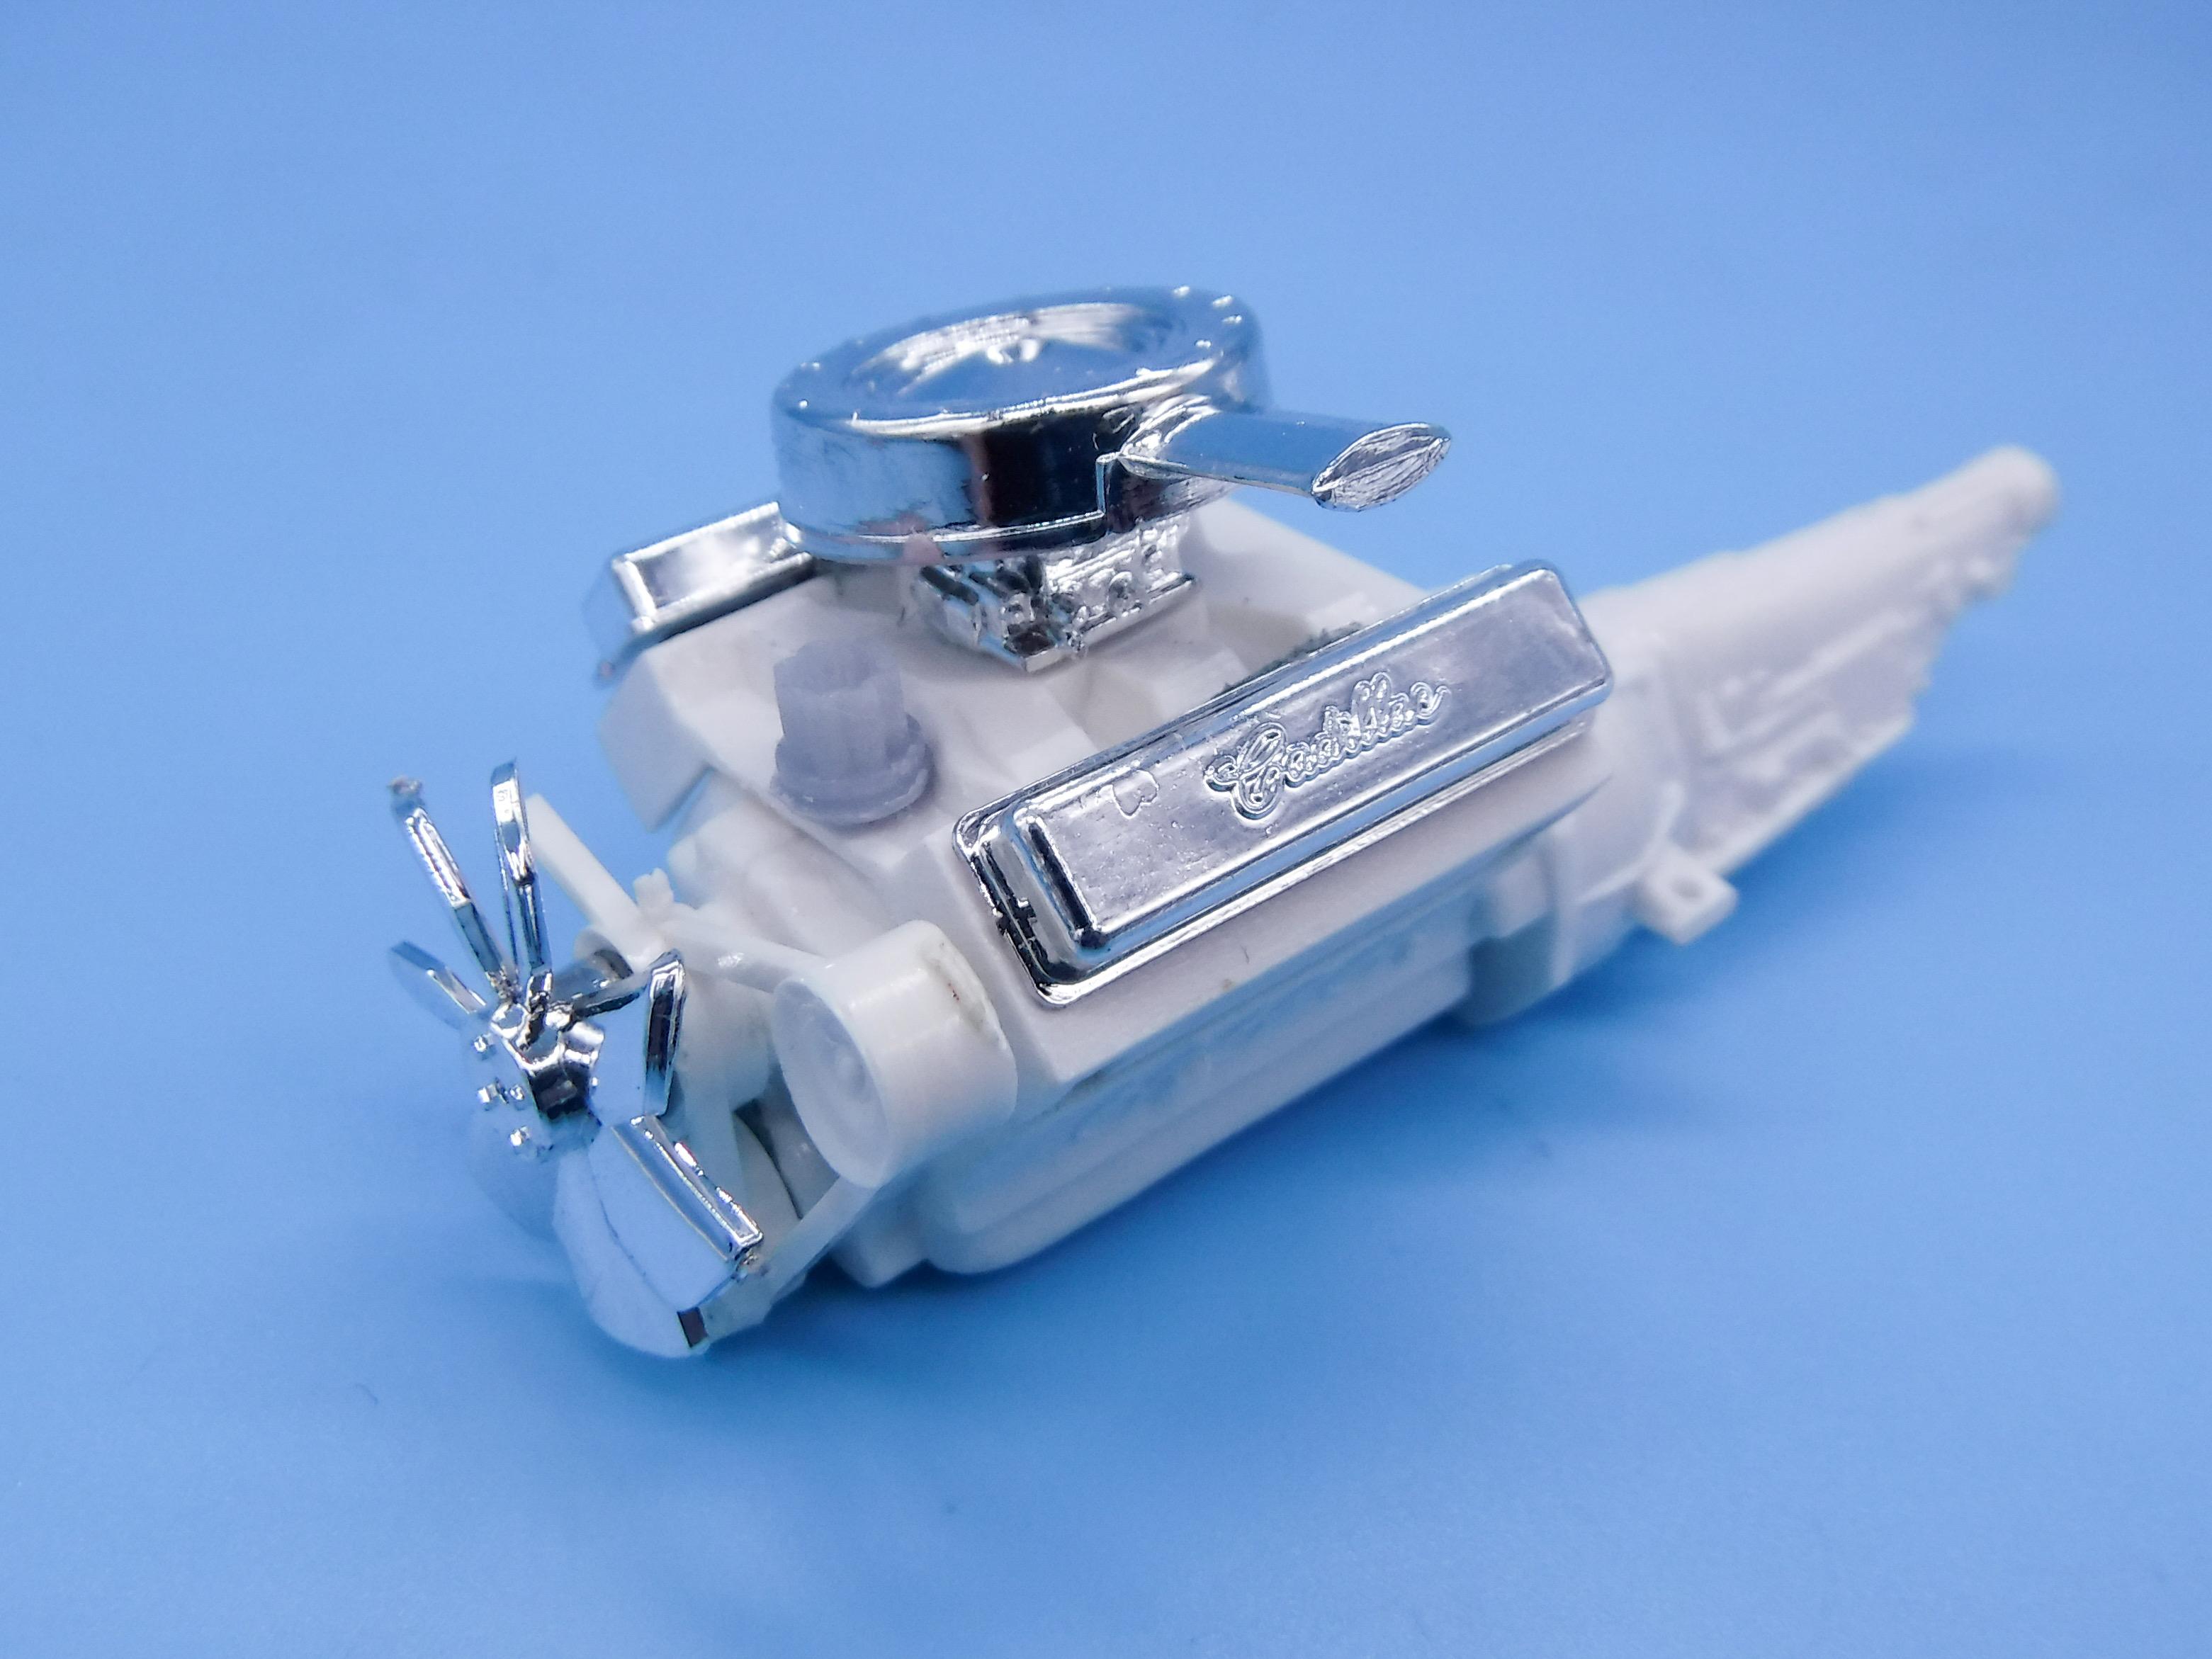
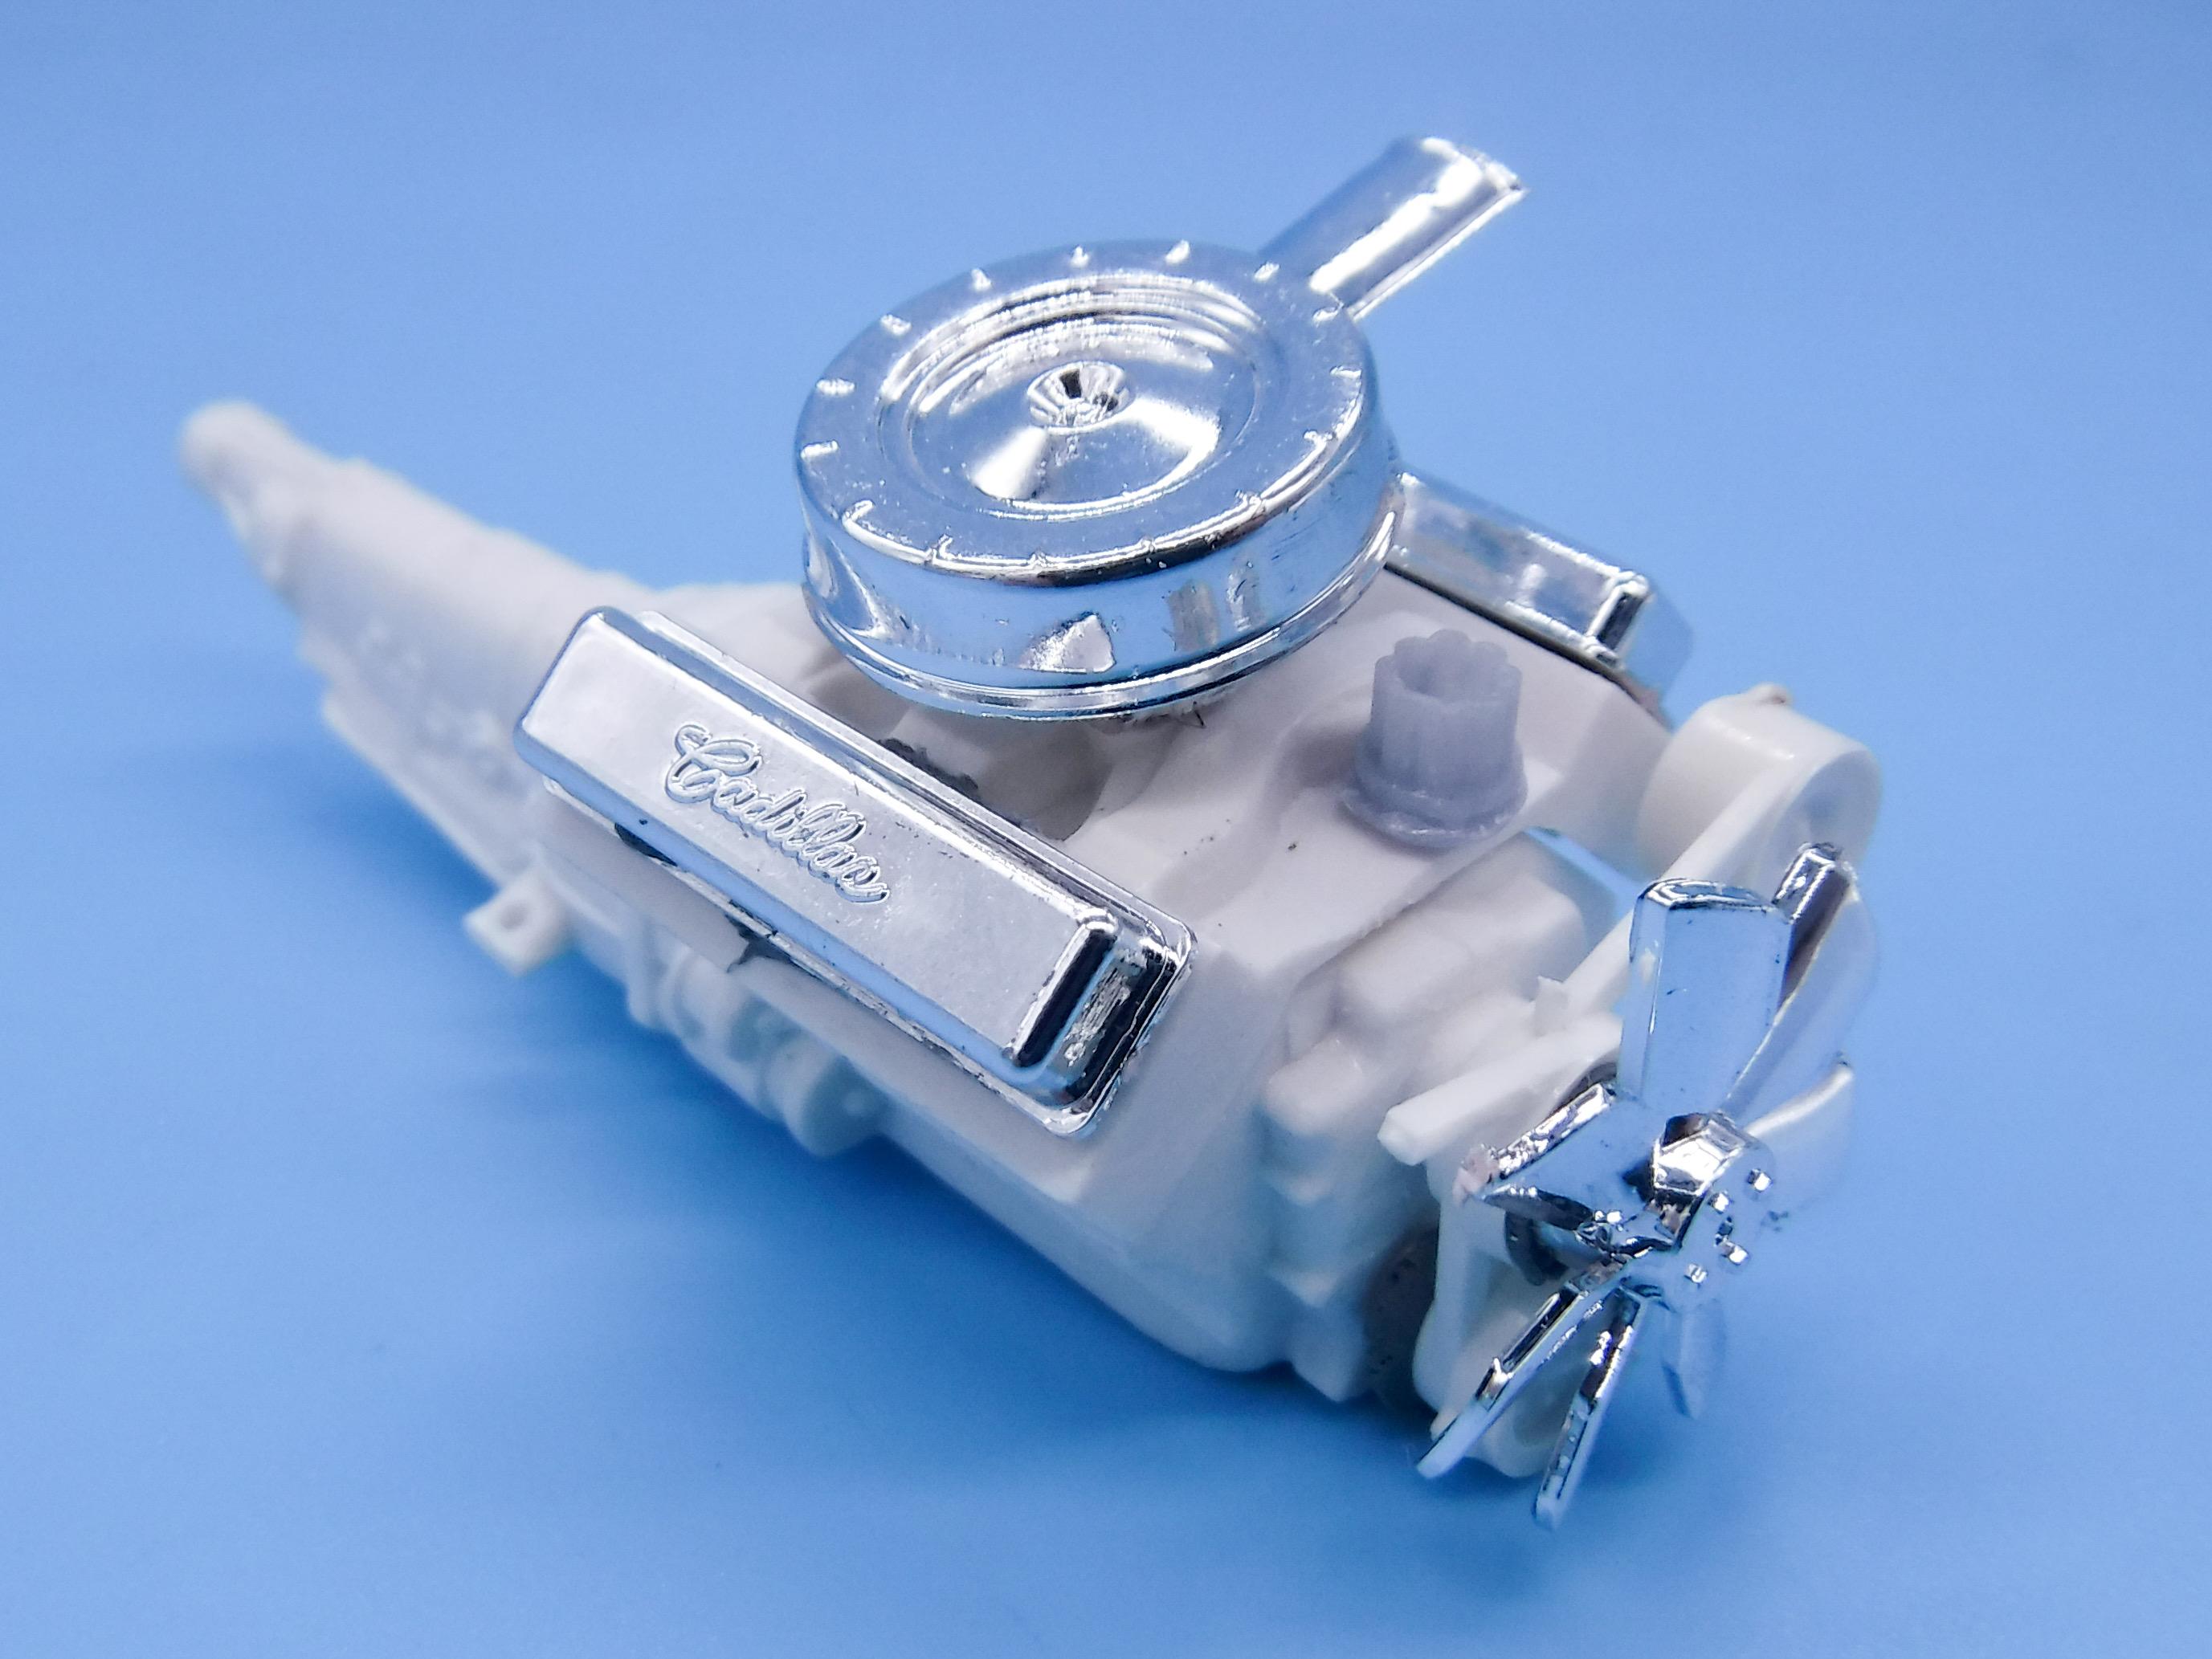
Thanks everybody! A little of both - if someone talented has made something better than I can design, I’ll support them and purchase it…but I enjoy designing my own parts too! In this case, I designed and 3D printed the license plate, distributor and wheelbacks, but there won’t be too much else I add to this one. Maybe the interior dome lights…I laid those out in CAD already, I just need to print a set… Today’s projects; first up, spent a couple of hours carefully going over the body and wetsanding the primer, looking for high and low spots. Found a few little areas that needed attention, but nothing major… Then, got it all back in primer for another go-around tomorrow: I’m hoping I can shoot color on it tomorrow, but I’m not planning on rushing it either…I’m REALLY tempted to shoot the underside in matching dark-blue to show off that nice detail under there (with the frame and suspension etc. painted metal shades and black) but they weren’t like that from the factory, so I may end up going with something simpler… And thirdly today, got the engine in color. I had the paint rep at our paint supplier at work give me a code for 60s Cadillac engine blue that I could use as reference for color - Createx opaque blue looks like a good match on my paint chart (although it’s nowhere near as vibrant under normal light as it appears in my photo booth…those LED lights really lighten it up a lot and make it more blue than it really is. Think, more like Yankees blue…) Need to clearcoat these parts tomorrow and then mask off the trans for factory black…and hopefully start laying down some color! More soon, thanks for looking!
-
Belated birthday present - I’ve wanted one of these for a while! Gonna build a replica of my 1:1… Seems like a nicely done kit - reminded me a lot of the Tamiya Mk1 Miata…
- 38,884 replies
-
- 1
-

-
- johan
- glue bombs
- (and 1 more)
-
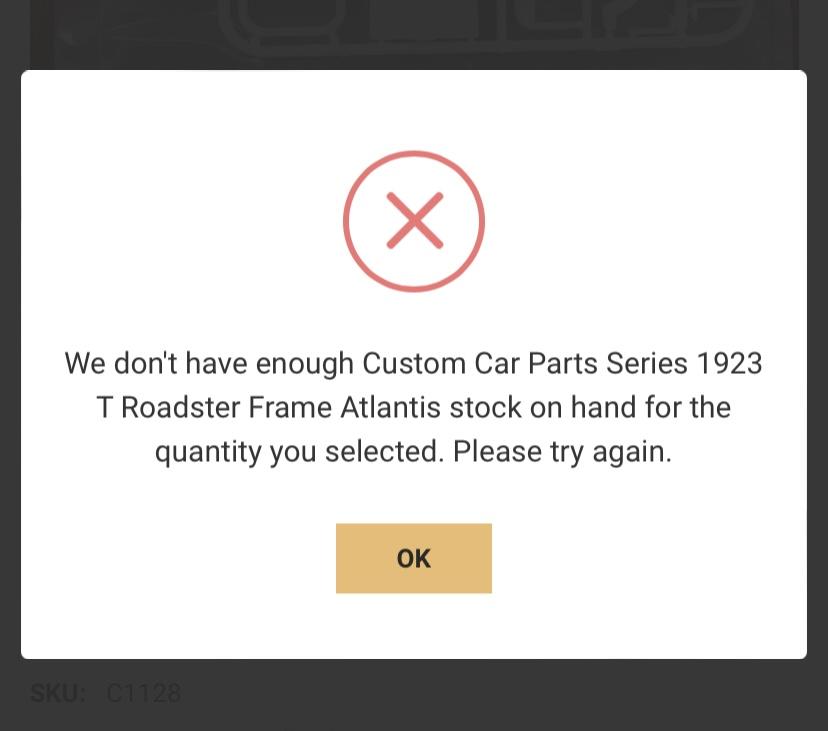
From the Atlantis email this morning - stand-alone parts-pack 23 T frames available for $8.99: https://atlantis-models.com/custom-car-parts-series-1923-t-roadster-frame-atlantis/
-
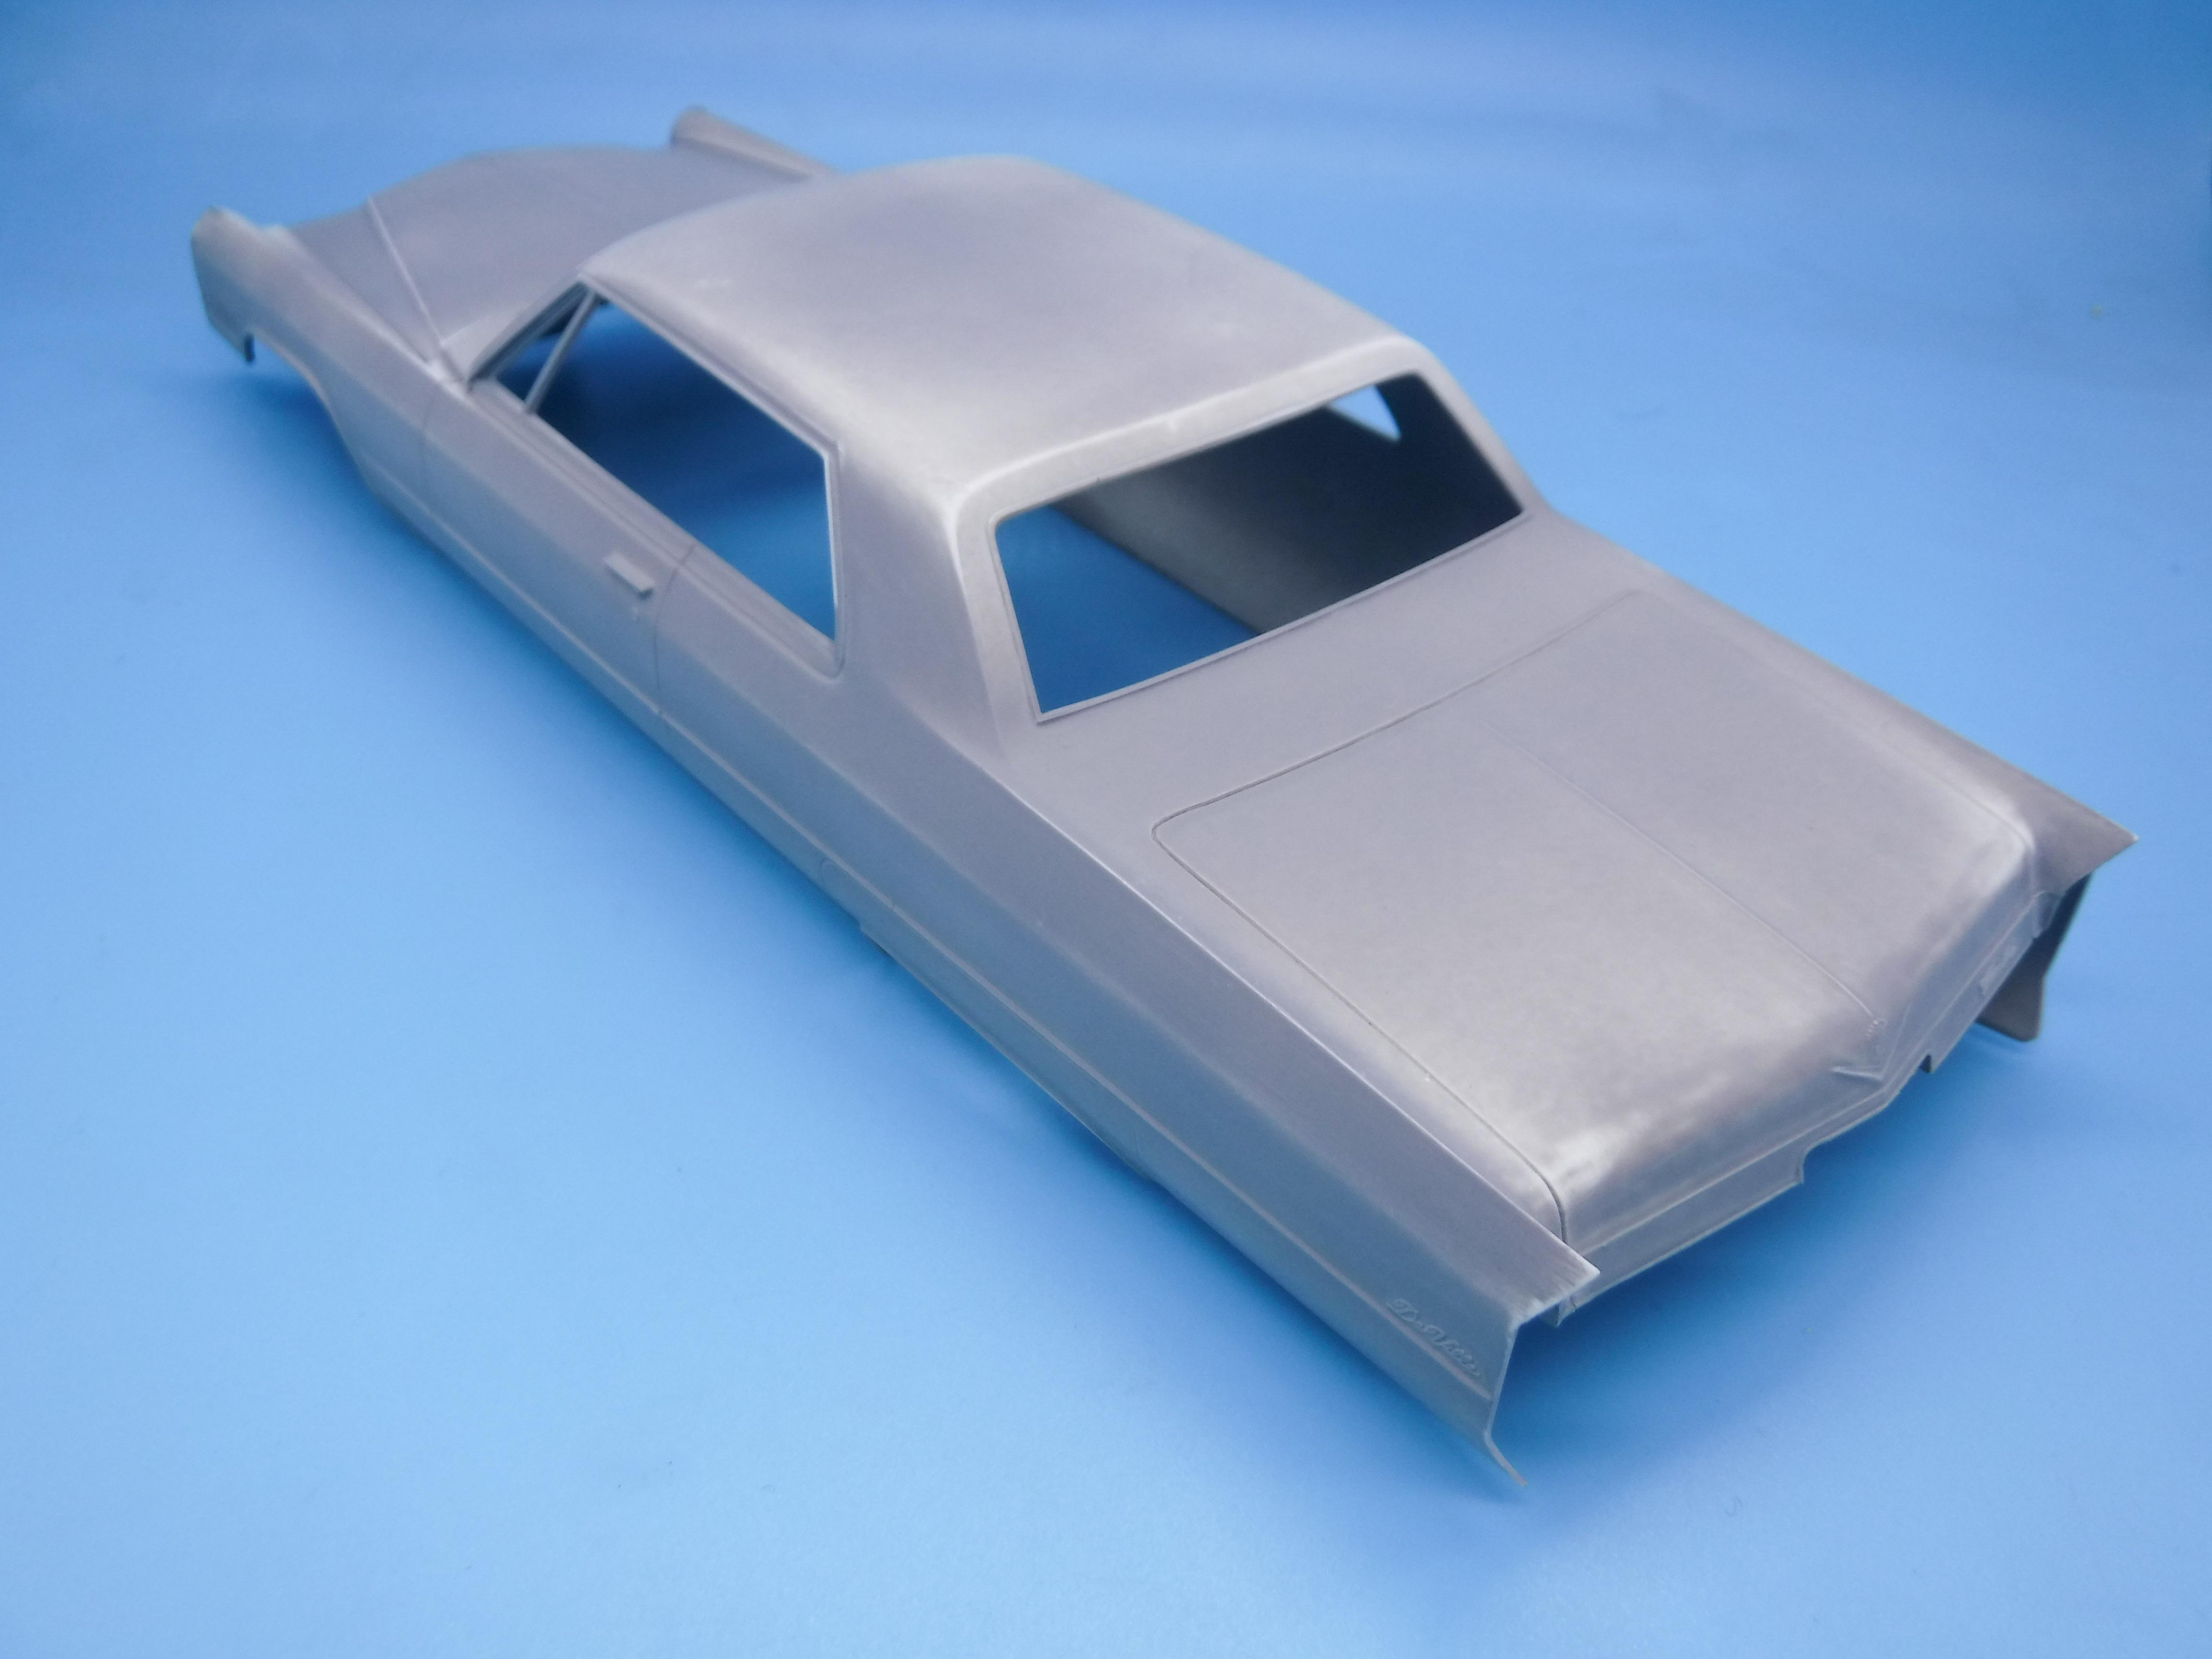
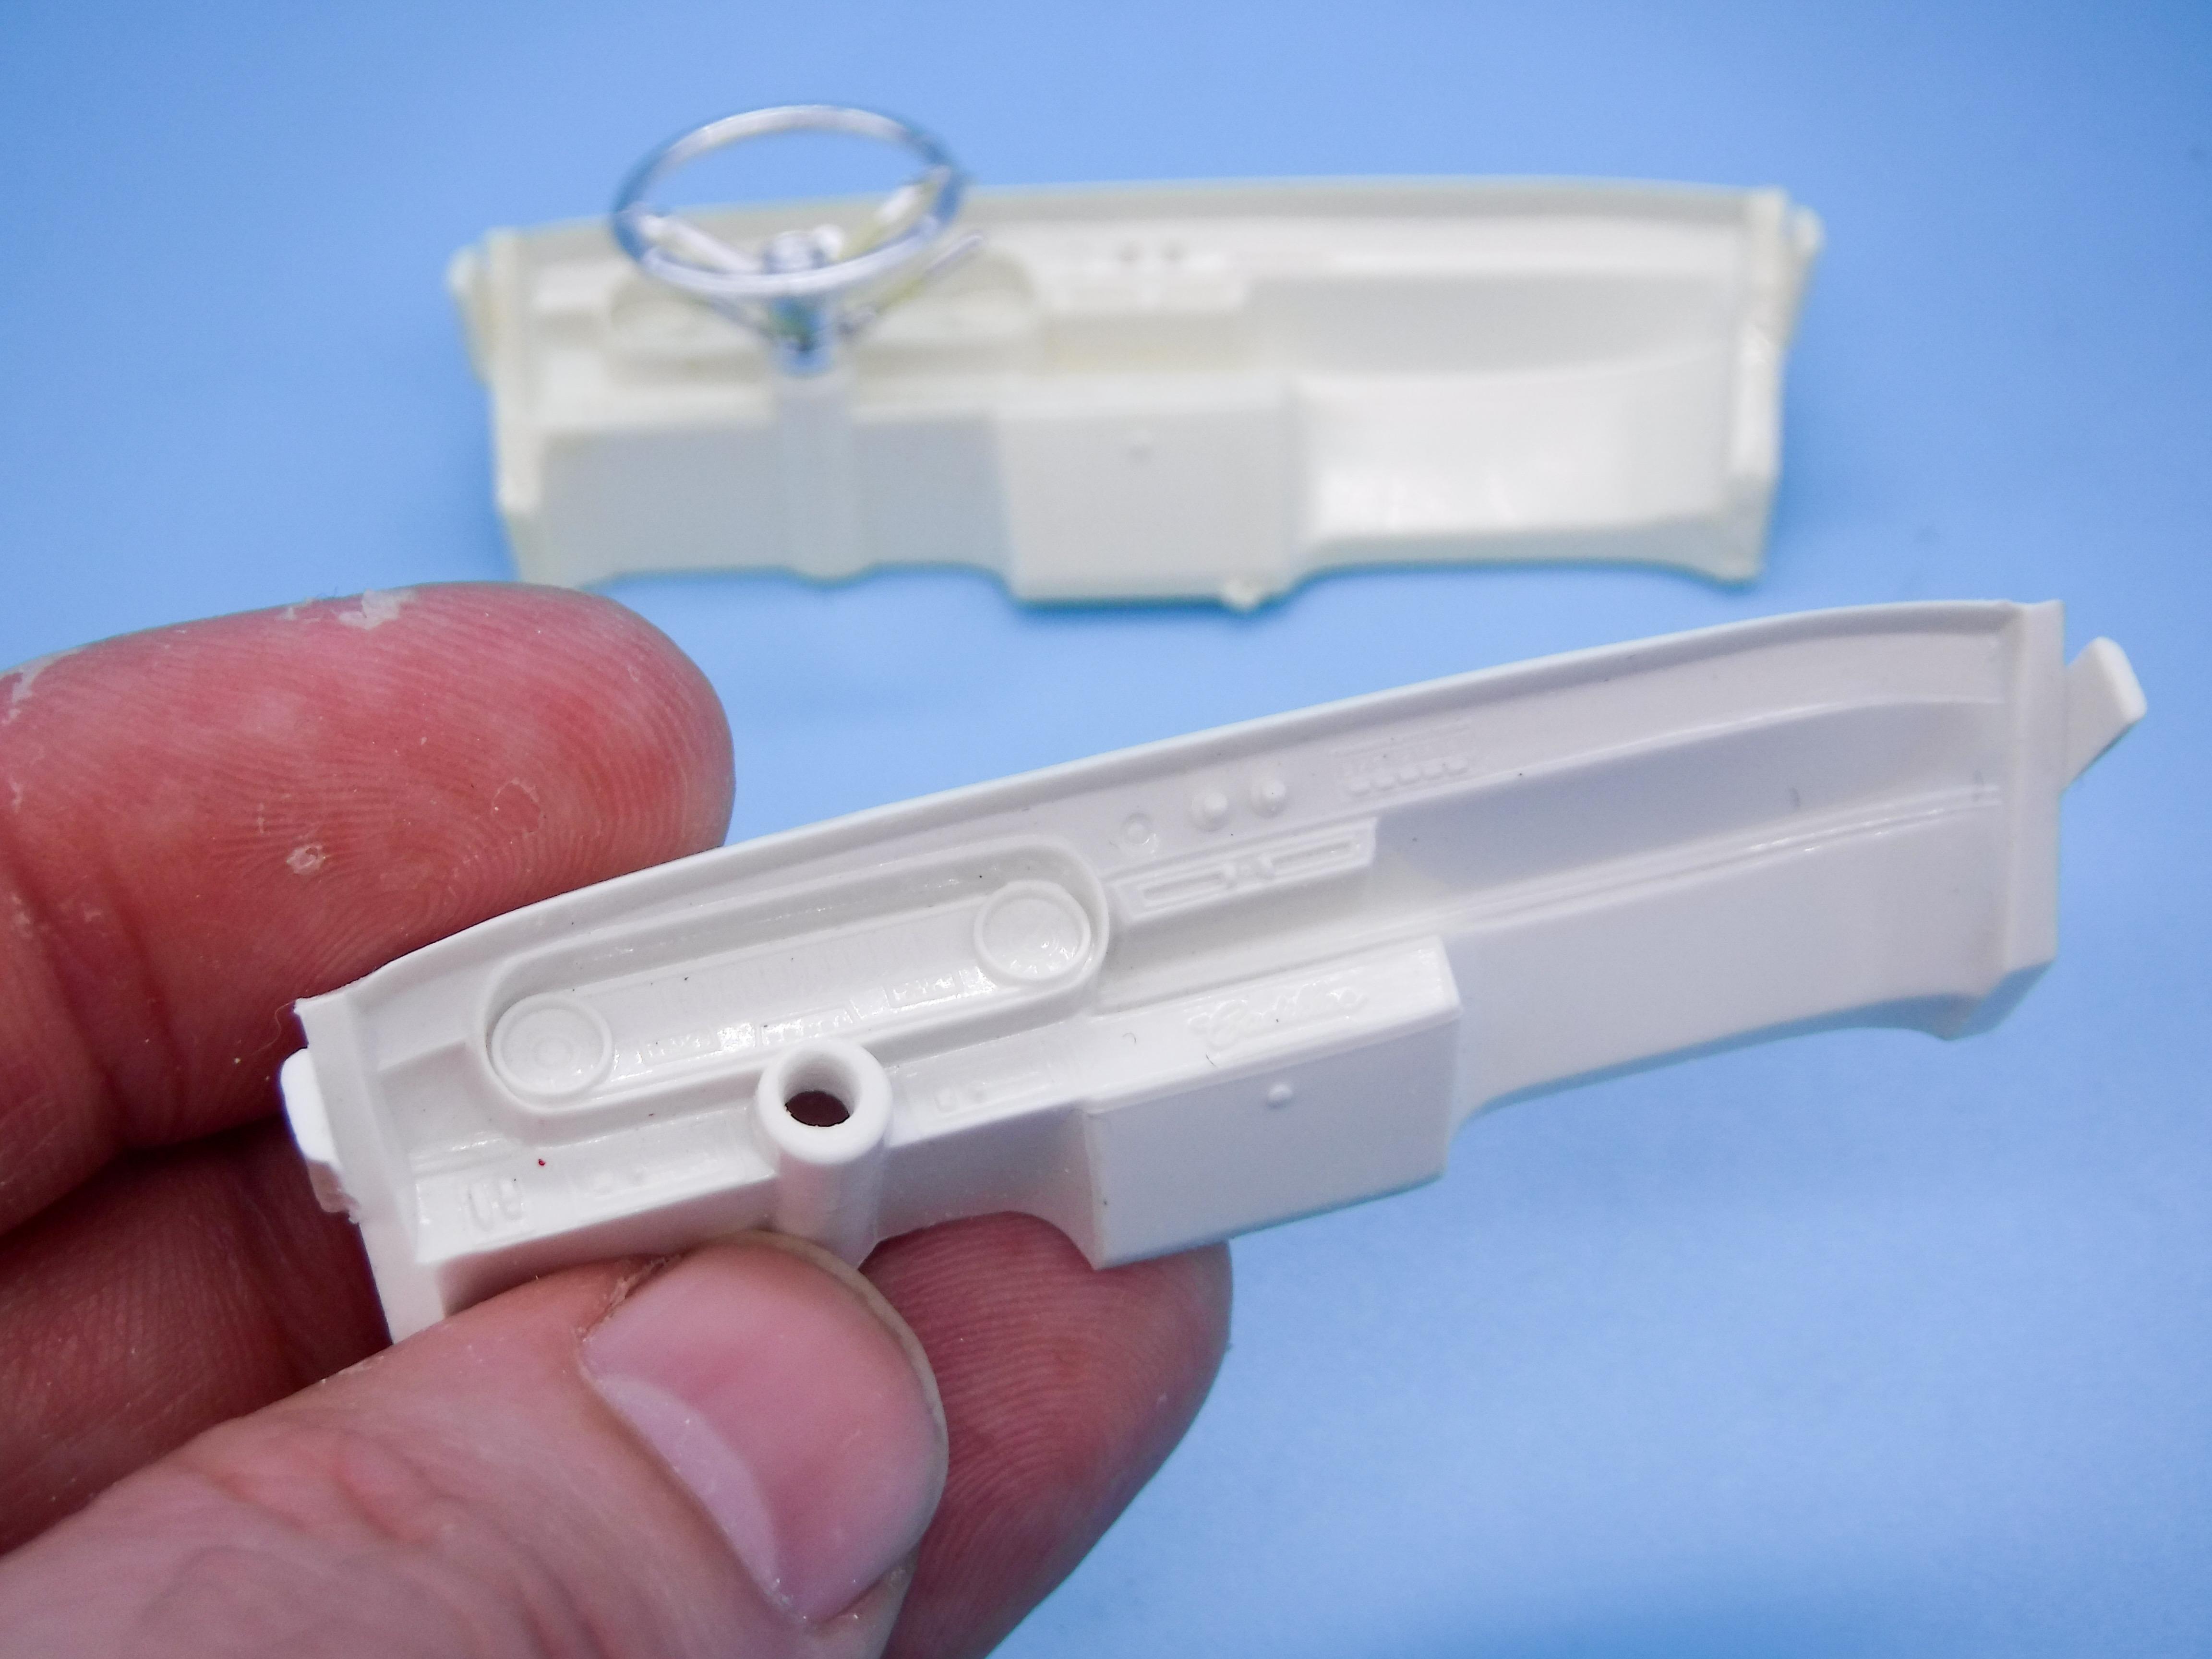
Thanks buddy! Good question! The chrome on the steering wheel is still nice and intact, at least where it needs to be, so I think I’ll try just painting the hoop and leave the spokes in the kit chrome. The valve covers, fan, carb and air filter aren’t chrome on the 1:1s, so I stripped those tonight. Which brings me onto tonight’s update… Stripped the chrome, and another mock-up of the engine: As you can see from that one yellow piece, the fan belt was broken and a piece missing…but luckily there was a spare (also broken, but in a different spot) in the box. I’ve just tacked the two together with some white glue for now, but if I can salvage those two into one good piece that matches what was in the kit originally I’ll be happy… In other progress, I’m prepping everything that will be body-colored ready for paint this weekend - so I cleaned up the dash and got that ready to roll. The top of the dash will be body colored, and the lower portions white and chrome… And finally, a light coat of primer on the body to see if anything immediately pops out to rectify…nothing major so far! Will wet sand this tomorrow to see how straight I’ve got those big long sides… Thanks for looking - more soon, soon as I’ve done more!
-
Lacquer over Pledge Floor Care Finish?
OldNYJim replied to aurfalien's topic in Model Building Questions and Answers
That’s super helpful - thank you sir! Working on an old Johan kit which I’ll be painting with a Scale Finishes lacquer, and I’d really like to not ‘crinkle’ anything! Appreciate the reply! -
Lacquer over Pledge Floor Care Finish?
OldNYJim replied to aurfalien's topic in Model Building Questions and Answers
An old topic Bill, but I respect your opinion…do you like to use the Future right over the plastic if you’re using it as a sealer, and then prime and paint as normal? -
Best way to apply a black wash?
OldNYJim replied to Brandon Miller's topic in Tips, Tricks, and Tutorials
Black India ink (ask at Michael's or Hobby Lobby) works great, can be cleaned up with water, covers well and is cheap...and it's thinned to the right consistency already! -
Great idea! I'd buy it! I never picked up the Scale Auto one - apparently it didn't work right on a Mac, and I've had Macs for years, so...but I would've if it had worked!
-
That’s a GREAT start! Nice work on the tires! Already transformed it into something better!
-
That’s REALLY cool!
-
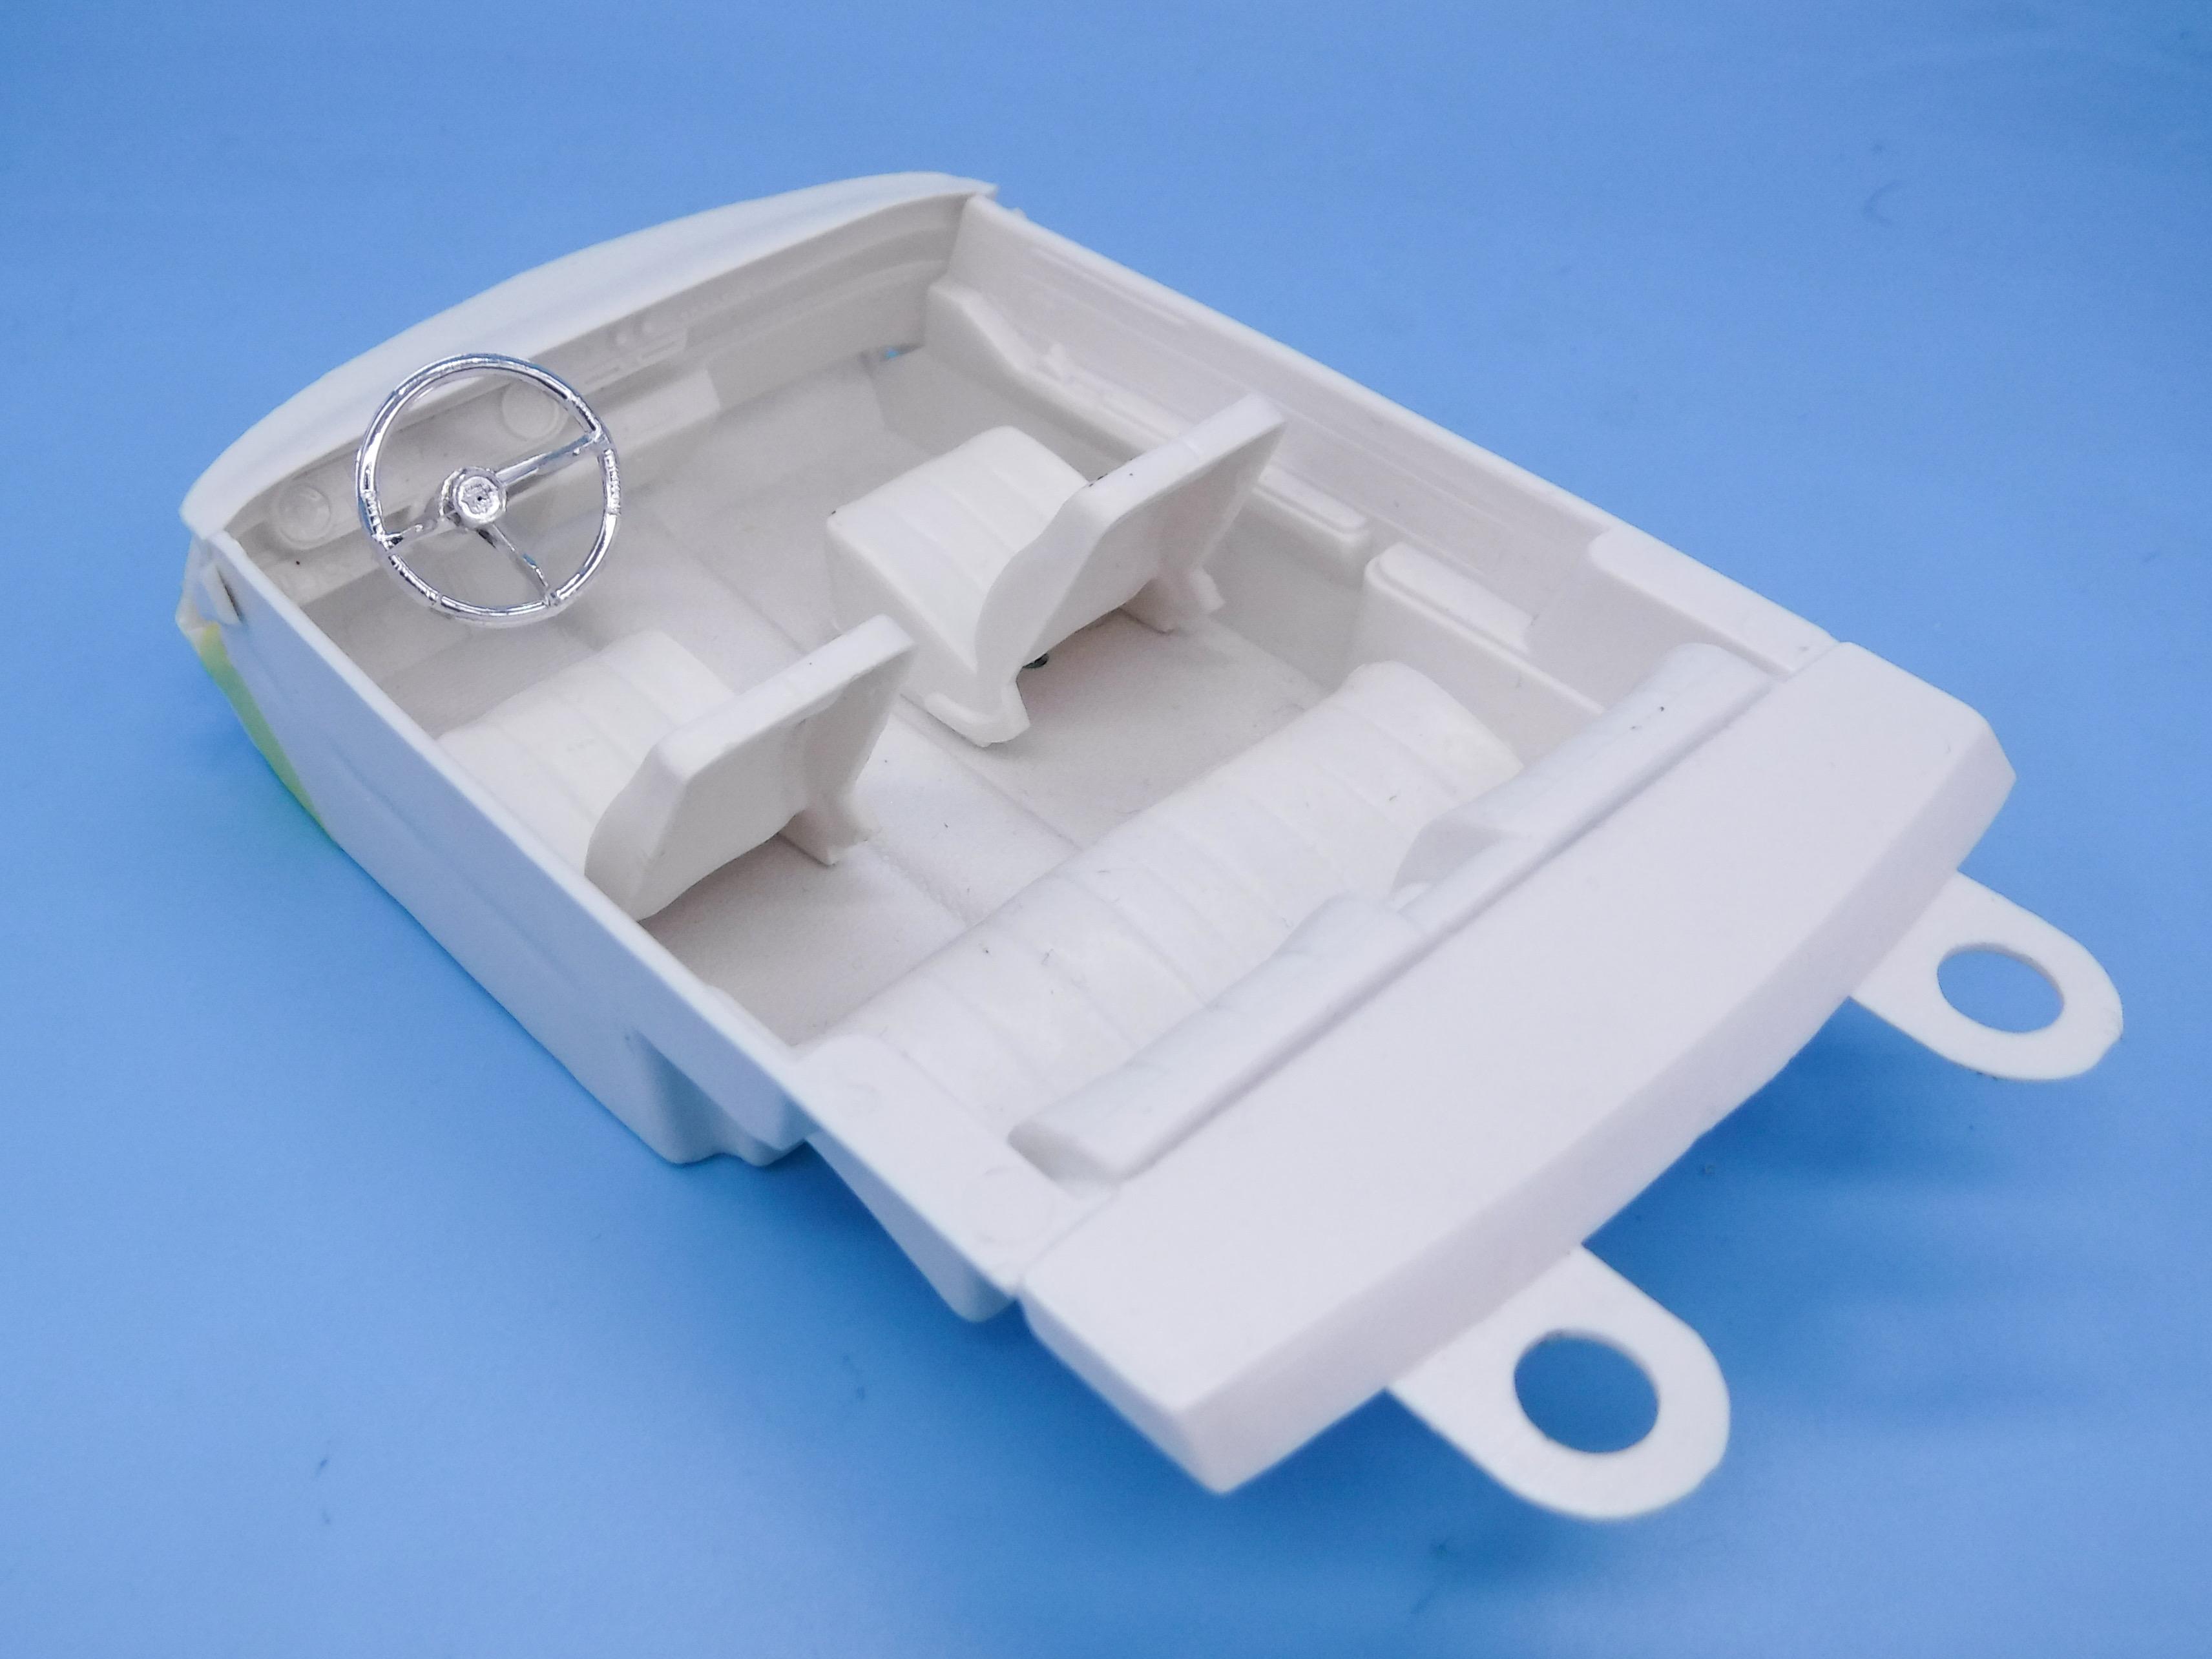
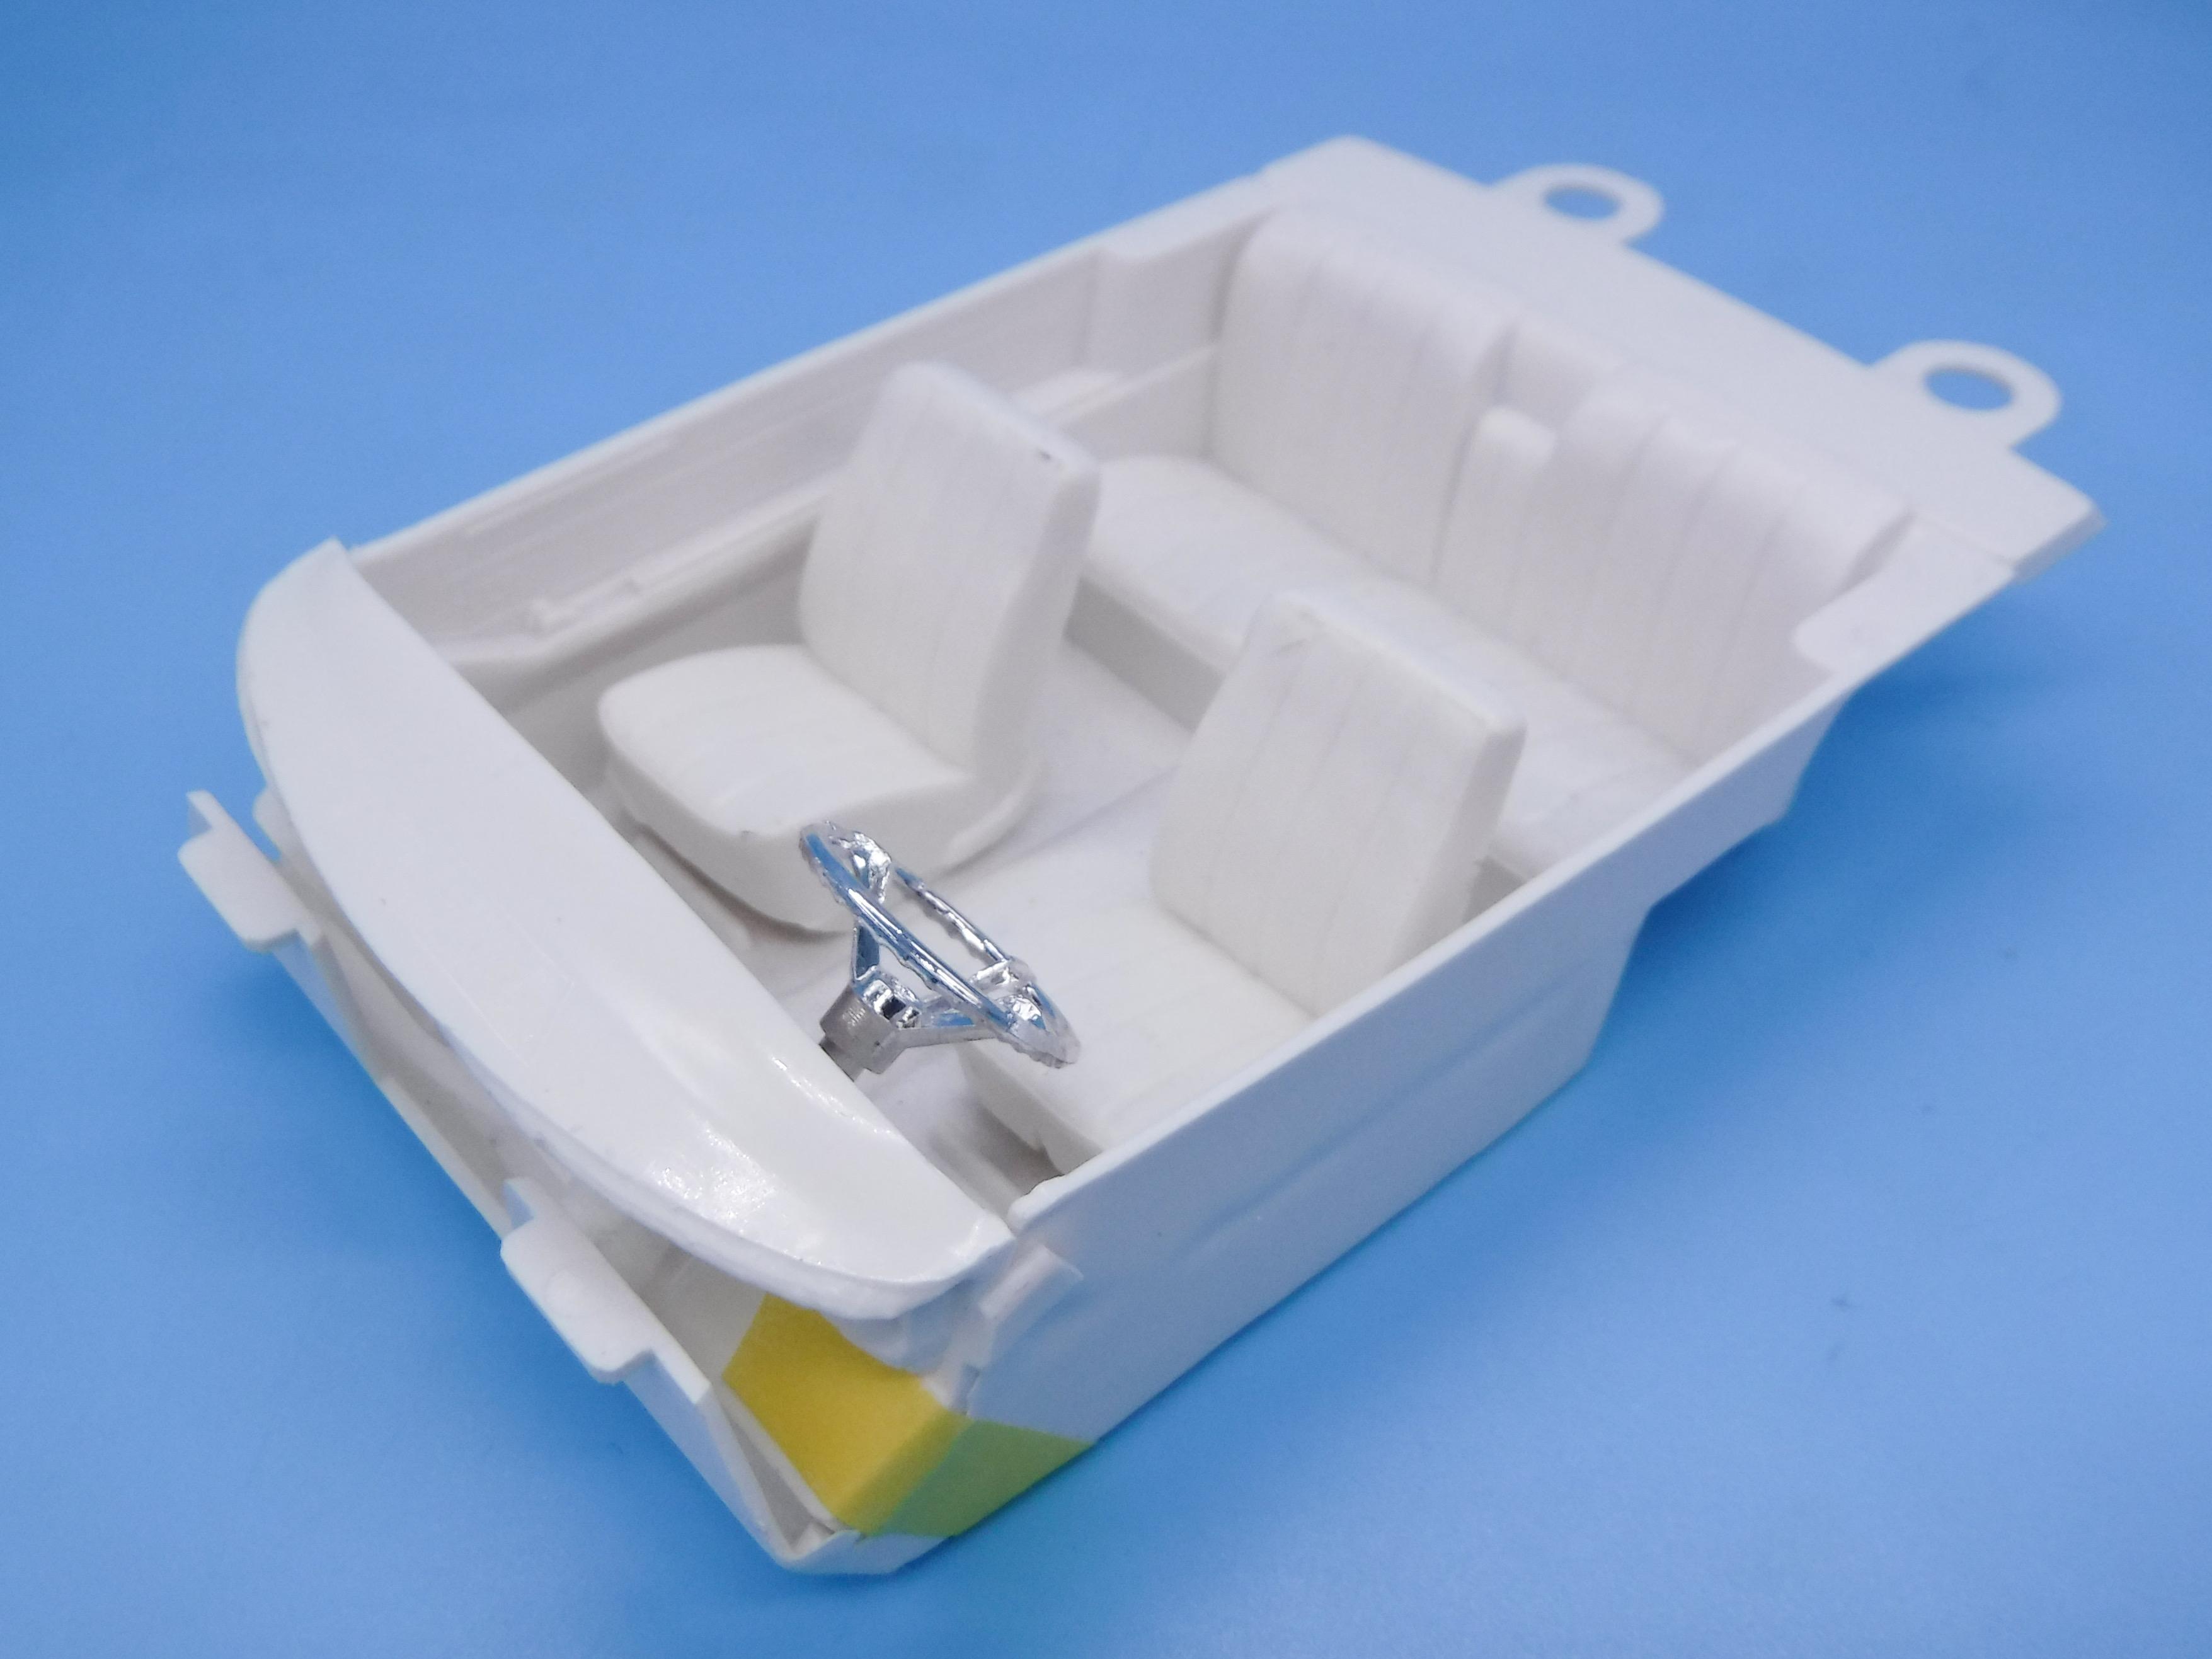
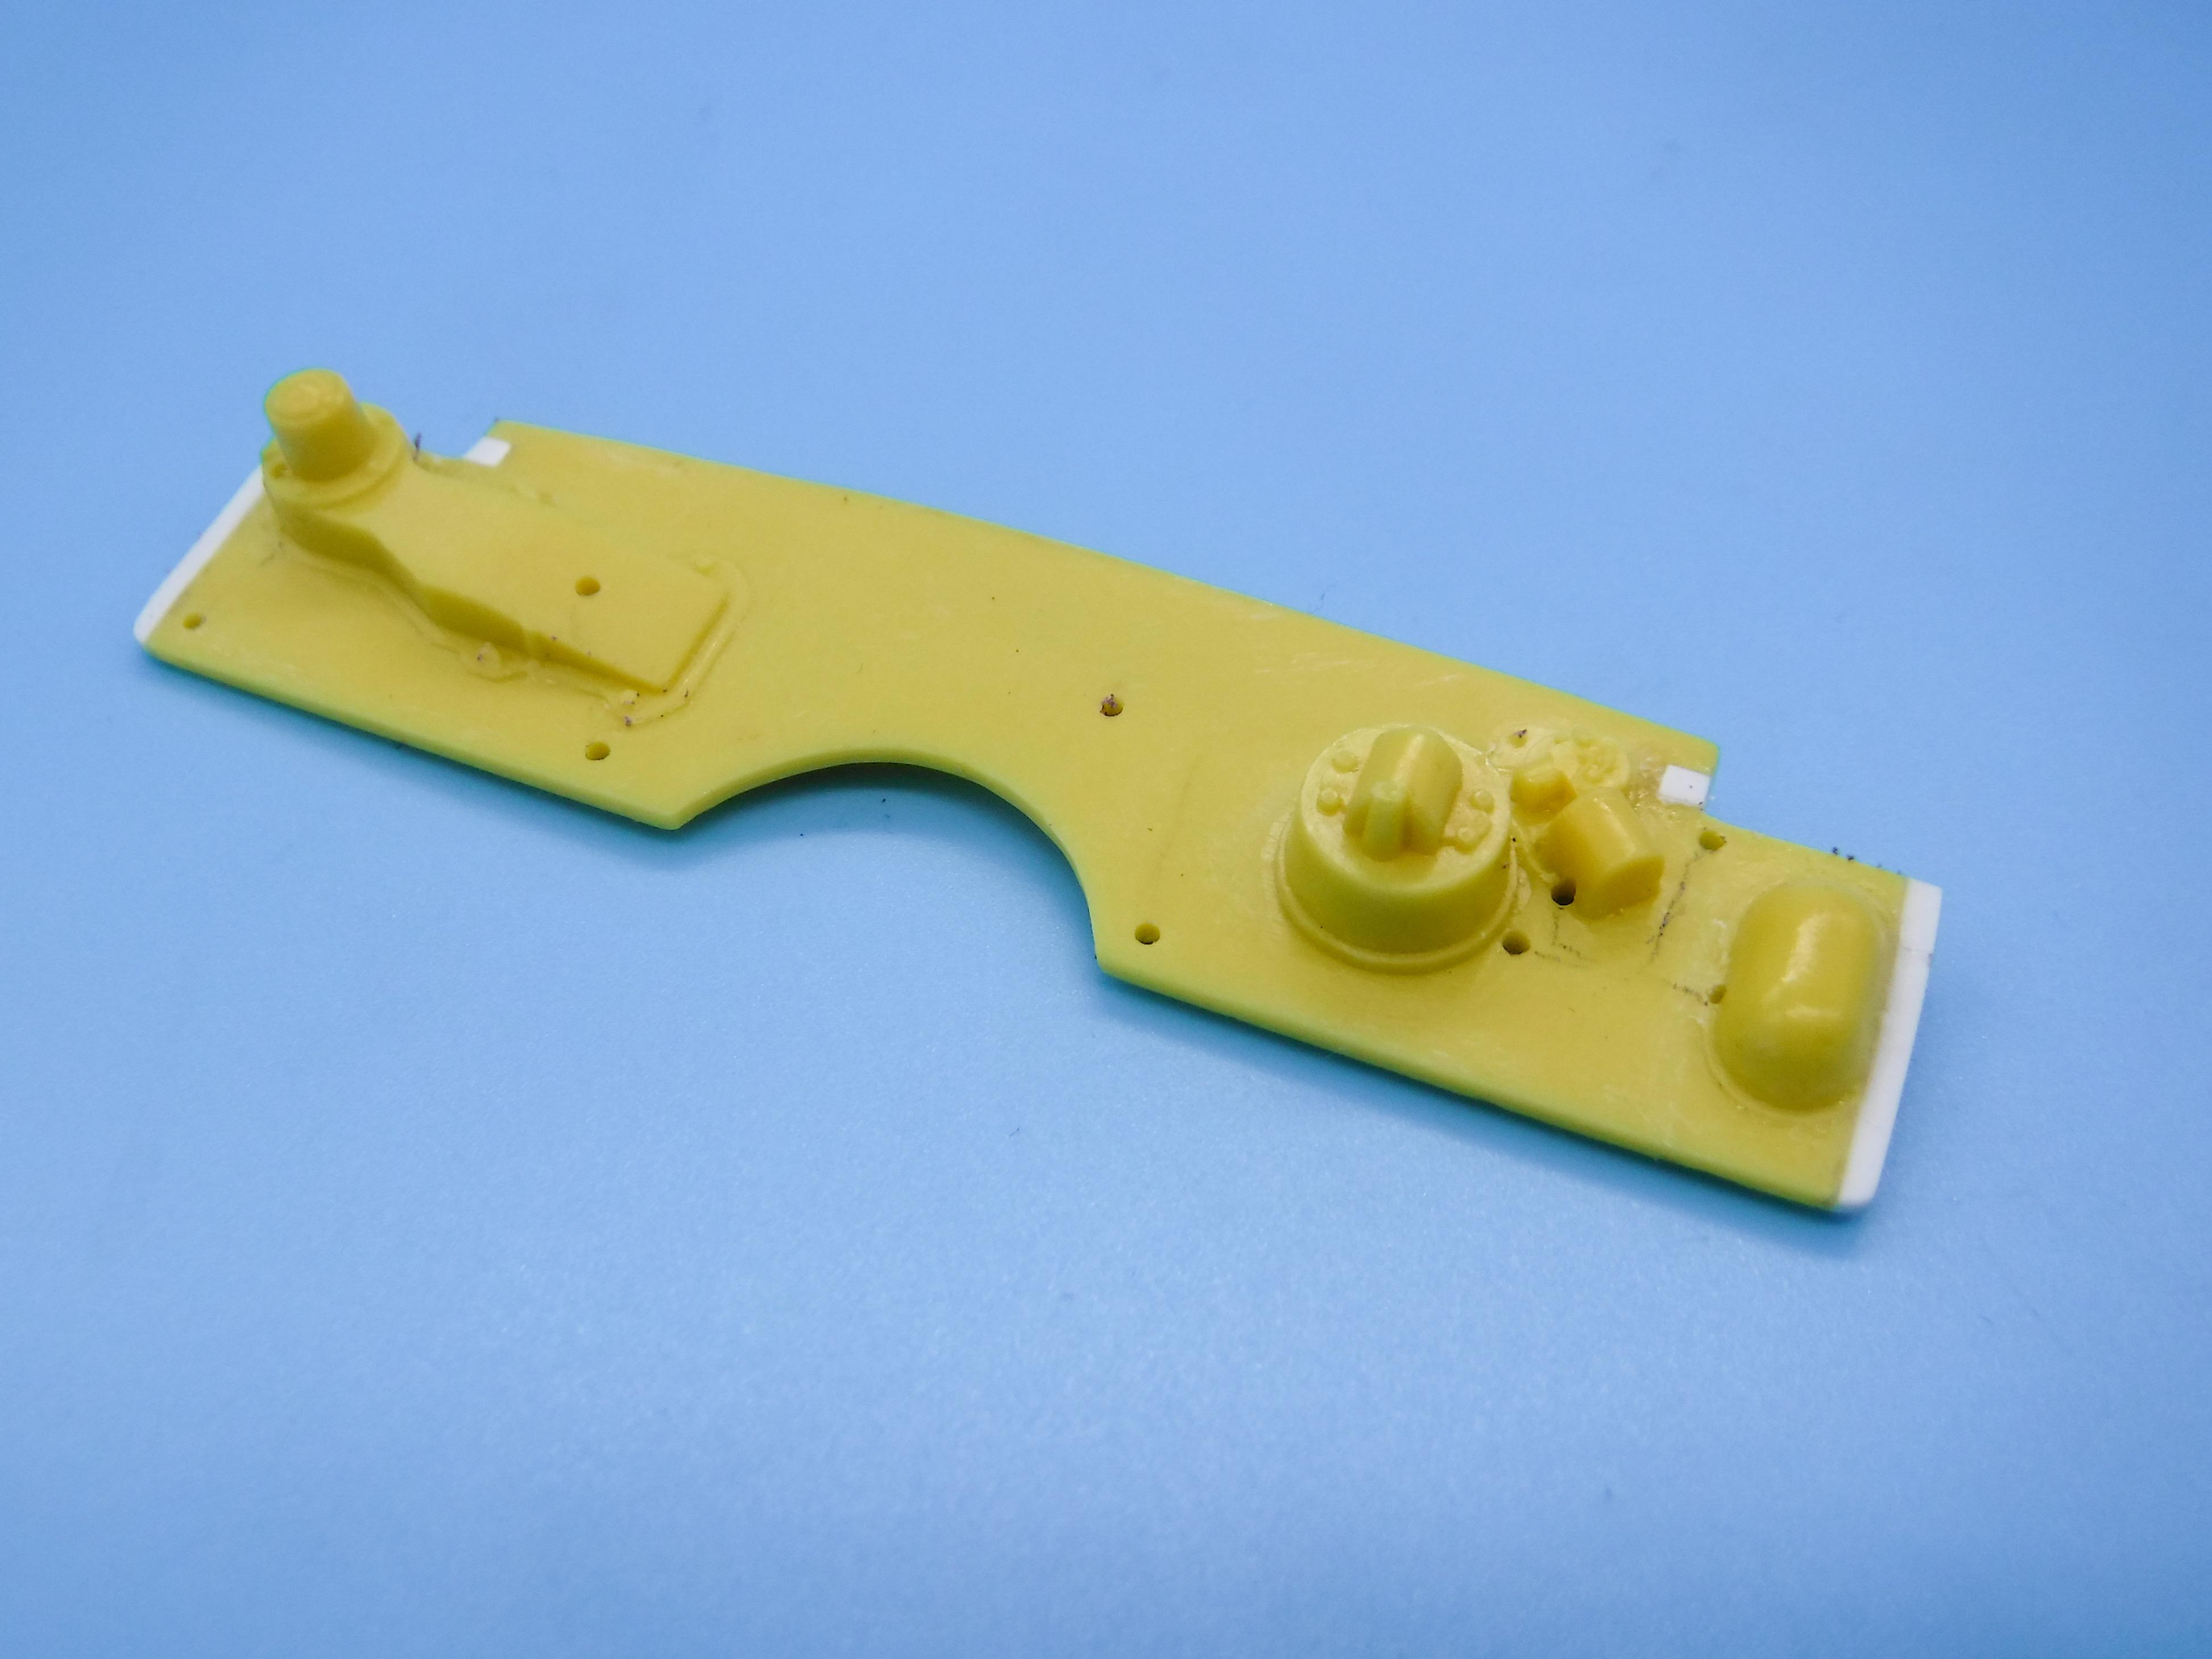
You know, I’ve kinda been struggling with the stance…it LOOKS too high, but then I like building little low hot rods. Then I look at reference pictures and compare…and it’s MARGINALLY too low, if anything ?. Comparing where the wheel centers sit on a real one versus this build, I could add a hair to the ride height and have it correct, but it looks kinda high to me right now. If this wasn’t a relatively rare kit, and an incredibly generous gift from a friend, I’d be getting it much lower… Thank you sir! Keeping the productivity streak going again tonight - did some un-interesting work like drilling holes for brake lines so that I can get the frame in primer, and cleaned up a bunch of parts - nothing worth photographing, but worked on a couple of interesting mini-projects… First up, I wanted to check fitment with the glass and interior in place so I mocked up the interior tub with the dash, steering wheel and seats - the dash especially has some really nice fine detailed engraving on it: I believe I’m missing a seat back, so that’ll be something to tackle before I get too far - but it’s a pretty simple little piece… Figured out a clean way to run all the lines and hoses on the firewall that wont look like a bird’s nest…I want to add this detail to the build but I don’t want a hundred little wires making a mess back there either. Drilled holes now before I get this part in paint along with the body, hood and dash… And finally, I knew I had plenty of room under that big old hood for the engine so I hadn’t really mocked it up properly - I ground off the moulded-in distributor so that I could add a more realistic 3D printed part but otherwise I’d like to keep it roughly as Johan made it… Will need to figure out what to do about this broken fan belt though… More soon, soon as I’ve done more!
-
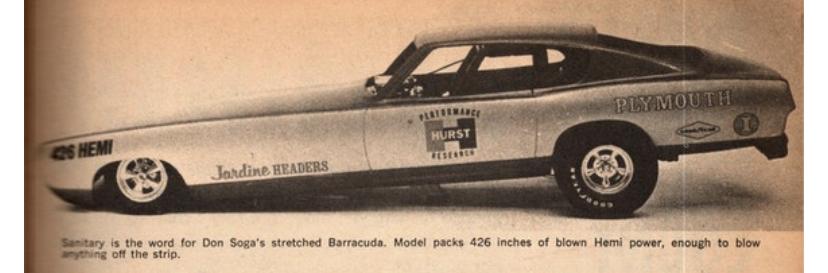
Also - it seems these long nose builds were something of a trend at the time - from the same magazine that Tim posted the cover of:
-
Every time I look at this thread I get a little more interested in building one of these of my own…should I be concerned?
-
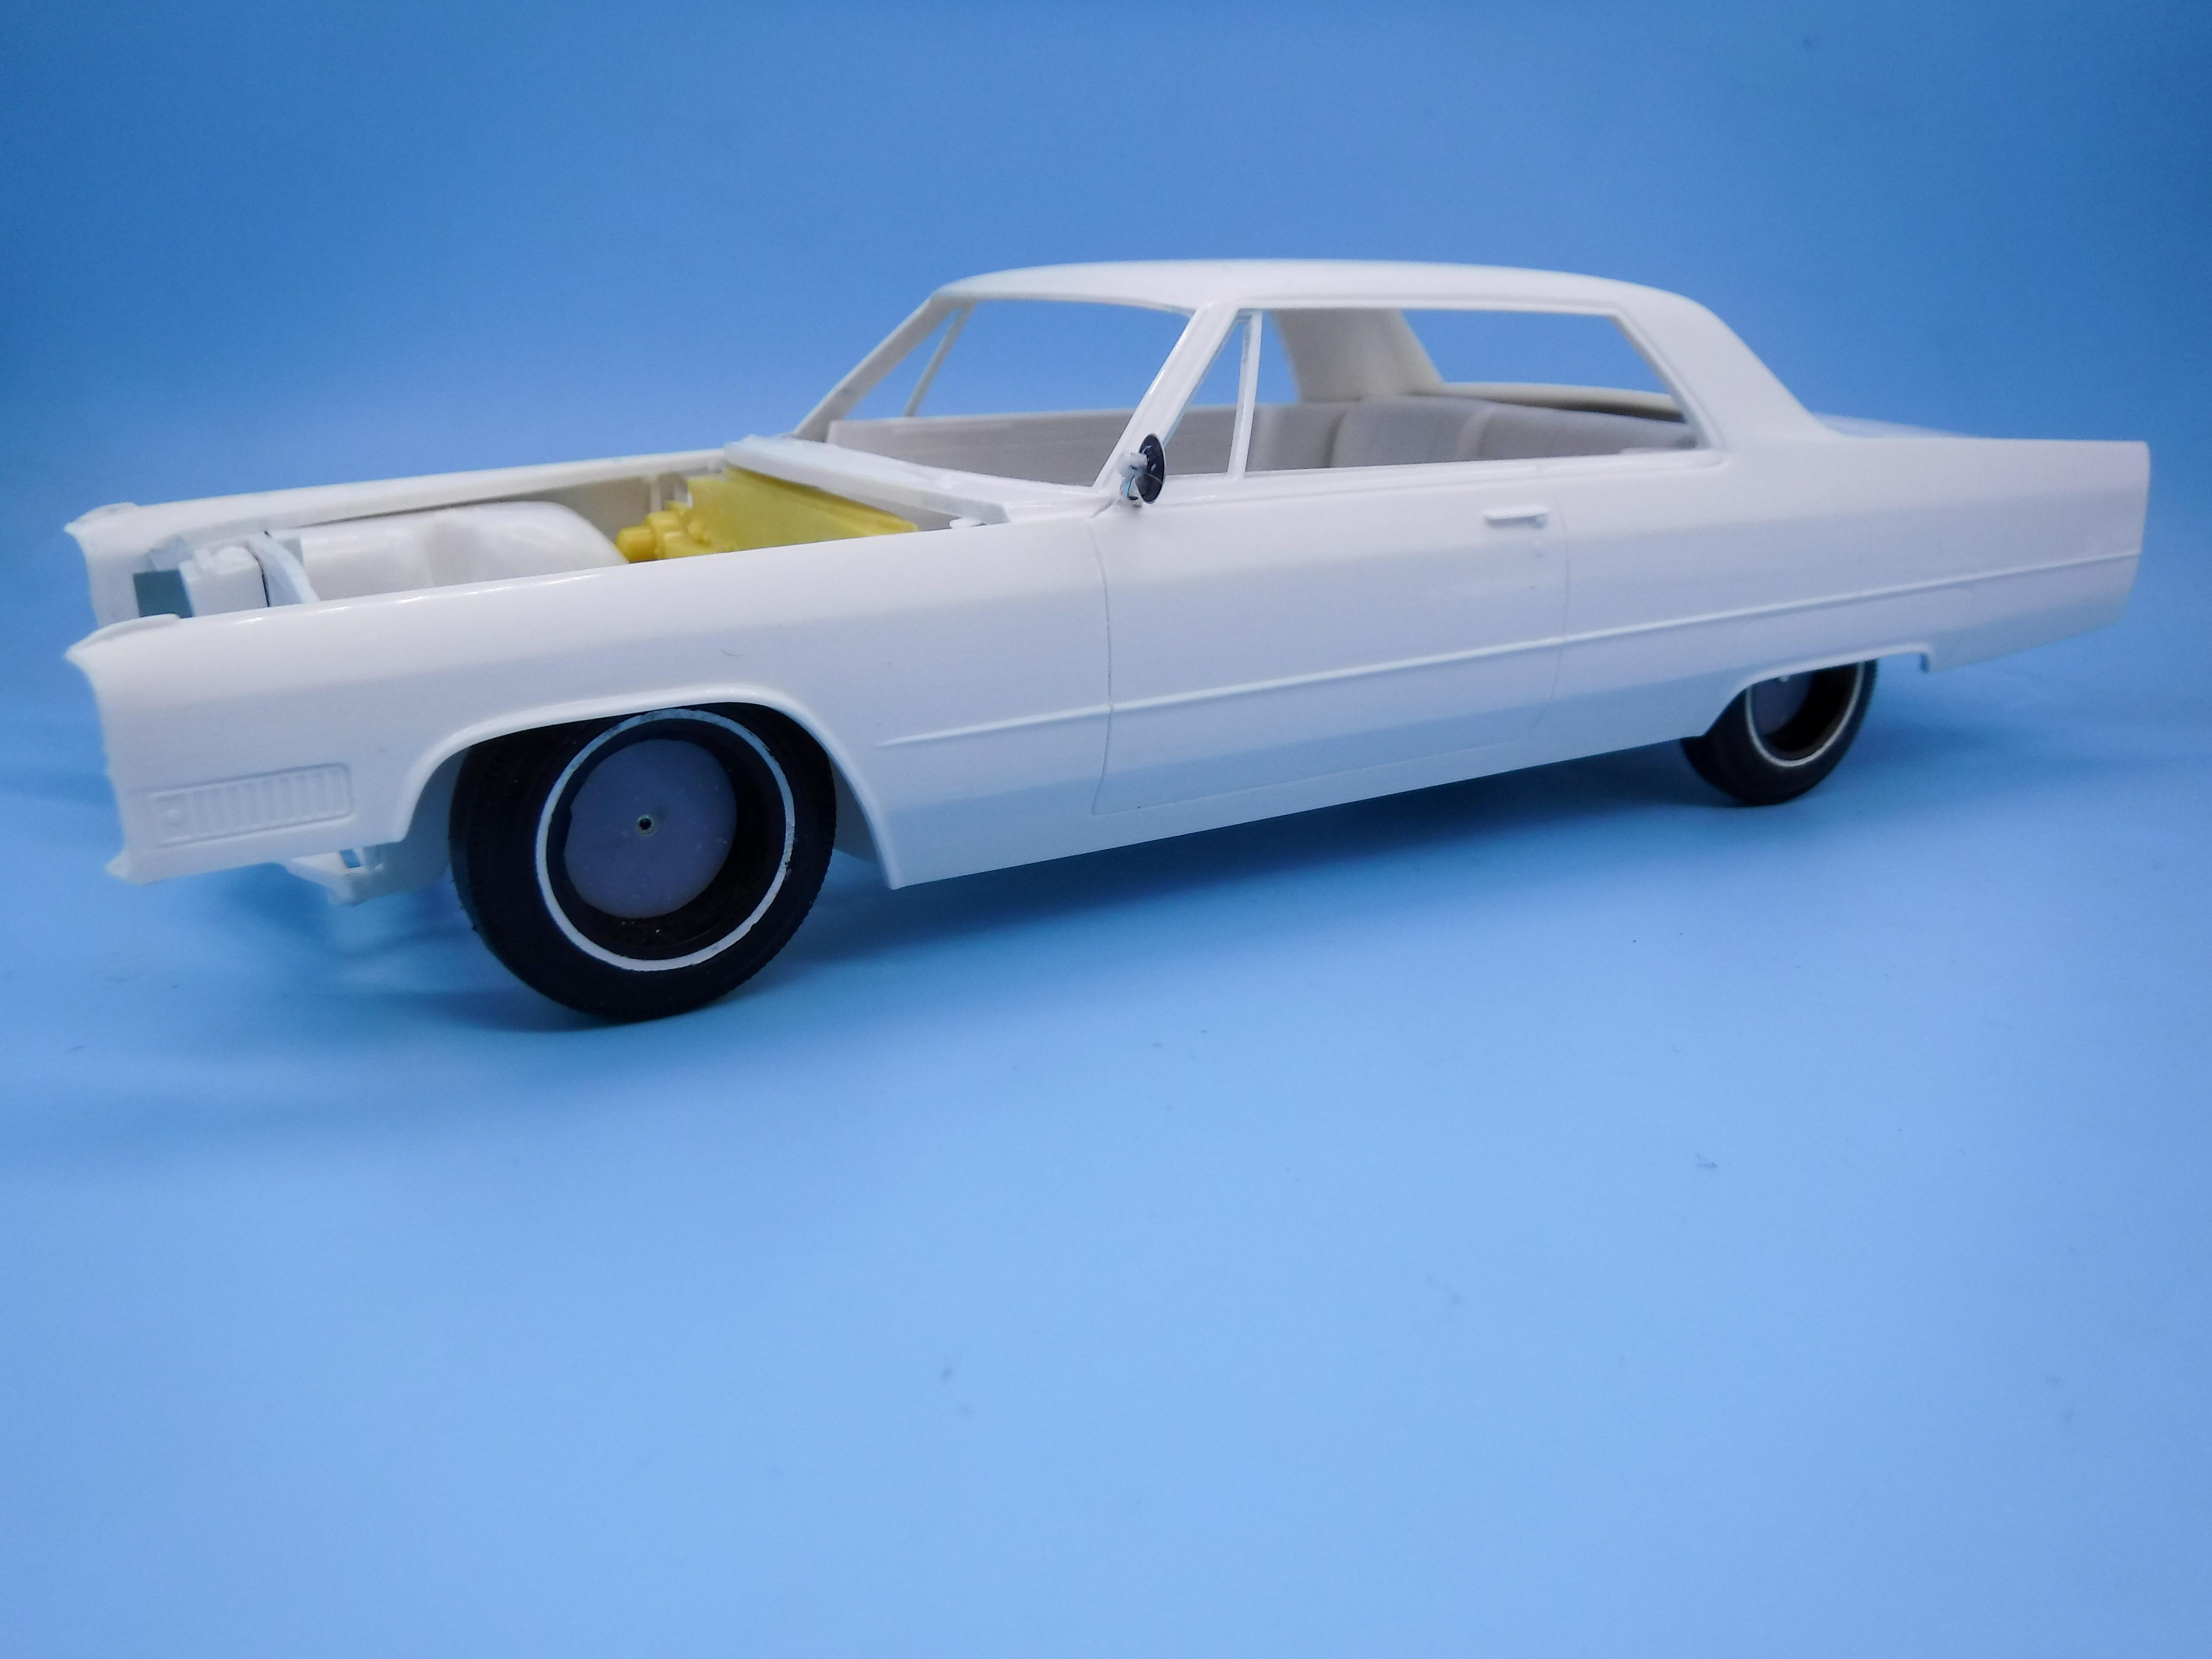
Thanks fellas! Keepjng this train rolling - finished up the front end tonight… Made some little brass inserts to fit into the kit pieces so that I can fit matching brakes to the front end too: That gray 3D printed piece replaces the standard kit wheel backer and sits the wheel in the same spot once the brake is on there. Bonus - still got possible steering! And with the brake drum on for a test-fit: Looks like we almost got a roller! Time for a test fit with the body… The nose sits a little low here, but the window glass and the dash bump it up about a scale inch so I think it’s going to work itself out just fine…cleaning up the dash and test fitting the glass is tomorrow’s adventure. Really like how this thing looks though…that view! ? Next jobs to do - make sure everything’s still copacetic with the dash and glass in place and then onto the engine and interior. More soon!
-
Apparently the Muira that got wrecked WAS real…but it had already been crashed and was one of two supplied to the movie by Lamborghini as a rolling shell with no engine. The second (main) car used for filming was immaculate and escaped unscathed, before going missing for a while. They DID destroy SIXTEEN Minis though, but they were presumably plentiful enough at the time that they weren’t too concerned with NOT ruining a bunch of them…
-
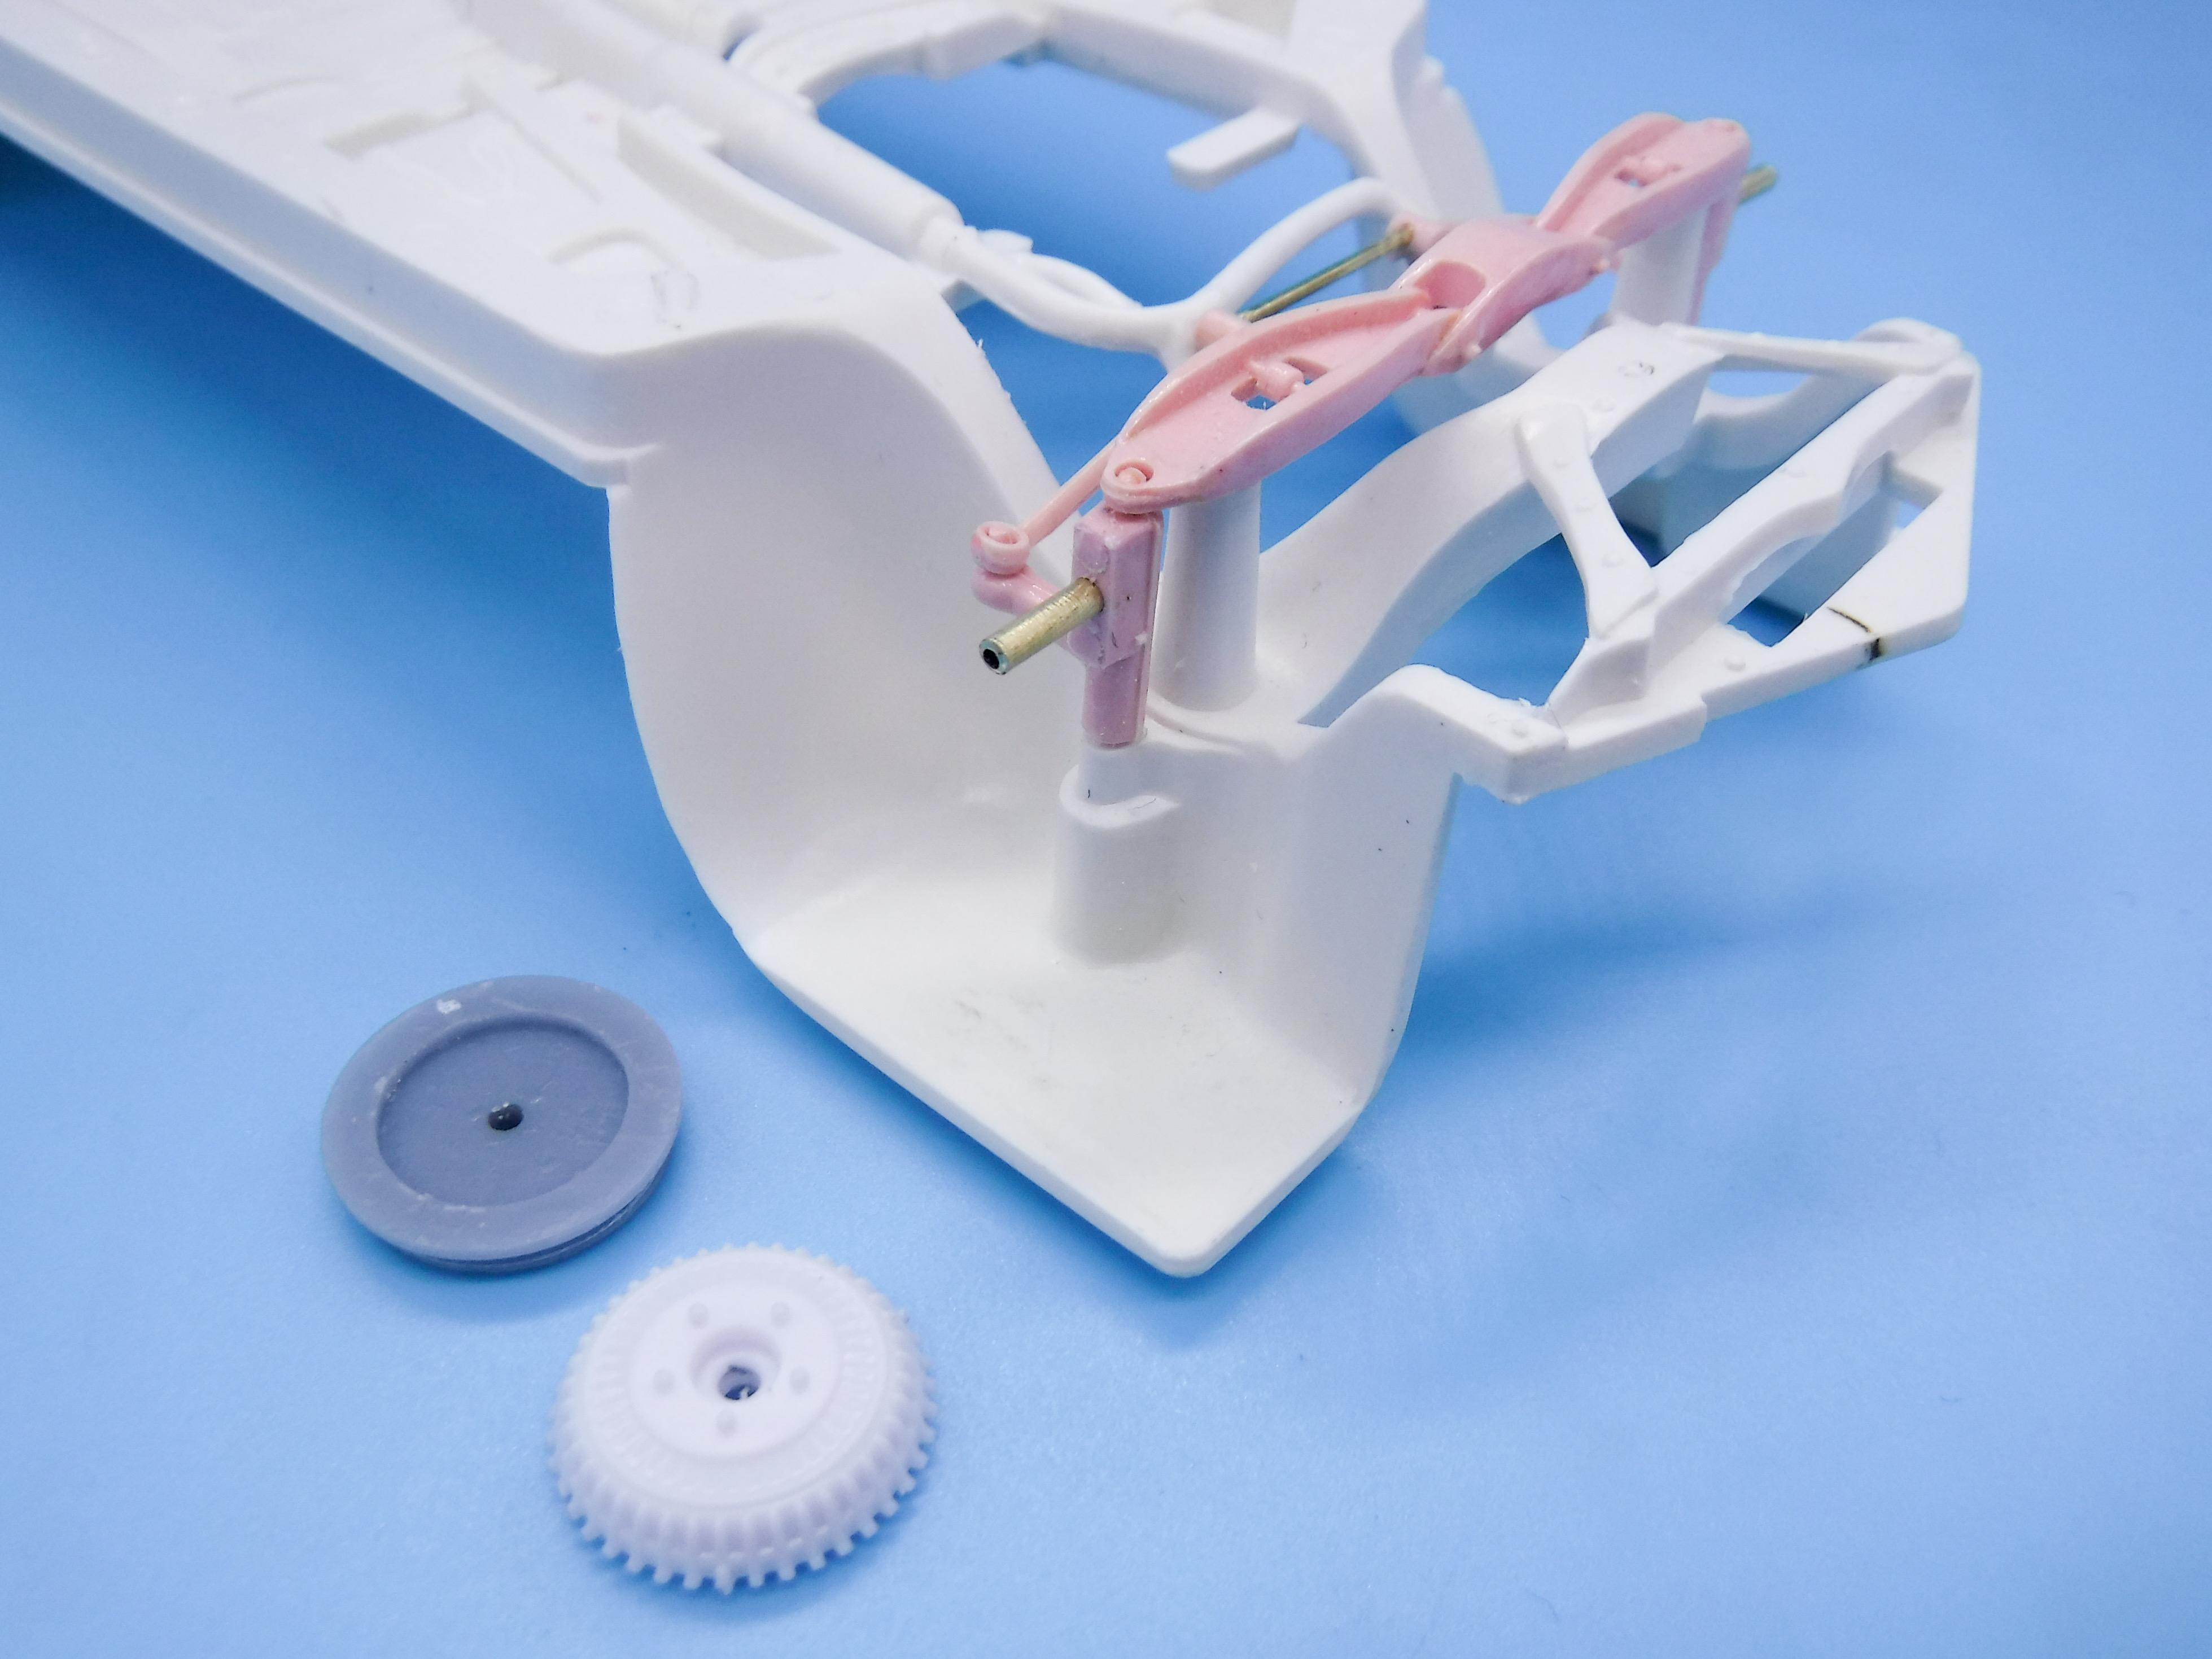
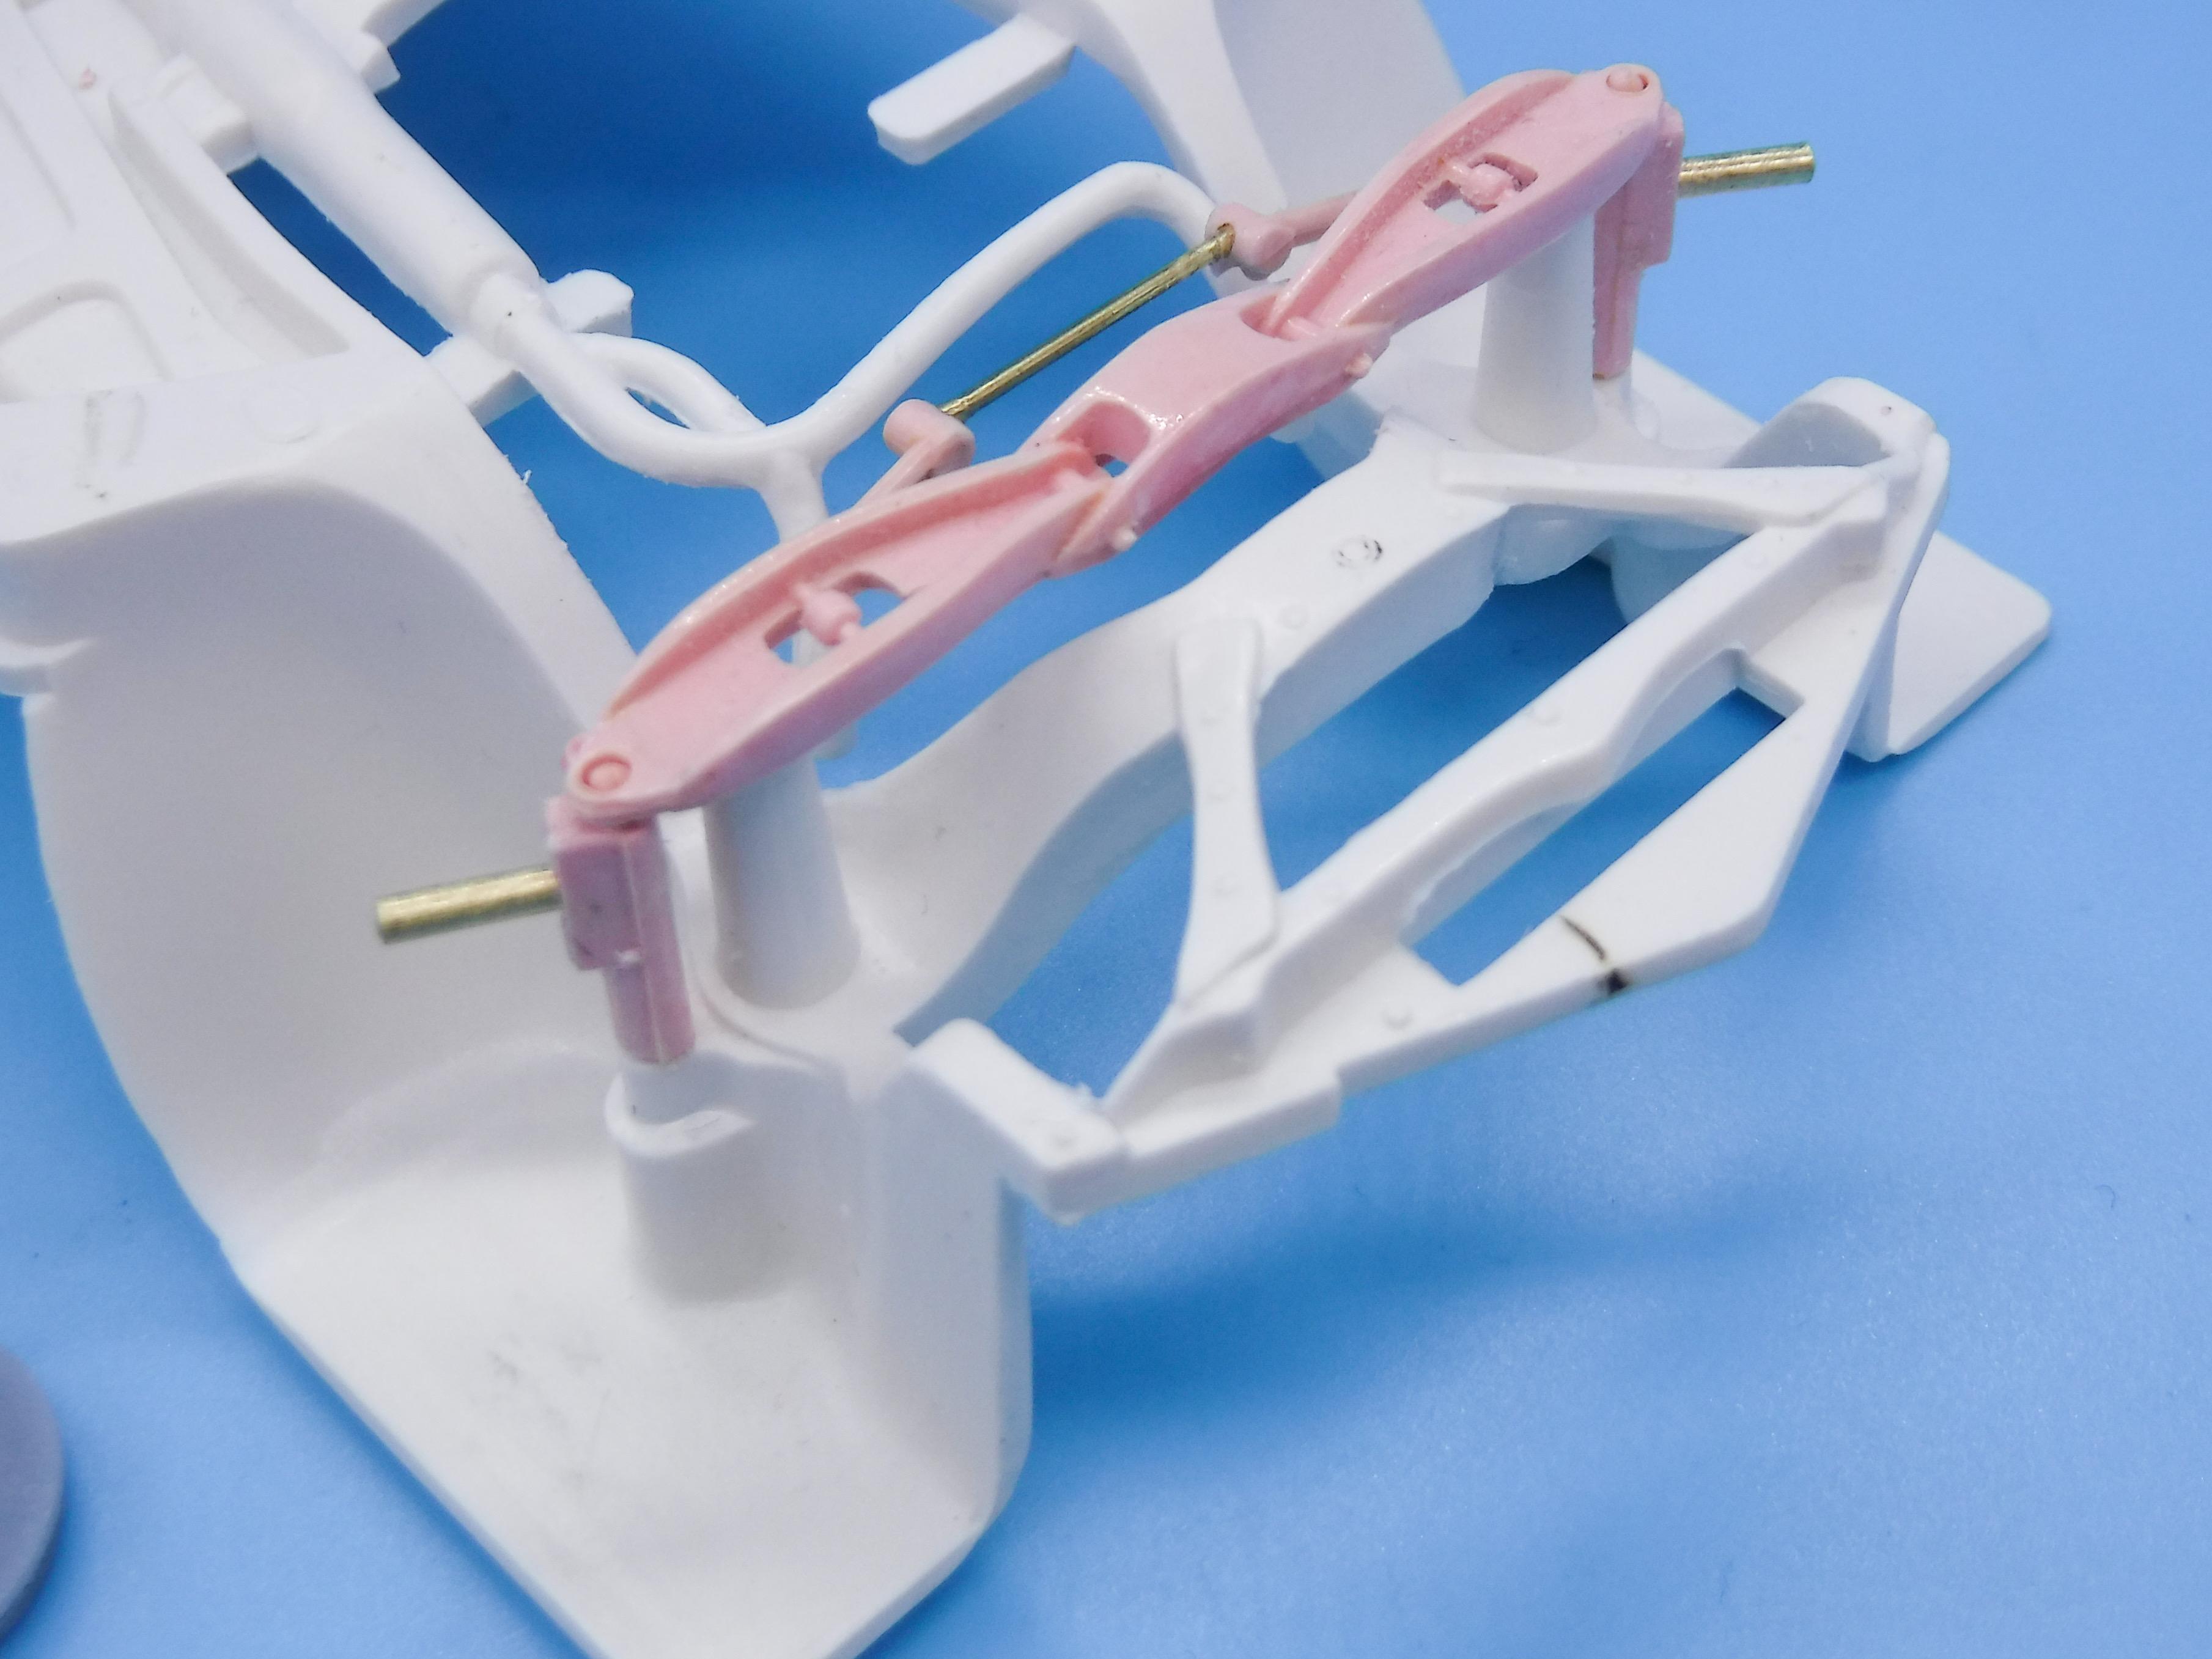
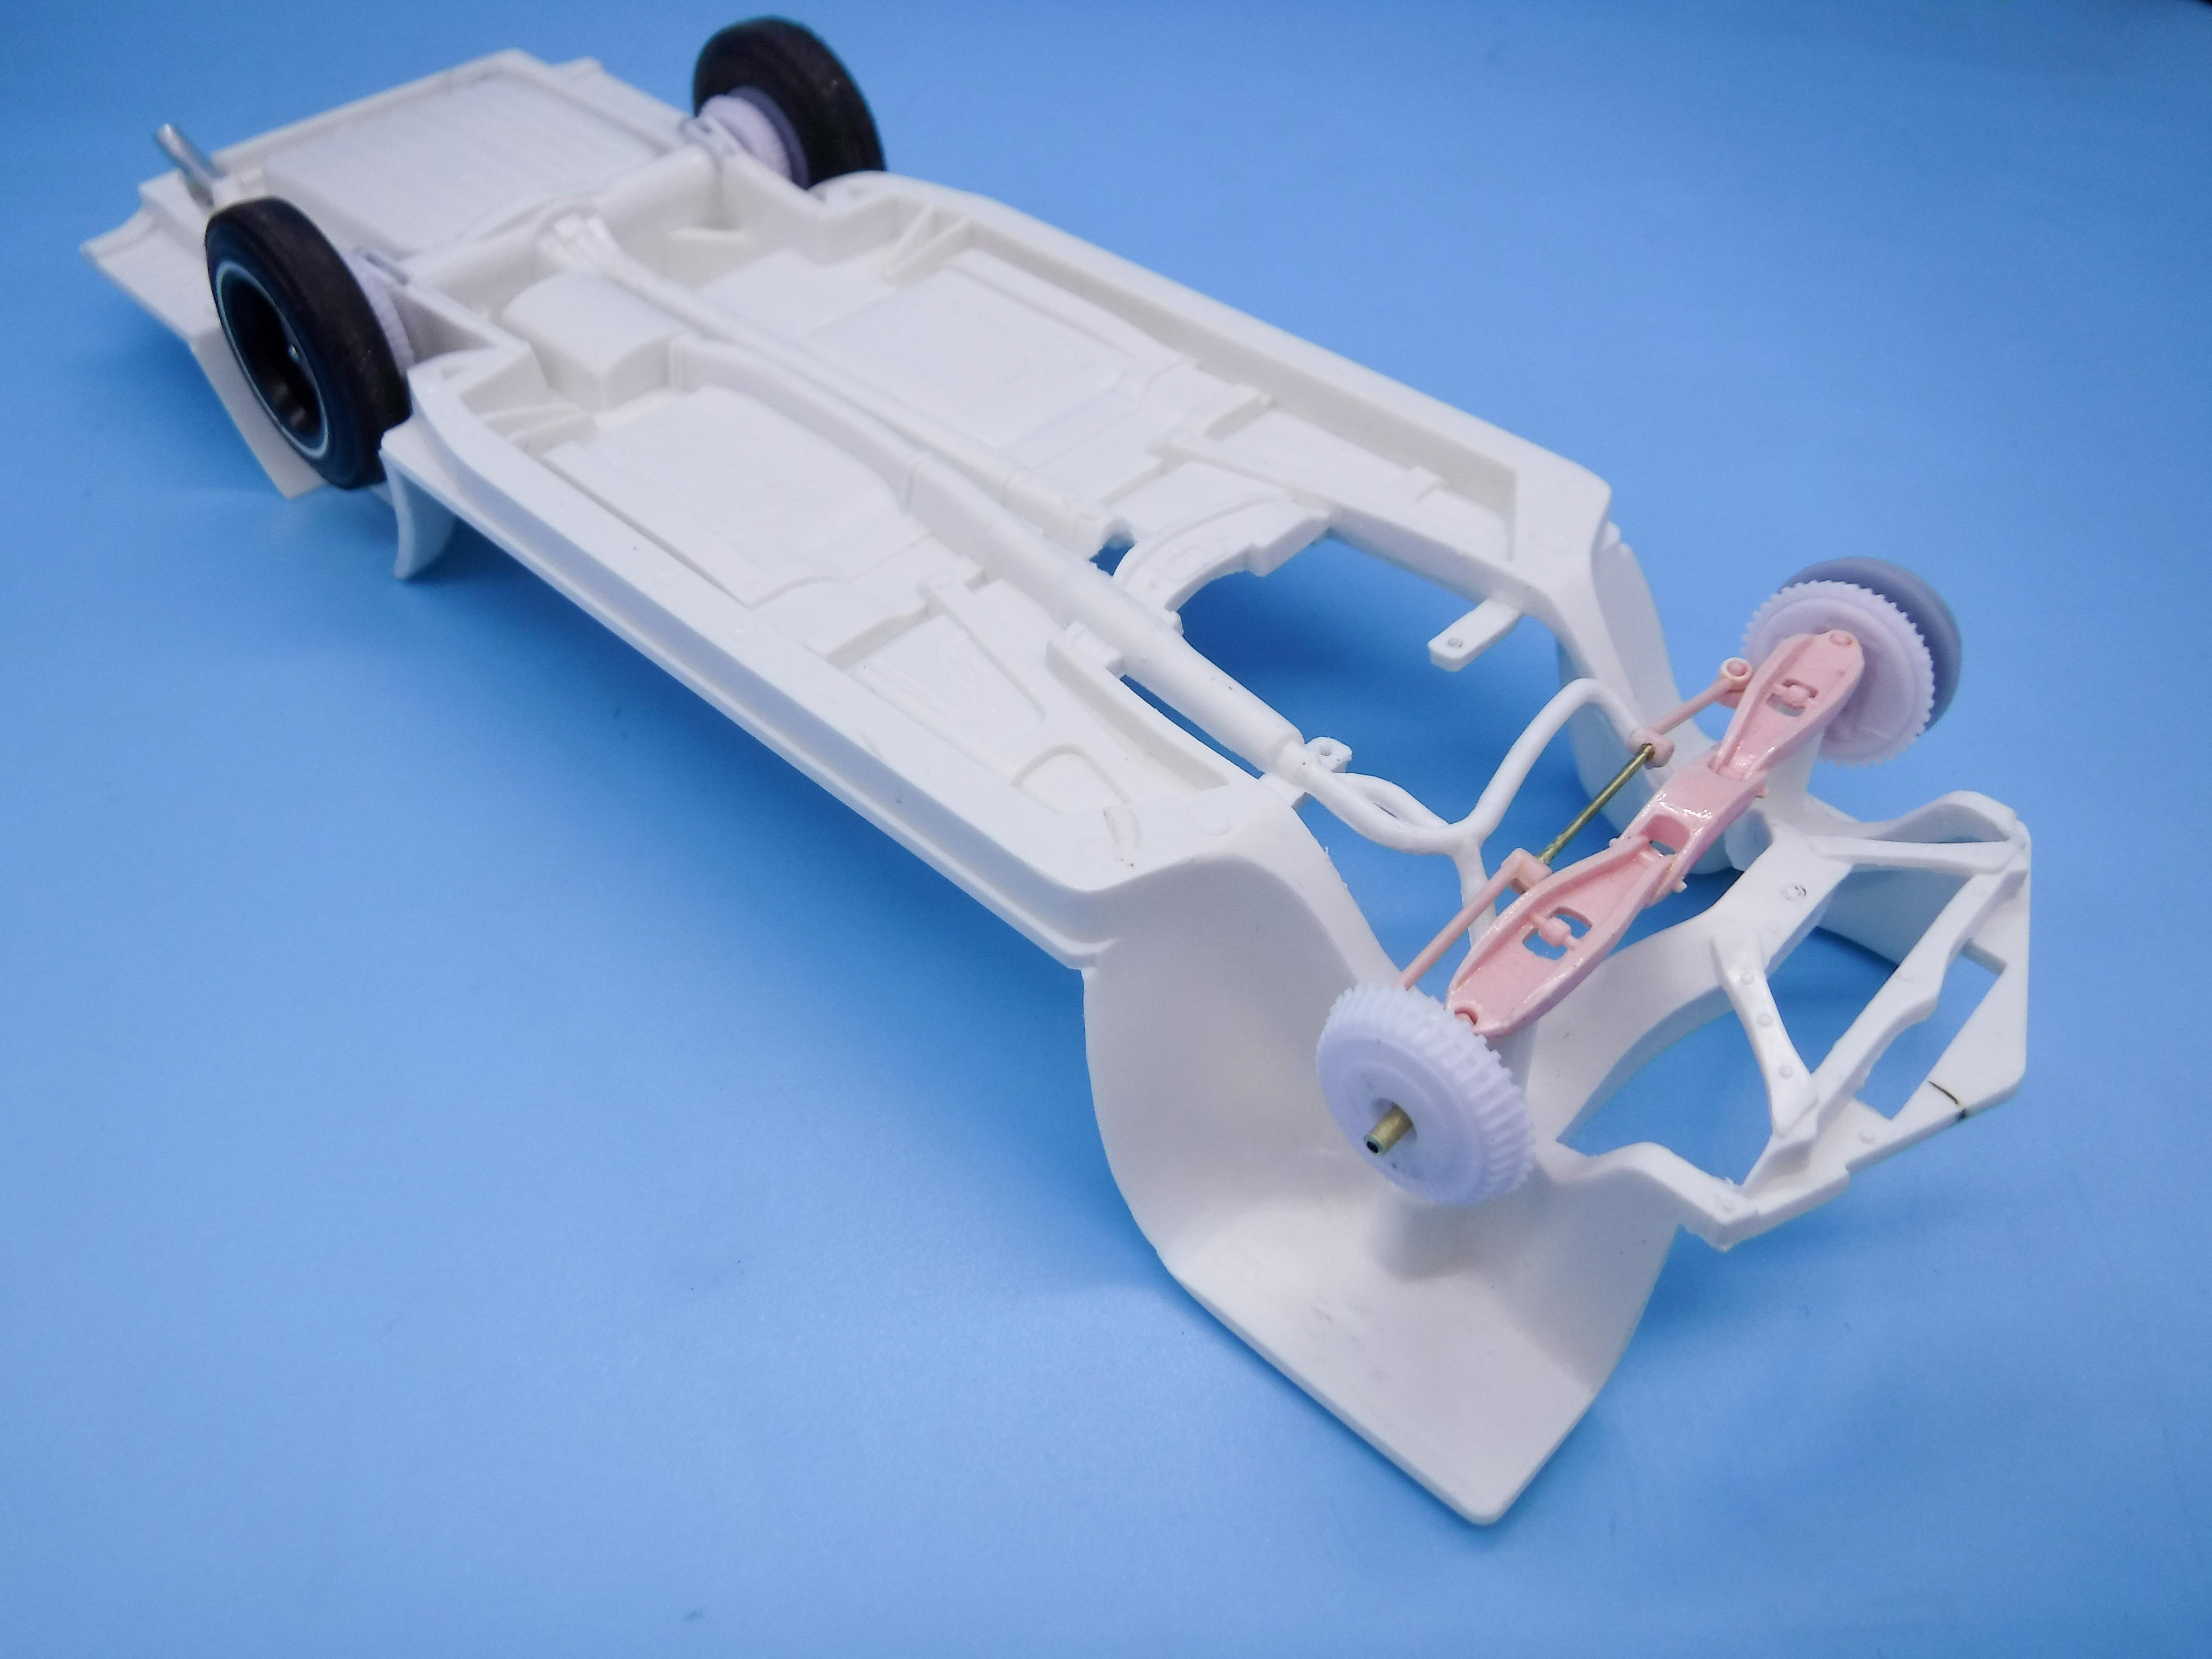
I’m quite enjoying making a special effort to make some good progress every day on this thing…but tonight I took a nap because my wife told me I was getting cranky. To keep the ball rolling though, couple of tiny projects achieved and off the list. First up, these Coupe De Villes ran really nice finned brake drums which may or may not be the same as the Buick (I think?) finned drums in the Revell 29/30 Ford kits. Either way; they look close enough to me so all I needed to do to add this missing detail to this kit was sand the lug-nuts off the kit Revell pieces and they’re good to go: I printed some wheel backs this evening too - I didn’t want to ruin the kit pieces if I could just make some that didn’t need to be modified. With the back end mostly handled, next job is to mock-up the front suspension and steering. I stripped the chrome from the front clip - it was a nice pink under there! Who woulda thought! The steering linkage was broken, and rather than try and reglue that tricky little piece I just replaced the broken center bar with some brass rod - a little more in-scale and a stronger piece as a result… Just a small update - but I’m trying to keep making good progress on this! Tomorrow I’m hoping to modify the drum brakes to fit the front end properly and start to prepare the frame for paint. More soon, soon as I’ve done more!