Joe Nunes
-
Posts
1,292 -
Joined
-
Last visited
Content Type
Profiles
Forums
Events
Gallery
Everything posted by Joe Nunes
-
This is really nice and in a good color combination. Well done! ? Joe
-
Has anyone tried this in their 70's?
Joe Nunes replied to landman's topic in Model Building Questions and Answers
I believe the older we become the more we are apt to see what a hobby like building plastic models is really all about. As an example, the other day I unknowingly stepped on the steering wheel for an original 1960 Buick HT. It lay on the floor in pieces and I can assure you I was not happy. During my younger years I would probably turn the air blue, toss out the broken steering wheel in a not so nice way and then just pull another steering wheel from the parts box. Instead, I told myself it's only a plastic part and it can most likely be fixed. And fix it I did and I enjoyed the time spent with the part. It's the same thought going through my mind as I work on a model...having fun is the most important aspect and if the desire comes along to make a change along the way then let me at least try out the idea. If the work comes out to my level of satisfaction then that's great; if not then at least I gave it a go and can always try another direction. If we all built our model exactly the same way it would be a very dull hobby indeed. Instead, we get to see what other folks are building and also enjoy the information being shared with us. ? Joe -
How to: Magnetic Alignment Board
Joe Nunes replied to Joe Nunes's topic in Tips, Tricks, and Tutorials
I am glad you like the build tip, Paul. Thank you for the kind compliment. ? Joe -
Has anyone tried this in their 70's?
Joe Nunes replied to landman's topic in Model Building Questions and Answers
At nearly 73 years old I find myself wearing reading glasses and a magnifying visor while working on a model. If you were to look at me sitting at the bench you would most likely be laughing as I sit there with reading glasses on, a magnifying visor sitting on my head and stereo headphones on my ears. Good thing I am doing this model thing down here in the basement work room! ??? And we call this FUN! Joe -
Italeri FLC and container trailer
Joe Nunes replied to tbill's topic in Model Trucks: Big Rigs and Heavy Equipment
Nice looking rig! Well done! ? Joe -
Curtis Turner - The USAC years
Joe Nunes replied to curt raitz's topic in Other Racing: Road Racing, Salt Flat Racers
Two nice looking models! Thanks for sharing the photos with us and the background information. Well done! ? Joe -
Nice family story and cool looking model build that reflects on the past. The interior and yellow detail work are great touches that really bring the model together for the purpose. Well done! ? Joe
-
Welcome to the forum, Oscar! Joe
-
How to: Magnetic Alignment Board
Joe Nunes replied to Joe Nunes's topic in Tips, Tricks, and Tutorials
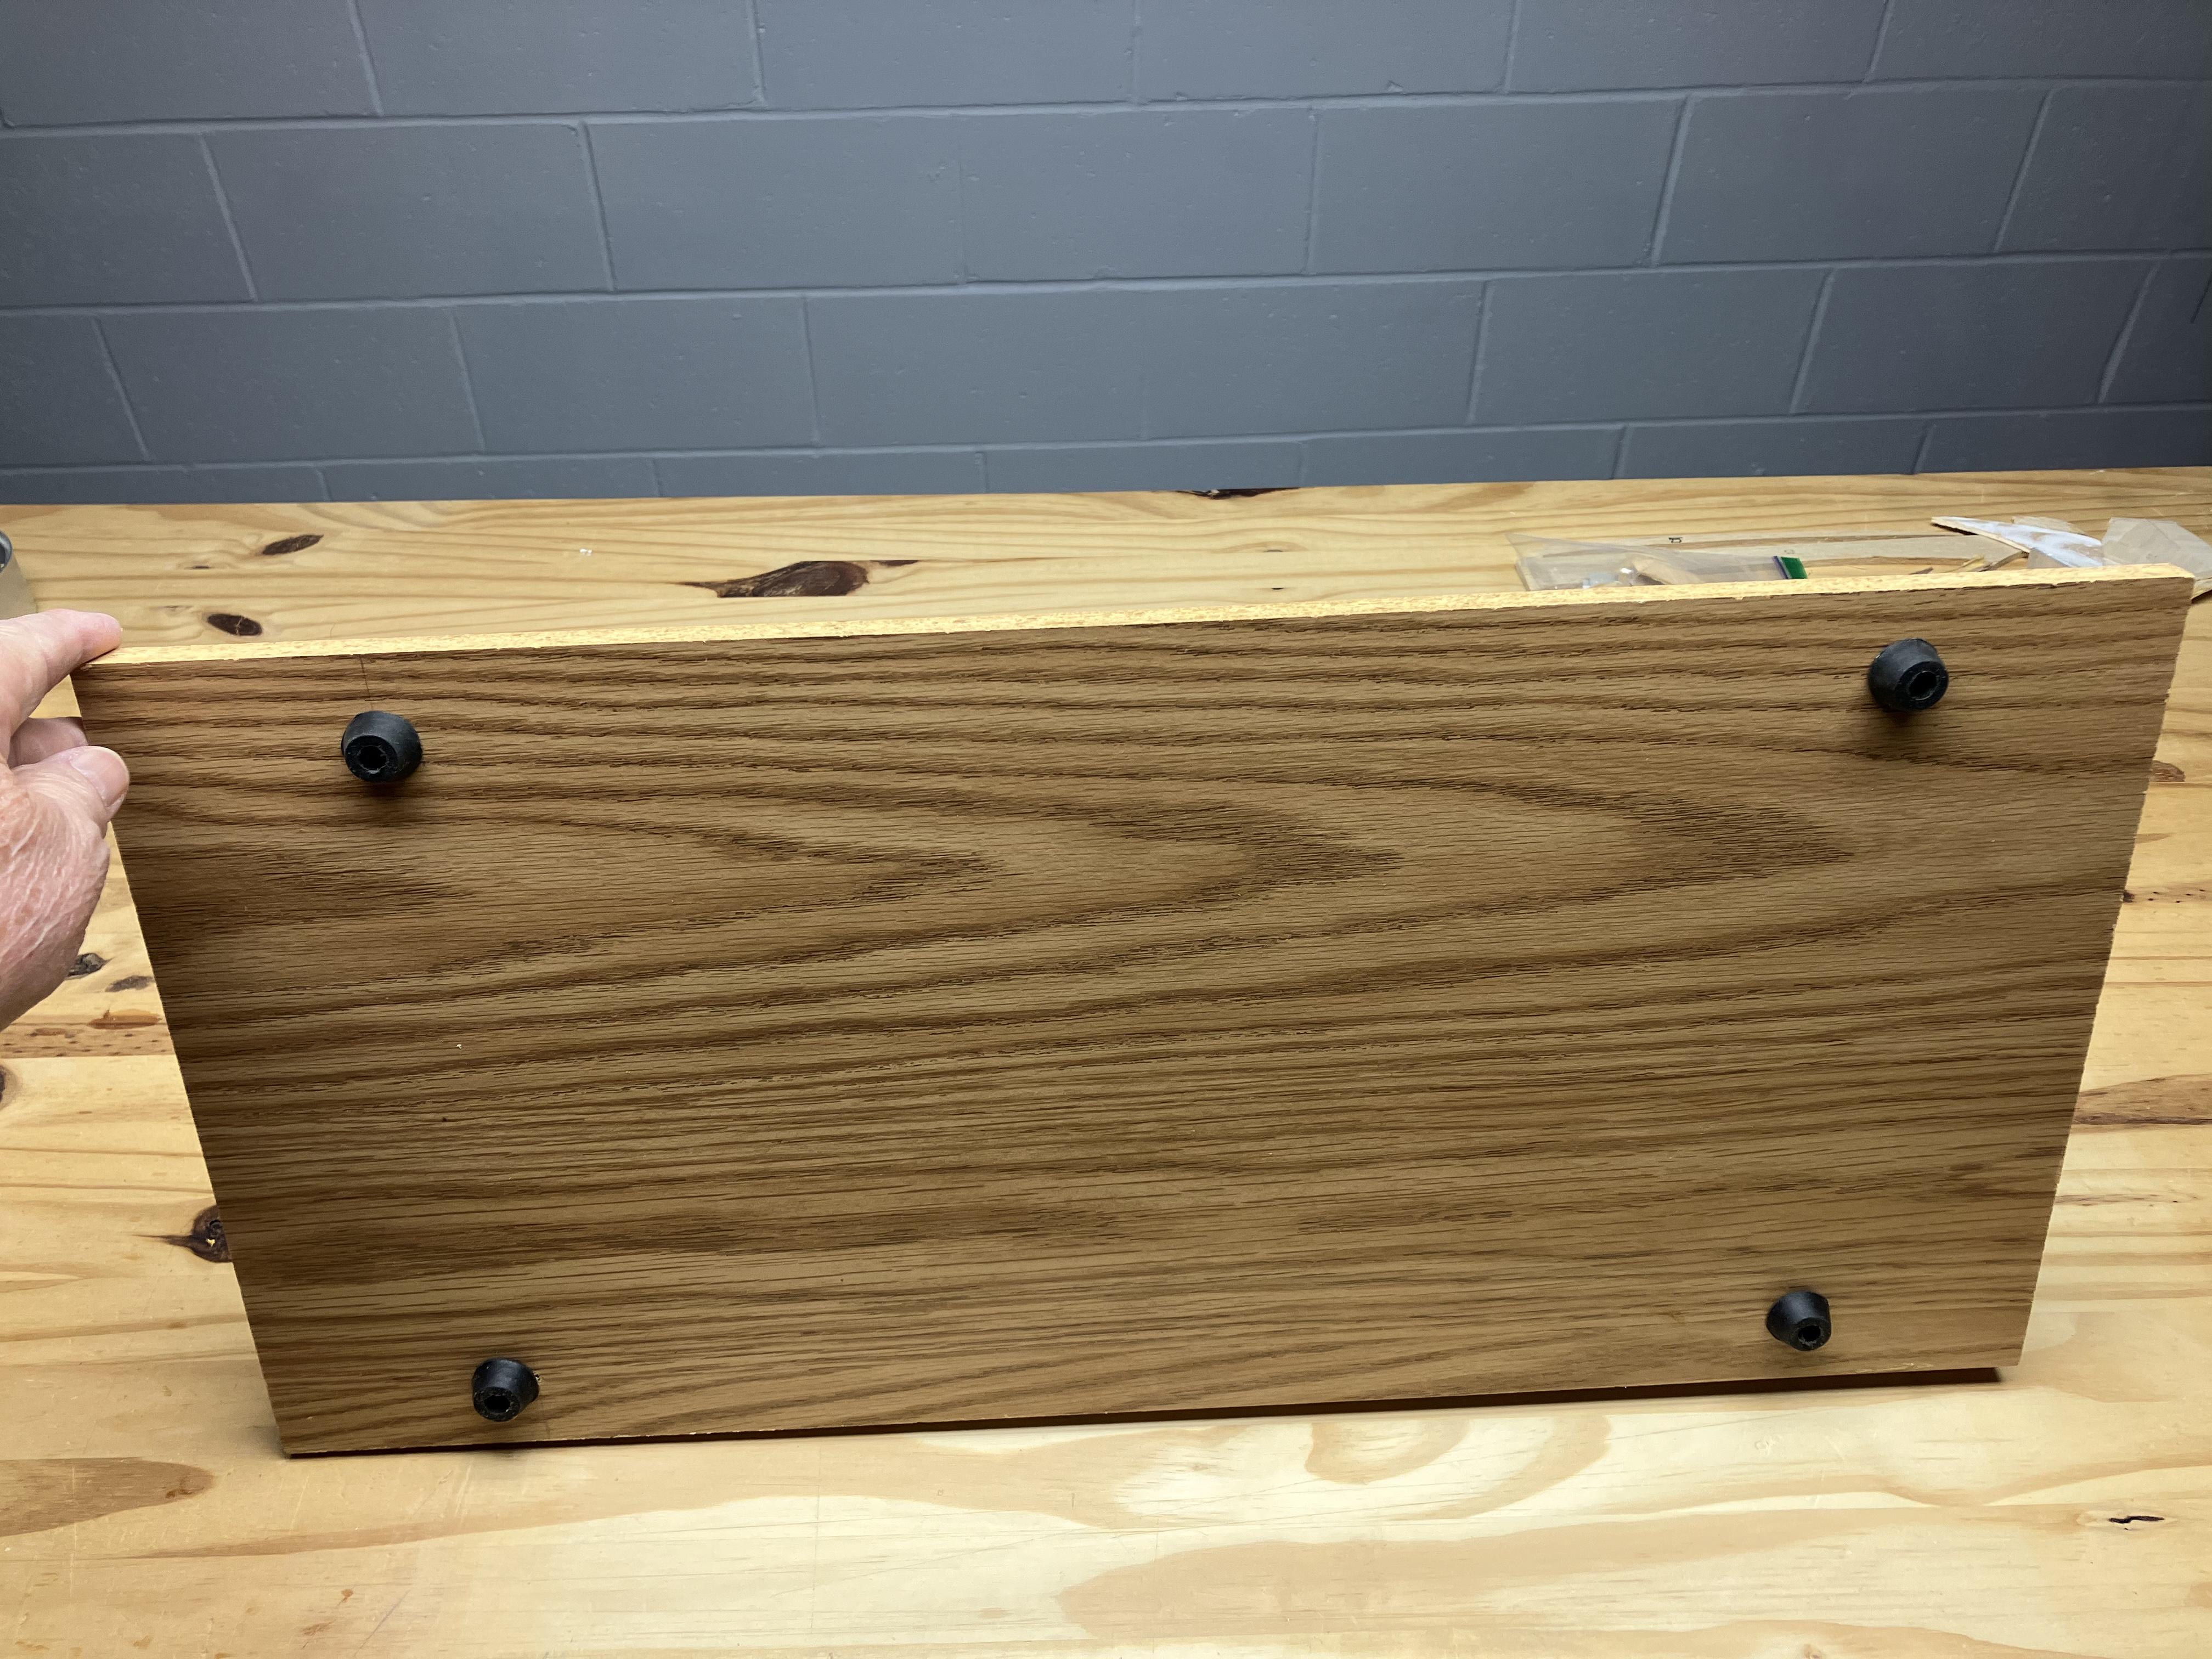
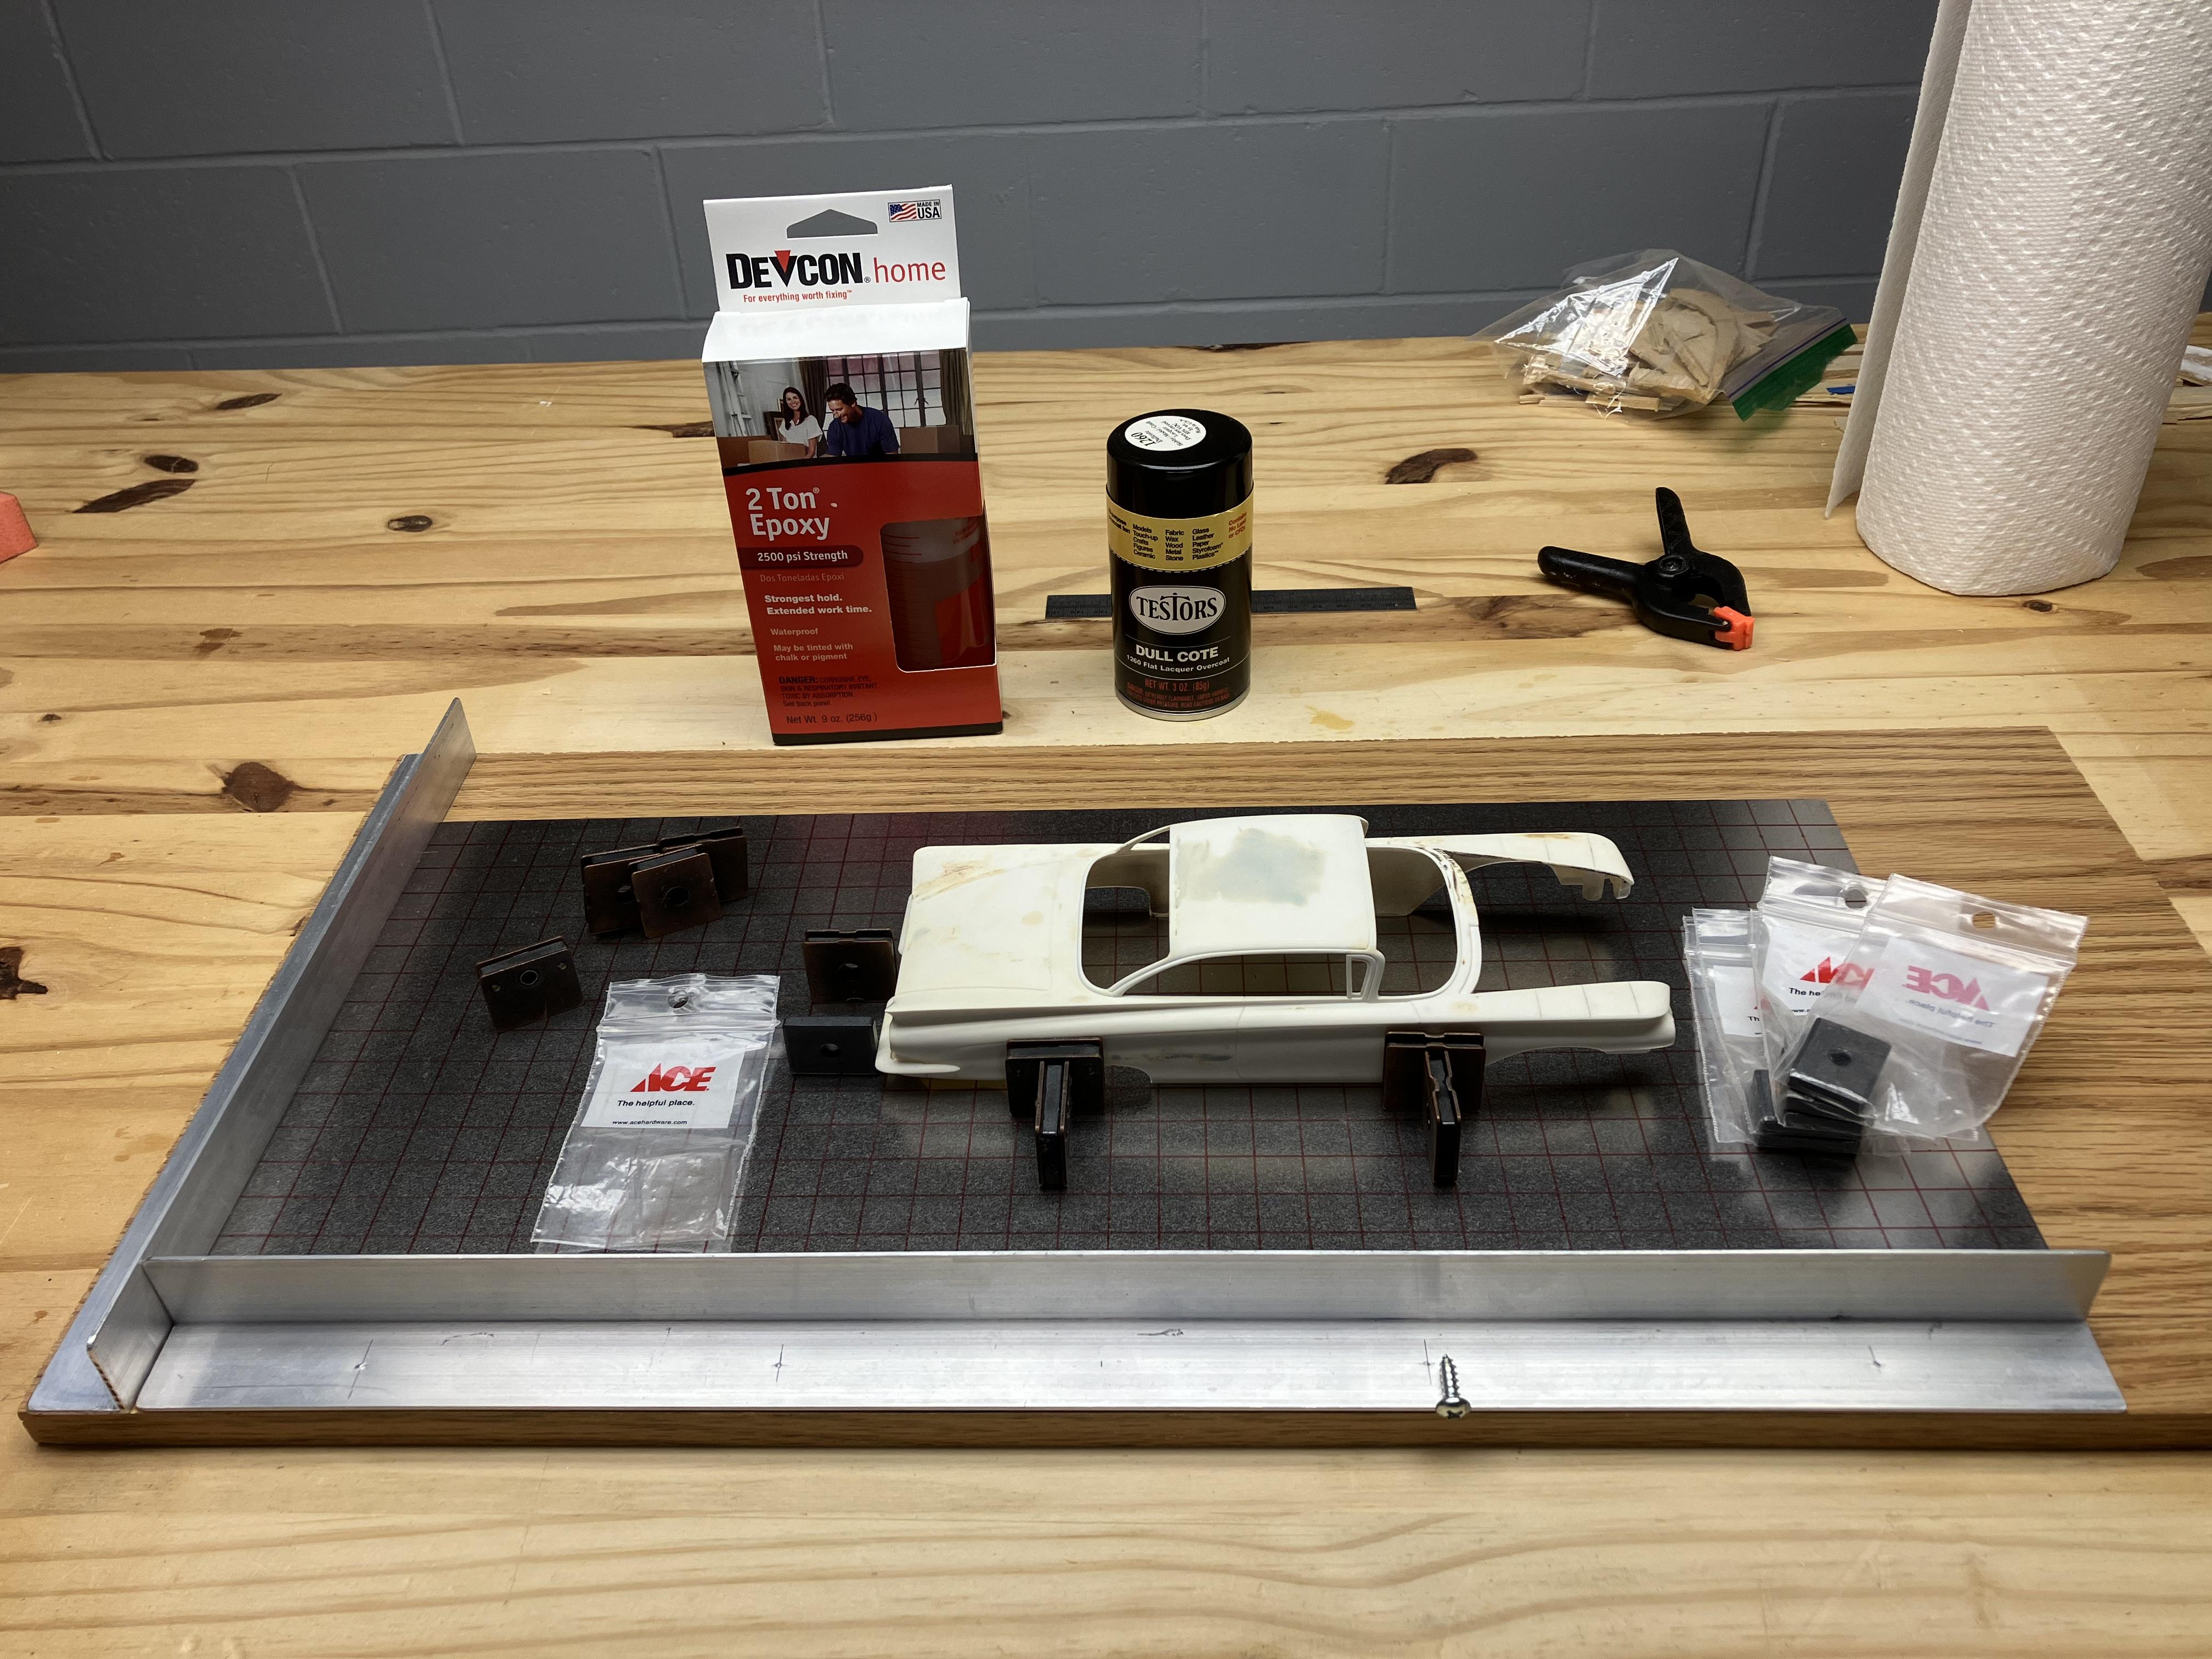
The angle pieces and the steel flat plate have been epoxied to the wood board and the screws attached through pre-drilled holes. I used plenty of weight to hold the steel plate flat while the epoxy cured overnight. The plate is flat to the board and ready for use. I also found four rubber “feet” which were screwed to the underside of the wood board. That’s about it, folks! Now I just need to get back to the bench and work on a model build so that I can use this tool…? Joe
-
AMT Kenworth K900 Watkins.
Joe Nunes replied to happy grumpy's topic in Model Trucks: Big Rigs and Heavy Equipment
Really nice looking model. Well done! ? Joe -
Nostalgia Fuel Dragster--Blower Manifold (01/28/23)
Joe Nunes replied to Straightliner59's topic in WIP: Drag Racing Models
Nice addition to the model! ? Joe -
Welcome to the forum, Greg! Joe
-
Well done! ? Joe
-
Nice start! You could call this paint color Santa's Sleigh Red. ? Joe
-
Nice model collection for the year. Well done! ? Joe
-
A quick update: just used the paint booth for the first time and I am really pleased with the operation of the unit. I sprayed two separate coats of Testors Dull Cote, from a spray can, 10 minutes apart, over an inked alignment grid that was drawn onto a steel plate. My bride, Joyce, was standing about 4 feet away from the booth during each spray time. Testors Dull Cote is a Lacquer based product. Neither of us could detect any paint/product odor throughout the entire procedure. The fan pulled the excess overspray and fumes from the paint booth immediately and I could actually see the overspray being physically pulled into the filter. I believe this paint booth will be a great addition to my shop tools. Hope my comments prove helpful to anyone considering this paint booth for their own use. Joe
-
Good looking model. Well done! ? Joe
-
A really good looking build. Some chains and a lowered boom would add to the effect. You might want to go for a scale boom height of 13' from the ground or lower if you can get it. There was a reason we had our auto transportation loads checked via those hanging chains before we left the yard; same idea would apply to any oversized load to avoid taking lines down or getting stuck under a bridge. You don't want that to happen! ??? Joe
-
1944 Diamond T wrecker
Joe Nunes replied to Chariots of Fire's topic in Model Trucks: Big Rigs and Heavy Equipment
This is a top shelf model project. Well done! ? Joe -
A good looking model that is cool! Well done. ? Joe
-
Nice start on a good looking model. The color choice works great. ? Joe
-
This model sure has a charm of it's own. Well done! ? Joe
-
A really good looking model in this color choice. Well done! ? Joe
-
Good detail information. Keep it coming! ? Joe
-
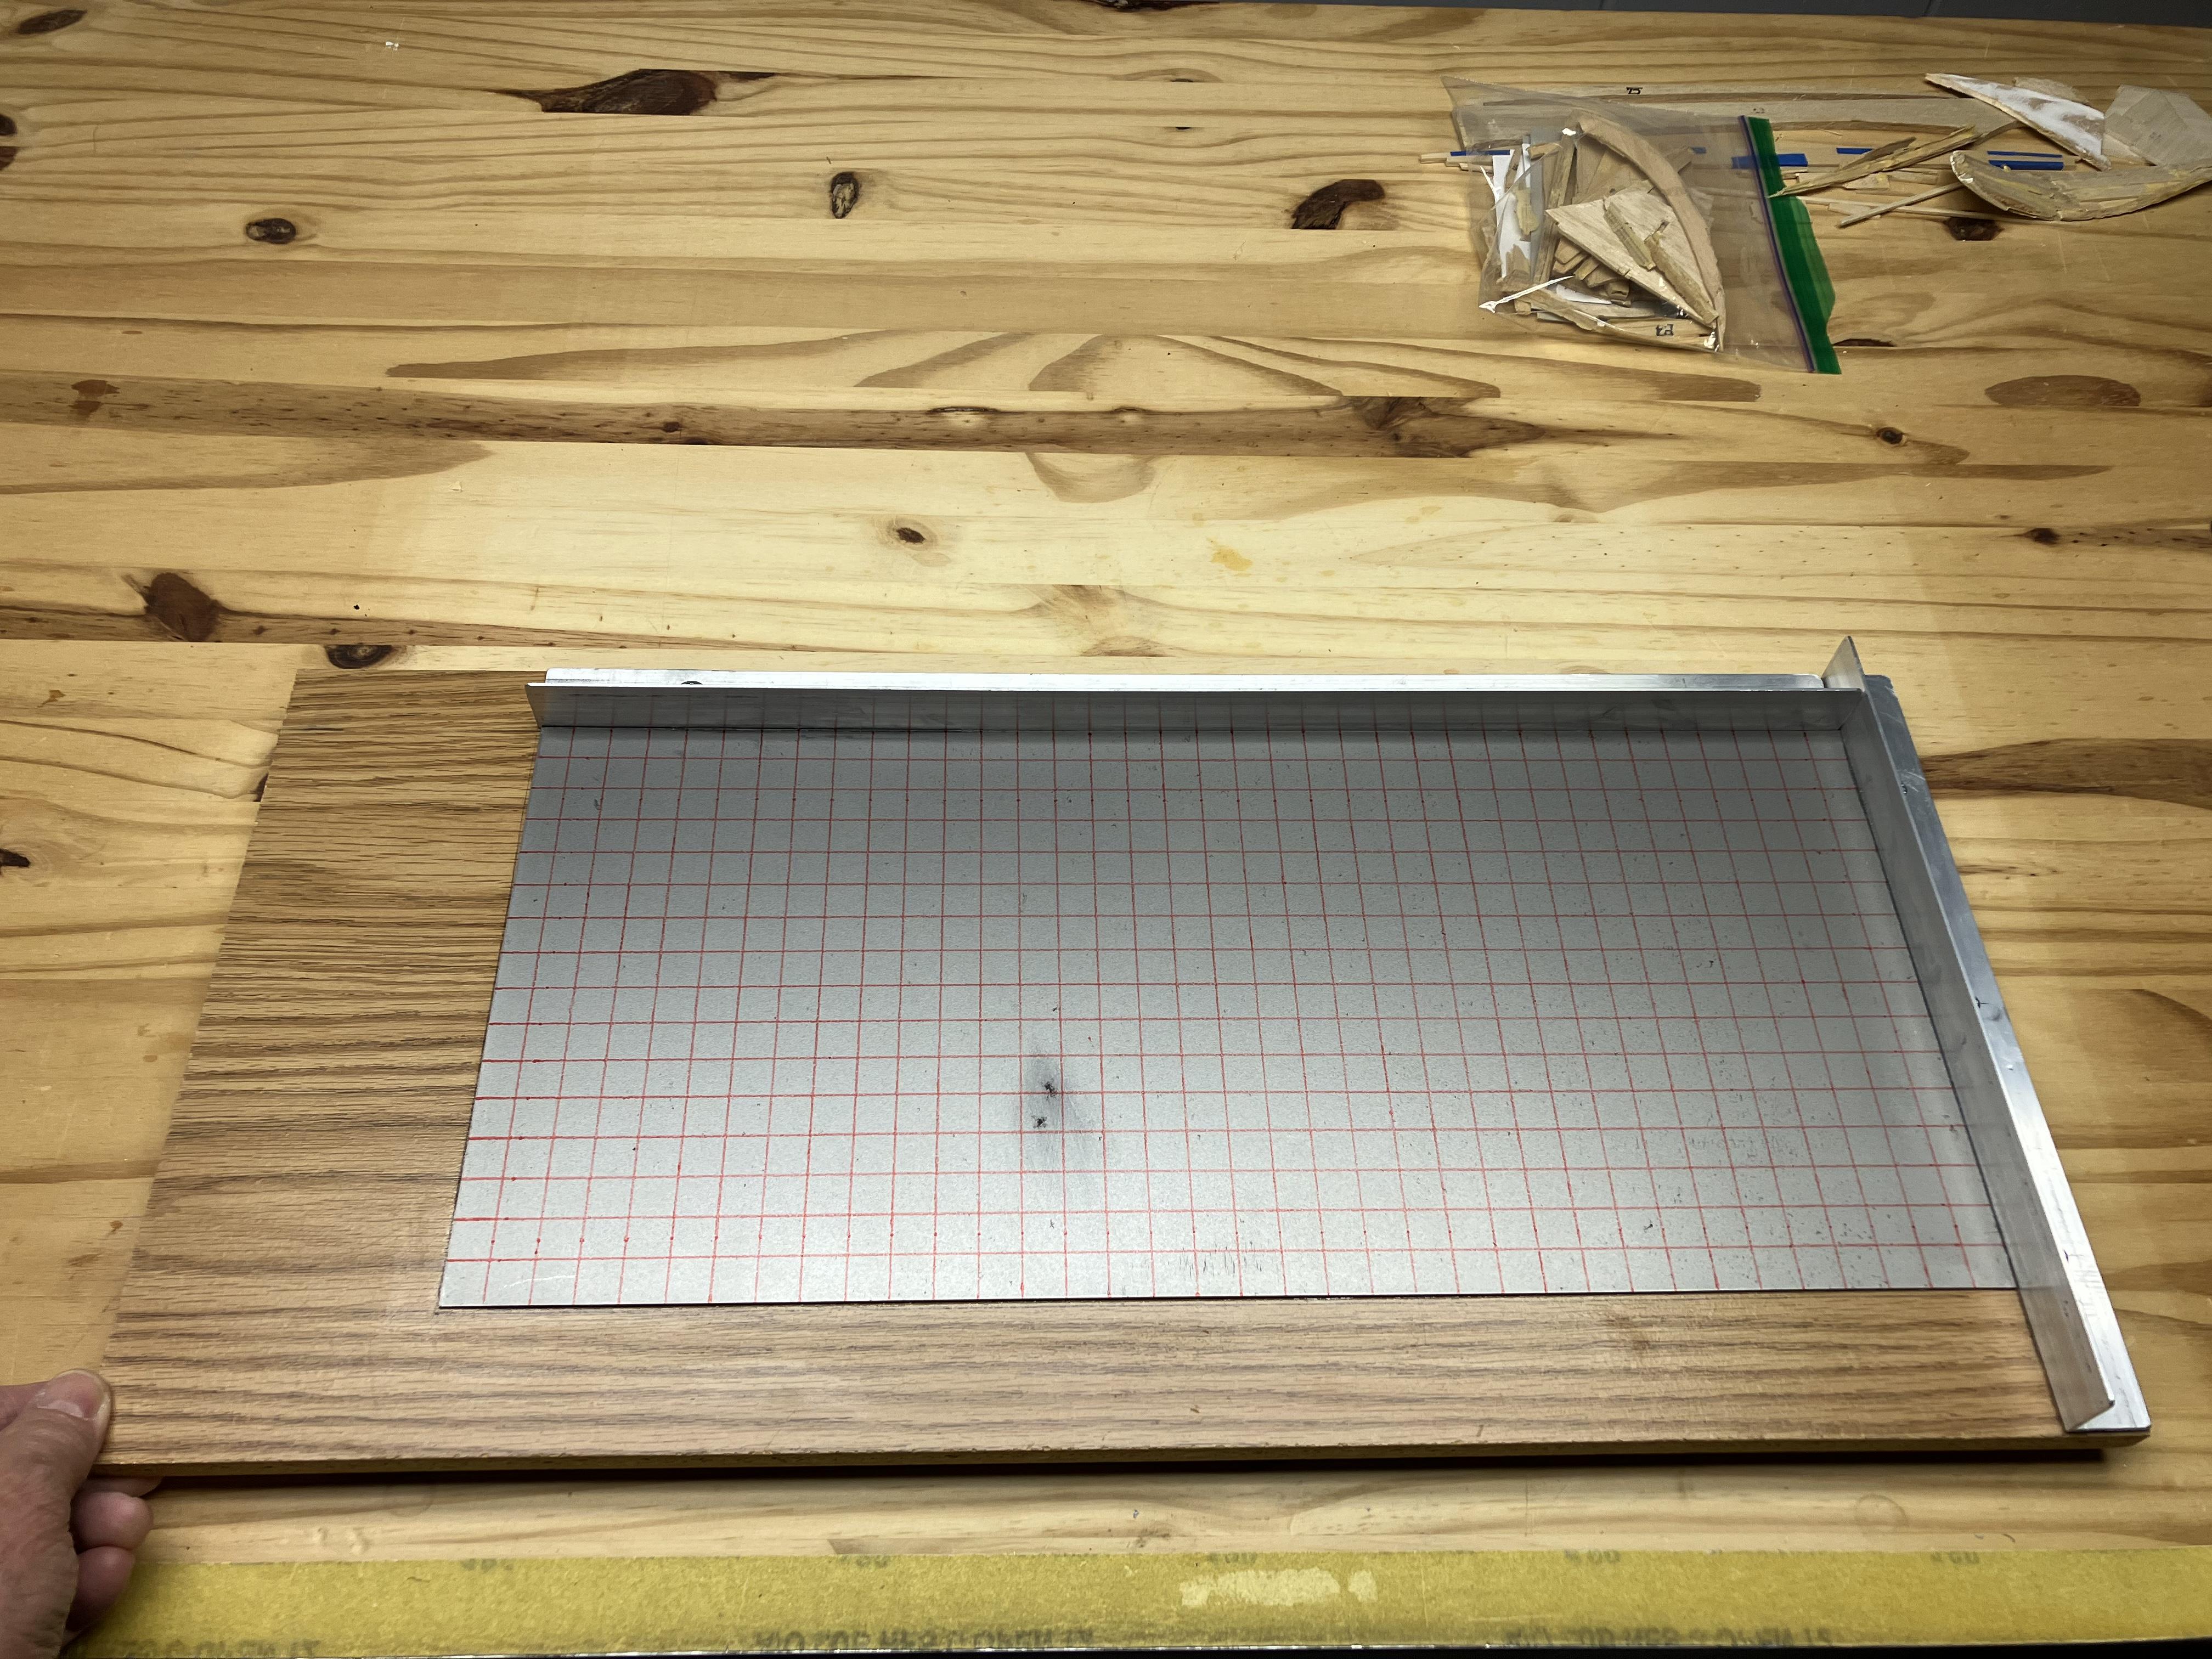
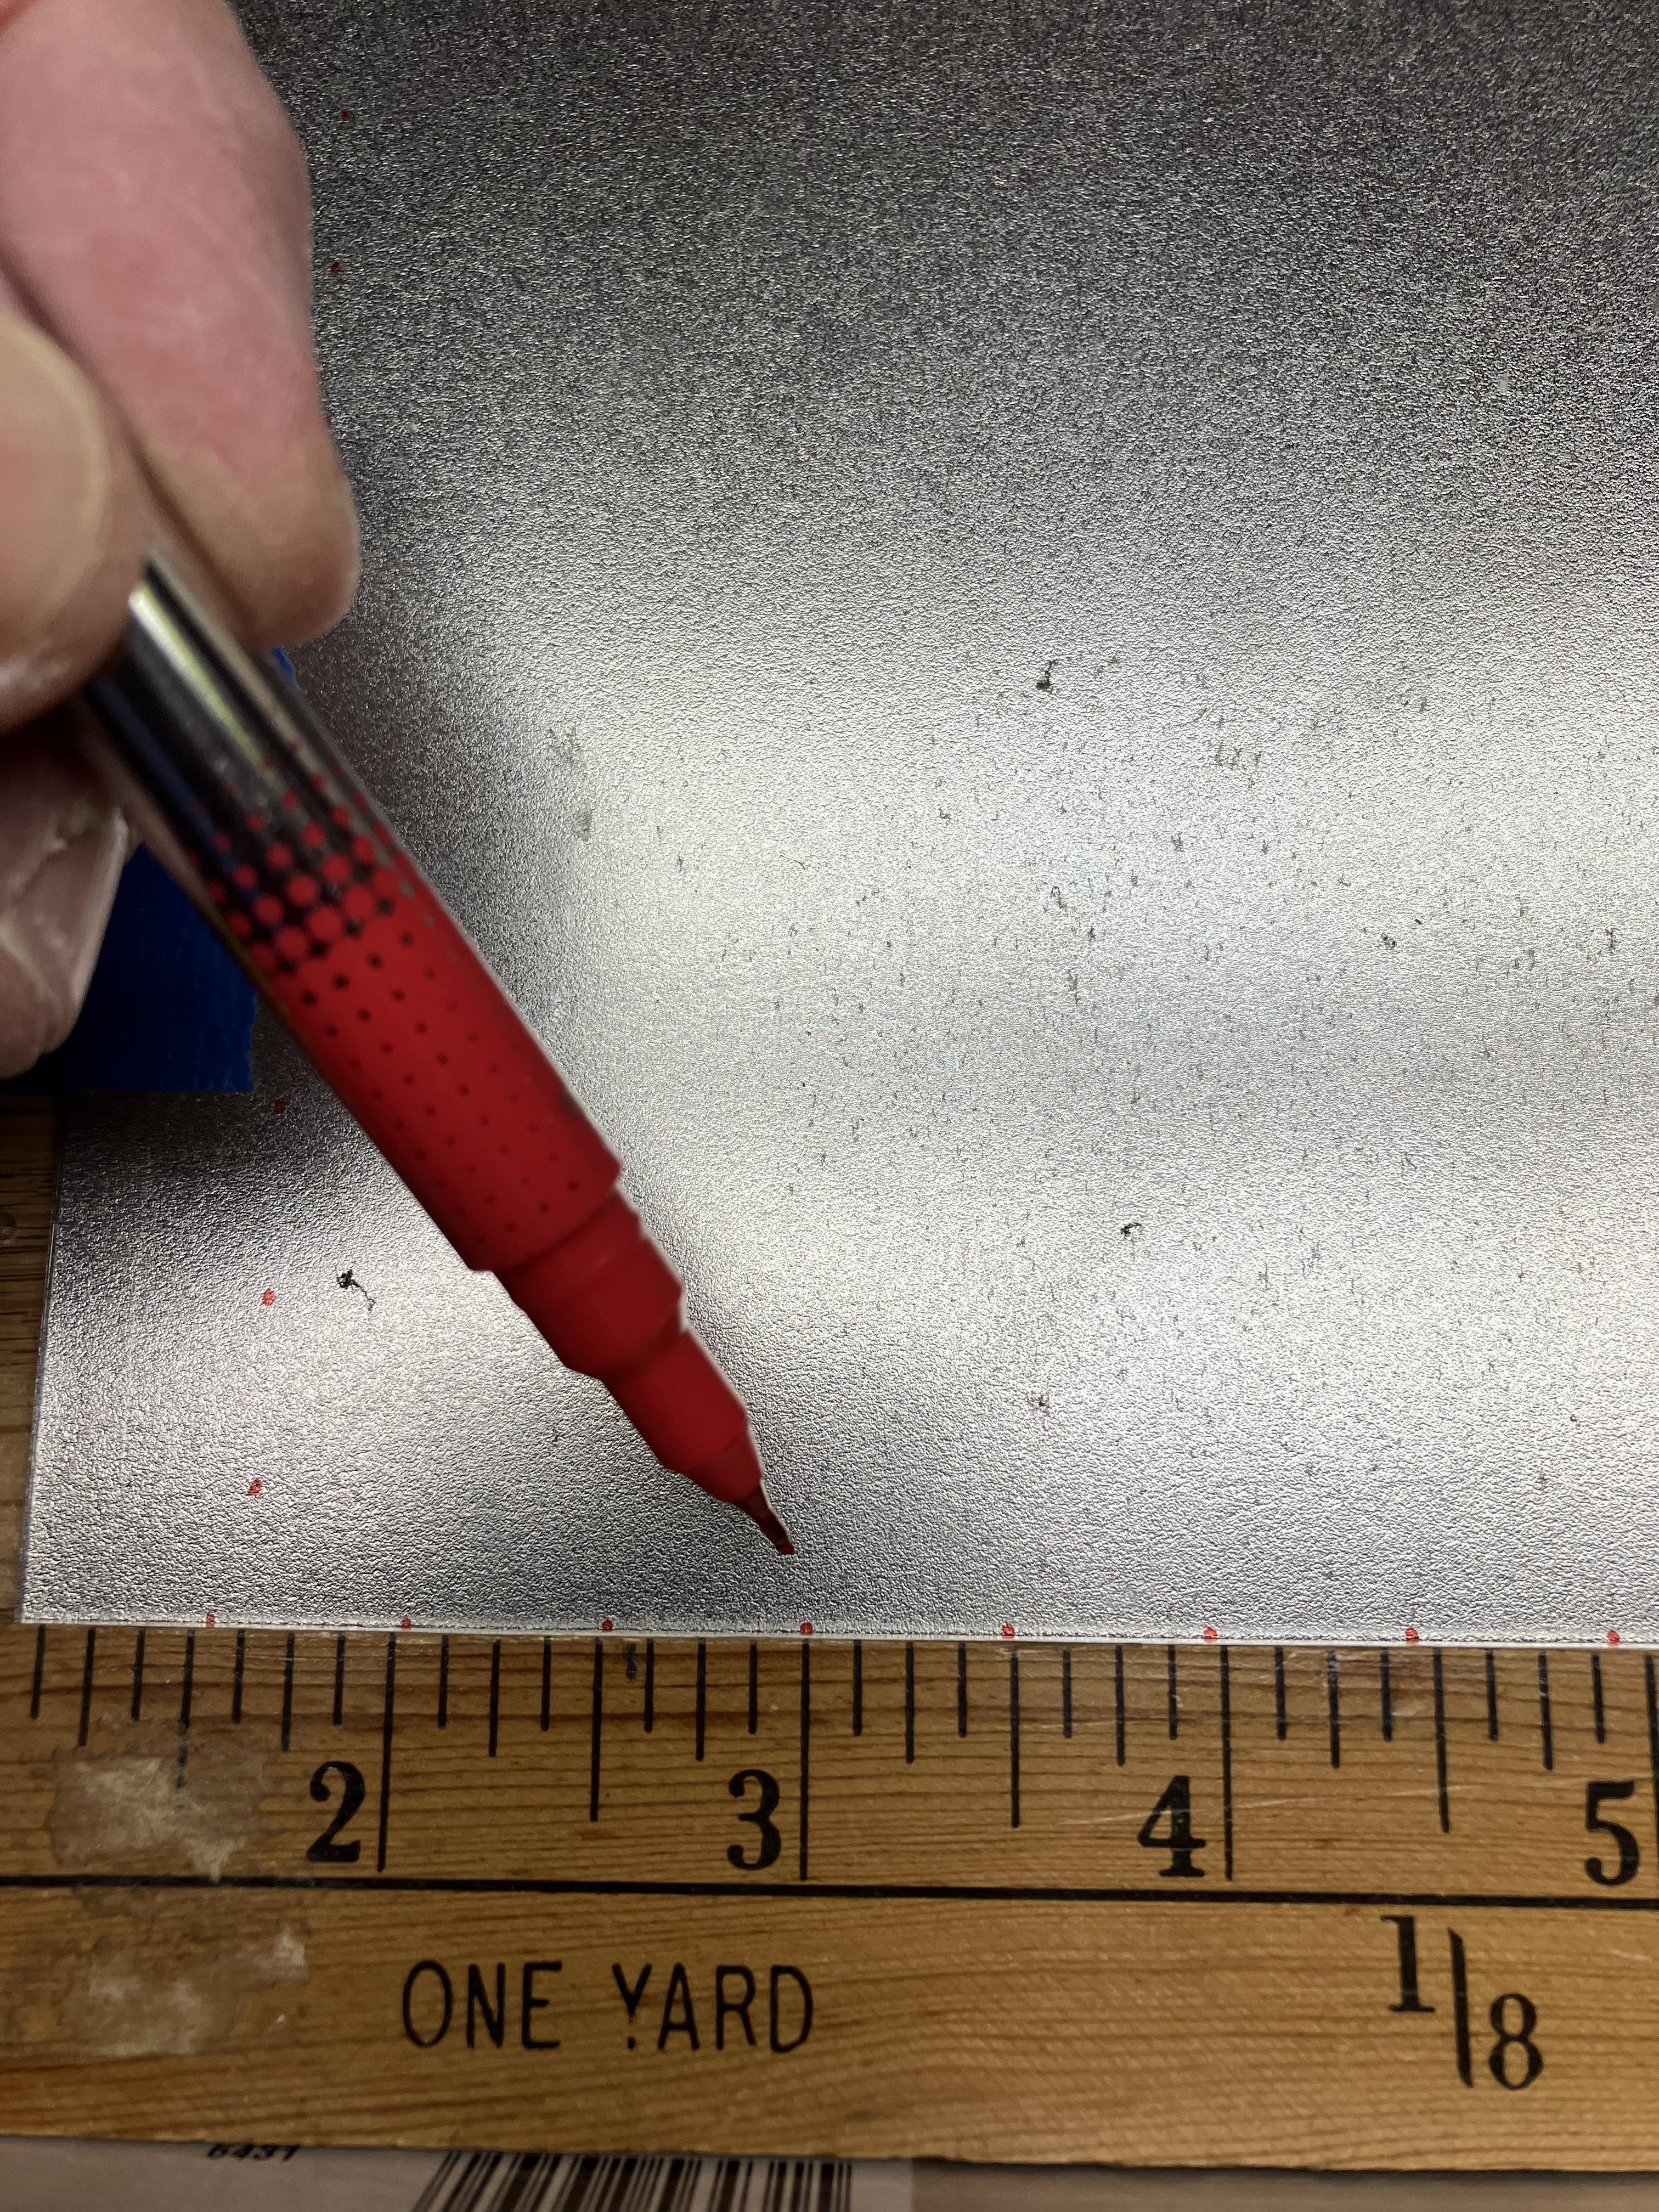
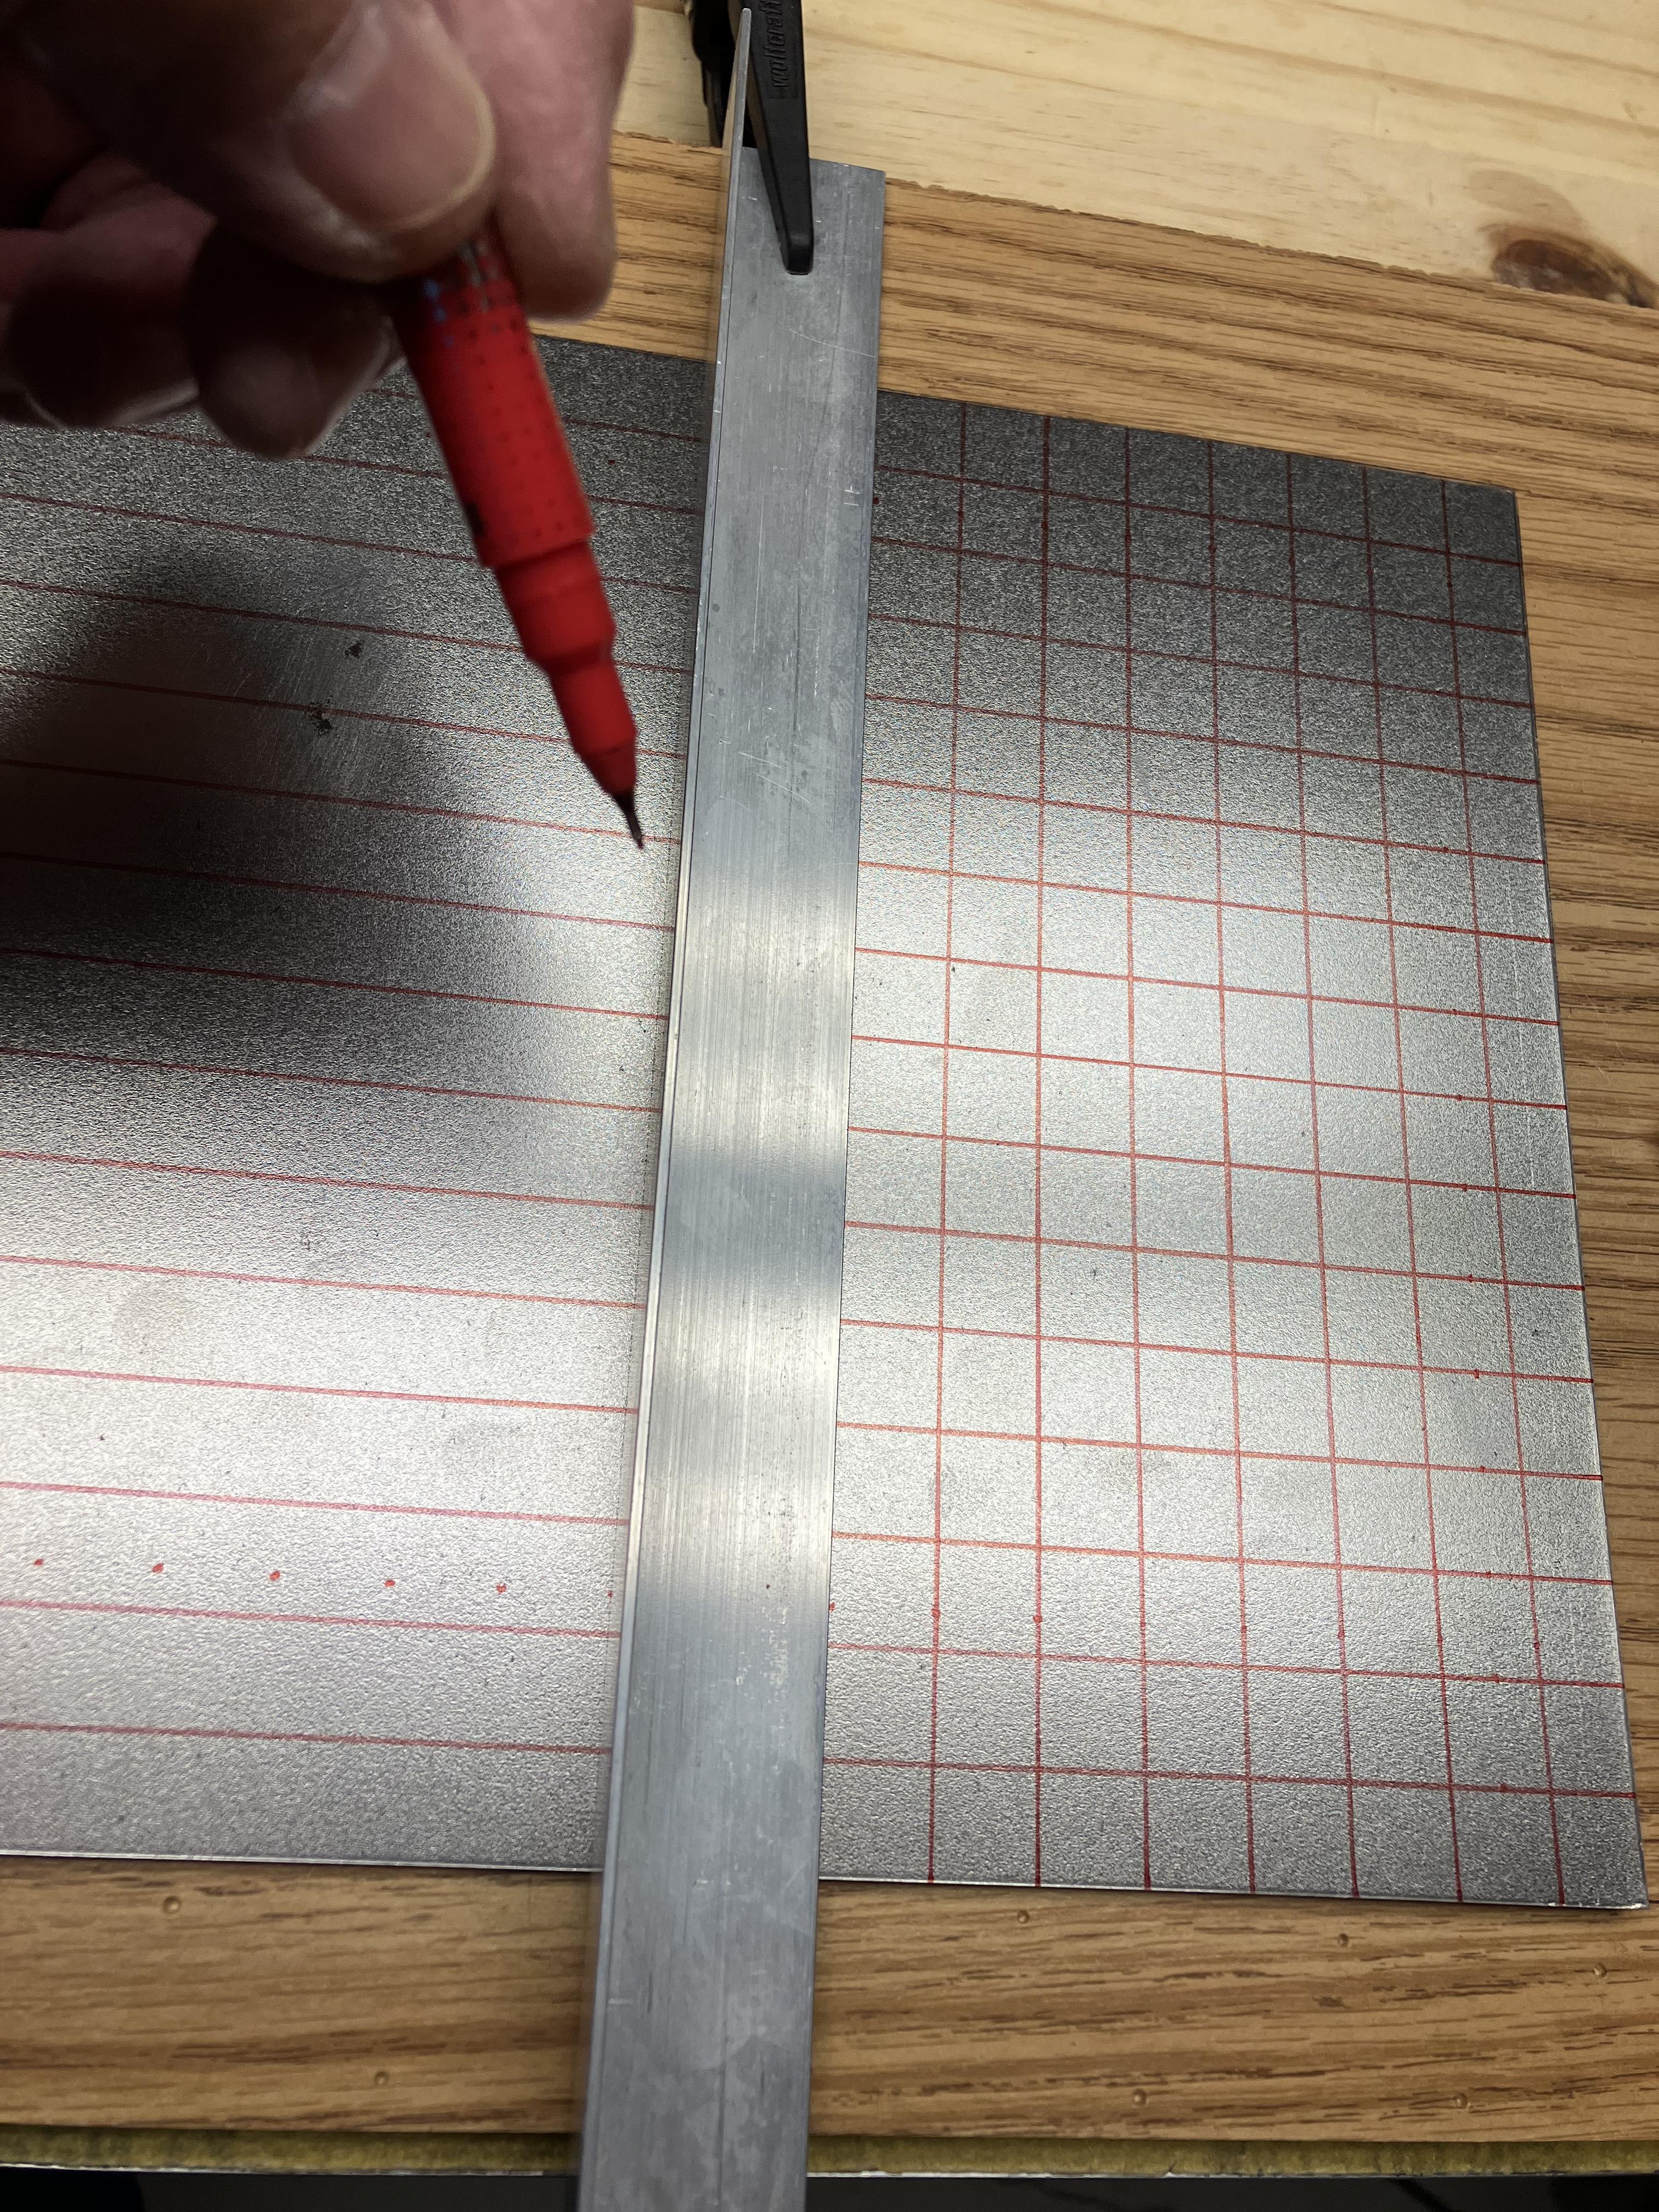
Today I put together a magnetic metal build board with an alignment grid. This can be a useful construction aid when gluing model parts together such as mounting tire/wheel assemblies to the chassis, as an example. I found a suitable piece of wood for the base in my shop. A 1/16” x 1” x 48” piece of aluminum angle, and a 1/16” x 8” x 18” piece of smooth flat steel plate was purchased at Lowes. I had the Devcon 2 part epoxy, Testors Dull Cote, and the wood screws in the shop. First thing I did was cut the aluminum angle to obtain the two side pieces for the wood board. The cut edges of the two aluminum angle pieces were filed/sanded smooth and the corners were rounded and sanded smooth. Don’t ask why I ended up doing this. Locations for the hold down wood screws were put on the two angle pieces in preparation for drilling the screw holes through the aluminum angle. Next up the flat steel plate was cleaned using a Dawn spray cleaner and then alcohol. The cleaning process proceeded marking the steel plate grid using an ultra fine permanent marker. Didn’t have a black marker on hand to use so I used a red marker which I did have. The alignment plate is going to just sit in the shop overnight to make sure the ink is dry. Tomorrow I will clean some fingerprints off the alignment grid, and spray the alignment grid/top of the plate with Testors Dull Cote to protect the inked grid lines and then let that dry. While the alignment grid is drying I will attach the two aluminum angle pieces to the wood board using the Devcon 2 part epoxy and some wood screws. Then the alignment plate will be epoxied to the wood board against the aluminum angle pieces. I will be using two types of small magnets with the alignment board. One type is the cabinet magnet, which has a strong pull against the steel plate, and the other type is a square magnet that has less of a pull against the metal plate. Joe