David G.
-
Posts
11,303 -
Joined
-
Last visited
Content Type
Profiles
Forums
Events
Gallery
Everything posted by David G.
-
 Thank you Mark, I appreciate your kind comment. I'd love to see your build of this kit, do you have any photos posted? David G.
 -
That's a great looking build! About as nice as it gets! David G.
-
Thank you kindly Tony. Yes indeed, a lot of patience was required for the entire build. David G.
-
Nice work! It looks like you're almost ready for assembly. David G.
-
Great looking terrain Paul! David G.
-
A keen eye and steady hand! It looks great! David G.
-
So much detail! More than one often sees in 1:12 and larger scale models. David G.
-
Alaskan Hauler refurbishing project
David G. replied to Jürgen M.'s topic in WIP: Model Trucks: Big Rigs and Heavy Equipment
Wow, you're making rapid progress on this one Jürgen! I think the tires look fine. If you plan on doing some weathering, a little added dirt and grit can cover up any irregularities. Nice idea for the tribute. I have some fond memories of those songs from my childhood. David G. -
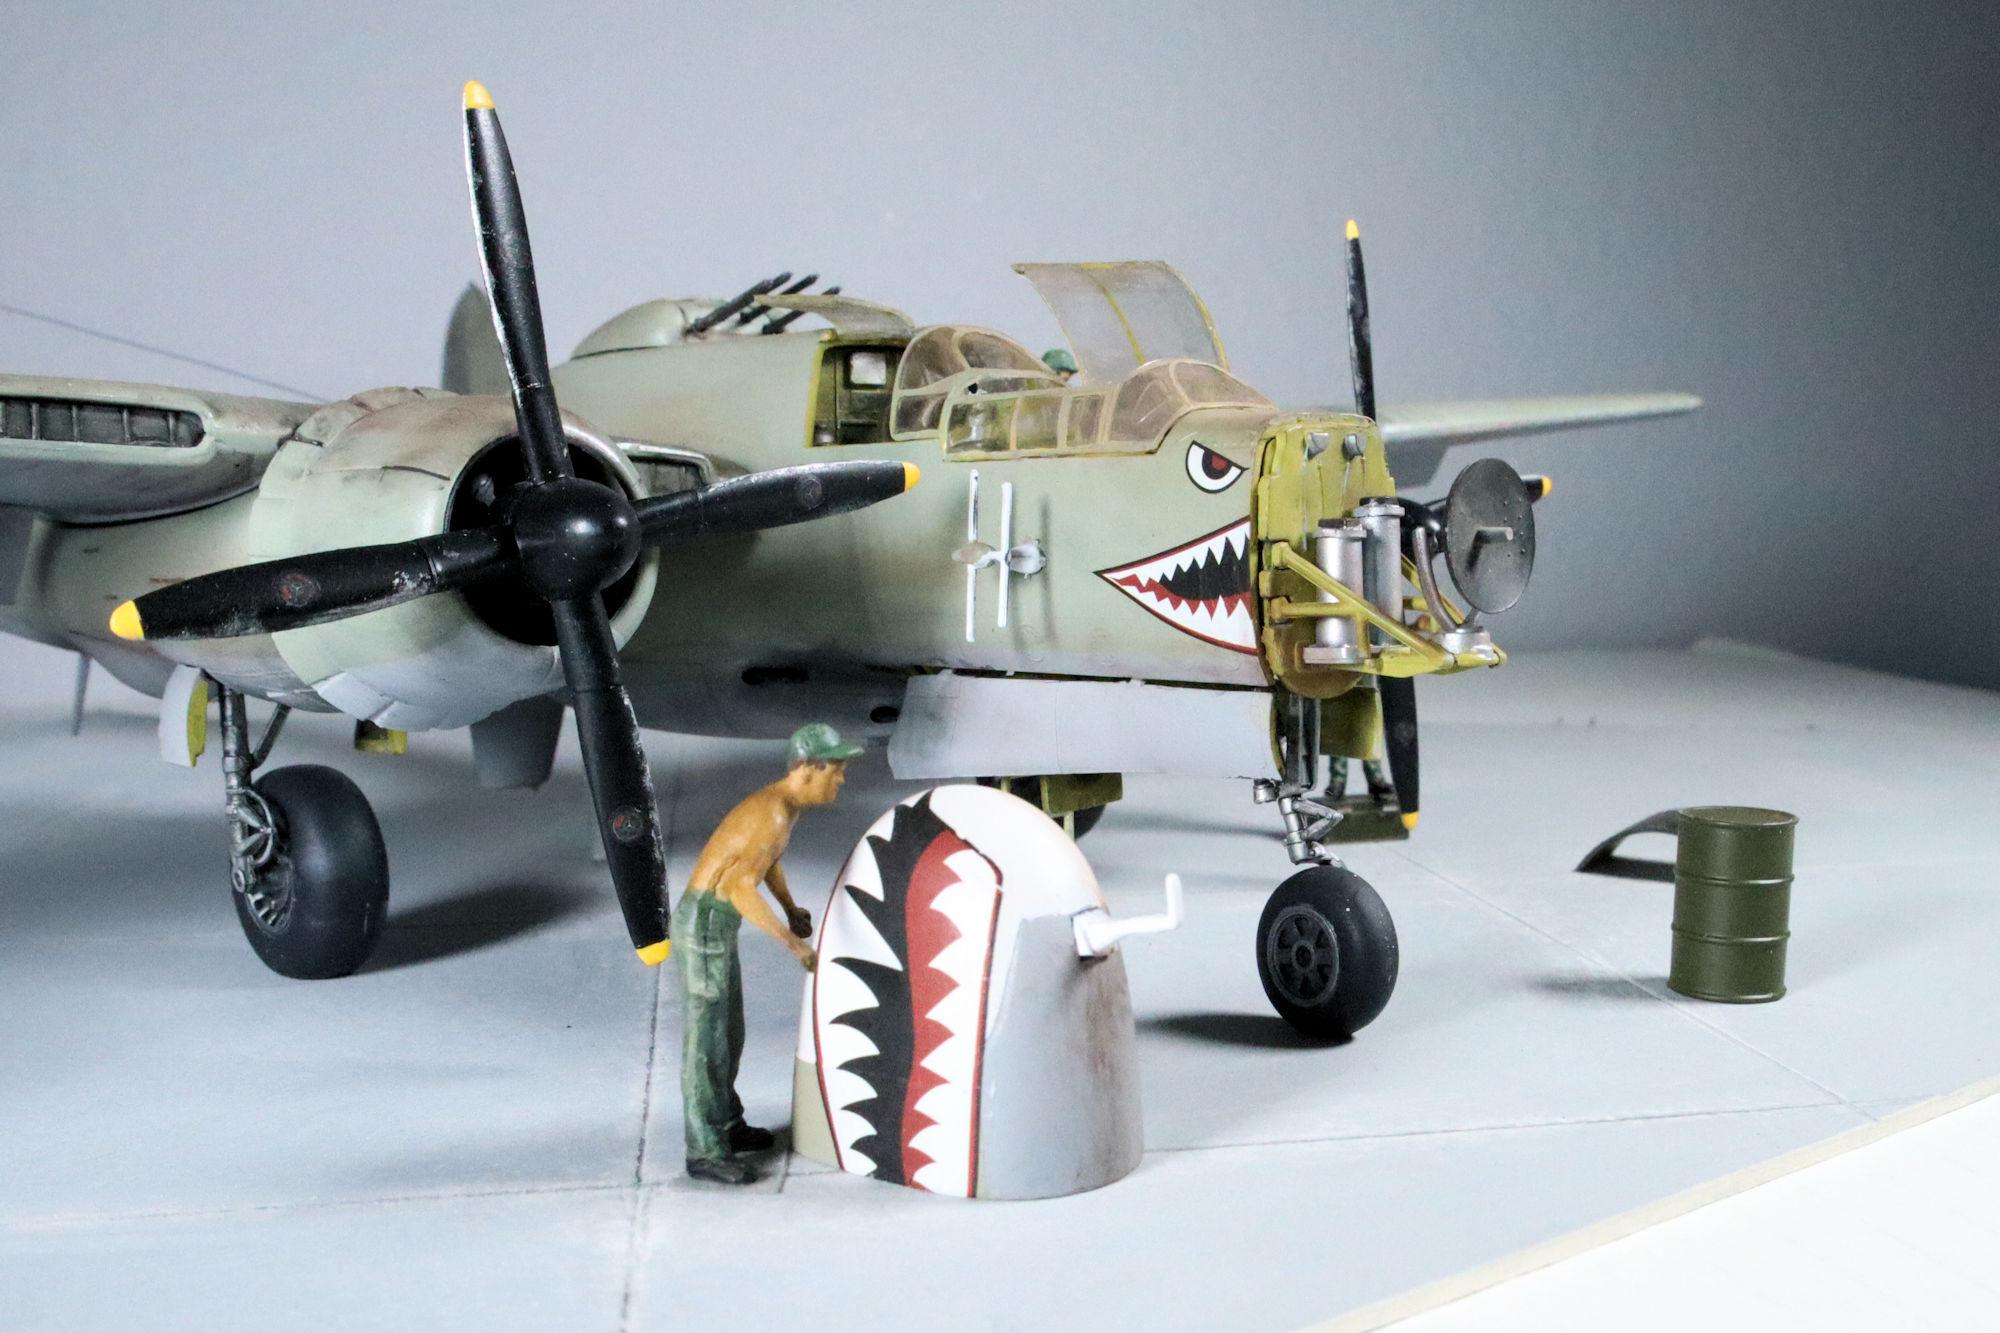
Hello Everybody! Here's the next photo set for Revell's Northrop P-61 Black Widow. Just one more after this. I promise In addition to the removeable panels, this kit comes with the fuel barrel and three figures shown. Many builders fill the nose cap with weight to balance this tail-heavy plane. I wanted to retain the ability to display the radar unit so I used a clear styrene rod to support the tail. Not having much detail, the figures add to the scene without drawing attention away from the plane. I did scratch build the crate that the crewman is standing on. As always, thanks for taking the time to look and please feel free to post your comments. David G.

-
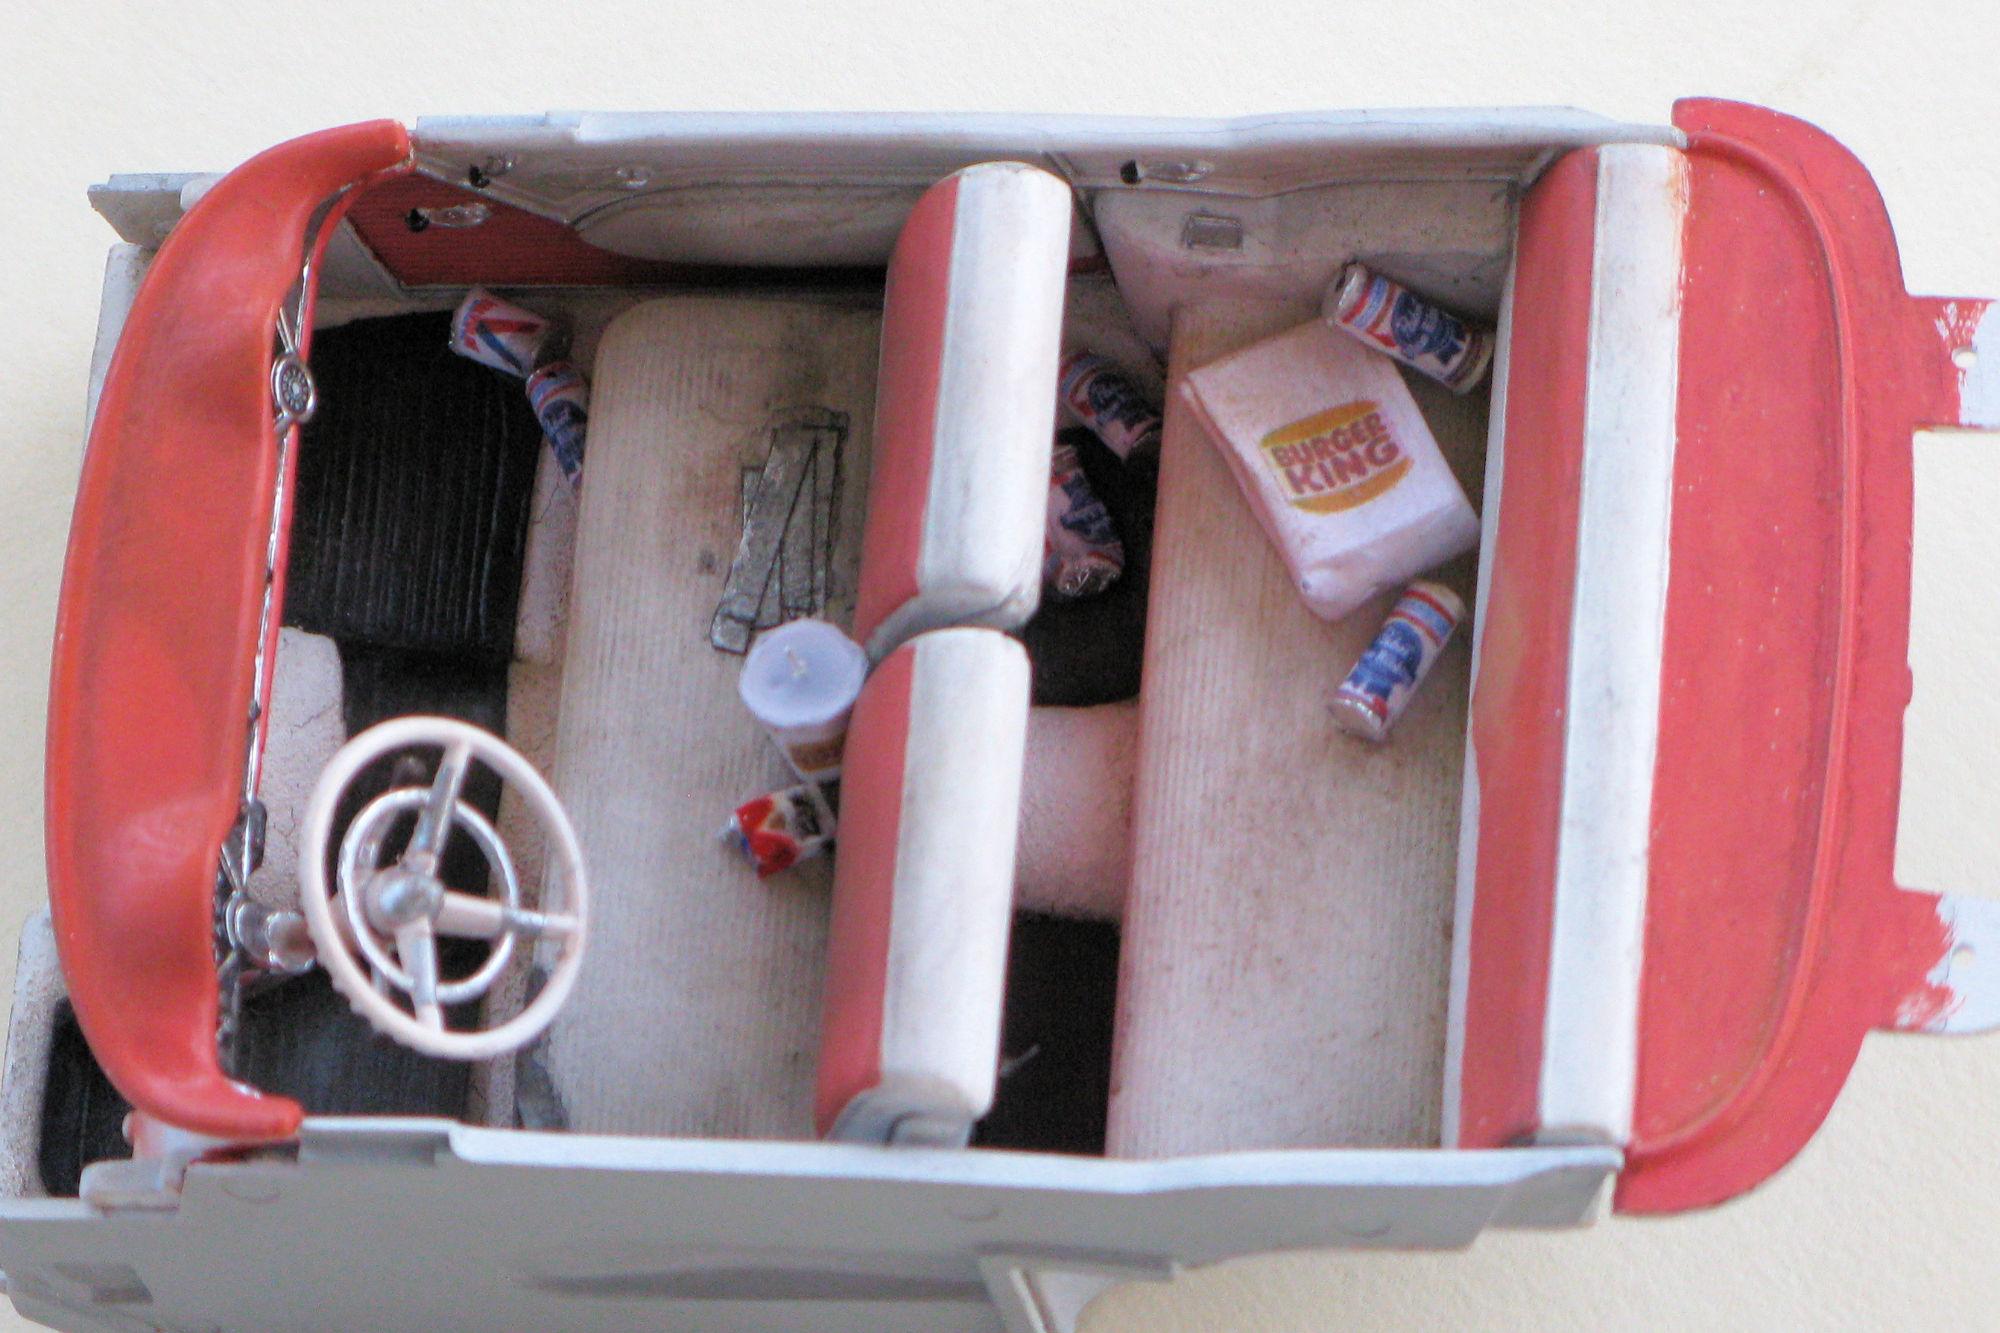
I made it from images I found on the internet. =D-
-
Nice one Joe! The wheels really make a big difference. I like the burger shop bag too, nice touch. I did something similar with my 55 Chevy beater. David G.
-
Tidy! Love the coil-overs! David G.
-
Alaskan Hauler refurbishing project
David G. replied to Jürgen M.'s topic in WIP: Model Trucks: Big Rigs and Heavy Equipment
Wow! Those sure are some chunky wheels Jürgen! They definitely have the proper attitude. David G. -
I'll keep an eye out for photos when you get it finished. =D-
-
Revell's Auto Transport Trailer: WIP
David G. replied to David G.'s topic in WIP: Model Trucks: Big Rigs and Heavy Equipment
Thank you Ron, it's good having you along for the adventure. I've seen this on the shelf off and on over the years. This is the first time I've had the resources to pick one up That would have been quite a combo kit! Thanks for following along Jeff, I appreciate that. I'll keep your comment in mind regarding the alignment, but so far- no problems! That's quite a bit of history on this kit Håkan, thank you for sharing it. I have the Pete 359 as a companion. I just started building it yesterday and will be posting photos soon. Thanks again to you all for your comments, I do enjoy reading and responding to them. David G. -
Hello Everybody! What model car builder hasn't at least considered, if not dreamed of building a scale transport trailer and loading it with model cars that they've built? I know I have! That's why when I saw this kit on the shelf at my local hobby shop I snatched it up straight away! Revell doesn't issue these often and when they do, the kits don't stay on the shelf for very long. I bought this model back in 2017. One of the reasons it's taken me so long to get to building it is the lack of space to display it upon completion. The trailer alone is about 23 1/2 inches (59.6cm) and with the loading ramps it is roughly 29 1/2 inches (75cm)! That's without a cab attached! When I first lined this trailer up to take the initial photos, my first thought was "I'm gong to need a bigger camera!". I couldn't afford that so I built a larger photo box out of a used trifold presentation board. Anyway, this is my first several build sessions edited into one image. Given the odd proportions of the trailer, it's the best way I could think of to present the photos. That's all for now. As always, thanks for taking the time to look and please feel free to share any comments you may have. David G.
-
Thank you James. Thank you very much Michelle. Thank you Alan, I found your suggestions and information quite helpful. Thank you Keith, Do you have a WIP thread going? If you do, I'd like to follow along. Thanks again everybody. David G.
-
Thanks Joe. Yeah, it seems as if I'm learning when to pull my head out of the rabbit hole. Thank you Greg. It's a pretty cool video, thanks for the link. The car is even more beautiful in motion. Thank you Carl. Yeah, it would have been nice to have operable headlights but I think it's a feature I can live without. David G.
-
Thank you very much Bob. Best of luck with the Futura, I found it quite challenging. Thank you kindly Greg. David G.
-
Who doesn't love a mock-up? Let's see yours!
David G. replied to Belairconvertable's topic in WIP: Model Cars
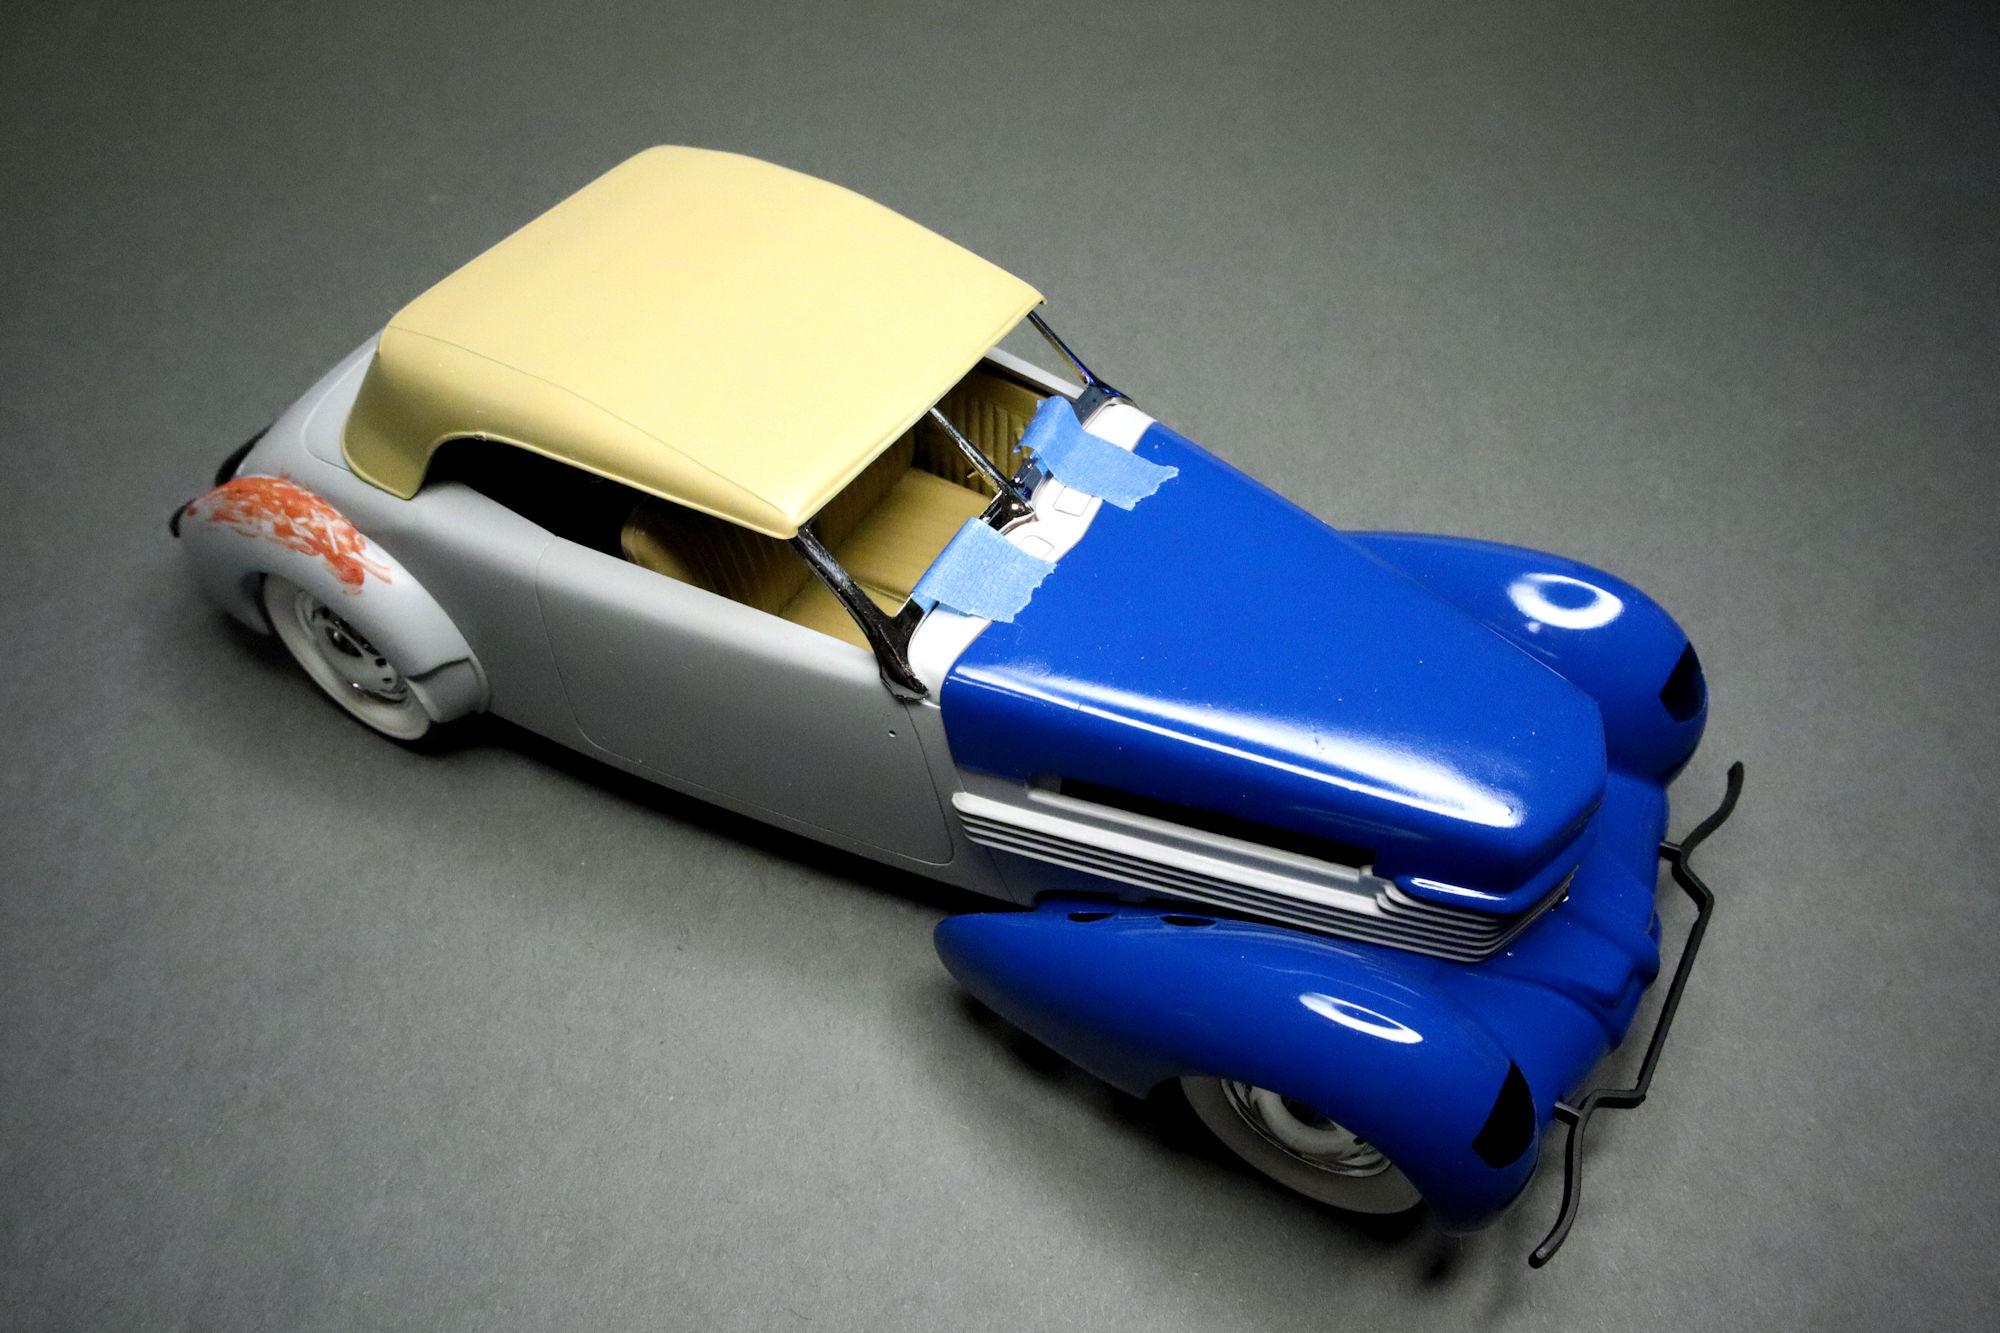
Here's a quick mockup of the 1937 Cord I'm working on. Still got a ways to go! David G.
-
Link-Belt HC-218 Truck Crane
David G. replied to redneckrigger's topic in WIP: Model Trucks: Big Rigs and Heavy Equipment
Excellent progress on this Tom. Travel safe! David G. -
That looks like it should work nicely. David G.
-
Testors 1/24 Ultra Detail Series T Bucket
David G. replied to mustang1989's topic in WIP: Model Cars
Those look good Joe. For the gauge covers I use Tamiya X-22 Clear and build it up in layers over a few days. David G. -
It's great seeing you back at this Paul. I think the rail line is a fabulous idea! David G.
-
Amazing builds, both of them Roger. David G.