David G.
-
Posts
11,326 -
Joined
-
Last visited
Content Type
Profiles
Forums
Events
Gallery
Everything posted by David G.
-

Revell's Peterbilt 359: WIP
David G. replied to David G.'s topic in WIP: Model Trucks: Big Rigs and Heavy Equipment
Thank you Jürgen. Yeah, the tires aren't great but they're certainly not the worst I've worked with. I did consider replacing them with some aftermarket units but I want to keep this build as OOB as I can. And honestly, I'm not really a truck builder. This is likely the only road tractor I'll ever build and I plan to give it only as much love as it needs to live. Thanks again, David G. -
Revell's Peterbilt 359: WIP
David G. replied to David G.'s topic in WIP: Model Trucks: Big Rigs and Heavy Equipment
Yes indeed Brian! That's exactly what I ended up doing. After a few days of fiddling about, I came to the same conclusion. I cut about half of the circumference of the webbing and packed the warped areas of the tires with paper napkin. Once mounted, I massaged and smooshed the tires into a more realistic shape. I'll post all that in a future update. Great minds, eh? Thanks again, David G. -
Who doesn't love a mock-up? Let's see yours!
David G. replied to Belairconvertable's topic in WIP: Model Cars
Thanks for the link Ken, they have some really good stuff there. I plan to keep this one mainly OOB... at least as much as I can. But I'll certainly throw their site into my favorites bar for future reference. =D- -
1974 Peterbilt 352
David G. replied to DRIPTROIT 71's topic in Model Trucks: Big Rigs and Heavy Equipment
Excellent detail and paint, love the decals too! A beautiful build! David G. -
An excellent and imaginative concept well planned and executed. It looks like it could start up and run! 😮 I also like that photo with the ghosted engine cover. David G.
-
S'LOW
David G. replied to TopherMcGinnis's topic in WIP: Model Trucks: Pickups, Vans, SUVs, Light Commercial
I've always liked these old panel trucks. Surprisingly, I don't have any in my collection. I'll just have to enjoy watching you build yours. David G. -
Who doesn't love a mock-up? Let's see yours!
David G. replied to Belairconvertable's topic in WIP: Model Cars
Cool! That's gotta be the first lowrider road tractor I've seen! 😮 =D- -
Revell's Peterbilt 359: WIP
David G. replied to David G.'s topic in WIP: Model Trucks: Big Rigs and Heavy Equipment
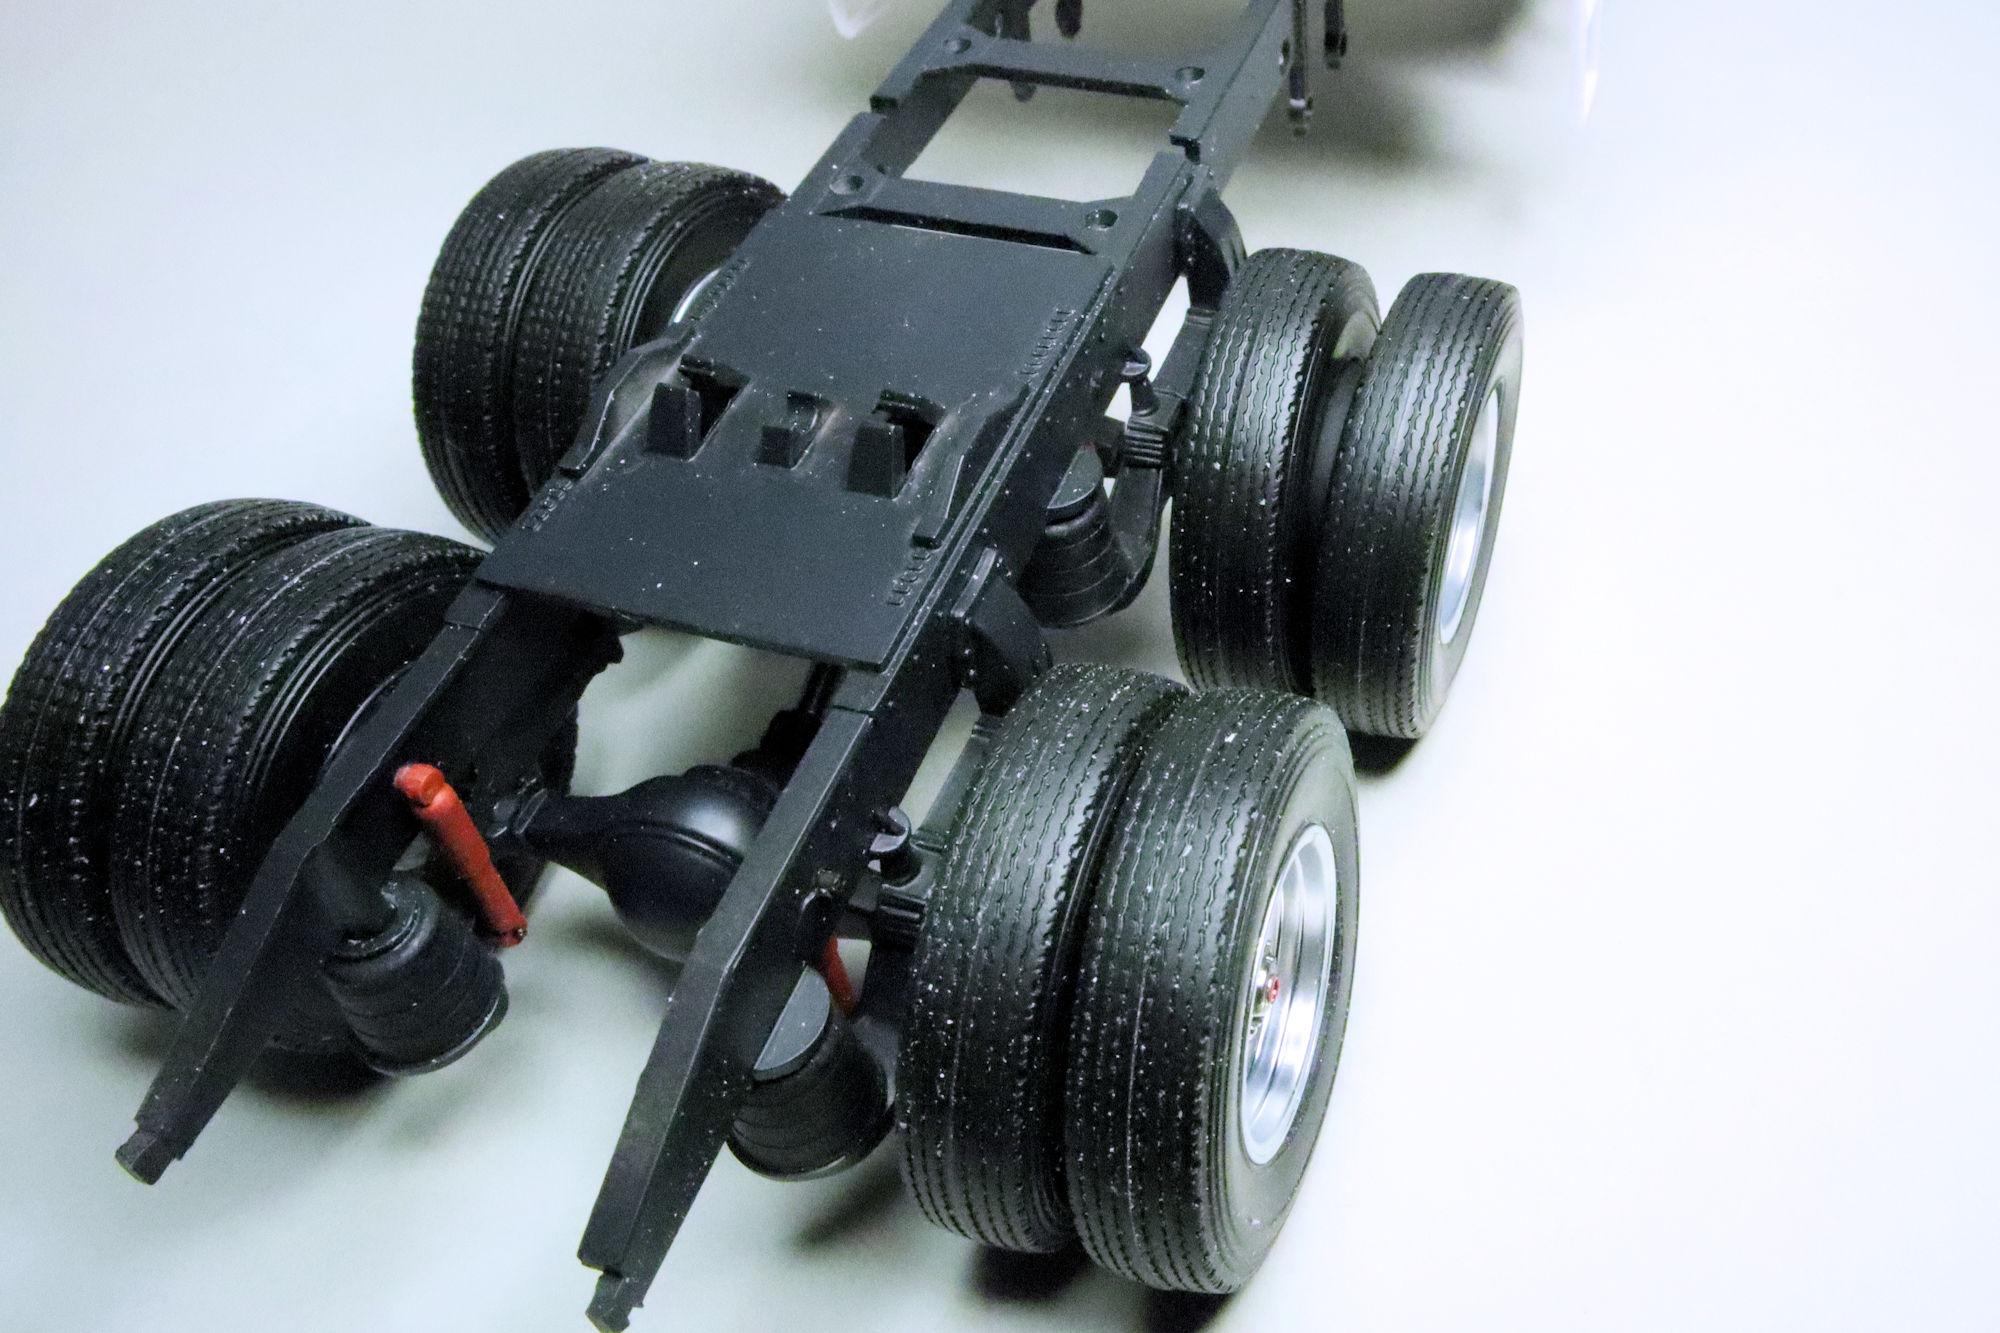
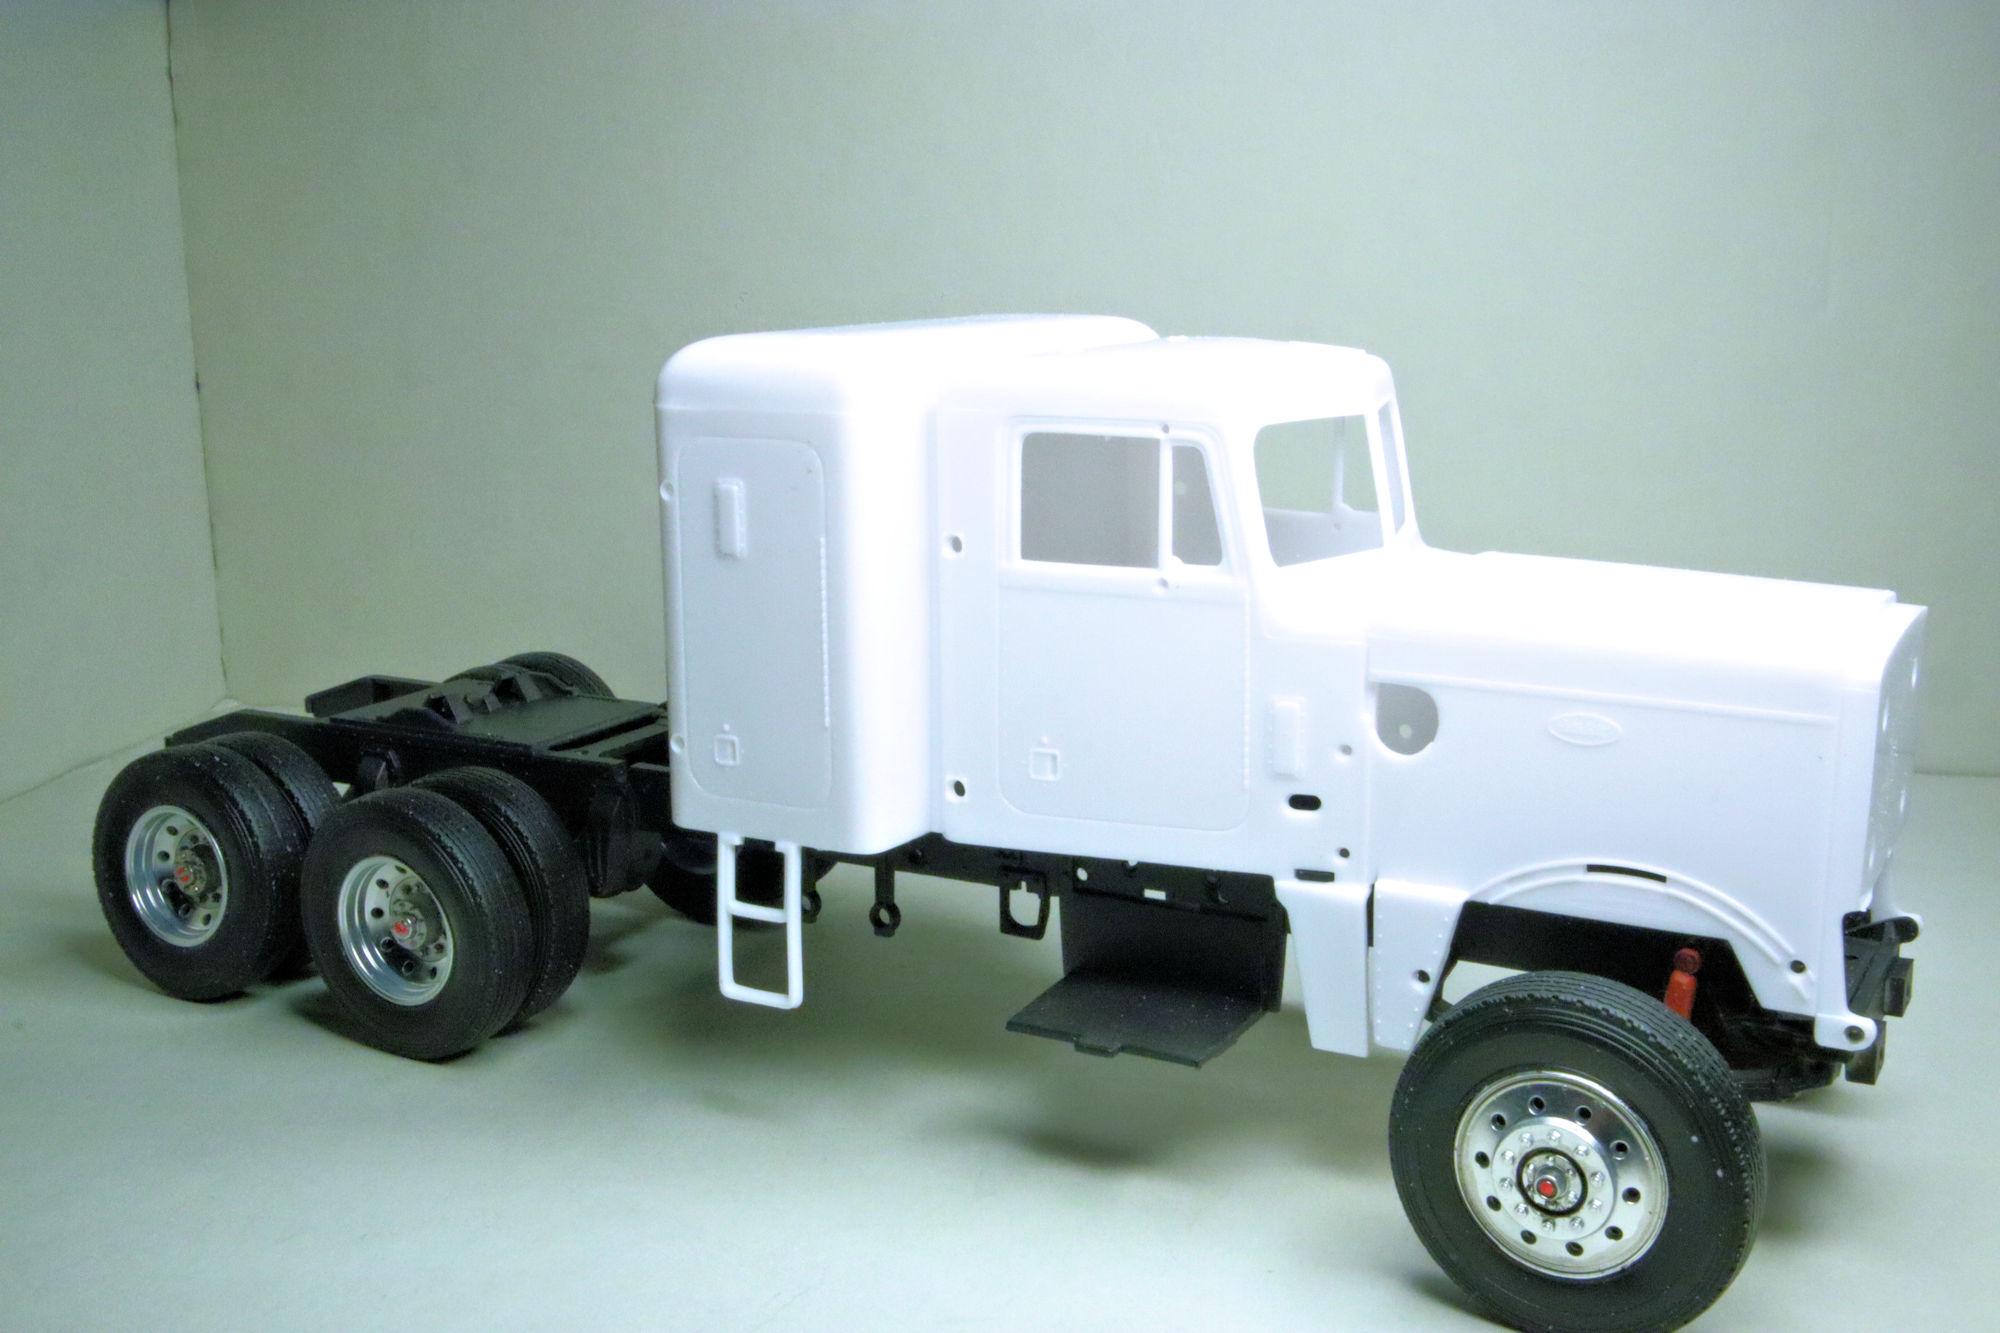
Hello Everybody! I took a week off building to allow my fingers to heal up a bit. I've been having trouble with my finger tips drying and splitting due to the cold & dry winter weather. They're not completely healed but they're getting better. So to celebrate, here's an update! Test fitting the cab and hood so they can get used to their future homes. The wheels are assembled and look pretty good, at least from this angle. I'm still working to find a way of getting the dual tires to align properly. At worst, if I mount the wheels with the gap on the bottom it'll be less noticeable. But to me, that would seem like cheating. So... onward! As always, thanks for taking the time to look and please feel free to share your thoughts and impressions. David G.
-
Who doesn't love a mock-up? Let's see yours!
David G. replied to Belairconvertable's topic in WIP: Model Cars
Revell's Peterbilt 359, my first road tractor! Test fitting the cab and hood so they can get used to their future homes. Thanks for lookin' David G.
-
Who doesn't love a mock-up? Let's see yours!
David G. replied to Belairconvertable's topic in WIP: Model Cars
That looks good so far. Is this the Revell version? If so, I'm curious about the hood. There was a warp in the hood on the one I built and I was unable to get it to fit properly. It looks like the one in your photo may have the same issue. Thanks, David G.
-
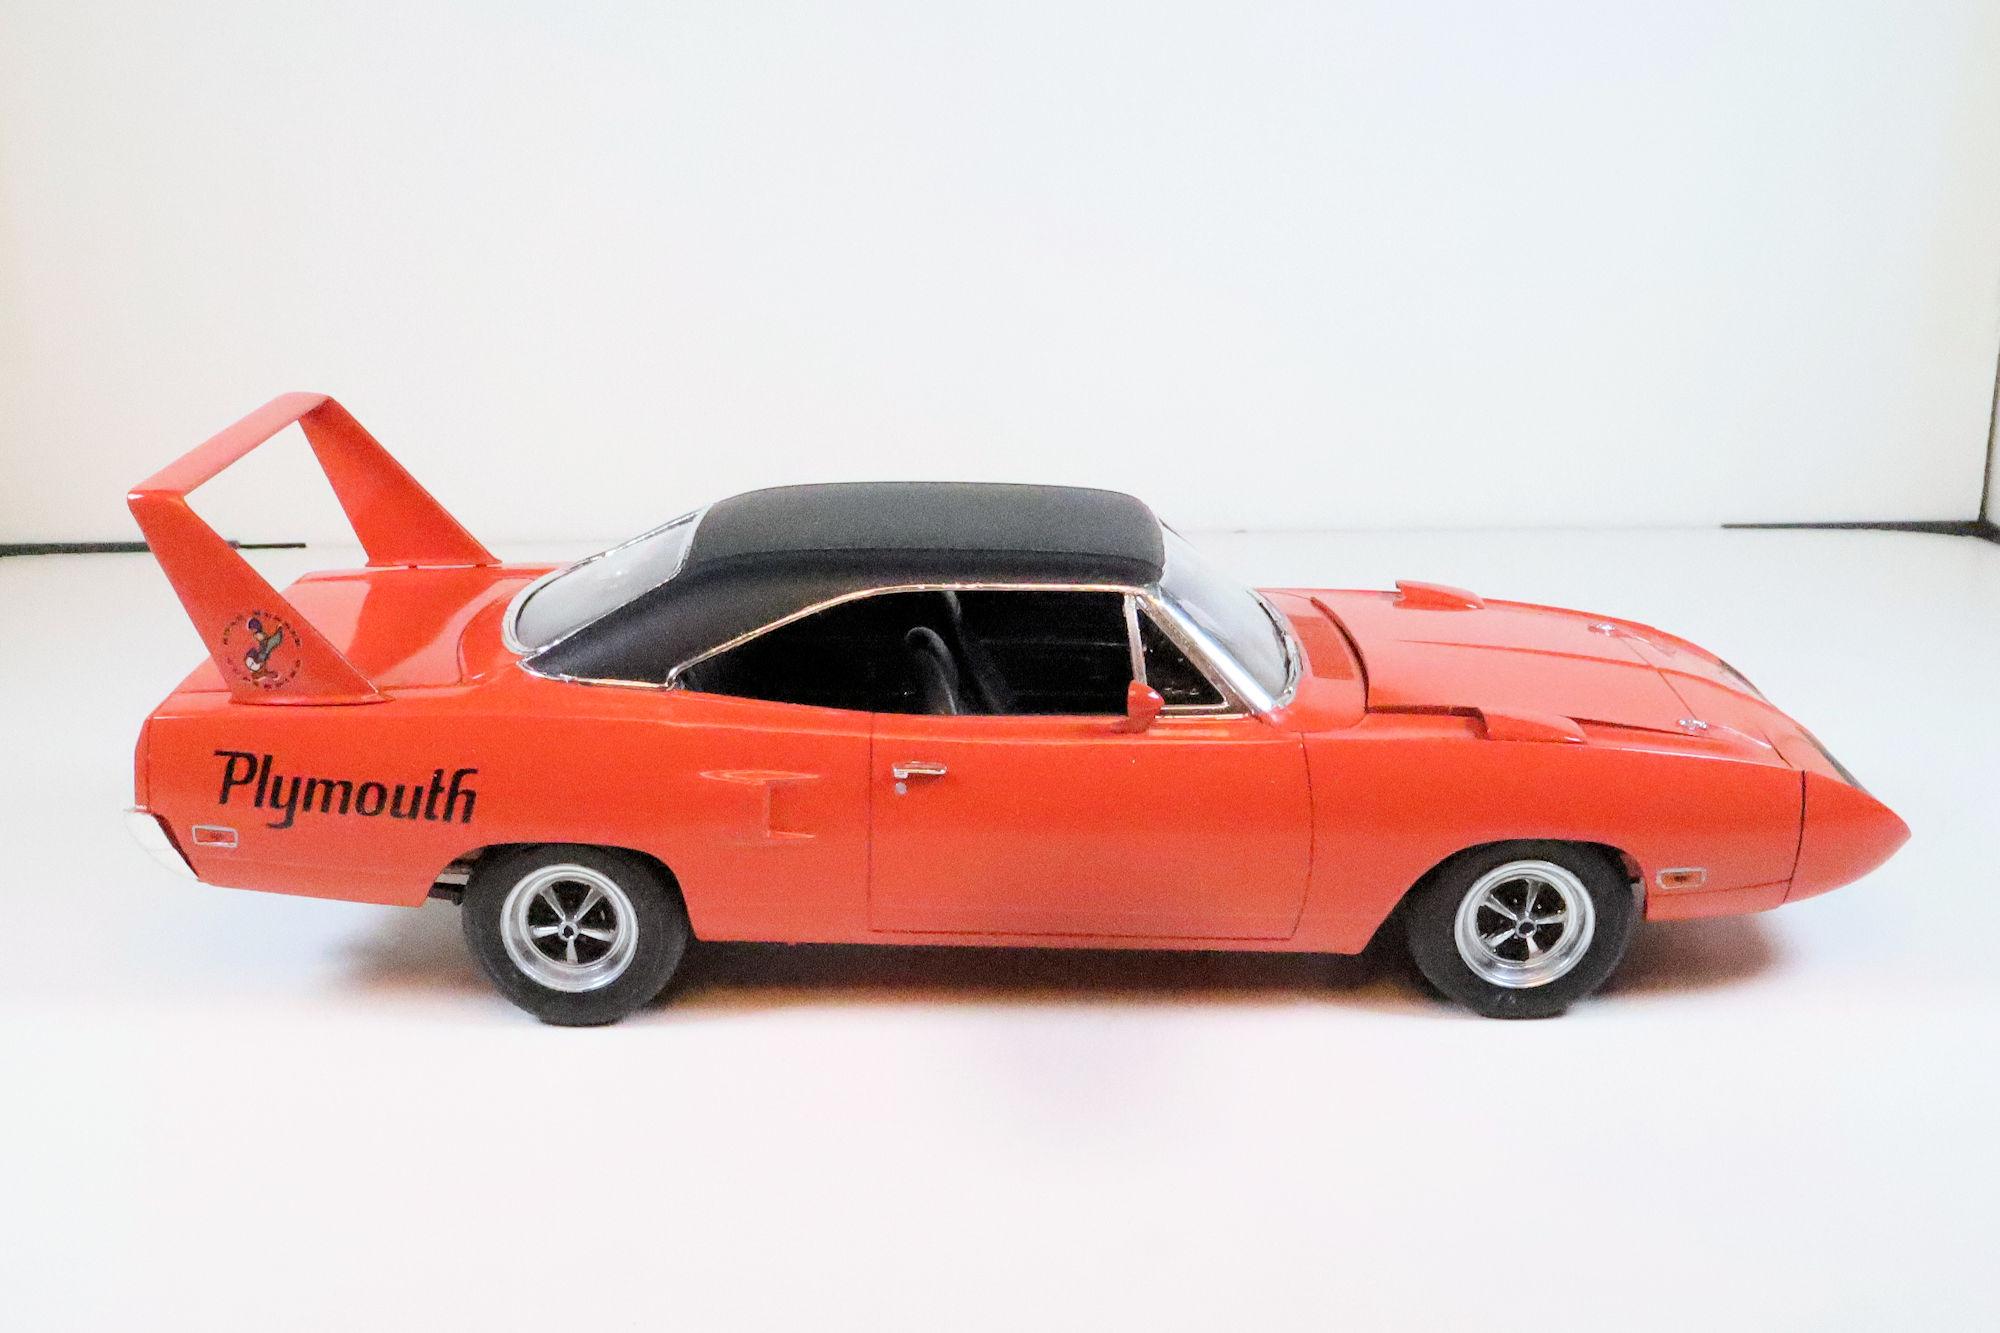
The paint and detail look great! I love that 70's rake. David G.
-
Thank you Len. Thanks Greg, I appreciate that. David G.
-
Oh! That's just cool in so many ways! Excellent work! David G.
-
Dave, Is it possible that the block-out is related to certain key words too? I seem to remember encountering a similar problem here a few years back that was triggered by the inclusion of certain words within the body of the text. I don't recall now specifically what those words were. But when the error kicked I could usually identify which word or words were causing the problem. They were usually words like "insertion" "attachment" "sticky". Not those words specifically, but words that model builders may frequently use but could be problematic in other contexts. I don't know if the information is helpful but there it is. Cheers! David G.
-
The trestle structure looks great, I'm also liking all the clutter. David G.
-
Those are some good, clean looking adjustments. Nicely done! David G.
- 56 replies
-
- 1
-

-
- lamborghini
- countach
- (and 1 more)
-
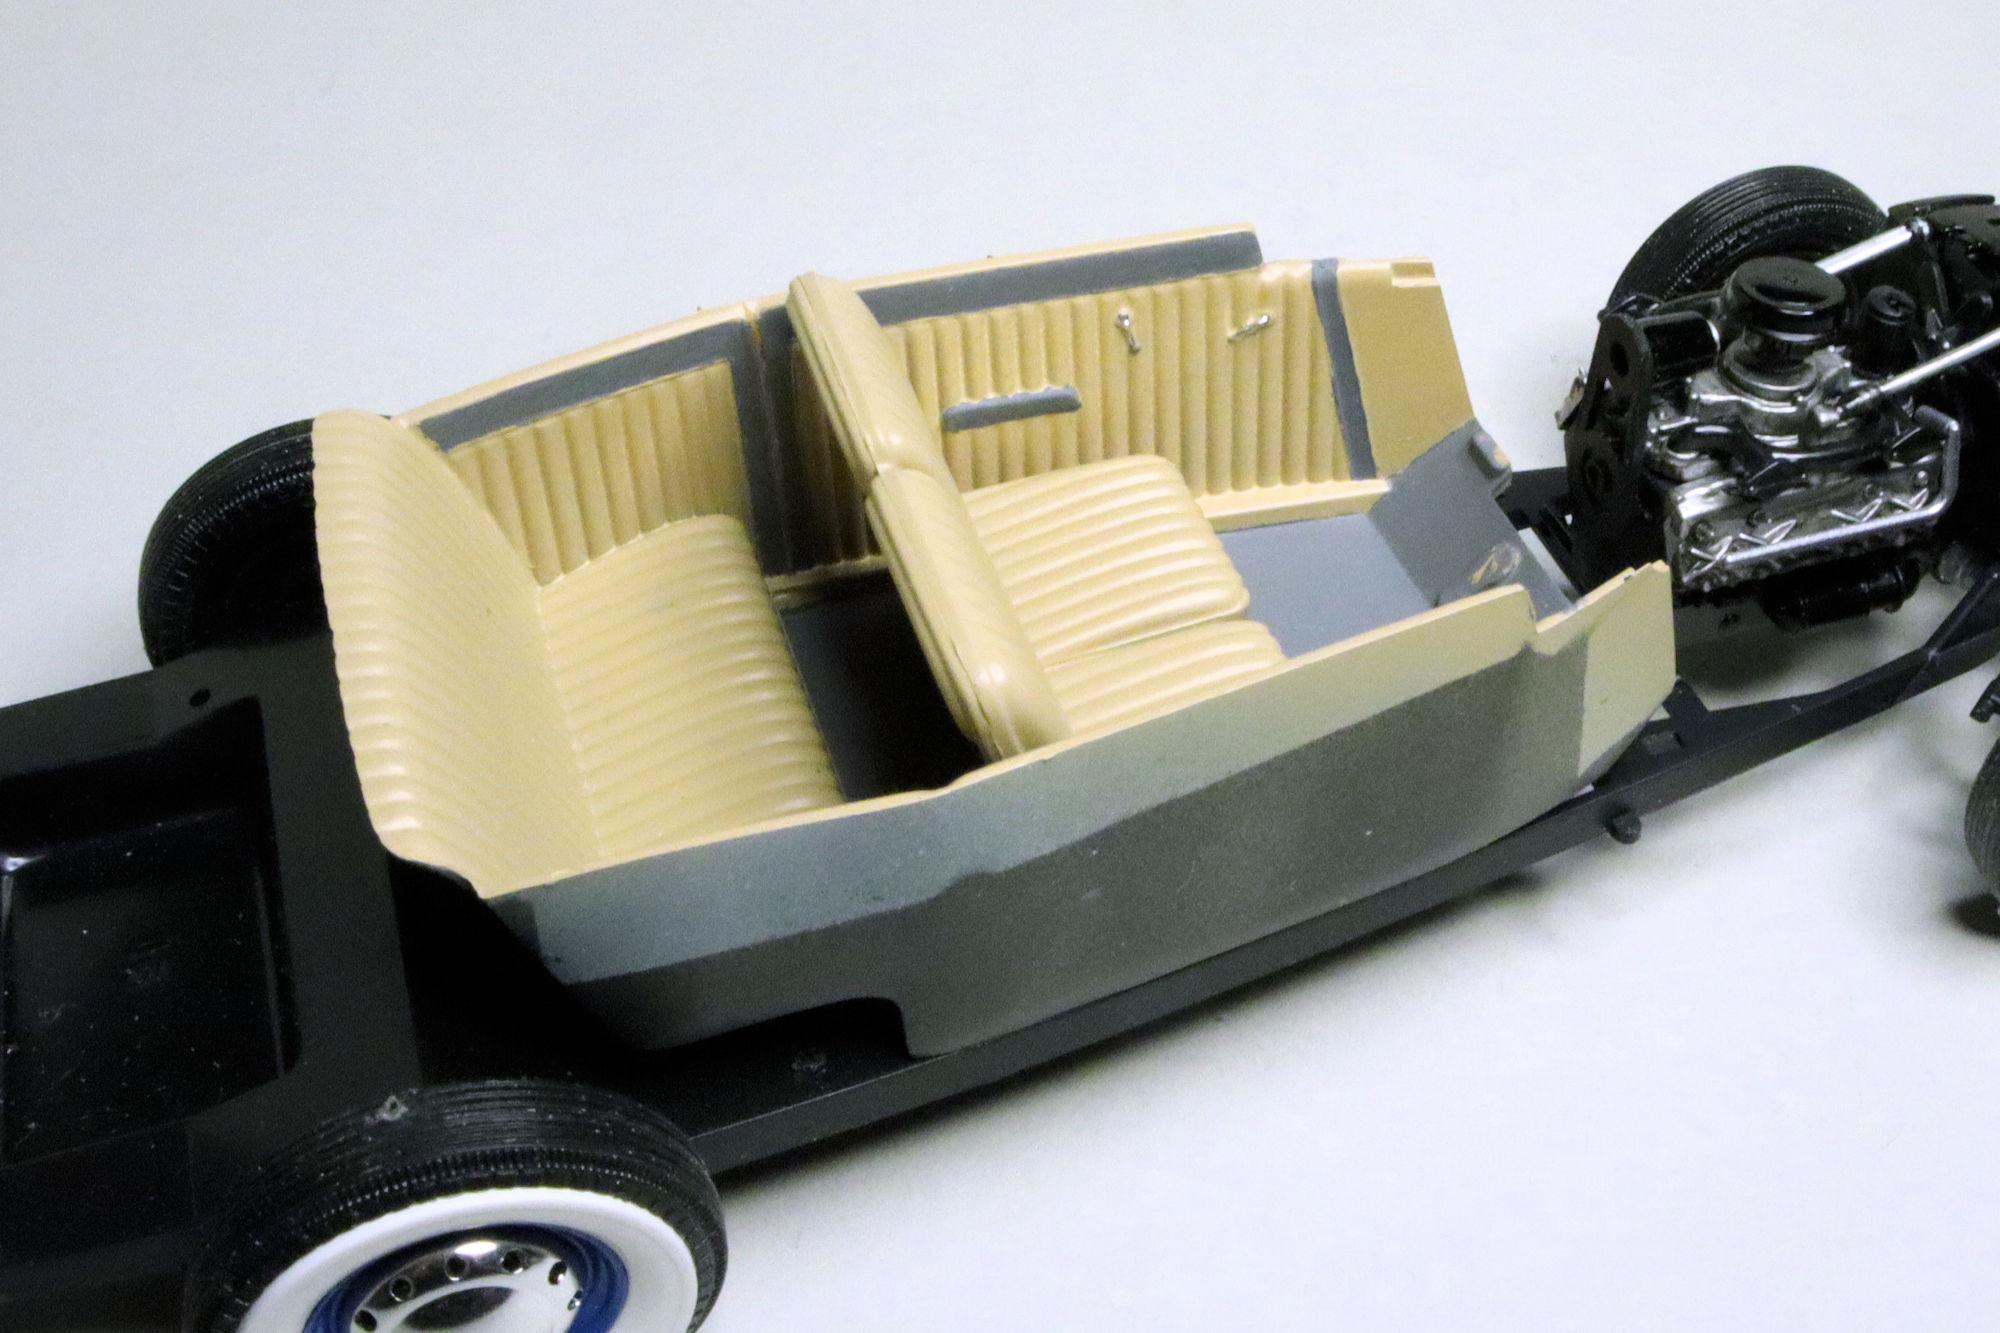
Hello Everybody! I've been having a little trouble with my finger tips drying and splitting due to the cold, dry winter weather so I took a week off building to allow my poor little fingies to heal up a bit. They're not completely healed but they're getting better. So in celebration, here's an update! I've decided on the trim color for the interior, Tamiya XF-75 IJN Gray. The dashboard has been painted Tamiya TS-93 Pure Blue to match the body color. There wasn't a lot of relief to work with when it came to detail painting the instruments so I did the best I could. With the dashboard complete, the steering wheel should be next so here it is. It's been painted Tamiya TS-46 Light Sand to match the upholstery with Molotow chrome accents. That's all for this update. As always, thanks for following along and please feel free to share your thoughts and views. David G.
-
Revell's Peterbilt 359: WIP
David G. replied to David G.'s topic in WIP: Model Trucks: Big Rigs and Heavy Equipment
Thanks for following Gary. Please feel free to use any ideas or techniques I show here, chances are pretty good that I stole them from someone else anyway! -
Looking good Marcel! I'd go with the more detailed turbo too. David G.
- 56 replies
-
- 1
-
-
- lamborghini
- countach
- (and 1 more)
-
A one-piece body and cab? Interesting. For some reason I'm picturing this finished in a turquoise blue with white accents. David G.
-
It's a good start on the body Daniel. Of course I'm interested to see how it all plays out. You know, with the decals you were working on last year. David G.
-
Revell's Peterbilt 359: WIP
David G. replied to David G.'s topic in WIP: Model Trucks: Big Rigs and Heavy Equipment
Thanks for your suggestion Lucas, I'll certainly keep it in mind. David G. -
I was a Plowboy fan too so I'll be following along. I can't wait to see where you go with this build. David G.
-
The paint looks great Anton! I like the grille too. David G.
-
The hobos are a nice touch, excellent work on the campfire light! David G.