David G.
-
Posts
11,305 -
Joined
-
Last visited
Content Type
Profiles
Forums
Events
Gallery
Everything posted by David G.
-
It's great seeing you back at this Paul. I think the rail line is a fabulous idea! David G.
-
Amazing builds, both of them Roger. David G.
-
Great looking builds for the year Bruce! I really like the Cadillac and the Fergie. That tractor is an unusual kit, I think I remember following your WIP on it. Who makes that, what scale is it and where can I get one? Thanks, David G.
-

No completions for '24, but 4 a little closer
David G. replied to Ace-Garageguy's topic in WIP: Model Cars
Bill, the level of detail and accuracy you work toward takes much more time and effort than just gluing together pieces from a box and slapping on some paint. I'm impressed that you have this many to show us. I do enjoy following your builds when you have time to work on them. David G. -
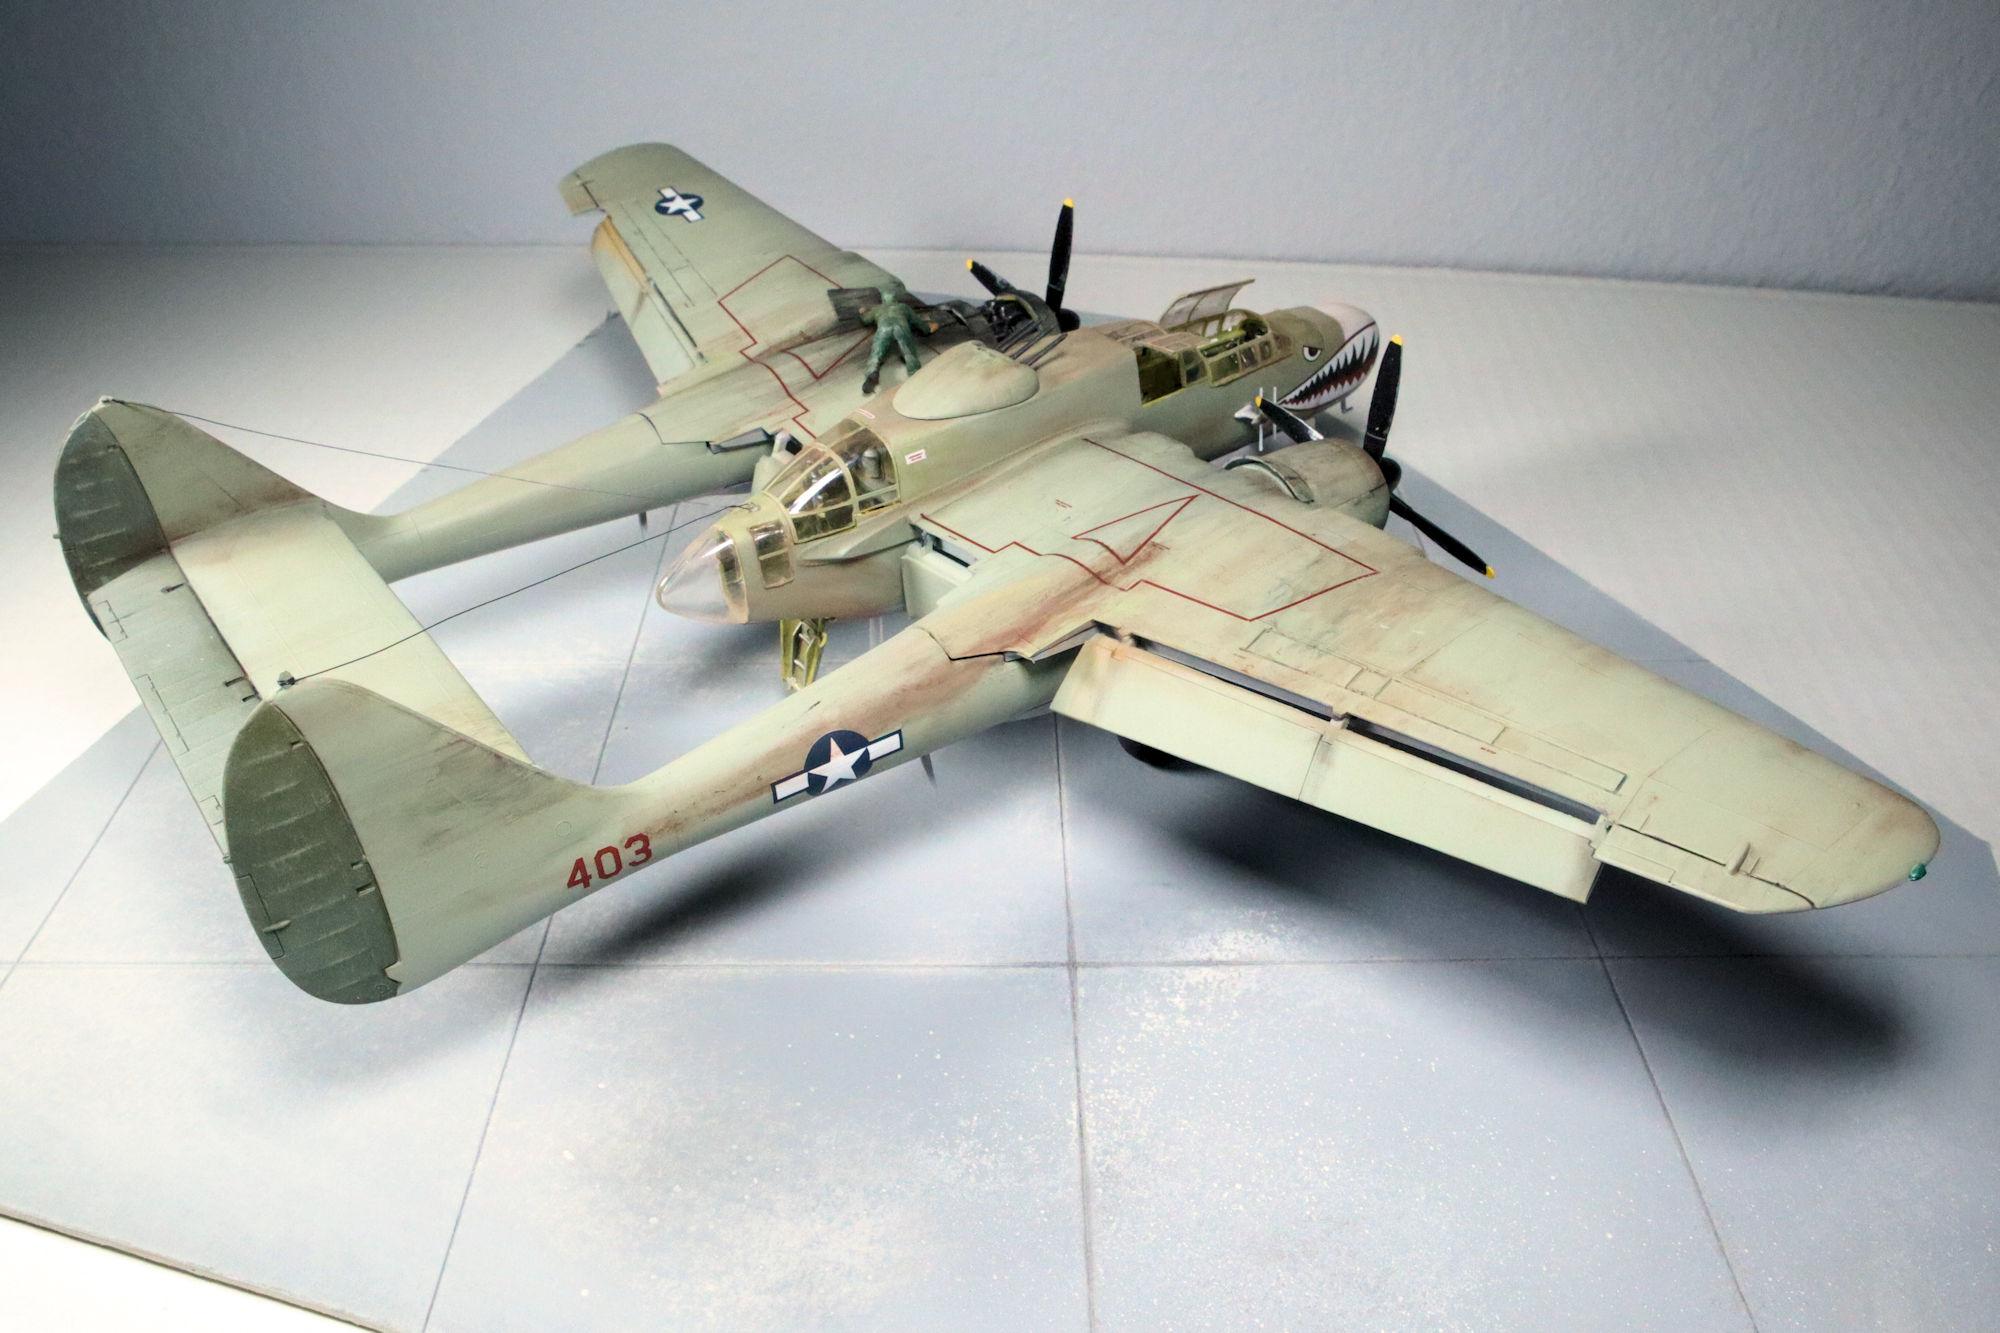
Hello everybody! I was finally able to get the photo upload working for the previous post, so in celebration, here's another set! I made a tarmac to park it on from an old piece of artboard. Though not very visible, the interior has some nice detail. I used some thin gauge steel wire for the antenna. I think one of the features that first appealed to me years ago was the removeable panels and exposed engine. I still like them. As always, thanks for taking the time to look and please feel free to post your comments. David G.

-
Thank you Mark! =D-
-
Yeah, I had to give it a shot Len. Like I said, it's a bit more work than I'm willing and able to do right now. I've discovered that one of the keys to life is effective management of one's own expectations. Thanks for the link Topher, there is some fascinating information there. One of the obstacles is that the model kit headlight proportions don't relate well to their real-world counterparts. This makes finding the proper pivot point a matter of trial and error rather than relying on the prototype example. There also seems to be some issues with the model itself. According to @lordairgtar I did do a quick online search to see if I could find the directions for the edition of the kit mentioned above, but no luck. Having an example to work from would have been exceedingly helpful. At that point, I decided just to move on with the build. Thank you kindly Bob. David G.
-
A nice variety of builds for the year. I really like the custom bubble-top Ford and the weathered pickup. David G.
-
That's a great looking set for the year, I love the Roadkill cars! David G.
-
Alaskan Hauler refurbishing project
David G. replied to Jürgen M.'s topic in WIP: Model Trucks: Big Rigs and Heavy Equipment
This looks like it should be a fun and satisfying overhaul Jürgen. I'm interested to see how the improvements work out. David G. -
Steve, your builds are without a doubt the most detailed, accurate and realistic models I've ever seen. I always enjoy following your WIP threads, thanks for posting them for us. David G.
-
Thank you Bob! =D-
-
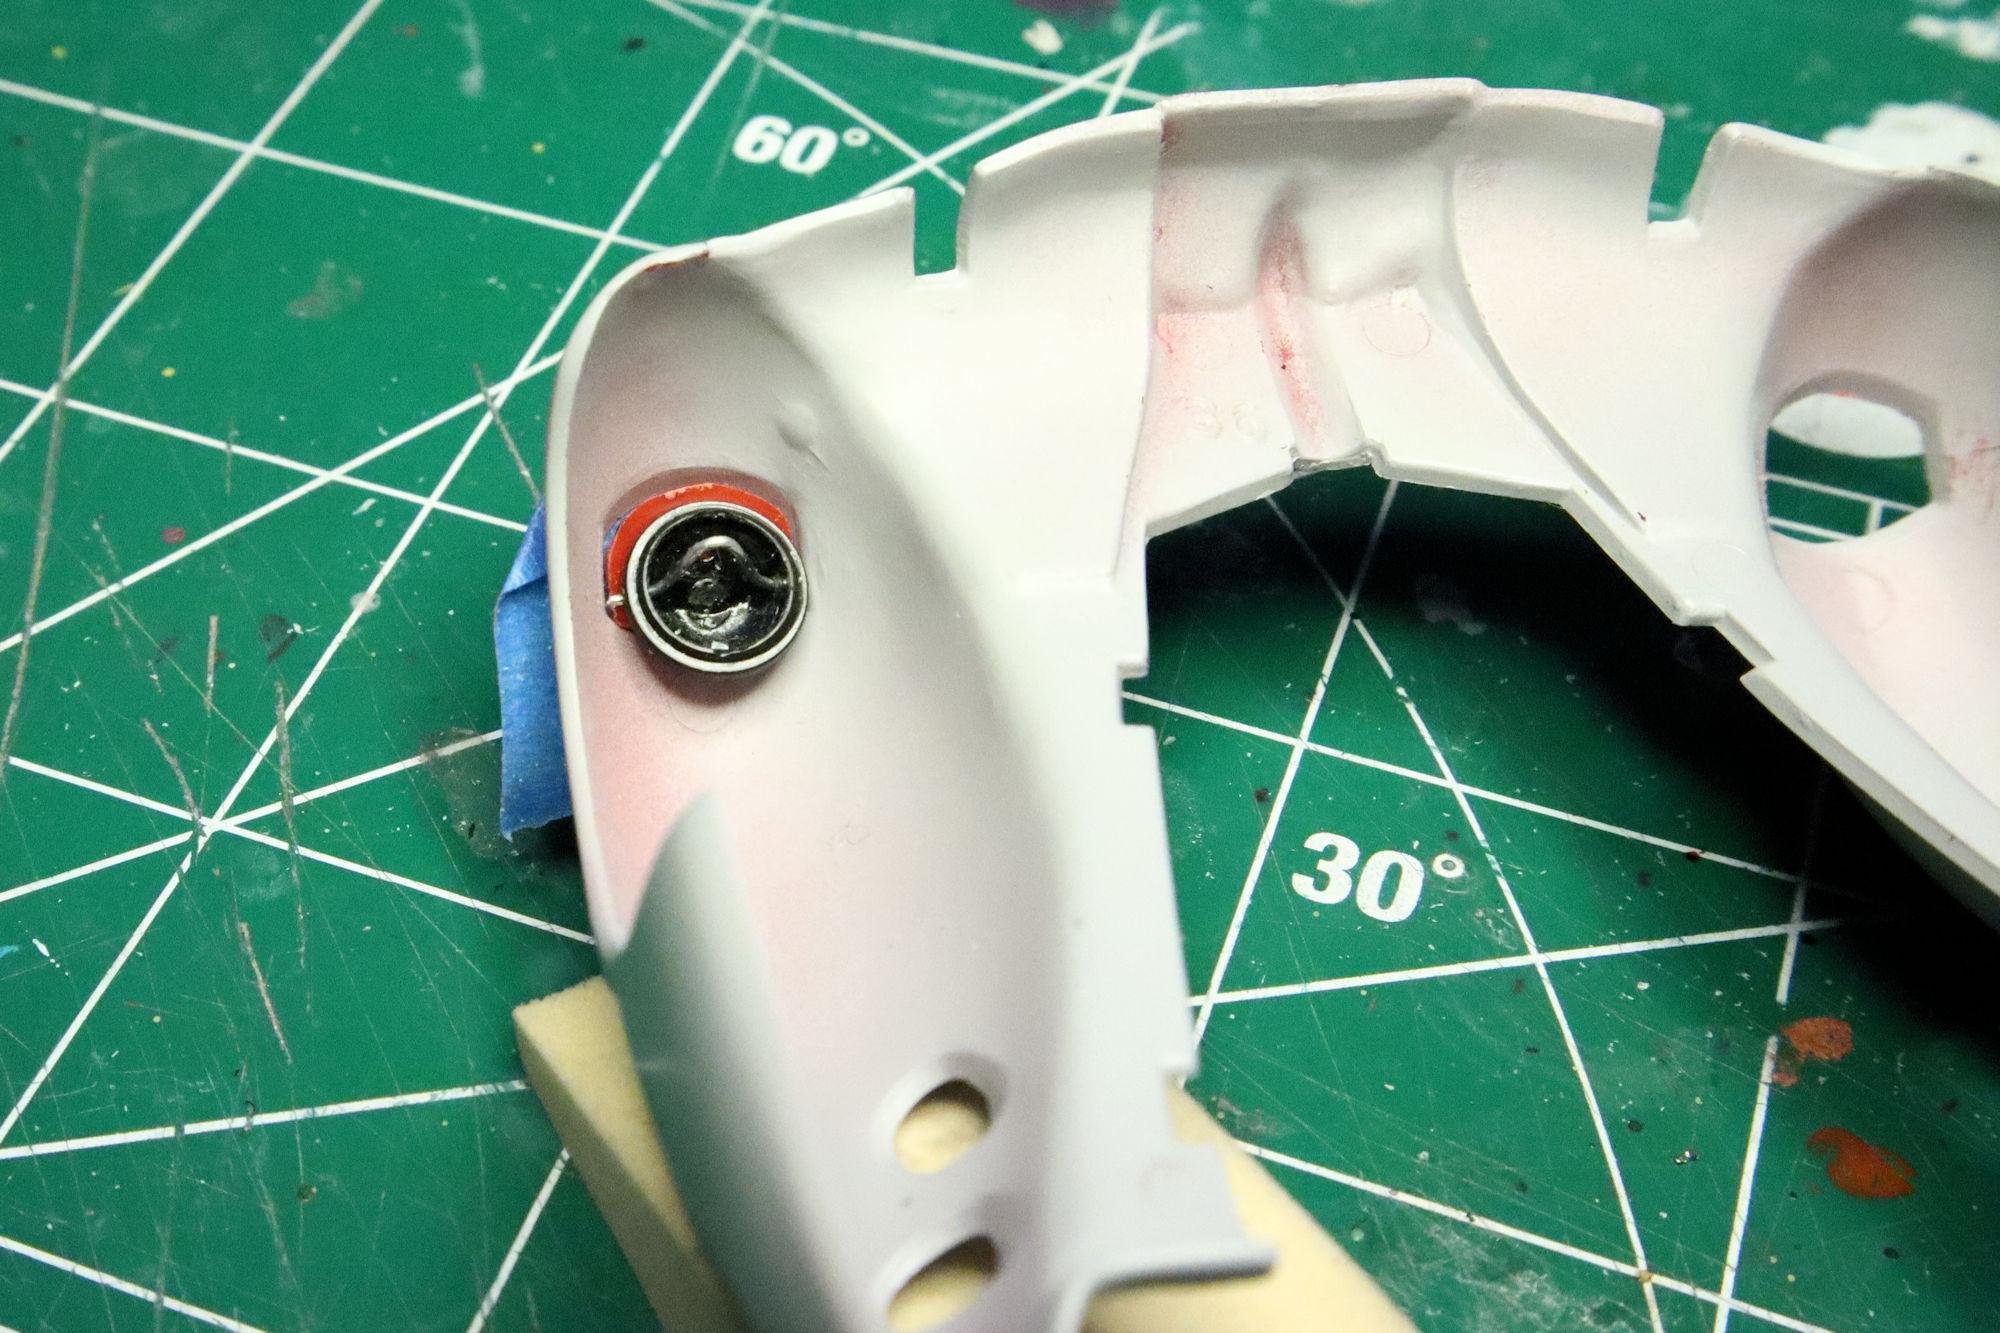
Hello Everybody! With my push to get the P-61 completed by year's end I haven't totally forgotten about the 1937 Cord. I've selected Tamiya TS-46 Light Sand as the primary color for the top and upholstery. I think the colors will work well together. Thank you all for your suggestions. The next item on my list was to have a look at the famous hideaway headlights to see if I could find a way to make them operable. My first thought was to make a fulcrum for the roll down headlights to roll down upon. I drilled one out and inserted a wire where I thought it would provide the best pivot point. After many attempts I concluded that the plastic in the fender and the headlight cover were both too thick to allow for a single pivot point that would permit the headlight assembly to roll through the opening in the fender. Due to the thickness of the headlight cover and the shallowness of the headlight bucket, the headlight assembly would not only have to roll up but slide forward and upward to arrive in the proper opened position. To make the headlights functional I would have to reduce the thickness of the headlight cover and the fender while creating a mechanism that moved on two or three axes in sequence. Right now, that's a bit beyond my skill level. And it's a bit more work than I want to do for this build. On to the next activity! As always, thanks for taking the time to look and please feel free to post any comments you may wish to share. David G.
-
Thank you kindly Carl, but as you'll see in the next post, I've found a suitable color. =D-
-
That looks great! I can't wait to see it with the decals. David G.
-
So many builds and each incredibly well done and such a variety! You continue to amaze and impress me Bill! Well done! Daid G.
-
Thank you very kindly Anton. =D-
-
Thank you very much David. Yeah, sometimes it's like I have my own personal comedy troupe following me around. I had a delightful and uneventful holiday season, thank you. I hope yours was pleasant as well. Two below is a bit cold for your part of the world, are you expecting any snow? I do look forward to seeing what you're brewing up David, I'll be sure to keep an eye out. Thanks again and I wish you and yours a happy, healthy and prosperous 2025. David G.
-
Thank you most kindly Niko! A very happy, healthy and prosperous New Year to you too. Thank you very much Steve! I just wish I'd had the foresight to wait for AMT to release the actual ambulance version rather than go through all that work to convert the Surf Shark back into an ambulance. 🙄 But I had fun with it nonetheless. Now I have the Ambulance which I plan to convert into a hearse. ...but maybe I should wait to see if AMT releases a hearse version? 🤔 Thanks again Steve and happy 2025! David G.
-
It looks great John! While you have the Molotow out, don't forget the badges on the fenders behind the wheels. David G.
-
Nice fabrication work on the steering linkage Greg! If they don't have what you want, build it yourself! David G.
-
That fuel plumbing is some amazing work Daniel! David G.
-
A great looking set of builds for the year! David G.
-
I'm really diggin' that Plymouth wagon! The Chevy truck is cool too, that's a fun kit to build. David G.
-
A great looking build! David G.