David G.
-
Posts
11,305 -
Joined
-
Last visited
Content Type
Profiles
Forums
Events
Gallery
Everything posted by David G.
-
Nicely done! David G.
-
Thank you Joe. I've selected Tamiya TS-46 Light Sand as the primary color for the top and upholstery. It's not exactly the color I had in mind but it's close enough. I'll probably throw in some blue accents, maybe a navy blue carpet. I have a little work done with that but not yet enough to make an interesting update. So... soon. Thanks for checking in, I appreciate it Joe. =D-
-
 Thank you Joe, I'm glad to know that you liked the build thread. I do enjoy making them almost as much as I like building the models. I thought that's why weathering was invented... to cover errors and mistakes. The added realism being just a side benefit. Yeah, I was a little concerned about both the weathering being a little too heavy and the shark mouth being a little too much. But it seems that they both worked out well, thanks for confirming that. I hope your 2025 is happy, healthy and productive. Thanks again, David G.
 -
Thank you Bruce, I'm glad you like it. Thanks Chris. Thank you Nathan, I appreciate that. Thank you Steve, I'm glad to know that you enjoy the effort I've put into these. Thanks for sharing your story about your dad too, I'm sure he had lots of cool stories. Thank you kindly Phil. Thank you Larry. Thank you much Al. Thank you very much Ken. Thanks Bill, much appreciated. Thank you my friend! Thank you Harry, that's most kind. Thank you all again, here's to a happy, healthy and productive 2025! David G.
-
An excellent set, nice looking detail and paint. David G.
-
I remember following along on most of these as you built them Donald. It's great seeing them all together in one post like this. Fabulous builds, each one. David G.
-
A great looking set for the year! I really like that Chevy truck, excellent color choice. David G.
-
An excellent set for the year! I remember following your WIP thread on the Plymouth, great stuff! David G.
-
That car's got a lotta tennis balls! =D-
-
Who doesn't love a mock-up? Let's see yours!
David G. replied to Belairconvertable's topic in WIP: Model Cars
Retconning a model kit! Cool! =D- -
The march continues! Nice recovery on the seat issue. David G.
-
The foil work is coming along nicely John. Patience is the key, but you seem to know that already. David G.
-
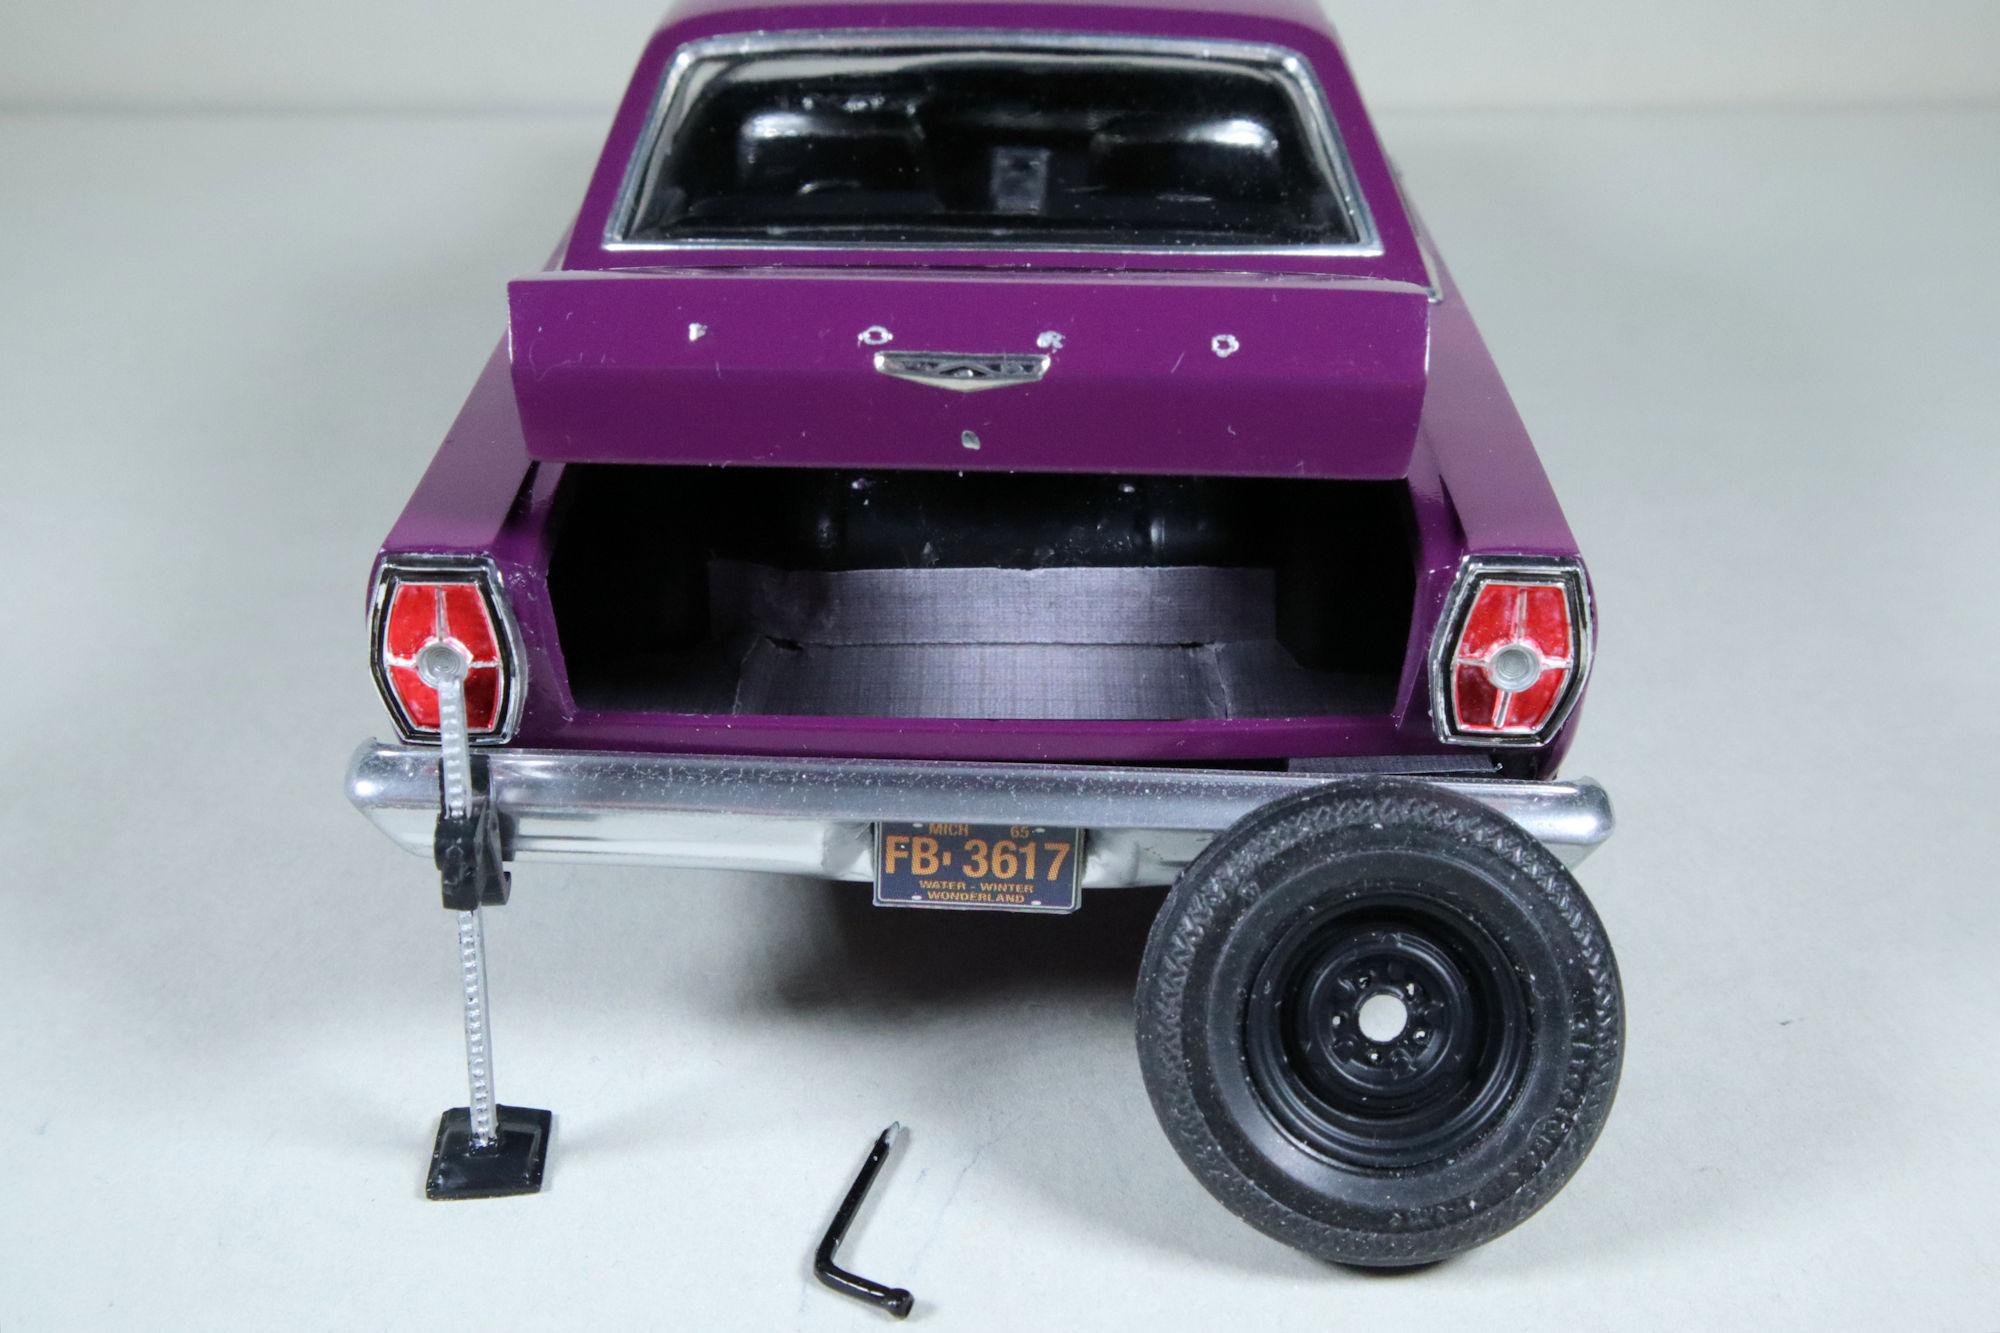
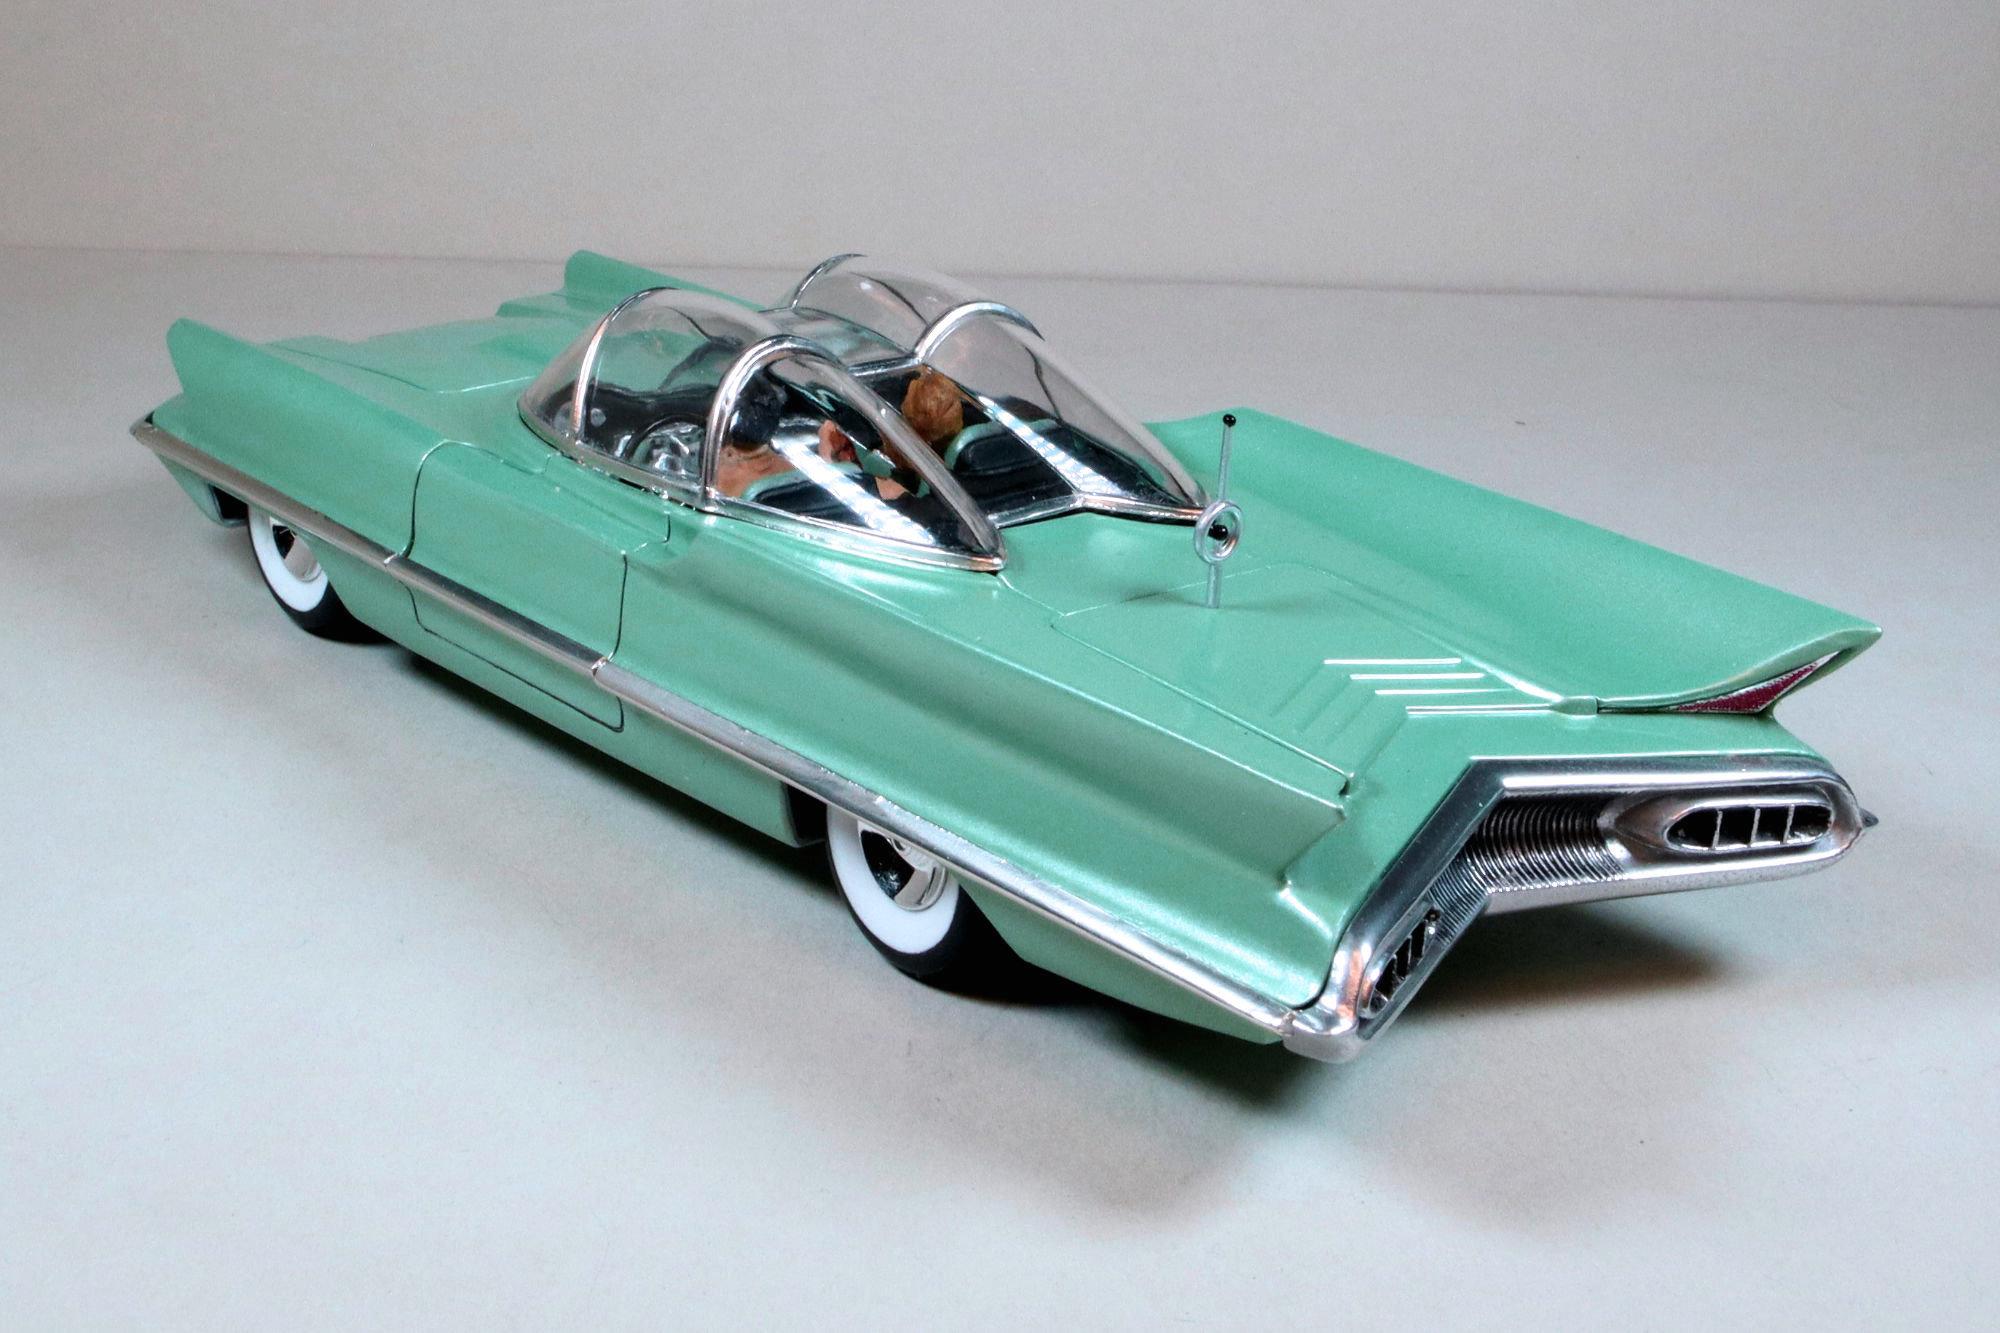
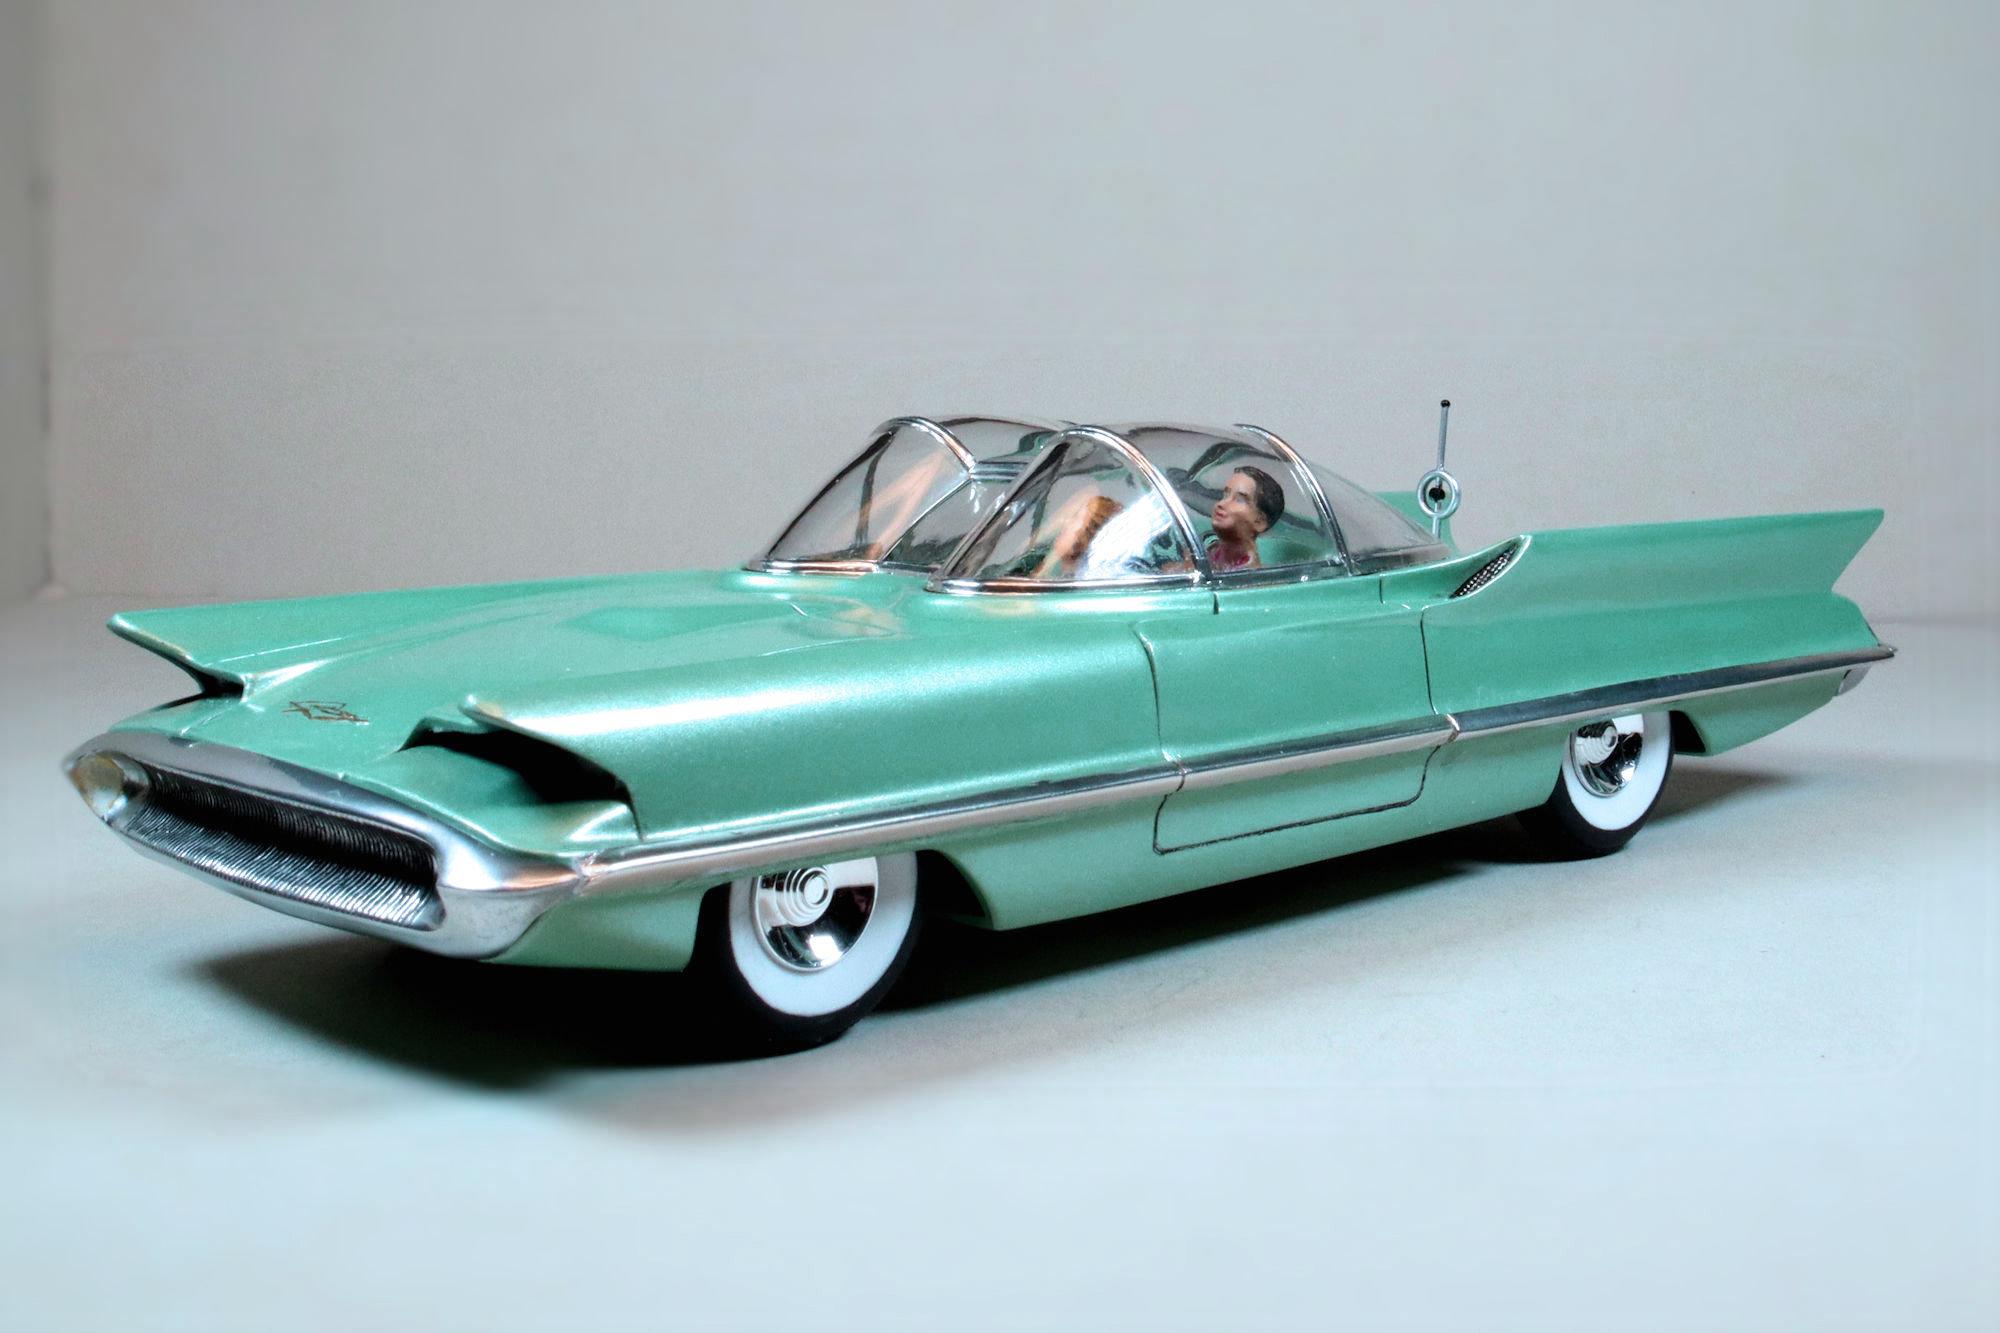
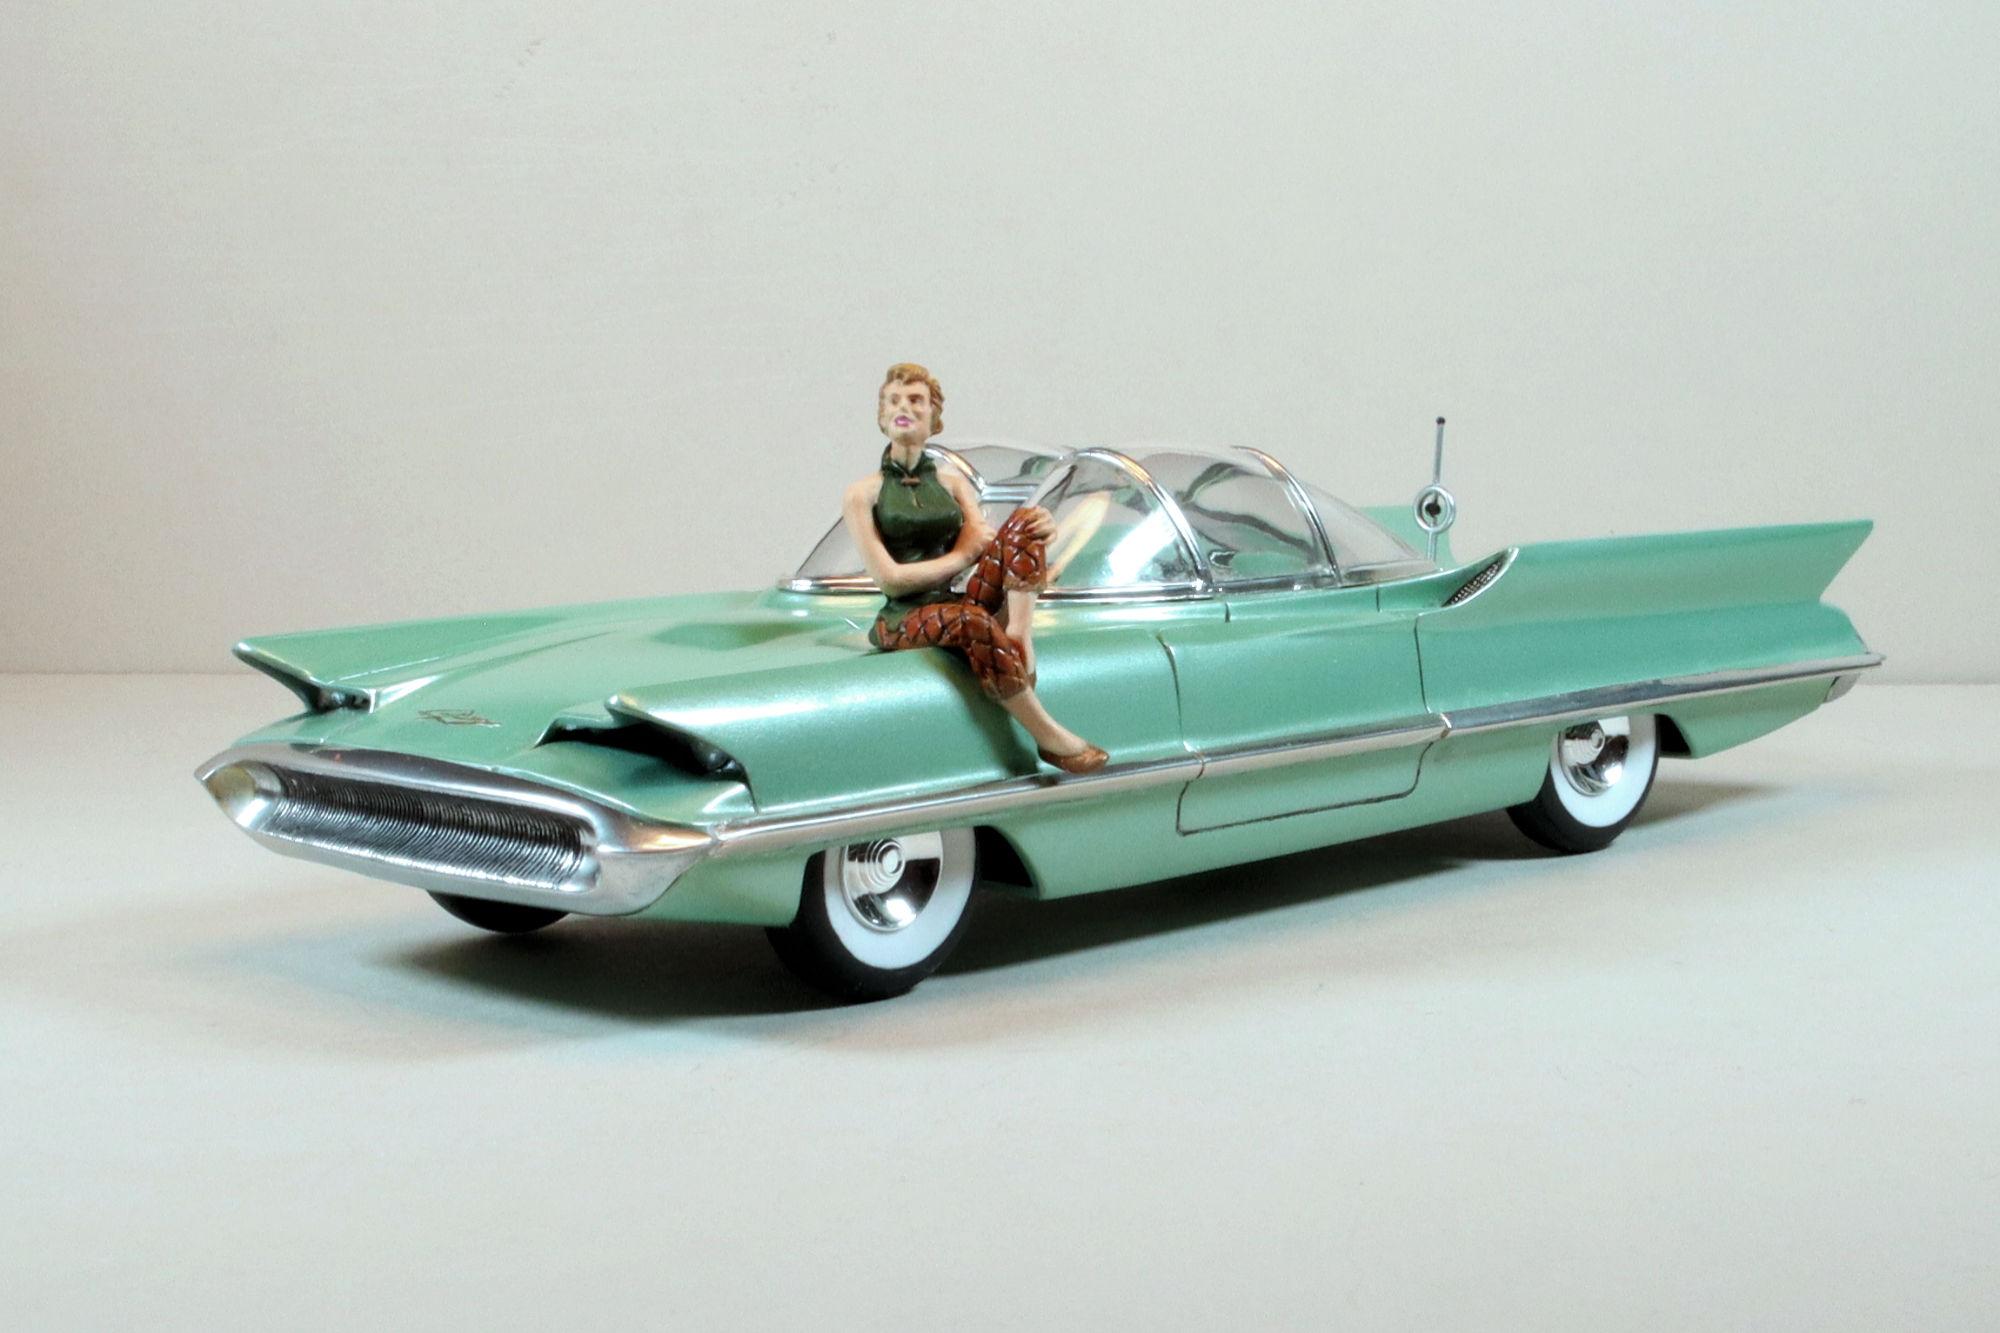
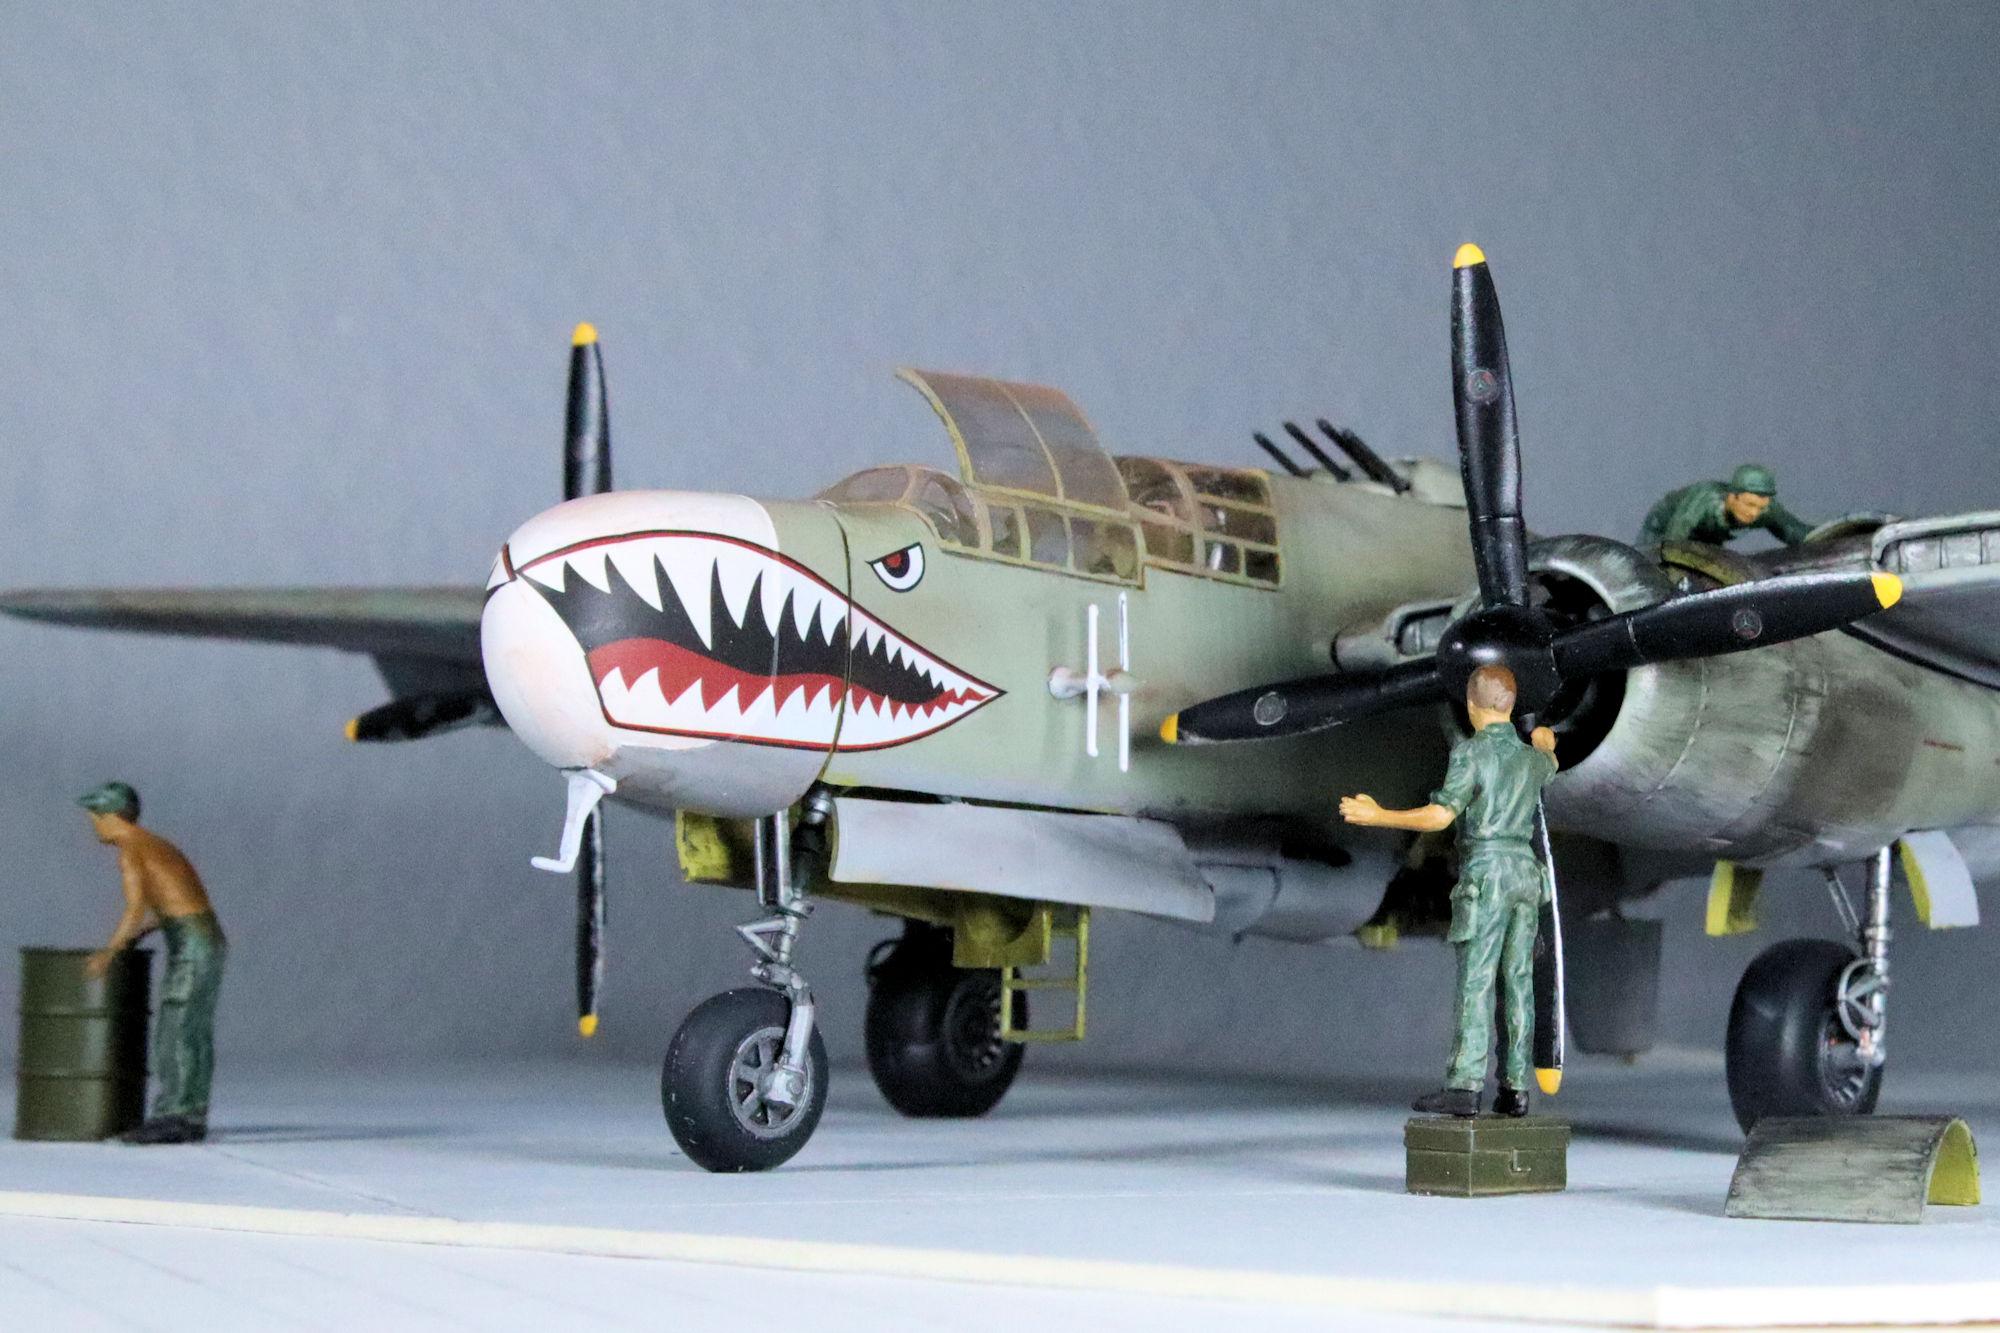
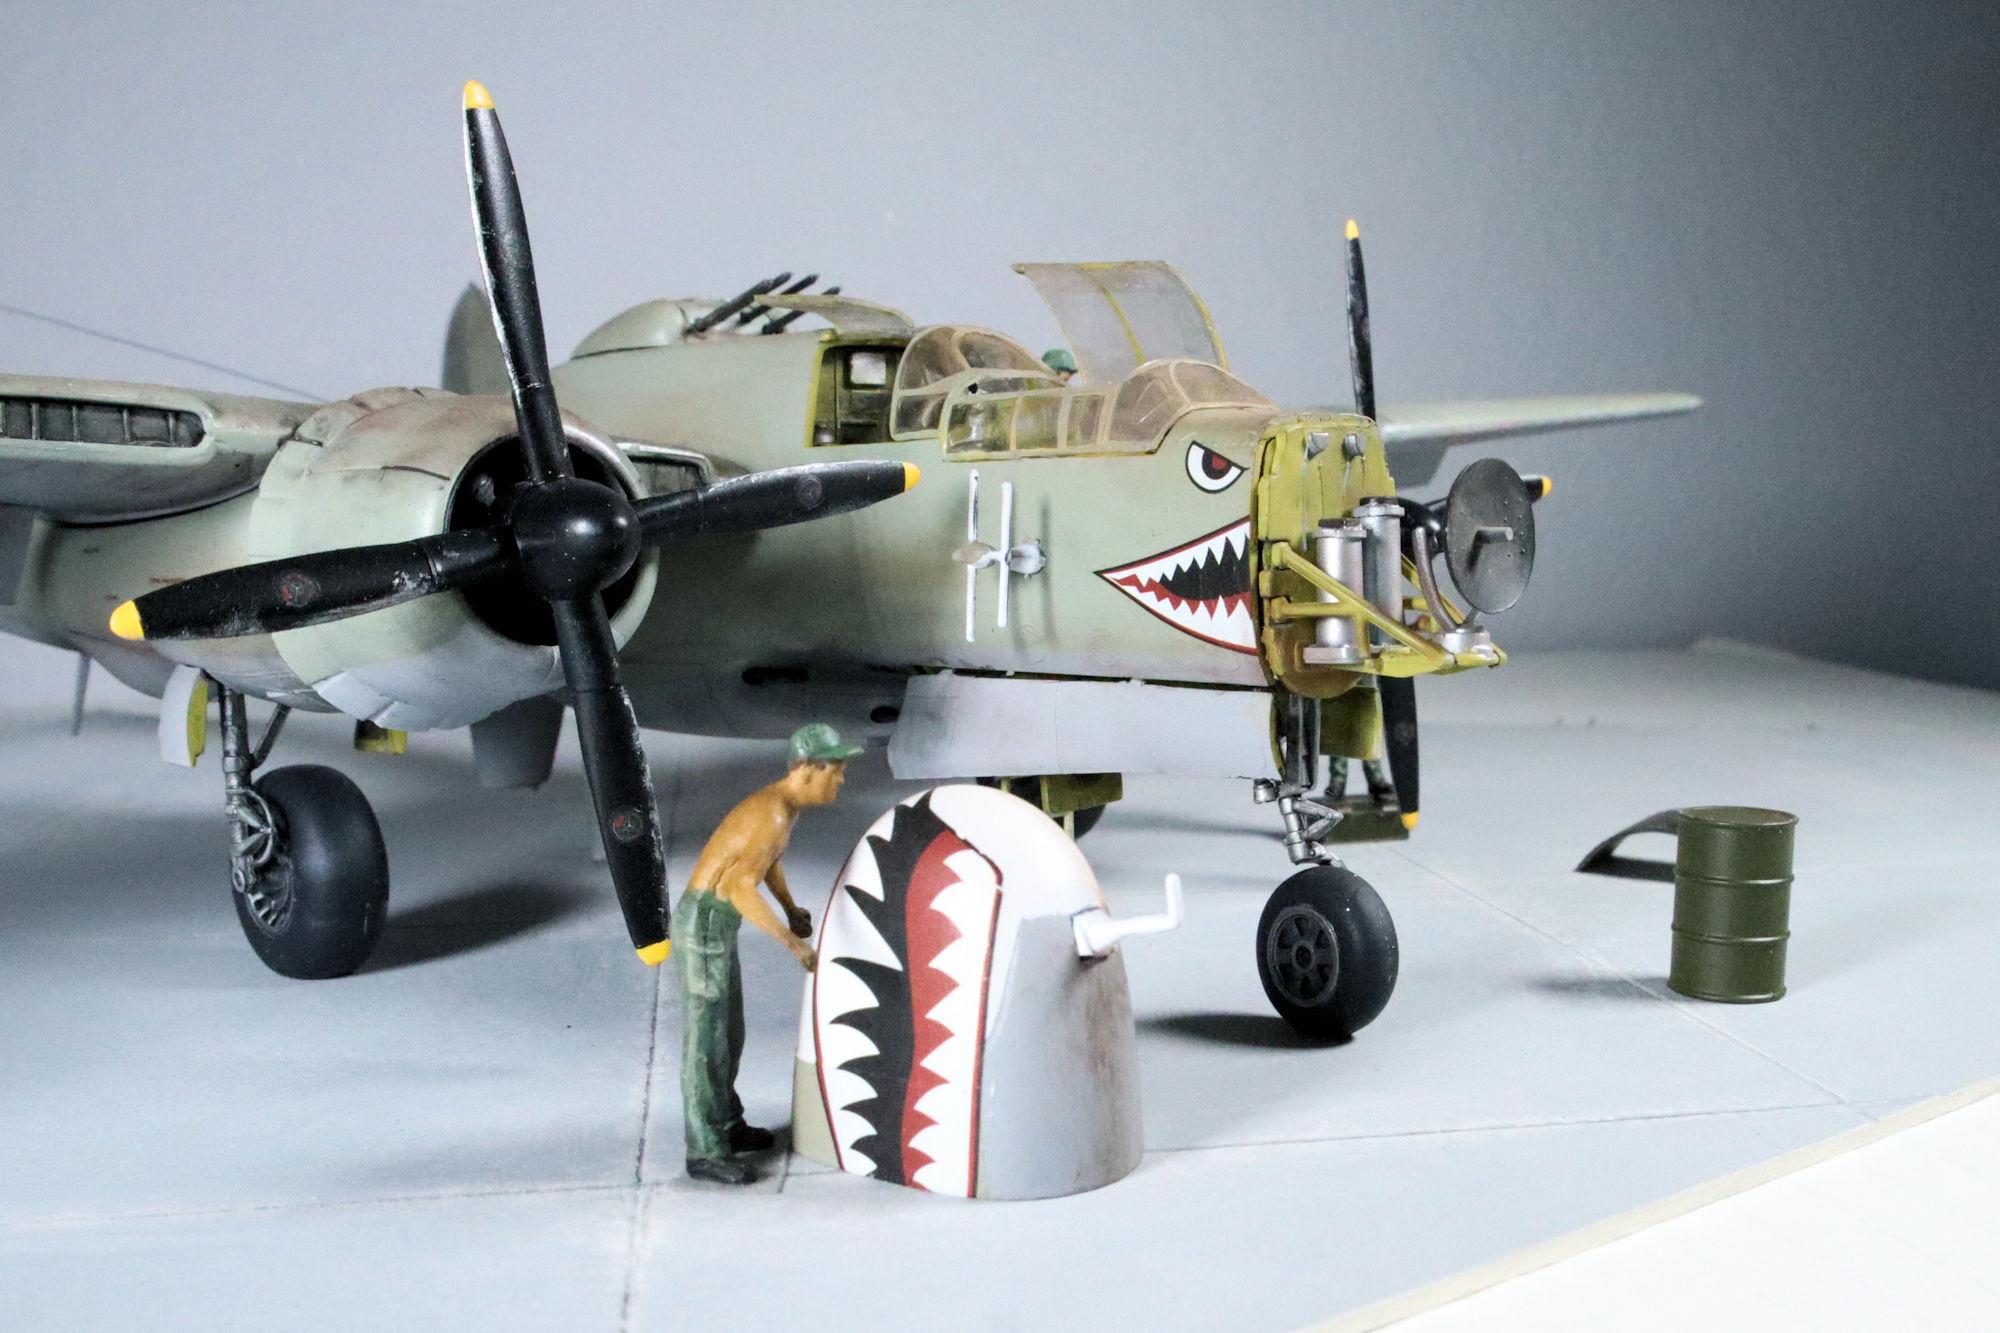
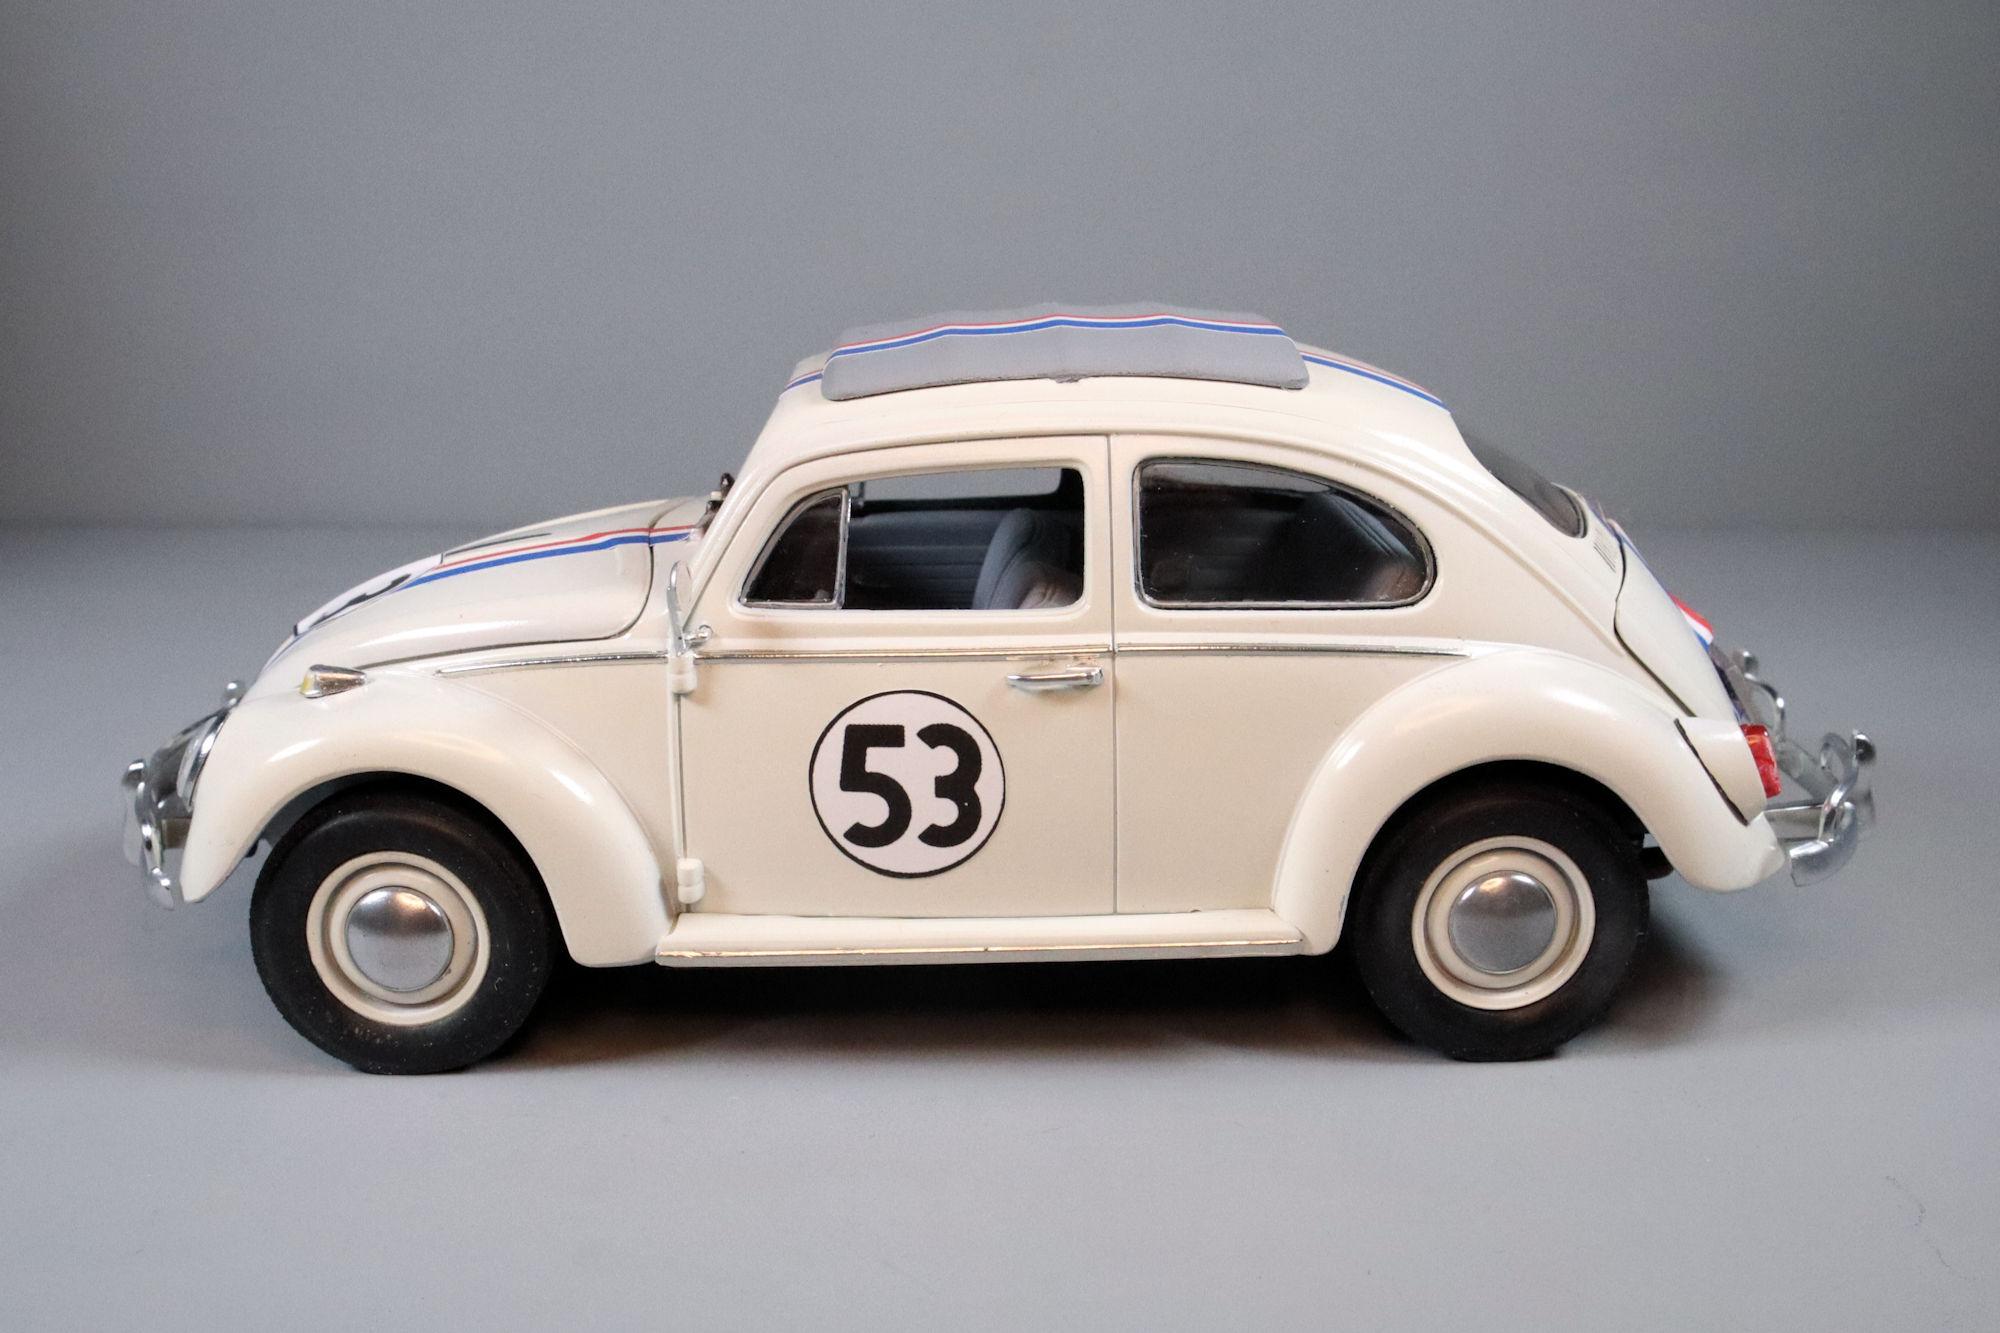
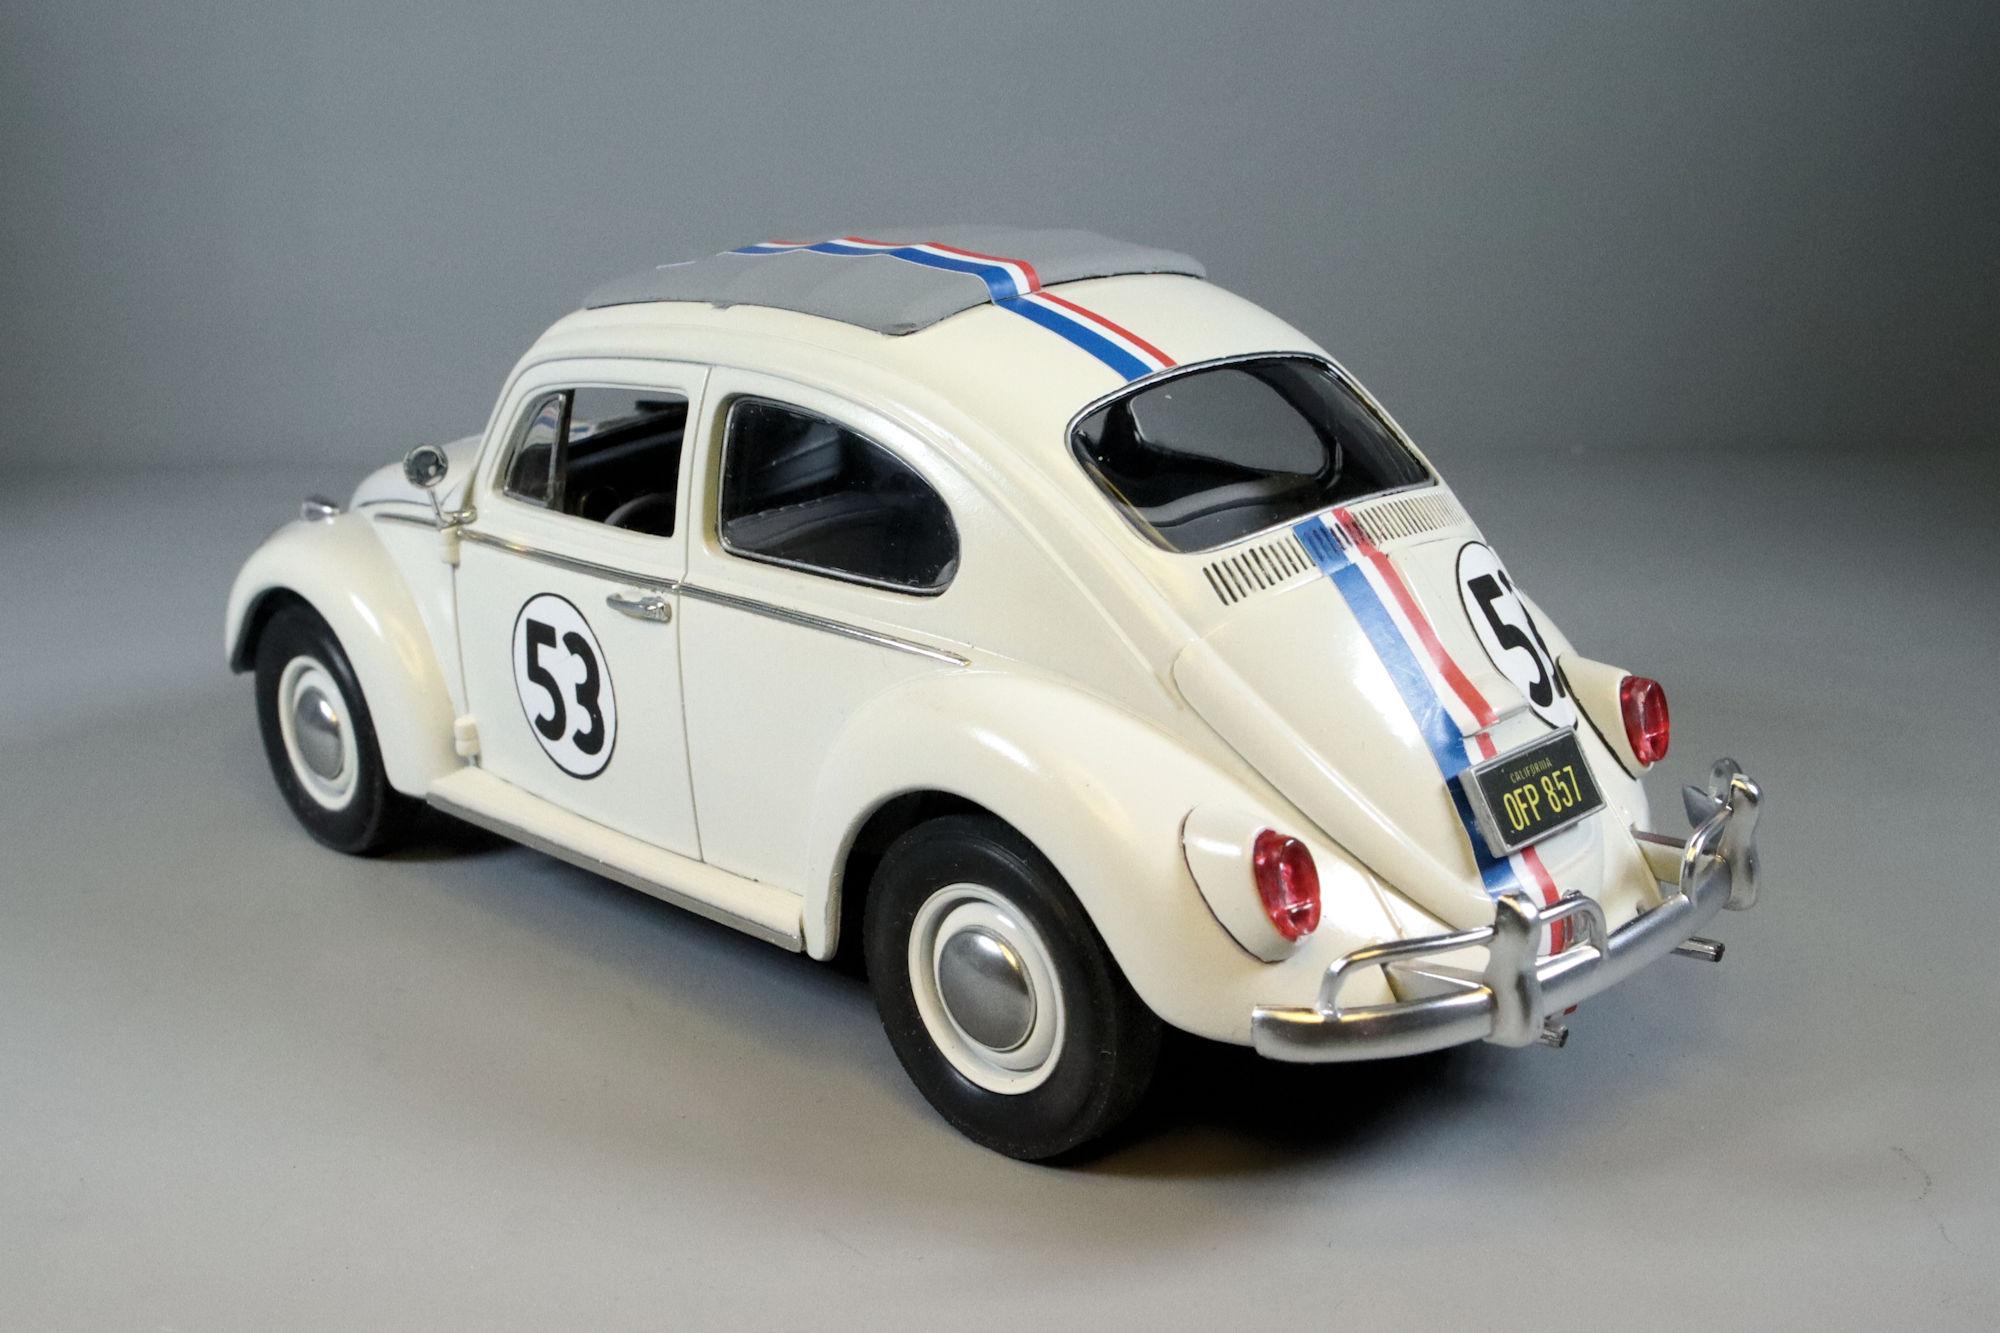
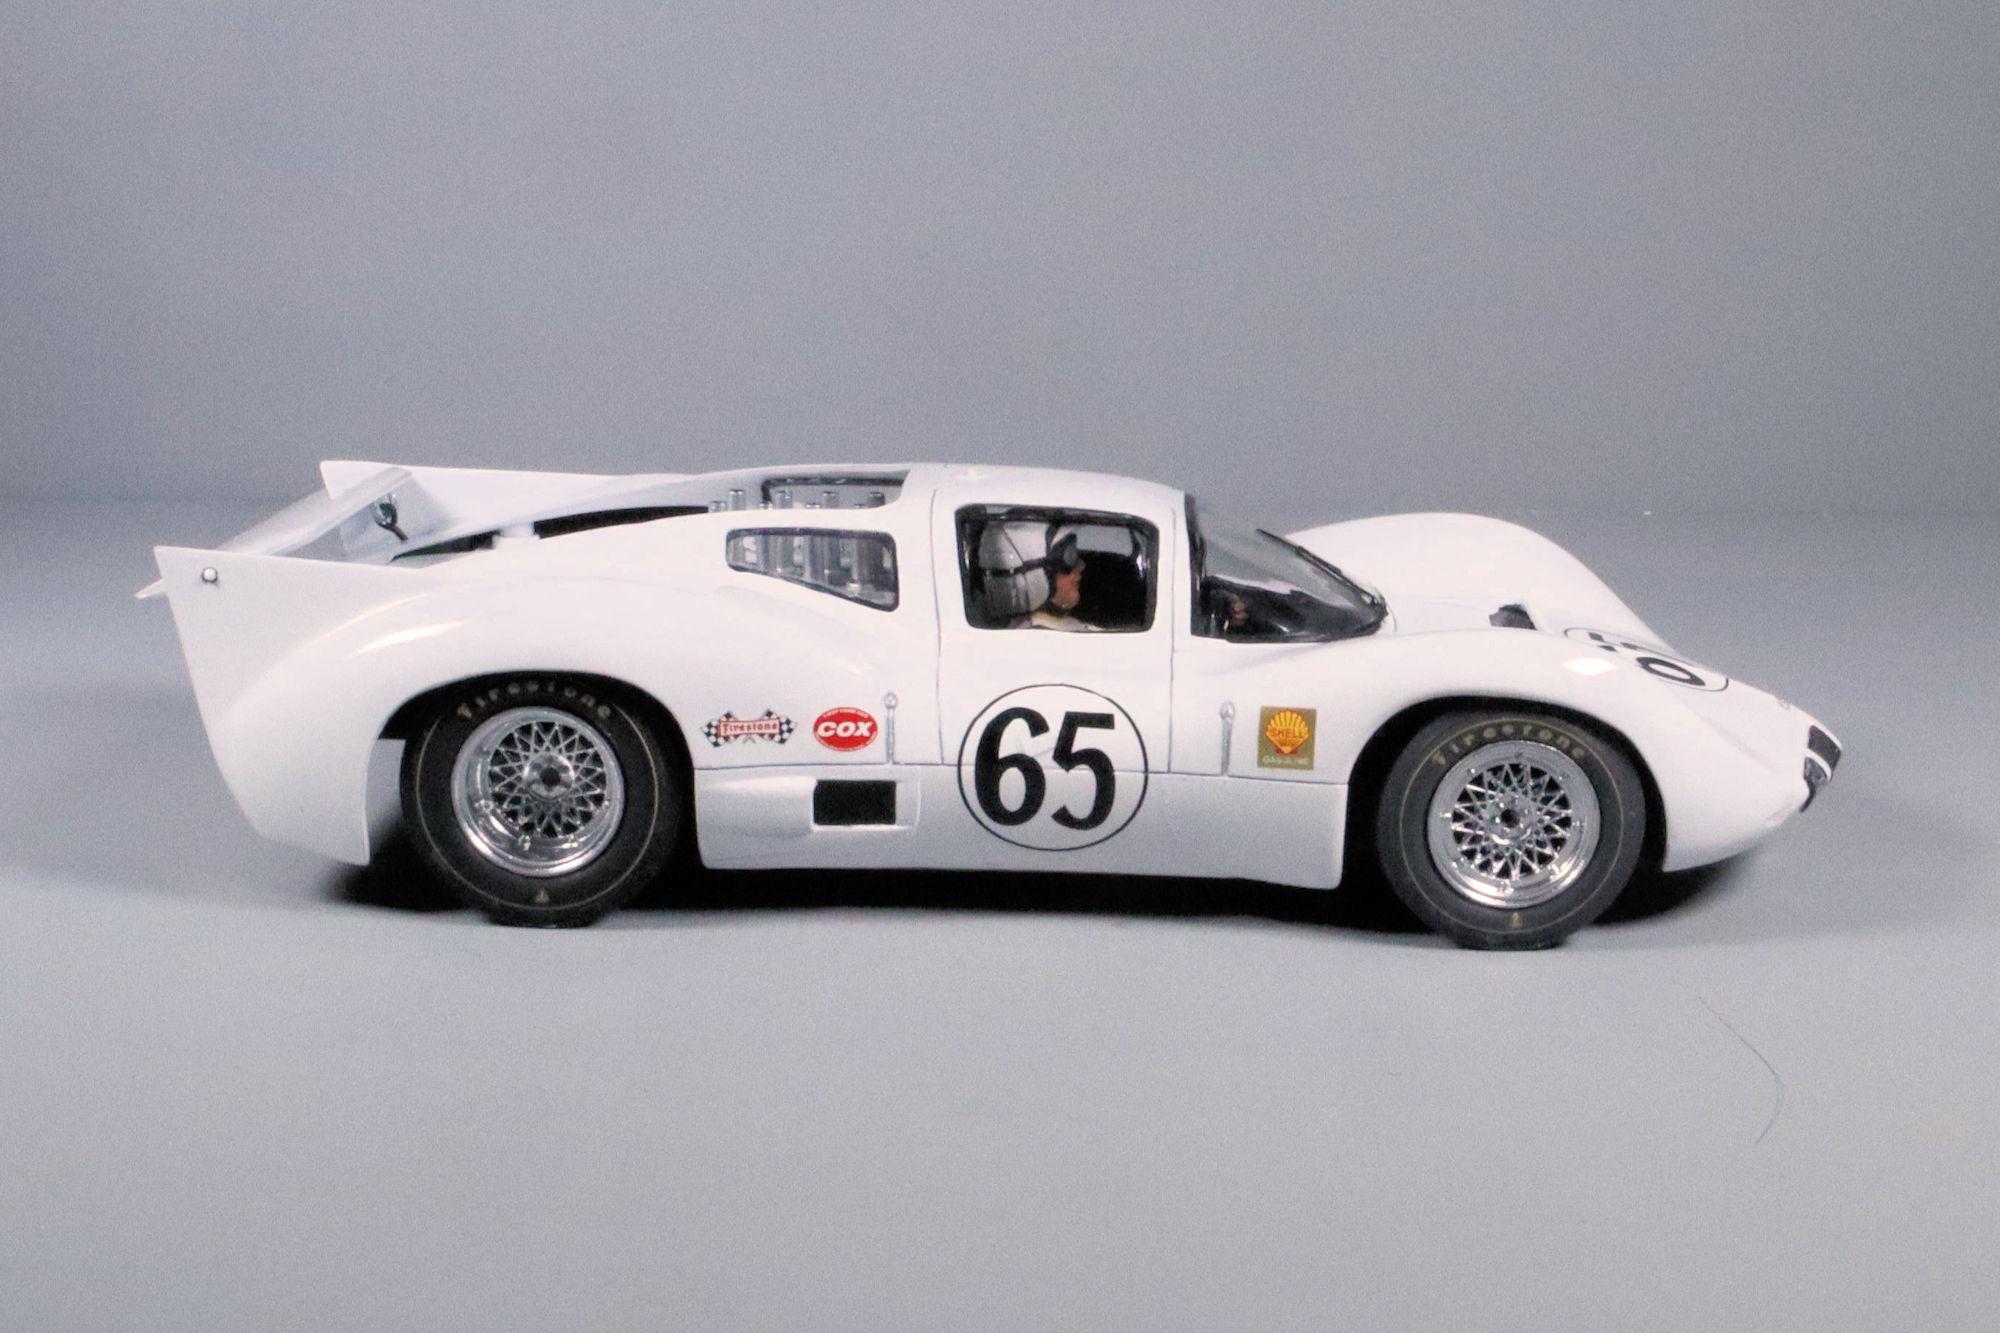
Hello Everybody! 2024 was my most productive model building year to date having completed eight builds for the year! Yay for me! My previous best was seven in 2021. 1959 Surf Shark Ambulance Conversion. Started 09/28/2023, completed 03/12/2024 with almost sixty hours invested. Added a gurney from Six Inches Under. Decals from AMT Ambulance plus other sources. Disney's VW Love Bug by Polar Lights. Started 03/10/2024 completed 04/21/2024 with 33.5 hours invested, nearly half of that time was spent trying to find good decals for the race livery markings. AMT's 1957 Ford Hardtop (Fairlane 500) Started on 12/27/2023 and completed on 5/2/2024 with 67.5 hours invested. A straight forward build with opening hood and doors. Monogram's 1966 Chaparral D2 Coupe. Started 04/21/2024 and completed on 06/04/2024 with 24.5 hours invested. A very simple build with custom aftermarket wheels and a pre-painted driver figure. Also my first model of a purpose-built race car. AMT's 1965 Ford Galaxie 500 XL. Started on 05/03/2024 and completed on 09/09/2024 with about 65 hours invested. Most of the challenges in building this kit were due to its age. It's an older kit and the molds are worn out causing casting errors and a general sloppiness that I found myself having to correct on an ongoing basis. Monogram's 1955 Lincoln Futura concept car. Started on 04/09/2024 and completed on 10/27/2024 with about 51.5 hours invested. A simple kit with complex problems. Issues with fit and casting quality due to age and wear of the molds were the main challenges. Aoshima's London Black Cab. Started on 09/09/2024 and completed on 12/12/2024 with about 44.5 hours invested. A rather simple kit with a few minor issues. Mainly the low quality of the castings for the windows, they were hazy and streaked with some noticeable distortion. Other than that, a satisfying build. Revell's P-61 Black Widow Started 06/08/2024 and completed on 12/25/2024 with about 85 hours invested. An old kit that is certainly showing its age. Mold wear has caused a number of fit issues that I needed to address. This is another nostalgia build calling back to my teenage years when I first built this kit. That's it for the year! I wish everybody a happy and healthy 2025. As always, thanks for stopping to look and please feel free to comment. David G.

- 26 replies
-
- 11
-

-
Hello Everybody! I've been having troubles posting photos of this completed build in the "Under Glass" section but I finally got something to work so here's the link: Thanks for your interest and support. David G.
-
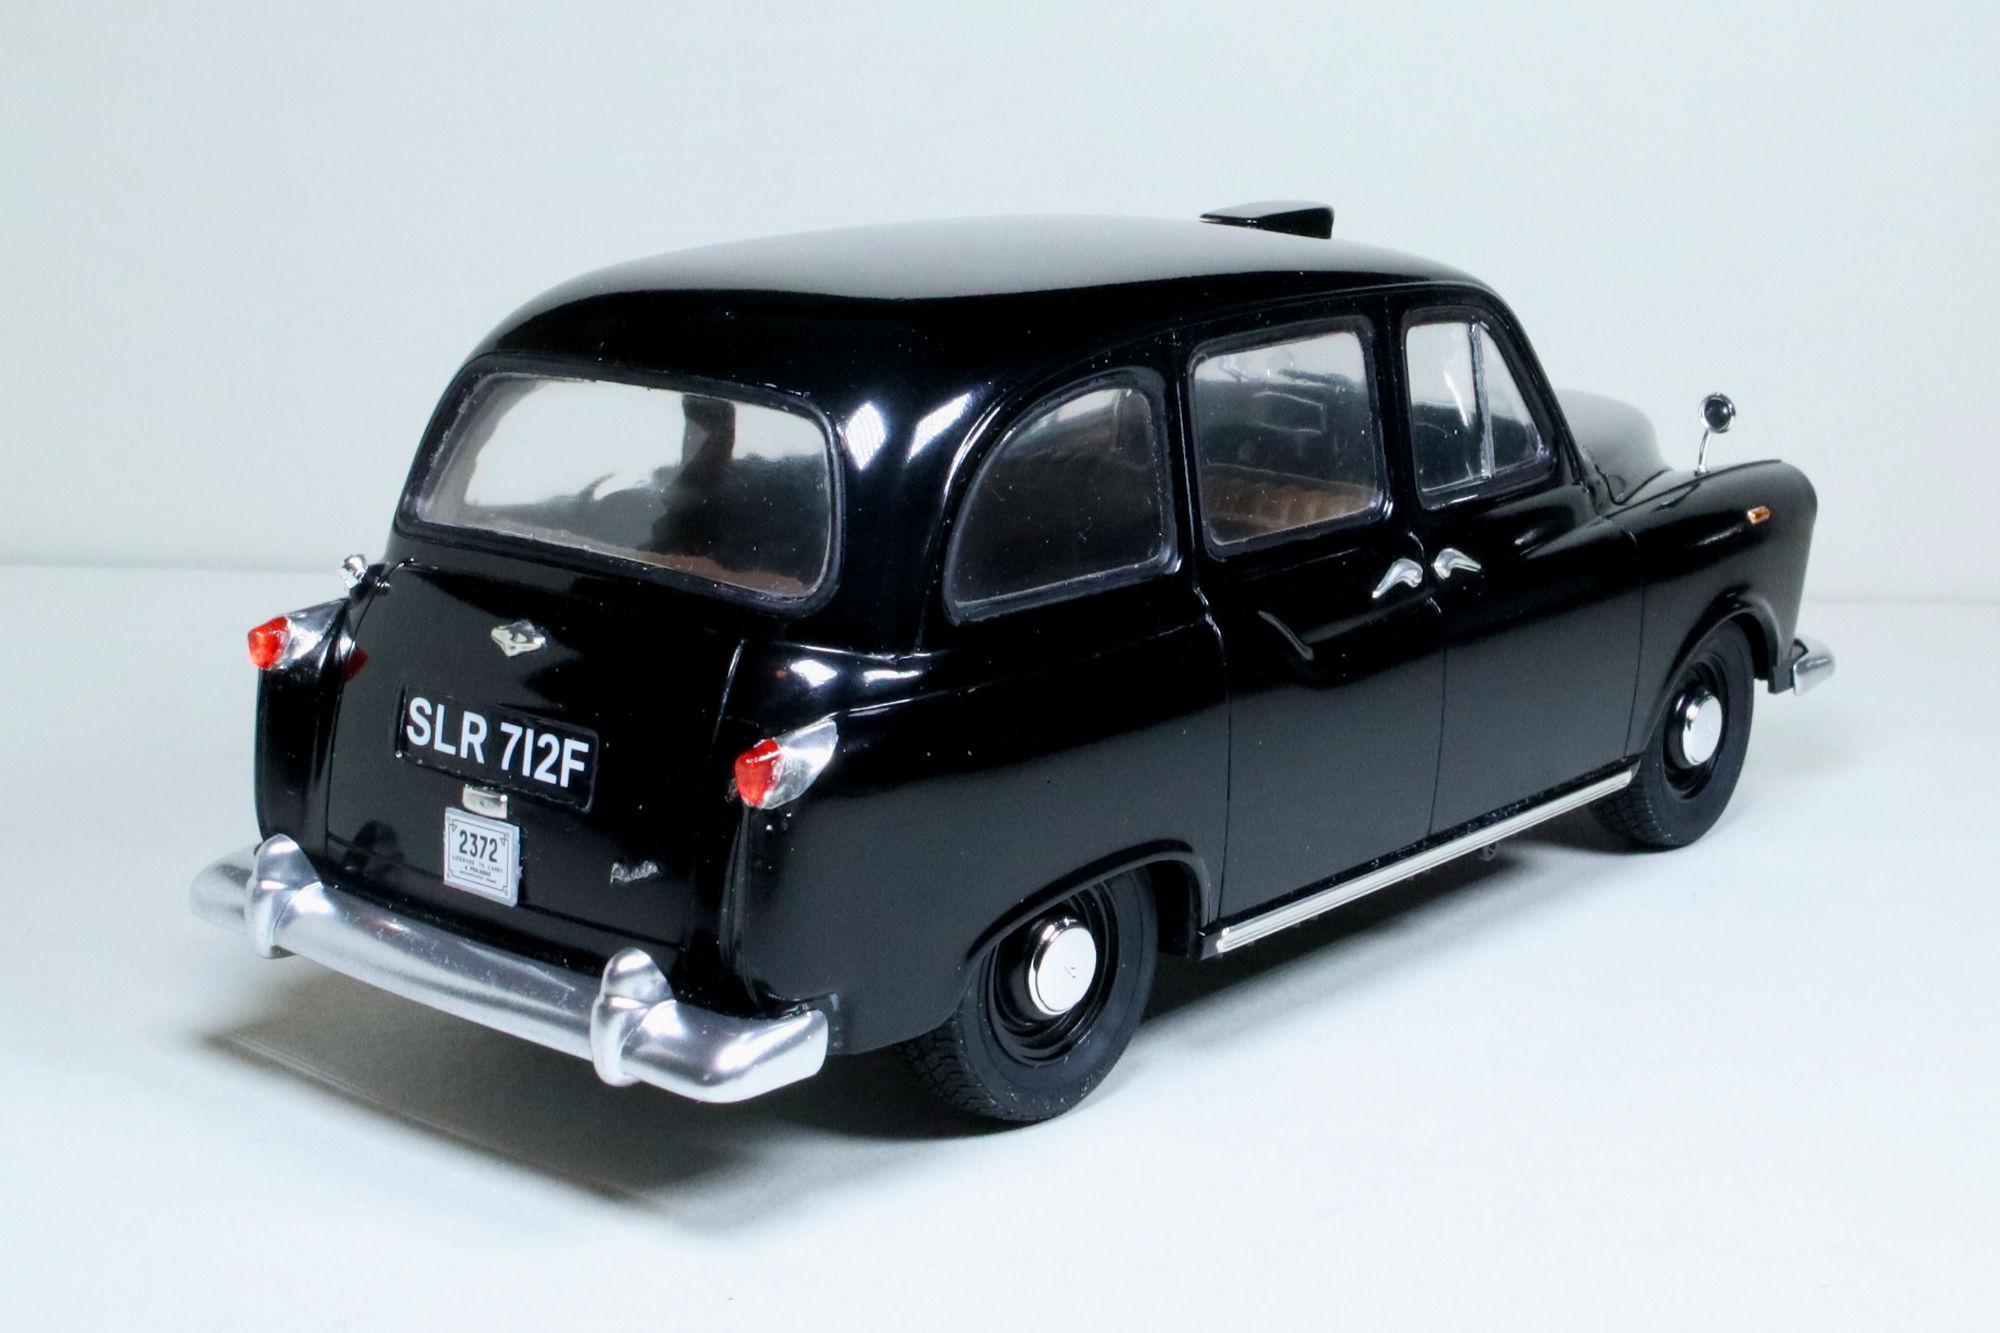
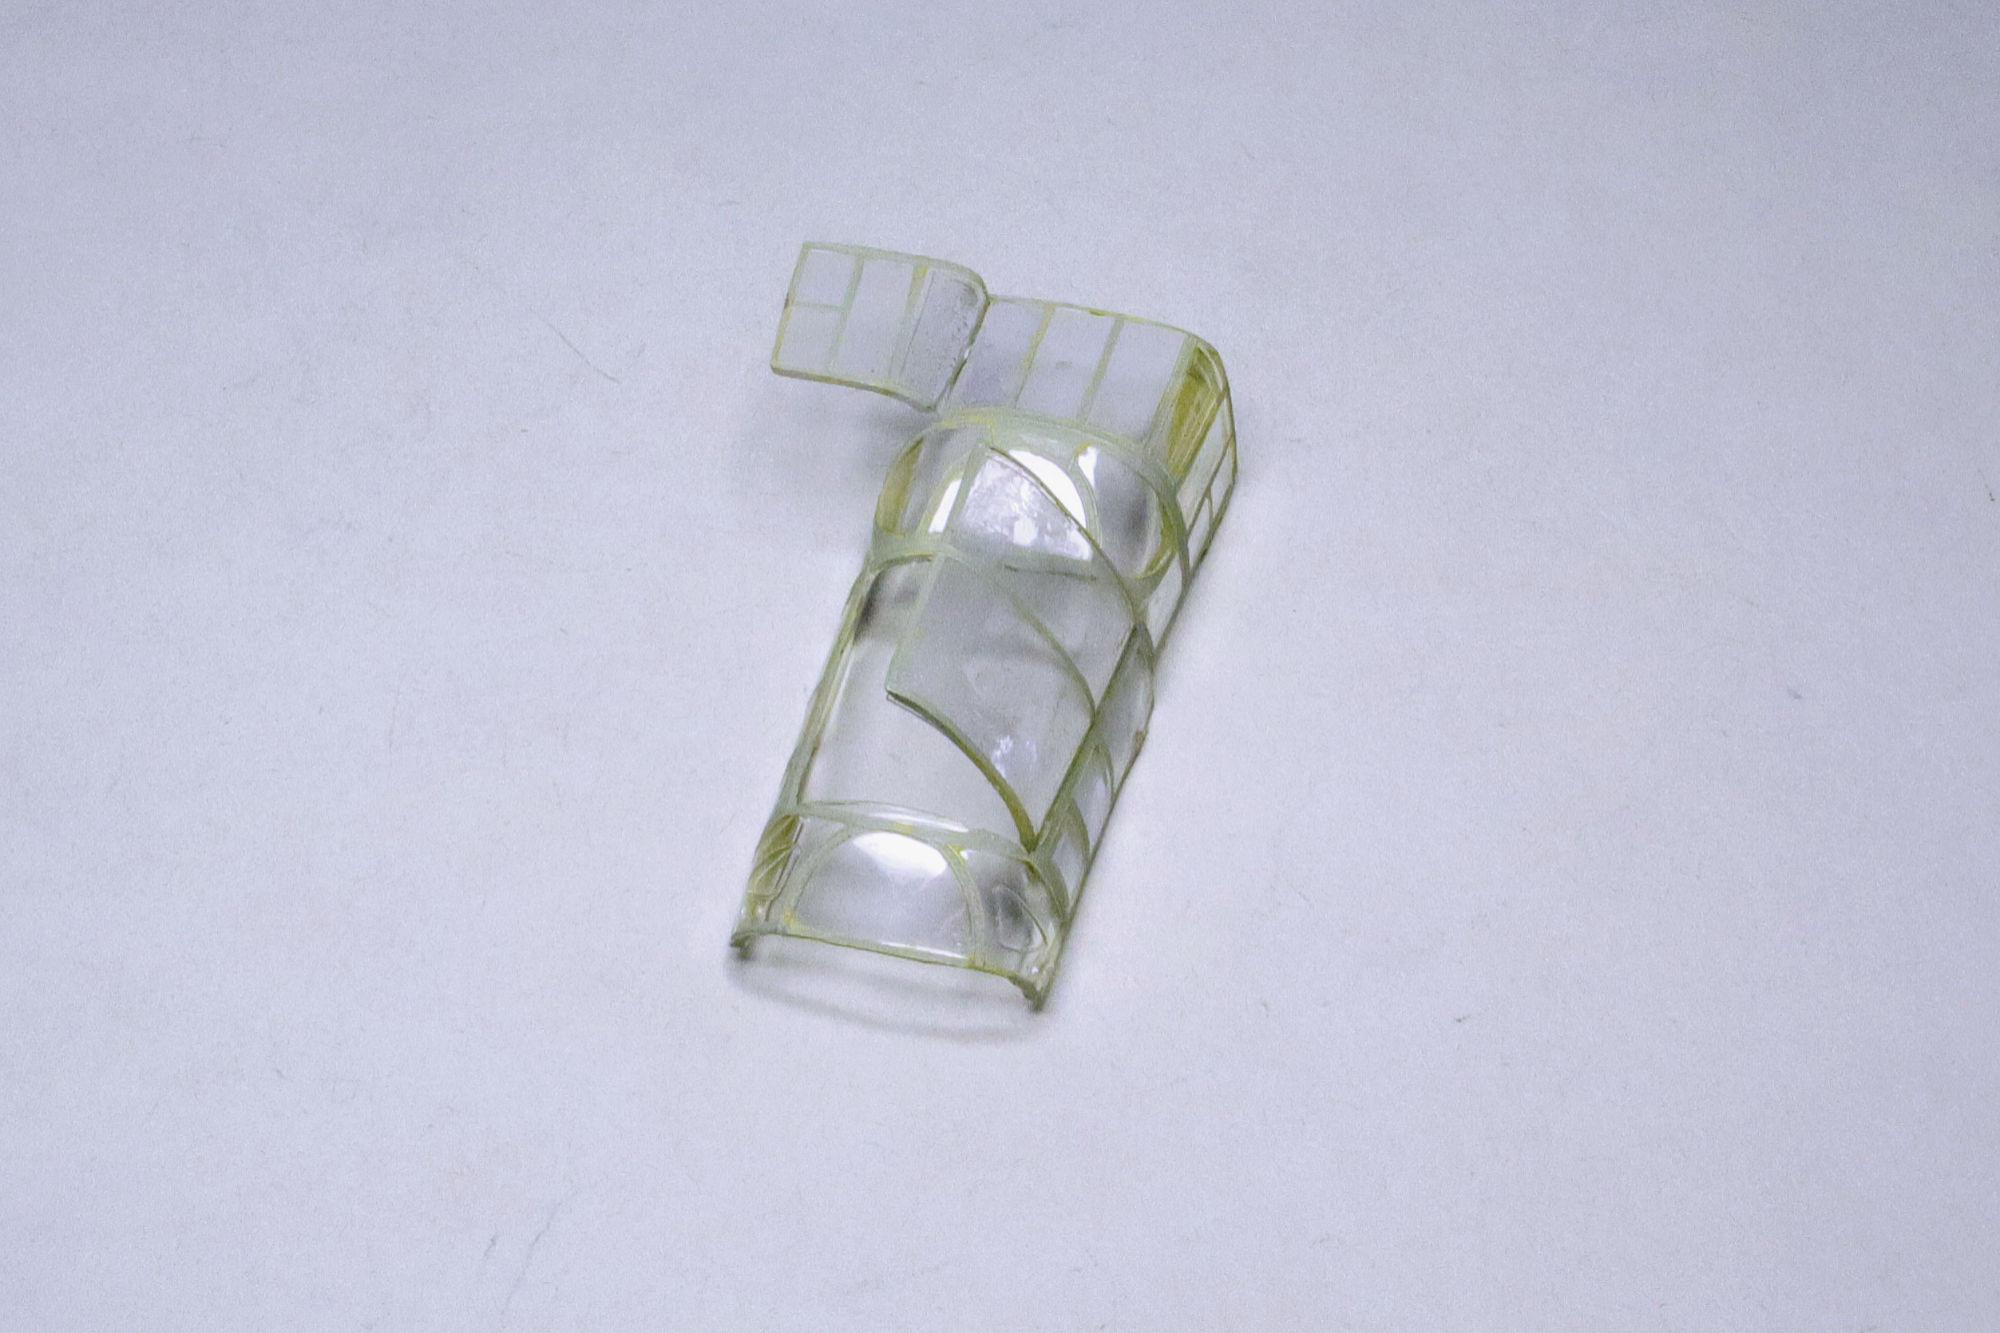
Hello Everybody! I am unable to post any photos at this time, I keep getting the "Page Not Found" error. I'll keep trying until something works At least once a year I try to step outside of my comfort zone and build something different from the model cars or trucks that I typically build. The Northrop P-61 Black Widow by Revell is this year's challenging diversion. I built one of these kits as a teenager back in the mid Seventies. So, yeah, it's a nostalgia build. This is also my final build for 2024. It seems that many of the P-61 model kits I found during my on-line research were finished in the typical black livery. However, not all of the actual aircraft were finished in this manner, there were some in various shades of army green. Based on the photos I've seen of actual aircraft, I decided to paint mine in Tamiya AS-29 Gray Green. This is the shot I selected for the album cover. Given that the kit comes with openable access panels, I felt the need to use some weathering to create a reason to have them open. Hence the fire damage to the left engine. While not tremendously detailed, the engine behind the panels does offer some visual interest. This side fared a little better with a minor fuel leak. The ground crew is standing by to top 'er up. The nose art is a leftover. I think it works well enough For those who may be interested in seeing just how much work this build entailed, here is a link to the WIP thread: As always, thanks for taking the time to look and please feel free to post any comments or questions you may have. I'll have more photos to post soon. Thanks, David G.
-
Thank you very much Juergen. I'm rather pleased with the way it all turned out. For supporting the tail I tried using a ladder in the aft hatch but that proved too fragile. Just in handling the plane I broke it twice and mended it once. Instead I made a strut from clear sprue anchored inside the plane and extending through the hole intended to accommodate a similar kit-supplied strut. Thank you again for your kind comment. I'm working on posting some photos in the "Under Glass" section but the website is being difficult right now and will not accept my post. I'll try again later. =D-
-
I'm really glad to know that you enjoyed following along. Thank you for letting me know that Chris. I'm just getting ready to post some photos of the finished build. I'll throw a link here once I get that set up. Thanks Again. David G.
-
Wow! That is beautiful! Very impressive! David G.
-
Those are beautiful builds Scott! I don't think I've seen that many Show Rods in one place since my last car show! Nicely done! David G.
-
Nice work Mike! A great collection of Gassers and Hotrods. David G.
-
My builds finished in '24 [OOPS, forgot one, added it]
David G. replied to Can-Con's topic in Model Cars
Excellent work Steve! I particularly like the Riviera, the custom T-Bird and the Red Baron. I'd really like to get one of those Red Barons in my collection. David G. -
You've had a very productive year. I really like the Z-28 and the Merc. David G.
-
Nicely done! David G.
-
Nice paint and detail on all of them. The Nova and the Vette are especially eye catching. David G.
-
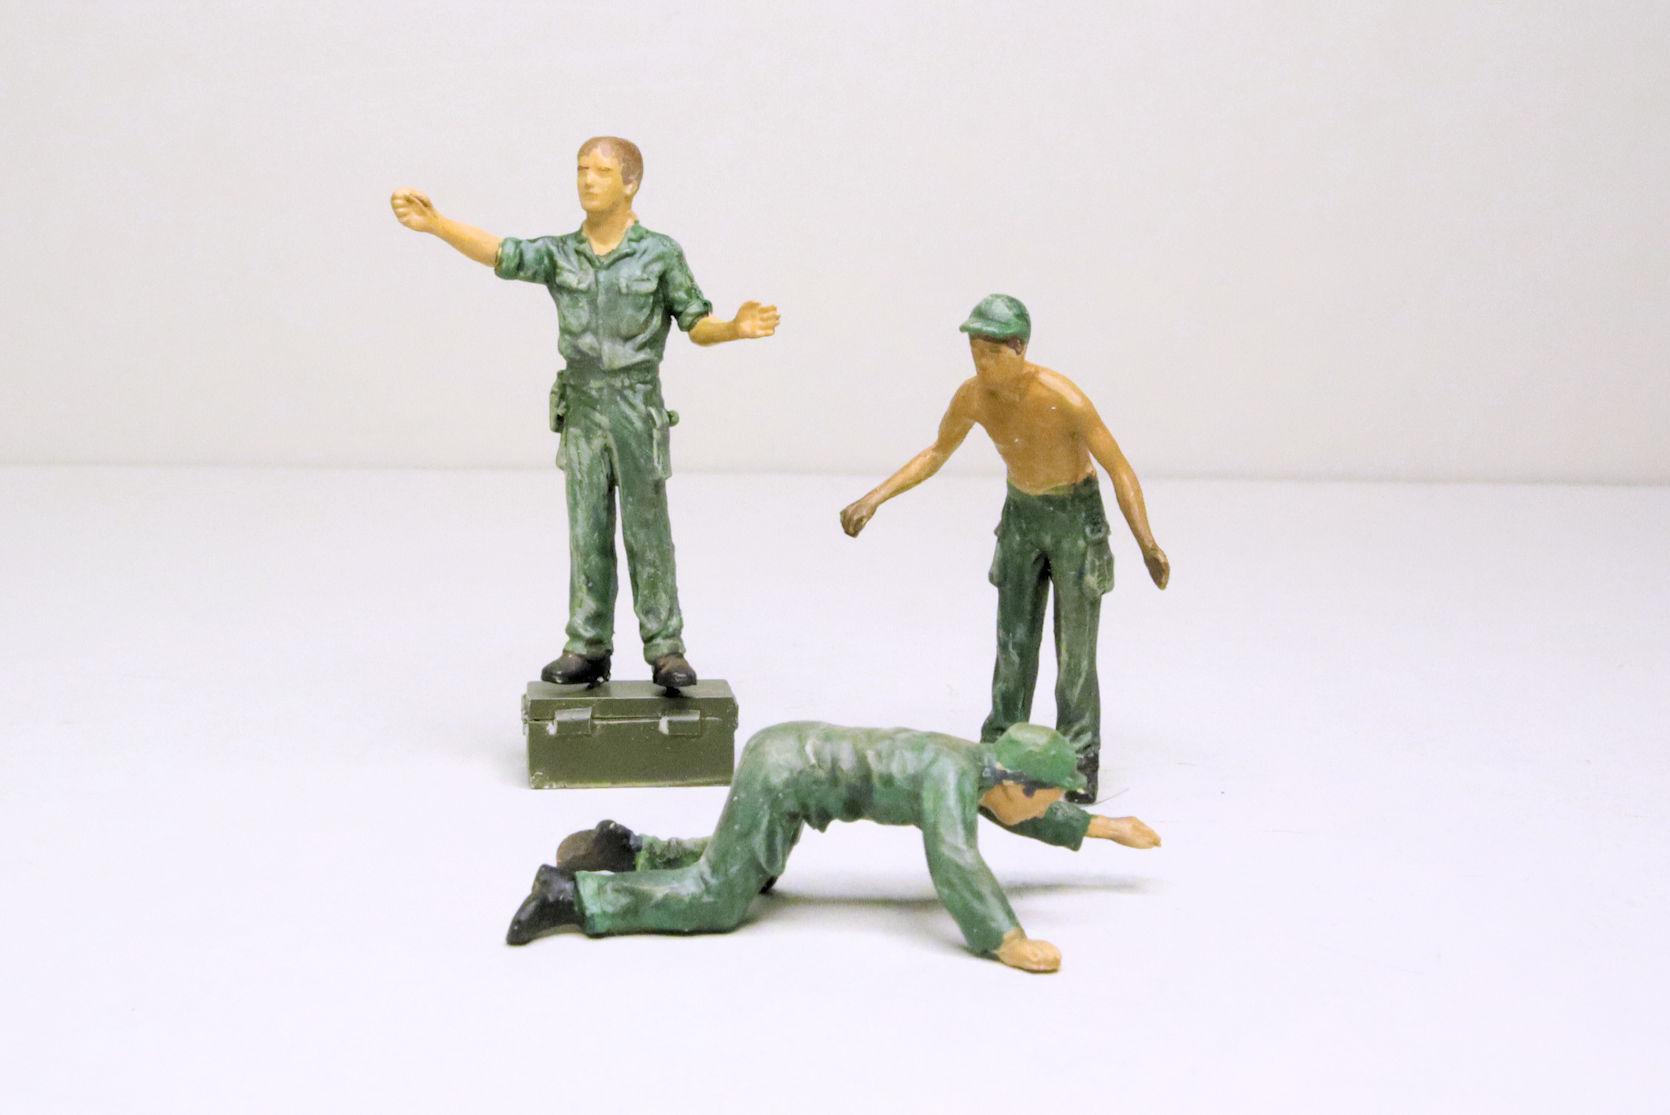
Hello Everybody! Here's my final build for 2024! The canopy can be built in an opened or closed configuration. The methods provided for doing this are less than optimal, so I came up with my own. I cut some pieces from clear acetate to attach the hatches to the canopy. I've already done this with the smaller hatch. Once glued in place with some PVA canopy adhesive the acetate effectively holds the hatches in place. A little weathering will help disguise the faintly visible adhesive. Here's the first pass on the paint for the crew. Here's what they look like with a shadow wash and some highlights. I gave the shirtless man a sunburn. Now all they need are some shoes and a little dust and they'll be good to go. The final pass on the crew with a shadow wash, some highlighting and oh yeah, shoes! It's finally complete! The last one for 2024. Here's a quick shot with the plans and crew. All I need to do now is set up my little studio and get some proper photos. Thanks to all of you who followed along and offered your tips, comments and support. Once I get some photos done I'll be posting this in the "Under Glass" section. Thanks again, David G.