David G.
-
Posts
11,326 -
Joined
-
Last visited
Content Type
Profiles
Forums
Events
Gallery
Everything posted by David G.
-
Sorry Steve. My eyes jumped a line. David G.
-
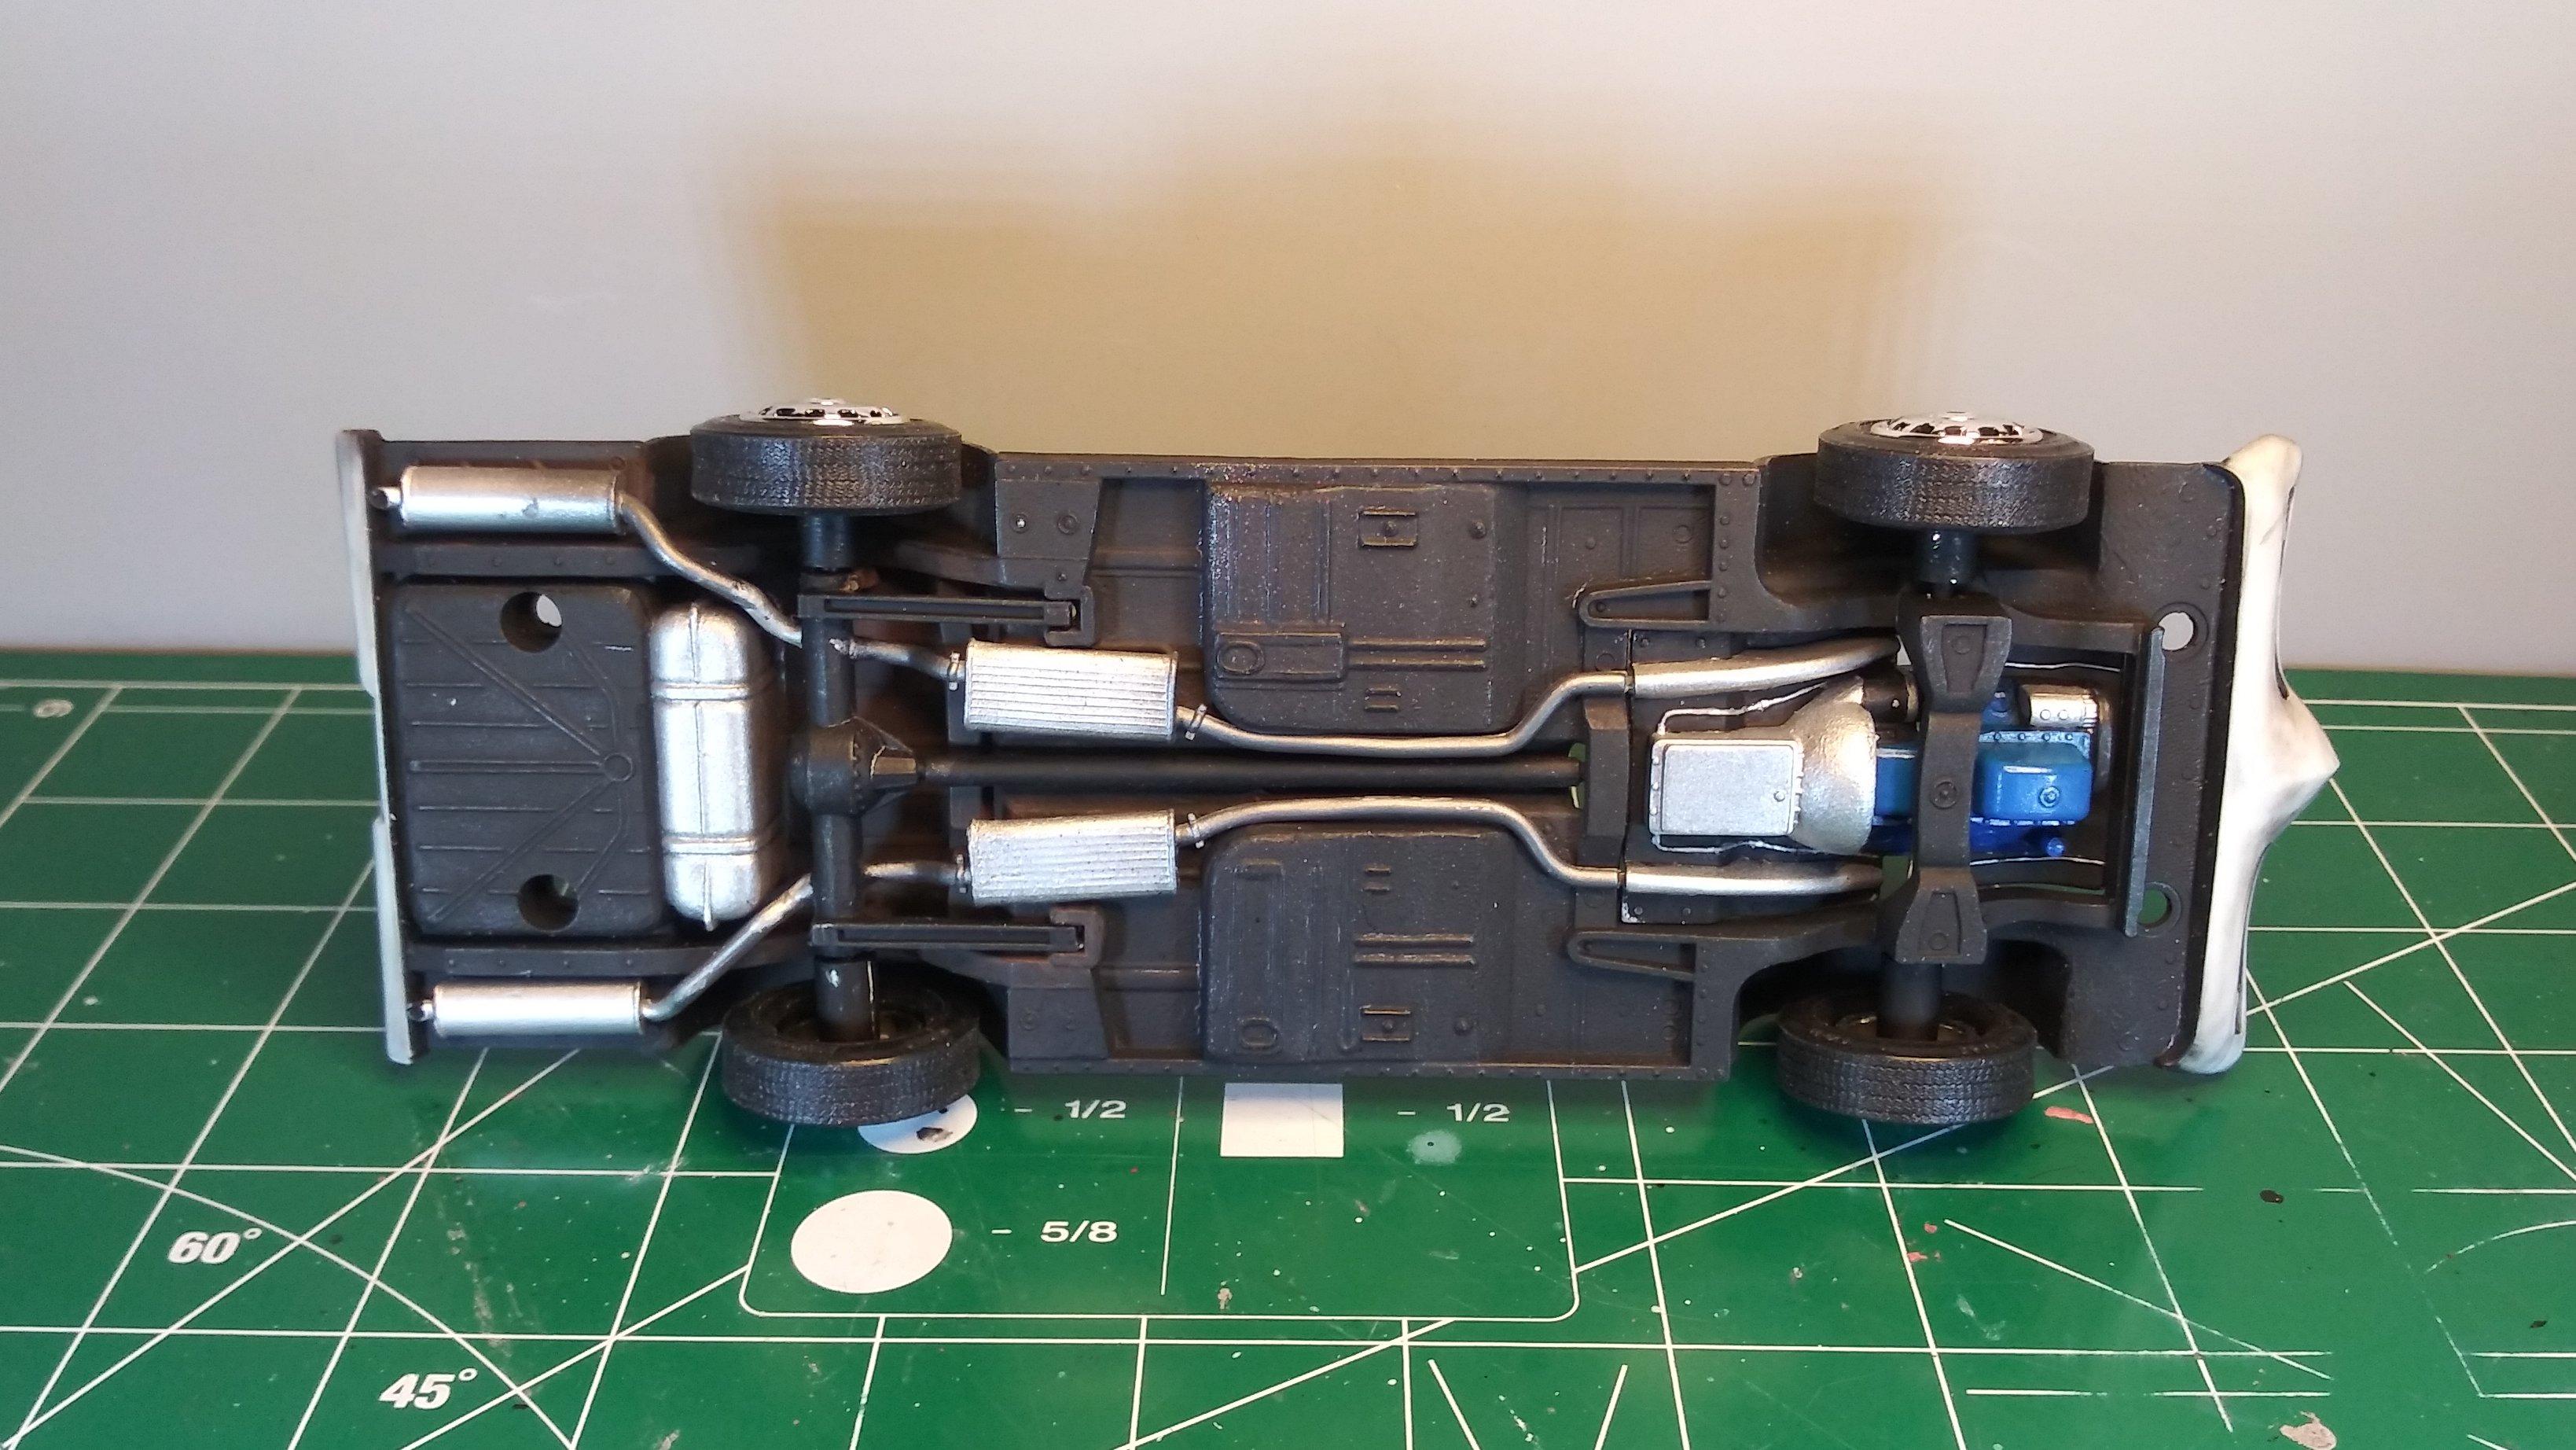
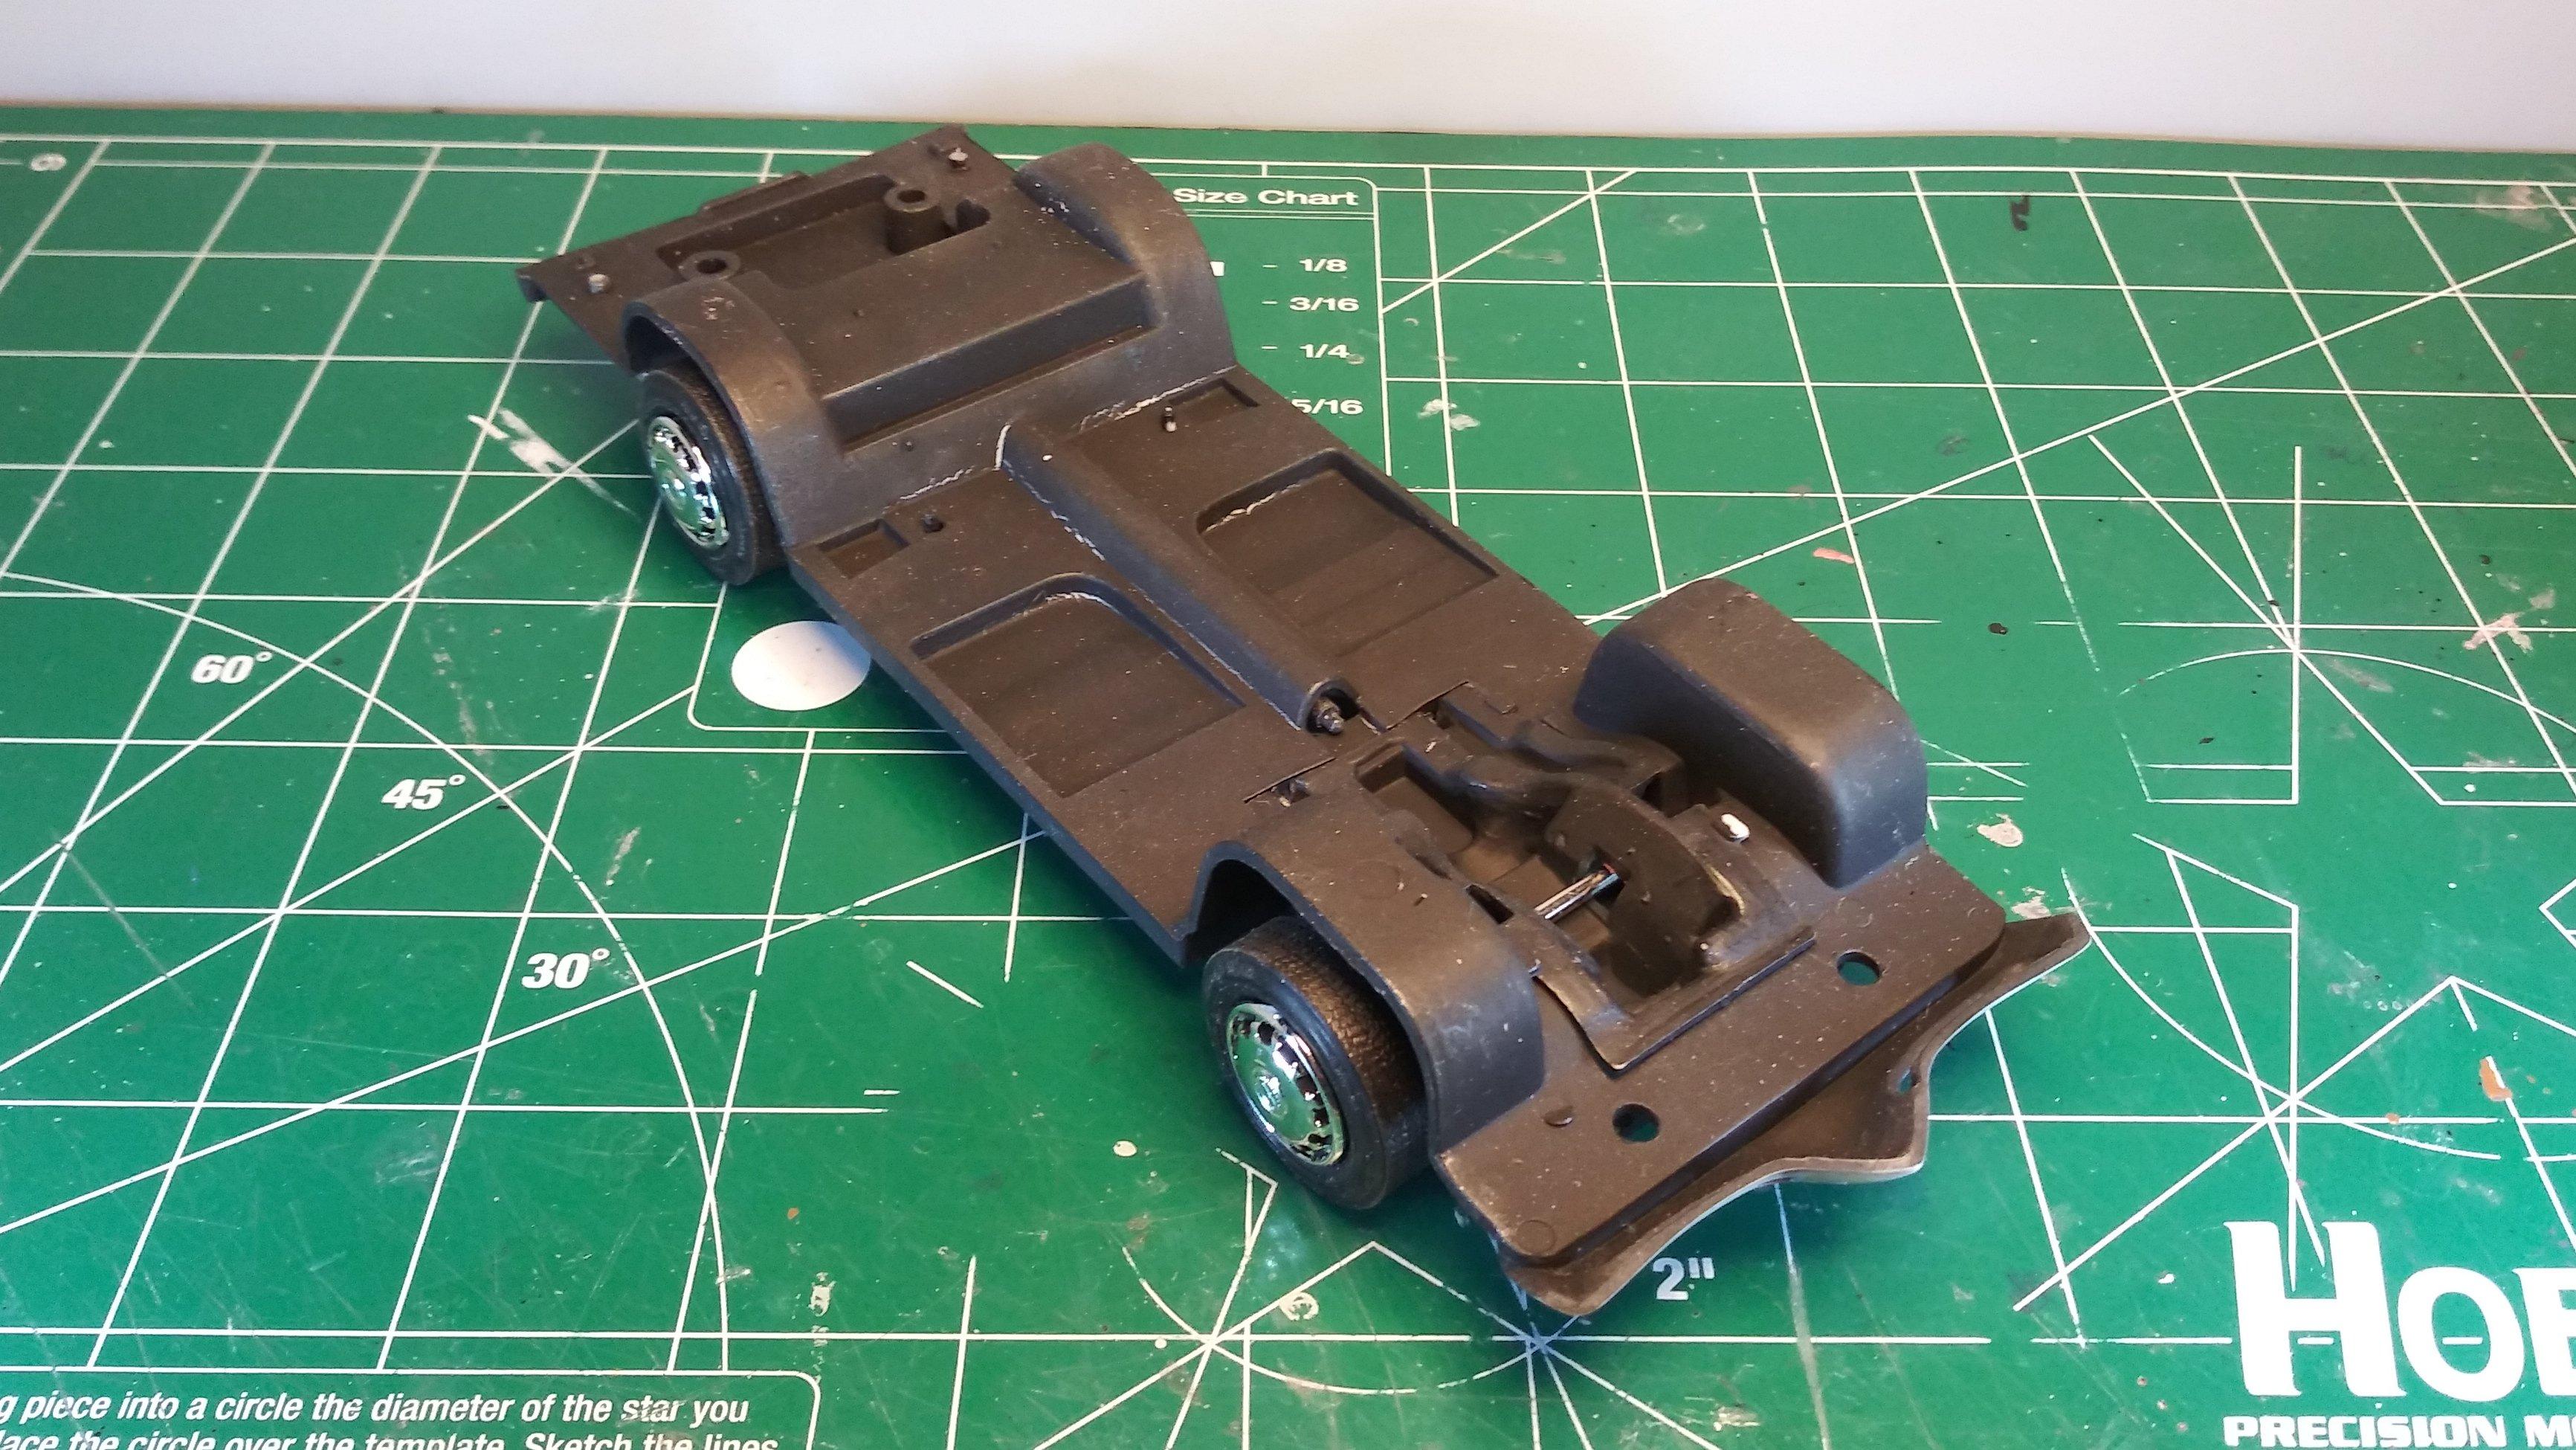
I had no idea Duke, I don't recall ever seeing one painted like that. The cars I remember seeing had that bit chromed so I assumed that it was a bumper. There were some massive bumpers during that era after all. In any event, I plan on chroming that part and that will be easier to do with it separated from the chassis plate. Thanks again for the information and the tip Duke. David G.

-
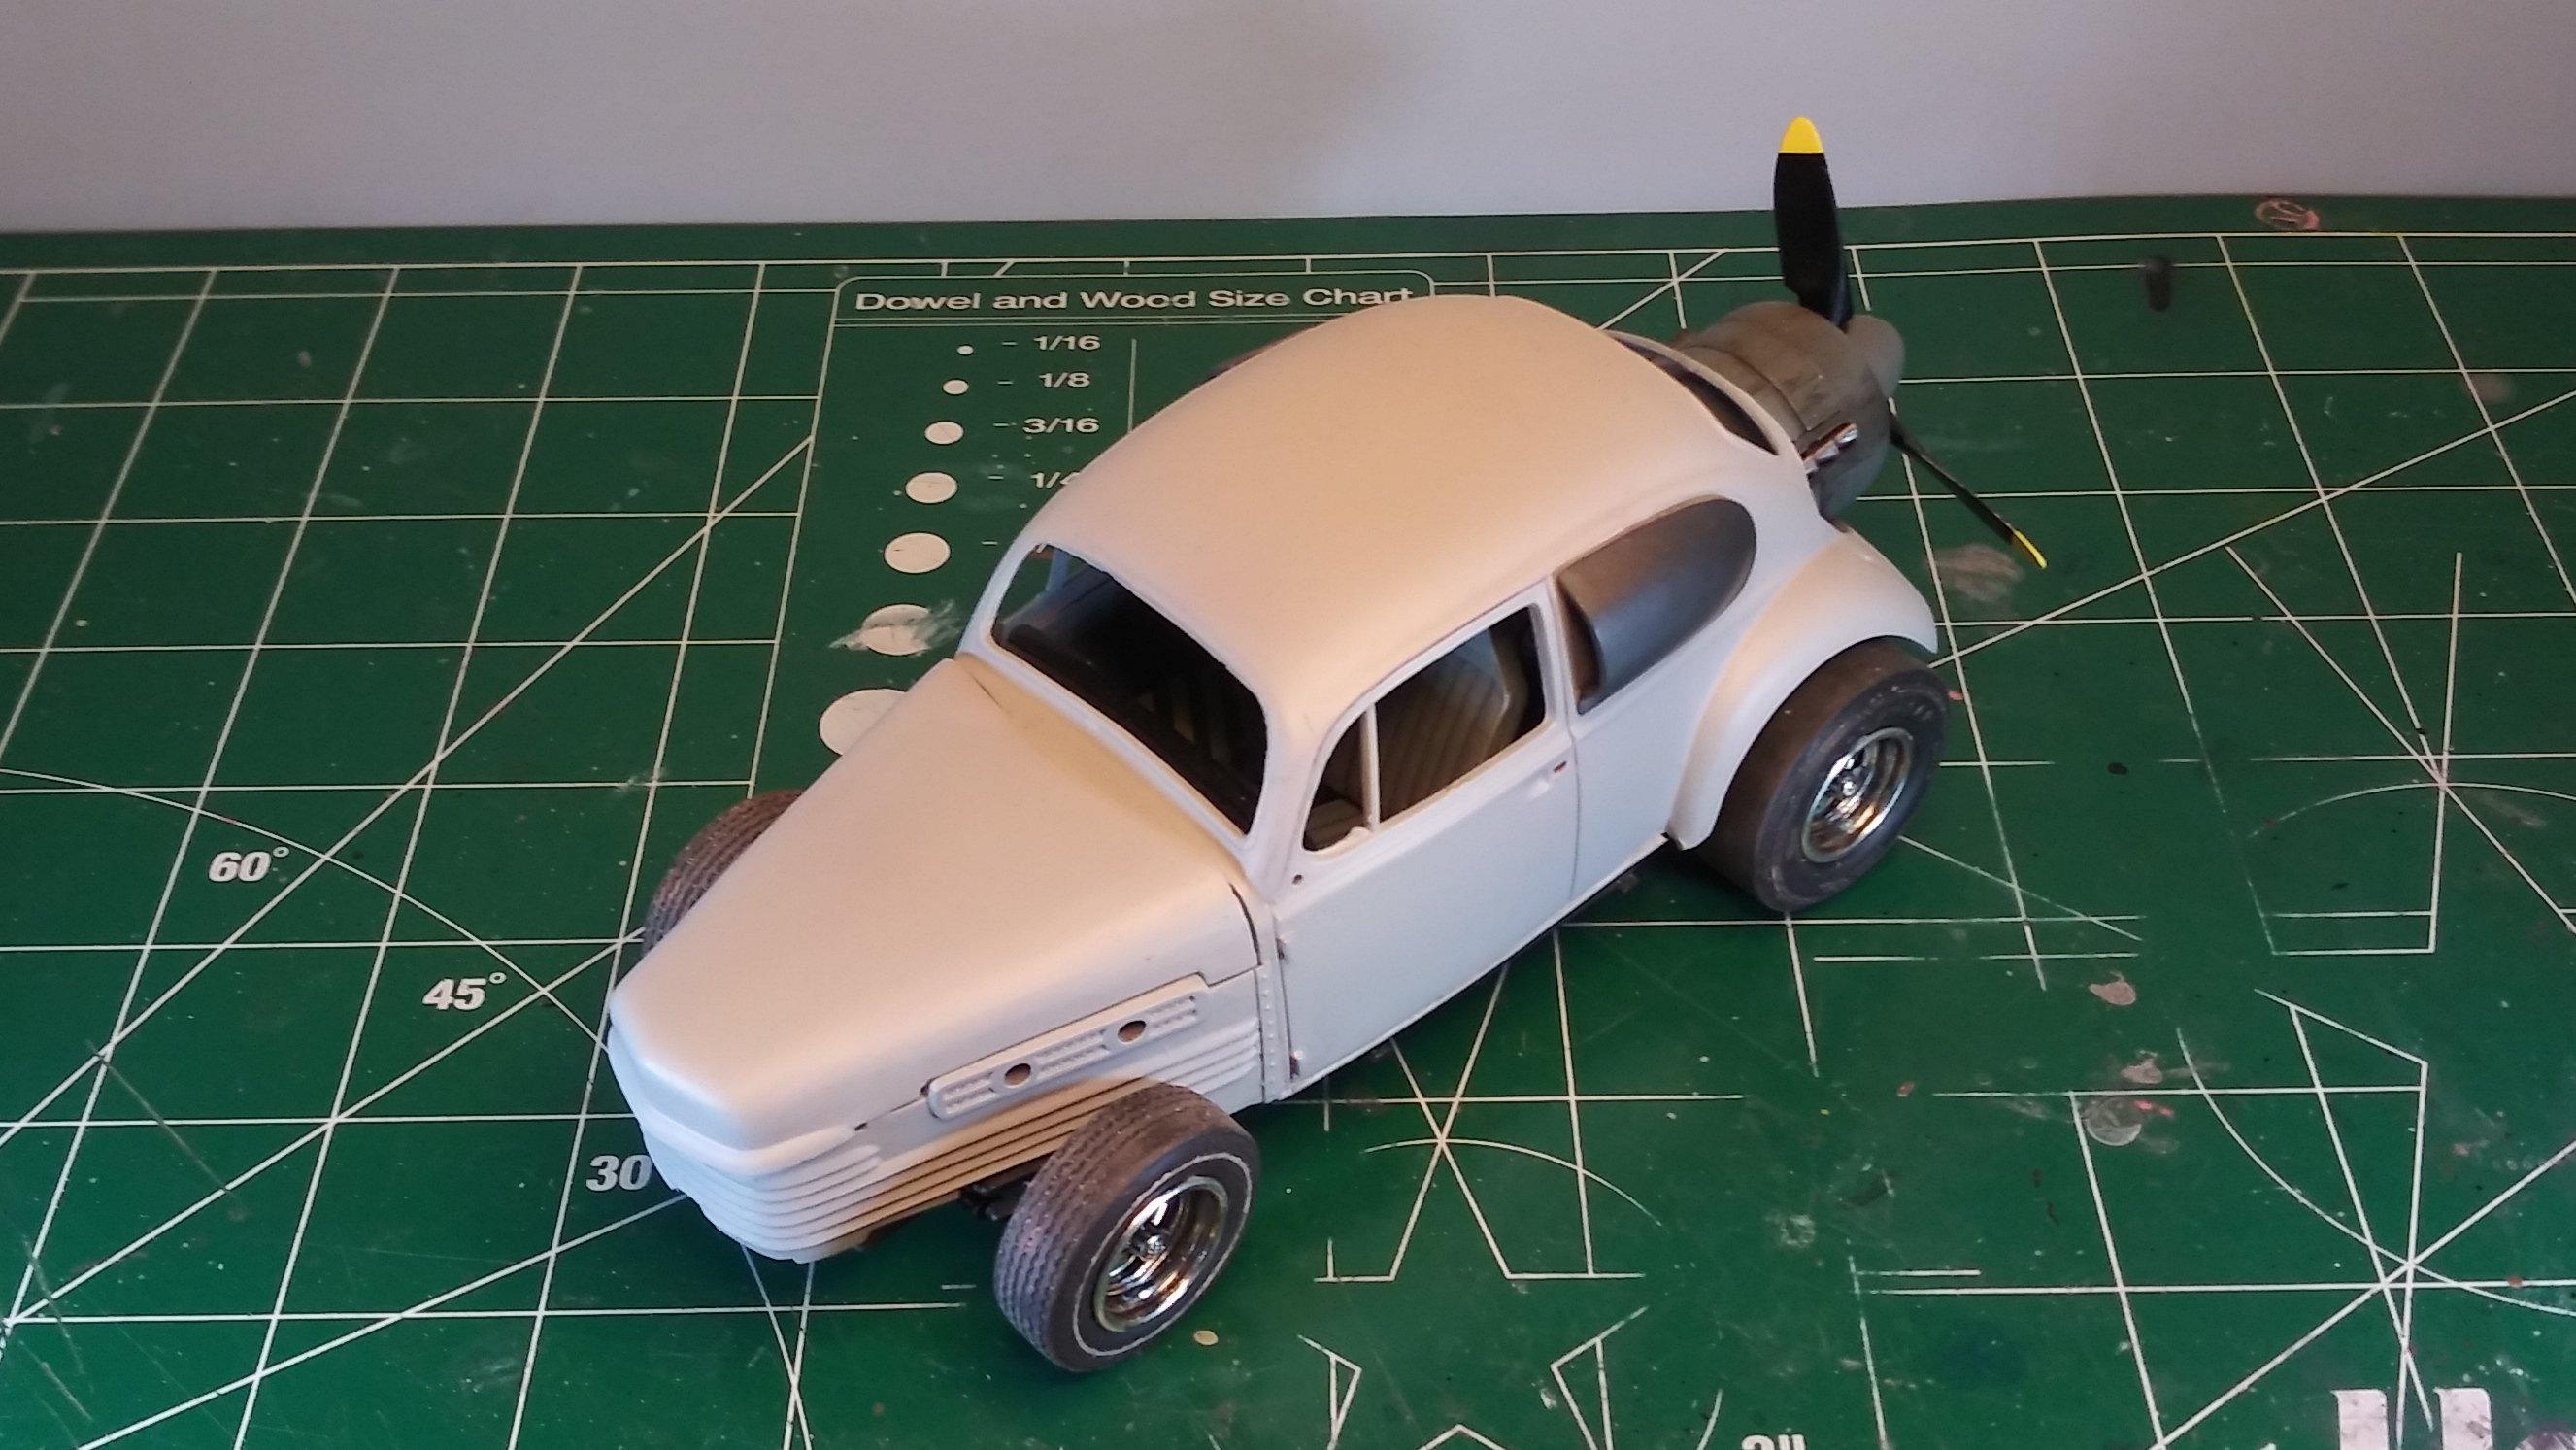
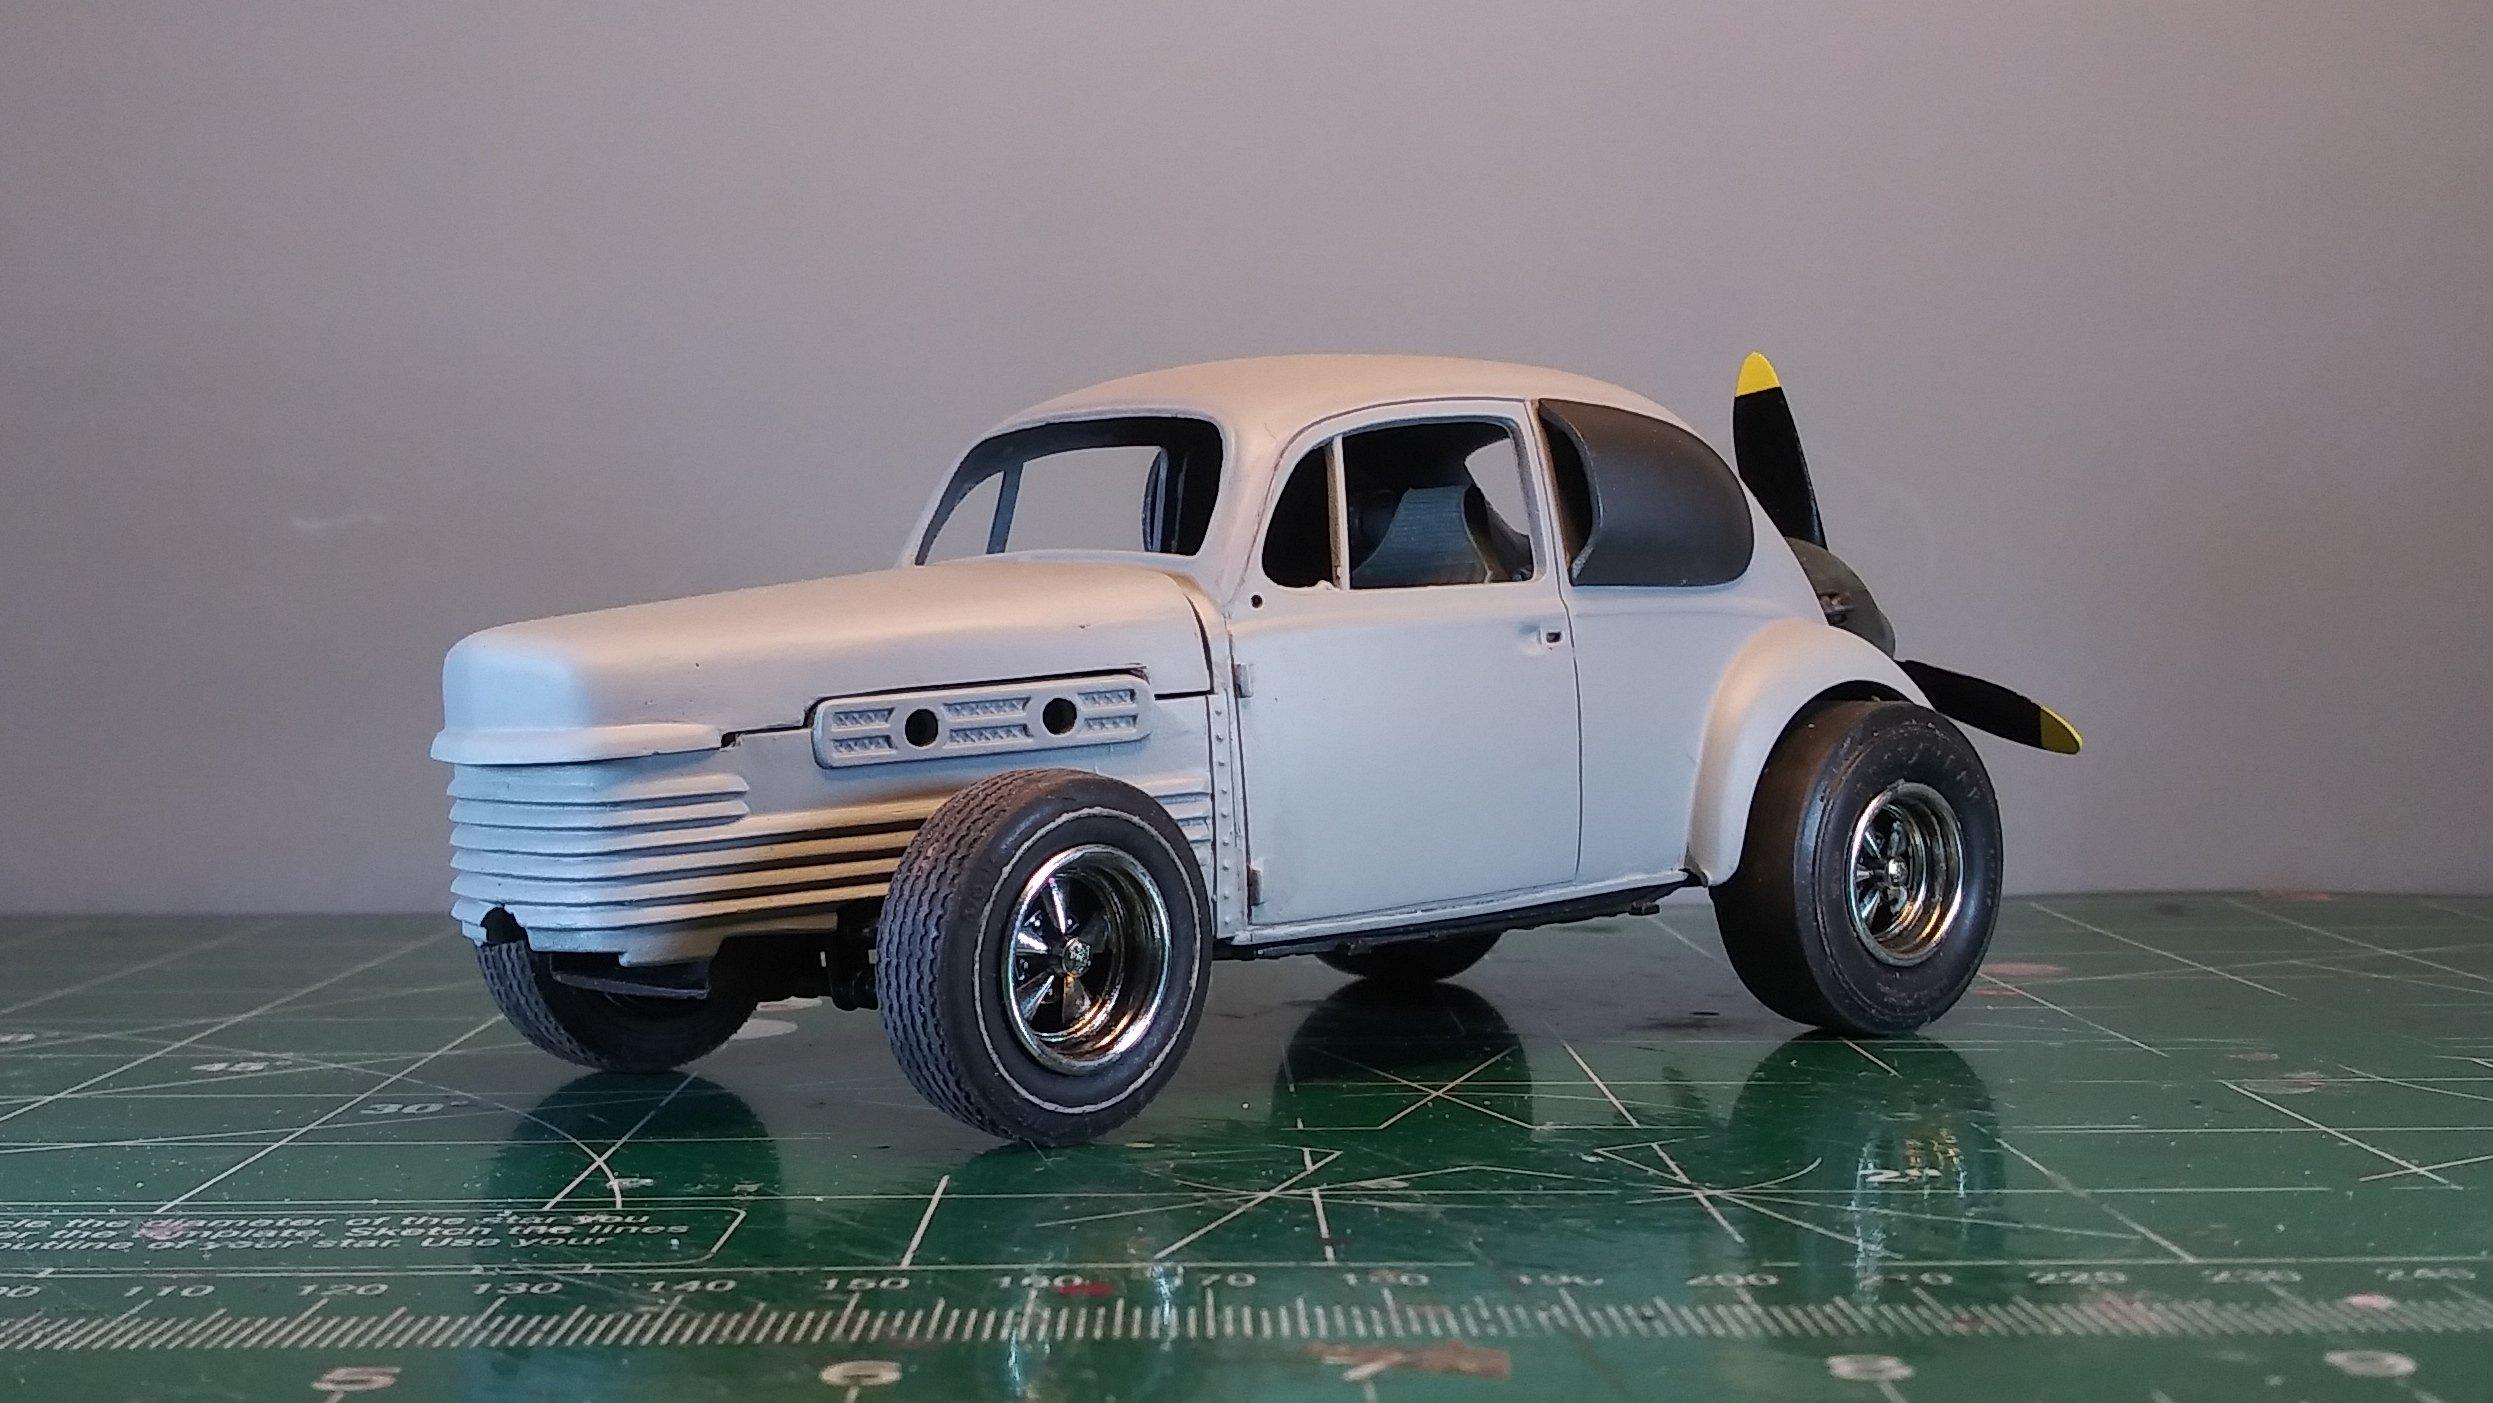
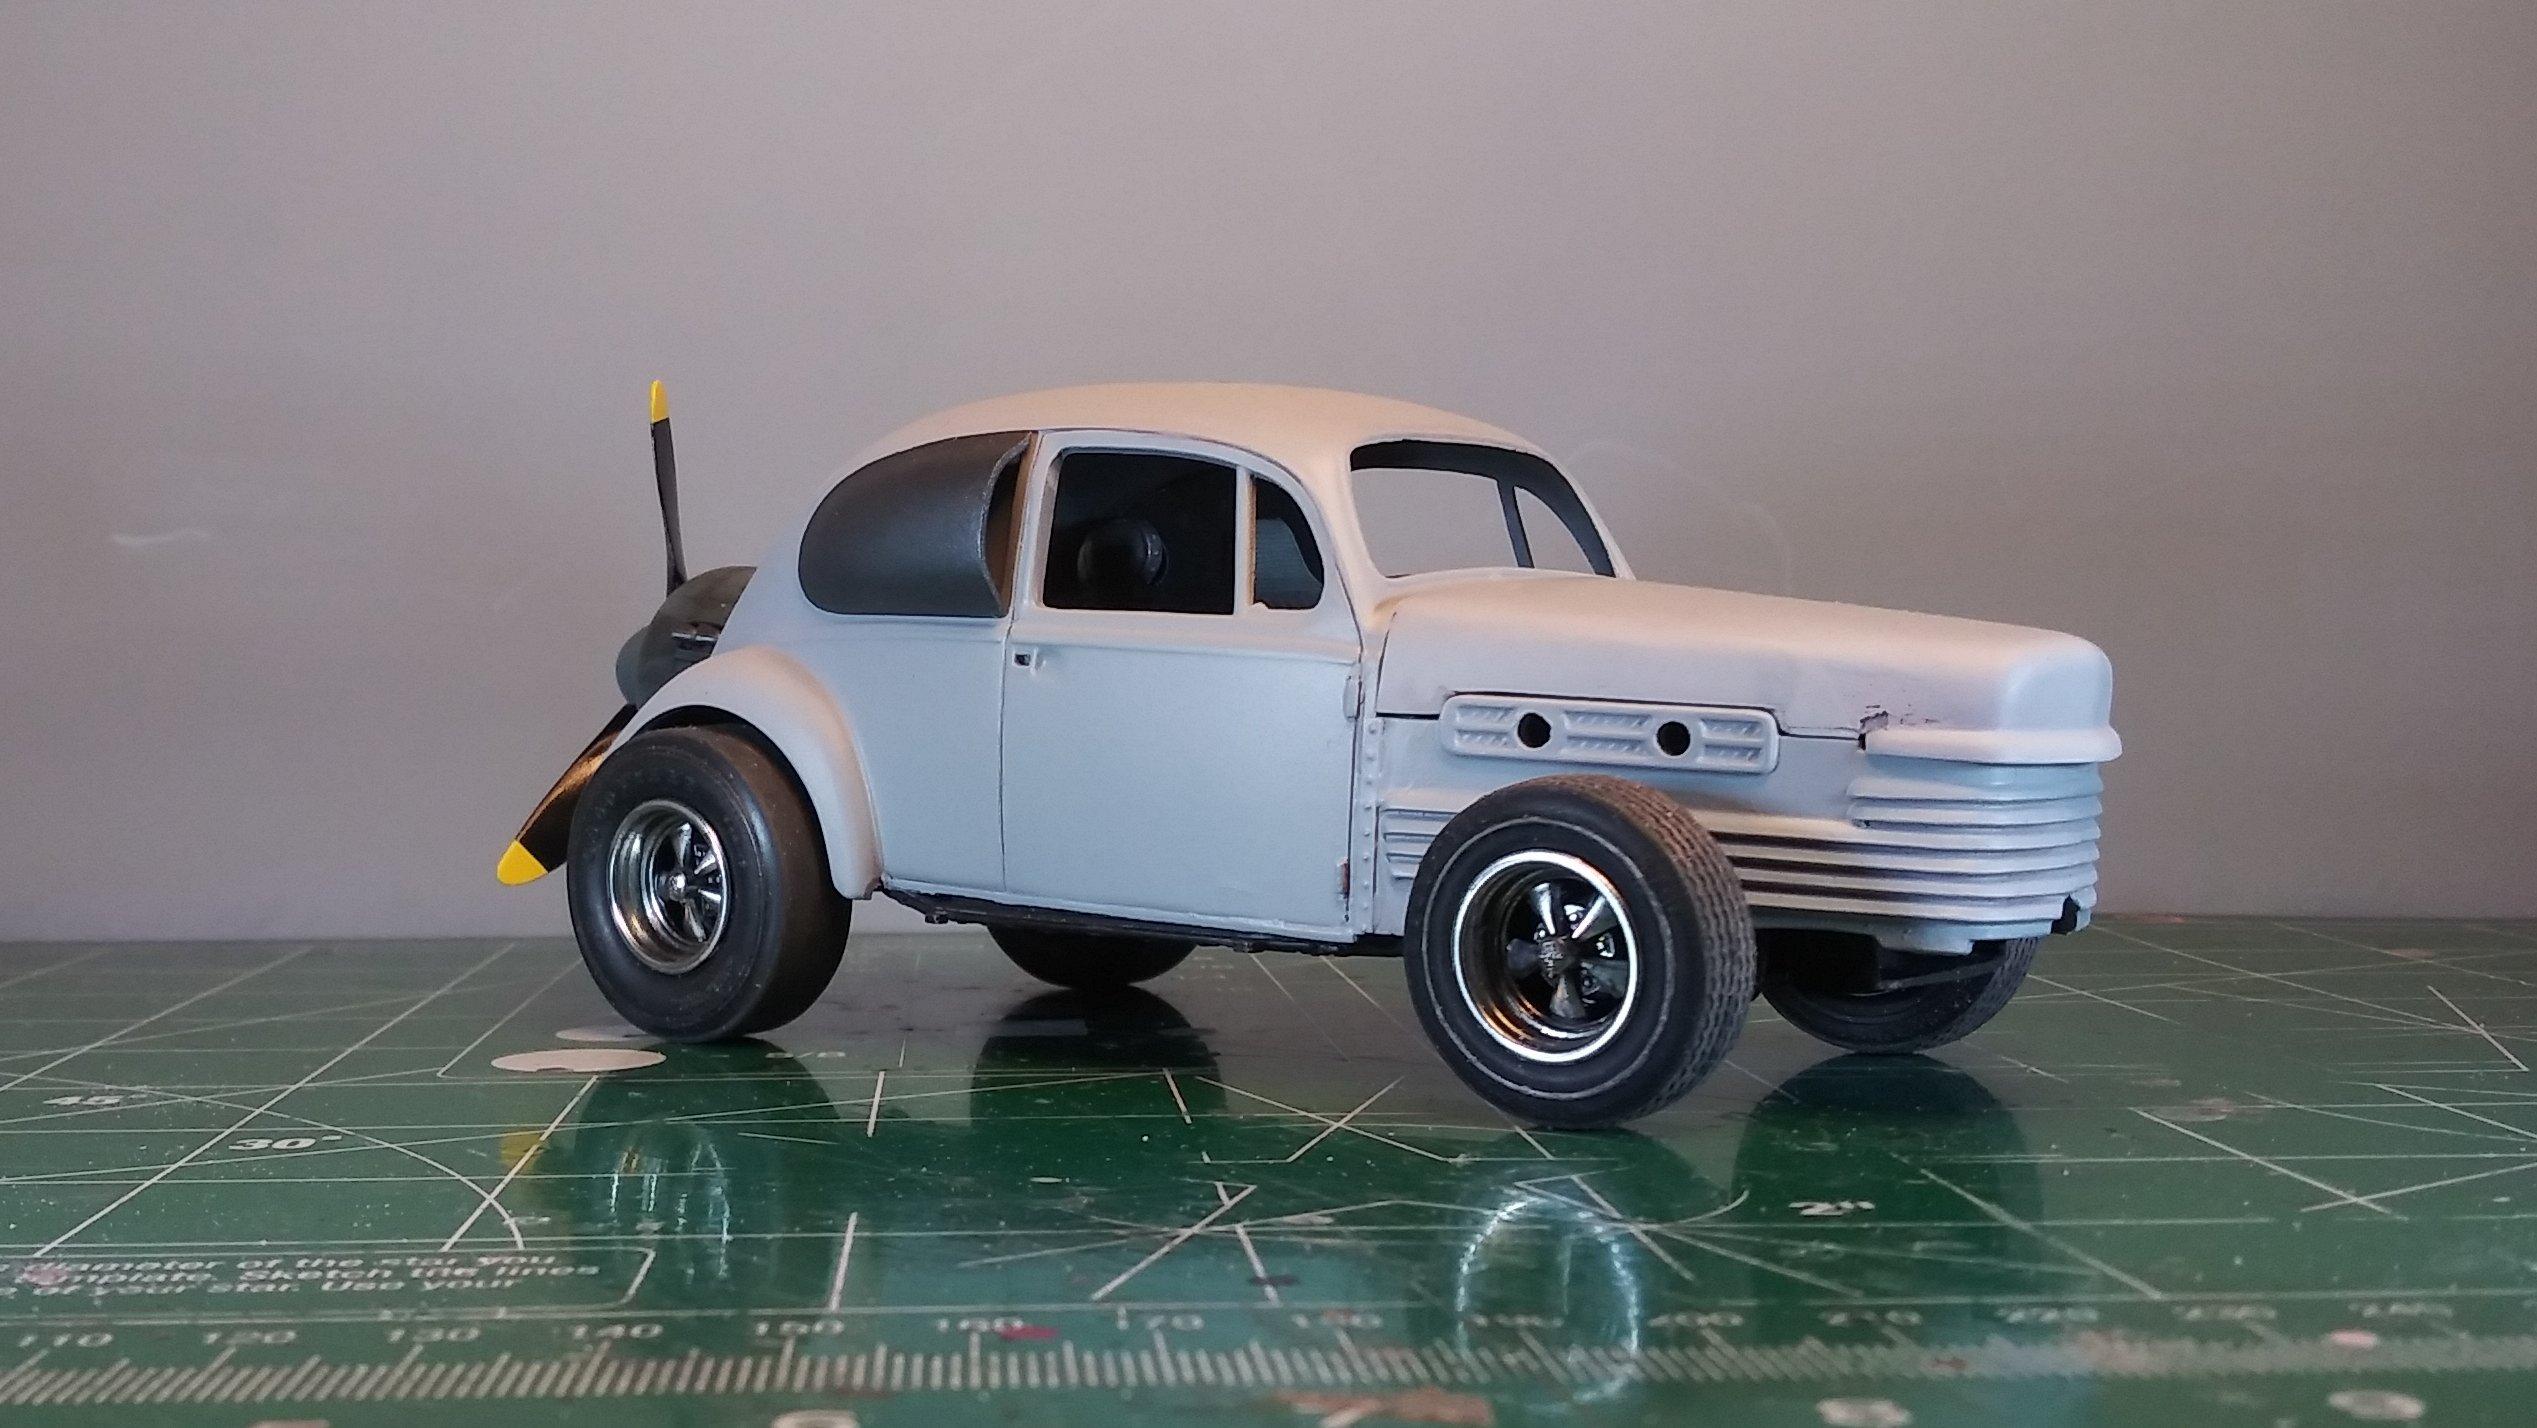
The body work is done! It's time to start planning the paint job. In keeping with the aircraft theme, I think some sort of silver is in order. Thanks again, David G.
-
Thanks for the comment Duke. During some of the test fitting sessions I did, I noticed that the front bumper piece attached to the chassis plate was going to require some adjustment to fit properly, I just hadn't determined what yet. Cutting it loose seems like a very viable option. I had also considered lowering the front suspension a bit too, probably about 1 or 2 mm. I think I'll go ahead on that one. Thanks for the tip. Thanks for the input Steve. Since that part is a chrome bumper, I had planned on spraying it with Alclad. Having it loose will make that easier. Thanks David G.
-
Super sweet paintwork Dann! David G.
-
Well, it does yield a nice finished model but the engineering of the kit is far from prototypical in a number of ways. I'm happy with the end result and that's what matters, right? Thanks, David G.
-
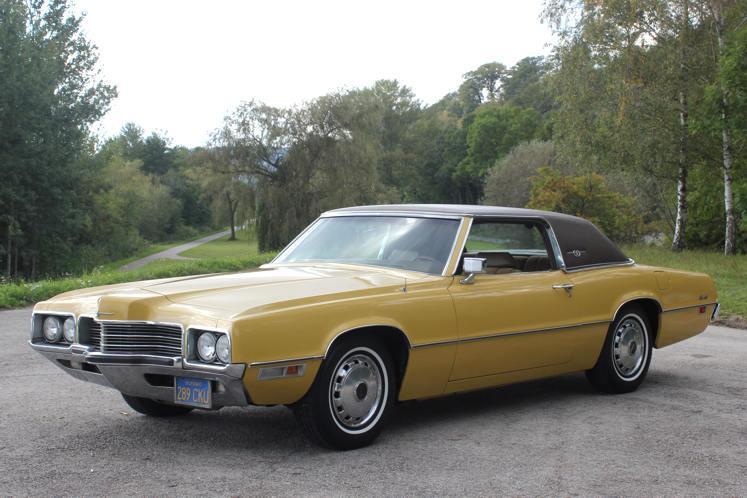
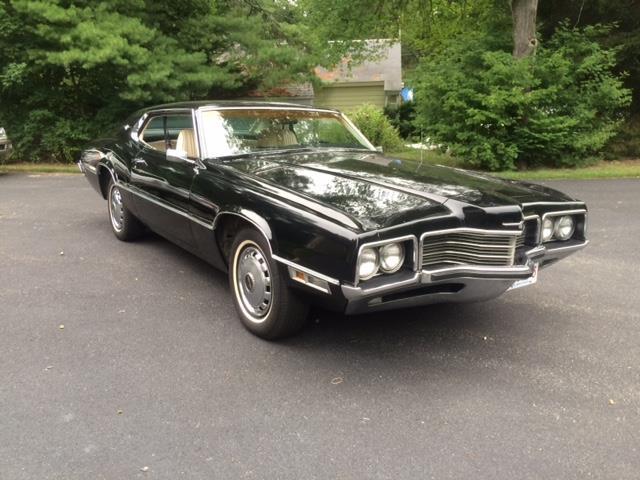
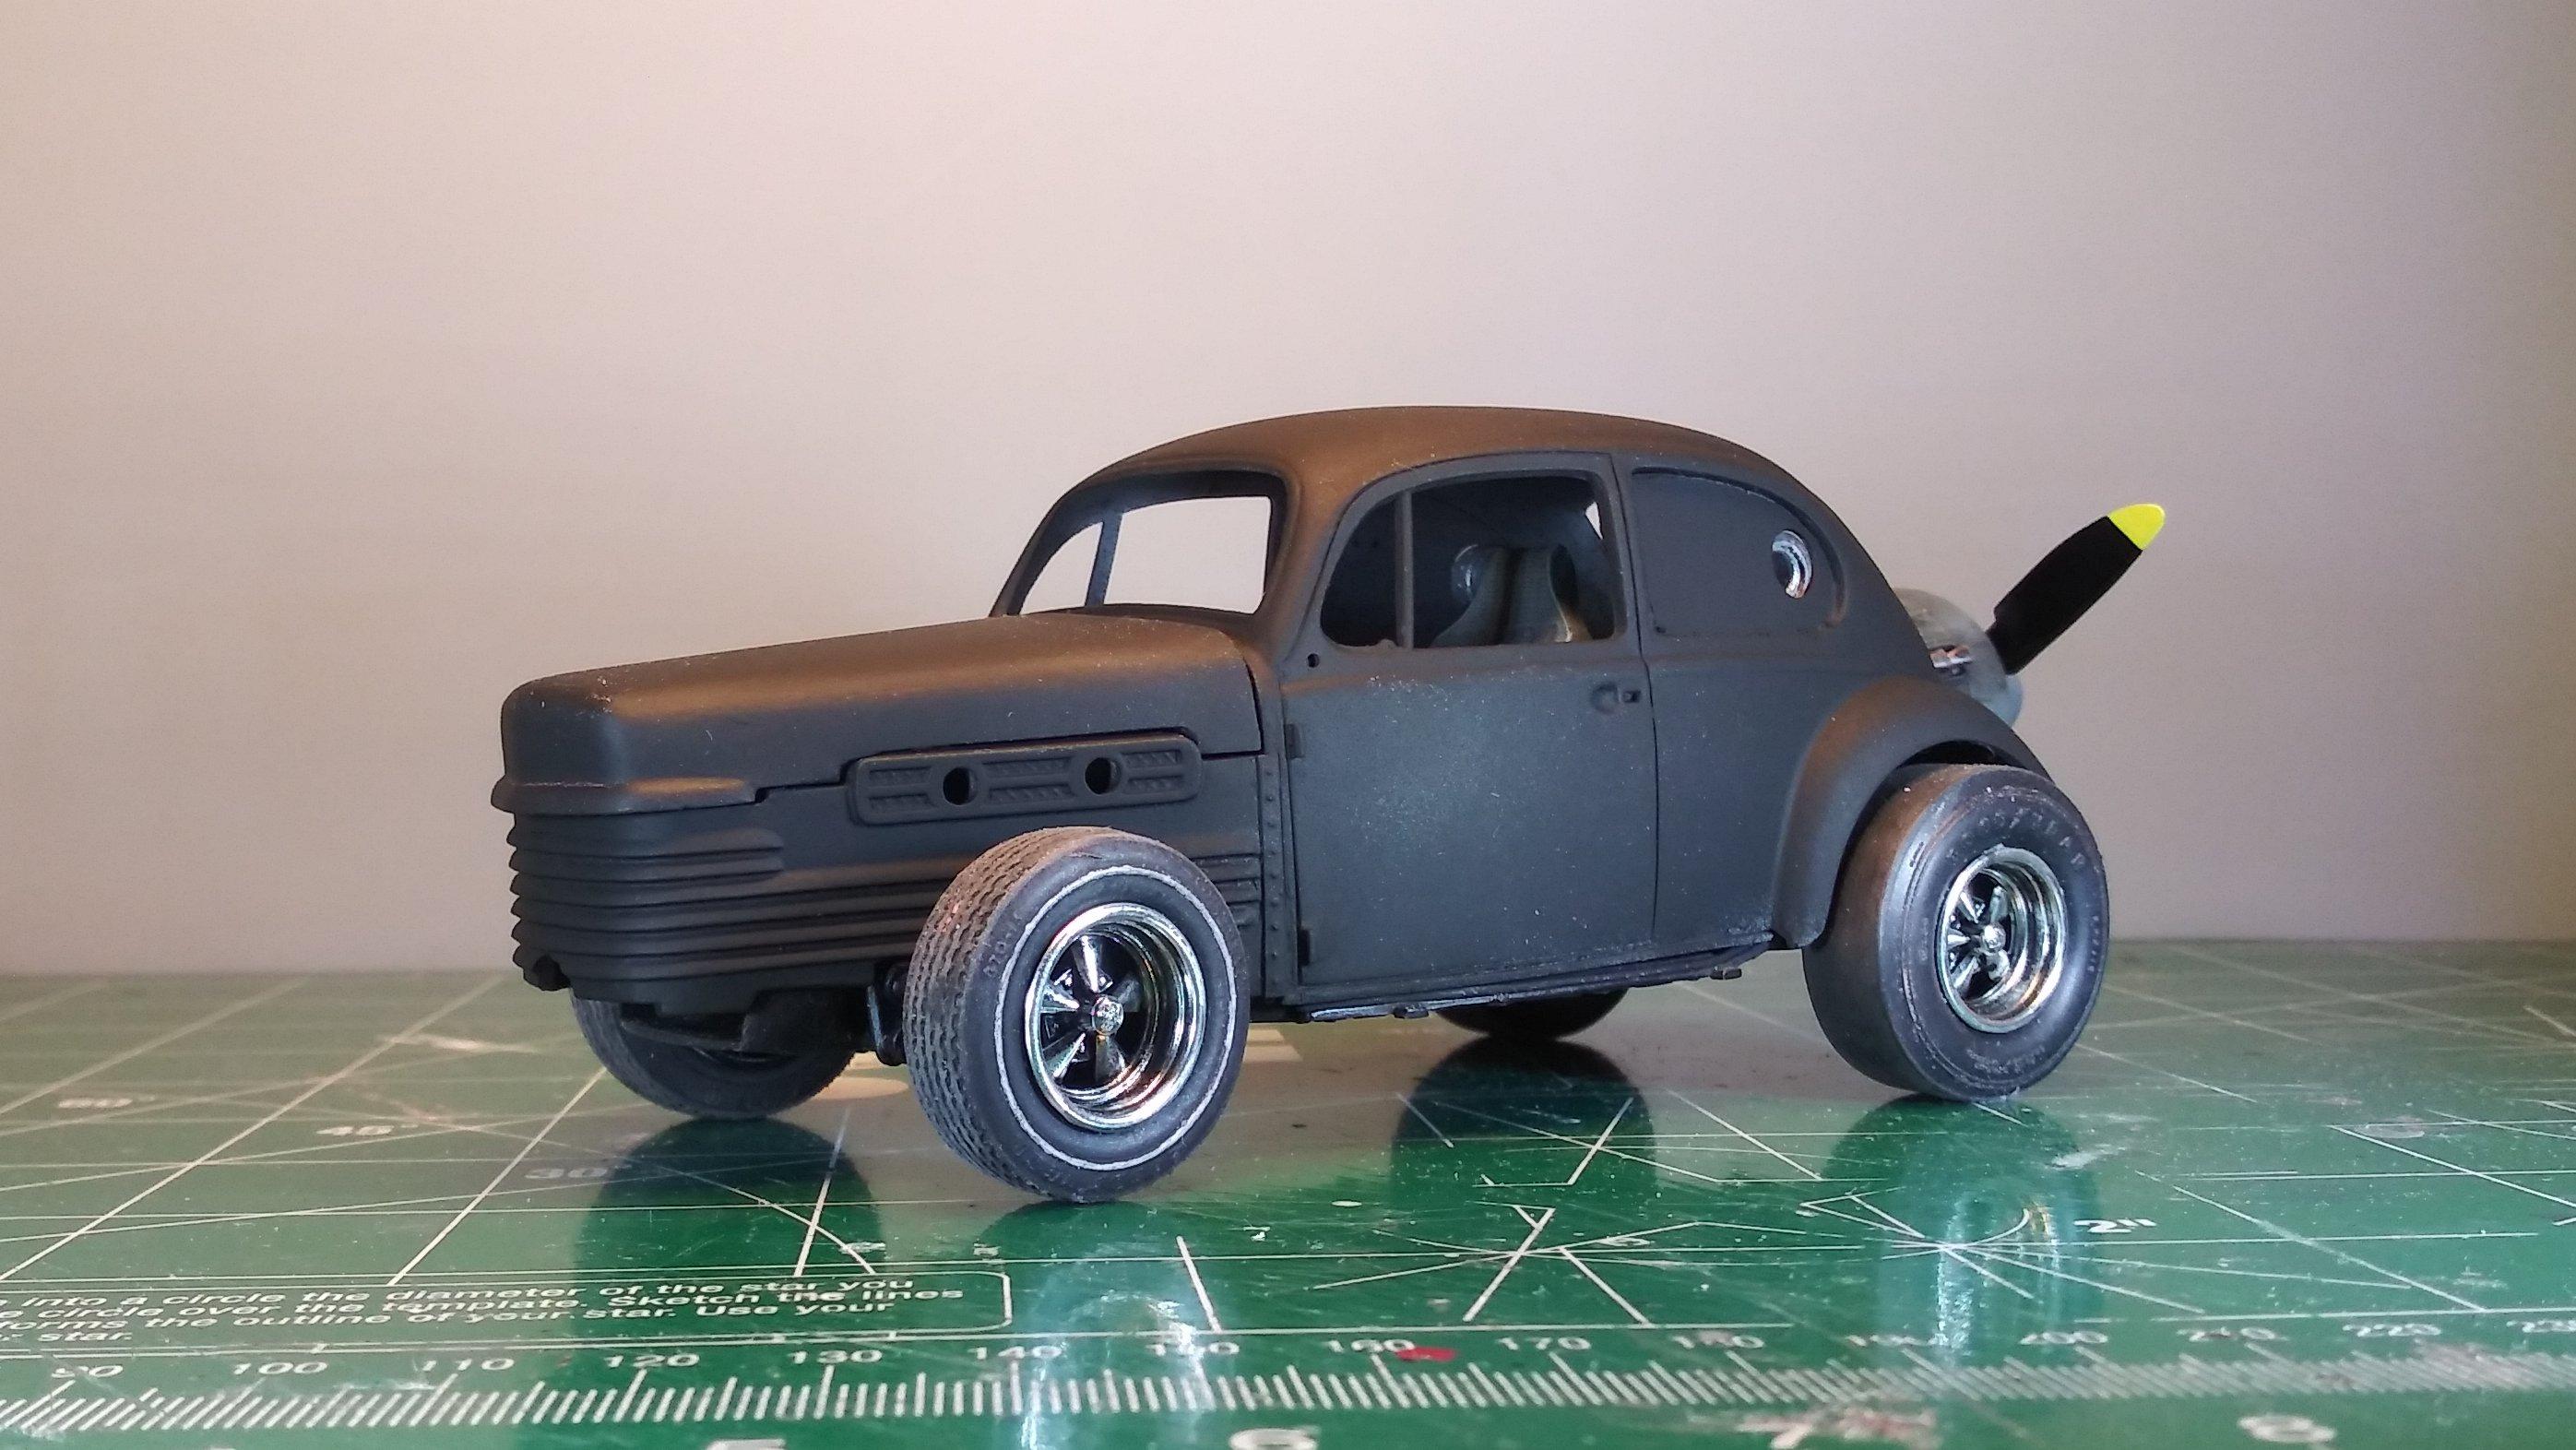
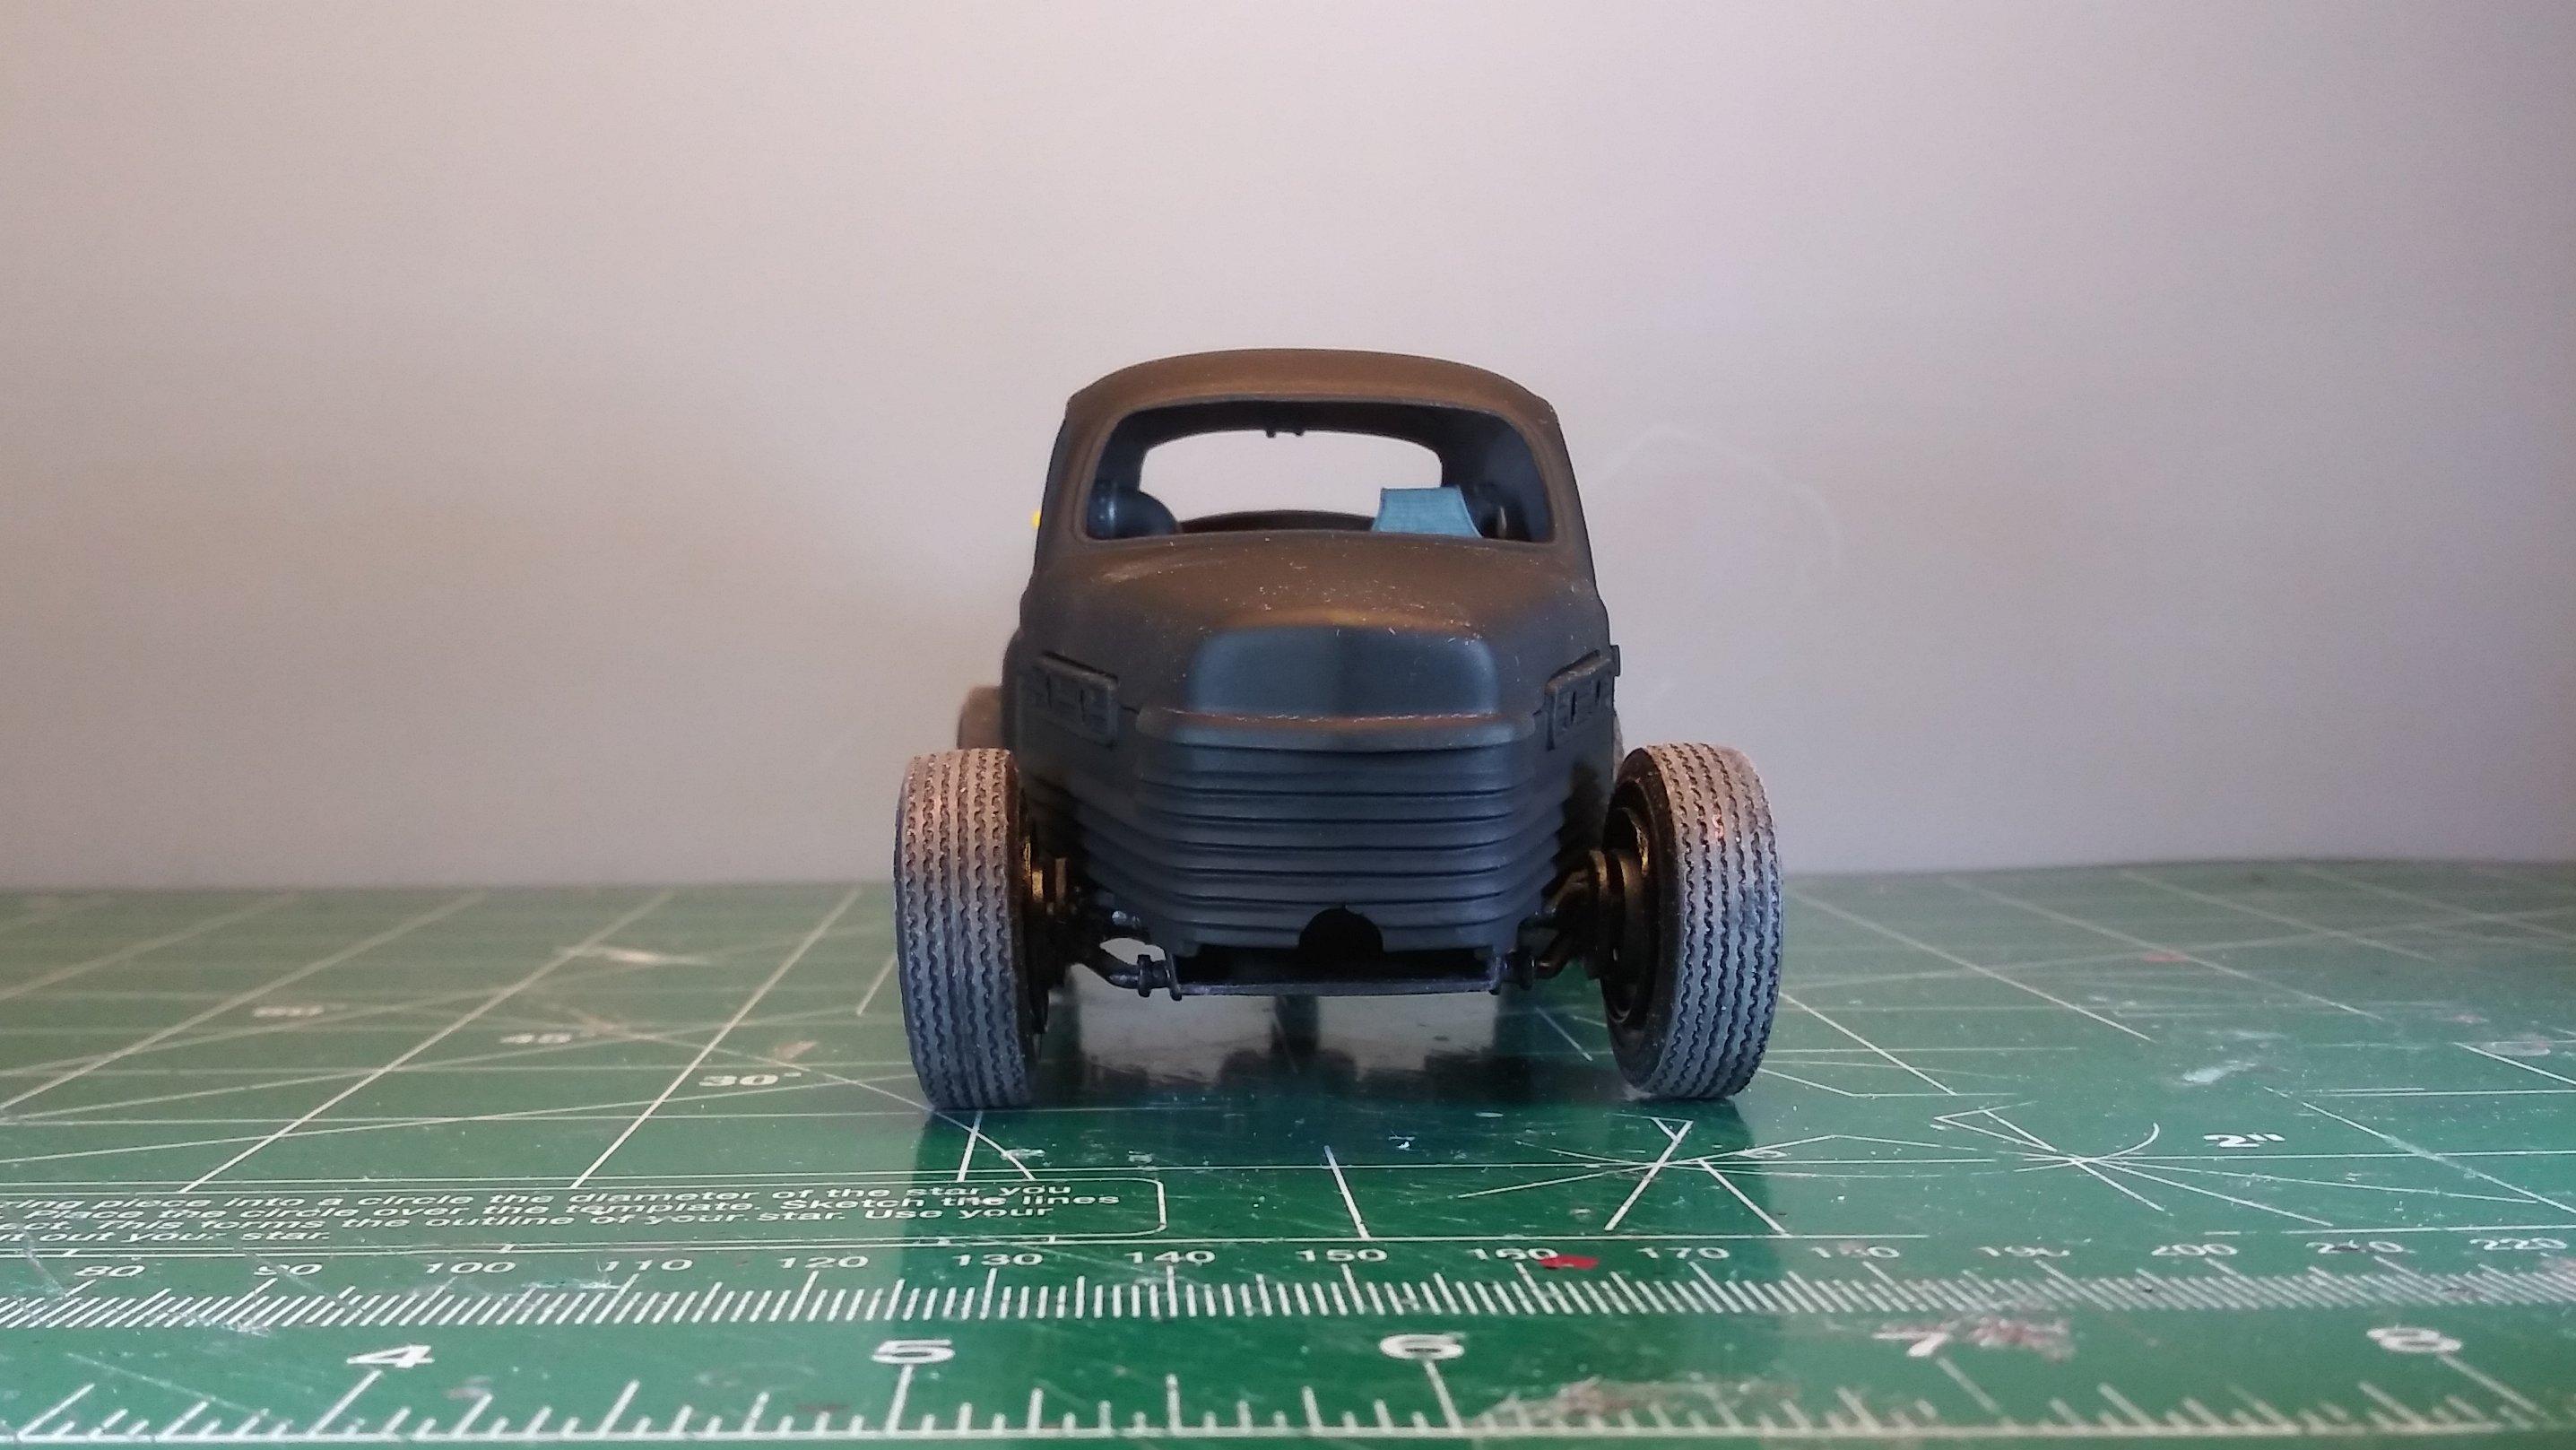
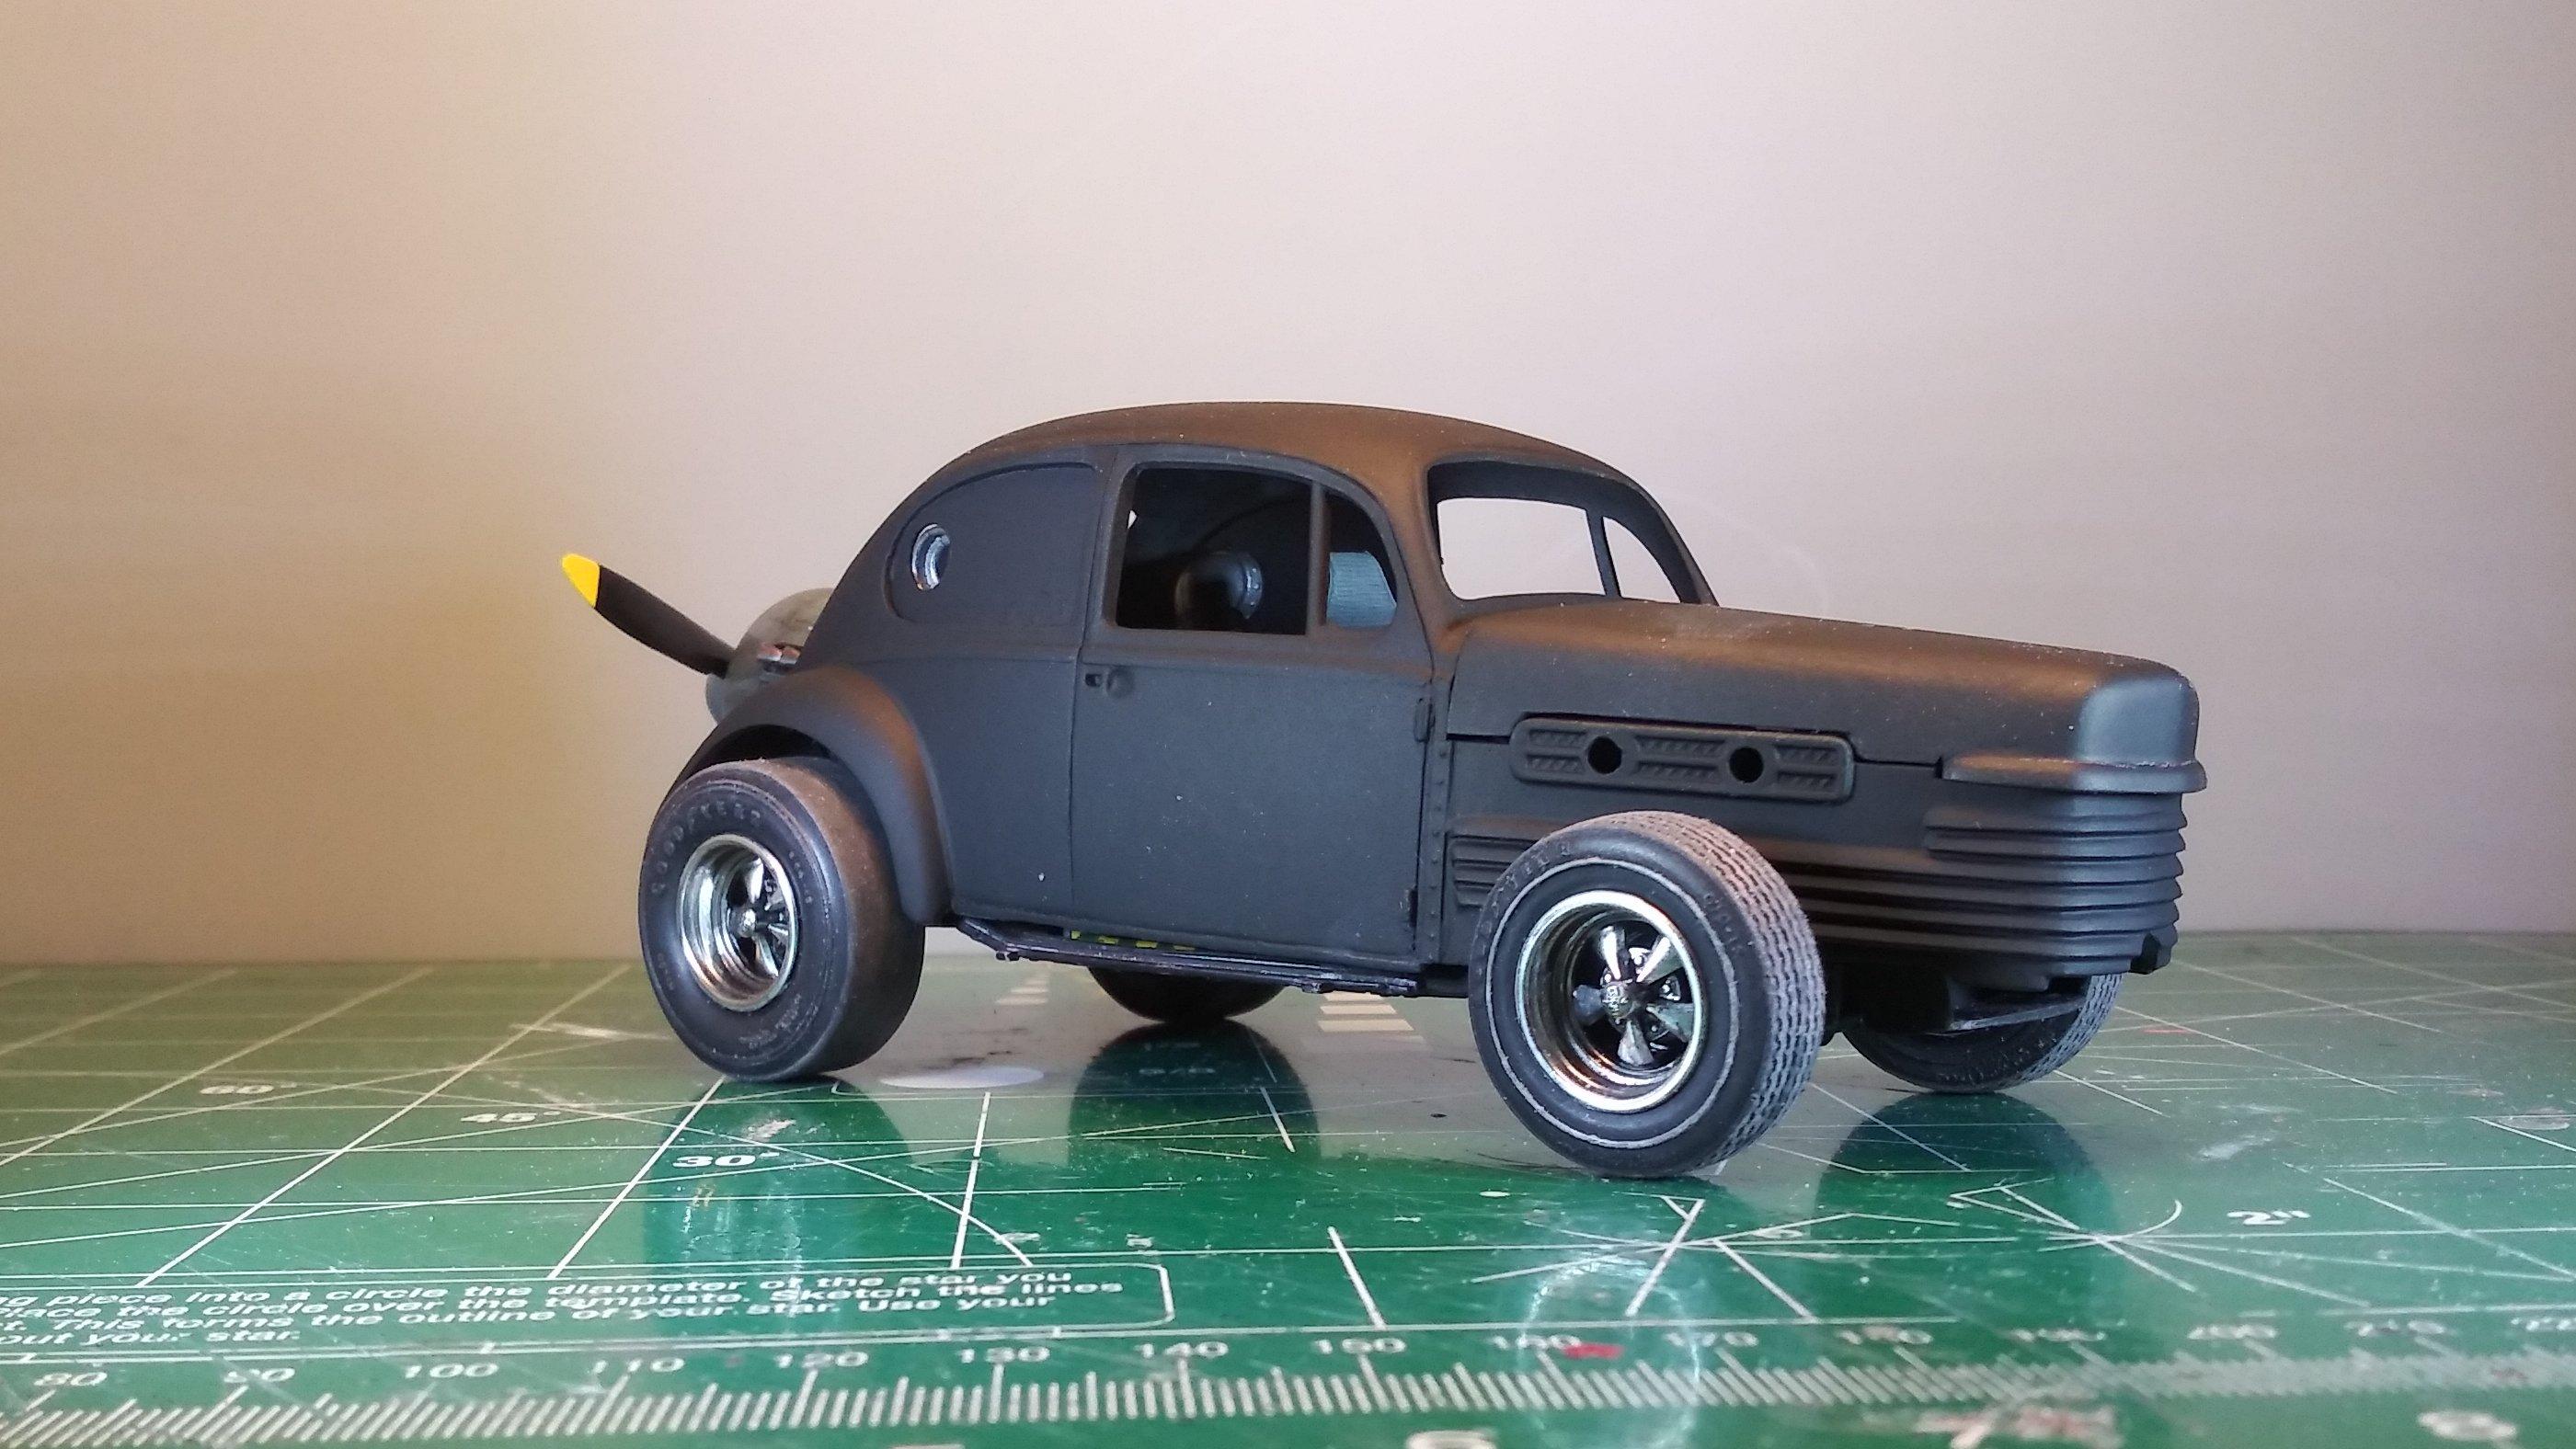
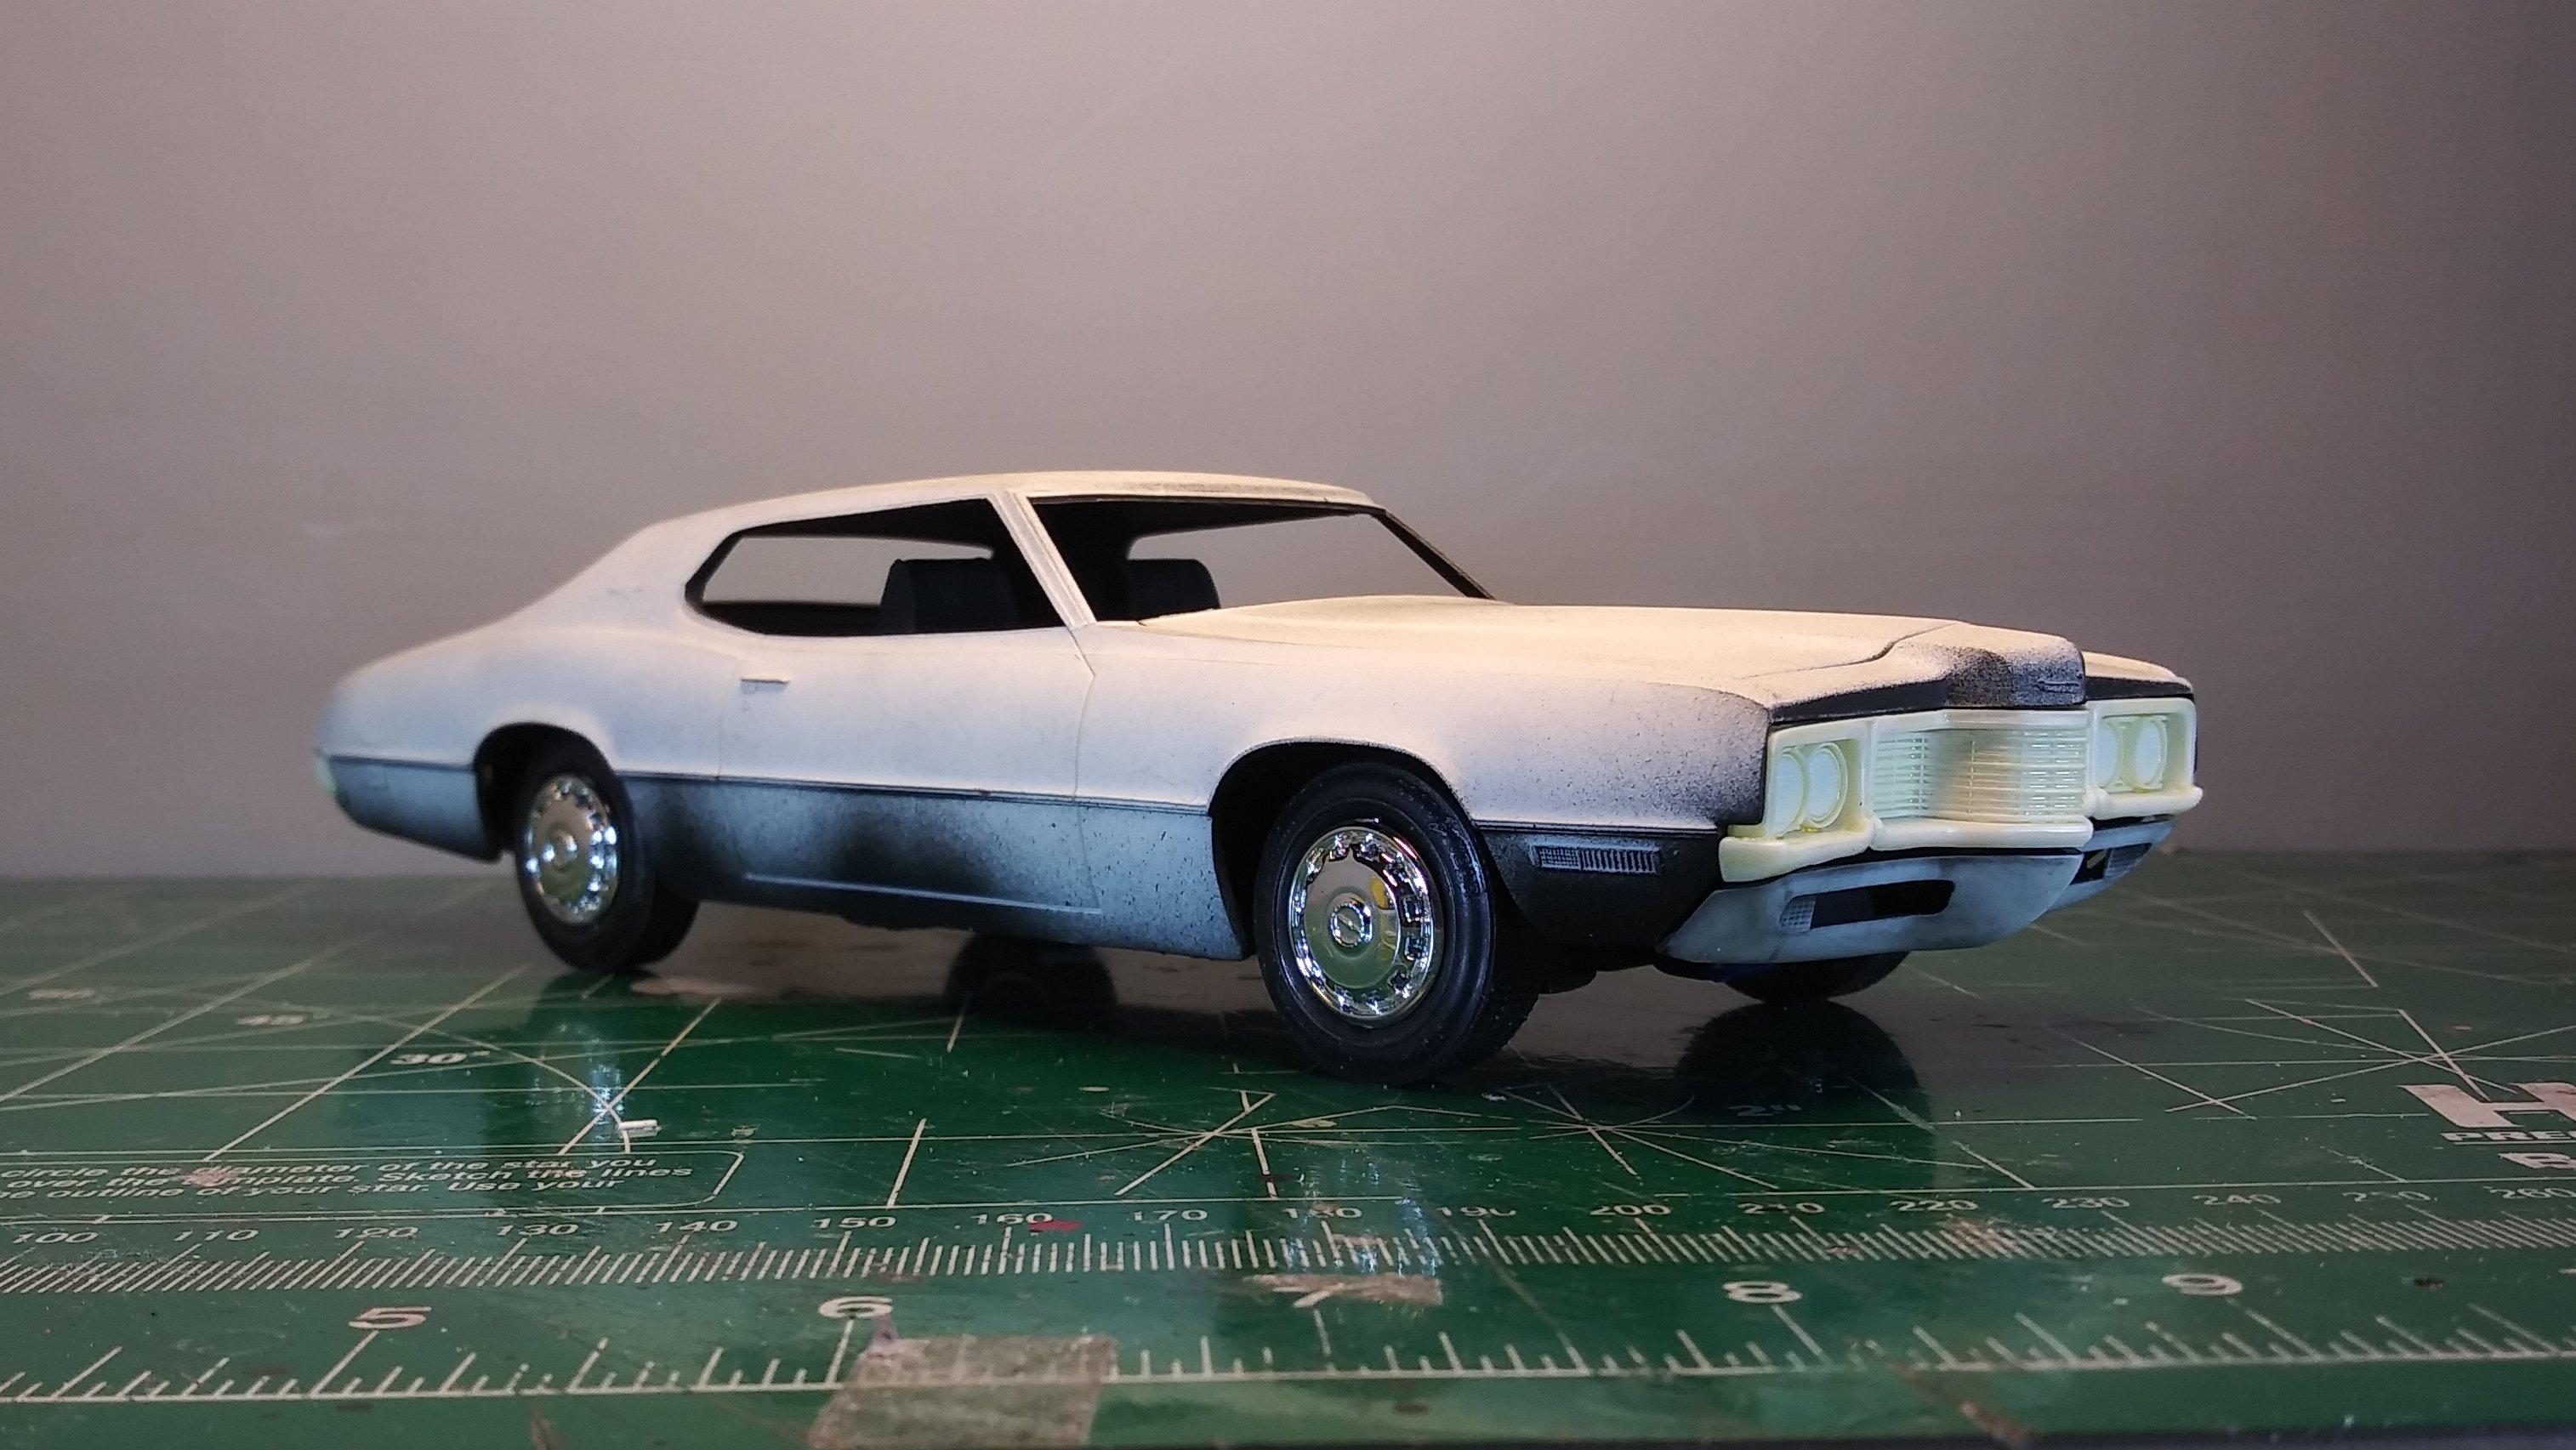
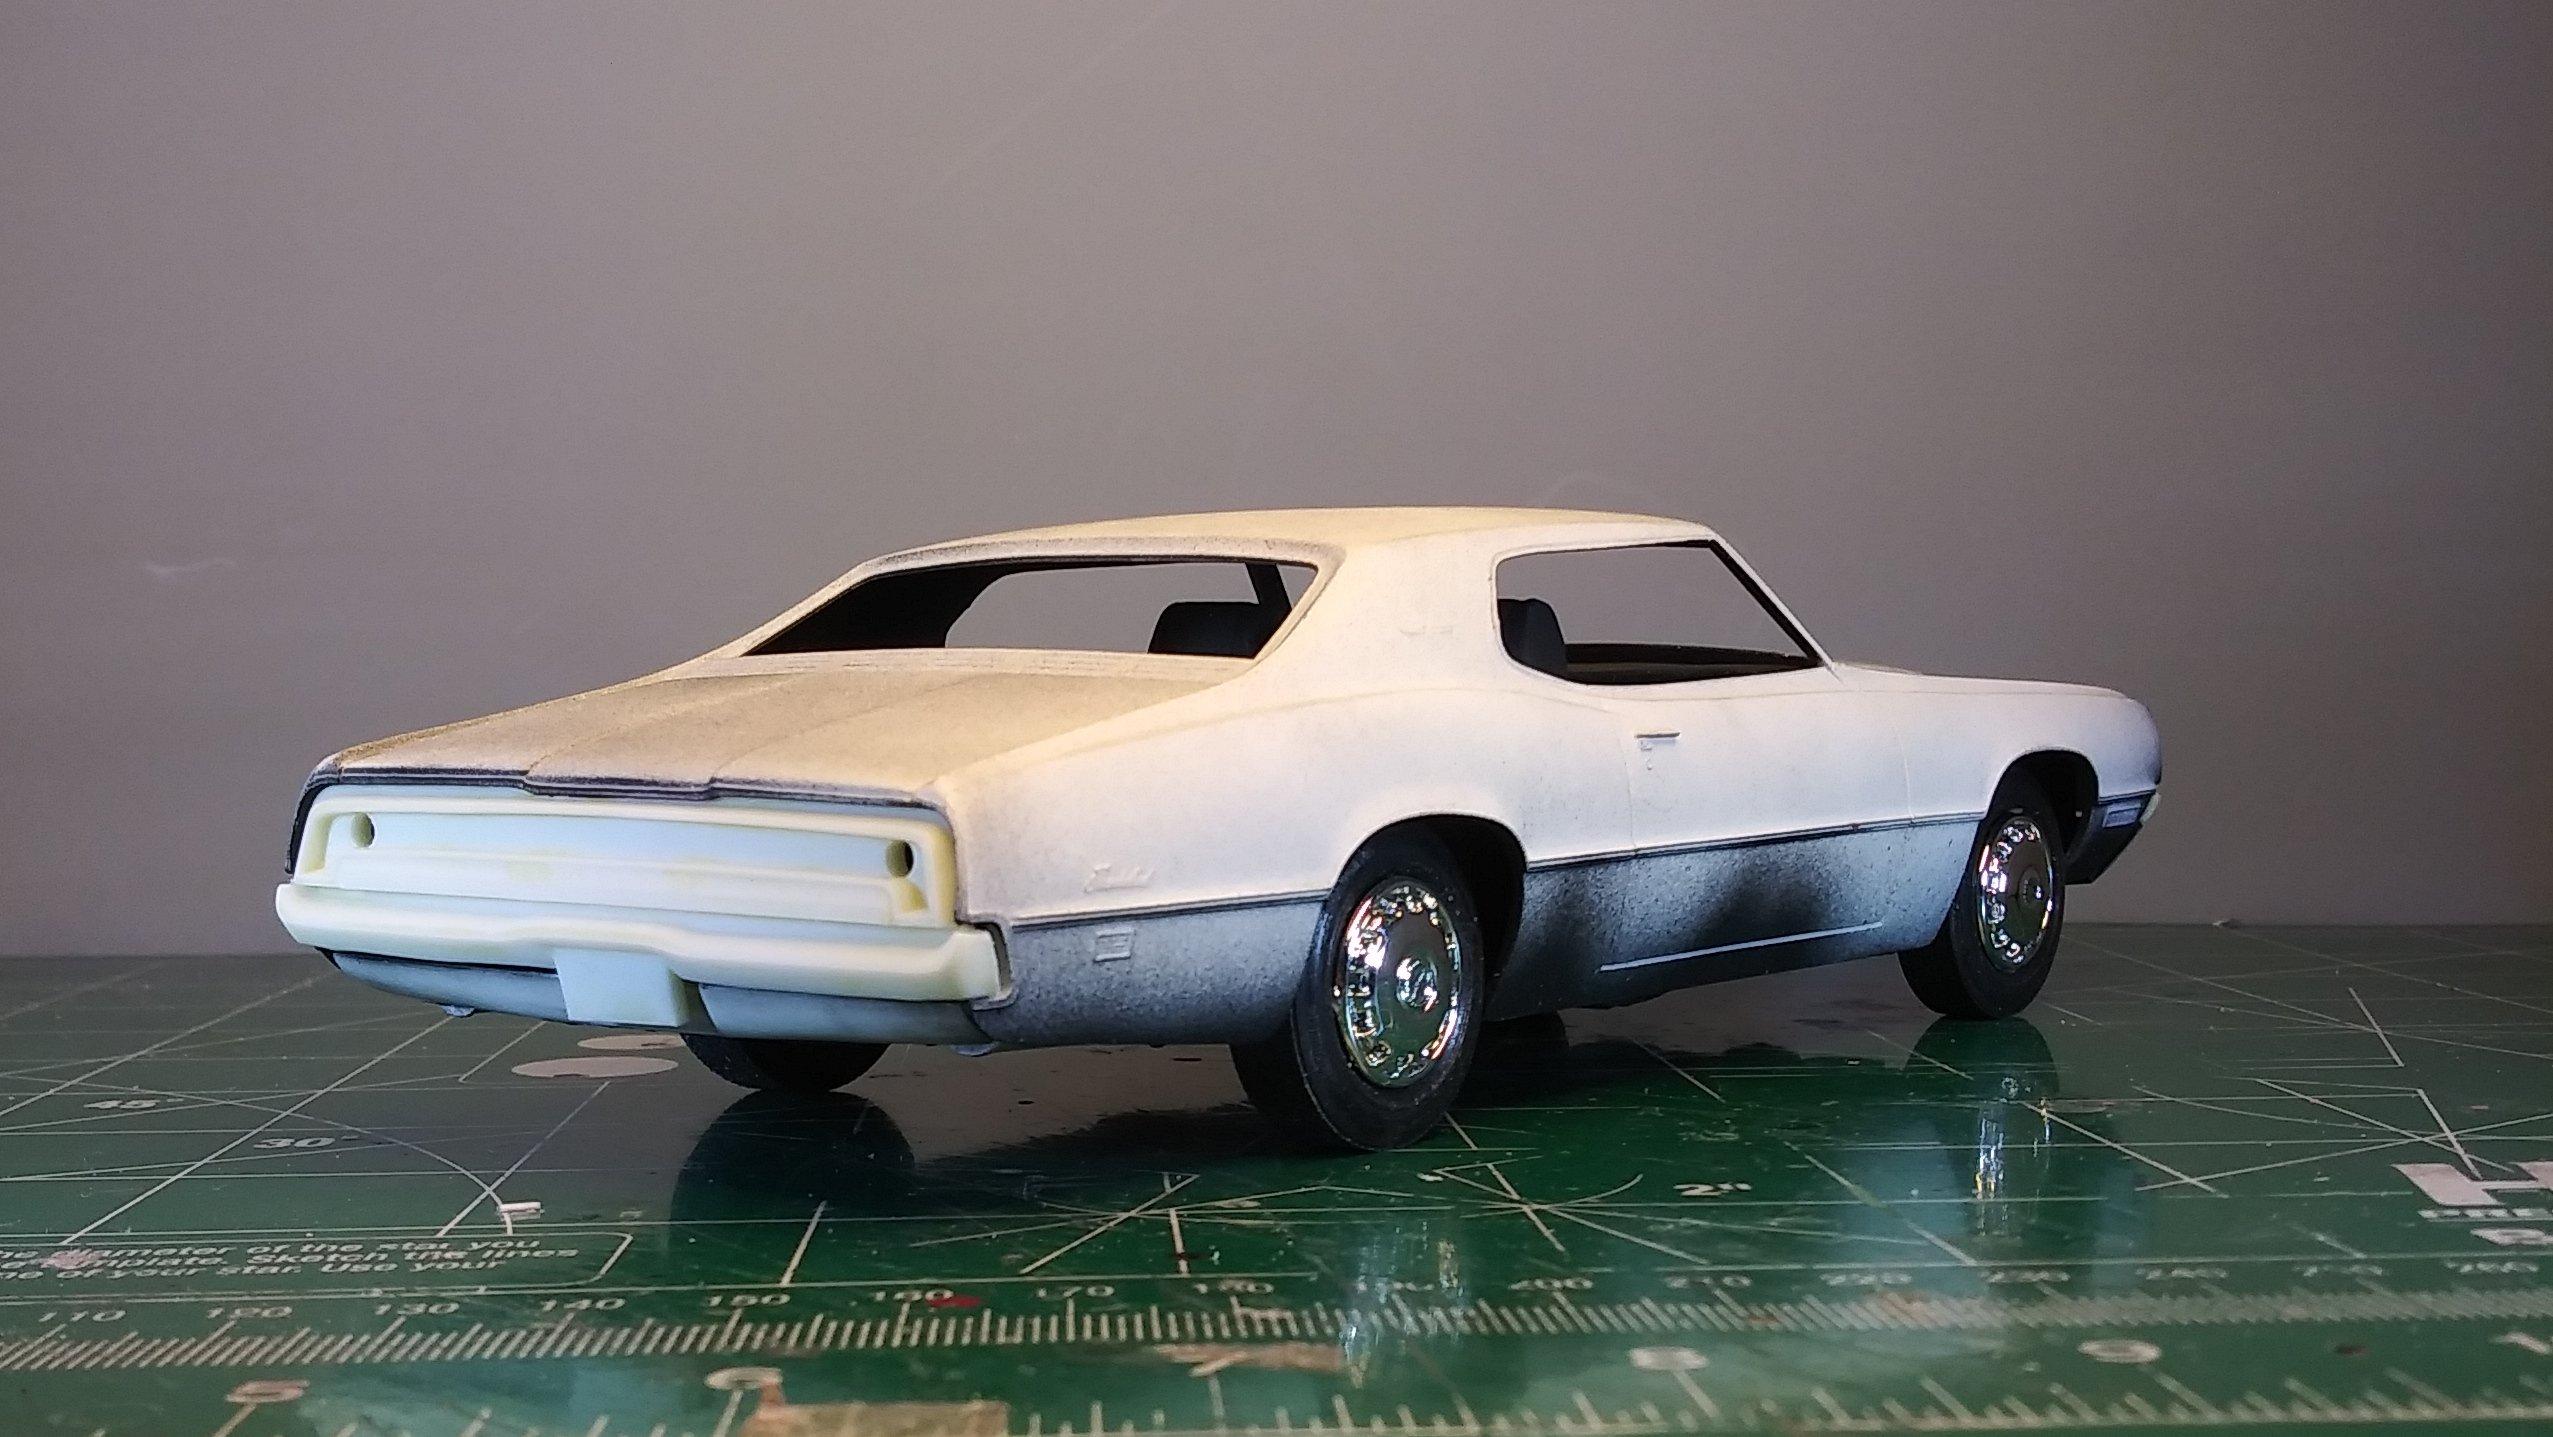
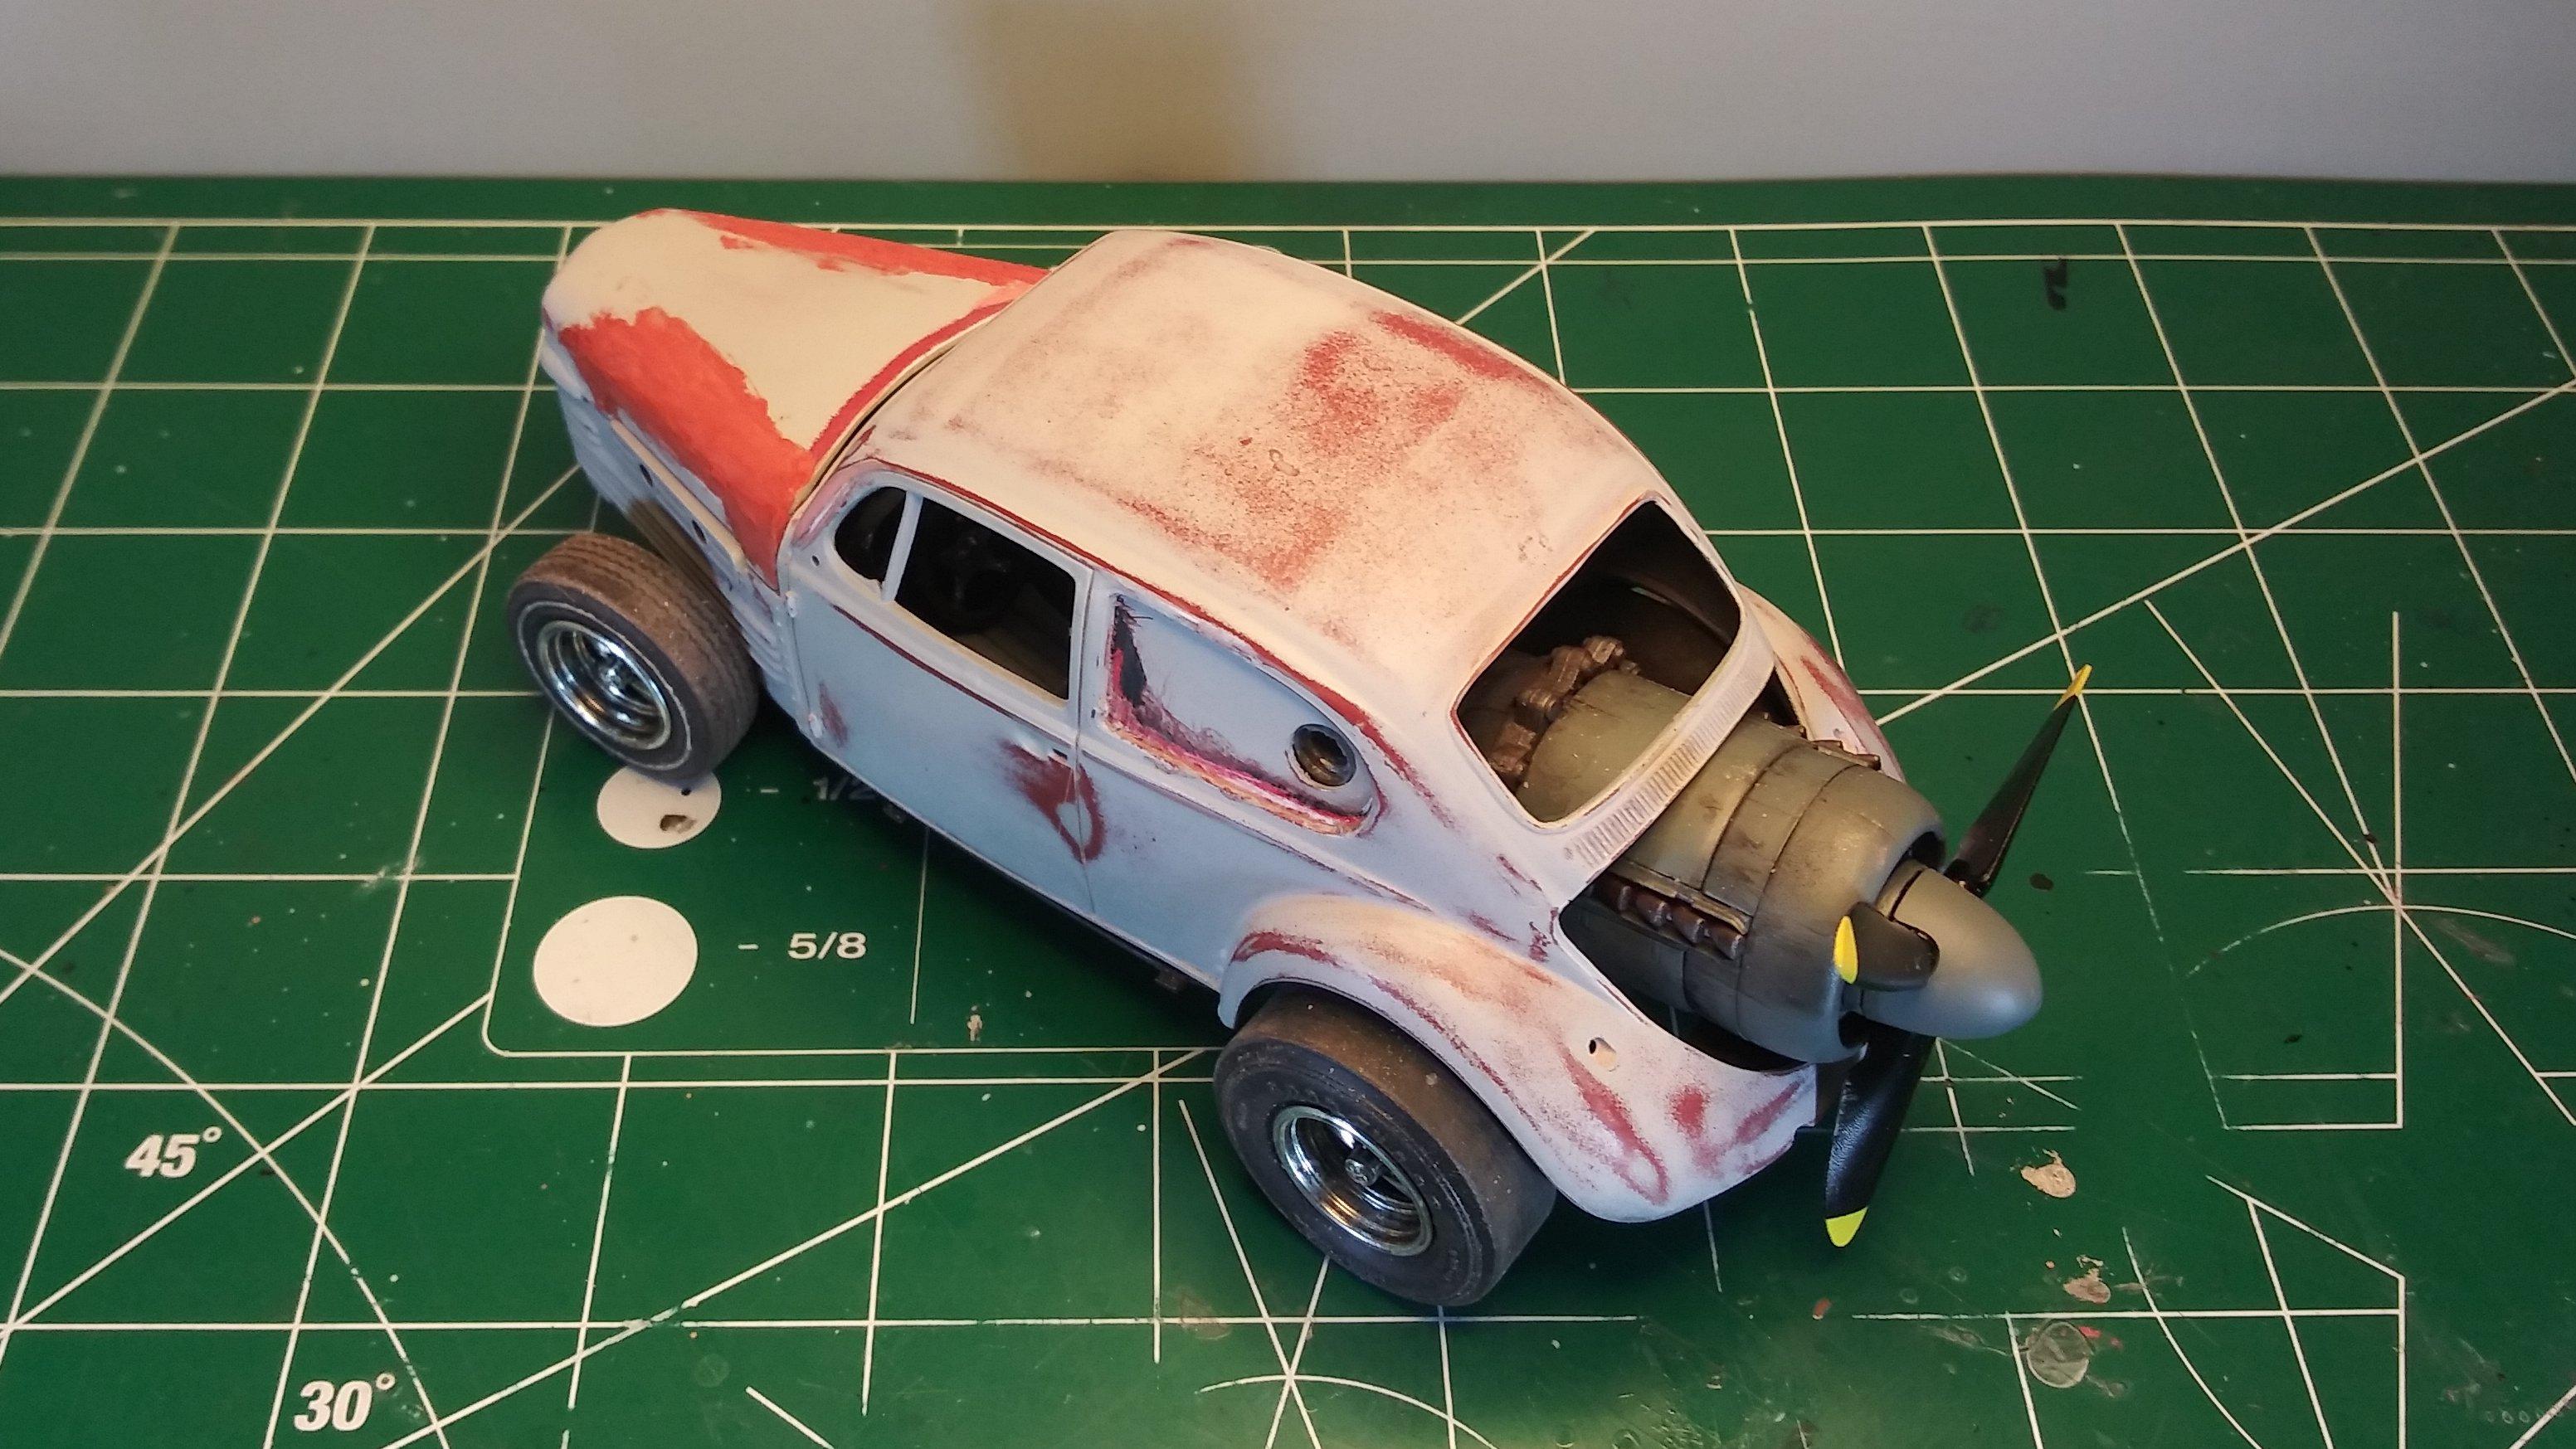
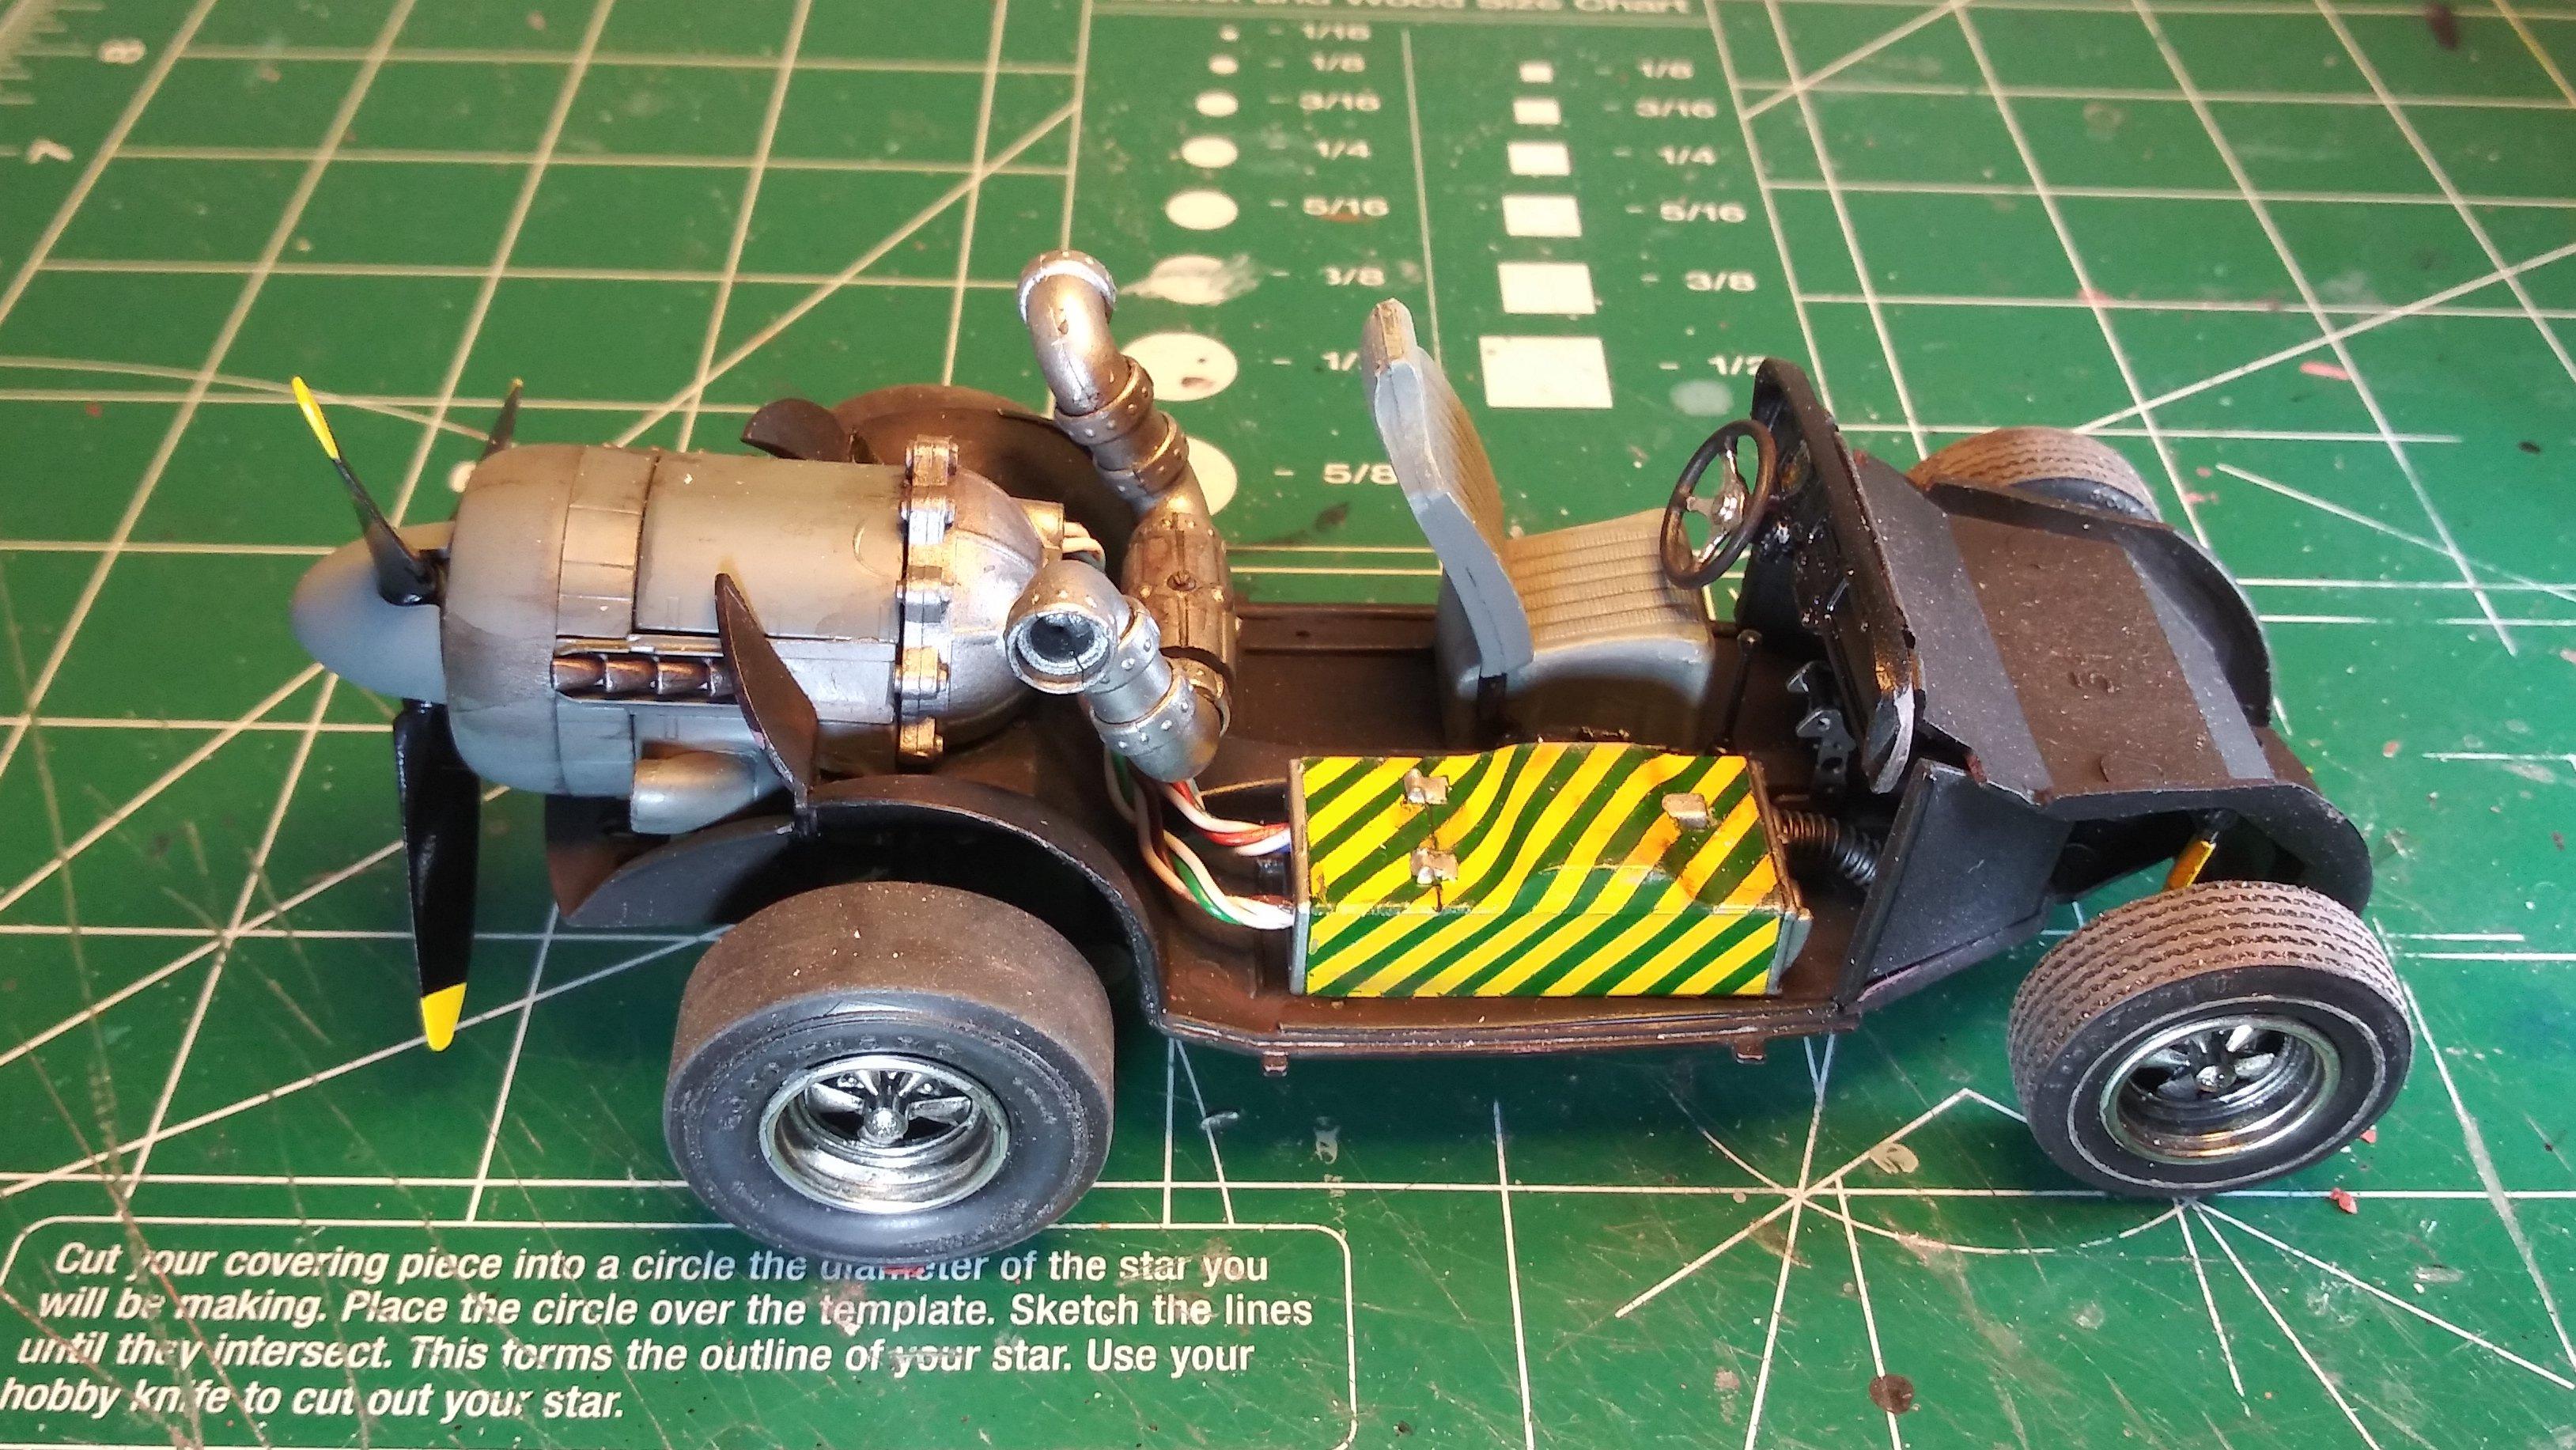
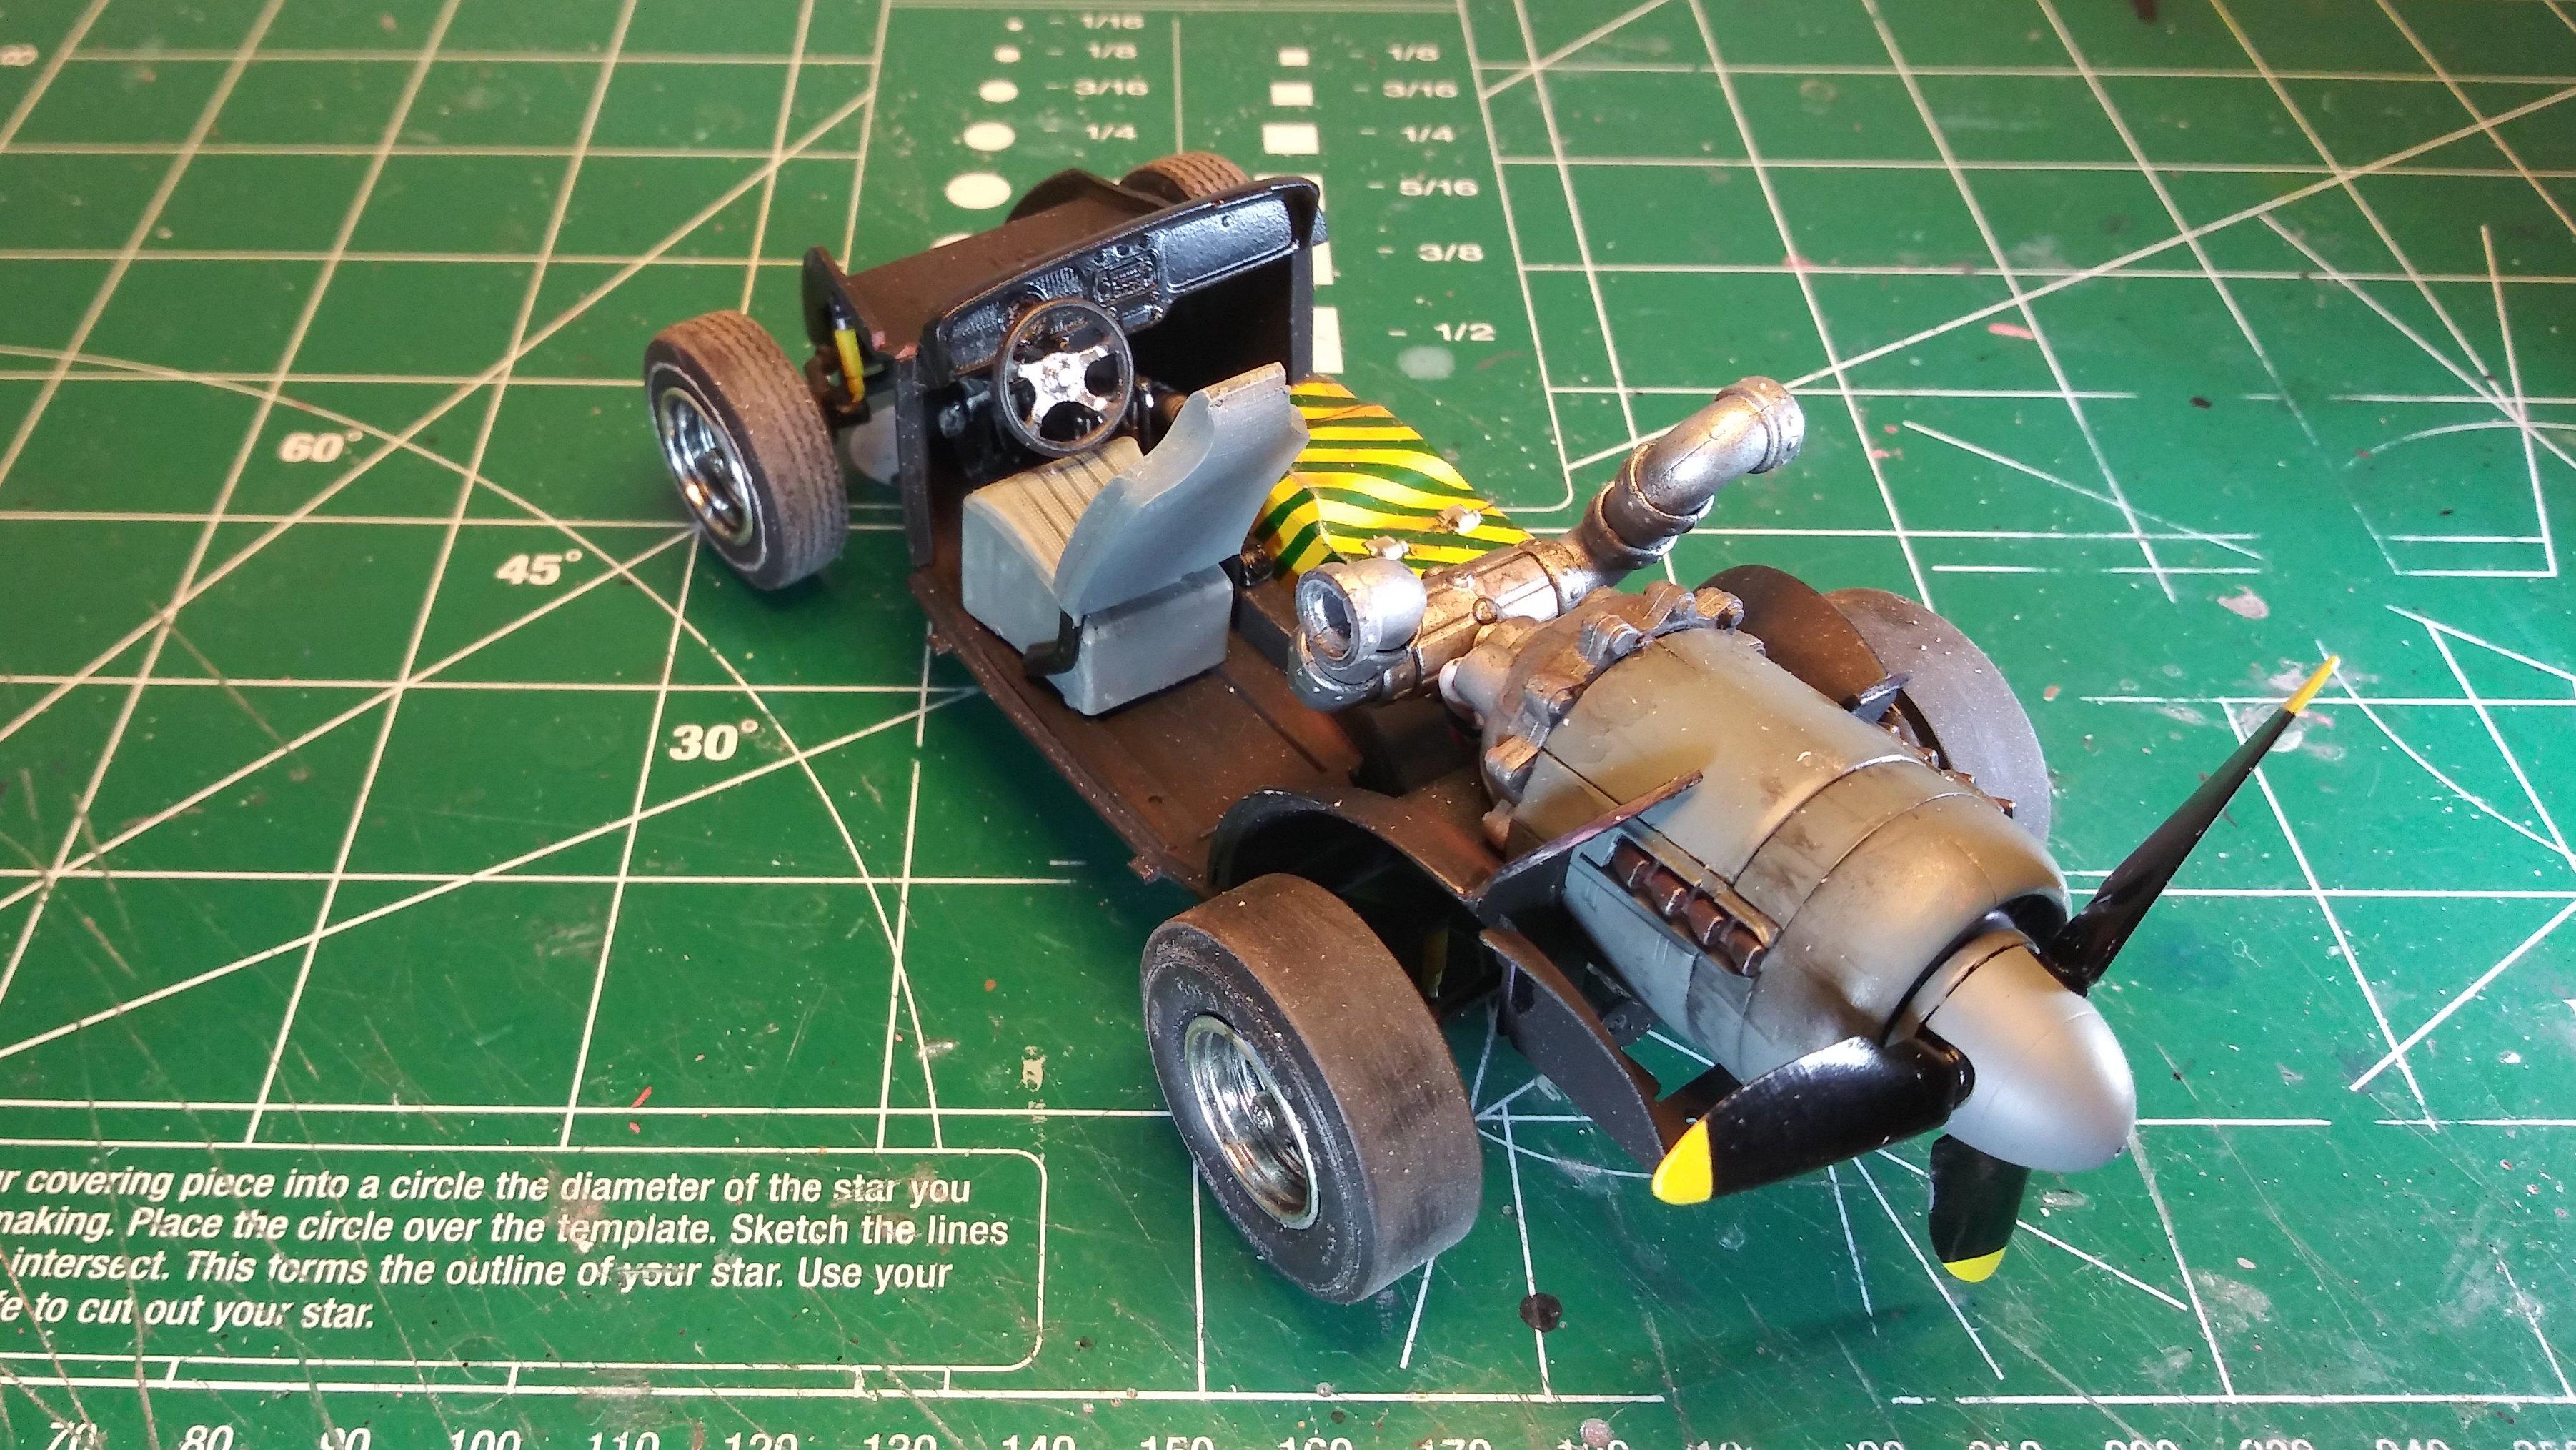
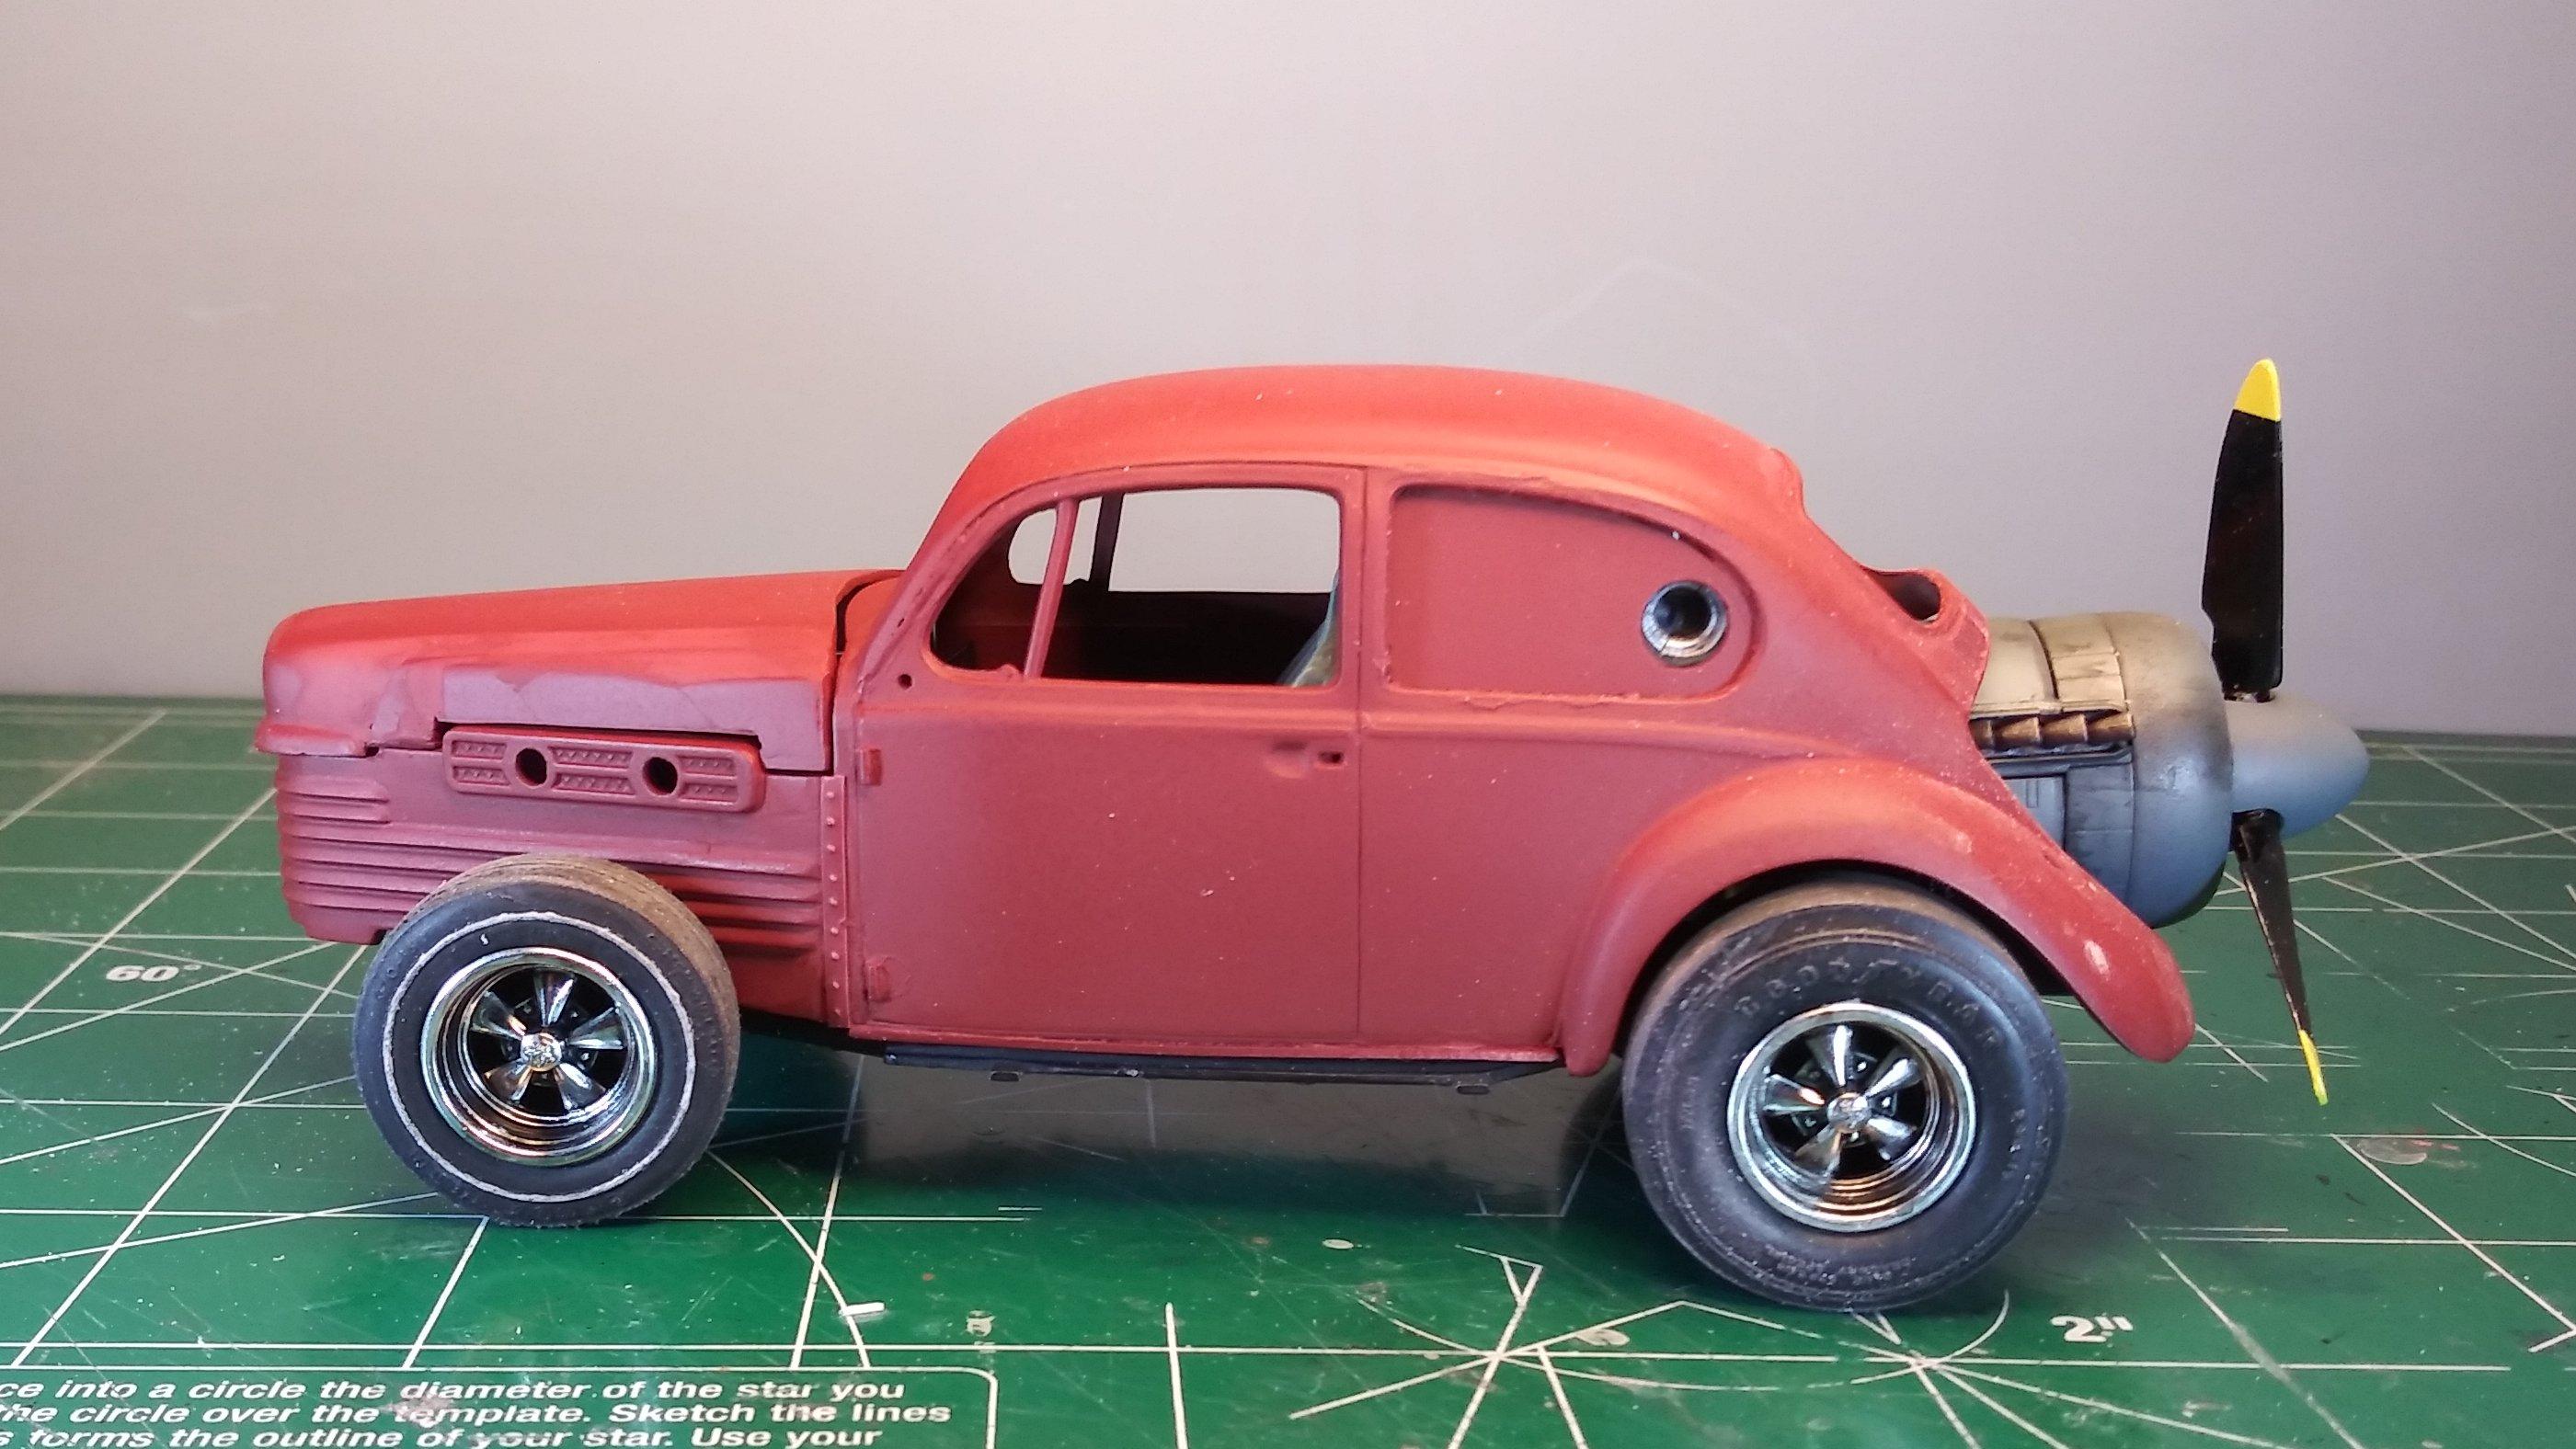
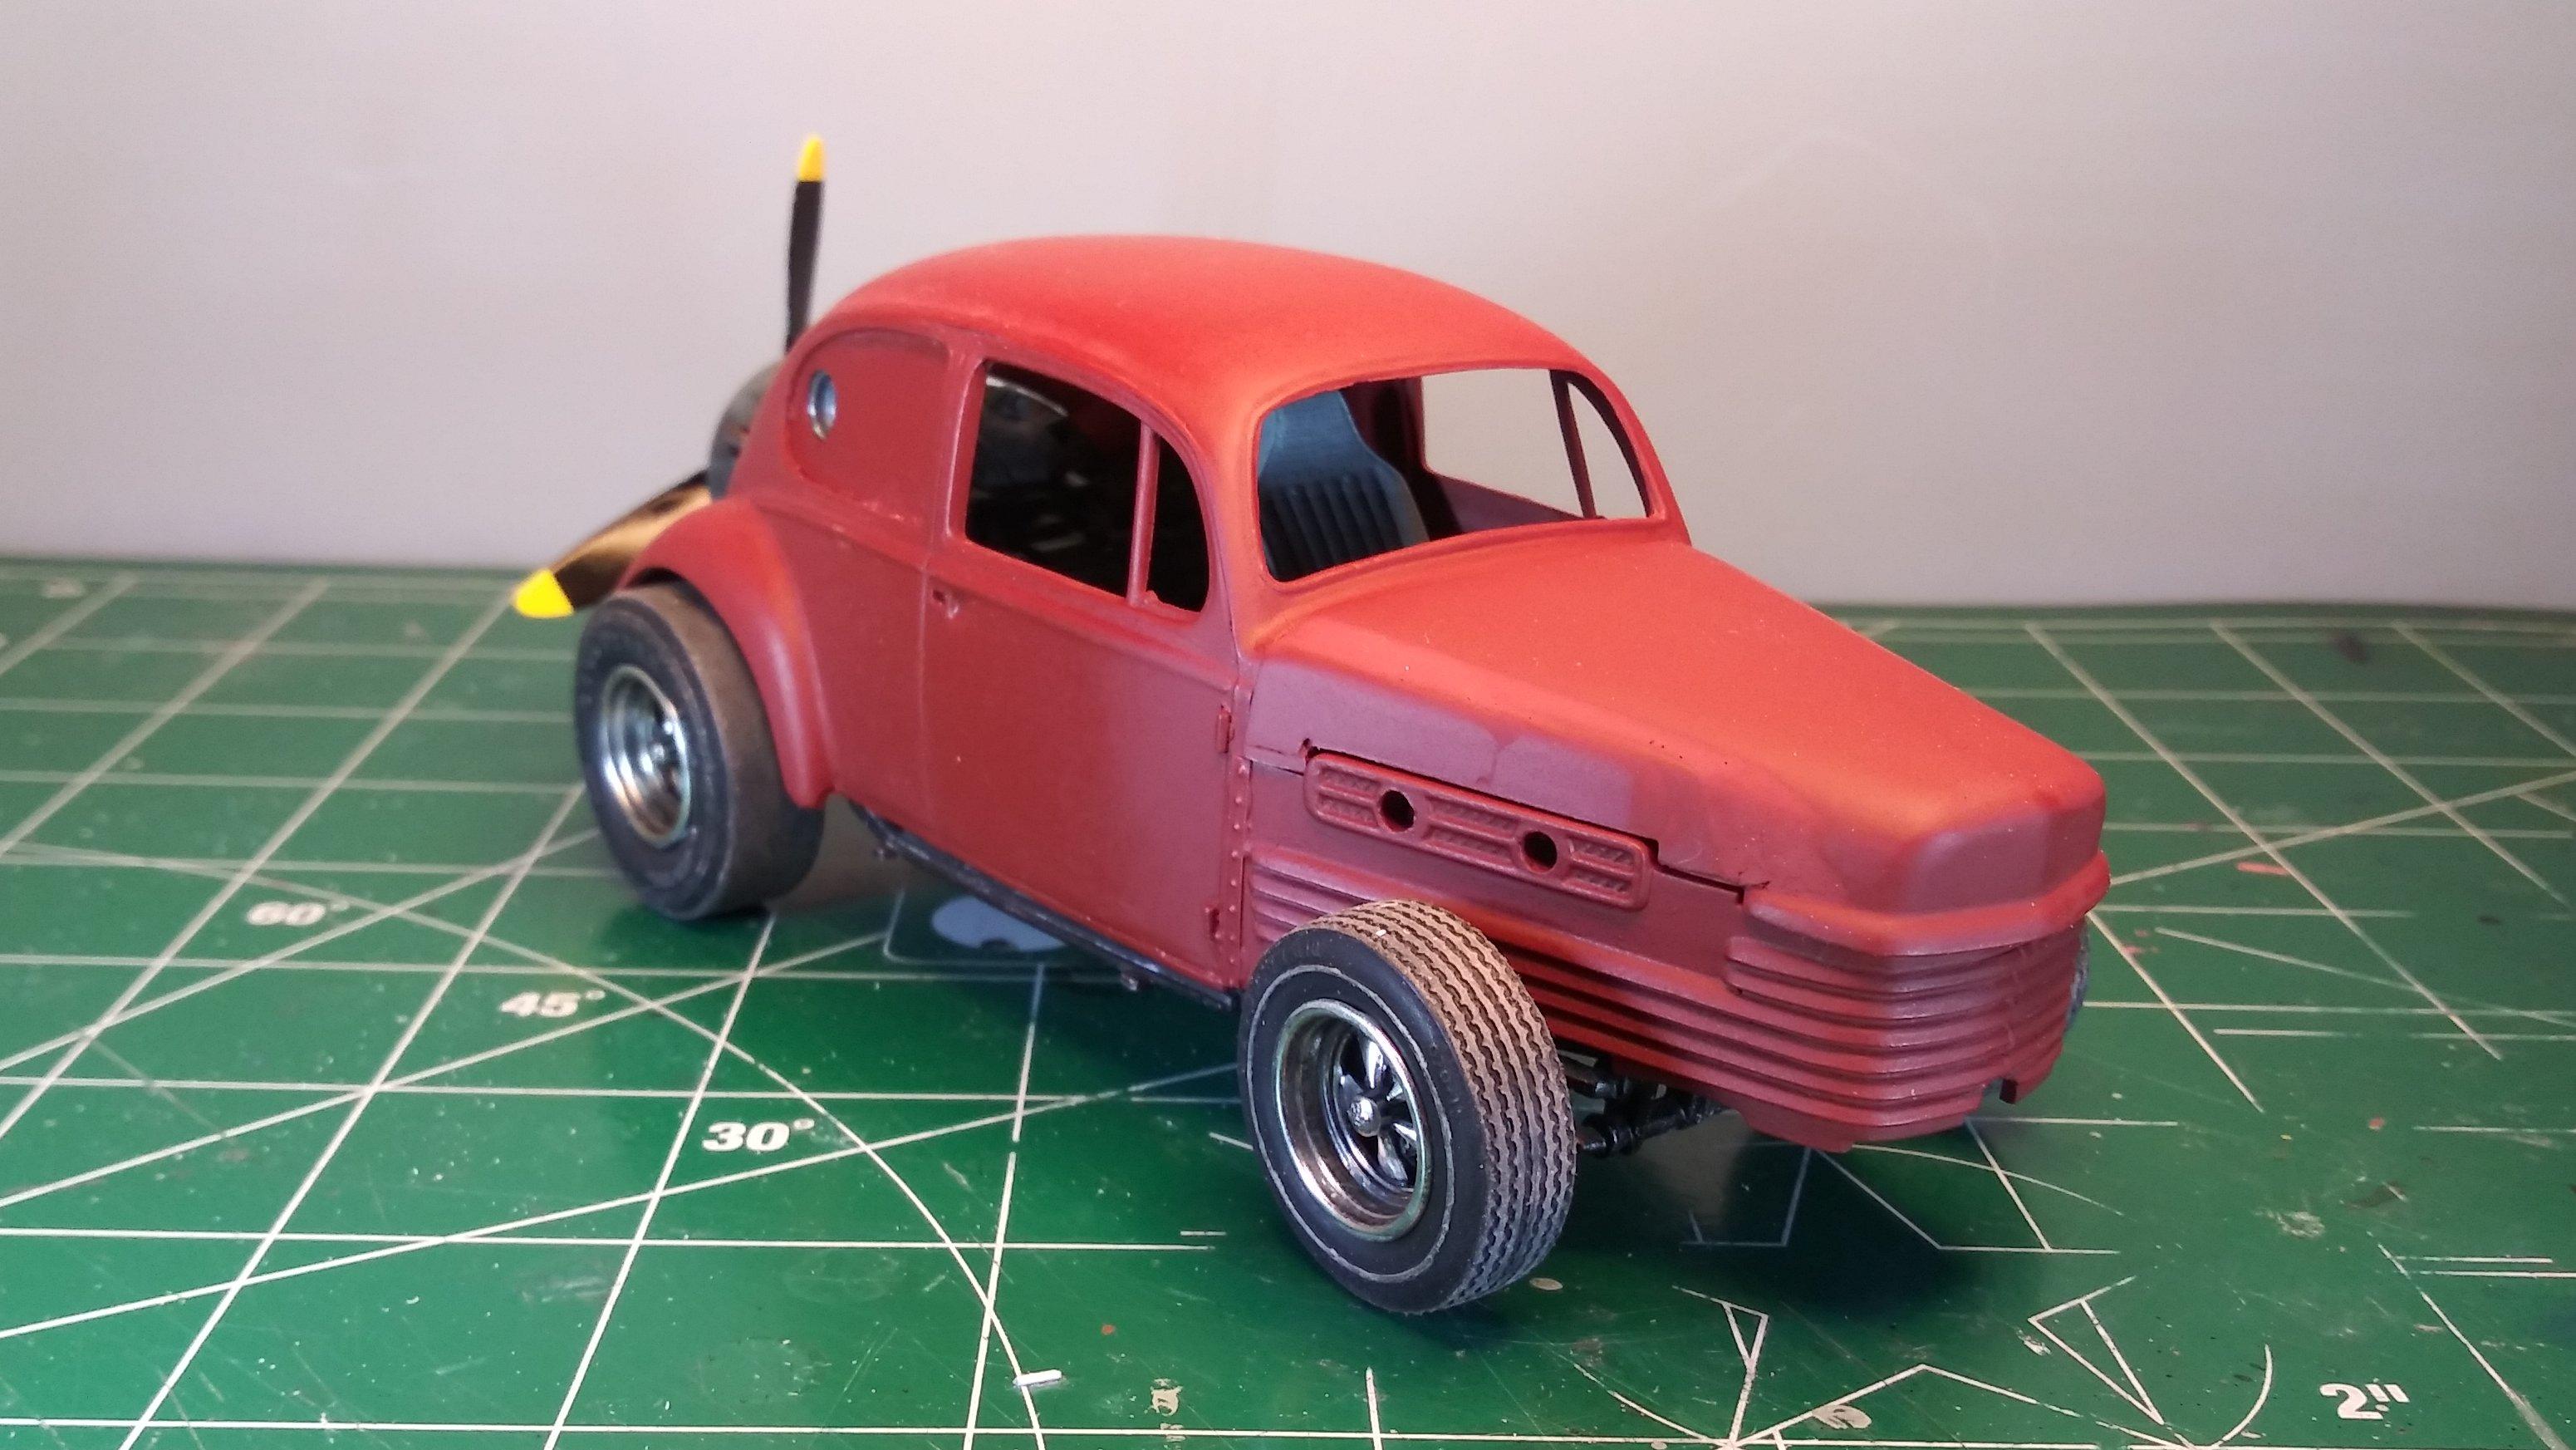
One of the cars I remember fondly from my childhood is the 1971 Ford Thunderbird. My Aunt and Uncle owned one and I had occasion to ride in it many times. It was fast and powerful. The body styling was almost as cool as any Batmobile and the interior followed suit. The high-back bucket seats and center console gave the interior a feeling of performance, rather like the cockpit of a fighter jet, while wrap-around rear seat gave the car a custom feel. Overall a very cool car and if I had my own "Jay Leno Garage", I would definitely have one of these in it. Yeah. I'm not building that version. I started this project while I was waiting for some putty to cure on my Karma Bug build. I needed something more simple that I could use to give myself a sense of completing something. Here the body is in white primer with black over-spray from the interior primer. I've also stripped the "chrome" from the front grill and tail panel assemblies. The chrome situation on this car is a little complicated and will require some special attention. In addition to a moderately detailed version of Ford's 429 V-8, this kit offers an engine plate as an option. Since I'm trying to keep this a simple build and I haven't yet build a model car with this option, I thought I'd give it a try. So we're goin' curbside! Given that this kit has metal wire axles with press-on wheel assemblies, an engine substitution plate and holes for screws that hold the whole thing together, basic detail painting on the chassis will be good enough. I wanted simple, I got simple! I really need to do something about those tires though. ? As always, thanks for taking the time to look and please always feel free to comment. David G.
-
Thanks Dann, that's a great idea! I think I'll do that. David G.
-
And thanks for following along Dann! I do appreciate your support and the support of everybody who have stuck with me on this one. Here's another update as the slow march drags on! Finally getting to a point where I can see completion on the horizon. So now it's time for a primer check to see where I need to do some of the finer body work. Which means that much of this pretty primer will be sanded away as I attempt to correct the blemishes. Yeah, I guess there were a few areas that required attention. I'm always amazed that body work in any scale still just looks like body work. Well, that's all for now. Thanks again to all those who offer their suggestions, comments critiques and all other types of support. David G.
-

1941 Plymouth - "Resto-Rod" - Interior pictures added
David G. replied to Ramfins59's topic in Model Cars
Well done! I like all the added detail in the engine bay. One question. Did you leave the windshield center post out as part of the customization? David G. -
Randy, I'm very glad to see your Maserati back on the bench. A work this spectacular deserves to be finished. Thank you for taking the time to document your work. This project is now and will doubtless continue to be an example of the pinnacle of what can be accomplished with our hobby. David G.
-
Wow Darren, somehow I missed a lot of updates on this one. You've been busy! I like the theme (really more of a composition actually) for this one and your weathering effects are very convincing. I'm glad this popped back up in mu que. Regards, David G.
-
The chassis and wheels look great! Then I went to the next page and saw the paintwork on the body, Wow! Not the color I expected. The original kit being cast in red styrene obviously set certain expectations in my mind. Then, Blammo! Expectations totally shattered! The blue looks fabulous on that body! And the masking for the stripes looks perfectly executed. Well Done Sir! David G.
-
Funny you should ask Dann! I was just editing my photos from the weekend and now I'm ready to post them. The body work is at the filling, smoothing, back-filling and re-smoothing stage. Rather tedious and not much to show. But, I finally got the interior finished. Once I got body modifications to where I was satisfied with their structural stability, I was able to make the needed adjustments to the foot-well / trunk-floor panel and install it. You can see the cuts I made to the panel near the dashboard to accommodate the thickness of the new hood. I also thinned the nose end to fit better into the more narrow front end of the car. Doing that allowed me to place the dashboard and steering wheel. Done! That's it for now. Thanks for staying with me on this one. David G.
-
As I recall there were some molding issues with the one I built too. I don't specifically remember what thew were but I think that they did influence some of my customization decisions. I'm sure you'll find a workable solution. What you have done so far looks great. David G.
-
Thanks for your kind comments! Here's to a fun and productive 2020! David G.
-
And what a build it is! Fabulous work! David G.
-
Wow! Your work is truly more "model engineering" than it is "model building"! Impressive. David G.
-
I'm glad to see that you're back at this Simon. This is a rather large undertaking and I admire your patience and persistence. Thank you for the updates. David G.
-
Thanks Dann. Knowing where one is and where one wants to be is the easy part. The road in between? Now that's another matter. Thanks Rusty, it's been a fun build too. I'm glad you're enjoying it. David G.
-
That's coming along rather fantastically! Can't wait to see more. David G.
-
Very cool concept, rather like a Chevy Deora. David G.
-
Very cool! Gilligan's Is;land was one of my favorite shows as a child. David G.
-
Looks like you got the perfect amount of shine on the vinyl upholstery bits. David G.
-
Not much bench time this week but still some progress. I finally have the hood dimensions roughed out. Now it's time for smoothing and evening the overall appearance. I think that the profile works. I also added some rivets. Jetzt mit Nieten! As always, thanks for following along. David G.