David G.
-
Posts
11,324 -
Joined
-
Last visited
Content Type
Profiles
Forums
Events
Gallery
Everything posted by David G.
-
I'd say you nailed it! It's amazing what can be achieved with some good detail painting. David G.
-
I'm amazed by the improvements you've made to this simple kit. All of them exceptionally well done. David G.
-
Excellent paintwork! I wish I could get paint to lay down like that. Of course, the rest is well done too but the paint really makes it pop. David G.
-
Very cool! David G.
-
Nicely Done! David G.
-
Rusty, Thank you! David G.
-
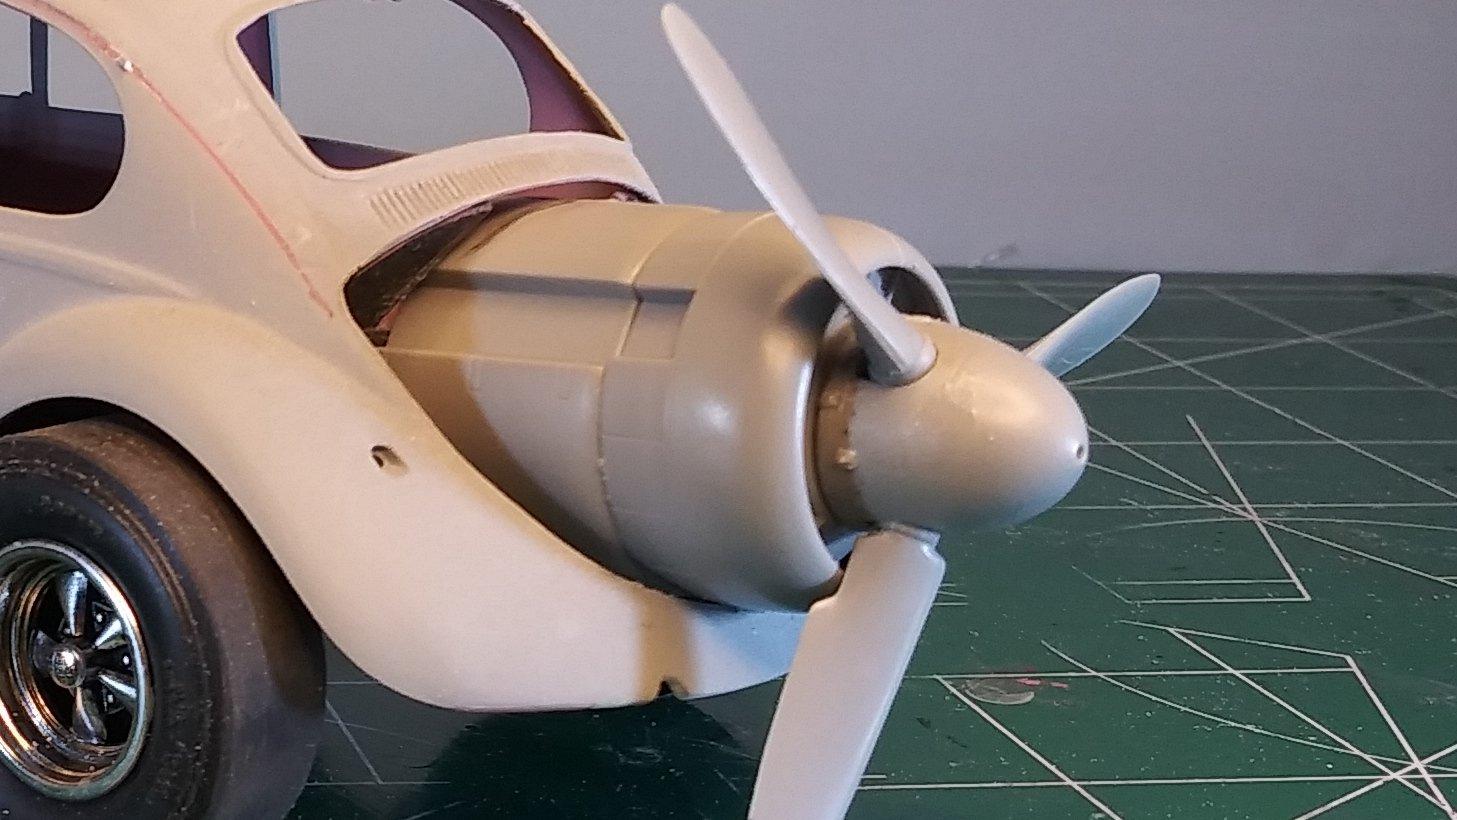
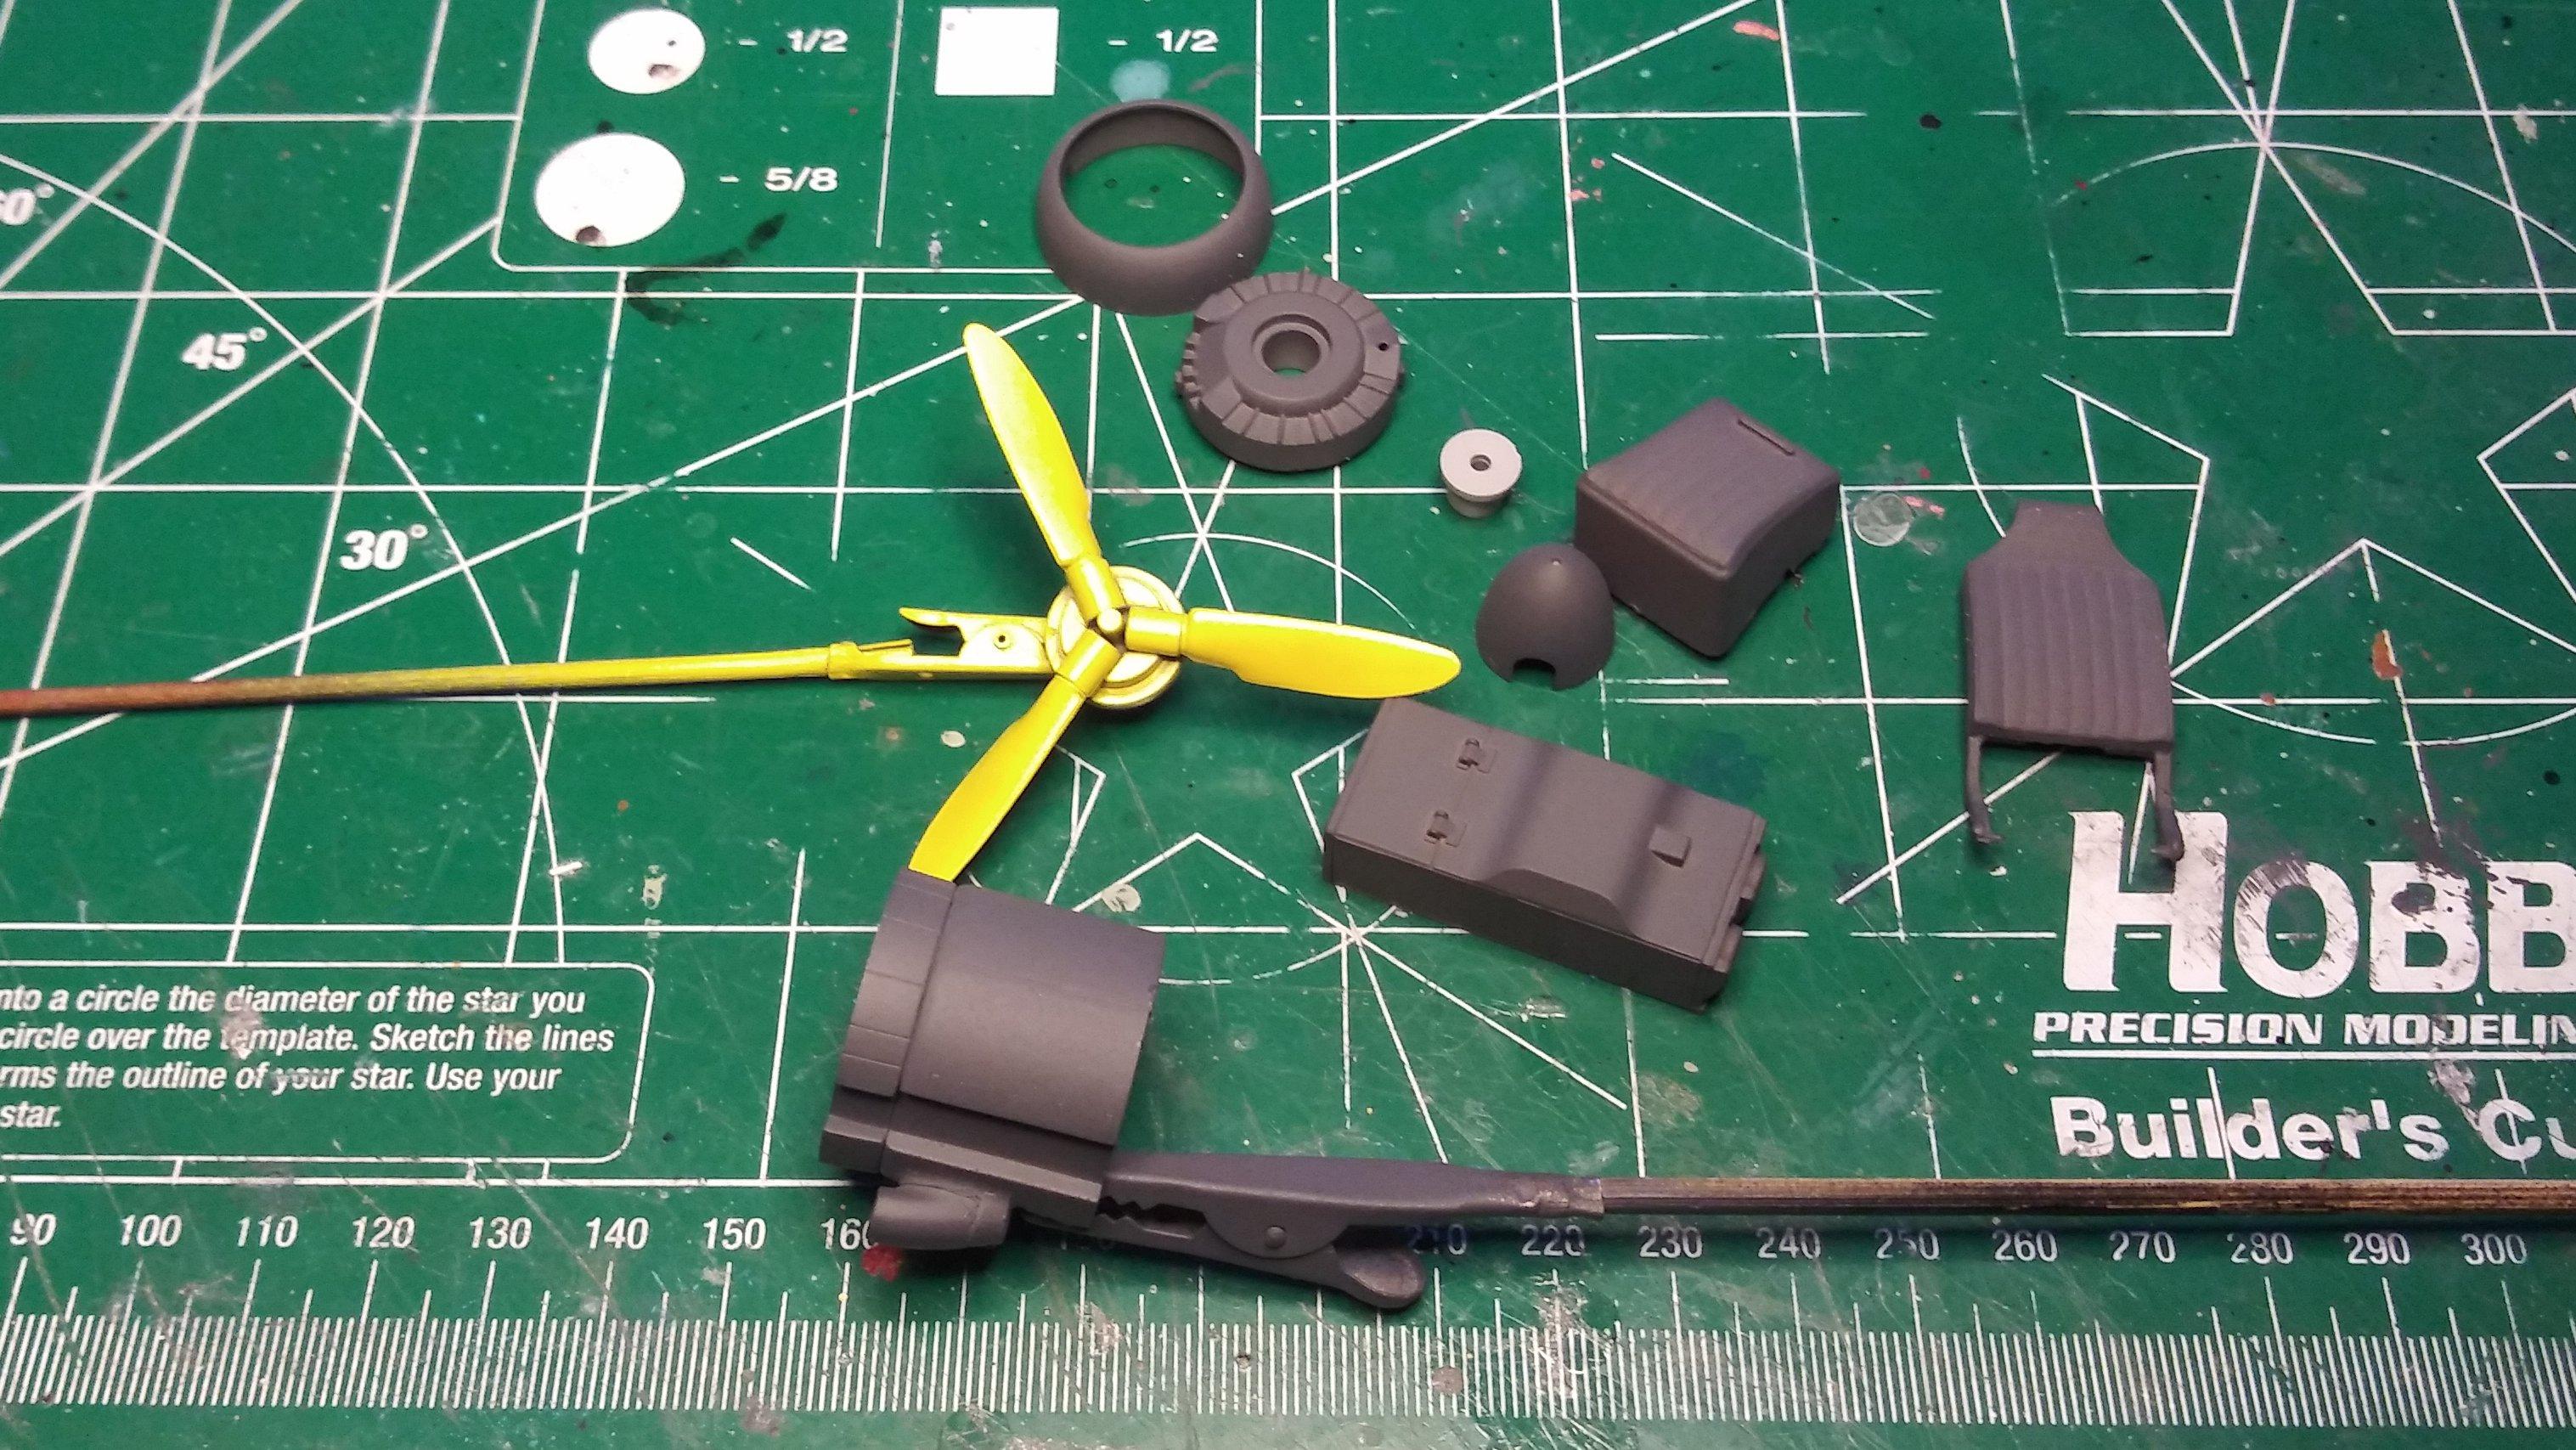
Thanks for the comment Don, I'm glad you like the scoops. The prop on the other hand is quite securely glued together and I believe that trying to pull it apart to rearrange the blades would probably destroy it. Unless I can find another one I'll probably just have to live with it the way it is. Believe me, this isn't a matter of trying to convince me to do the right thing, it's more a matter of me trying to justify, in my own mind, the error I've made. If switching the blades was matter of just deciding to do it, I would have done it by now. I'm still looking for another prop. If I can find one I'll correct the error. If I can't, I'll just have to live with the story I've created or abandon the project all together. Thanks, David G.
-
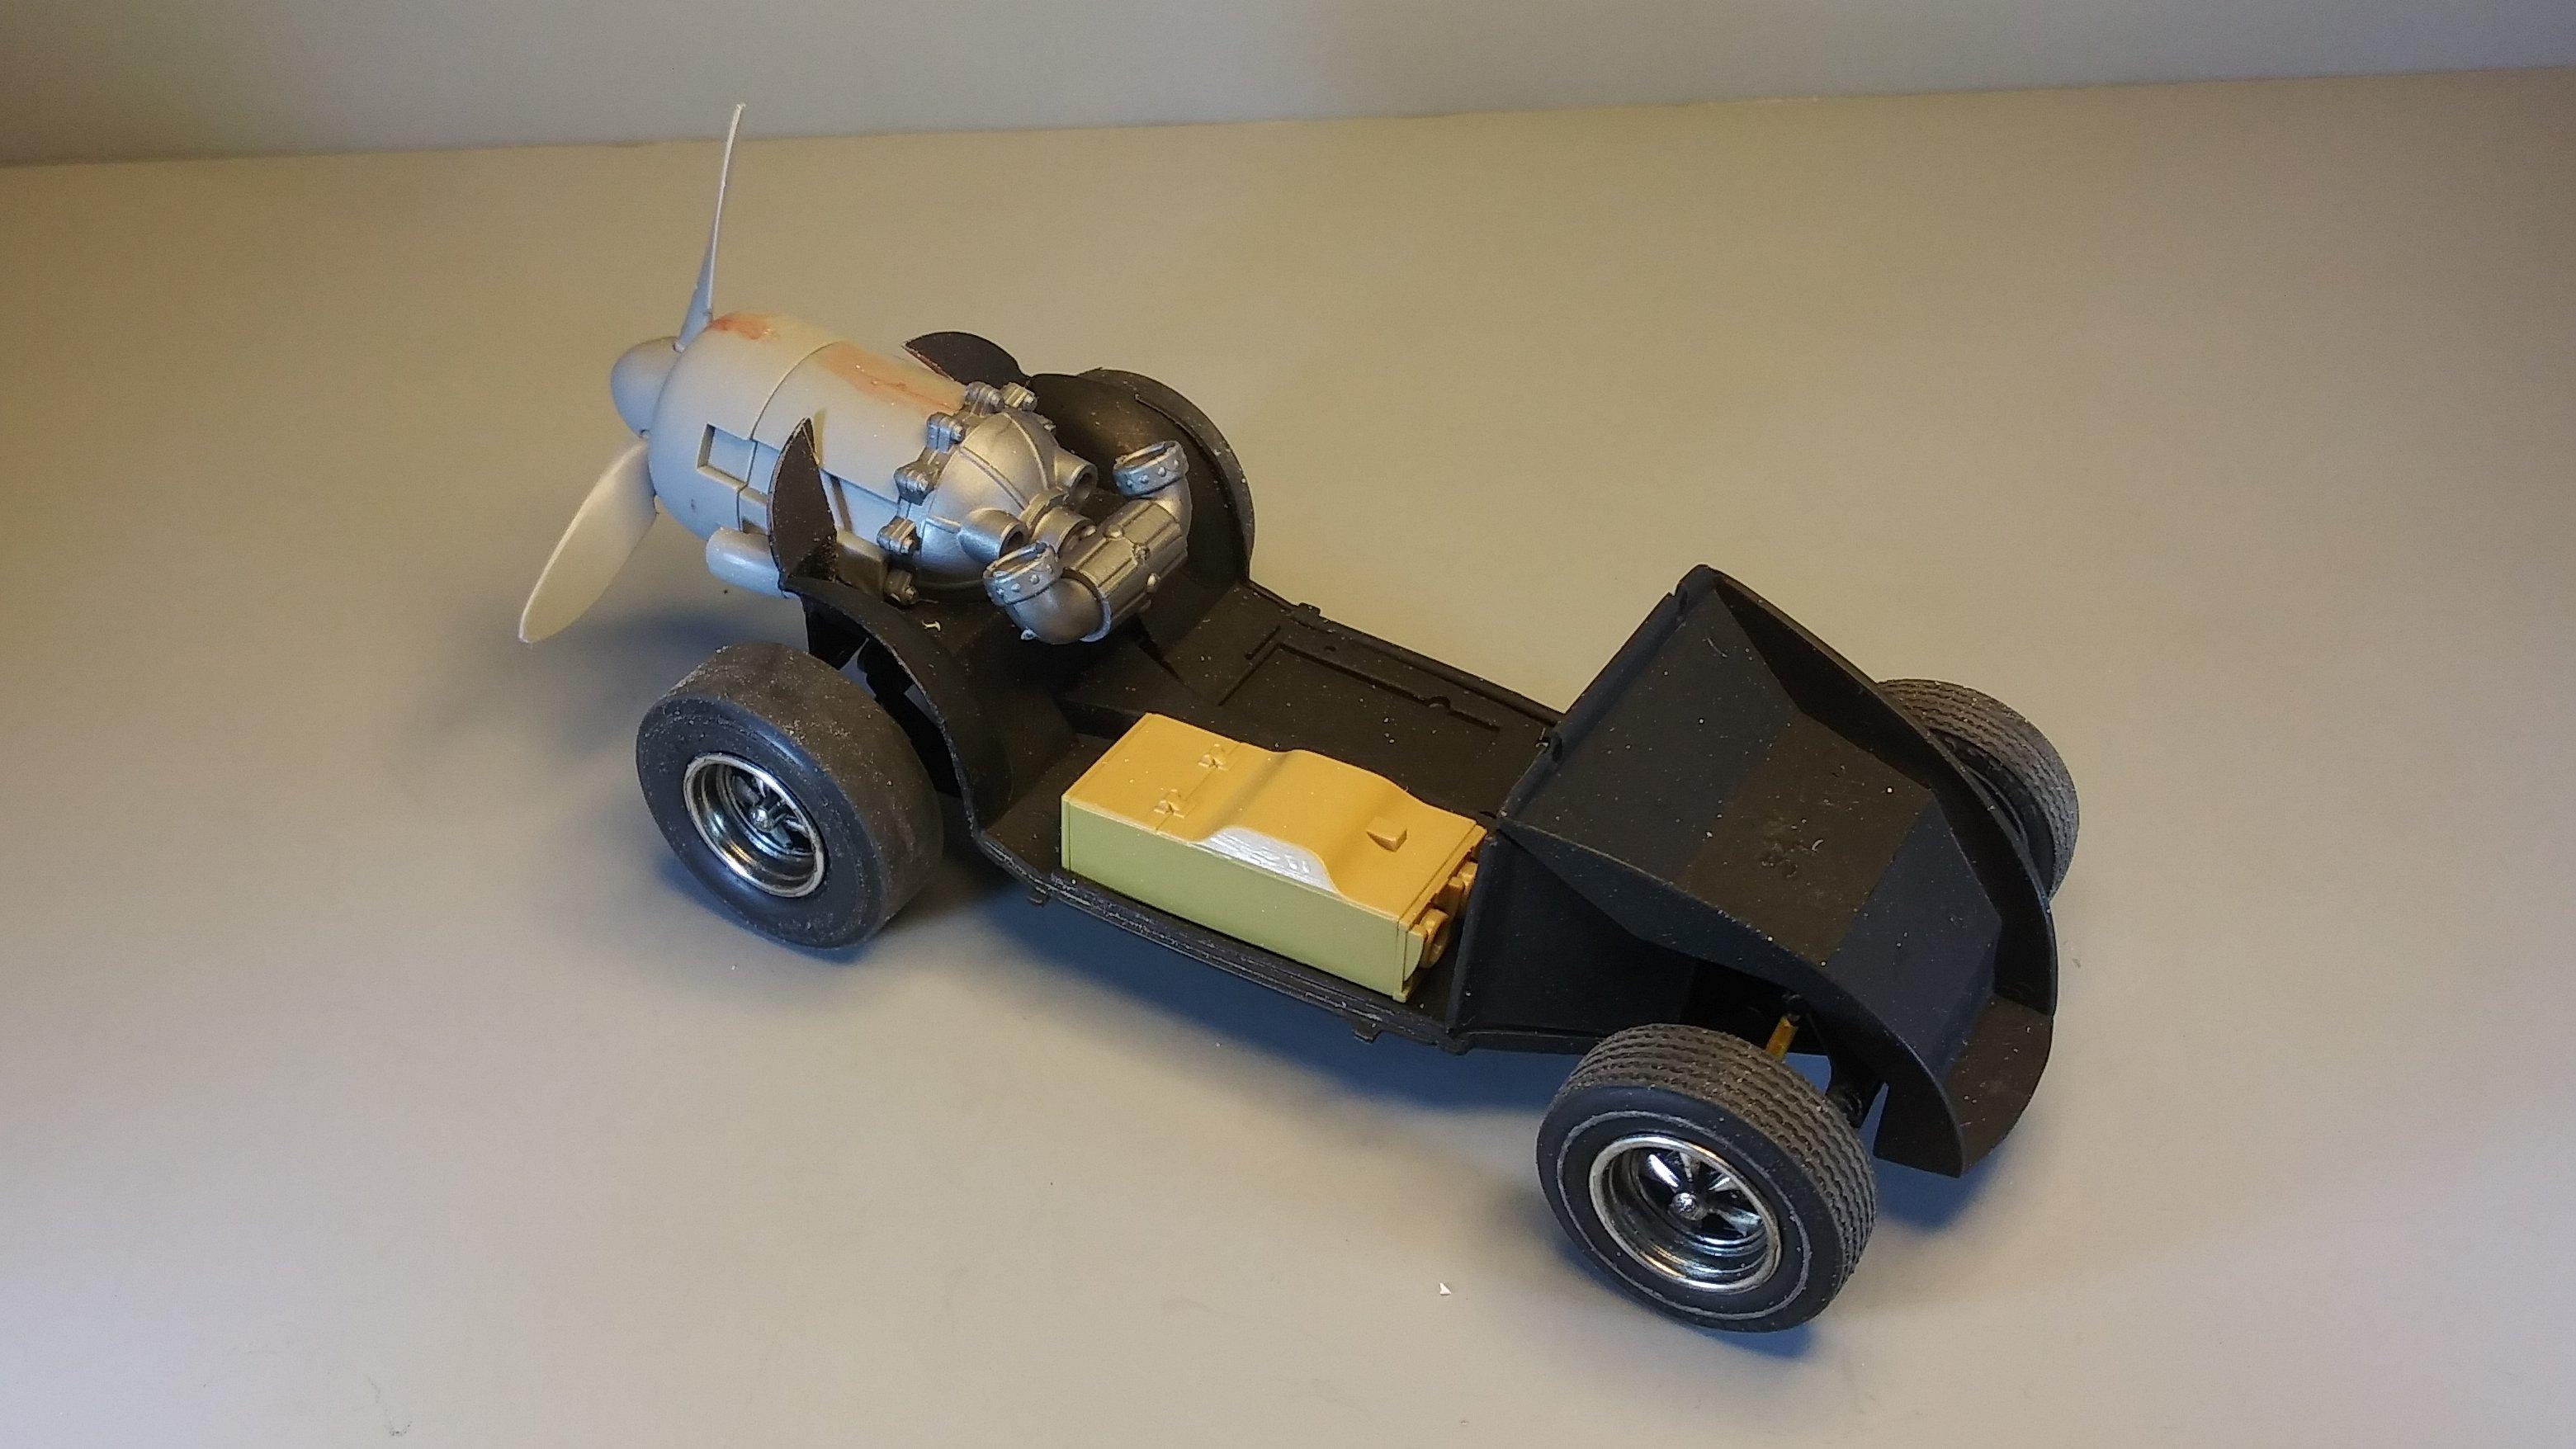
In the decade I've been a member of this community I have learned a tremendous amount of information relating not only to, most obviously, model cars and model building in general but also automotive history and engineering, physics, a bit of chemistry and even marketing. To that list I can now add aeronautical engineering. Though it seems obvious now, the concept that a propeller blade would have a specific directional structure had not occurred to me. My thought was if the direction of operation were reversed, the action, force and work energy would also reverse. After a little independent study on the physics and operation of aircraft propellers I learned that in prototypical operation most modern propellers have a variable pitch adjustment which essentially allows them to reverse operational direction while maintaining the same direction of rotation. This allows for pushing air forward of the aircraft, acting as a type of brake, rather than pulling it toward the aircraft to cause acceleration and create lift. So what does all this mean? Essentially nothing aside from giving me a somewhat rational explanation for how this whole irrational combination might reasonably function. Q: "So if the propeller turns in reverse, how do they get forward motion?" A: "They vary the pitch." I almost forgot to mention that I've worked in a transfer case between the rotary engine and the VW trans-axle to drive the road wheels. Besides, the way the propeller blades are formed to accommodate the shroud, I don't believe that simply flipping them over and mounting them would work without significant alteration or complete re-fabrication. Either it's a bit more work than I want to do for this goofy mash-up. So, after a bit of thought, I've decided that I can live with the prop the way it is. Now, on with the show! These air scoops are among the custom bits provided in the kit. Though I don't recall ever seeing an old Bug with anything like in place, I plan to use them for their intended purpose. In its usual configuration, a radial engine of this type is cooled mainly with the air rammed through it by the prop. Since this engine is in the rear and running the prop as a pusher instead of a tractor, the prop would have to pull air through the engine for cooling. All that air would have to come from somewhere and I think the scoops would help with that. The air collector will be attached via tubes to the window scoops. The box will house the "avionics controls". As always, thanks for taking the time to look and please feel free to comment. David G.

-
Love the color! Looks like the paint laid down nicely for you, I've had trouble with Testors paint in the past. David G.
-
Suh-Wheet! Looks fantastic! David G.
-
My apologies but my knowledge of basic aeronautical engineering is apparently lacking. Looking at the prop now, I think I can see what you're saying. The way that the piece is structured, each of the propeller blades mounts individually to the central hub. If I had realized this before I assembled it, I may have been able to flip each of the blades individually and mounted them that way. The way the assembly is structured, it can't just be flipped over and mounted- at least not easily. Since I've already glued the assembly together I'm concerned that I may damage or destroy the blades if I try to disassemble it now. I may be able to find a second prop assembly in the parts box and see if I can make a go of it but if not I may have to resign myself to living with the error. On the bright side, I did get some painting done today! Thanks again Snake for taking the time to comment, I do appreciate it. David G.
-
Nicely done! Great color choice and well detailed. David G.
-

67 type 2 pickup
David G. replied to ryanm's topic in Model Trucks: Pickups, Vans, SUVs, Light Commercial
That's gnarly! Looks like you nailed the weathering, well done! David G. -
Thanks David. It would definitely enforce the three second rule. Thanks guys, I actually imagine that the engine is operating in reverse direction. I mean why not? I'm mounting a plastic 1:48 scale airplane engine in a 1:25 scale plastic automobile. I think that reality has long since been thrown out the window on this one. I usually do try for at least a semi-plausible explanation whenever I can though. I am working on a reversed air cooling intake to account for the lack of air being rammed into the engine under the conventional operating scheme. And to quote a very wise man: Remember, to a real modeler, kit instructions are just Somebody Else's Opinion. Thanks for taking the time to share your thoughts. To know that there are folks paying that much attention to what I do makes me happy. Thanks David G.
-
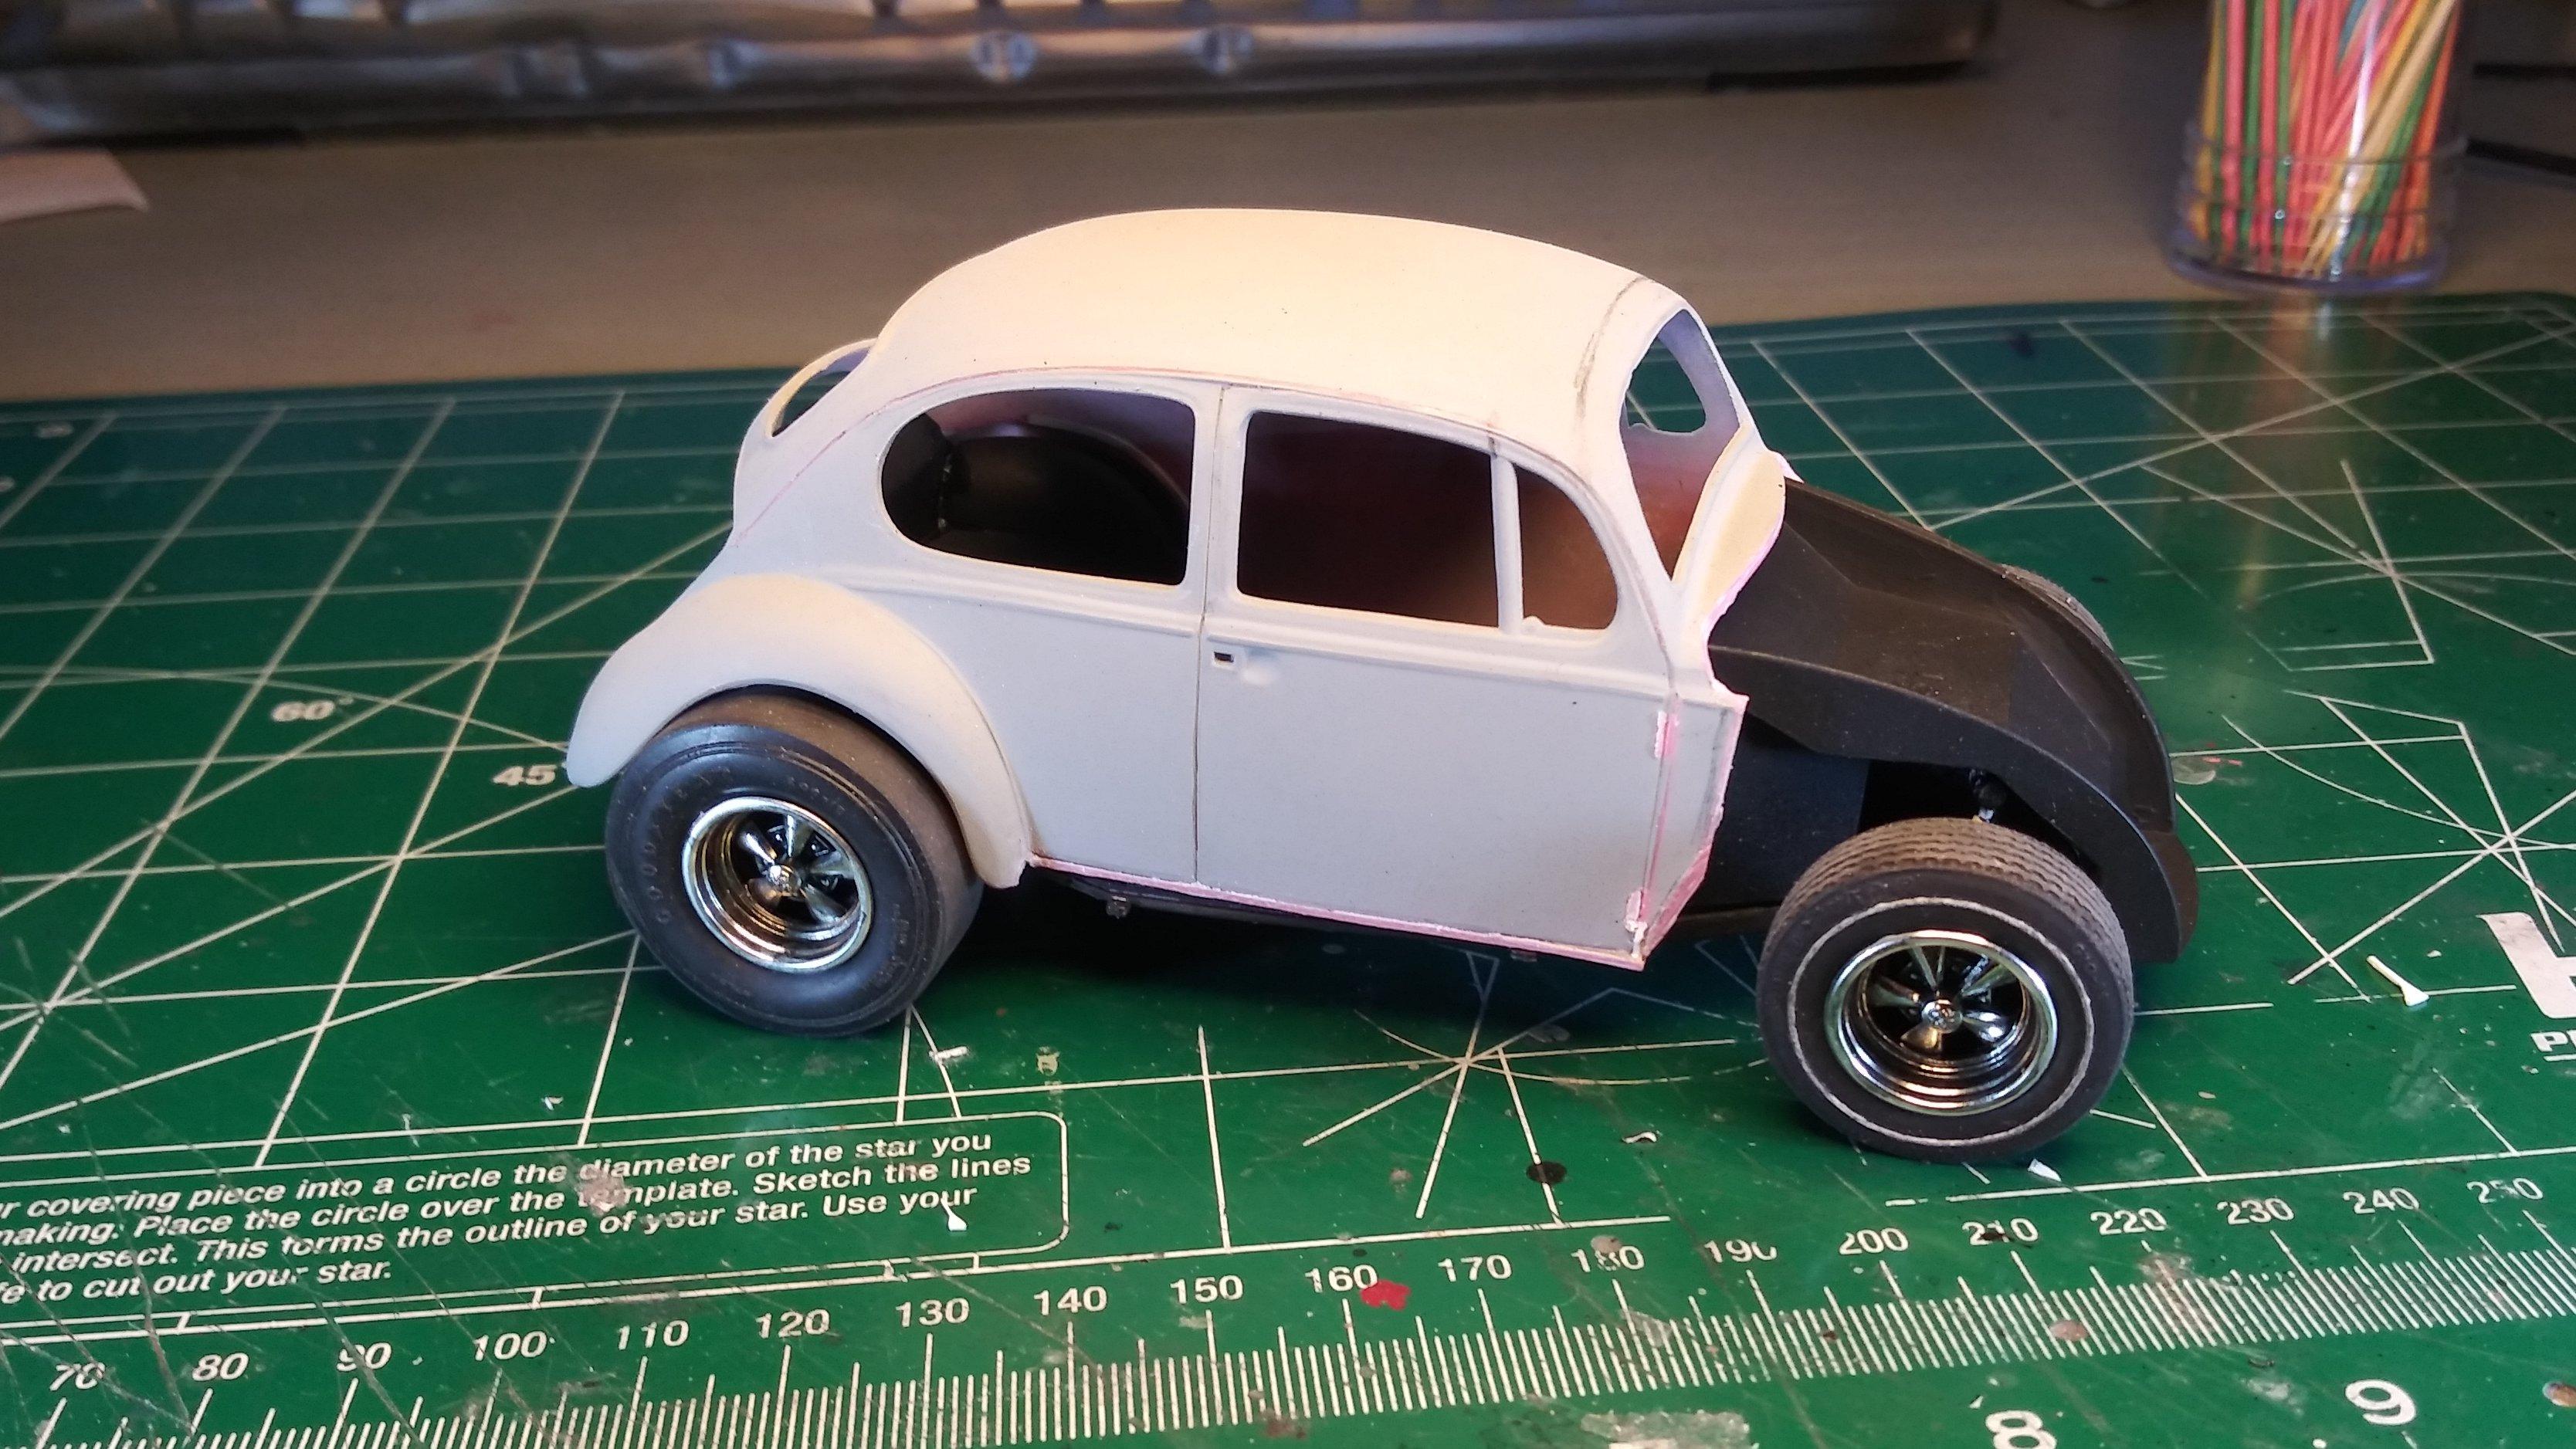
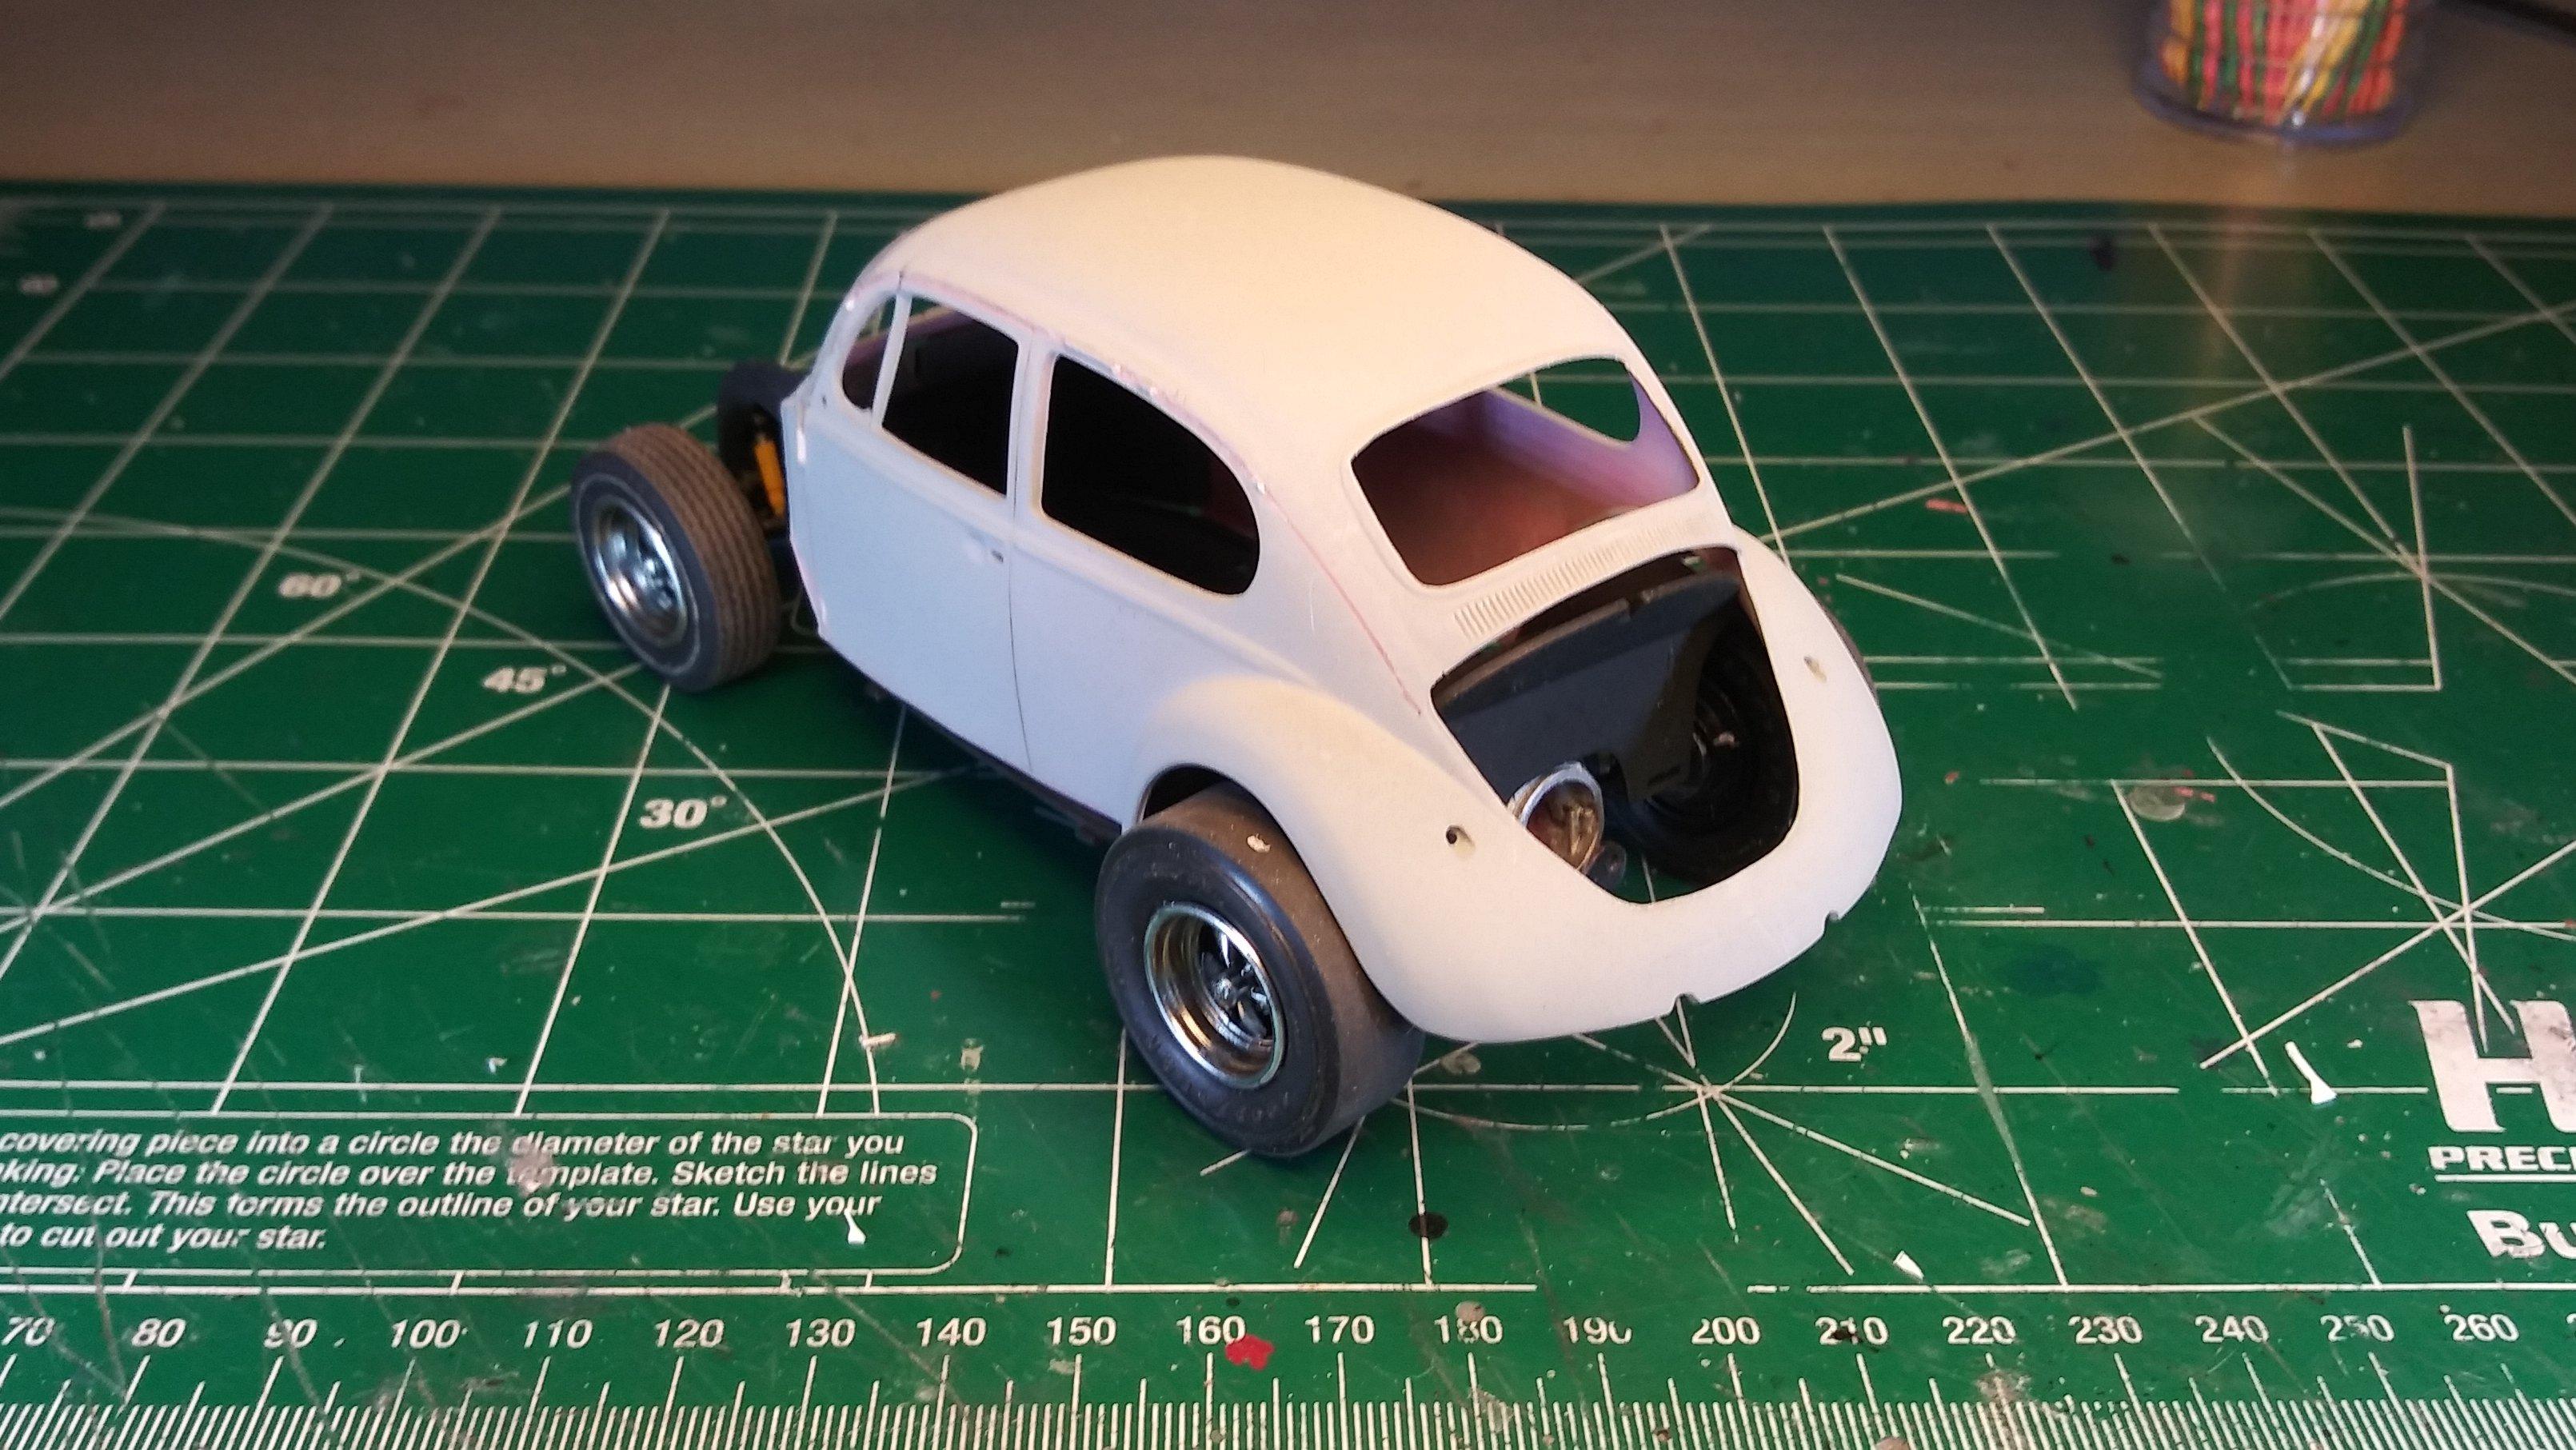
Time for another update. I still think I can finish this one before year's end. On my wife's recommendation, I cut the airplane engine deeper into the chassis to reduce some of the overhang. This will also allow me to add some visual interest to the interior with additional machinery. I'm still not sure what I'm going to do with the front end. But at least I got the ride height in the back where I want it. So... the car has been "stanced" as the saying goes. I plan to adjust any other clearance issues as I mount the engine. As always, thanks for taking the time to look and please feel free to comment. David G.
-
1937 Cord 812 - The Classic Monogram Kit After Some Improvements
David G. replied to Plastheniker's topic in Model Cars
Absolutely gorgeous! David G. -
Beautiful work! I am thoroughly watching your progress on this one, thanks for taking the time to share it with us, David G.
-
Nicely done! David G.
-
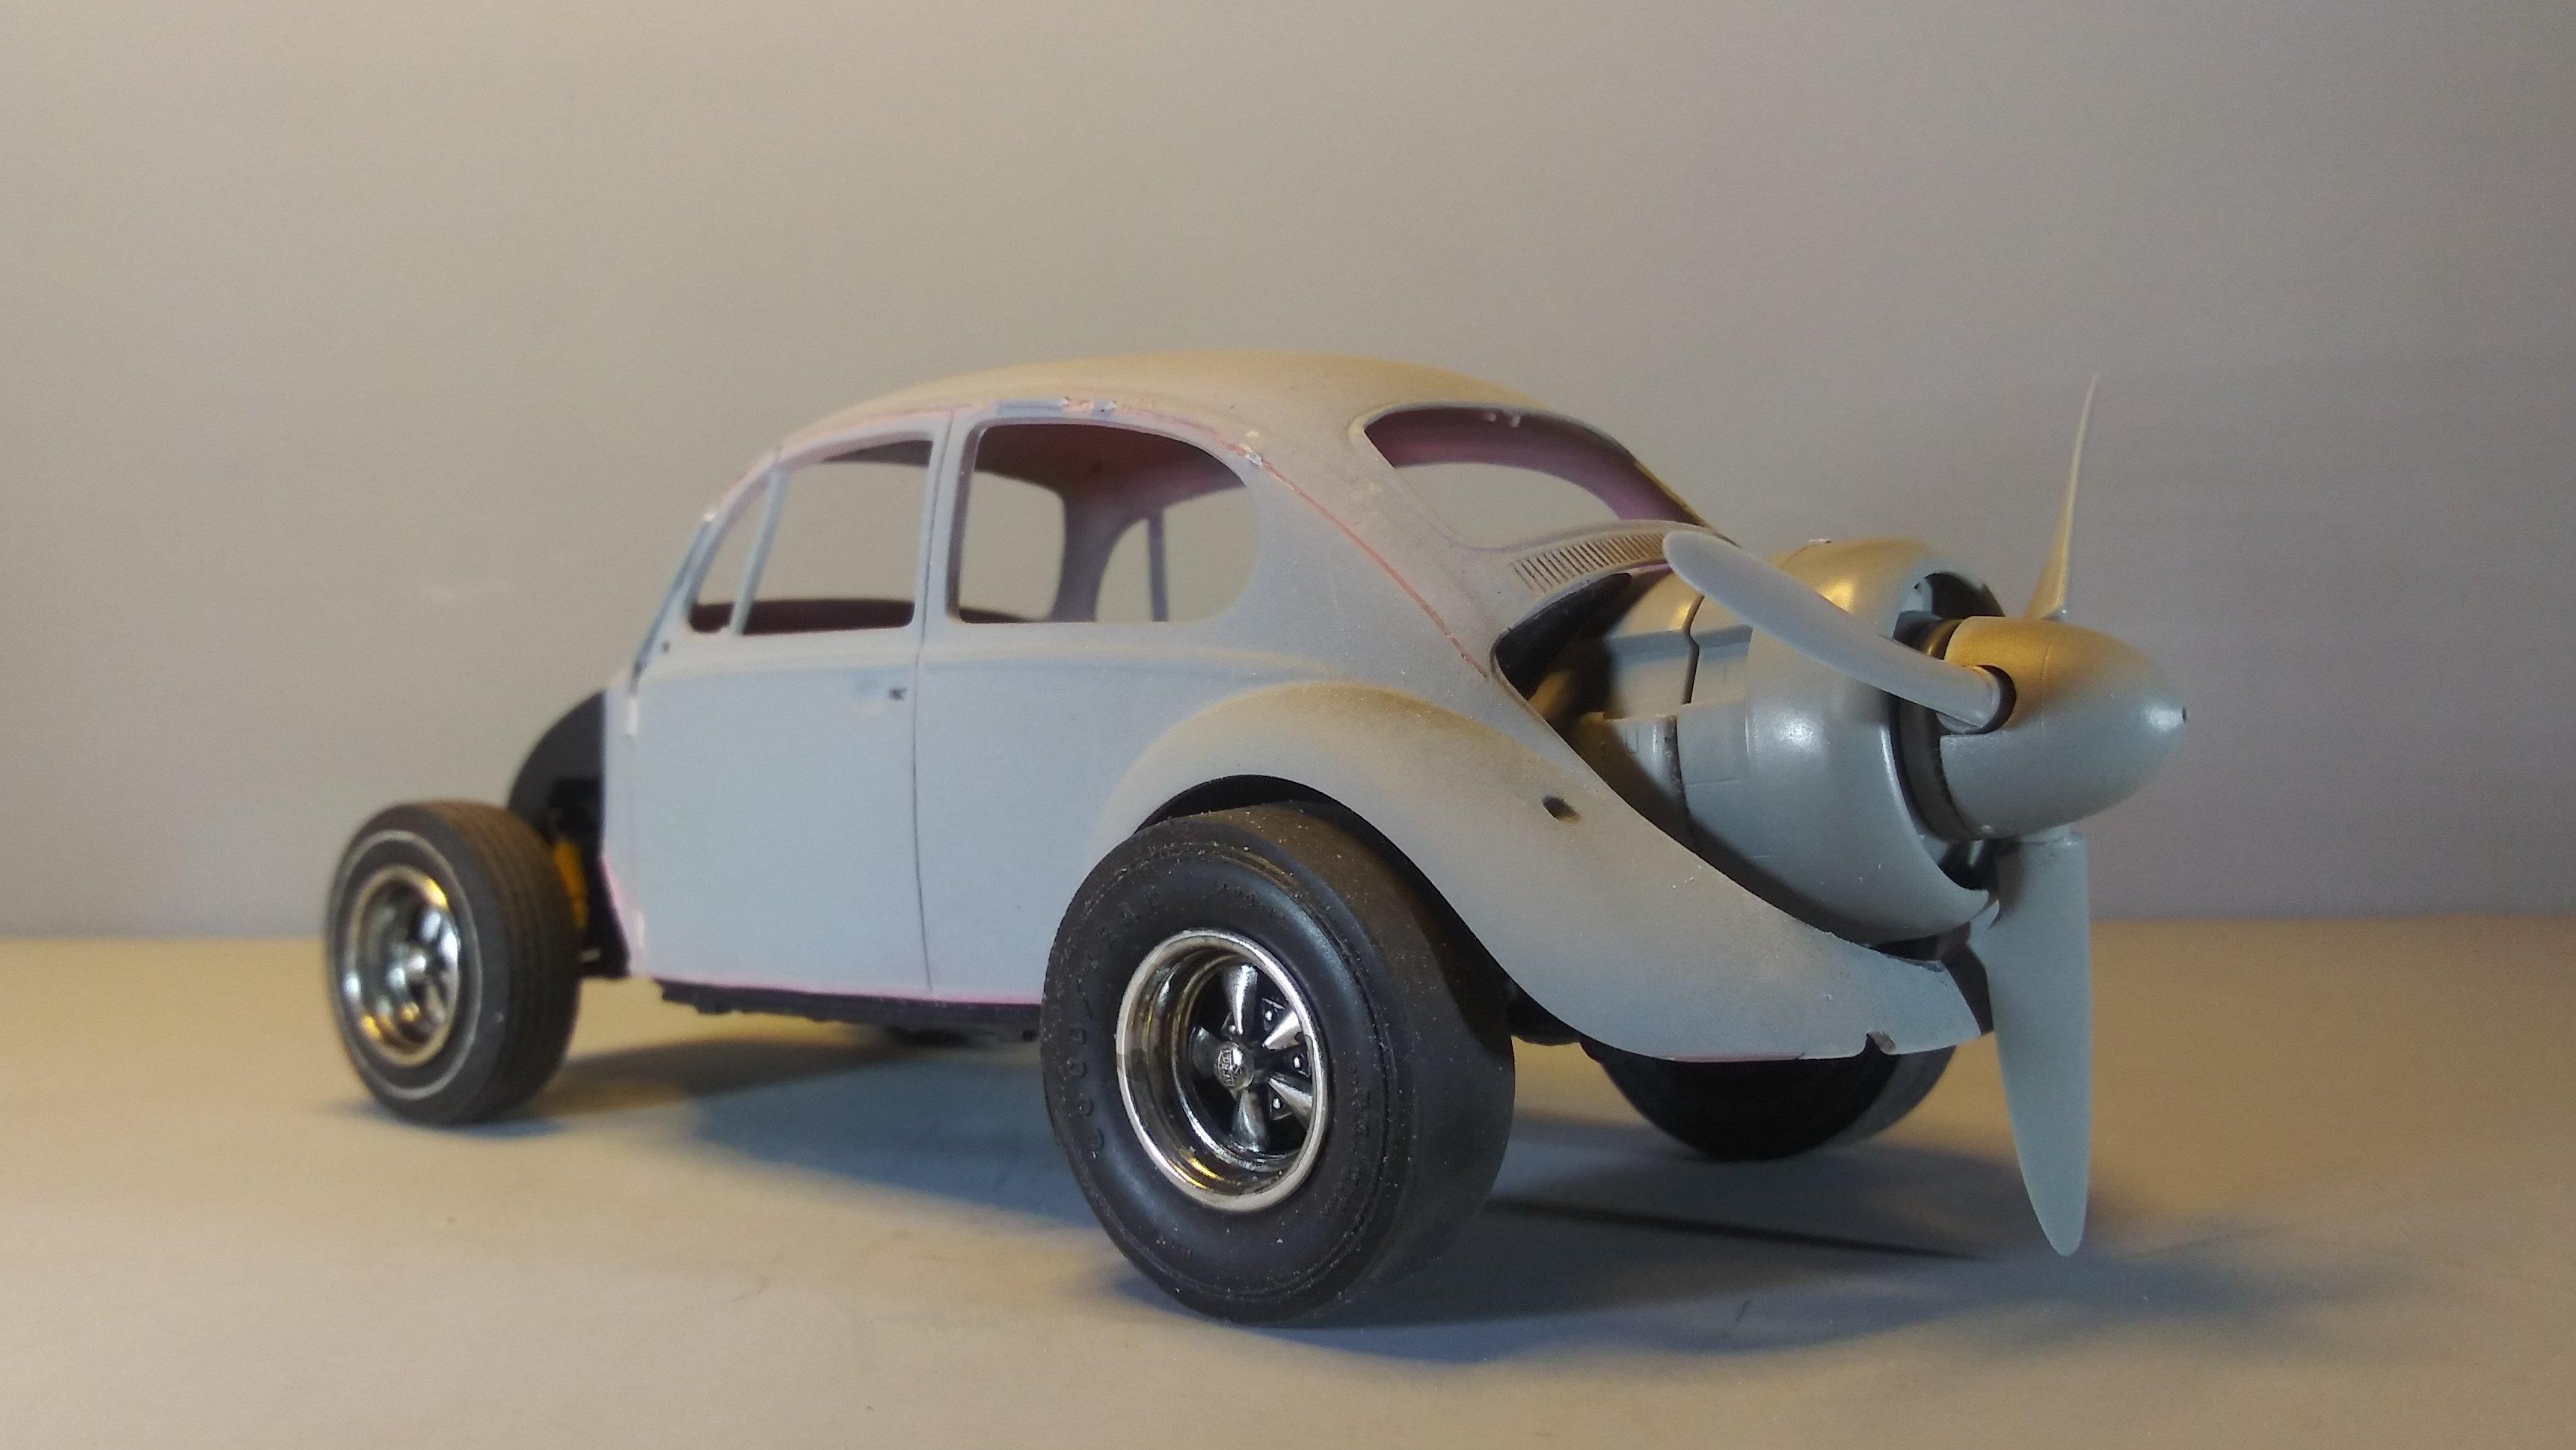
Rusty and Tom, thanks for the input, lots of good ideas there. I do want to keep the engine in the back, sort of a pusher style fan boat- It is a VW after all! There is no flipnose. When the previous owner cut the front off he salvaged the hood and fenders but there are no side panels left. I've spent a fair amount of time thinking of how to piece it all back together and came to the conclusion that if I tried to recreate a stock configuration it would just end up looking like a poor restoration attempt. That's why I decided to do a slap-dash custom job. As far as the nacelle idea, I do have some airplaney bits that I'm trying to piece together for the front but blending the shapes and surfaces is proving to be a challenge so I may just go with panels and rivets- raw metal, of course! Whichever way I go, it will certainly have a Mad Max wasteland feel to it. Thank you for sharing your thoughts, I now have some more options to consider. David G.
-
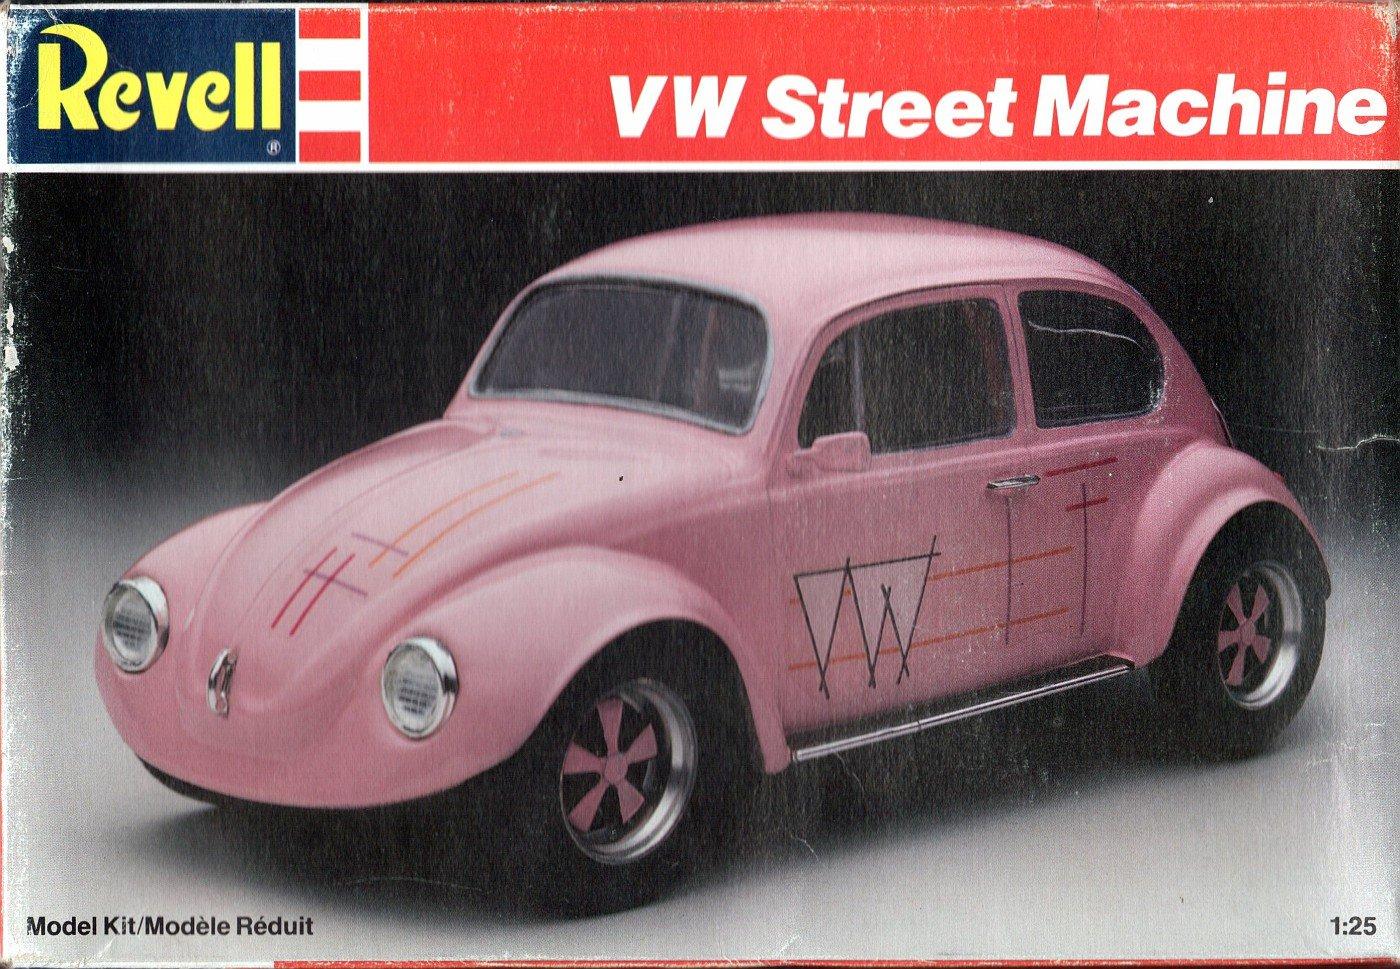
I want to see if I can knock another one out before the end of the year. I bought this pile of parts years ago at the Desert Scale Classic for a couple of dollars. One sleepless night about a decade ago, I pulled this mess out with the intent of sorting and cataloging it all. As one might imagine, I ended up actually working on it. That's when the name Karma Bug came into my mind. There's no logical reason for the name, it's just what I started calling it in my mind. This is the original kit as it was released back in 1987. Ah the eighties... Let's see if I can save this kit from its past. With some wheels from the parts box, I now have something to work with. Looks like a previous owner wanted to make poor little car a flip-nose custom. *sigh* Yup, I'm goin' there! I'll need to lift the tail a little... or shorten the prop. As always, thanks for taking the time to look and please feel free to post a comment, critique or suggestion. David G.
-
Excellent custom work! All the little added details are fantastically well done! David G.
-
Looks like an interesting project. Lots of good work so far. David G.
-
Nicely Done! David G.
-
Issue #206, Contest Issue, MAILED!!!
David G. replied to Gregg's topic in General Automotive Talk (Trucks and Cars)
I just received my copy in Phoenix, AZ. I can't wait to crack into it! David G. -
Rat Rod Rollback
David G. replied to 1320wayne's topic in WIP: Model Trucks: Pickups, Vans, SUVs, Light Commercial
Among all the other cool features, I really like the scrap metal license plate idea. I may have to borrow that some day. David G.