David G.
-
Posts
11,326 -
Joined
-
Last visited
Content Type
Profiles
Forums
Events
Gallery
Everything posted by David G.
-
Thanks Dann, I'm glad you like it. Thanks also for the pointer on the scoops, I believe that it's the little details like that make a big difference. Small details like that don't seem to consciously register with most people but they still make an impression. Thank you Christian, it's Dupli-Color BFM0236 Silver Charcoal Metallic. It does have a good glow, doesn't it? David G.
-
Good progress! Nice work area too. David G.
-
Looks great! Your detail painting is very well done. It's a bummer about the hood fit though. What kit is this? It looks like one that I'd be interested in building. David G.
-
Excellent progress! David G.
-
Nicely done, love the color. David G.
-
Excellent Work! David G.
-
Your level and precision of detail is just mind-blowing and a true pleasure to behold. David G.
-
You have some great ideas going on this one. David G.
-
Nicely Done! Love the color choice. David G.
-
Another informative and entertaining build thread! For all the years that I've been building models, there are still tips, pointers and ideas that I pick up from following your builds. Thanks for taking the time to throw them at us Dann! David G.
-
Wow, lot of progress on this one! What kind of wire did you use for the piping on the seat? David G.
-
Over the years, I've seen many kits like this with wild custom options. As a youngster, I even bought a few. I don't think I've ever seen one built to completion using all (or most) of the custom bits. This one is completely over the top and exceedingly well done! This style is not my particular cup of tea but it is a spectacular manifestation of the designer's vision. Spot on from every angle! David G.
-
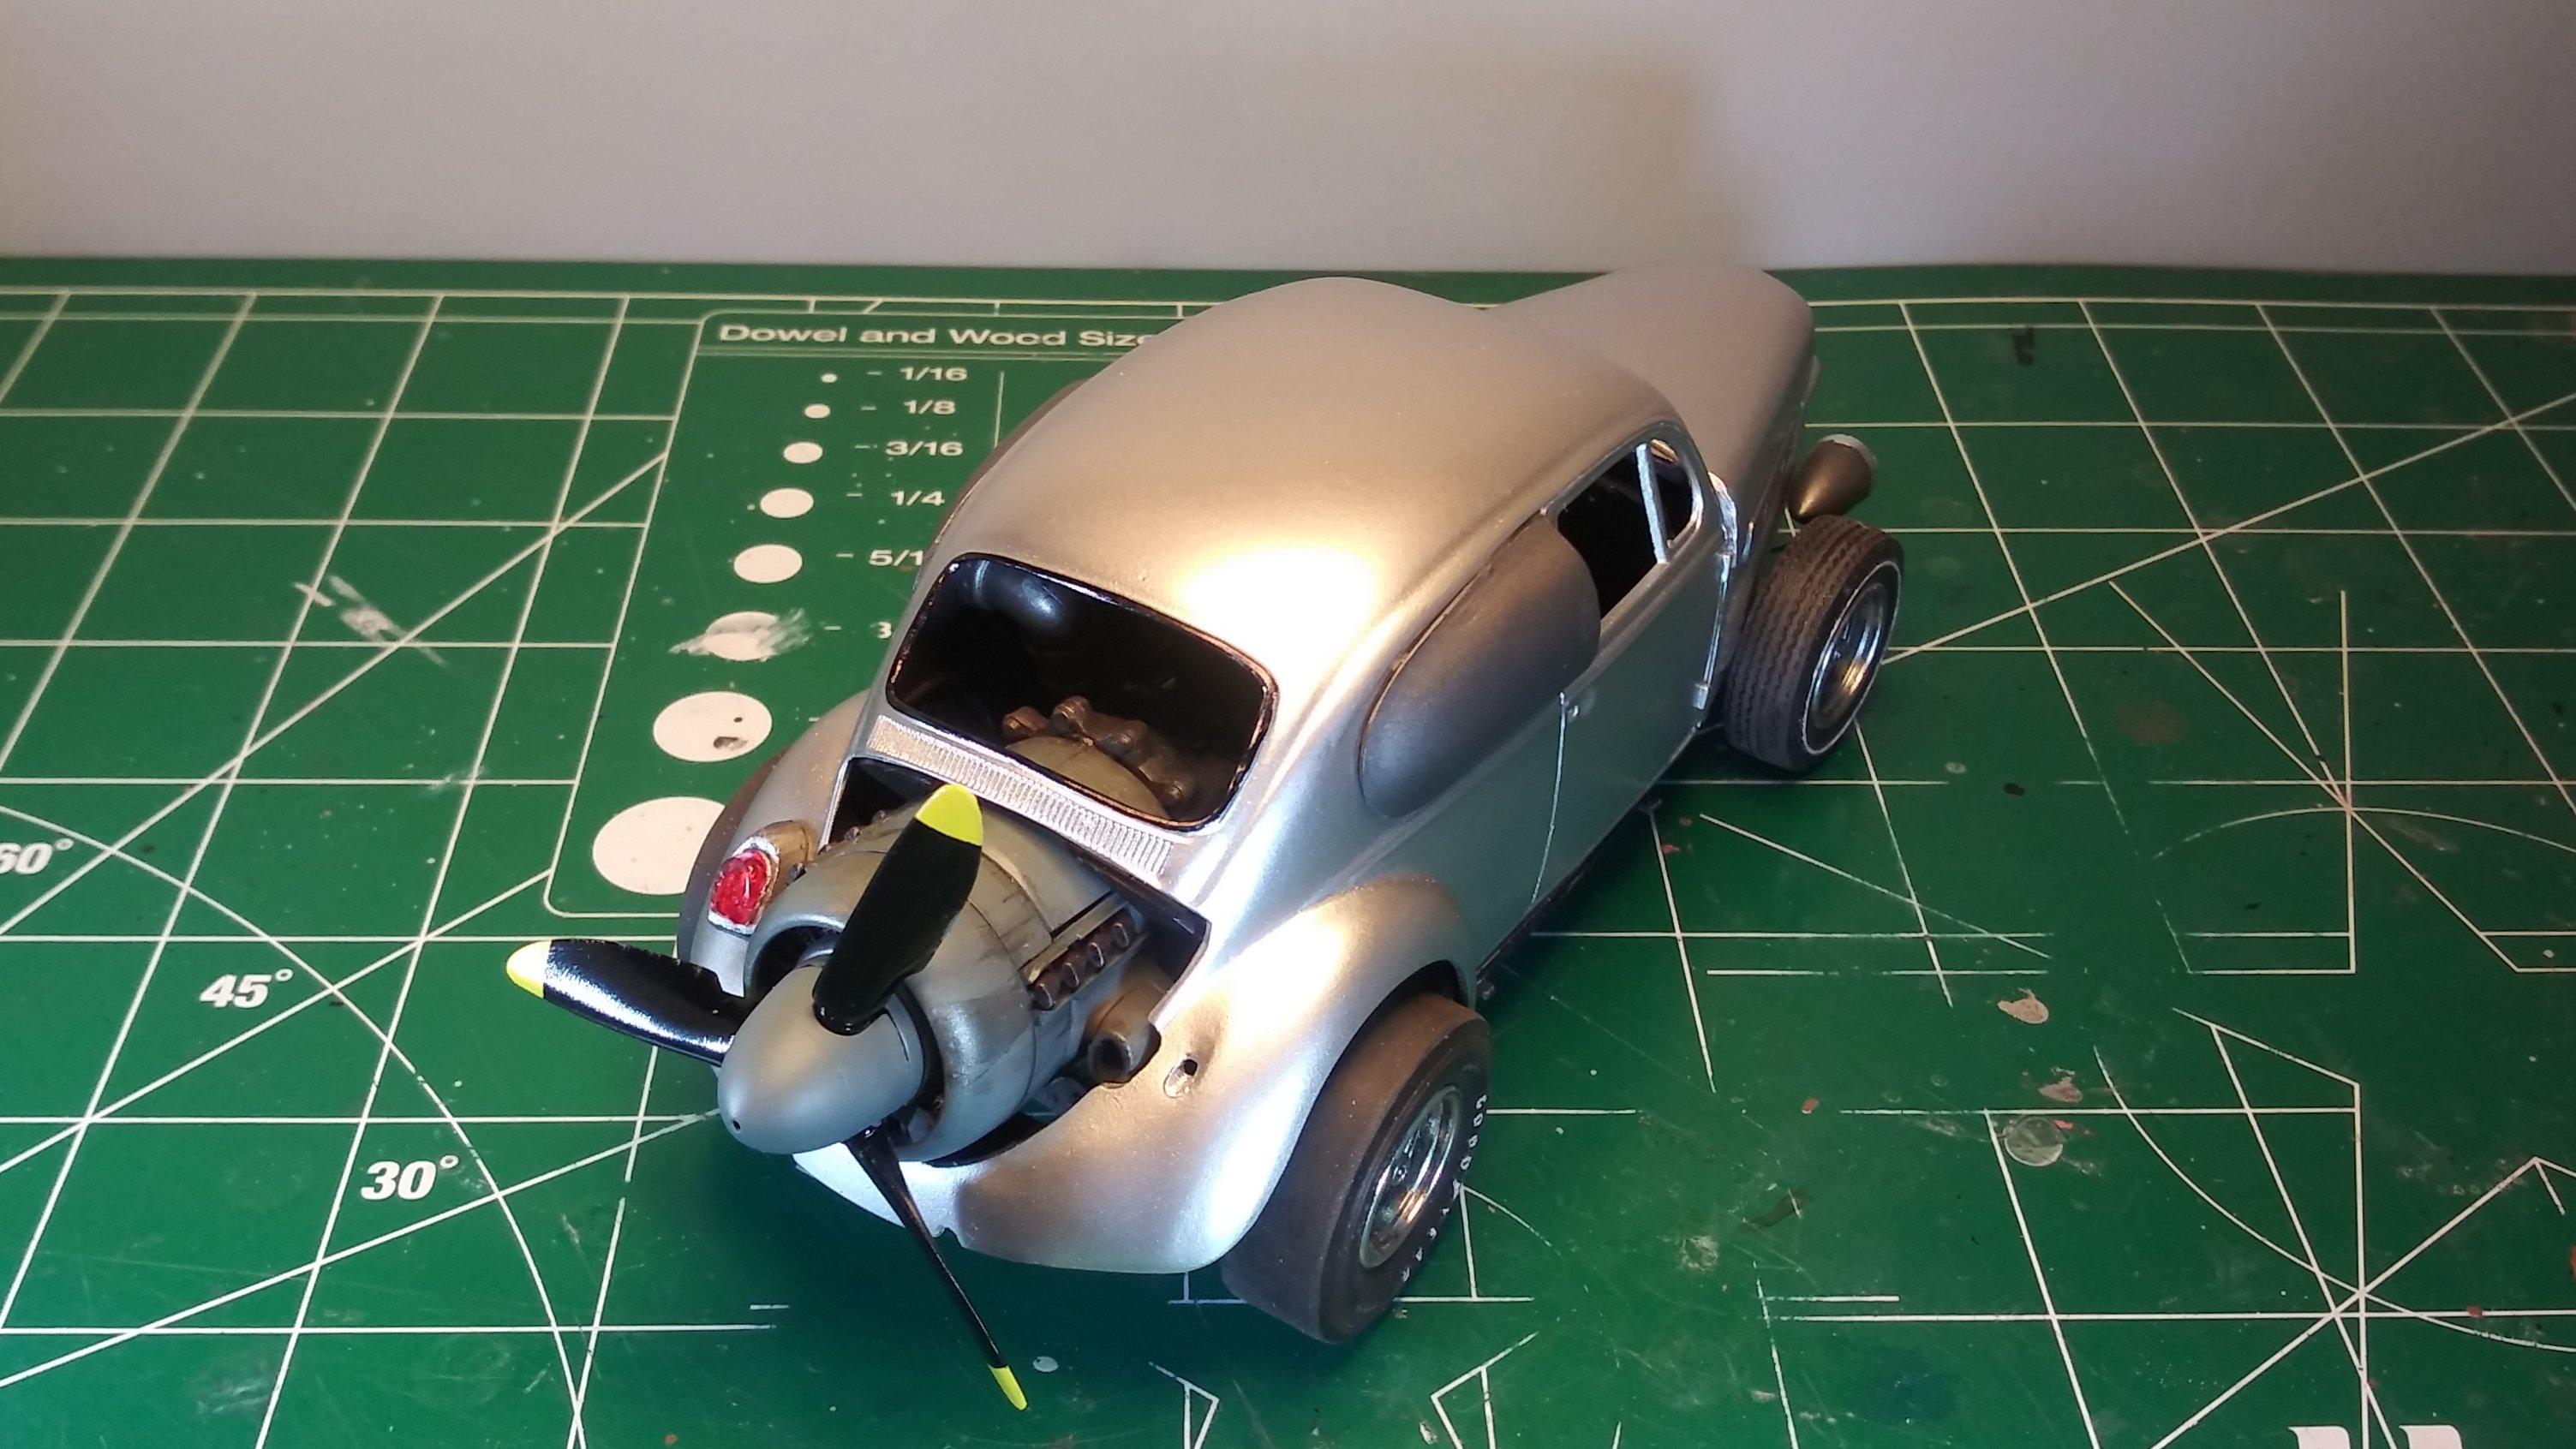
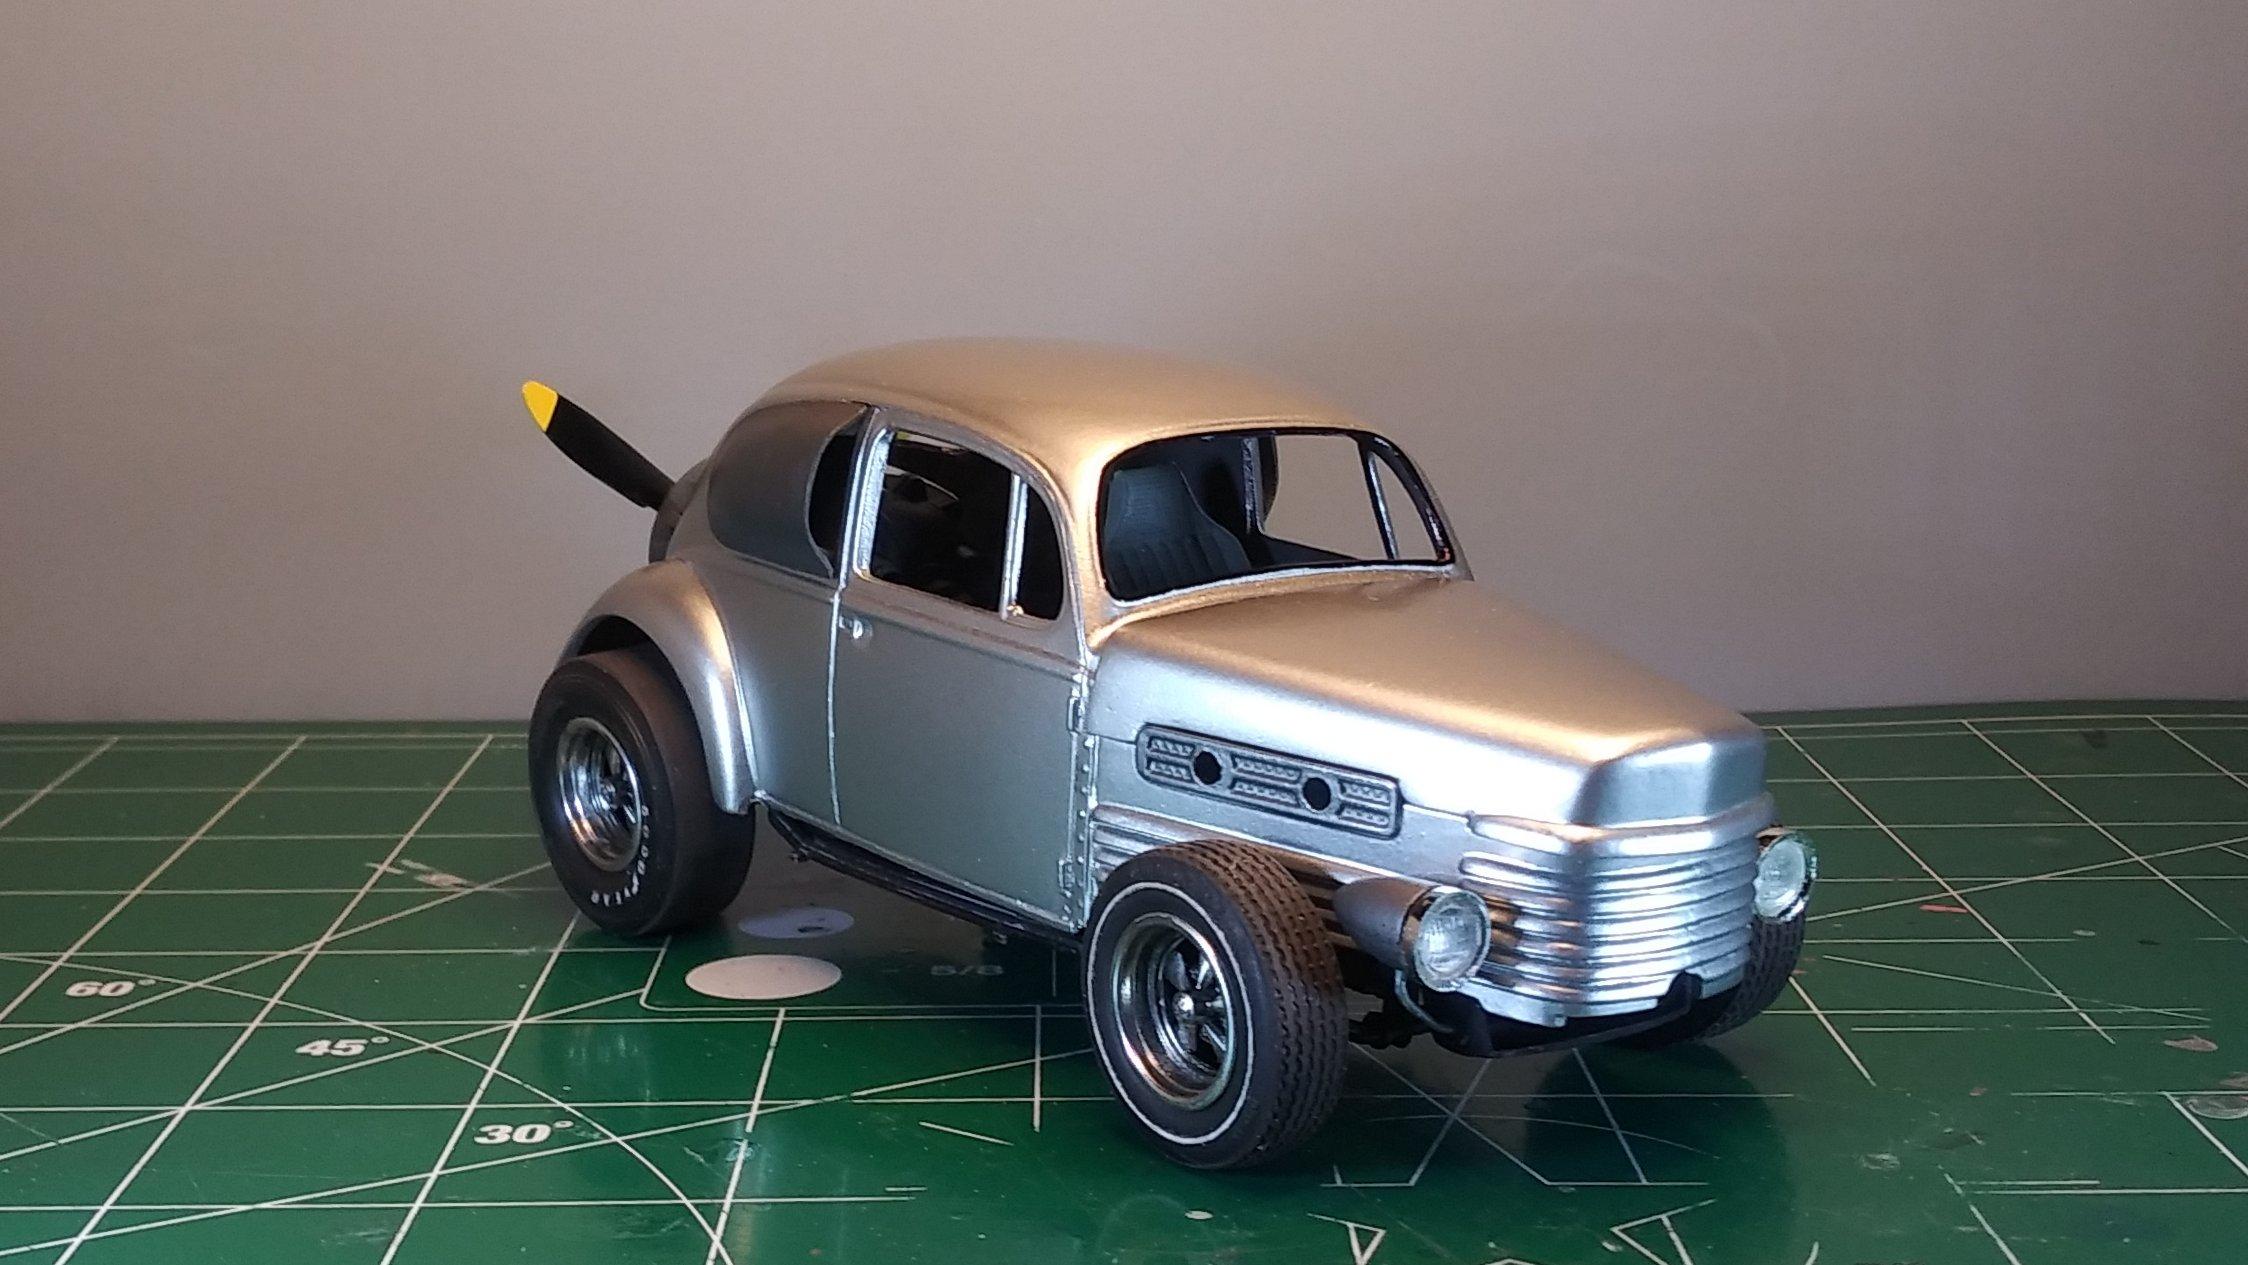
Made another mile in the slow and steady march. I finally got some lights on this... this... thing. Also, I'm officially changing the name from Karma Bug to Luftwagen which seems a better fit. The headlights are cut down from a pair of torpedo-bomber torpedoes. The left tail light is from the kit but the engine exhaust port interferes with the mounting location for the right. I'll have to work something out for that one. That's all for now. I thank you all for sticking with me on this one. We're getting close to the end (at least that's what I keep telling myself). David G.

-
Back in the saddle again! ...so to speak. David G.
-
Spectacular decal work! David G.
-
A clean, solid build. Looks great from every angle! David G.
-
Those decals look great on that car! Well done! David G.
-
Nicely Done! David G.
-
 Nicely done! I try to build one Sci-Fi, space or military model per year just to keep things fresh. David G.
 -
Fully detailed Airfix James Bond Aston Martin DB-5
David G. replied to Dann Tier's topic in WIP: Model Cars
Yeah, I just realized that you seem to have a lot of projects going at the same time. I try to keep myself limited to two on the burner at one time. Otherwise, they tend to get away from me. David G. -
Wow! Just... Wow! David G.
-
Excellent idea with the hood hinges. I might have tacked it lightly with a couple tiny dabs of museum wax. David G.
-
Nice work on the roof. Do you plan to leave it open or cover it? David G.
-
Good to have you back! I hope everything is alright. David G.
-
Thanks Dann! It's been slow going on this one recently; the Wife was on vacation last week so I've been a bit more time with her. I should be able to get back into my own rhythm soon. David G.