Randy D
-
Posts
1,925 -
Joined
-
Last visited
Content Type
Profiles
Forums
Events
Gallery
Everything posted by Randy D
-

Ford GT40 MK2 B-spec
Randy D replied to Phildaupho's topic in WIP: Other Racing: Road Racing, Land Speed Racers
I too am learning things about the GT40 that I never knew. Roll bar looks spot on! Randy -
Model factory hiro Porsche 917/30
Randy D replied to Brudda's topic in WIP: Other Racing: Road Racing, Land Speed Racers
Okay, a huge flat 12 with mechanical fuel injection. What's not to love!!!! Looks great my friend!!! Randy -
1/16th Scale Top Fuel Dragster Eddie Hill 4:99
Randy D replied to Ian McLaren's topic in WIP: Drag Racing Models
Another wonderful display of your considerable skills Ian!!! Looking forward to the new project. Randy -
I have to say that I was pretty excited to see a new post from you my friend? Scoop is looking great and can't wait for more!! Randy
-
’72 Dodge Demon Drag Racer 1/25 scale
Randy D replied to AmericanMuscleFan's topic in WIP: Drag Racing Models
Well that is just gorgeous Francis. I really appreciate it when you show the part coming to life on the mill. You are an artist Sir!!! Randy -
Outstanding work on this project David!!! Love your attention to all the small details. The rear end along with the front nose are just awesome with all the bling. Randy
-
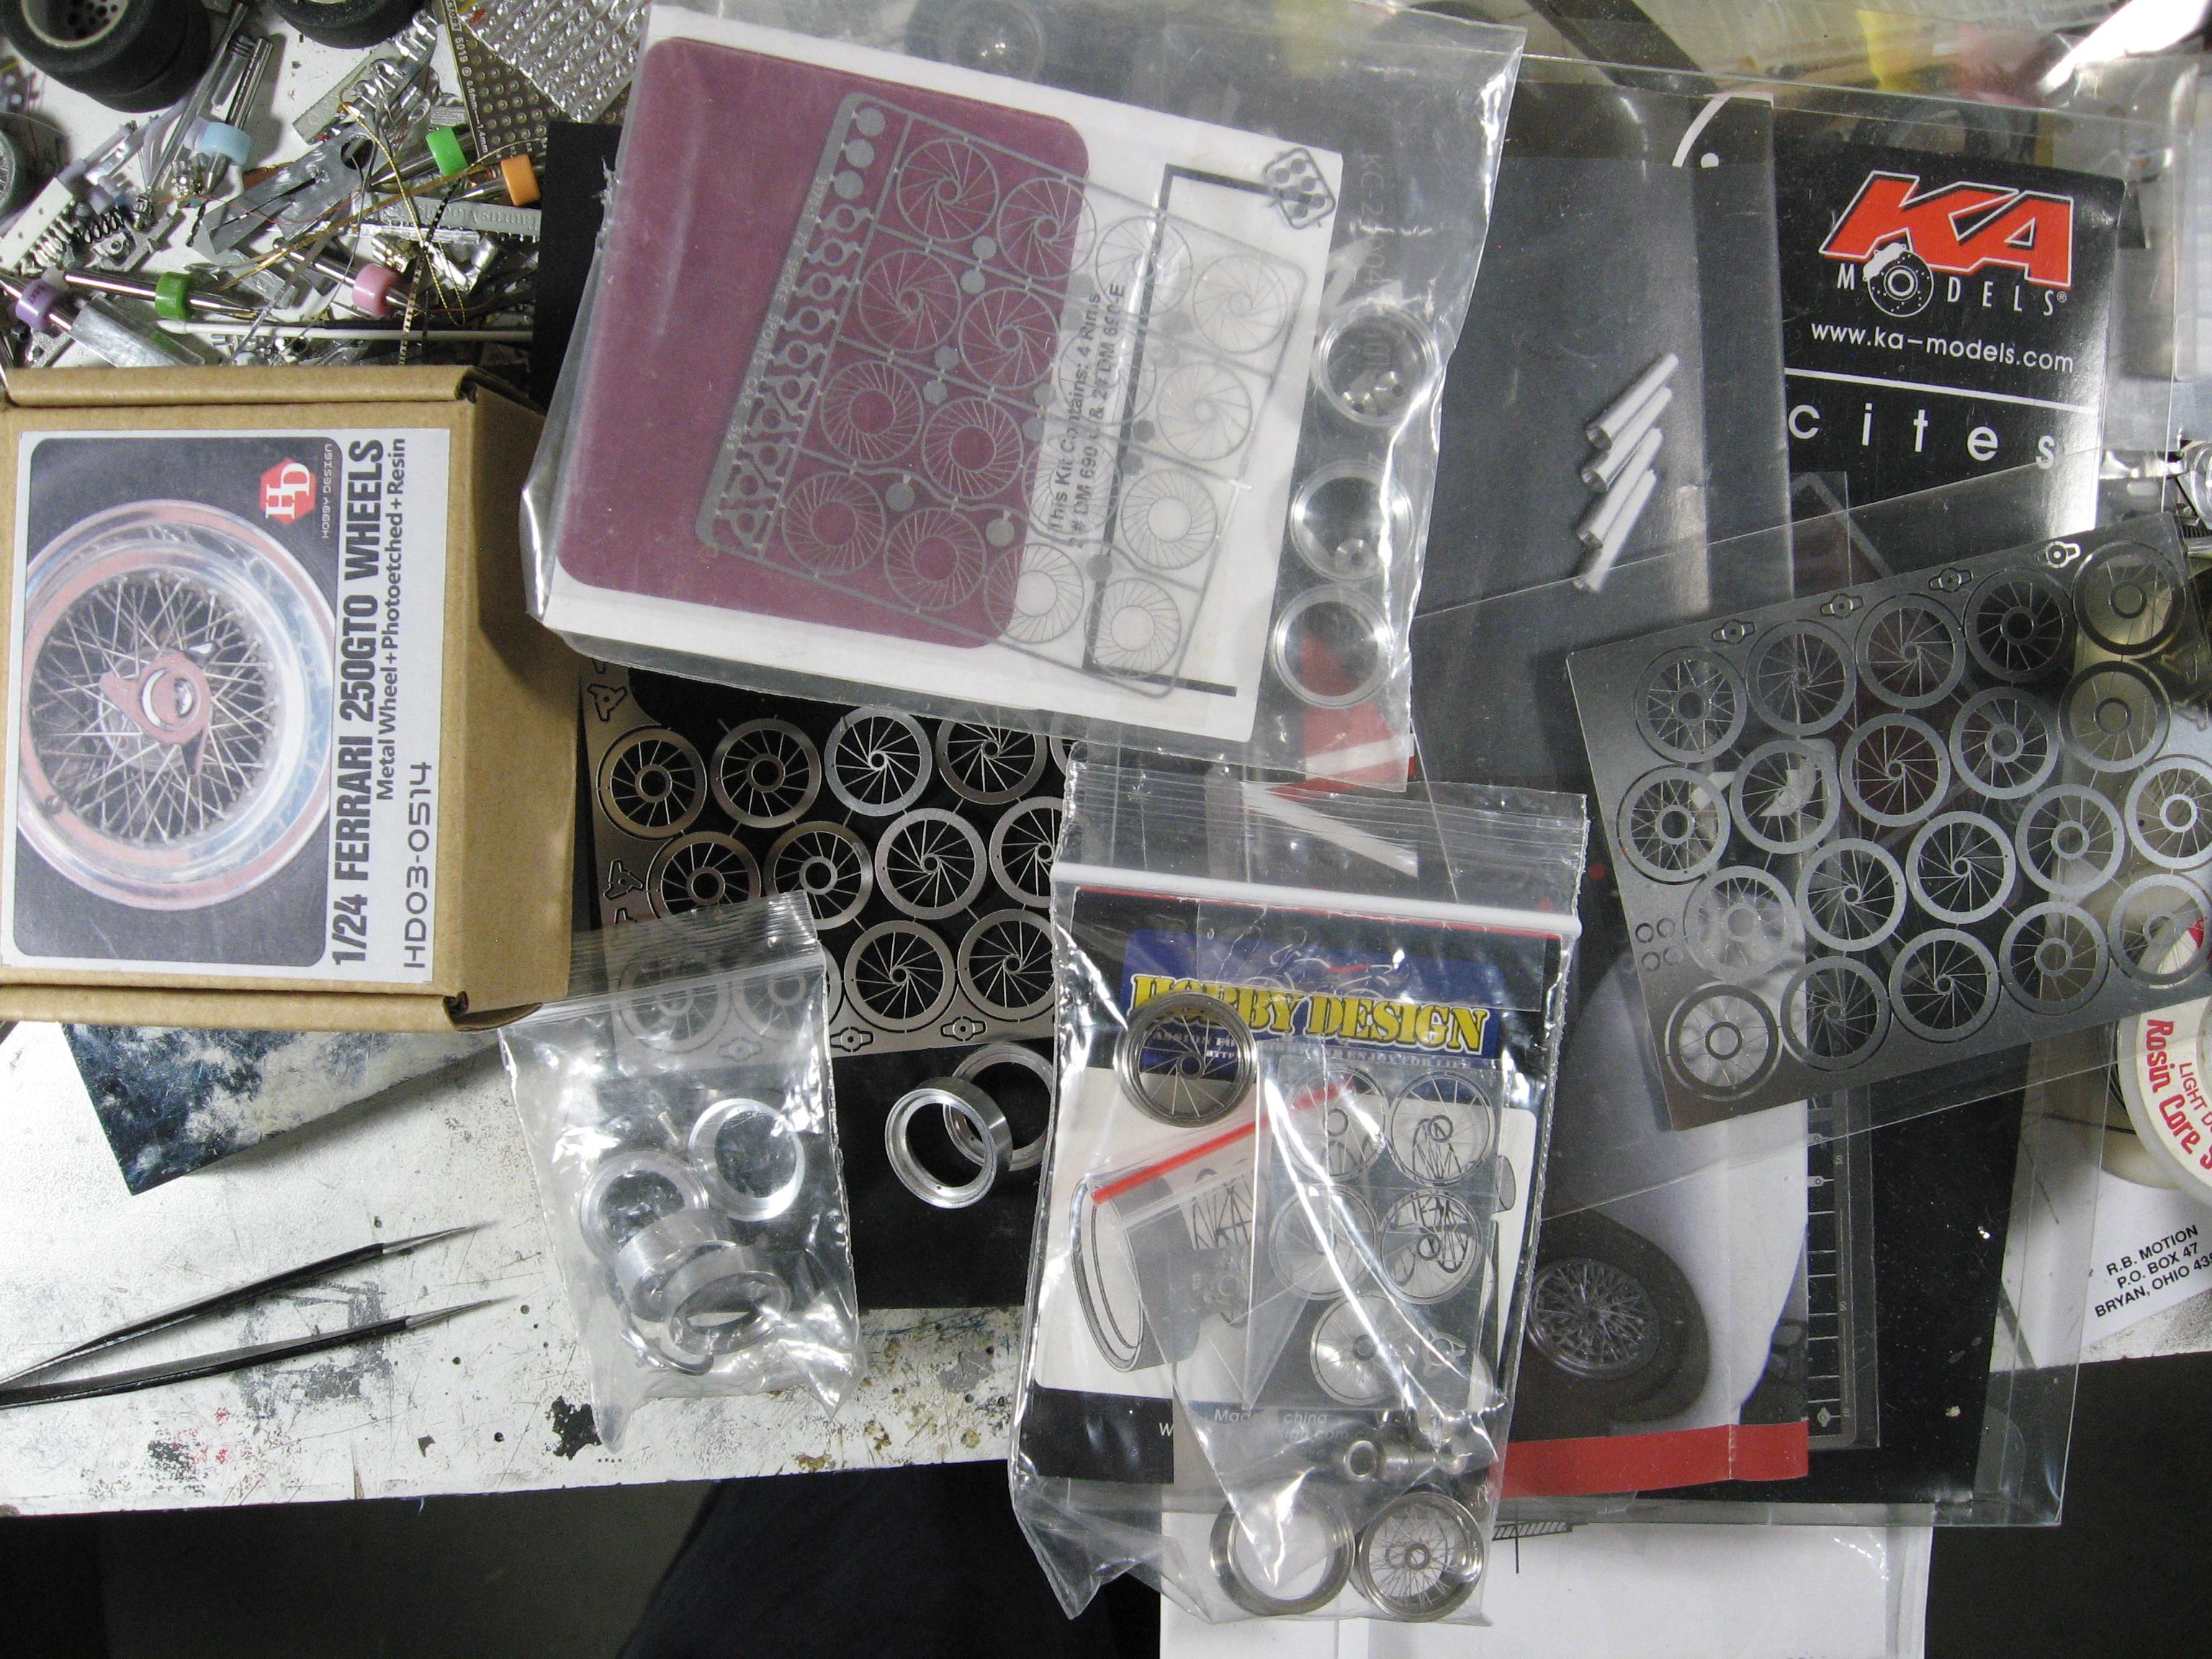
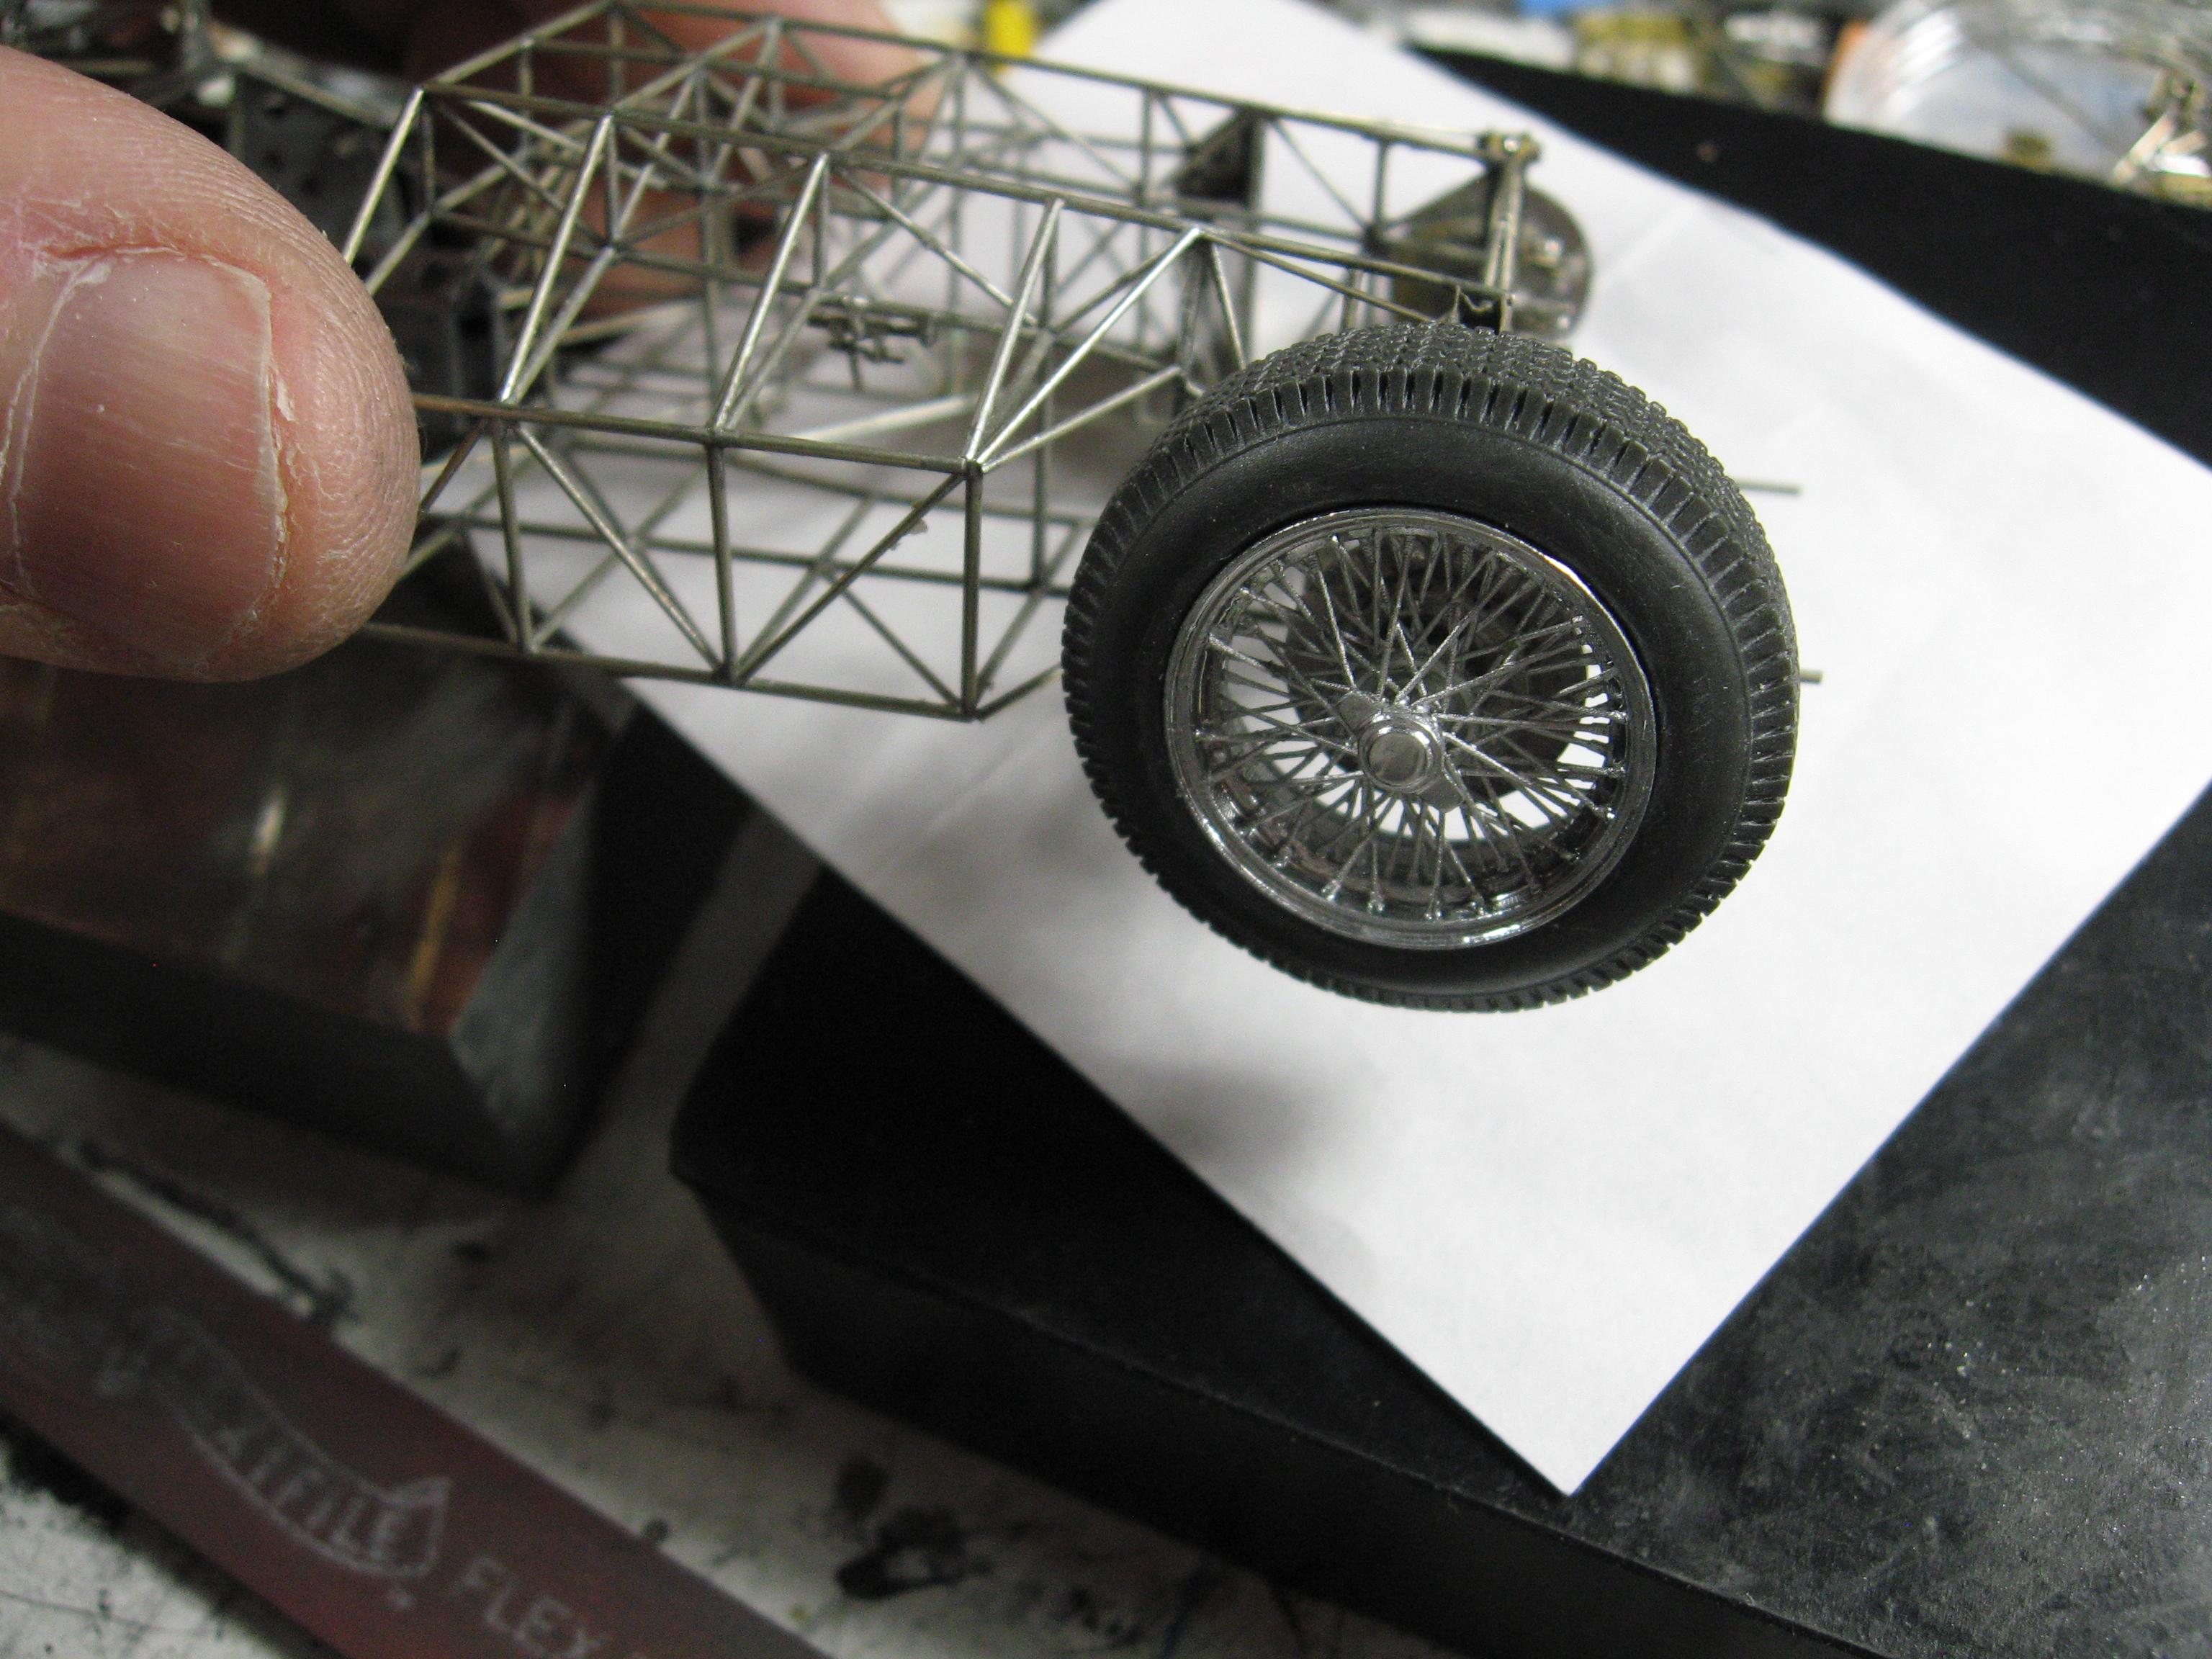
A little bit on Borrani wire wheels.... For this build I need the 72 spoke "outside" laced ones... Photo credit to Ed Matsuishi from the Tamsoldracecar site Here is a good pic illustrating the issues in modelling these wheels in 1/24th scale... The inter-lacing of the spokes and the unique spoke tightening nut sets these wheels apart from others. Photo etch wheels can look nice with their turned metal rims and centers and thin spokes but lack the tightening nuts and the spokes do not inter lace. plus of course, the spokes are flat Fernando Pinto wheels have real wire spokes but suffer the same two issues of no interlacing and no nut detail This is an area where the advent of 3d printing can really help. A couple of pics of my pile of options... so far the clubhouse leader is some 3d printed wheels that Ricardo, my partner for 3d goodies, made a few years ago.....here is a photo They look pretty good but I am eagerly awaiting the upcoming offering from Jason at Jack Modeling. Pete, Pierre and Helmut from this forum are helping him come out with this style of wire wheel. The fast paced upgrade in technology in 3D printing from when these were made will be a real boost in quality. That is all for now. Thank you for looking in. Randy

-
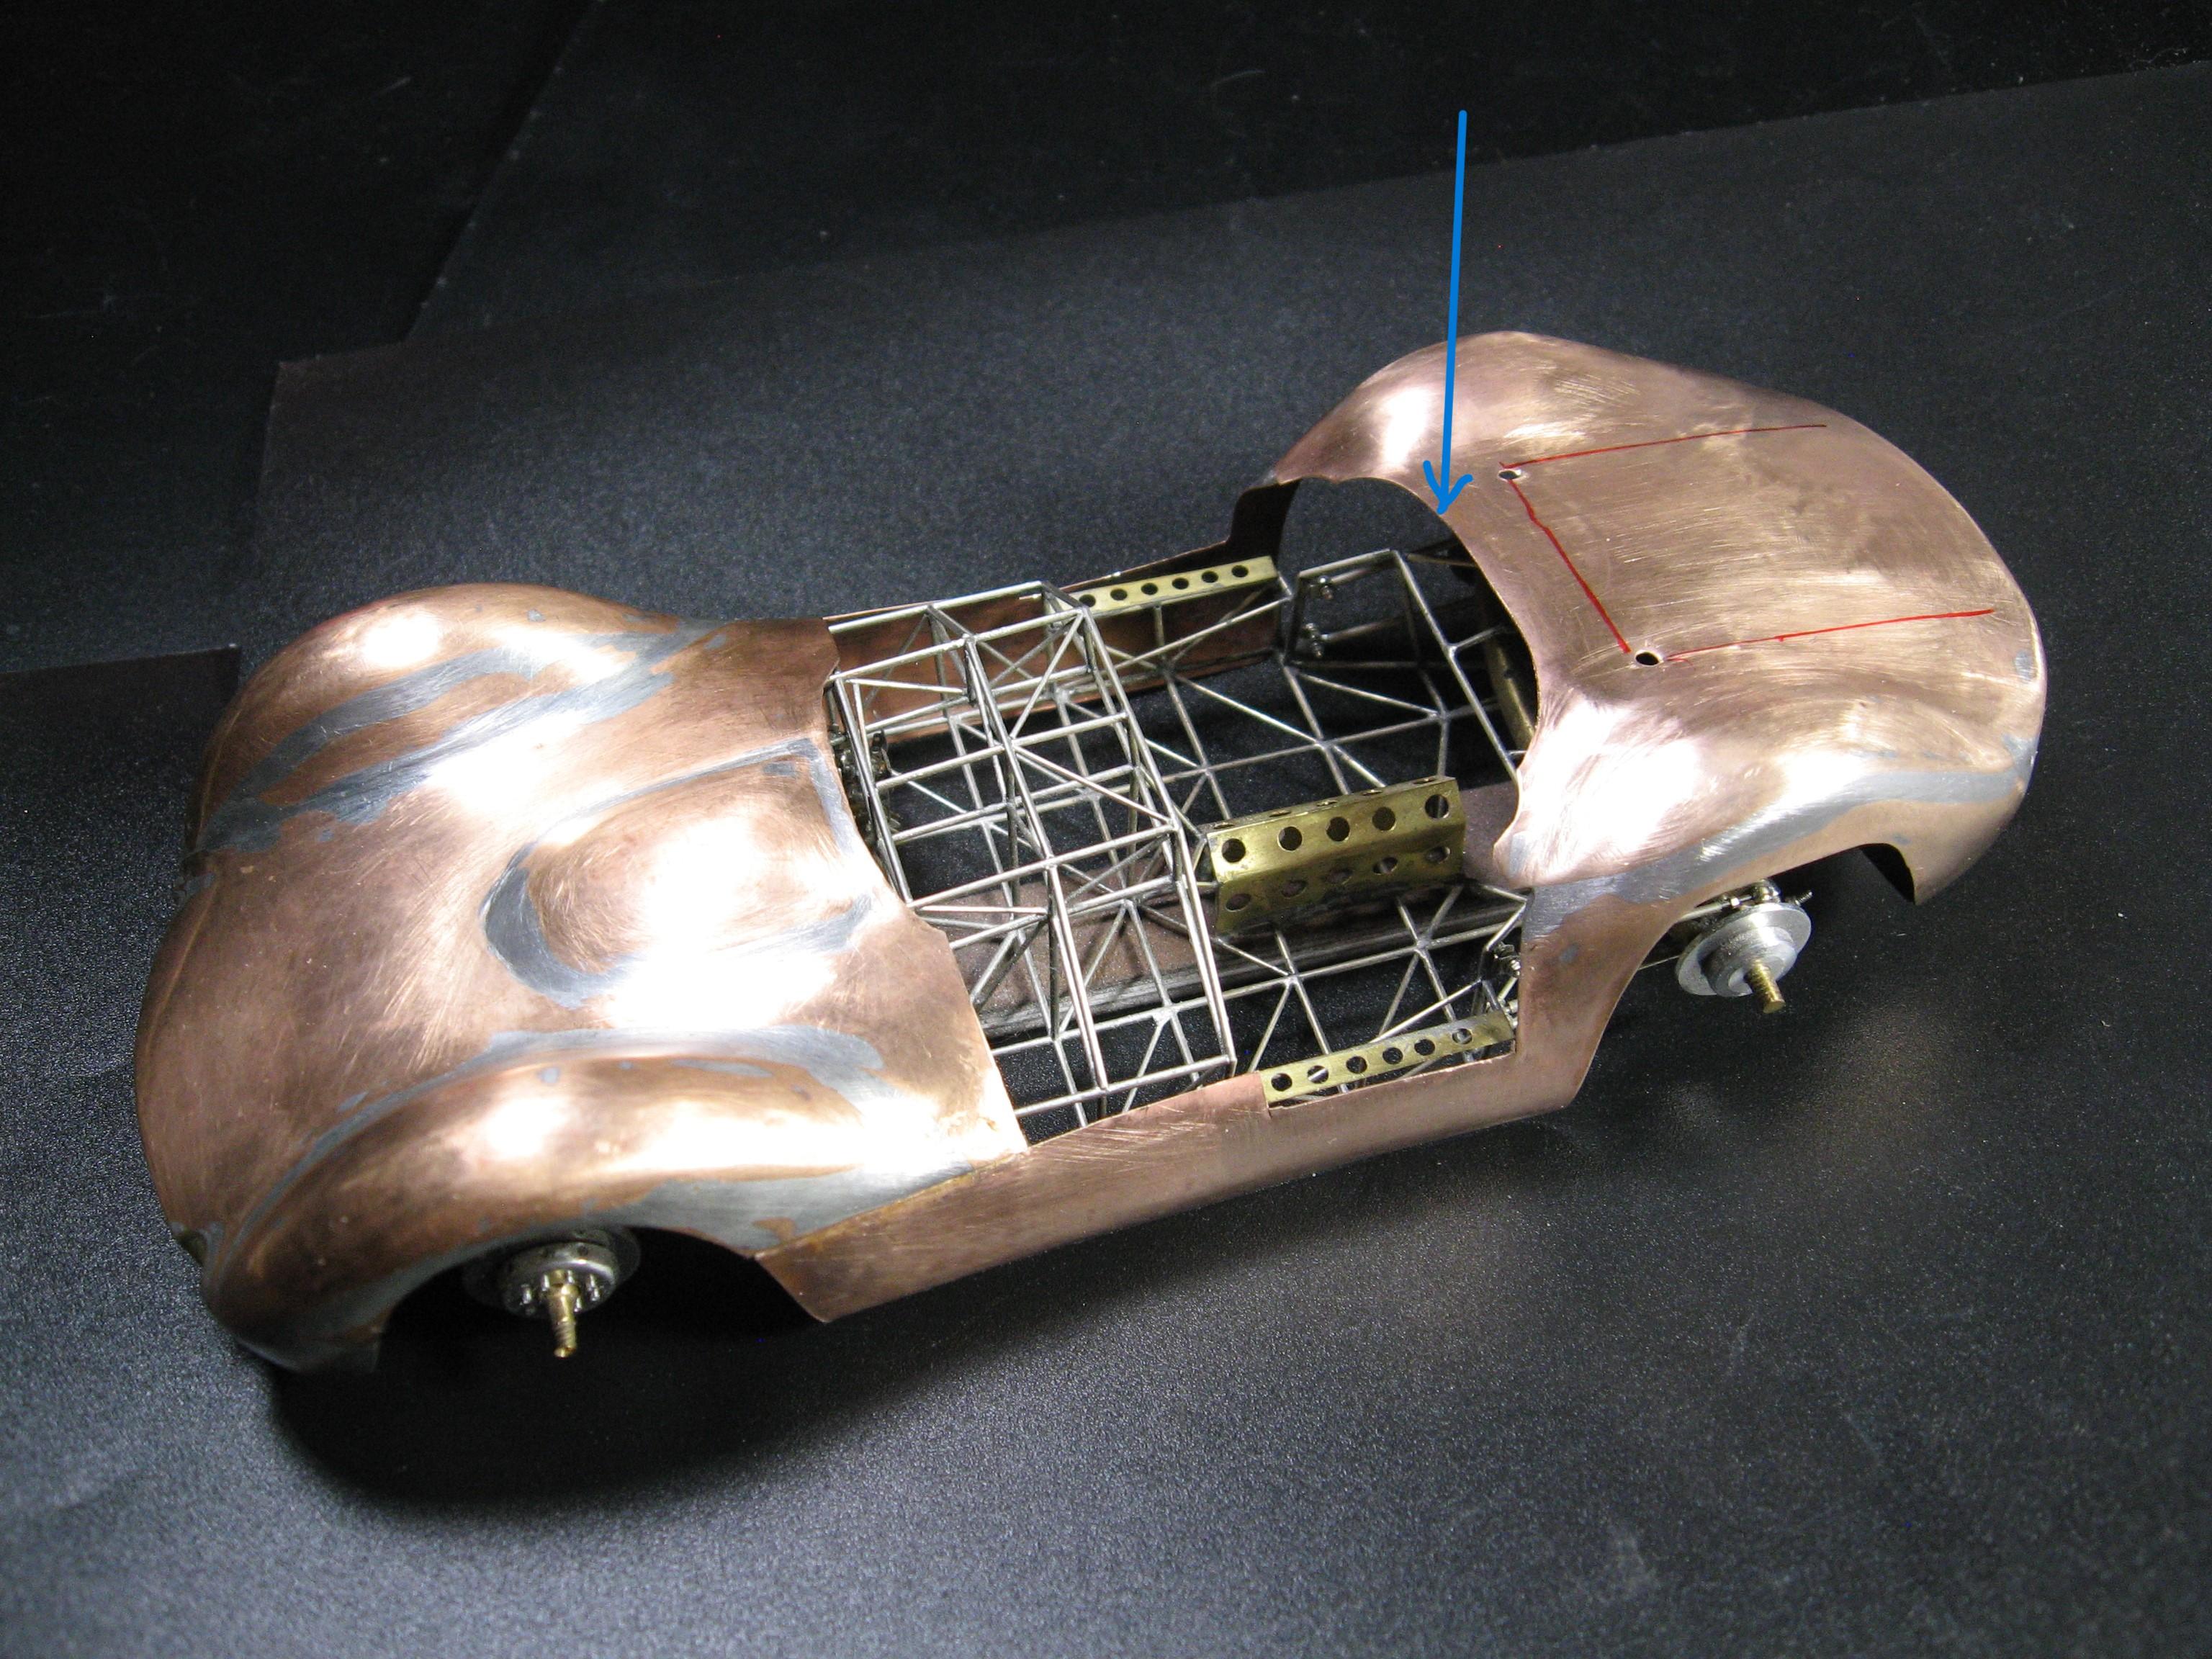
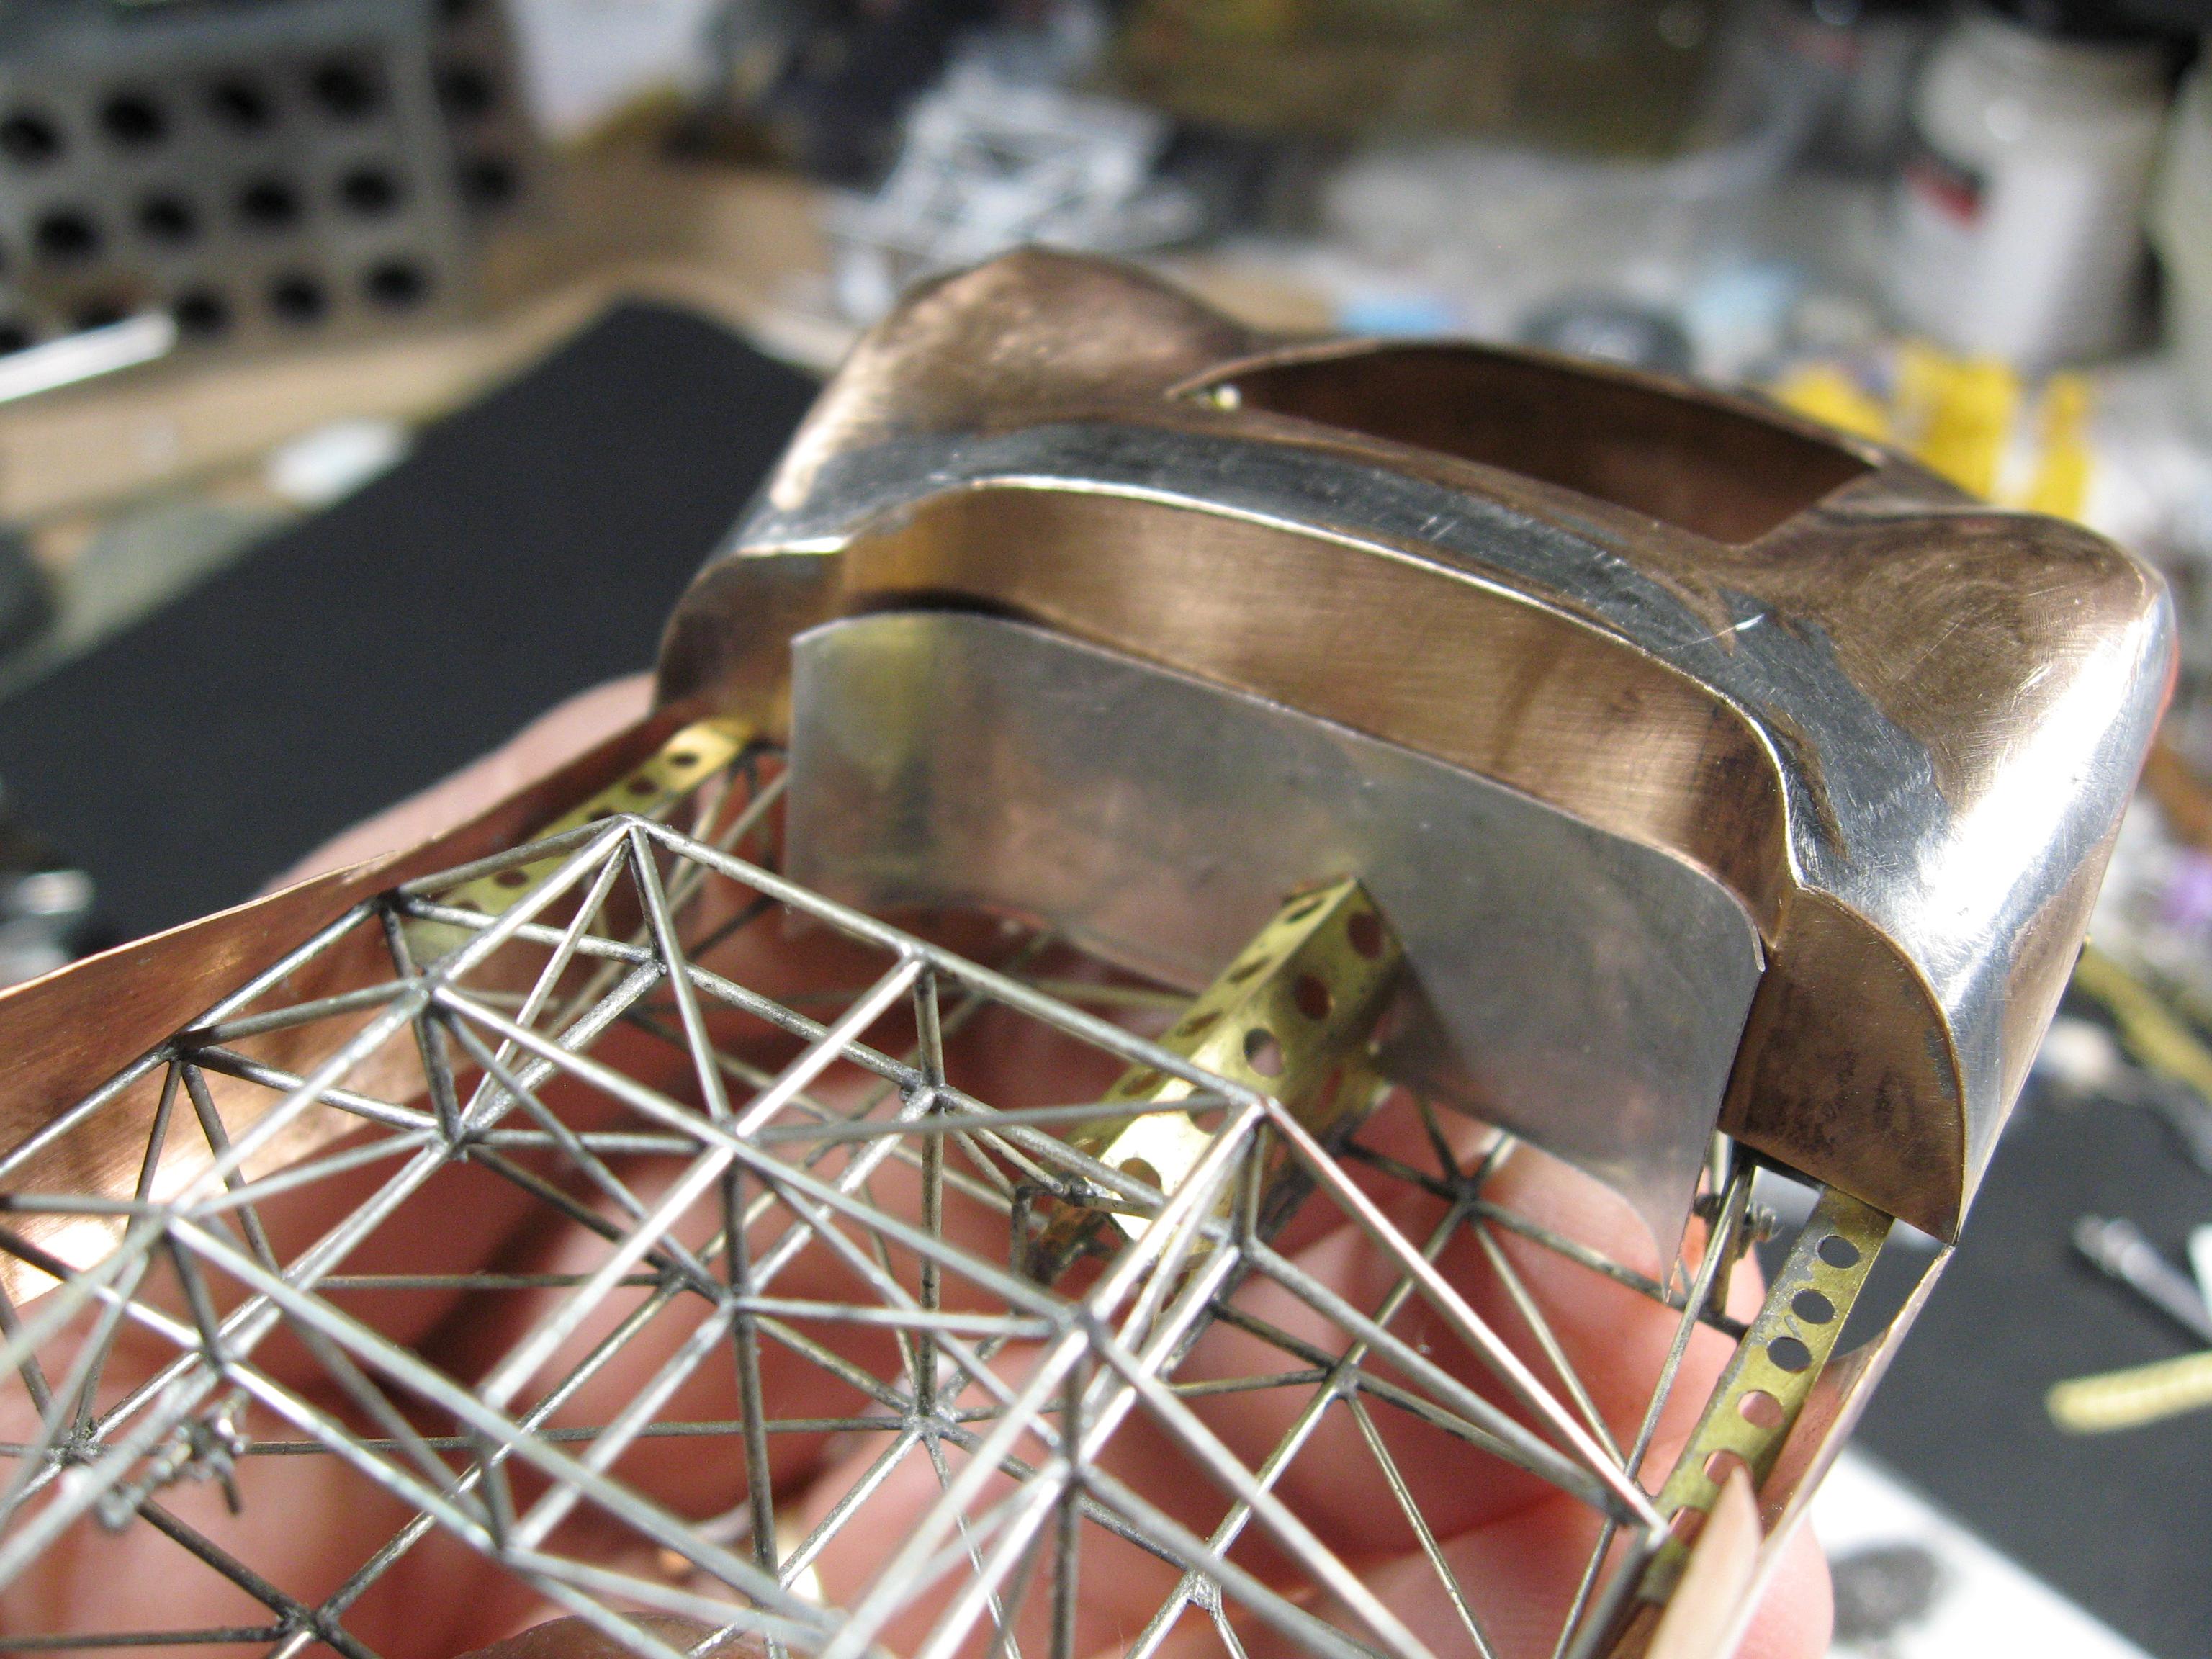
Okay, finally a progress report. Had to spend some time fixing a screw up on my part. I had removed too much material from the back of the interior tub.... The back wall should be more vertical so I needed to add some material and feather it in... When I get to finishing the interior there will be a piece of stock going down to the floor.. needs to look like this ..... more....
-
Hi Folks Bill, Still chasing gremlins in the wiring, no spark!!! Chris , Thank you, just how many wonderful big scale builds do you have going at the same time???? Steve, Always appreciate you checking in my friend? David, Thank you for sticking with me on my long drawn out attempts to build something! Hey Tim, Thank you and hope to see you posting again soon. Your talents are truly one of a kind and sorely missed. Thank you Bruce ! JC, Thank you now get back to work on those Porsche builds. Noel, Thank you for the kind words. Tom, Probably enough to build another car! Thanks Andy? Daniel, Such a treat to see your dragster in person and get to talk to you. Pierre, Thank you for checking in. Always enjoy looking at your builds going on. Very sad to see the issues with the Mercedes 300 build Francis, Wonderful comments from a builder who I really admire!!! Randy
-
Replicas & Miniatures Co of Maryland
Randy D replied to Claes Ericsson's topic in Model Building Questions and Answers
No secret way to get Norm's goodies Mike? Just seeing if I could help on the payment side of things. Randy -
1/8 Pocher Lotus 72
Randy D replied to Chris Smith's topic in WIP: Other Racing: Road Racing, Land Speed Racers
Hi Chris, It's big and it's awesome !!!!! Such an iconic car. Randy -
Ferrari F 2003 GA
Randy D replied to Chris Smith's topic in WIP: Other Racing: Road Racing, Land Speed Racers
Carbon is cool!!!! Randy -
Replicas & Miniatures Co of Maryland
Randy D replied to Claes Ericsson's topic in Model Building Questions and Answers
Hello Claes, Norm does not sell his products thru vendors I have sent you a PM. Randy -
Hey Andy, Love the work you are putting into the details!!!! That might be the best scale rendition of bungy cords I've seen. Randy
-
Comstock Ford GT40 MKI
Randy D replied to Phildaupho's topic in WIP: Other Racing: Road Racing, Land Speed Racers
Great looking engine compartment Phil!!! Taking a curbside model and turning it into into this ??? Good call on your part to upgrade the Weber carbs. What did you use for the carb "tray" ? Randy -
WOW, amazing result my friend!!! Those w/t from Jack Modeling look great. Randy
-
It is amazing to see what a craftsman can do with these humble beginnings!!! Great stuff Bill. Randy
-
This is a great project Art!!!! Cool to see you getting into printing your own parts. Randy
-
Ebbro/Tamiya 1:12 1968 Matra MS11 F1
Randy D replied to Nacho Z's topic in WIP: Other Racing: Road Racing, Land Speed Racers
Really enjoying this Matra build John, hope you get back to it soon! Randy -
This result from what you started with Pierre is just fabulous. Love the subtle weathering!!! Details and paint work?? One to be proud of my friend. Randy
-
67 Ferrari 330P4 Spider
Randy D replied to Chris Smith's topic in WIP: Other Racing: Road Racing, Land Speed Racers
Oh you can't do this to us Chris!!!!!!! We got kicked to the curb for a modern F1 car????? Okay, I can wait. Randy -
T41 Bugatti sport coupe
Randy D replied to charlie libby's topic in WIP: Other Racing: Road Racing, Land Speed Racers
Speechless here Charlie, Your body work and those wheels are just off the chain!!!! That little English wheel ? Randy -
You never cease to amaze Pierre!!! You have another great looking project going here. Randy
-
Pierre, You are doing great work on this !!!! I would have never thought that this transformation could be done. Following!!! Randy
-
WOW Misha !!!! Your MG looks awesome with the paint and decals. Randy