Search the Community
Showing results for tags 'Aoshima'.
-
Background: The FD3S RX-7 is my favourite looking Japanese sports car. I've built a Tamiya one and a Fujimi one so it's time to add to that collection with an Aoshima one, and for variety I've picked this tuner-style heavily modified version. Pros: Awesome subject. Mostly goes together easily, well moulded with few seamlines and no flash. Good wheels and tyres (even thought I changed them). Nicely detailed chassis and interior and convenient that the instrument dials are all on one decal rather than 5 seperat circles. Seats fit very solidly. Cons: The rear lights are hard to get to stick in place, as are the door mirrors. It'd be better if the engine vents were open. No JDM plates in the decals. No engine. Verdict: Great. Aside from the couple of tricky bits of gluing, it's an easy to build kit giving a great looking result. Build notes: Built in a little over 3 weeks in September 2025. Painted with "Mazda Smoky Rose" paint from a rattle-can. Seats are Ford Dove Grey. Clearcoated with Mr Hobby Premium Gloss. I've changed the wheels for a set of Aoshima RAYS RE30, changed the steering wheel and the exhaust tip and also added Hobby Design seat belt retainers, front mats, PE bonnet pins and a few extra detail elements into the chassis none of which (for the chassis) - as usual - can be seen in the photos. But I know they are there :). The decals are all from the parts box except the RE Amemiya ones and the number plates which were custom printed by indycals. A very satisfying build and a contender for the 2025 top 3 which is looking like the hardest year for me to pick the 3 favourites from.
-
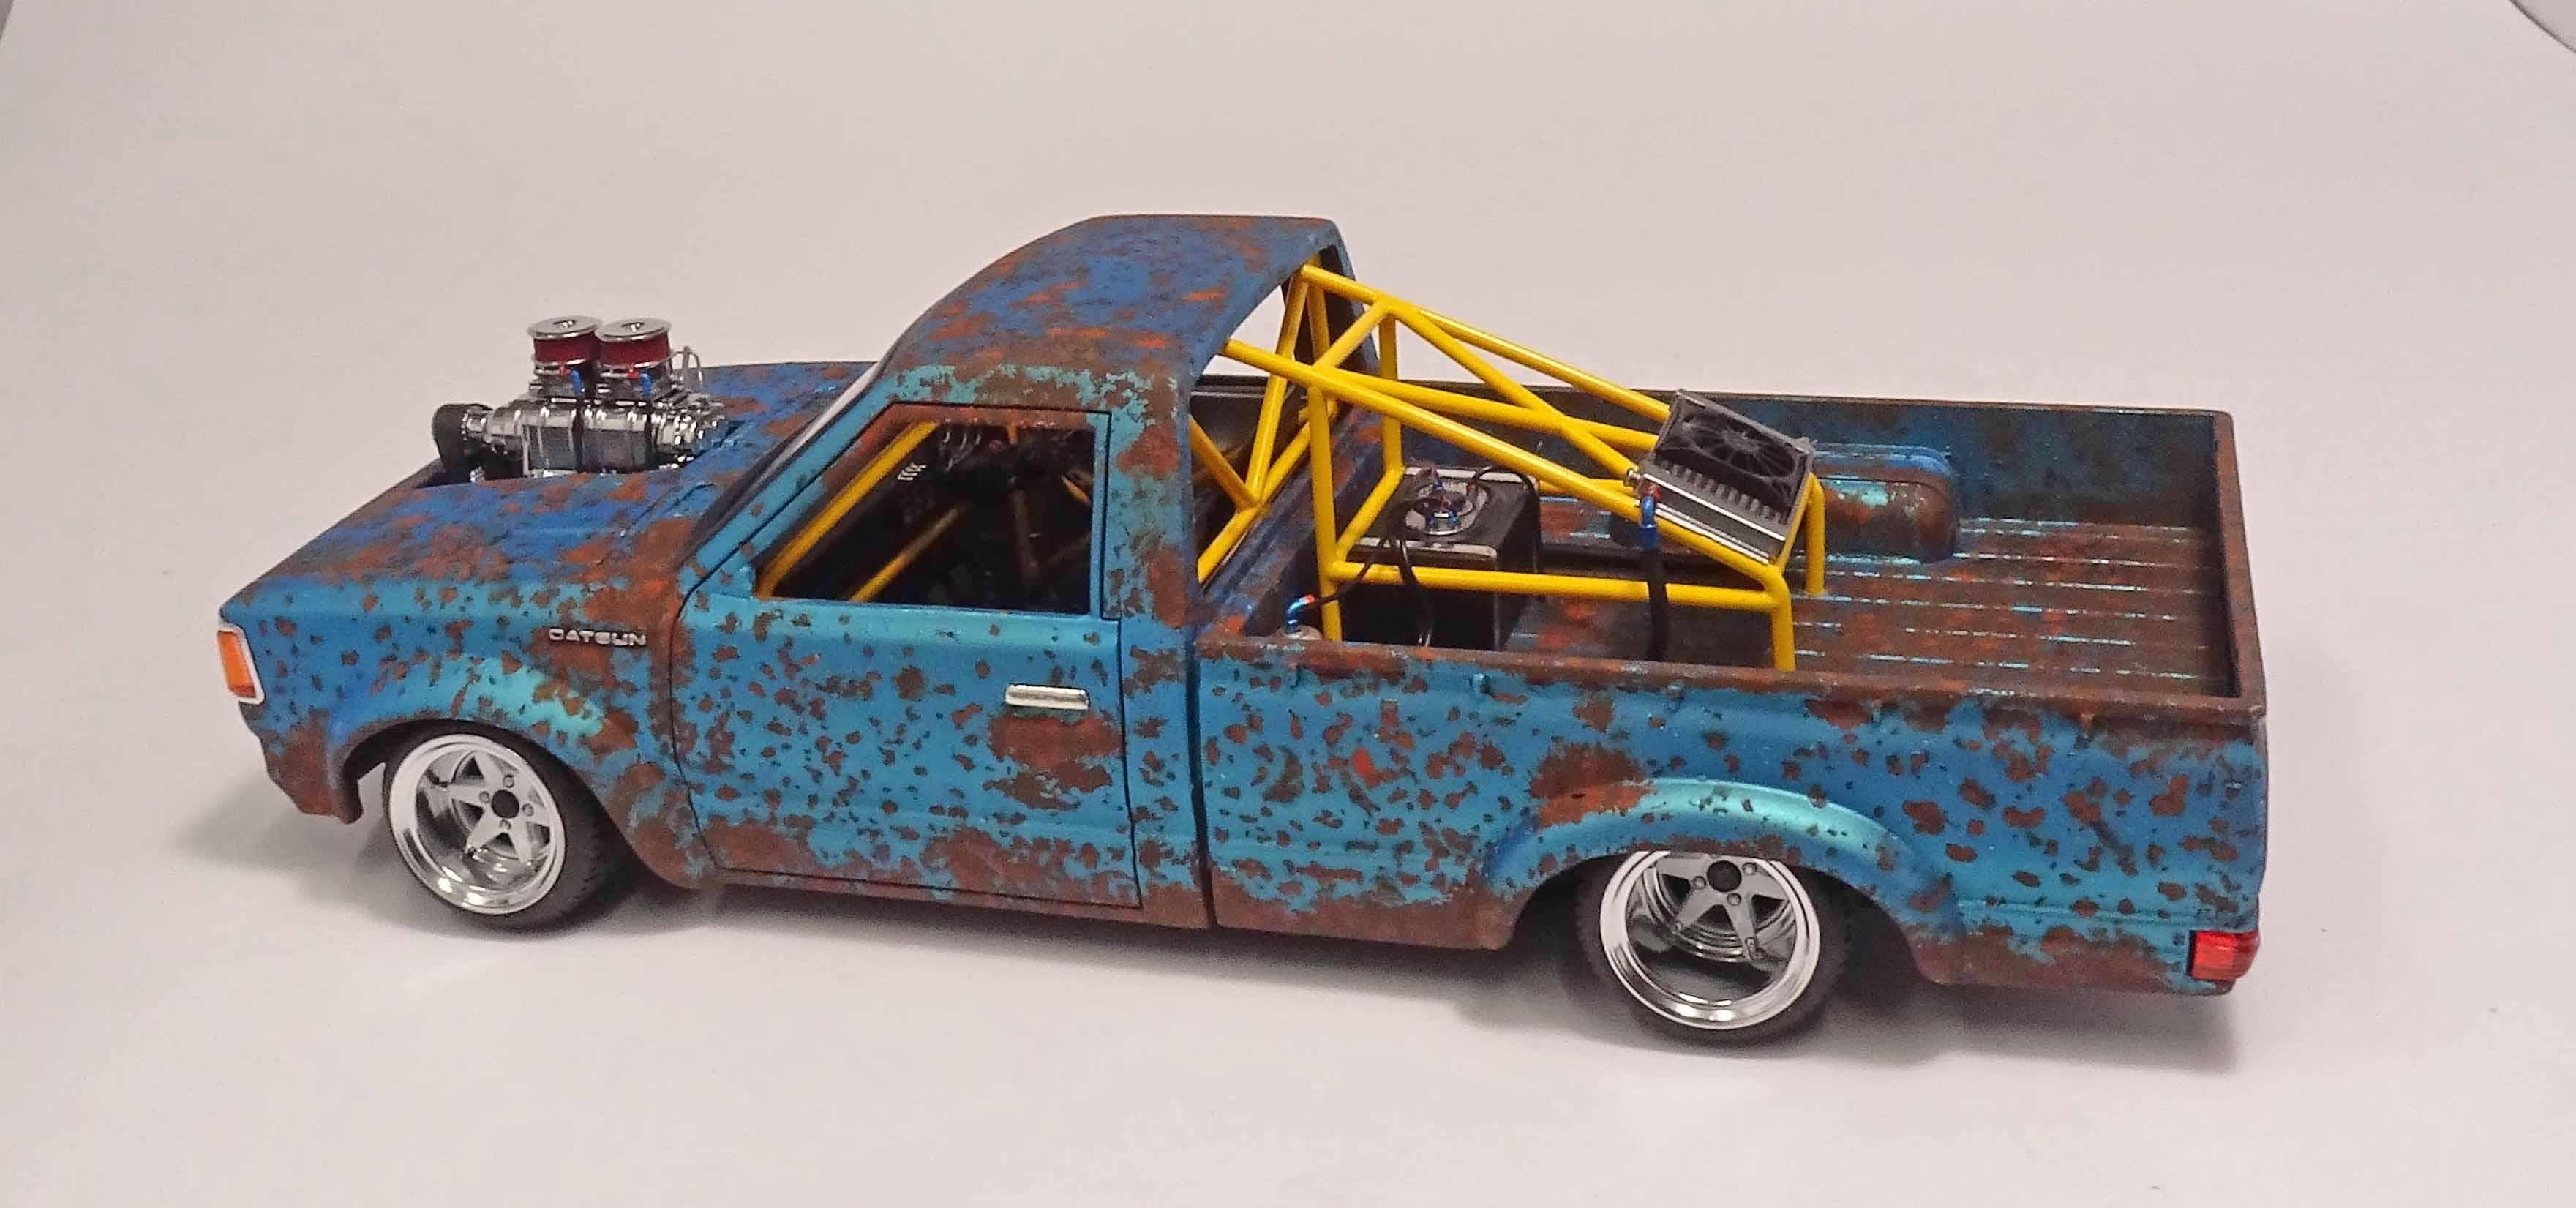
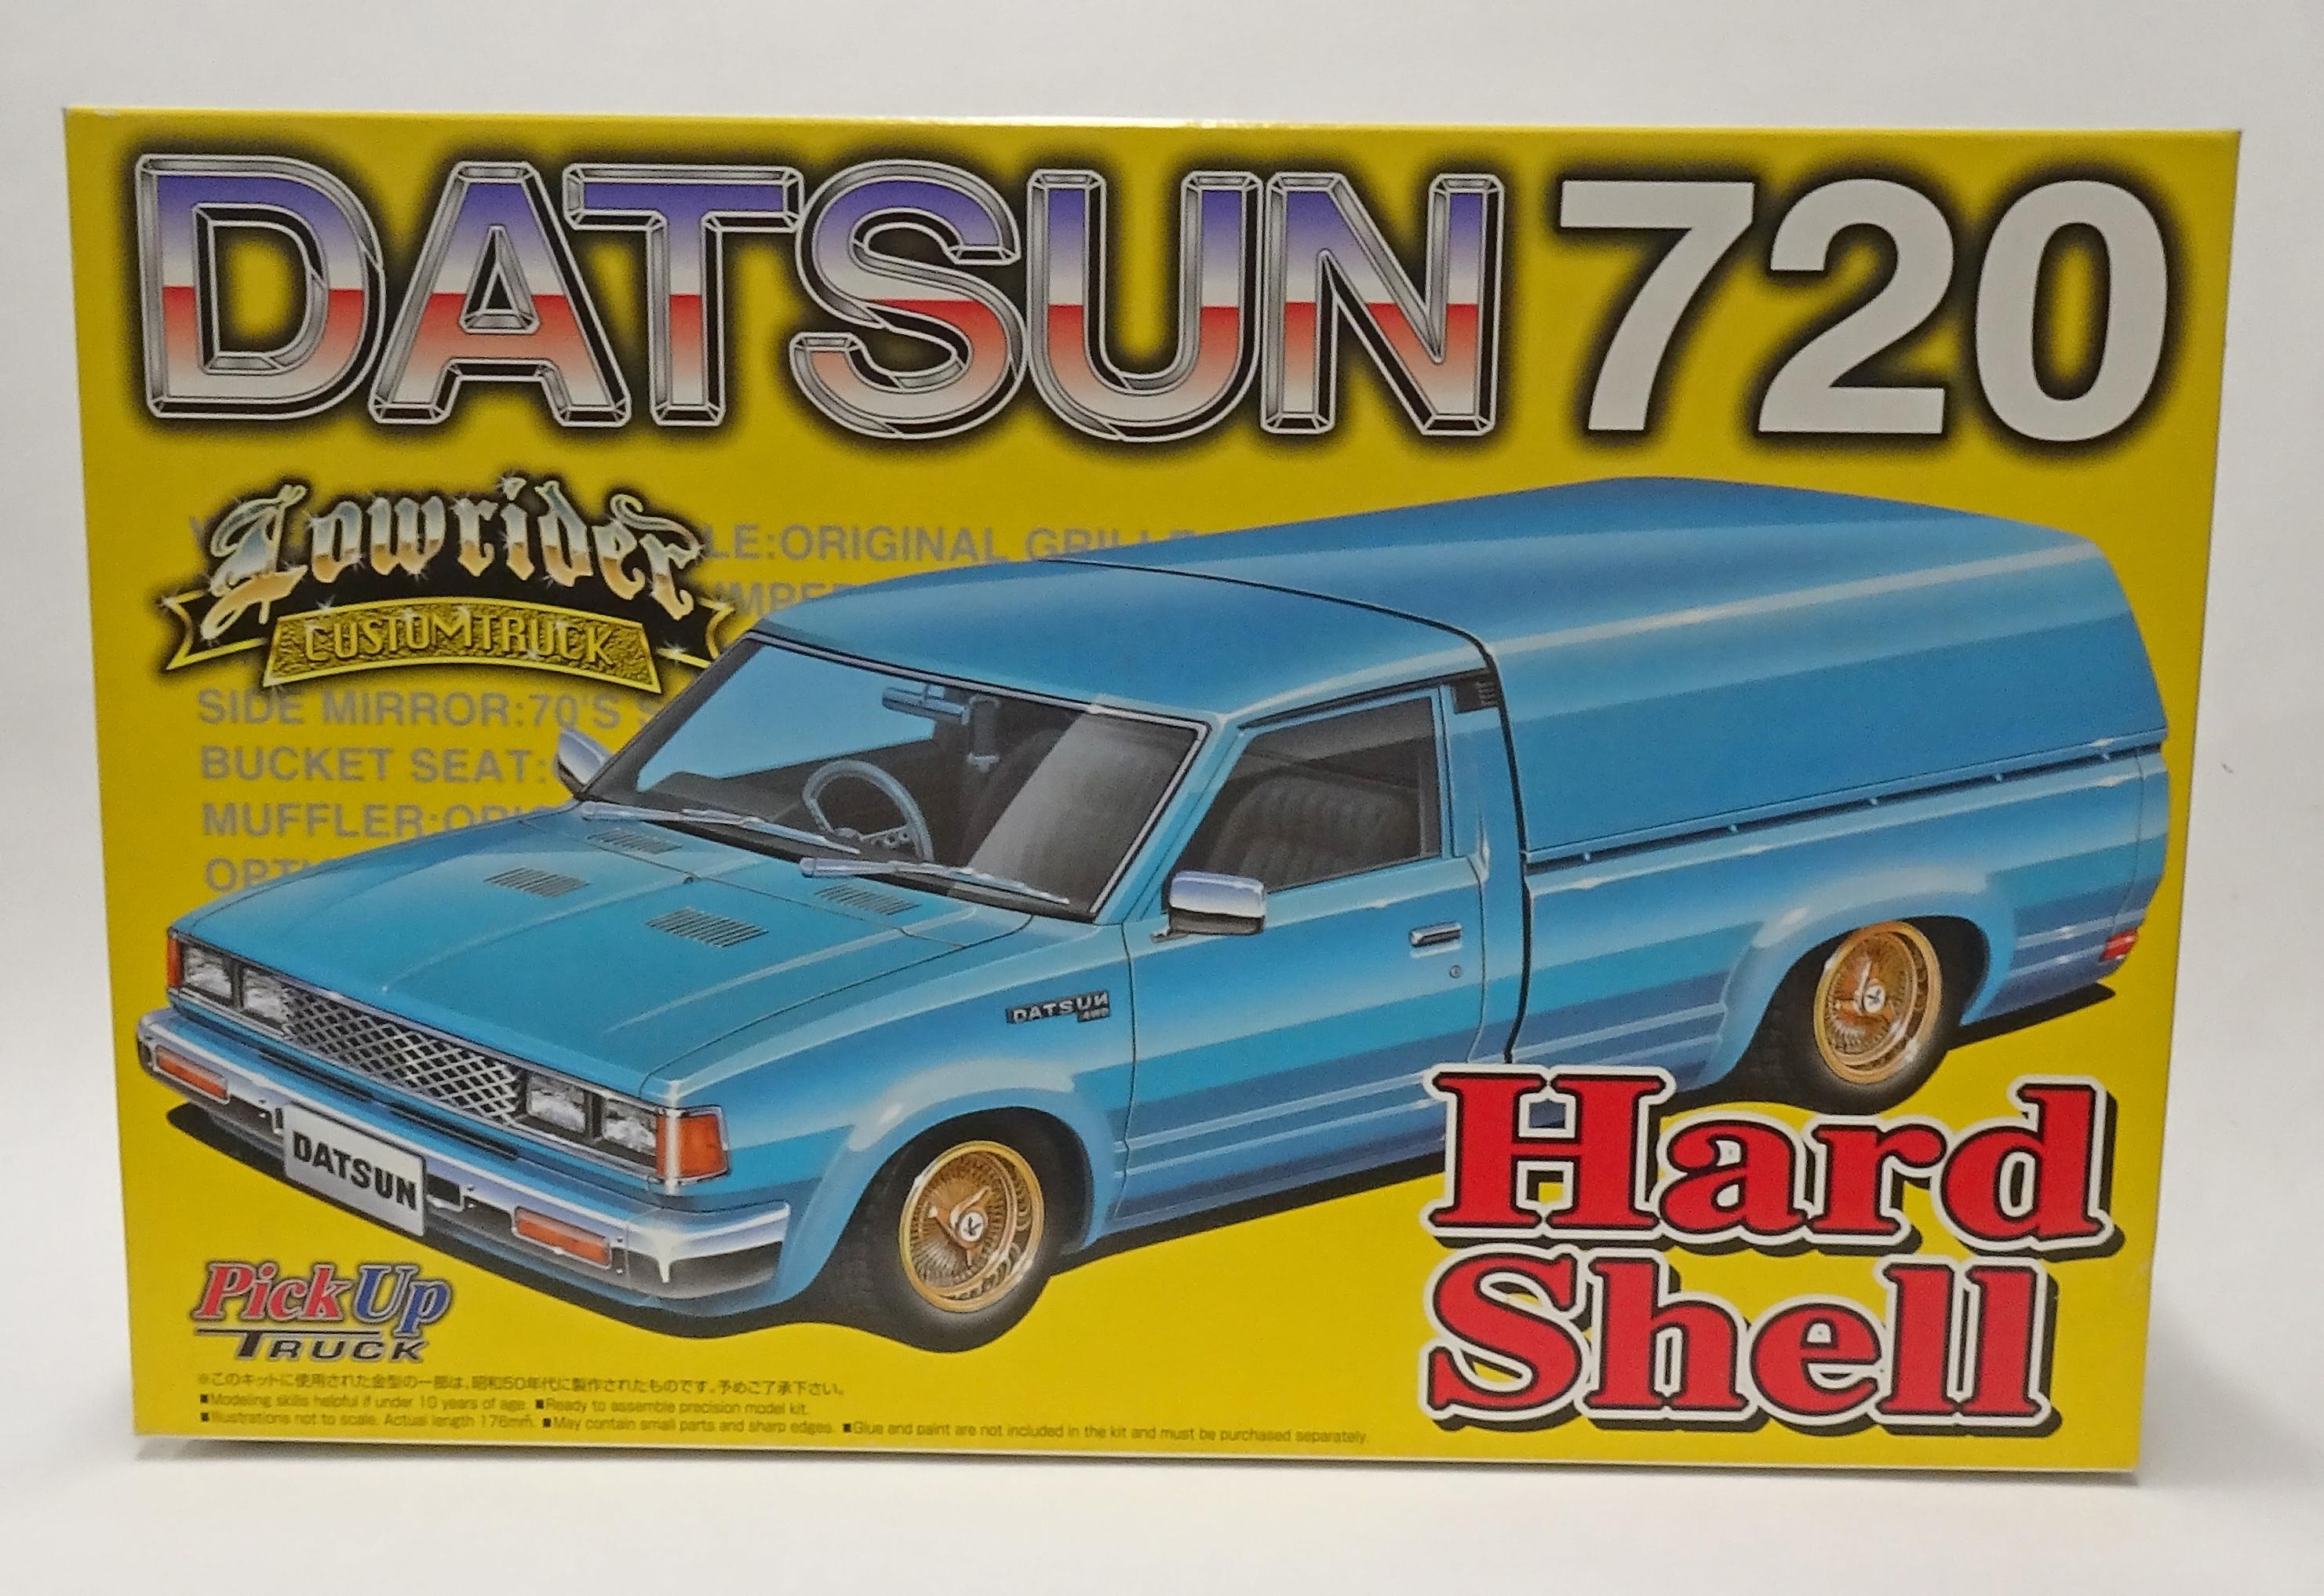
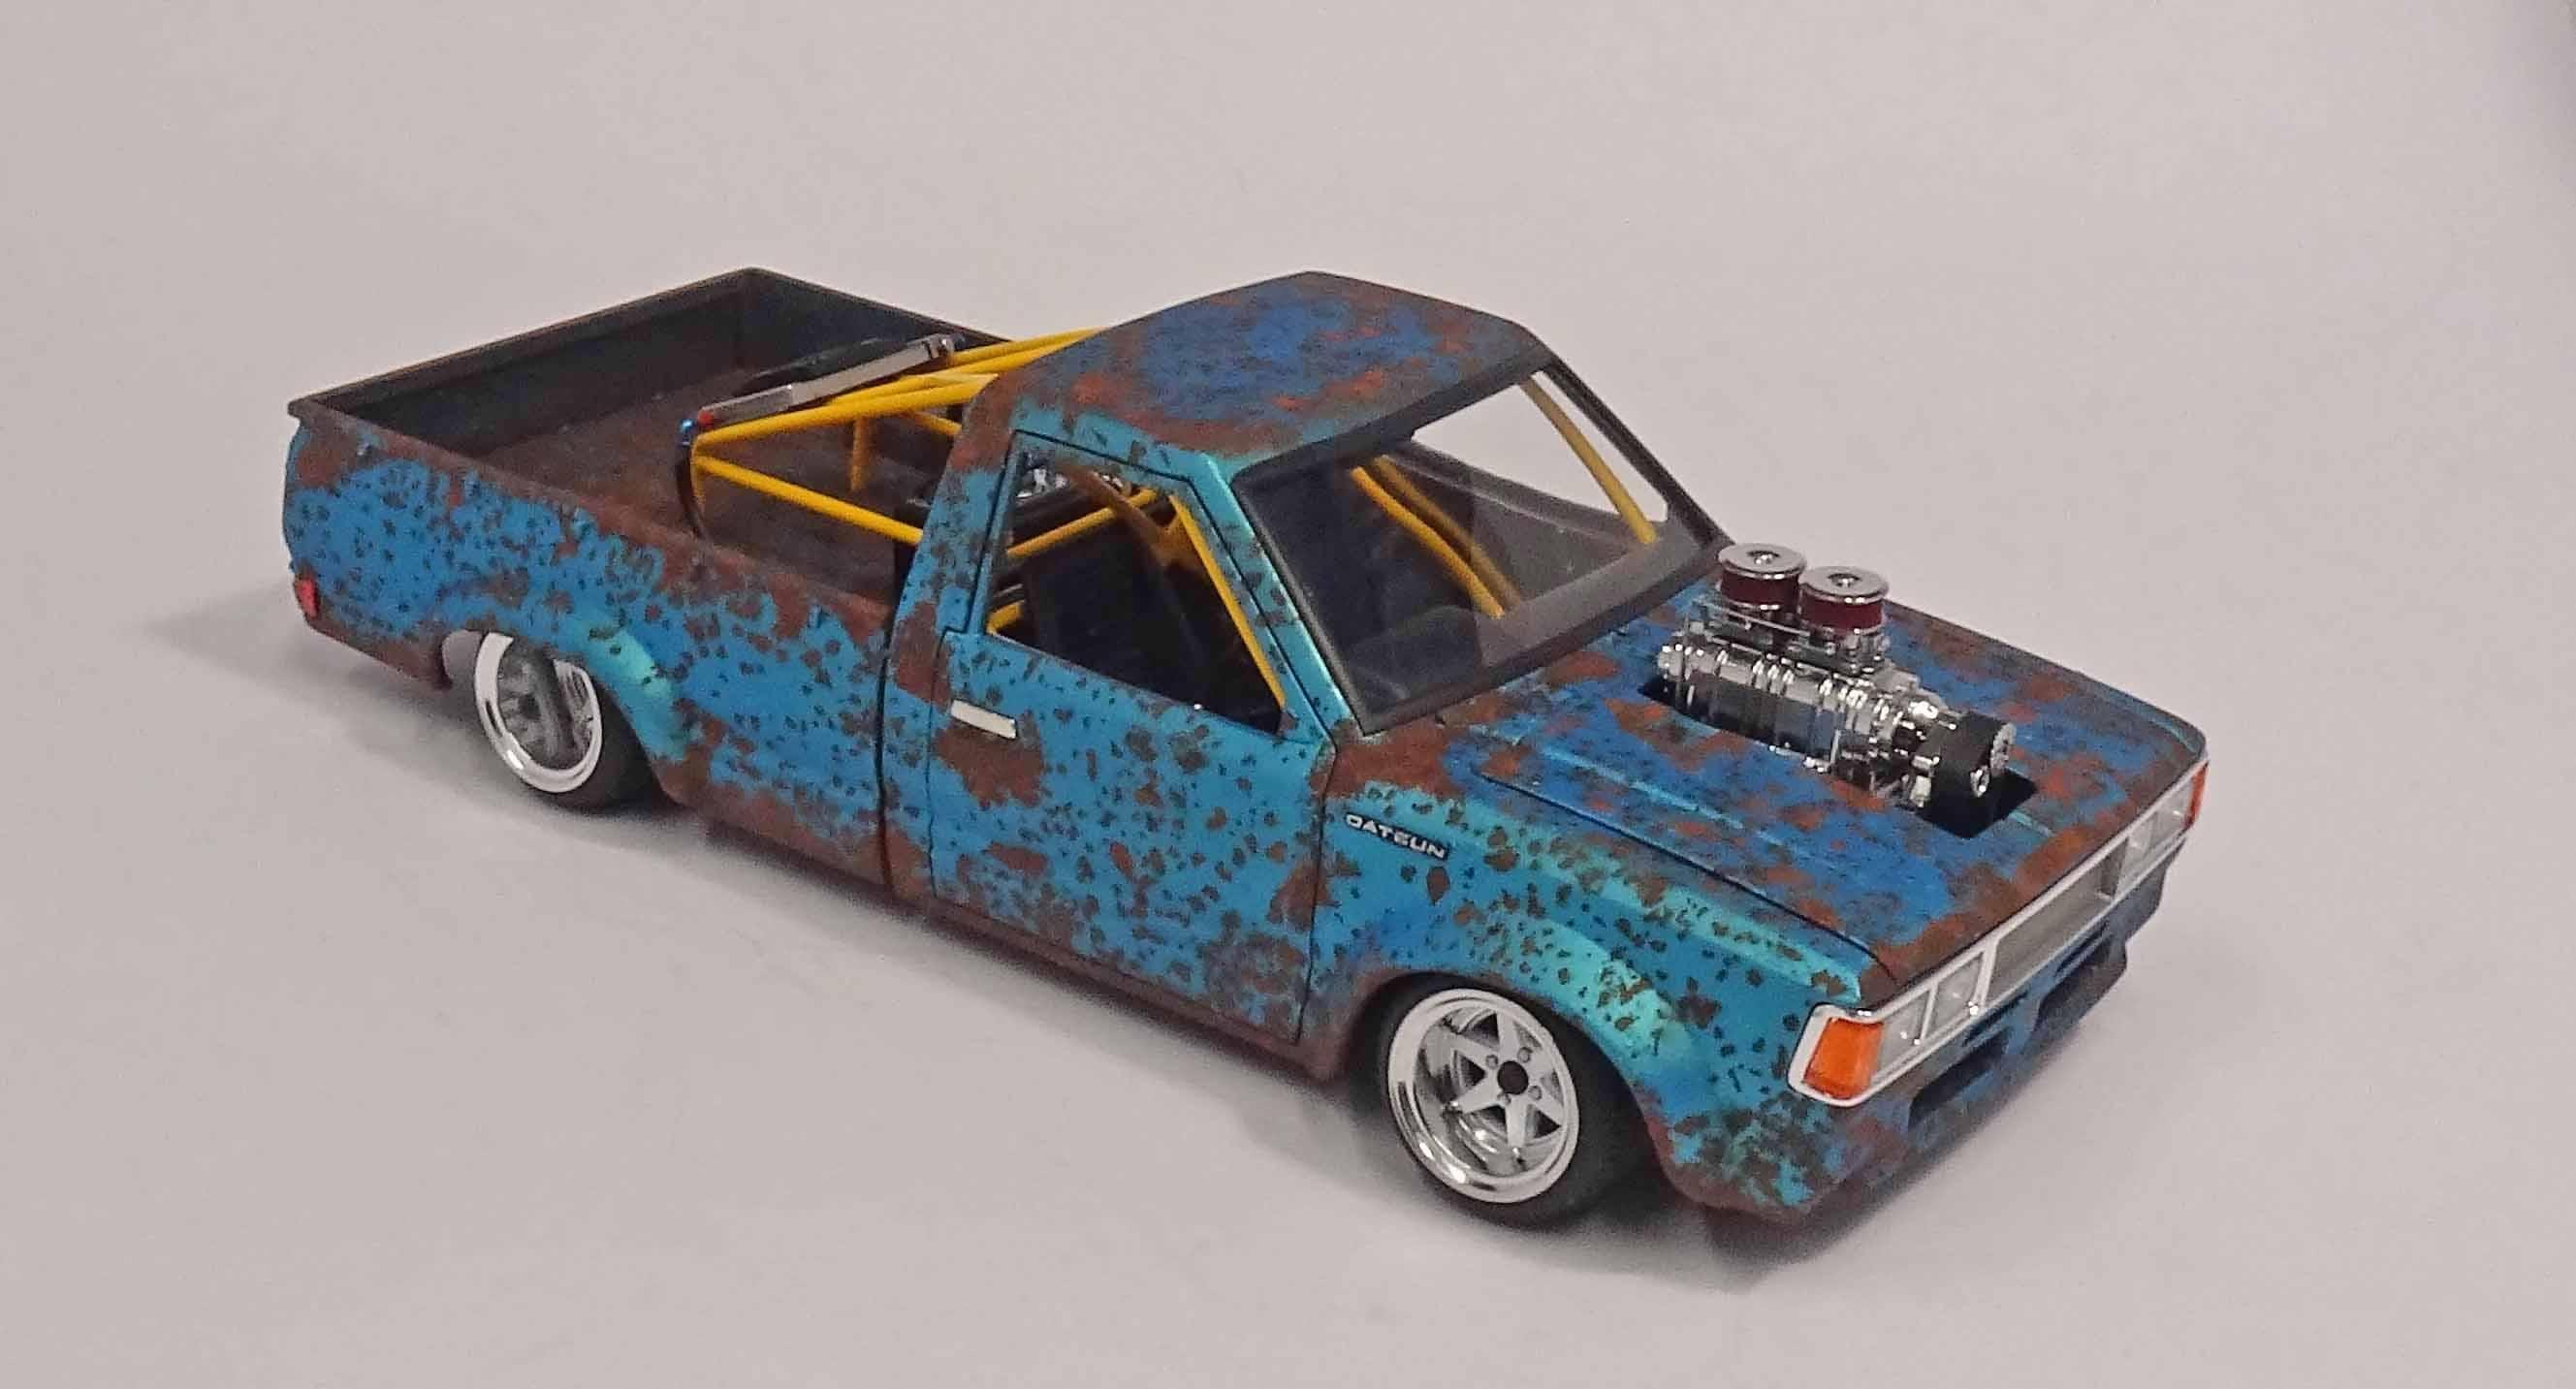
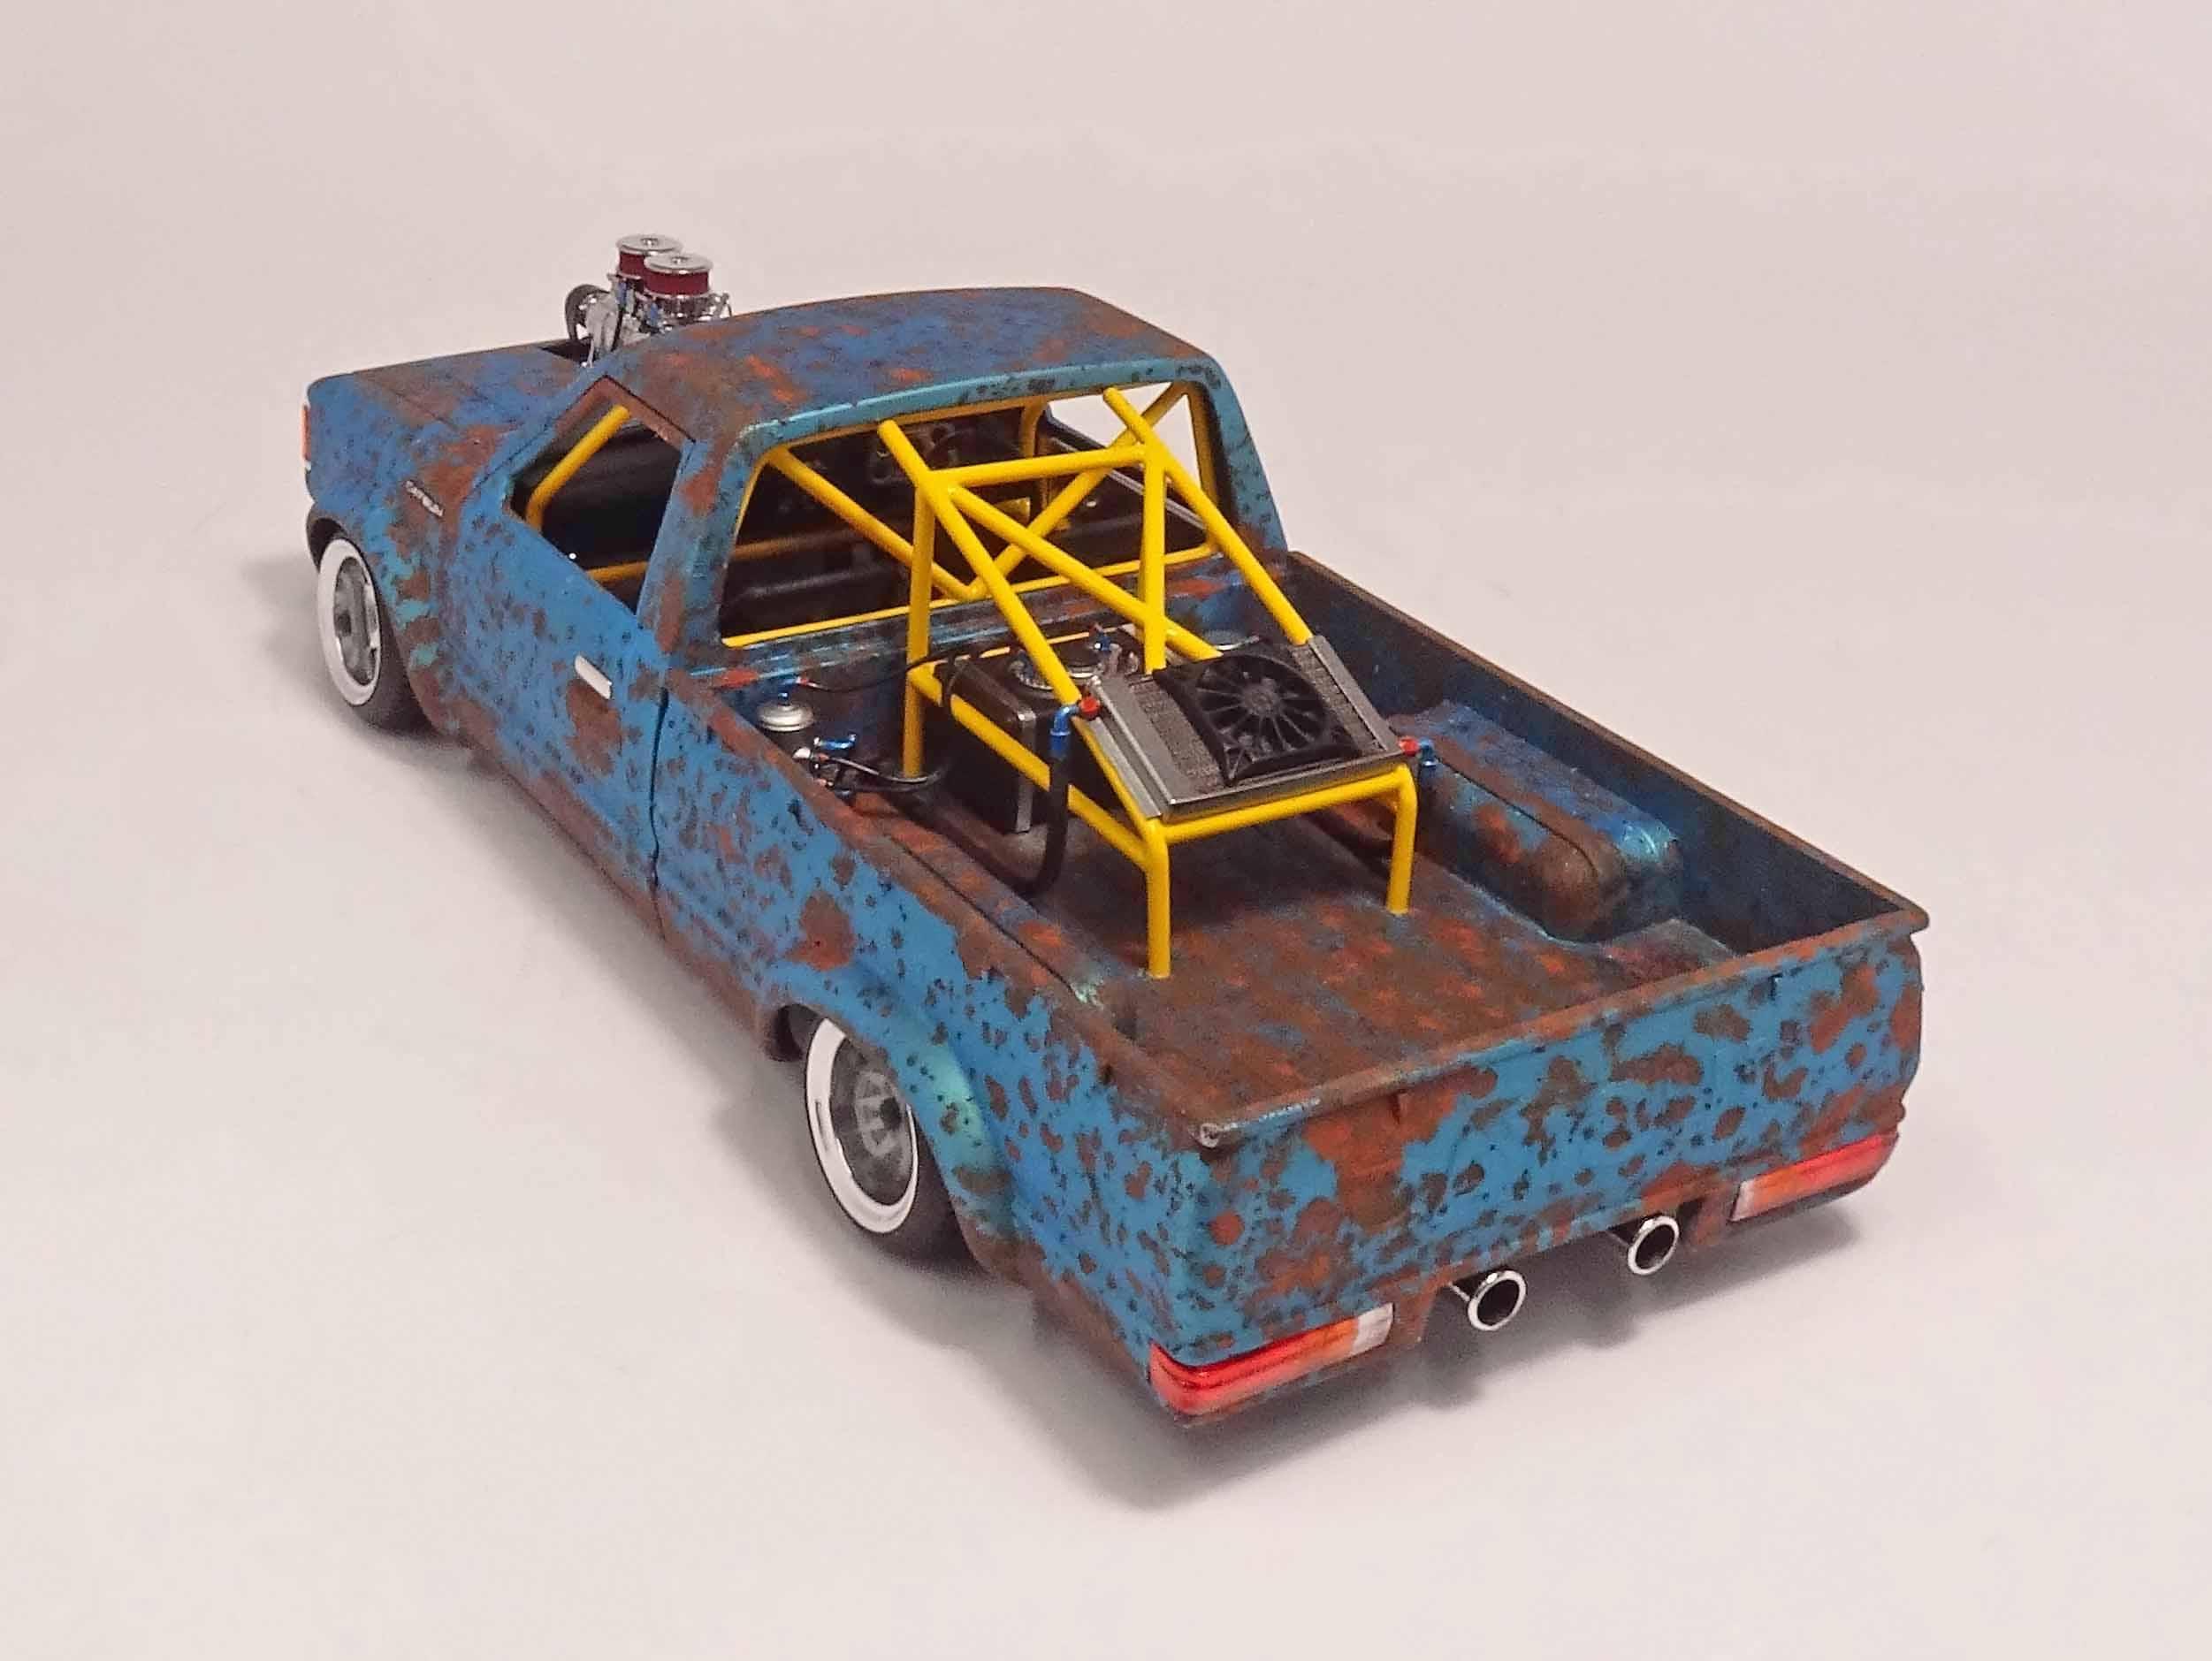
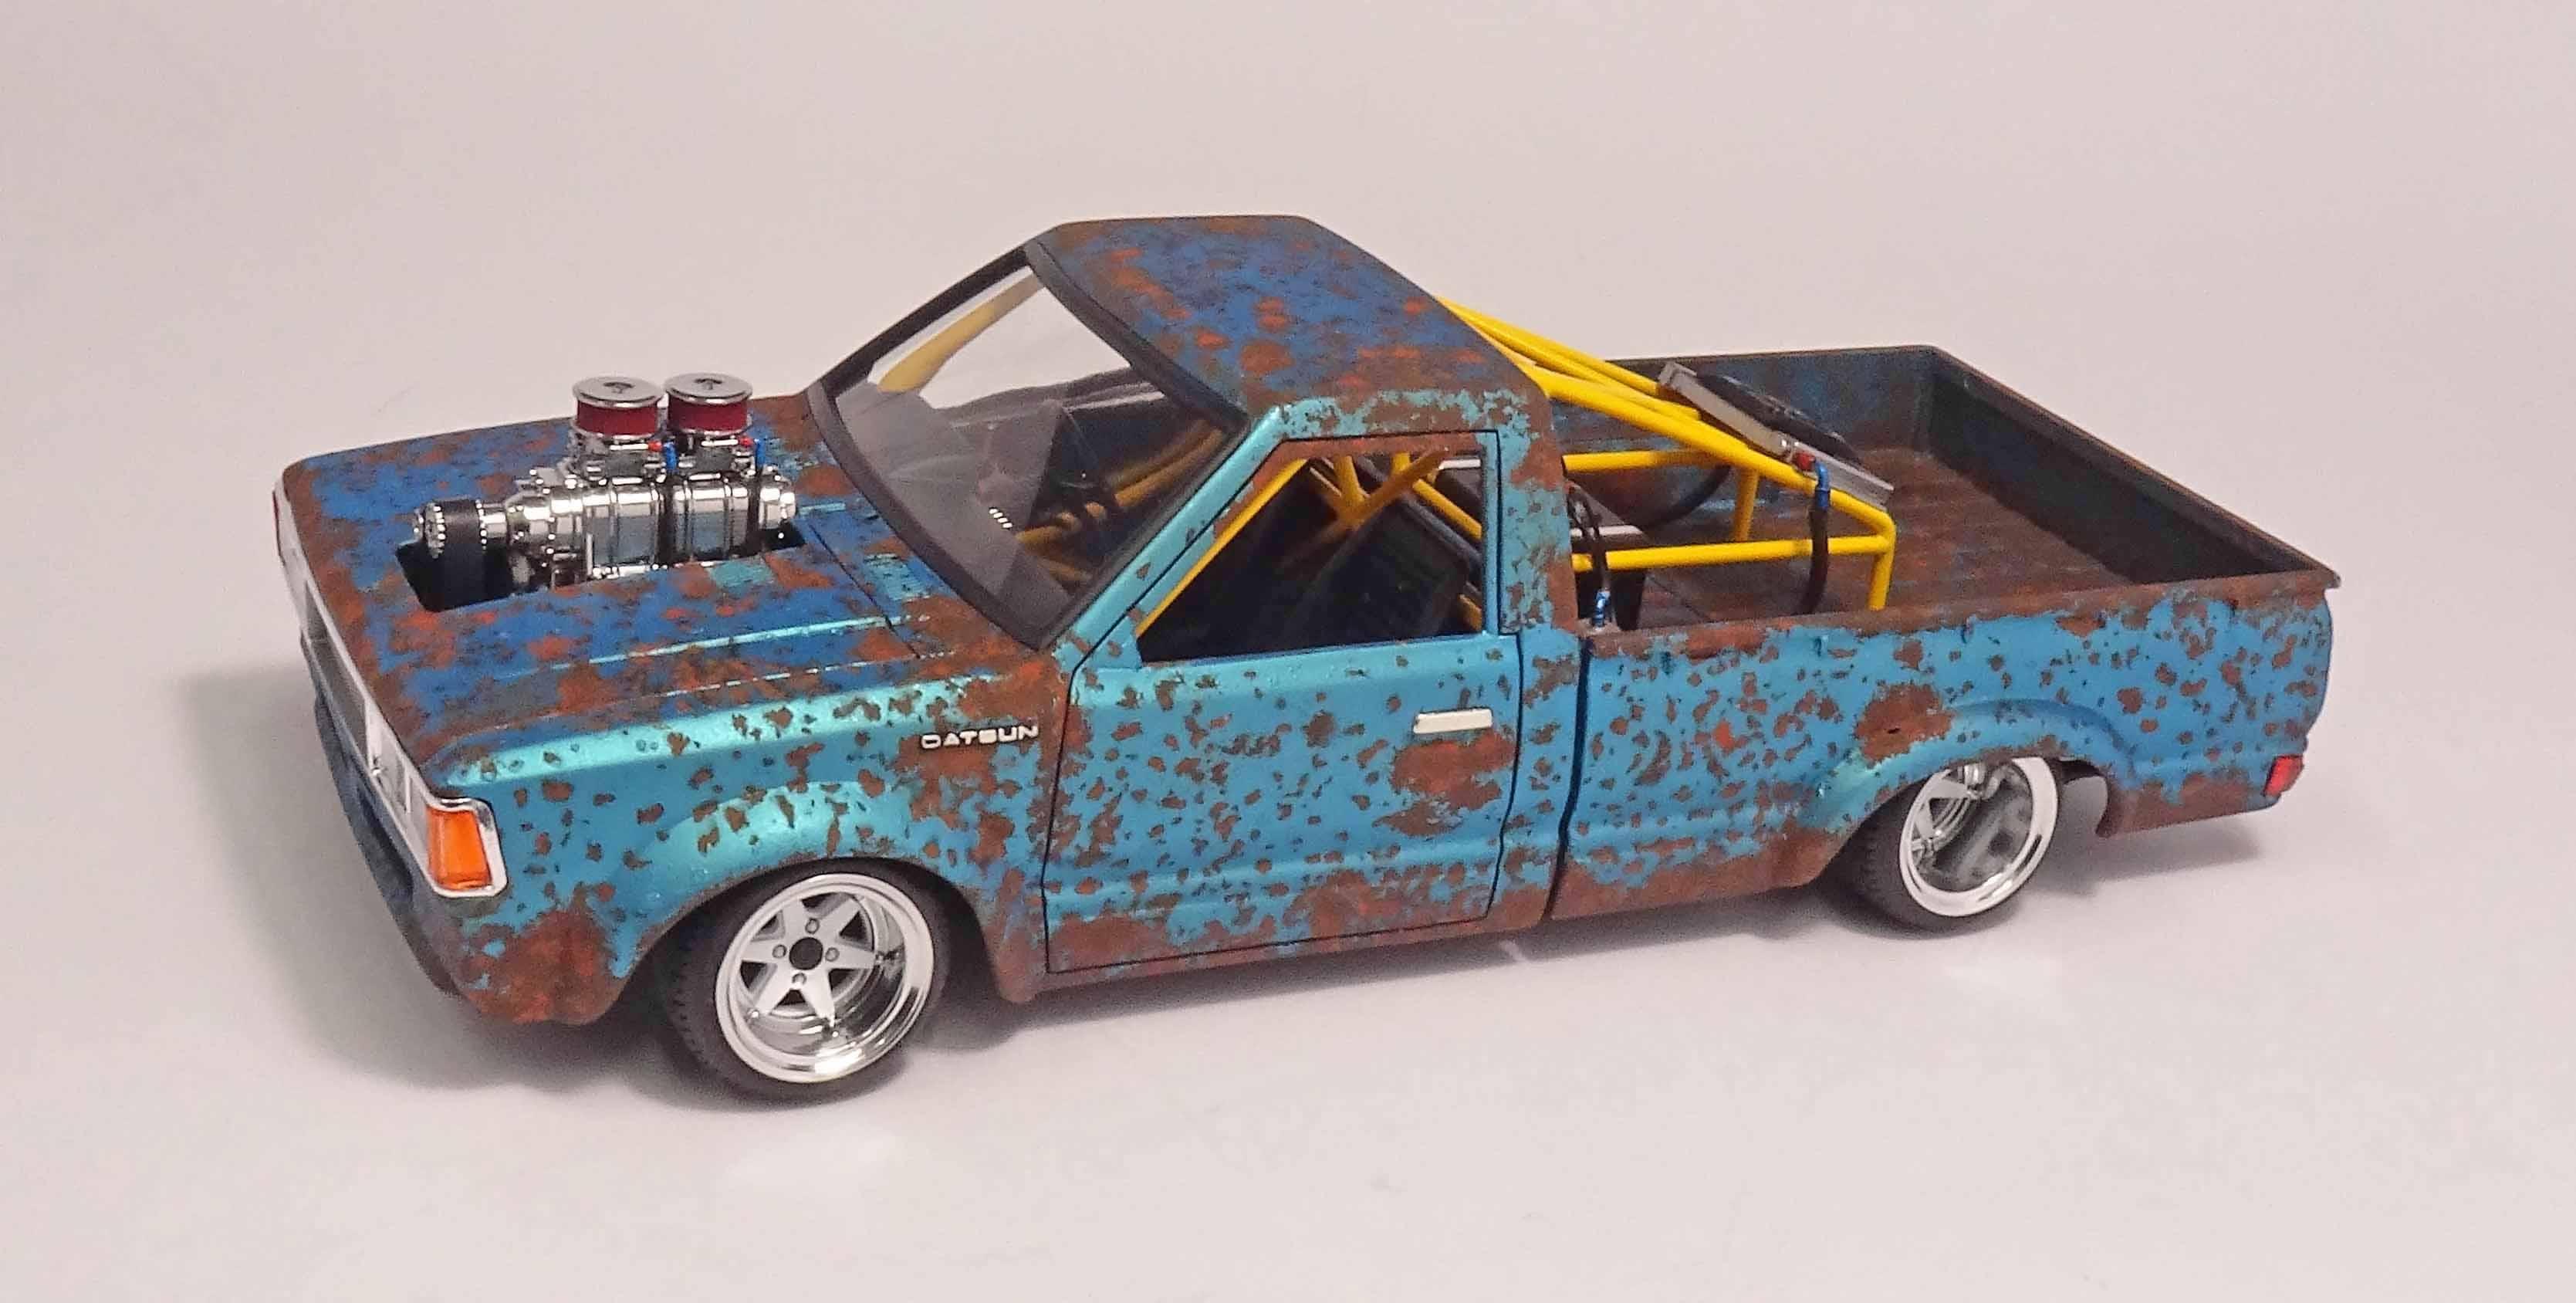
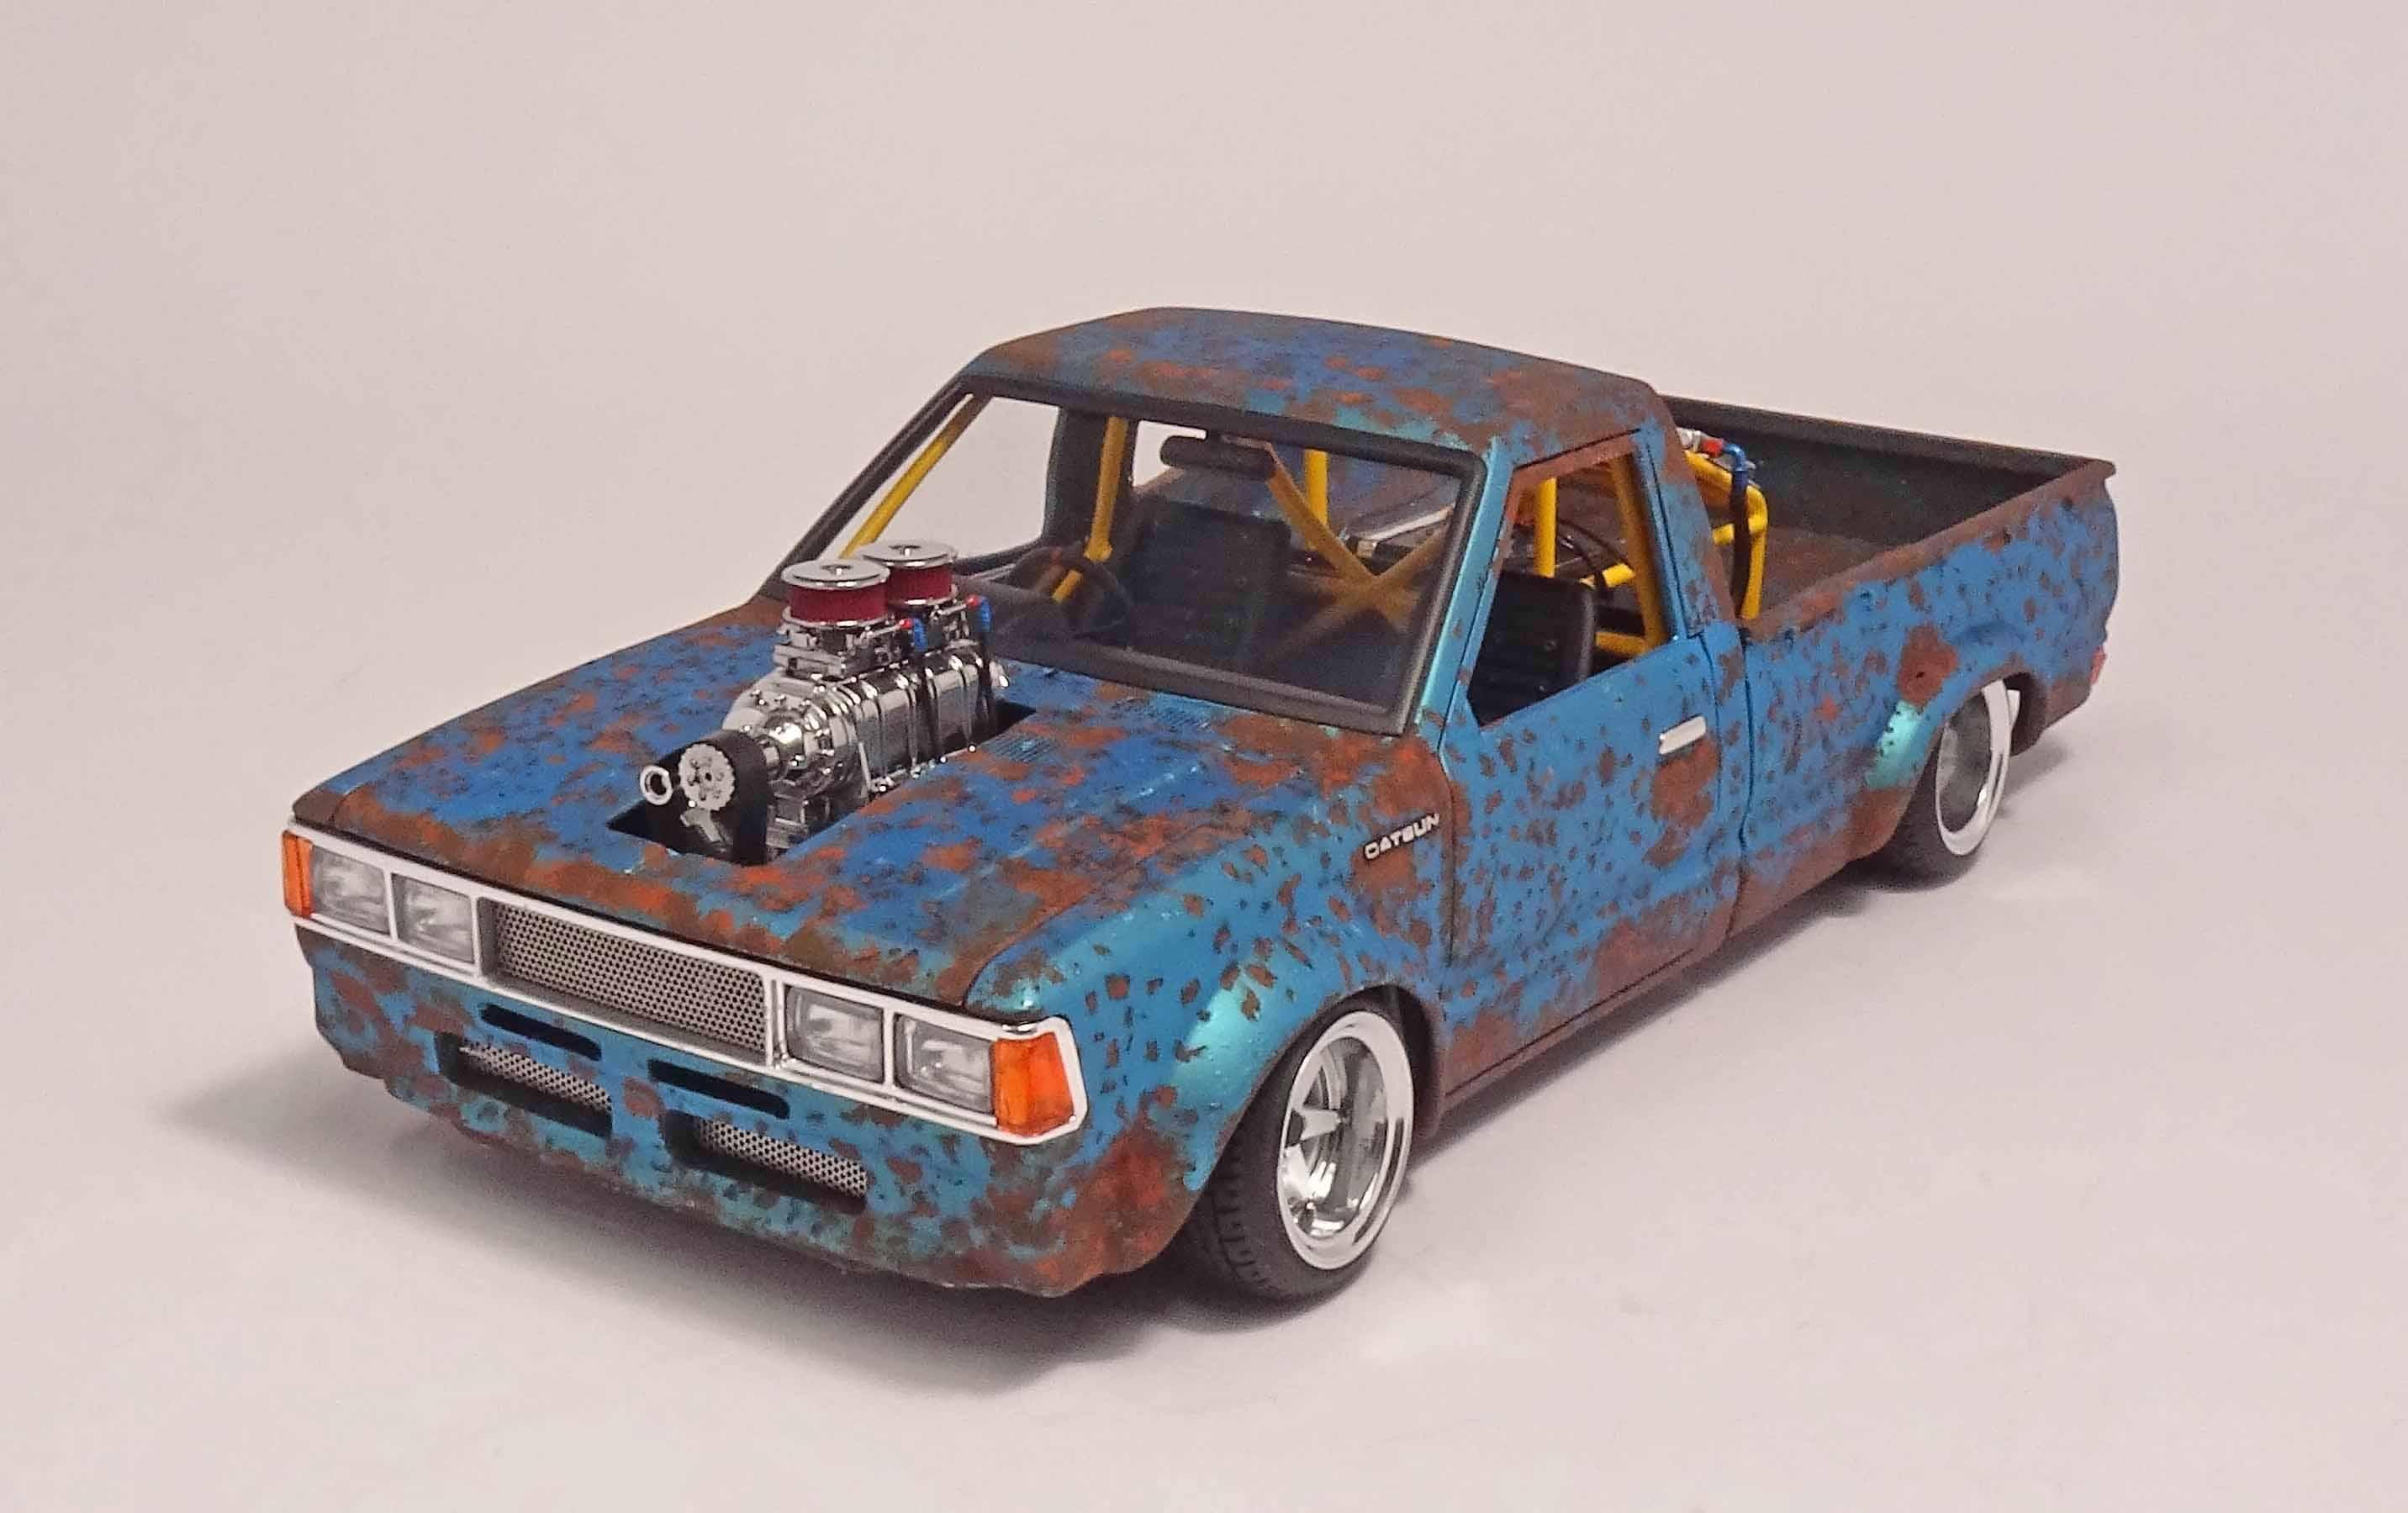
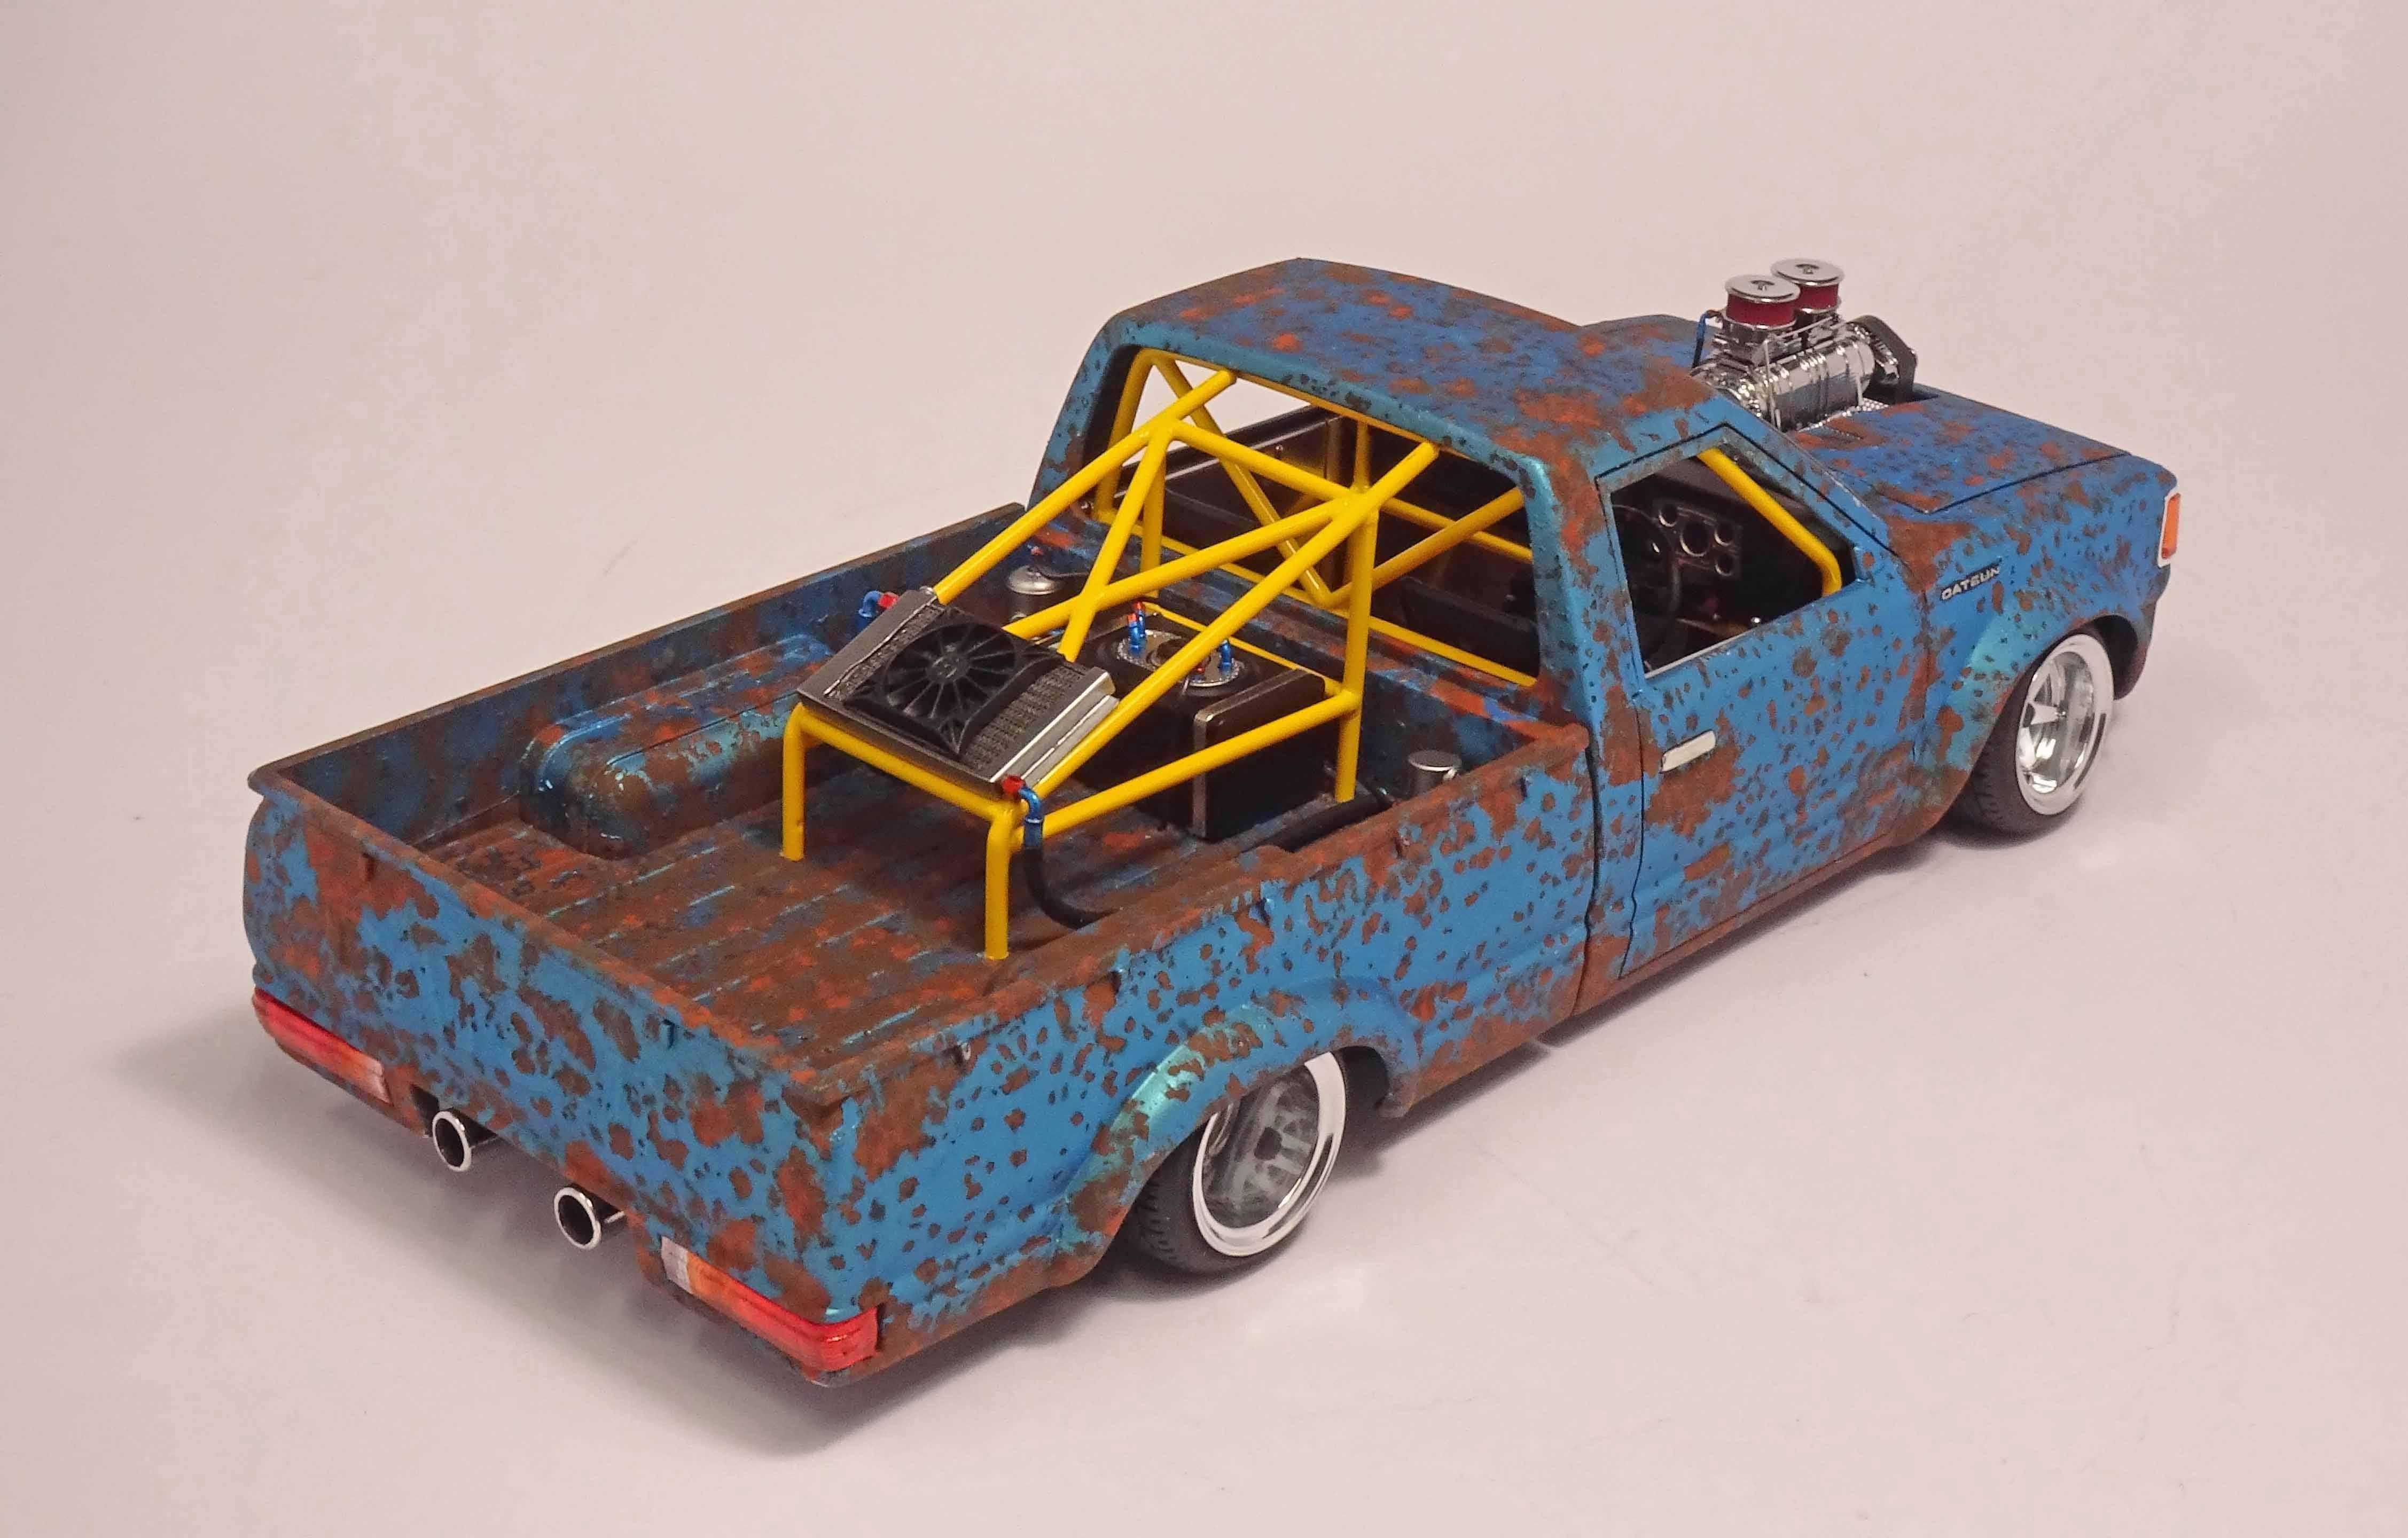
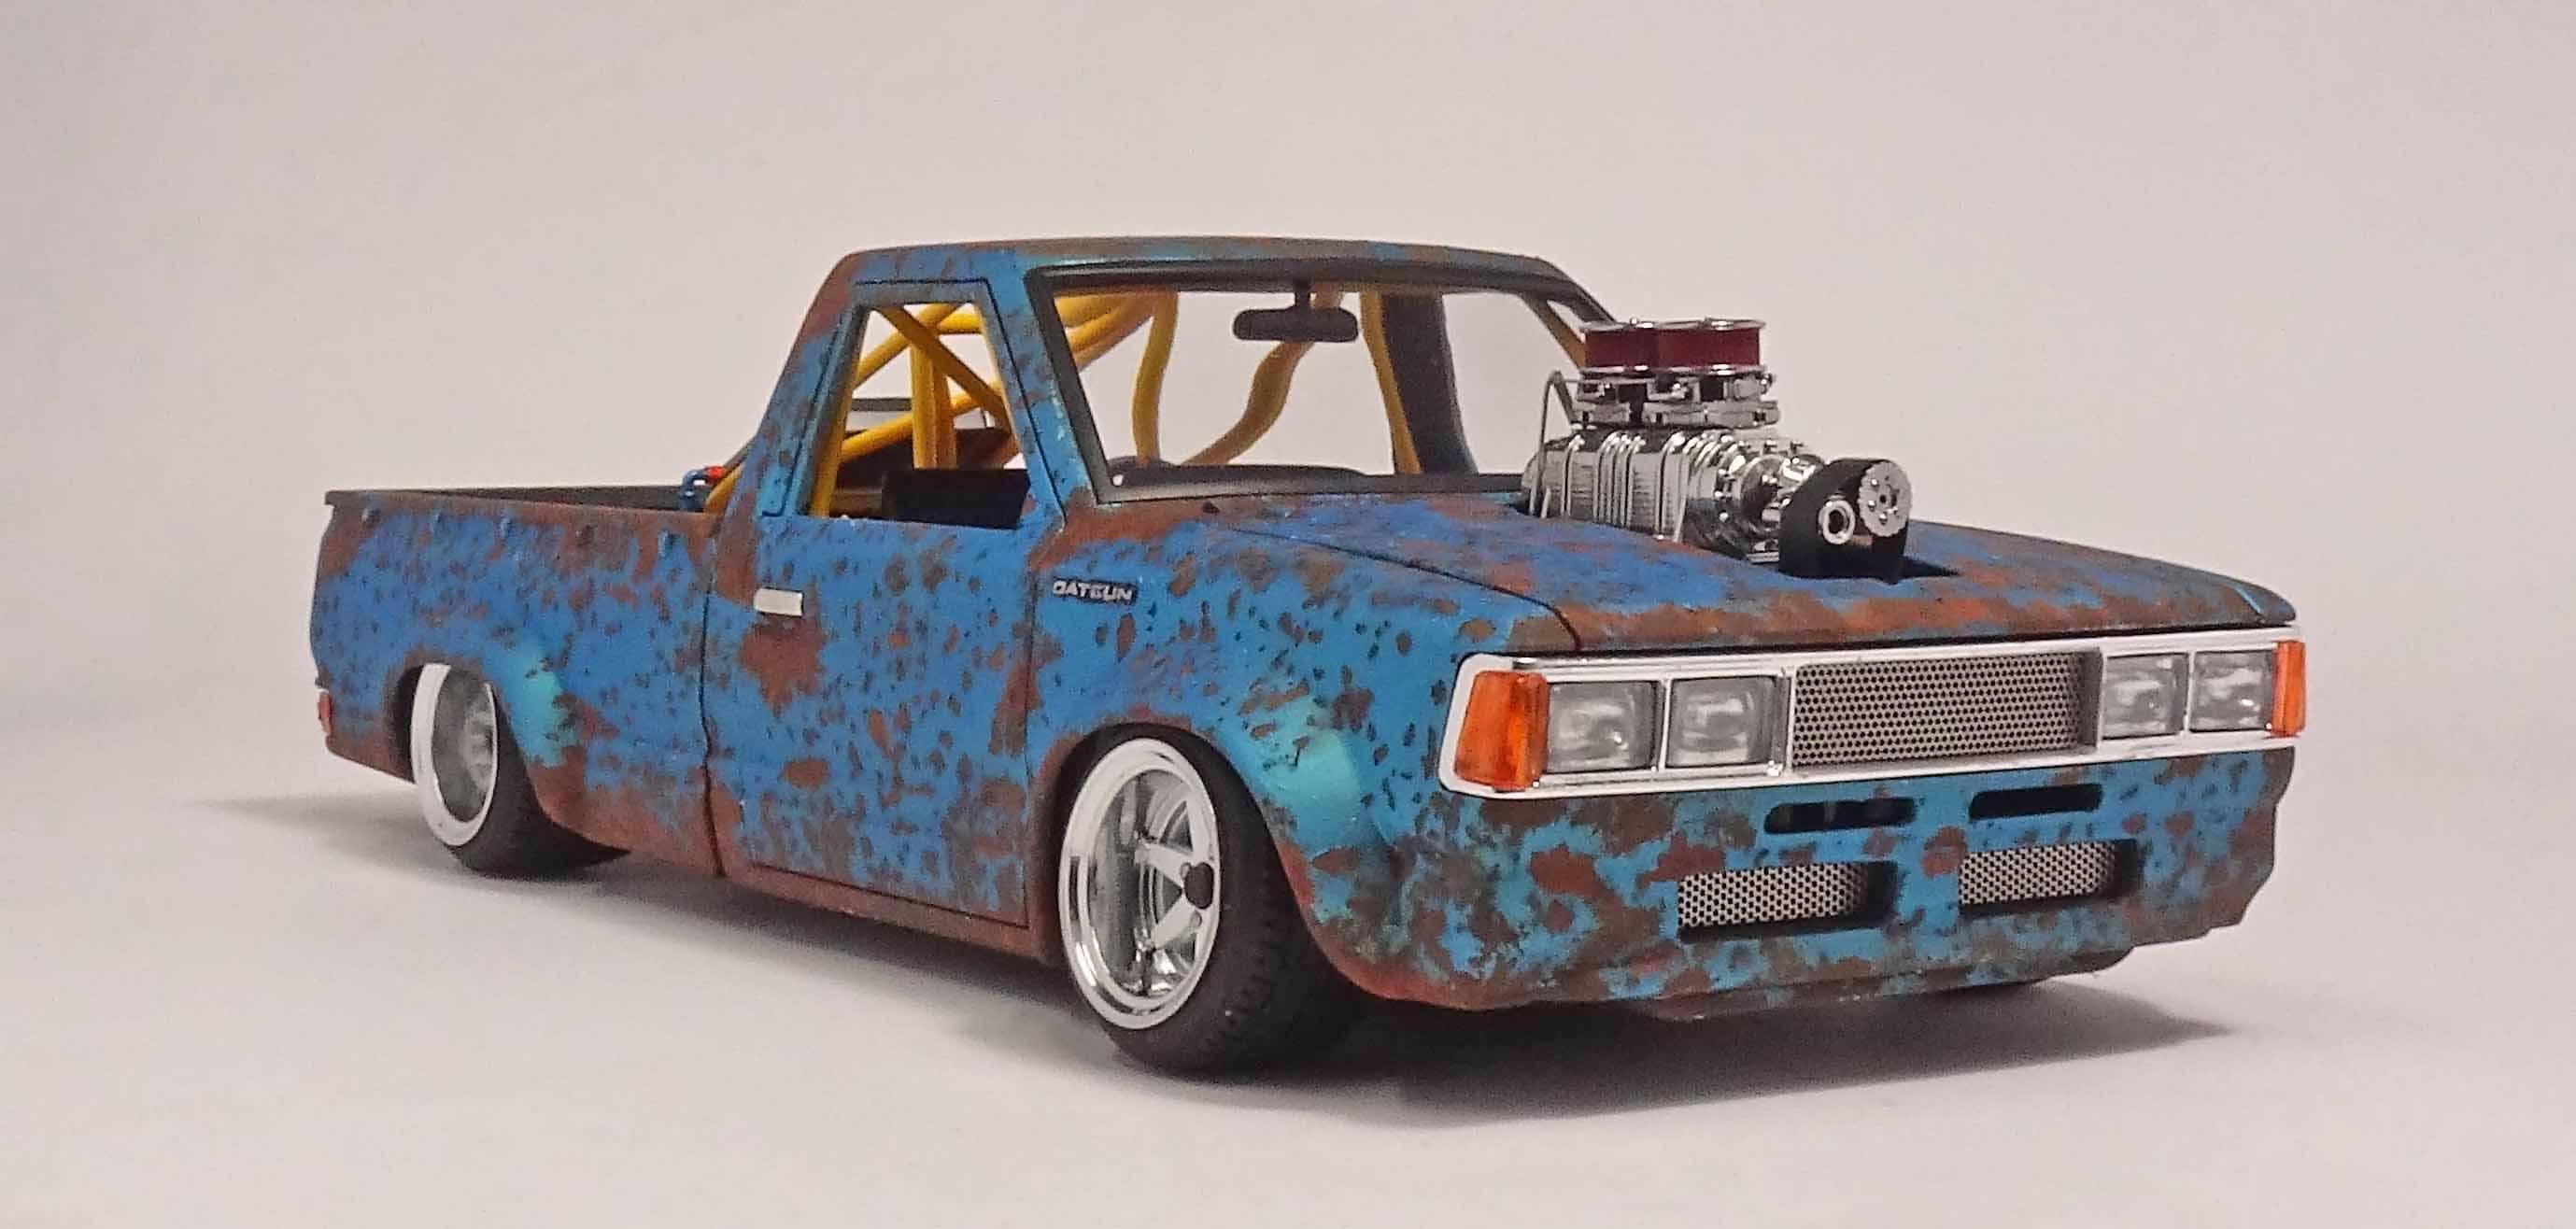
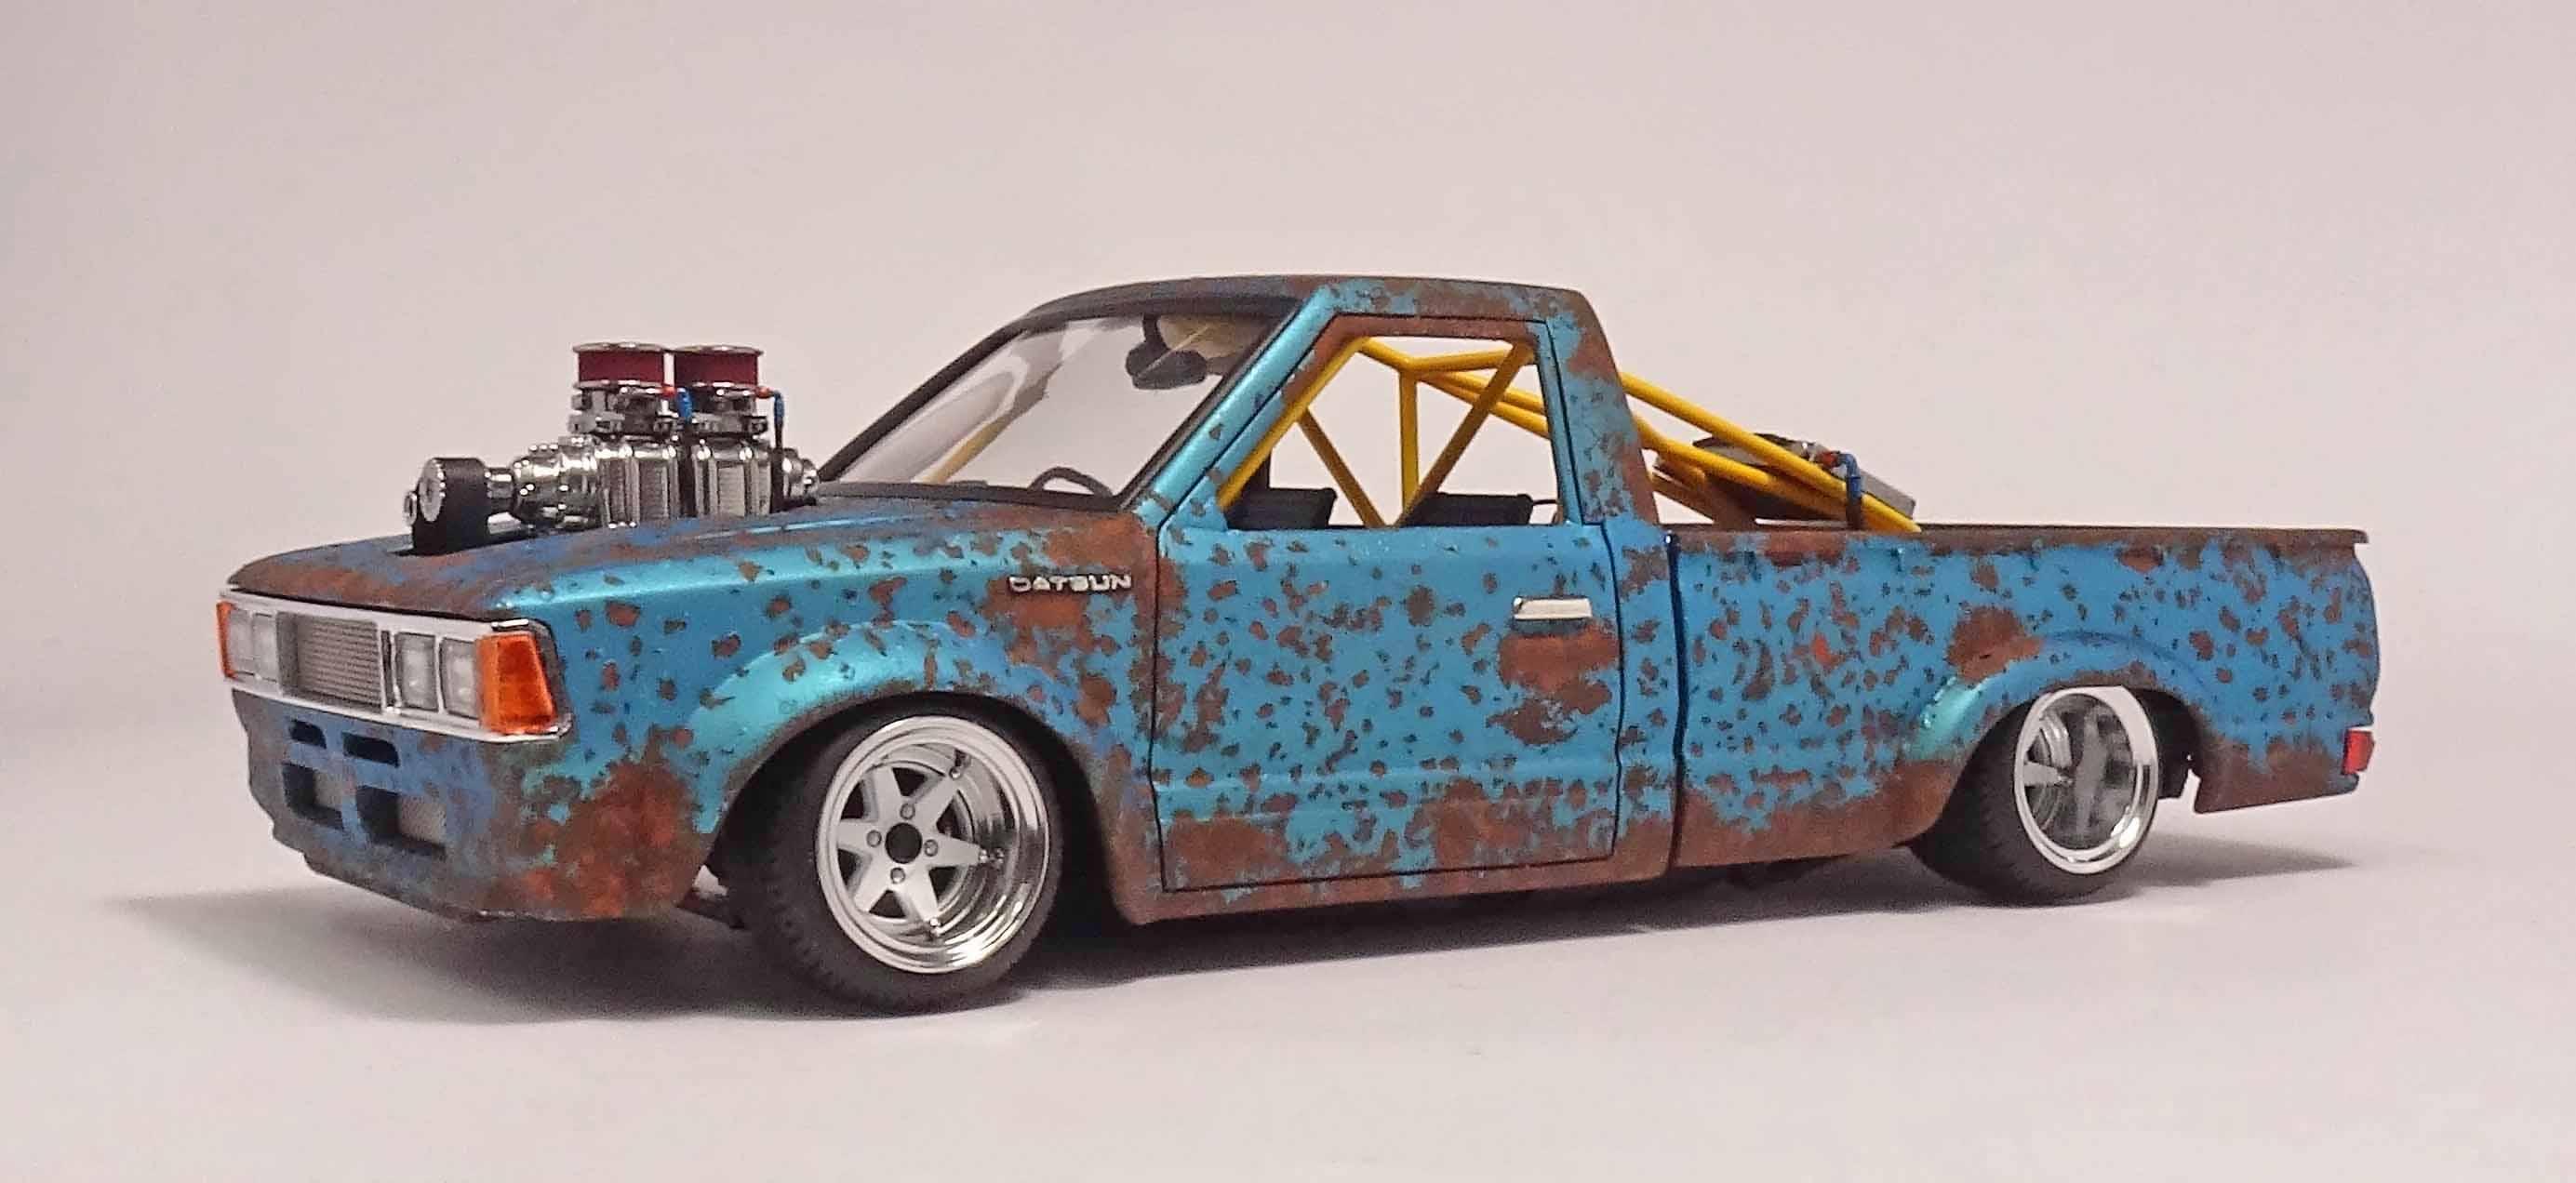
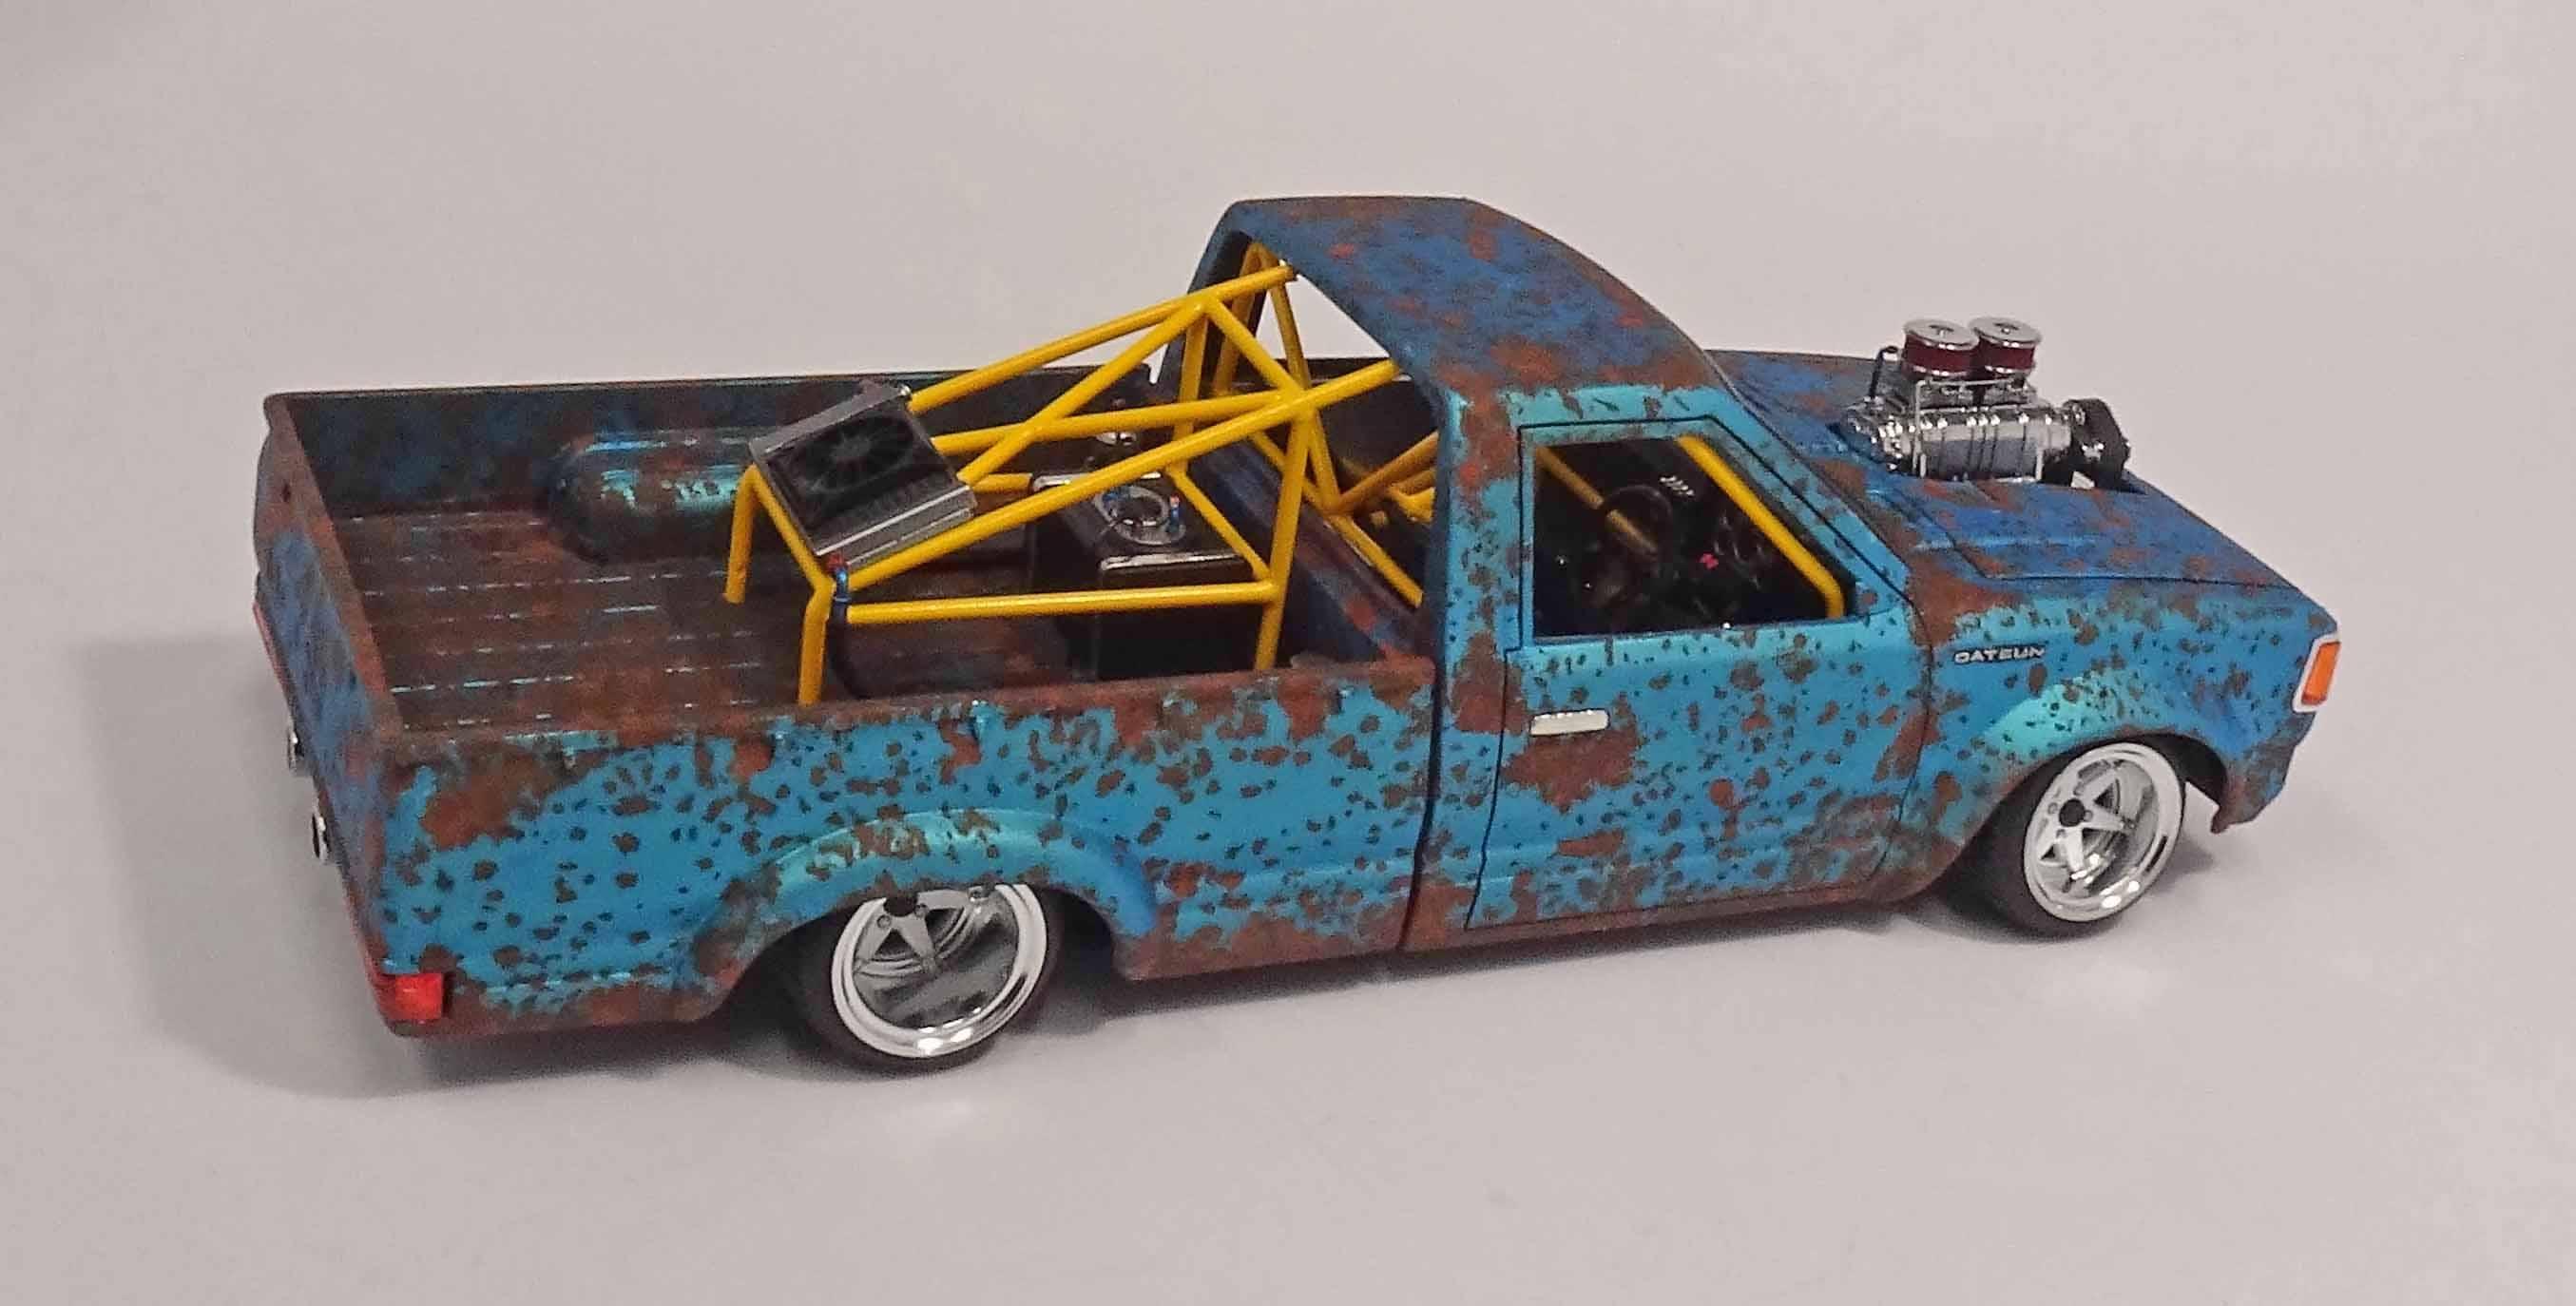
I seen another modeler of the forum working on a kit from this Aoshima series. And it inspired me to dig out a long ago stalled build. The idea for the style of this build is a Datsun ute pulled from a wrecking yard and converted to a drift car with a supercharged power plant. Paint work same technique I used on a previous Skyline build The supercharger was 3D printed, the file sourced from Slowys Models Scratch built interior tub and roll cage, I 3D printed fuel cell and radiator. Filled in the tail gate. Styrene tube for the exhaust. I 3D printed the wheels and tyres are Aoshima 14' stretch wall cambered. Crazy Modeler photo etched mesh used for the grills.

-
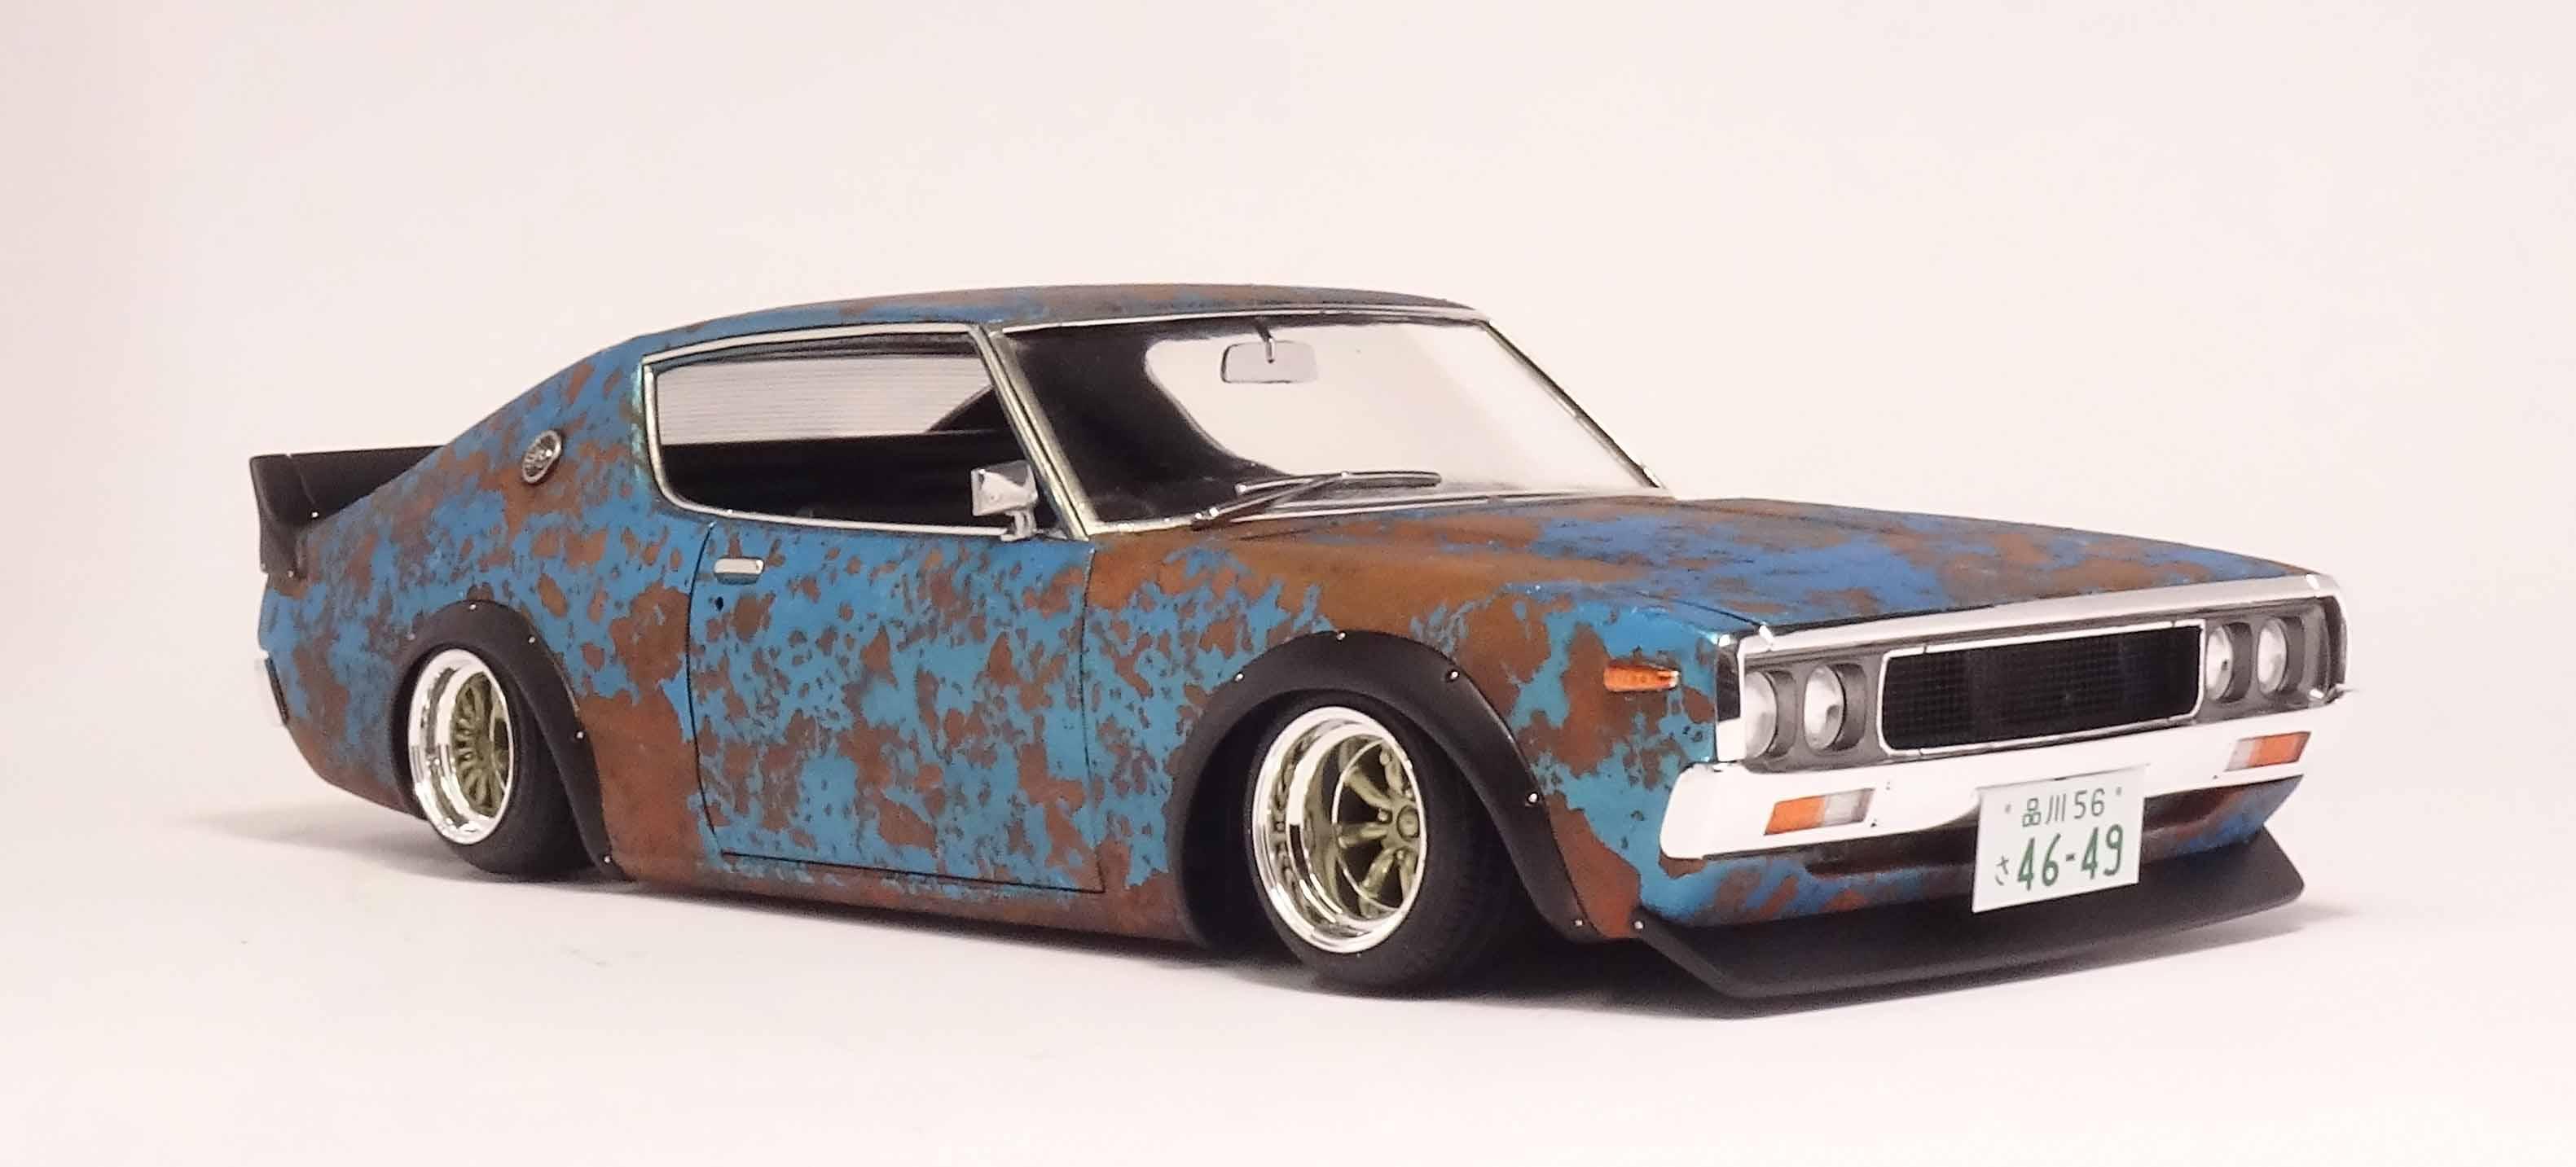
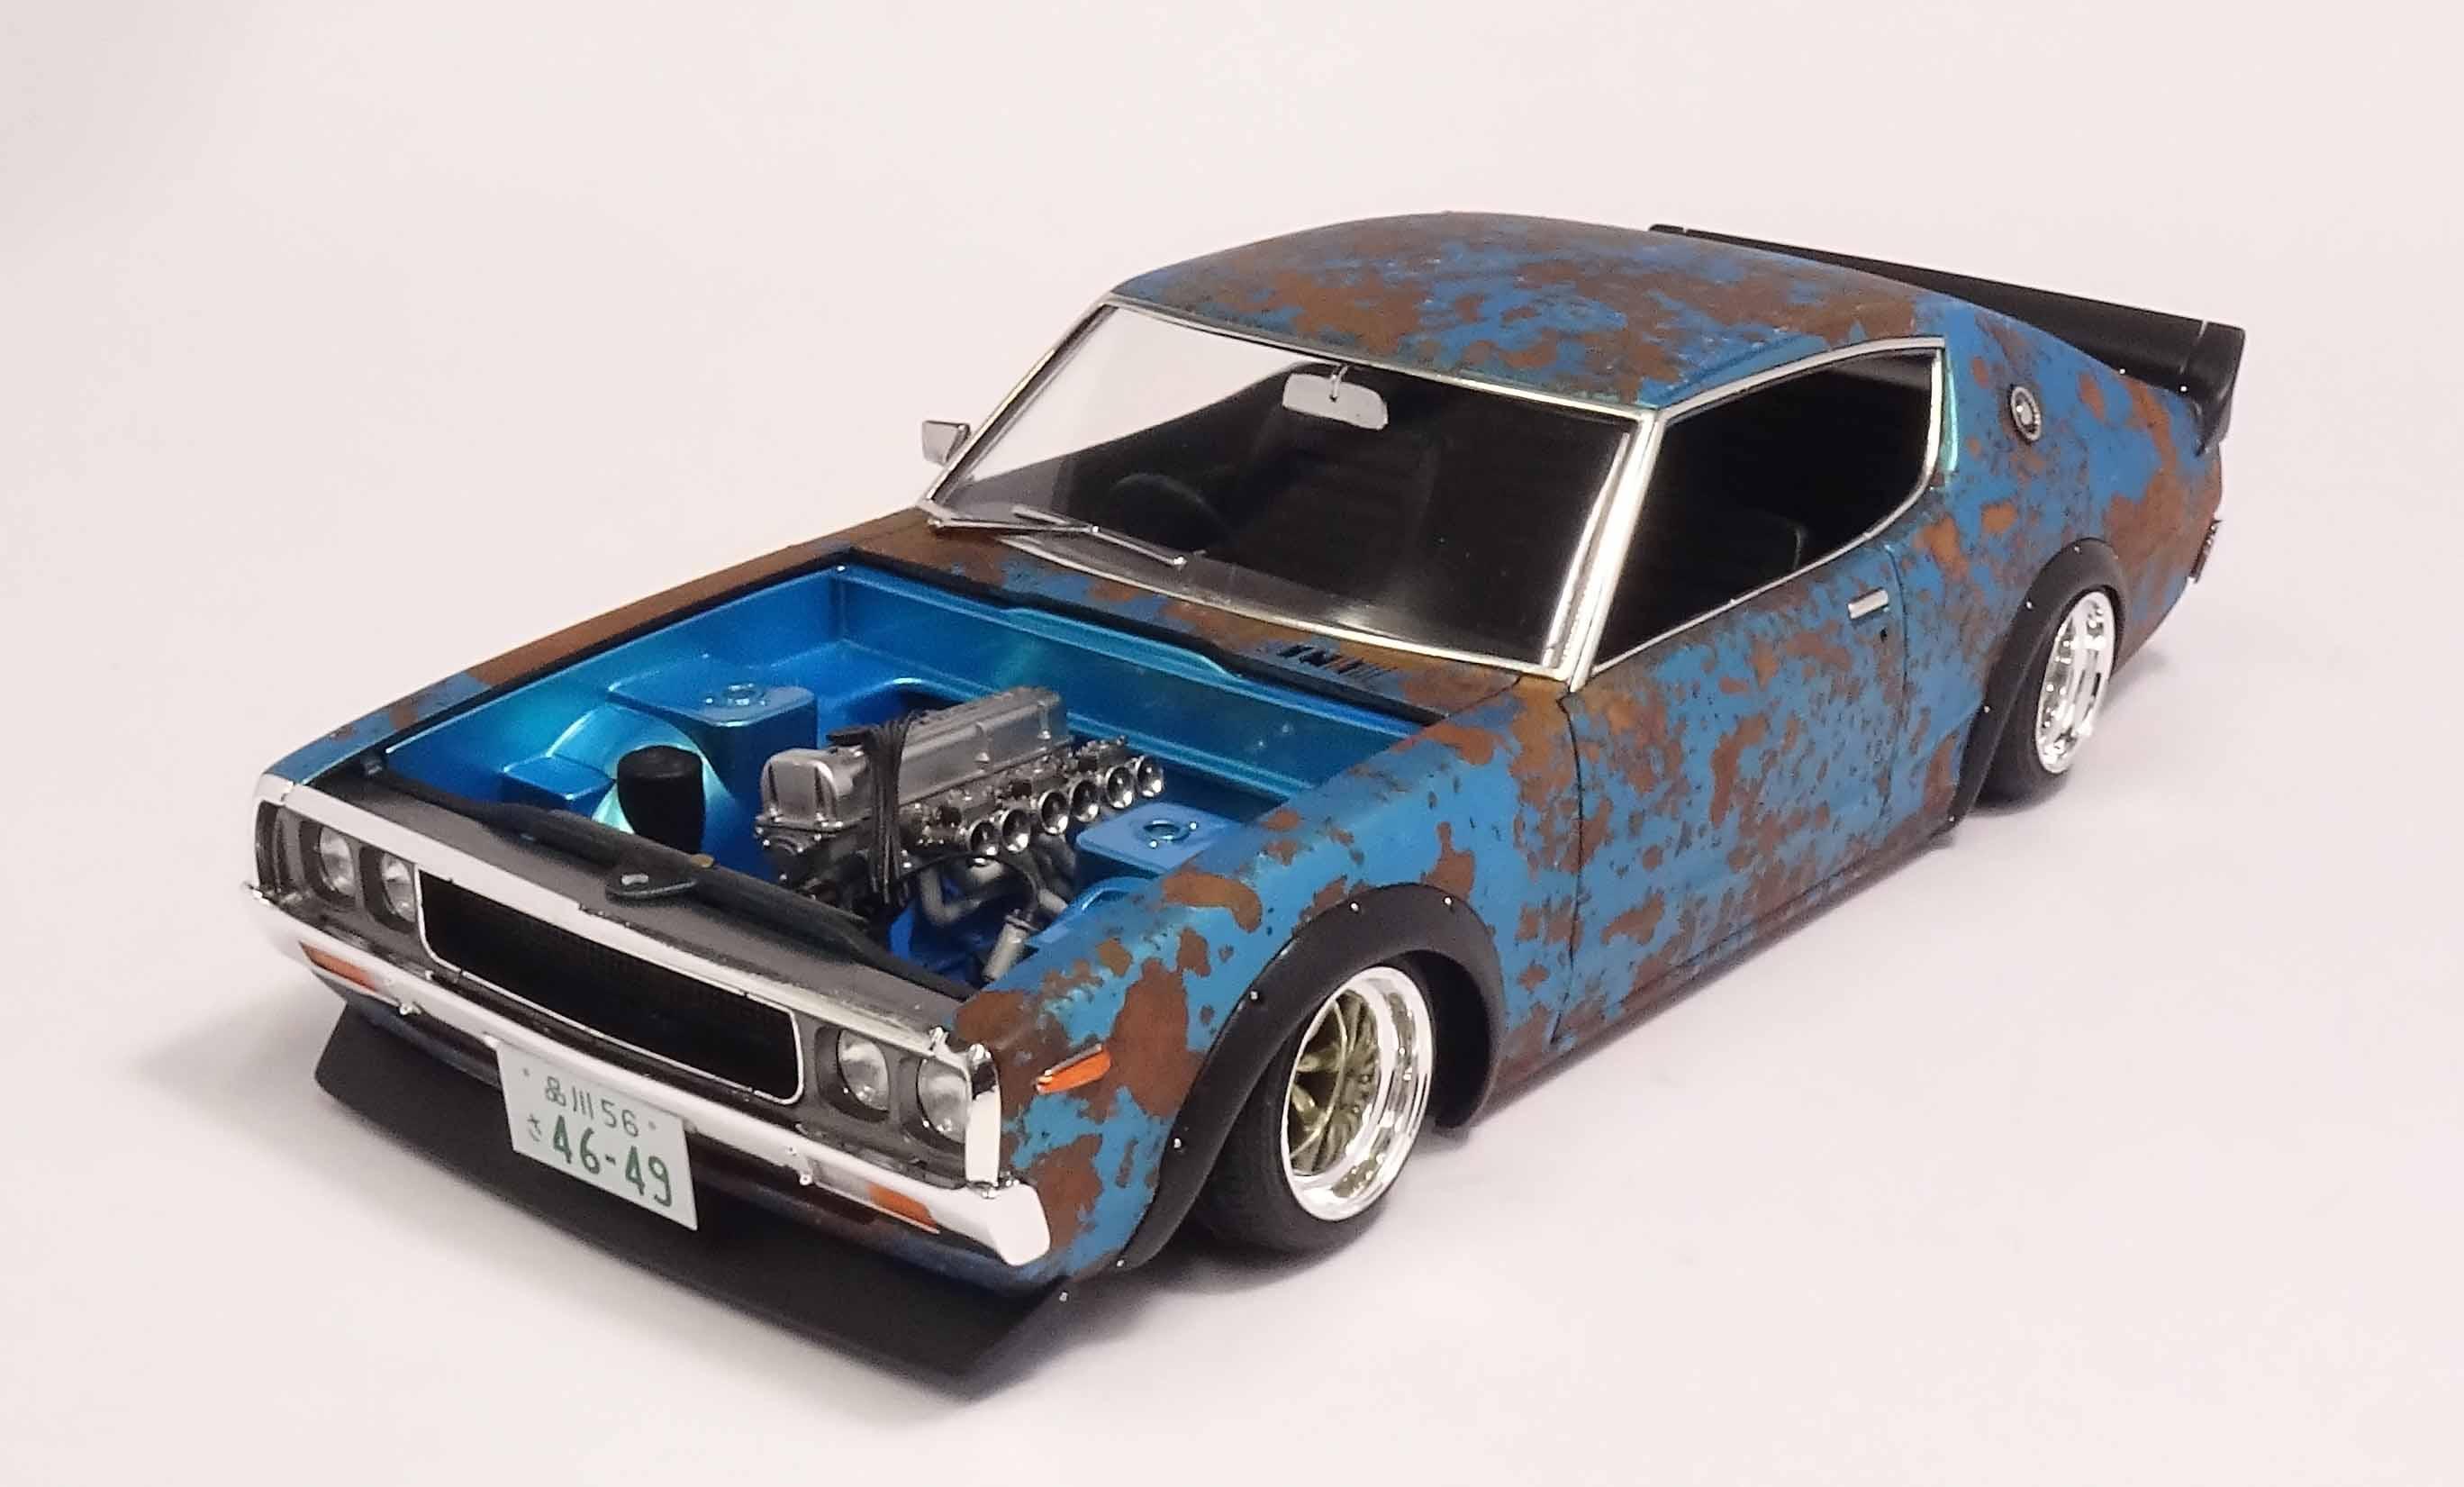
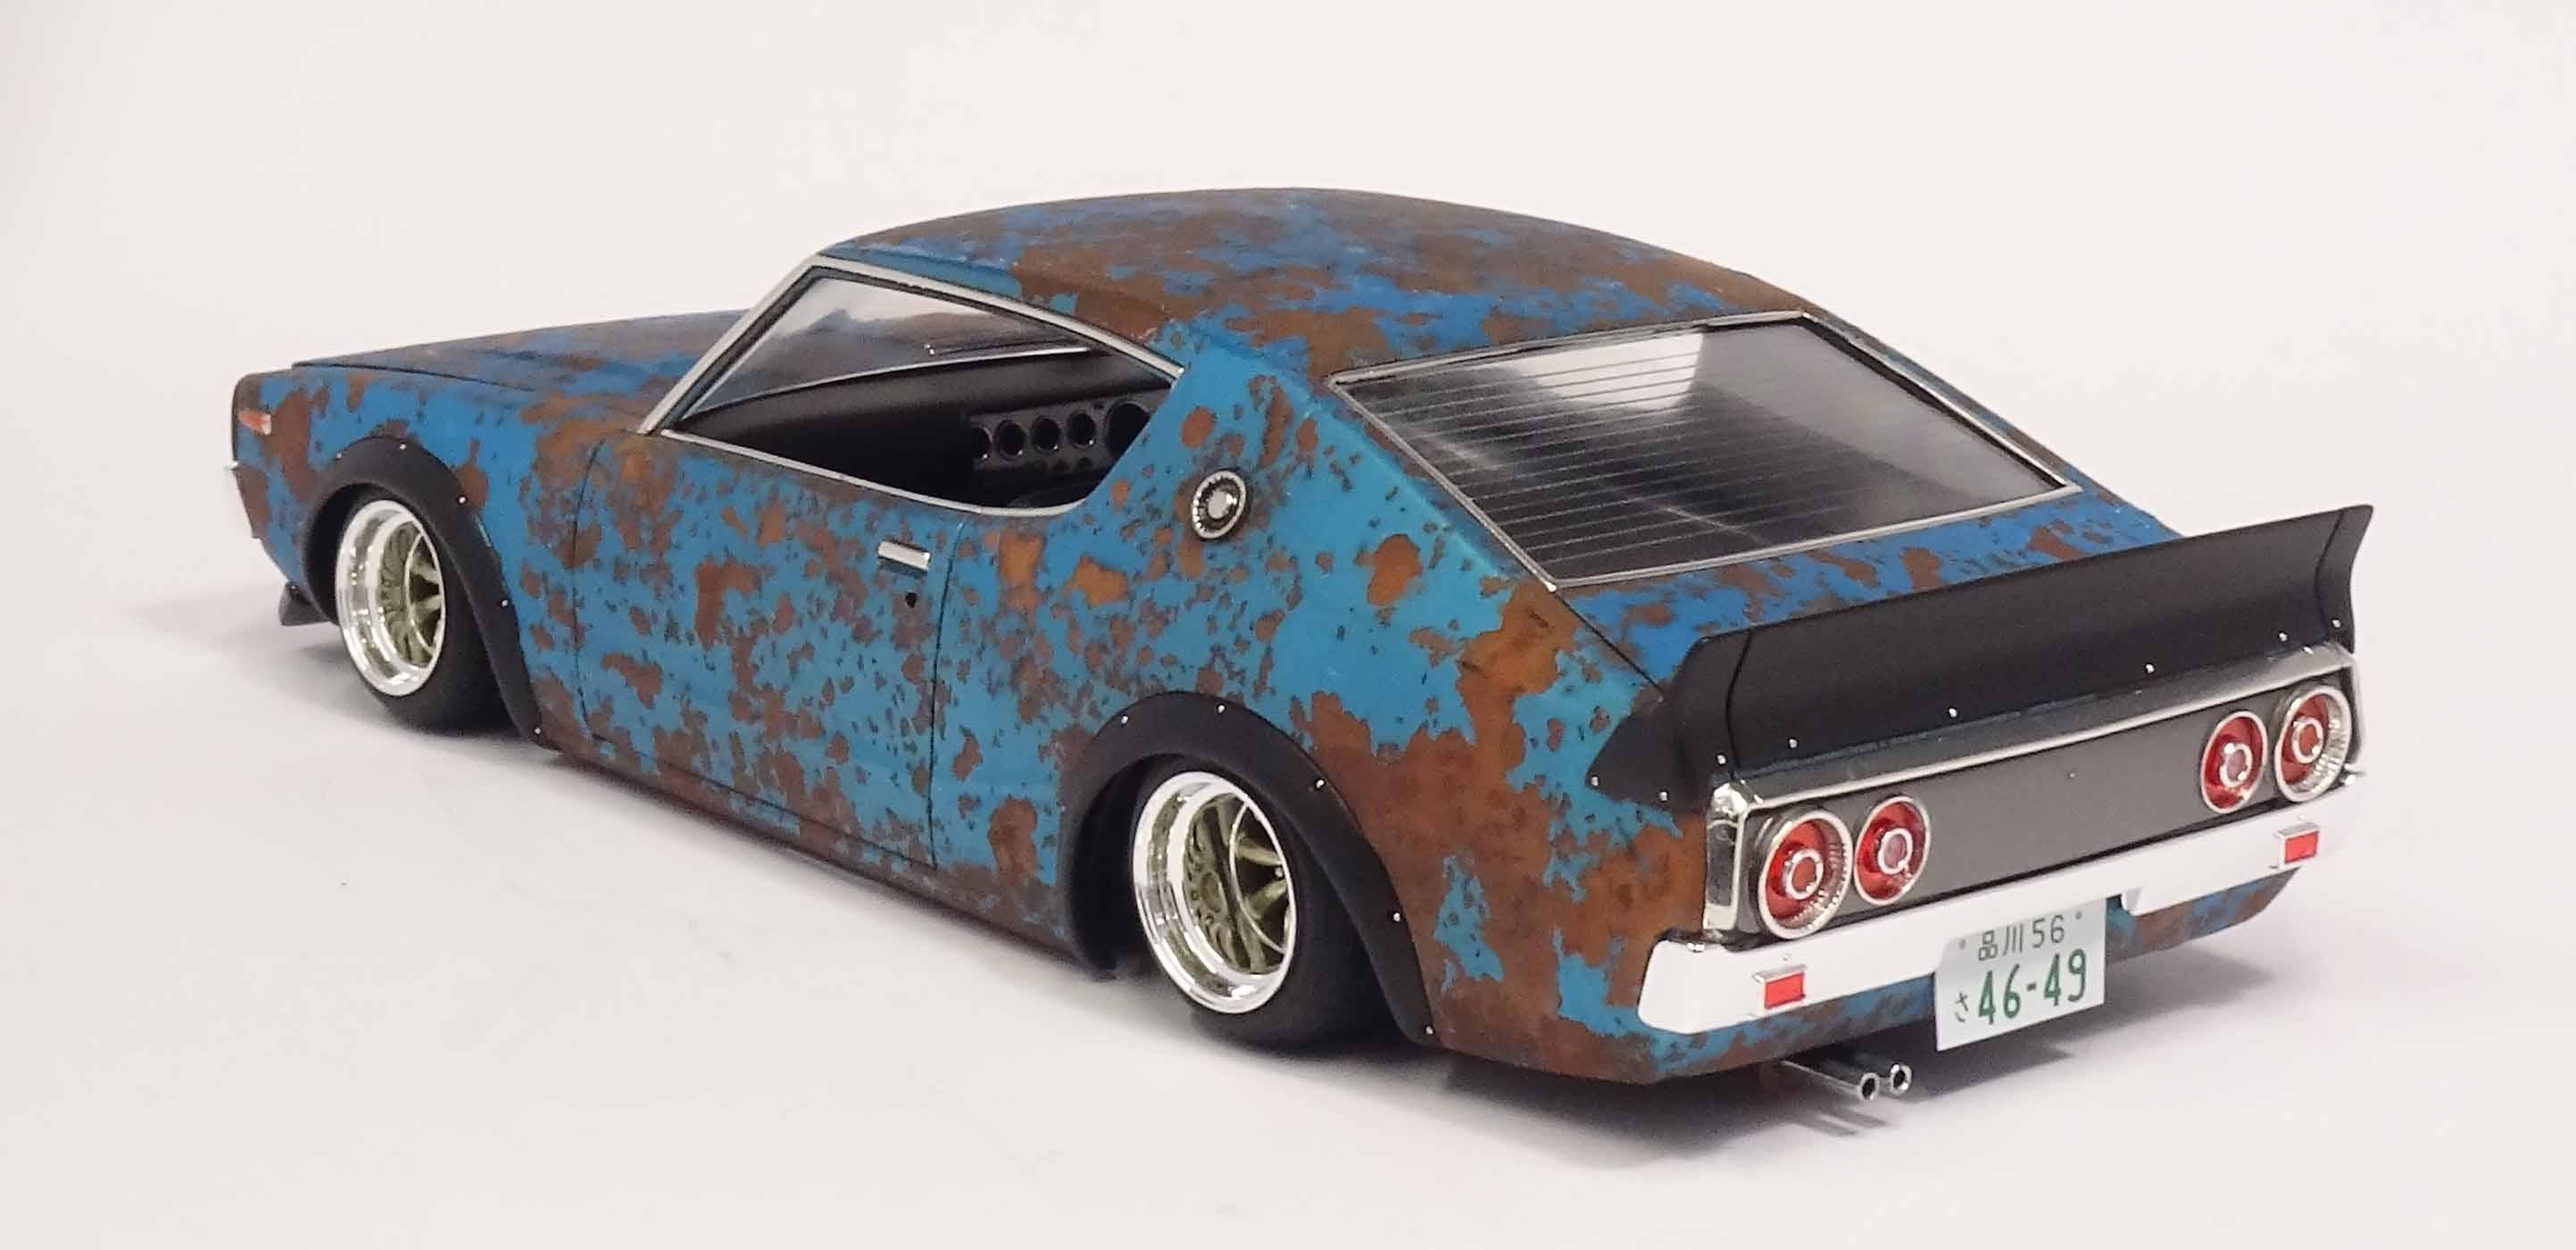
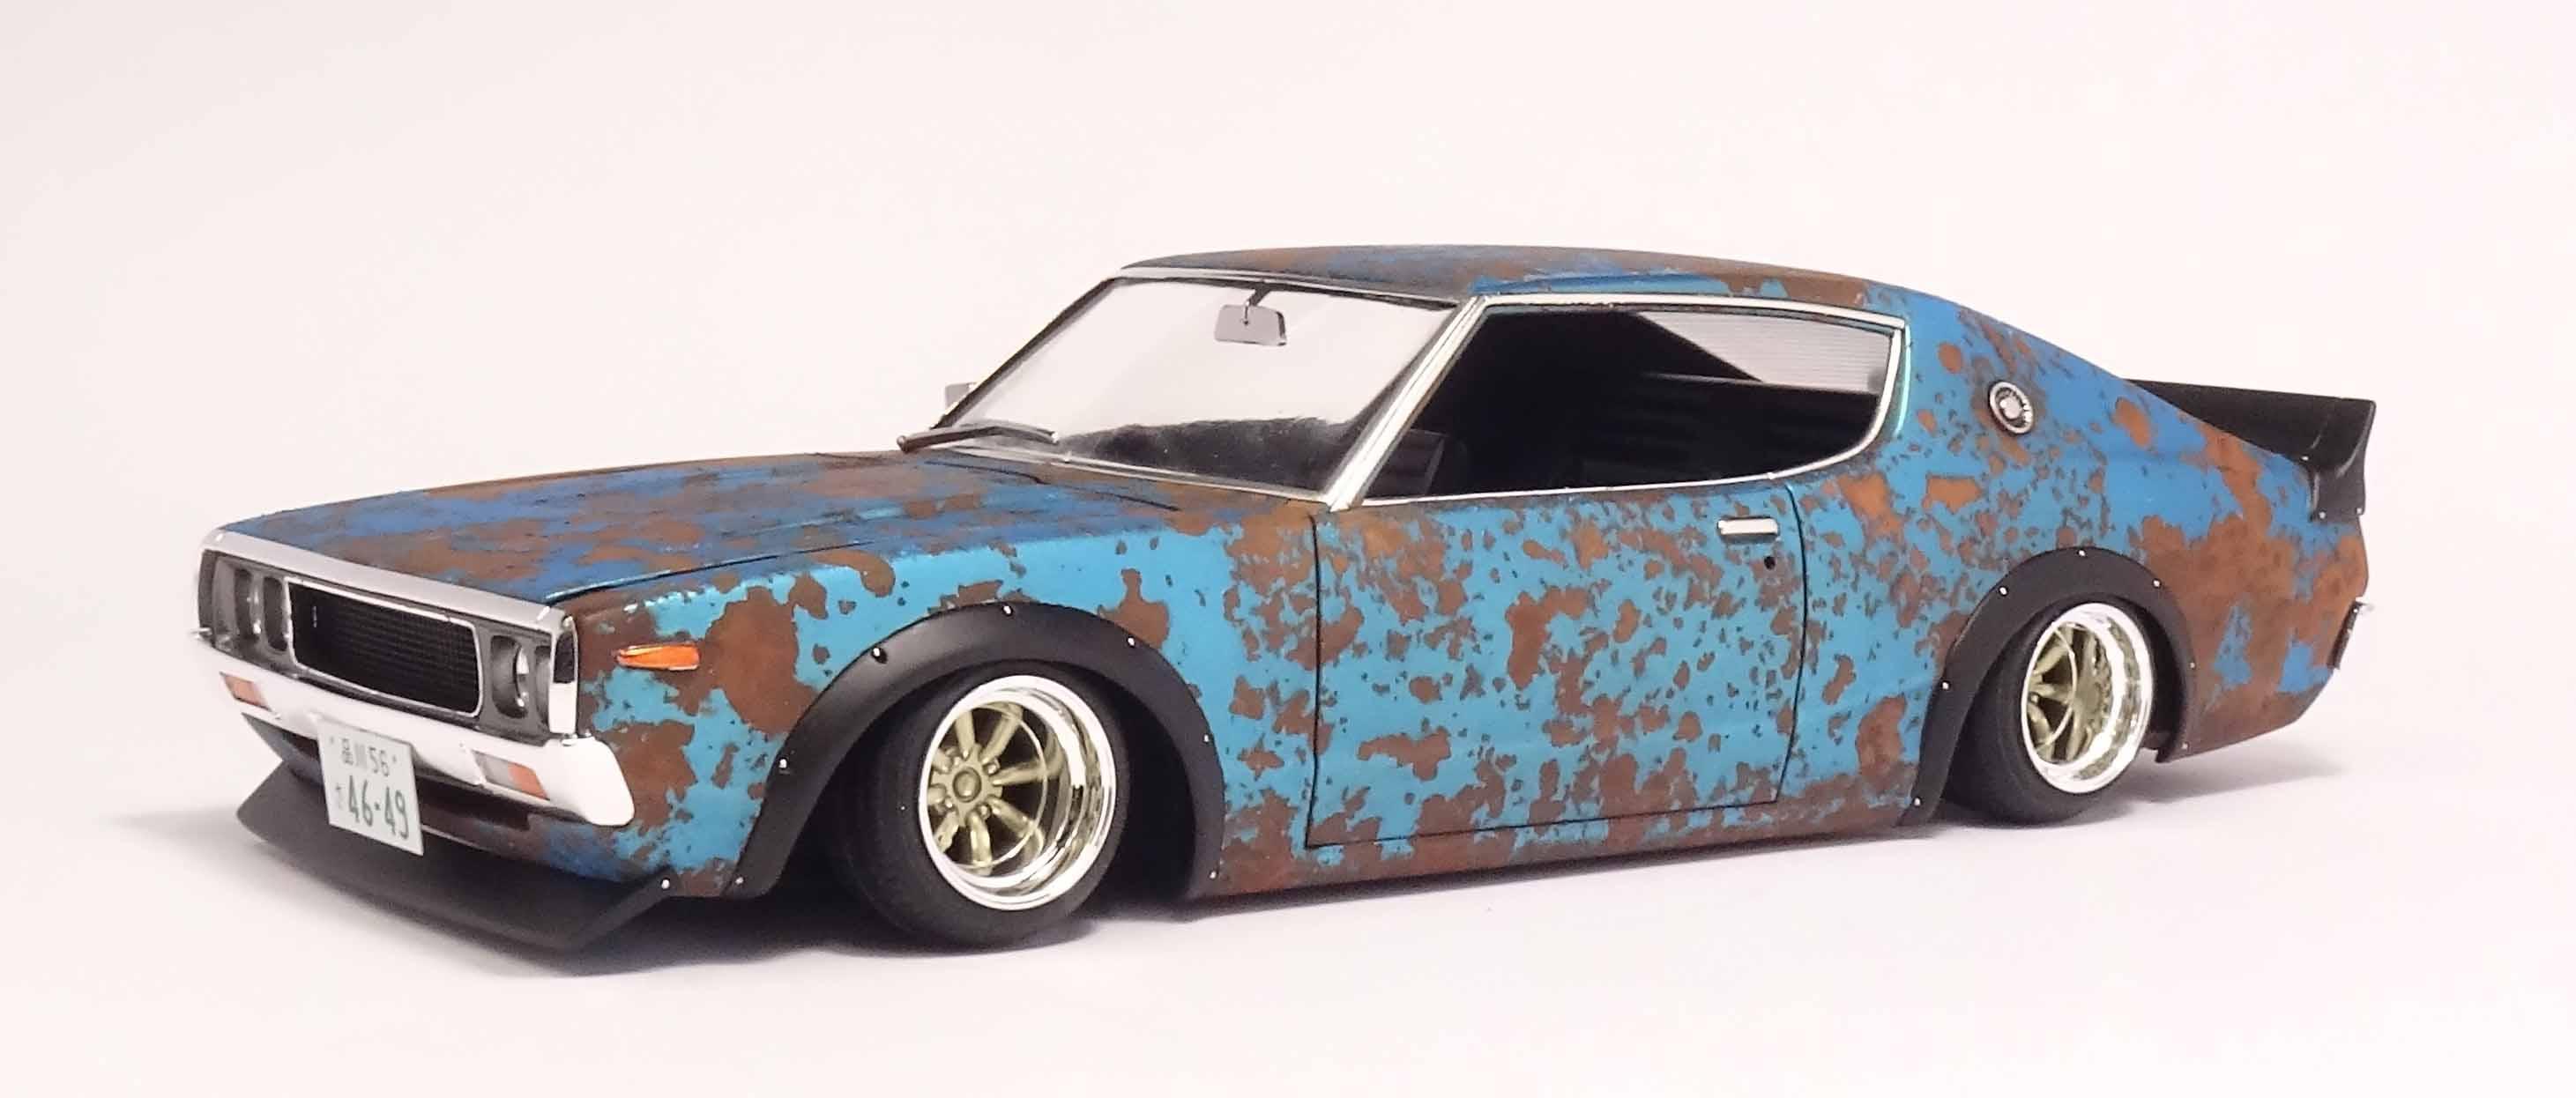
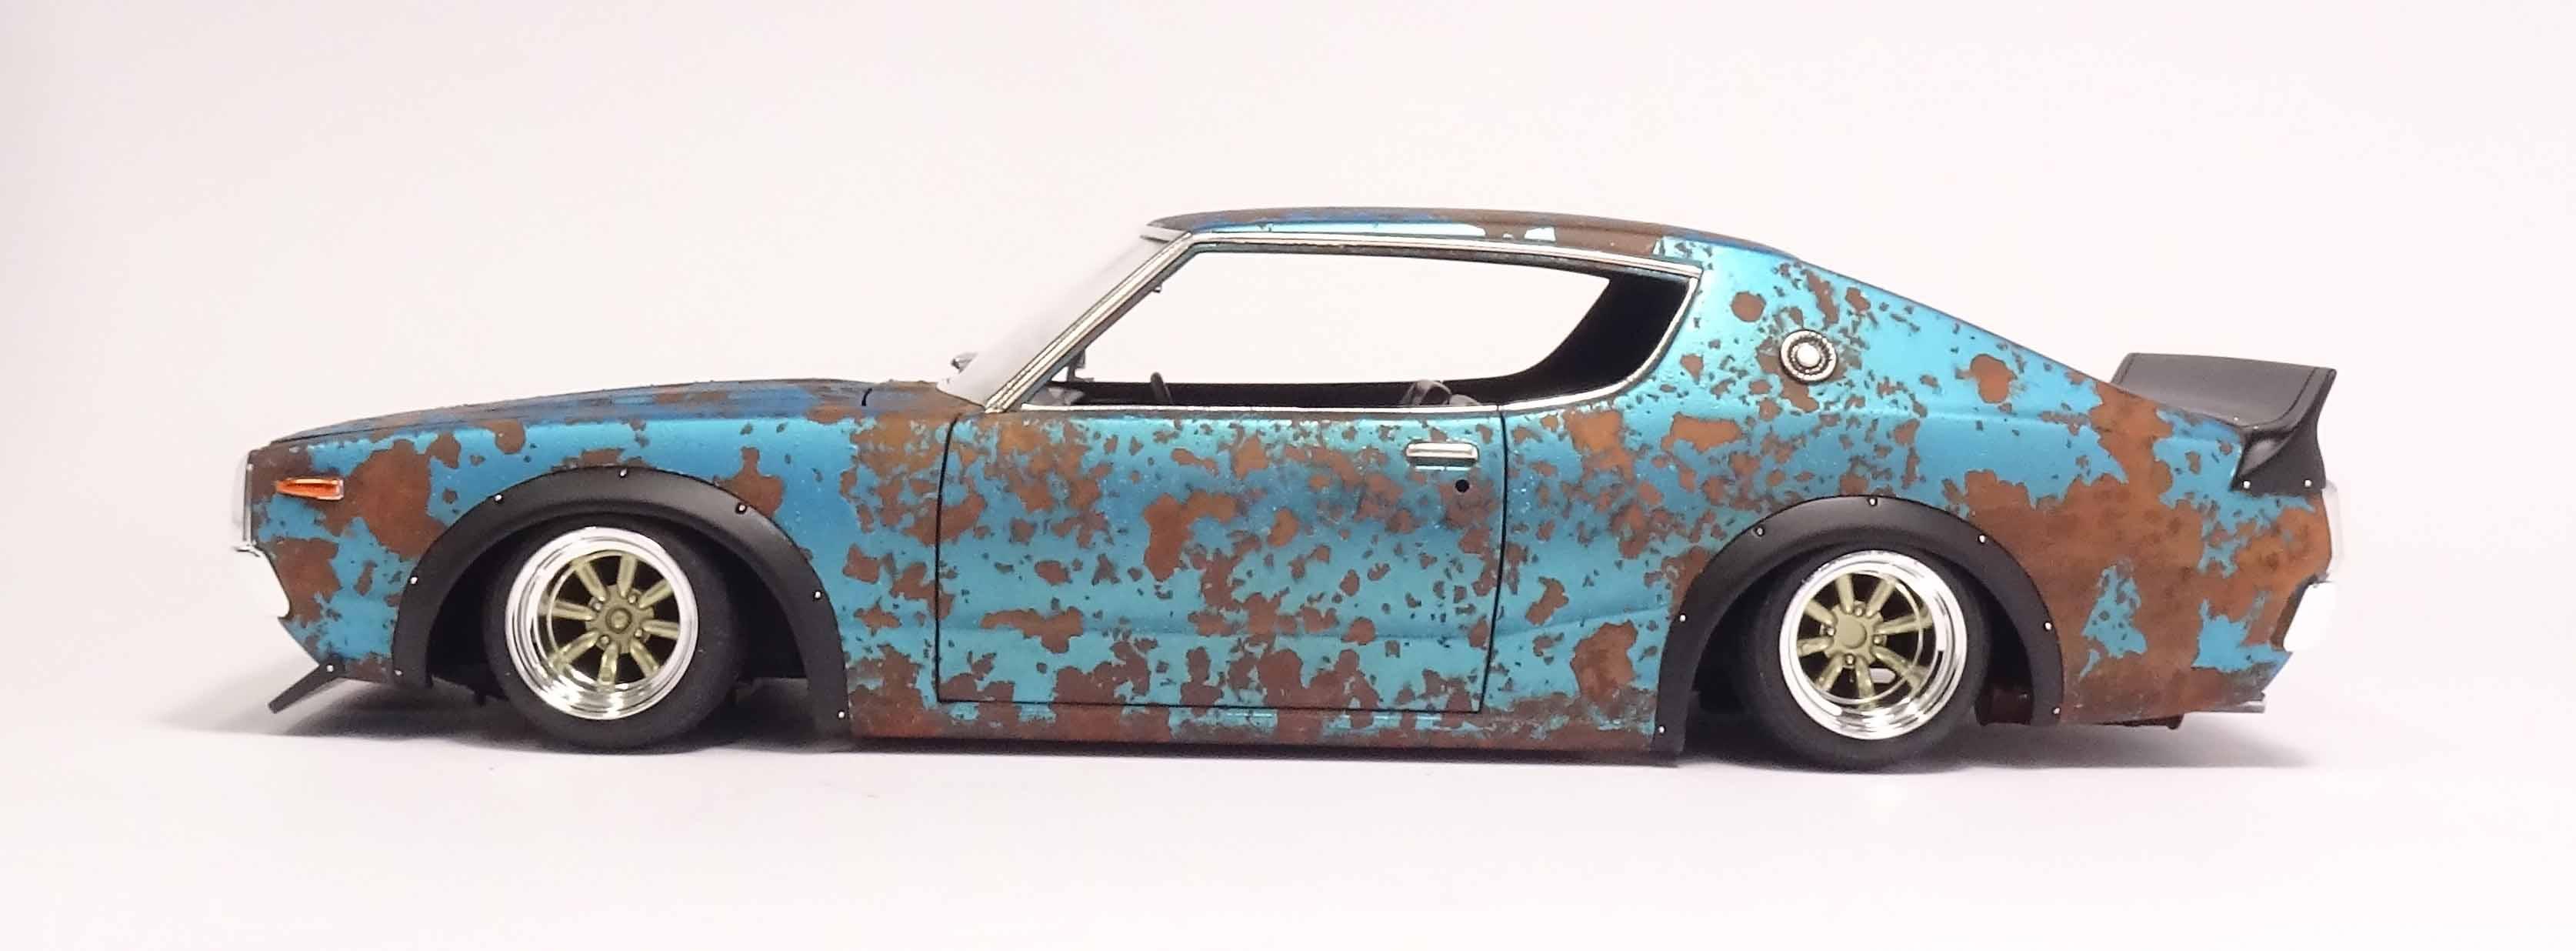
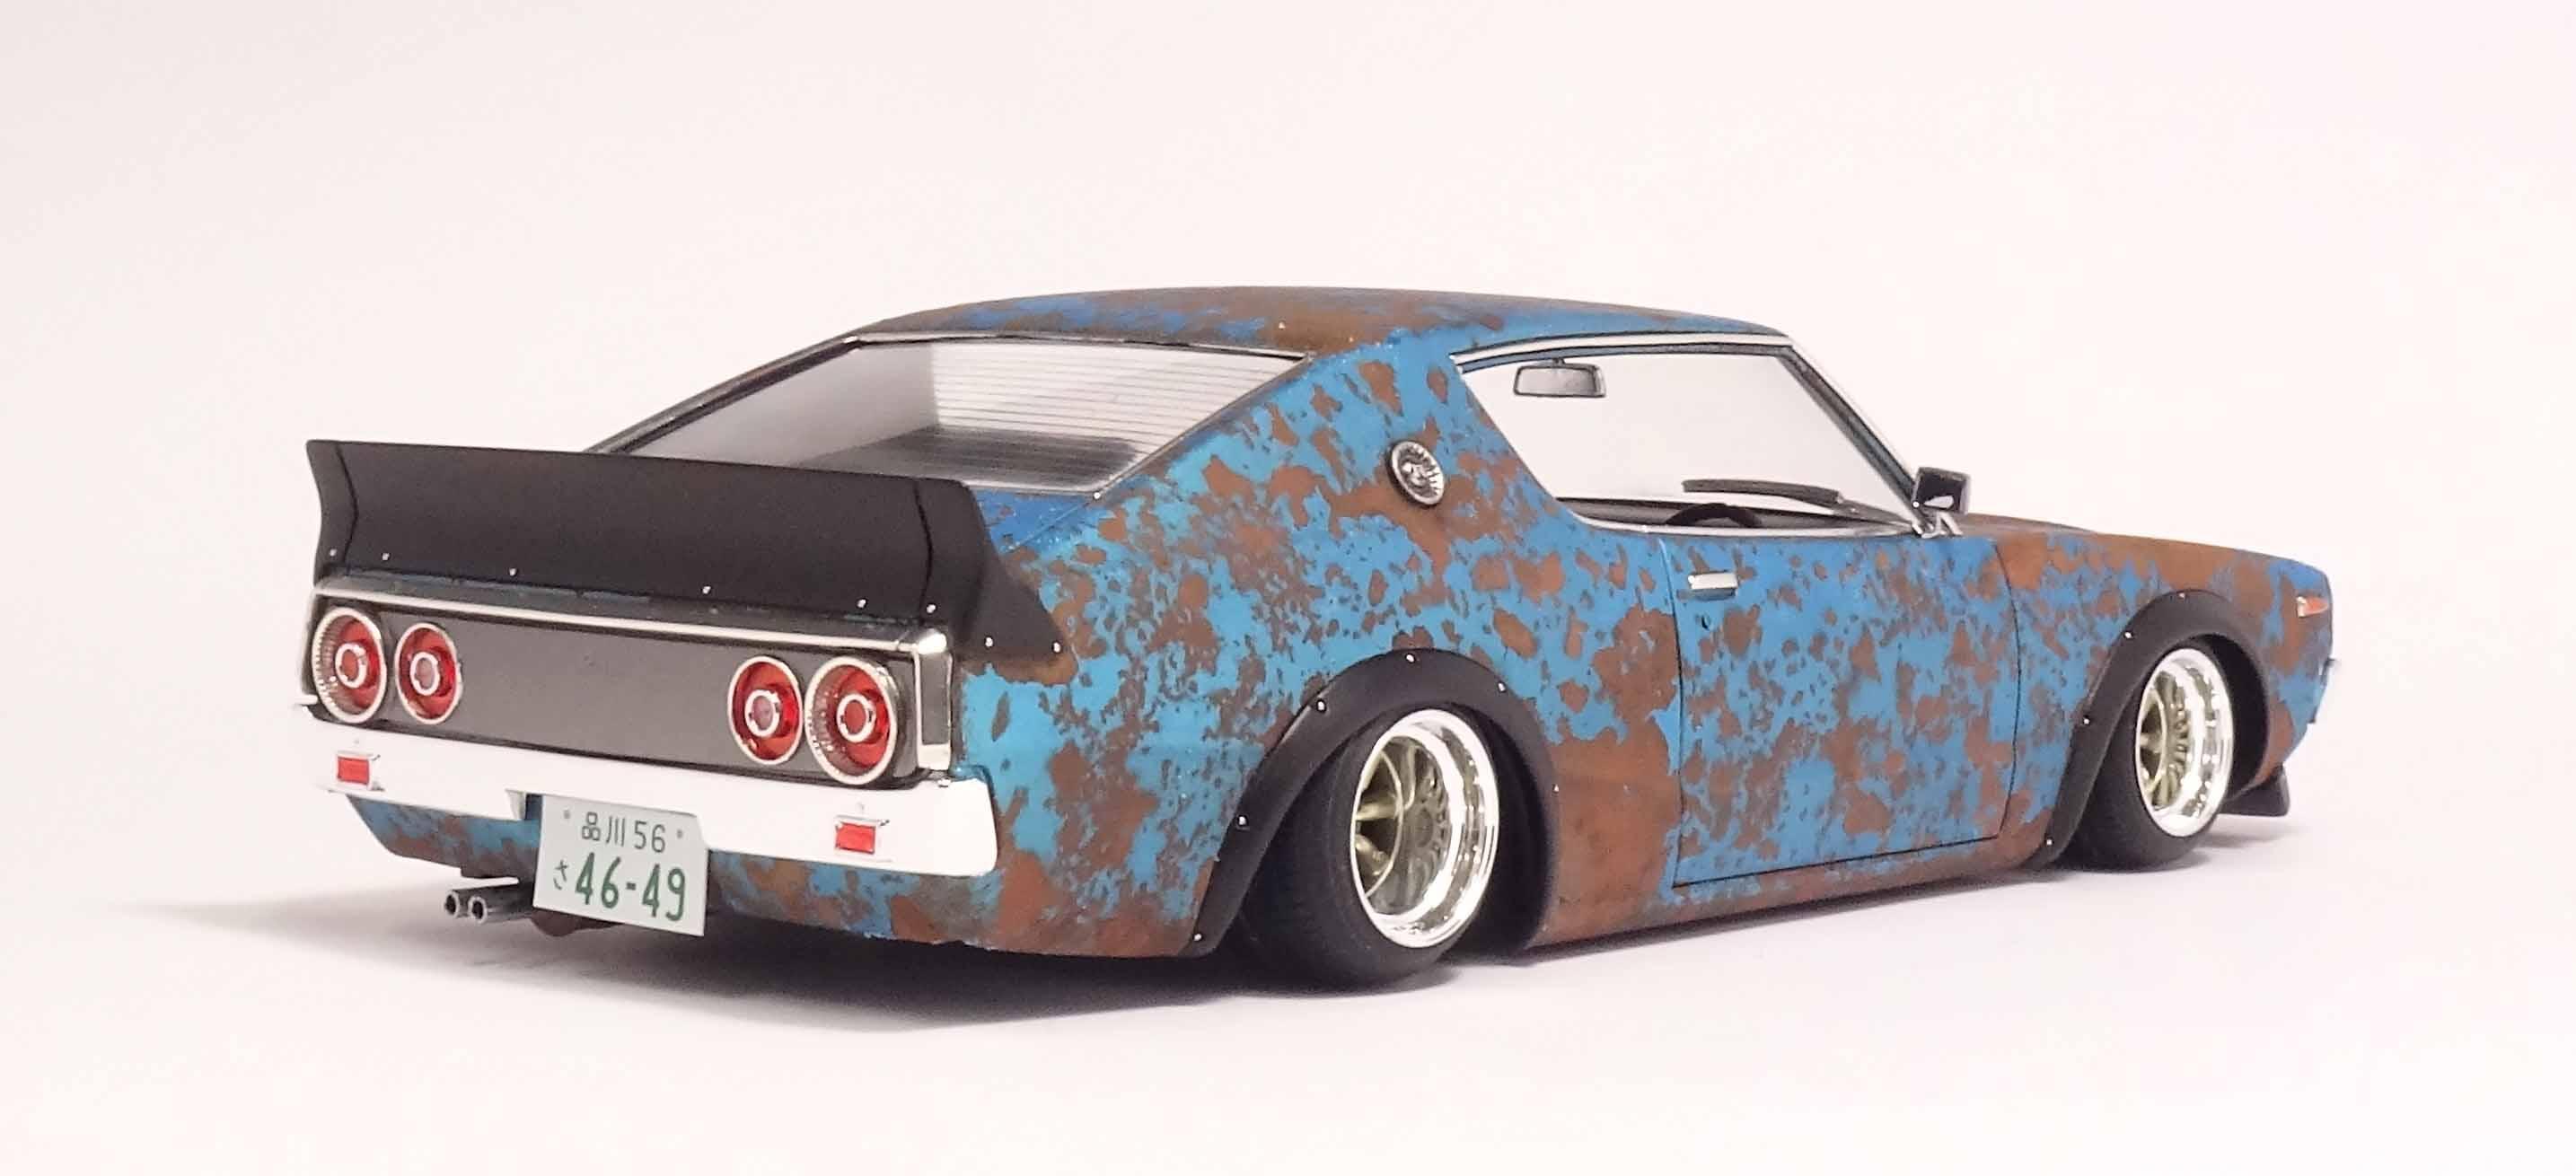
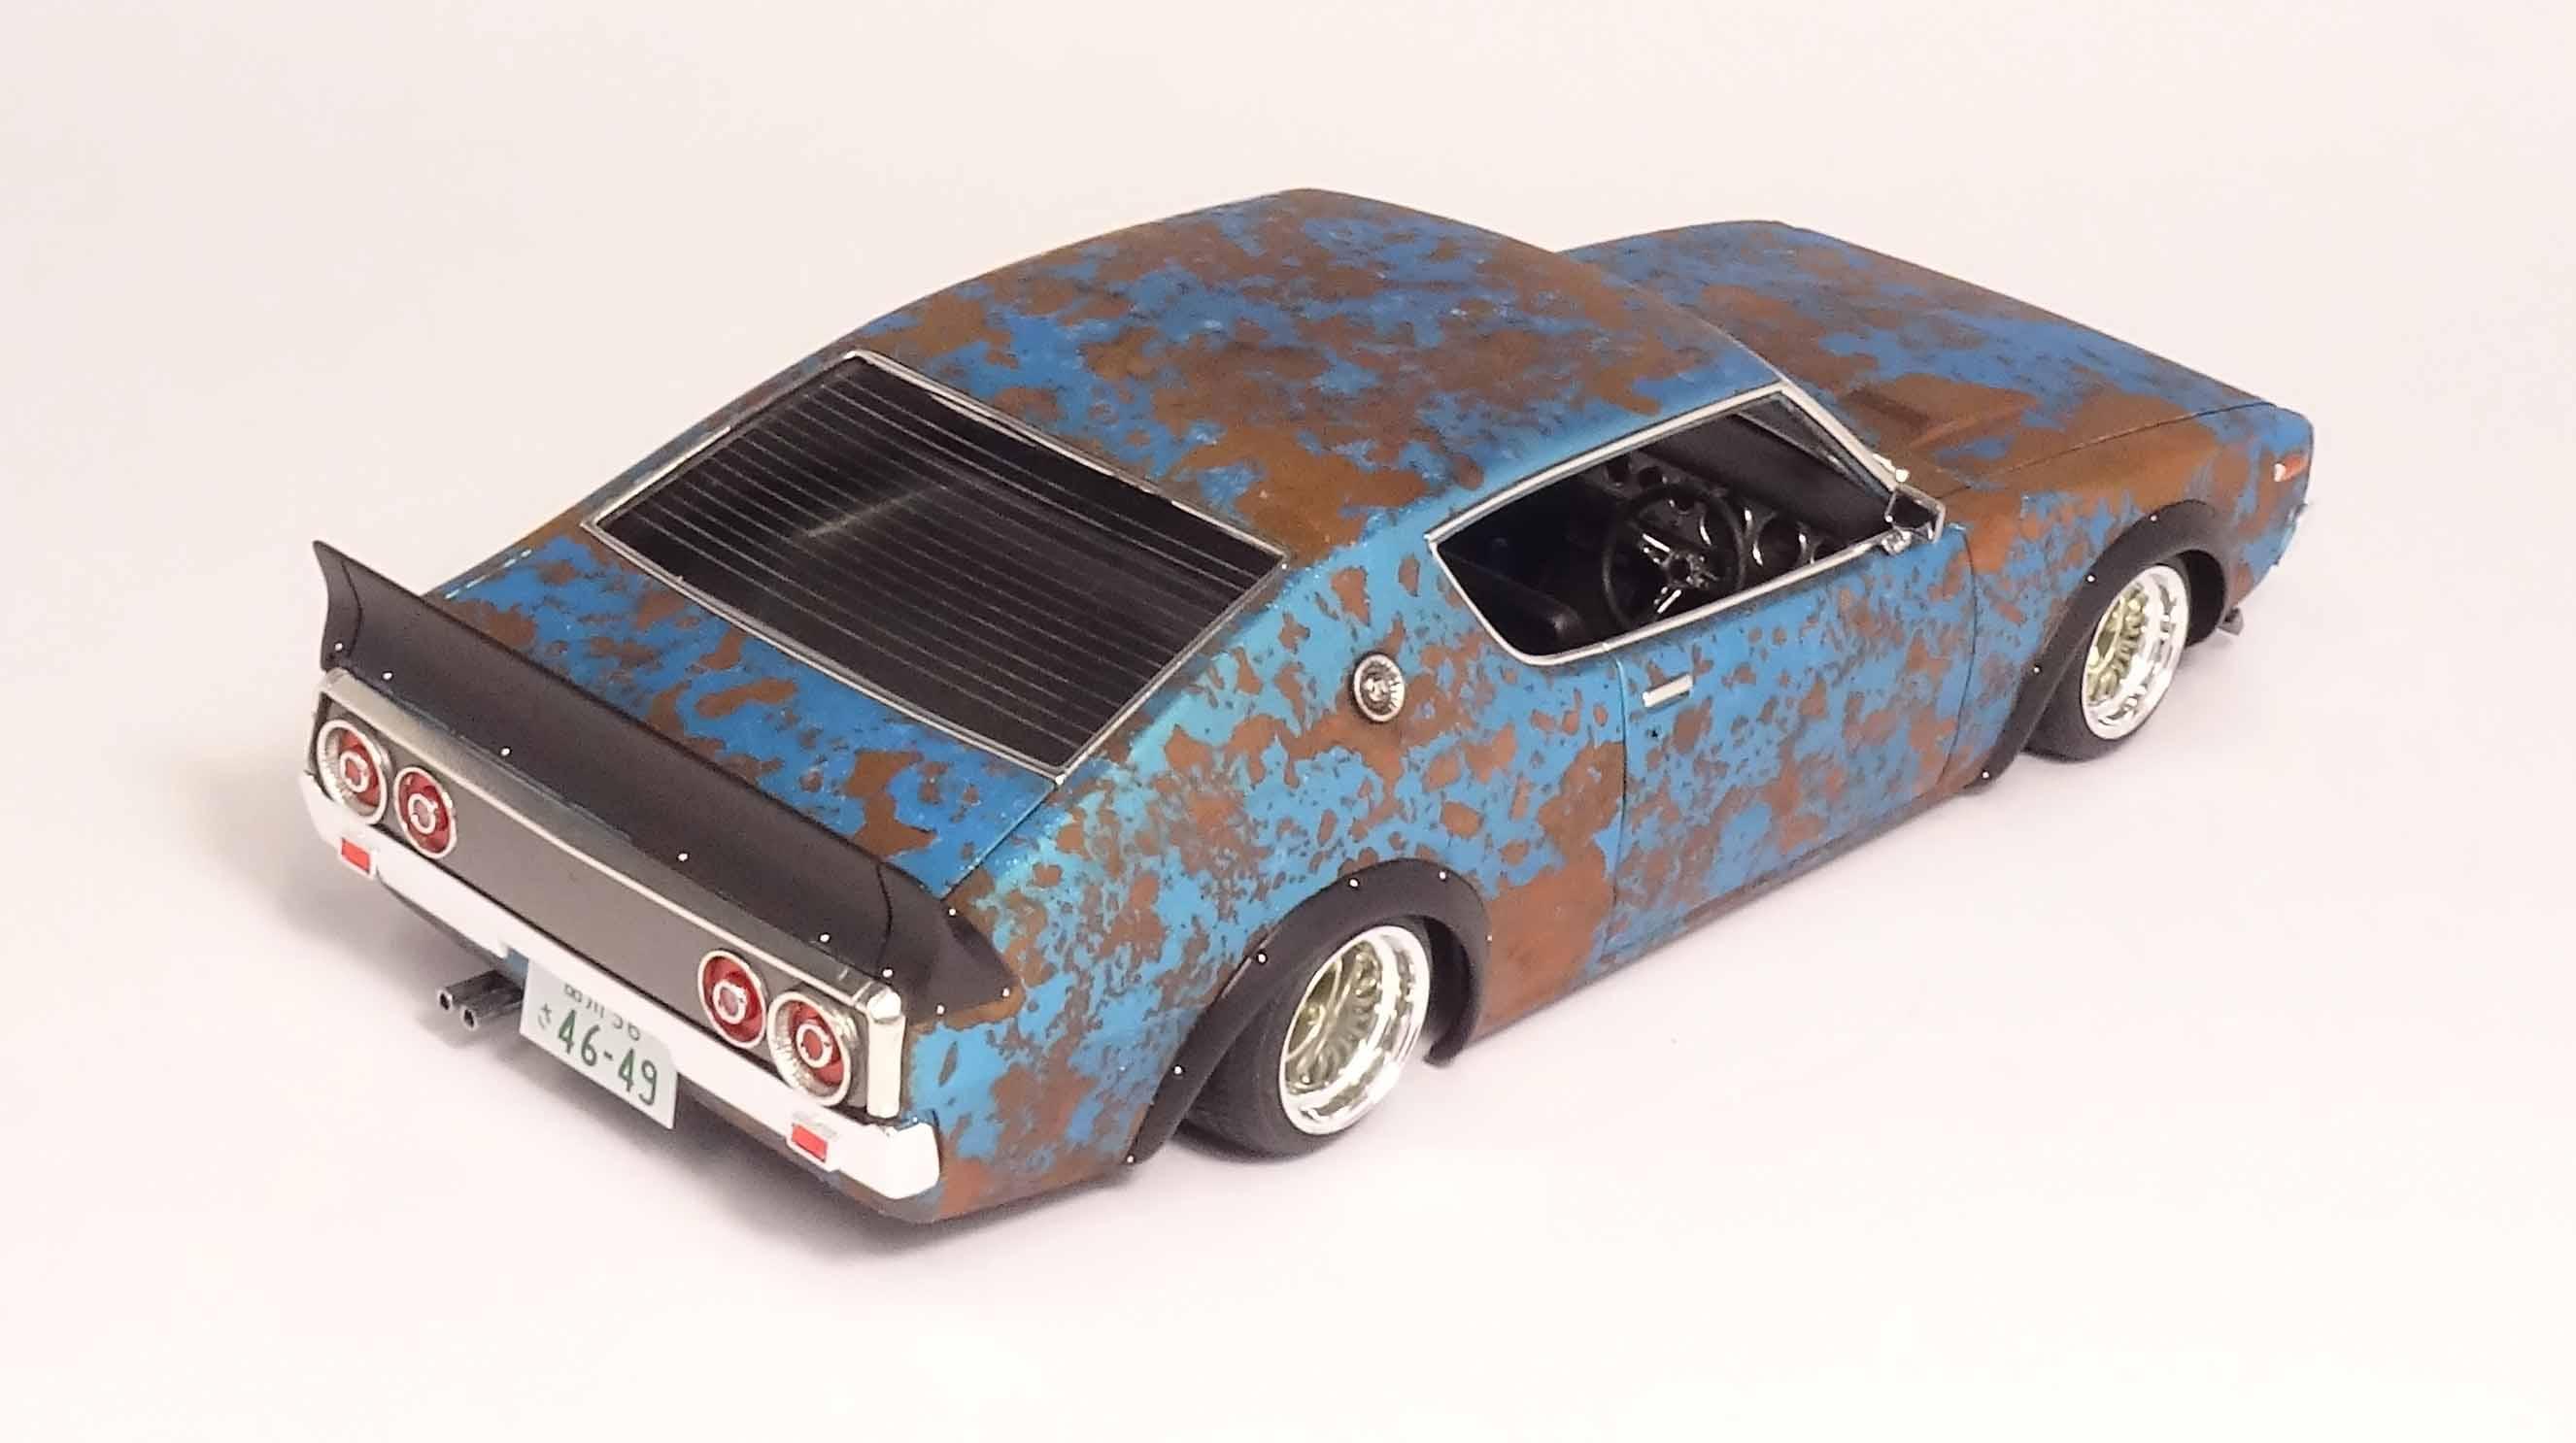
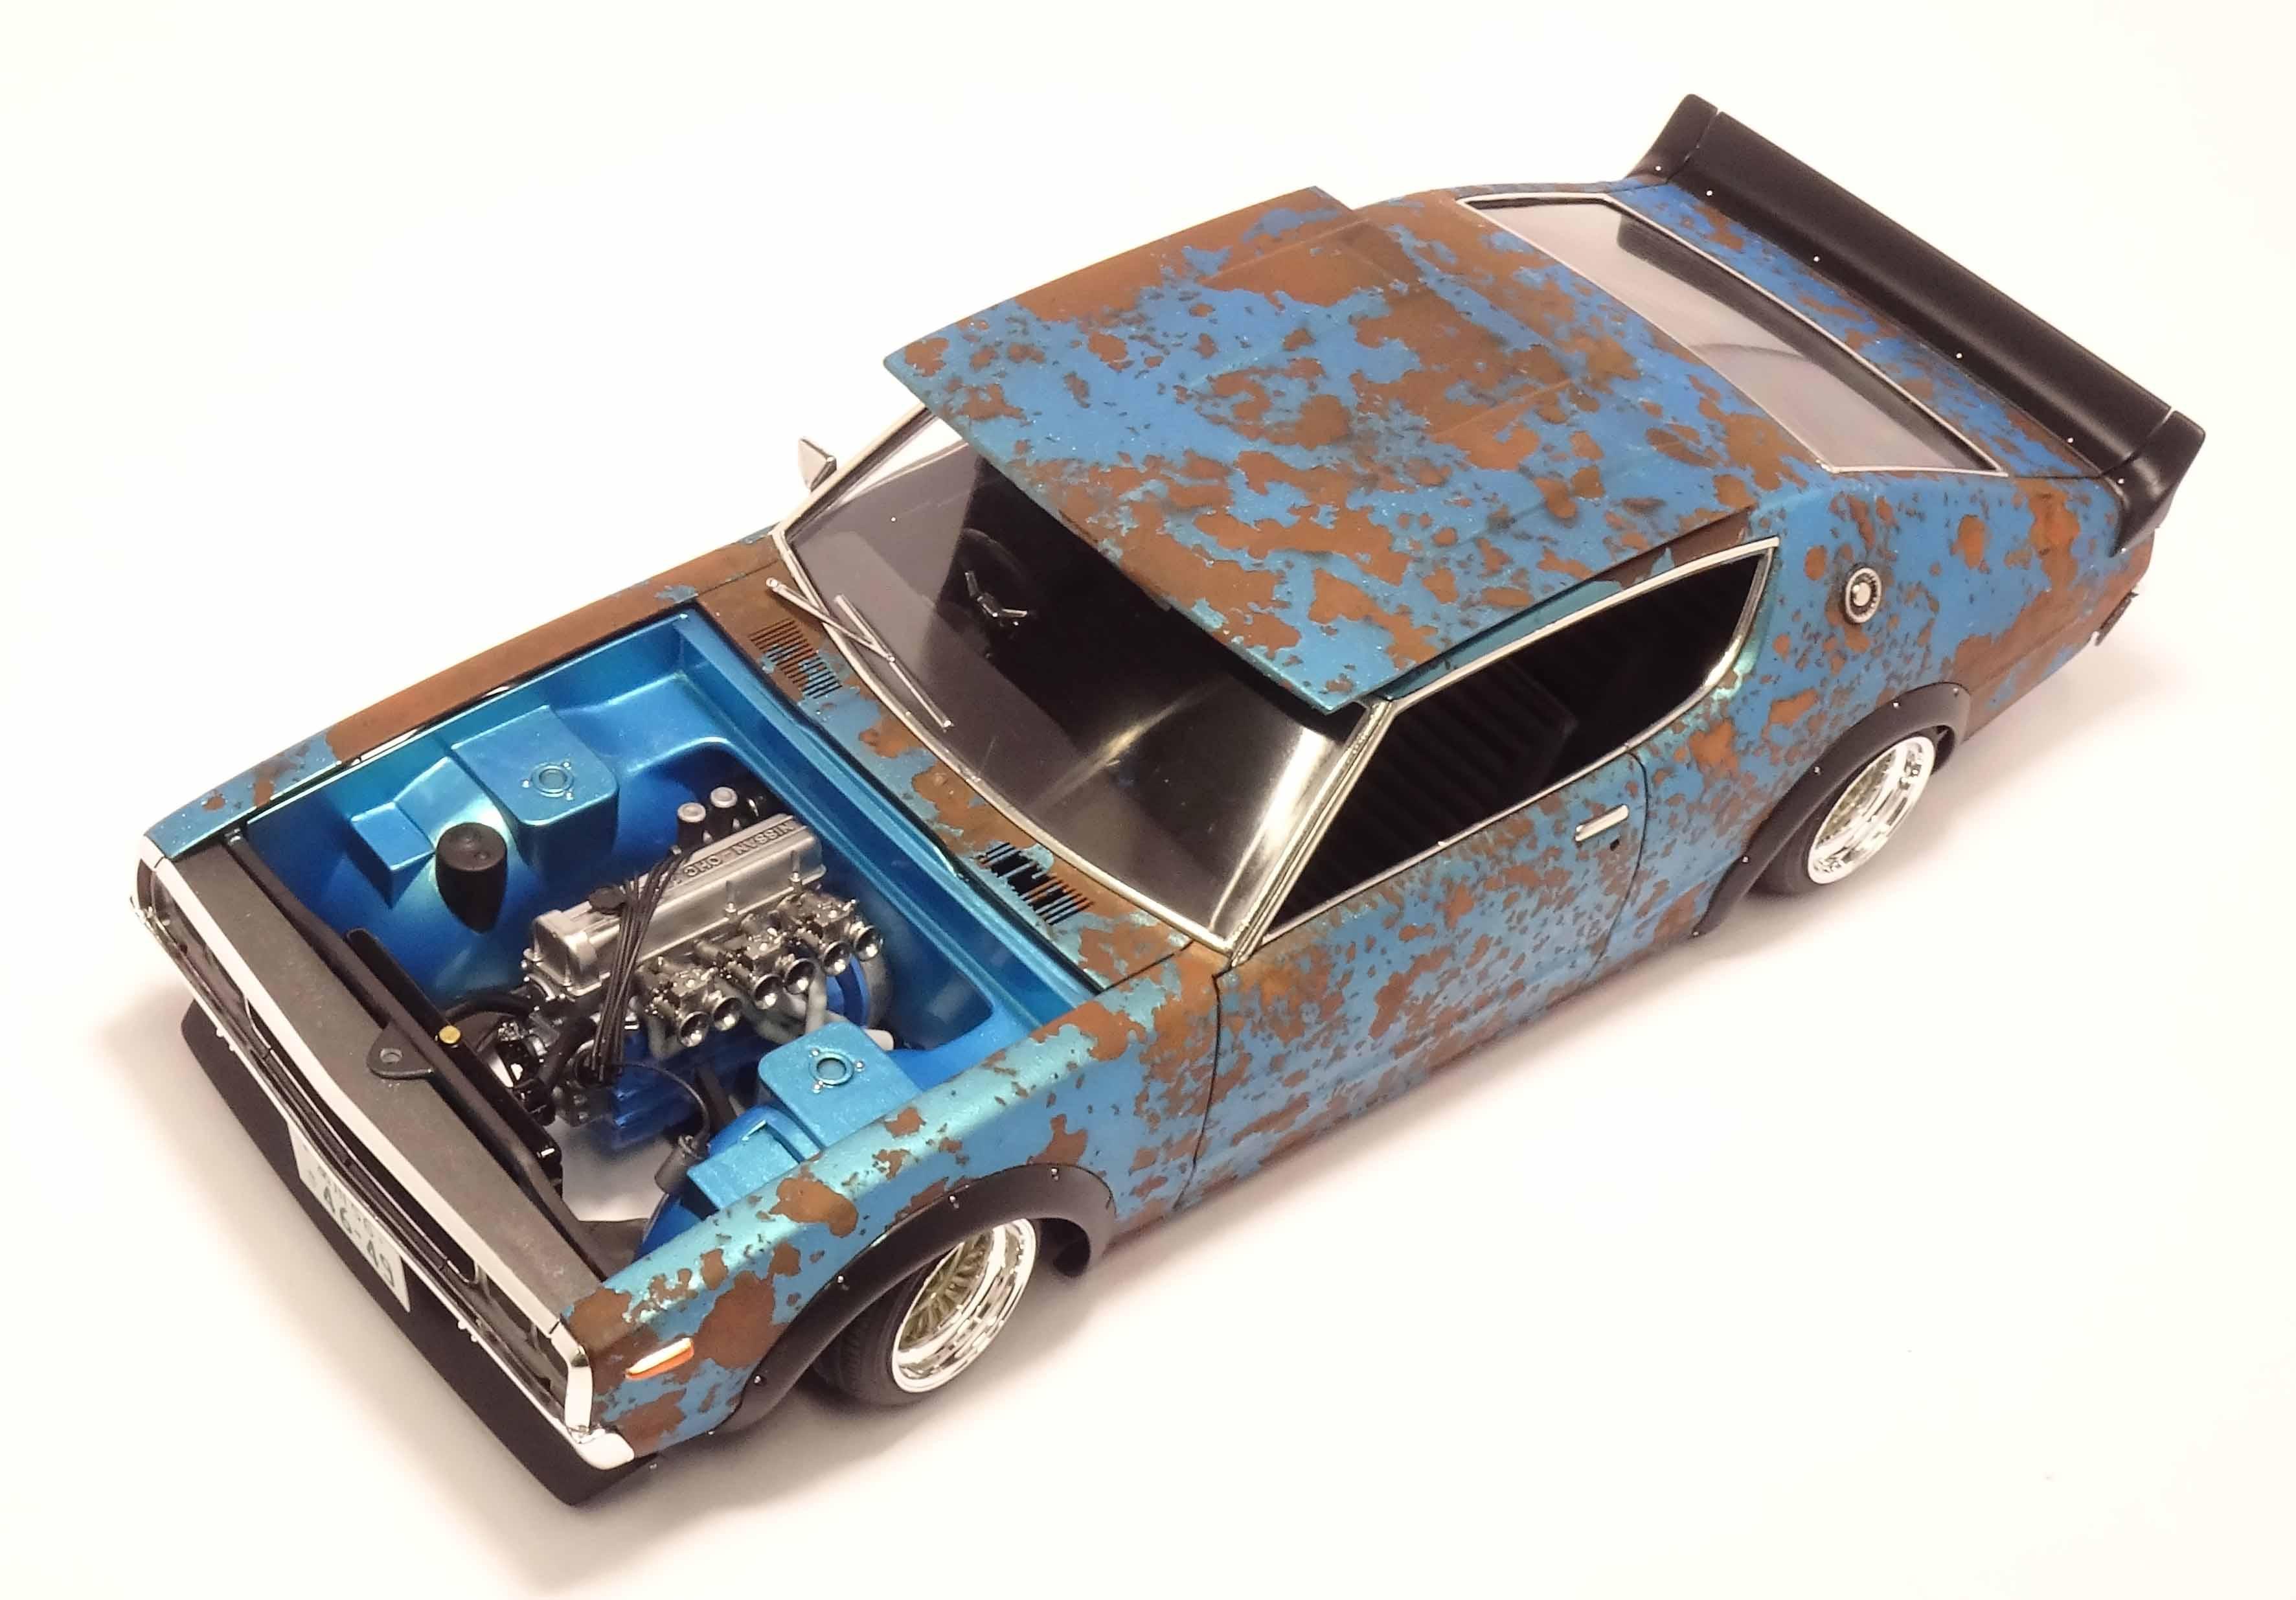
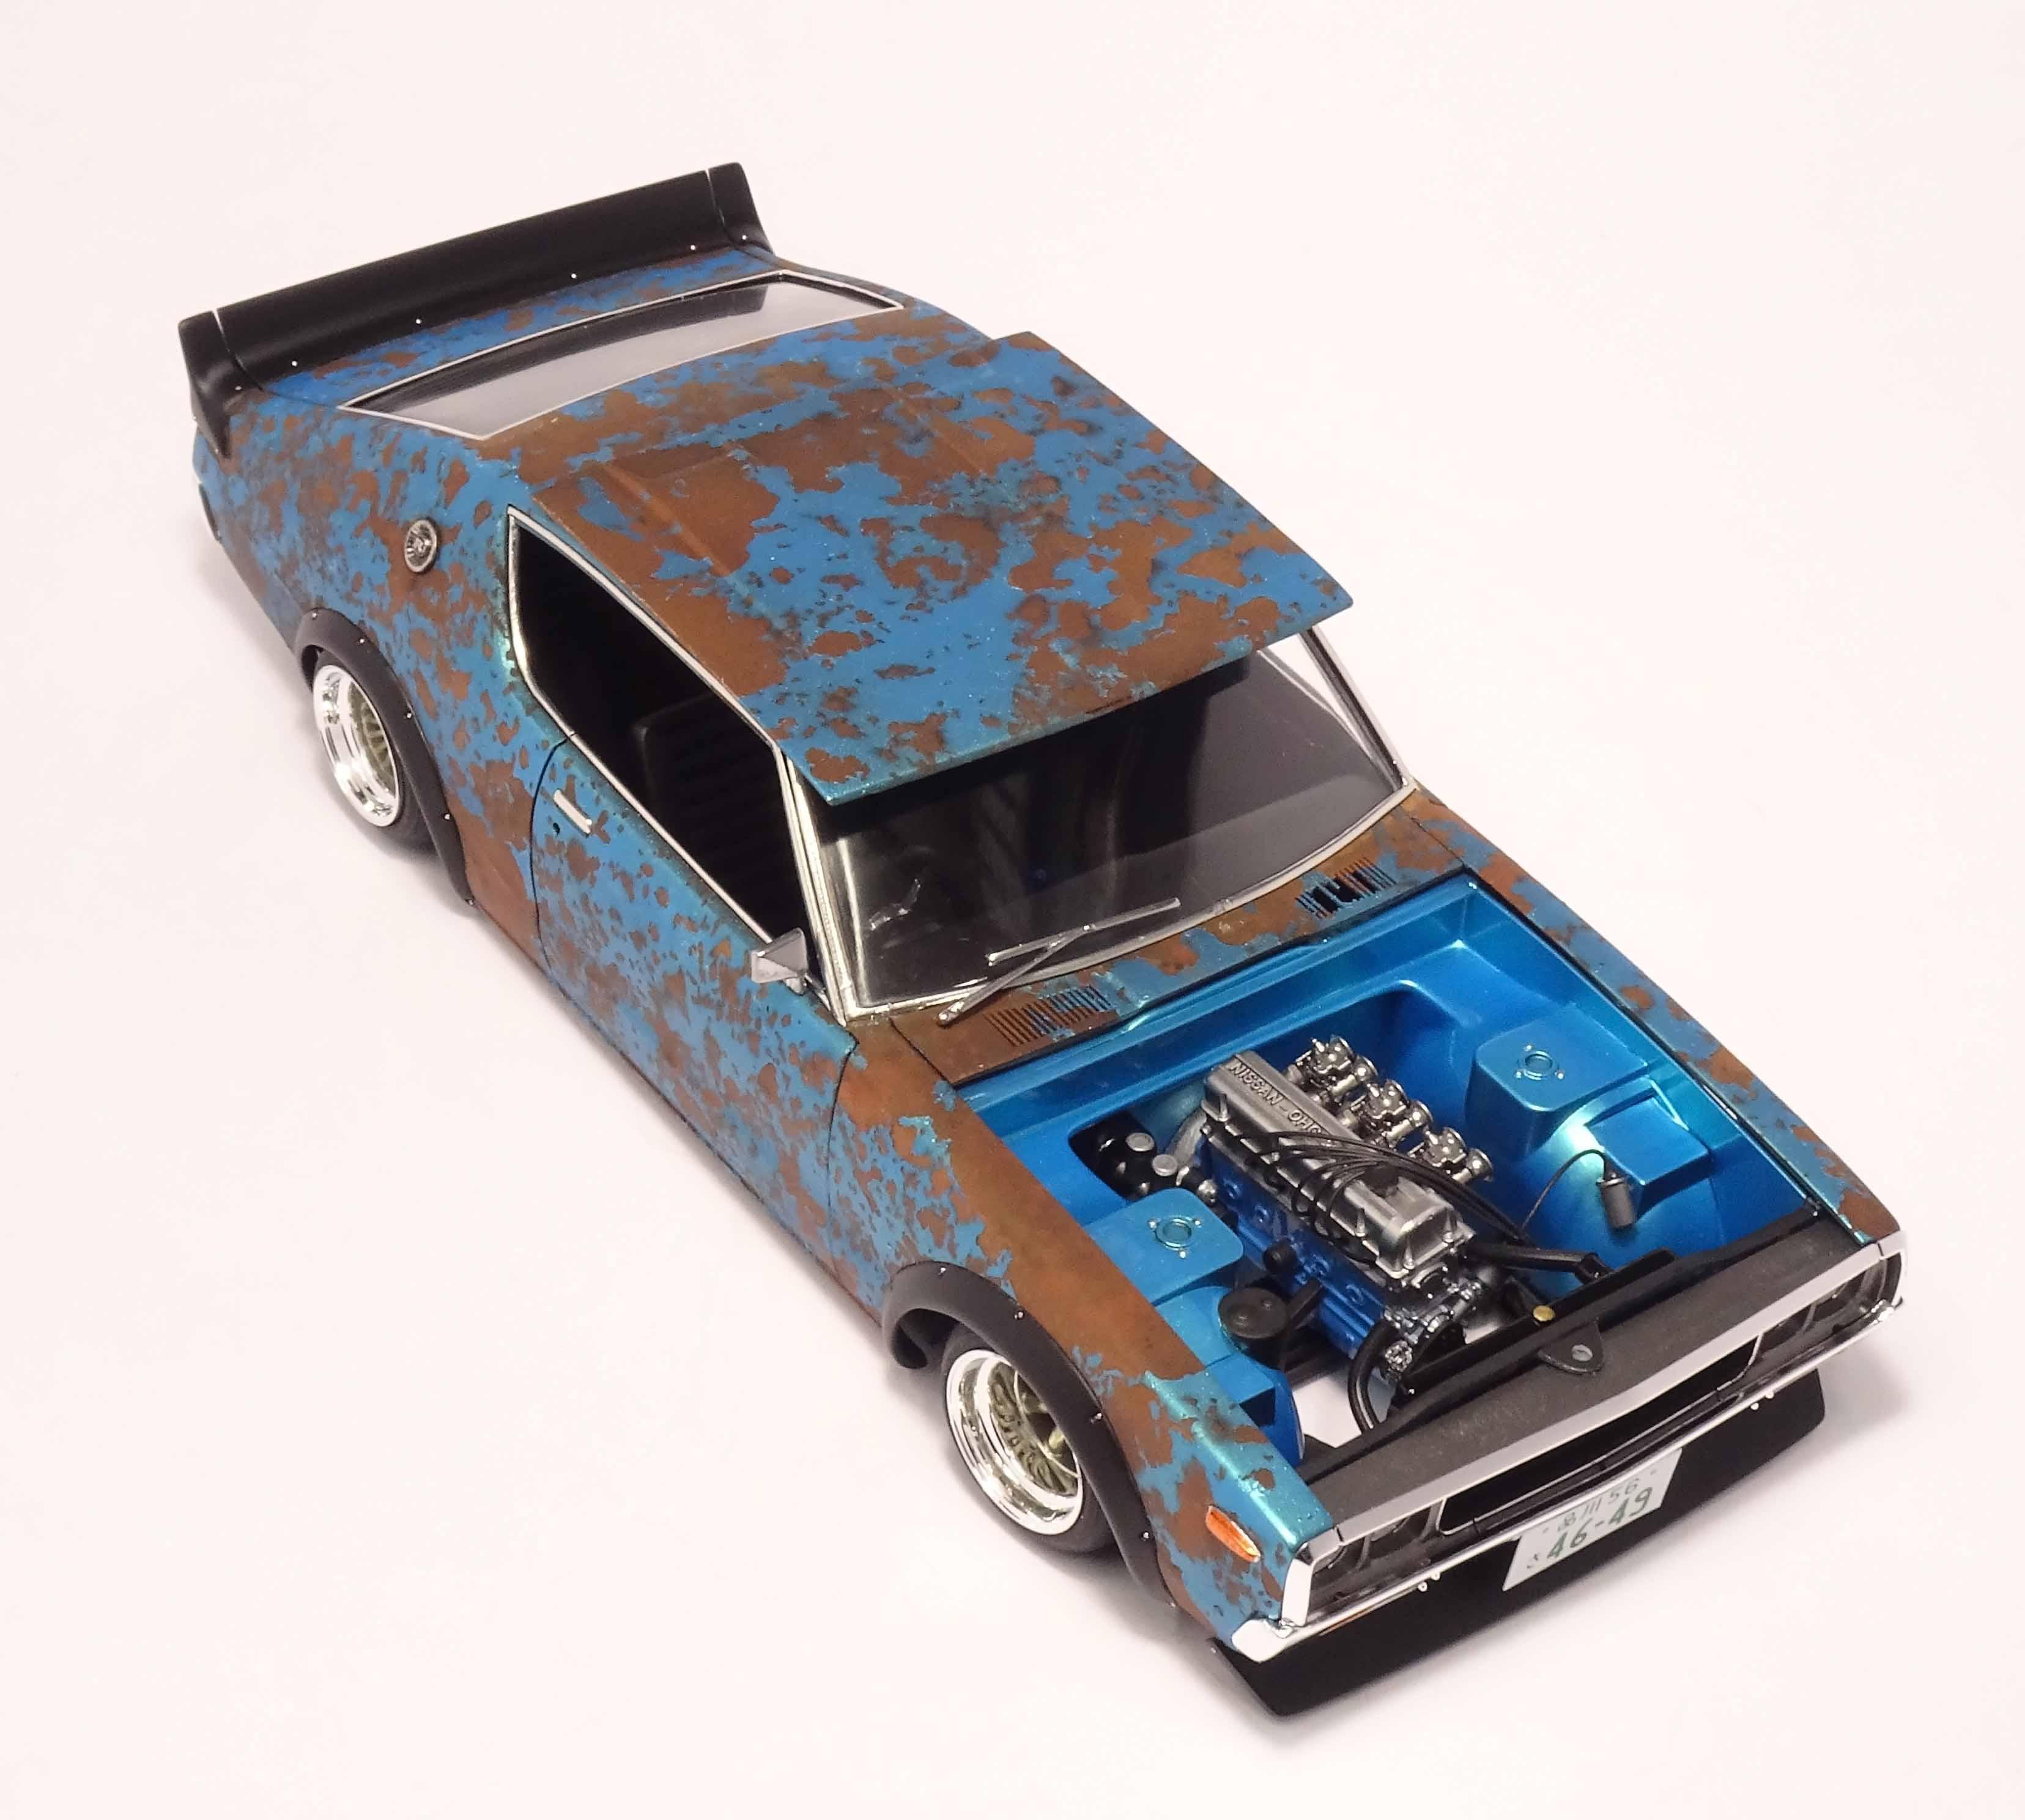
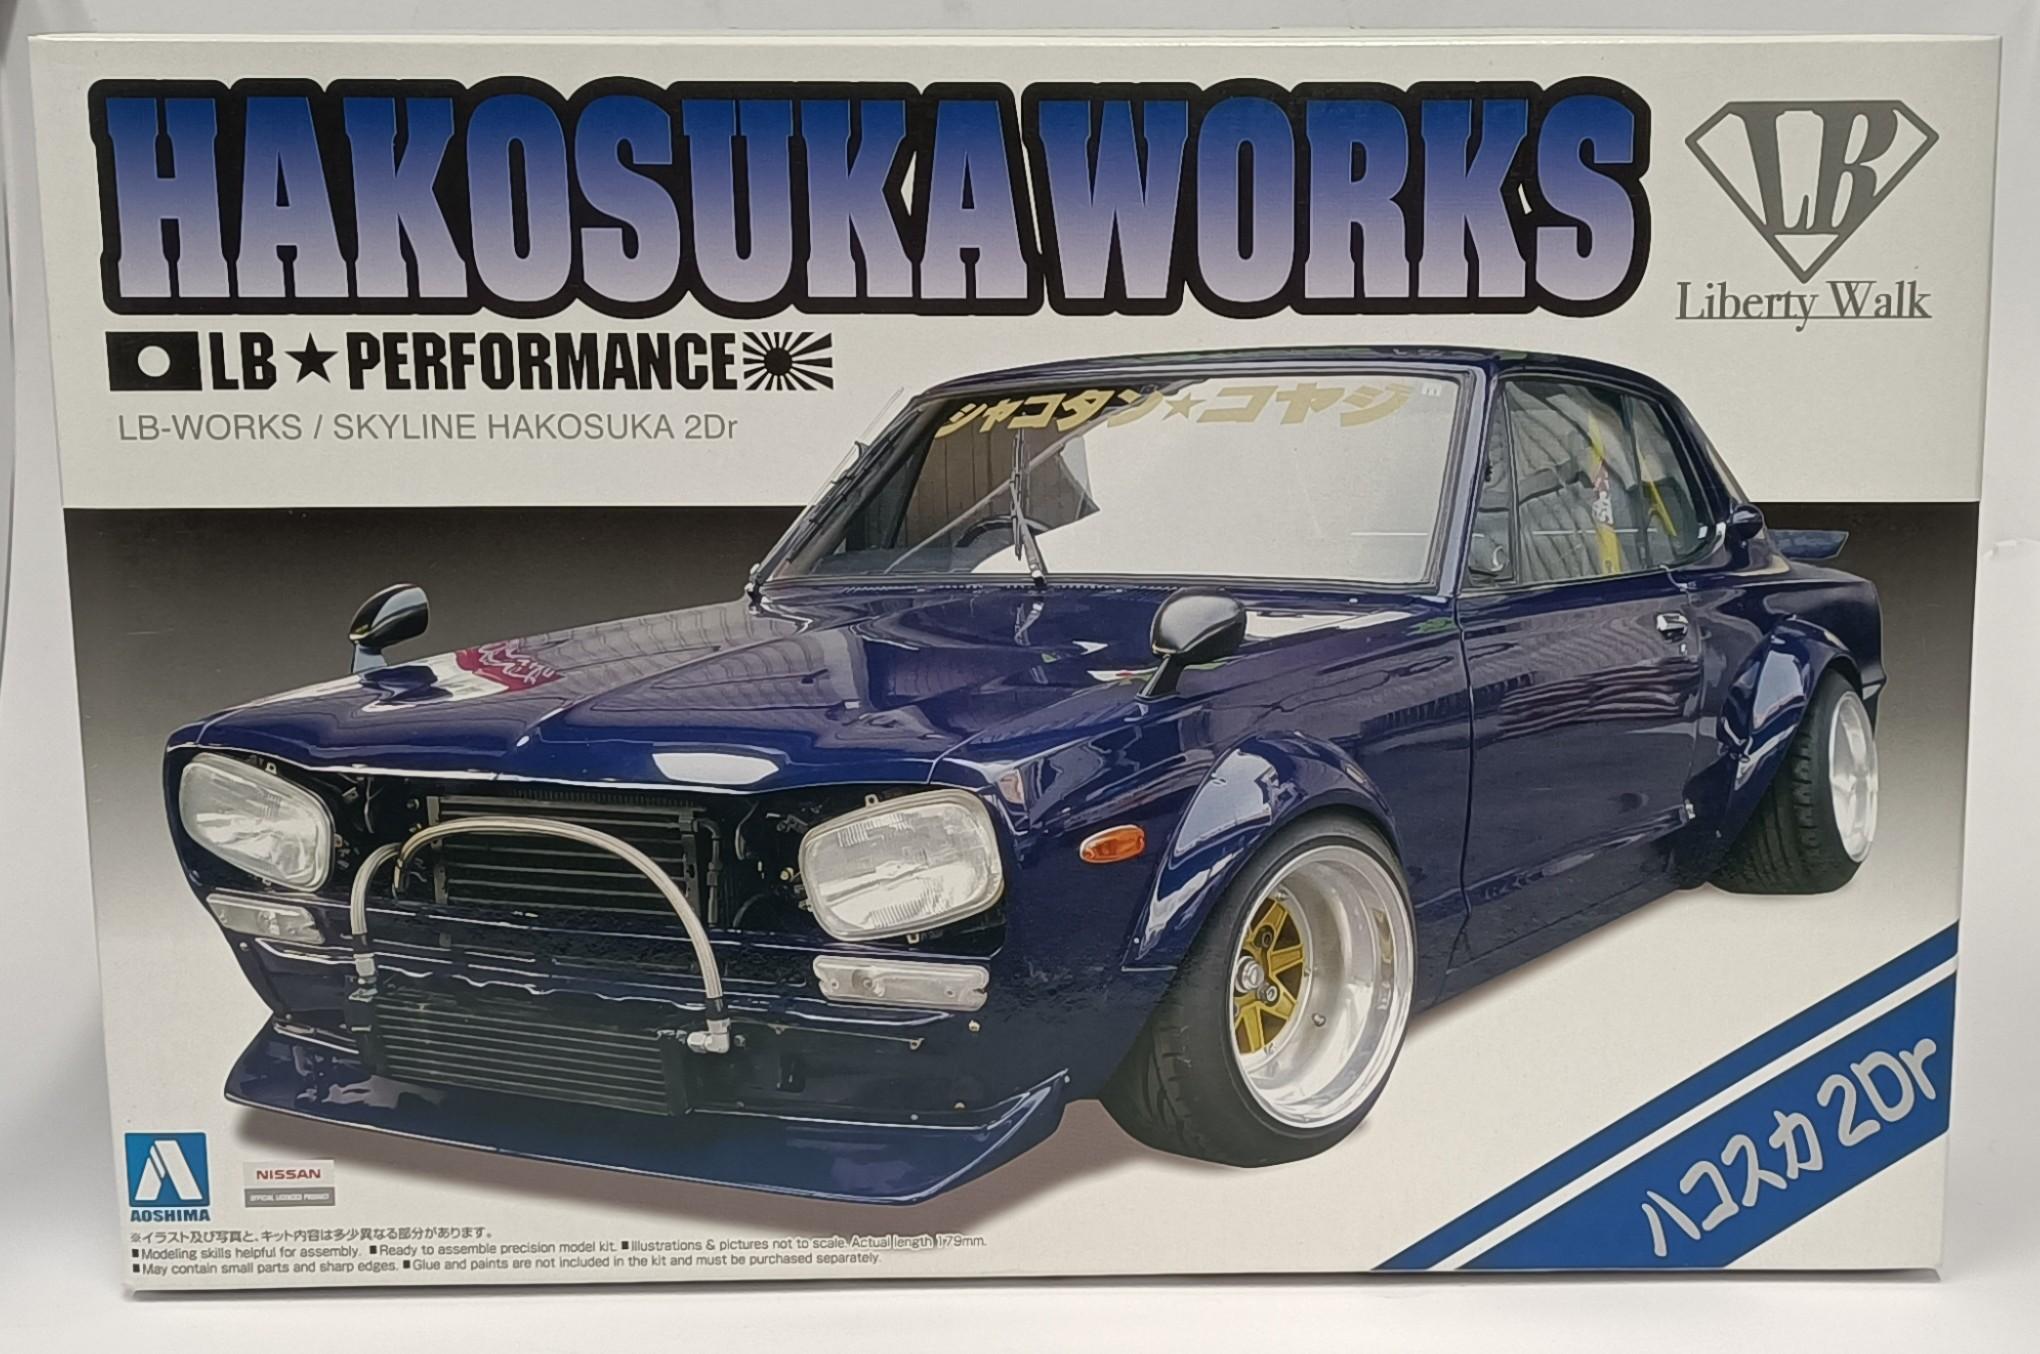
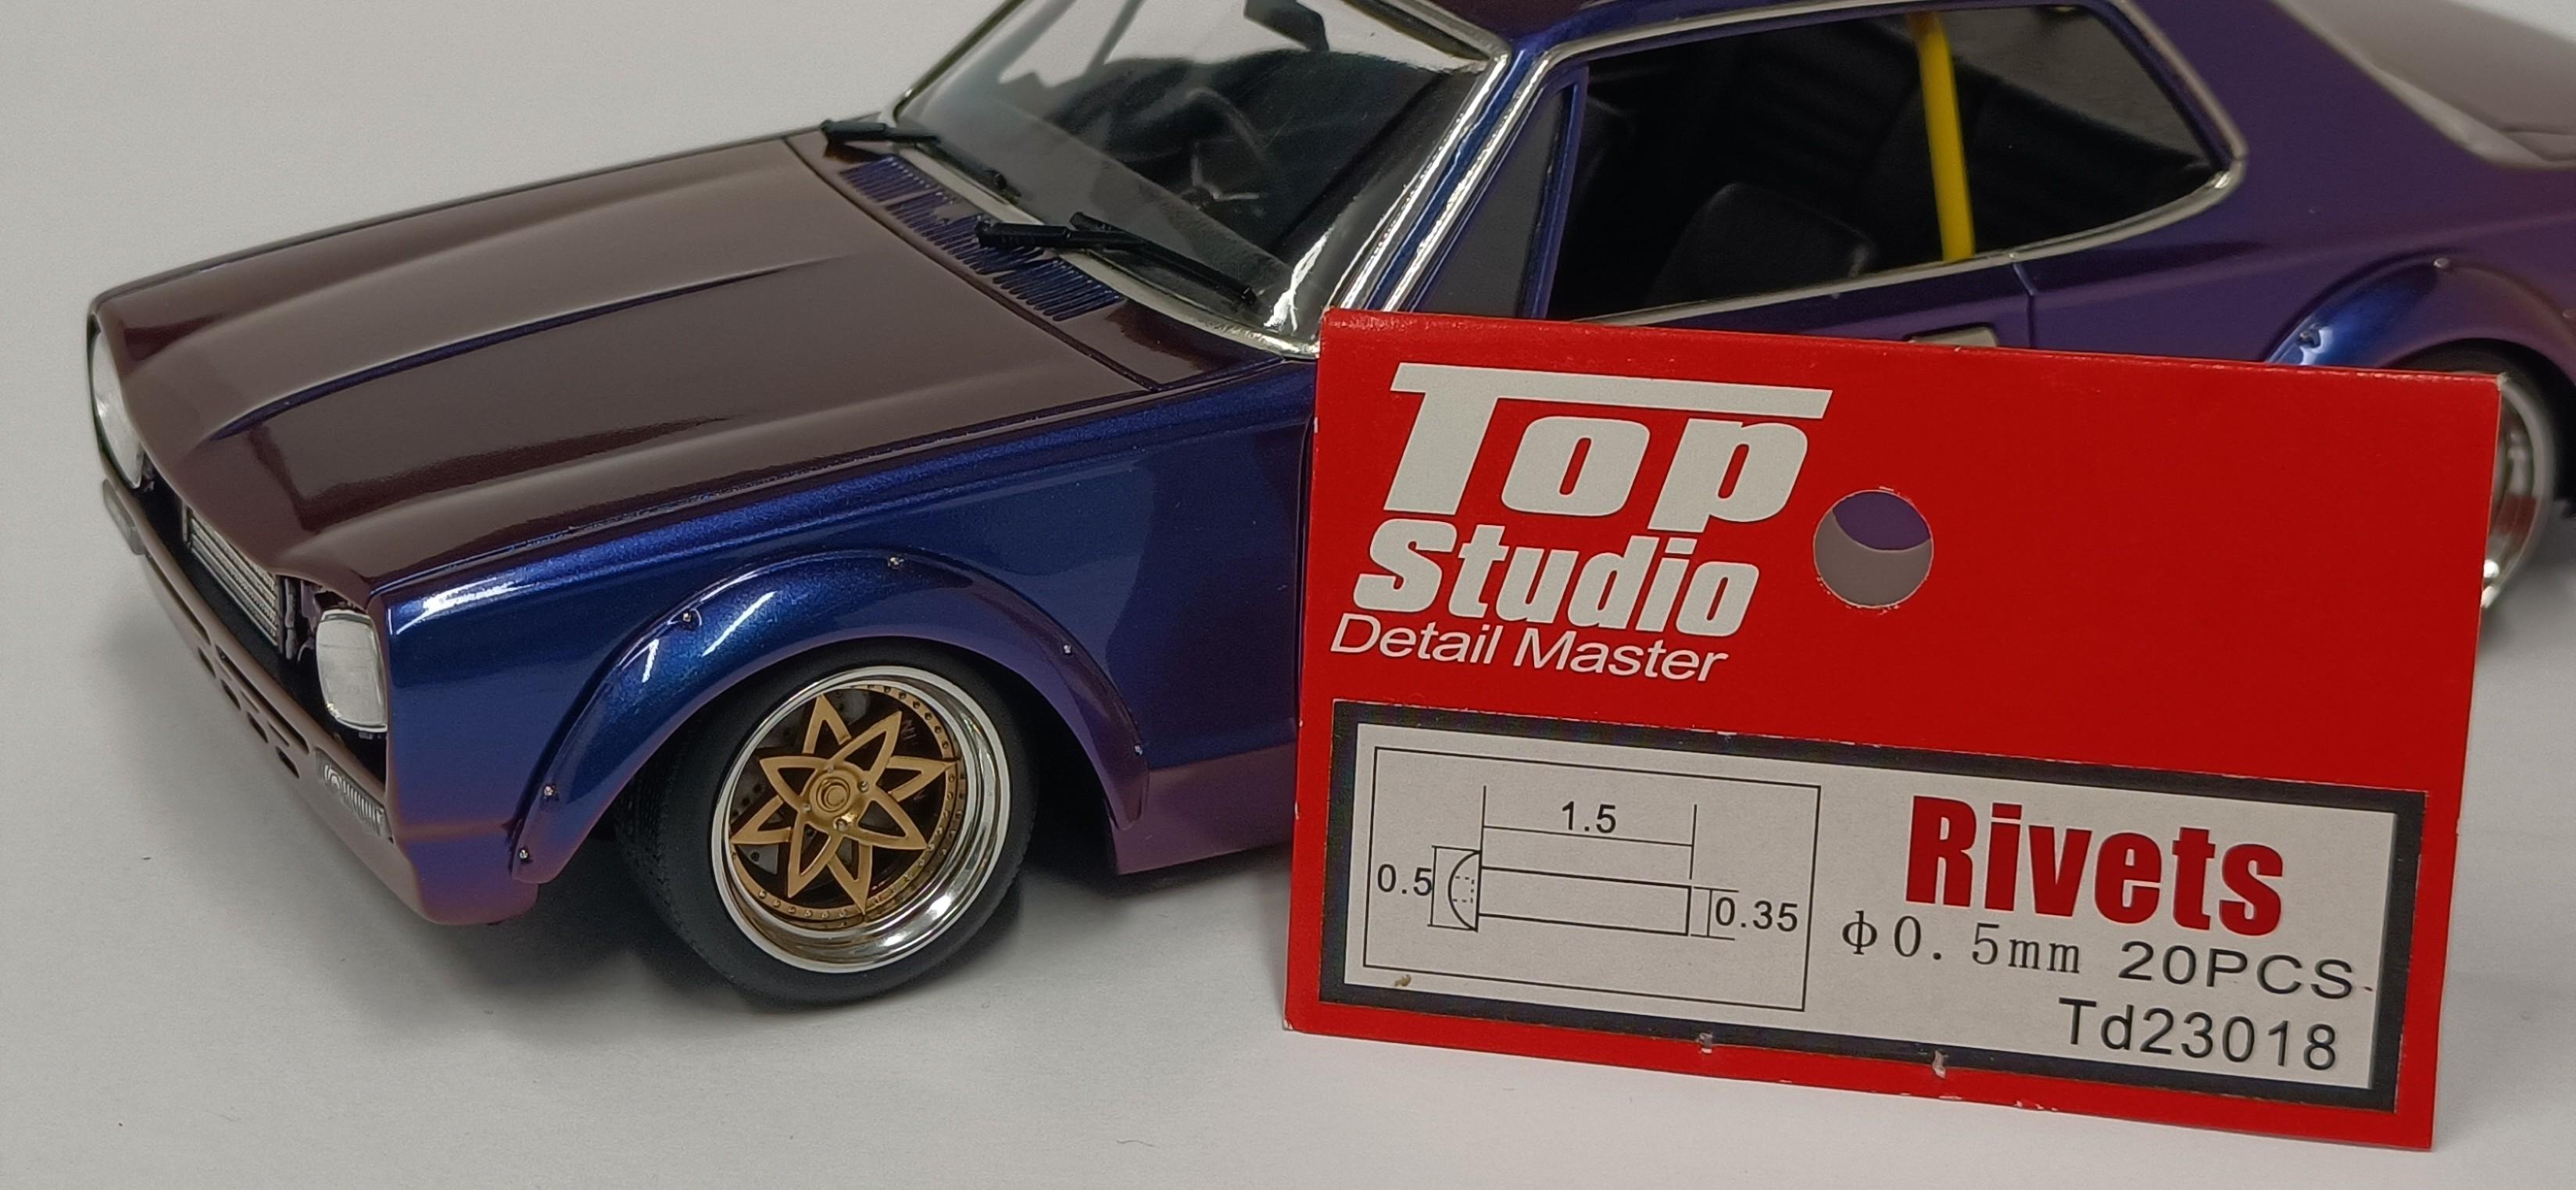
Always enjoy building these kits from Aoshima. I chose to build my own version using some of the optional parts from the kit and used these wheels. I had some issues with paint work and after stripping the paint decided to go a different route and do a rusty styled build for a change. So I dedicate this build to Dr Cranky an old forum friend who loved his rust. Also some ideas and inspiration came from Low Standards Jay Skyline Work in progress Opened up the molded in grill detail and replaced with photo etch mesh. I 3D printed the engine and scratch built the bay building upon the chassis plate inner guards. As per usual on my over fender builds, Top Studio rivets were used. Hopefully the professor approves of the amount of pictures and the angles they were taken.🤣
- 10 replies
-
- 15
-

-
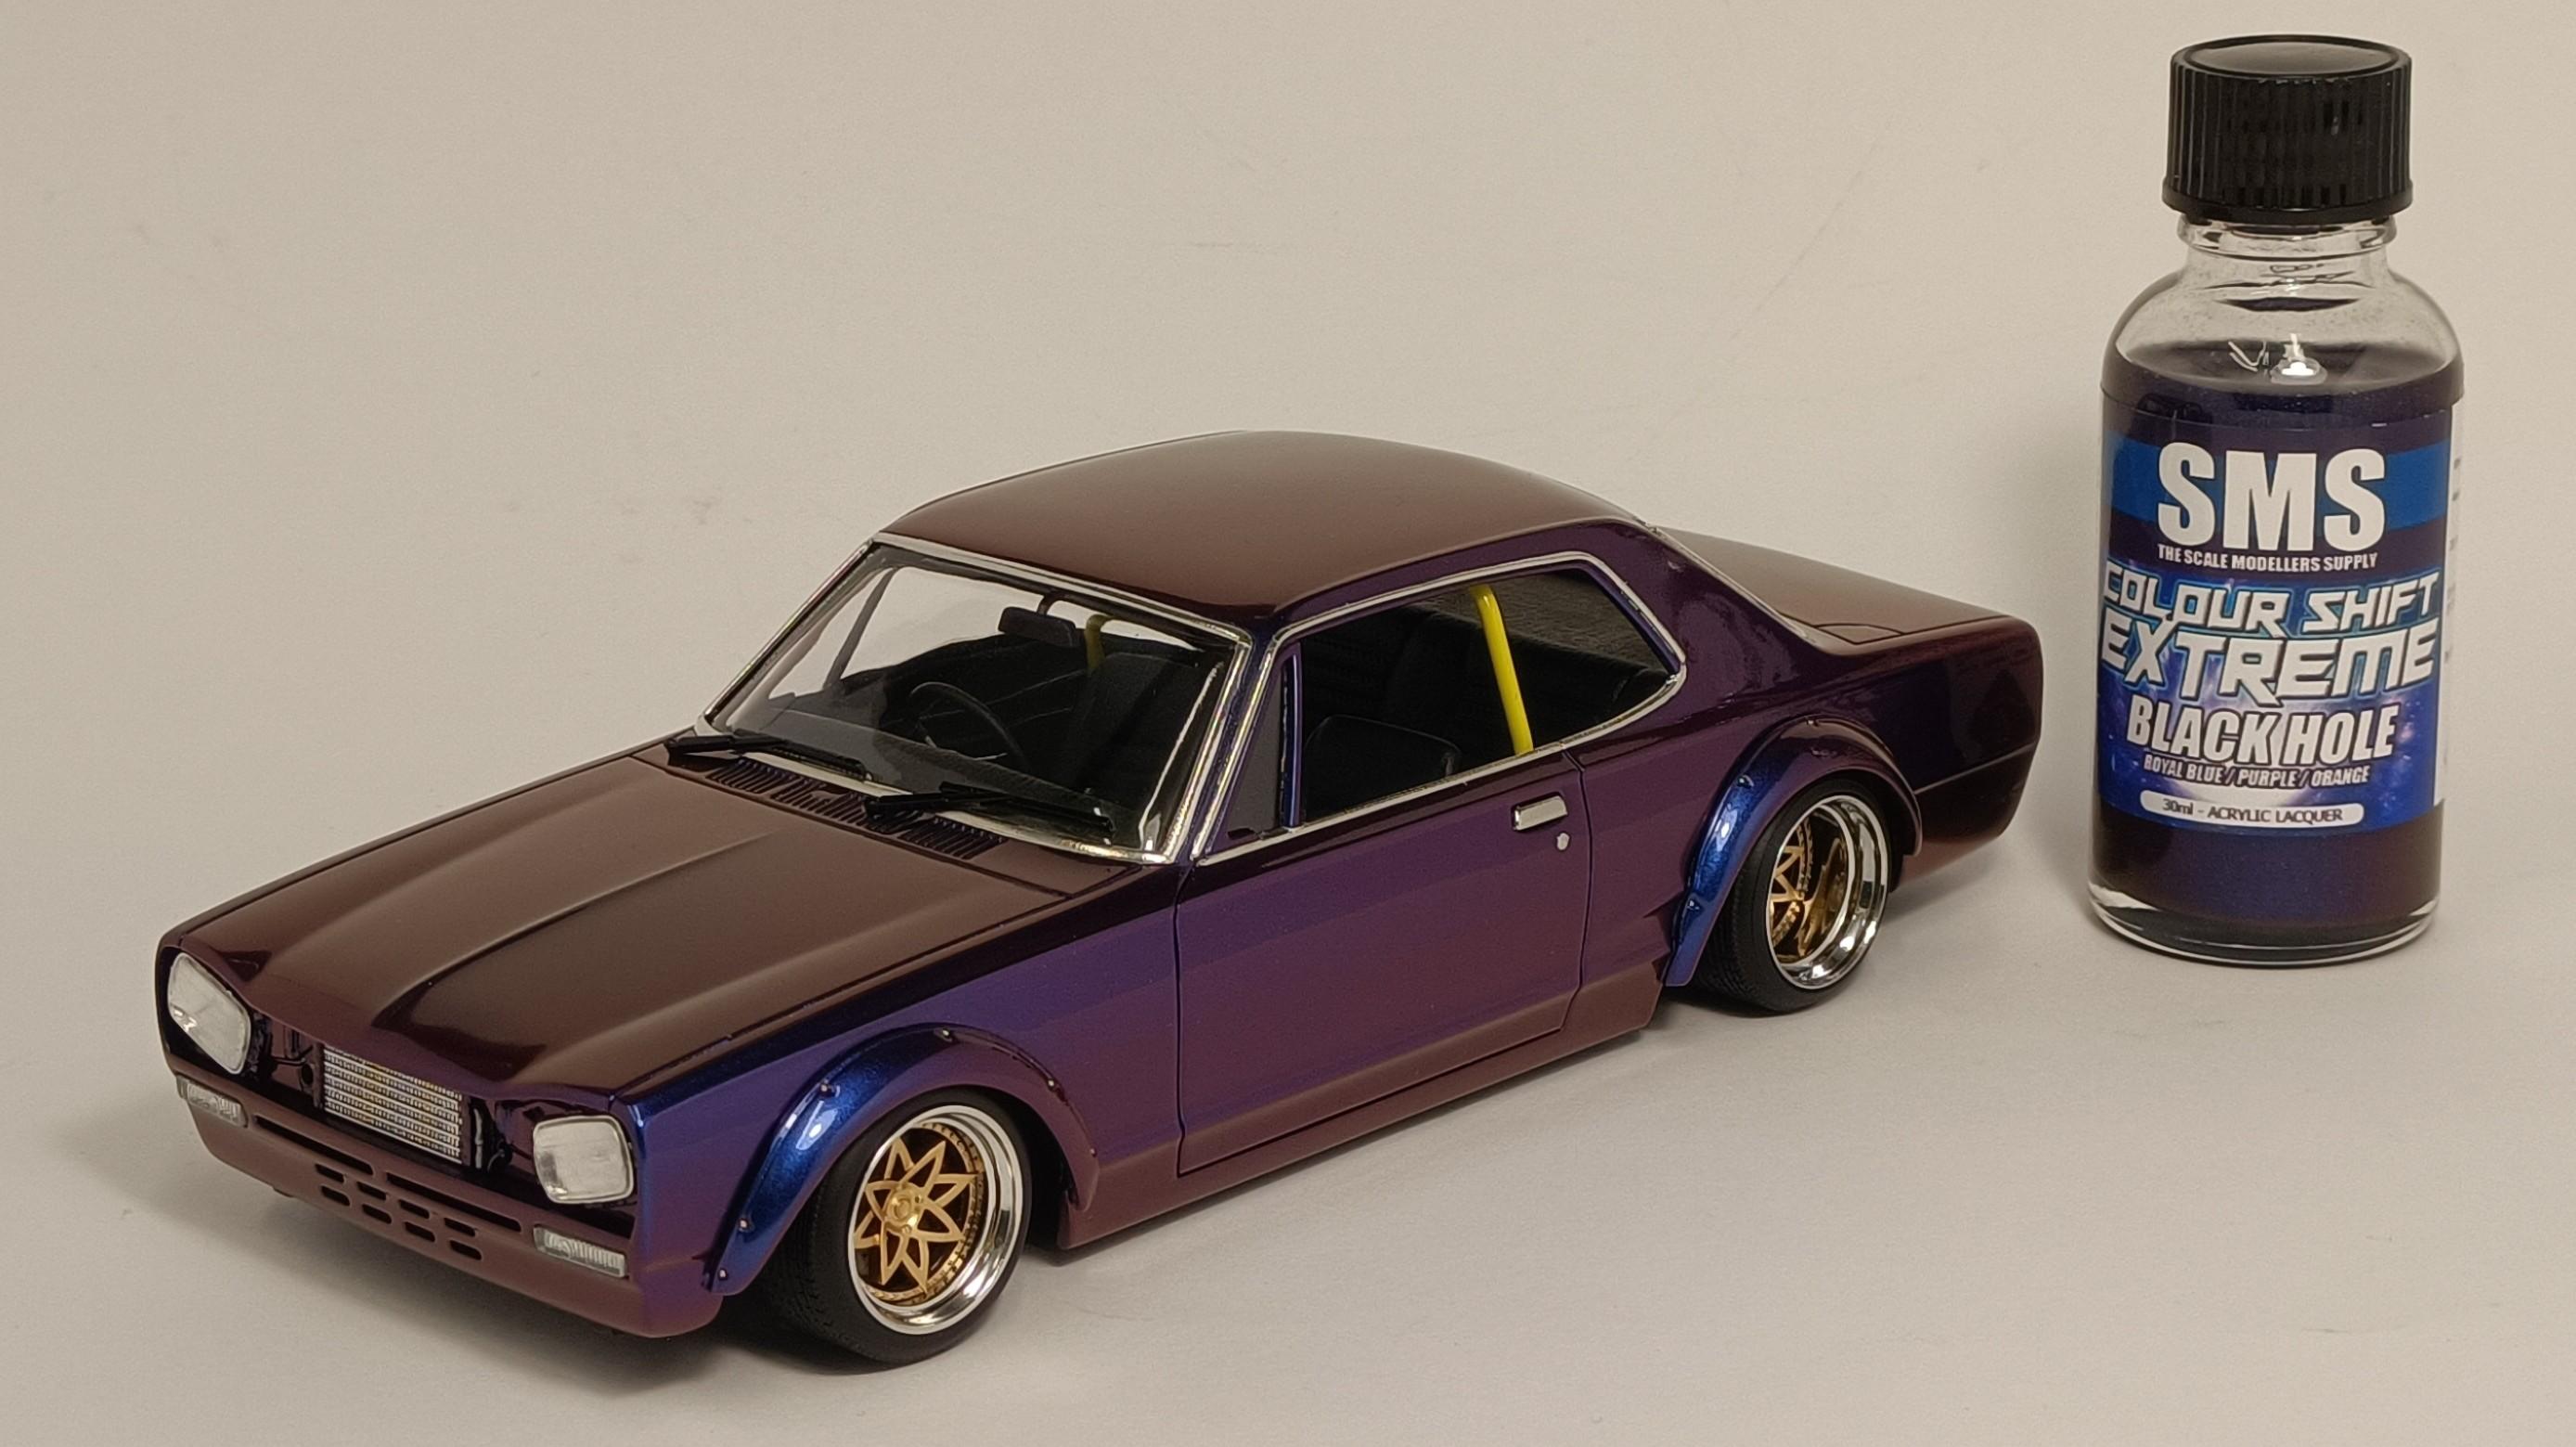
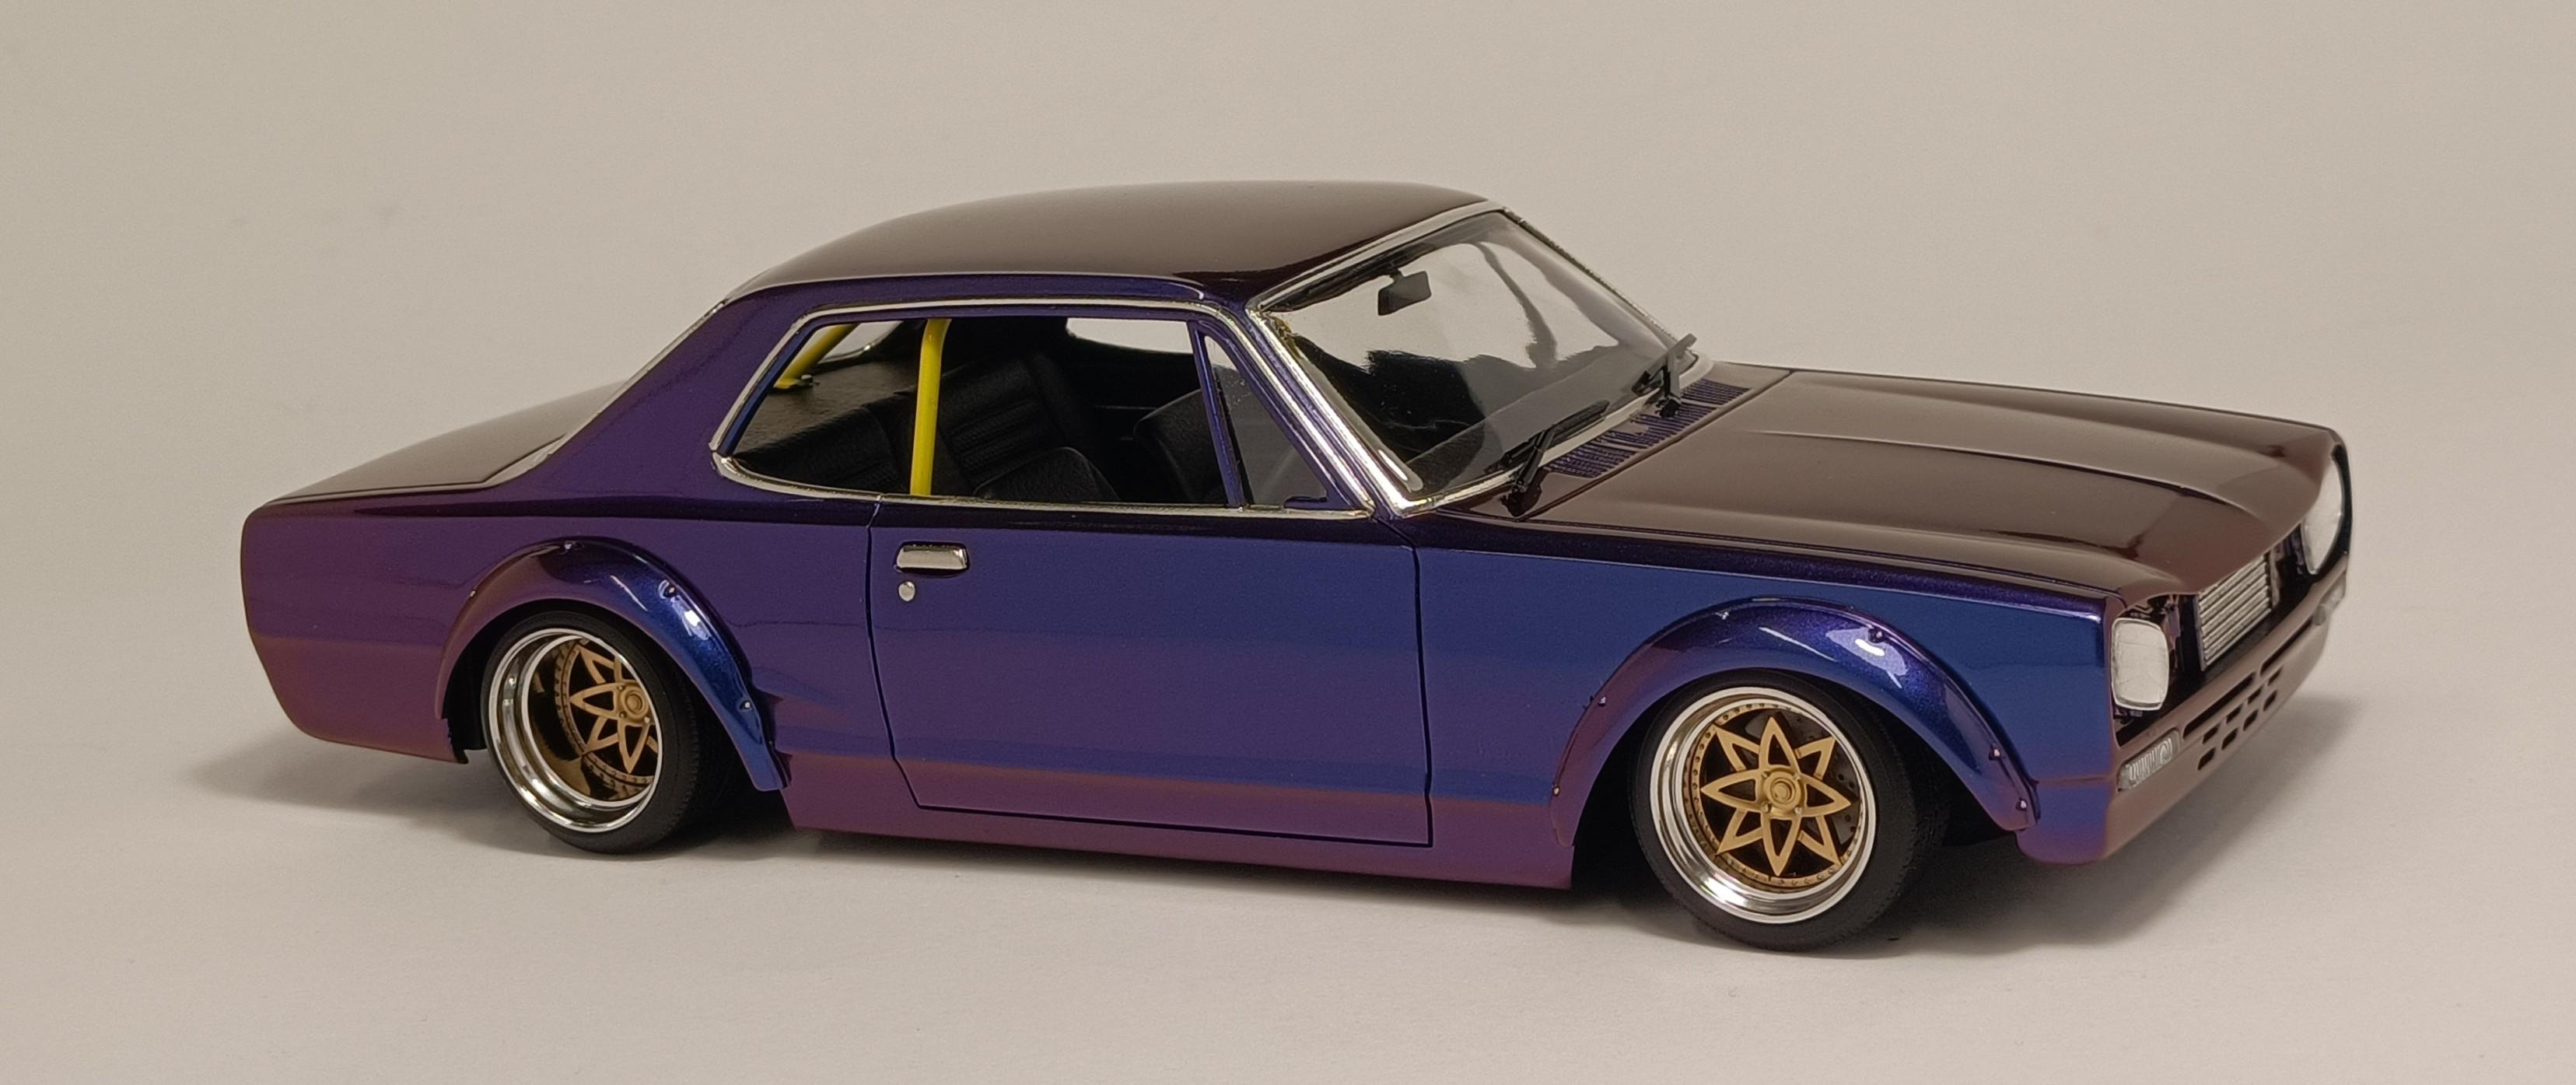
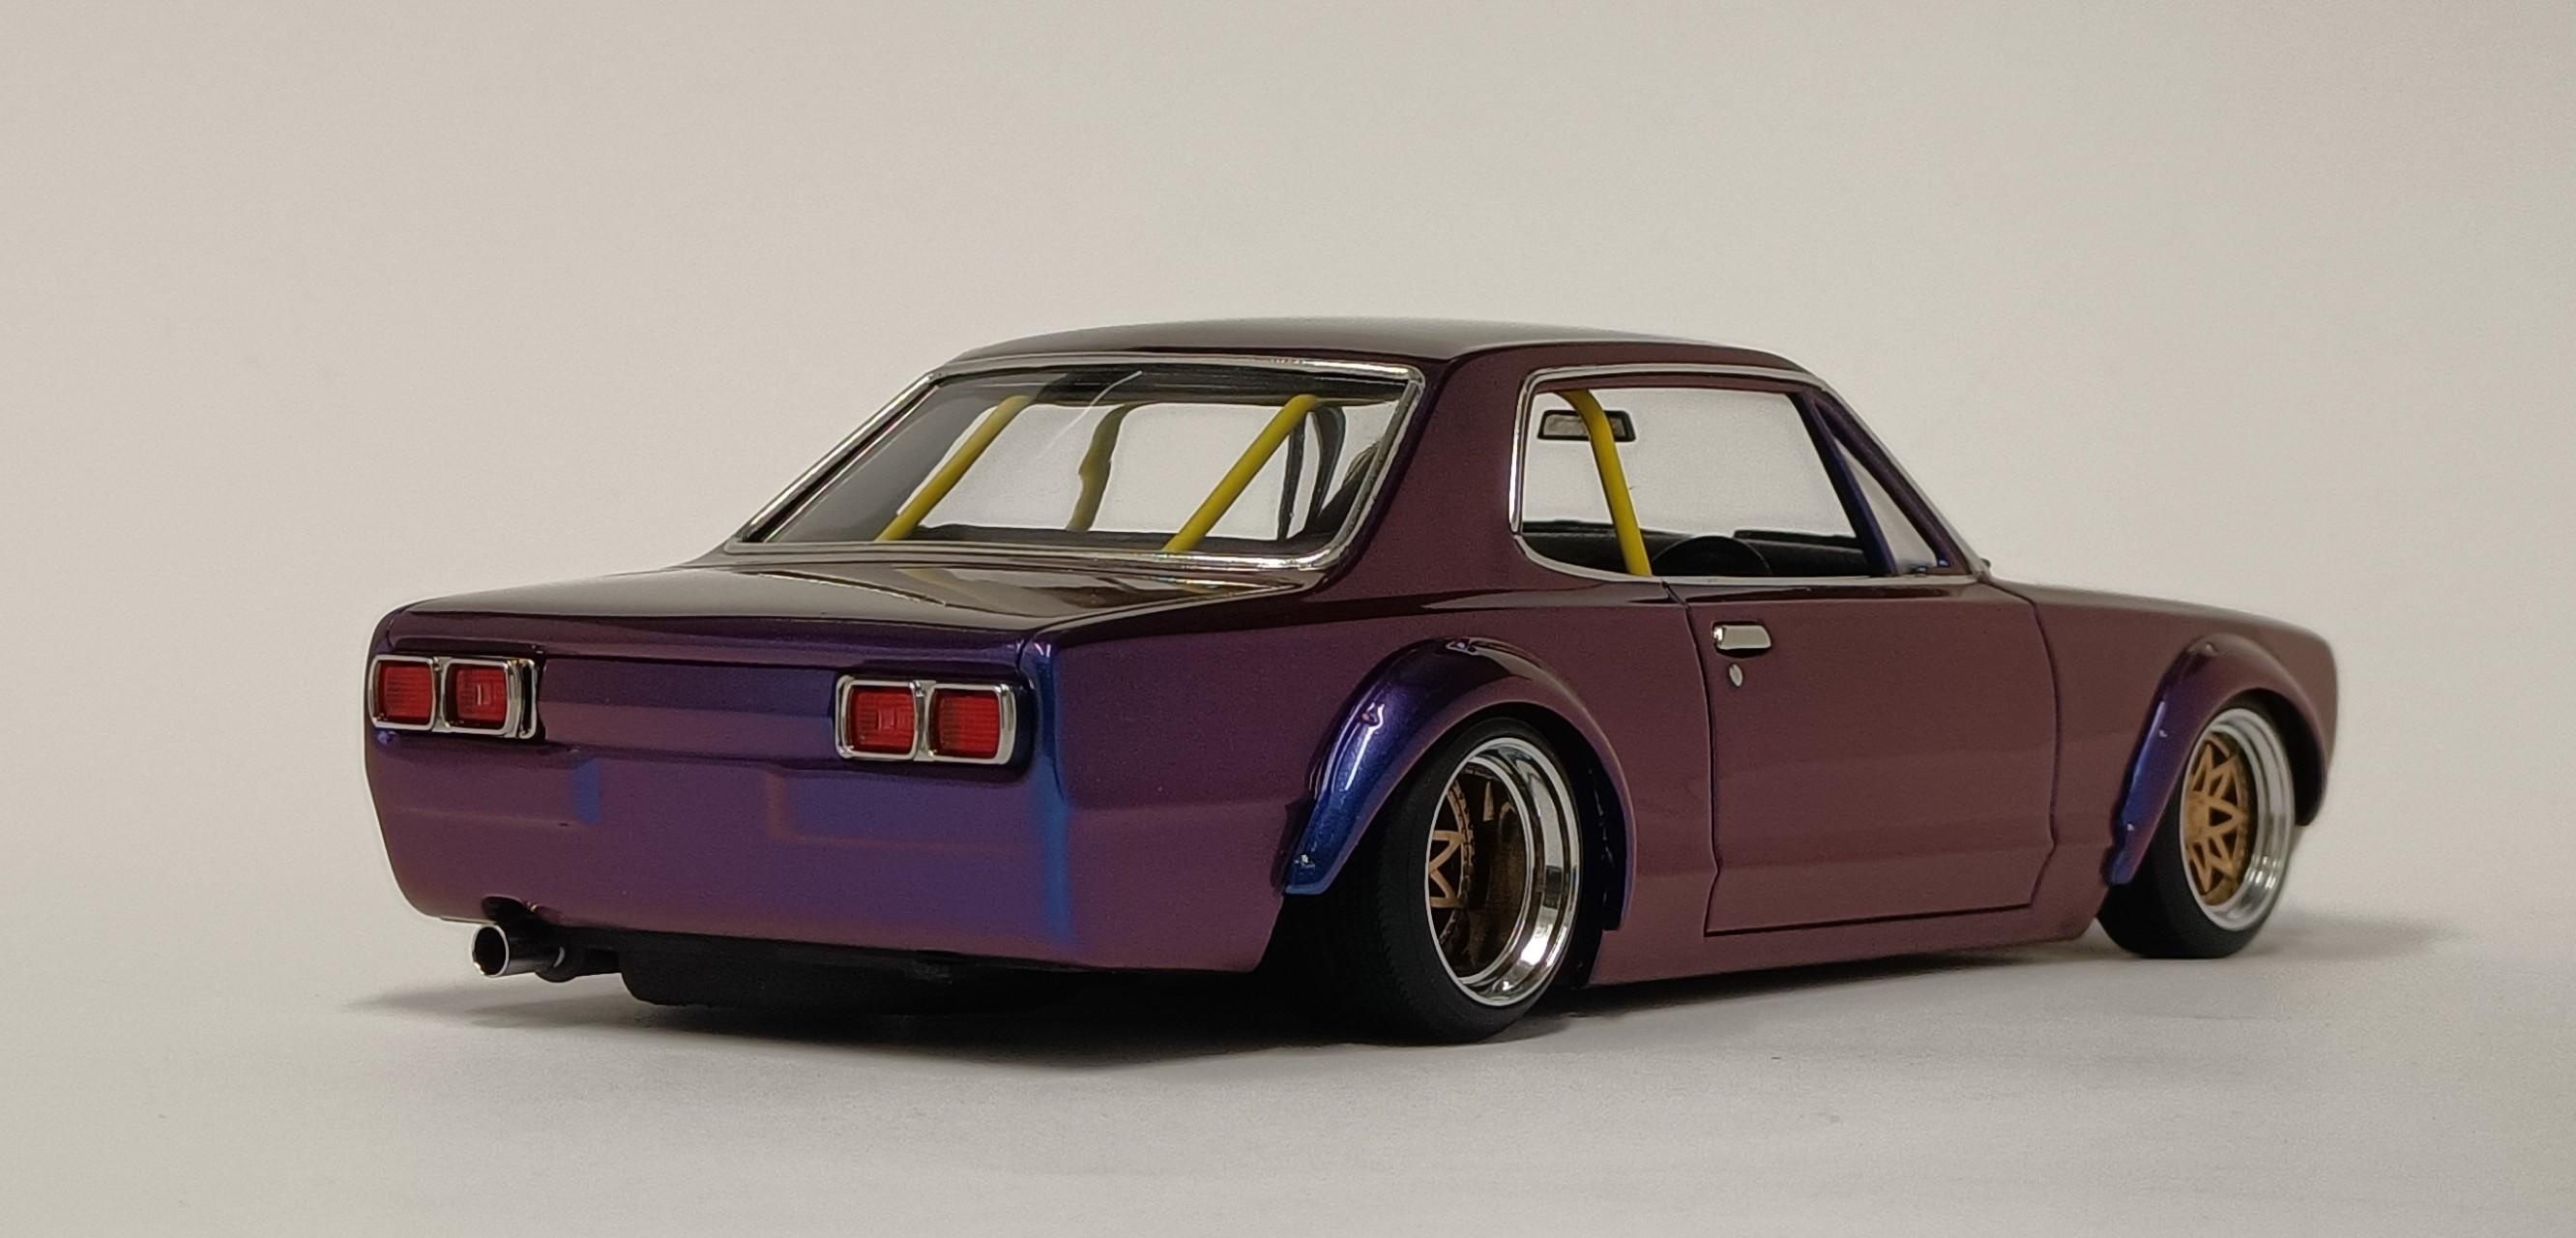
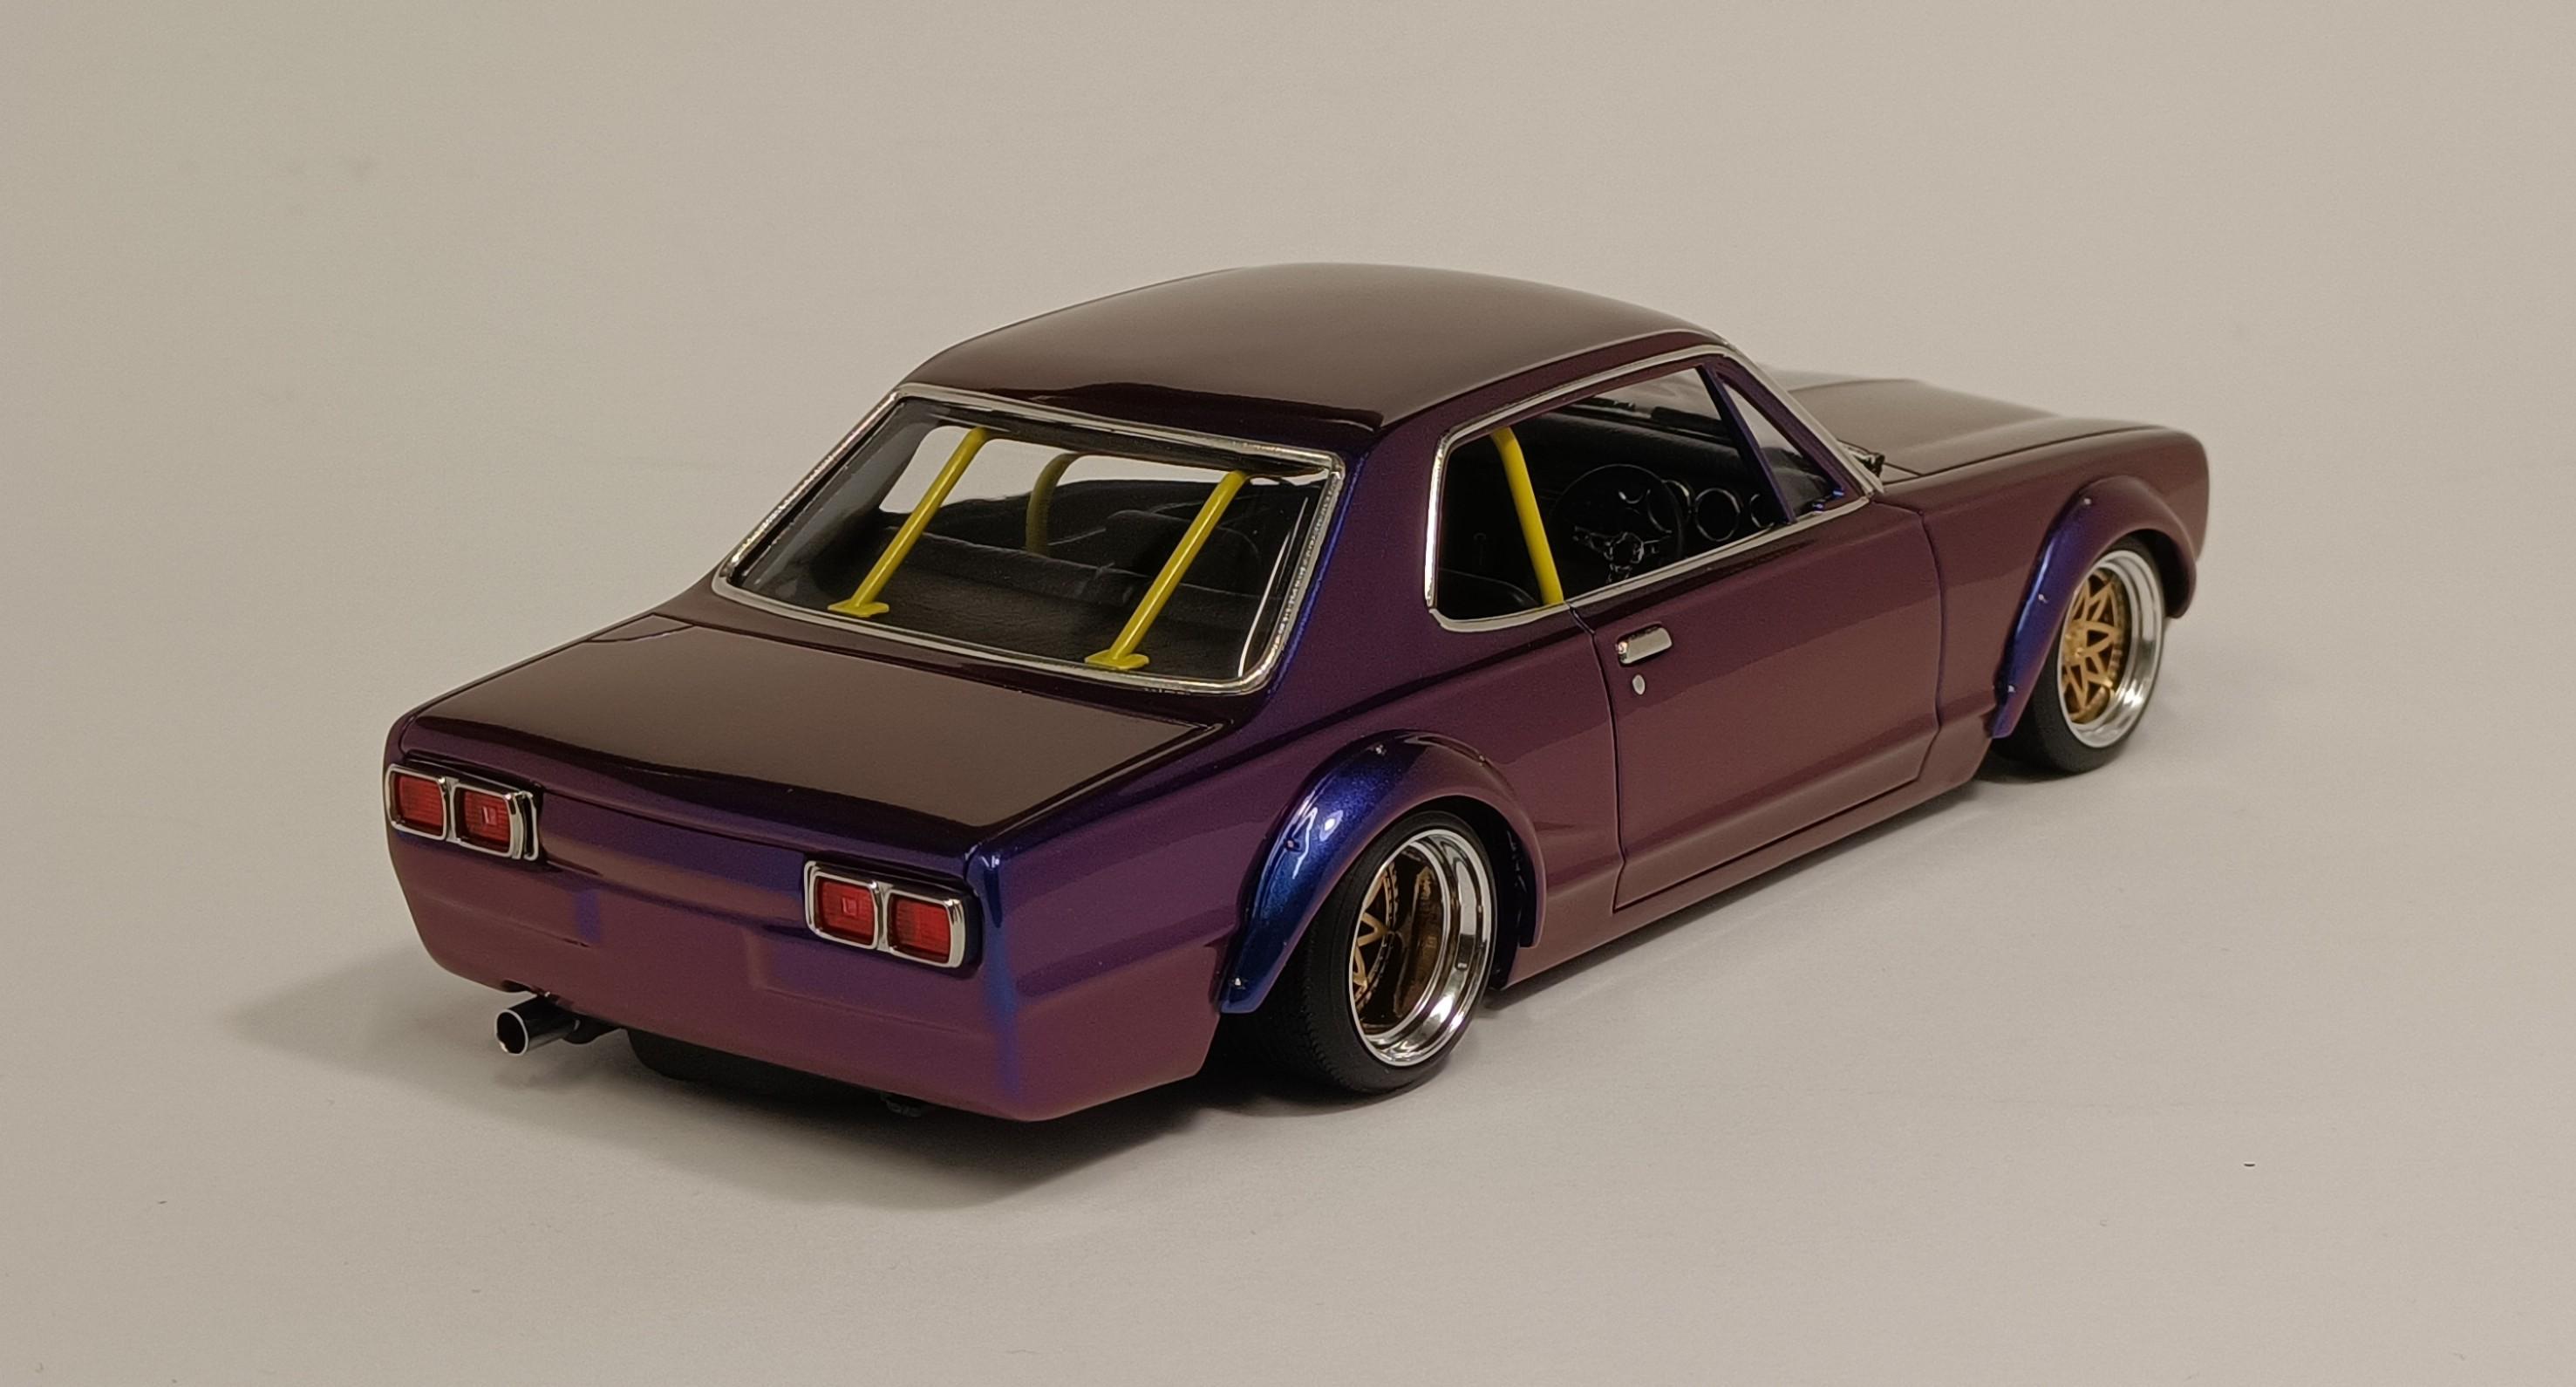
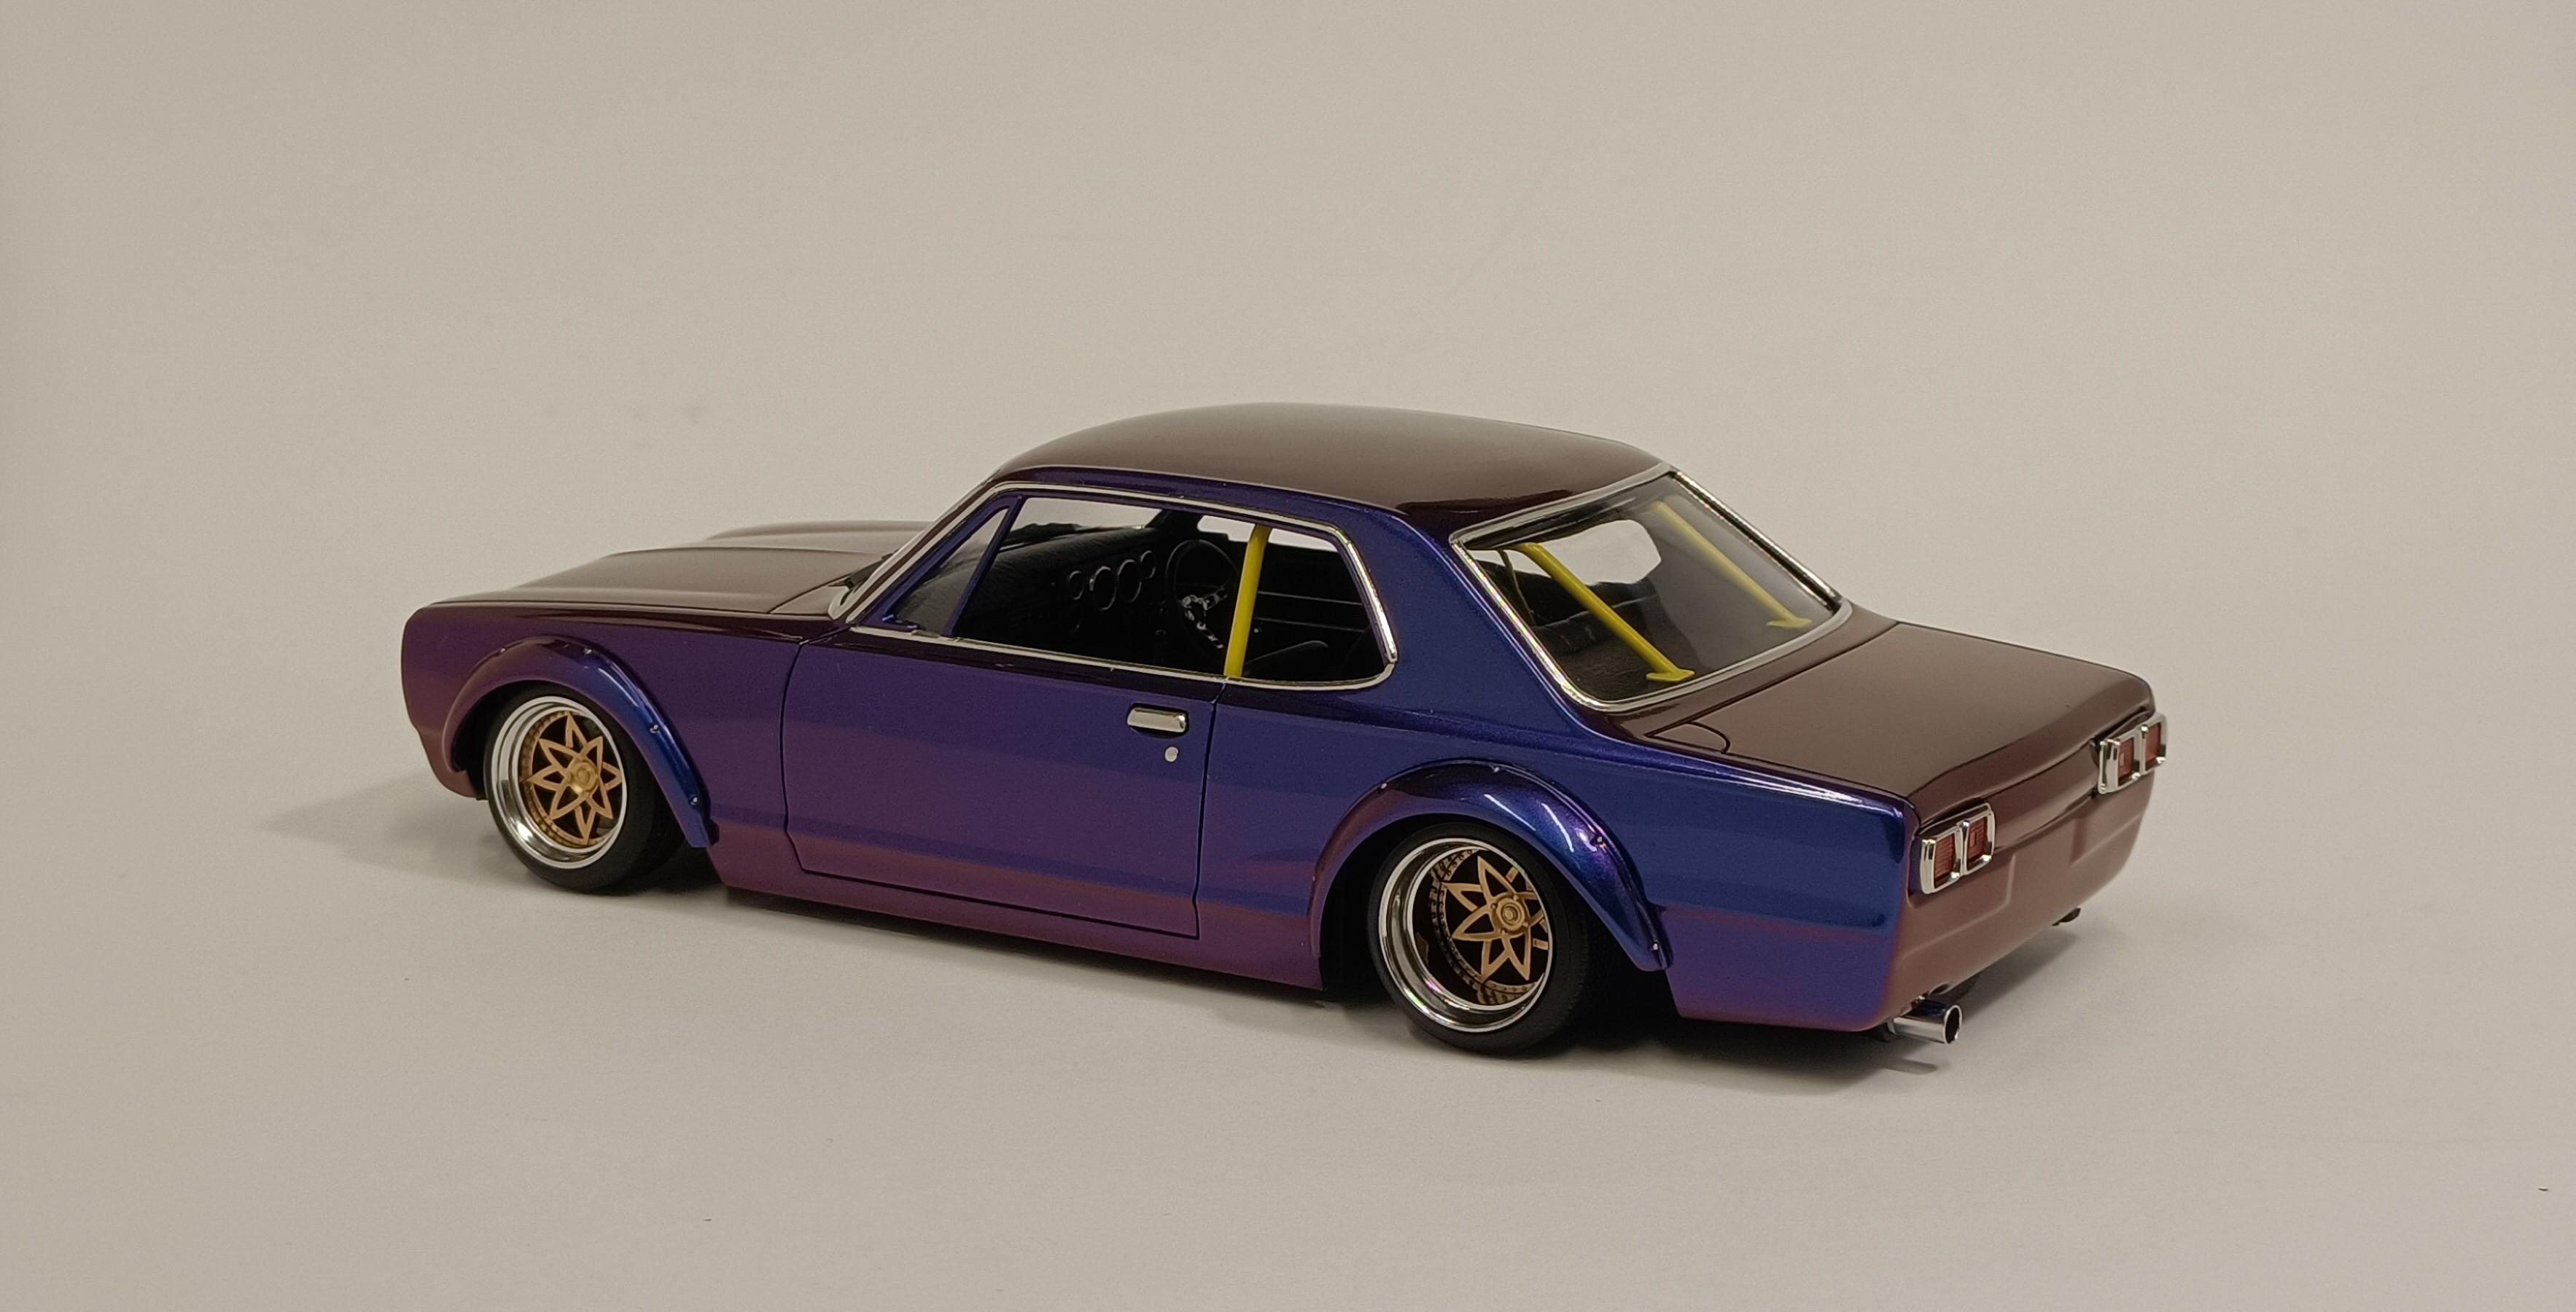
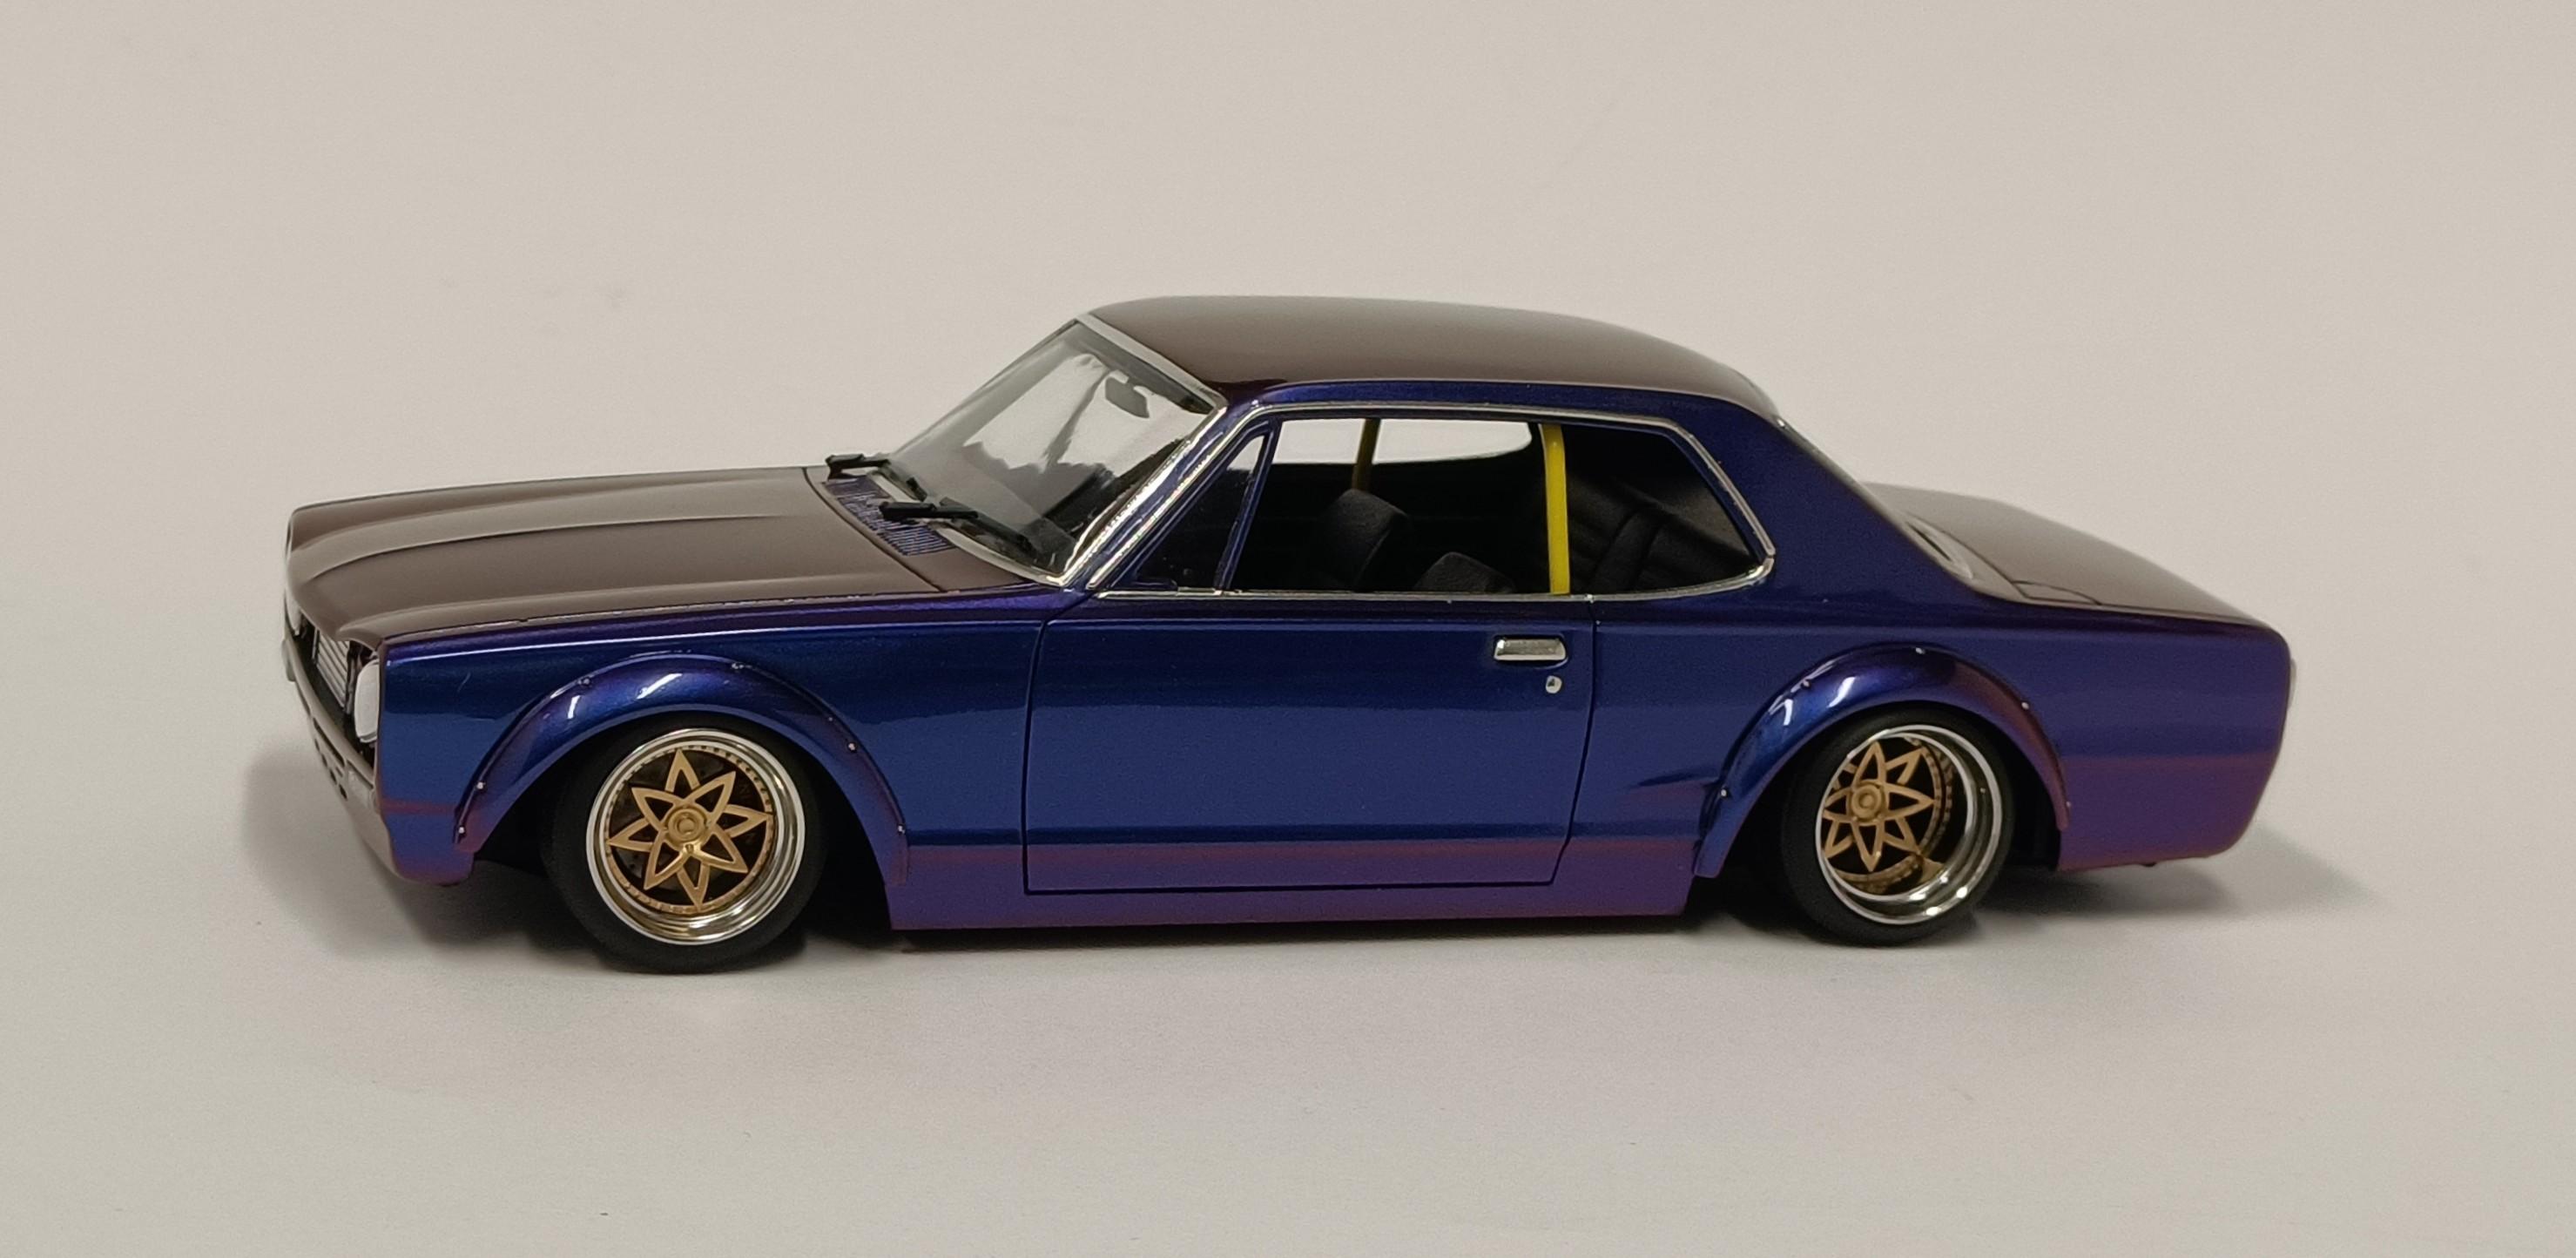
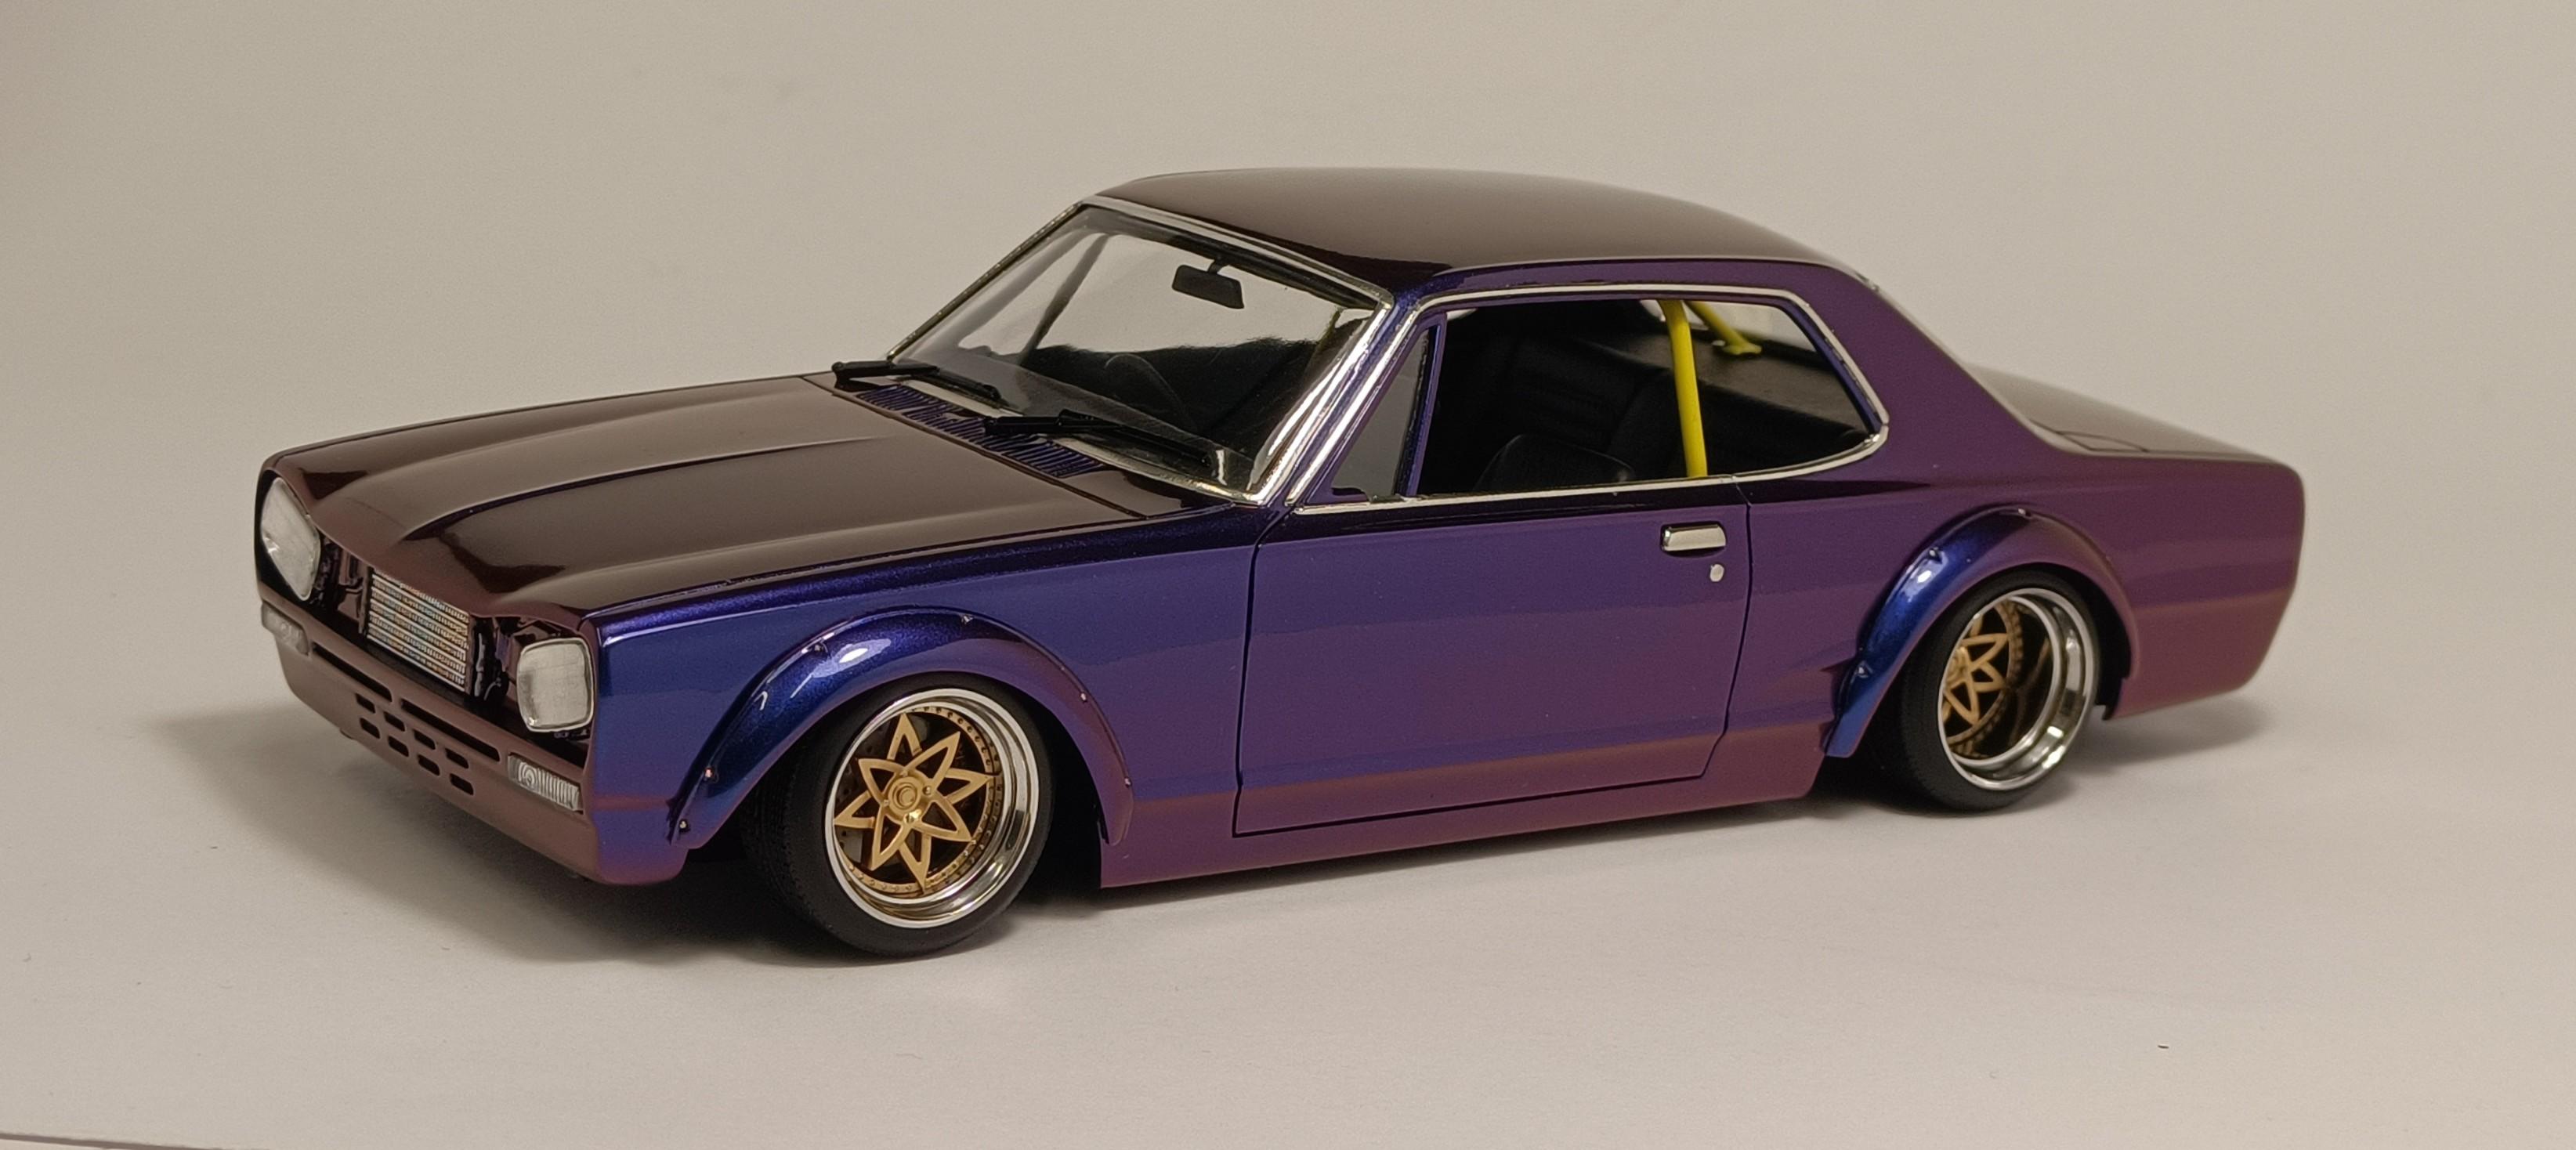
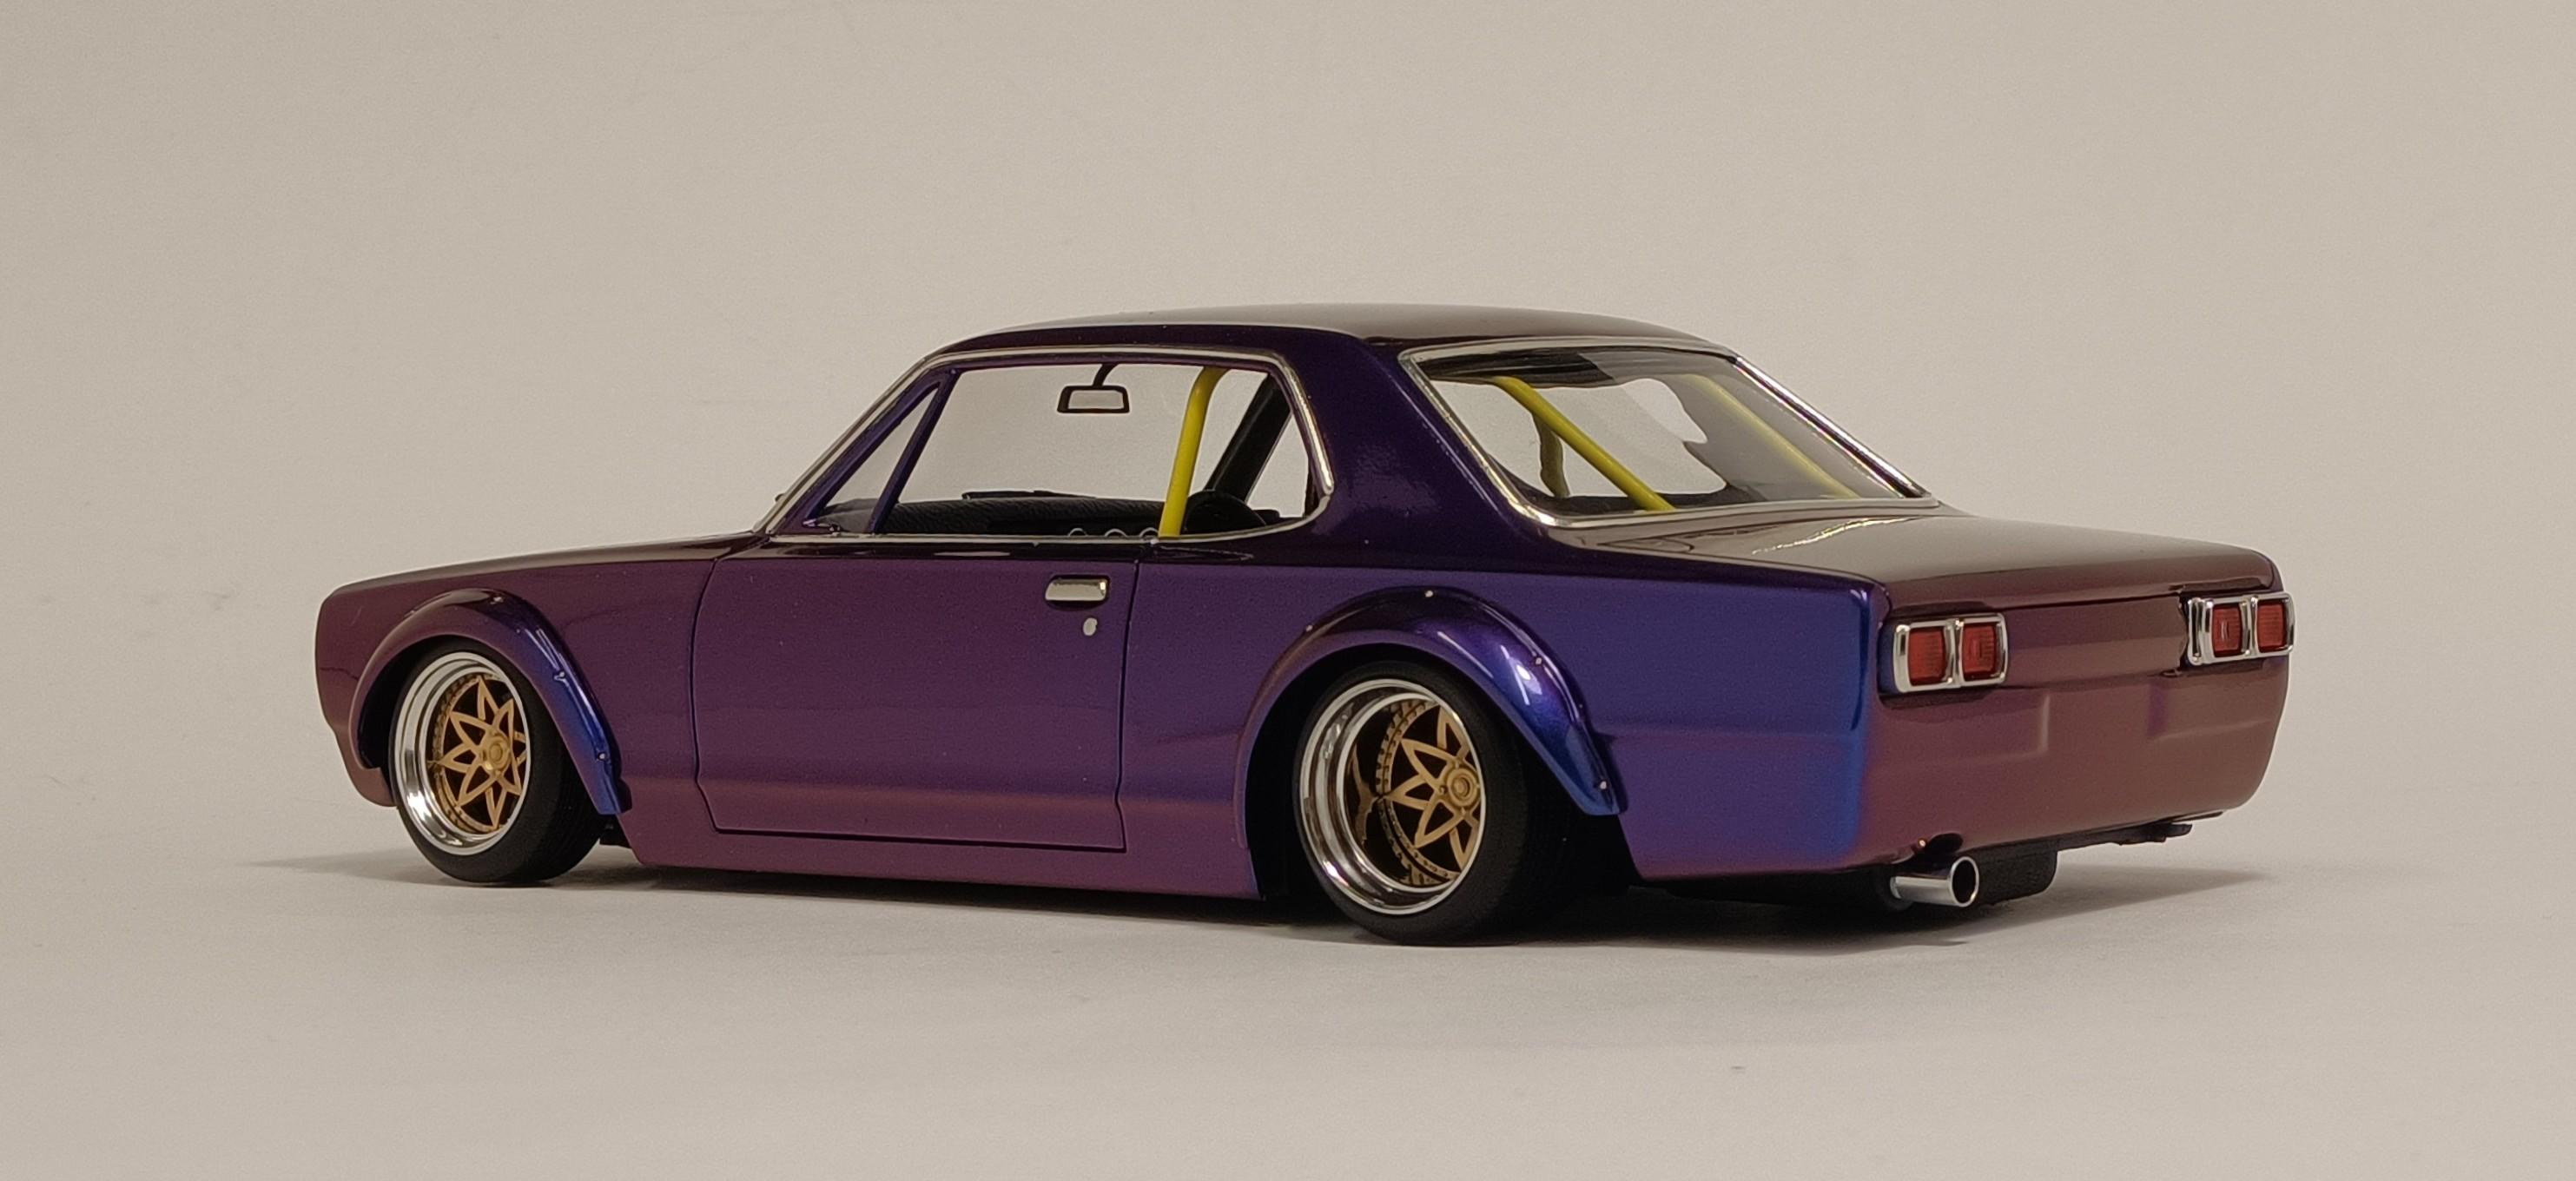
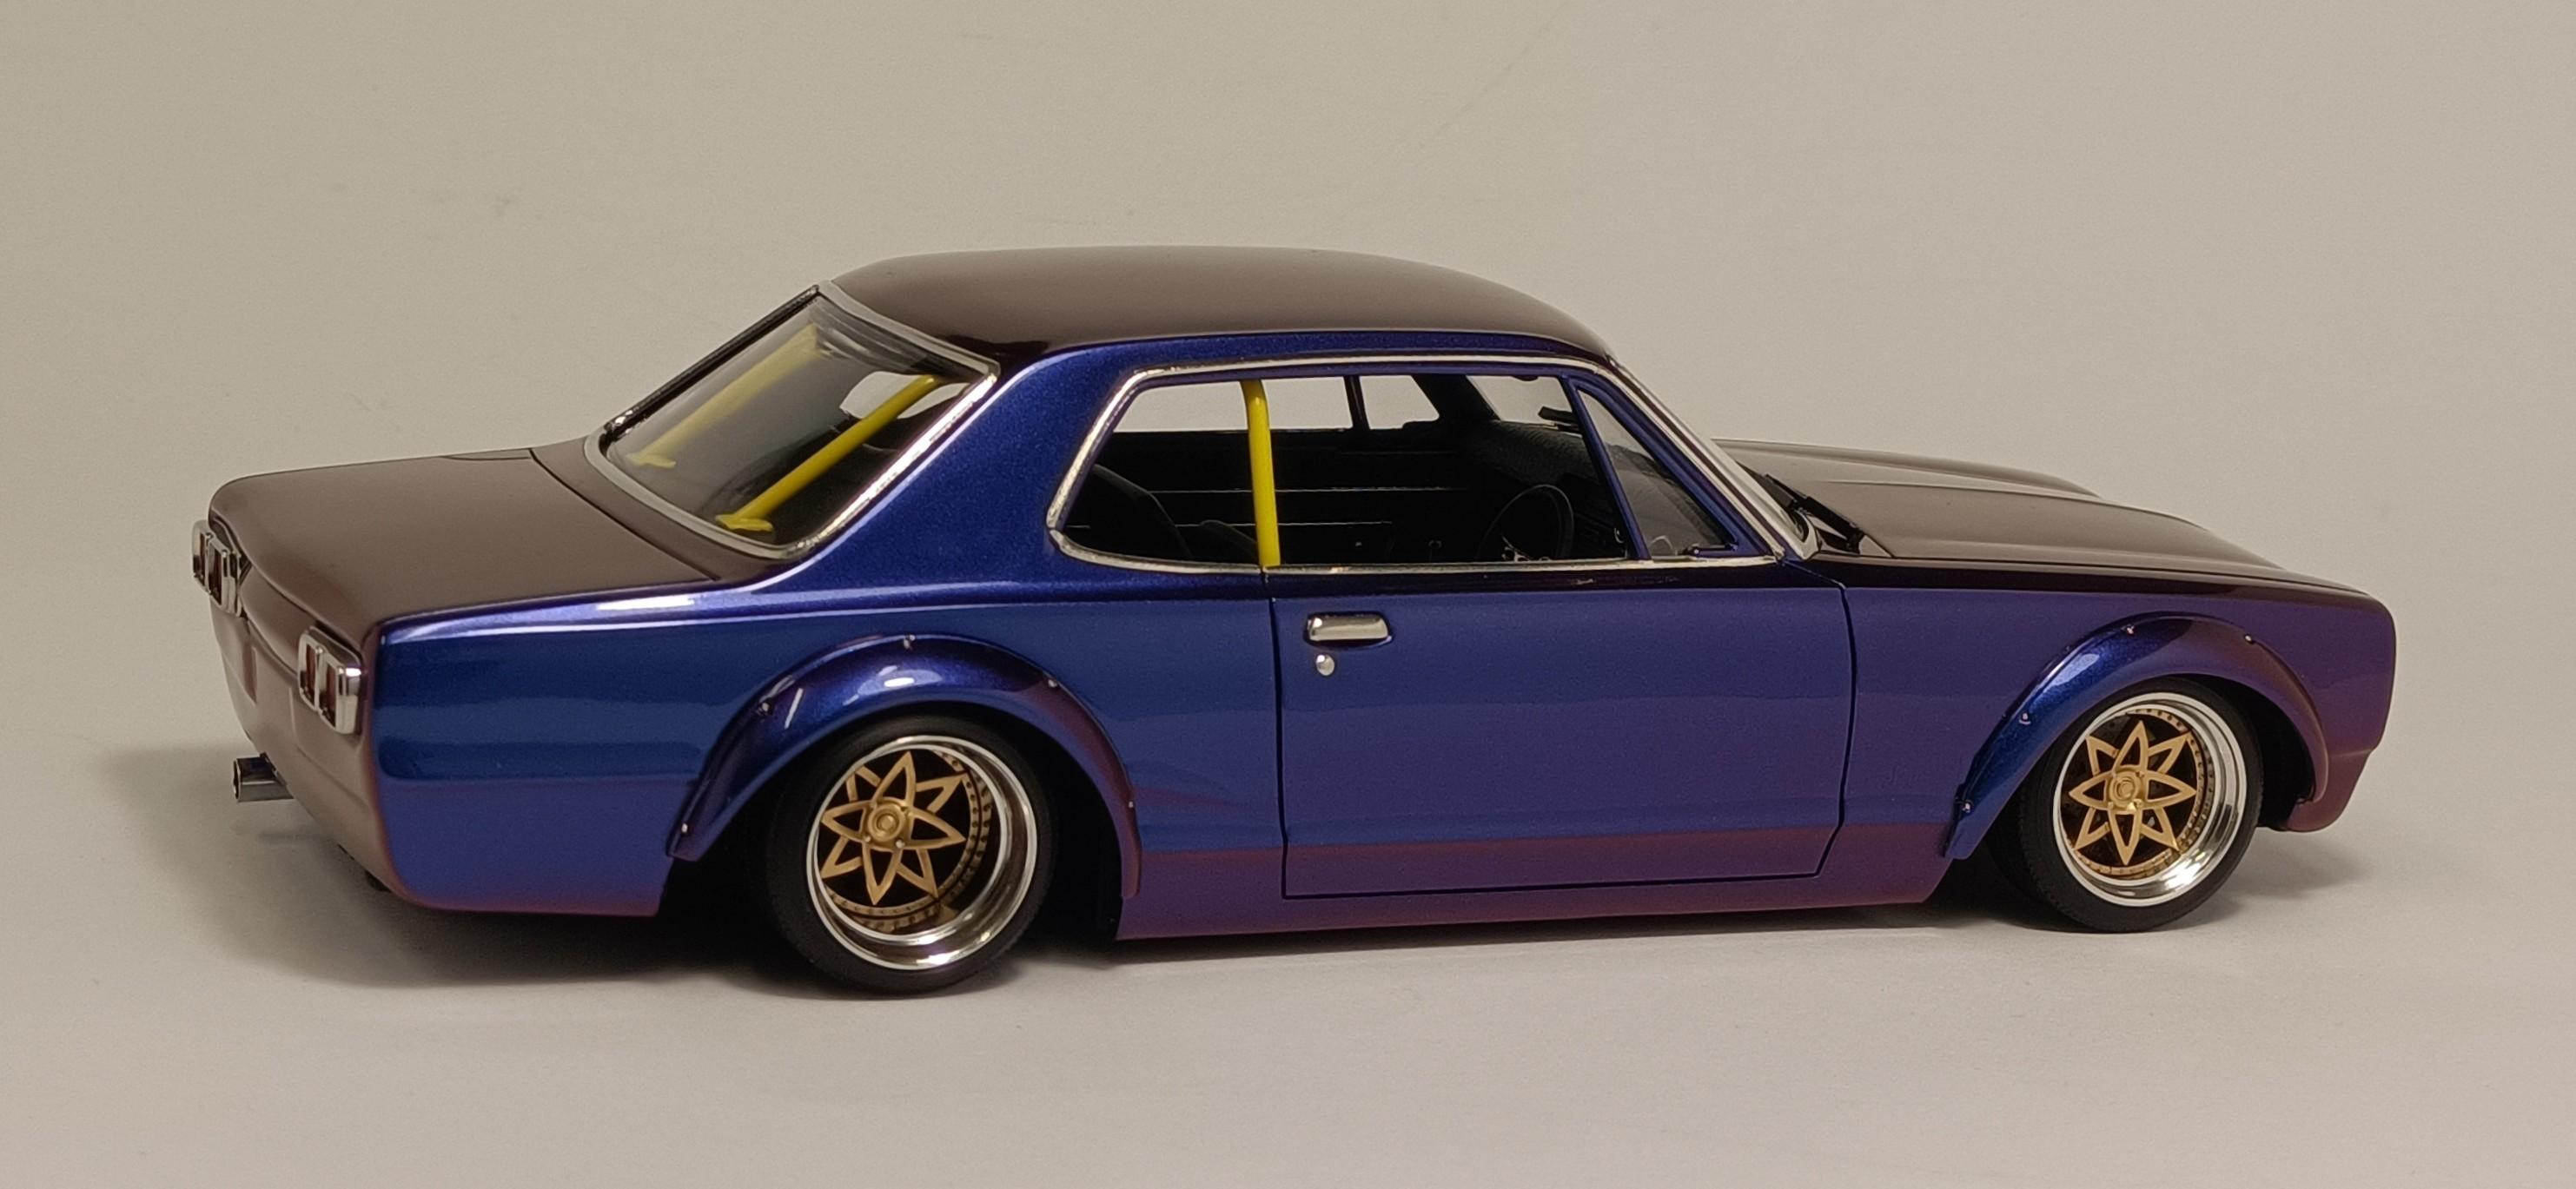
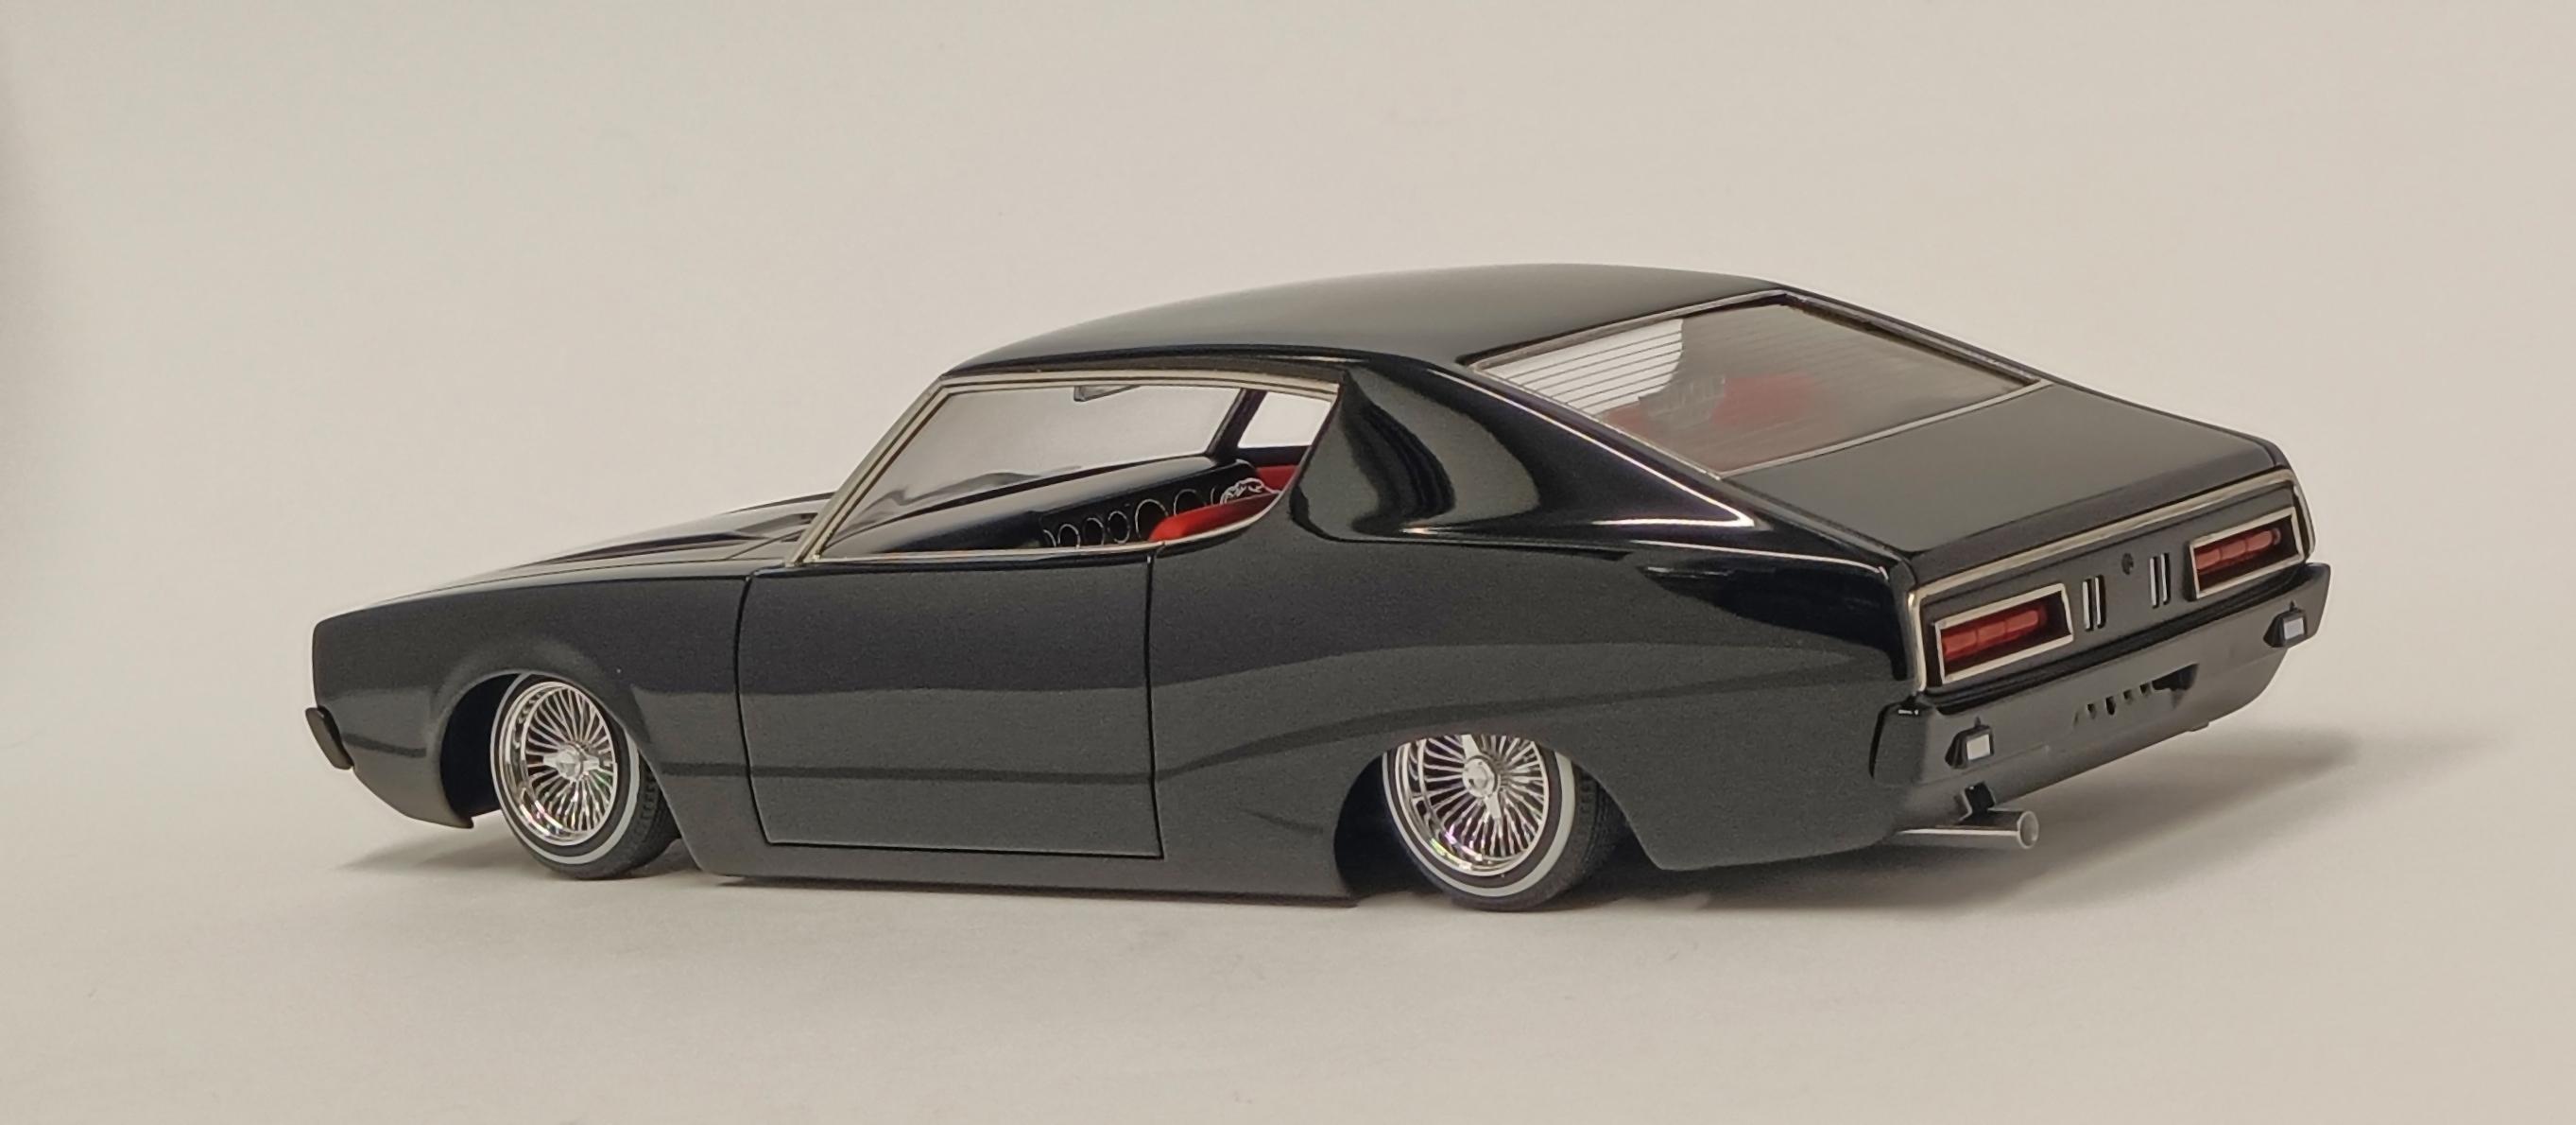
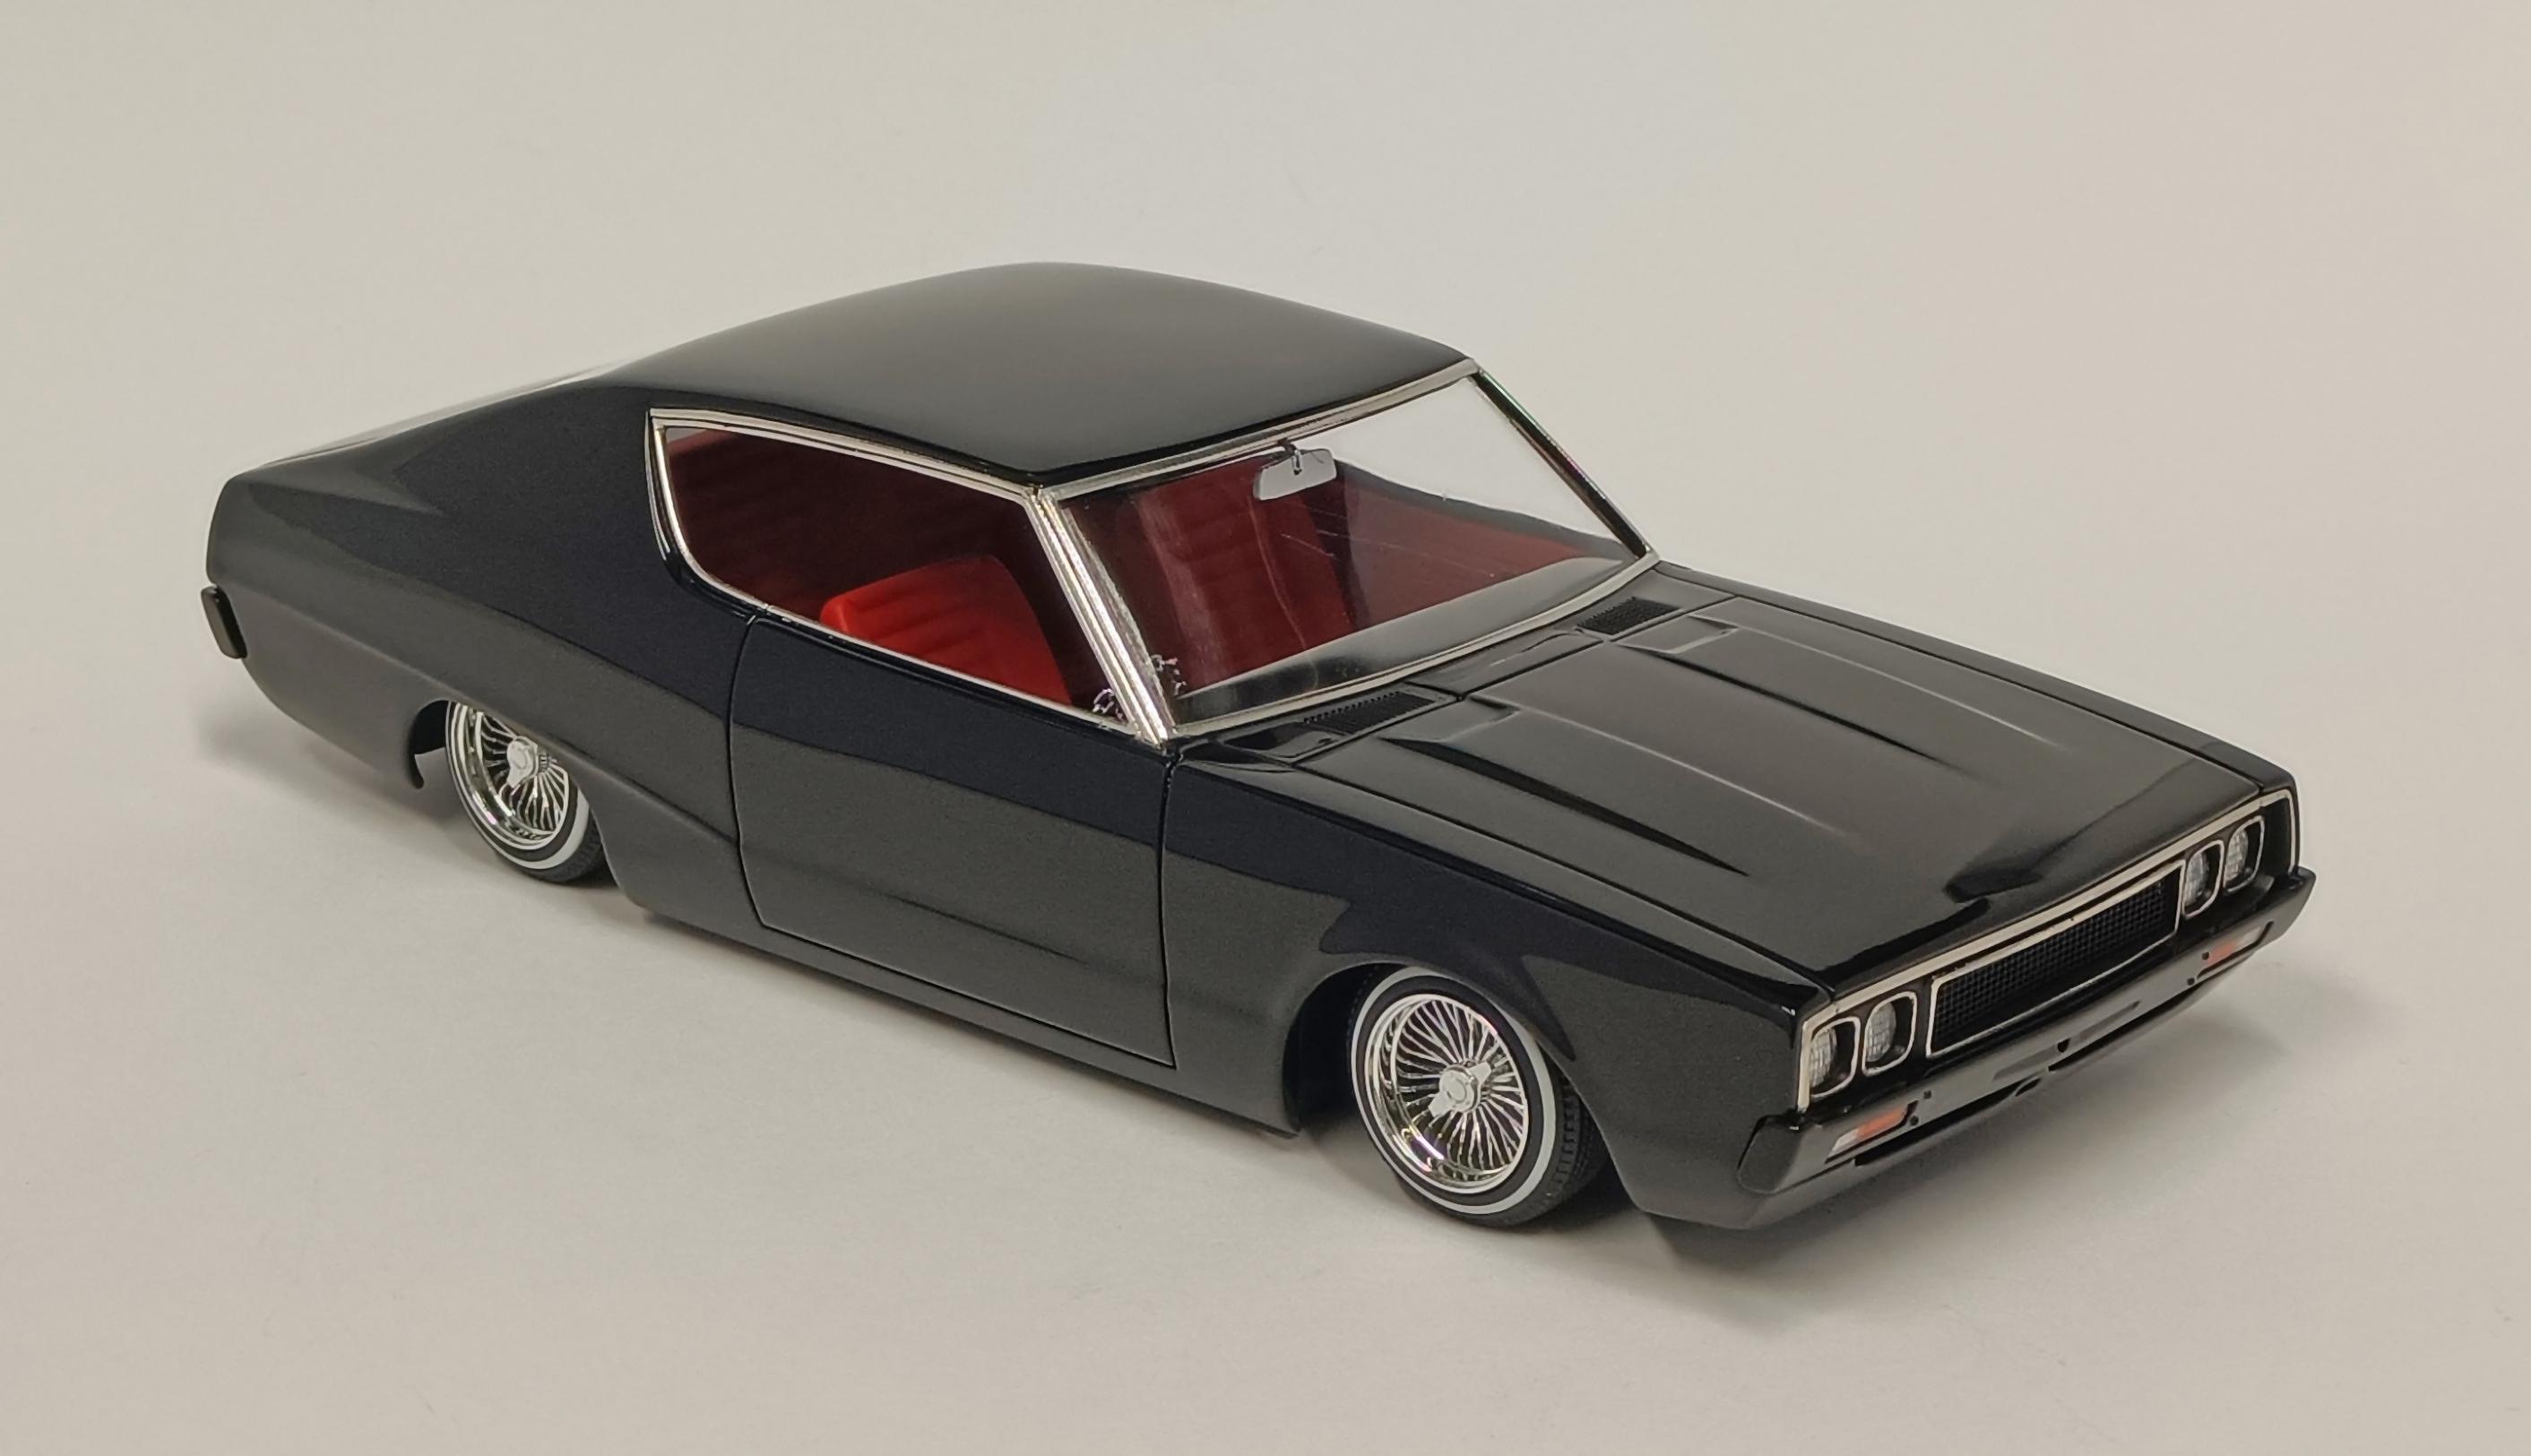
About time I got this build completed. Shaved front and rear side marker lights and script, filled the recess for the badge on the C pillar, shaved the badges on the trunk, filled the rear license plate locating holes and filled the rear bumper and oil cooler locating holes. I 3D printed the wheels which are from SlowysModels. 3D printed steering wheel from BlockBox. Chose the colour as it's very similar to Nissan OEM midnight purple II. As per usual with my over fender builds. SMS paints Hyper Chrome Dark Tone was applied to the tail light surrounds. Aluminum tube for the exhaust tip.
- 25 replies
-
- 17
-
-
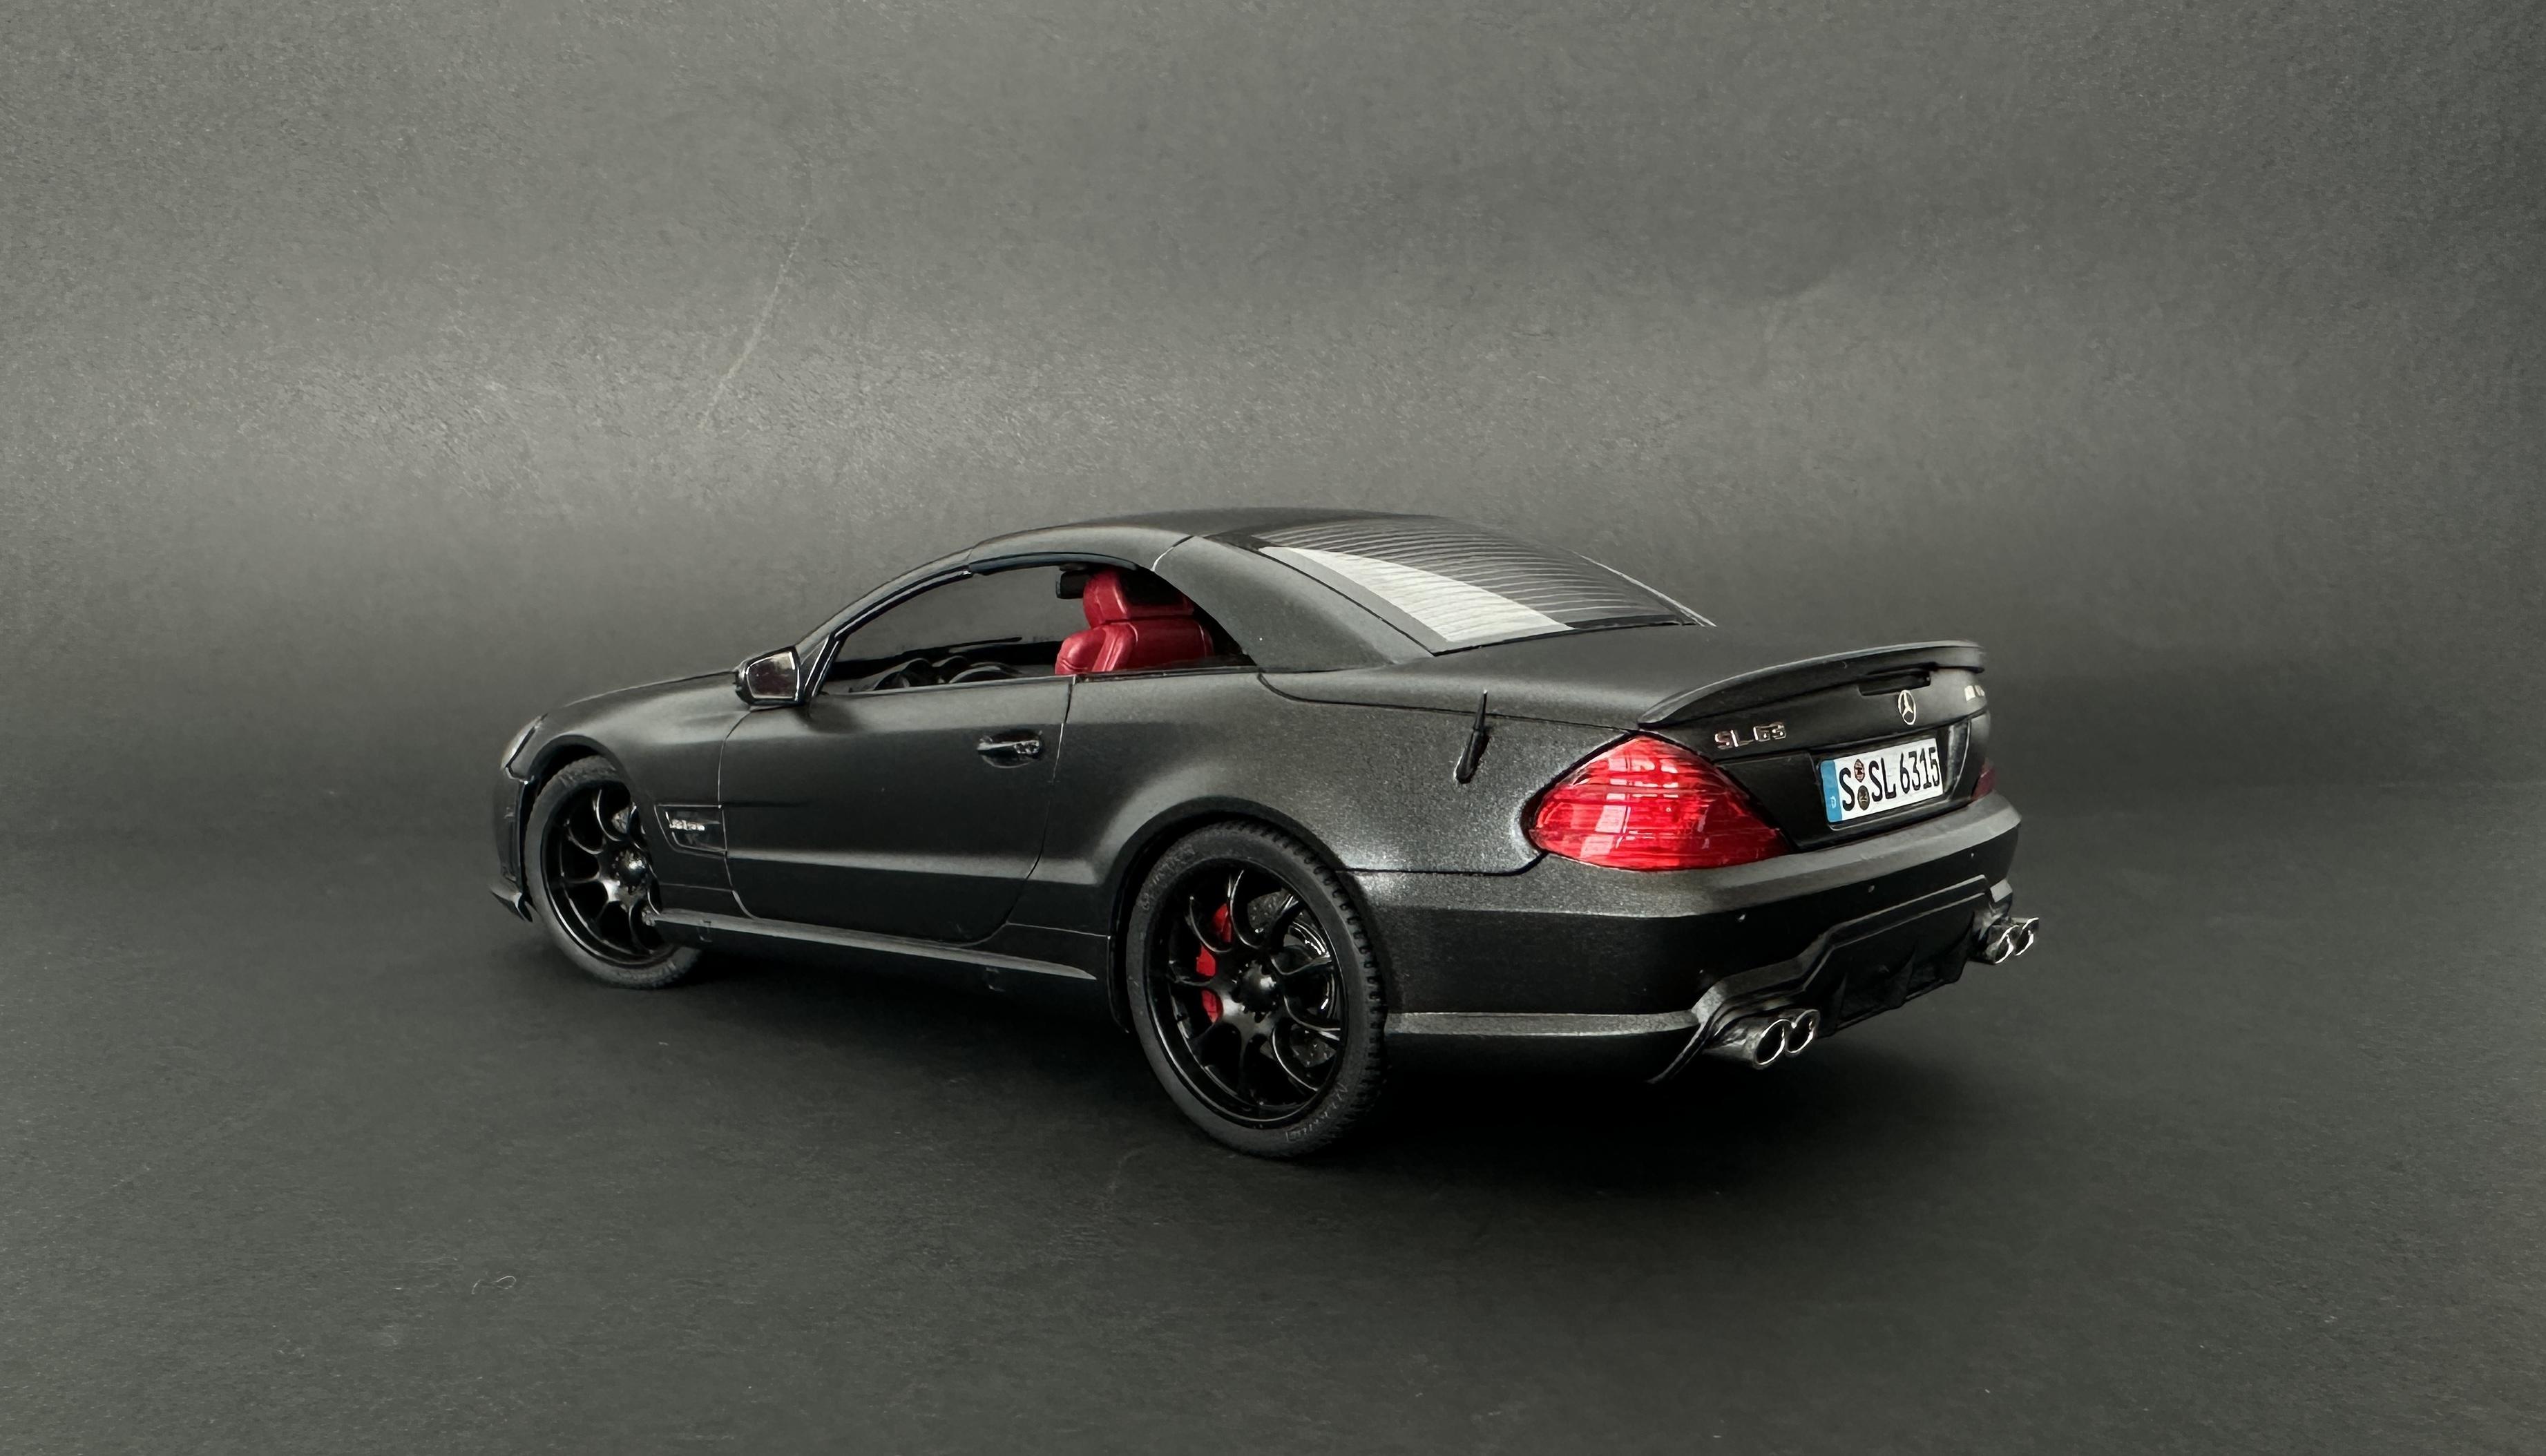
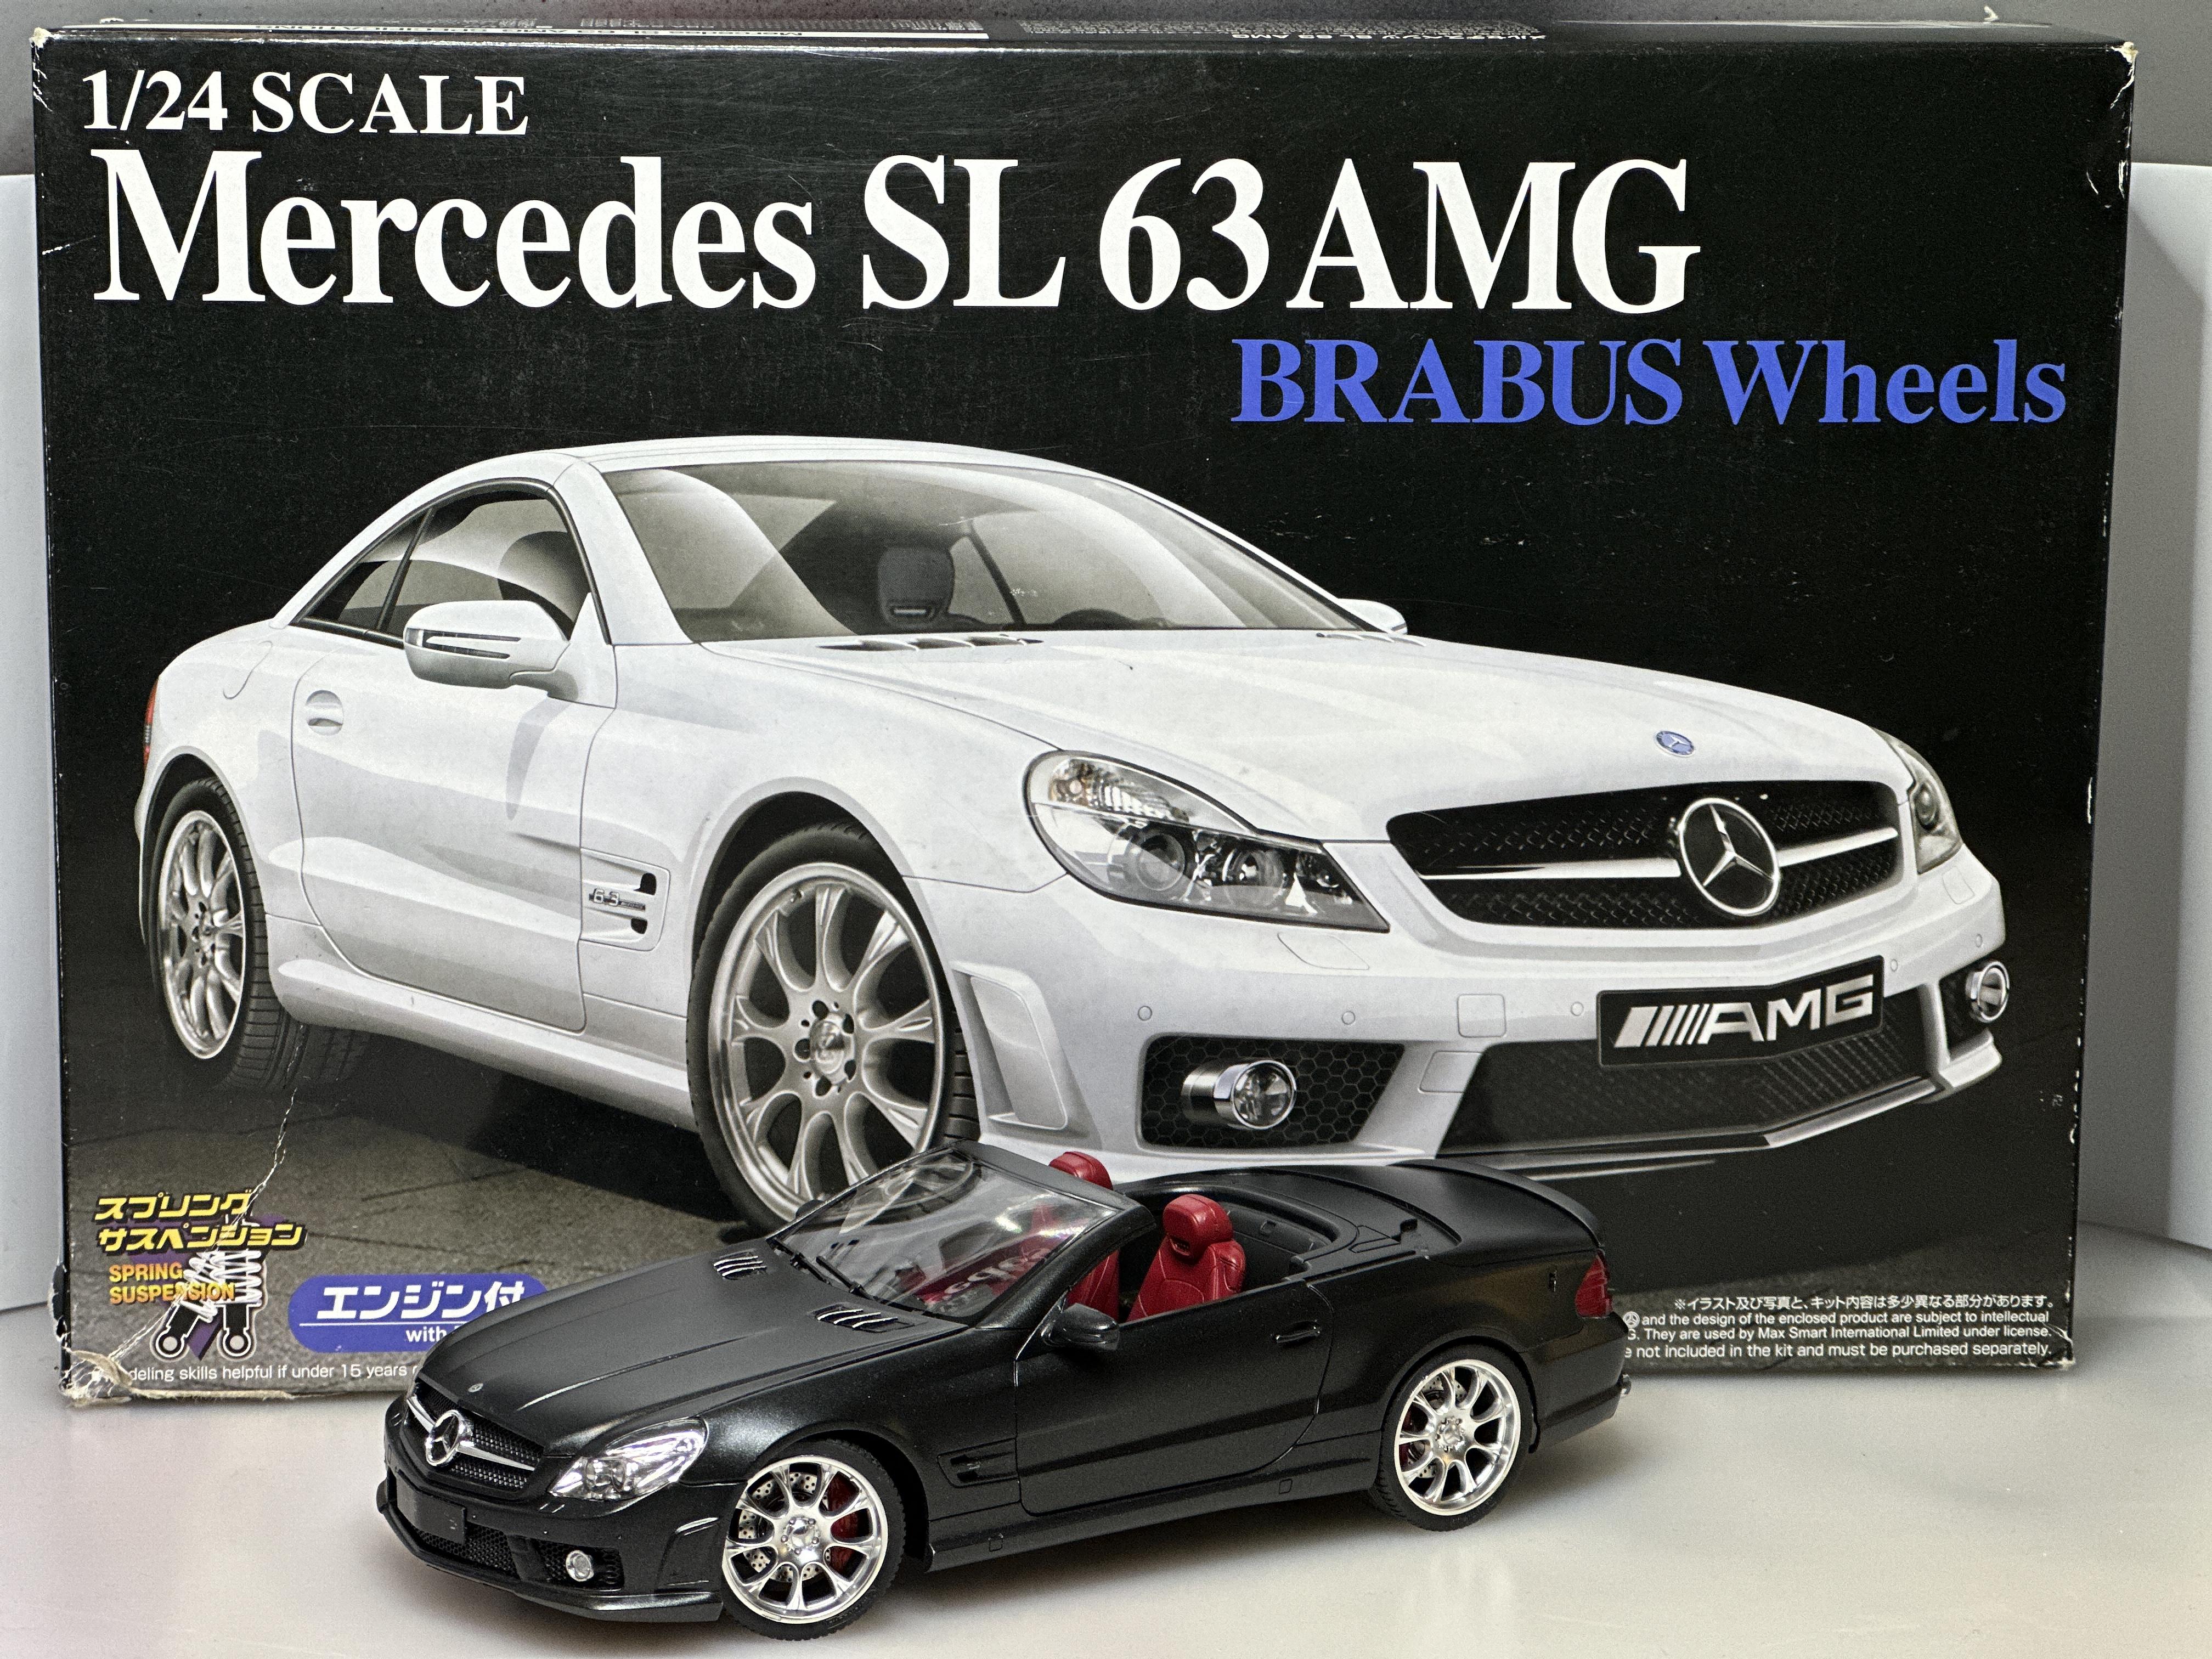
Mercedes R230 generation replaced the previous generation R129 when it was introduced in 2001. The R230 model generation went through some facelifts during it´s lifespan. This Aoshima kit from the year 2009 depicts the last facelift that took place in 2008. This was my last finished model from the year 2024. Quality of the kit was excellent, it even has real suspension springs. Exterior paint is Mercedes Magnetite Black Metallic. This is one of the few car kits I didn´t gloss coat so the finish is satin black. A funny thing is I forgot to paint the back seat red as I didn´t first realise it´s a seat (kind of) and when I did it was too late 🙂 I also left the wheels and the front grill in their kit aluminium first, then painted them satin black to make this a "black edition".
-
Been awhile since ive completed a build. And like always my go to kits when trying to get back into building model cars are the Aoshima kits, I like them for the simplicity and ease of building. So I grab this kit out the stash and set about customising it to my favourite lowrider build style. Box art is just too cool with these kits. I shaved the door handles, scripts, fuel cap, front turn signals and wiper mounts. Fitted Pegasus #1311 DZ's wire wheels. I 3D printed and installed a chain steering wheel. Used optional part in the kit for the tail light panel set up. Aluminium tube for the exhaust tip. Modified the optional front grill by opening it up to install some photo etch mesh And like always paint is Tamiya TS-14 black, which was wet sanded and polished with the Tamiya compounds. And the interior is TS-49 bright red with flat clear over coat.
-
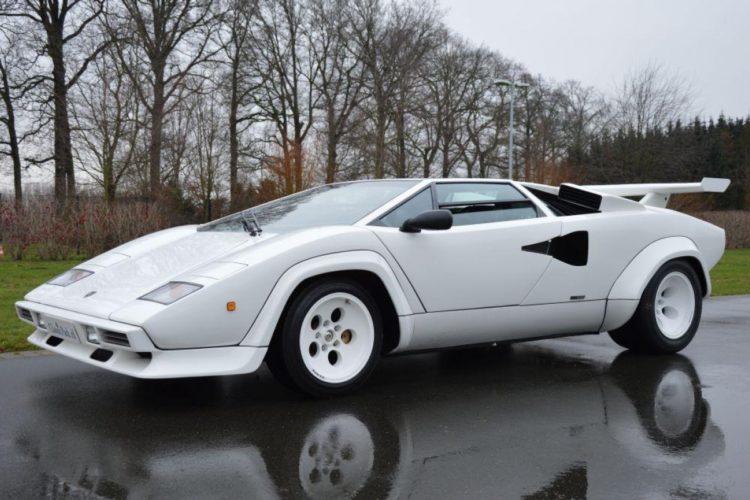
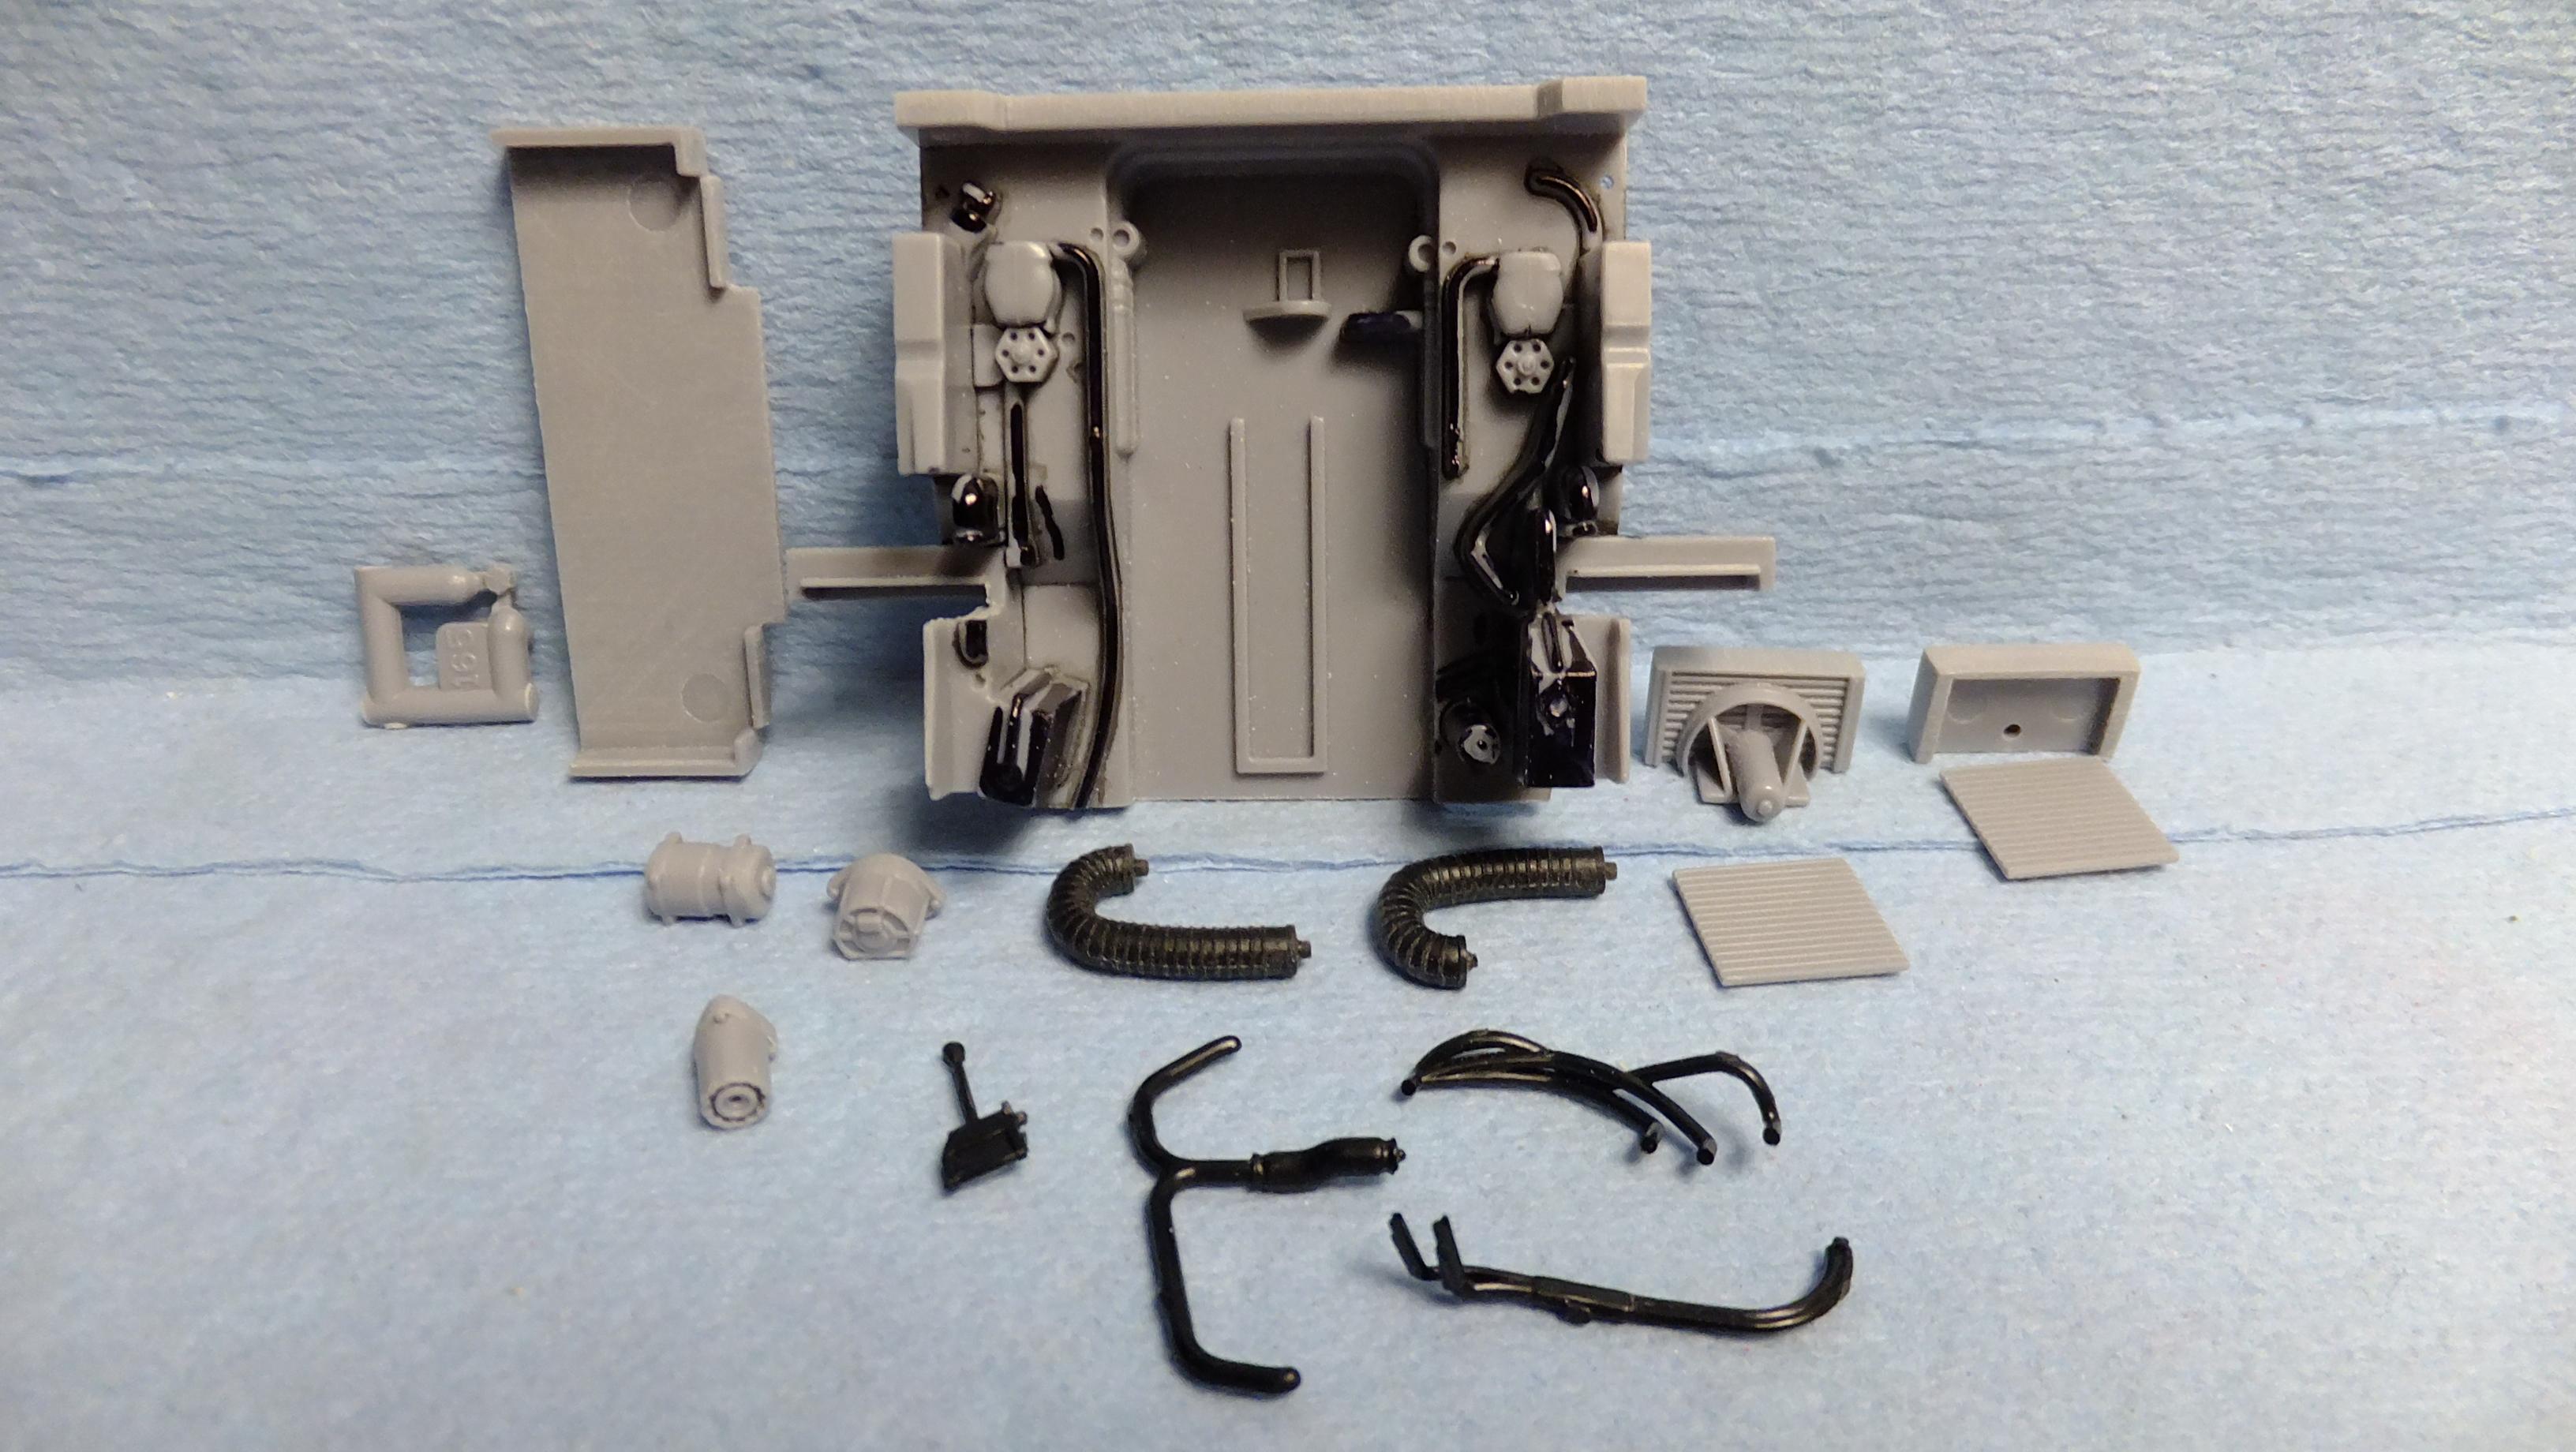
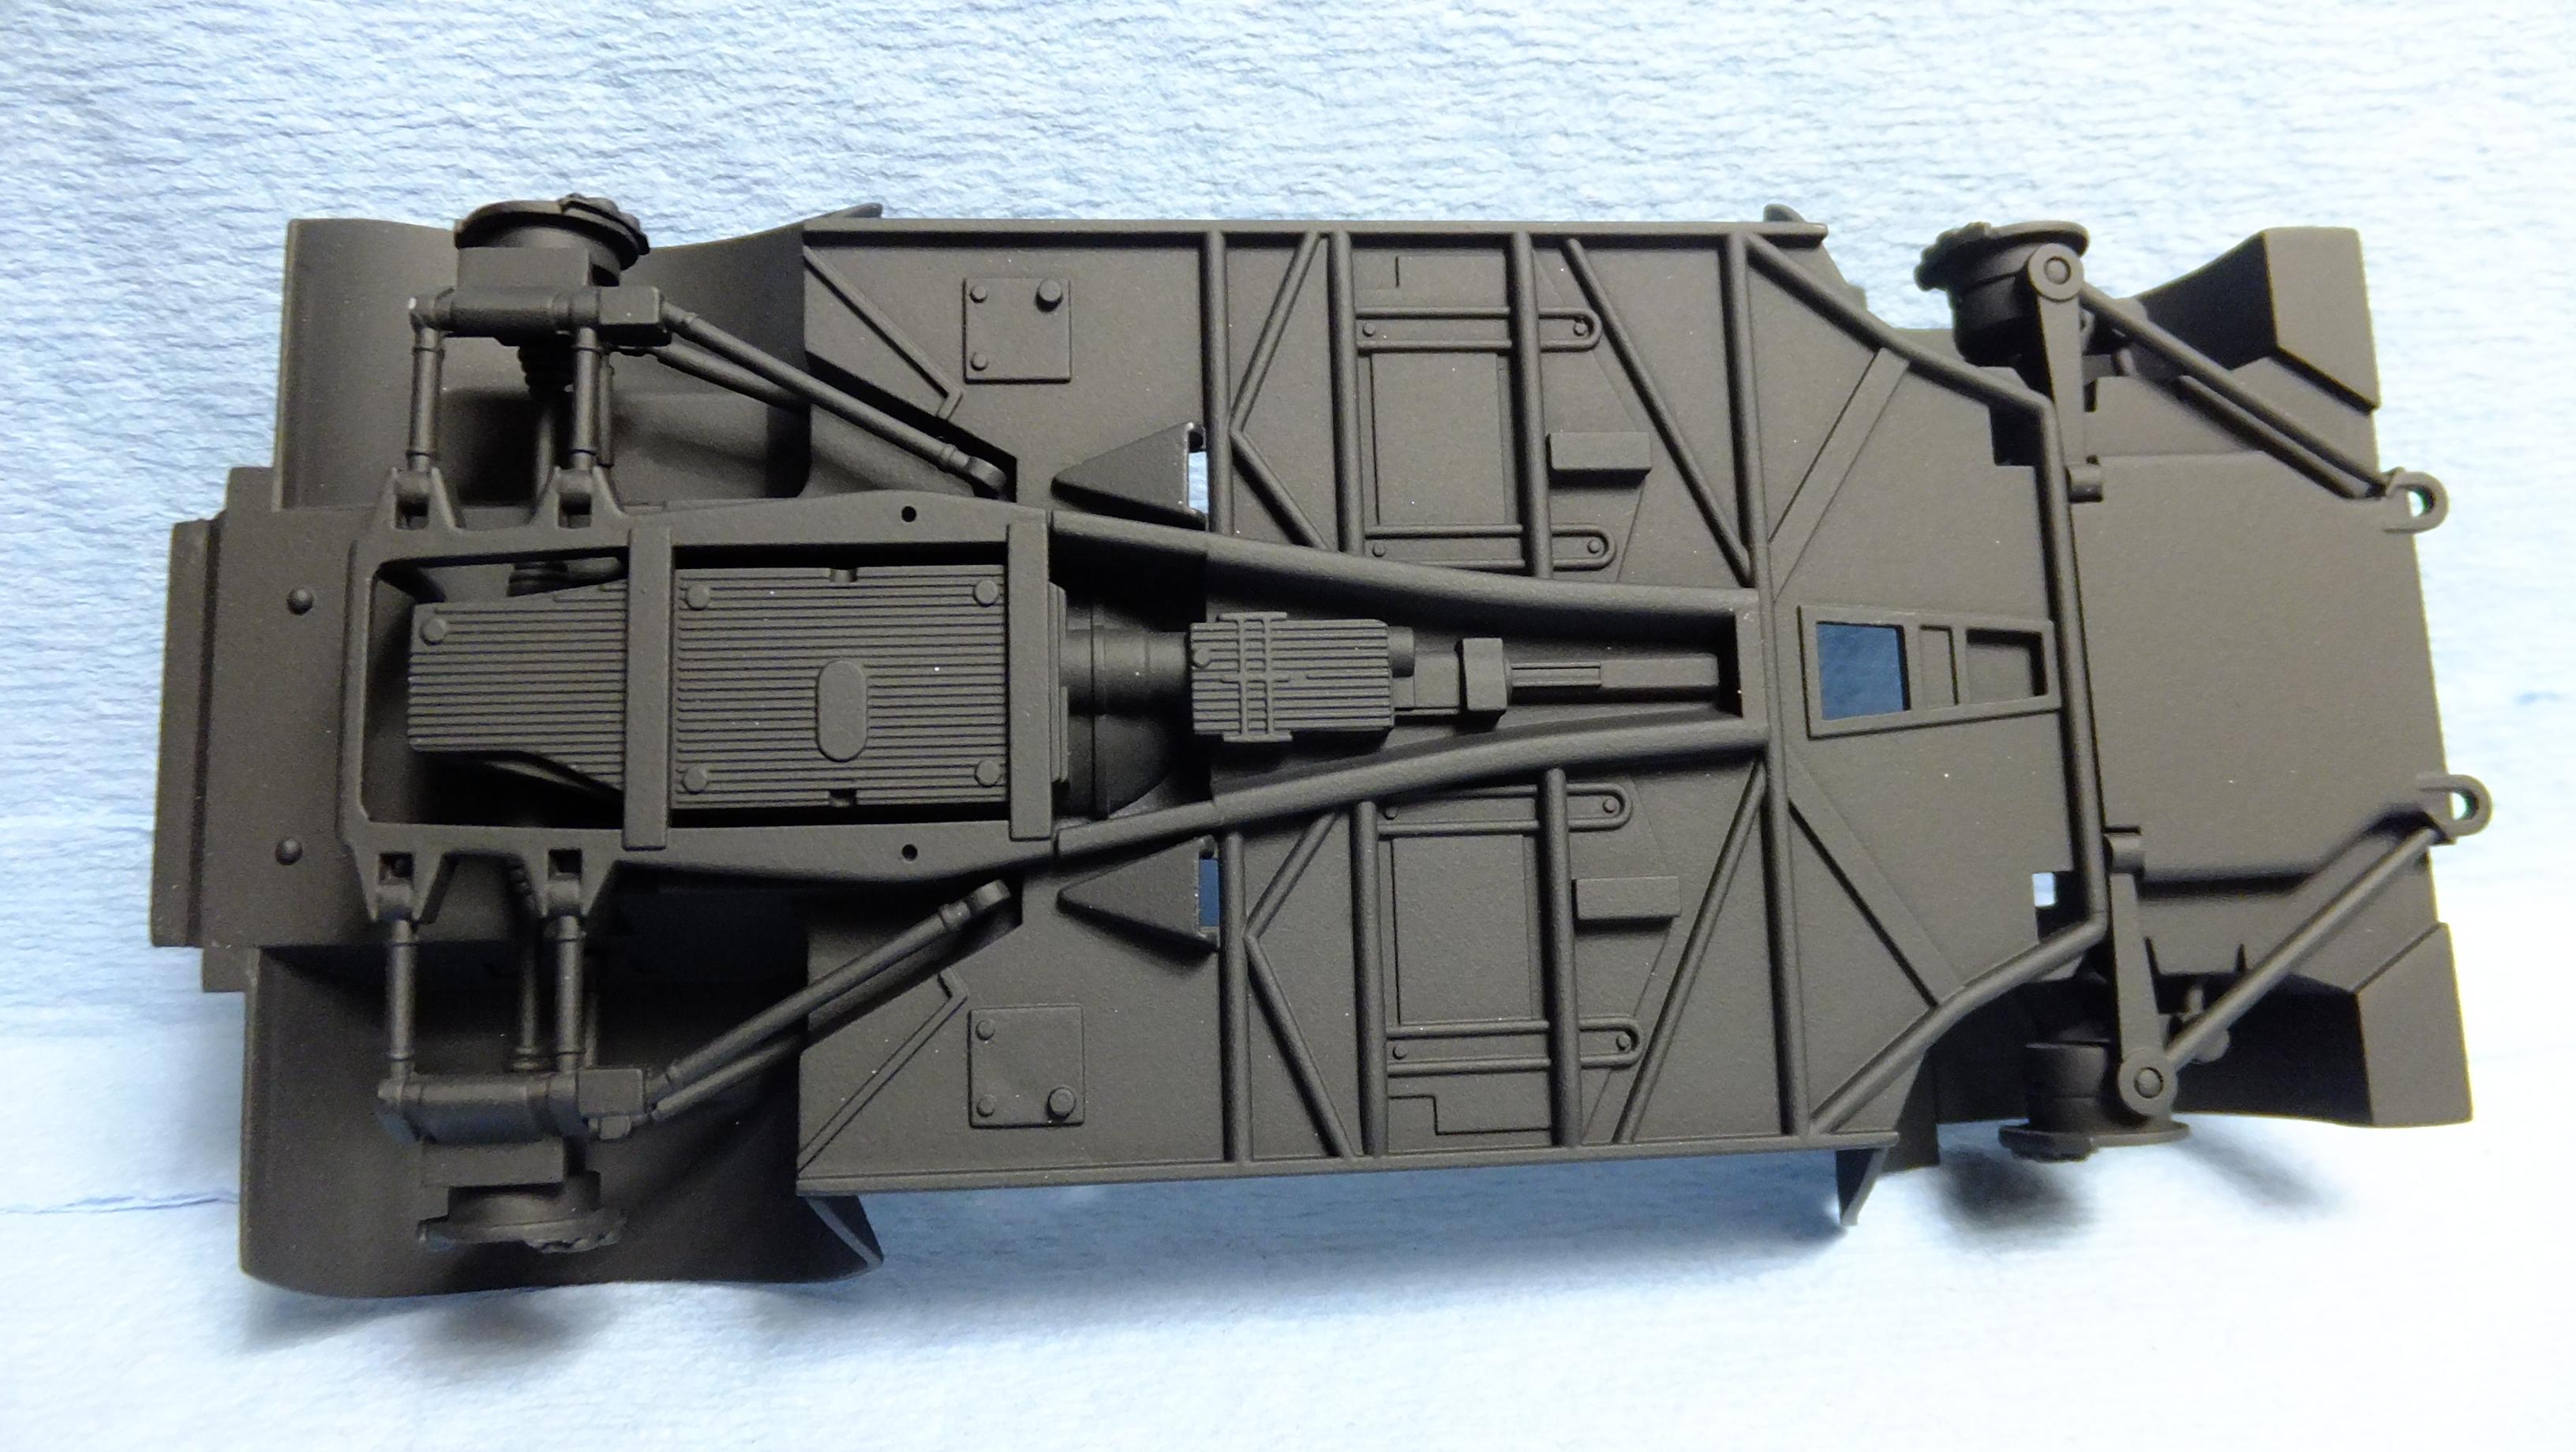
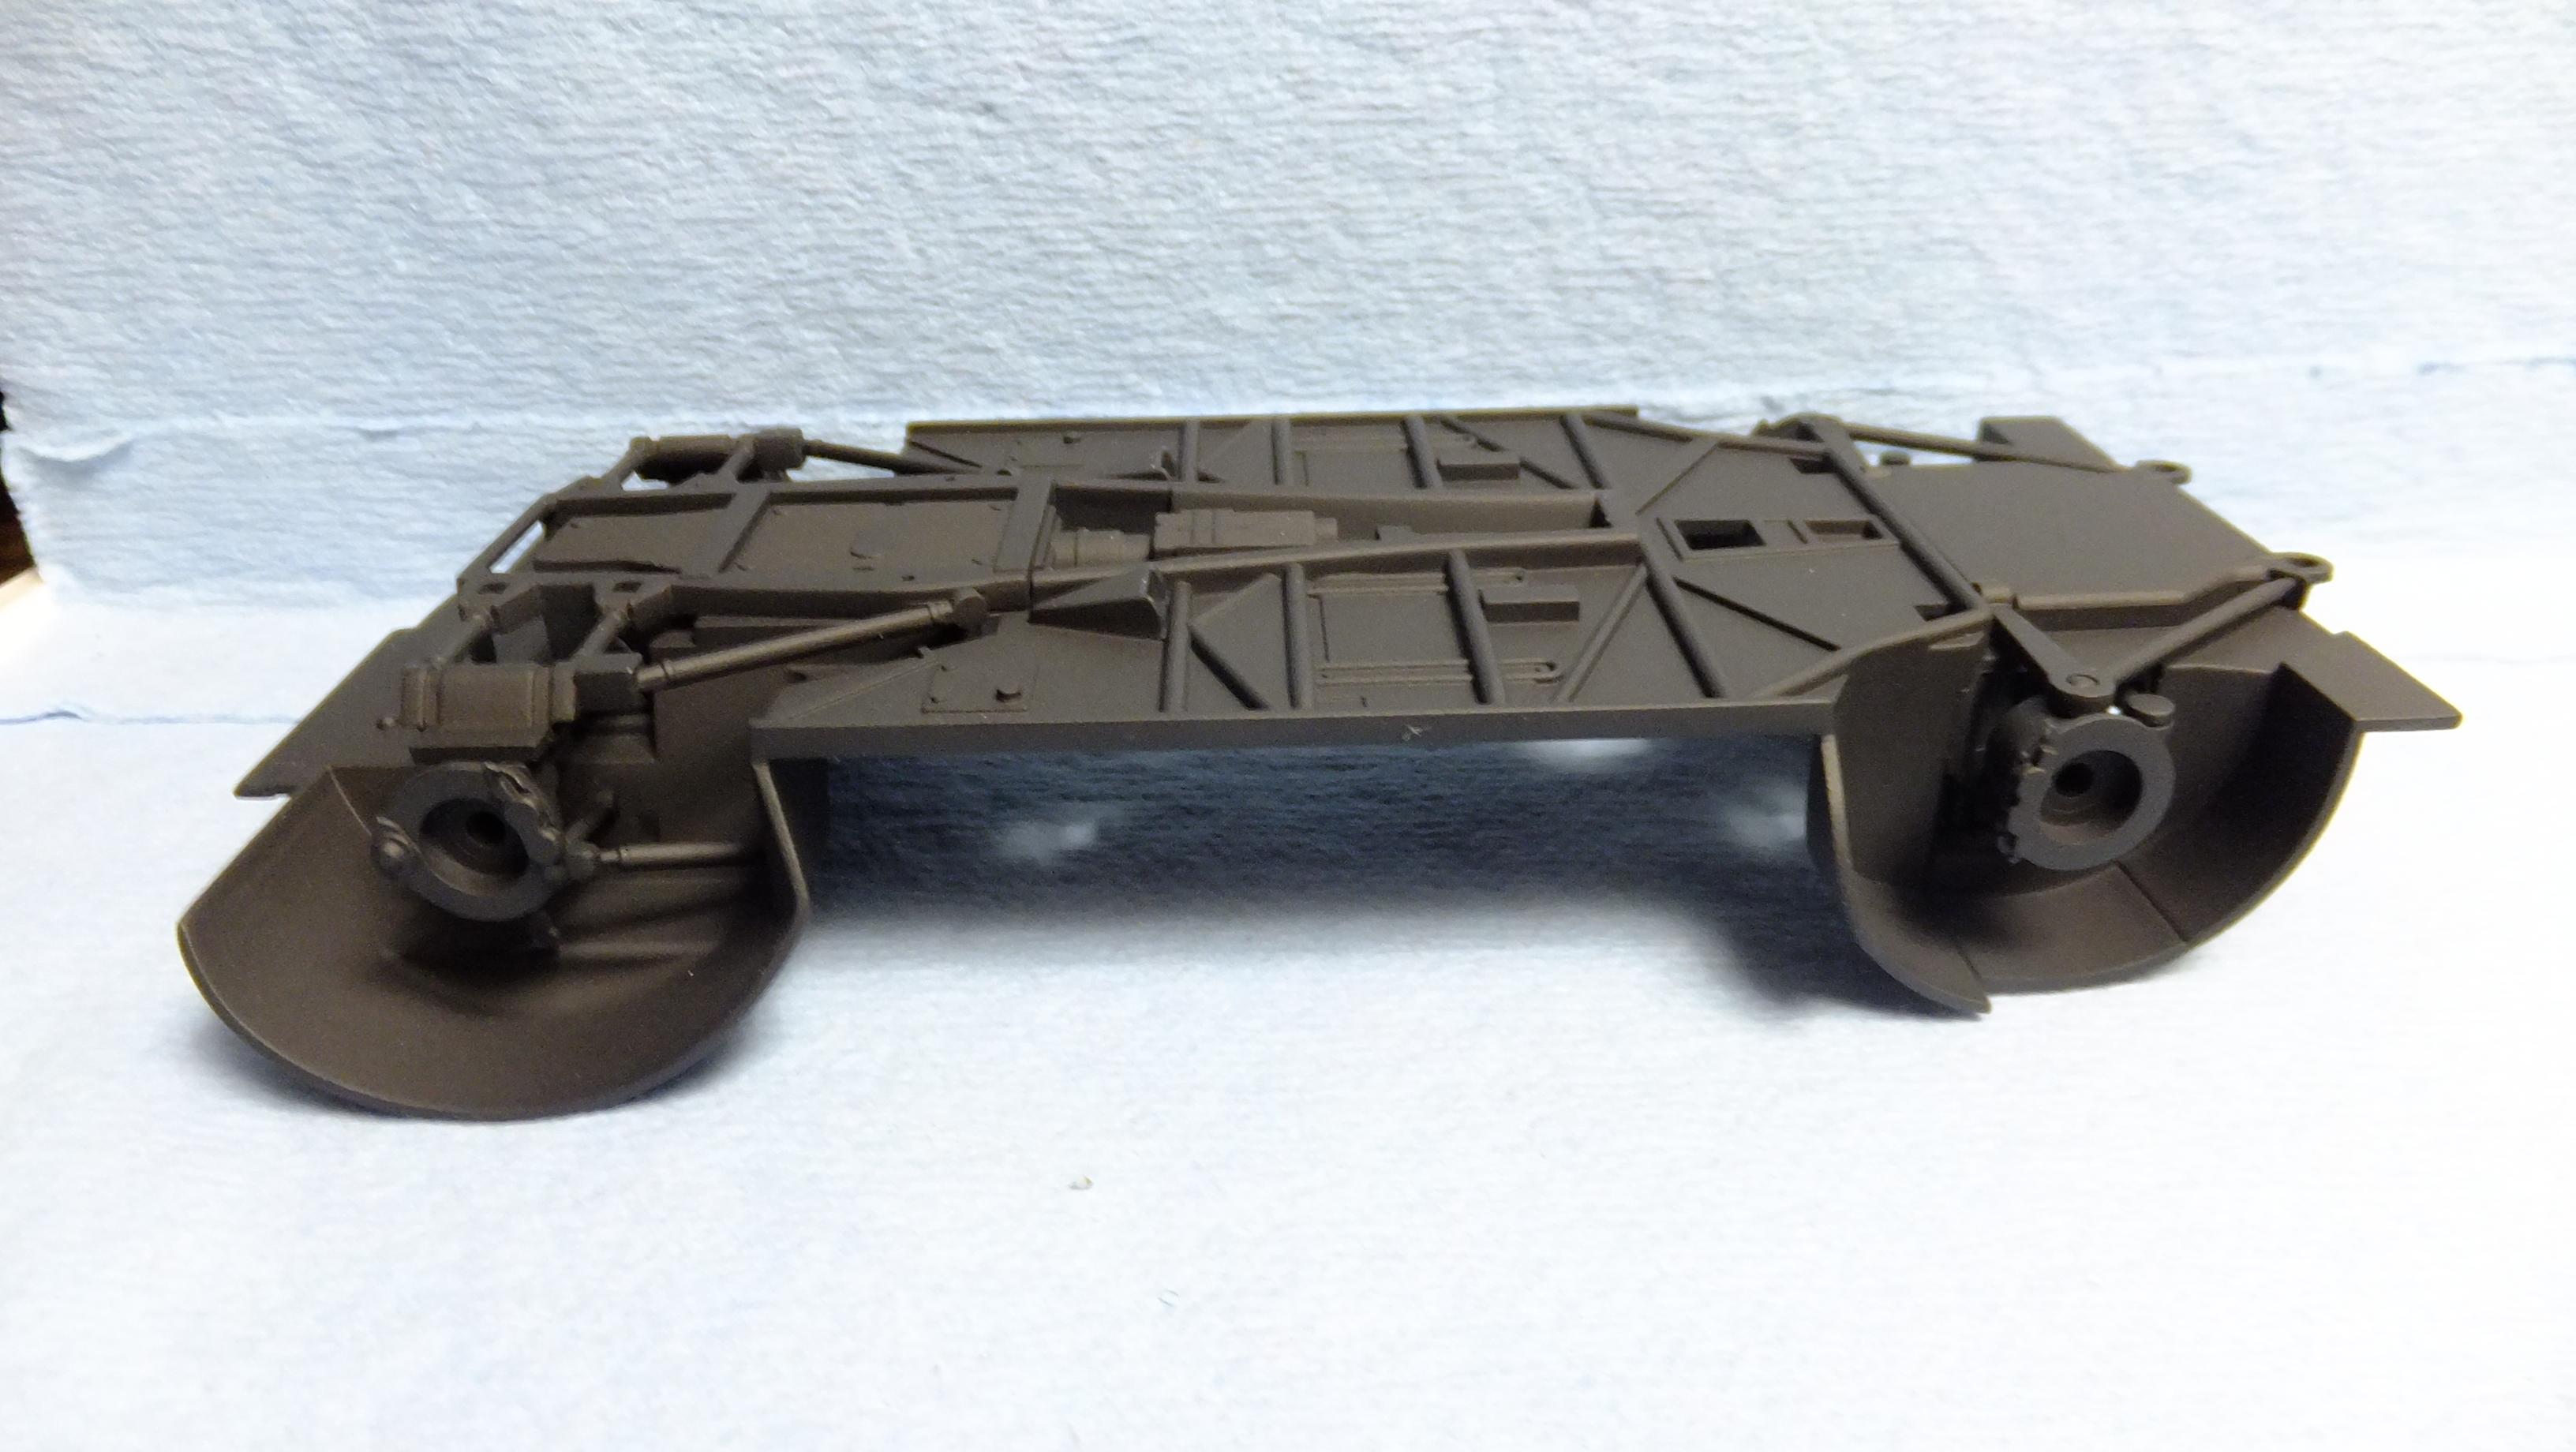
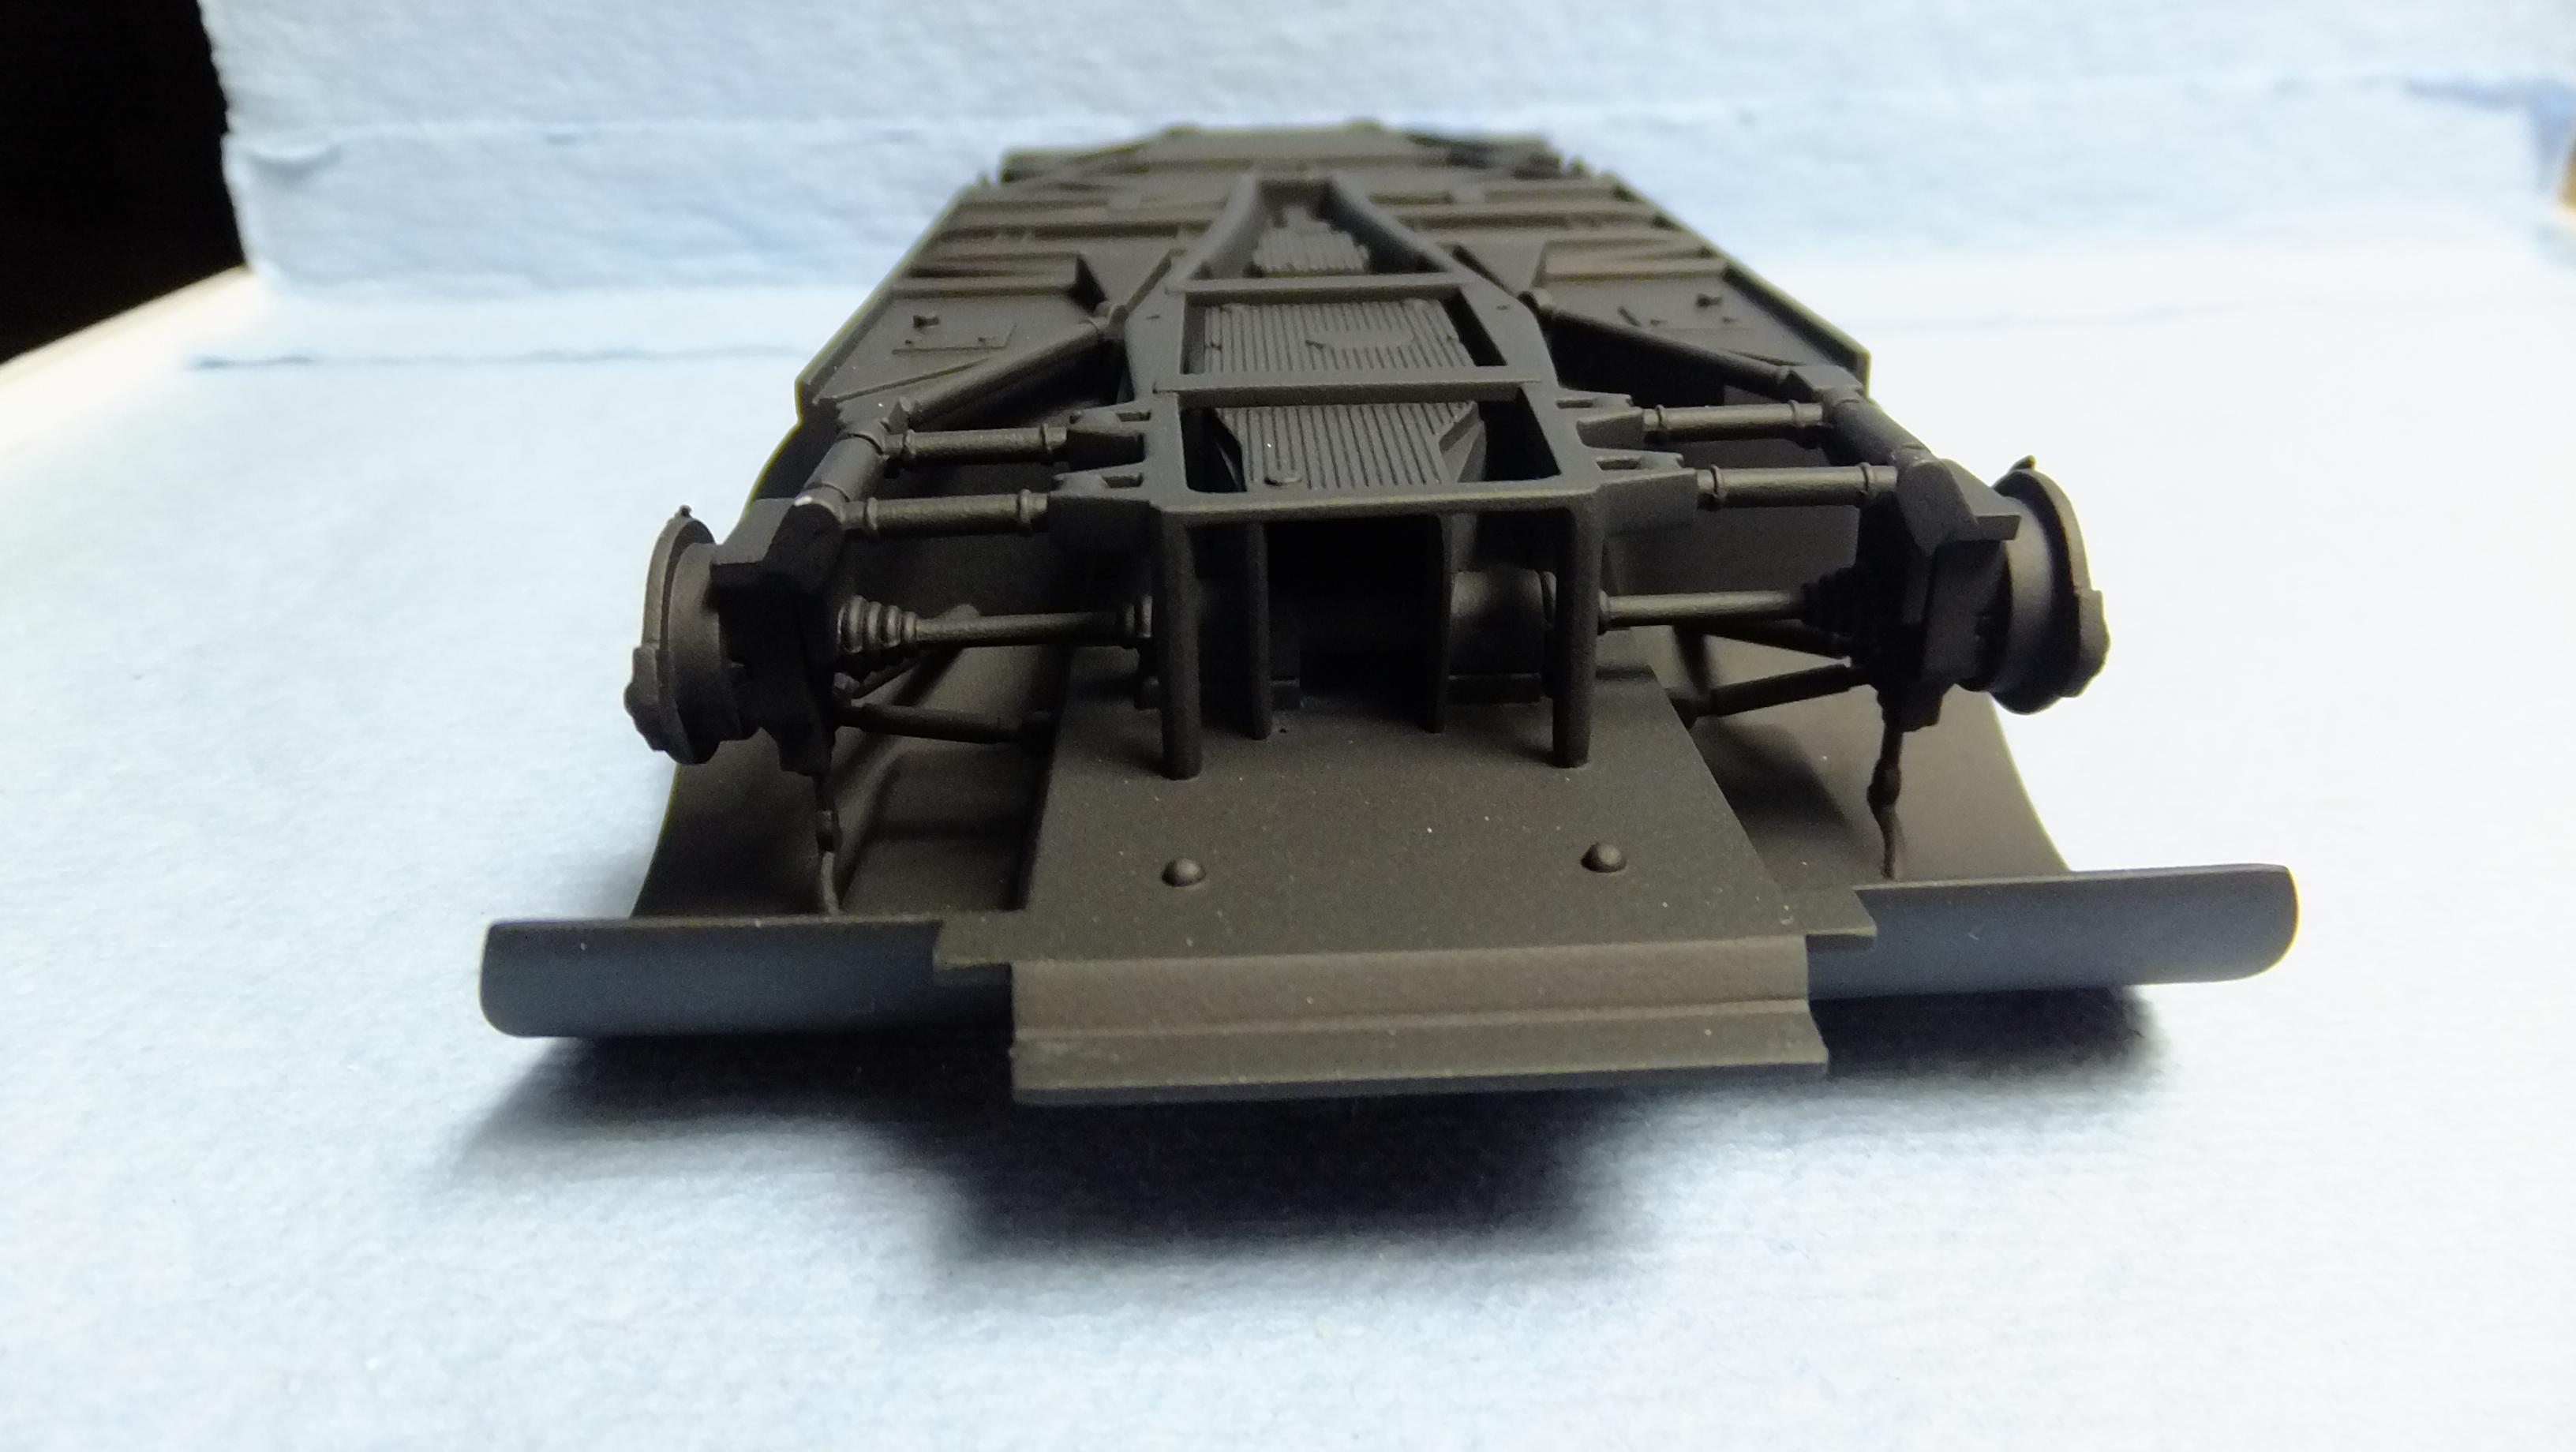
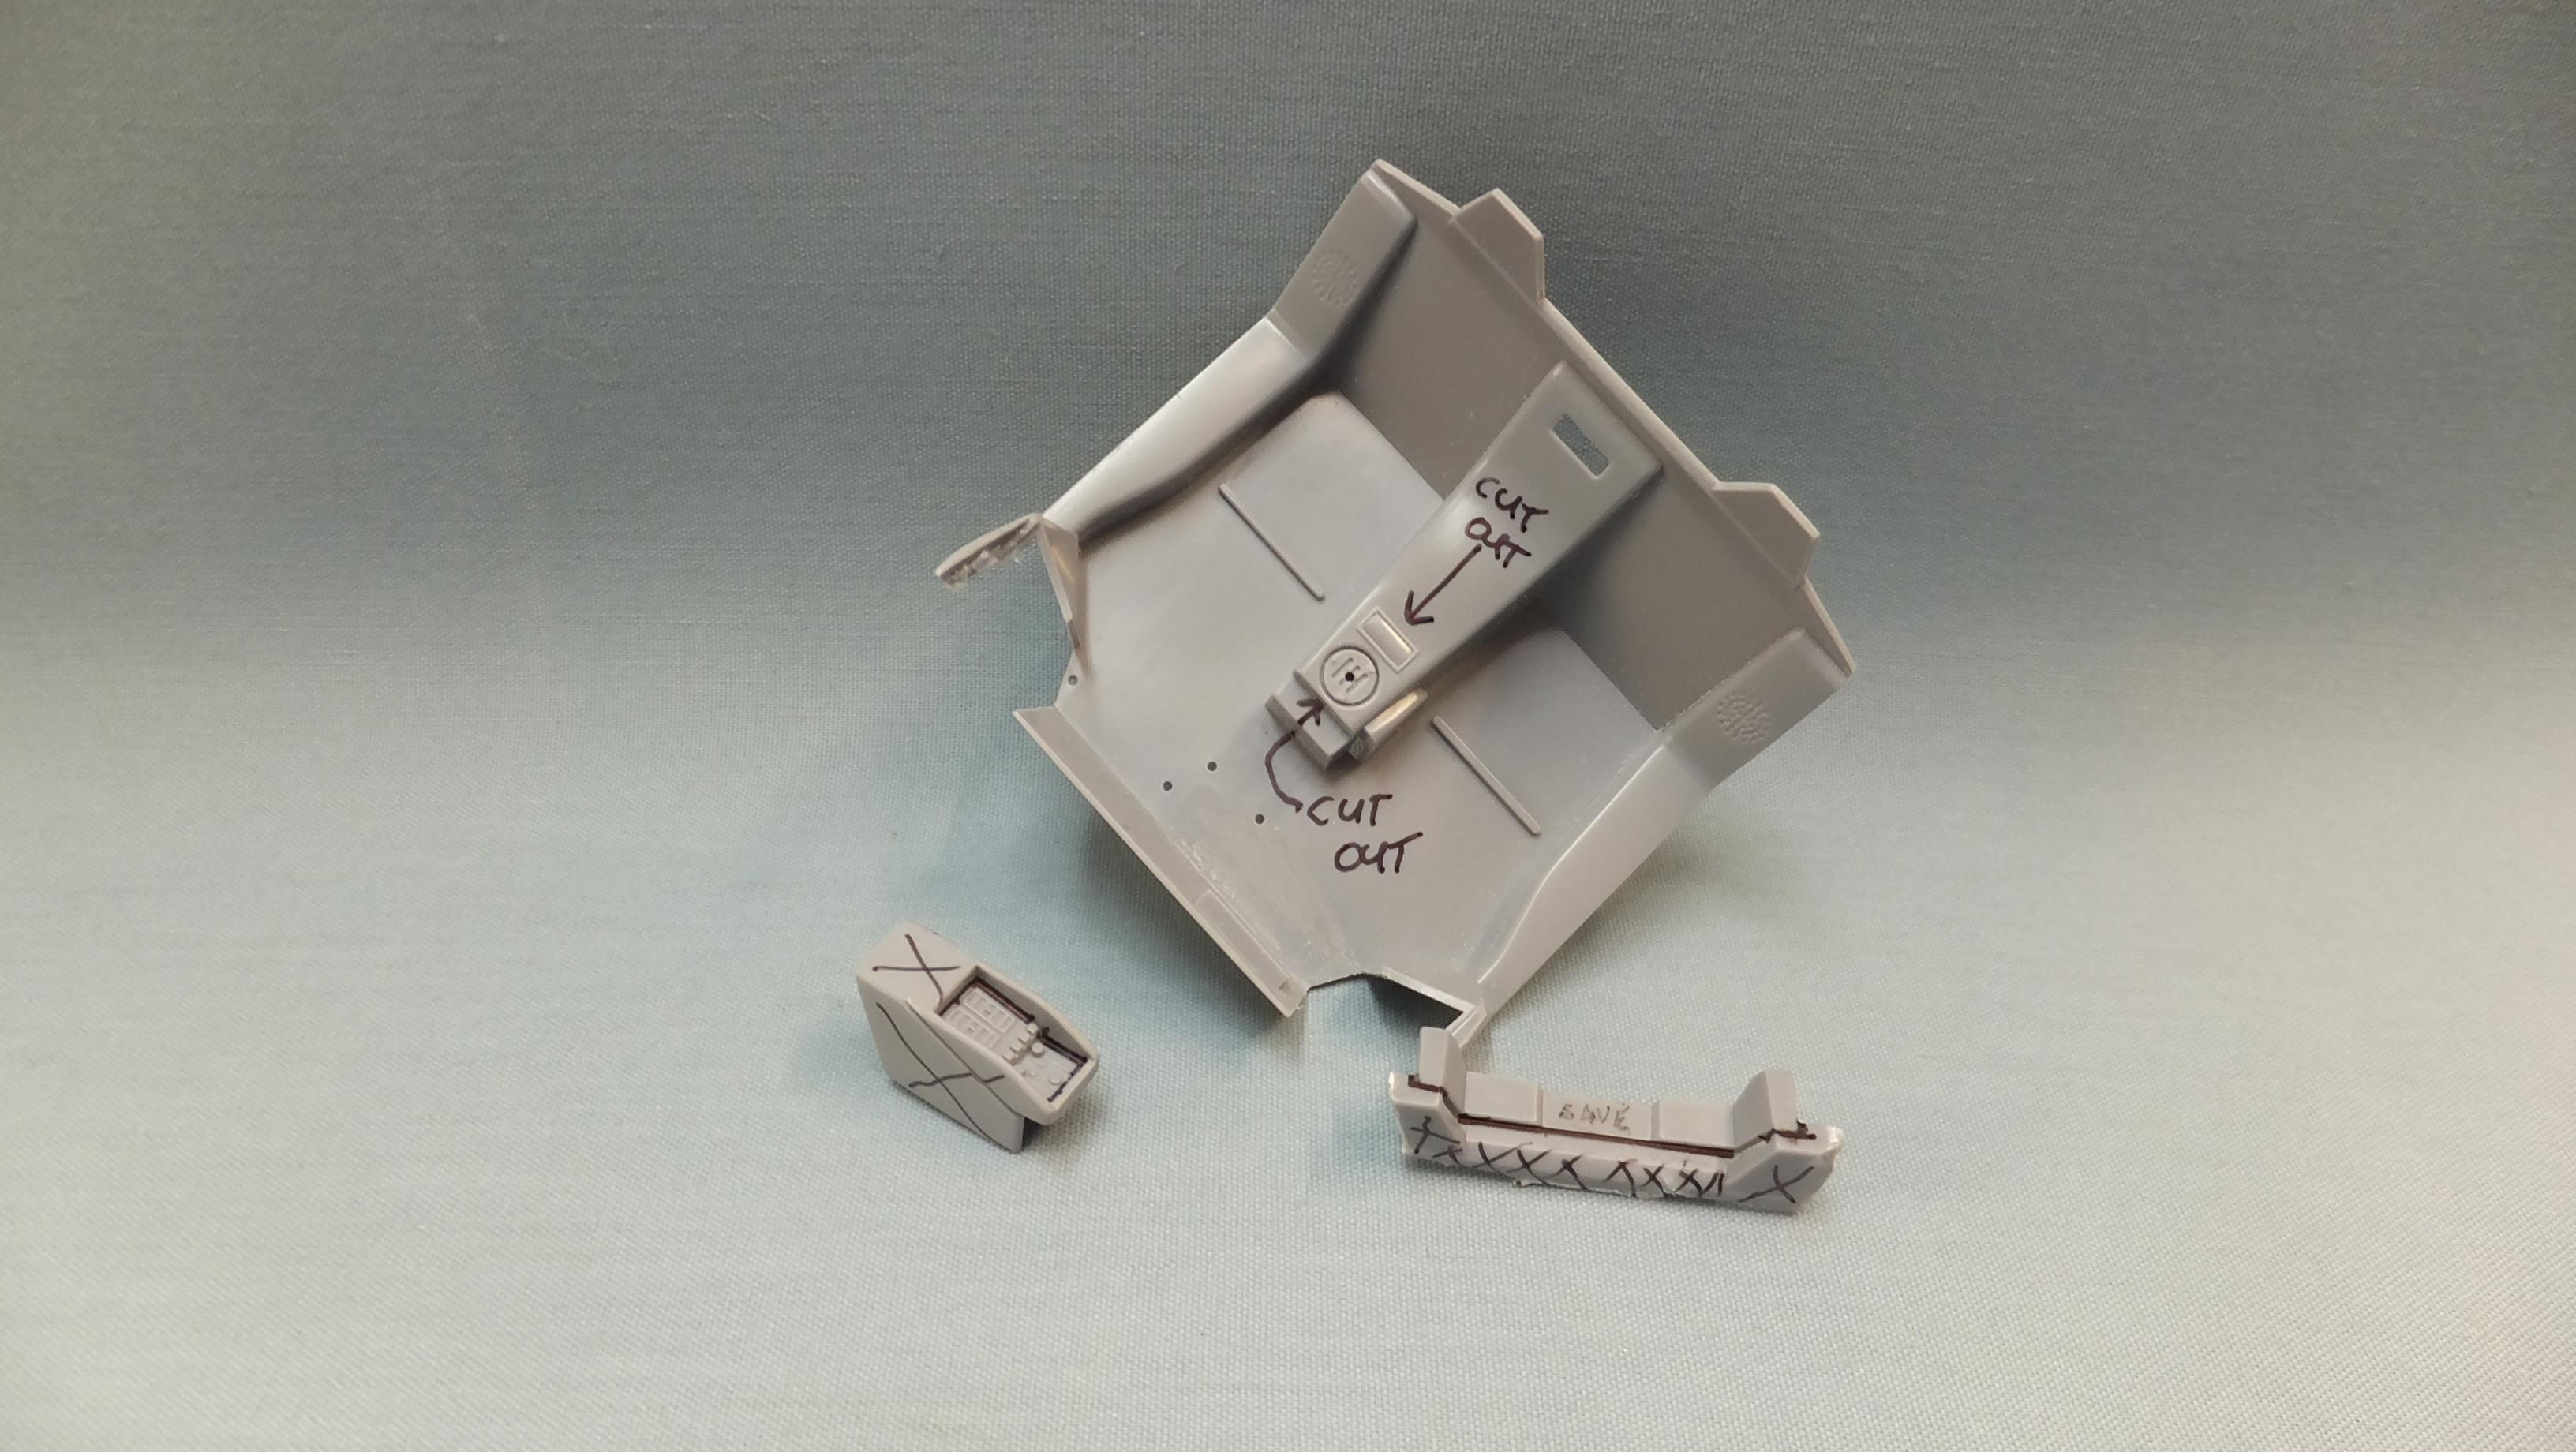
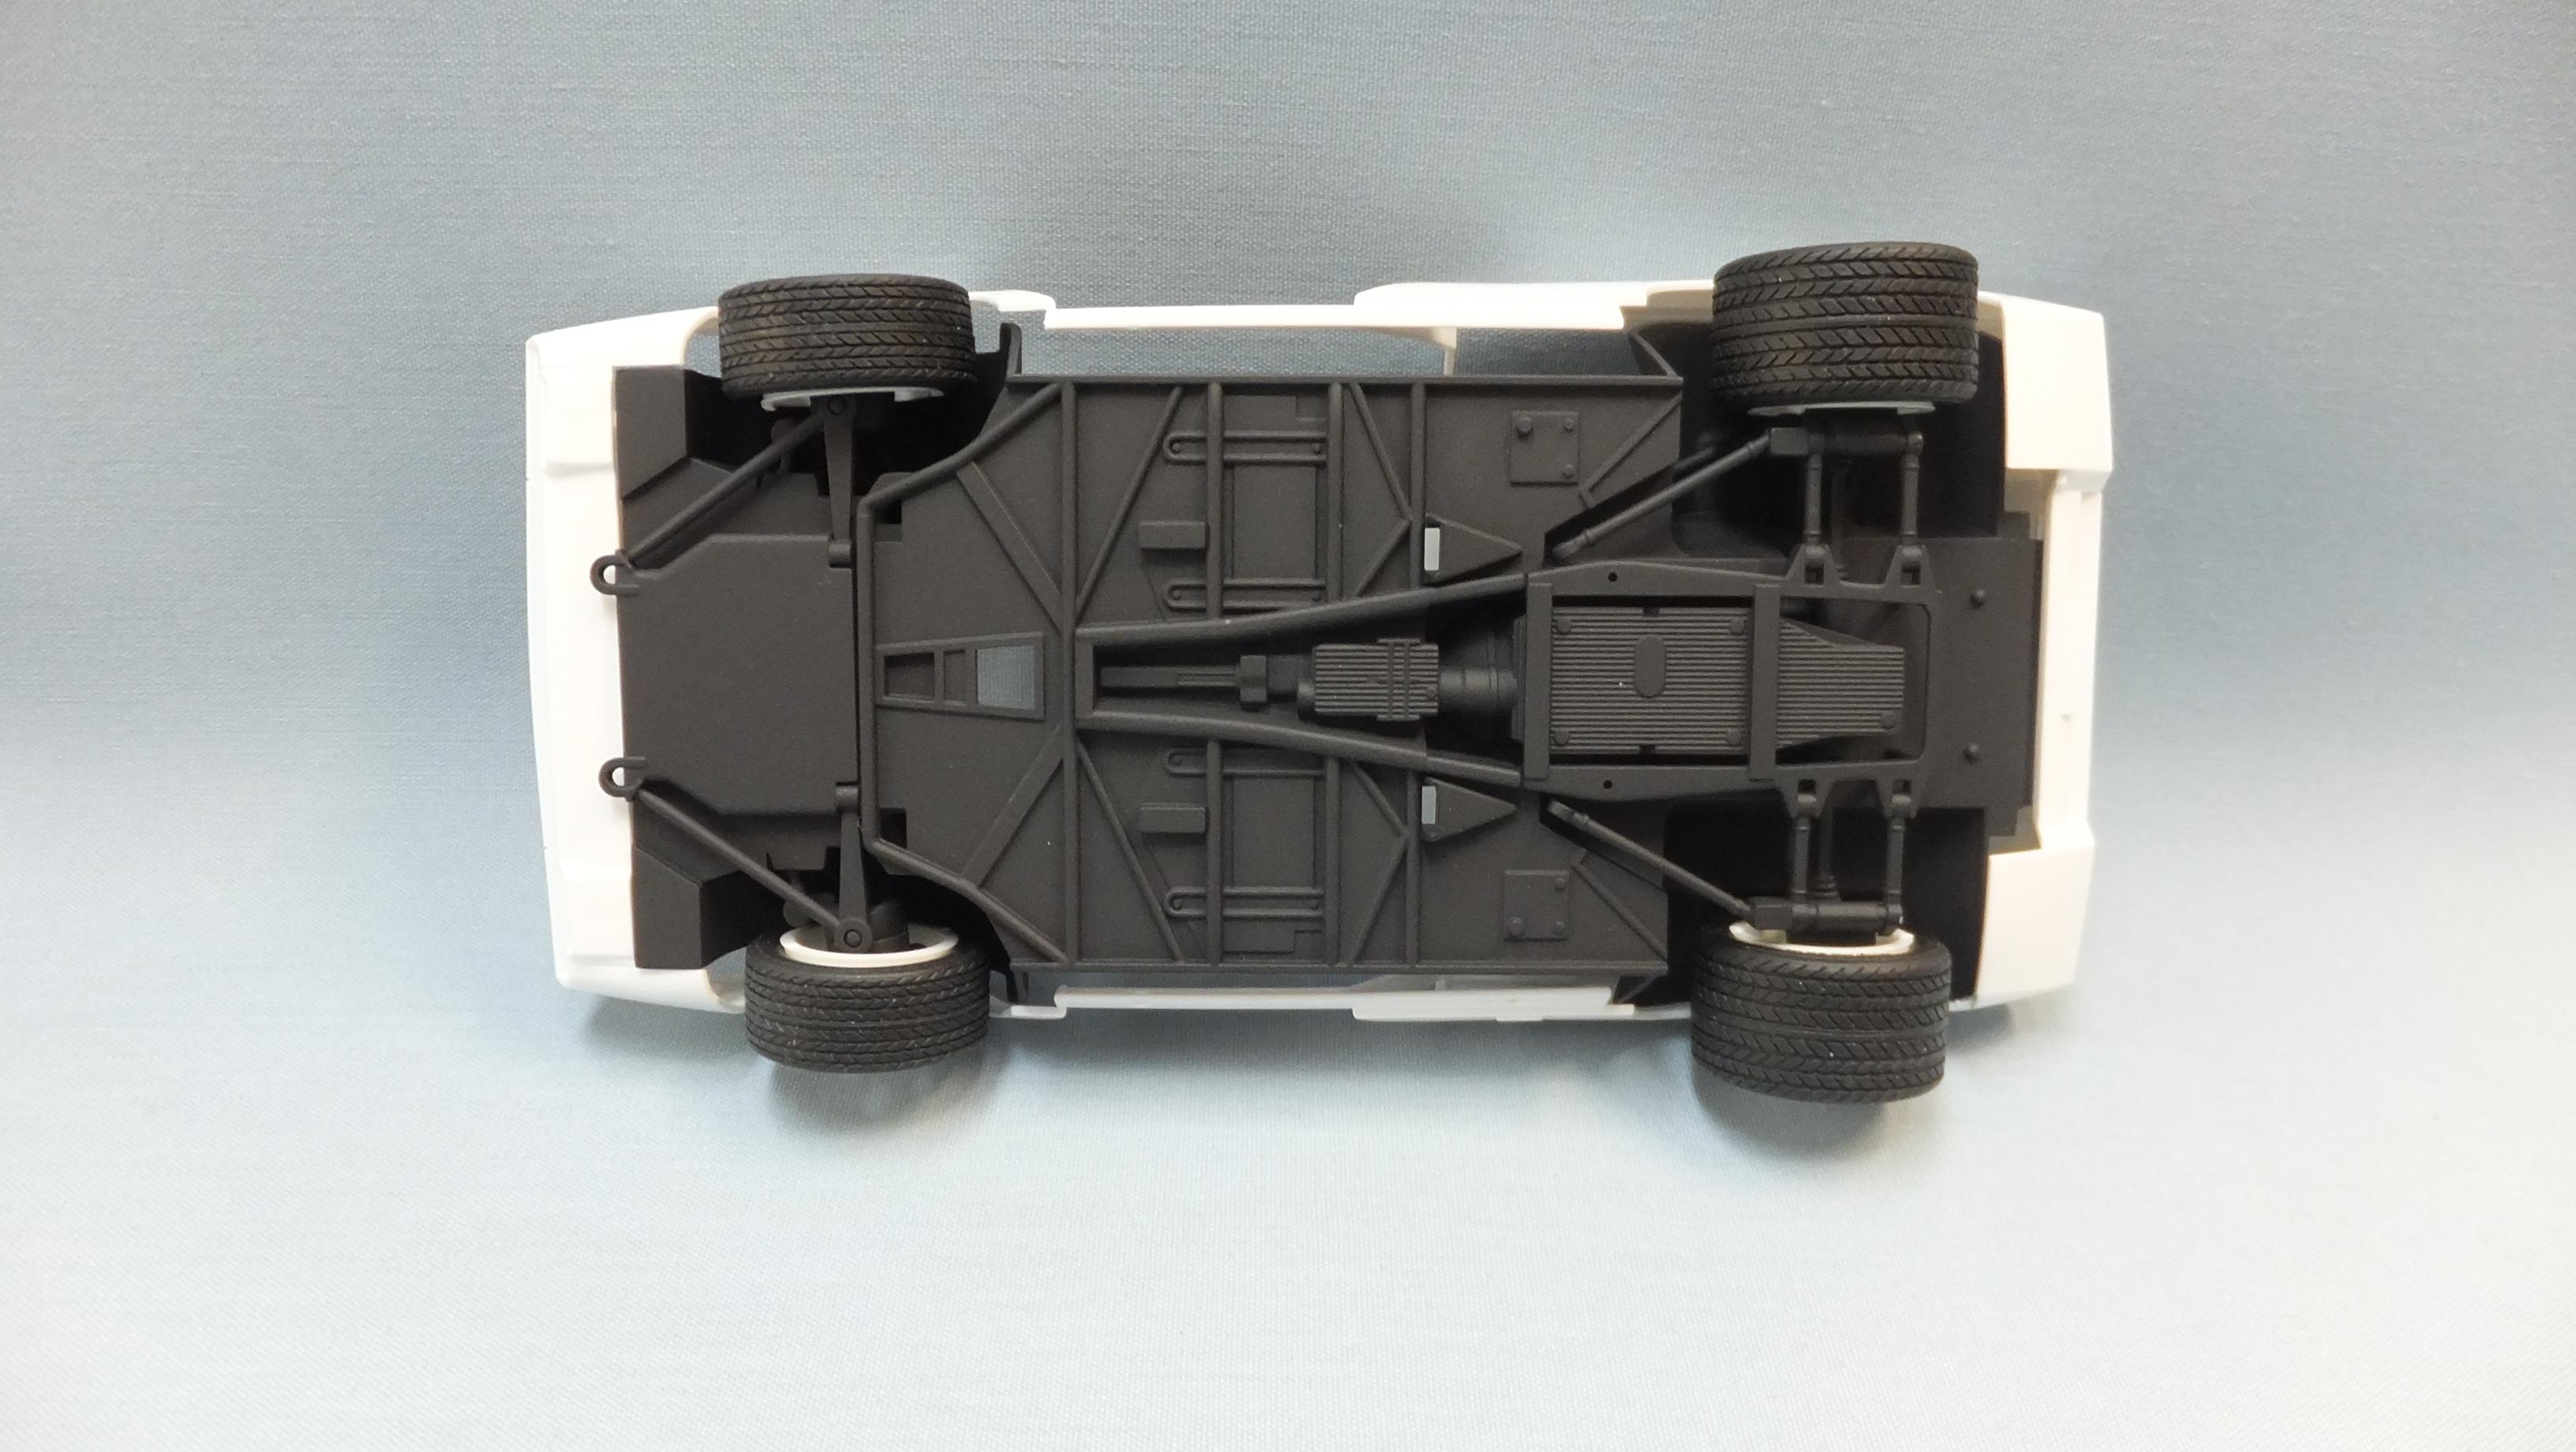
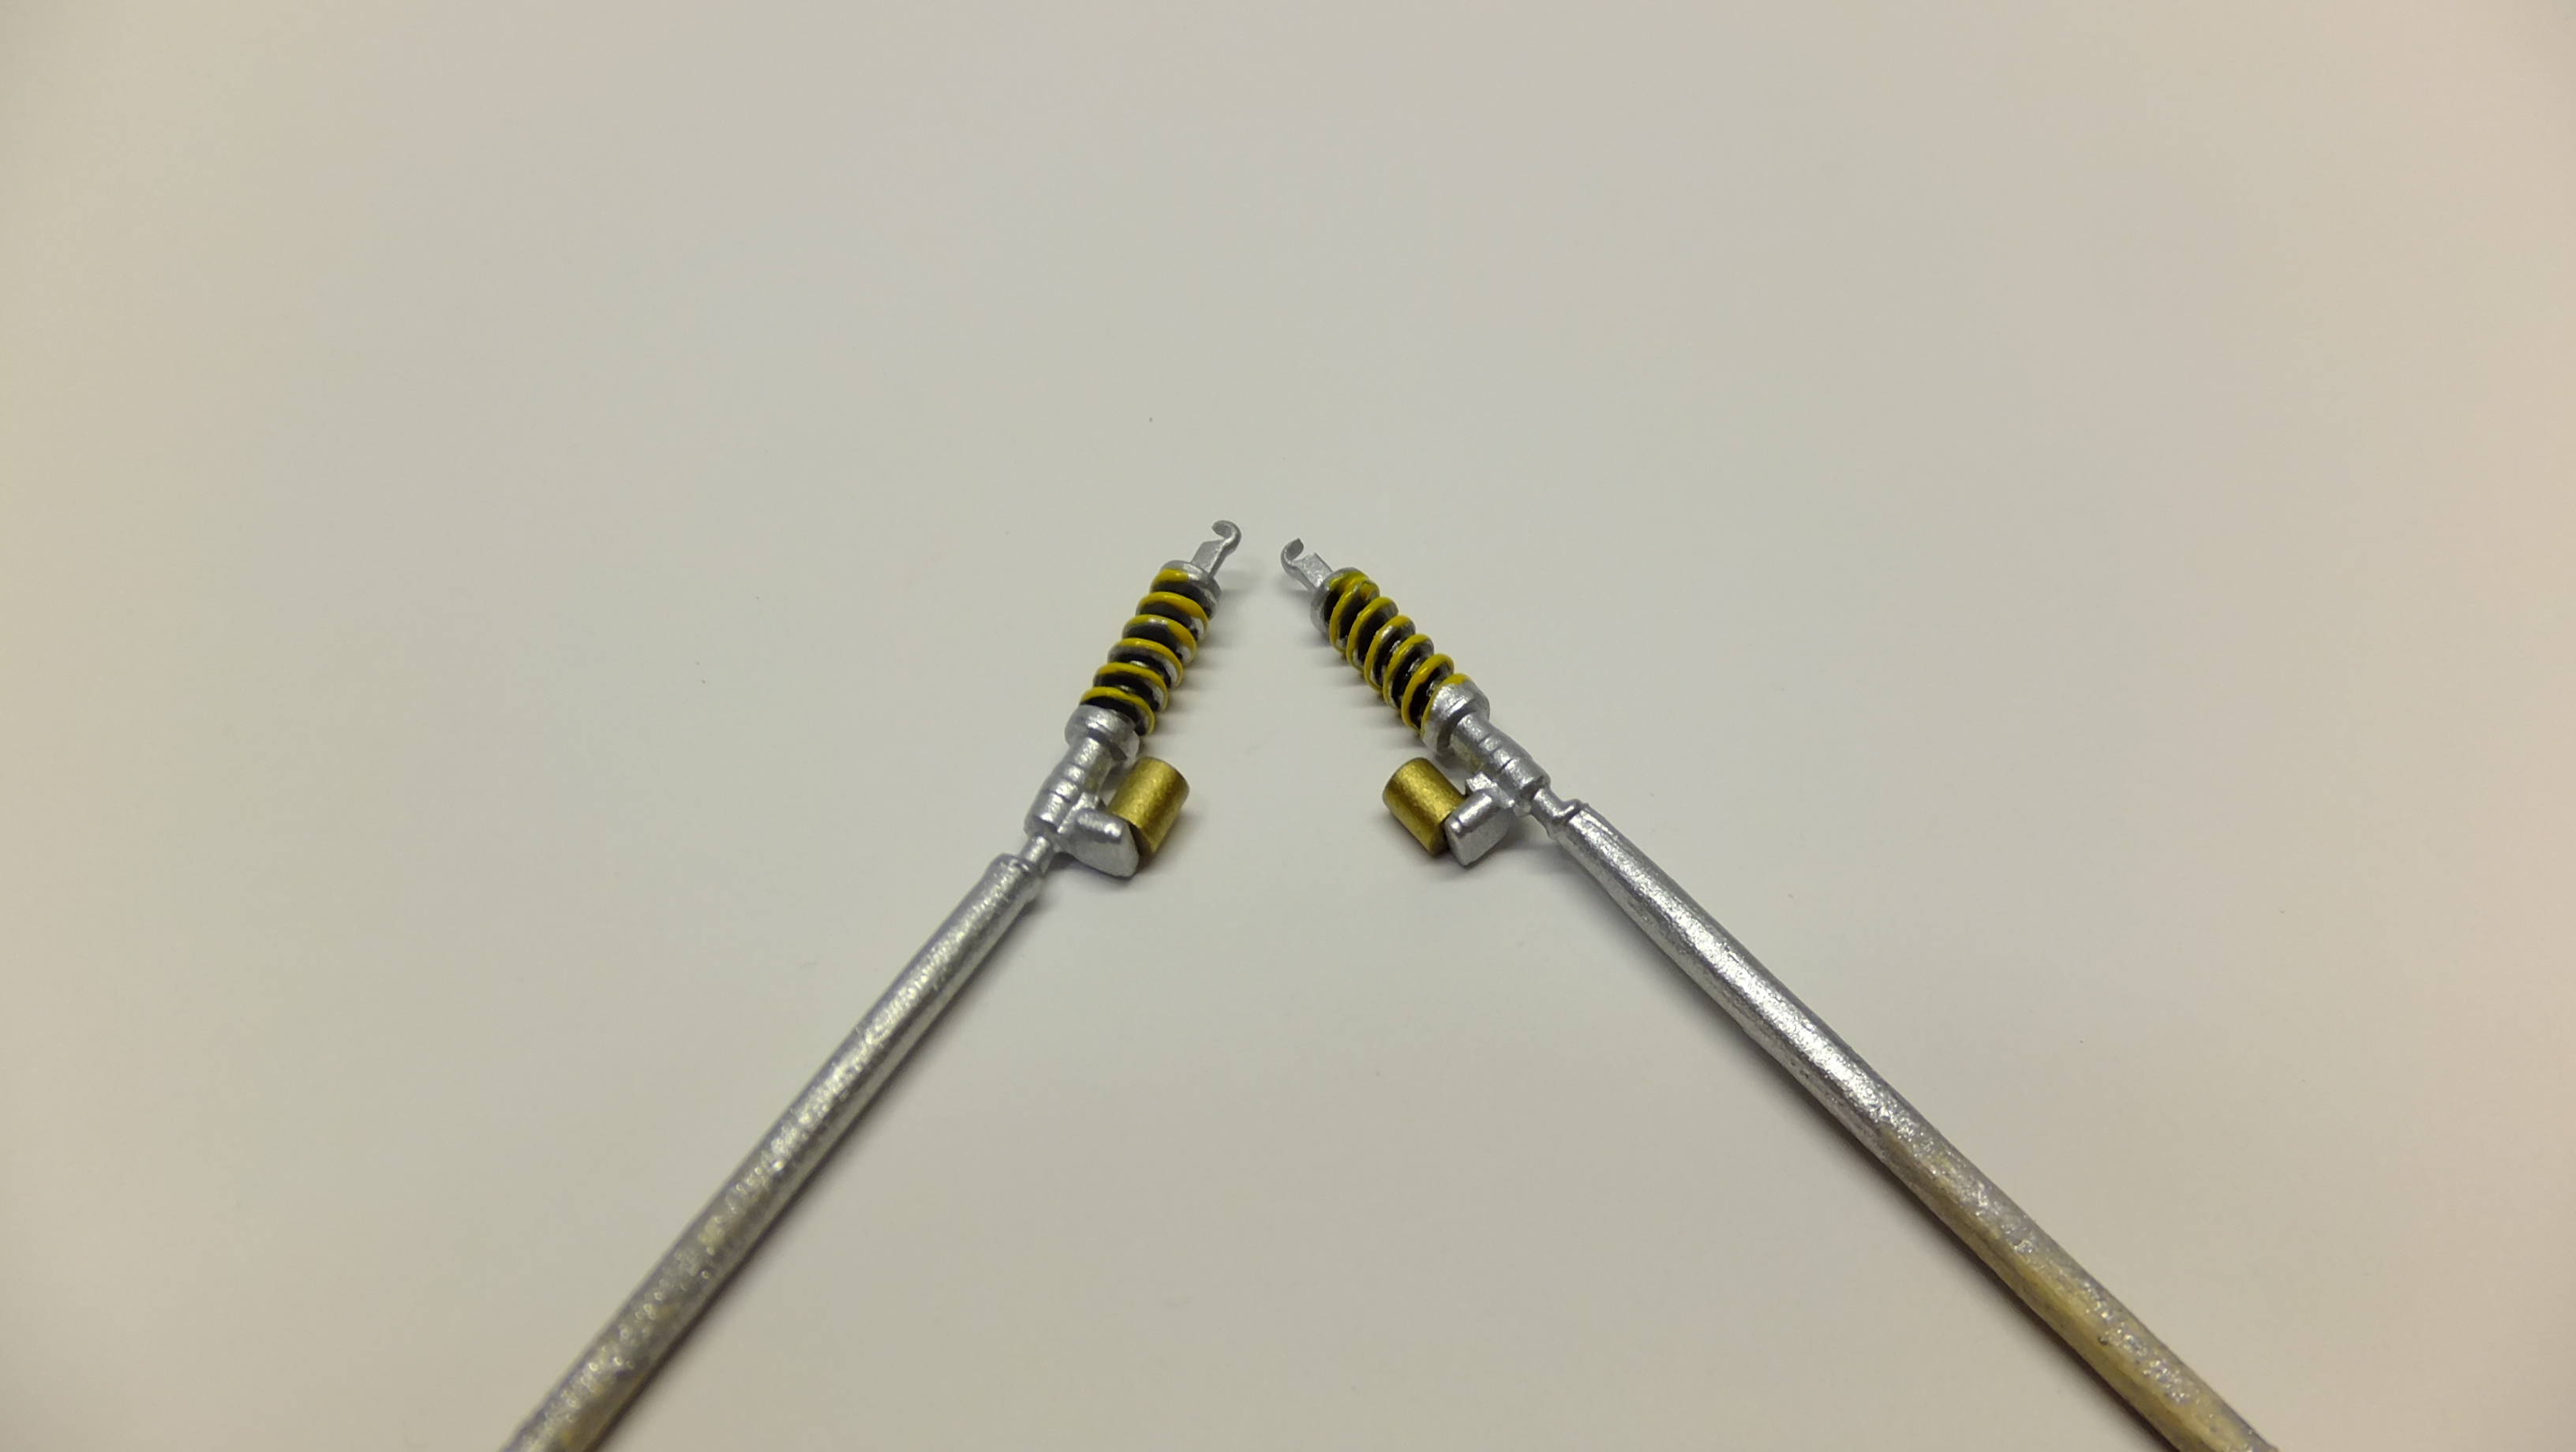
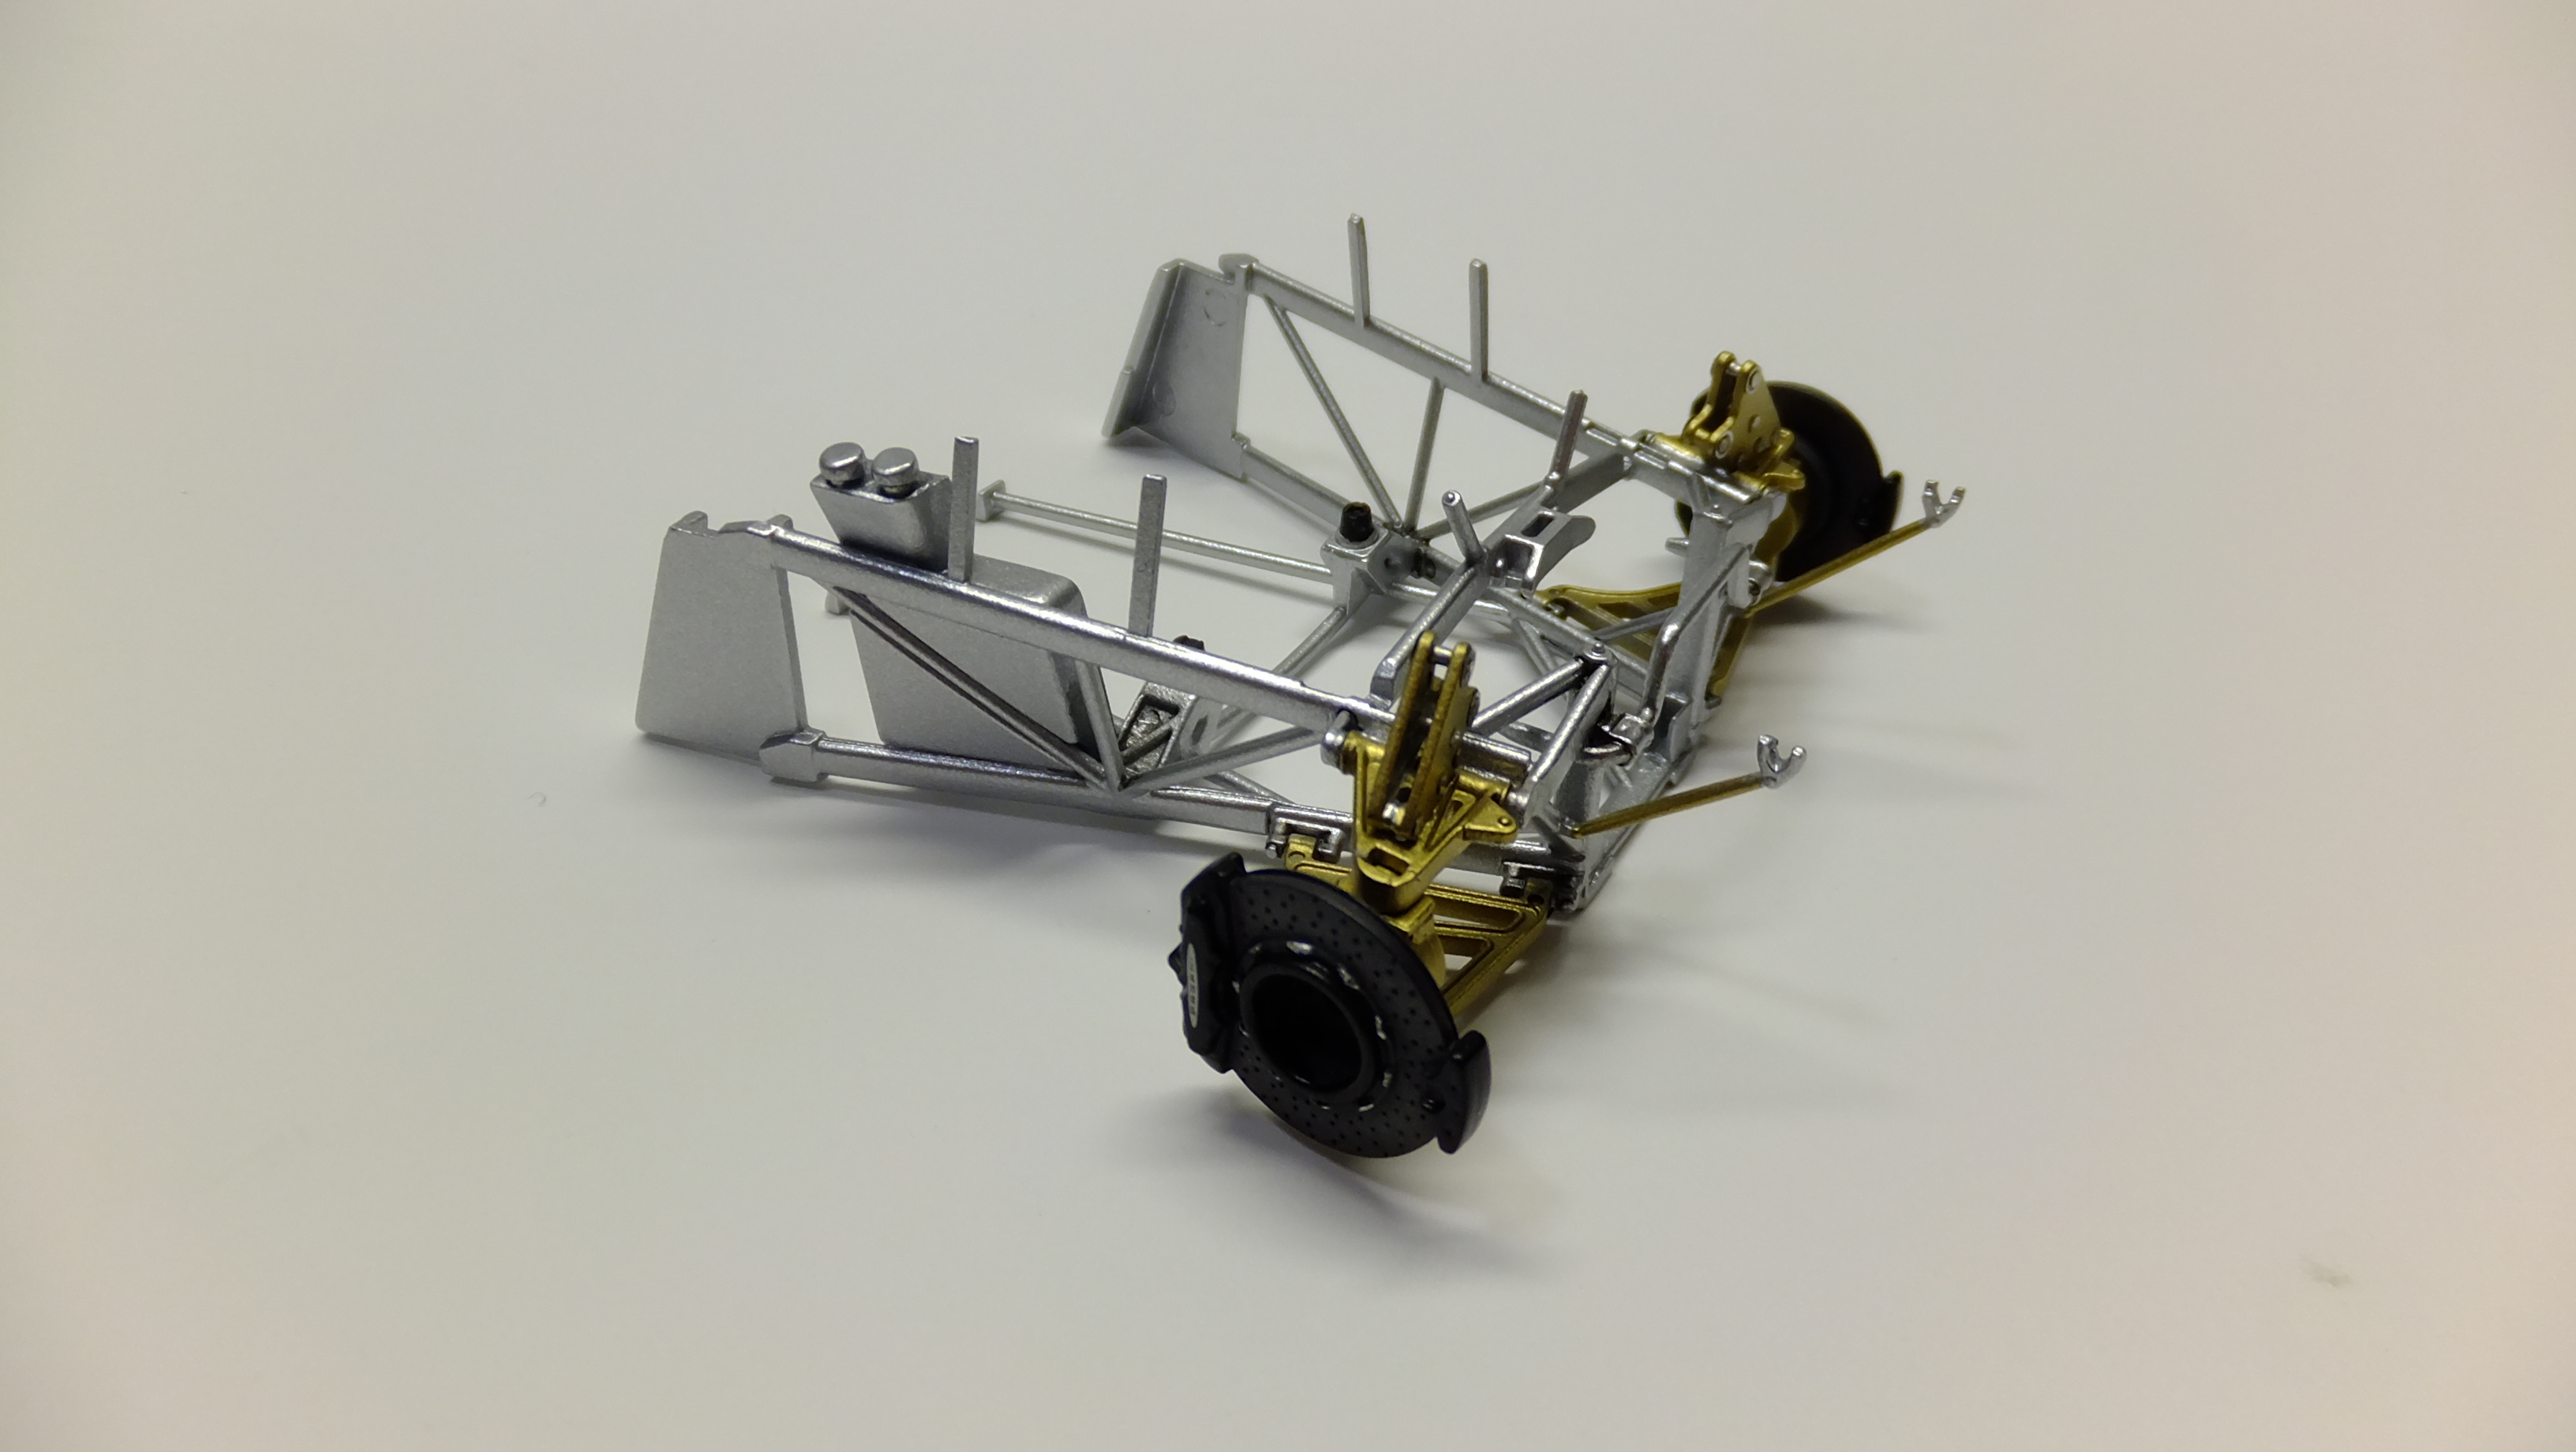
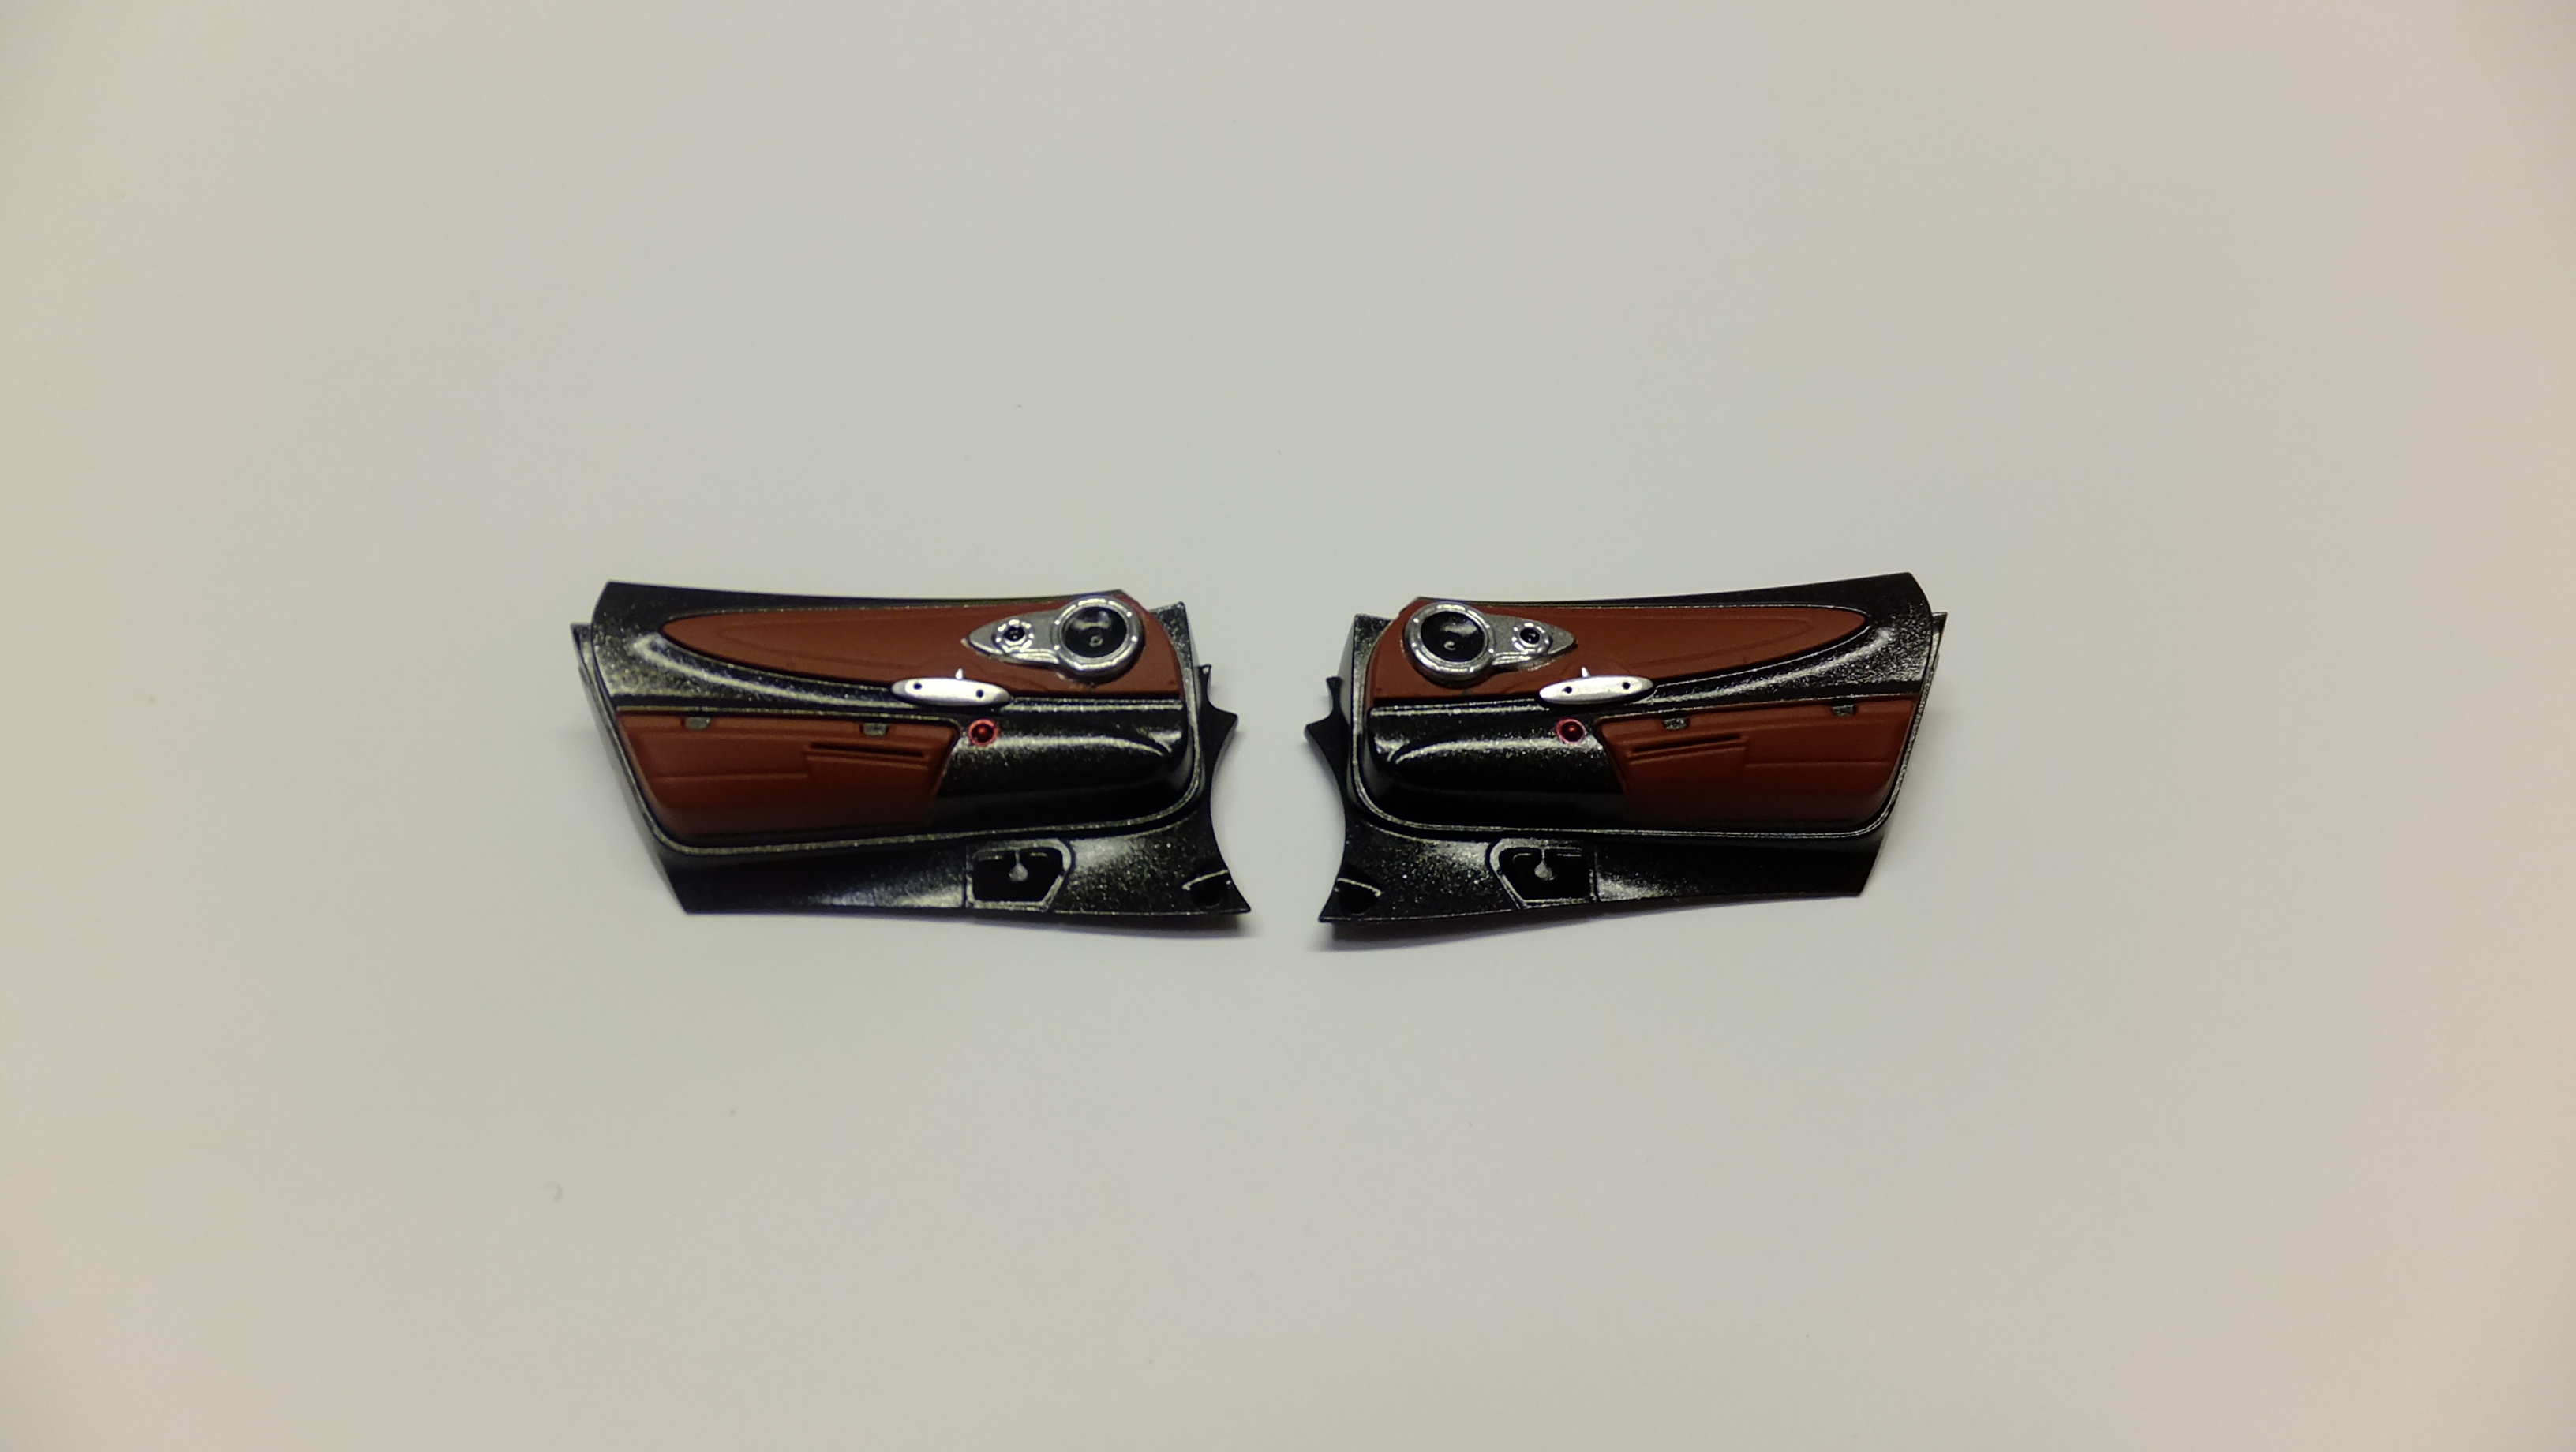
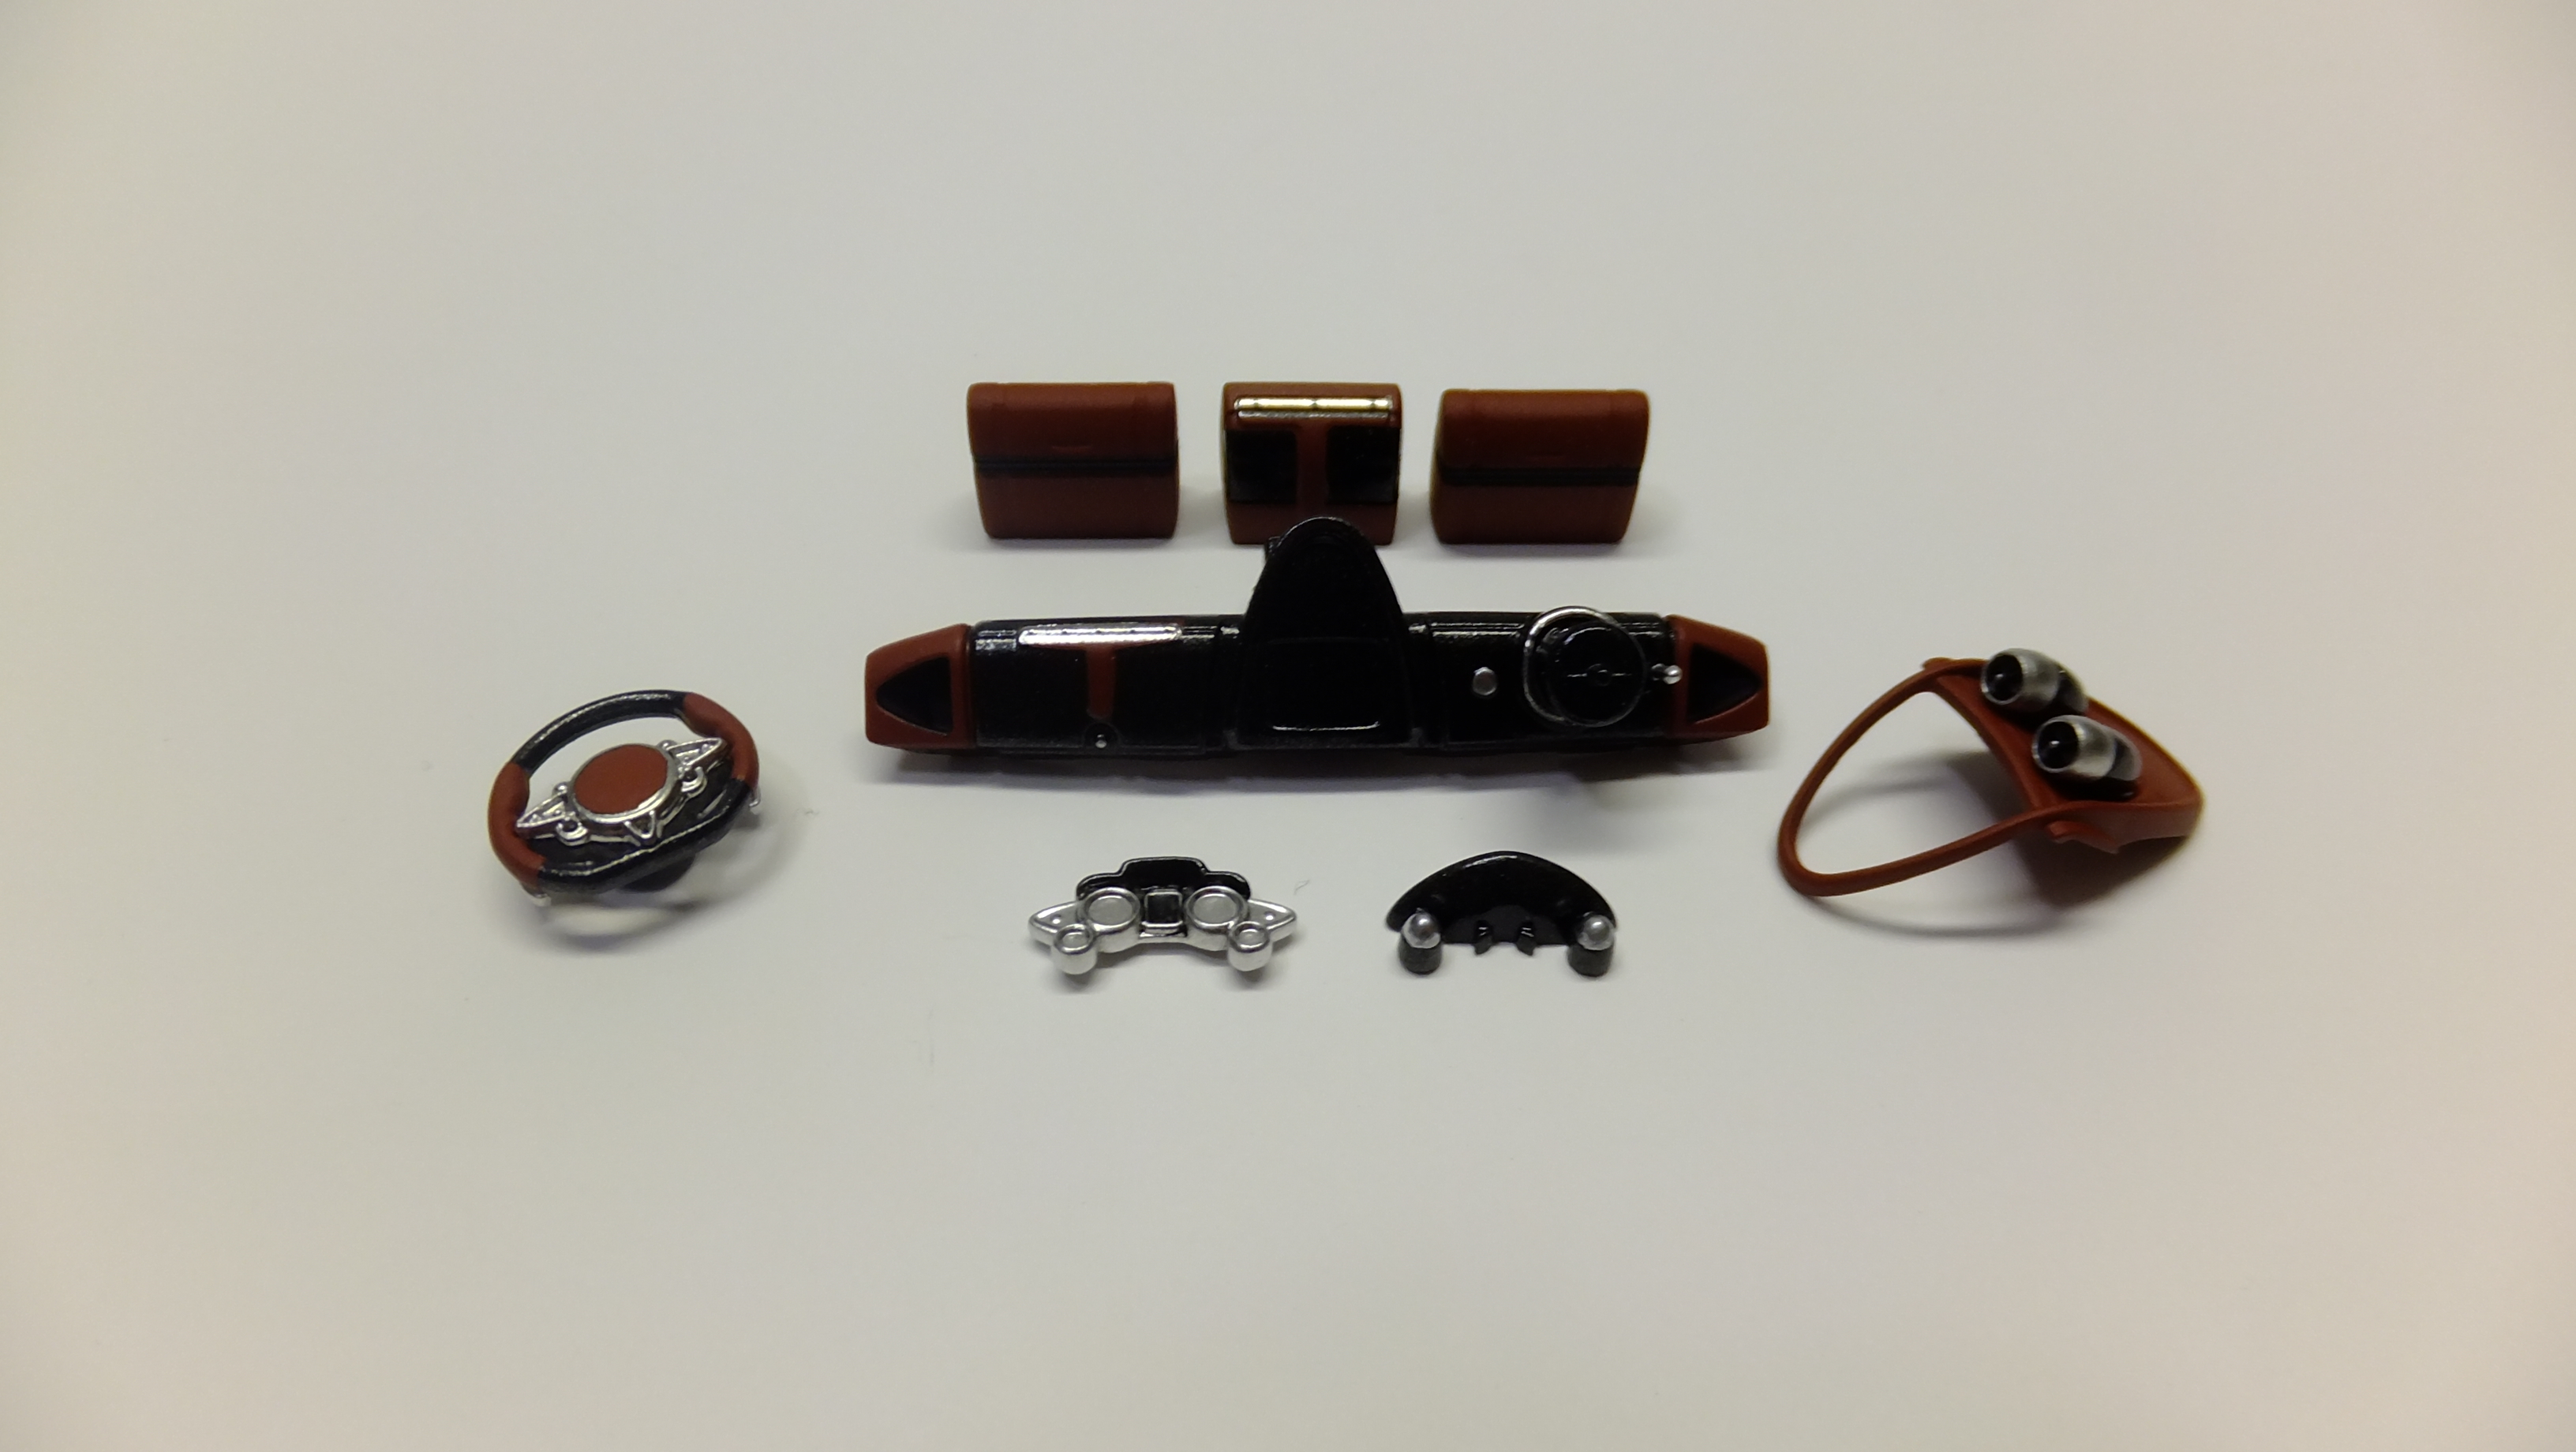
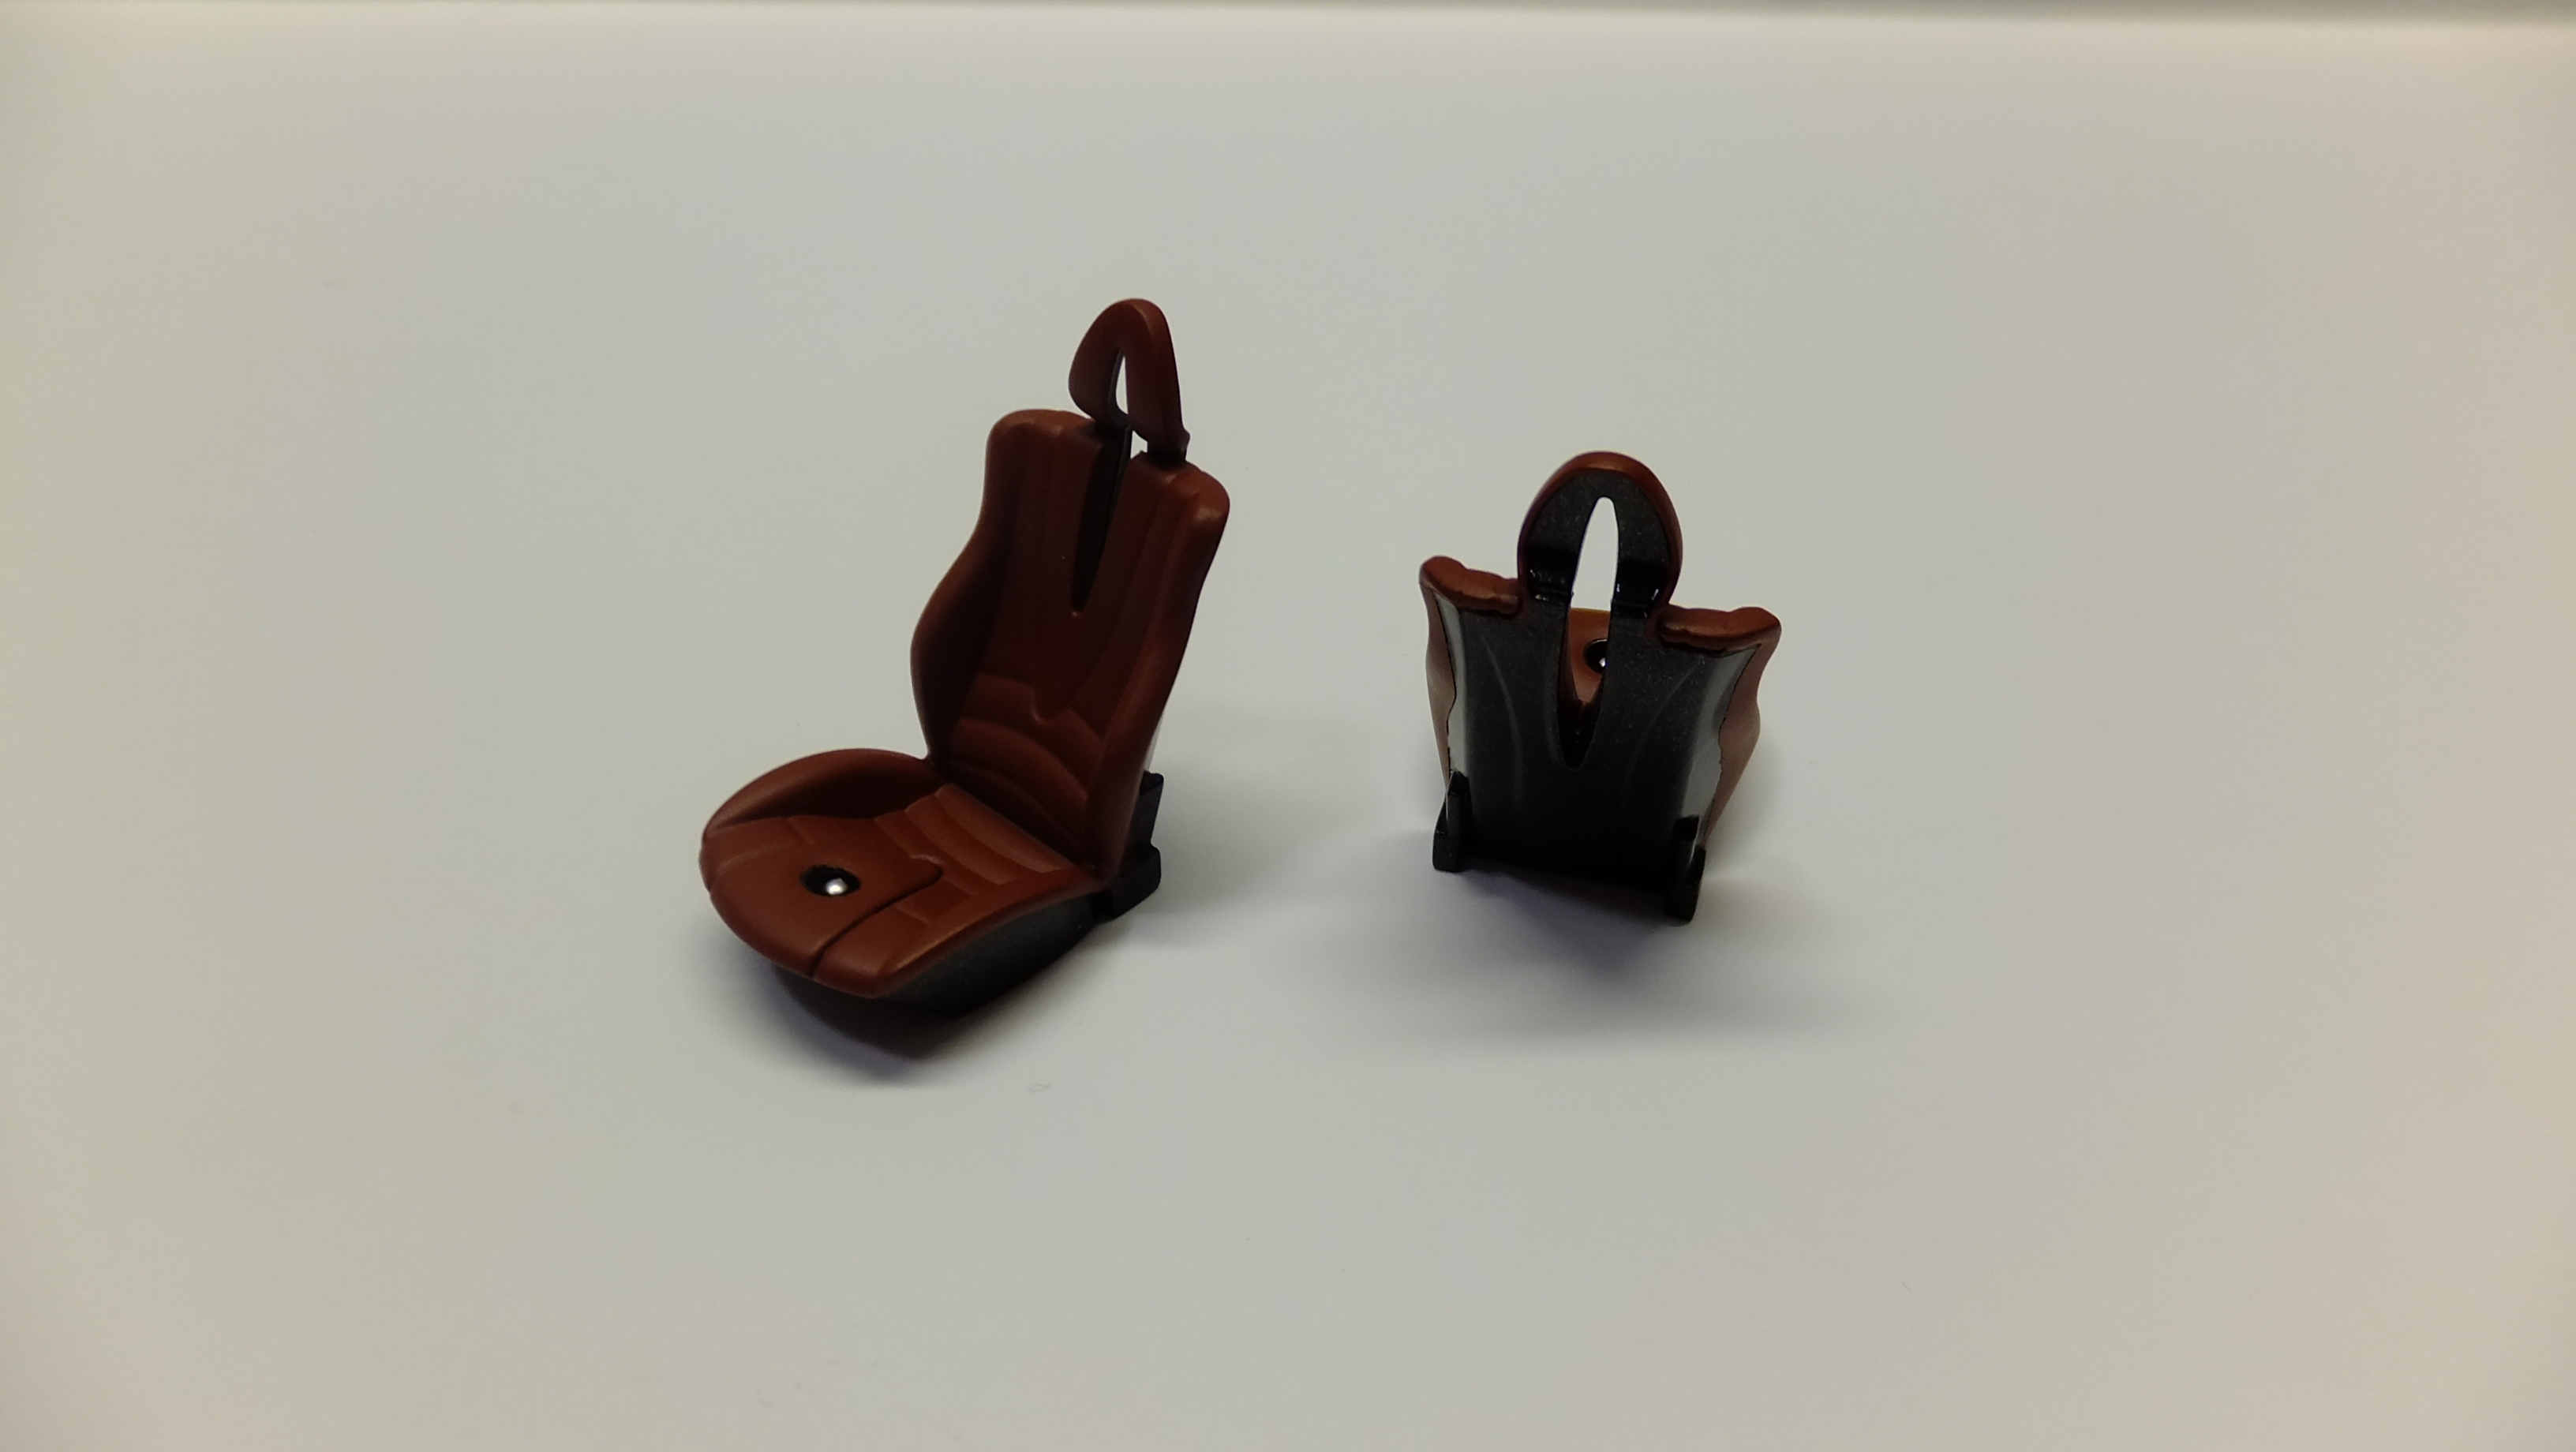
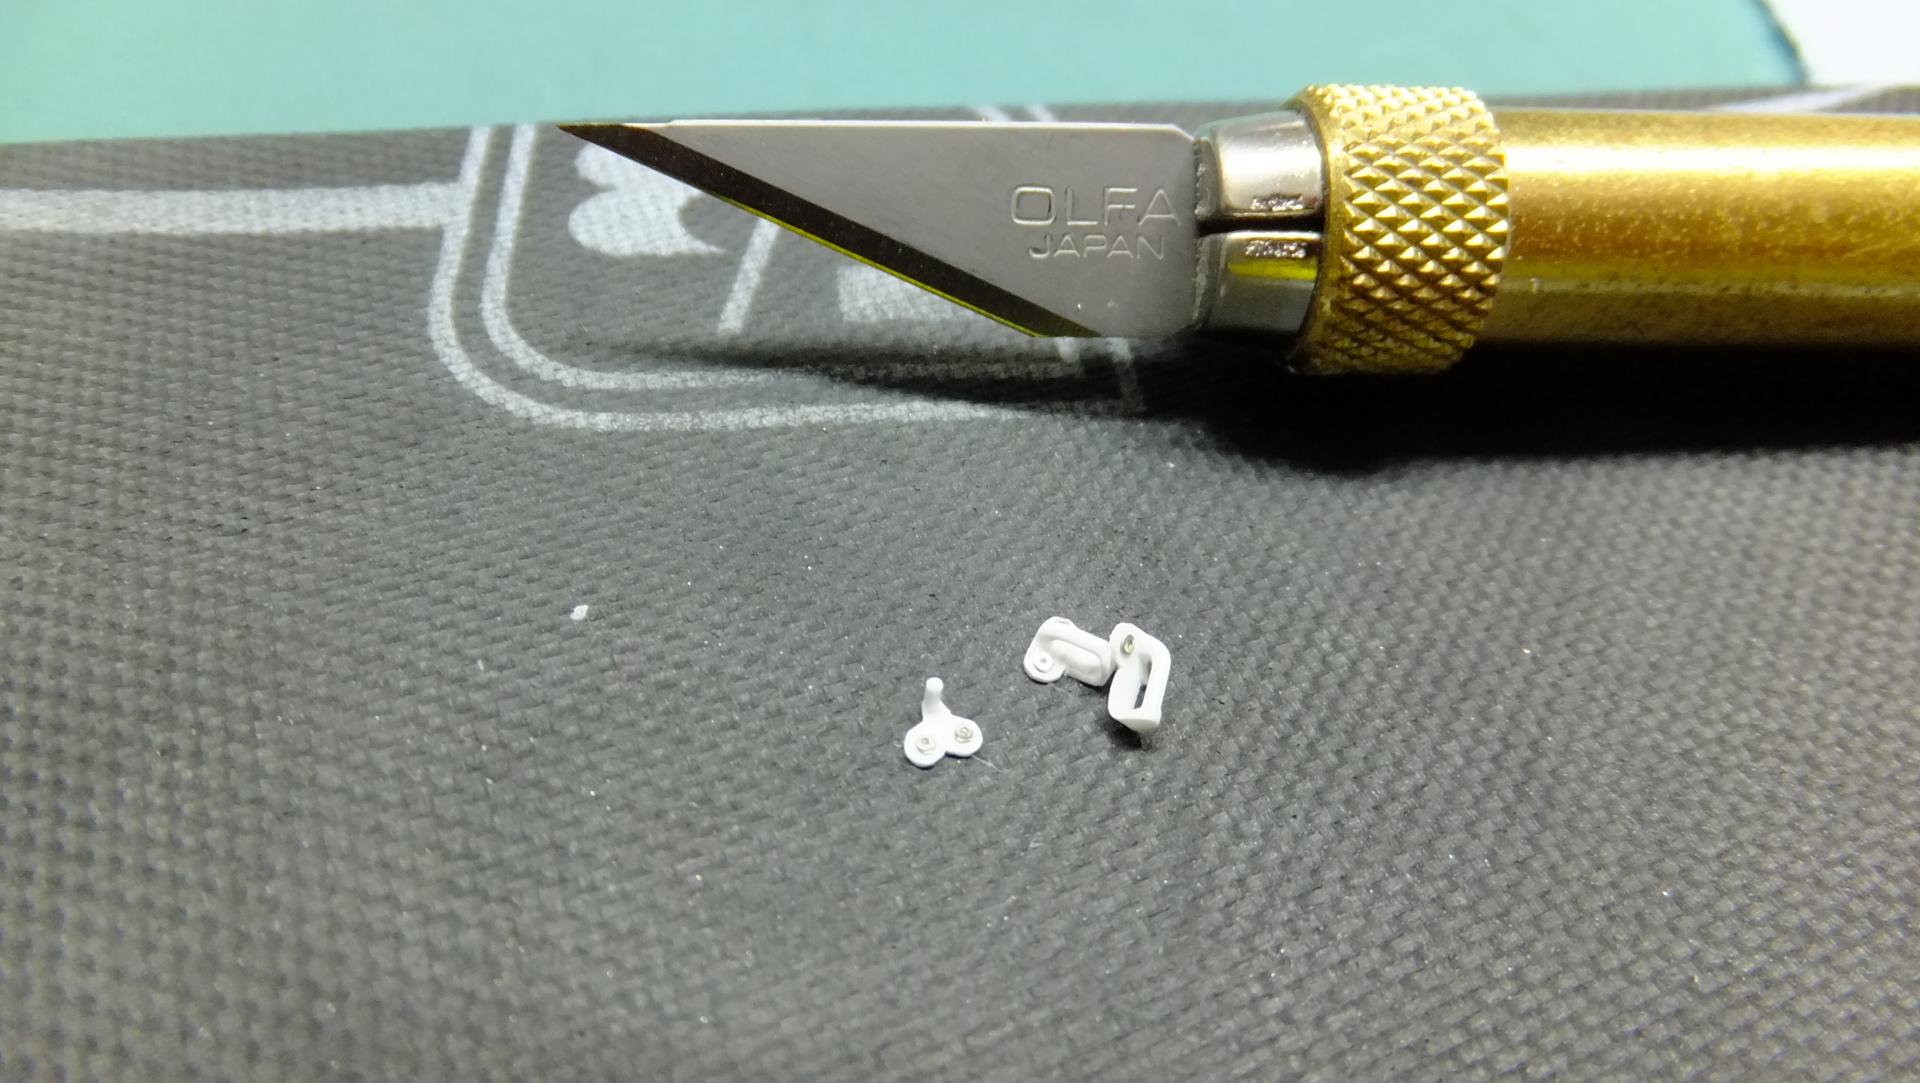
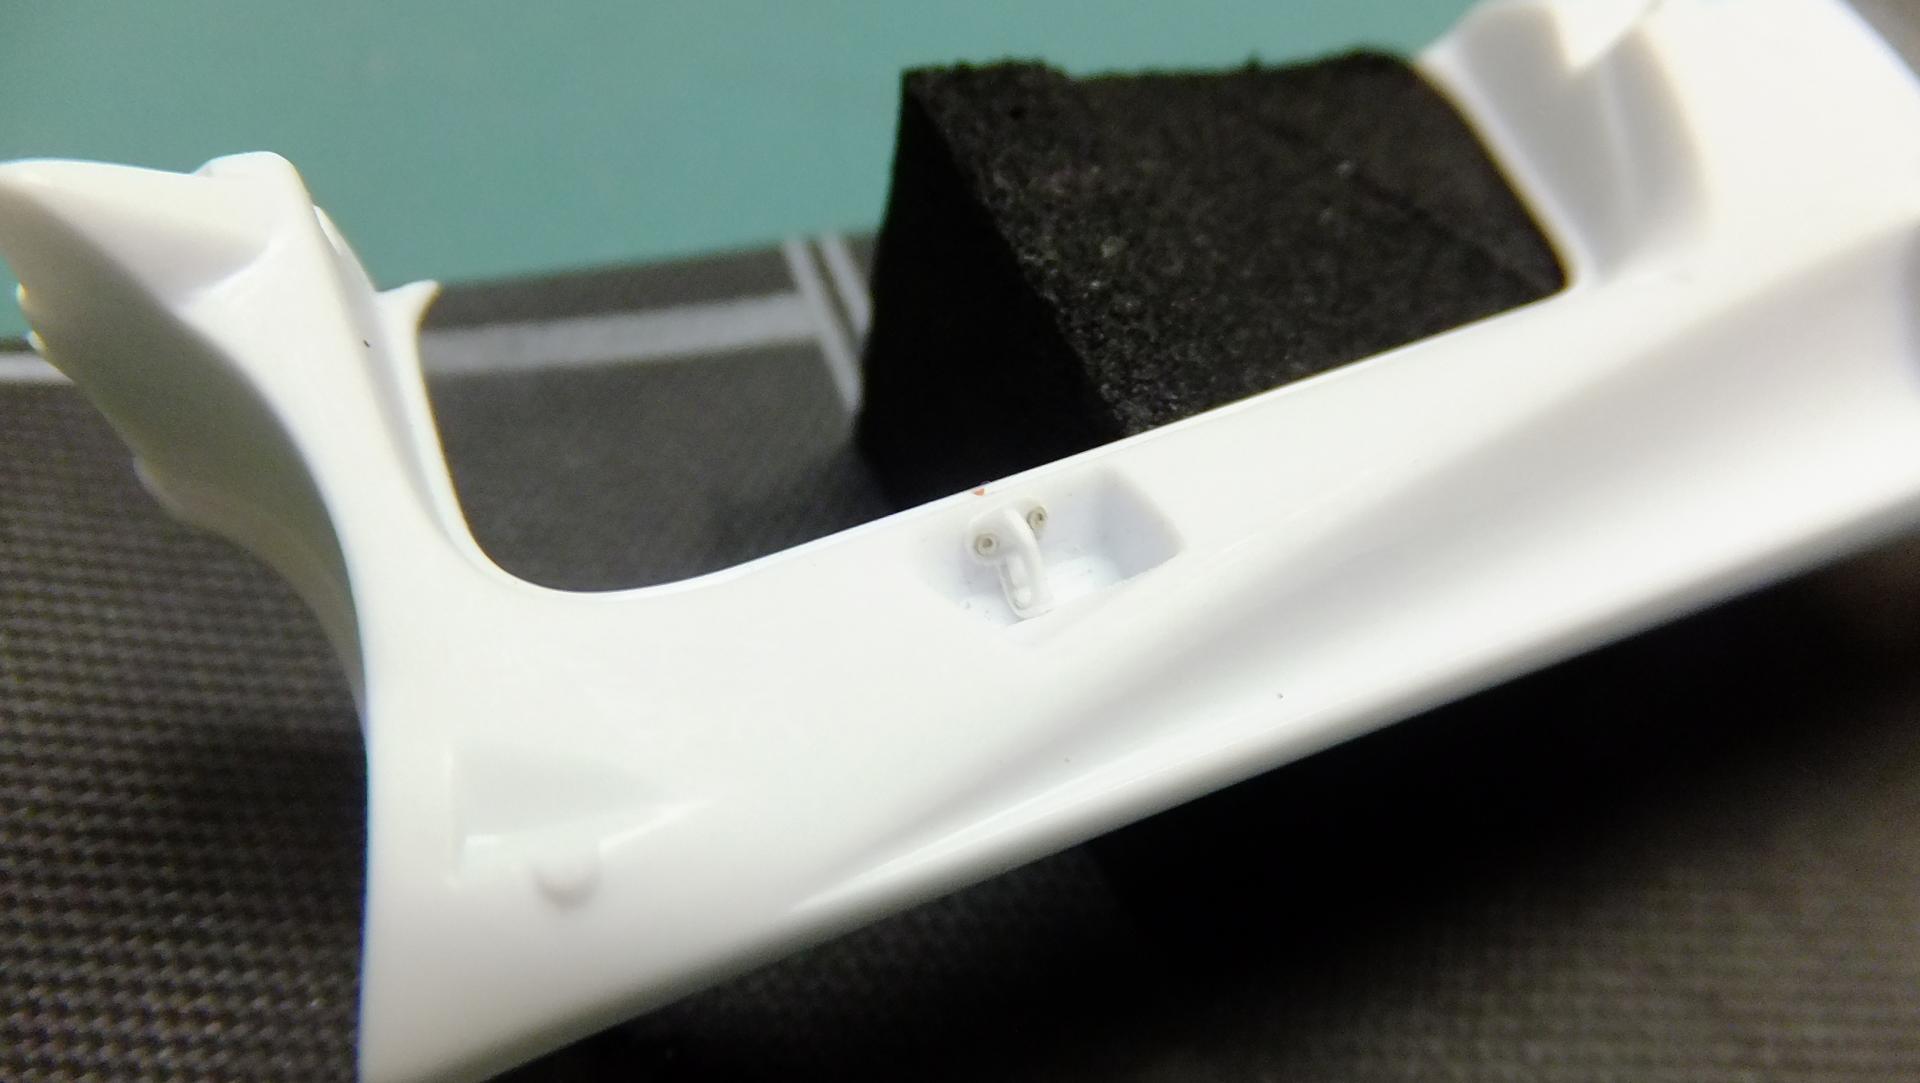
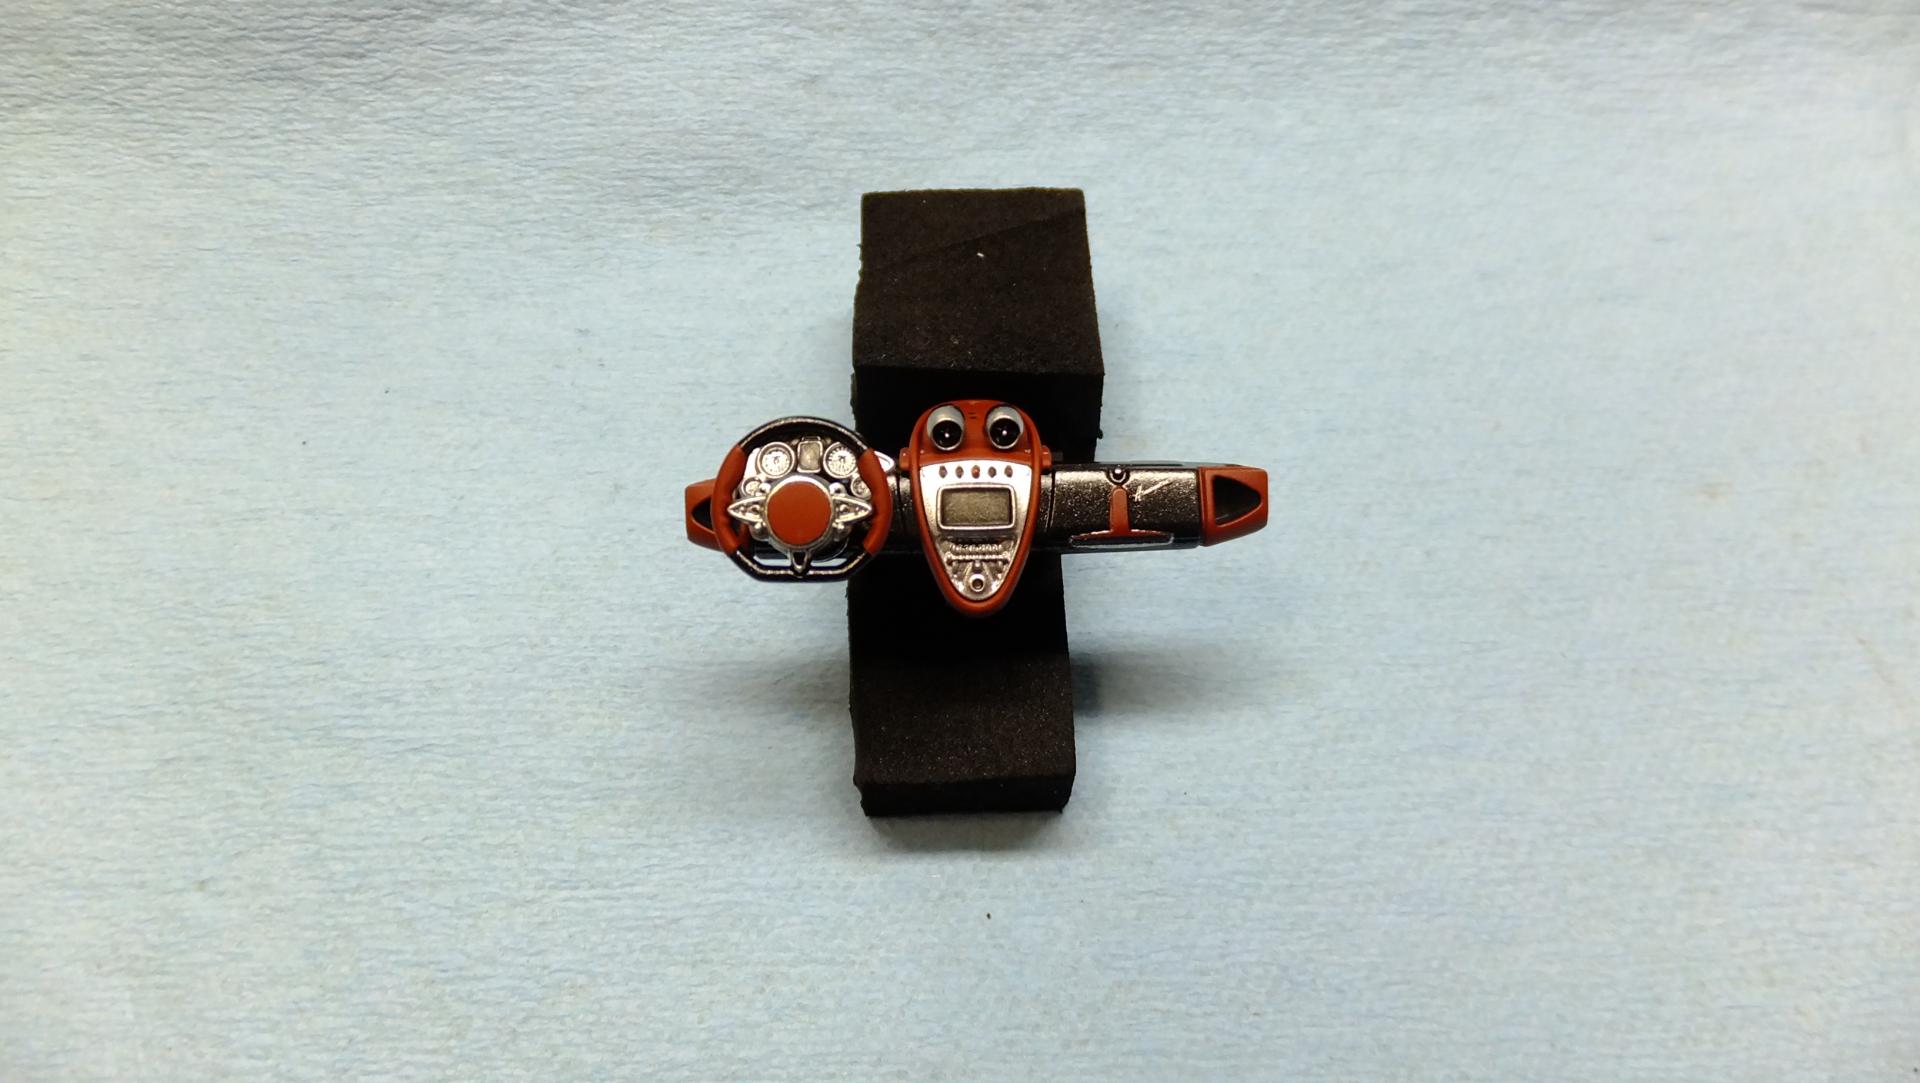
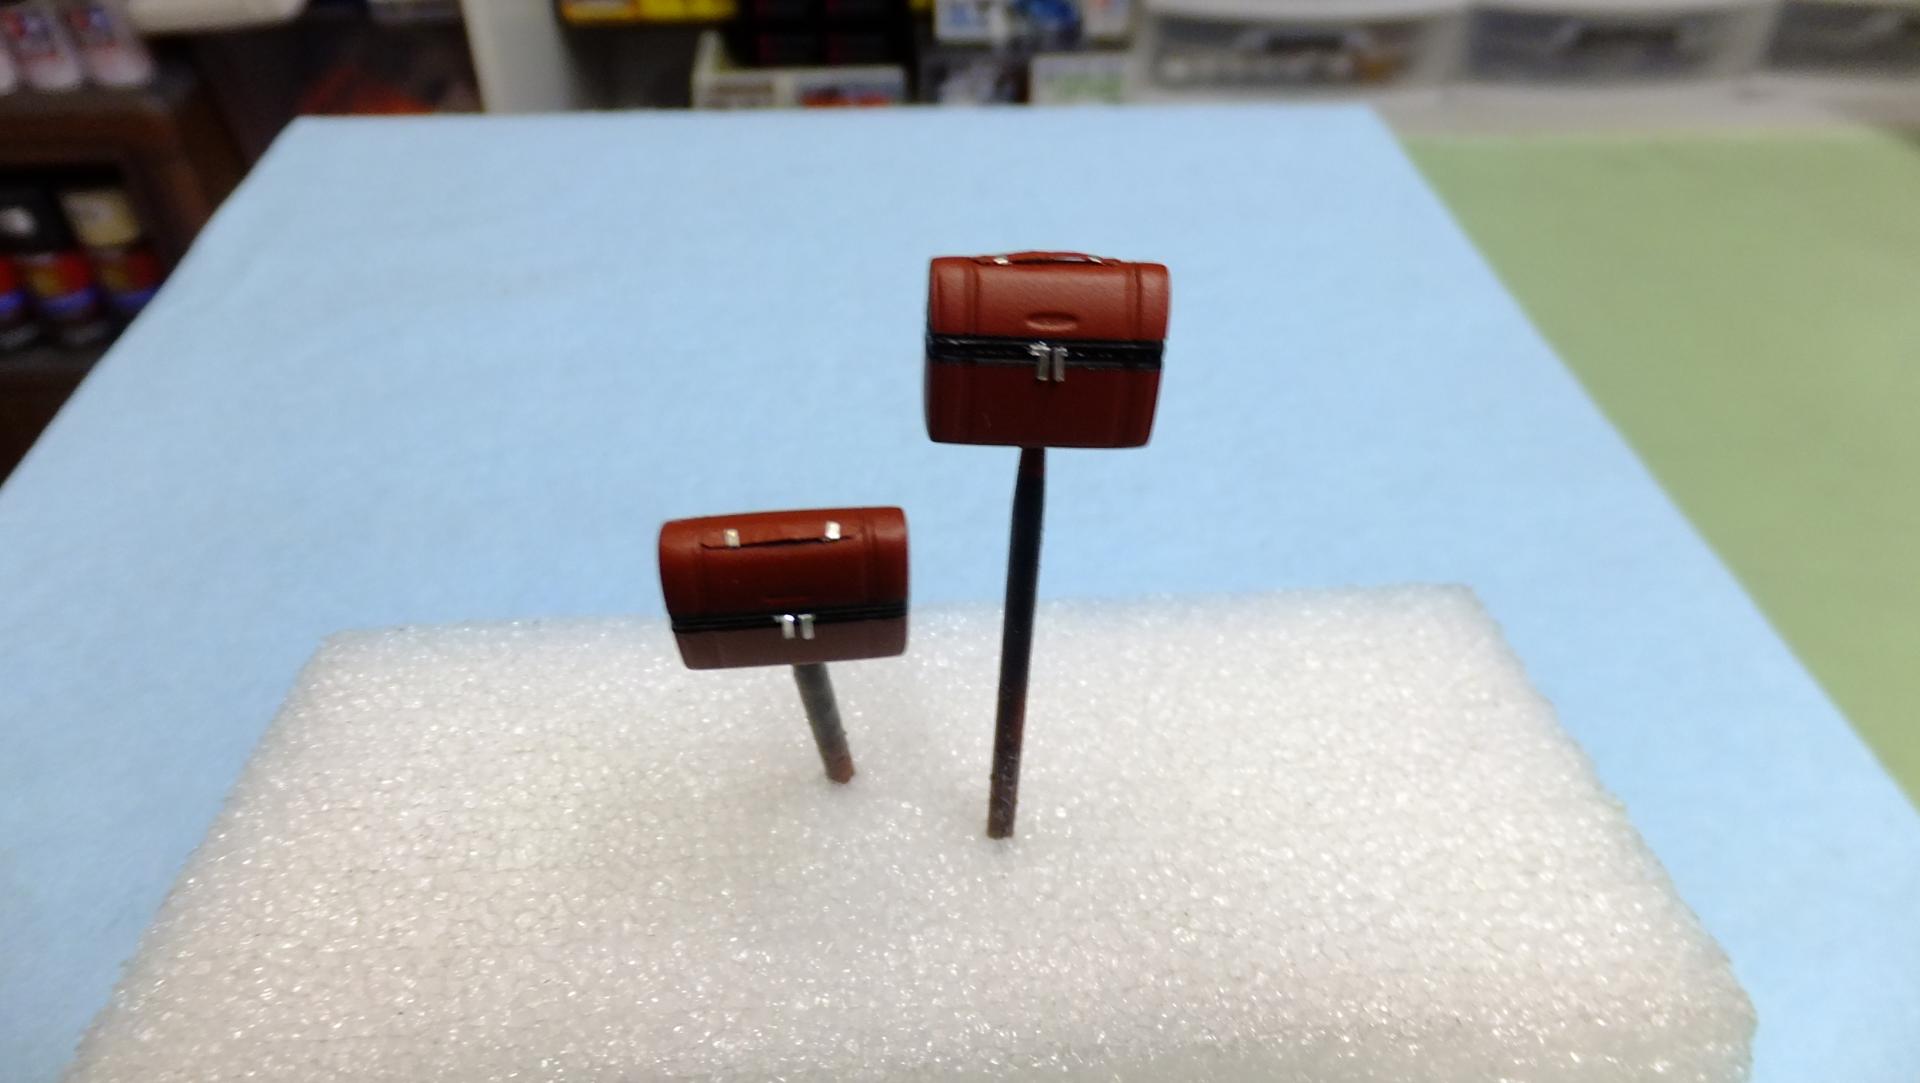
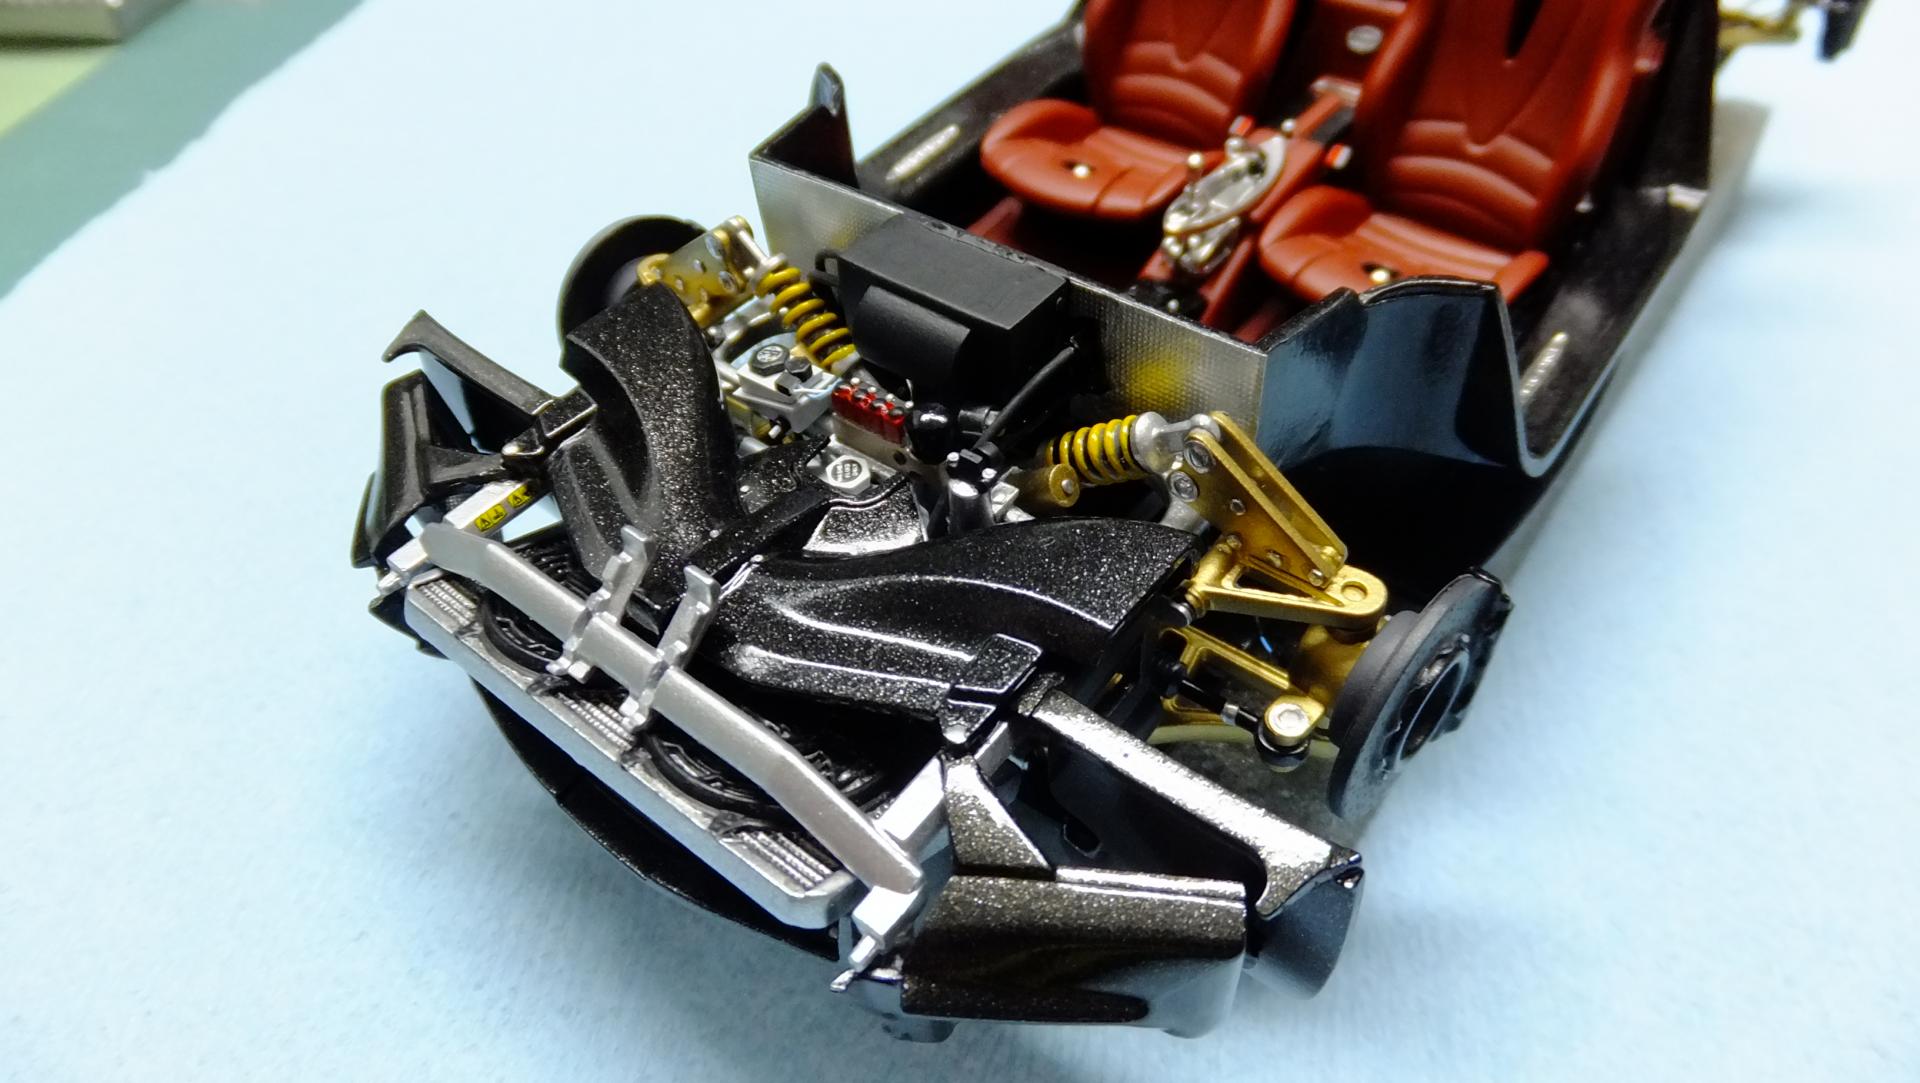
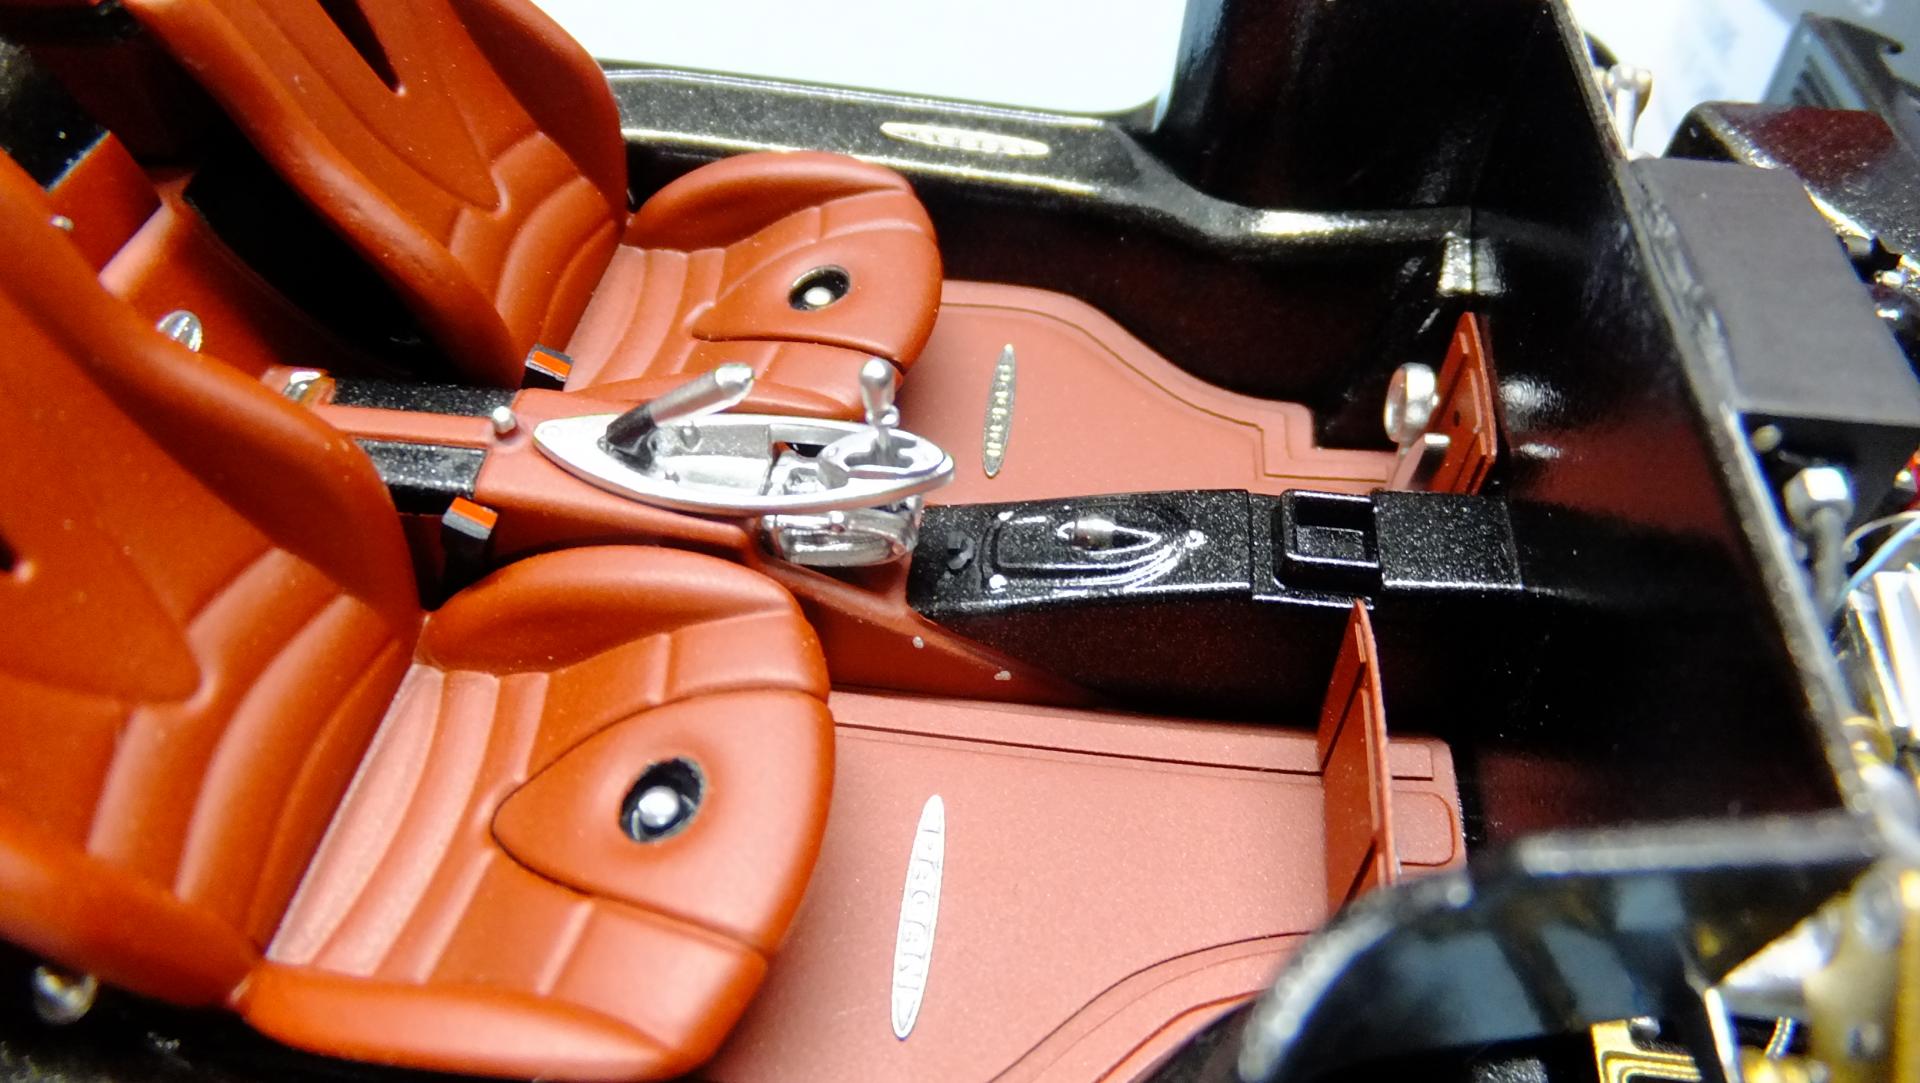
Hey everyone, this is a Countach that i started a couple years ago. Its my favorite car ever...especially white with matching wheels. Even though its my favorite, i have never been able to finish one for myself. I actually ruined 16 Fujimi kits trying. After a 20 year break from trying anymore, i'm back at it, but with this kit instead. Aoshimas kit is way better than Fujimis if you dont count the lack of a full engine/suspension, and under bonnet detail. At this point, i just want a really nice curbside build, but i'm gonna add a tone of details to it to still make the engine bay look just as real as Fujimis. -Photo 1; The kit, or should i say; two of these kits. -Photo 2; Some inspiration -Photo 3; Everything marked by sharpie needs to be cut away. I was in the process of scribing stitching lines. A ignition switch needs to be added to the steering column, which also needs the under side filled in. -Photo 4; Here are the replacement parts. I know it seems like alot of work, but to me its cleaner looking in the end, and isnt really that bad to do. -Photo 5; There are a ton of marked bits to cut away for better realism. -Photo 6; Since its a curbside, i assembled most of the chassis, and shot it up with black primer. I will paint details that end up being visible while sitting on a shelf. Brake lines will be added since they are very visible on this car. -Photo 7; It already has a great stance. Its nice not having to fix the ride height on something. I also had the wheels stripped already.
- 10 replies
-
- 6
-
-
- aoshima
- lamborghini
- (and 1 more)
-
Something different. Not a serious build, but a challenging journey to make the idea I had a reality. I really like the hard top styling of the Nissan Skyline C210 and C211. To me they are like a mini Japanese version of some of the American Muscle hard top coupe's form the late 60's early 70's Aoshima's Skyline kits are a great canvas to do some customising and fun experimenting trying to build in different styles and thats what I did with this build. Started with this kit. And after some extensive body work and scratch building I ended up with this. 3D printed wheels are designed by SlowlyModels Engine was donated from the AMT General Lee kit. Interior parts before install. Like mentioned nothing serious, just a fun build all about the visual. Some wip pictures can be found here.
- 24 replies
-
- 17
-
-
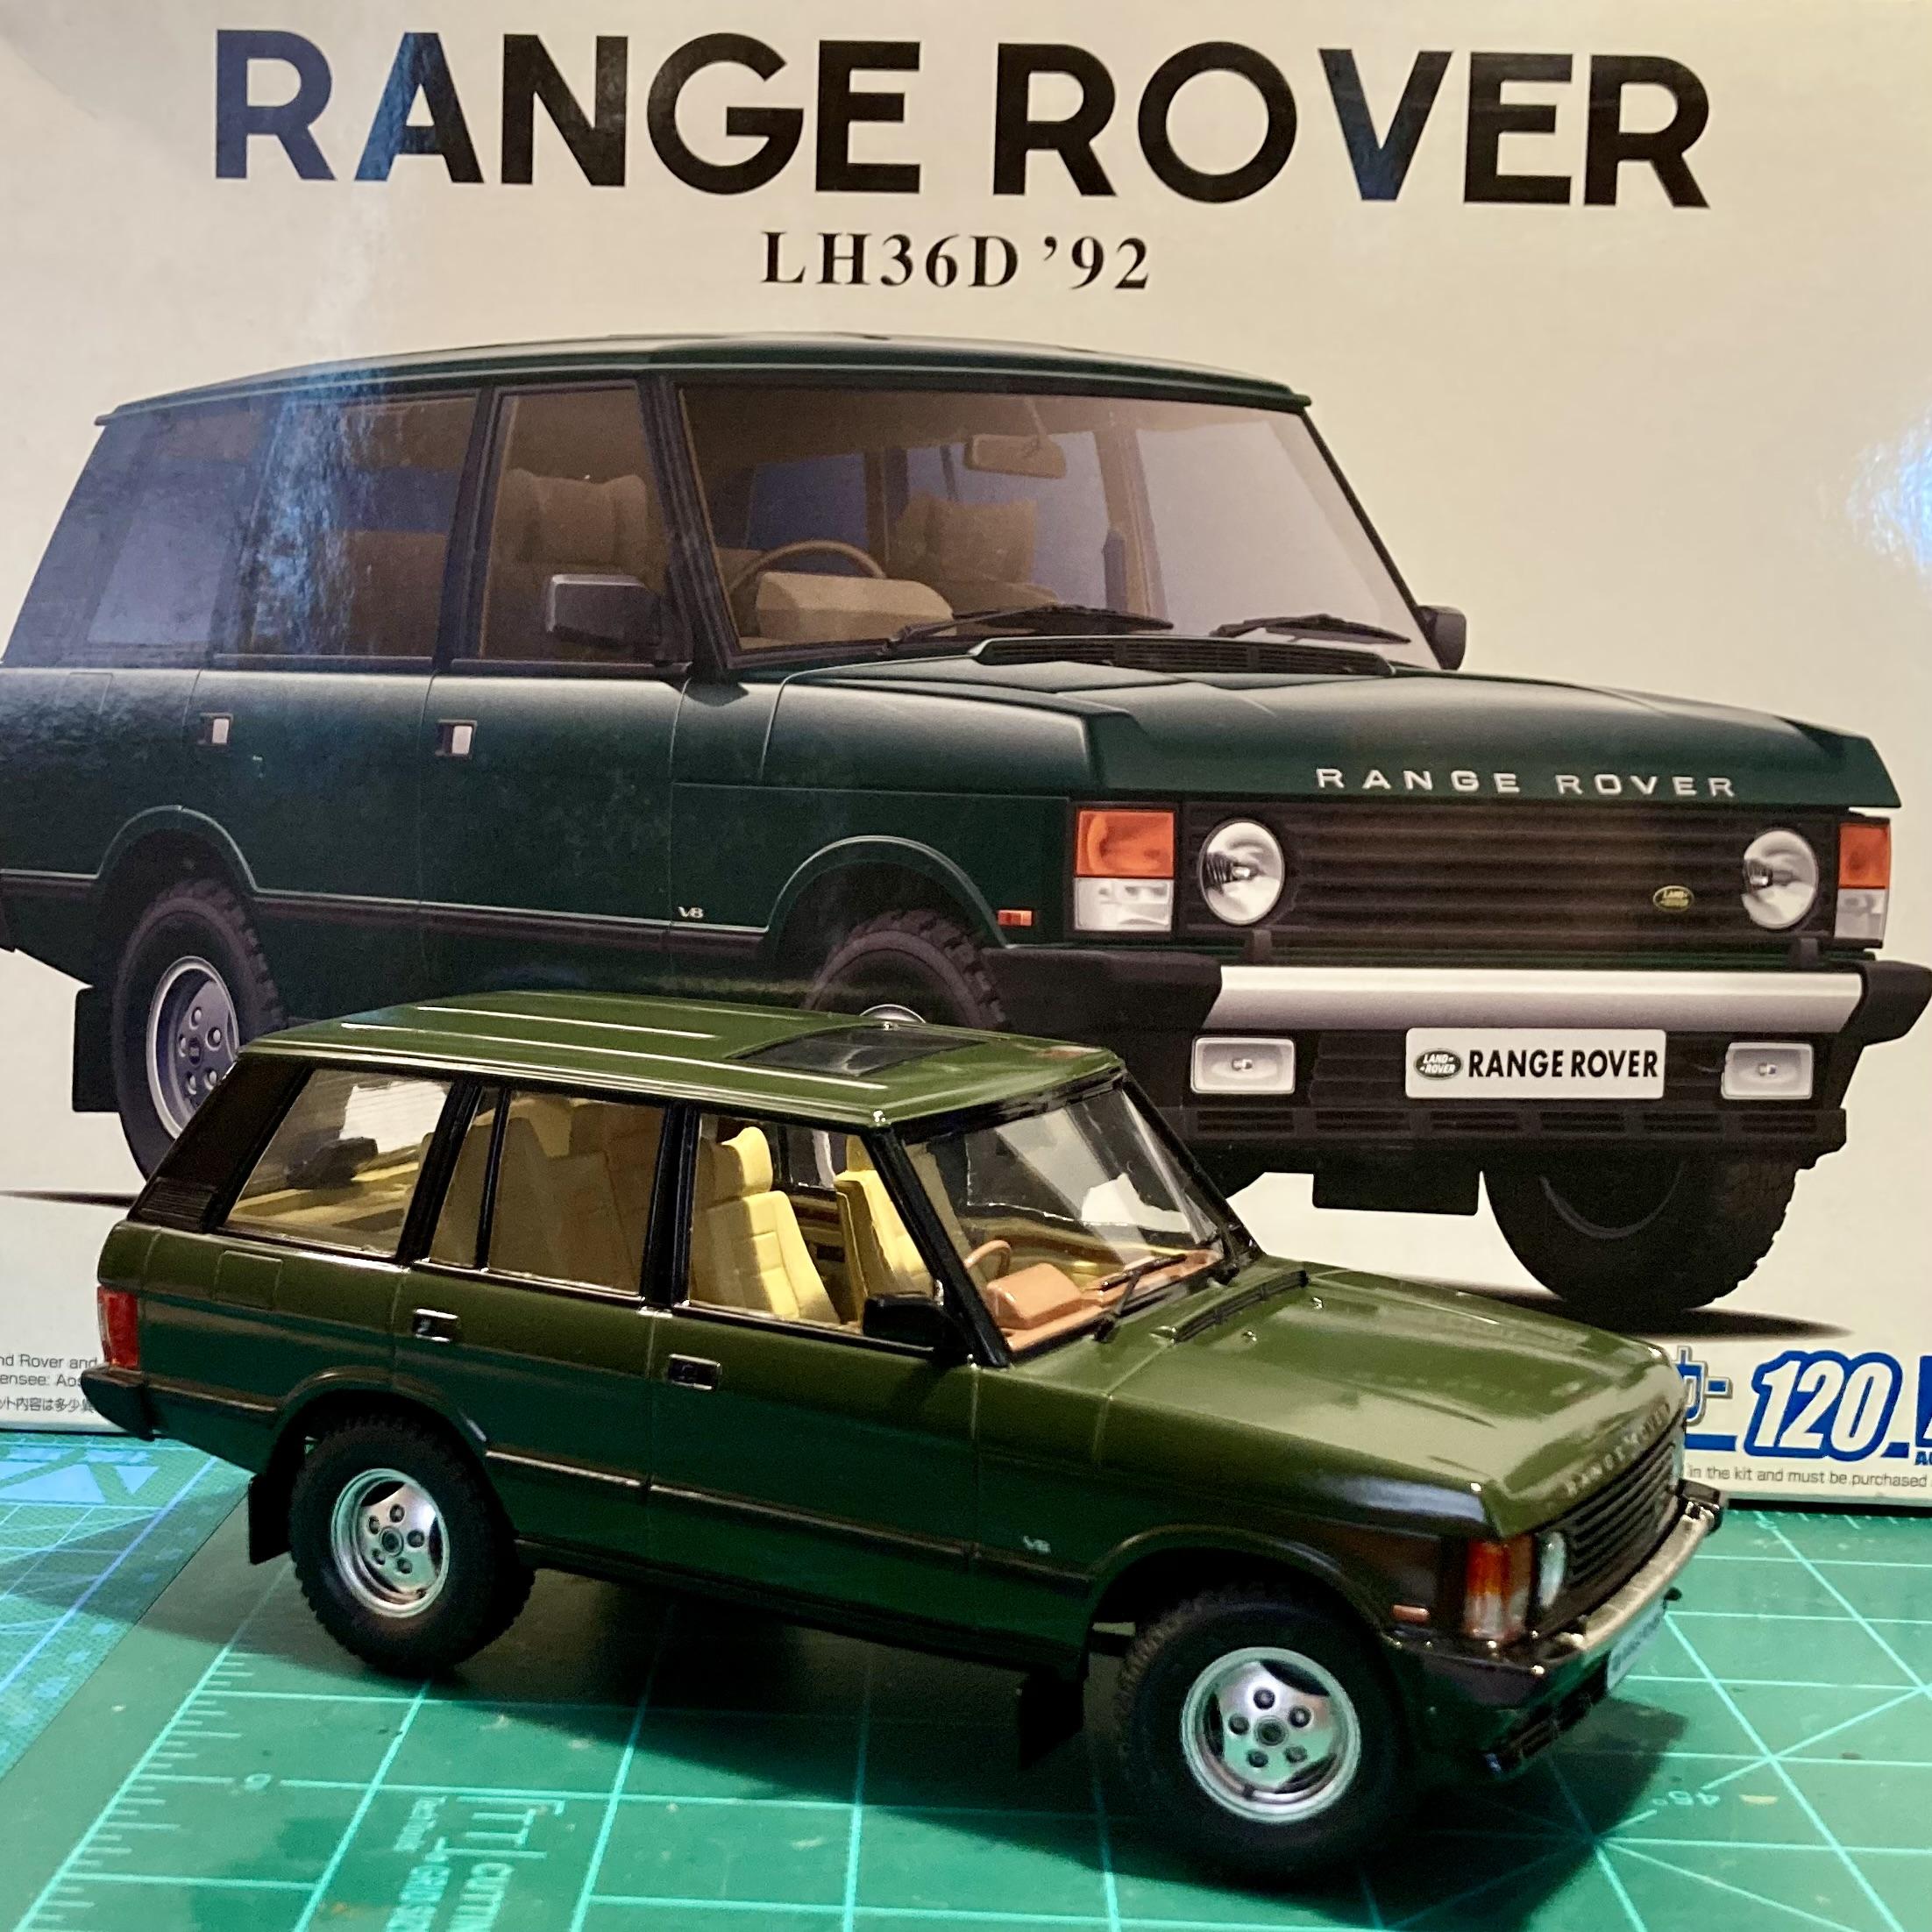
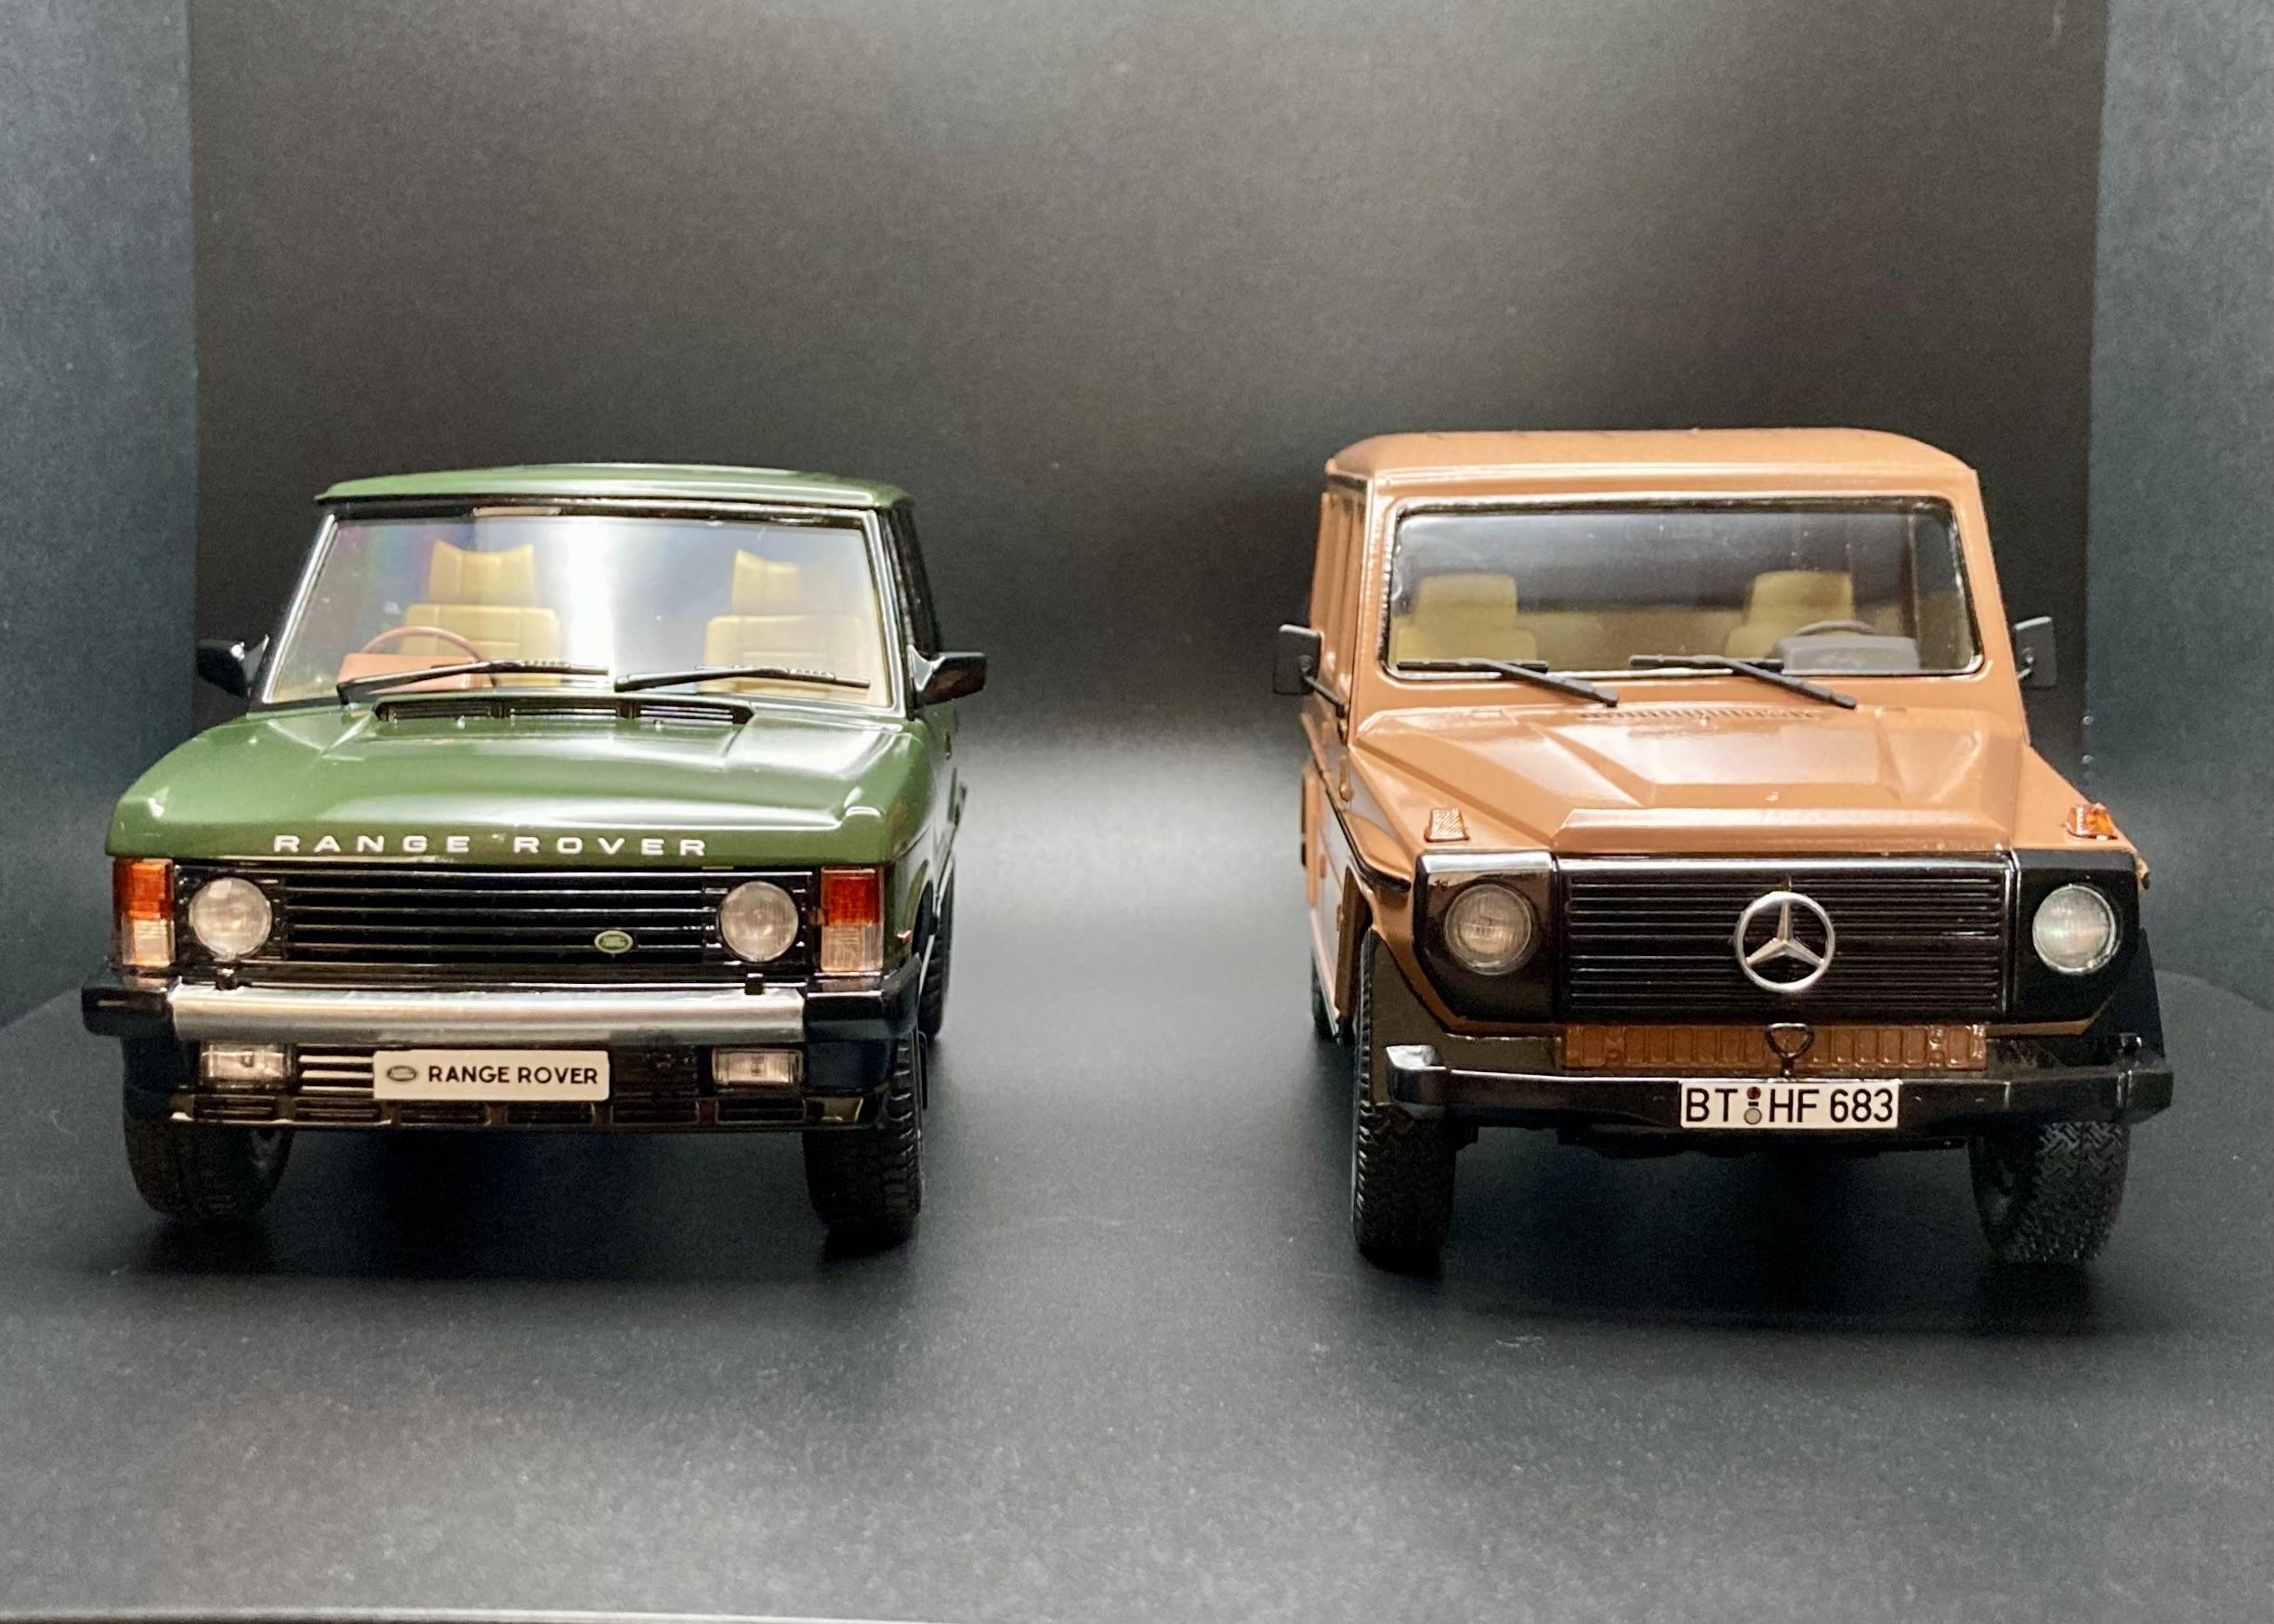
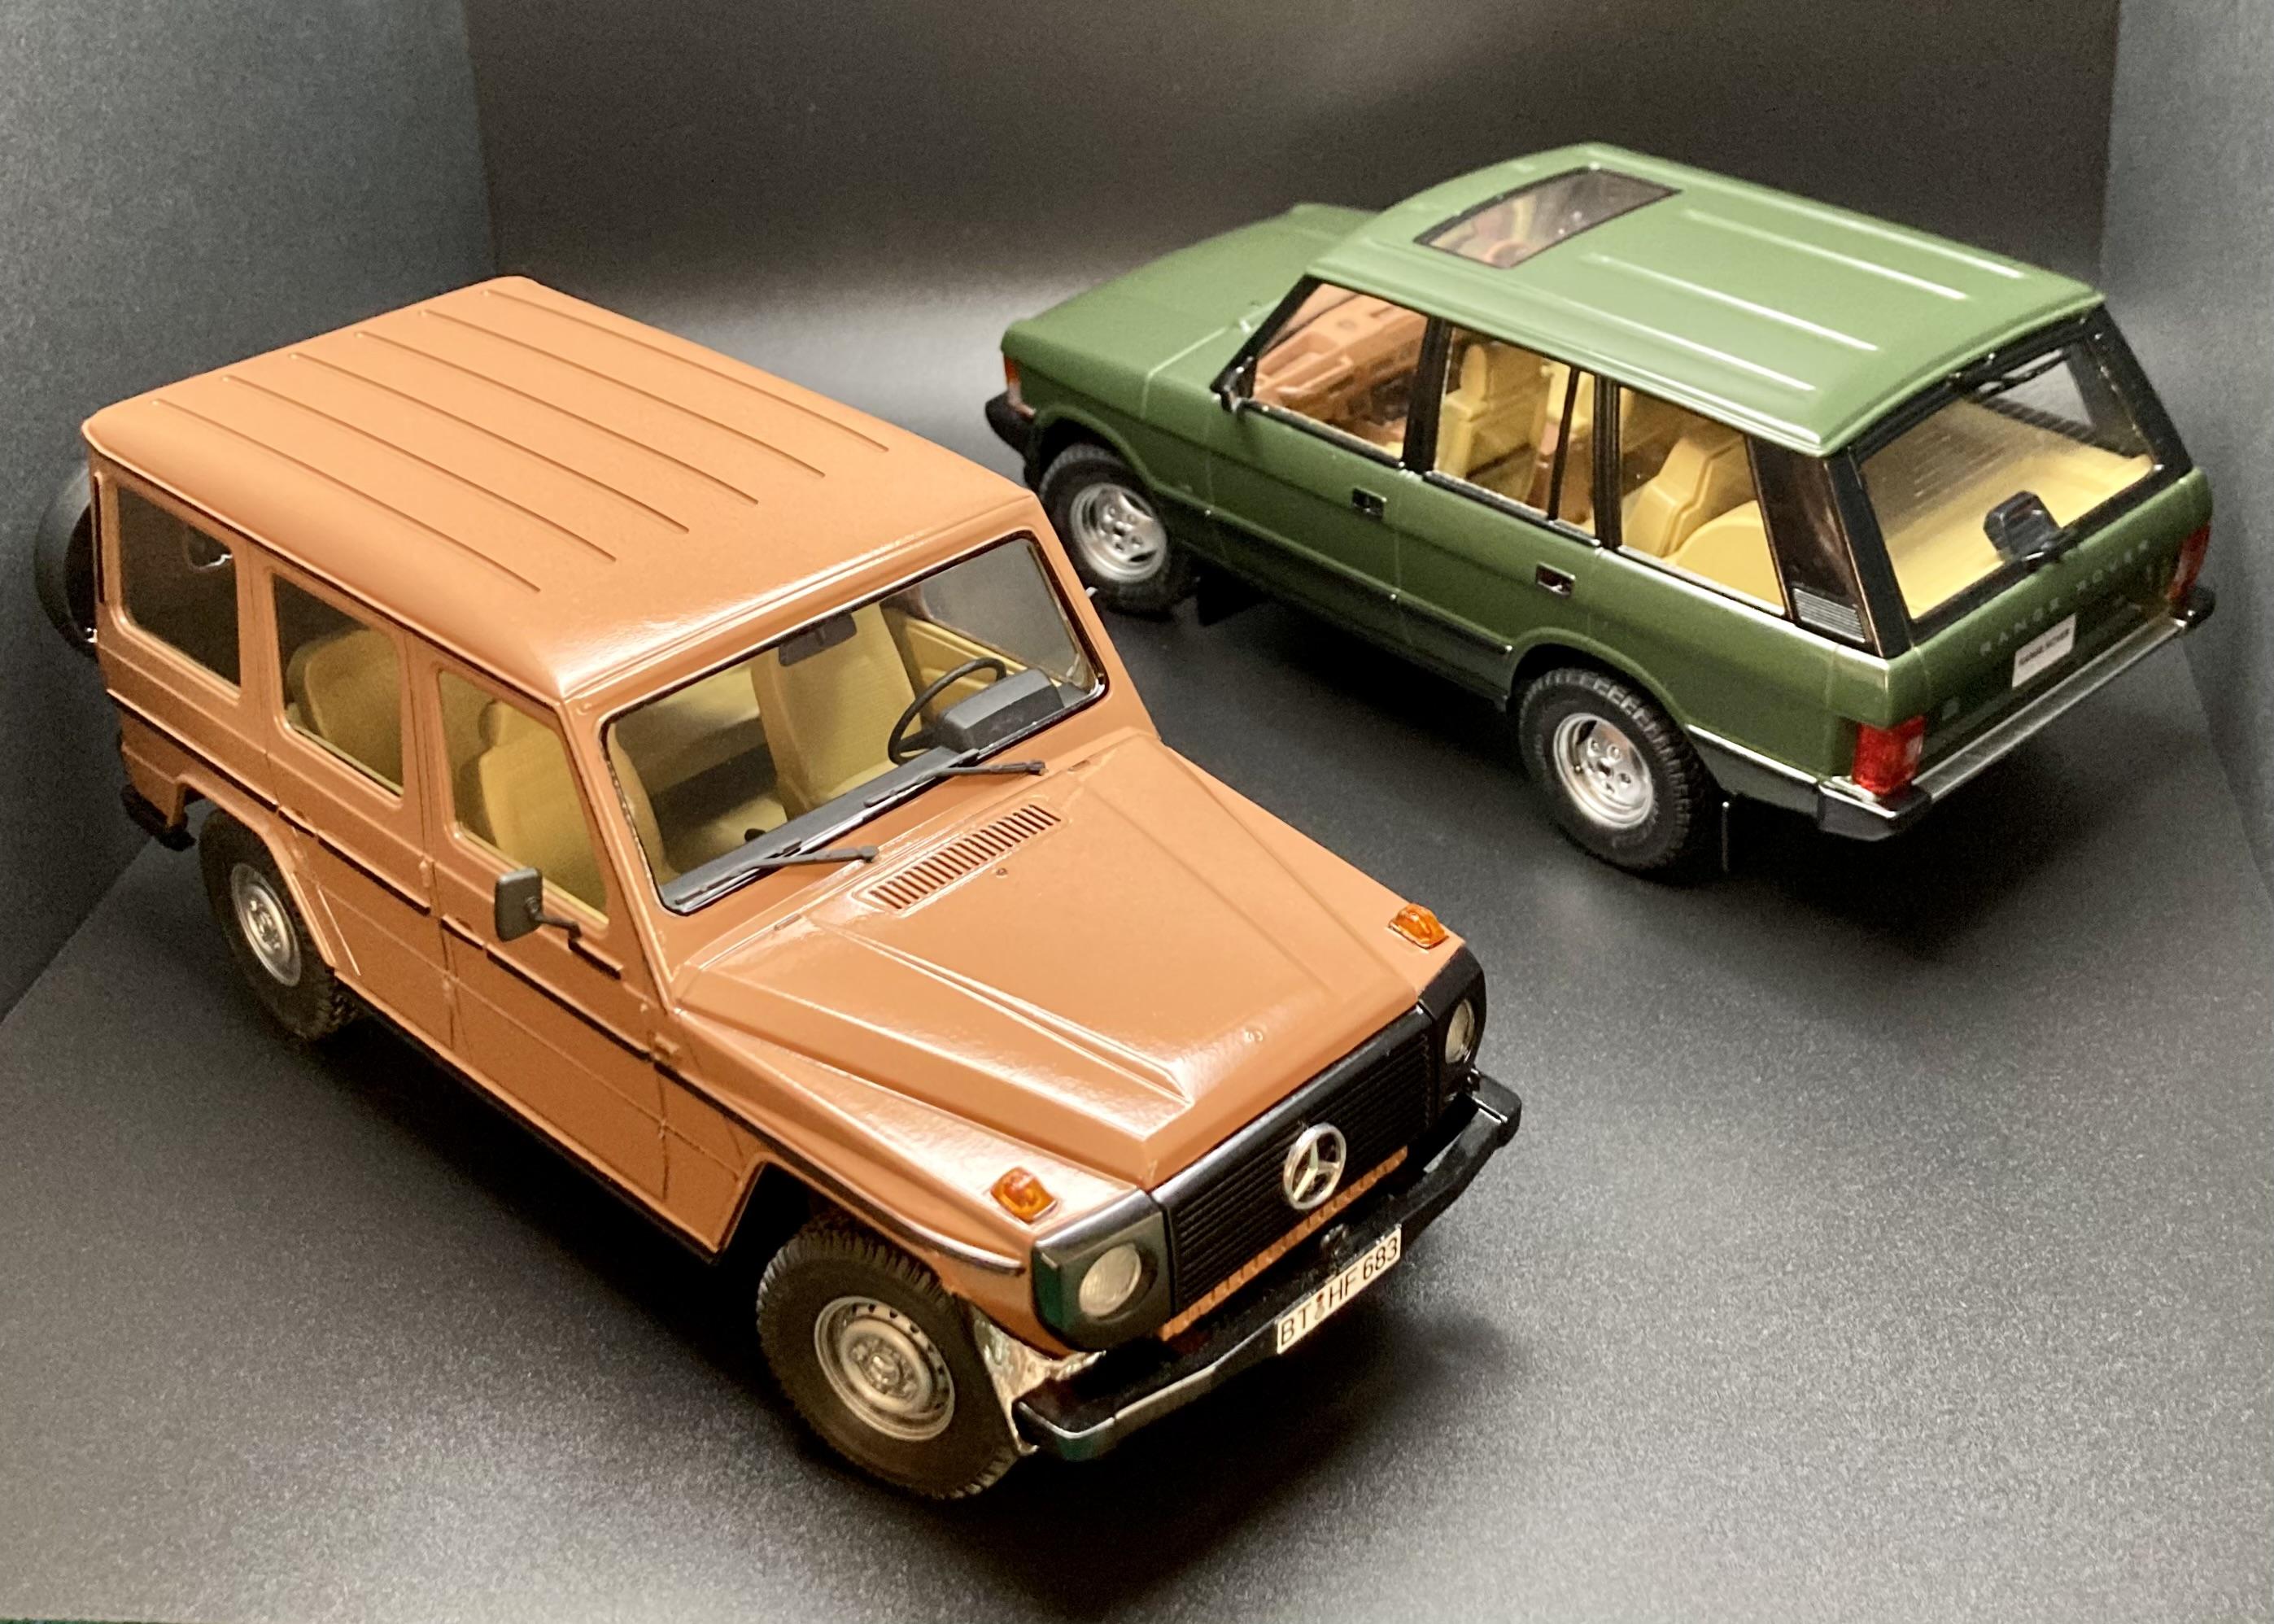
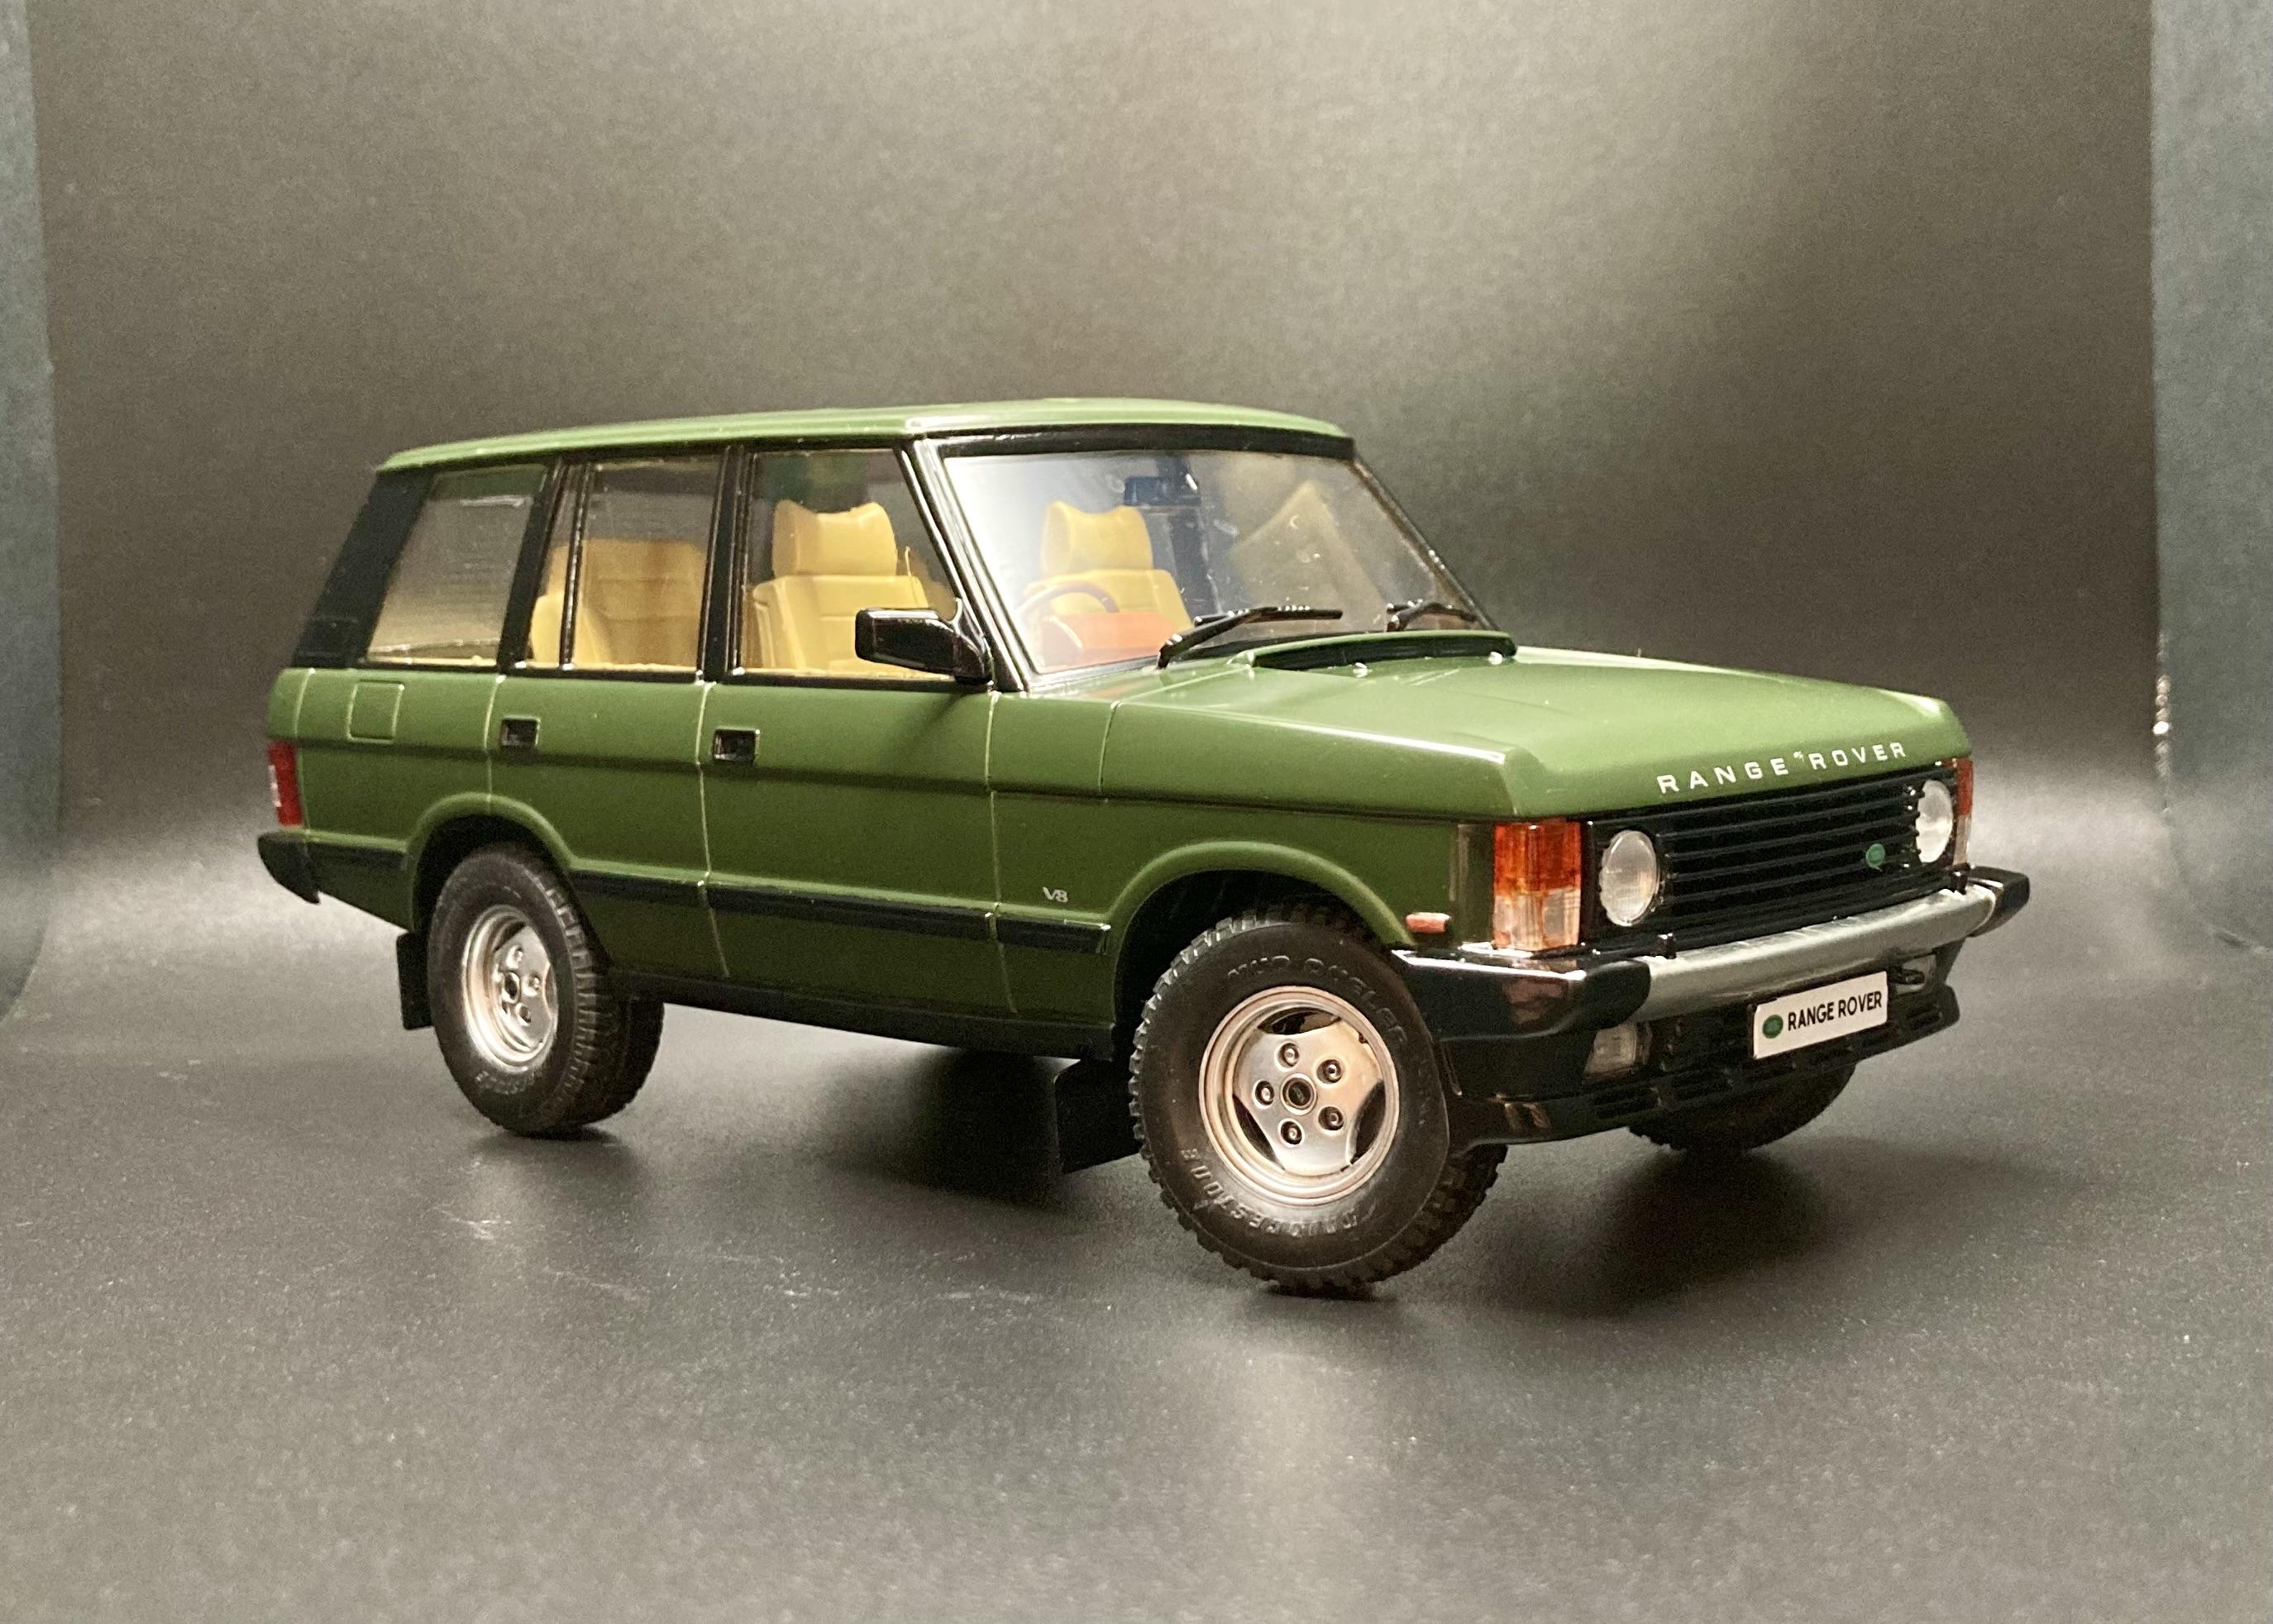
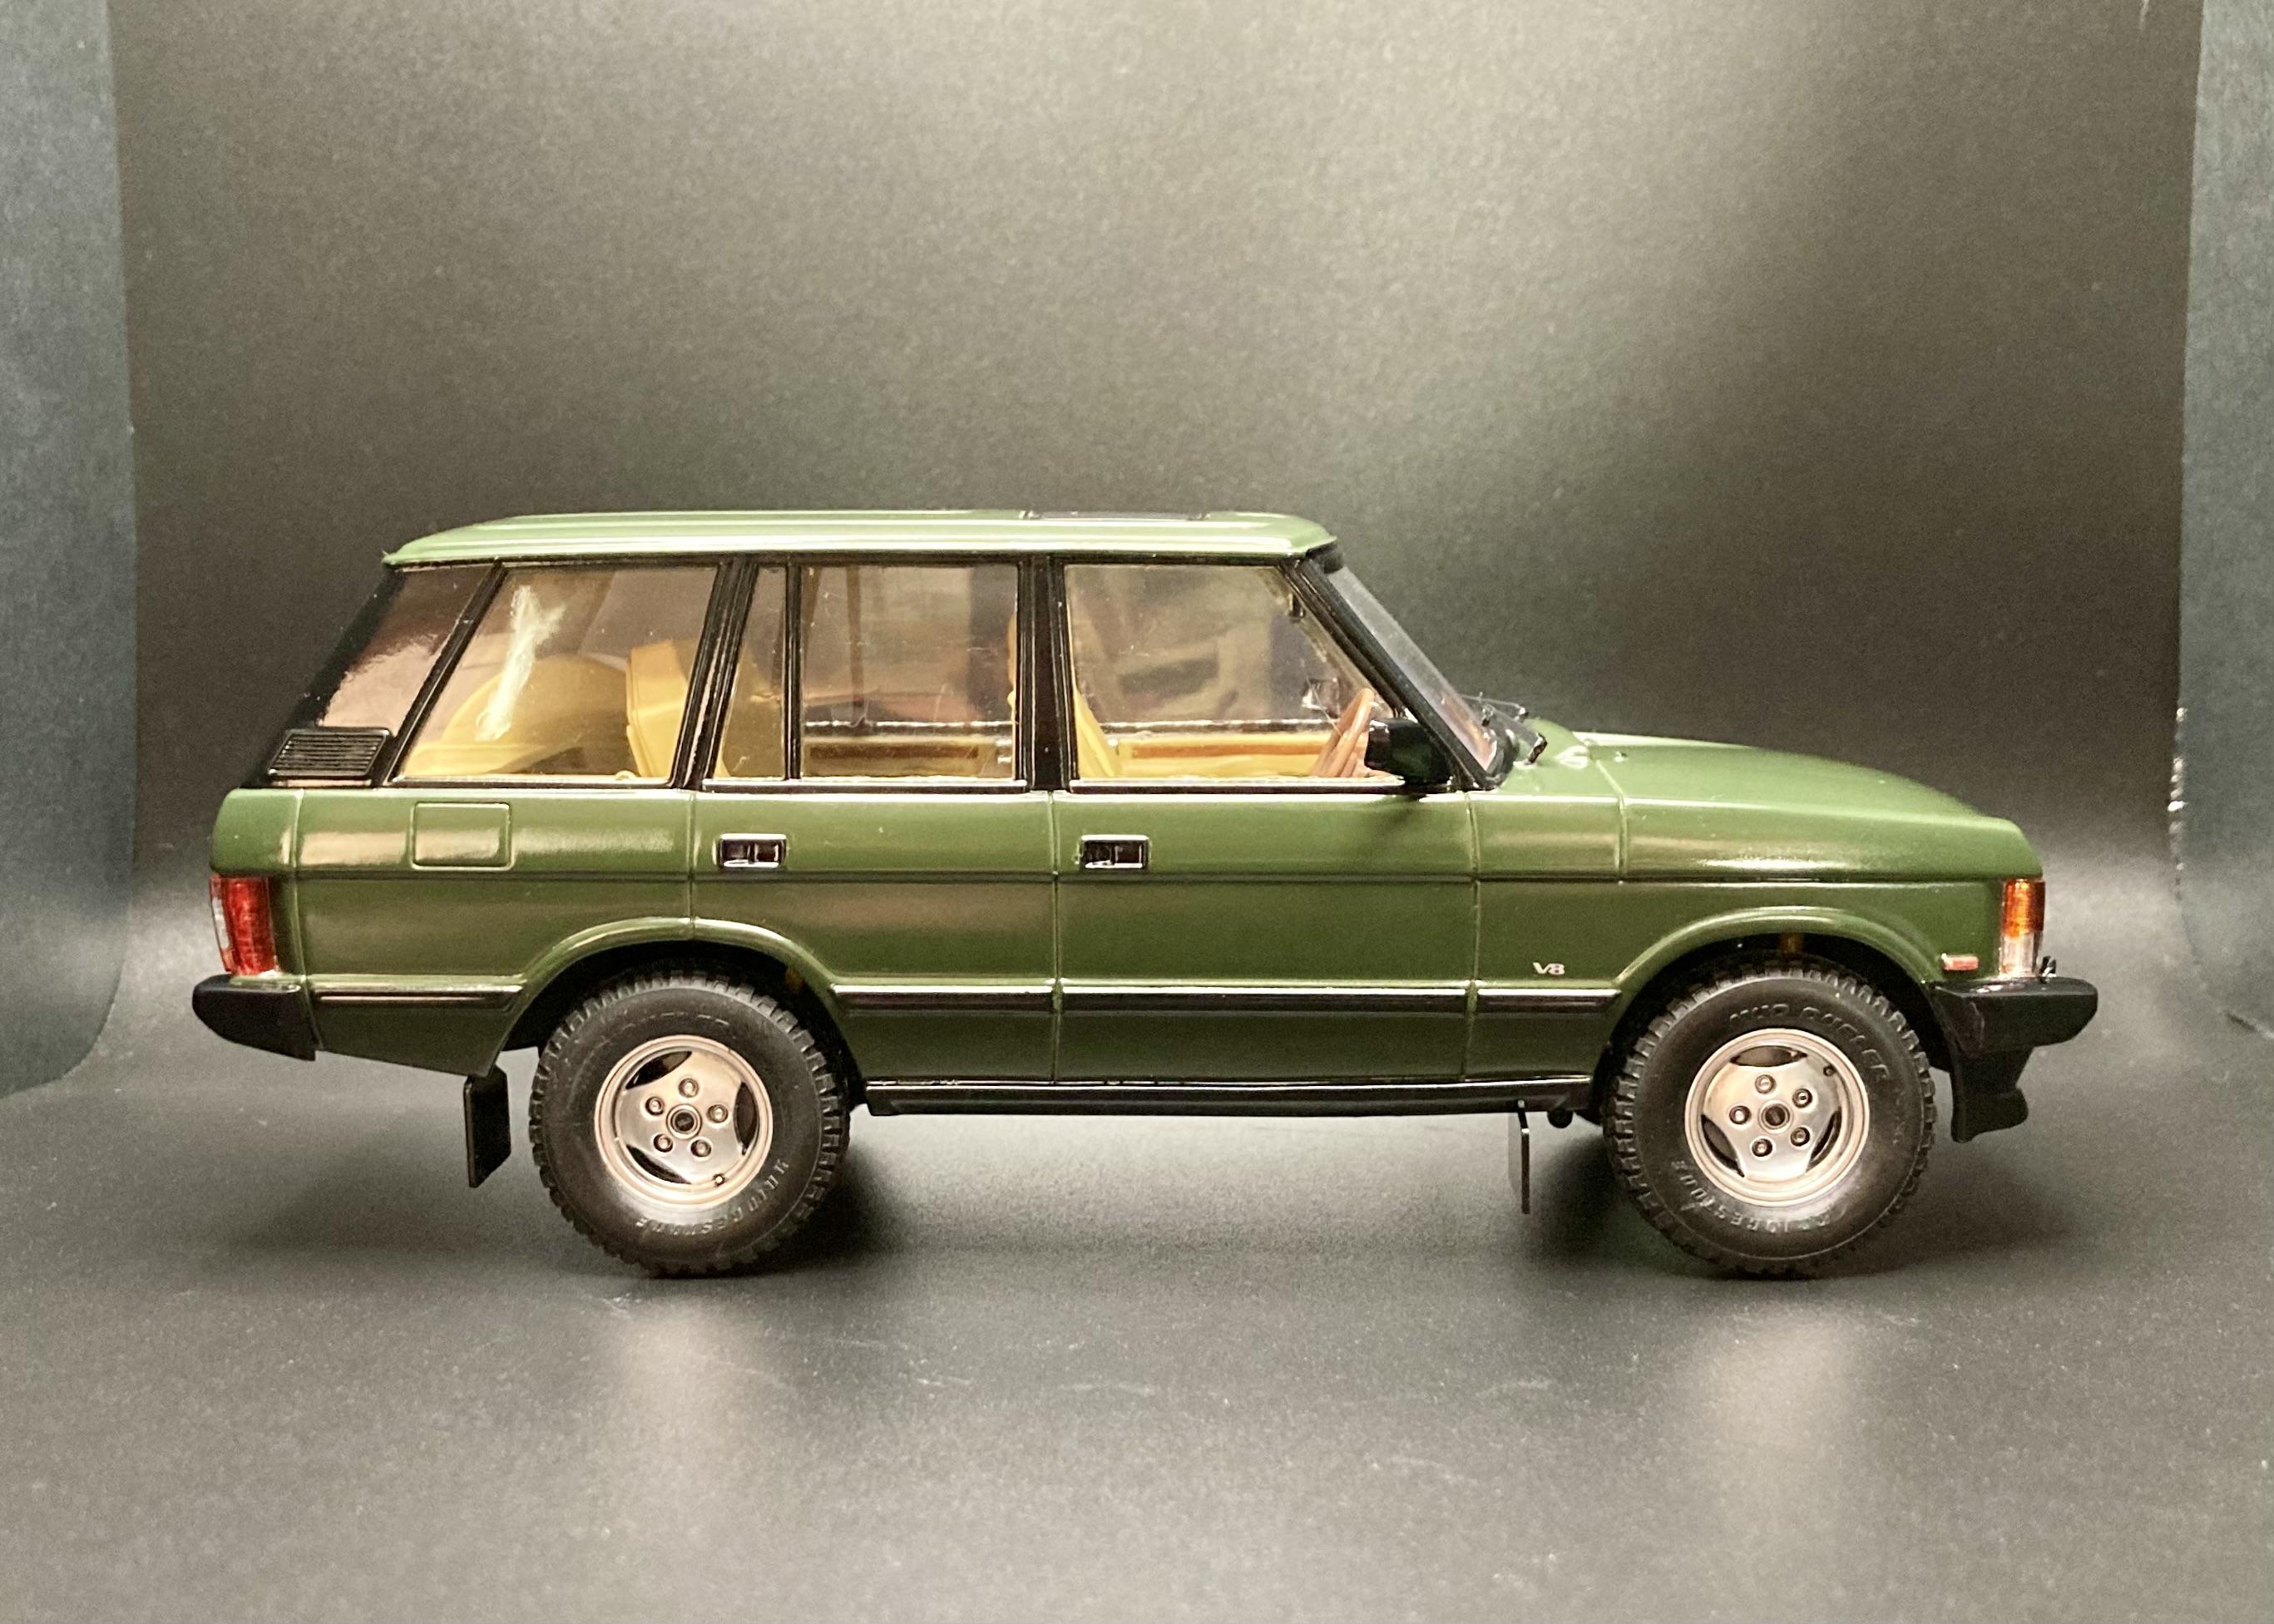
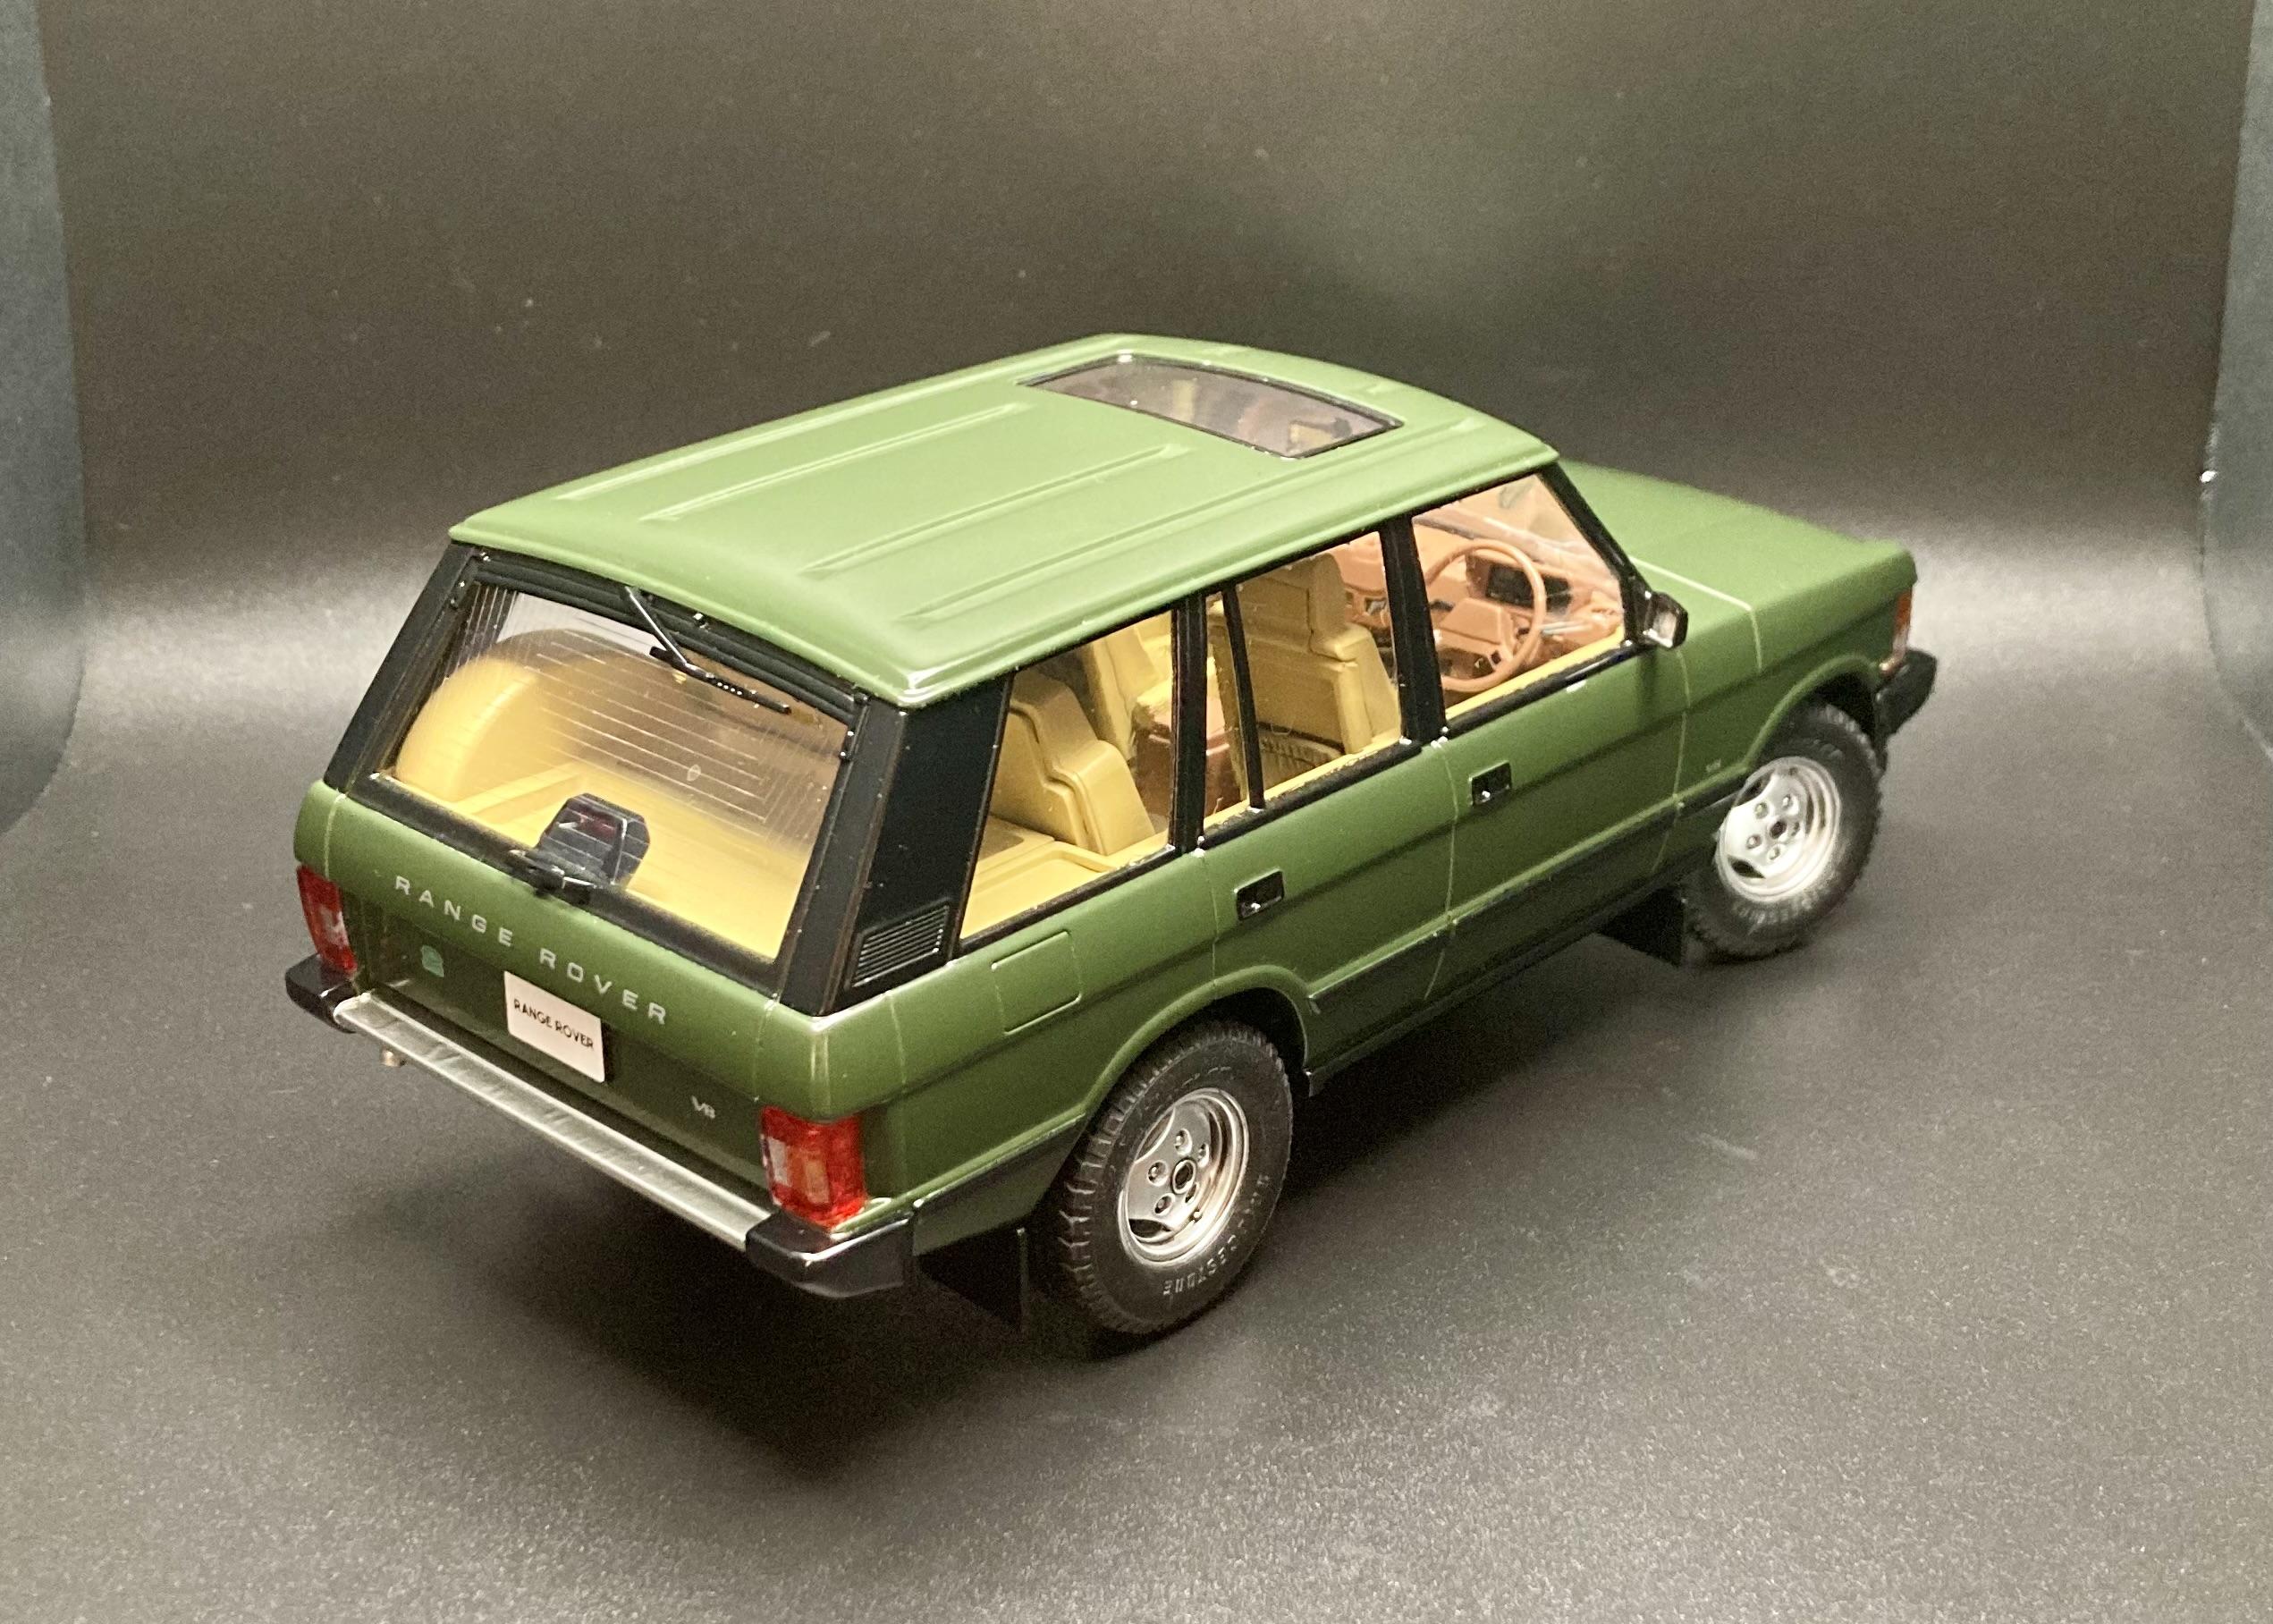
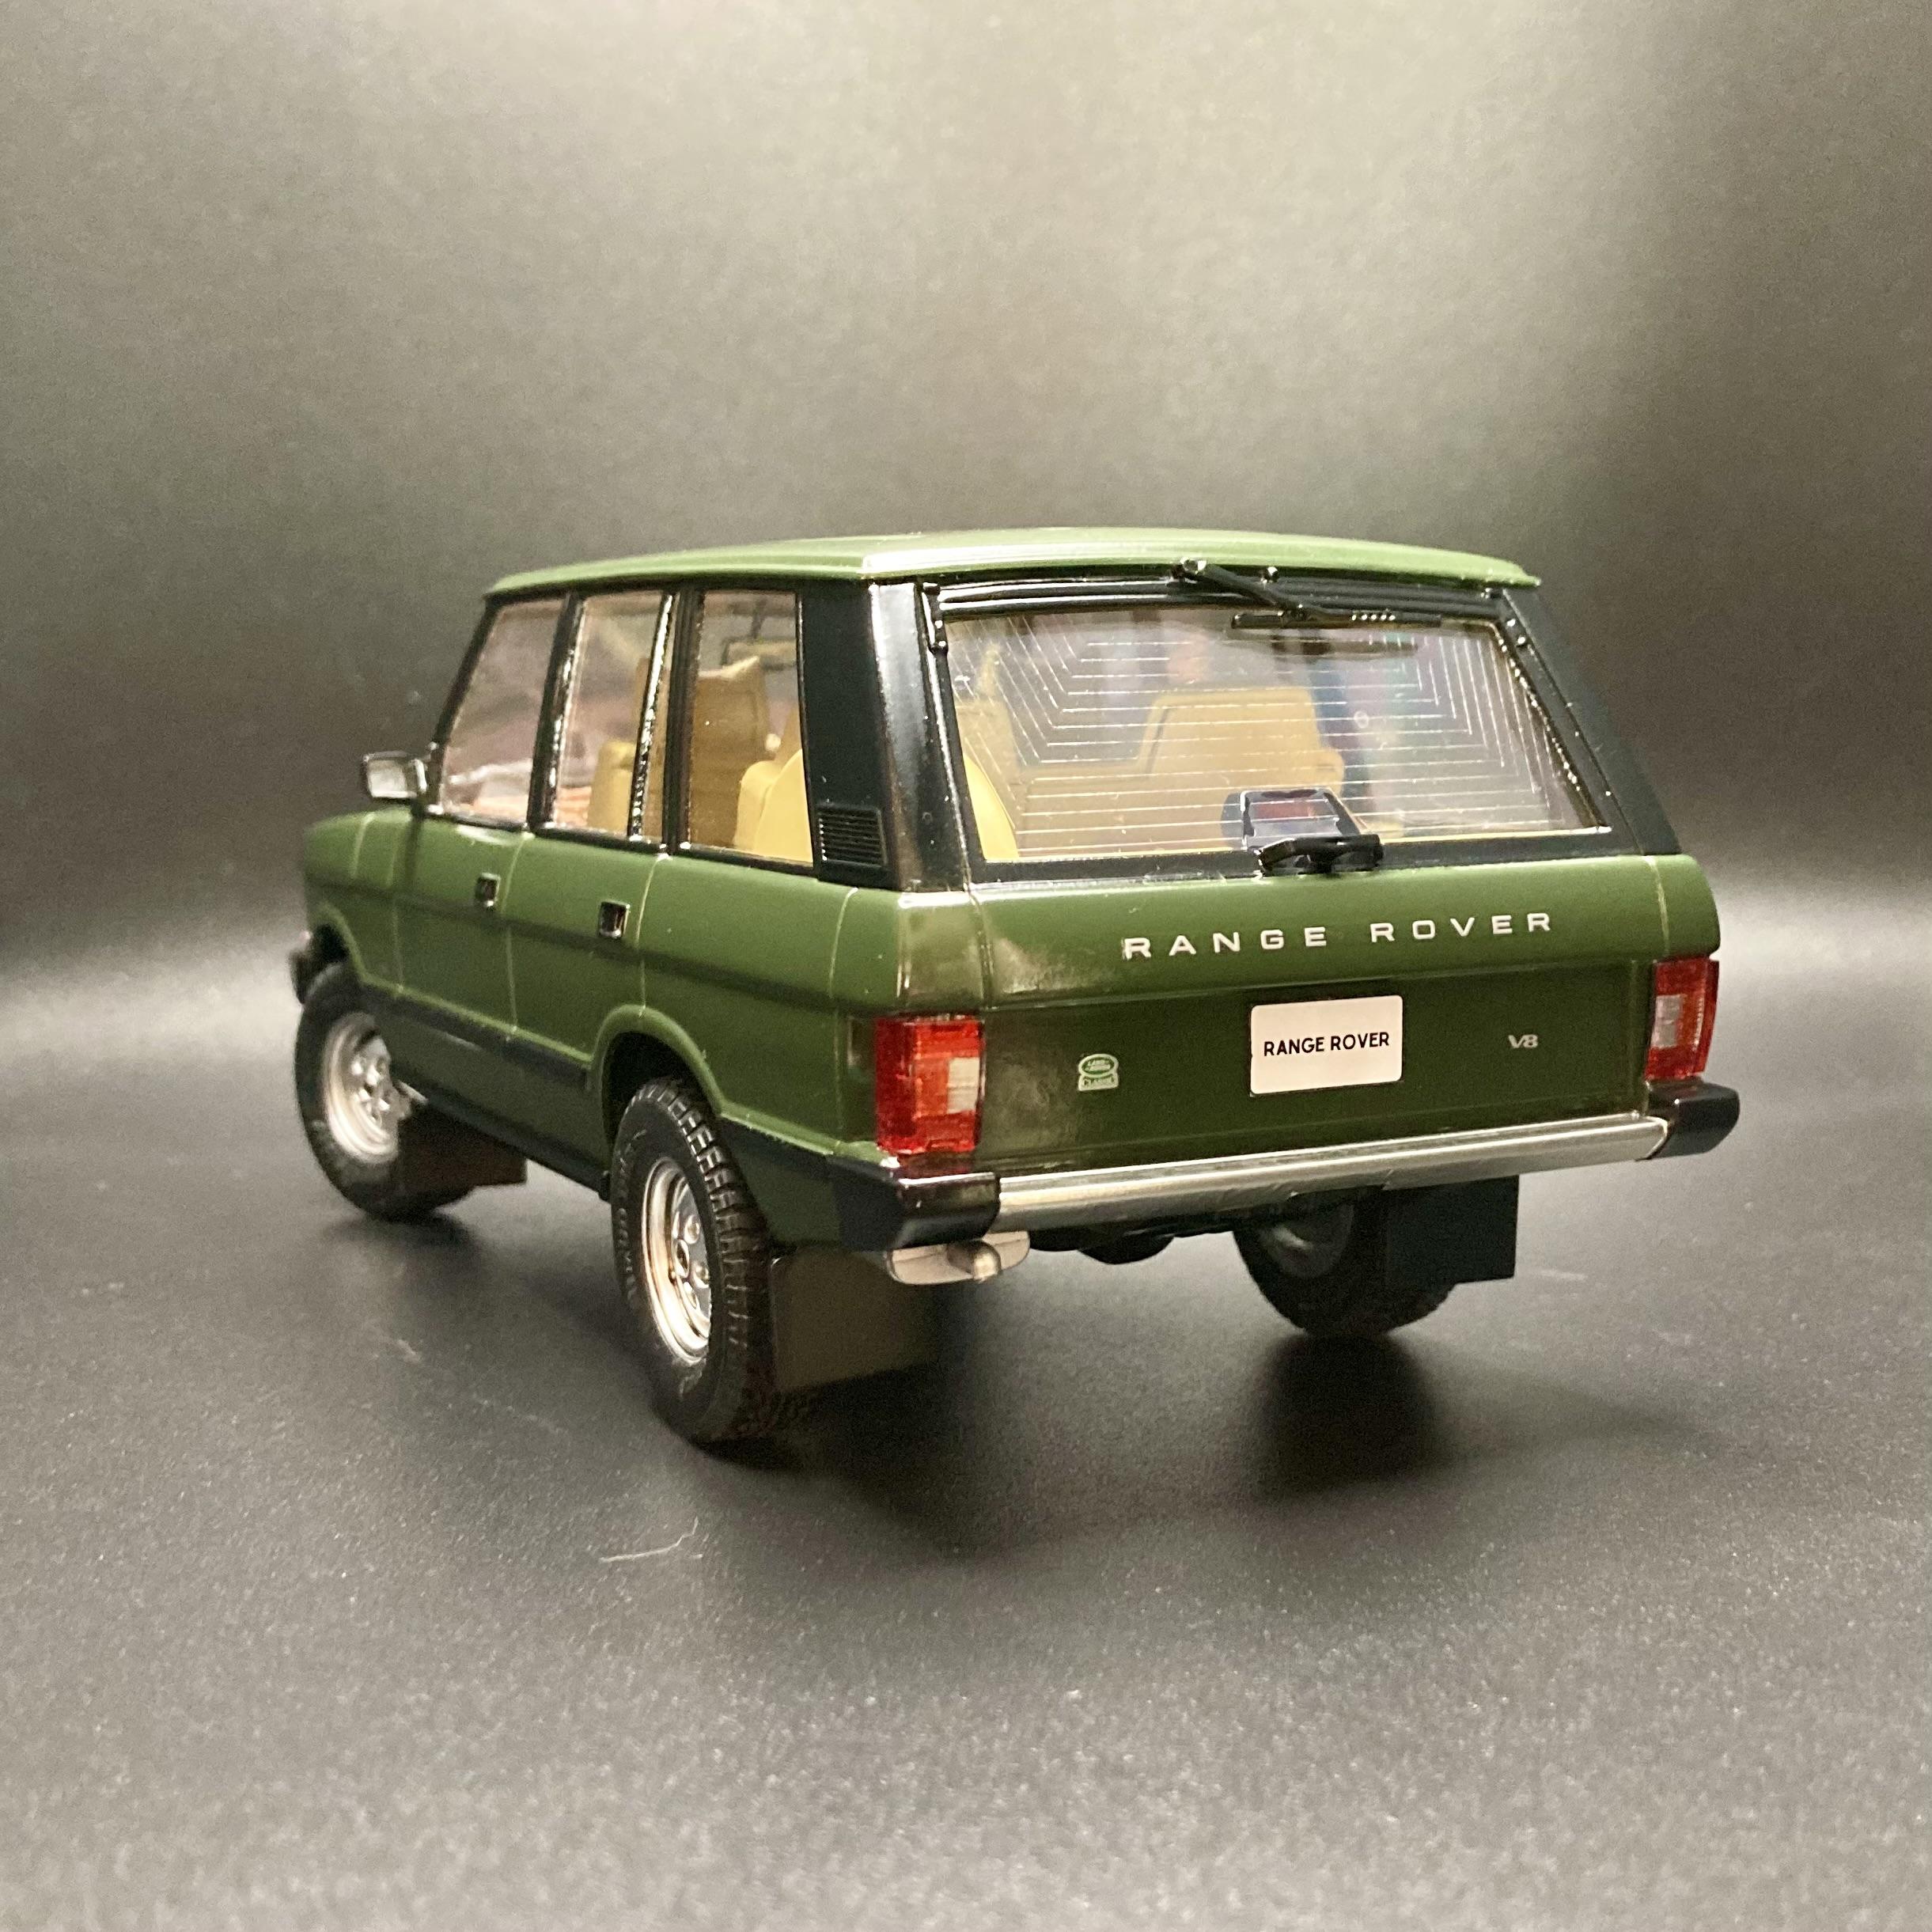
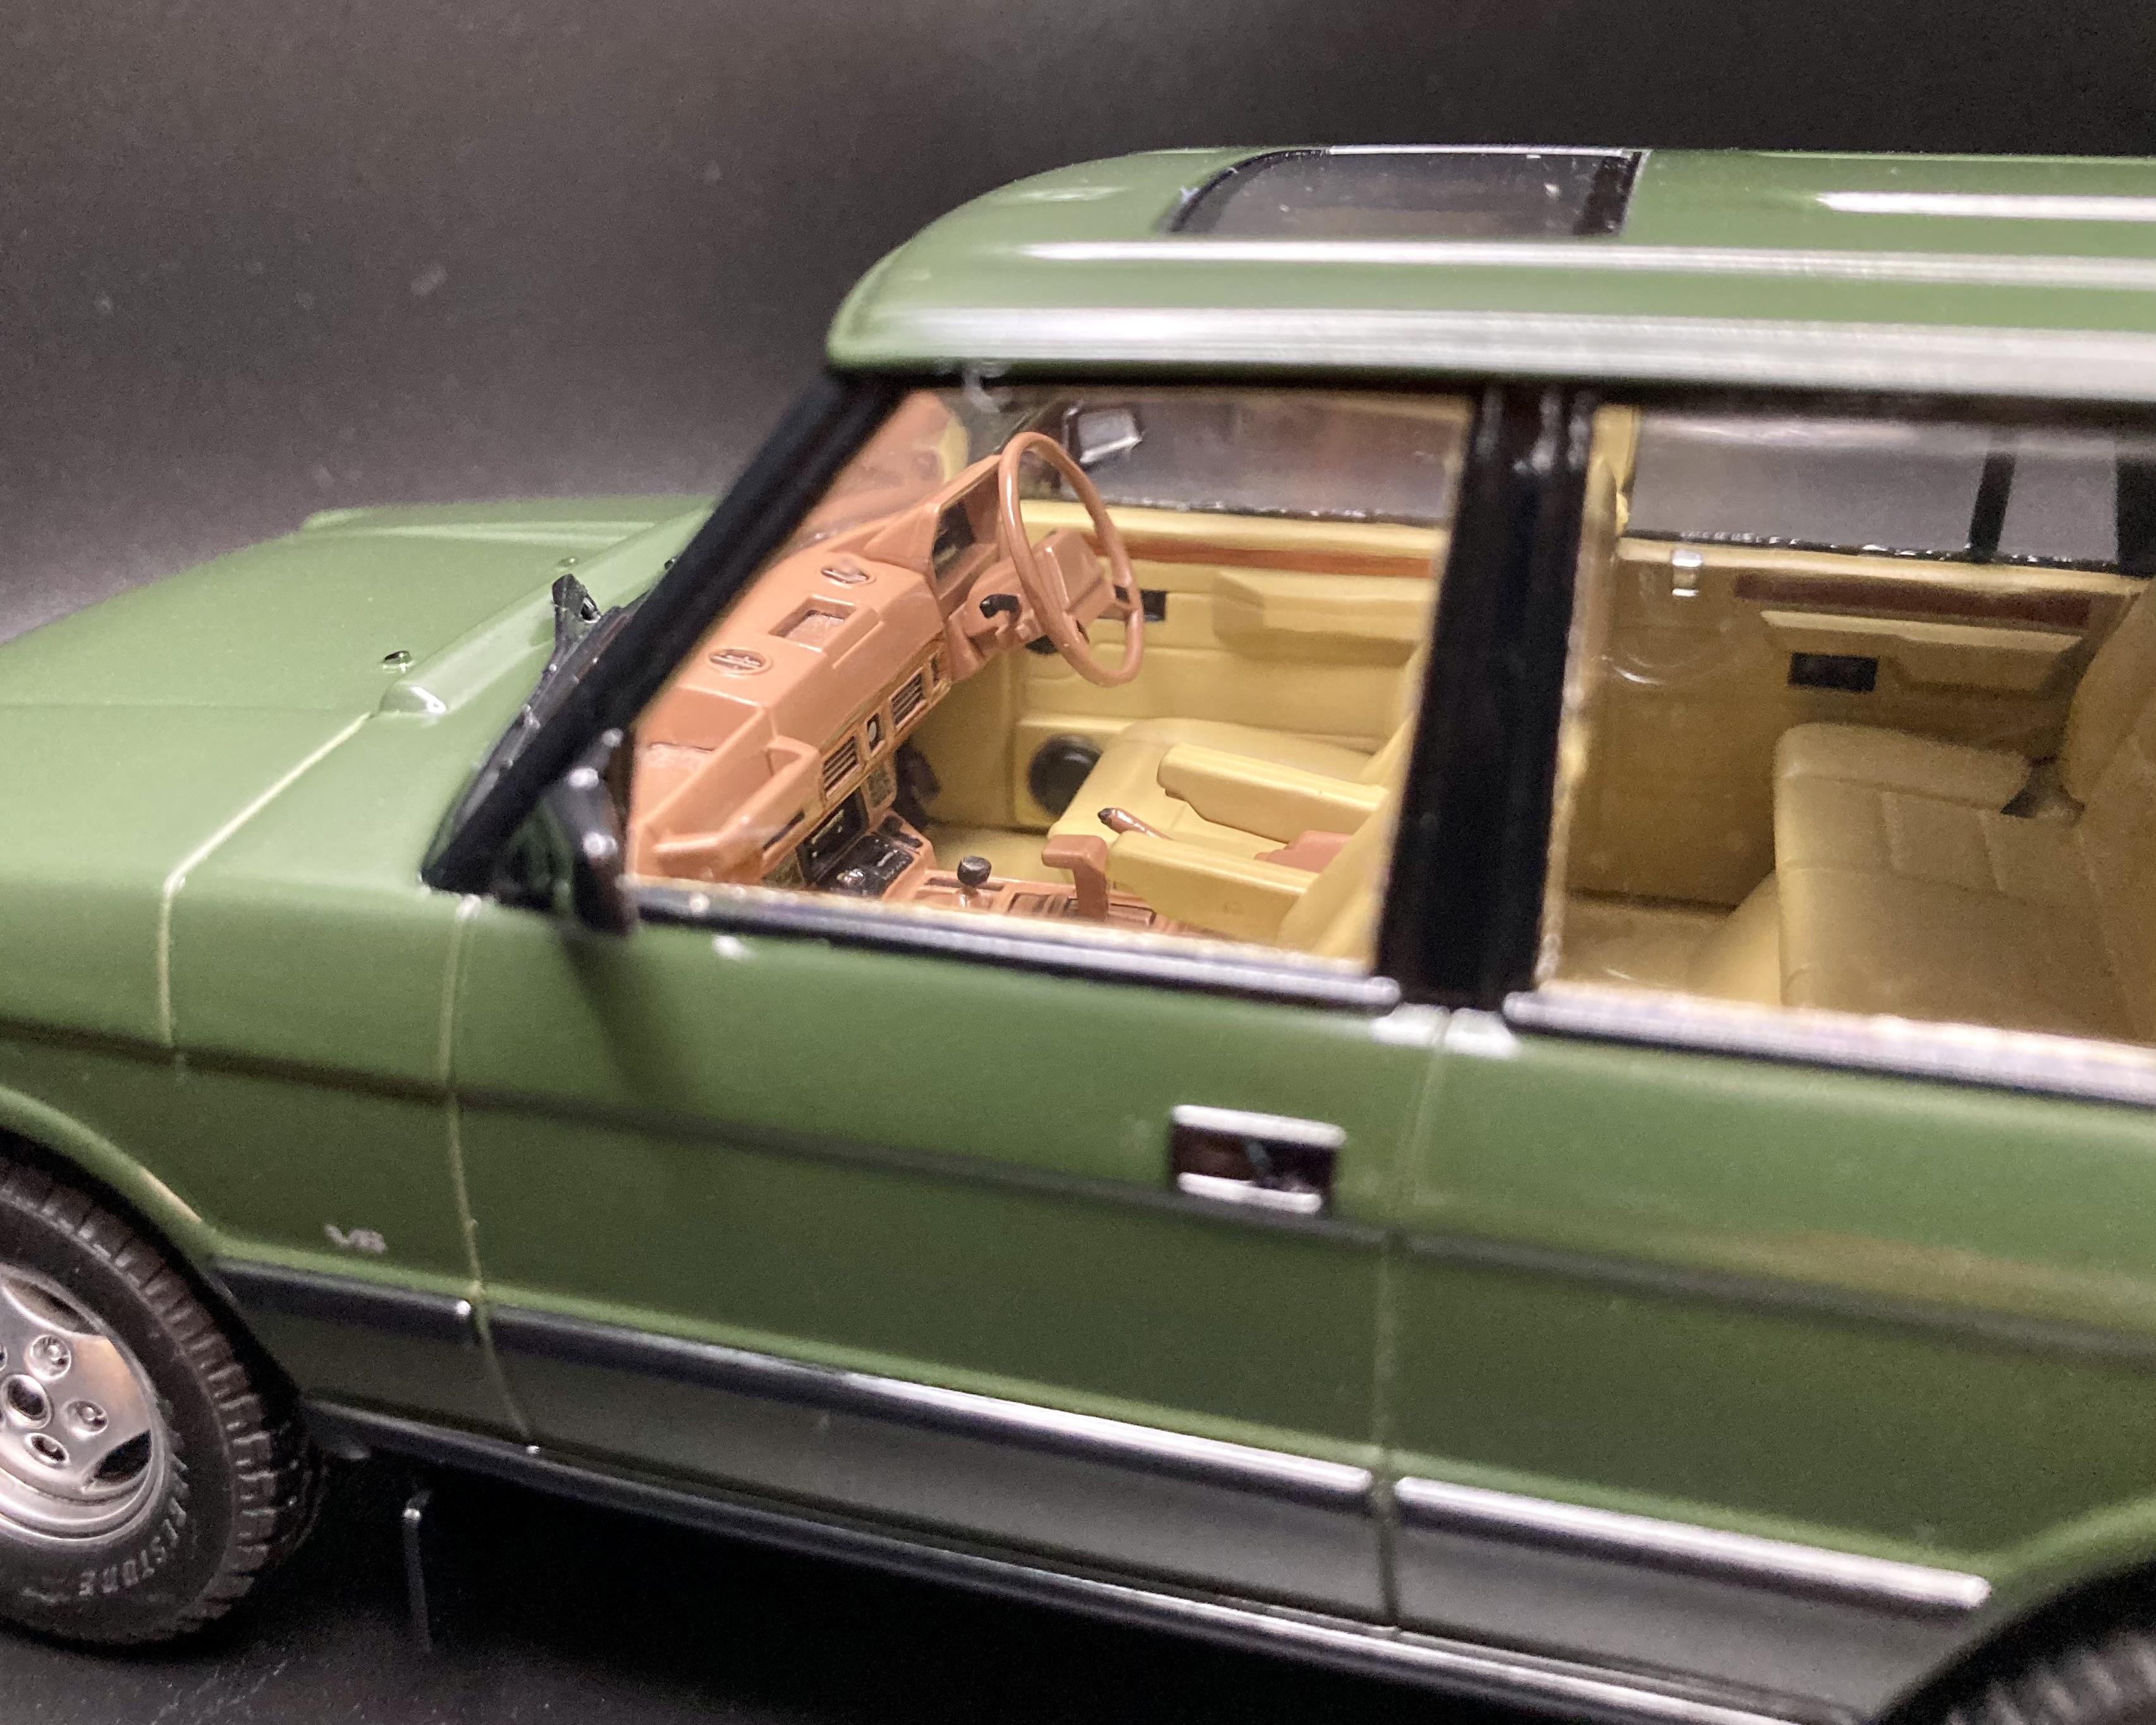
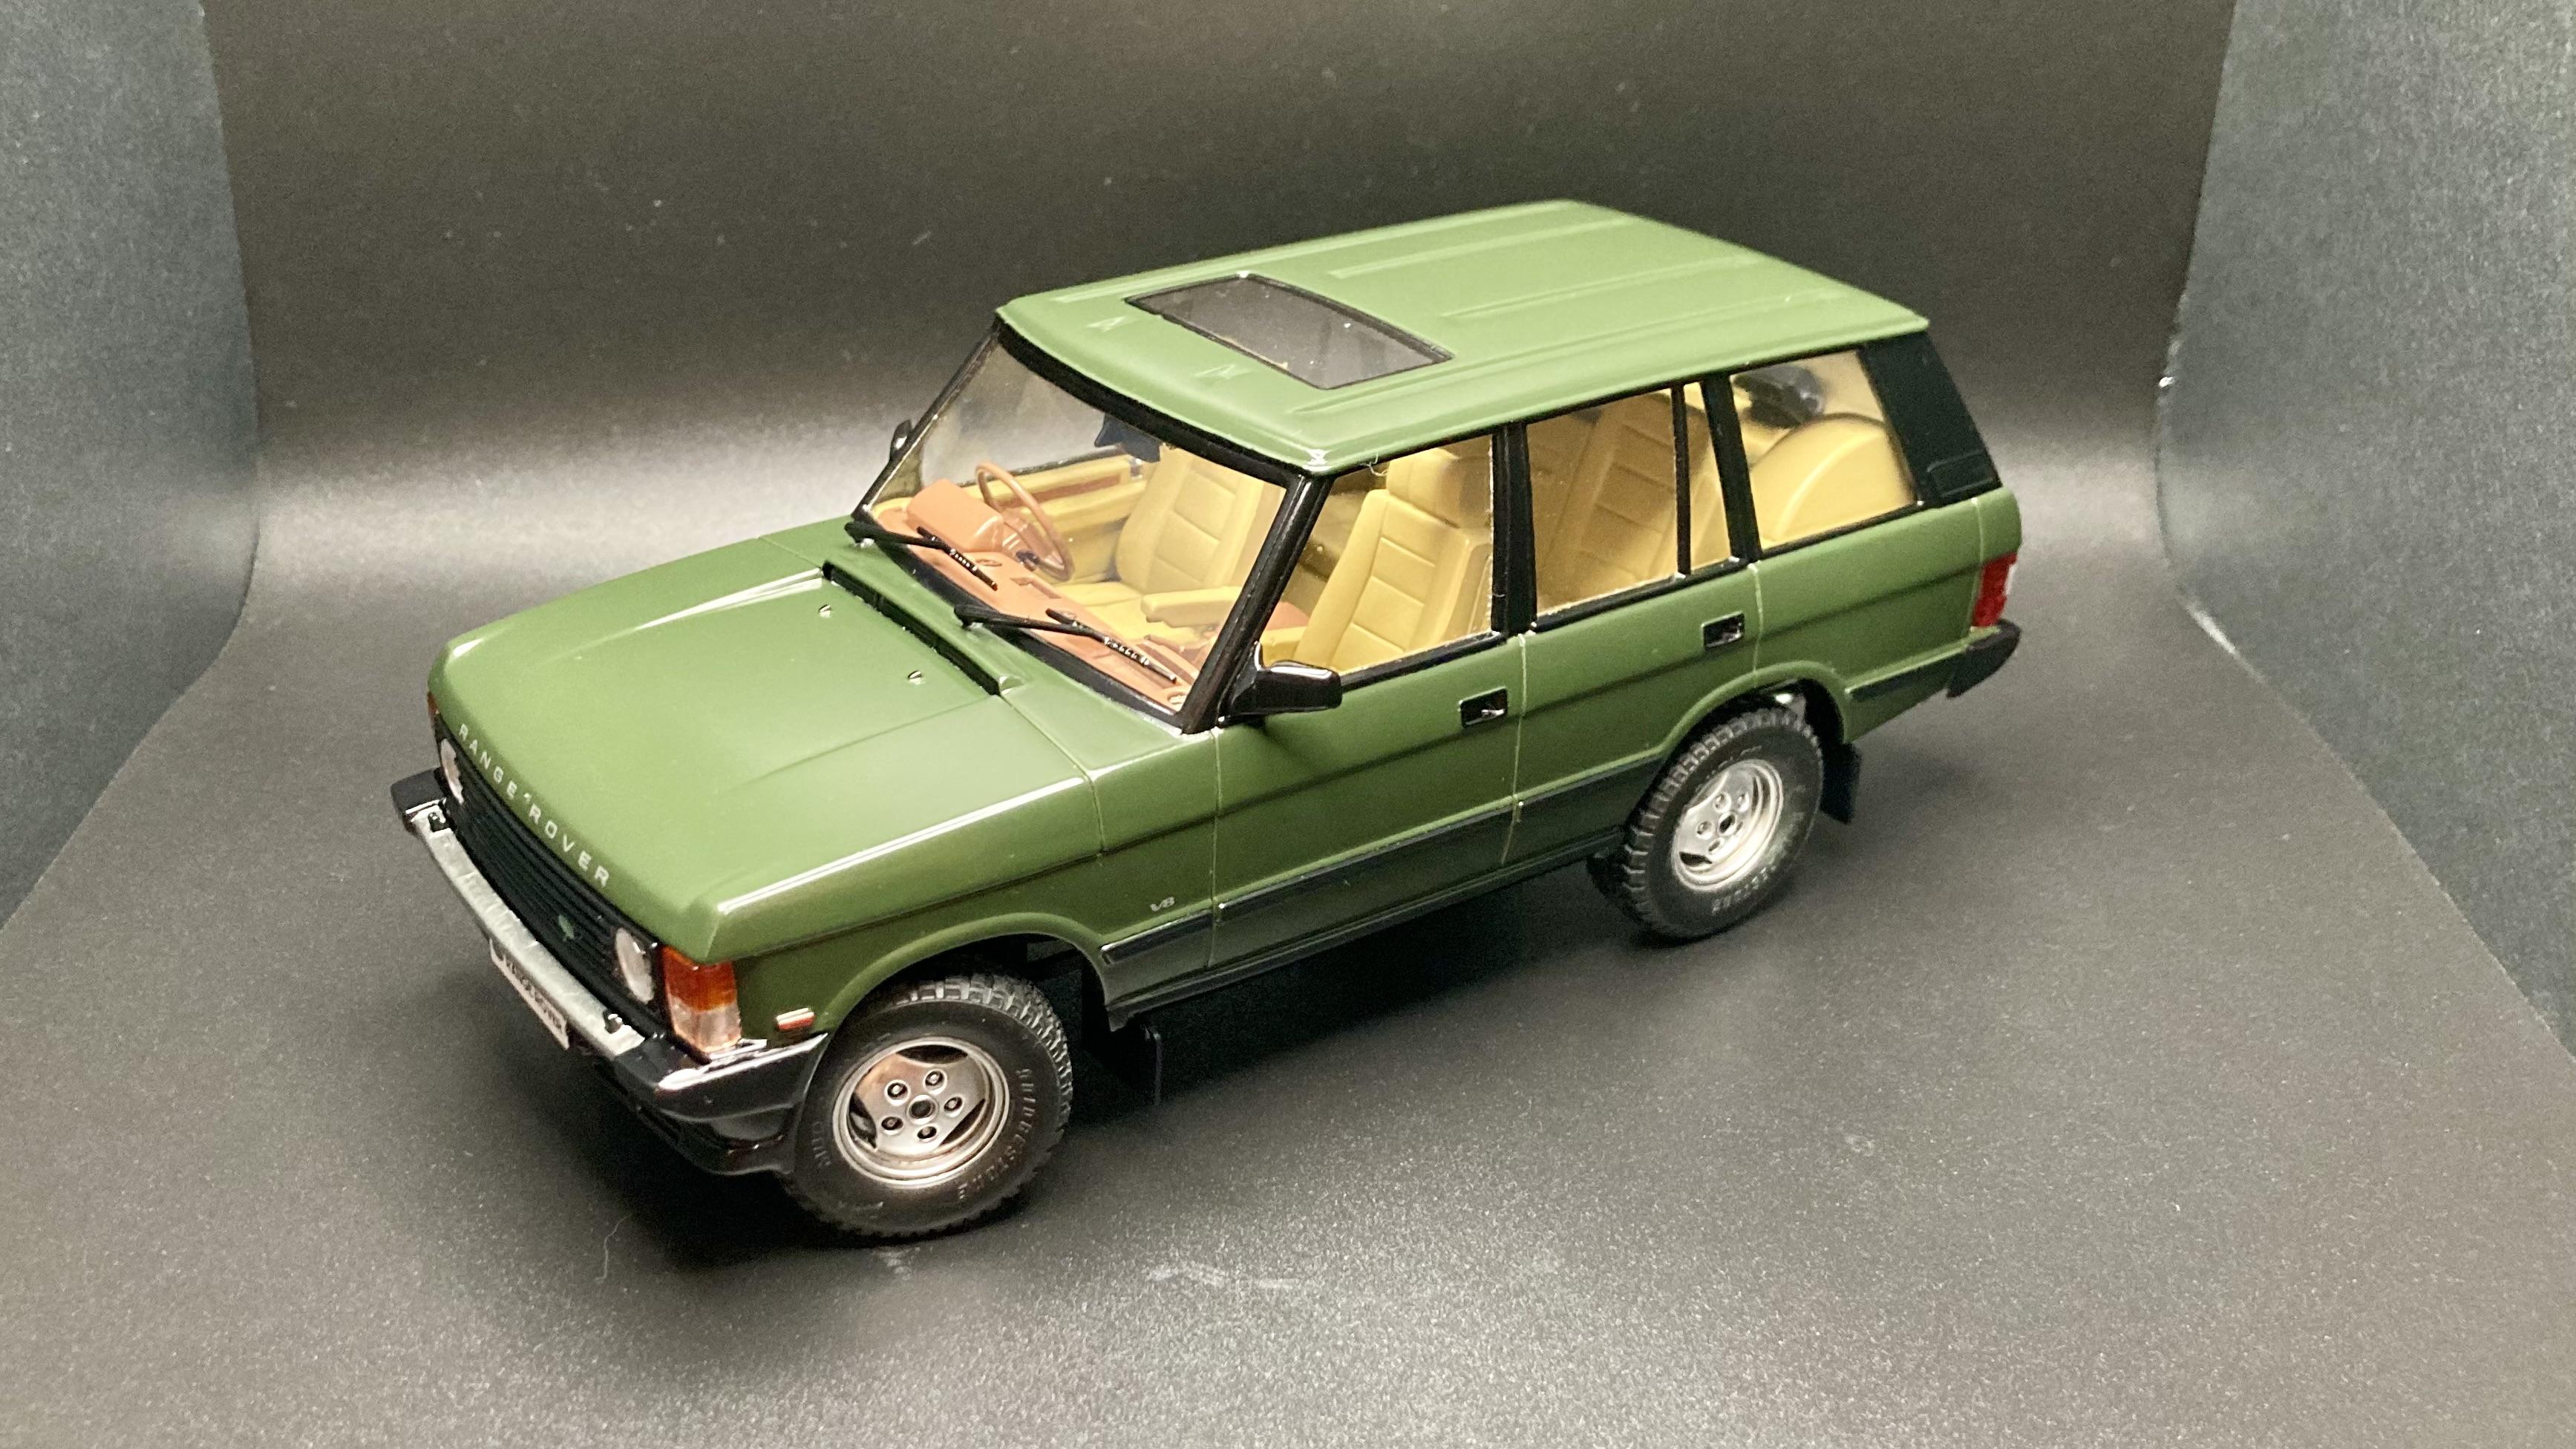
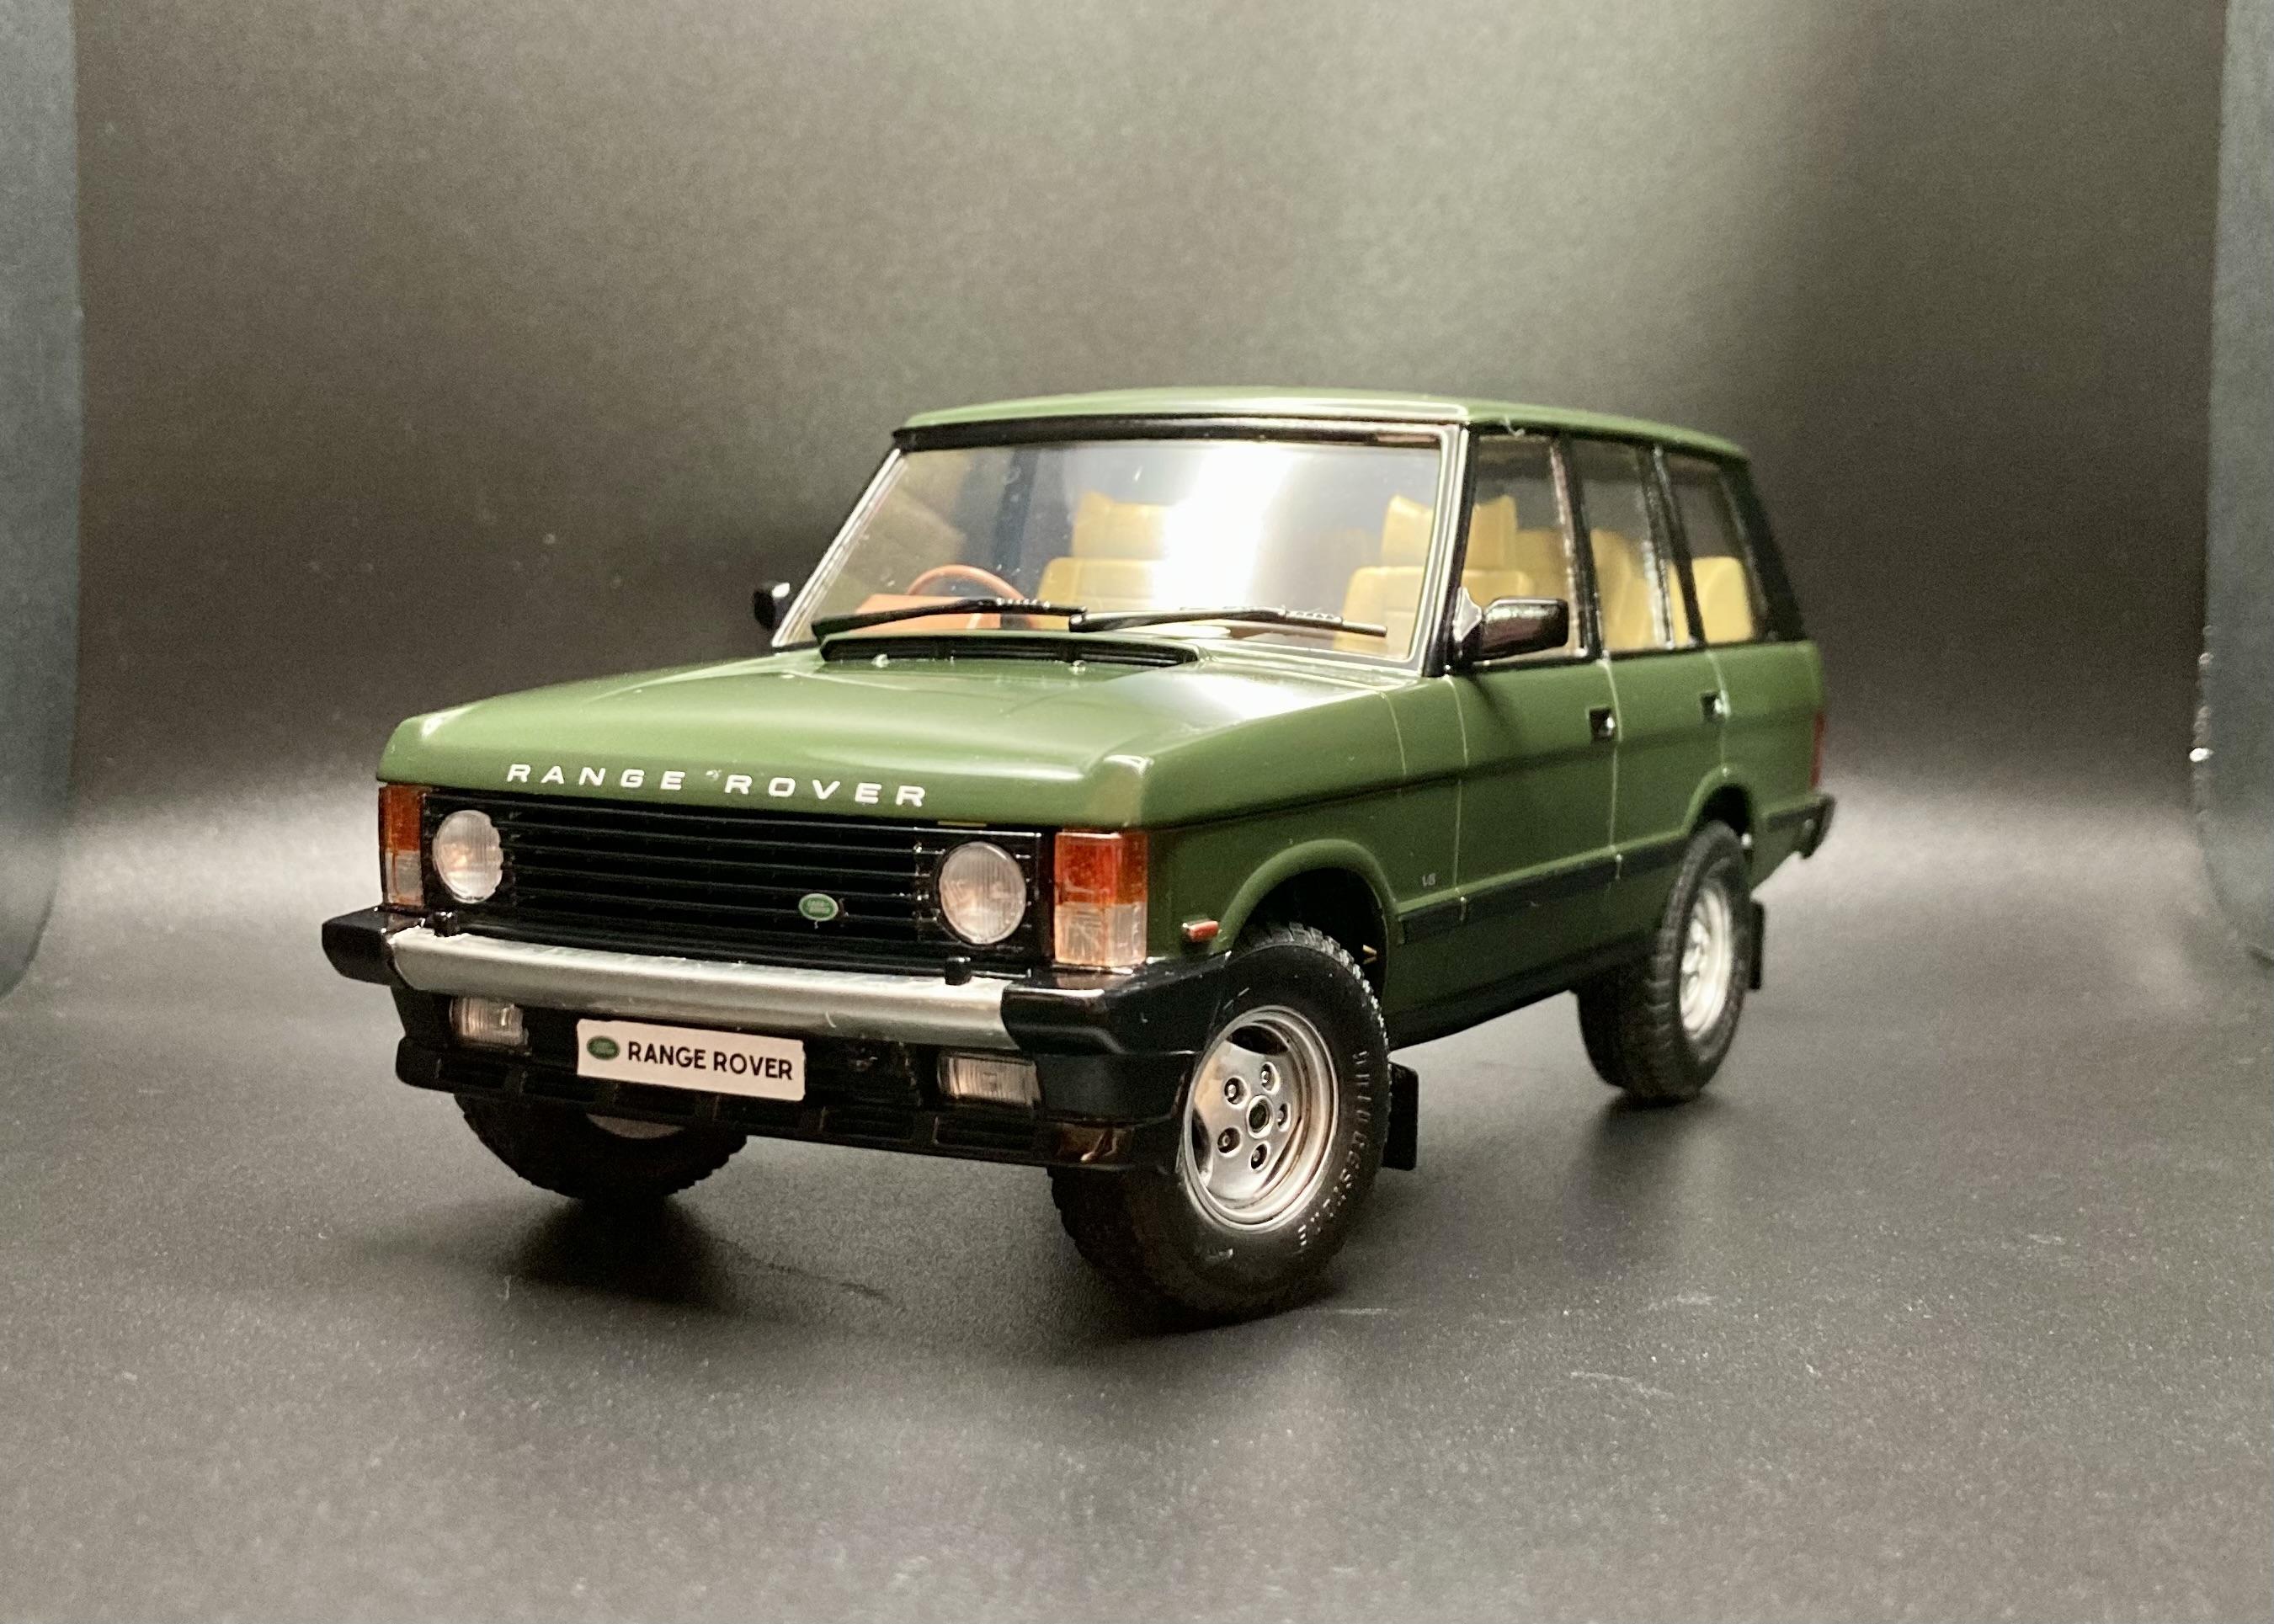
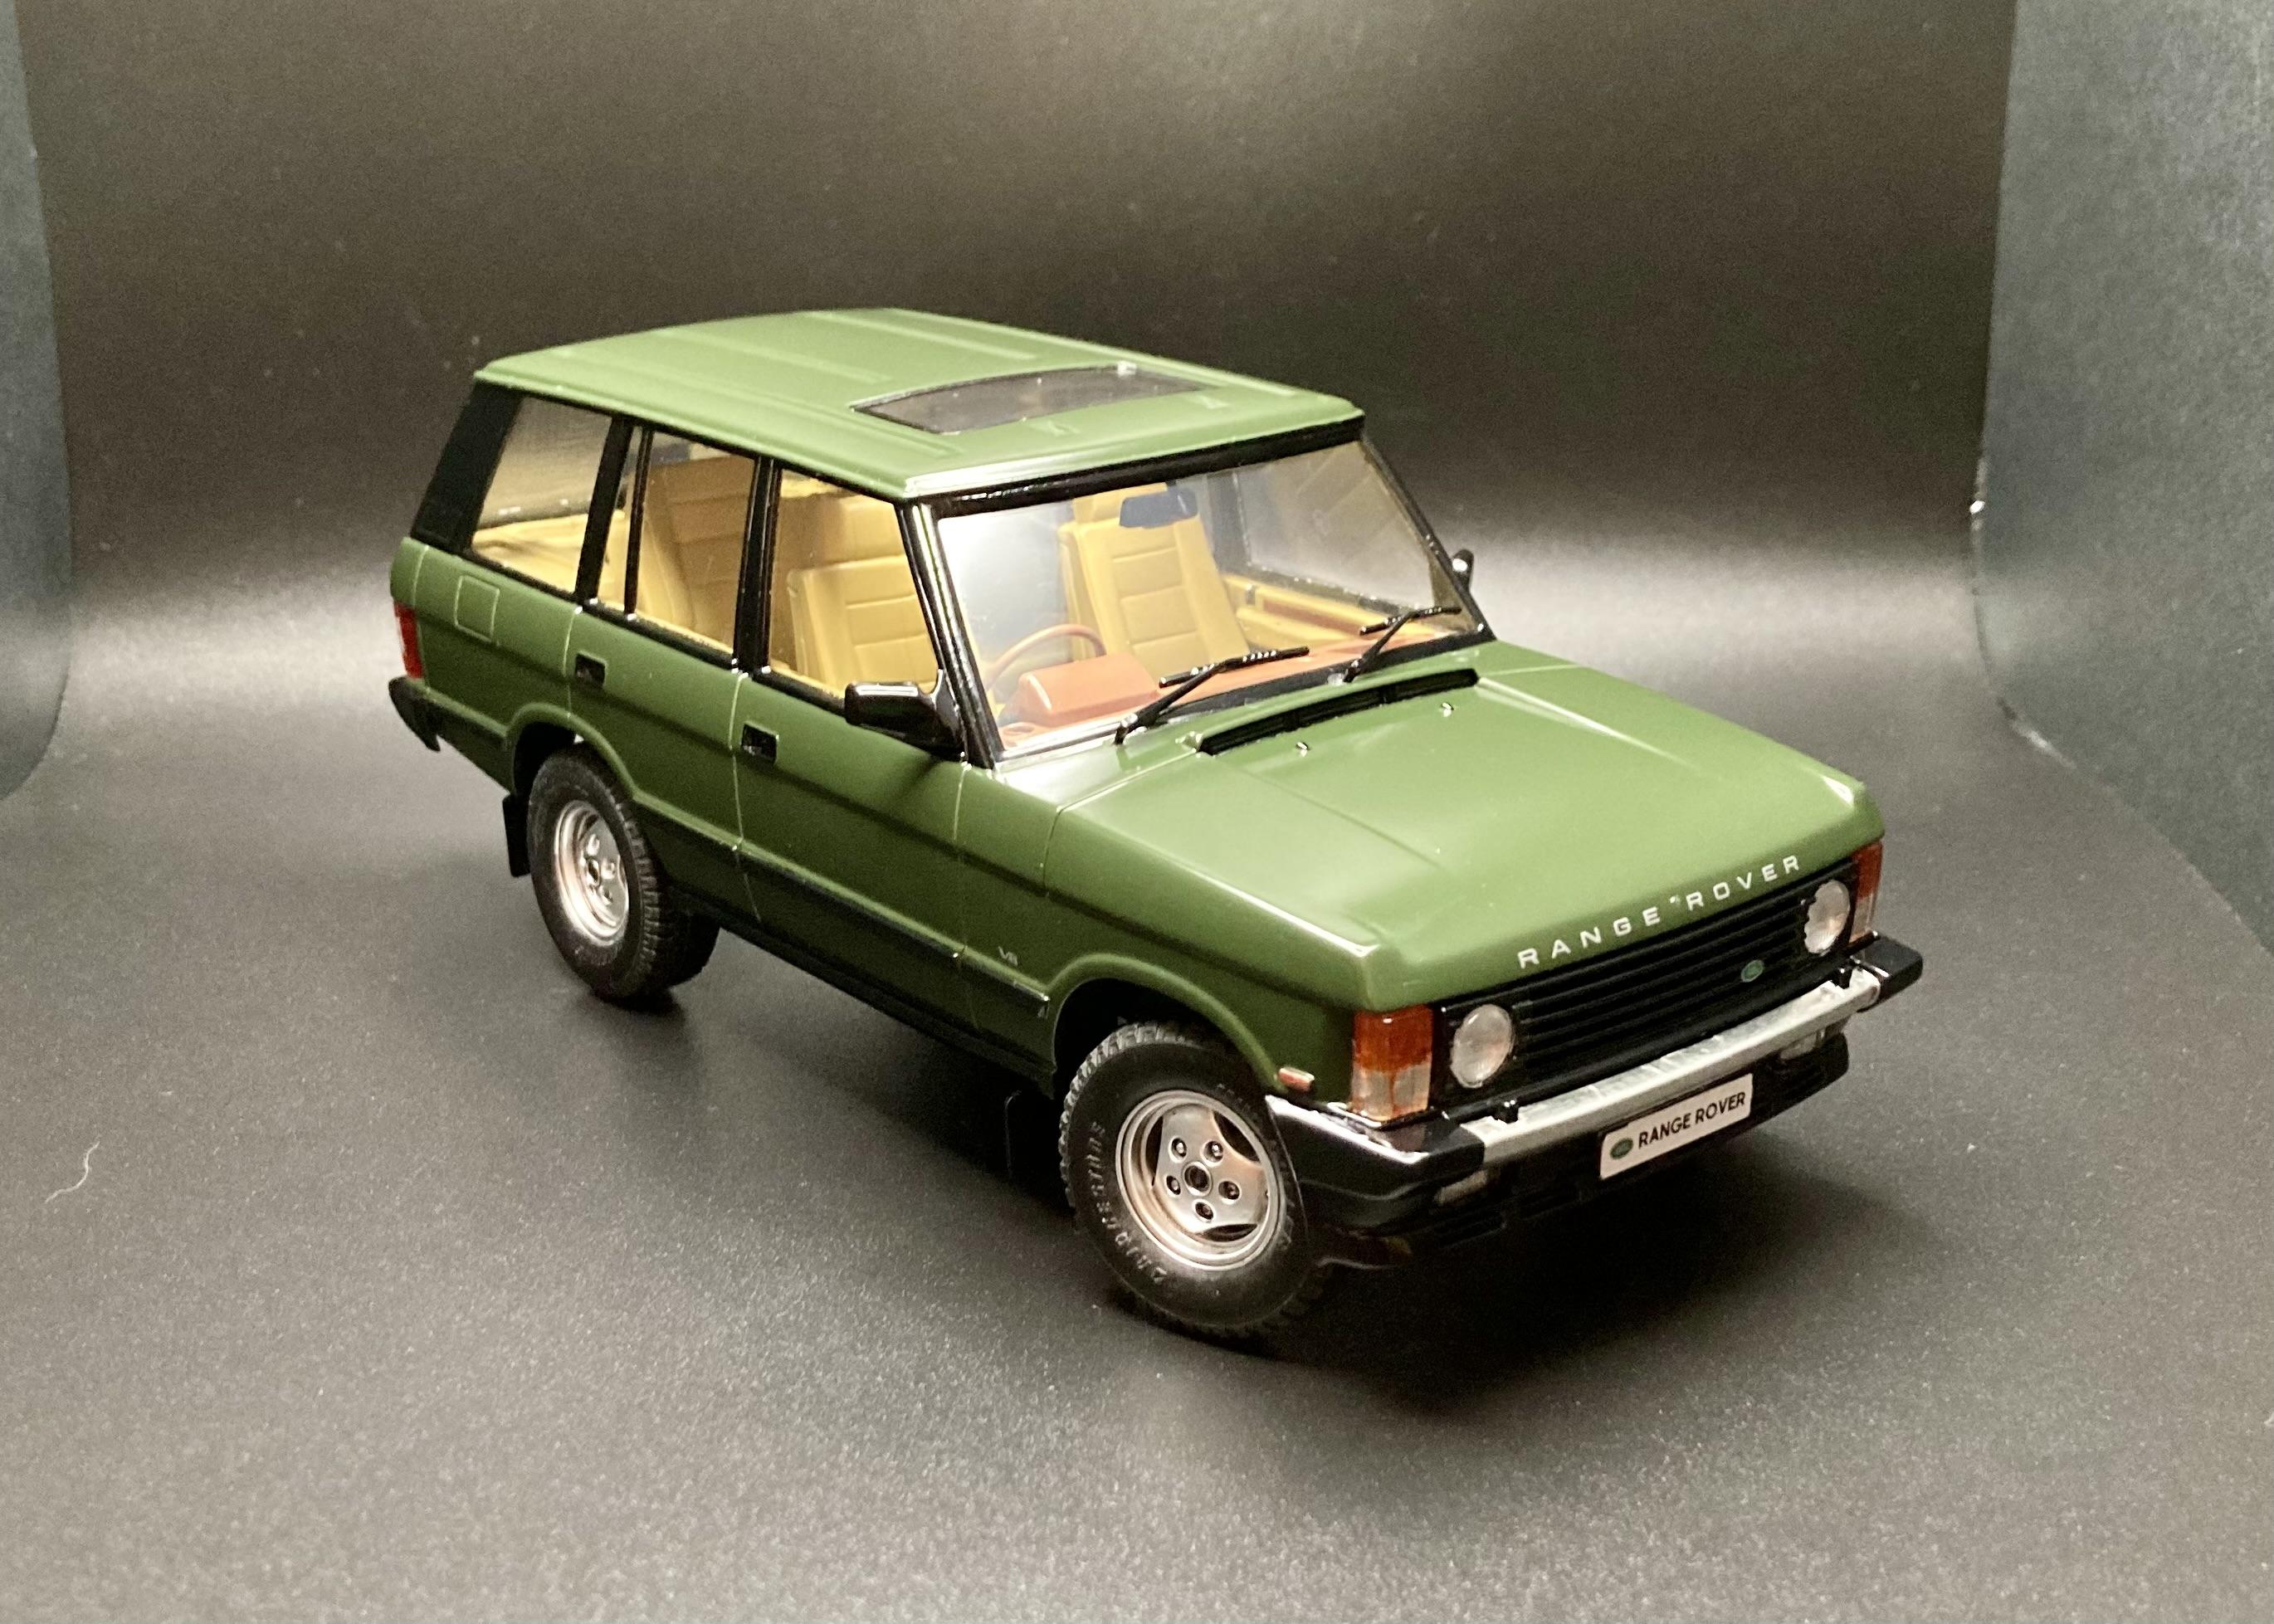
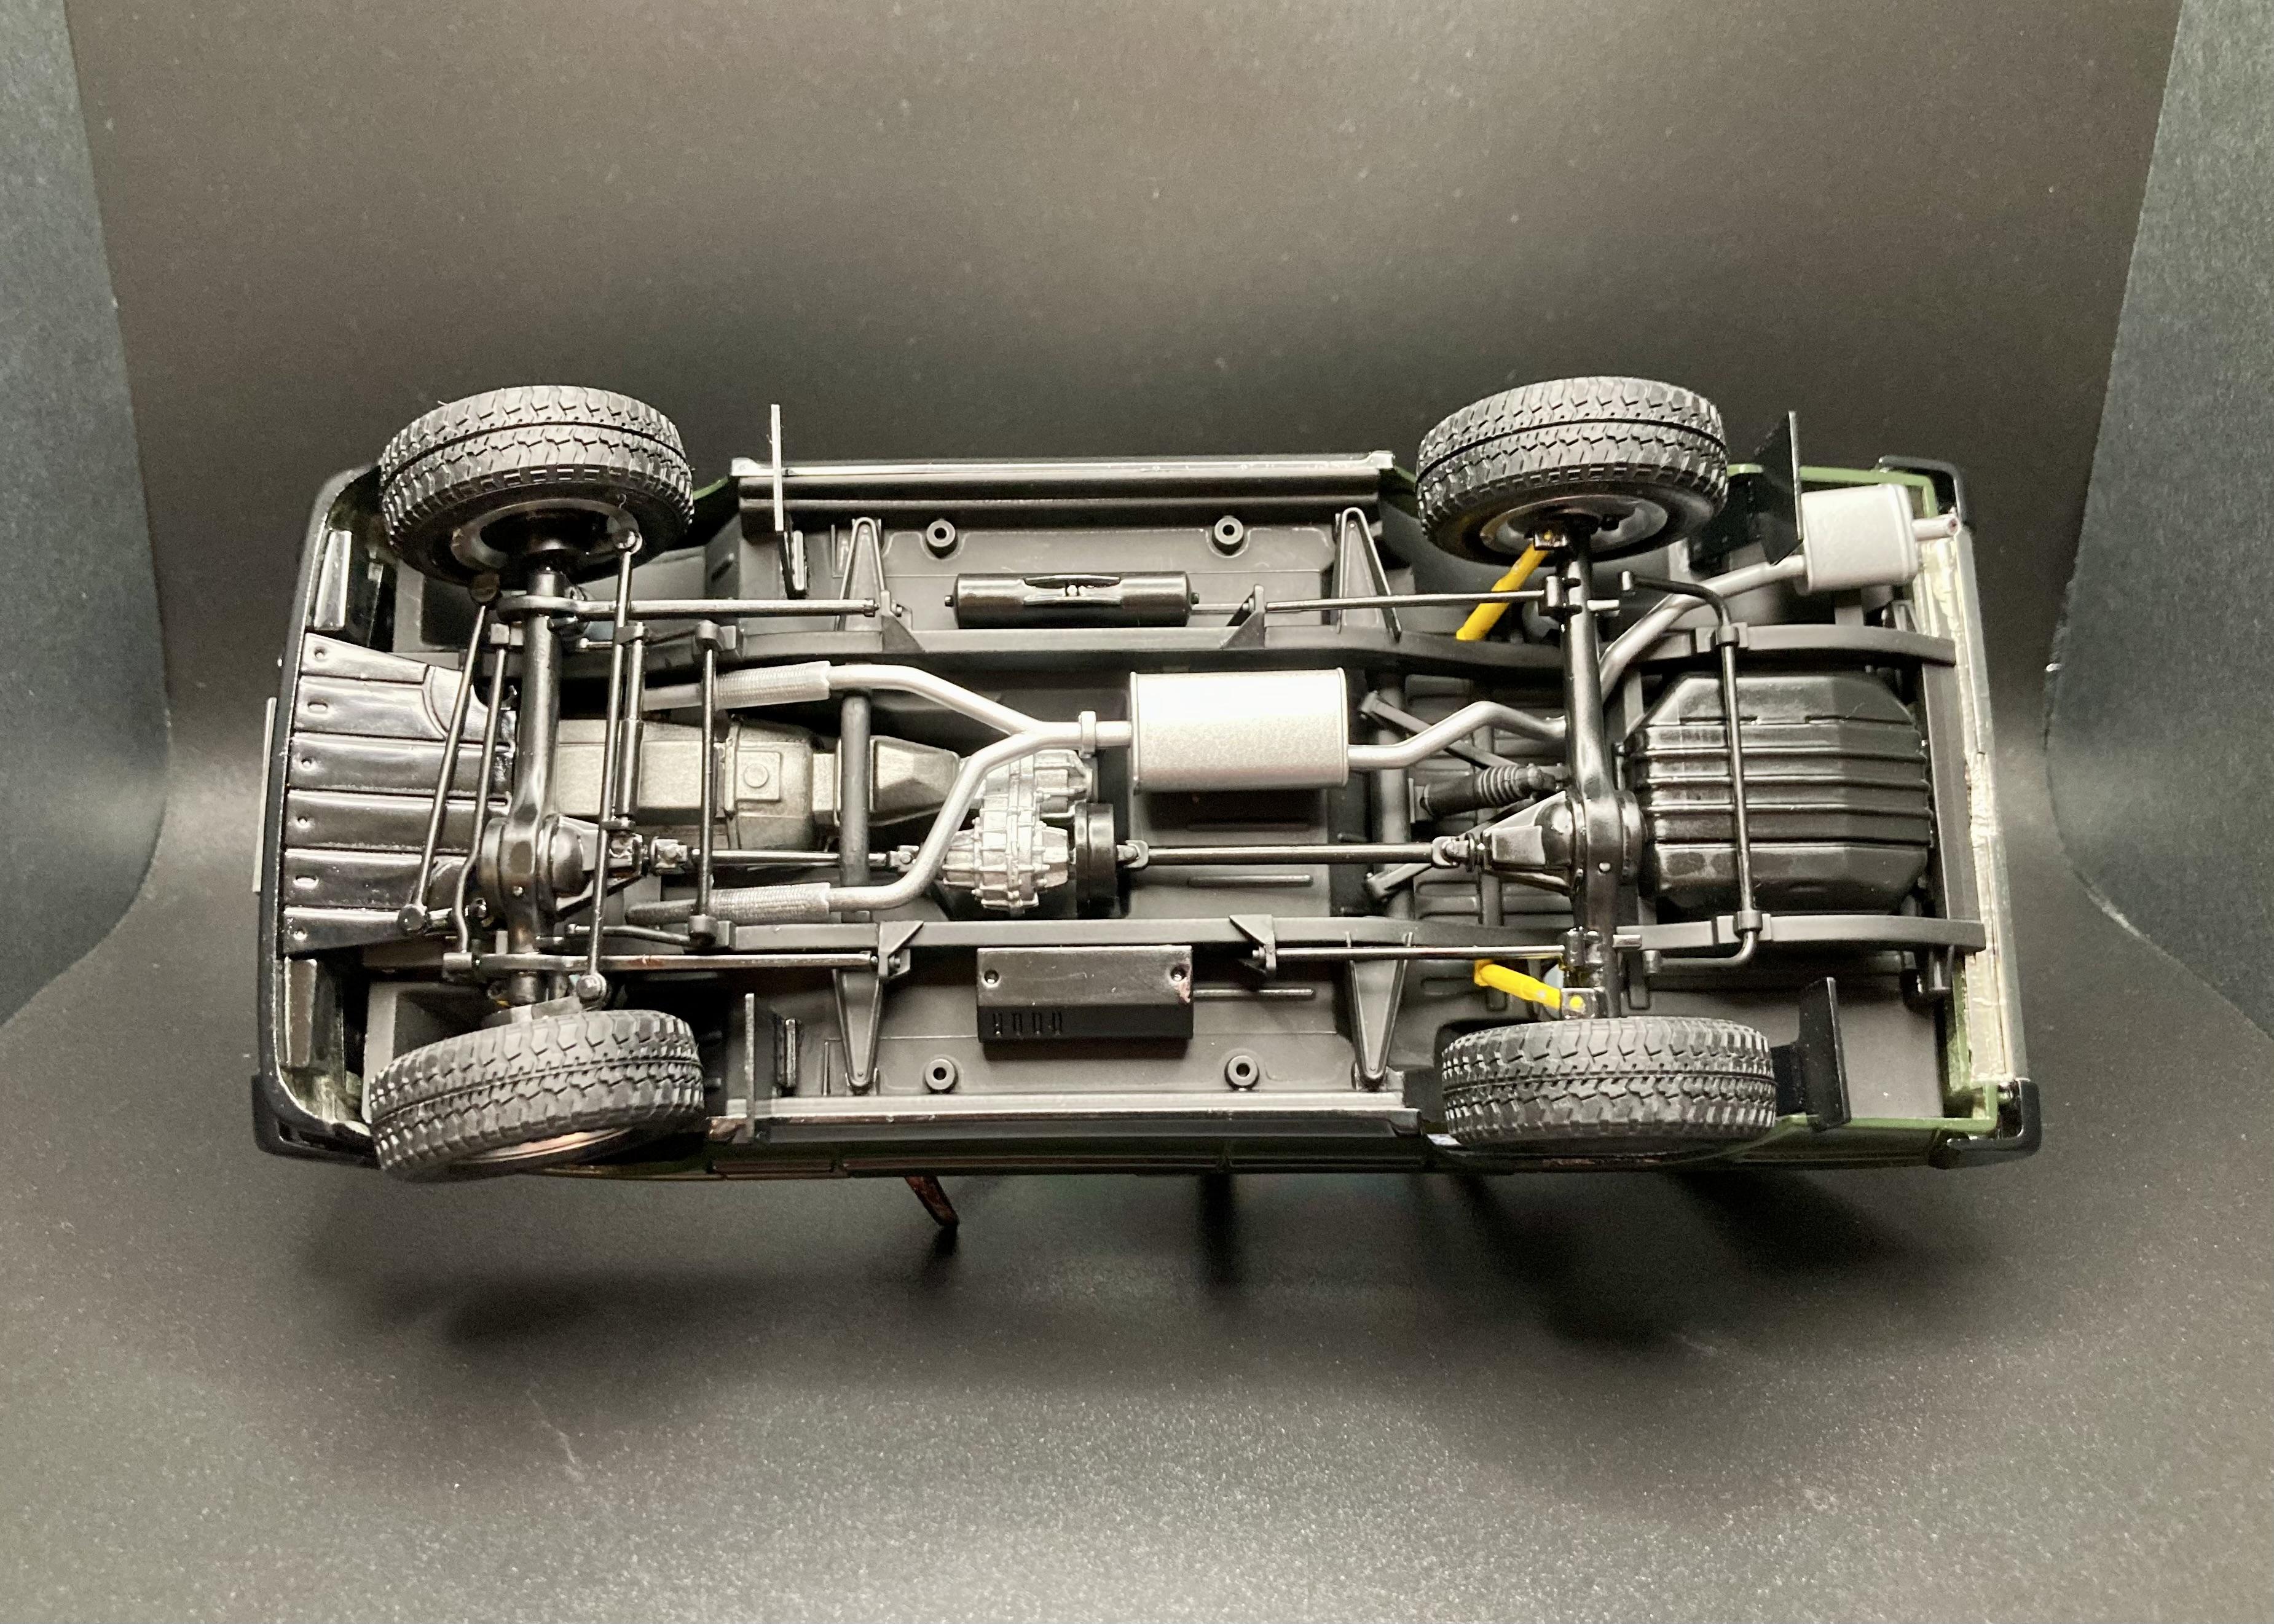
 Here’s my build of Aoshima’s ‘92 Range Rover! It’s a pretty simple curbside kit that goes together great and has plenty of detail. It’s painted in Tamiya TS-2 “Dark Green” with three coats of Pledge floor gloss (TS-2 is a matte finish). Thanks for looking!
-
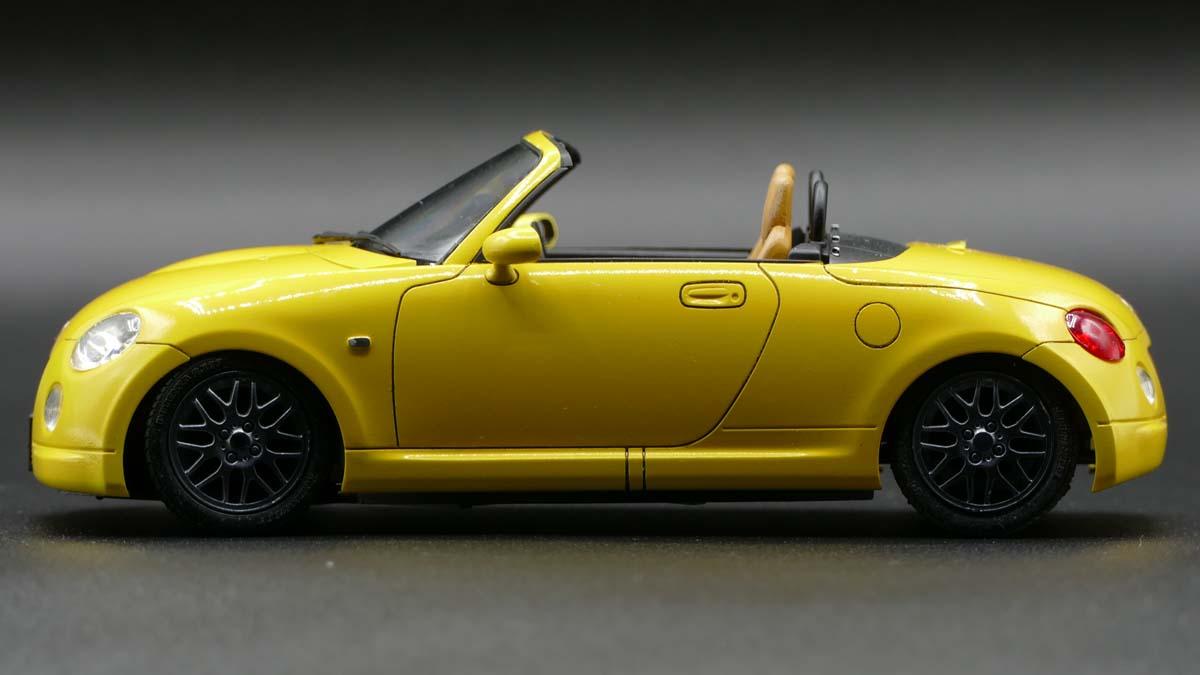
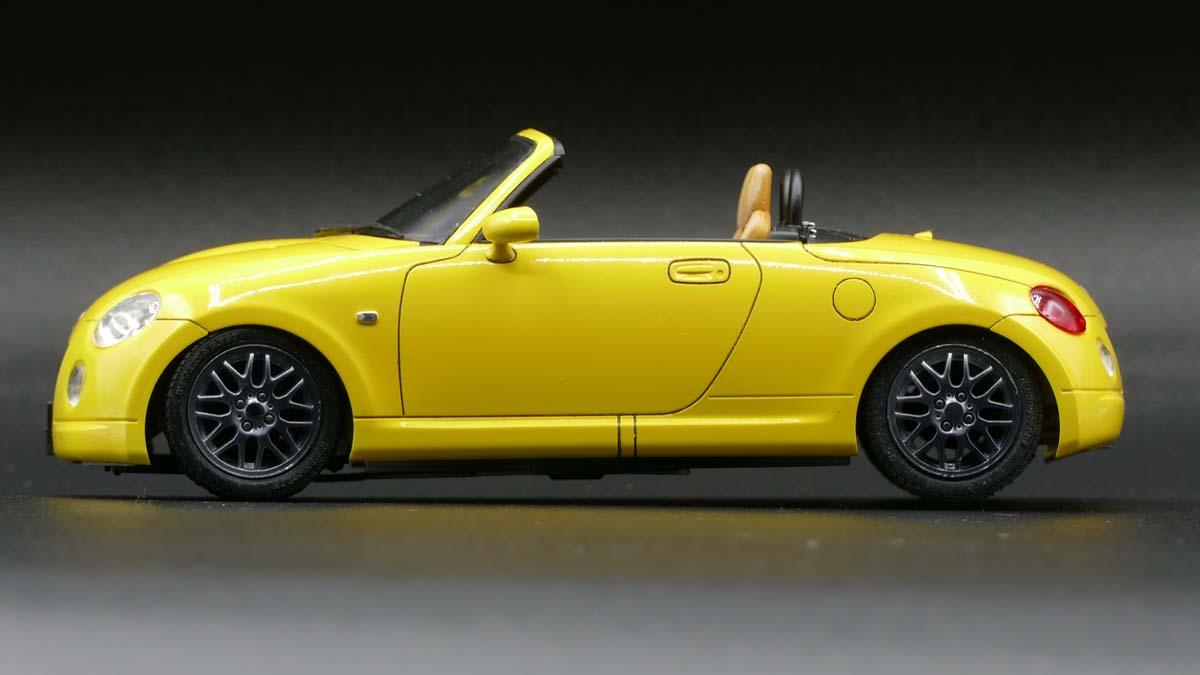
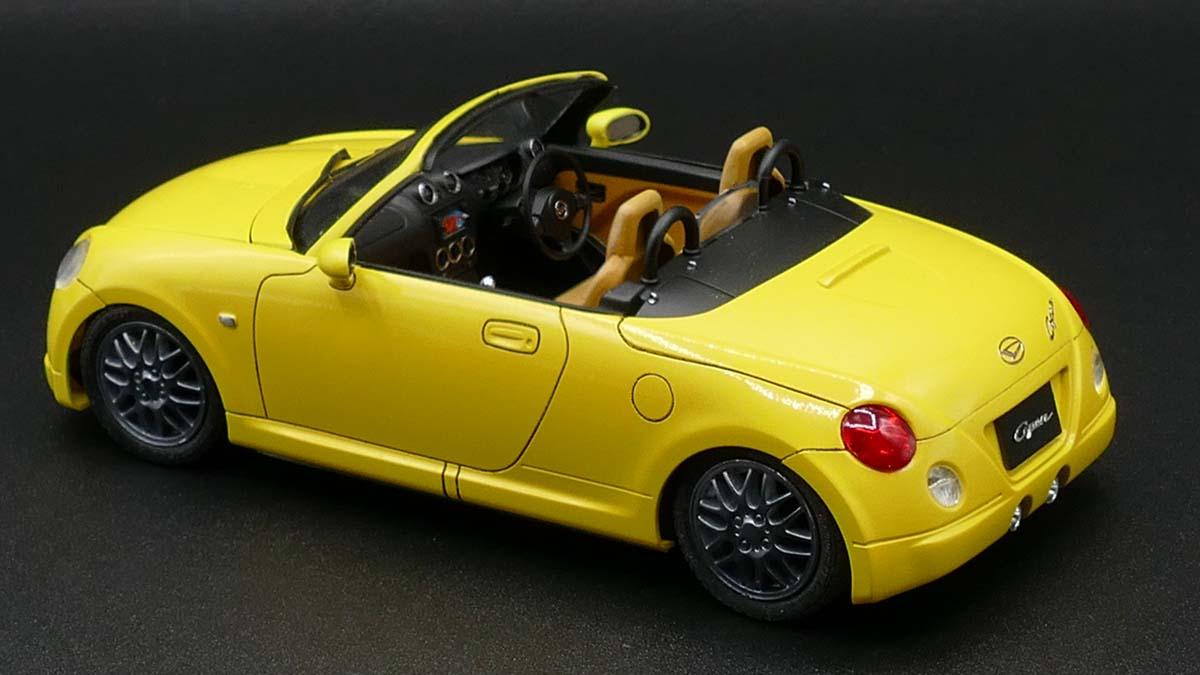
Thank you for allowing me to post another build. More work on trying to improve my gloss finish. I chose the "lowered" option and in hindsight I have would now gone for the normal ride car or maybe a half-lowered modification. Perhaps the light shrouds on the inside were interfering with the body sitting level on the frame. Mr Hobby paints and clear coat gloss. The roll bars and grille were de-chromed and Rub'n Buff silver applied on the grille to slightly tone it down from chrome. I'm adding an upper trunk brake light reflector panel but it will have to dry a few more days before applying. Thank you for checking in and all comments welcome.
-
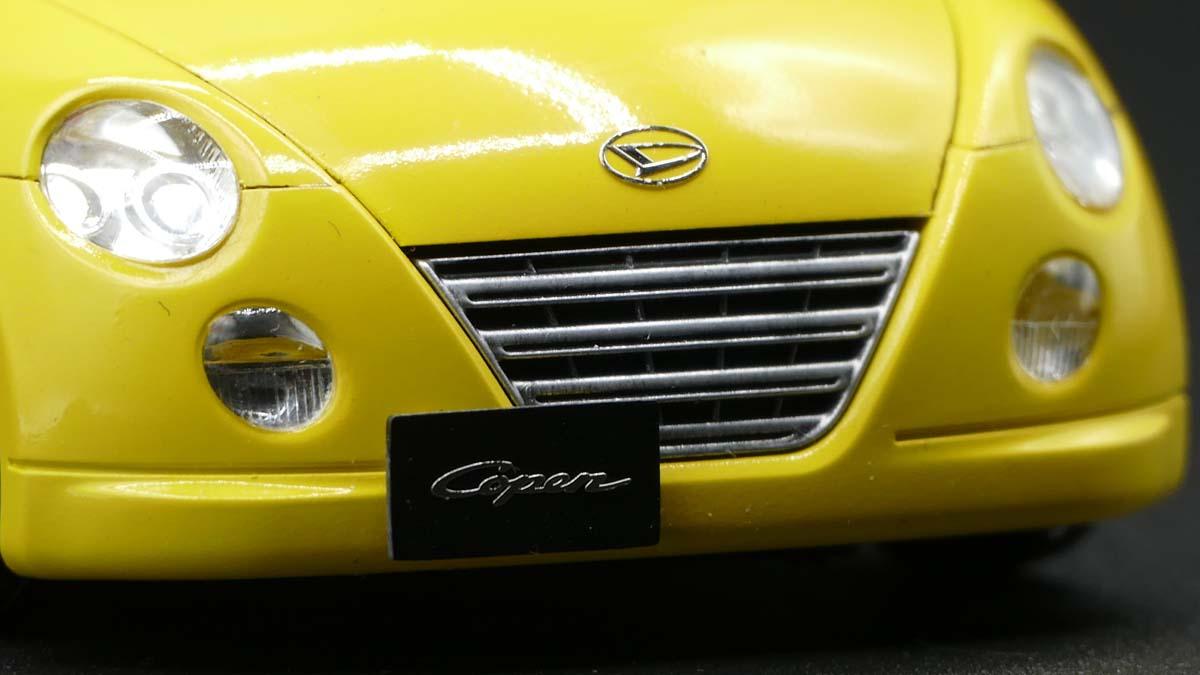
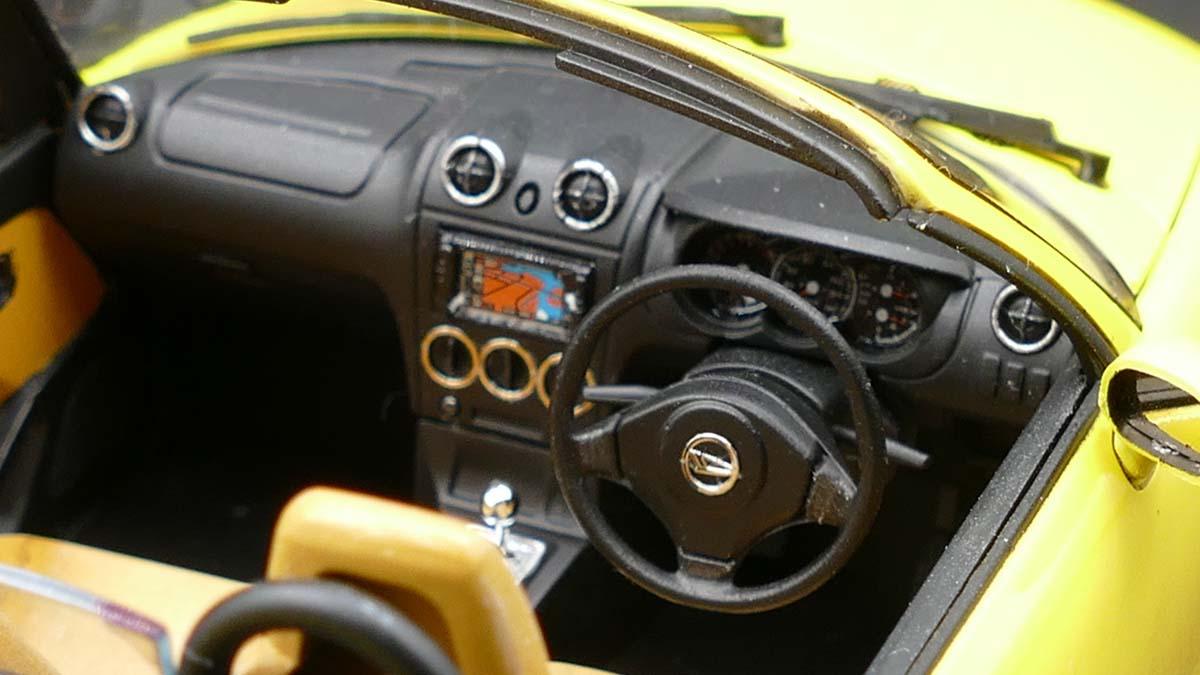
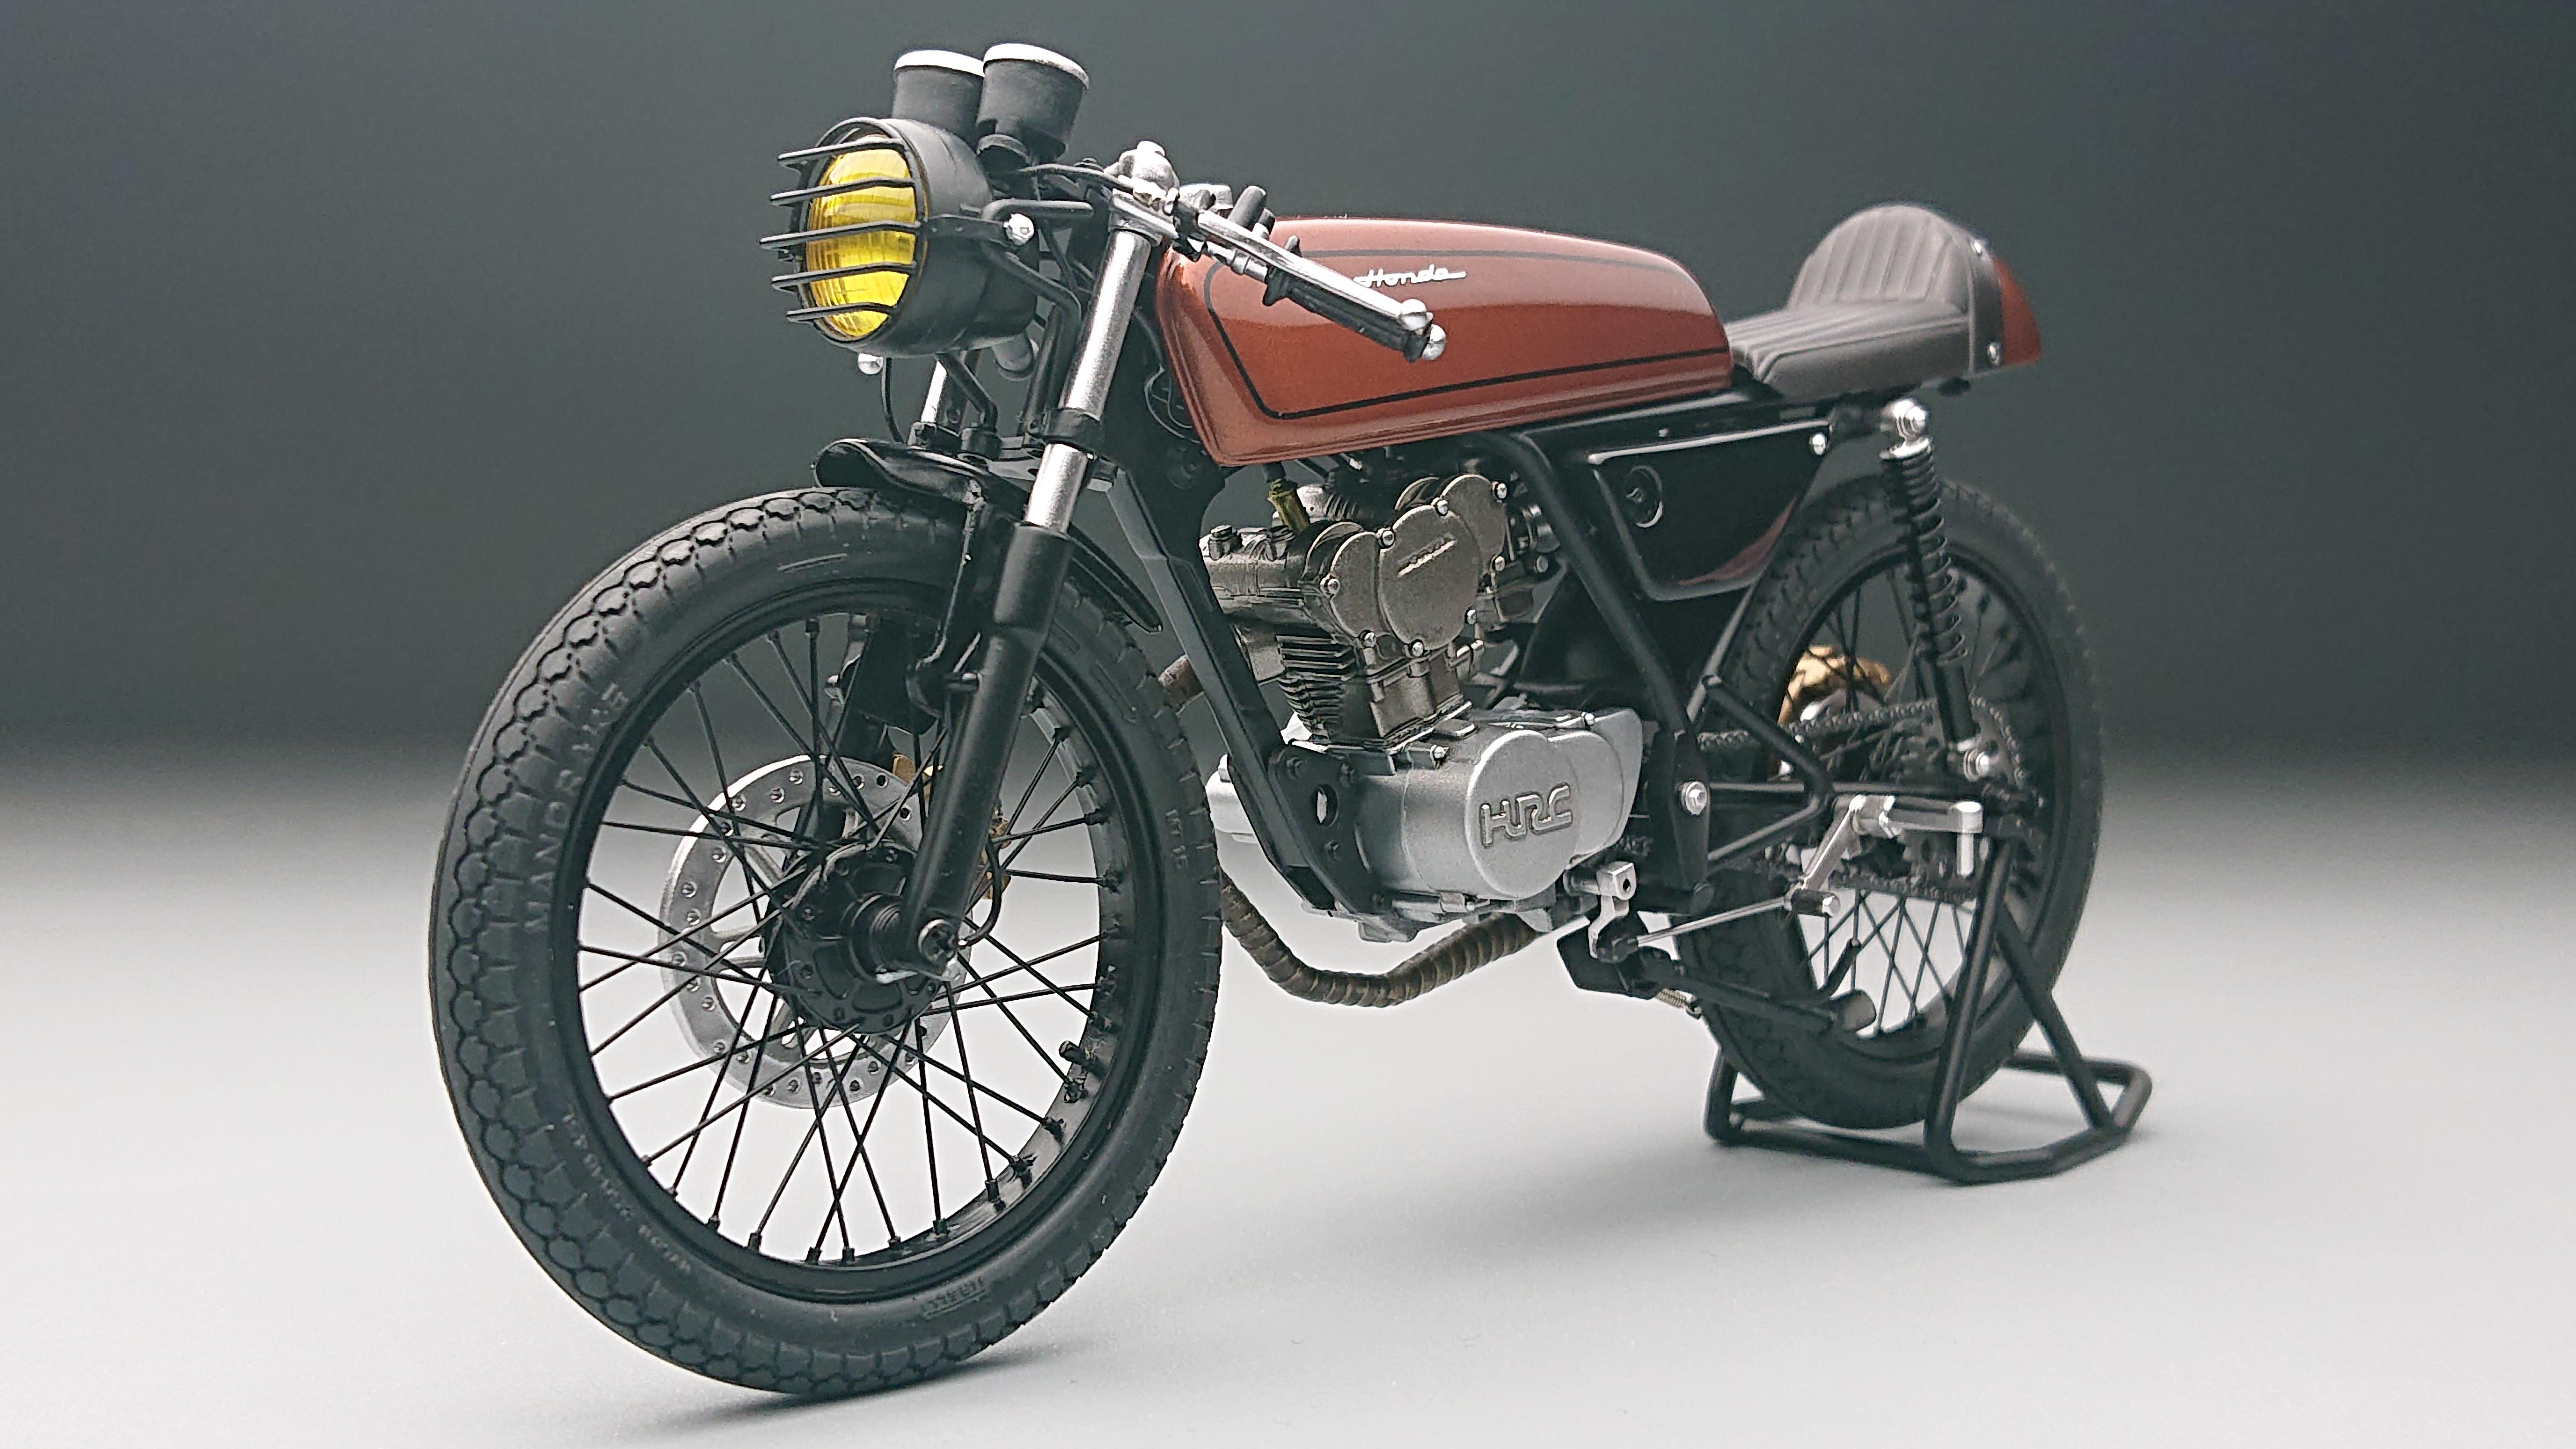
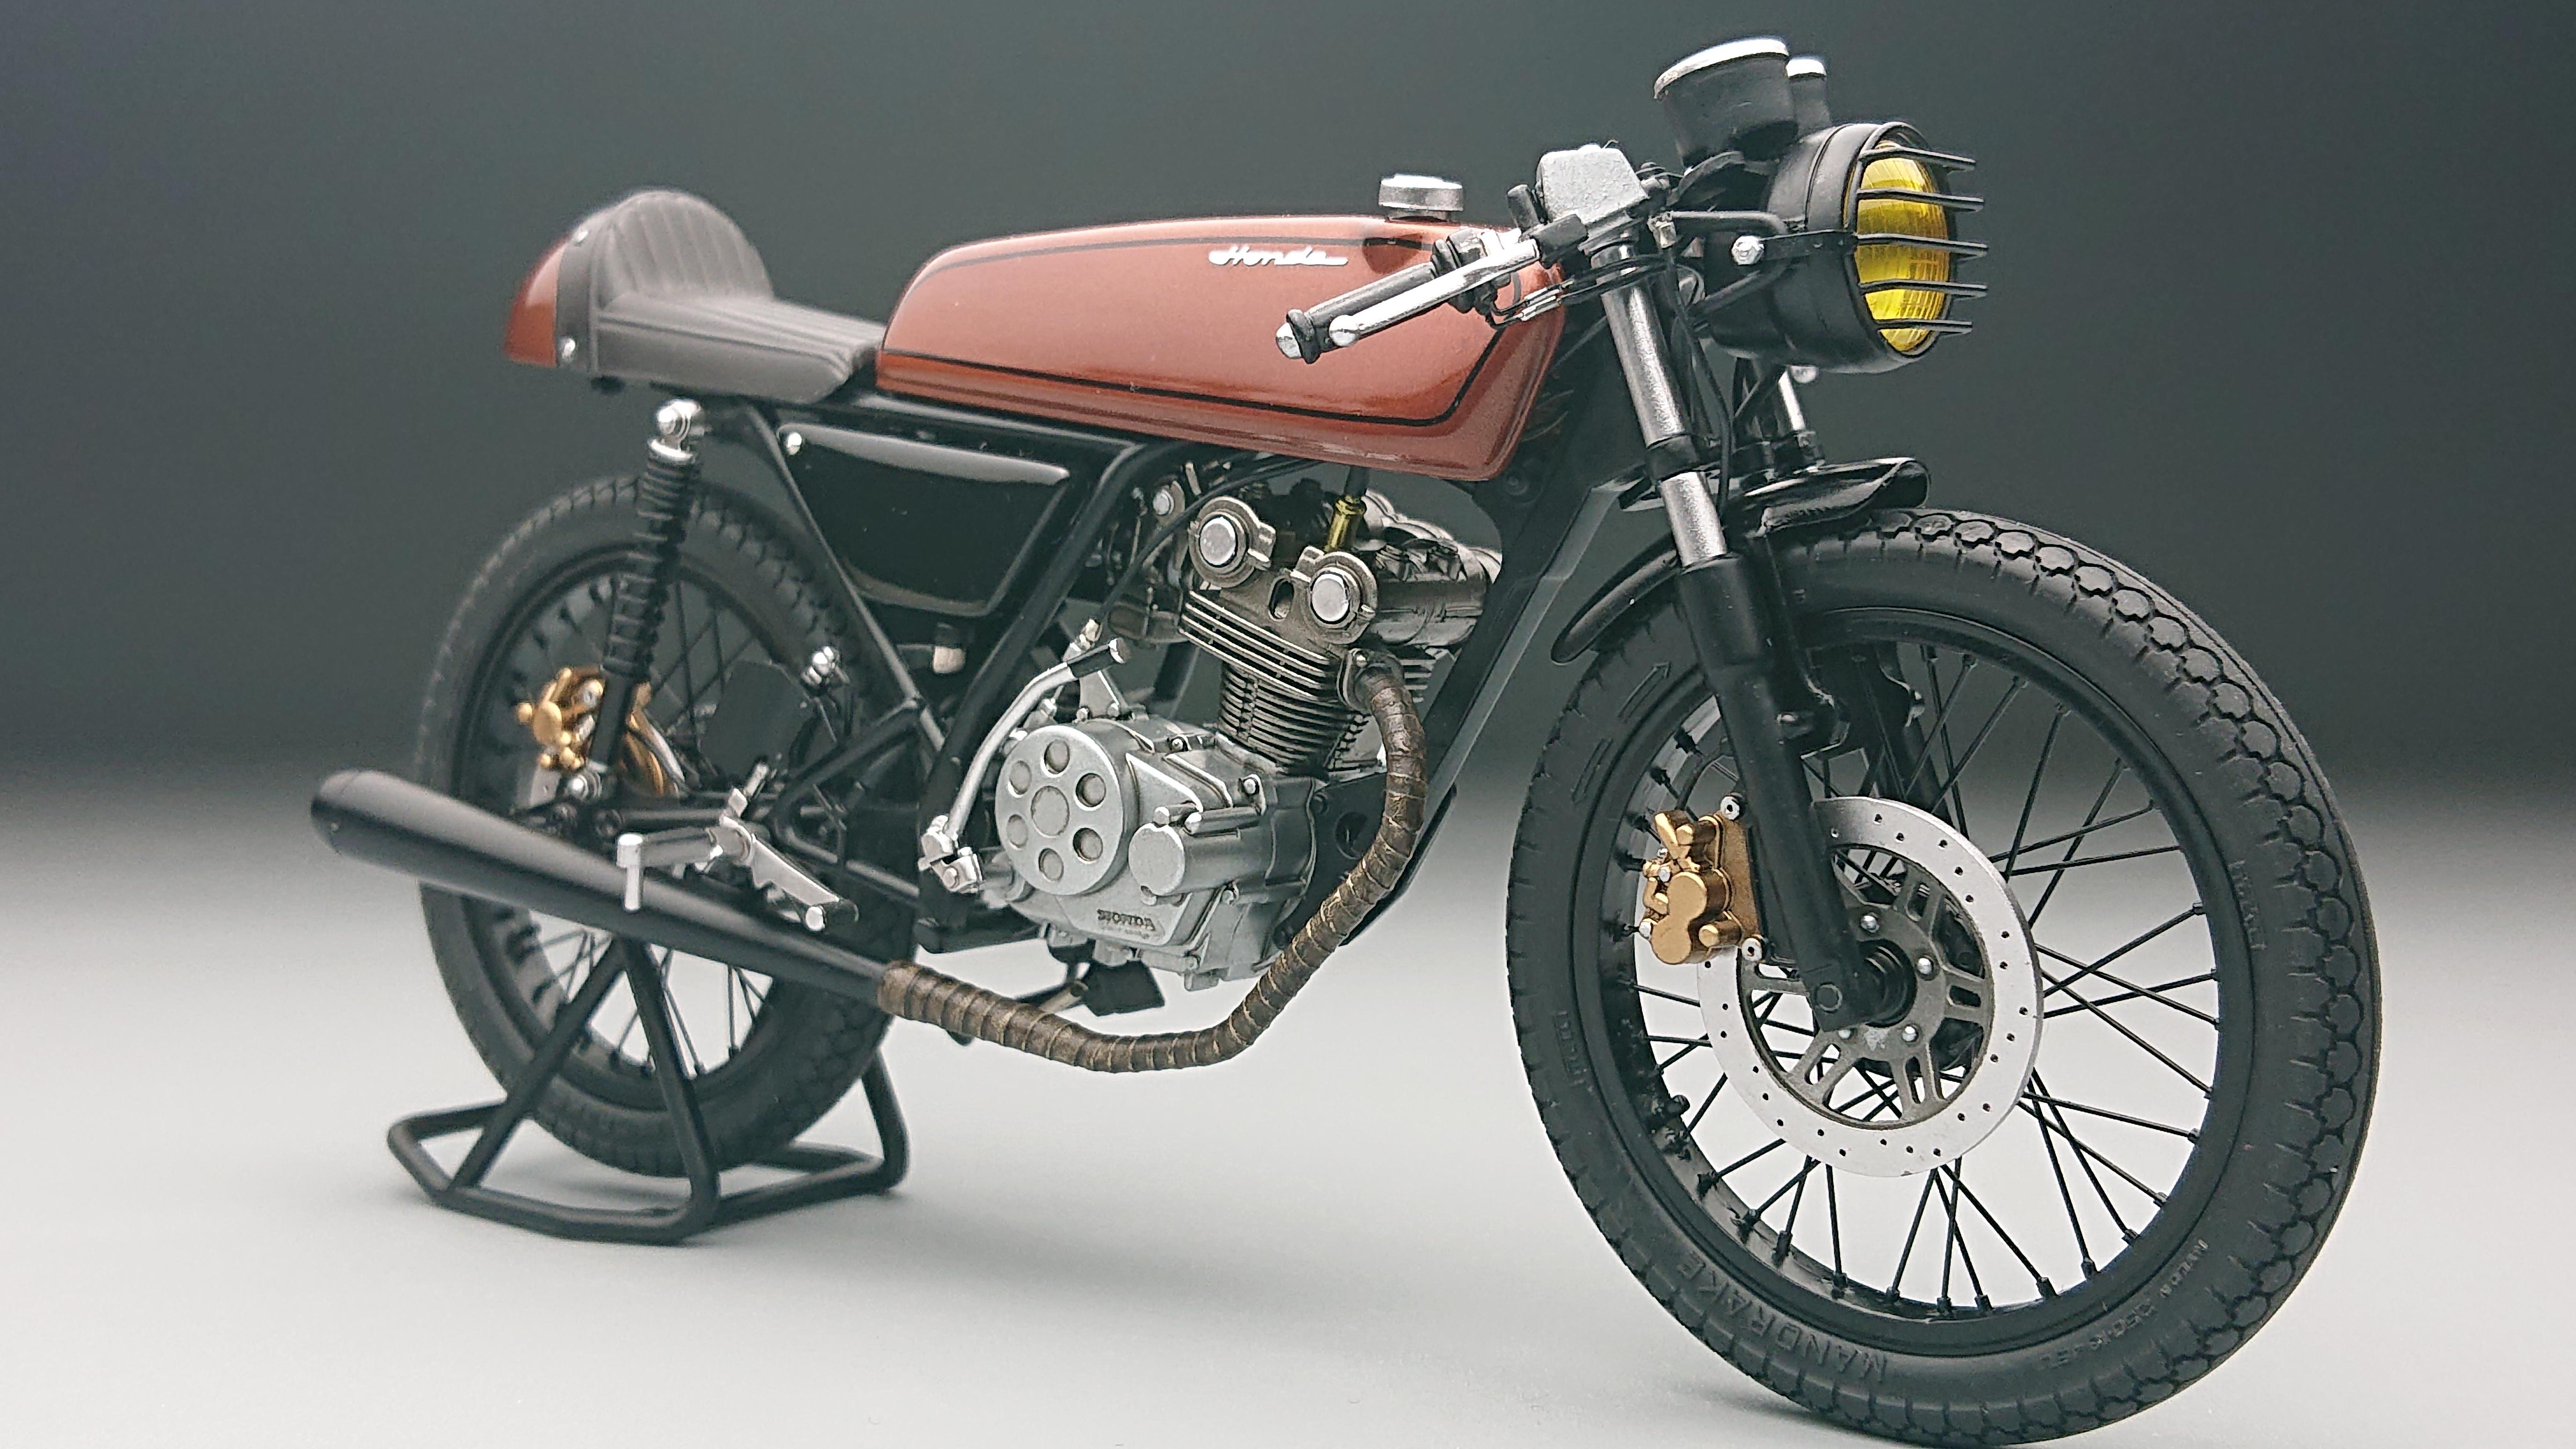
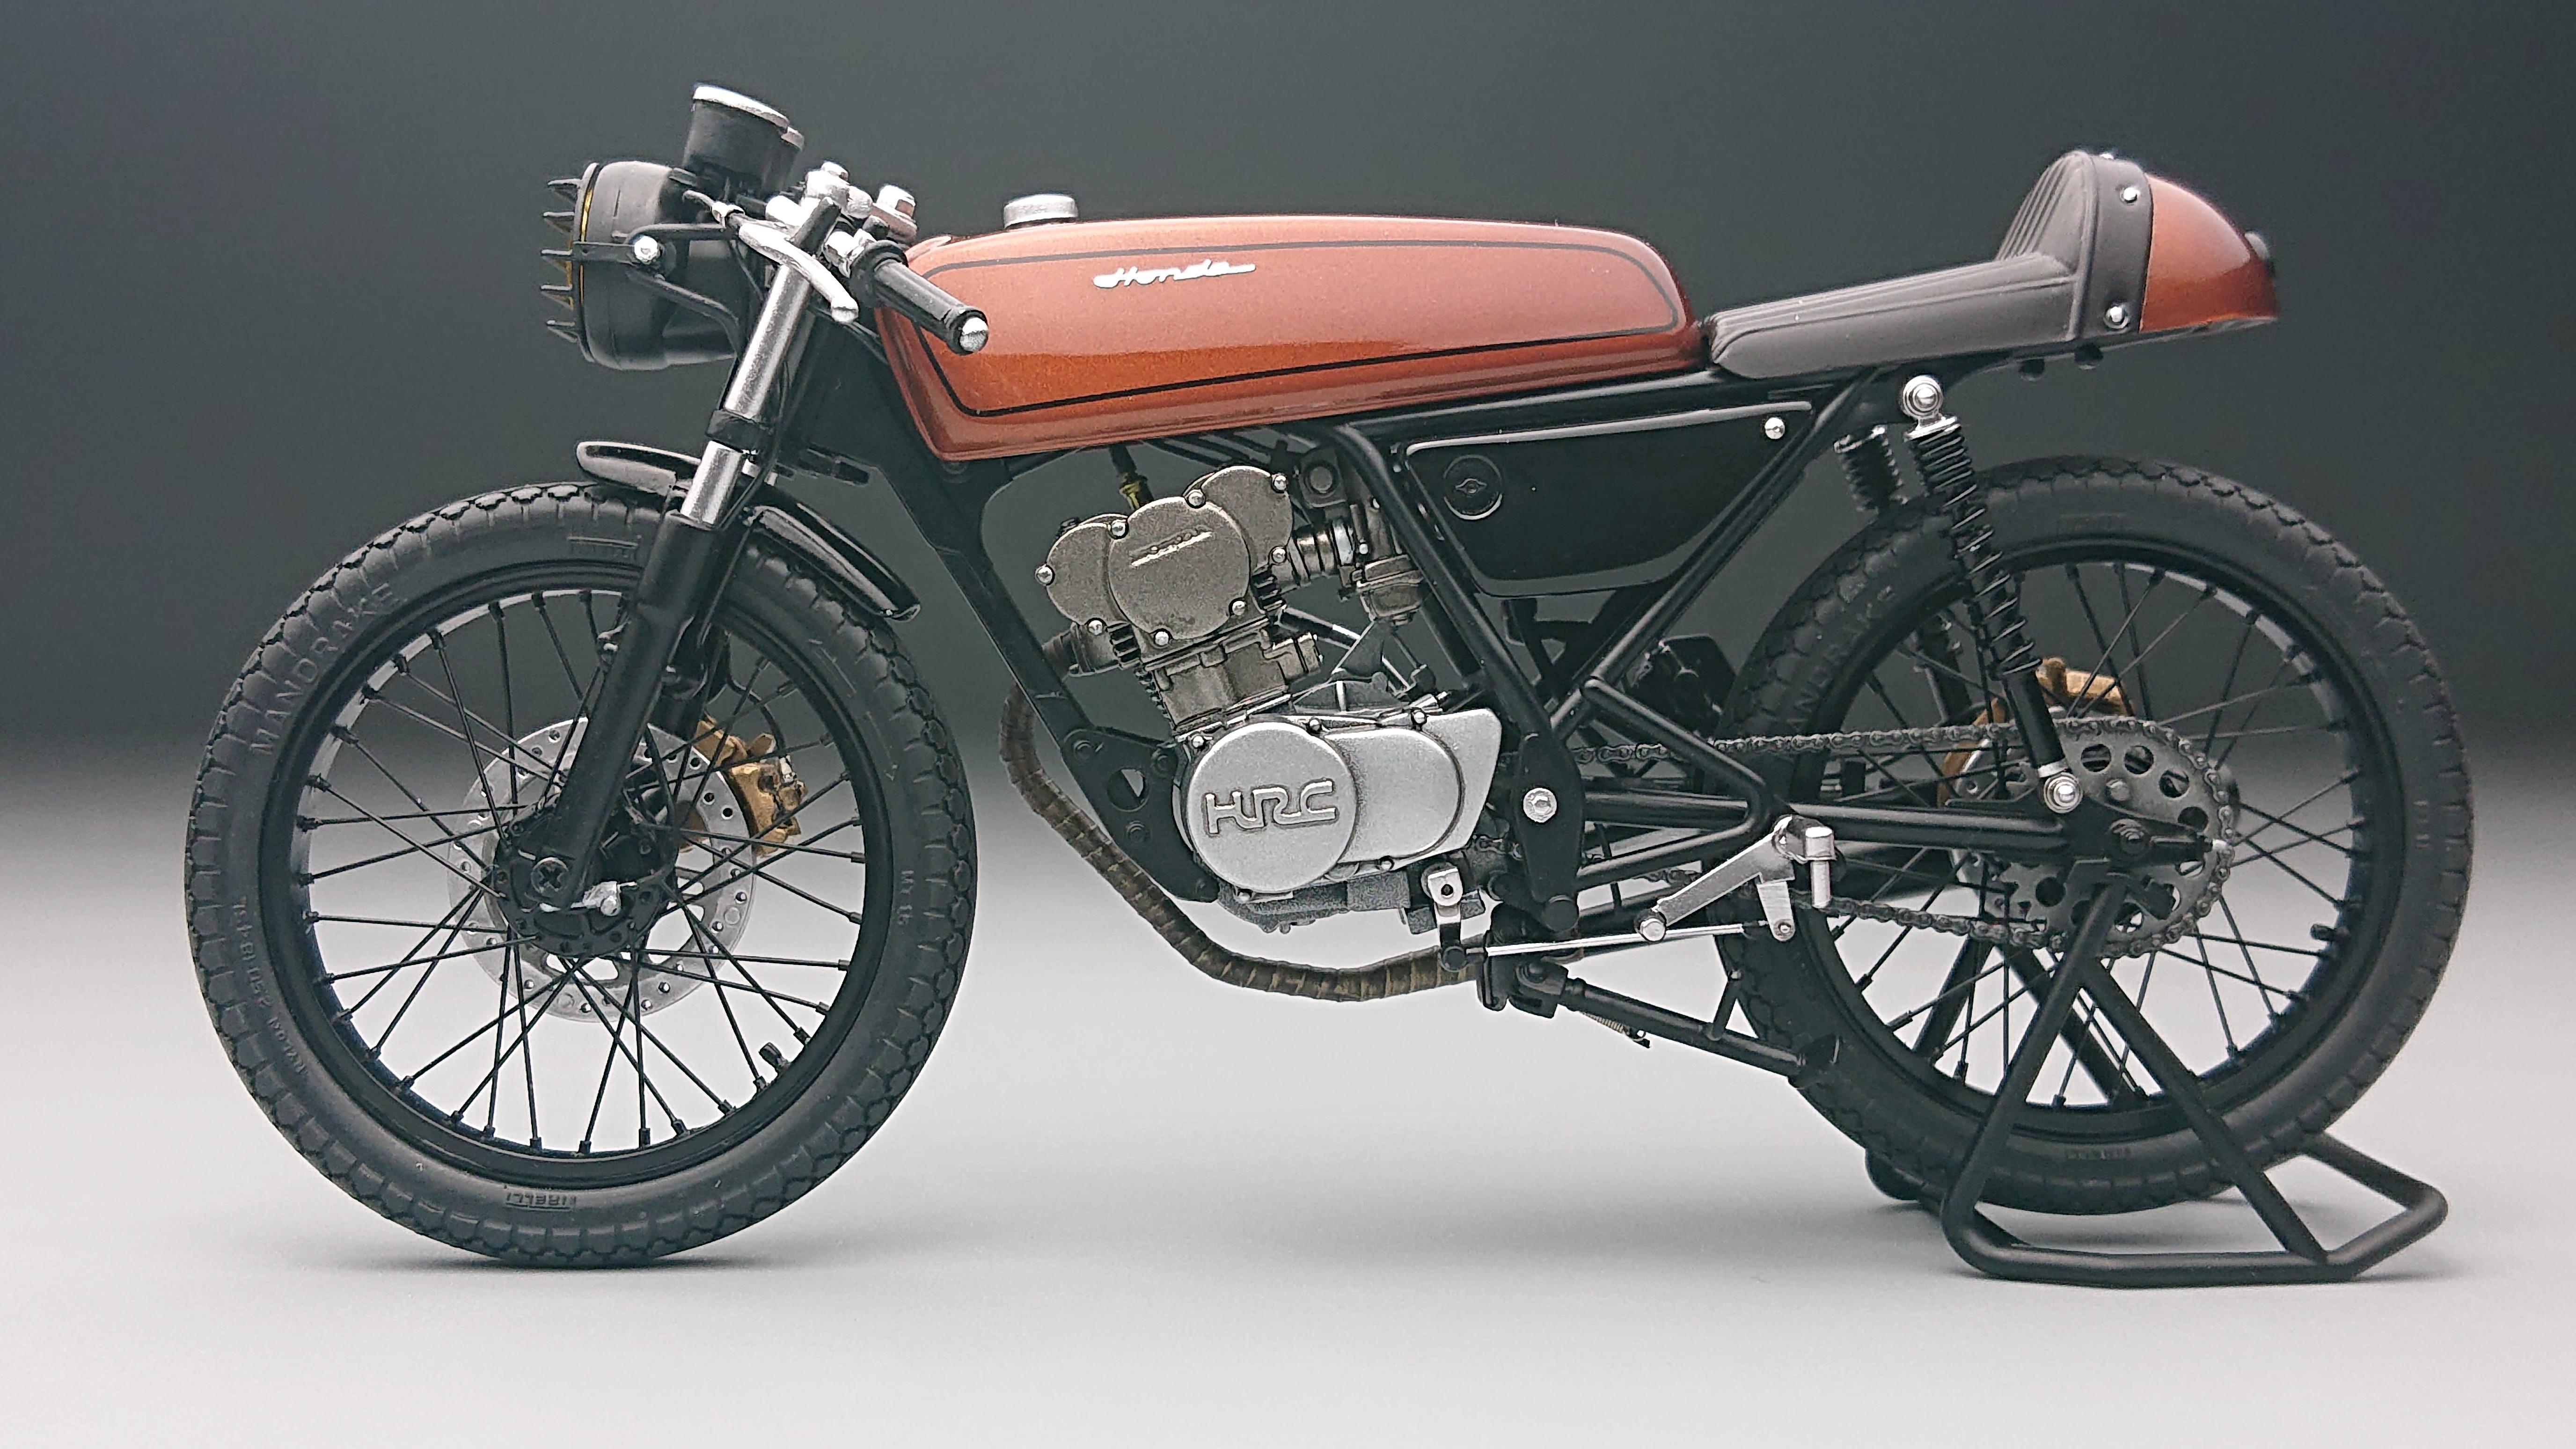
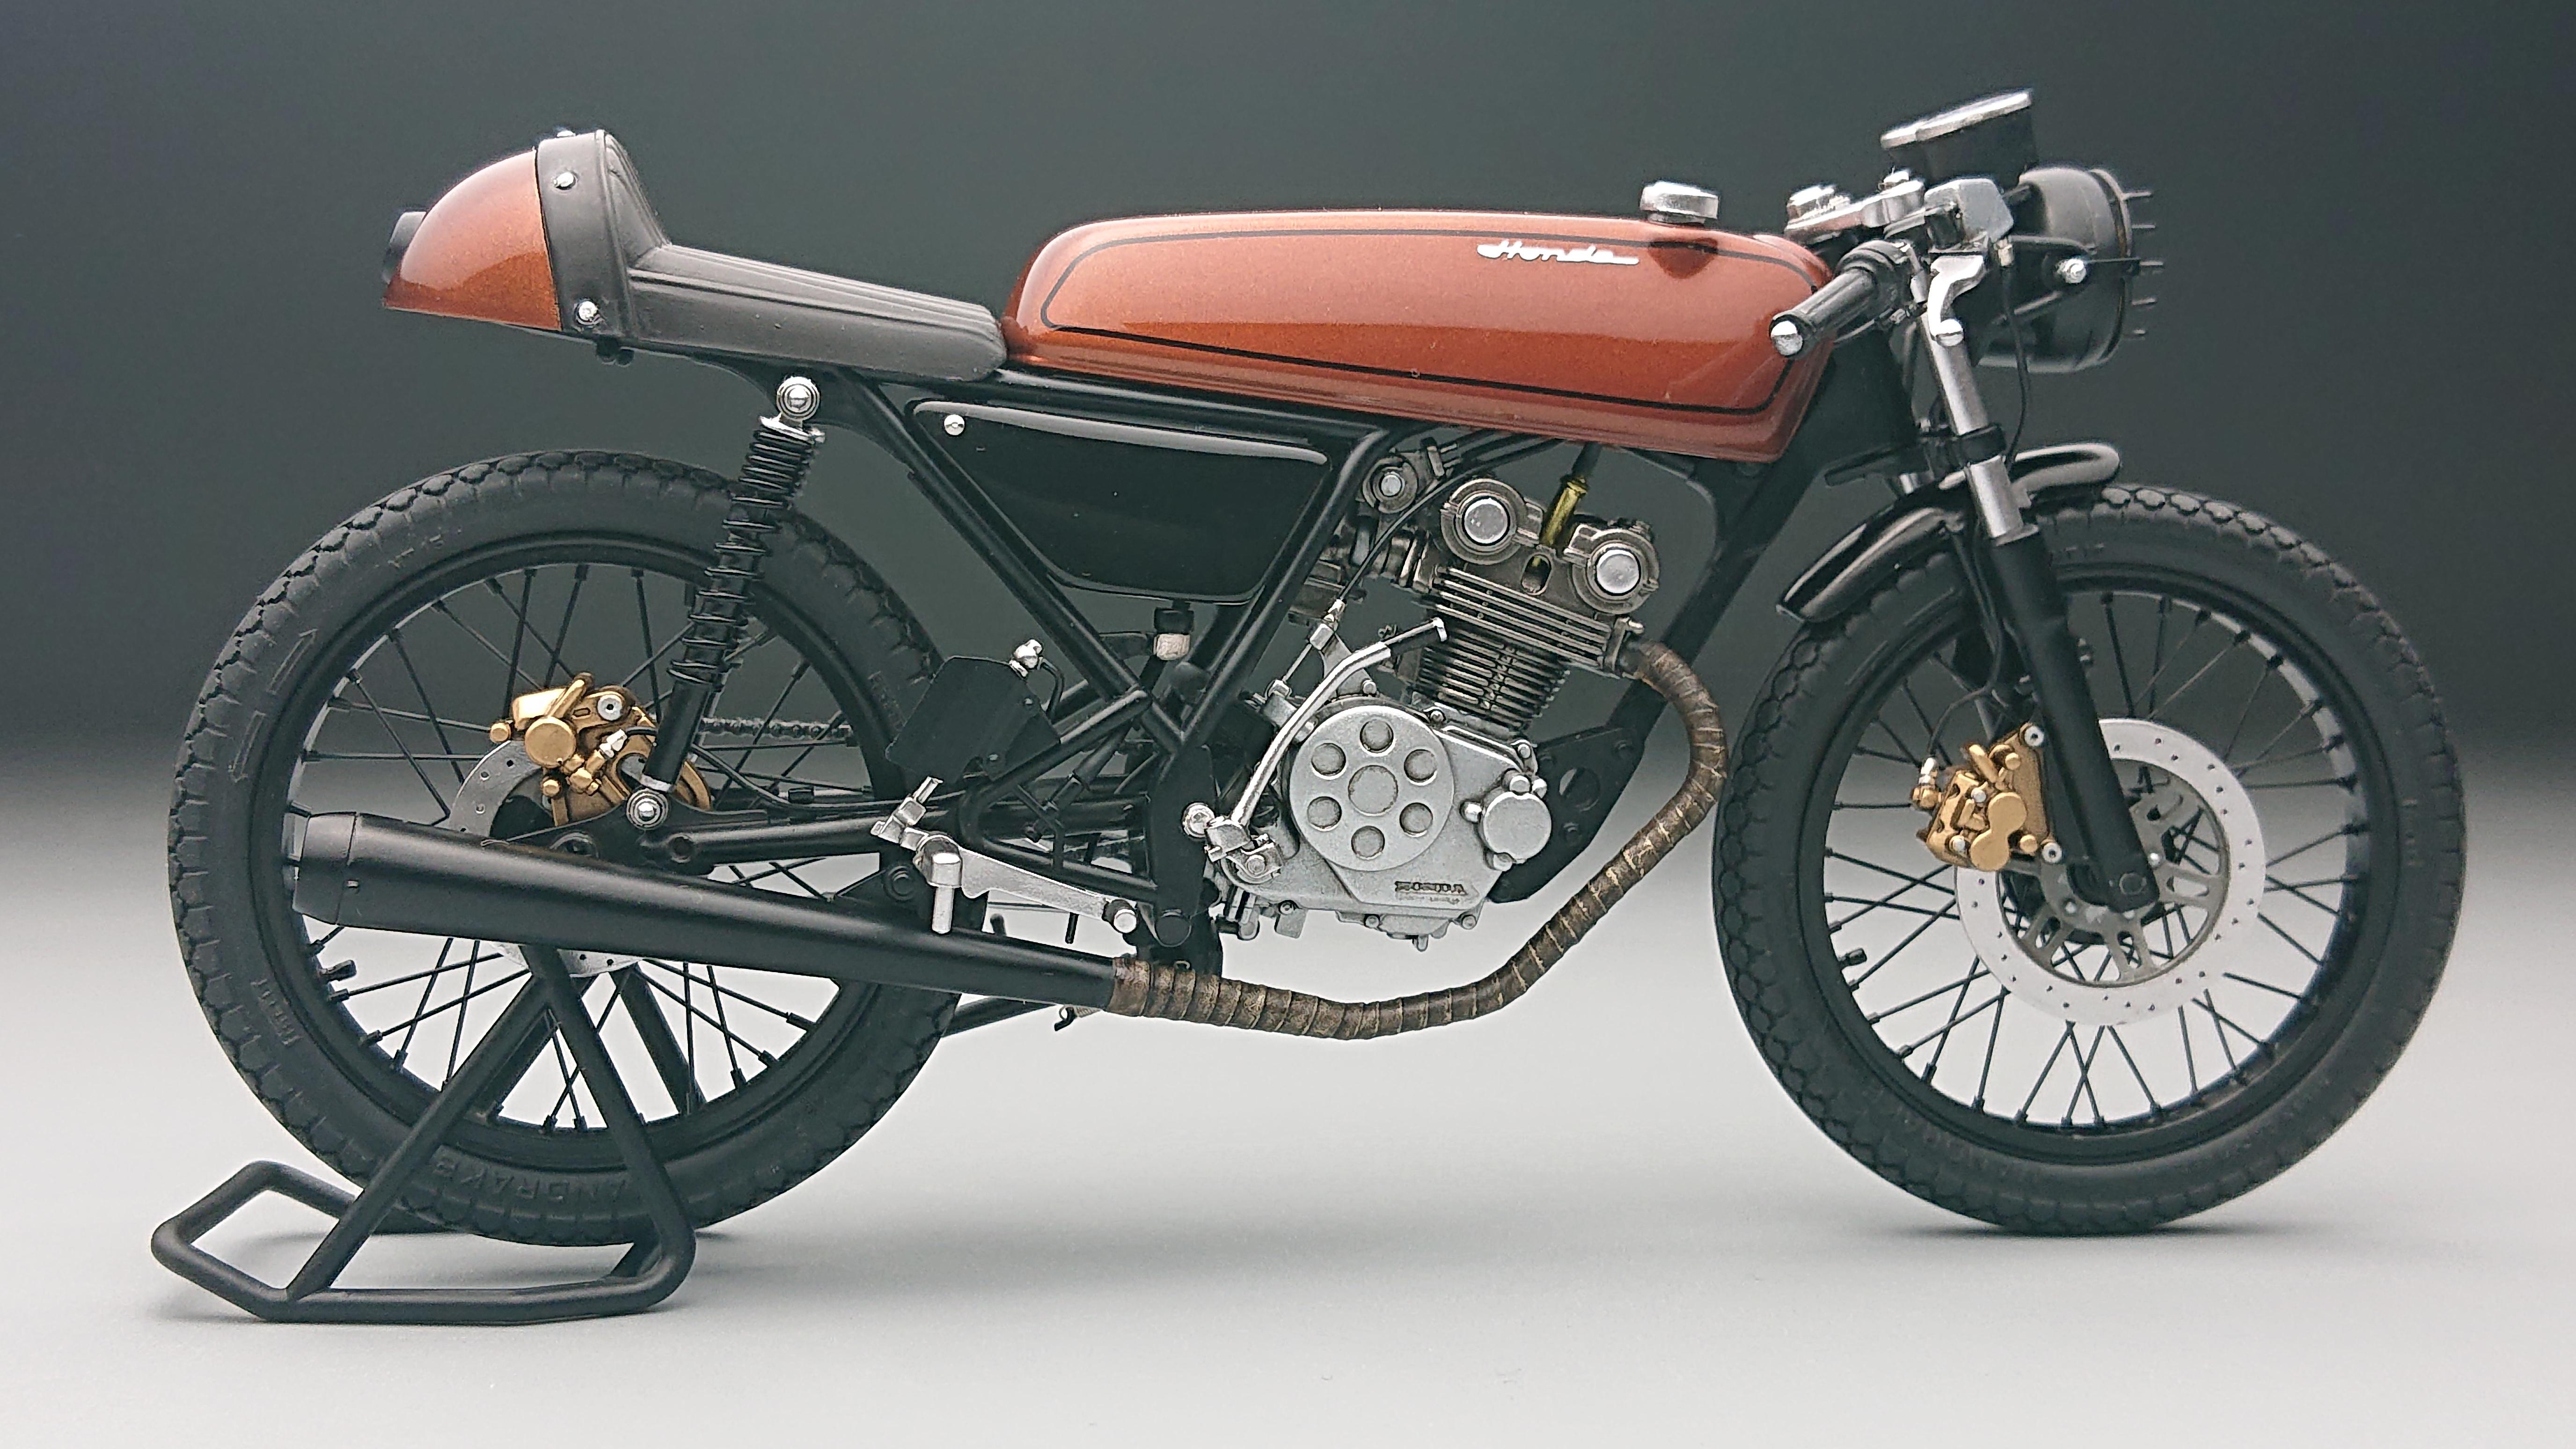
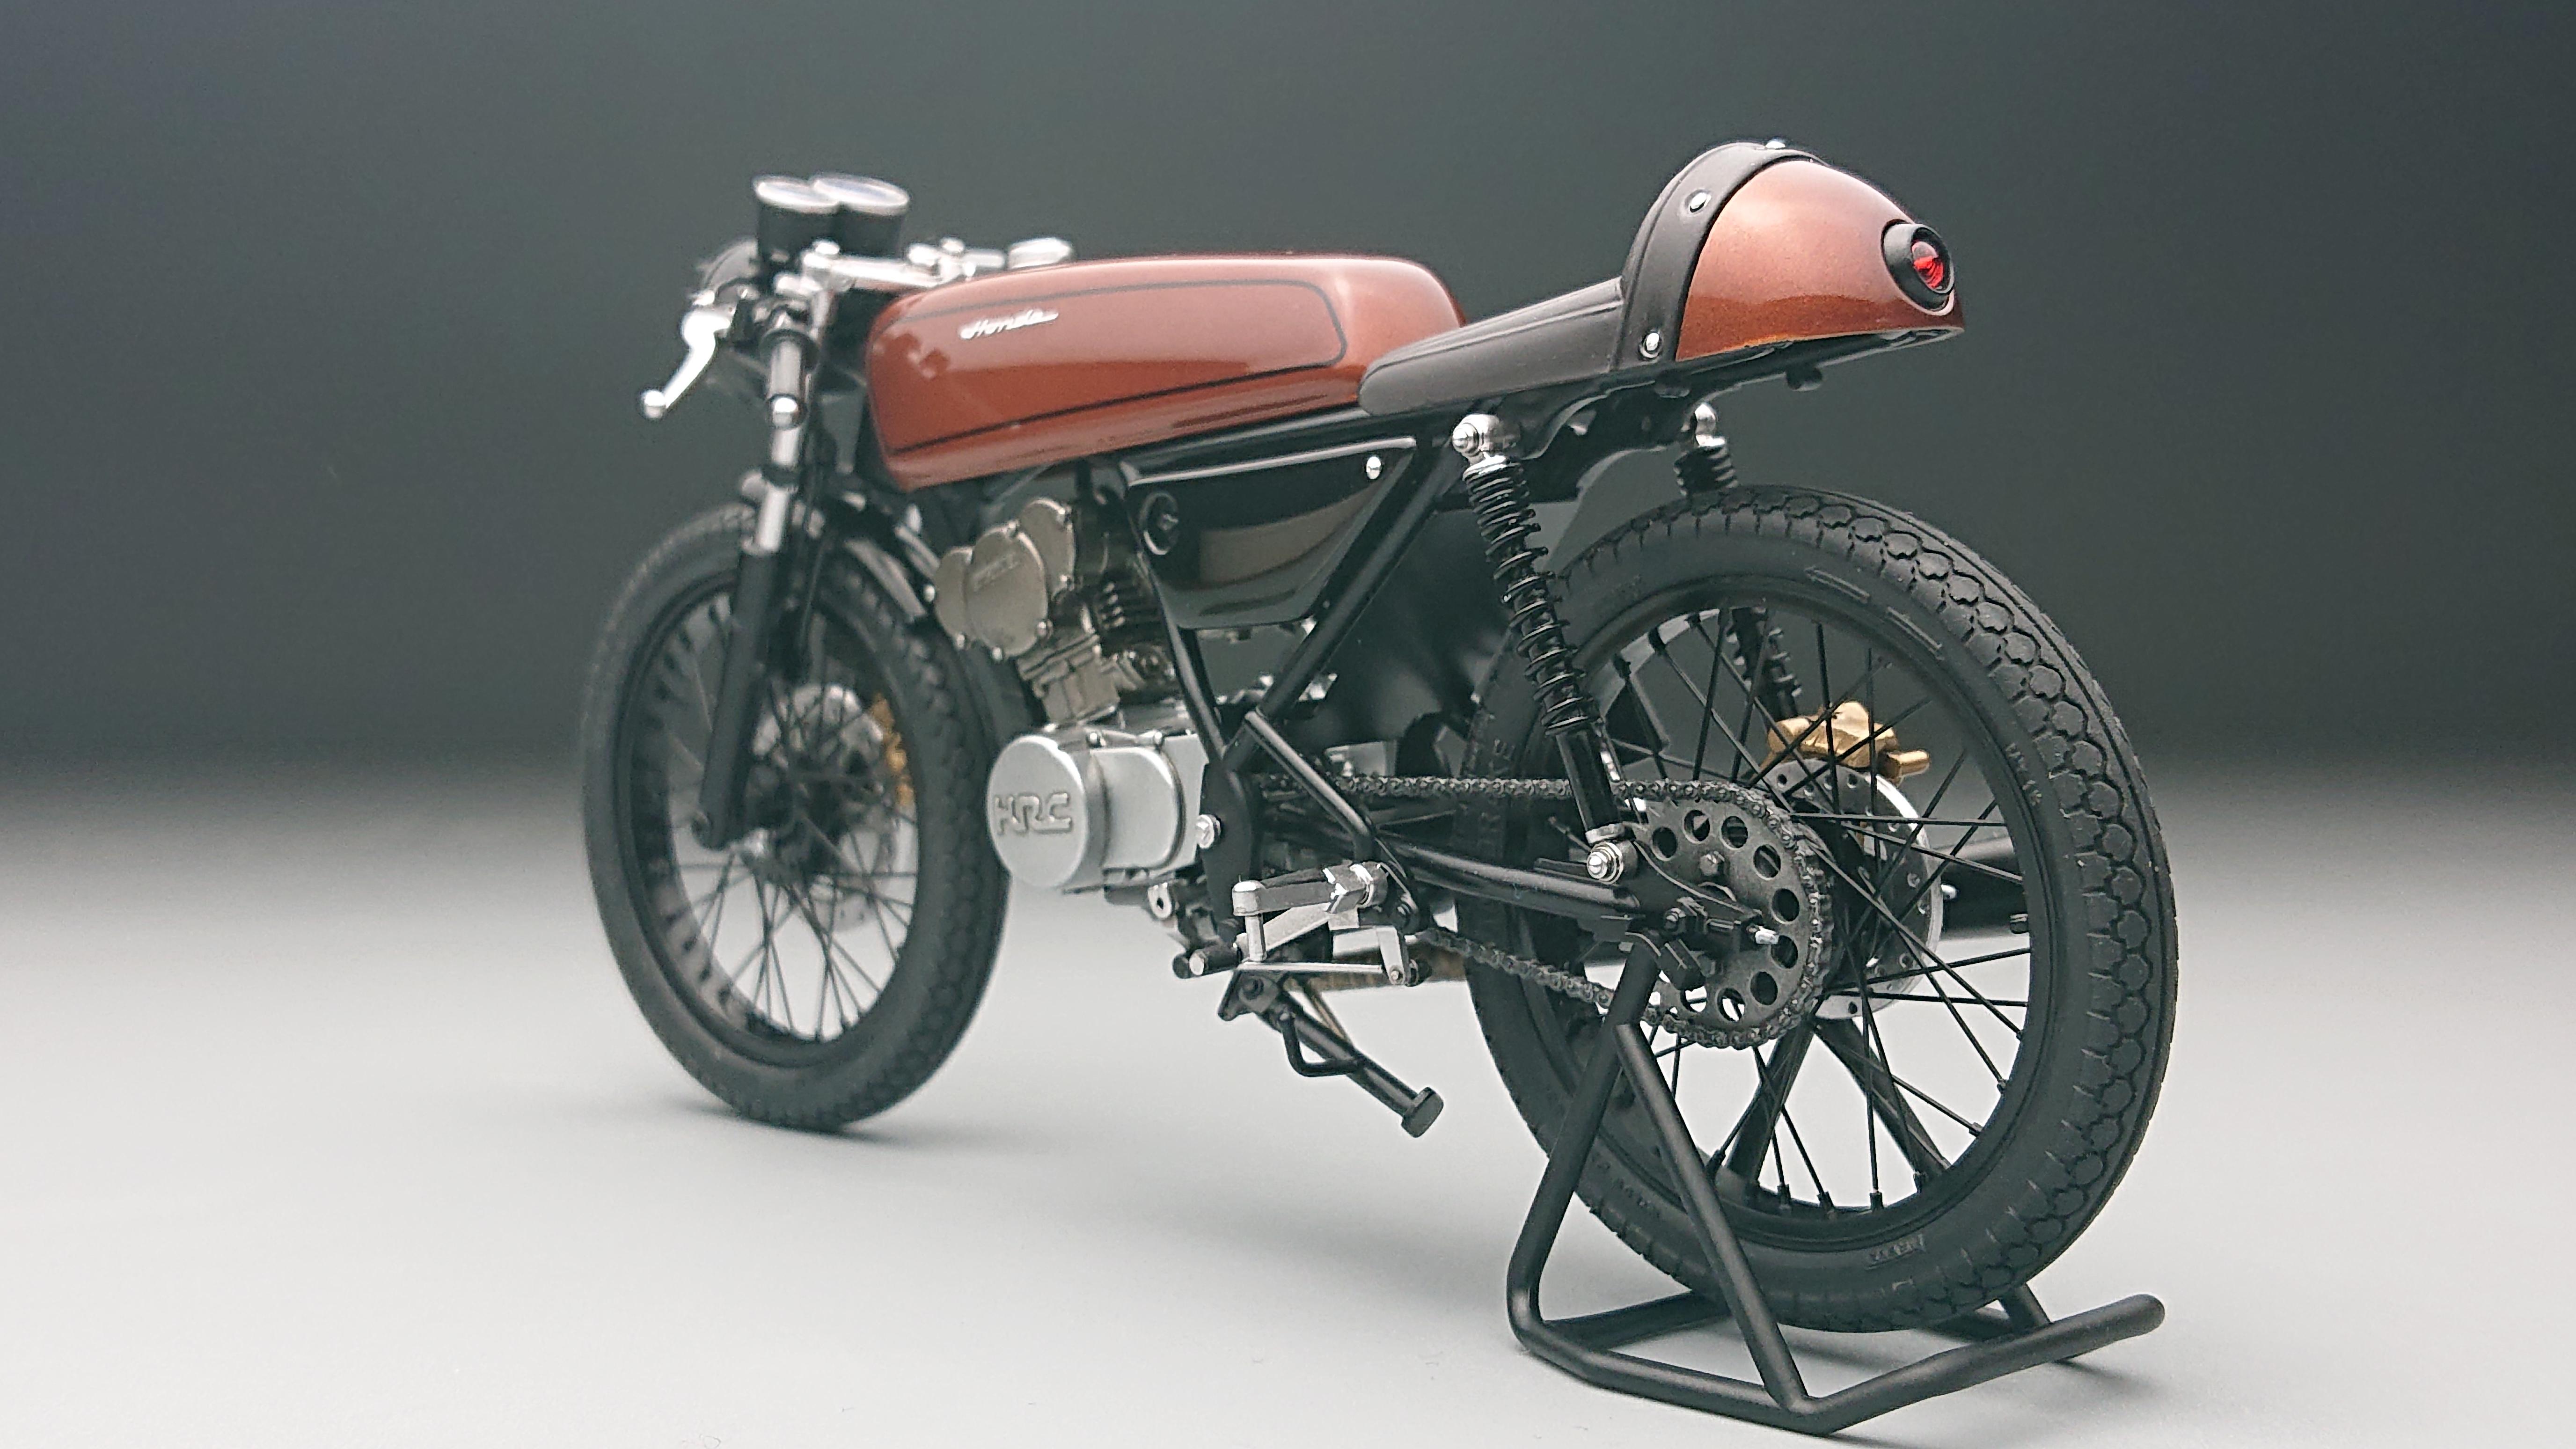
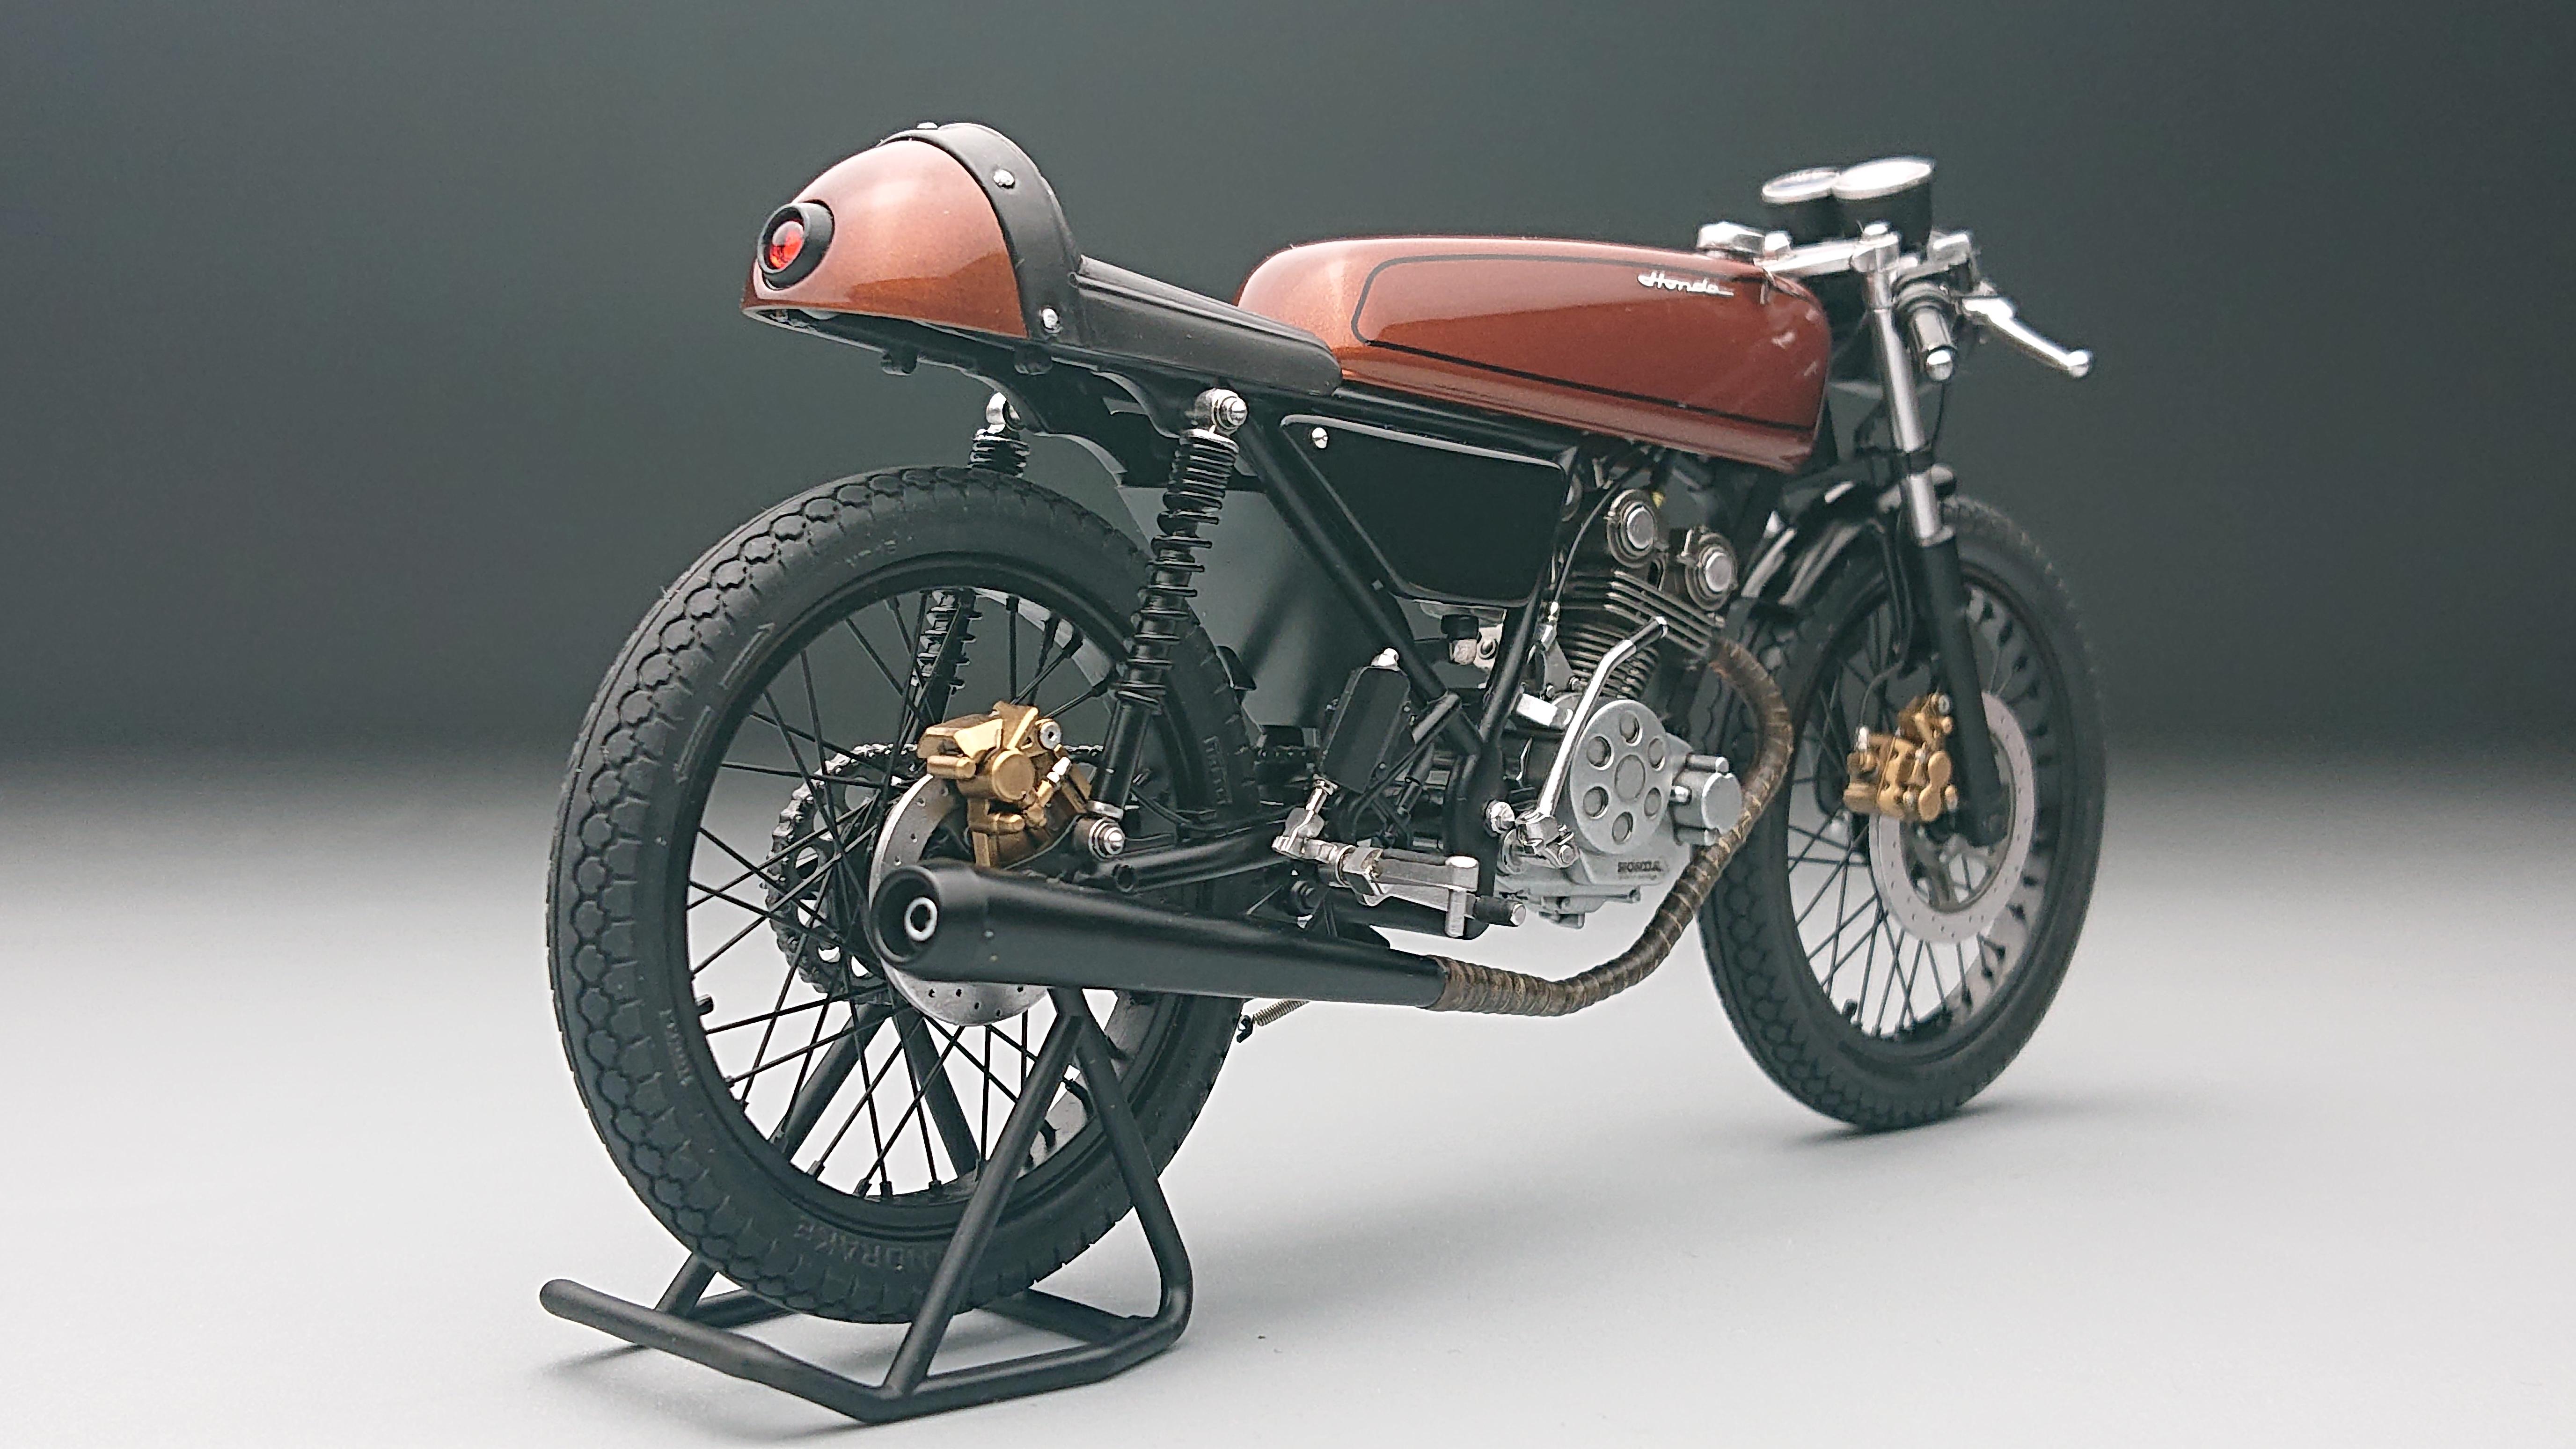
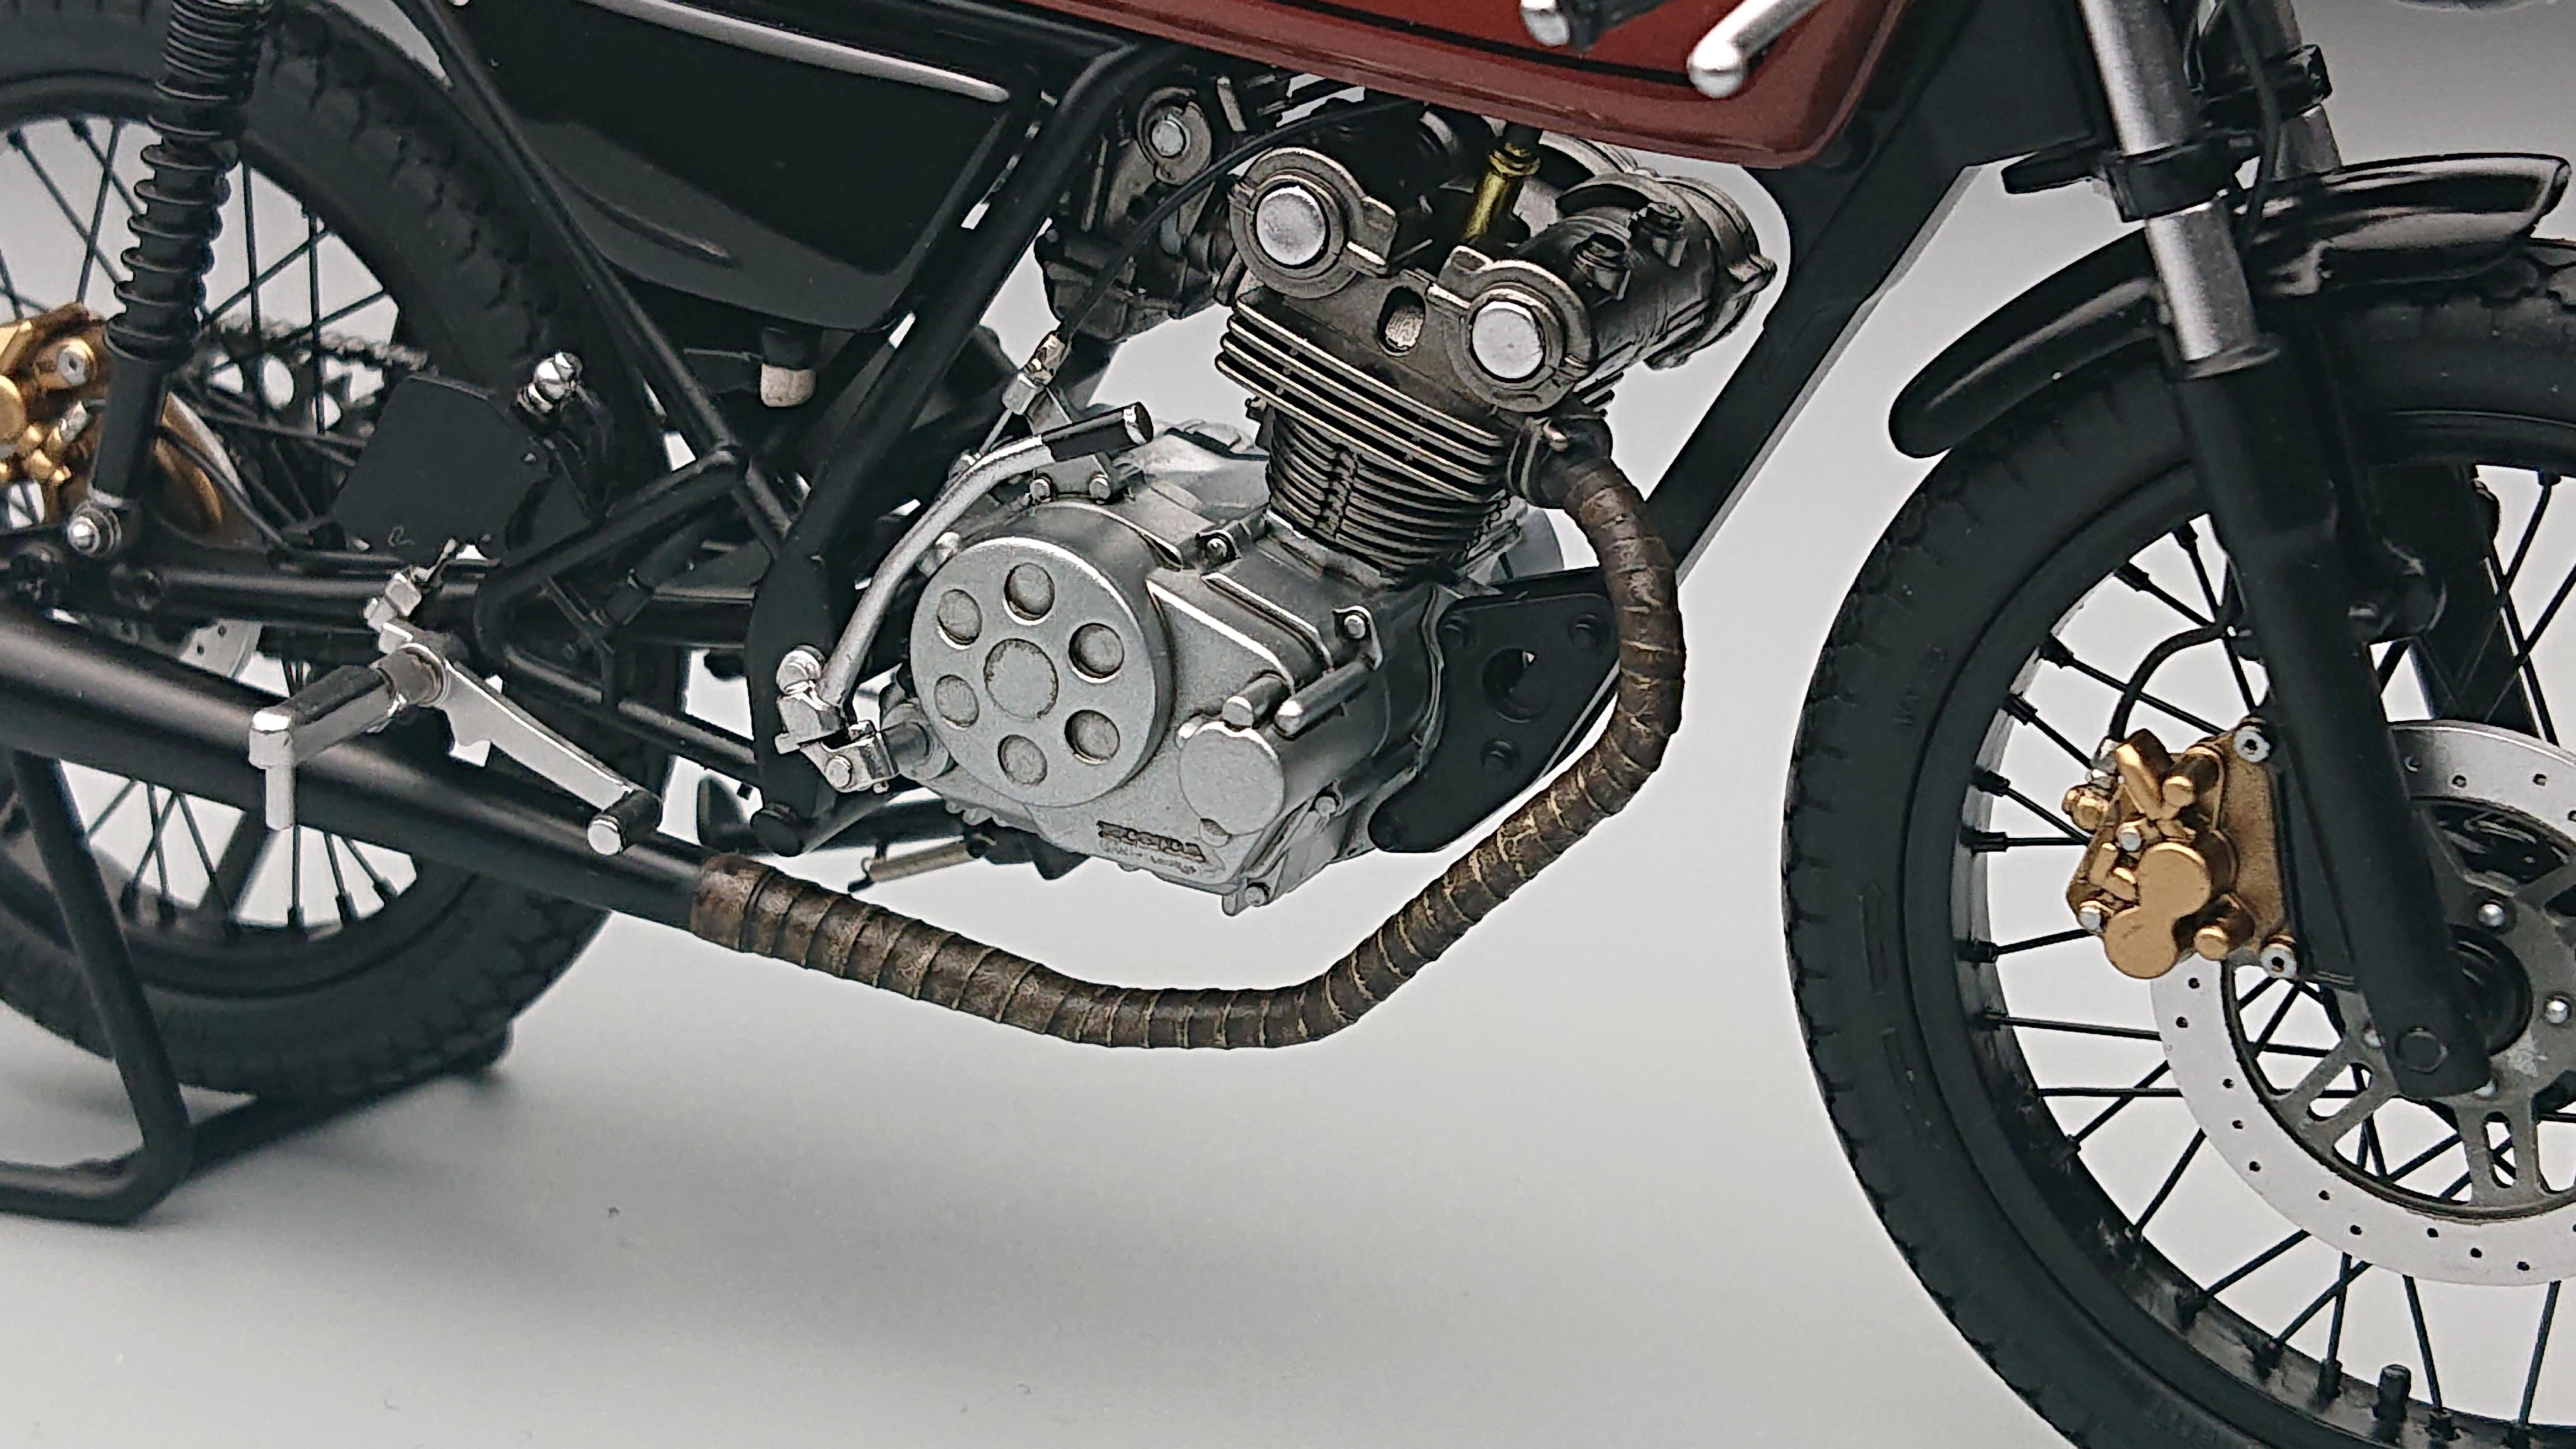
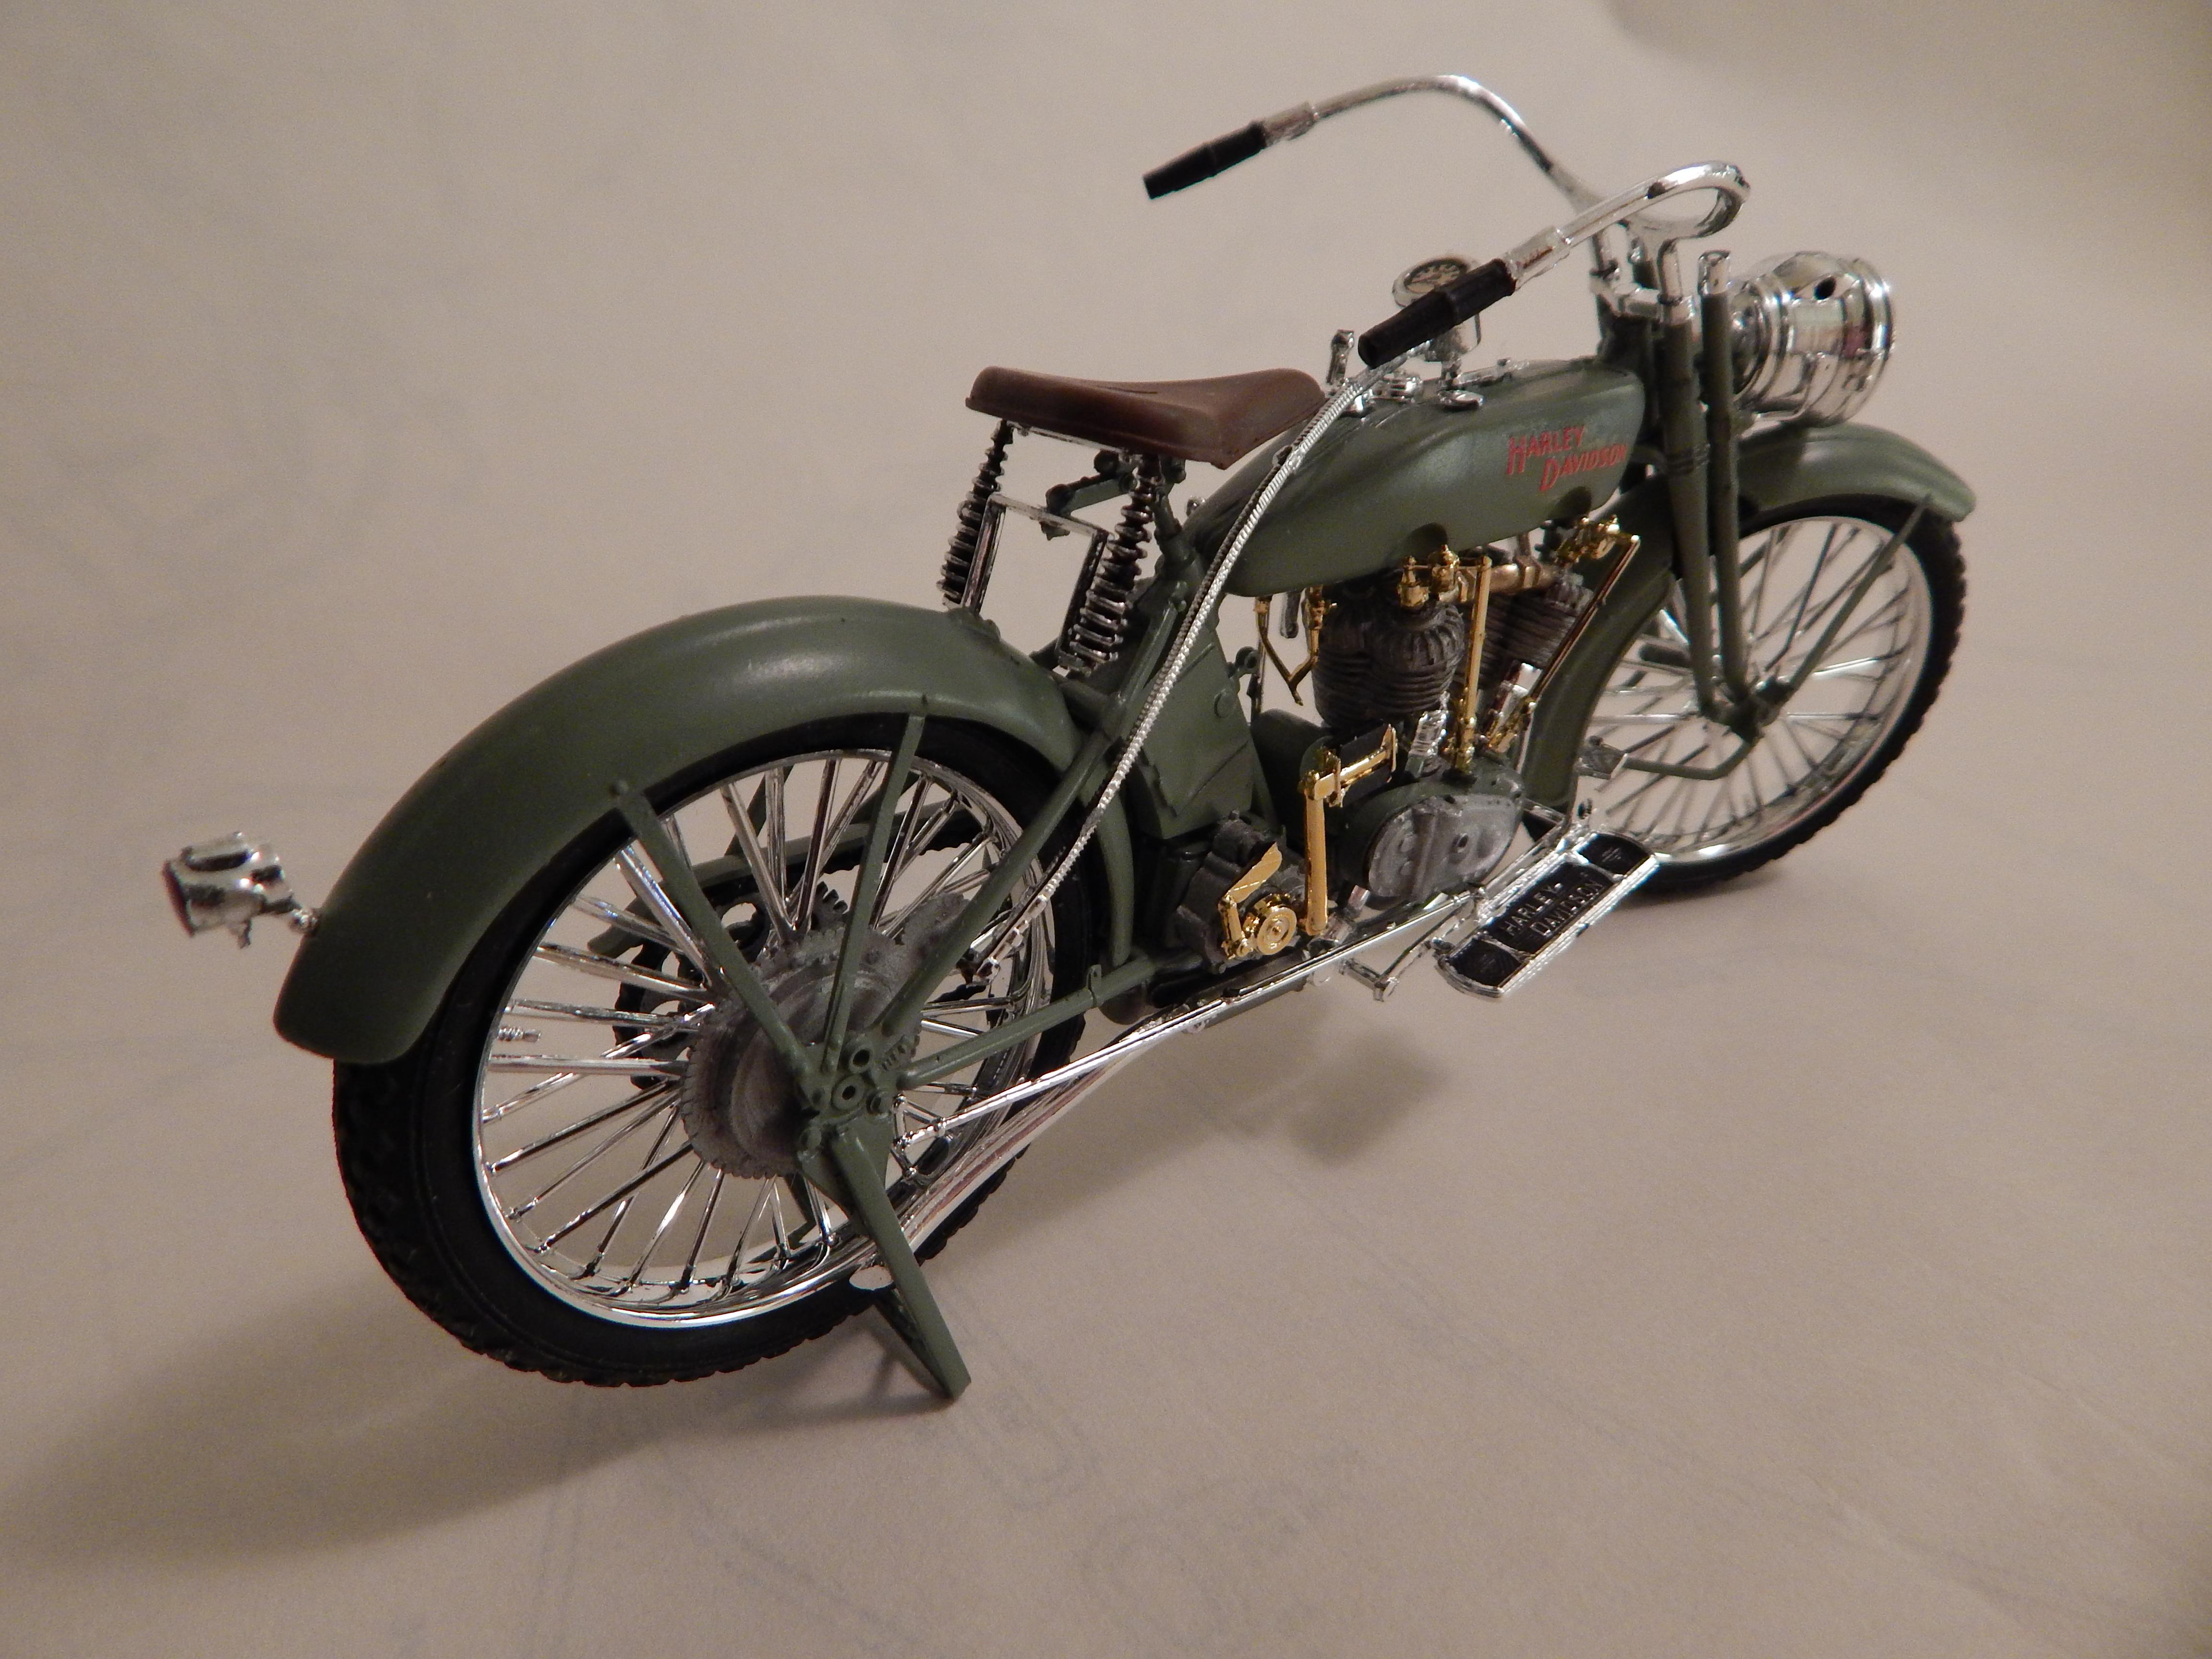
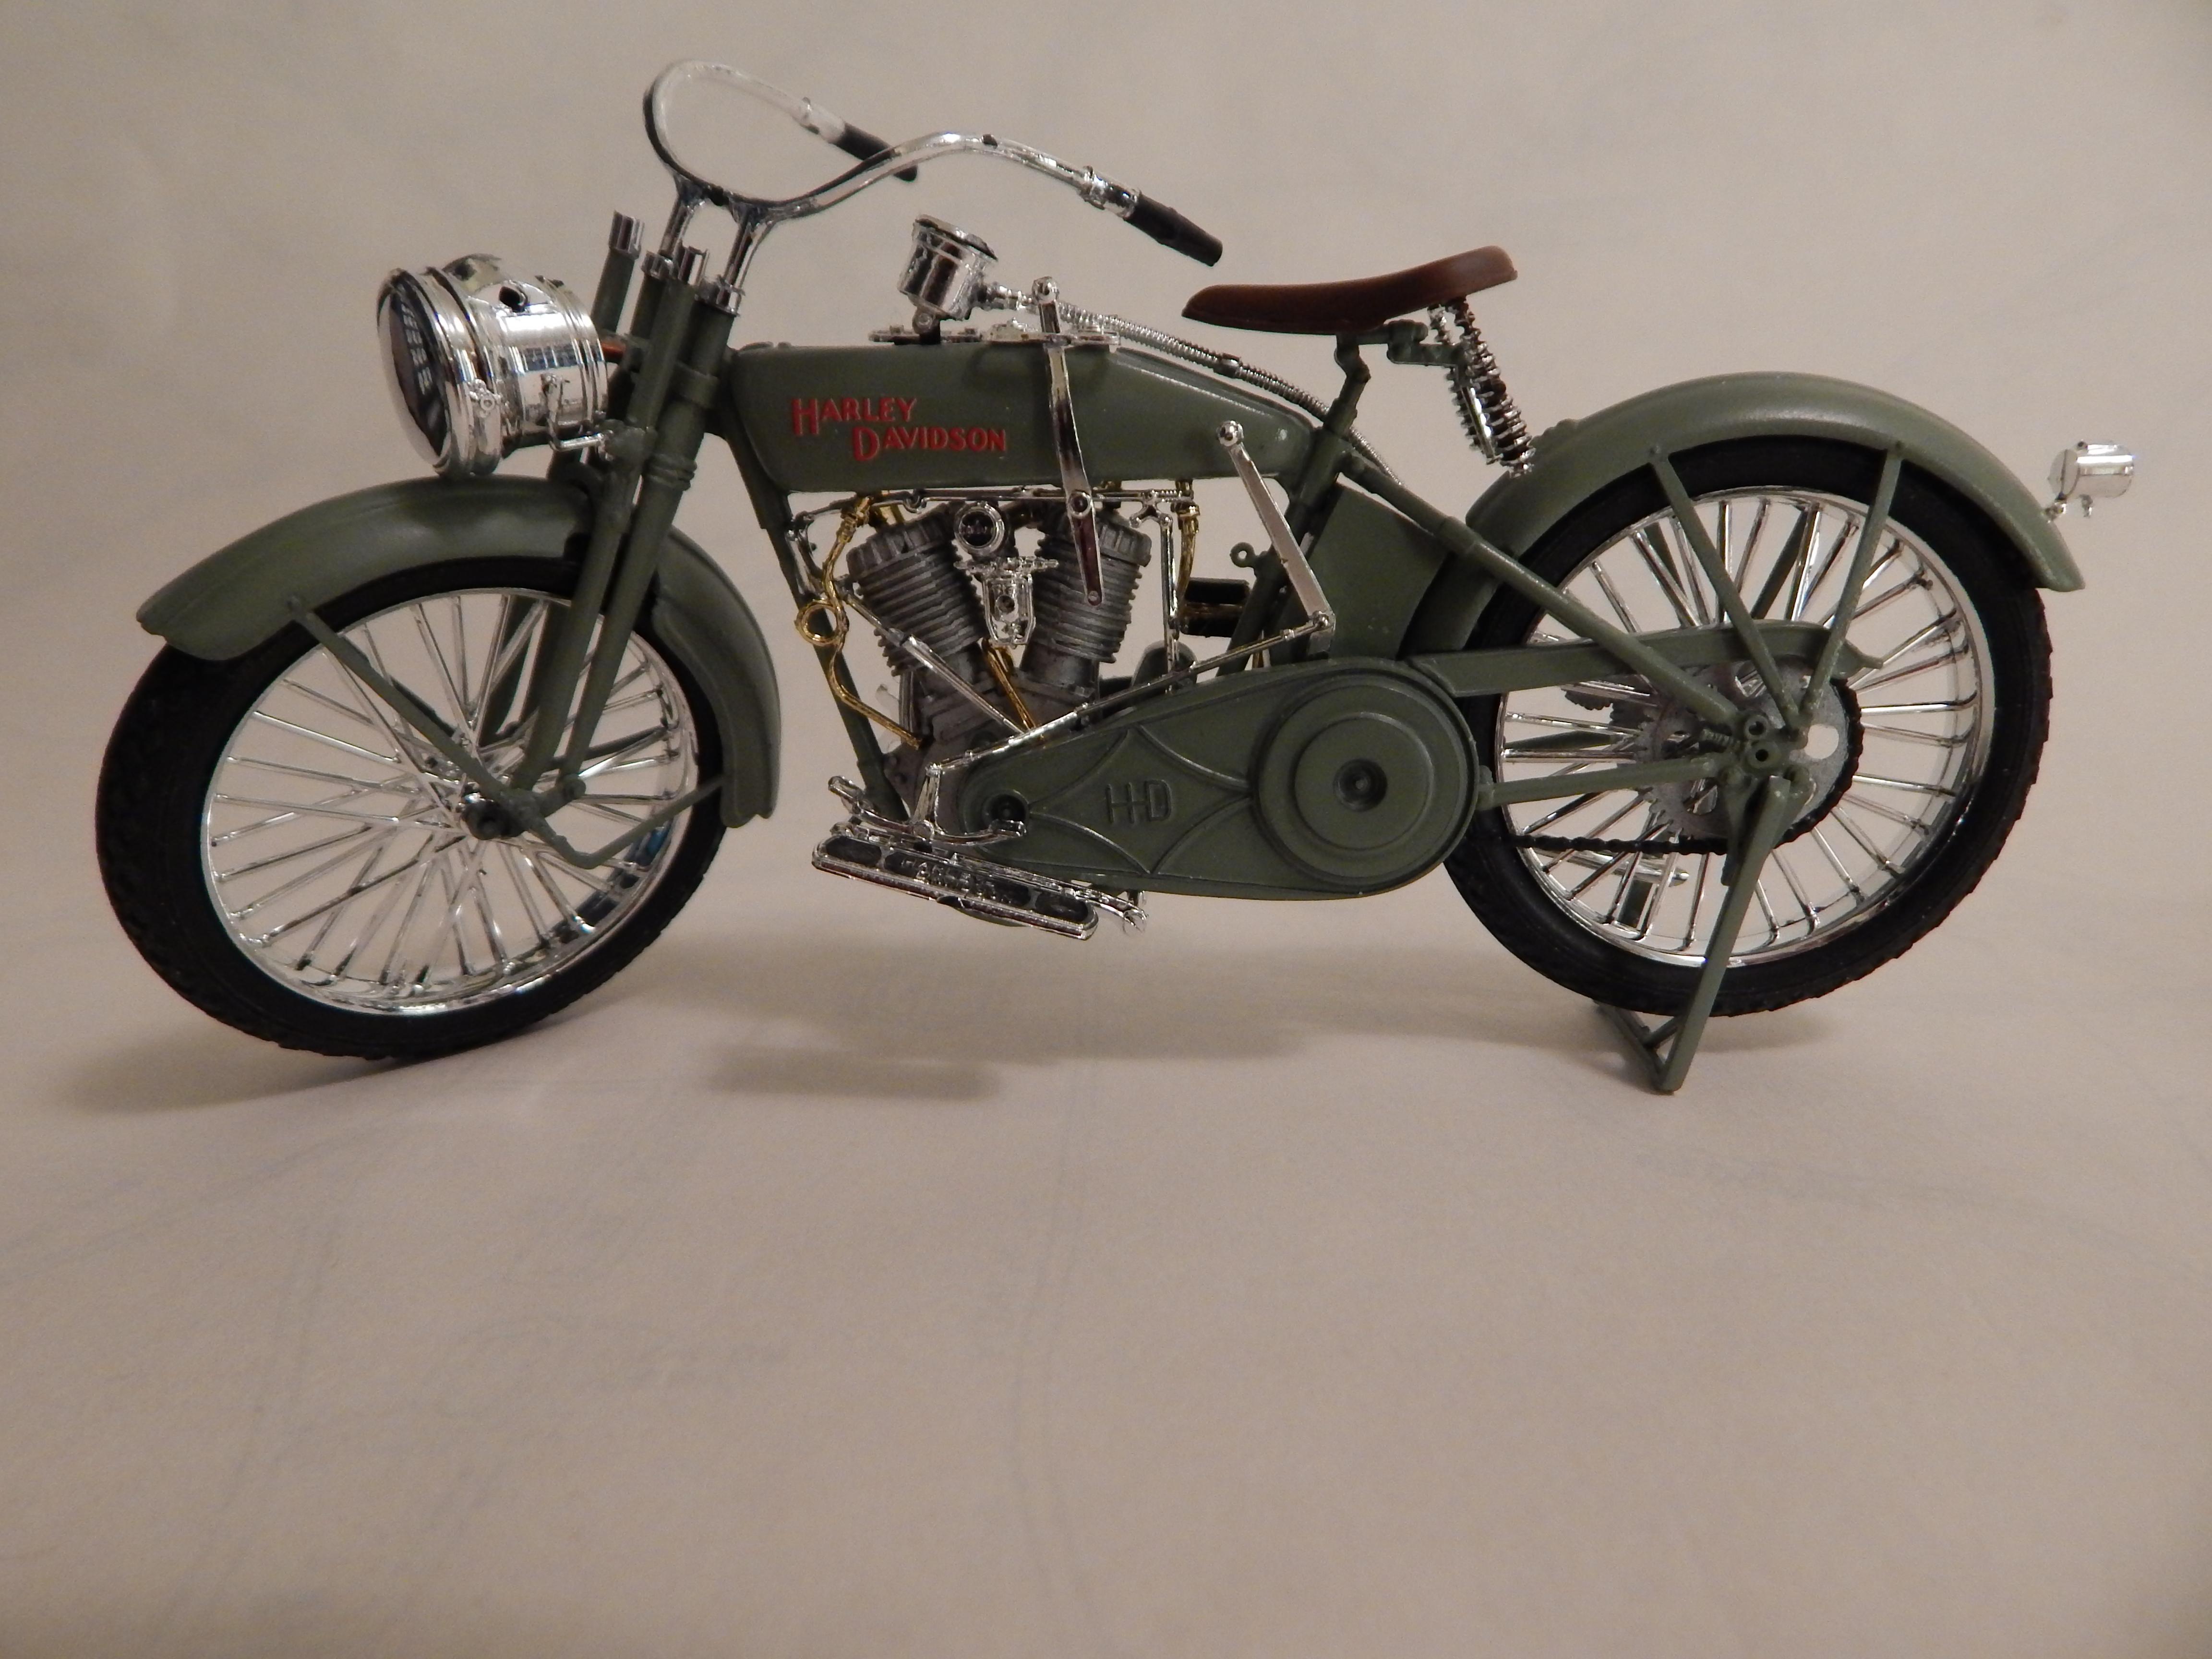
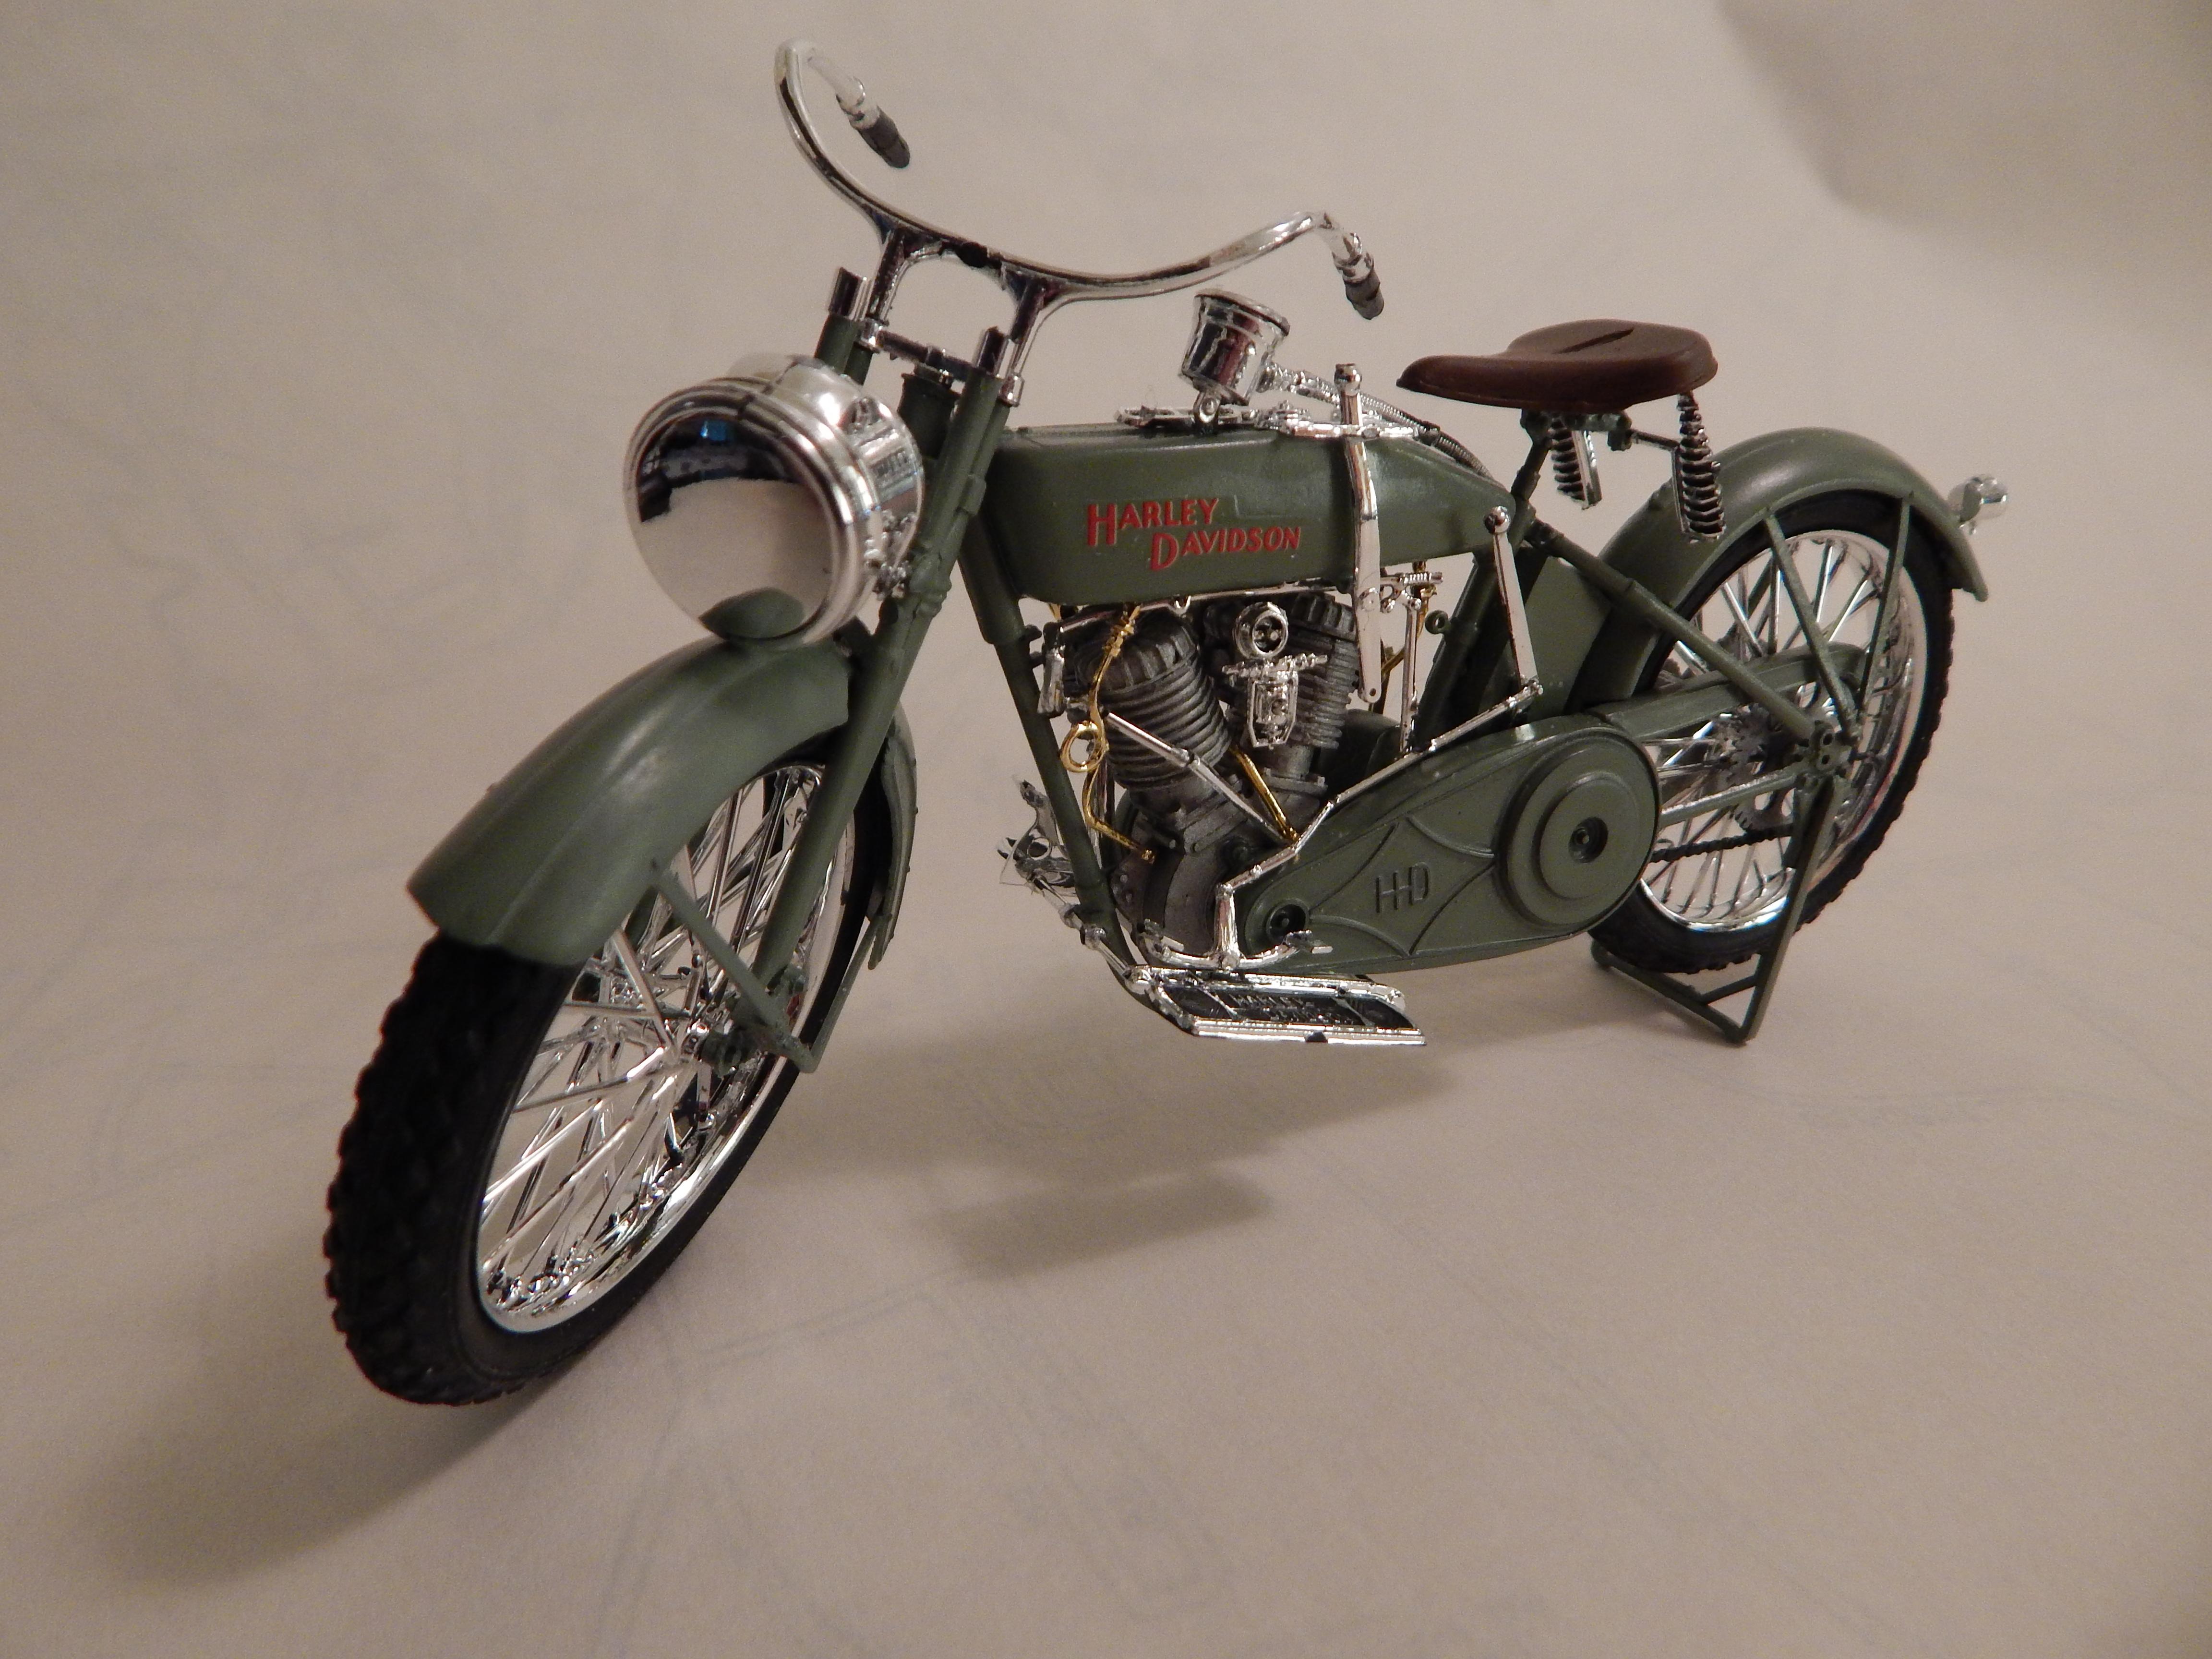
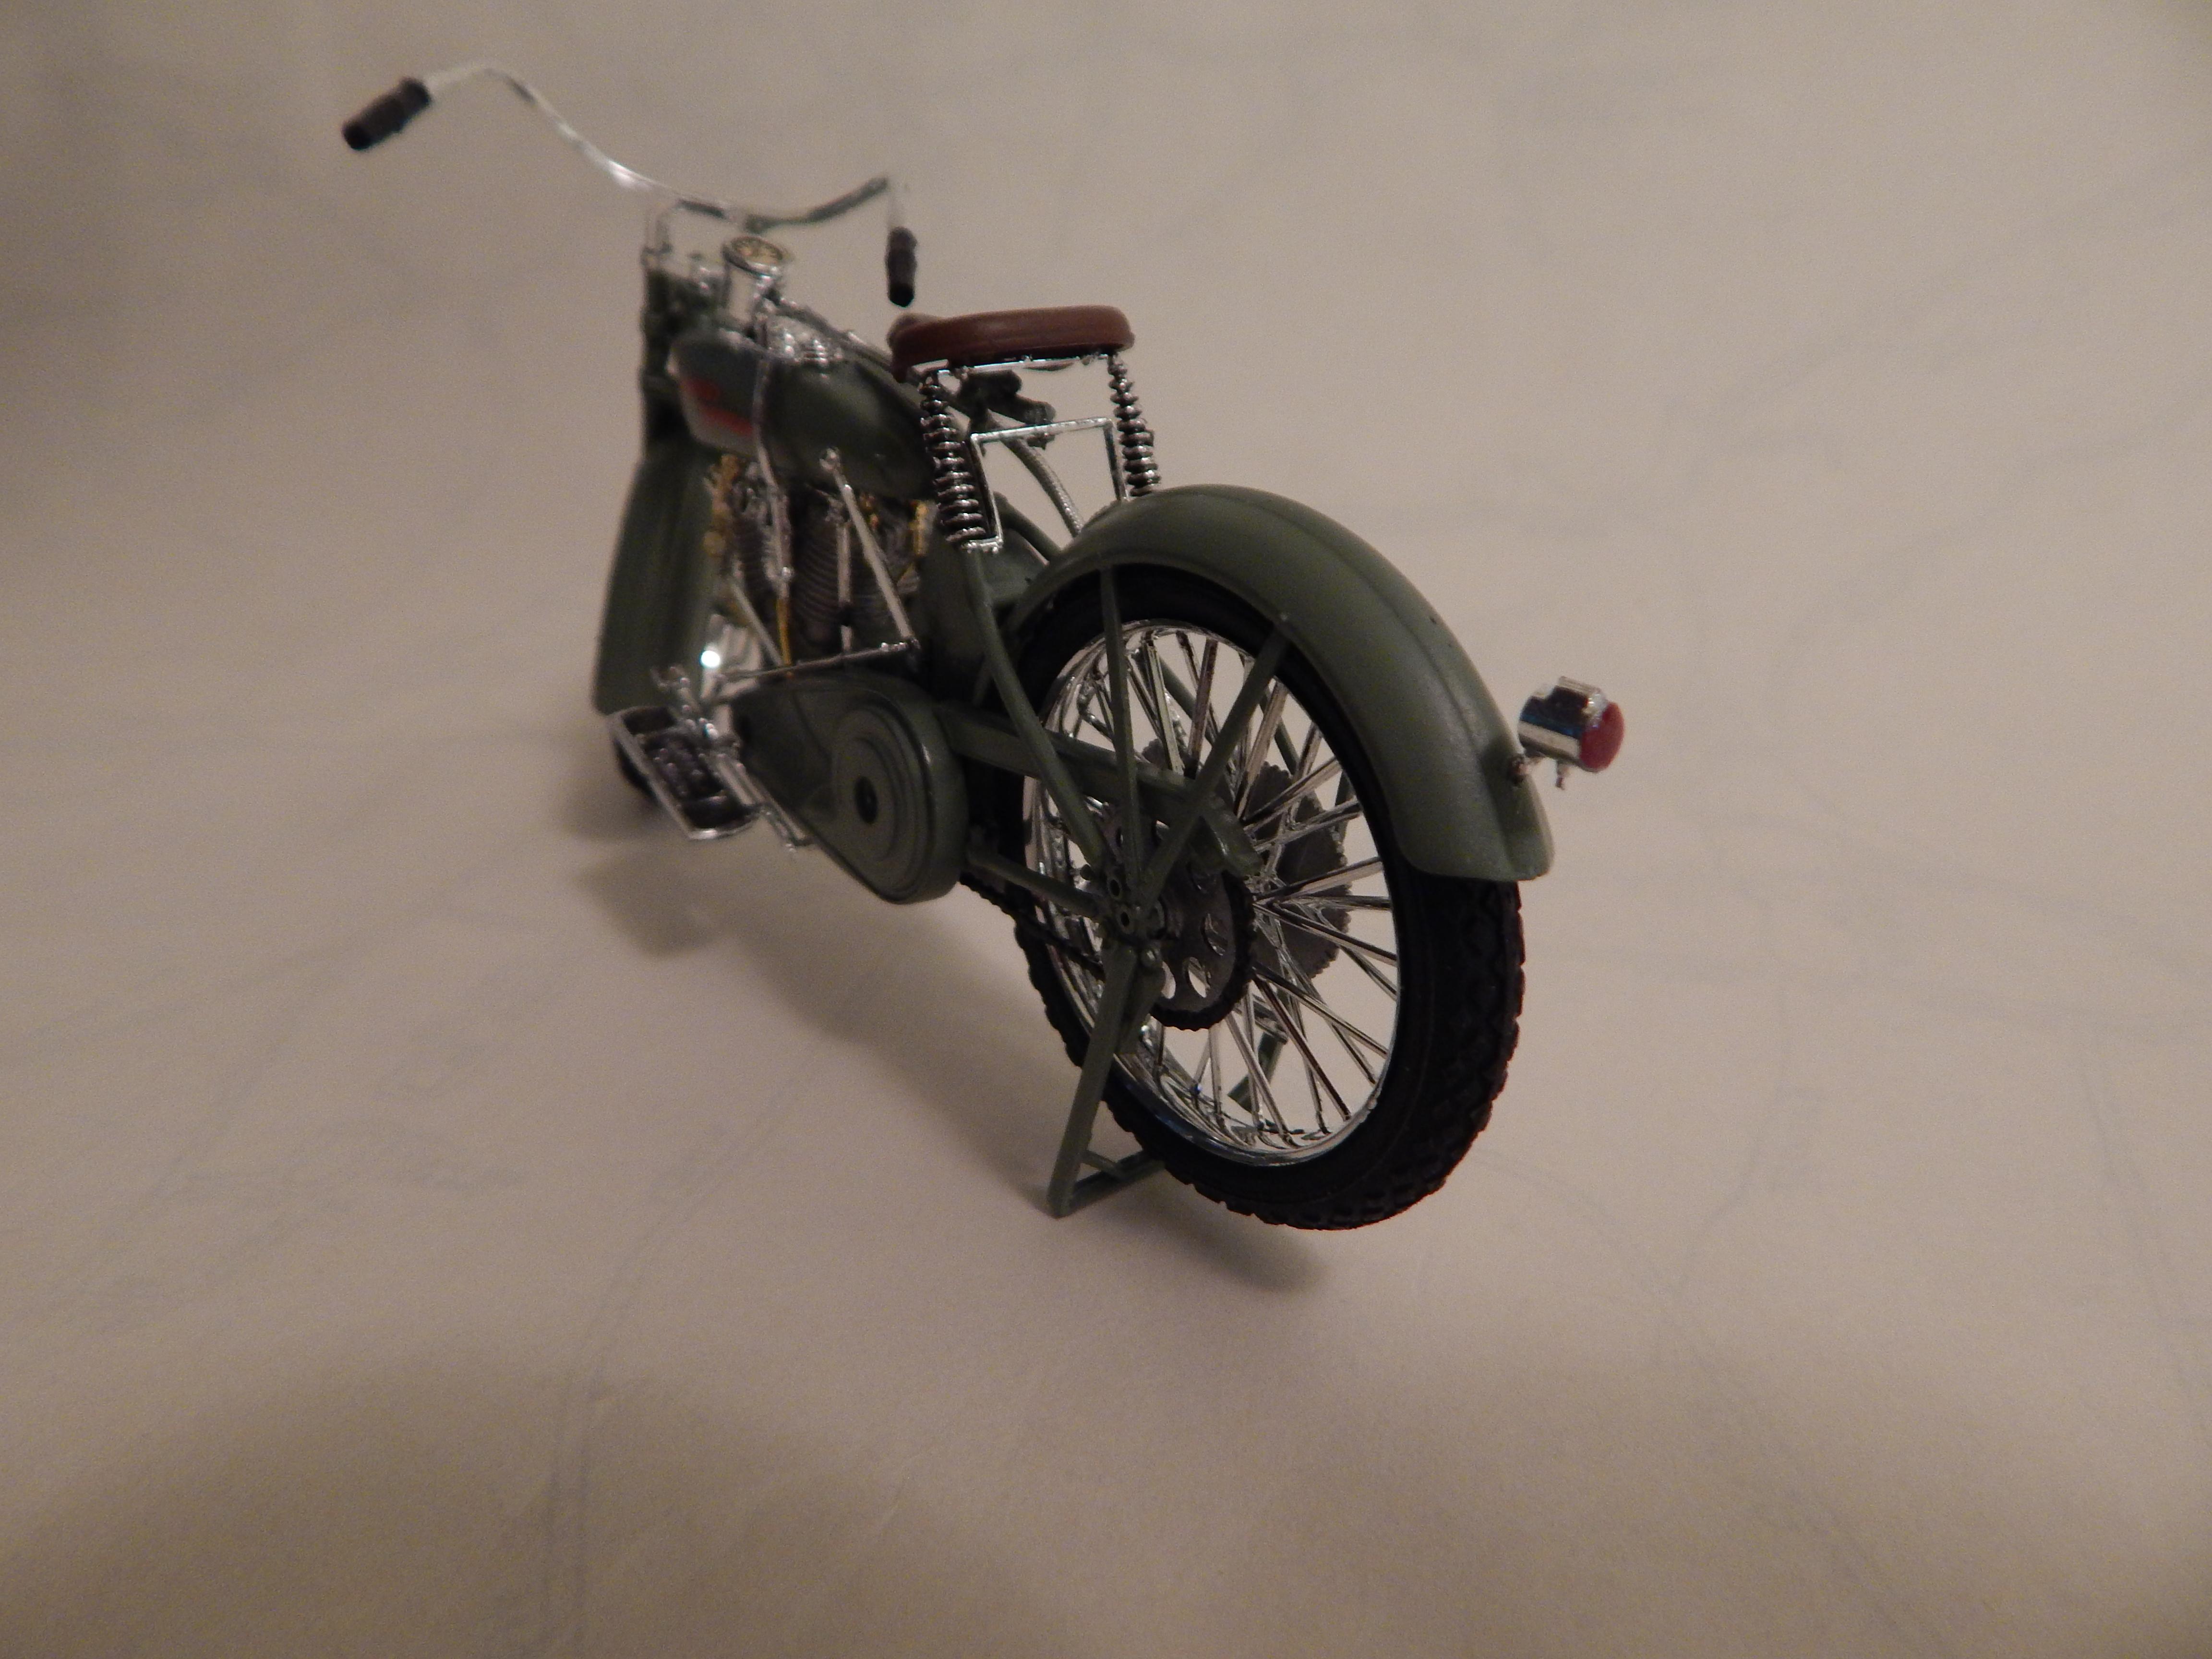
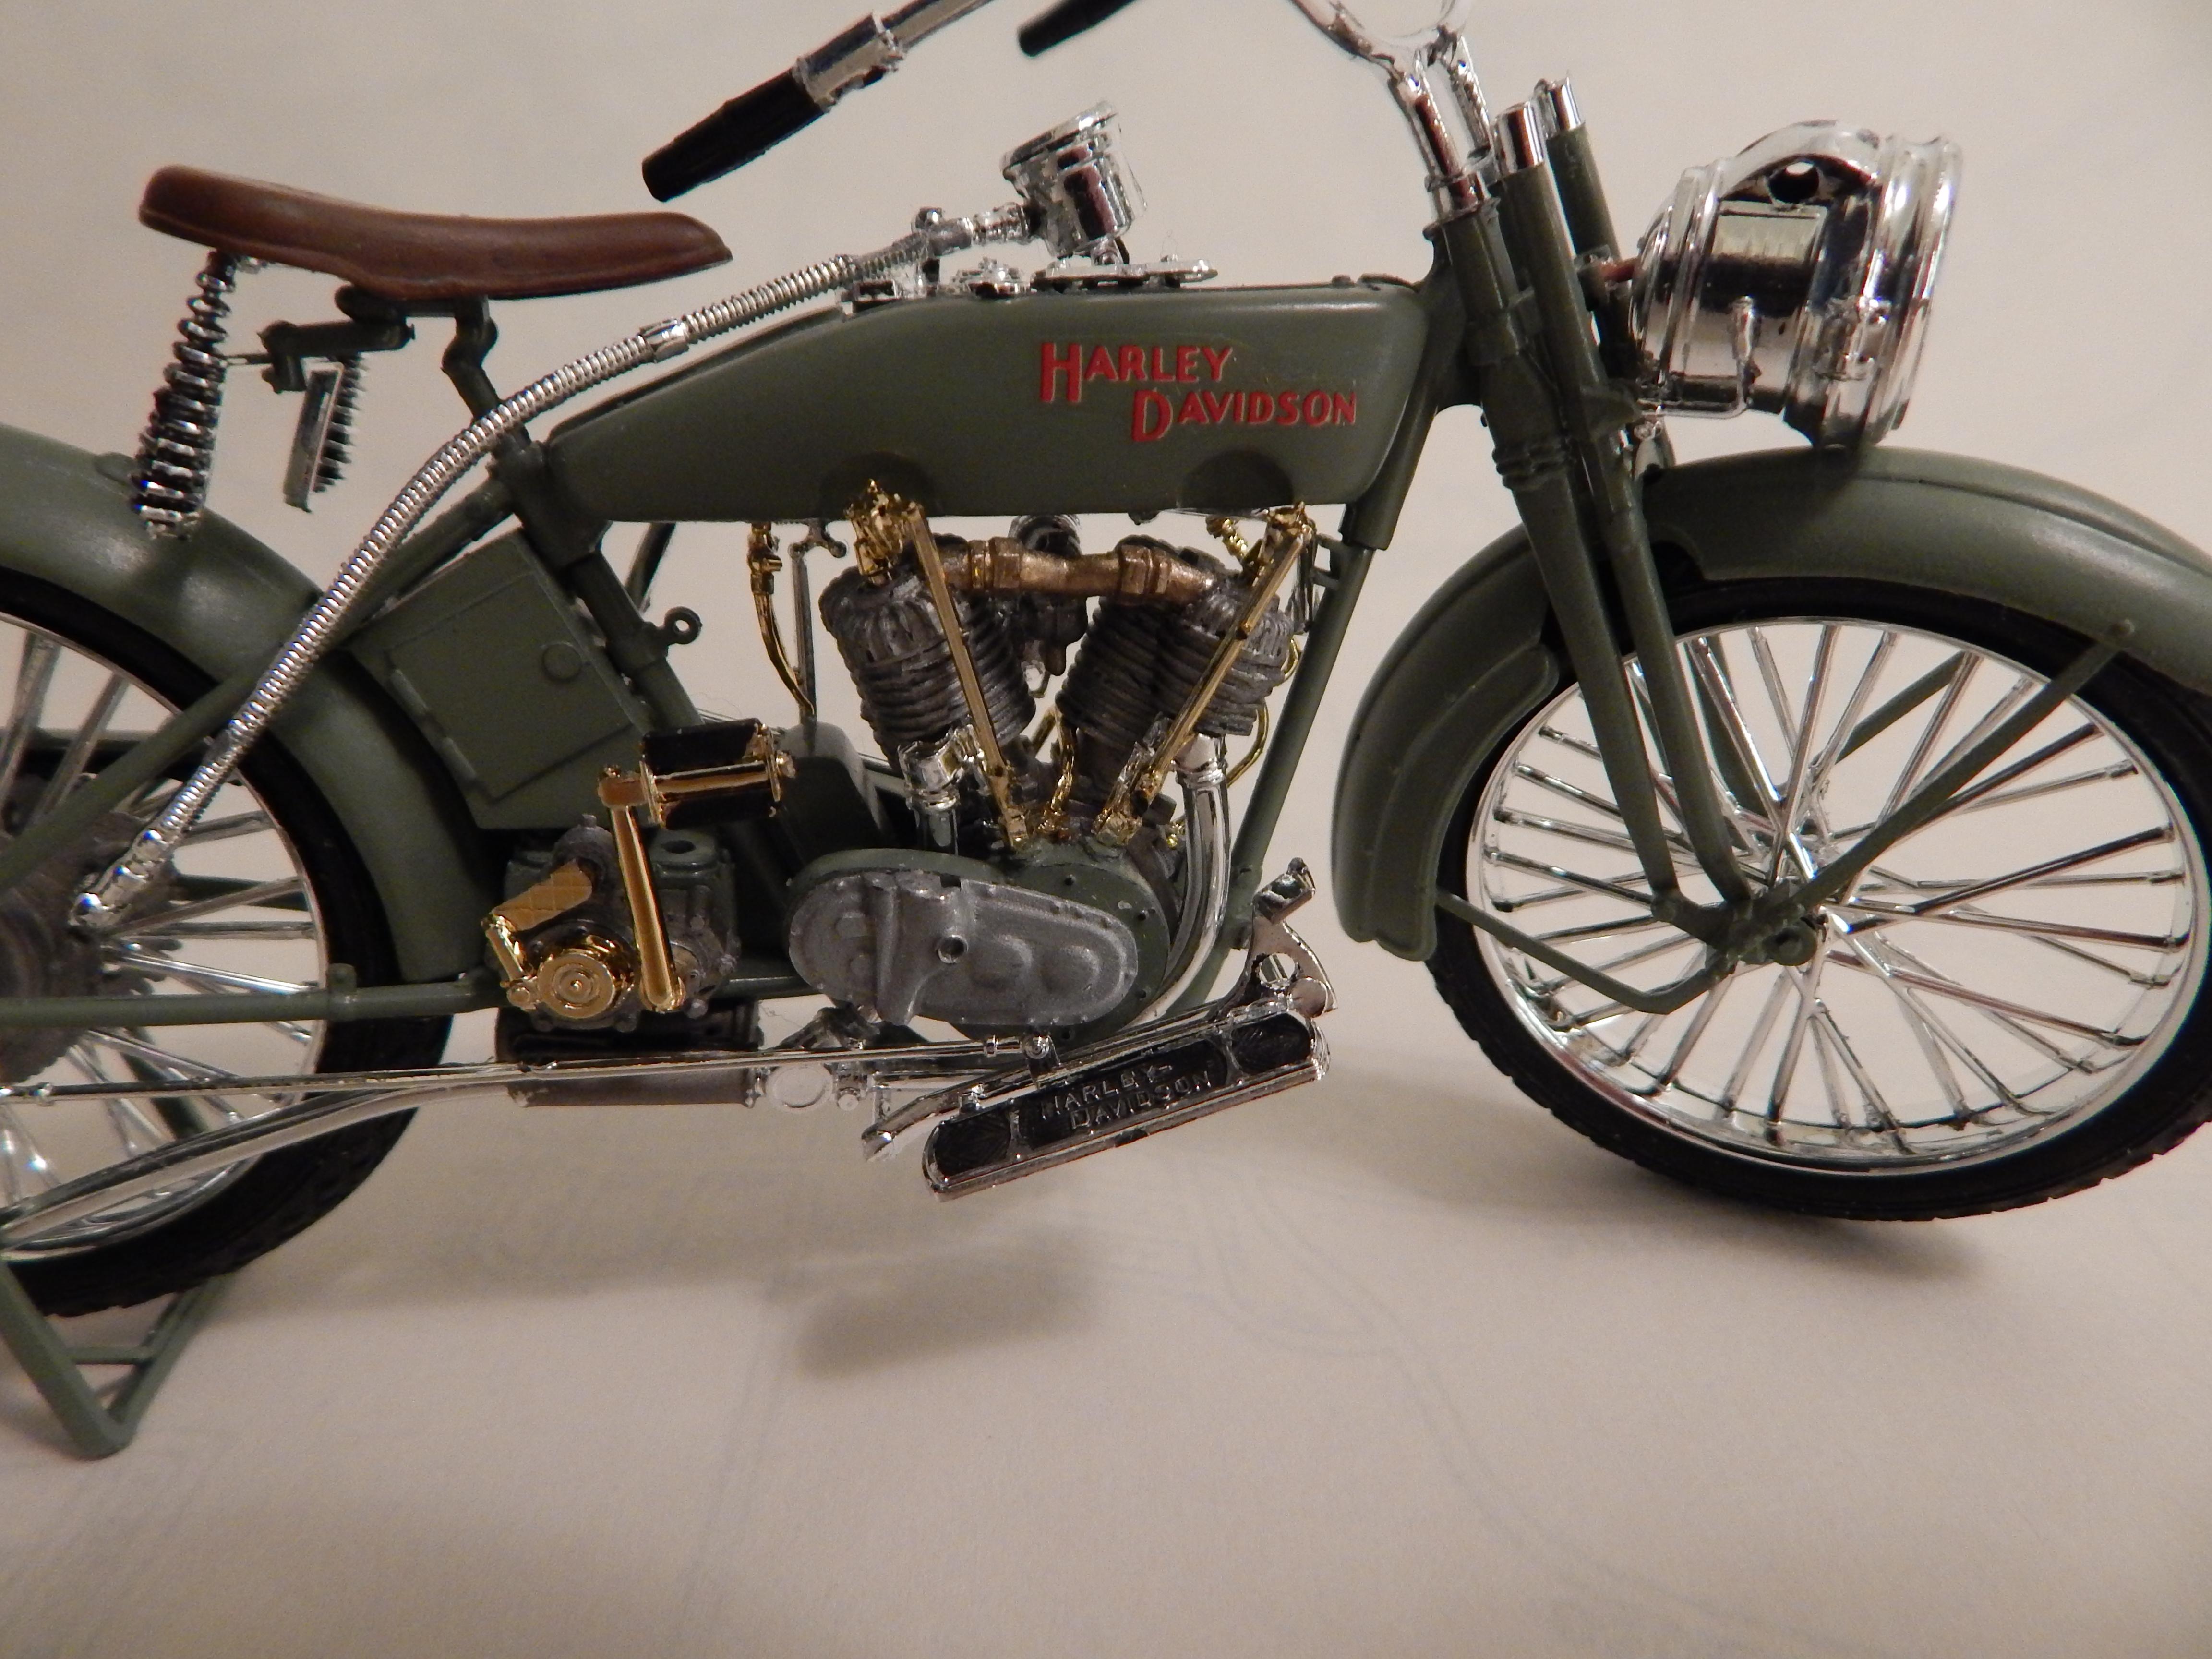
 hi,every one!!? this is my first motorcycle model. I did some modification on this little bike.. not perfect, but I am happy with the result hope you like it ? and here is the video build if you are interested?
- 20 replies
-
- 2
-
-
- 1/12 scale
- honda
- (and 1 more)
-
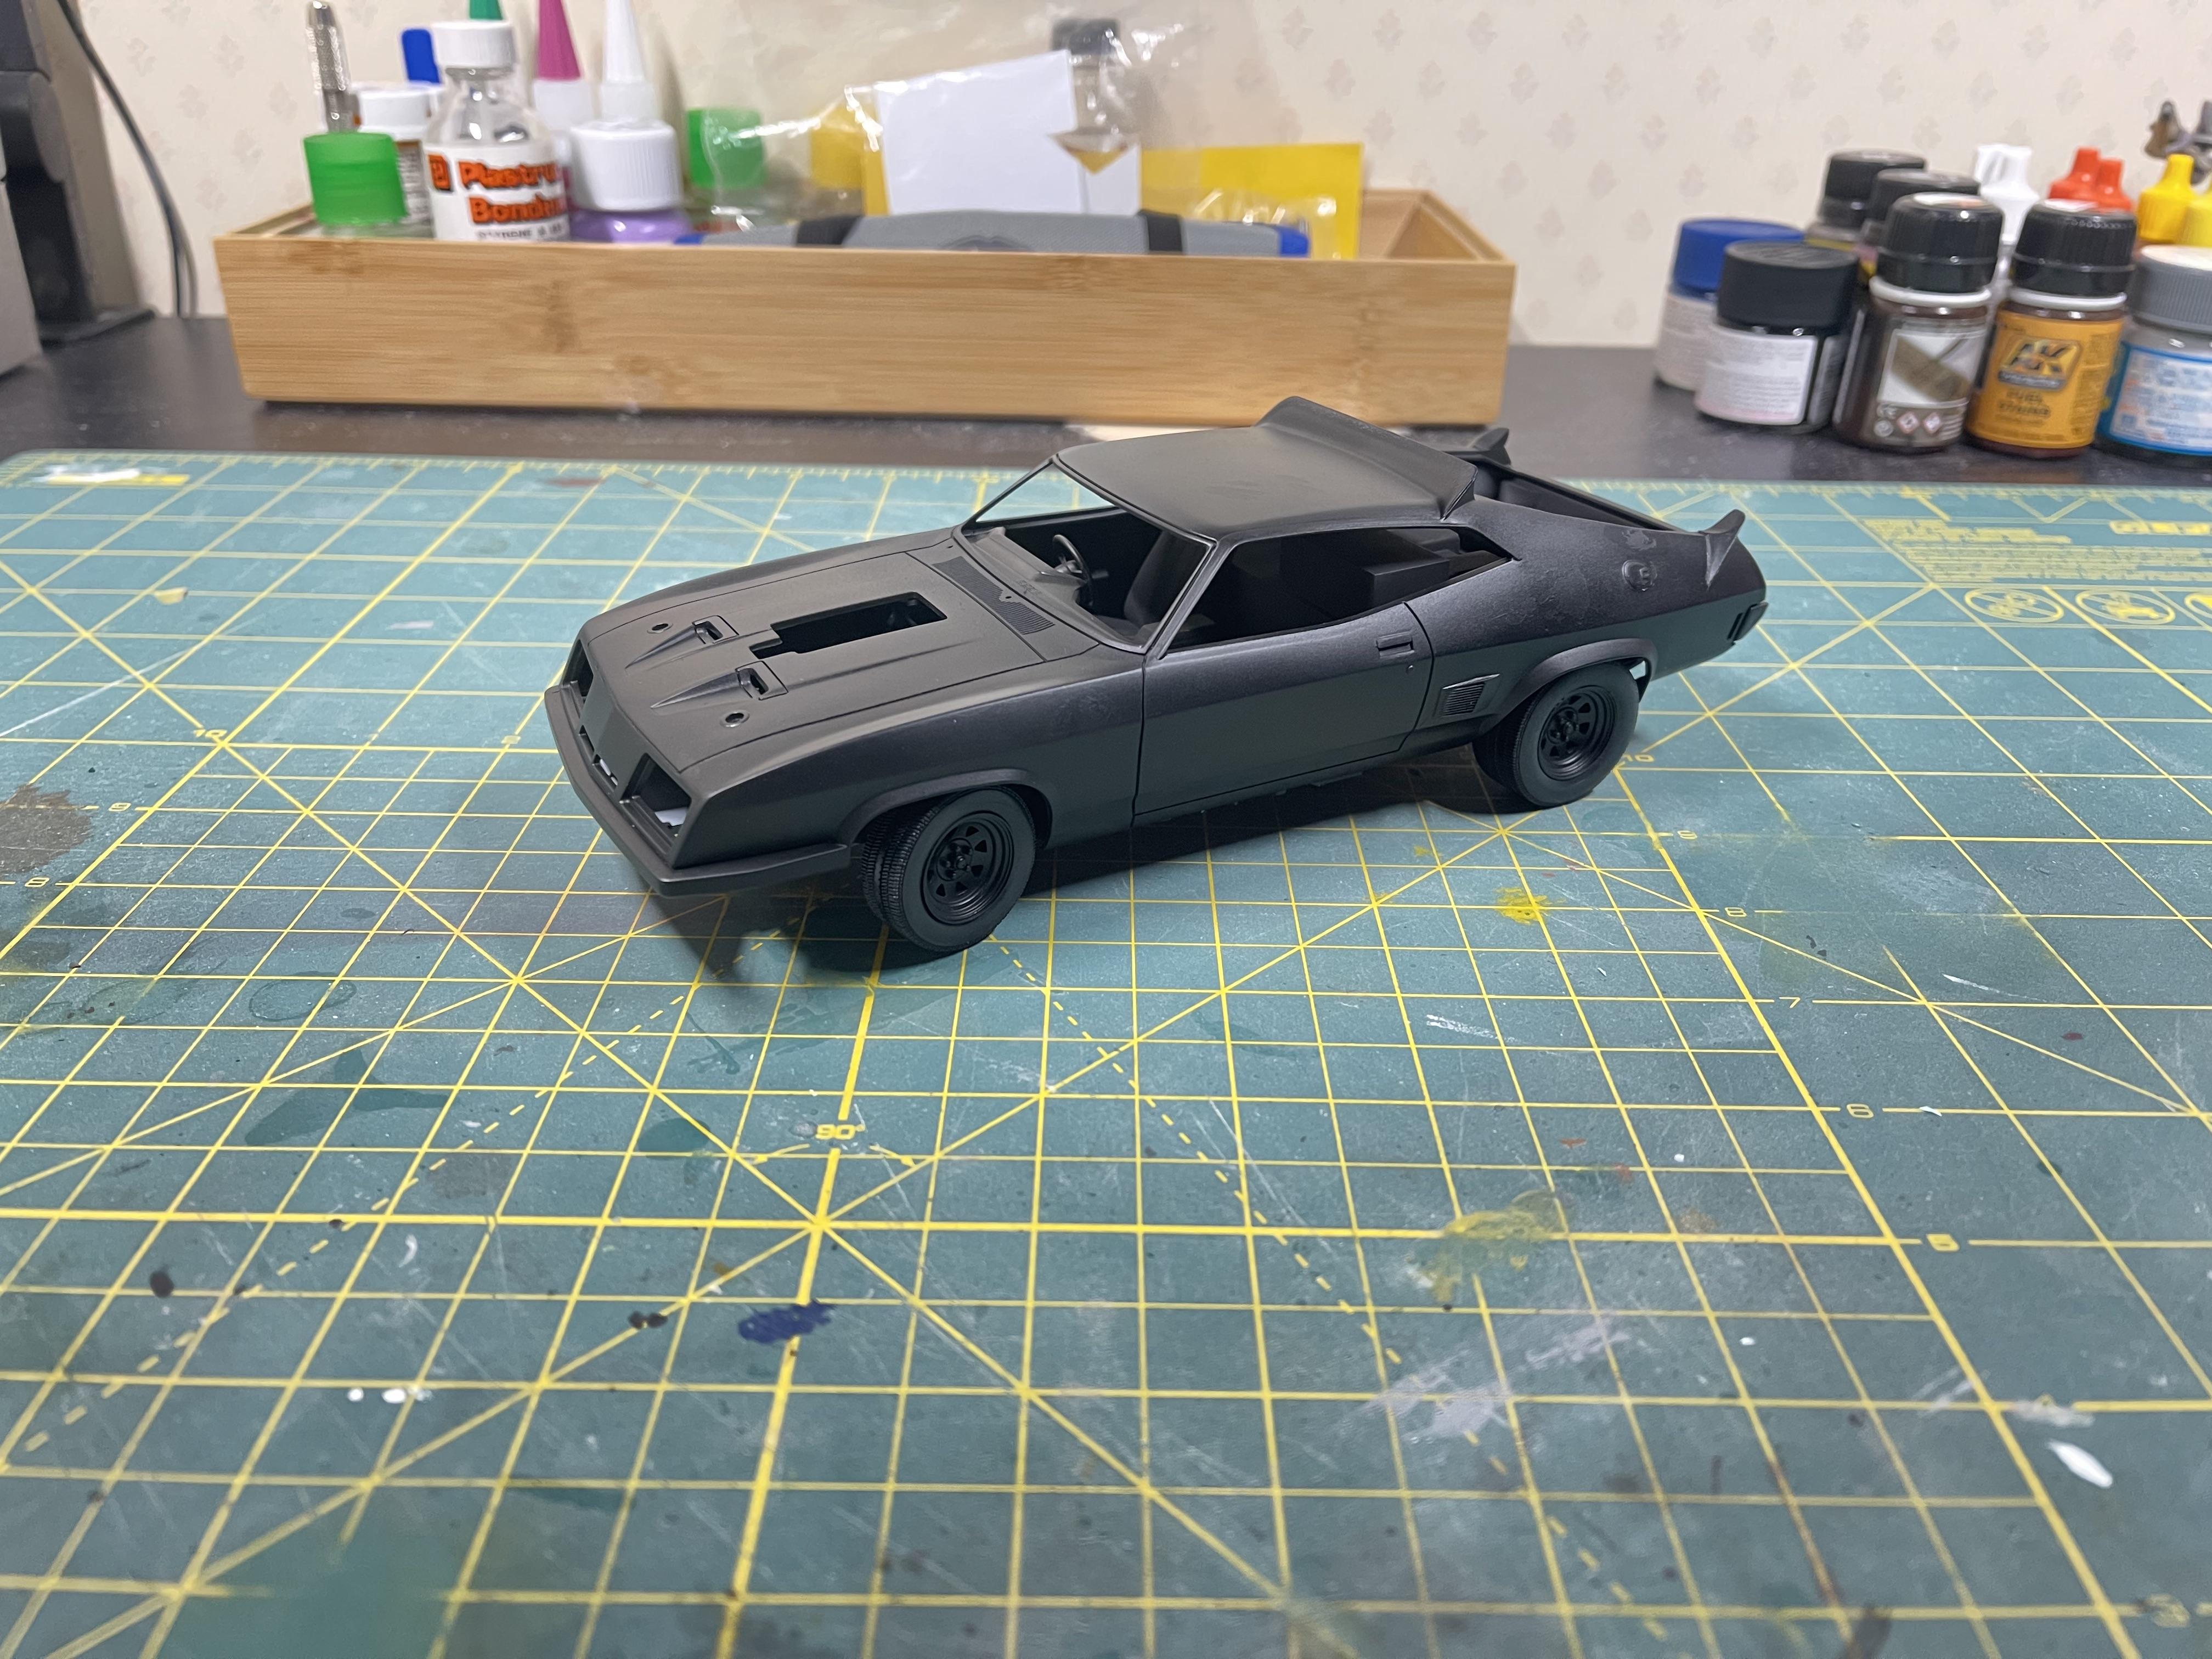
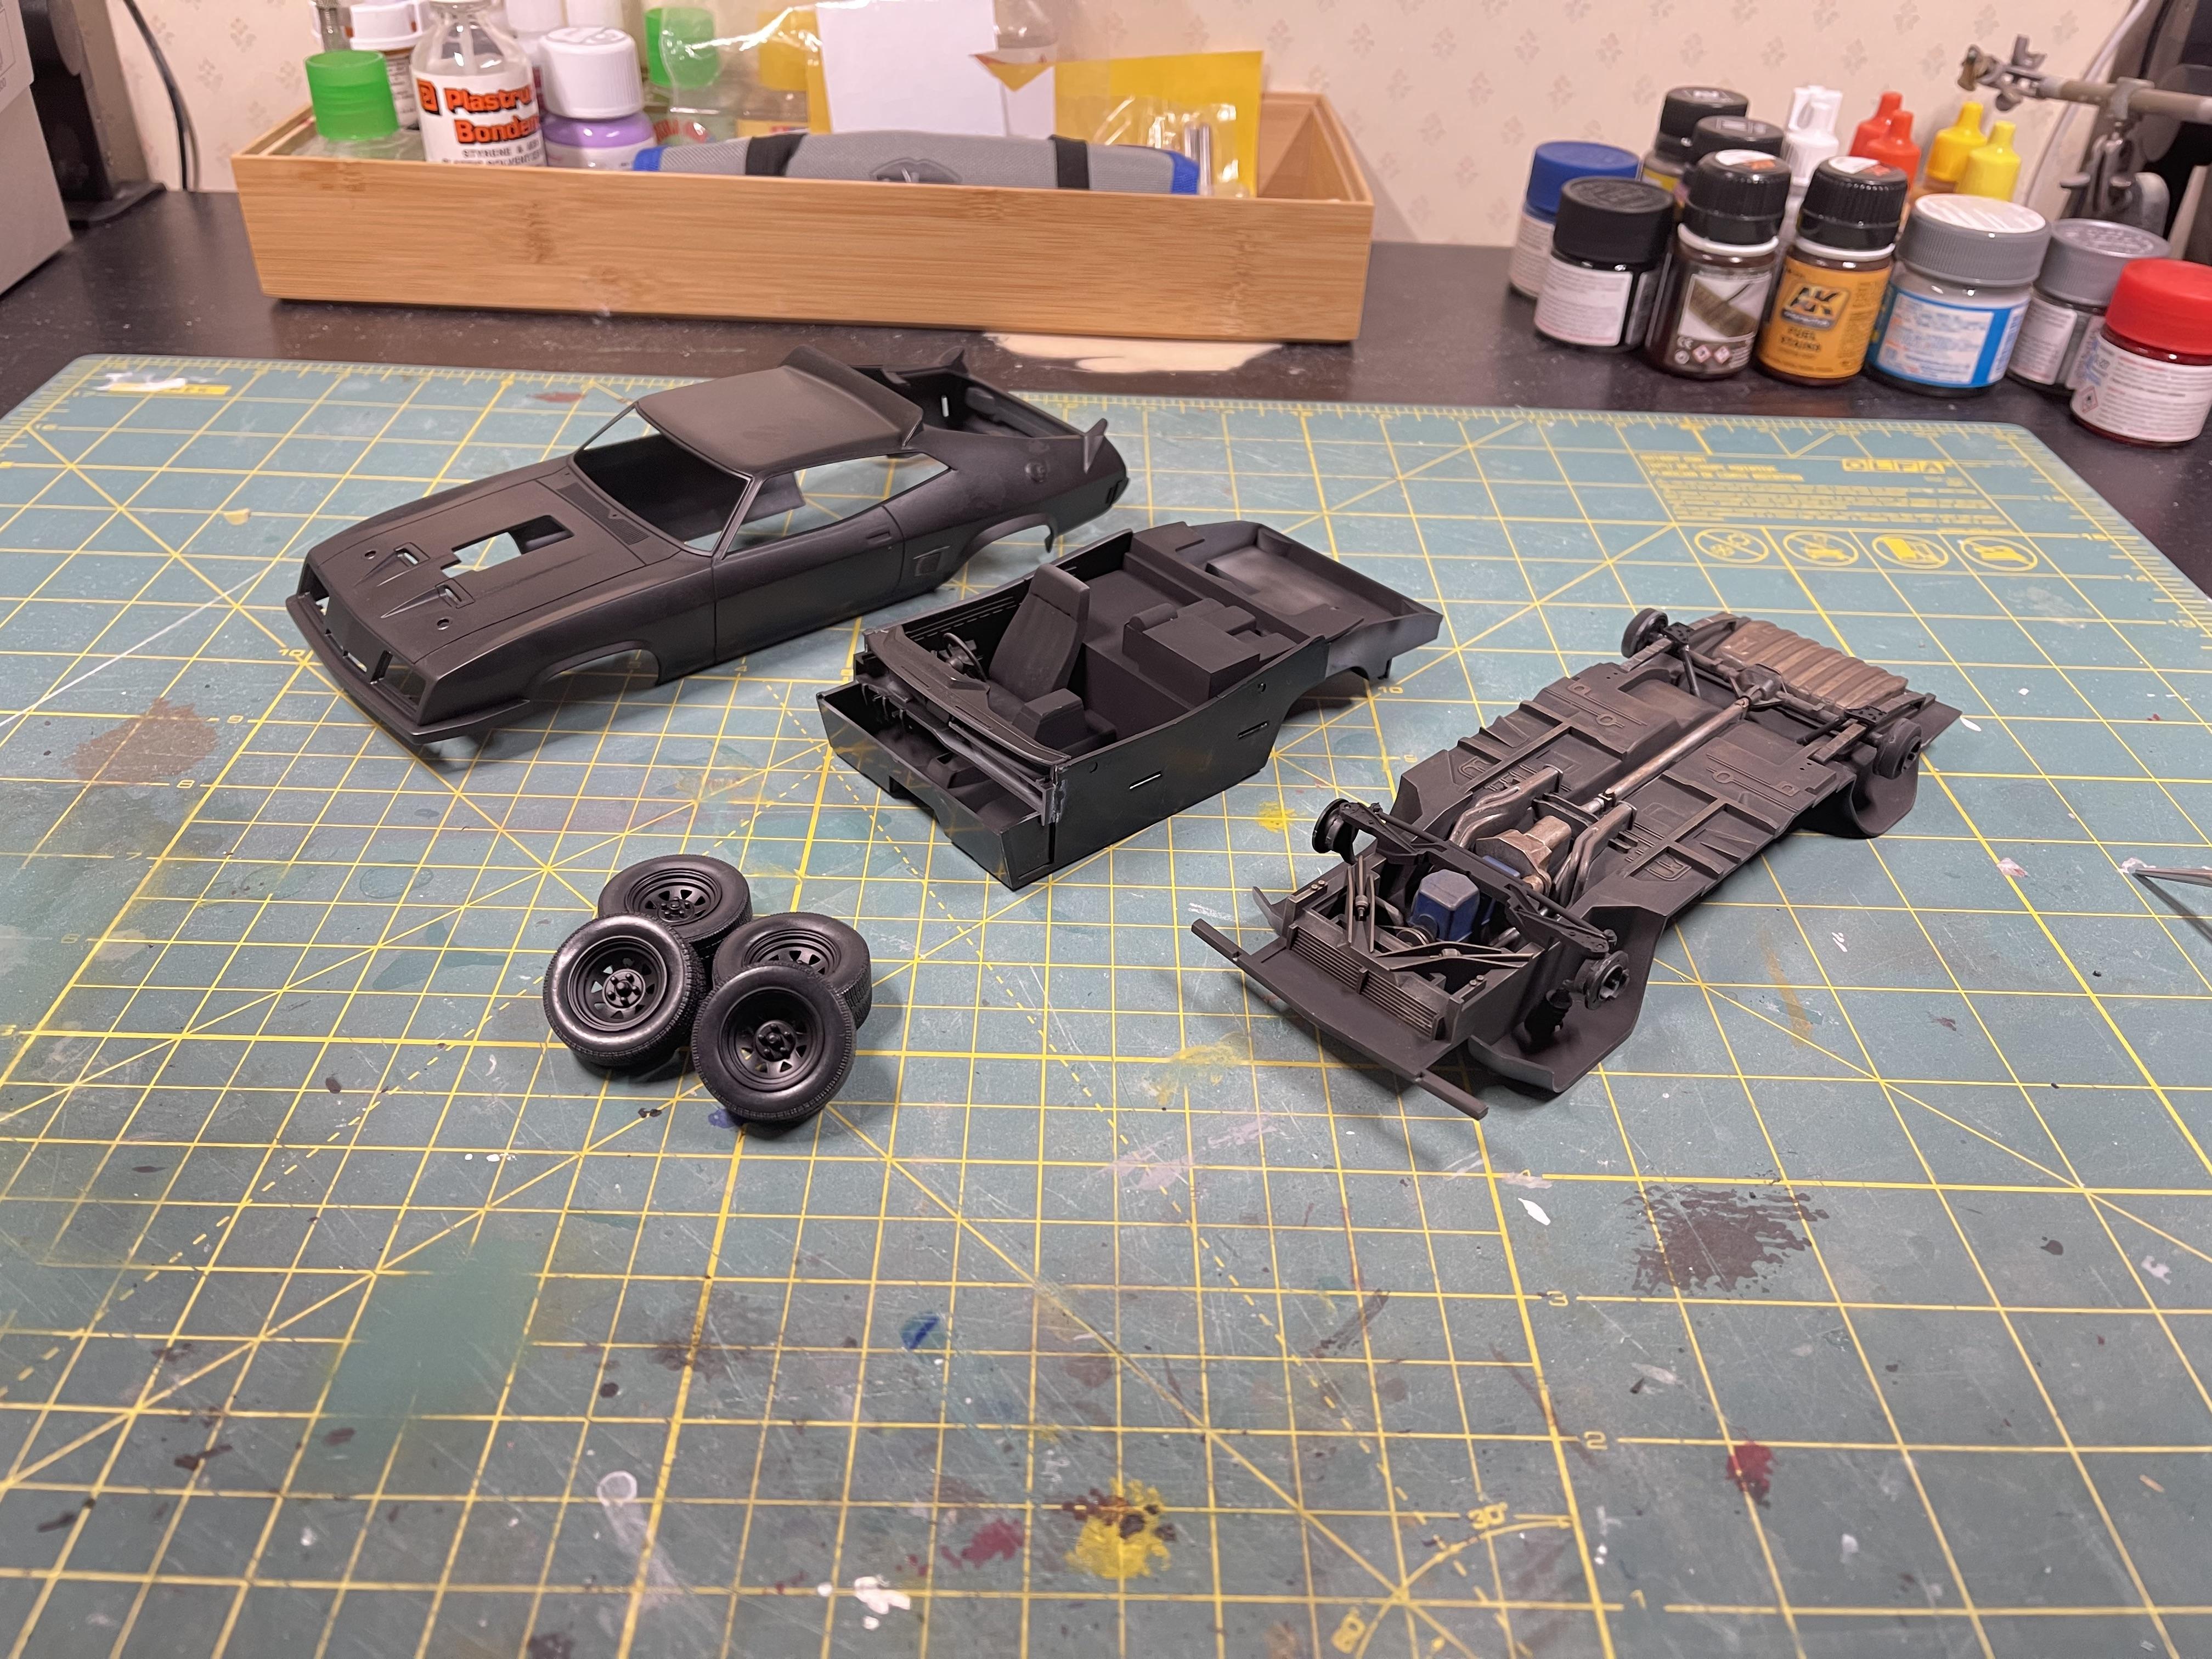
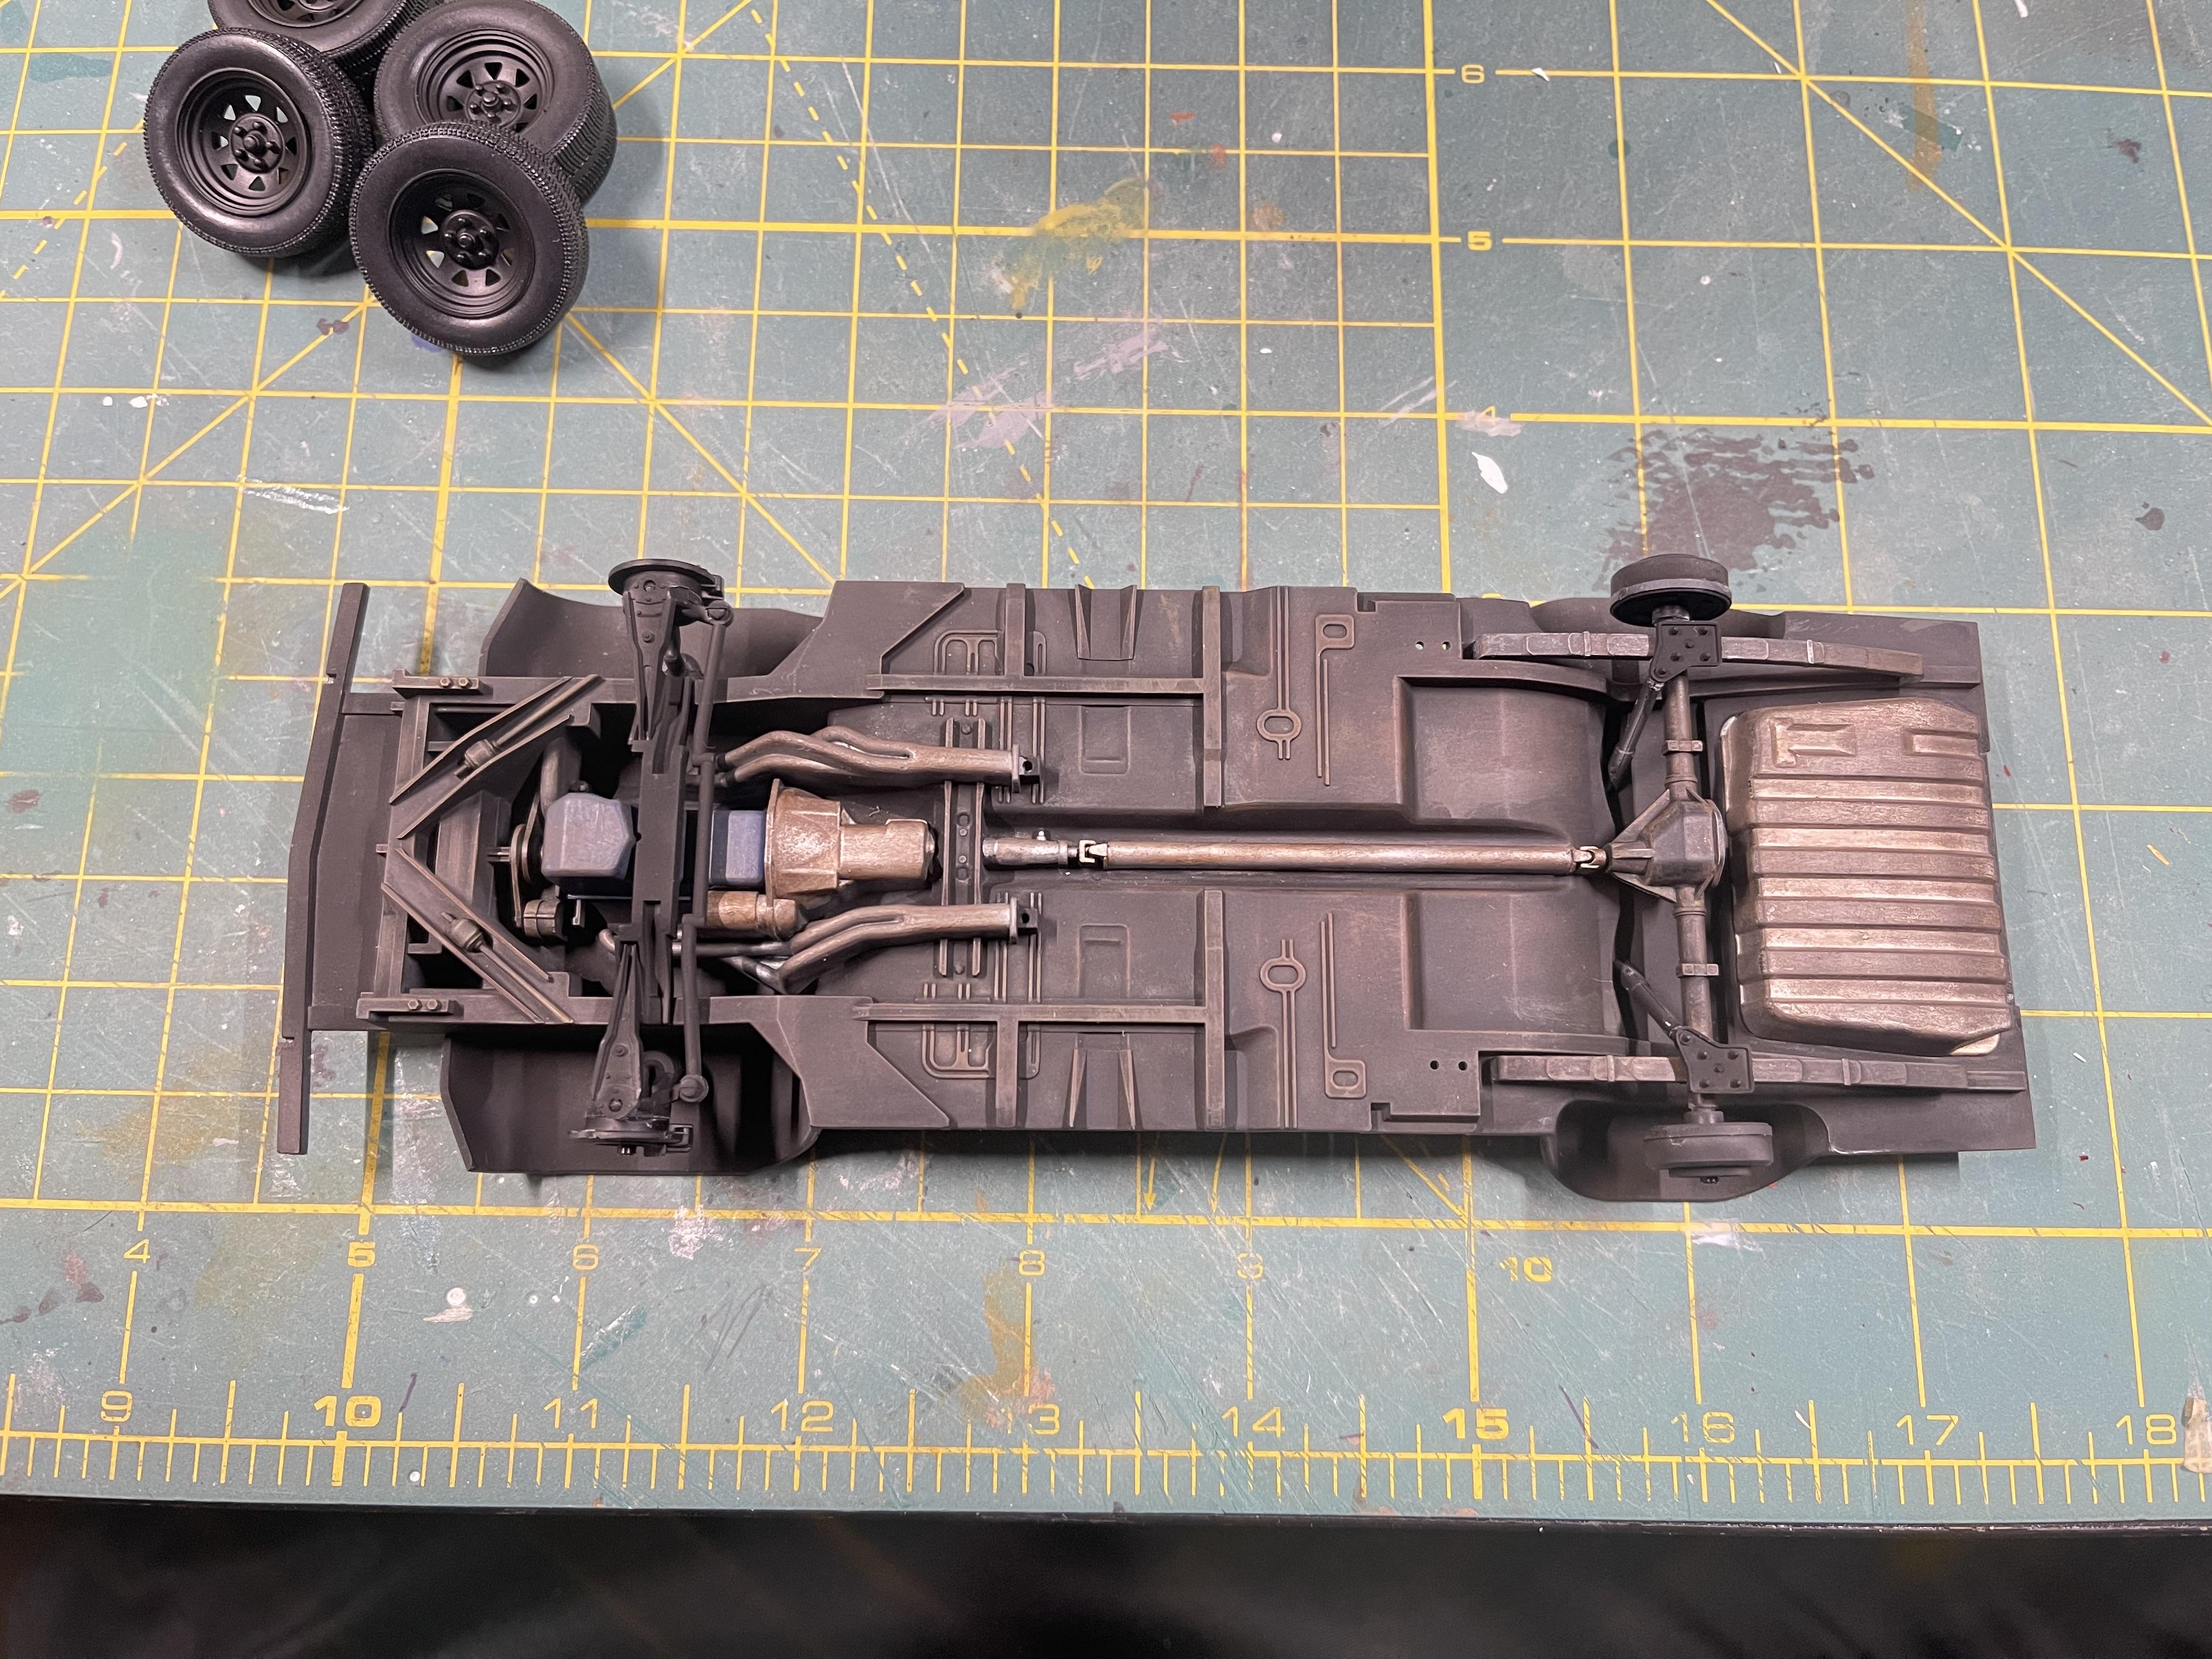
In an effort to keep thinning the stash and trying to produce one model a month, I started this relatively simple kit. The fit and finish of parts are great, really easy to assemble. As of this morning I only had parts in primer and some with a first coat of paint. I will just be doing a box stock build with light weathering. Here are all the parts assembled so far. Here is the chassis which is almost complete. I need to add the exhaust and weather the shock mounts and front steering assembly as well as some other minor details. Here it is all test fitted. Stance checks out okay. I'm excited to see it finished. Will be applying some weathering techniques to the body within the coming days. It already has some "battle scars" showing through the paint. I wanted some rough spots on the paint, came out good.
-
Started this kit at the beginning of 2021, got it painted in preparation for a winter build. But got distracted with other things and other kits, so it sat lingering on the shelf until last week when I decided it was time to catch up on some of my stalled builds. Some wip pics are here. The kit. Lots of optional parts, so picked a combo and built my own version. Wheels My usual colour combo Really like building these Aoshima kits, easy fun builds.
- 7 replies
-
- 4
-
-
- aoshima
- hakosuka works
- (and 1 more)
-
Started with an Aoshima kit. Wheels Full bumper delete with custom roll pans, Modified front to resemble hidden headlight and modified the rear and fitted Nissan Laurel C130 tail lights. Painted the usual Tamiya TS-14 black, polished with Tamiya fine, coarse and finish compounds. Waxed with Meguiars NXT.
-
Previous build. Built from this kit. Wheels. Paint. Inspiration for the colour from this.
-
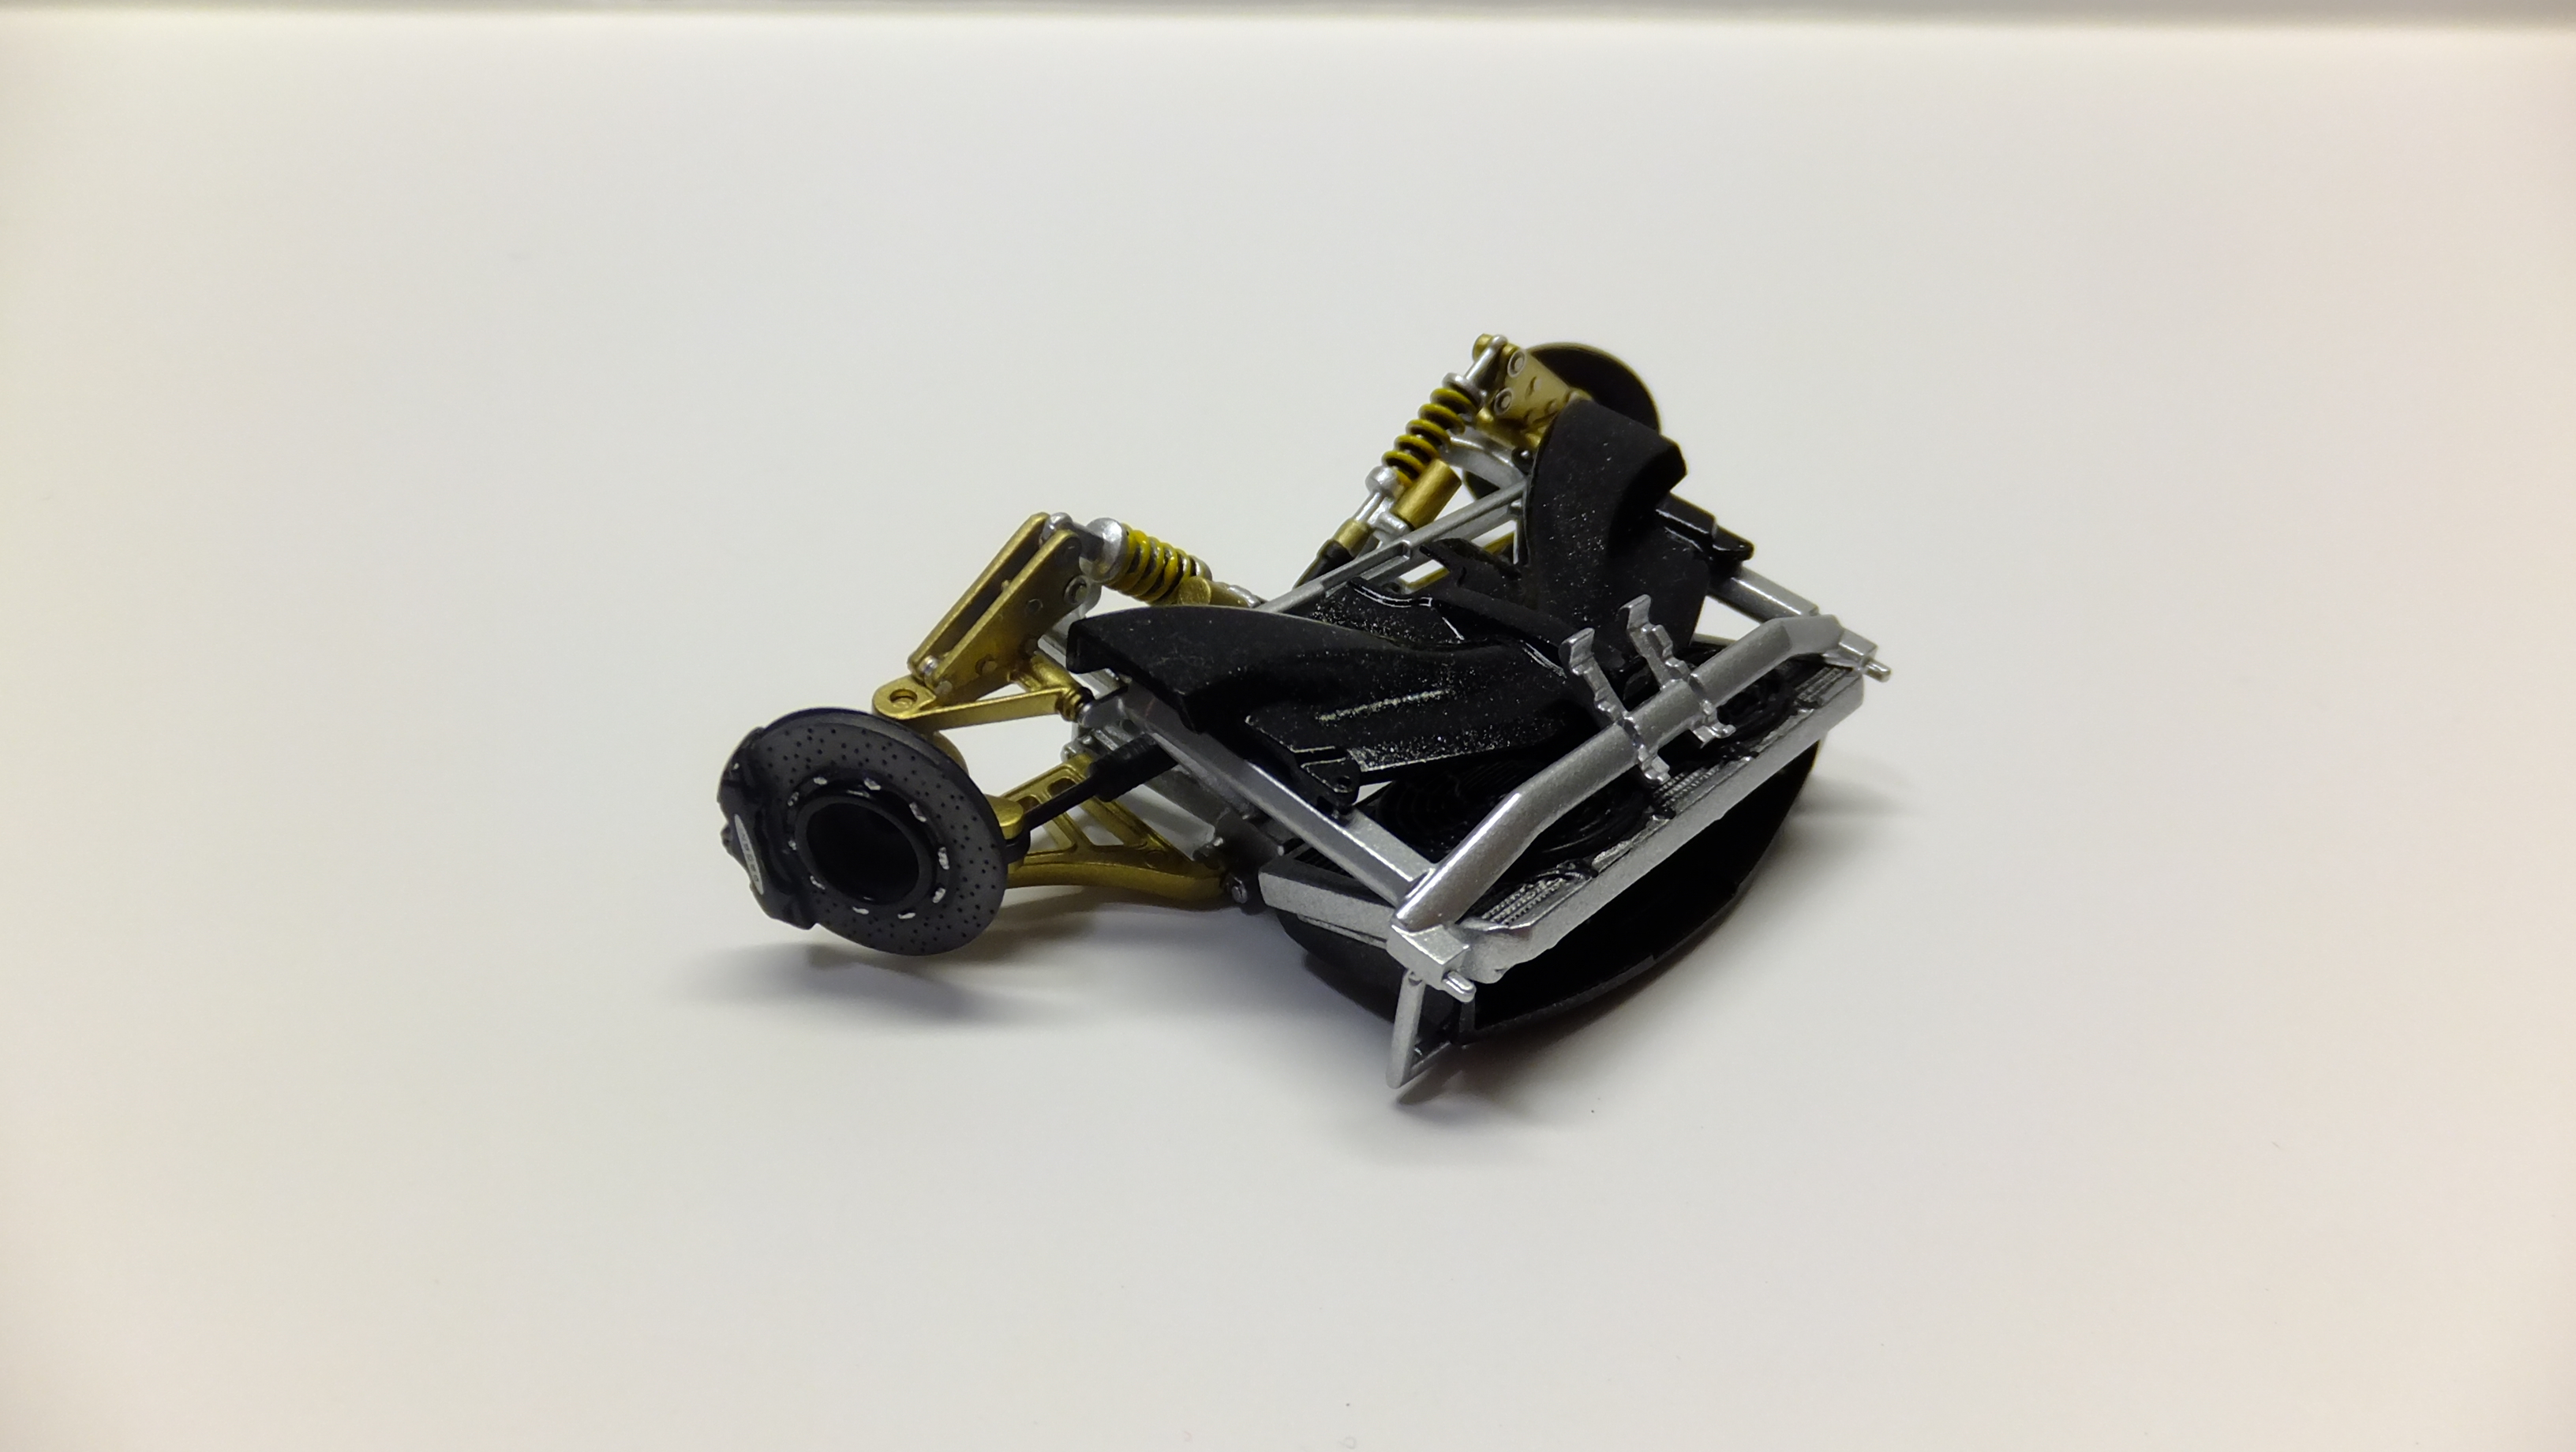
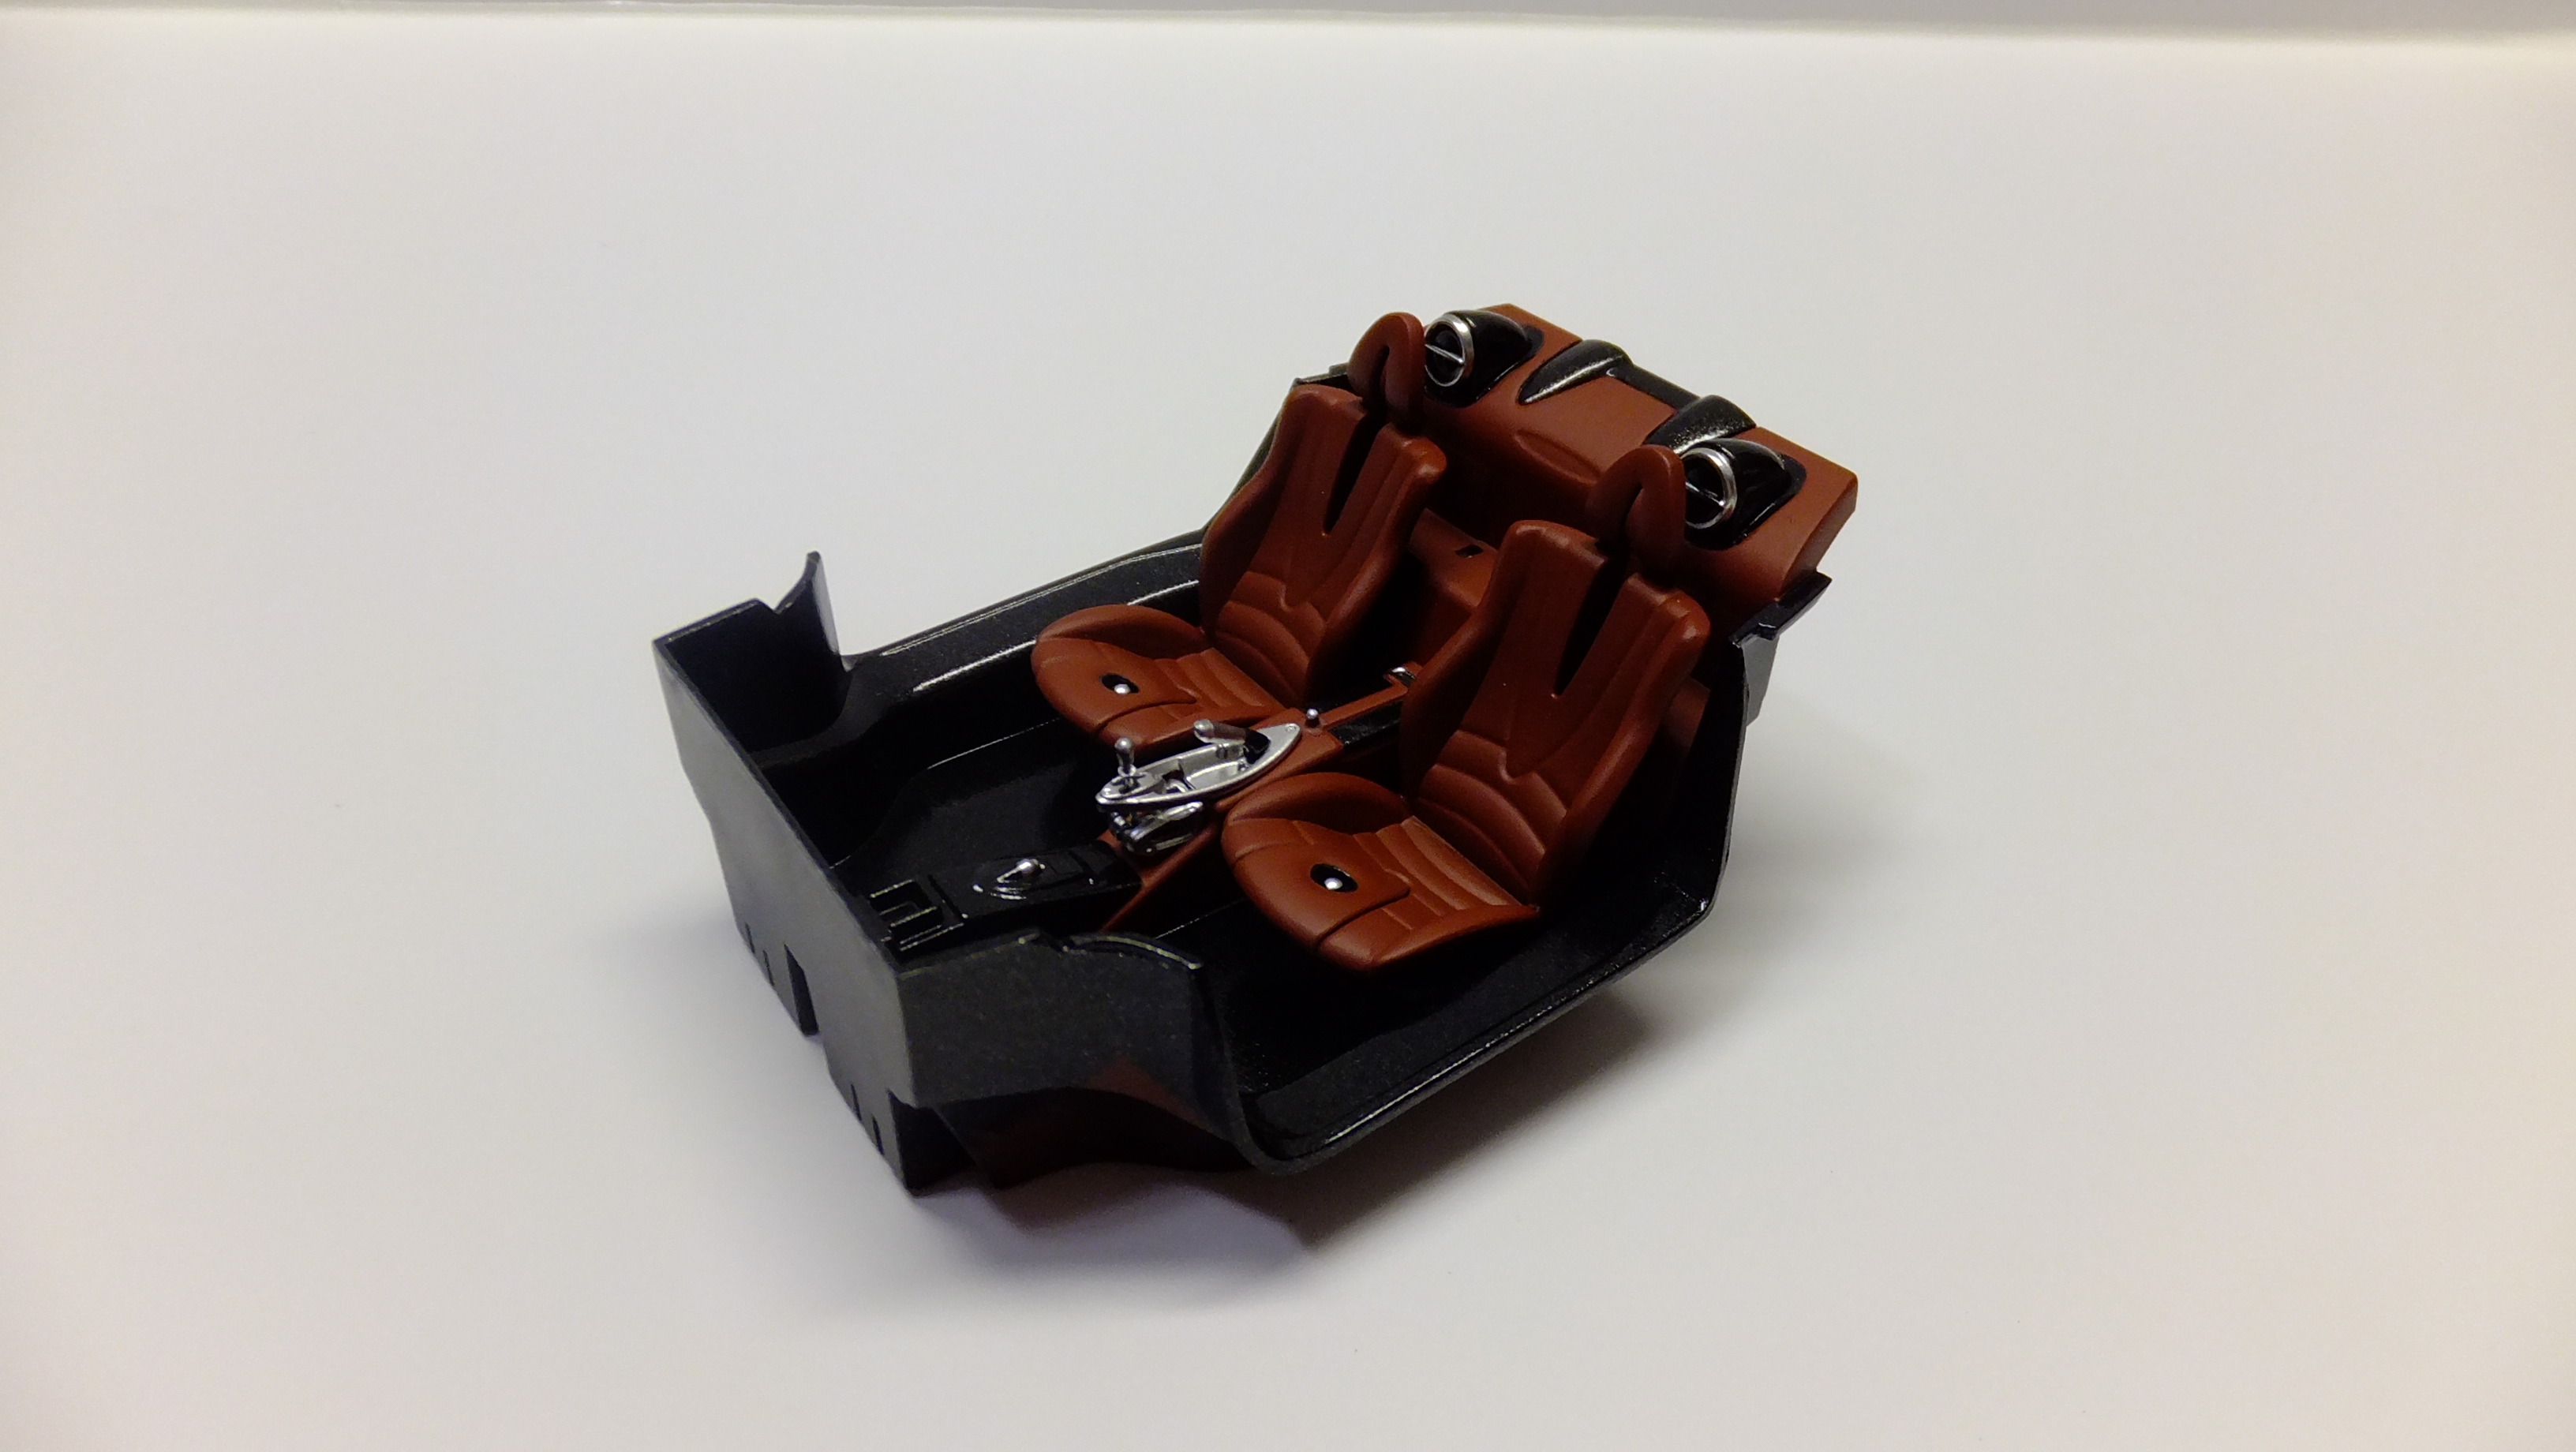
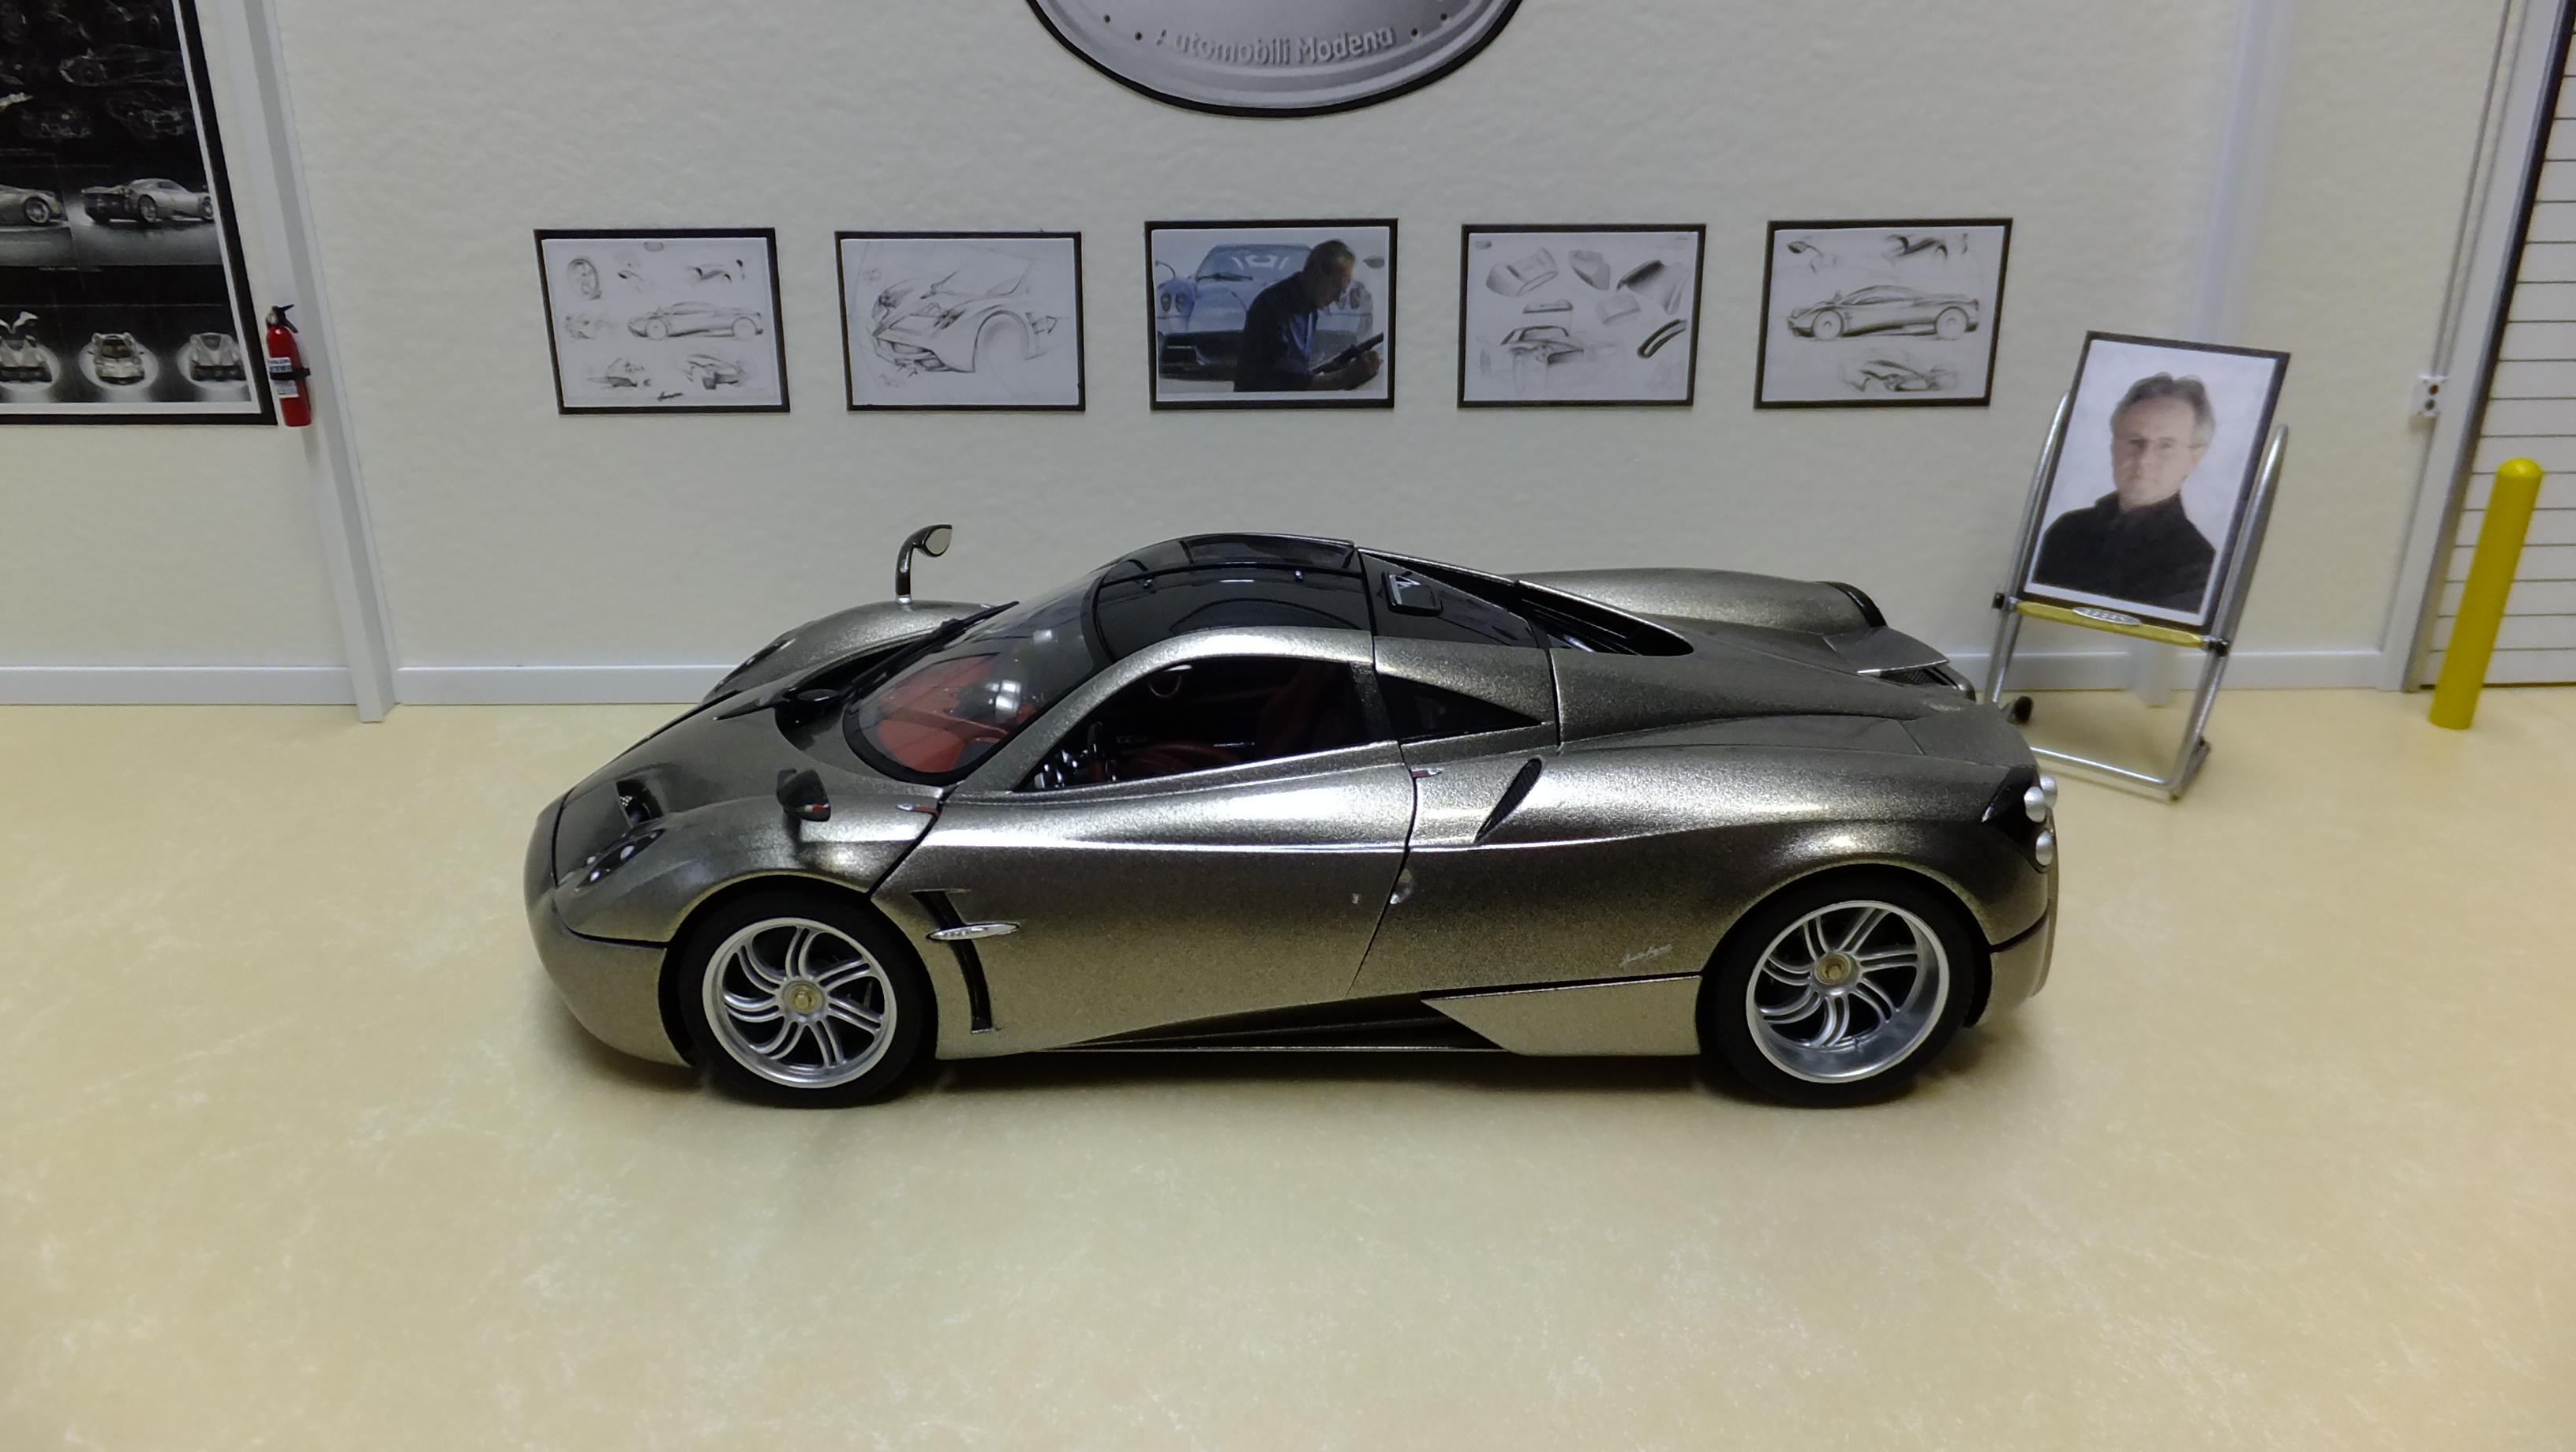
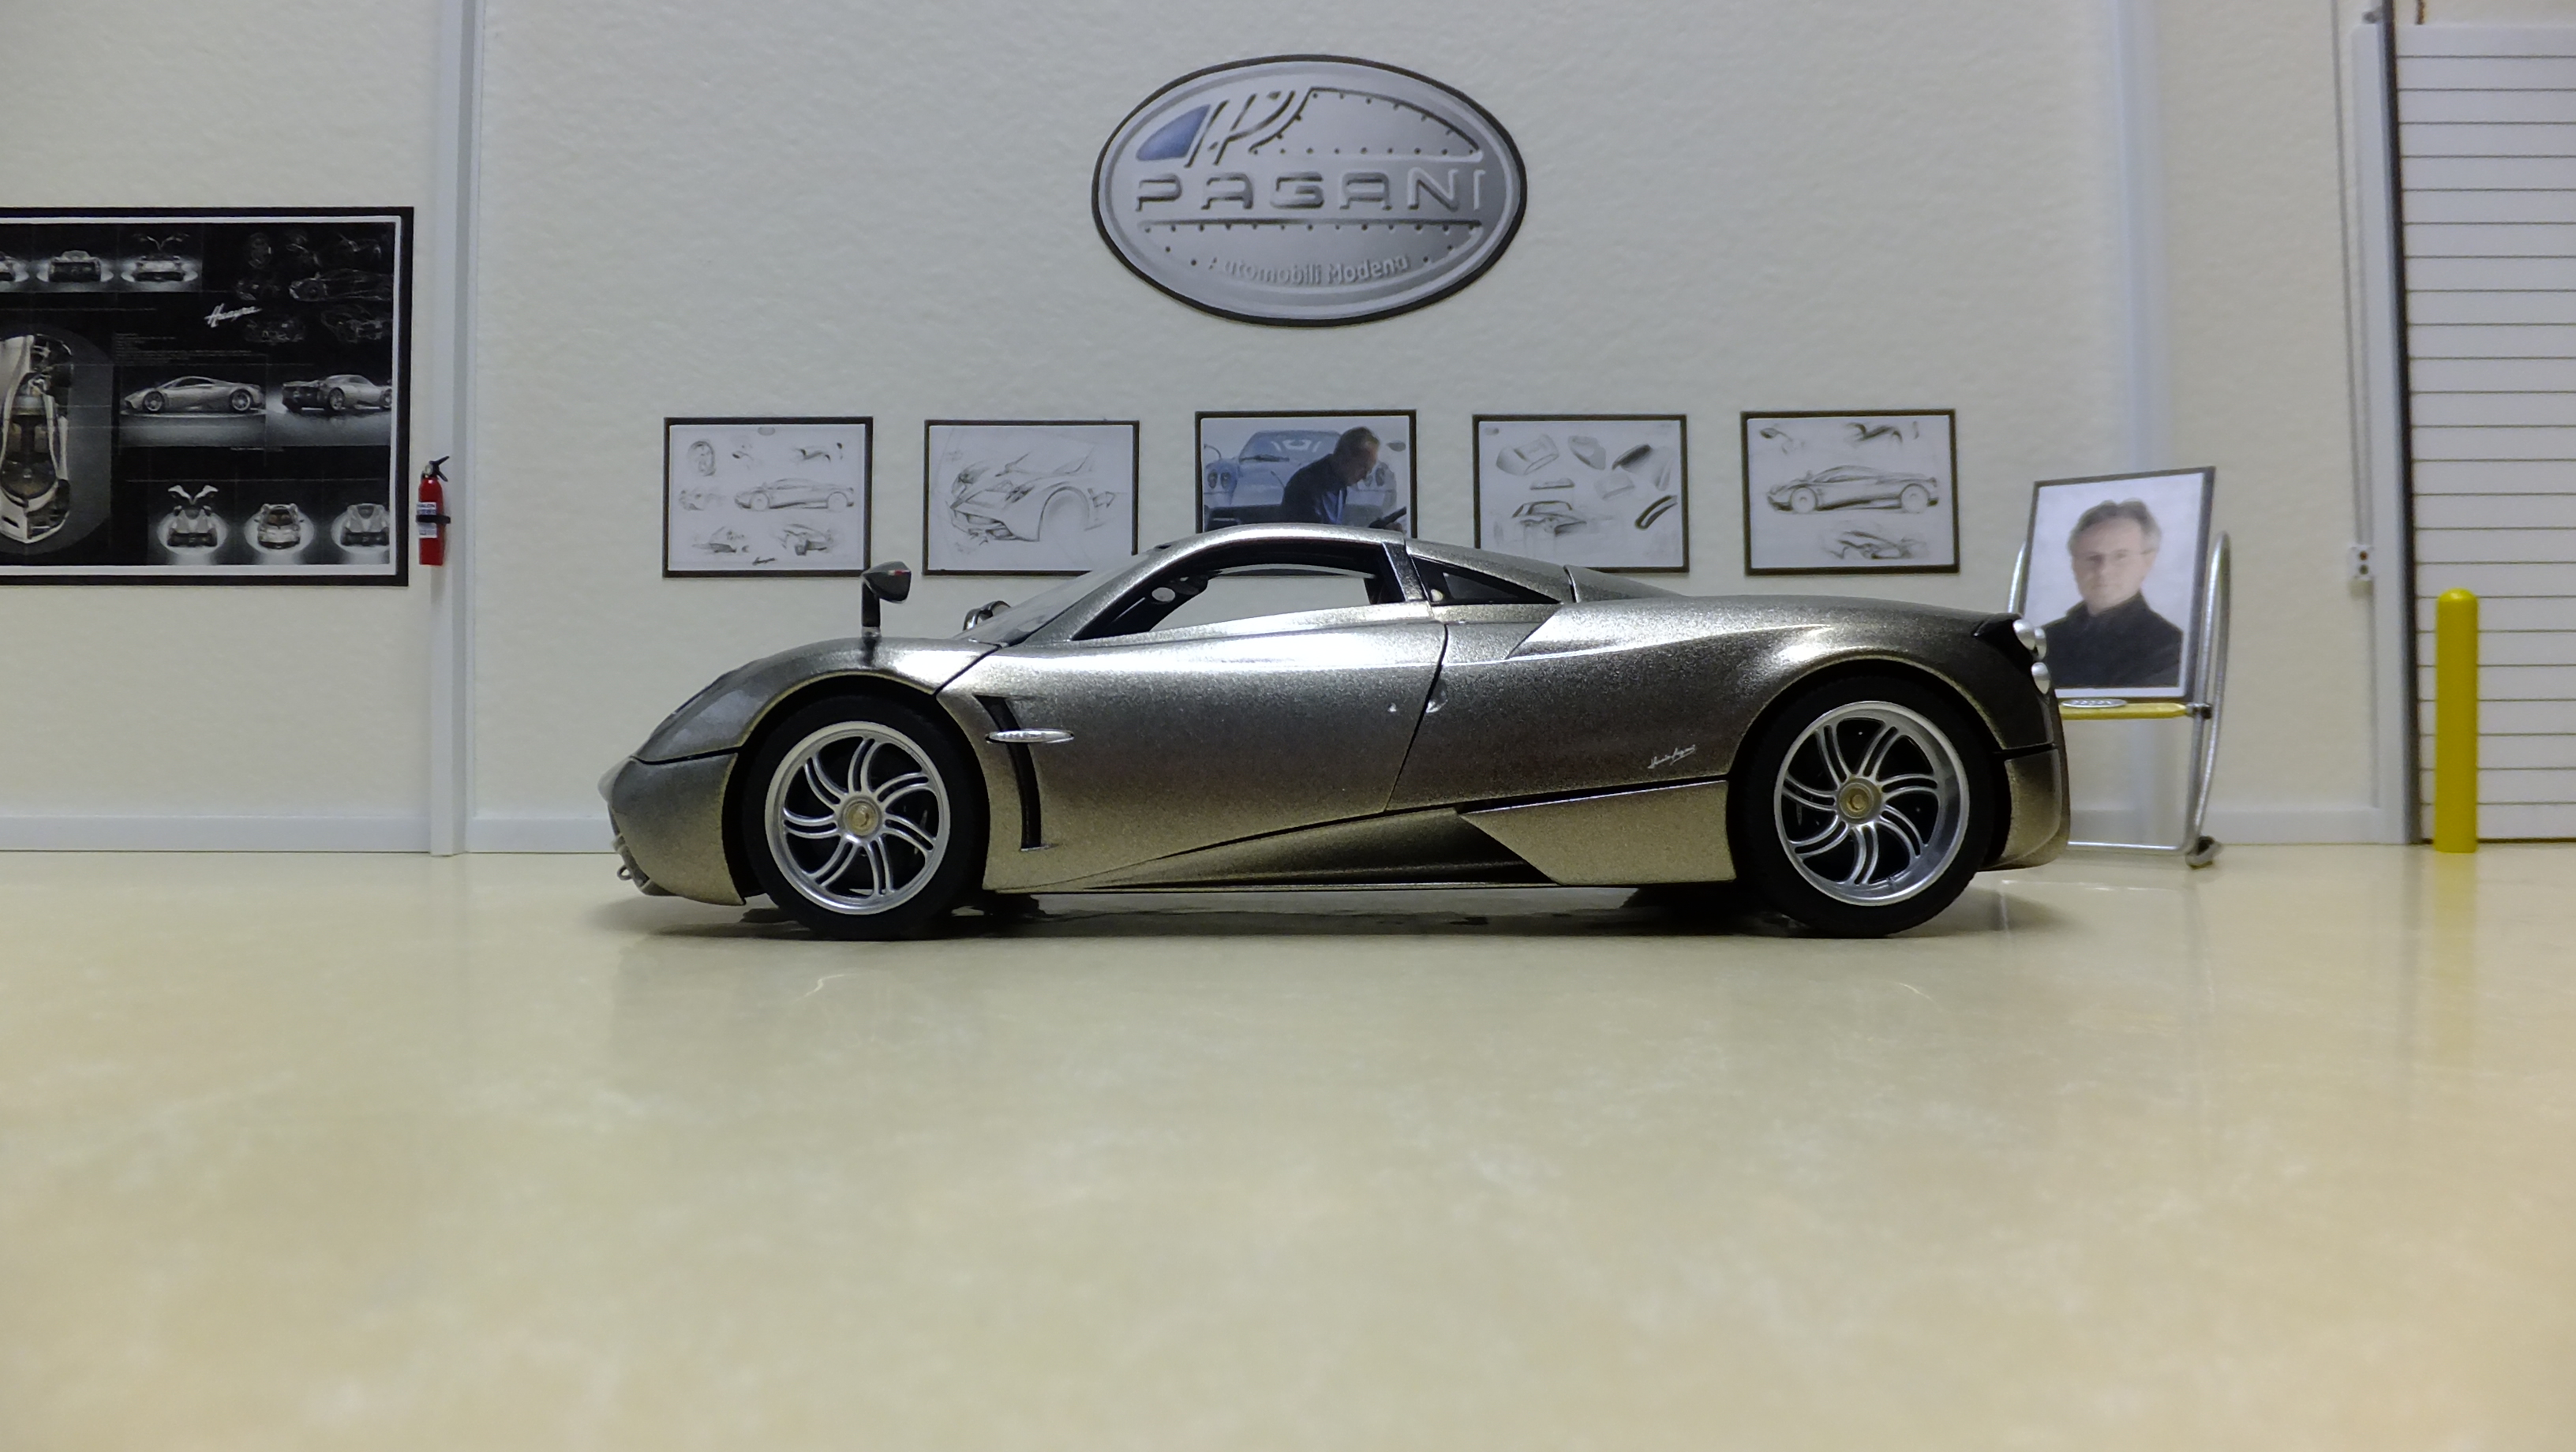
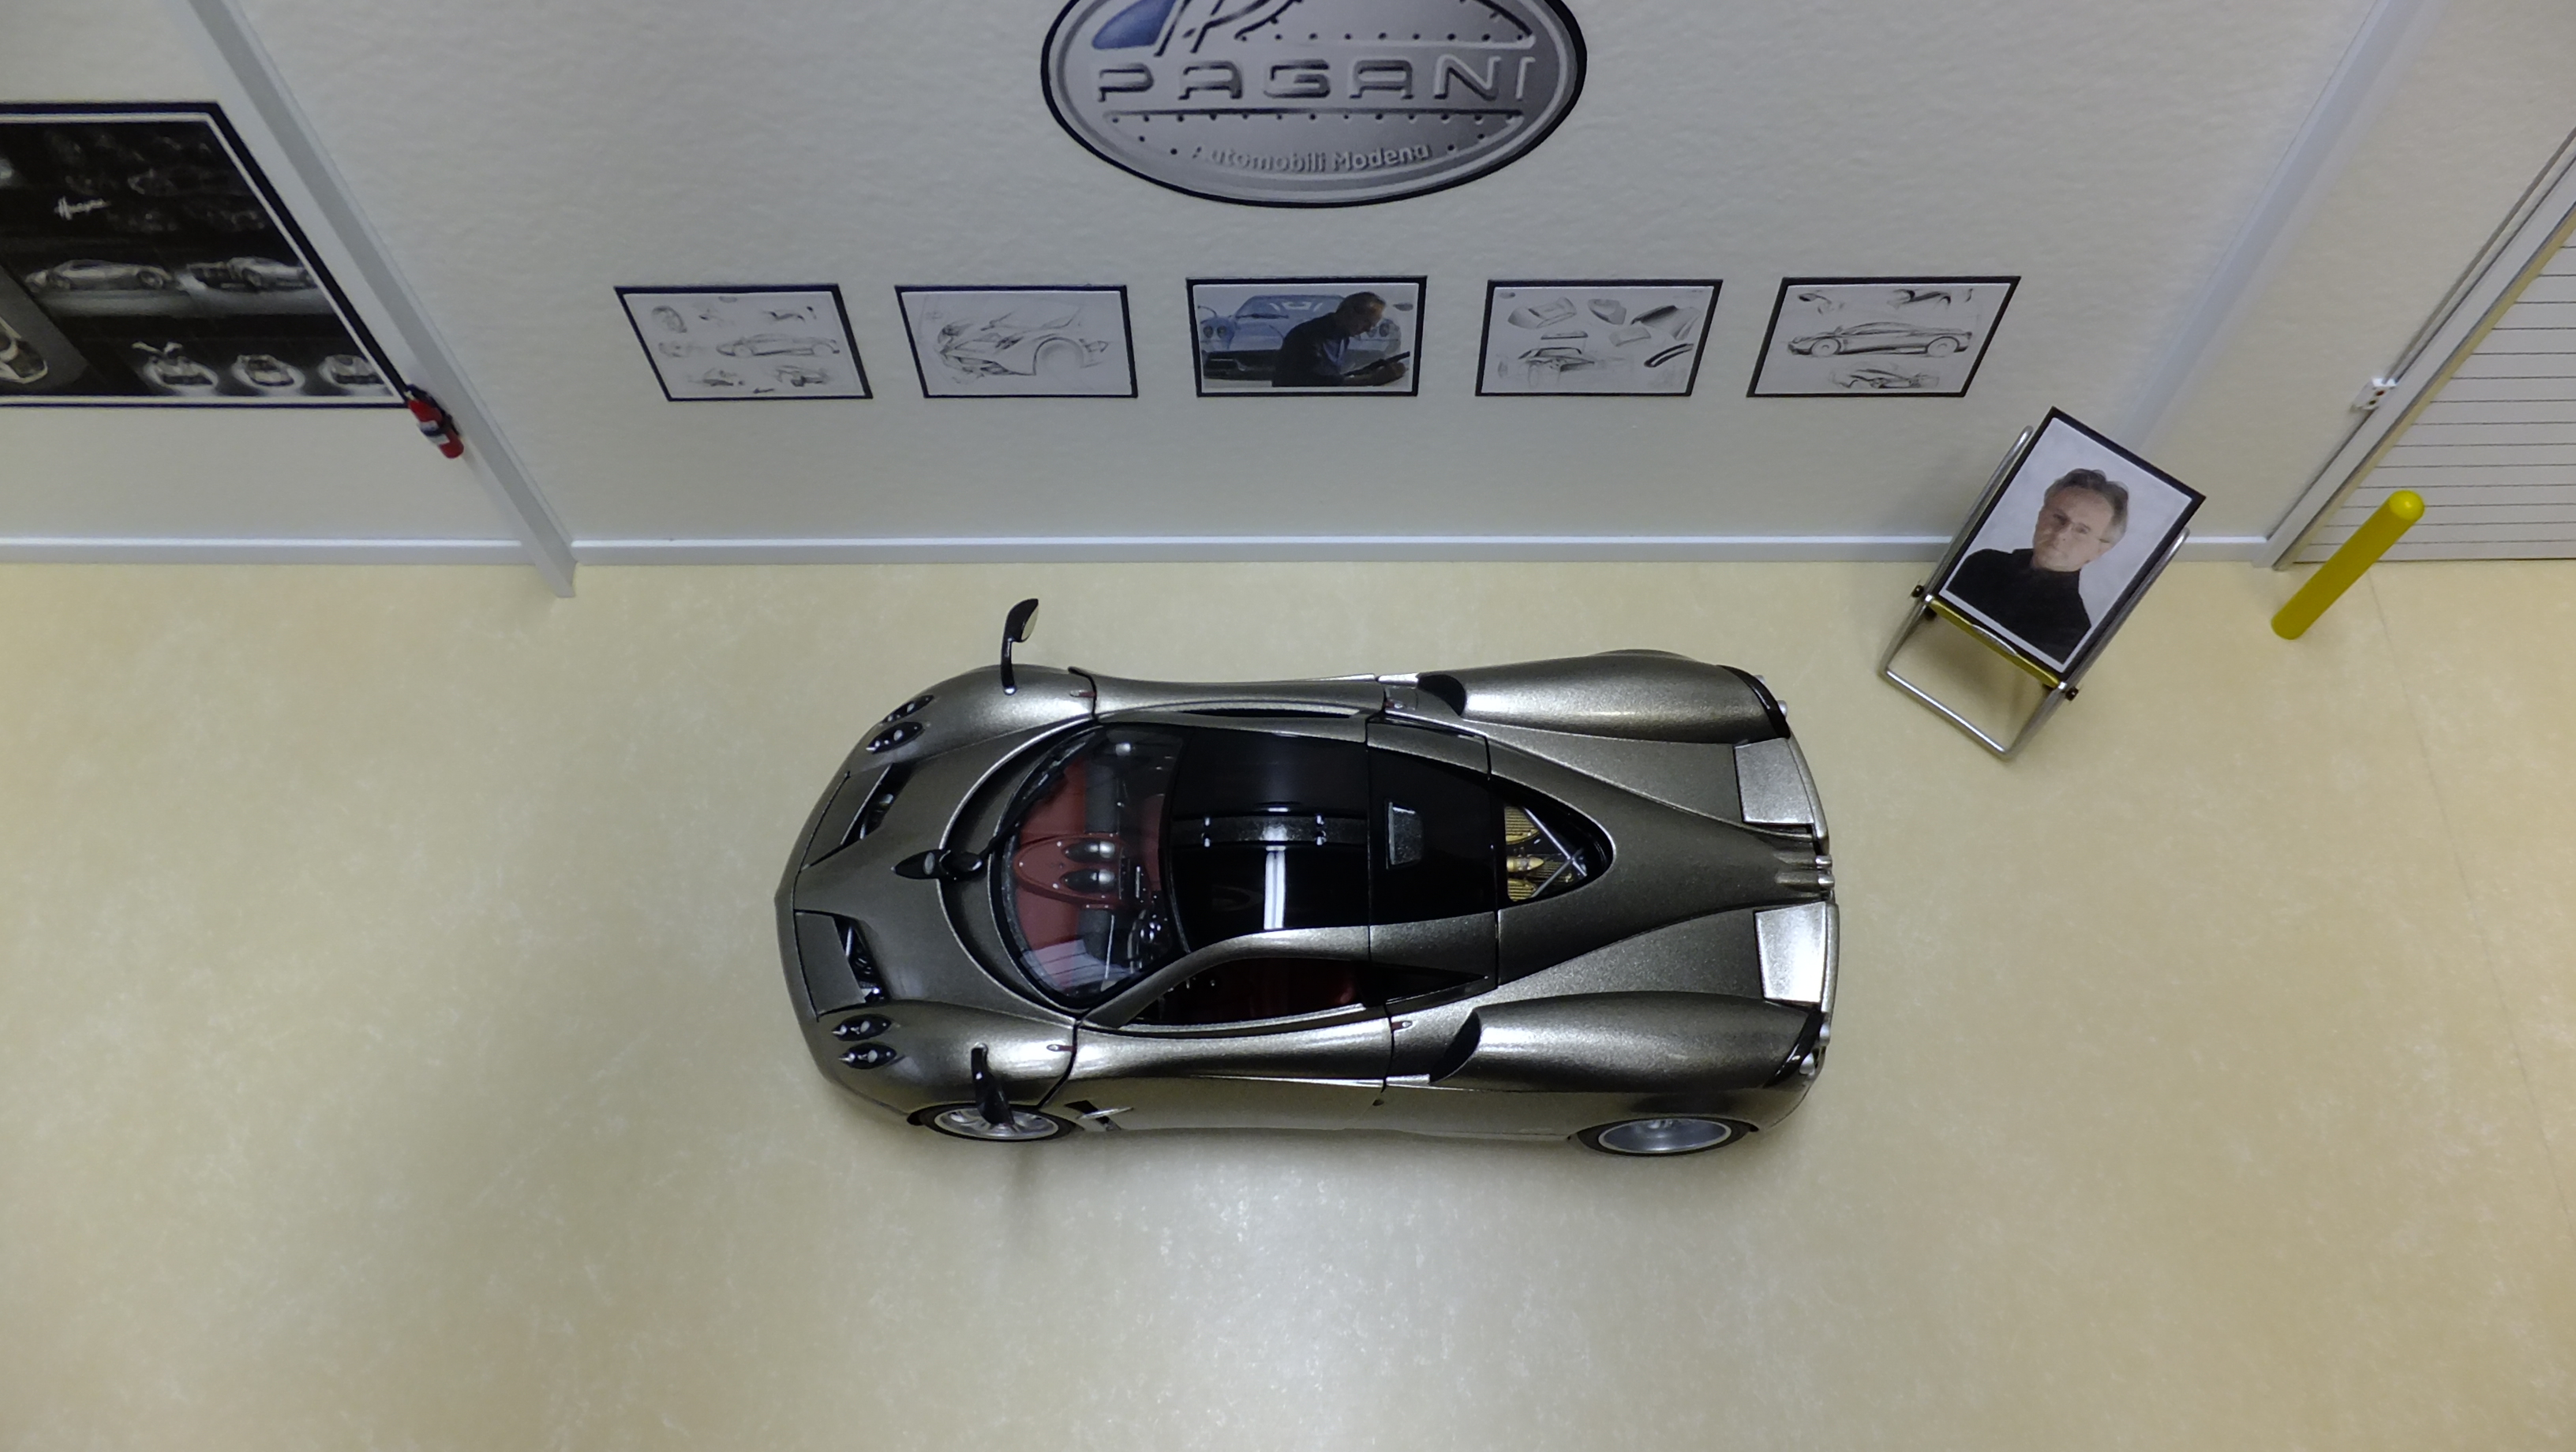
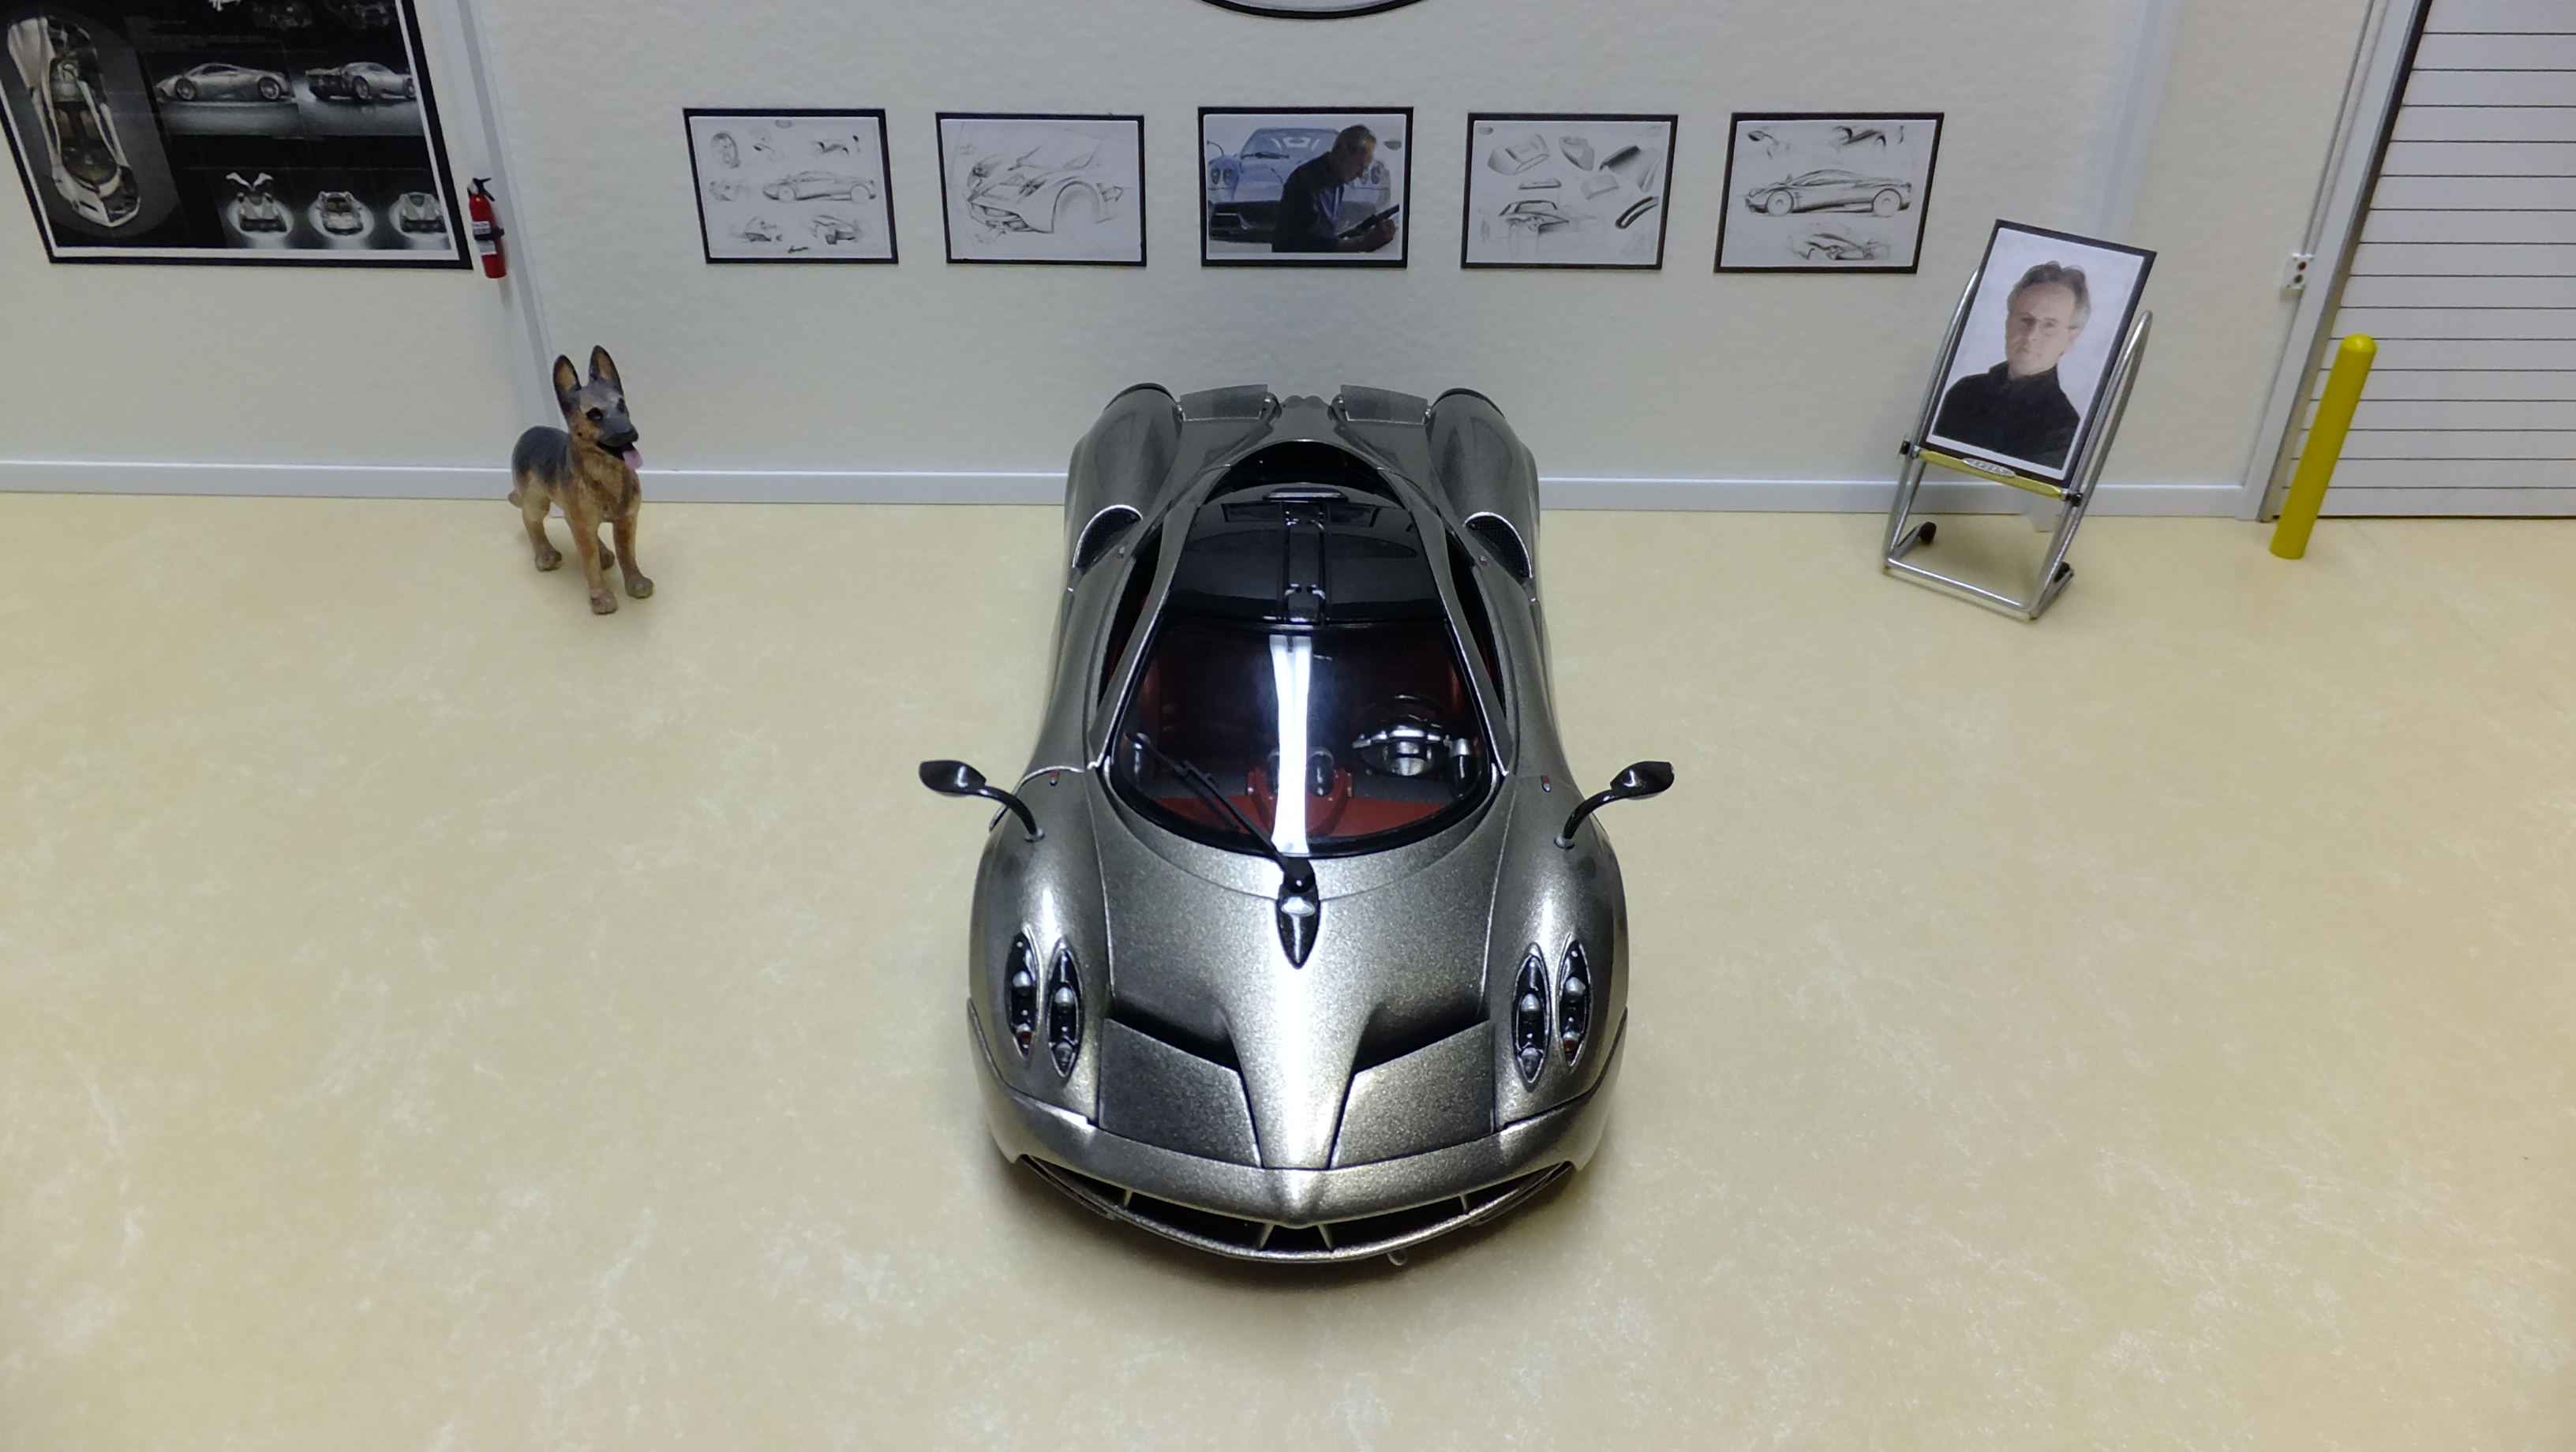
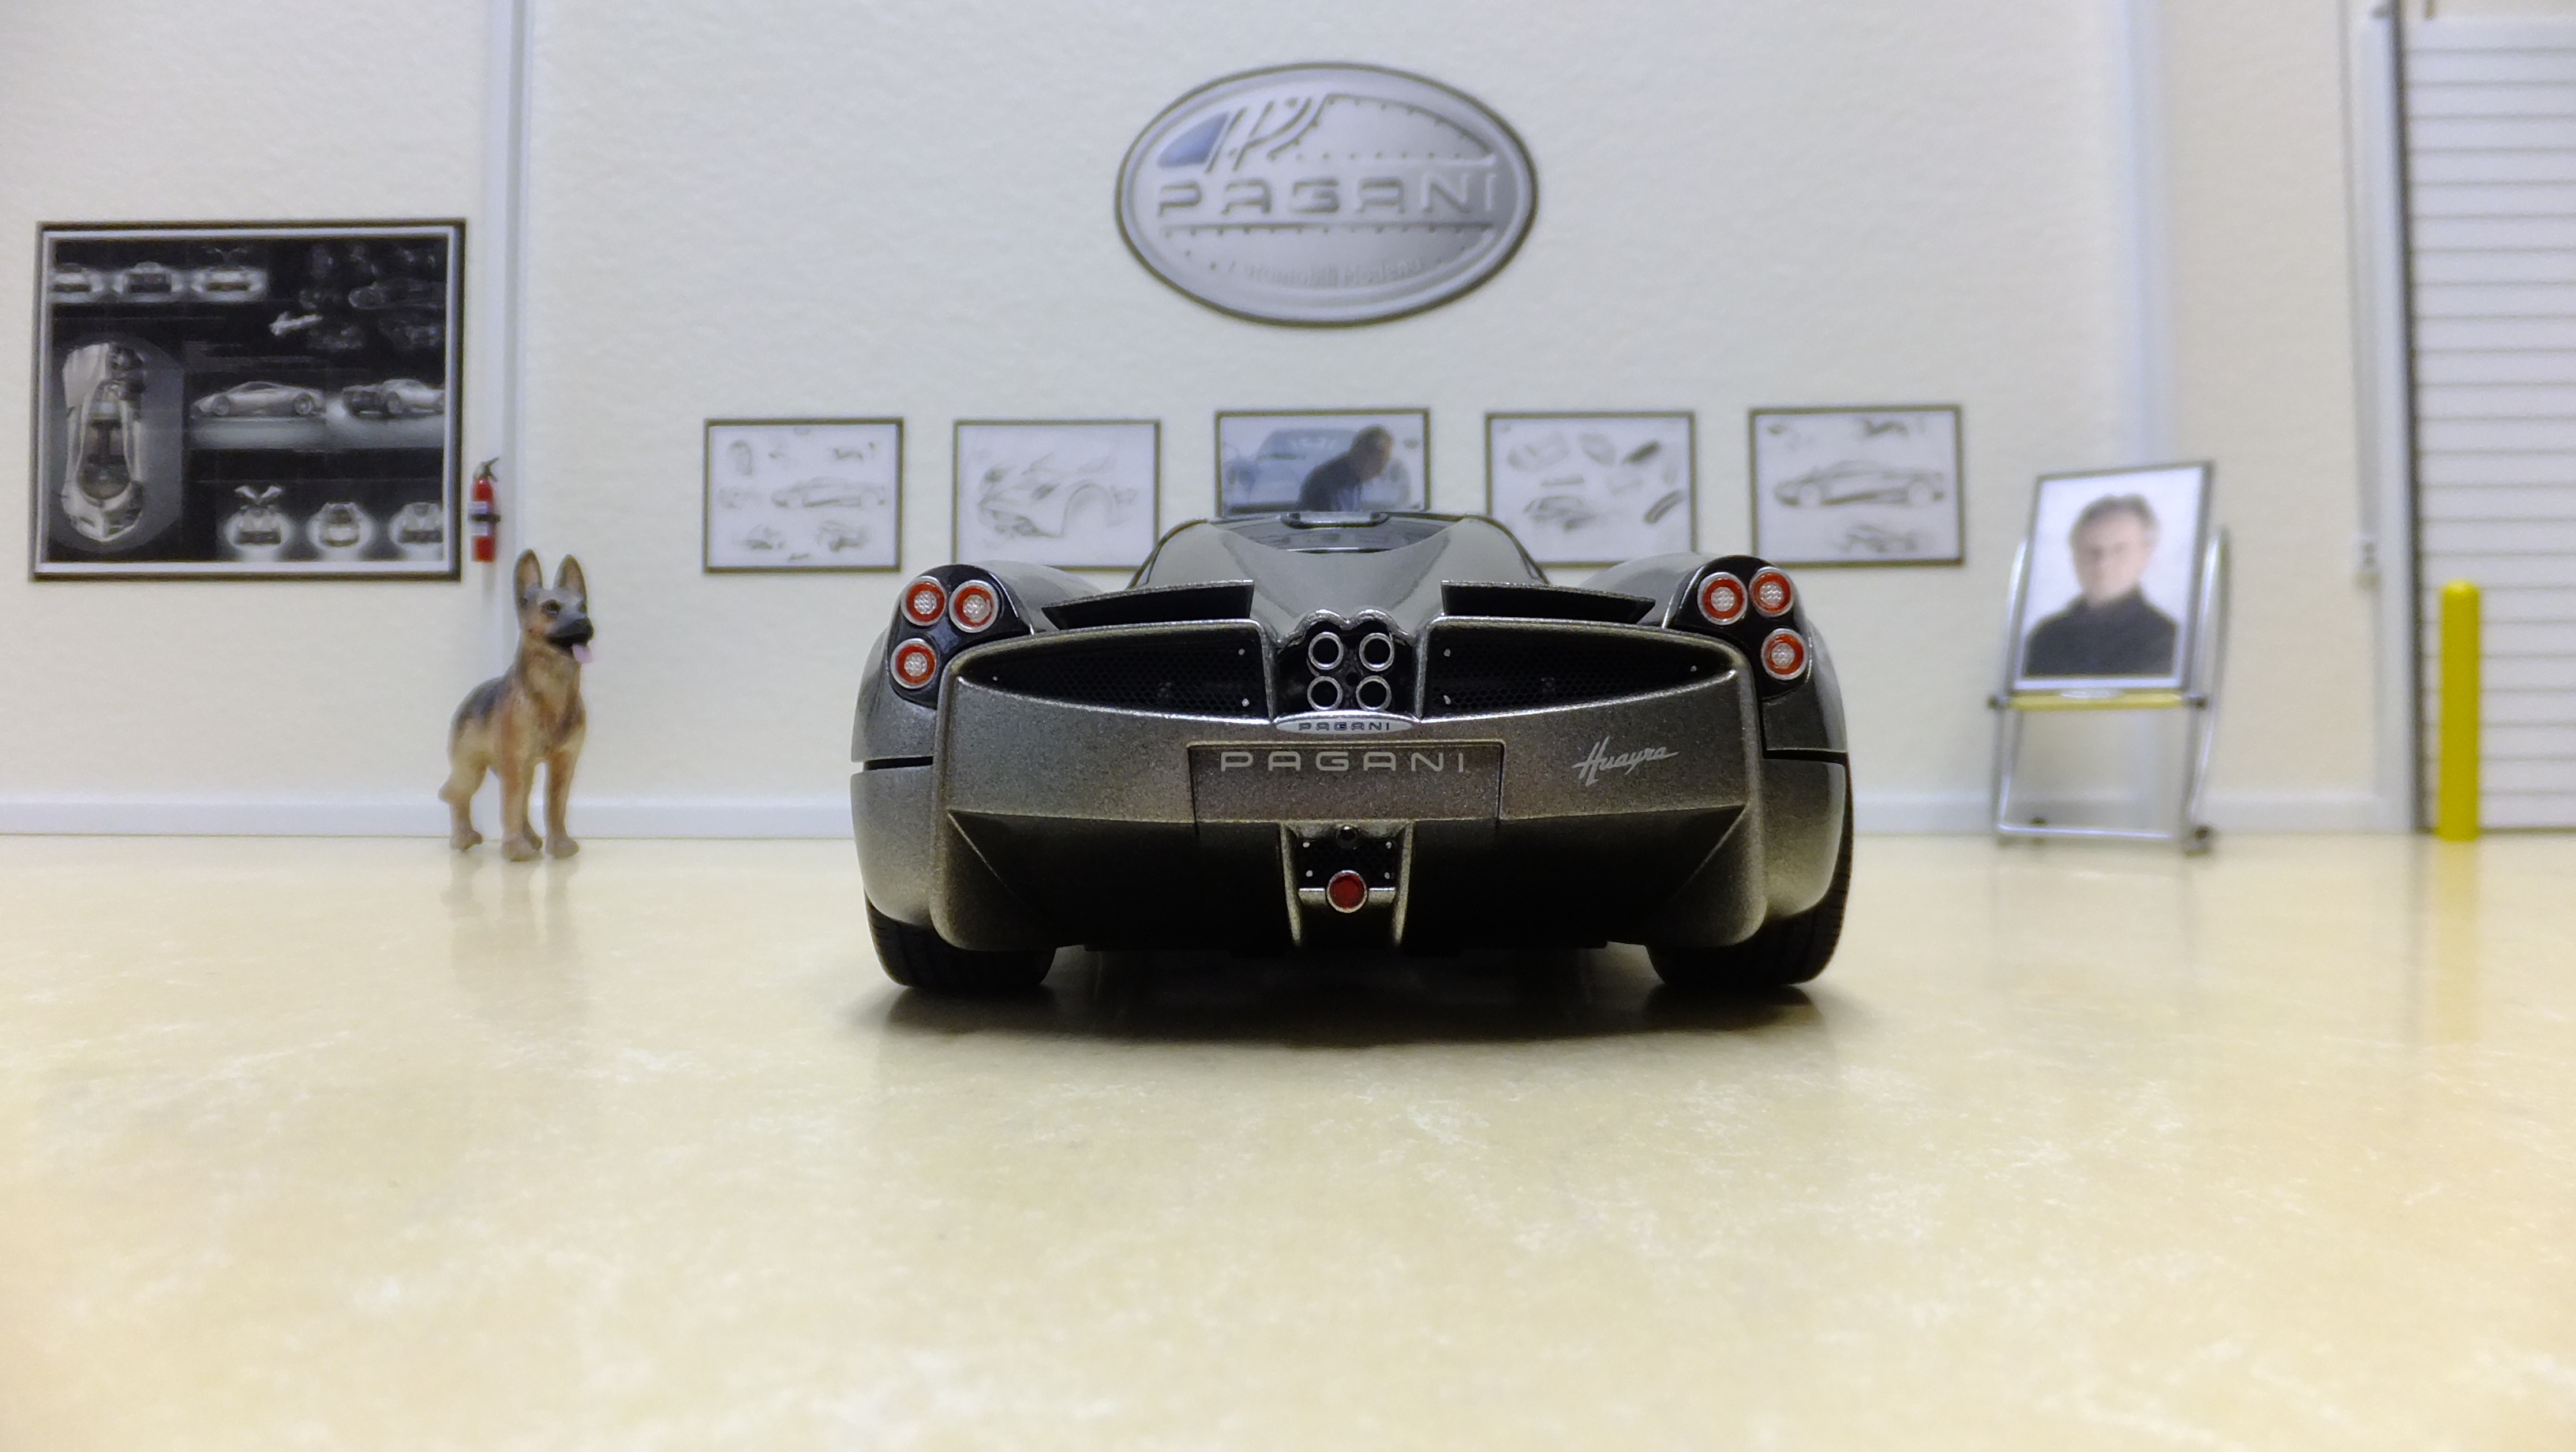
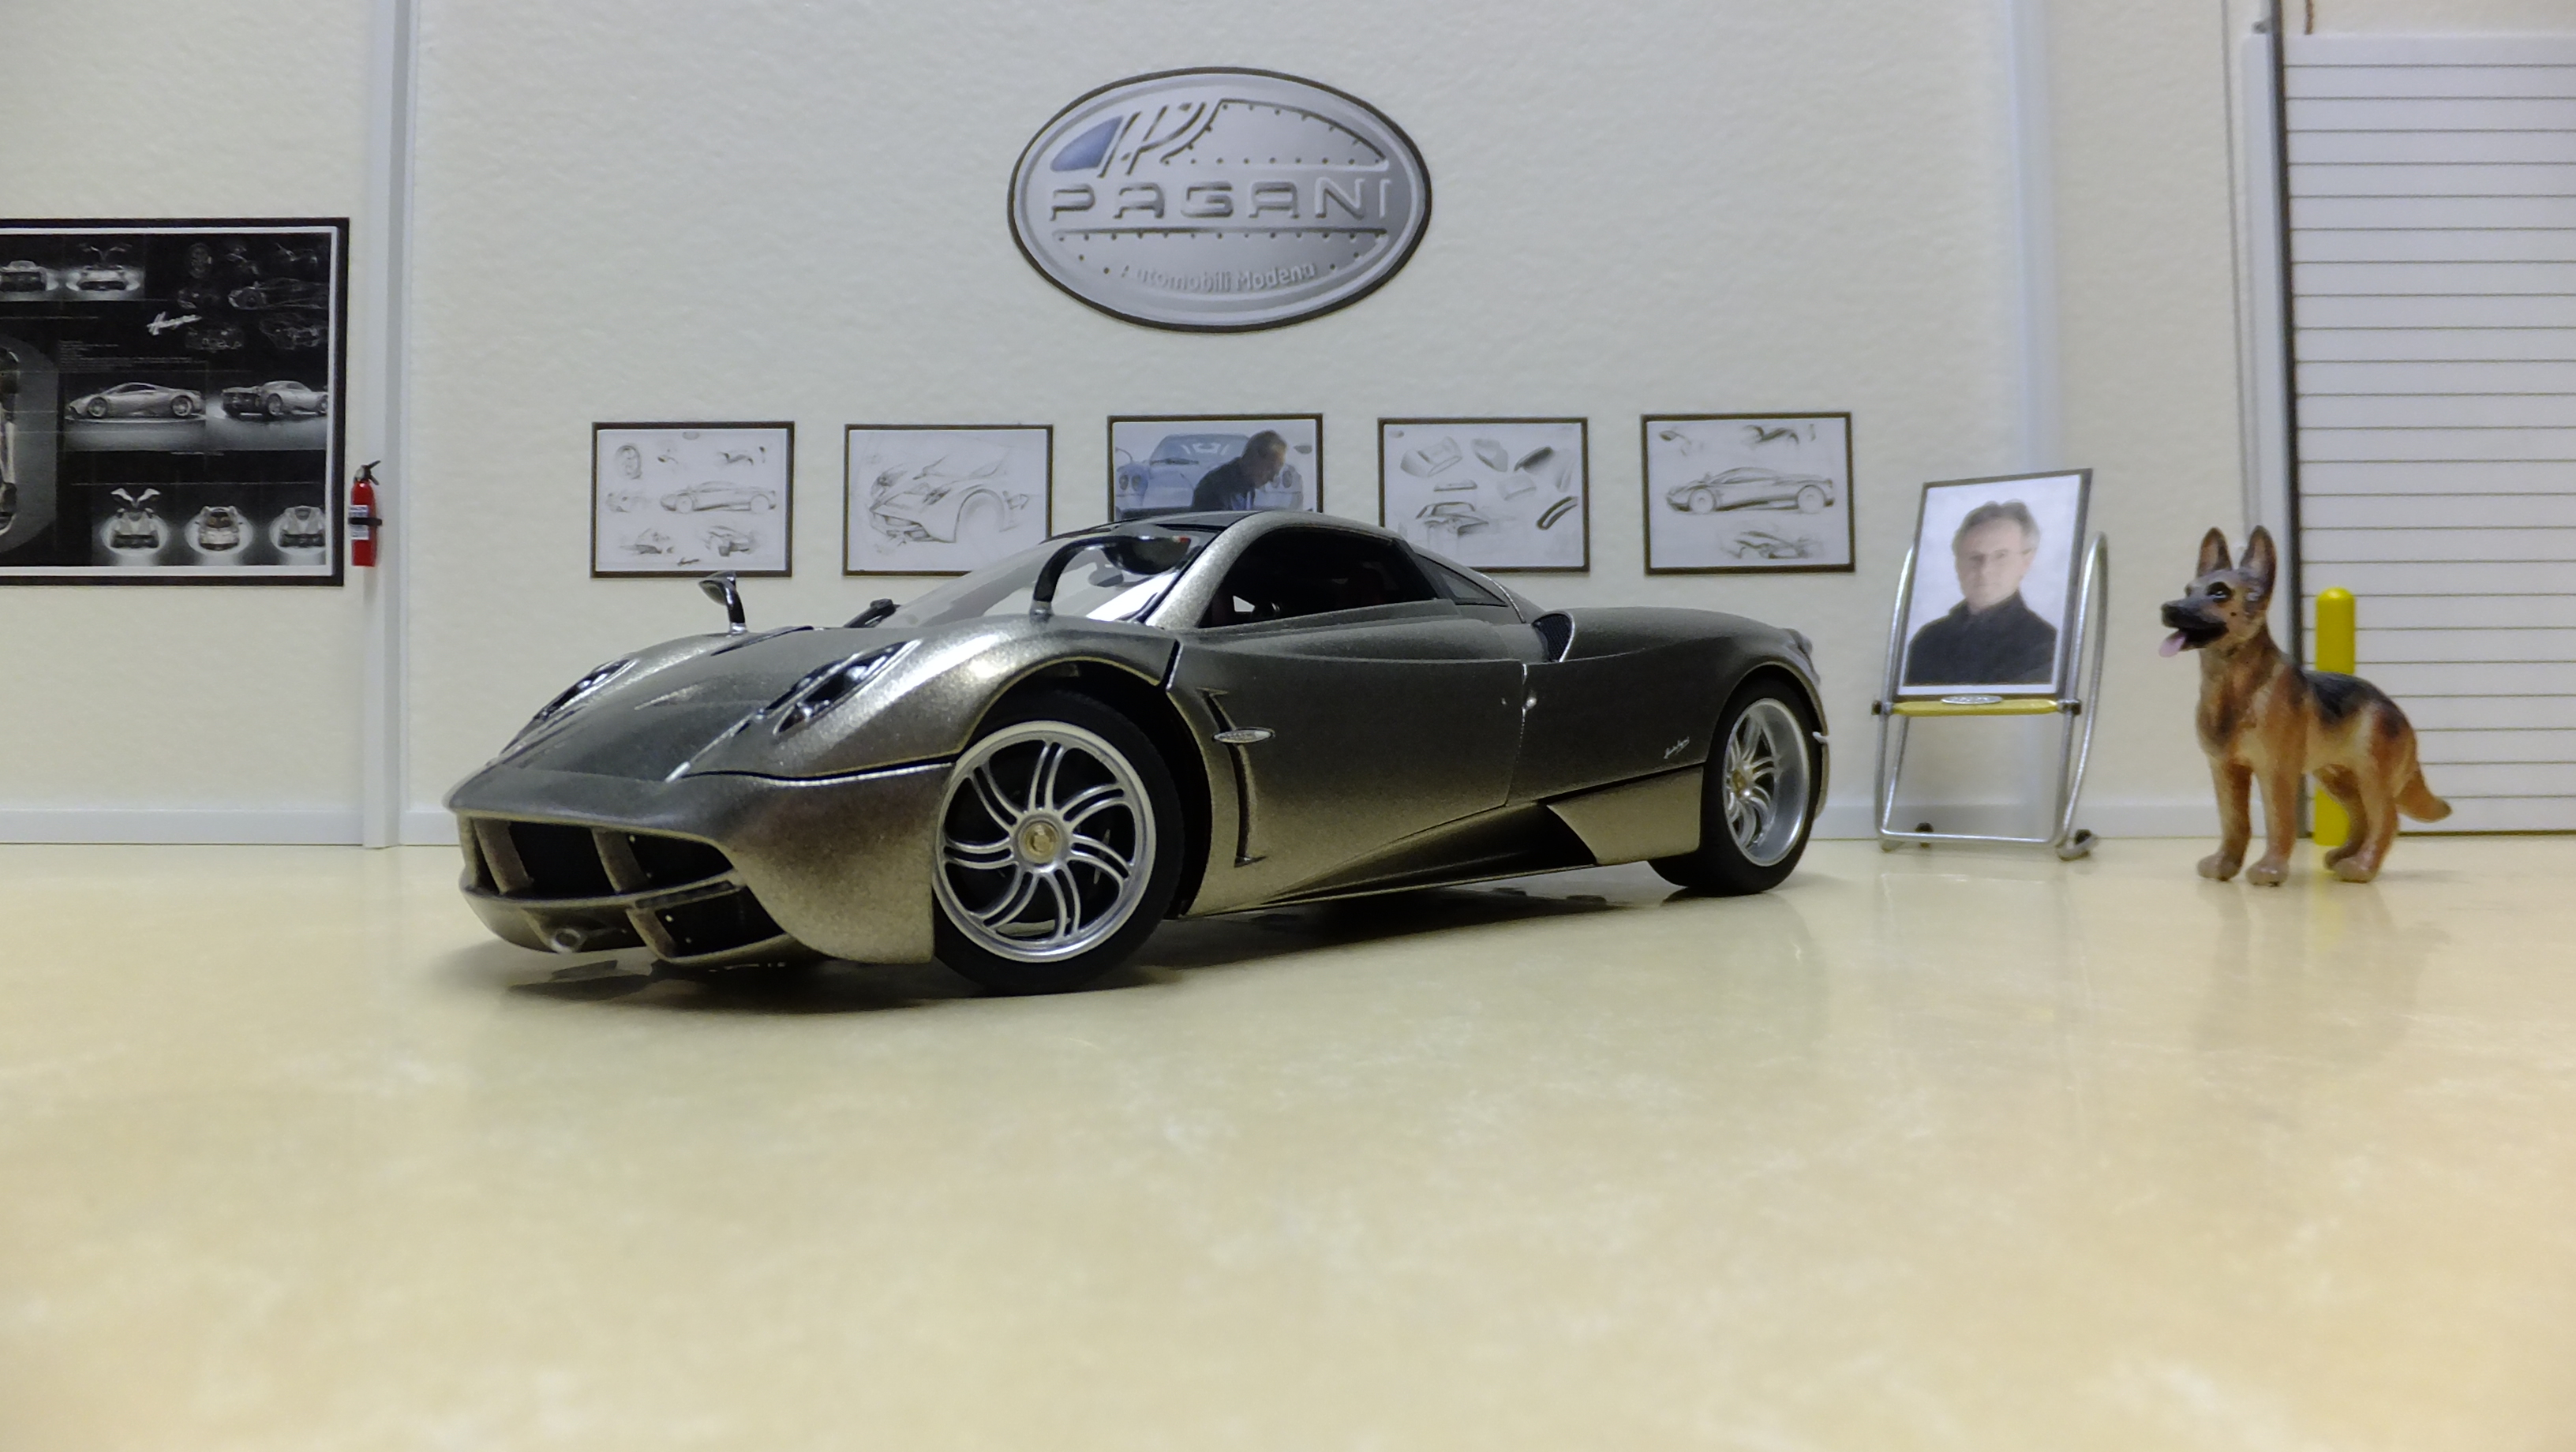
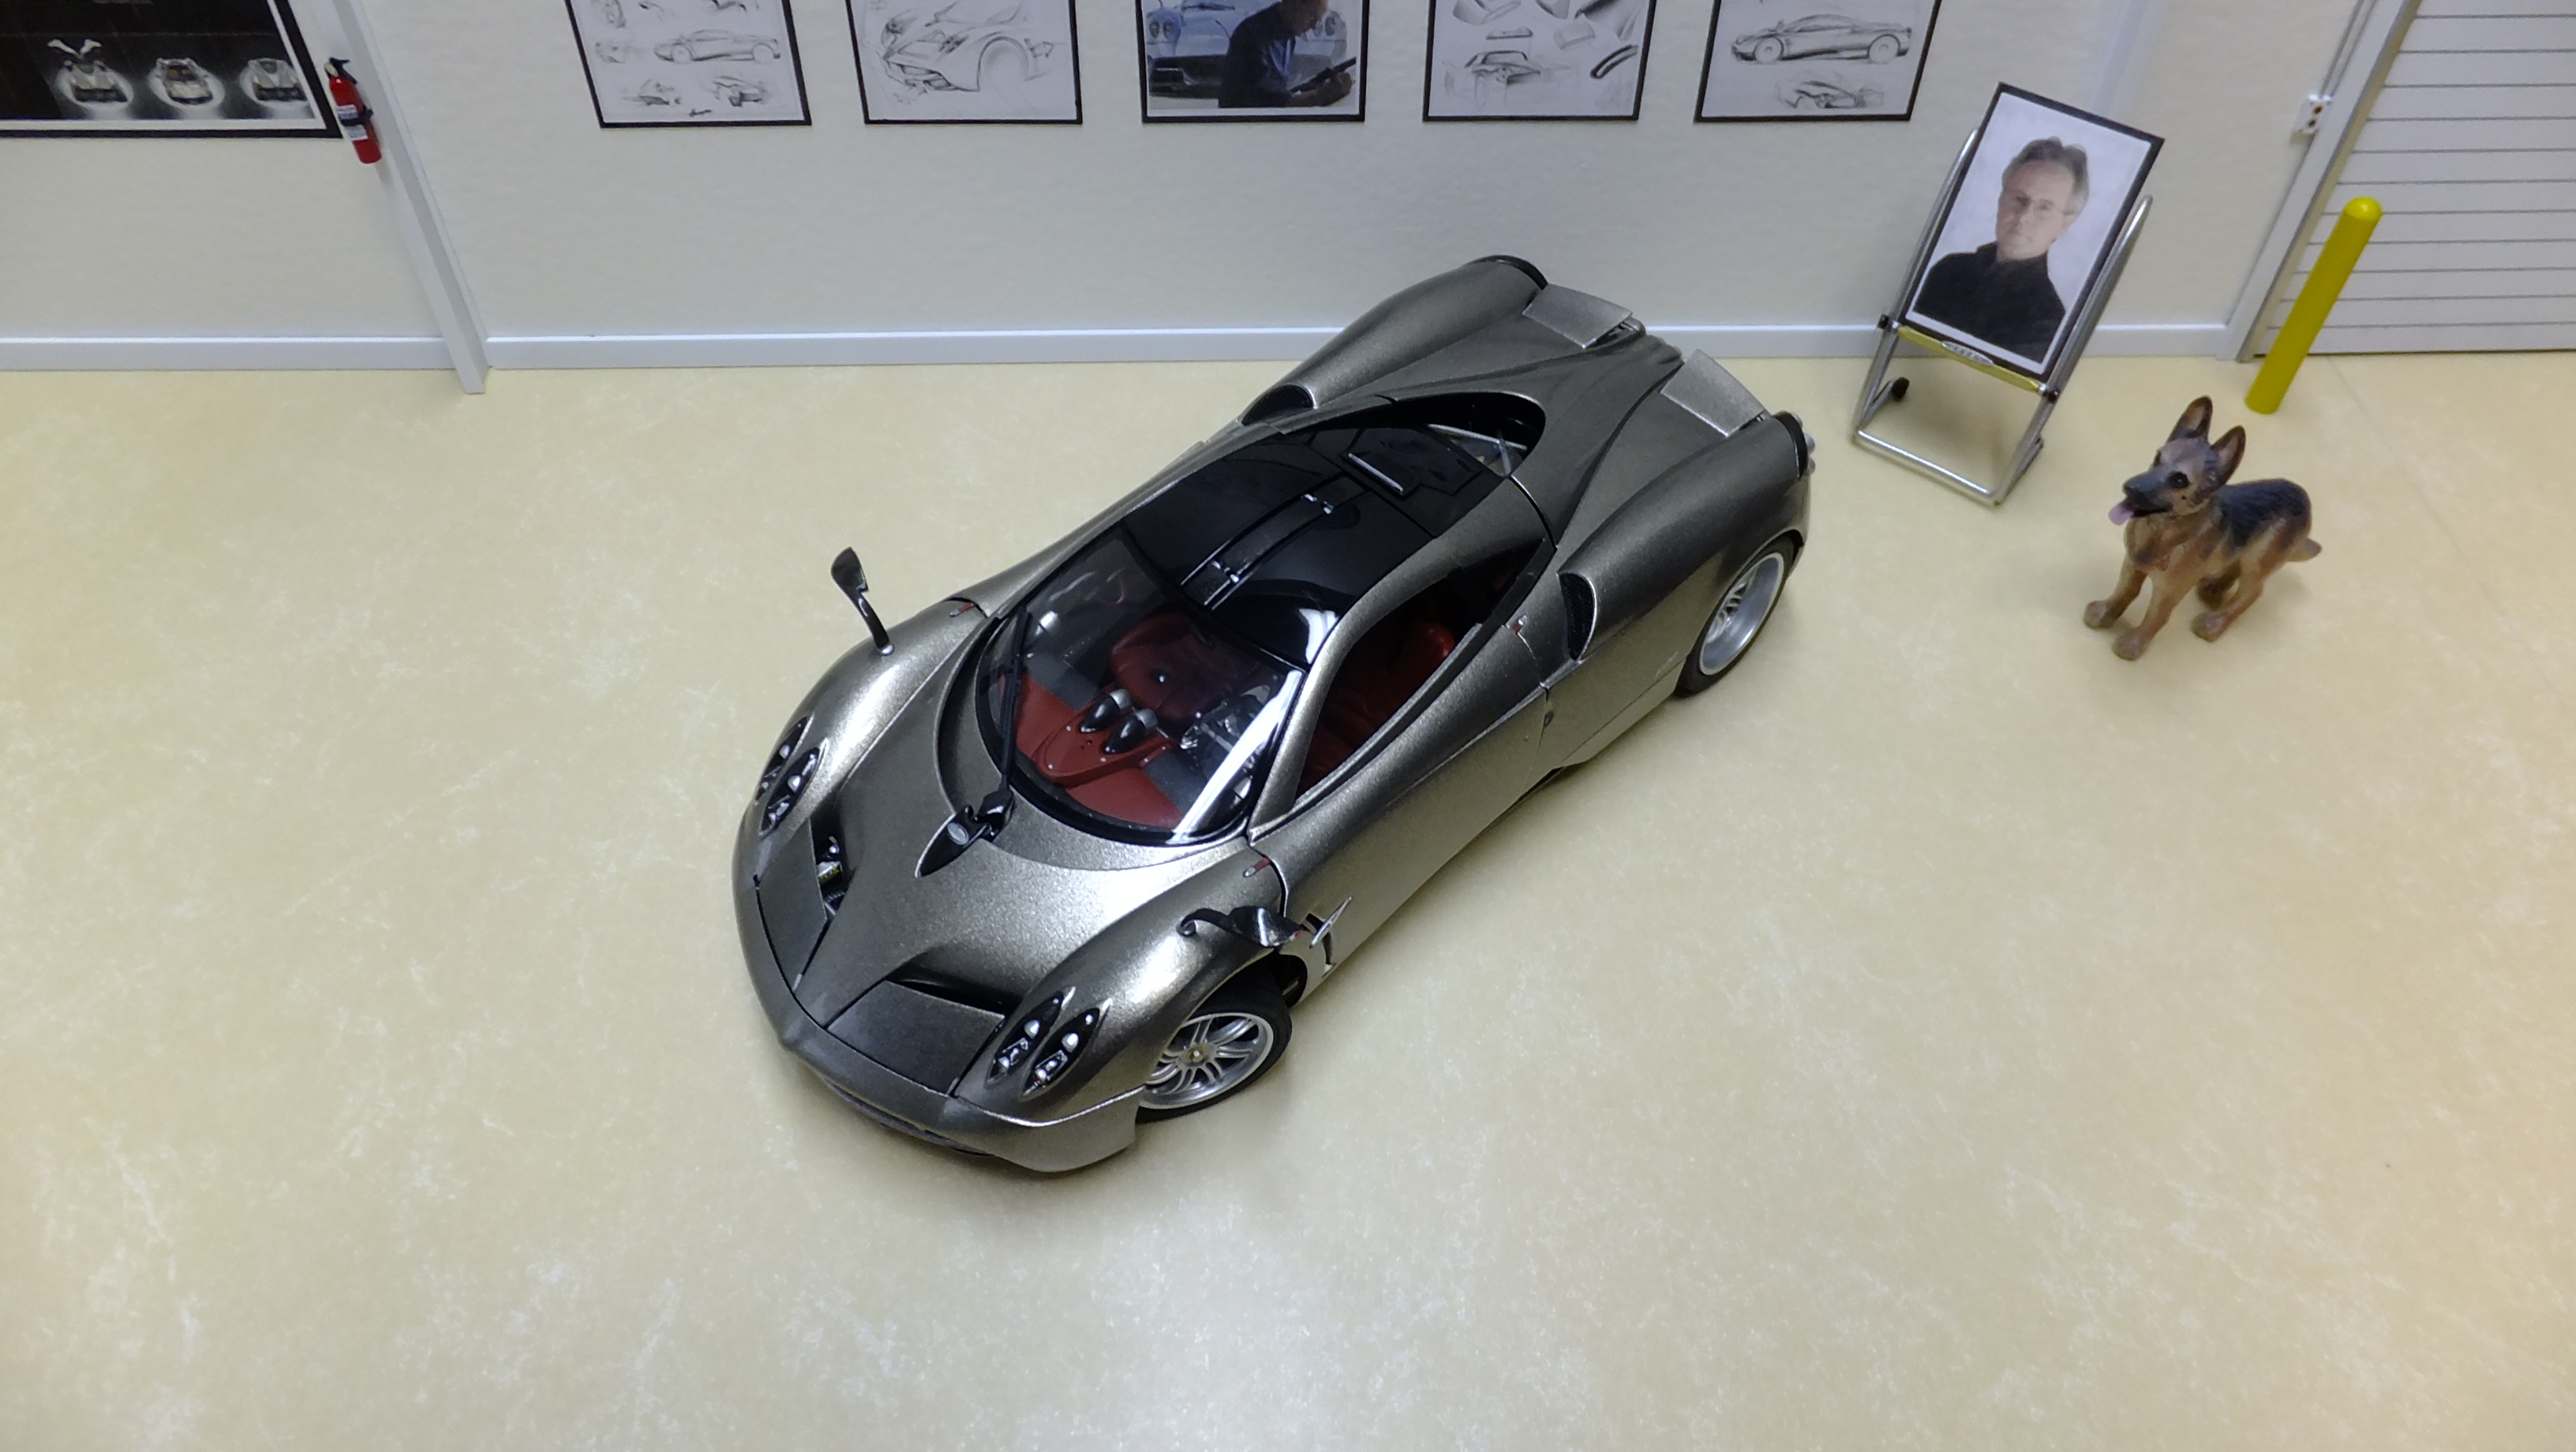
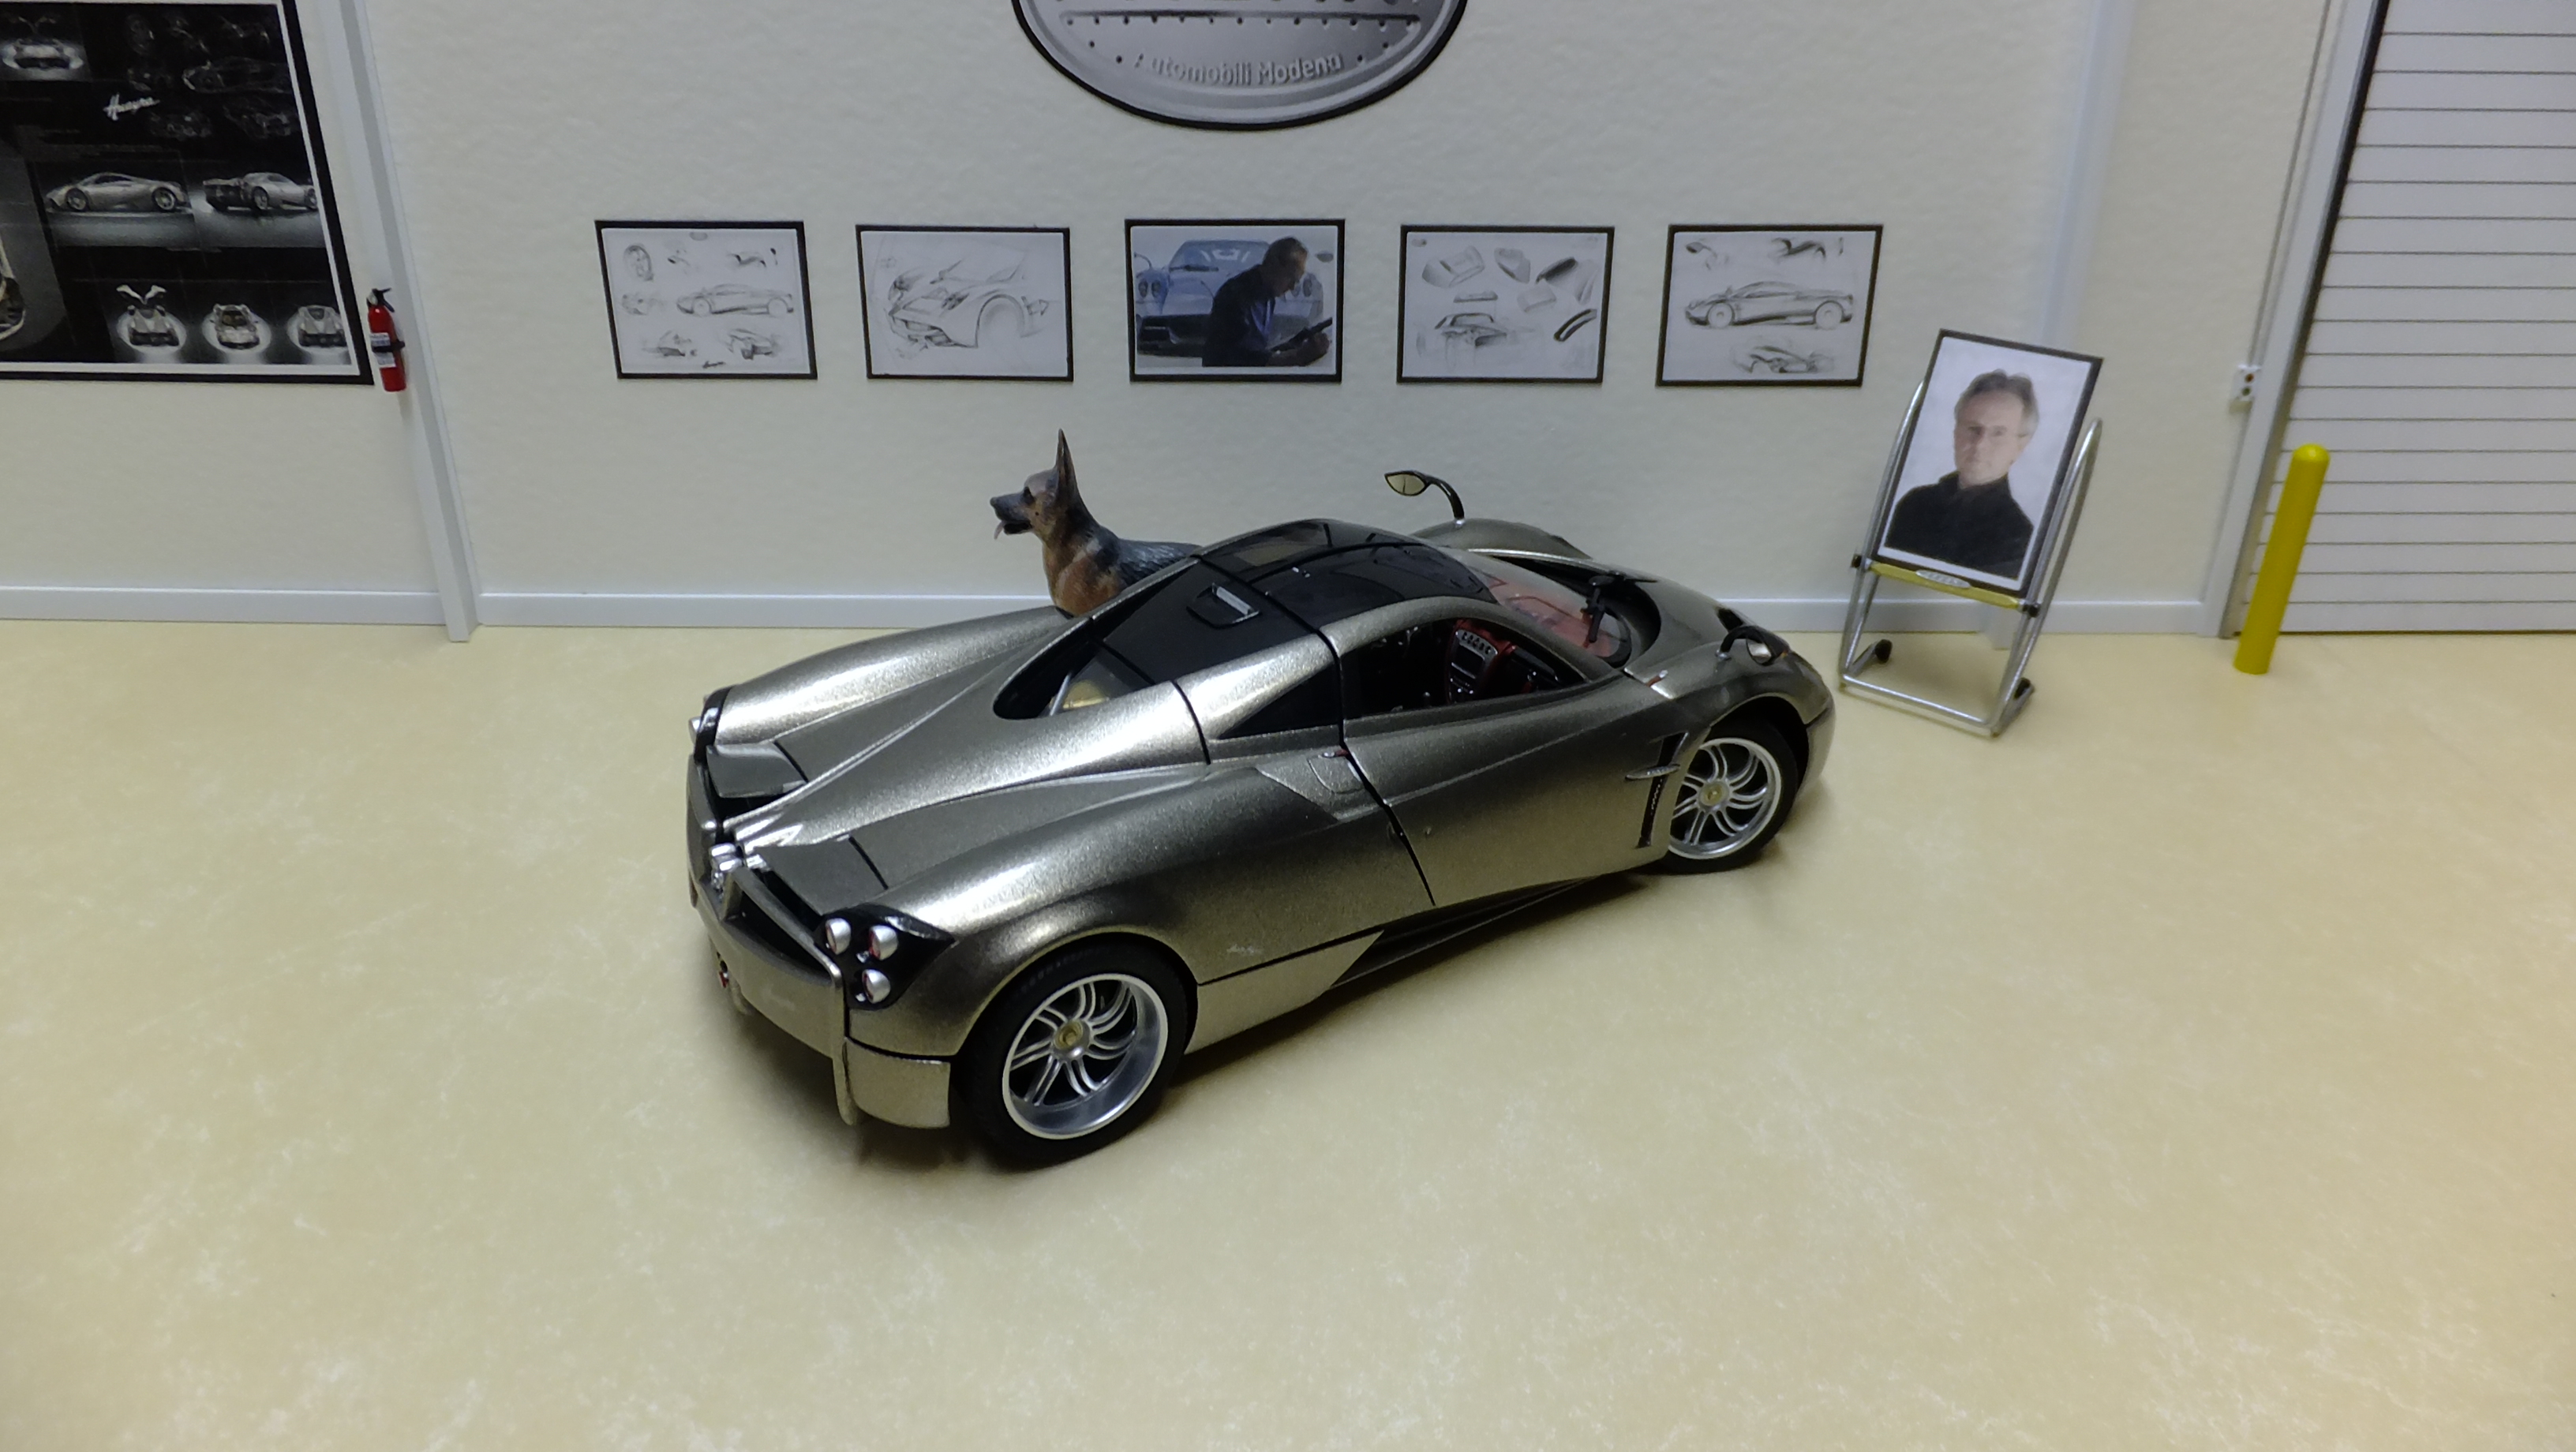
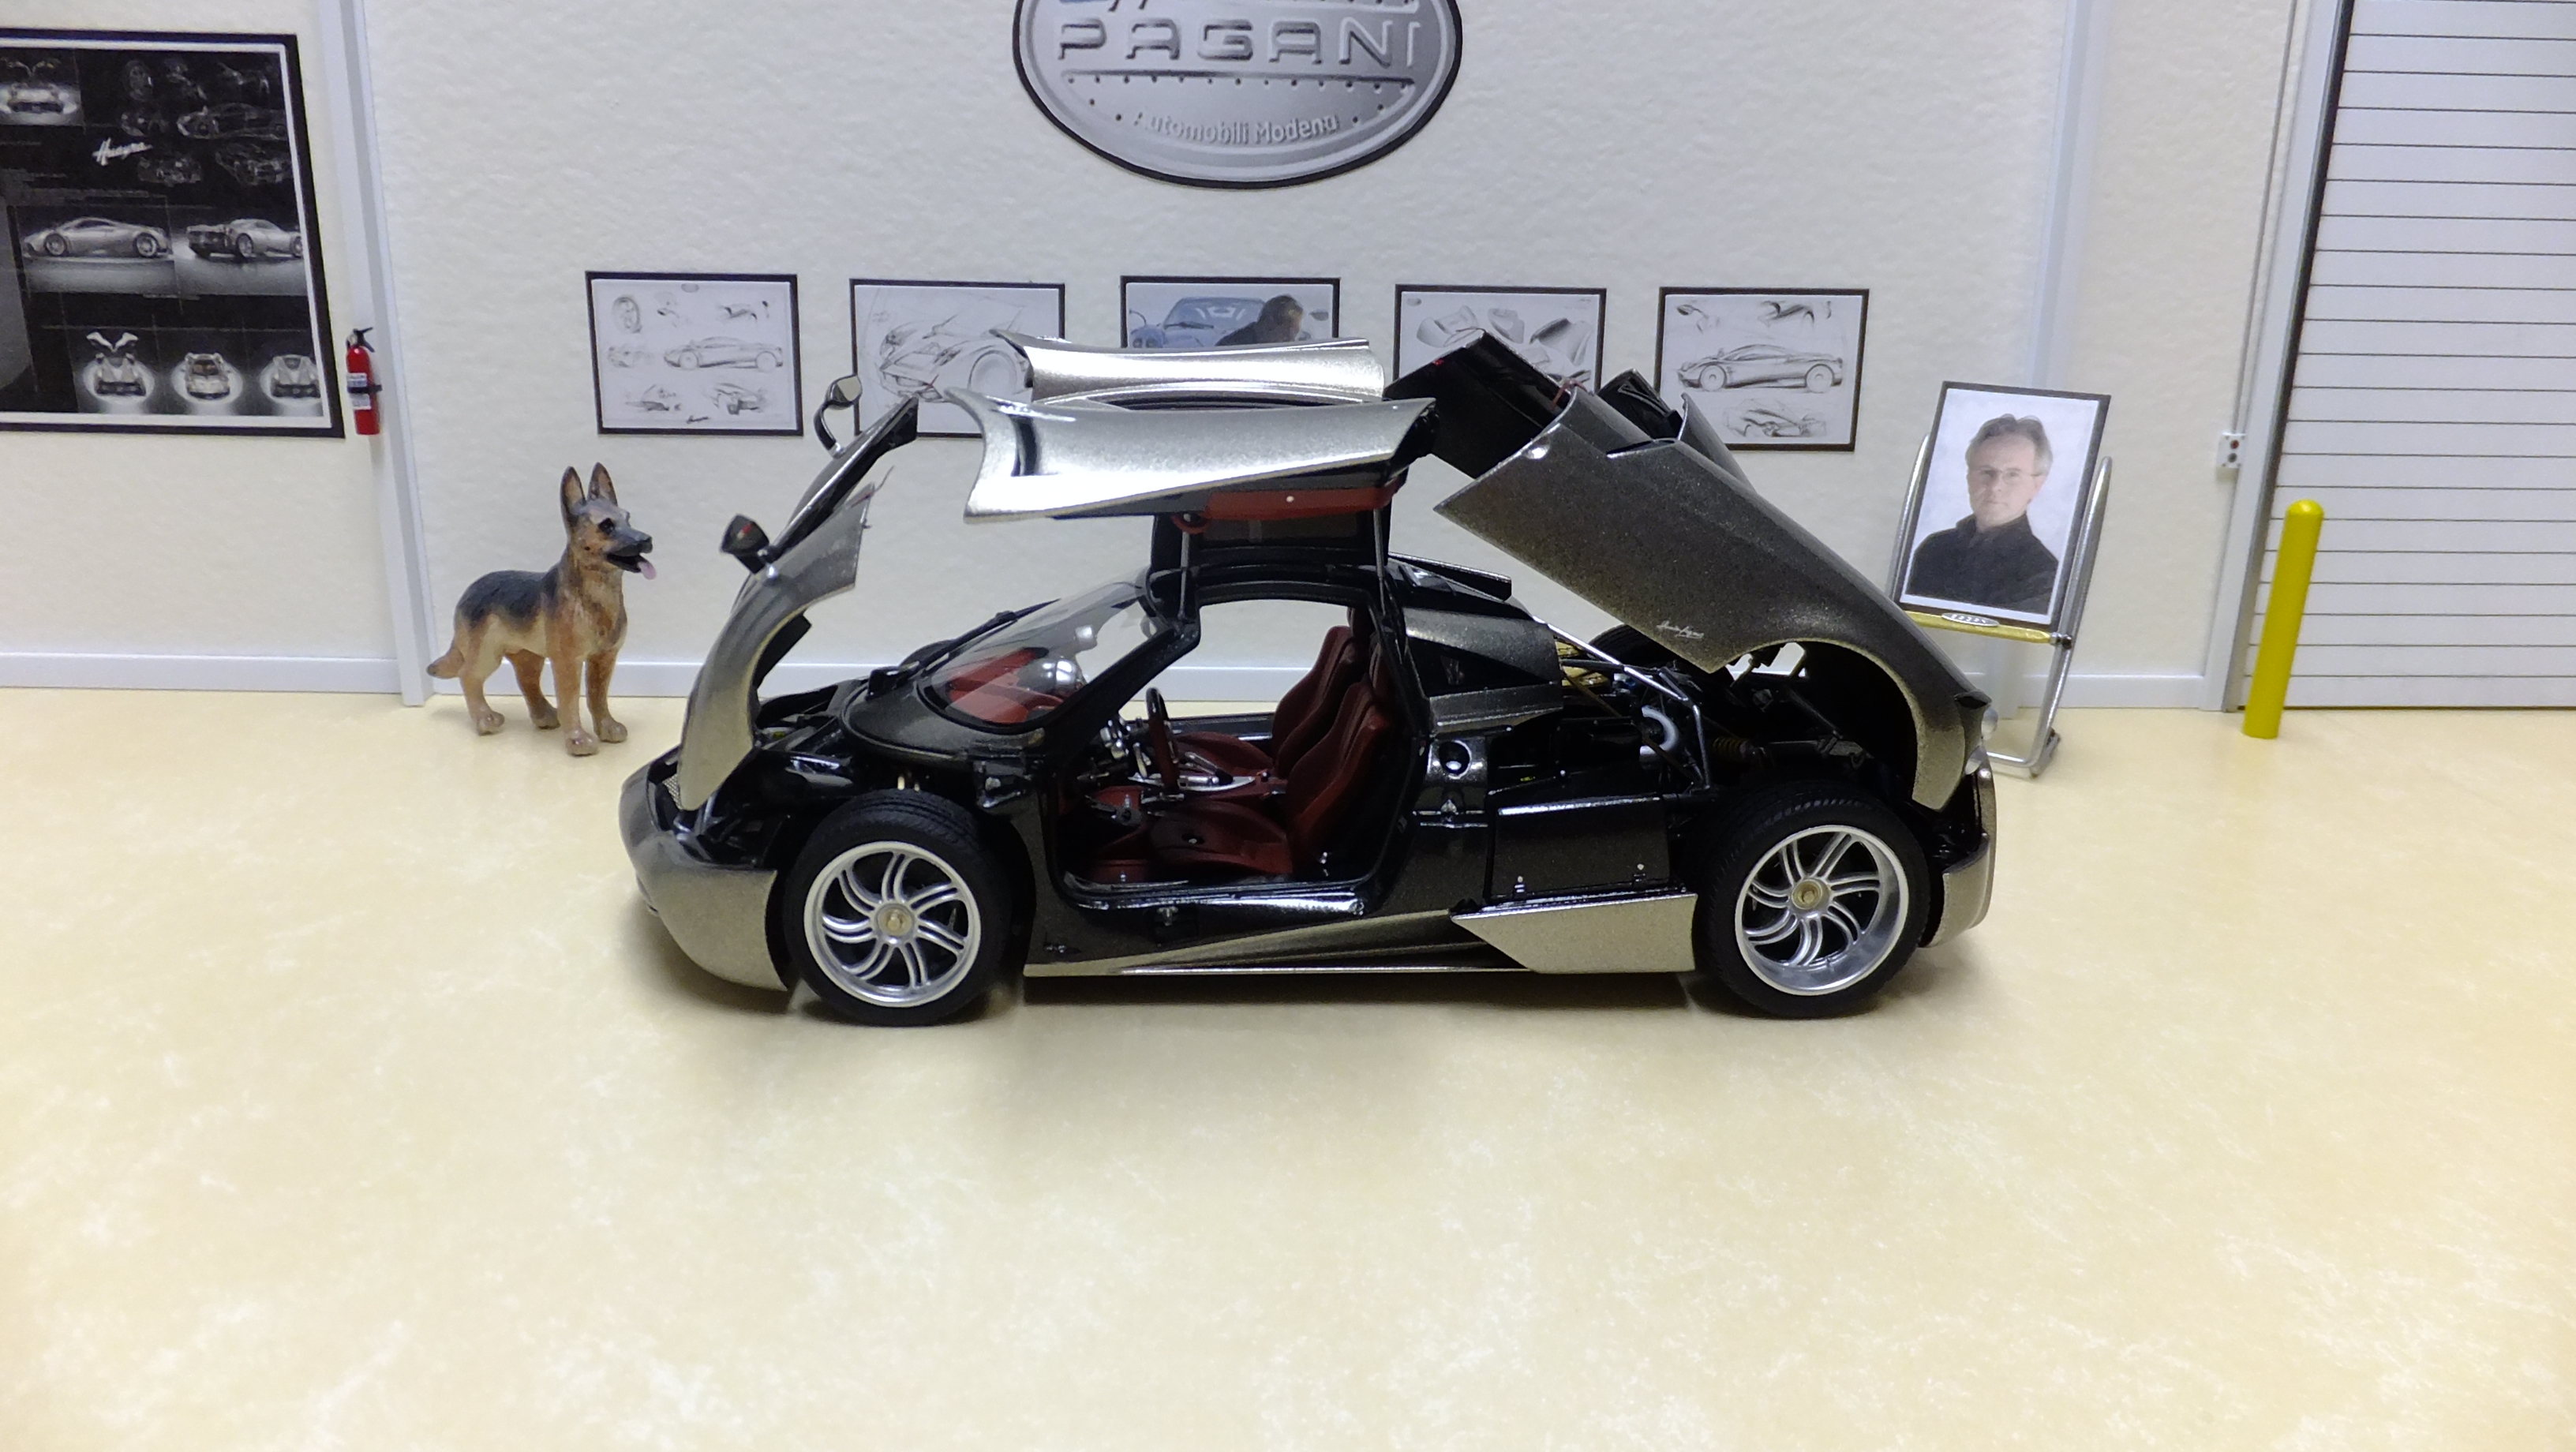
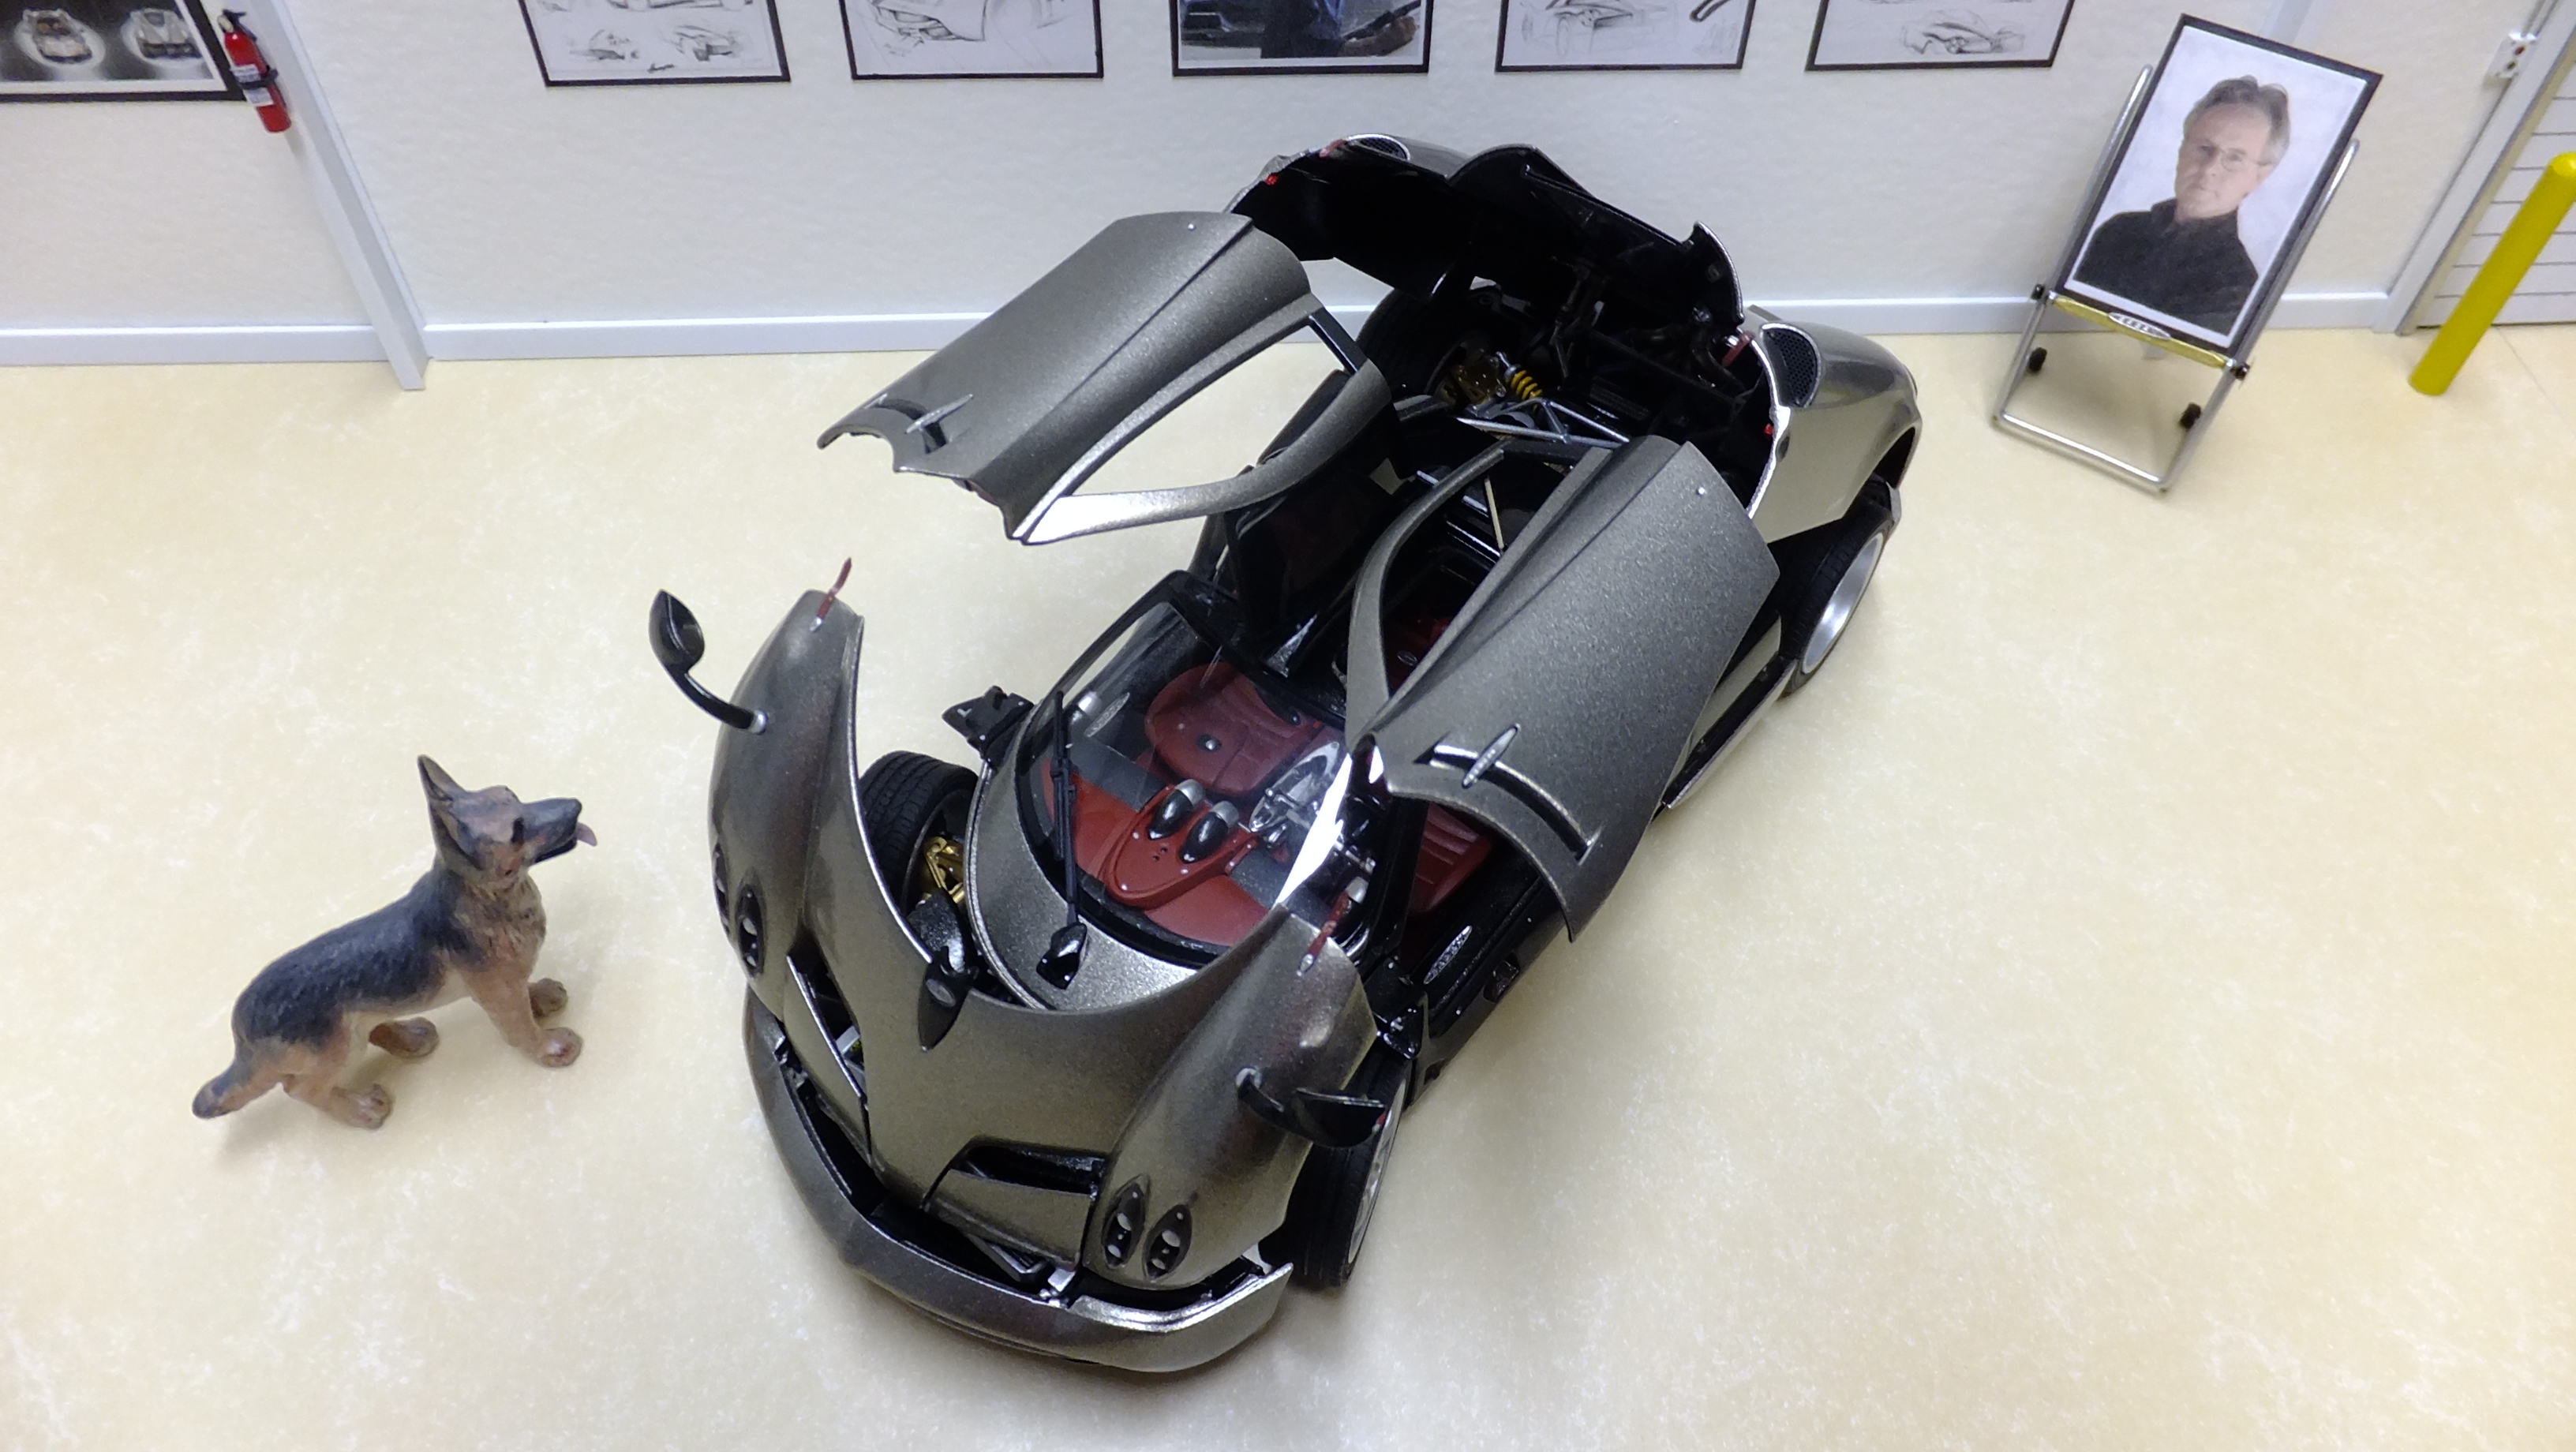
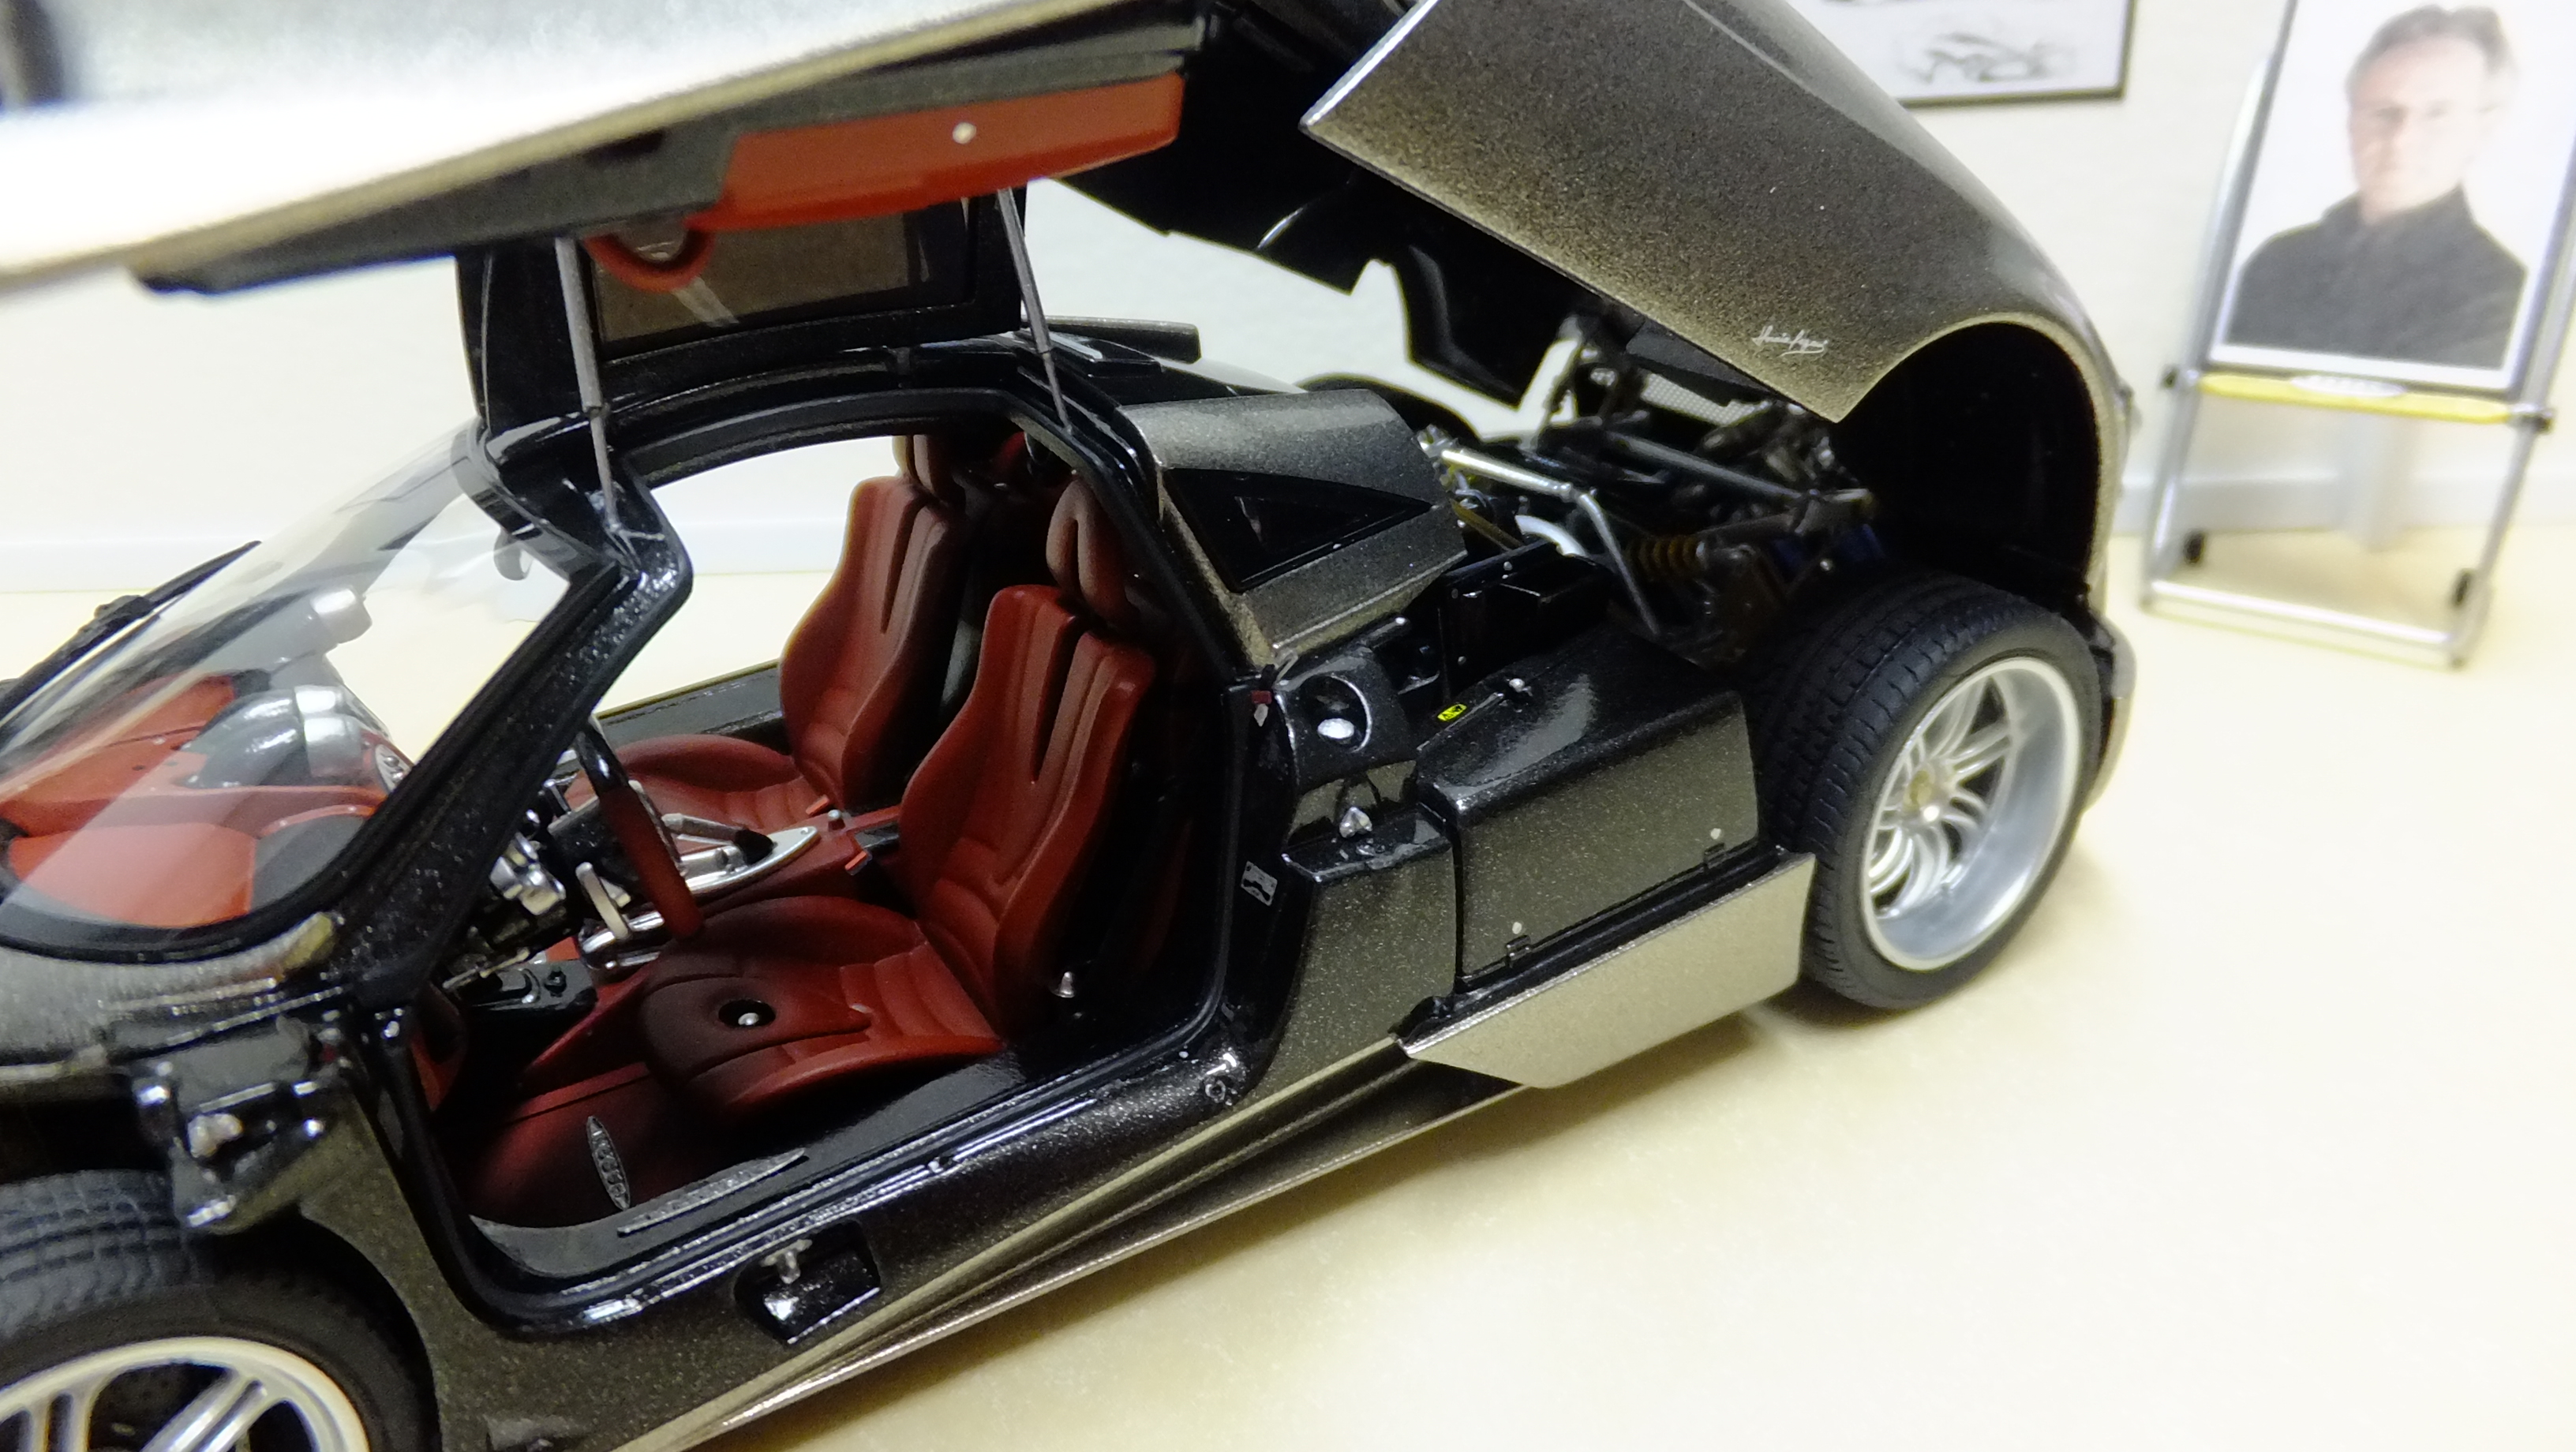
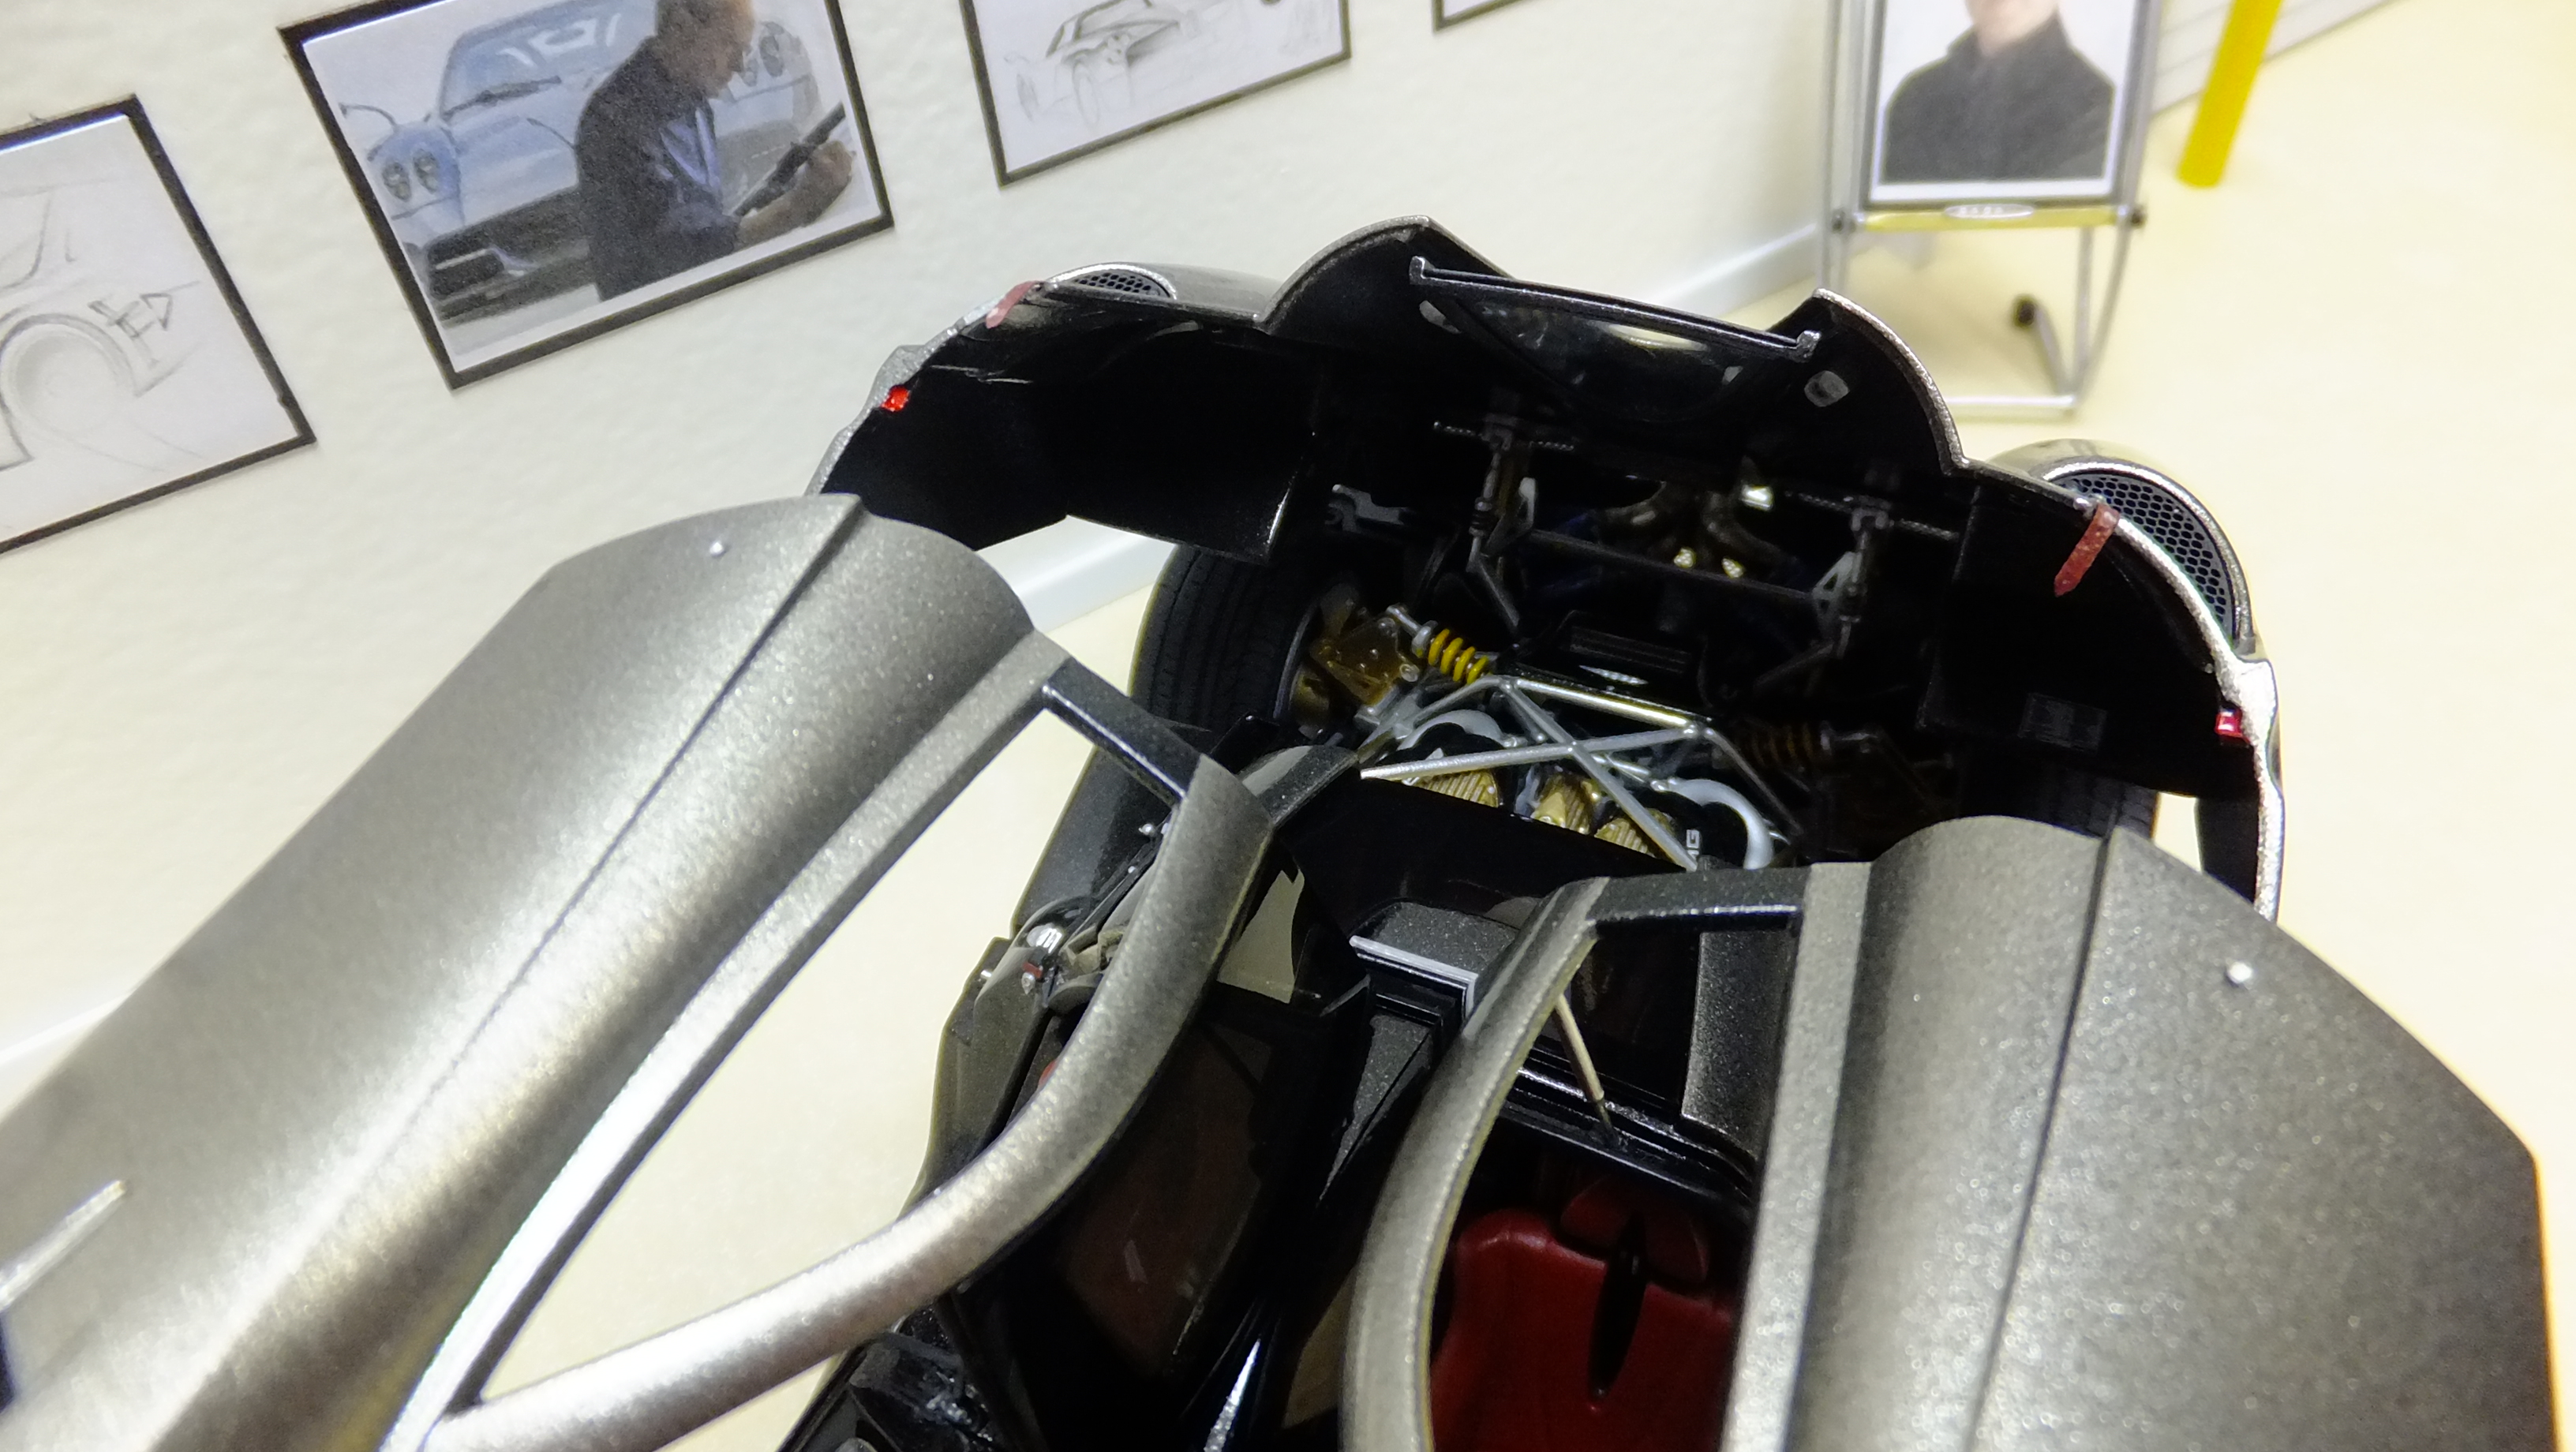
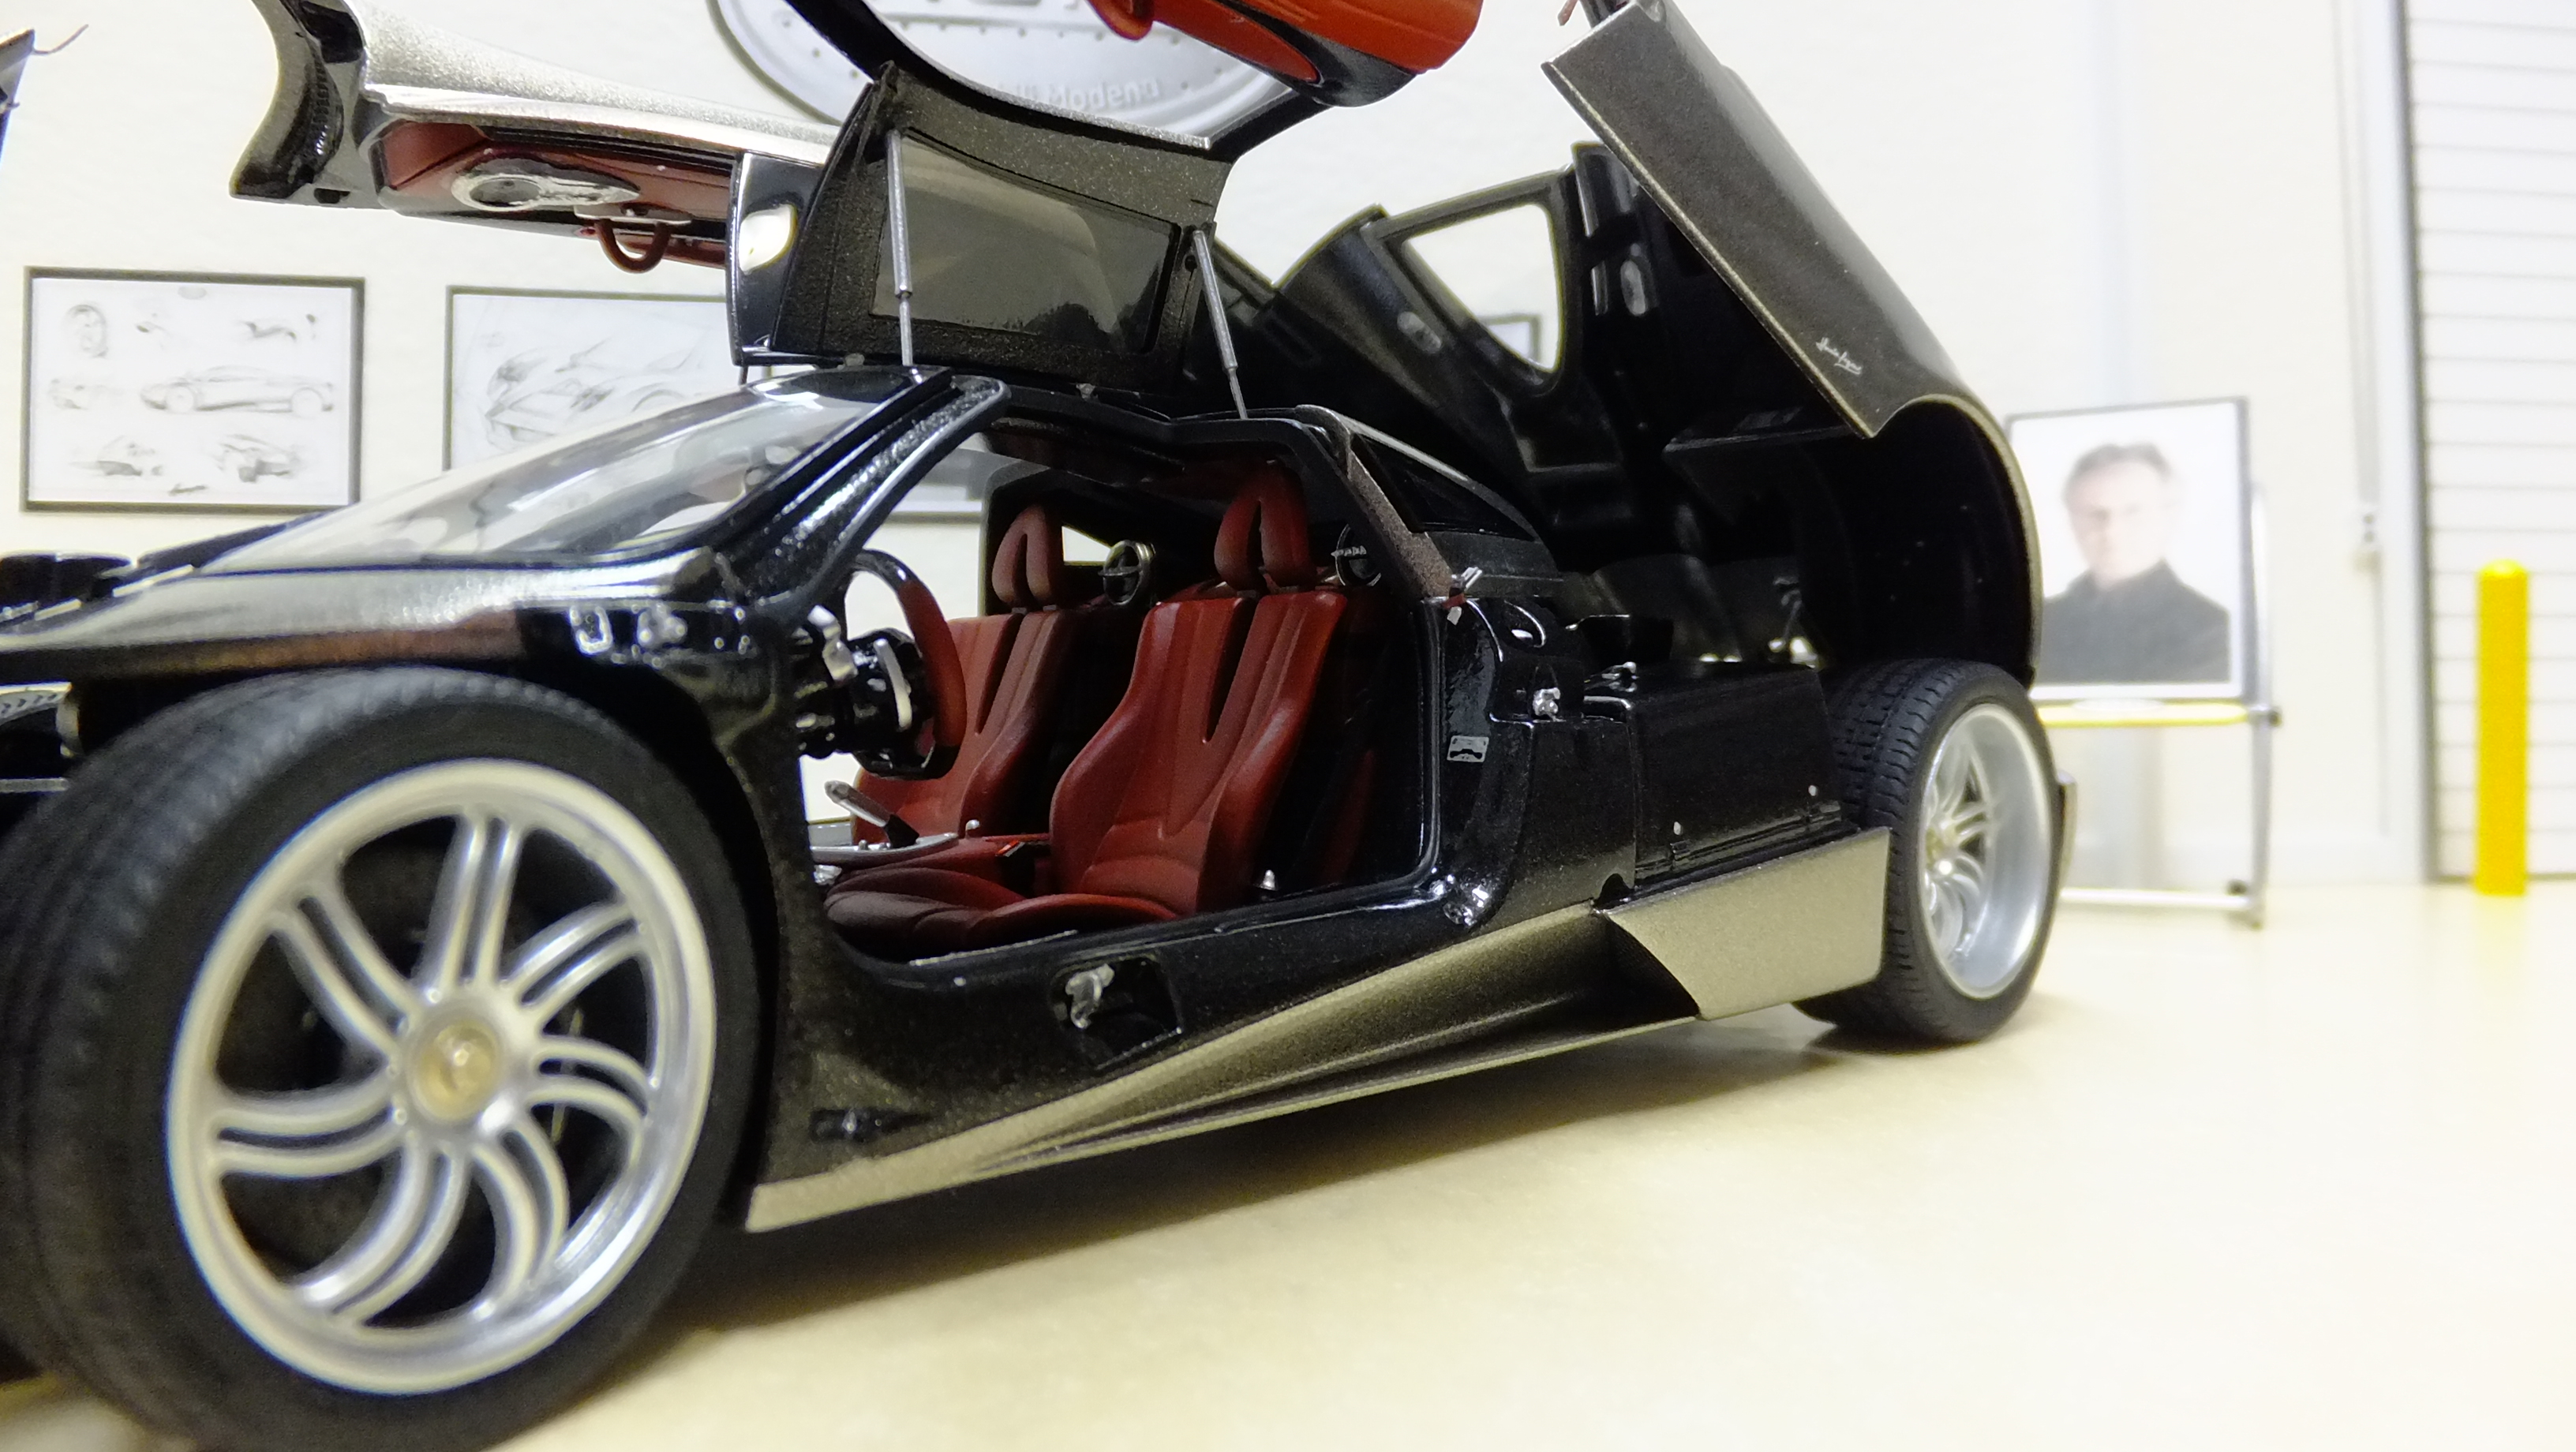
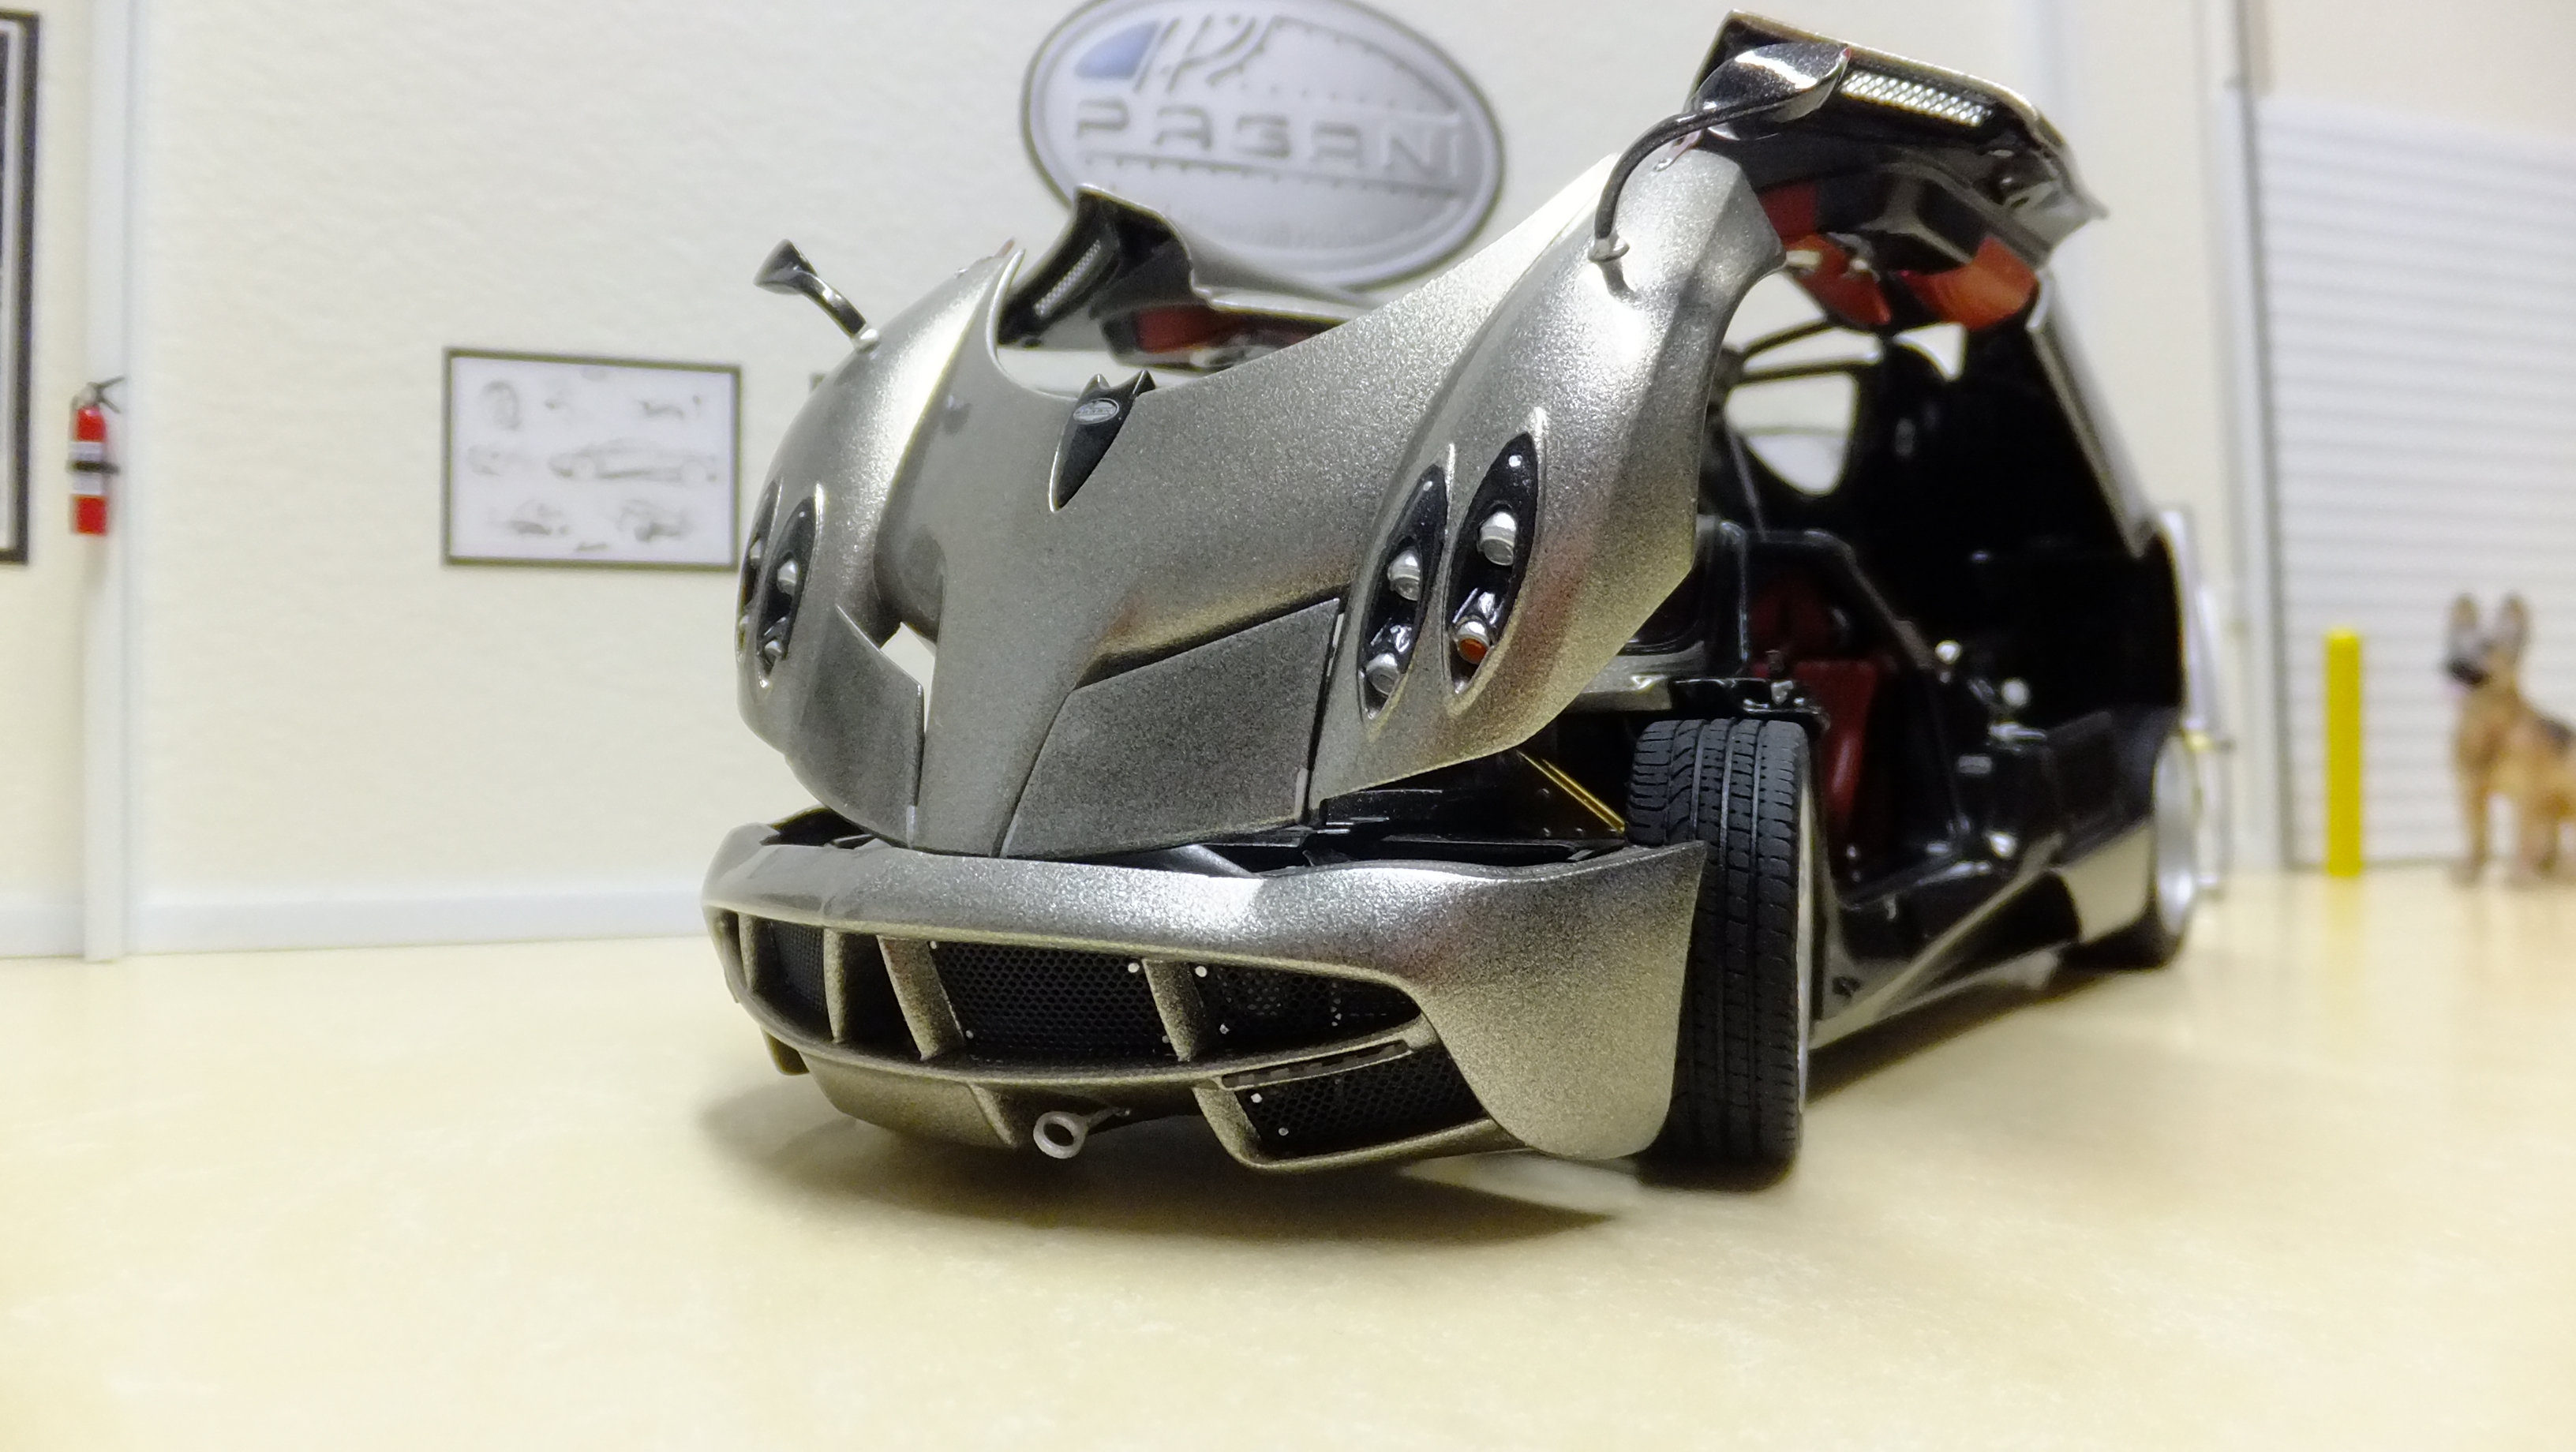
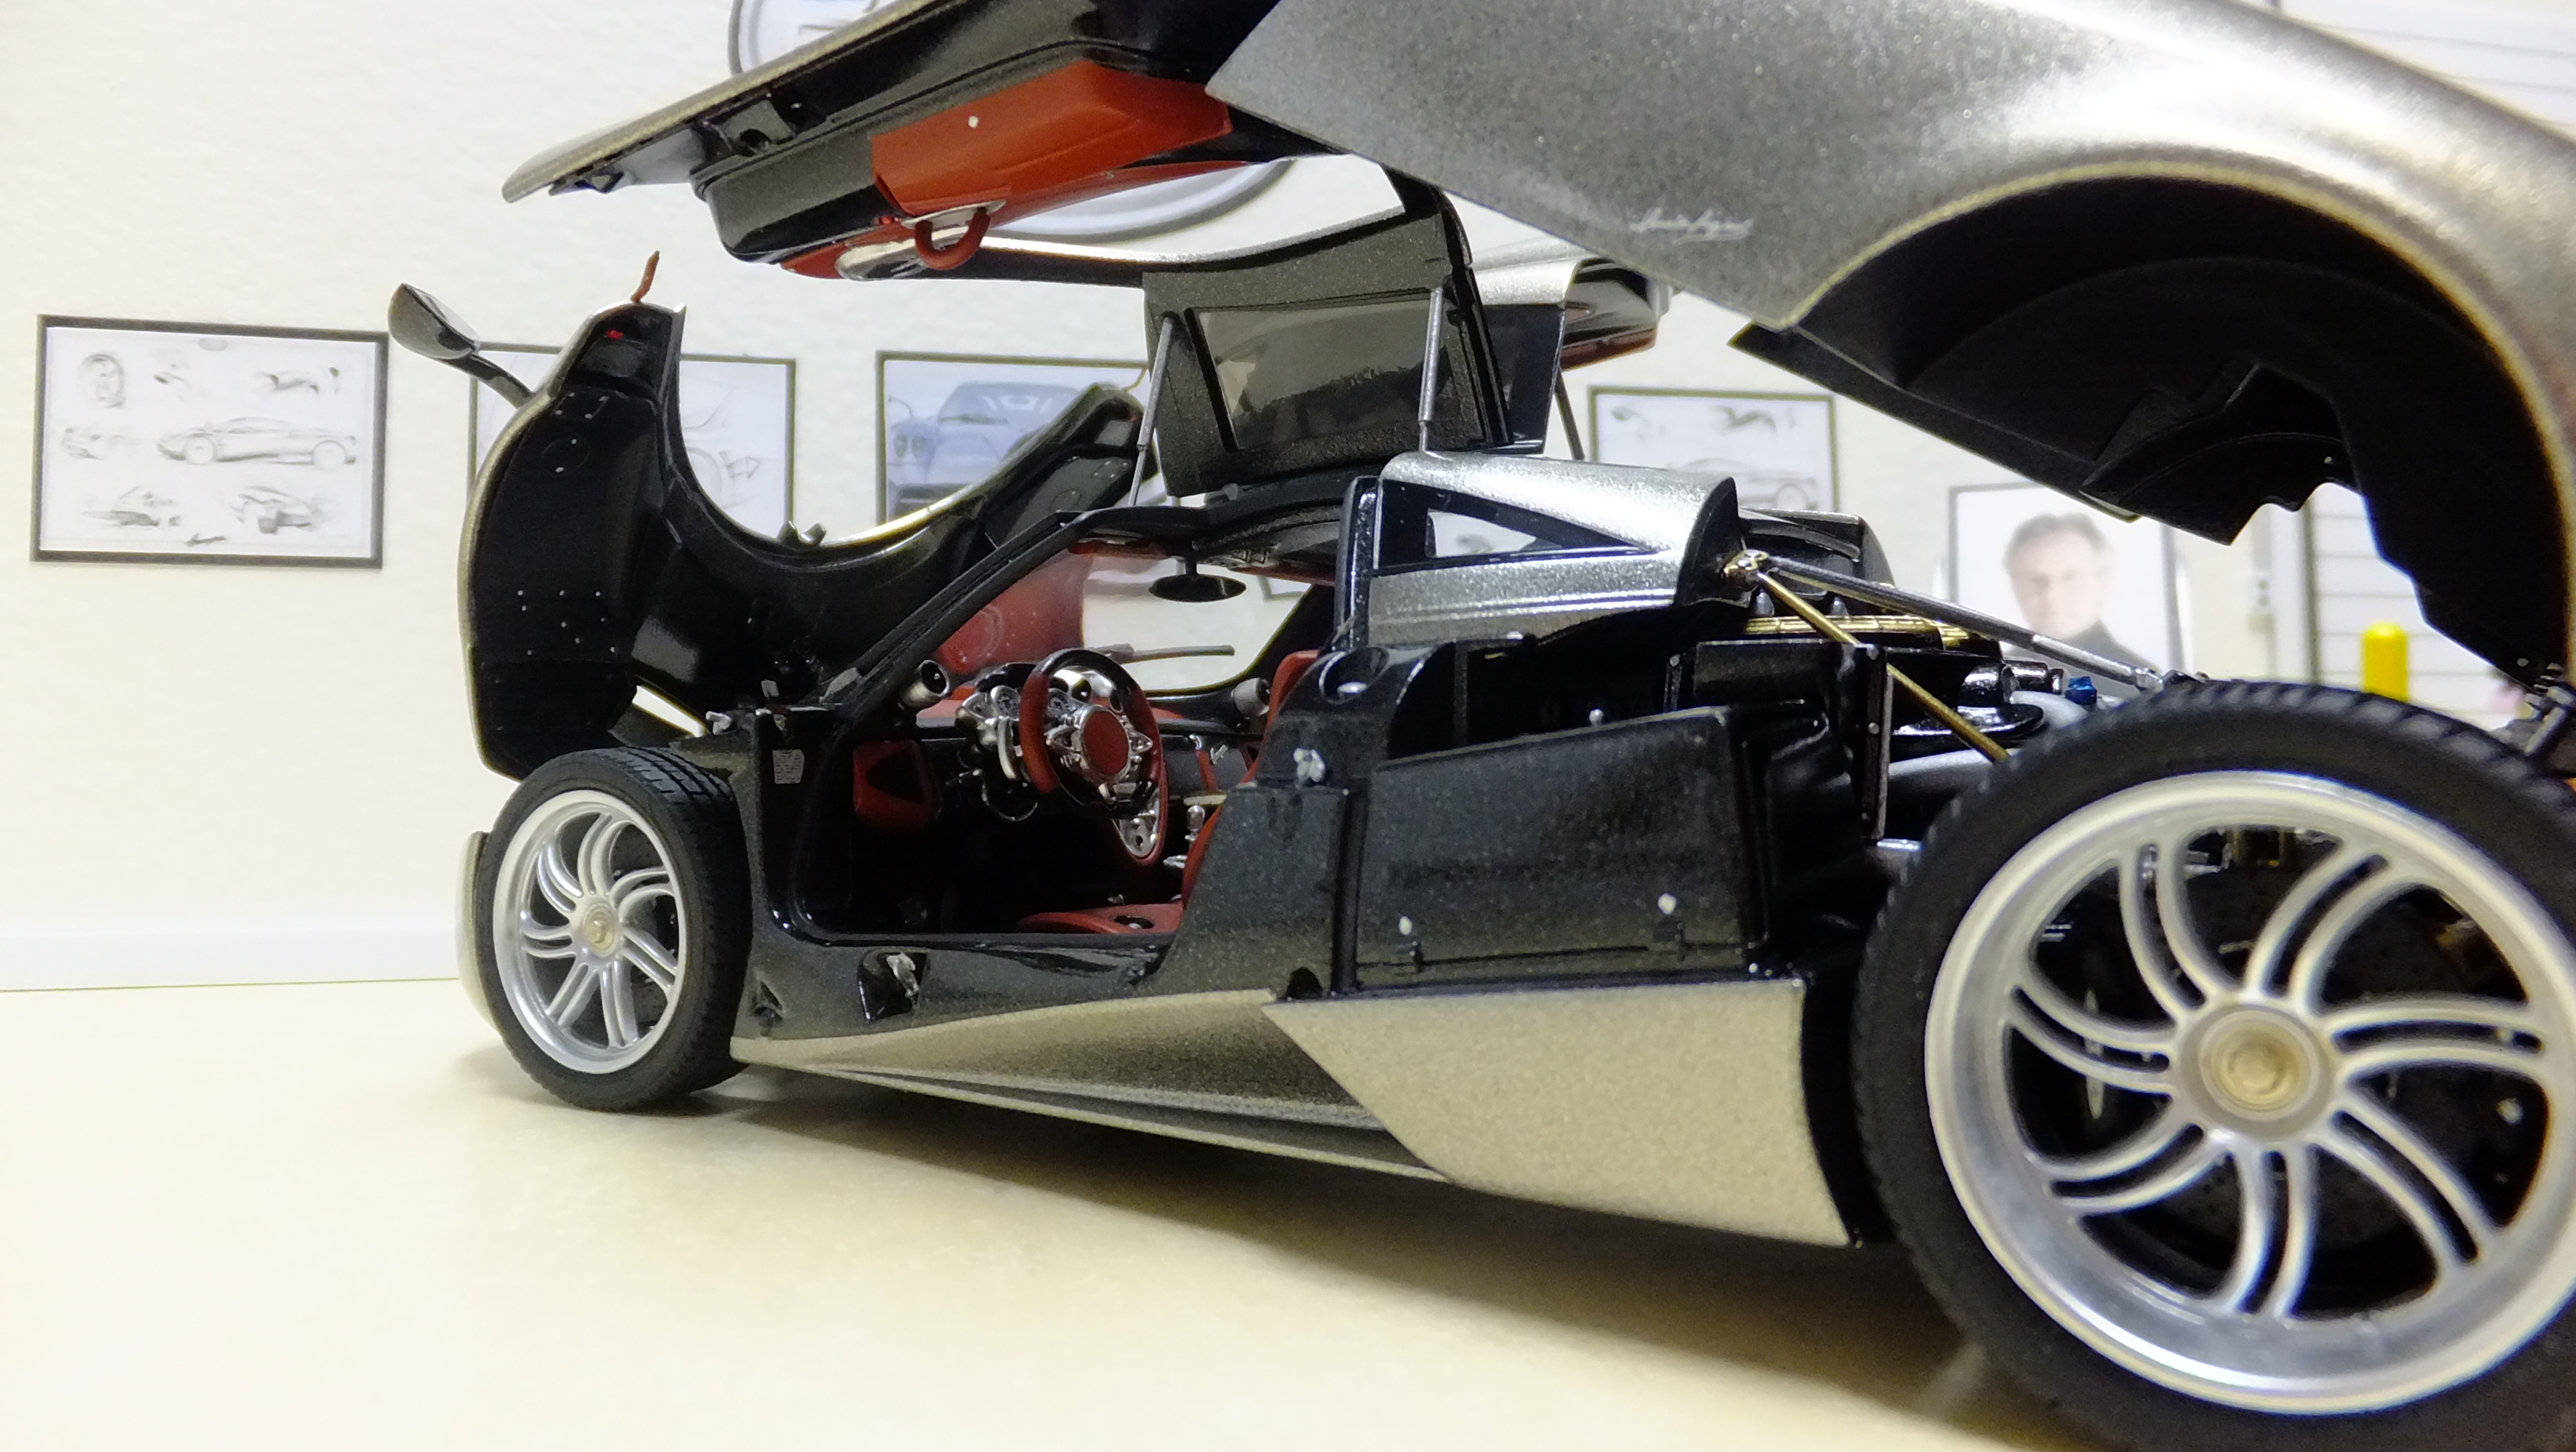
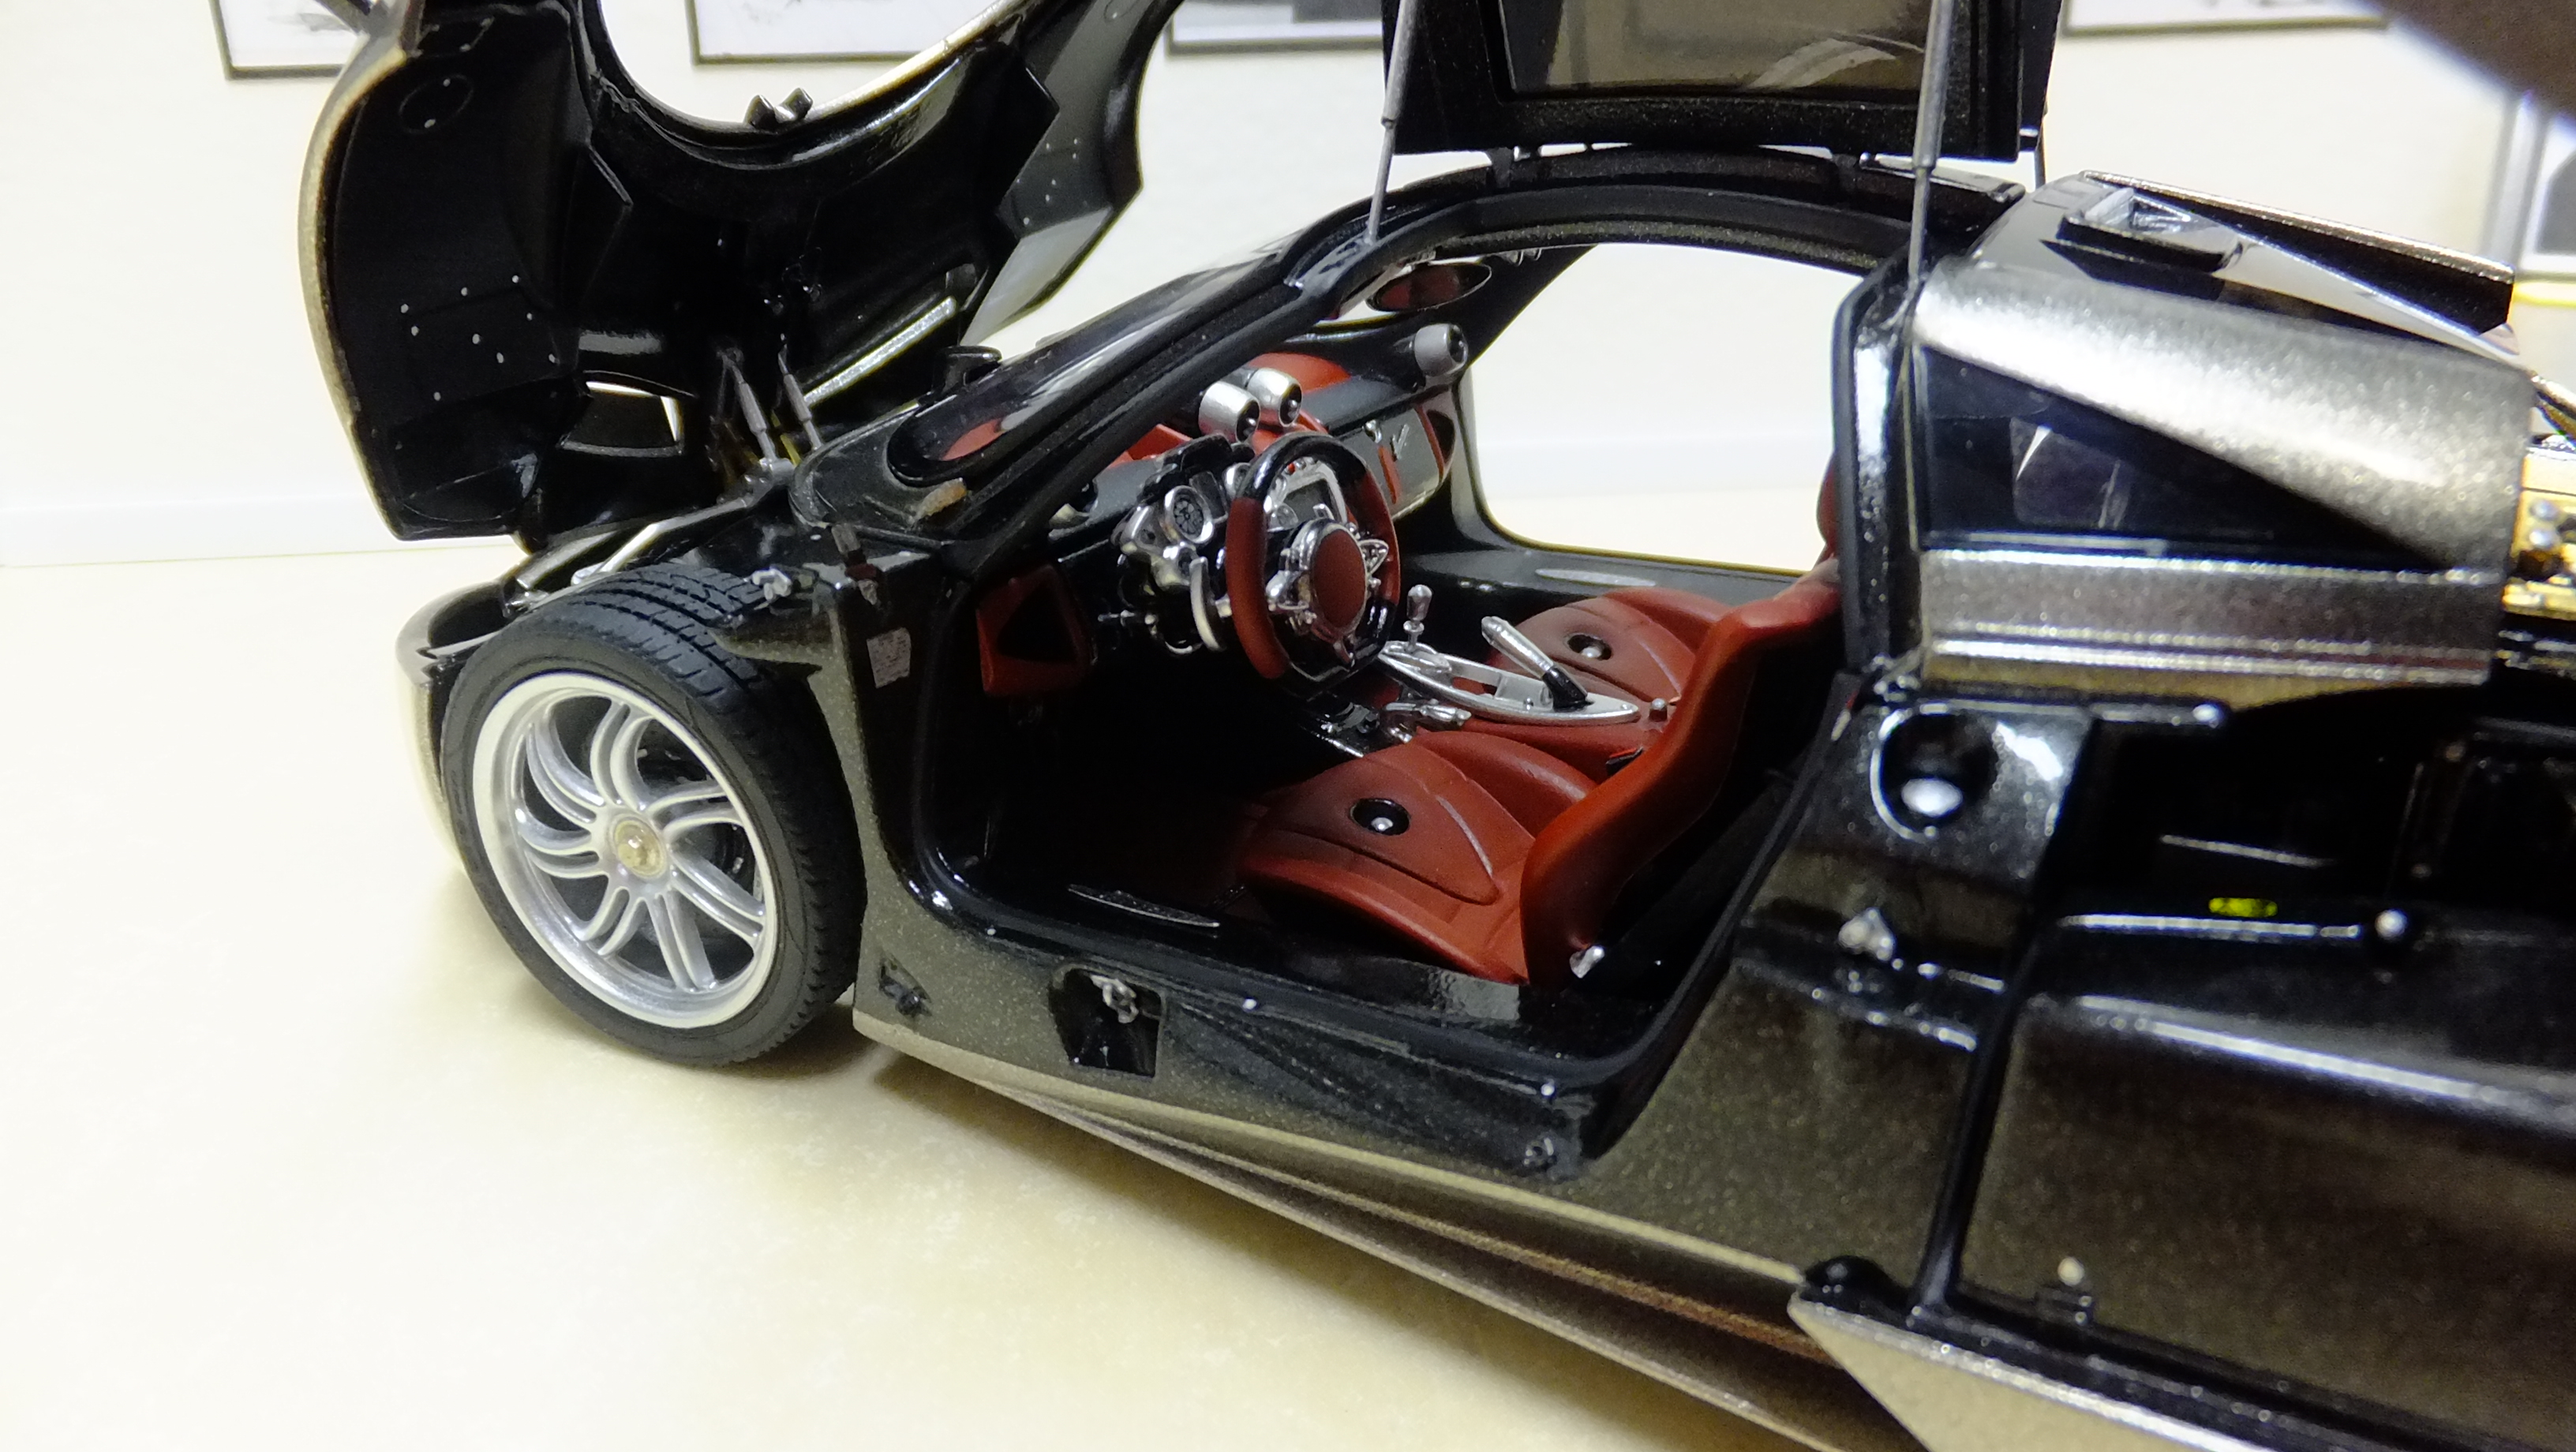
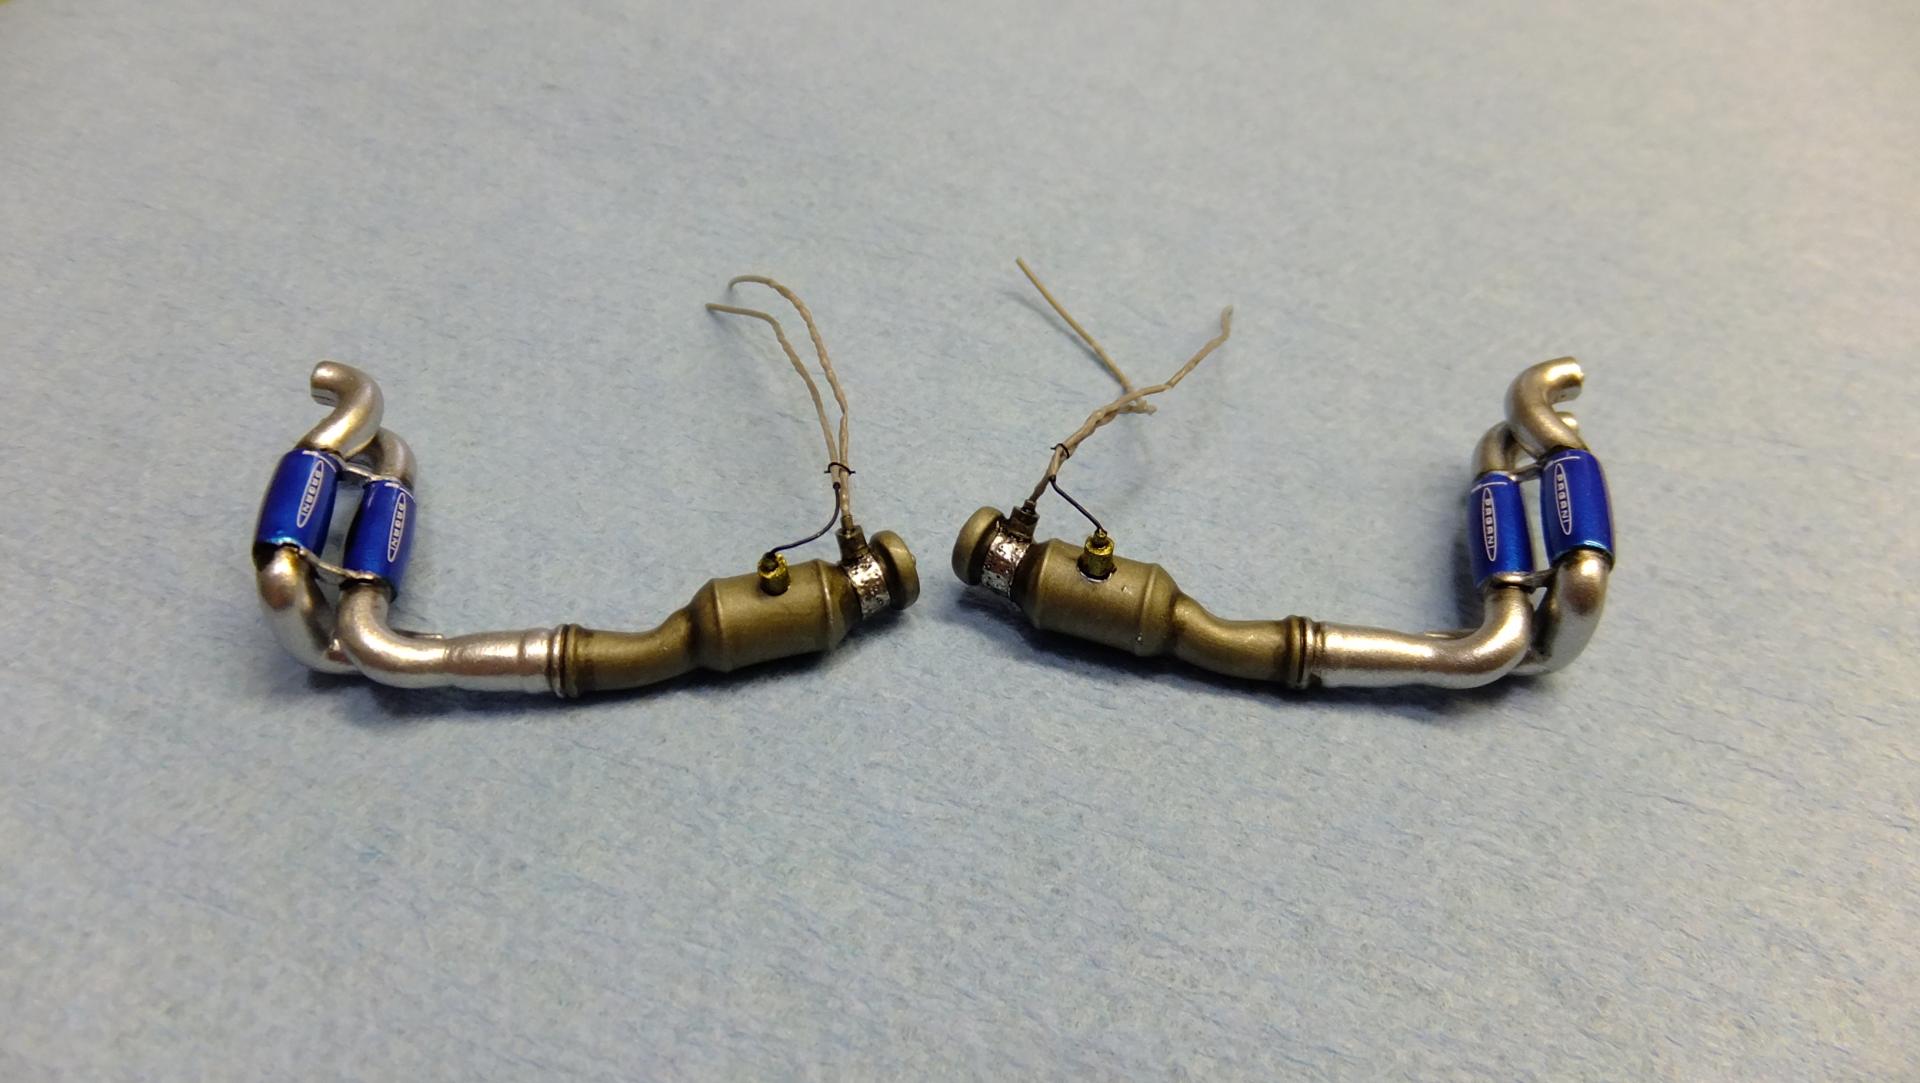
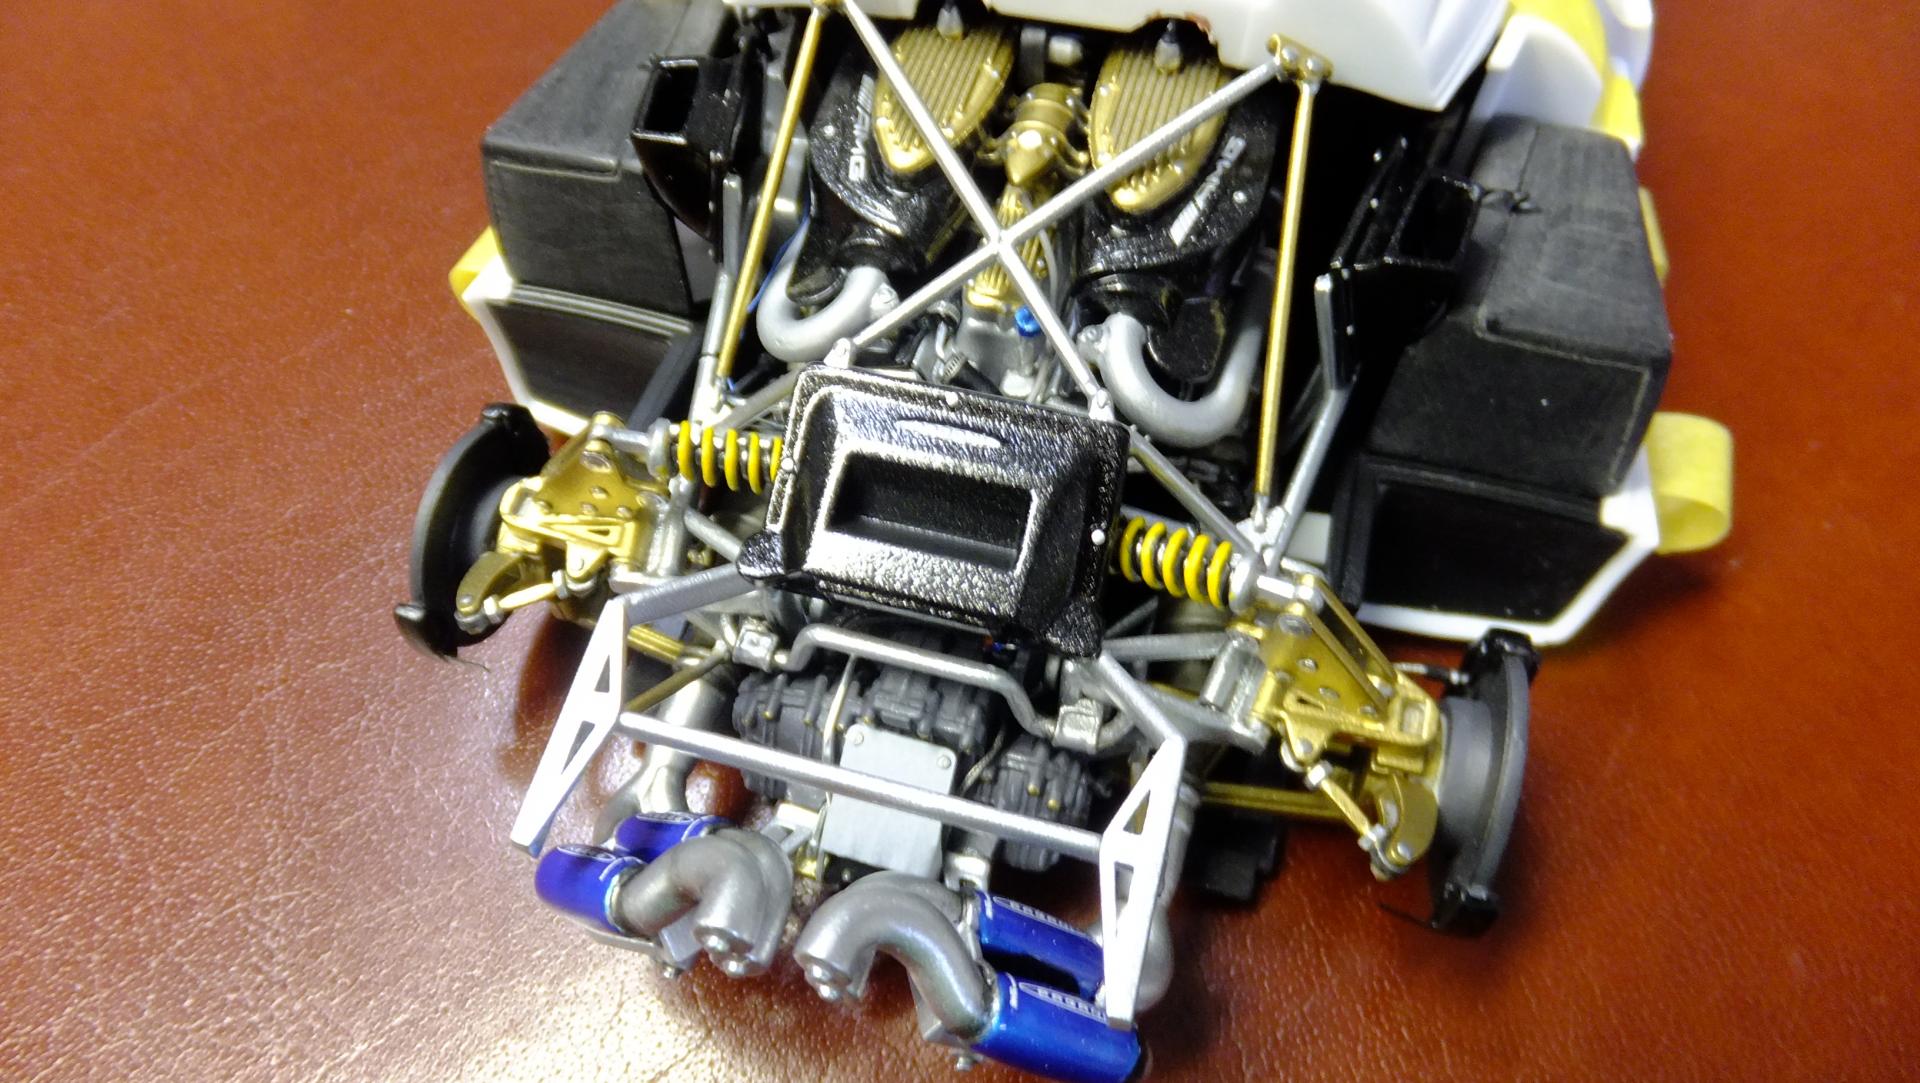
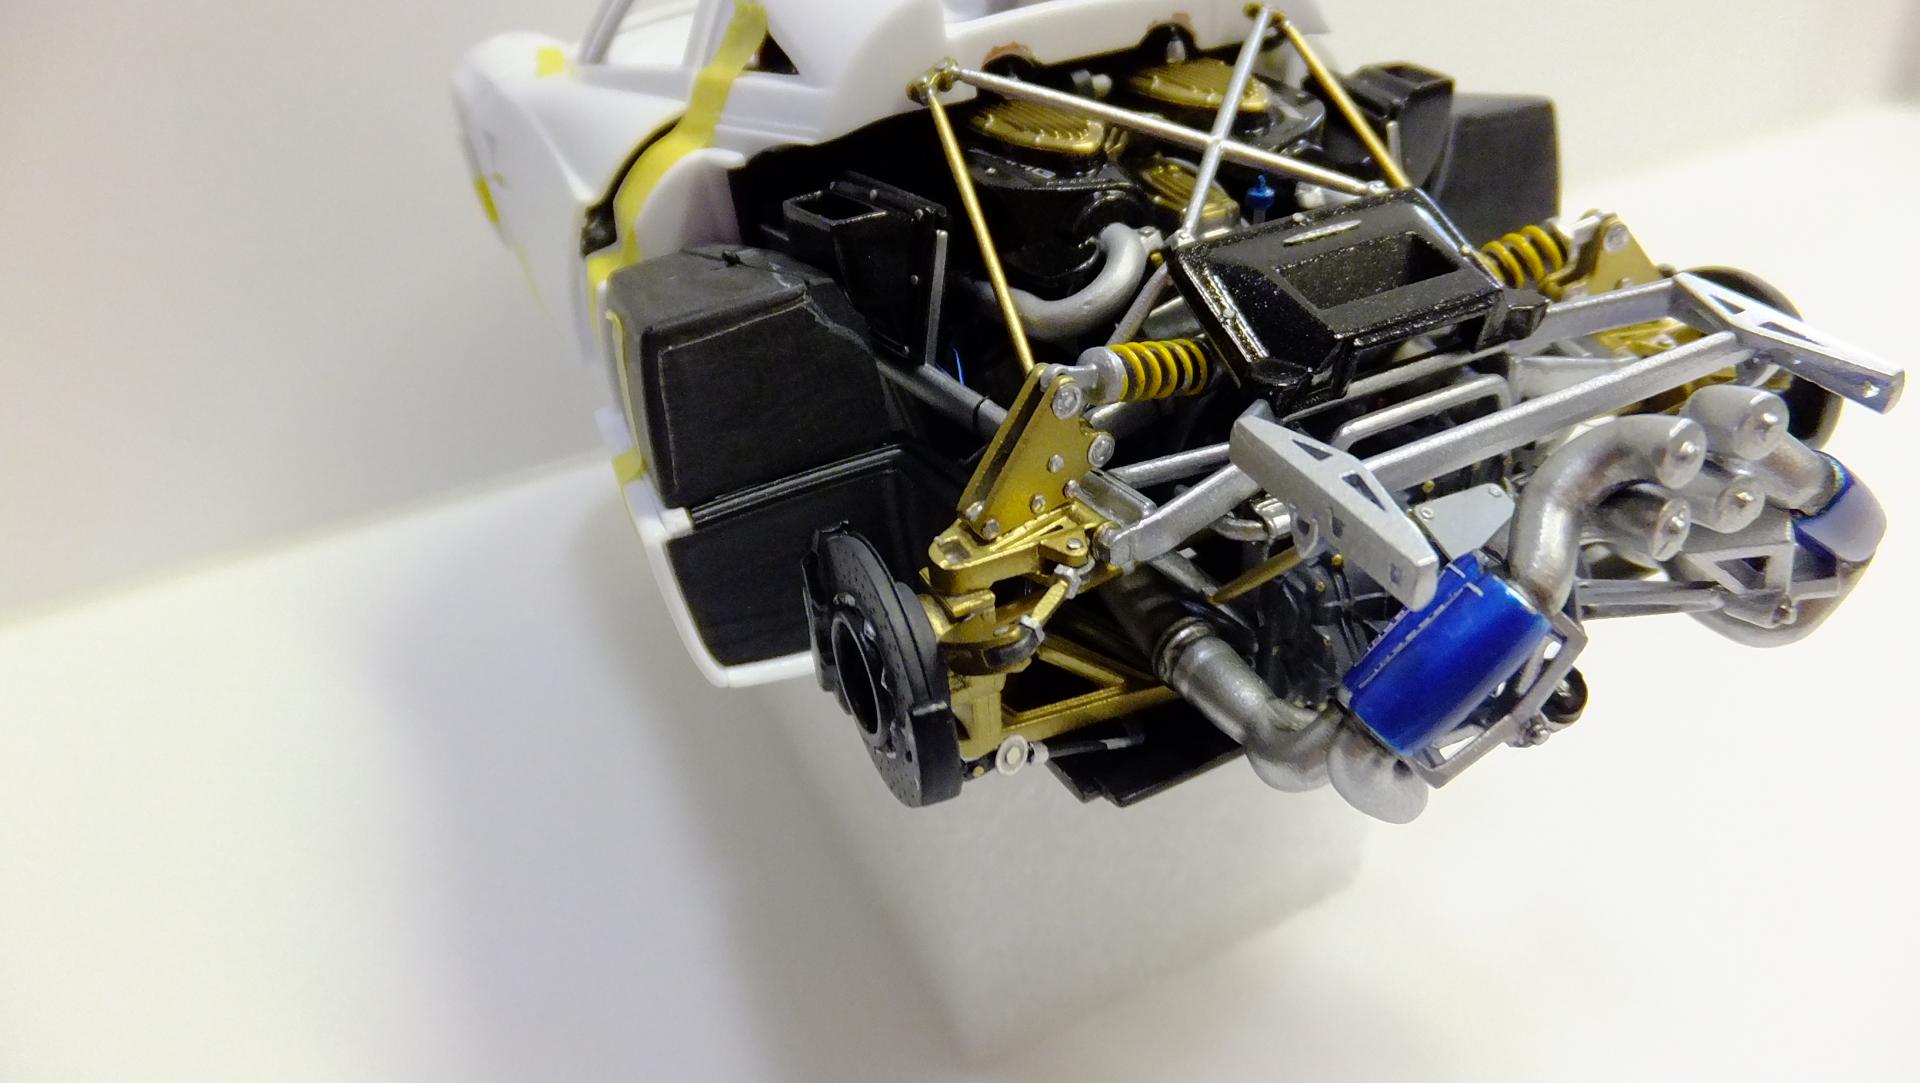
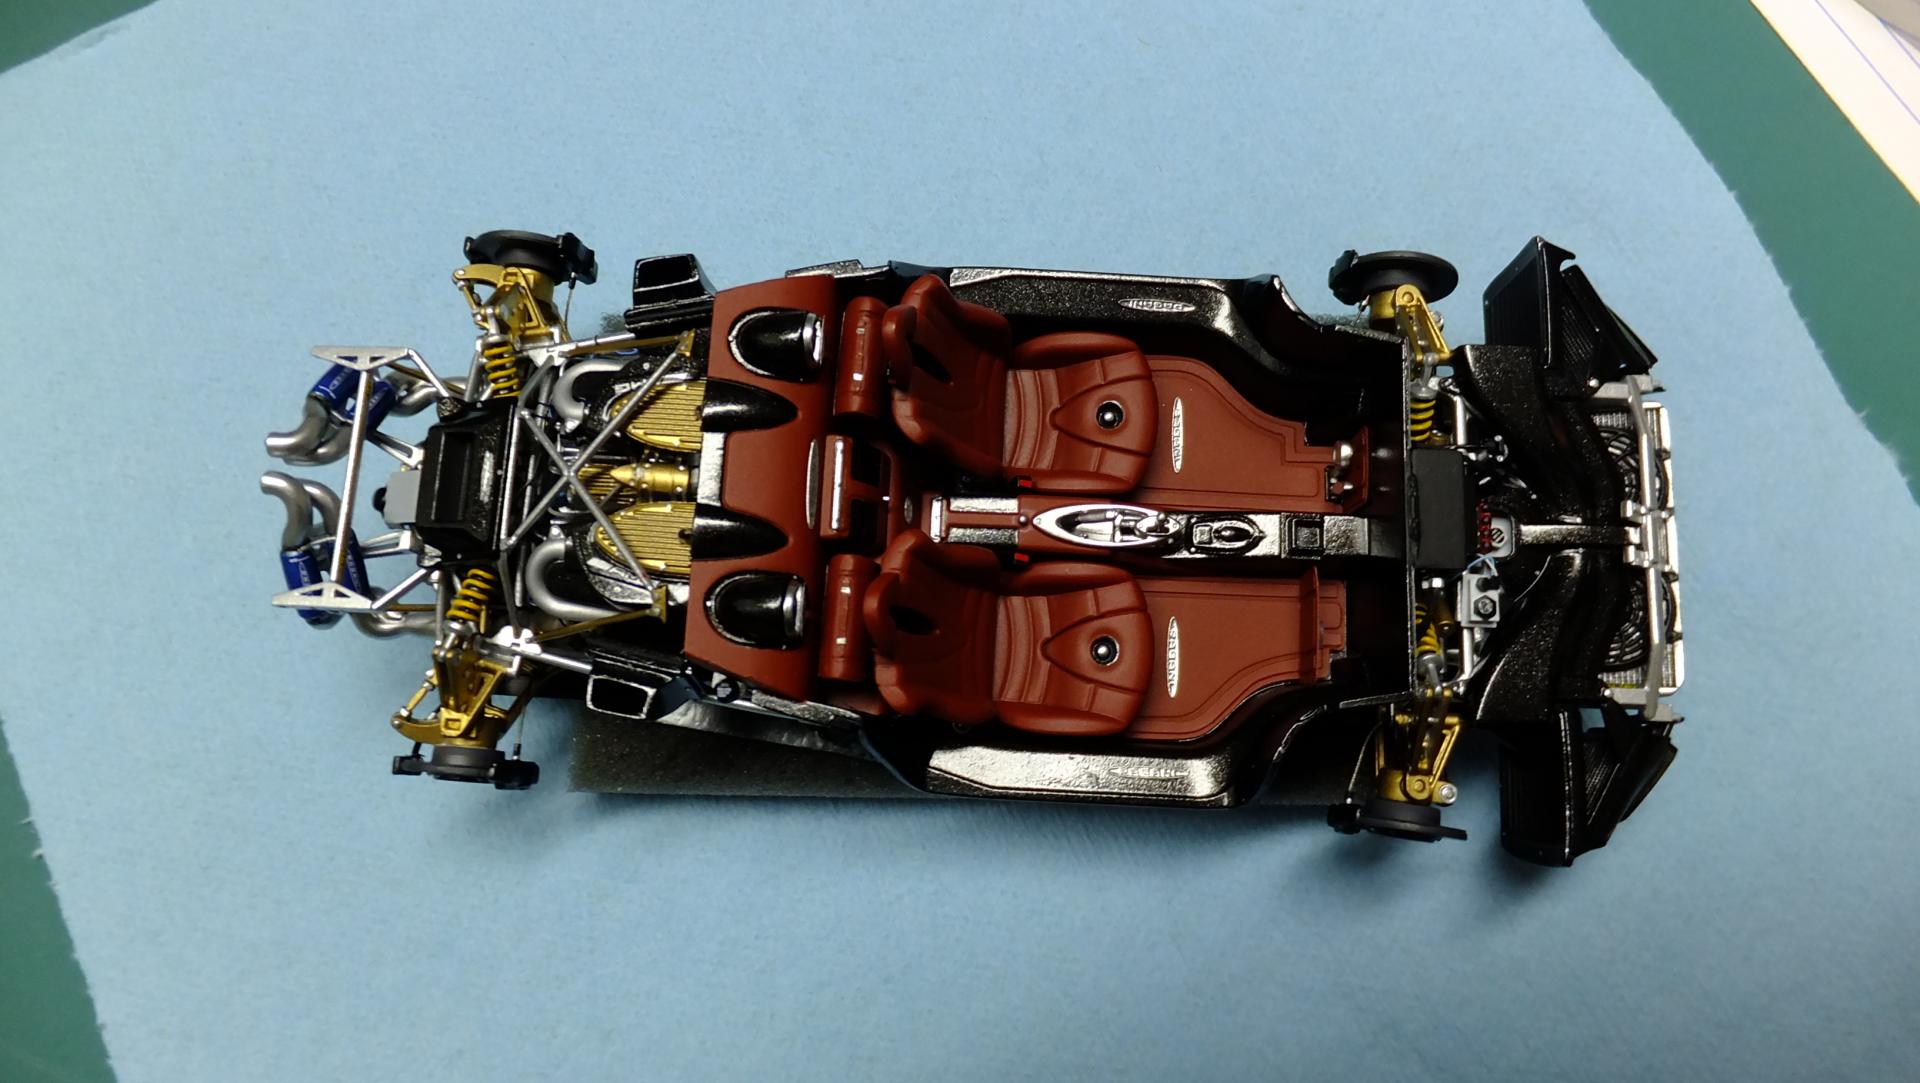
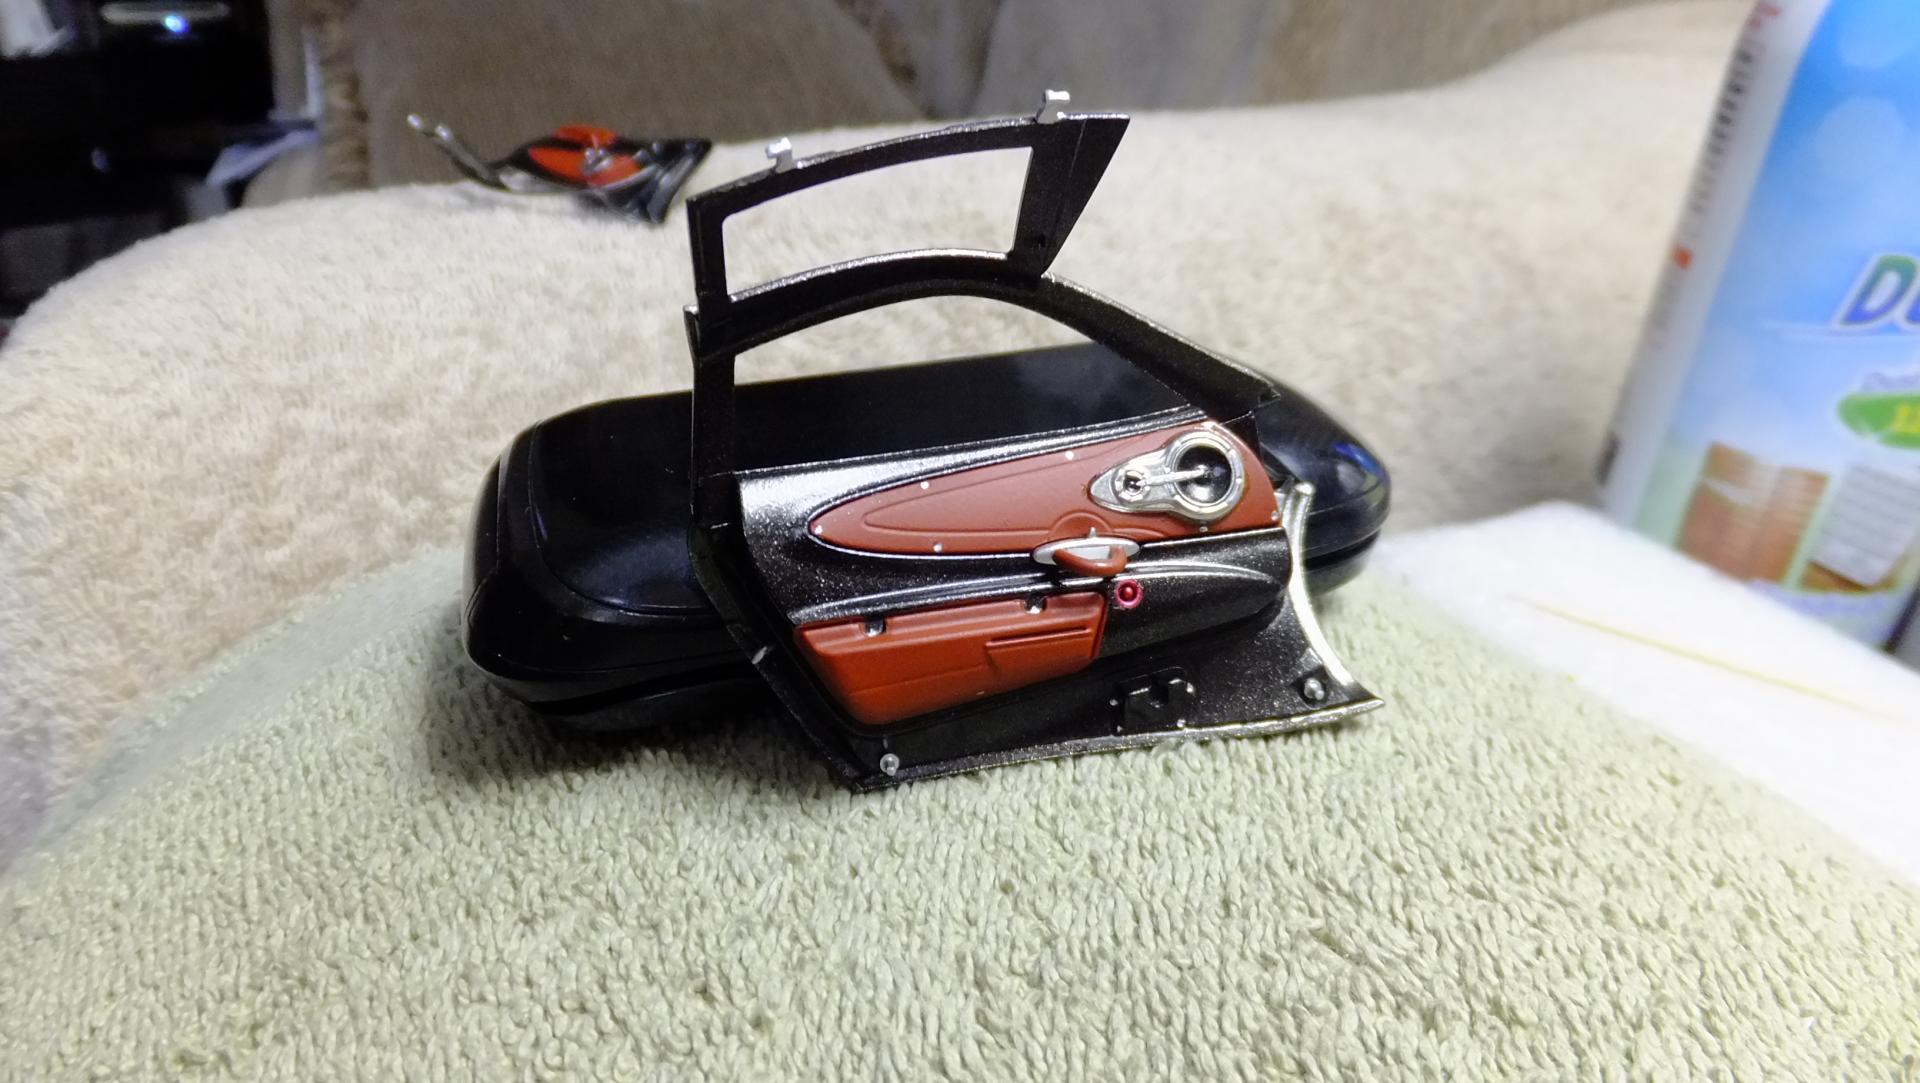
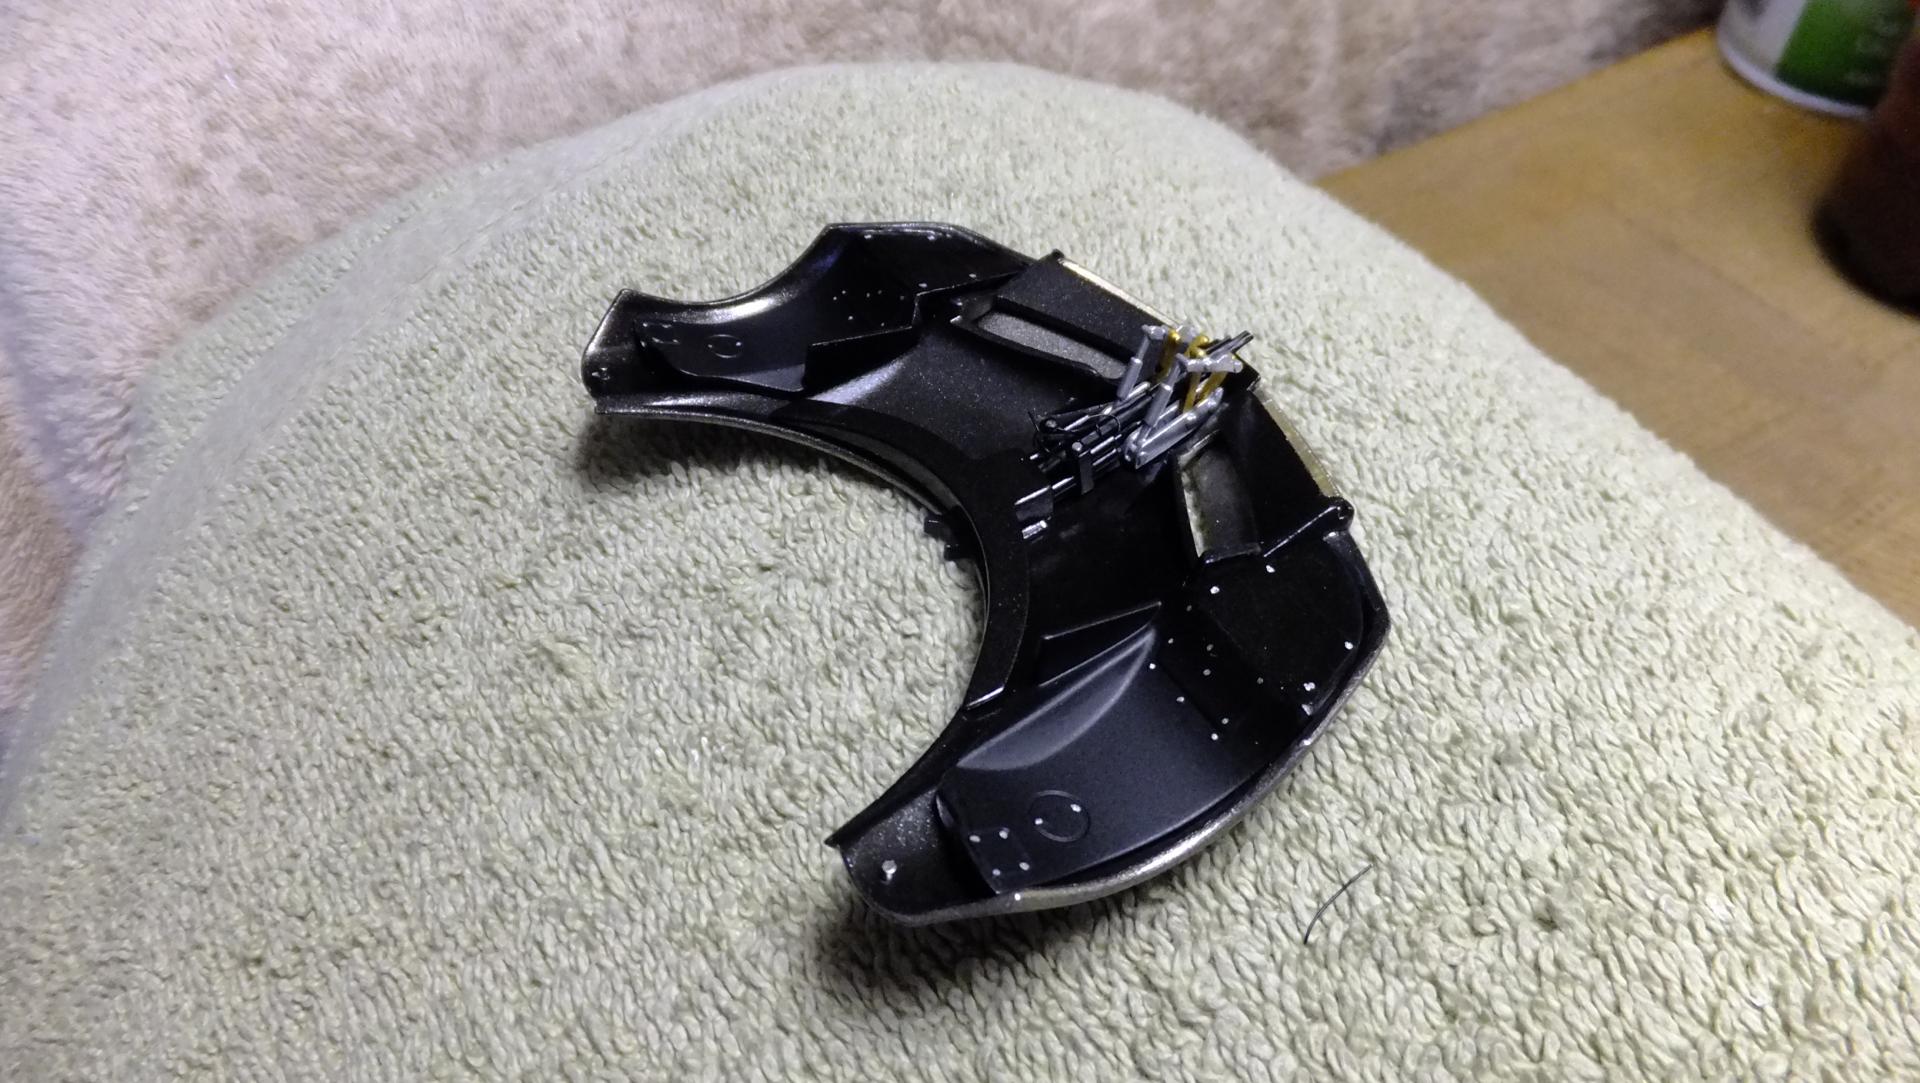
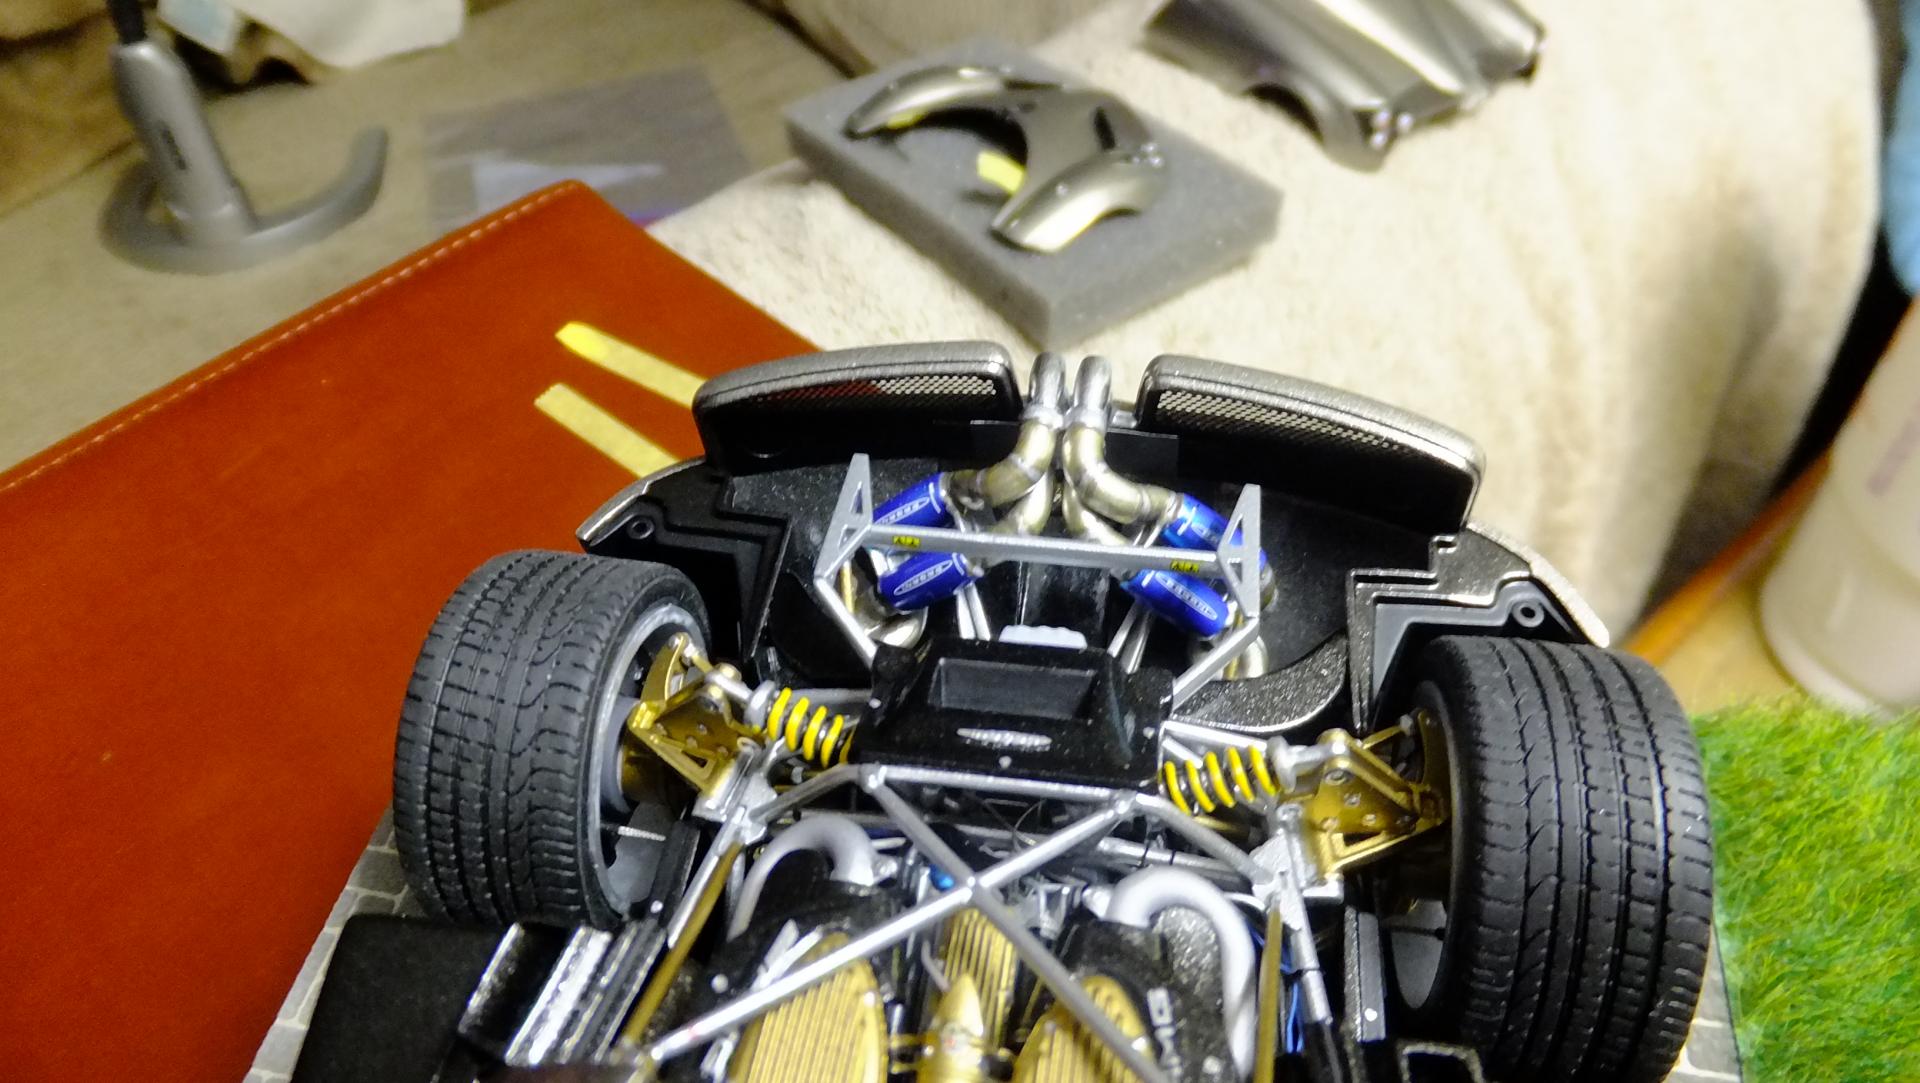
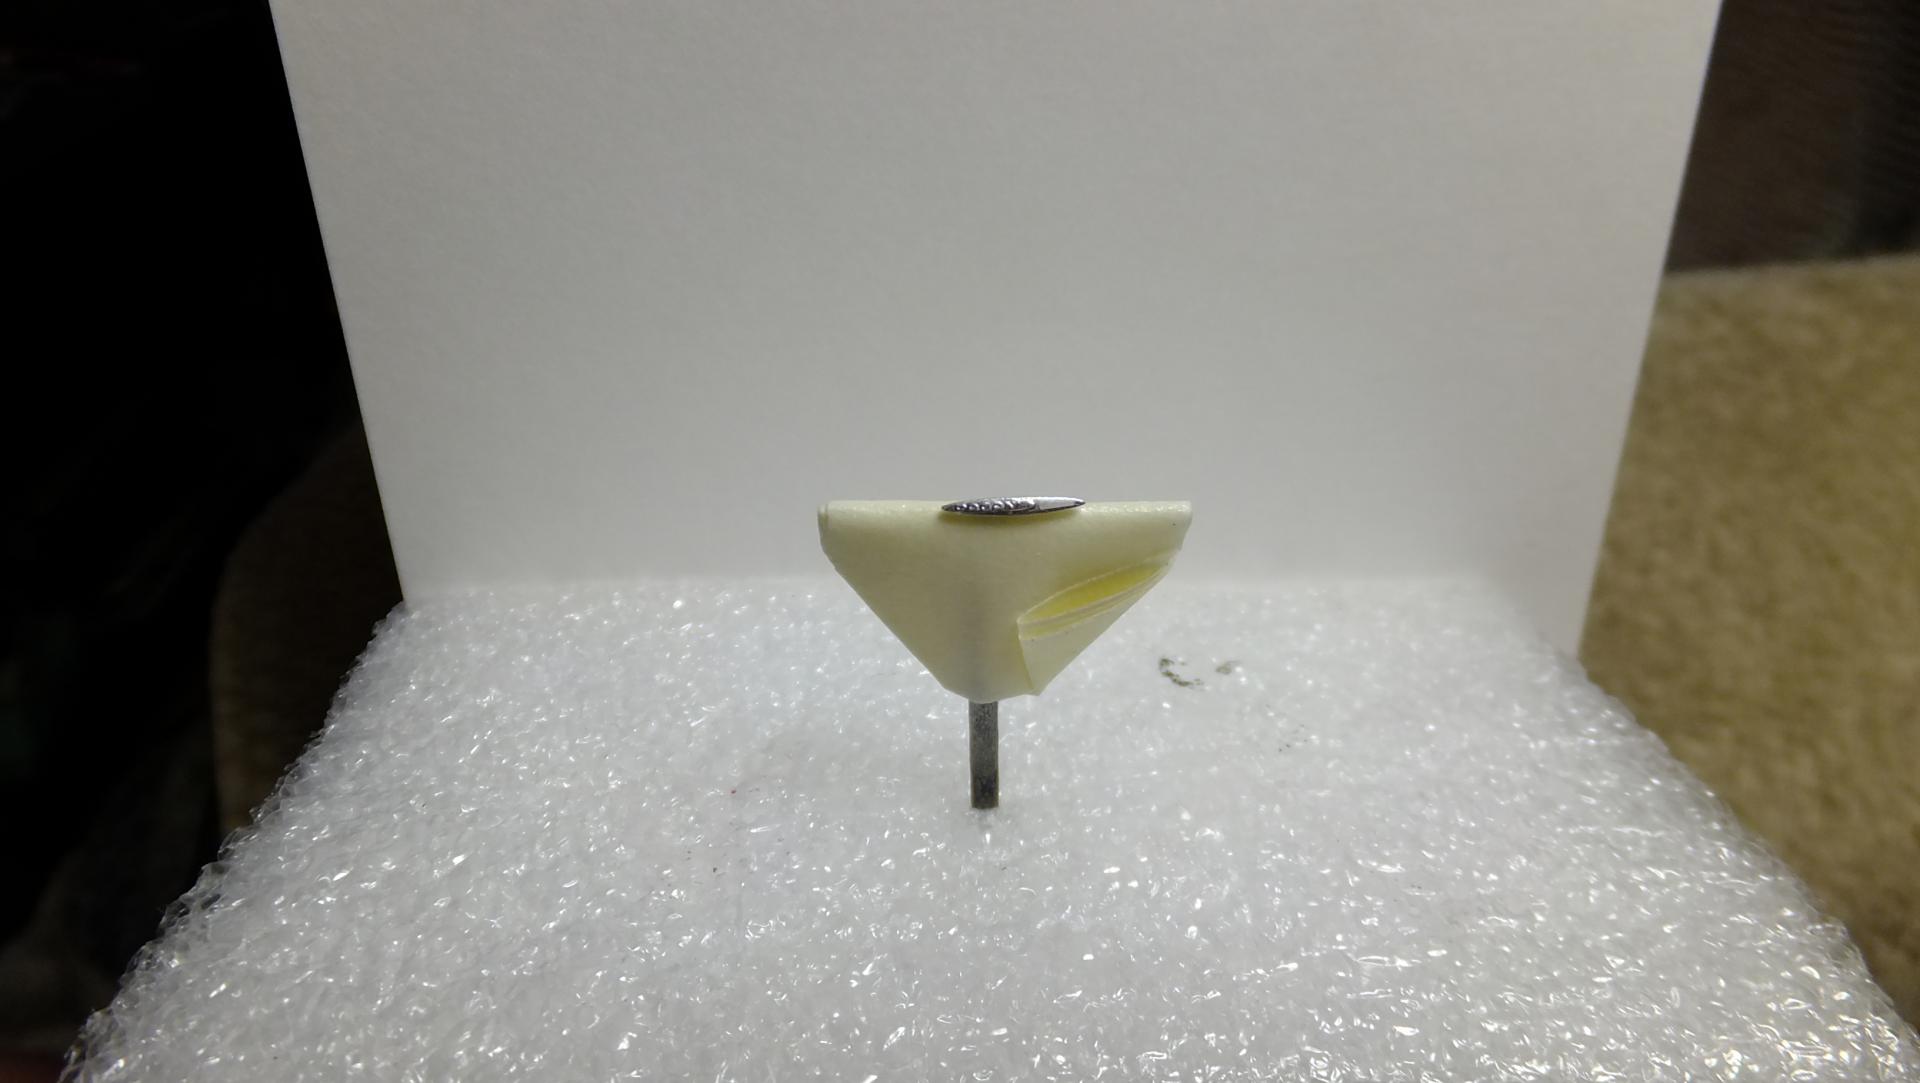
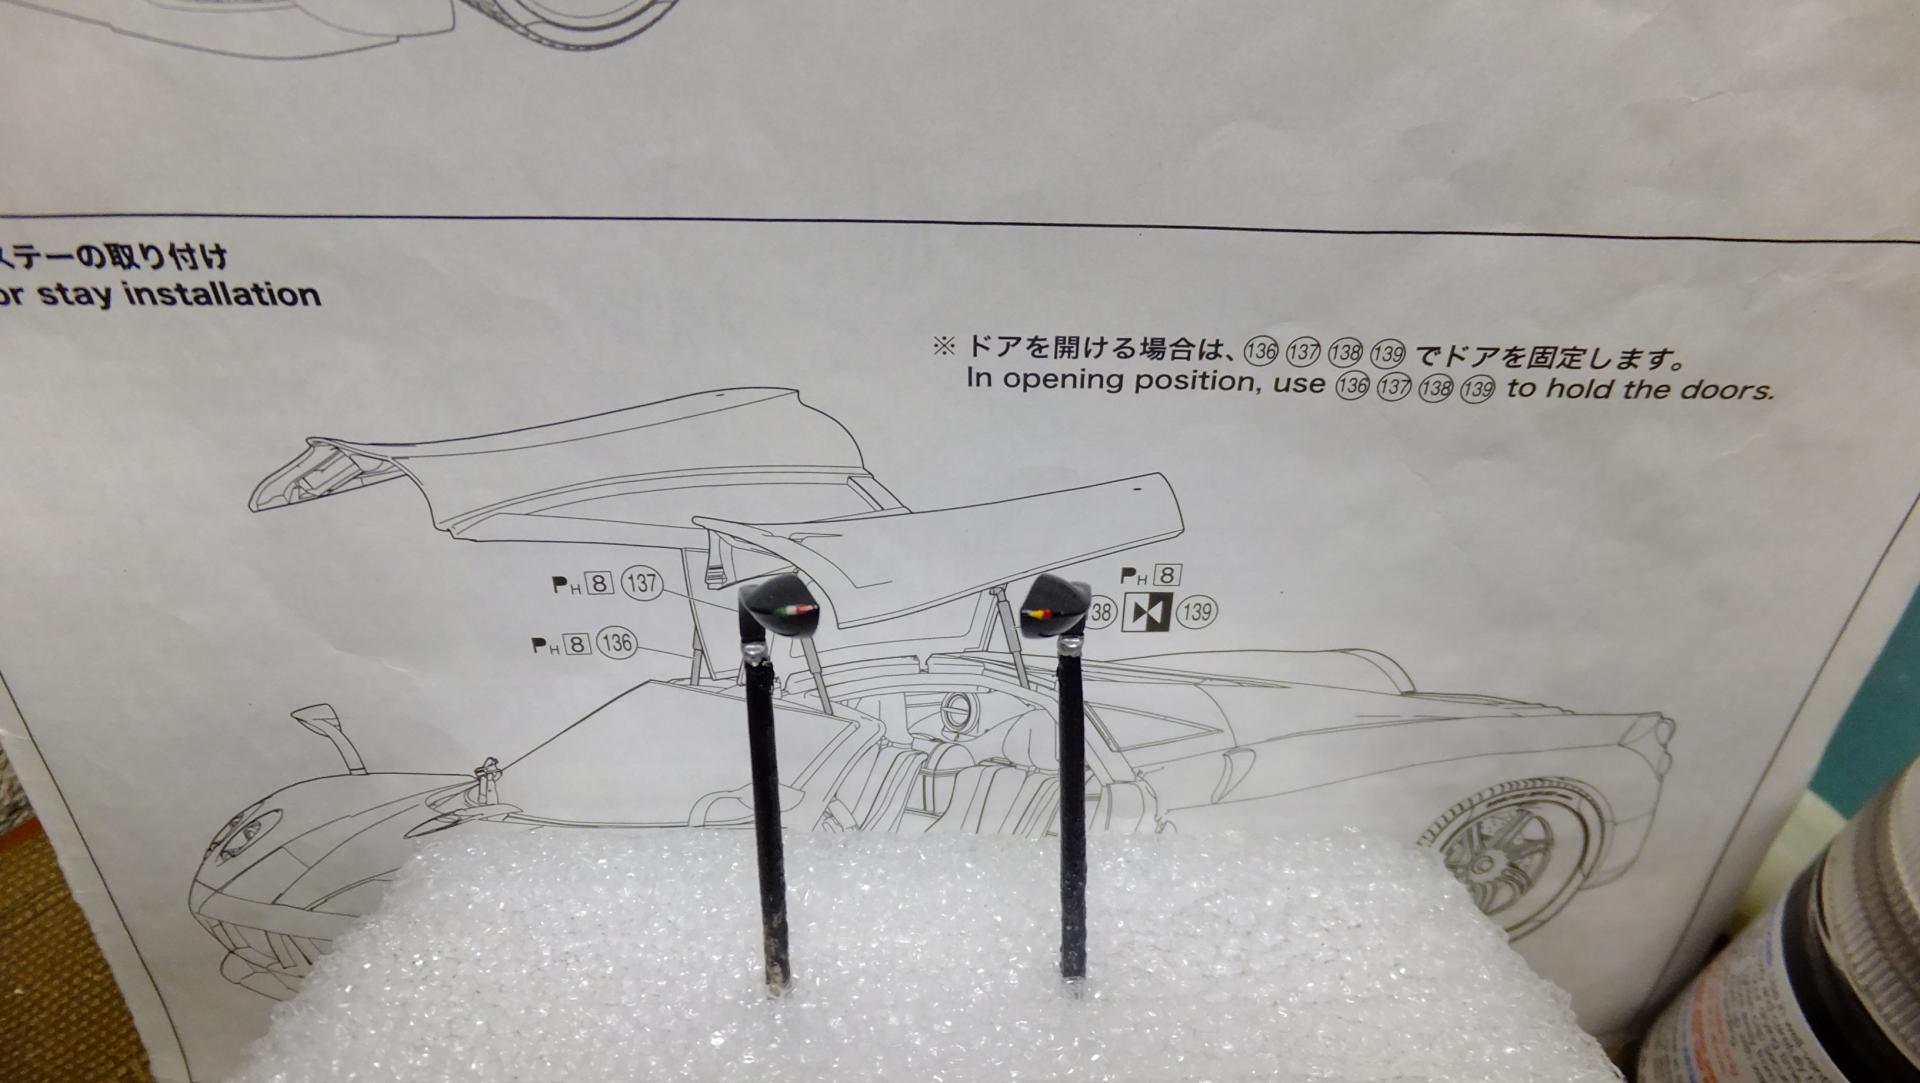
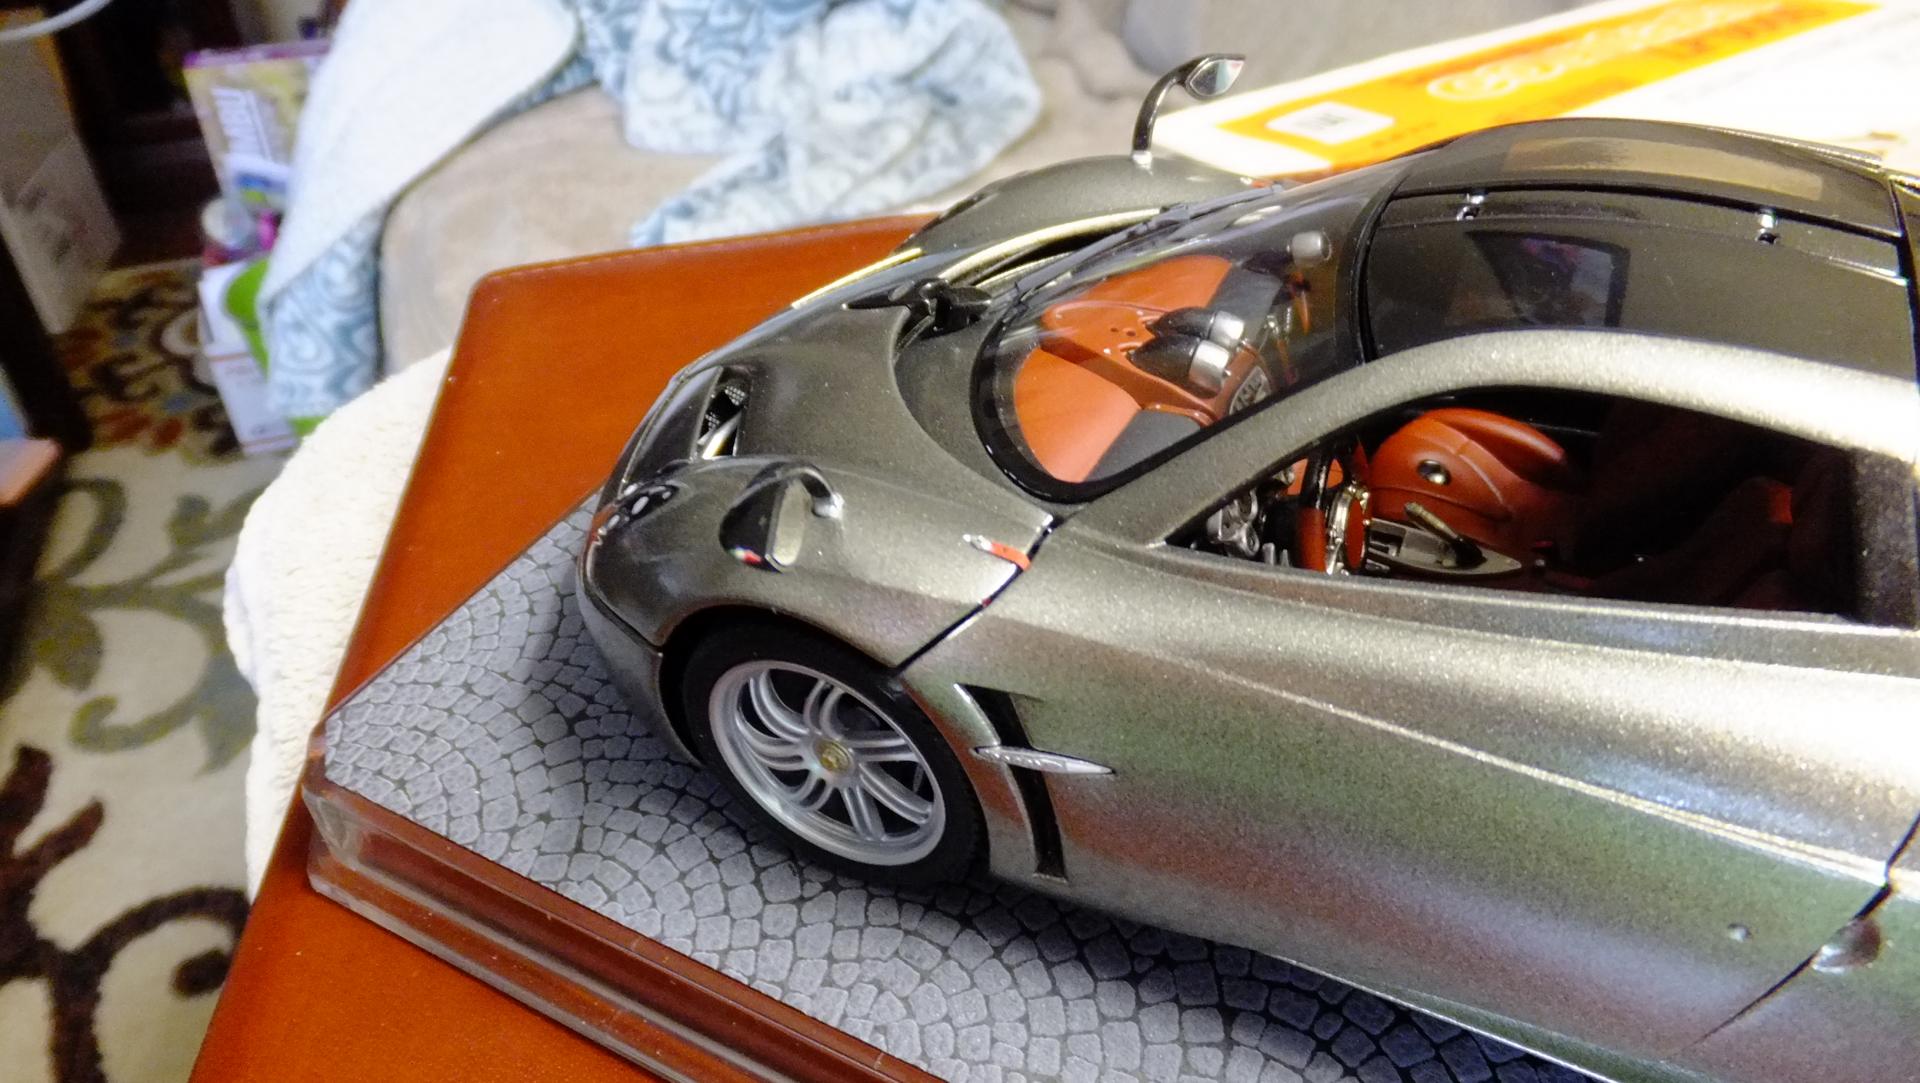
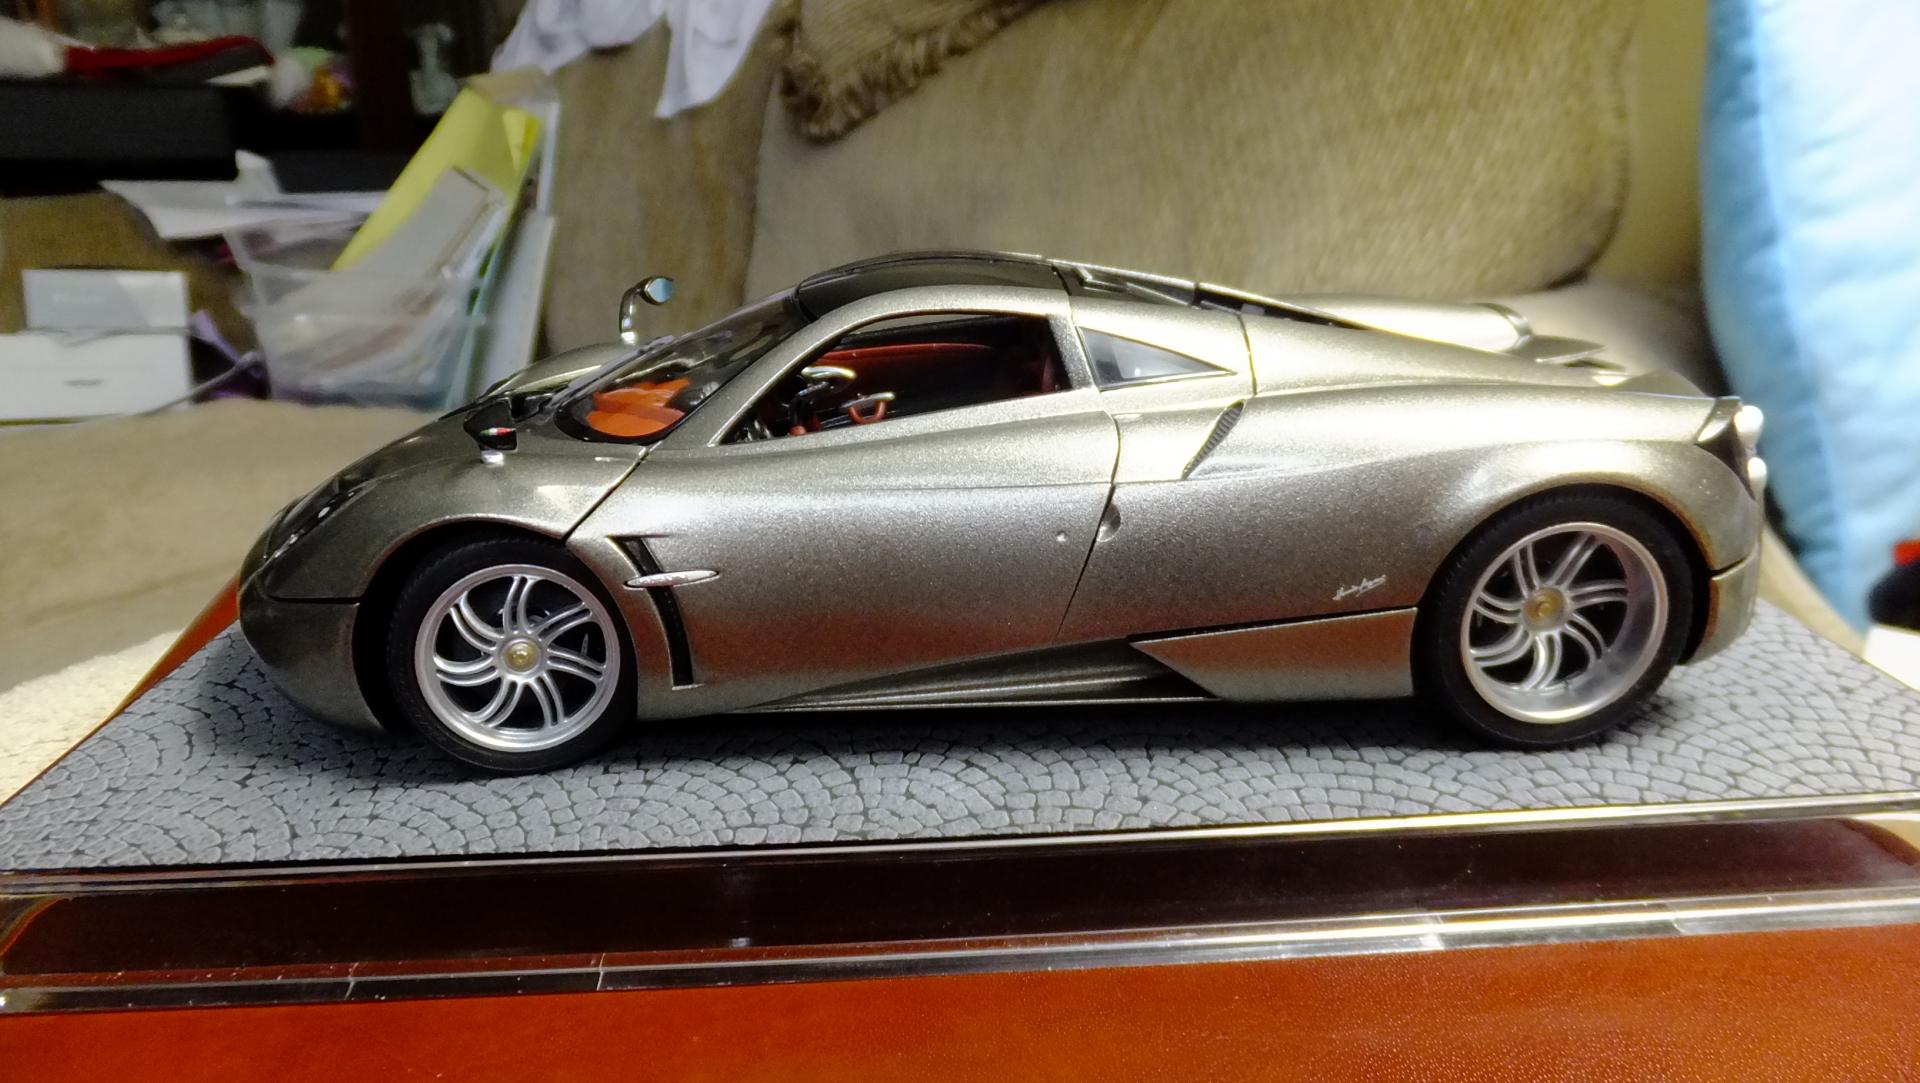
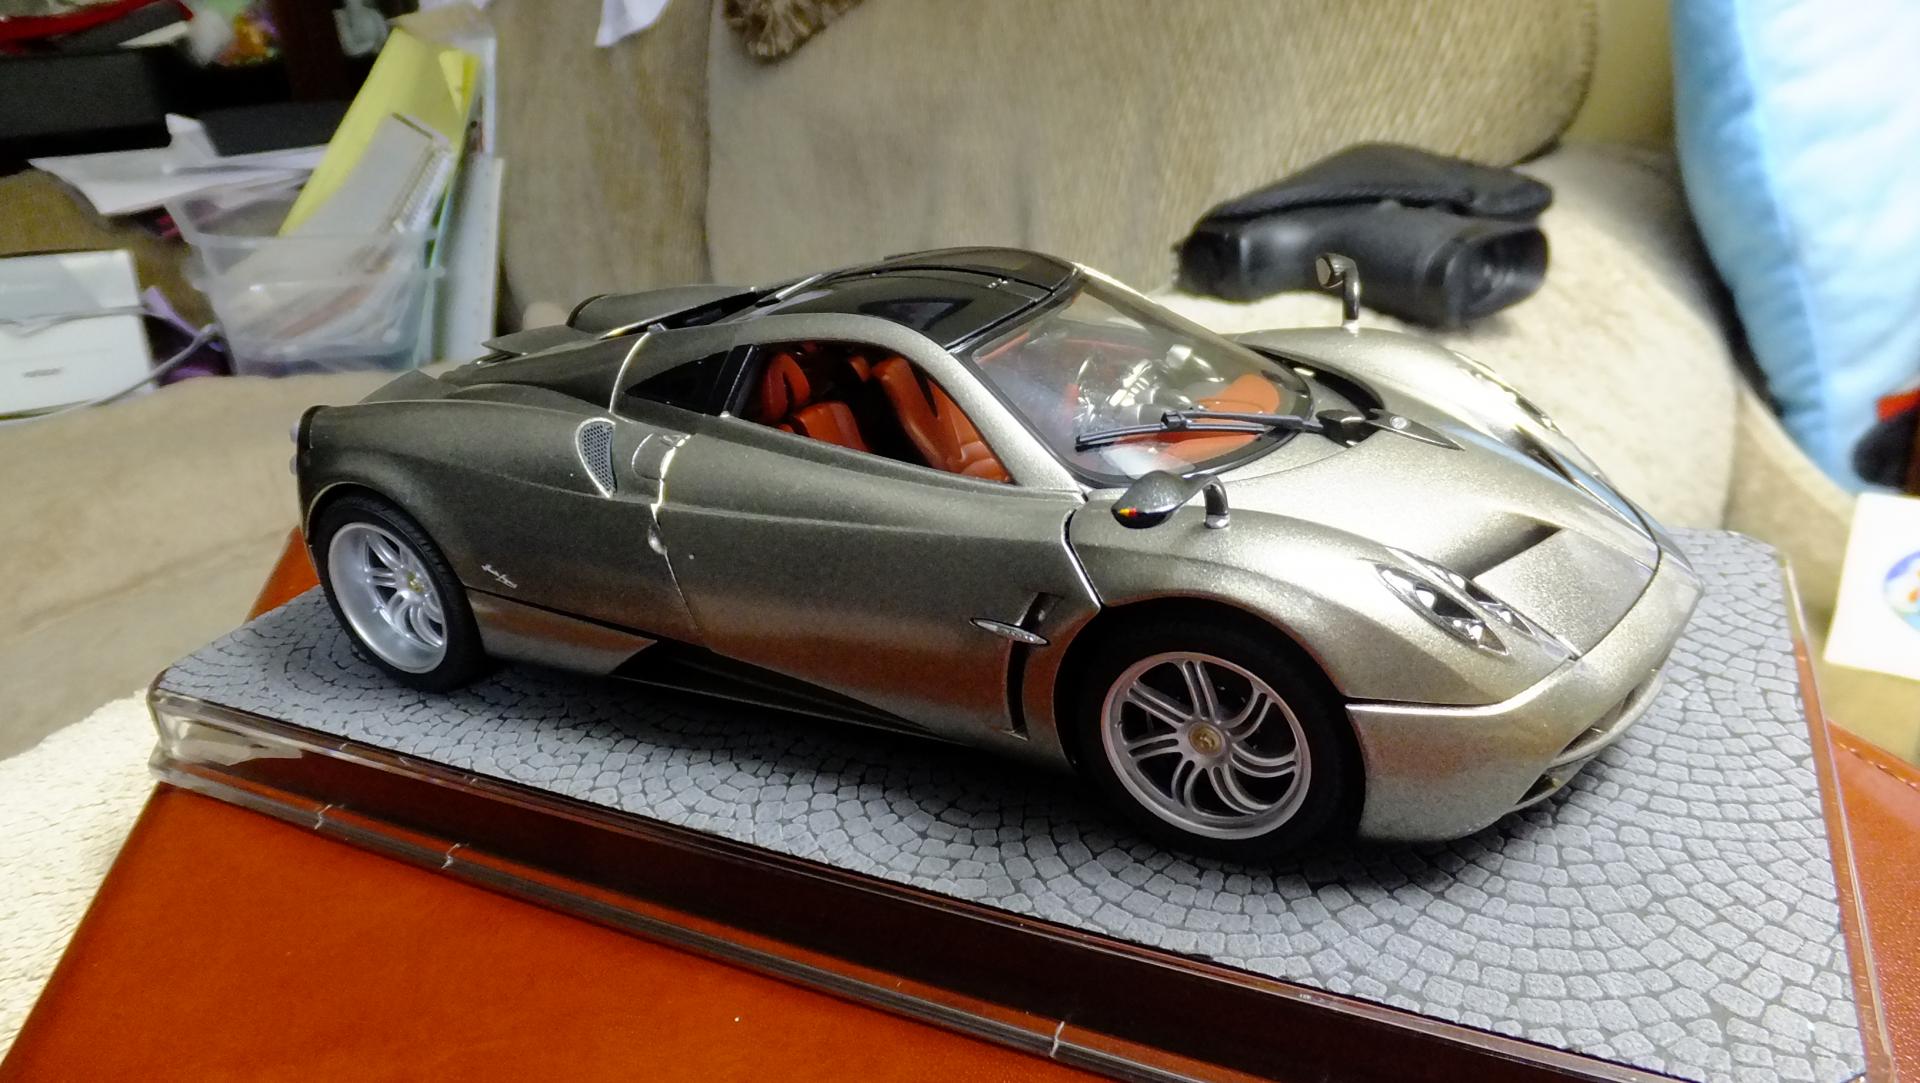
I haven't been able to work on models in a while, so i'm still working on my Pagani. This is also the first time I've ever posted here as I build. This kit has modelers nervous since no one has been able to make everything fit together. I was going to wait and make a video, but at the rate I build, I wouldn't be helping very much. The way this model builds up out of the box, only gives you two options; 1) leave parts off just so you can close everything (not very well), and 2) glue everything in the "open" position. I'm 99.9% sure that I can make everything function as expected, in fact, i'm going to be ADDING a lot of details as well. My Pagani will be totally wired up as much as photos will show. I hope I can help others build this kit the way it should be......thanks for looking in.
-
We now have more info on this one, like when and how much, Dec is the release date given, and depending on where you like to import from, is going to run you just under 3000yen http://hlj.com/product/AOS05260 http://www.1999.co.jp/eng/10410662
-
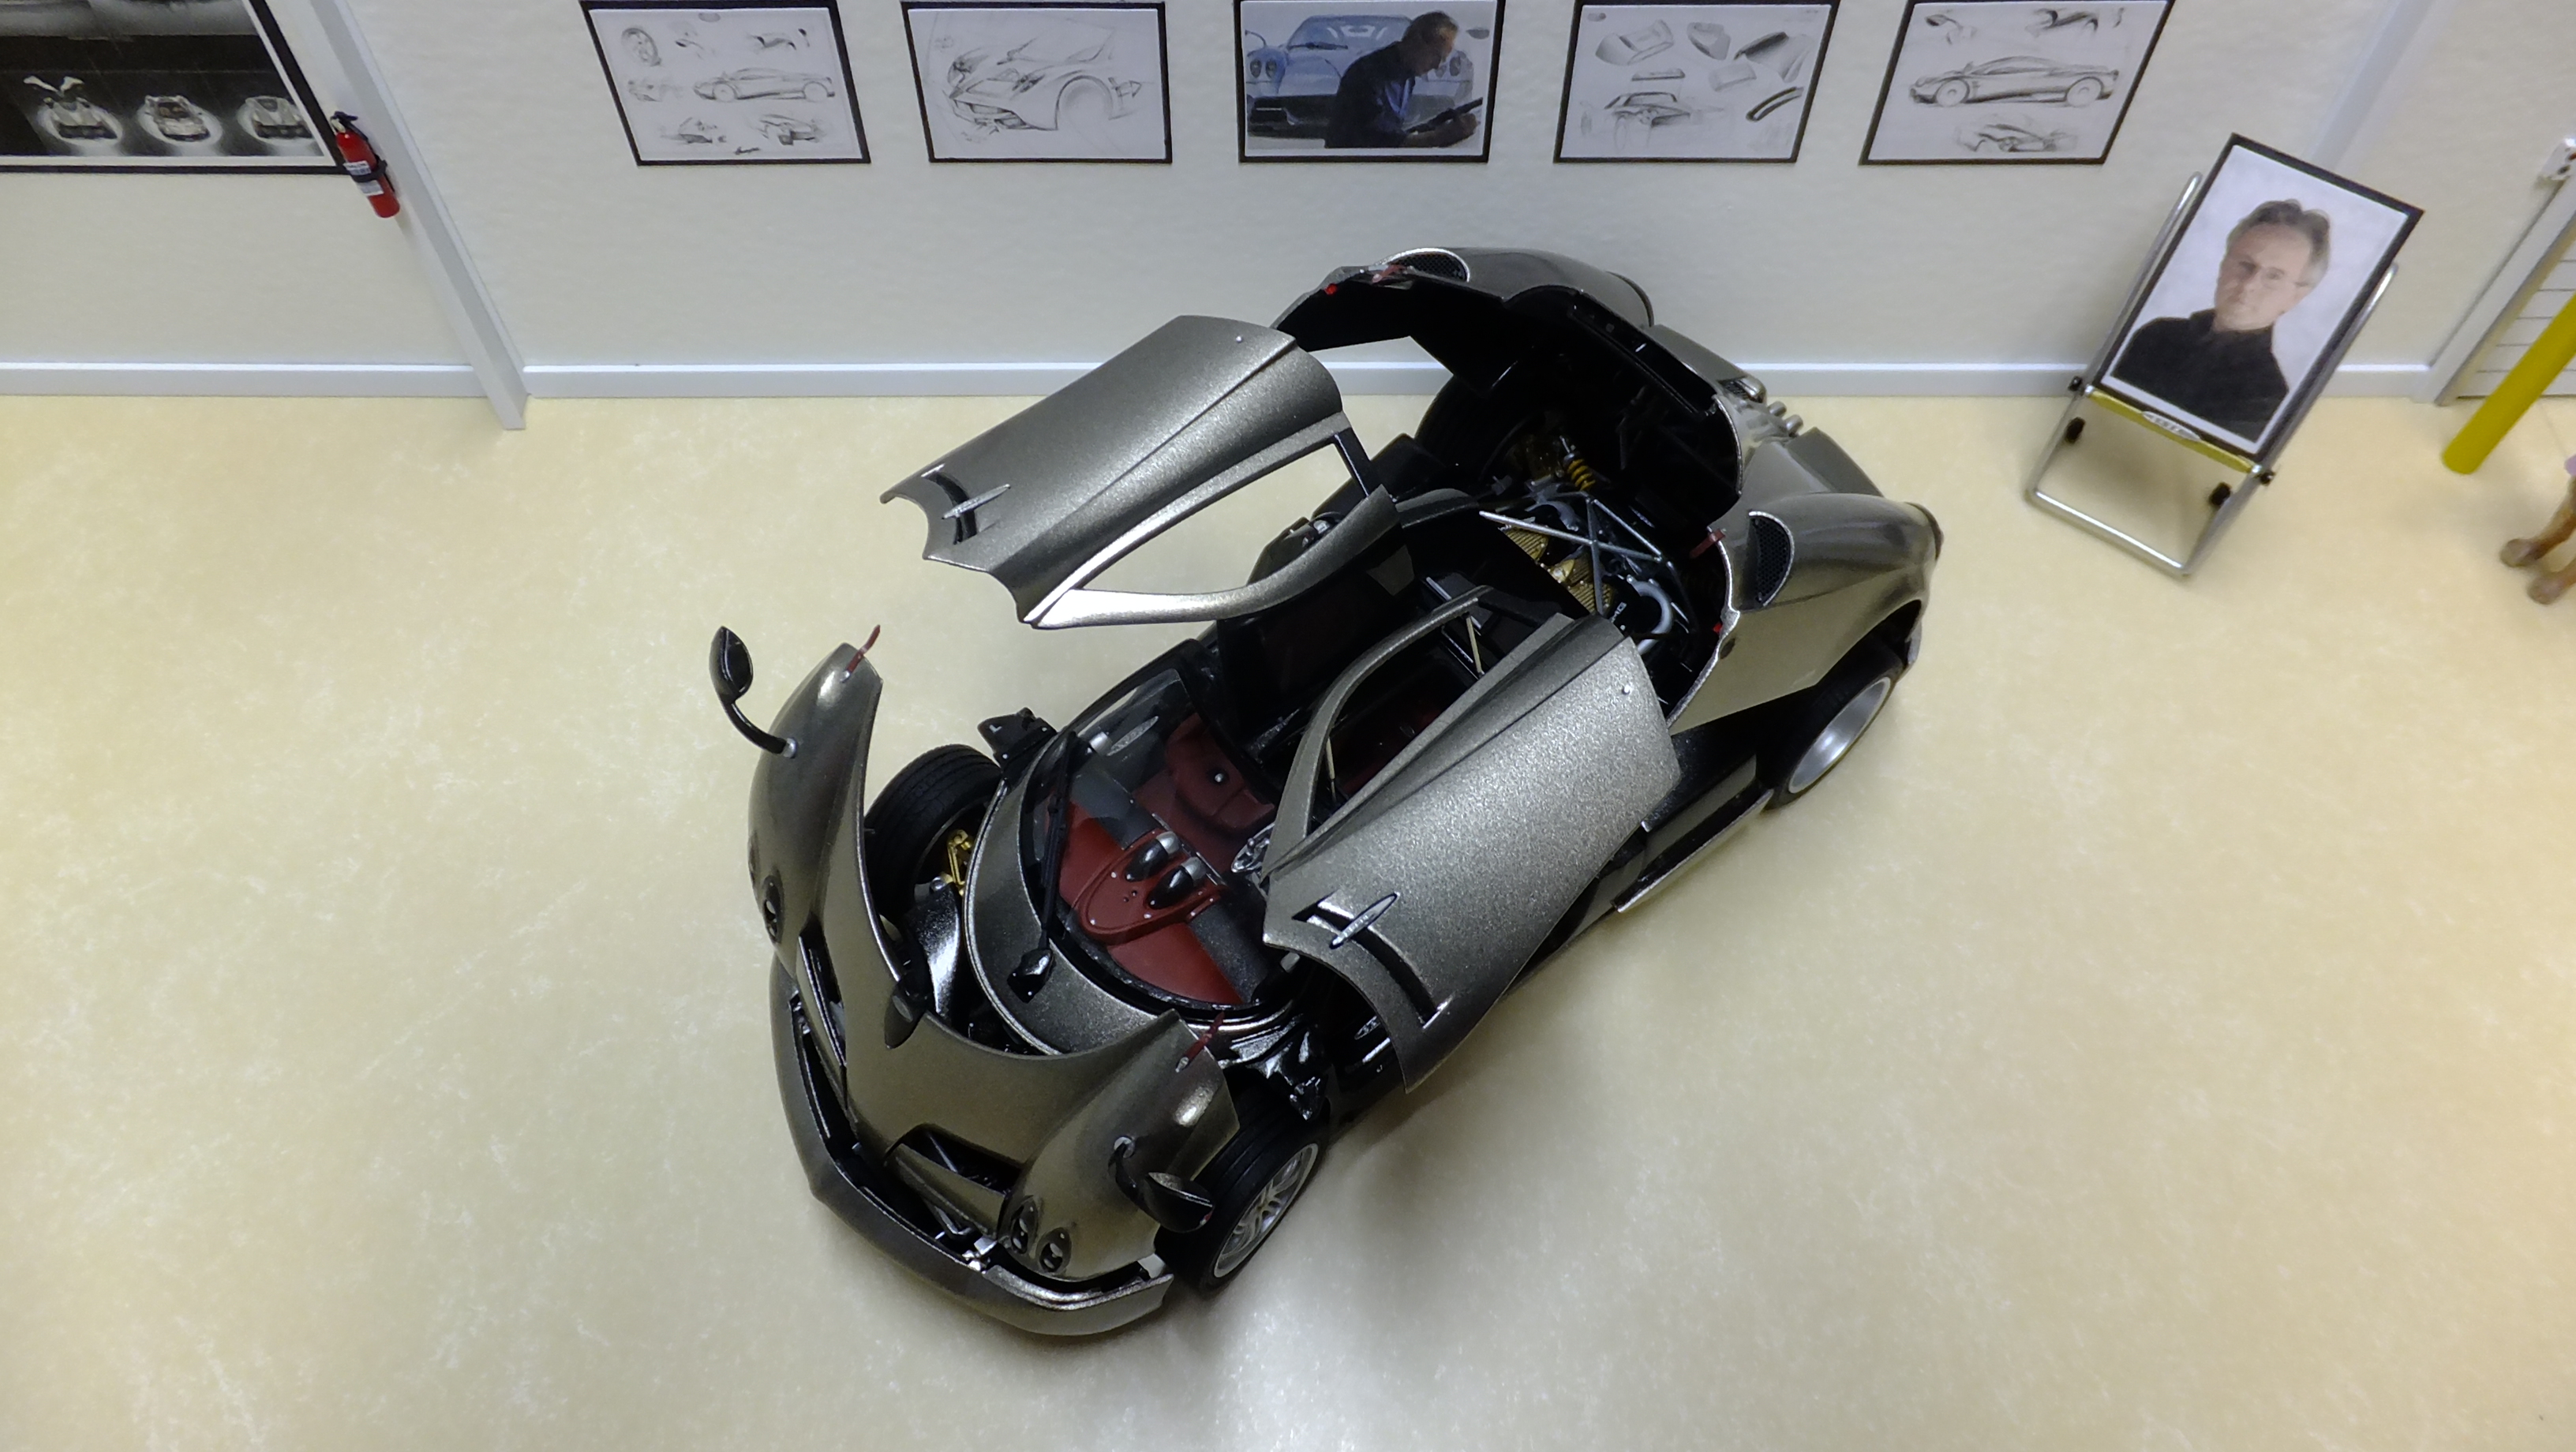
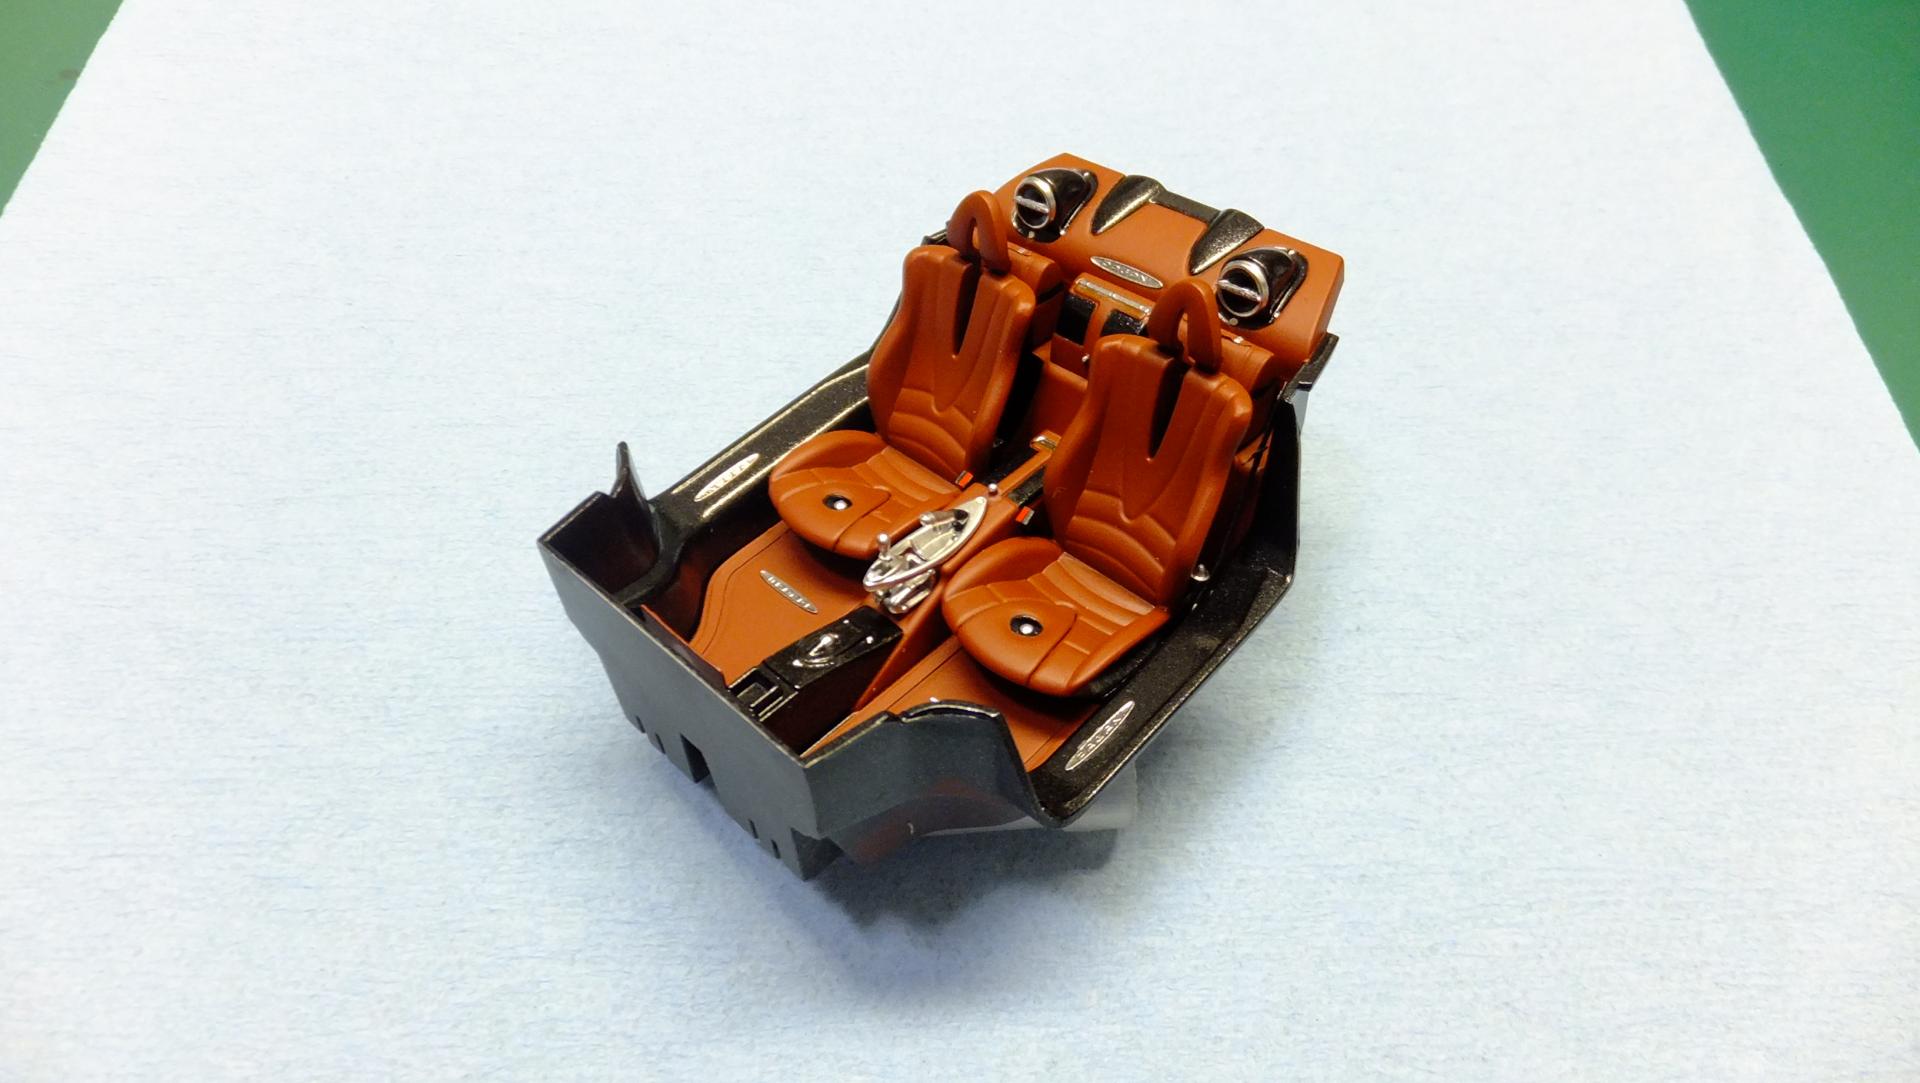
Hello, everyone!, its been a very long road, but she's finally done!! I set out to show how it was possible to build it as any kit should be i.e; you can display it both open....AND shut. Its not perfect, but then again, nobodies ever is, and I am actually pretty stoked about how she's turned out. For those of you who have been following along, you know that there is WAAAAY too many things I changed, SB, or added, to be able to write them all down here. There is a 27 page WIP on it that will show it better than I can ever remember, and i'd like to thank everyone who followed along, and supported me with their encouragement!....YOU ALL are VERY much appreciated!!! I also hope to see more of these built in the future....it is an amazing kit, that deserves to be built.
-
The Kit, The build.
-
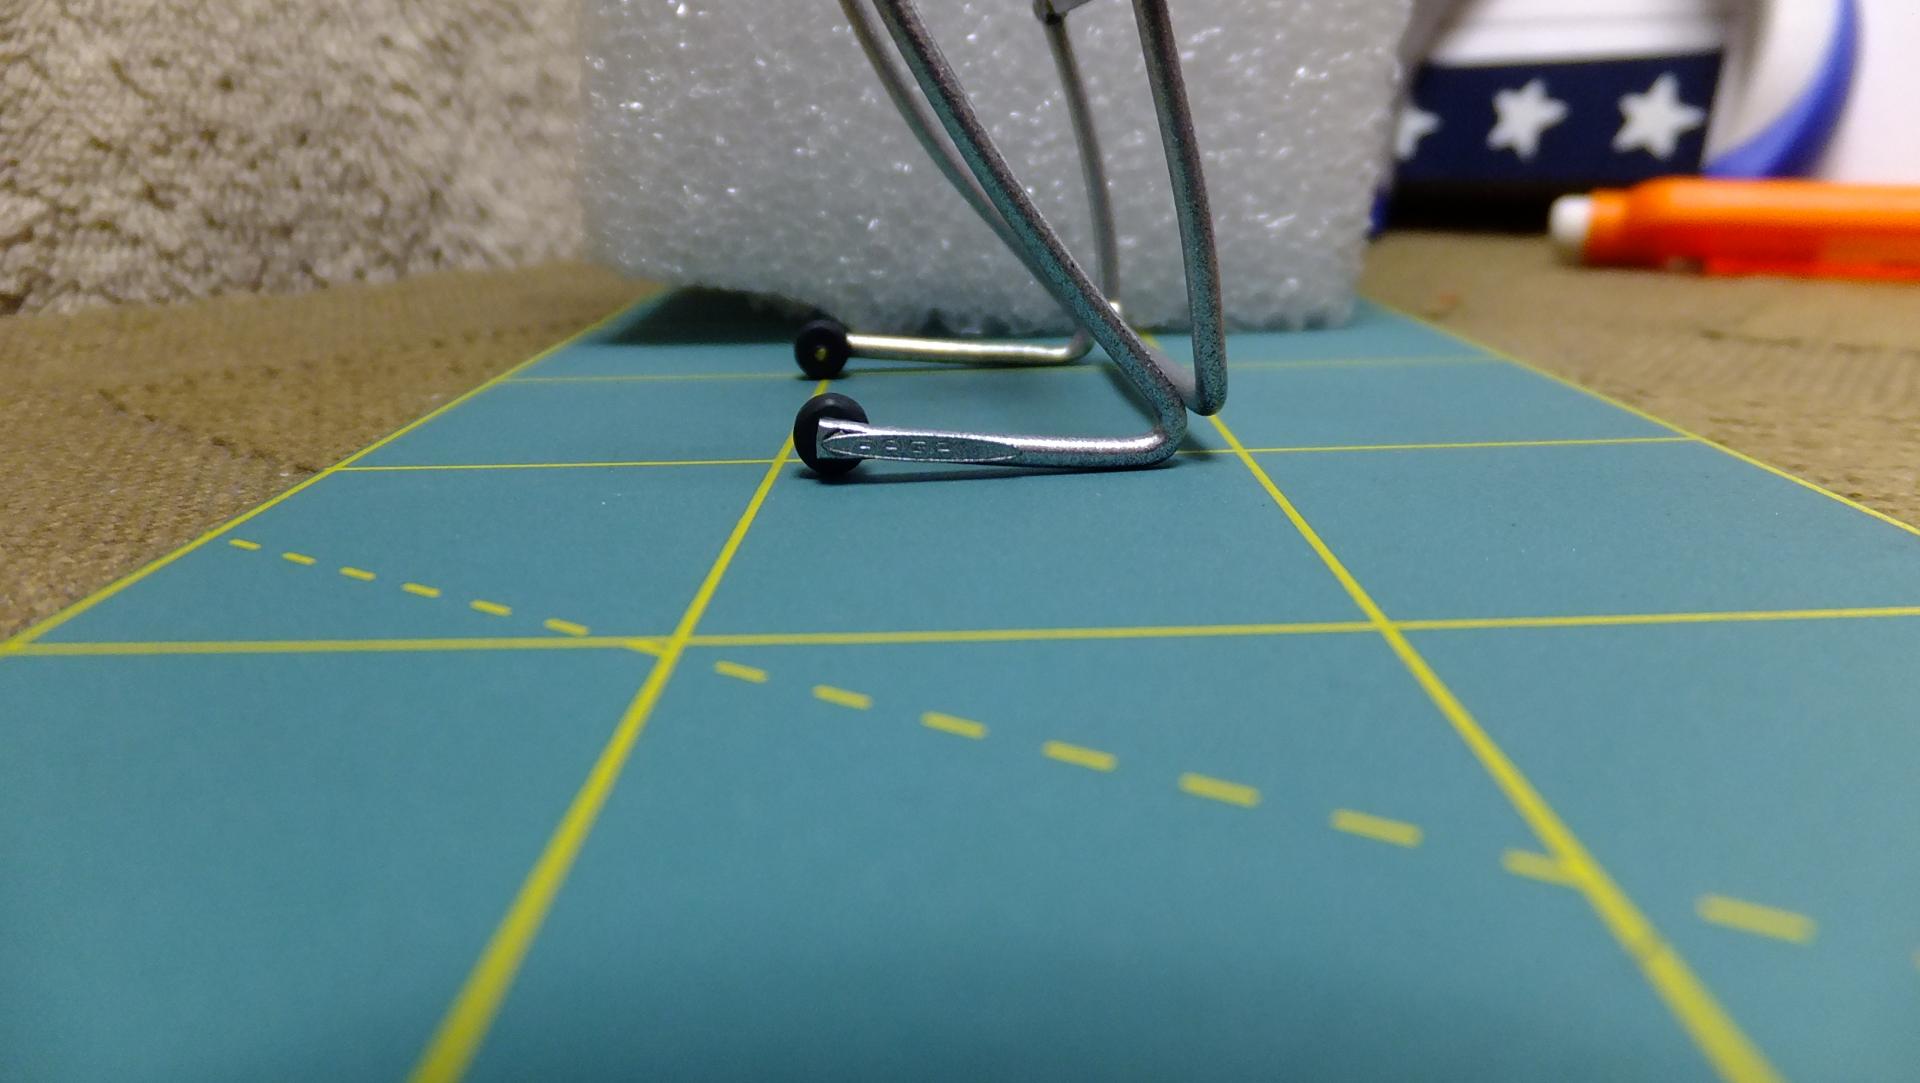
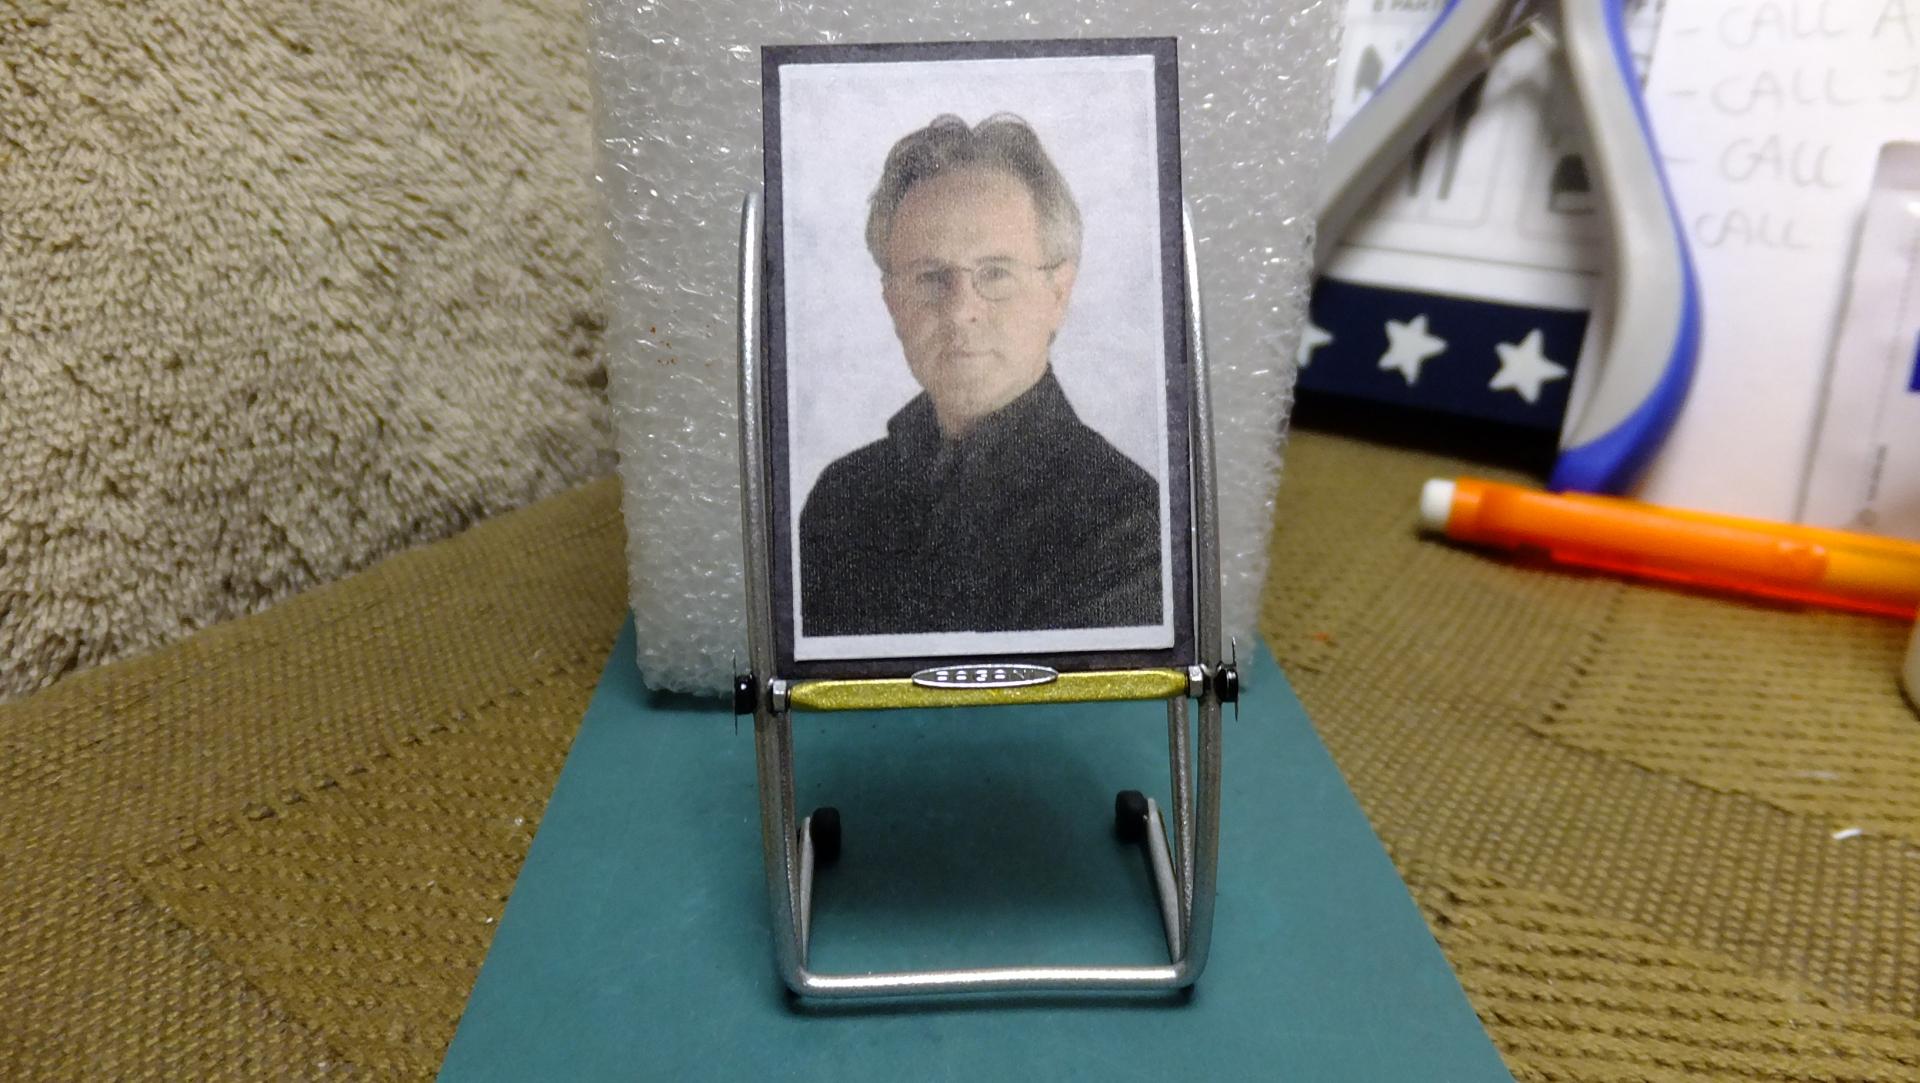
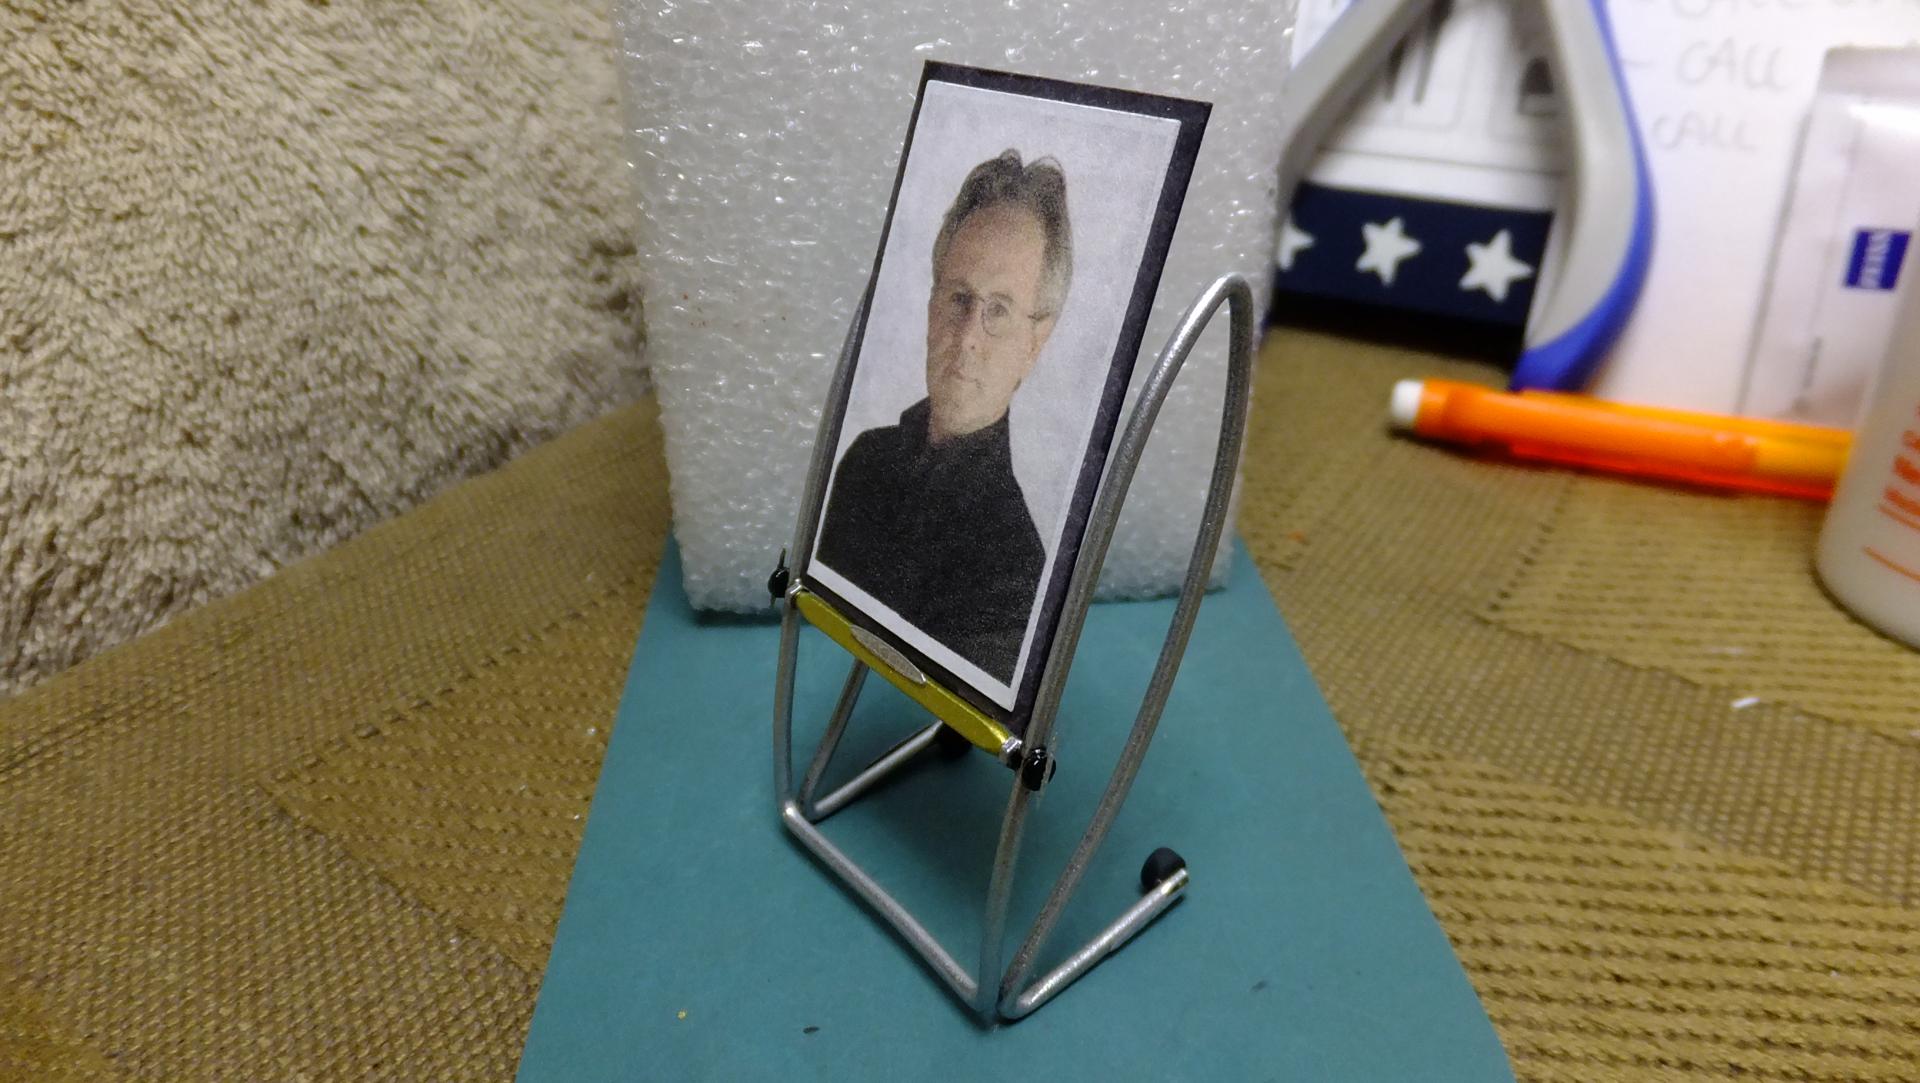
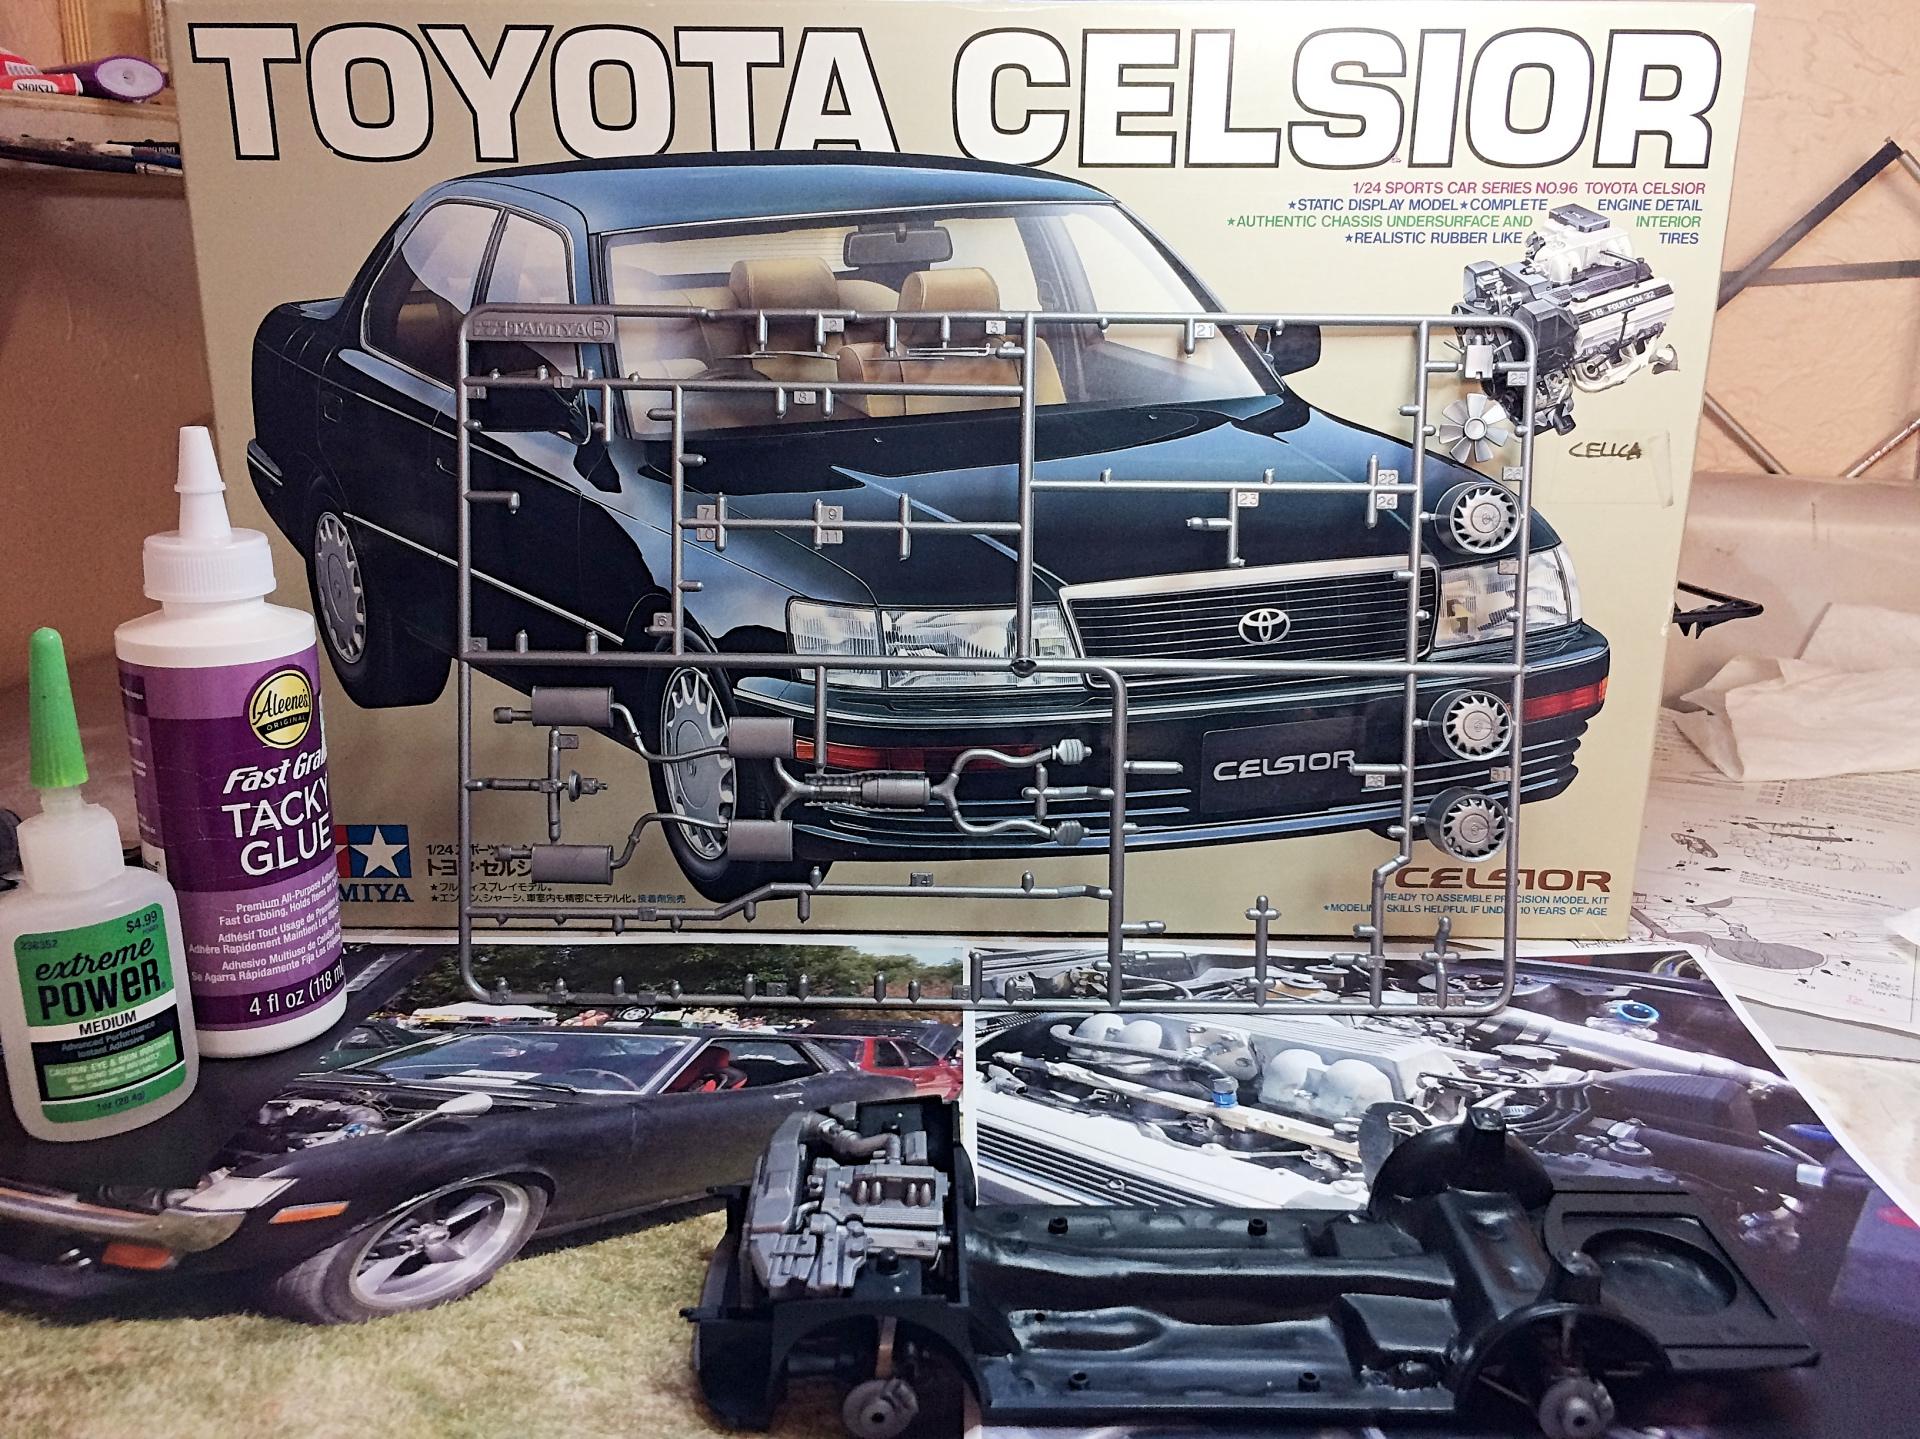
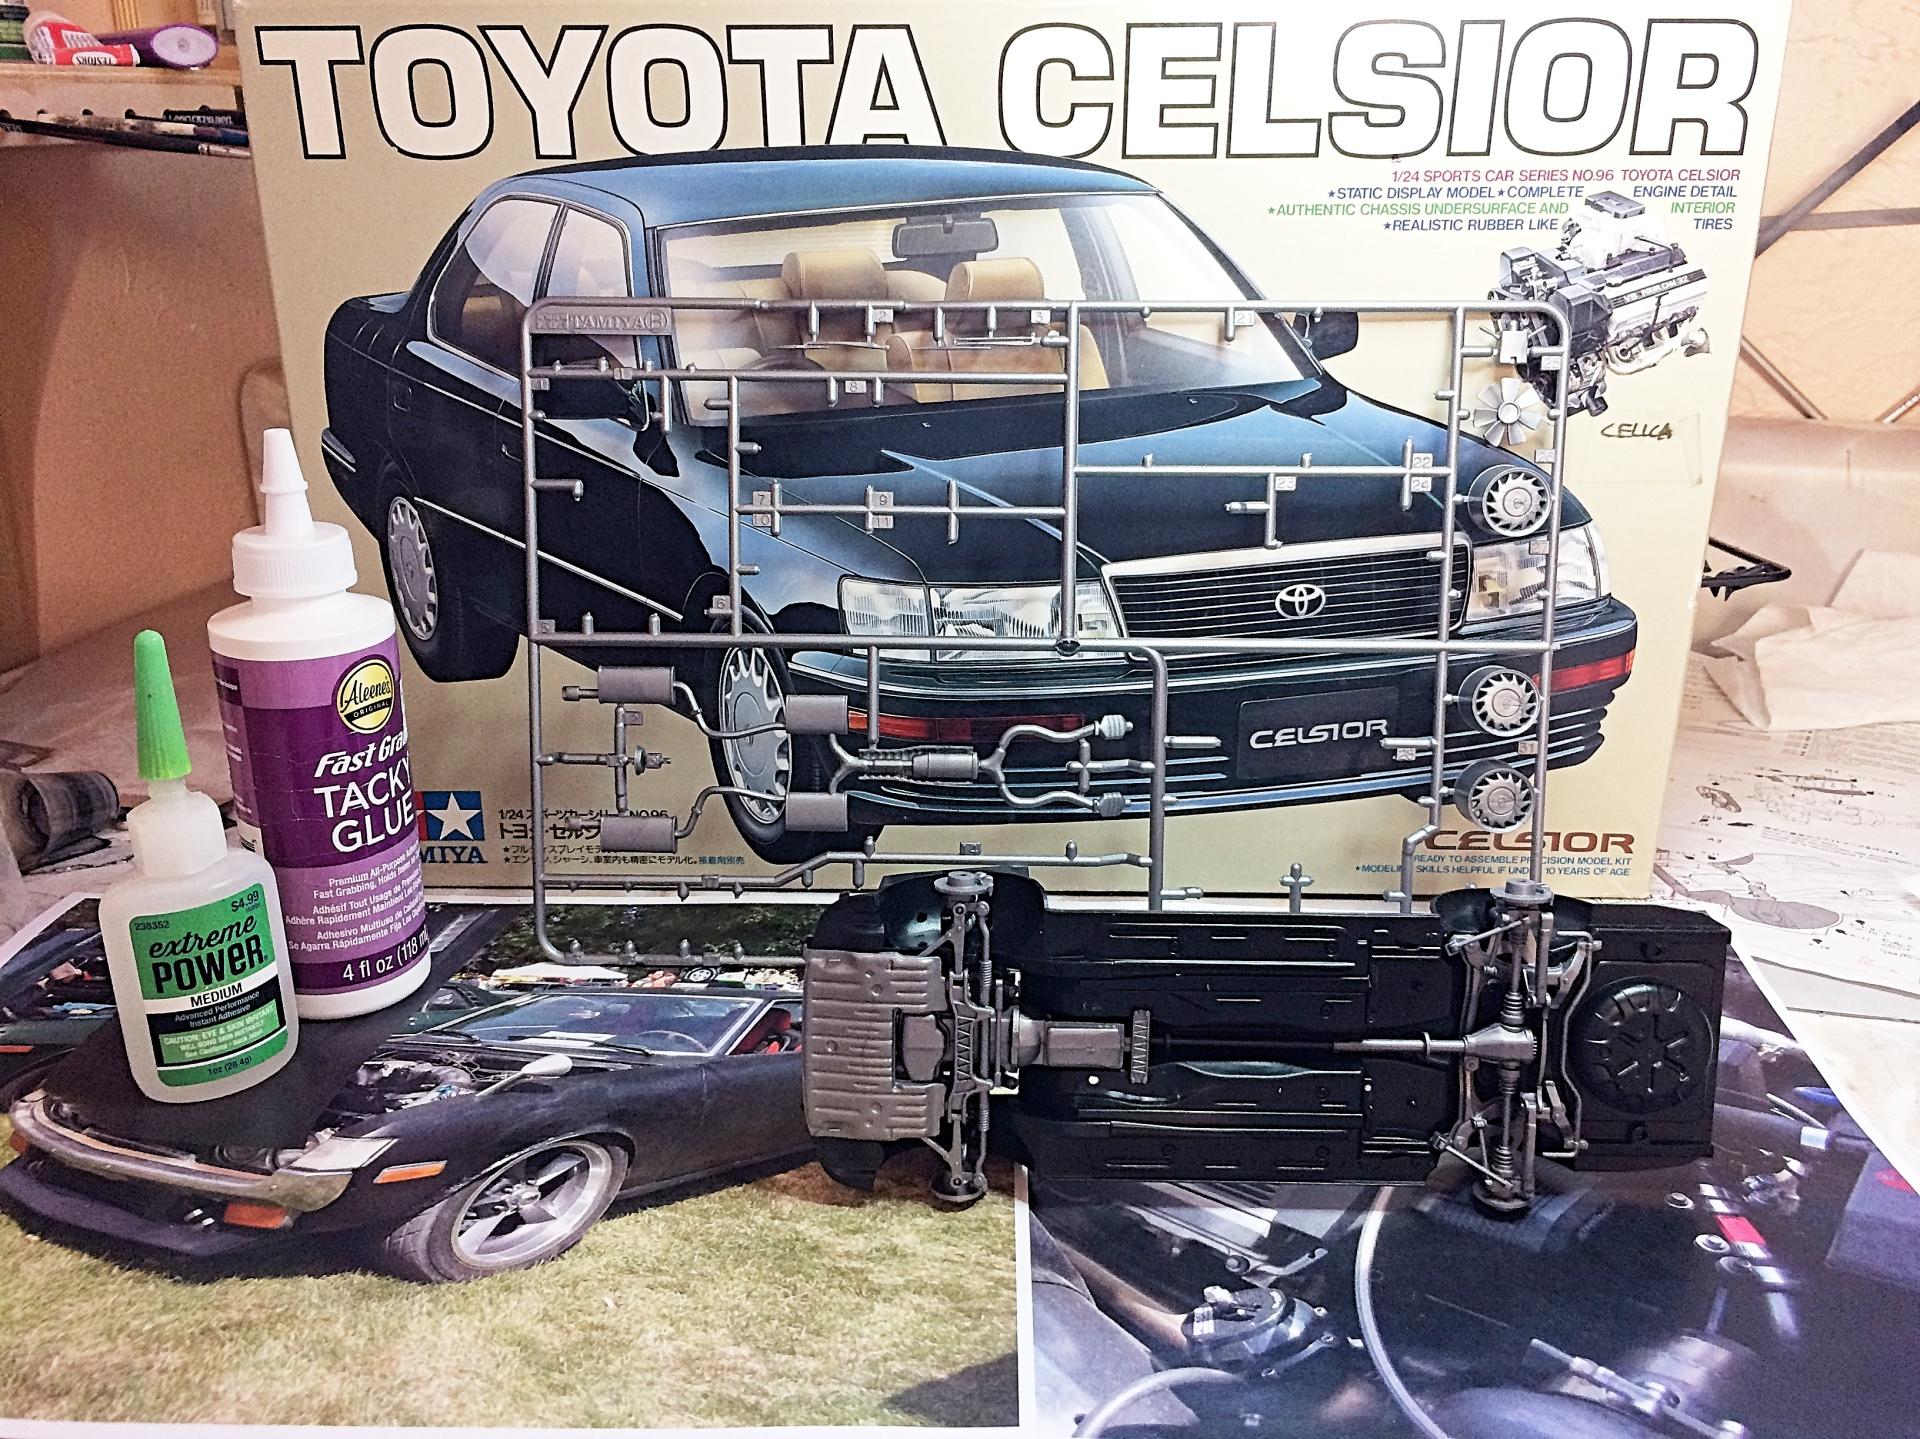
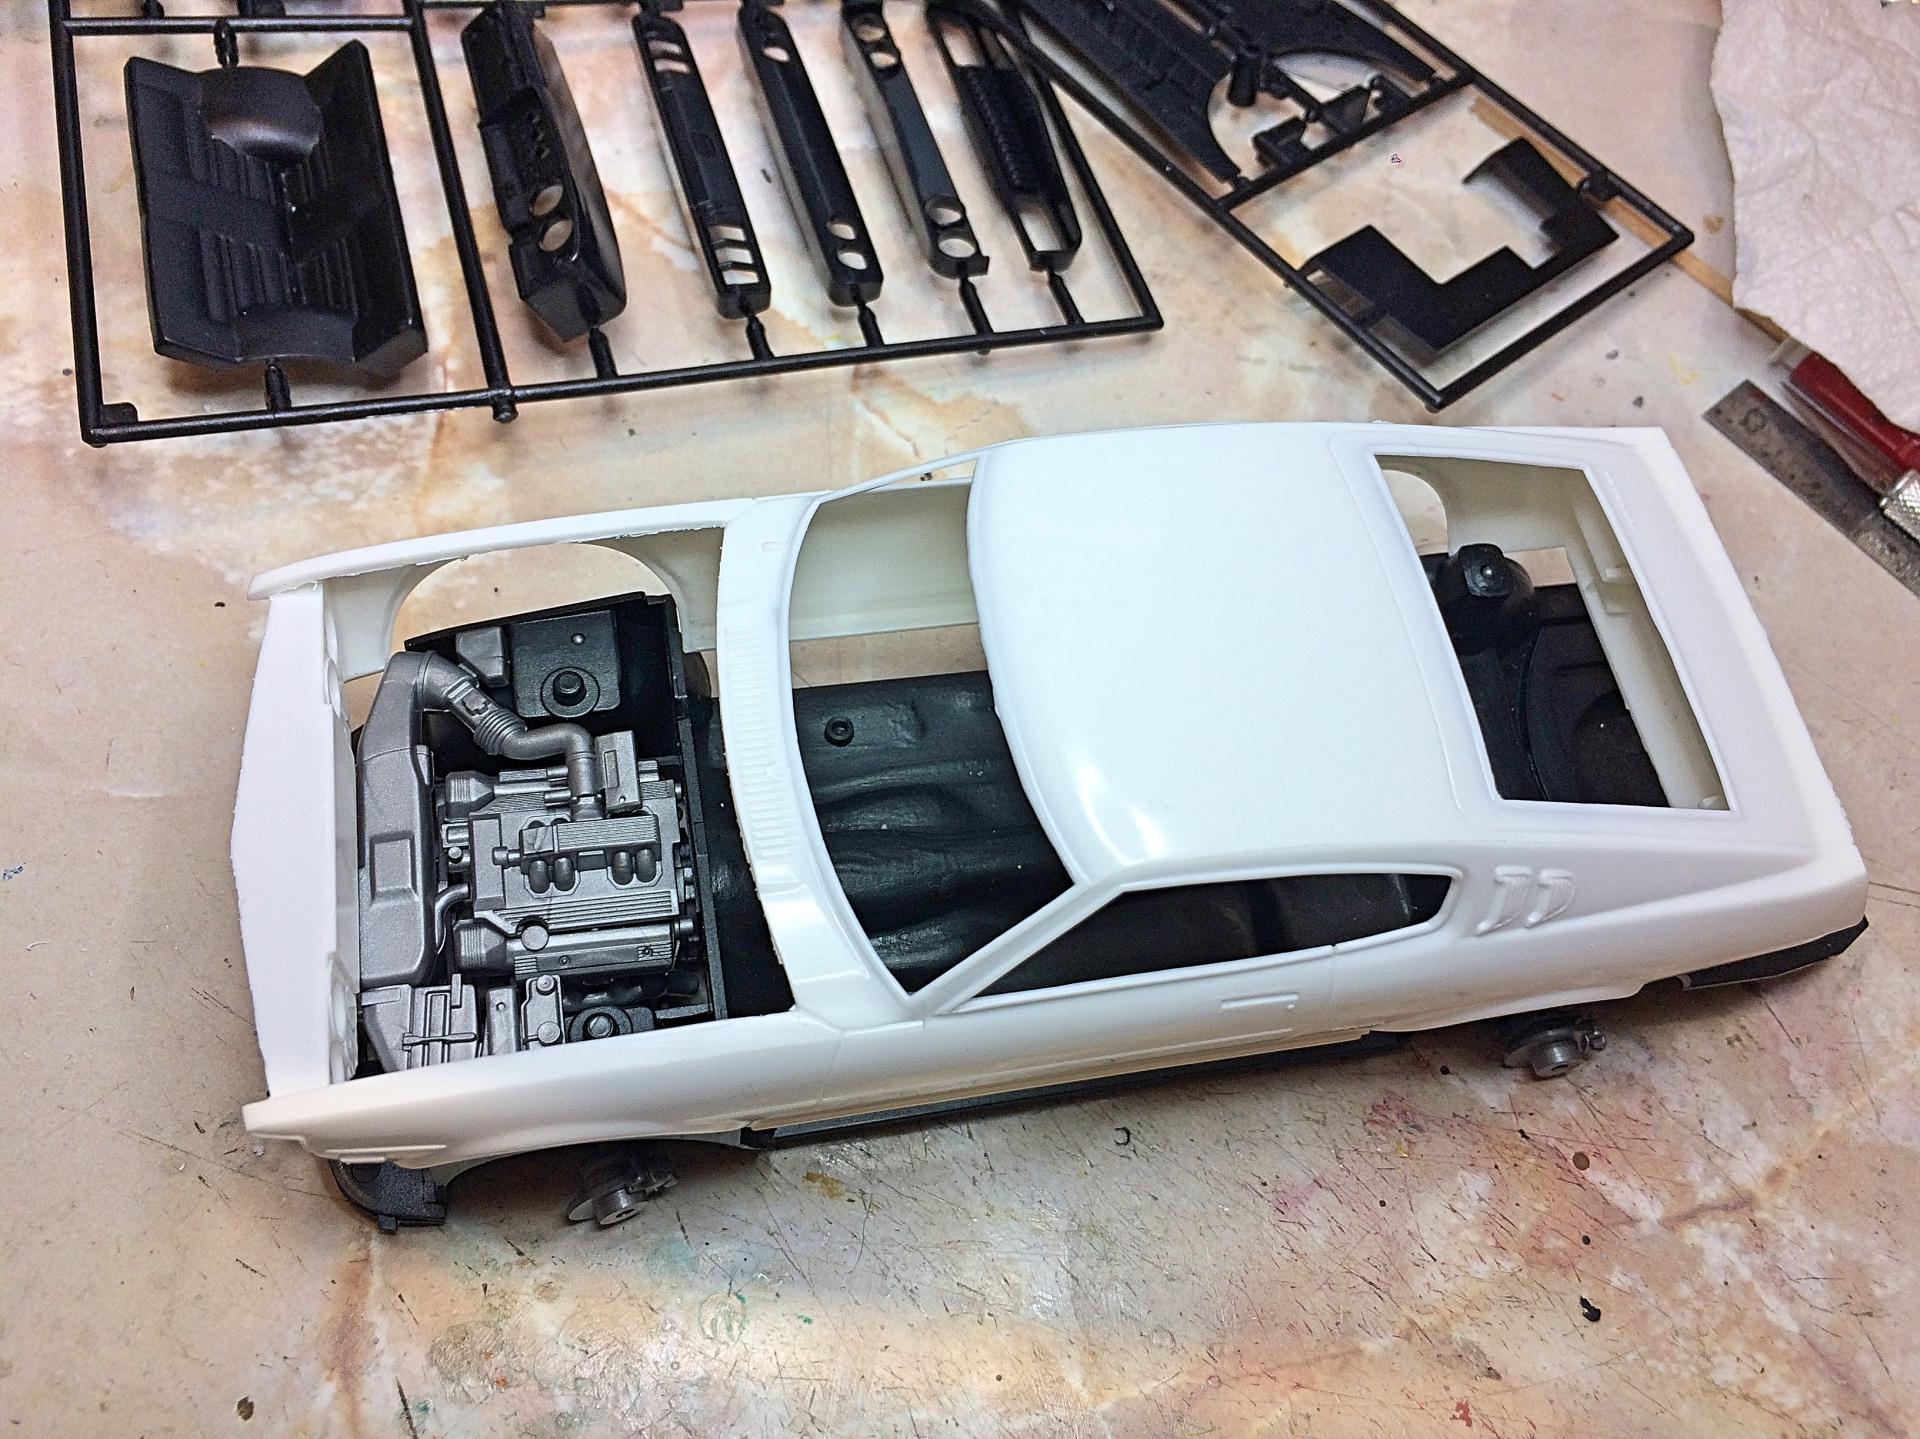
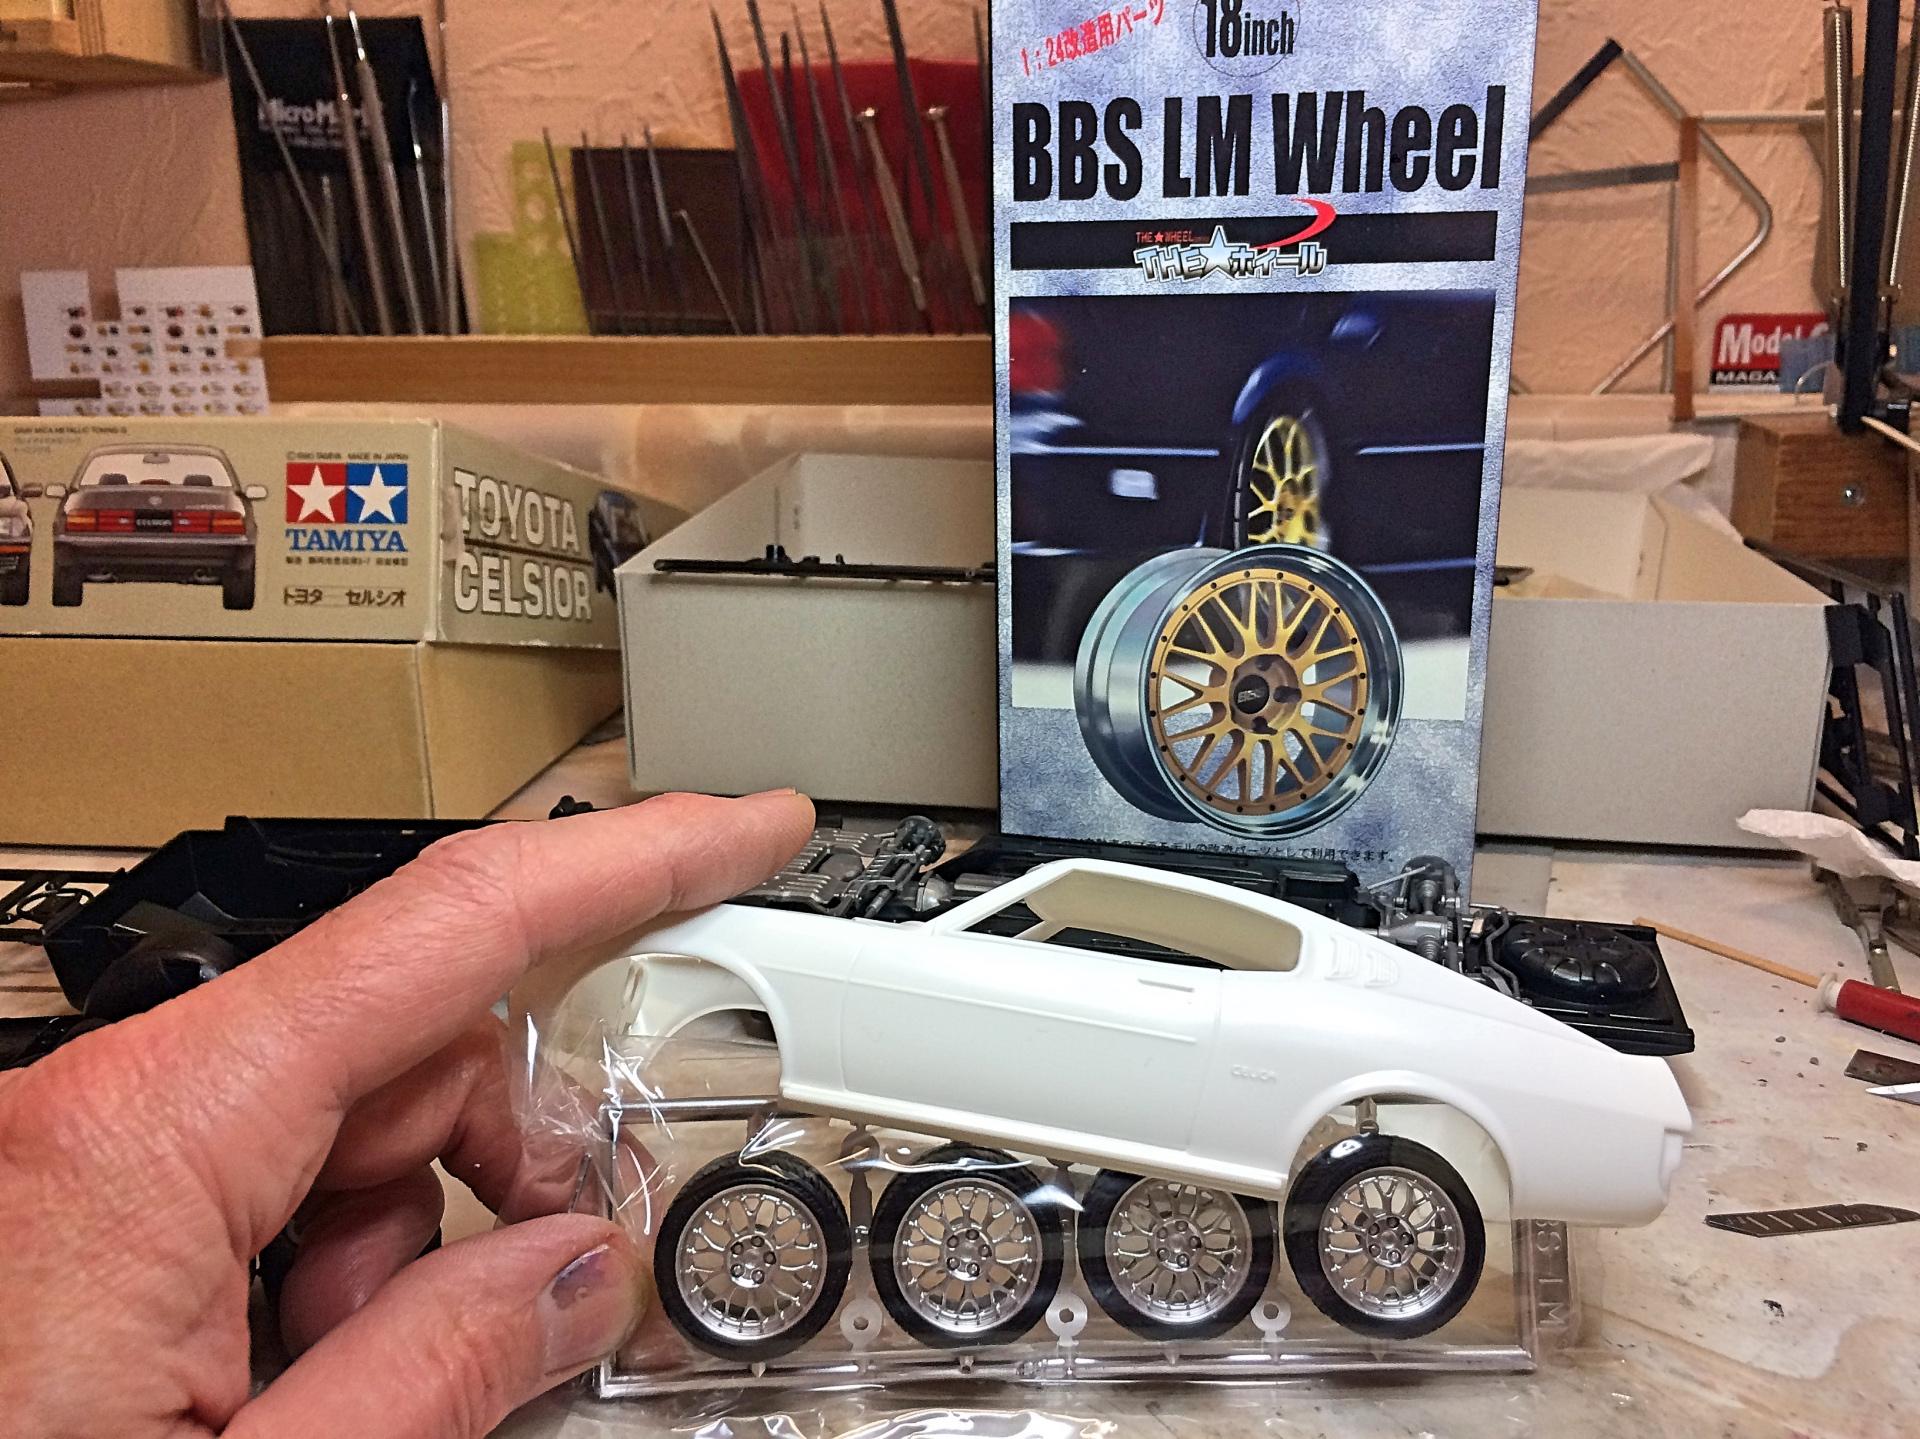
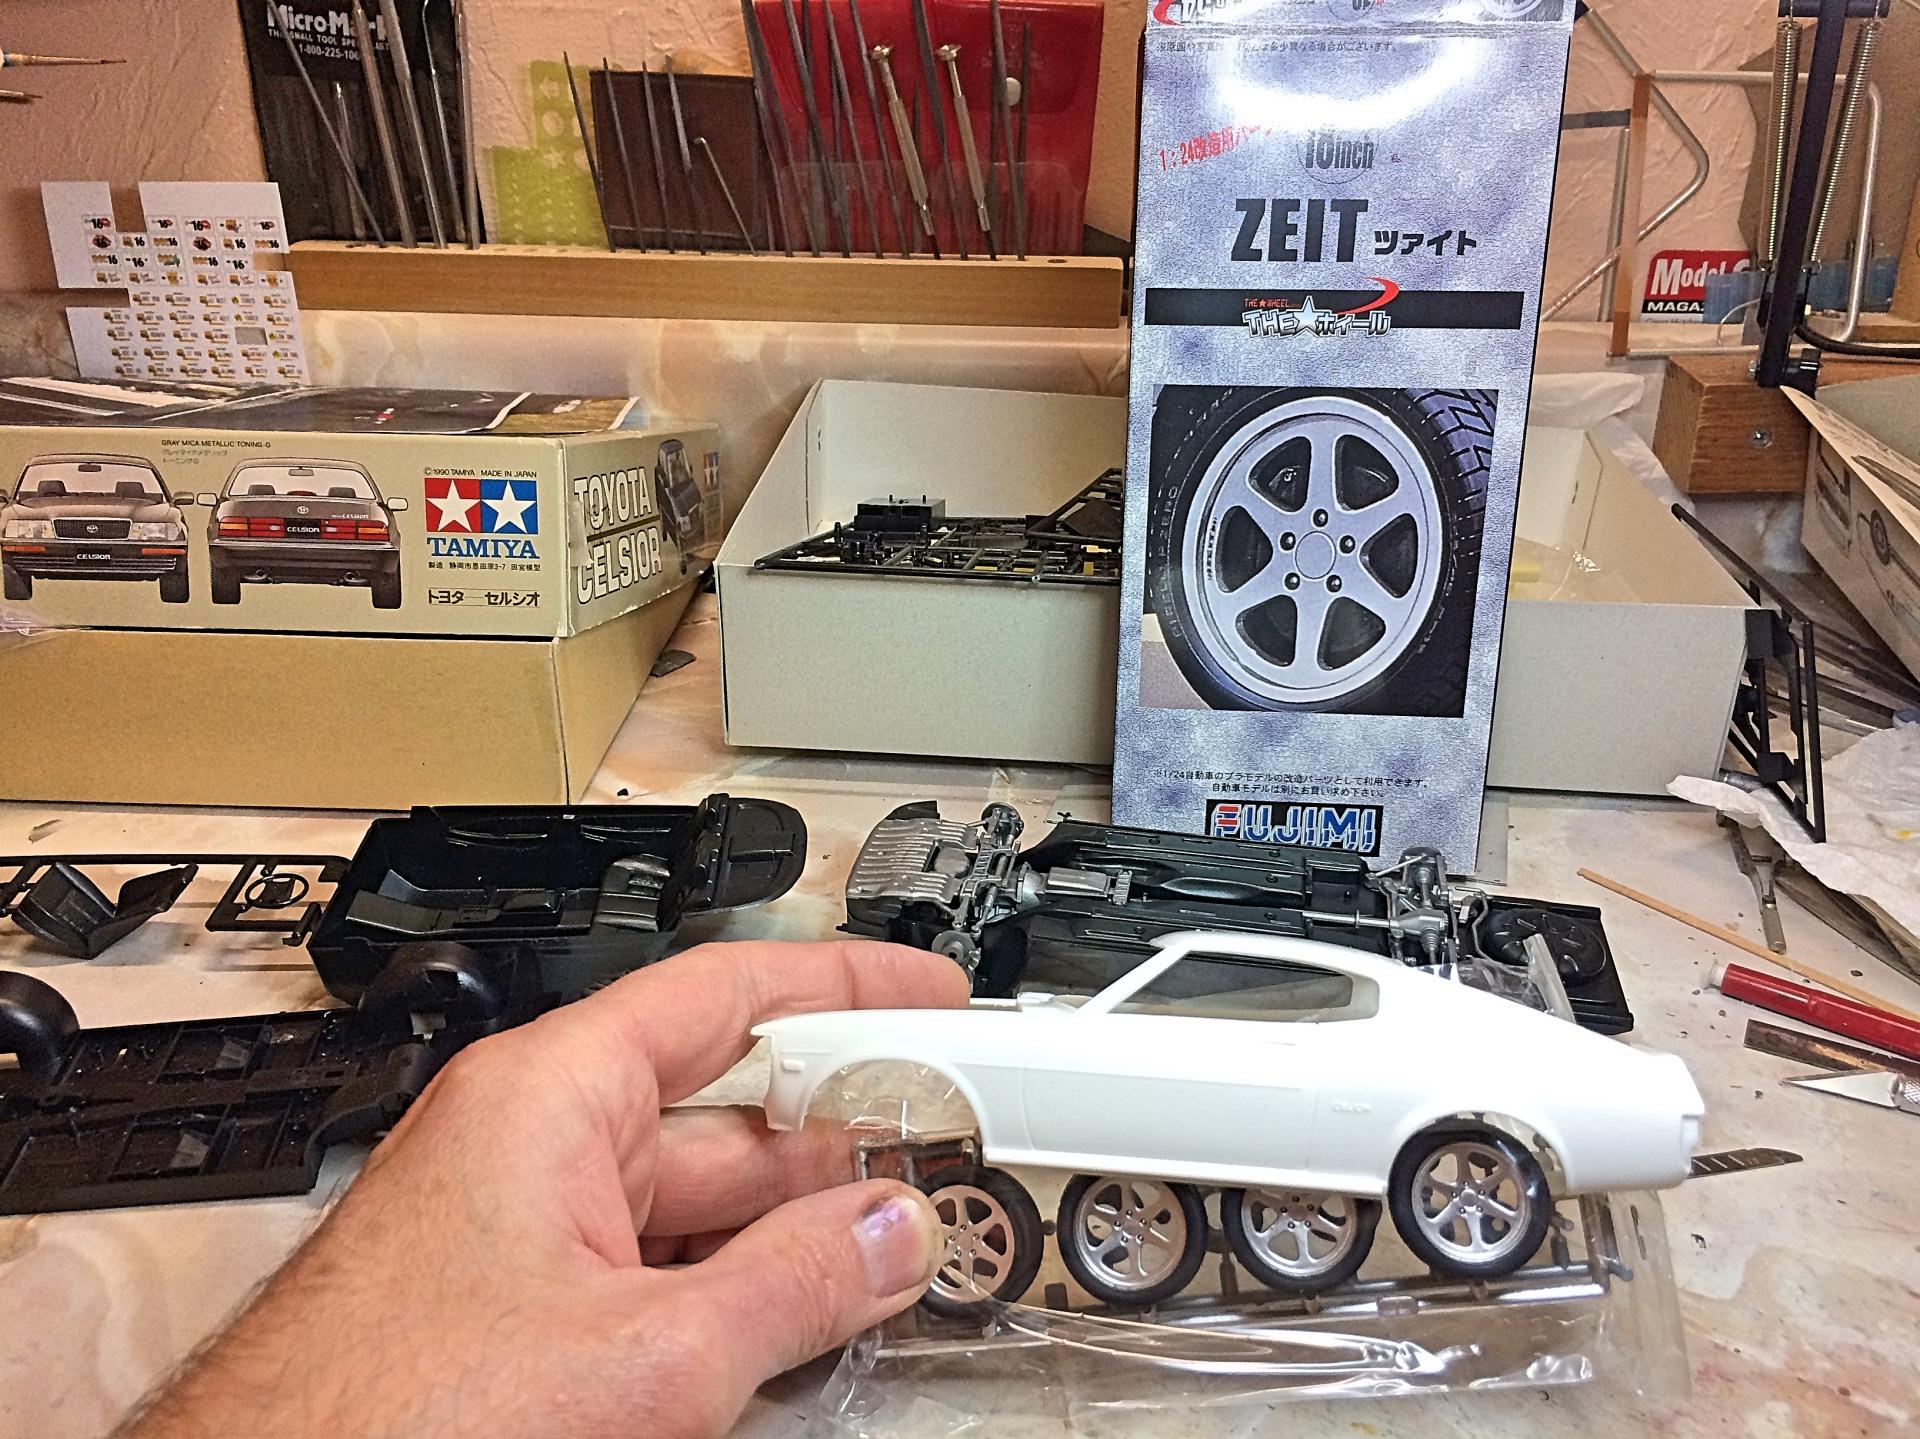
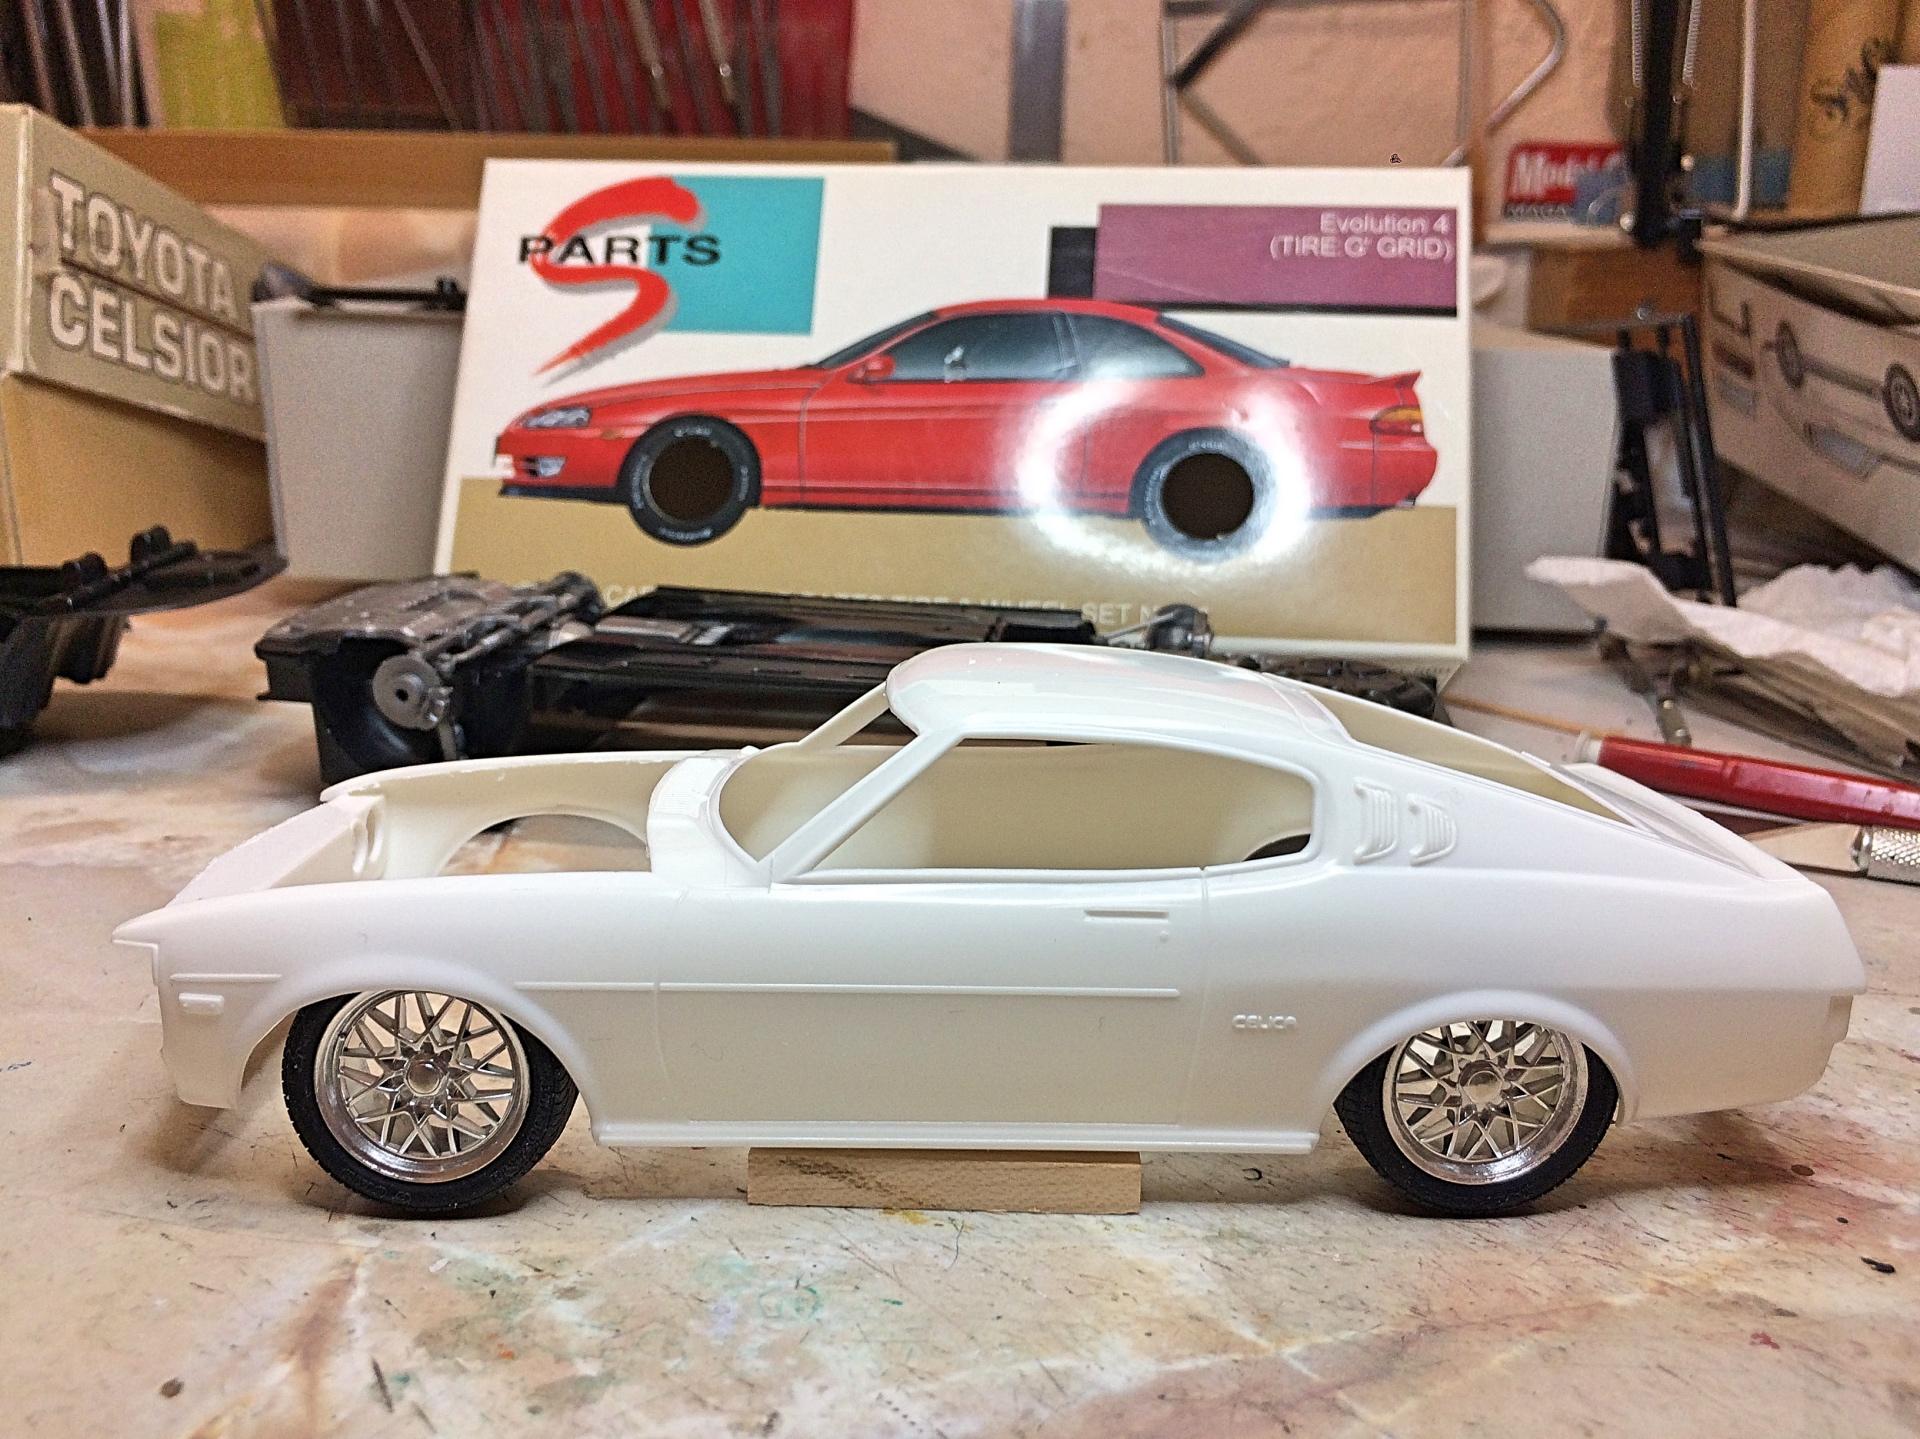
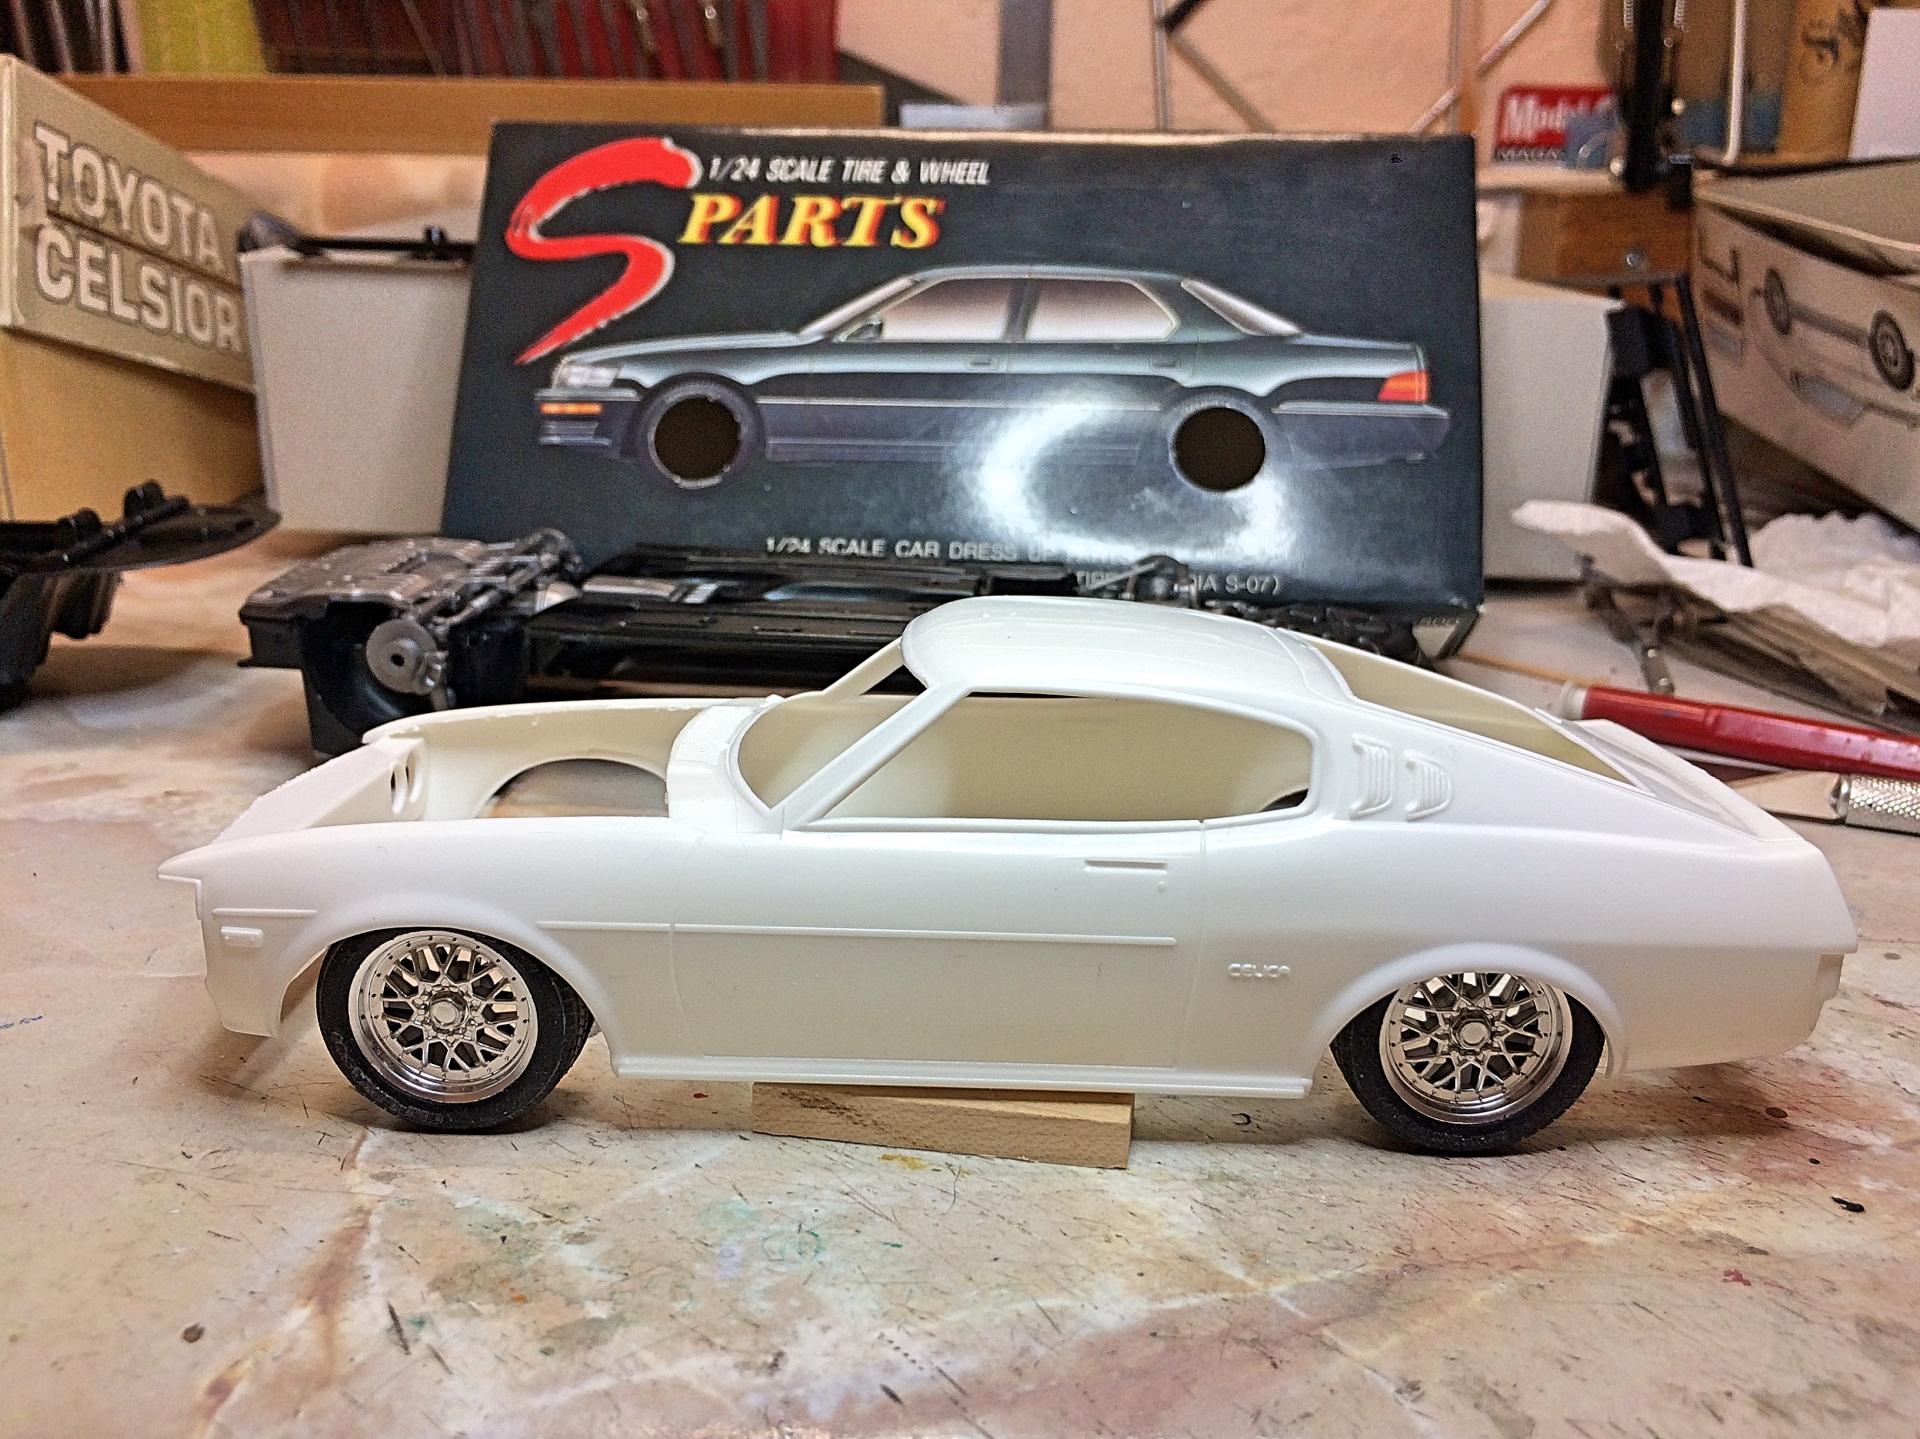
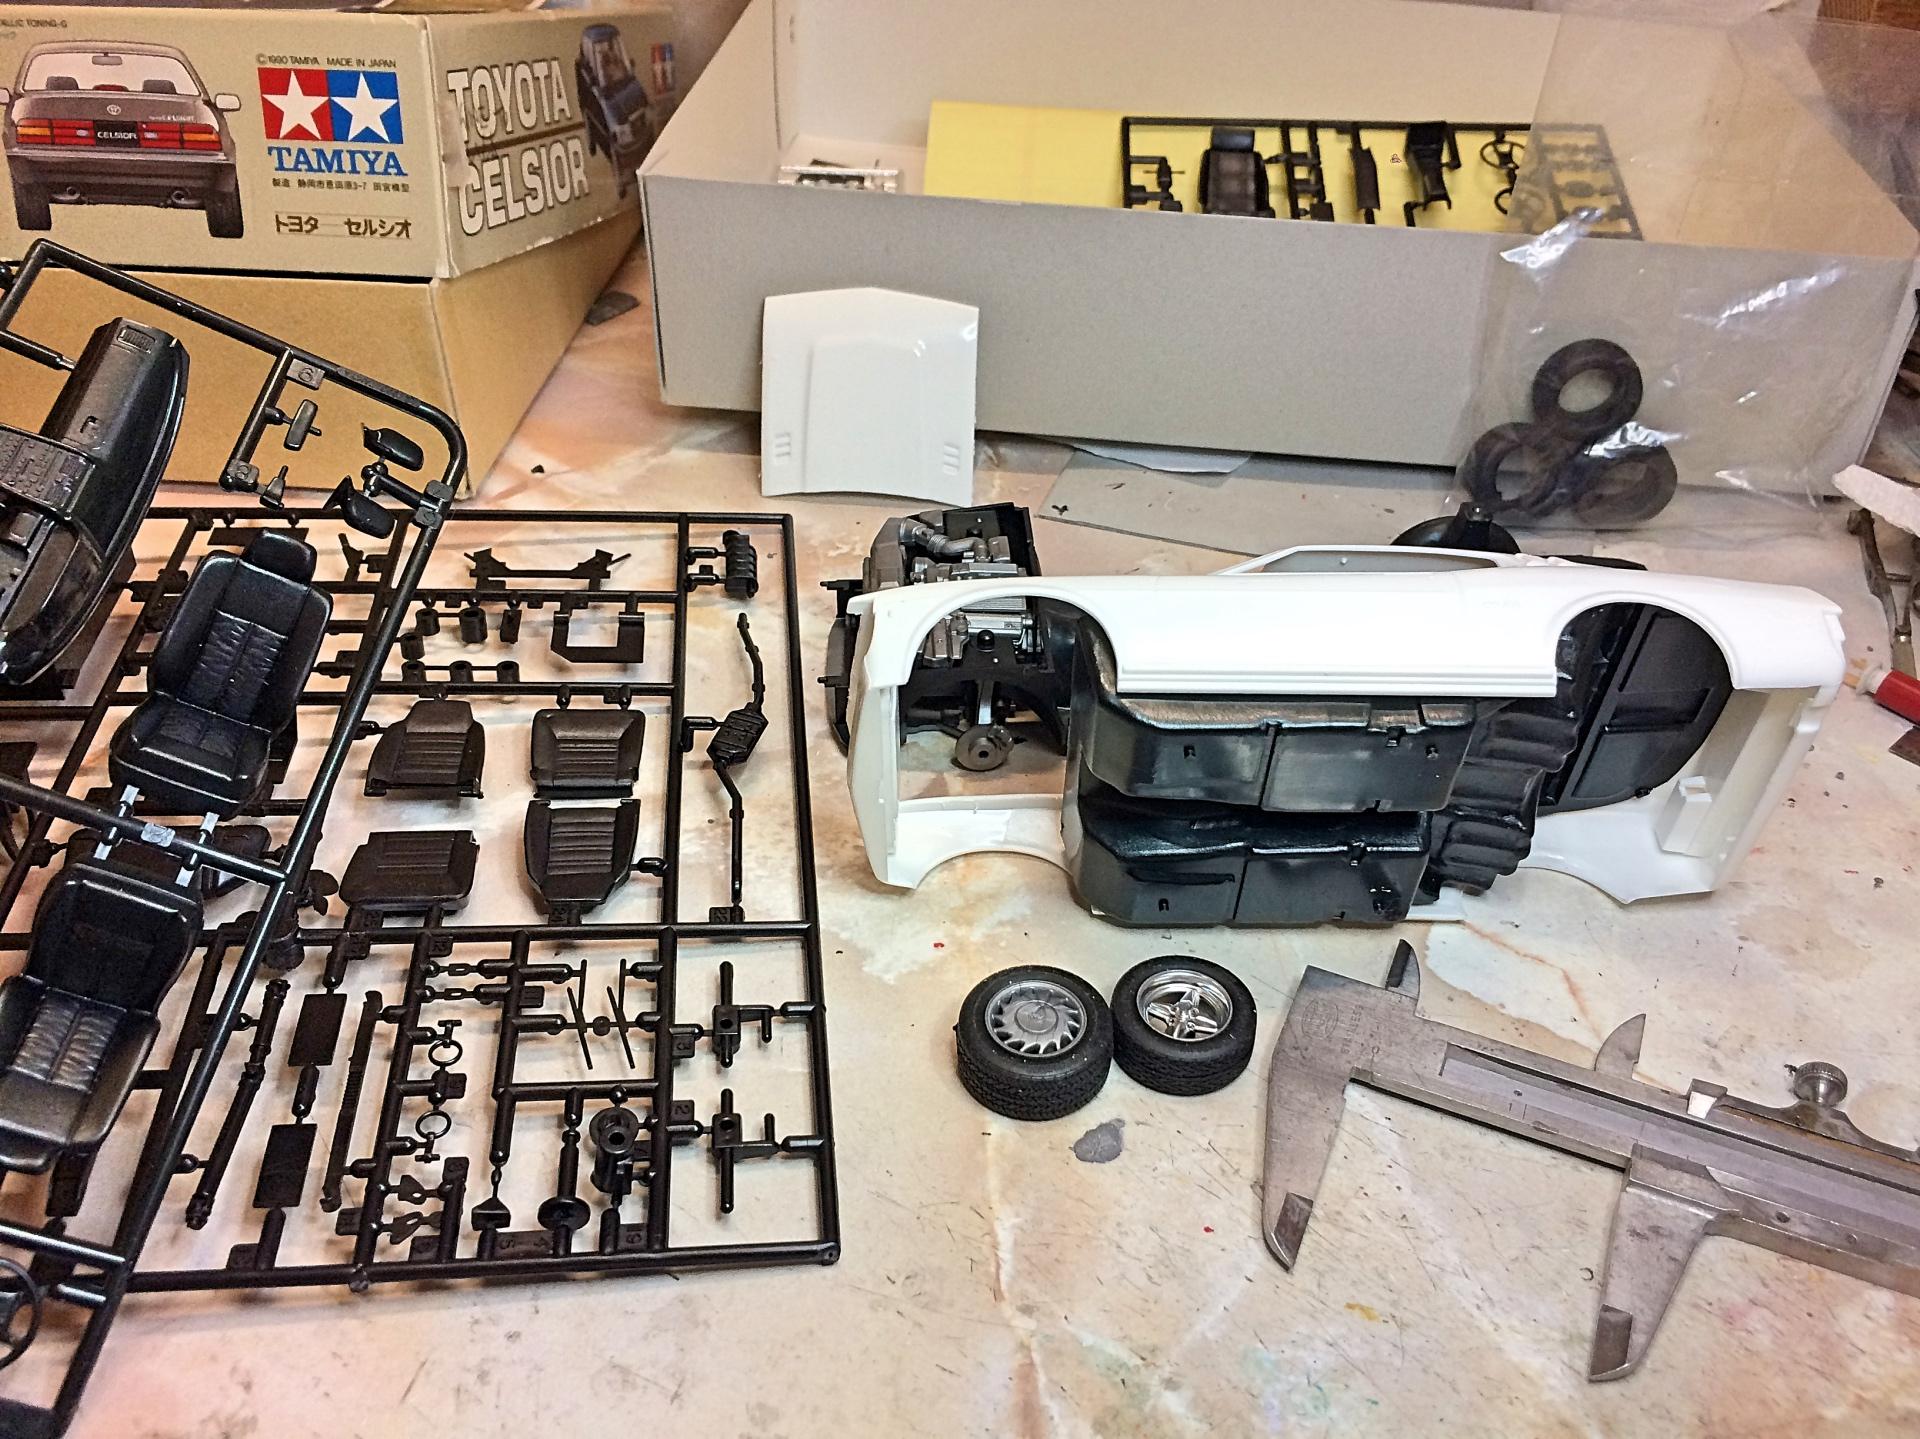
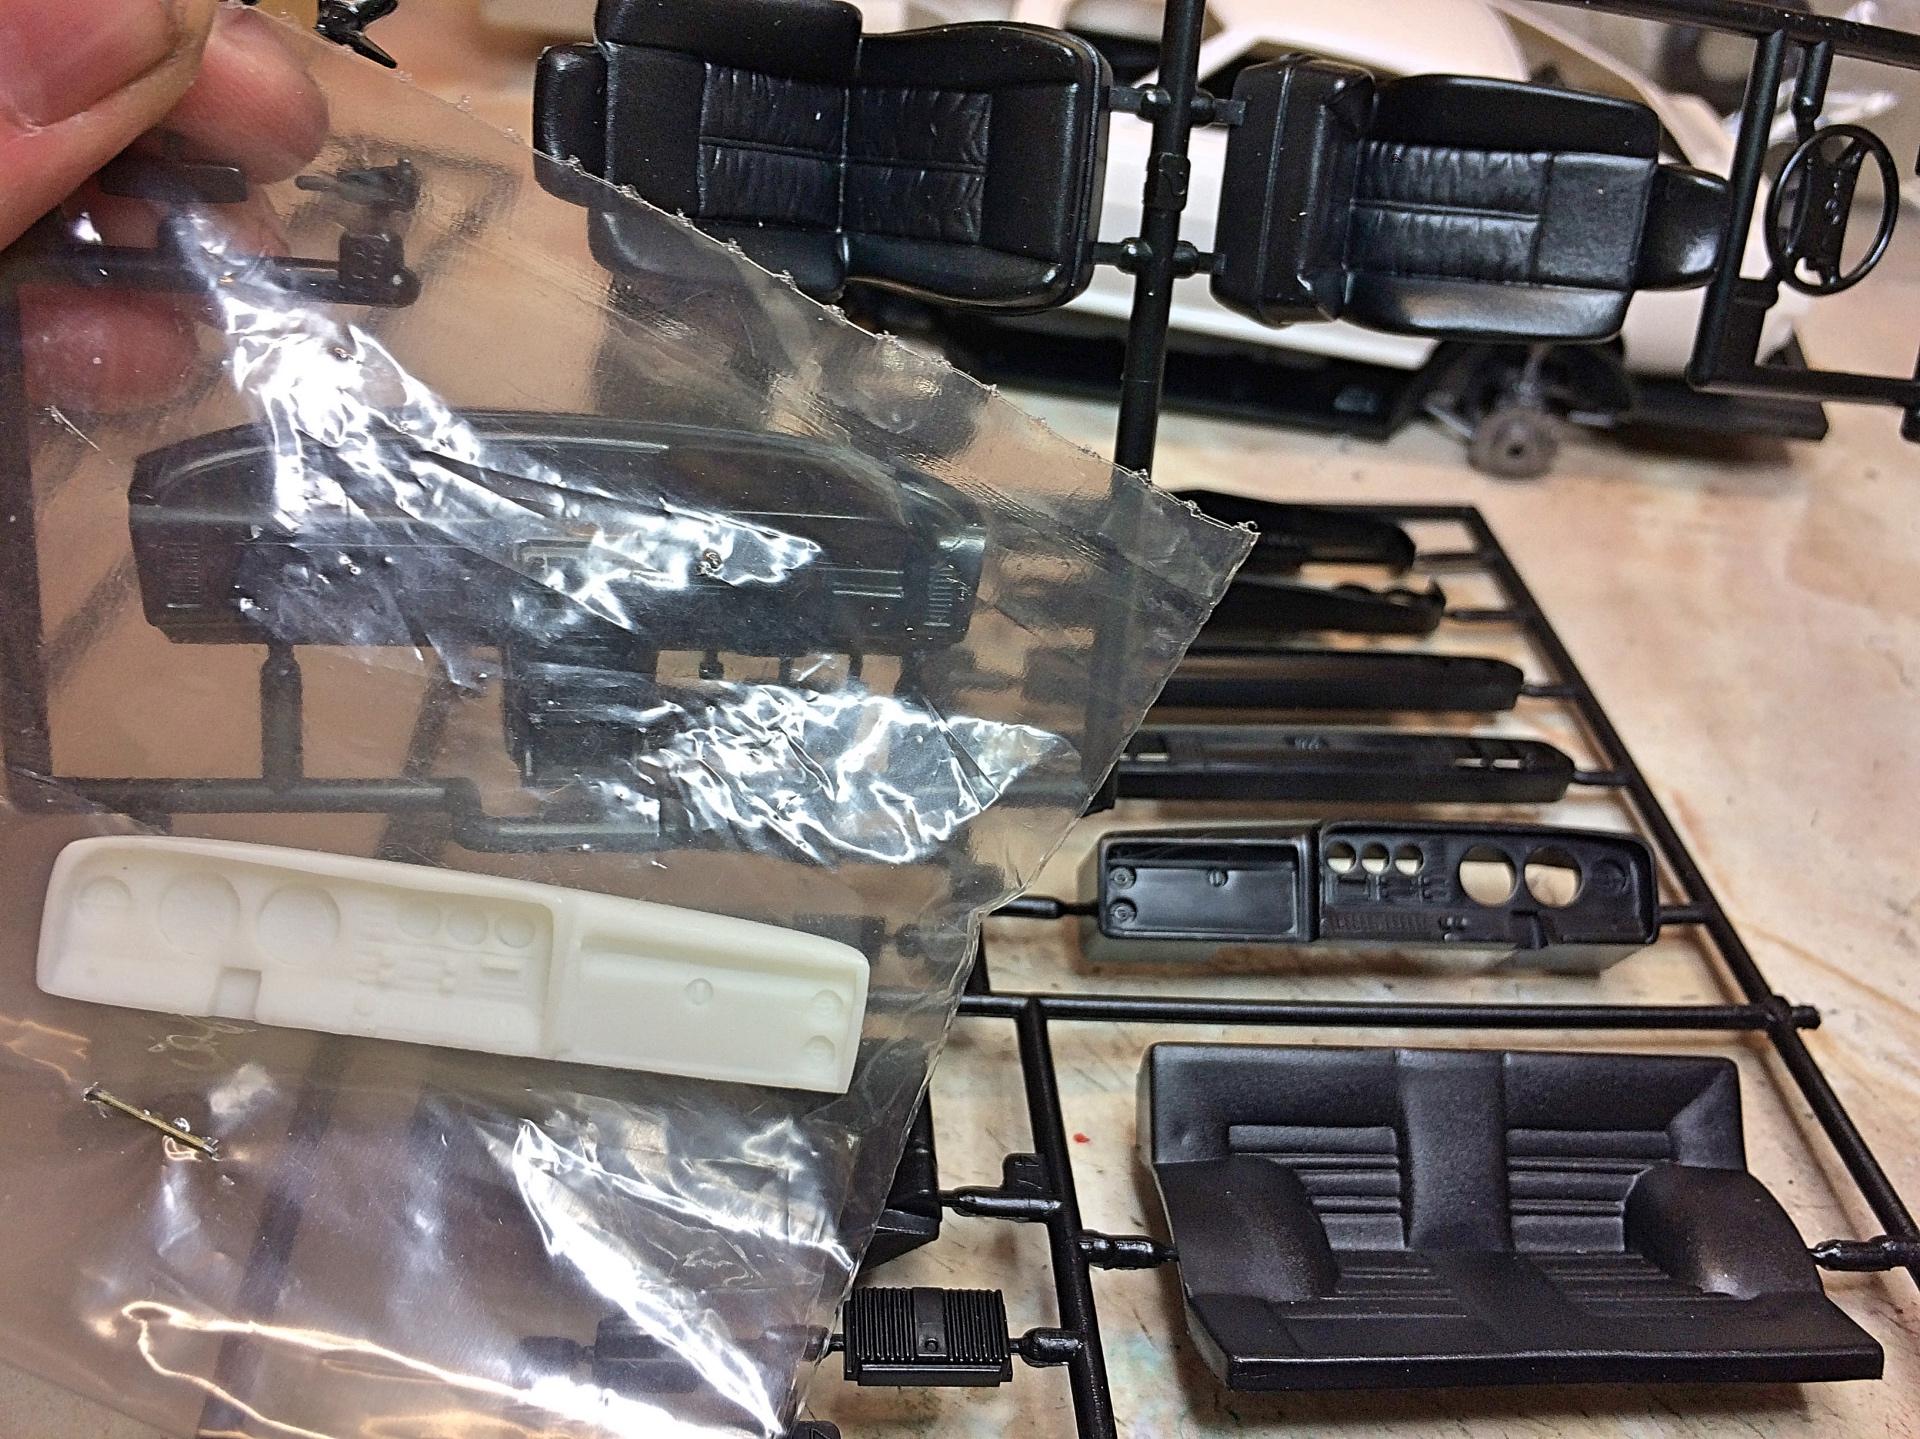
Kitbash of the Aoshima Toyota Celica LB 2000GT Liftback and the Tamiya Toyota Celsior (USA market Lexus LS400). Been thinking of this project for some time. Have a couple of photos found on the web of a Celica with a turbocharged Lexus V8, so that is where I started. Assembled the chassis and engine, mostly with Tacky glue. Cut off the hood, using the Tamiya scriber. I knew there might need to be flares, design pending. Chassis pan will be shortened in the middle, cut off the back, and much of the front overhang removed. Looked at my choice of wheels. This is my first choice, has two widths of tires, and Brembo brakes. I like the look, but same width tires. Maybe, but no brakes. Only because the box shows the Lexus. Interior tub width is a very close fit. Planning to chop off the back seat, and fabricate a simple back area. Lexus seats are really nice. The dashboard is the challenge, sort of. The Aoshima kit came via Satco, which made the resin LHD dashboard. I couldn't let the dust settle after finishing the VW Microbus, so I'm off and ruining two perfectly good kits.
-
Something different. I get bored with the same old same old. Find these Aoshima kits are alot of fun to build. The kit. The completed build.
-
Here's my 4th build of 2018. A OBB stock C210 Nissan Skyline. Looking back on this I really wished I polished it but another time. Tamiya paint n clear coat. Not much else to say. Hopefully ill have my first build of 2019 finish next week. Another Nissan with a fixed up exhaust too
-
 Finished this up today, second of these kits I've built, probably the last. Very fiddly construction, not many positive attachment points, vague instructions. For bikes I think I'll go with a bit larger scales from now on. Comments welcome, thanks for looking.
-
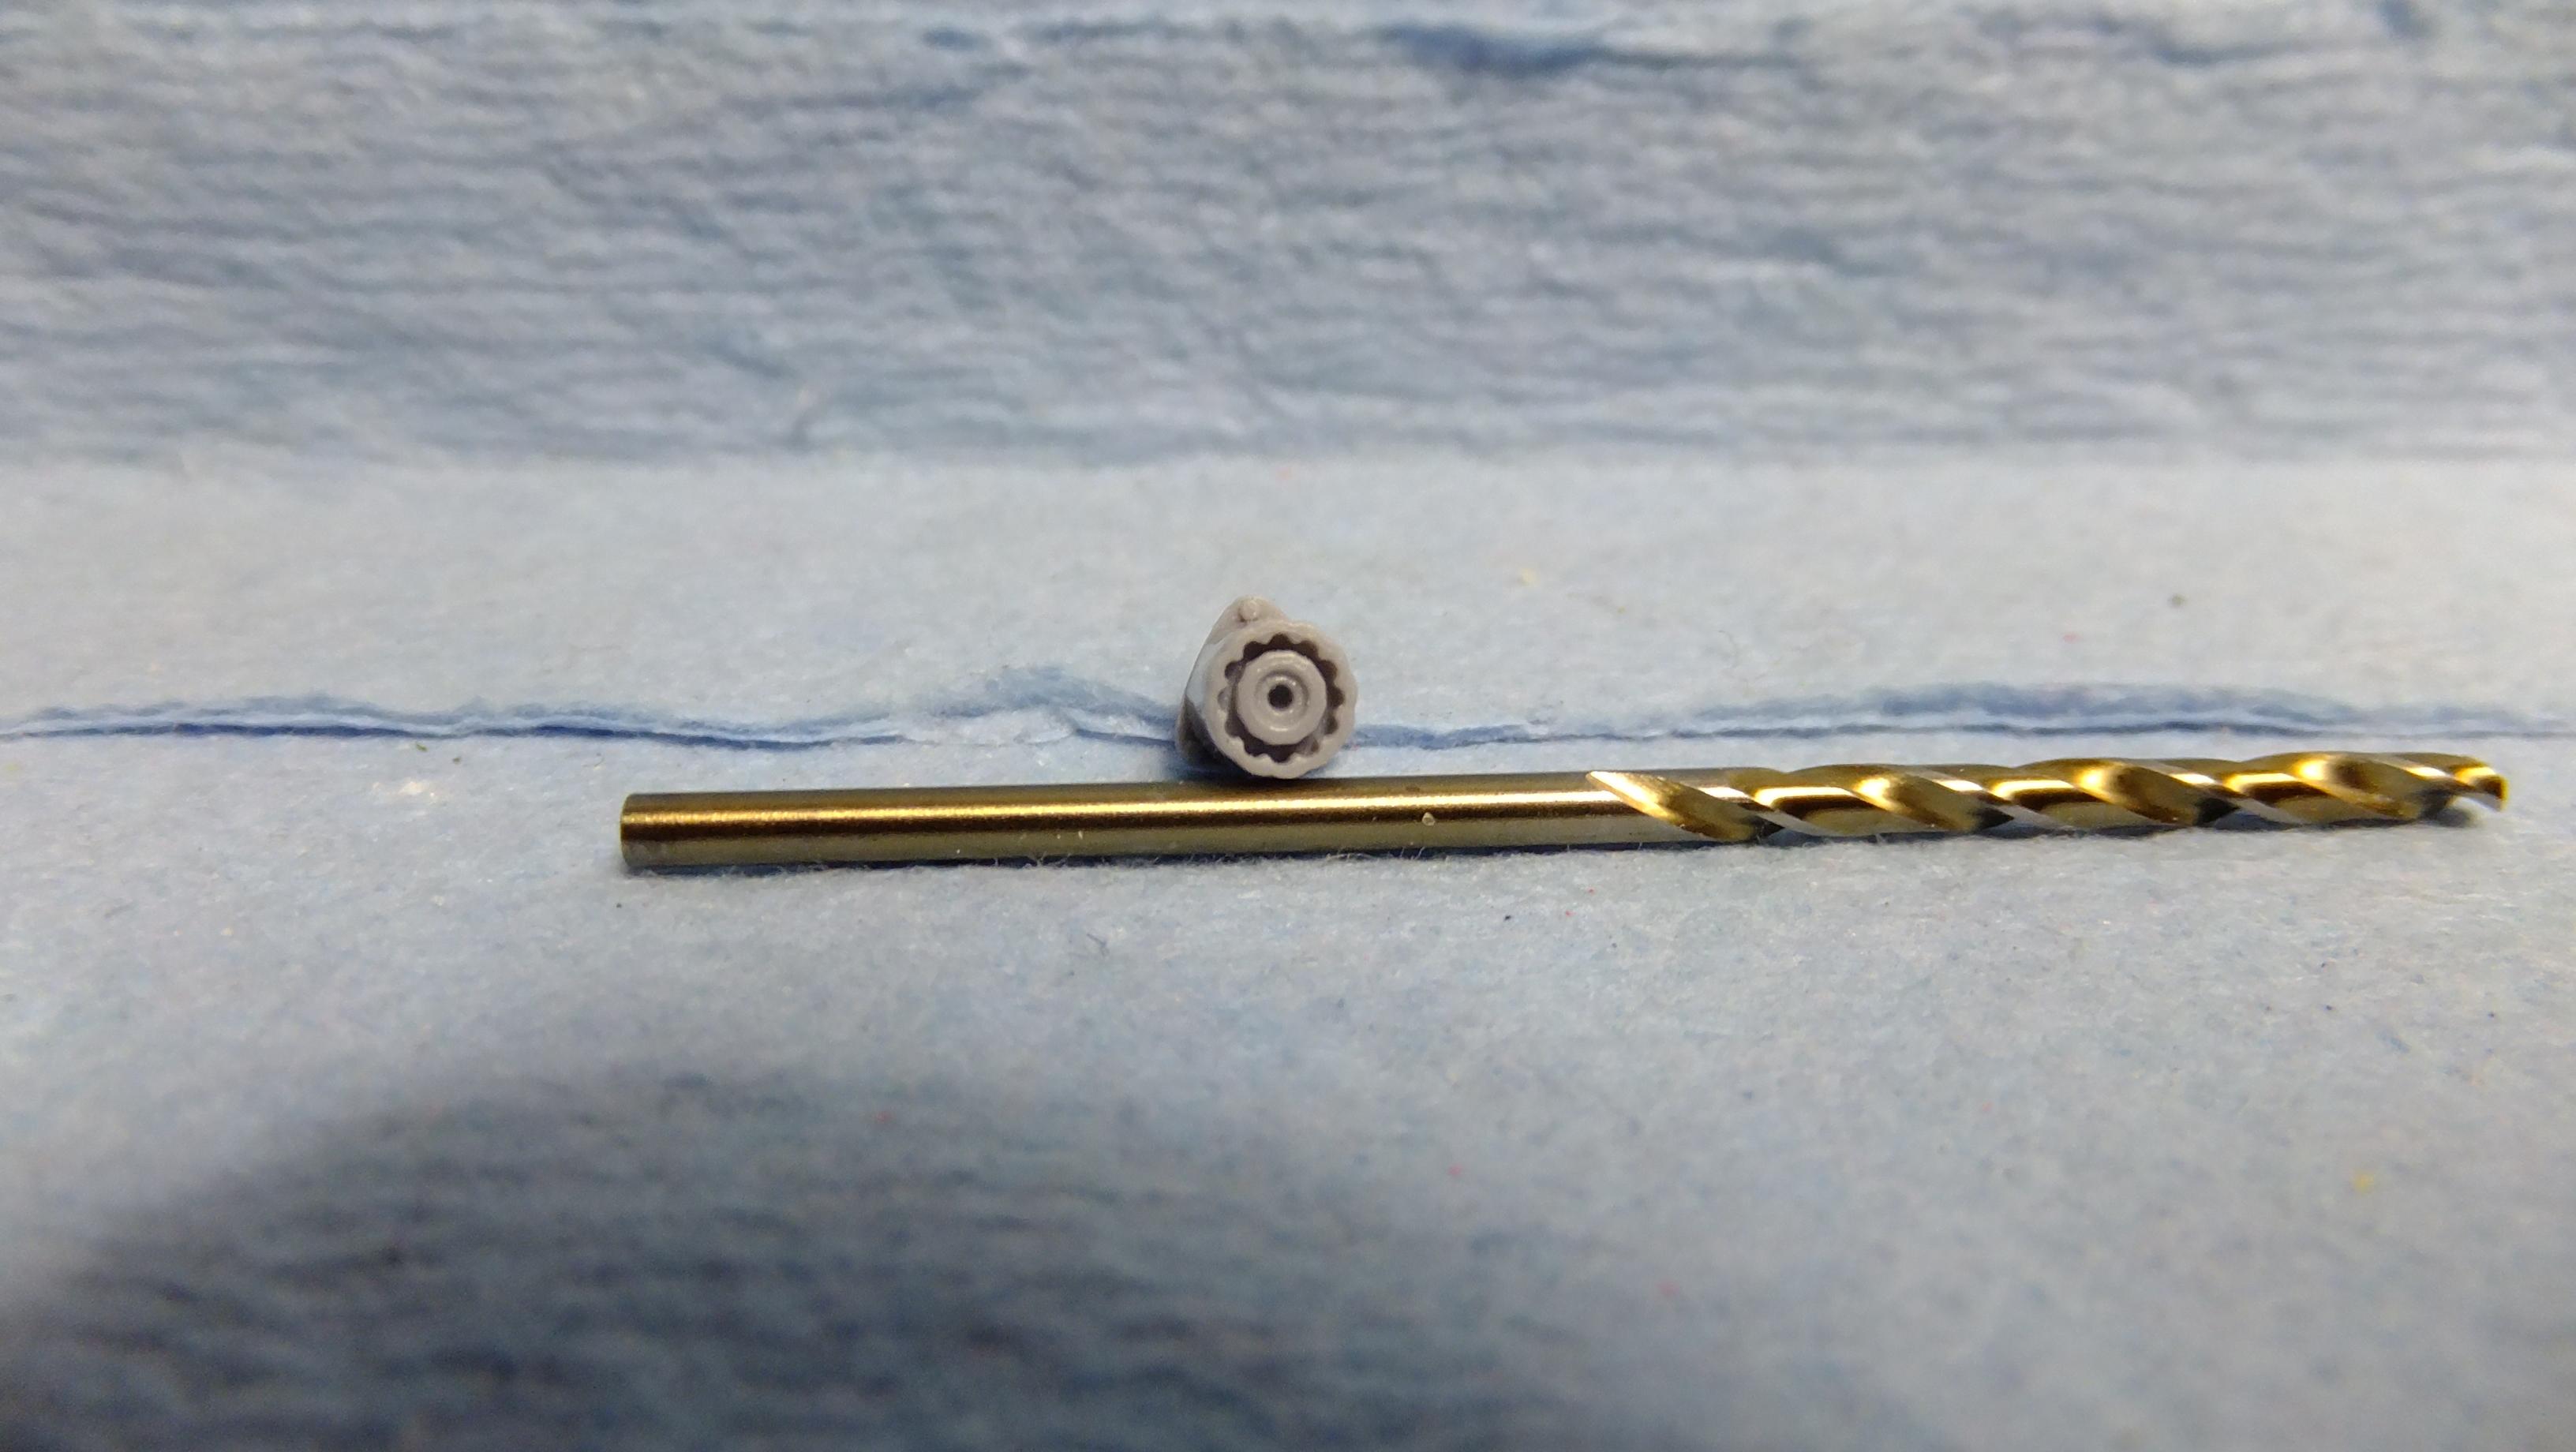
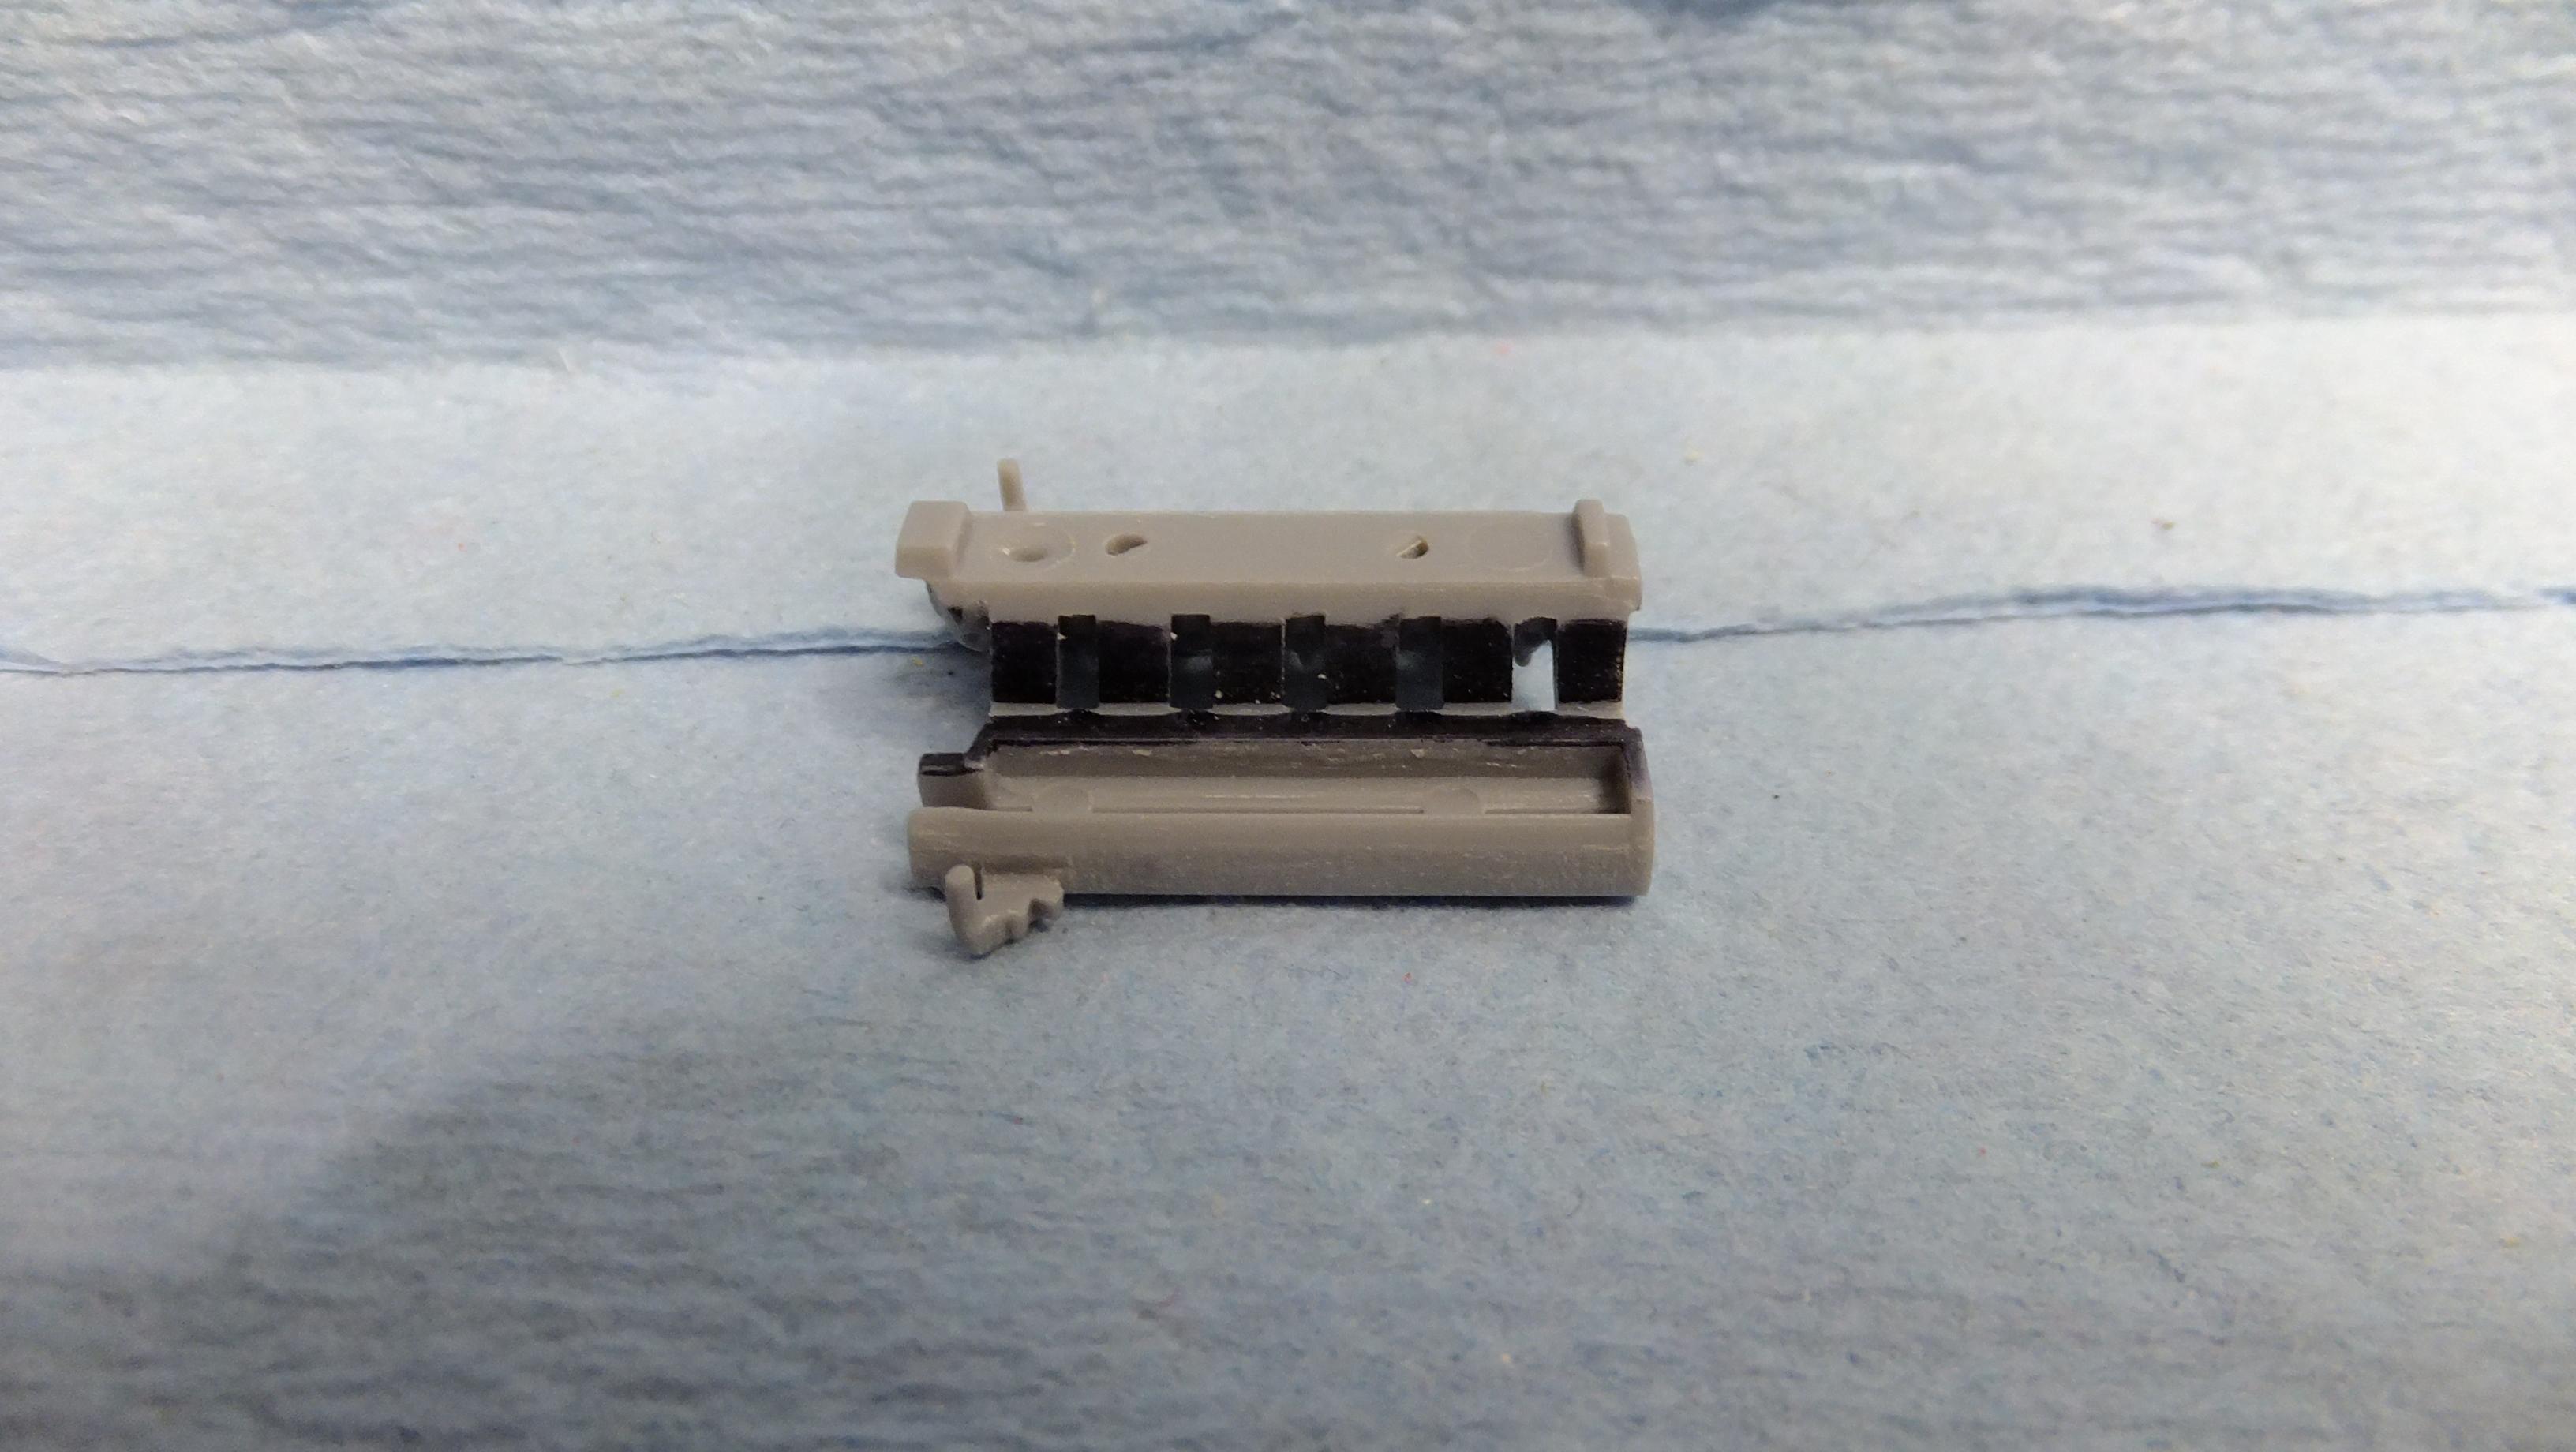
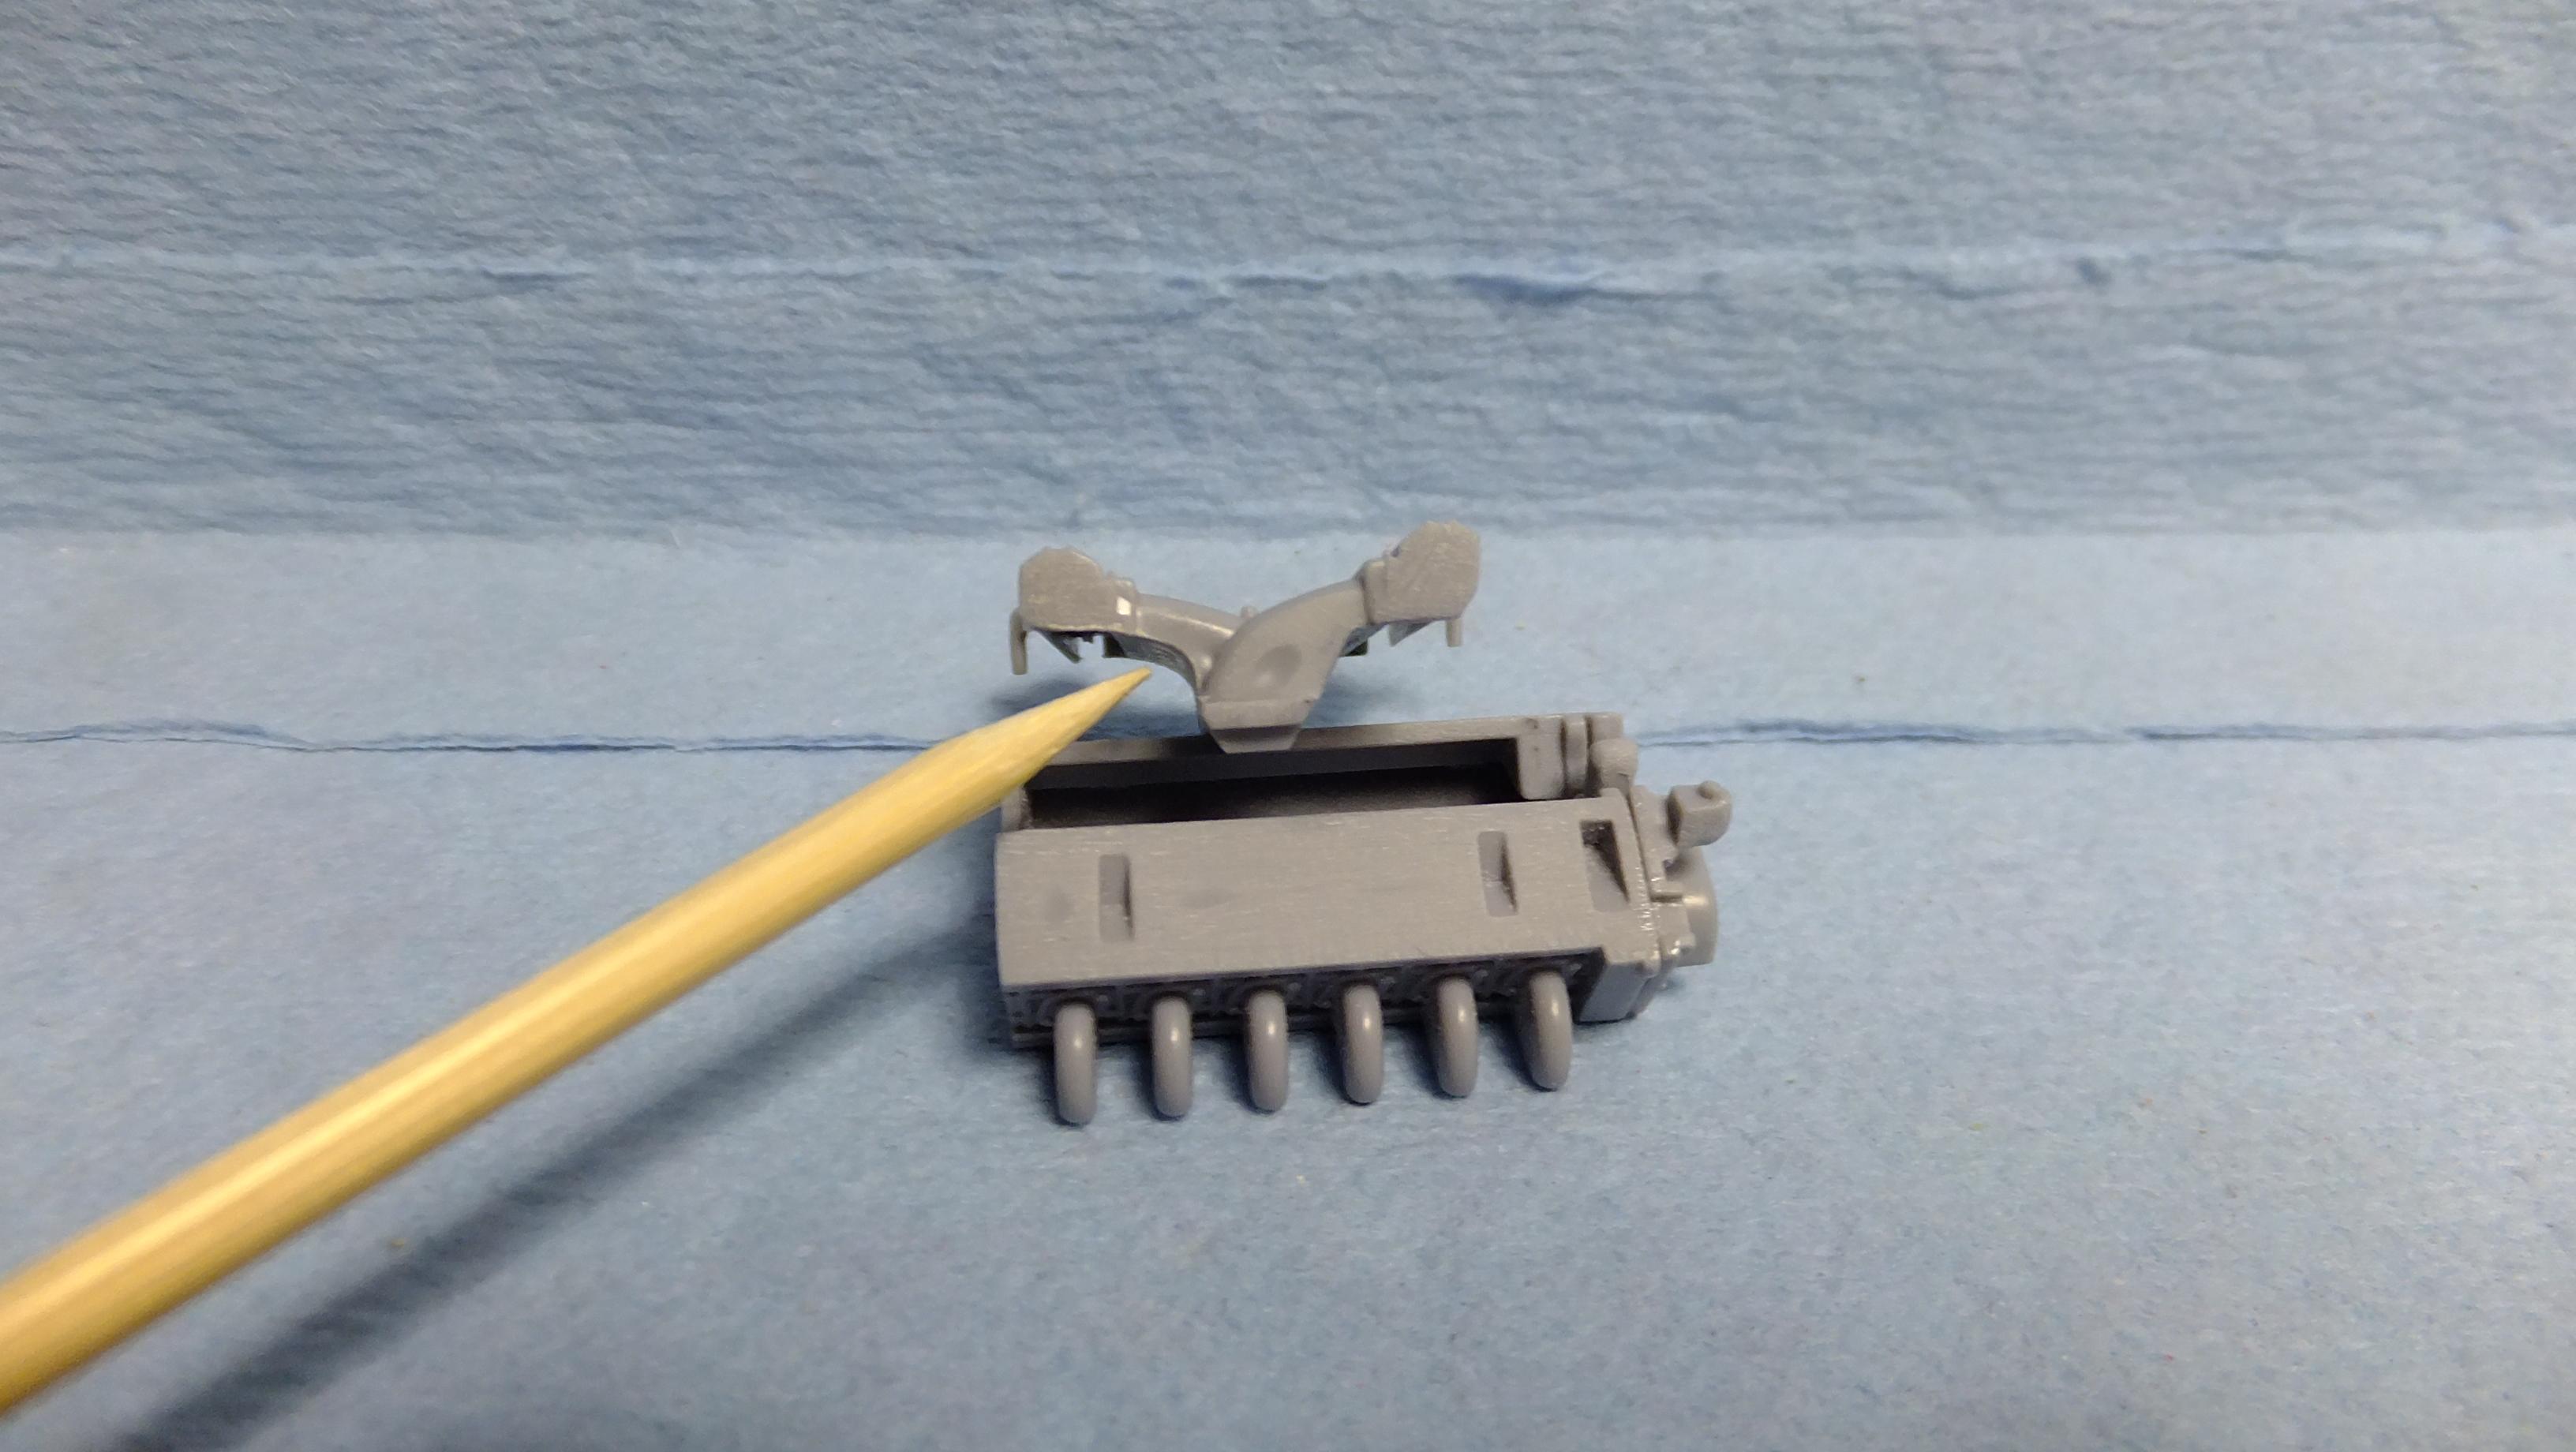
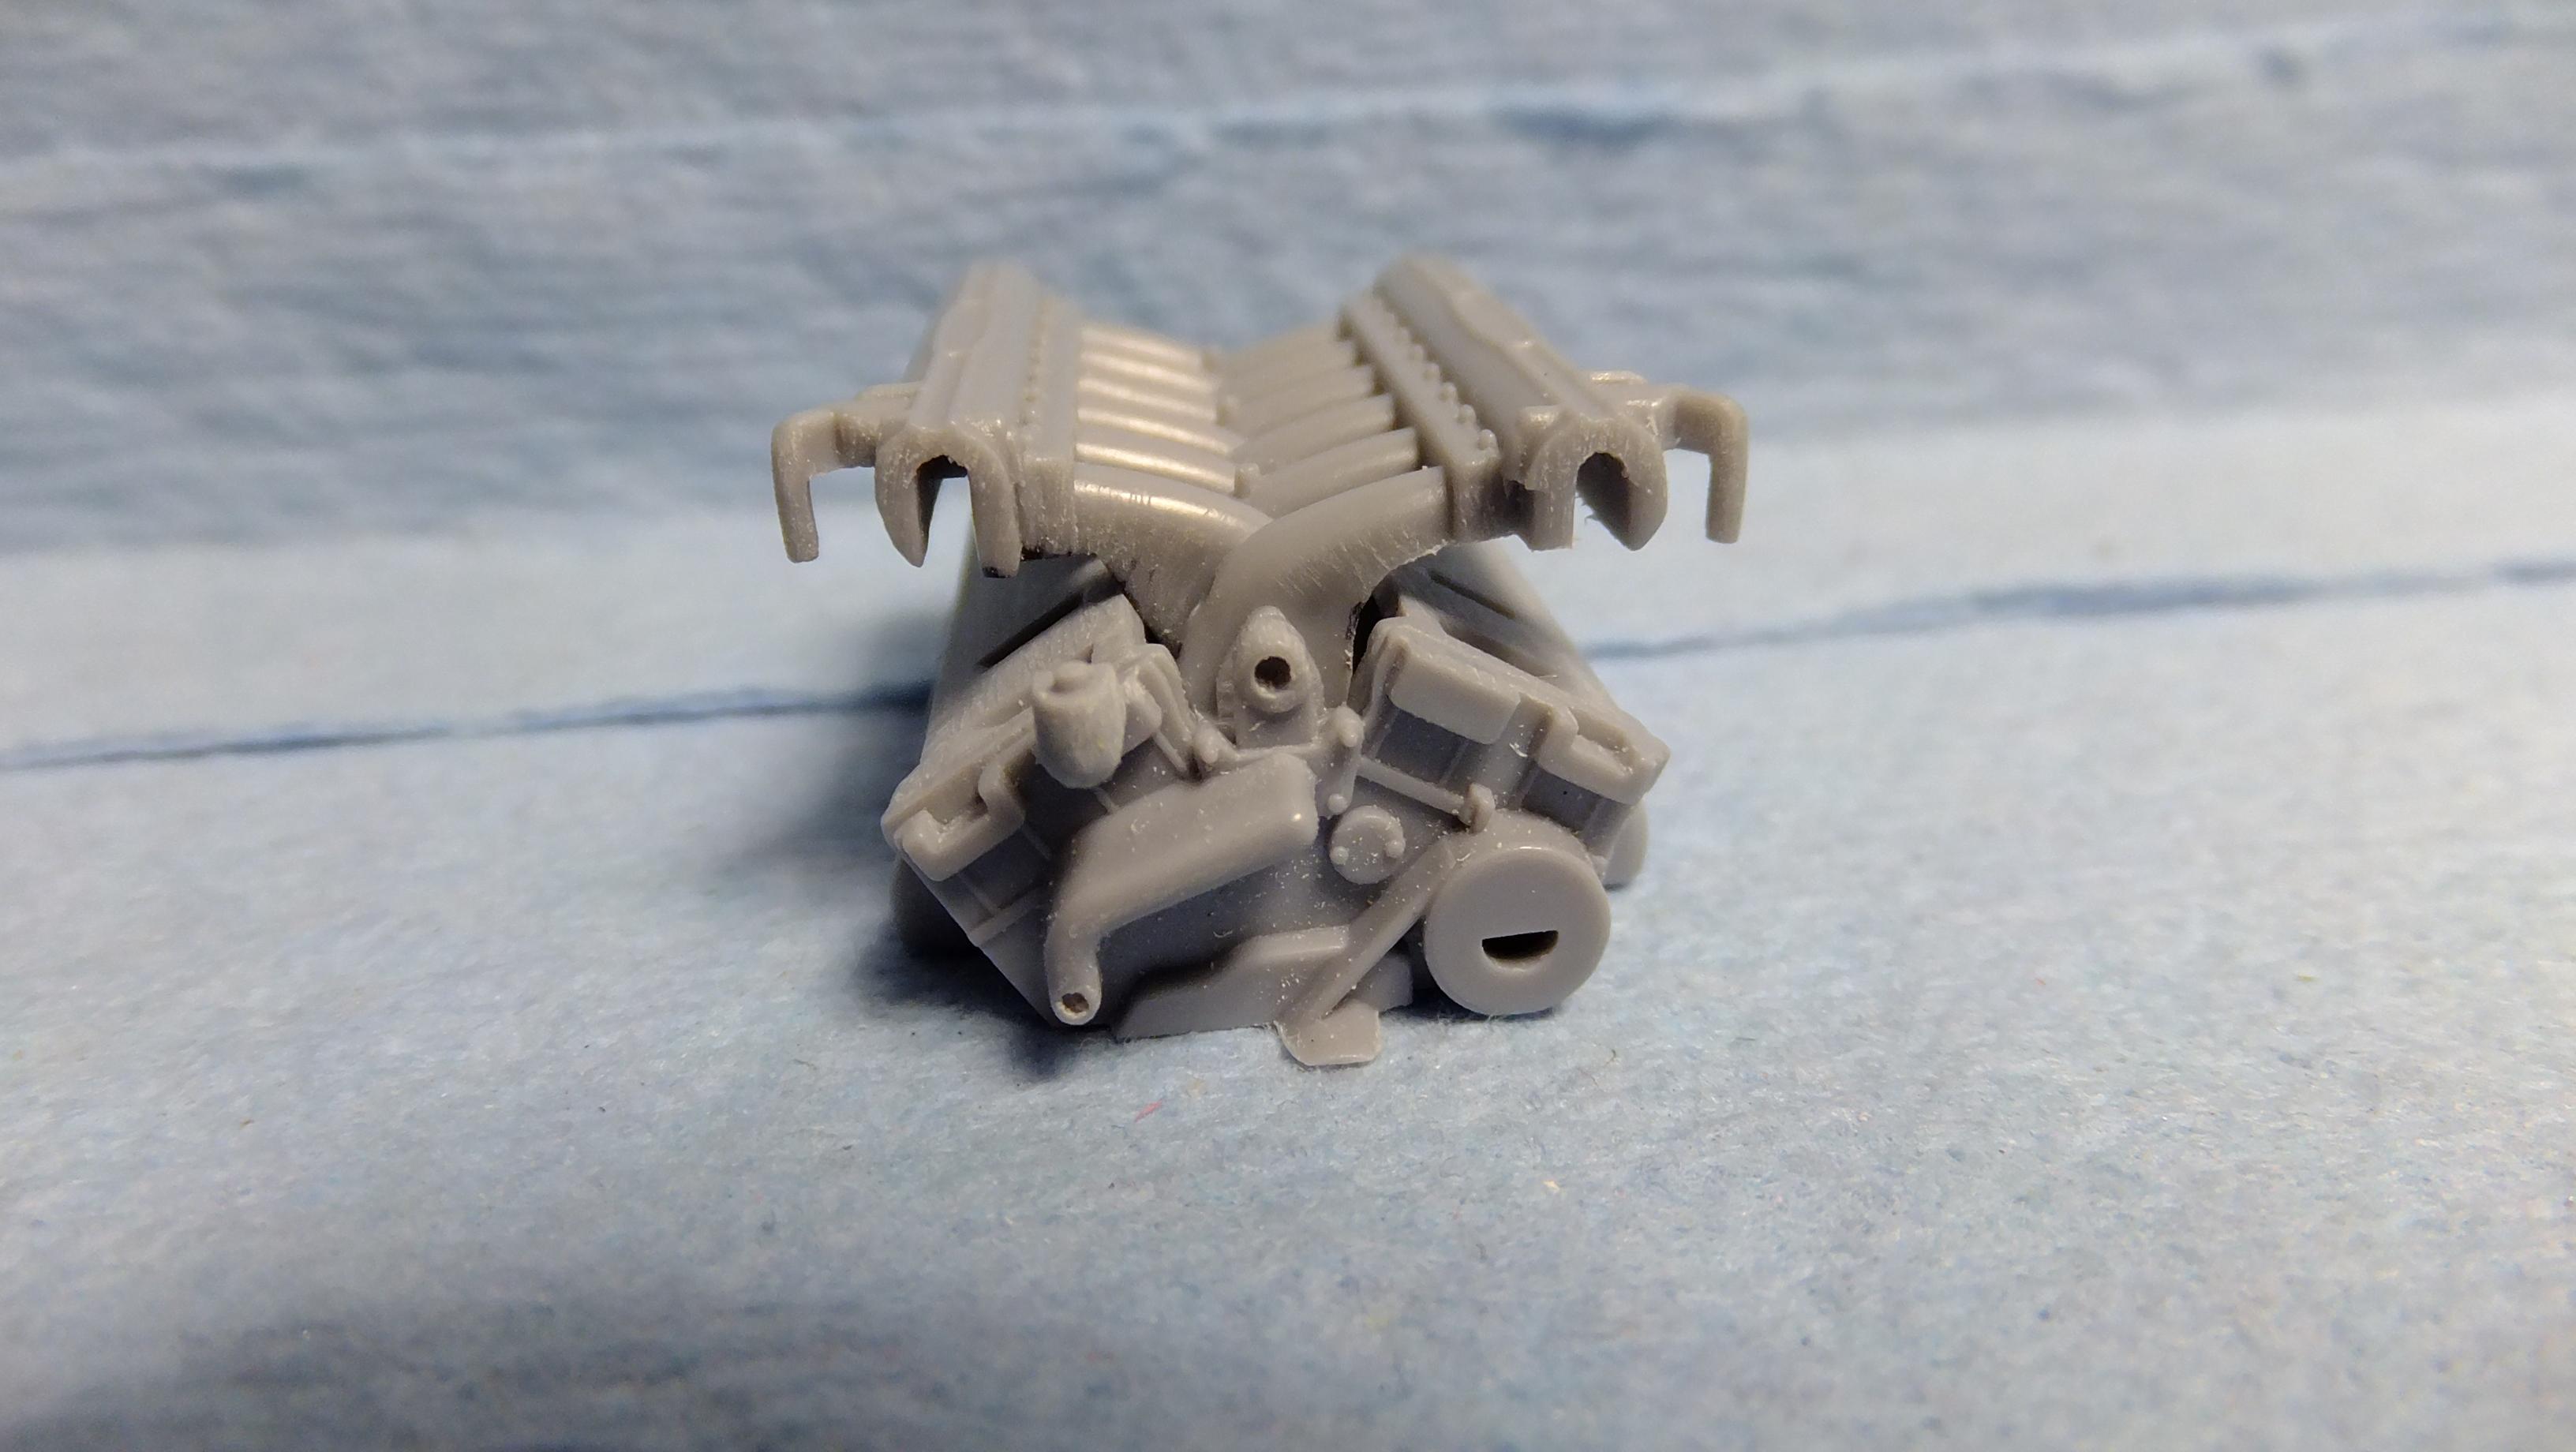
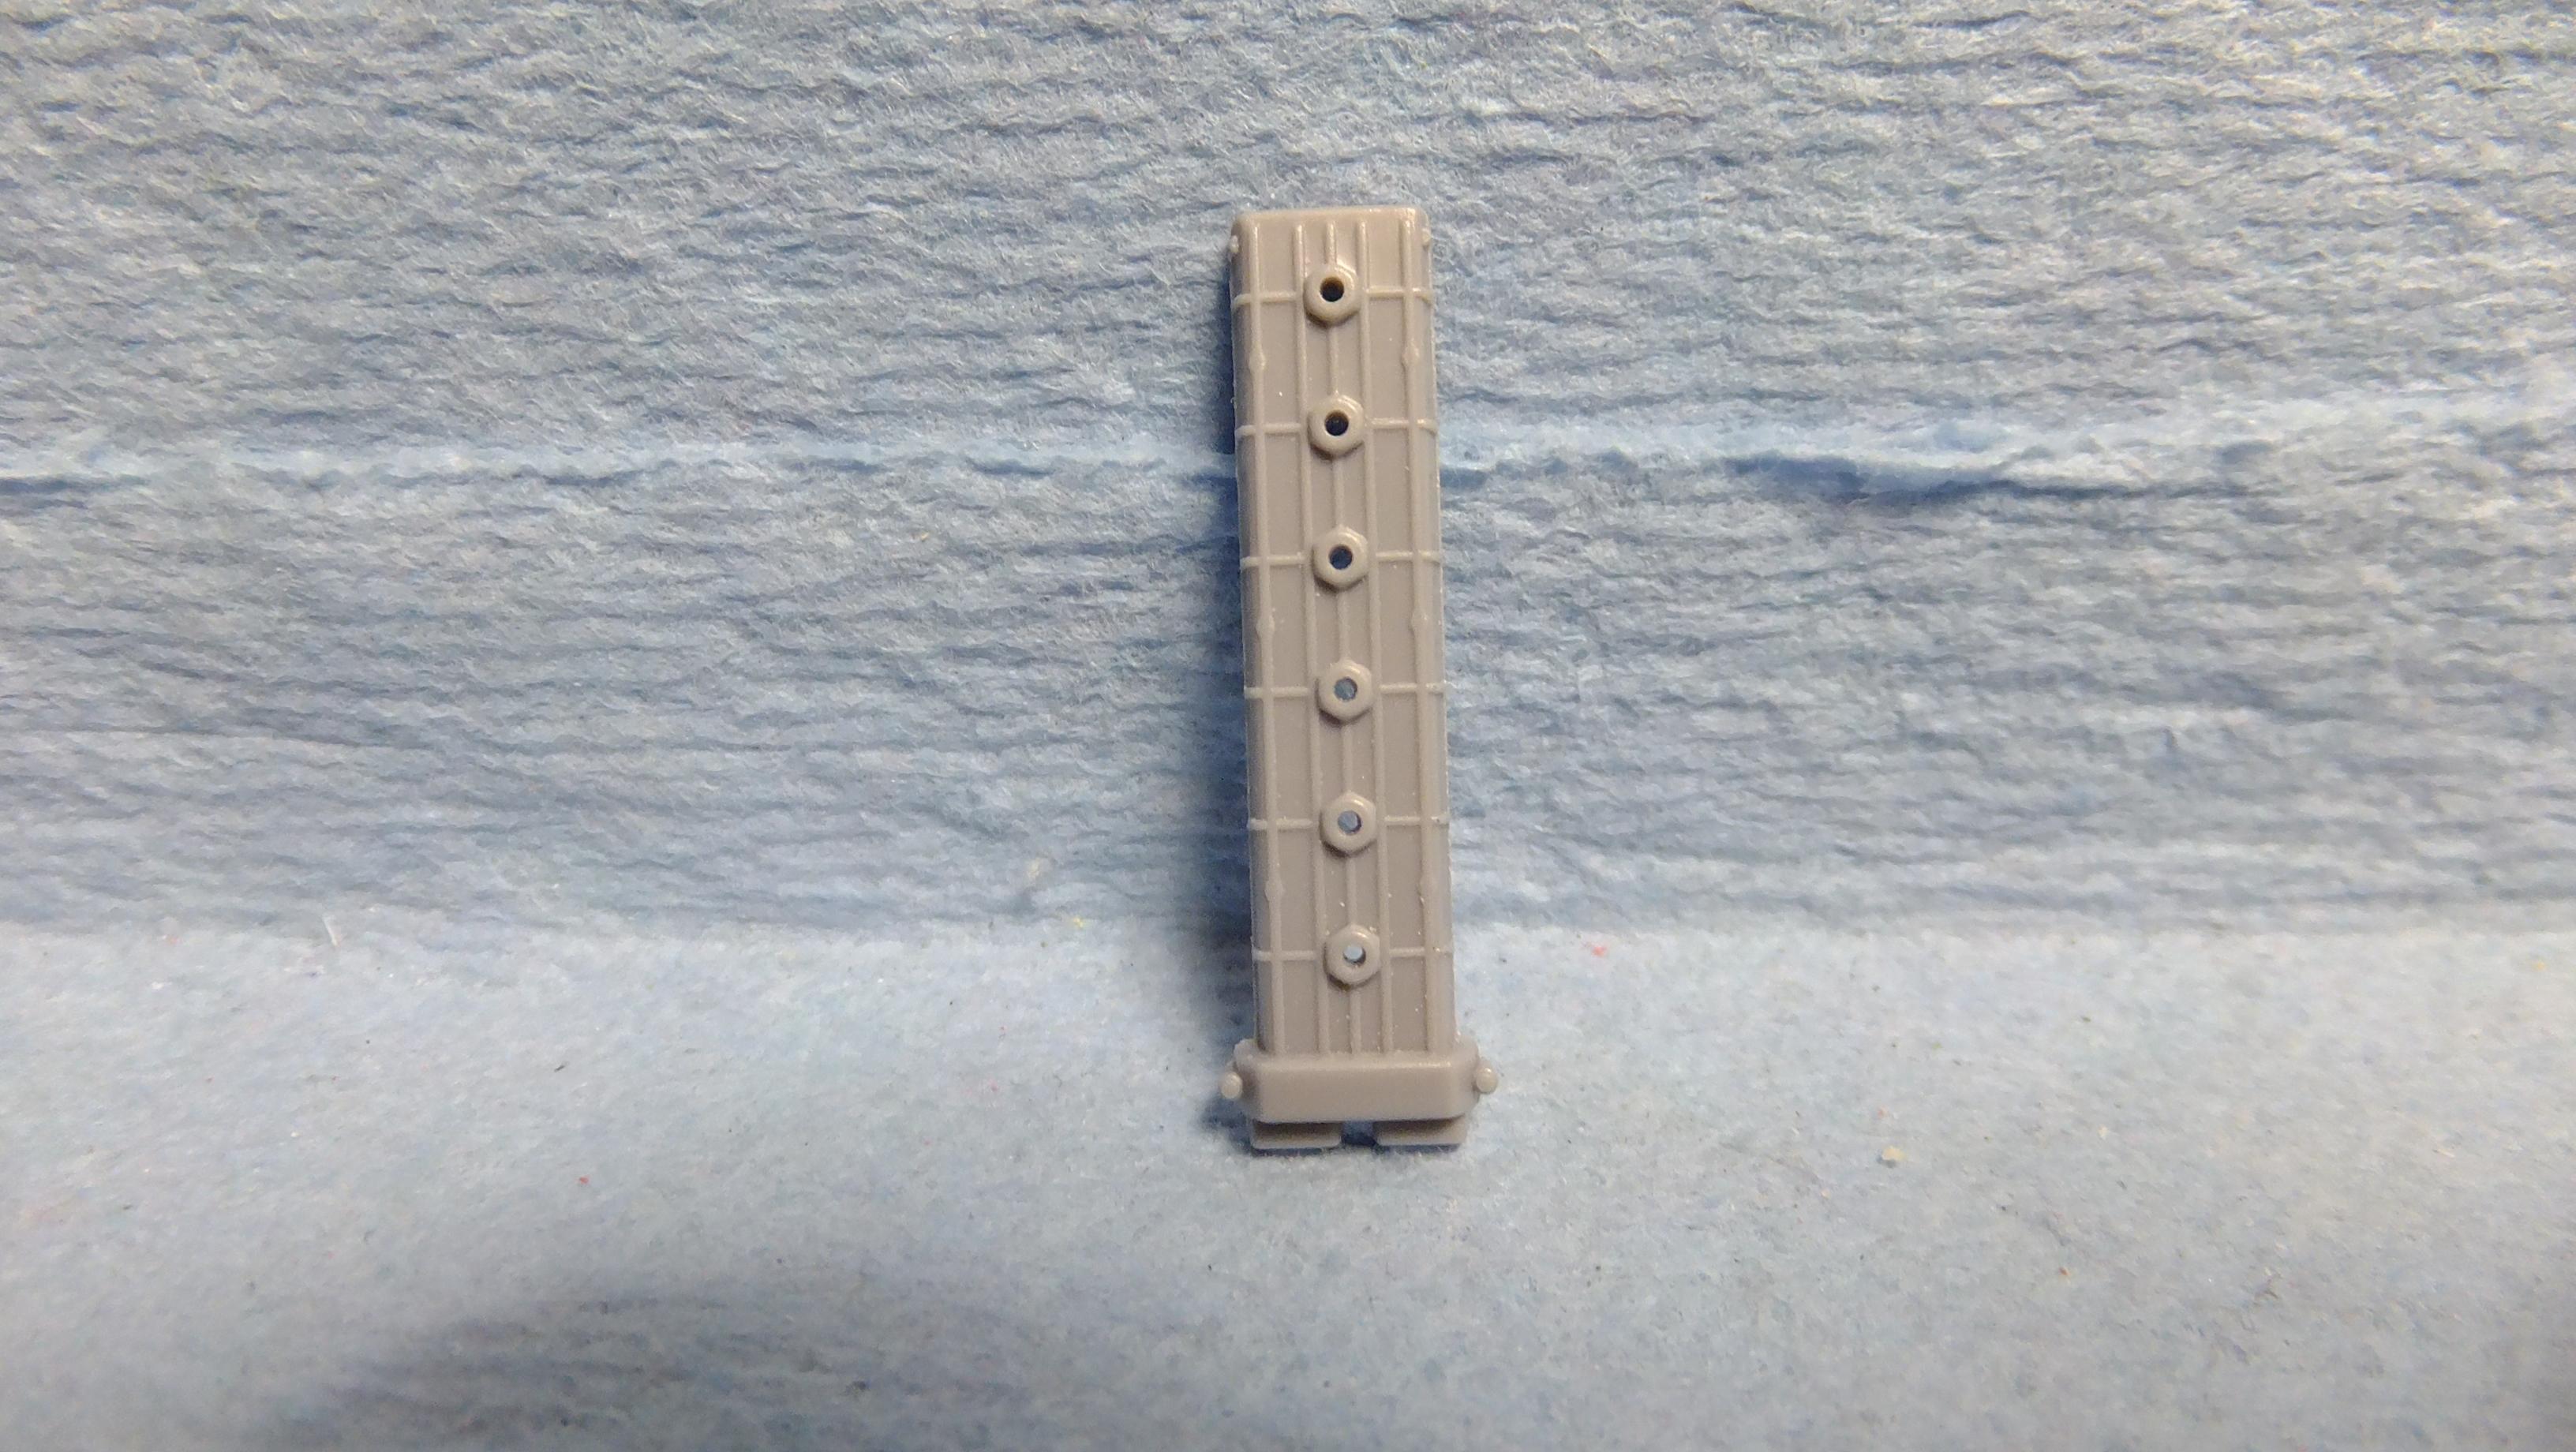
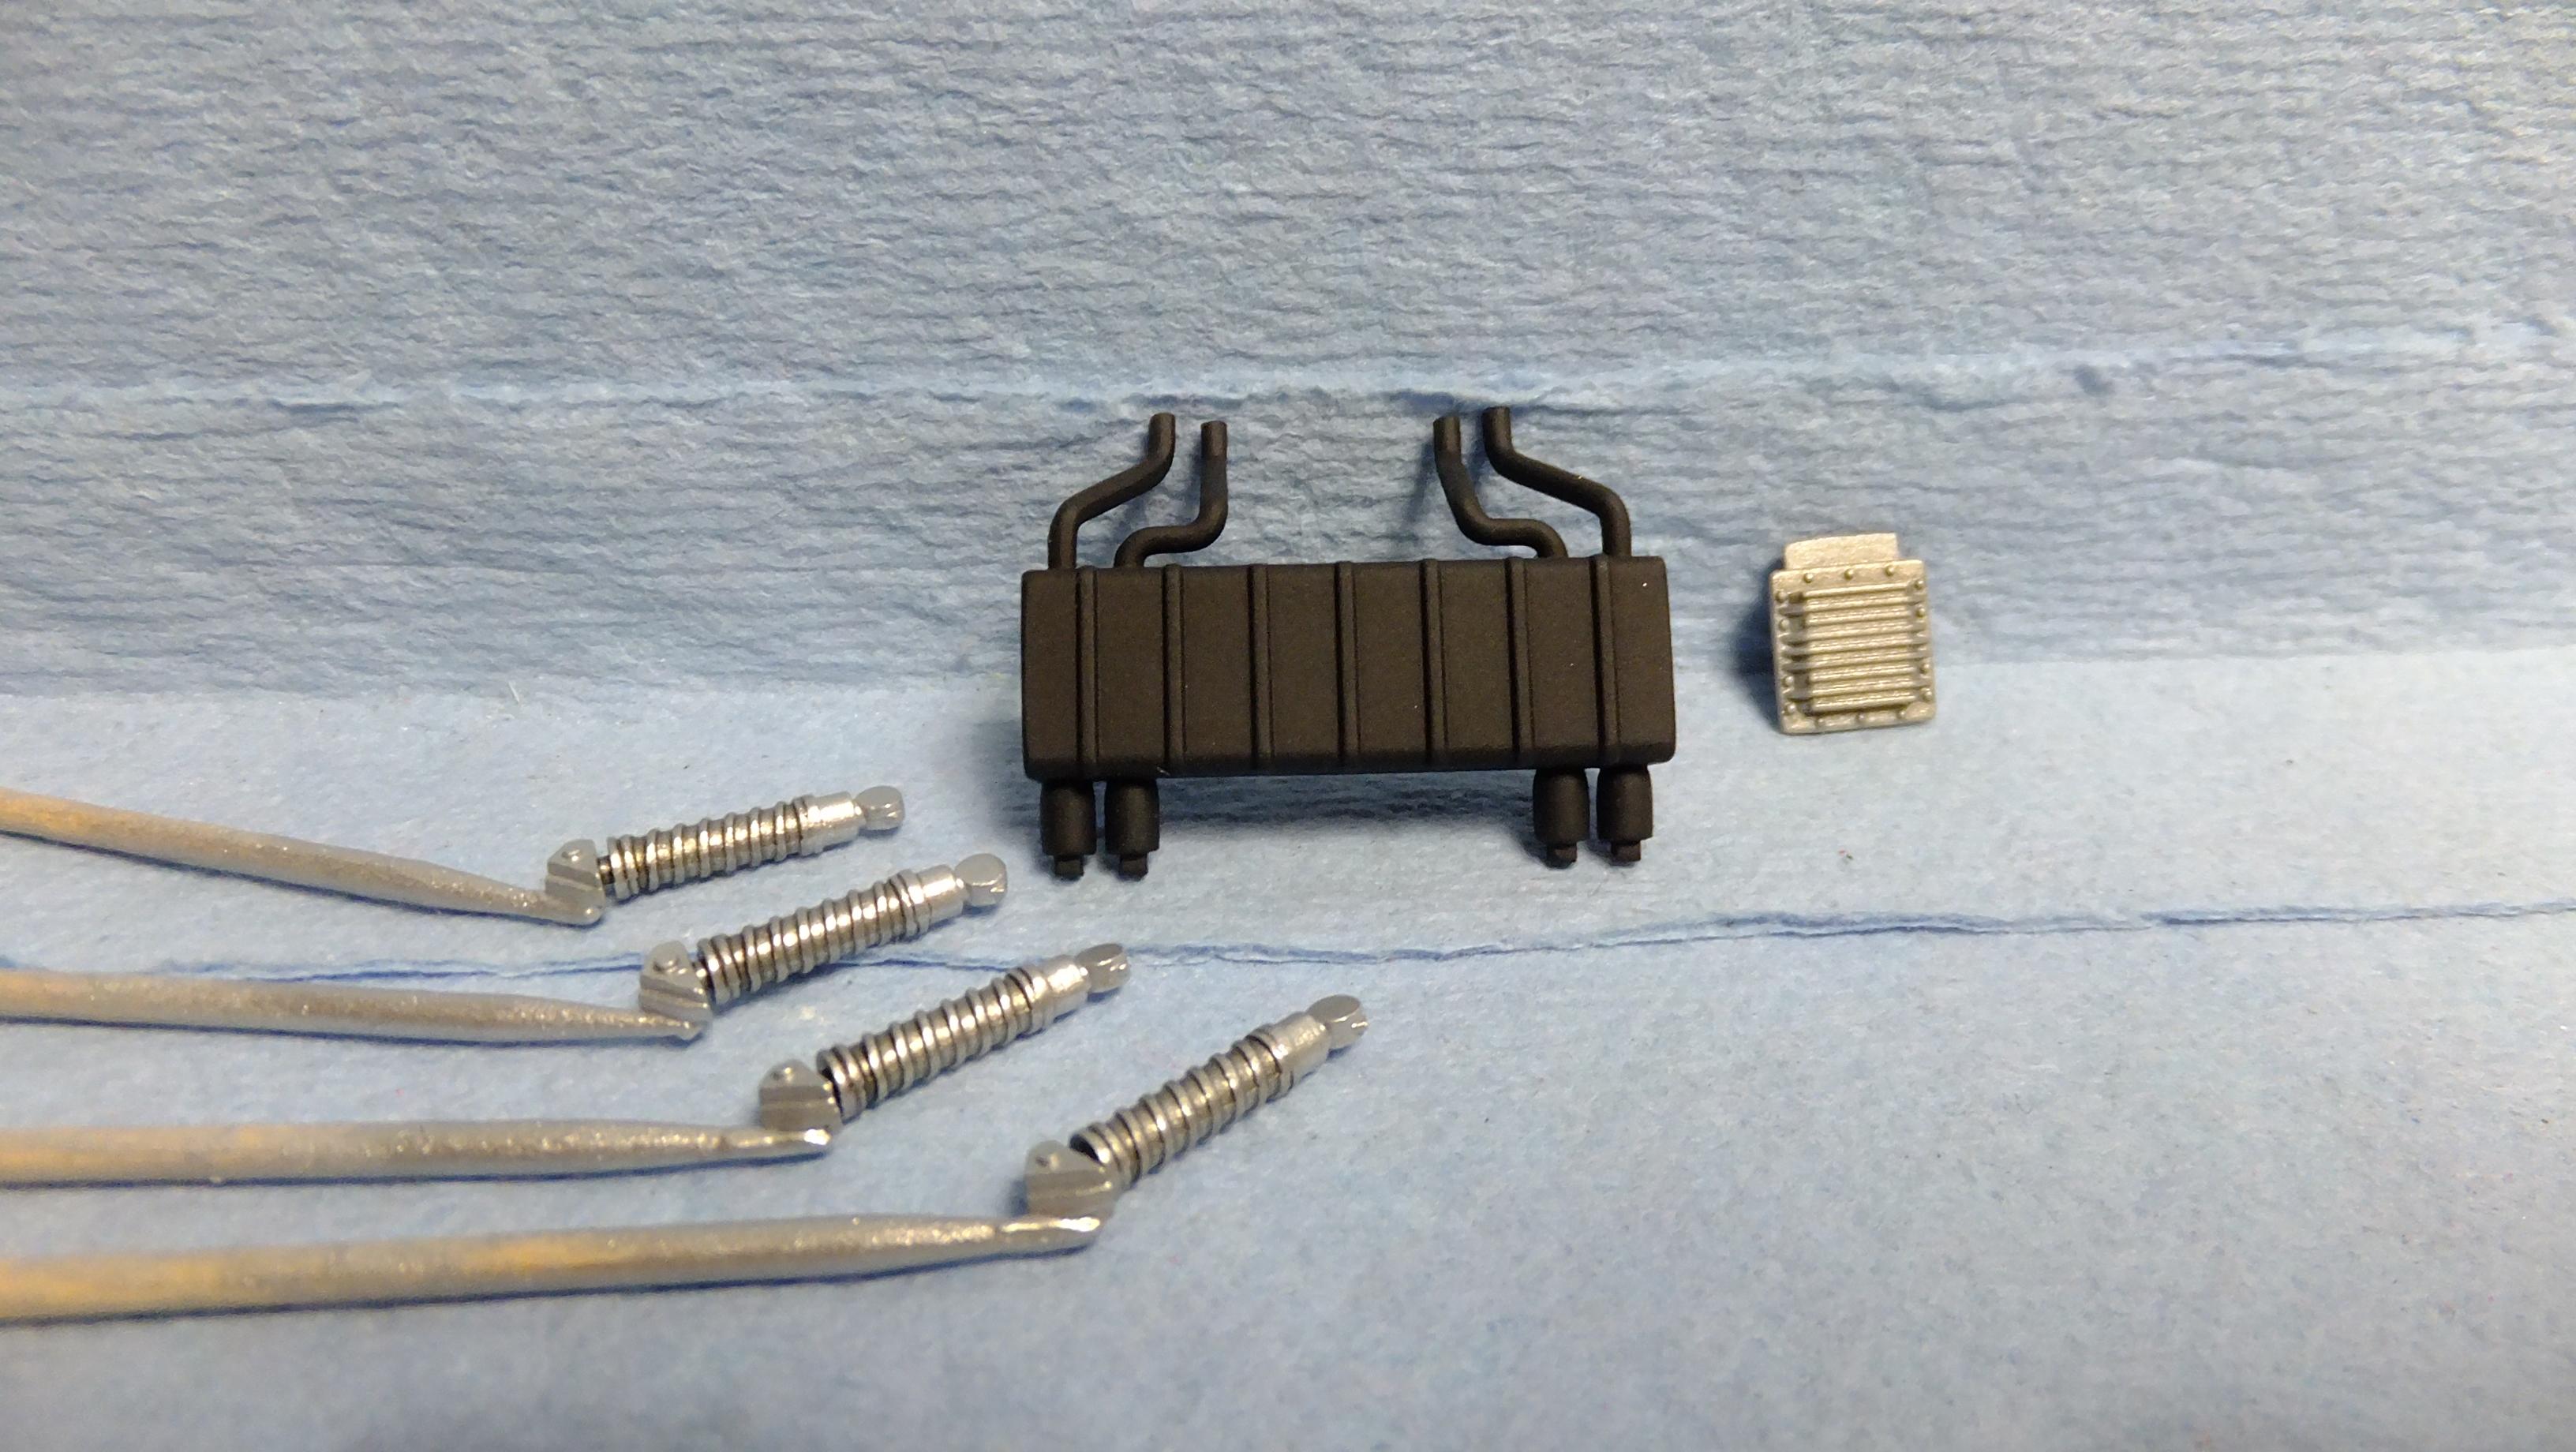
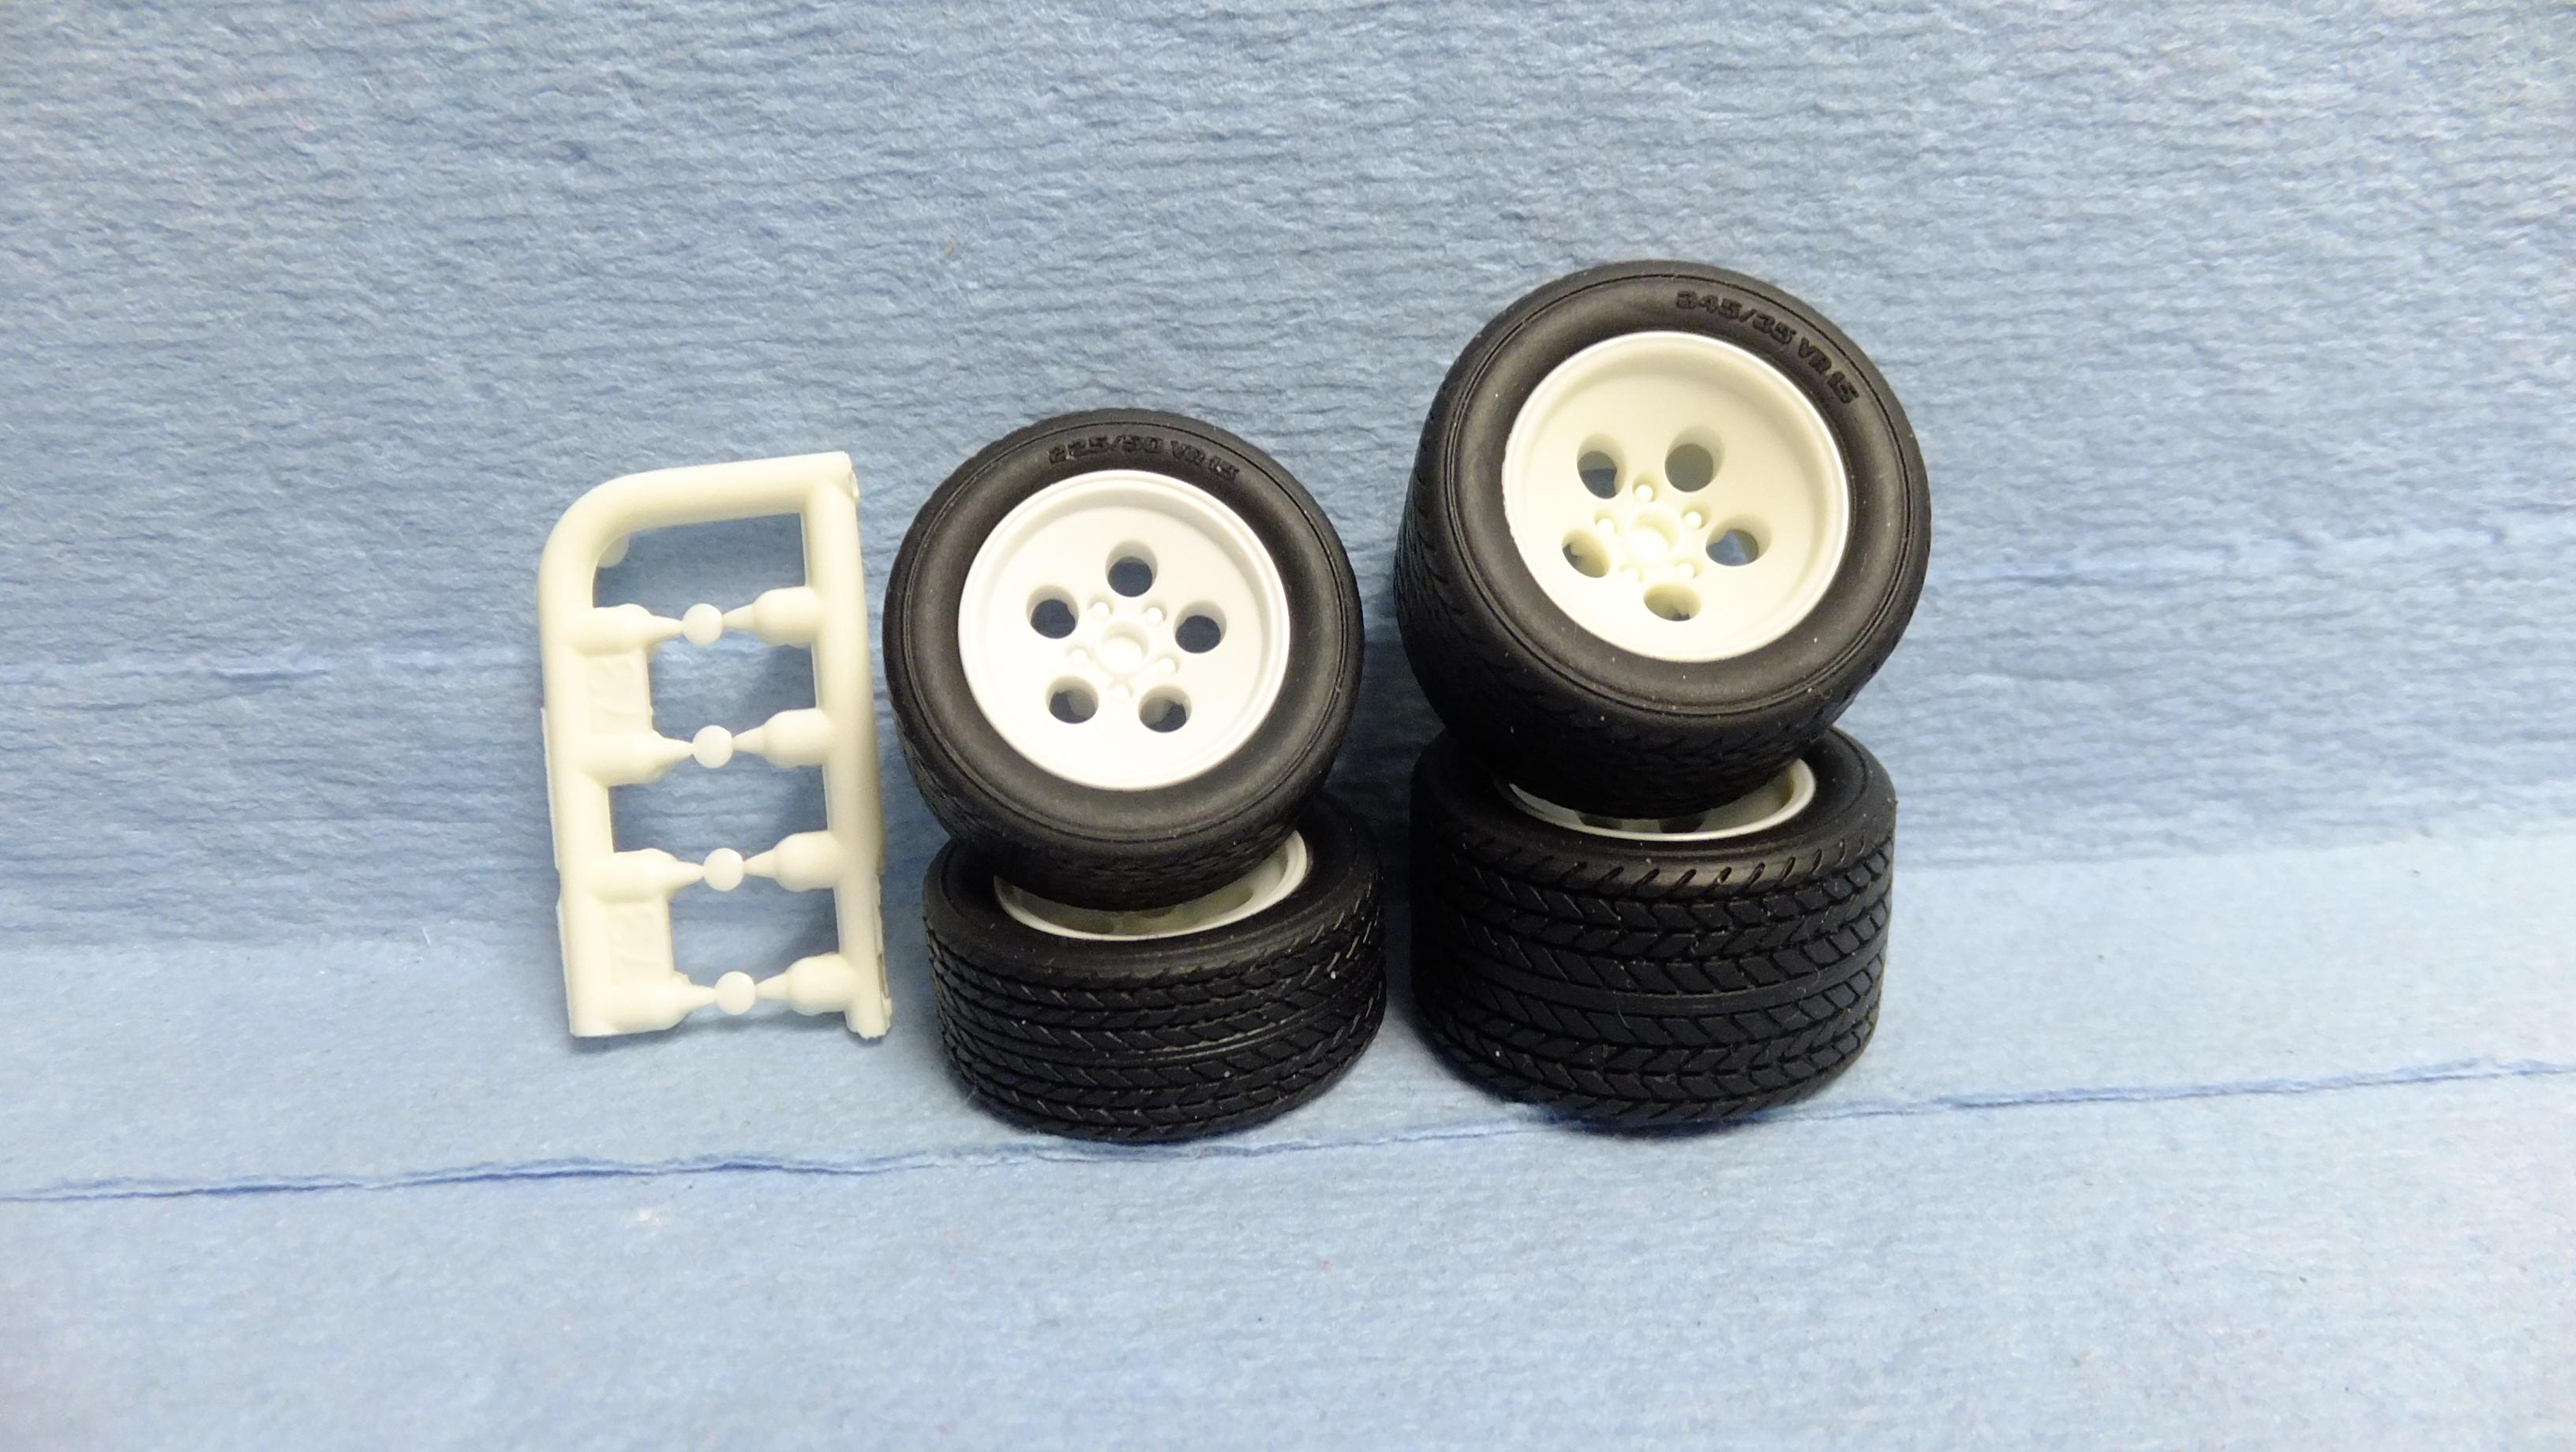
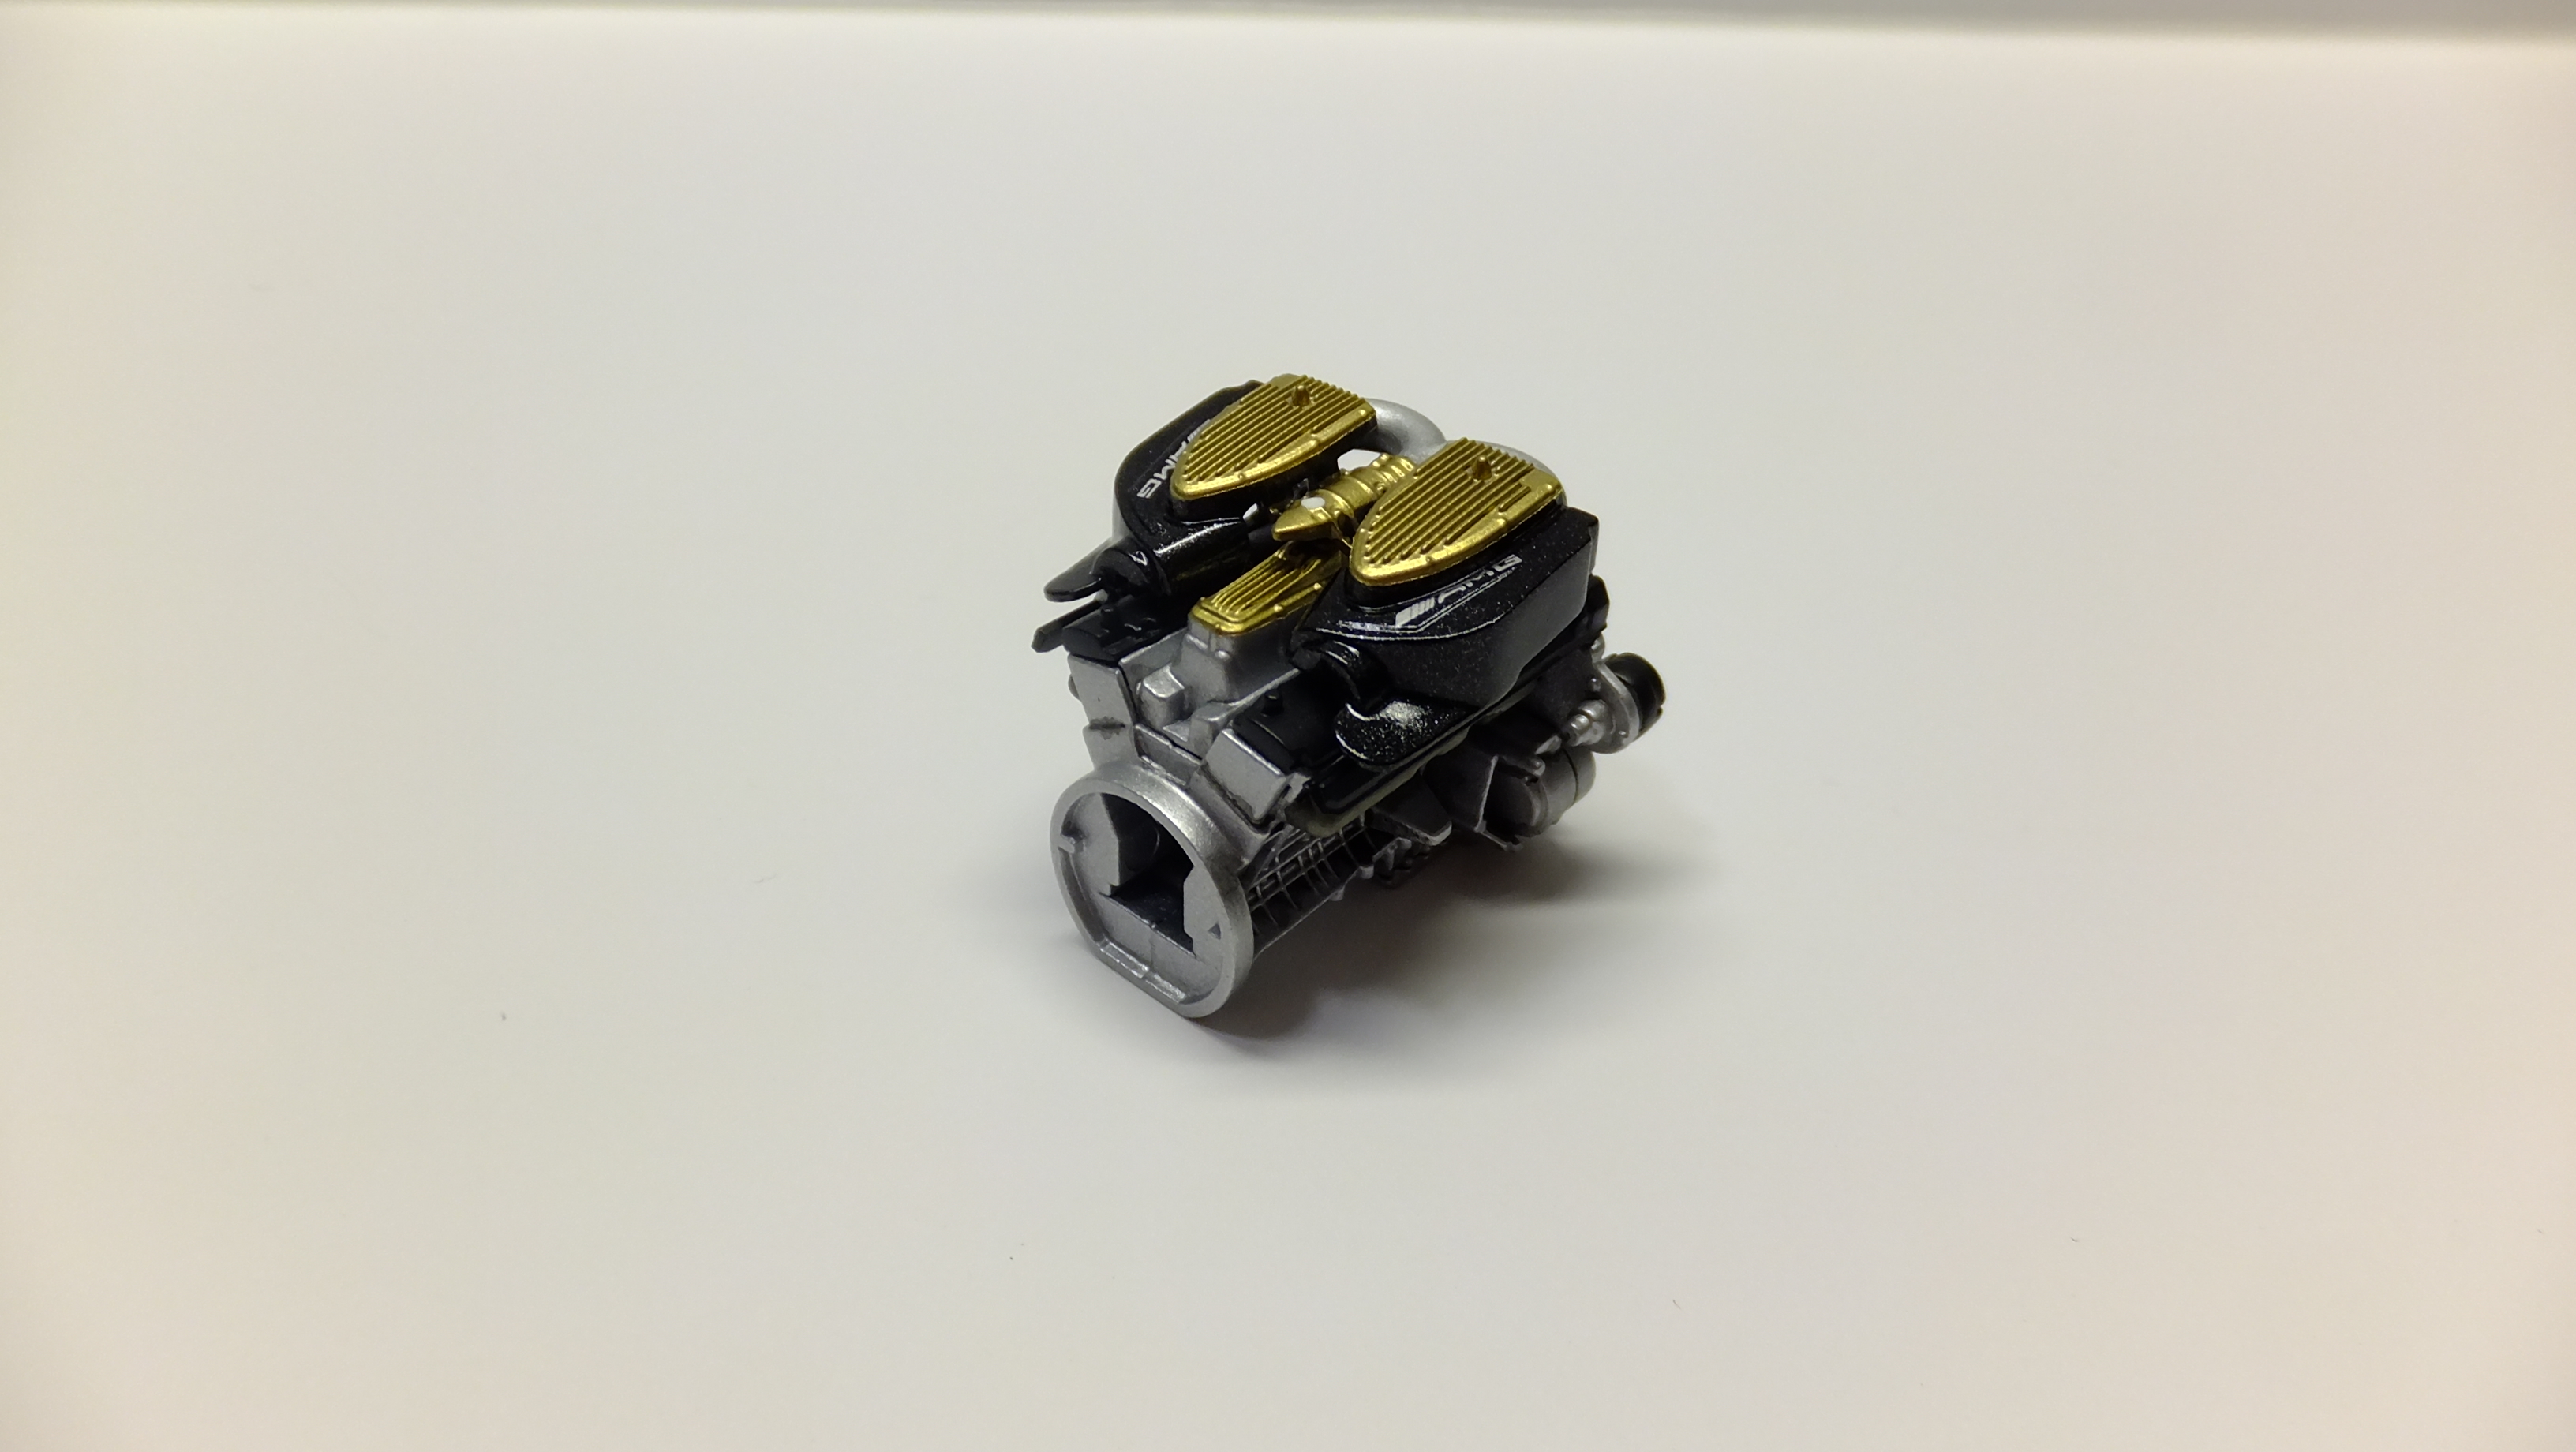
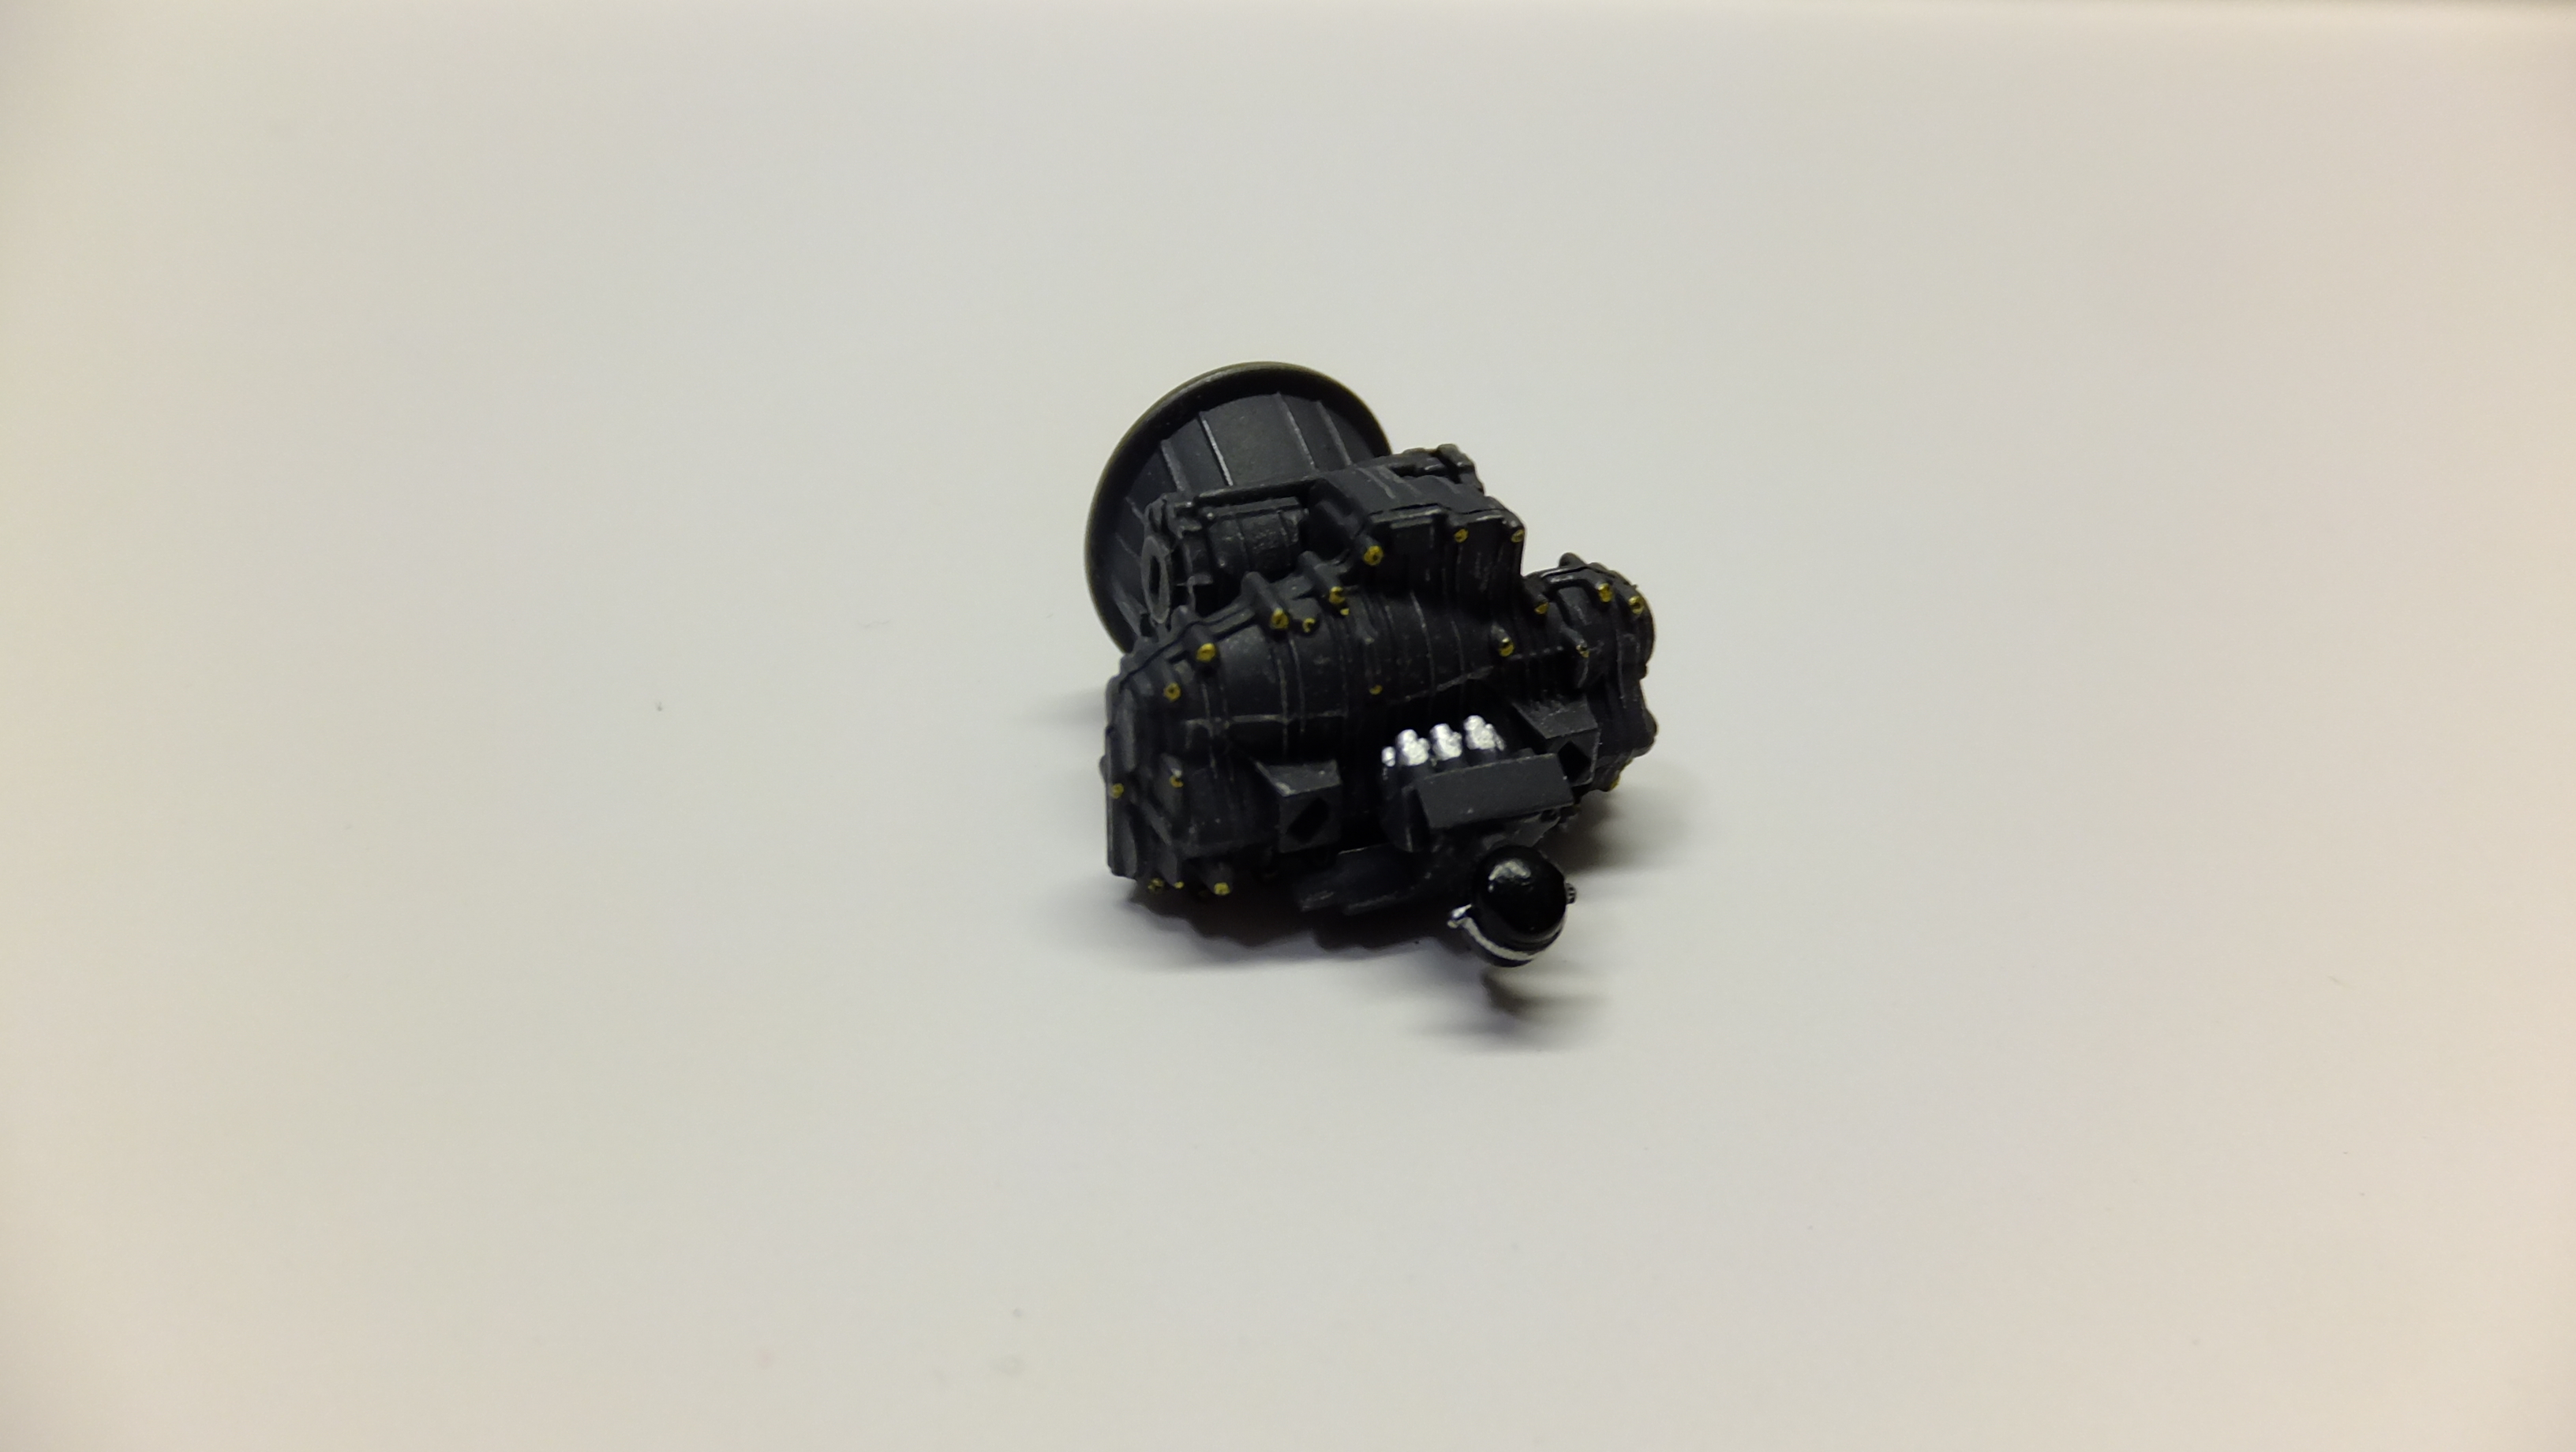
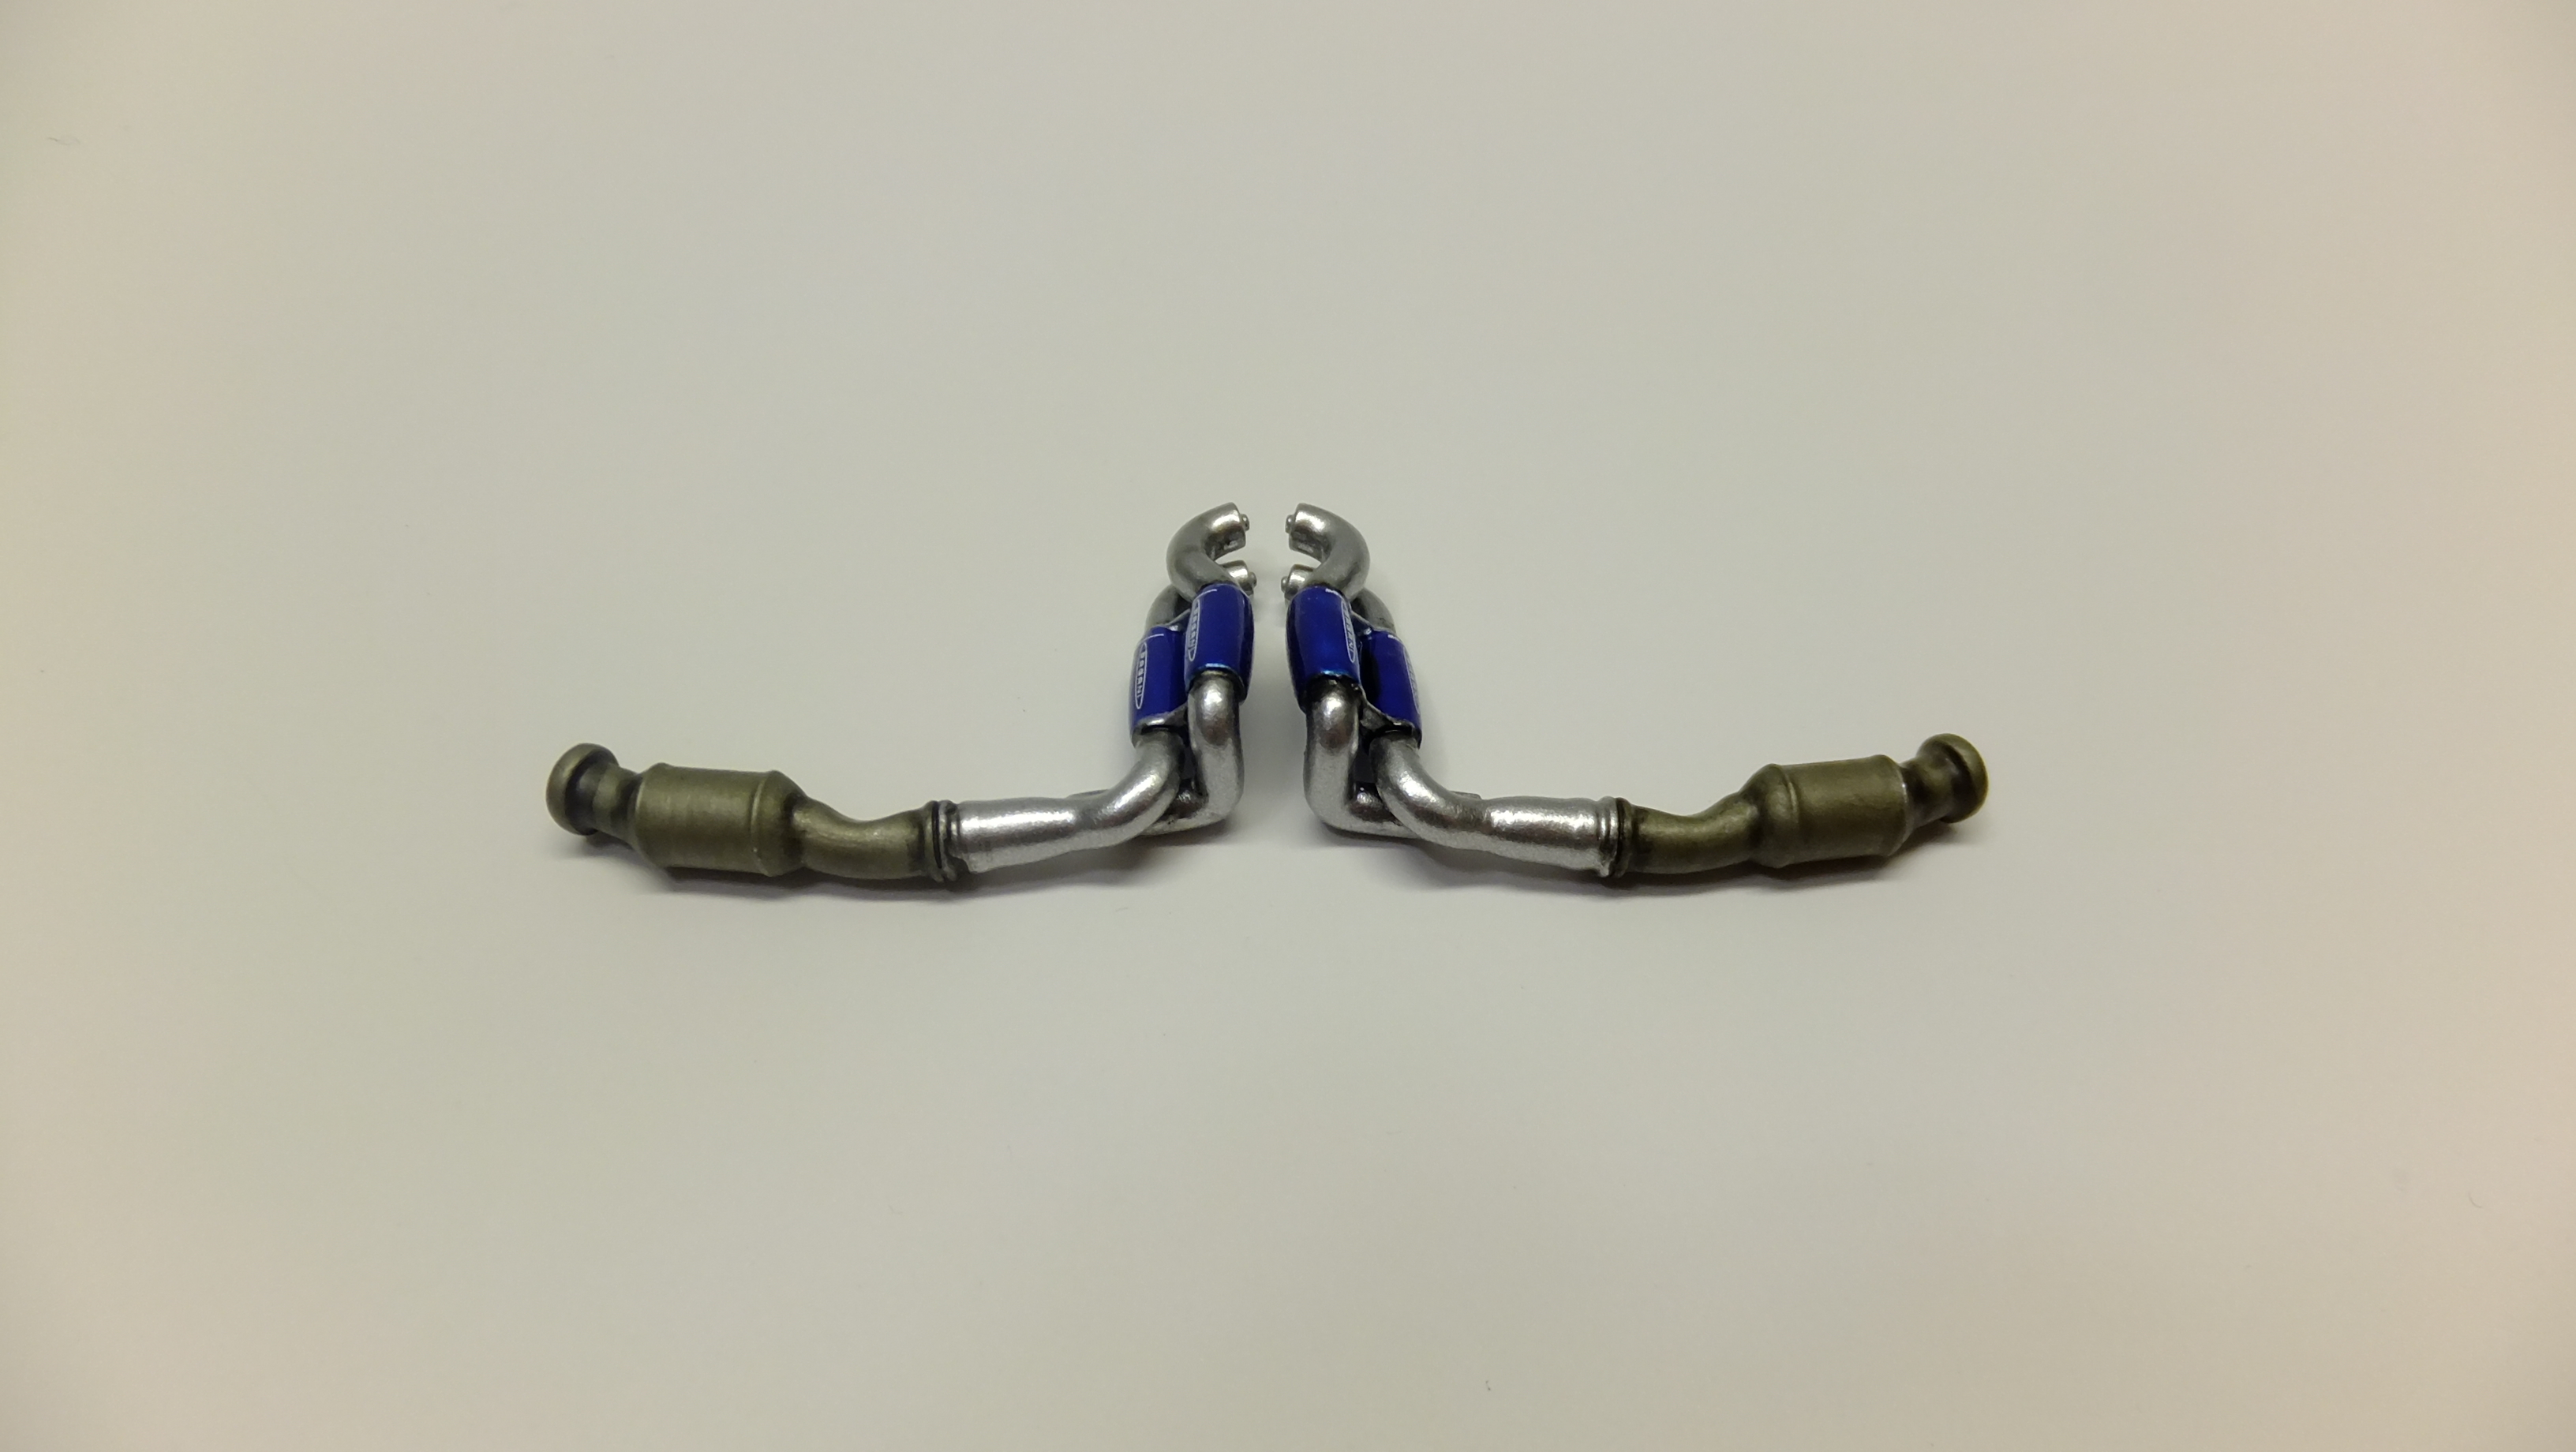
As i am doing with my Fujimi Aventador, this too i will compare part by part, which kit is better -Aoshima, or Fujimi. I've built 15 Fujimi Countach's in my time, and i actually like this kit waaaay better for the reasons you will learn. I'm not concerned about undercarriage detail, but everything else WILL be uber detailed! -Photo 2; This is how mine will hopefully look when done......i'm usually heck with white -my nemesis. -Photo 3; Heres the start of the undercarriage parts...All the Sharpie marks are molded-in hoses, and pipes that i will be grinding away.Fujimi wins in the engine compartment detail...they have a complete engine/ suspension. However, Aoshima added just enough clever design details, that done the right way, this engine bay will still look very realistic! -Photo 4; Aoshimas distributor totally wins over Fujimi!....it comes pre-drilled!!...anybody whose tried to wire up a V12 distributor will REALLY appreciate this! -Photo 5; The details of the engine bits are very crisp, but..... -Photo 6; ....in order to seat the intake all the way down, this area on BOTH sides needs to be cut back. If you dont, this part will hit the valve covers, which can cause the hood to NOT close all the way. -Photo 7; The side on the left is properly adjusted....see how horrible the right side looks. -Photo 8; see?...the clearance is perfect now(right side now). -Photo 9; Aoshima wins here as well....pre-drilled valve covers -Nice!! -Photo 10; Both kits are about the same with these bits. The shocks both have their own different details, but are equal to me. -Photo 11&12; I had already pre-assembled these undercarriage bits, and primered them black. It has the usual detail of front suspension bits, but a simplified rear suspension area. The lower half of the engine, and tranny are a separate part. As you can see, they are still pretty nice, but as stated before, Fujimi wins over this. Aoshima has the two tow loops in the front....Fujimi doesnt. -Photo 13; After all the other bits are attached, it will look pretty believable. -Photo 14; These tyres, and wheels are waaay better than Fujimis, which are undersized, and too narrow. Aoshimas wheels are far cleaner too.
-
Box art Wheels are from another kit, but this what they are. Painted TS-55 dark blue, cant all be black as much as would like them to be. Whoa! nearly flooded the tail pipe.


.png.f30dafbfabc4778a792487c2e6b1c7ca.png)


.jpg.a37e42e69cb690bd45cc009cc55ec282.jpg)