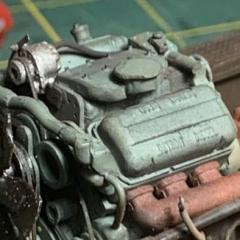
DRIPTROIT 71 Posted June 16, 2019 Share Posted June 16, 2019 (edited) This one was completely built out of junk, Evergreen Stryrene, and Plastruct. The only new parts were the resin front tires that came from a great trade with Jeff Buimer "gotnitro". No model kits were harmed in the building of this truck! The frame is from a junk IH 4270. A big thanks to Tom Decker "redneckrigger" for the rear tires. The engine is a 6v-53 Detroit. The bed and spreader is scratch built. The interior was scratch built. The windshield was made from a "DR. Perky" (generic Dr Pepper) bottle. It had the right curve in it. The parts box took care of the rest. The cab was a mess, but turned out okay. This is what the cab looked like when I started: Edited June 17, 2019 by DRIPTROIT 71 Quote Link to comment Share on other sites More sharing options...
Jim B Posted June 17, 2019 Share Posted June 17, 2019 Great save on the cab. Great looking build. Quote Link to comment Share on other sites More sharing options...
the goon Posted June 17, 2019 Share Posted June 17, 2019 4 minutes ago, Jim B said: Great save on the cab. Great looking build. +1. Mark Quote Link to comment Share on other sites More sharing options...
redneckrigger Posted June 17, 2019 Share Posted June 17, 2019 WOW! That looks fantastic! Actually looks like a well used old GMC in her last role of work............................and looks EXACTLY like it would be expected, a little worn out around the edges, but still capable of a day's work. LOVE IT! Quote Link to comment Share on other sites More sharing options...
Tesla Posted June 17, 2019 Share Posted June 17, 2019 Your perseverance paid off! Well done! Quote Link to comment Share on other sites More sharing options...
afx Posted June 17, 2019 Share Posted June 17, 2019 Turned out great Brian. Quote Link to comment Share on other sites More sharing options...
Oldmopars Posted June 17, 2019 Share Posted June 17, 2019 I love how you turned that Sows ear into a Silk purse. You did a great job and the truck really looks the part. It looks like a well used farm truck. I used to see these all the time where I grew up and this looks just like the ones I remember. Great job. Quote Link to comment Share on other sites More sharing options...
Sam I Am Posted June 18, 2019 Share Posted June 18, 2019 Excellent work Brian! Quote Link to comment Share on other sites More sharing options...
Ken Gilkeson Posted June 18, 2019 Share Posted June 18, 2019 nice build Quote Link to comment Share on other sites More sharing options...
BIGTRUCK Posted June 18, 2019 Share Posted June 18, 2019 Very nice. Something you never see anyone build. Great job. Quote Link to comment Share on other sites More sharing options...
Warren D Posted June 19, 2019 Share Posted June 19, 2019 Came out great, looks ready for the fields. Quote Link to comment Share on other sites More sharing options...
Plastheniker Posted June 19, 2019 Share Posted June 19, 2019 Good idea, very different! Quote Link to comment Share on other sites More sharing options...
DRIPTROIT 71 Posted June 20, 2019 Author Share Posted June 20, 2019 On 6/16/2019 at 10:05 PM, Jim B said: Great save on the cab. Great looking build. Thanks Jim!! On 6/16/2019 at 10:10 PM, the goon said: +1. Mark Thanks Mark! On 6/16/2019 at 10:45 PM, redneckrigger said: WOW! That looks fantastic! Actually looks like a well used old GMC in her last role of work............................and looks EXACTLY like it would be expected, a little worn out around the edges, but still capable of a day's work. LOVE IT! Thanks Tom! Thanks again for the tires too! They were a big help! I didn't want it to look destroyed, just well used, but mostly taken care of. On 6/17/2019 at 5:53 AM, Tesla said: Your perseverance paid off! Well done! Thanks Dennis! I did consider scrapping this cab many times though. On 6/17/2019 at 6:13 AM, afx said: Turned out great Brian. Thanks!!! On 6/17/2019 at 11:10 AM, Oldmopars said: I love how you turned that Sows ear into a Silk purse. You did a great job and the truck really looks the part. It looks like a well used farm truck. I used to see these all the time where I grew up and this looks just like the ones I remember. Great job. Thanks for the kind words! There are a few around here, but most have 48" tires on the rear and regular highway flotation tires on the front. On 6/17/2019 at 11:11 PM, Sam I Am said: Excellent work Brian! Thanks!! On 6/18/2019 at 9:10 AM, Ken Gilkeson said: nice build Thanks Ken! On 6/18/2019 at 7:34 PM, BIGTRUCK said: Very nice. Something you never see anyone build. Great job. Thanks! It actually began with the front tires. I started researching ideas on how to use them, I halfway settled on this project and after I started the bed I decided that I was going to finish it even if I had to change to a different cab. On 6/19/2019 at 5:52 AM, Warren D said: Came out great, looks ready for the fields. Thanks Warren! 20 hours ago, Plastheniker said: Good idea, very different! Thanks! Quote Link to comment Share on other sites More sharing options...
TECHMAN Posted June 21, 2019 Share Posted June 21, 2019 WOW!!!!! For all the fits that cab gave you, this really turned out great!!!! DJ Quote Link to comment Share on other sites More sharing options...
signguy2108 Posted June 22, 2019 Share Posted June 22, 2019 With all the problems u had, it came out extremely well, I like the bed. Quote Link to comment Share on other sites More sharing options...
1930fordpickup Posted June 22, 2019 Share Posted June 22, 2019 This even looks better now Brian. Sure would fit in around here in the fields. Quote Link to comment Share on other sites More sharing options...
CRUSADER2 Posted June 23, 2019 Share Posted June 23, 2019 I followed your build, man you really went through the mill with this one, came out great in the end though, well worth all the effort it really looks the part, fantastic build and weathering, top job again!!! Quote Link to comment Share on other sites More sharing options...
DRIPTROIT 71 Posted June 26, 2019 Author Share Posted June 26, 2019 On 6/21/2019 at 9:49 AM, TECHMAN said: WOW!!!!! For all the fits that cab gave you, this really turned out great!!!! DJ Thanks man!! On 6/21/2019 at 10:27 PM, signguy2108 said: With all the problems u had, it came out extremely well, I like the bed. Thanks!! On 6/22/2019 at 12:29 AM, 1930fordpickup said: This even looks better now Brian. Sure would fit in around here in the fields. Thanks! Most of the ones around here have the 48" tires on the rear, but after finding pictures of these on line, I had to try to build one. On 6/23/2019 at 6:42 PM, CRUSADER2 said: I followed your build, man you really went through the mill with this one, came out great in the end though, well worth all the effort it really looks the part, fantastic build and weathering, top job again!!! Thanks so much!! Quote Link to comment Share on other sites More sharing options...
OldTrucker Posted June 27, 2019 Share Posted June 27, 2019 Love it and great save! Takes me back to when we lived on Colorado and I worked for Simplot Soil Builders, an ag service. Ours were Internationals and one Ford. Still can remember starting down a field that was almost a mile and half long over a hill! Real pain keeping a straight line on tat one! Thankfully had the foam to mark our way!LOL Quote Link to comment Share on other sites More sharing options...
Mike Williams Posted June 28, 2019 Share Posted June 28, 2019 Excellent, what a view! A wonderful model, and excellent save. Question: The tires, especially the fronts, appear to be deflated. How did you achieve the look….I love it. Quote Link to comment Share on other sites More sharing options...
DRIPTROIT 71 Posted June 29, 2019 Author Share Posted June 29, 2019 On 6/26/2019 at 10:50 PM, OldTrucker said: Love it and great save! Takes me back to when we lived on Colorado and I worked for Simplot Soil Builders, an ag service. Ours were Internationals and one Ford. Still can remember starting down a field that was almost a mile and half long over a hill! Real pain keeping a straight line on tat one! Thankfully had the foam to mark our way!LOL Thanks! Most of the ones that I found on line were Internationals too. 6 hours ago, Mike Williams said: Excellent, what a view! A wonderful model, and excellent save. Question: The tires, especially the fronts, appear to be deflated. How did you achieve the look….I love it. Thanks!! The front tires are solid cast resin from Kit Form Services and they are cast that way with the weighted look. For the rear tires which are 66" kit tires from a monster truck, I first glue a styrene block to the air side of the wheel where the tire rides centered between the rim edges. This will be at the bottom once on the truck. I drill a pin sized hole in the center of the block. I cut about a quarter inch hole in the center of the tread of the tire. I take a piece of styrene sheet about 1/2 inch square and drill a pin size hole in it as well. I place the tire on the rim aligning the hole in the tire with the pin hole in the block and then place a pin through the 1/2 inch square and glue it into the the the styrene block on the rim which collapses the tire. The length of the pin determines how collapsed the tire will be. This at least for me caused a concaved area in the tread of the tire. I then cut a small area out of another scrap tire's tread and glued it in place to fill in the concaved area. Once on the ground it looks pretty good and much better I think than the ballooned weightless look especially on a truck. Quote Link to comment Share on other sites More sharing options...
Mike Williams Posted July 1, 2019 Share Posted July 1, 2019 @DRIPTROIT...thanks for the reply and the explanation. Compliments. Giving so much attention to detail is a big plus for our hobby...and a great salute to modelers who go to the trouble of making their own way. Wonderful. Your model is very good, with excellent detailing. Quote Link to comment Share on other sites More sharing options...
purepmd Posted July 6, 2019 Share Posted July 6, 2019 On June 16, 2019 at 8:45 PM, redneckrigger said: WOW! That looks fantastic! Actually looks like a well used old GMC in her last role of work............................and looks EXACTLY like it would be expected, a little worn out around the edges, but still capable of a day's work. LOVE IT! On June 17, 2019 at 3:53 AM, Tesla said: Your perseverance paid off! Well done! Really liking this build, the work really paid off. Quote Link to comment Share on other sites More sharing options...
DrKerry Posted July 6, 2019 Share Posted July 6, 2019 Turned out awesome Brian! Like the low air pressure in the tires!! Quote Link to comment Share on other sites More sharing options...
DRIPTROIT 71 Posted July 7, 2019 Author Share Posted July 7, 2019 On 7/5/2019 at 9:24 PM, purepmd said: Really liking this build, the work really paid off. Thanks Mark!! On 7/5/2019 at 9:39 PM, DrKerry said: Turned out awesome Brian! Like the low air pressure in the tires!! Thanks Kerry!! Quote Link to comment Share on other sites More sharing options...
Recommended Posts
Join the conversation
You can post now and register later. If you have an account, sign in now to post with your account.
Note: Your post will require moderator approval before it will be visible.