Search the Community
Showing results for tags 'chevelle'.
-
Well, as you can tell, I'm a bit of a Chevelle guy. The 68 being my favorite body style. I loved the kit and wanted to get a second one. I built it to look like the car I would want to have. SAM_1390 by Eric Lucas, on Flickr SAM_1391 by Eric Lucas, on Flickr SAM_1392 by Eric Lucas, on Flickr
-
I see (in someone's avatar...you know who you are ) the 1/25 Lindberg '66 Chevelle Super Sport kit is about to be reissued very soon, so until Round2 puts something up on their 'site, super-hobby has some very shots of the included parts from the last go 'round: http://www.super-hobby.com/products/1966-Chevy-Chevelle-Super-Sport.html IIRC this one one of Lindberg best offerings during their brief renaissance back in the '90s, so I'm looking forward to seeing how Round2 packages this kit this time around.
-
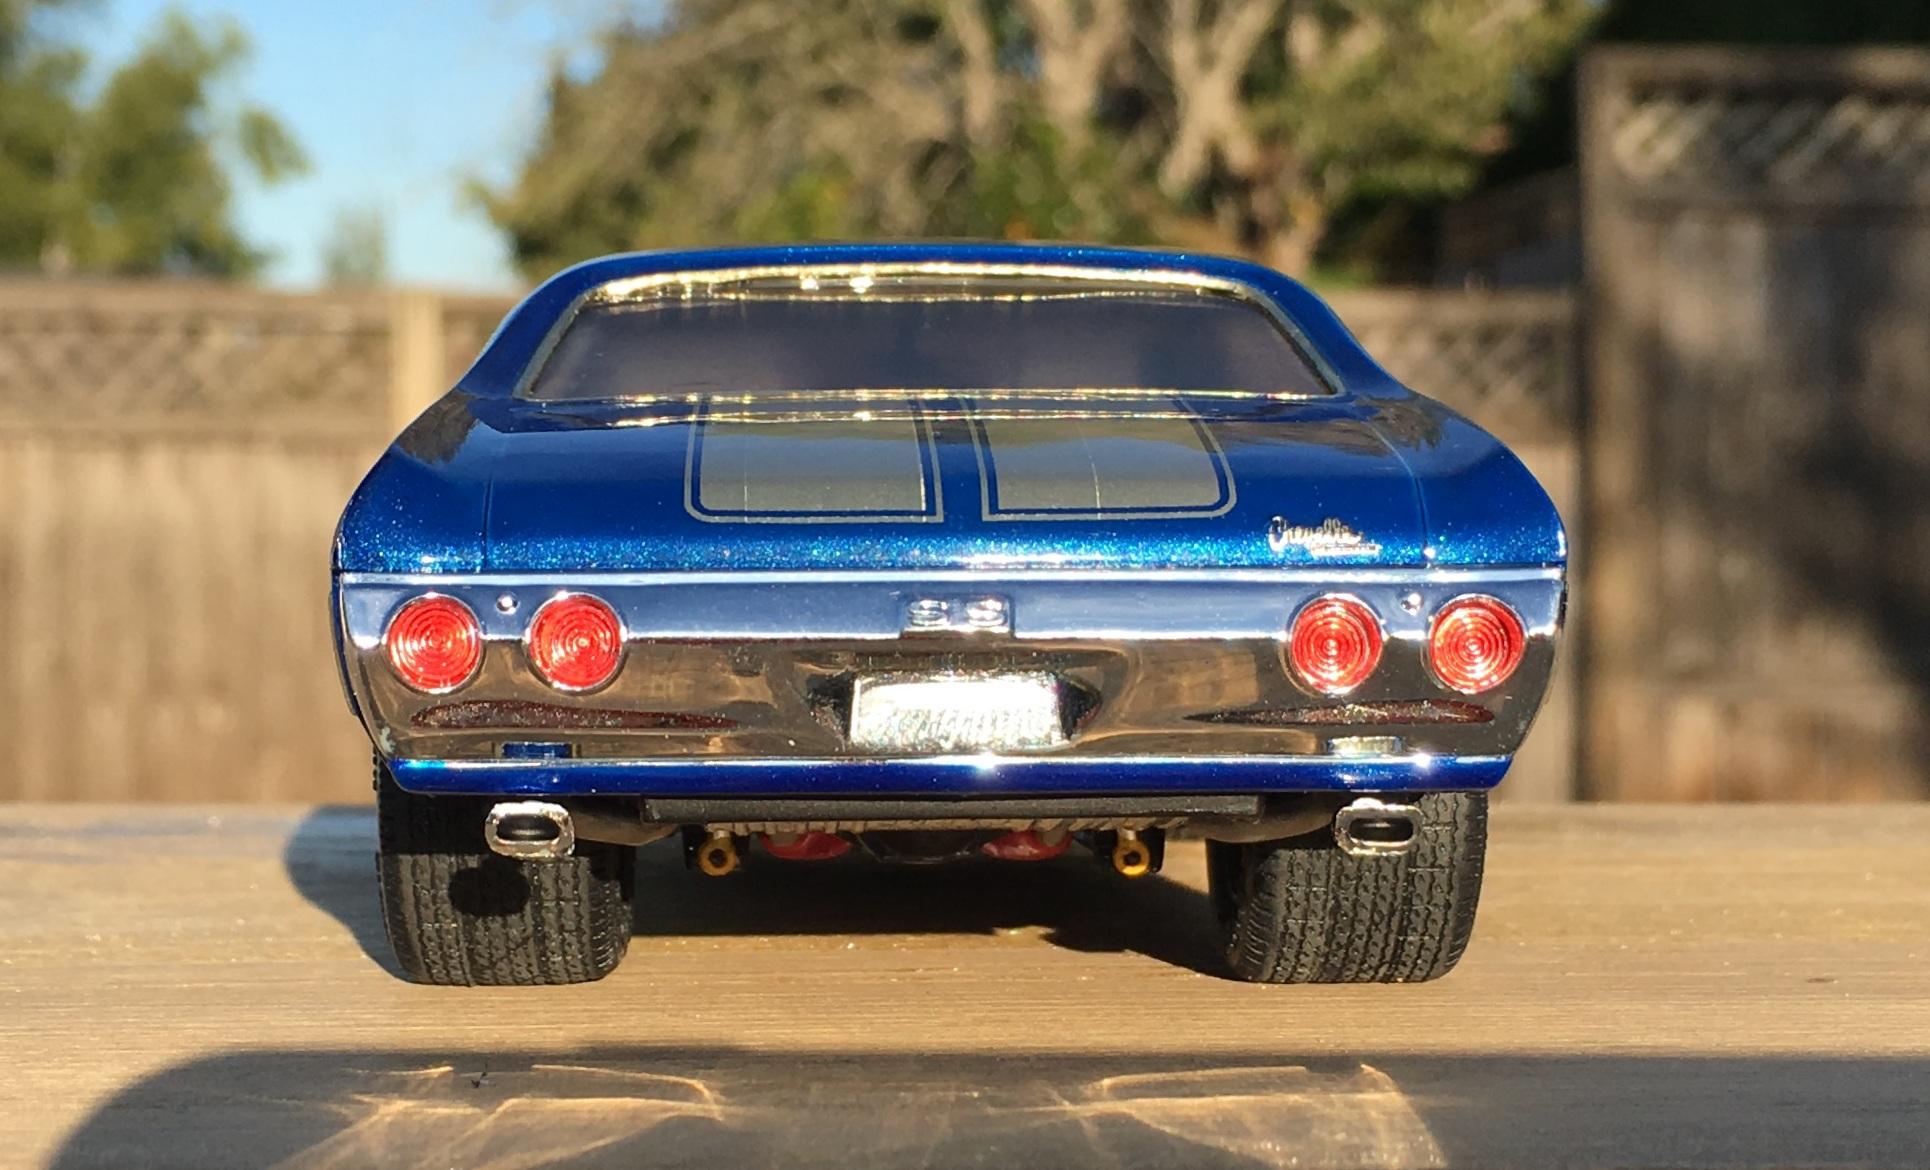
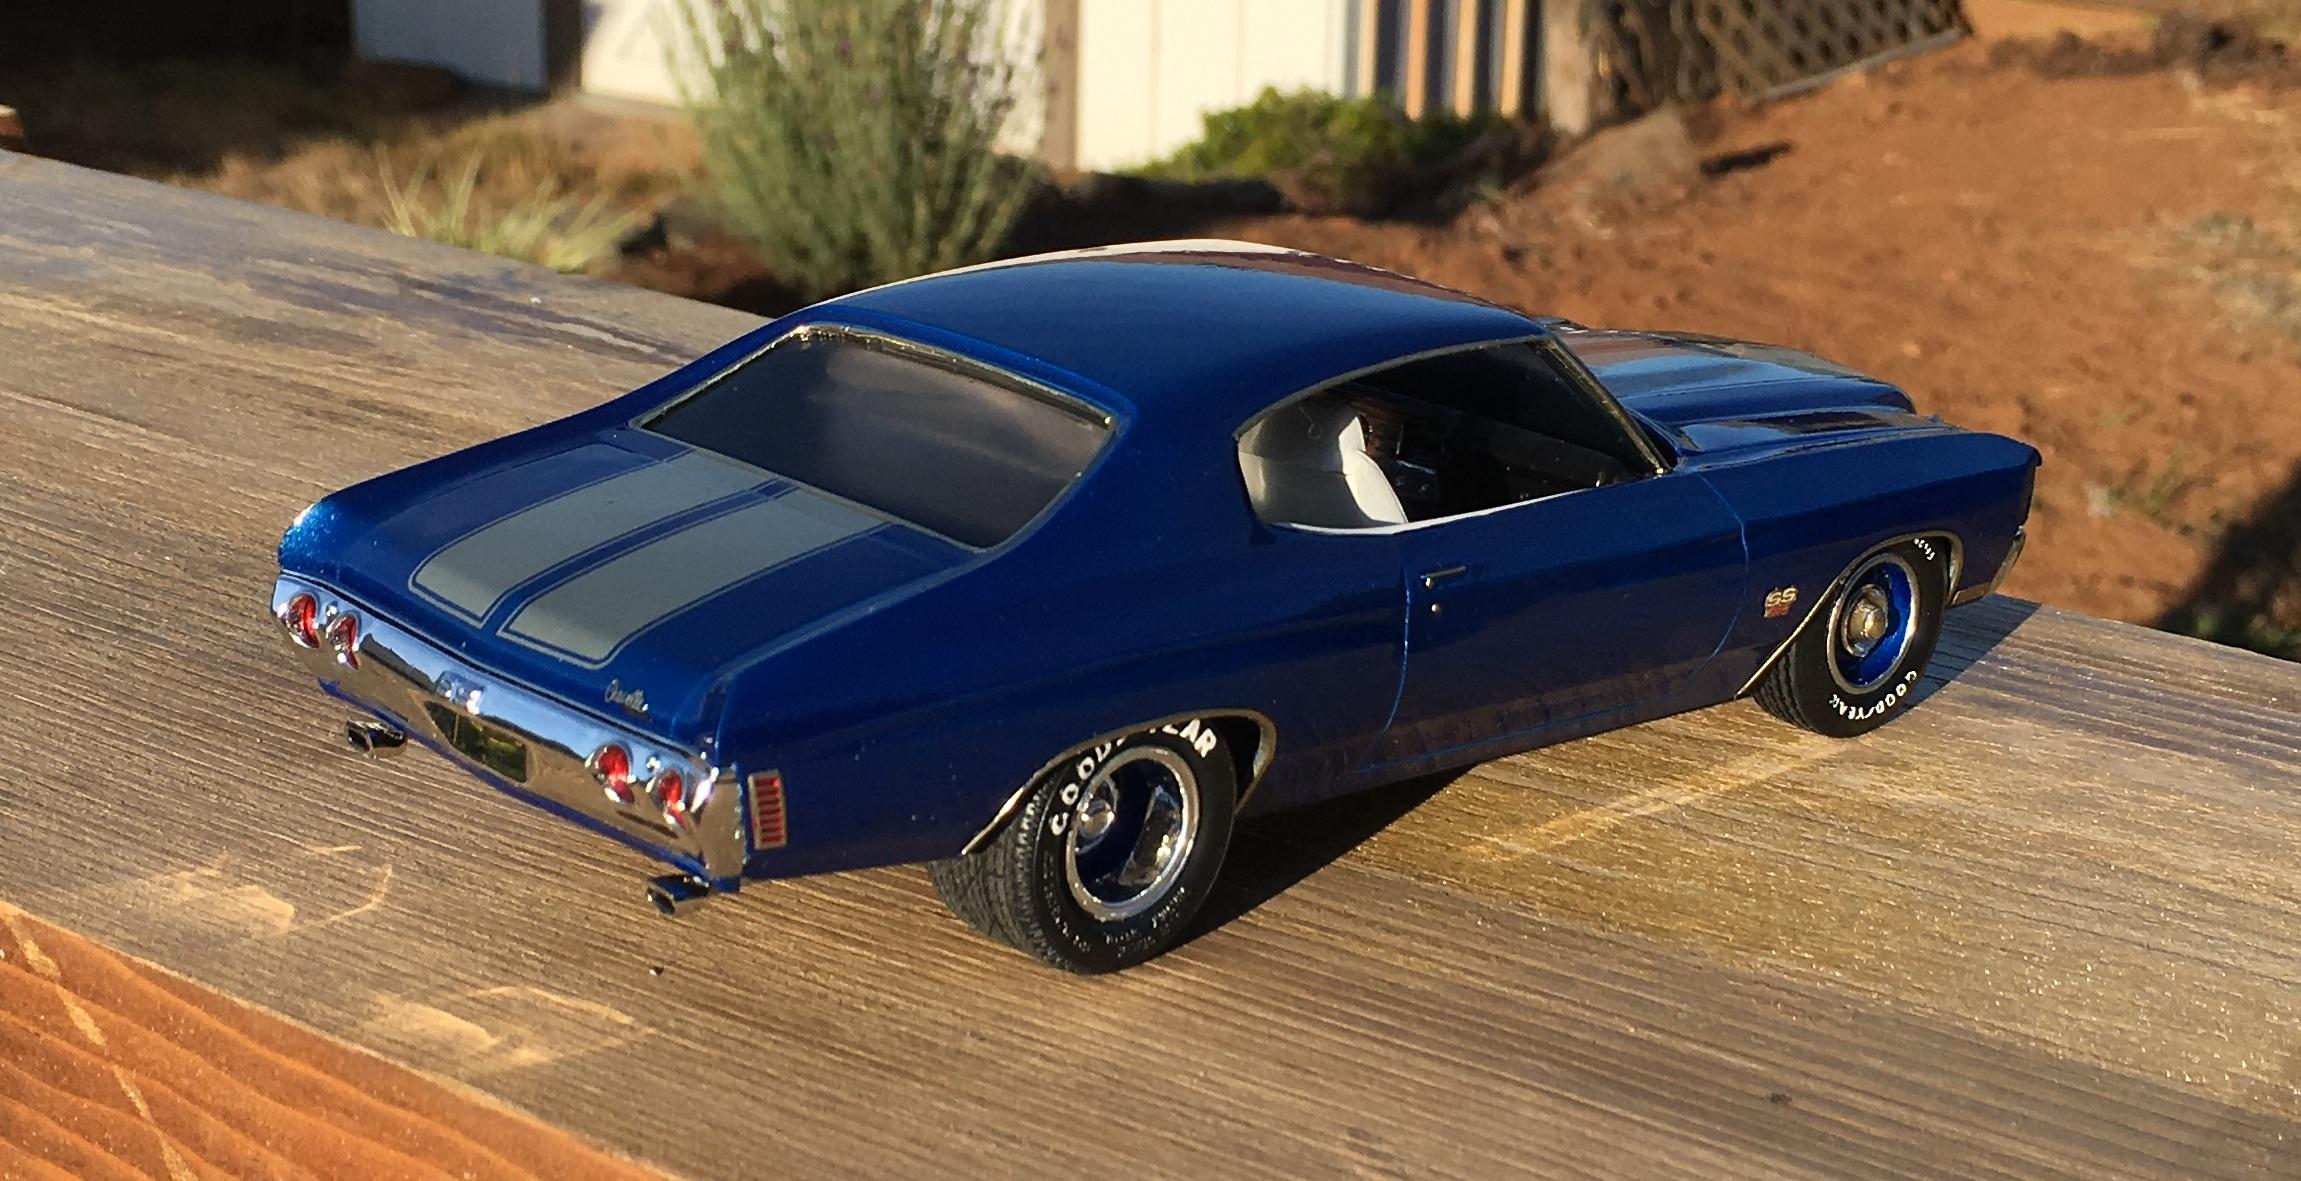
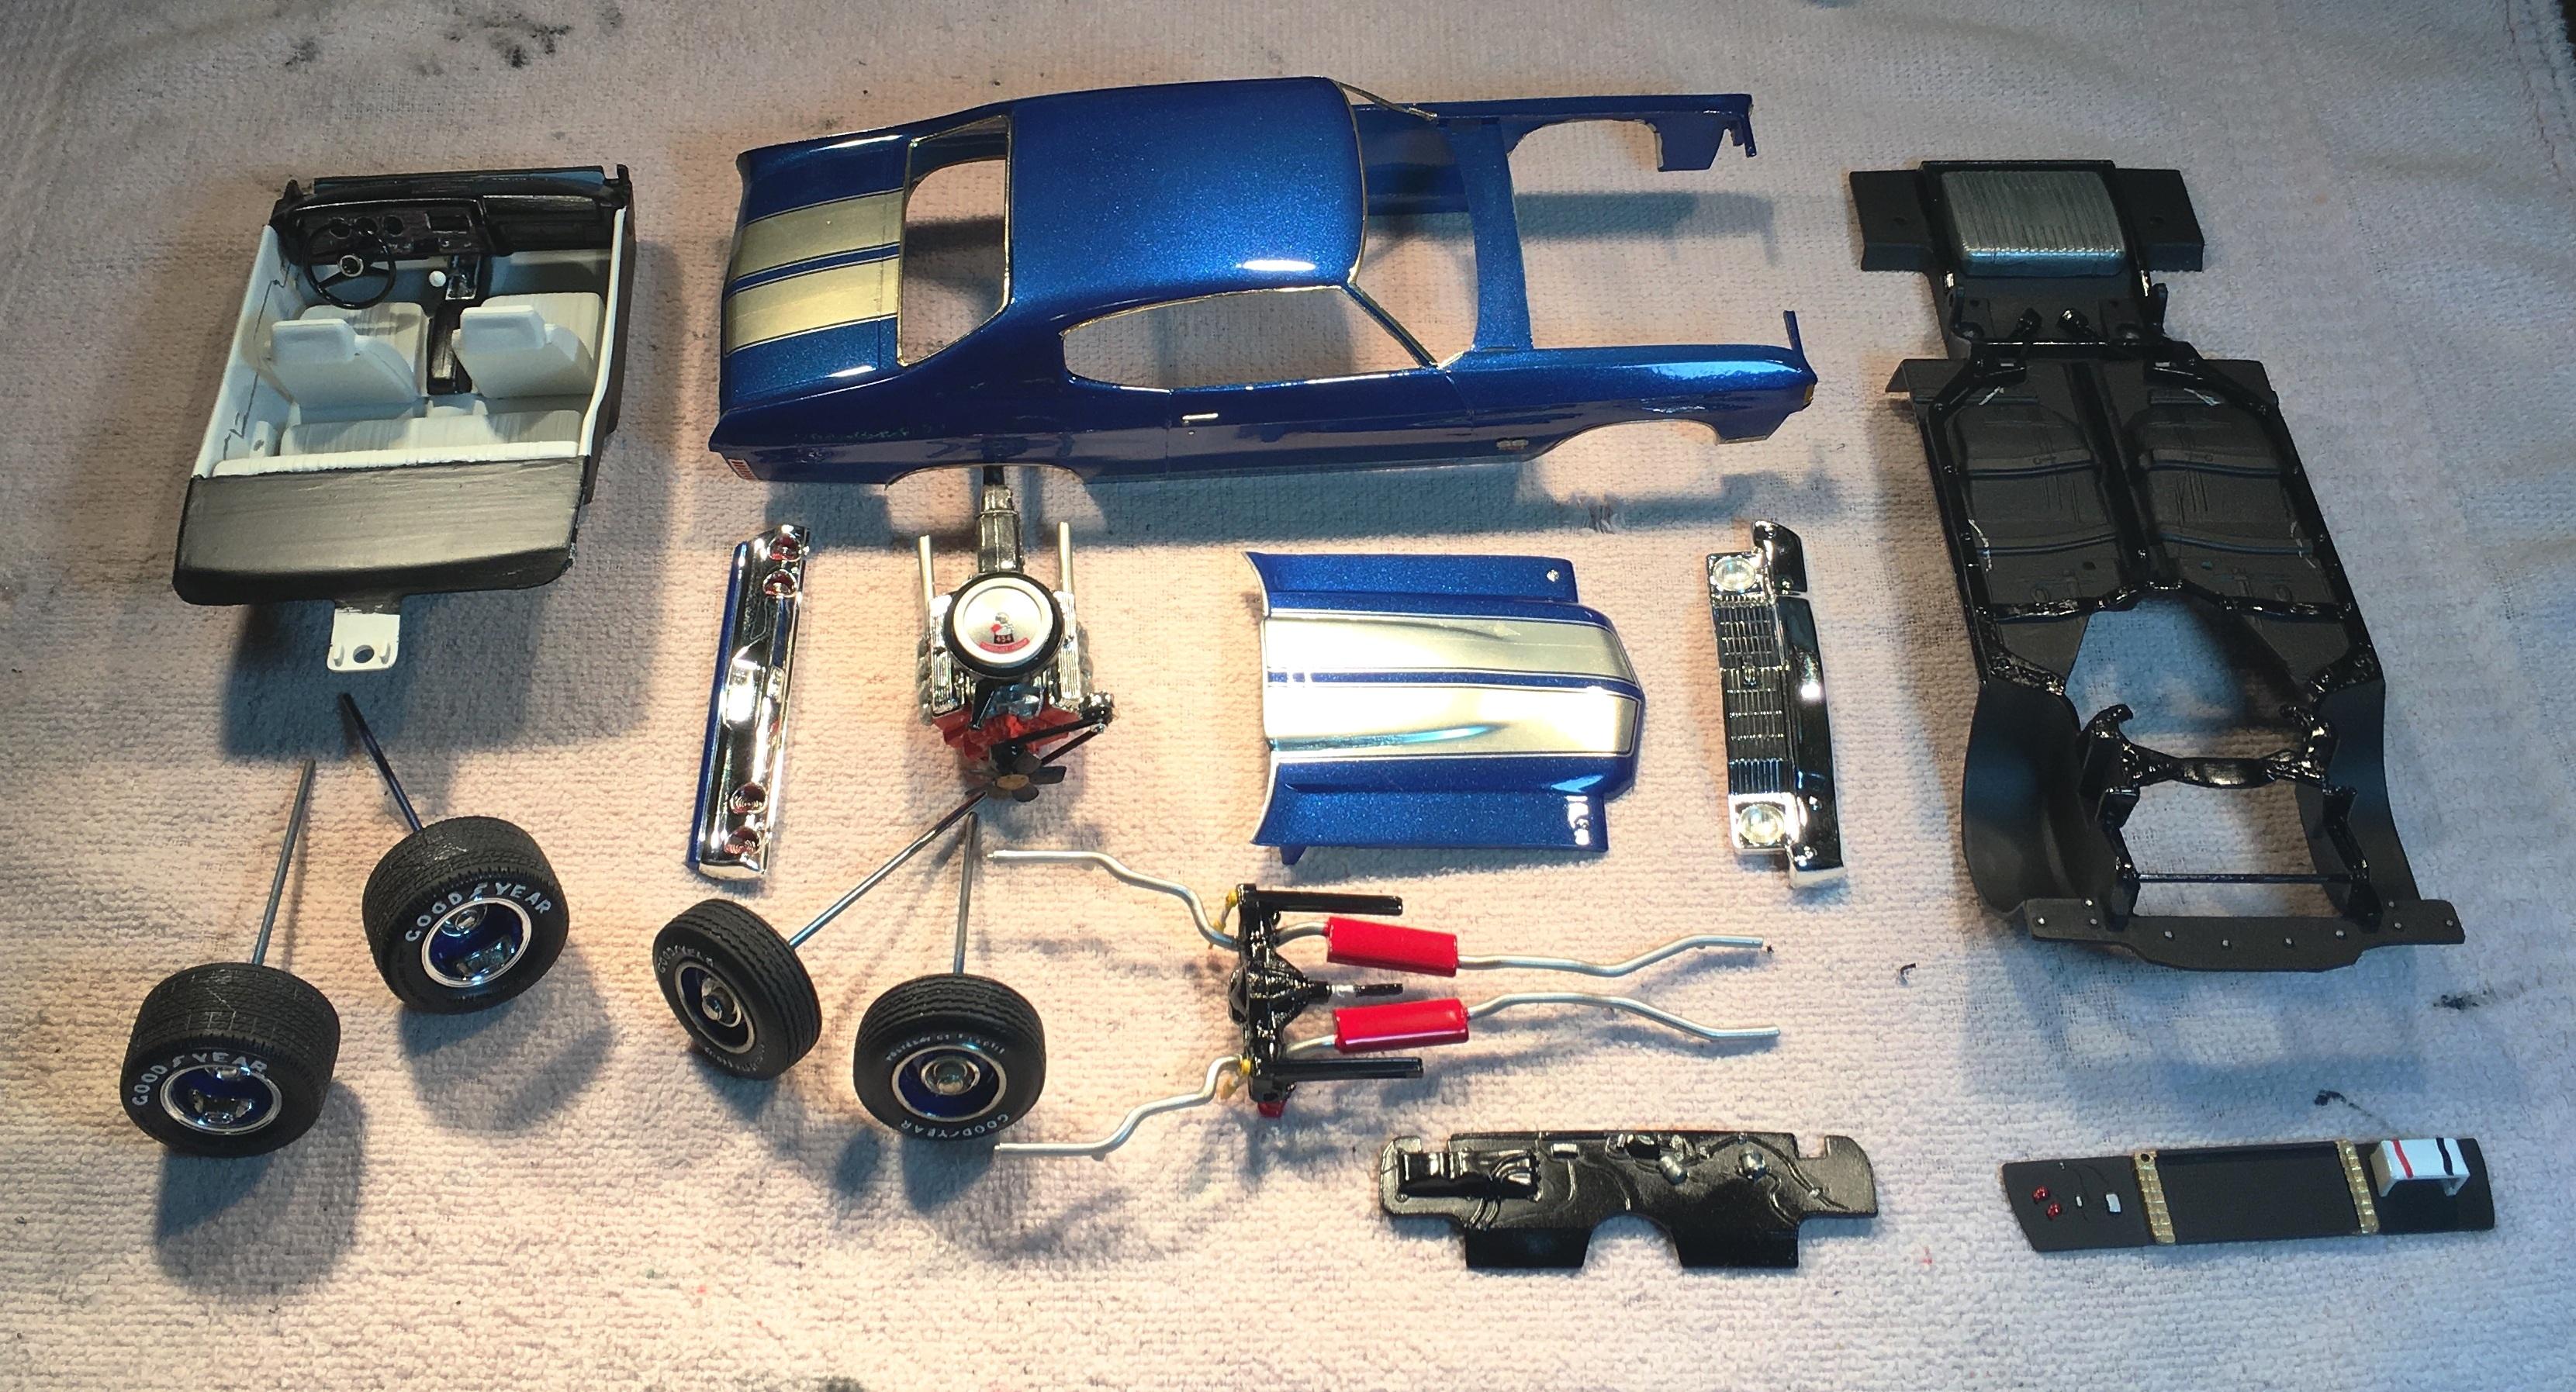
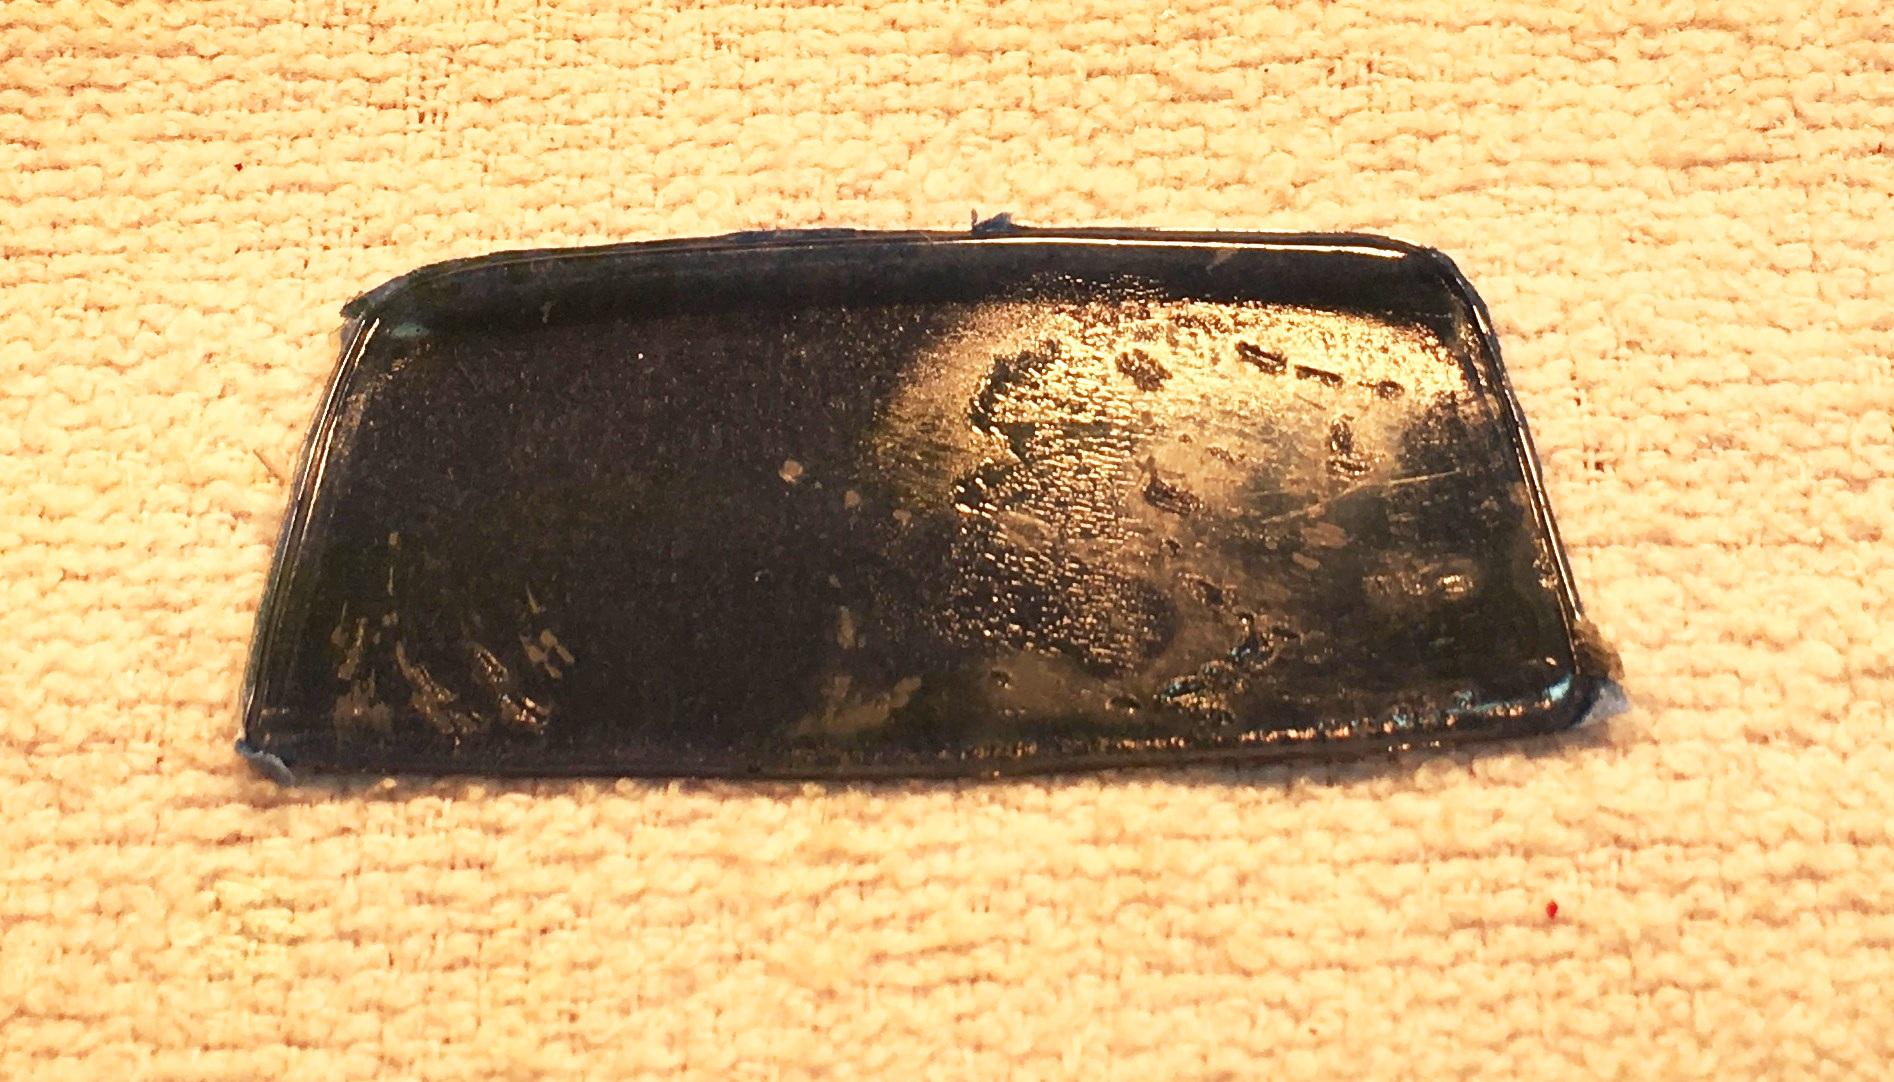
This was an open box purchase from a friend who wanted me to build a replica of the 1:1 car he is building. Unfortunately this kit was not appropriate for his build. So instead I built it for me. It is Testors Star Spangled Blue and has been top coated with Testors Wet look clear. I have only used rattle cans and this is the best paint job I have EVER done. The silver SS stripes are from Keith Marks. The rear window took some fine sanding and Future clear to remove the glue smears. The engine is a BBC mixed and matched with parts box pieces. The side emblems are photo etch and the wheels and tires are parts box pieces. (I wish I had more) Be advised the grille is NOT for ANY year Chevelle. It looks like is was adapted from a Monte Carlo. This is definitely one of my top 3 builds (so far).

-
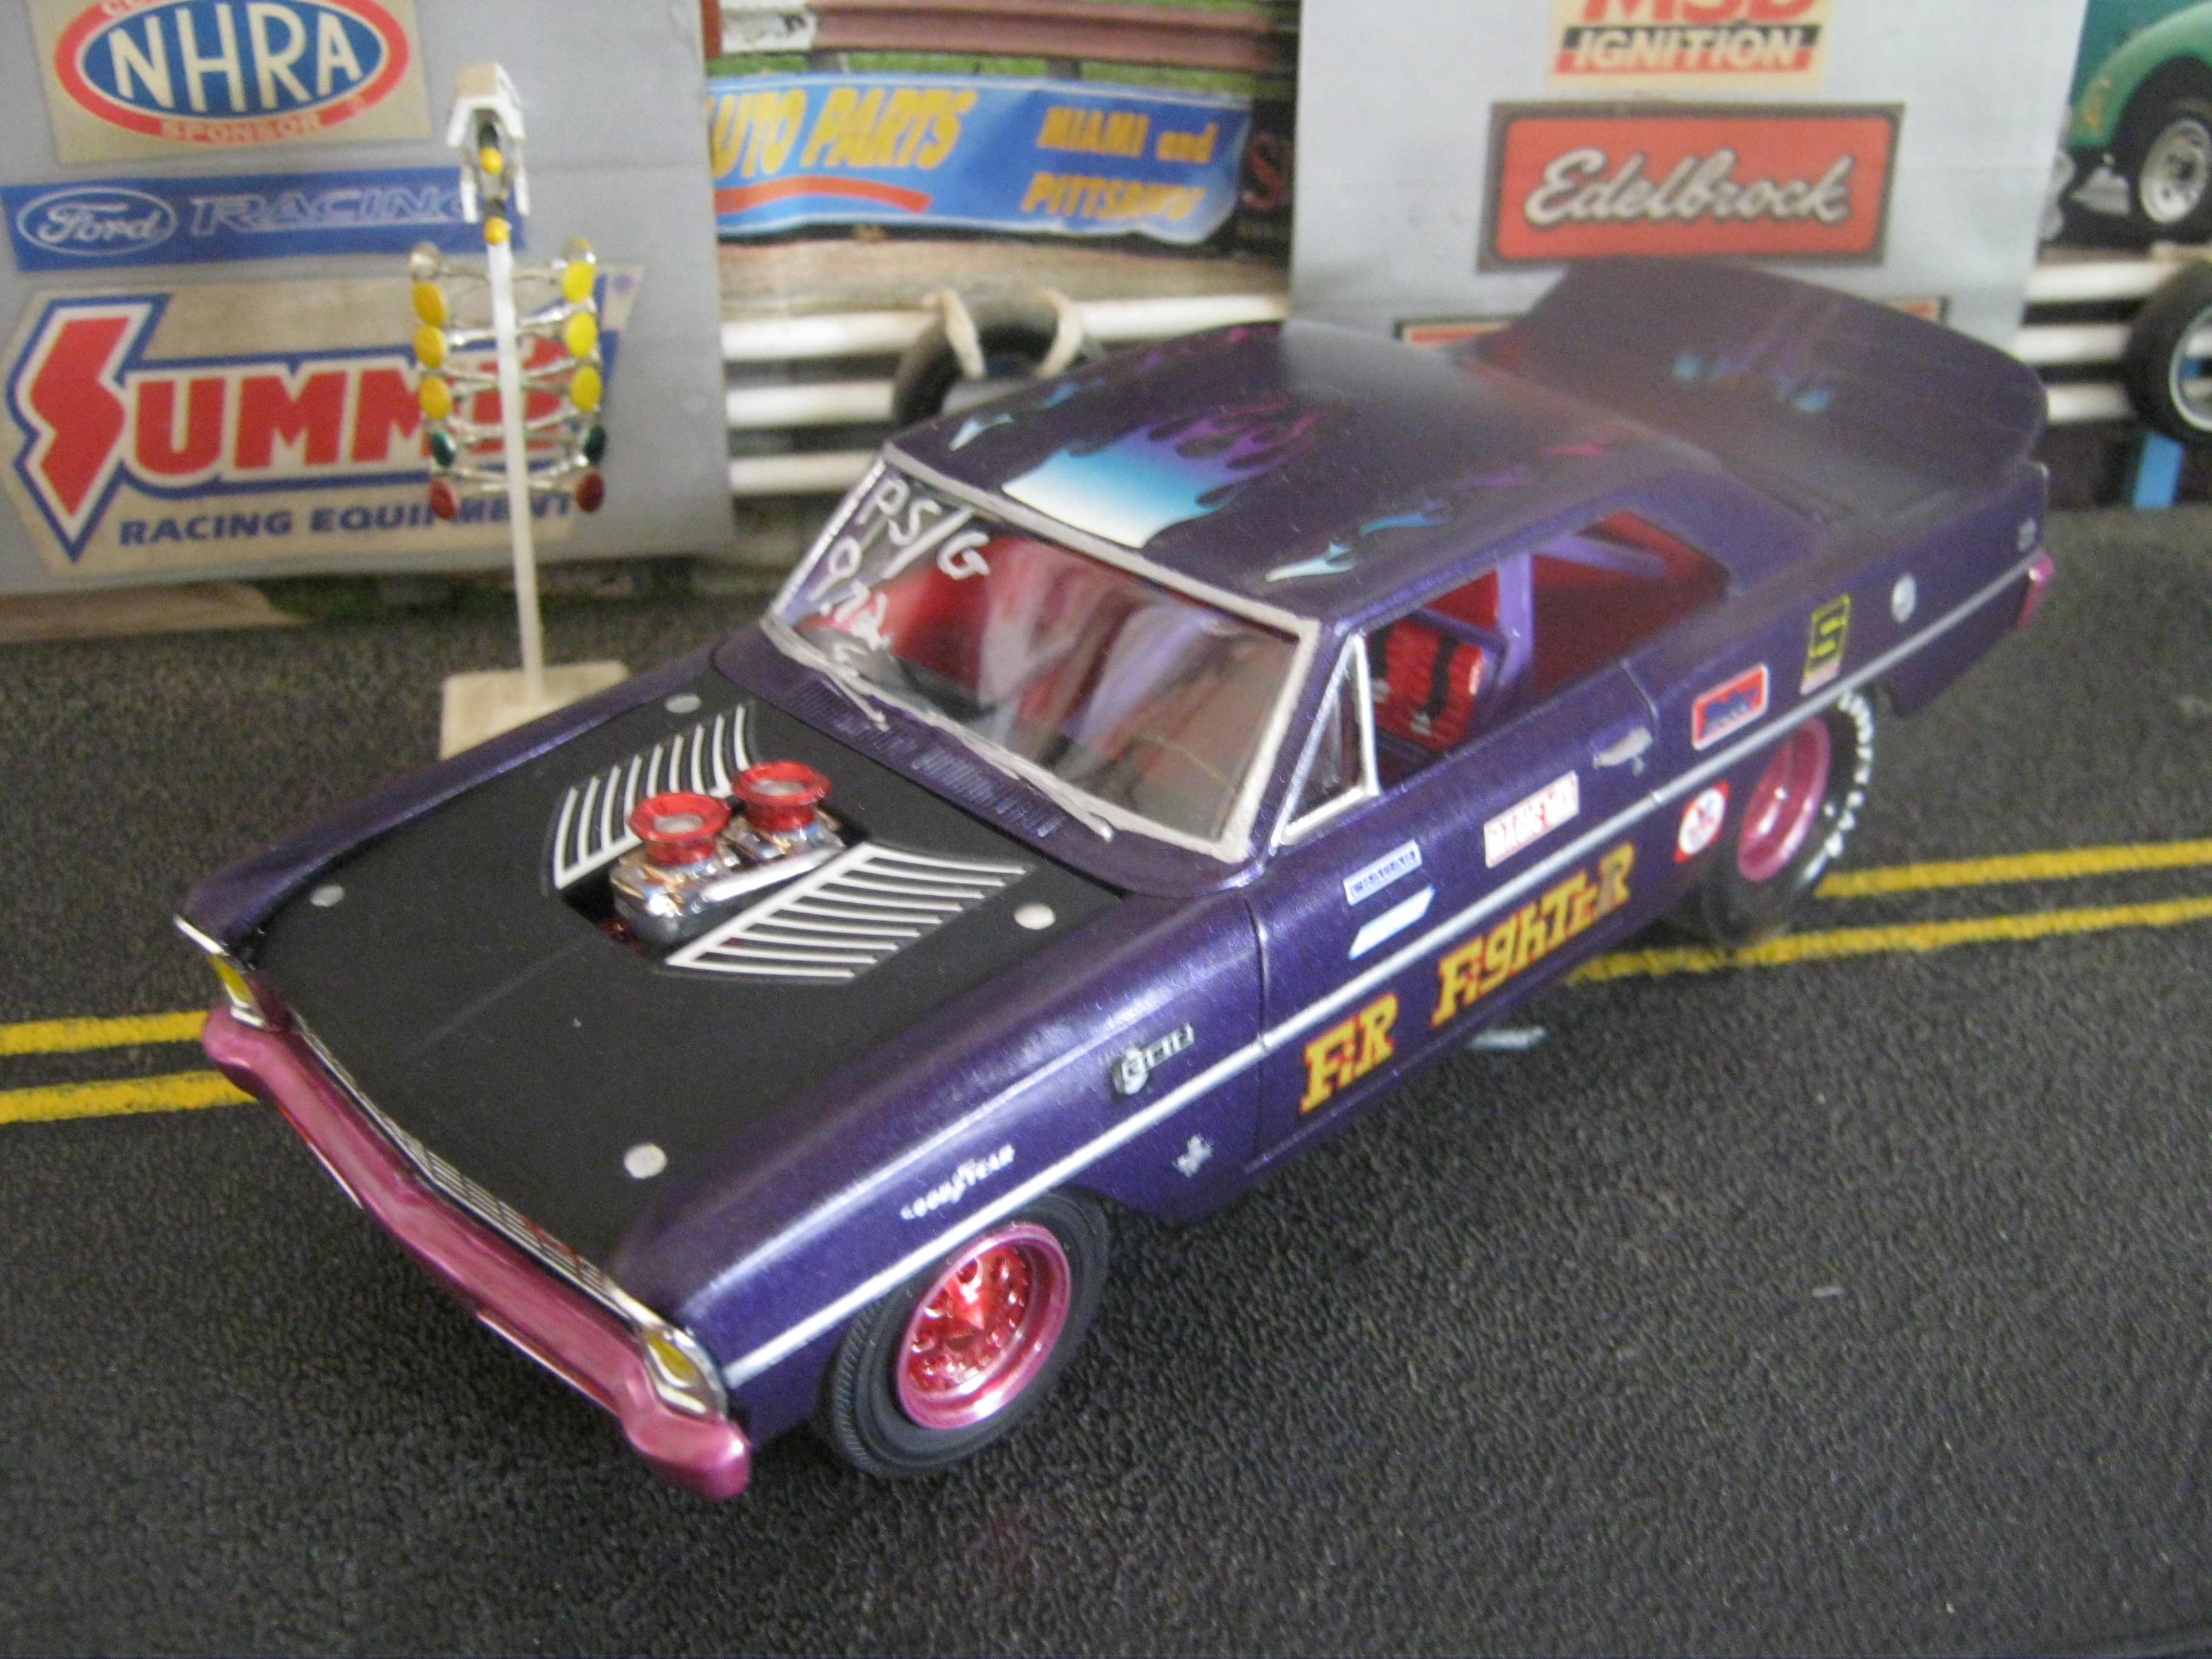
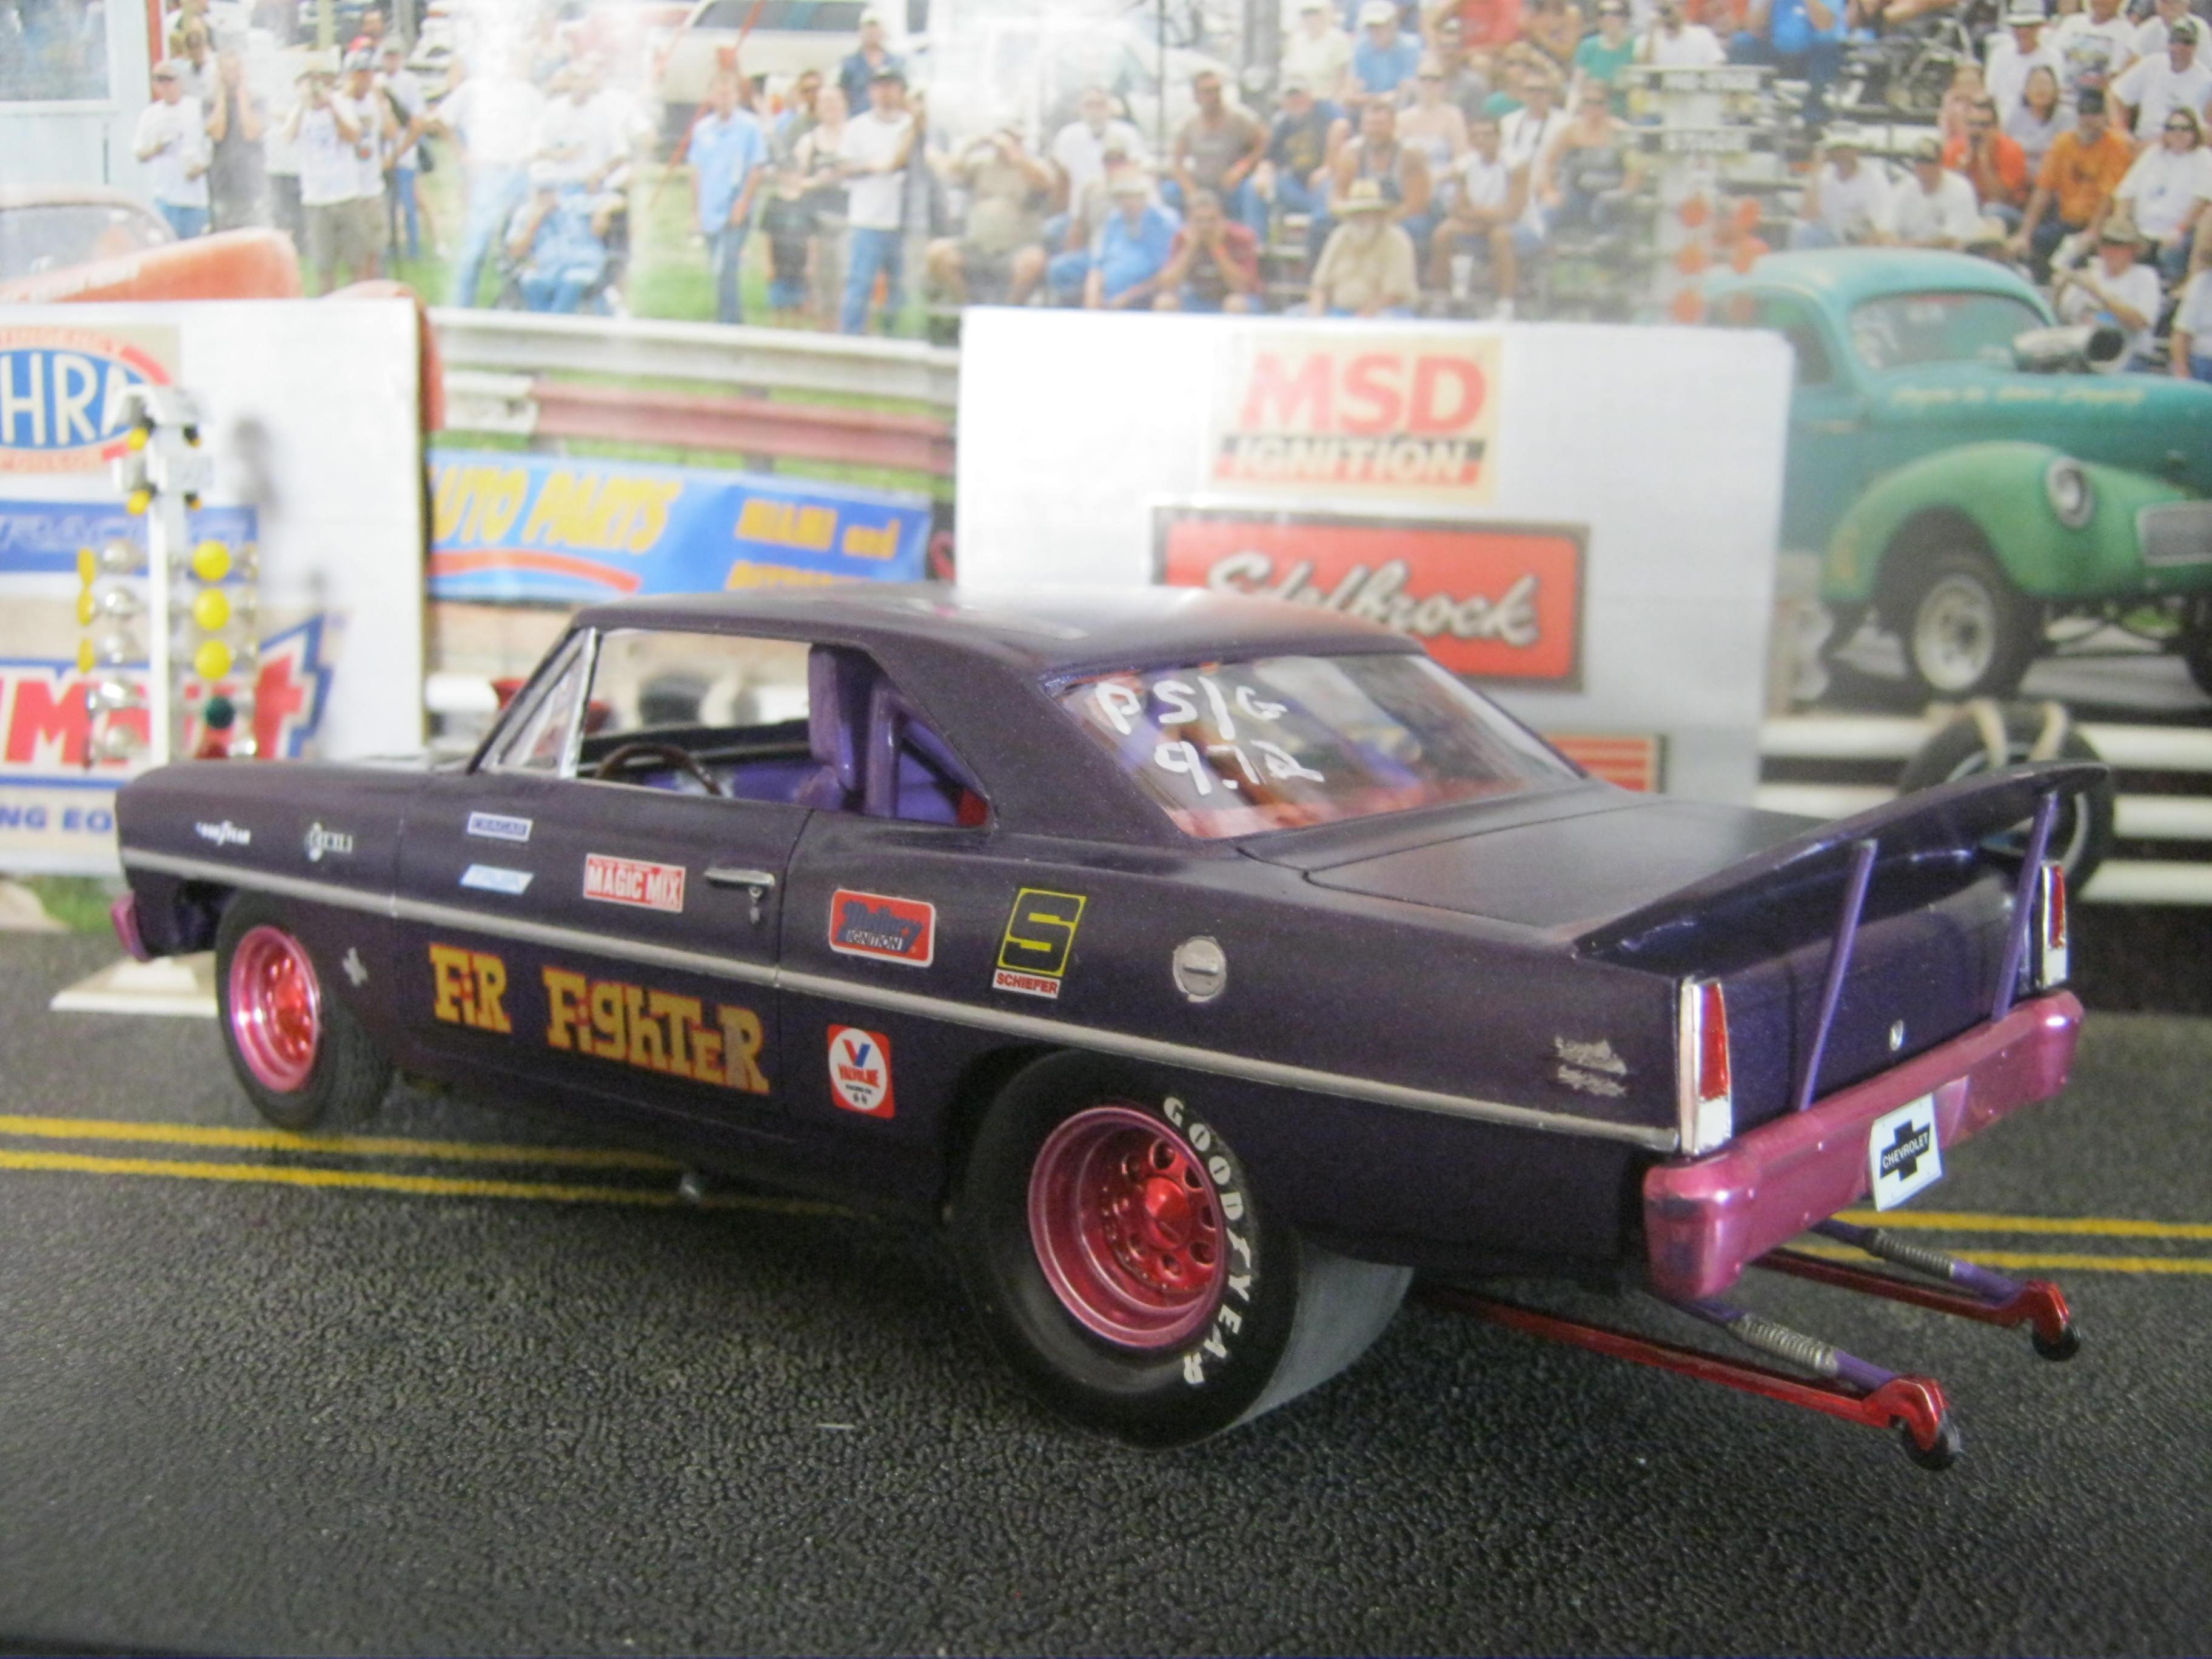
Happy friday,,lookin at the leaves changing colors in my back yard,,and I see Mr Woodchuck crawling out from under my tool shed in back yard,,Im thinkin,,,pest control company named "Fir Fighters" ,,if they had a drag race car ,,this would be it. Its the AMT 66 Chevy Nova PS kit. Cool kit,,nice tires,,tubbed chassis,,wheelie bars,,no roll bar though,,I had to make one from the leftovers bx. Also replaced stock seat w/race seat. And added the rear trunk deck wing. {all cars should have a wing on them} Also opened up wheel wells to view rims+tires better. Sprayed rattlecan testors purplelicious quikdry,,hand bottle painted rest of it. Kit went together well,,and looks decent on the shelf,,guess thats all I can ask for! Enjoy everybodys work here! Build on!
-
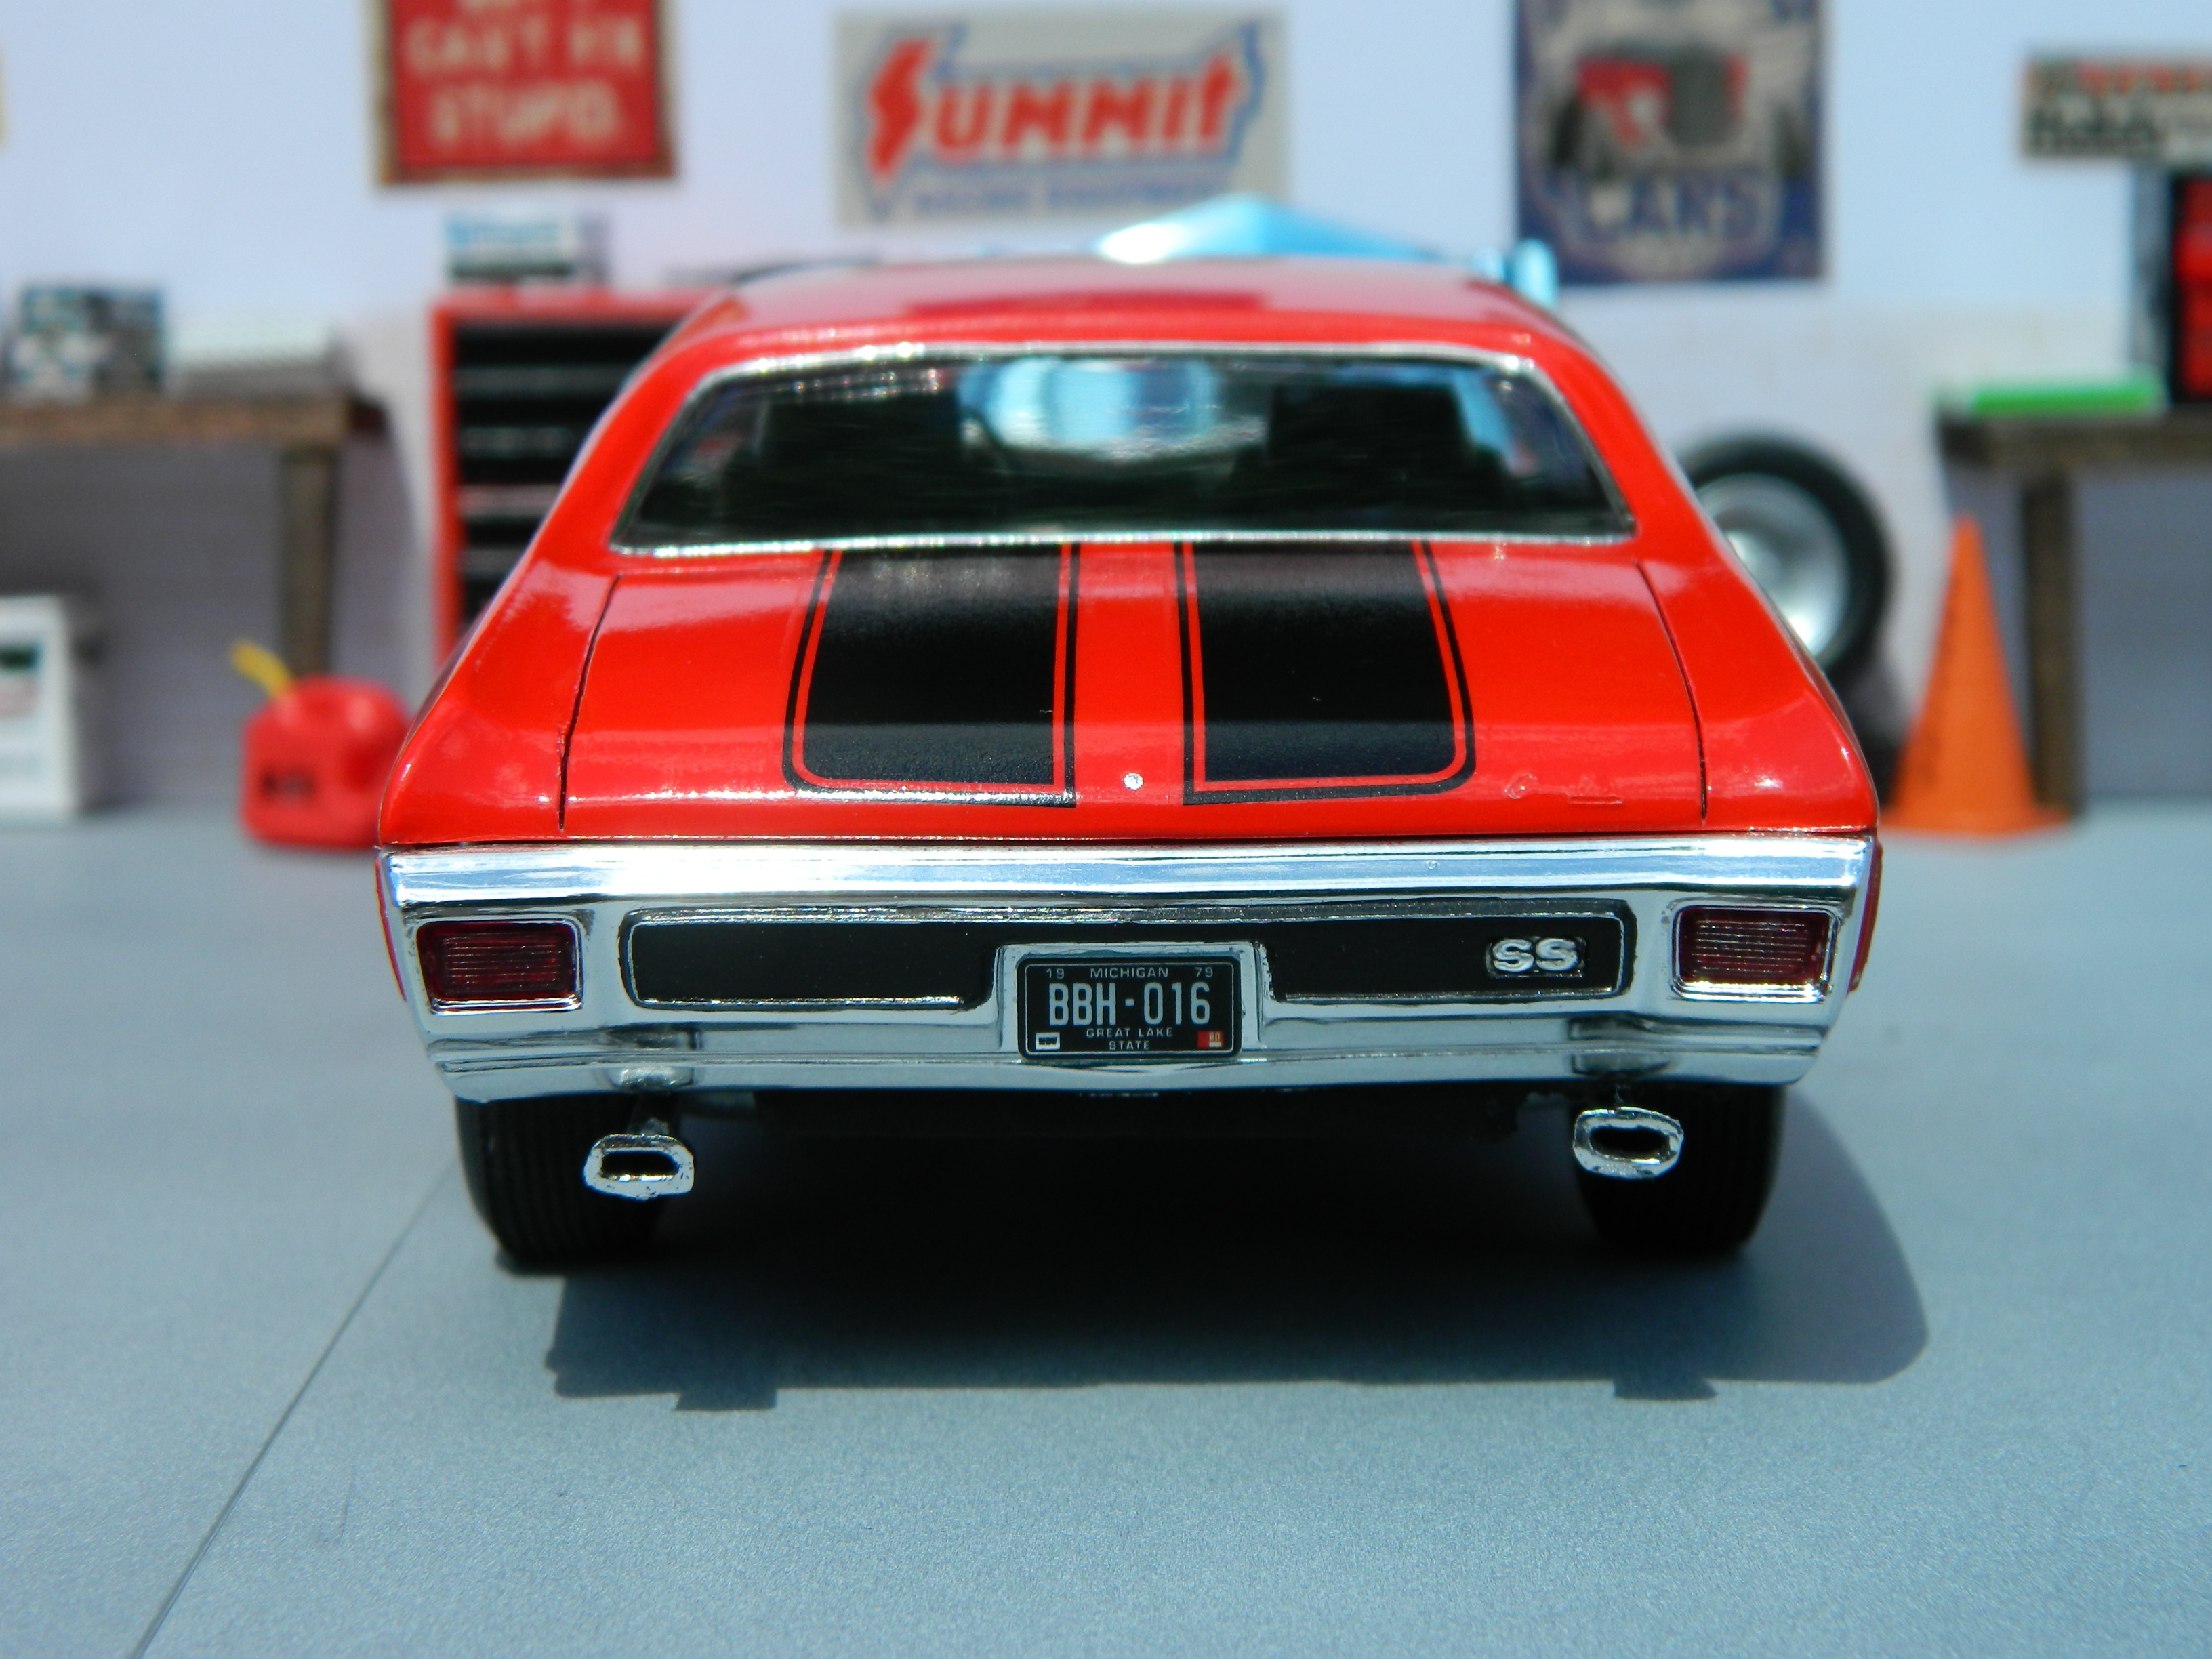
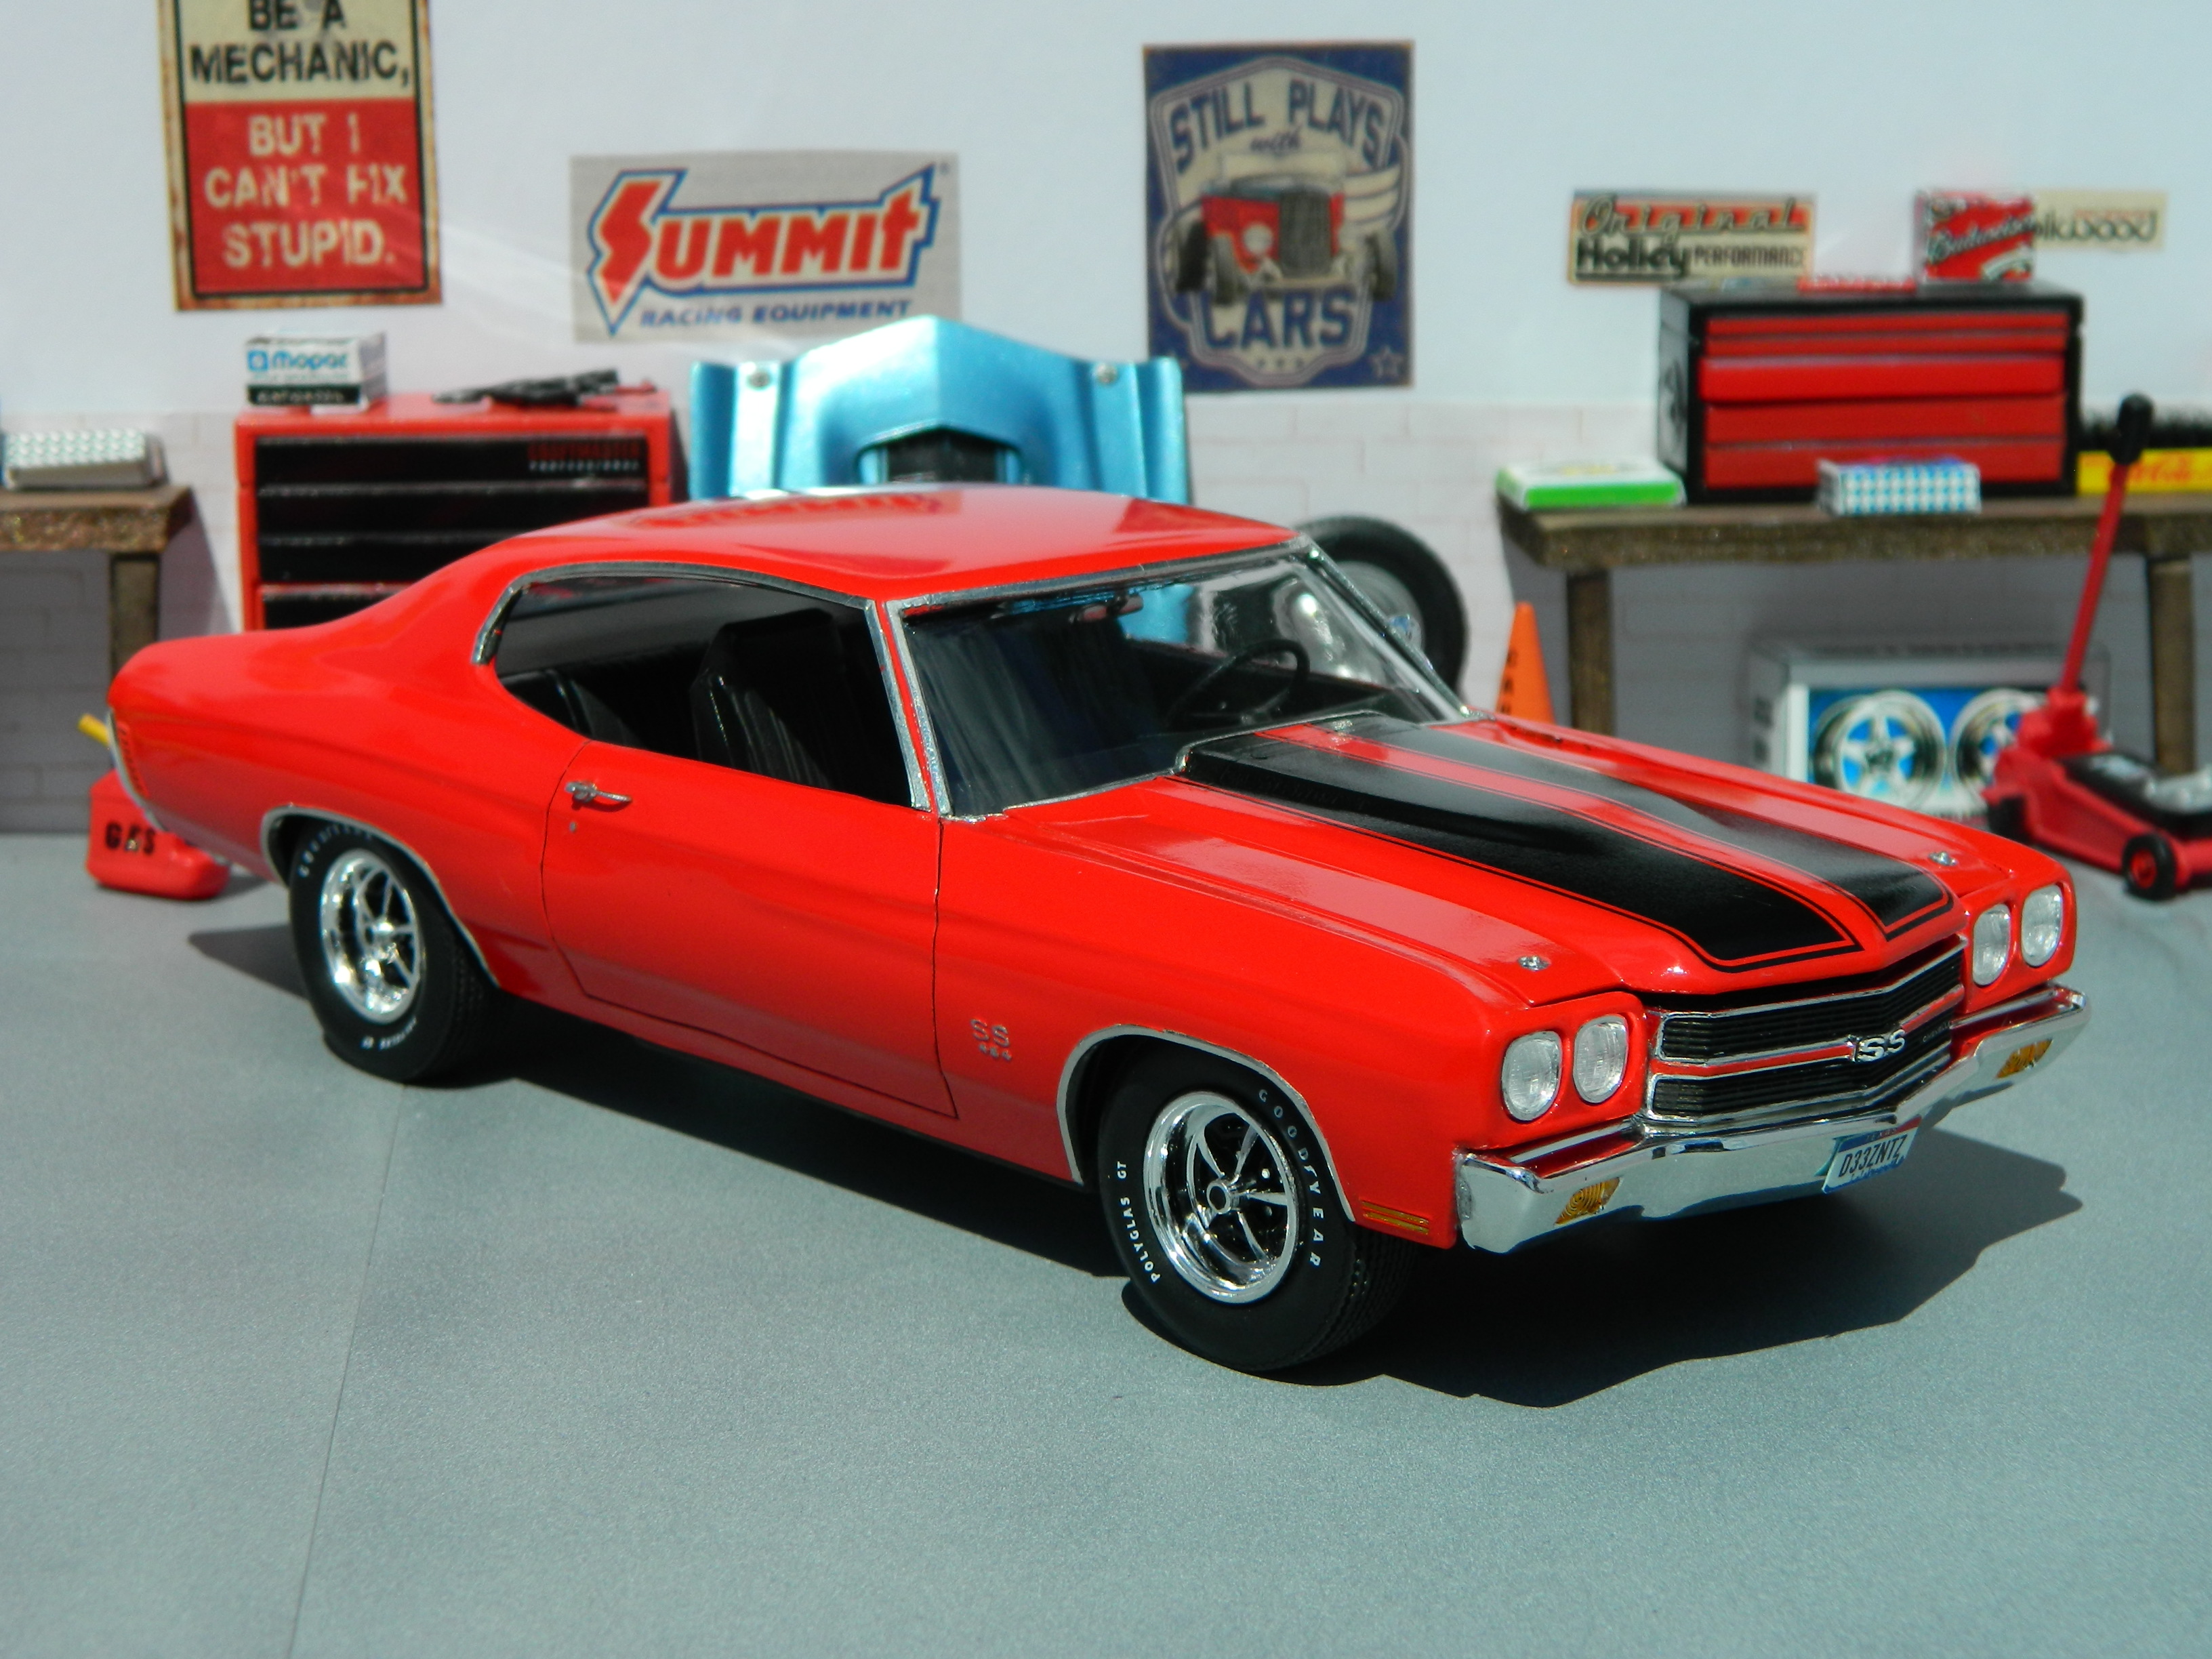
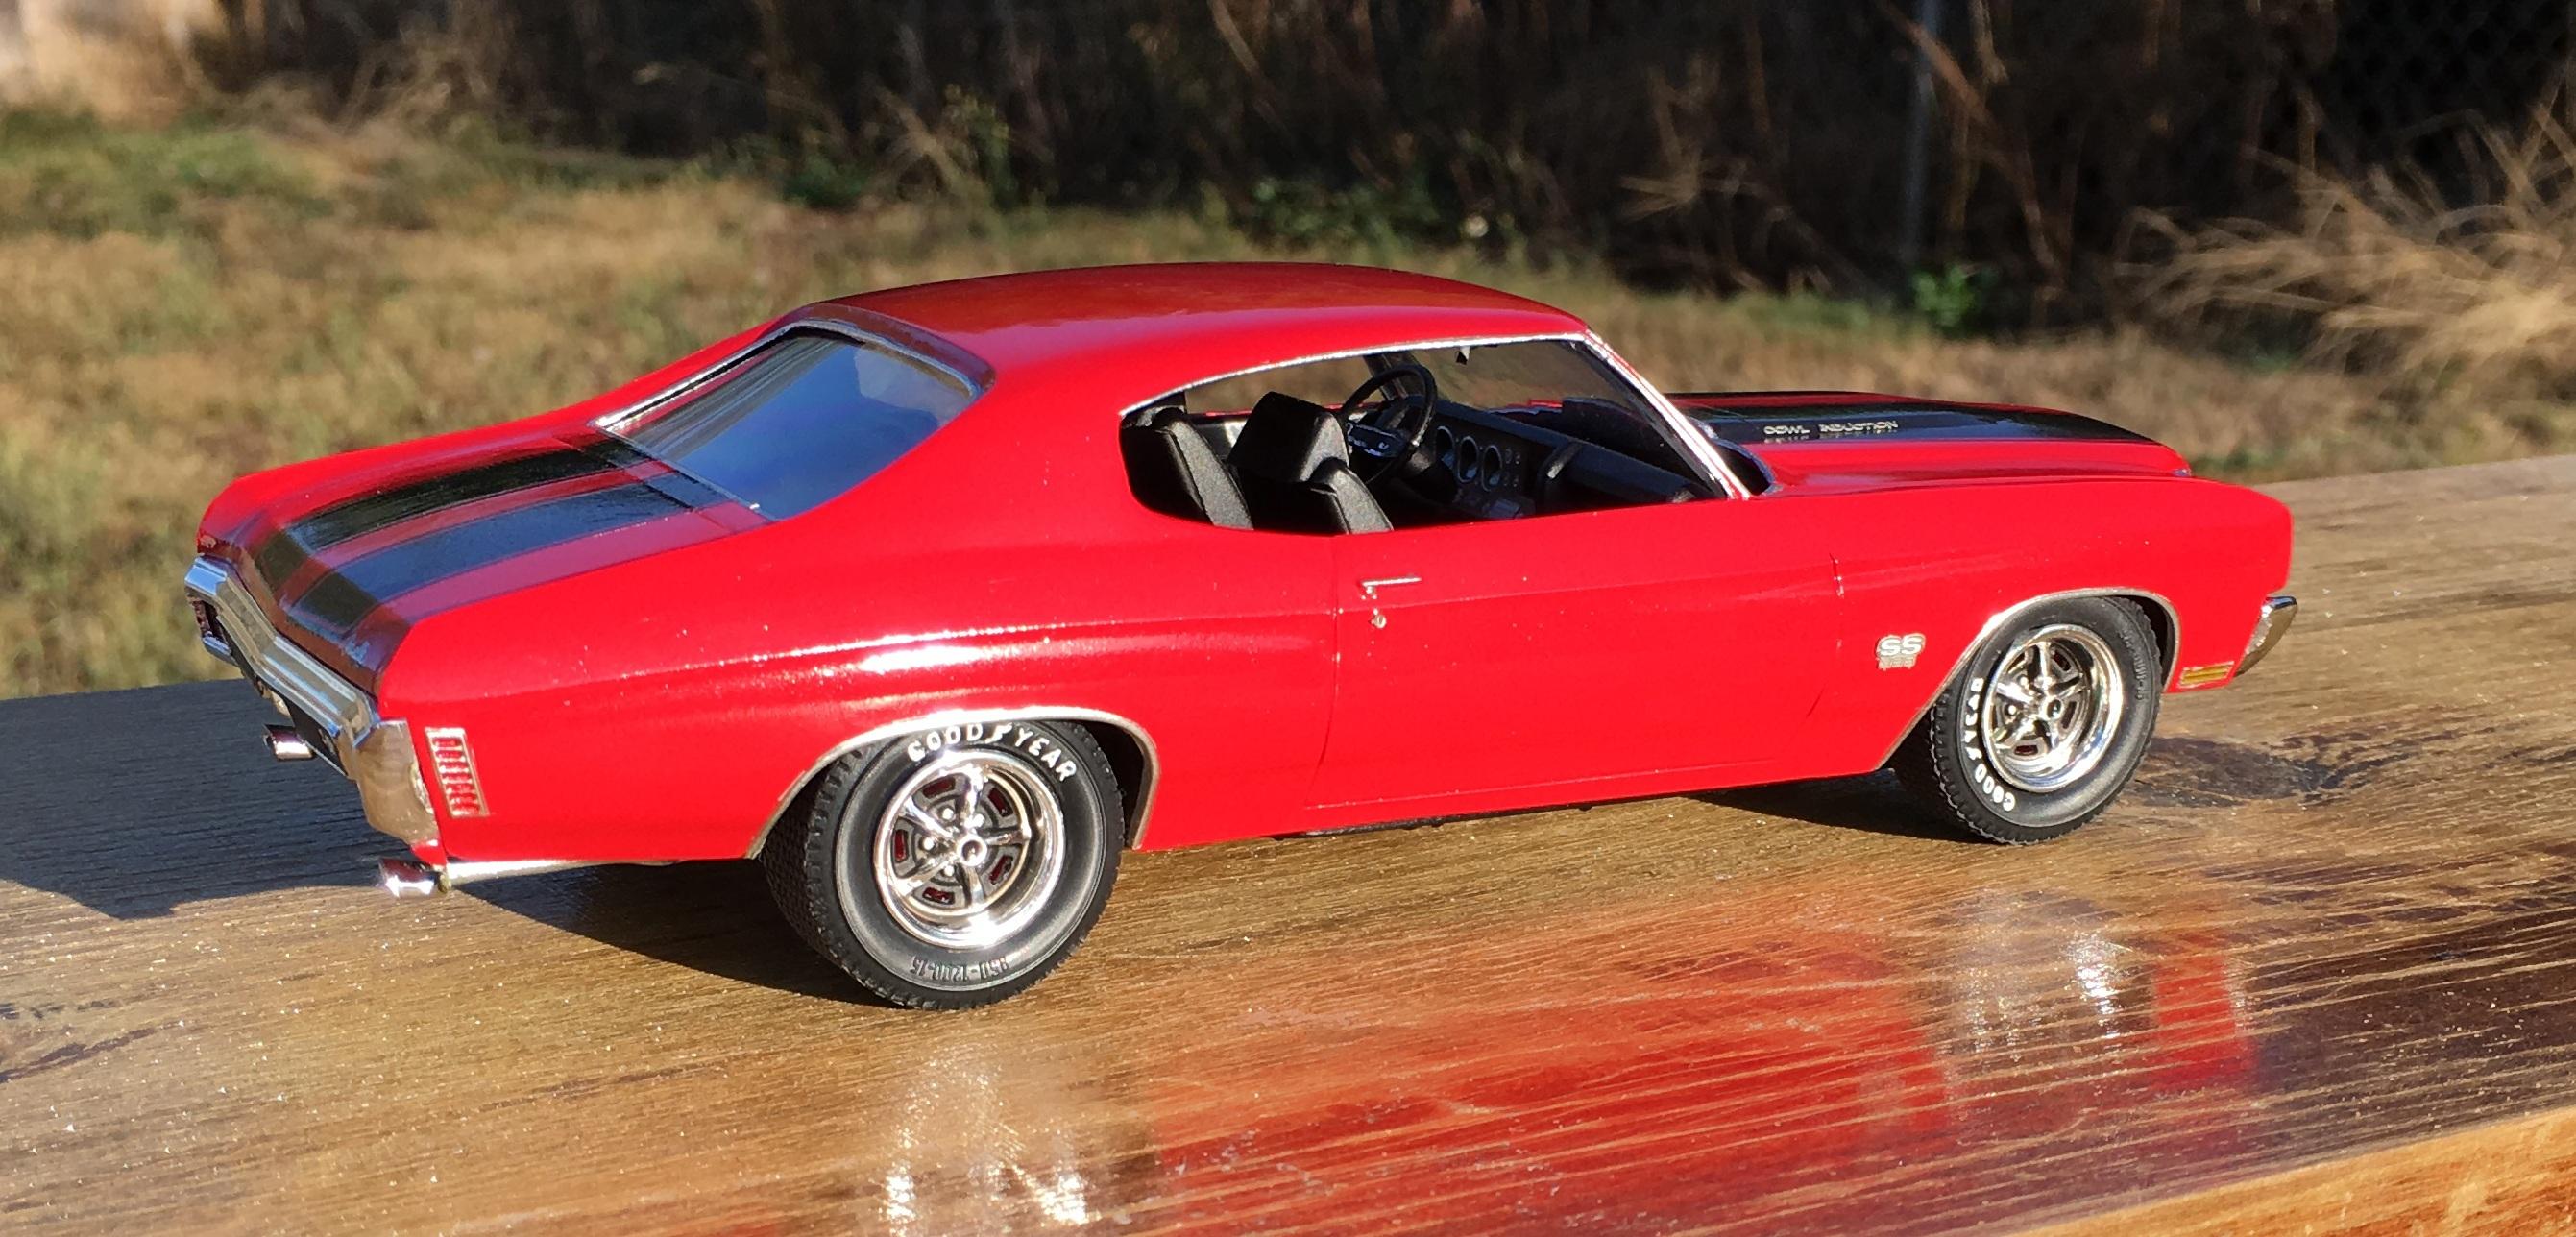
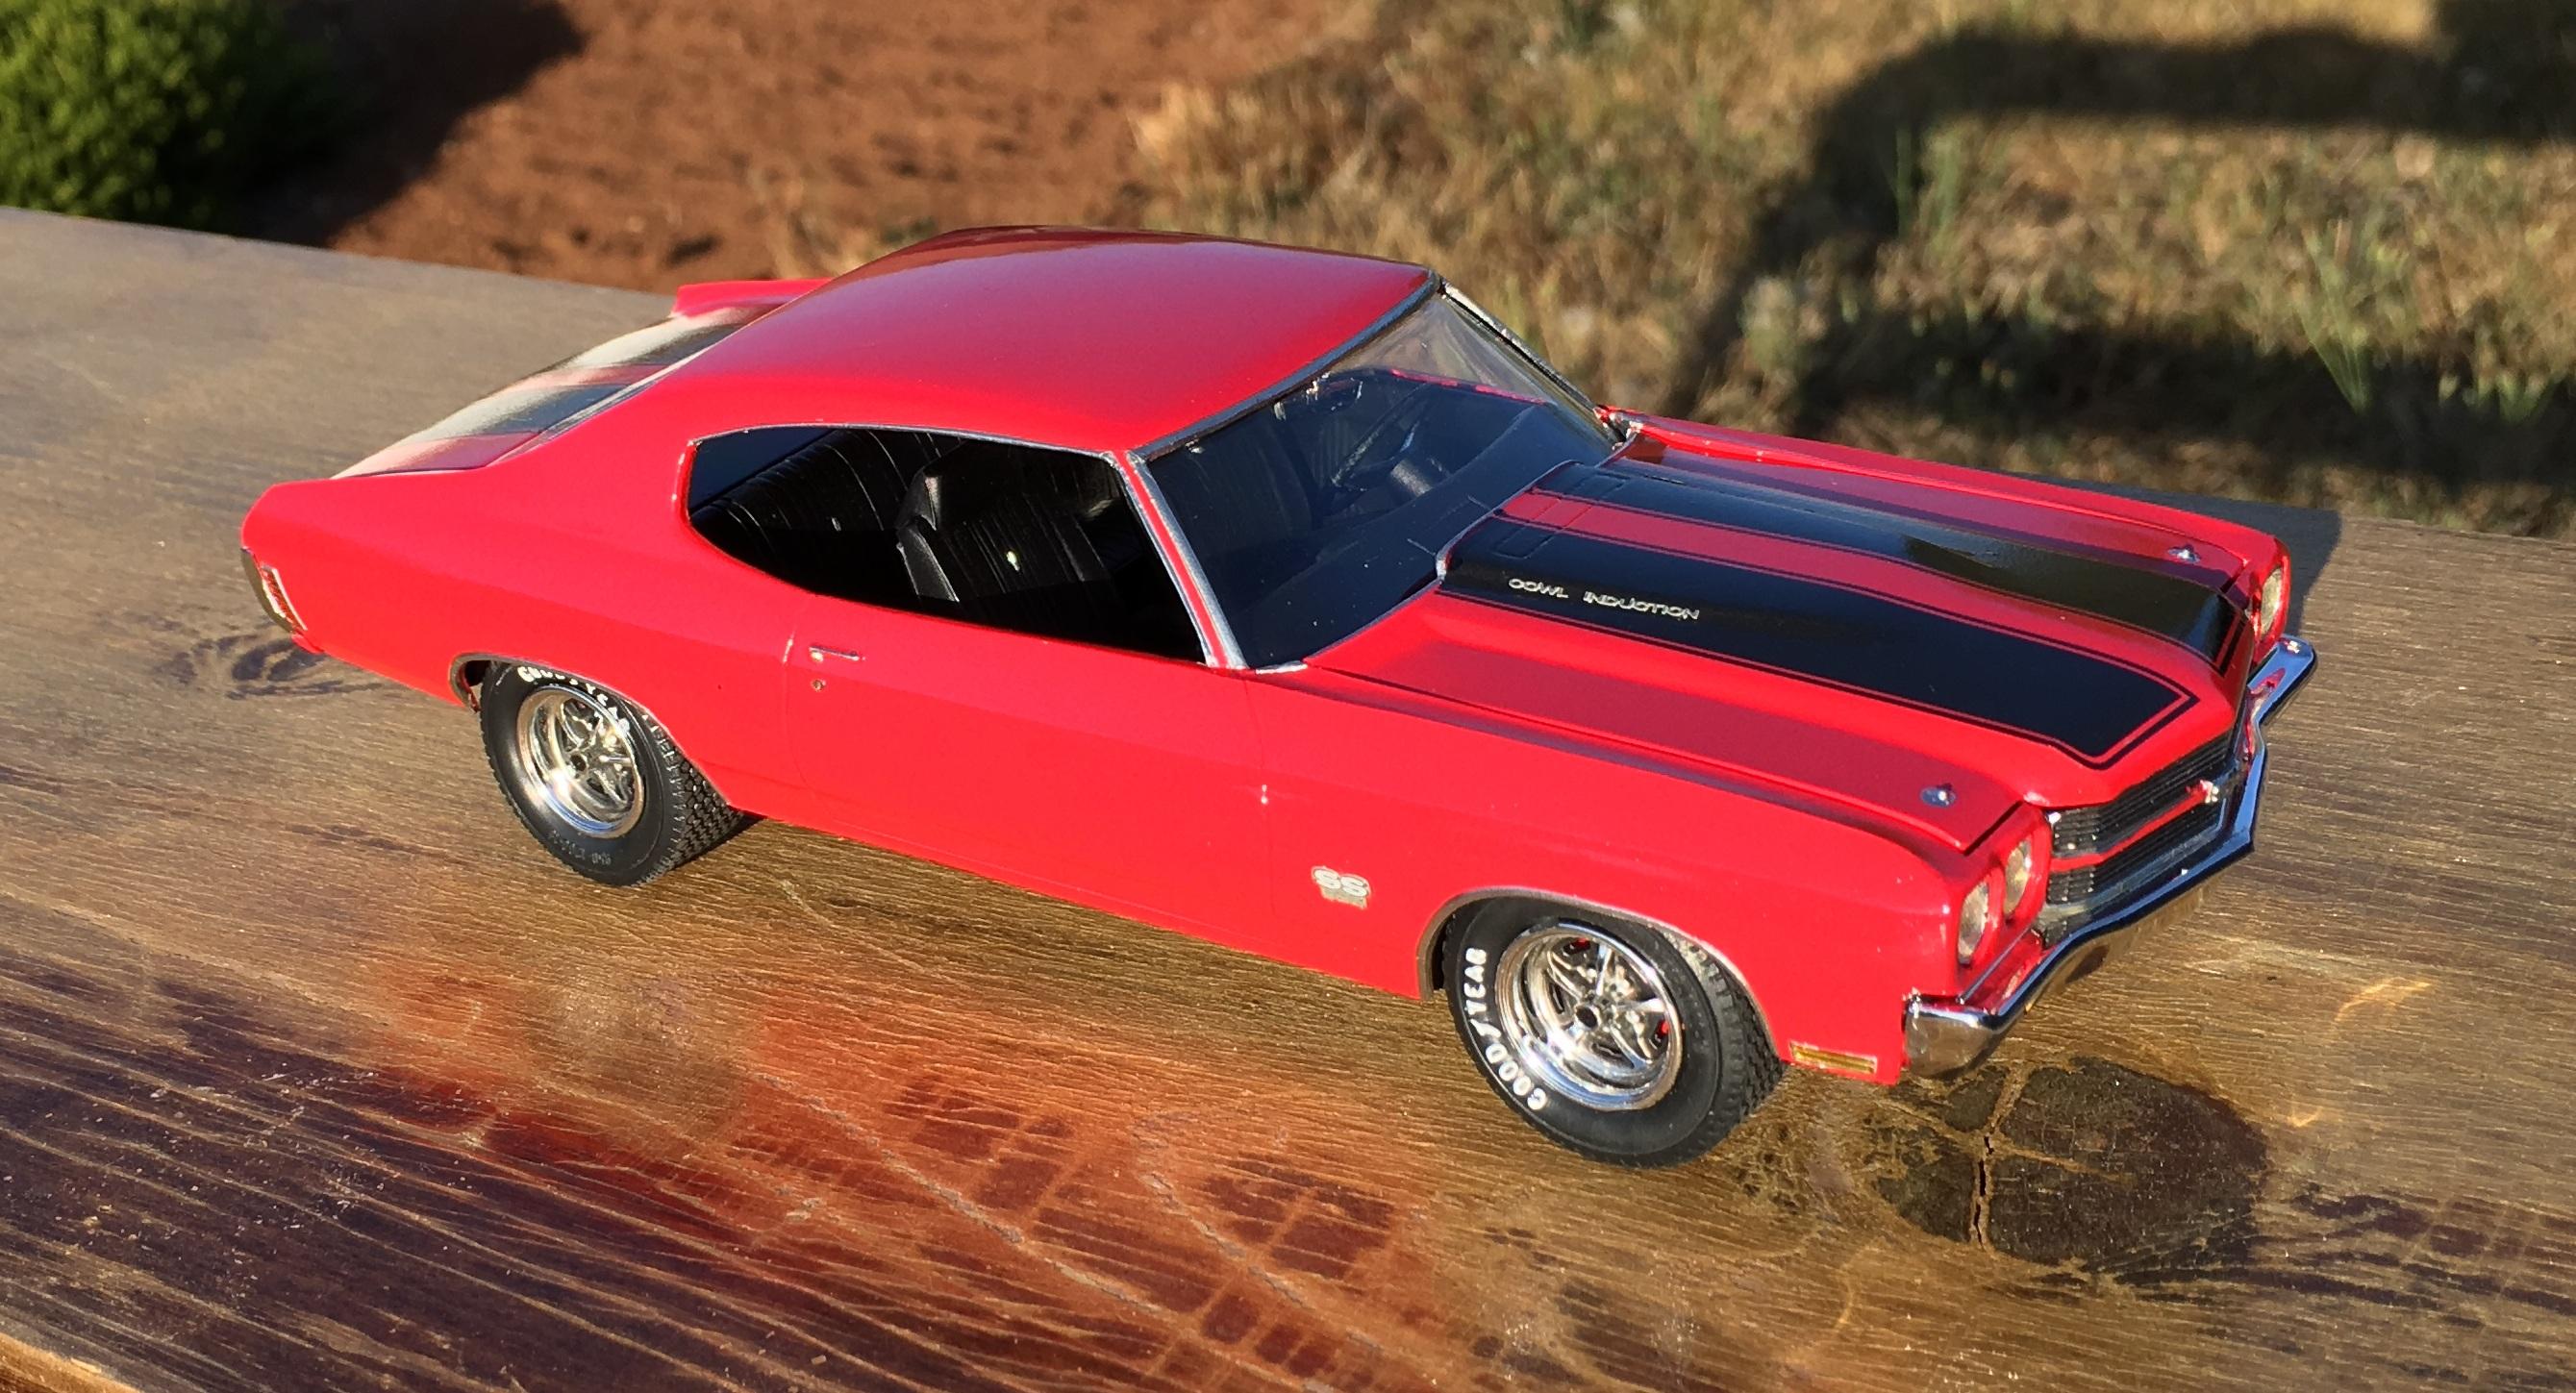
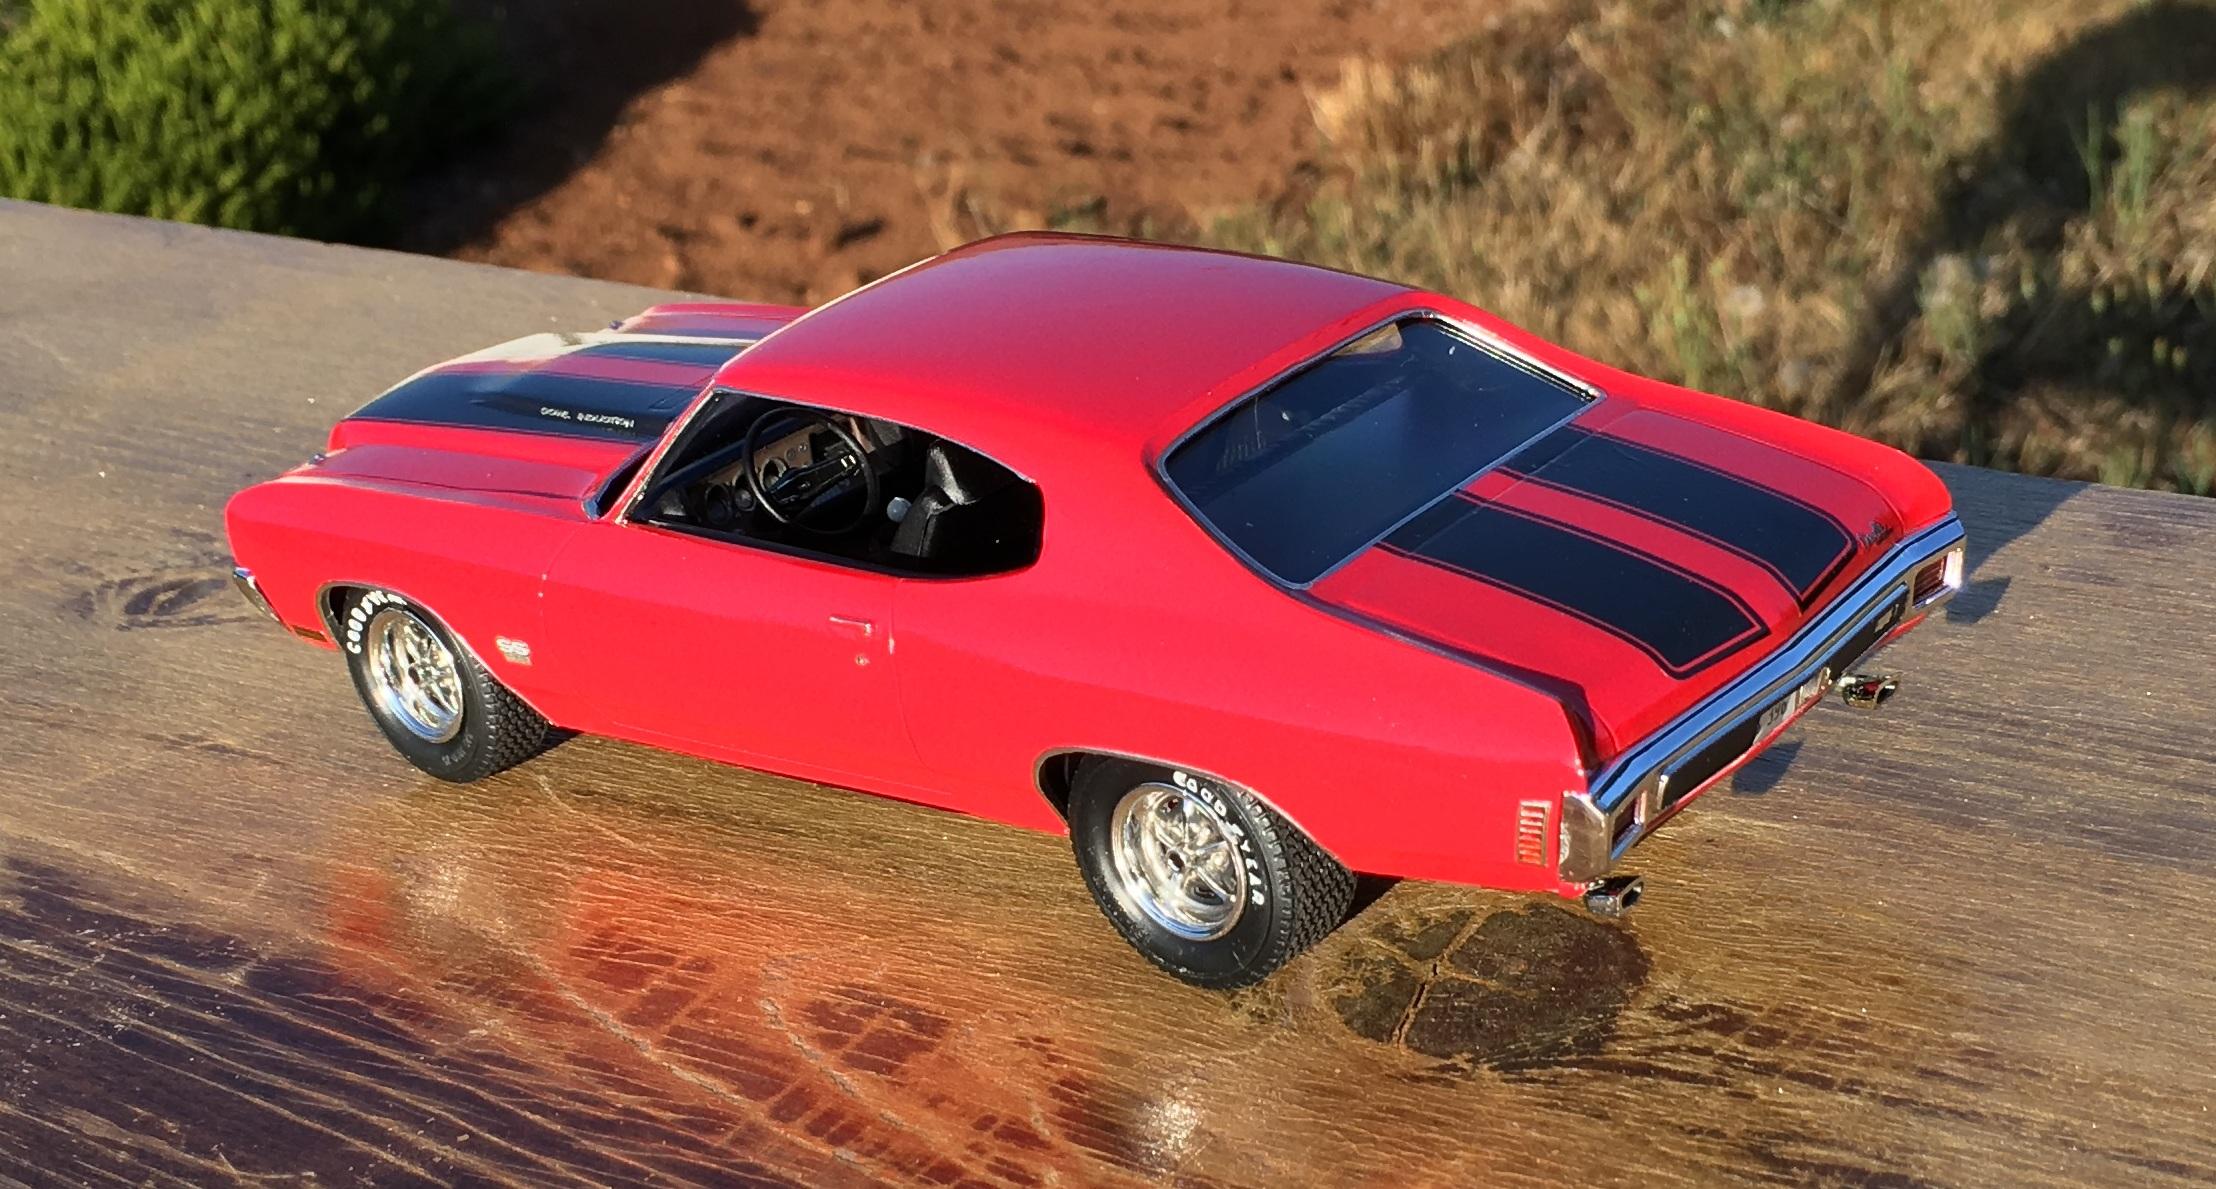
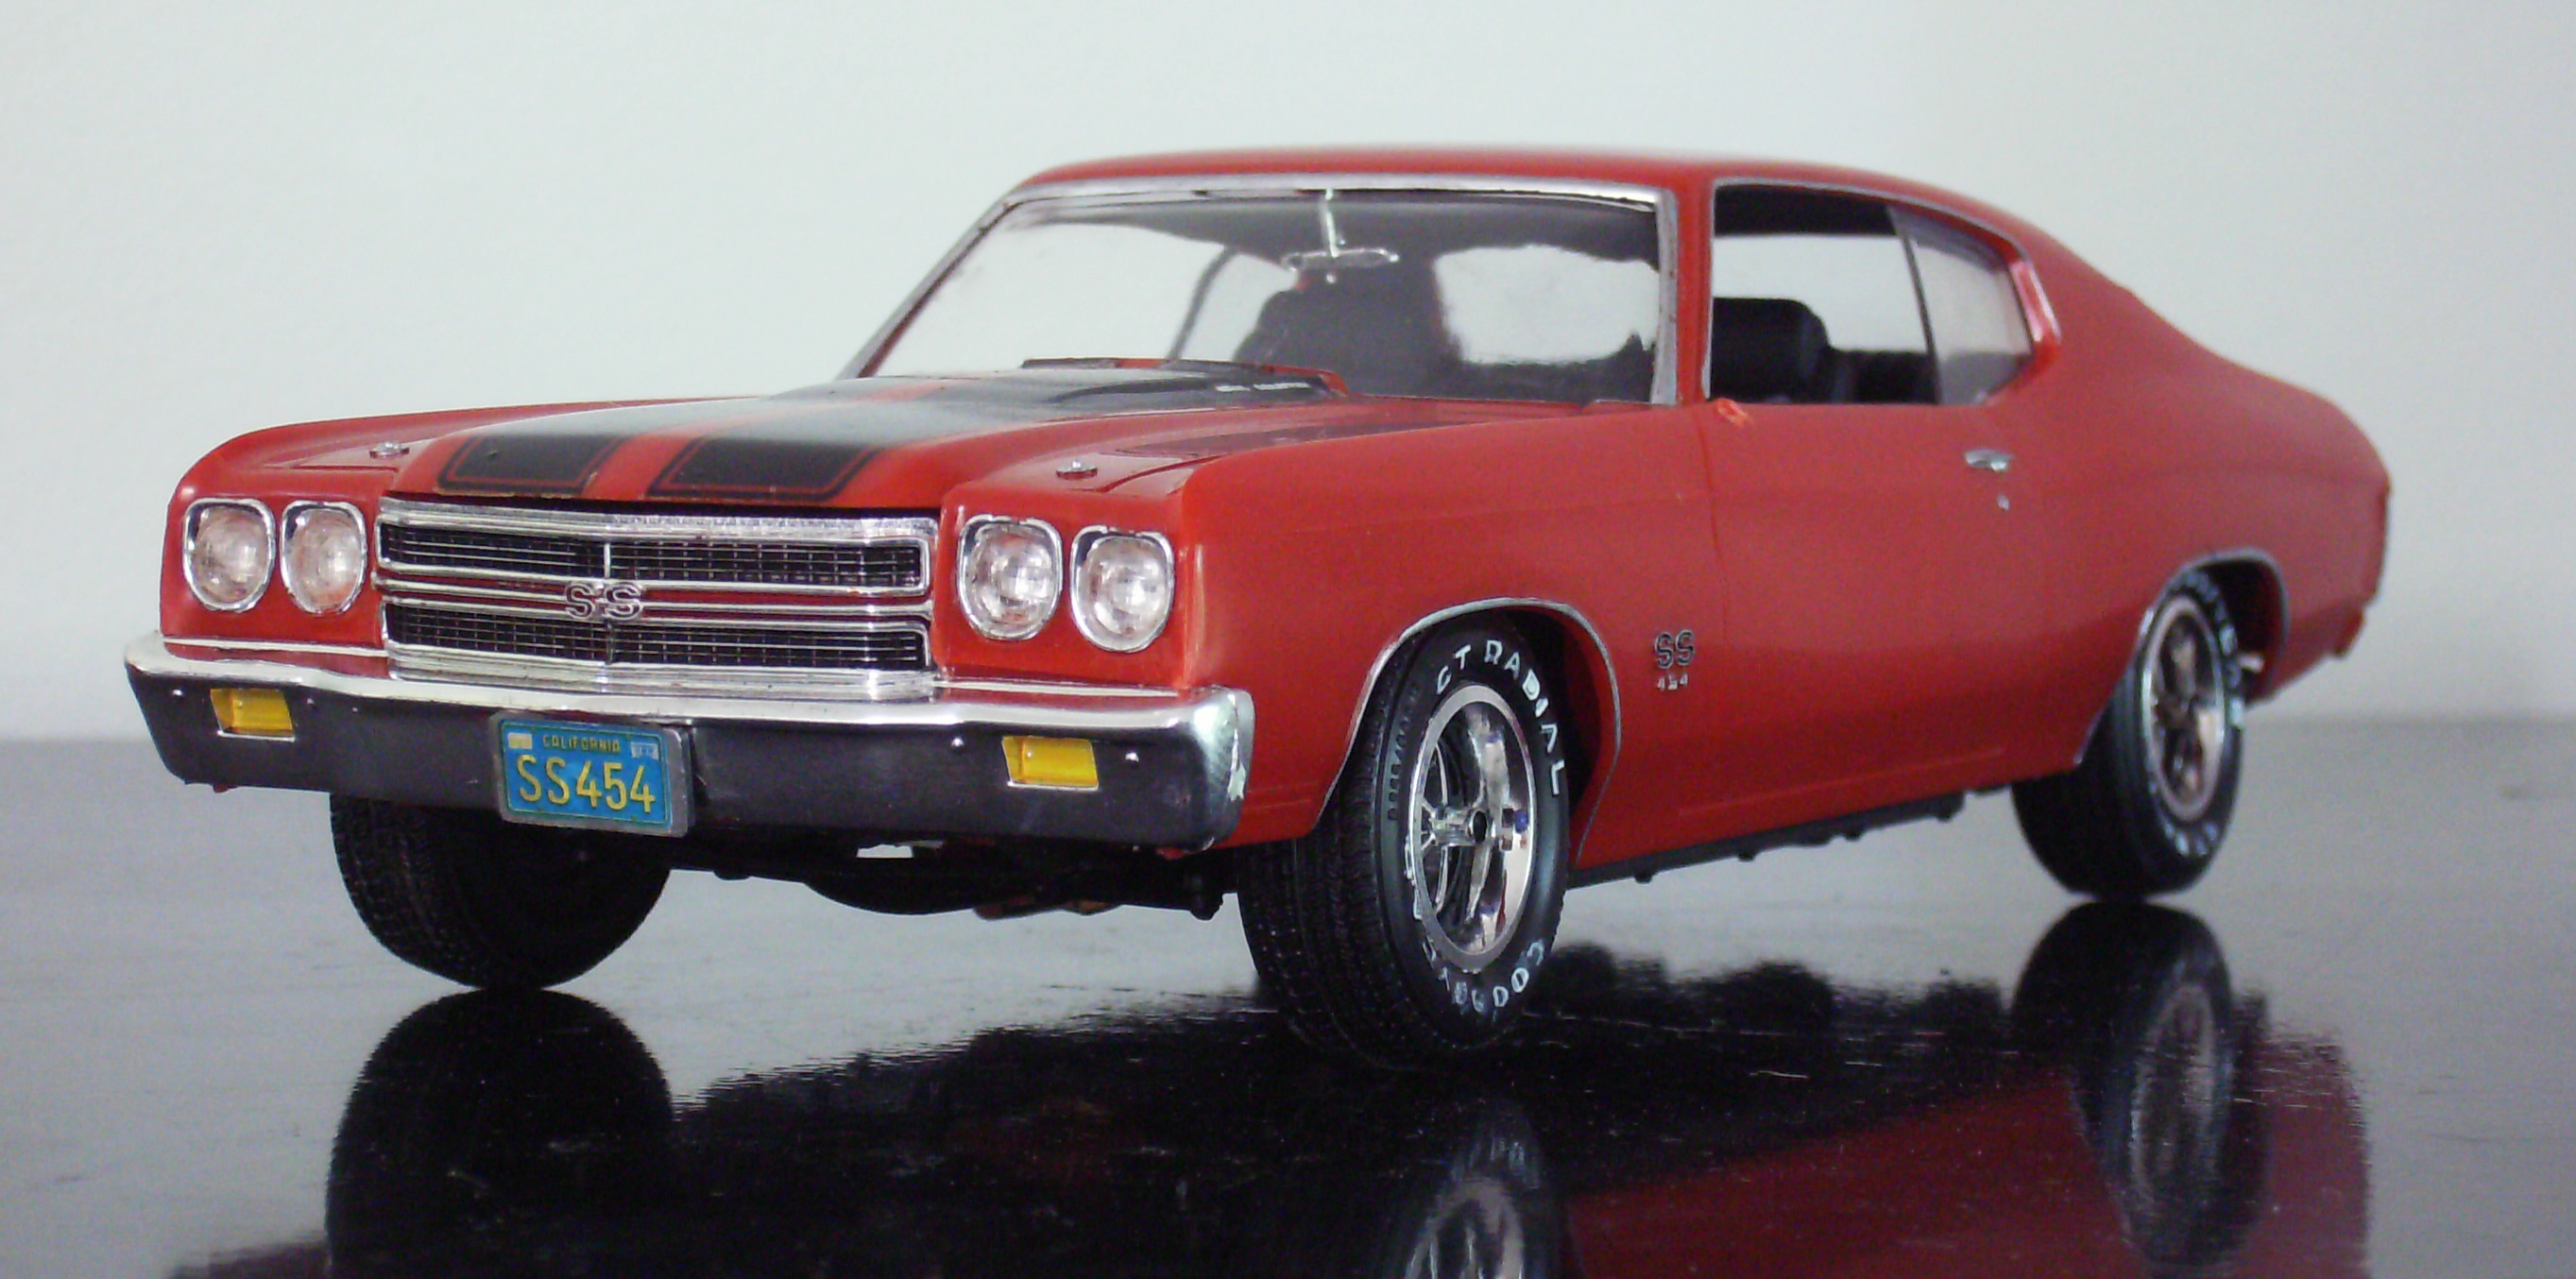
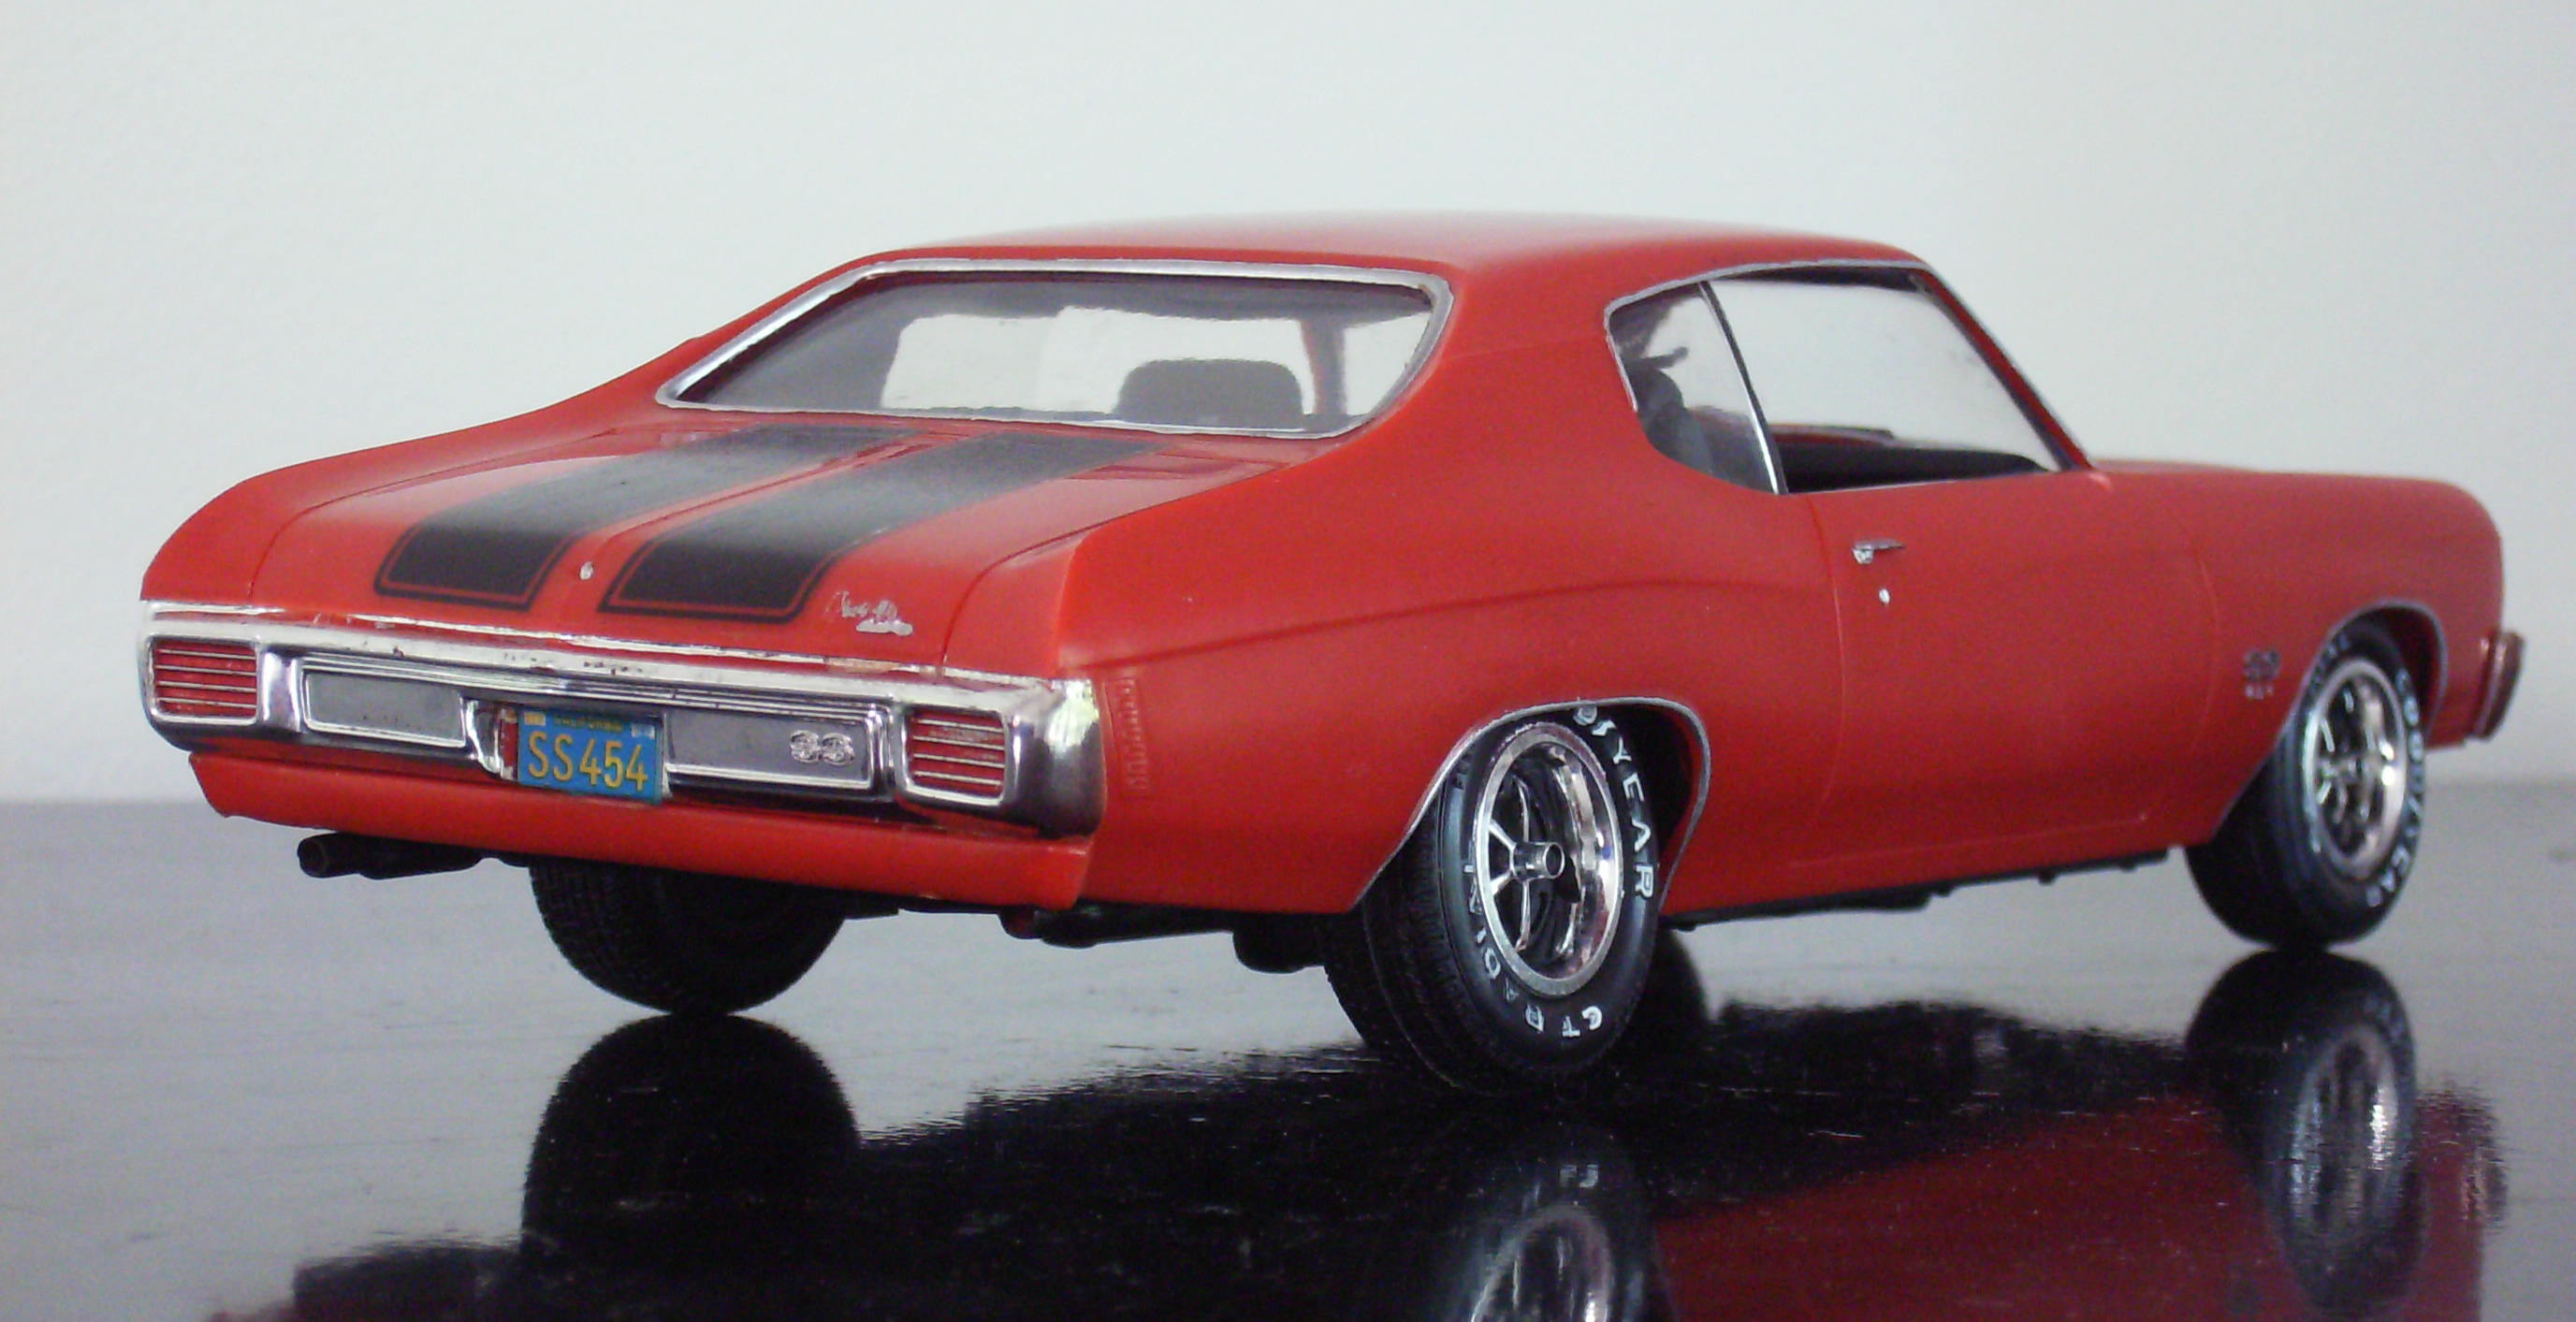
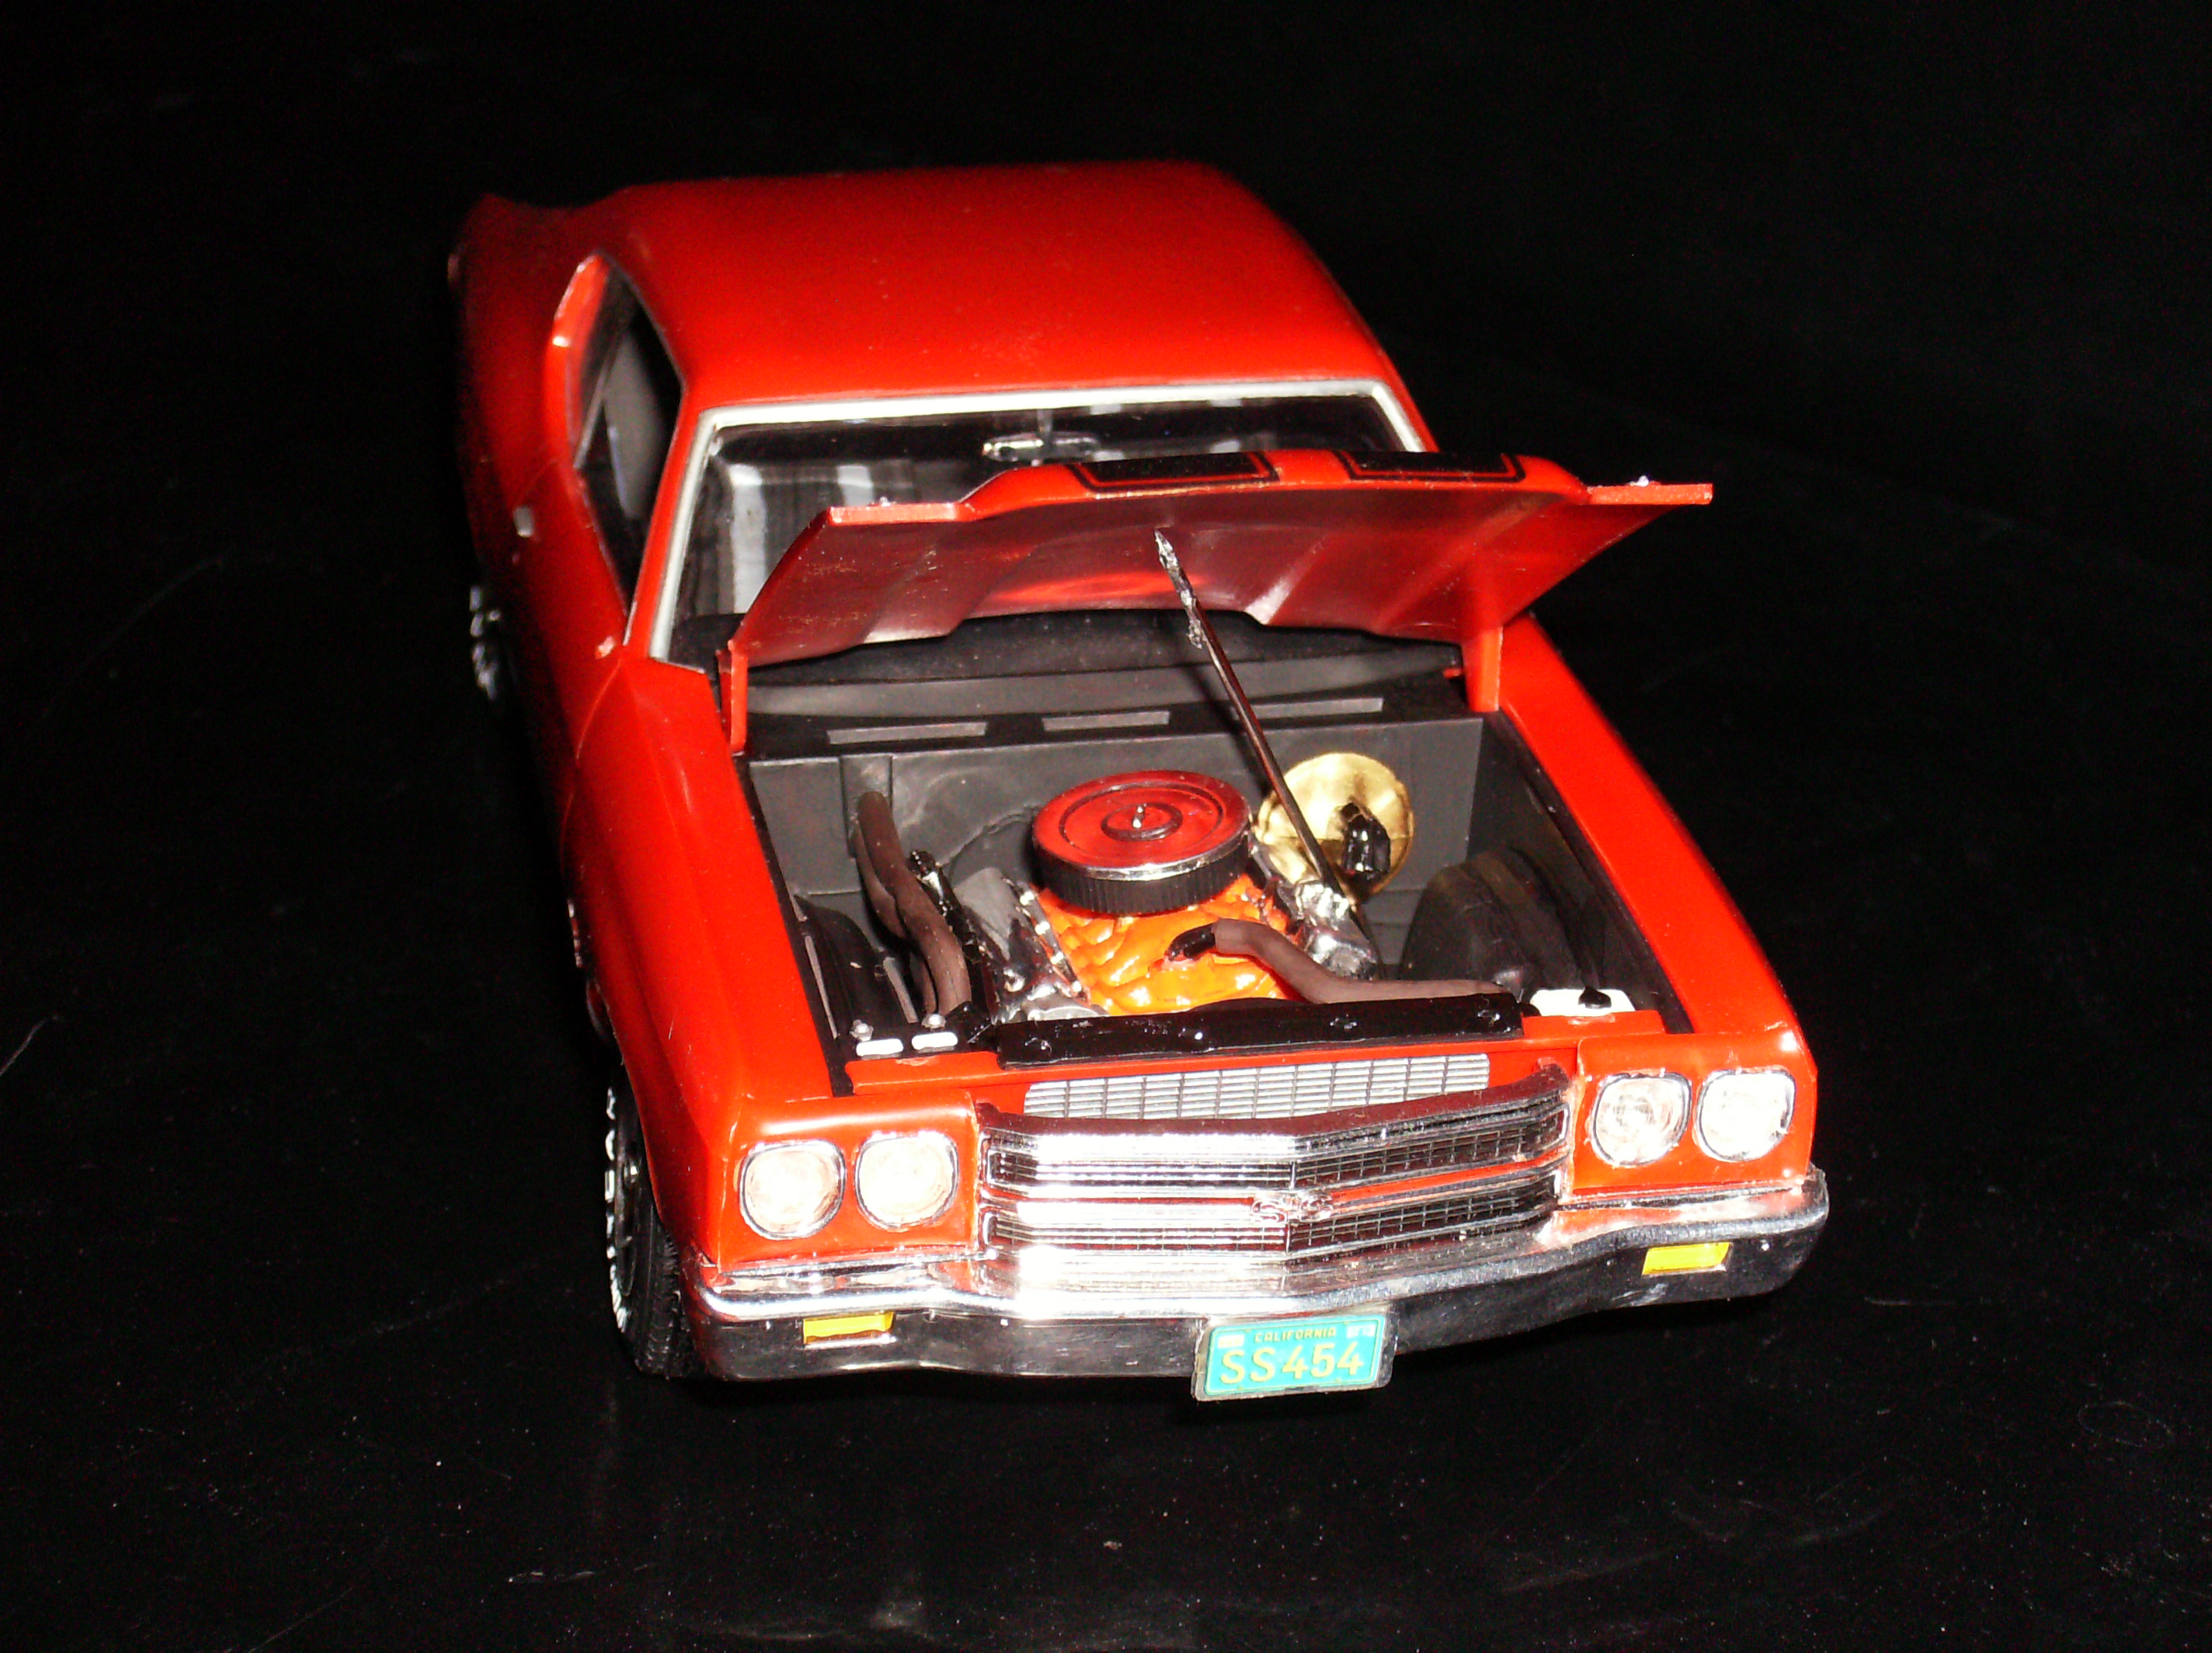
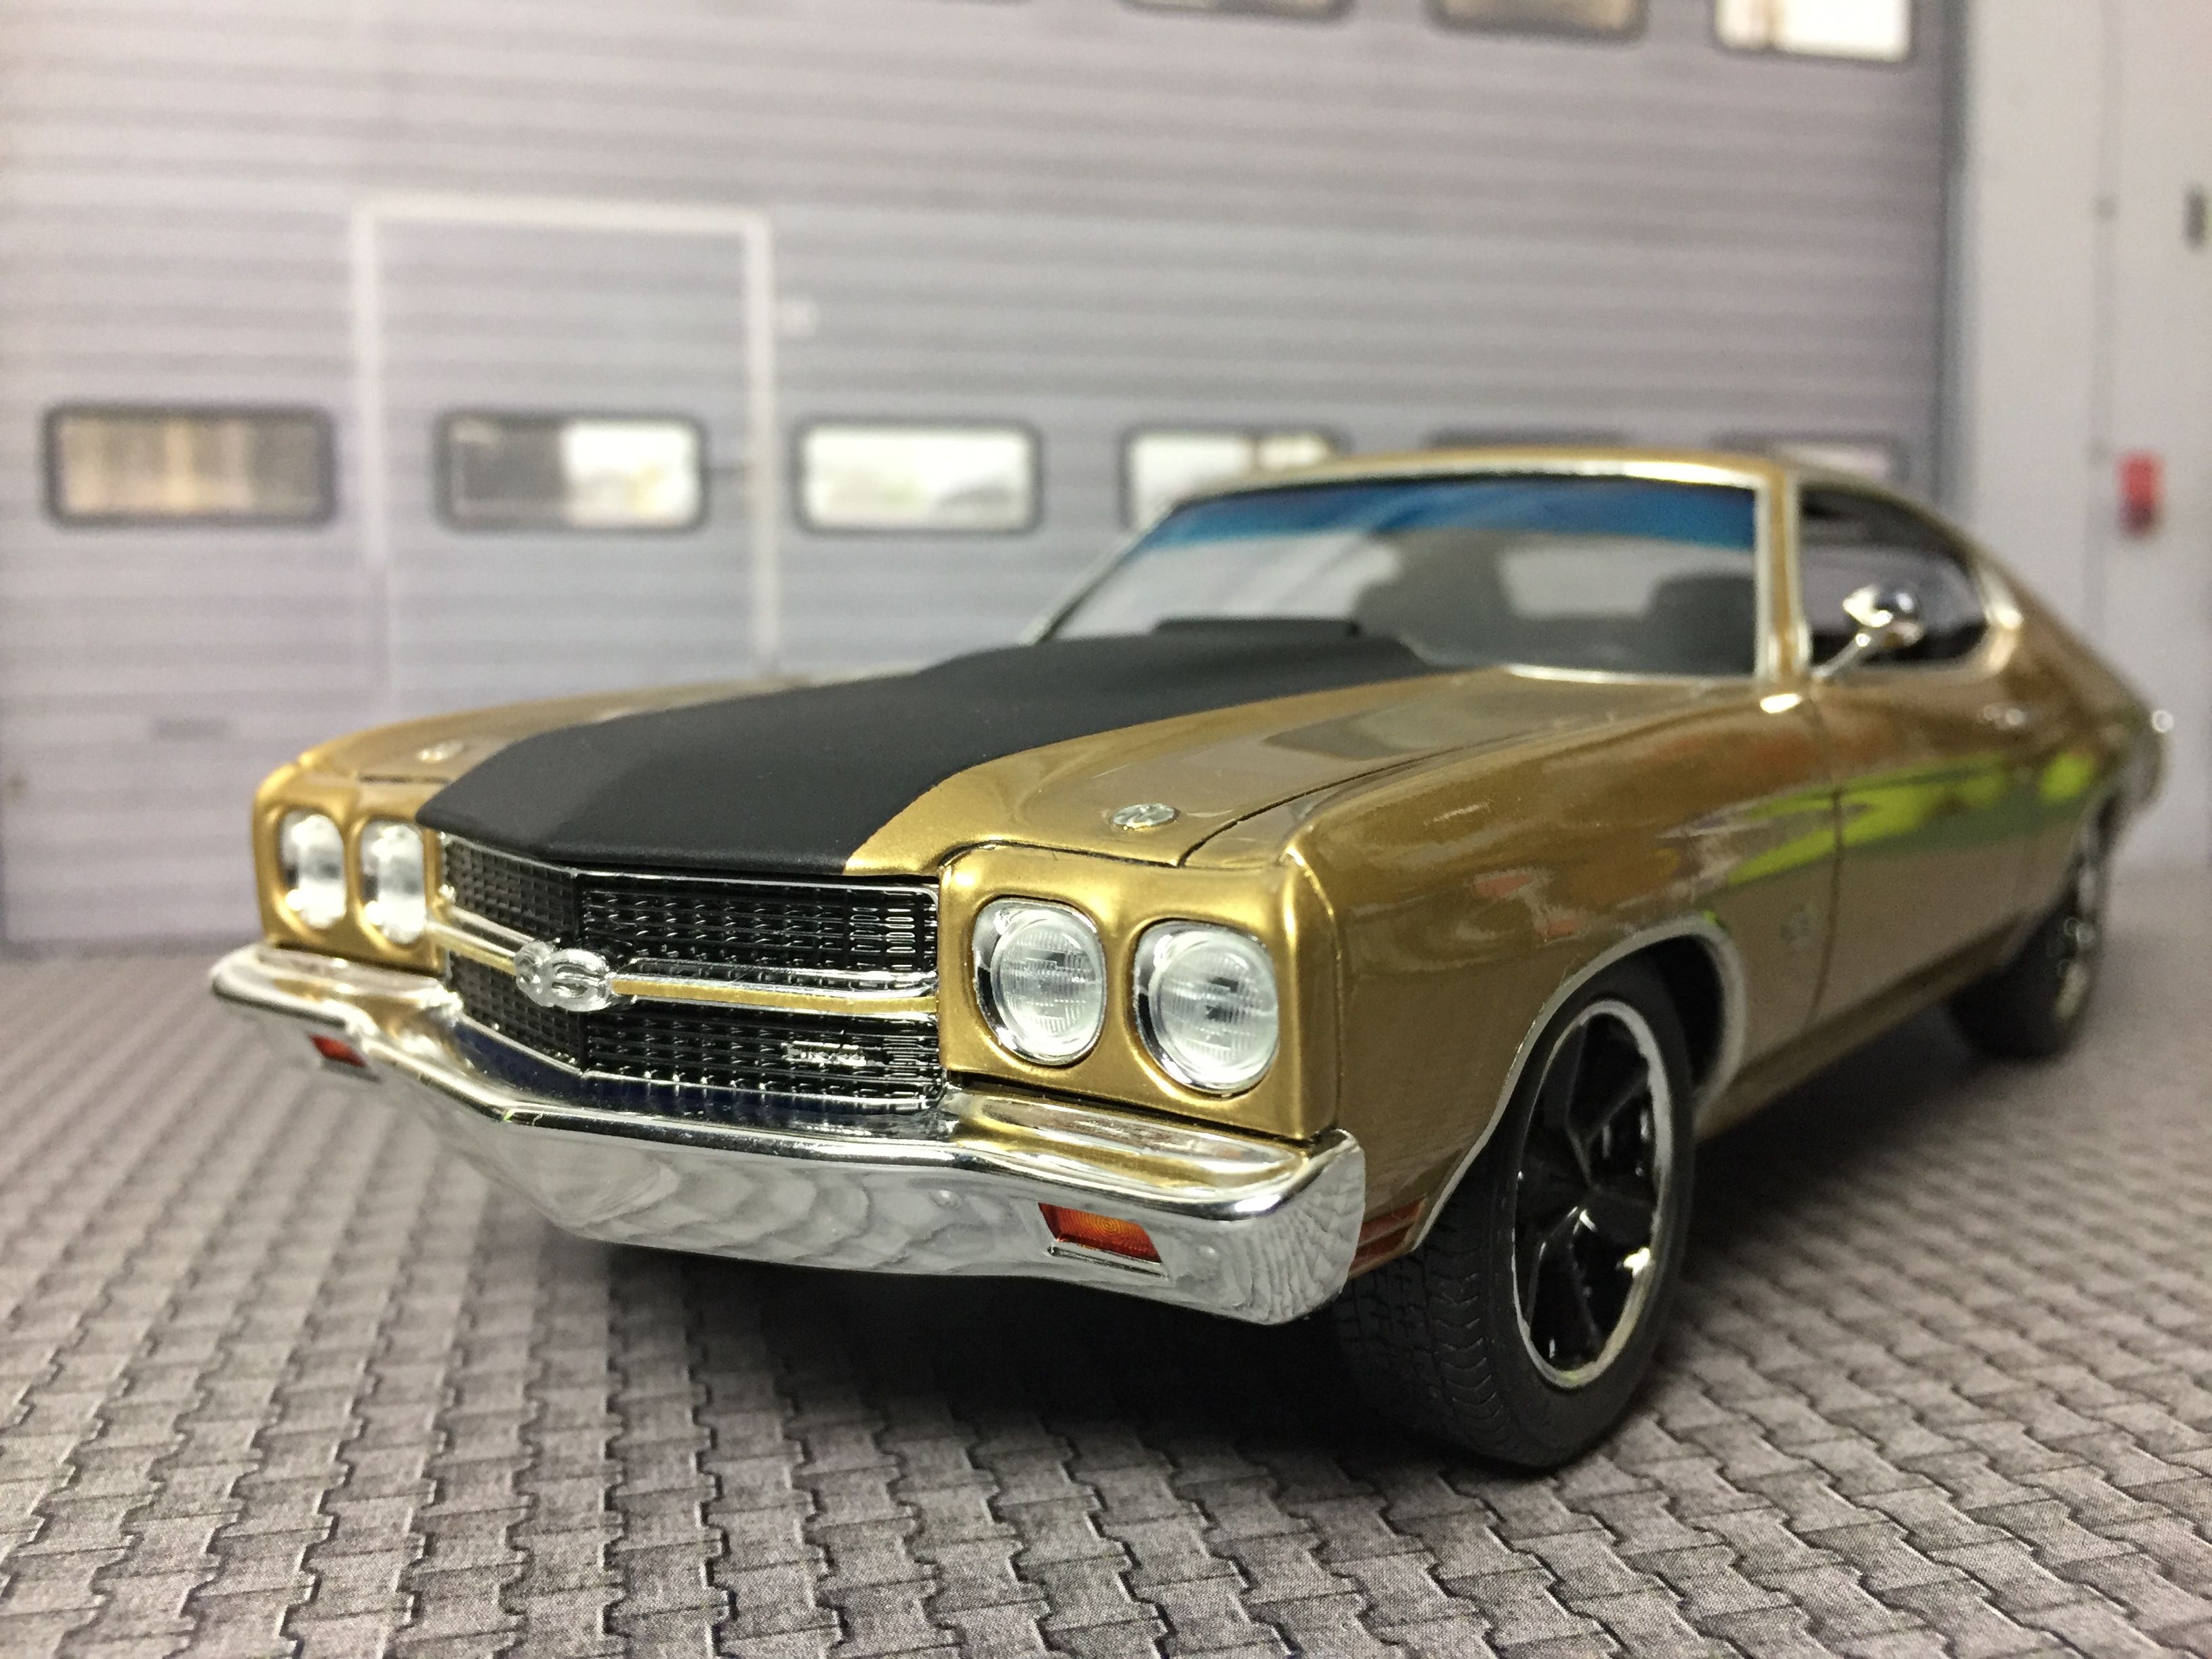
 I finished the AMT 1970 Chevelle SS454 yesterday. I know, same old--same old, everybody does them in red, but to me the most iconic Muscle Car is a Red Chevelle SS454. So the color is Tamiya TS-49 Bright Red. I left the interior primer black and brushed satin clear over the dash, door panels, and parts of the seats. I added valve stems, ignition wires, heater hoses, and an Accel Supercoil from MAD for extra details. The trim is Bare Metal Foil and the door handles came from Fireball Modelworks and were painted with Molotow Chrome. The final fit was pretty finicky, but after 4 tries I finally got it to look right, although I'm not happy with the gap between the hood and grille. I also sanded down the door window trim on each side, as it was almost non-existent, and used some .010" x .030" styrene strip for the trim. It's a pretty basic but familiar AMT kit with low parts count, lacking details, and showing it's age, but it turned out pretty good and felt nicely nostalgic.
-
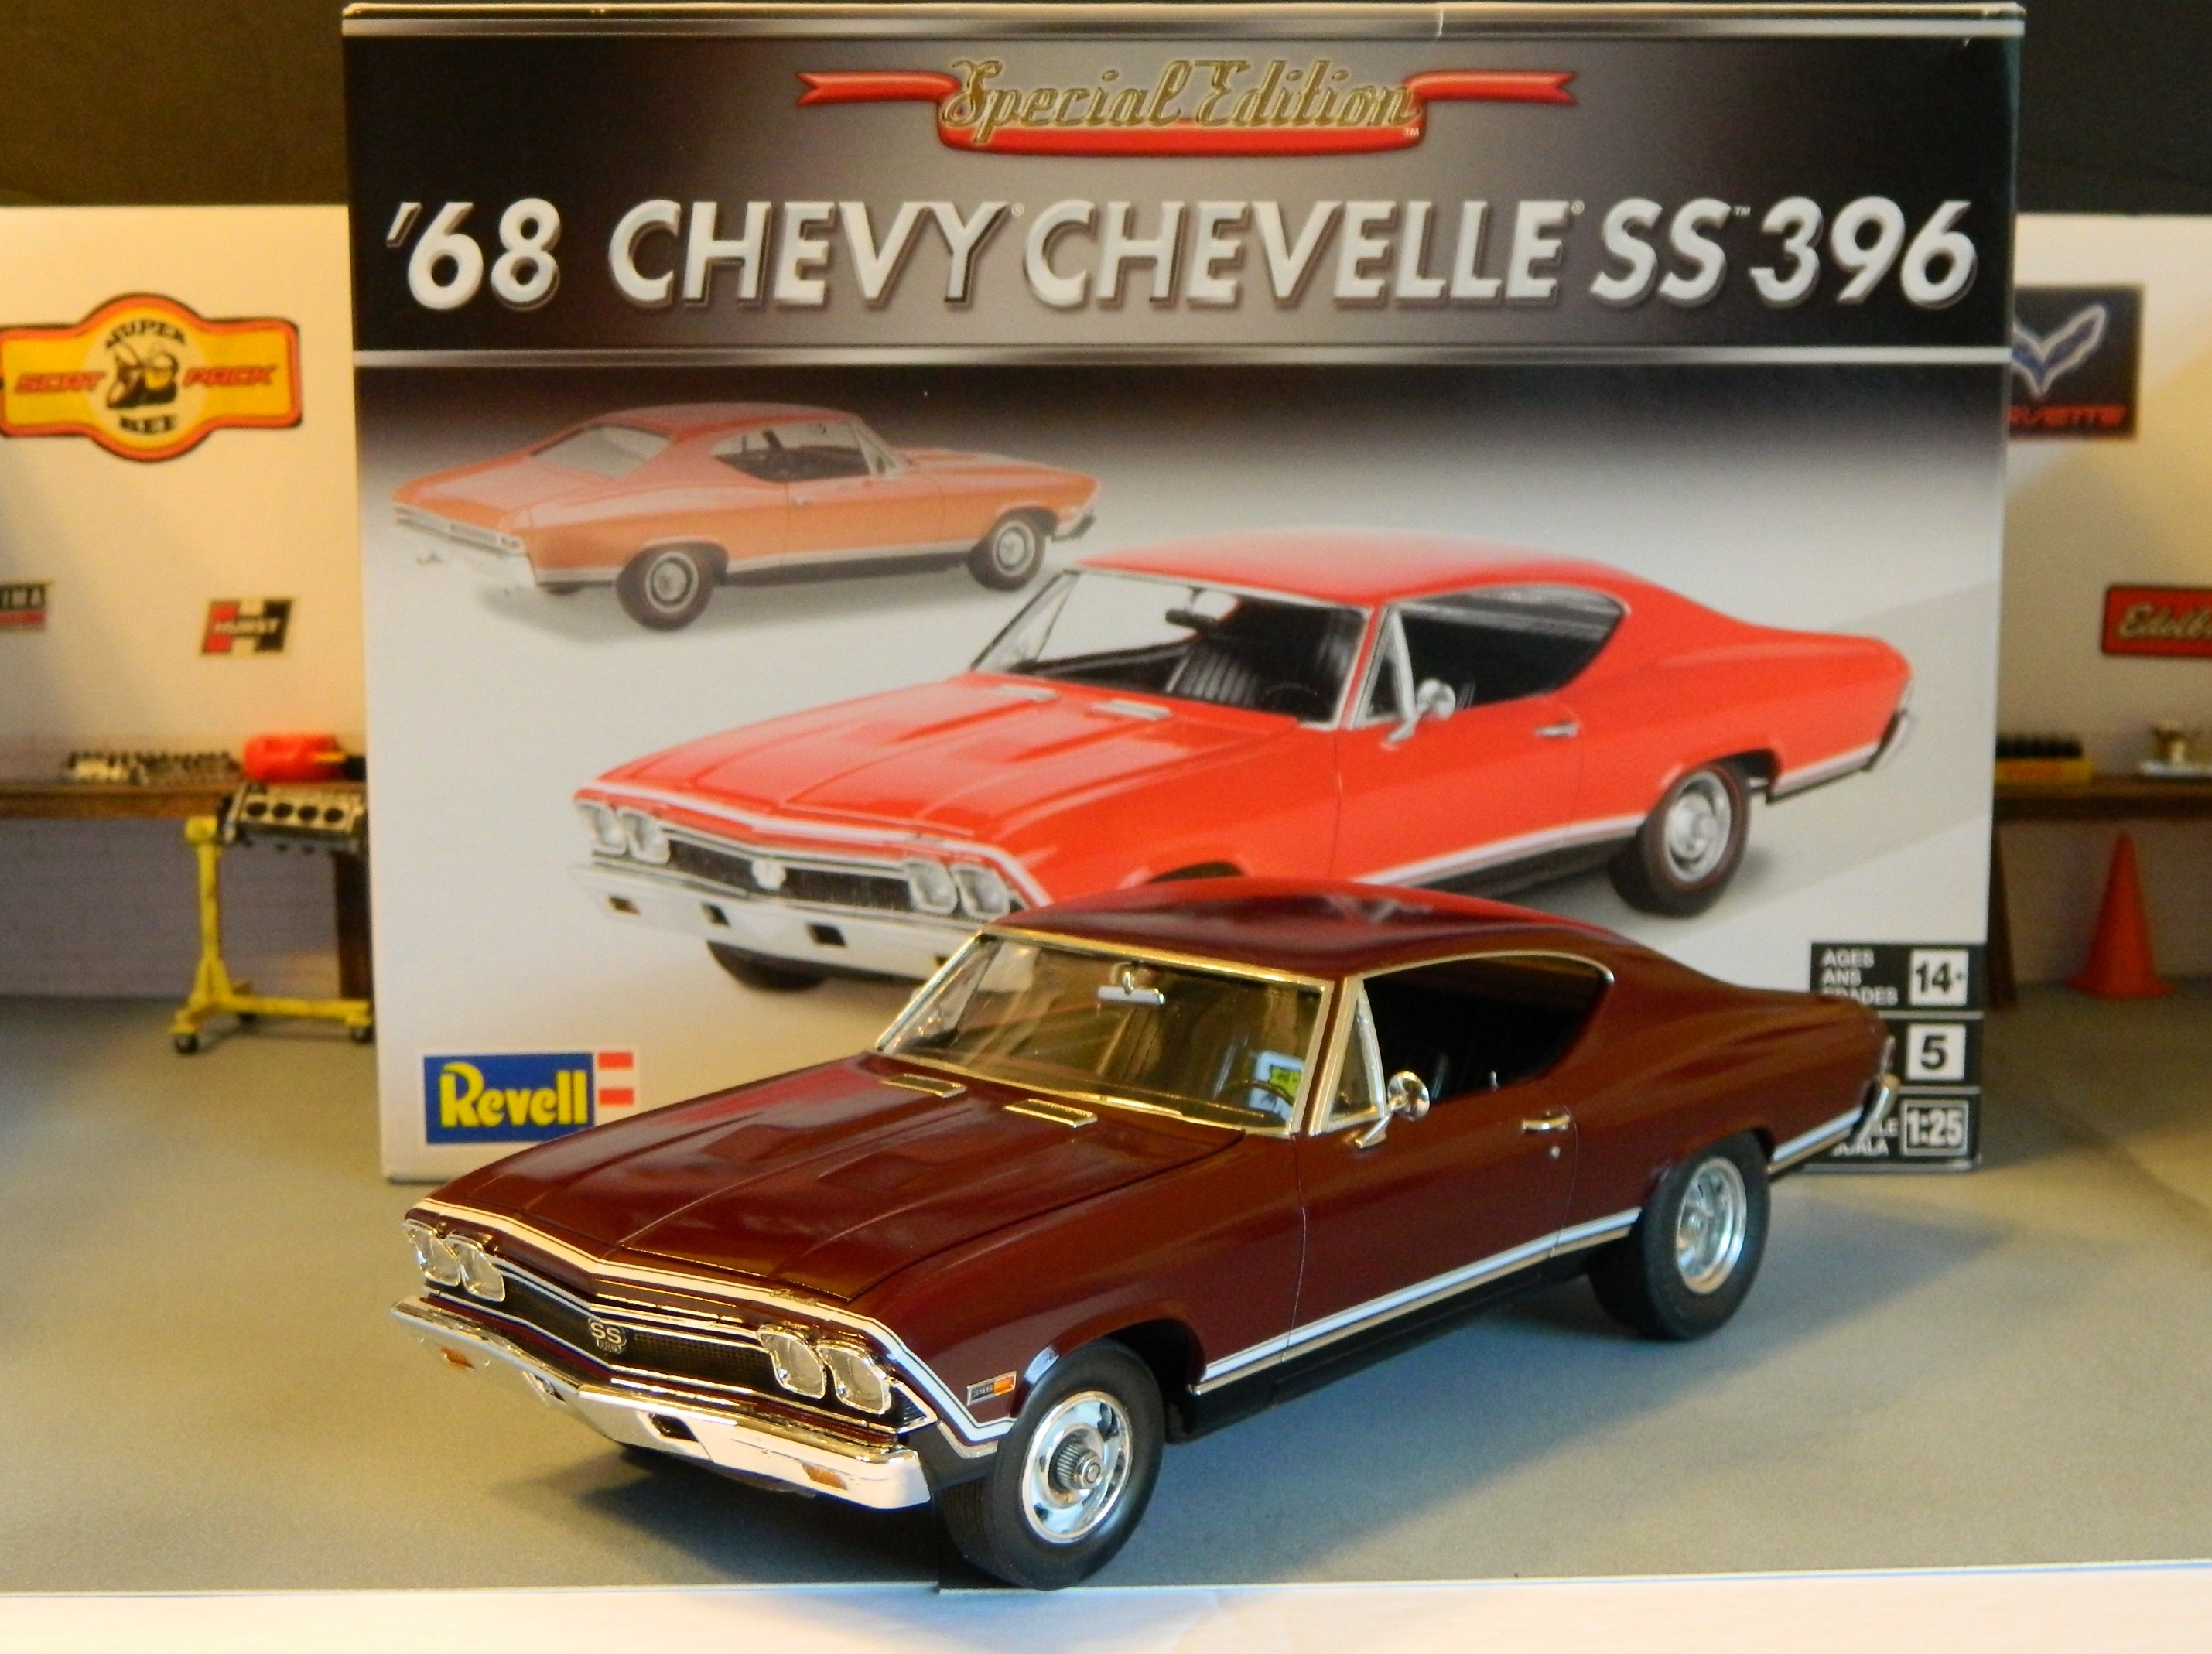
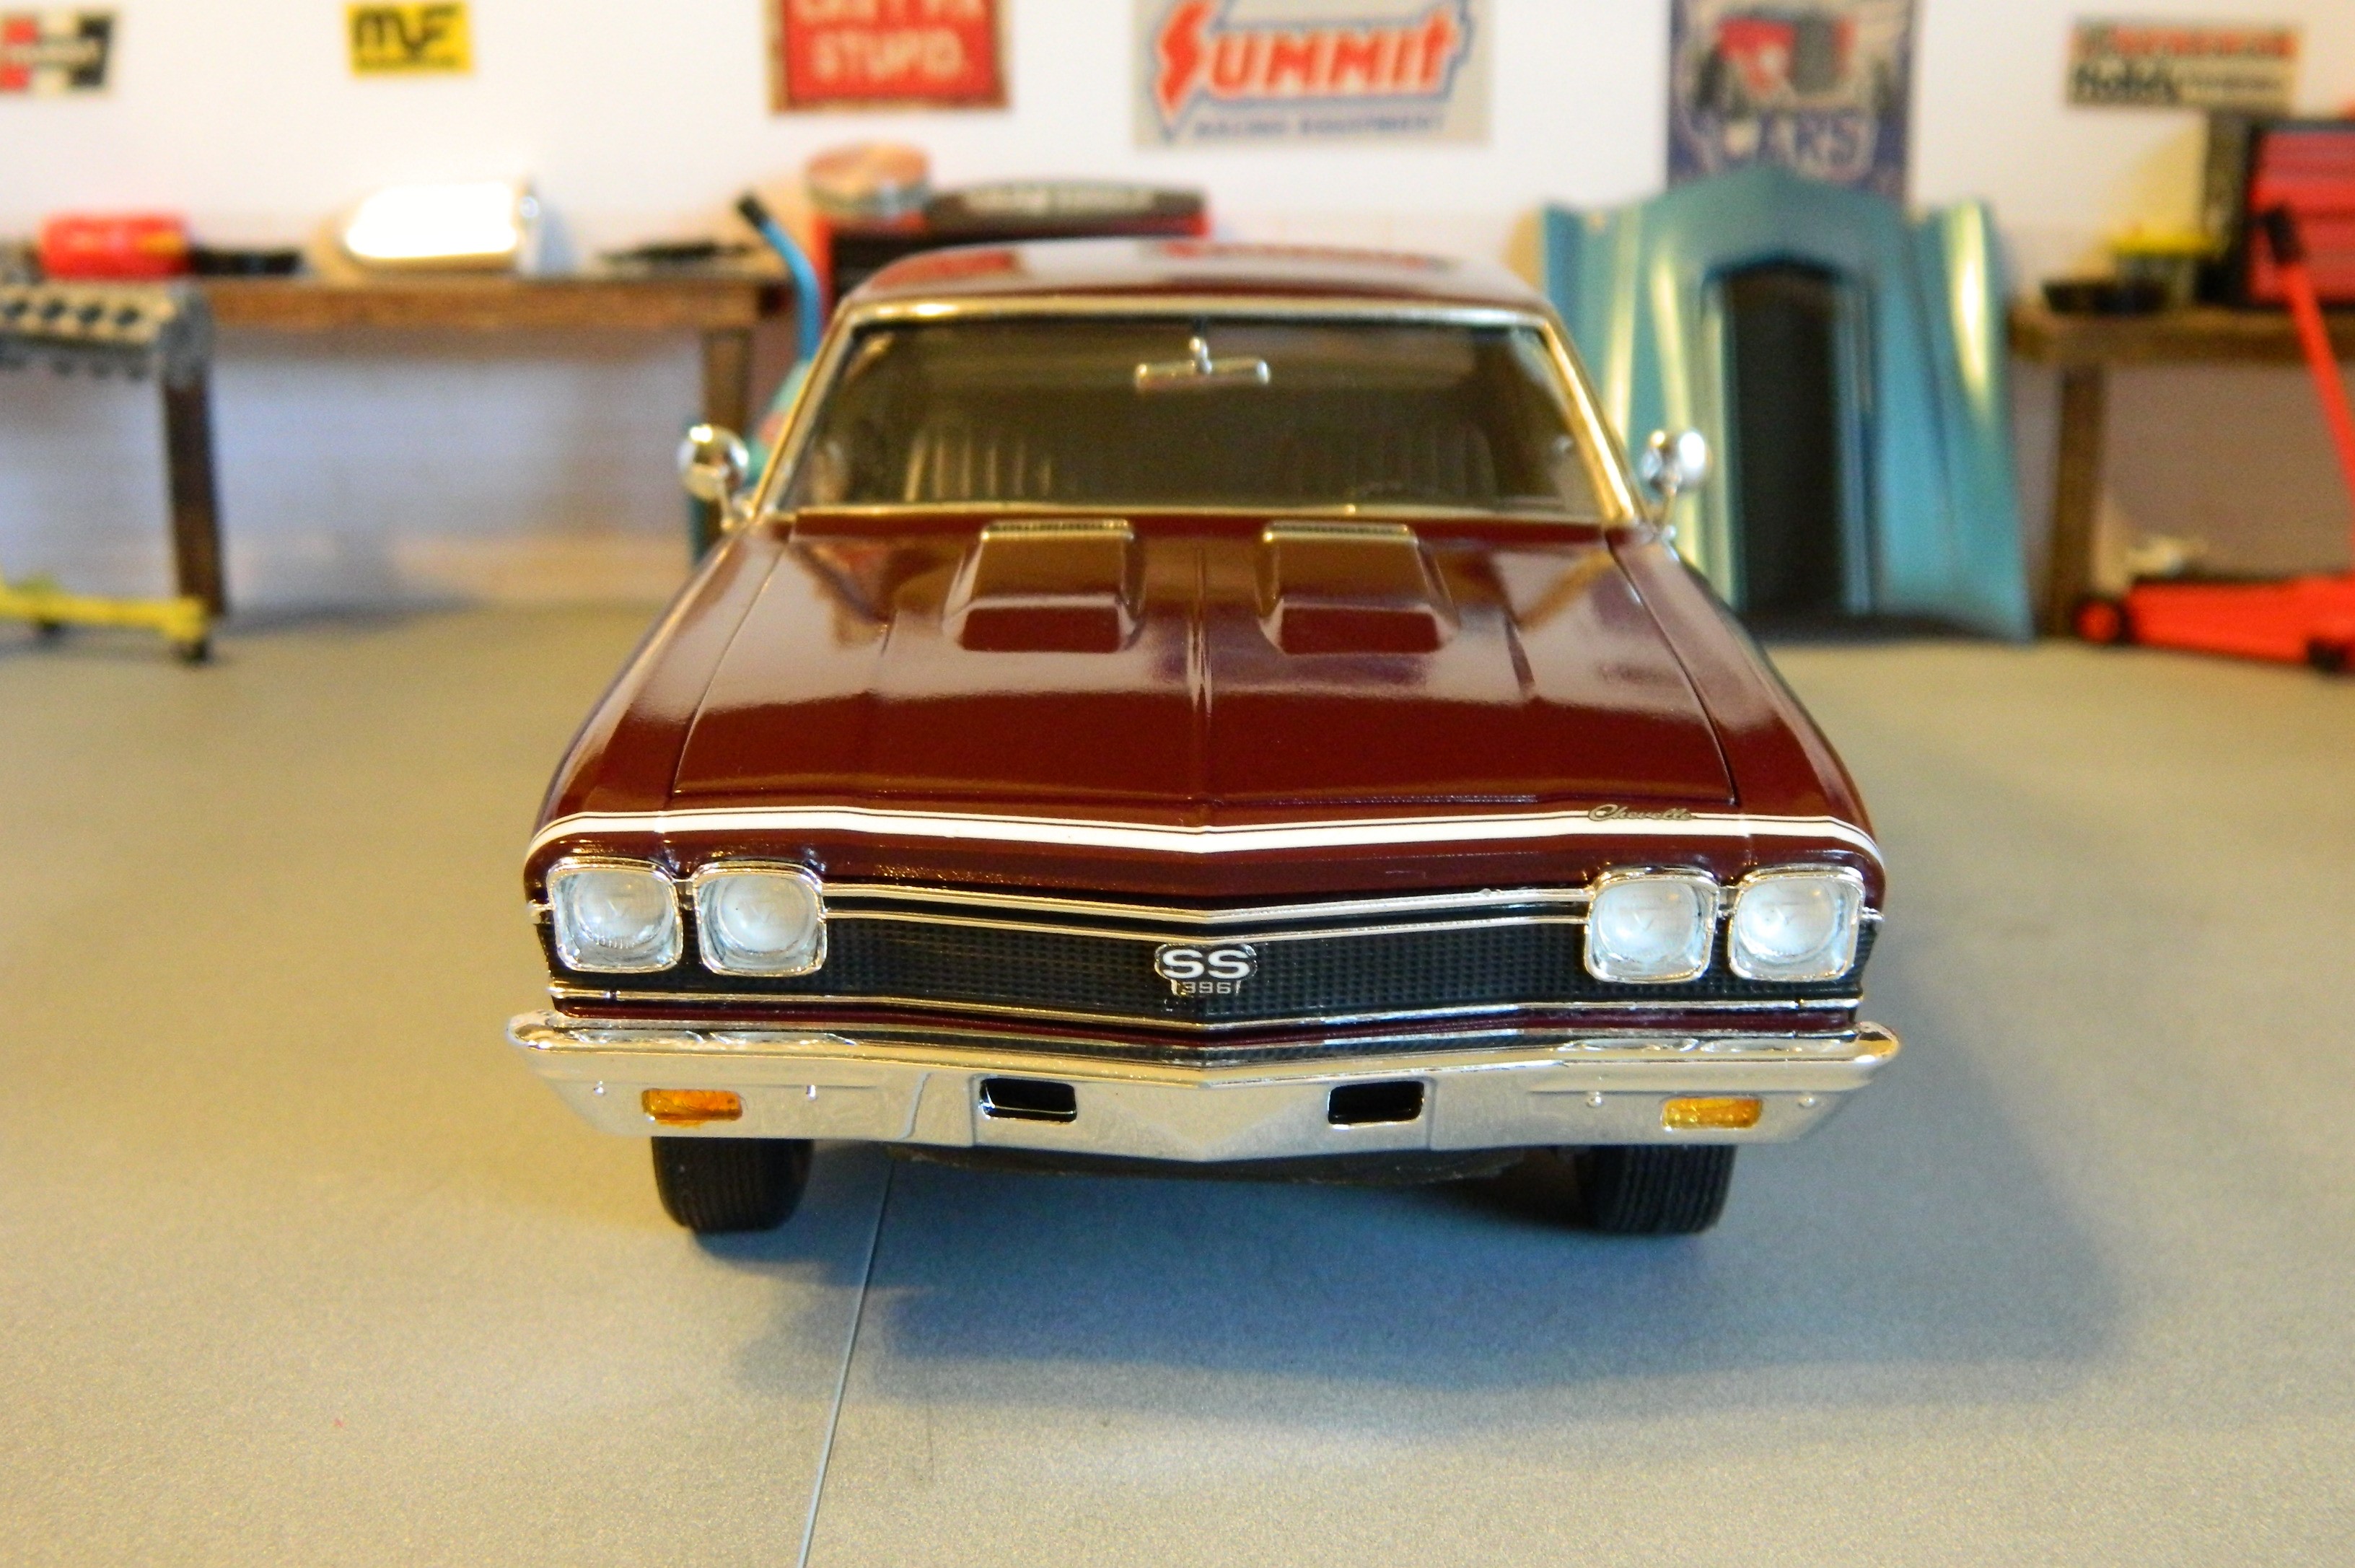
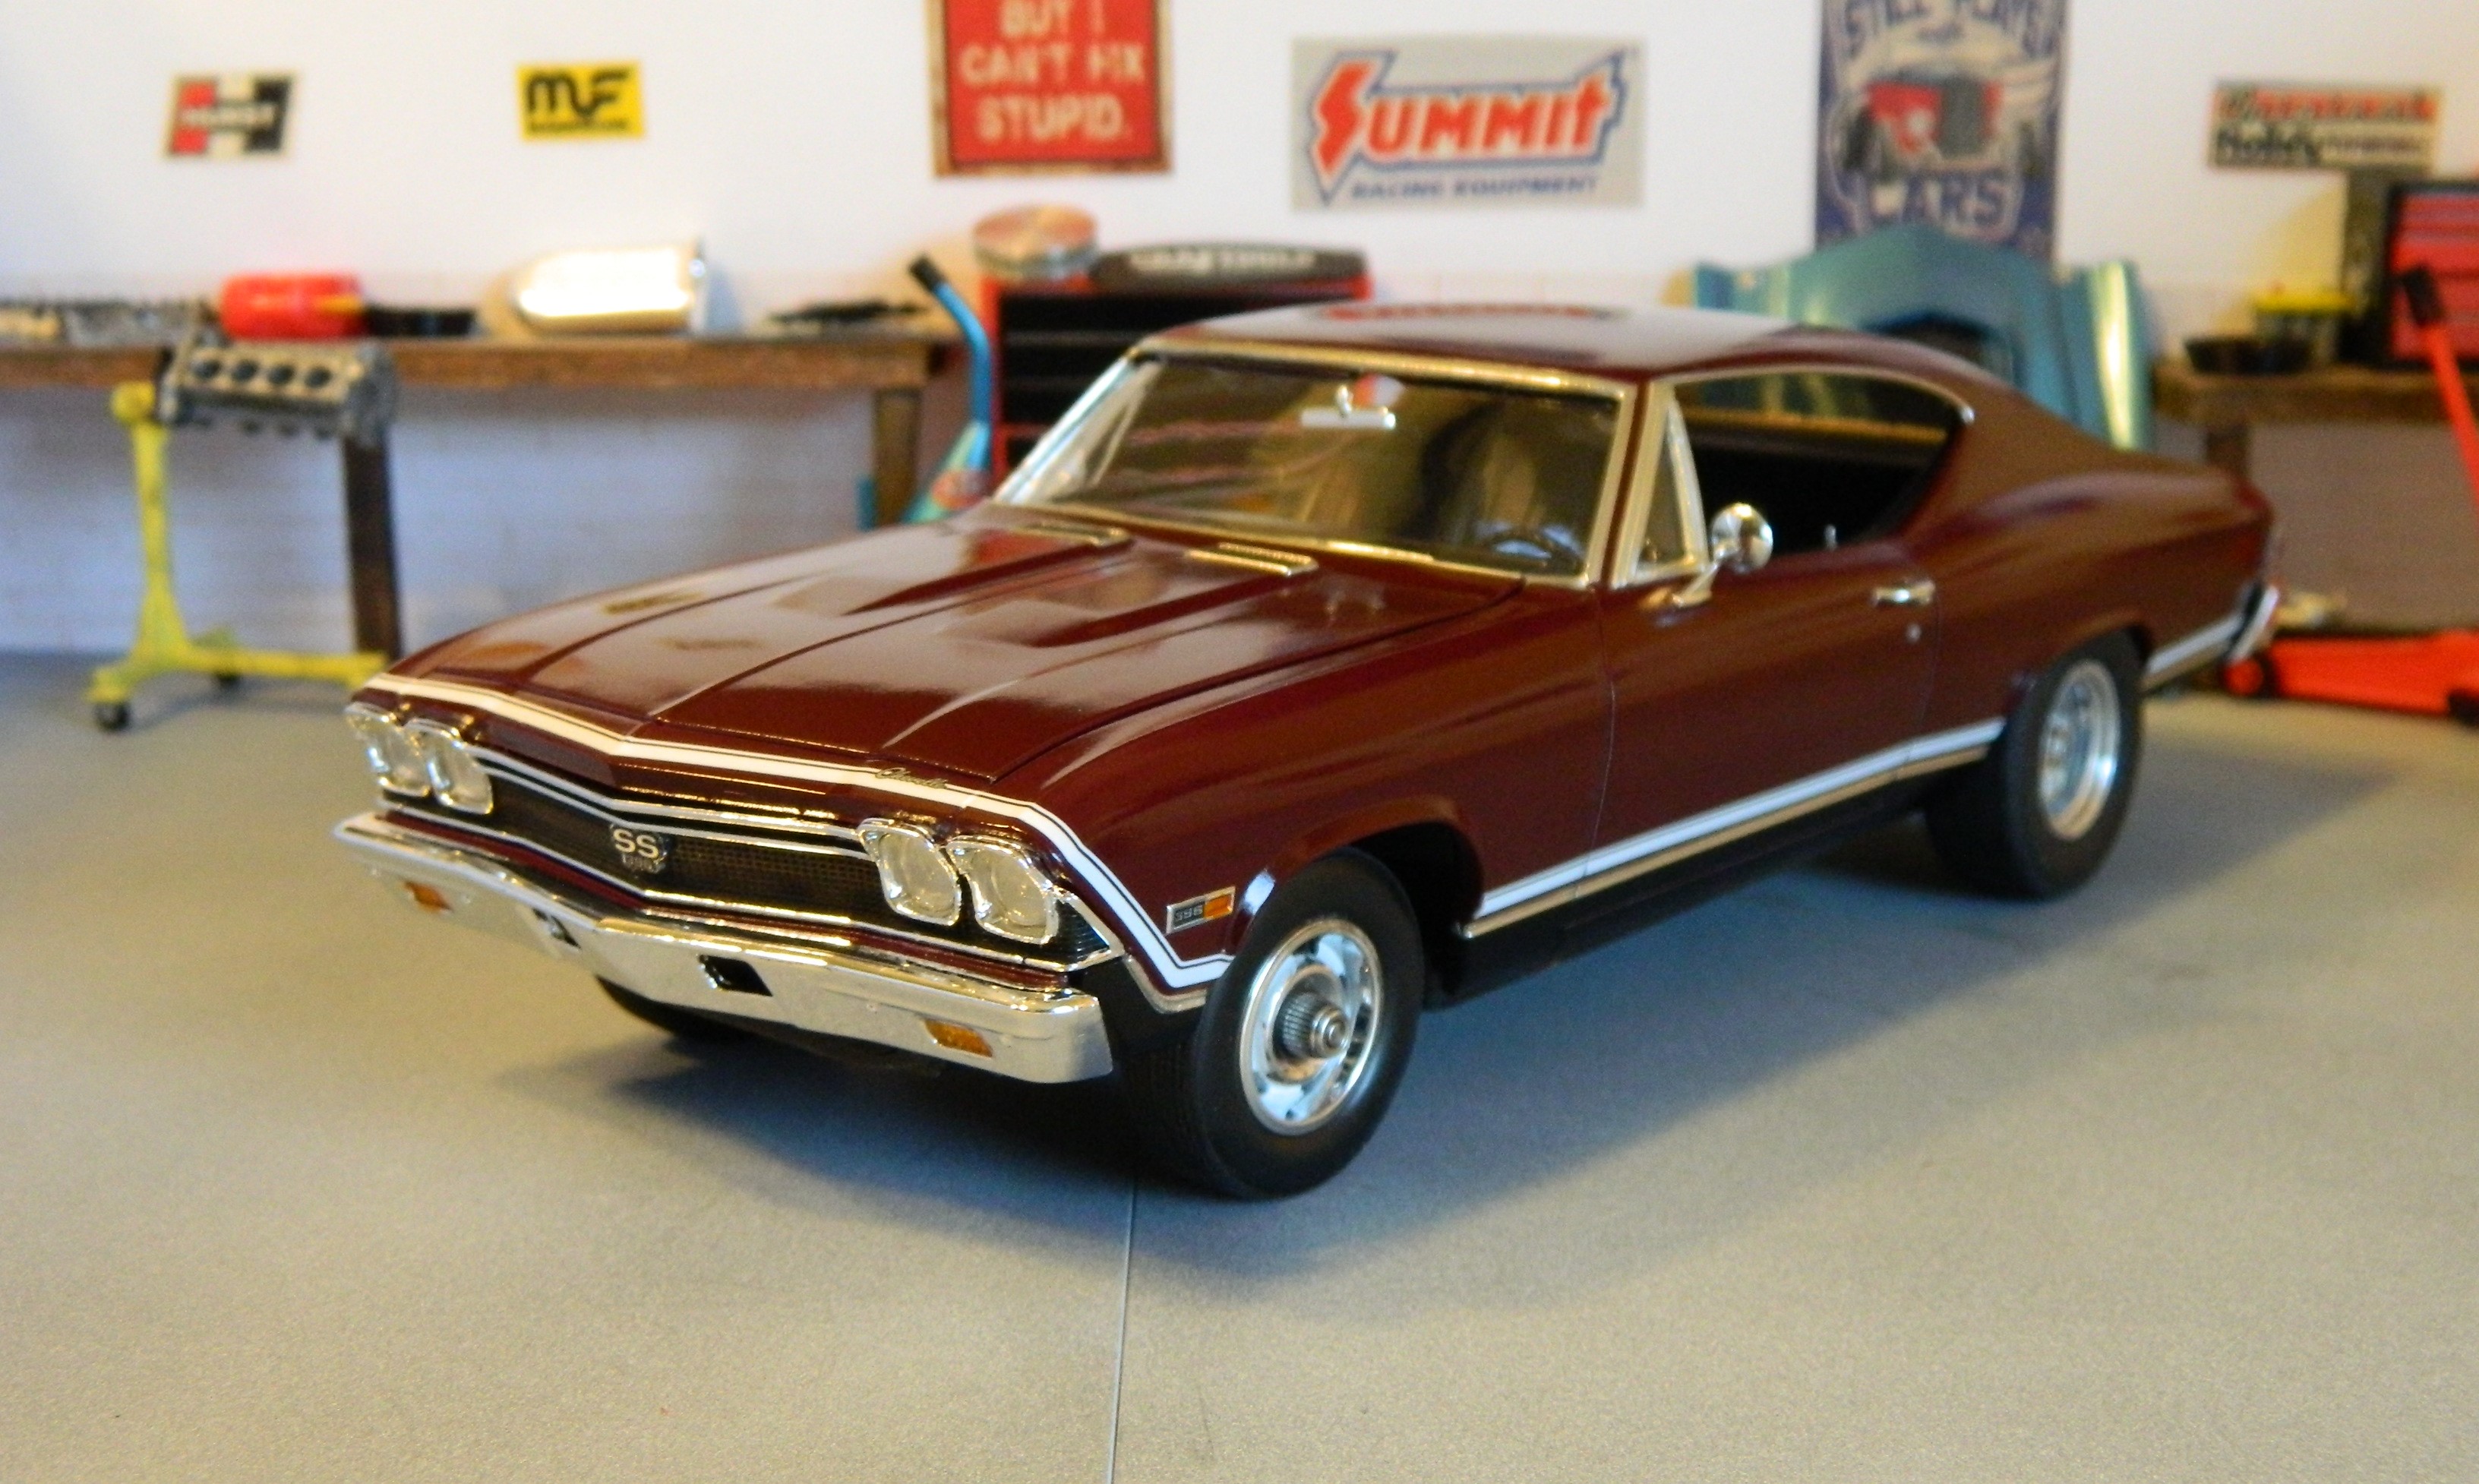
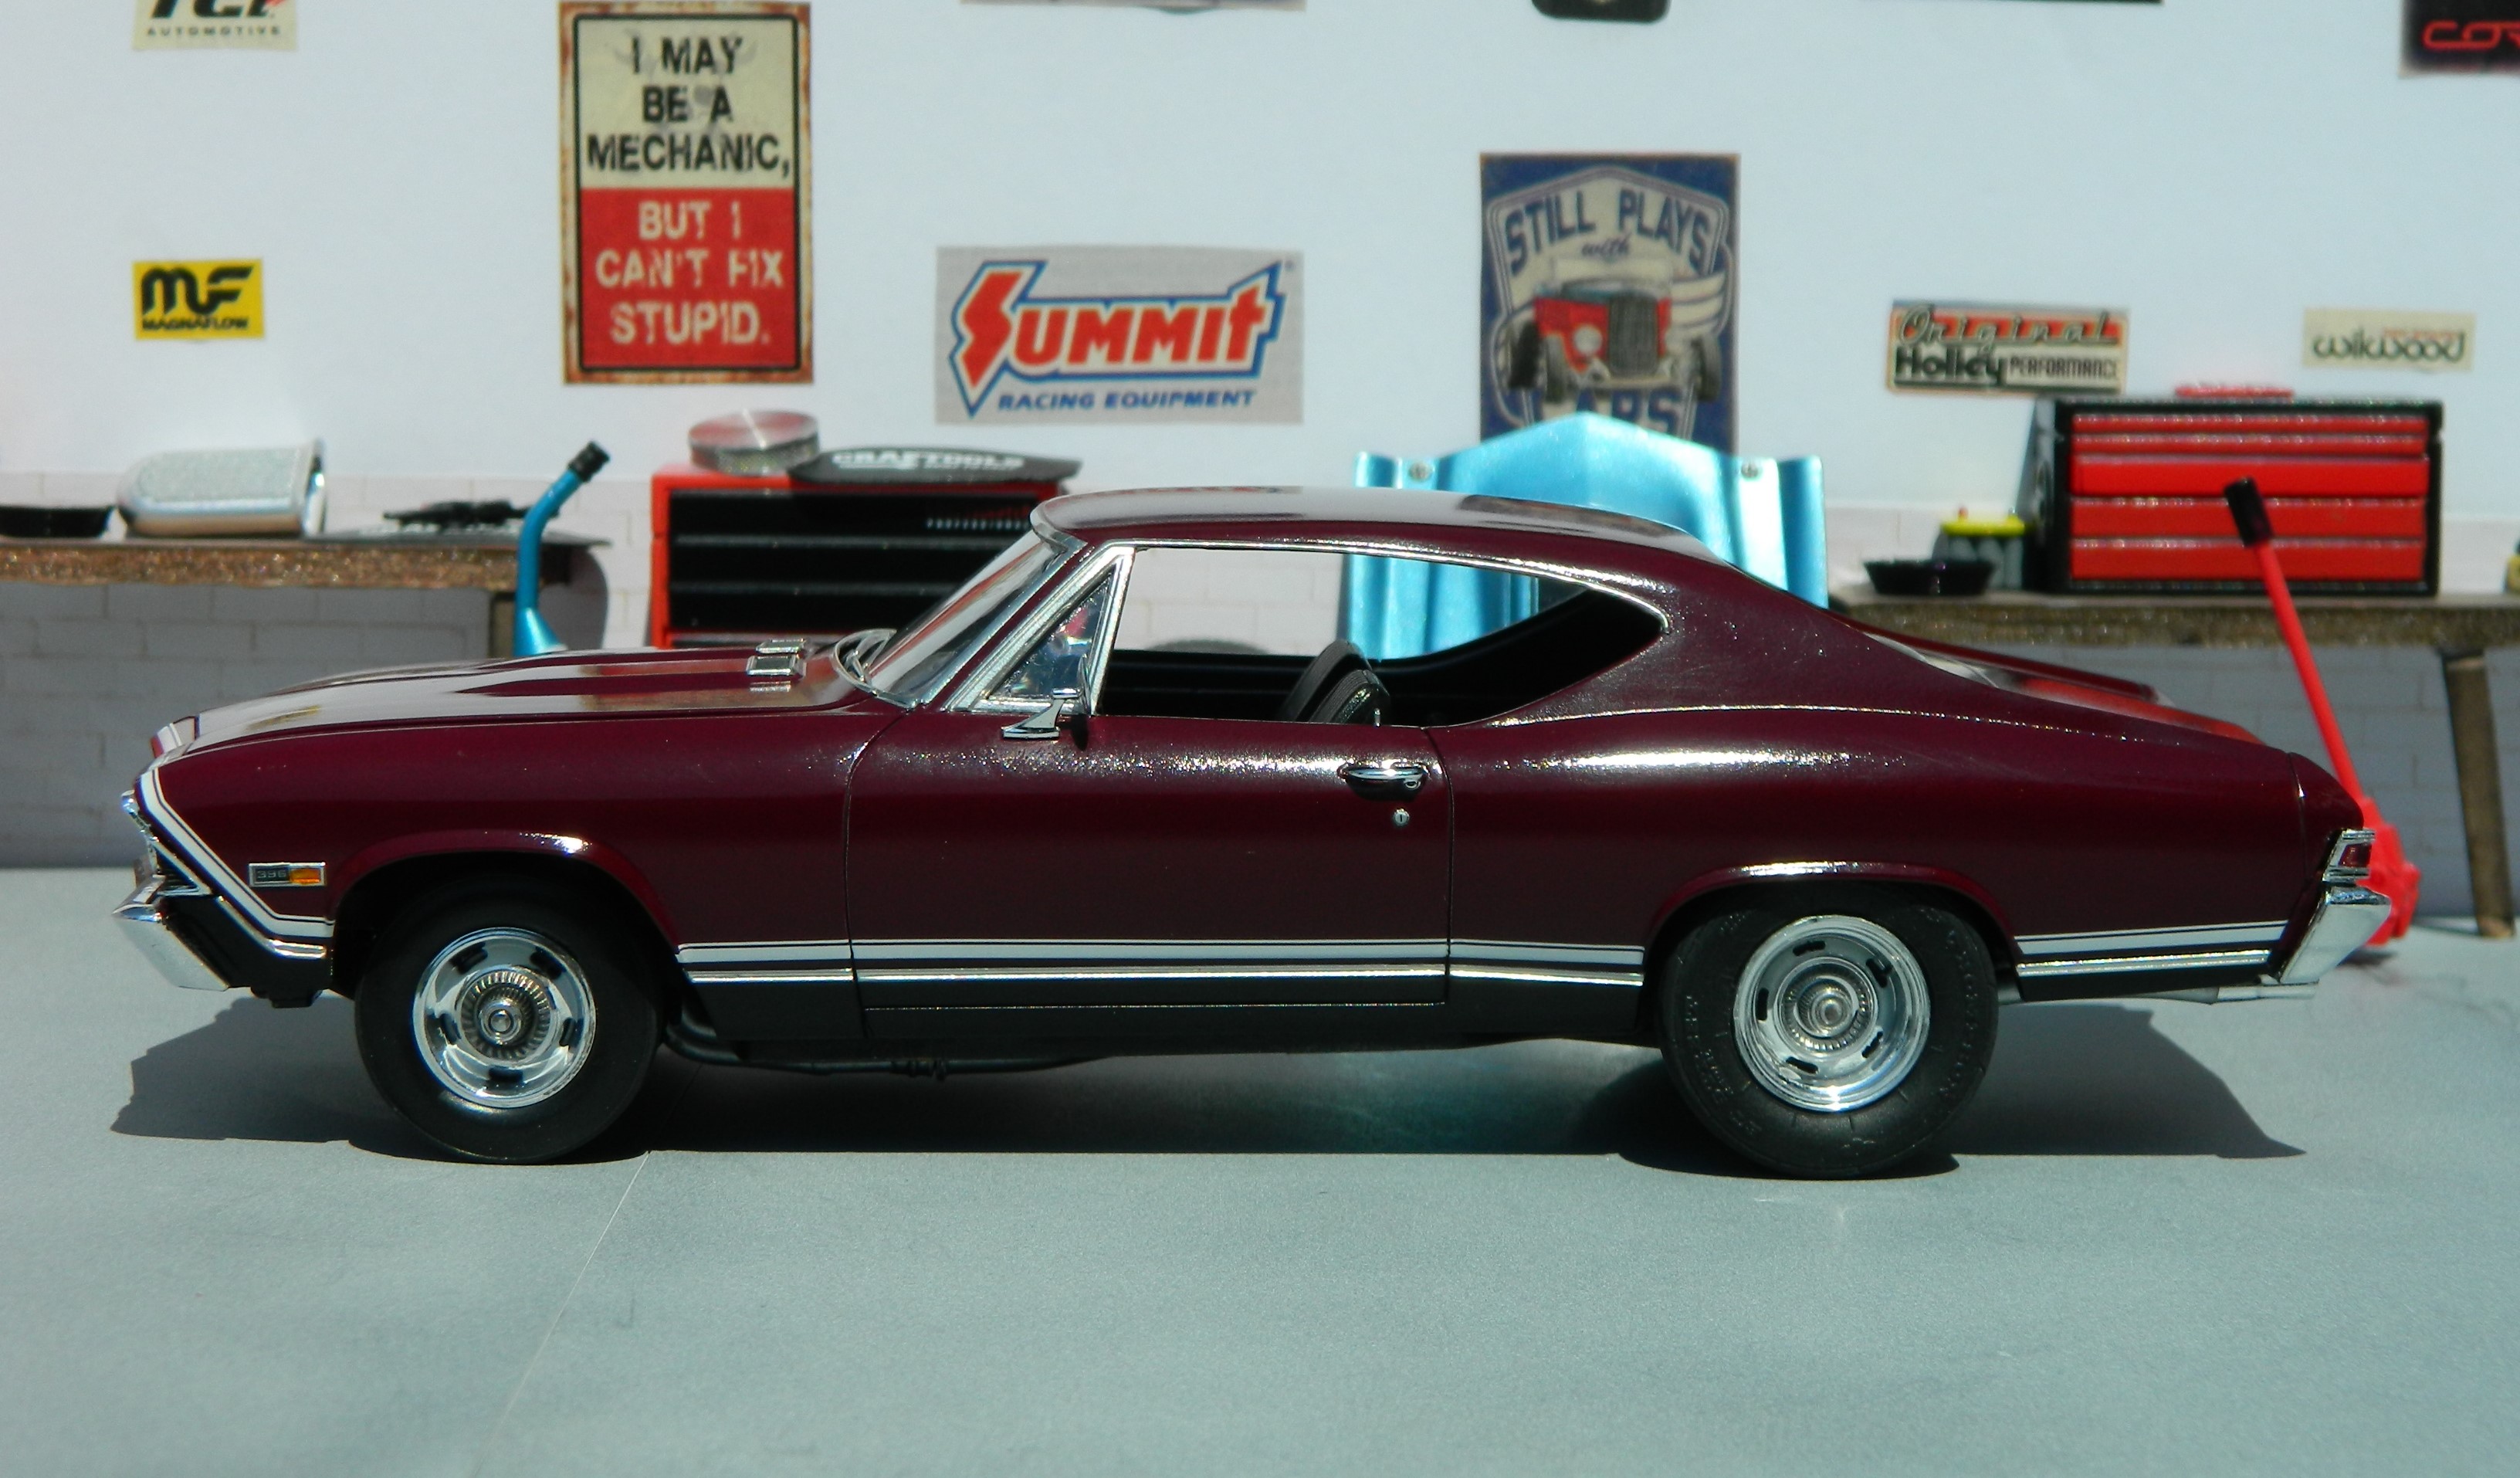
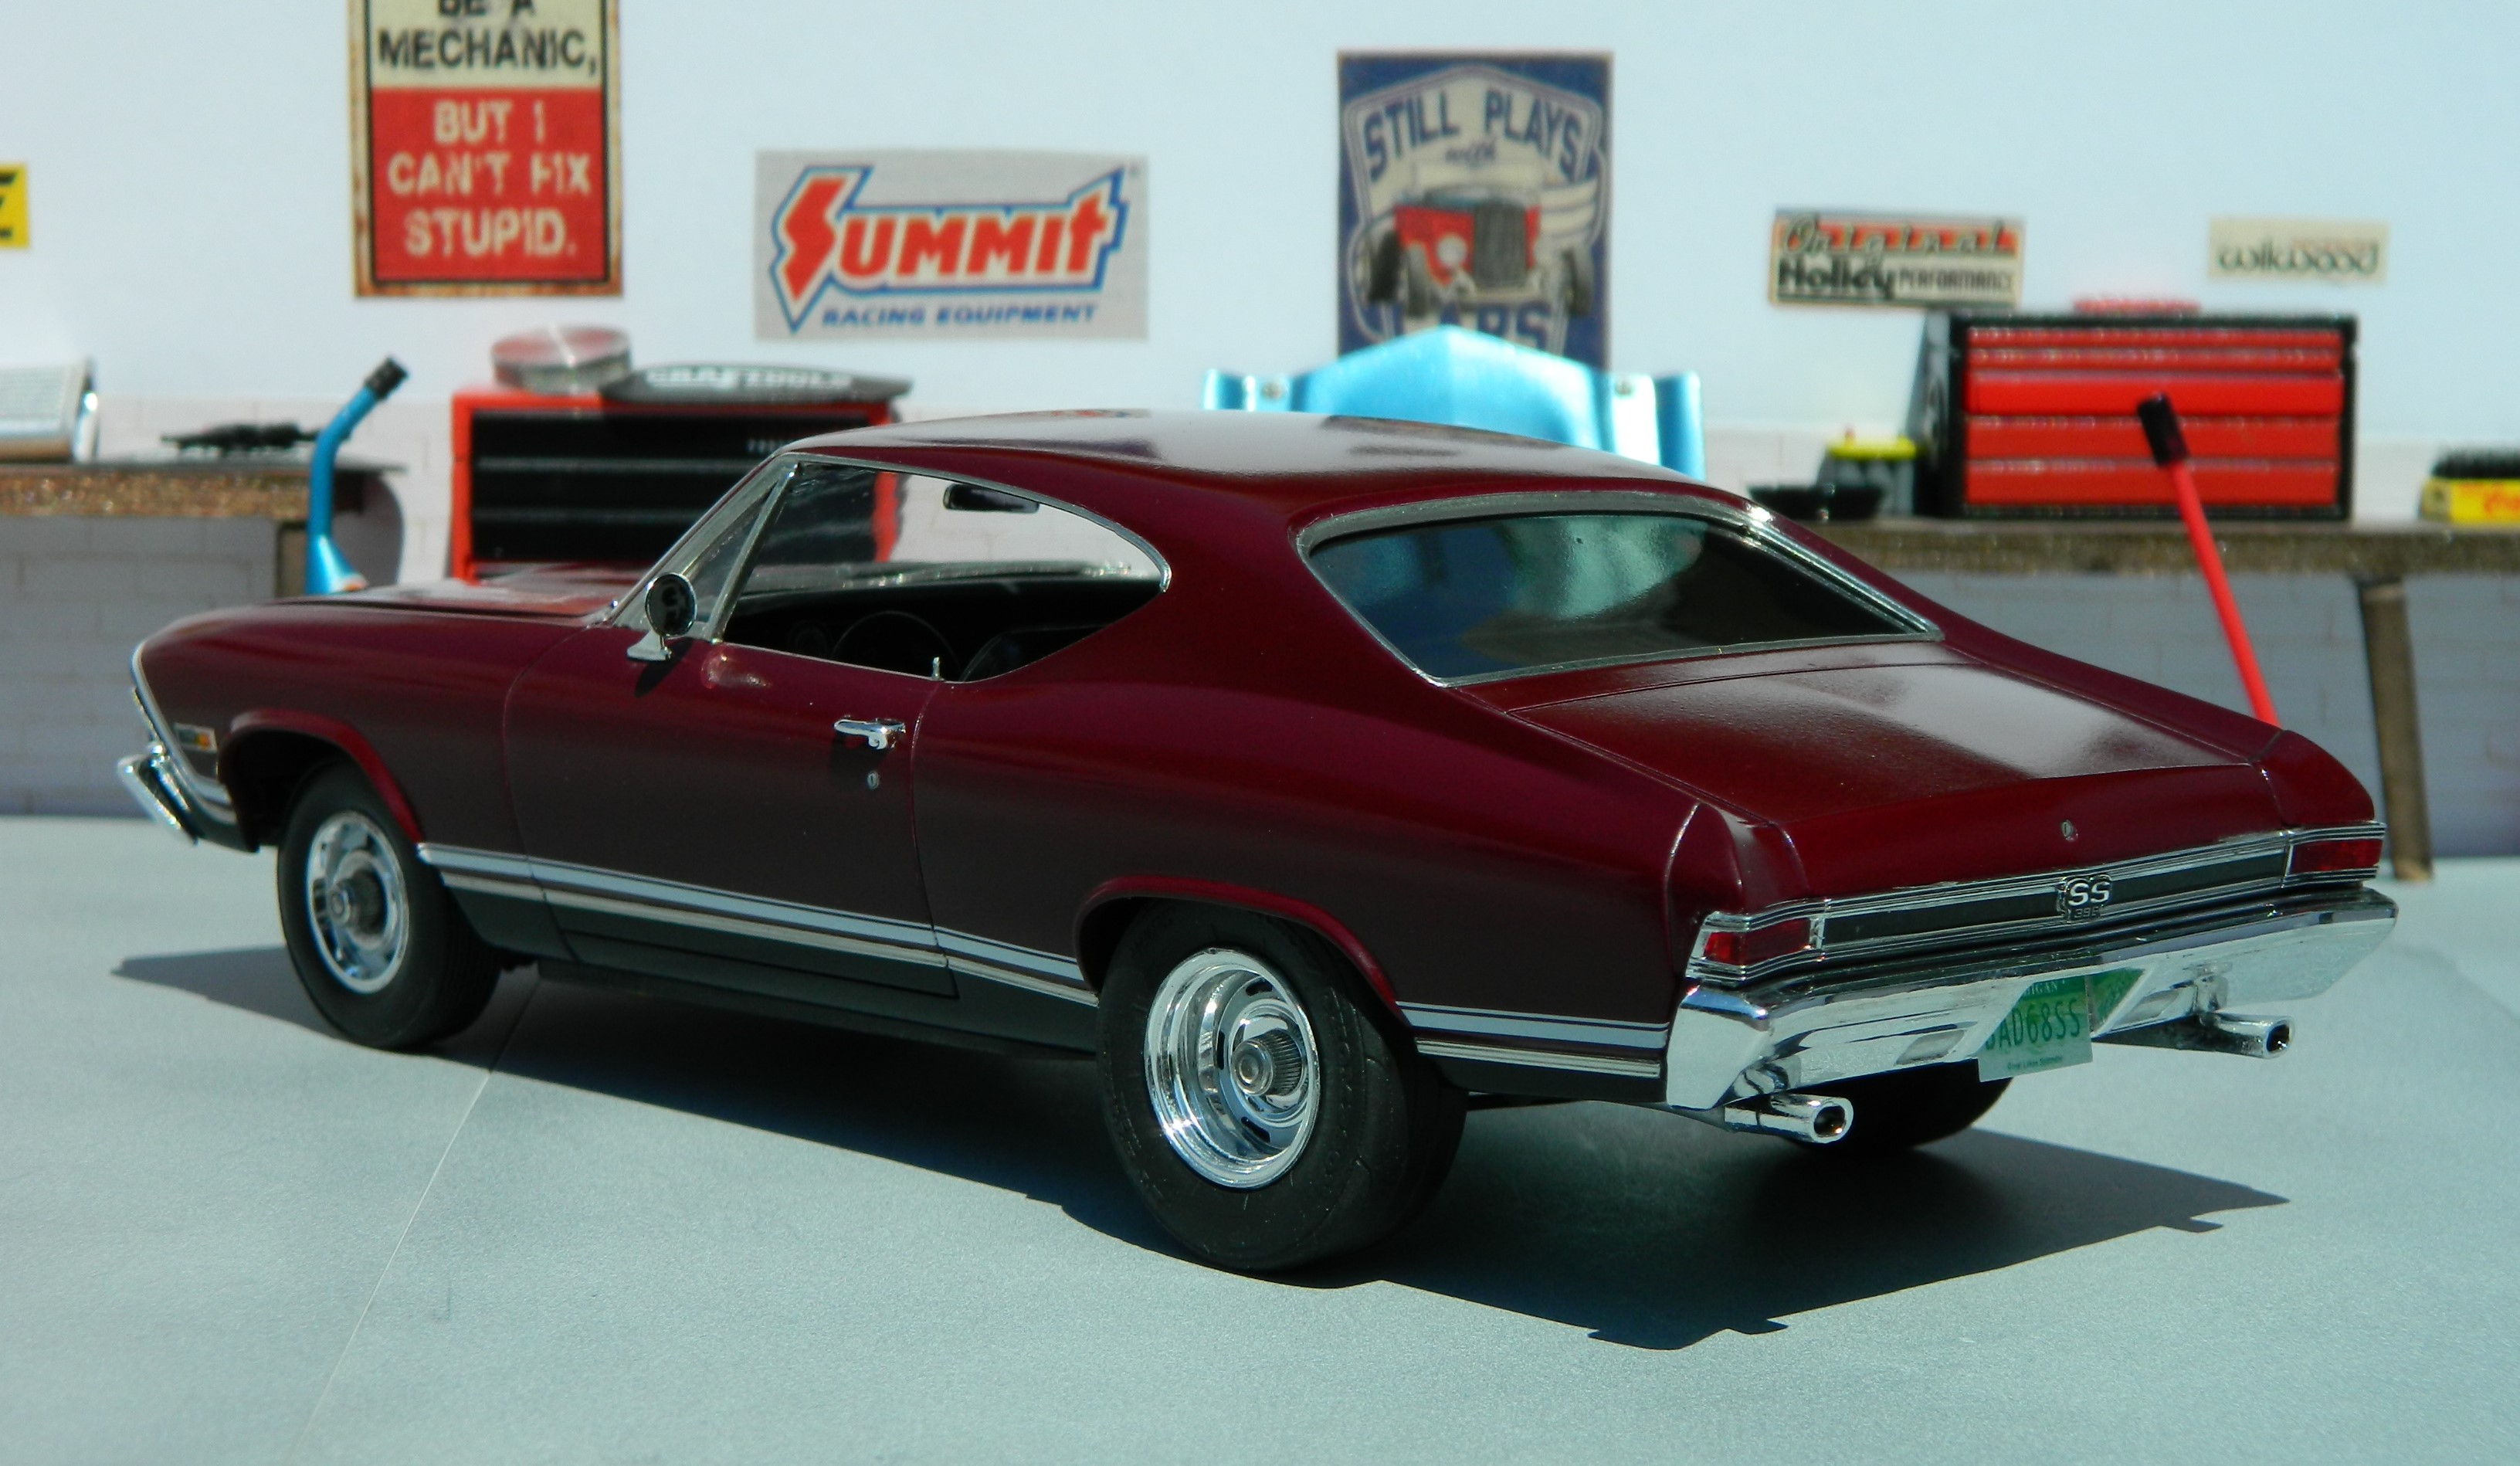
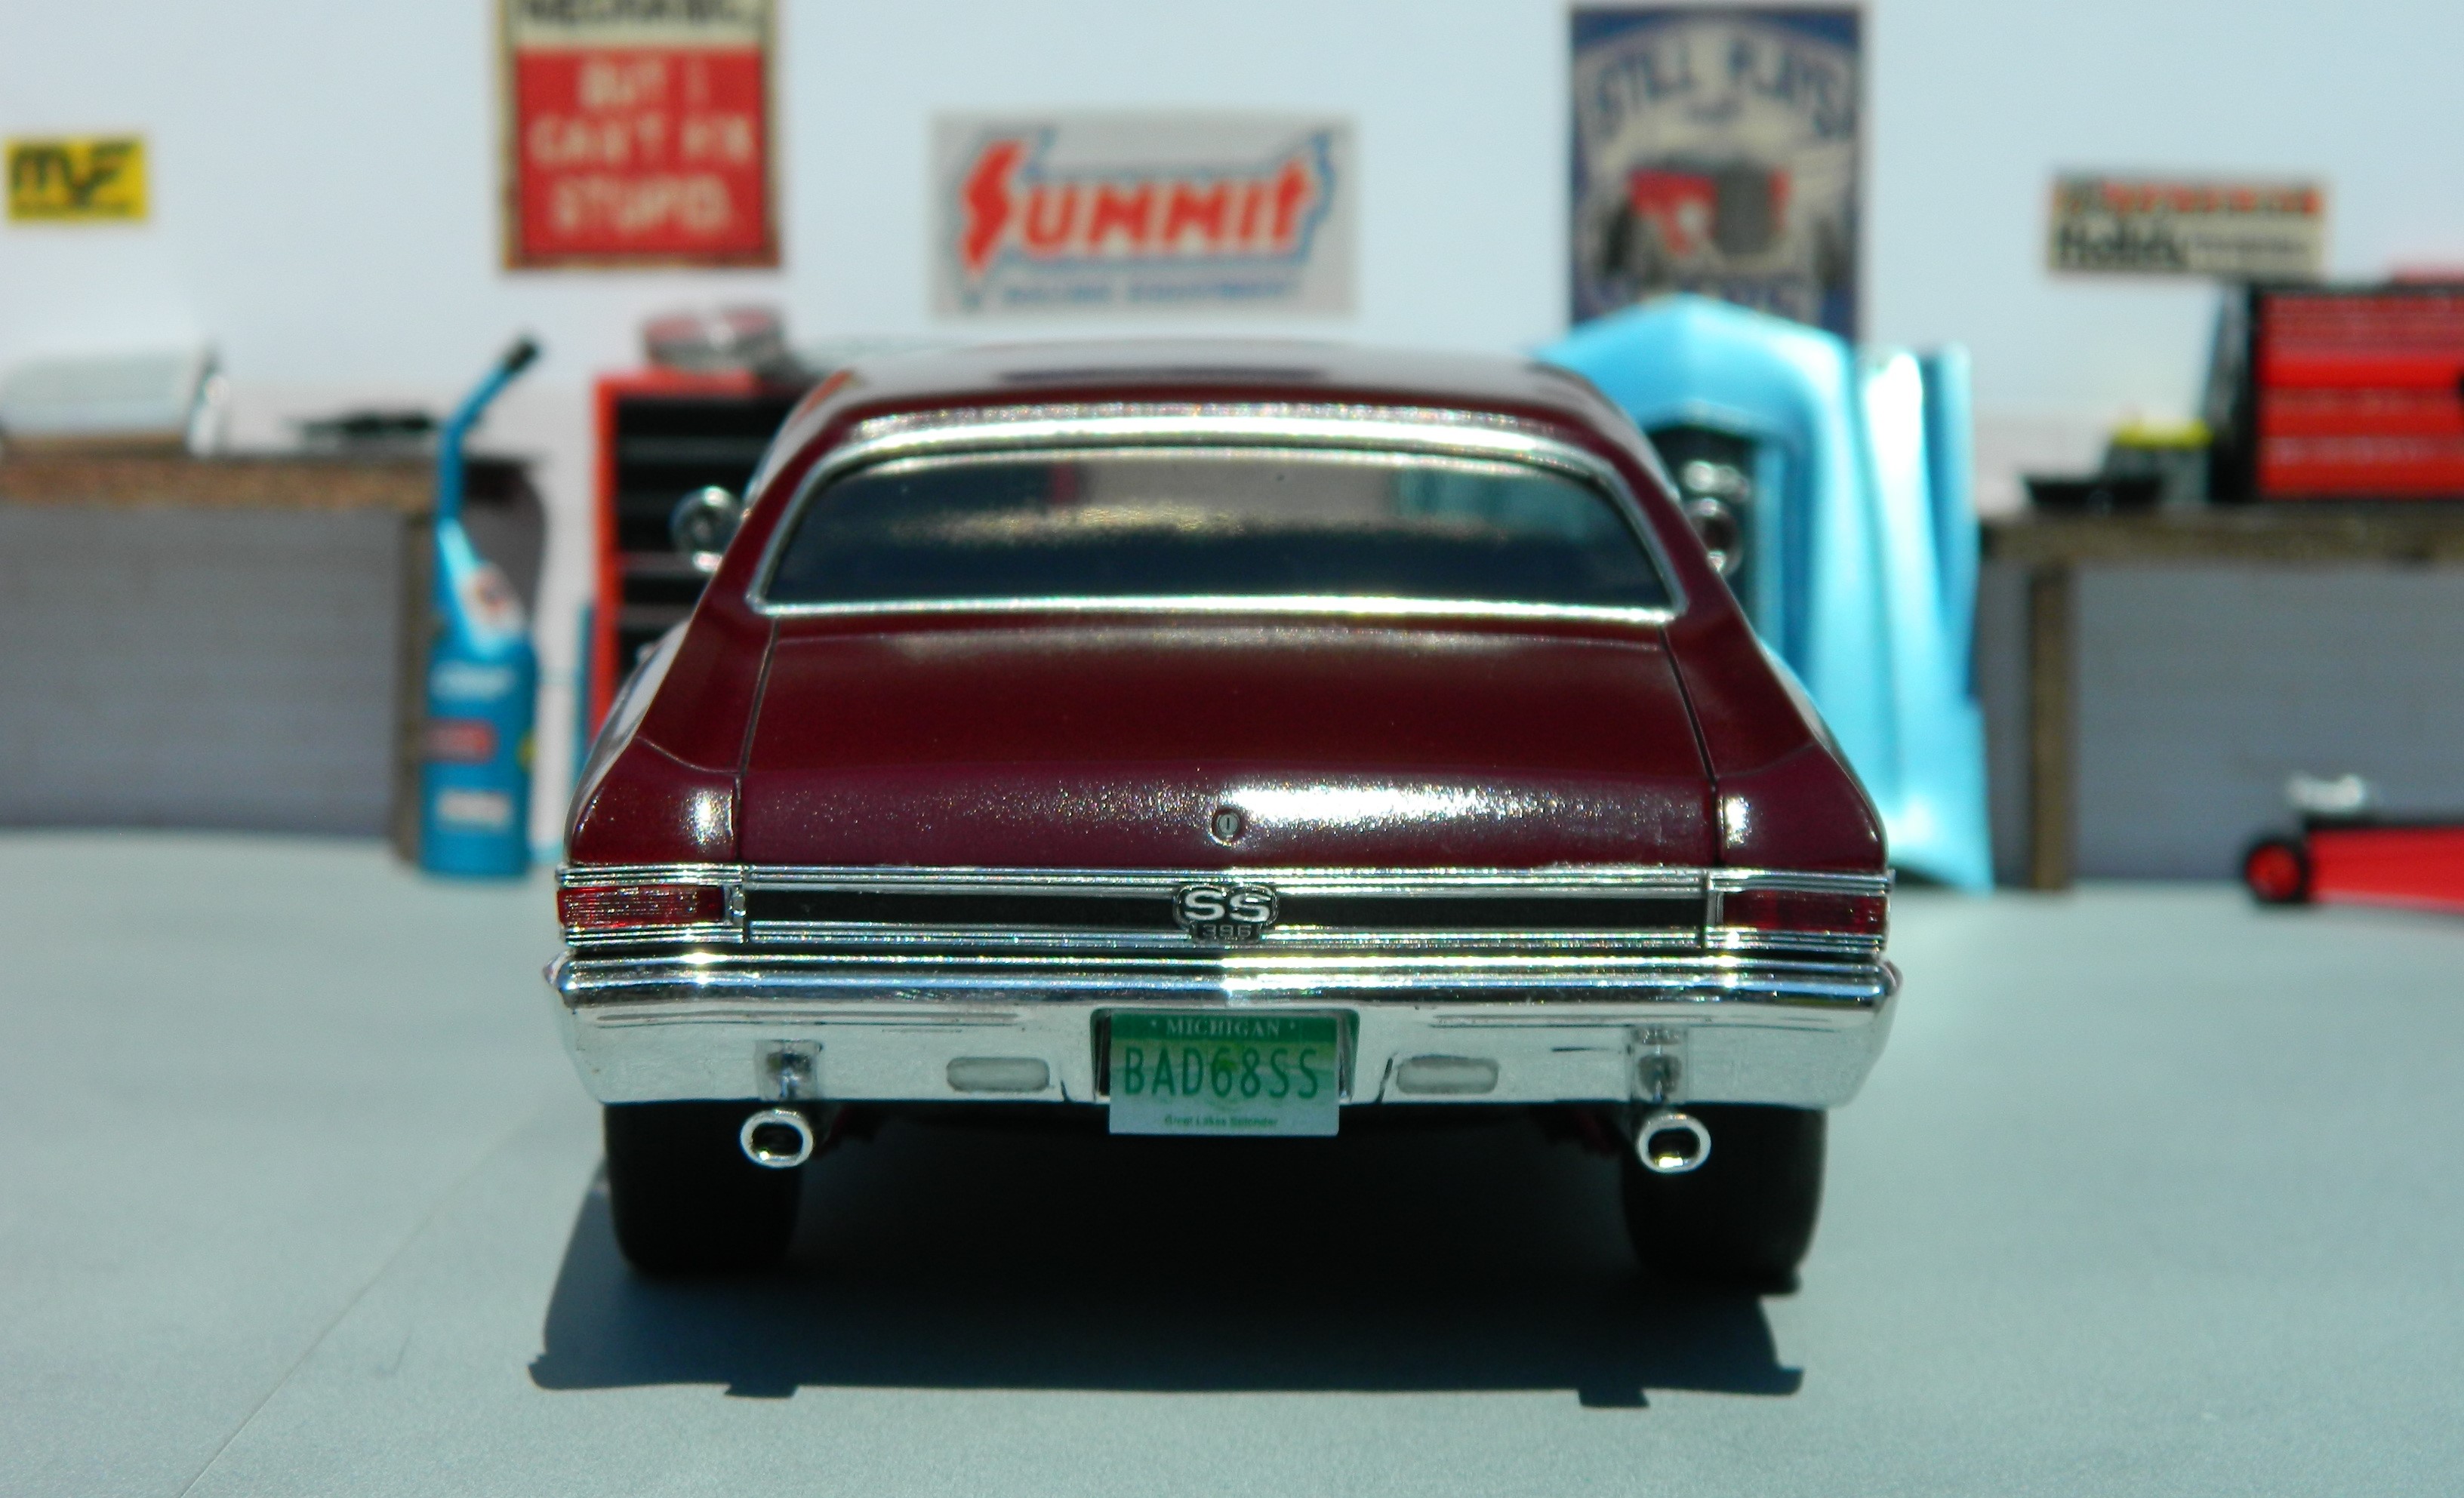
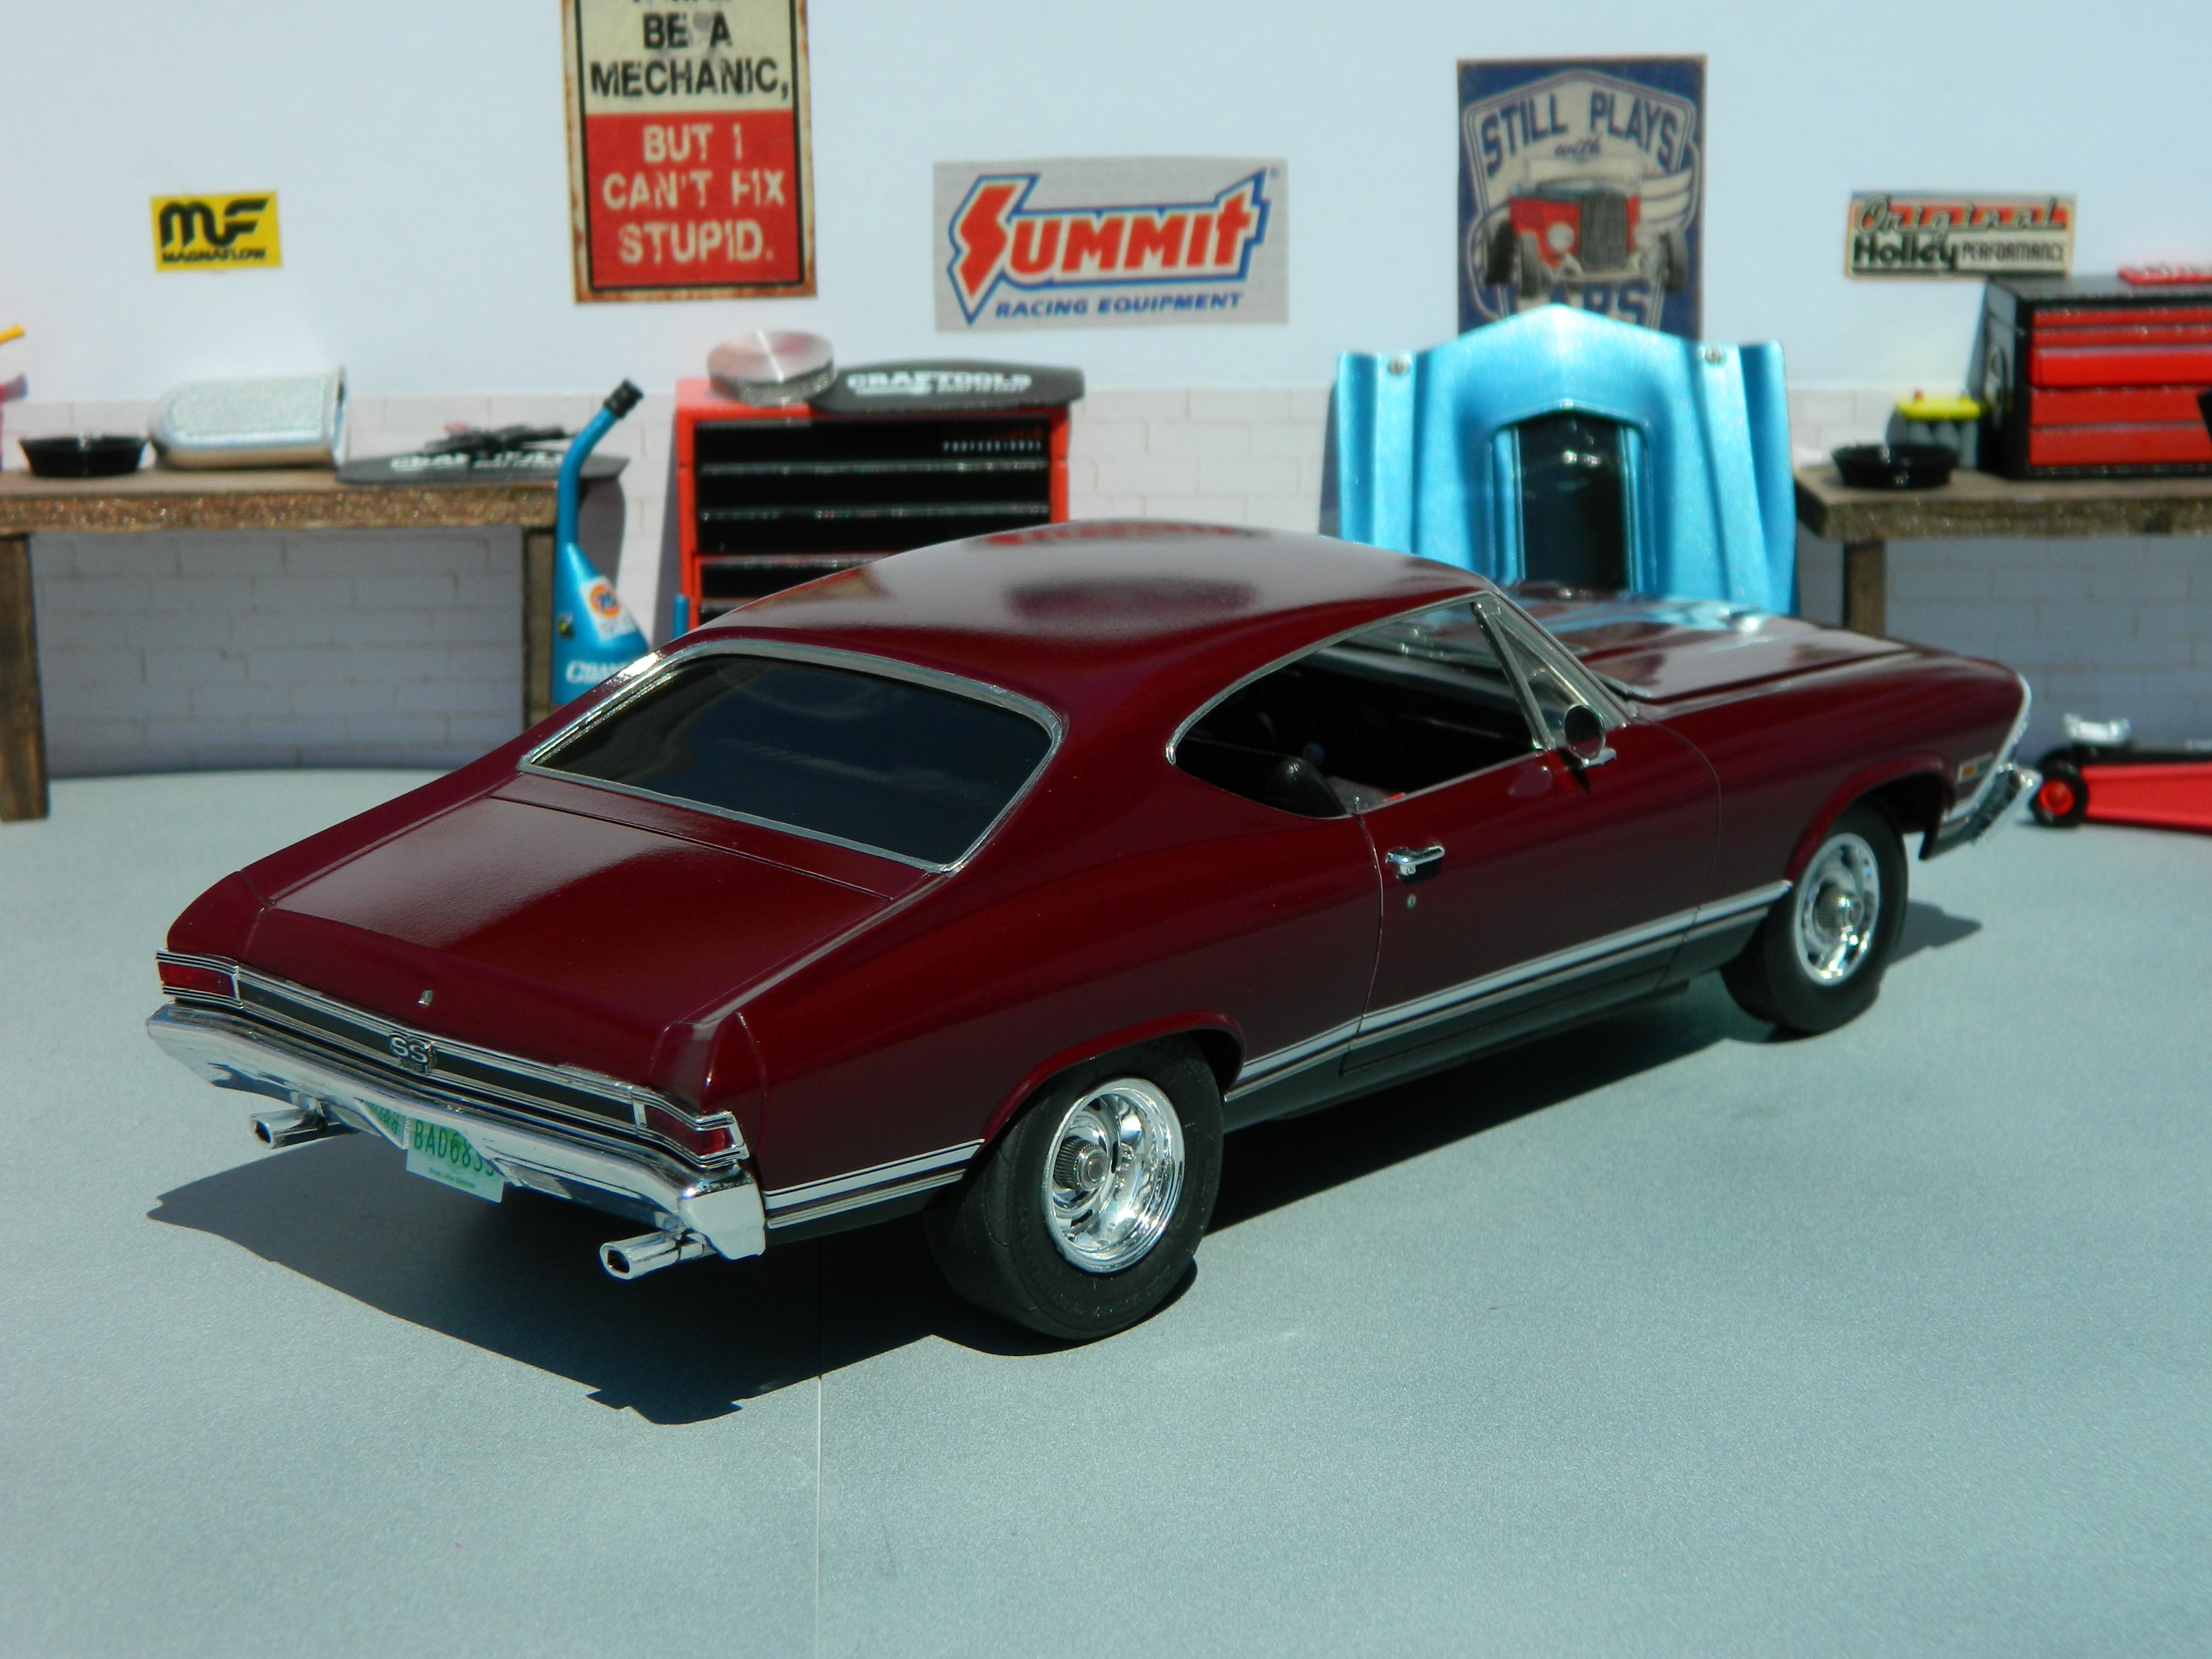
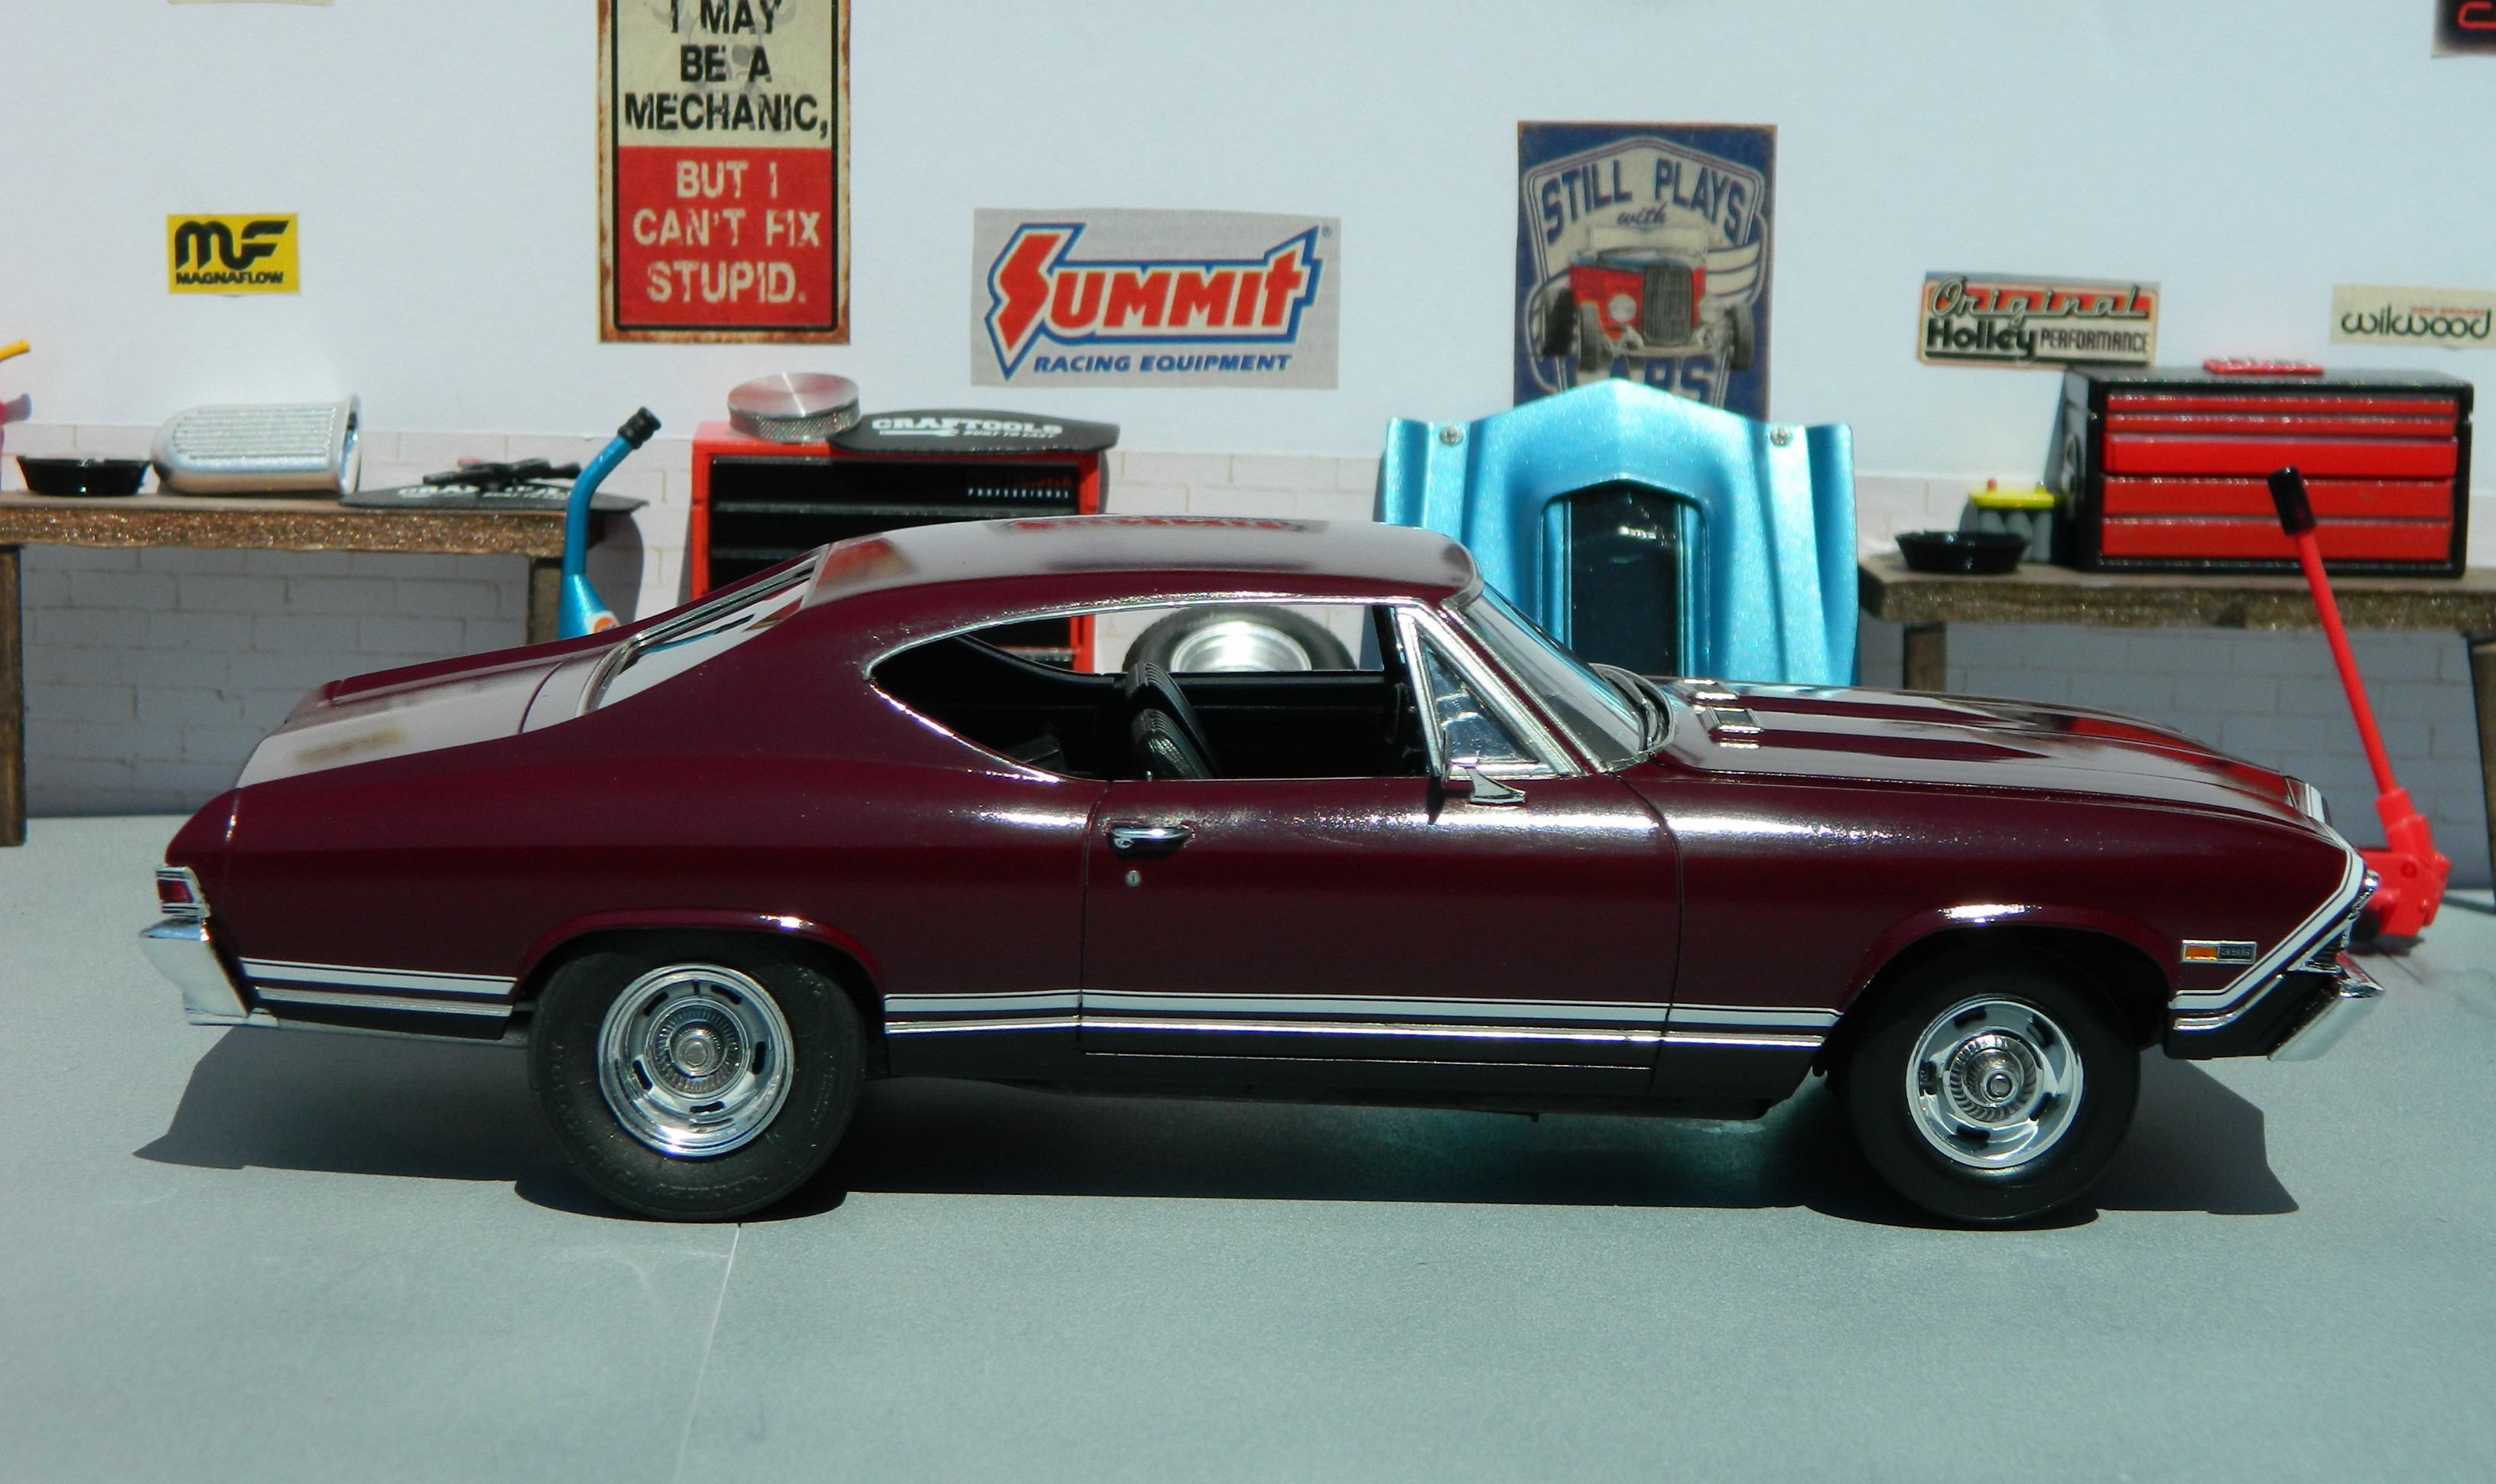
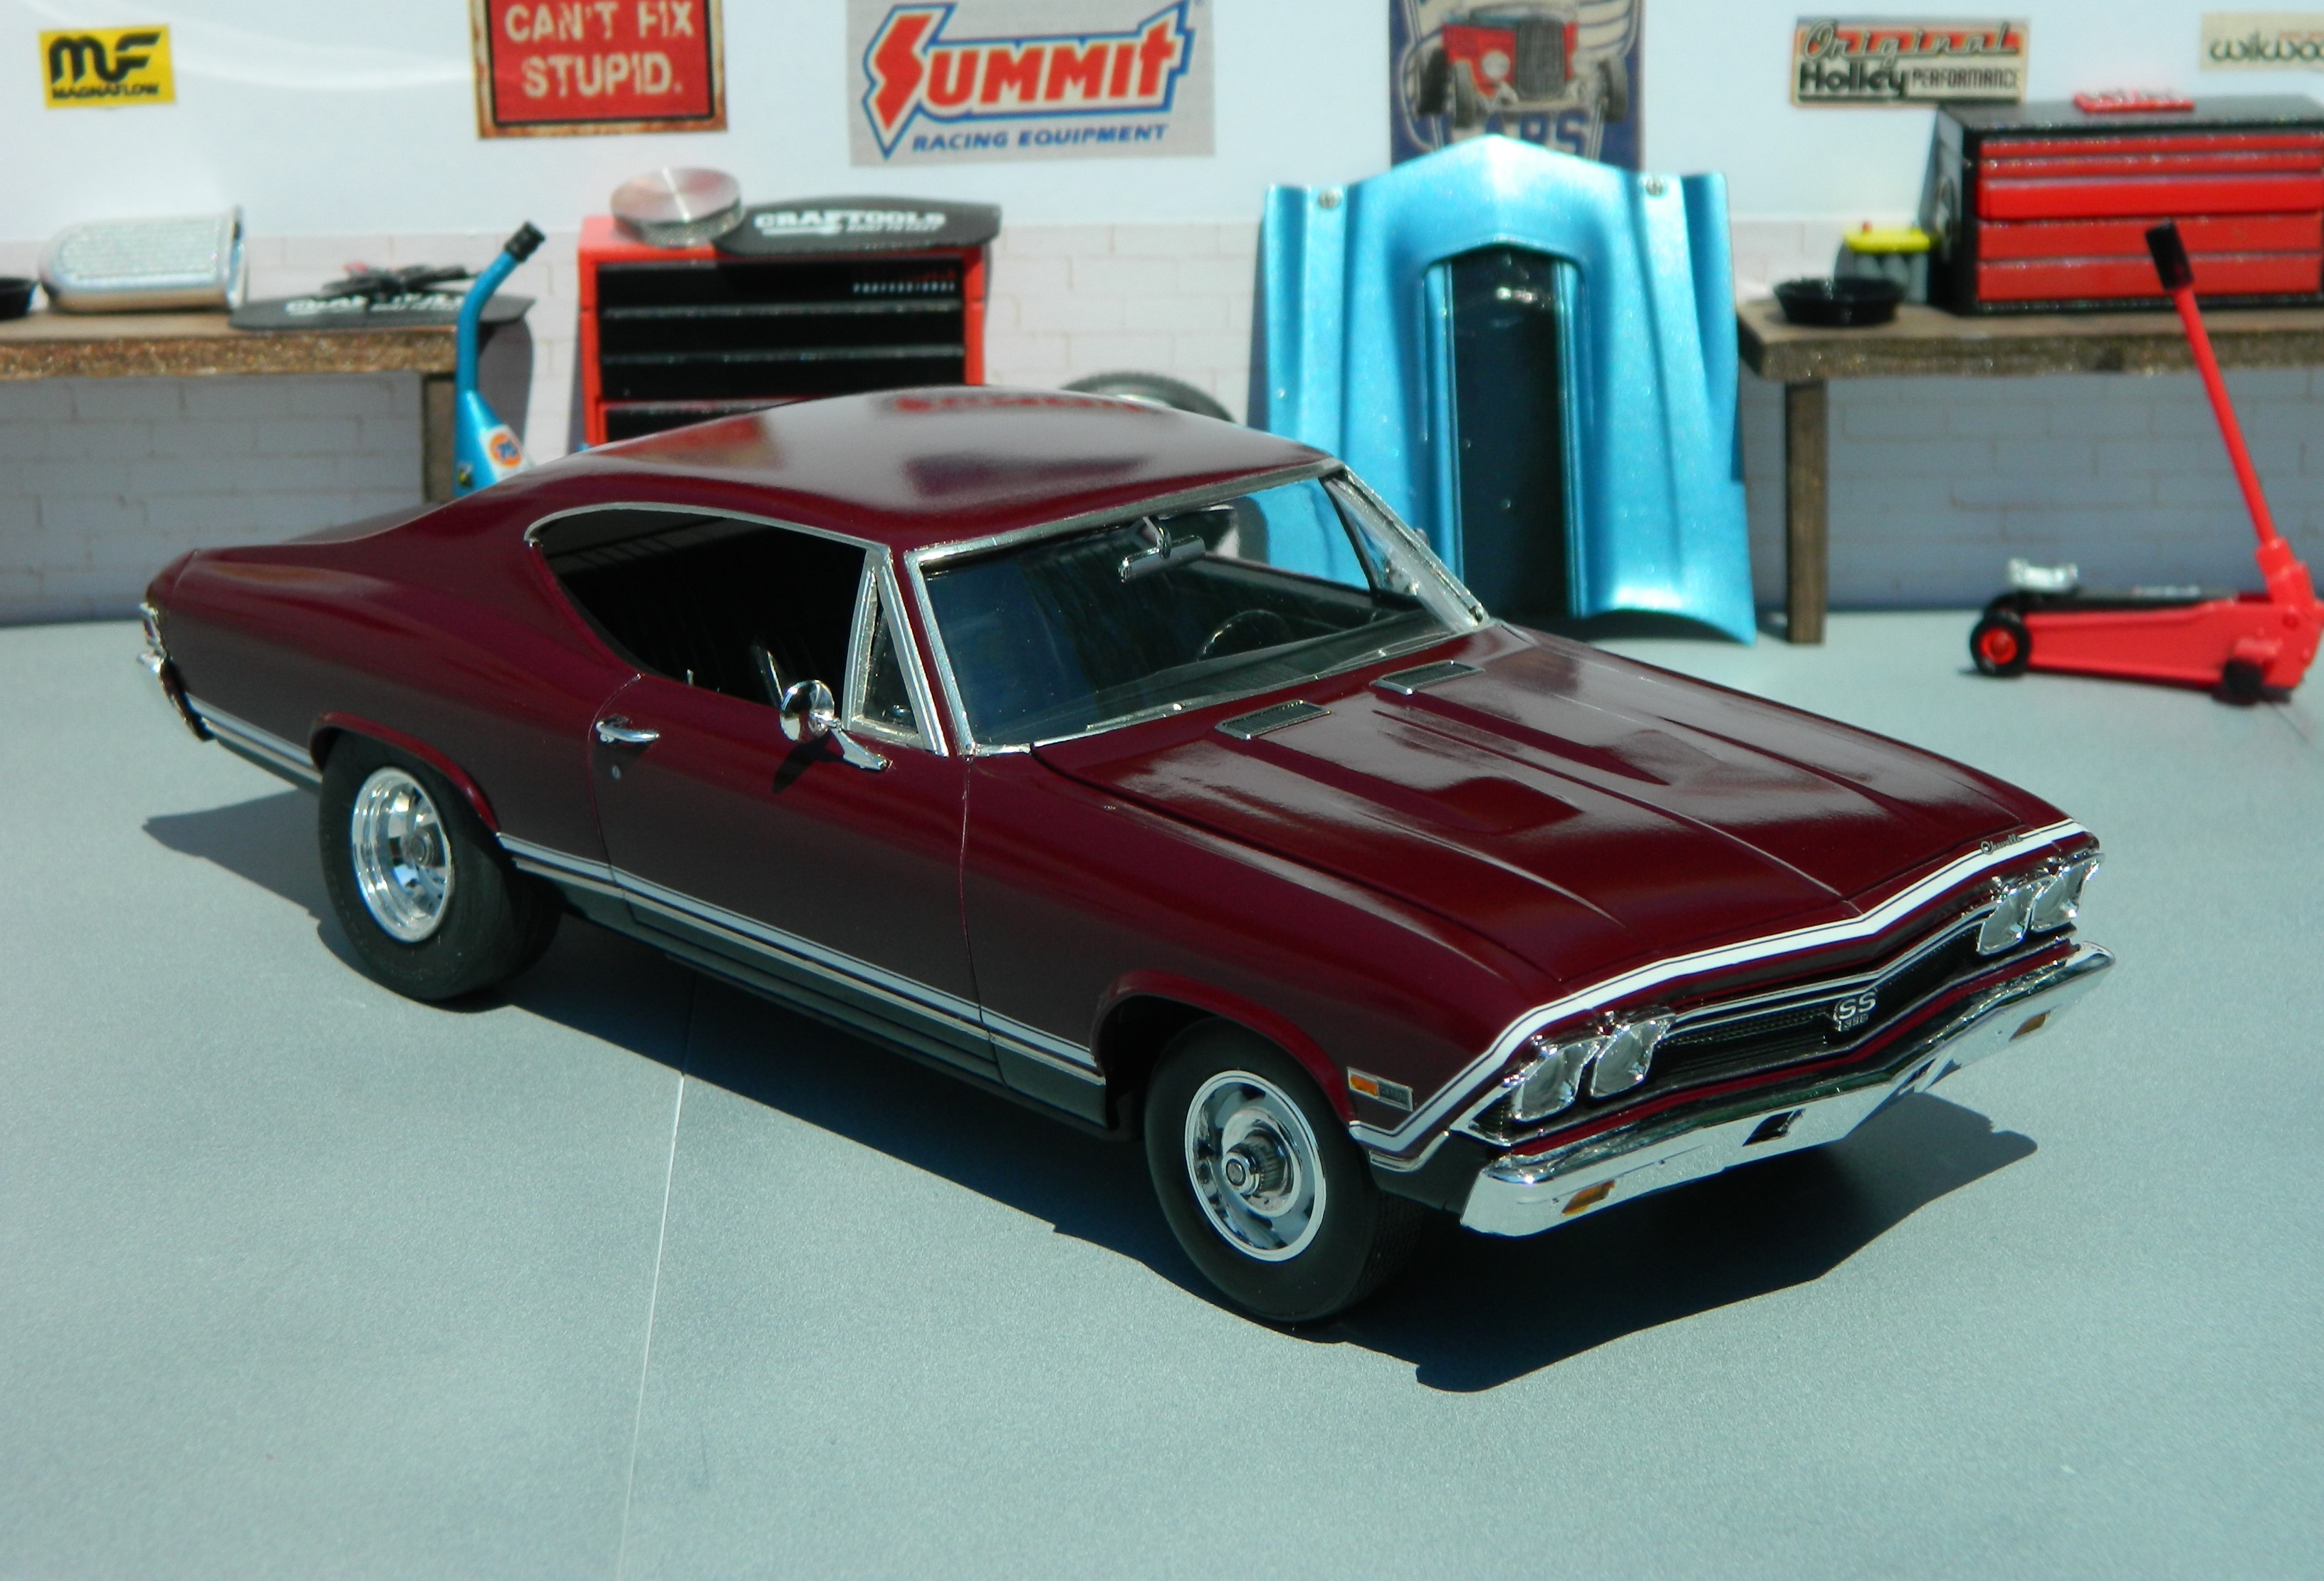
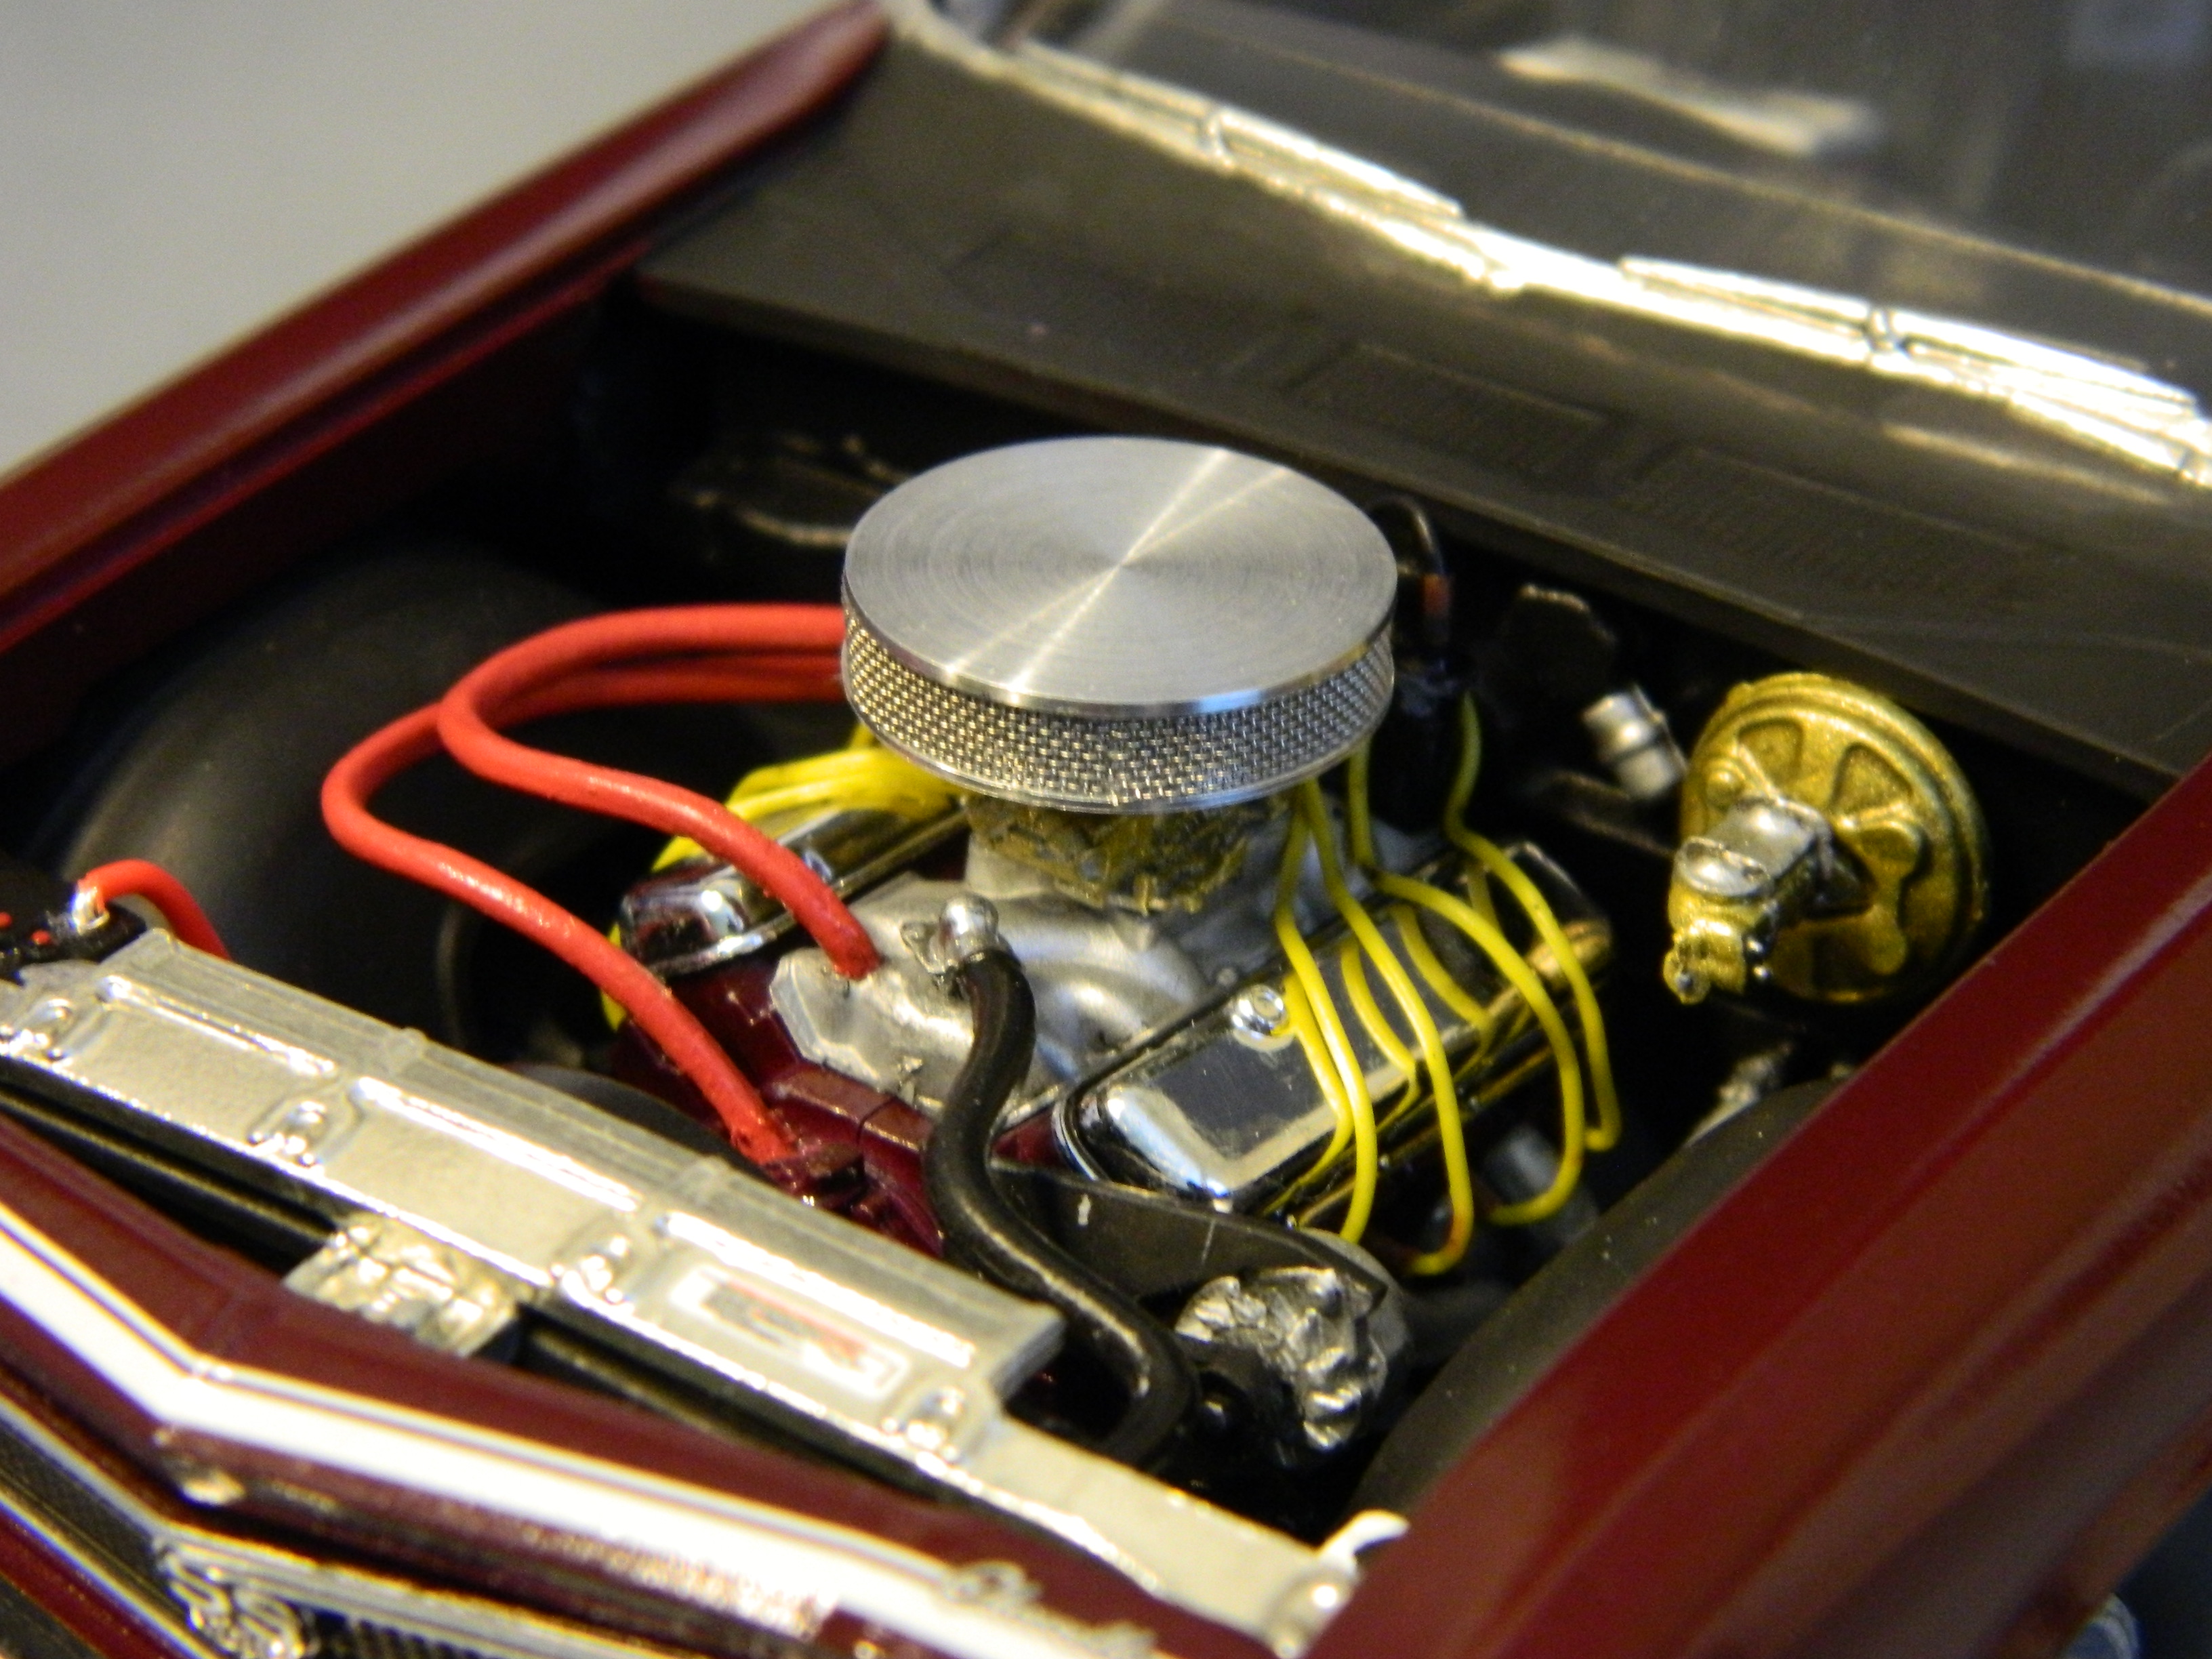
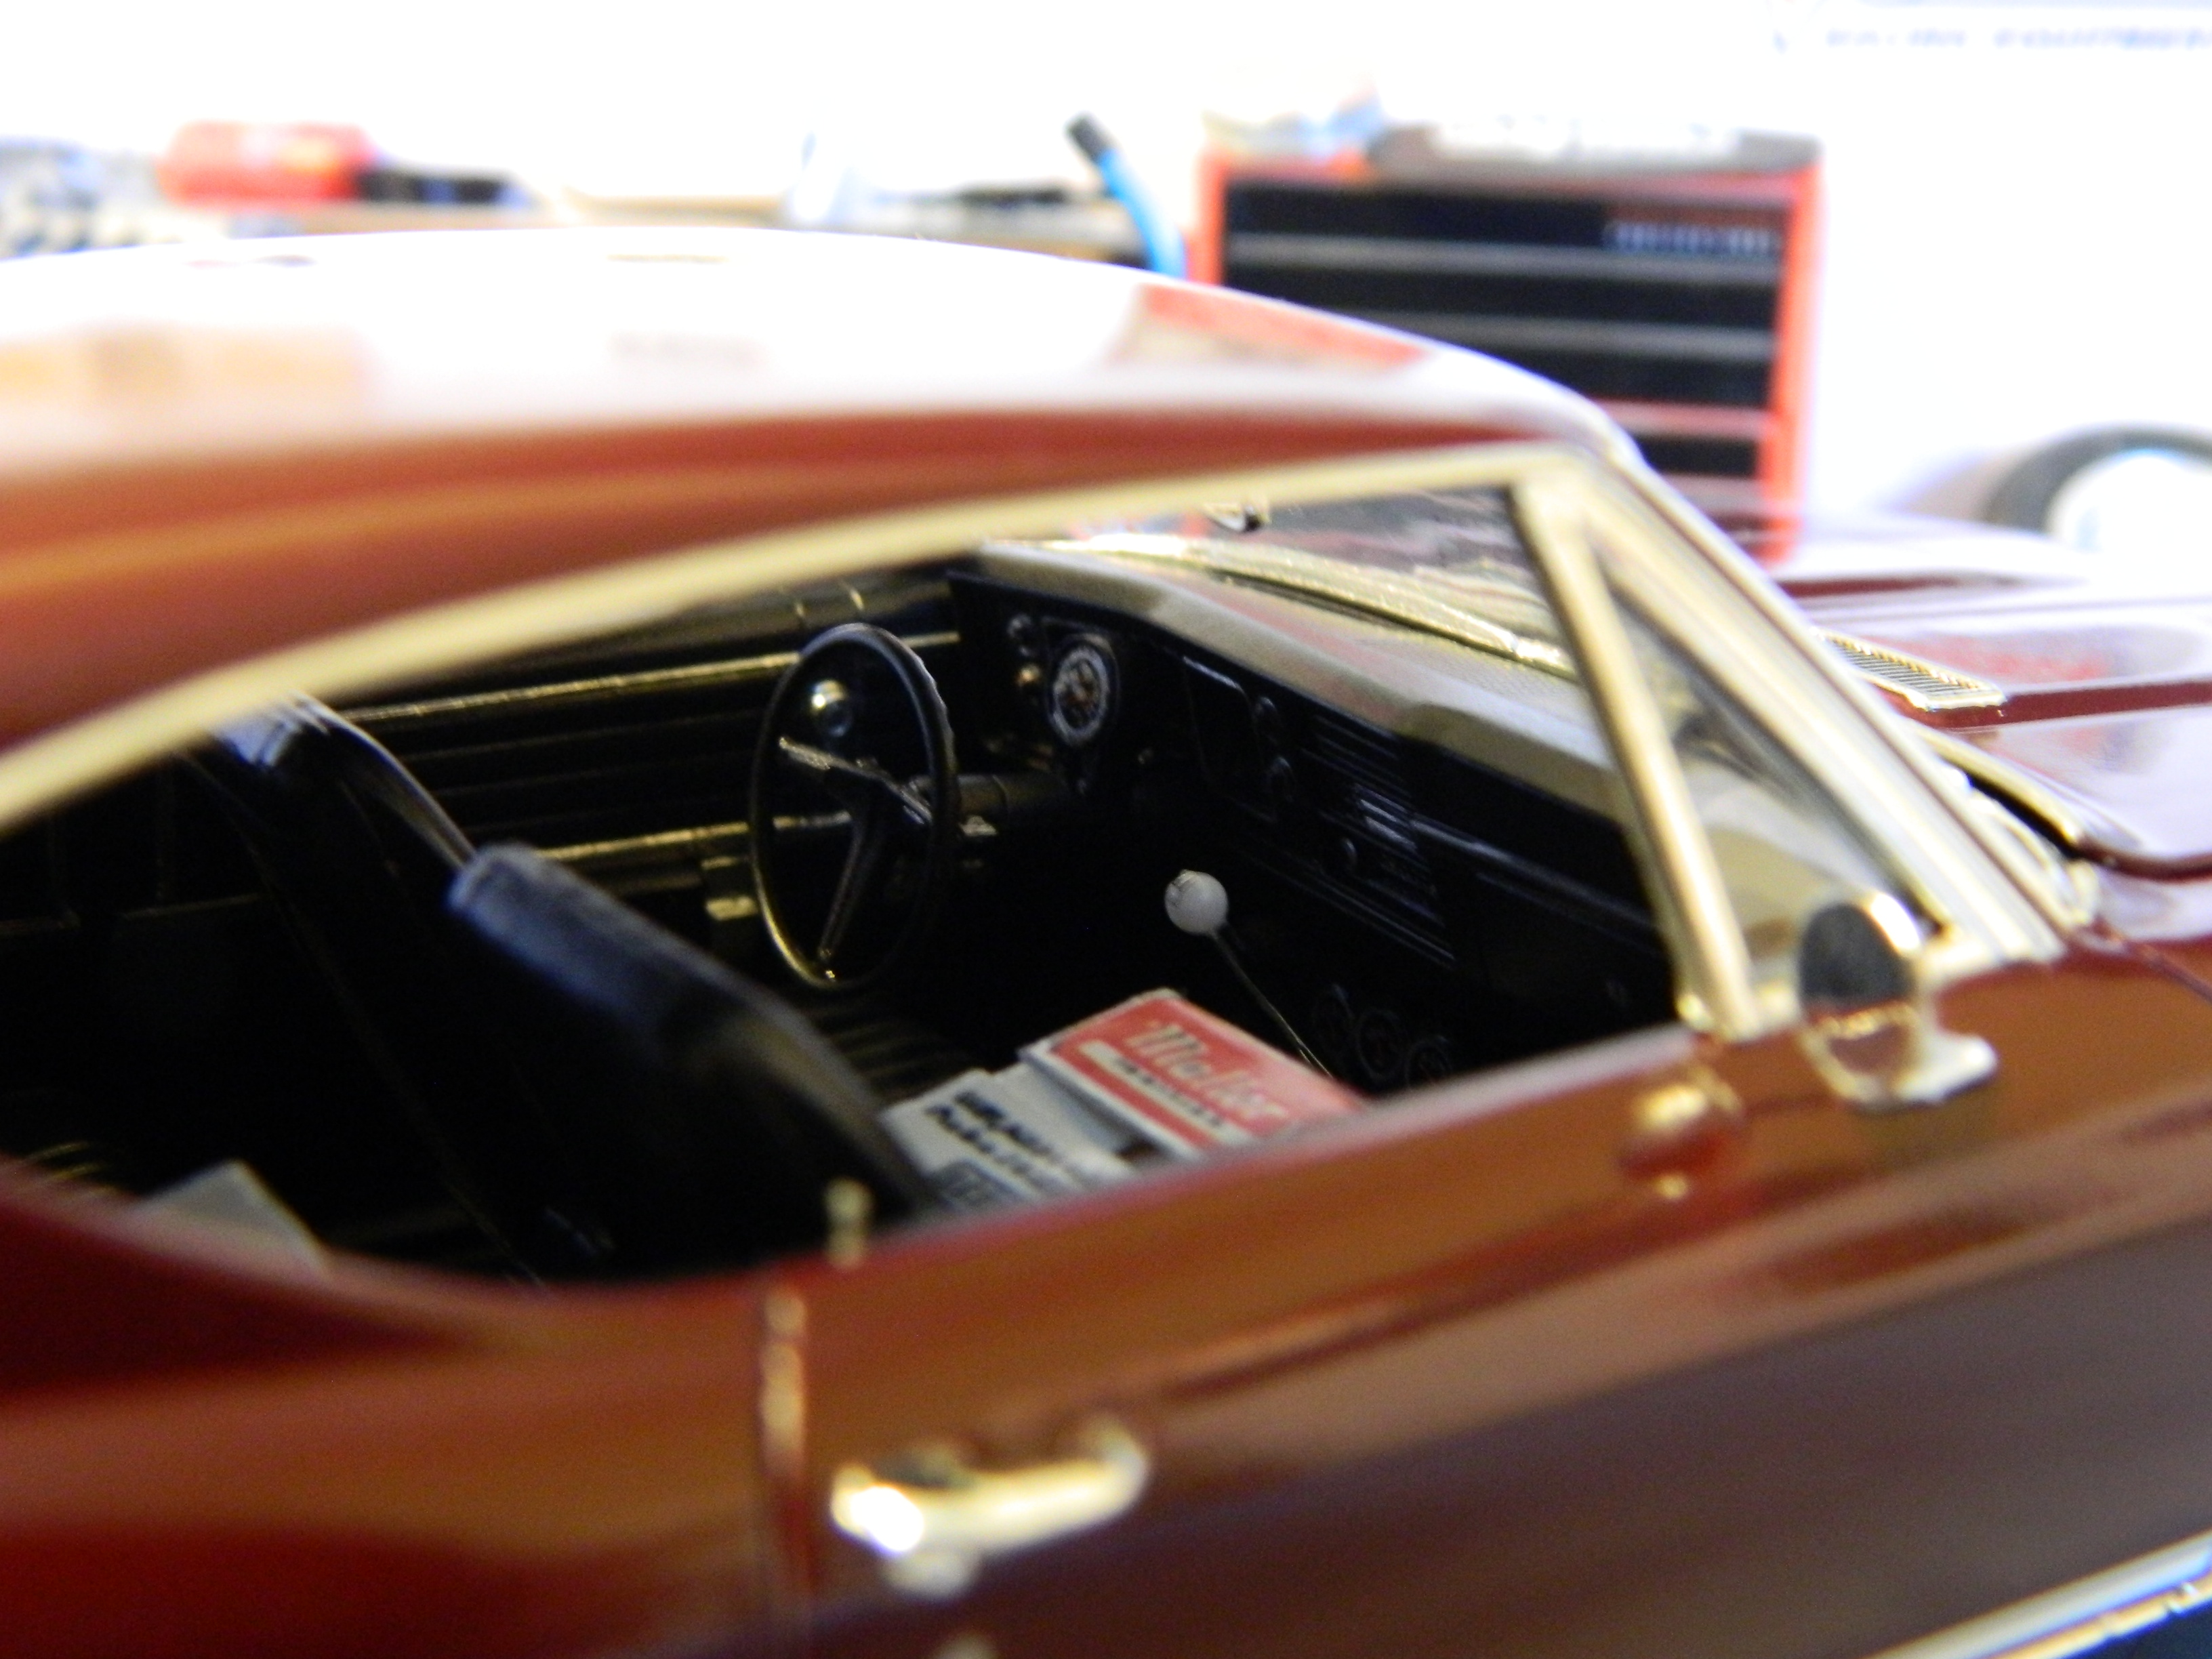
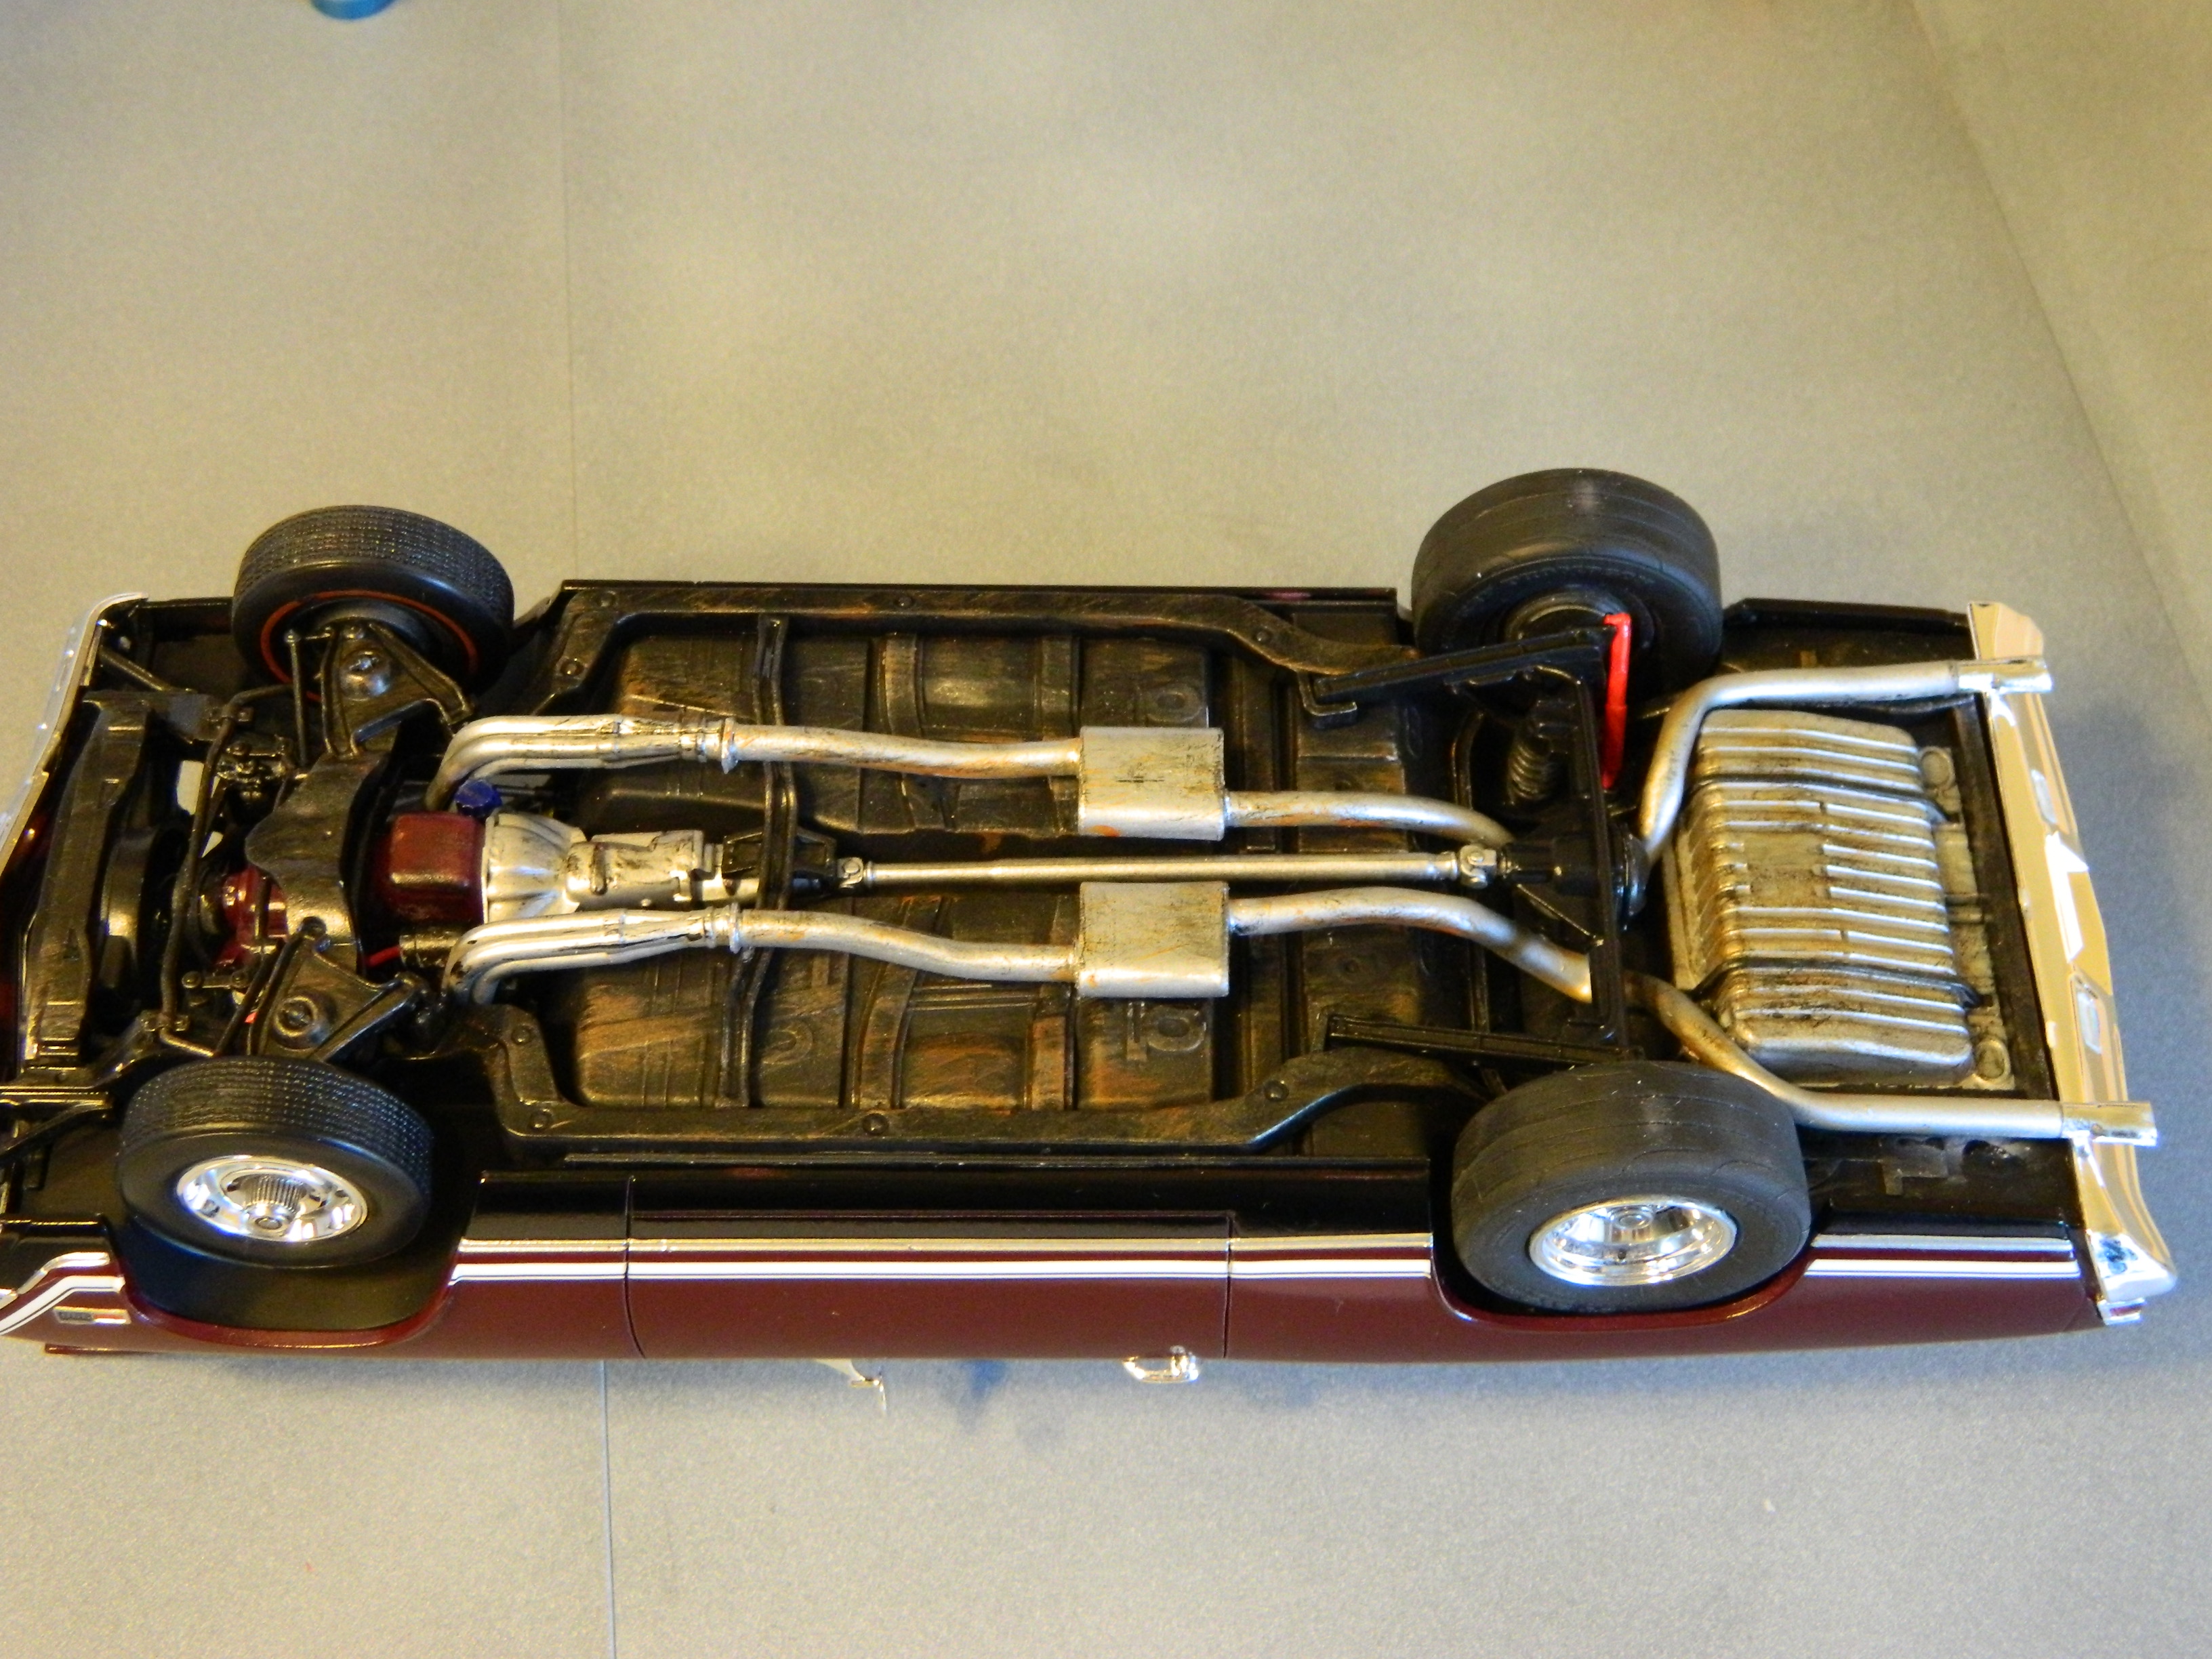
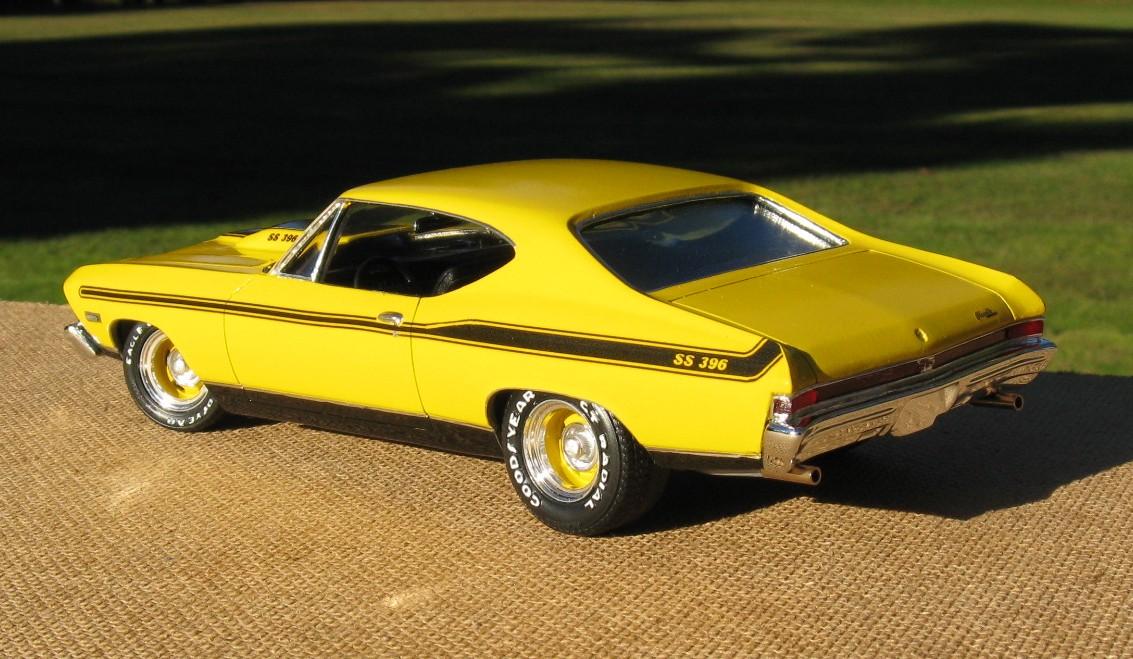
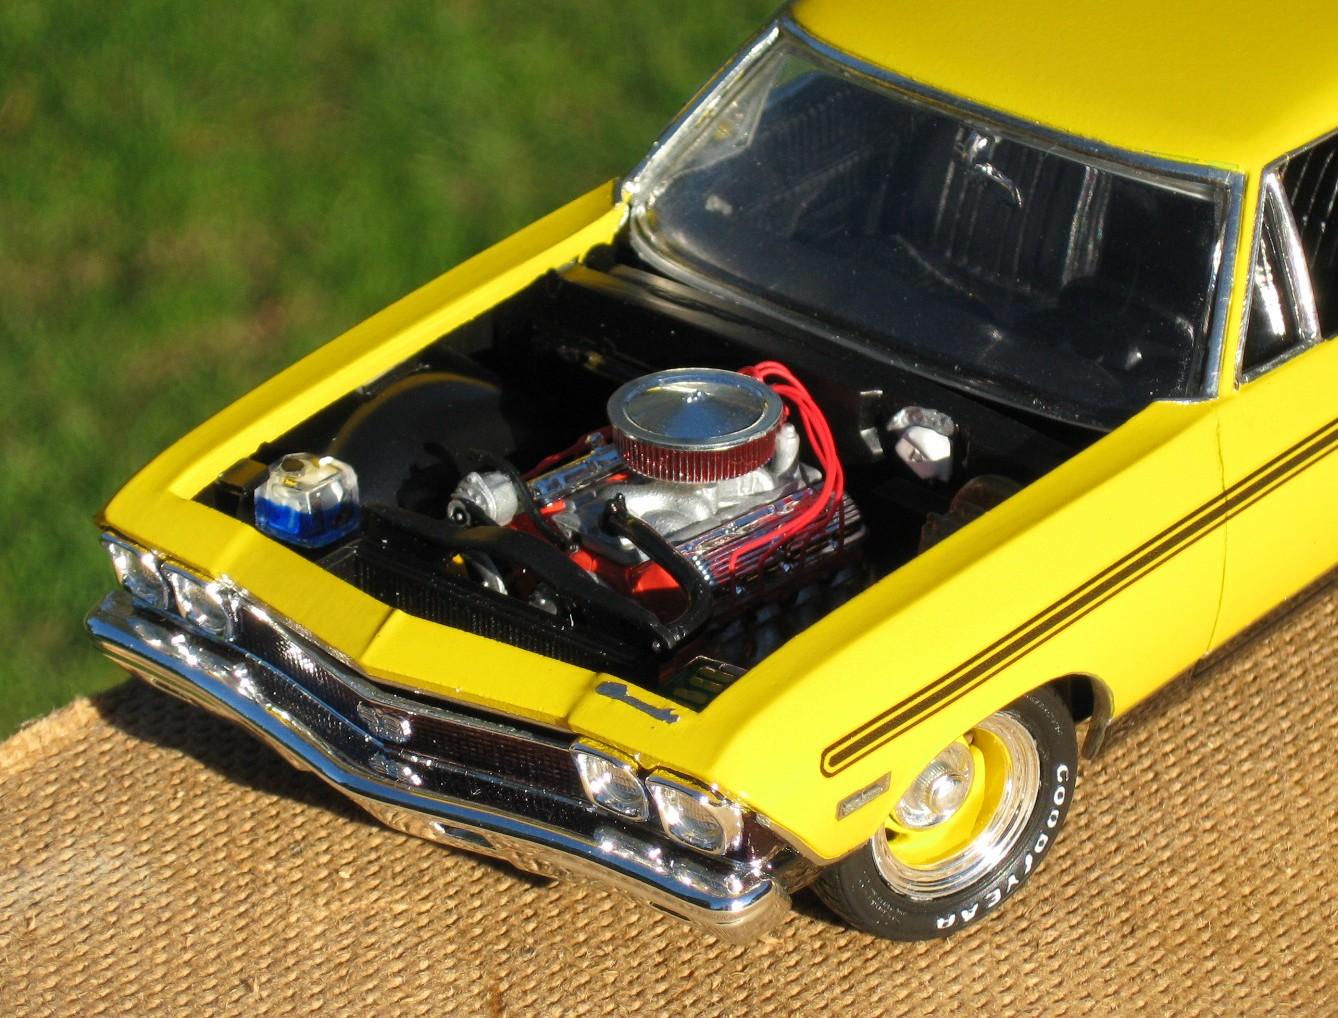
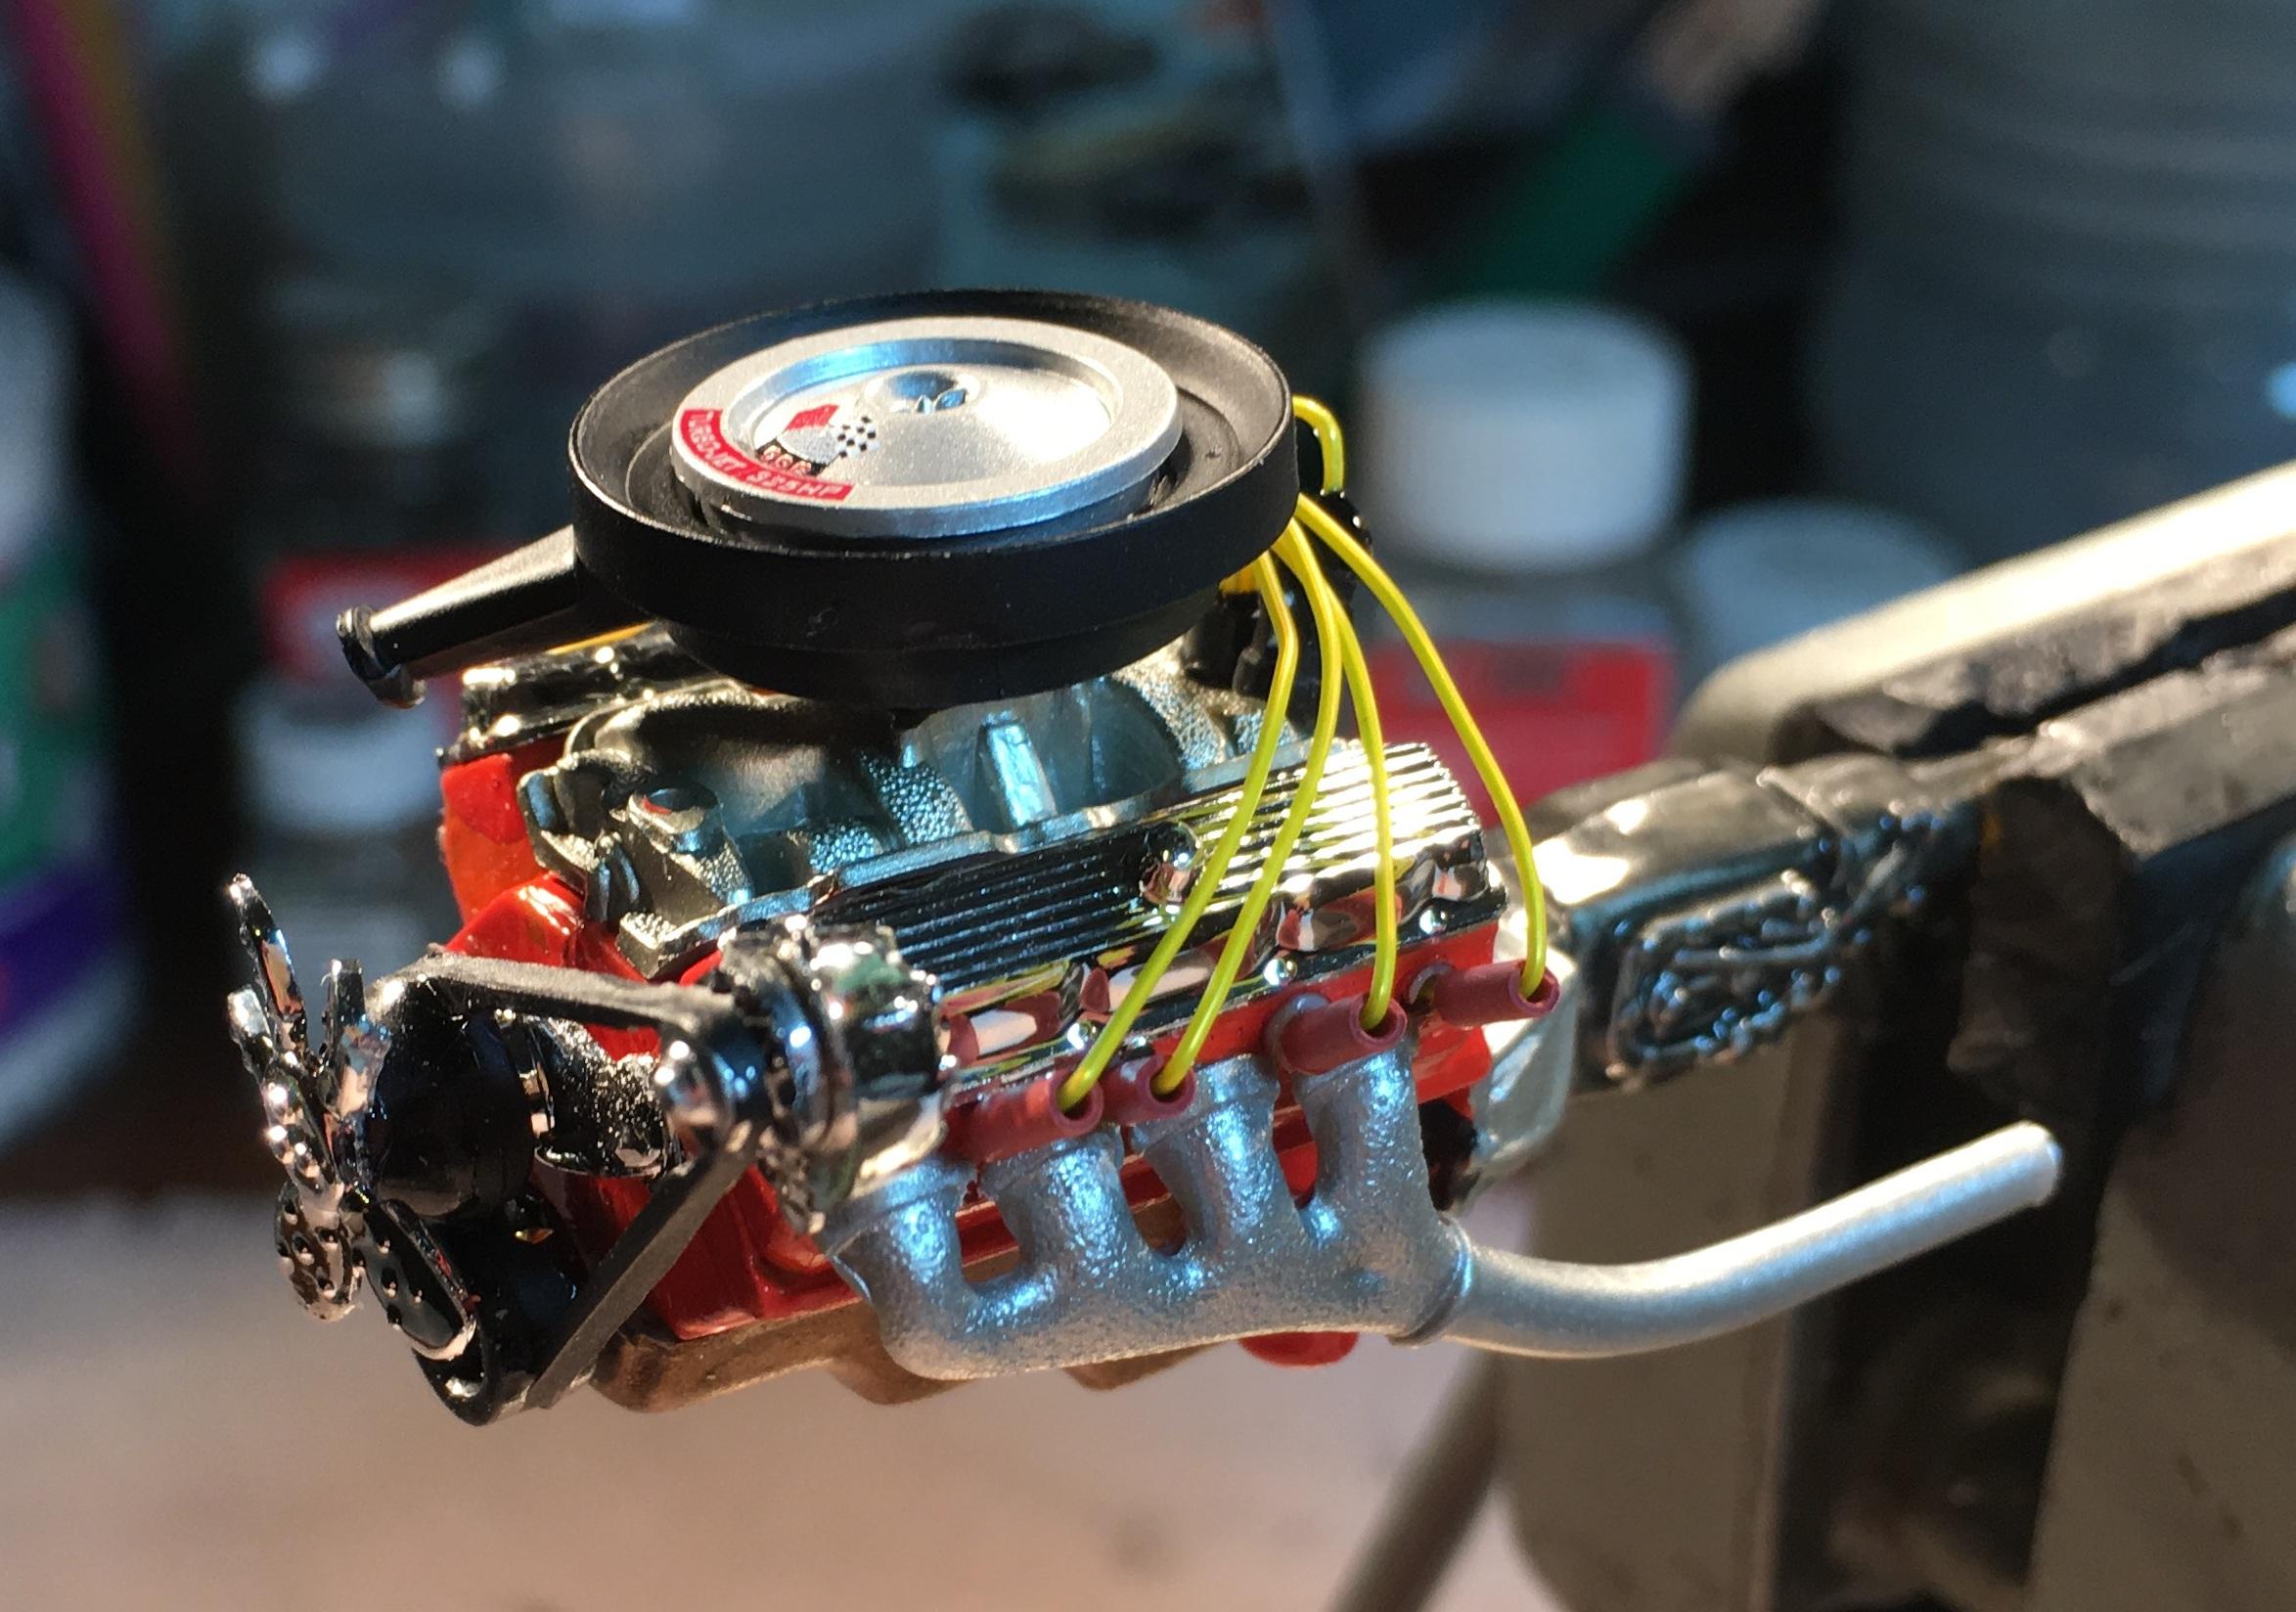
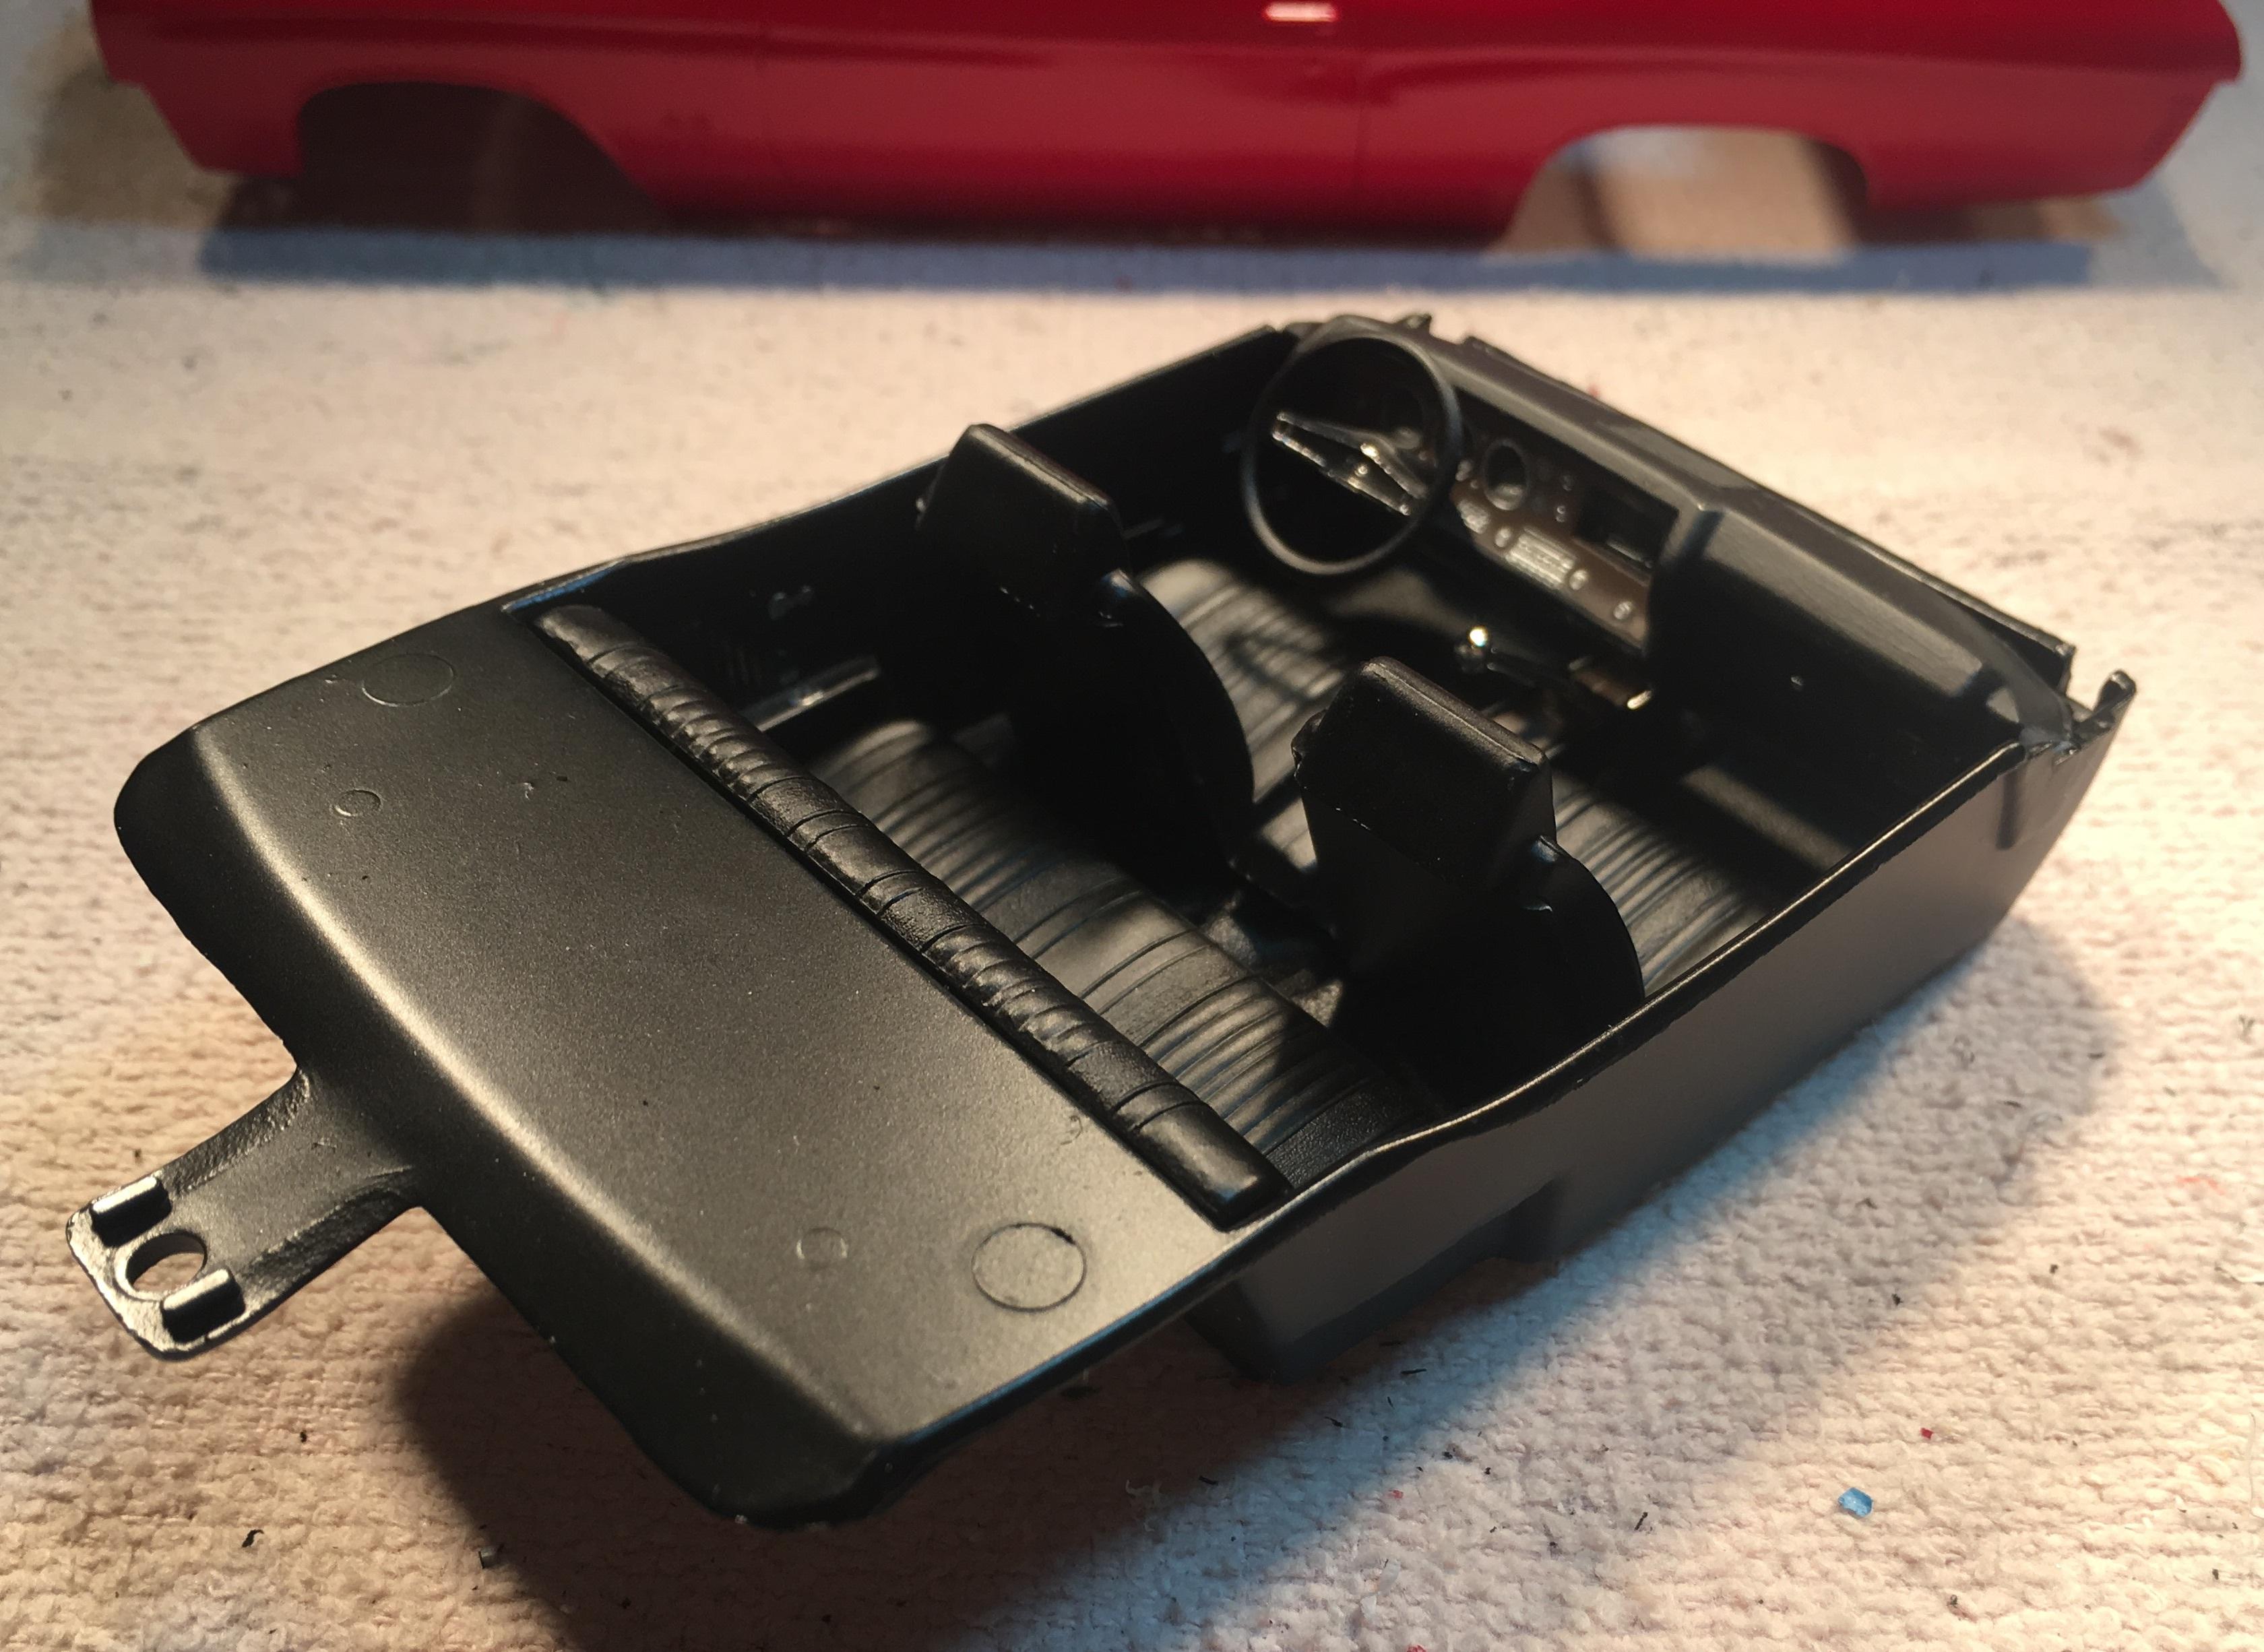
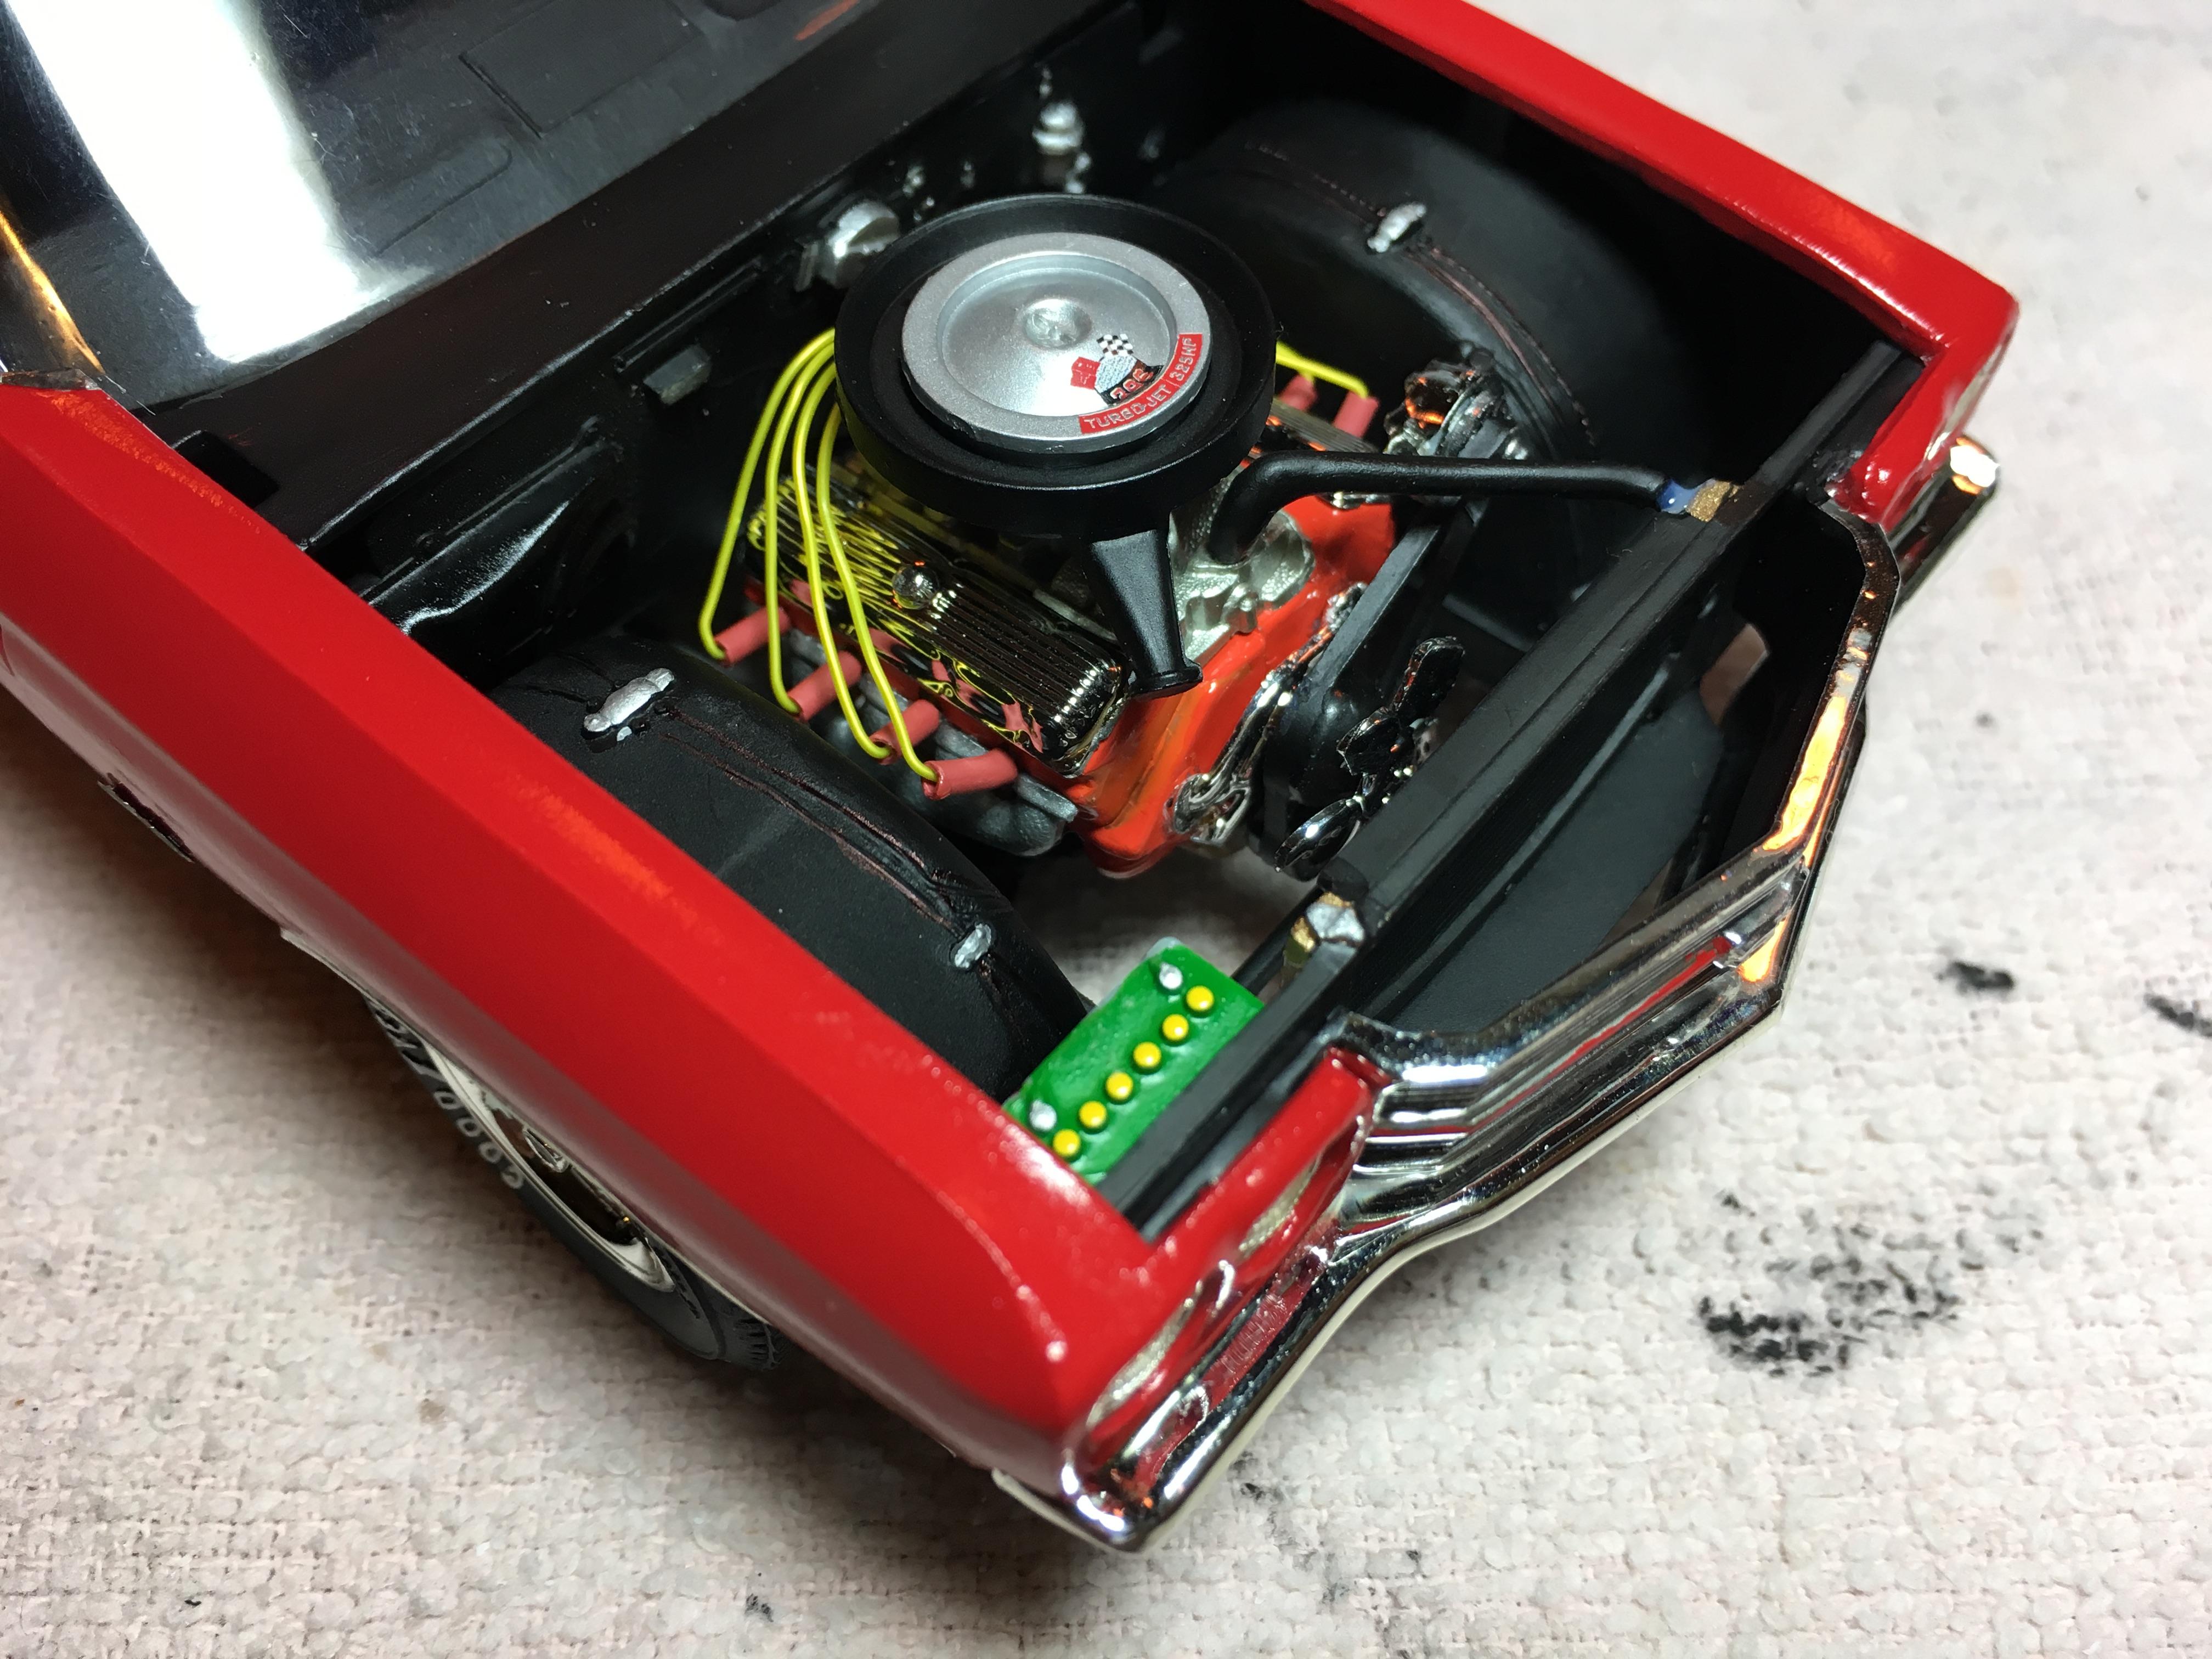
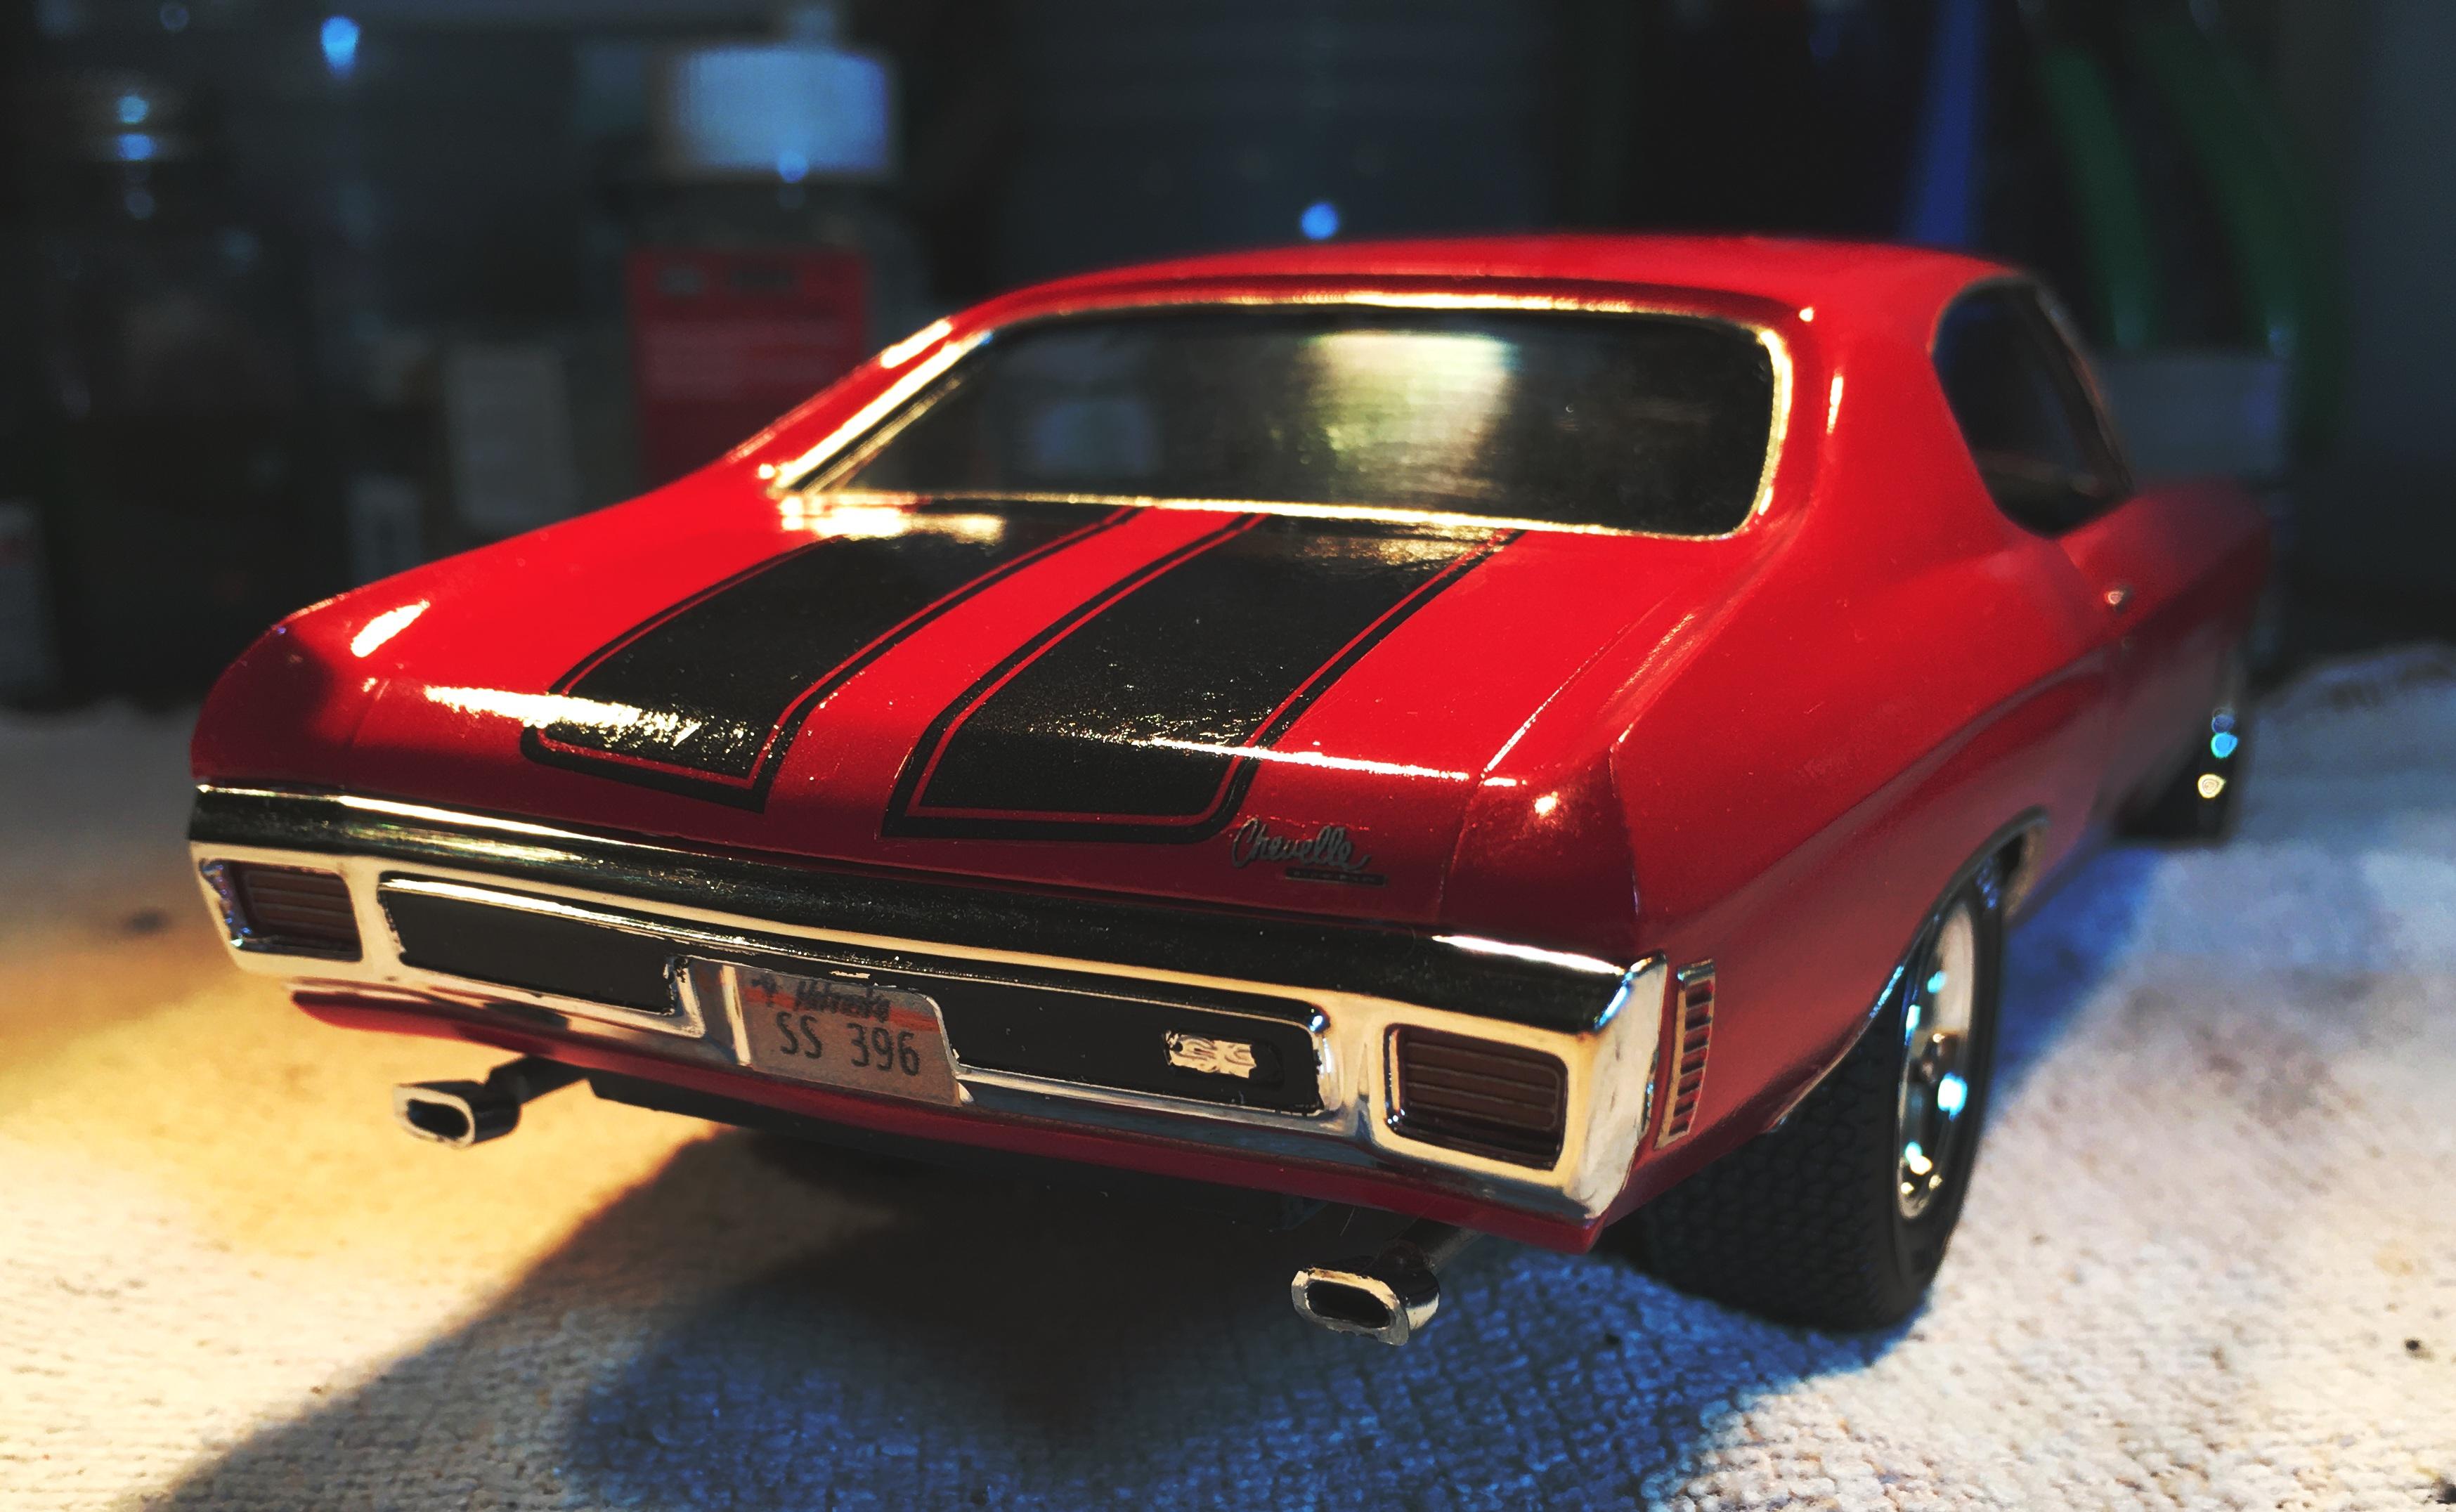
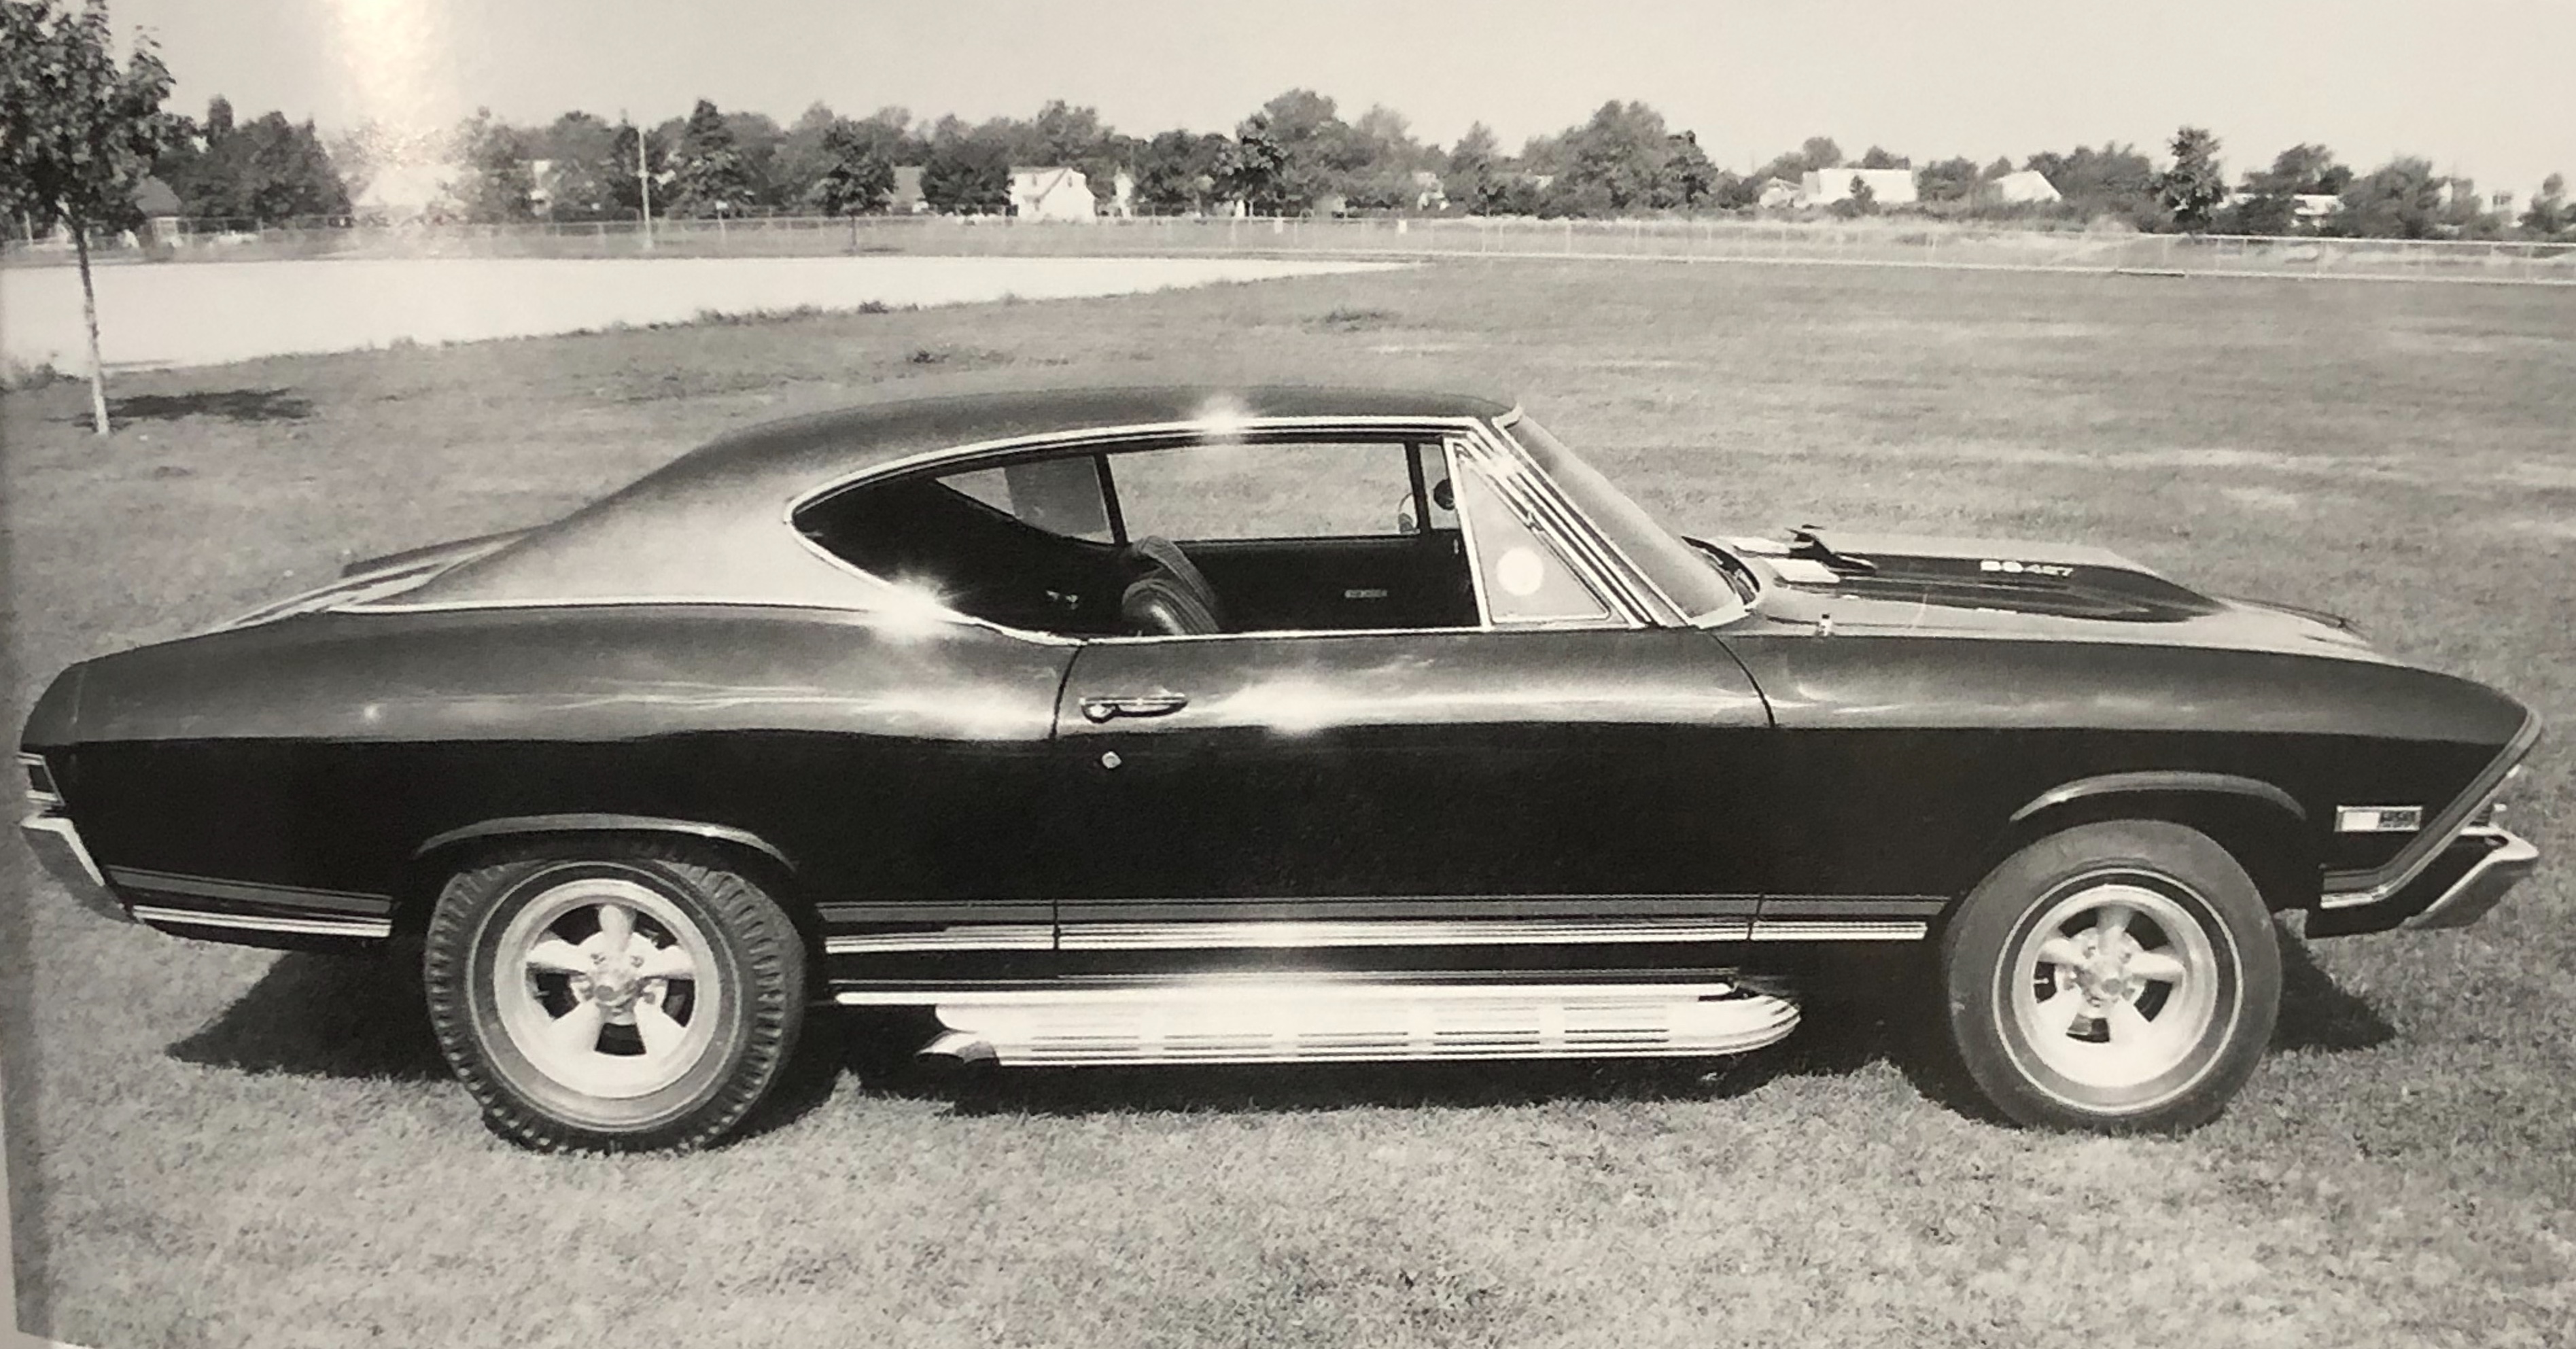
Here's my 1968 Chevelle that I just completed along with a little back story. The owner bought her back in 1997 before the prices of Muscle Cars started going crazy with the intention of doing a complete restoration. Life and other things got in the way so it sat until a few years ago when he finally had time and resources to get working on it. The goal was to have a "triple threat" vehicle that looks and runs like a winner. He wanted it to be right at home at the strip, on the streets as a cruiser, and on the show grounds. After 3 years (actually weeks, lol) he feels like he accomplished his goal. Oh yeah, never mind the boxes on the seat, he just got back from the auto parts store when he took the pics, lol. He kept the 396 badges on the car to keep up the "wolf in sheep's clothing" façade, lol. The owner also kept all of the original parts in case he ever wanted to put it back to factory stock. He pulled the original 396 and replaced it with a 454 bored up to 496 cubic inches (not really, but who can tell in 1/25 scale plastic, lol), and topped it off with an Edelbrock intake and a Holley Carb (from Fireball Modelworks). The air cleaner is a machined unit from Off The Sprue. The paint is Tamiya TS-11 Maroon and is cleared with Tamiya TS-13. The lower panels are painted in Tamiya TS-14 Black and the trim is done with BMF. The interior is done in Black craft paint with some satin varnish mixed in for a little sheen. A column mounted tach was added and a triple gauge pod on the console behind the shifter. The exhaust is custom made with scratch built mufflers and 3/8 inch styrene tubing for the pipes, and the headers came from the AMT '67 Chevelle Pro Street kit. The wheels are custom made deep dish Rally's in the rear and the kit rally's in the front, while the front tires are also from the kit and the rears from Fireball Modelworks. I added Battery Cables, ignition wires, heater hoses, valve stems and door locks for extra details. This is a fantastic kit and was a joy to build. Thanks for looking!
-
Does anyone have a pdf of the instructions for the old "Red Alert" Chevelle? I want to see how many parts I'm missing on my original one before I tear it down for a rebuild. Thanks! John
-
Well, being the Chevelle guy, I had to get it. This kit is awesome! I don't think I have any complaints about the kit. It came out amazing. I just wish the sun had been out for the pictures. They don't do the paint job justice. SAM_0110 by Eric Lucas, on Flickr SAM_0111 by Eric Lucas, on Flickr SAM_0112 by Eric Lucas, on Flickr SAM_0113 by Eric Lucas, on Flickr SAM_0114 by Eric Lucas, on Flickr
-
Started today, this is a companion piece for my hugger orange 69 Camaro. Painted Testors hugger orange with wet look clear. Thanks for looking, all comments welcomed.
-
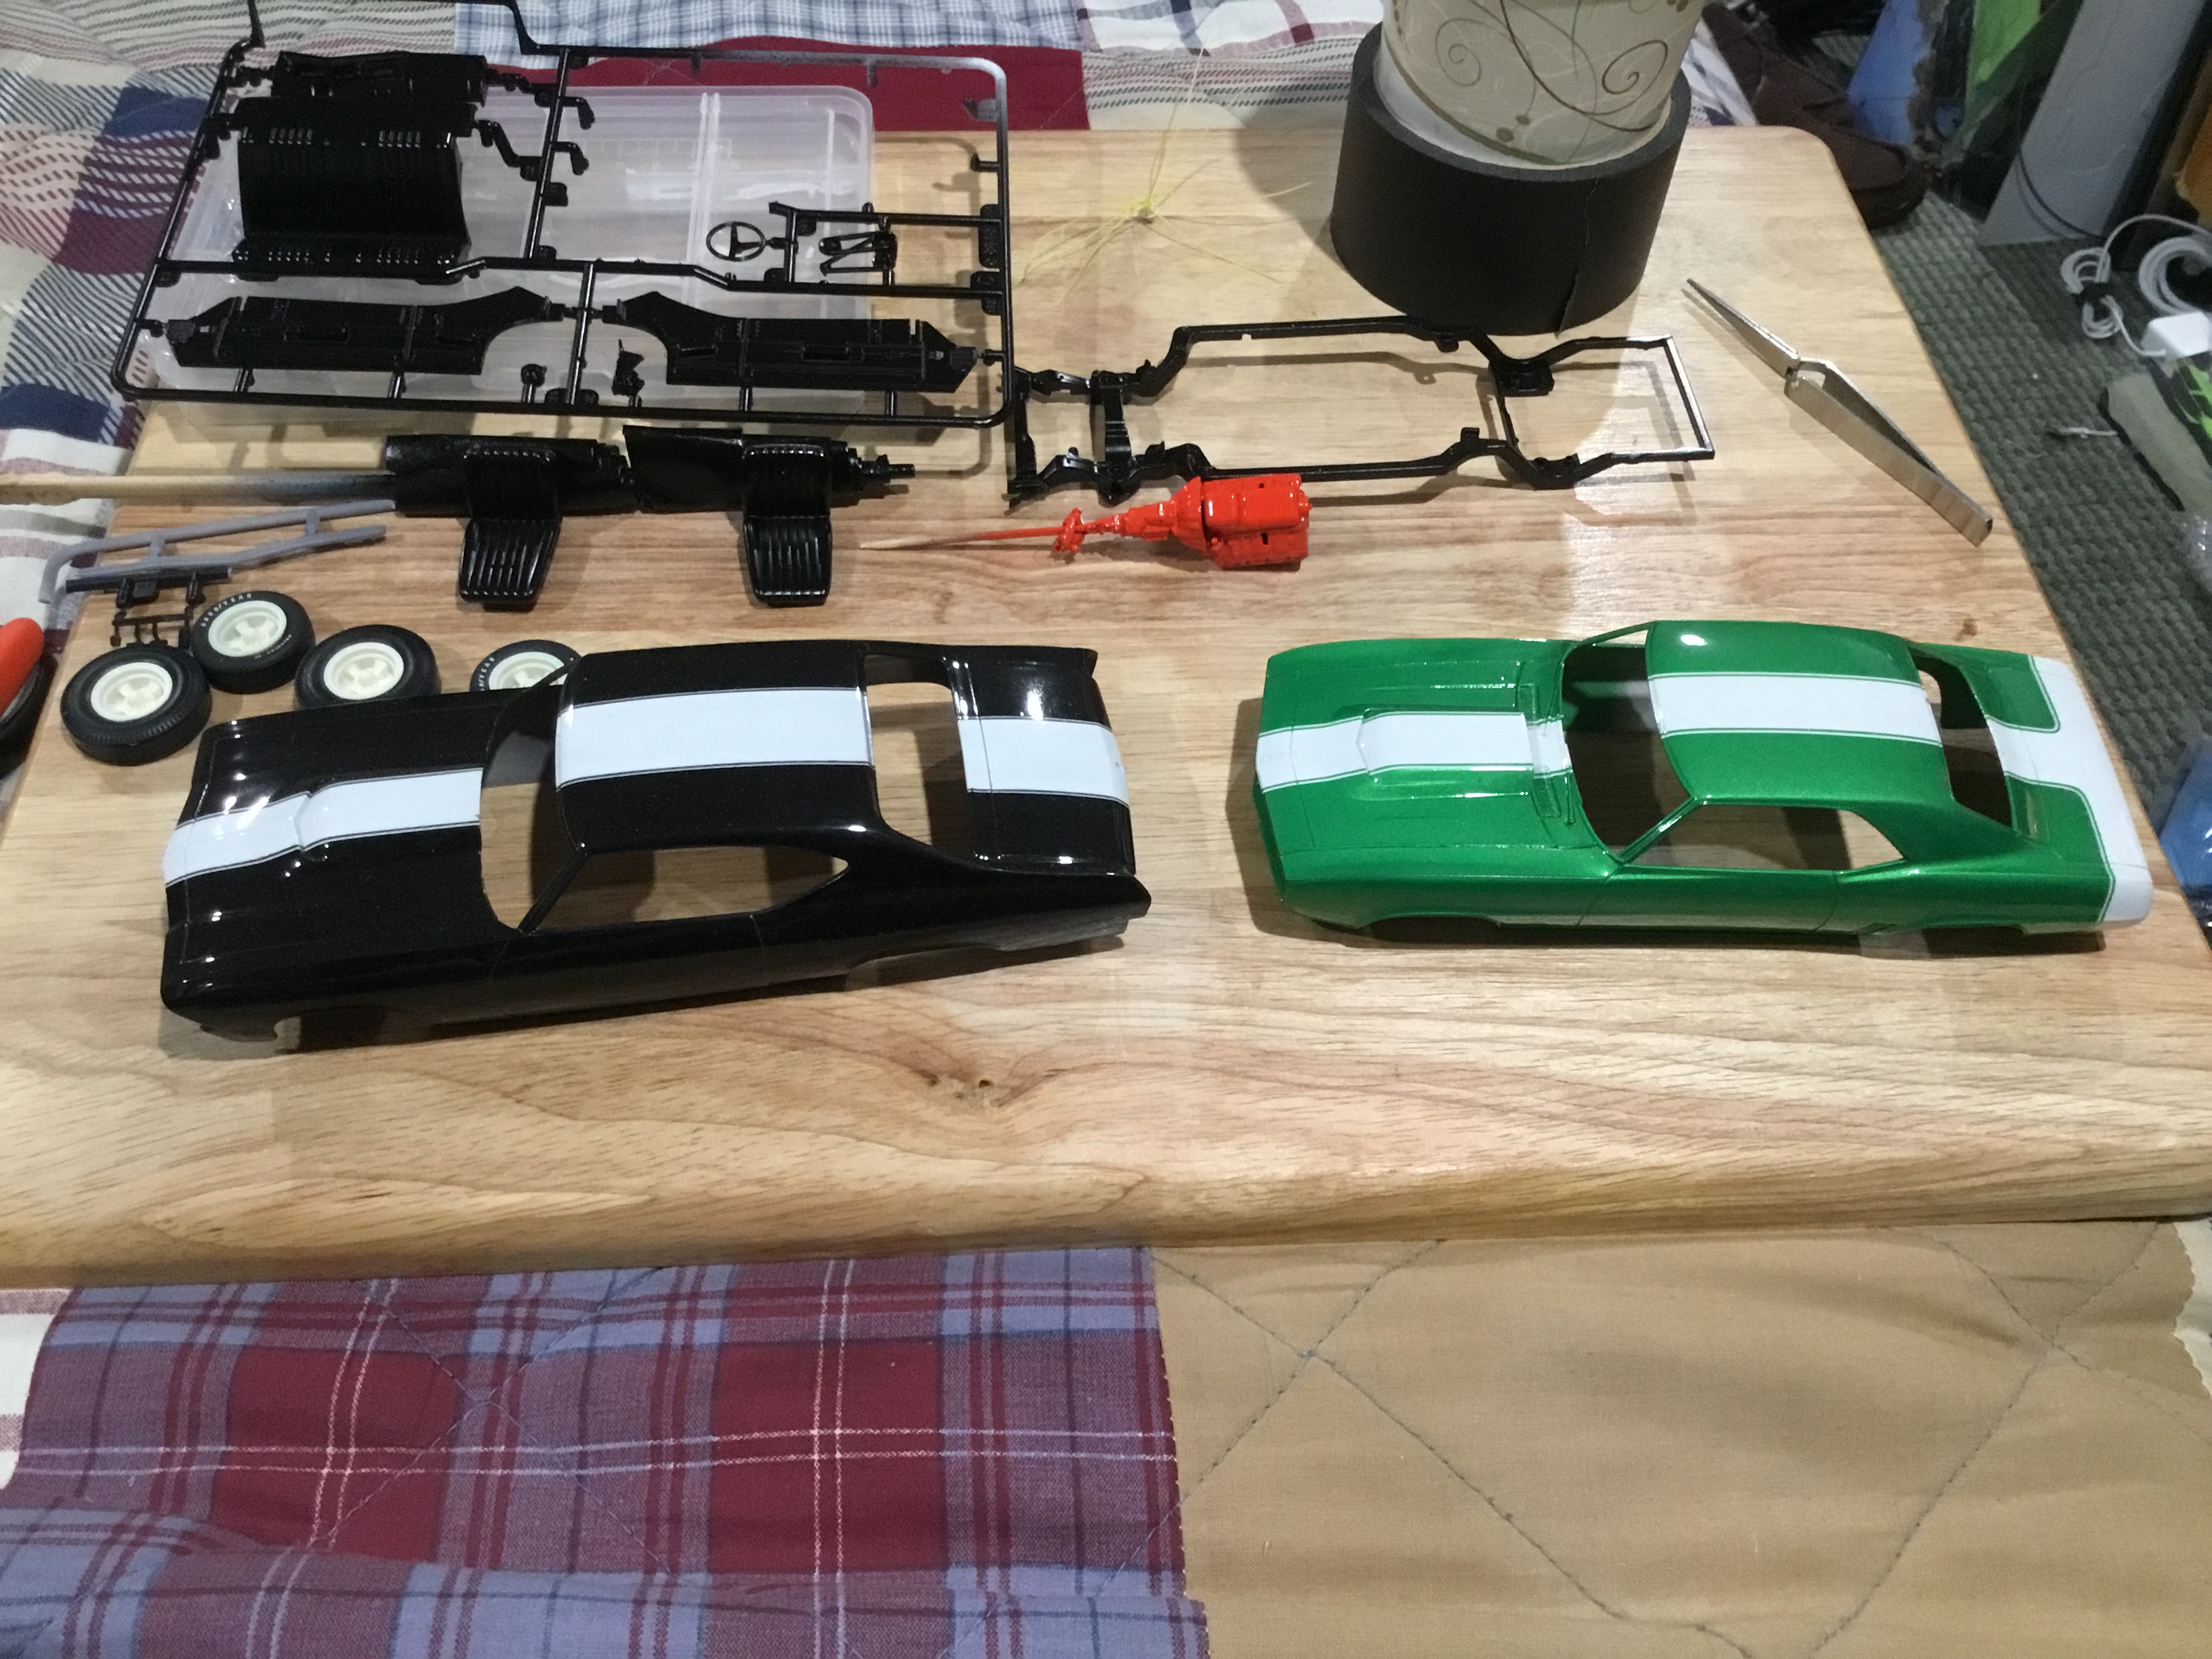
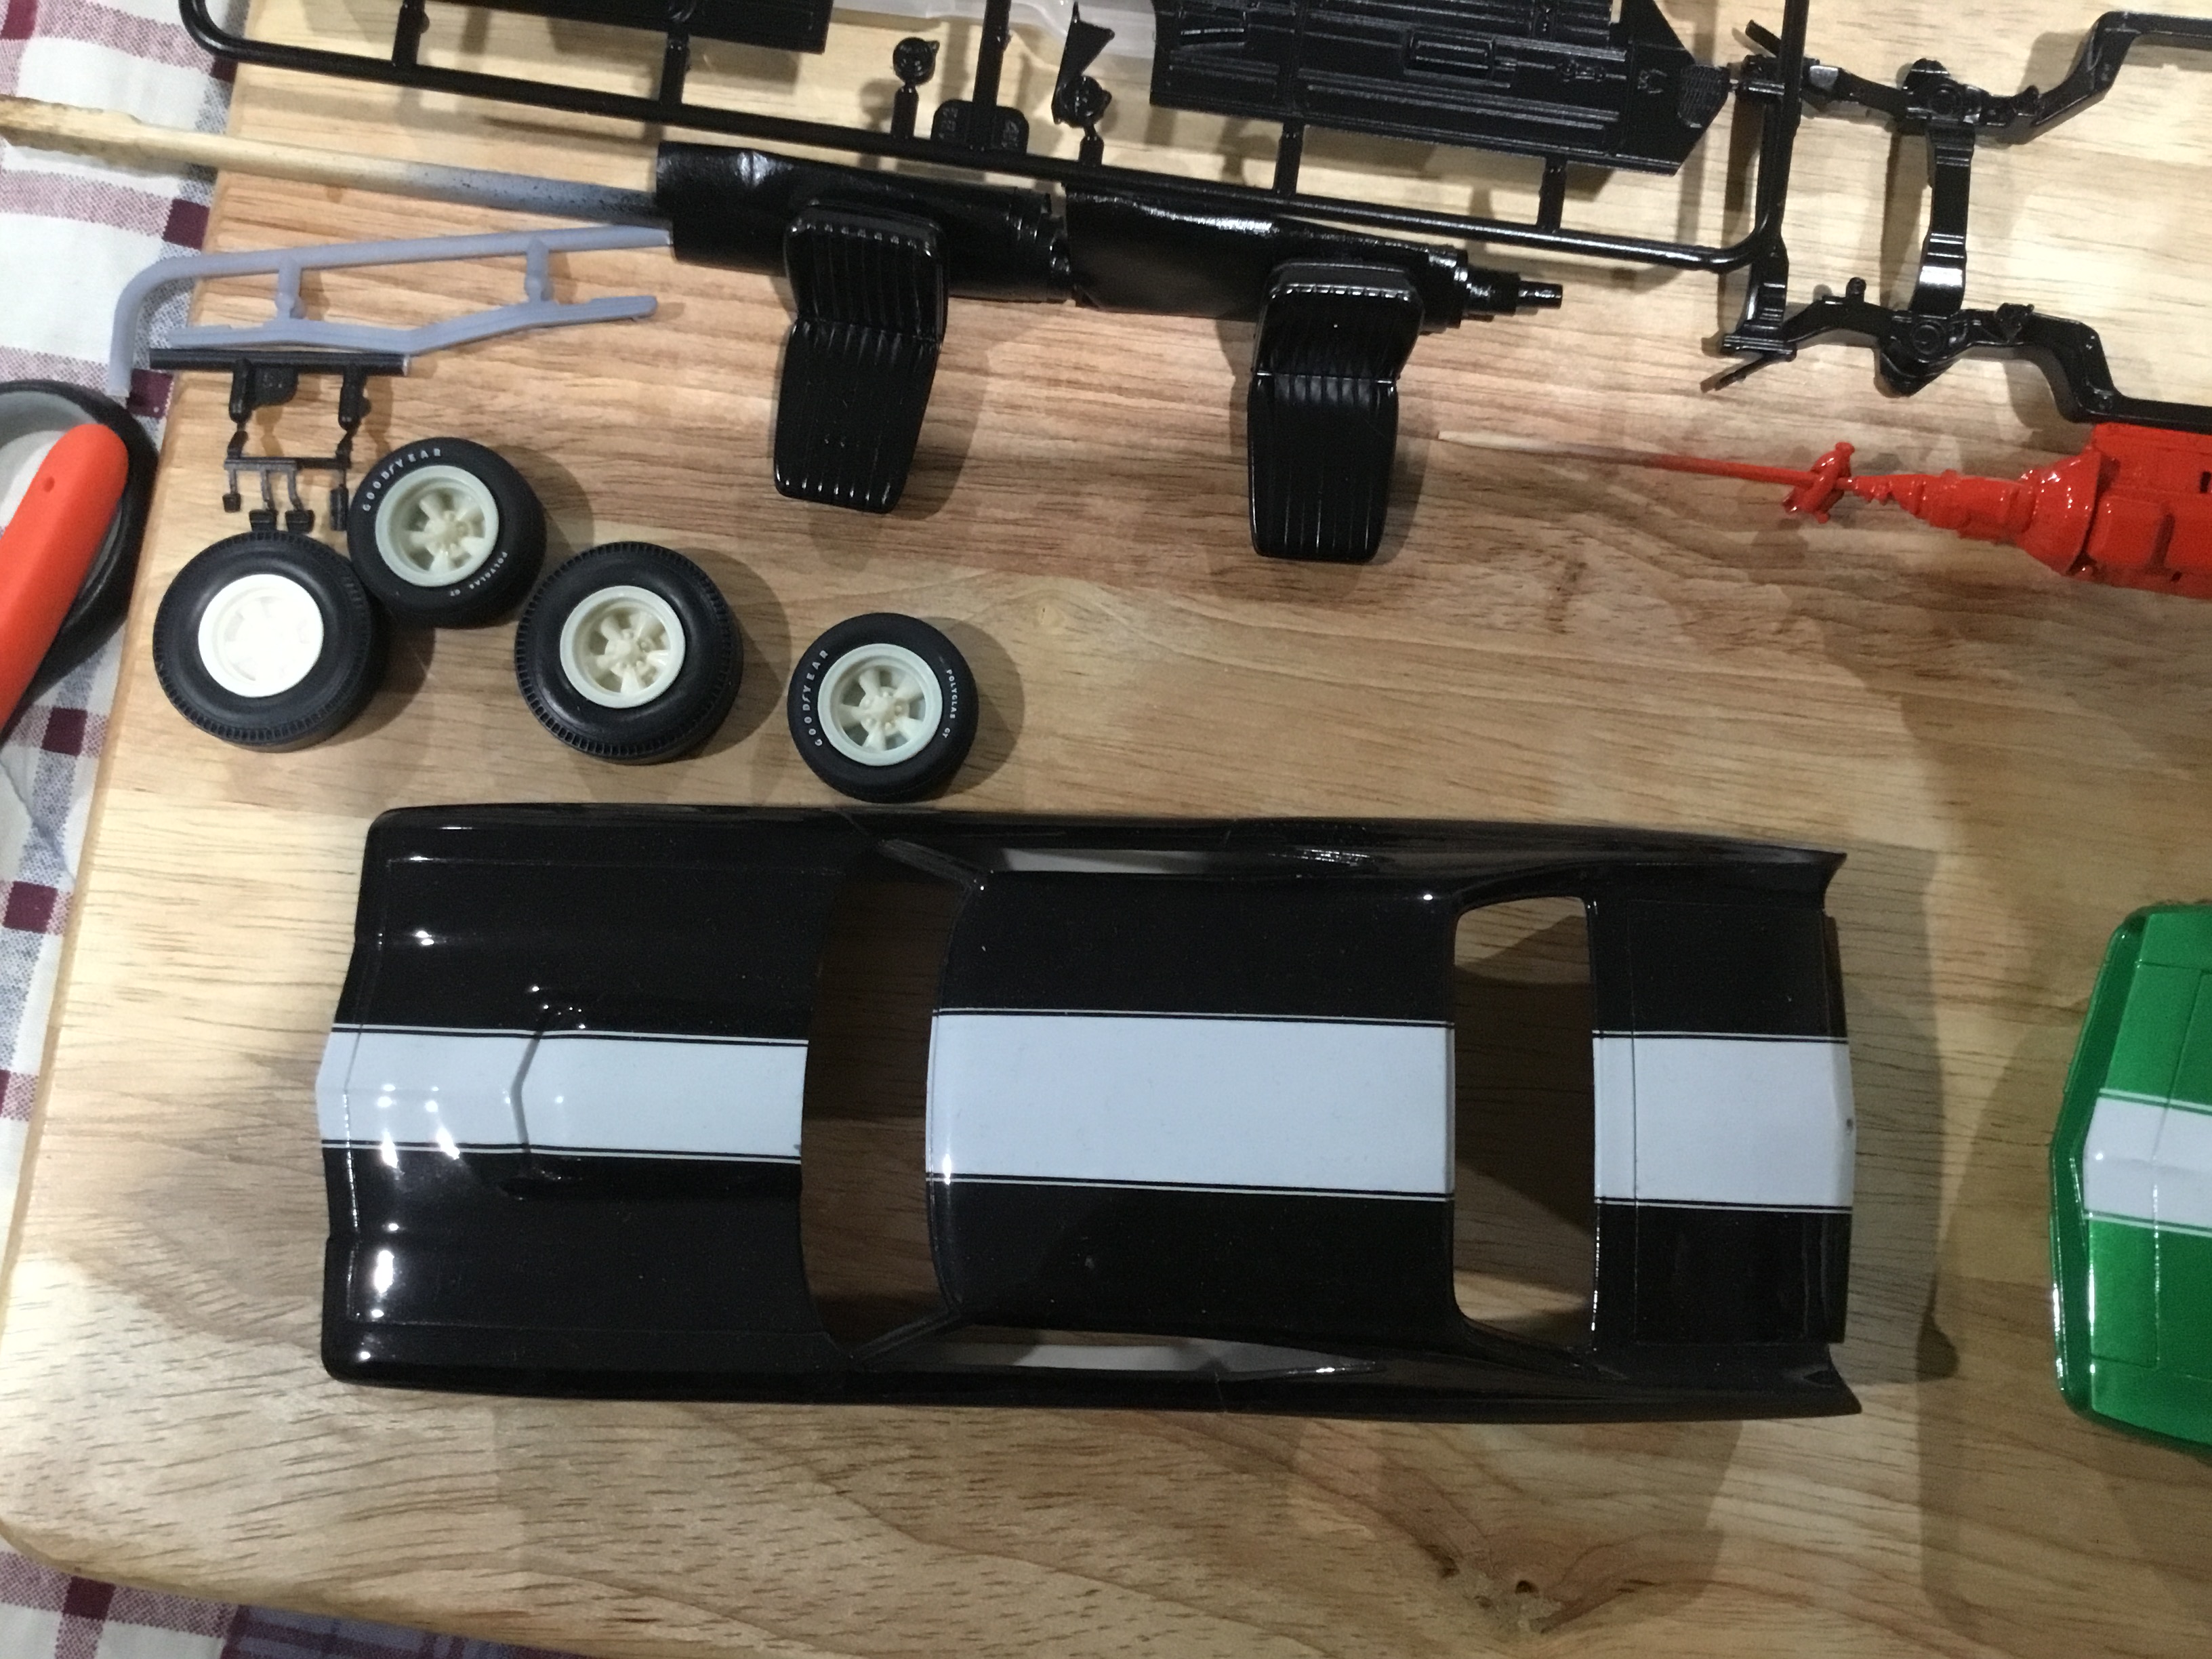
Started on these today. Got the frames down and will wait for good weather to paint them. Thanks for looking!
-
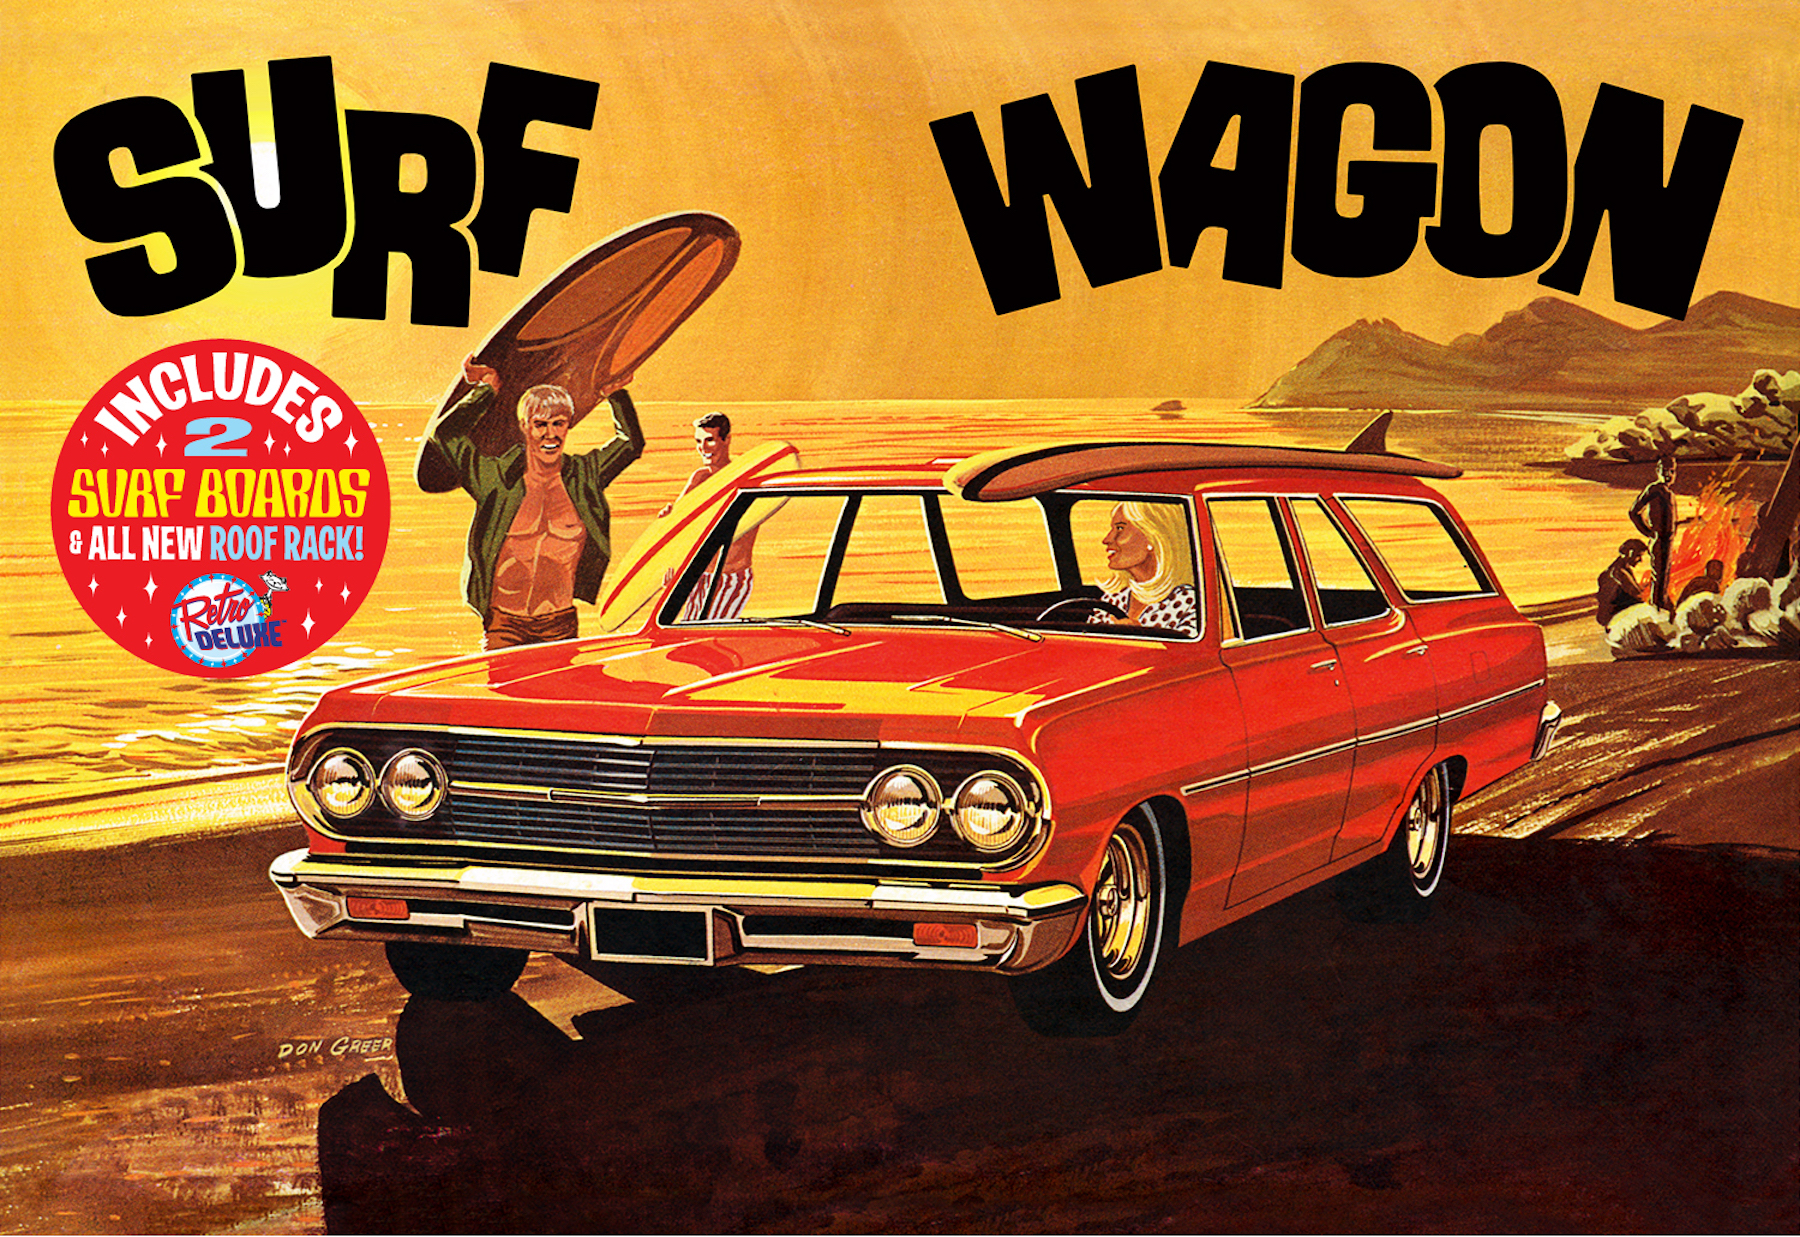
My latest W.I.P. : the AMT 1965 Chevelle "Surfin' Wagon' . This is the first time I've built one of these ( oddly , I've built many of its El Camino counterparts ) , and I'm enjoying it greatly . It's going to be Tamiya Pure White with Tamiya Medium Blue Metallic interior (see photos of the nearly-completed interior) . I've covered the flooring with black embossing powder ; then primed with Tamiya grey primer ; then colour coats , and ; Tamiya Flat Blue was brushed-over the 'powdered sections --- that gave the surfaces a texture and finish similar to colour-keyed rubber floor mats (yes , I know this is the Malibu trim level , but I wanted a 300 appearance). Without further ado , here's photos of the nearly-complete interior ( dashboard and steering wheel are still being finalised)
-
This model is the first full resin body conversion I have ever attempted. It is a 1968 Chevelle SS casted by Ed Fluck of Drag City Castings http://www.dragcitycasting.com . It was pretty easy to work with, which is nice, since I do not have any body work skills. I simply removed the flashing and thinned areas as needed. A couple of donor kits were used in this build. The first was an AMT 68 El Camino. From that I took the windshield, dash, steering wheel, front seats and console. The interior tub and complete chassis were donated by an AMT 69 Olds 442. It has a very detailed chassis with multi-piece suspension and working steering. Floor pan-wise, it took very minor trimming to fit nicely under the Chevelle body. The rear glass is from a 69 Chevelle. I originally wanted to do it up as a Yenko Super Chevy. However, after doing some research I found out that Yenko did not modify any Chevelles in 1968. Besides that, the Drag City Castings “Stinger” hood wouldn’t accept the YSC decal format. Since I had already purchased the Yenko decal set from Keith Marks http://public.fotki.com/mofobow/chevy/chevelle/ I scanned them in my PC and modified the side stripes to read “SS 396”. The hood decal artwork I designed from scratch in MS Paint as a .bmp. I used my inkjet printer and Testors decal paper to produce them. The yellow color, which I like to refer as “Magazine Cover Yellow”, is some craft store rattle can my wife got awhile back. The paint and decals are clear coated with Future. As you can obviously see, I used BMF as there is a lot of trim. If I had to do it over I might have added a black vinyl top. The wheels are multi-piece Corvette rally wheels that have been widened in the rear. I also widened the rear tires and lettered them with a Gelly Roll pen. The exhaust tips are nickel plated ‘crimp’ tubes (for RC planes) I picked up at my LHS. The big block Chevy engine came from the parts box and is a basic High Performance 4-BBL with ribbed valve covers. The wired distributor I made myself from scratch. The K&N air cleaner is high enough to be visible in the hood scoop opening. The front and rear bumpers including red tail light lenses are Modelhaus items http://www.modelhaus.com .
-
This model is an approximation of the real Chevelle my friend Mike M. had right after we graduated high school. It was a true SS 396 in red with black stripes, black interior and black vinyl top. It was a 4-speed and the engine was built up with Holley, Edelbrock and Hooker parts. The thing was bad fast too. We had to go WAY out to the country to look at it which helped as they only wanted $1000 for it. If it wasn't, it would have been snatched up long before we got there. This model is the closest to box stock as I have ever built. I did add some photo etch emblems. I am about 70% happy with the paint and 95% happy with all the details.
-
Here is my 70 SS Chevelle, removed the roof an put Cutlass Convertible on! Used Woopie kat decals
-
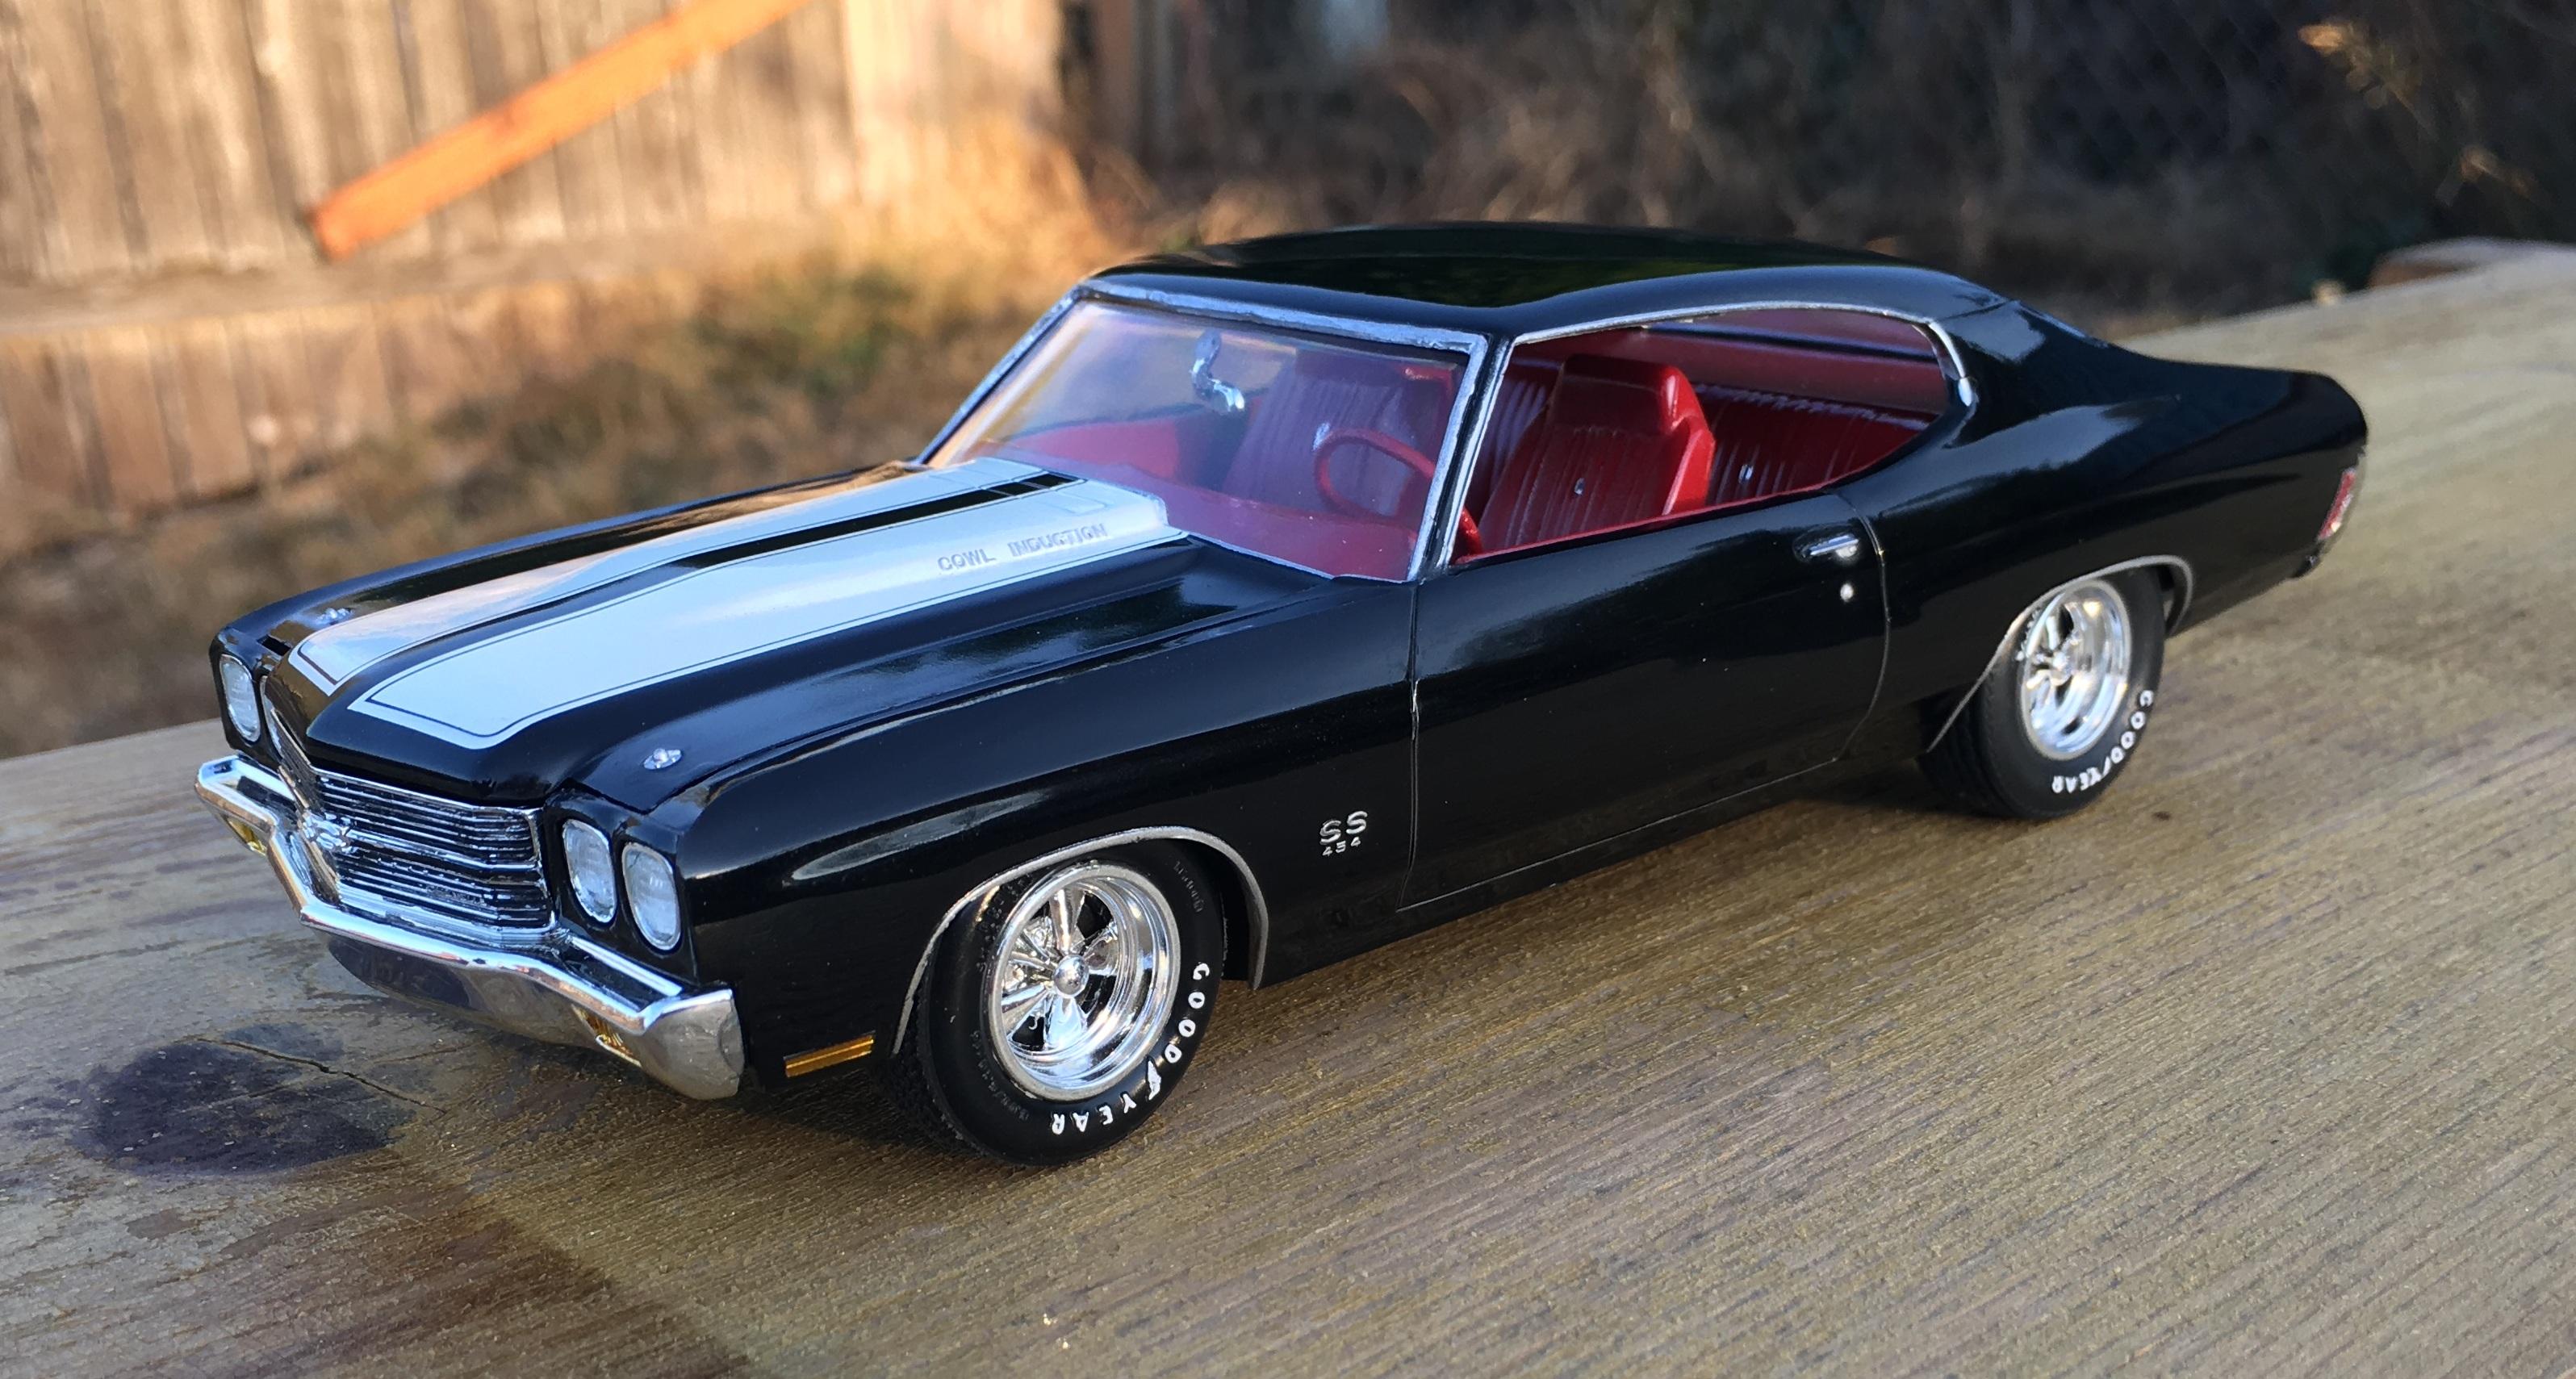
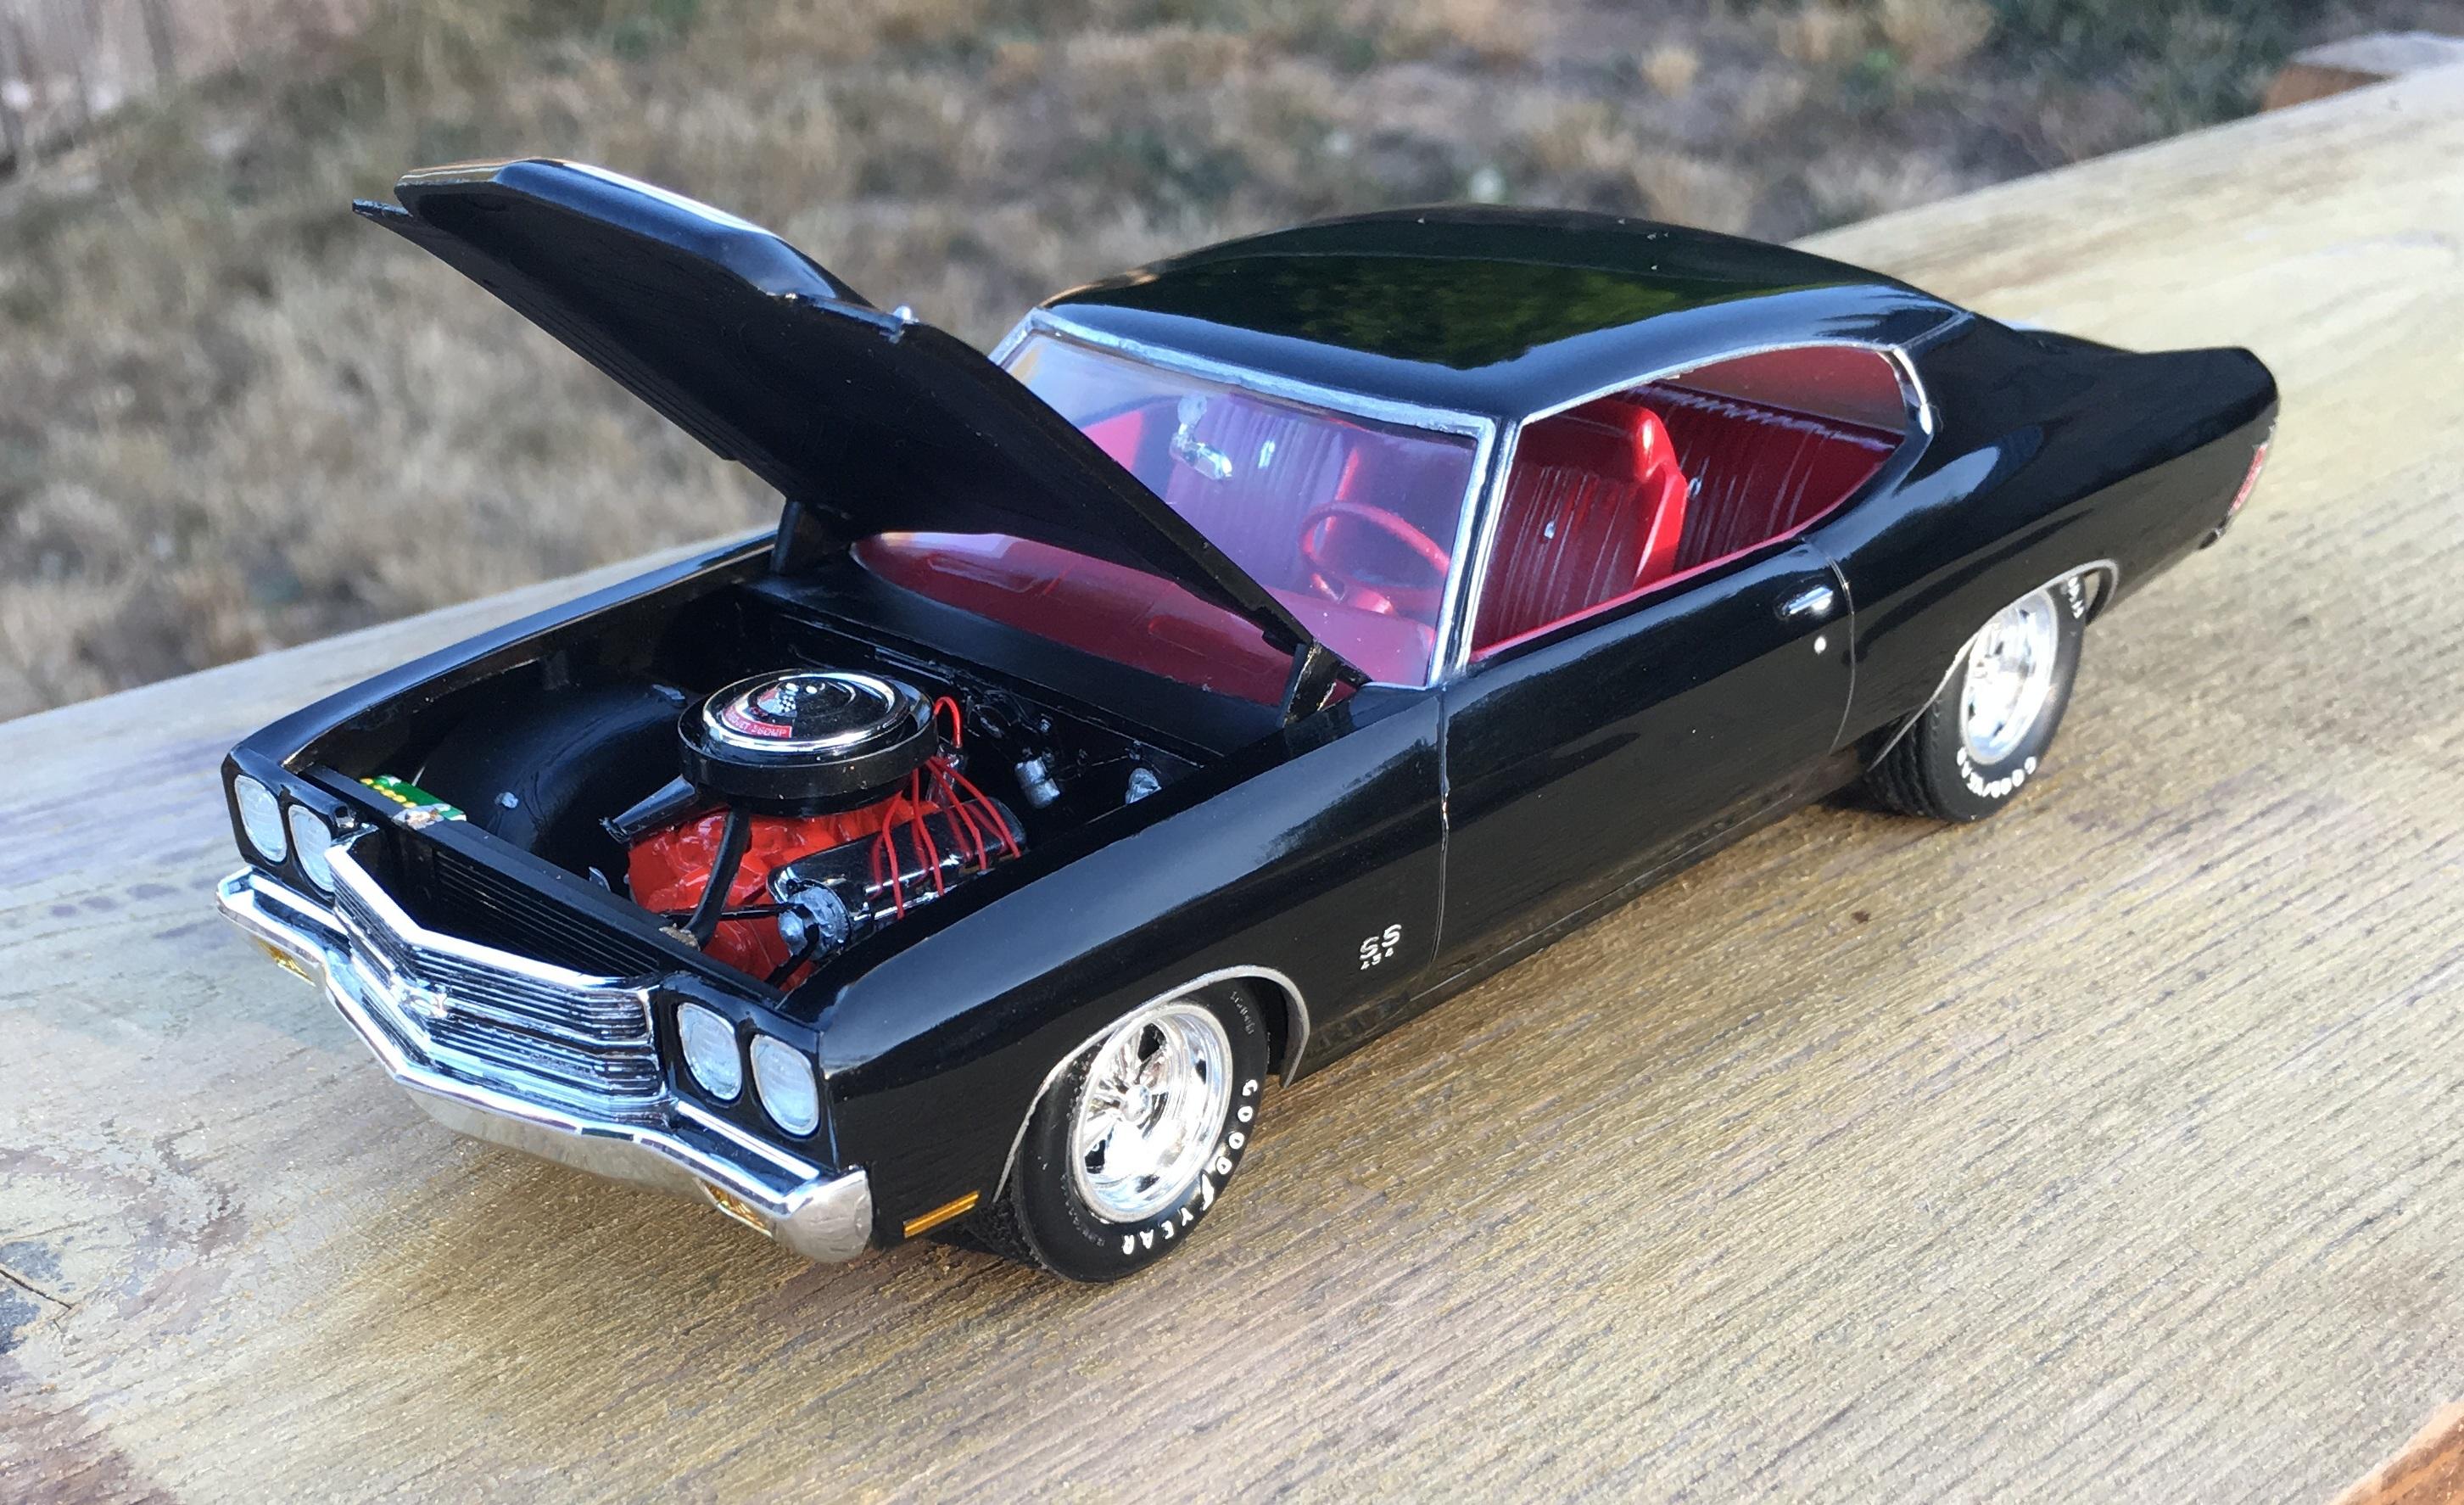
This is a ProShop pre-painted kit with mixing and matching of parts from my other Chevelles. Overall it turned out pretty well. I picked the Cragar S/S wheels because they look good on Chevys. I went with a red interior just to spice it up. The engine is a 454 Big Block with ignition wires added. Except for the side marker lights, no BMF was used. Just a touch of Molotow chrome here and there.
-
This is a restoration of an 1987 reissue 69 Chevelle SS. I have taken some liberties with it, insofar as mixing and matching parts with another reissued kit. The "Stinger" hood is from Drag City Casting http://www.dragcitycasting.com/ And has the scoop opened up via Dremel tool. The 'Yenko' and 'SYC' decals are leftovers from a Keith Marks decal set. The pinstripe is from the newer kit. The rear tires were widened and the Cragar SS rims are from the parts box. The cross ram dual quad manifold is from the parts box as well. The distributor and wires are scratch built. The paint came out so-so mostly because it was a really old can (20+ years) and had lost some of its pressure. Other details include BMF and Sharpie marker treatments. This car reminds me of the first stick shift car I ever drove. A genuine red with black SS stripes SS396 4-speed.
-
-
Did I post this one before? I forget. My memory ain't too good these days, but then it never was. Love me some Chevelles. I think this was a Monogram kit. Been so long ago, I don't remember. I graduated high school that year. Dang, I'm getting old!
-
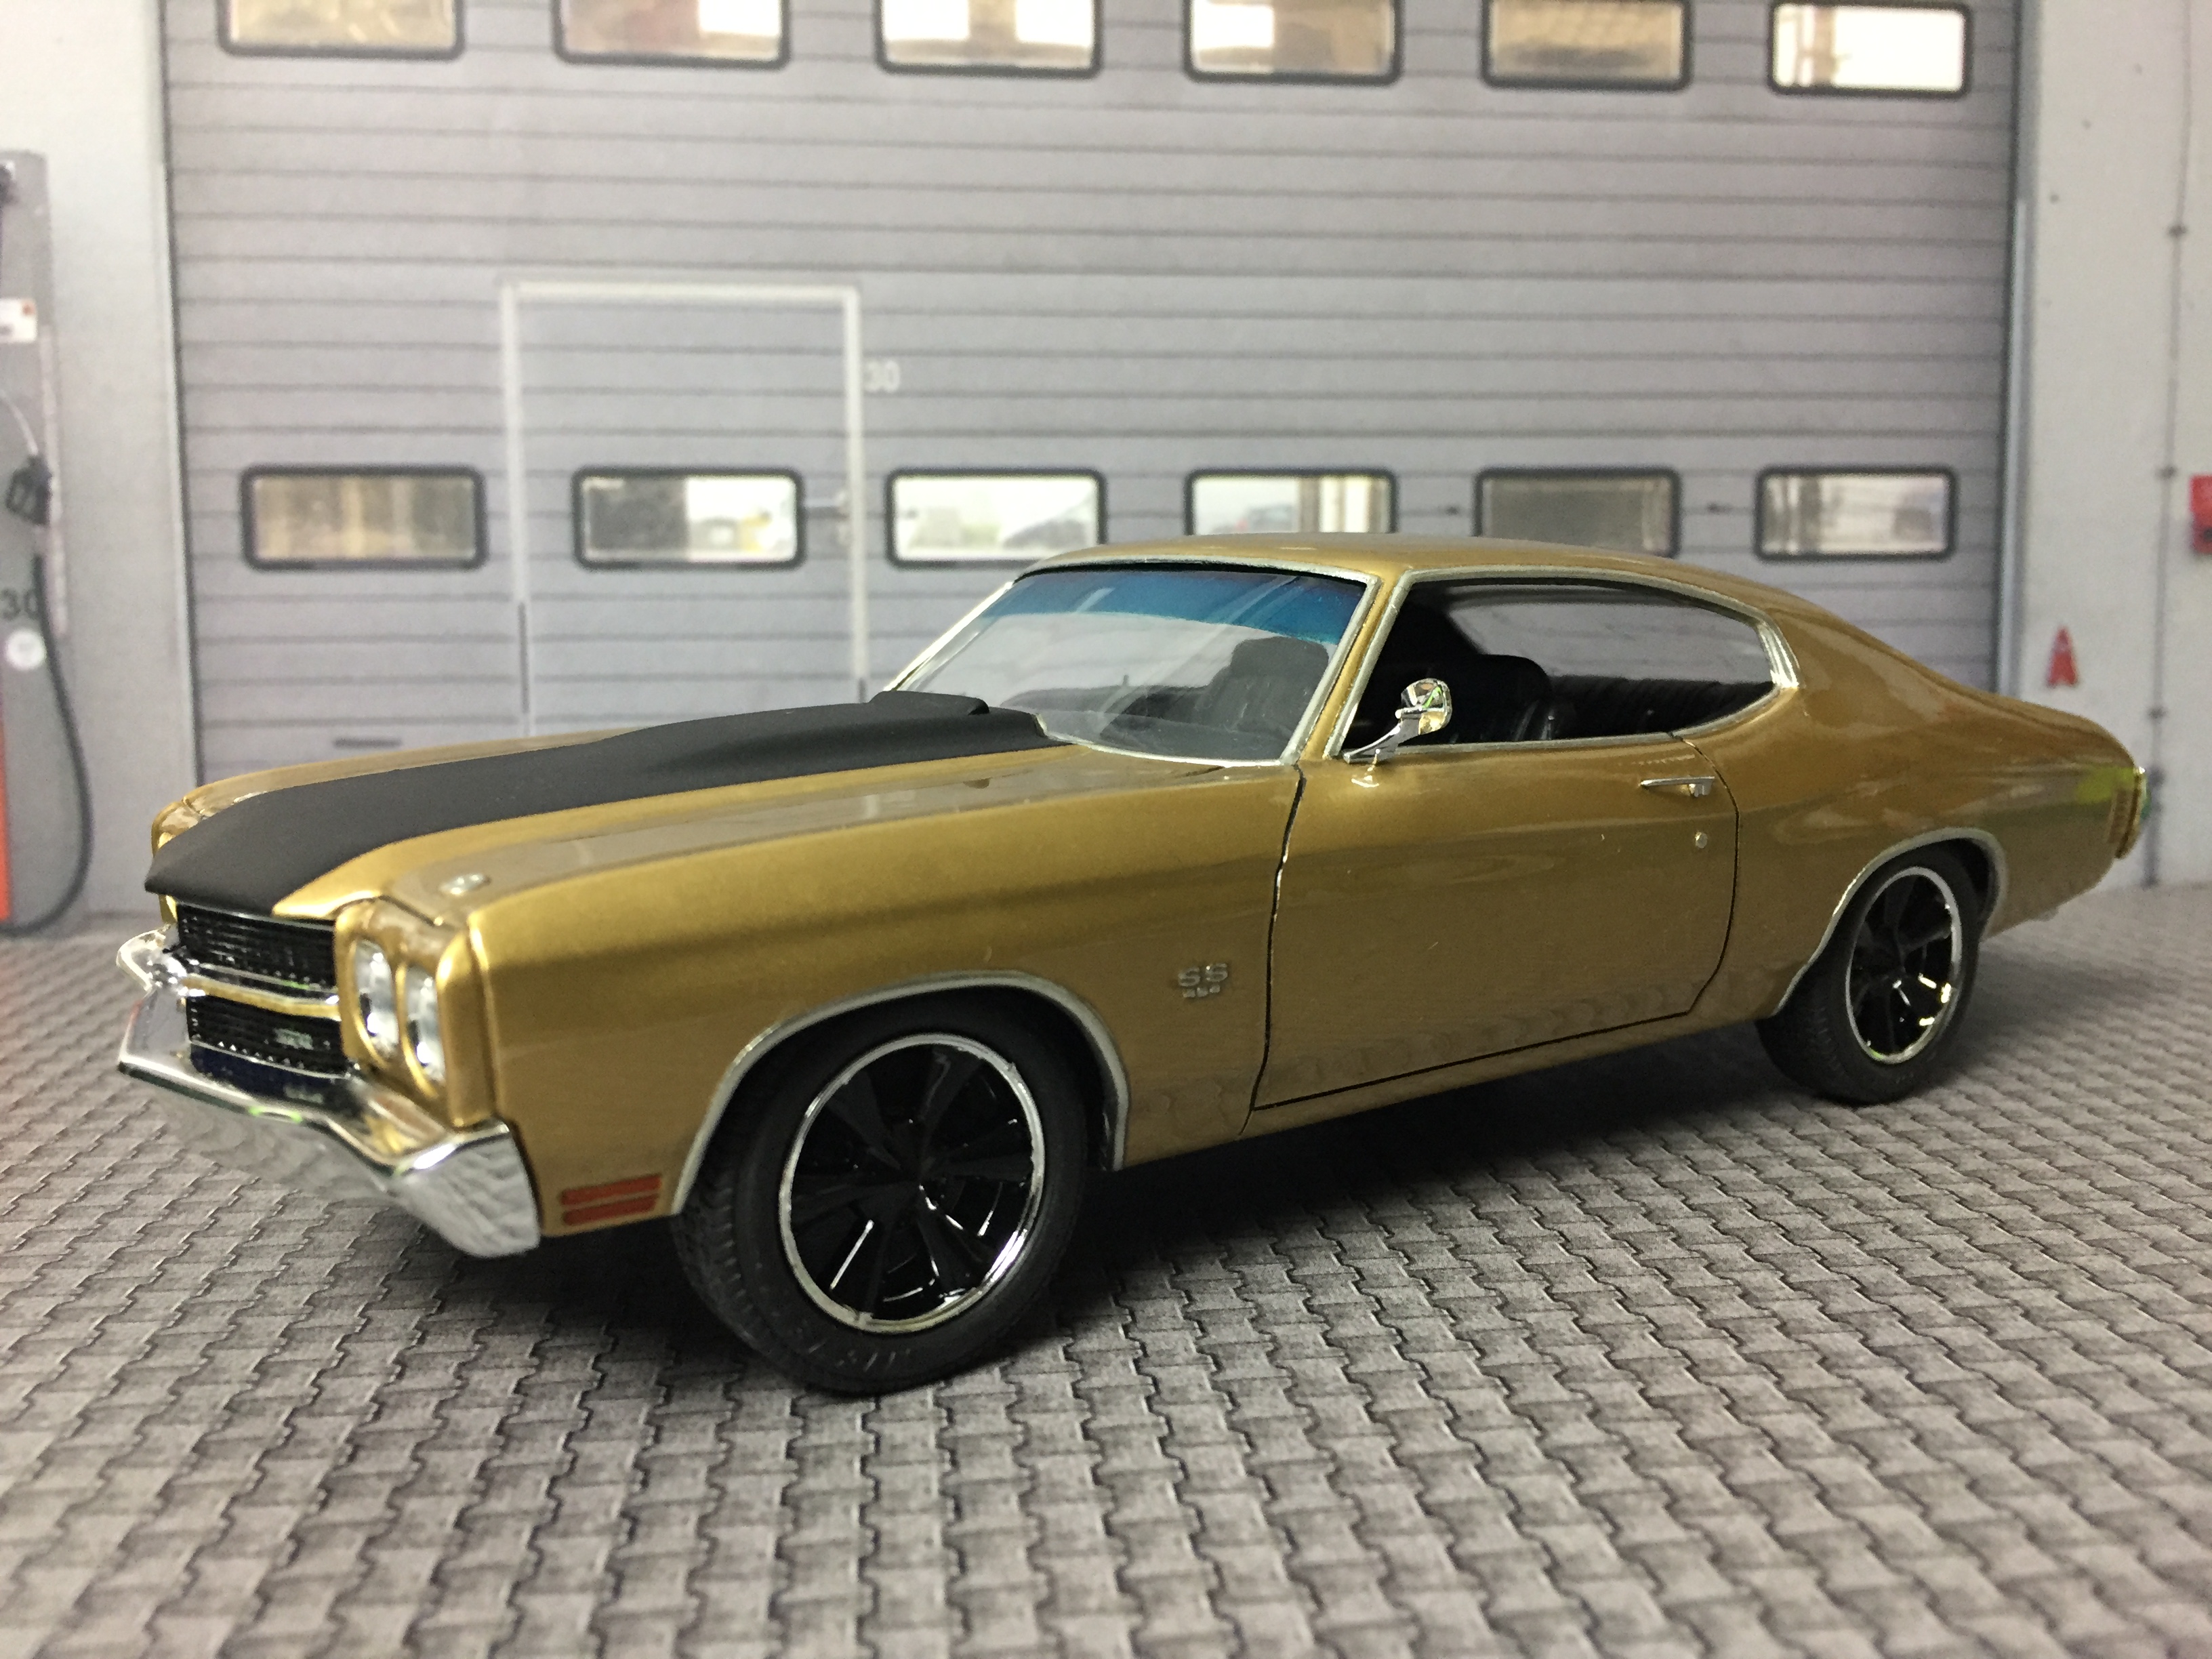
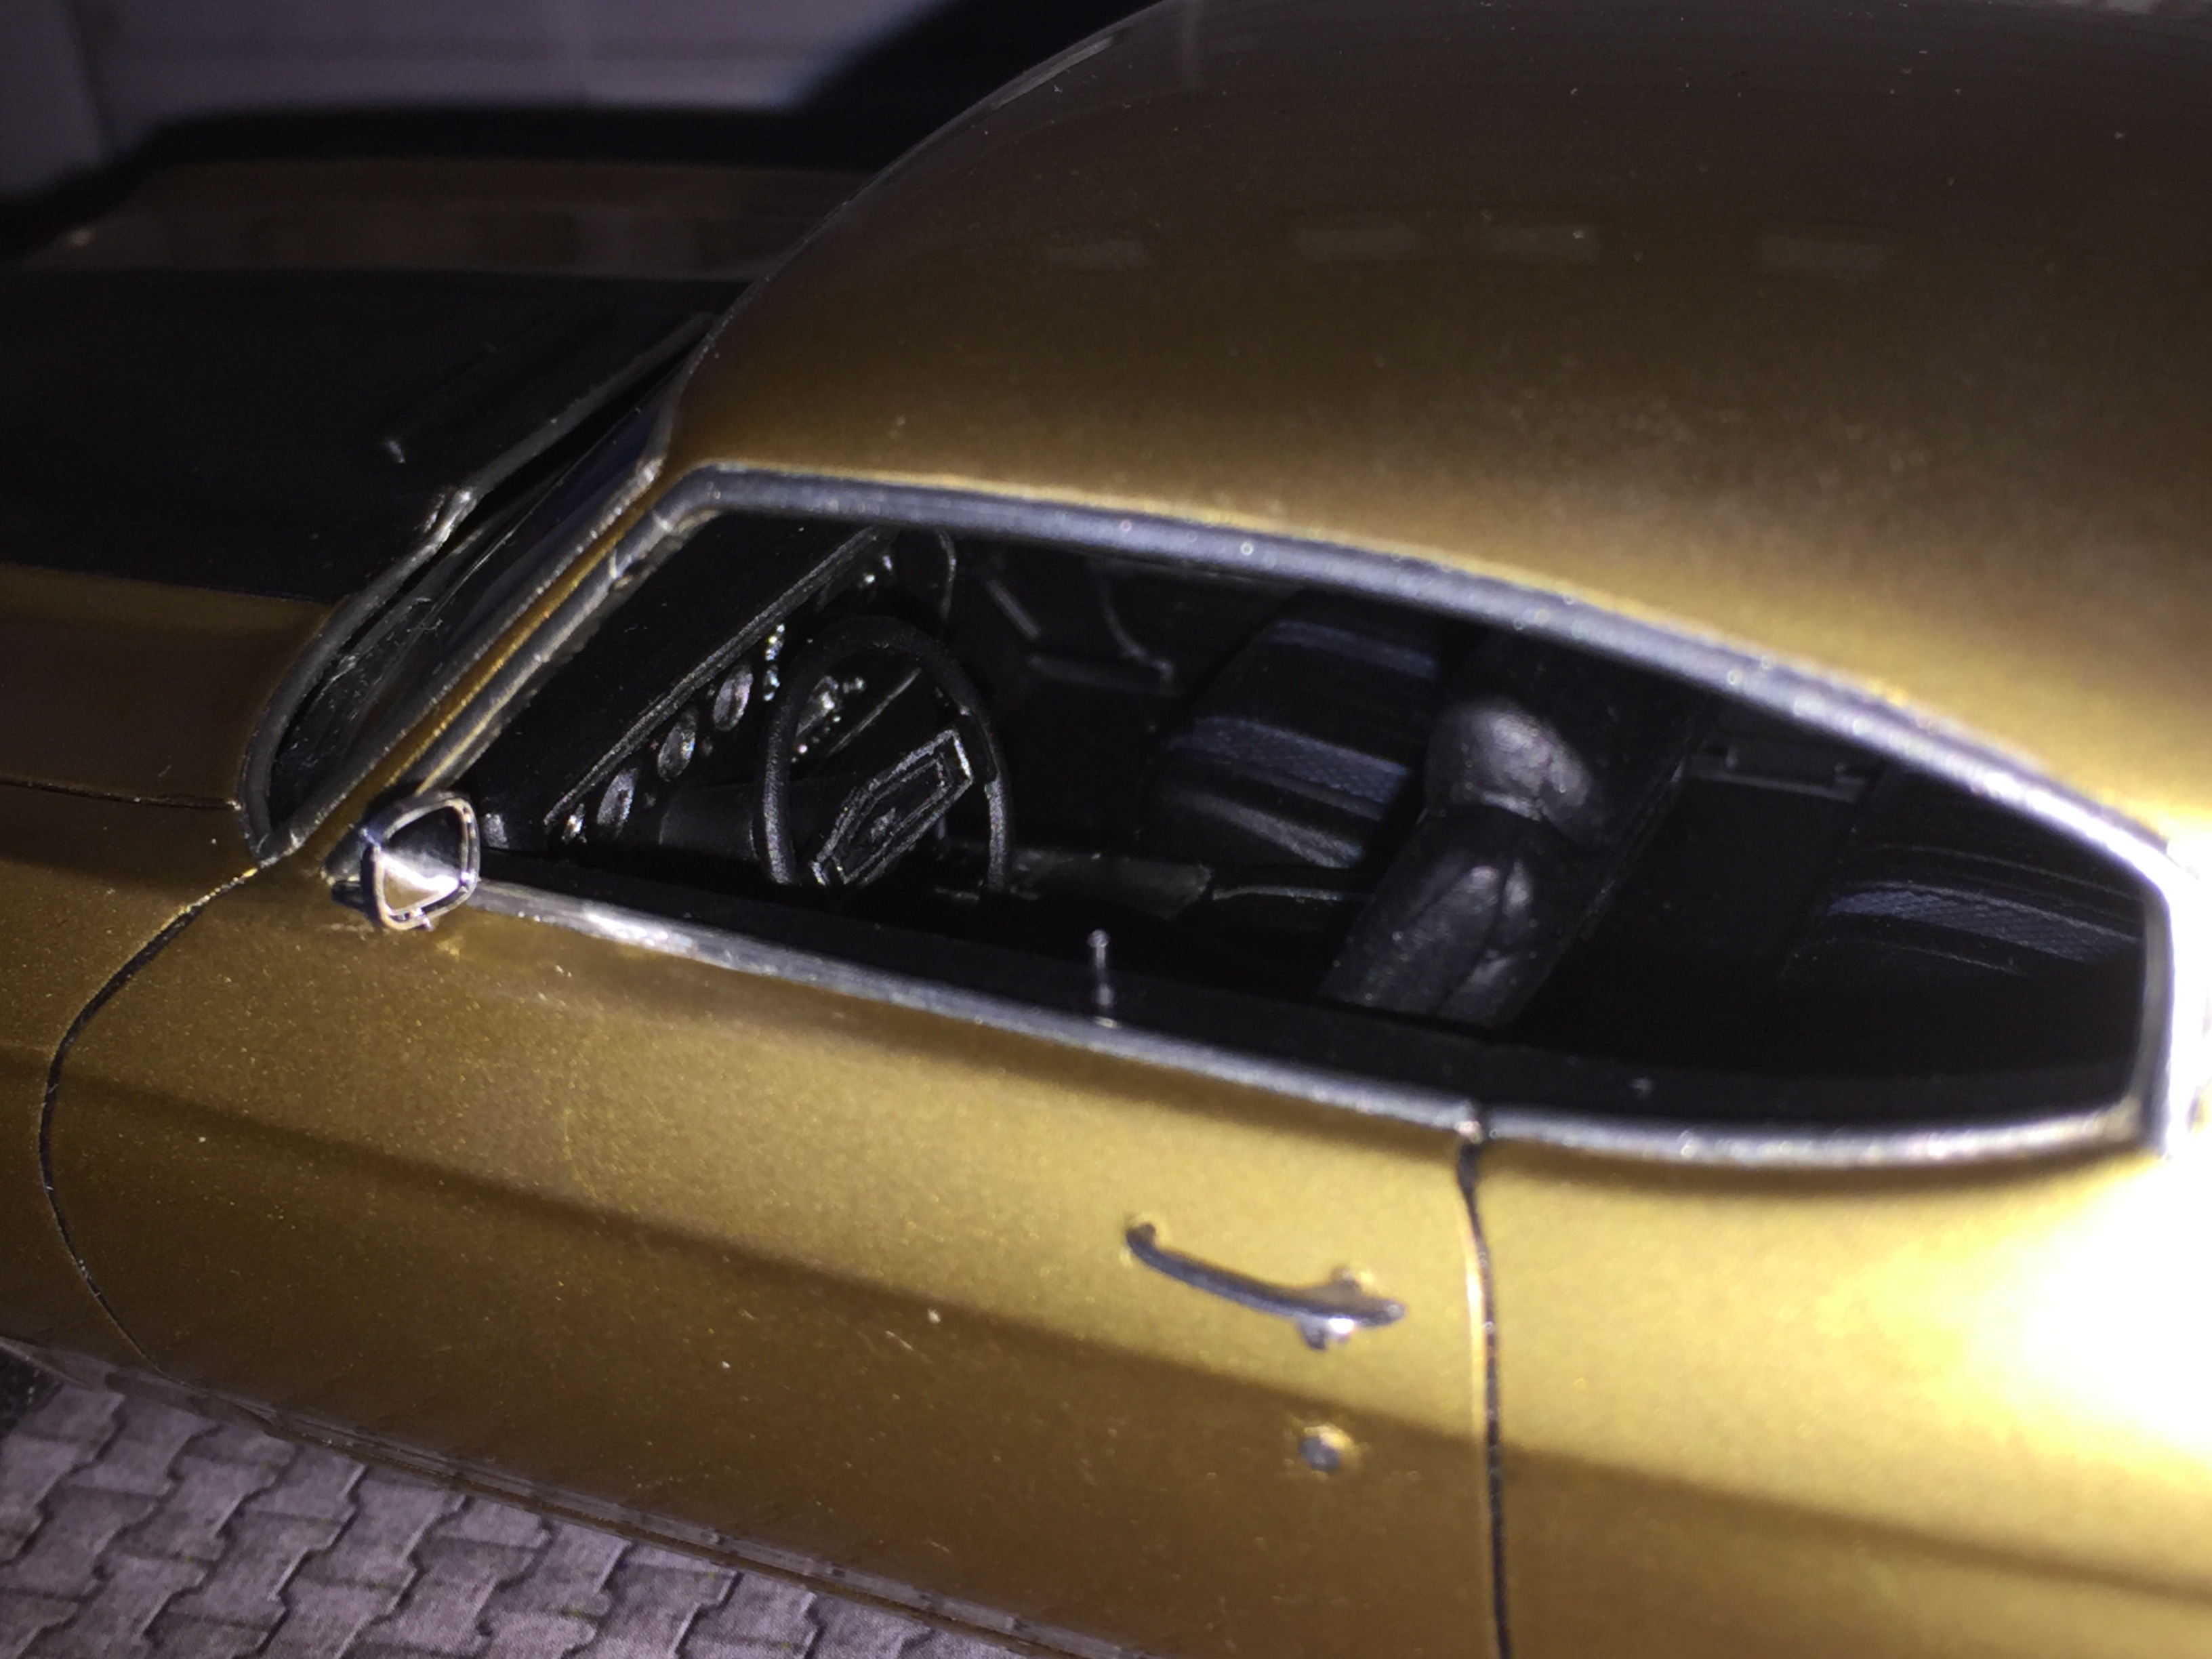
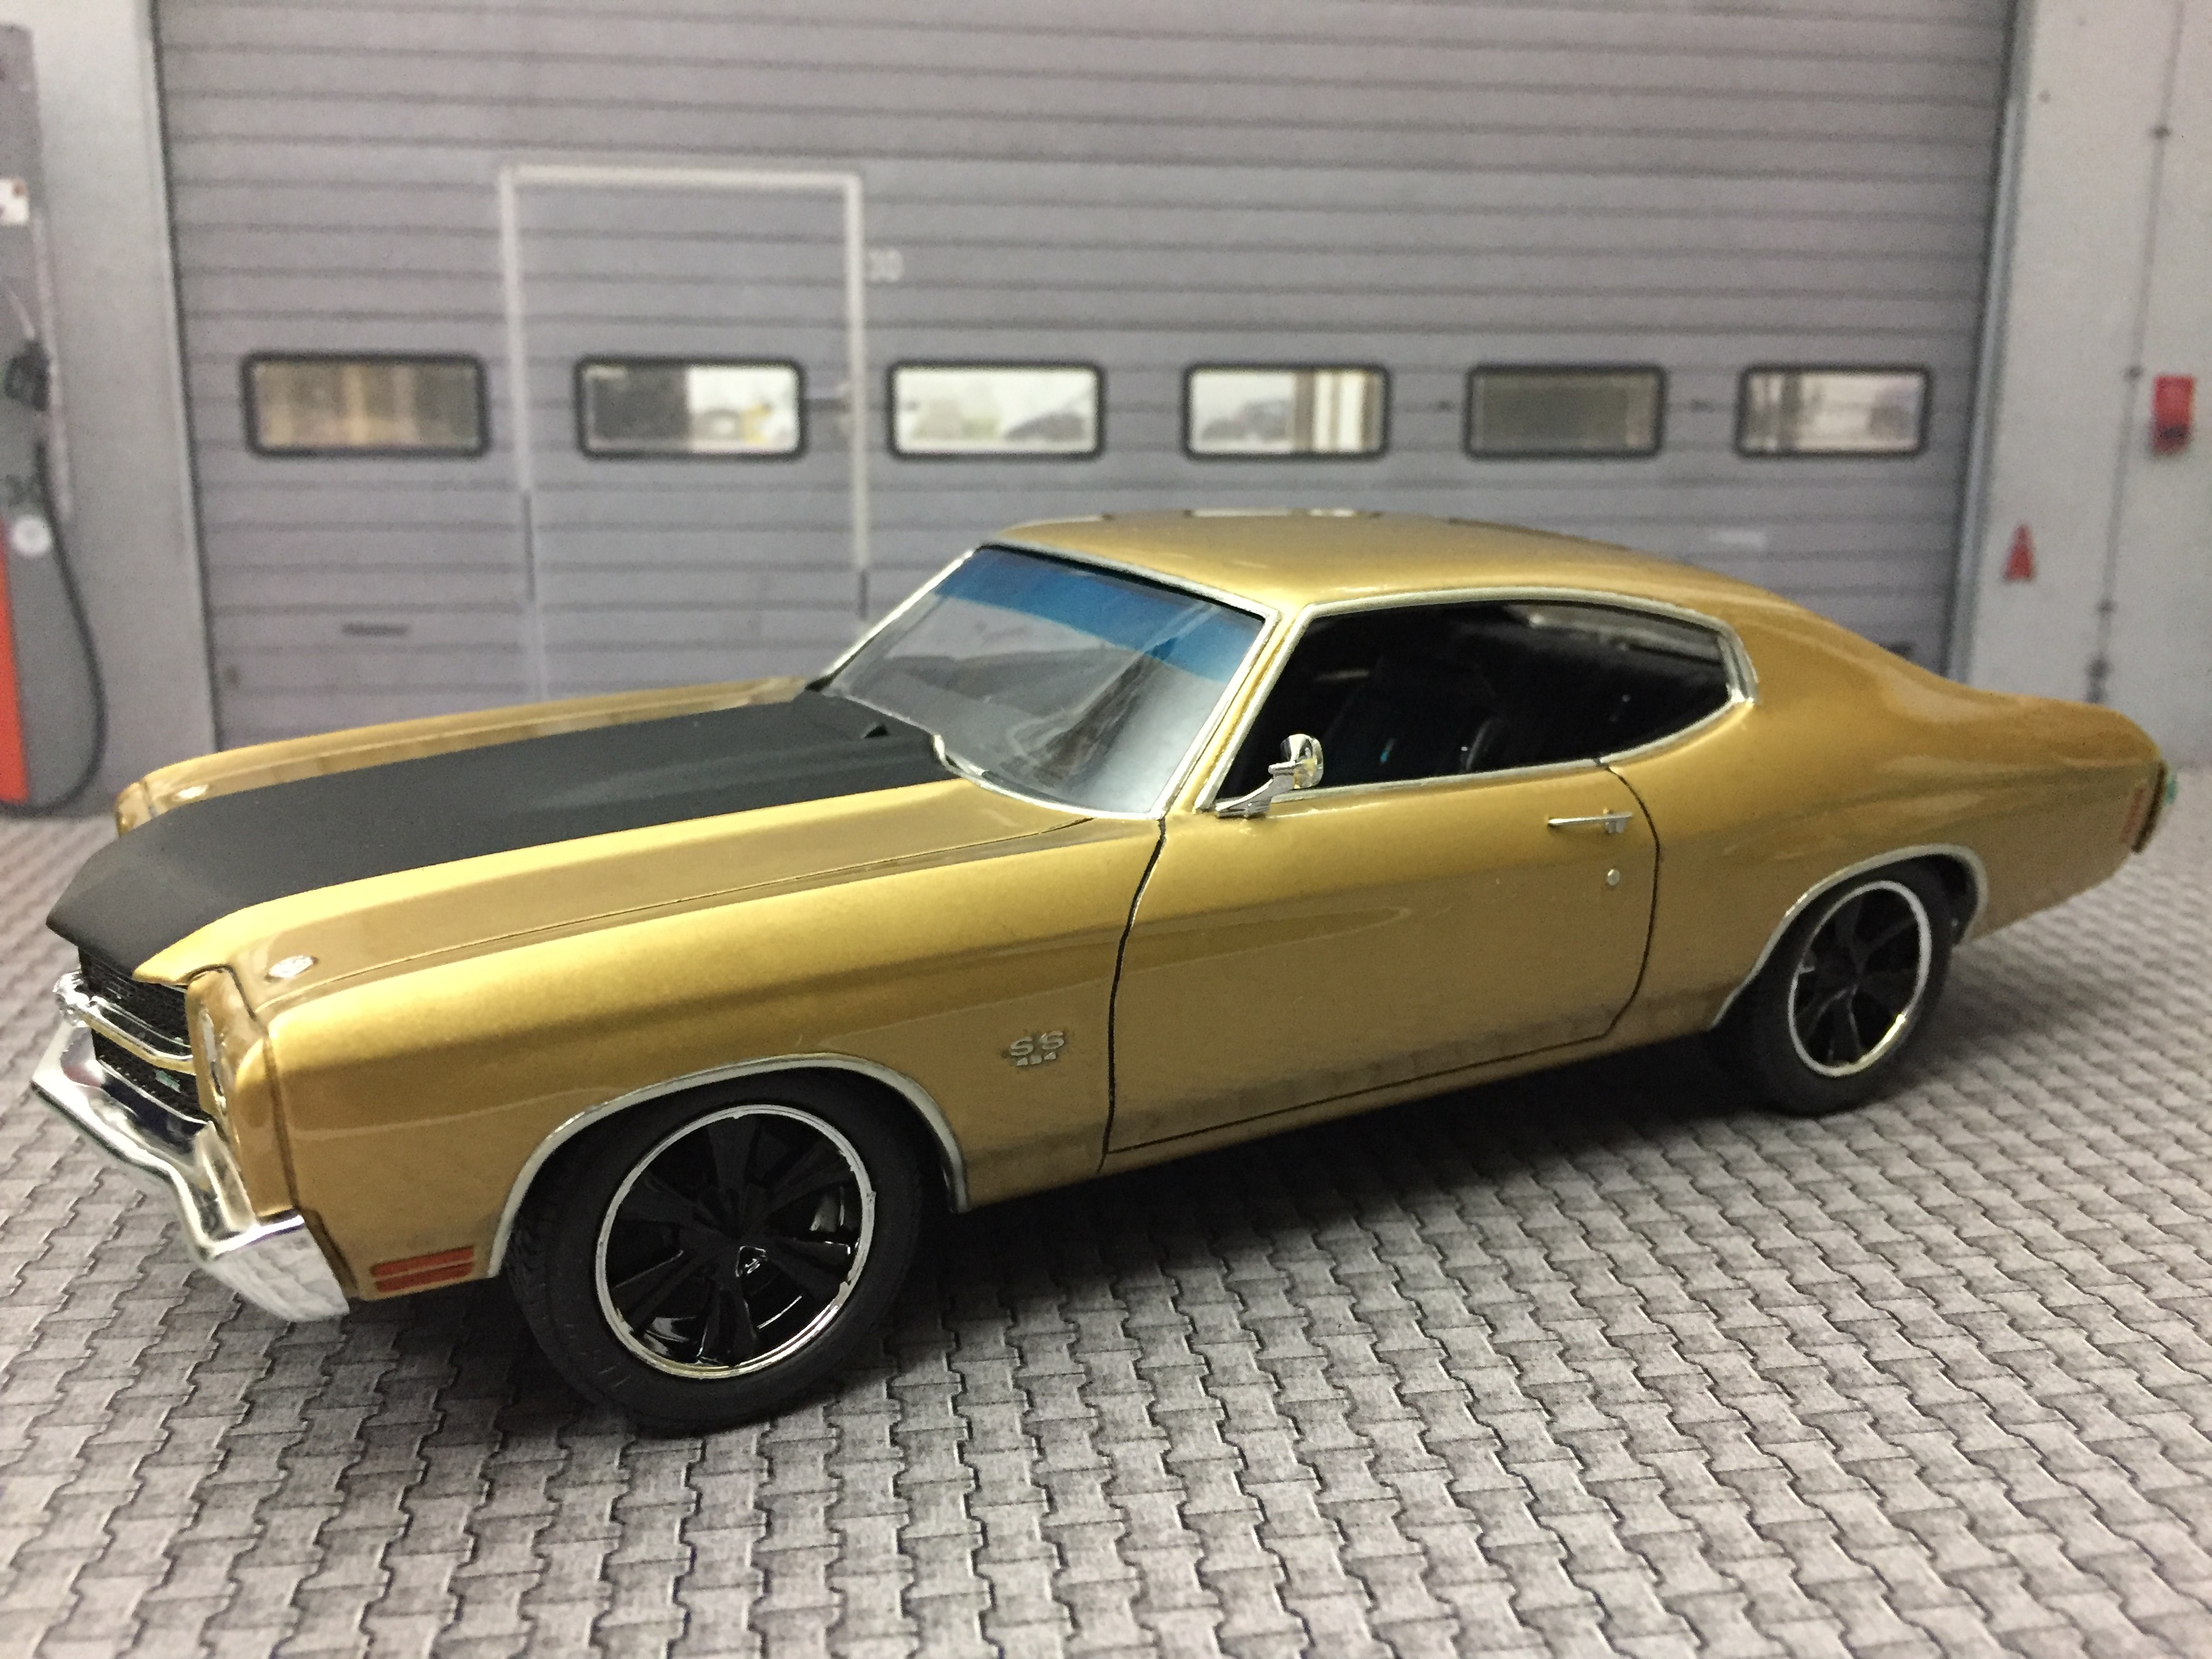
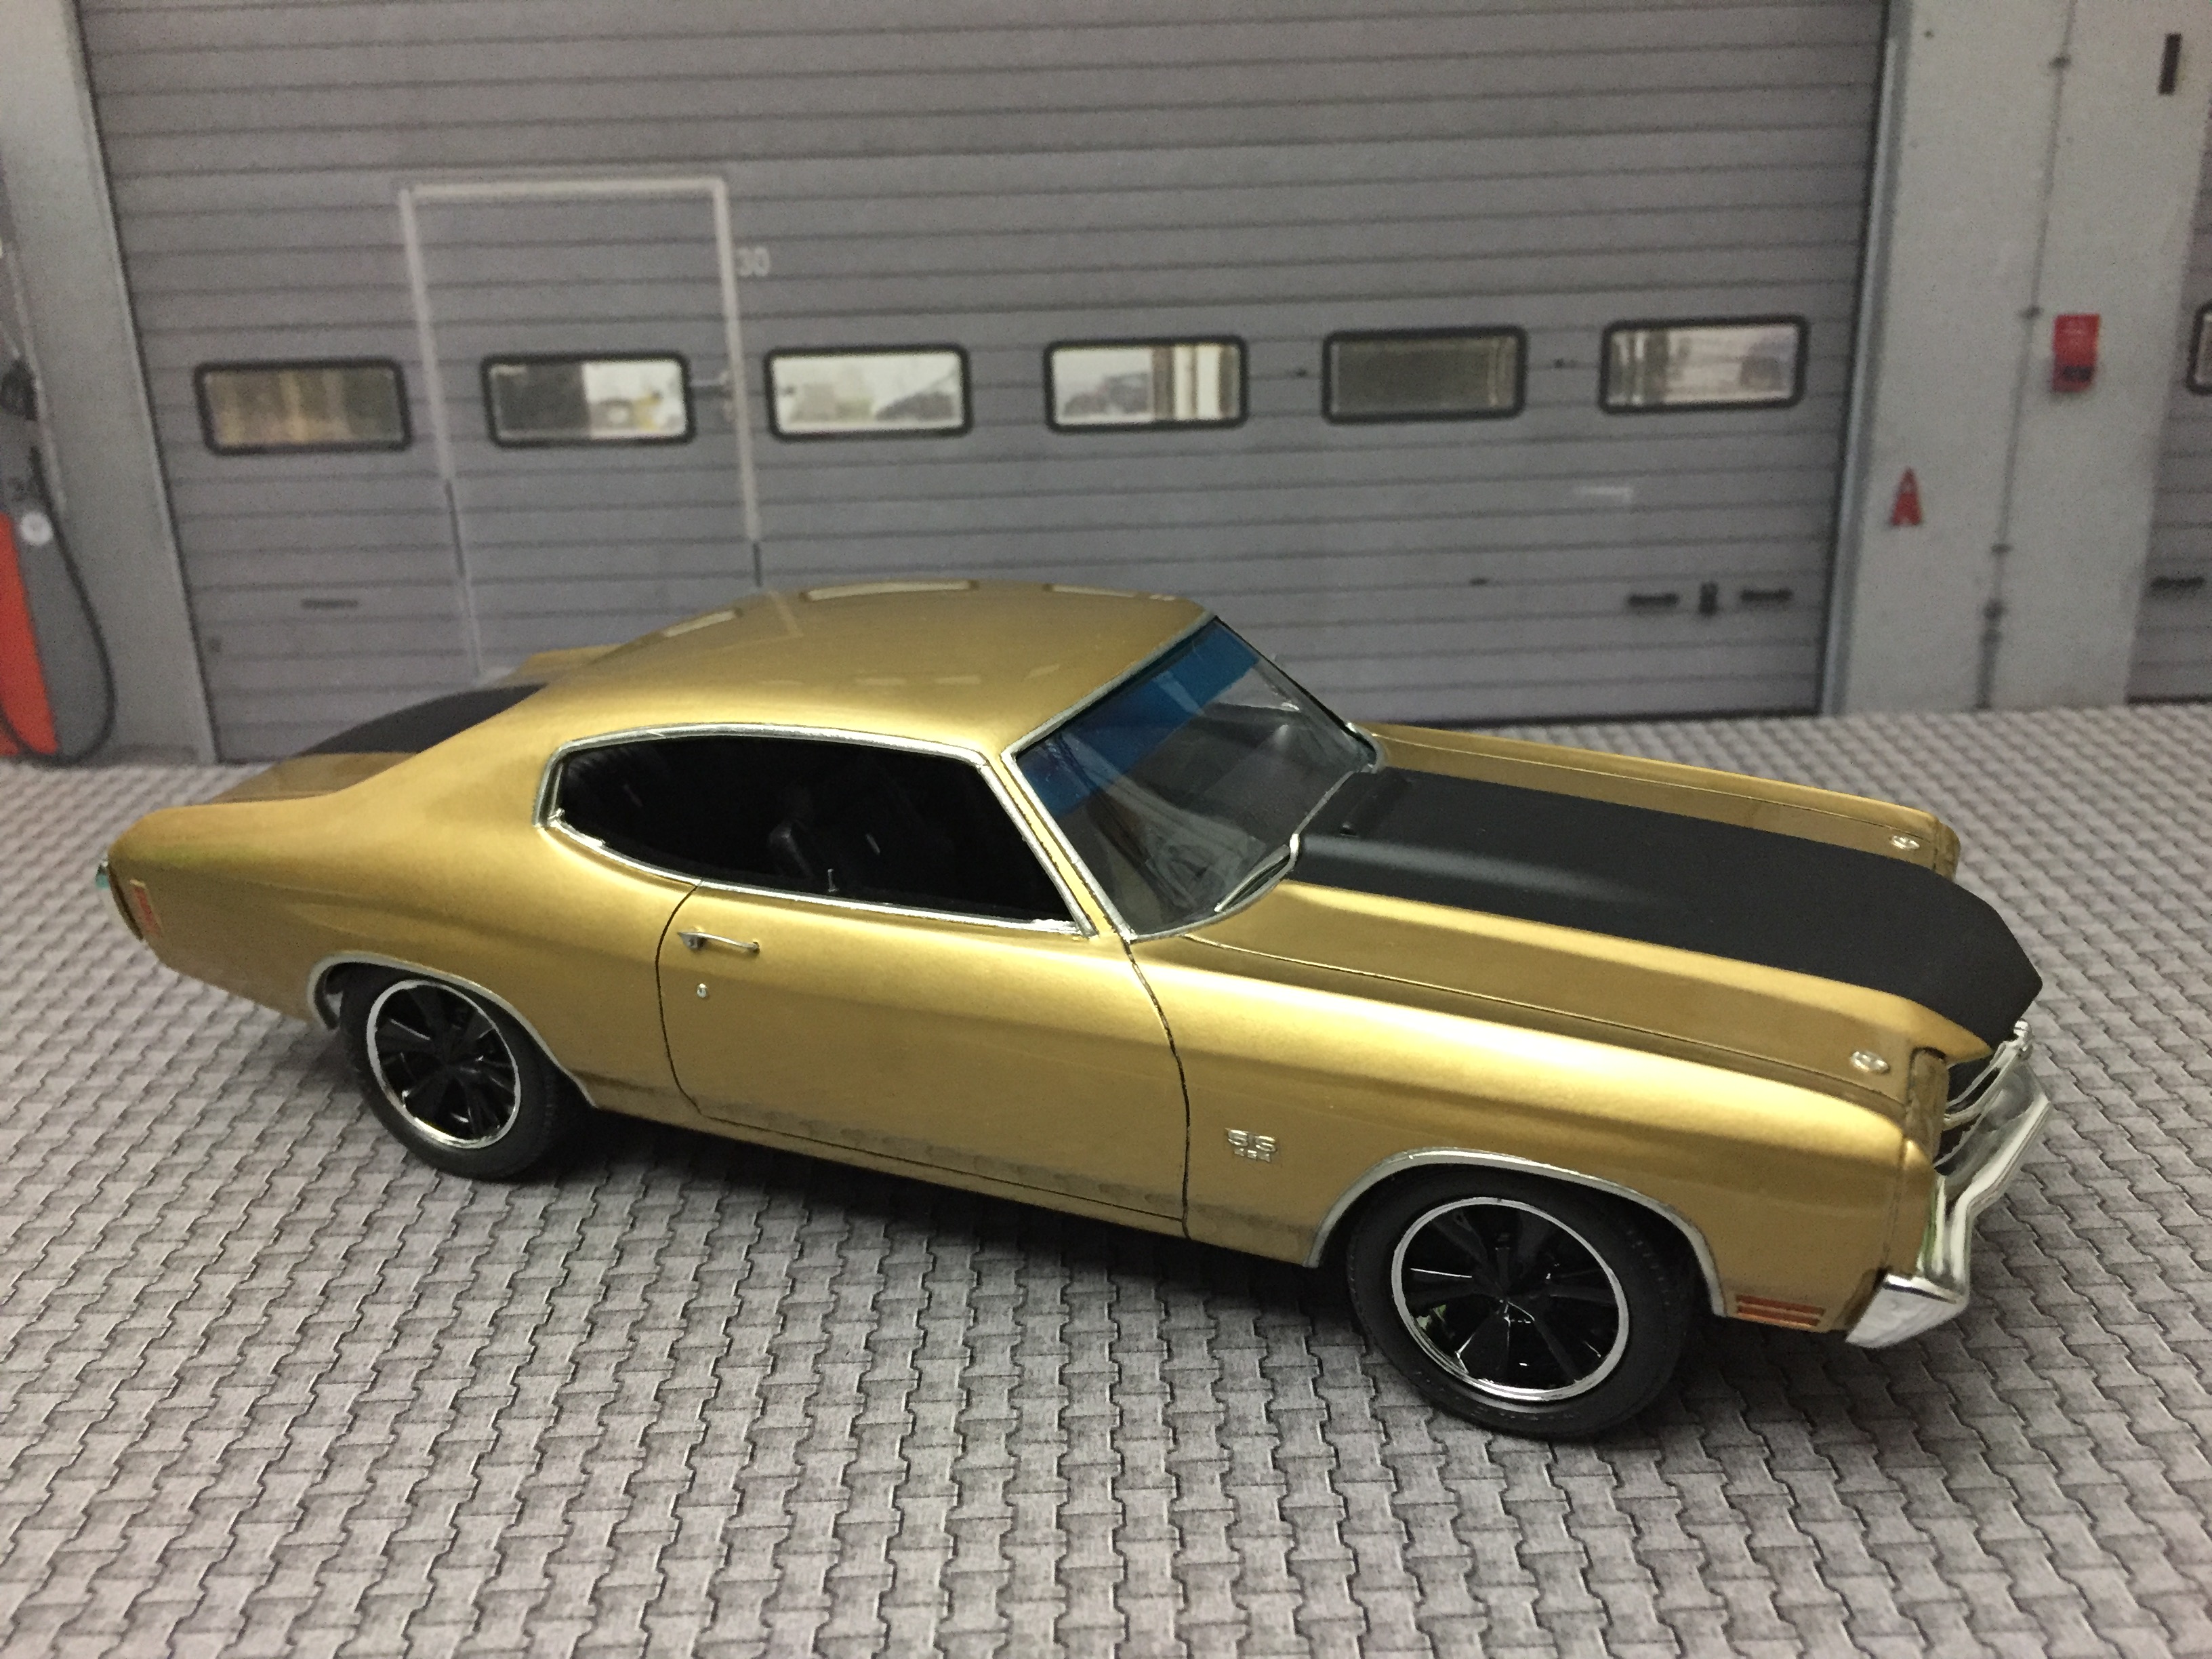
So I finished up my AMT 1970 Chevrolet Chevelle SS LS6 yesterday evening, and I think it came out ok. I will admit that I was inspired by Chris' (hpiguy) build of "Melba Toast". Did mine come out as nice as Chris'? No, not even close, but I am please with the results. I used the Model car Garage 1970 Chevelle P/E set for some interior details (window cranks, SS454 door badges, & rear view mirror). The driver's door mirror is not included in the kit, and it came from Tom's (tbill) parts box. Thanks, Tom. The 1970 Rhode Island license plate came from 15q.net. I also added a P/E radiator cap (just for fun), P/E "COWL INDUCTION" logos, and P/E fender badges.
-
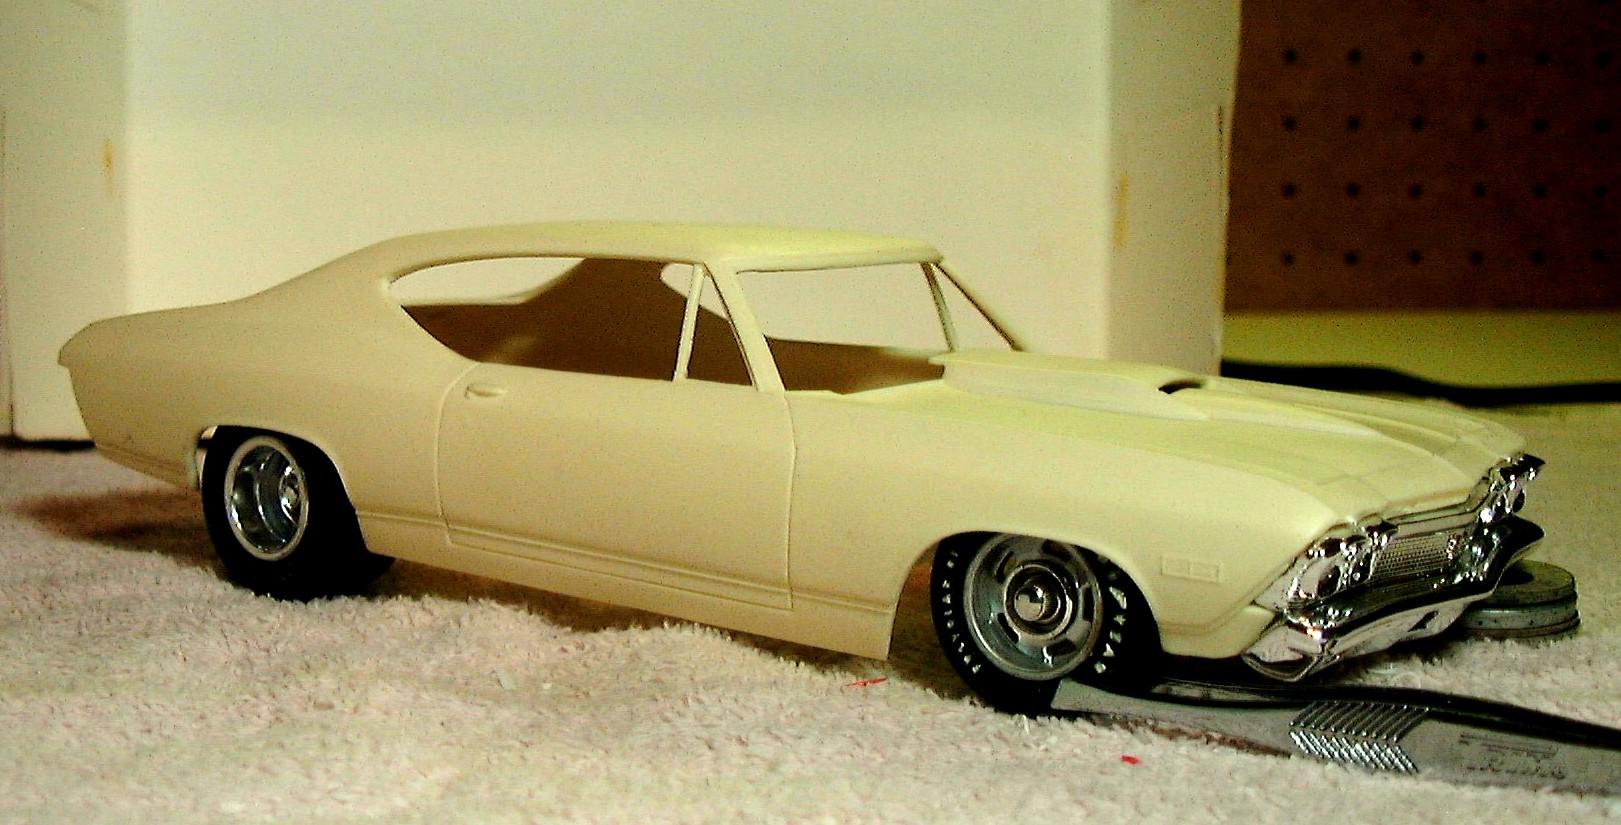
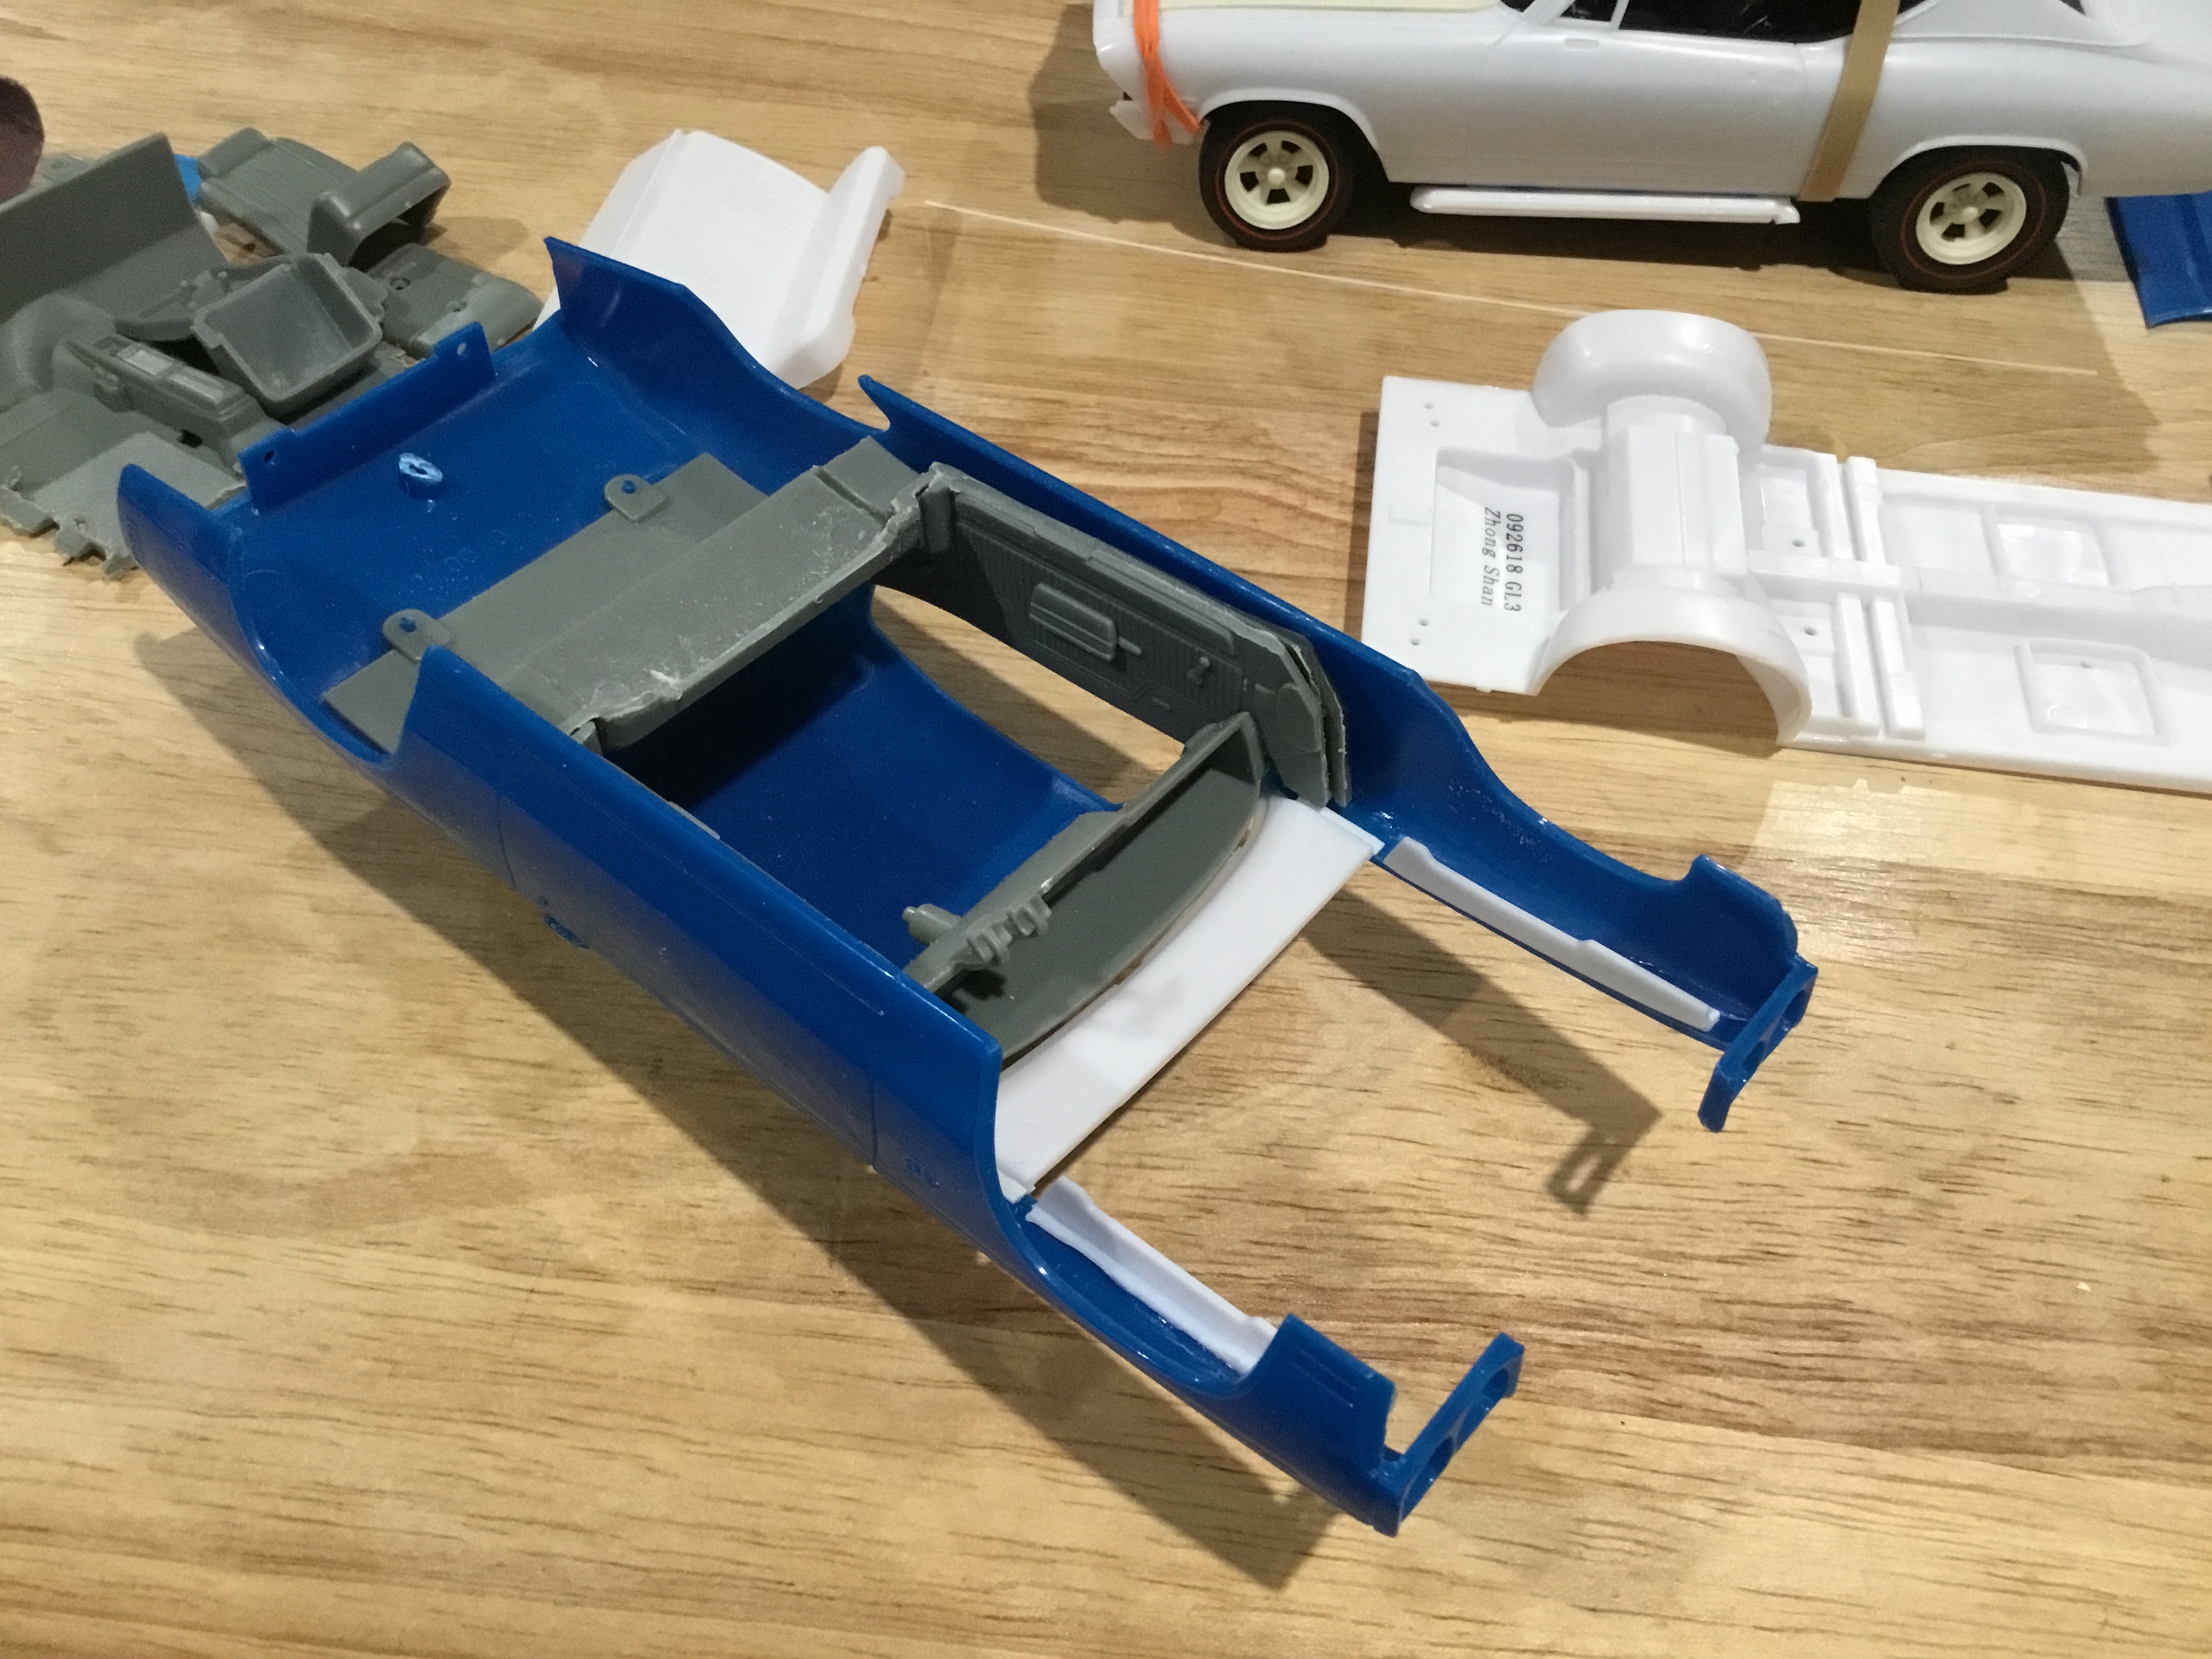
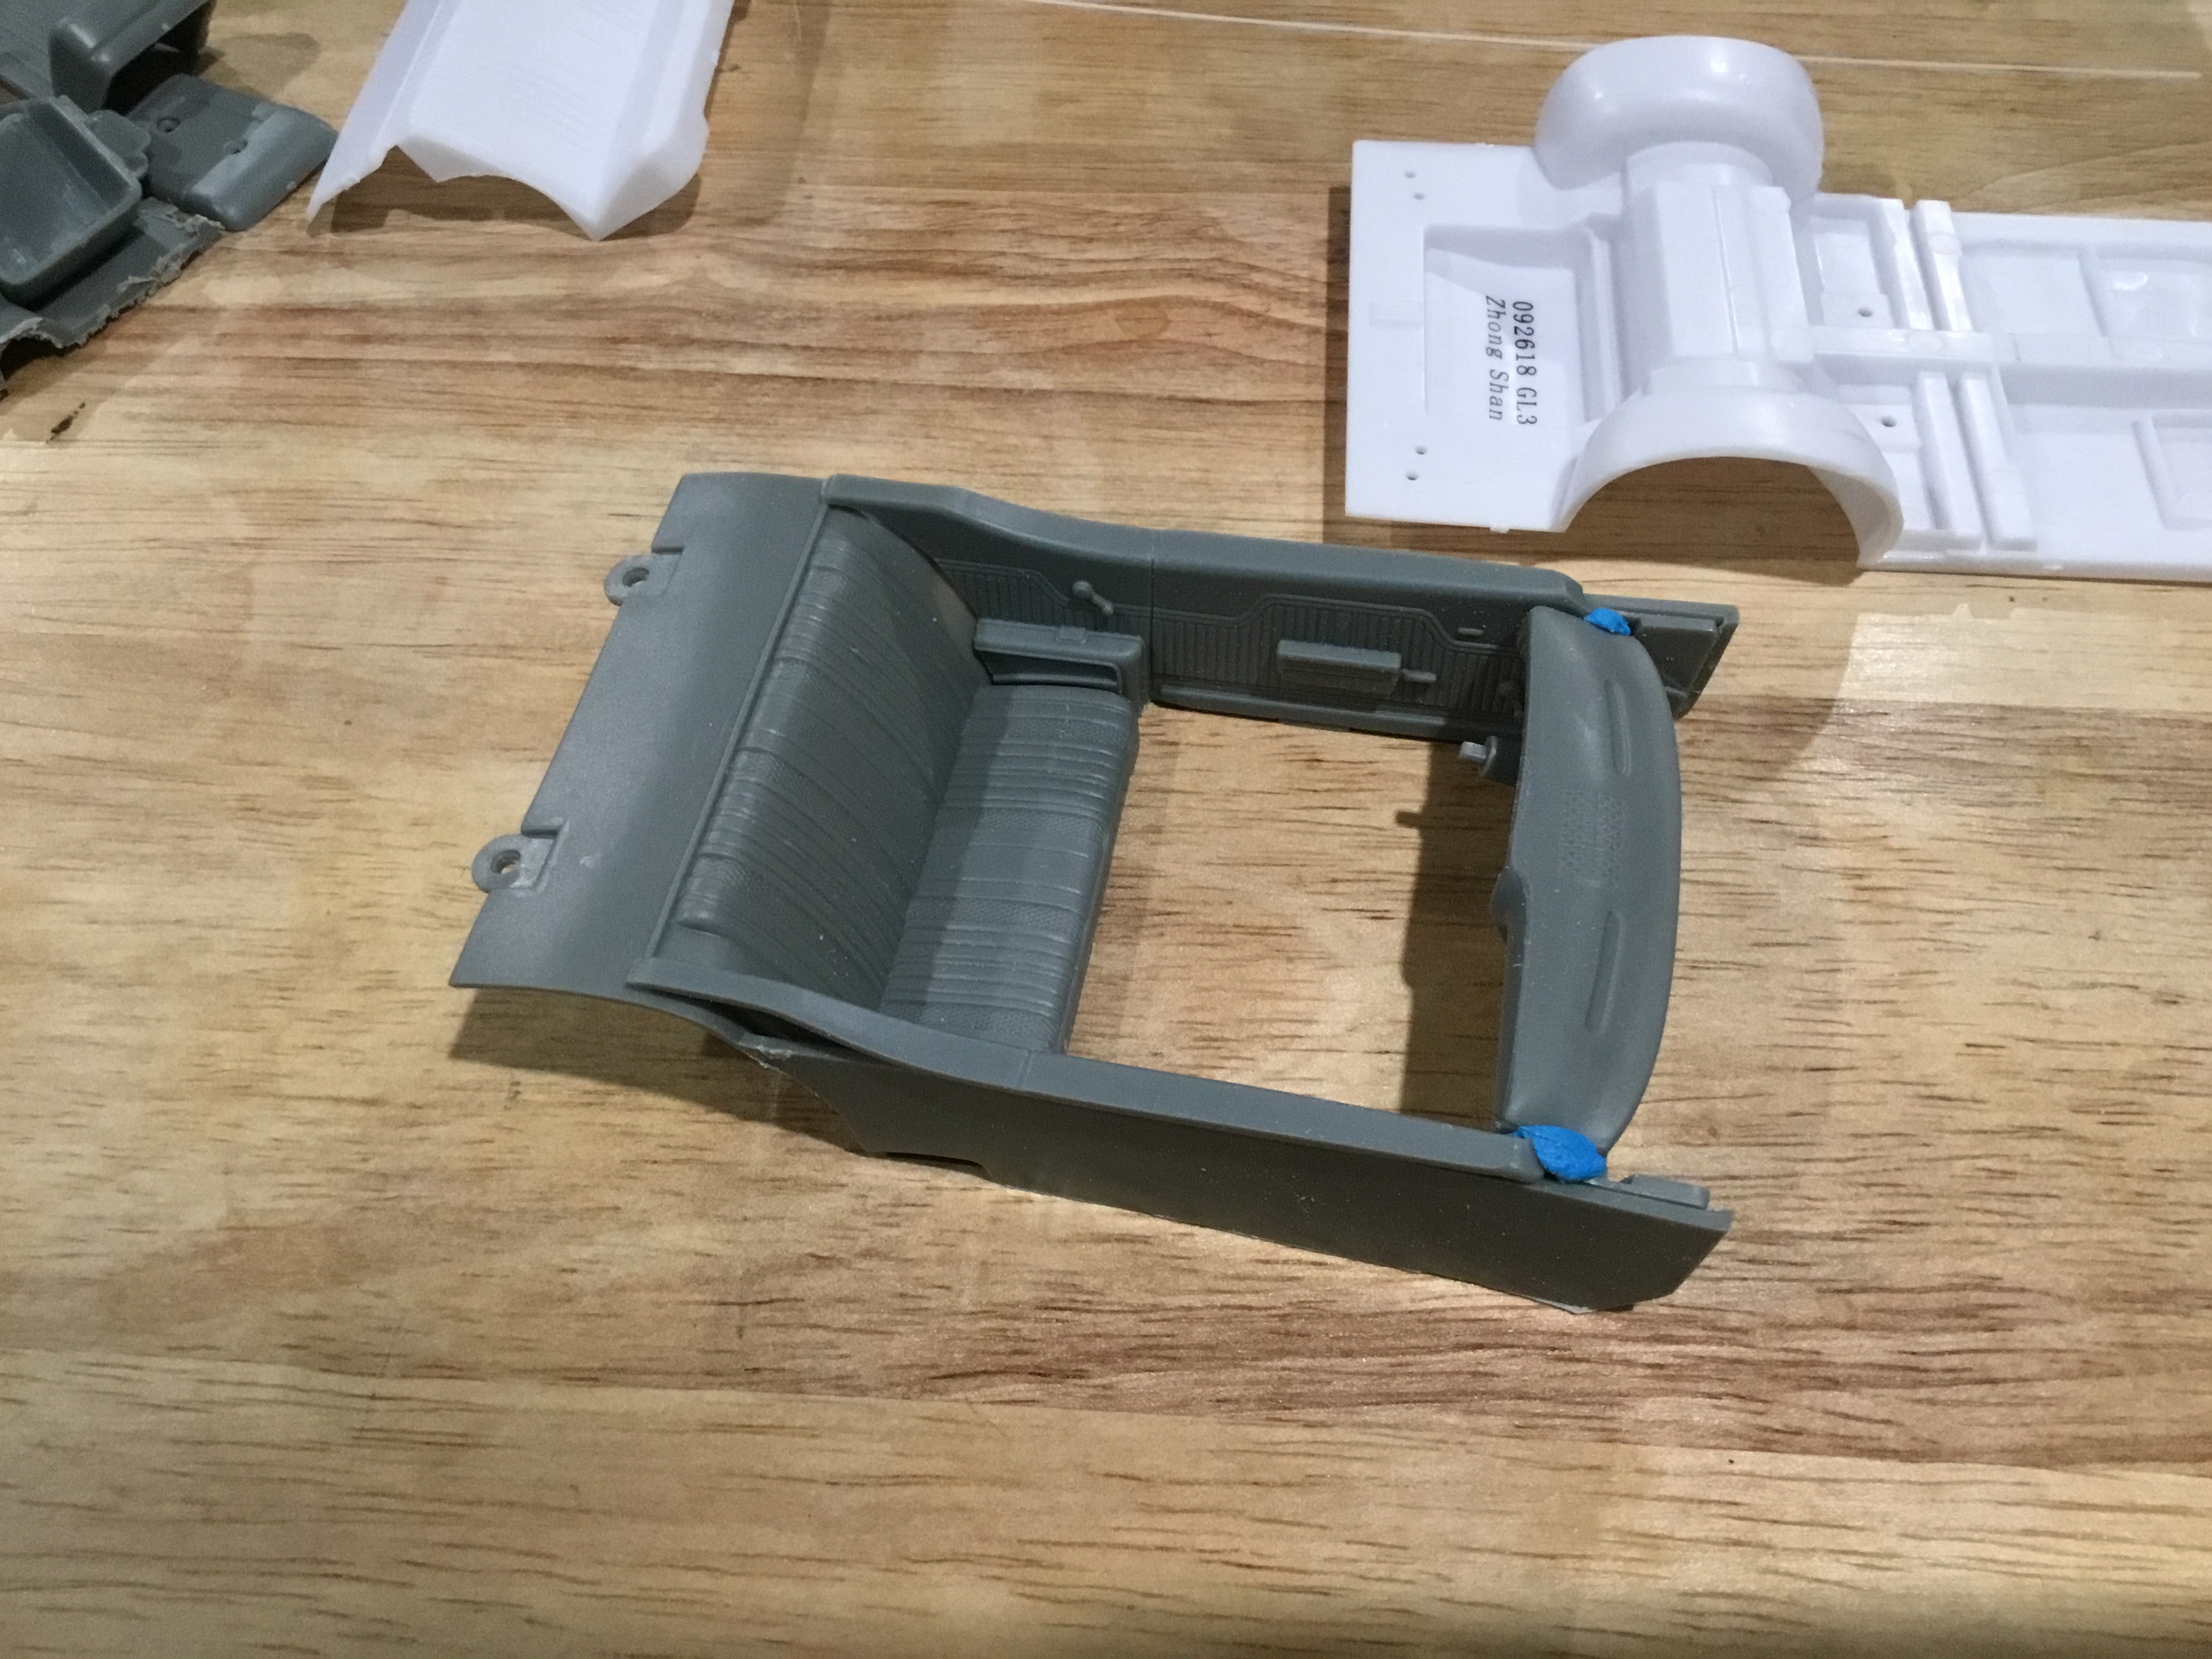
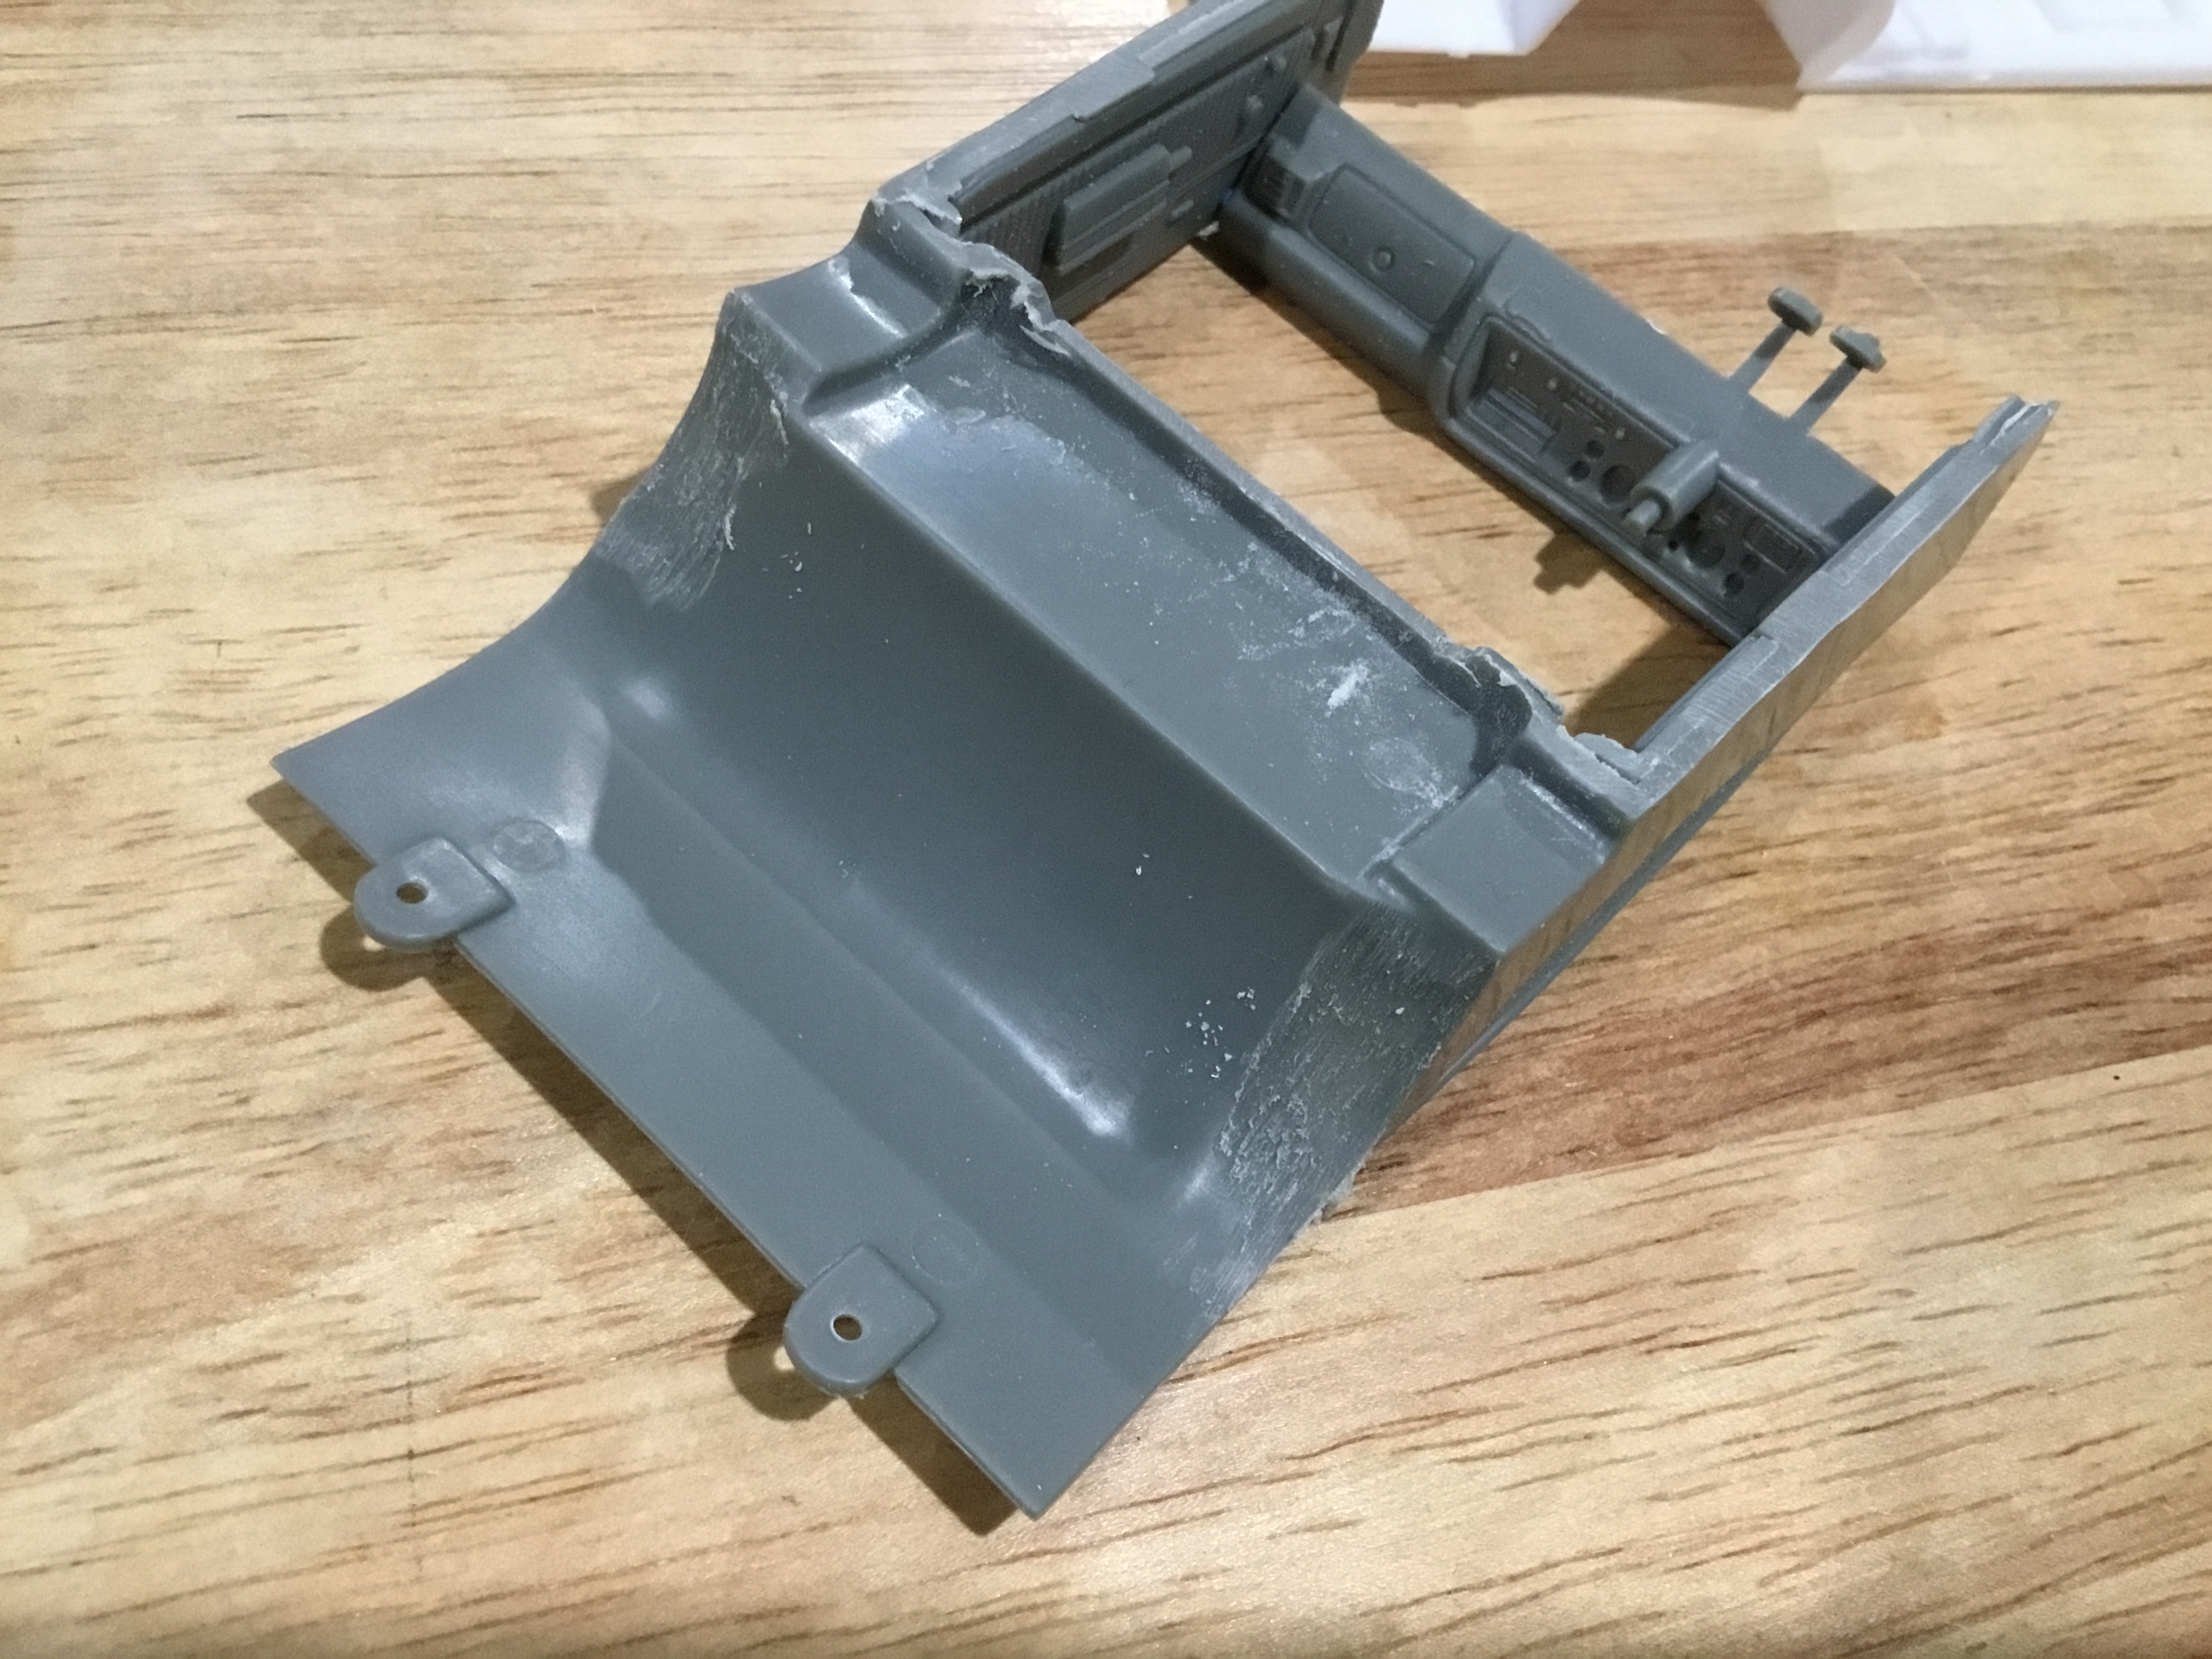
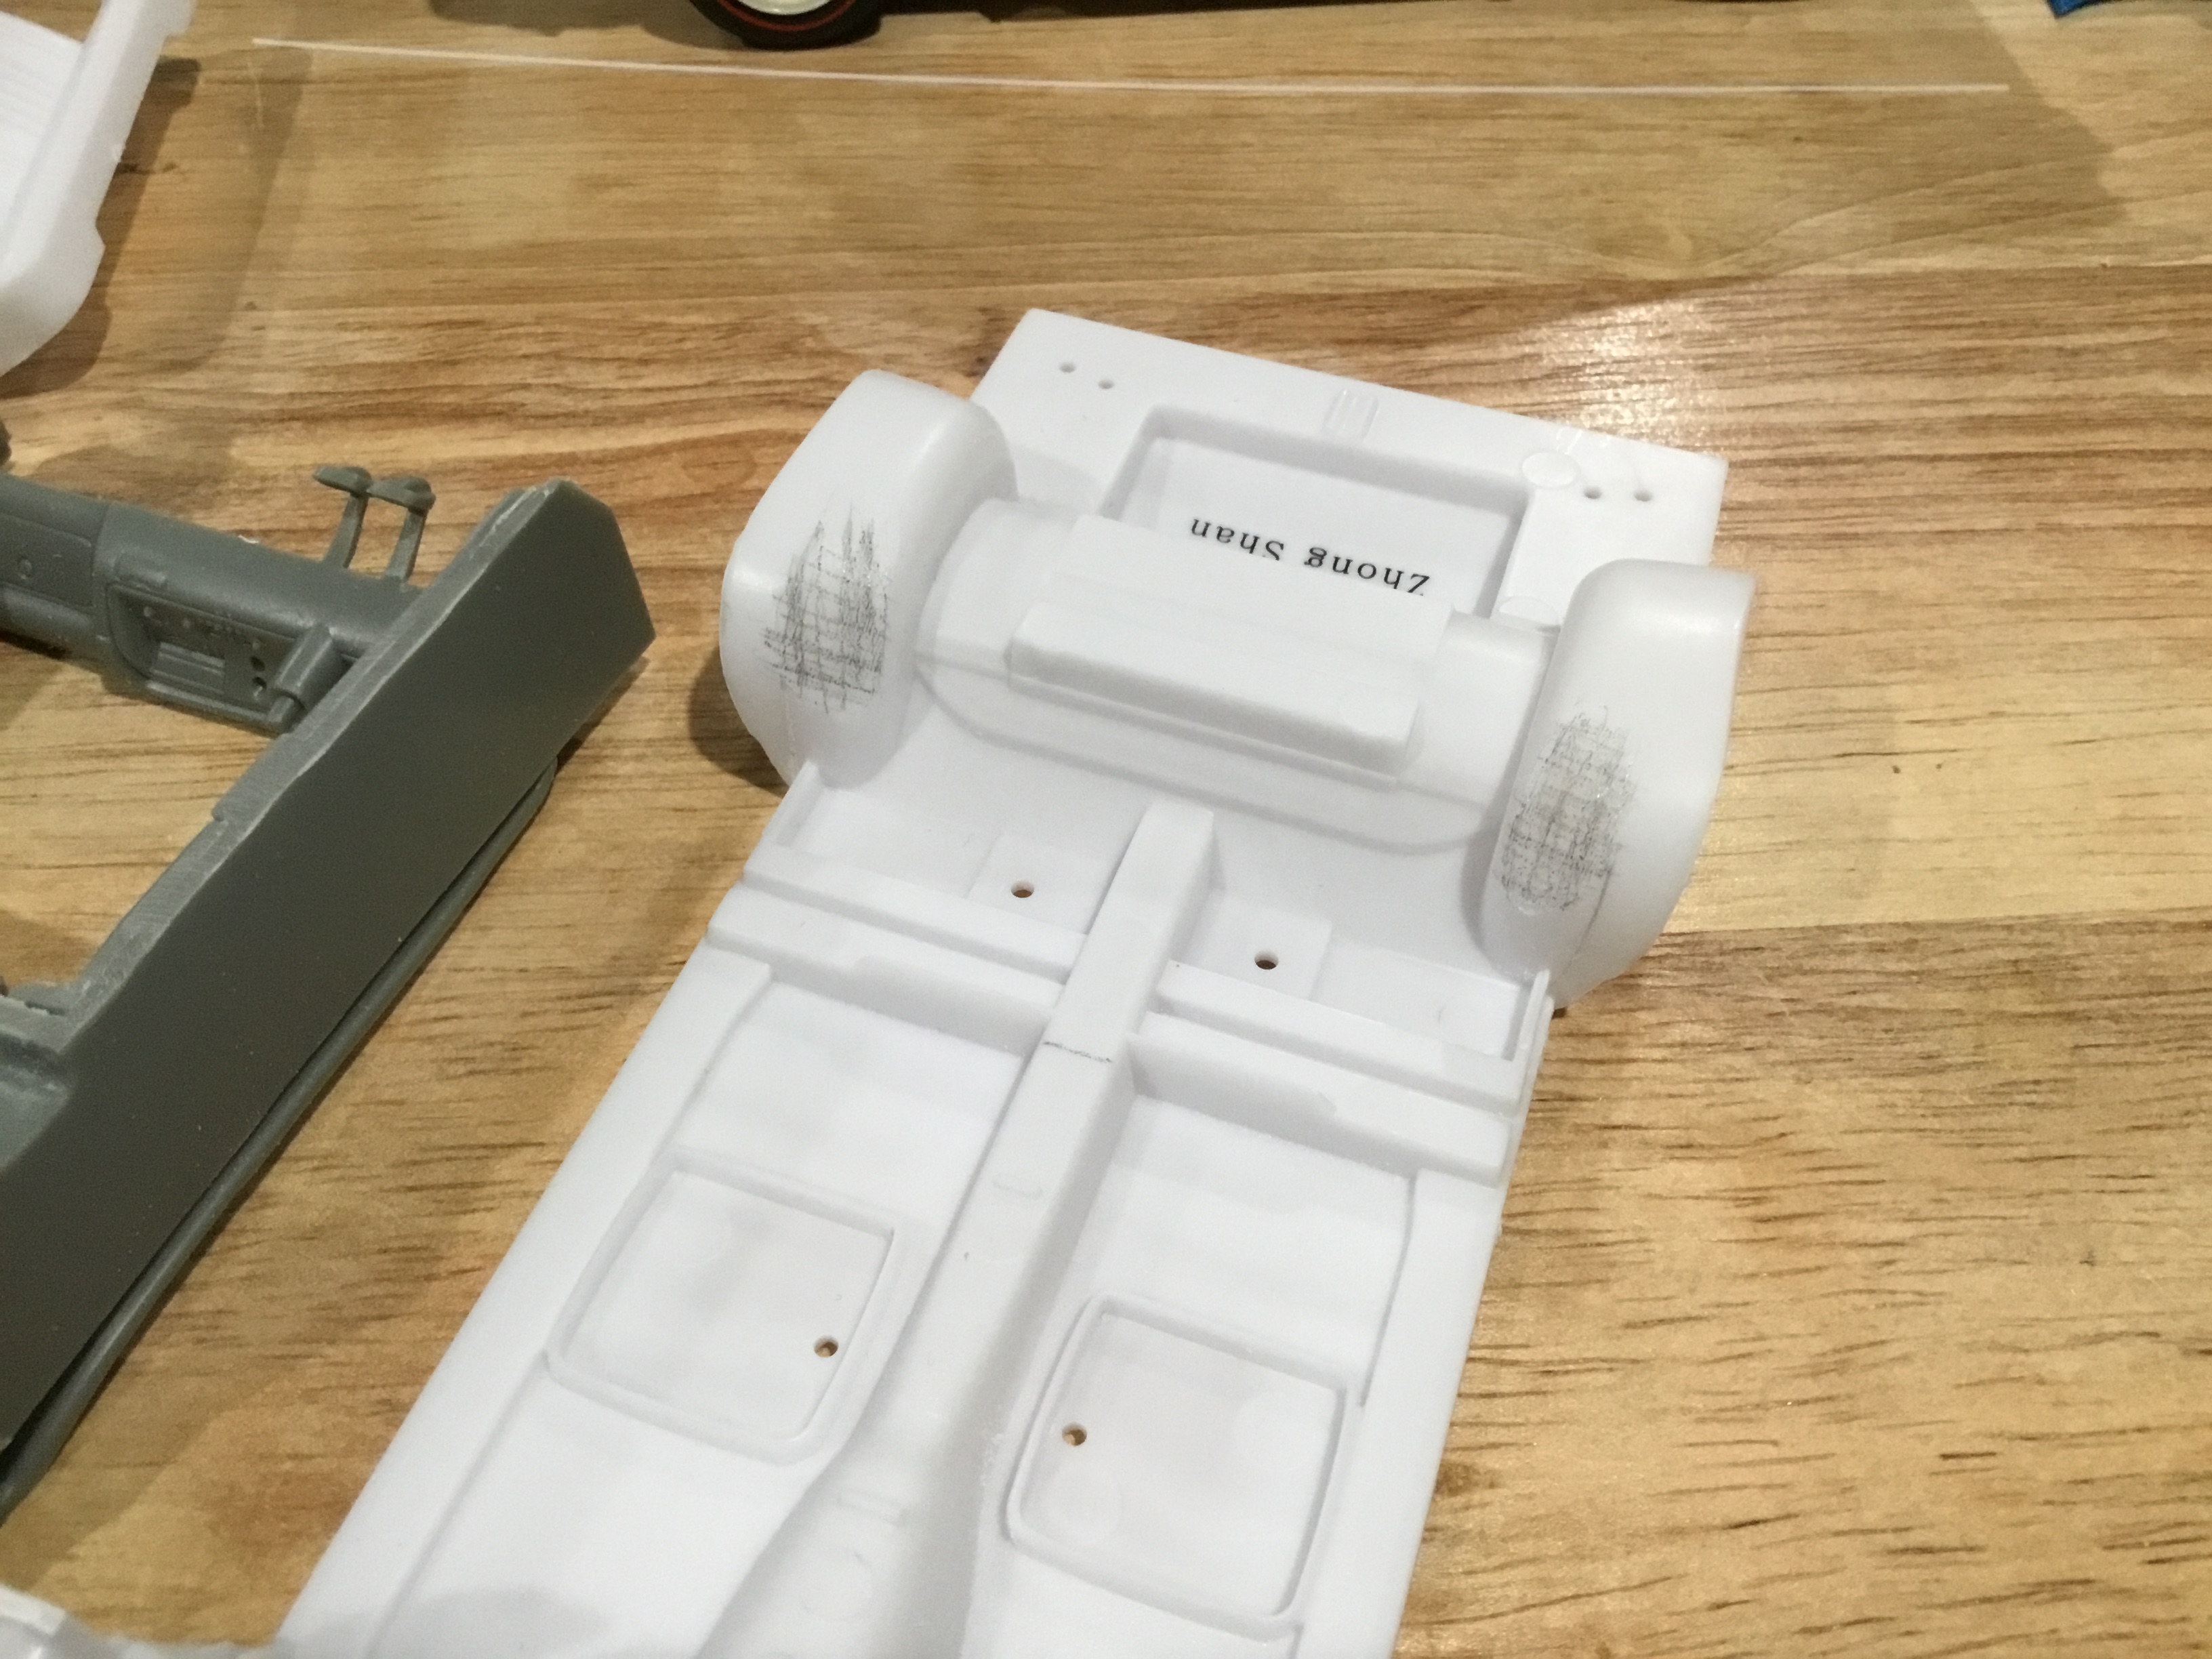
Everything under the skin of the new Revell 68 Chevelle is so nice, I figured I would beat Revell to the punch and use it to make a decent 1970 Chevelle. I’ve always thought the Revell snaps-tight Chevelle had a wel proportioned body, high detail door panels, and its super smooth! So out came my cut off wheel, razor saws and sanding sticks! Here is where I’m at so far. I started by checking the fit of the floor pan assembly. It fit like a glove! Then, I carefully removed the hood with the back of a #11 technique. I removed the upper cowl from the 68 and mounted it in the 70. To locate it properly, I tacked the 68 interior together with the firewall in place too. Positioned the upper cowl in line with the firewall and tacked it to the fenders. Then I swapped out in the inner fender sides to give the hood something to sit on. Satisfied with that start, I moved to the interior. I cut out the floor of the 70 first, then slowly started sanding the bottom of the rear seat until it sat in the right position. I built off the rear seat with the interior sides to the dashboard. Then after numerous test fits with the 68 floor, sanding, fitting and sanding some more.... I got it in place and in line with the firewall again! That’s where it stands right now. I have to find my L88 hood for the 70 now. I mastered and cast it for the AMT 70 Chevelle years ago and I think it will fit with a little modification. If not, it will give up it’s scoop to make a new one. Hope you like it, and maybe try this yourself! Questions and comments always welcome.
-
Getting my Chevelle underway..... this kit looks promising with the builds that have been posted up so far. It will be painted Tripoli Turquoise with a parchment and black interior. White SS stripes will be my choice for the decals. They will help accent the white vinyl top. Minor wiring and plumbing on the 396 engine and accessories. An opening deck lid to showcase the trunk area details will be added as well. Pics coming later...
-
Hello folks, just finished another snapper... Hope you like it.
-
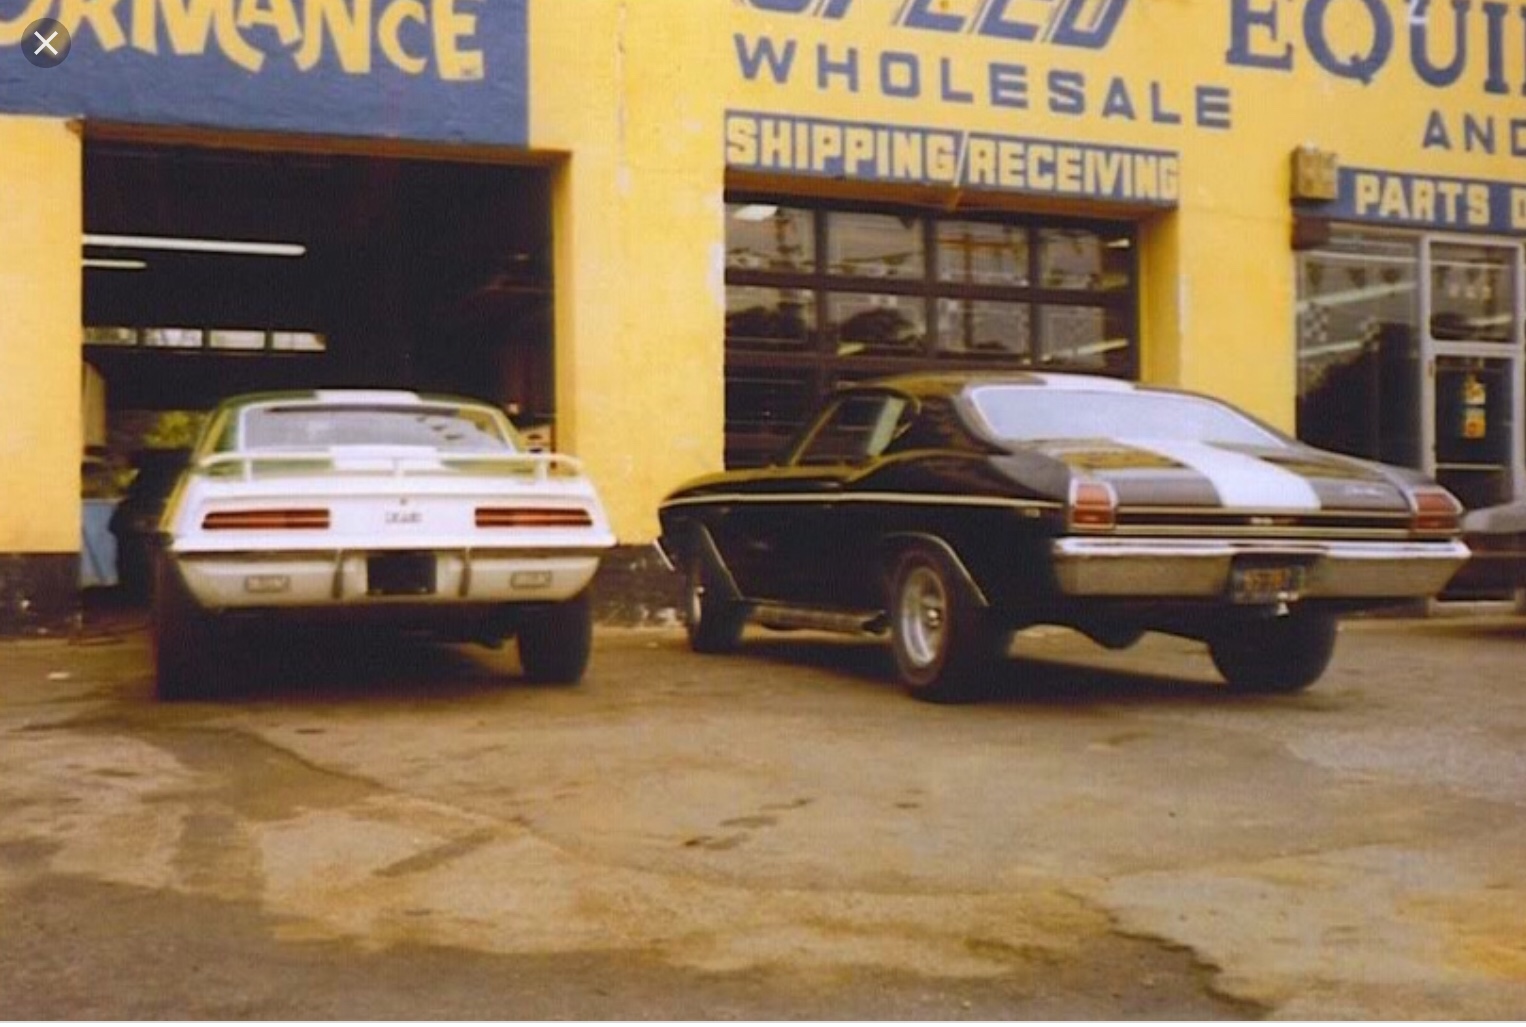
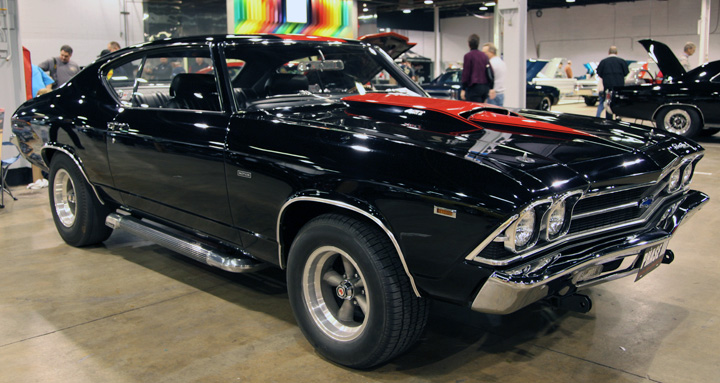
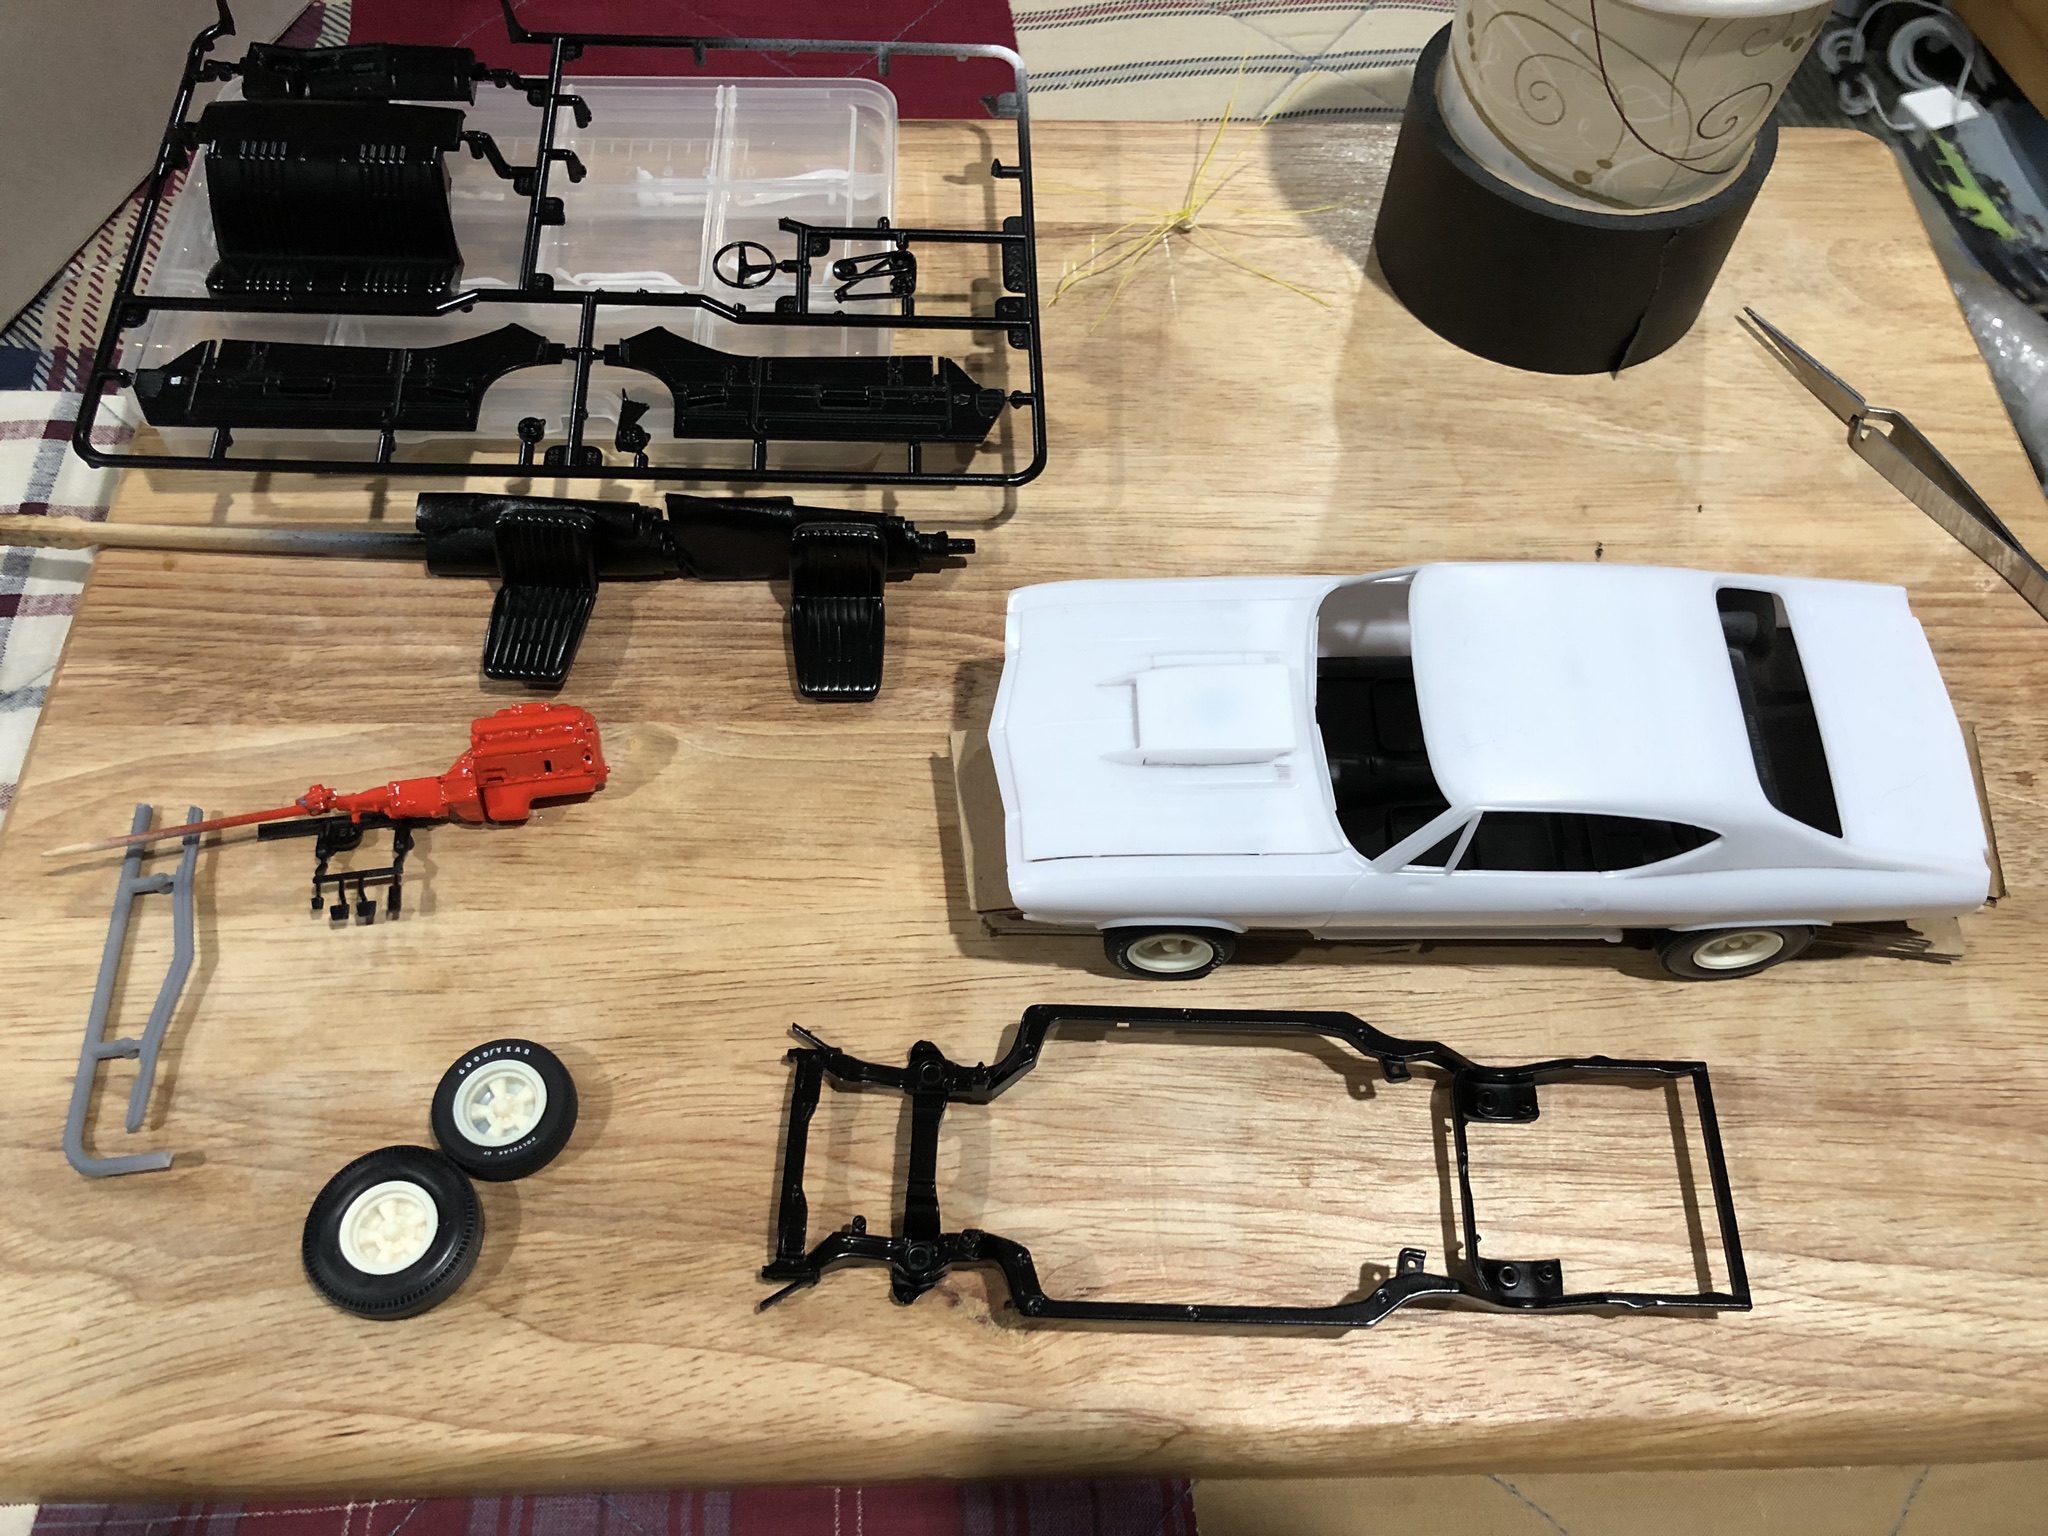
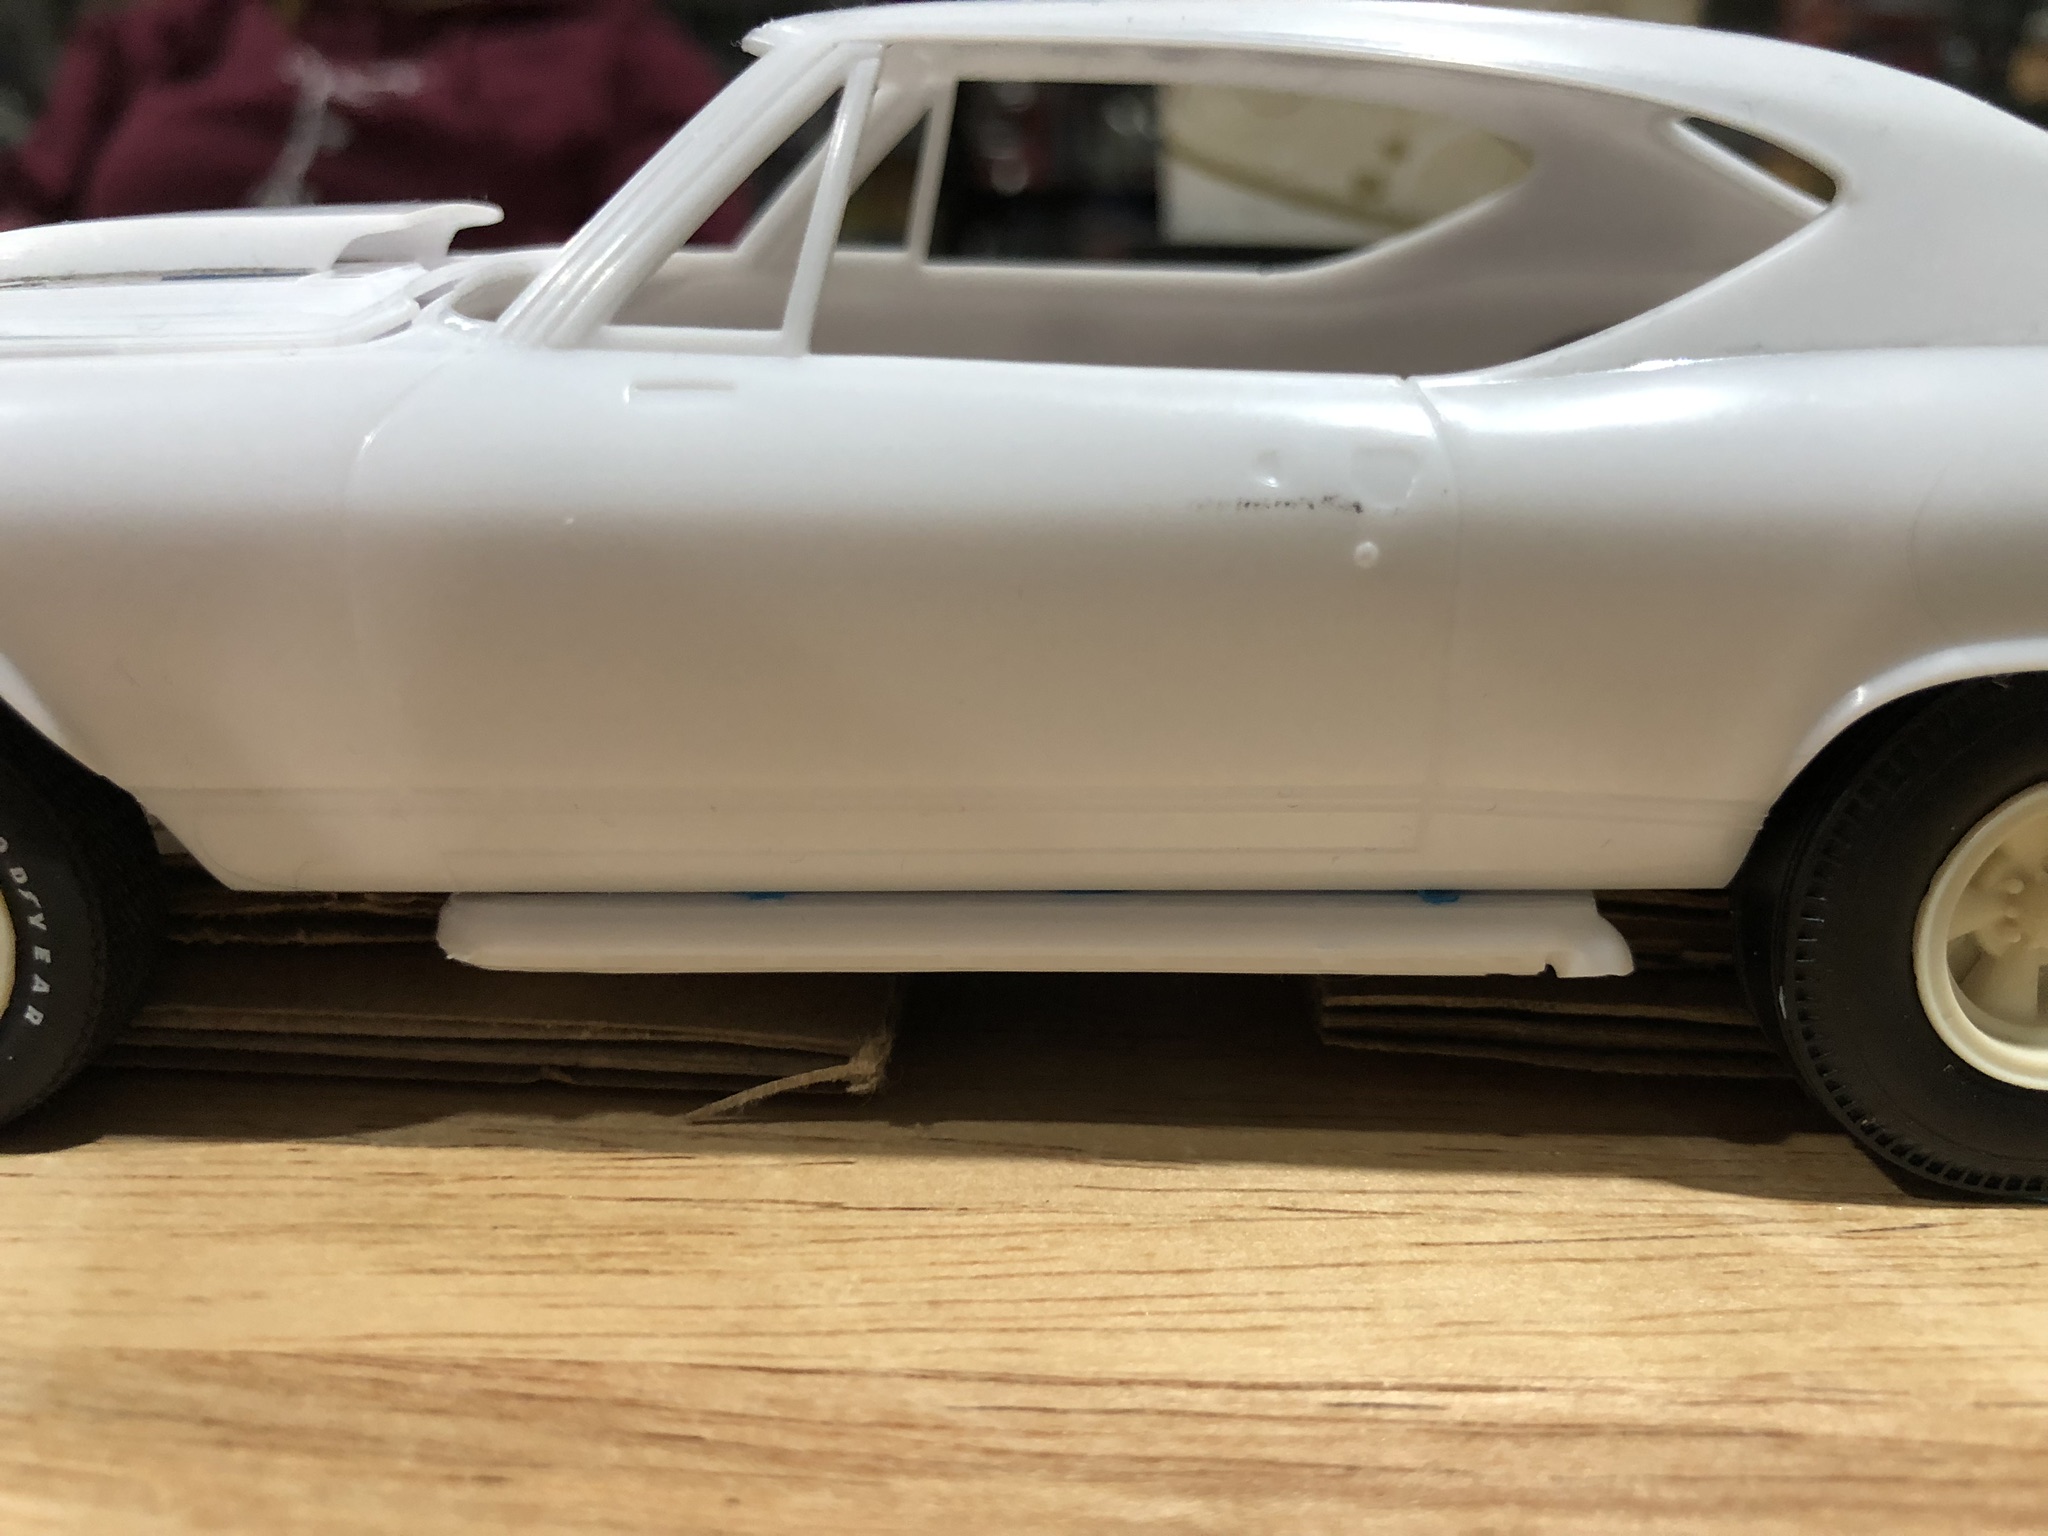
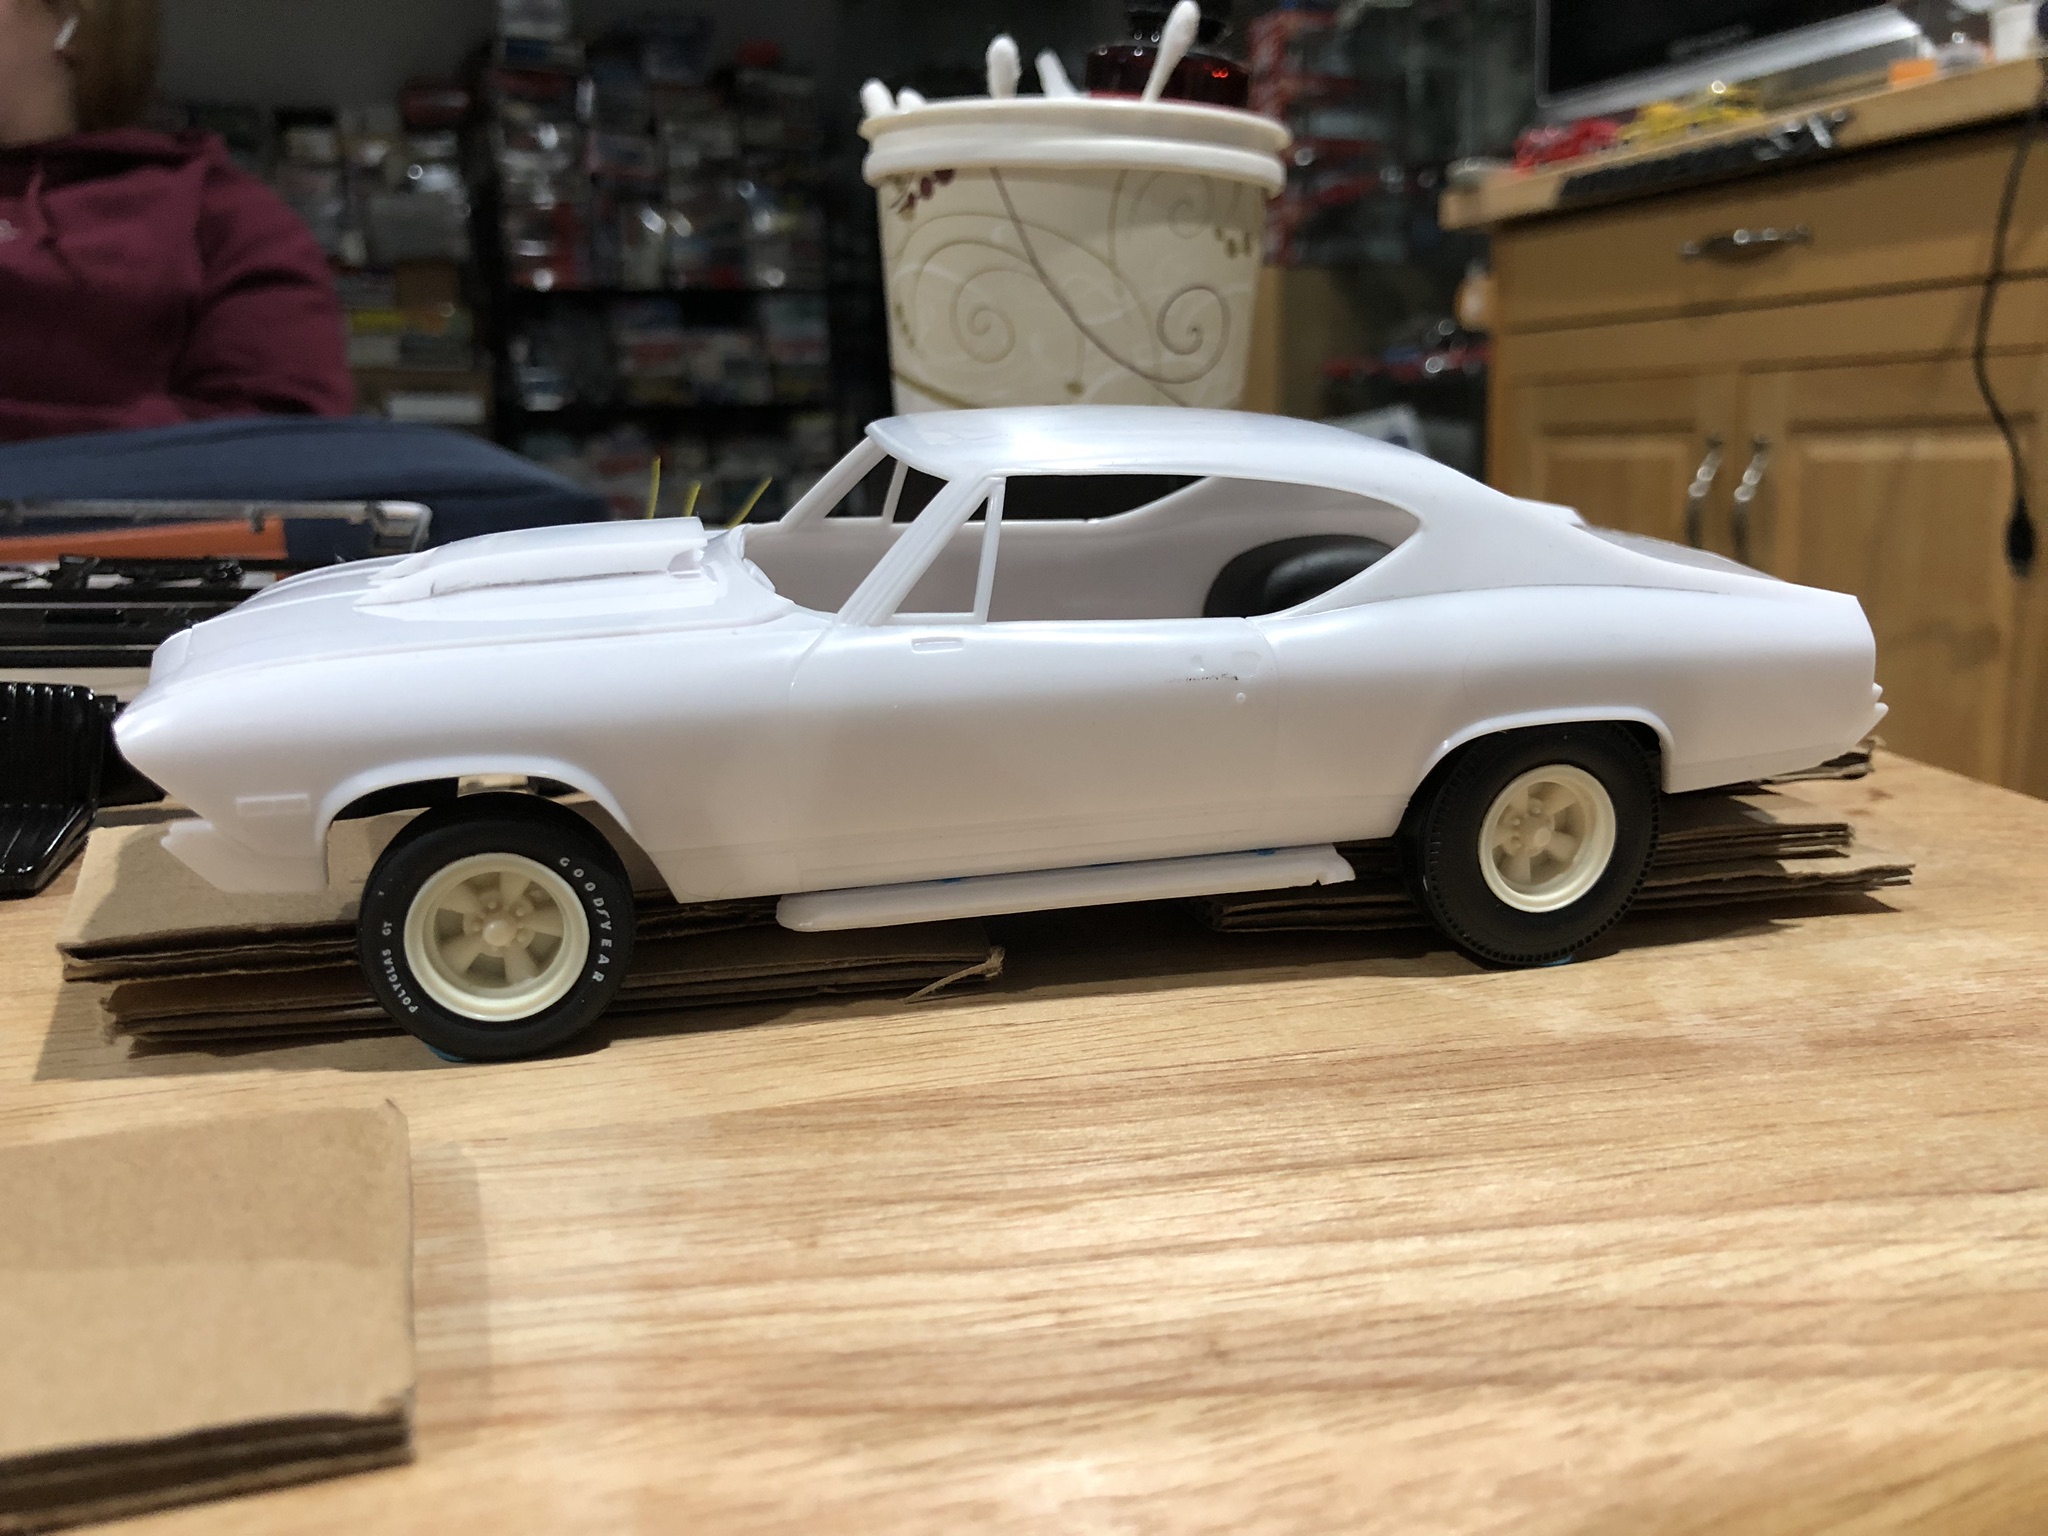
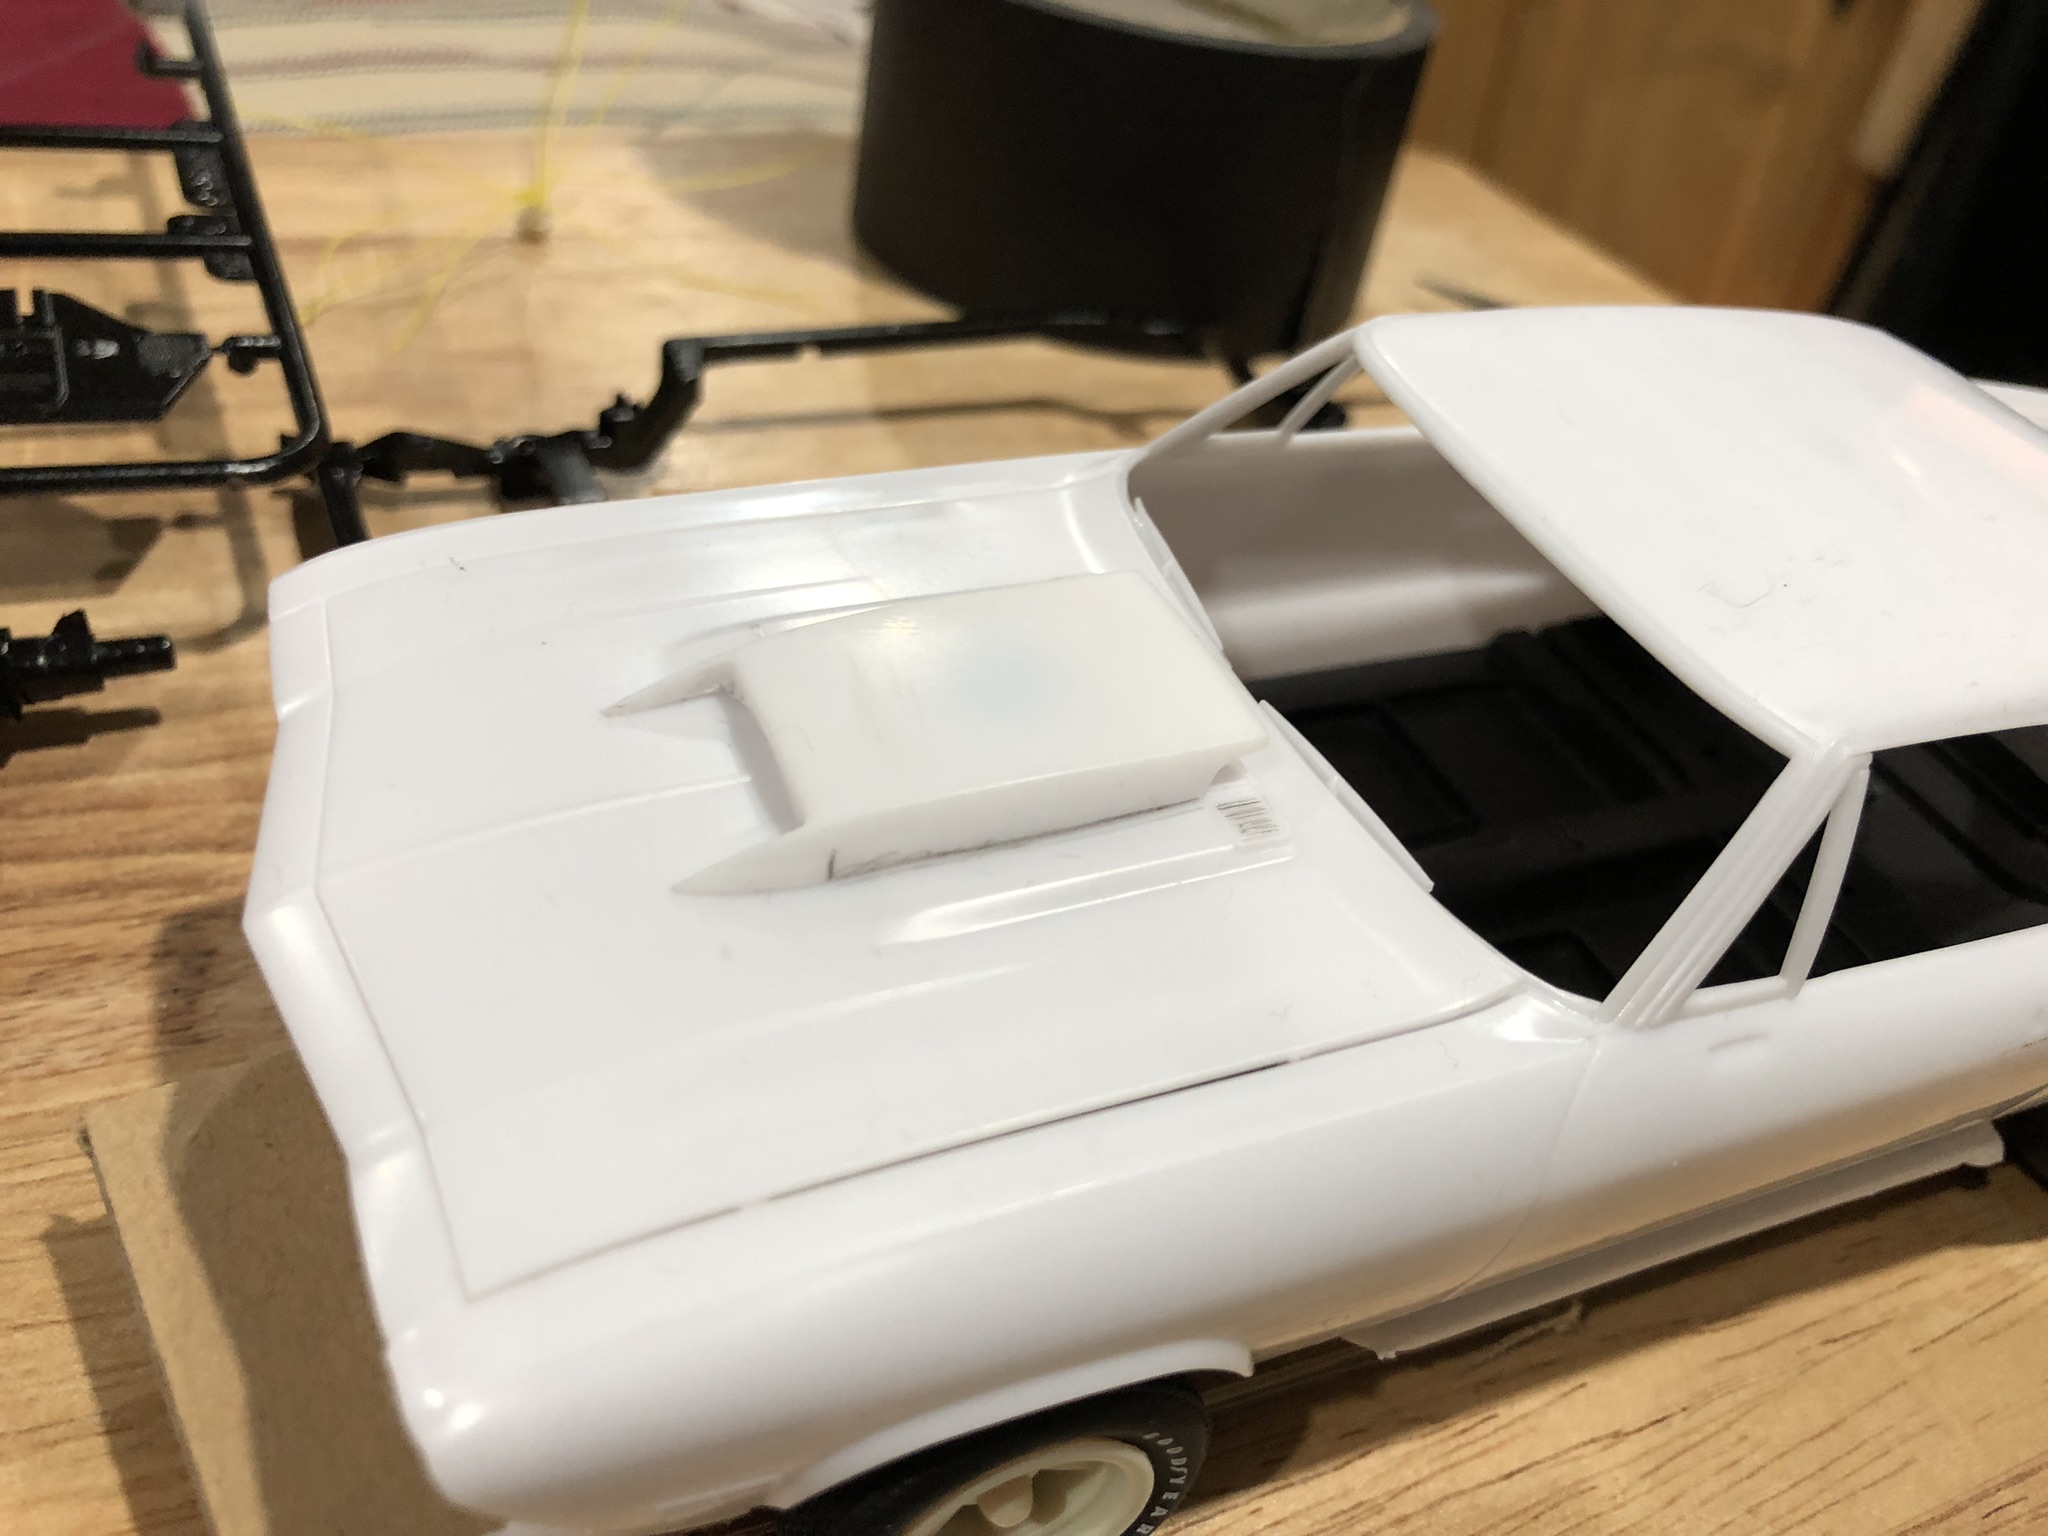
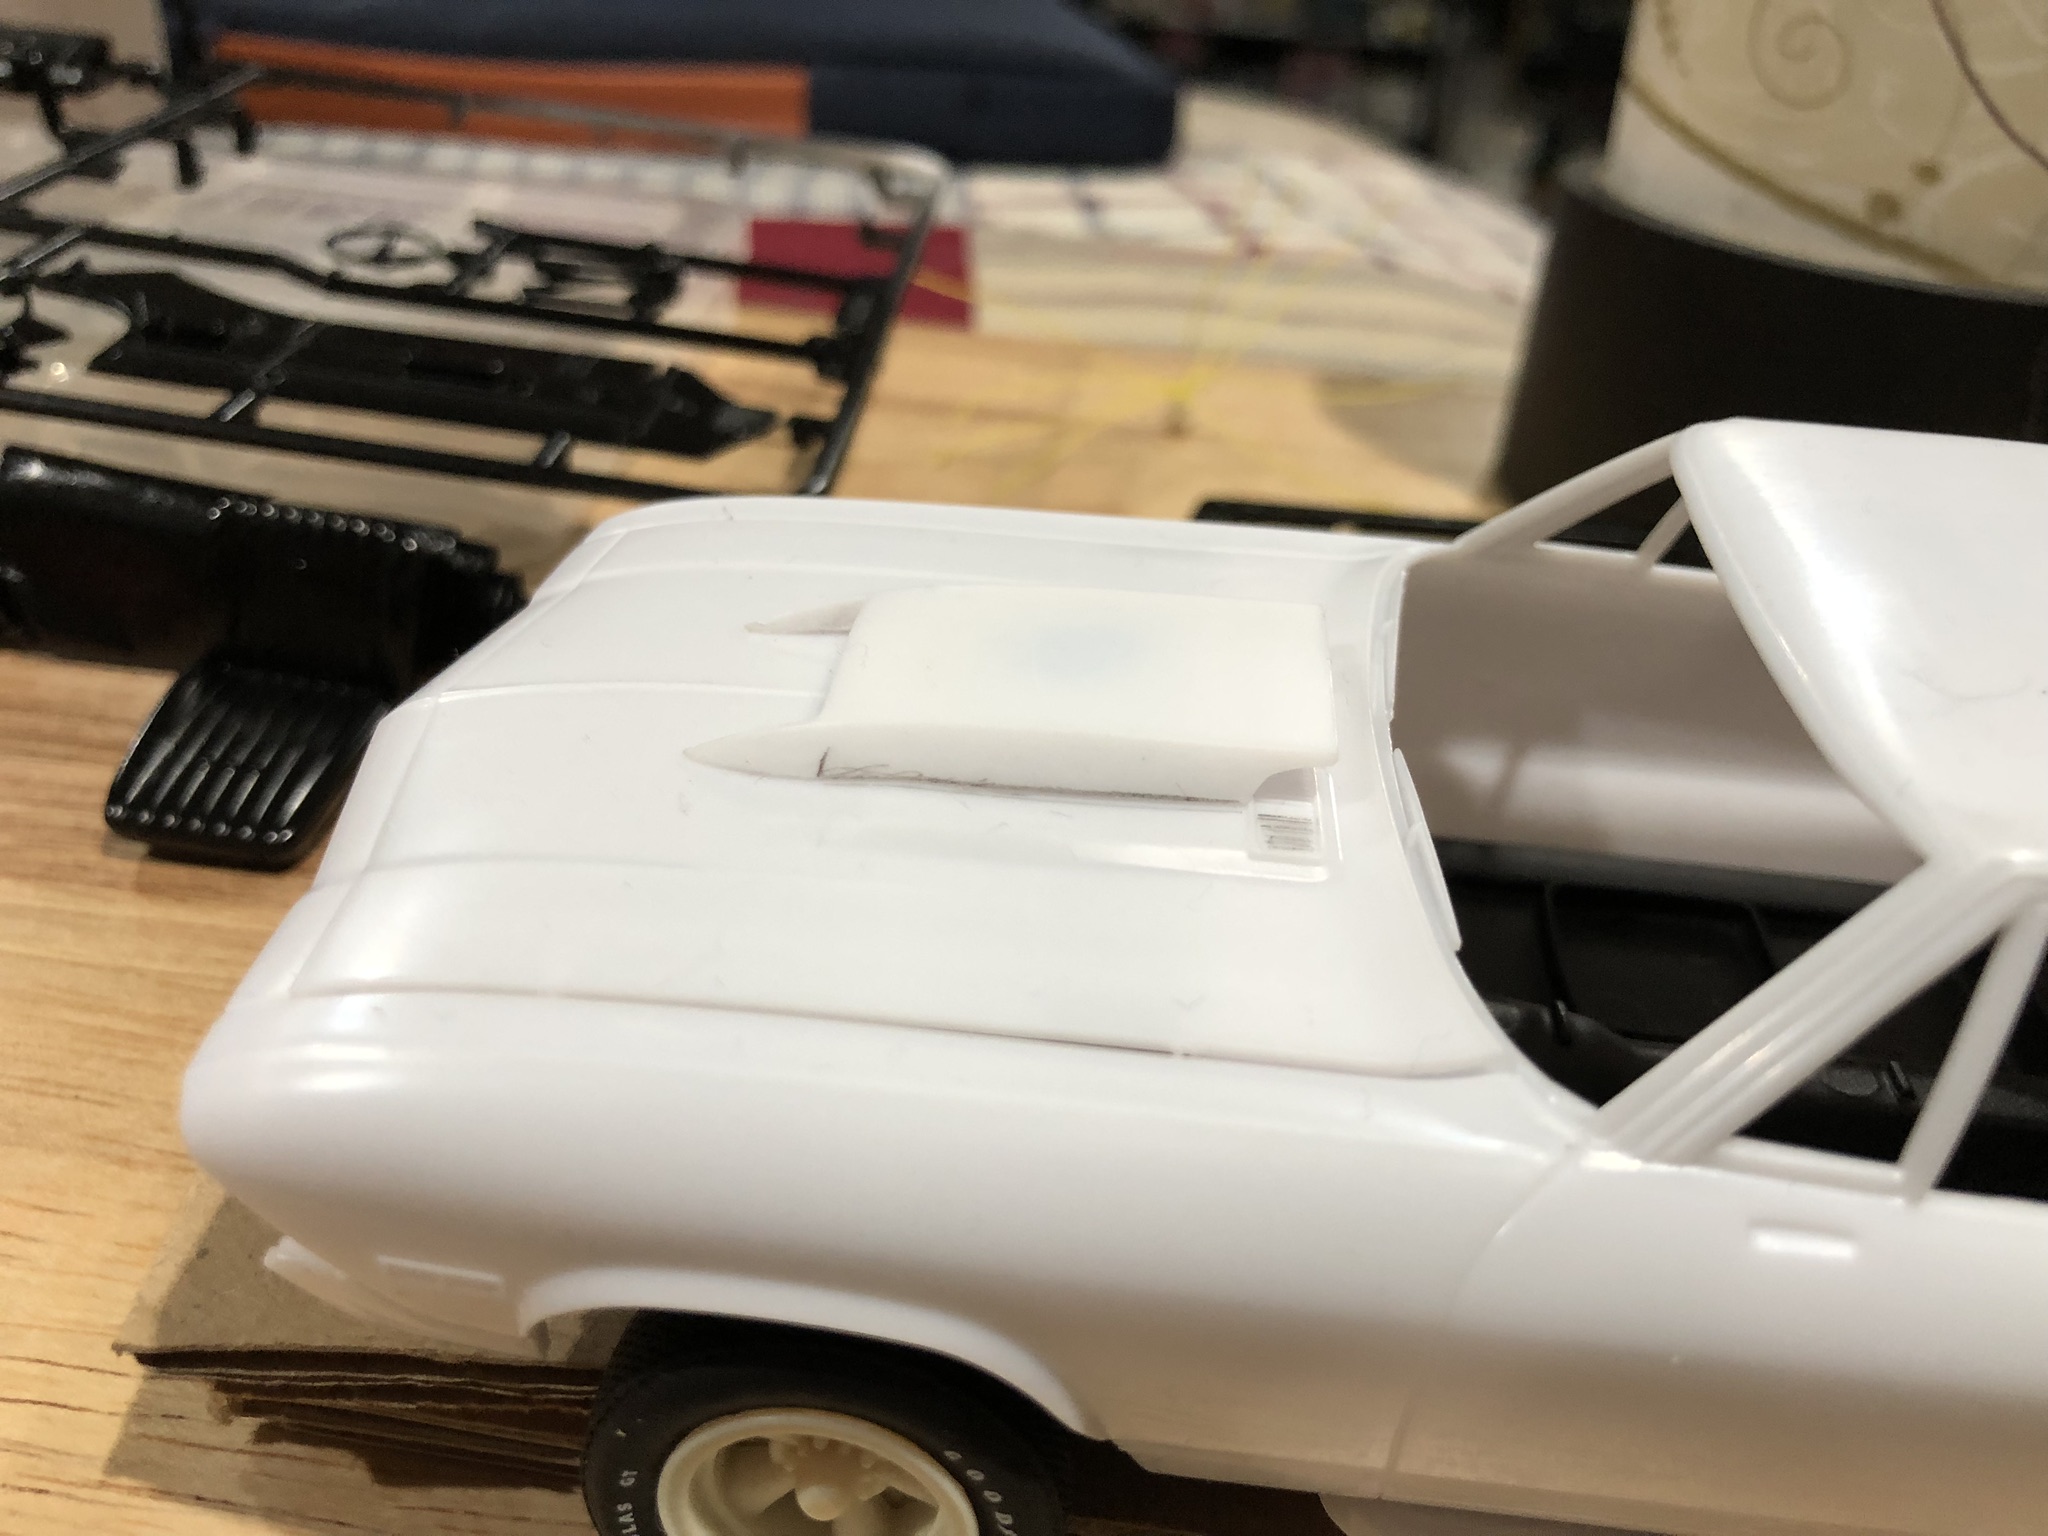
After finishing the Buick GSX, I was eager to start on the brand new 1968 Chevelle from Revell. Almost 20 years ago I painted a couple cars that were to replicate a pair of Baldwin Motion cars sold ordered by Roberto Schneider. The Camaro cost $9,300 and the Chevelle was over $7,000! The Chevelle was used by Mr. Schneider to flat tow the Camaro to Texas and eventually into Mexico. I’ve always wanted to build the pair in towing configuration and was well on my way when a couple problems arose with the Chevelle. #1 was the tail lights. They are very inaccurate. #2 was, the stipe I laid down was much narrower on the hood than the rest of the car. This fustration sidelined the project for a long time. After realizing that the new Revell Chevelle will probably be released as a 1969 down the road, I decided to continue to wait on this project. In the meantime, my love for Motion cars steered me towards what I think is the “prototype” Baldwin Motion Phase III Chevelle. One reason I believe it is the prototype is the hood. It’s the only one I have seen with Corvette scoop with no stinger portion on top of the Chevelle SS hood! The “production” fiberglass hoods were the full stinger on a flat Chevelle hood. I spoke with Joel Rosen a couple weeks ago but didn’t ask him about the 68. I have an email in to him to see if my suspicions are correct. In the meantime I started getting stuff together for this project. And here is where I’m at. The stinger scoop is from the 1967 Nickey Camaro, side exhaust is from the 1969 Motion Camaro and the wheels are from EBay. Any questions and comments are welcome!
-
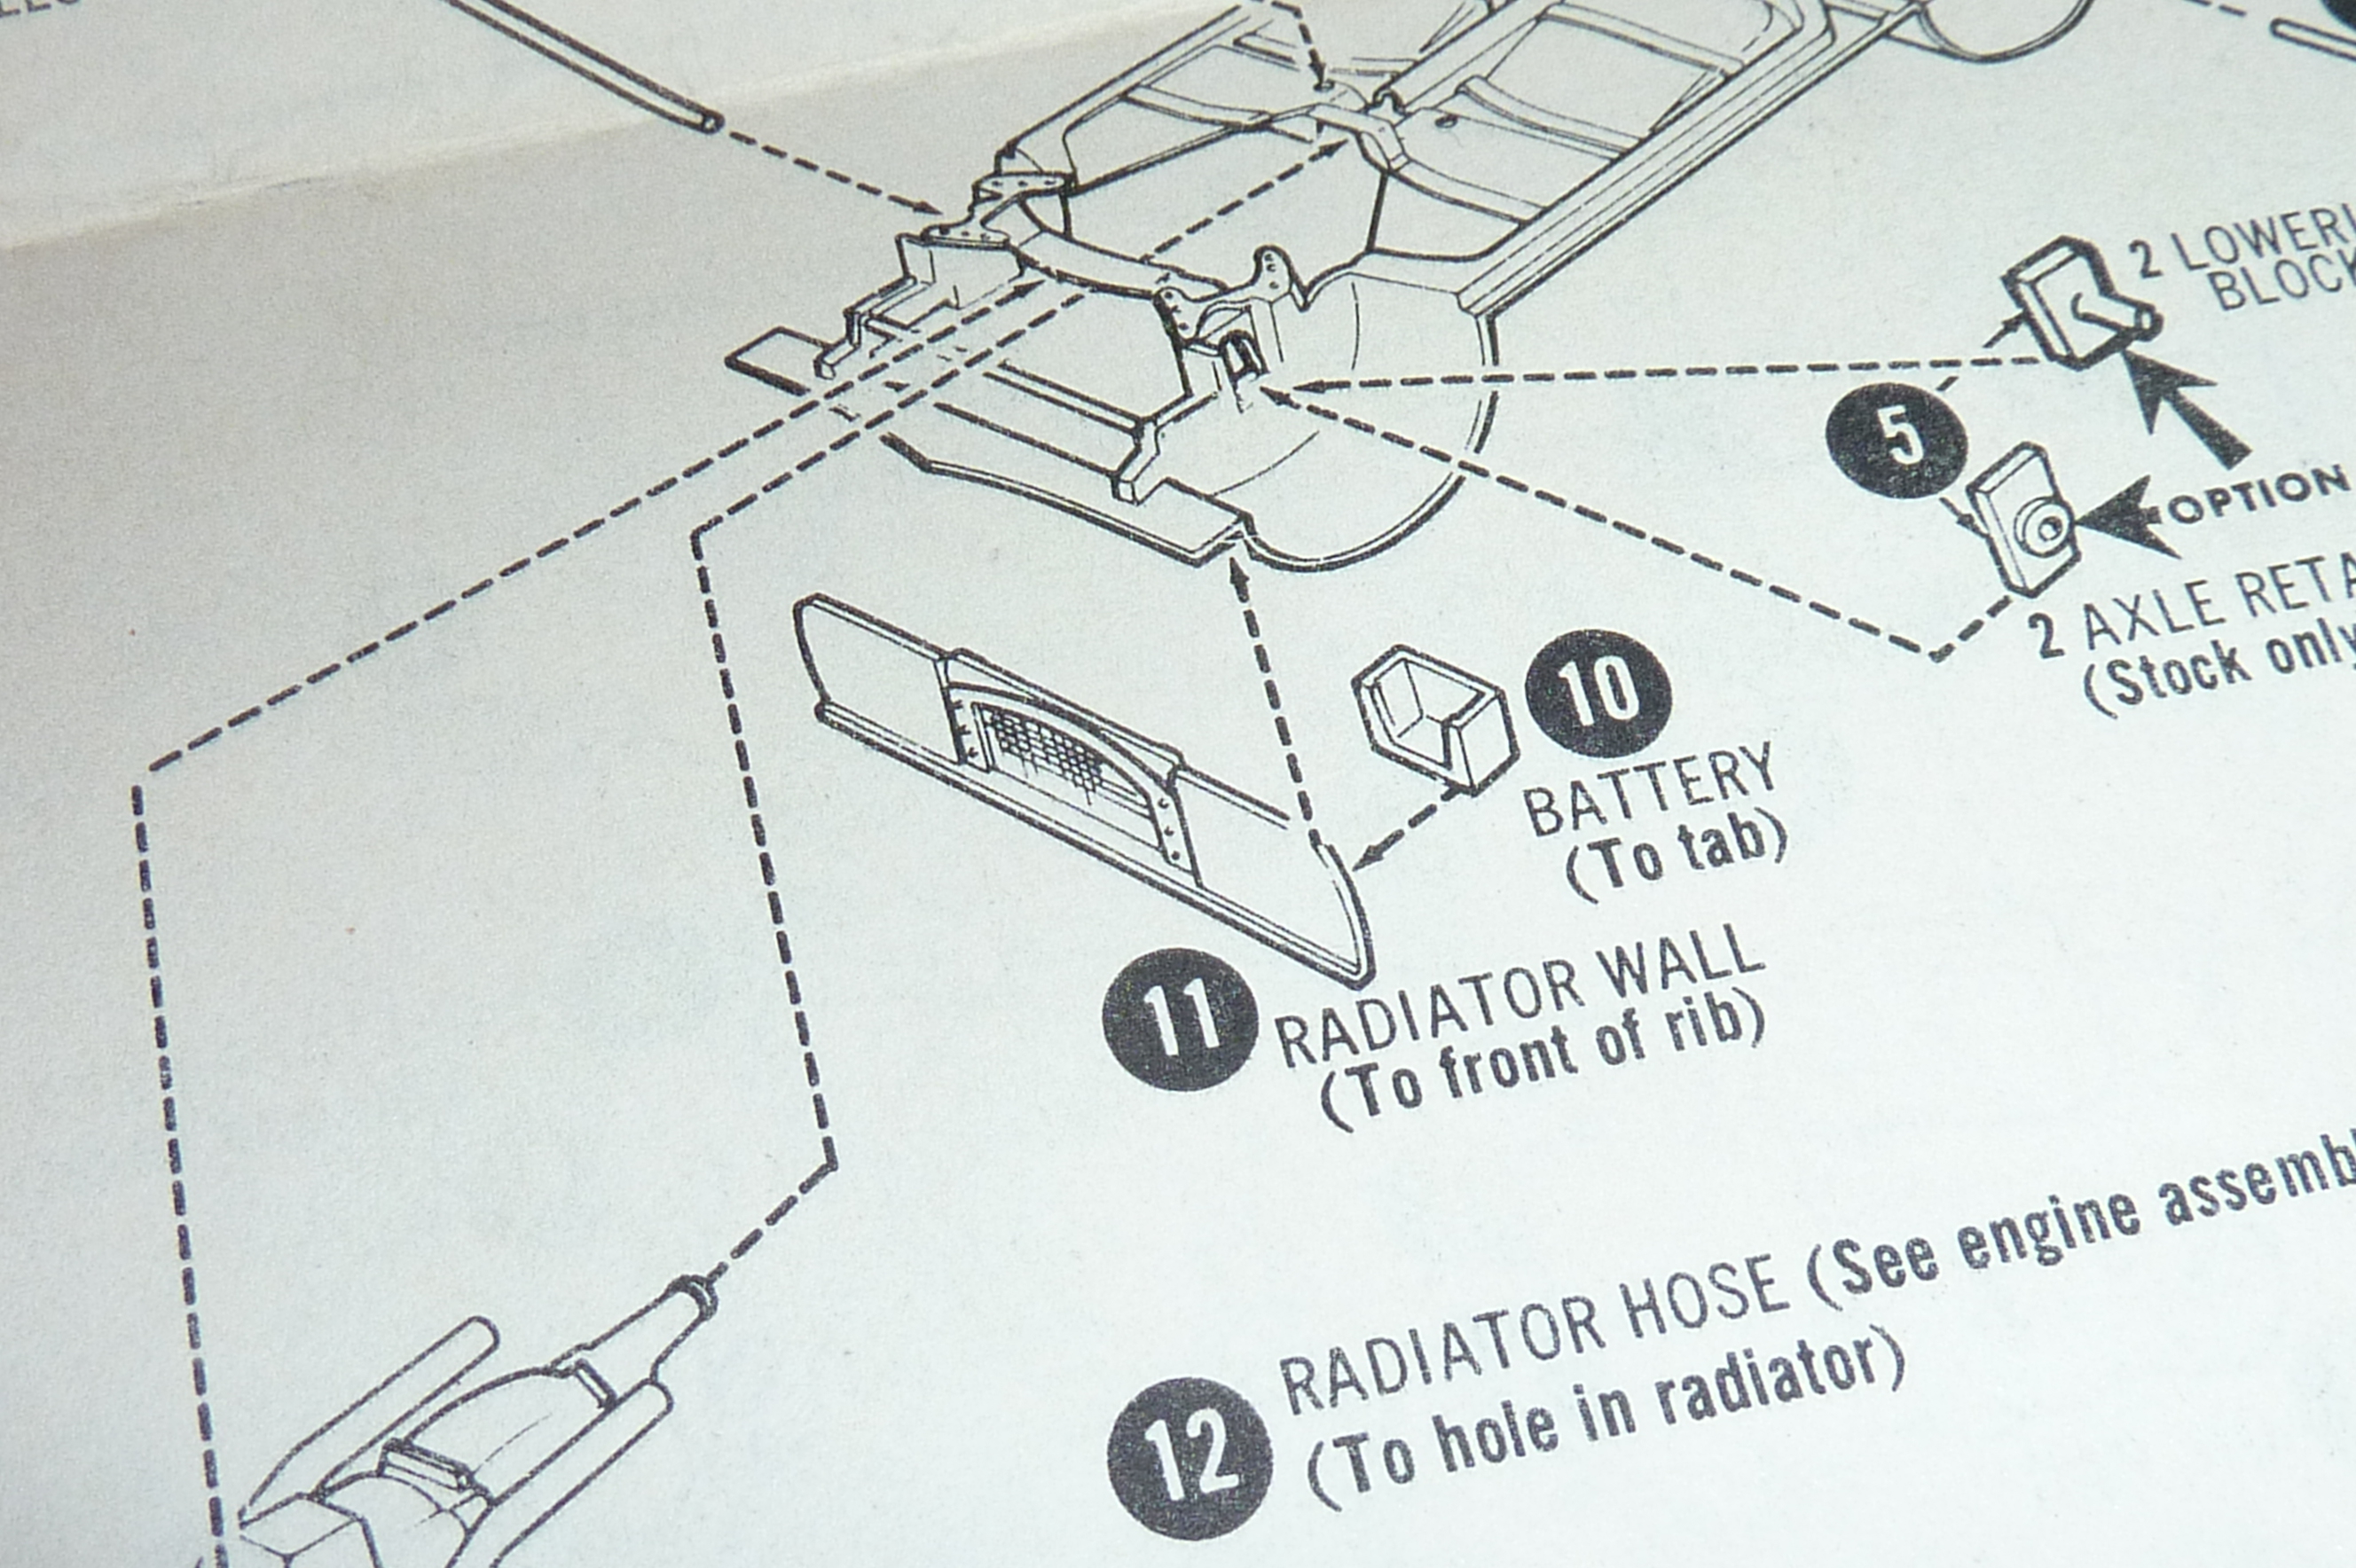
I just purchased a lot of kits and there was a AMT Red Alert Chevelle in the batch. I inventoried the kit and it is missing the radiator support (shown in the instructions) but the body in the kit has the support molded in. I have searched the internet and every 70-72 chevelle body I could find does not have this piece molded in. Any clue what kit this body is from? There are no numbers or writing molded in the underside of the part. The chassis hood and interior fit perfect.
-
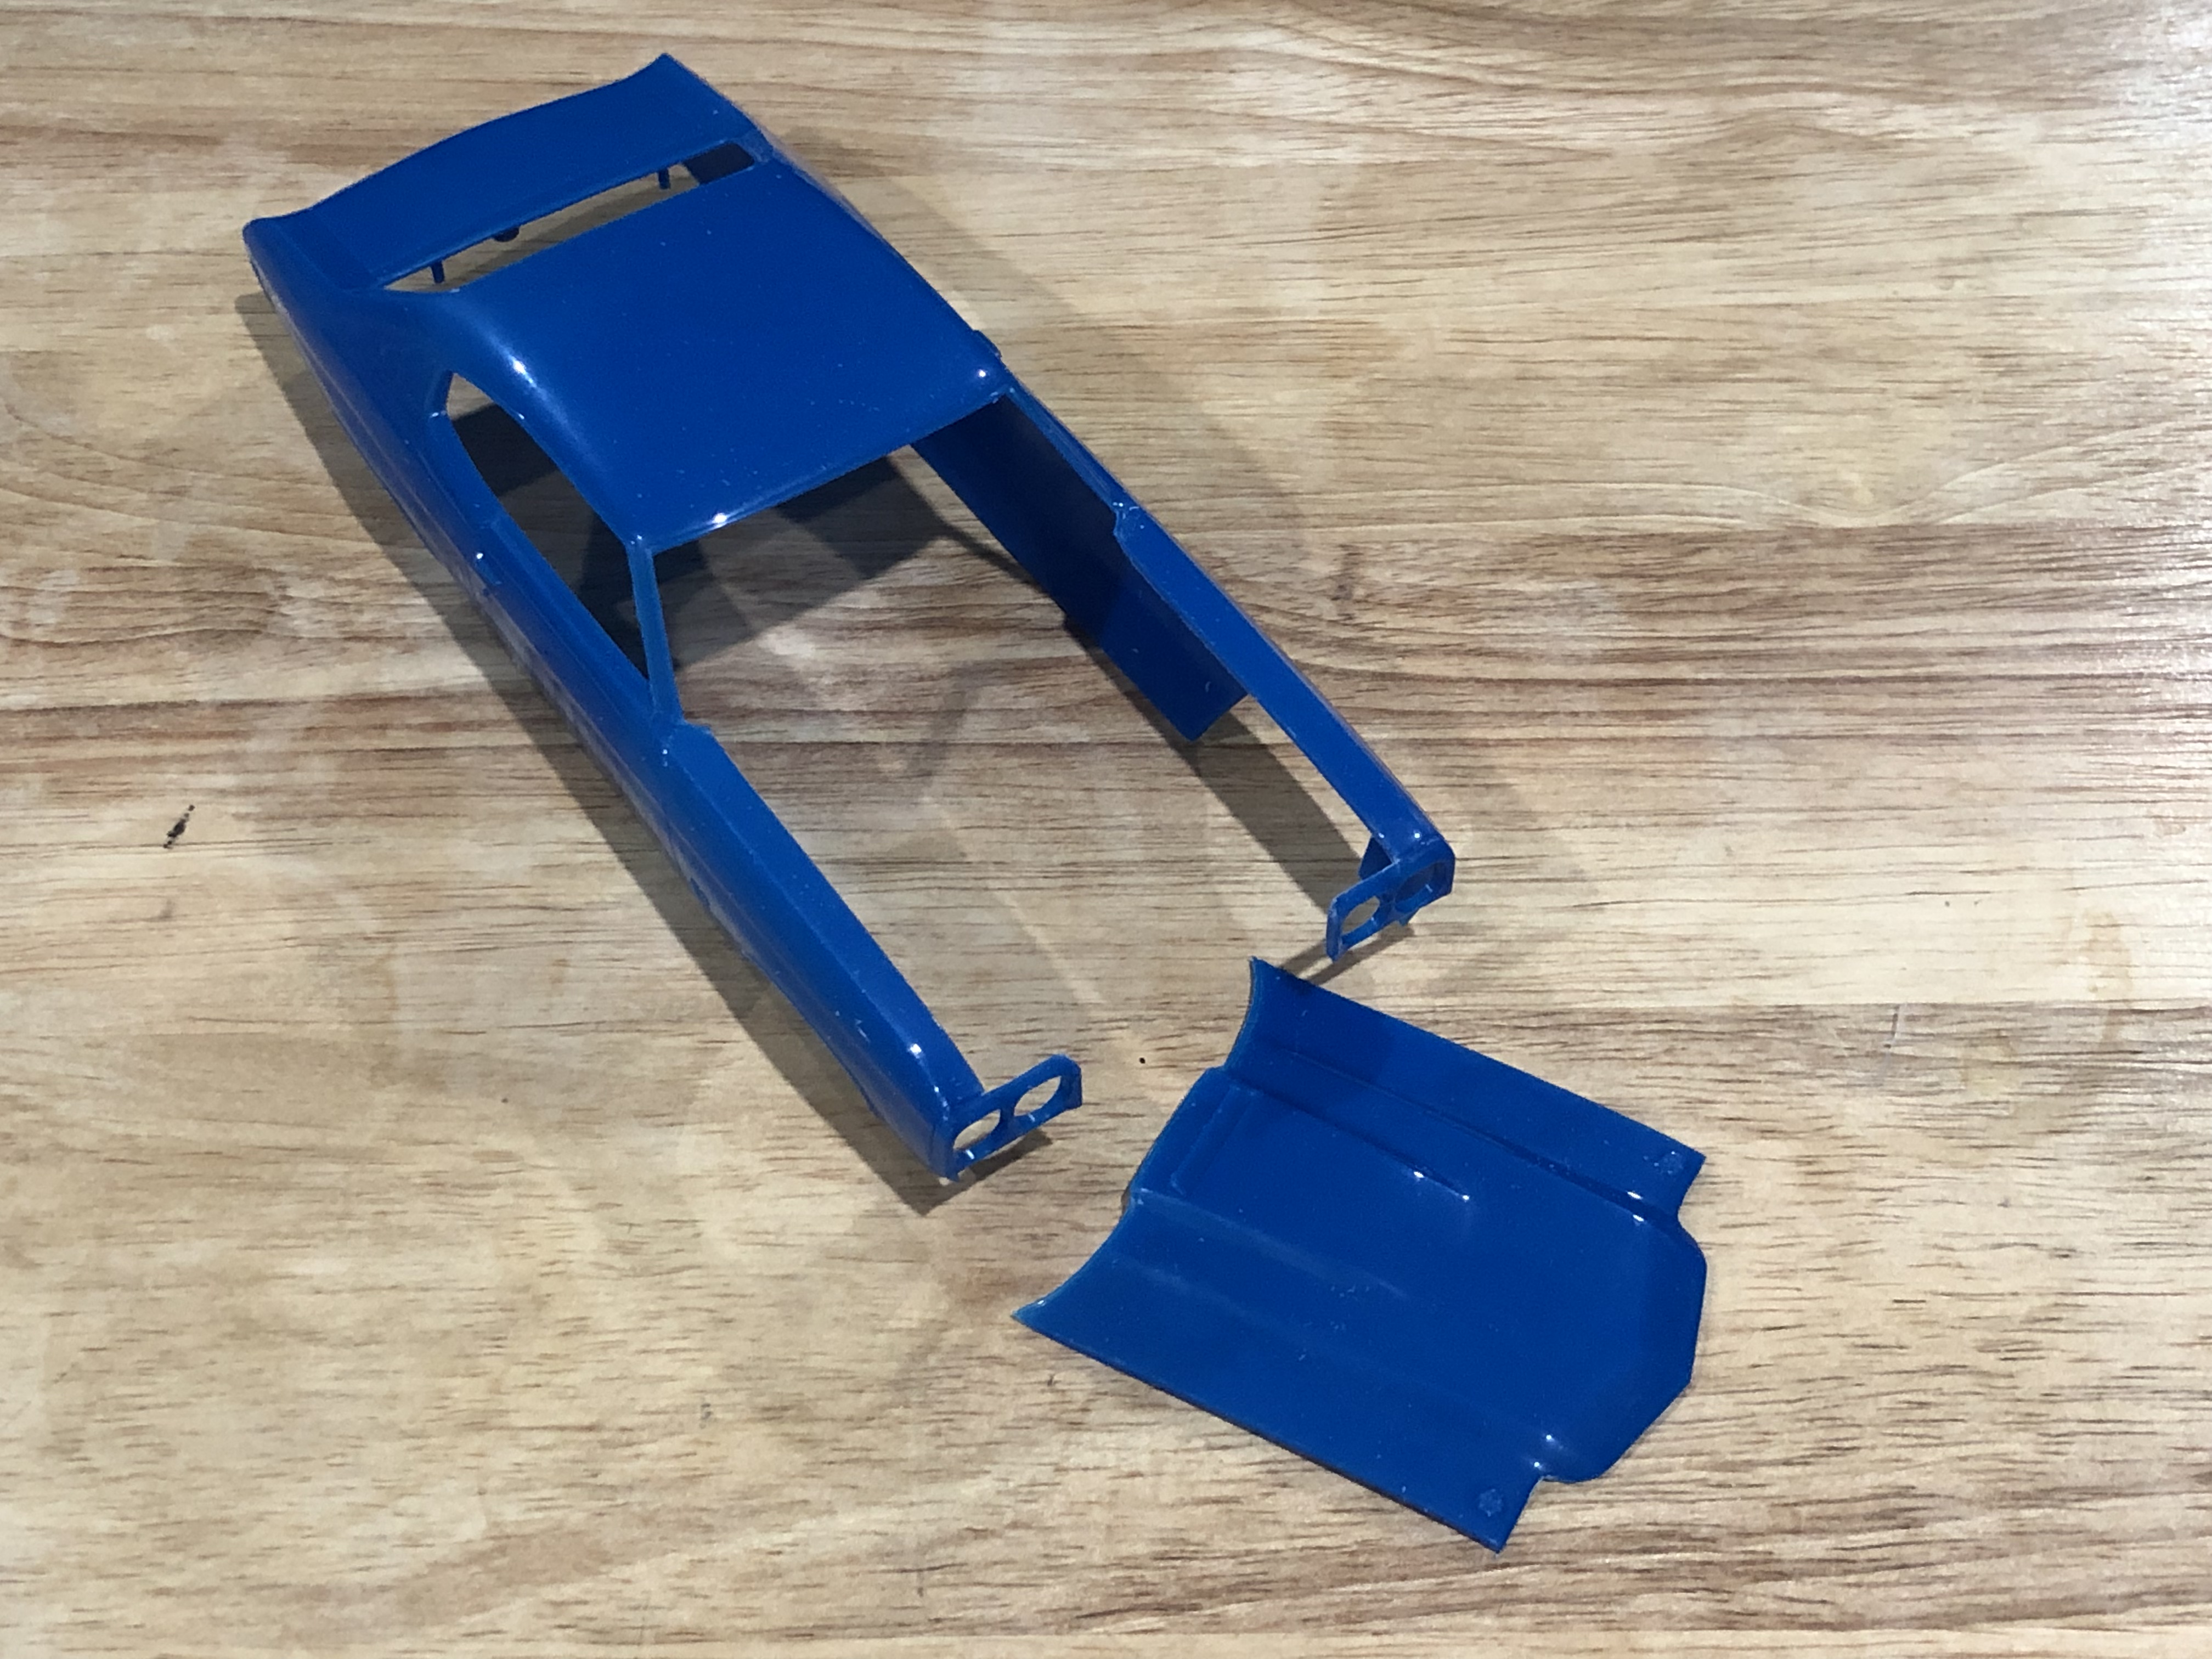
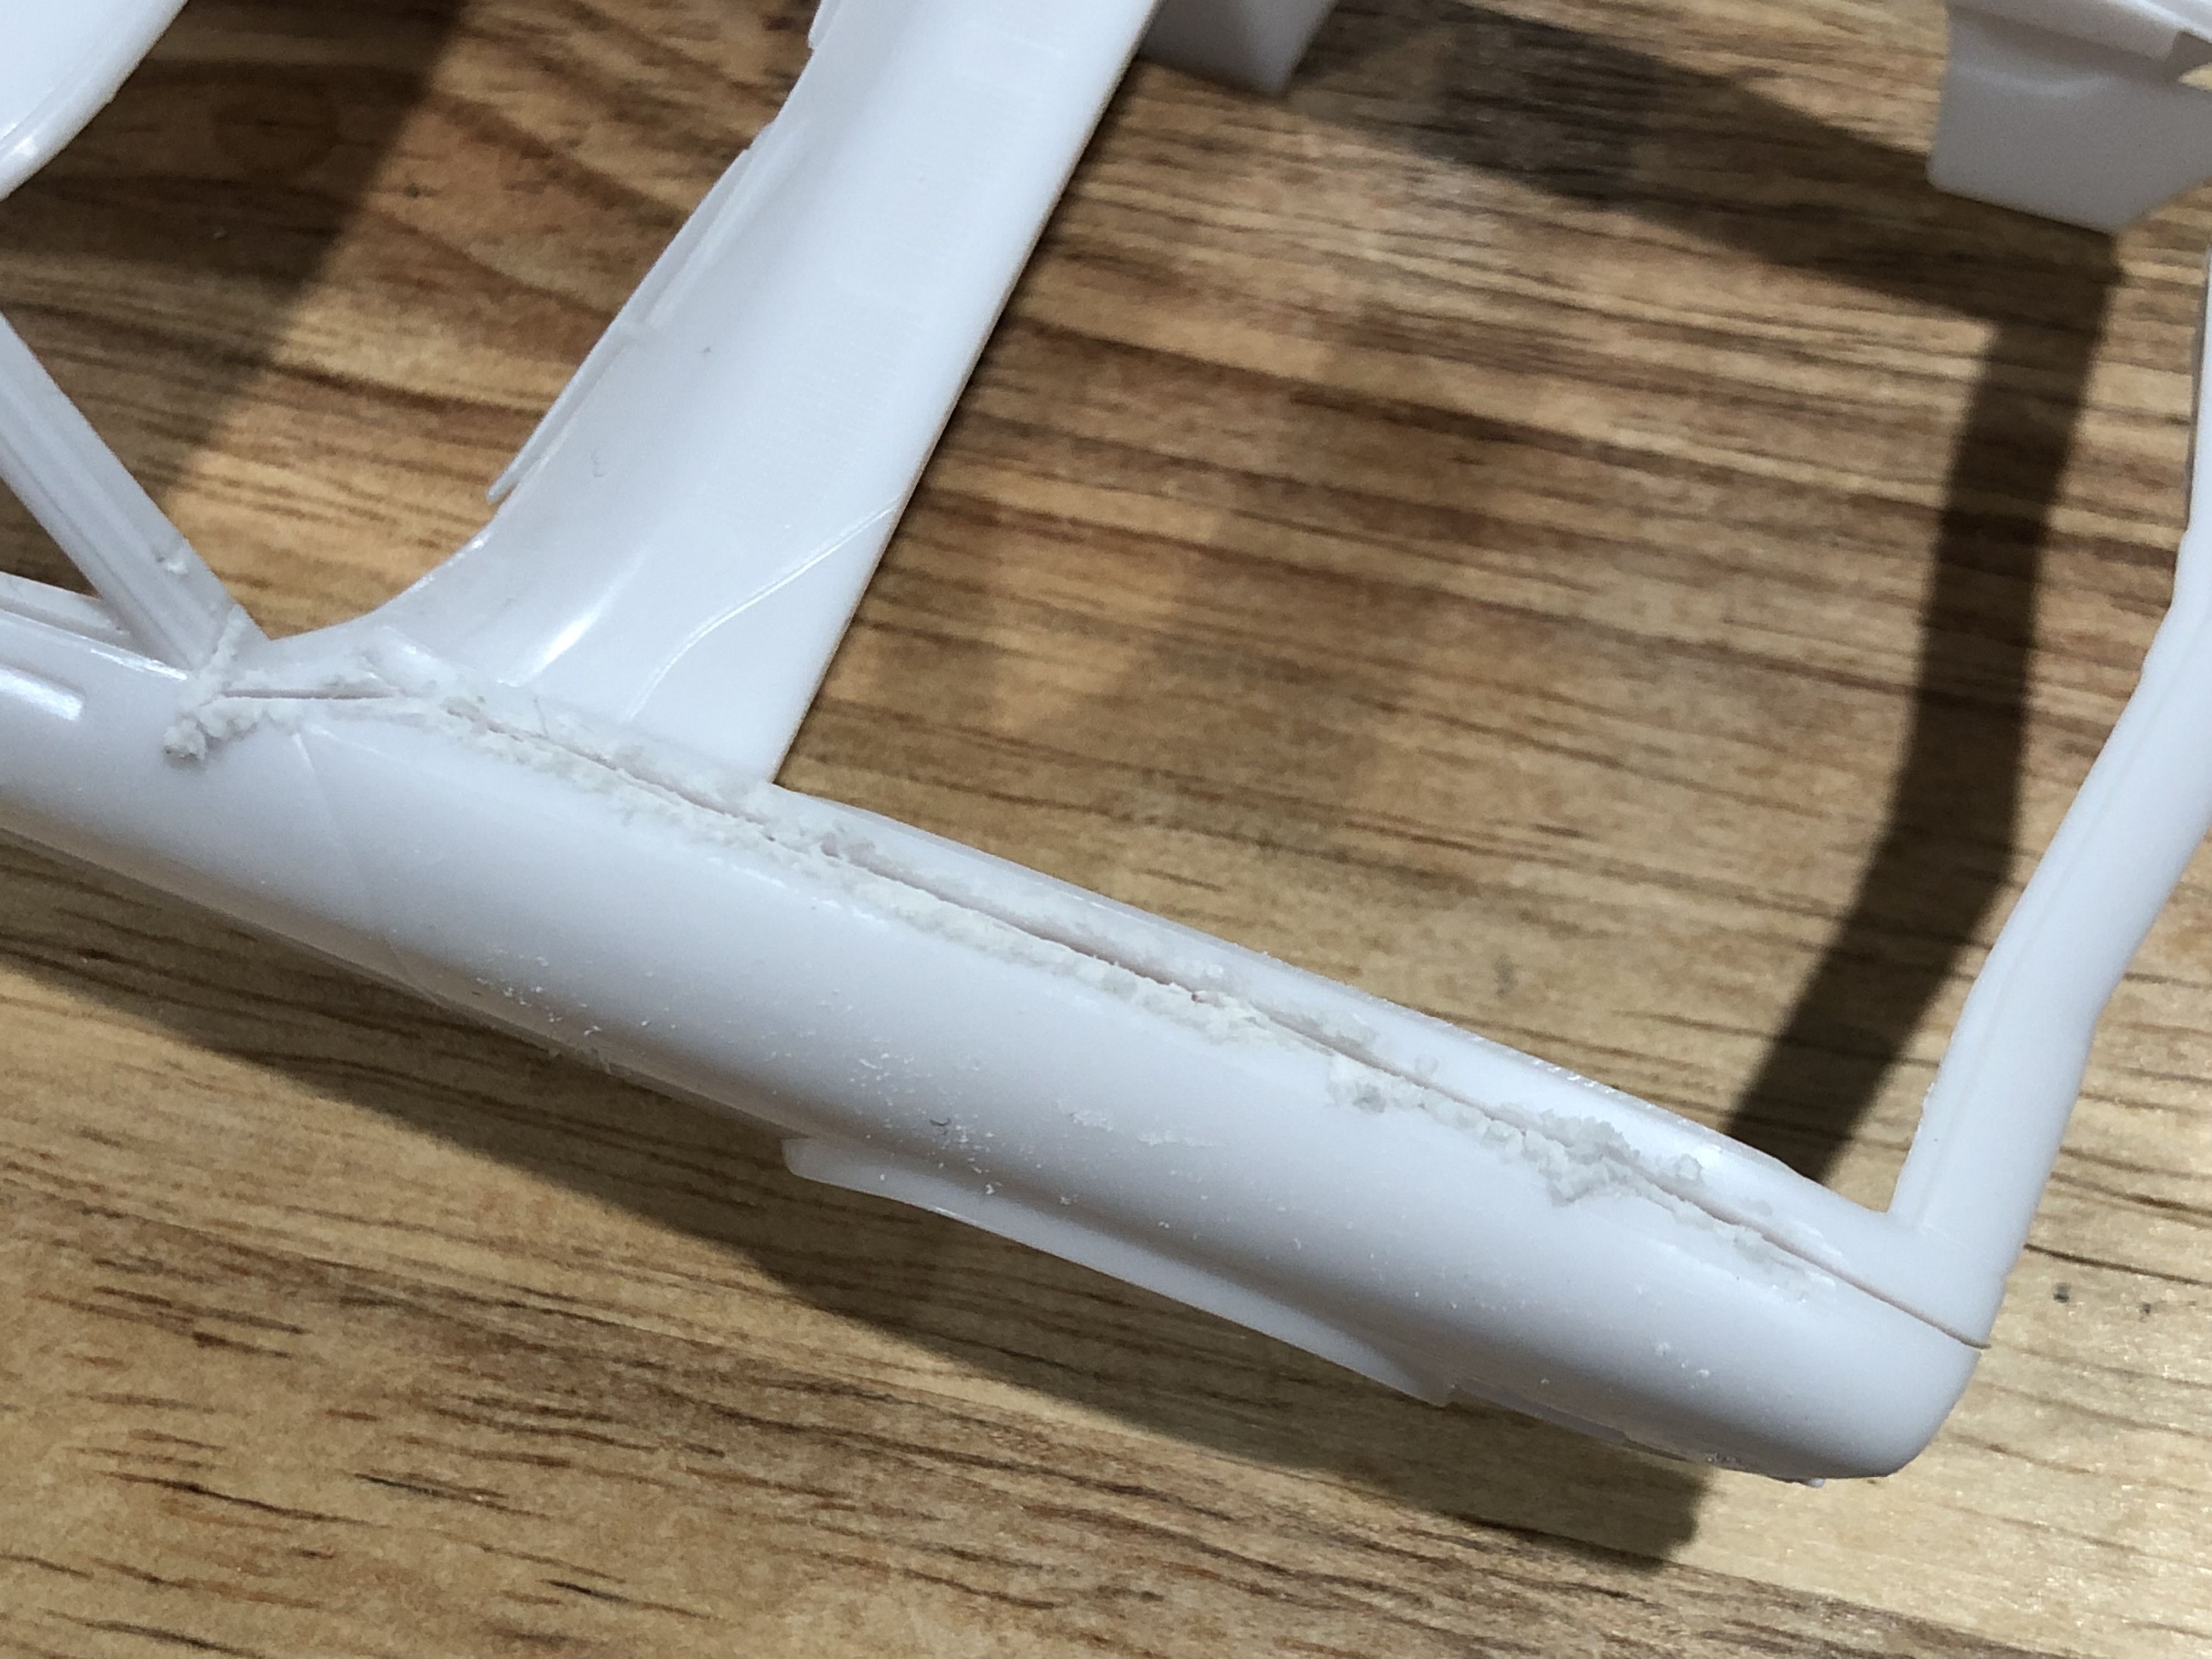
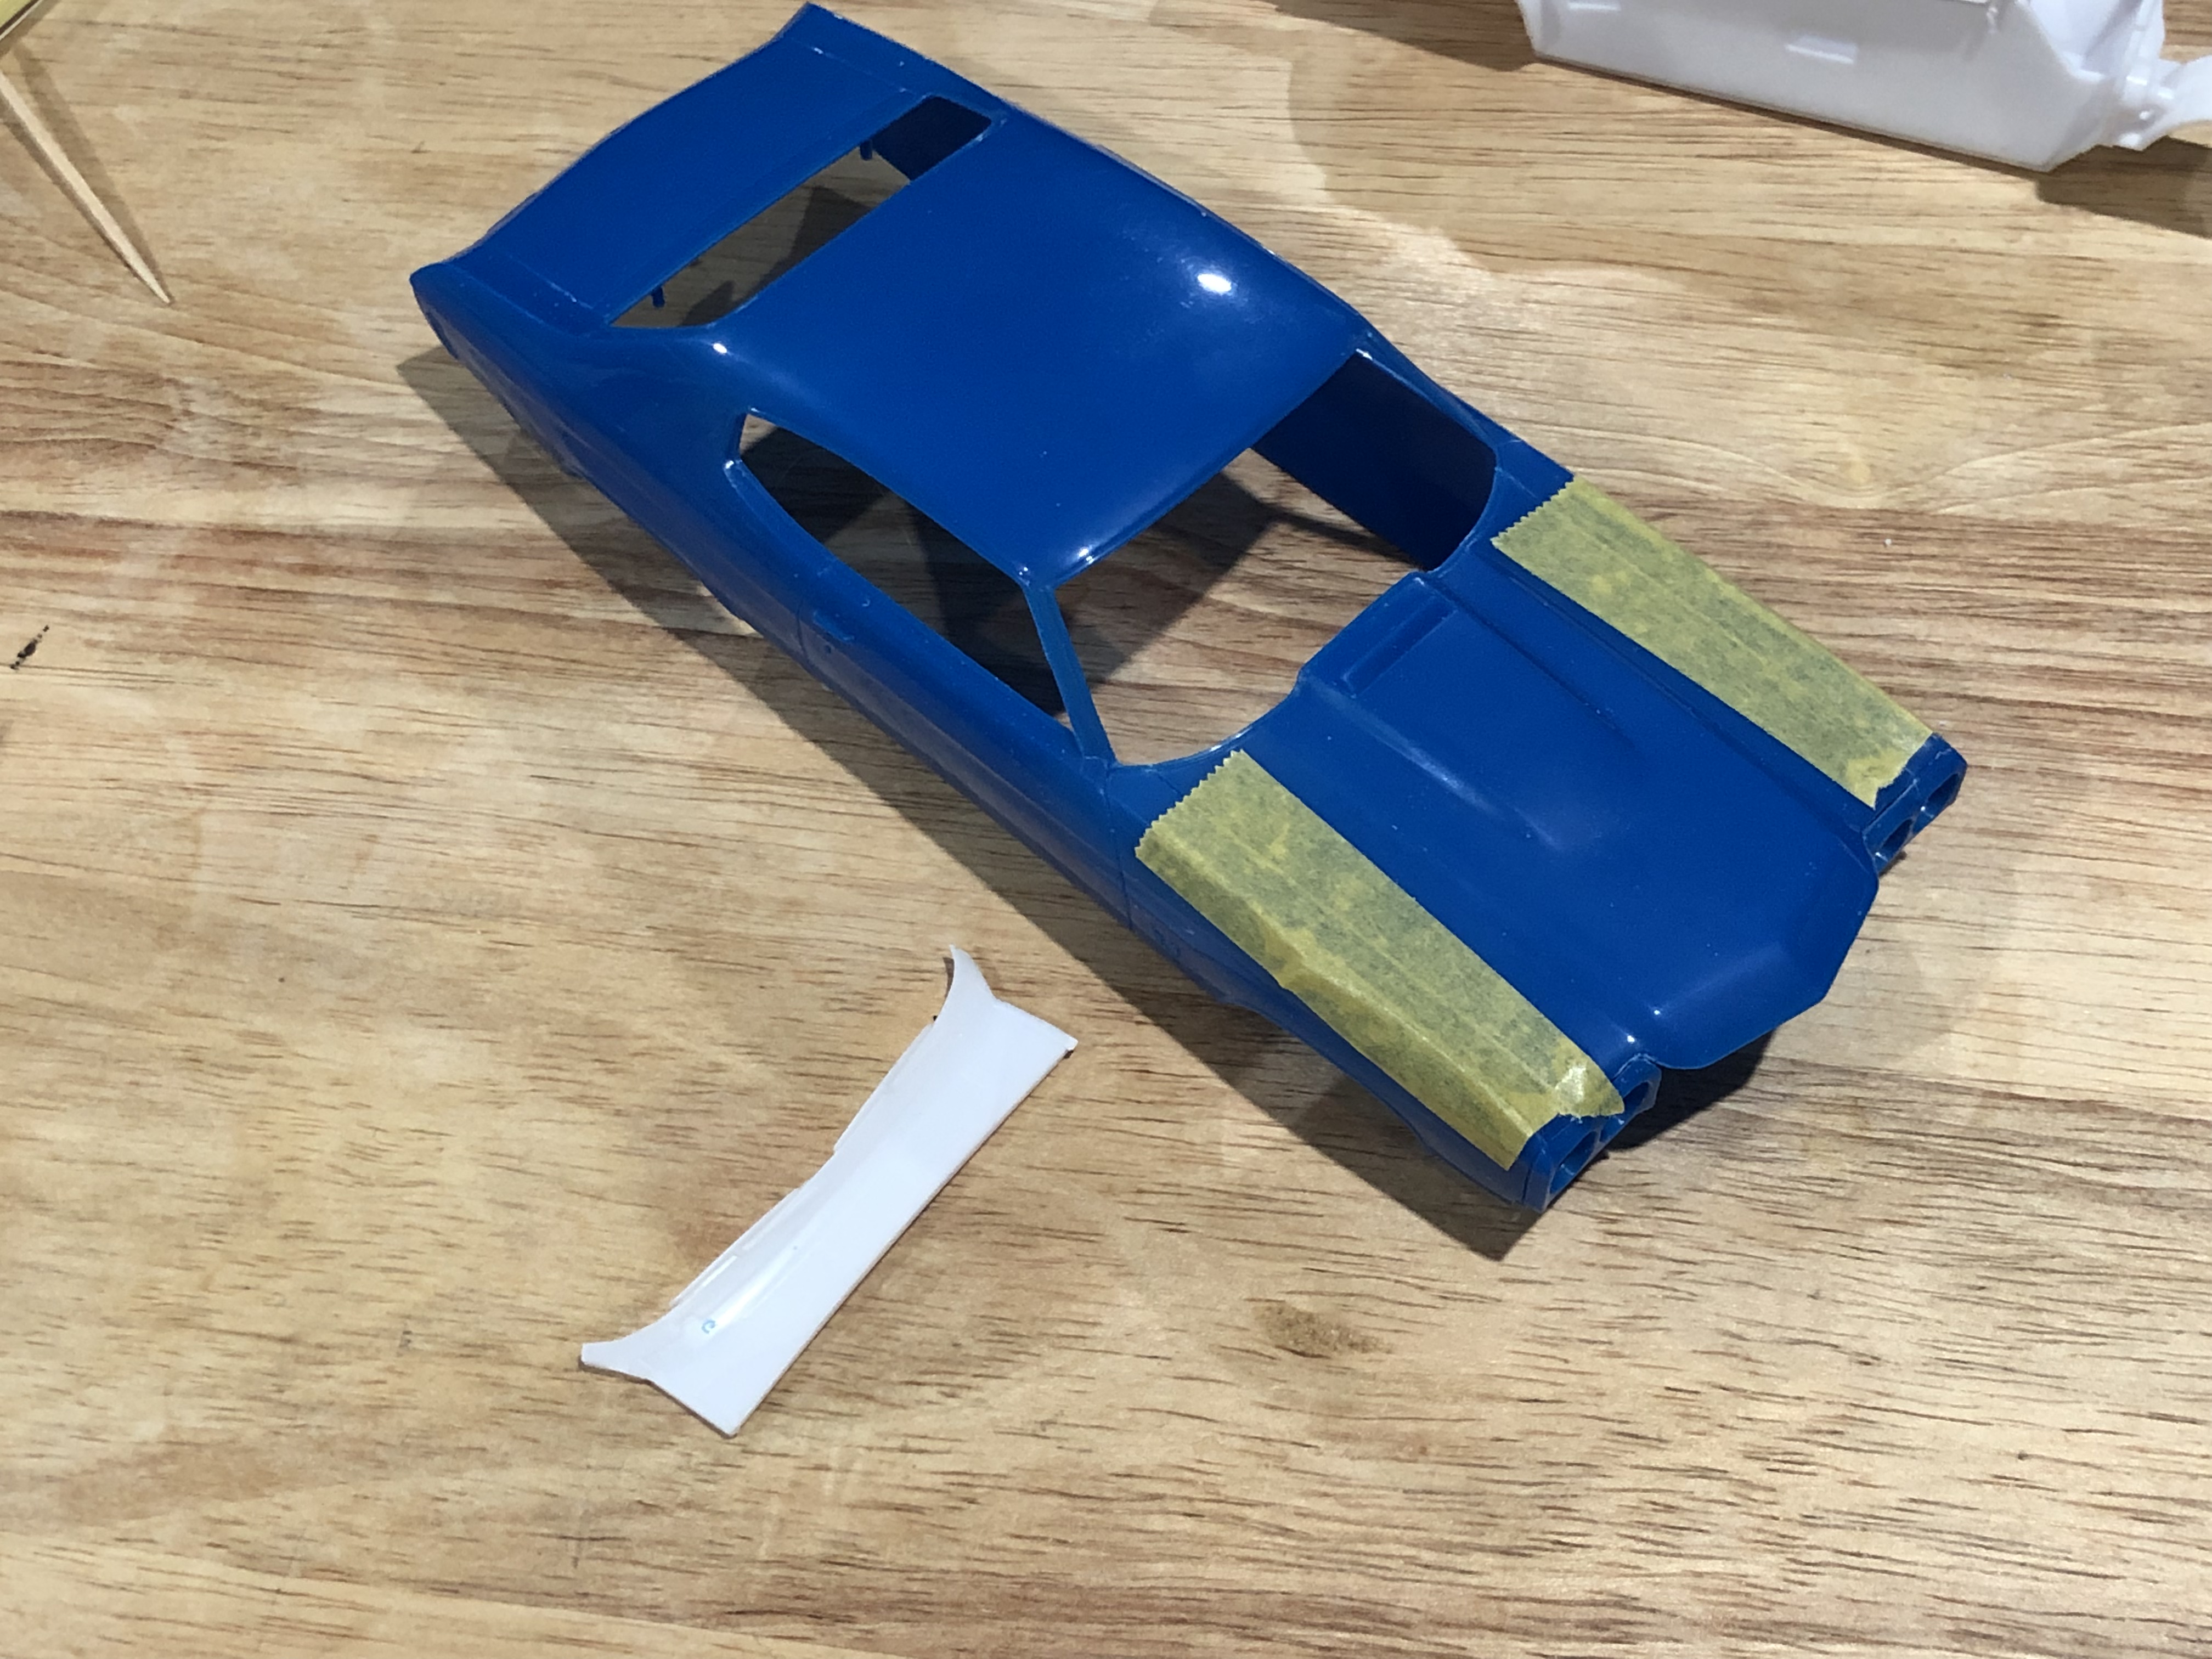
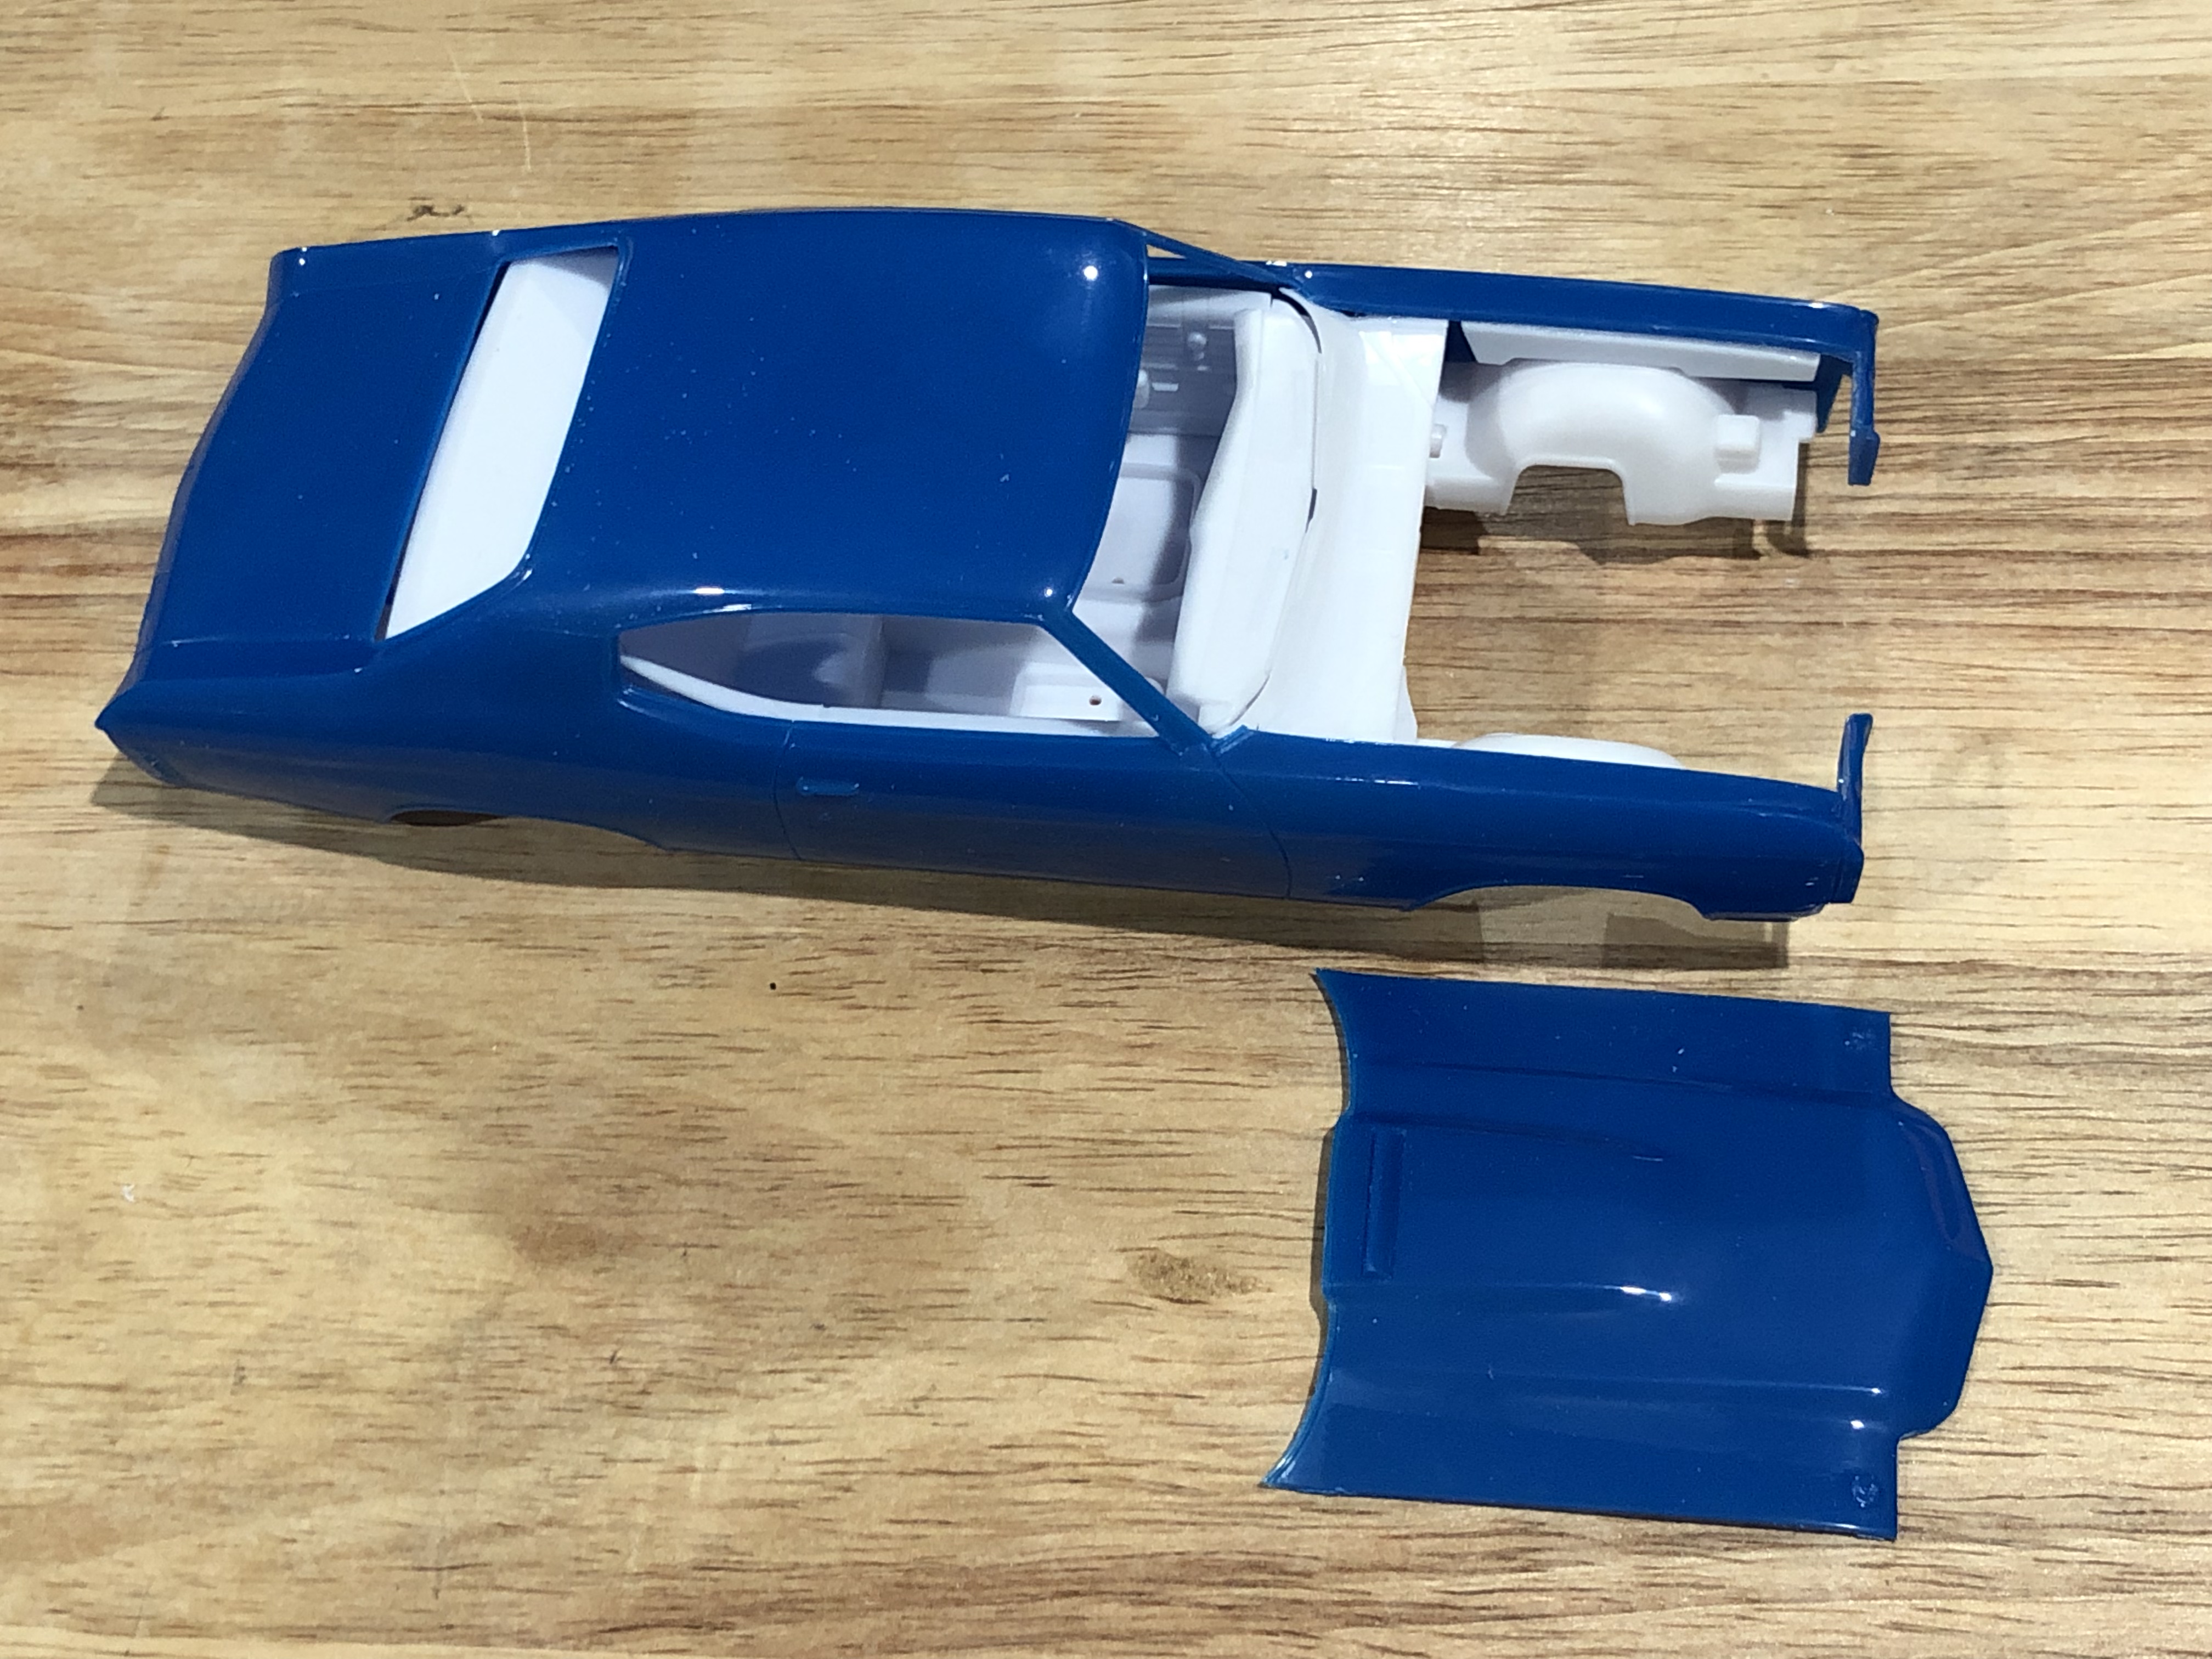
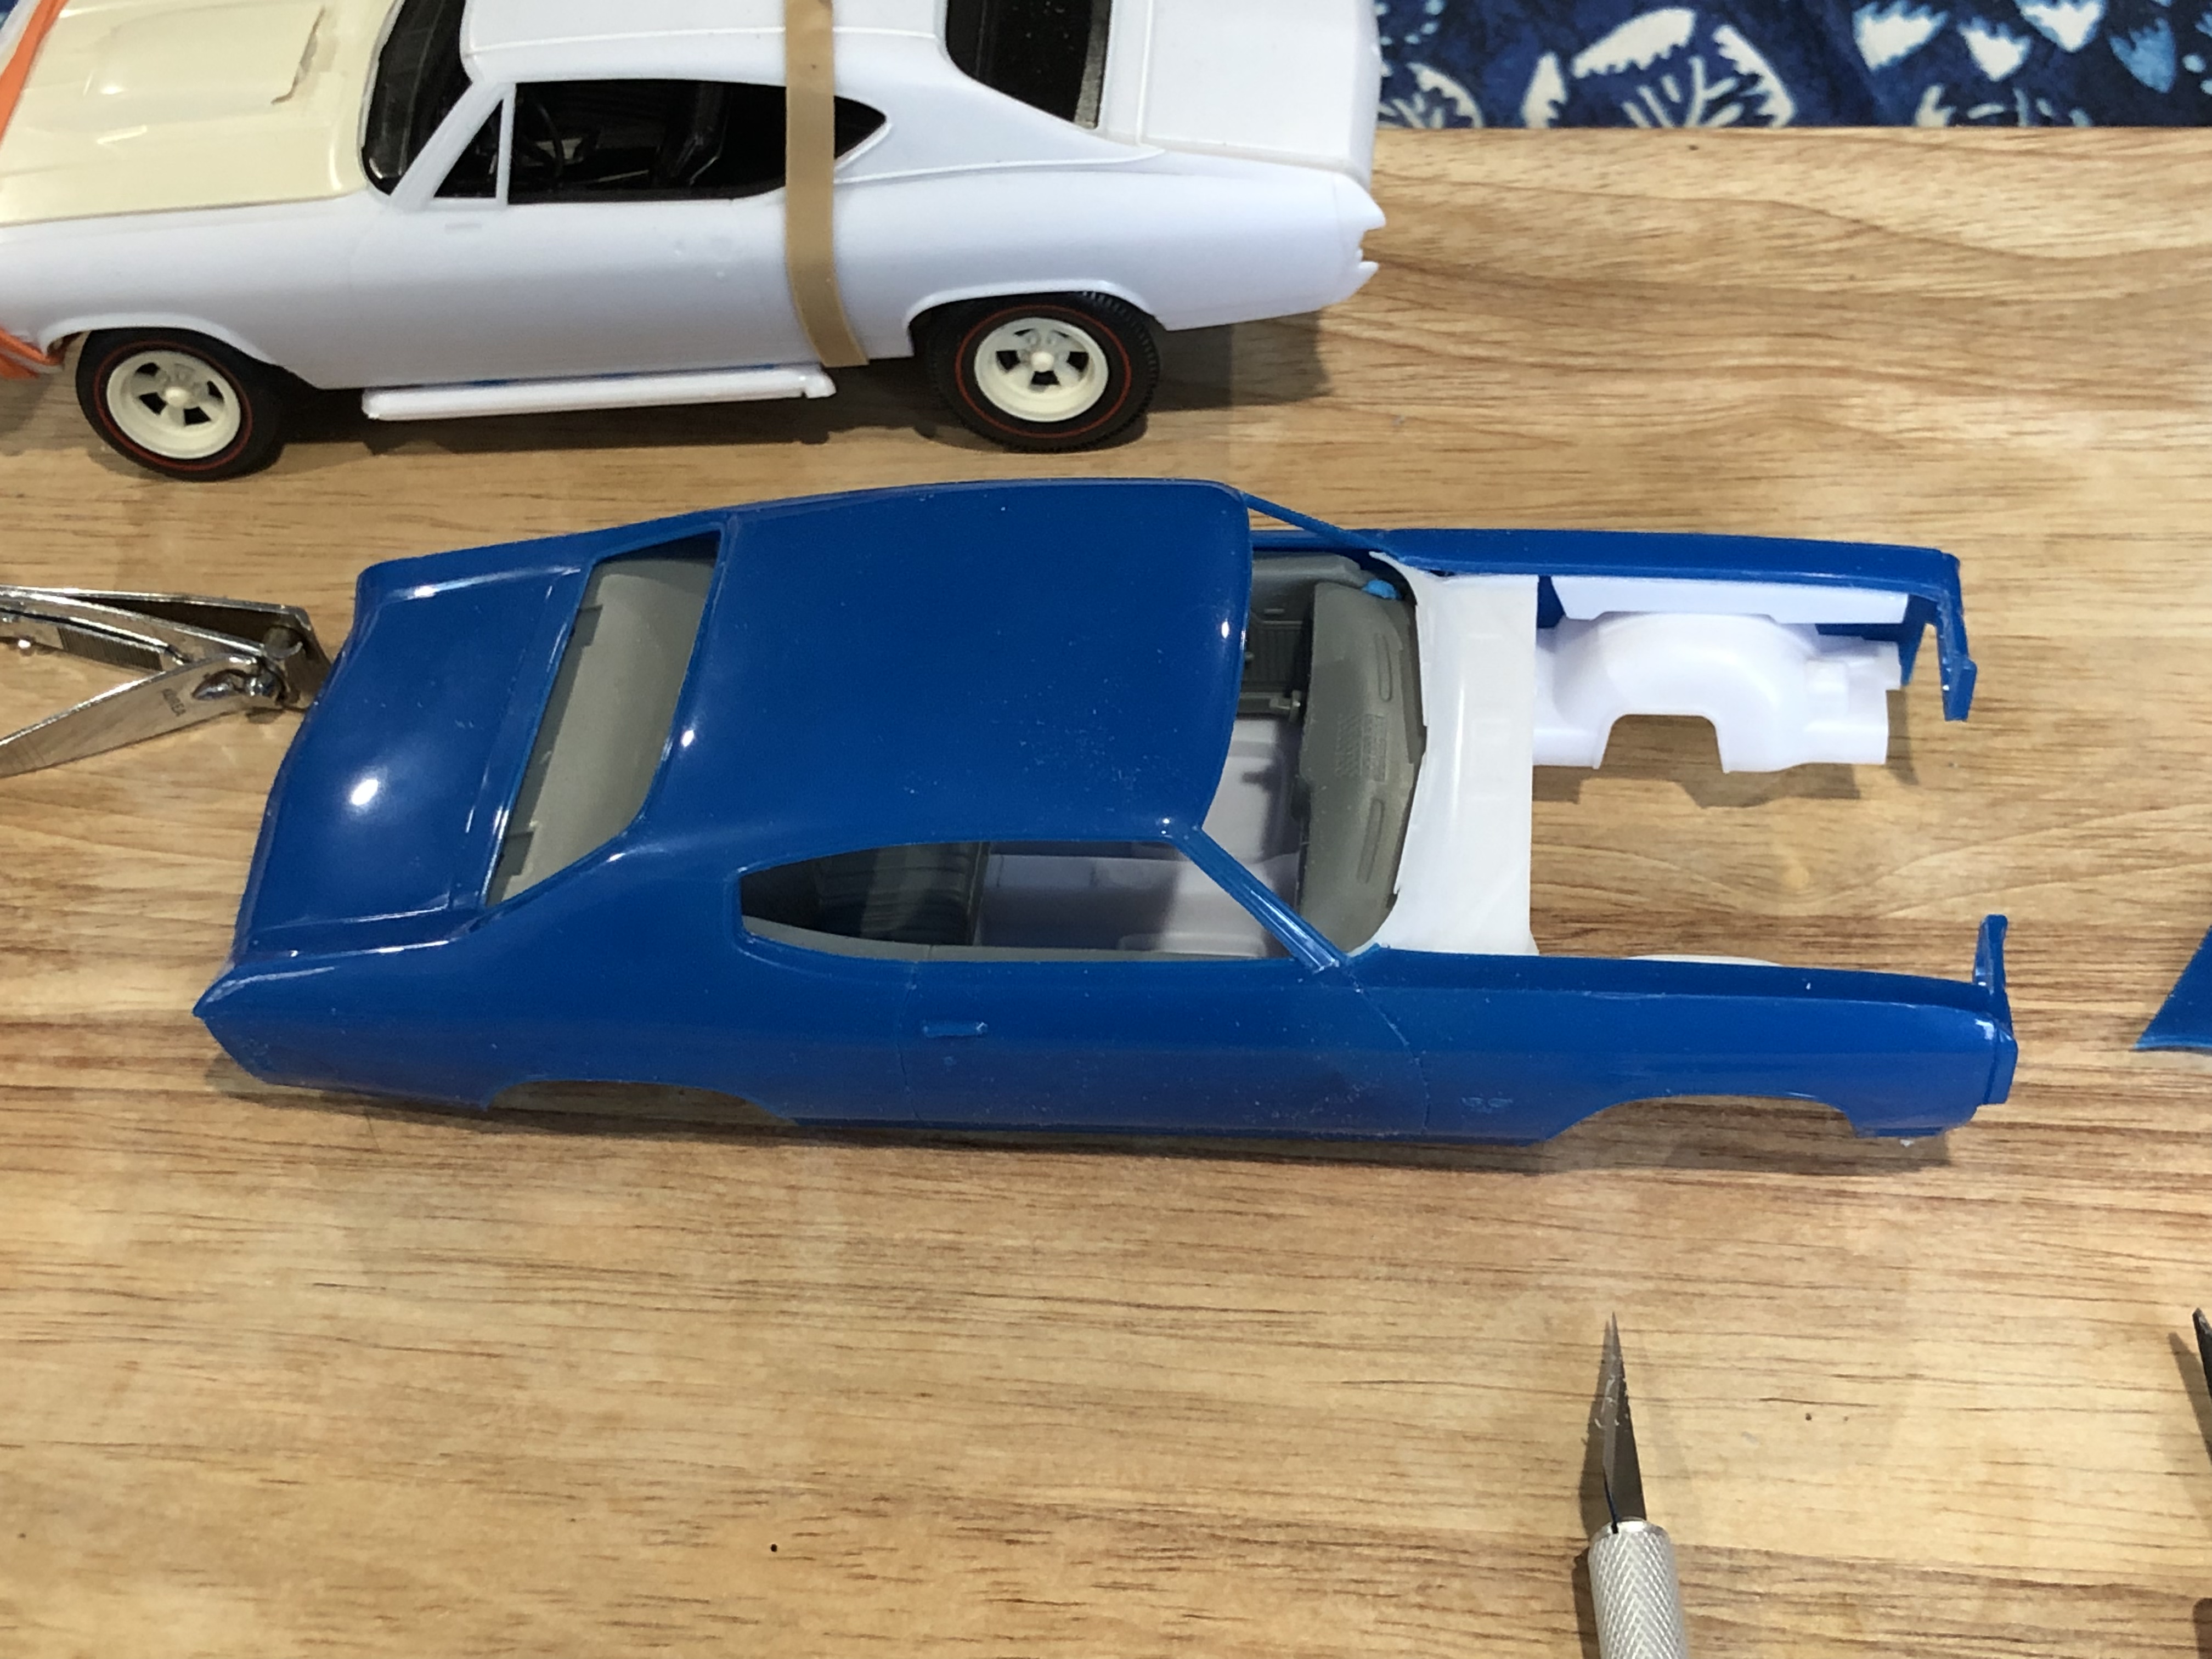
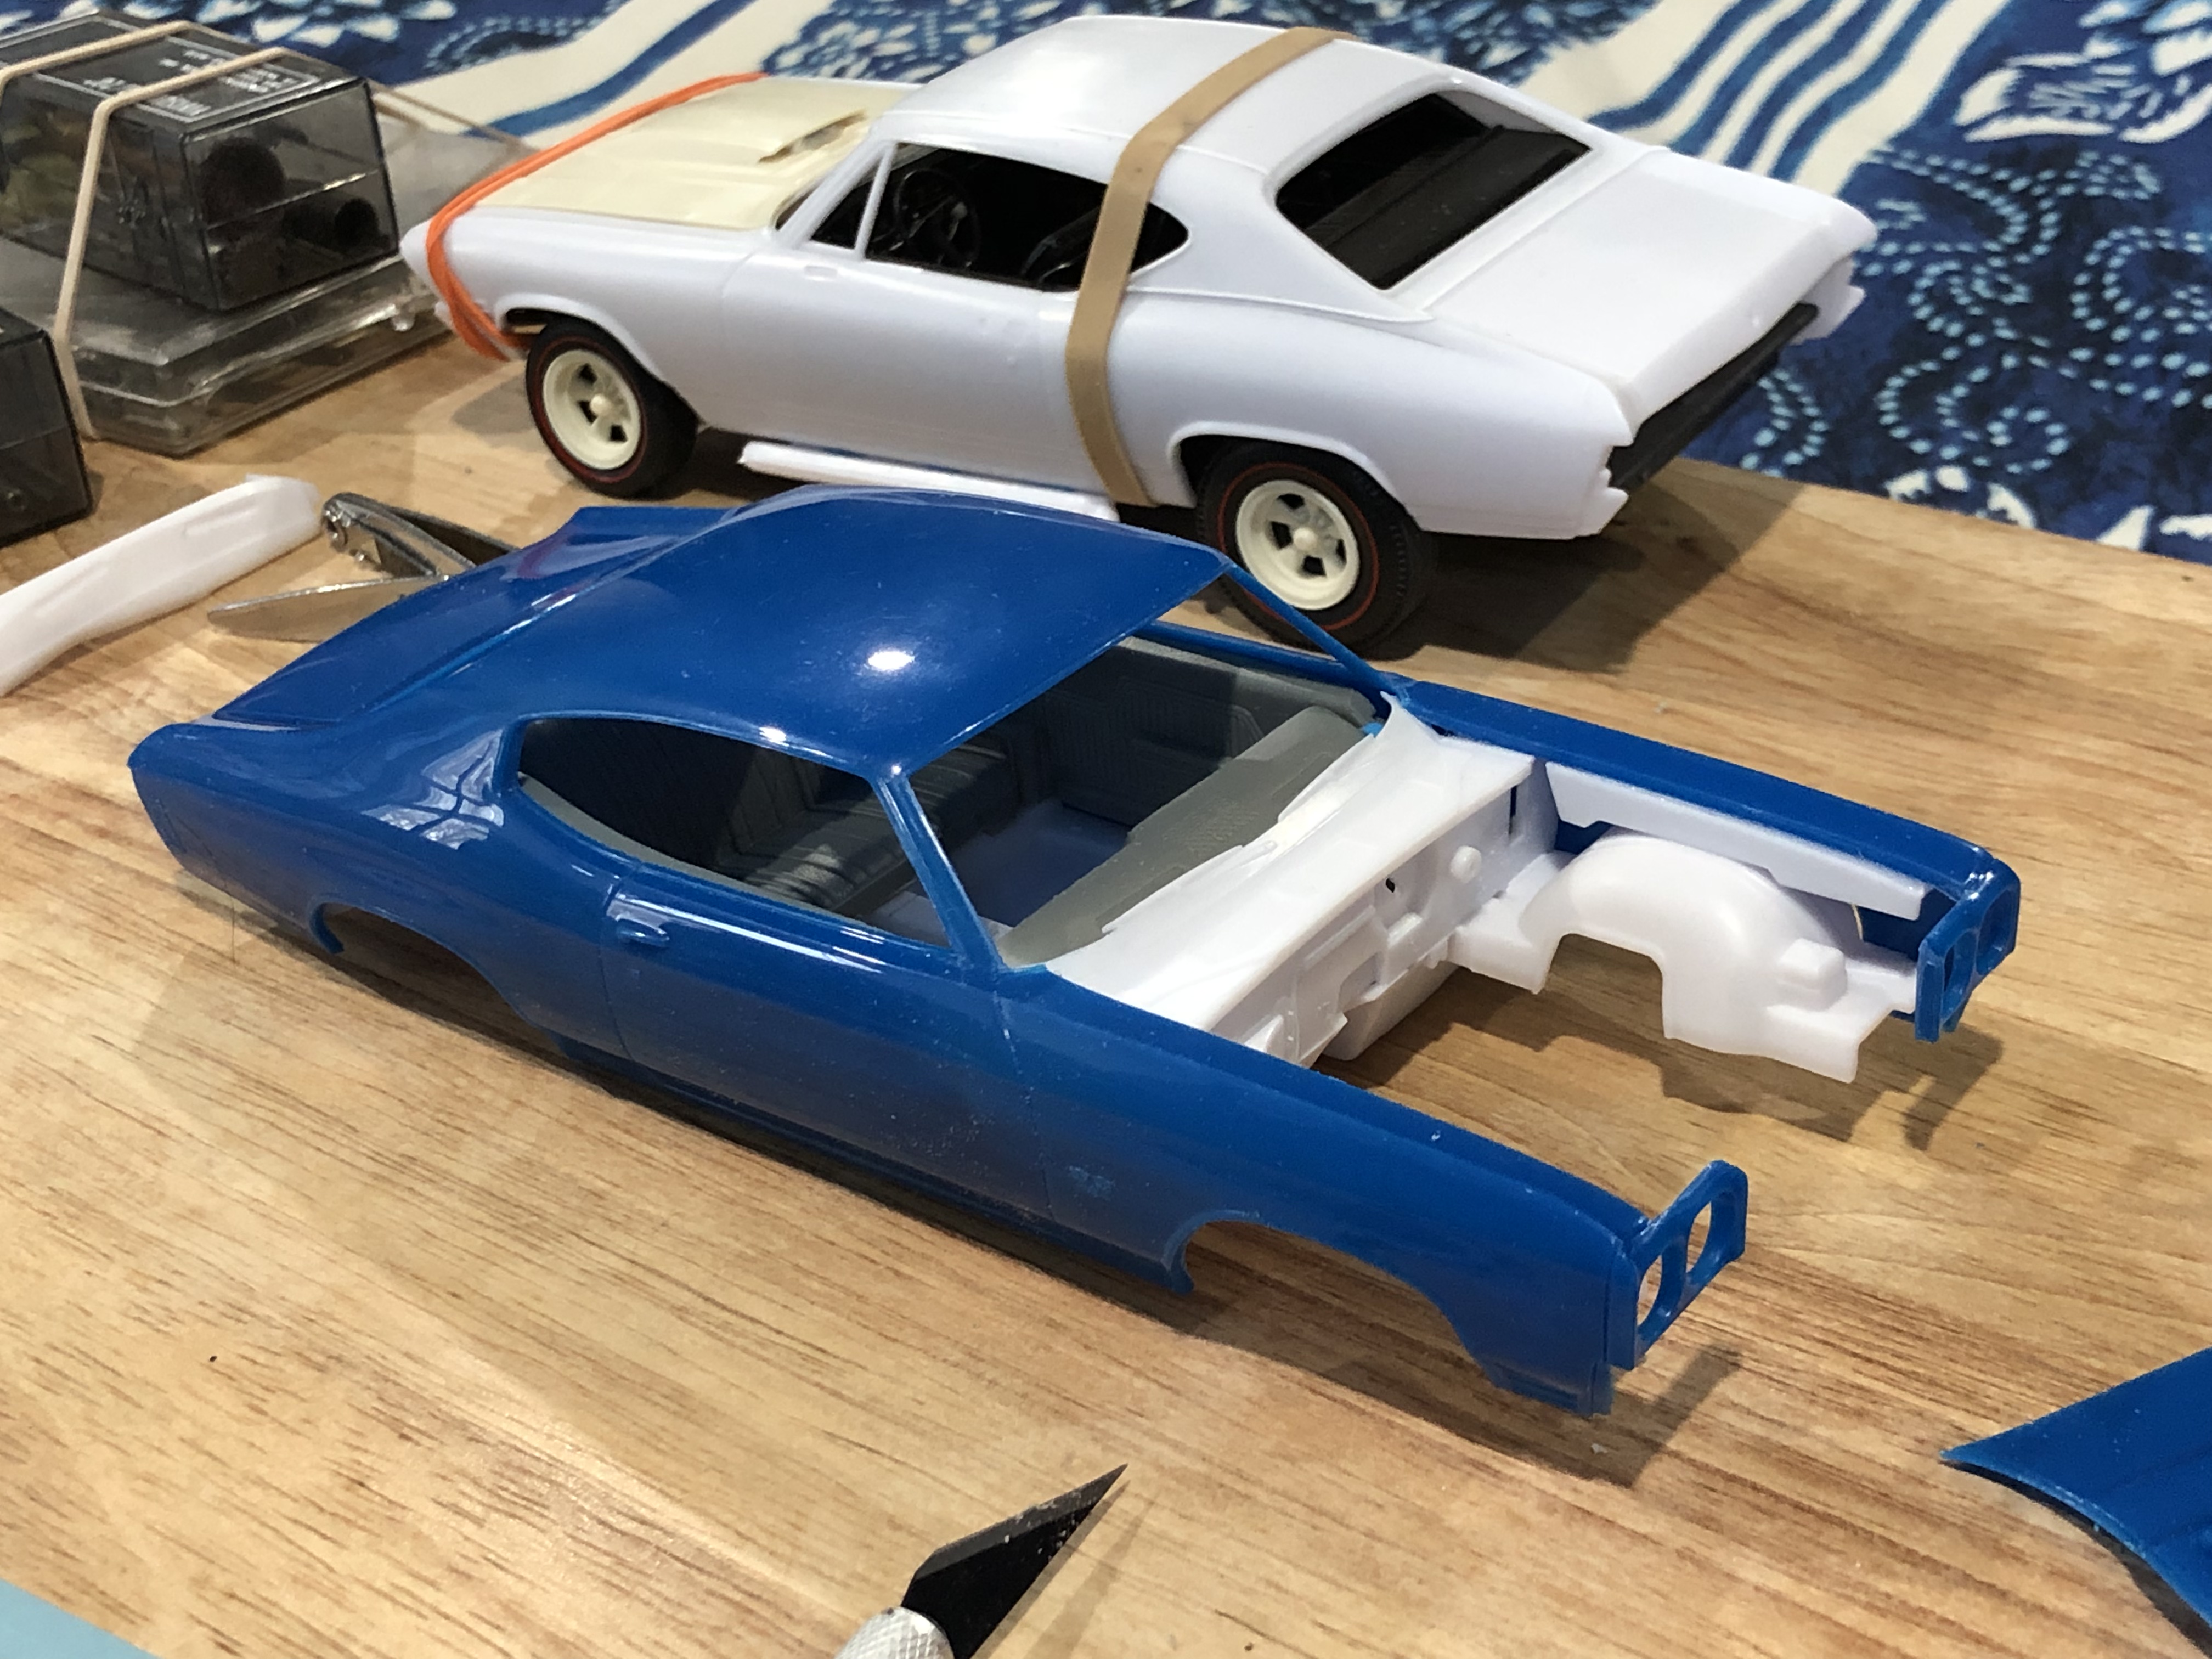
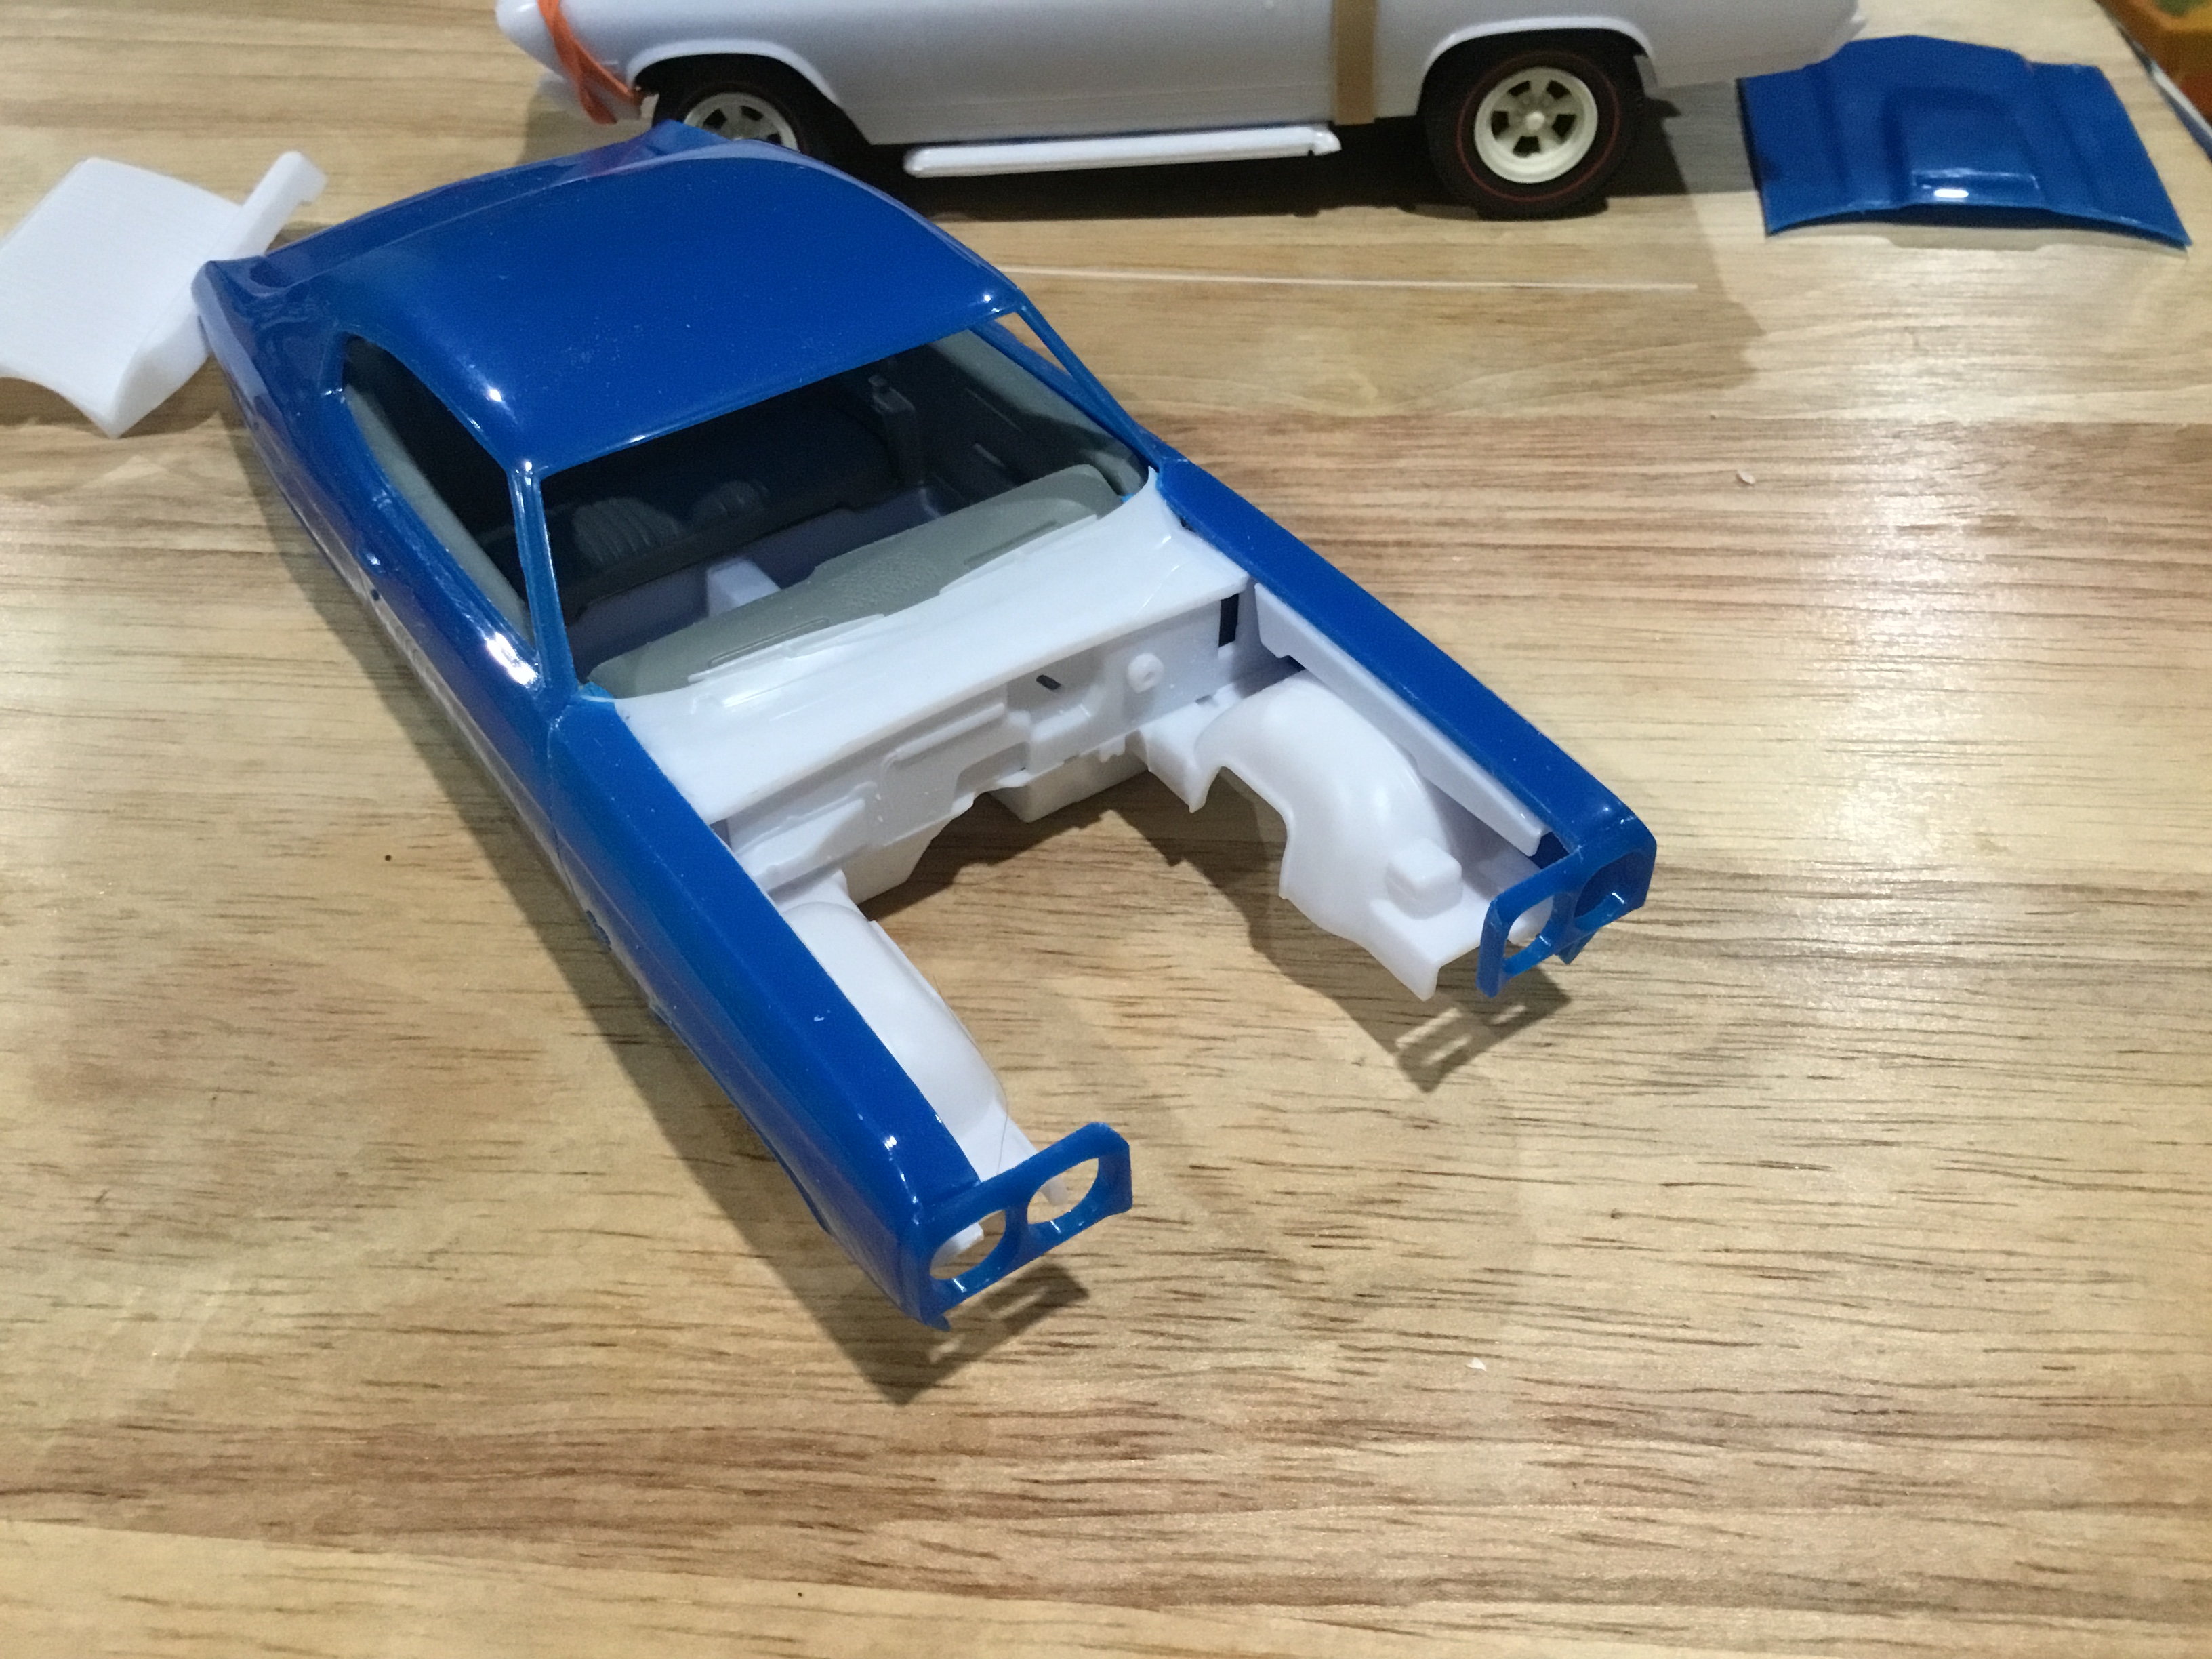
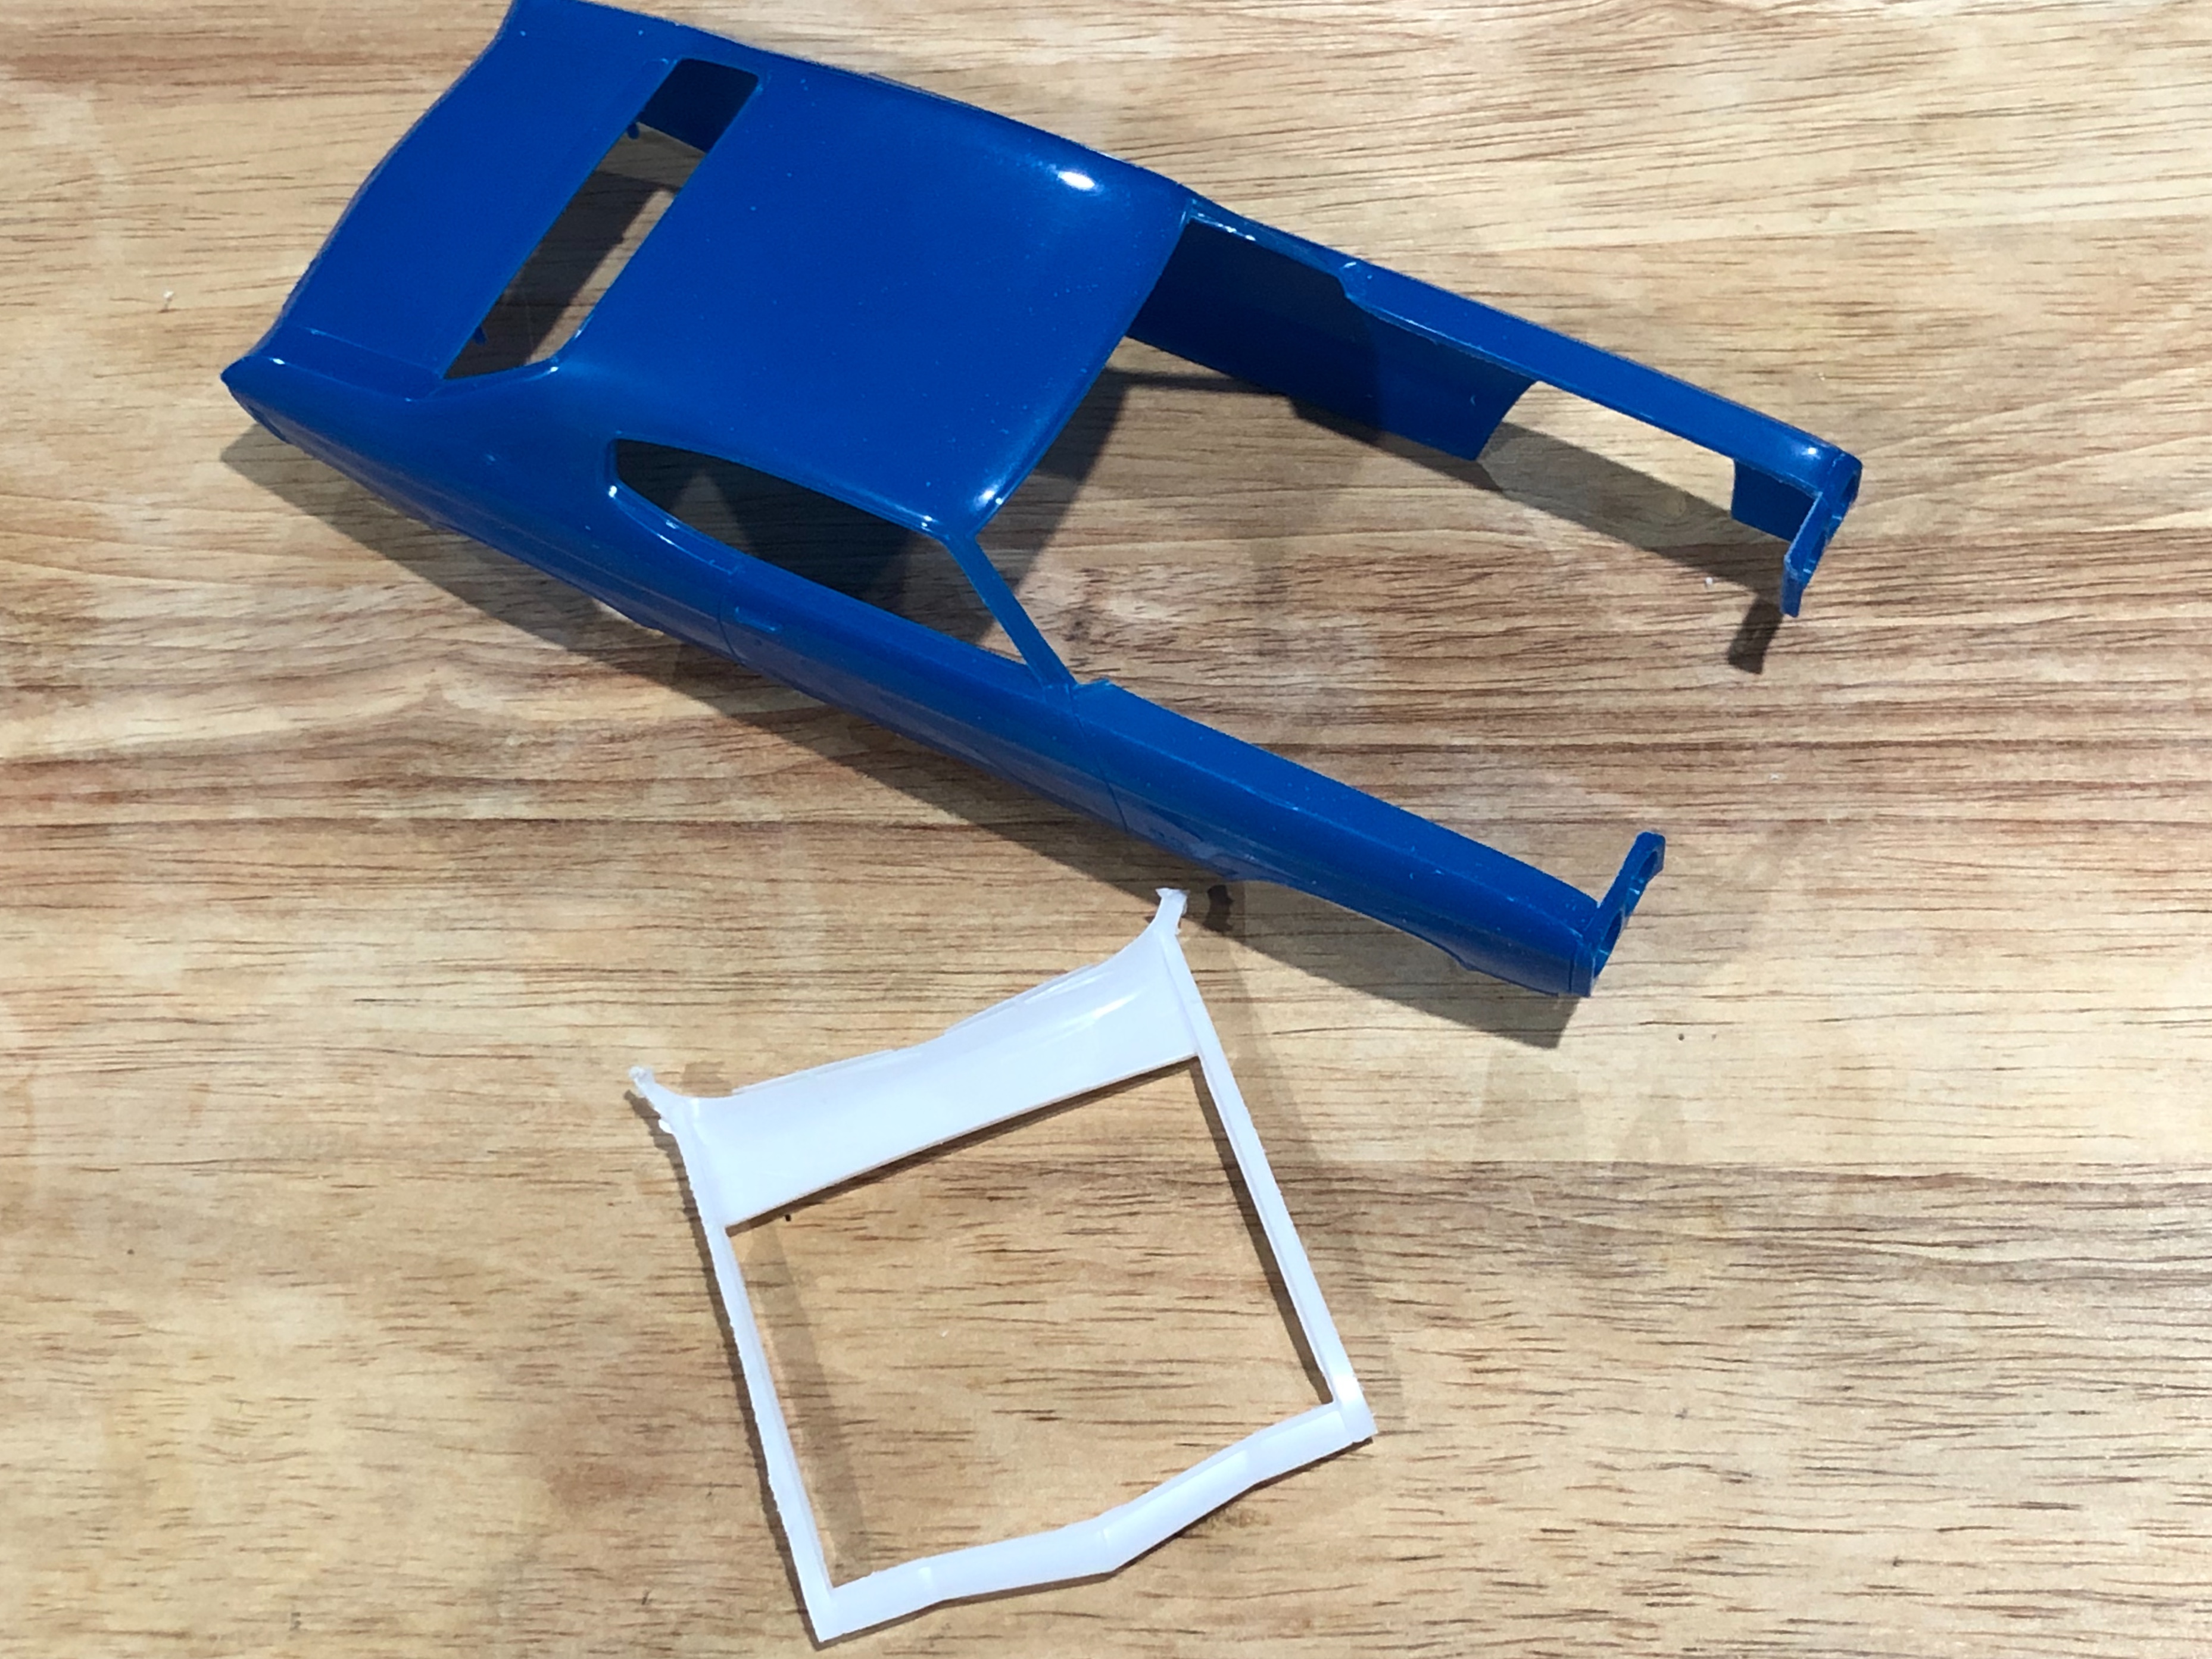
I picked up the snap Revell 70 Chevelle yesterday just to check it out and see how well the 68 frame and floor pan fits. What do you all think? There were no modifications done to either the body or the floor pan for this fitting. So this conversion of the snap kit is thoroughly doable, except for one thing. The cost. In order to do this right, someone would need to get two of the snap kits in order to cut the hood out. (unless of course the hood from the AMT kit would fit, which by looking at it I don't think it would. Too short.) In order to get a nice fitting hood a person would need to first cut out the hood from the donor kit along the fender side, leaving room between the cut and the hood edge of the hood for final sanding. The body you are using to build your 70 Chevelle, you would cut the hood out between the hood edge and the fender on the hood side, that way you could sand it even with the fender. Once you do that the hood will fit with the clearance of the grove that is already cut into the body. Basically you would cut on either side of the hood groove and then sand down for fit. The other thing a person would need to get is the 68 Chevelle kit for the running gear. Of course, you could always use the 68 frame and floor pan and mate that to the unmodified snap body for a nice curbside with good frame detail, that way you only need to buy one kit. At the cost of kits now-a-days, we are talking around $60, seems pretty expensive to me. While I do agree the Revell body is way more accurate than the AMT version, perhaps I could live with just a snapper for the 70 version, of build one of the three AMT ones I have! Thanks for looking!


.thumb.jpg.e0420fe52e683c60d19e843462316523.jpg)


.JPG.eb2faab3fe7d217c196dcfa8fb0c59c2.JPG)