Funkychiken
-
Posts
2,662 -
Joined
-
Last visited
Content Type
Profiles
Forums
Events
Gallery
Everything posted by Funkychiken
-
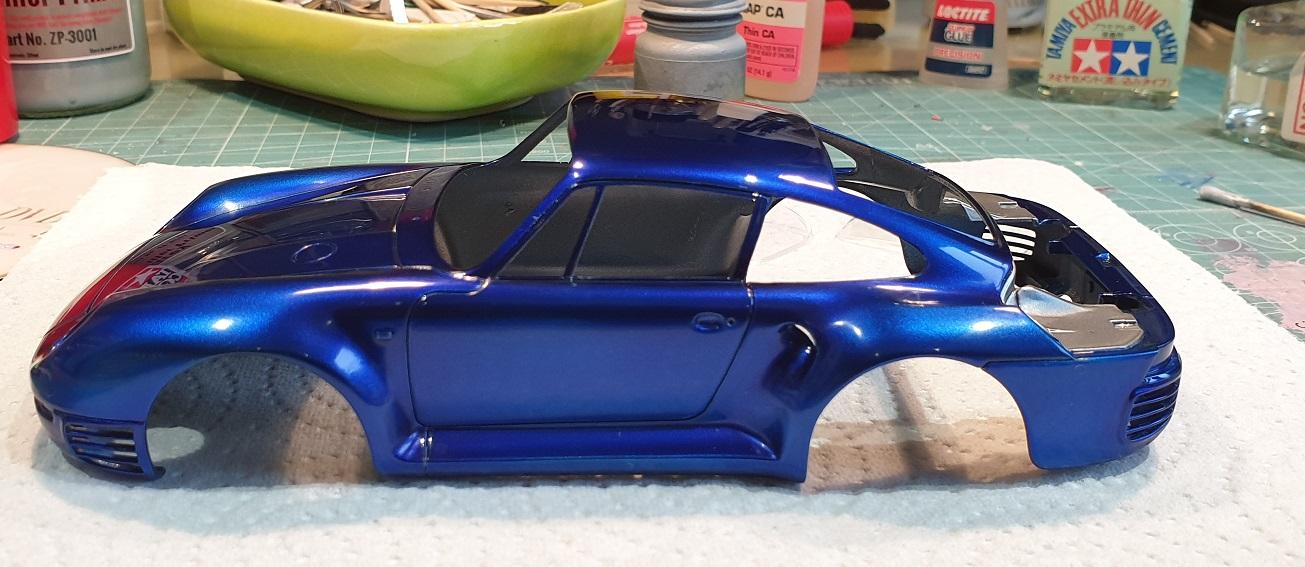
Hi Bee, This is zero 2k over alclad II cobalt blue... It's been sanded and polished!
-
59´Cadillac Eldorado Seville Hardtop 1/25 Monogram
Funkychiken replied to Fairfax's topic in Model Cars
Wow, stunning build, the reflection of the paint work is impressive! -
Beautiful cobra!
-
The paint work is excellent!
-
That's a killer finish on this f50!
-
Odd ball builds and run of the mills are my favourites! Looking forward to this build...
-
That's a great colour, engine looks good too!
-
Italeri - Ferrari 275 GTS (Spyder N.A.R.T.)
Funkychiken replied to 89AKurt's topic in WIP: Model Cars
This is a beautiful Ferrari! -
Great looking build so far!
-
That's a great start!
-
great builds!
-
nice neat build! great finish on the paint
-
Stunning build...!
-
It does look gangster, nice clean lines, great build!
-
For such an old kit, it turns out really nice!
-
Killer build!
-
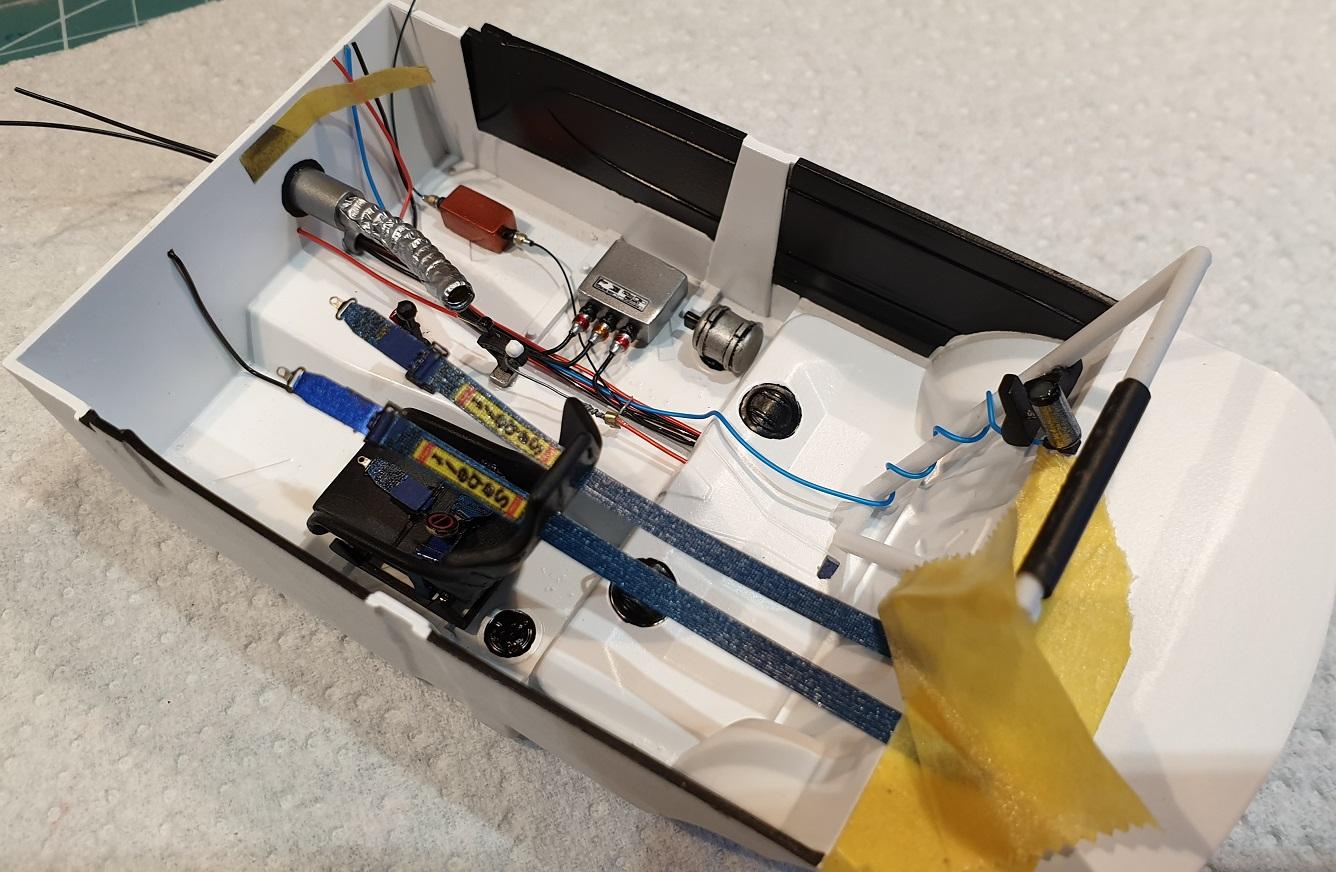
Thanks to Dr Trevor, I should be getting a replacement set of decals, the interior does not look like much, but its many hours of tedious time at the bench! I'm tring to soak off the old decals, they are being tough, hours, and not bugding. I did some research, and they may come up with decal softener...

-
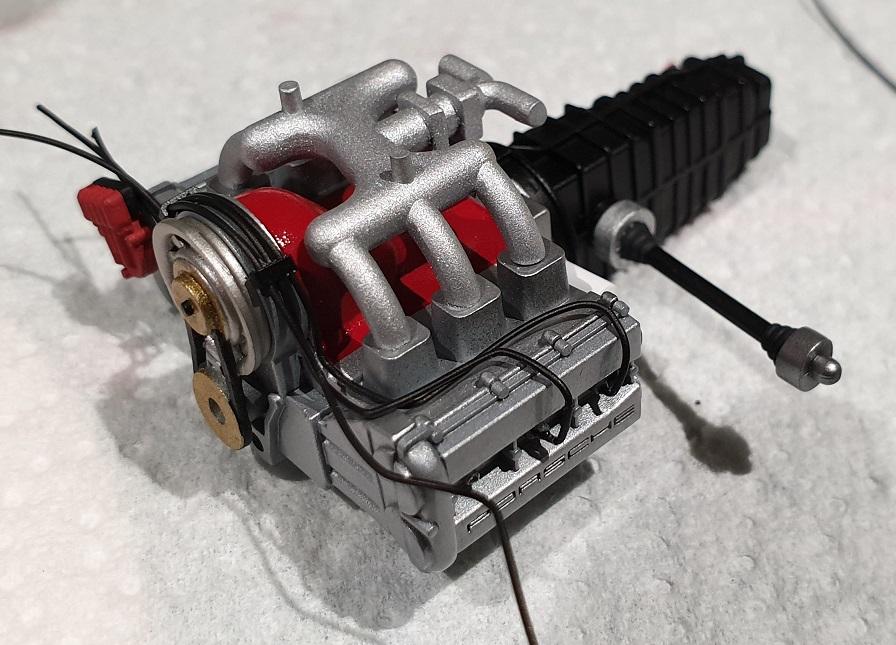
polished the Zero 2K, and started to wire the engine, it's a bit fiddly! just final assembly now...
-
wow, that's amazing work!
-
Monogram Ferrari GTO 1/24 Scale the 5 year build
Funkychiken replied to Funkychiken's topic in WIP: Model Cars
Hi Dann, I used tamiya white primer, lightly sanded. I'm in 2 minds as to what to do more. I might sand and respray... Or try to coat with tamiya clear, and see if it levels out somewhat... Looking at you tube videos, others do appear to lay quite heavy costs too... -
Fantastic!
-
Land Rover Series III
Funkychiken replied to mrmike's topic in Model Trucks: Pickups, Vans, SUVs, Light Commercial
That's a super clean Landie Mr Mike, great subject! -
2005 Cadillac Escalade EXT
Funkychiken replied to Chuck Most's topic in Model Trucks: Pickups, Vans, SUVs, Light Commercial
That weathering really sets it off, great vision! -
Sweet build, those wheels really suit it!
-
Nice weathering, and those really do look like things one would put in the bed of a pick up!