Straightliner59
-
Posts
5,809 -
Joined
-
Last visited
Content Type
Profiles
Forums
Events
Gallery
Everything posted by Straightliner59
-
Thank you, Ray! I think the paint scheme matches the time period, pretty well.
-
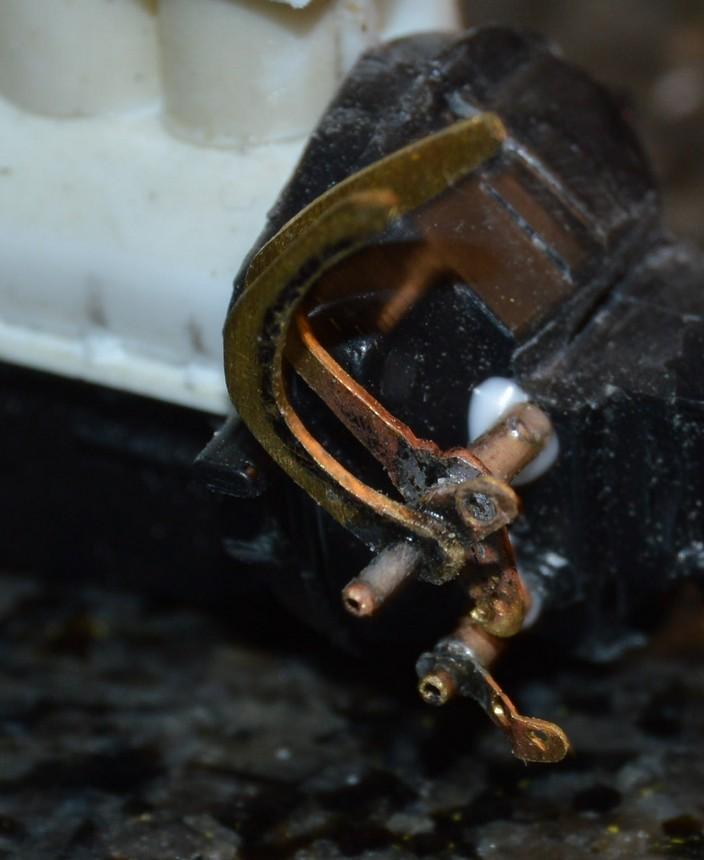
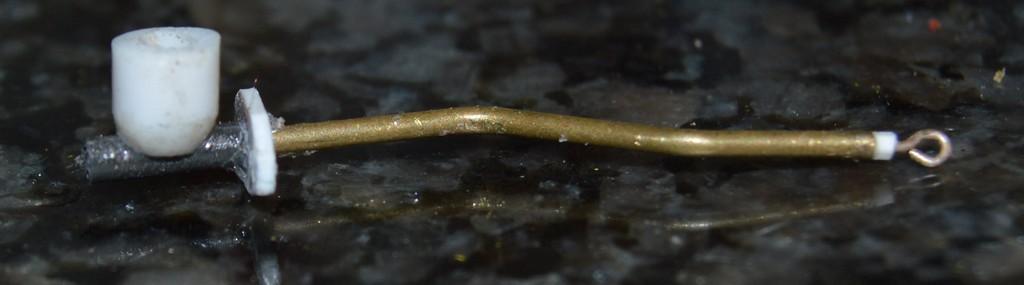
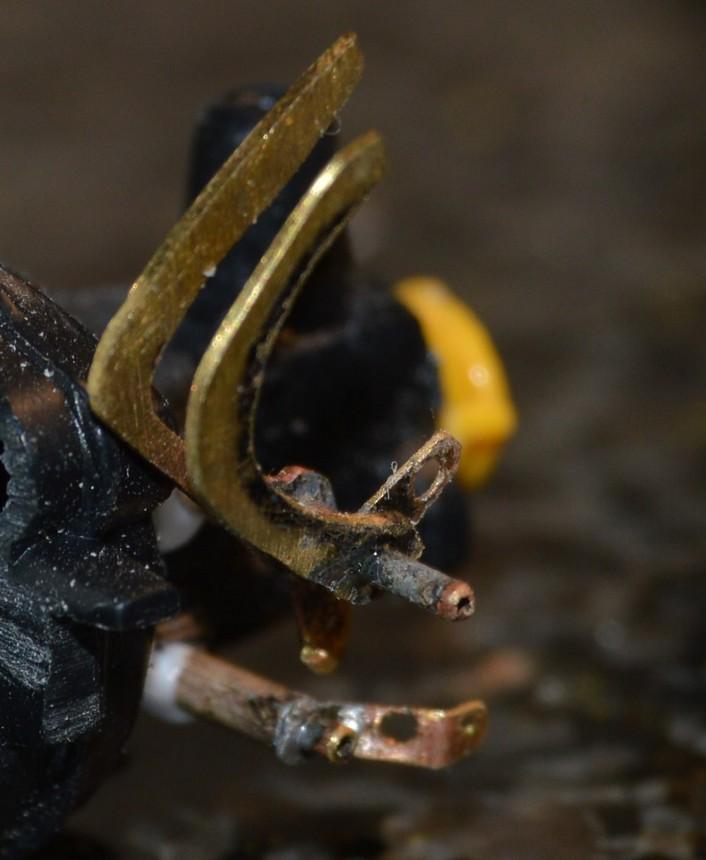
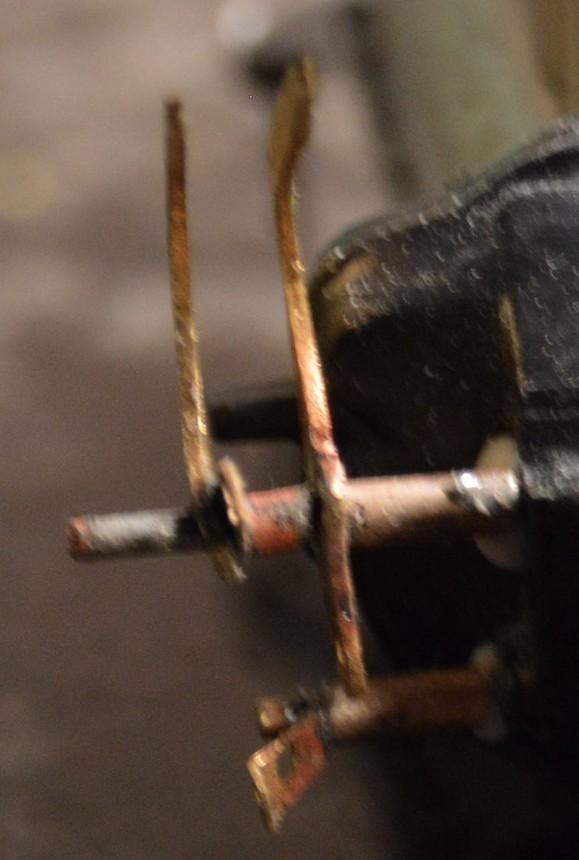
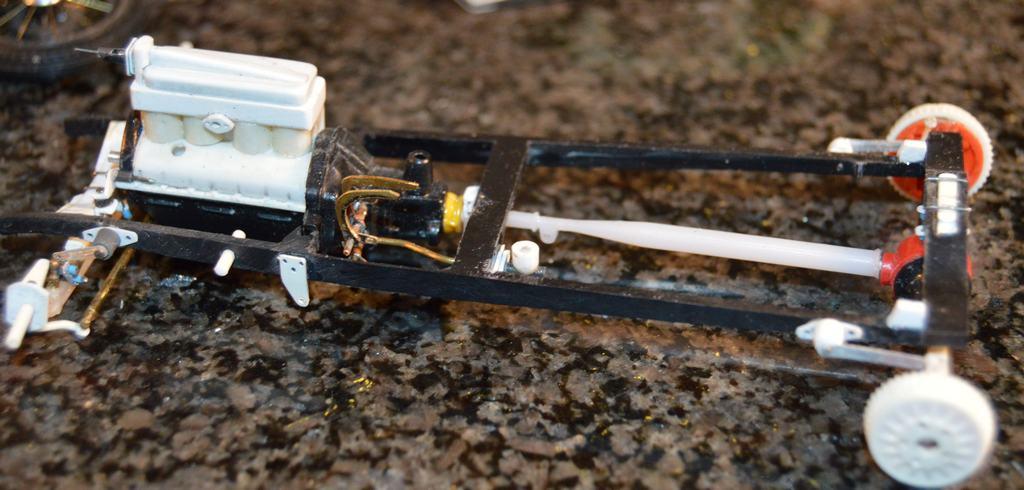
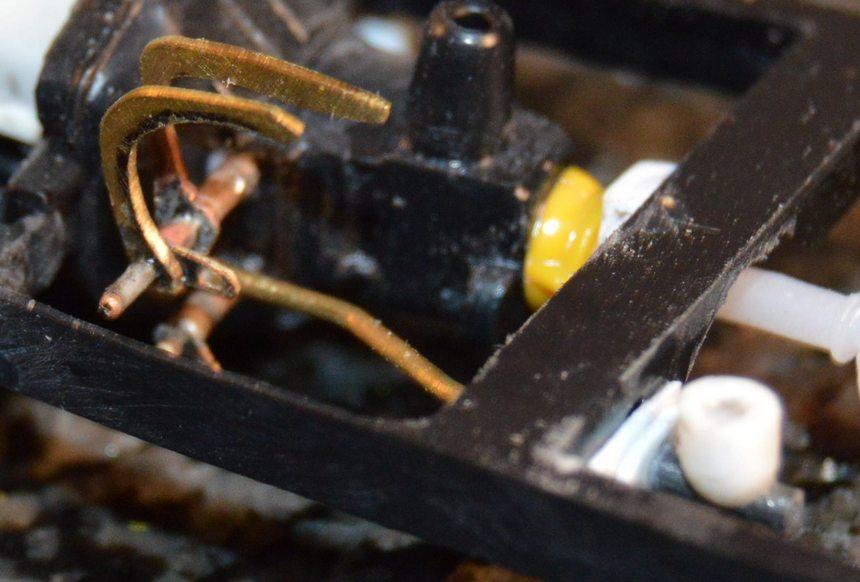
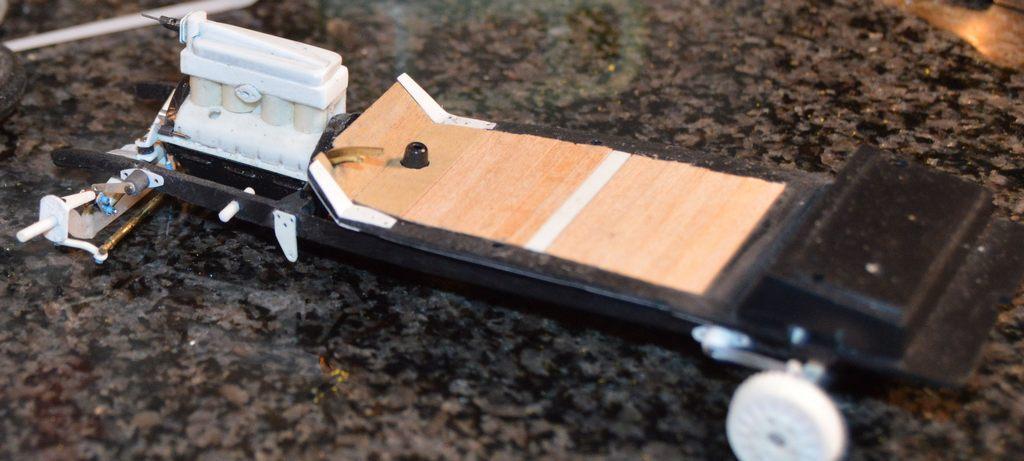
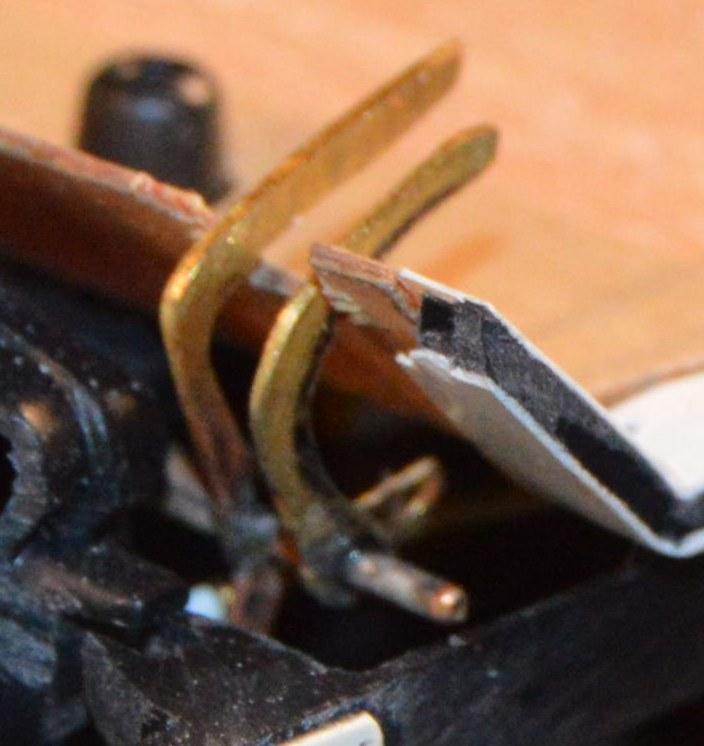
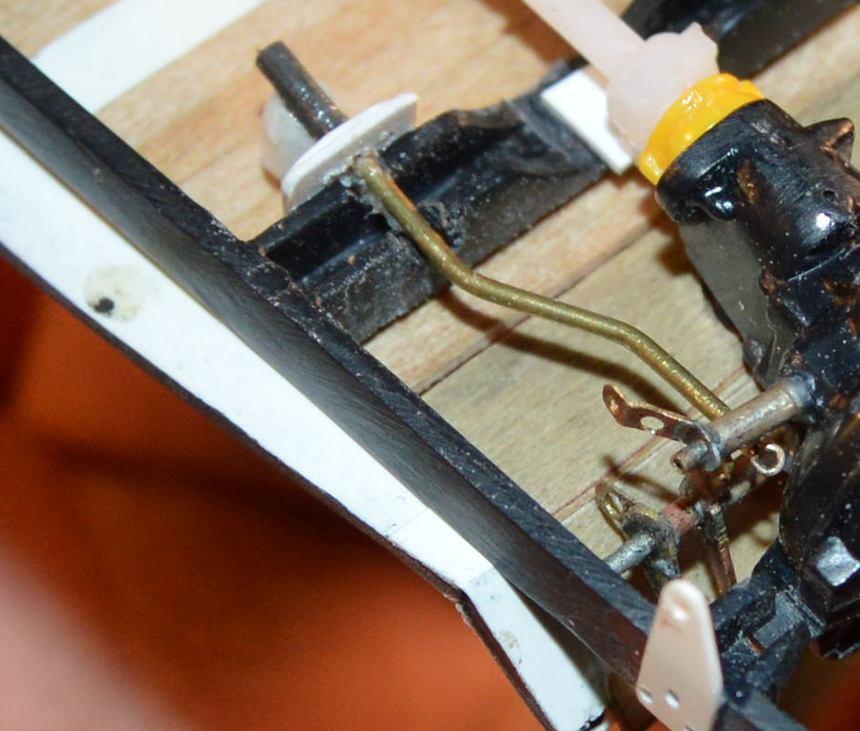
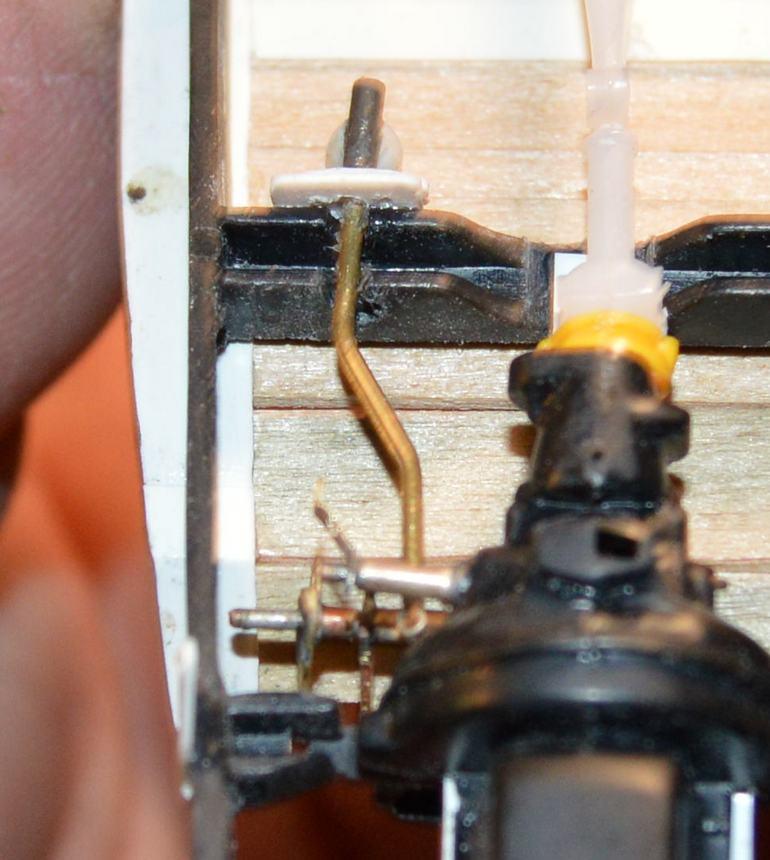
After finishing up the Firebird, I finally got back to work on this. I needed to make sure the pedals and arms and levers, and all that stuff would clear each other, so I white glued it all together, along with the master cylinder and the brake pushrod. It looks like it'll all work, so I can finish tacking the suspension back together. I also need to see if I can find a set of brakes for the front. If I can find some I like, I will use them. Otherwise I'll go suicide style! As always, critiques, questions and comments are always welcome. Thanks for looking!

-
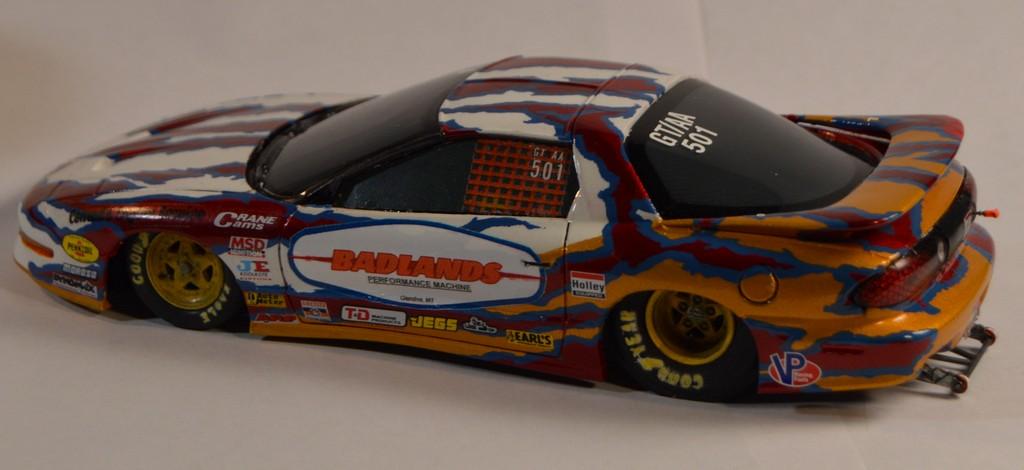
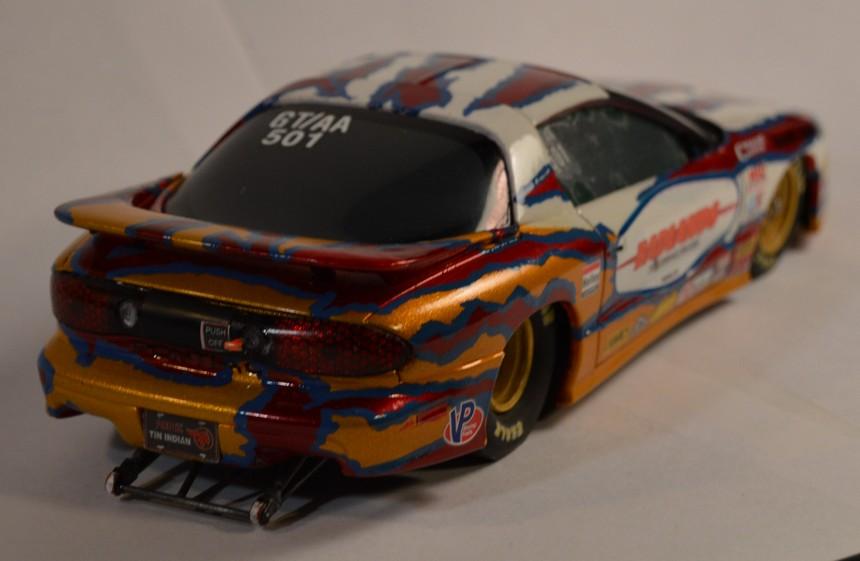
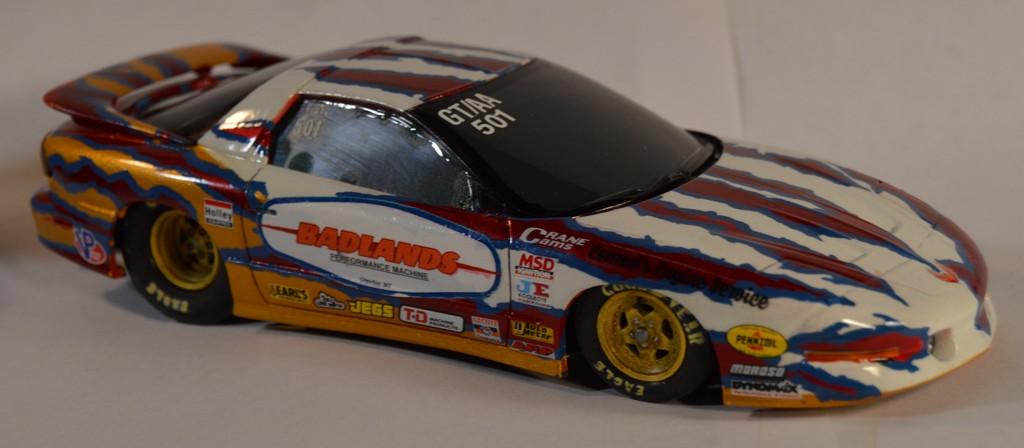
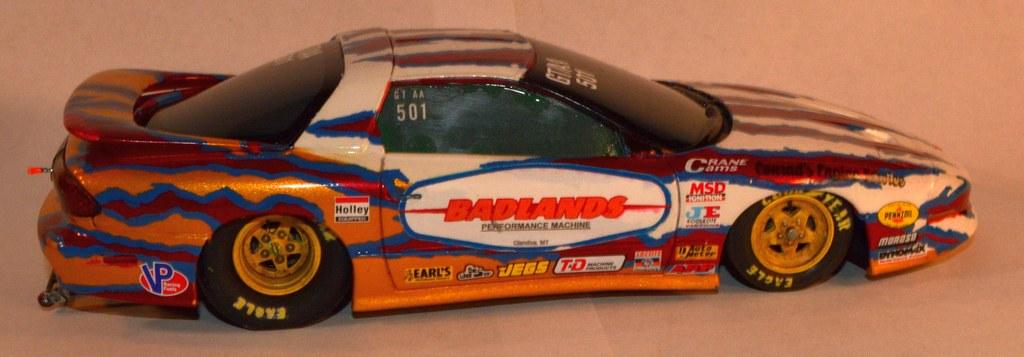
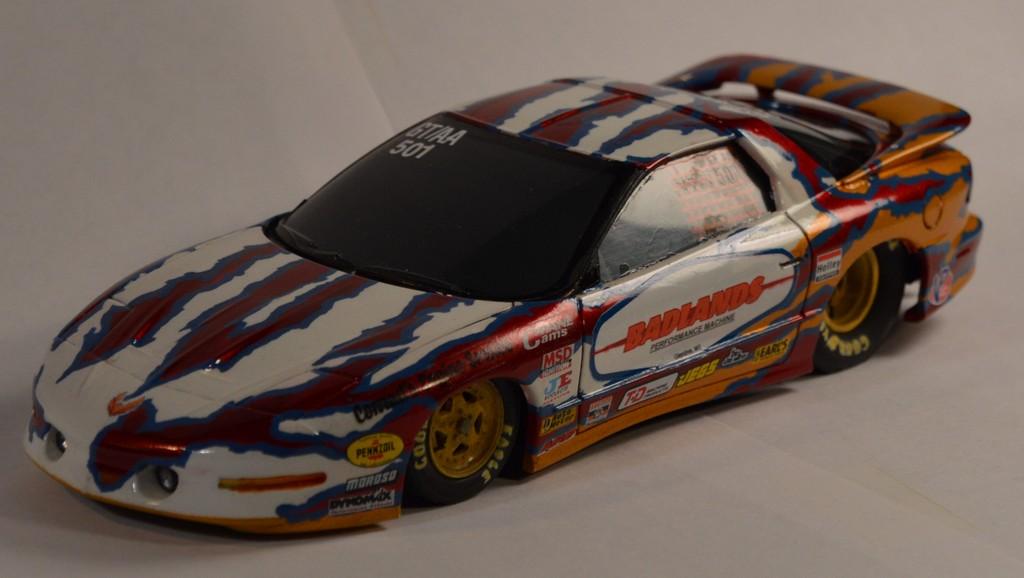
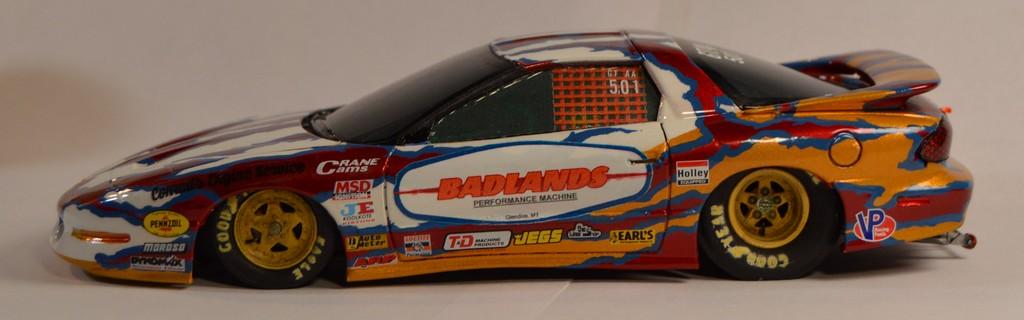
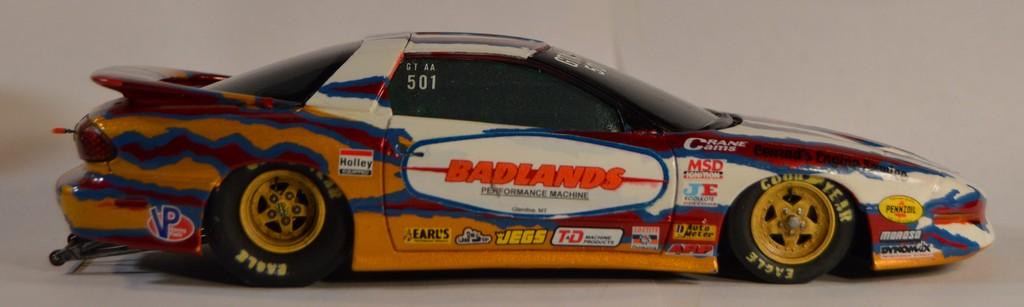
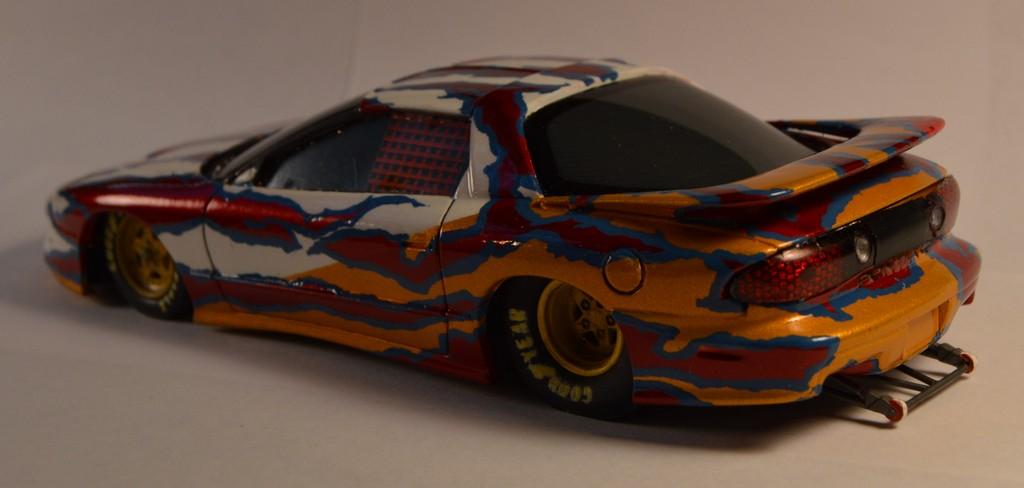
I just finished this, over the past weekend. It's an AMT snap-together/unassembled promo that came in a three(?) pack, from a Kaybee Toys outlet store.The chassis is a sheet styrene plate. I cut out half circles of sheet to support the axles. I blacked out the windows, since it was never intended to be anything more than a slammer. When I started painting it, thirteen years ago (?), I thought I had a plan for it, so, I taped it off and began spraying what the can's label showed to be a pale yellow. As soon as I started shooting it, I realized that the label was wrong! Out came a dusty coral color, which would have looked great, on a 'sled, but, not so much on an early 2000s race car! Back in the box, it went. Fast-forward to 2017. I returned to Colorado, and had gone to visit my late friend, Don Fahrni, and had taken the model with me, to show him. I took one look at it, and handed me a can of Testor's Inca Gold, and said, "Fix that!" So, I did. He was much happier. While the color was better, I still really didn't have a plan for the paint scheme. I decided to use it as my entry in Snake's "Bring Out Your Dead" thread. I needed to come up with a scheme, for the paint. Out of some sort of desperation, I just began to tear pieces of masking tape, and apply them over the paint that was already there. Next I shot some Plasti-cote automotive paint (I don't recall the color's name) over that. I followed that up by striping the colors off with One-Shot Process Blue. I made the door markings and the hexagon pattern for the taillights , as well as the "Conrad's Engine Service" decals on an inkjet printer. I added wheelie bars and a master kill switch to the rear of the car. It's far from perfect, but, I like the way it looks. It's probably a tad low,in front. By rule it should be no lower than 3", and I think this is about 2". Anyway... Questions, comments and critiques are always welcome! Thanks for looking!
-

Testors paint thinning for airbrush
Straightliner59 replied to Ctmodeler's topic in Tips, Tricks, and Tutorials
Agreed. I always thinned it to the consistency of milk or half and half, which fits John Pol's description. Somewhere between 20 and 30 PSI... -
NHRA GT/AA '96 Firebird Slammer
Straightliner59 replied to Straightliner59's topic in WIP: Drag Racing Models
Thanks, Ron. I didn't plan the paint, and just ended up winging it, with strips of torn masking tape. I used One-Shot Process Blue for the striping. I am pleasantly surprised at the way it worled out! Thanks, Scott. Since it's a slammer, it just has to look the part. It's not anywhere near perfect, but, I like it! -
Those are my favorite projects! I just like to keep parts, graphics, etc. proper for the era (or year, in some cases). Most of my drag car models are like the movies that say "inspired by a true story"...This looks very cool, sir!
-
Wing or foil shaped styrene rod
Straightliner59 replied to Scott Colmer's topic in Model Building Questions and Answers
Brilliant idea! Such a simple, and practical solution. Thanks for passing that along! -
NHRA GT/AA '96 Firebird Slammer
Straightliner59 replied to Straightliner59's topic in WIP: Drag Racing Models
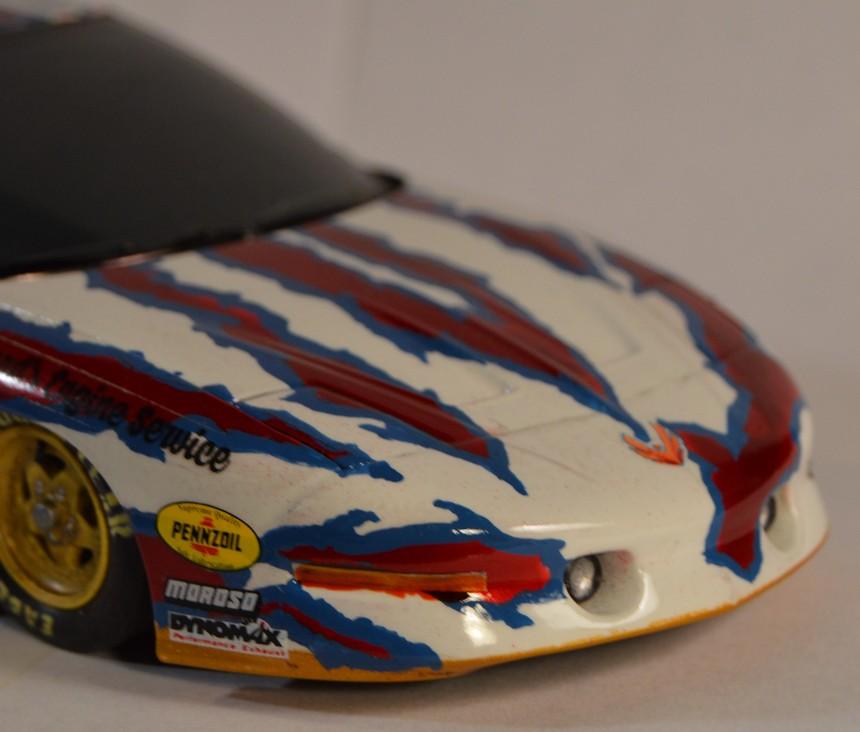
Well, it only took thirteen years to complete this slammer! ? Here she is. She's really rough, but, I thought fourteen years to build a slammer would be a little excessive! I made the door markings on an inkjet printer, as well as the Phoenix on the nose, and my mostly-ubiquitous "Conrad's Engine Service" tag, which is a tribute to my dad. If you don't look too close, it looks pretty cool, I think! Questions, comments, critiques are always welcome! Thanks for looking!
-
‘65 A/FX Satellite rear floor - carpeted?
Straightliner59 replied to Matt T.'s topic in Model Building Questions and Answers
I stand corrected. I was thinking of the later altered wheelbase cars that morphed into FCs. -
roll-cage diameter tubing, 1/25 - 1/24
Straightliner59 replied to fiatboy's topic in Model Building Questions and Answers
I have a bunch of that stuff from Cornwall. I love it! It used to be marketed in the U.S. by Midwest Models (the balsa wood folks) under the name "Super Styrene". Absolutely! If you're building a replica, you need to know what that particular car used. If you're building an accurate, fictional racer, then, as Bill pointed out, you must default to the rule book for the year you want to build for. All that said, while it scales out a tad larger than required by rule, I think that, in instances of enclosed cars, .080" looks best. -
‘65 A/FX Satellite rear floor - carpeted?
Straightliner59 replied to Matt T.'s topic in Model Building Questions and Answers
I would guess that the vast majority of the FX/altered wheelbase cars were virtually gutted, if not from the outset, very shortly, thereafter. Weight was "the great satan", and anything you could do to get rid of it would be done, especially if it was something as simple as tearing out carpet! It's one step--"tear it out!" ? -
This guy has several sets for sale. They came in the original blister packs. Total cost for the sets (2 front, 2 rear) with shipping was $20.88. If you want to take some Wright's Silver Cream to them, they'd look exactly like polished, uh...magnesium! ?
-
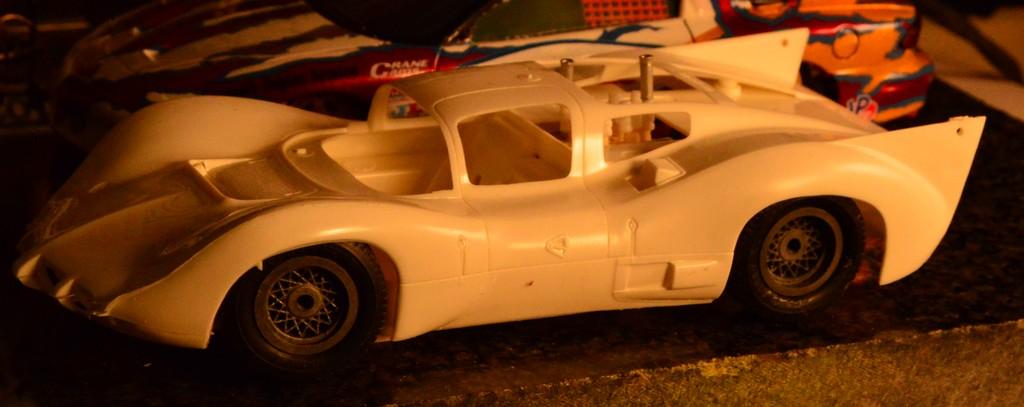
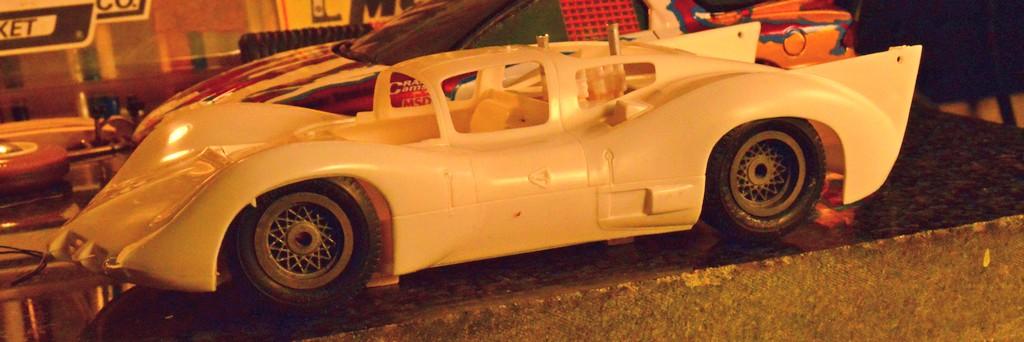
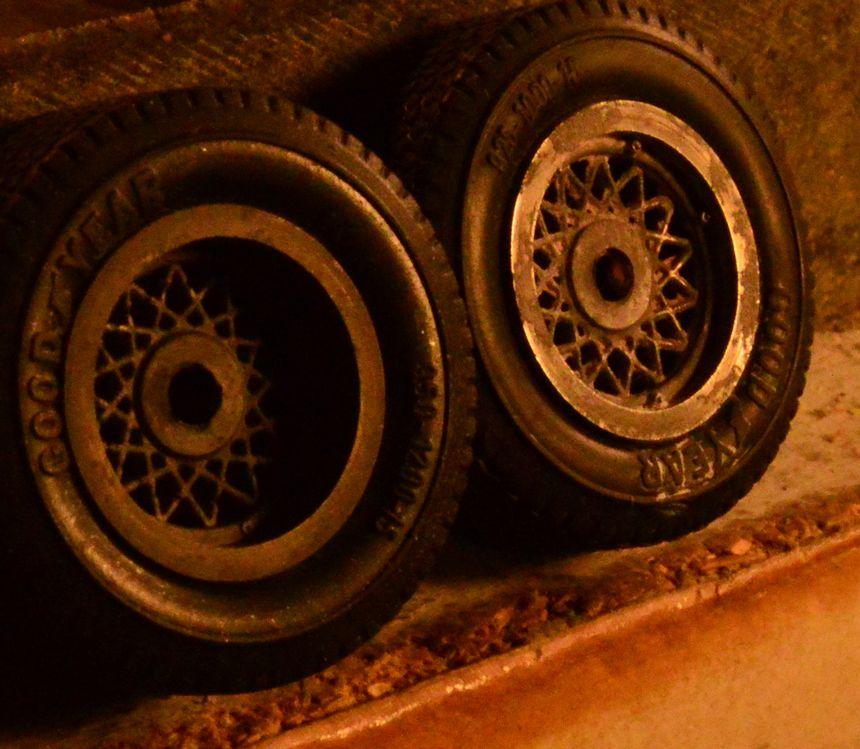
I got these magnesium Cox Chaparral wheels from an Ebay sale. I would like to get some HRM Chaparral wheels and tires, but they are difficult to come by. These tires are wrong, too, but, they're the closest thing I have, profile-wise. I think I may be able to use these wheels.
-
"Bring Out Your Dead" Completion Build--ROUND 2 Is On!
Straightliner59 replied to Snake45's topic in WIP: Model Cars
Thanks, Snake! I think I have needed an extension, every time I've participated. But, I am glad I have, because a couple of them may have just been stuck back in the closet, instead of in the display case! It's kept them near the front of the bench. I am just waiting on a sheet of Gofer decals, so I can put some contingency stickers on it. They should be in the mail, today, and I am off, tonight, so, this will be in the display case, by morning.
-
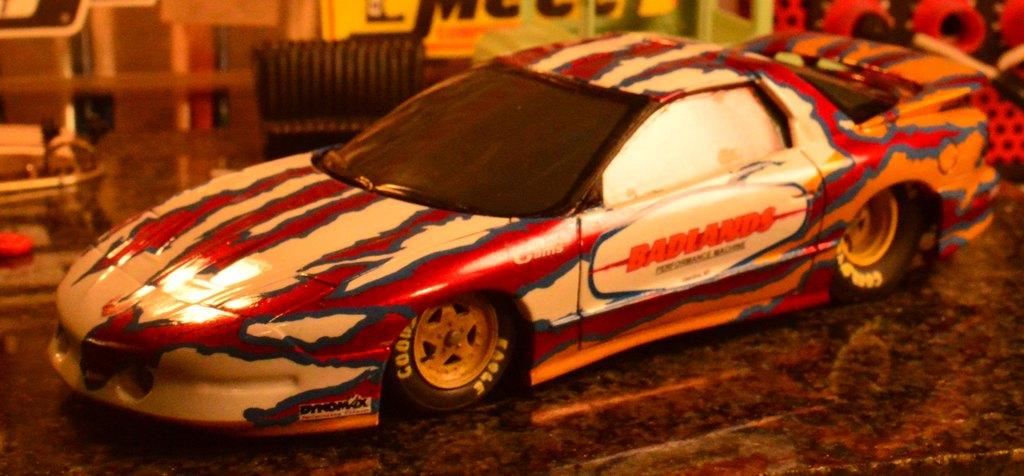
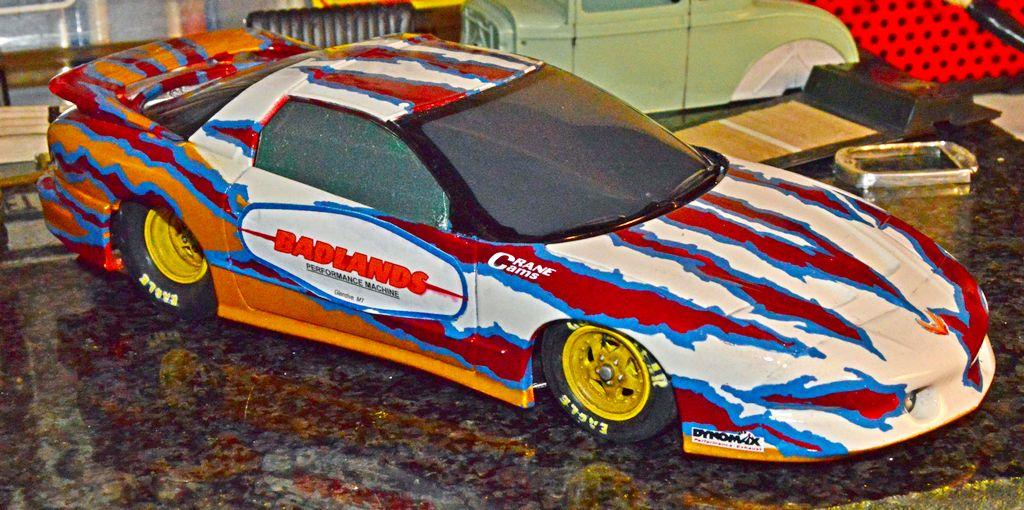
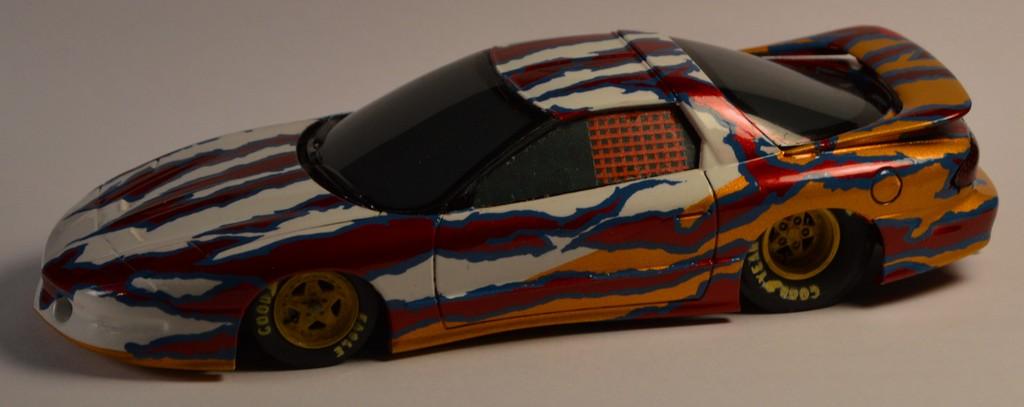
I got some fictitious livery created for the Firebird.
-
"Bring Out Your Dead" Completion Build--ROUND 2 Is On!
Straightliner59 replied to Snake45's topic in WIP: Model Cars
Thanks, Anthony! I don't know that I'm the guy to ask for photography pointers, though! ? I can't seem to get my photos to look as good as many of the other modelers, here, even when I take the time to set up my tripod, and use long exposures. Oh, well! Stance is very important, especially when it comes to race cars, for sure. -
"Bring Out Your Dead" Completion Build--ROUND 2 Is On!
Straightliner59 replied to Snake45's topic in WIP: Model Cars
Well, I am fine with whichever you decide. If it helps, I had planned to have it done about two and a half weeks ago, but the weather wouldn't cooperate. I wanted to take it outside, and really hose it down, with clear. Anyhoo...I'll be happy to be the first one in, and done, for Round 7! -
"Bring Out Your Dead" Completion Build--ROUND 2 Is On!
Straightliner59 replied to Snake45's topic in WIP: Model Cars
As a show of good faith, I went ahead and finished it, except for markings. It has its warts, that I have learned to accept, thus, I was able to move on. ? Here she is!
-
"Bring Out Your Dead" Completion Build--ROUND 2 Is On!
Straightliner59 replied to Snake45's topic in WIP: Model Cars
I totally understand! I hope to have it done by Sunday! I tell ya', it's nothing but curveballs, the last six months, or so. ? -
"Bring Out Your Dead" Completion Build--ROUND 2 Is On!
Straightliner59 replied to Snake45's topic in WIP: Model Cars
The stars finally aligned, and I think I just shot the final coat of clear on the Firebird, today. This whole virus thing really shifted my schedule, and it's been like jetlag. Anyway, I am going to let that dry, then glue in the side windows and the last details and call it done. After that, I will work out the graphics for it. Can I get in? -
Cooper barn find
Straightliner59 replied to absmiami's topic in WIP: Other Racing: Road Racing, Land Speed Racers
It's awesome to get in that zone! This thing is looking great. -
64 Dodge D100 Pickup Pro Street
Straightliner59 replied to AmericanMuscleFan's topic in WIP: Drag Racing Models
Francis, such excellent work, sir. Thank you for sharing the process. -
I have to agree! I've used the "Amazing" brand, which is also made by Alumilite. It's what I use to cast pre-"drilled" distributors. You can go from zero, to never having to buy another one, or drill another one, ever again, in less than an hour.
-
Cooper barn find
Straightliner59 replied to absmiami's topic in WIP: Other Racing: Road Racing, Land Speed Racers
That suspension is looking excellent! Enjoying your work, Andy. -
Thank you for that heads-up! I will keep that in mind.