Straightliner59
-
Posts
5,800 -
Joined
-
Last visited
Content Type
Profiles
Forums
Events
Gallery
Everything posted by Straightliner59
-

Gassers and rear spoilers?
Straightliner59 replied to Farmboy's topic in Model Building Questions and Answers
You have a lot more leeway, and can still get a very similar look! -
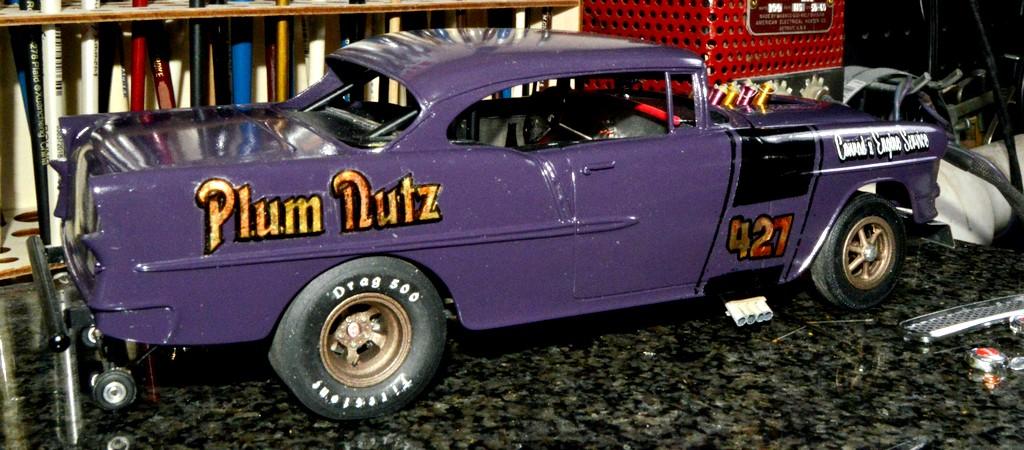
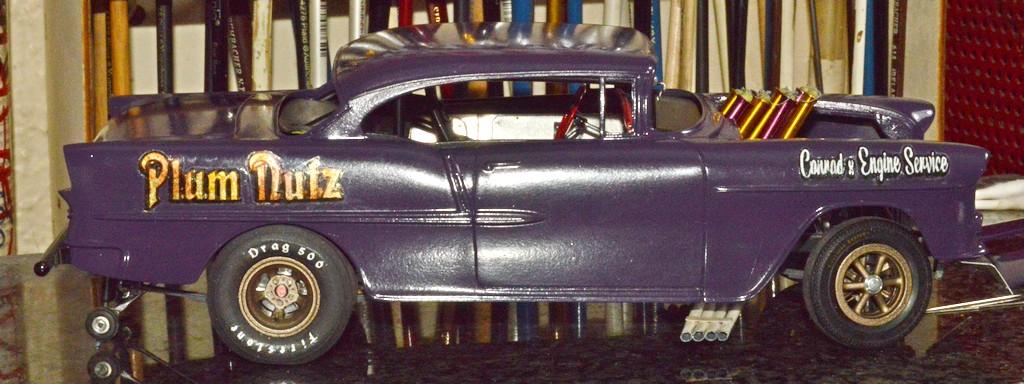
I am almost positive that's what it was, in this case. The clear cracked parallel with the arc of the fender. I went back and cut some new fender slashes from decal paper, then taped them off and shot them with Walmart's now extinct Color Place gloss black. I applied each about fifteen minutes after spraying them, with no clear coat. I'm using Koala transparent decal paper. I really like it, but, the film is very flimsy. It stretches, easily, too. That trait caused me a couple of bobbles in the fender slashes. Overall, I think I can get happy with them, once I've cleaned them up, and flowed some Future into any voids along the edges, and shot some clear over everything! Thank you for your kinds words, David! Thanks for looking!

-
Gassers and rear spoilers?
Straightliner59 replied to Farmboy's topic in Model Building Questions and Answers
If you want to run the spoiler, just call it an Altered. The rules state that spoilers, in Gas classes, must be originally available, for the body used, otherwise, not allowed. -
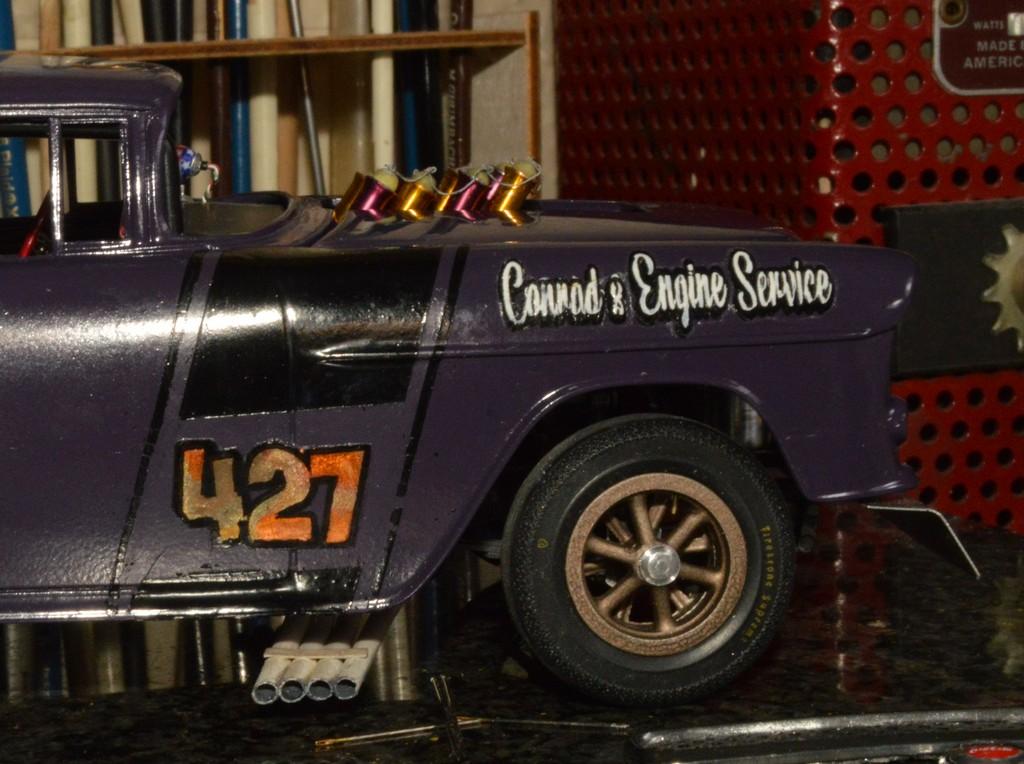
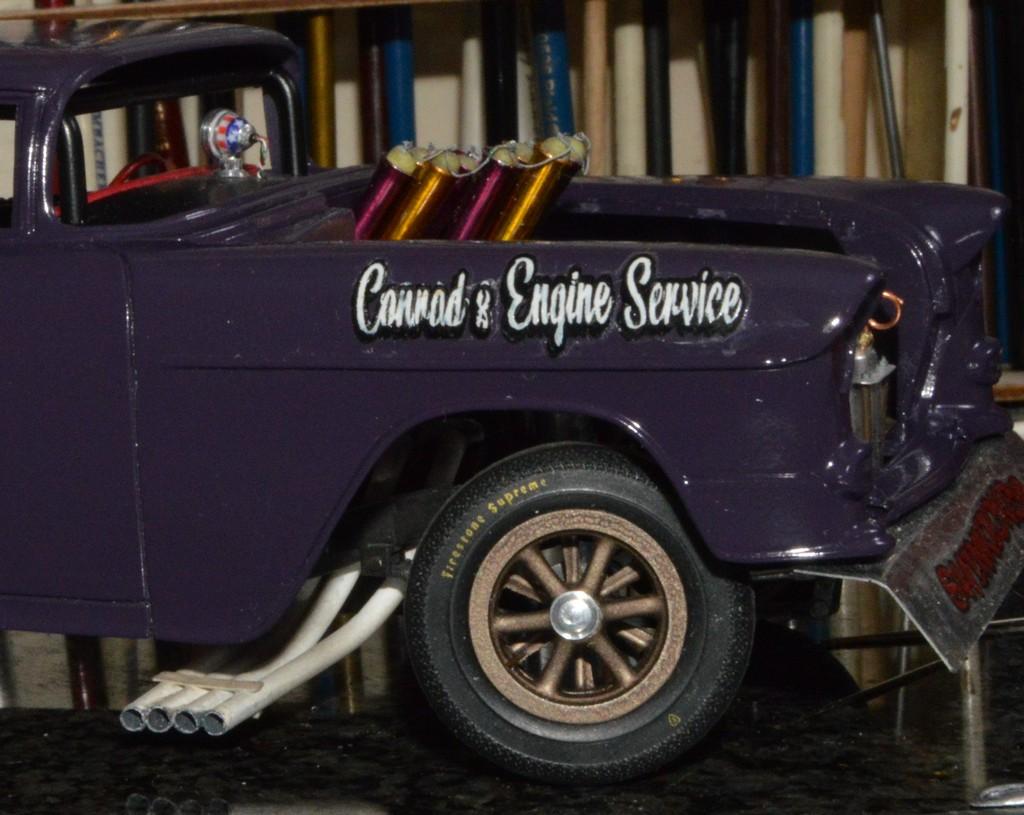
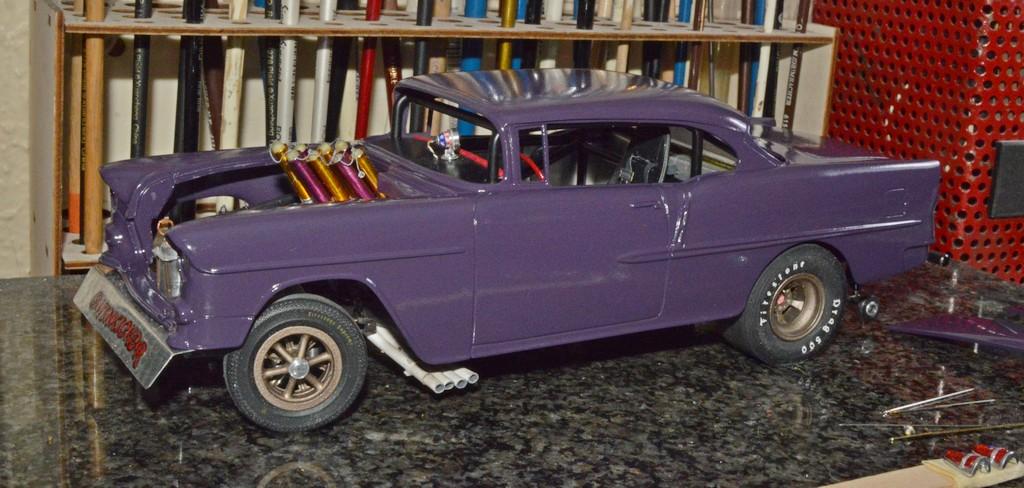
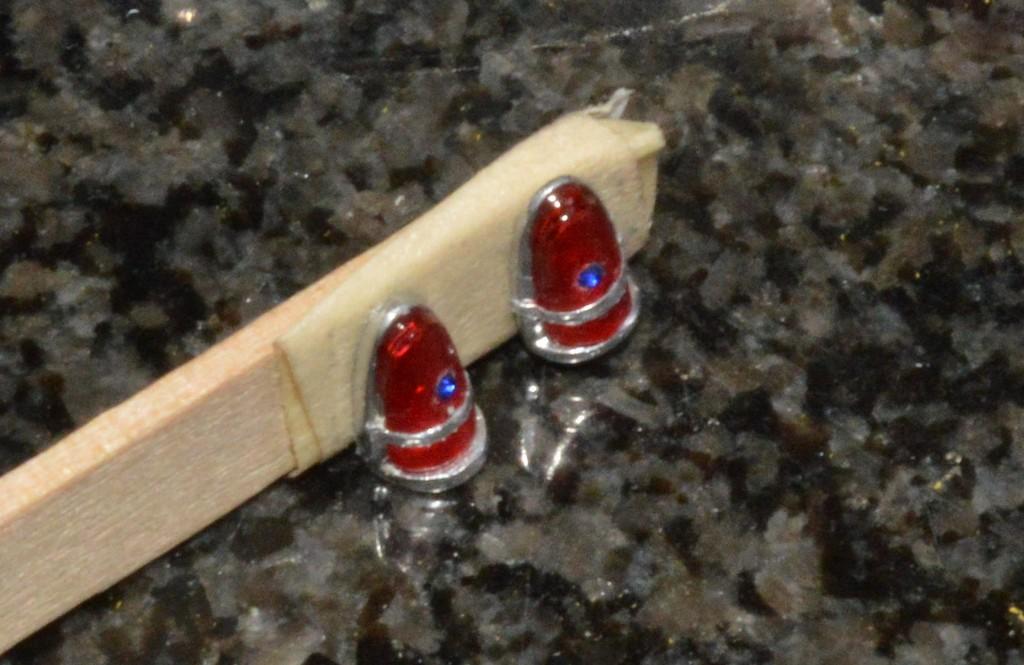
Thank you, David. I really wanted Blue Dots on the car, and didn't want to put them in the chrome-plated kit taillights, painted with clear red. Oh, don't worry! All my paint jobs look a little rough!😂 I always tell anyone who asks, "They're race cars! They aren't supposed to look like show queens!" I started putting on the "painted-on" decals, so they can get some clear, over them. I need to make new fender decals, because the clear coat on these had completely cured, and when I applied them, it cracked. I'll make new ones, and apply them, within an hour or so, of clearing them, while the paint is still flexible. Now that I've started applying them, I really like the way the leafing plays off the anodized stacks! I see some touchup that needs to be taken care of, too. Anyway...she's getting closer! Questions and comments are always welcomed. Thanks for looking!
-
Pony Express 70s BB/FC ex M/T Pinto
Straightliner59 replied to Ian McLaren's topic in WIP: Drag Racing Models
Looks great, Ian! I'm a big fan of "bare bones" and form following function. Nice touch with the fuel tank. Good story! -
I love this concept! I have one of those kits sitting here, and had considered something similar. I'll be watching, Niko!
-
Just solving problems, my friend!🙂 Thank you, Francis! I'm pretty happy with the way that worked out.
-
Thank you, my friend! Yes, that duct tape is super-useful!
-
Thanks, Andy!
-
That'd sure look sweet, with a LaSalle grille!
-
Thanks, Tim. I used to spend a lot of money in Caboose Hobbies, here in Denver. It was easily the best place to get scratchbuilding supplies. Plus, a lot of railroad detailing parts were very useful--especially before the model car aftermarket took off. I've finished the taillights. The lenses were incredibly slippery and difficult to work with. That made it a real test (which I failed) to sand them flat, on the back, while thinning them to fit the remains of the Badman's bezels. I was able to get a very satisfactory fix using UV activated resin to fill the space between the bezel and the tops of the lenses. A little touch-up with some Tamiya clear red, and voila! I also added the chrome strip that divides the sections of the lights using aluminum duct tape. I think they'll look great, on the car. Thanks for looking!
-
Thank you, Pierre! I wanted Blue Dots, at the start, which is why I redid the taillights. I got the second round of paint on it, early, this morning, before I went to bed! Waiting for paint to dry has given me the opportunity to get almost everything else done! I still need to thermo-form the windshield and backlight, yet. I still think I may need one more round of paint, but I'll have to wait and see. Nonetheless, it's getting pretty close! There's a contest here, near the end of March that I should be able to debut it at! Thanks, Tony! It's getting there!
-
’72 Dodge Demon Drag Racer 1/25 scale
Straightliner59 replied to AmericanMuscleFan's topic in WIP: Drag Racing Models
I love it! That radiator is a work of art, my friend. Bravo! -
Mercedes Benz SSK
Straightliner59 replied to Pierre Rivard's topic in WIP: Other Racing: Road Racing, Land Speed Racers
Fantastic! The hood strap is some sweet icing on a delicious cake! -
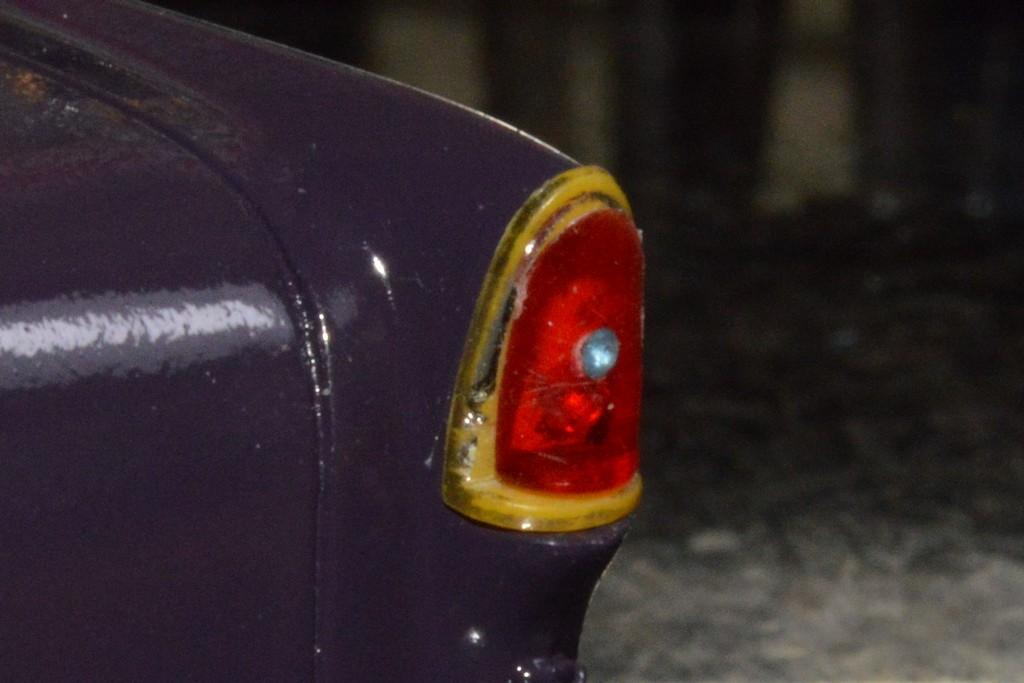
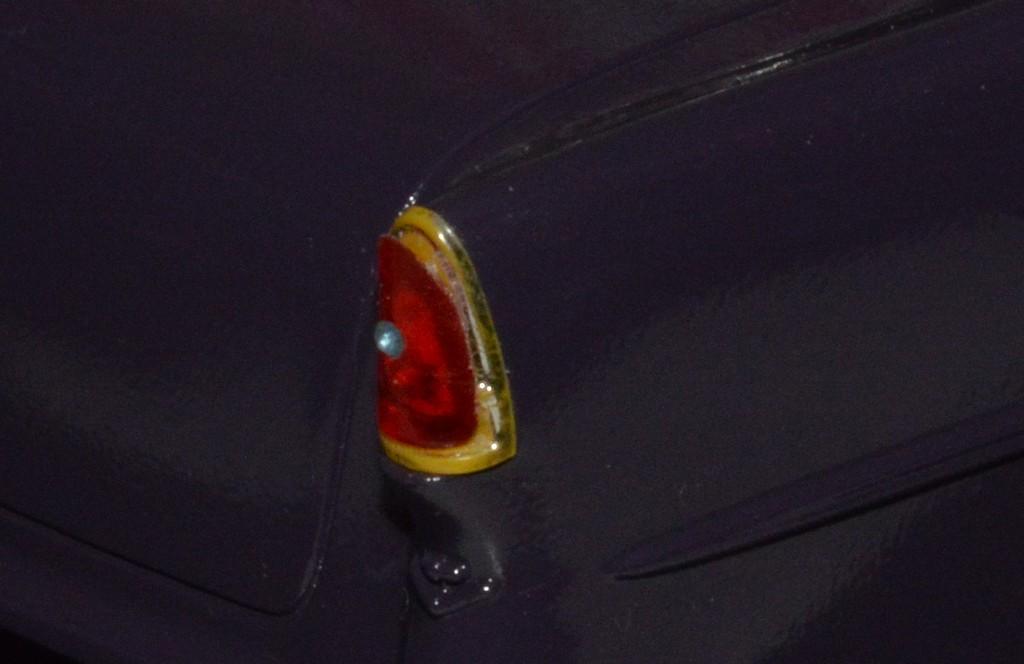
Taillights are done. They aren't perfect, but they're definitely better than the kit parts. I used lenses from an AMT Nomad. Blue Dots are model RR pieces. "Headlight" decals are from a MicroScale RR sheet. If I had another pair of those lenses, I would probably replace one of these. Thanks for looking!
-
While waiting (somewhat less patiently!) on paint--I'll get to that, later today--I concentrated my efforts on what do do with the taillights. I like to have lenses on my lights, whether headlights, taillamps, turn signals, or side marker lights. Also, I've wanted to put Blue Dots on here, pretty much since inception. I ended up cutting the lenses from the Badman taillights, then modifying an AMT '55 Chevy taillight lens to fit (I still need to get it nice and flat), and installed a blue "light" from model railroading supplies. I think this'll work! Comments and questions are always welcomed. Thanks for looking!
-
Thanks to everyone for your feedback/input/expertise! On a flyer, I took a look an AMT Nomad I have an in the stash. As stated earlier, I cut the lenses from a Badman taillight, leaving only the bezel/base. I did some rough sanding on the AMT taillight lens, to make it fit--it was too thick at the bottom, and protruded too far. I made a divot for the Blue Dot. It's a tad big, but some darker blue should tone it down. I need to decide what to do for the reflectors, inside, and do some finish sanding on the lens, so it rests flat, on the base. I think I can be happy with this!
-
I thought they looked separate in the photos I'd seen, but, none of them were close enough to tell, for sure. I may take a chance on one. They're not unreasonably priced. Thanks for your help! I think it might be worth a shot, on one of these. Currently, I've cut the lower (backup?) lens out, and the upper lens off. I turned a piece of clear red sprue to make new taillight lenses, but, I still need to split that, and hope it leaves enough to make the second one. I have some tiny, blue model RR reflectors I want to install in them, too. Thanks for your input!
-
Good thing I'm not! 🙂
-
Thanks, Mark. I will take that to the bank. Back to cutting out the lenses on the Badman!
-
Does anybody have photos of the taillights from Monogram's 55 Chevy convertible? I'm looking for taillights for my Badman. I have the kit's (Badman) taillights, but I am looking for something with lenses, not plated lenses that need to be painted.
-
It's been curing for almost a week. I'm thinking of wet-sanding after work, tonight. Then, I can wait for another week. Ugh. Next time, I will find something in Krylon! If I'd had some, the decals would be on, already!
-
You beat me to it!
-
Neil Peart used to carry a case for building when they were on the road, in their early days.
-
Very nice, Tim! Once you're finished with the machining, the media blasting is going to look awesome! It'll look exactly like you shrunk one down!