Straightliner59
-
Posts
5,803 -
Joined
-
Last visited
Content Type
Profiles
Forums
Events
Gallery
Everything posted by Straightliner59
-
 You beat me to it!
 -
Neil Peart used to carry a case for building when they were on the road, in their early days.
-
Very nice, Tim! Once you're finished with the machining, the media blasting is going to look awesome! It'll look exactly like you shrunk one down!
-
Pony Express 70s BB/FC ex M/T Pinto
Straightliner59 replied to Ian McLaren's topic in WIP: Drag Racing Models
Those fronts are especially beautiful! -
Just so I'm 100% sure; If I've been logging in with my email address, all along, anyway, I don't need to change a thing, correct?
-
Thank you, David! It's getting there! Maybe by the end of the month! Thanks, so much, Pierre! I'd love to see you add some aluminum panels to your arsenal. It will only enhance the beautiful work you do, already! Thank you, Robert! Yeah, it's a lot more than I had intended, originally!😄
-
Thank you, sir! This one's actually a Badman. I'm pretty excited about it! Hoping to have it done in a month, or less.
-
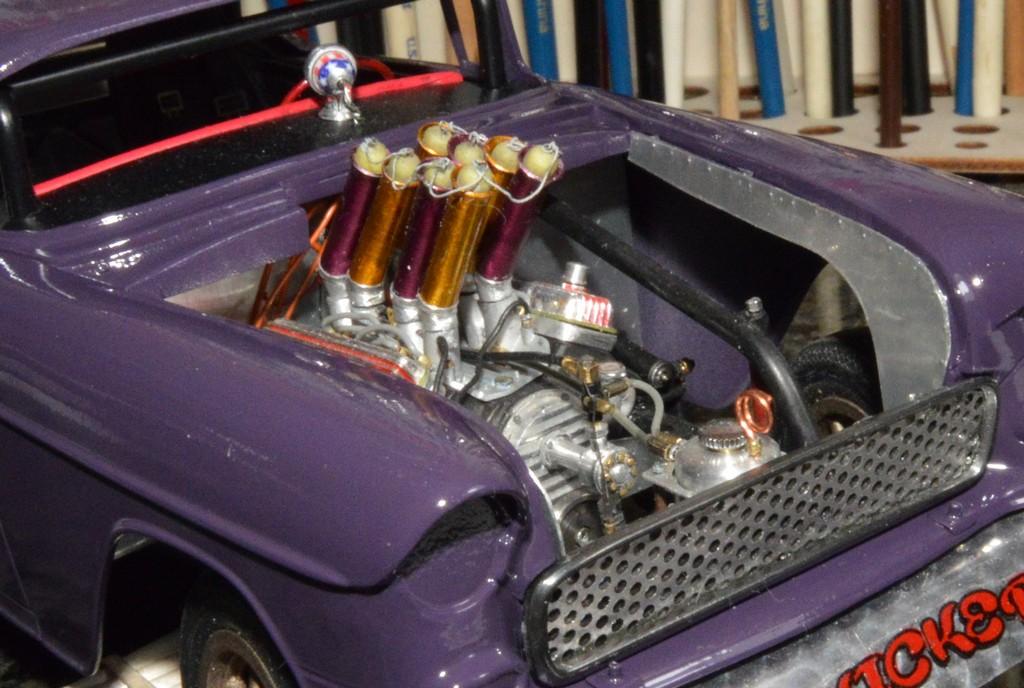
Set the hood on, just for grins. I think I solved the parking light quandary, so I made two "bezels". I ended up using a piece of styrene to emboss the lens area, as it pressed more cleanly than the original wooden burnisher I was using. I think these things look pretty good. Certainly better than the kit's molded-on bits! Thanks for looking!

-
Thanks, Carl! Got it a little farther along, today!
-
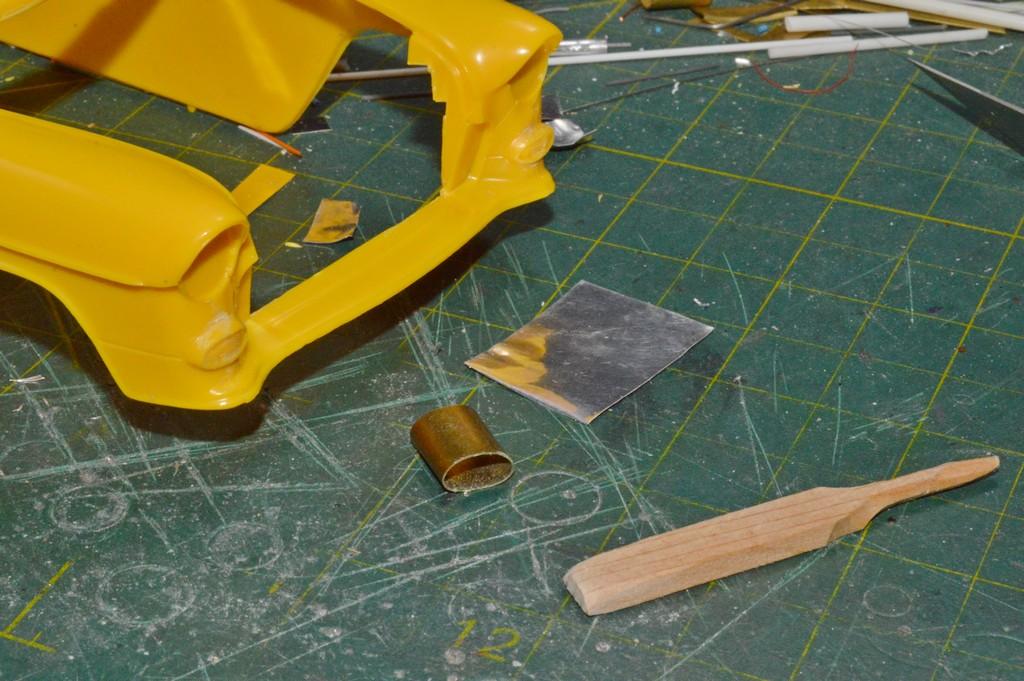
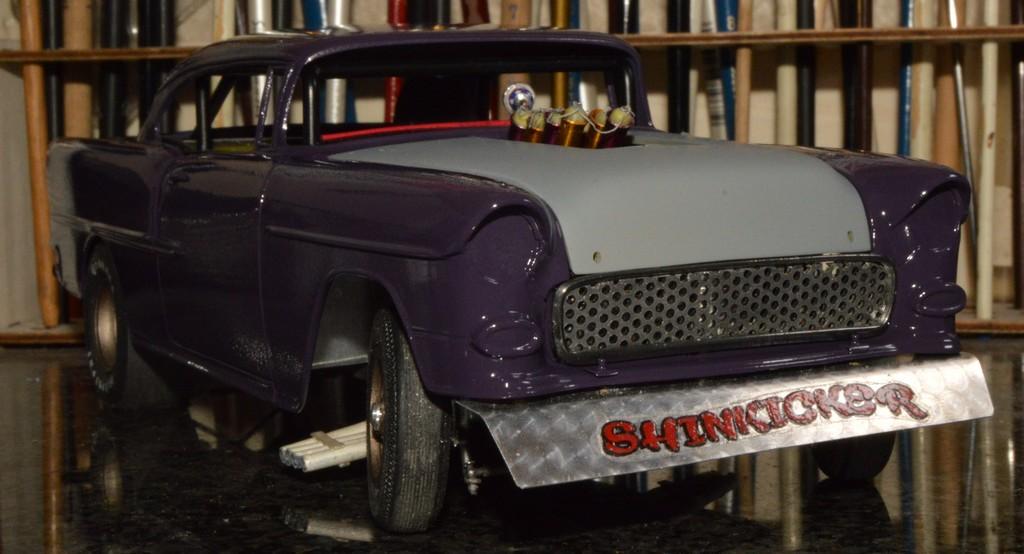
@Pierre RivardAlong with some progress shots, I'm including a couple of photos of the tools I use to make rivet details. The material I prefer, for this is aluminum step flashing. My stock is 5"x7" sheets, but, it's also available in rolls. The sheets are better to work with, because they're already flat, eliminating a step. I think the smaller-pointed tool was the stylus end of an X-Acto compass. The other is an ordinary scratch awl. I lightly polished a round point on the smaller tool, just enough so that it doesn't pierce the metal, too easily. I hope this is helpful! If you have further questions, feel free to ask! As you noted, nothing looks more like metal than metal, itself. I enjoy working with it, too! I shot some color on the hood. Unfortunately, a booger or two, as well. It's not a big deal, other than the slower cure time of the One-Shot. I'm still waiting to feel comfortable with the body, before wet-sanding and re-coating. In the mean time, using a spare body, I began experimenting with some tooling aluminum (dead-soft sheet) and a form made from a piece of brass tube, and a quickly-carved burnisher, to make aluminum surrounds for the parking lamps. Although I intend to use aluminum "plates", rather than lenses, I felt like something needed to be done with them. I'd planned to address this issue, but forgot, in my excitement to paint. I think I'm on the way to fixing it, yet, it's a work in progress. I really like the way the front end is coming together! As always, your questions and comments are welcomed. Thanks for looking!
-
A lot of very cool stuff, for sure! The Brooks Daytona brings back memories. Johan stuff is always nice to "find".
- 39,065 replies
-
- 4
-

-
- johan
- glue bombs
- (and 1 more)
-
Thank you, Francis! I'm glad I decided to make bigger ones. They really did tidy things up. I think you'll like them in the Demon, too!
-
Thank you, Pierre! I will post about the material and tools, some time after I get home from work. I'll also post better photos, once the paint is done. Thanks for following!
-
I made these nifty inner fender skirts, to tidy things up, a bit. They're tacky-glued in, currently, pending completion of painting. Thanks for looking!
-
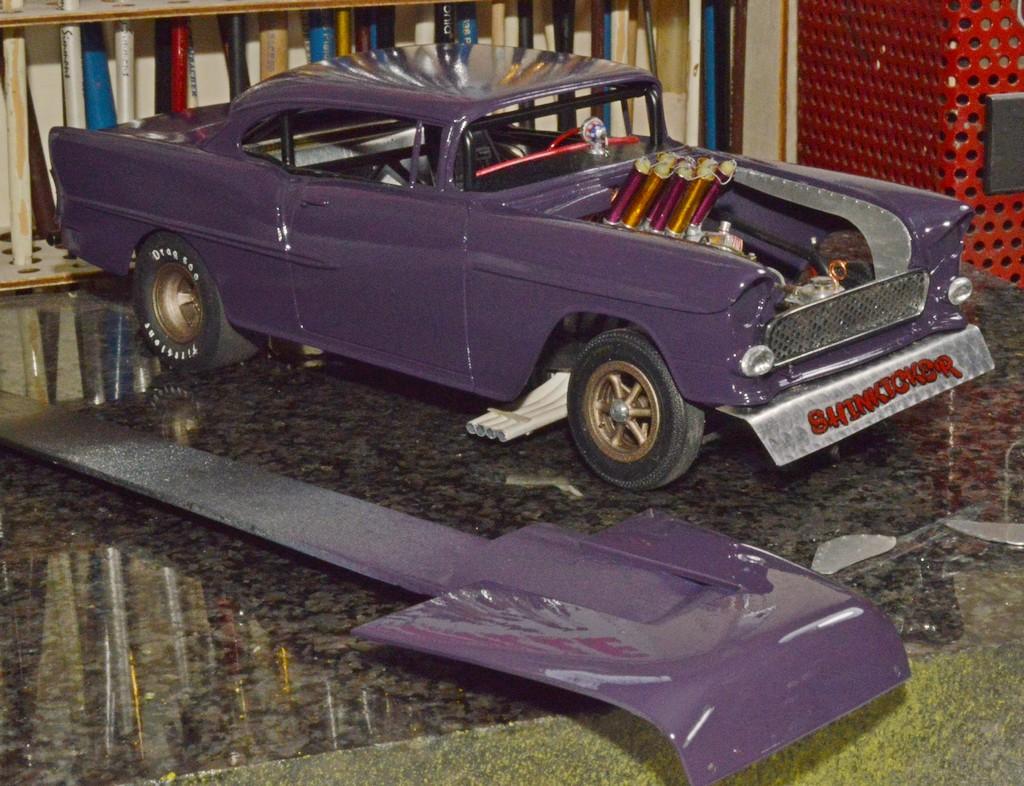
Never mind those last photos. Now, it's really gettin' interesting! I'm happy I trimmed the top of the grille, and was able to get the surround to attach to it. The fit between the hood and grille is much improved. Now, my vision for this is really coming through. Thanks for looking!
-
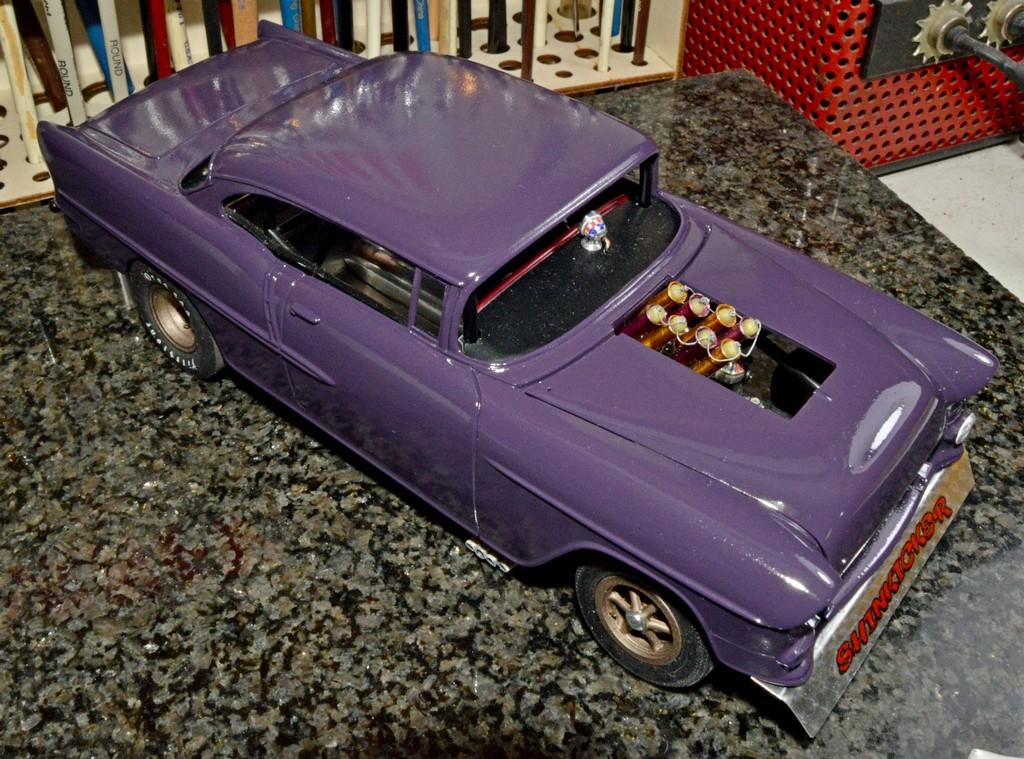
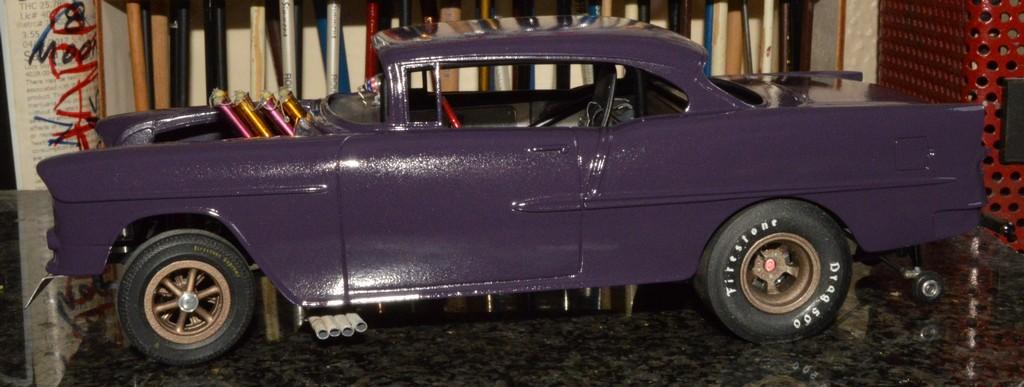
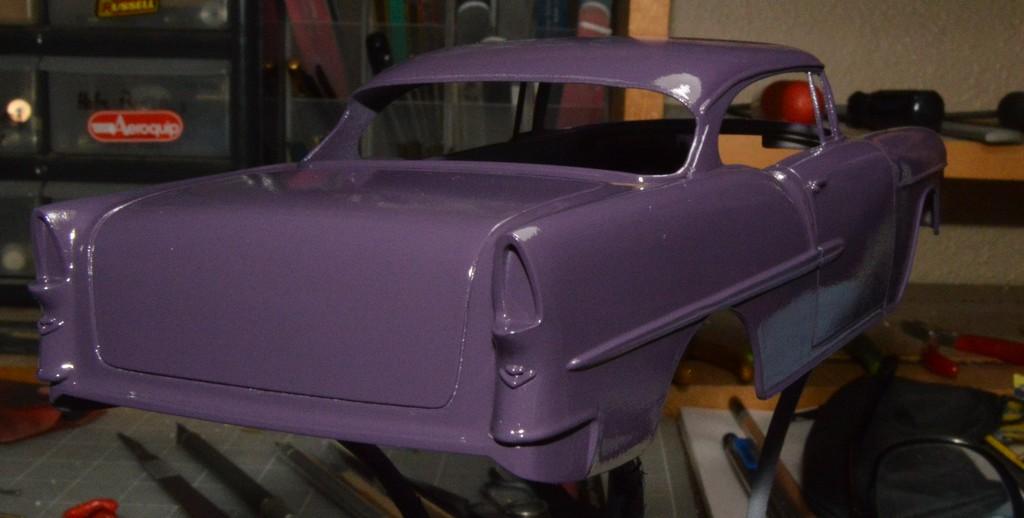
Sprayed this purple I mixed with One-Shot, cut with lacquer thinner. It's taking longer to dry than I'd hoped, but knew that was a possibility, with the One-Shot. Needs a little work, then another coat.
-
Spotlight Hobbies Plating Service
Straightliner59 replied to Straightliner59's topic in Car Aftermarket / Resin / 3D Printed
Like I said...😂 Not surprised I did! -
I probably missed it, here, but I saw an ad somewhere for Spotlight Hobbies offering a plating service. $35 for a 6"x8" rack. Just in case anyone needed to know. It's certainly a reputable source!
-
Mercedes Benz SSK
Straightliner59 replied to Pierre Rivard's topic in WIP: Other Racing: Road Racing, Land Speed Racers
I just got the "warm, fuzzies" looking at this. It's always a joy, seeing great workmanship. -
Here it is! This isn't going to go as quickly as I'd hoped. Since I mixed One-Shot enamel, the lacquer thinner I cut it with didn't speed its drying, as much as I'd hoped. So...I wait. There are a couple of motes in it, and it's a little "peel-y" in a couple of spots. I am reasonably sure that's because I am used to using spray cans, so I move quickly across the surface, to avoid paint build up. That's not a successful formula for the airbrush! Anyway, once it's dry, I'll wet-sand and shoot it again. I still have the option to darken it, a tad, but, I would have to use black, because I don't have Royal Blue, which I think would be better to avoid muddiness. When I held the chassis assembly alongside it...Wow! The colors look sweet, together! If it gets at least dry enough to gently handle it, I'll set it on the chassis, and get a couple of shots. Thanks for looking!
-
’72 Dodge Demon Drag Racer 1/25 scale
Straightliner59 replied to AmericanMuscleFan's topic in WIP: Drag Racing Models
I appreciate your kind words, Francis. You solved that problem, very nicely, my friend! It's always a good feeling, to find something that just works! -
’72 Dodge Demon Drag Racer 1/25 scale
Straightliner59 replied to AmericanMuscleFan's topic in WIP: Drag Racing Models
He sounds just like us, Pierre!😃 -
’72 Dodge Demon Drag Racer 1/25 scale
Straightliner59 replied to AmericanMuscleFan's topic in WIP: Drag Racing Models
Such fine work, Francis! It looks fantastic. The flexible boots are wonderful! -
Yessir, Pierre! It's a kind of medium purple, but I am thinking of making it a tad darker, although I like what I have mixed. I'll likely sleep for a little while, and get up early (usually about 11:30 AM) with an eye toward starting about 8:30, or so. Maybe I can put the markings on, on Monday! Fun, exciting times!
-
55 Chevy chrome
Straightliner59 replied to Brutalform's topic in Model Building Questions and Answers
Thanks, Tom. I appreciate it! It sounds like maybe the plastic "relaxed" across the front, and spread the fenders apart a tad?